Category: Baking

Hippity-poppity

It’s almost EASTER.

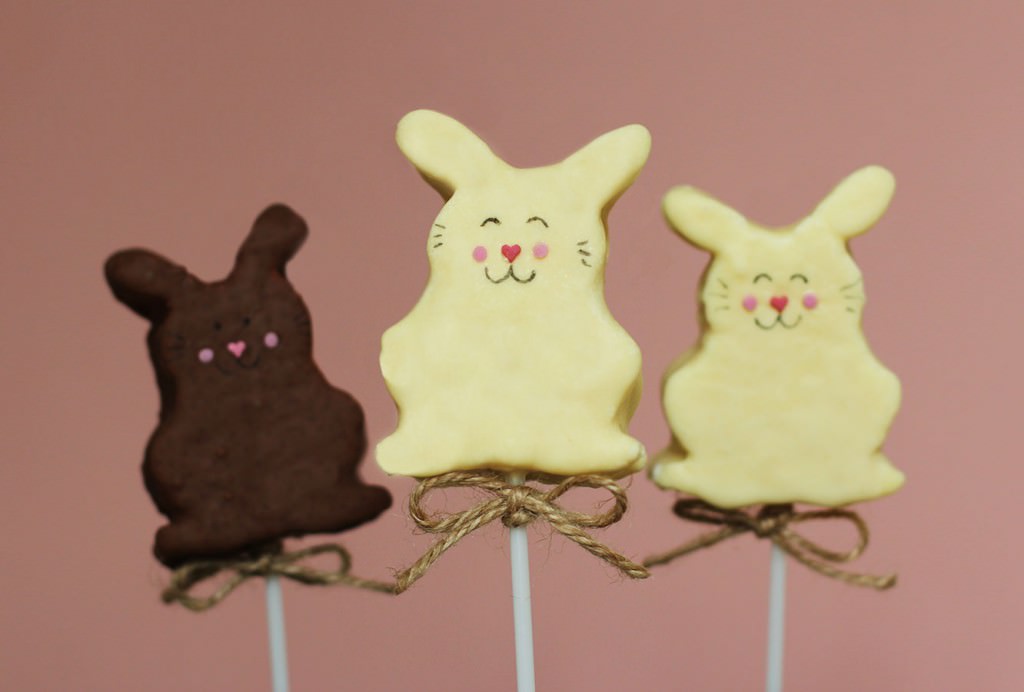
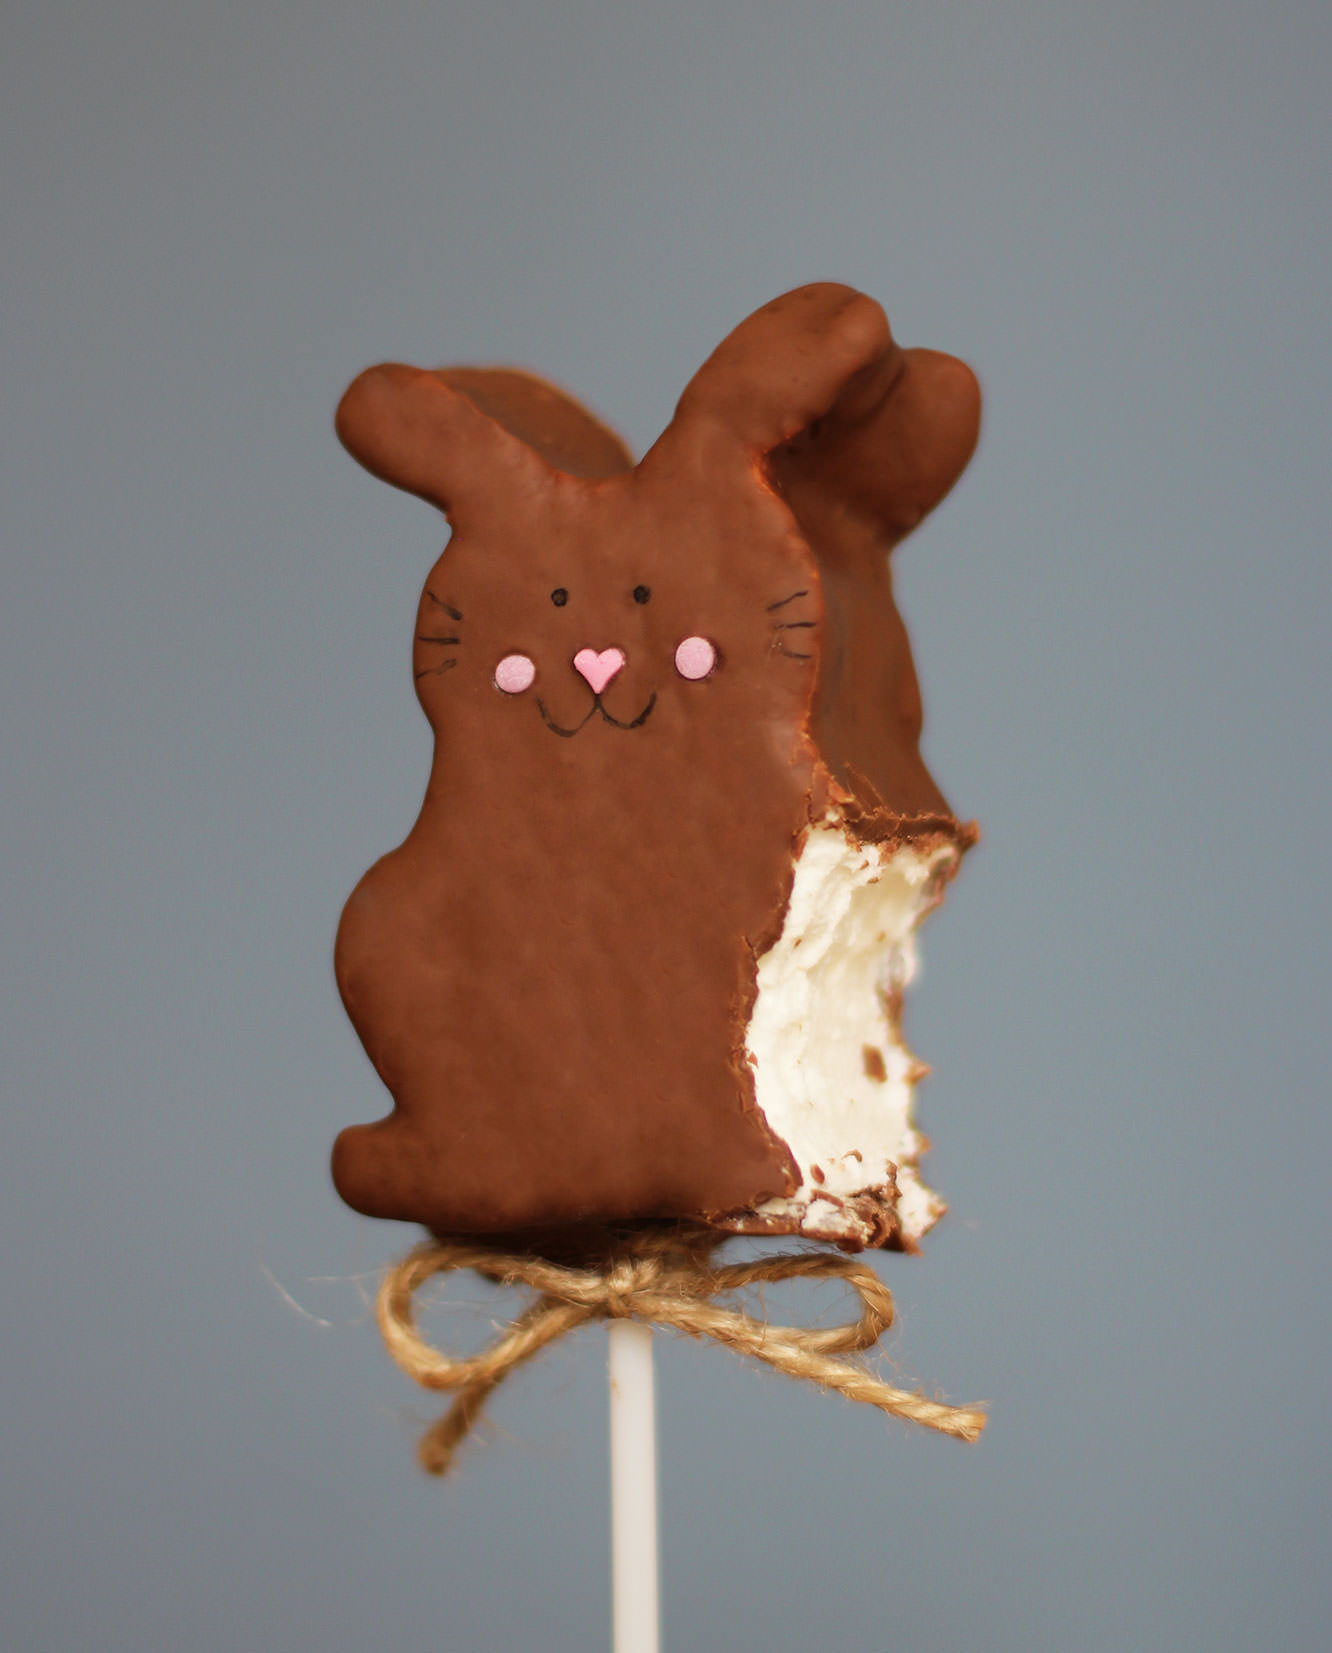
I’ve had these little bunny pops in my mind’s eye for a while now. I’ll precursor this post with saying they don’t look exactly how I imagined. Sure, they do look a bit like Pikachu, but they are scrummy, so I vote worth the time if you’ve a free afternoon and a healthy dose of patience in your arsenal.
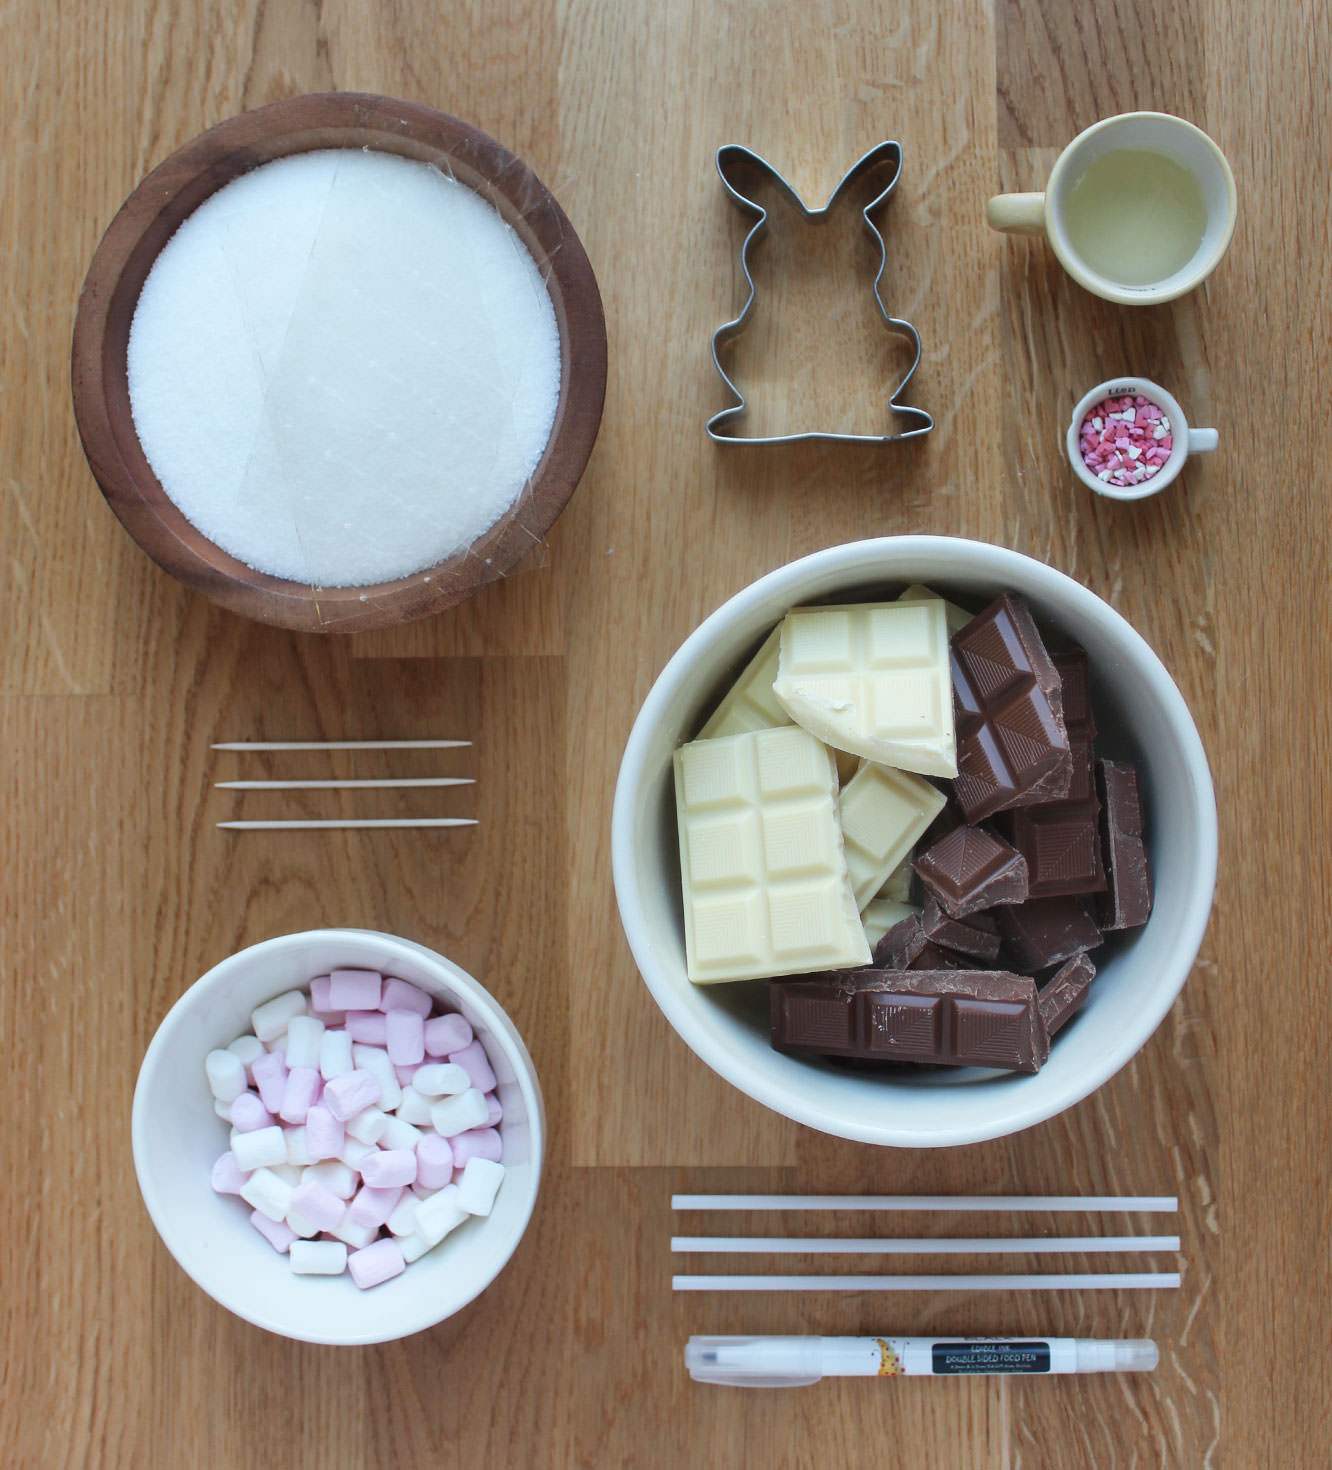
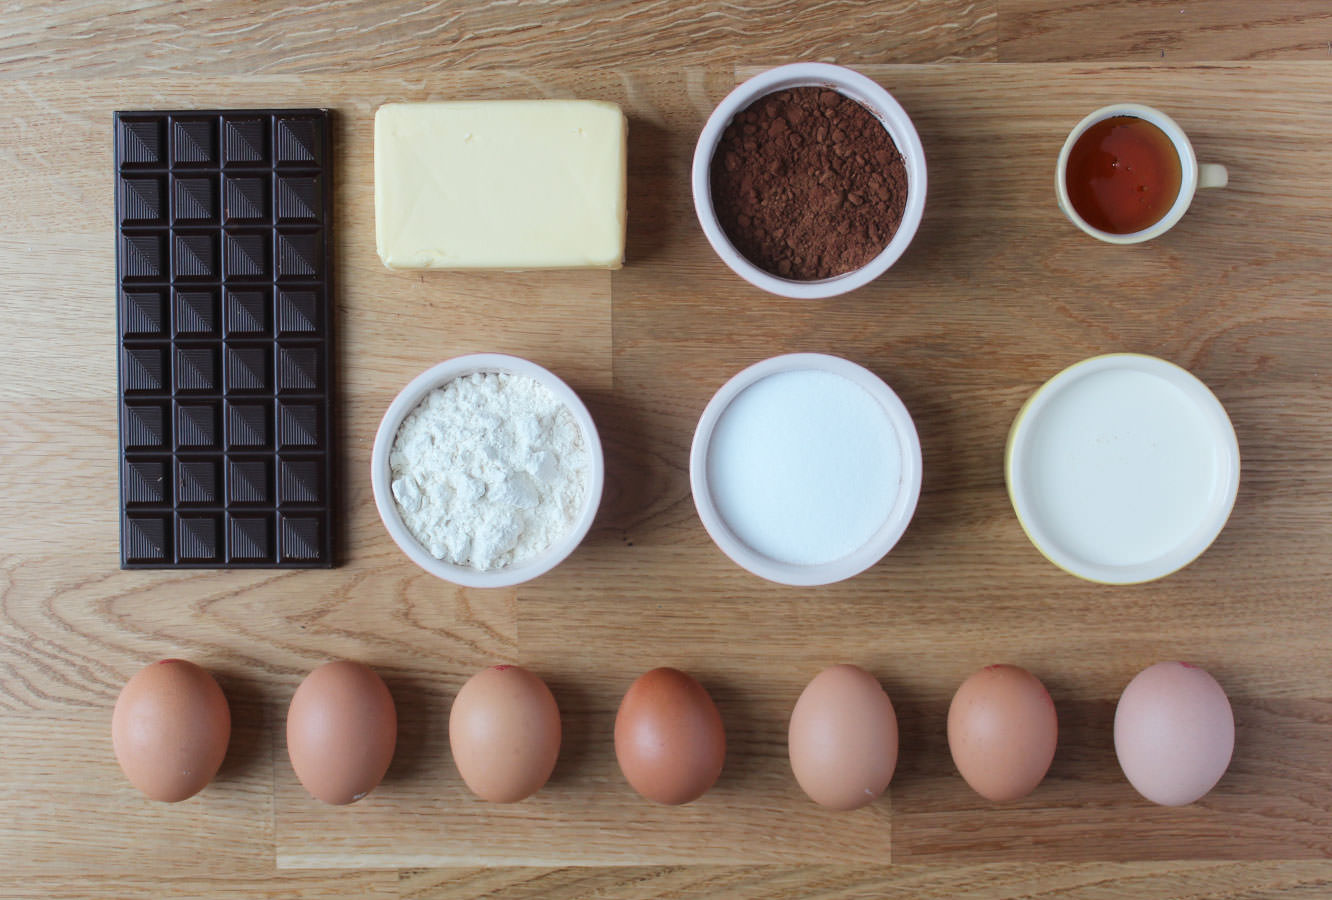
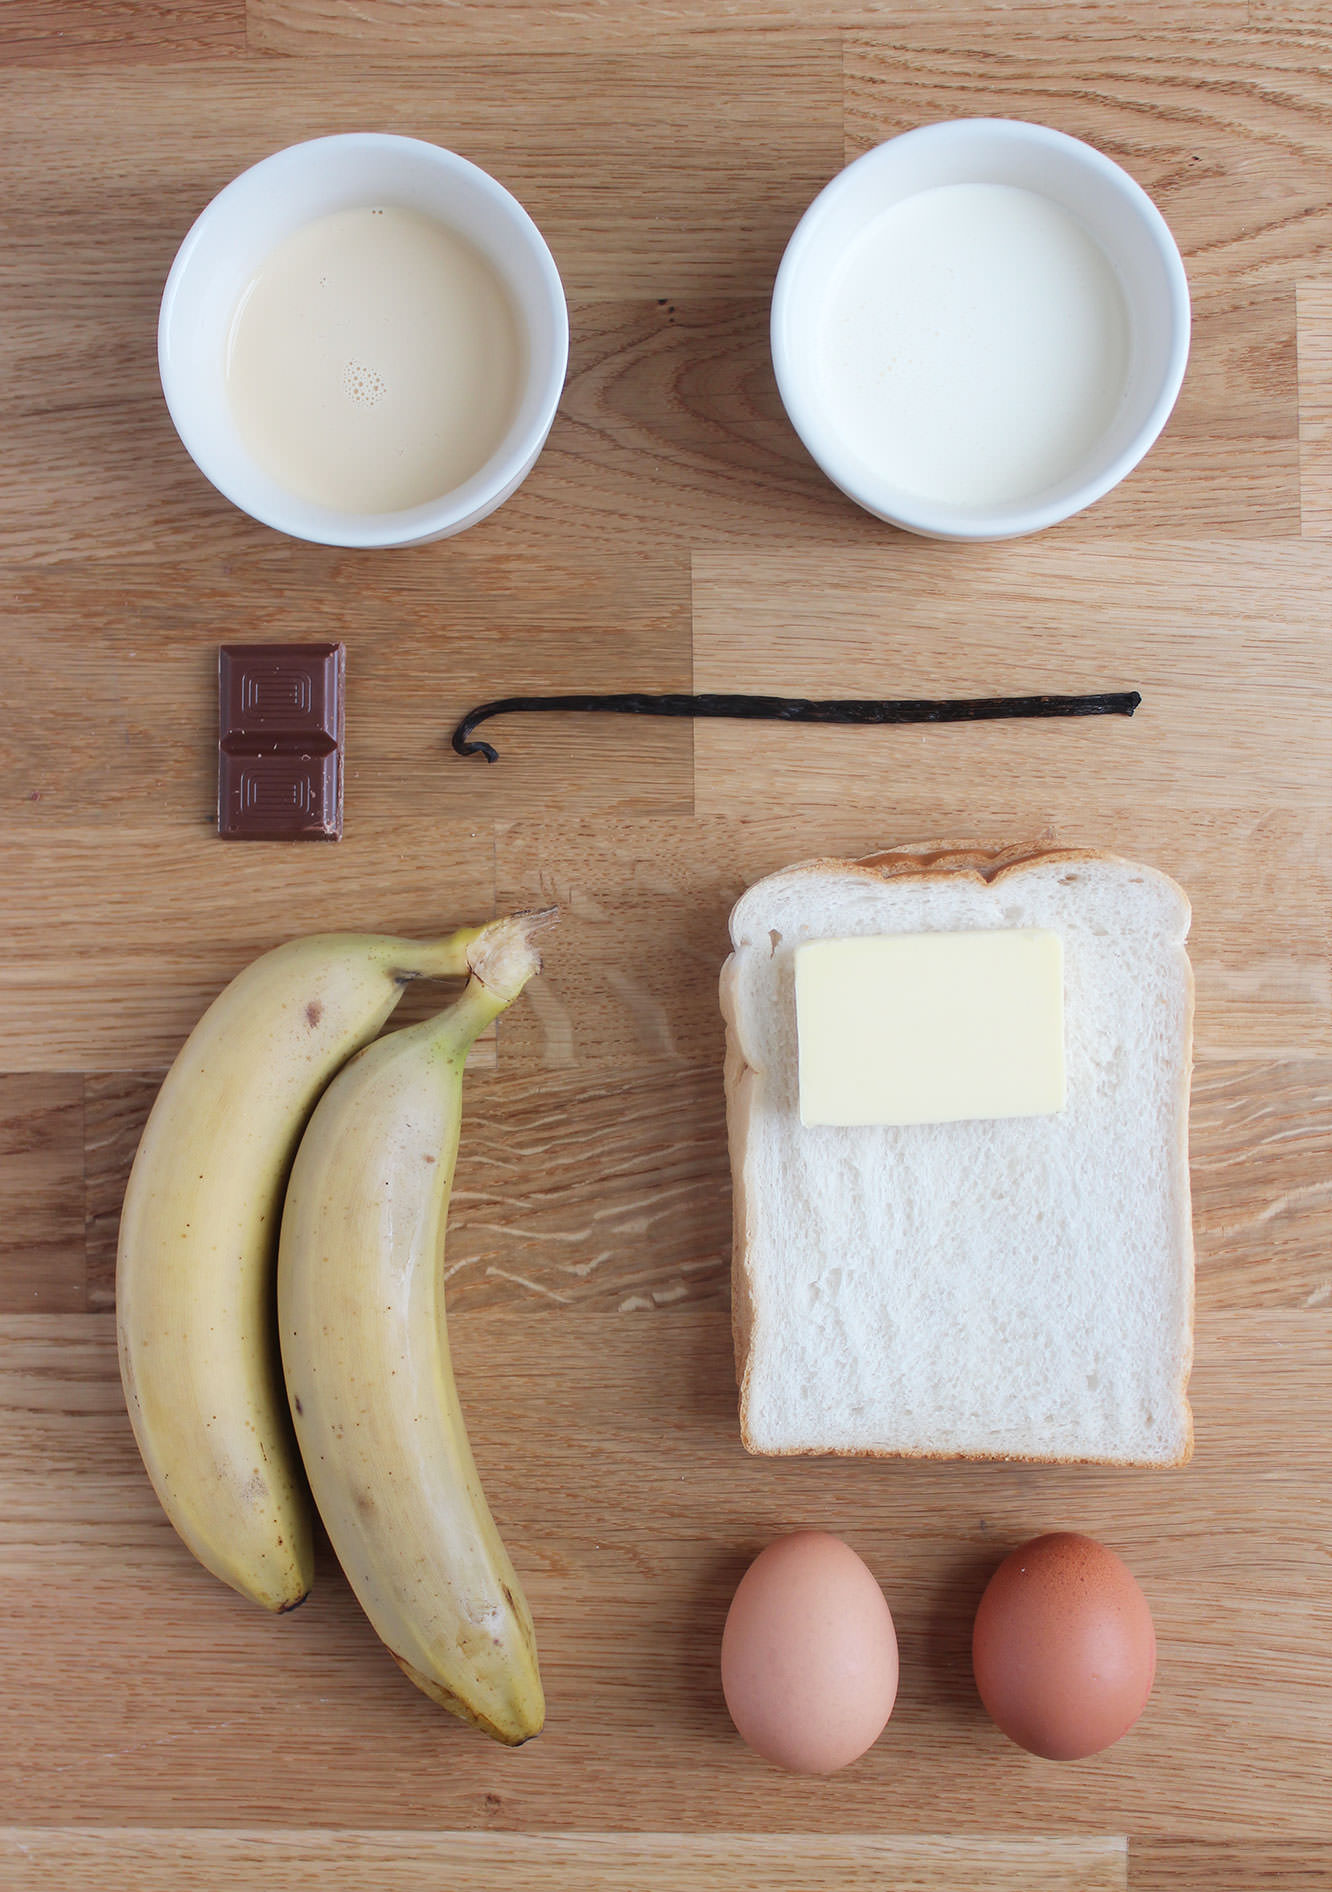
caramel-chocolate-marshmallow-bunny-pops-recipe

You will need

9 gelatine sheets

300g/10.5 oz granulated sugar
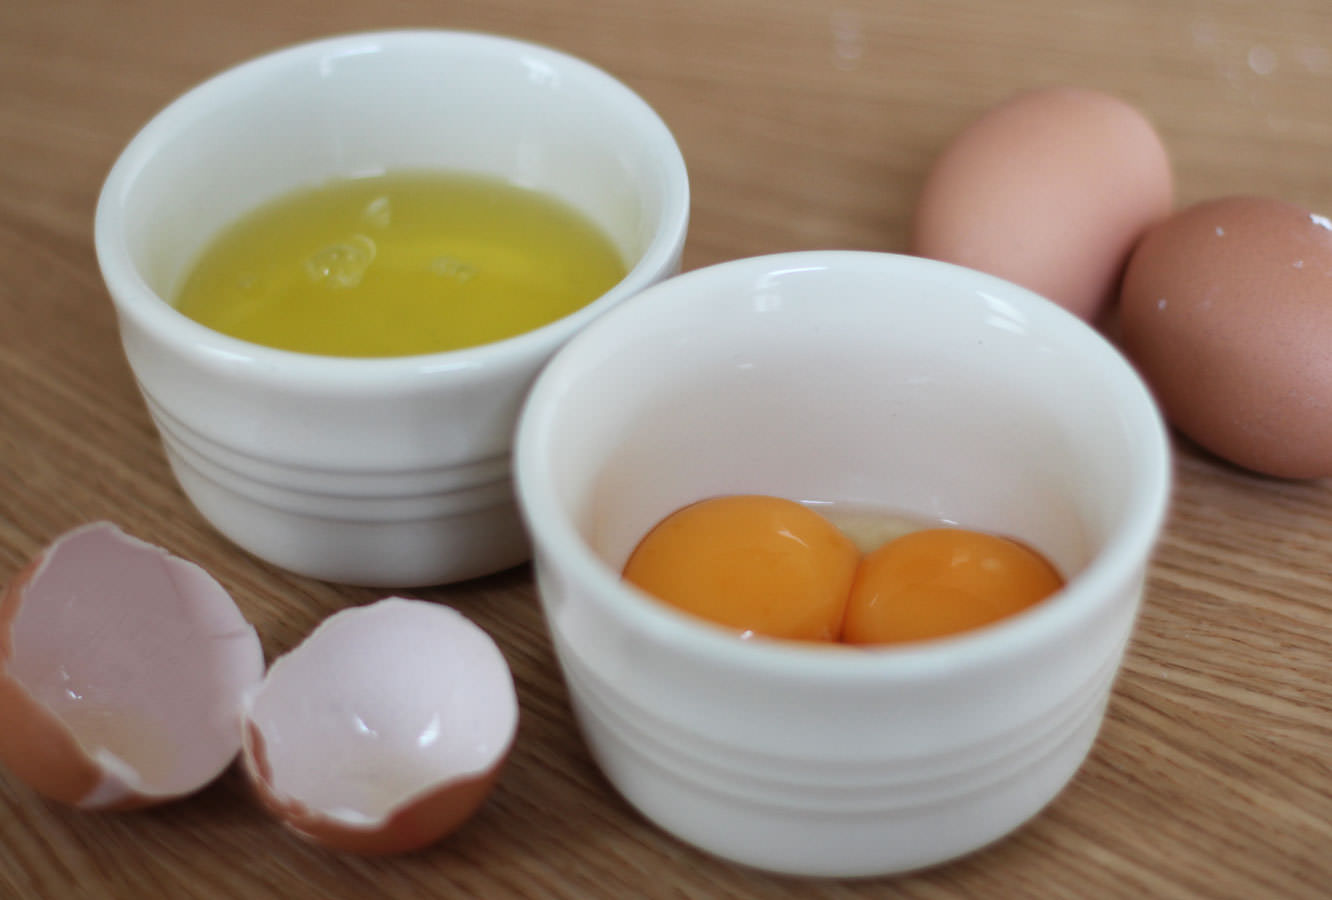
2 egg whites

1 tbsp liquid glucose (you can find this in a squeezy toothpaste type tube in the baking section)

2-3 tsp extract of your choice (but I HIGHLY recommend ‘buttery caramel’ from the natural professional flavours range – bought at Lakeland)

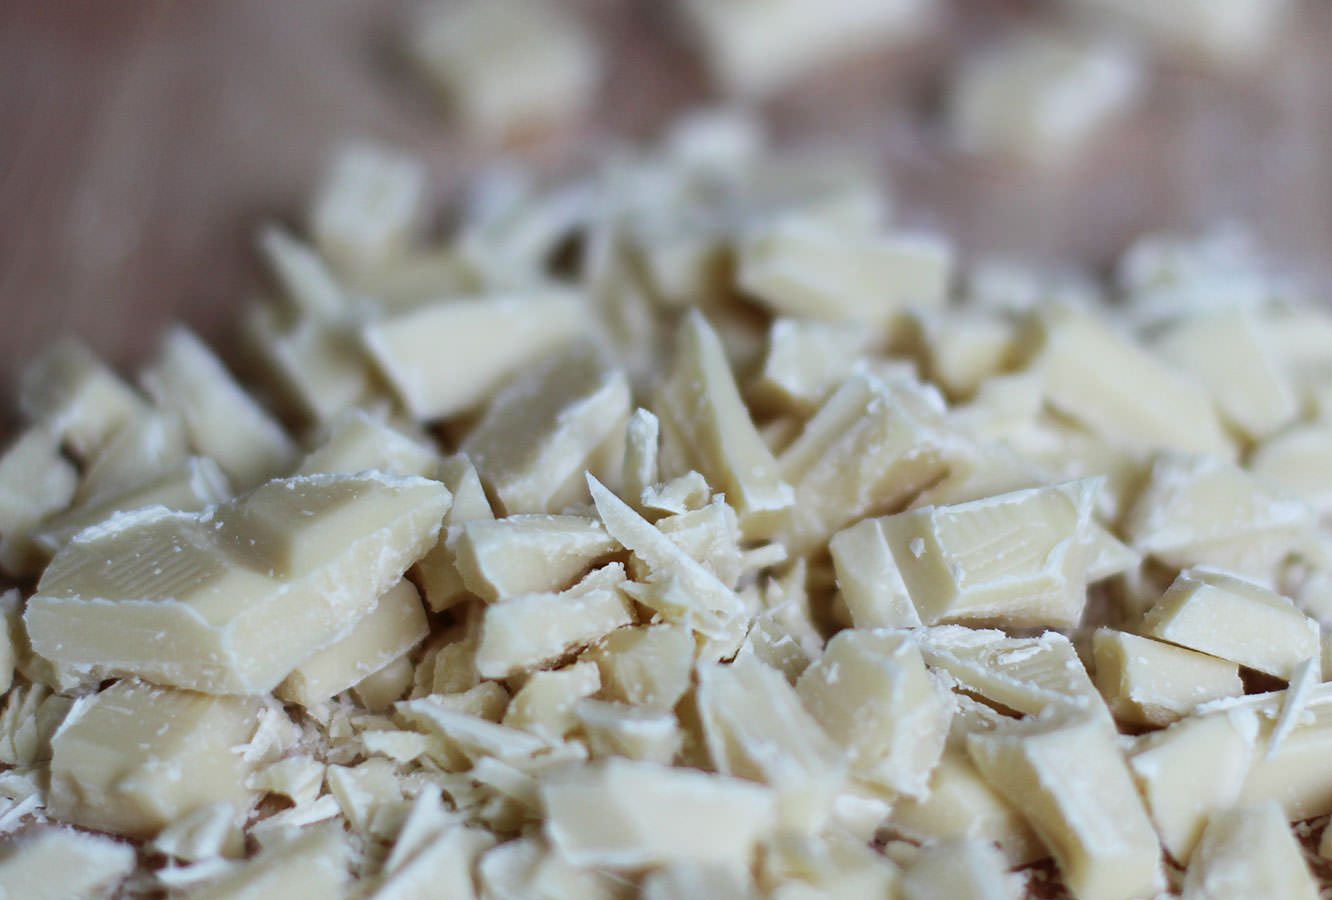
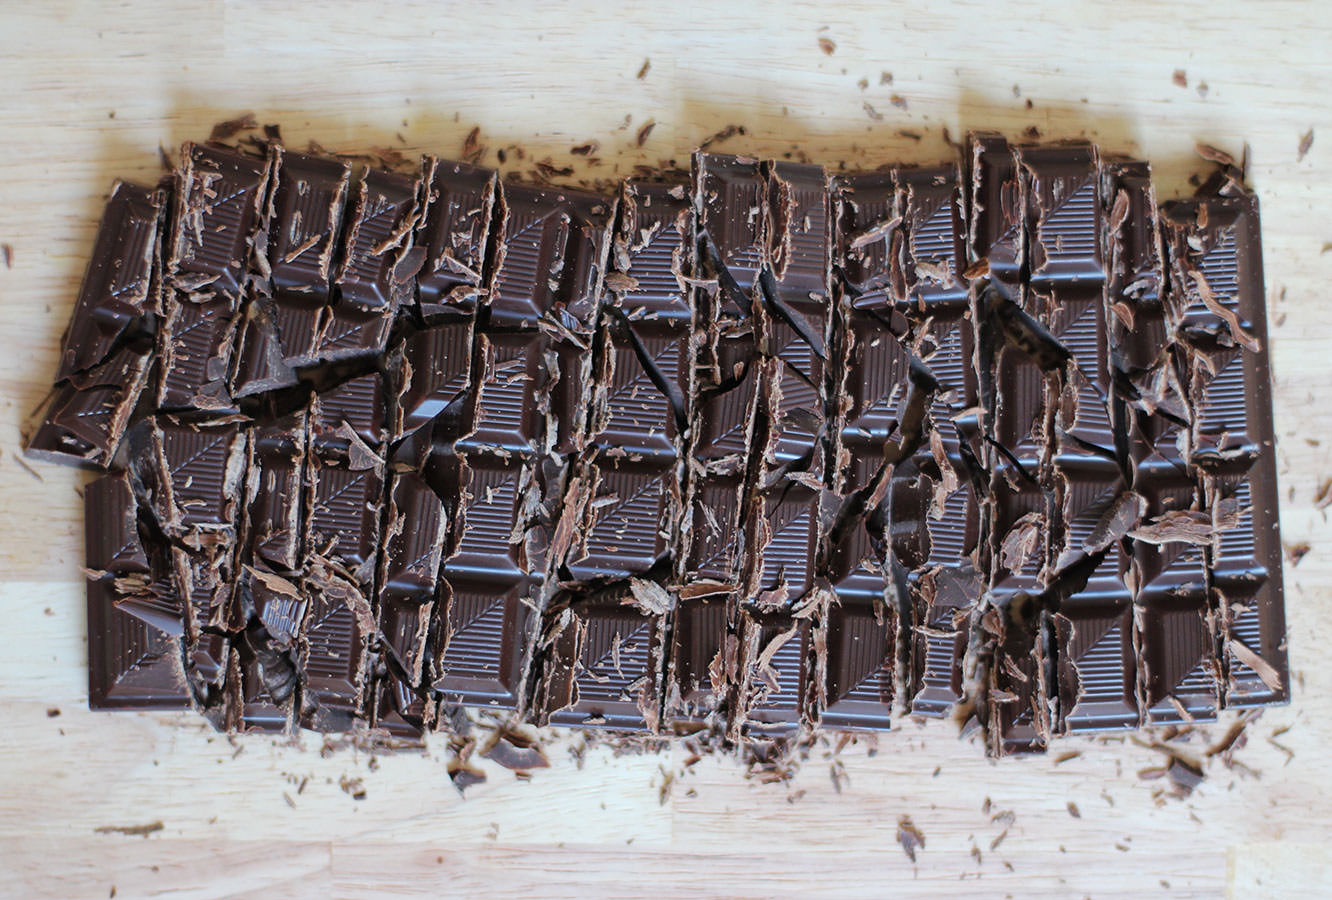
600-800g/1lb 5 oz – 1lb 12 oz chocolate for dipping (having sampled milk and white, I’d go white)

Sugar confetti for faces

Edible ink pen (or melted dark chocolate and a cocktail stick)

Icing sugar for dusting

A sugar thermometer

A bunny cutter (I got this from Amazon)

A handful of mini marshmallows (for fluffy bunny tails)

Cake pop sticks

caramel-chocolate-marshmallow-bunny-pops-recipe-2

Step one

In a cereal bowl, soak the gelatine in 150ml/5 fl oz cold water. Set aside.
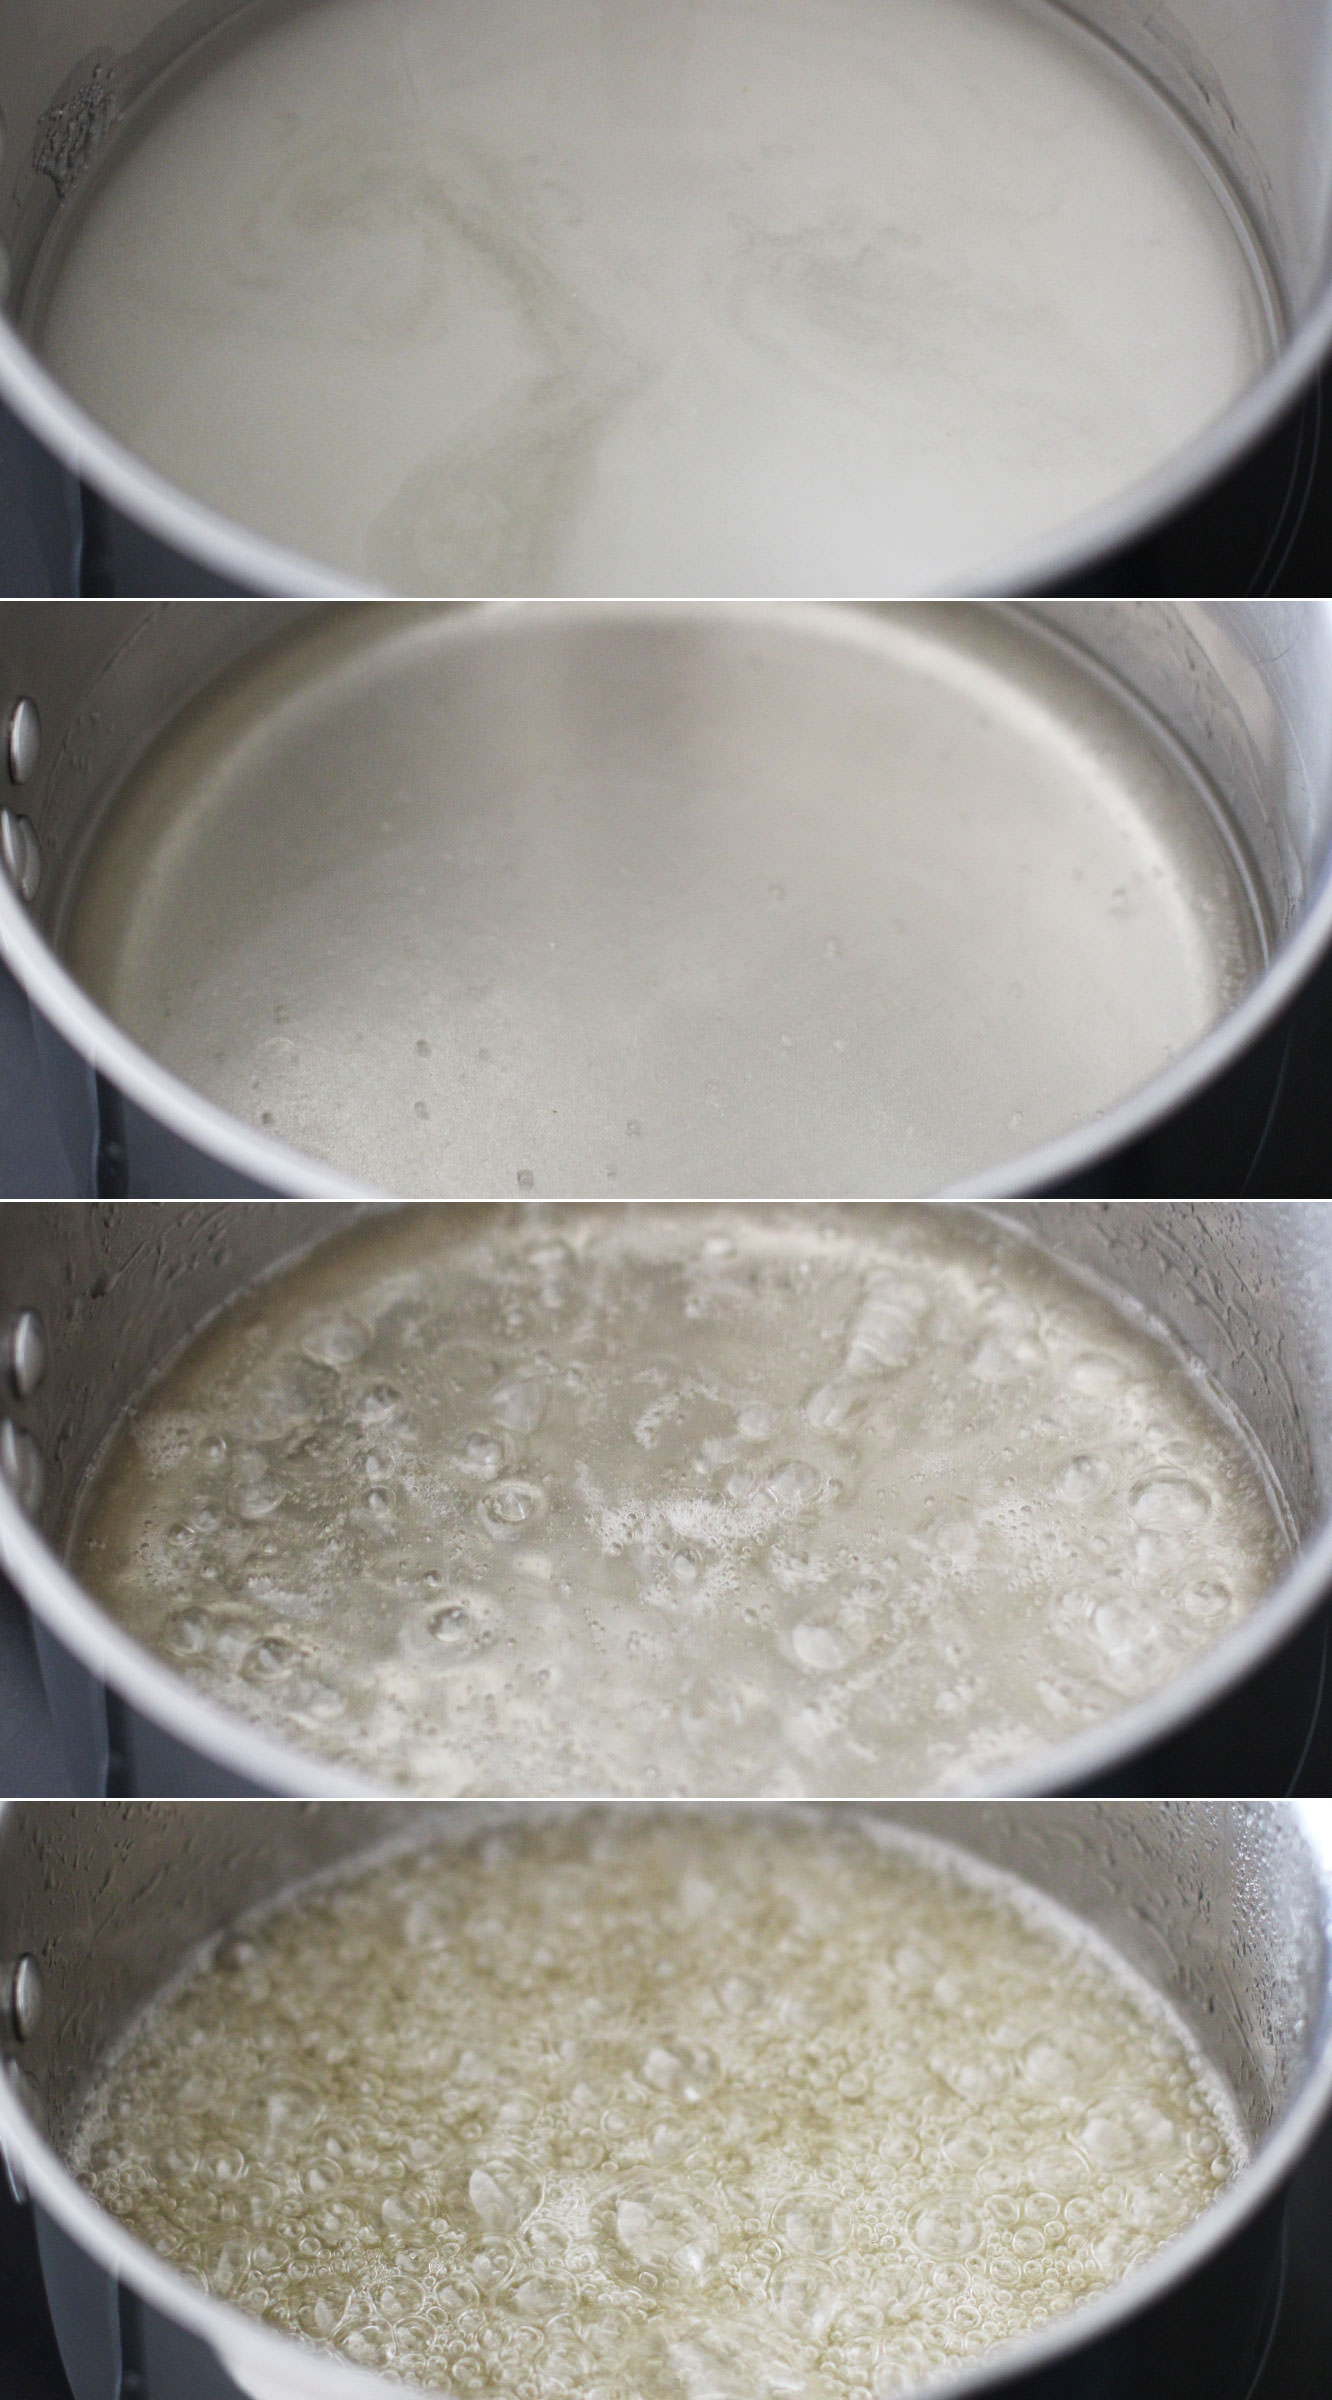
Step two

Combine the sugar, 150ml/5 fl oz water (different to the gelatine water) and the liquid glucose in a smallish saucepan. Allow the sugar to dissolve on a low heat, and then turn it up to medium-high. Be careful not to burn the sugar or any of your extremities.

The temperature you want this to get to is 118 C. It will feel like it will never get there, but stay strong.

maple-marshmallow-recipe-1

Step three

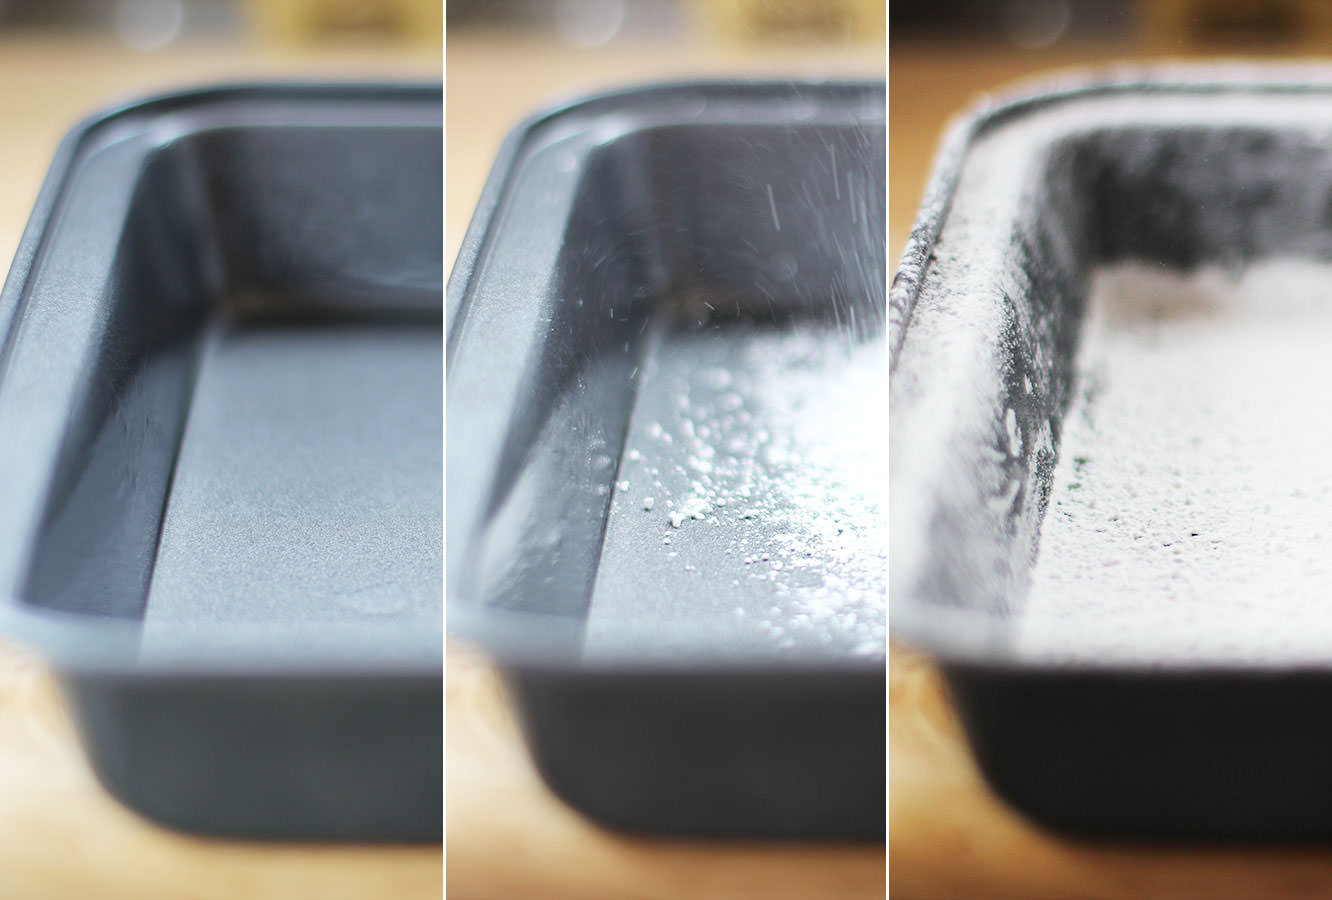
While the sugar is bubbling away take the opportunity to dust a brownie tin with icing sugar. Use a really small amount of olive oil before dusting to hold the icing sugar to the pan.

caramel-chocolate-marshmallow-bunny-pops-recipe-1

Step four

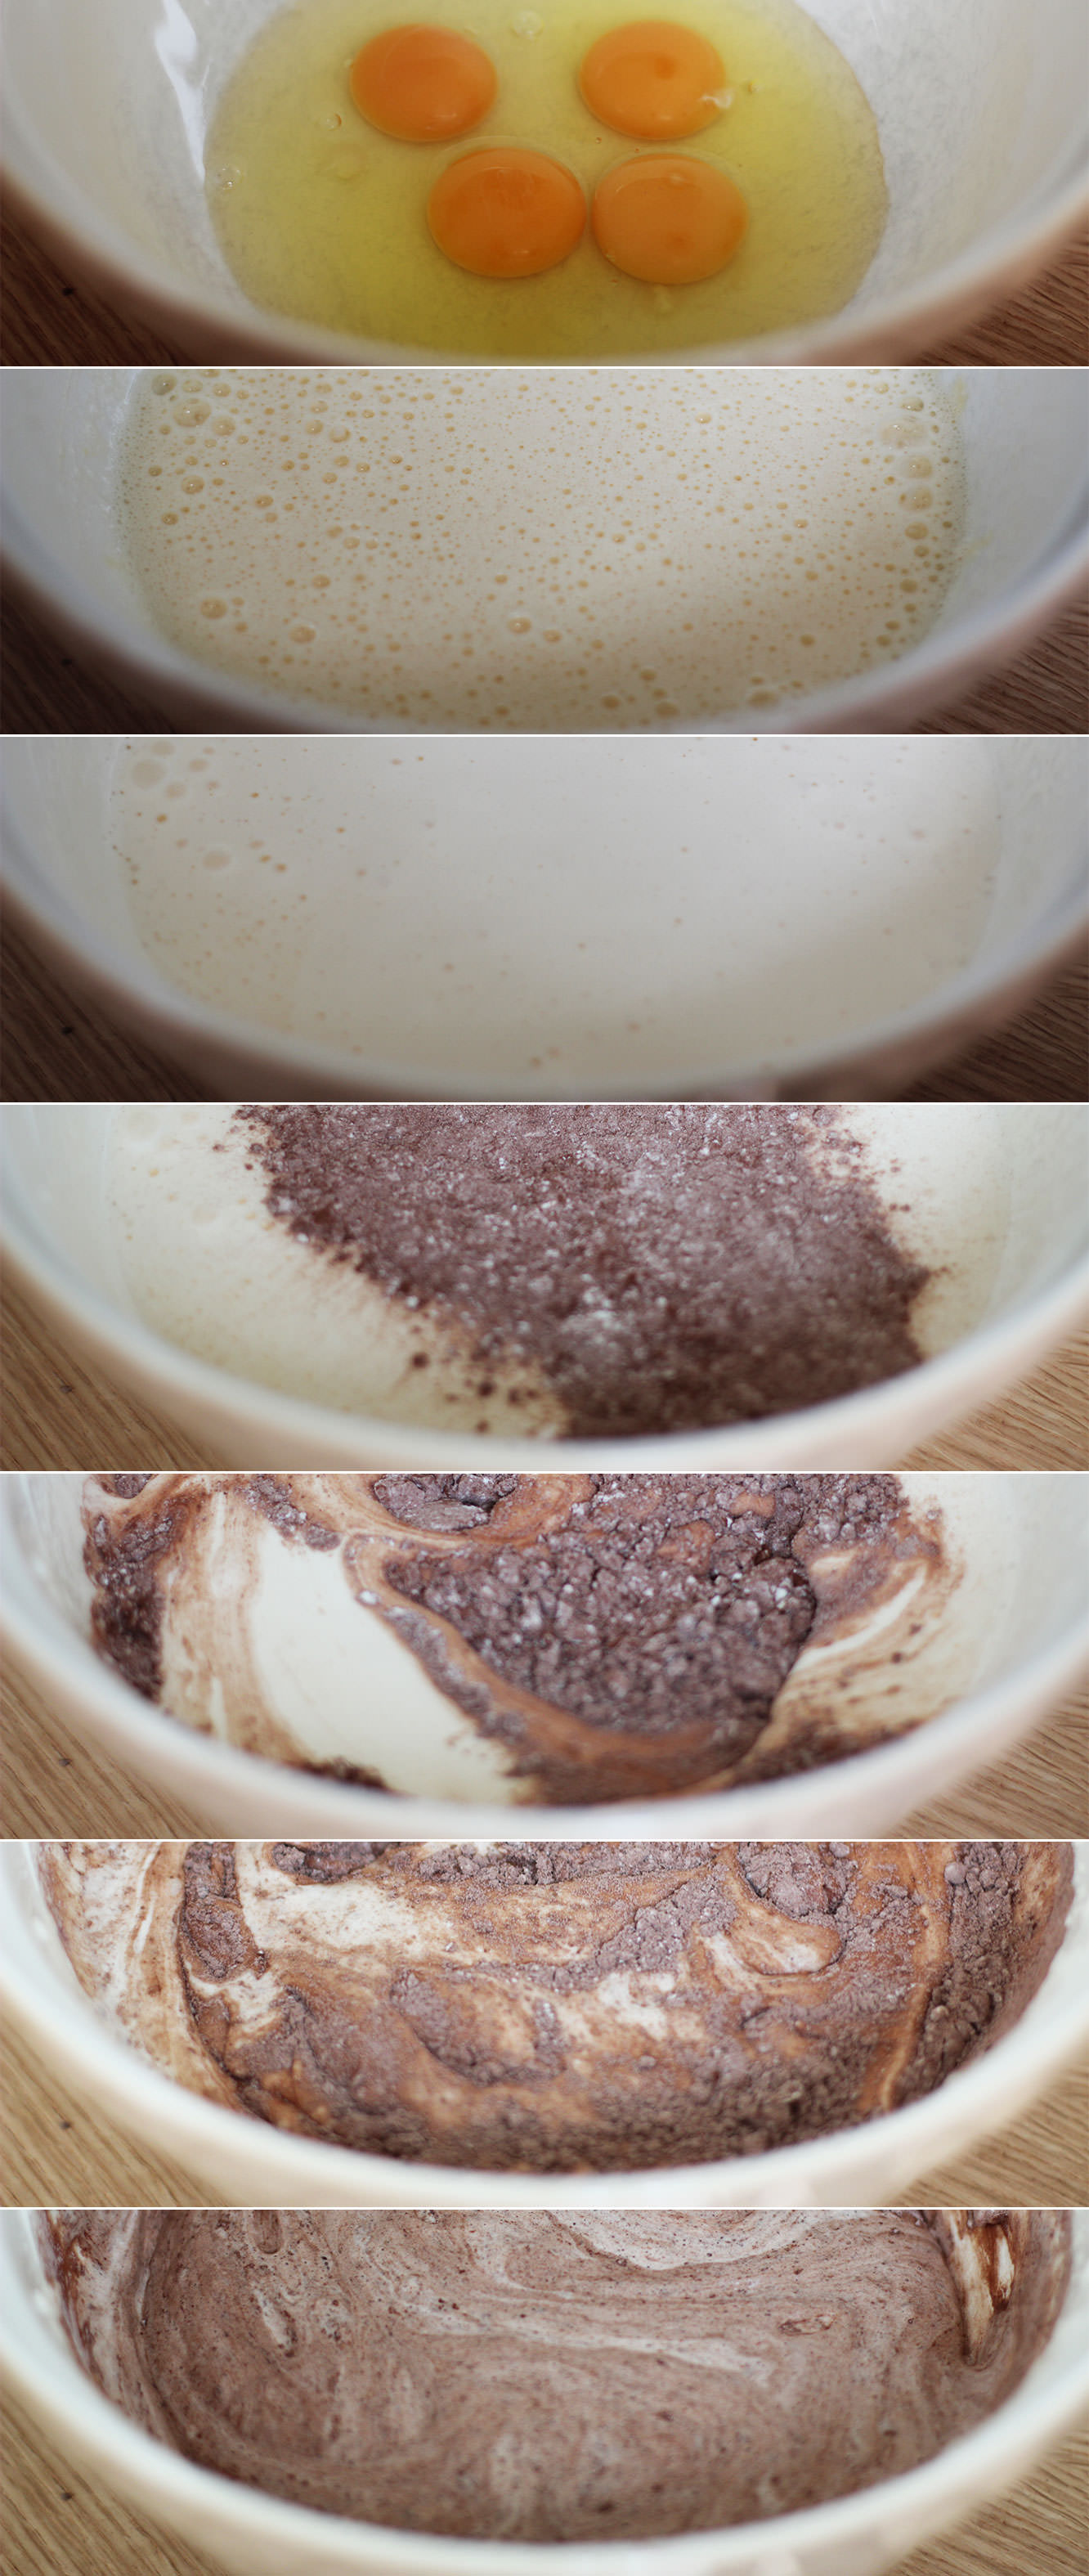
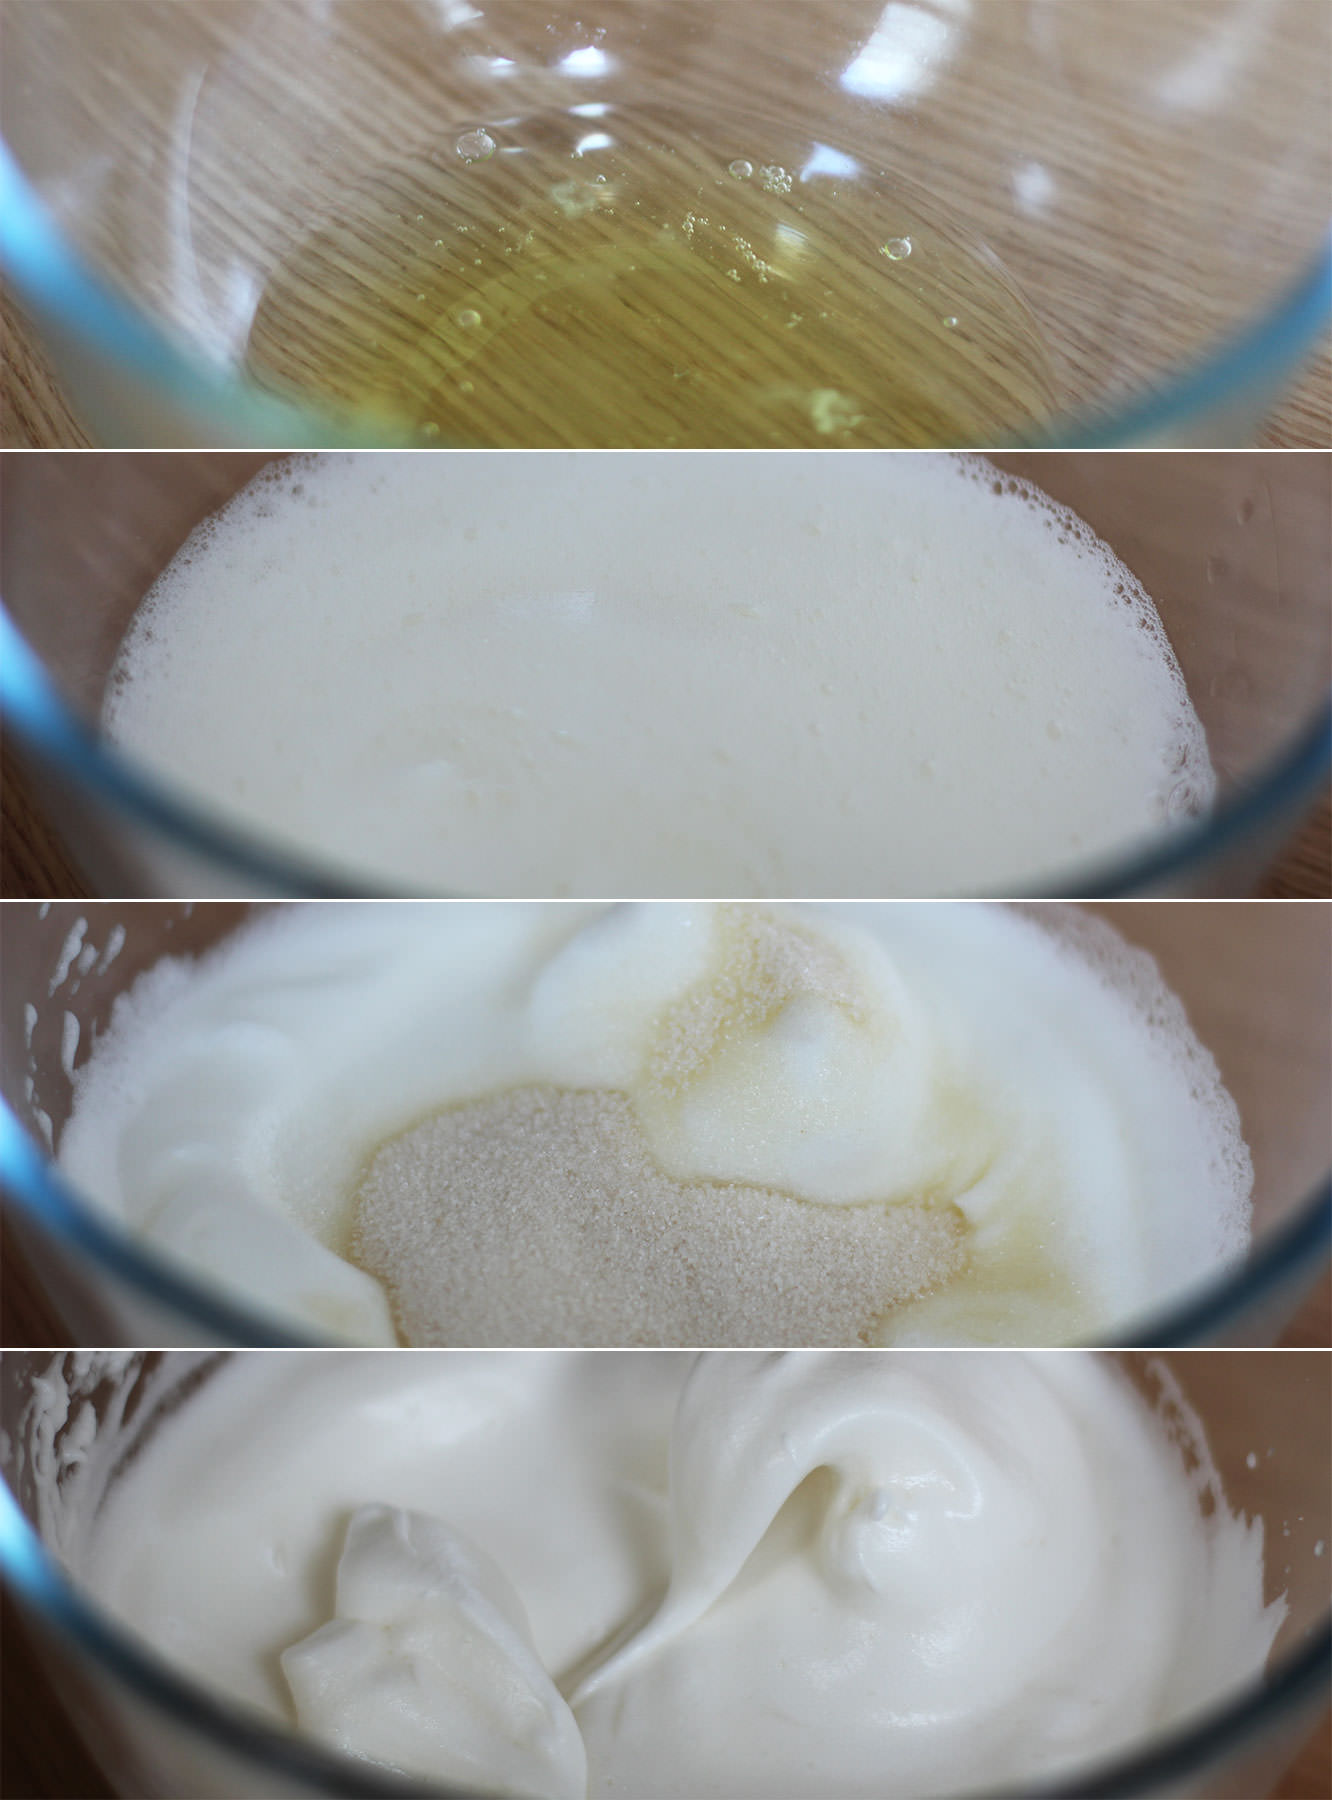
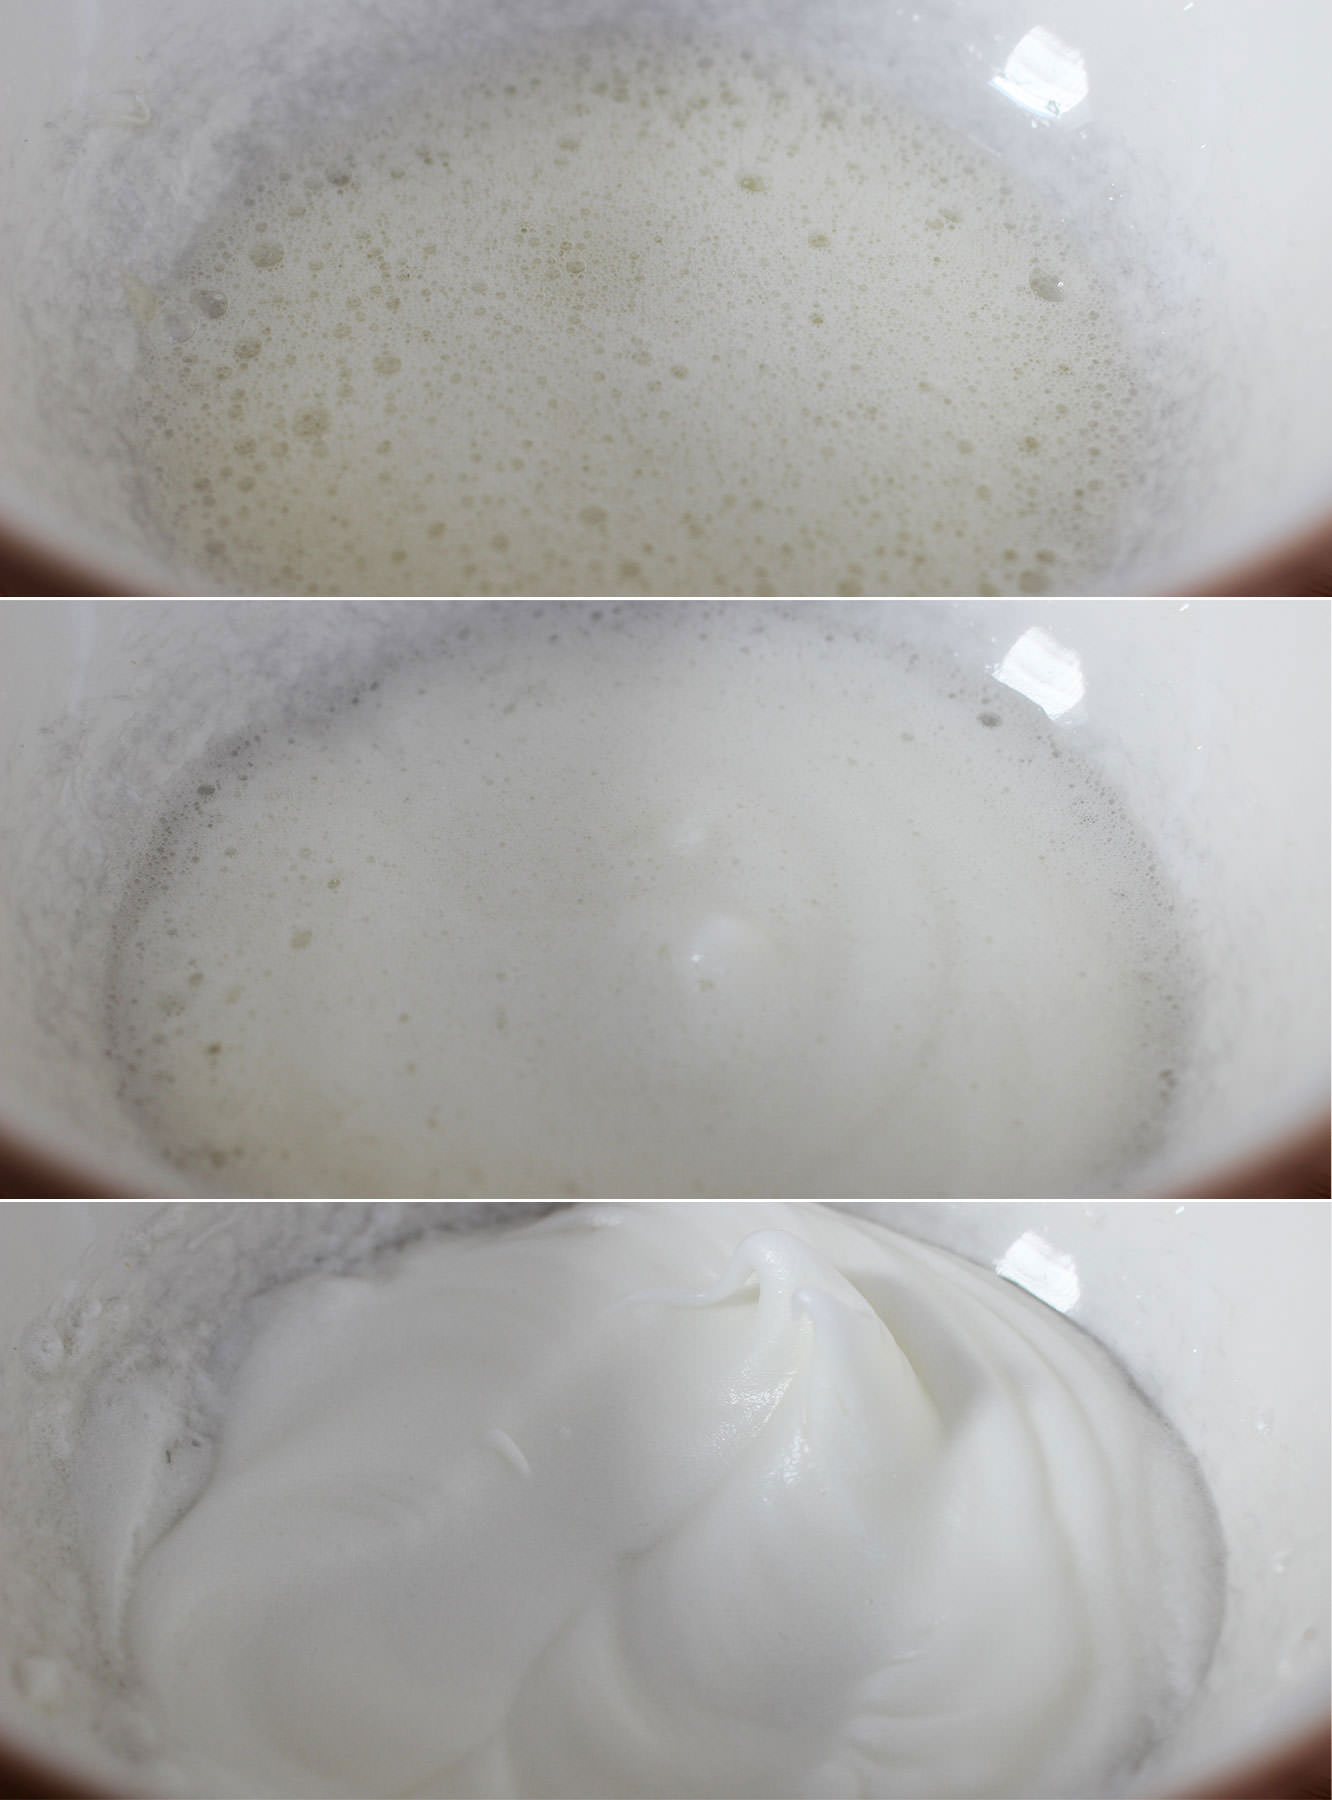
Place the egg whites in a metal or glass bowl, never plastic. Or you know, if you want to wreck your lovely Mason Cash bowl by using an electric whisk on it, by all means do. Those handsome grey marks? You could have those too.

When the sugar gets to somewhere around 112-115C whisk the egg whites into stiff peaks.

Step five

When the sugar reaches 118C take it off the heat.

Squeeze the gelatine out a bit and add it to the sugar mix. It will bubble right up so don’t panic. It should settle pretty quickly.

caramel-chocolate-marshmallow-bunny-pops-recipe-3

Step six

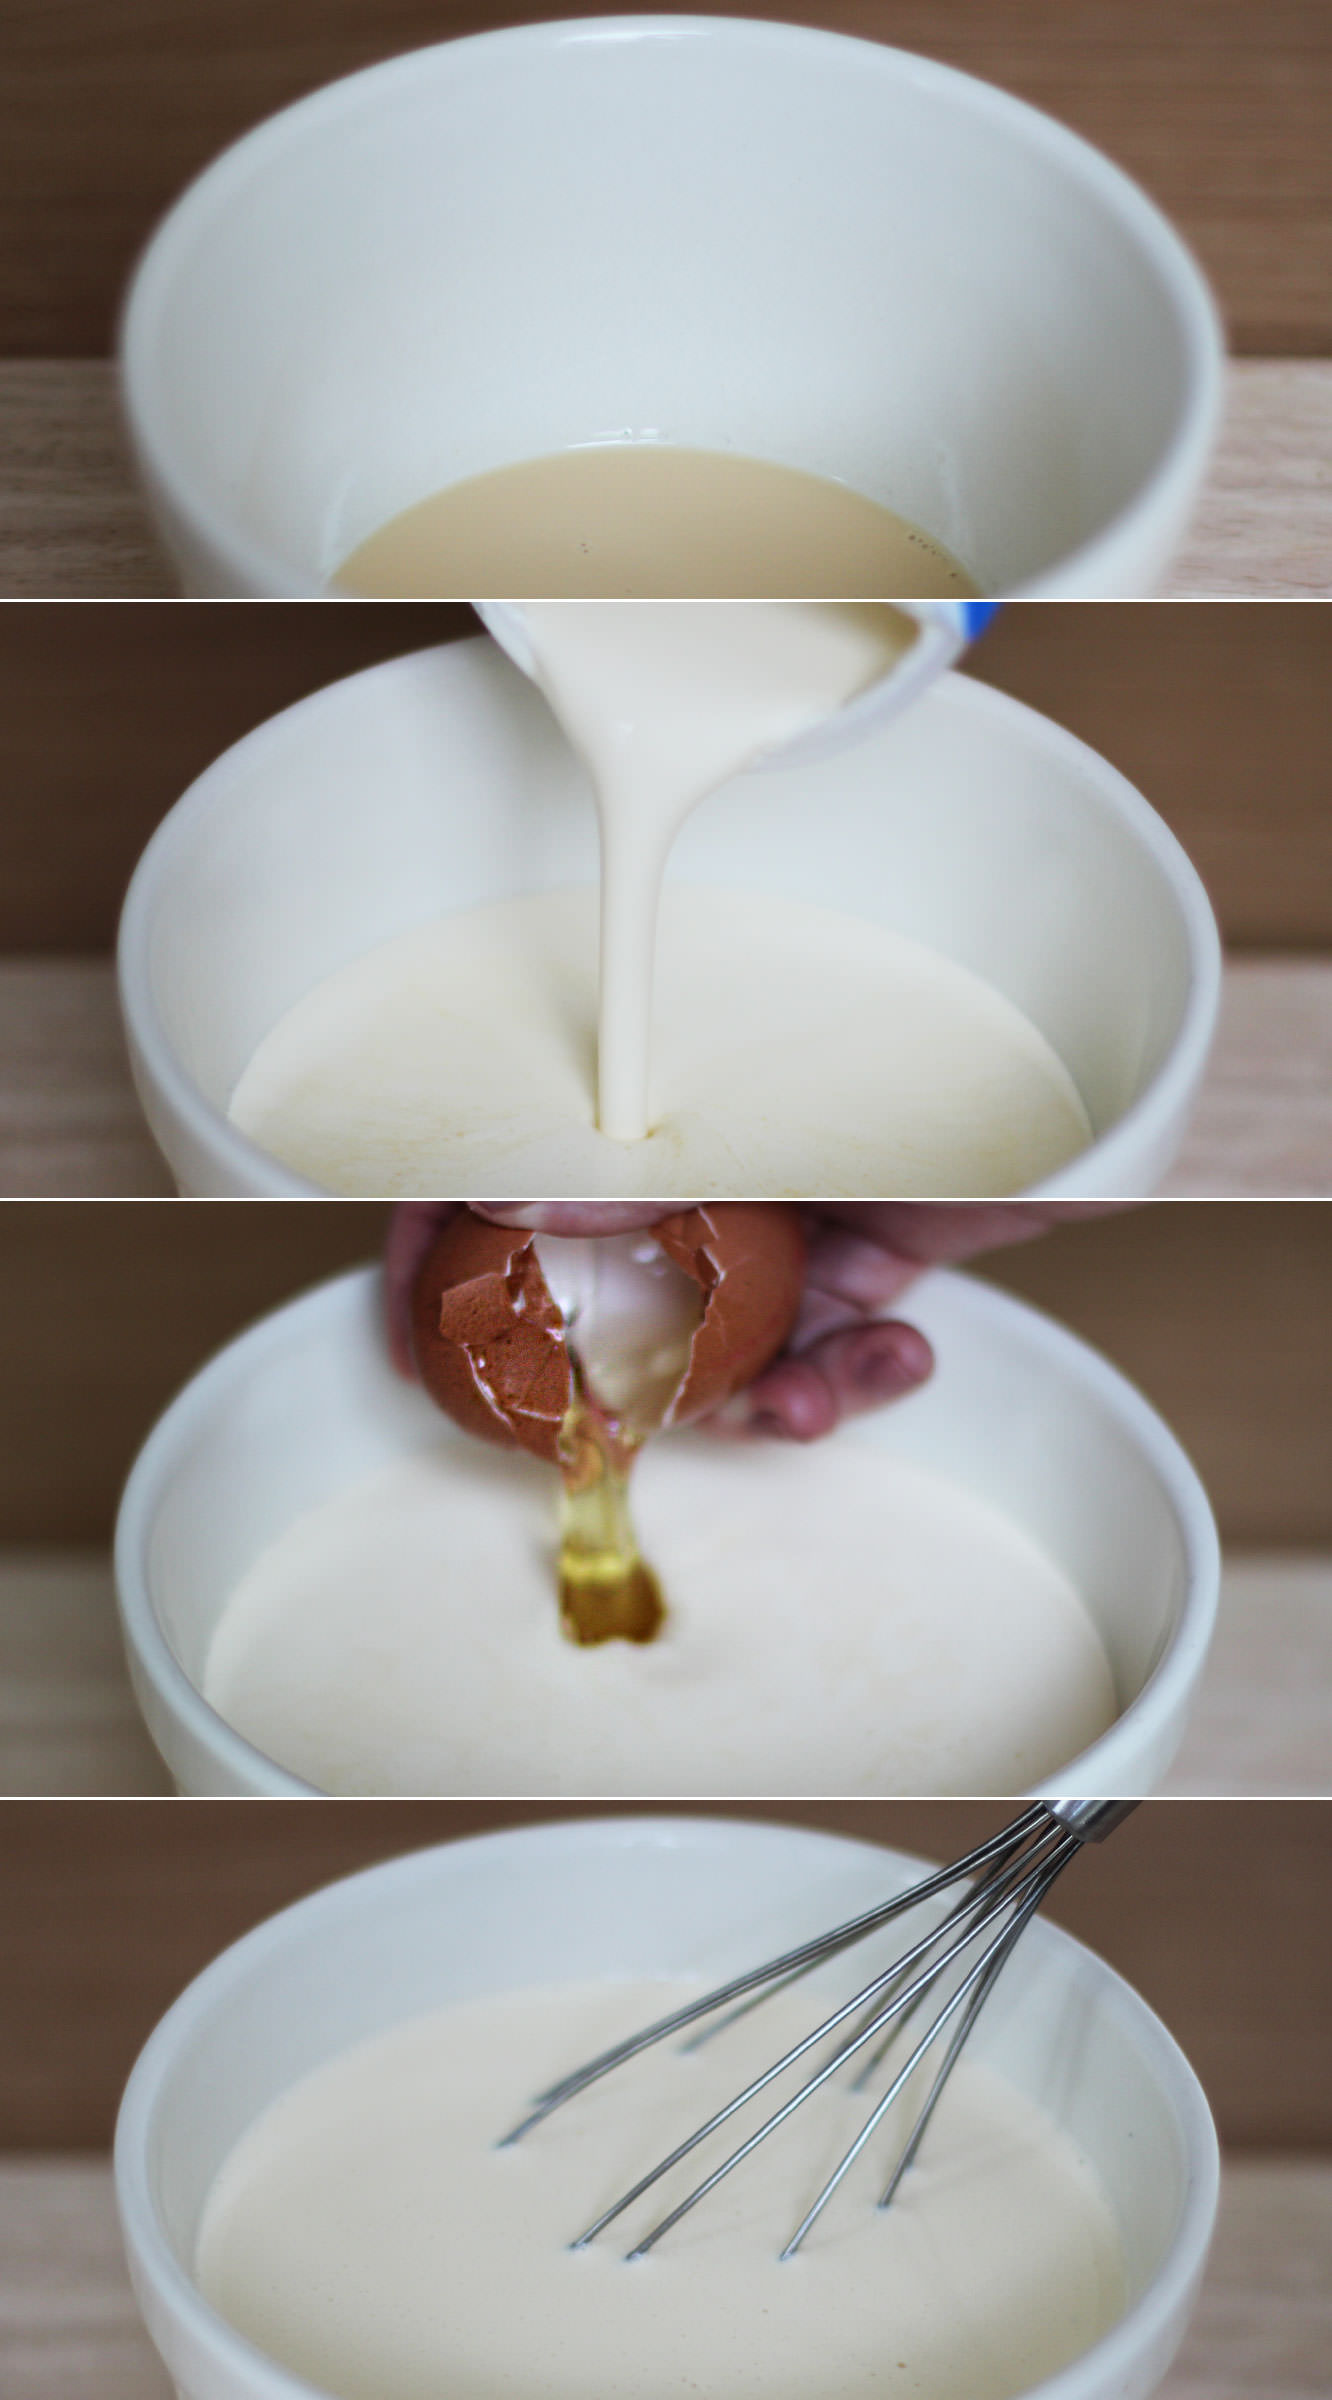
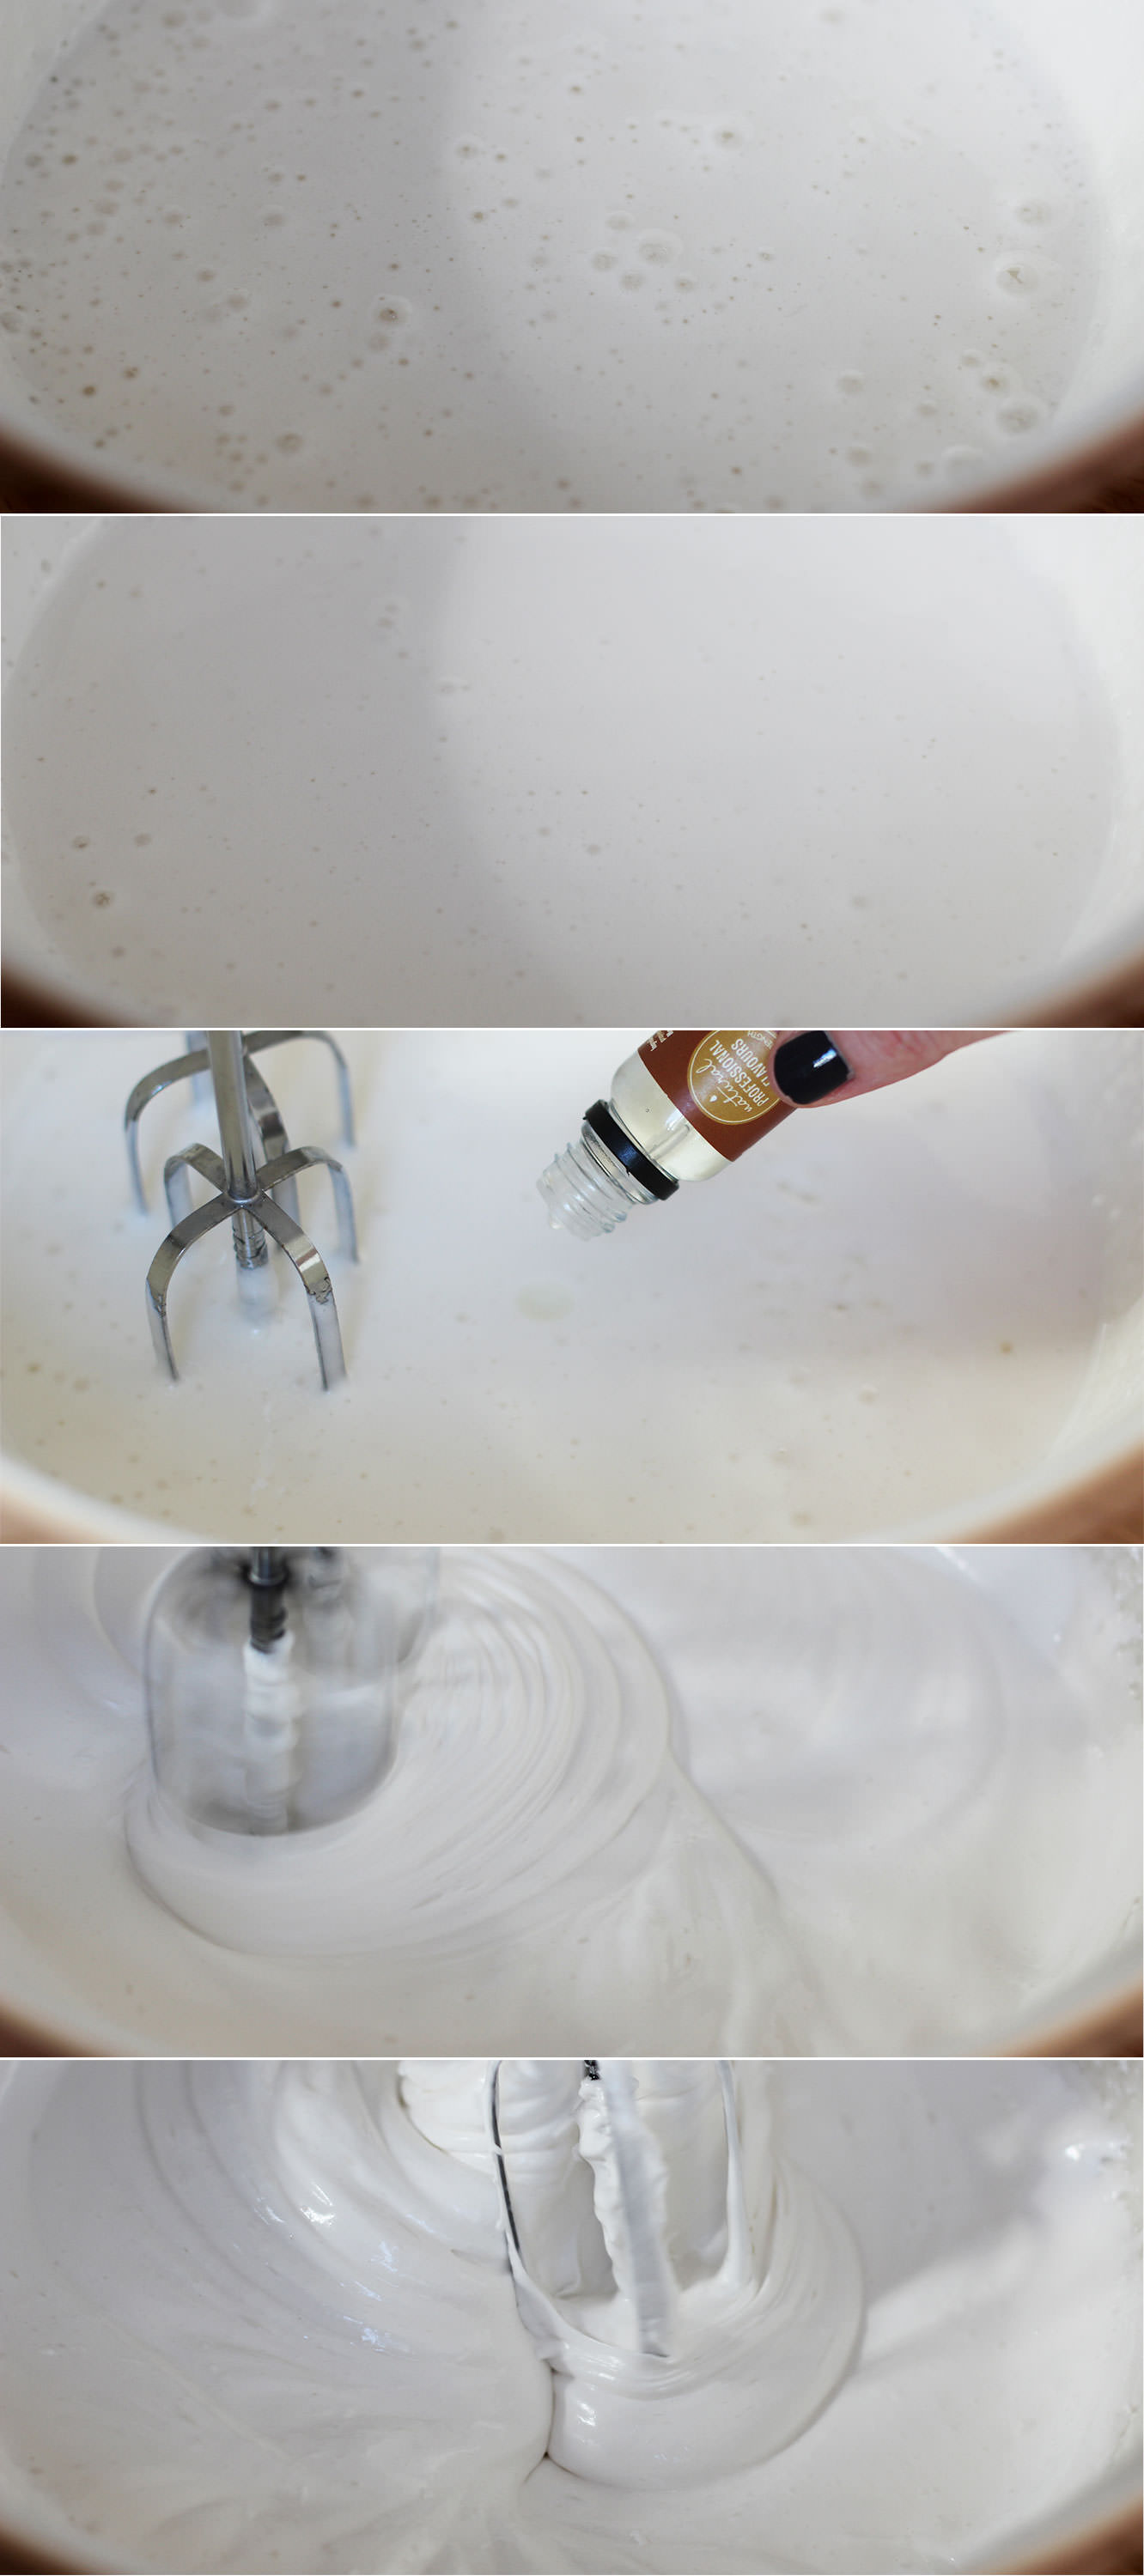
Pour the hot sugar into the eggs, but make sure you’re whisking continually to avoid a big lump of sugar at the bottom of the bowl.

Whisk until the mixture holds its shape well and is quite thick. This can take up to ten minutes.

Somewhere during the whisking (probably when you need to give your arm a rest) add the flavouring. Vanilla extract is lovely in these but they will take basically anything you fancy. Like I said in the ingredients list I really recommend ‘Buttery Caramel’ from the Natural Professional Flavours brand.

caramel-chocolate-marshmallow-bunny-pops-recipe-4

Step seven

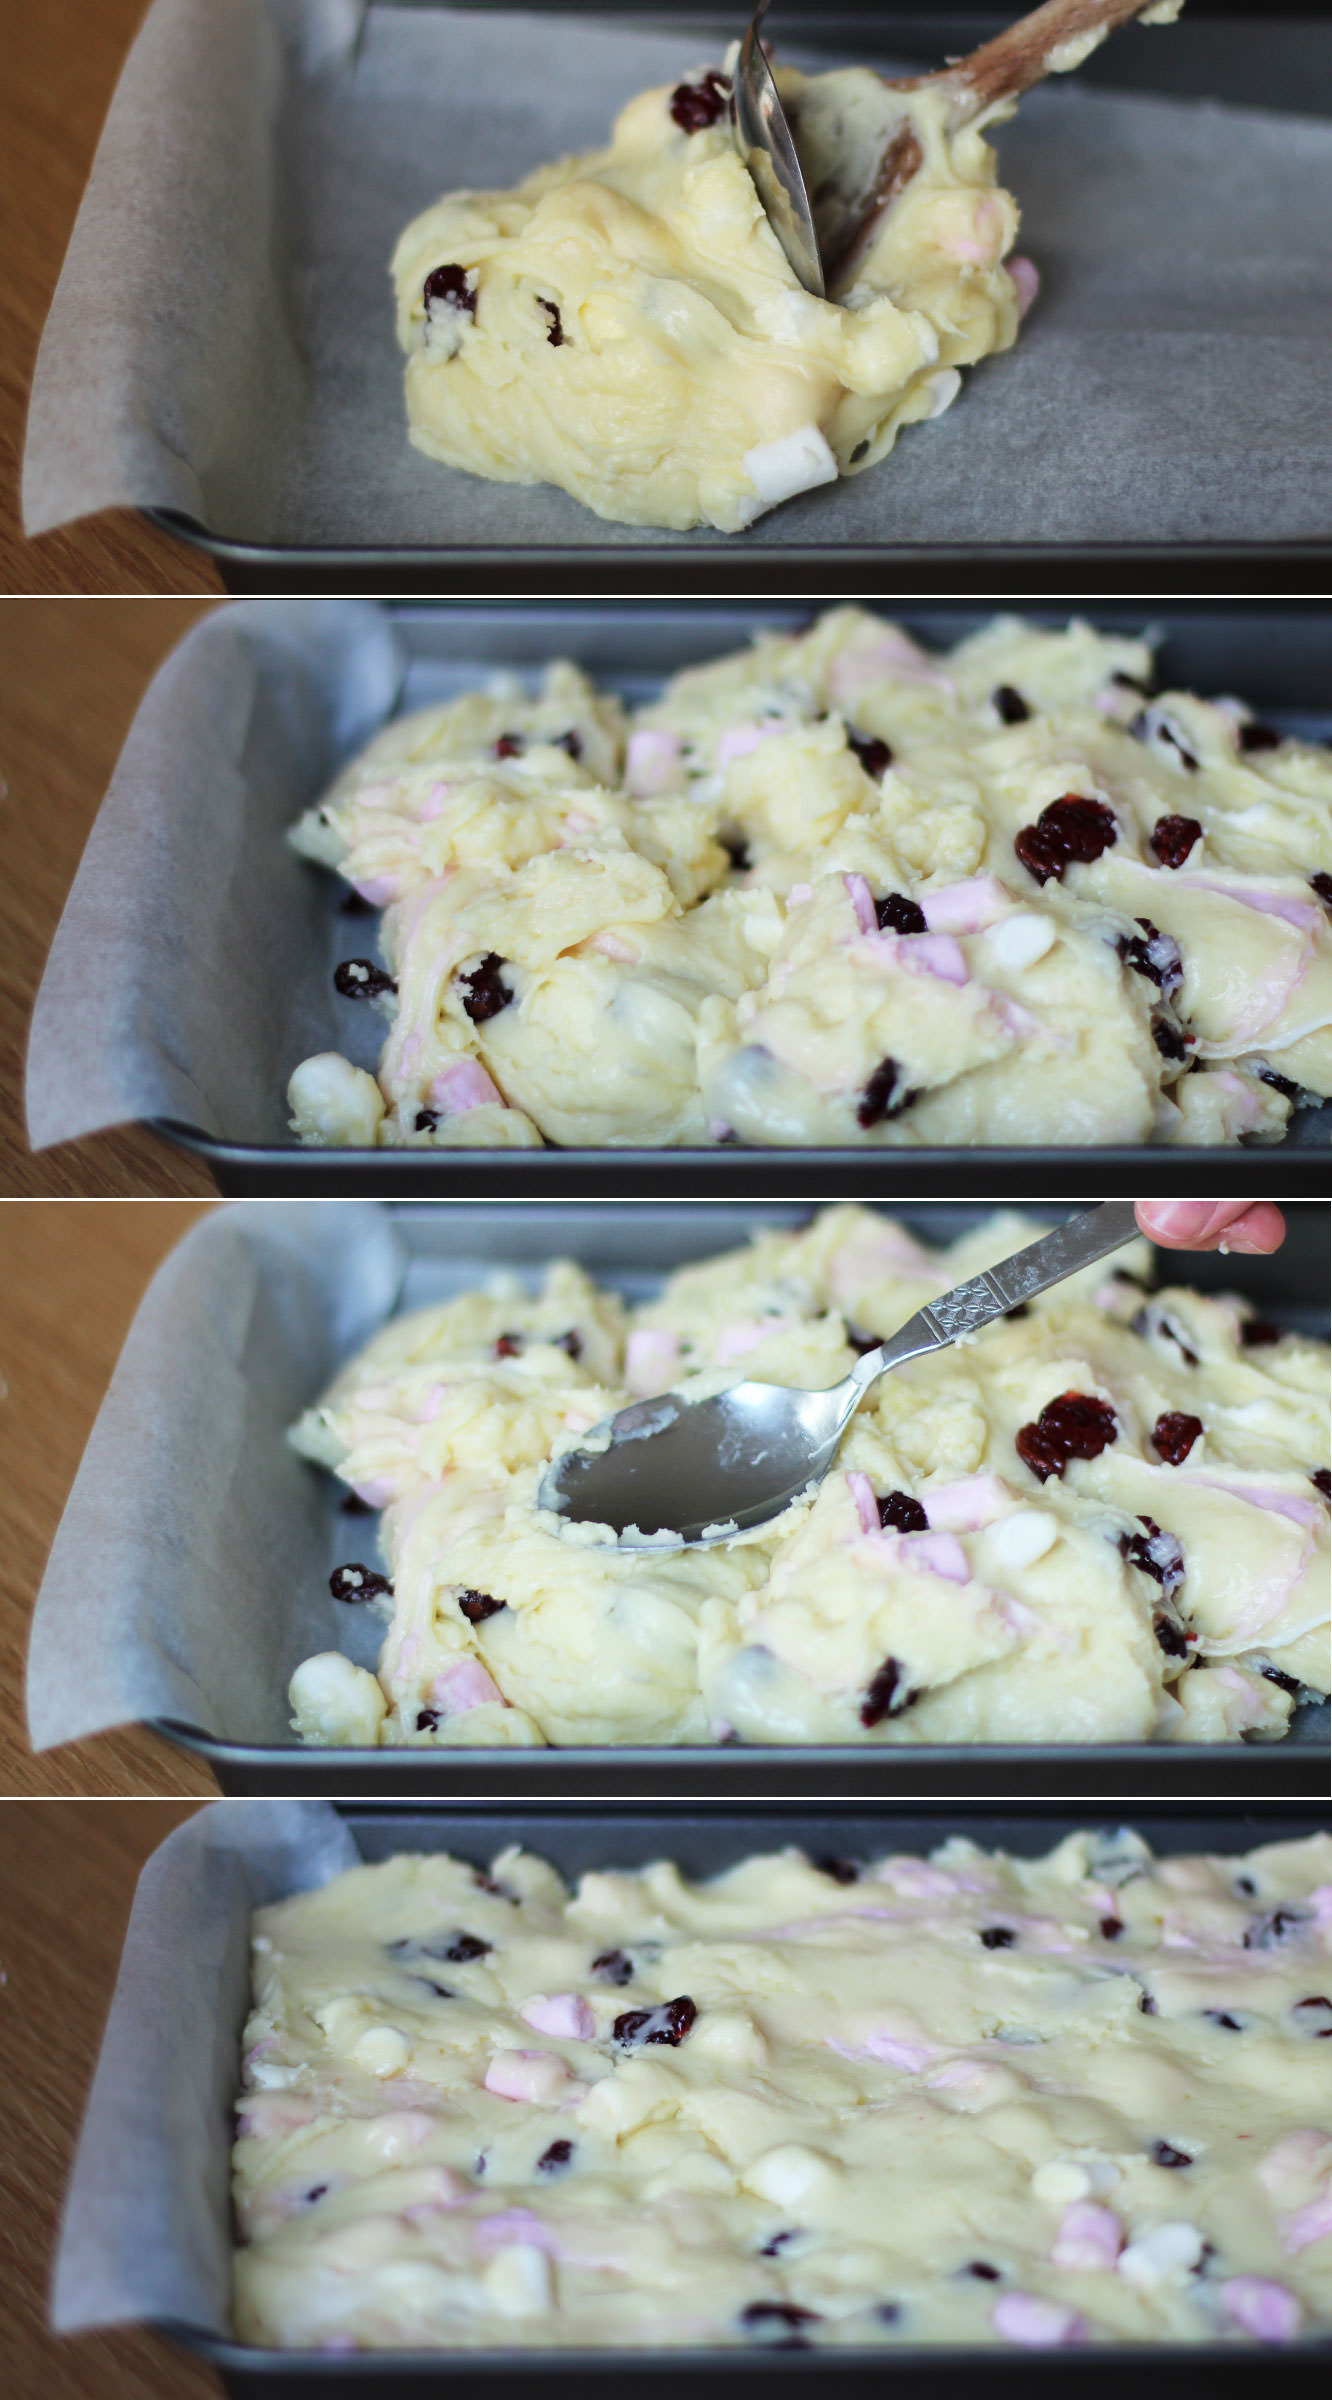
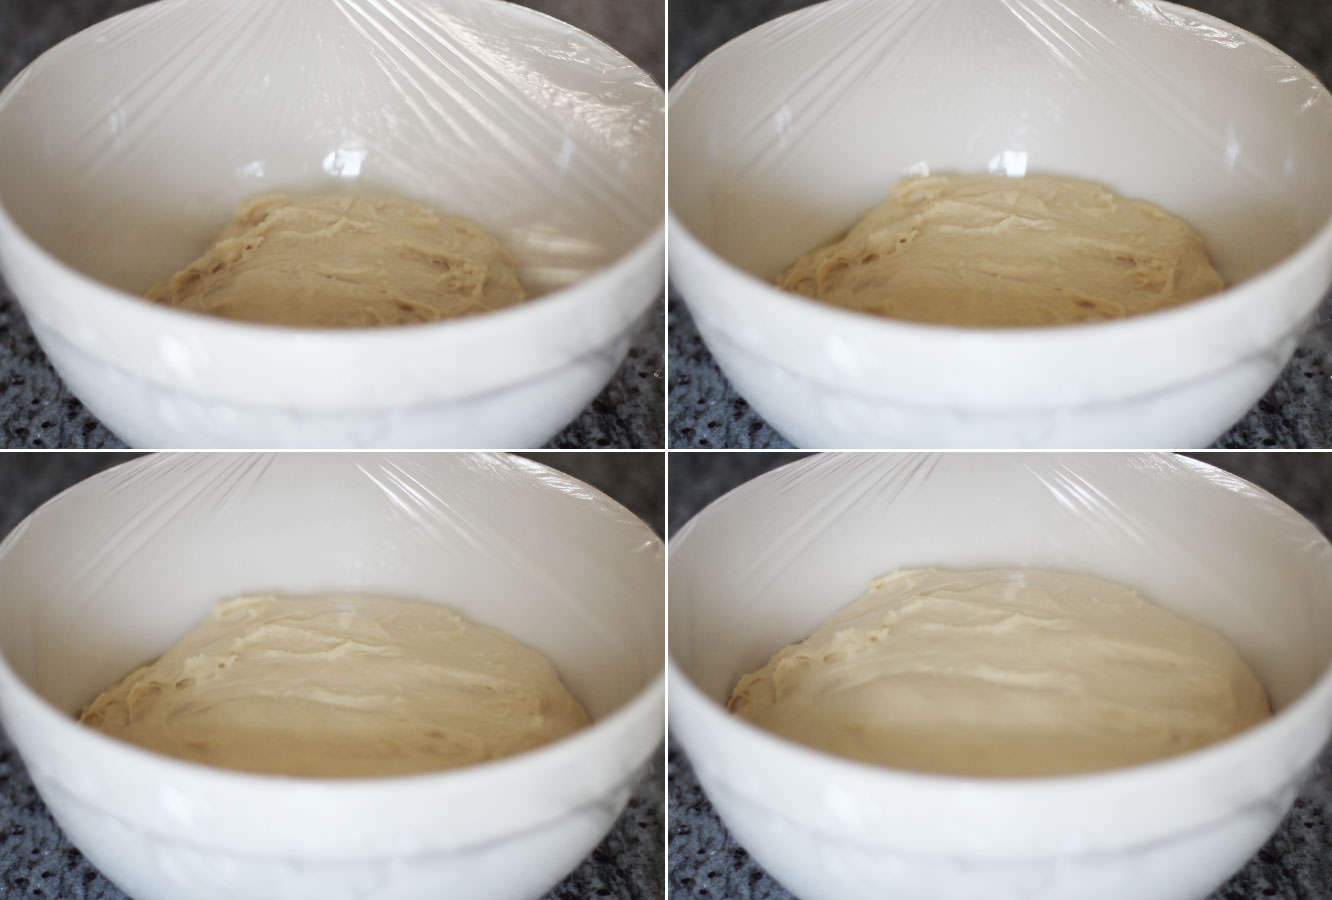
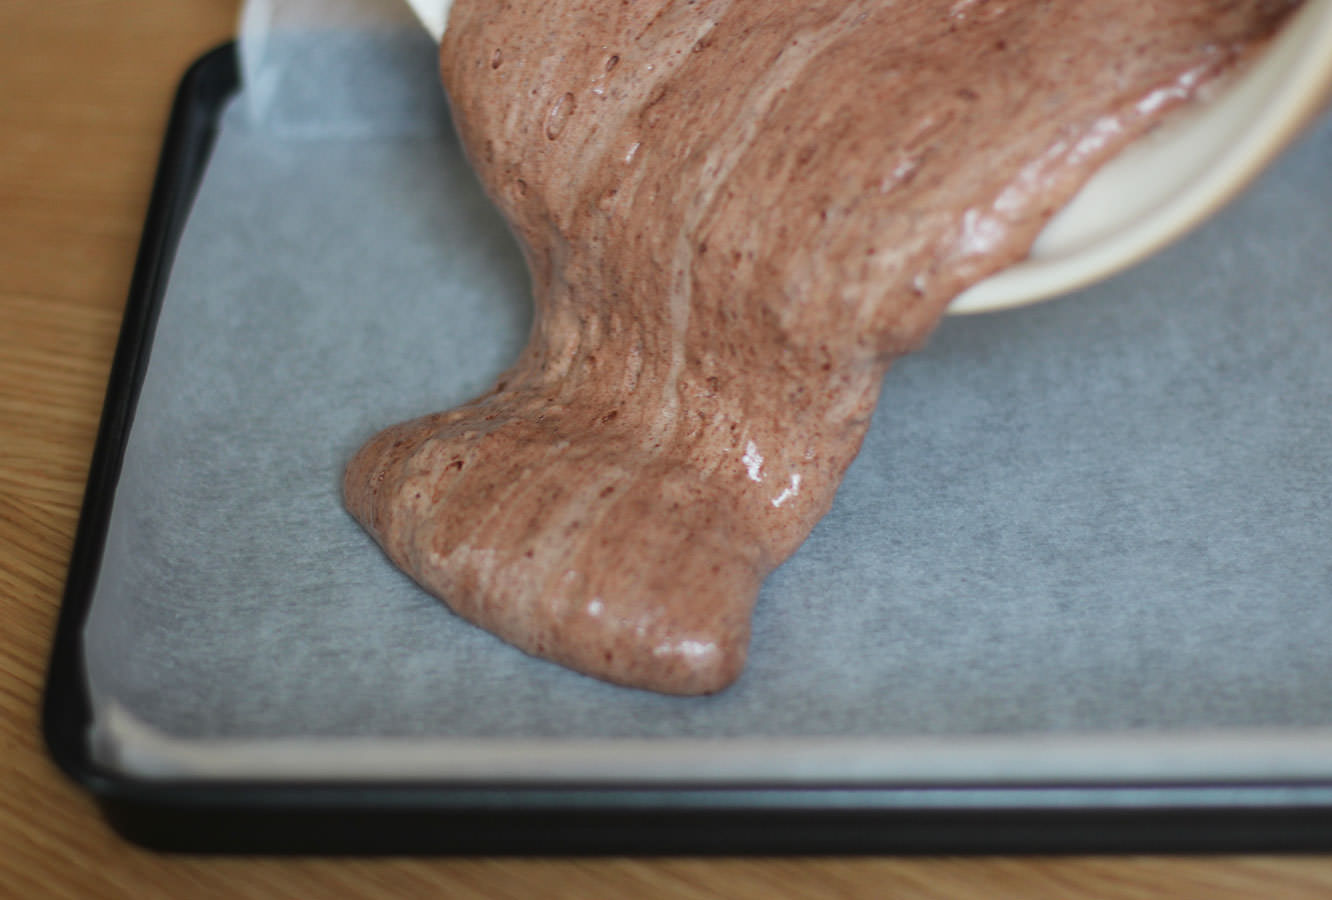
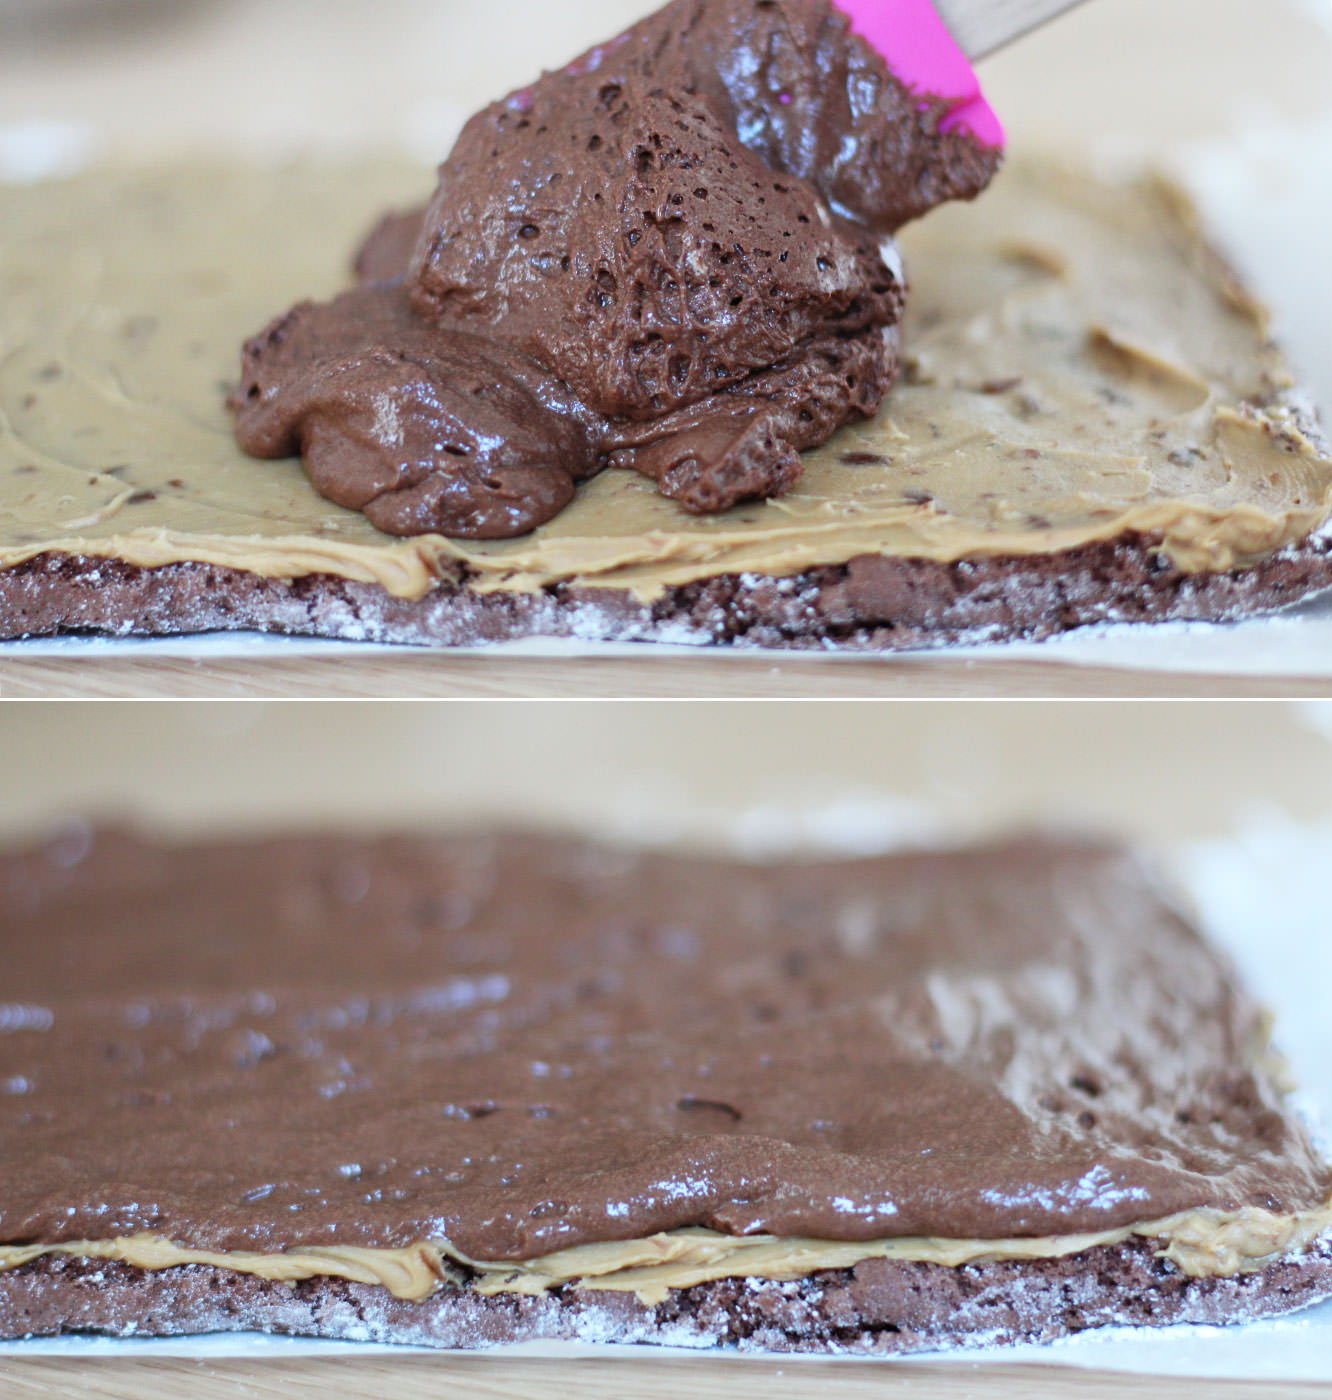
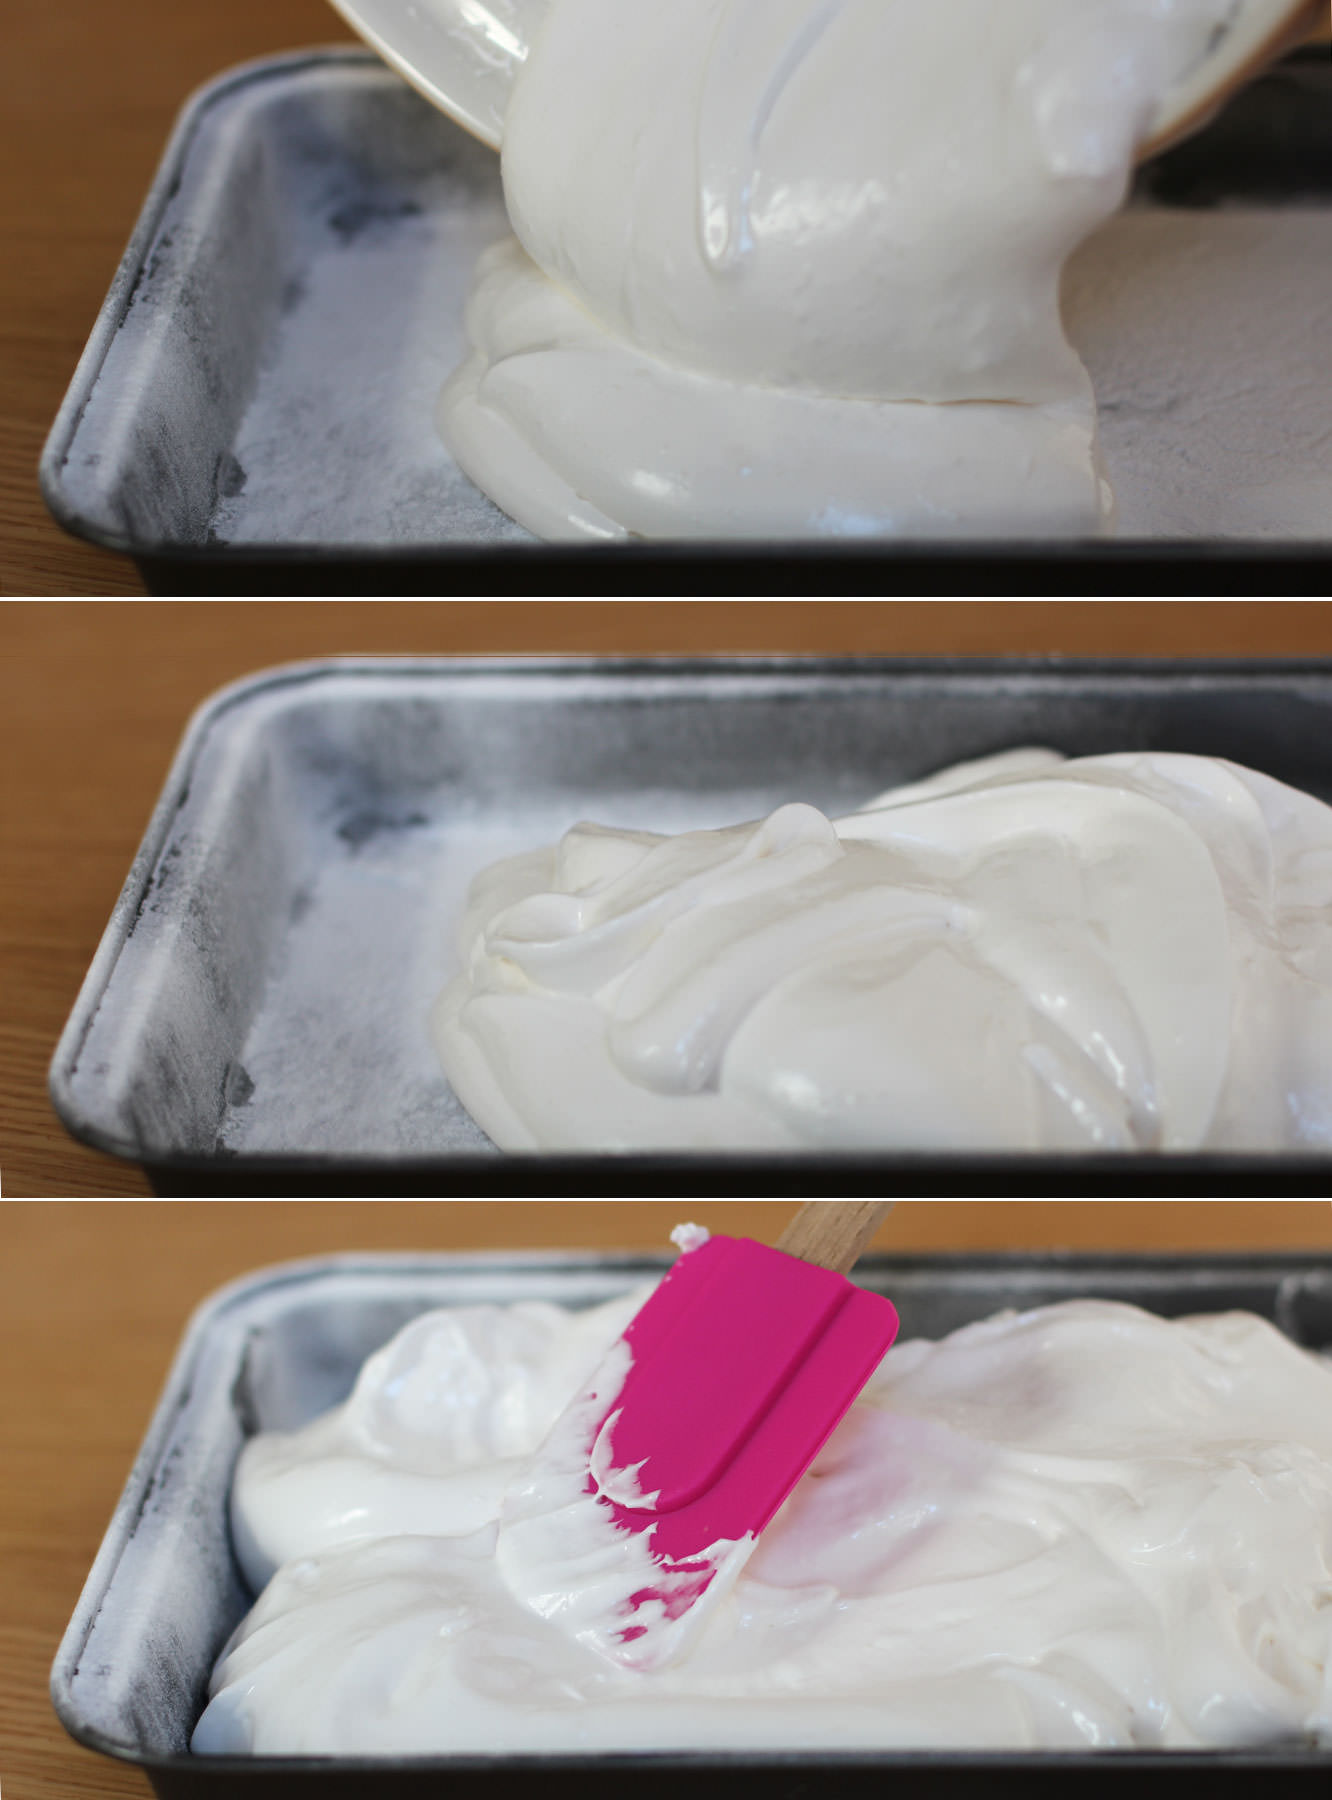
Pour the mixture into the prepared tin and smooth out as much as possible.

Dust with icing sugar and leave to set for about an hour.

caramel-chocolate-marshmallow-bunny-pops-recipe-5

Step eight

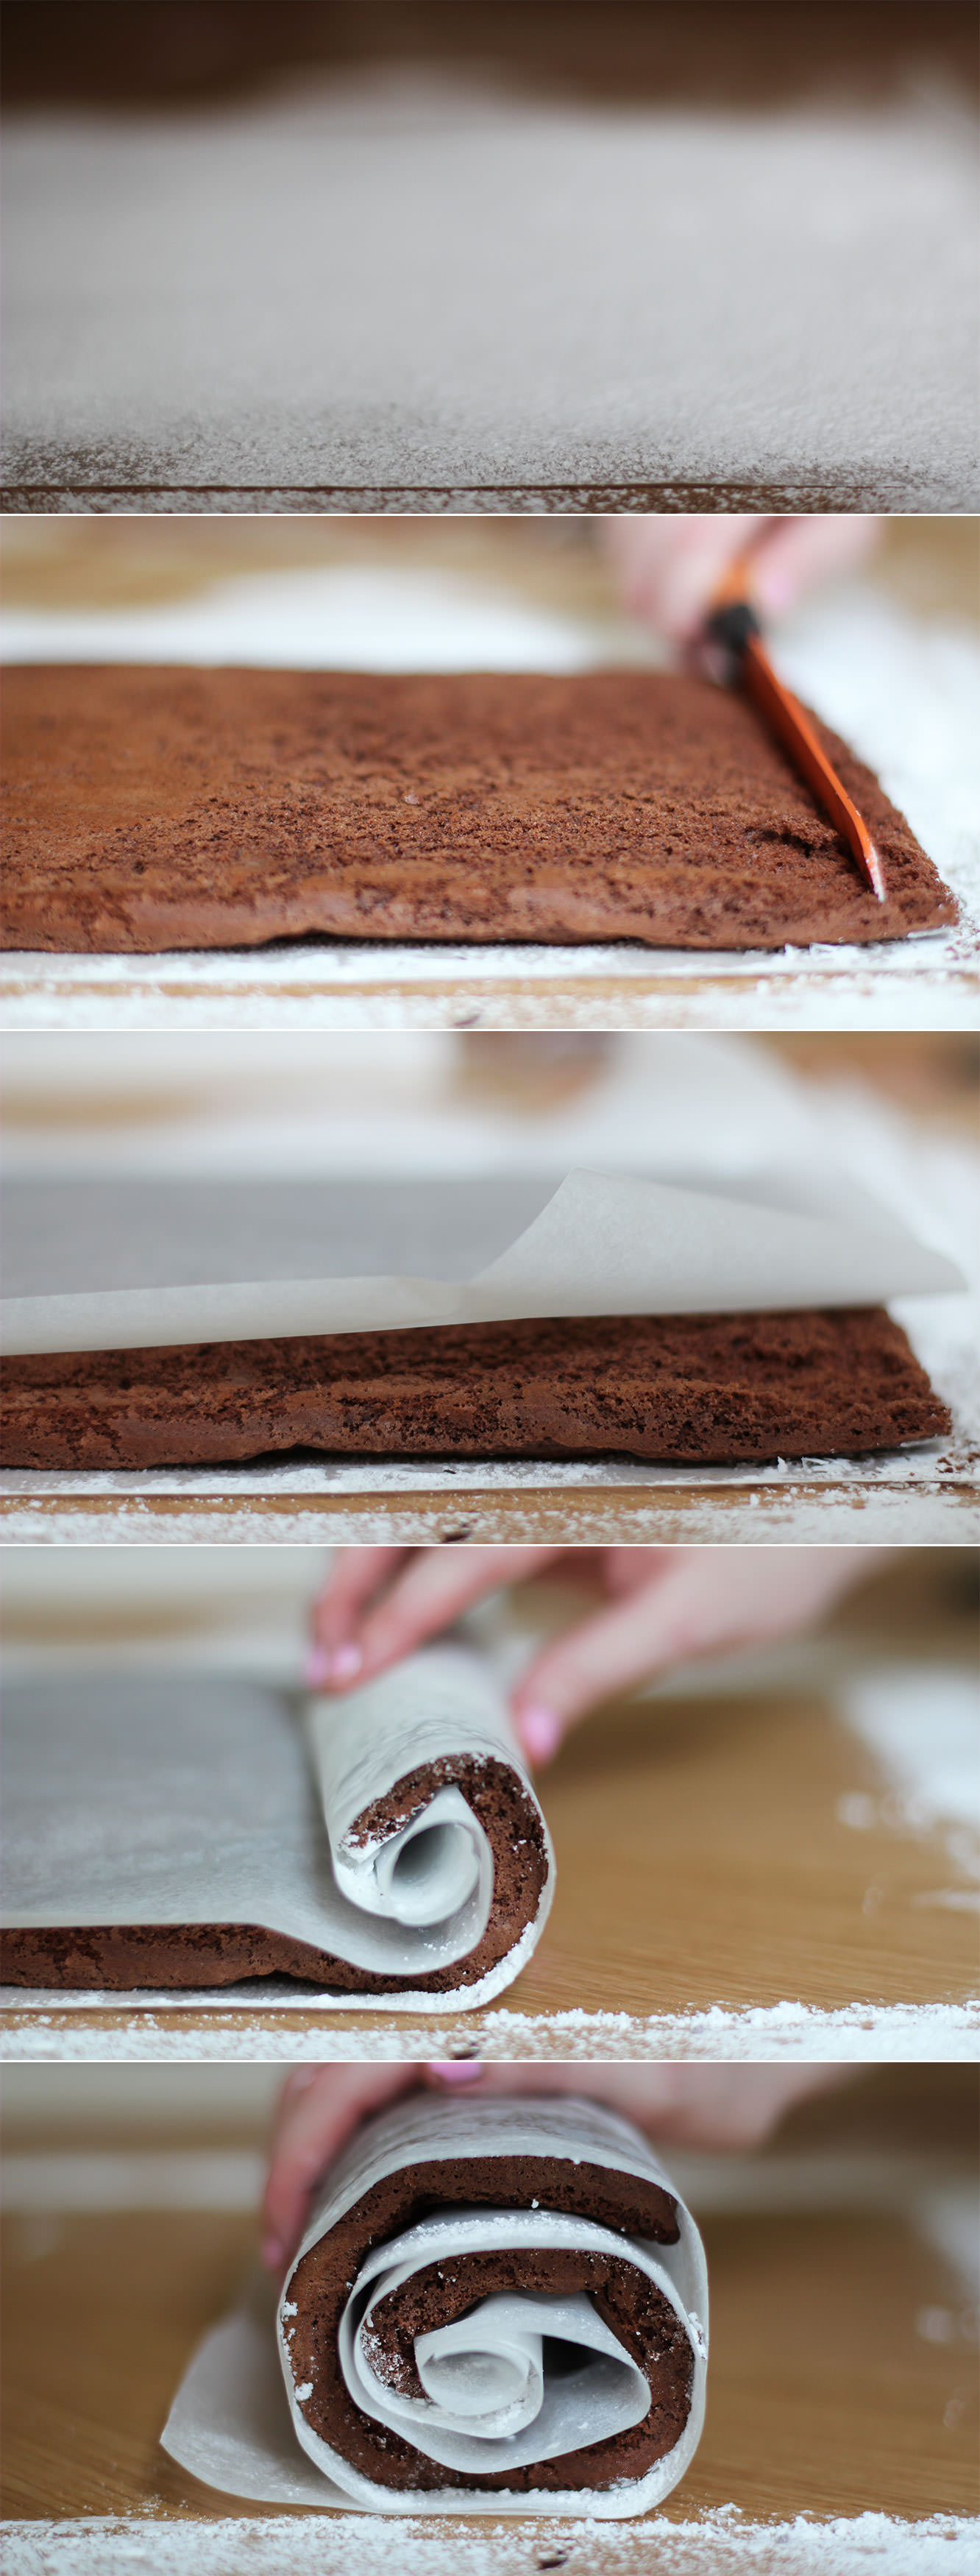
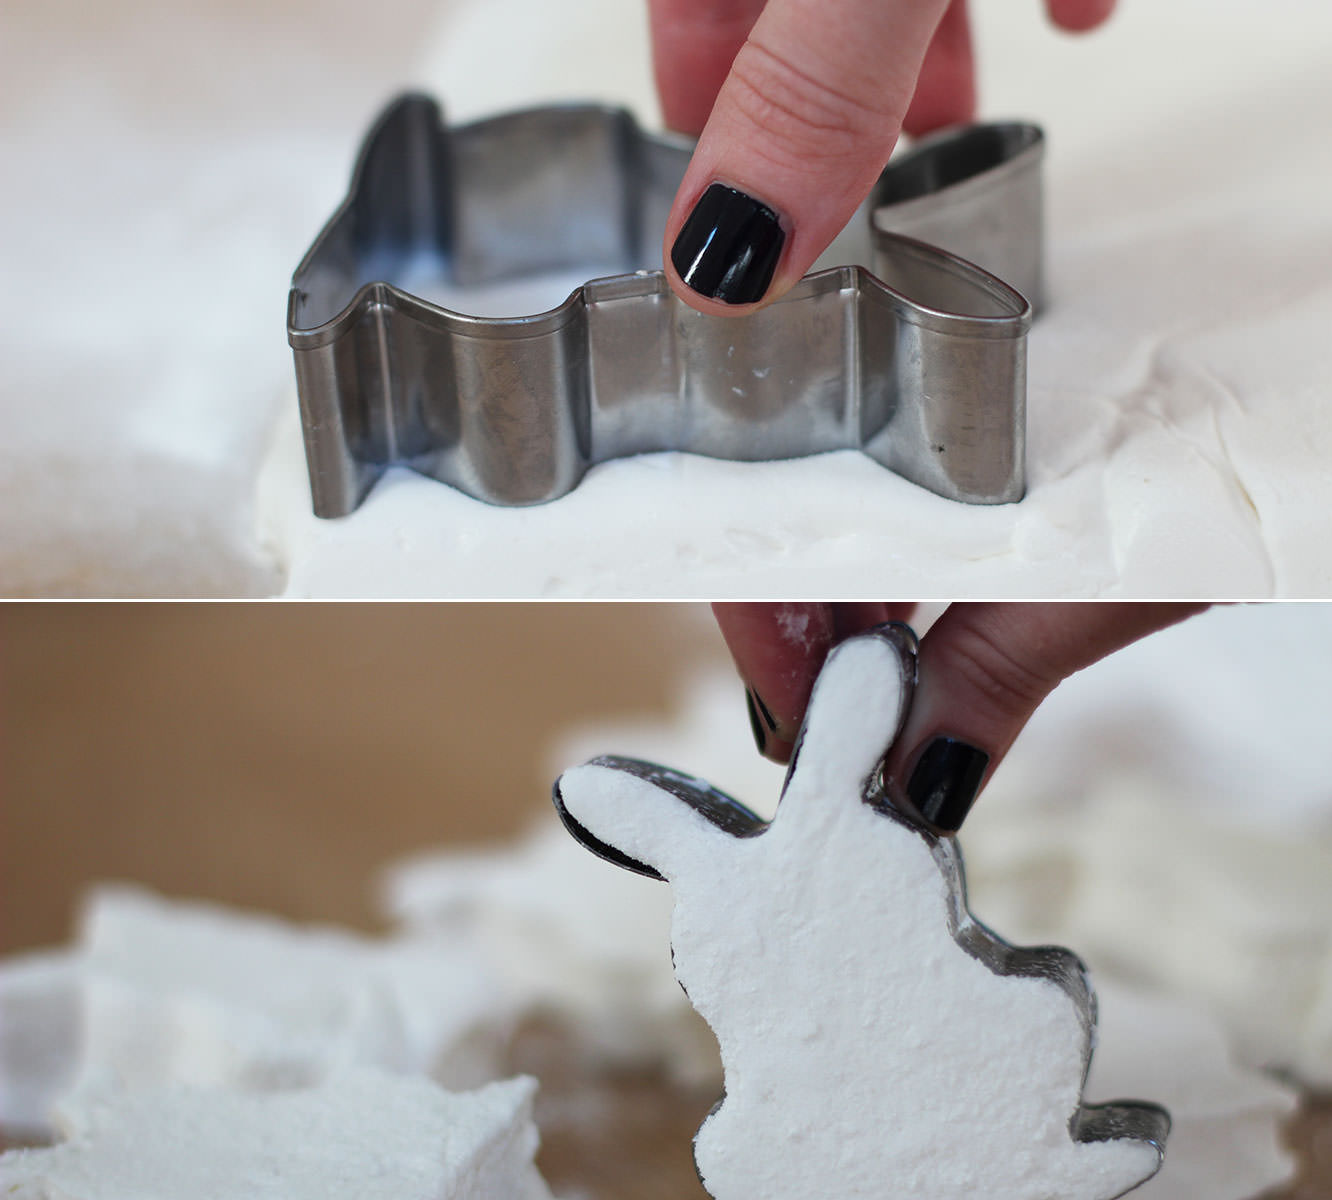
Turn the marshmallow out onto a clean surface.

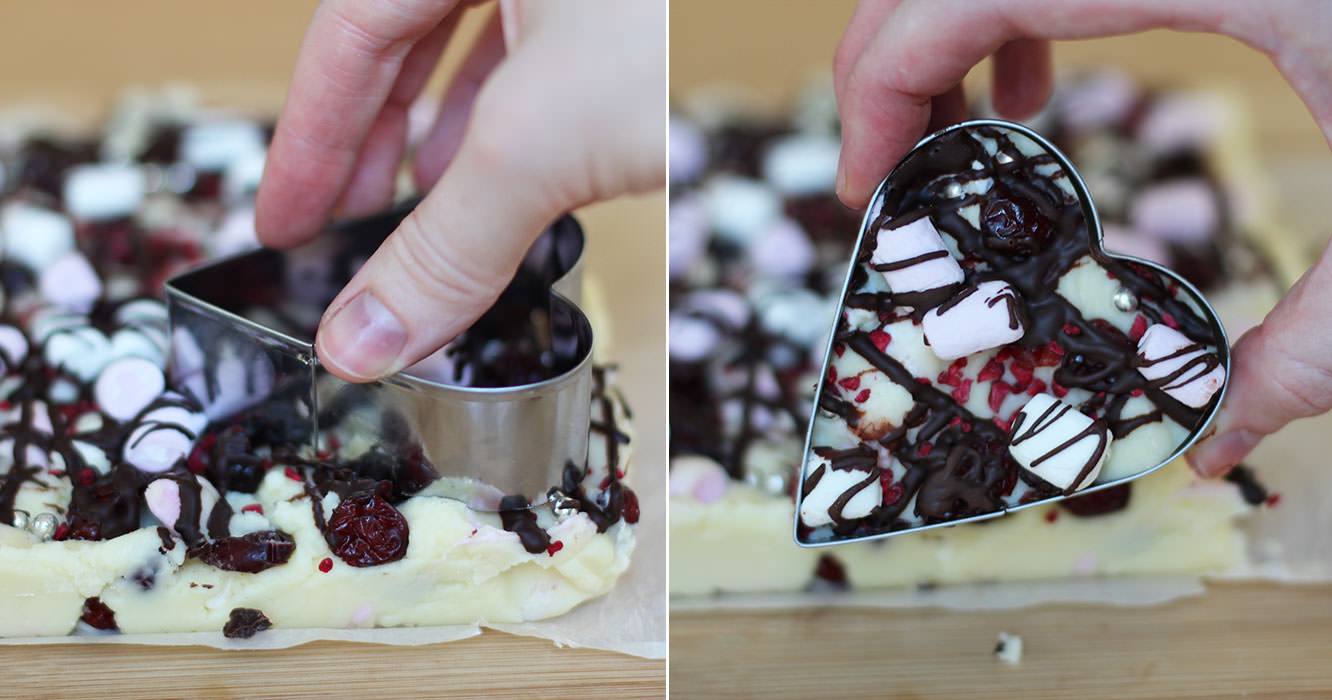
Cut as many bunnies as you can out of the sheet of marshmallow. This will vary depending on your tin and cutter size. I got nine out of mine.

caramel-chocolate-marshmallow-bunny-pops-recipe-6

Step nine

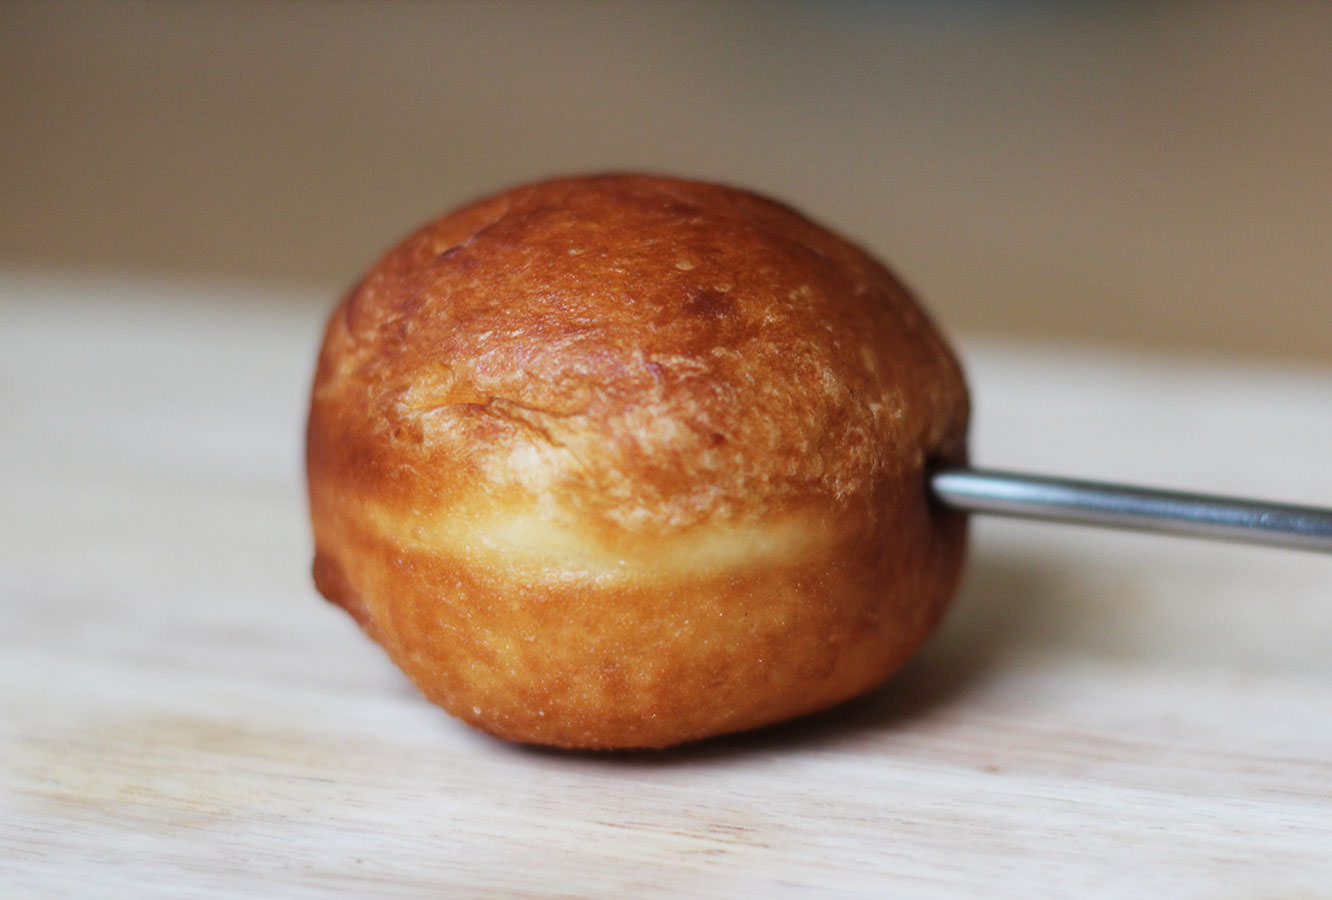
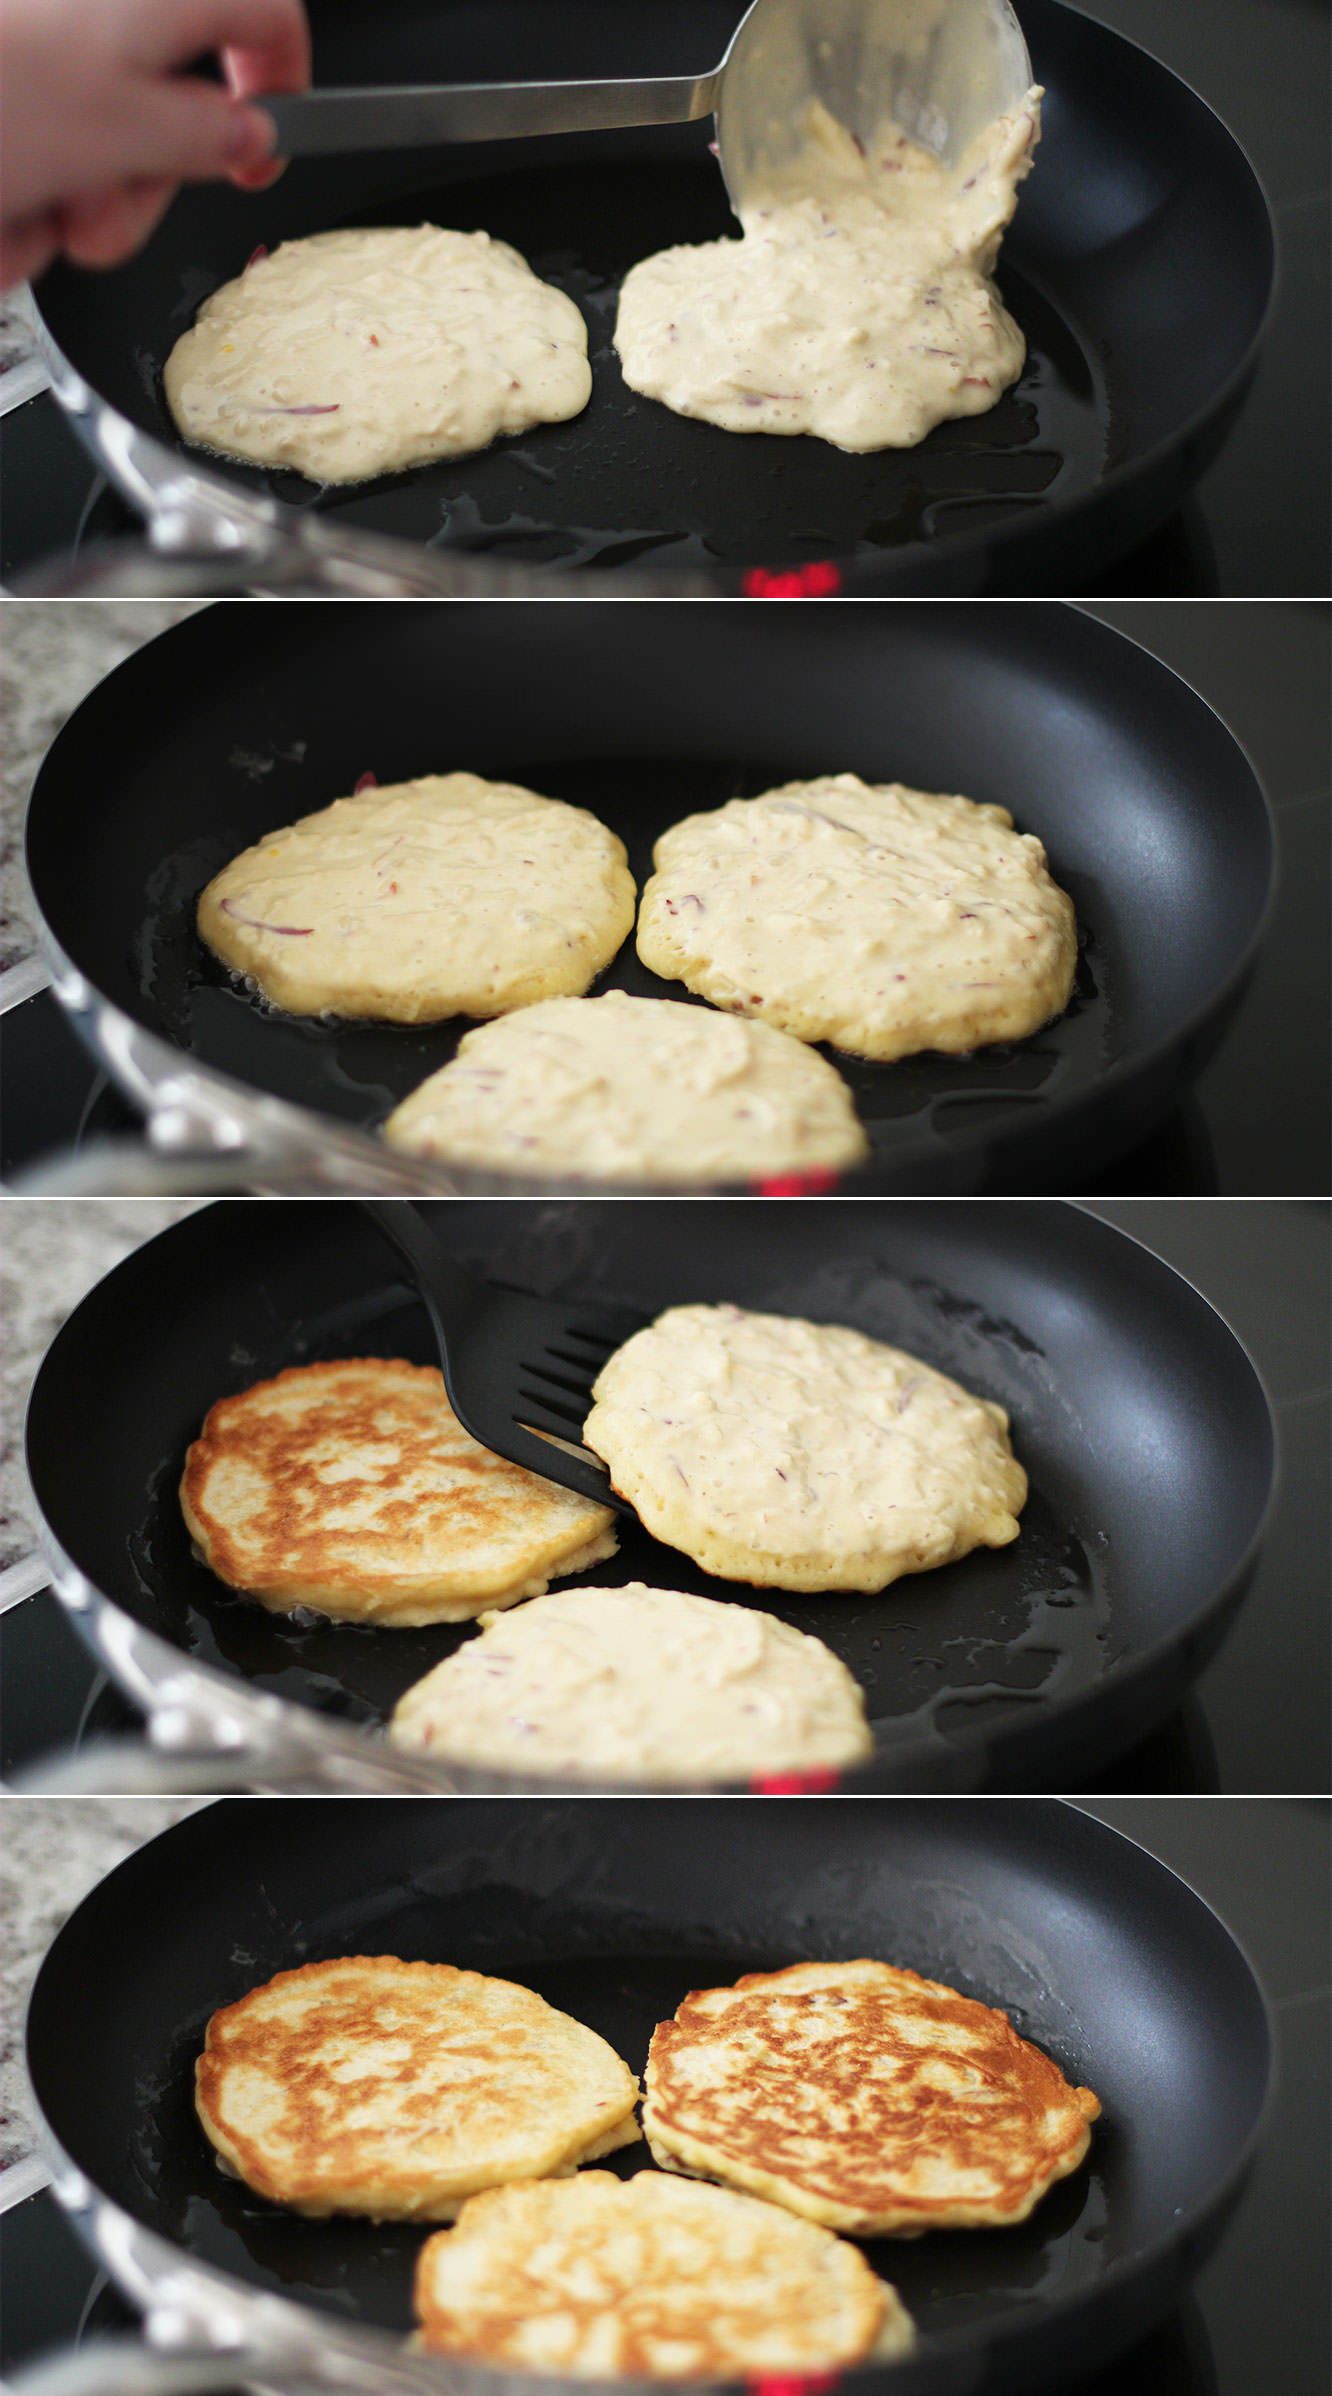
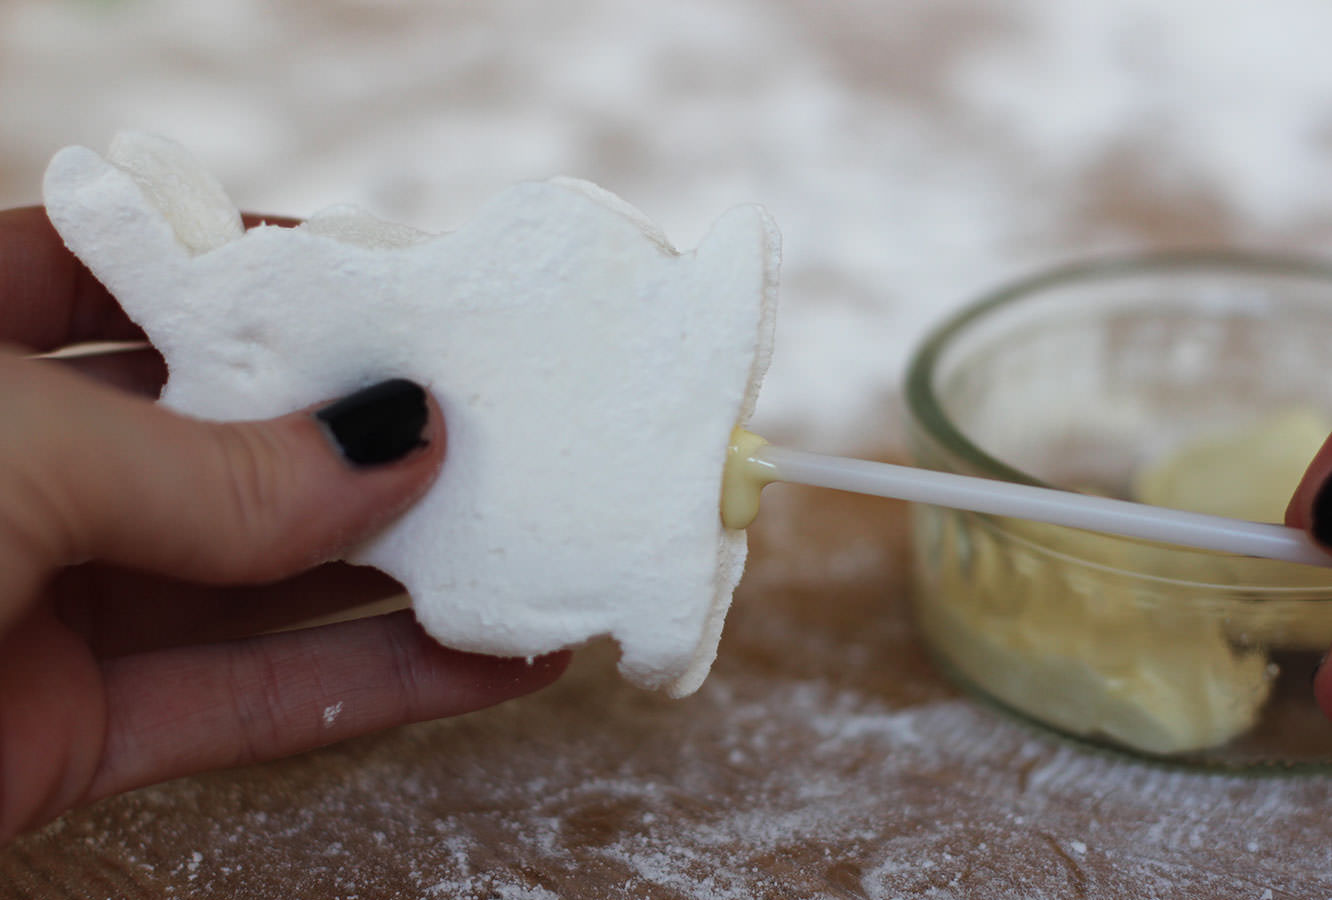
Melt a couple of pieces of chocolate in the microwave.

Dip the cake pop sticks in and push them into the bottom of the bunnies. I put mine in up to the head to increase stability. Leave to set.

caramel-chocolate-marshmallow-bunny-pops-recipe-7

Step ten

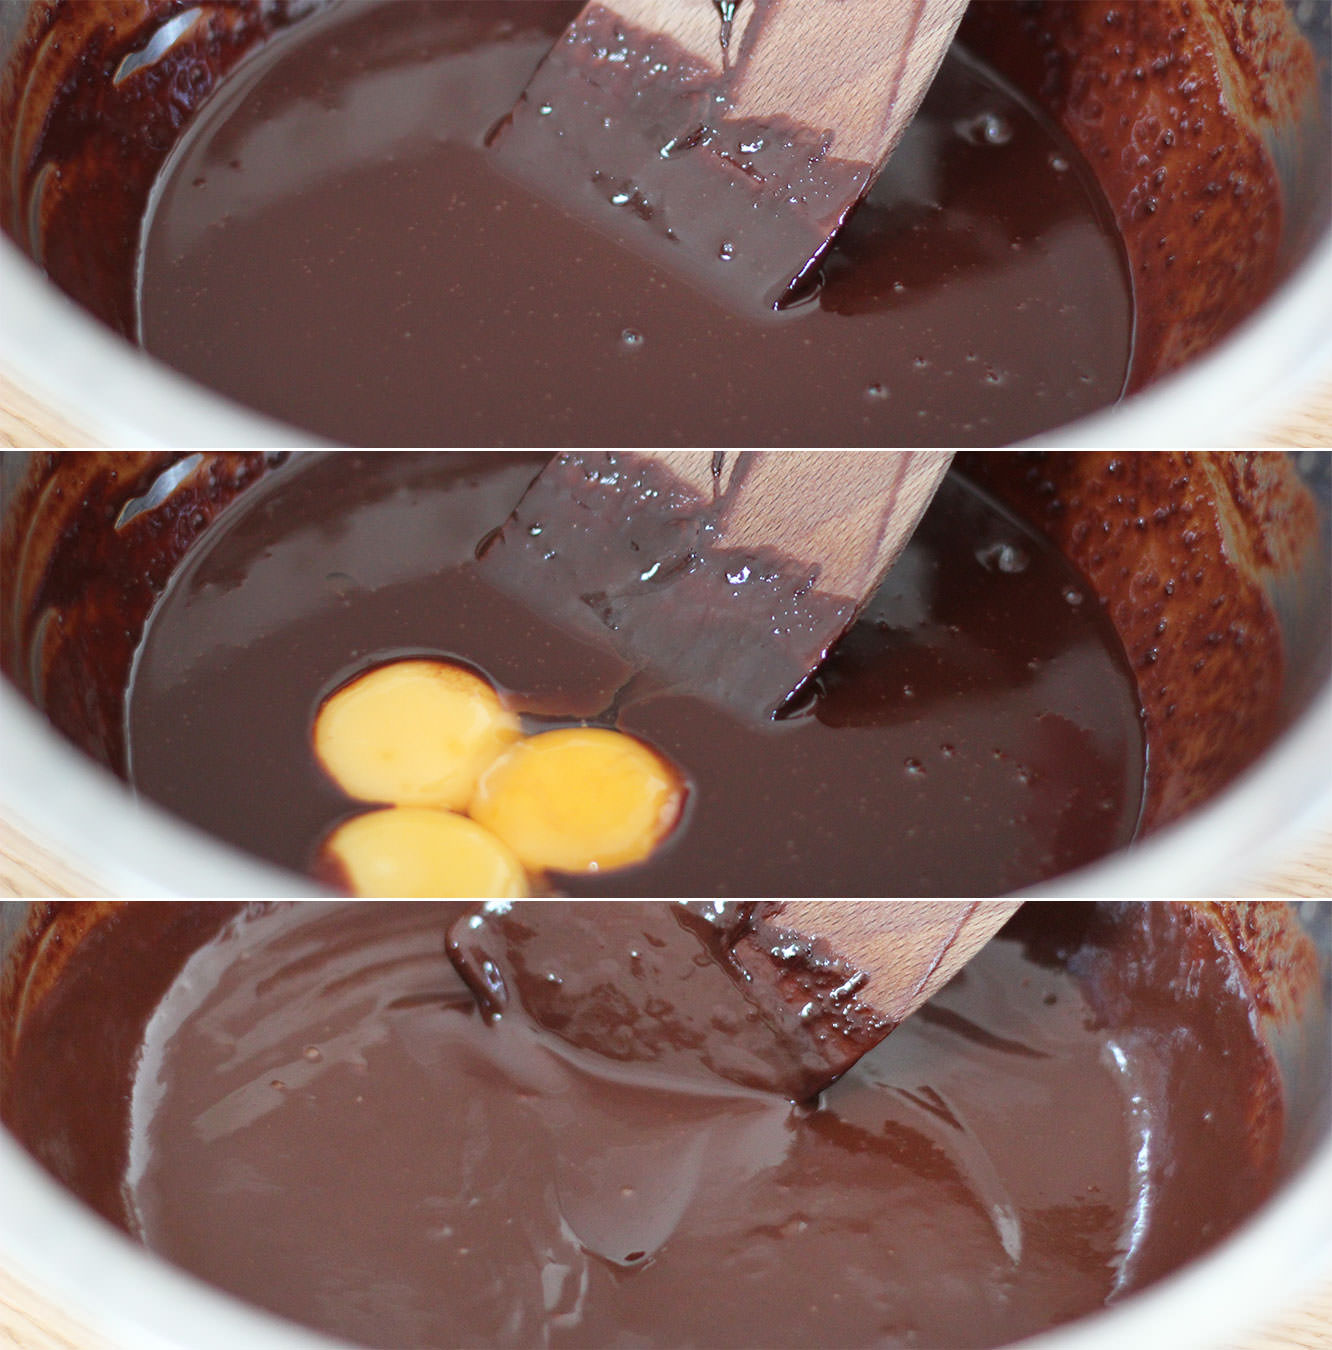
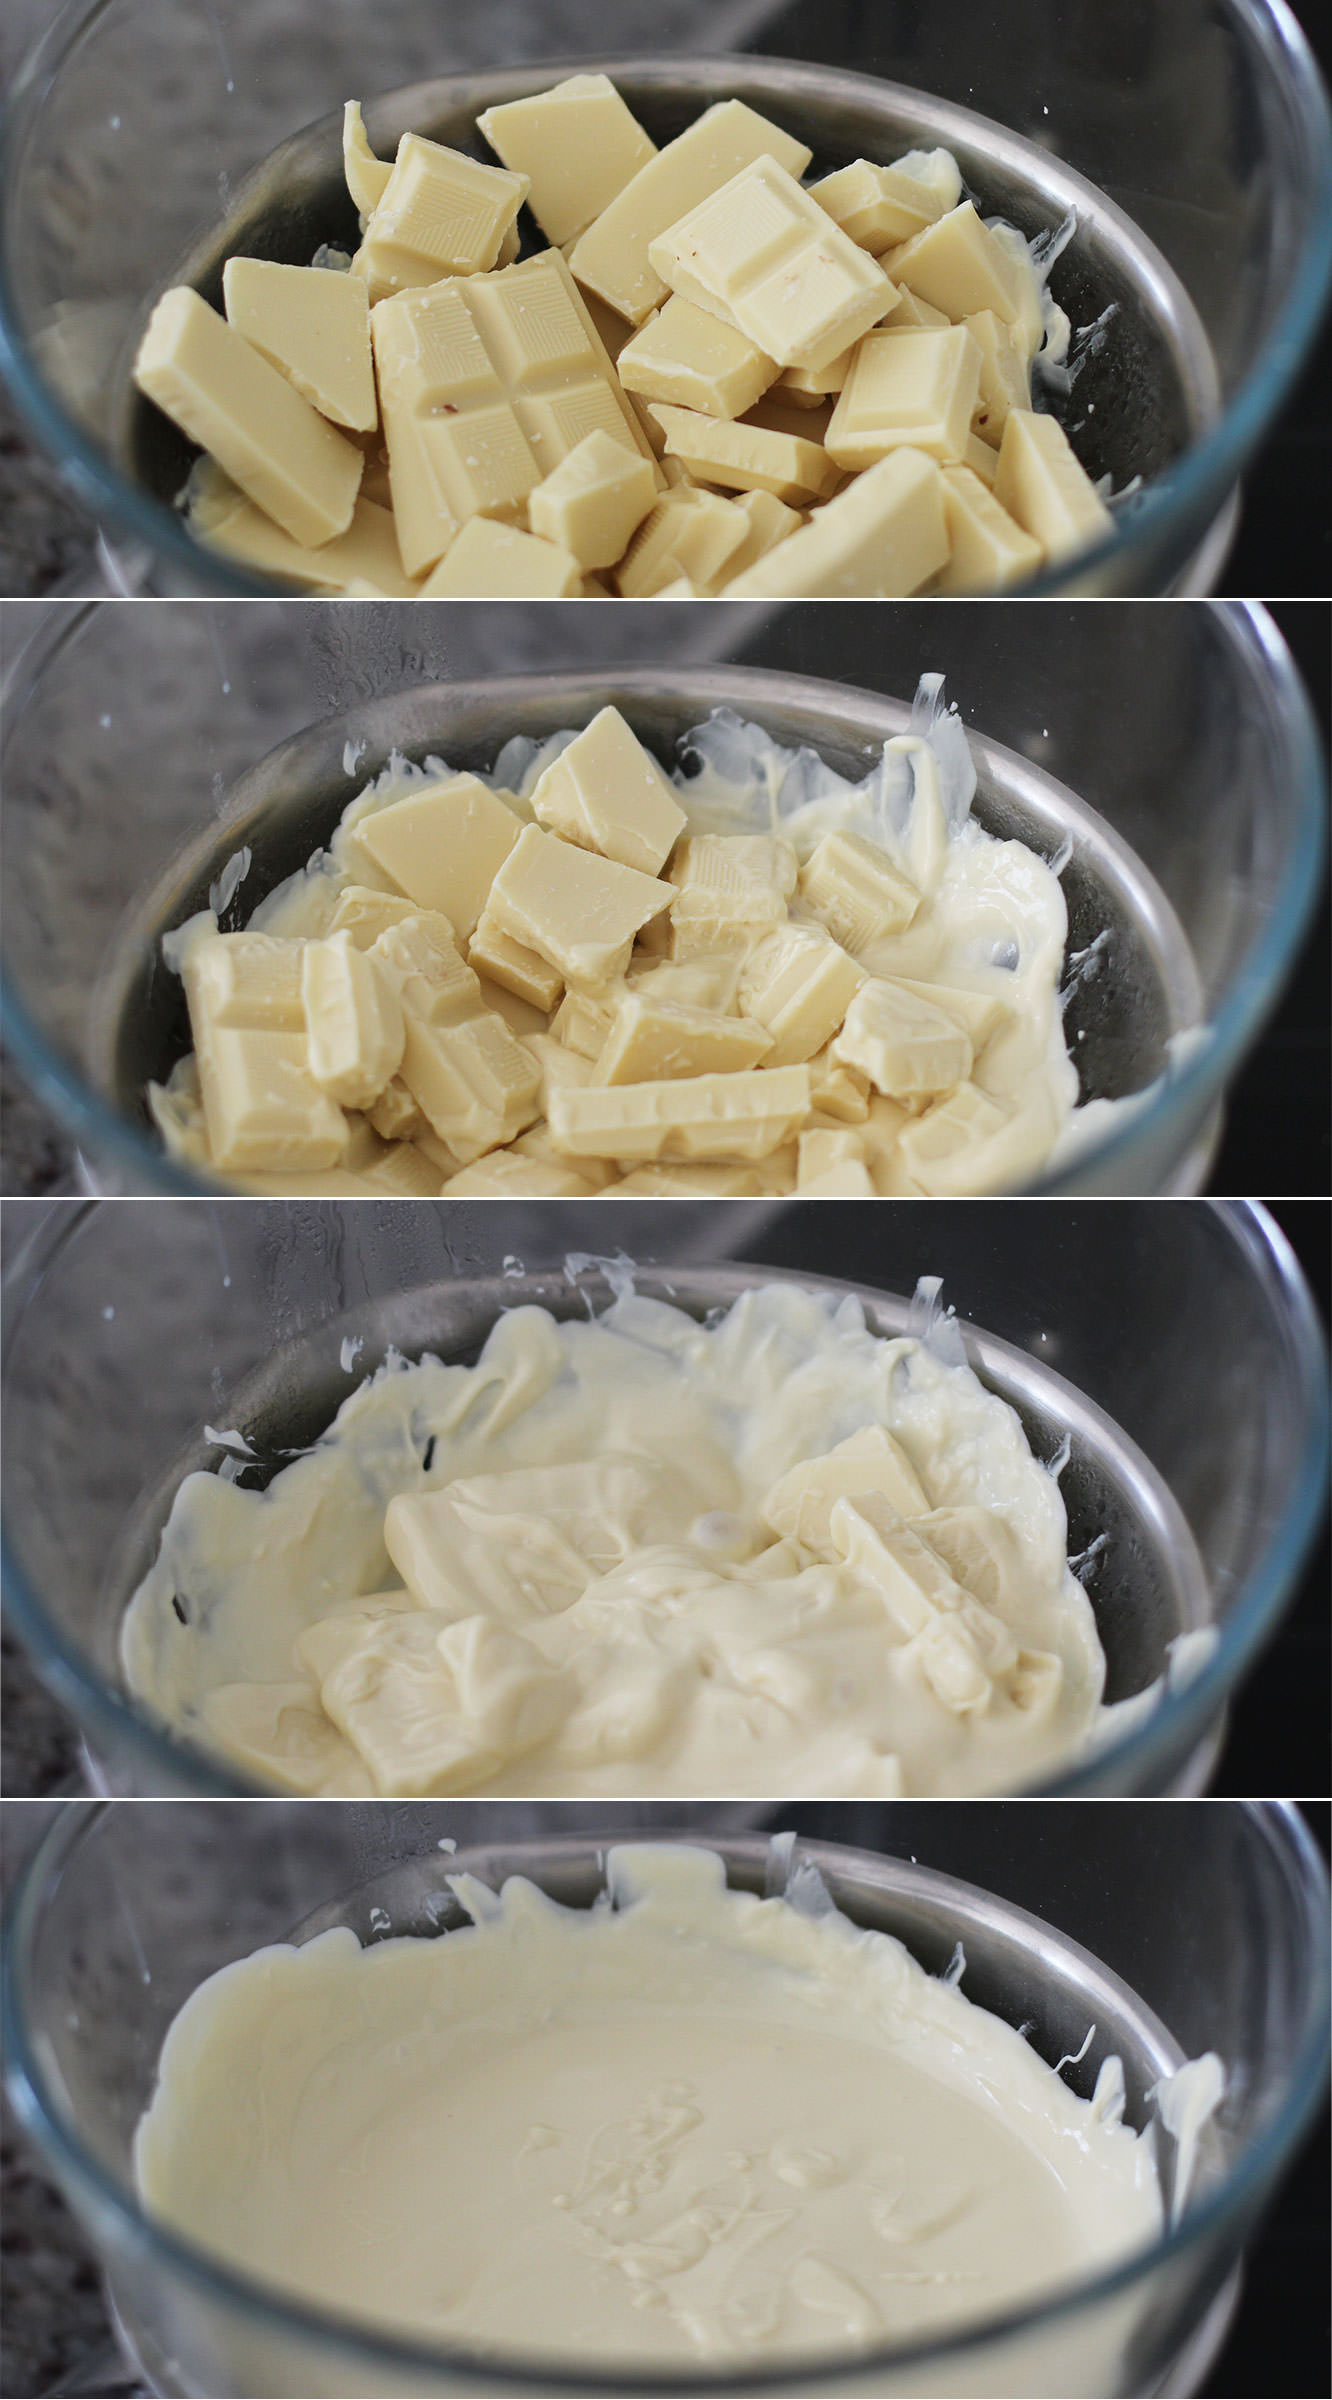
I recommend tempering the chocolate. Then you will get a nice snap when you bite into the pops and you can use the remaining chocolate to do something like this. Don’t feel you have to though, it will work without.

caramel-chocolate-marshmallow-bunny-pops-recipe-8

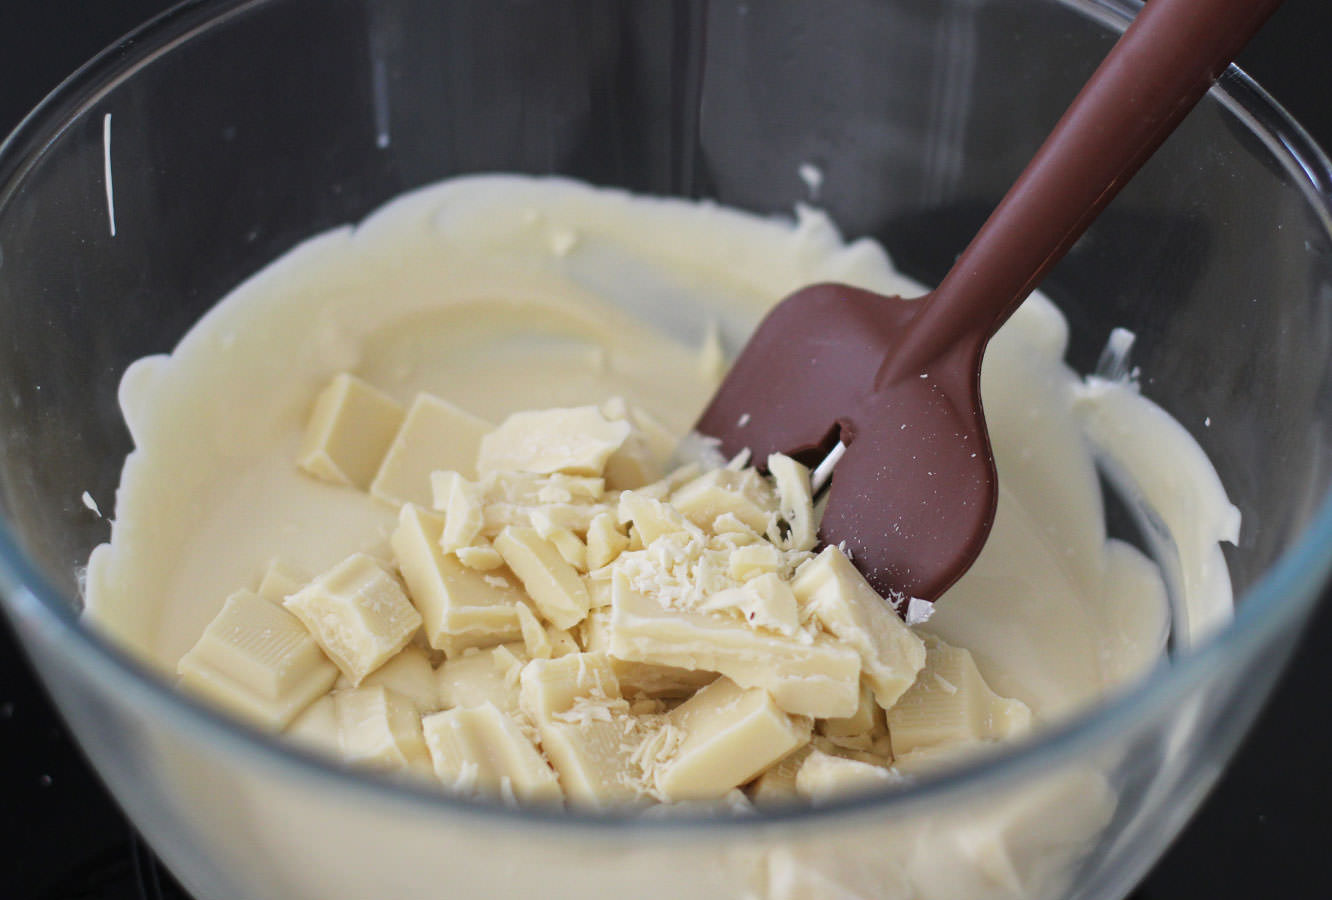
To temper, melt two thirds of the chocolate over a pan of boiling water and allow it to reach 45C. Remove it from the heat and add the rest of the chocolate. This should melt in and cool it down quicker. Stir it to cool down to 25C. Place it back on the heat to get it back up to 28C.

caramel-chocolate-marshmallow-bunny-pops-recipe-gif

Step eleven

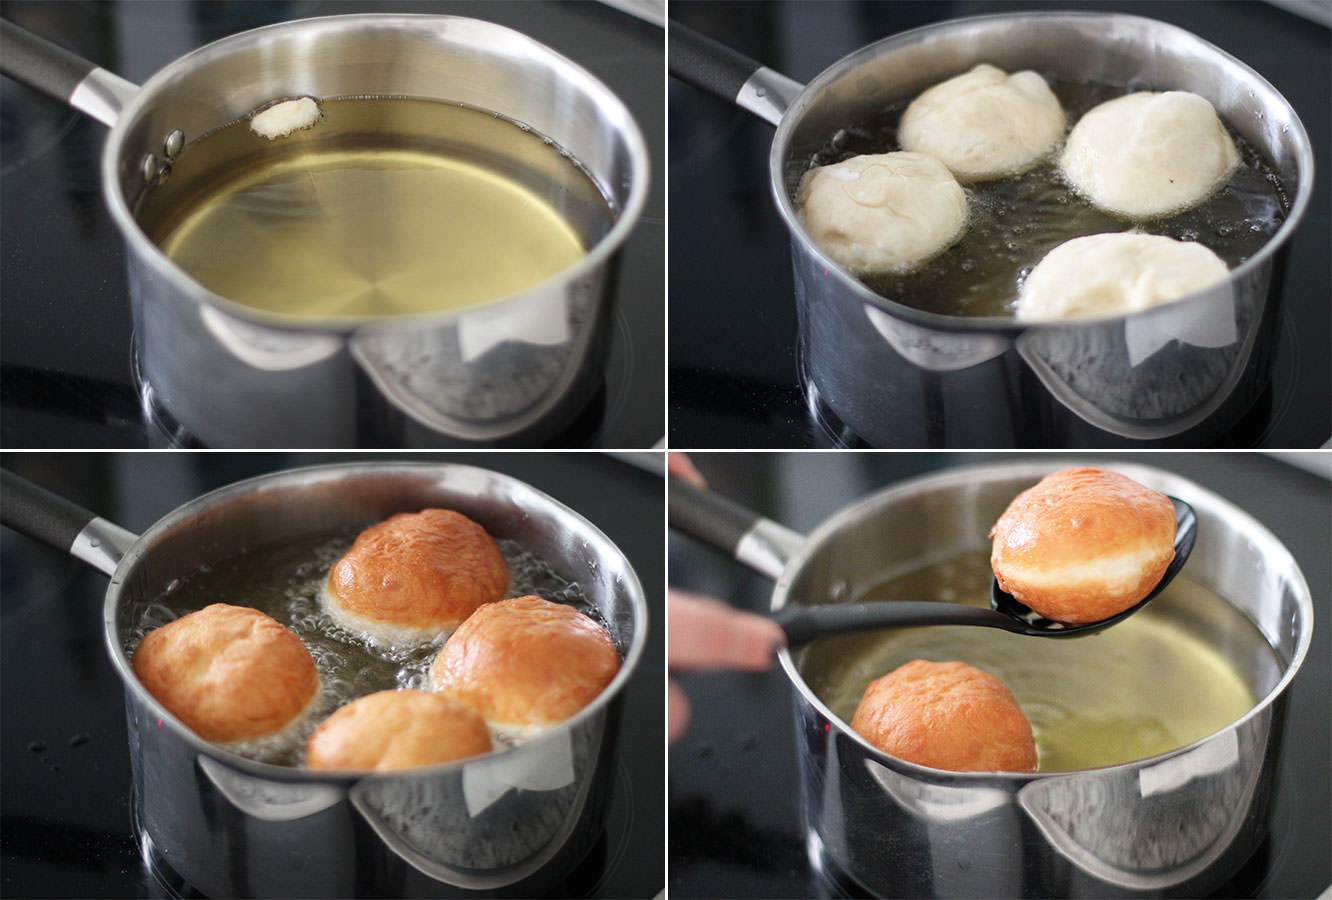
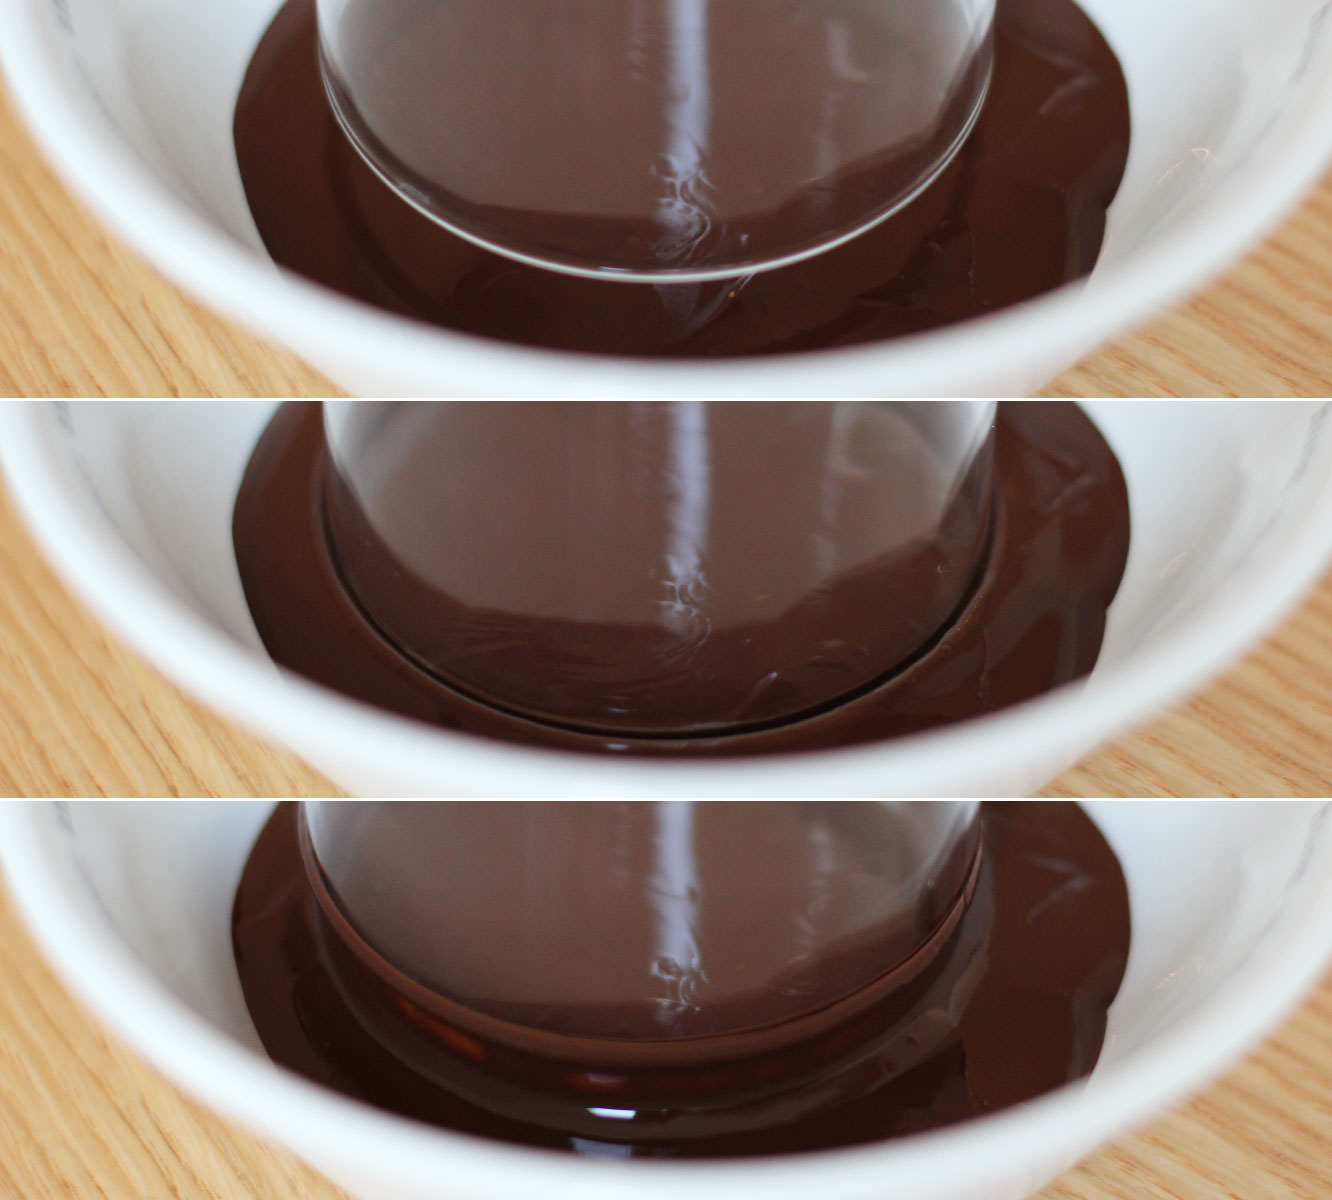
Place the chocolate into a small deep bowl (or I actually found with the milk chocolate that a glass works really well).

Dip the bunnies in and make sure to coat well. Allow excess chocolate to drip off, twirl it round to get an even, smooth coating.

This is where I ran into a spot of difficulty and filled my left hand with bunny pops that were covered in melted chocolate. I suggest you a) get a spare pair of willing hands, b) get a block of florist’s oasis/cake pop stand to stick them in, c) accept the back of them won’t be beautiful and lay them down on cellophane or greaseproof paper.

Step twelve

Once dry, add their little faces and tails. I used a cocktail stick with a small amount of melted chocolate to stick on sugar decorations. I got the little hearts I used for the noses from Tiger, and I can’t be sure about the circles for the cheeks.

I drew the faces on with an edible ink pen I bought online. You could use a cocktail stick and some dark chocolate if you prefer.

caramel-chocolate-marshmallow-bunny-pops-recipe-9

caramel-chocolate-marshmallow-bunny-pops-recipe-10

Step thirteen

Tie a piece of twine or ribbon around the stick and make a day a little bit happier.

cookie dough + chocolate brownie = yum

I used to make a cheat’s version of this recipe with two packet mixes, and recently I just thought to myself, ‘I wonder if this would taste better if I made the batters from scratch’. Oh boy does it.

You just have to find an excuse to make this and eat it warm from the oven with some ice cream. It’s very easy and quite a bit more impressive than regular brownies.

cookie-dough-brownie-recipe-0

You will need

For the brownie batter:

300g/10.5 oz Caster sugar (golden if you have it)

170g/6 oz Unsalted butter

170g/6 oz Plain flour

45g/1.5 oz Cocoa powder

3 Eggs

1/2 tsp Baking powder

For the cookie dough:

170g/6 oz Plain flour

100g/3.5 oz Soft light brown sugar

100g/3.5 oz Milk chocolate chips

60g/2 oz Unsalted butter

1 Egg

1 tbsp Golden syrup

1/2 tsp Baking powder

Extra

45g/1.5 oz Dark chocolate

cookie-dough-brownie-recipe

Step one

Starting with the brownie batter, mix together the baking powder, sugar, flour and cocoa powder.

cookie-dough-brownie-recipe-1

Step two

Make a well in the middle of your dry ingredients and add the eggs. Using a hand whisk, combine gradually using small circles in the centre of the batter.

Step three

Melt the butter in the microwave. Only until it has just about dissolved mind, or it will cook the eggs and this is not intended to be a recipe for scrambled egg brownie.

Step four

Add the butter into the mixture and continue with your little circles until most of the flour is combined, then use a spatula or wooden spoon to fold in the rest.

cookie-dough-brownie-recipe-2

Step five

Pour into a greased and lined brownie tray and gently spread into the corners.

Get a teaspoon and eat a bit. You know you want to.

Moving on to the cookie dough…

cookie-dough-brownie-recipe-3

Step six

Beat together the butter, soft brown sugar and golden syrup. You might find it easier/quicker to use an electric whisk.

Step seven

Beat in the egg until pale, light and fluffy.

cookie-dough-brownie-recipe-4

Step eight

Fold in the flour and baking powder until you have a smooth dough.

cookie-dough-brownie-recipe-5

Step nine

Add the chocolate chips.

Time for another little taste.

cookie-dough-brownie-recipe-7

Step ten

Using a pair of teaspoons drop blobs of the batter onto the surface of the brownie mixture.

cookie-dough-brownie-recipe-gif

cookie-dough-brownie-recipe-6

Step eleven

Push the cookie dough blobs down a bit with the back of a spoon and use a butter knife to make a marbled effect on top.

Step twelve

Bake in the oven for 30-35 minutes on 180C/350F/gas mark 4. You want there to still be a bit of fudgey chocolate between the brownie and cookie so be careful not to over do it.

Step thirteen

Melt the dark chocolate in the microwave and drizzle over with a spoon.

cookie-dough-brownie-recipe-8

cookie-dough-brownie-recipe-9

Yeah. You are so welcome.

Ta, Ma.

Apparently when I think Mother’s Day blogging I think fudge. It’s a good thing my mum likes fudge. What’s that? You didn’t realise Mother’s day was so soon? I know, right? Me neither. It’s this Sunday for those of you in GB, the rest of you should check your calendars, this is the sneakiest holiday of the year.

This is a super super easy way to make a treat for your Ma. It’s not like the last fudge recipe I posted, which while being totally delicious I’d wager none of you actually made. Well there’s no boiling sugar or a thermometer required for this one, and barely any cooking at all.

You might need to cut this recipe by half or even more, it makes quite a large batch for just one mummy to eat. It can be frozen.

white-chocolate-fudge-mothers-day-recipe-1

You will need

600g/1 lb 3 oz White chocolate (yeah, this is serious stuff)

397g Condensed milk (1 can basically)

125g/4.5 oz Cranberries

85g/3 oz Mini marshmallows

25g/1 oz Dark chocolate

Other decorations (I used silver balls and freeze dried raspberries because that’s what I had, but any manner of nuts and dried fruits would be acceptable, even as a substitute for the marshmallows and cranberries)

white-chocolate-fudge-mothers-day-recipe-2

Step one

Break the white chocolate into chunks and place in a pan with the tin of condensed milk.

Melt together on a low heat. Once you have a smooth fudge-like mixture, remove from the hob.

white-chocolate-fudge-mothers-day-recipe-7

Step two

Add two thirds of the cranberries and marshmallows, stir to combine.

white-chocolate-fudge-mothers-day-recipe-3

Step three

Drop the mixture into a brownie tin lined with greaseproof paper. Push into the corners with the back of a spoon and even the top out a bit.

white-chocolate-fudge-mothers-day-recipe-6

Step four

Sprinkle the remaining cranberries, the silver balls and freeze-dried raspberries on top and push down slightly so they stick.

The alternative would be to swap this step with the next one so they stick to the chocolate (this would probably also look nicer because you would actually be able to see them rather than hiding them with a load of dark chocolate…). I make the mistakes so you don’t have to.

white-chocolate-fudge-mothers-day-recipe-gif

Step five

Melt the dark chocolate in the microwave and drizzle over the fudge. Sprinkle the remaining marshmallows on top. I had a bit of dark chocolate left so did another layer on top of the marshmallows.

Place in the fridge to allow the whole thing to set.

white-chocolate-fudge-mothers-day-recipe-4

Step six

Using a cutter of your choice (this heart-shaped one was from Lakeland), cut the fudge into pieces. If you don’t have a cutter, then bars or chunks would look nice too.

white-chocolate-fudge-mothers-day-recipe-5

Watch your back Tim Horton

I’m going to call it before you do. I am a tiny bit cheating in this post. Back in November my housemate Vicky and I made Bonfire Night doughnuts. It was an epic feat of baking, one I vowed not to repeat for a very long time. That is, until my teacher at college had a birthday last week and I took to the kitchen again to make a maple themed bun in honour of his Canadian homeland.

So I confess. Given that doughnuts are a touch on the complex side, I’ve repeated many of the photos from November. It’s a lot easier to get snap happy when there’s a spare set of eyes to watch the pan of hot oil, so don’t judge me too harshly friends.

I urge you to give doughnuts a try some day.

maple-syrup-doughnut-recipe-4

You will need

For the doughnuts:

350ml/12 fl oz Warm full fat milk

700g/1lb 8 oz Strong white bread flour

2 Eggs

70g/2.5 oz Unsalted butter

100g/3.5 oz Caster sugar

1 tsp Salt

14g/0.5 oz Dried yeast

50ml Warm water

For the filling:

300g/10.5 oz Icing sugar

125g/4.5 oz Unsalted butter

175ml/6 fl oz Maple syrup (as good as you can afford)

1 tsp Maple extract (don’t panic if you don’t have this or can’t find it, I lumped for a caramel extract in the end, and you could leave it out altogether)

For the glaze:

100ml/3 fl oz Maple syrup

100g/3.5 oz Icing sugar

25g/1 oz Unsalted butter

Extras

1.5 litres/50 fl oz Vegetable oil for frying

Sprinkles (these bronze ones are from Waitrose)

A flavour injector or piping bag with long thin nozzle

(Makes 25-30)

toffee-apple-cinder-toffee-dougnut-recipe-1

Step one

Put the yeast in the warm water and wait until frothy.

Step two

Combine half the flour with the rest of the dough ingredients (including the yeast froth).

Put the yeast and the salt on opposite sides of the bowl so the salt doesn’t prevent the yeast from doing its thang.

Step three

When the batter is smooth, gradually add the rest of the flour and stir.

The dough will be sticky but not impossible to work with. Having said that I still gave the work top a significant dusting of flour.

toffee-apple-cinder-toffee-dougnut-recipe-2

Step four

Turn the dough out onto a floured surface.

Knead for about 10 minutes, don’t worry if you have to add more flour to stop it sticking but don’t add loads and loads.

toffee-apple-cinder-toffee-dougnut-recipe-3

Step five

Pop it back in the bowl and cover with clingfilm. Leave in a warm dry place for 60-90 minutes or until doubled in size.

toffee-apple-cinder-toffee-dougnut-recipe-4

Step six

Once the dough has finished rising turn it back out of the bowl and roll out into two long strips. Cut into 30 equal pieces.

toffee-apple-cinder-toffee-dougnut-recipe-5

Step seven

Roll the pieces into balls and leave on a lightly dusted (with flour just in case that wasn’t obvious) surface or tray to prove.

Step eight

You’ve probably got time here to make the filling and the glaze.

Essentially for both you just need to whisk all the ingredients together in a bowl. I can’t even make that sound remotely more complicated.

toffee-apple-cinder-toffee-dougnut-recipe-9

Step nine

About 20 minutes after the proving has started put the oil in the pan on a low-medium heat. Definitely don’t rush this stage, it will take a long time for the oil to come to the right temperature but patience is key.

Test your oil heat with little pieces of a dough. When this tester floats and bubbles straight away you’re good to go.

toffee-apple-cinder-toffee-dougnut-recipe-10

Step ten

Cook your doughnuts. I did this by eye, but I reckon it only takes about 30 seconds to a minute on each side.

Leave your doughnuts to rest on a few sheets of kitchen roll which will soak up any excess oil.

maple-syrup-doughnut-recipe-1

Step eleven

Once the doughnuts are completely cool, fill them with the maple buttercream.

My flavour injector has measurements on the side, so I went for about 10 ml in each. If you don’t have that luxury, practice piping an adequate amount of filling out so you know how much pressure to add and for how long to fill them properly.

Step twelve

Place the glaze in a deep cereal bowl.

Turn the doughnuts upside down and dip them in the mixture. Sprinkle some, well, sprinkles, on top.

maple-syrup-doughnut-recipe-3

Step thirteen

Stand back and survey. You just made doughnuts my friend.

Flat as a pancake

Sorry, what’s that? IT’S PANCAKE DAY TOMORROW? Or maybe if you read this on a Tuesday it’s pancake day today. Or maybe if you’re reading this in a few months time pancake day is nowhere nearby, and if that’s the case there’s nothing stopping you from making pancakes anyway. Especially when they taste THIS good.

I don’t think there can ever be enough pancakes, so I bring you not one, not two, but three recipes this week. And with three recipes comes three gifs. I know, I spoil you.

My fellow Europeans will have to excuse me for edging towards the North American style of pancake (you can add more flavours this way, but I assure you I’m still a die hard fan of our traditional flat friends). Those of you across the pond will also have to excuse me for not adding sugar and melted butter and all that nonsense to the mix.

These are a hybrid, somewhere half way between. Maybe this is what happens in Iceland or Greenland, who knows?

Enough ramble. LET’S. GET. FLIPPING.

Who am I kidding? I’m far too anxious to flip them.

ultimate-pancake-recipe2

You will need

Apple, maple and bacon pancakes

1 cup Plain flour

1 cup Full fat milk

1 Apple

1 Egg

1 tsp Baking powder

Bacon and maple syrup to serve (adjust to your own preference)

White chocolate and raspberry pancakes

1 cup Plain flour

1 cup Full fat milk

1 cup Raspberries

1 Egg

1 tsp Baking powder

100g/3.5 oz White chocolate

50g/1.5 oz Dark chocolate to serve

Banana and blueberry buttermilk almond pancakes

1 cup Plain flour

1 tub Buttermilk (284ml)

1 Egg

1 tsp Baking powder

1/2 tsp Almond extract

2 Bananas

1/2 cup Blueberries

More blueberries, some natural yoghurt and honey to serve

NB: The process is the same for all three recipes, however, the banana ones use buttermilk instead of regular milk. This makes a much thicker, goopier mixture.

All the recipes make 6-8 pancakes depending on their size.


Apple, maple and bacon pancakes

ultimate-pancake-recipe

Step one

Whisk together the flour and baking powder and make a well in the middle for the egg.

The way to make smooth pancakes is to whisk little circles to gradually include the flour. Slowly add the milk a third at a time and continue making circles until all the flour is mixed in.

ultimate-pancake-recipe4

Step two

Grate the apple until you get to the core and add to the pancake batter.

ultimate-apple-pancake-recipe5

Step three

Using a tablespoon or so of vegetable oil, fry the pancakes until you start to see lots of little bubbles on the surface.

FLIP FLIP FLIP.

Step four

If you’re wanting bacon with this (and unless you’re a vegetarian, you are wanting bacon) then you’ll want to have that grilling or frying off at the same time.

ultimate-apple-pancake-recipe-gif

ultimate-apple-pancake-recipe6

Right. One down, two to go.


White chocolate and raspberry pancakes

ultimate-pancake-recipe

Step one

Refer to step one of apple, maple and bacon recipe.

ultimate-pancake-recipe3

Step two

Chop the white chocolate into smallish chunks.

Step three

Stir the raspberries and chocolate into the batter. I squashed a few of them with the back of the spoon.

ultimate-raspberry-white-chocolate-pancake-recipe5

Step four

Cook em off.

You will find this mix a little runnier than the last one from a combo of the raspberry juice and the melting white chocolate.

Step five

Put the dark chocolate in a small bowl in the microwave and melt gradually, 20-30 seconds at a time.

ultimate-raspberry-white-chocolate-pancake-recipe-gif

ultimate-raspberry-white-chocolate-pancake-recipe6

Step six

Stack them, cover in dark chocolate, enjoy.


Banana and blueberry buttermilk almond pancakes

Step one

Repeat the usual step one, you’re a pro by now. This time the buttermilk rather than the milk will make a thicker texture. Don’t forget to include the almond extract.

ultimate-banana-blueberry-almond-buttermilk-pancake-recipe5

Step two

Spoon a pancake into the pan and place slices of banana and some blueberries onto the surface. Push them down a little so they don’t fall out when you flip them.

ultimate-banana-blueberry-almond-buttermilk-pancake-recipe-gif

ultimate-banana-blueberry-almond-buttermilk-pancake-recipe6

Step three

Pour some honey and natural yoghurt on top.

Eat until you can’t move.

It’d be roulade not to…

I promise next week will be more diet friendly. Well, actually I don’t. I really like food, and the sweeter the better as far as I’m concerned.

Last week we had some buddies round for a sleepover and I couldn’t resist making a naughty pud. This salted caramel chocolate mousse filled roulade is the perfect edition to a girls’ night in, or a dinner party, or breakfast.

Buckle up, it’s not a speedy bake, but it’s worth it.

chocolate-mousse-salted-caramel-roulade-recipe

You will need

For the sponge:

130g/4.5 oz Caster sugar

100g/3.5 oz Plain flour

4 Eggs

35g/1.5 oz Cocoa powder

For the chocolate mousse:

200g/7 oz Dark chocolate

3 Eggs

40g/1.5 oz Caster sugar (golden if you have it)

90ml/3 fl oz Water

For the salted caramel frosting:

300g/10.5 oz Icing sugar

250g/9 oz Butter

80g/3 oz Soft brown sugar

100ml/3.5 fl oz Double cream

2 tbsp Golden syrup

2 tsp Salt

chocolate-mousse-salted-caramel-roulade-recipe-1

Step one

Sift together the cocoa powder and flour. Usually I’m not one of life’s sifters, but for this one you’ll want to; you don’t want to knock out all the air trying to get the lumps out of the flour.

chocolate-mousse-salted-caramel-roulade-recipe-2

Step two

Whisk the four eggs until they are pale and shiny and so that the tracks of the whisk stay for a few seconds before sinking back into the main mixture.

Step three

Gently fold the flour and cocoa powder mix in two halves. Do this with a metal spoon and imagine you are stirring a bowl of baby kittens. Softly.

Ideally I guess it should all be one colour, but mine was still a little marbled and it didn’t seem to impact the bake.

chocolate-mousse-salted-caramel-roulade-recipe-3

Step four

Slowly pour batter evenly across a lined tin. Mine’s not actually a swiss roll tin, it’s a bit bigger. Try not to knock any air out.

chocolate-mousse-salted-caramel-roulade-recipe-gif

Step five

Tilt the tin to distribute the sponge mix as evenly as possible and get it right into the corners. You want to avoid spreading it with anything but you do need it to be as flat as possible on the surface. There’s no fat in this recipe to melt down and level everything off.

p.s. the GIF makes it look quicker than it is, be patient.

Step six

Bake in a preheated oven on 220C/ gas mark 7/ 450F for 10 minutes.

chocolate-mousse-salted-caramel-roulade-recipe-4

Step seven

While the sponge is in the oven, dust a sheet of greaseproof paper with icing sugar.

Step eight

As soon as it’s finished cooking turn the sponge out onto the paper.

Cut a small groove about 1cm in from the edge to start the roll. Place another sheet of greaseproof on top and roll the cake up. Leave it to one side to cool.

chocolate-mousse-salted-caramel-roulade-recipe-6

chocolate-mousse-salted-caramel-roulade-recipe-5

Step nine

Move onto the mousse. In fact, probably do the mousse first, it needs a while to chill.

Separate the three eggs into two bowls and finely chop the chocolate.

chocolate-mousse-salted-caramel-roulade-recipe-7

Step ten

Place the chocolate and 90ml water in a heatproof bowl over a pan of simmering water until melted.

Allow to cool for 10 minutes and then stir in the egg yolks. The mixture will become thicker and should be glossy.

chocolate-mousse-salted-caramel-roulade-recipe-8

Step eleven

Whisk the egg whites into stiff peaks, add the caster sugar and whisk again until combined. You should be able to turn the bowl upside-down without it all falling out.

chocolate-mousse-salted-caramel-roulade-recipe-9

Step twelve

Place a spoonful of egg white into the chocolate and stir quickly to loosen the chocolate mix. Then add the rest and gently fold in with a metal spoon.

Put in the fridge for an hour or two, the longer the better really.

autumn-mess-10

Step thirteen

Make the salted caramel for the buttercream by melting together 100g of the butter, the brown sugar, golden syrup and salt. Do this slowly and then bring the heat up to a simmer.

Simmer for 10 minutes. Stir regularly so that it doesn’t catch and burn. Leave to cool down for about half an hour or so.

If you think you’ve seen this before, you have, this is about the 5th time I’ve used this salted caramel recipe.

autumn-mess-11

Step fourteen

Once the caramel has cooled down a bit, stir in the 100ml of cream. Set to one side and make the buttercream.

Step fifteen

With an electric whisk beat together the rest of the butter and the icing sugar. Cover with a tea towel to begin with, or you will wind up looking like a cloud.

Step sixteen

Add the salted caramel to the buttercream and whisk. Voila. Place in fridge for at least 15 minutes until cooled completely.

chocolate-mousse-salted-caramel-roulade-recipe-10

Step seventeen

Once the chocolate mousse is set get ready to assemble.

Unroll the sponge and spread a layer of caramel over the surface. I didn’t use all the buttercream so go with what feels right. I used the rest of it up on some cupcakes. Apparently I want my housemates to be obese.

If you’re wondering why mine looks darker than yours it’s because I used dark soft brown sugar and cooked it for too long.

chocolate-mousse-salted-caramel-roulade-recipe-11

Step eighteen

Spread the mousse over, try to keep air in it if you want, but you’ll abandon all hope fairly soon.

chocolate-mousse-salted-caramel-roulade-recipe-gif-1

Step nineteen

Using the greaseproof paper roll the roulade up. Now. I probably didn’t get my first bit tight enough, but regardless, this bit ain’t pretty. Just do it, put it on a chopping board/tray put it back in the fridge and don’t think about it.

Seriously. The mousse will splurge a lot a bit. Pretend it never happened.

Step twenty

After about an hour or so in the fridge the mousse will have firmed up again. You can take it out, wipe away any excess filling and dust some more icing sugar over it.

chocolate-mousse-salted-caramel-roulade-recipe-12

Yeah. Enjoy that my friend.

A bit of bread and butter

Hi there. Welcome back.

This week a cheap and cheerful bake was on the cards for everyone out there cutting costs this January. The perfect pudding to blast away those winter blues. I apologise in advance for laughing in the face of all your 2015 diets, but if you’re going to break them, this is a great way to do so.

This recipe is ideal for people who doubt their skills in the kitchen, I’ll be seriously impressed if you managed to mess this one up. Send me photos if you do.

bread-butter-banana-dulche-de-leche-chocolate-pudding-recipe-1

You will need

For the pudding:

500ml/17 fl oz Double cream

100ml/3.5 fl oz Condensed milk

2 Eggs

Vanilla pod/2 tsp Vanilla extract

100g/3.5 oz Dark/Milk chocolate

50g/2 oz Soft brown sugar

6 – 8 Slices white bread (let’s be honest, you will need to get a loaf anyway, and I wasn’t counting properly)

3 Bananas

Butter for spreading

Ramekins if you’re feeling a bit posh.

For the salted caramel:

100g/3.5 oz Salted butter

80g/3 oz Soft brown sugar

100ml/3.5 fl oz Double cream

2 tbsp Golden syrup

2 tsp Salt

(Makes 6)

bread-butter-banana-dulche-de-leche-chocolate-pudding-recipe-2

Step one

Whisk together the cream, condensed milk, vanilla and eggs. Set aside, and try not to think about how much cream that was.

bread-butter-banana-dulche-de-leche-chocolate-pudding-recipe-3

Step two

Butter the bread slices generously. I just used regular spreadable butter for this, but if you’re a purest you could buy unsalted.

Using a cutter that’s the same diameter as your ramekins, cut circles out of the bread. Chop the offcuts into small pieces and leave to one side.

bread-butter-banana-dulche-de-leche-chocolate-pudding-recipe-4

Step three

Slice the banana into thin pieces and chop the chocolate into small chunks (as if I haven’t said it enough – a bread knife is the best way to do this).

bread-butter-banana-dulche-de-leche-chocolate-pudding-recipe-gif


Step four

Assemble!

Butter the ramekins and layer up the puddings. Bread, banana, chocolate, sugar, repeat. Finish the last layer with bread using the offcuts and sprinkle some caster sugar on top, this will make a lovely crisp topping.

Step five

Once all the ramekins are layered up, pour the custard mixture on top, try to fill them evenly.

Leave to sit for 20 minutes to let the custard soak into the bread.

Step six

Bake in a pre-heated oven for 35 minutes on 180C/350F/gas mark 4.

autumn-mess-10

Step seven

While you are baking the puddings, place all the ingredients for the salted caramel into a saucepan (minus the cream).

Heat gently until melted and then bring to a simmer. Simmer for 10 minutes. Stir regularly so that it doesn’t catch and burn. Leave to cool for about half an hour.

autumn-mess-11

Step eight

Once cooled, stir in the 100ml double cream.

bread-butter-banana-dulche-de-leche-chocolate-pudding-recipe-6

bread-butter-banana-dulche-de-leche-chocolate-pudding-recipe-5

Not the prettiest things but they aren’t too shabby to eat. Bon apetit!

Ginger breading fun 2014

Hello again. Just a little post with some photos of this year’s gingerbread house. I said back in this post that I would start to theme them, which I’m afraid I didn’t have the inspiration for in the end, but it does have a balcony which was my engineering feat of the year.

For those of you looking to squeeze a bit of gingerbread house making into what’s left of Christmas eve, other than needing your head examining, you might find the posts I did last year useful:

#1: Gingerbread house recipe

#2: How to assemble a gingerbread house

#3: Tips for decorating a gingerbread house

Now for the good bit…

Gingerbread house 2014

gingerbread-house-2014-recipe

gingerbread-house-2014-recipe-2

gingerbread-house-2014-recipe-1

gingerbread-house-2014-recipe-5

gingerbread-house-2014-recipe-3

gingerbread-house-2014-recipe-4

Have a wonderful Christmas all 

Grown up milk and cookies

In England we tend to leave Santa a sherry or a brandy and a mince pie. I’ve heard that in some Scandinavian countries he gets ‘treated’ to porridge…lucky guy. Well this post is a nod to our North American friends from whom Santa receives milk and cookies. I decided to jazz up the traditional a little, after all, you hard working parents deserve a little more than a glass of milk on the 24th.

I should start off by saying that the recipe leans more towards a sort of whoopie pie consistency than a cookie, a whookie if you’d like. Perhaps if you wanted to commit to whoopie pies you could sandwich them with the salted caramel buttercream I made a couple of months back.

Without further ado here’s an easy Bailey’s (Irish cream) cocktail (which is more like a pudding really) and triple chocolate Mars Bar whookies.

mars-bar-baileys-cocktail-whoopie-pie-cookie

You will need

260g/9 oz Plain flour

150g/5.5 oz Soft dark brown sugar

100g/3.5 oz Unsalted butted

100g/3.5 oz White chocolate chips

40g/1.5 oz Cocoa powder

50-100g/2-3.5 oz Dark chocolate

3 Eggs

3 Mars Bars

1.5 tsp Baking powder

1 tbsp Full fat milk

For the Bailey’s cocktail

Bailey’s Irish Cream

Chocolate milk

50g/2 oz Dark chocolate

Rum/Brandy if you have some (I went without)

A sprinkle of cinnamon and nutmeg

mars-bar-baileys-cocktail-whoopie-pie-cookie-1

Step one

Chop the Mars bars into small chunks.

If you, like me, can’t control yourself around chocolate, you might want to add an extra one to the mix. There’s just something about chopped up Mars bar that is excessively moorish.

mars-bar-baileys-cocktail-whoopie-pie-cookie-2

Step two

Combine all the dry ingredients (minus the chocolate) in a large bowl.

Step three

Make a well in the middle and add the eggs, milk and butter. Stir to combine. Ideally your butter will be room temperature, otherwise you’ll be mixing for a while.

Step four

Add the white chocolate and Mars bar and mix again until the chips and chunks are evenly distributed.

mars-bar-baileys-cocktail-whoopie-pie-cookie-3

Step five

Drop dessert spoonfuls of the mixture onto baking trays lined with greaseproof paper. They won’t spread too much so flatten down a bit.

Step six

Bake on 180C/gas mark 4/350 F for about 15-20 minutes.

Step seven

Leave to cool and then melt the dark chocolate and drizzle over the top.

mars-bar-baileys-cocktail-whoopie-pie-cookie-4

Step eight

Melt the remaining dark chocolate in a small bowl and dip your glasses in to coat the rim.

mars-bar-baileys-cocktail-whoopie-pie-cookie-gif

Step nine

Add a shot of Baileys (and a dash of rum if you have it). A sprinkle of both cinnamon and nutmeg. Top up with approx 150ml of chocolate milk.

As you can probably tell, I didn’t exactly measure this one out, so go with your taste as a measure.

mars-bar-baileys-cocktail-whoopie-pie-cookie-5

mars-bar-baileys-cocktail-whoopie-pie-cookie-6

Step ten

Leave out for Santa.

Little pudding

This week two celebrations collided when my lovely teacher at college had a special birthday and we crept ever closer to the 25th December. Thankfully, teach didn’t mind the seasonally confused gift – Happy Birthday Lana!

This week it’s Christmas pudding truffles, surprisingly easy to make, and with a large yield they are perfect for last minute gifts on a budget.

christmas-pudding-truffles-recipe

You will need

300g/10.5 oz Dark chocolate

100g/3.5 oz White chocolate

300ml/10.5 fl oz Double cream

30g/1 oz Unsalted butter

Red sprinkles

Cocoa and caster sugar for dusting

(Makes 60-70)

christmas-pudding-truffles-recipe-1

Step one

Chop the dark chocolate finely using a bread knife. Resist the urge to eat it all.

christmas-pudding-truffles-recipe-2

Step two

Heat the cream and butter gently in a saucepan. Wait until it starts to bubble and steam dances across the surface. There is no need to let it boil, as Mary Berry always says – chocolate melts in a child’s pocket.

Step three

Take the cream off the heat and whisk into the chocolate until fully melted. Place in the fridge to speed up the setting process.

christmas-pudding-truffles-recipe-3

Step four

Check regularly on the truffle mix, don’t let it harden fully. Once a spoonful holds its shape when dropped onto the rest of the mixture it’s pipe-able.

Place into a piping bag, and, holding it perpendicular to the greaseproof paper (which you have put down as instructed, um, nowhere in this post) squeeze downwards. Don’t worry if these are a bit misshapen, it’s just to make sure they’re roughly the same size.

christmas-pudding-truffles-recipe-gif

christmas-pudding-truffles-recipe-4

Step five

Pipe pipe pipe.

Leave to set a bit longer, preferably with a window open to cool the truffle down quickly. The truffles won’t thank your winter central heating.

christmas-pudding-truffles-recipe-5

Step six

When the truffles are set roll them into balls. You will need fairly cold hands for this, so rinse them in cold water.

Step seven

Dust the truffles in cocoa and caster sugar. I mixed these at random so I’m not sure on quantities, but I used about two thirds caster sugar to a third cocoa powder.

I dusted as I rolled, as hands warm the outside of the truffles so the caster sugar will stick.

christmas-pudding-truffles-recipe-6

Step eight

Melt the white chocolate slowly in the microwave, pipe little splodges and drop some red sprinkles on top. I got these from Sainsbury’s, so not too hard to track down.

christmas-pudding-truffles-recipe-8

Leave the white chocolate to set and pack away your truffles into little bags or boxes and spread the Christmas (or Birthday) cheer!