Another week another birthday. This time round it’s my lovely housemate who is bravely entering her mid-twenties; just another excuse for me to get in the kitchen.
Earlier in the week Vicky (the birthday girl in question), Matt (the fiance) and I, had sat down to watch The Princess Bride (a hilarious farce of a film), and we cracked open some Crabbie’s. It was such a lovely little evening, and I thought I would bake the experience into a cake to commemorate the little one’s birth.
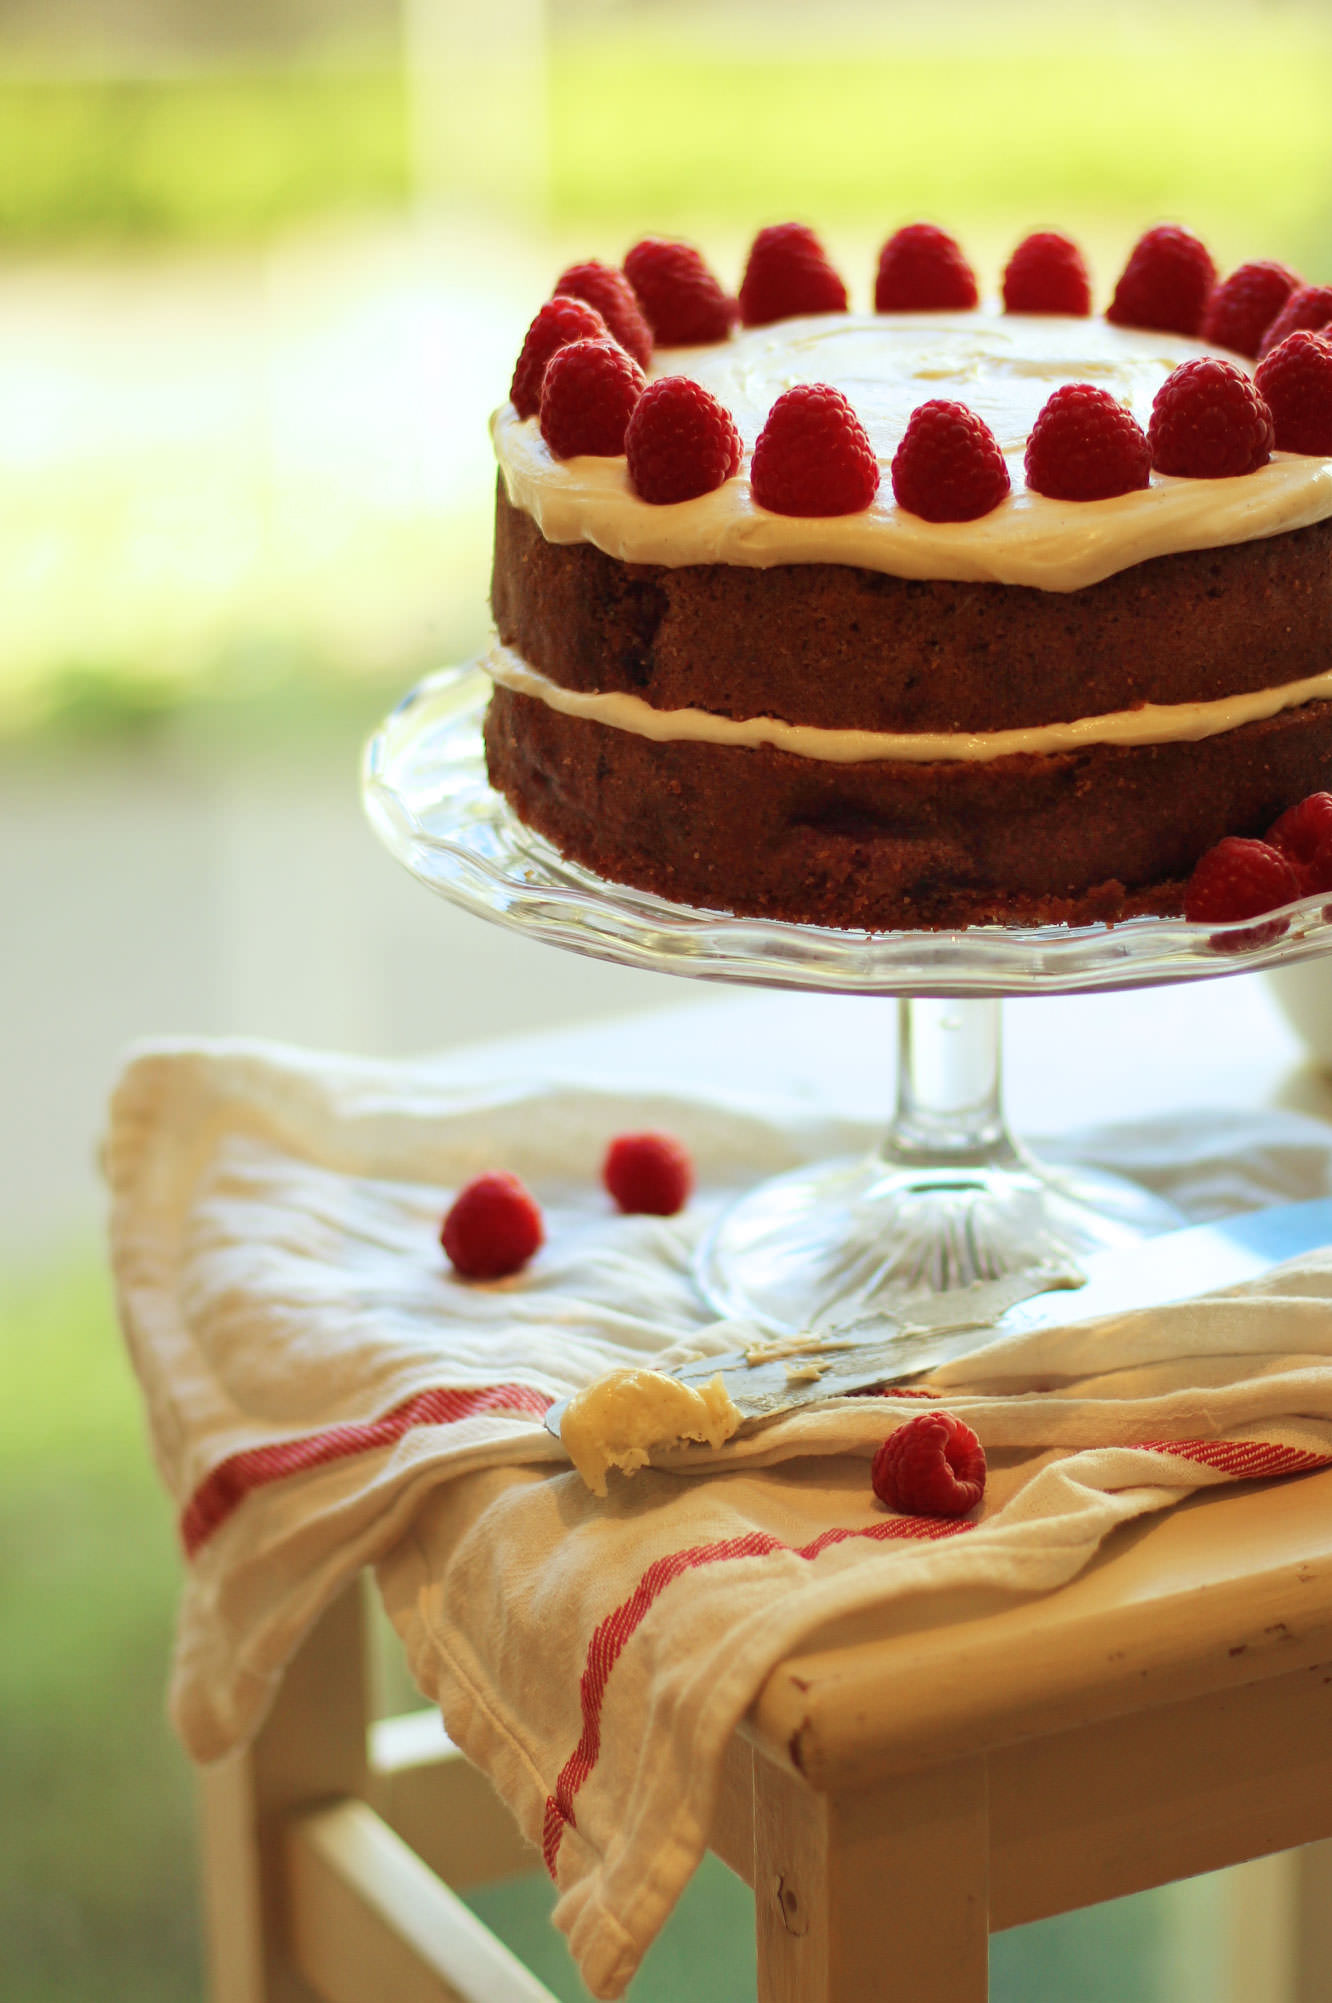
Crabbie’s, for anyone who doesn’t know (more fool you), is alcoholic ginger beer. This particular batch was raspberry flavoured, and nobody was more surprised than me to discover how nicely ginger and raspberry complement each other. Add to that a honey and vanilla icing and you’ve got a birthday cake fit for any 24 year old.
You will need
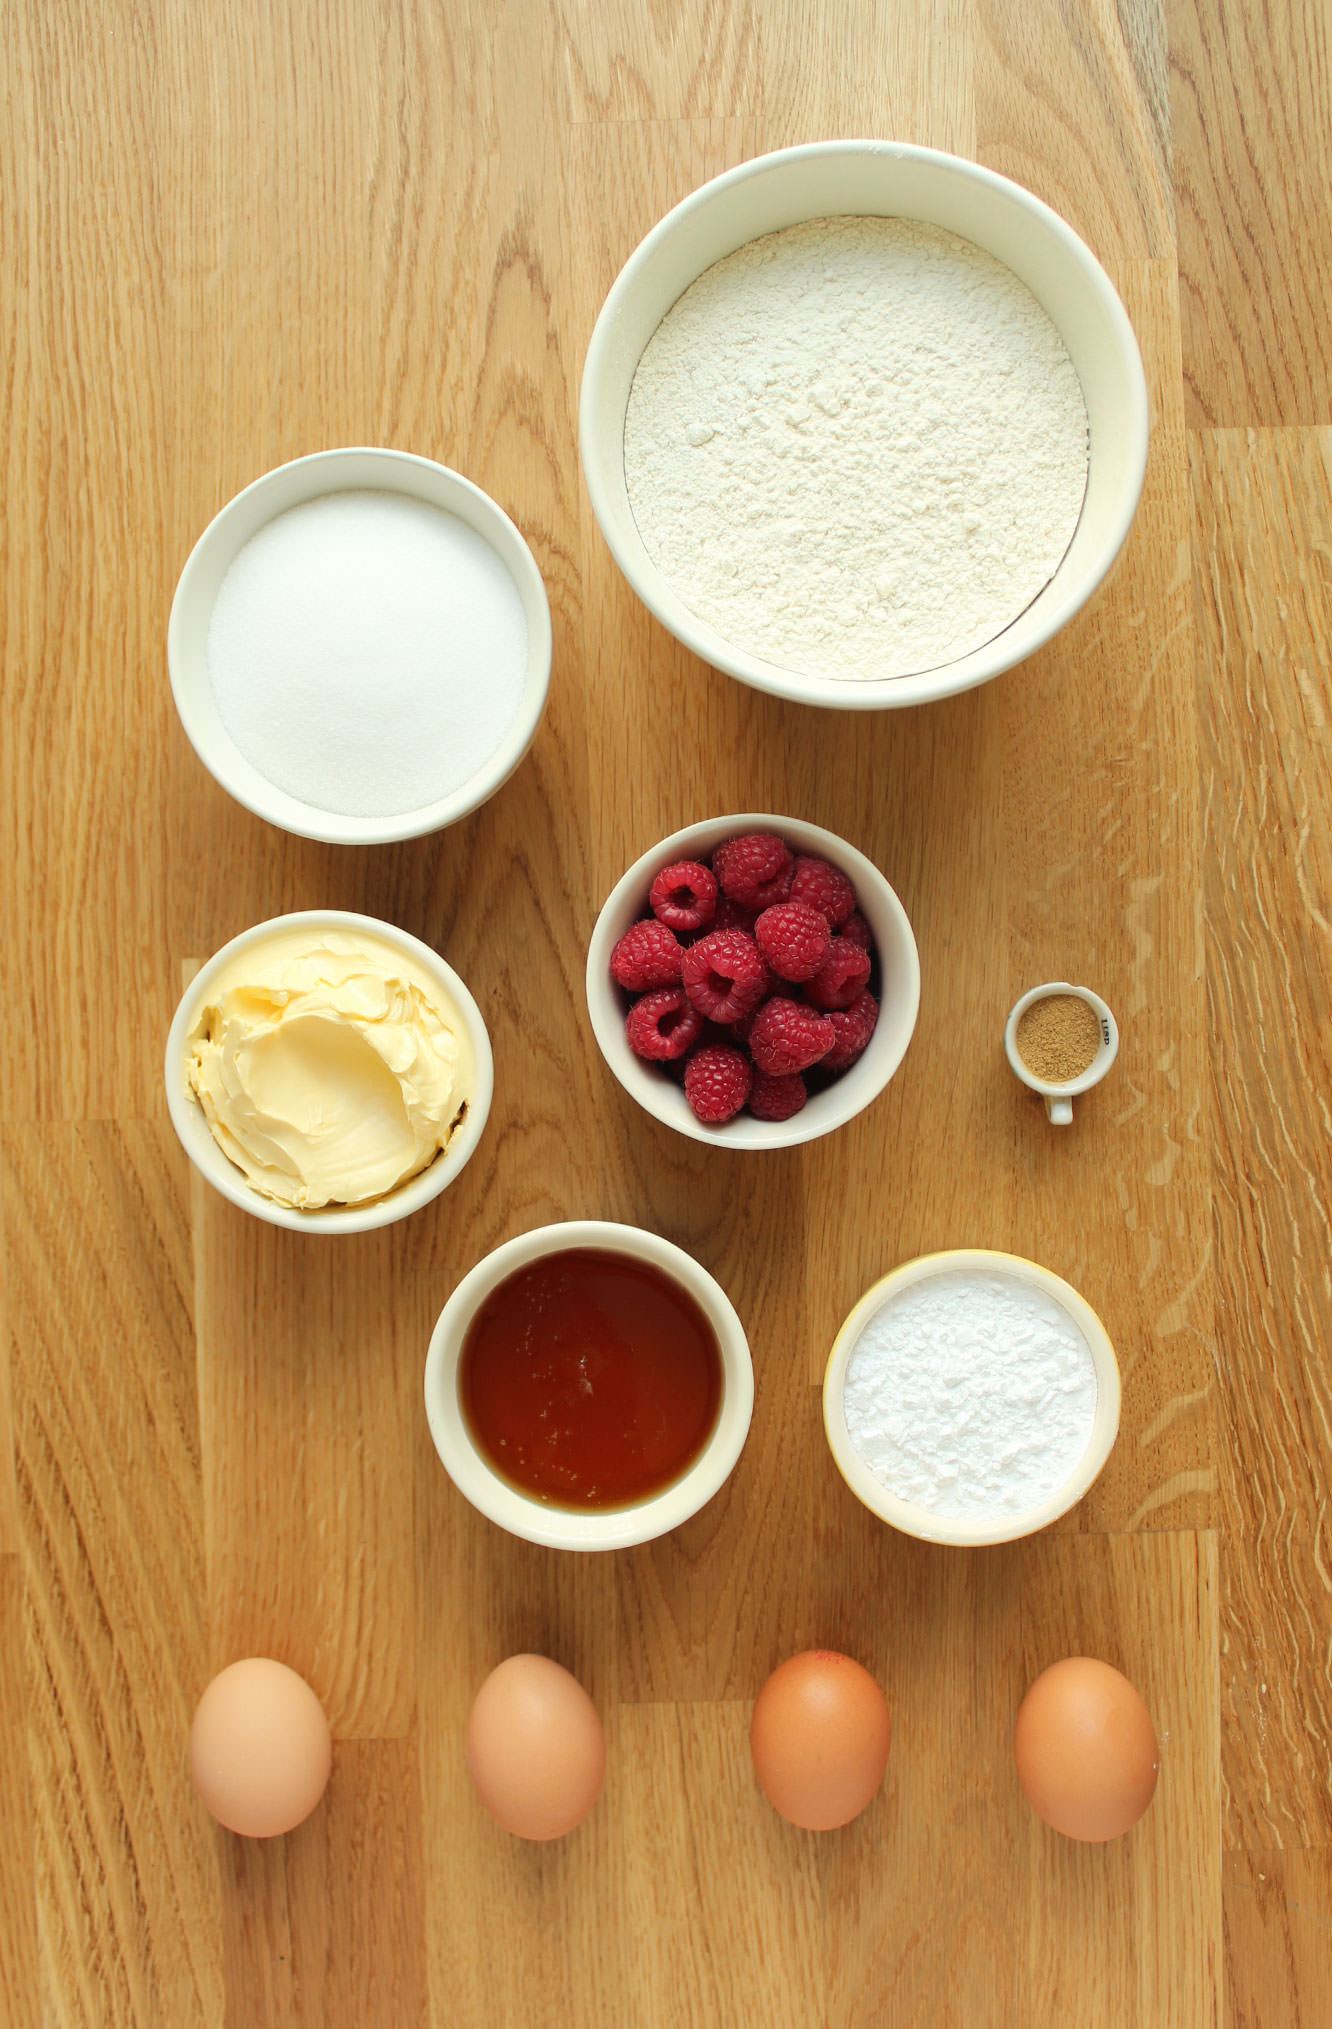
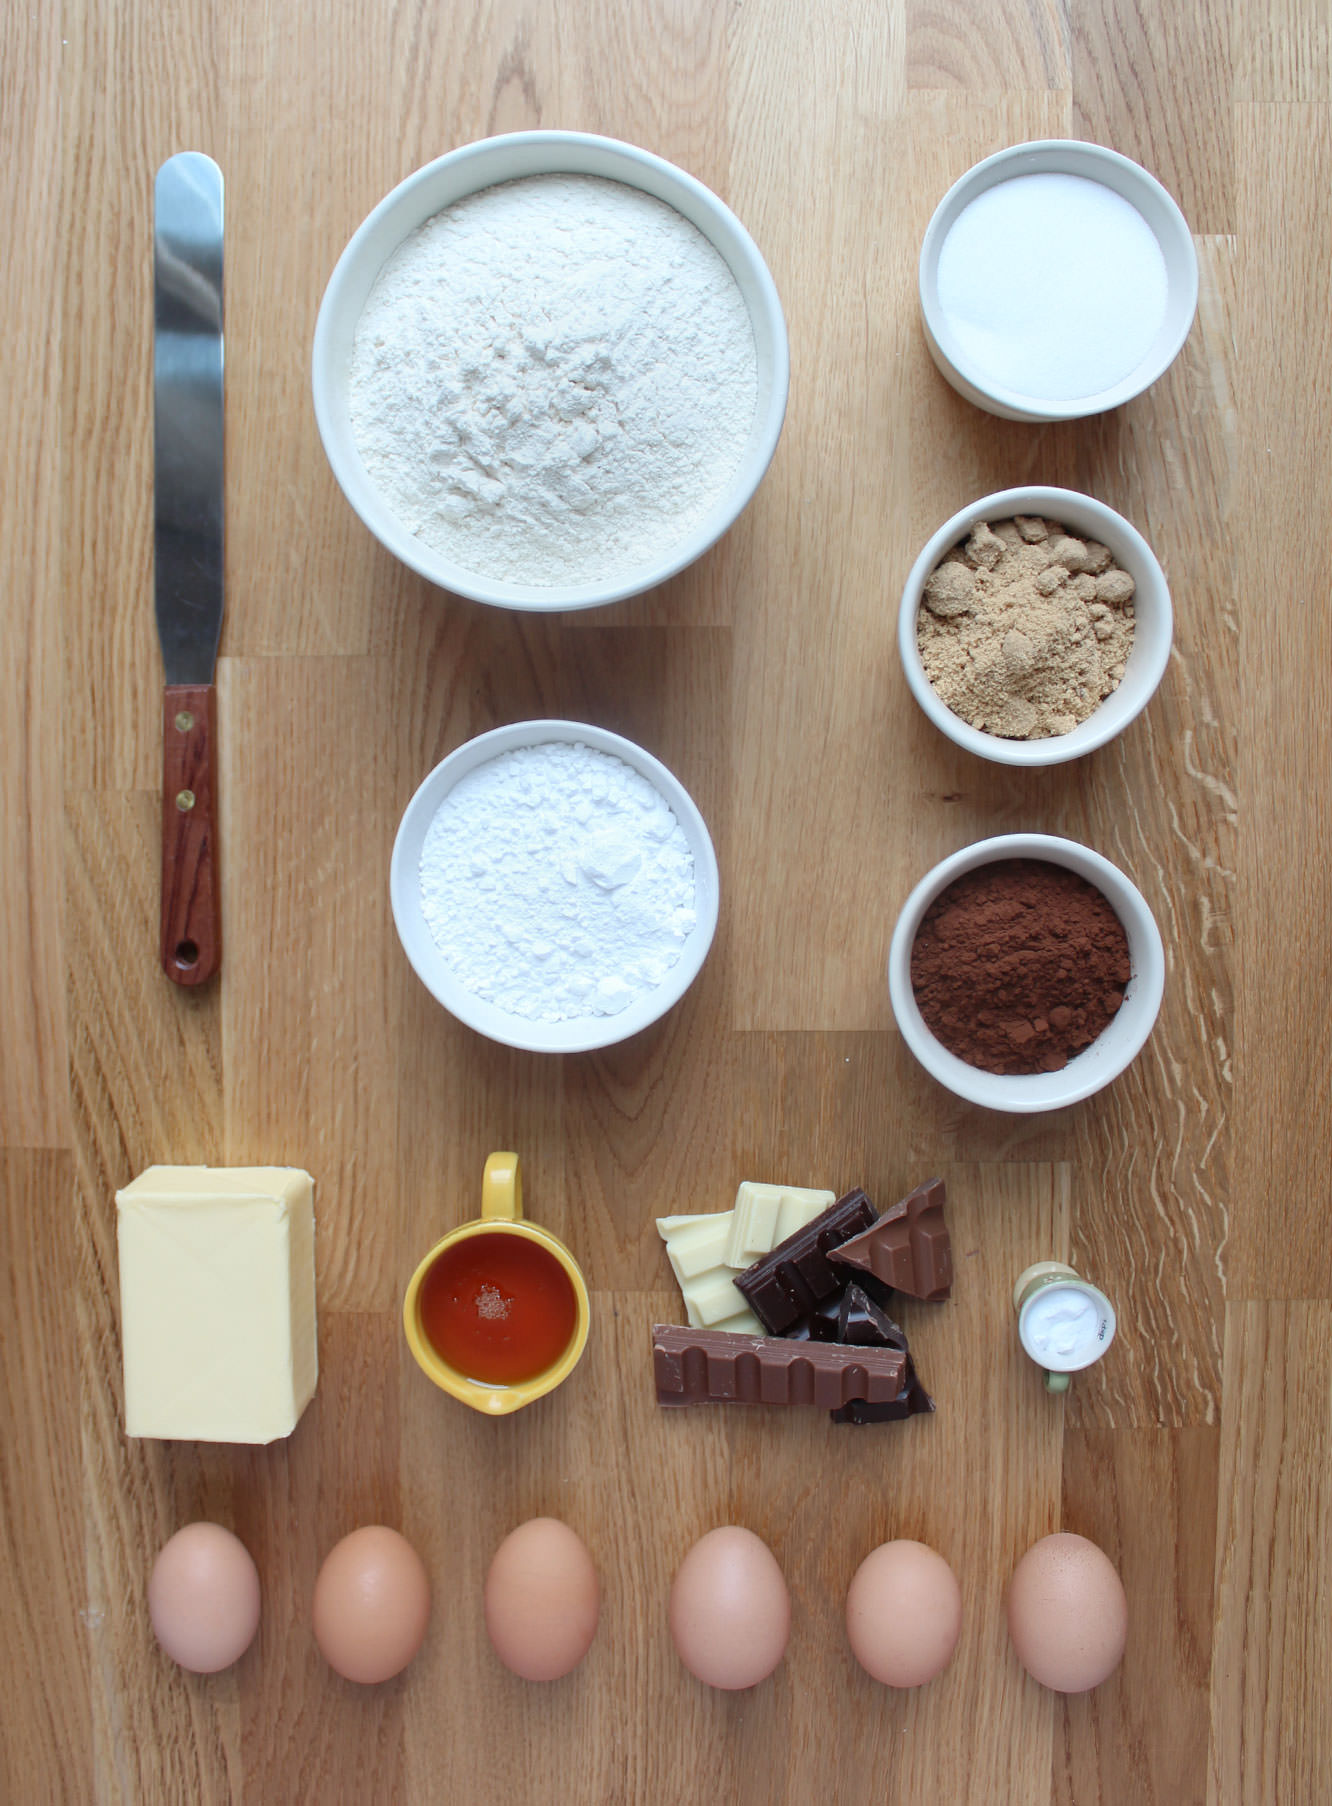
For the cake:
255g/9 oz self raising flour
255g/9 oz caster sugar
255g/9 oz margarine/butter (I use stork for cakes)
4 eggs
2 tsp ground ginger (add a bit more if you want a really strong ginger taste, 2 tsp is nice and subtle)
1 tsp vanilla extract/paste
1 tsp bicarbonate of soda
200g/7 oz raspberries
For the icing/decoration:
350g/12 oz icing sugar
150g/5 oz softened butter
170g/6 oz honey
1-2 tsp vanilla extract/paste (or even a pod if you have one so you get the lovely flecks)
100g/3.5 oz raspberries
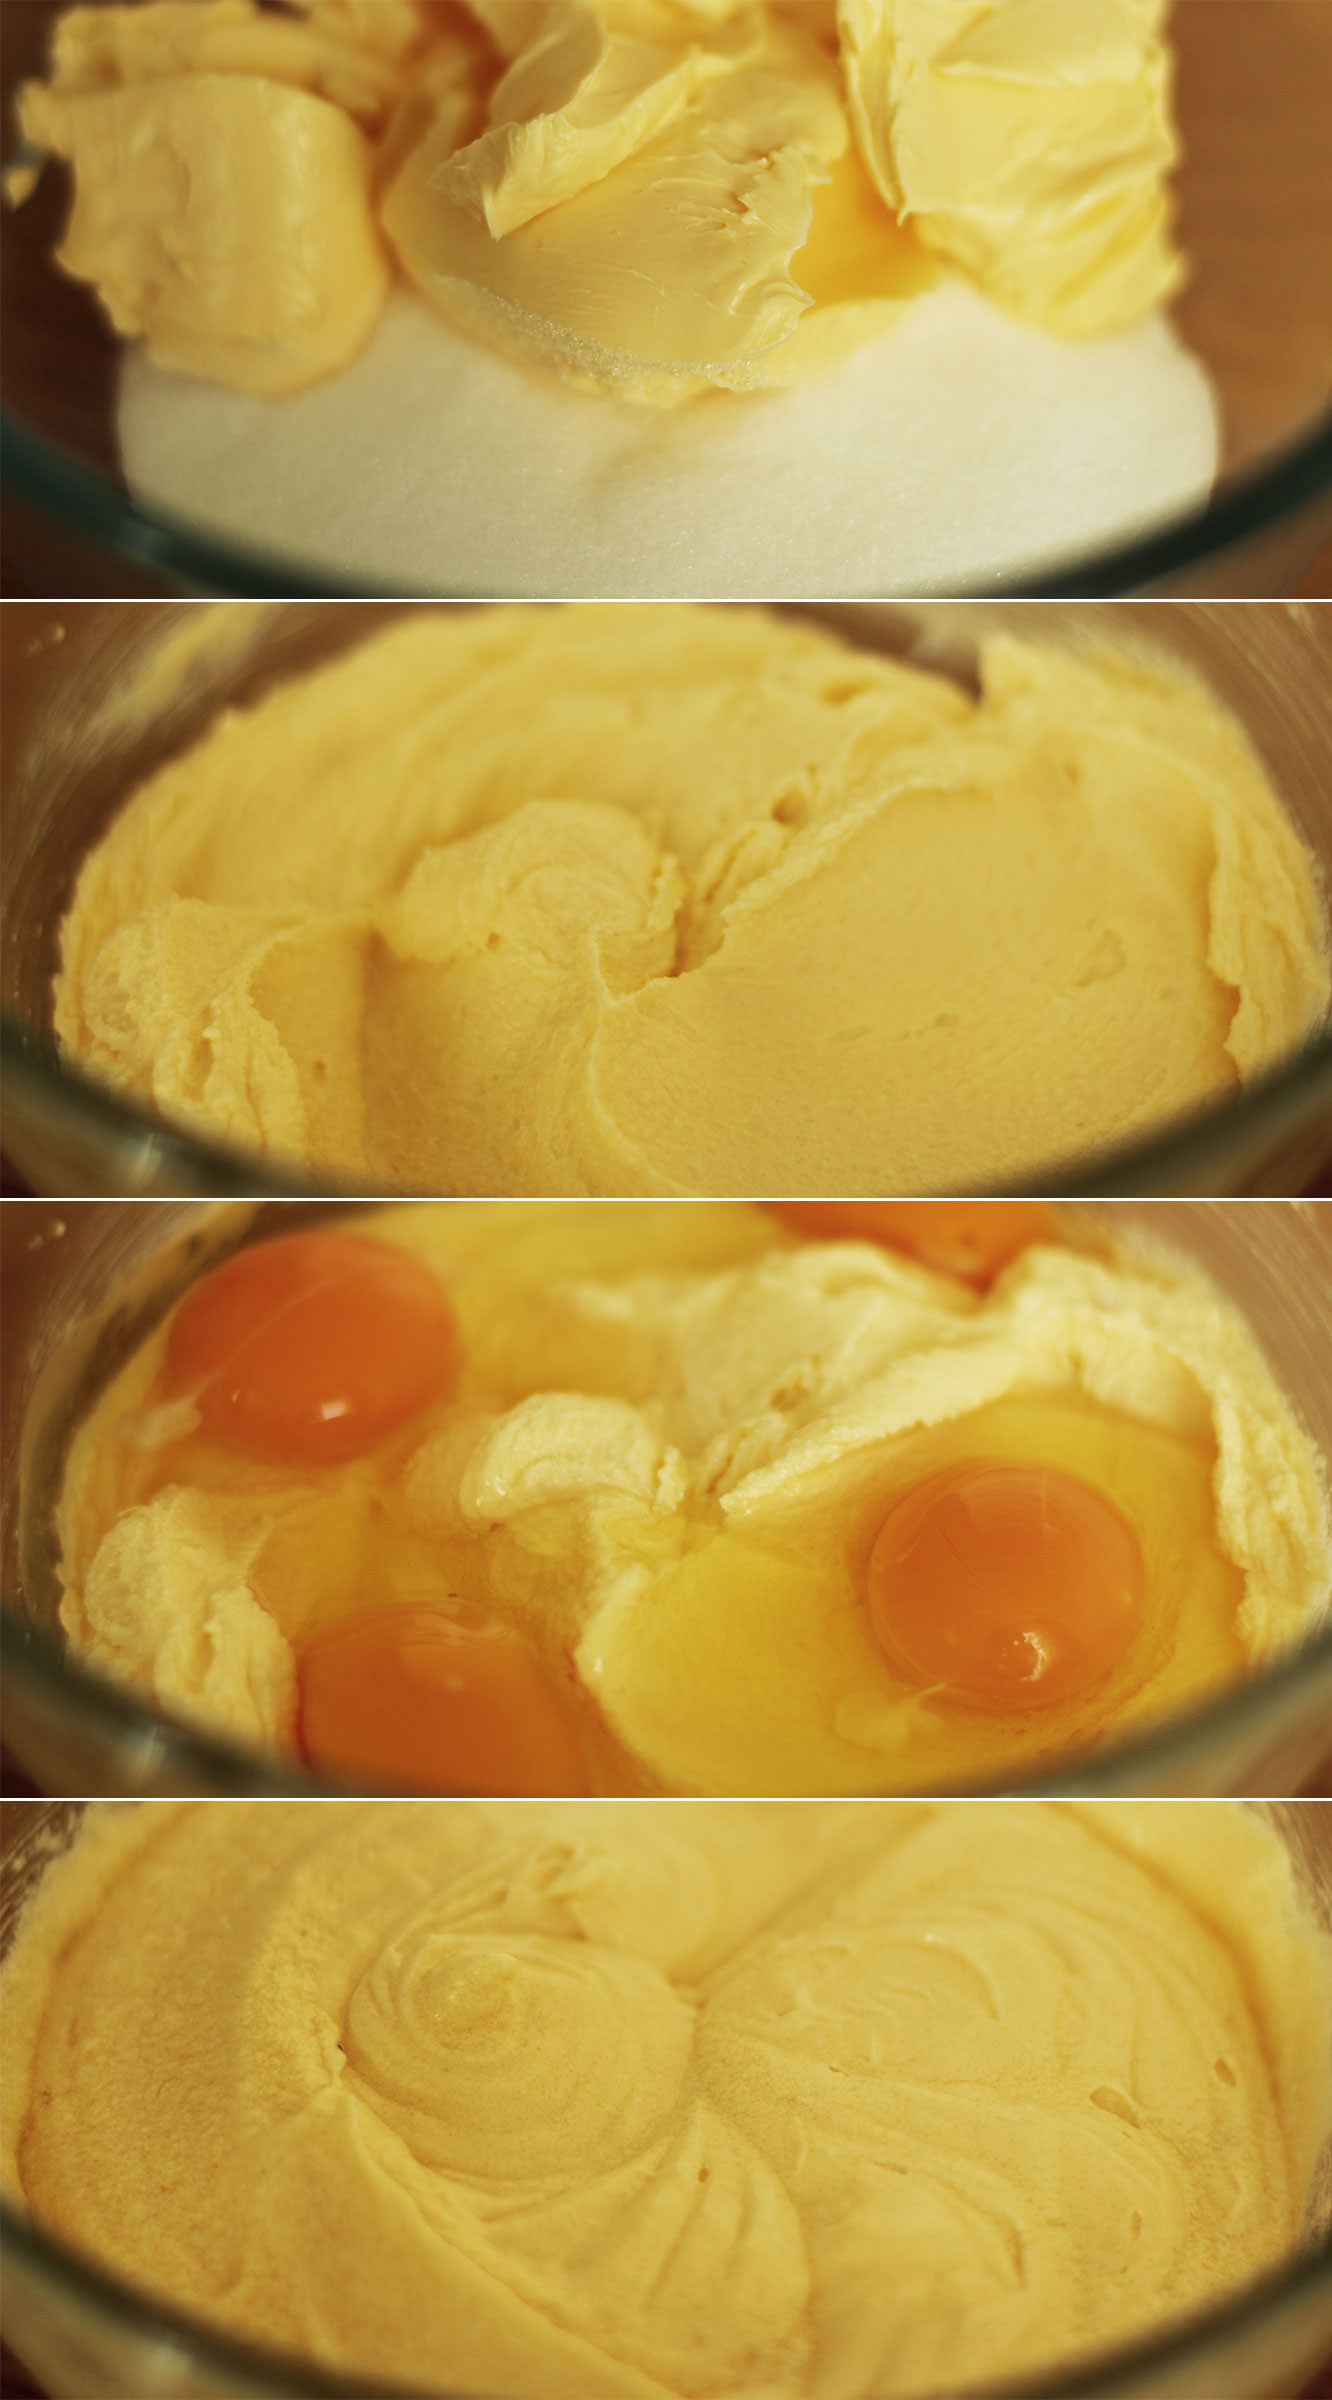
Step one
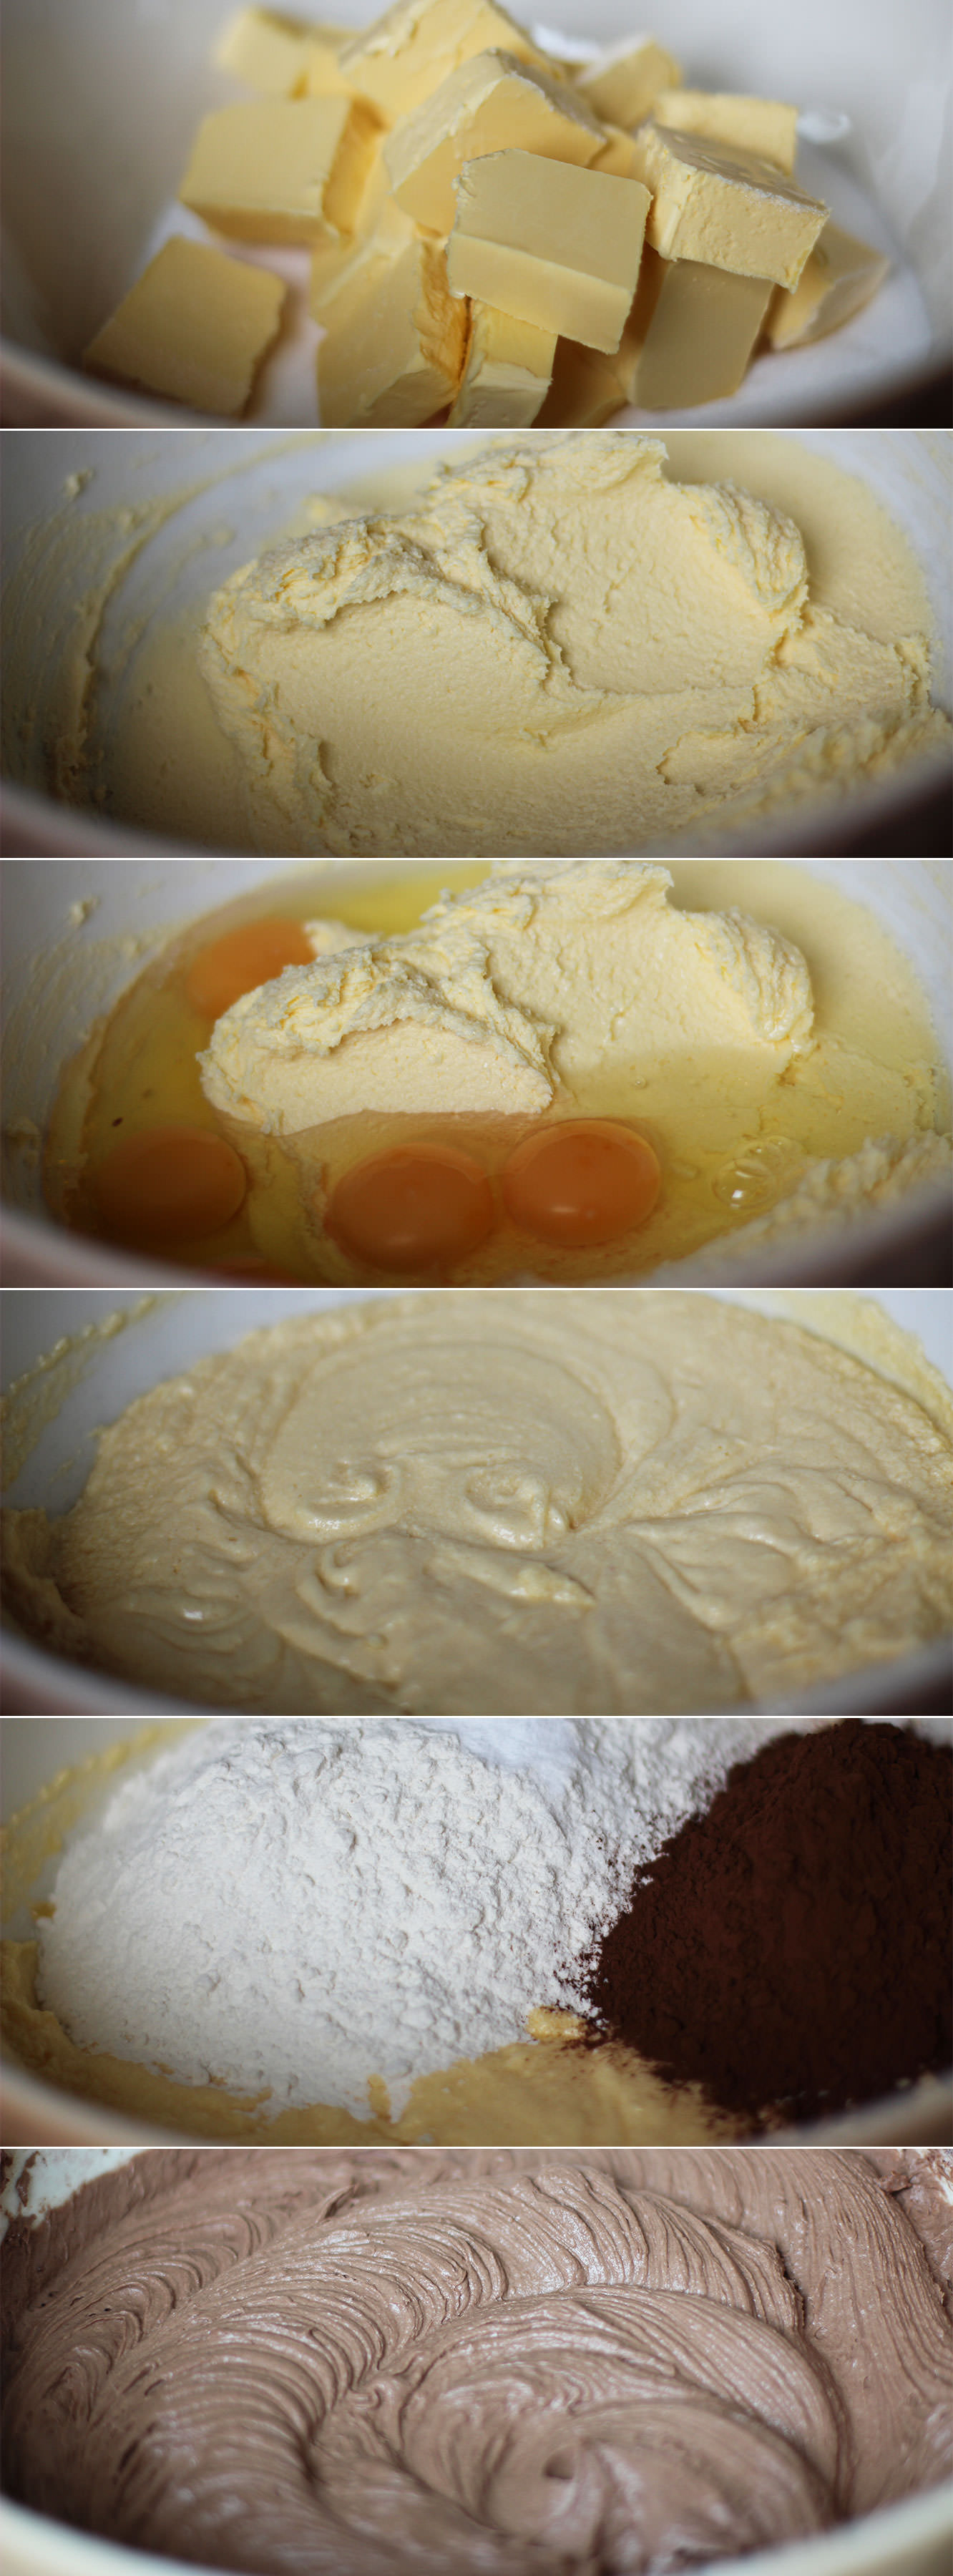
Using an electric whisk beat together the margarine and sugar until well blended and fluffy.
Step two
Add the eggs and beat again until combined. It looks a little split at this stage (see those little lumps at the sides) but you don’t need to worry, the flour never fails to sort that out.
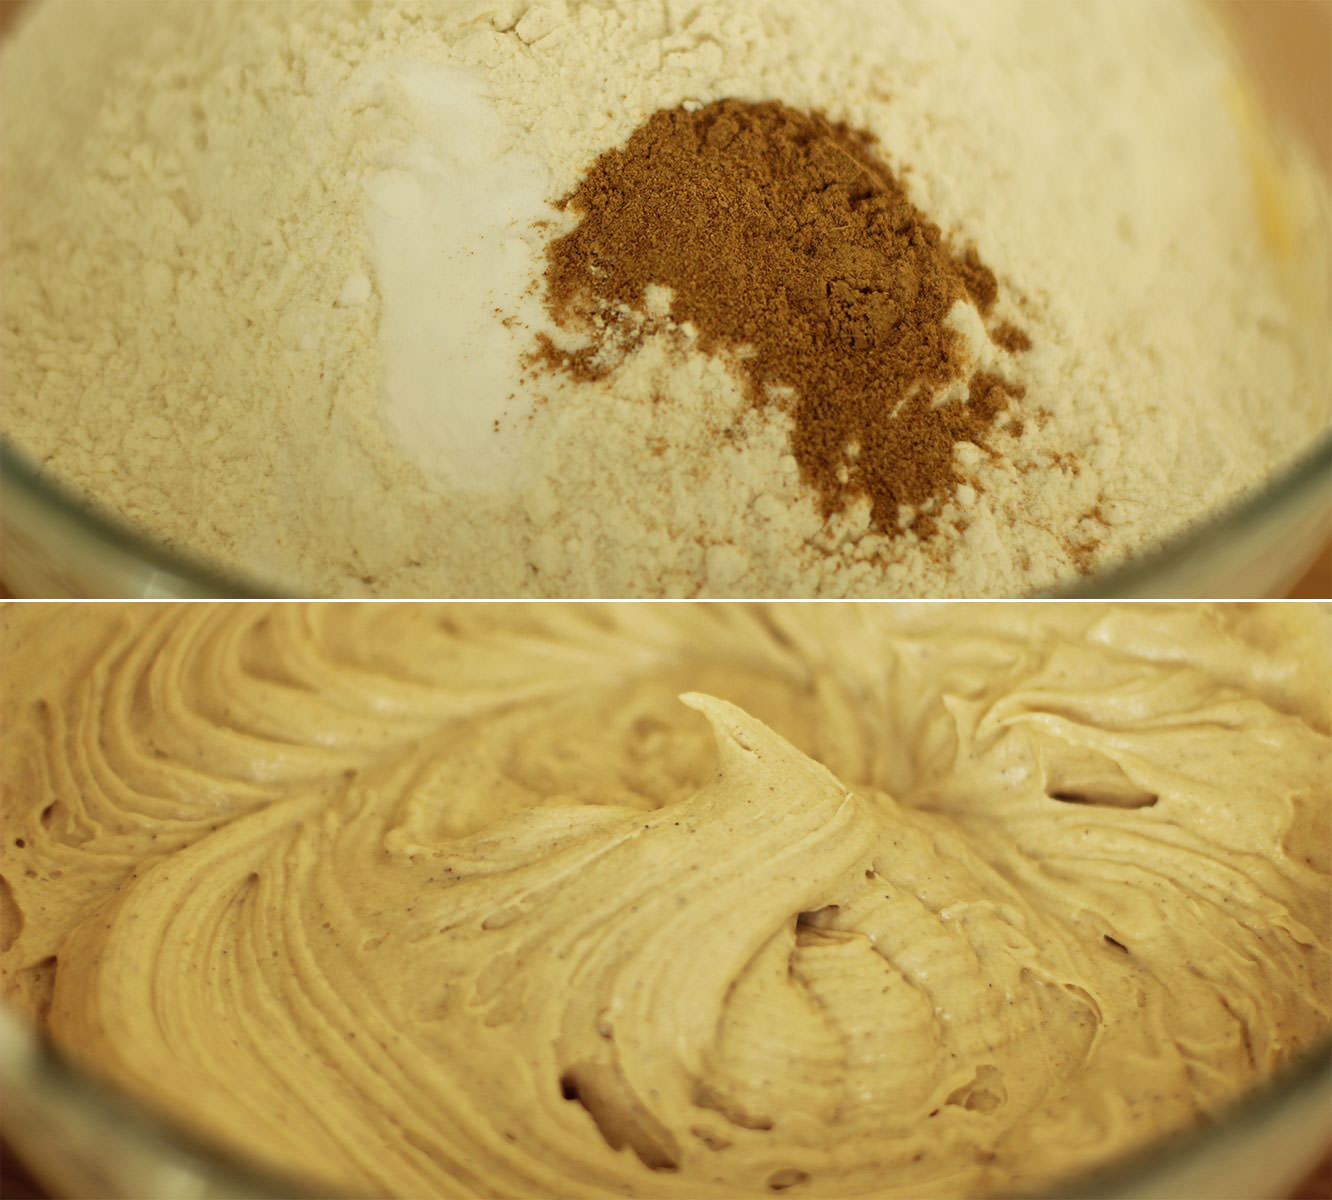
Step three
Add the flour, bicarbonate of soda and ginger and whisk again until smooth.
I also added the vanilla at this point which is in the form great paste my friend brought me back from Vanuatu, tastes delicious and has the beans in it. If you aren’t swinging by the South Pacific any time soon and don’t fancy the investment in a pod or some paste then extract will do the trick.
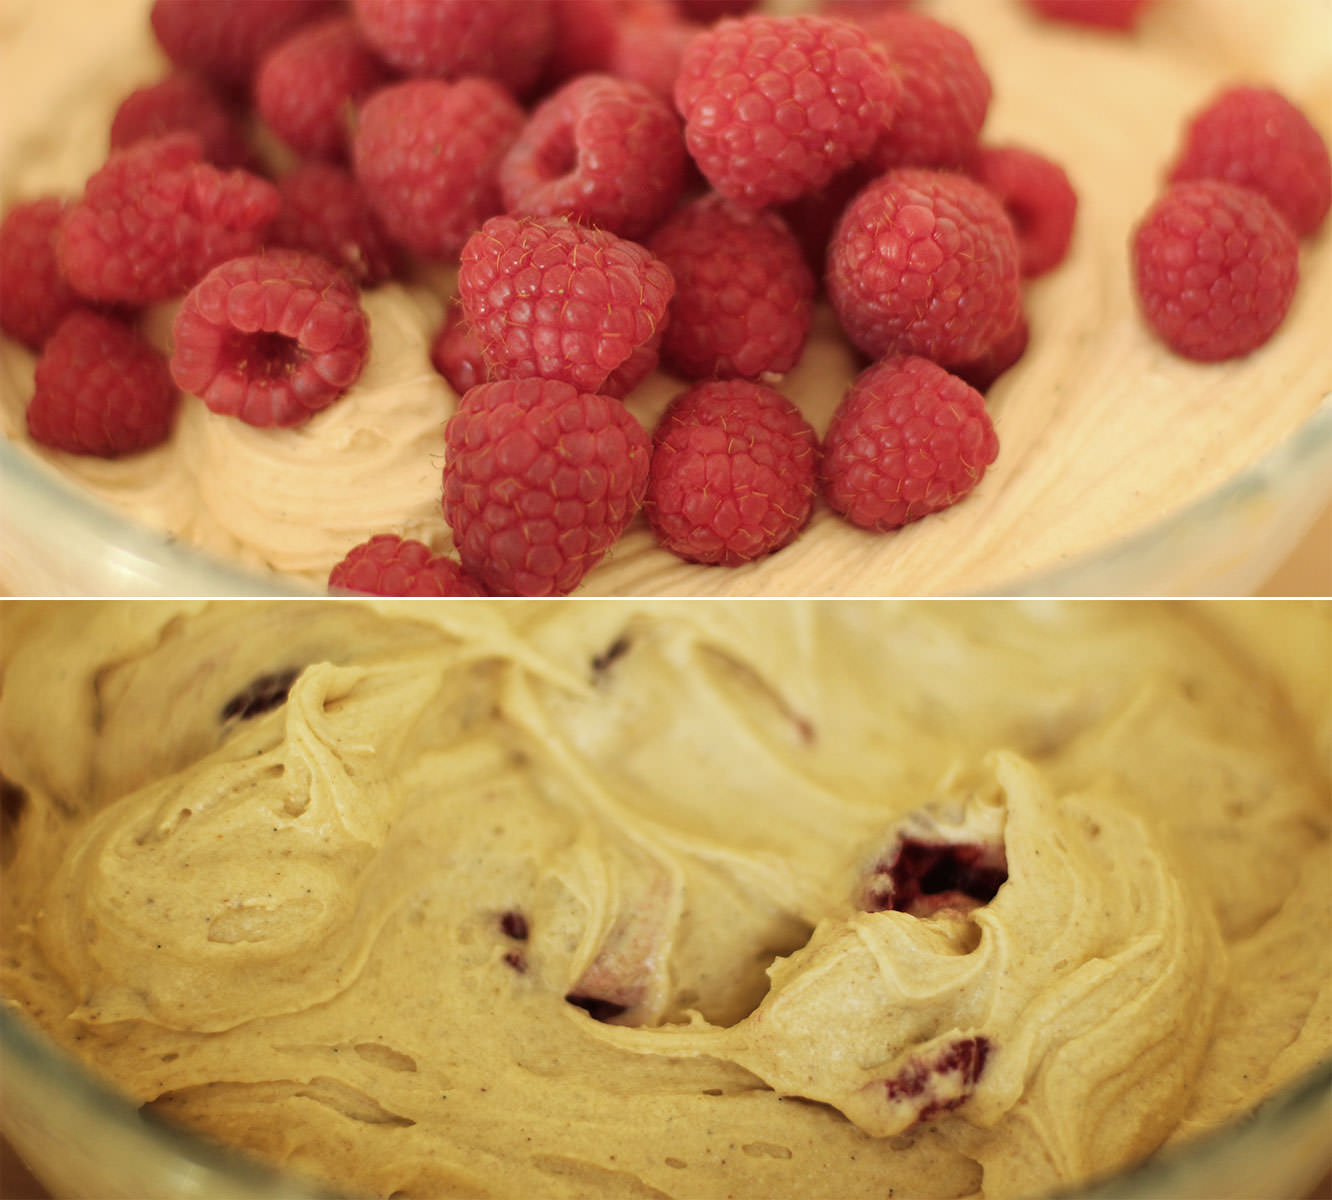
Step four
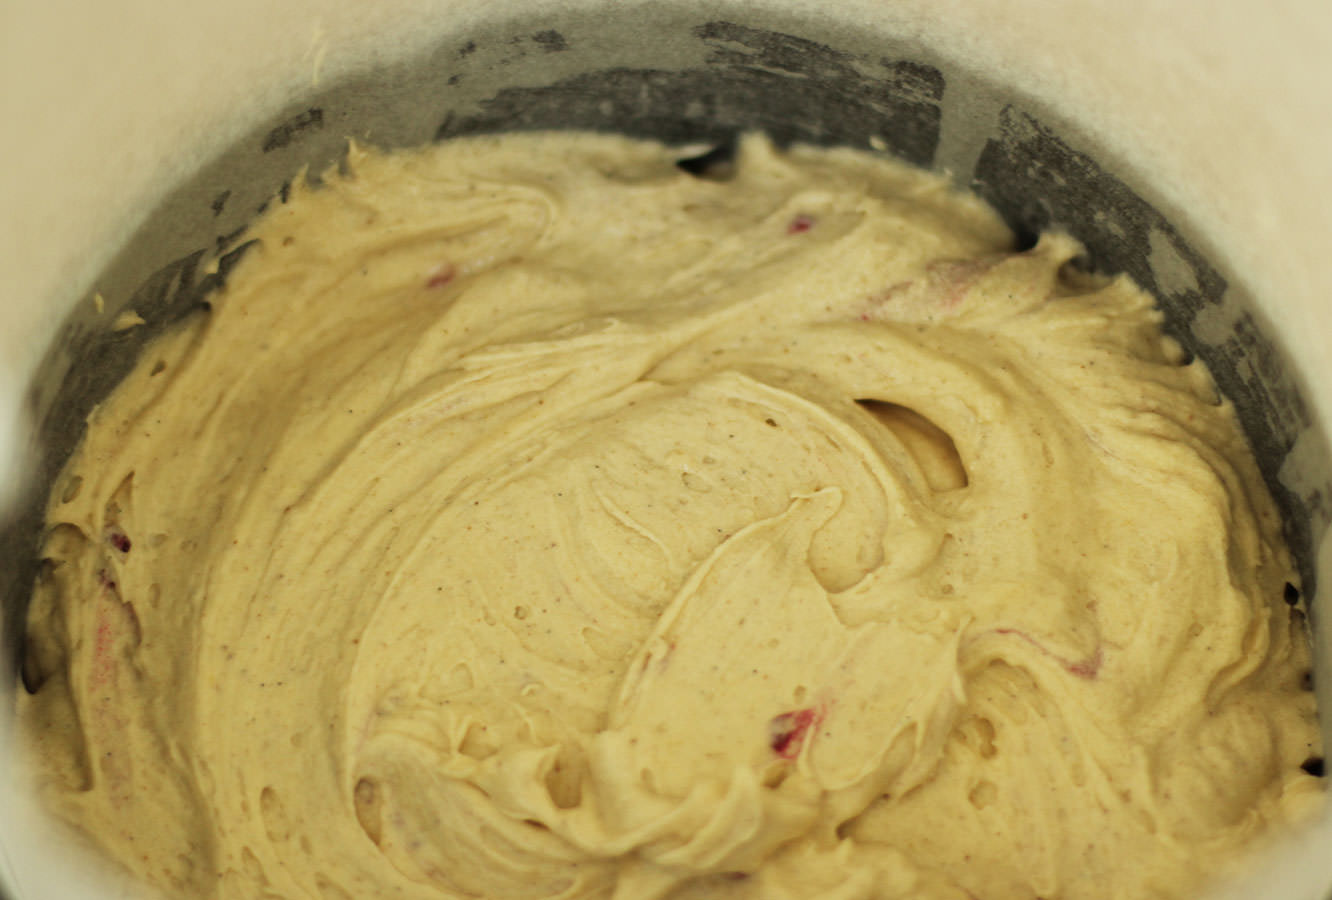
Add the raspberries and stir them in with a wooden spoon. I crushed some of them with the back of the spoon against the side of the bowl to help distribute them a little better.
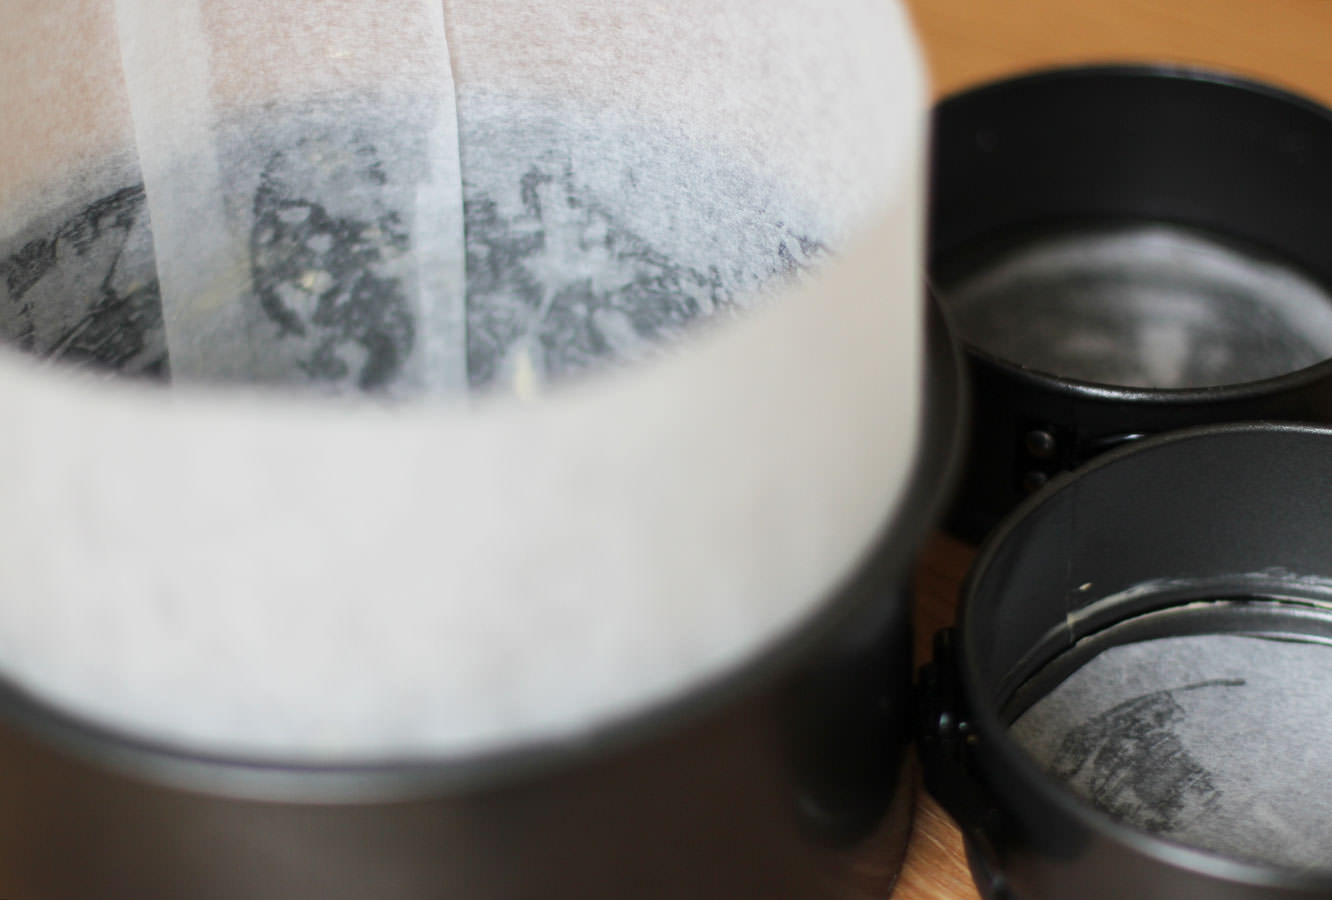
Step five
Spoon into a greased and lined tin, or two tins. Bake on 180C/350F/gas mark 4.
If you are just using a single tin you need about 45-55 minutes and make sure you line the sides so that the greaseproof protects the sides and top of the cake from burning. If you are using two separate tins 35-40 minutes should do the trick, and you only need to line the bottoms of the tins.
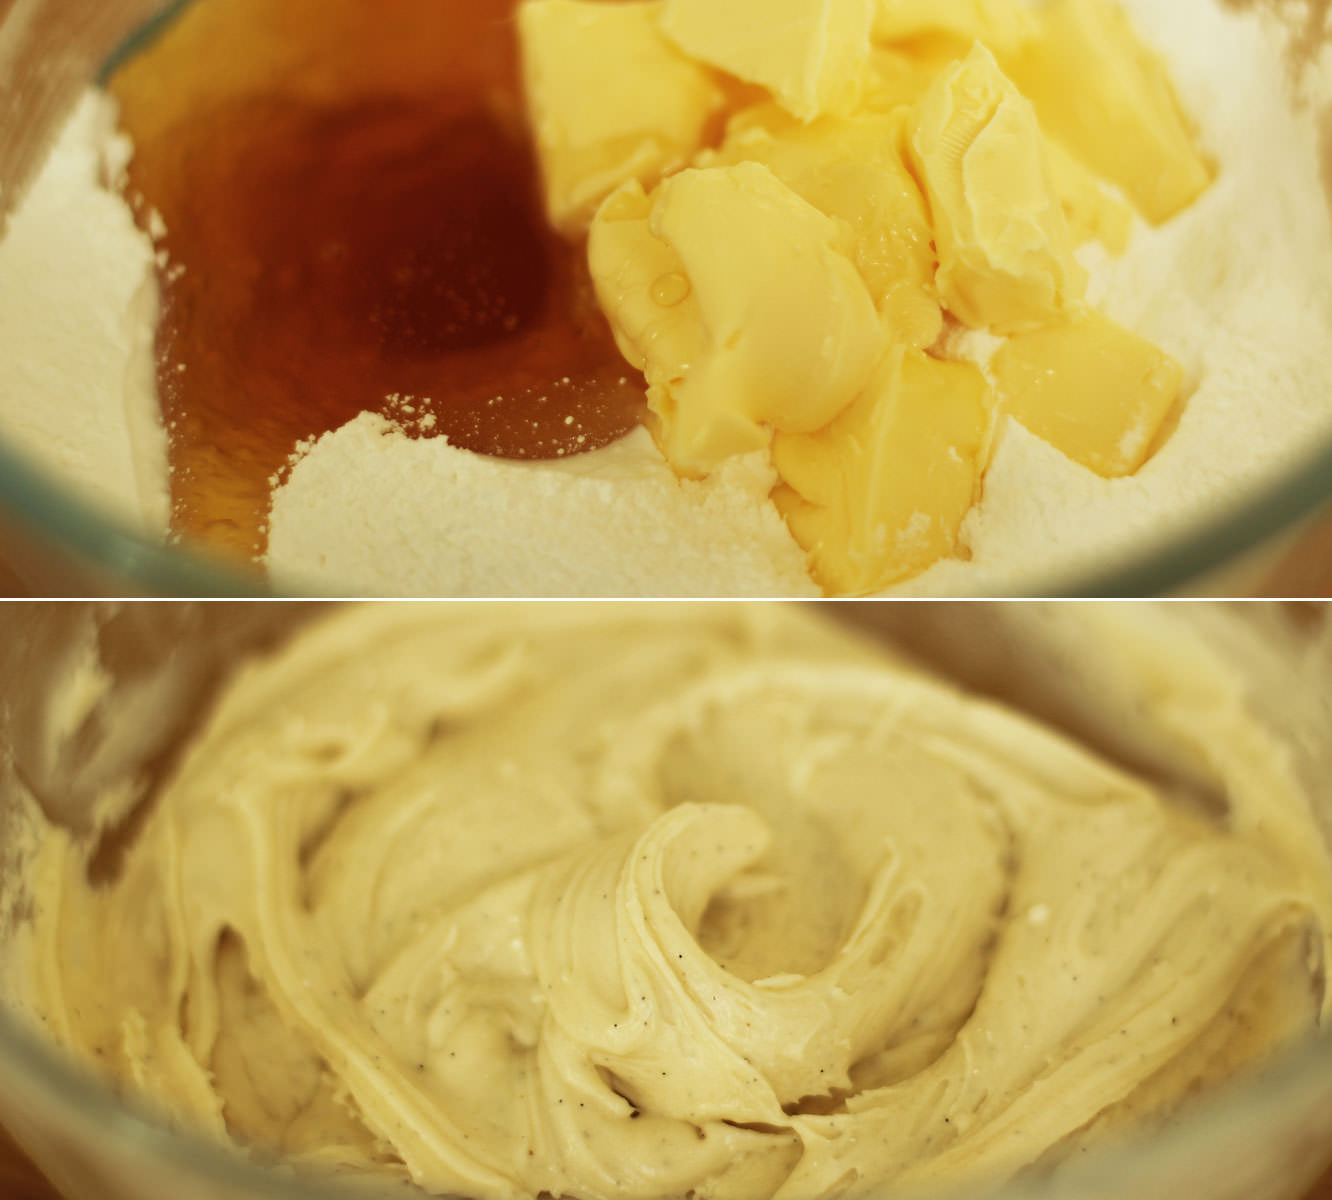
Step six
Whisk together the butter, icing sugar, vanilla and honey for the icing. Cover the bowl with a tea towel before turning on the whisk so you don’t get covered in icing sugar.
Step seven
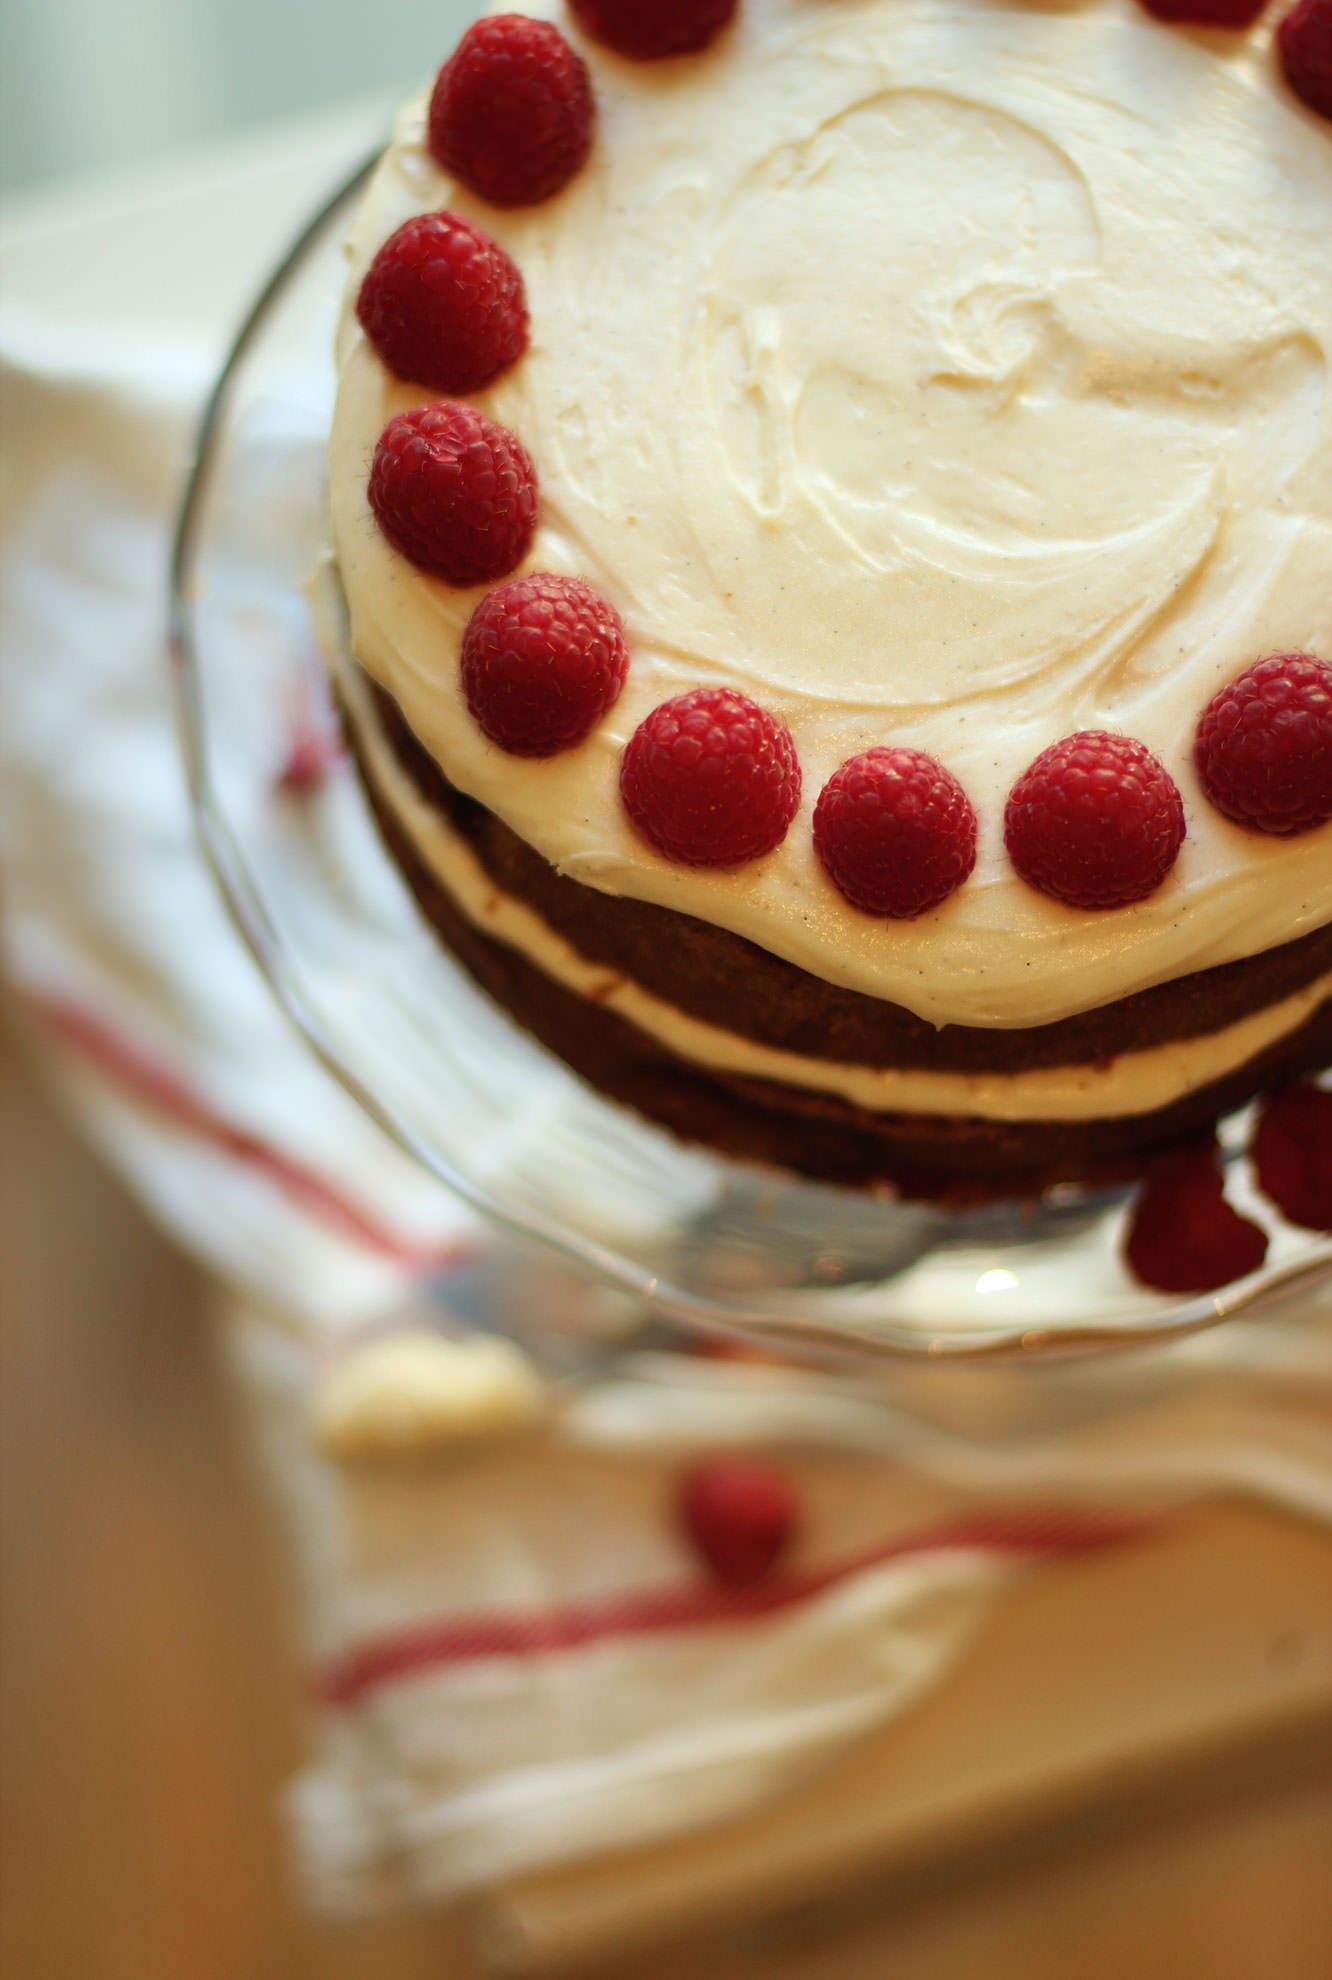
Once the cake has completely cooled assemble it. Use just under half the icing in the middle and the rest on top.
I then decorated with the remaining raspberries, but feel free to get creative!
A couple of weeks ago one of my favourite colleagues had a special birthday, so for a special birthday we needed a special cake.
I had only attempted one two tier cake before and had never made the chocolate collar you’ll see below. Sure this cake was a bit more effort than your average victoria sponge, but if you’ve got a few hours and a bit of patience and determination this is very much possible.
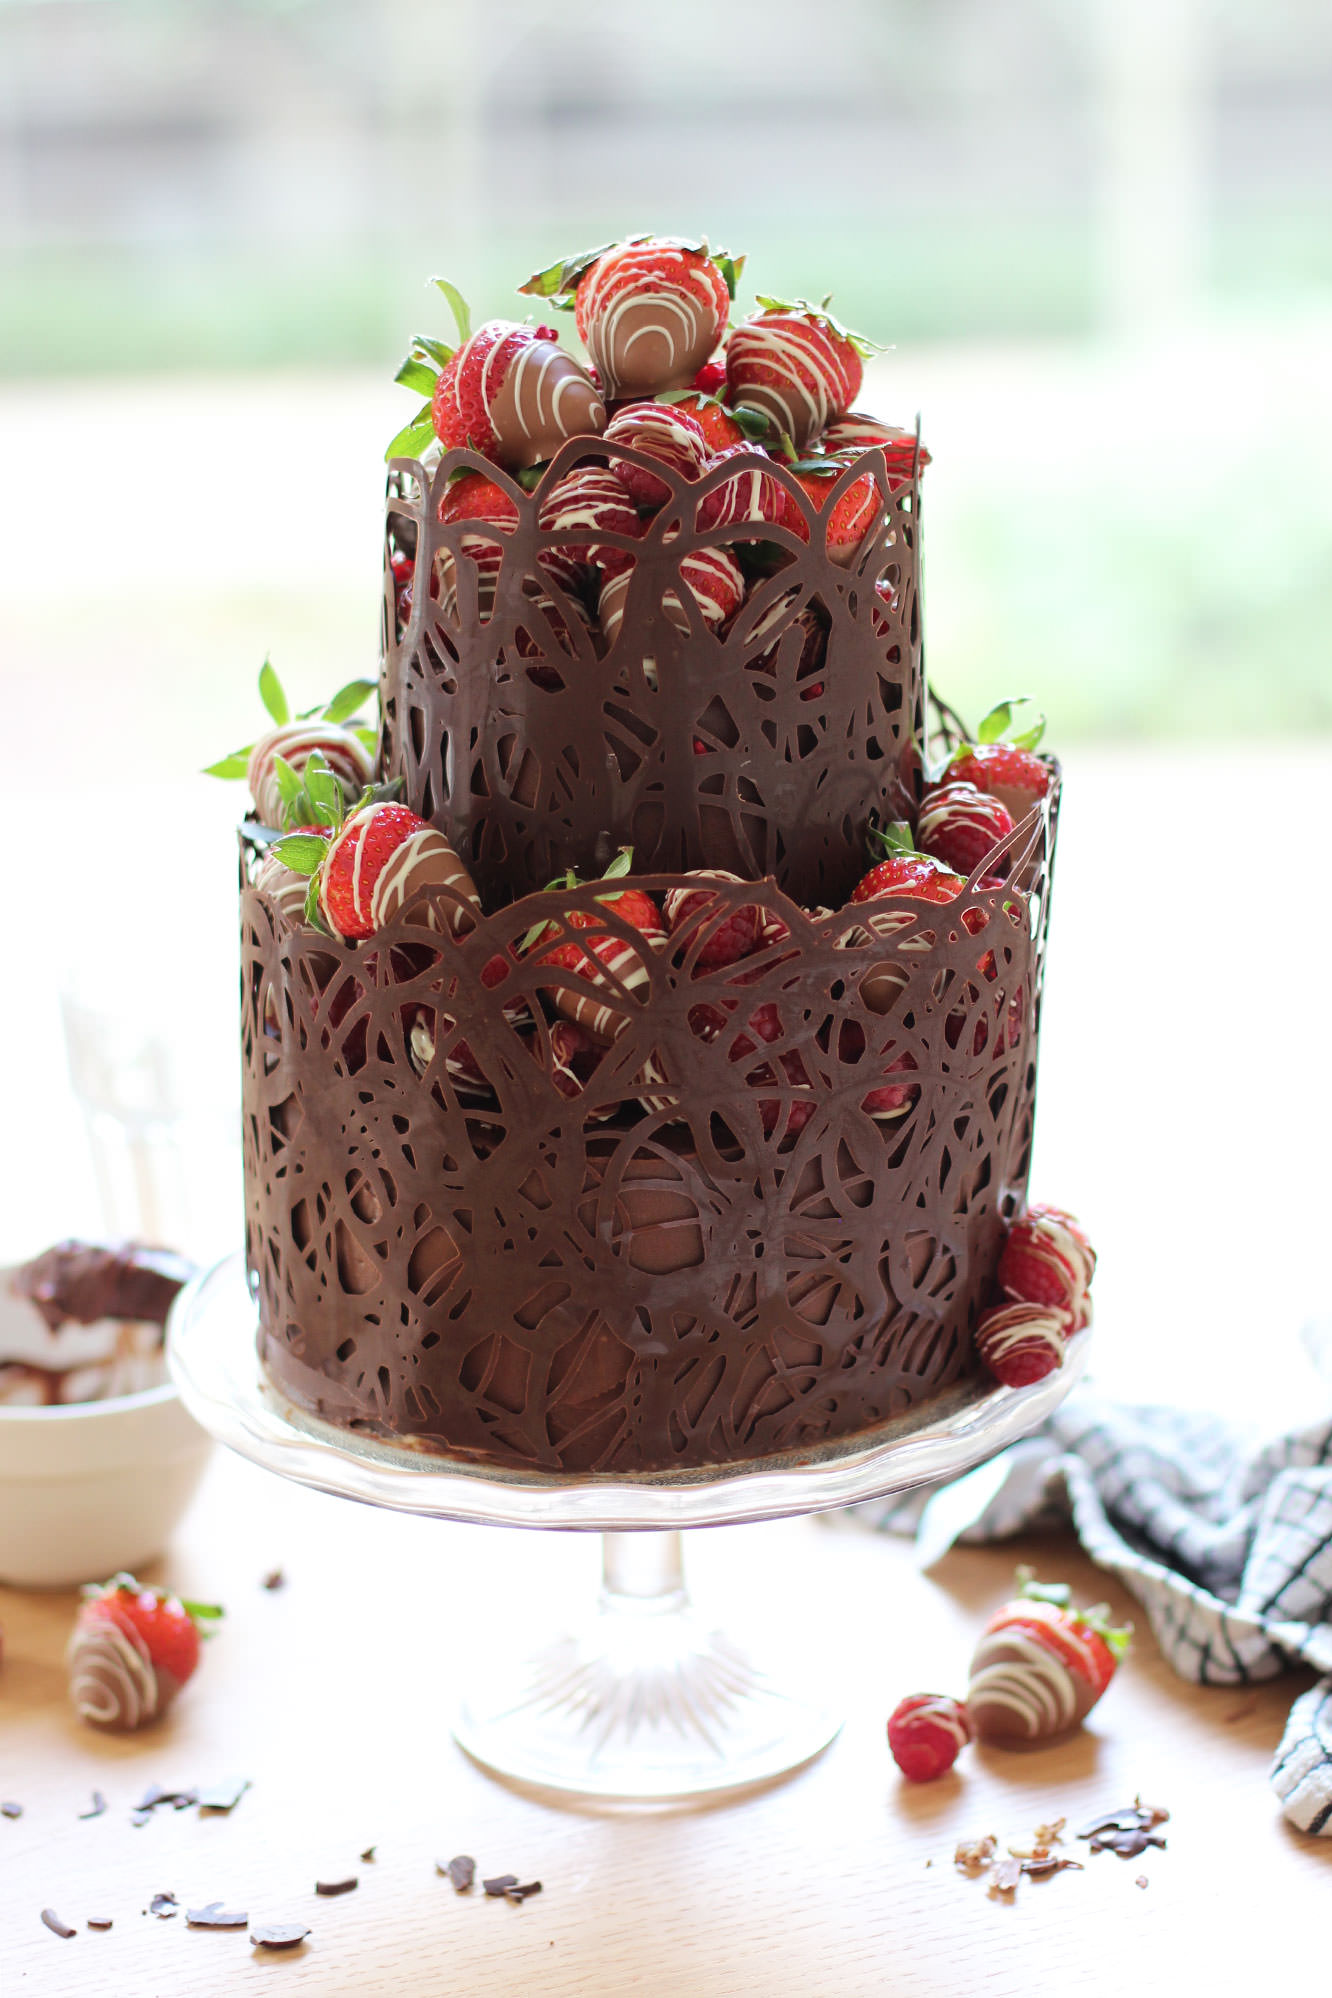
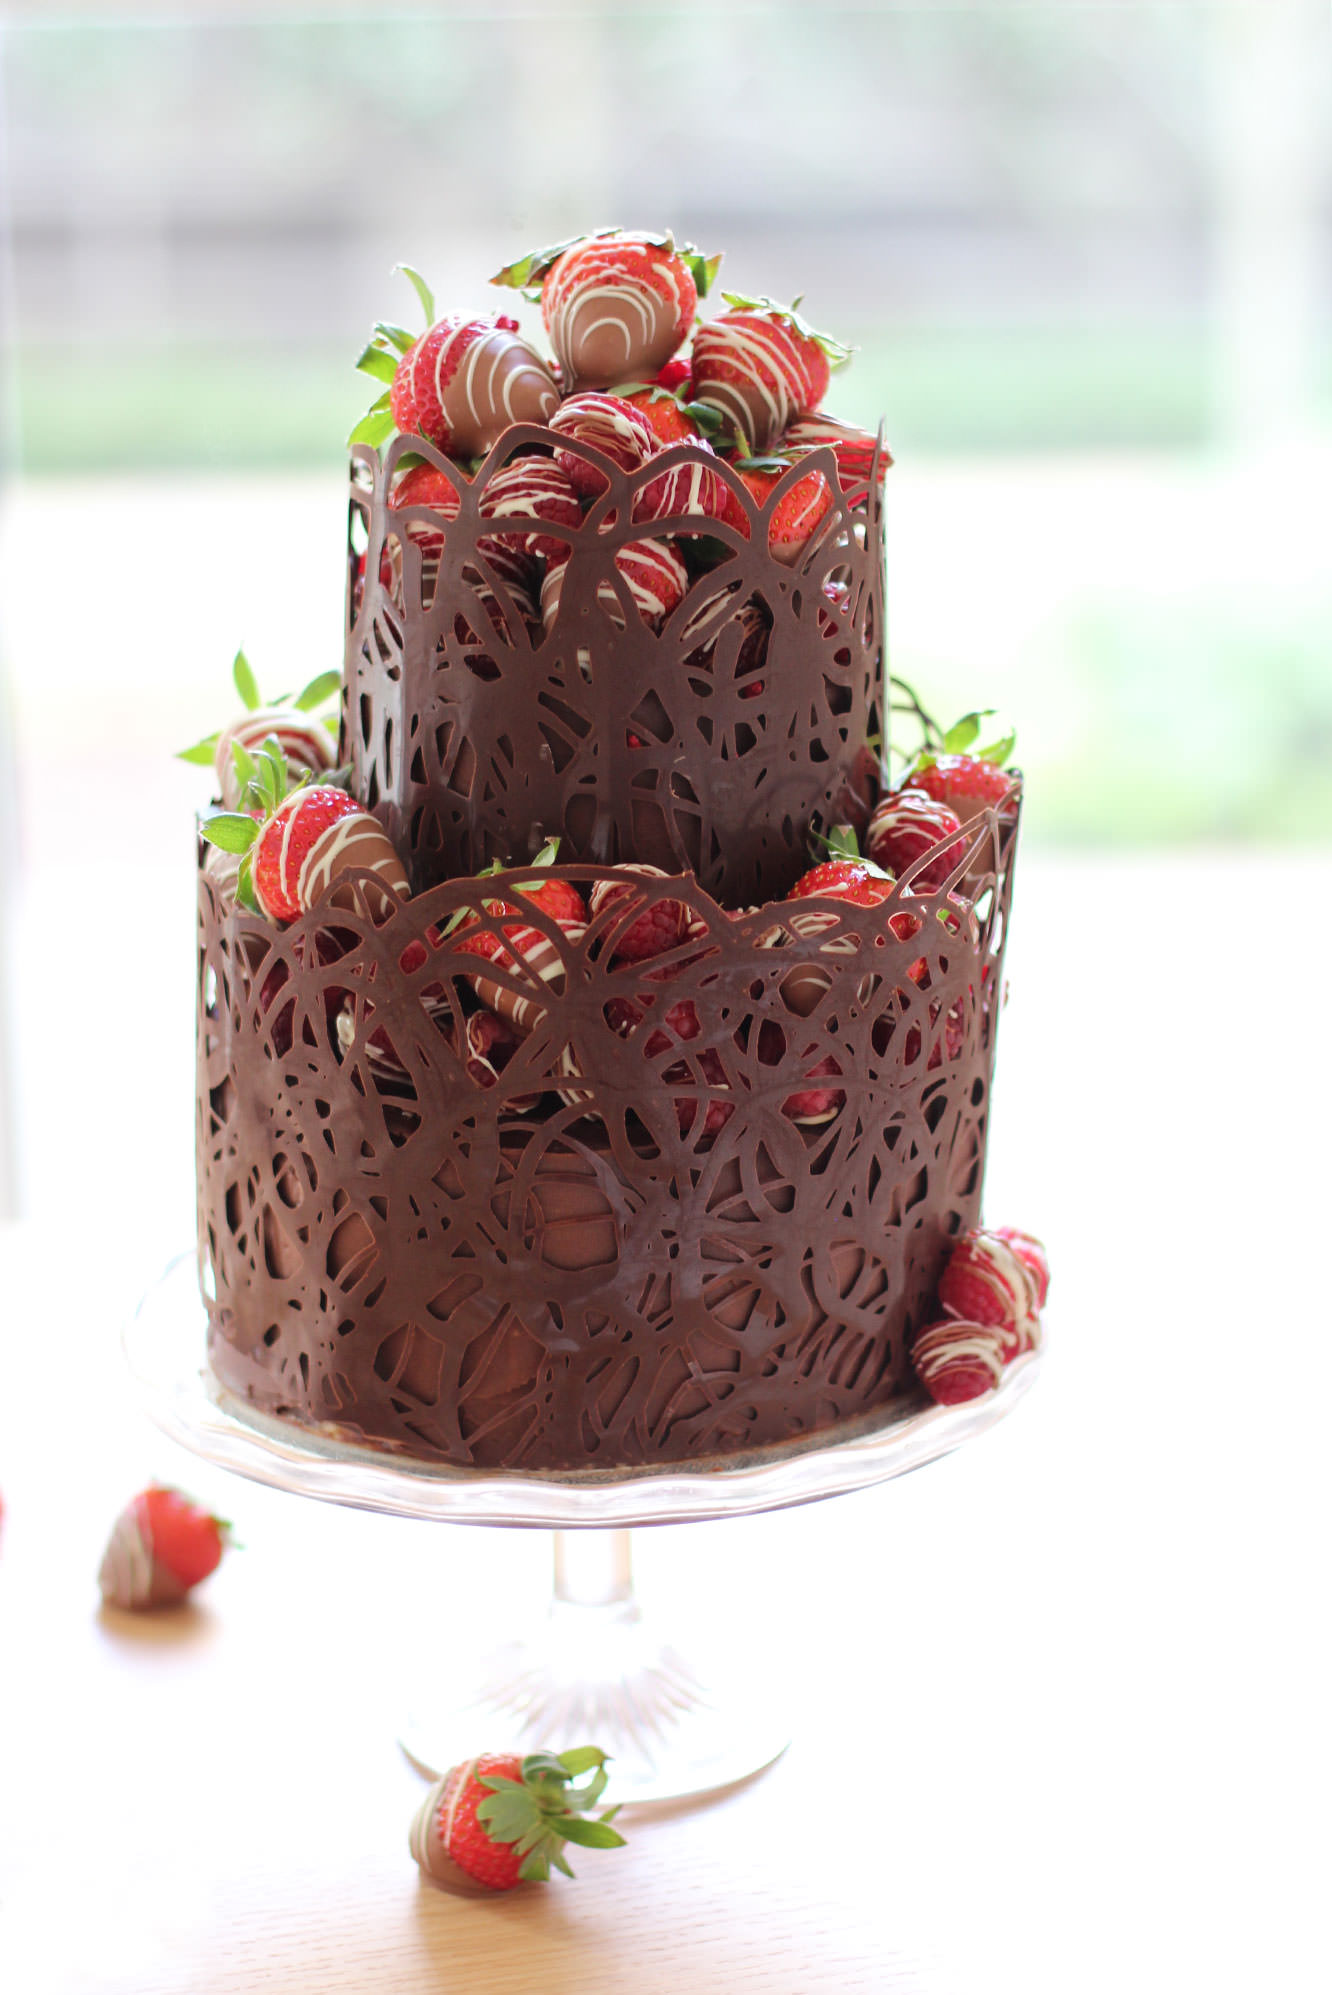
I present to you a full step-by-step recipe for a two tiered chocolate fudge cake with salted caramel buttercream, decorated with a dark chocolate collar and chocolate dipped berries. I just wanted to say that out loud. Look away if you don’t like chocolate. This won’t please you.
Happy birthday Jane!
You will need
For the cake:
380g/13.5 oz caster sugar
380g/13.5 oz unsalted butter or margarine (I use stork)
325g/11.5 oz self raising flour
6 eggs
55g/2 oz cocoa powder
1 1/2 tsp bicarbonate of soda
For the salted caramel buttercream:
400g/14 oz icing sugar
250g/9 oz butter
80g/3 oz soft brown sugar
100ml/3.5 fl oz double cream
2 tbsp golden syrup
2 tsp salt
For the chocolate fudge icing:
225g/8 oz unsalted butter
200g/7 oz plain chocolate
100g/3.5 oz milk chocolate
2 tbsp golden syrup
200ml/6.5 fl oz double cream
For the decorations:
1 packet strawberries (sorry I didn’t look at weight)
2 packets of raspberries (about 500g)
200g/7 oz plain chocolate
200g/7 oz milk chocolate
100g/3.5 oz white chocolate
(for the chocolate amounts are the best approximates I can make, I bought a LOT of chocolate. I strongly recommend Sainbury’s Belgian cooking chocolate if you are in the UK, definitely do not buy that scot block stuff)
Other:
Cake tin bottom tier – 1 x 7 inch (3.5 inches deep)
Cake tin top tier – 2 x 5 inch (1.5 inches deep)
Cake boards – 1 x 8 inch, 1 x 5 inch
Sticks/straws for support. I used cake pop sticks, but wooden dowling or special cake making supports would be fine. Make sure they are at least 4 inches so you can cut them to size.
Palette knife
Sugar thermometer (not 100% essential but I recommend tempering the chocolate)
Cellophane
Piping bags
Step one
Grease and line the tins.
Note how I created a bit of a collar on the larger tin from greaseproof. This is to help stop the sides of the cake catching while the inside bakes as it’s essentially double the thickness.
Step two
Whisk together the butter and sugar with an electric whisk, or a wooden spoon and some elbow grease, until smooth.
I used a block of stork for this, but I prefer the softer version you can get in a tub, you don’t have to wait for it to come to room temperature first that way. Margarine works just fine for cakes, I think it makes them fluffier.
You might want to use a tea towel over the bowl to avoid everything getting covered in sugar and butter.
Step three
Add all the eggs and whisk until combined.
Step four
In go the flour, bicarbonate of soda and cocoa powder.
Stir gently to start mixing the dry ingredients in first before turning the whisk on, you don’t want to choke on flour, that’s not a good way to go. It also means you will never get to eat this cake.
Step five
Divide into the tins.
Bake in the oven on 180C/350F/gas mark 4. This is where it’s a little tricky as the little cakes need a lot less time but you don’t want to open the oven much or your big cake will sink.
I say give the big cake about 30 minutes on its own, and then opening the door as little as possible add the smaller ones for the next 20 minutes. You will then need to test the cakes by sticking a sharp knife, or a cake tester if you have one. If this comes out clean (or with the odd crumb) you’re all good. If not give them another 5-10 minutes.
Step six
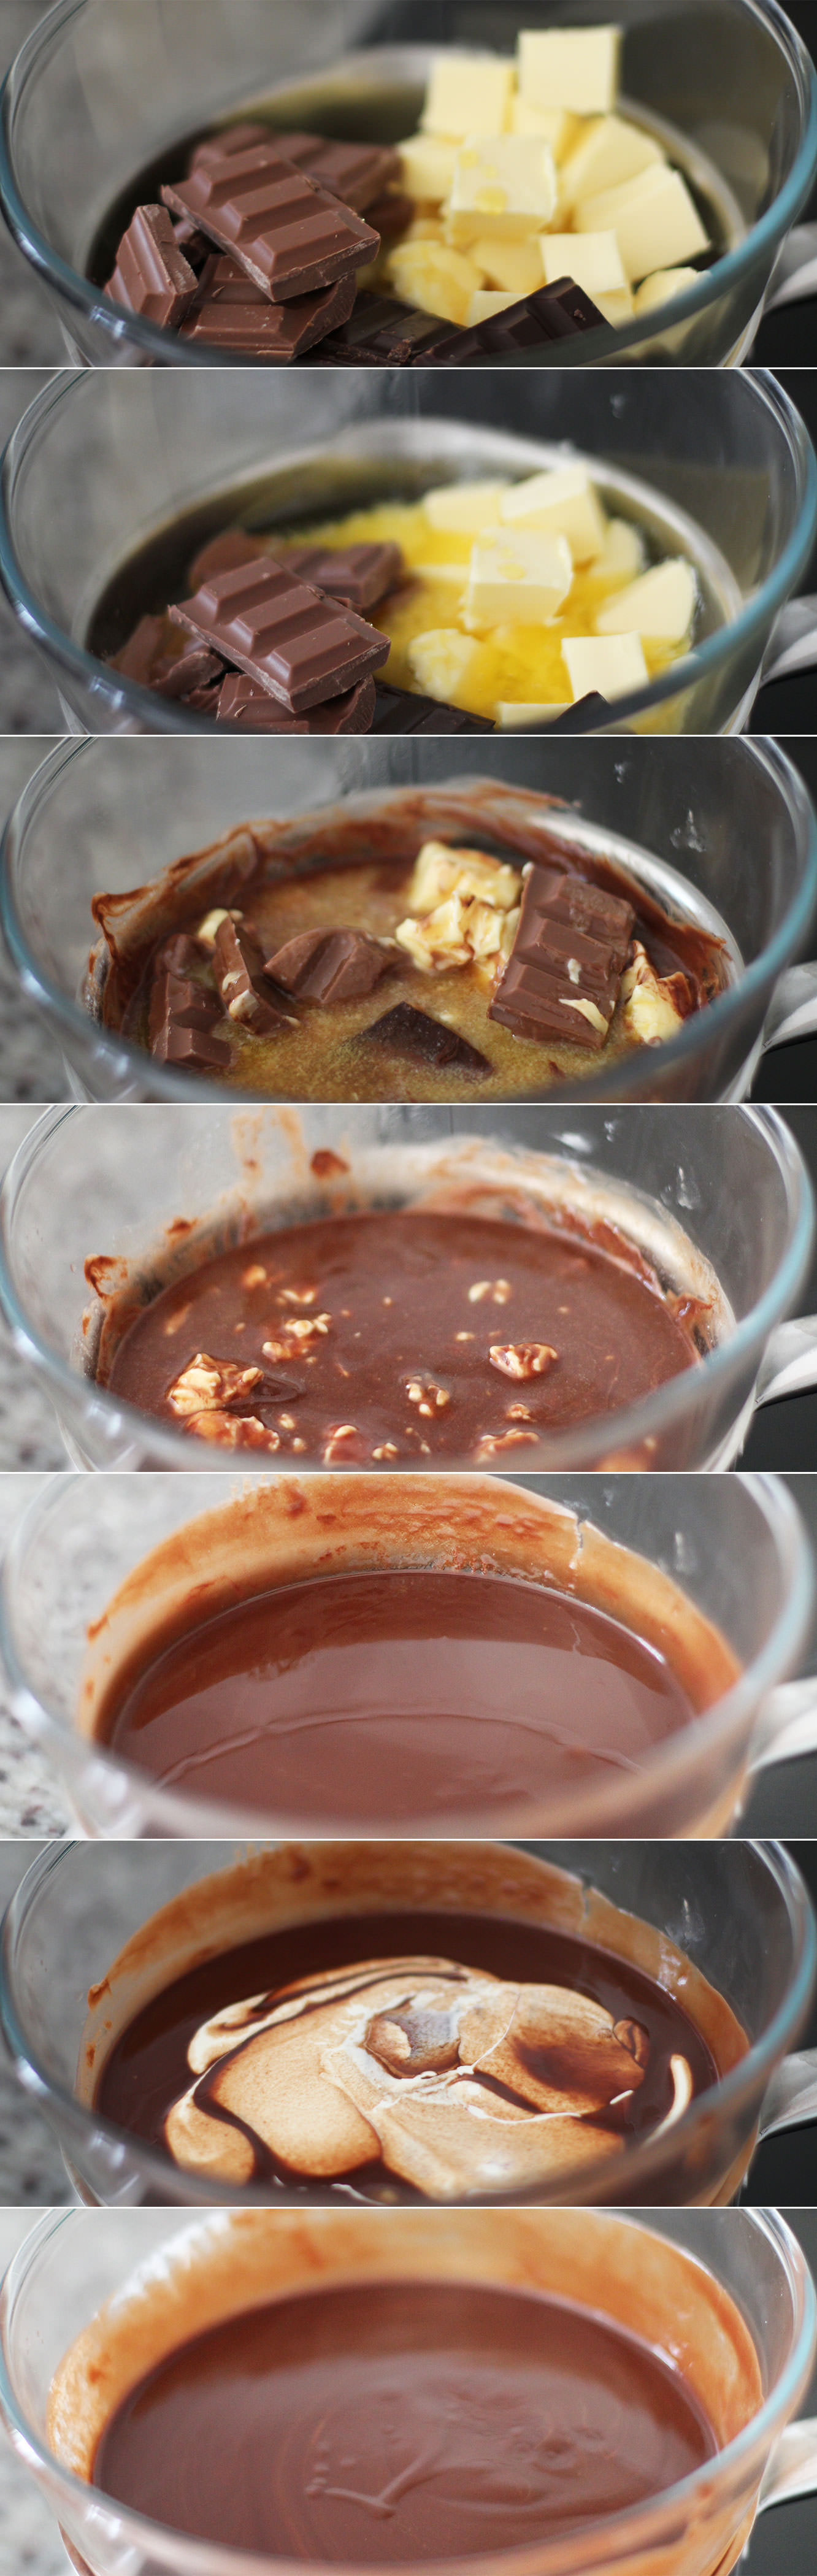
While the cakes are in the oven make the icing as both, but particularly the chocolate, need time to cool.
Place a heatproof bowl over a pan of barely simmering water. Add the butter (real butter this time), chocolate and golden syrup. Melt until smooth.
Remove from heat and stir in the cream quickly. Take the bowl off the pan and place somewhere cool and dry.
I don’t really suggest the fridge because you might forget it (like I did) and then you have to wait for it to warm up enough to spread. But that being said, the fridge is a viable option, just keep an eye on it.
Step seven
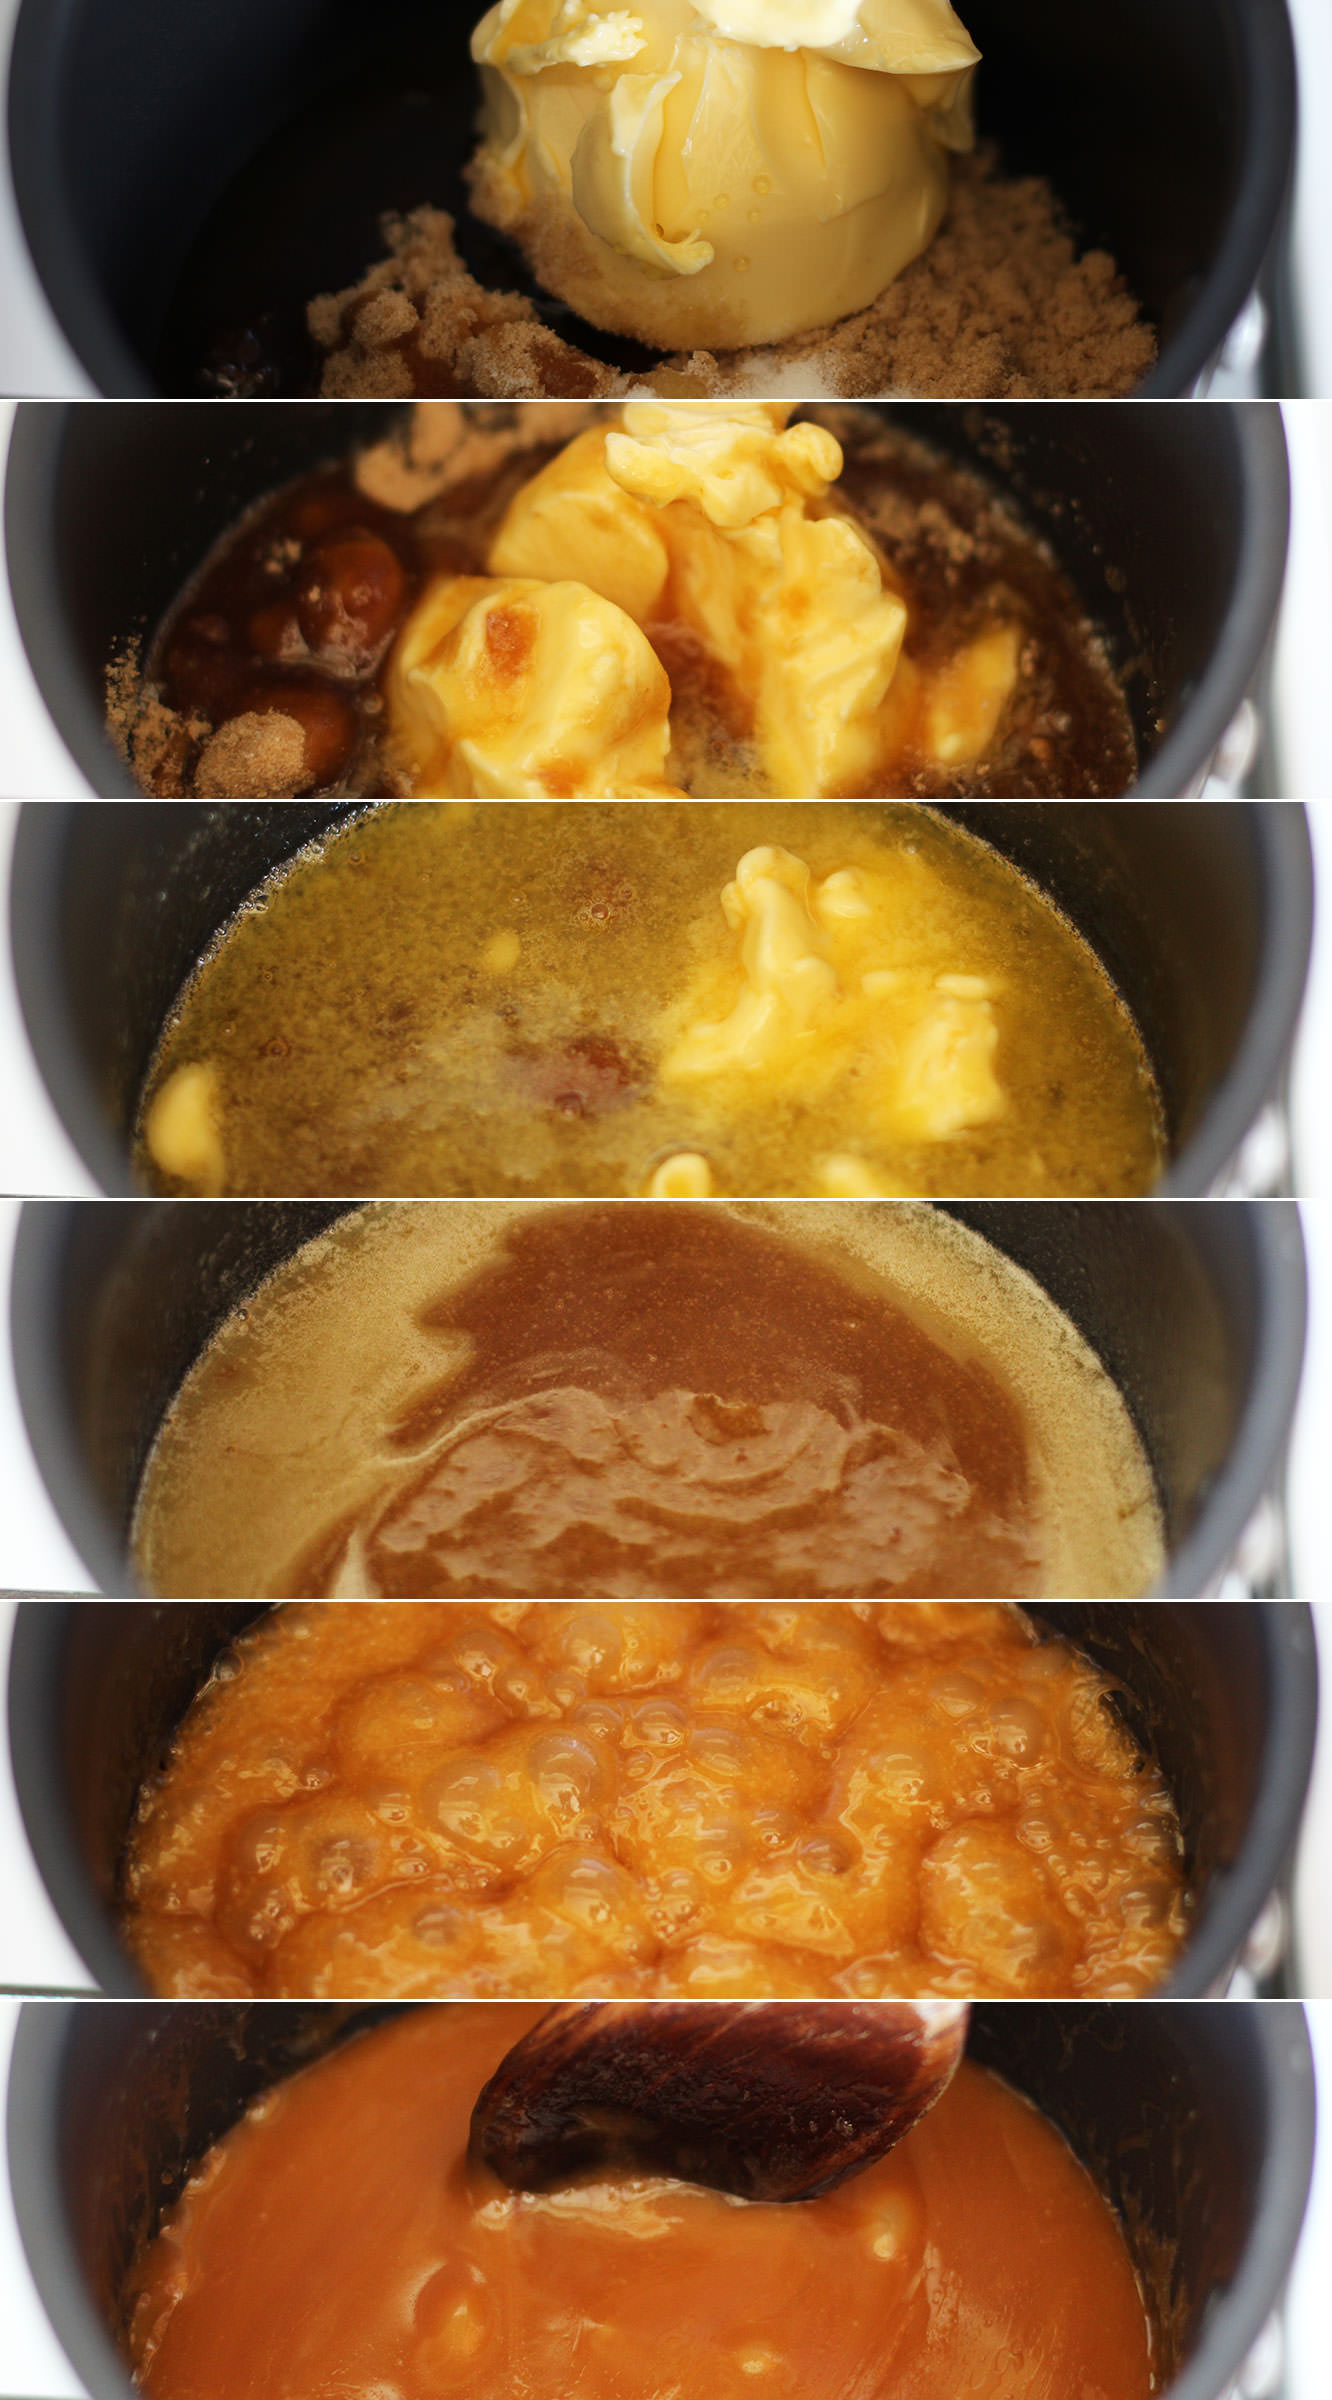
For the salted caramel buttercream melt together 100g of the butter, the brown sugar, golden syrup and salt. Do this slowly and then bring the heat up to a simmer.
Simmer for 10 minutes. Stir regularly so that it doesn’t catch and burn. Leave to cool down for about half an hour or so.
Step eight
Stir in the 100ml cream and leave to cool further.
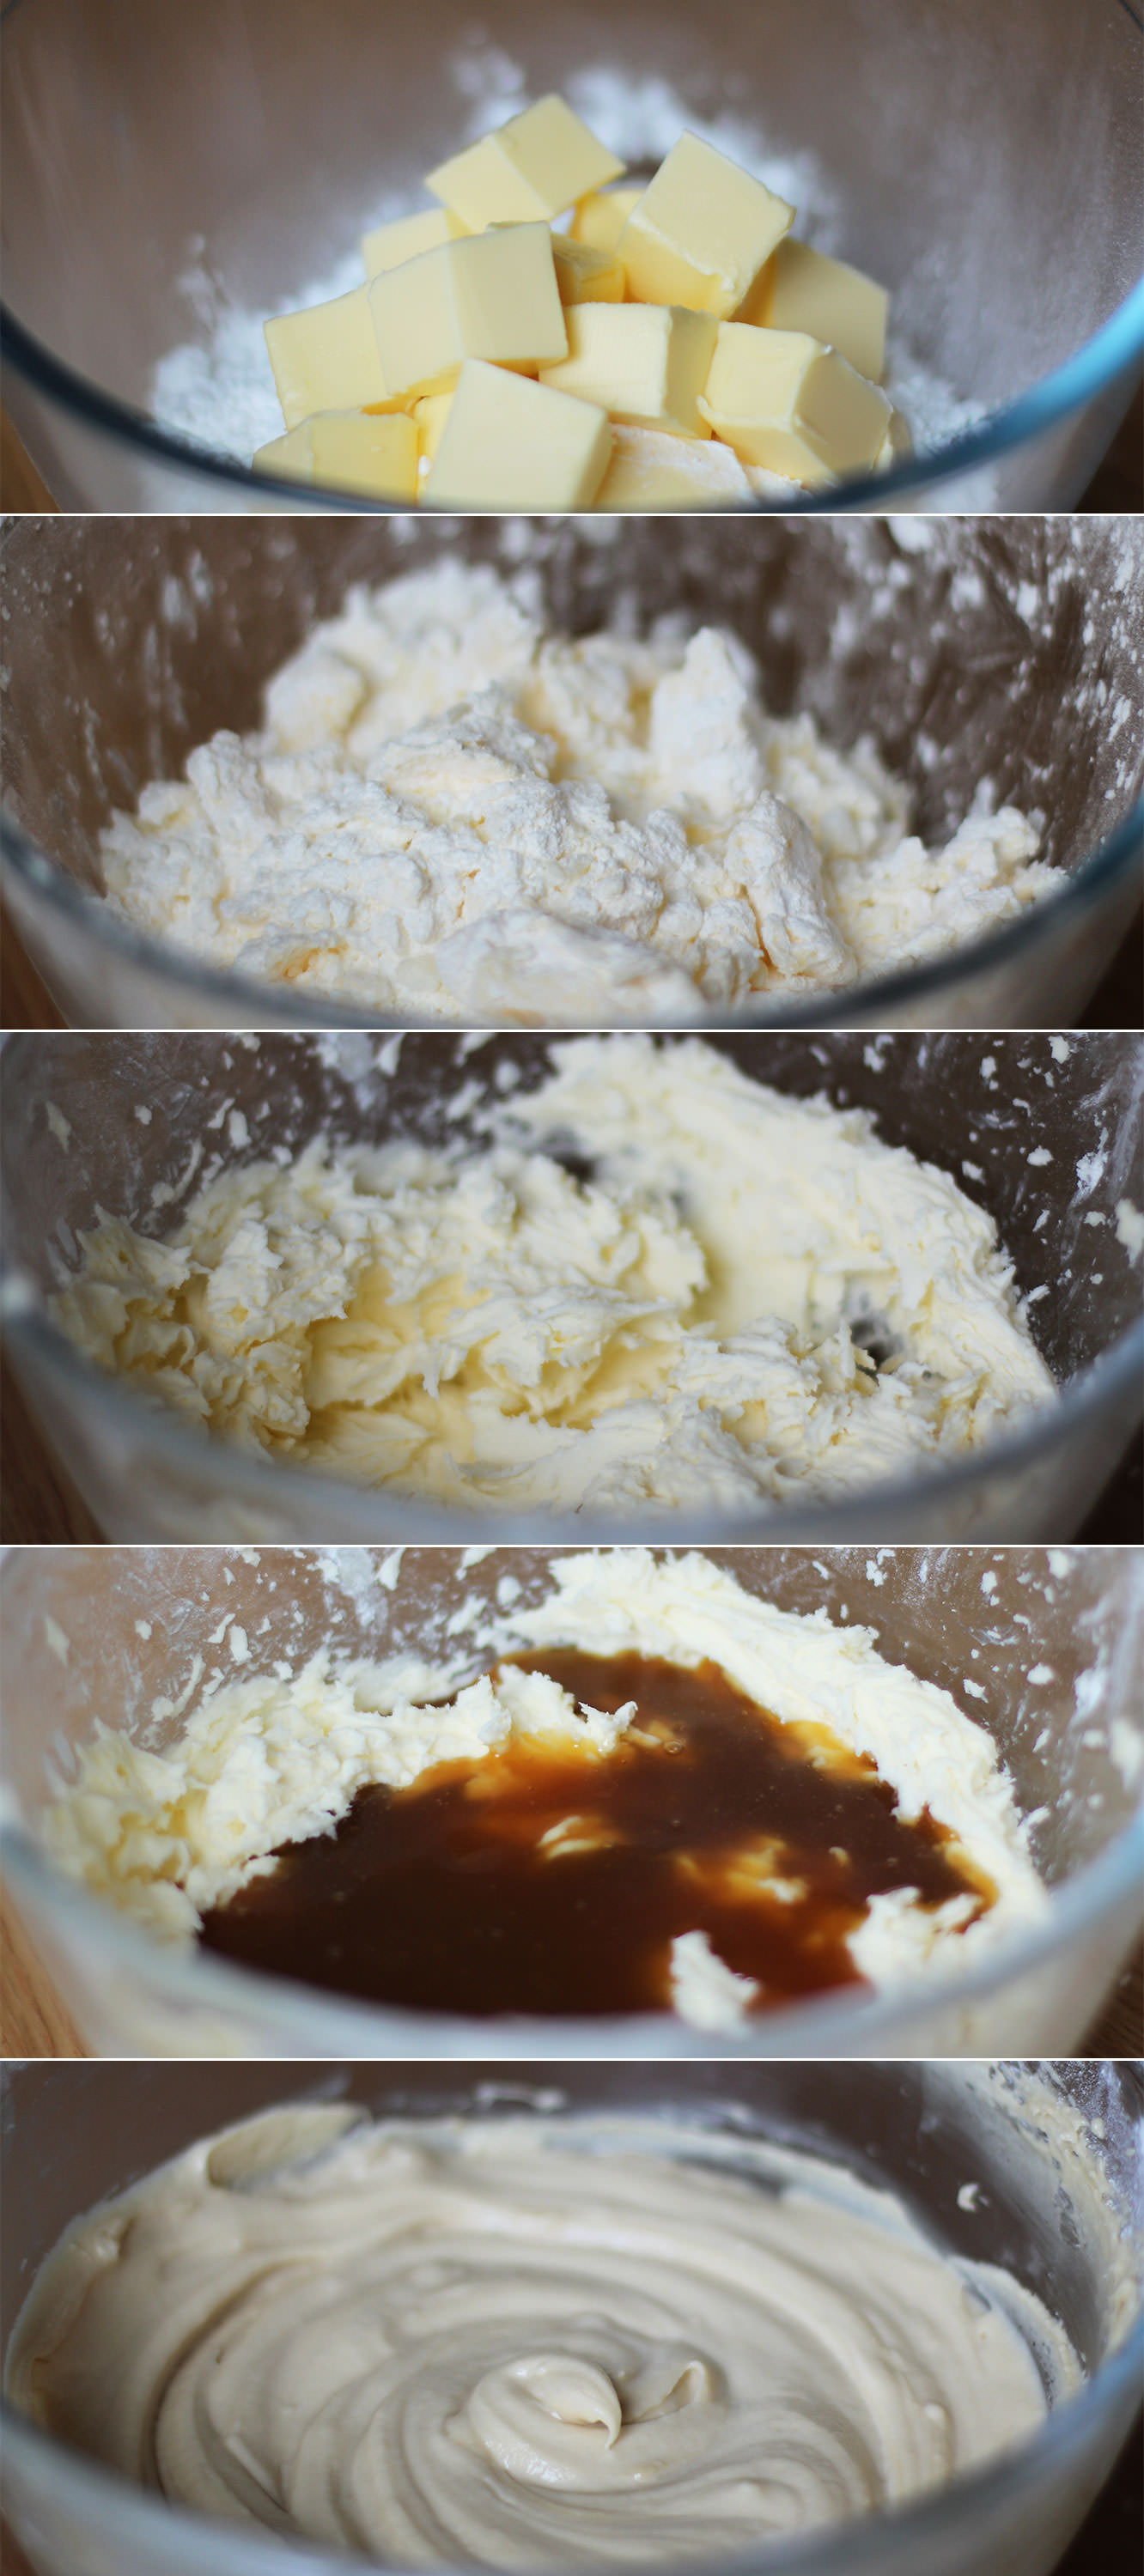
Step nine
Whisk the icing sugar and 150g of butter together with the salt. Definitely cover the bowl with the tea towel this time. I find if my butter is not quite soft enough it helps to rub it in a bit with clean hands first. There is NOwhere icing sugar won’t go when you use an electric whisk.
Step ten
Add the caramel and whisk again until smooth. Don’t worry if the caramel is still a little warm, just leave your buttercream to cool in the fridge for a bit. But again, don’t forget about it or it won’t be spreadable.
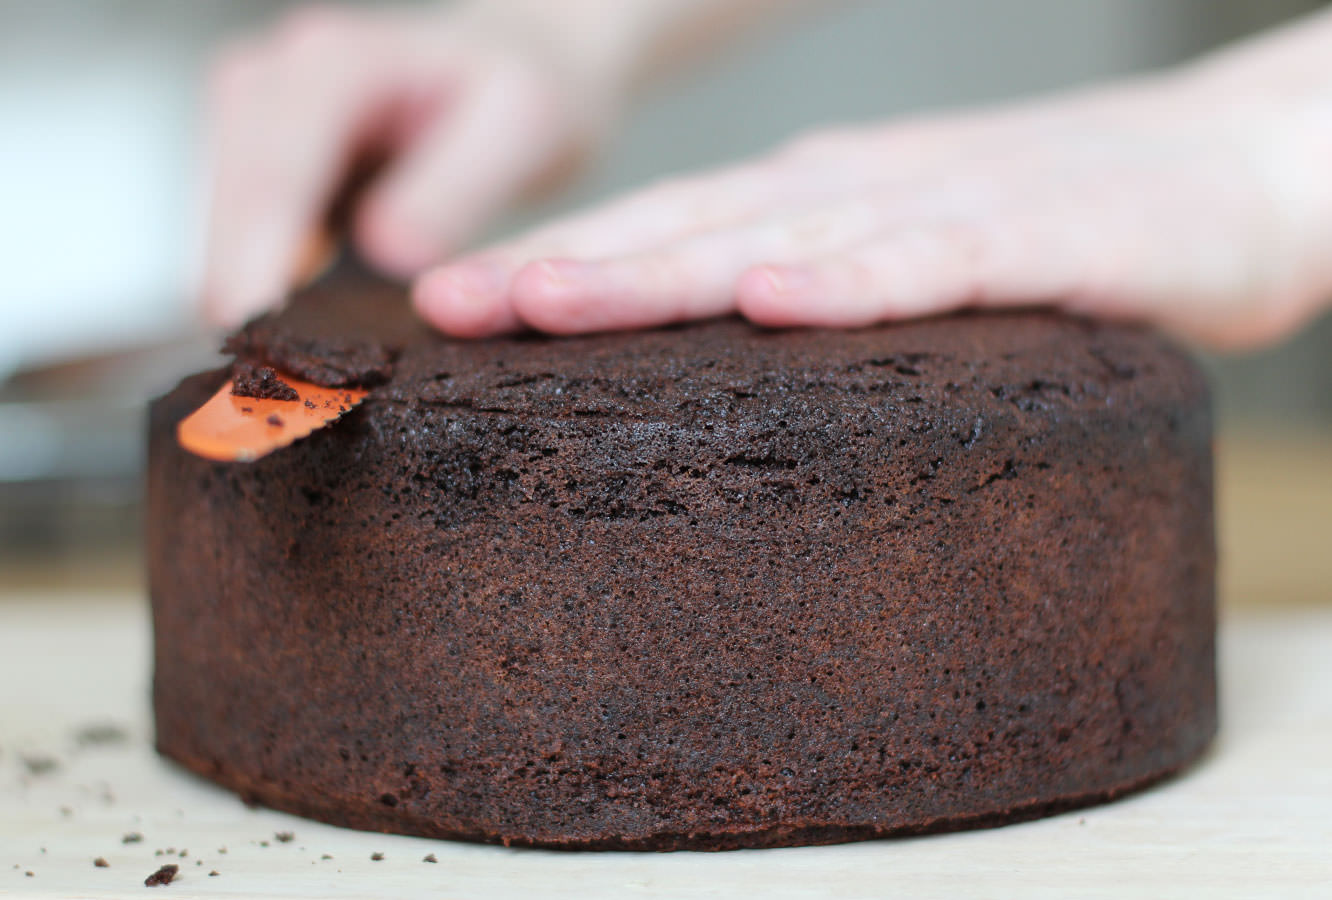
Step eleven
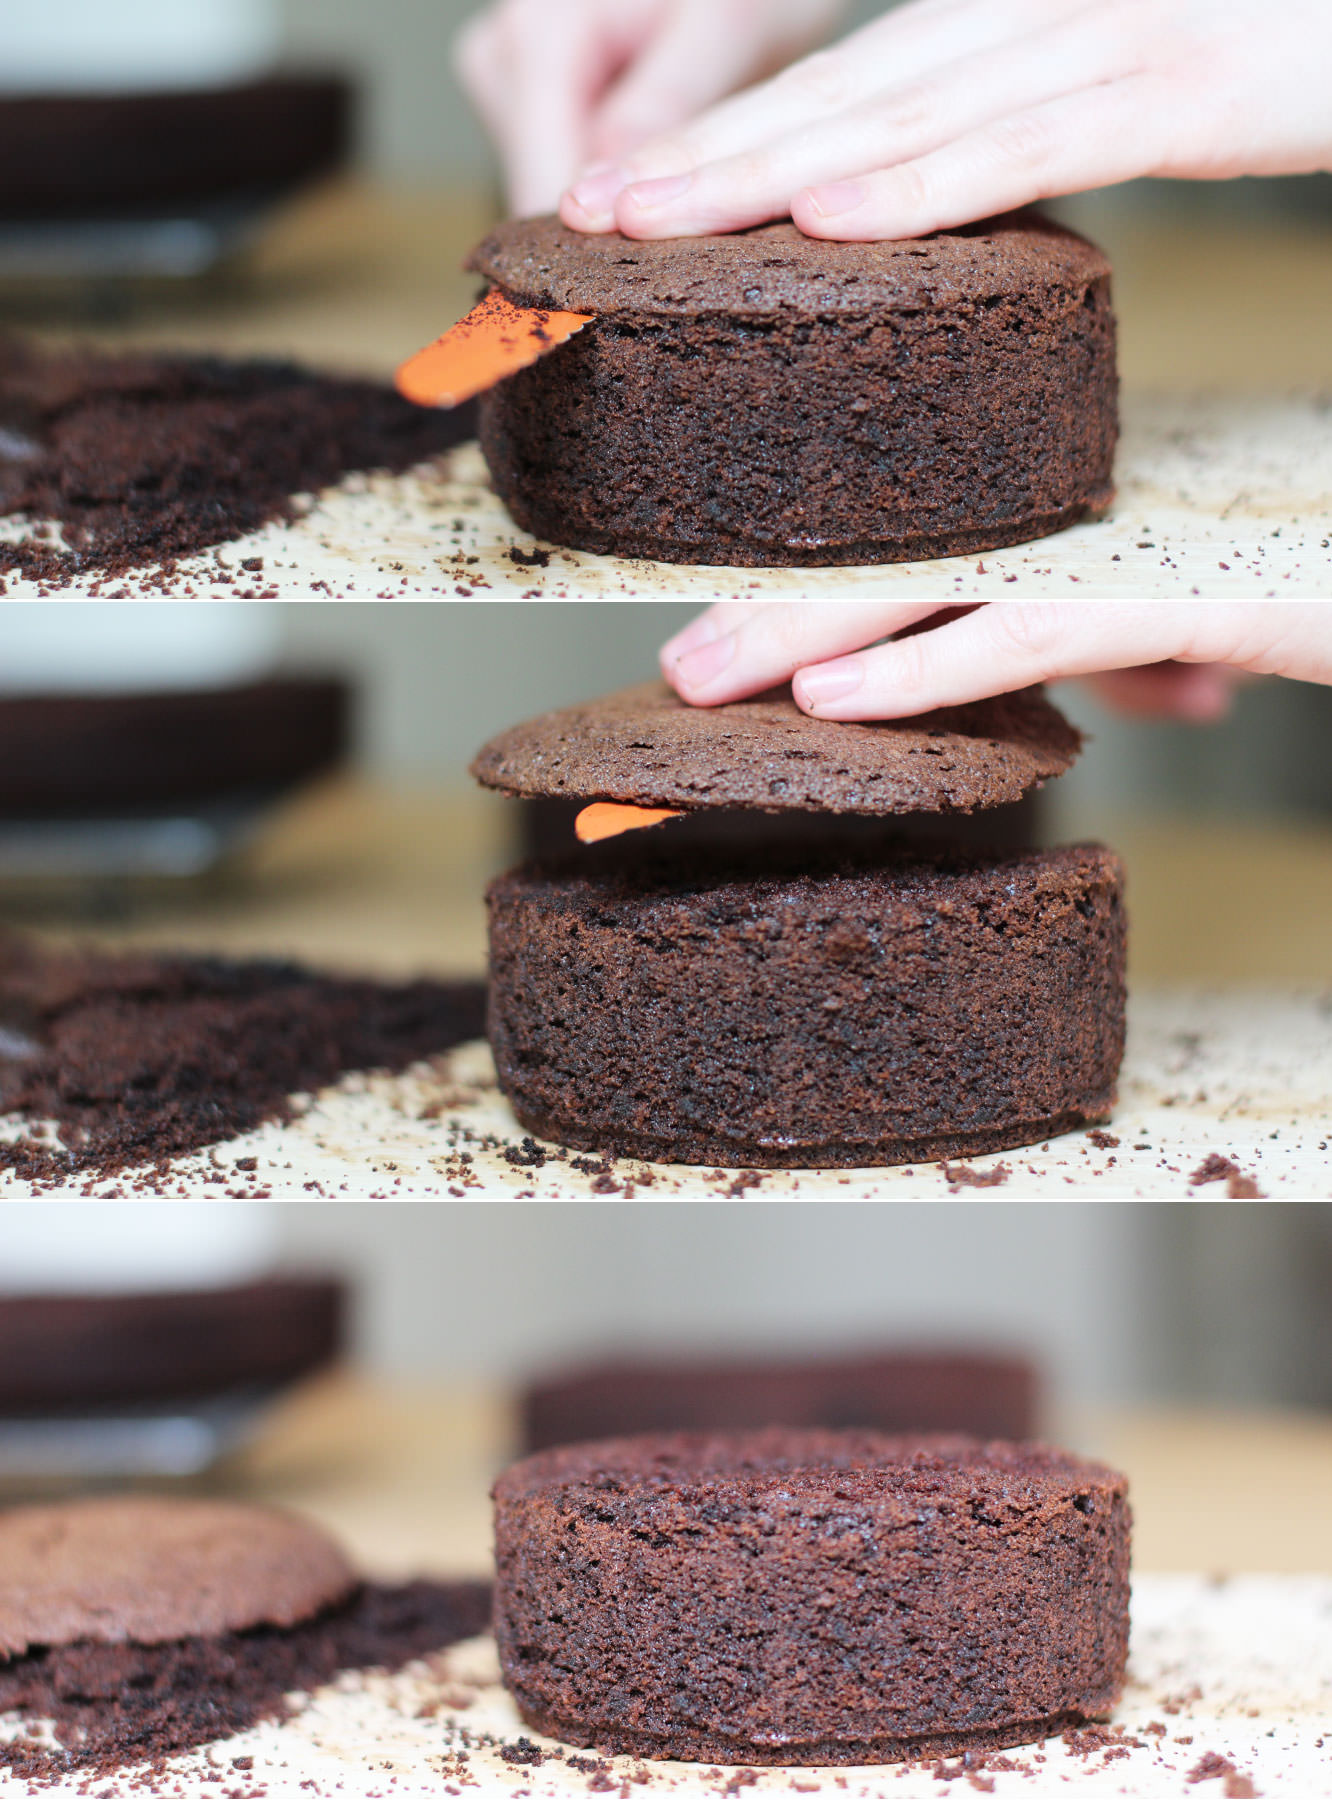
When your cakes have completely cooled prepare them for icing. You need to lop the top off the large one until it’s as flat as possible on top. So much of this cake is covered in decoration that you can get away with a little bit of wonky though so don’t panic if it’s not prefect. Having said that the flatter the better so the top tier sits straight. NO PRESSURE.
Step twelve
Cut the cake in the middle. Try to do this evenly by scoring it the whole way round first. Just keep going round in circles, getting further in each time until you’re all the way through.
Step thirteen
Level out the tops of the small cakes. I would be lying if I said I didn’t spread some icing on the offcuts and eat them.
Step fourteen
Using a palette knife ice the cakes.
First place a bit of buttercream on the cake base to stick the cake to it. Start with the caramel buttercream and ice the middle and the top. Don’t worry if bits splurge out the sides.
Smooth these out around the sides with the palette knife, gradually adding buttercream here and there to create the sharpest sides you can. Some parts will have a thicker coating than others, this layer is made to contain all the crumbs (hence the name crumb layer) and to even out the shape a bit. It’s not going to be pretty.
Place in the fridge for about an hour before starting the chocolate.
Ice the chocolate on in the same way, neatening as you go. For the most part it will be covered up, so it really doesn’t need to be too smooth.
Step fifteen
Cover the small cake in the same way.
Place both in the fridge while you prepare the decorations.
Step sixteen
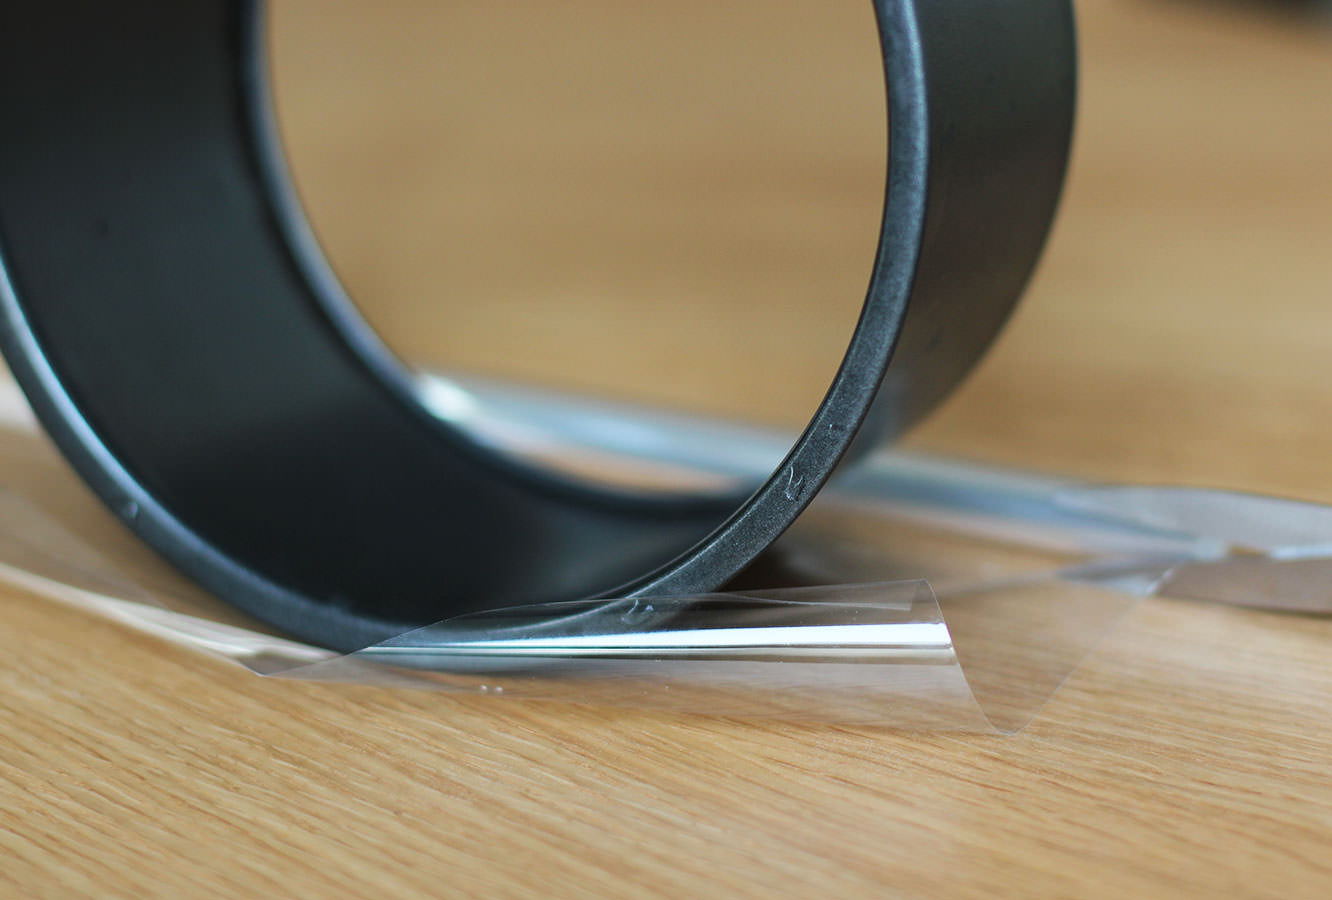
Using the tins as a guide cut a strip of the cellophane for both the top and bottom layer. You want these to be quite close to the size of the chocolate collar, so tall enough that you will have about 5cm/two inches taller than the cake, and wide enough to match the circumference. You can quickly check this against the cake to ensure it will fit.
Don’t forget to cut one for the top tier and one for the bottom, bearing in mind your top tier cake is twice as tall as the tin.
Step seventeen
Temper 200g dark chocolate. Don’t look at me like that…you are really going to want to do this so you have shiny chocolate on the collar.
First melt 125g of the chocolate in a heatproof bowl over a pan of simmering water. Let it get to 55C/131F before removing from the heat.
Chop the remaining chocolate and stir into the melted mix to aid the cool down process. Stir continually until it cools to 28C/82F. I found a good way to speed this up a bit. Put cold water in a large saucepan and the bowl on top. You’re welcome.
Place the bowl back on the heat and bring it to 31C/88F. Your chocolate is tempered.
Be warned – if you’re doing a different type of chocolate the temperatures are different:
Milk – 45C/113F original melt, 27C/81F cool down, 29C/84F
White – 45C/113F original melt, 26C/79F cool down, 28C/82F
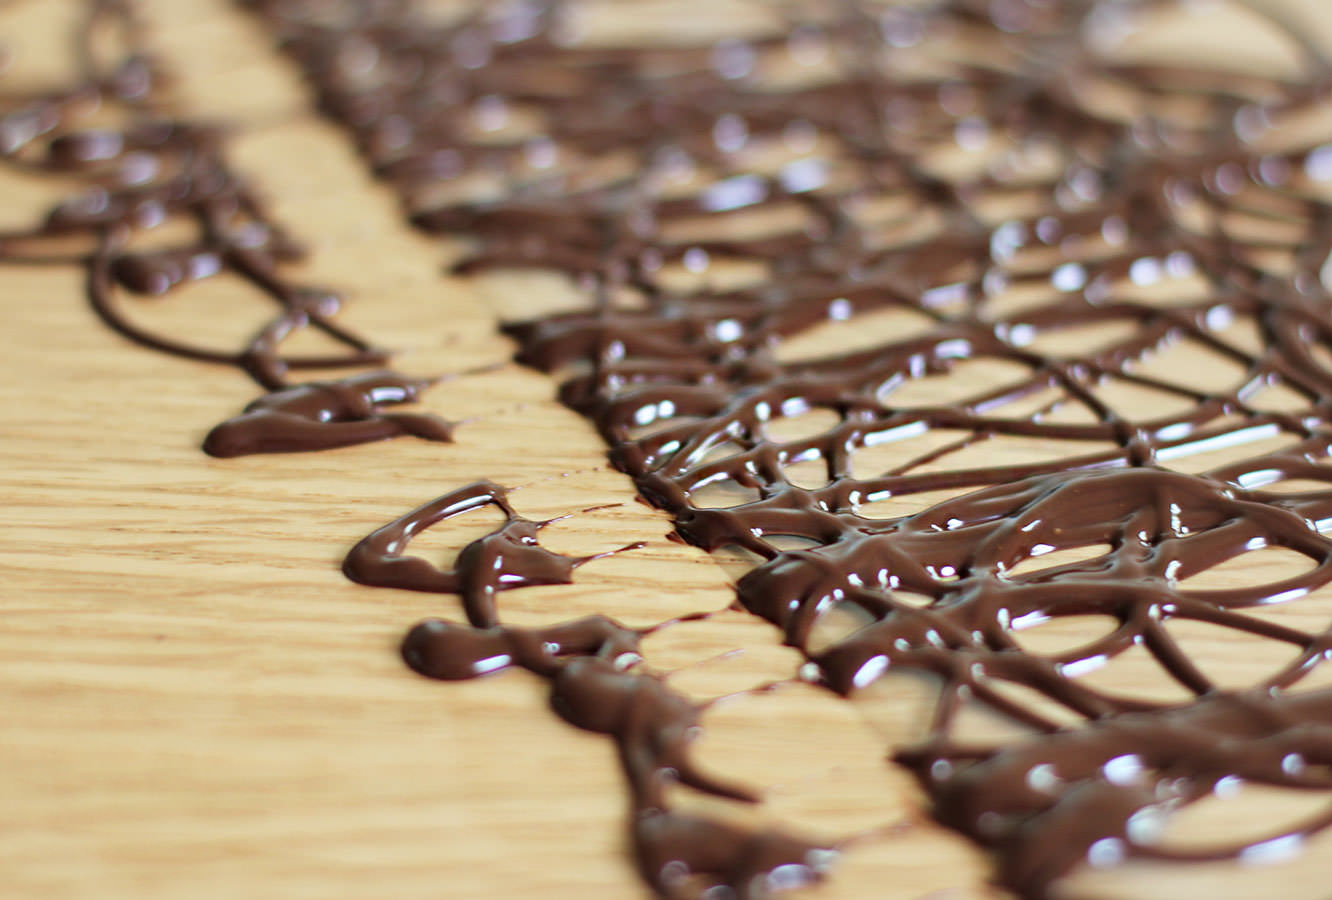
Step eighteen
Place chocolate in a piping bag and using circular motions cover the cellophane with swirls. Go over the bottom edge onto the work surface but ensure the top stays on the cellophane so it’s ‘whirly’.
Step nineteen
When it has started to dry pull the cellophane away so the bottom is clear of the extra overlap bits.
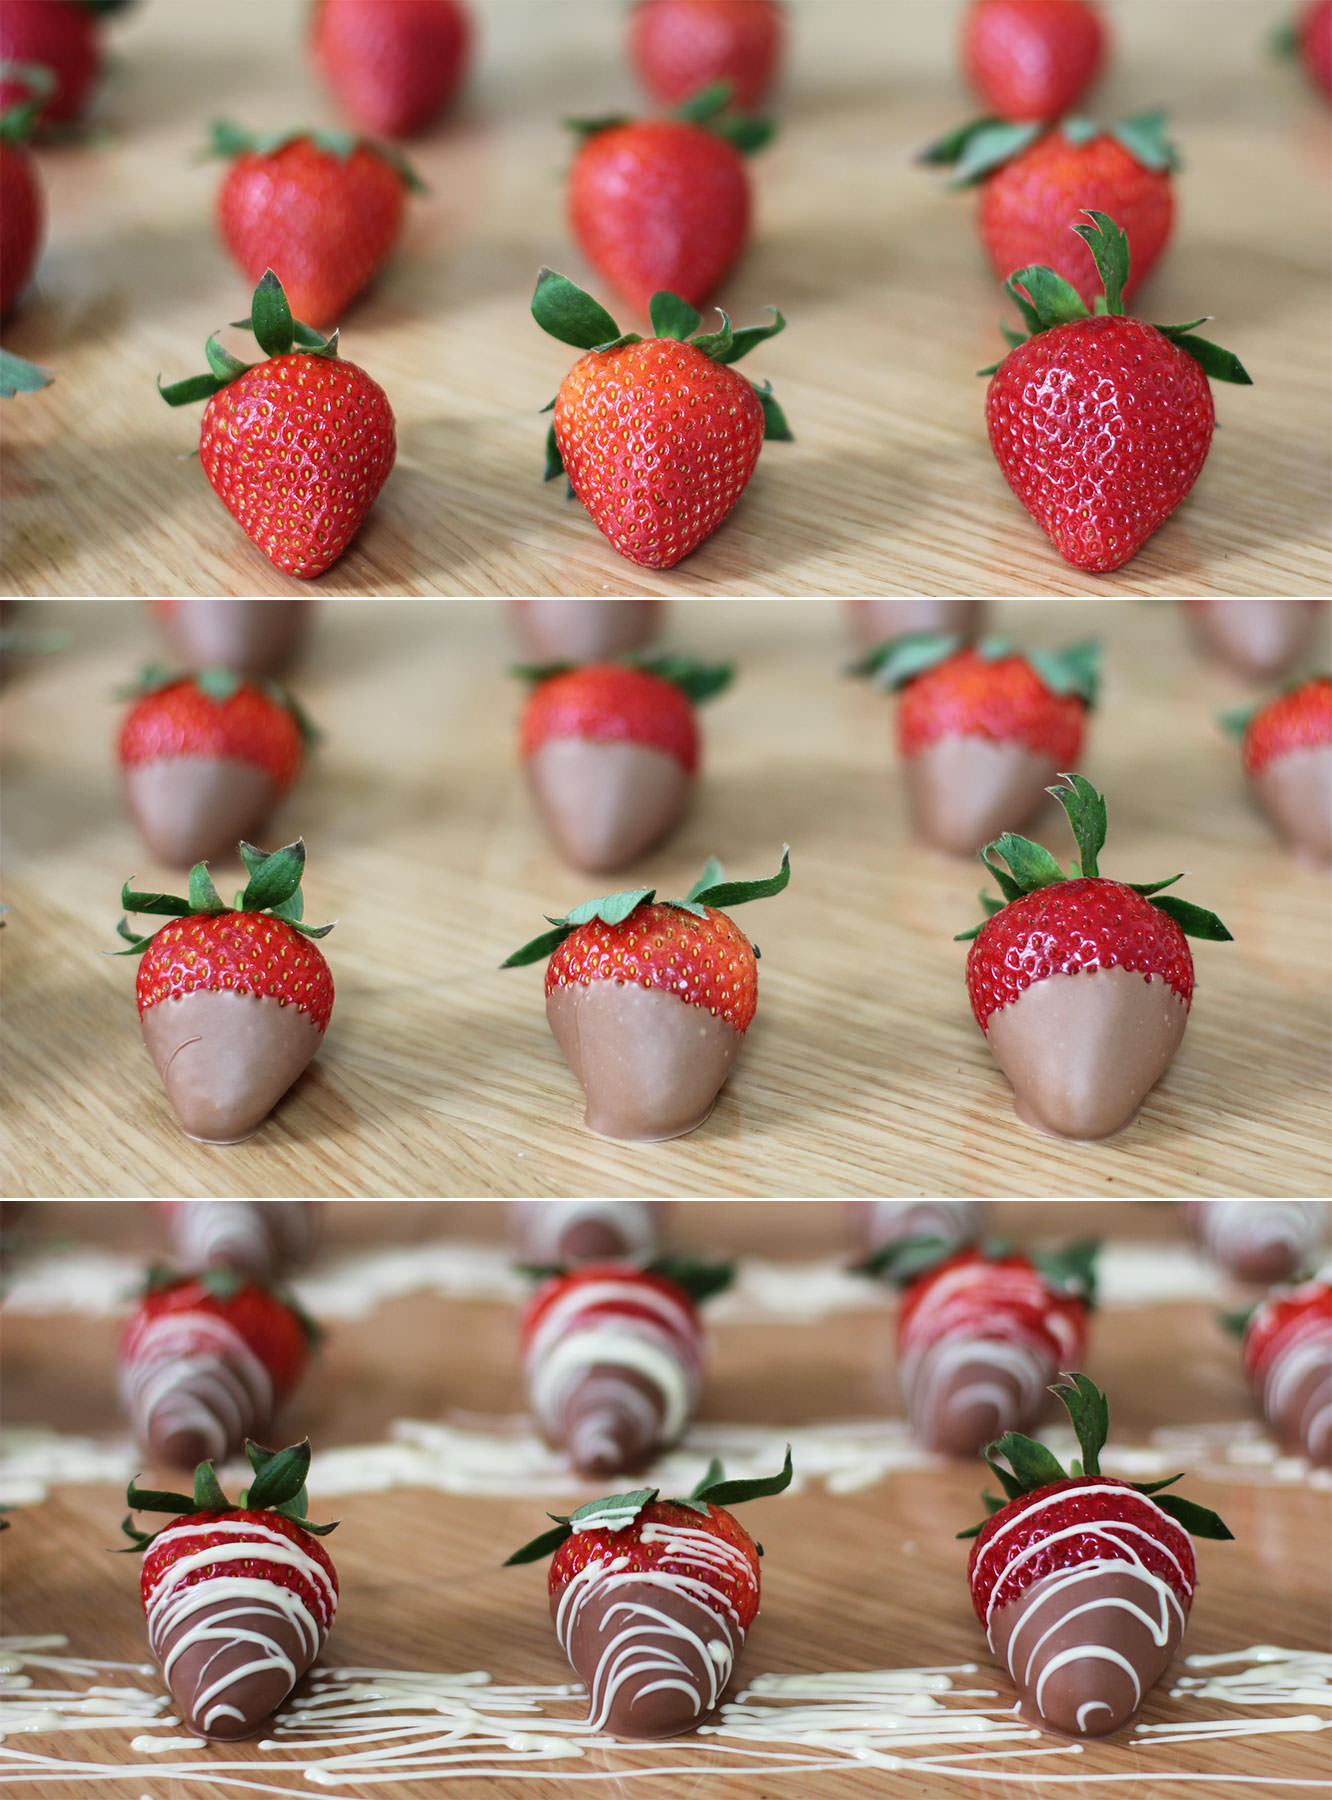
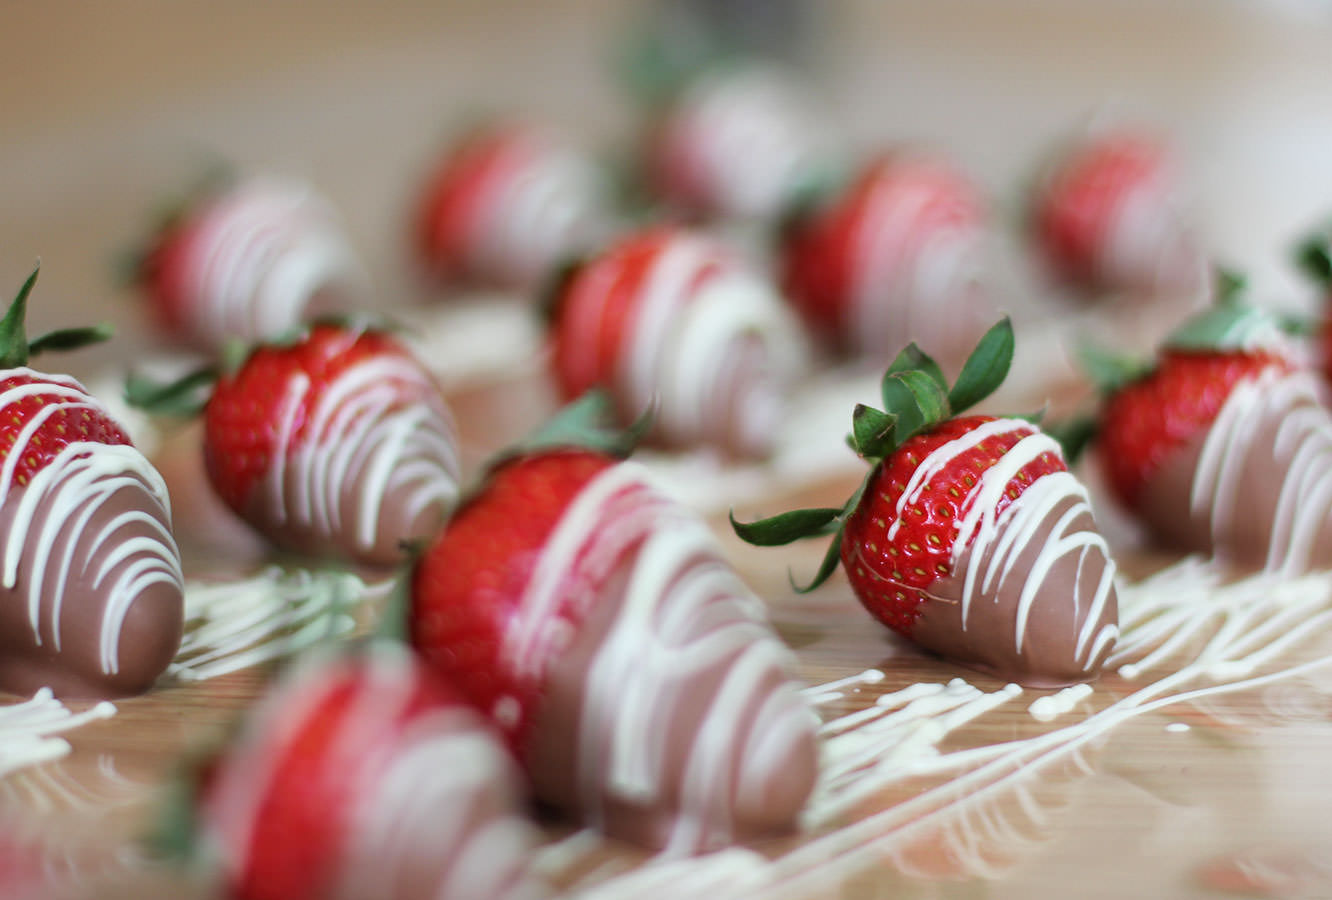
Step twenty
Melt (preferably temper) the milk chocolate. Dip the strawberries in half way and leave to set on some more cellophane.
Melt the white chocolate (no real need to temper this) and place in a piping bag. swing the bag back and forth to drizzle the white chocolate over the top.
Step twenty one
Drizzle the raspberries with white and milk chocolate. You can dip them if you want to, but, really? I know this is taking a while, but do you have that kind of time??
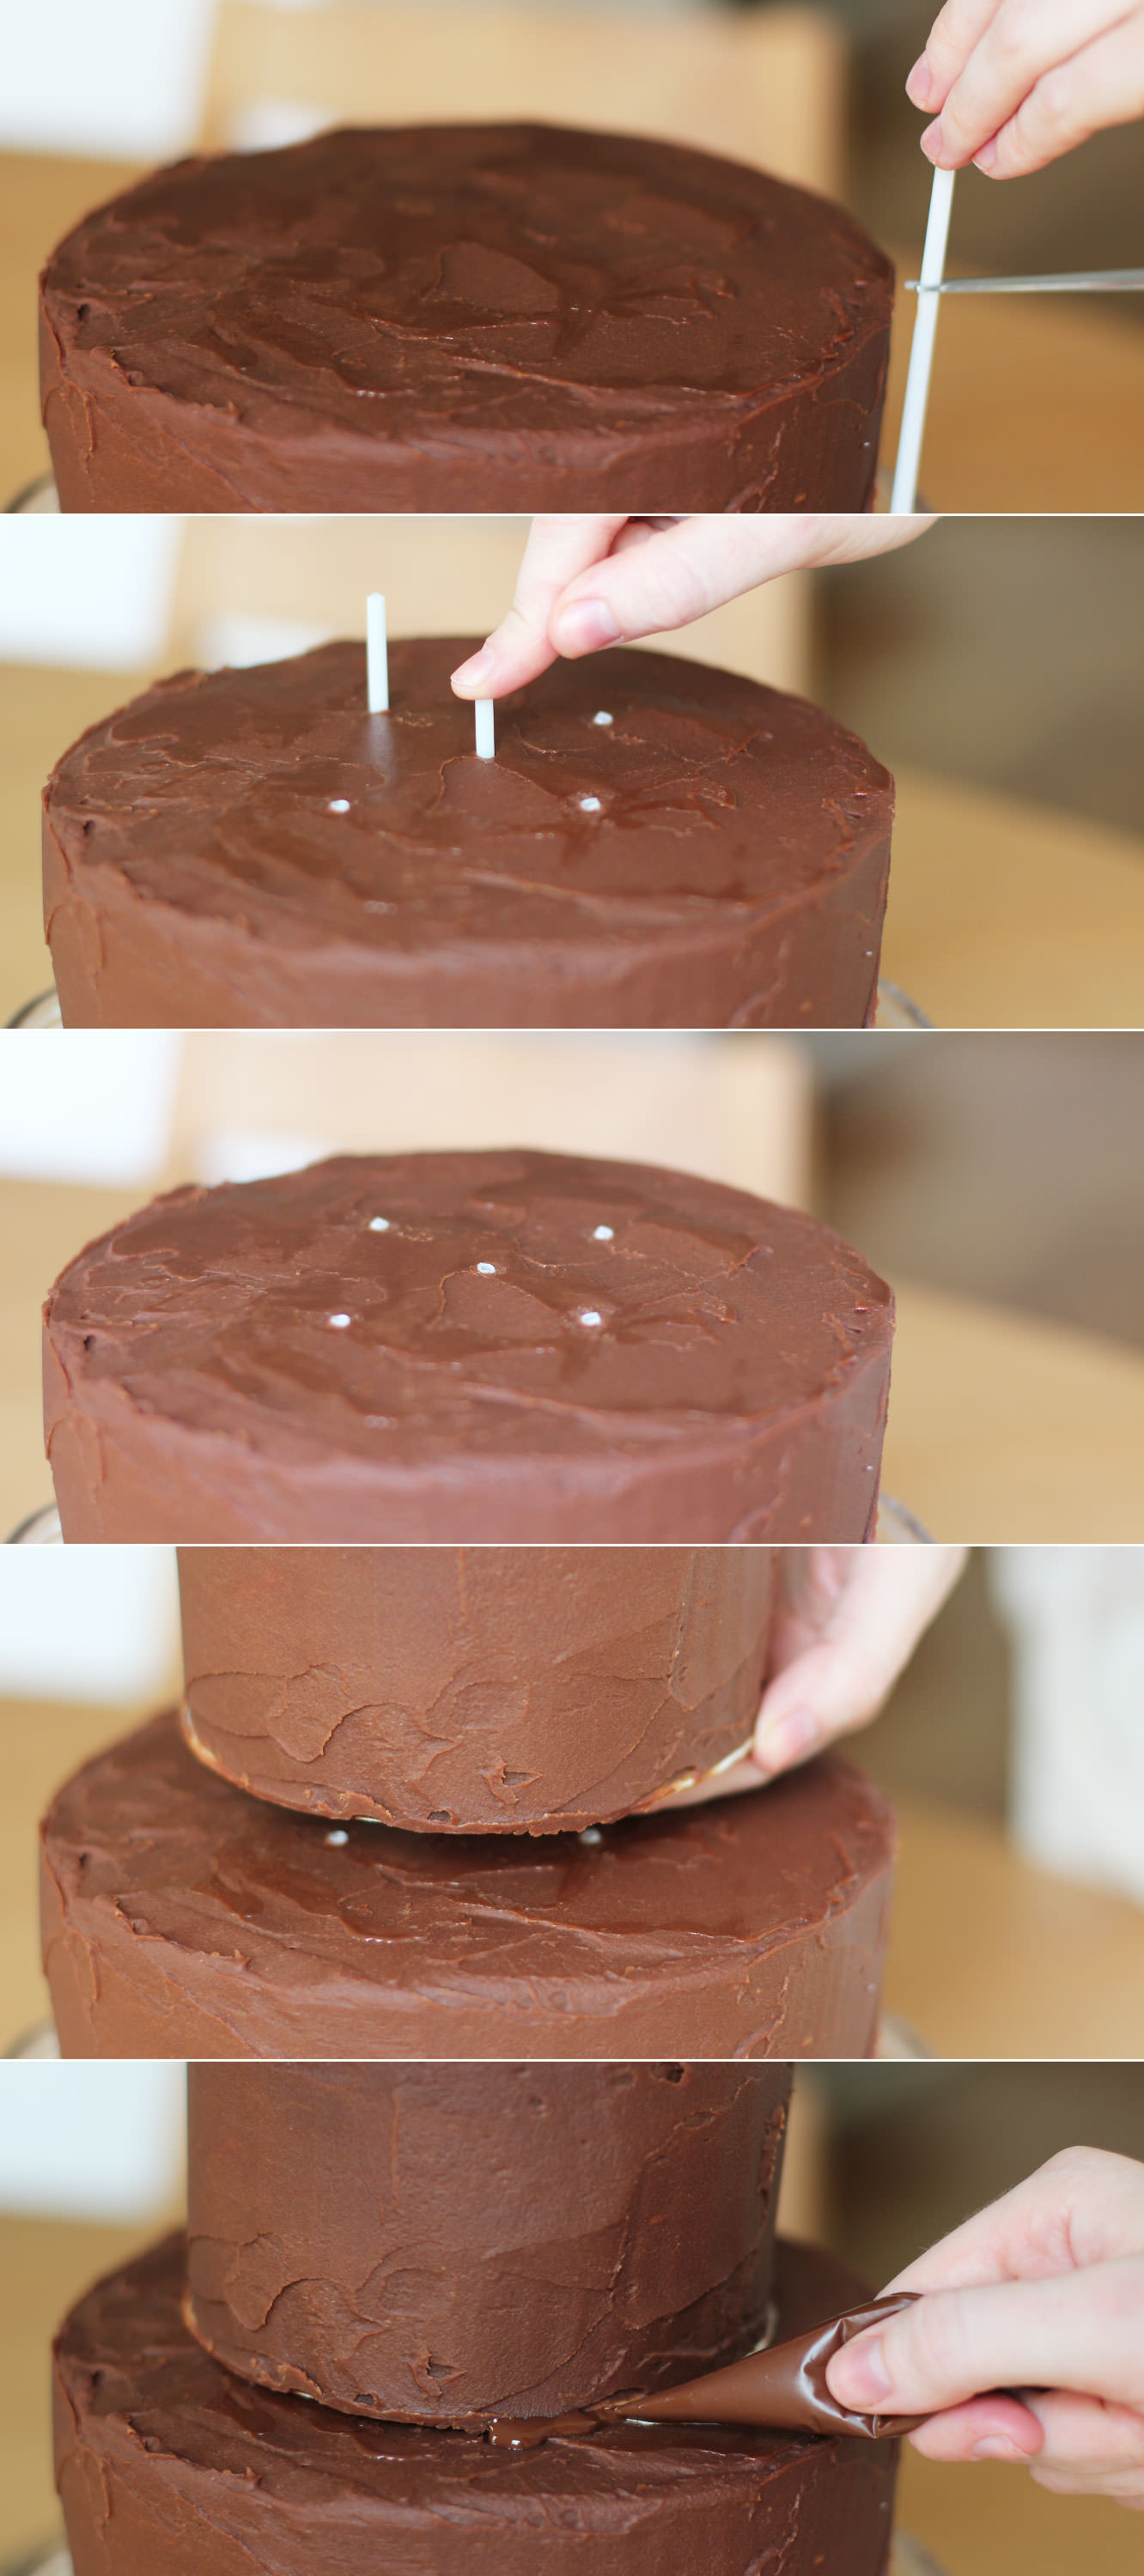
Step twenty two
Get the cakes out of the fridge to assemble.
Cut the sticks to size and push through the bottom layer where the top tier will sit.
Place it on top.
I then secured this a bit further with the remaining dark chocolate I had. It will be covered up so no big deal if it’s messy.
Step twenty three
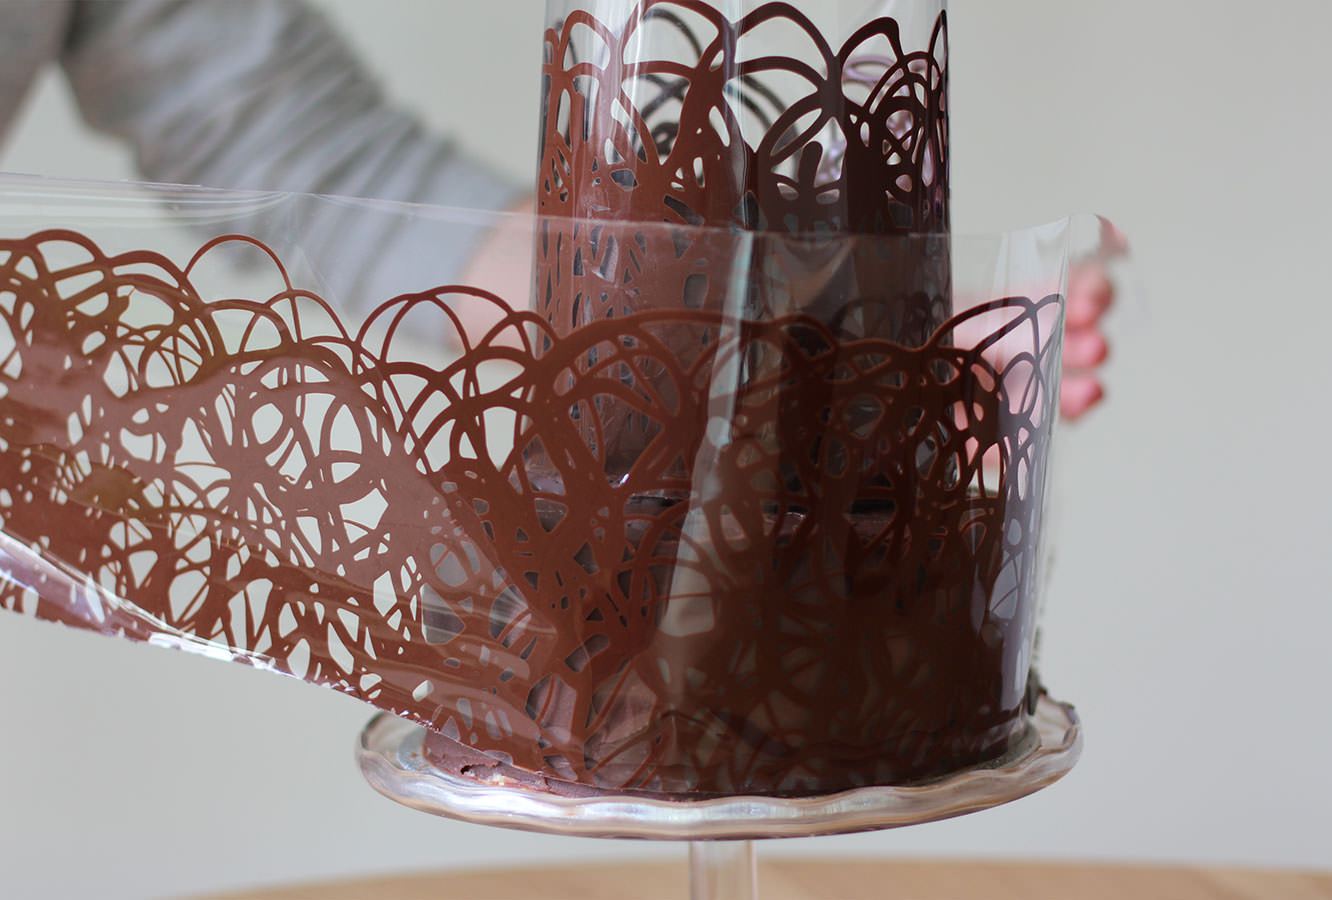
When the collars become touch dry, (meaning if you gently touch the surface you shouldn’t get chocolate on your finger, but what’s underneath is still not set) wrap them around the cake.
LEAVE THE CELLOPHANE ON. Sorry for shouting. But please. Walk away and don’t touch it for a while. Maybe leave a window open if it’s a cool day to help the process along.
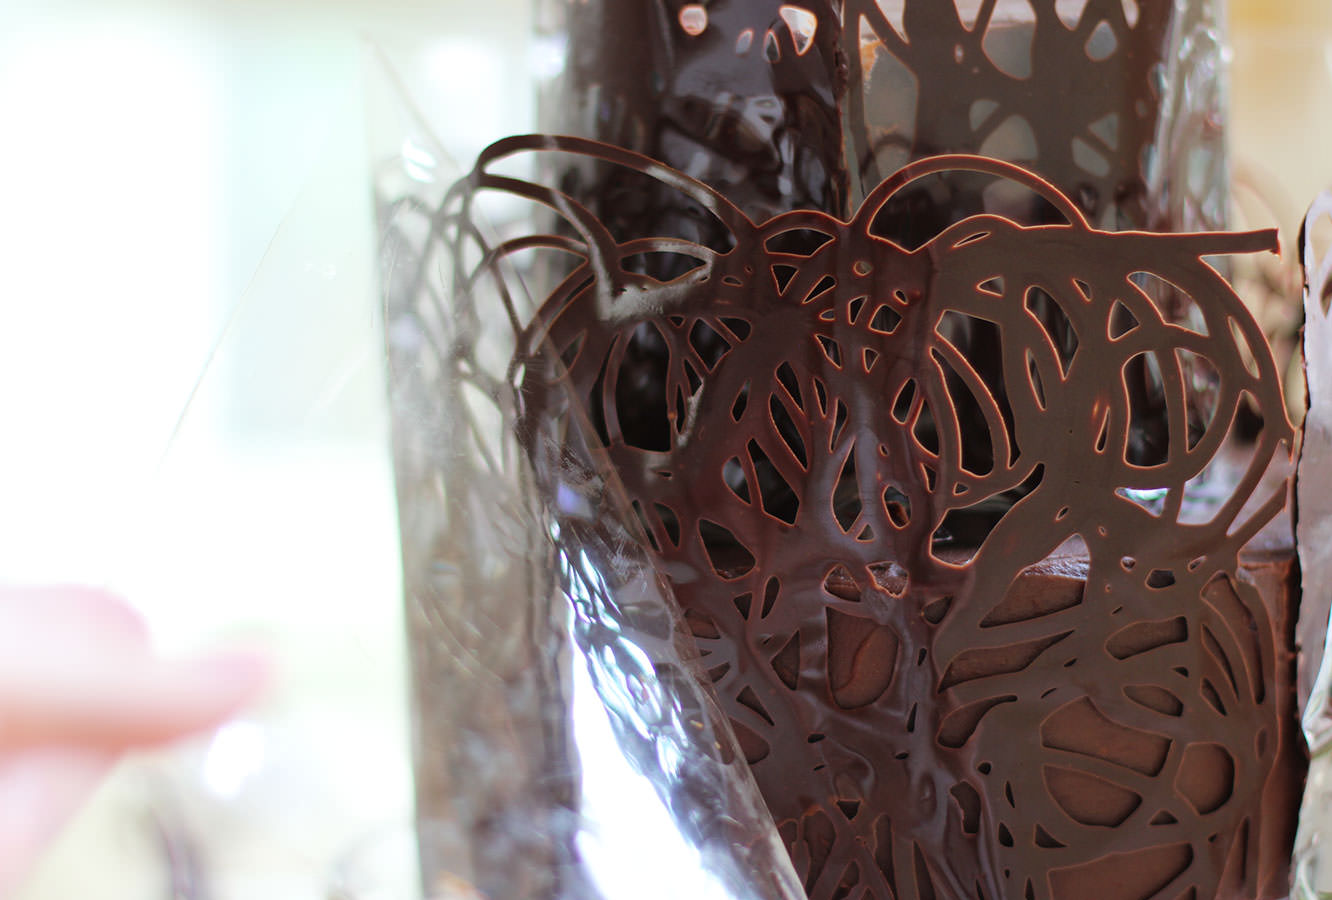
Step twenty four
When you’re feeling brave slowly peel off the cellophane to reveal your beautiful shiny chocolate collar. I was pretty excited at this point I must confess.
Step twenty five
Fill with the fruit and make someone’s occasion that bit happier.
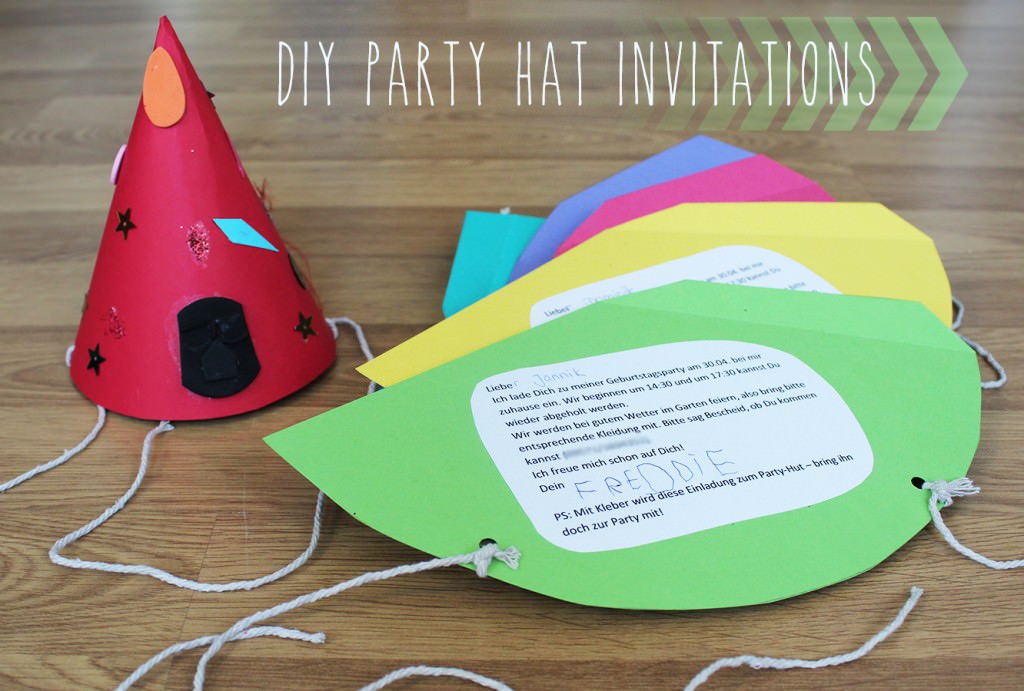
You might remember my mentioning I went on a little trip to Germany recently? I went a-visiting a wonderful little family who I miss very much. Capitalising on their crafty house guest there were some birthday preparations to be done. So aside from baking over 70 cupcakes (very popular little chap) there was the small matter of inviting other little people to come and eat them.
They were throwing a garden party with lots of traditional German party games, I really wish I’d have stuck around a bit longer to join in! So Mr Freddie and I crafted some invites that were fun and festive and will adapt to any theme or themeless party you’ve got going on.
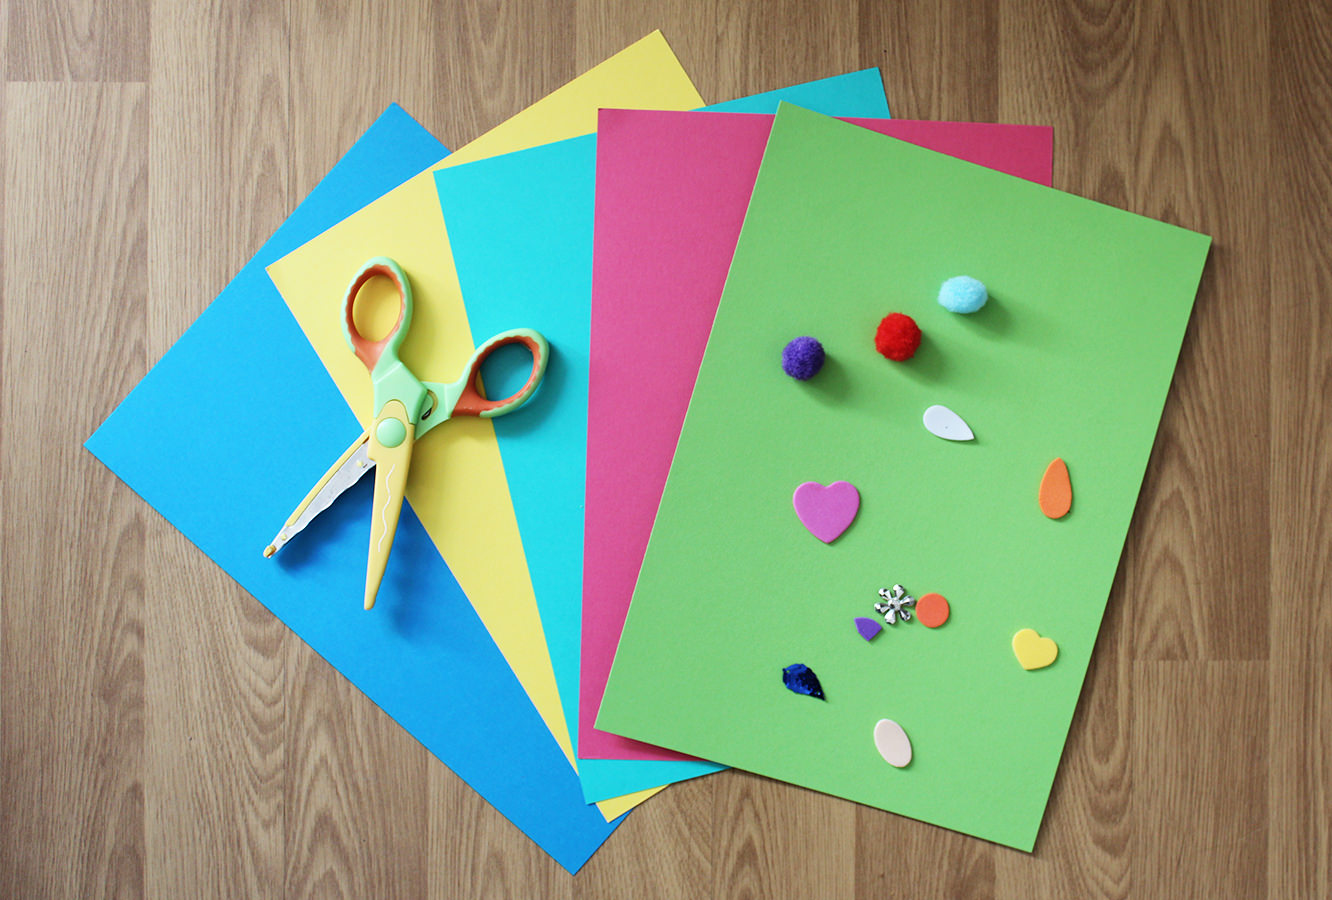
You will need
A4 Card/thick paper (one per guest and an extra for the birthday boy/girl)
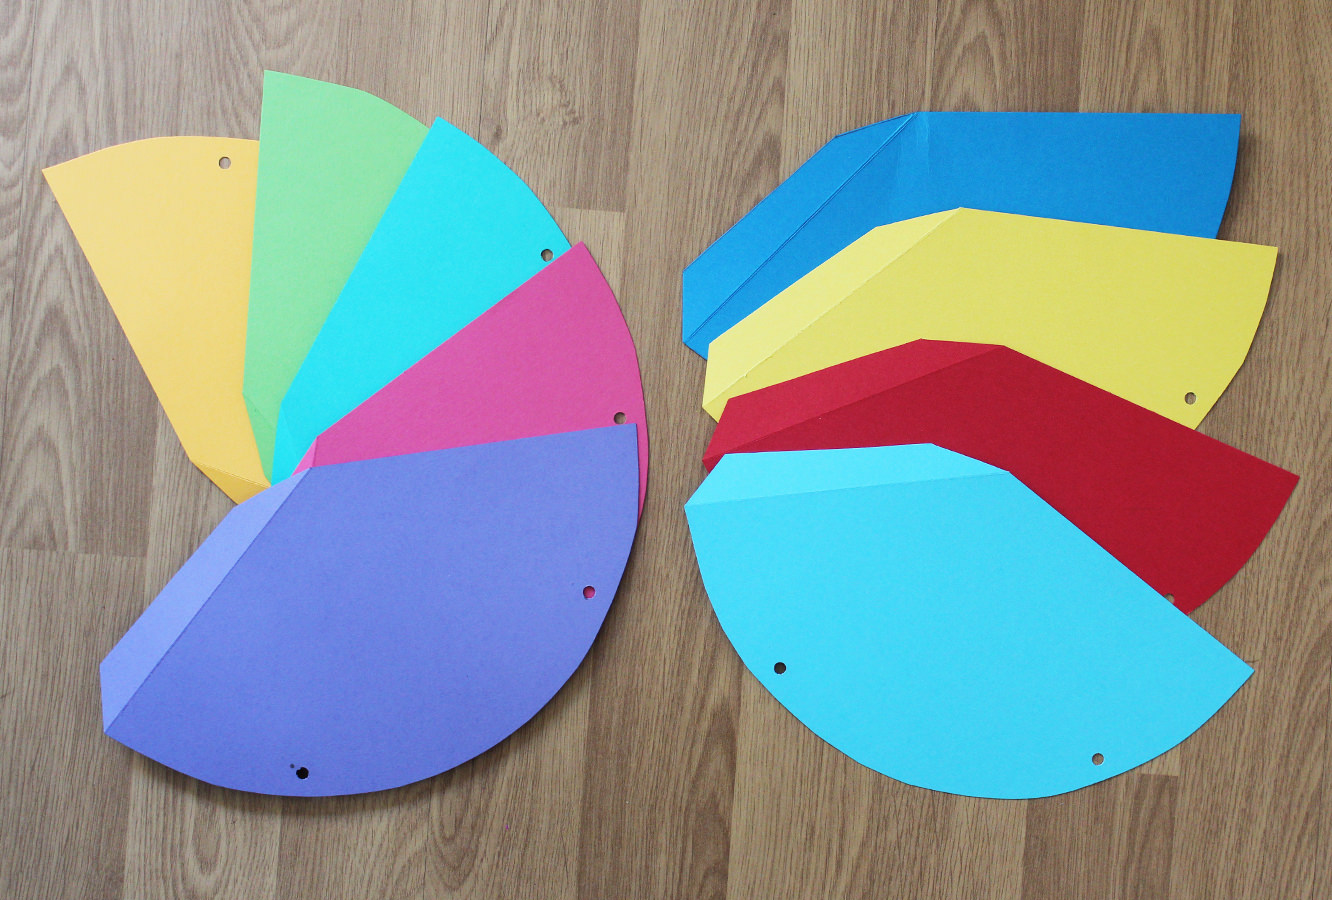
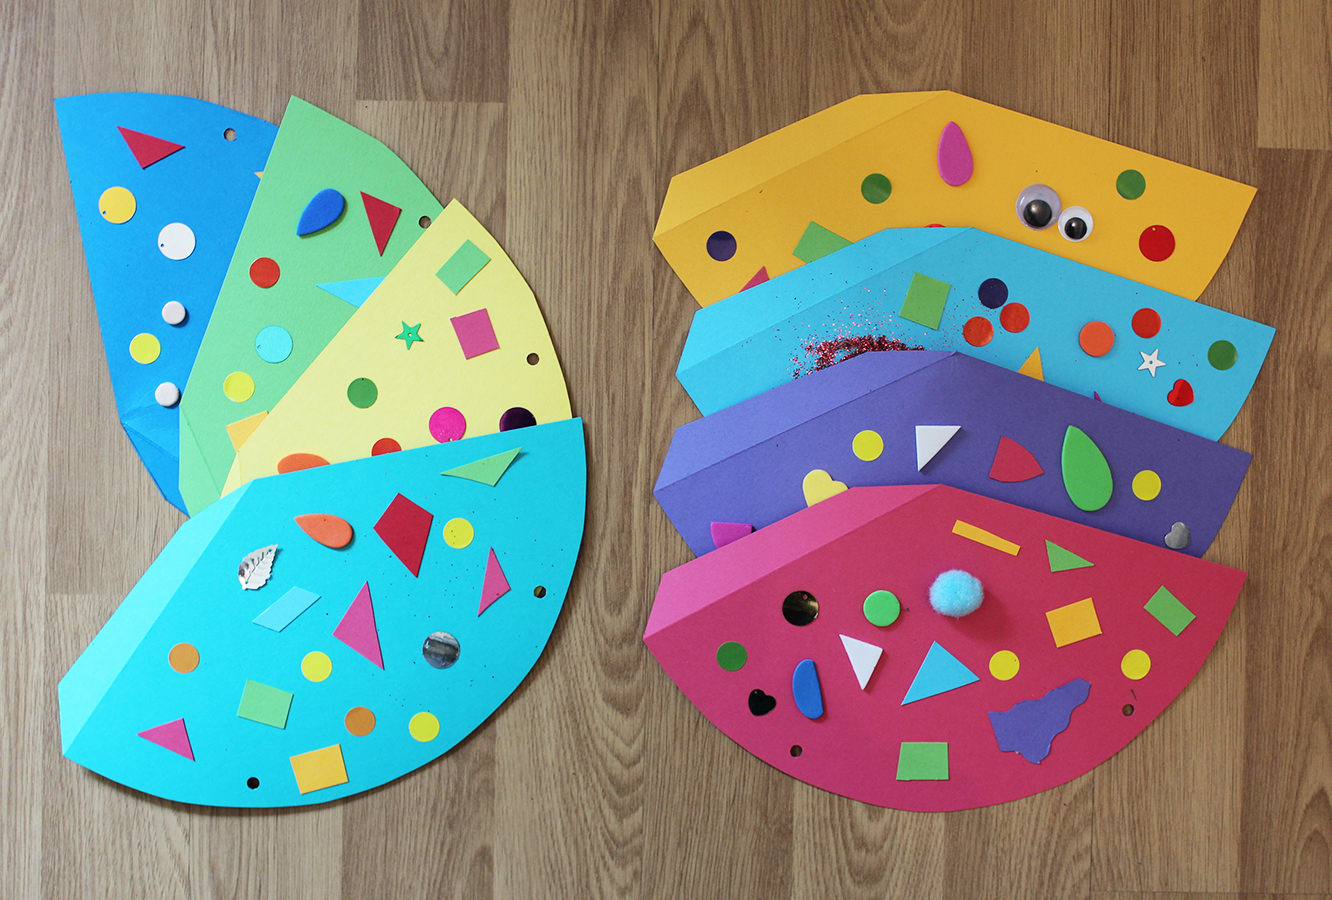
Draw round the template onto each piece of card and cut out a hat for each guest, not forgetting one for the birthday boy or girl.
Step two
Use a hole punch or something sharp poke holes in each hat (as marked on the template).
Step three
Using an open pair of scissors and a ruler score along the dotted line to create a flap.
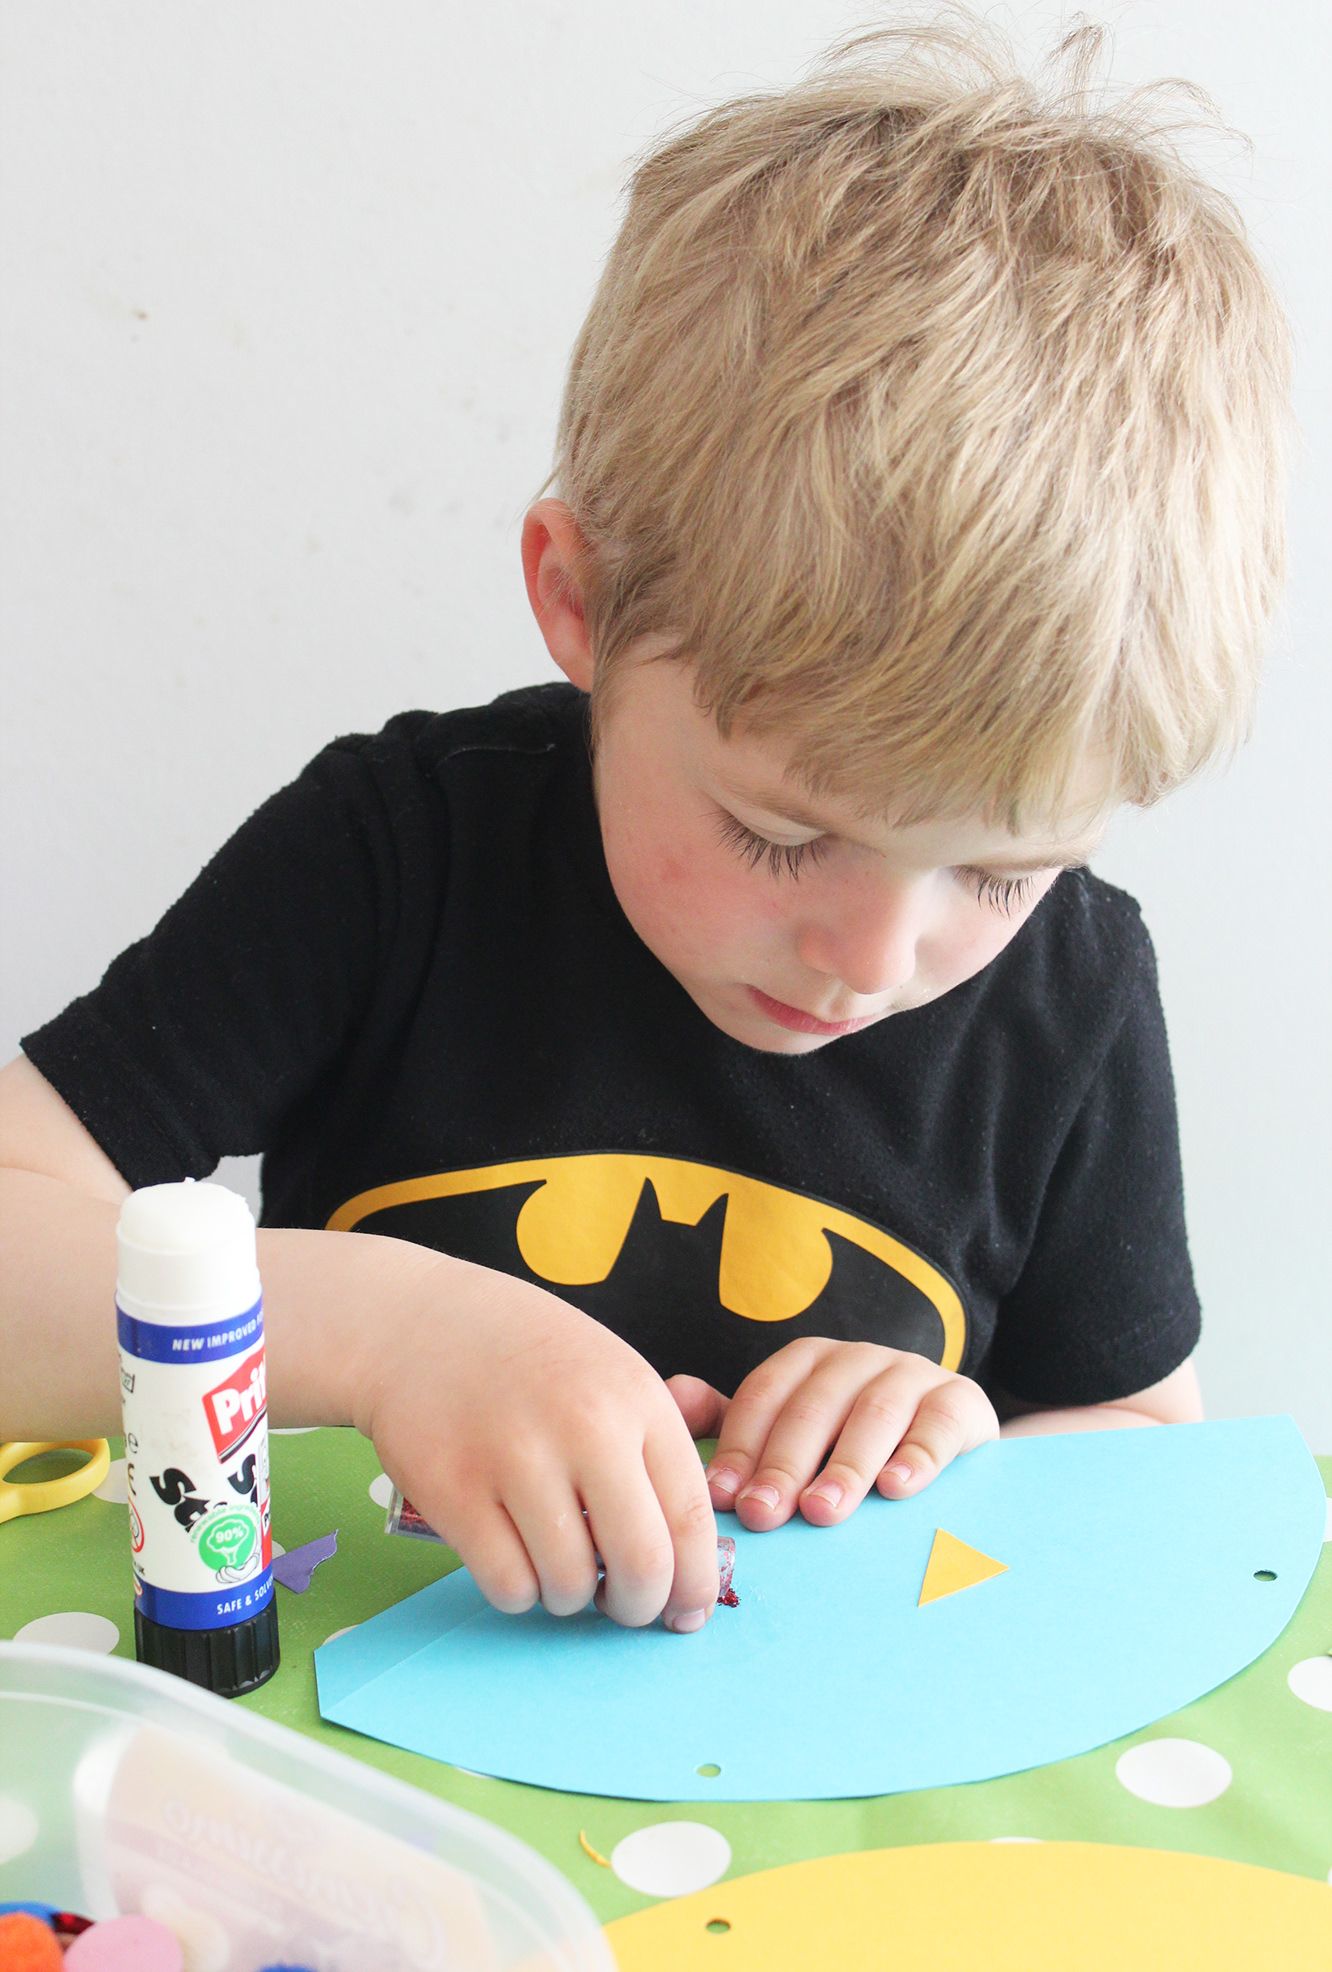
Step four
Decorate! Use your (or your child’s) imagination, Freds and I used foam shapes, stickers and glitter that mummy already had in stock. We also cut some shapes out from the left over card so as not to waste anything.
You can use whatever you can get your hands on, cut outs from old magazines/buttons/feathers/draw pictures or each child’s name. Your only limit is the attention span of the child in question!
(don’t decorate the flap)
Step five
Cut two lengths of string for each hat. Use the child you already have in stock to get an idea of length, you need to be able to tie a bow under their chins. Doing it this way rather than one loop means they are adjustable for each guest.
Step six
Add the party details on the other side and voila! Your hats are ready to give out. Each guest is in charge of assembling their hat and bringing it with them to the party (worth having one or two spare just in case!)
To stick together just glue the flap (with the hat right side up) and stick underneath the opposite edge.
Well hi. Apologies for being MIA, sometimes the blog falls victim to life’s unpredictability, but I’m back, and thanks for sticking with it.
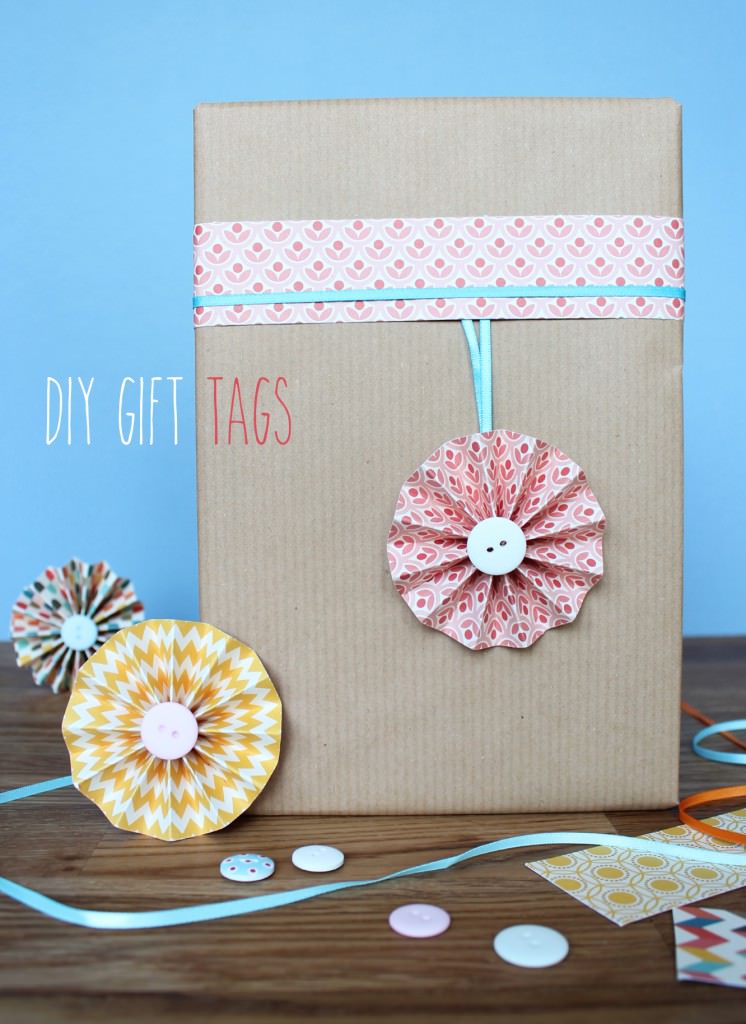
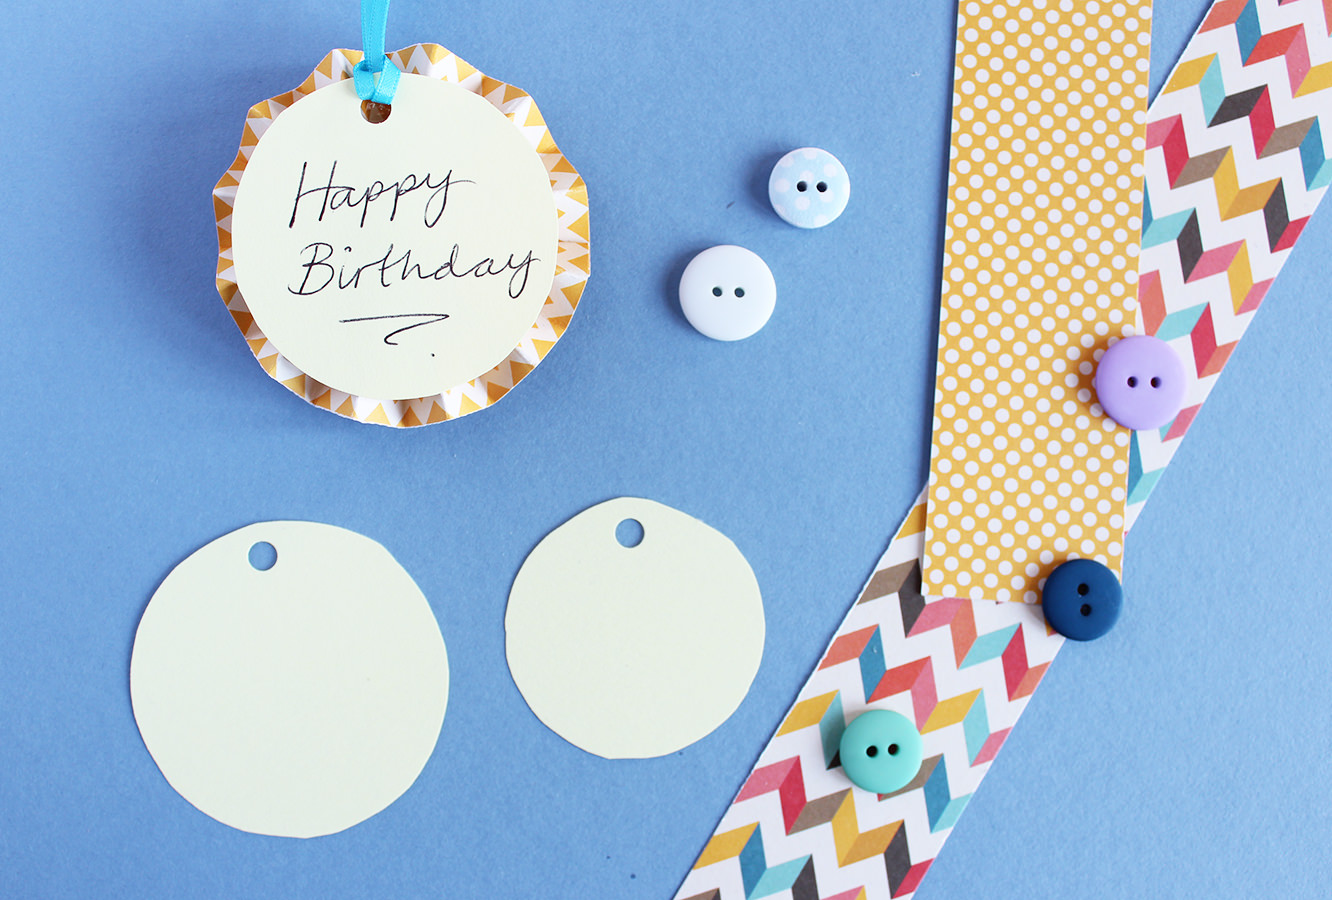
I had a birthday recently, so in honour of my stepping over the early-mid twenties boundary *weeps silently* I have devised an excellent little make to help your gifts stand out from the crowd. You can make a load of these up in one go so that you have a good stock of supplies to whip out at a moment’s notice.
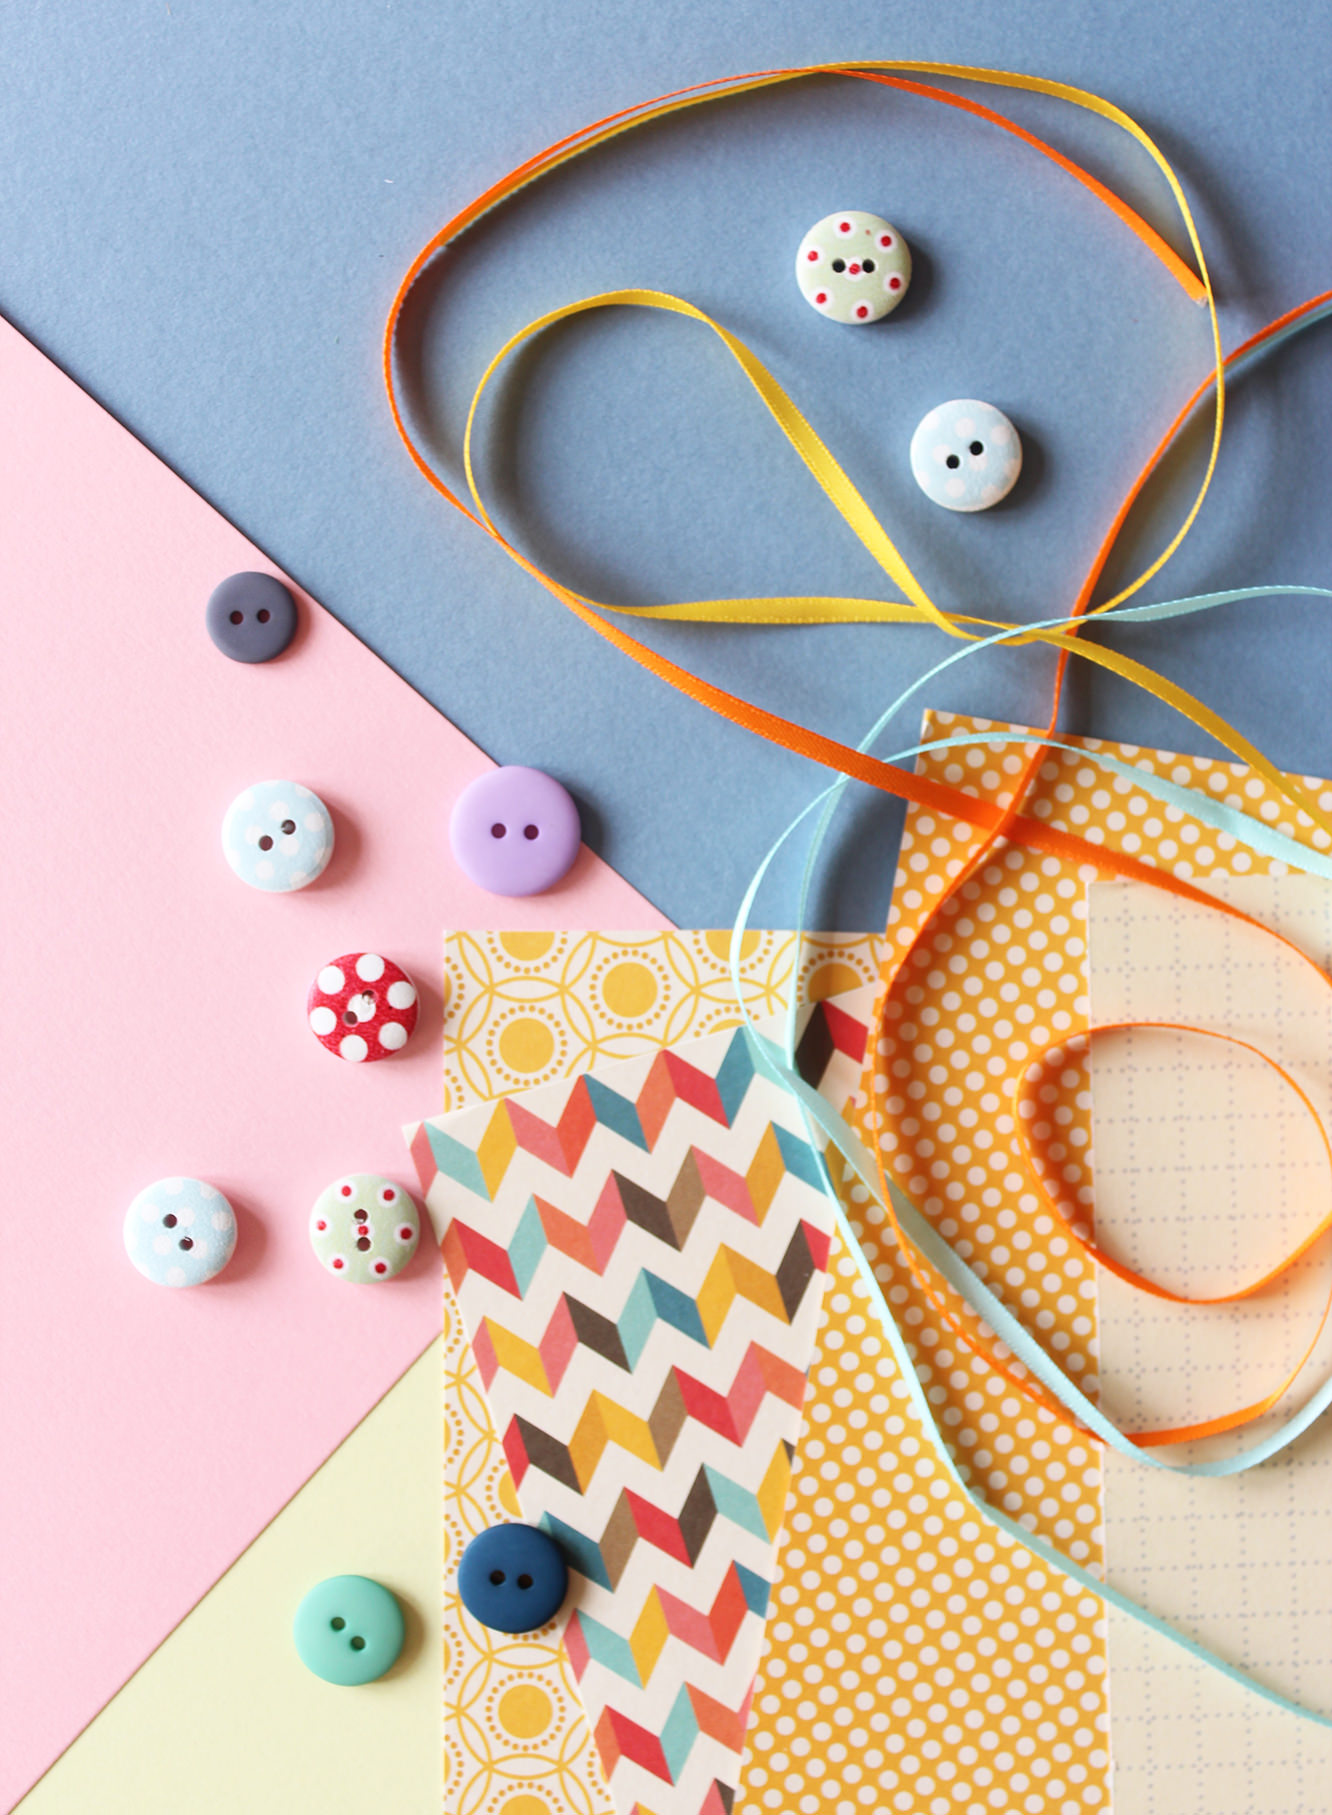
You will need
Cheerful patterned paper
Some plain card or paper
Buttons
Ribbon
Strong quick drying glue
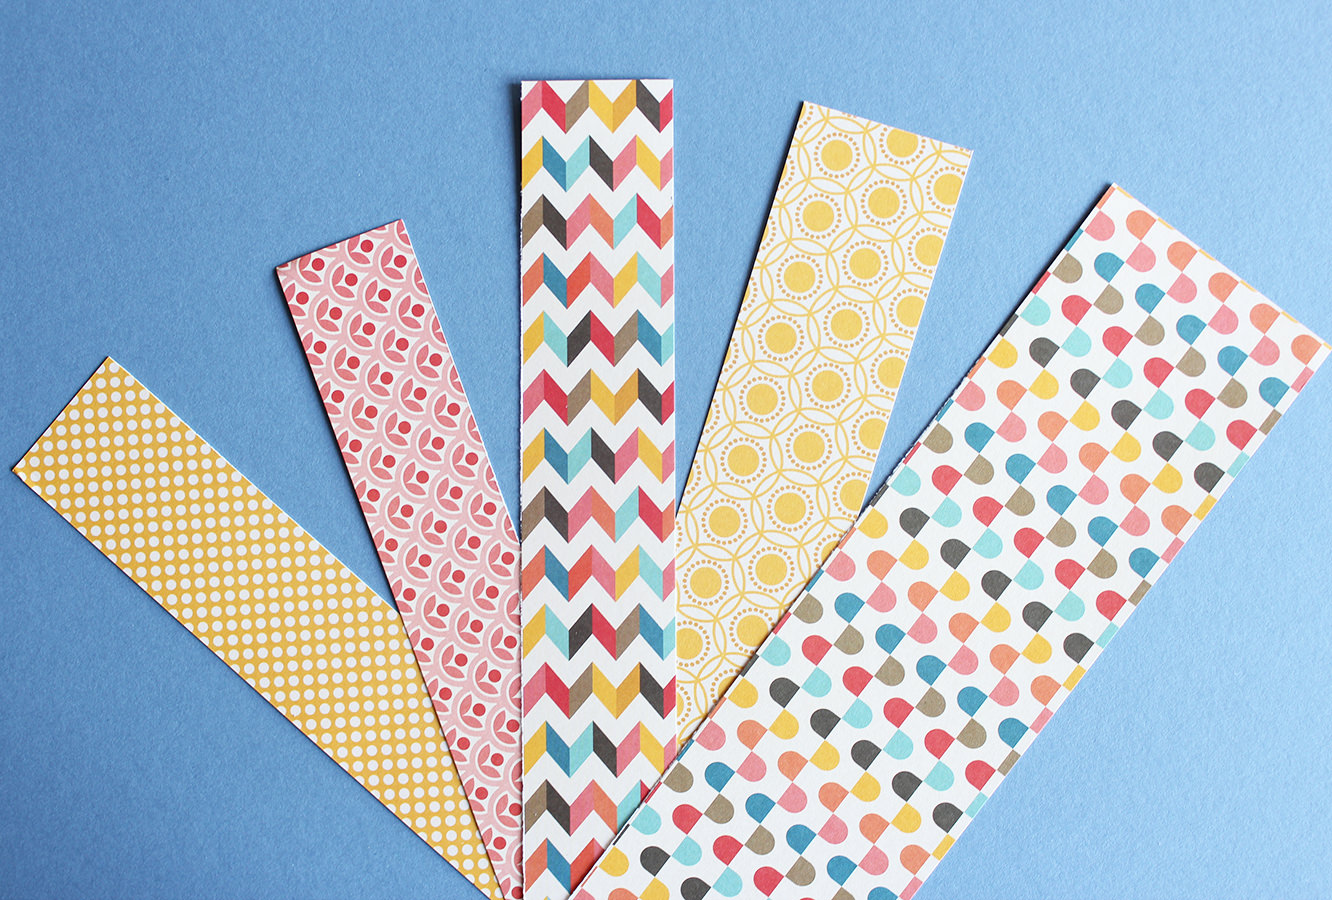
Step one
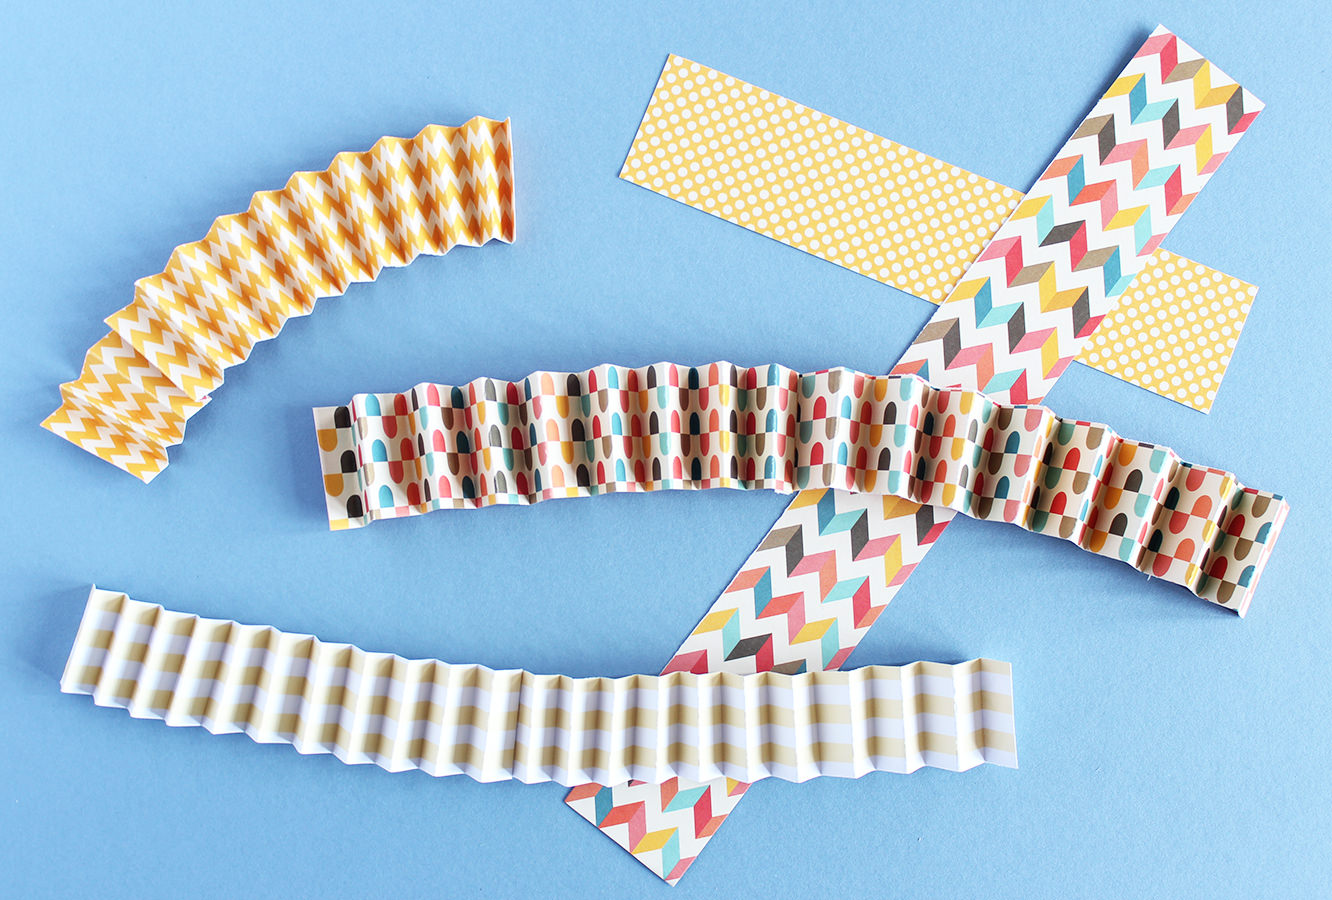
Cut your paper into long strips.
The width is up to you, but bear in mind it will be the radius of your tag. I found the thicker the strip, the longer it needs to be to work (I didn’t deserve my Maths GCSE for not knowing that instinctually) so you may need to tape two strips together if you want big tags.
All will become clear.
Step two
Fold the strips into a concertina (one bit forward, one back, just like in primary school when you made paper fans).
Step three
Stick together the two ends of each strip so that you have the star shape type things above.
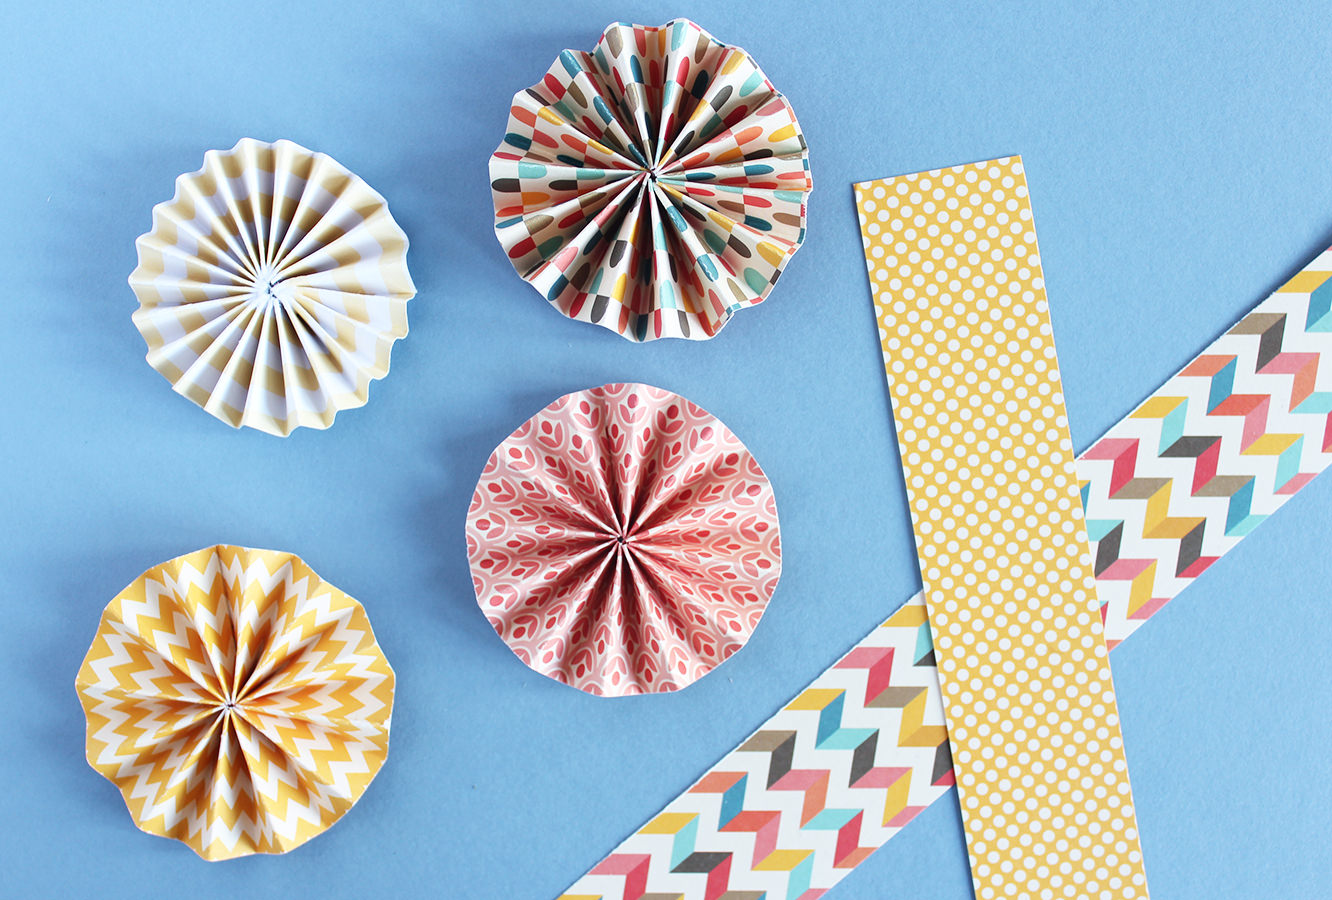
Step four
Pick up your stars and push the top edges into the middle to make these circular flowery fan things.
Put a small dab of strong glue on the centre and hold until stuck (I mean super glue really, I have zero patience for anything else, and glue burns to prove it). On that note, be careful it doesn’t drip all the way through the middle while you’re holding it – unless you want a charming new finger accessory.
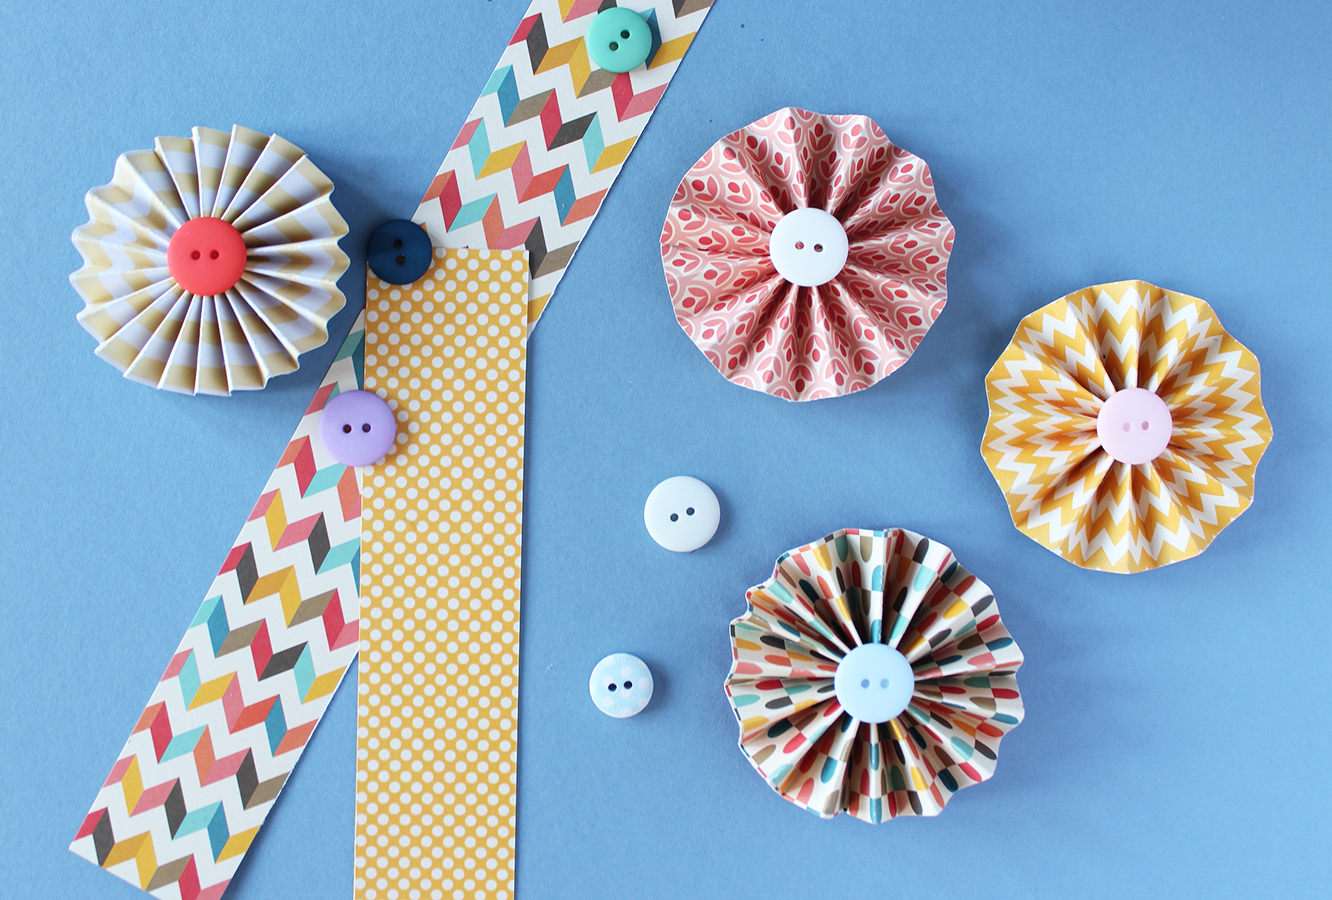
Step five
Stick a button over the join in the middle.
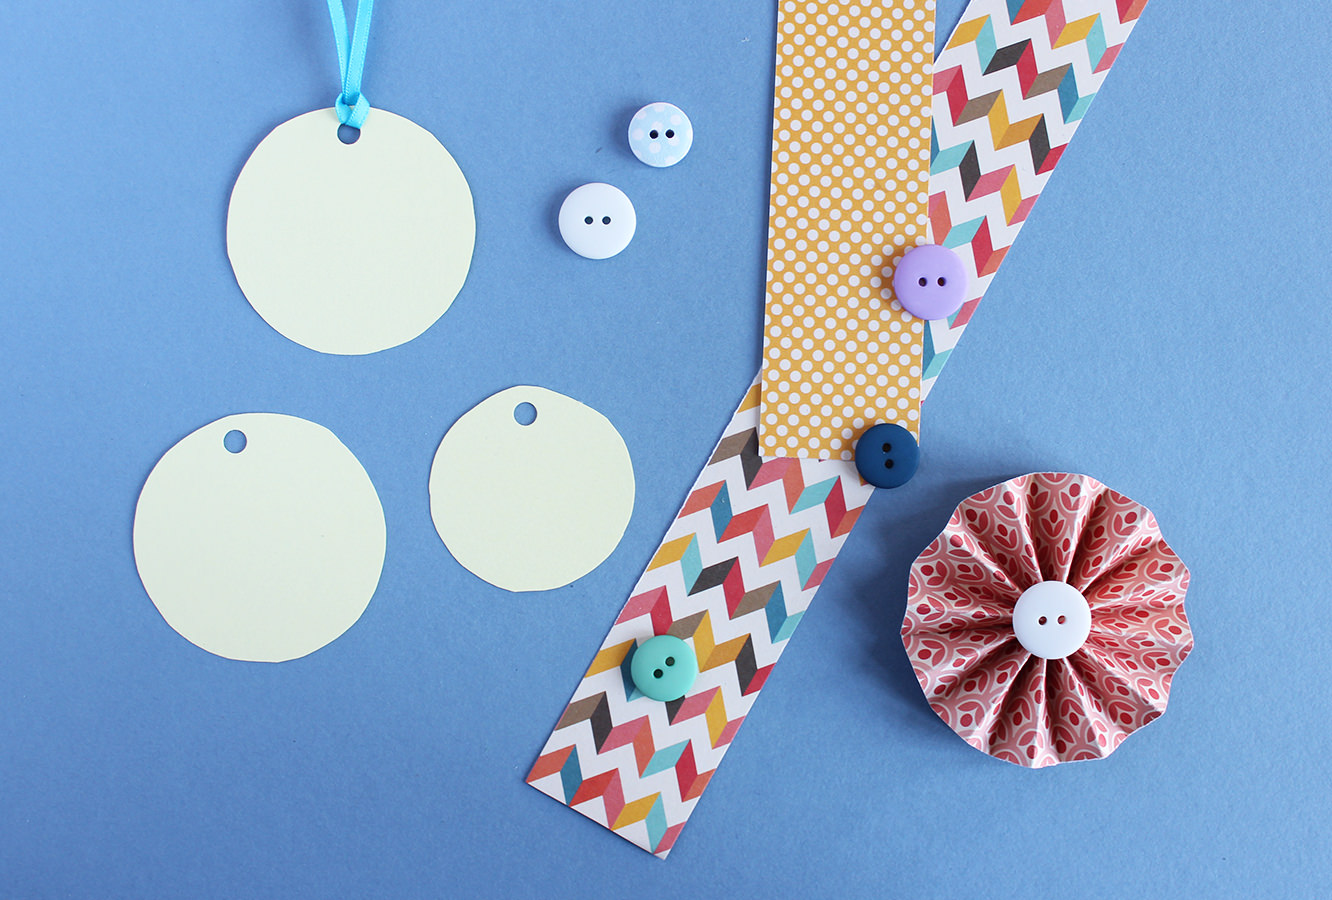
Step six
Find something circular that matches the size of your tags (or use a set of compasses). You want the circle to be a bit smaller than the tag itself.
Cut said circles out from plain coloured card and use a hole punch to make, well, a hole.
Loop a short length of ribbon through the hole.
Step seven
Stick the card disks to the backs of the tags using double sided tape or glue.
Write your meaningful and heartfelt congratulations that the birthday person is still alive on the reverse.
Affix to gift.
Step eight
Smugly produce your beautifully tagged gift at the appropriate moment.