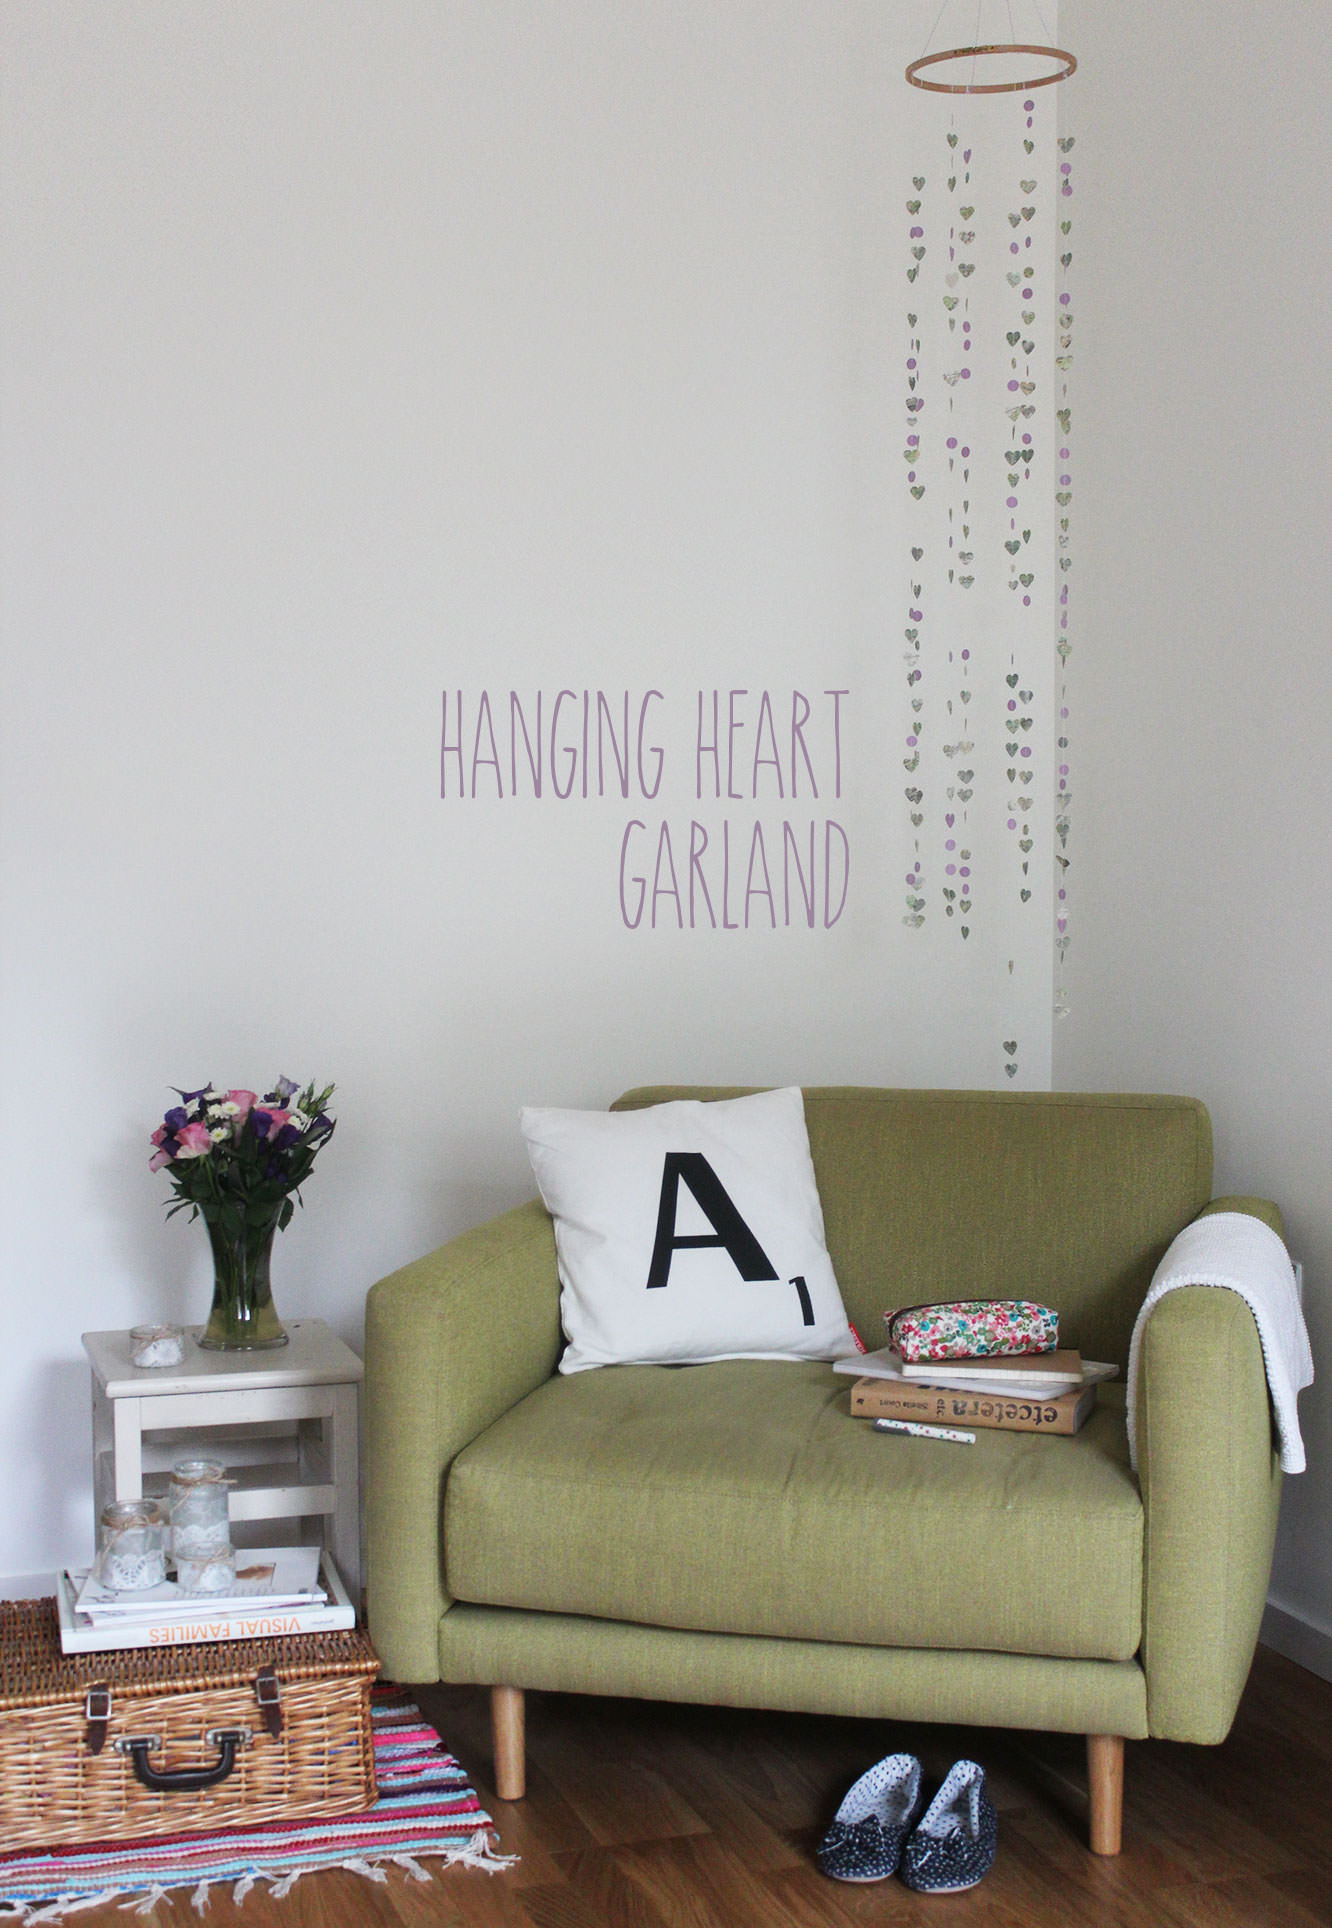
Just when you (and I) thought I was going to stop going on about my wedding filled life, one of my best friends decided to get married in December. Of course being a little bit obsessed with her and with craft, I set about thinking up some decoration ideas.
The bride in question hasn’t got a huge budget, so whether you’re due down the aisle yourself, know someone who is, or just fancy brightening up a corner of your living room you won’t be too out of pocket with this one.
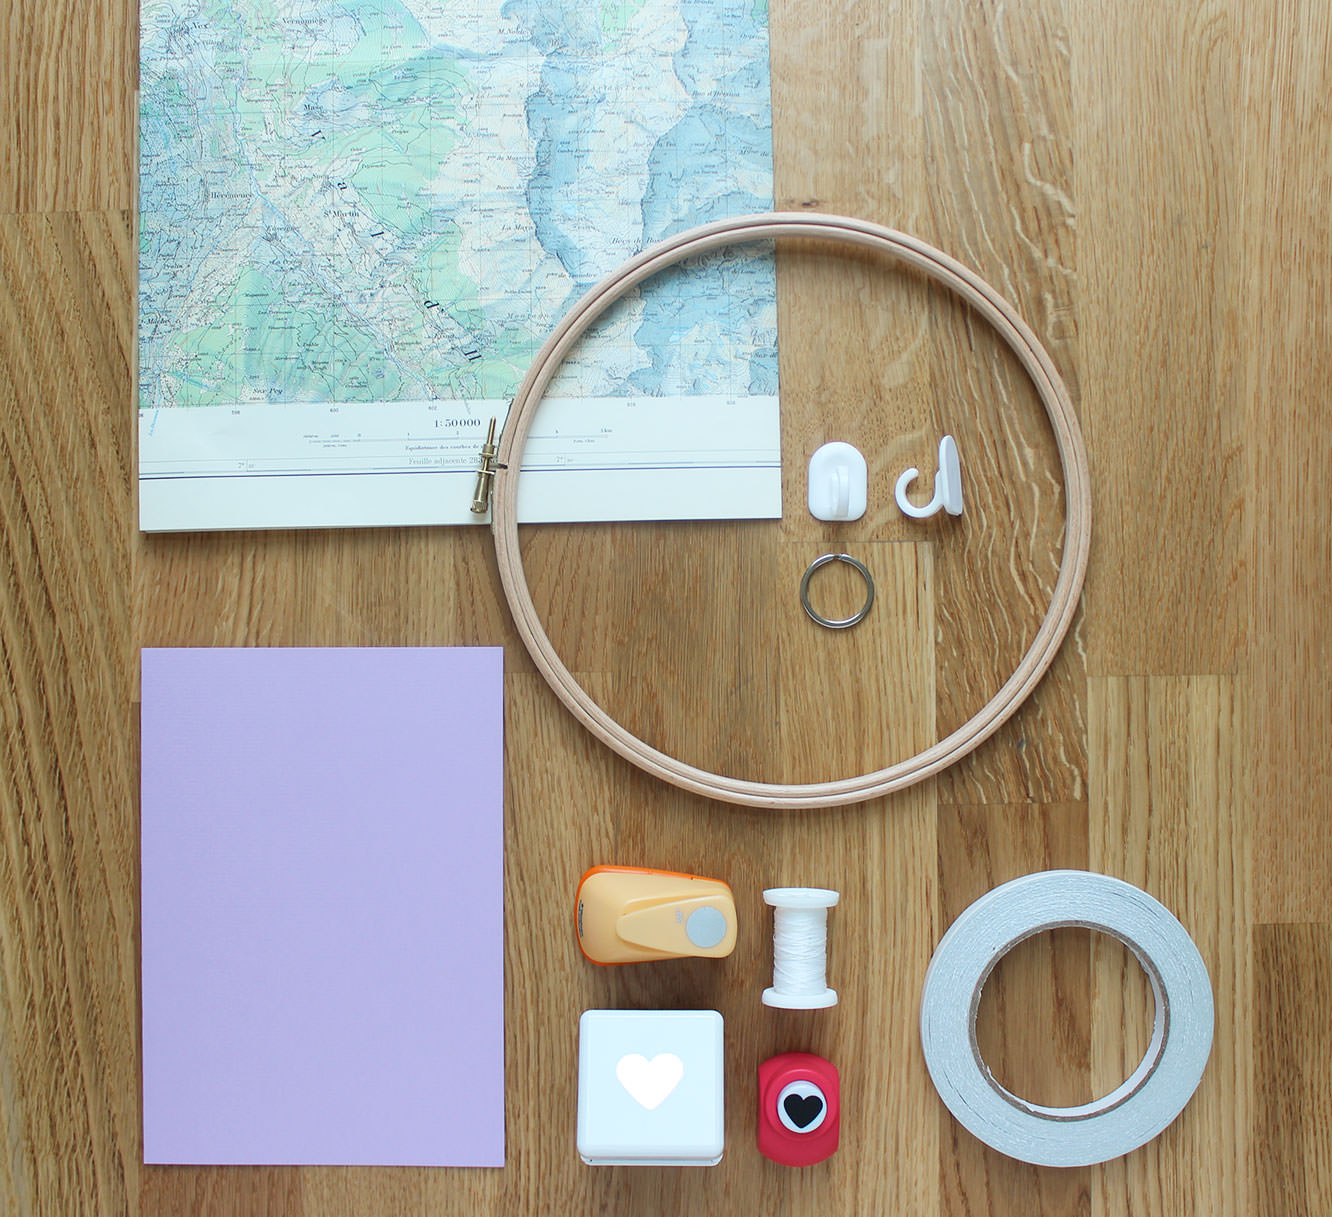
You will need
An embroidery hoop (mine was 9″ from John Lewis for about £2, they are probably even cheaper elsewhere)
Cotton thread
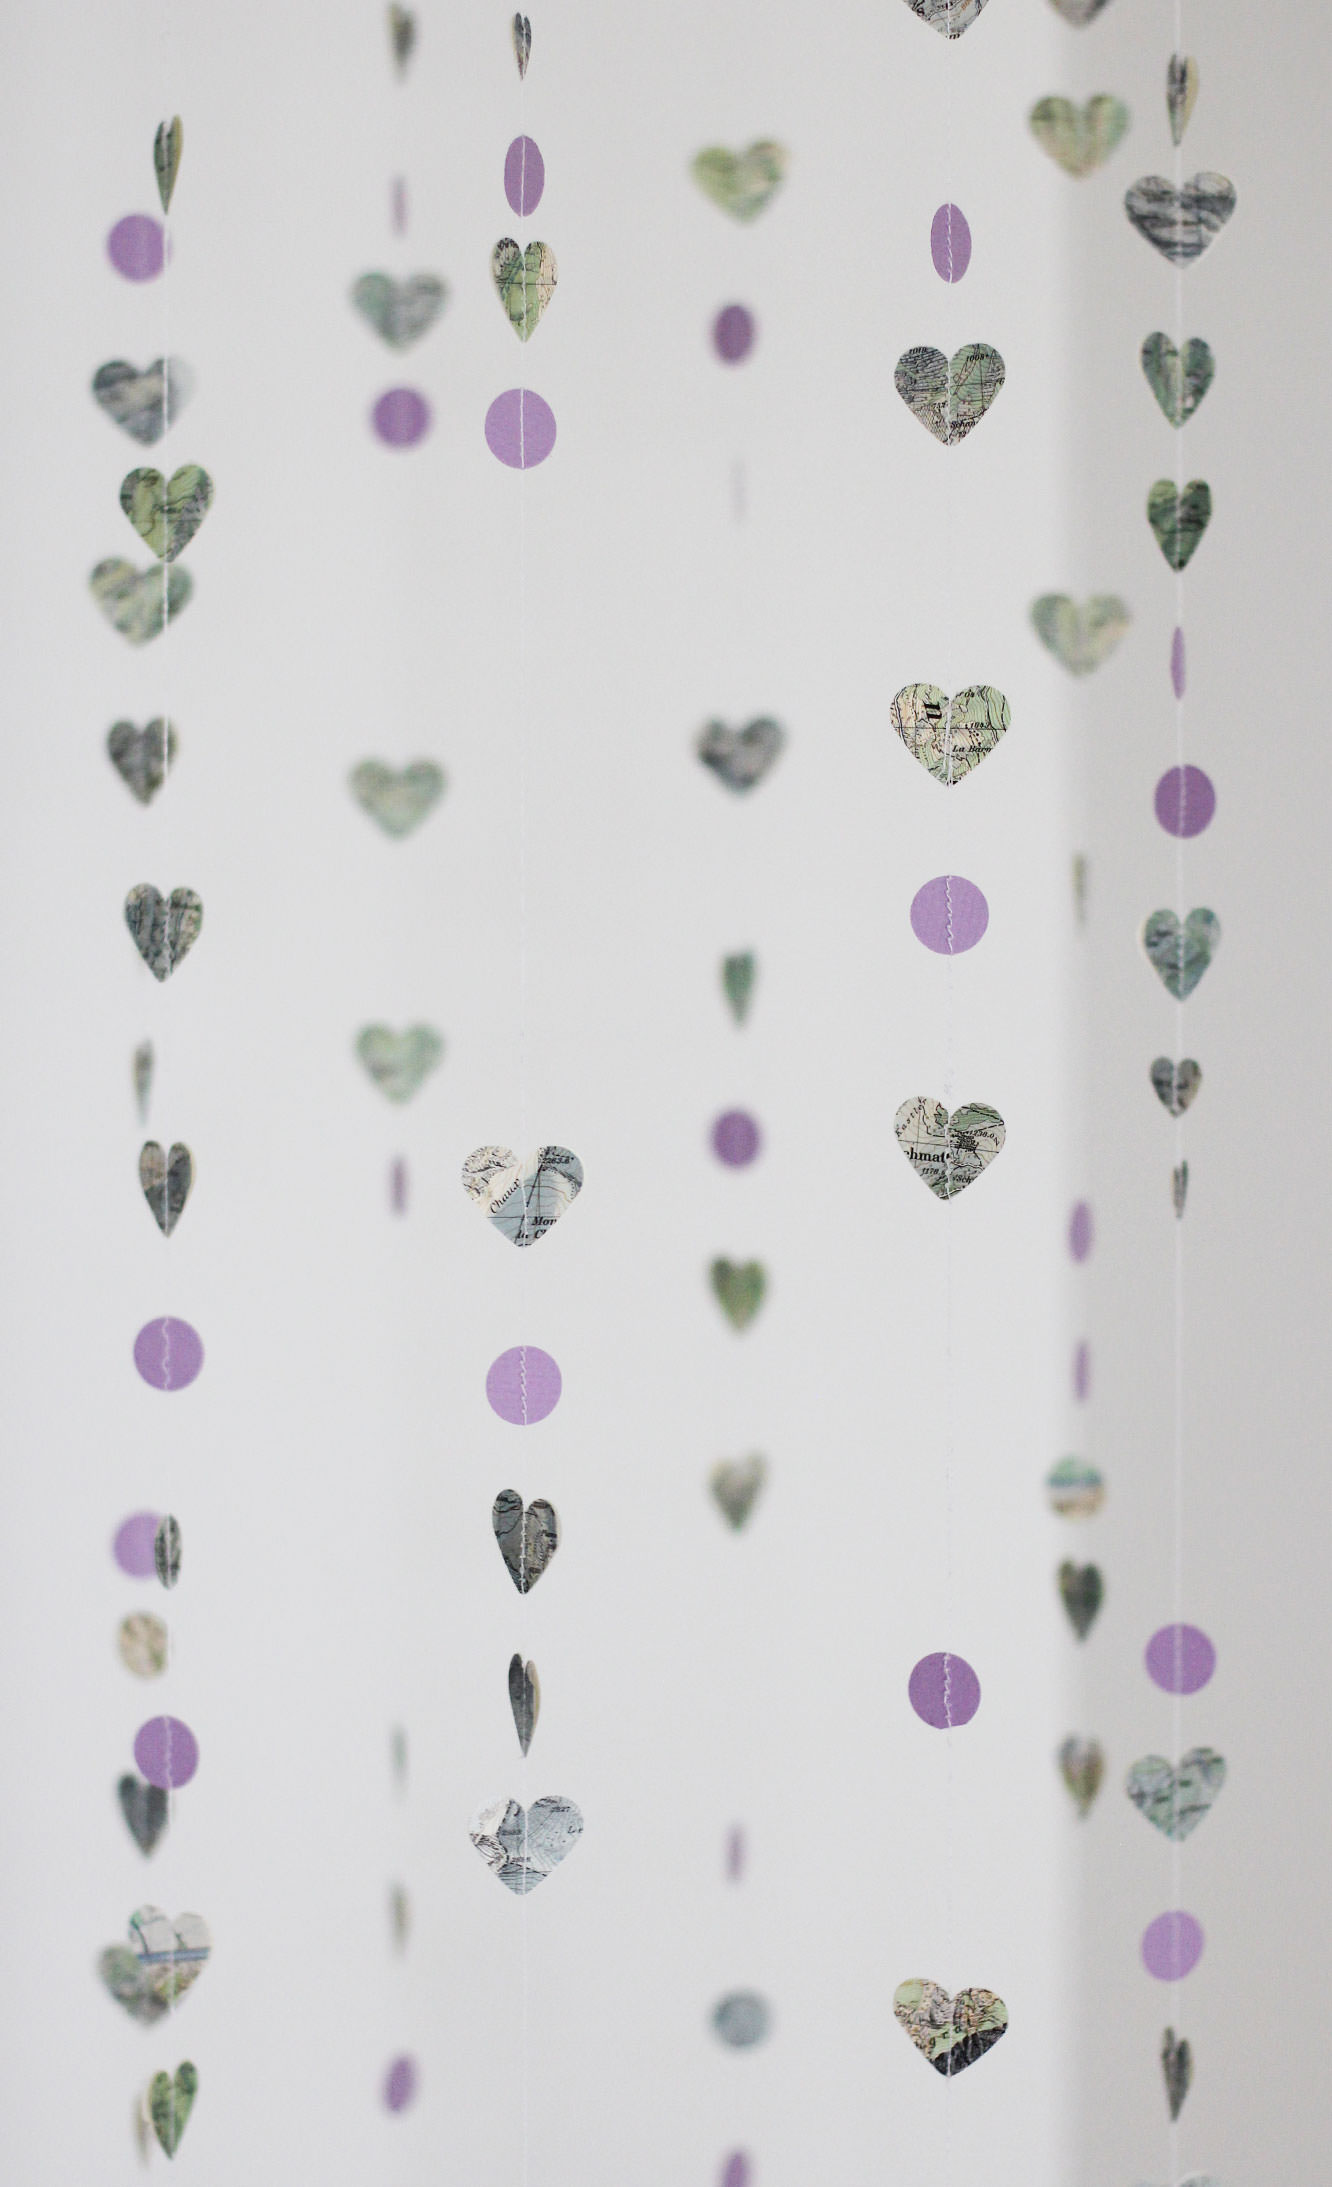
Card/paper of your chosen pattern and colour (I was very fortunate to have an old map that had lots of dark blues and sage greens matching the colour scheme perfectly)
Double sided tape (not totally essential)
Craft punches of whatever shape and size you like the most
A ring from an old keyring
A sticky hook (I bought these from Wilkinsons; make sure you choose one with a very round hook as you are sticking it to the ceiling, not a wall, and you don’t want your decorations to slip off and come crashing down)
Step one
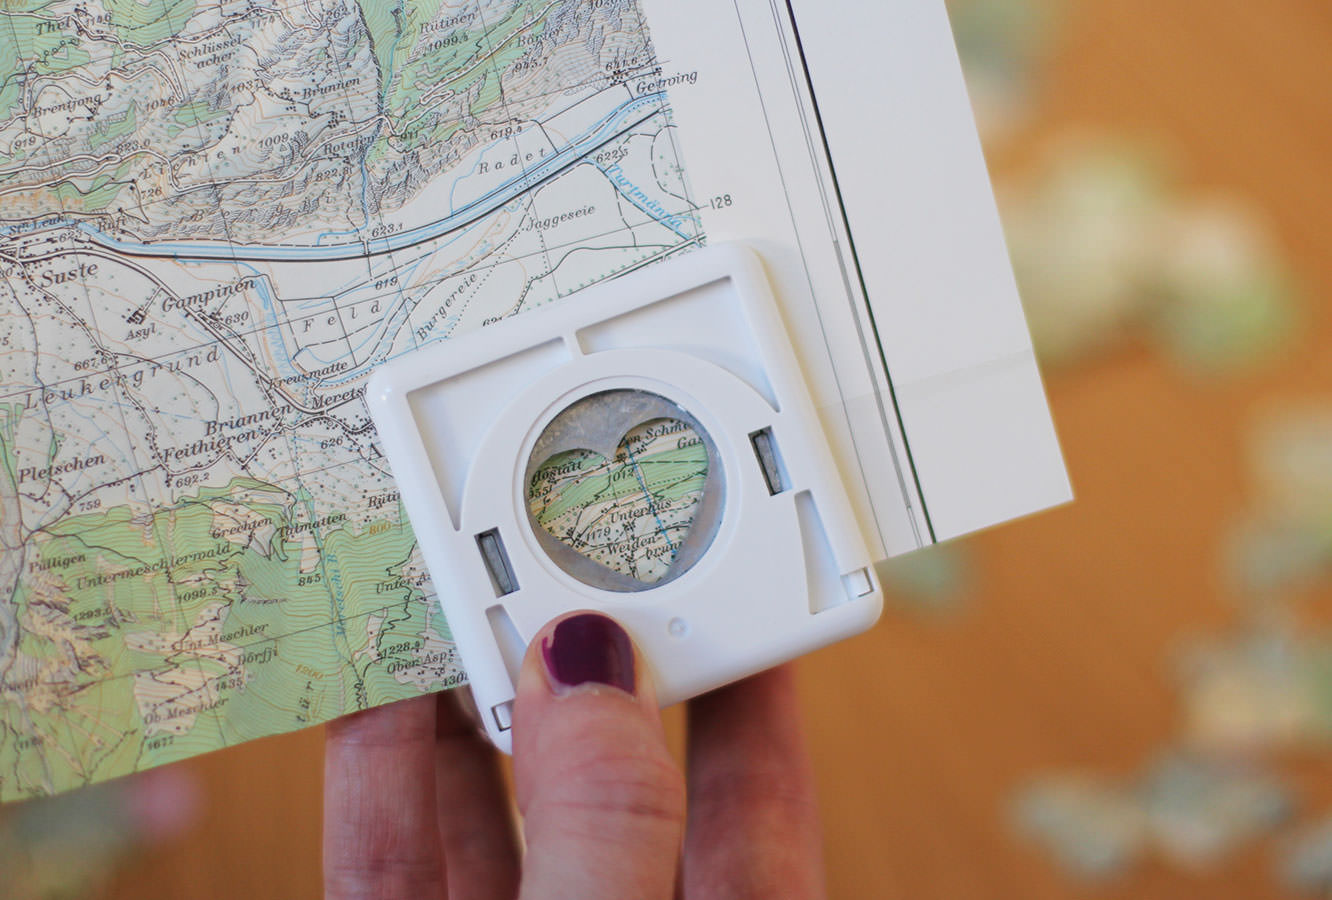
Use the craft punch(es) to cut out loads of your chosen shapes. Meg wanted hearts for her wedding but this could easily work with stars or leaves or something too. I also used some circles and smaller hearts to vary the design slightly. I got a bit cross with the small heart punch though so they are few and far between…
I used the punch upside-down to make sure my shapes were whole and that I wasn’t wasting any paper.

Step two
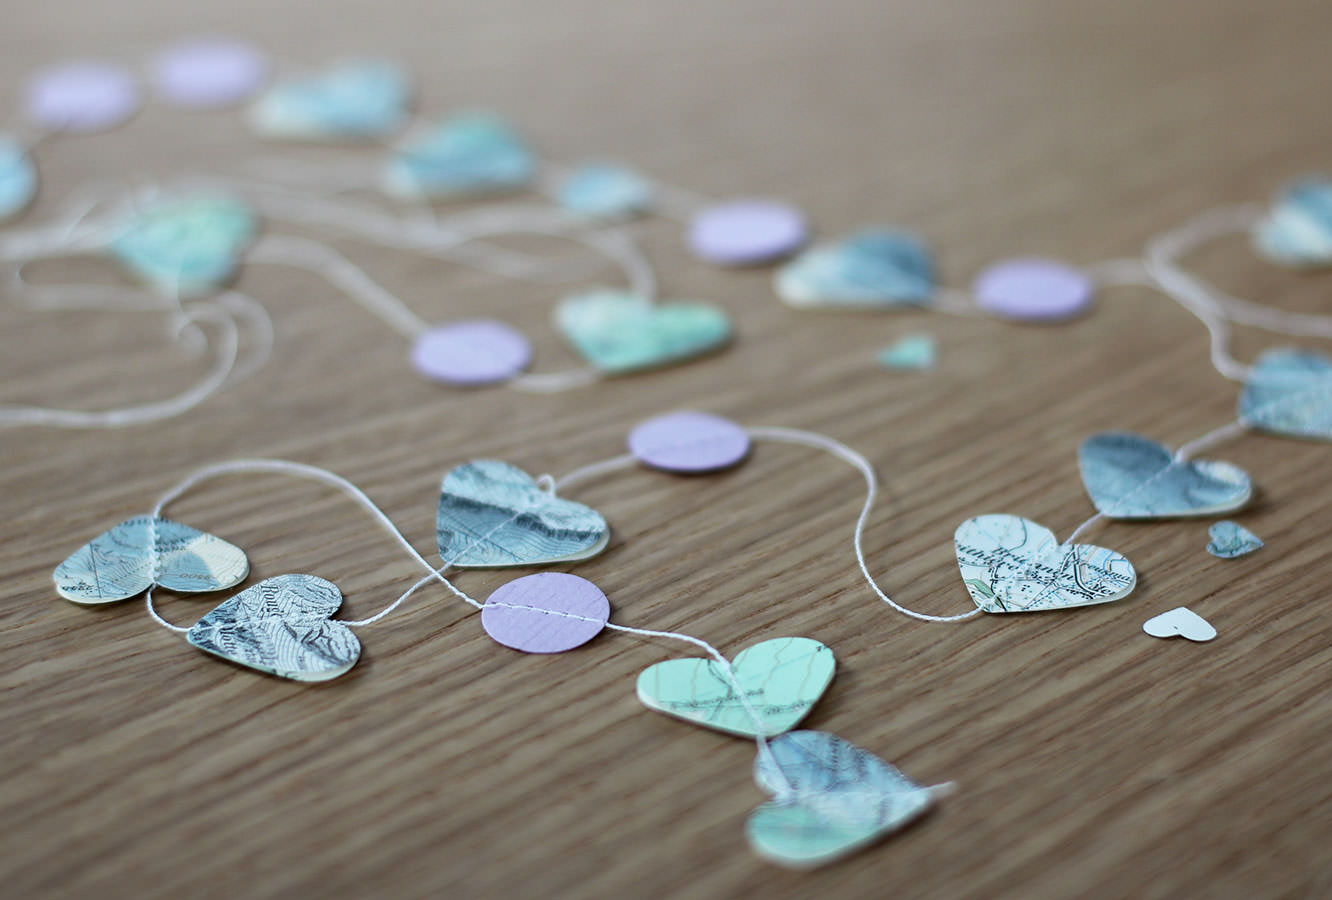
Keep cutting until you have a big old mound of them. I decided I didn’t want to have the white back of the map showing so needed to cut twice as many as I thought I would use so I could put them back to back. Of course if you’re using coloured card or double sided paper then you won’t have the same issue.
Step three
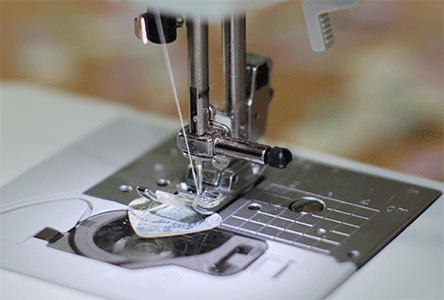
If you’ve got a sewing machine, run your shapes through it until you have a long string of hearts. I decided not to measure mine as I wanted them to all finish at slightly different lengths and for the shapes to be unevenly spaced. It will cause you a lot less stress doing it that way too!
If you don’t have a sewing machine use double sided tape or glue to stick matching shapes back to back with the thread running through the middle.
Make sure you leave a generous length of thread at the top to tie onto the hoop later.
Step four
Make several more strings like this. I think eight is the perfect number, but you might choose to experiment if your hoop is smaller/bigger than mine.
Step five
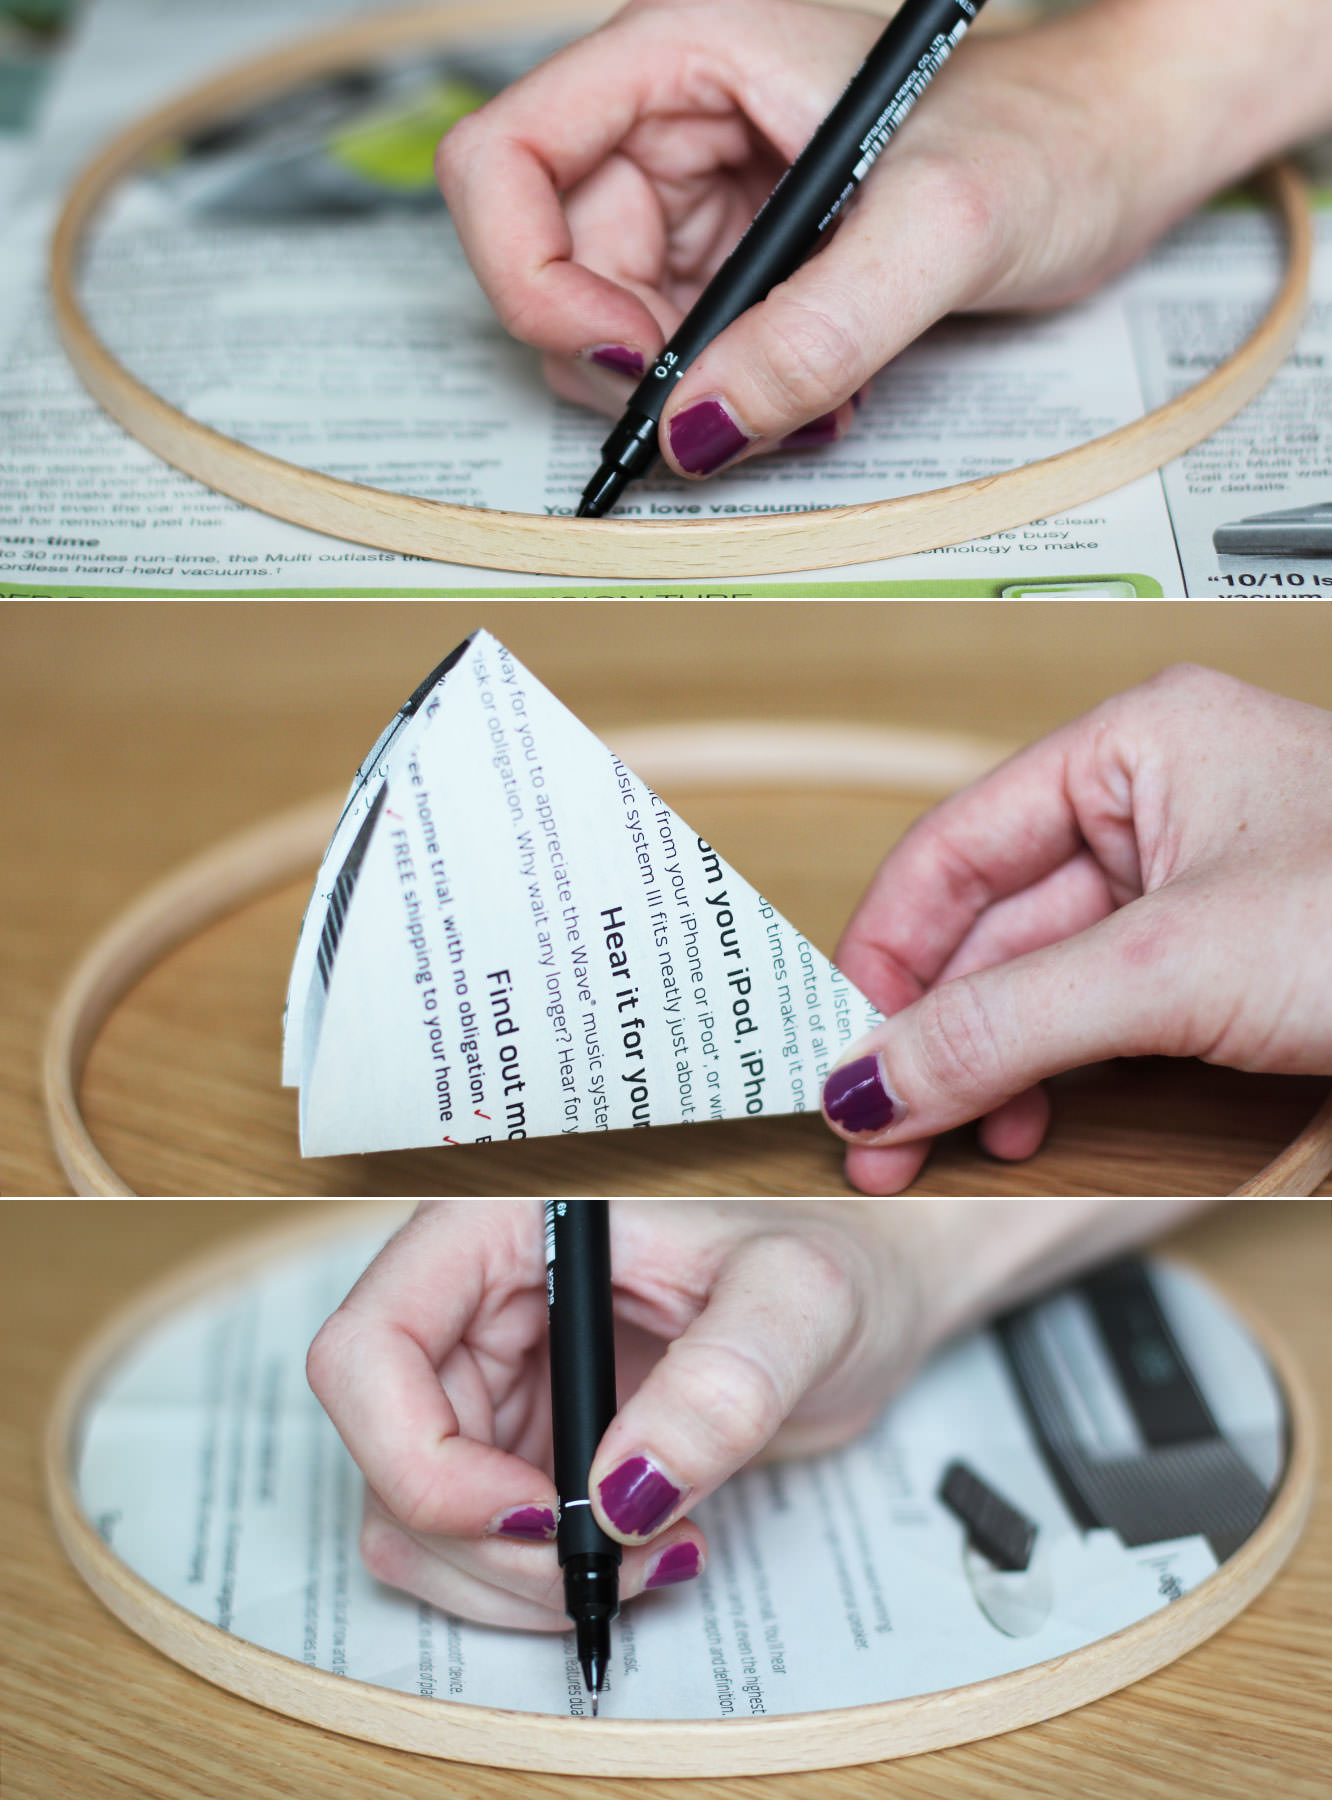
Remove the inner circle from your embroidery hoop and mark even spaces around the circumference.
I did this by tracing the circle onto newspaper and cutting it out. Then I folded the paper circle in half three times giving me an eighth sized segment. After unfolding I just used the fold marks as guides for my marking out.
Step six
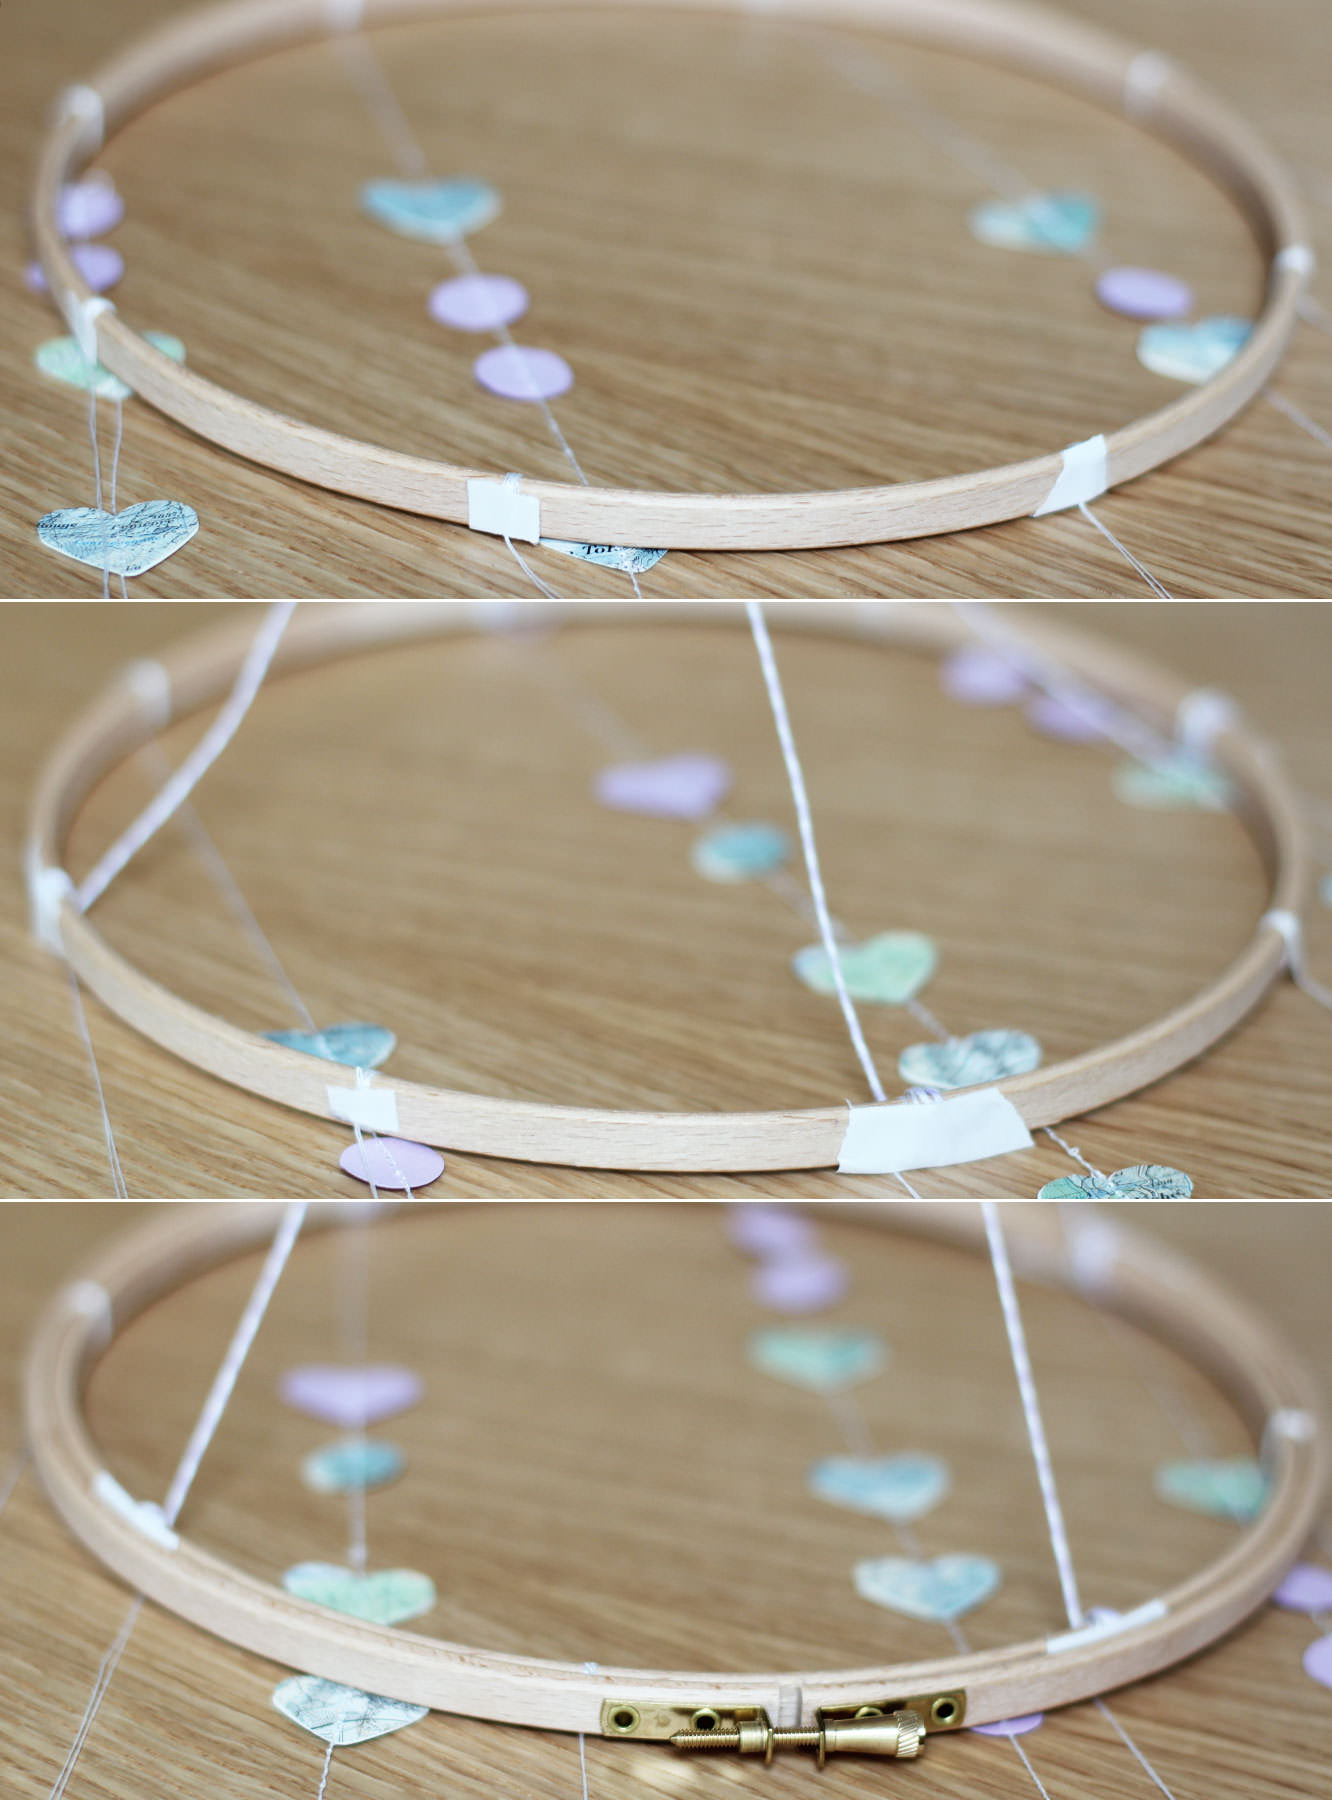
Wrap the top of each length of garland around the hoop several times at the marked points. Secure with tape on the outside of the hoop.
Step seven
Using two lengths of slightly stronger thread/string if you have it; make a cross for hanging. Attach so that there is thread at the 12, 3, 6 and 9 o’clock points of the hoop.
I also then tied a single length of thread to the place the hanging cross lengths overlapped, and attached the ring of a keyring to that. I wanted the garland to spin around gently, and this won’t happen if you use the crossed threads to hang it by.
Step seven and a half
Unscrew the larger hoop part way to loosen it, place it over the top of the inner hoop and tighten as much as possible.
Step eight
Affix the sticky hook to desired space on the ceiling and hang.