At last, time to decorate.
This is by far the best bit, and your opportunity to hide any blemishes. For me, that was a whacking great crack down the front, the odd broken window pane and some darker than attractive edges. So fill your piping bags, stick on a Christmas film, or phone a good friend using hands-free and enjoy!
There are no steps in this post, just some ideas to get you going.
Things you need:
Royal icing of course (you can use regular but I find royal dries quicker and looks whiter)
Piping bags
Sweets Sweets Sweets
A little tip
When you’re buying your sweets you should have a think about roughly what will go where, specifically in terms of the roof. Make sure you overestimate how much you think you will need, it’s always surprising how quickly everything disappears. Particularly if you adopt a ‘one for the house, one for me’ approach, which is the correct way to do this in case you were wondering.
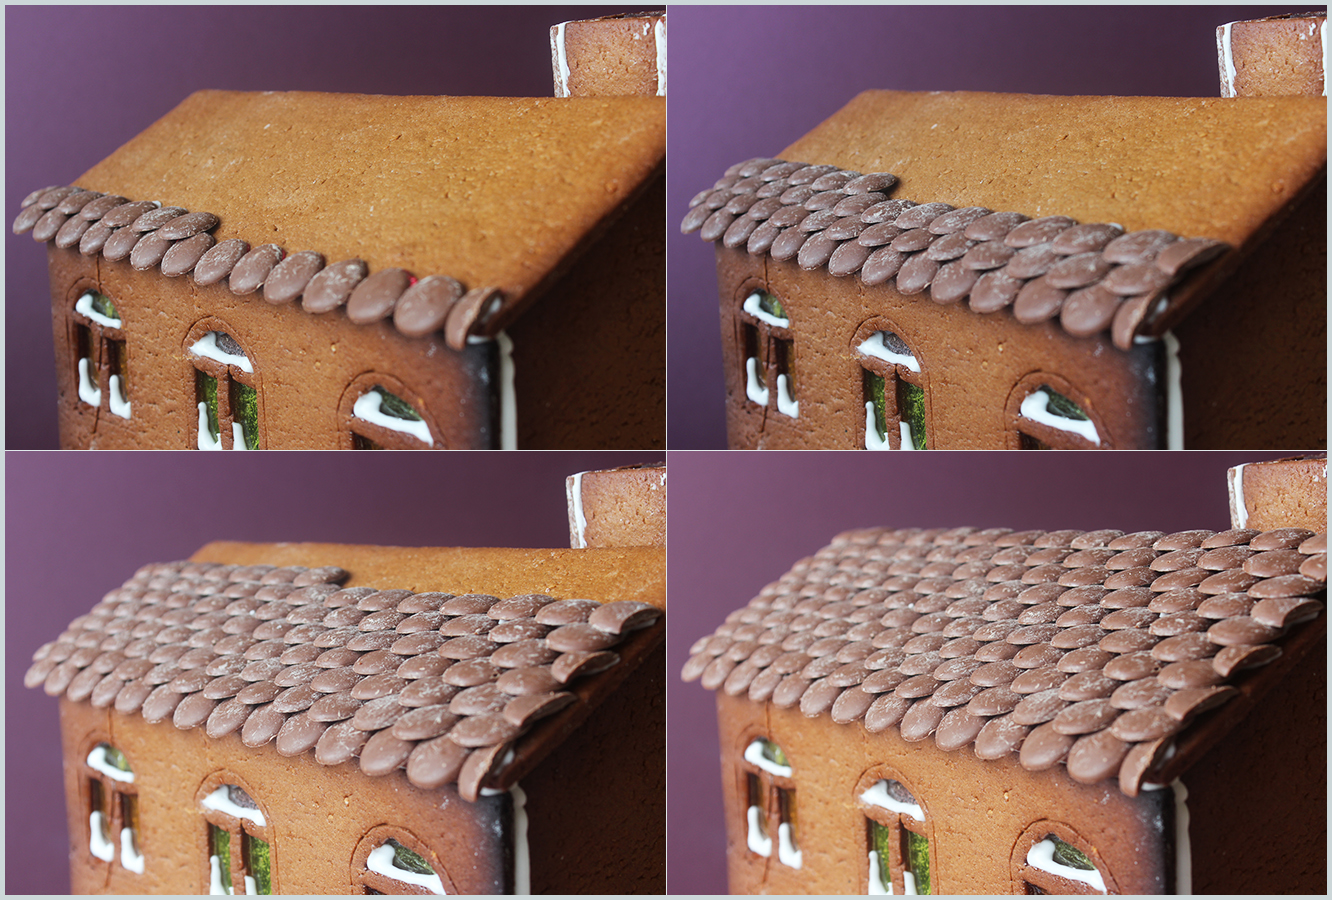
I chose button tiles for my roof. The key is to make sure there is some overhang on your first layer, and then just keep going in lines, overlapping slightly, until you hit the top. Chocolate fingers or matchmakers work for a sort of log cabin look, or I’ve seen shredded wheat for a thatched roof (not sure who would want to eat that though!).
Once I had finished I dusted my roof with some icing sugar snow for a wintery look.

The last couple of years I’ve done normal houses, but I’ve decided to start theming them more now I’ve got the hang of it a little bit. So this year’s effort is designed to be an old fashioned sweet shop (it seemed apt given the sugar coma it put me in). Obviously it needed an awning or two! I just coloured some of my icing red and alternated between the two colours until I reached the end. If you want straight lines then the trick is to hover away from the biscuit a bit so you have more control over the direction.

What cosy winter hideaway is complete without some snow caught in the window panes? The idea here is to fill one of the corners a little more than the other, which I realised after piping the window in the centre…
And now ladies and gents…the finished article! Complete with flickering fire light (an LED tea light candle pushed through the doorway)
As you can see I bought mainly different coloured and sized circles: chocolate drops, silver balls, smarties and chocolate buttons. I like little dots of icing to decorate with too, but you need to decide what works best for you, it should be fun! I don’t really pre-plan, but buying lots of similar shaped things helps I think.


Oh wait!
That’s not all… remember this little guy?

Well I decorated him too. The base he was sitting on is actually the lid of a gift box, I won’t show you what’s inside though, incase the recipient is reading this (there needs to be some element of surprise!) This adds a lovely personal touch to any present, or can just be the present in itself!
The front and back are A6 size (A4 paper folded into quarters) and then measure everything else out based on that. You can get at least four of these guys out of one batch of mixture.
Before you go…just one more little idea…

A homemade festive gift without the fuss for someone you like, but not an ‘I made you a gingerbread house’ level of like.
To make a tree the easiest thing to do is to get your hands on star shaped biscuit cutters of at least three or four different sizes. You want around 16 or so stars for each tree, then just stack them with icing to stick each layer together. If you don’t have cutters then make some templates to cut round instead (you can do this using auto shapes on the computer). One batch of mixture should make at least 8 I reckon.
Pipe lots of blobs of icing and add silver balls, chocolate drops and smarties for decoration.
I used a candle holder turned upside down for the base, but a disc of cardboard covered in tinfoil would work just fine too. Remember, whatever you use, you aren’t going to get back!
The cellophane I used to wrap it was bought from a florist supplies shop online and was about £3 for the roll, which I’ve been using for various projects for about 2 years!
Cut a big square (bigger than you think), I made one as large as my roll would allow. Place tree on the middle and bring all the corners to meet in the middle. scrunch the remaining edges together and call for help (this will save your little finger aerobics when you’re tying the ribbon). With someone else holding it all together, double knot a few pieces of gift ribbon and curl the ends with scissors. Chop off the messy bits of plastic.
Voila!
Oh my life these are amazing! Love that you have a blog, Katie – if you want to promote it at all just let me know and I can put up an ad for you on mine 🙂
-Katie (Anna’s sister)
Ahhh thank you! Hope you’re enjoying having Aunty Anna home for the holidays, and your first Christmas with bubba. If you don’t mind doing that at some point I definitely wouldn’t say no! I follow yours via Facebook as Anna told me about it. Happy Christmas! Xx