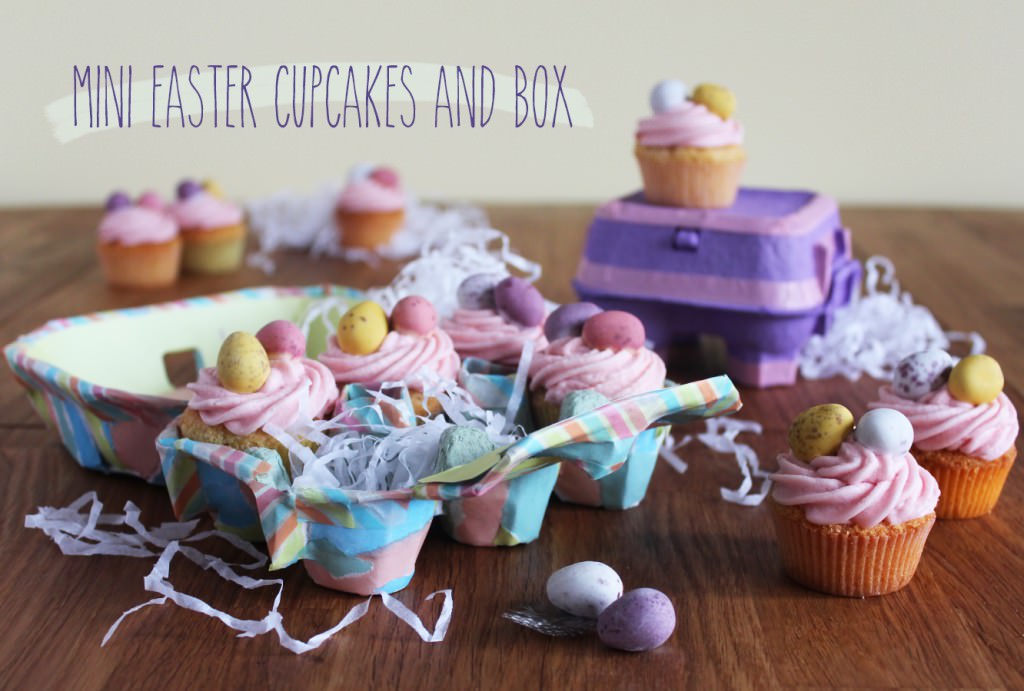
In case you hadn’t noticed, Easter is fast approaching. I’m a big fan of Easter, and Spring in general. This year I’m heading to Germany to see some very wonderful people and I can’t wait.
In the meantime though, I’m busy covering everything in mini eggs and thinking up yummy Easter treats for you to get chubby eating. You’re welcome.
This one is great for kids and would make a lovely little present for the relatives or anyone else you might be seeing over the next few weeks.
You will need
An egg box
Coloured paper/paints
PVA glue
For the cakes
4.5 oz/125g Self raising flour
4.5 oz/125g Butter/margarine (I use stork for most cakes)
4.5 oz/125g Caster sugar
2 eggs
1tsp Vanilla extract
For the decoration
4.5 oz/125g Unsalted butter (room temperature)
2 tbsp Full fat milk
12 oz/350g Icing sugar
Food colouring
1 tsp Vanilla extract
Mini eggs
Mini cupcake/muffin cases
Makes 24
Step one
Decorate your egg box. This post is just a suggestion, you can paint it, or cover it in glitter, or stick cotton wool balls all over to make it look like a sheep. Your only limit is your imagination, and the fact it’s an egg box…
Rip paper into strips. The thinner the paper the better with this really, as egg boxes, I discovered, are rather lumpy, so thicker papers don’t mould around them so well.
Mix PVA and water together in a bowl that you don’t mind getting temporarily covered in glue. You want about 3 parts PVA to 1 part water (otherwise the egg box will get soggy).
Paint the glue mix onto the surface of the box and stick paper on top. Cover each strip of paper with more glue mix as you go. This is where it all gets very Art Attack. Neil Buchanan made it look so easy…
Keep going until the whole outside is covered and leave somewhere to dry. Make sure you do the box bit a good few hours in advance of using it, ideally the day before.
At this stage mine looked like the above, and I still thought it was a bit messy.
Step two
Line the edges with washi tape. I did this to neaten mine up mainly, you possibly won’t have the same issue.
You might notice the purple box in the background…thought I would include a cheats option. That’s the box from those Cadbury’s Egg n’ Spoon things. They are amazing in case you were wondering, and now you have an excuse to buy a pack.
Cut the central doo-dahs so they are level with the rest of the sides.
Line the lid either using the same technique as before, or with cut paper and double sided tape.
Step three
Time to start on the cakes. I use an electric whisk to make cakes but a wooden spoon and some elbow grease is just as good.
Cream together the margarine and caster sugar. If you’re using butter bring it to room temperature before doing this. You want it to be fluffy and light like the image on the right. Honestly, Stork is the way forward for this. Cheaper too.
Step four
Quickly whisk/beat in the eggs and vanilla extract and then add the flour.
Stir until you have a smooth thick batter.
Heat oven to gas mark 4/180 C/350 F
Step five
Fill cake cases with mixture. You want them to be about two thirds full, a few of mine were too full, so if in doubt look at the above and go for a bit less!
Step six
Bake for about 30 mins on gas mark 4/180 C/350 F. My oven is a touch special so keep an eye on yours, timings may vary.
Leave to cool completely before icing.
Step seven
Whisk together the unsalted butter, icing sugar, milk, and vanilla extract. Add food colouring of your choice.
Now, I don’t usually use a recipe for this so don’t shy away from adding a bit more icing sugar if your icing is too wet or a splash more milk if too dry.
Step eight
Ice your cakes and pop two mini eggs on top.
I won’t give too many piping tips as I’m still getting the hang of things myself. The general rule though is to keep the piping bag at quite an upright angle and apply even pressure.
Step nine
Put them in the egg box and make someone’s day that little bit more joyful.


