A classic case of things not turning out quite how they were meant to this week. I’m not sure exactly what I was expecting, but my housemates managed to cajole me into embracing the rustic charm of these makes nonetheless. By the end I managed to accept them as ‘not too bad after all’ and the lack of precision means that they would be a great little craft for kiddies as the winter creeps in.
With Christmas decorating just around the corner these guys are a great finishing touch as tree decorations, tags on presents and for card making. They are cheap to make and are cute little token gifts for the people you love, or at least those you like enough to want to give them something, but not enough to actually apply yourself to Christmas shopping.

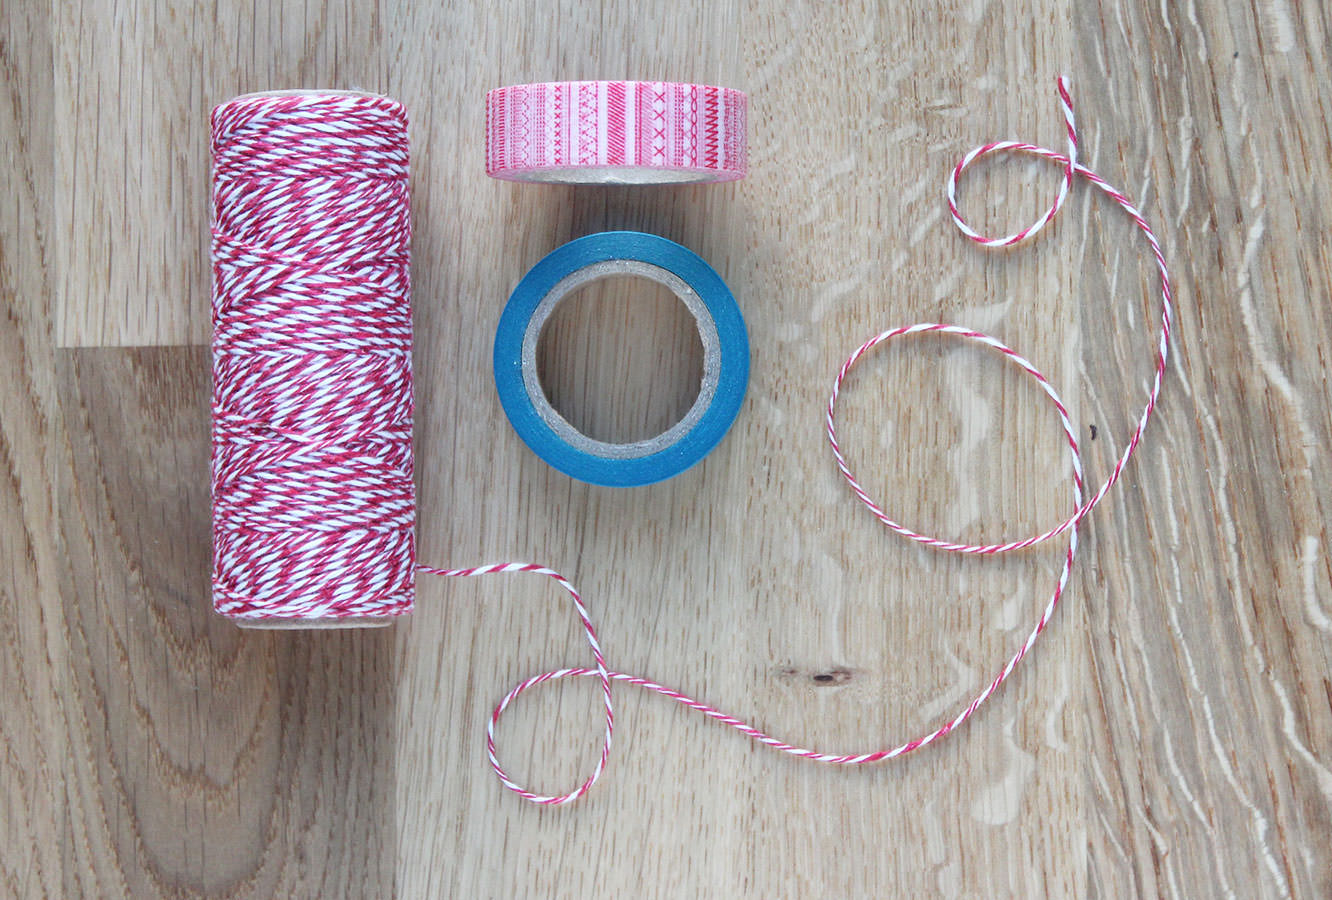
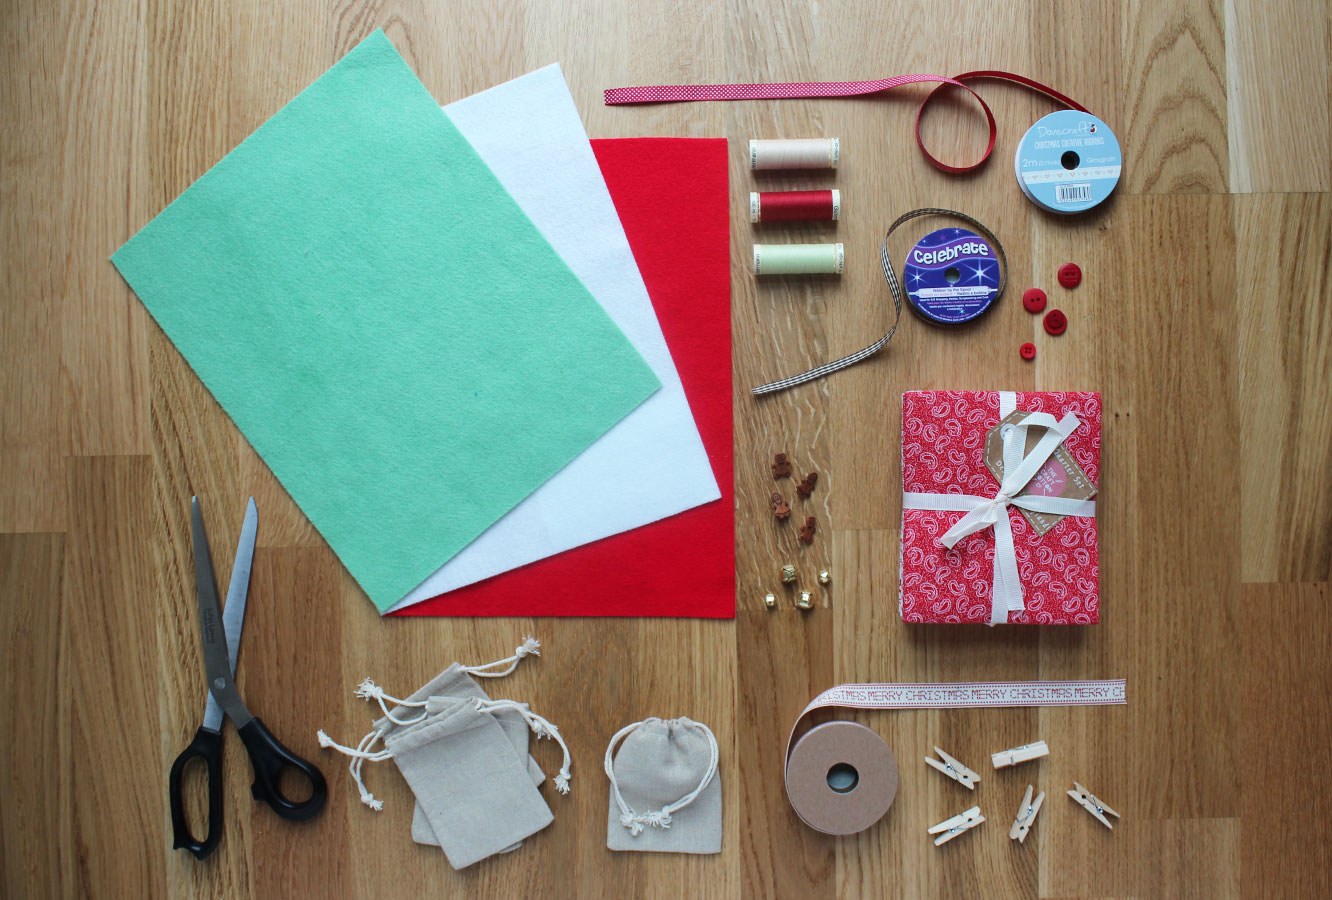
You will need
A block of FIMO modelling clay
Shape cutters
Festive string or ribbon
Acrylic paint and a small paint brush
Alphabet cookie stamp, I go this from Tiger recently (or regular stamps might work)
A paperclip
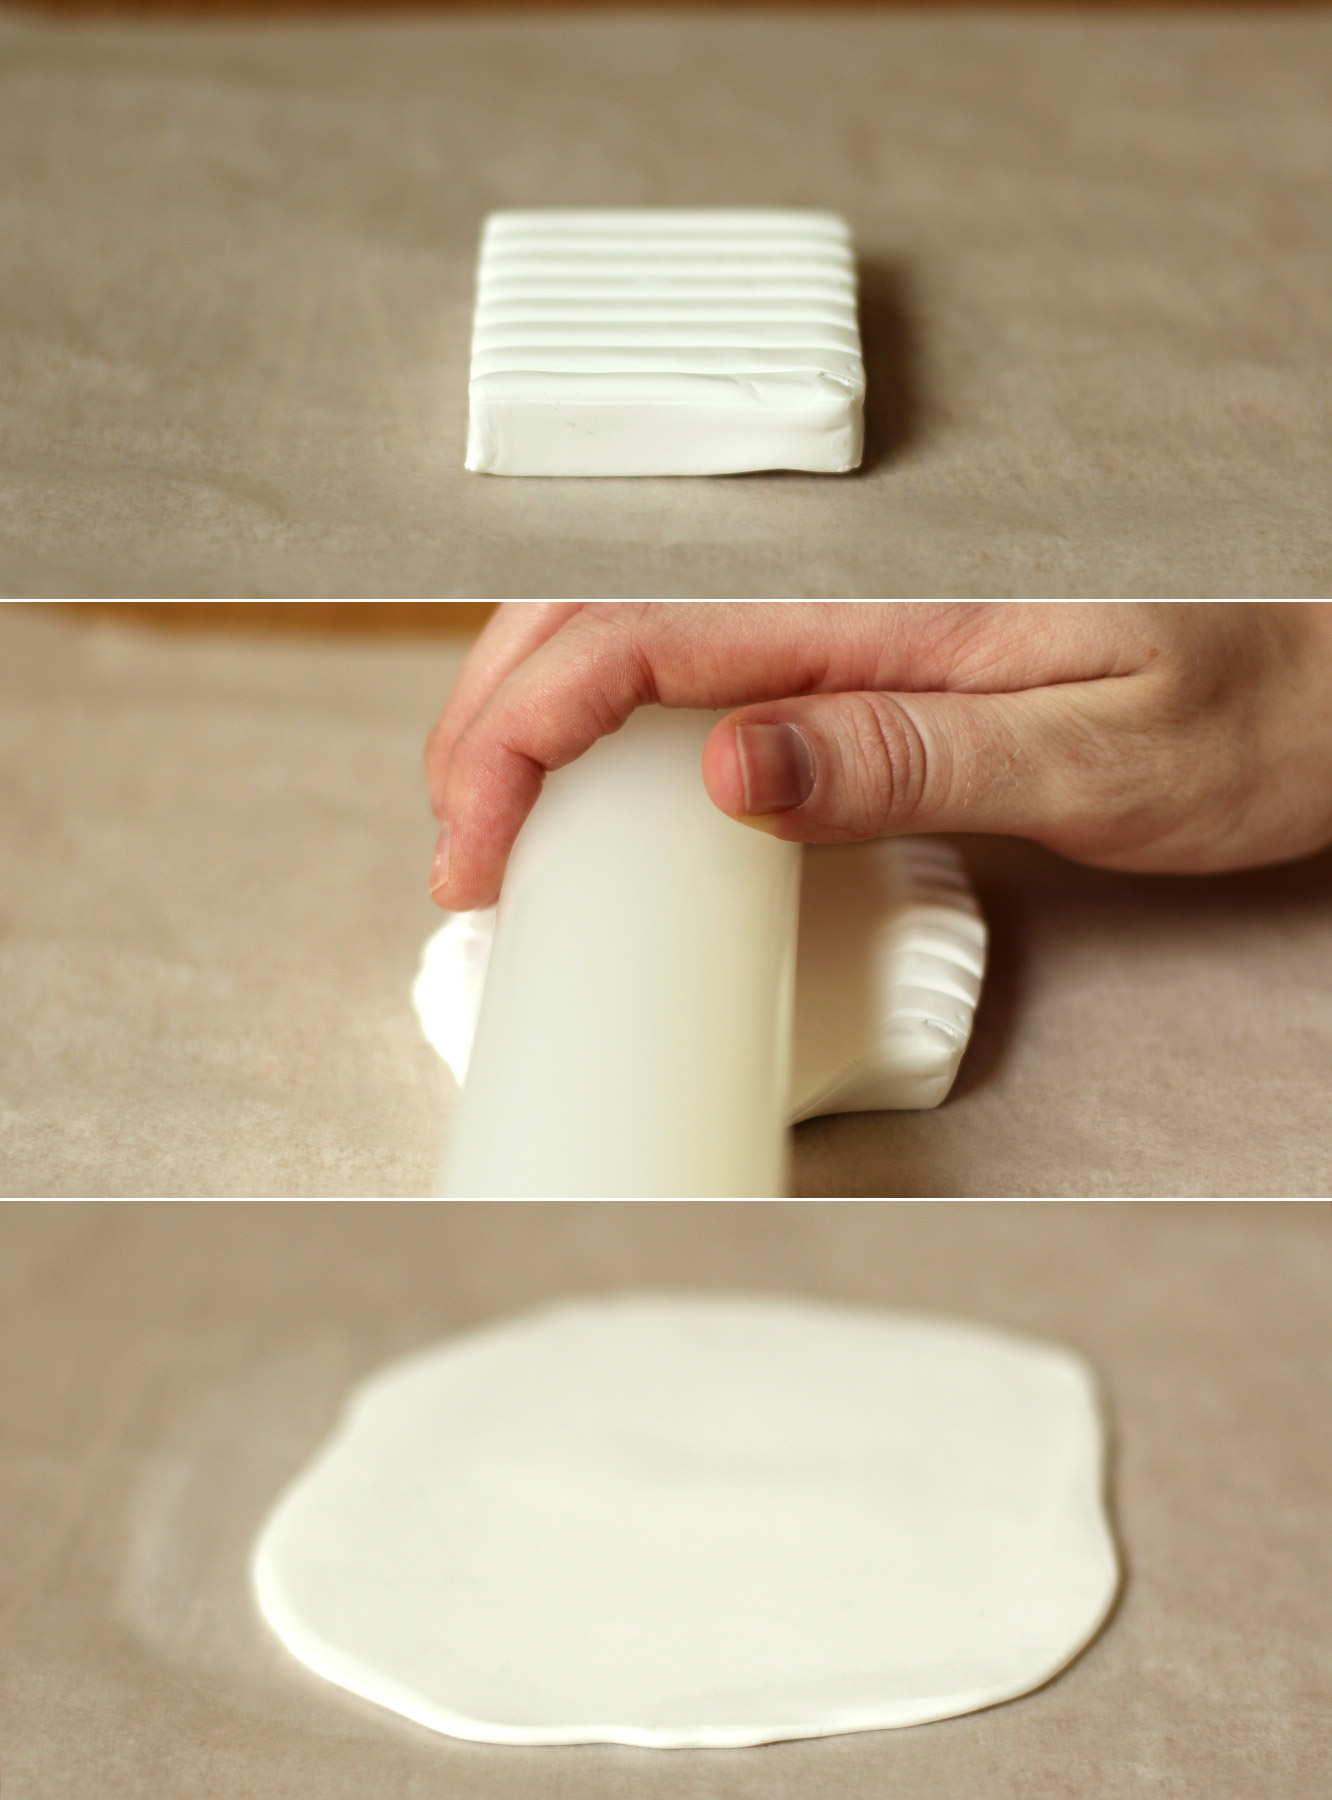
Step one
Roll the FIMO out into a thin sheet, about 2-3mm thick.
I learned a few things here. Greaseproof paper is not the easiest thing to roll this out onto, a clean surface would be better. Roll the FIMO into a ball with your hands first to warm it up a bit as it will be easier than just rolling straight onto the block. Dust will get into the FIMO so easily, it picks up EVERYTHING, so make sure you wipe your rolling pin and surface carefully.
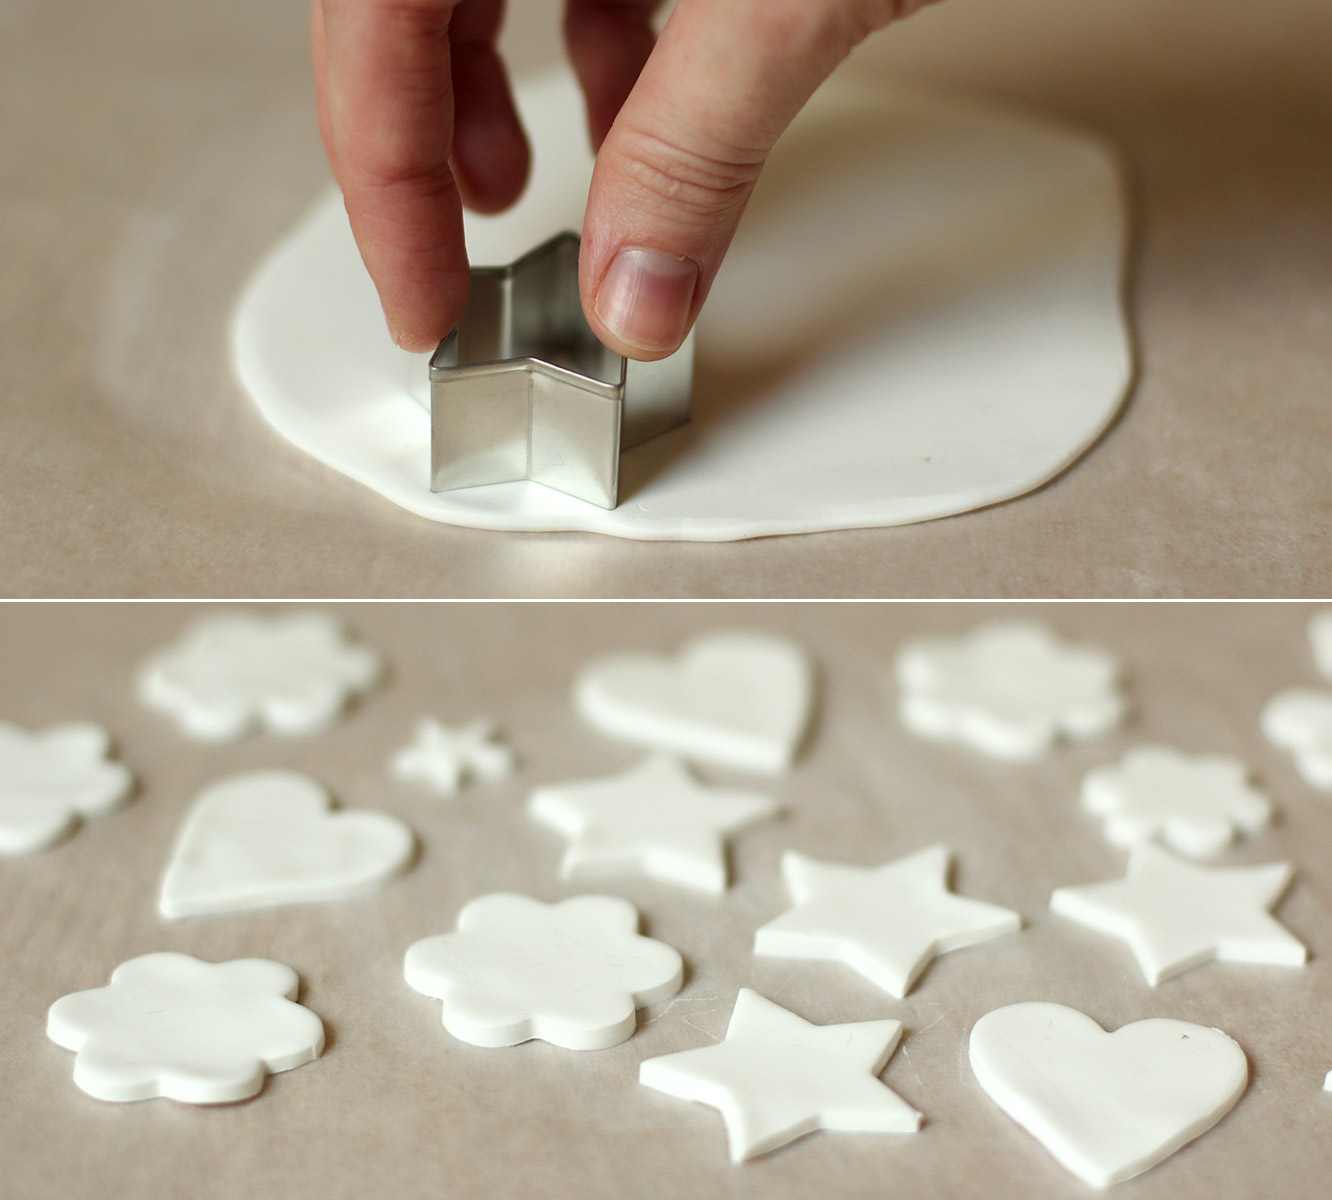
Step two
Cut out a variety of shapes. Re-roll and keep cutting until you have used all the FIMO. It’s surprising how many you get in the end out of such a small block.
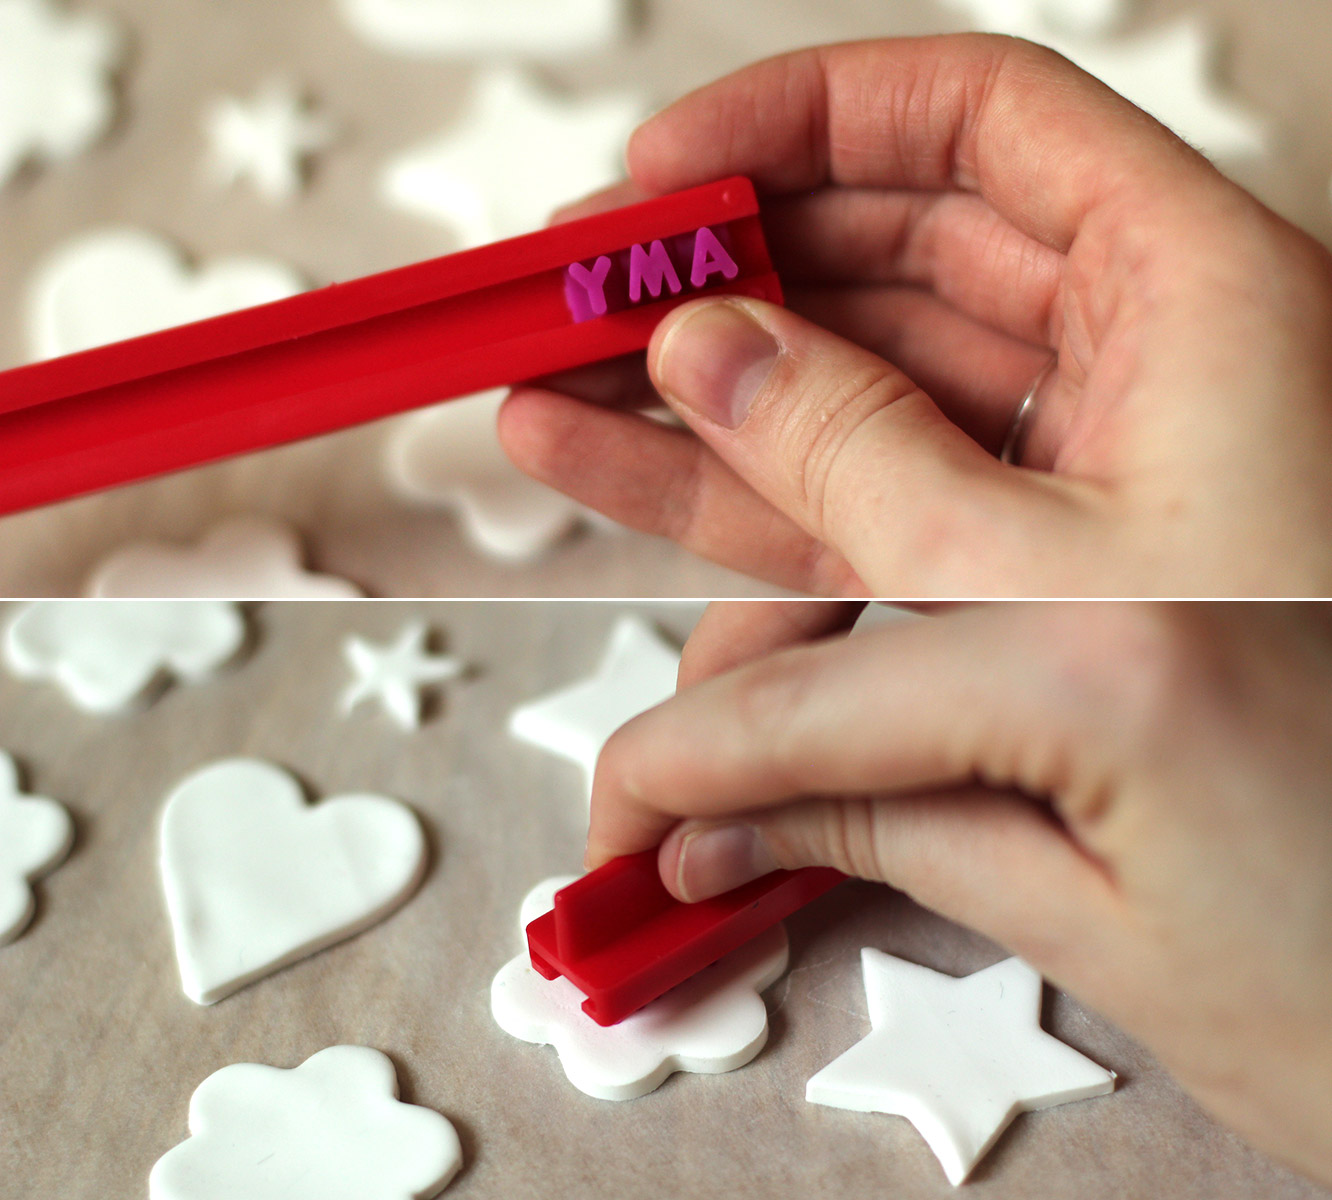
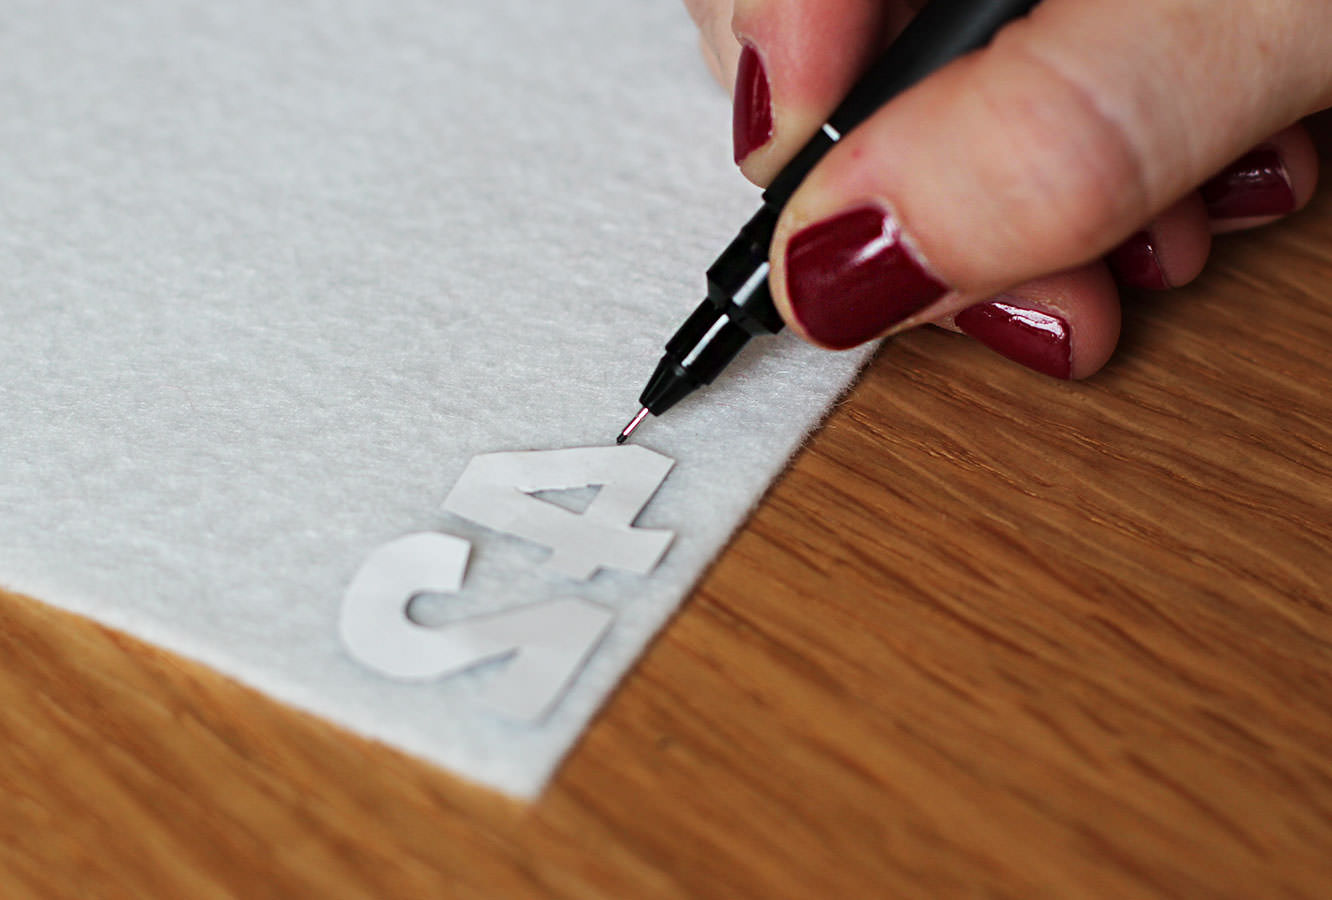
Step three
Stamp the names of your nearest and dearest into the shapes. I found that words longer than four letters were problematic. I employed some creative shortenings, although my housie Marianne was not impressed with Matz as her new nickname. It will depend on the sizes of your cutters, but you might want to do initials or words like ‘love’, ‘joy’ and ‘noel’ if there’re some long names knocking about.
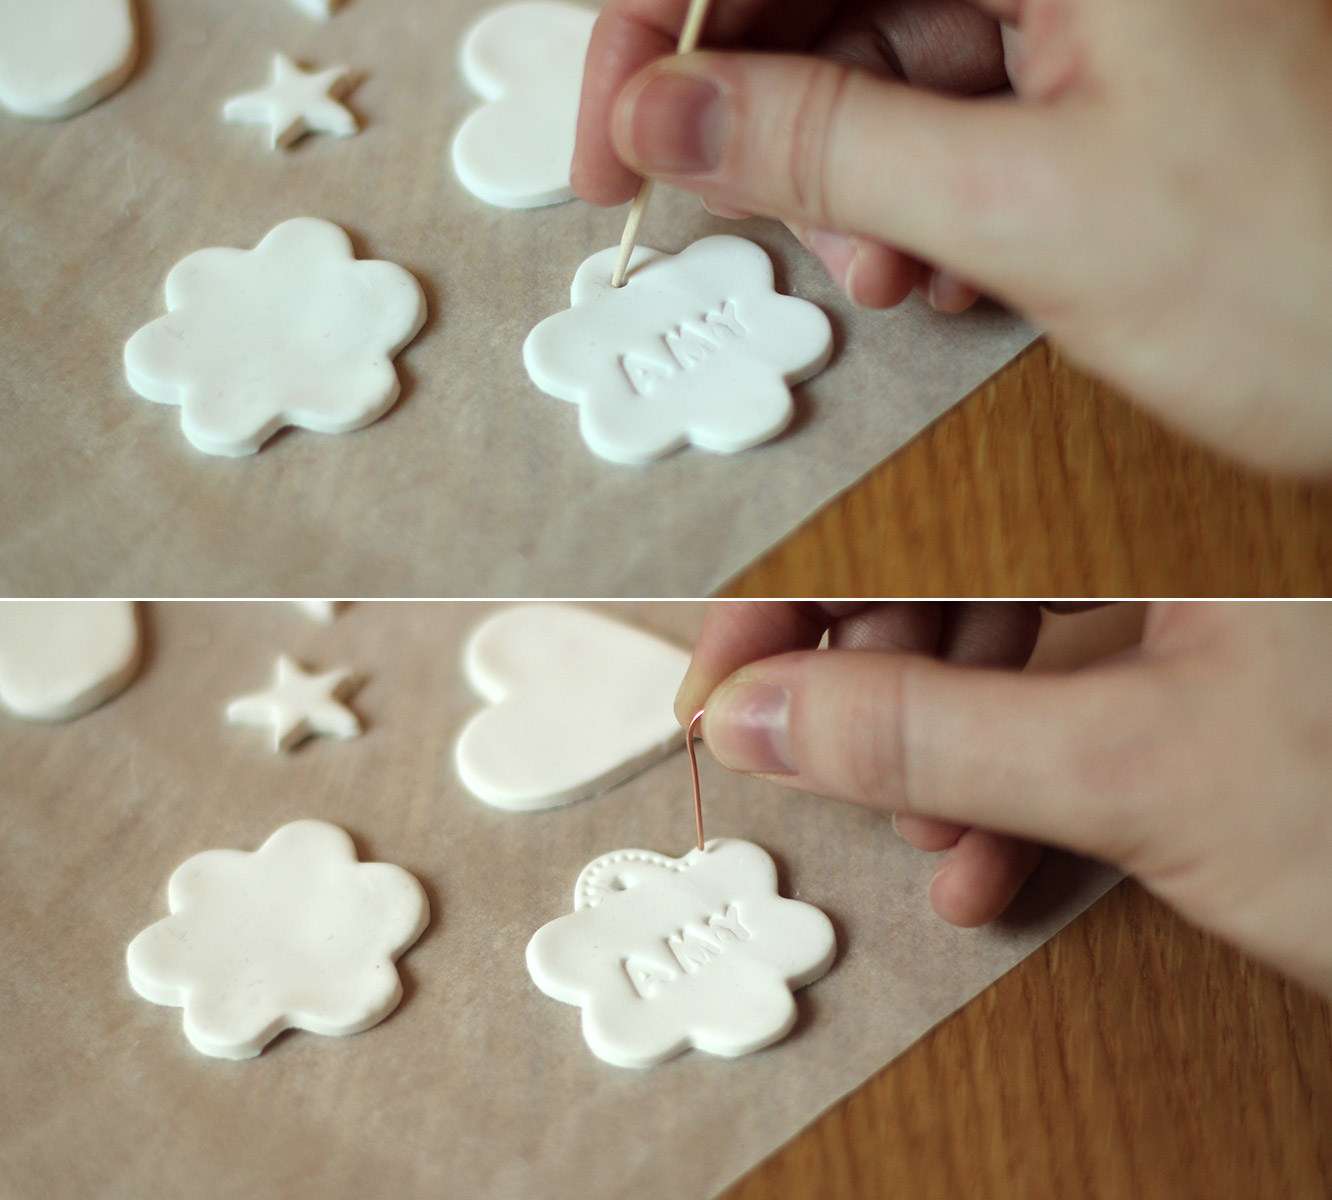
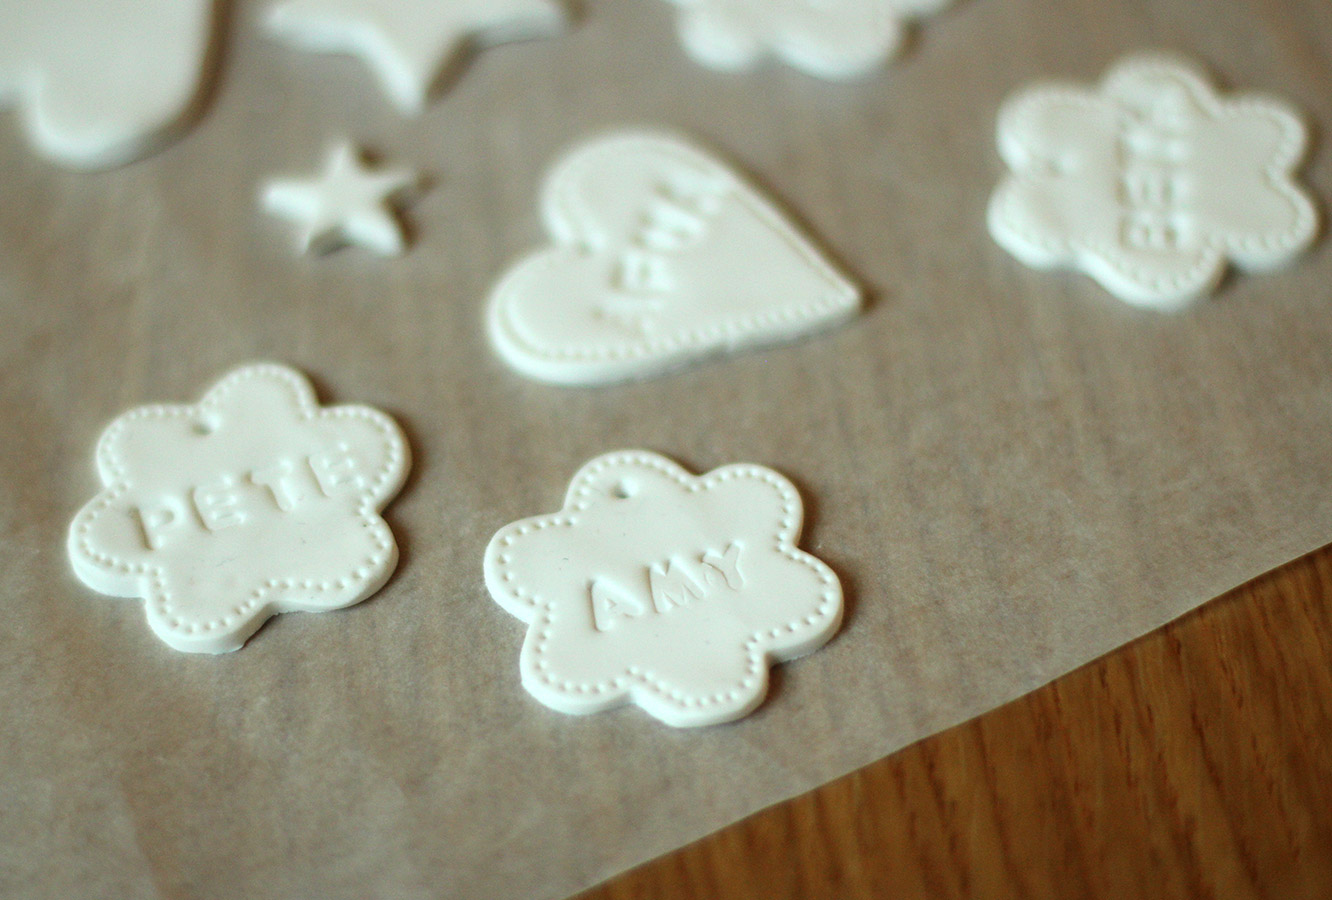
Step four
Using a cocktail stick or bent out paperclip make a hole at the top for the hanging. Wiggle the stick about in a circular motion to make sure the opening is big enough for your string or ribbon.
I then made dots all around as an edging with a paperclip.
Step five
Place on greaseproof paper and onto a tray. Bake in the oven on 100C/200F/gas mark 1 for about 30 minutes. I guessed because the packet provides zero instructions, other than to not heat it above 130C. You can tell by picking them up as they start to feel less soft and a bit lighter as they cook.
Step six
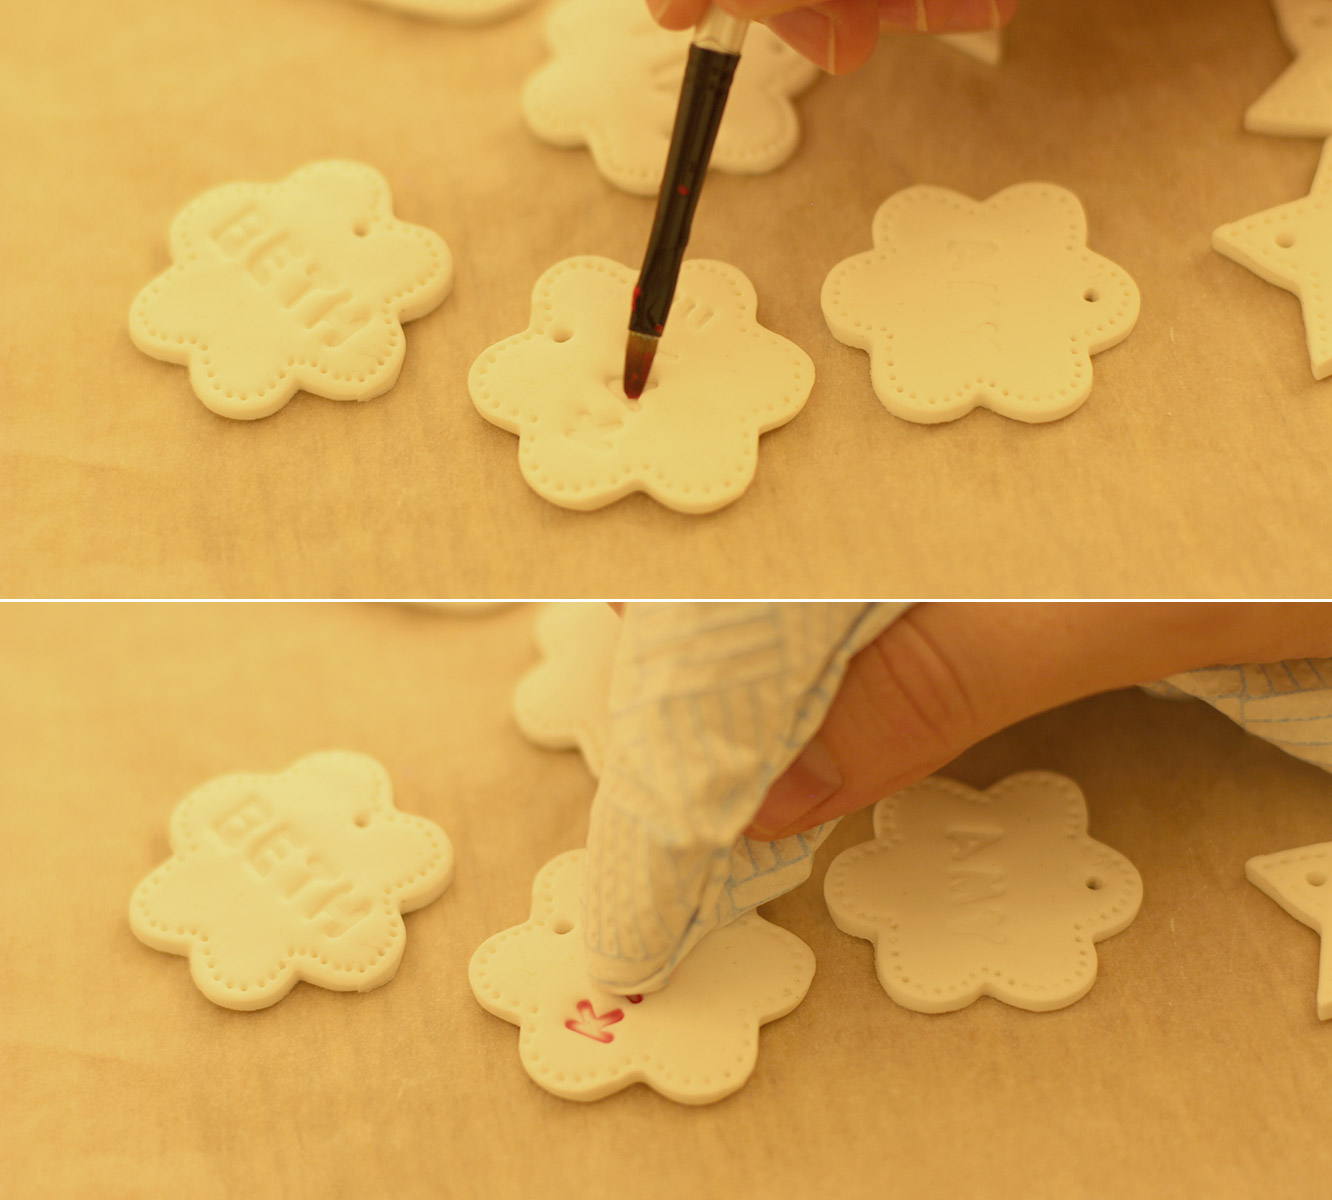
Using very watery acrylic paint, brush over the letters and the edging. Quickly dab away the excess with some clingfilm to create a rustic look.
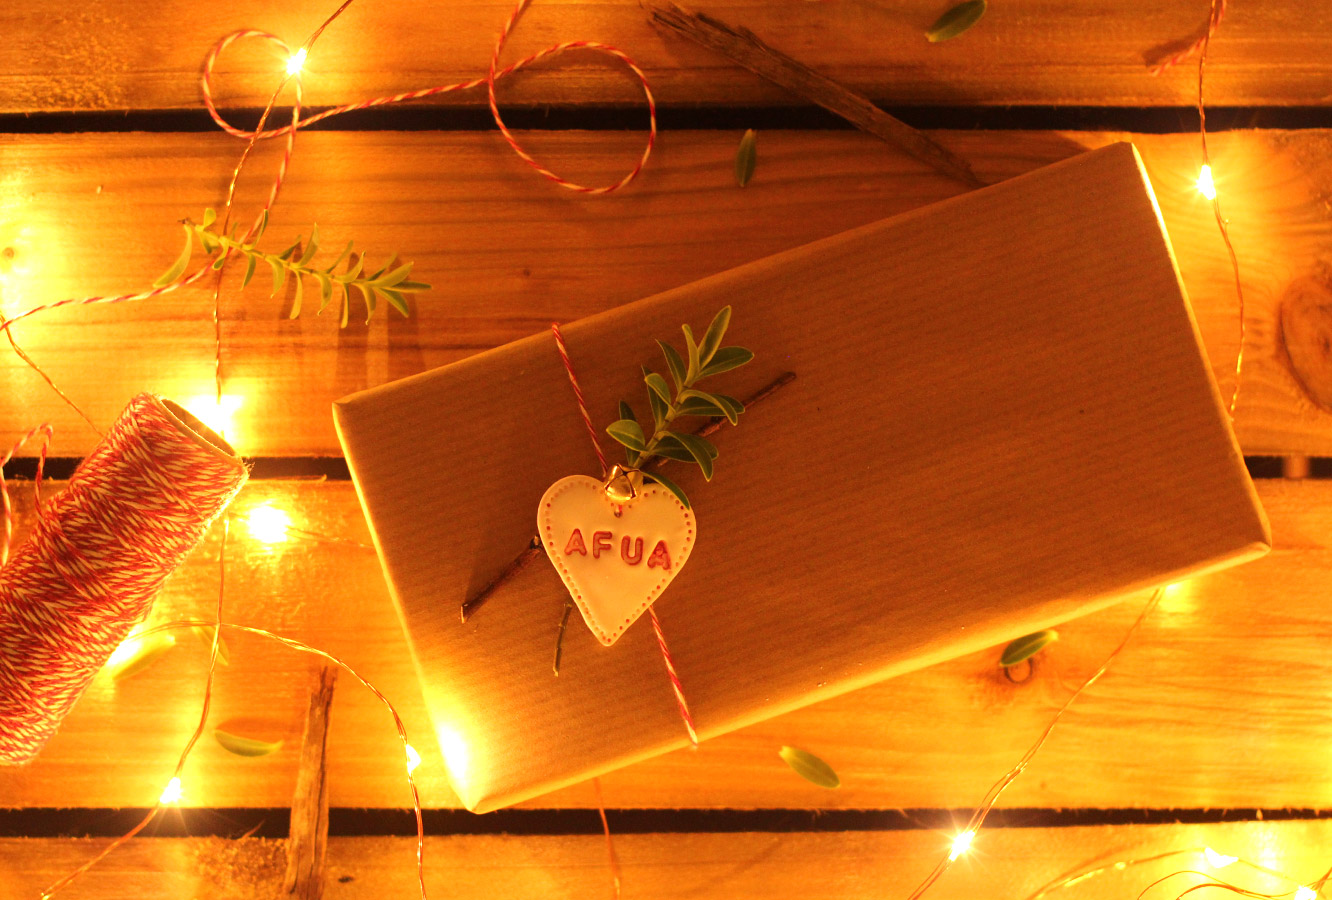
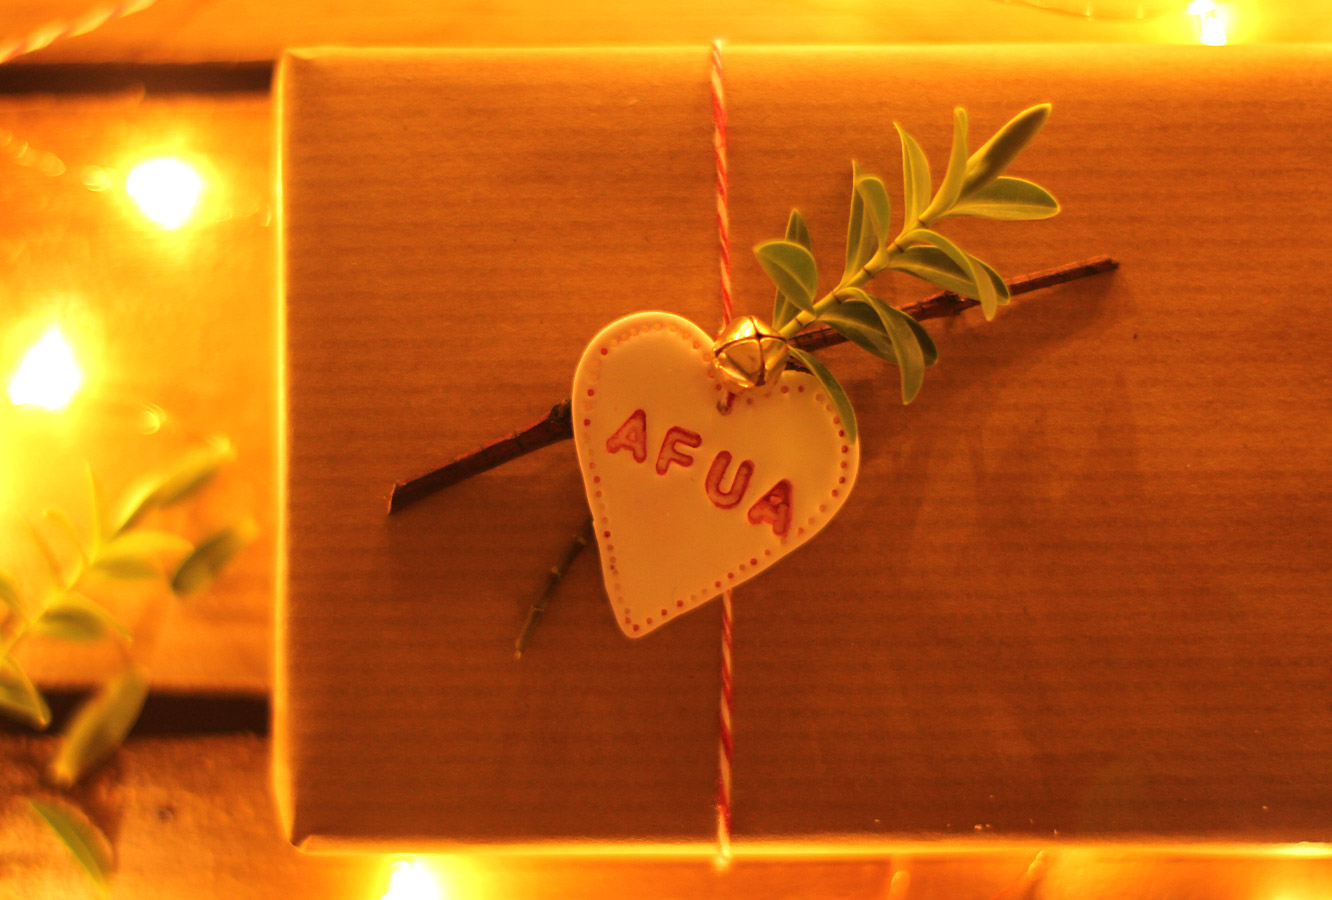
Use one: Tie up with a couple of trimmings from the garden, maybe a button/pom pom/little bell like mine. Tie with the string around a gift wrapped in brown paper.

Use two: String up and hang from a jug of twigs or your Chrimbo tree.

Use three: Make mini ones with initials and create a simple Christmas card with a piece of wash tape and brown card.