Category: New Year

Munchies

A while back I started a small ‘series’ courtesy of Matt and Vicky’s engagement party. I didn’t get very far, because Christmas. Sorry about that. In case you haven’t seen it, the first post is here.

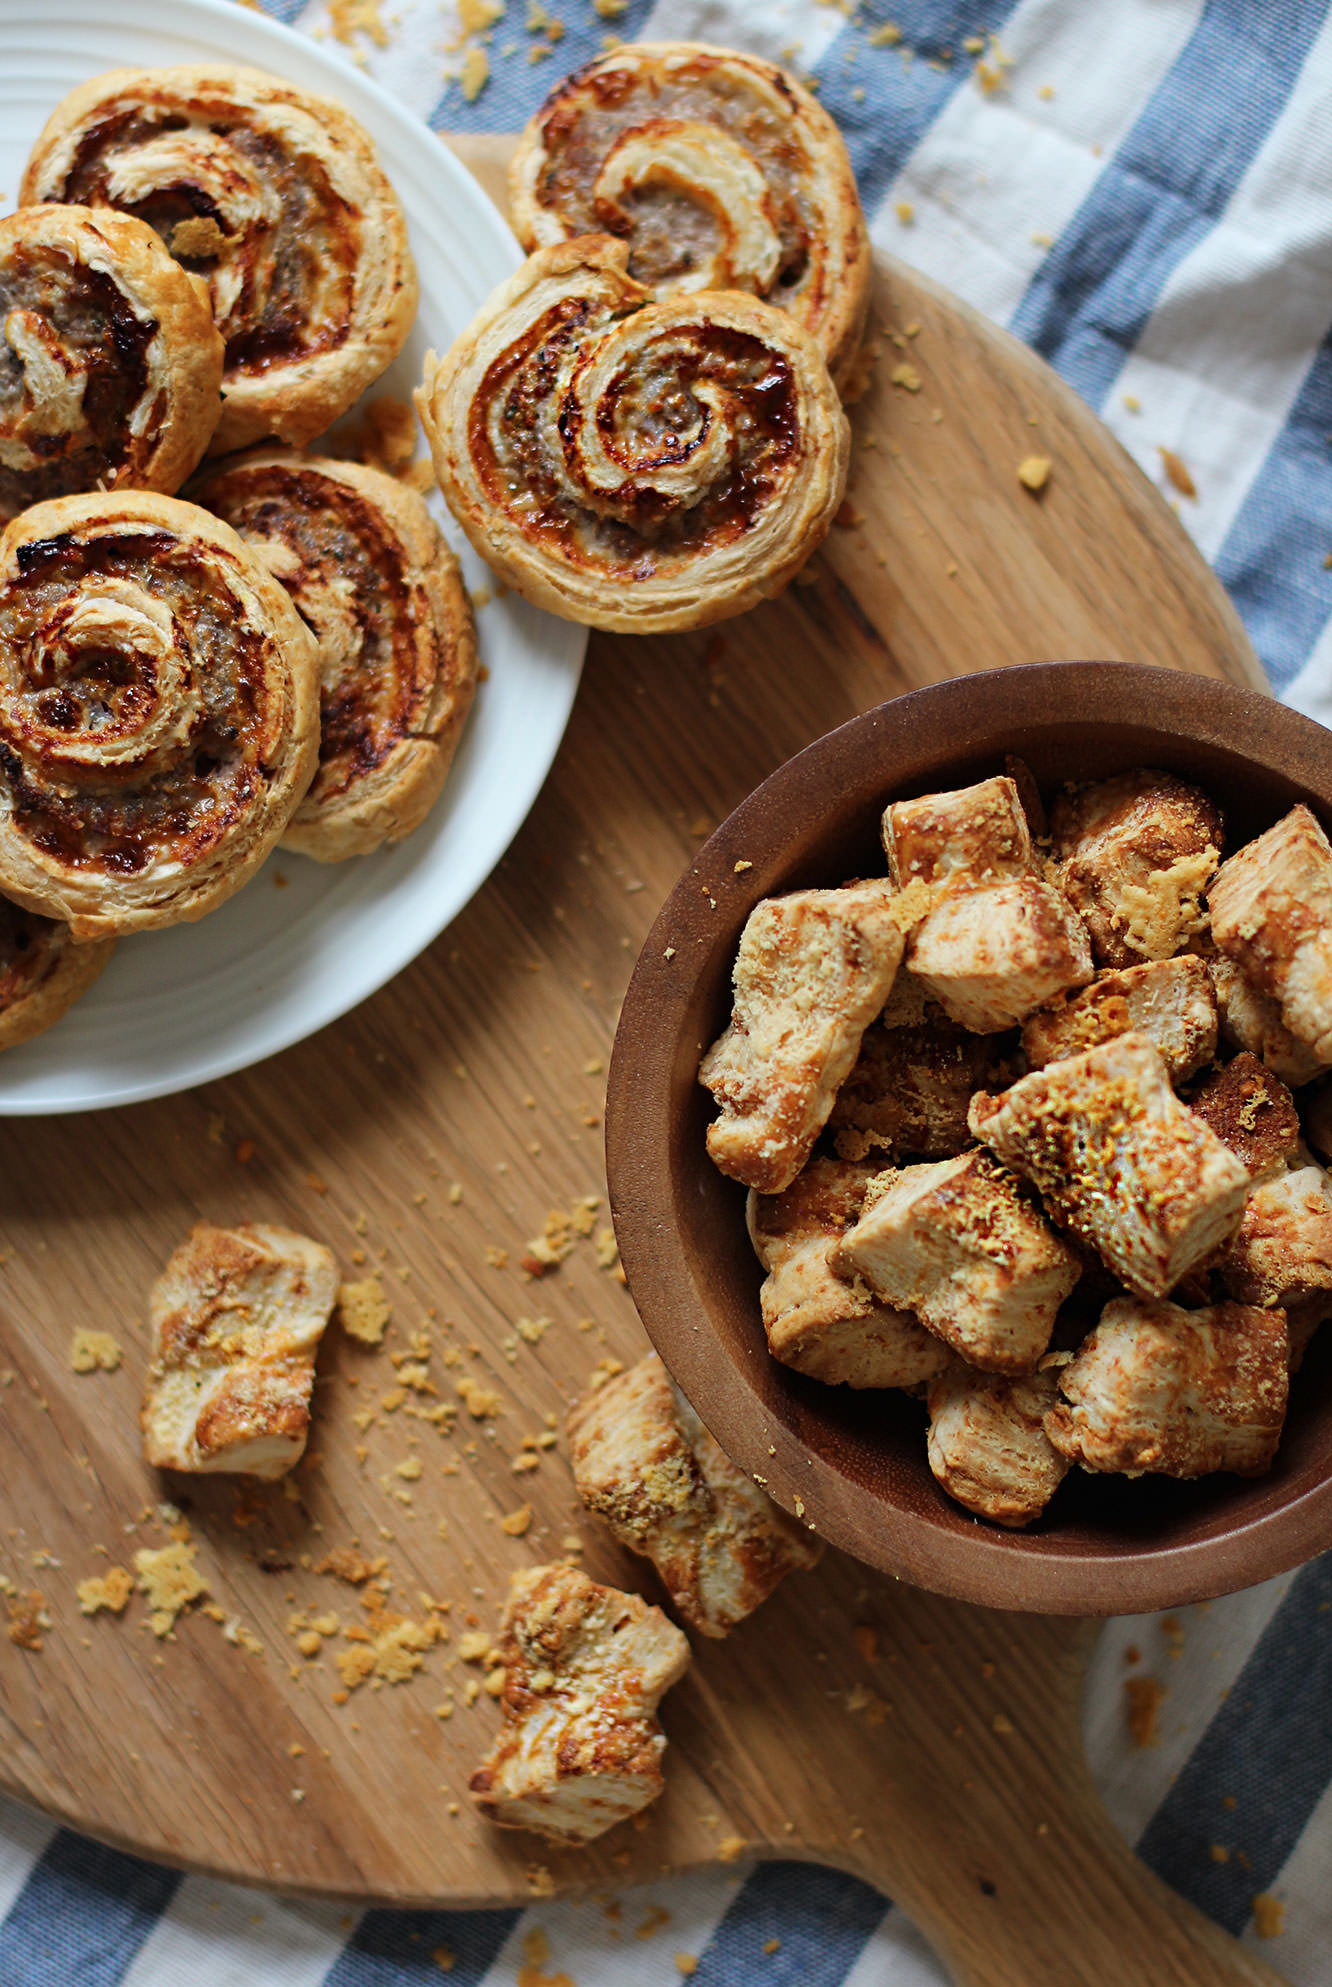
So, in honour of NYE and the parties you’ll all be throwing and in need of nibbles for, here’s a couple of quick and easy last minute bites for the table: some sausage wheels and cheese puff pastry bites.

There’s a lot of cheating in this recipe. I’m not one for making my own puff pastry. Apparently I’m not even one for seasoning my own food now either.
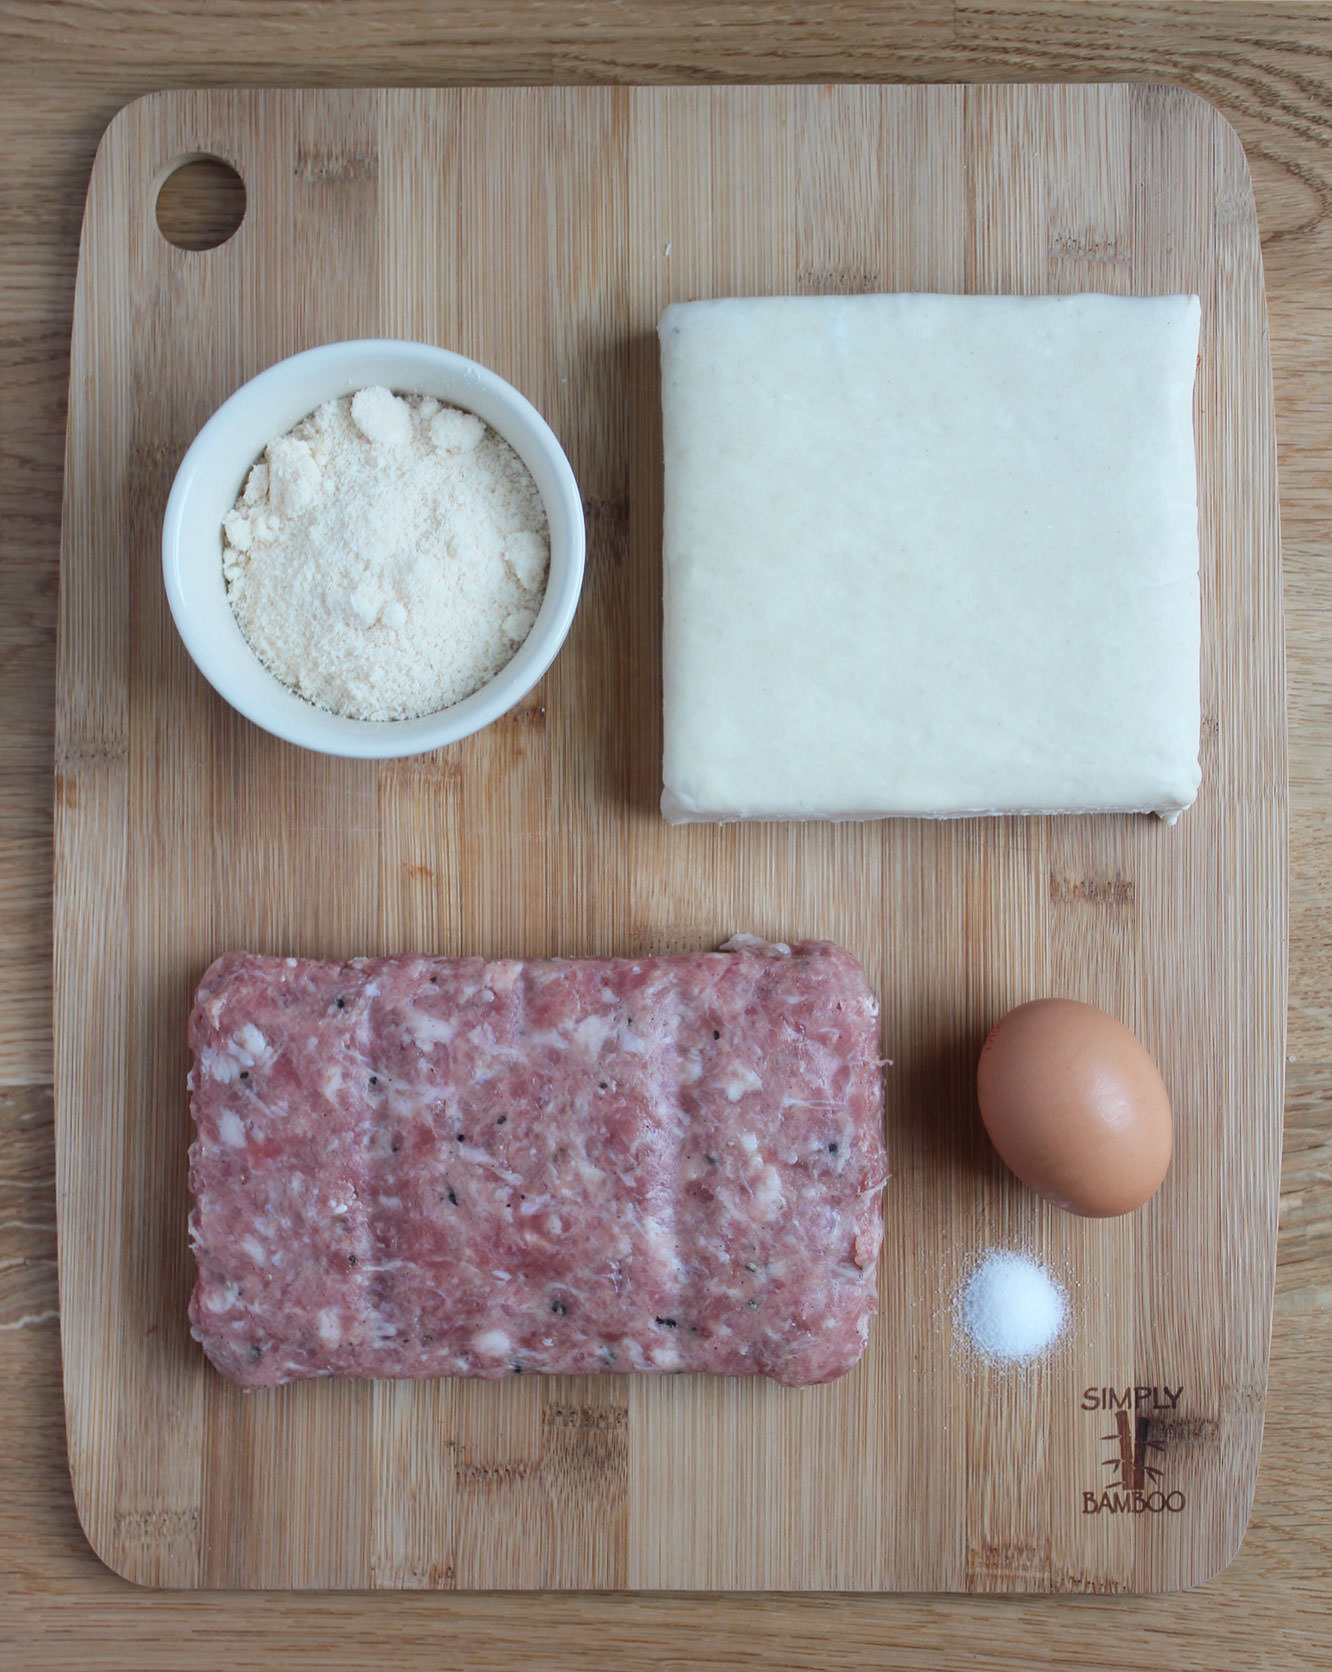
easy-quick-puff-pastry-party-nibbles-1

You will need

500g packet of puff pastry

400g/ 14oz of sausage meat (I bought packet of pre-seasoned/flavoured stuff from Waitrose. Zero regrets)

75g/ 2.5oz grated parmesan

1 egg

A generous pinch of salt
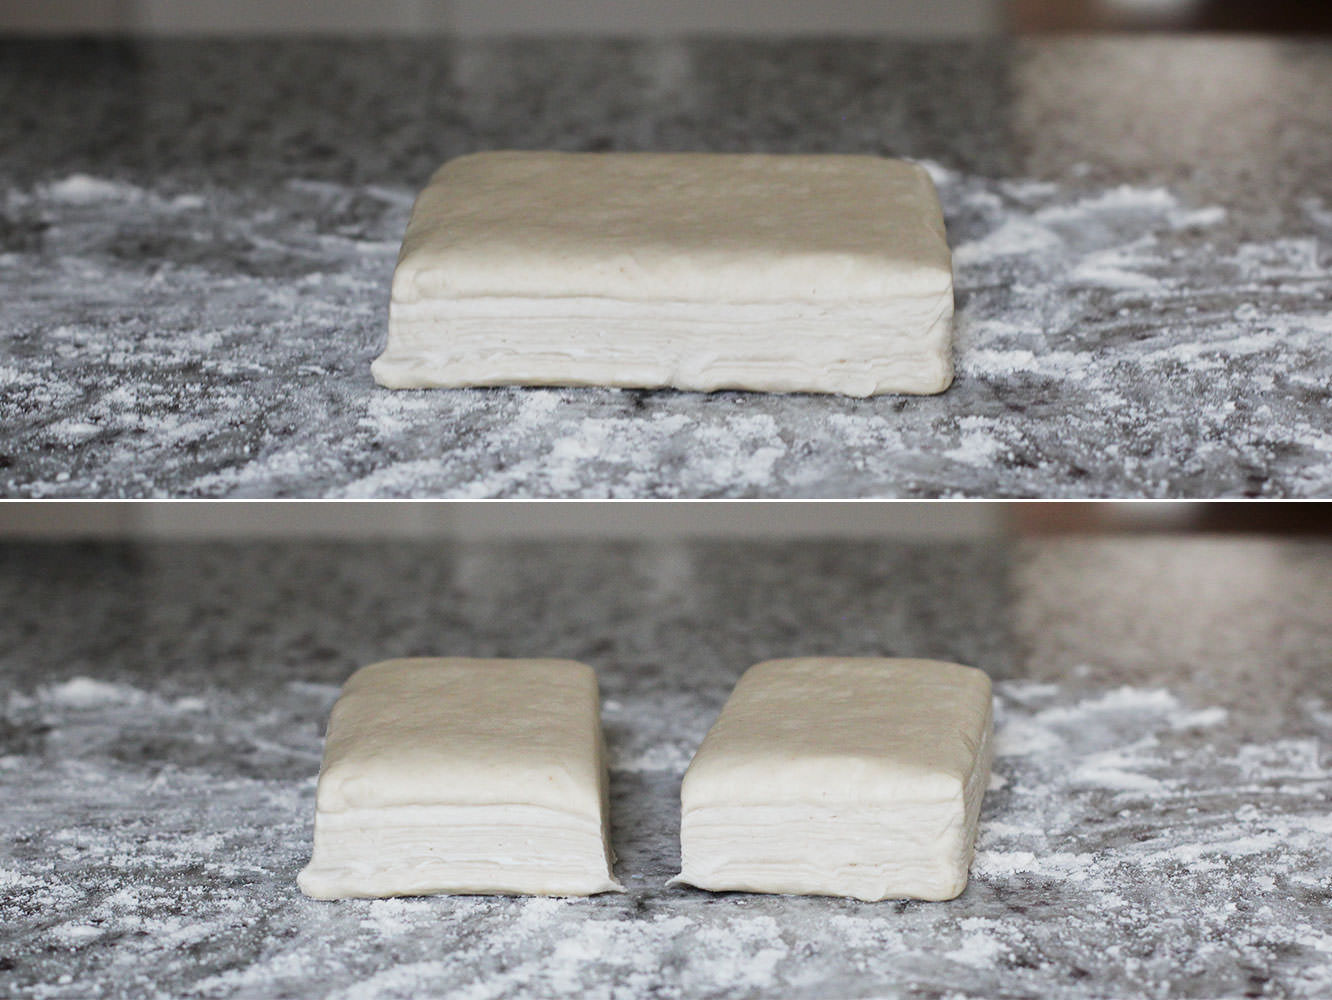
easy-quick-puff-pastry-party-nibbles-2

Step one

Divide pastry into halves.
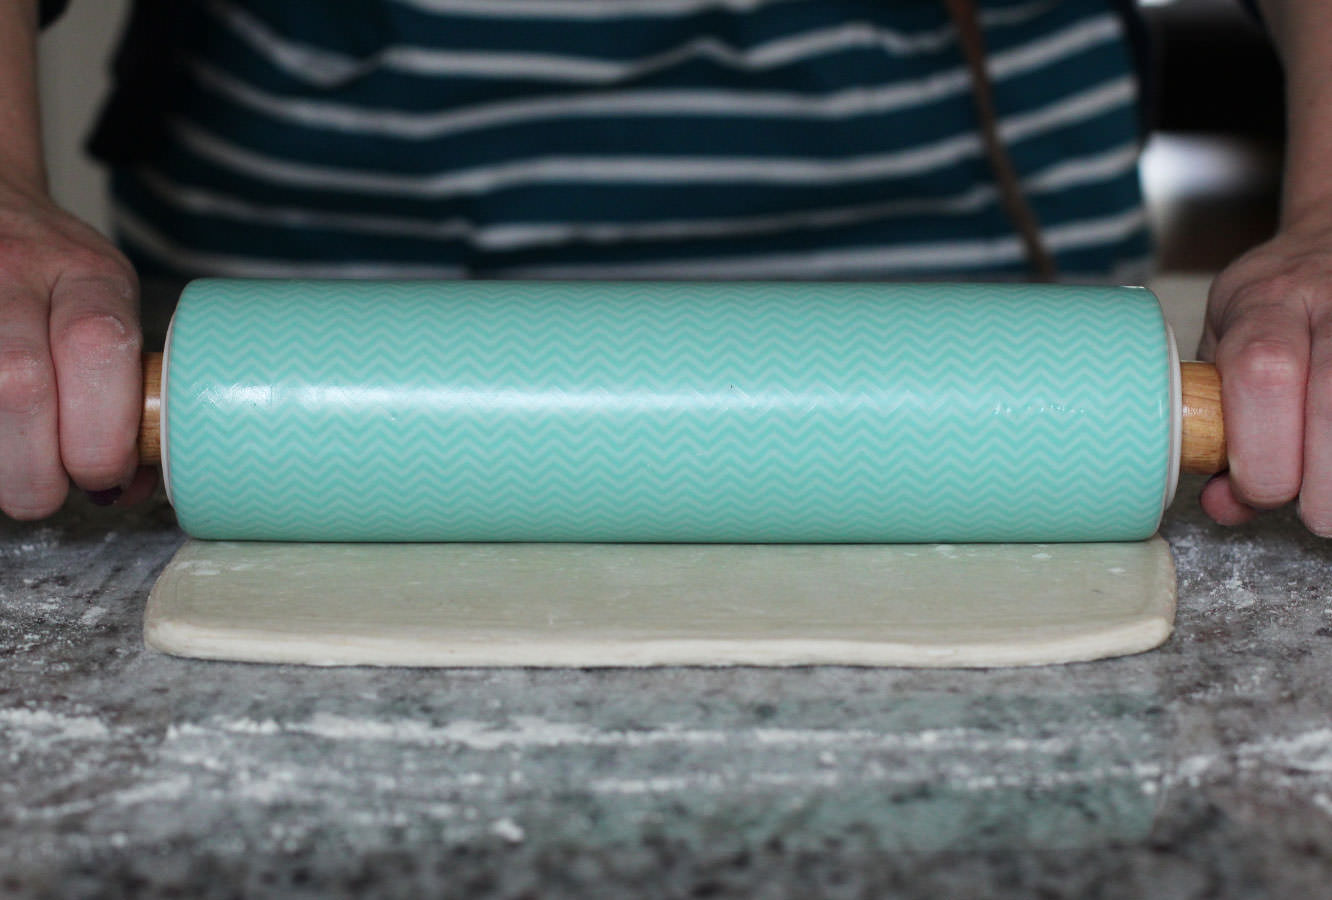
easy-quick-puff-pastry-party-nibbles-3

Step two

Roll out one of the halves until it’s about a centimetre thick.
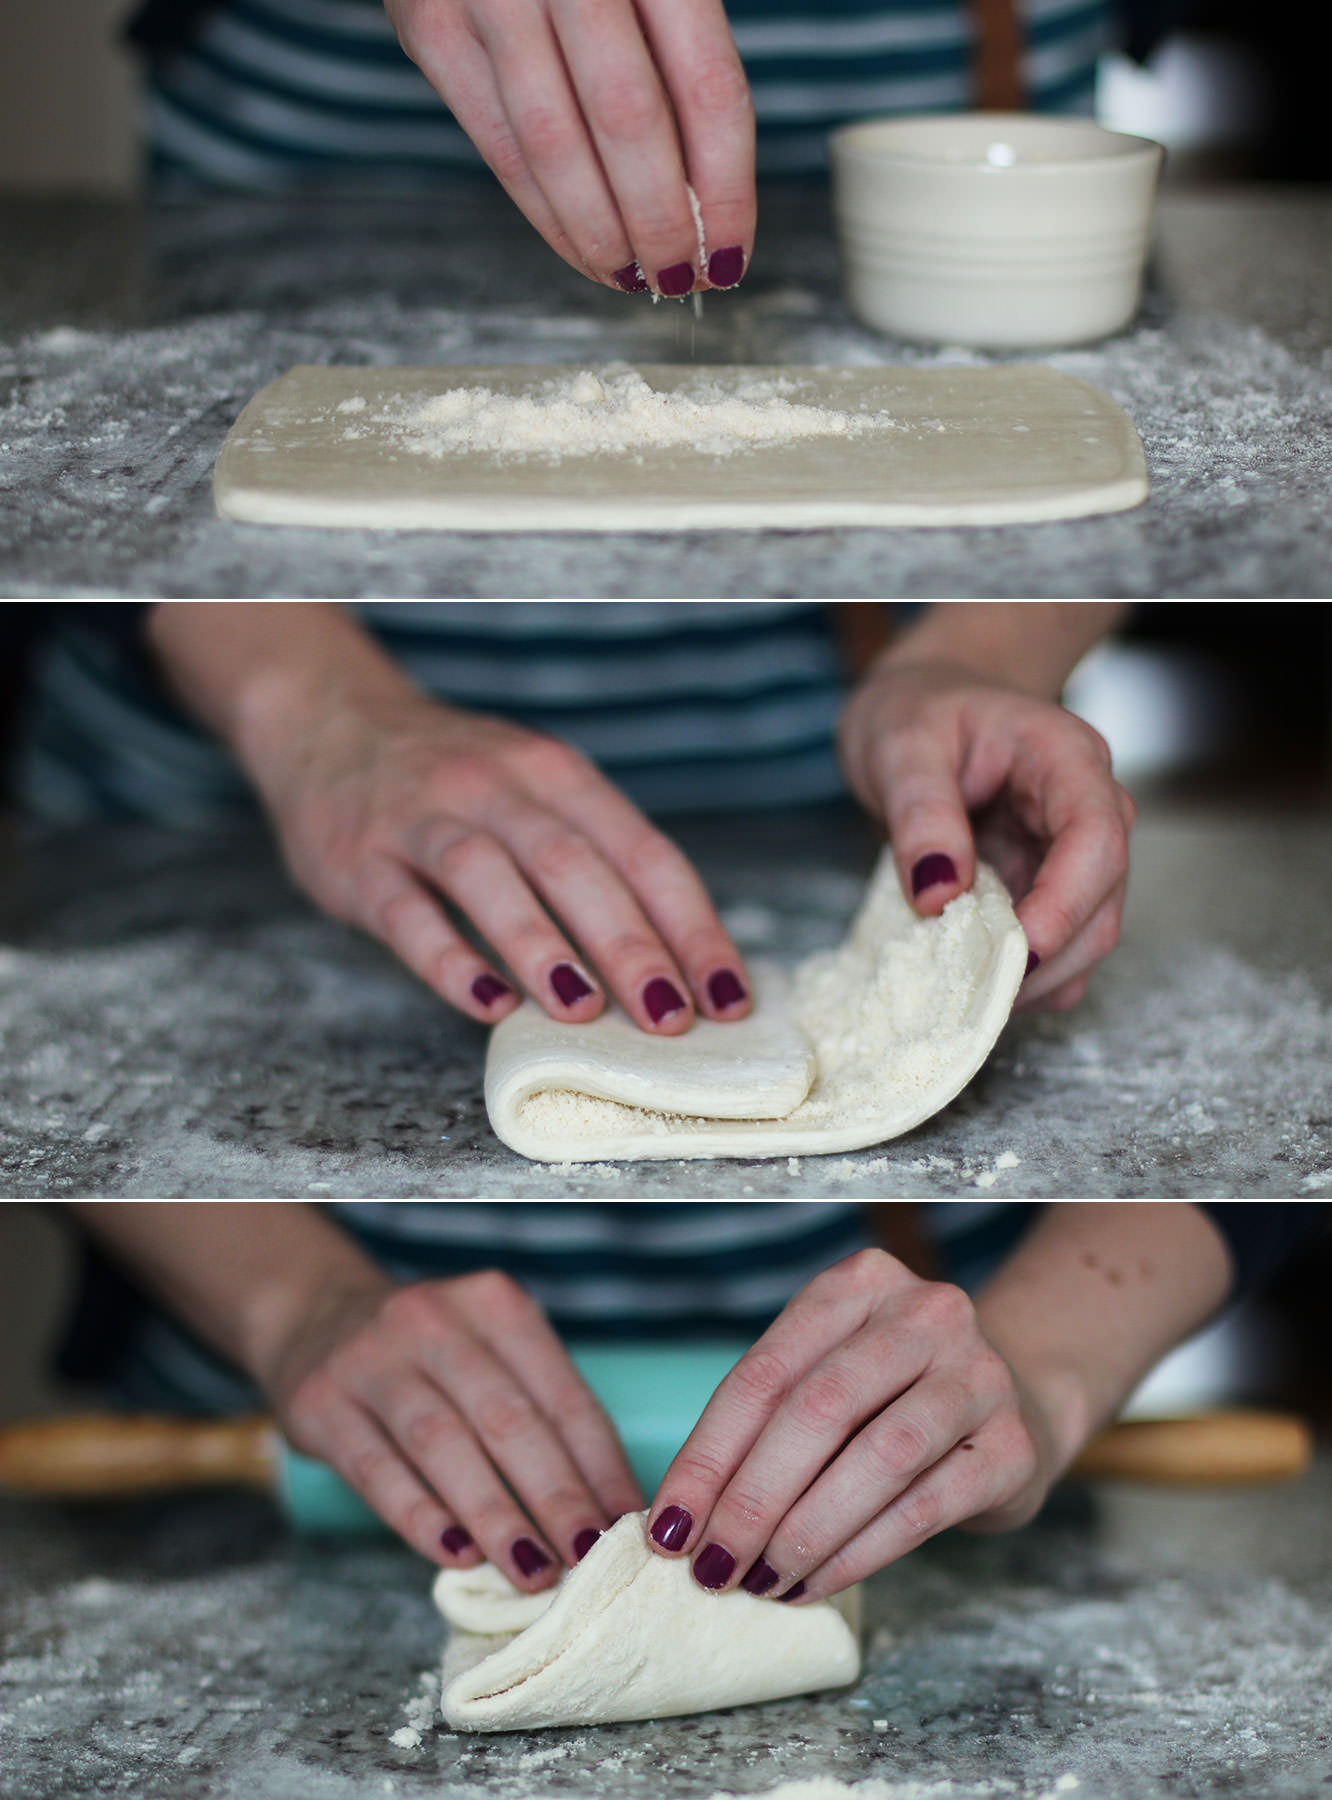
easy-quick-puff-pastry-party-nibbles-4

Step three

Sprinkle half the parmesan onto the pastry. Fold it into thirds and roll out a little. Fold into thirds again in the opposite direction and roll again until square.

Be careful not to over work it.

easy-quick-puff-pastry-party-nibbles-5

Step four

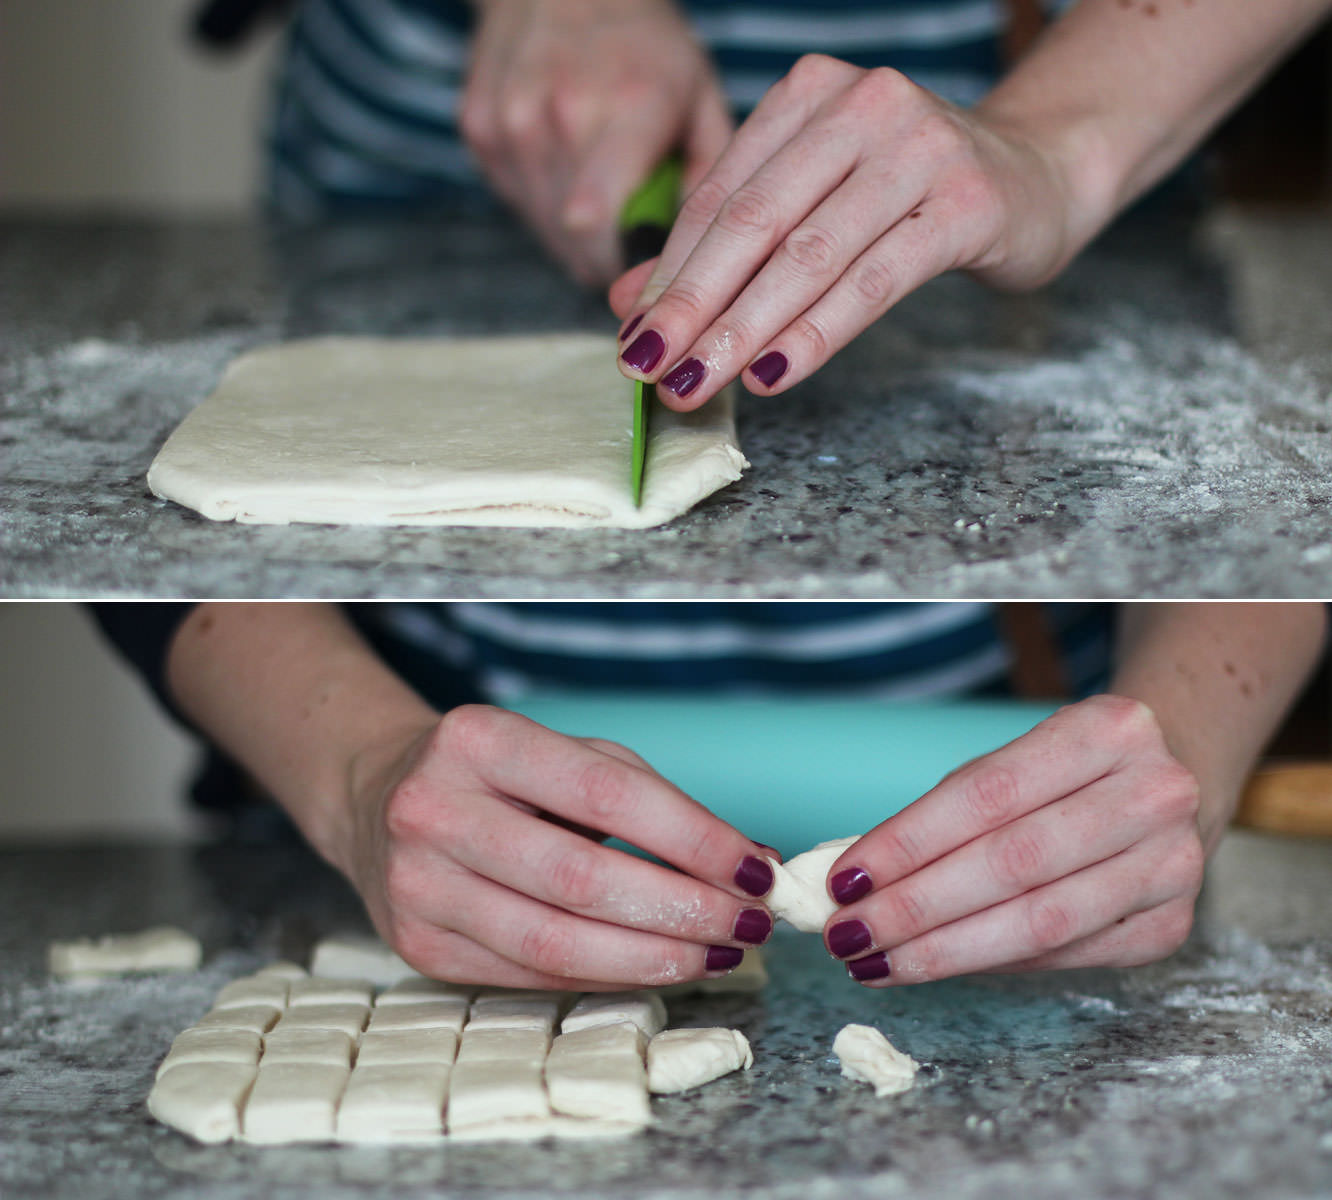
Cut into small rectangles and twist to make little bow tie looking shapes. If my ailing memory serves me correctly I believe this made around 25-30.

easy-quick-puff-pastry-party-nibbles-6

Step five

Place on a baking tray and sprinkle with more parmesan and some salt.

Bake on 180C/ gas mark 4/ 350F for about 45 minutes. You need to keep an eye on them as they can look done on the outside and not be cooked the whole way through.
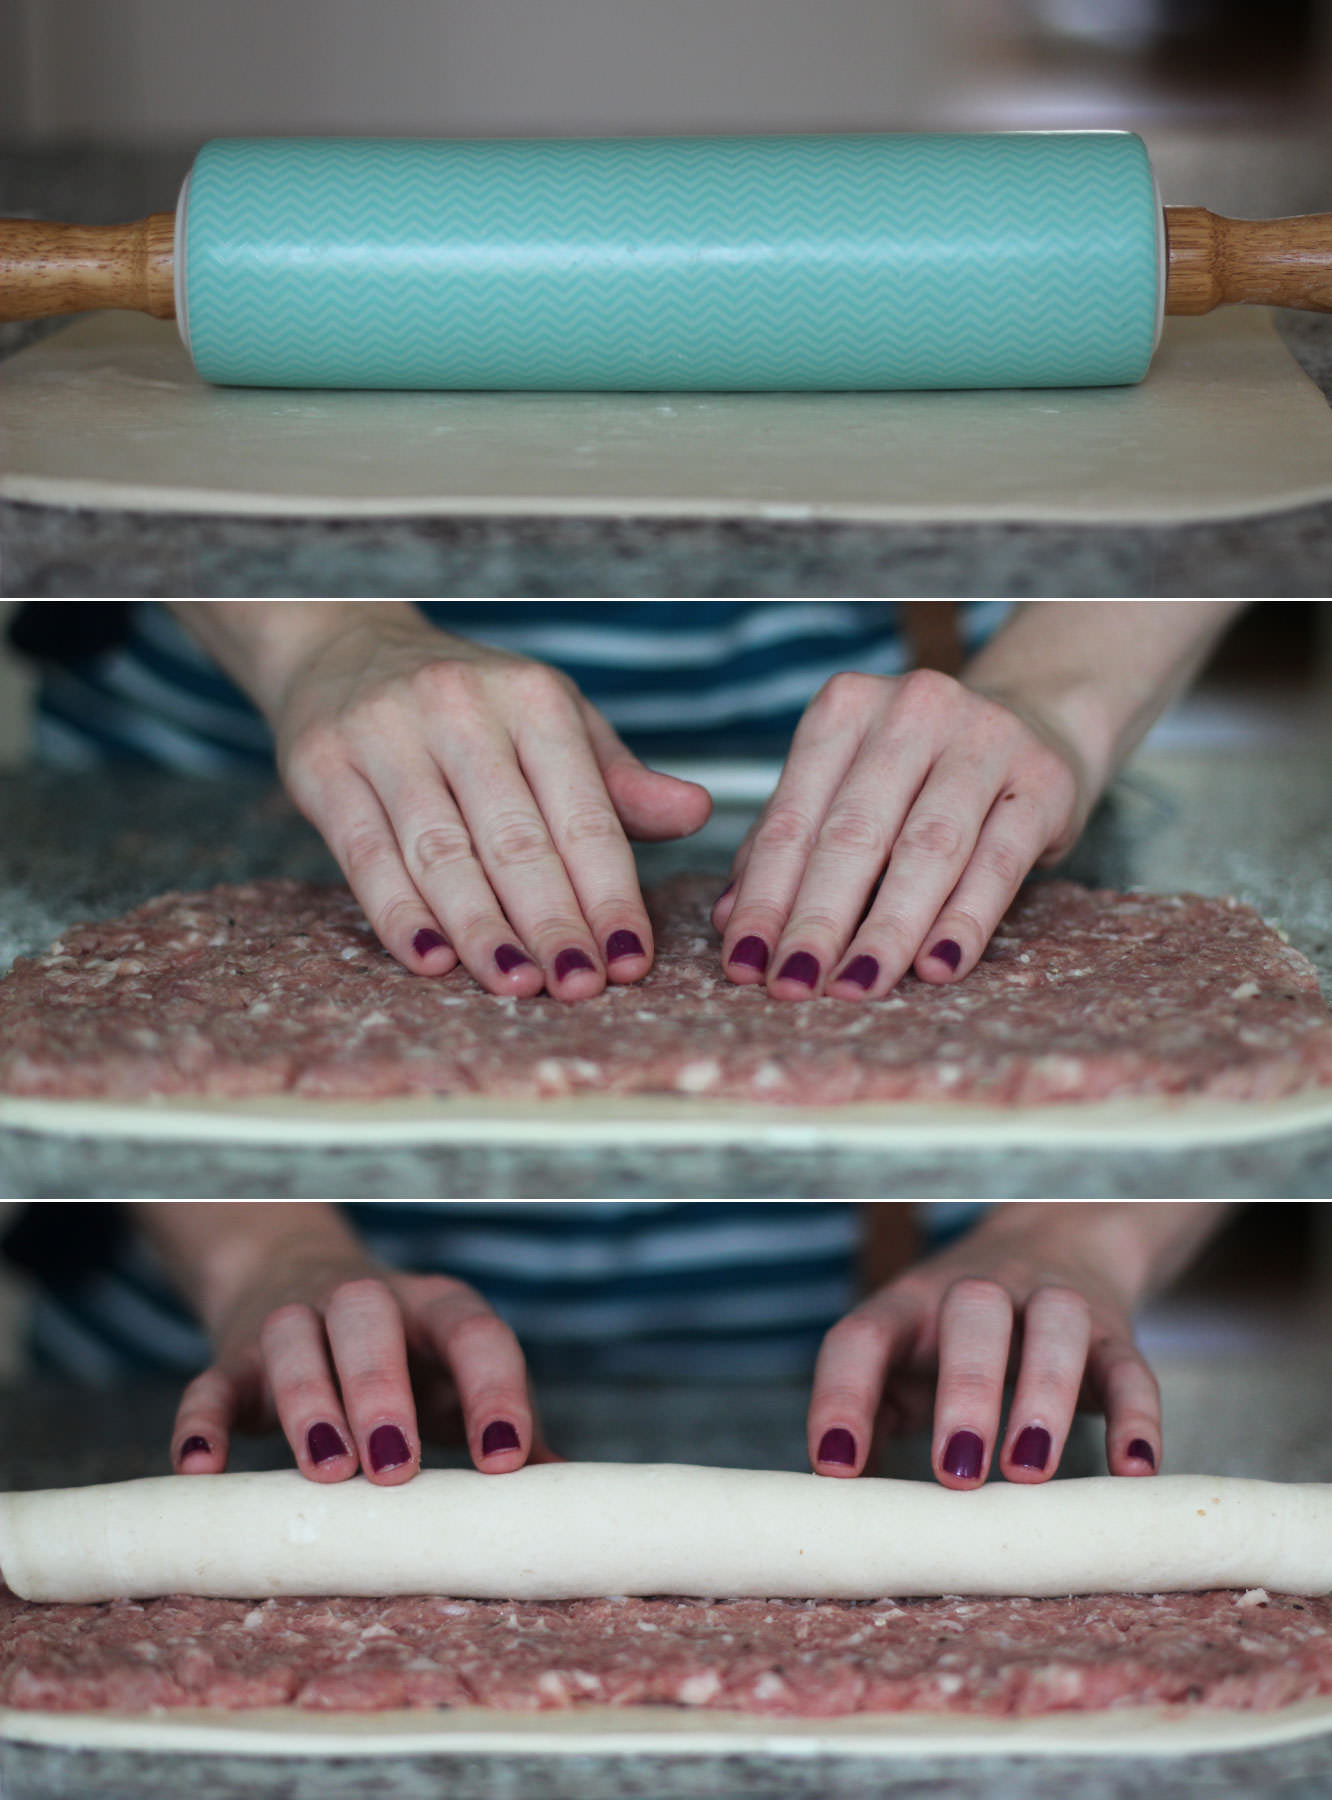
easy-quick-puff-pastry-party-nibbles-7

Step six

Roll out the second half of the pastry until it’s about 5mm thick.

Step seven

Spread the sausage meat out across the surface of the pastry. Leave a gap of 1-2cm on the long edge.

Step eight

Whisk the egg in a small bowl with a fork. Using a pastry brush (or your clean fingers) spread the egg along the gap you left in step seven.

Step nine

Roll the pastry up, the egg should help the edge to seal.
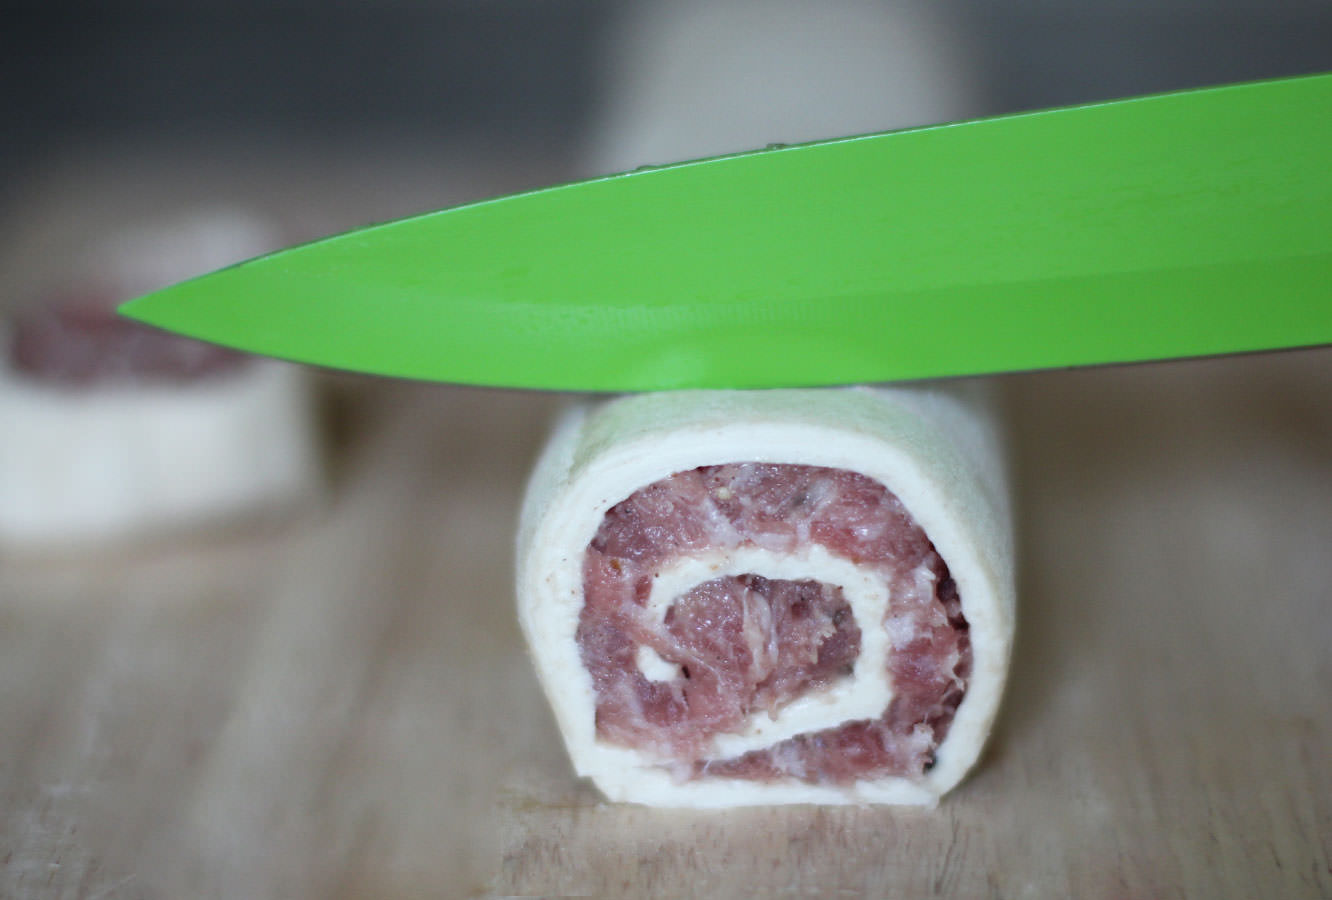
easy-quick-puff-pastry-party-nibbles-8

Step ten

Cut slices of the sausage about 1.5cm thick.
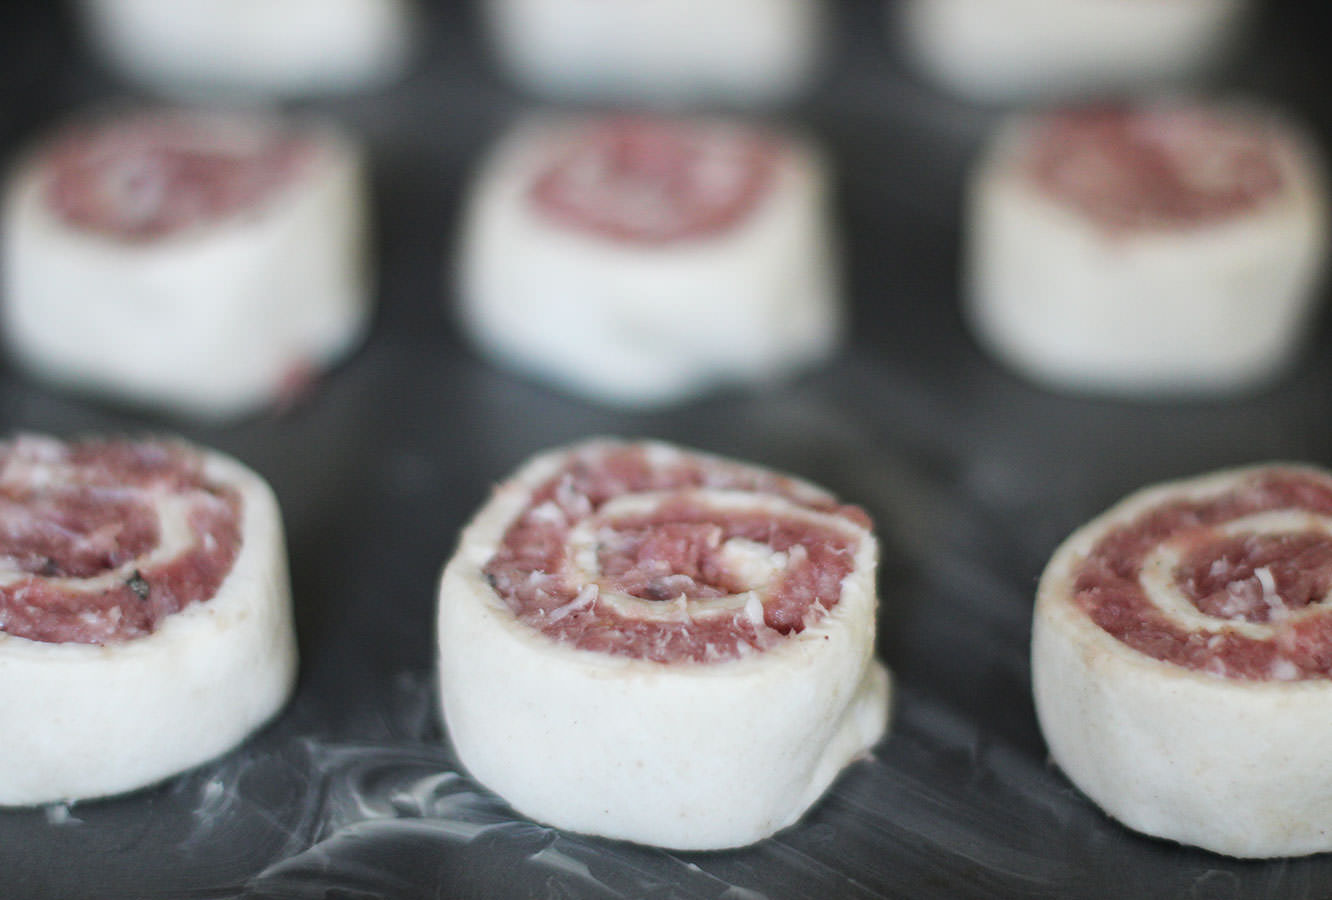
easy-quick-puff-pastry-party-nibbles-9

Step eleven

Place on a greased baking tray and cook with the cheese bites.

easy-quick-puff-pastry-party-nibbles-10

Step twelve

Serve fresh from the oven and try not to eat them all before the guests arrive.

2014 – The year of the game face

So Christmas has fizzed and New Year has popped. It was back to work for yours truly this morning after a glorious two week break, and boy did the world inside my duvet seem a lot friendlier than the one outside it at 6.30am.

Usually I don’t set much store in New Year, and I’m not the resolution making type – I figure that if you want to do something you just should, whatever the season. However, this year is already panning out to be quite different to the others I have spent on our fair planet, so I hereby christen it ‘the year of the game face’. Not because I expect it to be awful. Quite the opposite actually, but it will be new, and probably quite challenging, so insert game face here, I’m ready for you 2014.

One thing I’m particularly looking forward to is growing this little blog. While I do I would love any comments, ideas or suggestions that you might have. If you like fabrefaction you can add it to your RSS feed, subscribe via email, or follow along with a WordPress account. My next job is to set up Facebook, so keep an eye out for that too.

Oh, and if you make anything from the blog please show me, I just love to see it. Actually…to wrap up the festive season, I have a couple of projects to show you that brought a big smile to my face.

Homemade Advent Calendar

Above is Jane from Newcastle’s version of the Homemade Advent Calendar. Jane sources a different advent calendar for one of her friends every year, such a lovely tradition, I’m very glad I could share a little inspiration!

Below is gorgeous Miss Maija busily beavering away to make her calendar too. Maija lined up all her choccies by type so she didn’t end  up with the same one two days in a row. Great idea Maija, wish I’d thought of that!

MaijaAdventCalendar

Advent Calendar Maija

That’s all for now, Happy New Year!

Let’s party like it’s 2014

I don’t know about you but I’m always taken by surprise when New Year rolls around, I’m so distracted by Christmas it’s a bit ‘oh! there you are’ on NYE.

If your experience is anything like mine you’ll need a make which is easy on the budget and low hassle. I present to you cut out party hats.

PartyHat1

You will need:

A4 coloured card/paper (one sheet per hat)

Glue/Double sided tape

Scissors

Elastic/String/Wool

PartyHat2

Step one

Cut a corner off your sheet, at a 45 degree angle. Don’t worry if you don’t have a protractor – just fold a scrap piece of paper to a point on one of the corners and use as a guide.

PartyHat3

Step two

Make the first fold by matching your cut edge to the top edge of the paper. Essentially making a point from that wide angle you just created.

PartyHat4

Step three

Fold at least twice more. My paper was quite thick so this is as far as mine would go without forcing it, but feel free to keep folding.

PartyHat5

Step four

Find the shortest edge going across your hat, and cut the excess off at this point.

PartyHat6

Step five

Unfold to check your curve is ok, if not neaten any points with scissors.

PartyHat7

Step six

Fold back up and make your cuts. This is generally easier with paper but then if you over cut you weaken your hat so keep a good balance!

Make sure you keep a line at the bottom in tact so you can add your string and wear your hat.

PartyHat8

Step seven:

Unfold and survey your masterpiece.

Iron this flat or leave under a heavy box/book for a few hours. The thinner your paper/card the more of your creases you will get out, but don’t worry too much, you won’t really notice on the finished item.

PartyHat9

Step eight

Retrieve that discarded corner from earlier, and cut a strip from the longest edge.

Cover in glue or double sided tape and assemble your hat. I then cut a second strip and stuck inside to strengthen the hold.

PartyHat10

Step nine

Bit of a Blue Peter moment here…place bit of blu tac/banana under your hat edge and use something sharp to make a hole. Repeat on opposite side.

Now, I had some elastic lying around. If you do too, measure it under your chin and round the sides of your head, but make sure to cut it slightly shorter than this distance so that there’s some pull to keep it in place. Push through the hole and tie a knot on the inside.

If you don’t have elastic do not despair; string or thin wool will work too, you can just do two long strips and tie in a bow under your chin.

Step ten

Put on head, have great time.

PartyHat12

PartyHat11