Tag: Paper

Banner-tastic

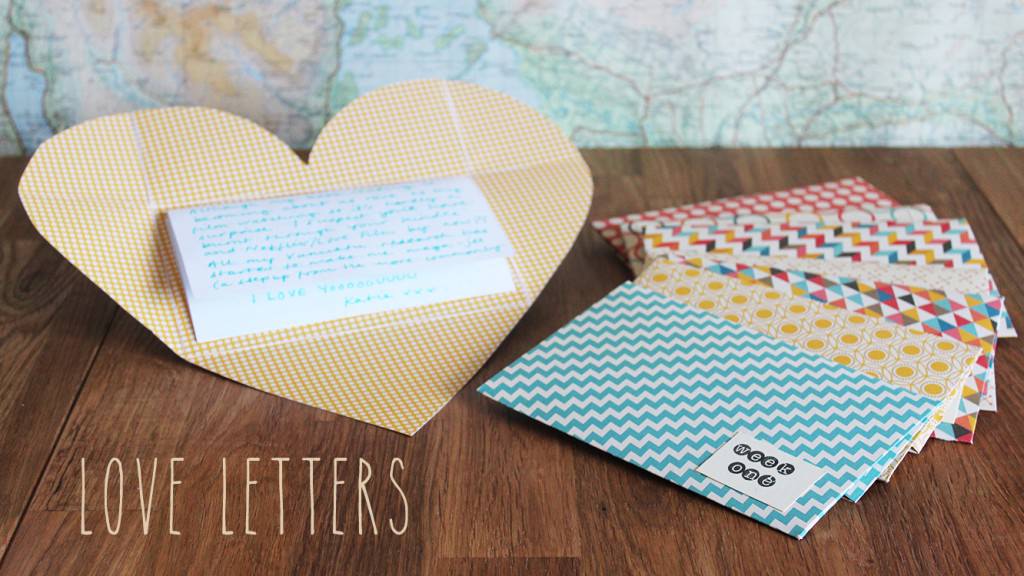
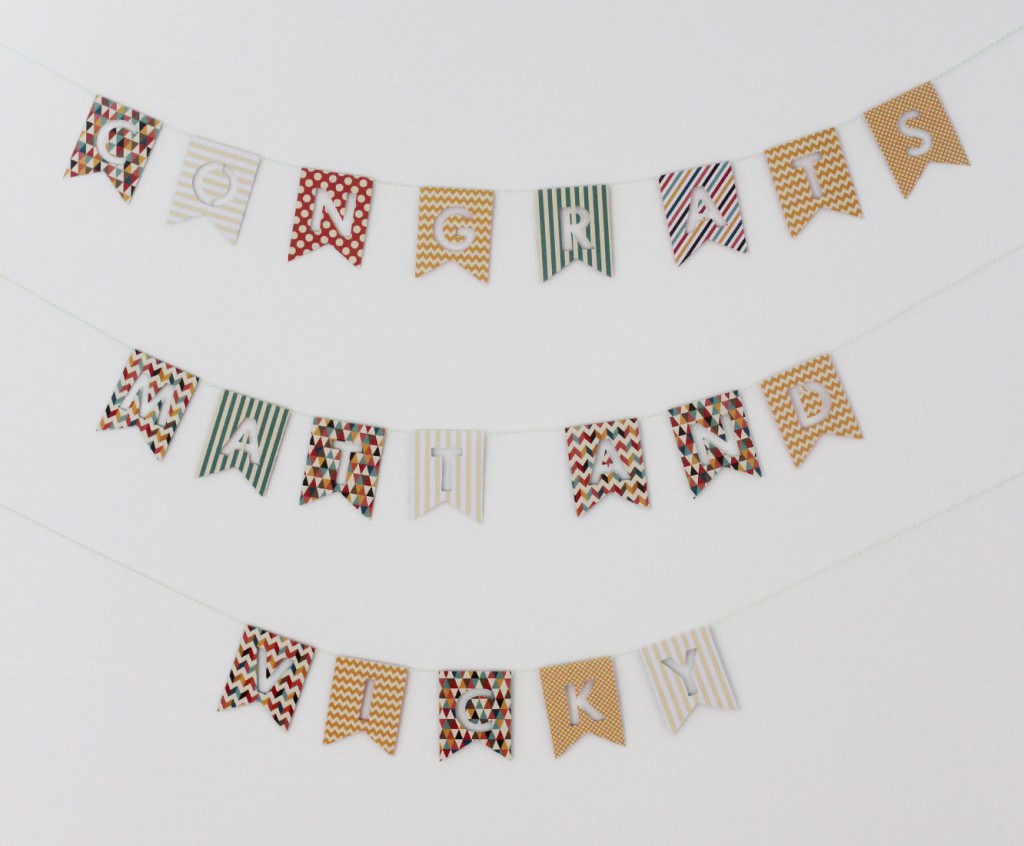
I’m finally going to wrap up my little series of posts from Matt and Vicky’s engagement party this week. I know, you didn’t think there could possibly be more right? Well, no party is complete without a banner.

Just in case their guests forgot, I made a little congratulations banner. A congrats banner, let’s be honest, congratulations is a long word.
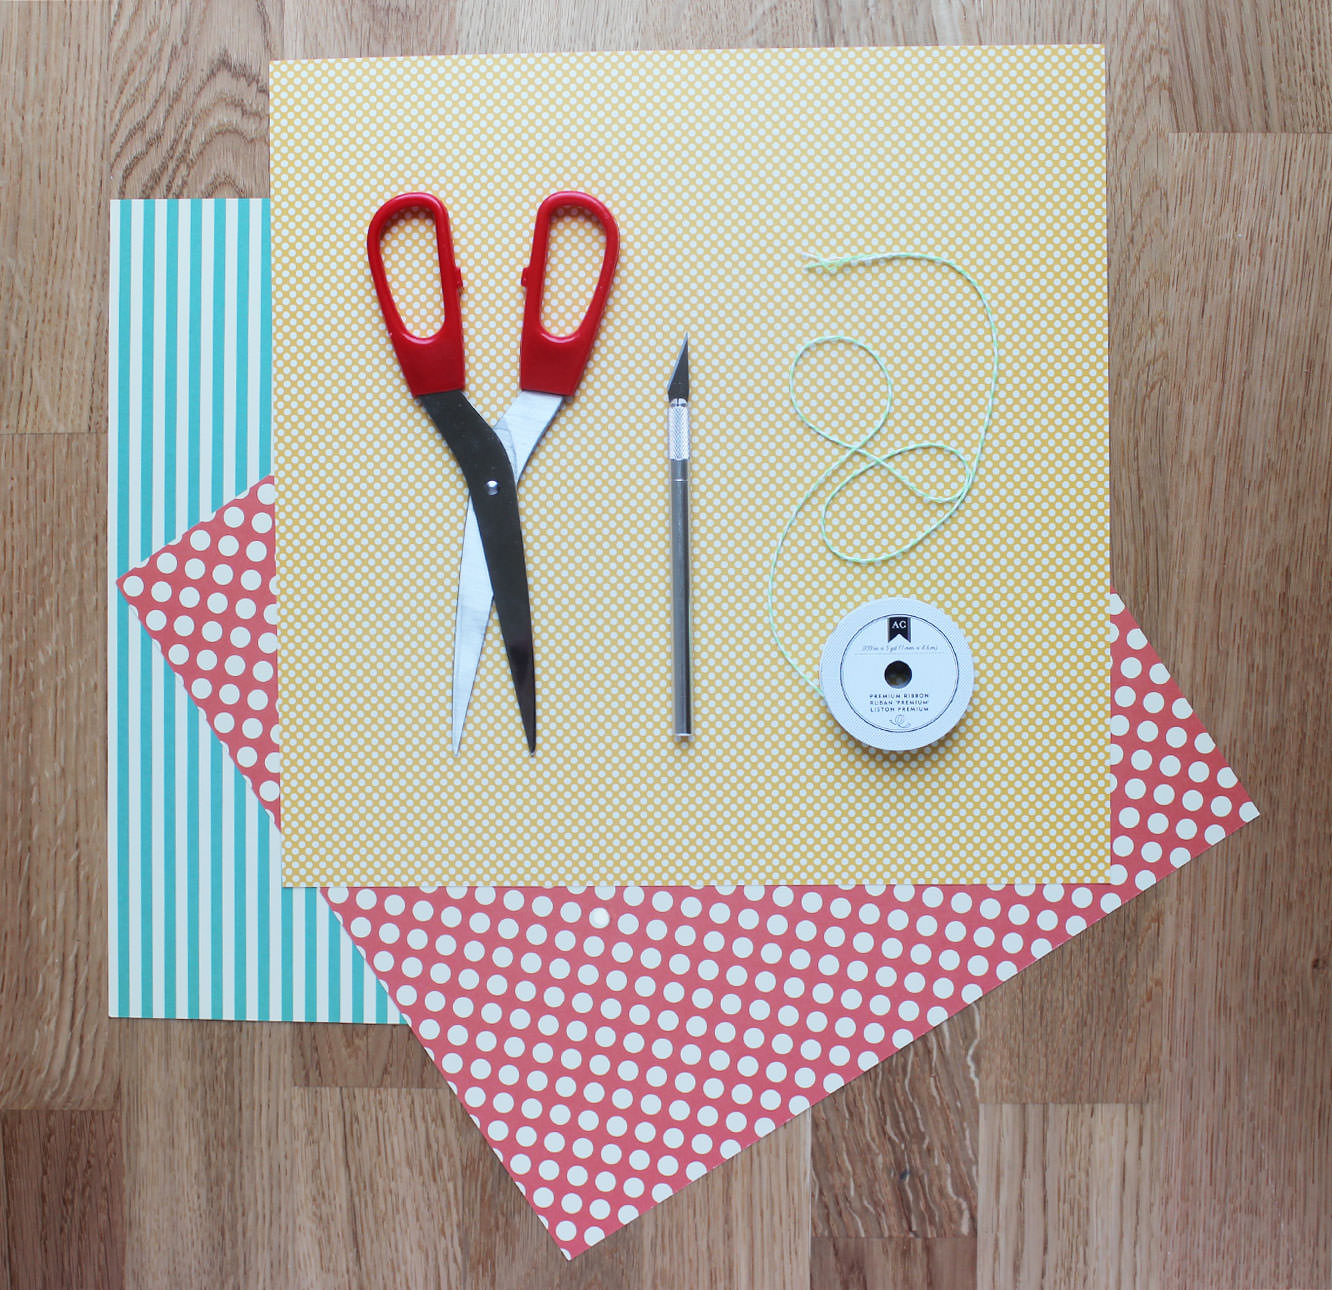
home-made-party-congratulations-banner

You will need

Some pretty paper or card

A craft knife and a cutting mat (or chopping board)

Double-sided tape

String

home-made-party-congratulations-banner-2

Step one

Using a chunky font, type out the message for your banner. I think this was Futura in case you want to copy exactly (but then you would also need to find a Matt and a Vicky to congratulate).

home-made-party-congratulations-banner-3

Step two

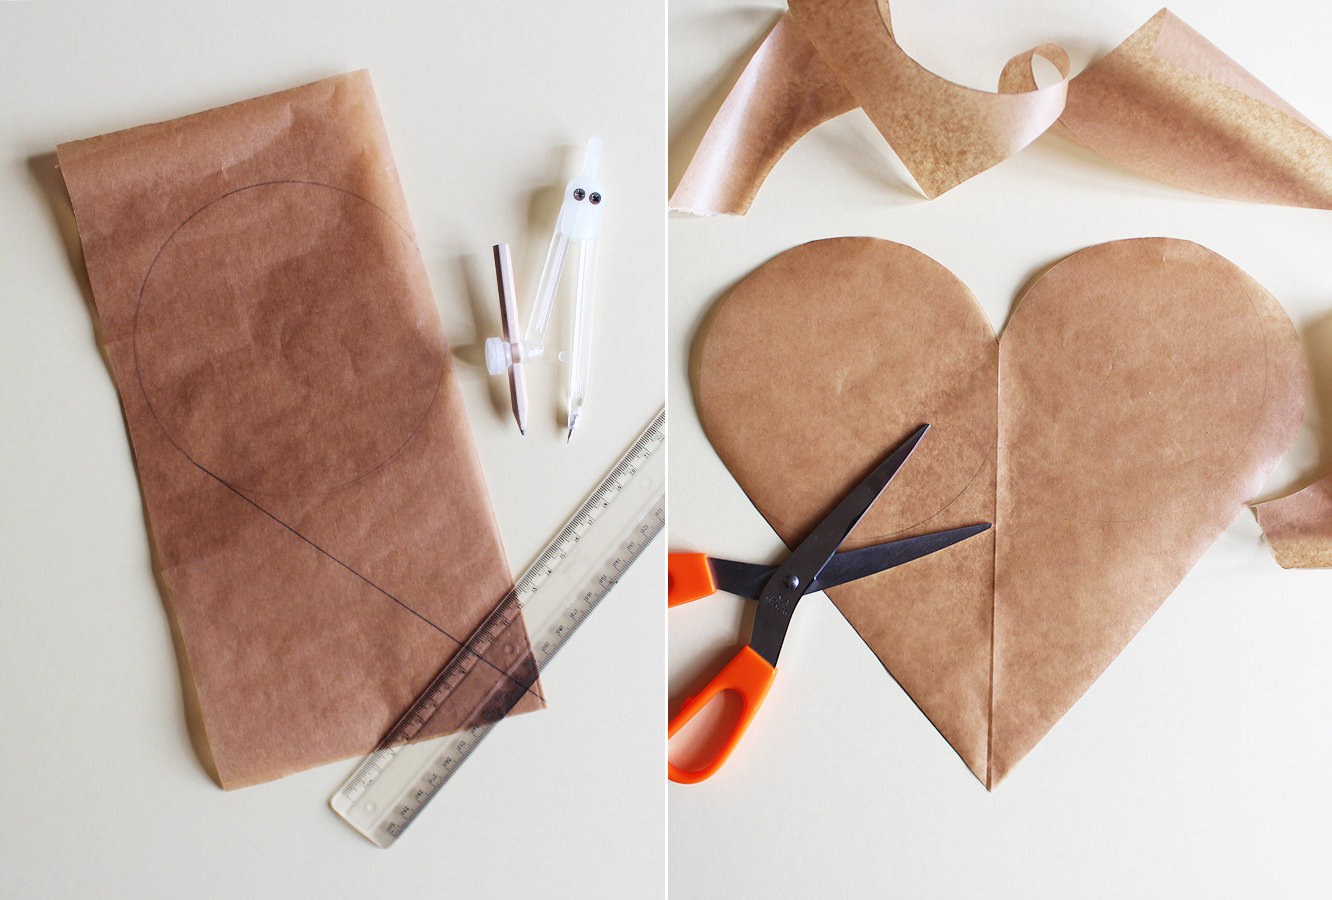
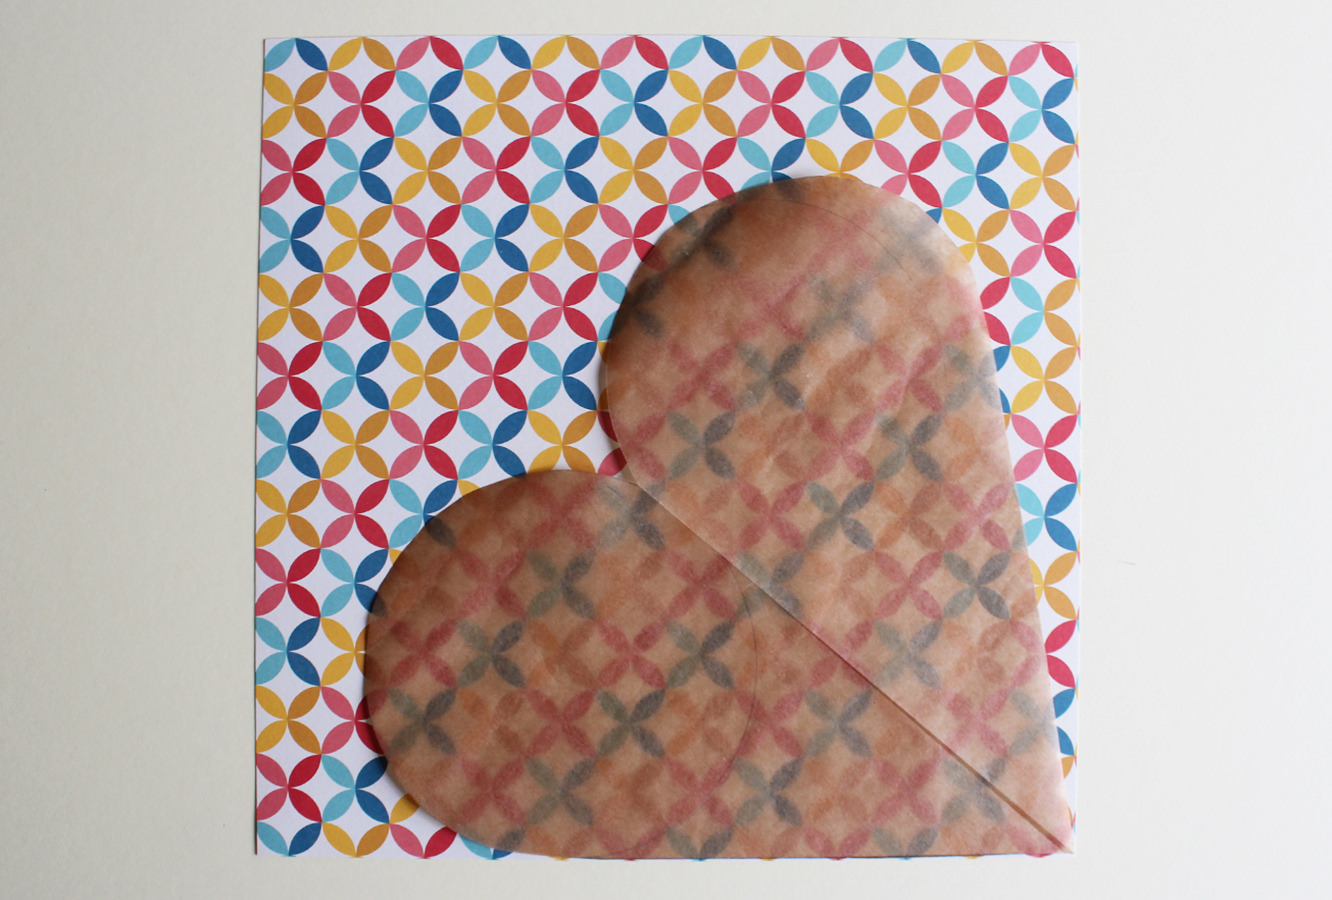
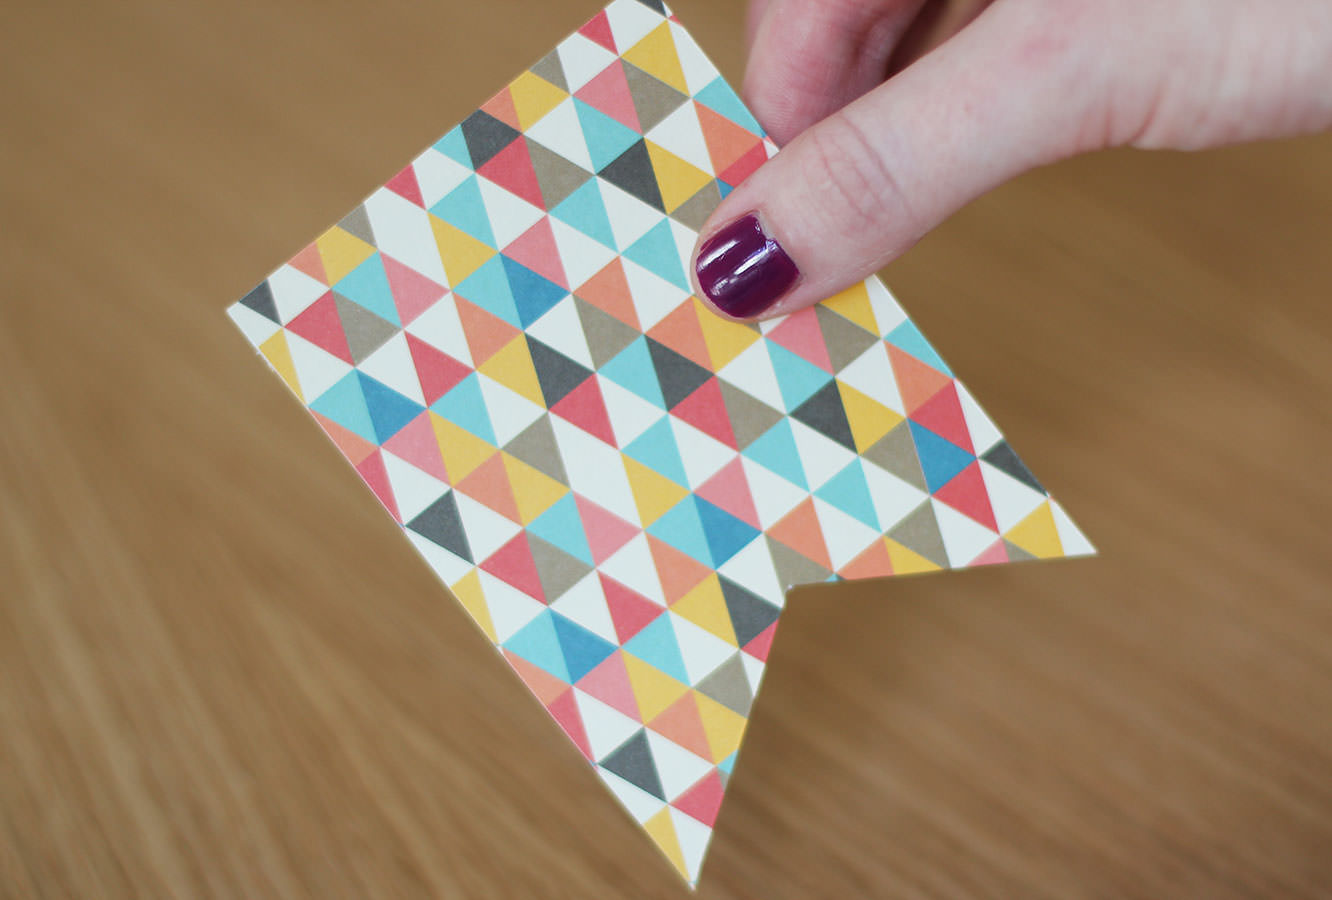
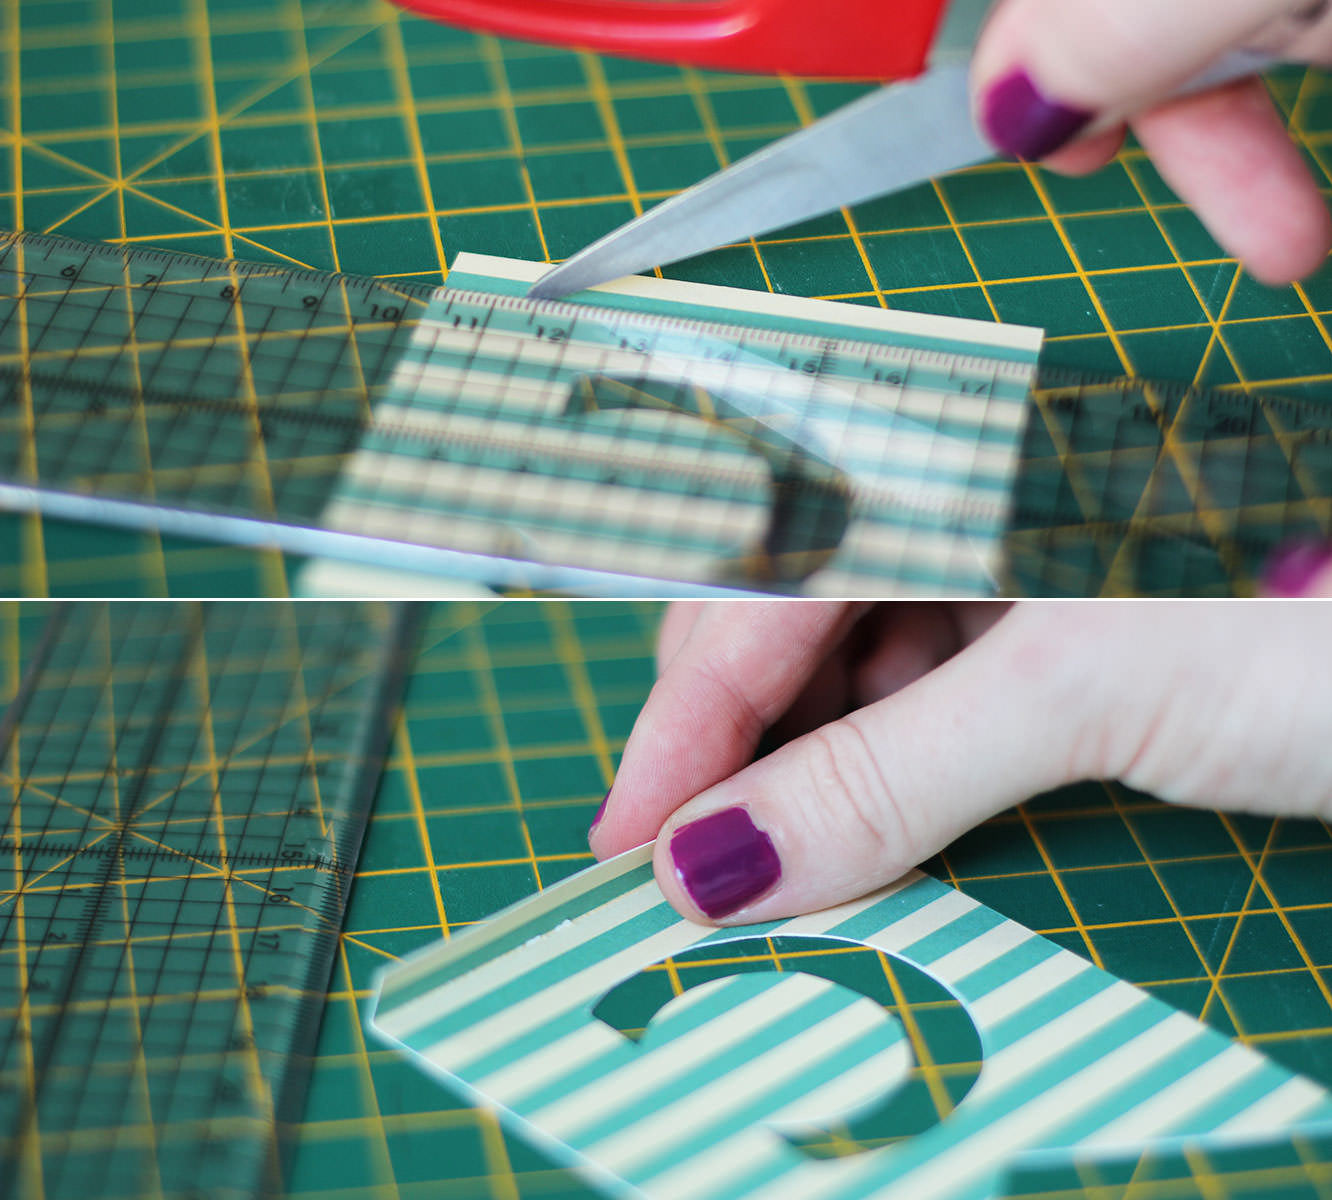
Cut out little flag shapes big enough to house your letters, remember to leave at least half a centimetre at the top to fold over.

These are super simple to get even, just draw a rectangle with a line down the centre and then draw two diagonals from the corner to the same point on the central line. Use the first one as a template.
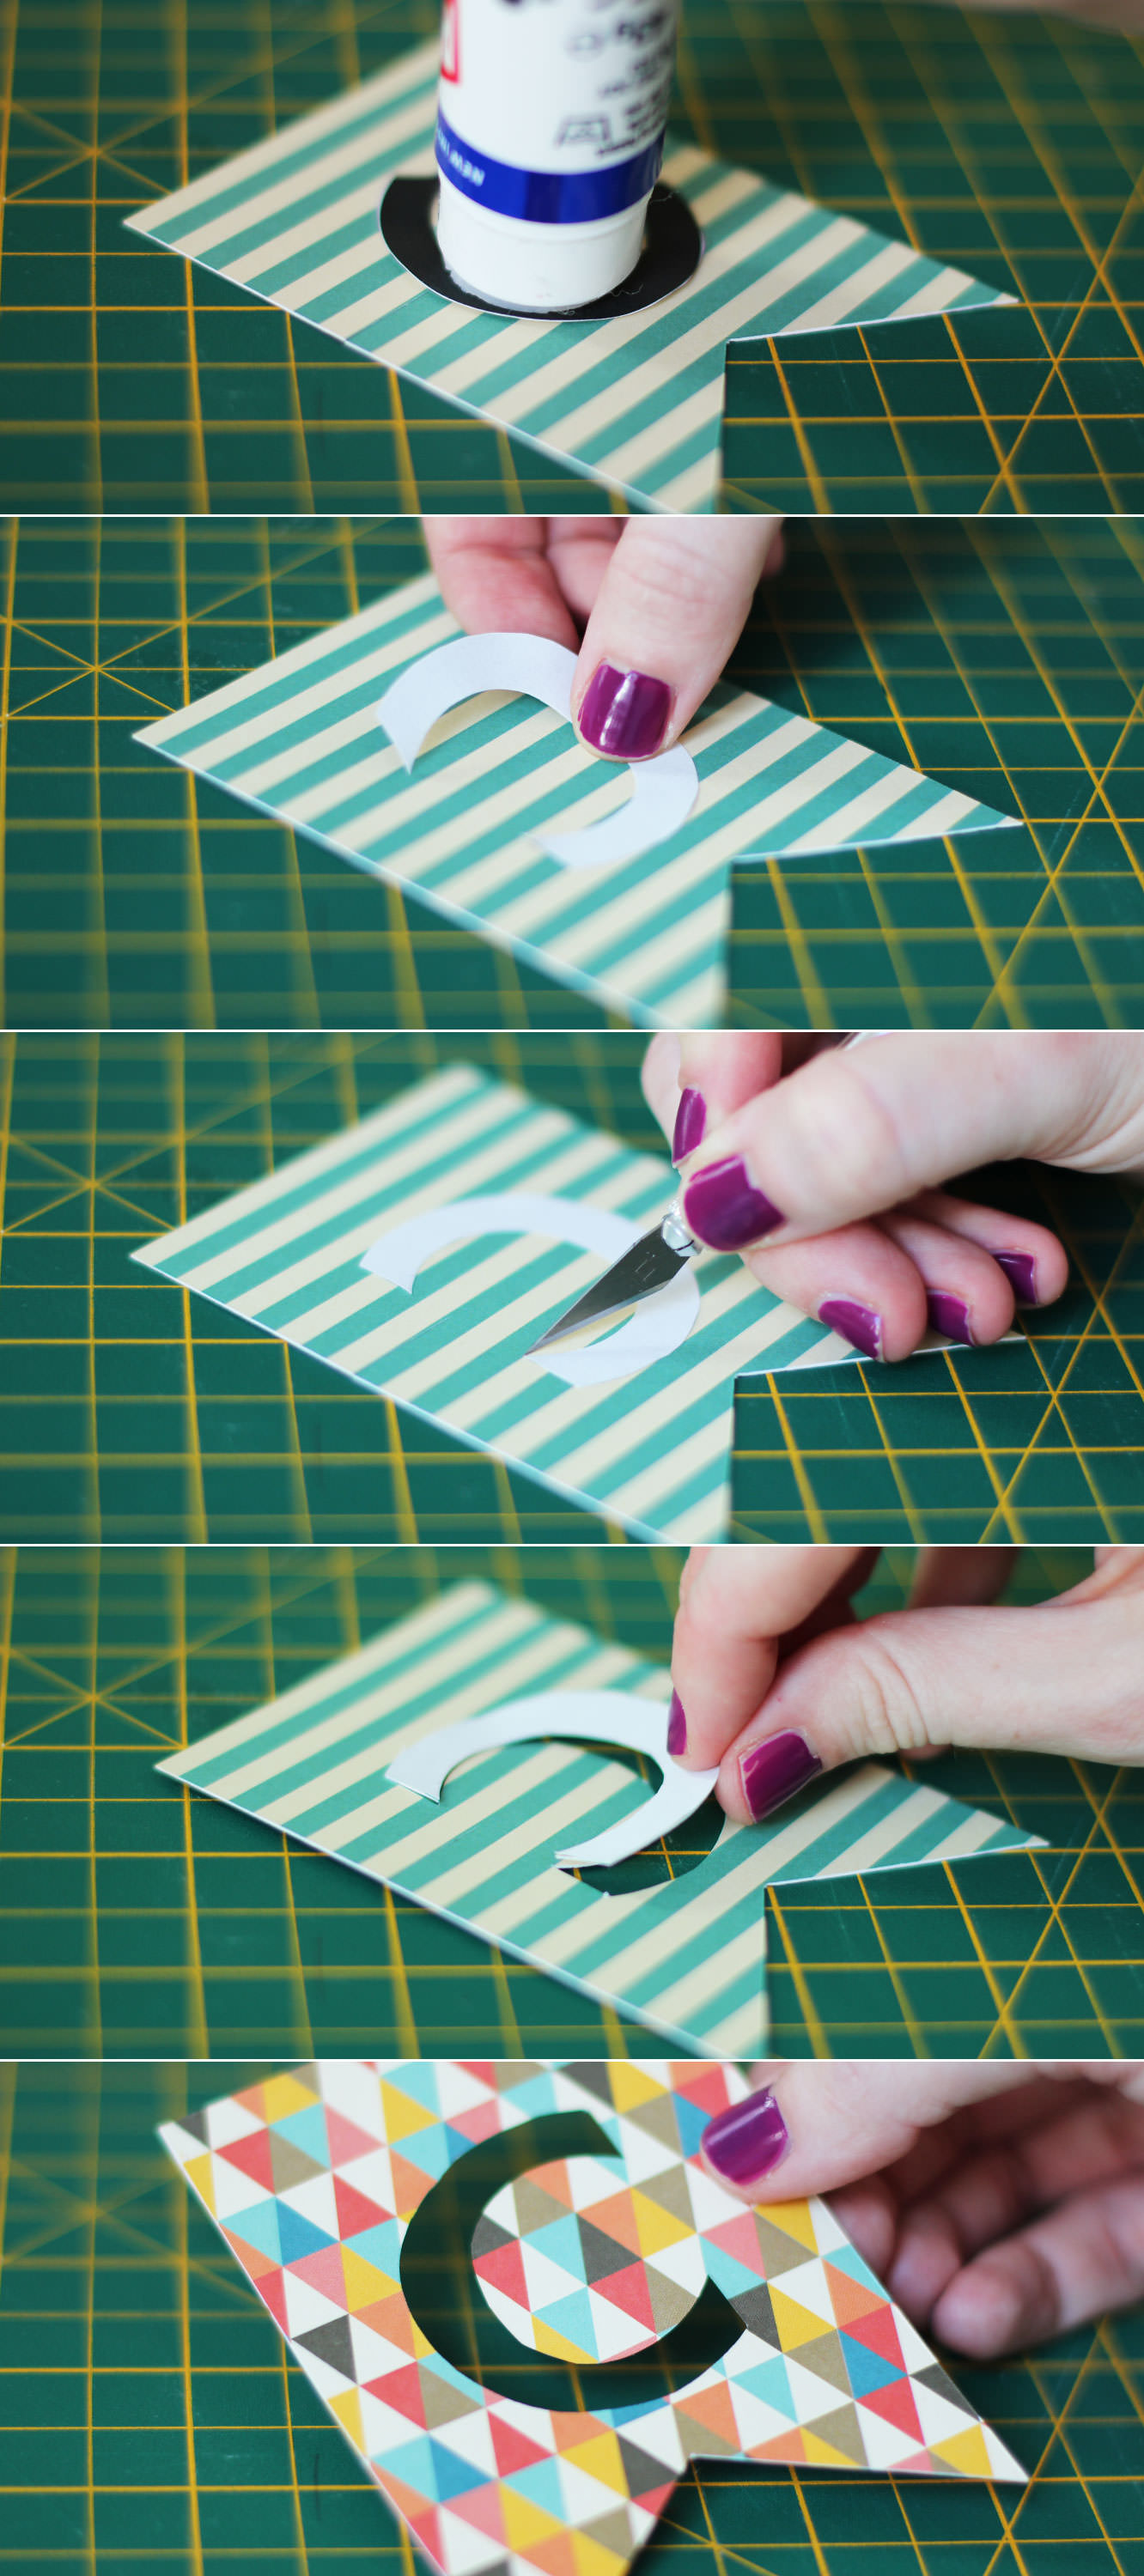
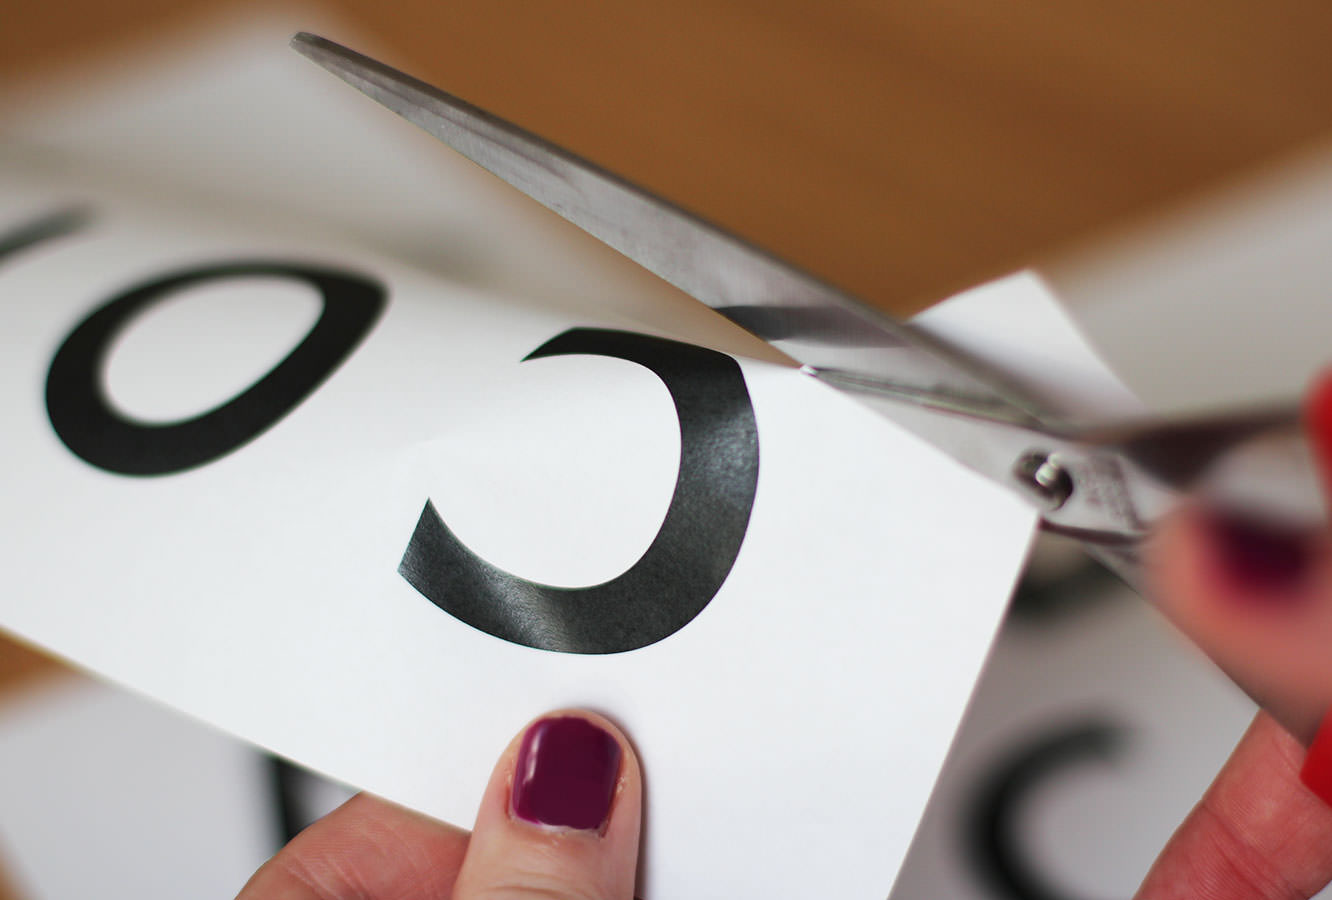
home-made-party-congratulations-banner-4

Step three

Glue the front of the letters and stick them face down on the back of each flag.

Use a craft knife to cut around the edge of the letter. The child in me was bizarrely satisfied by punching these out.

When cutting out letters like A and O which have a counter in them remember to keep a small stem so you don’t totally hollow them out.

home-made-party-congratulations-banner-5

Step four

Using open scissors score the top of the flag (on the back) to create a fold.
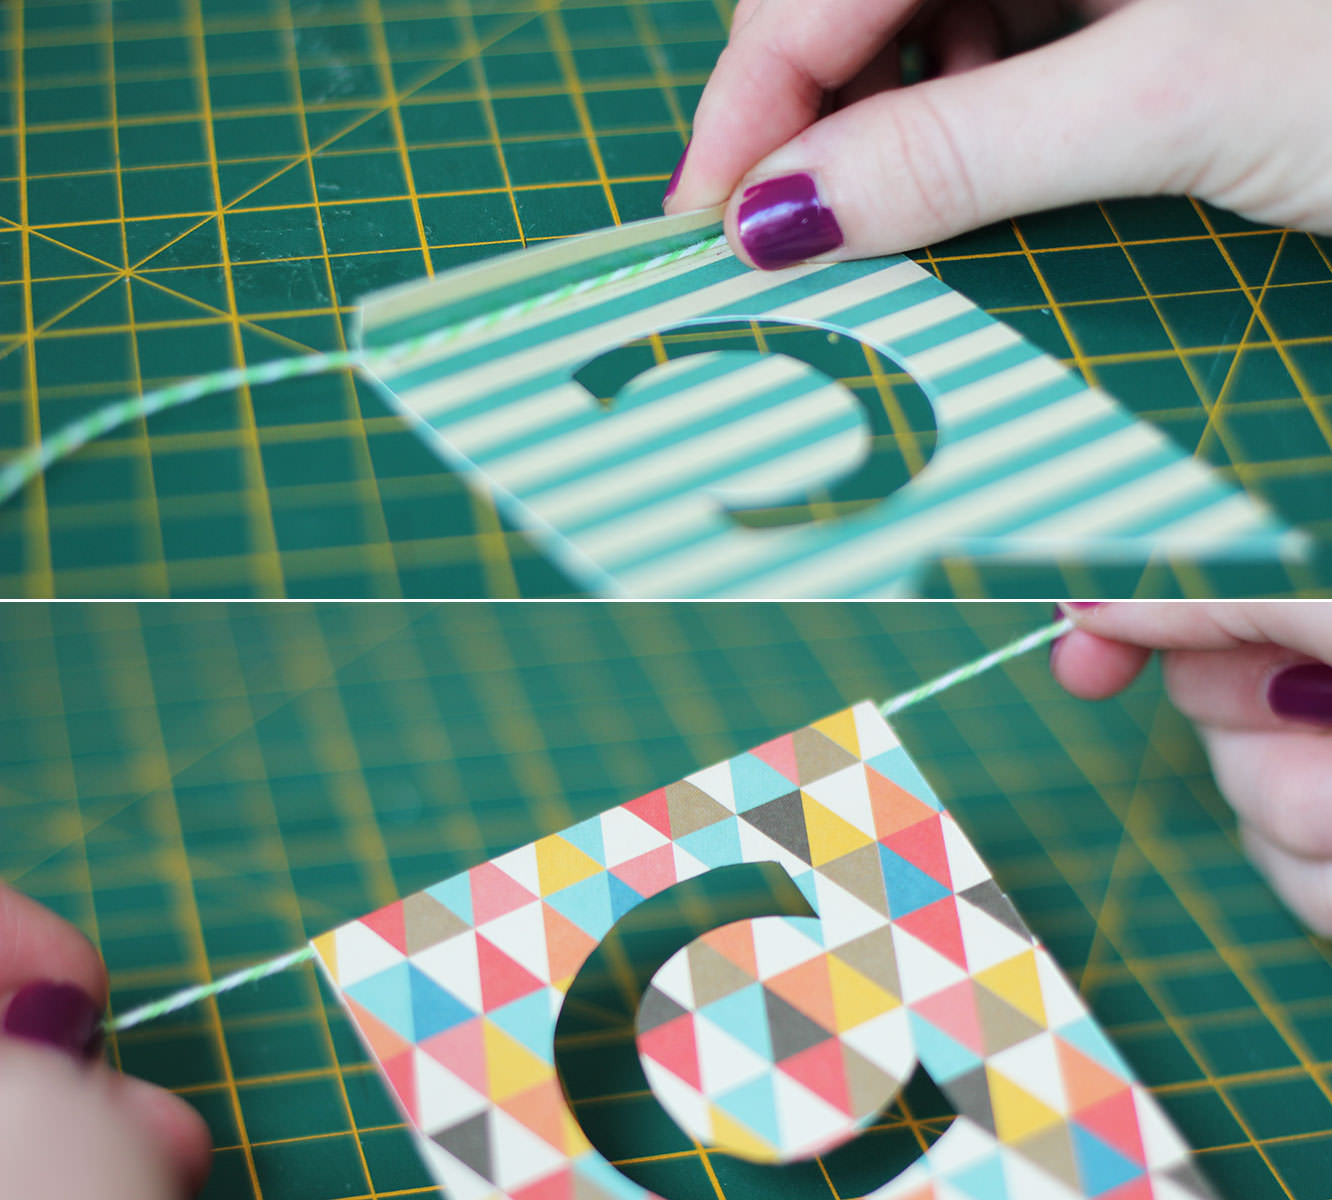
home-made-party-congratulations-banner-6

Step five

Stick double sided tape inside the fold, making sure it’s right to the top edge. Place the string in the fold and stick down.

Step six

Repeat until you have a full sentiment.
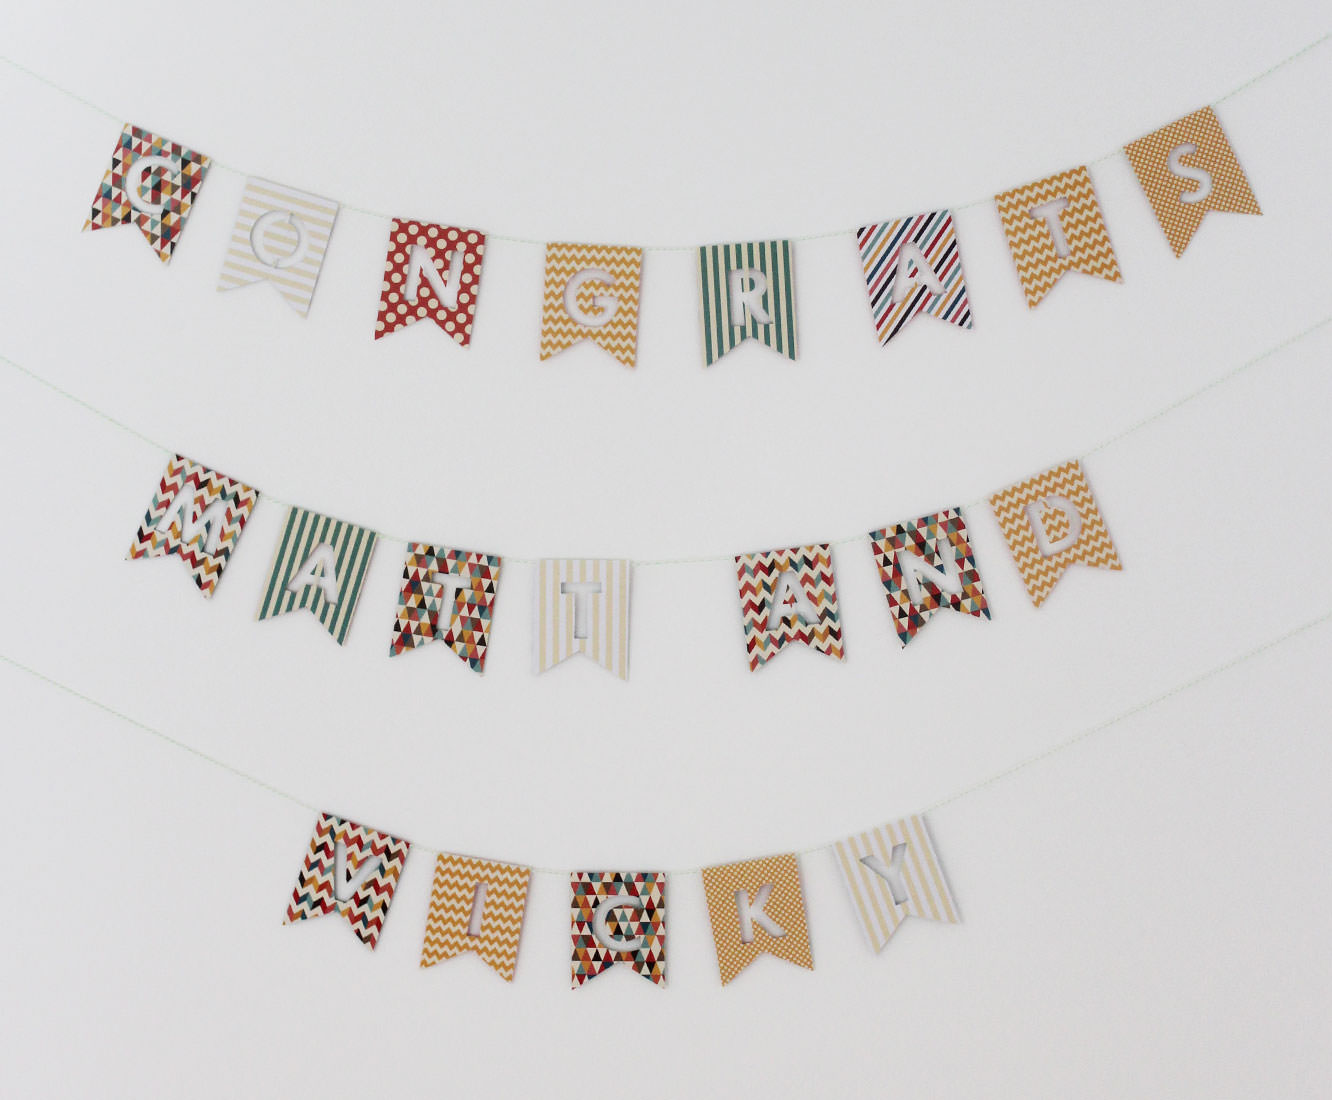
home-made-party-congratulations-banner-7

Ta da!

Dear darling….

Yo. Another Monday, another blog from me. It’s sort of a cheat really, as it’s a spin off from this present I made for my friend Beth a few months ago. I made one for each week she was away travelling, I hope she’s having as much fun reading them as I had writing them. I MISS her.

I’ve been reflecting a whole lot lately on what wonderful friends I have. Beth is truly one of life’s diamonds (I promise I’m not usually this cheesy).

So if you have a special someone in your life, take a moment to make them a little love letter and let them know how much they are valued.

heart-envelope-homemade-love-letter-1

You will need

Large pieces of pretty card/paper (mine are scrapbook sheets 12″x 12″)

Something round/set of compasses

Scissors

The outpourings of your heart

heart-envelope-homemade-love-letter-2

Step one

Using a piece of plain paper/newspaper/greaseproof the same size as your proper paper, make a heart template.

I did this by folding the template paper in half and drawing a circle to almost full width. Then use a ruler and draw a line from the edge of the circle towards the fold to make a point.

Cut out and unfold. Voila.

heart-envelope-homemade-love-letter-3

Step two

Draw round the template on your nice paper/card. Don’t be a peasant – use pencil.

heart-envelope-homemade-love-letter-4

Step three

Cut out as many as you need. I appreciate for you guys this might just be one, not everyone fancies their friends as much as I do.

heart-envelope-homemade-love-letter-5

Step four

Turn the heart around so the point is facing away from you, and fold the sides in. You might want to use the scissor blades to score the lines first if you are using thicker stock.

Fold the domed bits up to make the bottom of the envelope. Finally, fold the point down to make the flap.

A disclaimer for this step is to practice on the template version first so you have the right dimensions, to make sure your envelope doesn’t have any gaps. You’ll see what I mean.

Step six

Write away.

I folded strips of A4 and stuck one section to the back of the heart so it kind of pulls out. You might prefer to write straight onto the it if your paper doesn’t have such busy patterns.

I stuck a button on each of mine to close them.

heart-envelope-homemade-love-letter-6

Enjoy telling people the people you love that they are great!

I’d tag that

Well hi. Apologies for being MIA, sometimes the blog falls victim to life’s unpredictability, but I’m back, and thanks for sticking with it.

I had a birthday recently, so in honour of my stepping over the early-mid twenties boundary *weeps silently* I have devised an excellent little make to help your gifts stand out from the crowd. You can make a load of these up in one go so that you have a good stock of supplies to whip out at a moment’s notice.

DIY-gift-tag-1

You will need

Cheerful patterned paper

Some plain card or paper

Buttons

Ribbon

Strong quick drying glue

DIY-gift-tag-2

Step one

Cut your paper into long strips.

The width is up to you, but bear in mind it will be the radius of your tag. I found the thicker the strip, the longer it needs to be to work (I didn’t deserve my Maths GCSE for not knowing that instinctually) so you may need to tape two strips together if you want big tags.

All will become clear.

DIY-gift-tag-3

Step two

Fold the strips into a concertina (one bit forward, one back, just like in primary school when you made paper fans).

DIY-gift-tag-4

Step three

Stick together the two ends of each strip so that you have the star shape type things above.

DIY-gift-tag-5

Step four

Pick up your stars and push the top edges into the middle to make these circular flowery fan things.

Put a small dab of strong glue on the centre and hold until stuck (I mean super glue really, I have zero patience for anything else, and glue burns to prove it). On that note, be careful it doesn’t drip all the way through the middle while you’re holding it – unless you want a charming new finger accessory.

DIY-gift-tag-6

Step five

Stick a button over the join in the middle.

DIY-gift-tag-7

Step six

Find something circular that matches the size of your tags (or use a set of compasses). You want the circle to be a bit smaller than the tag itself.

Cut said circles out from plain coloured card and use a hole punch to make, well, a hole.

Loop a short length of ribbon through the hole.

DIY-gift-tag-8

Step seven

Stick the card disks to the backs of the tags using double sided tape or glue.

Write your meaningful and heartfelt congratulations that the birthday person is still alive on the reverse.

Affix to gift.

DIY-gift-tag-9

Step eight

Smugly produce your beautifully tagged gift at the appropriate moment.

Thanks for stopping by, have a great week!

Truffles – The making of the bag

So, I missed Monday blog day. Apologies, but there was some urgent badge making to see to, for a very special nearly 8 year old who’s mum was tearing her hair out looking for an 8th birthday pin. Katie and her dusty old badge-it to the rescue.

badge

Now to business…I know you spent your weekend making those lovely truffles and need something to gift them in. Here’s how to make a little bag. I warn you, it’s not really the industry approved method (I’ll do a tutorial for that another time) but it does the trick and is super quick and easy.

diy-gift-bag1

Step one

Choose your paper, I’m a sucker for a bit of brown parcel paper, but as long as it’s relatively thick you’re good to go with whatever takes your fancy.

Find a box whose dimensions match the rough size and shape you want your bag to be.

Cut paper to size as if you are wrapping a gift, but leave a little extra on the long side so you have some to fold down to close the bag.

diy-gift-bag2

Step two

Wrap the long side first. Fold over the edge that will appear on top so that it’s nice and neat and stick down with glue or double sided tape.

diy-gift-bag3

diy-gift-bag4

diy-gift-bag5

Step three

I don’t really want to patronise you and tell you how to wrap a parcel particularly when the above isn’t even the best. But wrap the bottom of the box, but make sure you leave the other end open!

diy-gift-bag6

Step four

Pull box out of the wrapping so you have the basic bag shape. You can go ahead and use it now (see I told you it was quick and easy) but I prefer to make it look a bit more authentic.

Pinch the edges to make crisper folds.

diy-gift-bag7

Step five

This step was a little difficult to photograph, but basically you want to create a fold in the centre of the long side. Put your index finger in between your two folds and use your thumb and middle finger to sort of pinch it together.

diy-gift-bag8

Step six

Fold the bottom under as shown above. This will give you the little triangular type bits, and also means that you can make a few and store them flat until you need them.

diy-gift-bag9

Step eight

Unfold, and fill with yummy truffles.

(note triangle bit I was talking about above – I’m not mad)

diy-gift-bag10

Step nine

For Valentine’s day decoration I used a wooden BBQ skewer. Chop with a pair of garden clippers to about the width of the bag.

diy-gift-bag11

Step ten

Use a bit of washi tape to create the feather of cupid’s arrow. Stick a bit on both sides and trim as above.

diy-gift-bag12

Step eleven

Fold down the opening of the bag and cut two slits through all layers of paper. Push arrow through to secure.

diy-gift-bag13

Step twelve

Use washi tape to make an arrowhead and secure to the end.

diy-gift-bag14

Step thirteen

Stick a heart over the centre.

In all honesty I am not a huge fan of this, but I think it’s probably partly because the woods don’t match. You could cut one out of coloured paper or card if you don’t have a little wooden heart in your supplies. Just make sure you don’t do what I did; hold it up first to see if you like the look of it rather than sticking it on and wishing you hadn’t.

diy-gift-bag

Voila!

Let’s party like it’s 2014

I don’t know about you but I’m always taken by surprise when New Year rolls around, I’m so distracted by Christmas it’s a bit ‘oh! there you are’ on NYE.

If your experience is anything like mine you’ll need a make which is easy on the budget and low hassle. I present to you cut out party hats.

PartyHat1

You will need:

A4 coloured card/paper (one sheet per hat)

Glue/Double sided tape

Scissors

Elastic/String/Wool

PartyHat2

Step one

Cut a corner off your sheet, at a 45 degree angle. Don’t worry if you don’t have a protractor – just fold a scrap piece of paper to a point on one of the corners and use as a guide.

PartyHat3

Step two

Make the first fold by matching your cut edge to the top edge of the paper. Essentially making a point from that wide angle you just created.

PartyHat4

Step three

Fold at least twice more. My paper was quite thick so this is as far as mine would go without forcing it, but feel free to keep folding.

PartyHat5

Step four

Find the shortest edge going across your hat, and cut the excess off at this point.

PartyHat6

Step five

Unfold to check your curve is ok, if not neaten any points with scissors.

PartyHat7

Step six

Fold back up and make your cuts. This is generally easier with paper but then if you over cut you weaken your hat so keep a good balance!

Make sure you keep a line at the bottom in tact so you can add your string and wear your hat.

PartyHat8

Step seven:

Unfold and survey your masterpiece.

Iron this flat or leave under a heavy box/book for a few hours. The thinner your paper/card the more of your creases you will get out, but don’t worry too much, you won’t really notice on the finished item.

PartyHat9

Step eight

Retrieve that discarded corner from earlier, and cut a strip from the longest edge.

Cover in glue or double sided tape and assemble your hat. I then cut a second strip and stuck inside to strengthen the hold.

PartyHat10

Step nine

Bit of a Blue Peter moment here…place bit of blu tac/banana under your hat edge and use something sharp to make a hole. Repeat on opposite side.

Now, I had some elastic lying around. If you do too, measure it under your chin and round the sides of your head, but make sure to cut it slightly shorter than this distance so that there’s some pull to keep it in place. Push through the hole and tie a knot on the inside.

If you don’t have elastic do not despair; string or thin wool will work too, you can just do two long strips and tie in a bow under your chin.

Step ten

Put on head, have great time.

PartyHat12

PartyHat11