This half term holiday I had promised two little friends of mine a day in my London pad. They were very excited and had all kinds of crafty plans and ideas to keep us busy.
When thinking about what we could do on a budget, I remembered learning how to sew when not much older than them.
I was pretty impressed with these two; by the end they were using the sewing machine unaided (although for their parents’ benefit – heavily supervised!)
This is a great little project for beginners of any age, but for the reference of anyone planning to do this with children, these two are 7 and 8 and handled it very well. It would certainly be doable if you don’t have a machine too.
You will need
Cute fabric
Elasticated hair bands
Needle and thread (or a sewing machine)
Step one
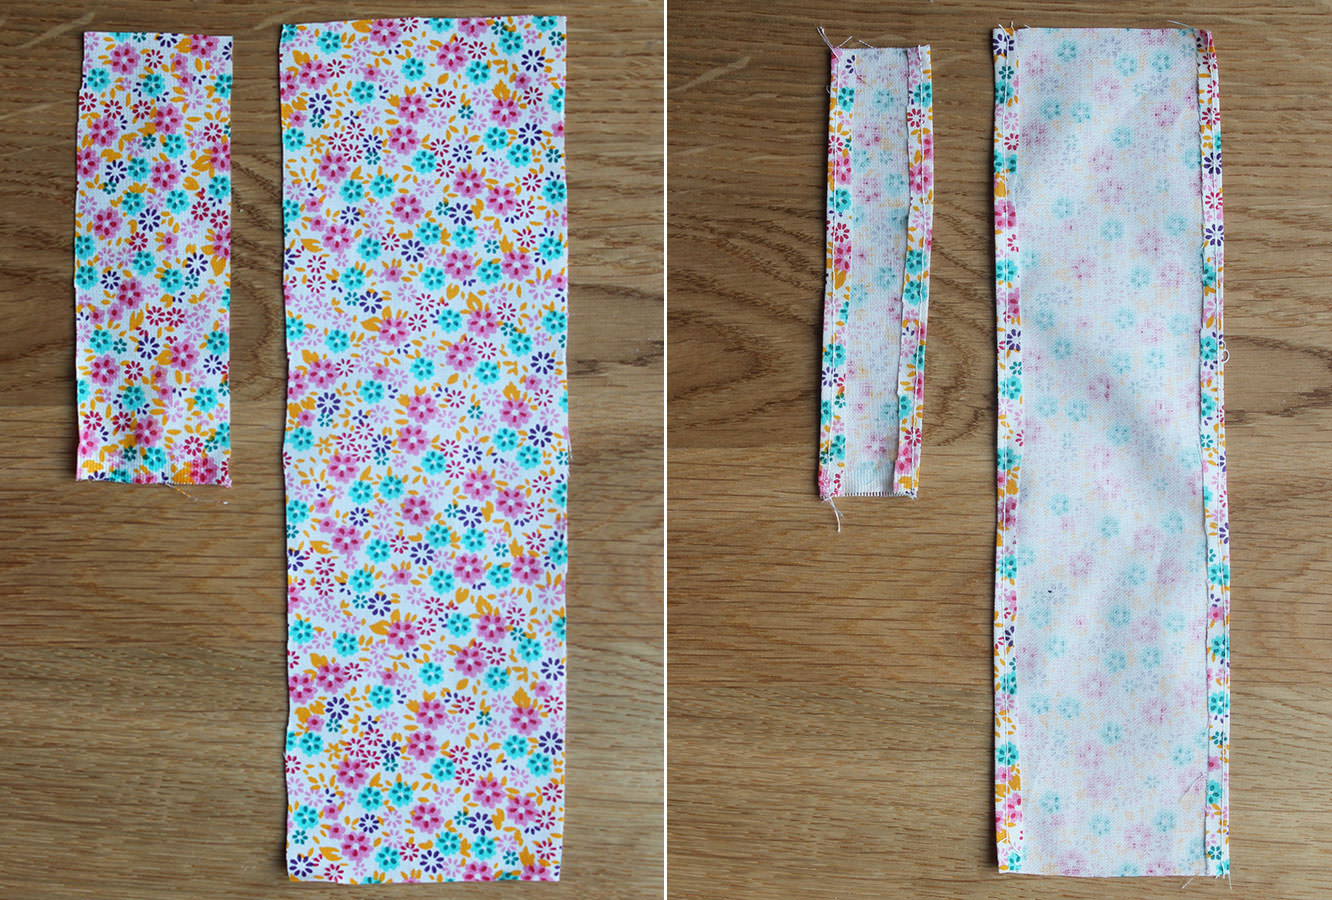
Cut two lengths of fabric, one 7cm x 22cm and the other 3.5 cm x 12 cm.
Step two
Sew a small hem along the long edges as shown above.
When doing this with the girls they used the foot while I guided it through at first, then I took a turn with the foot so they could guide, then they took the helm altogether.
Step three
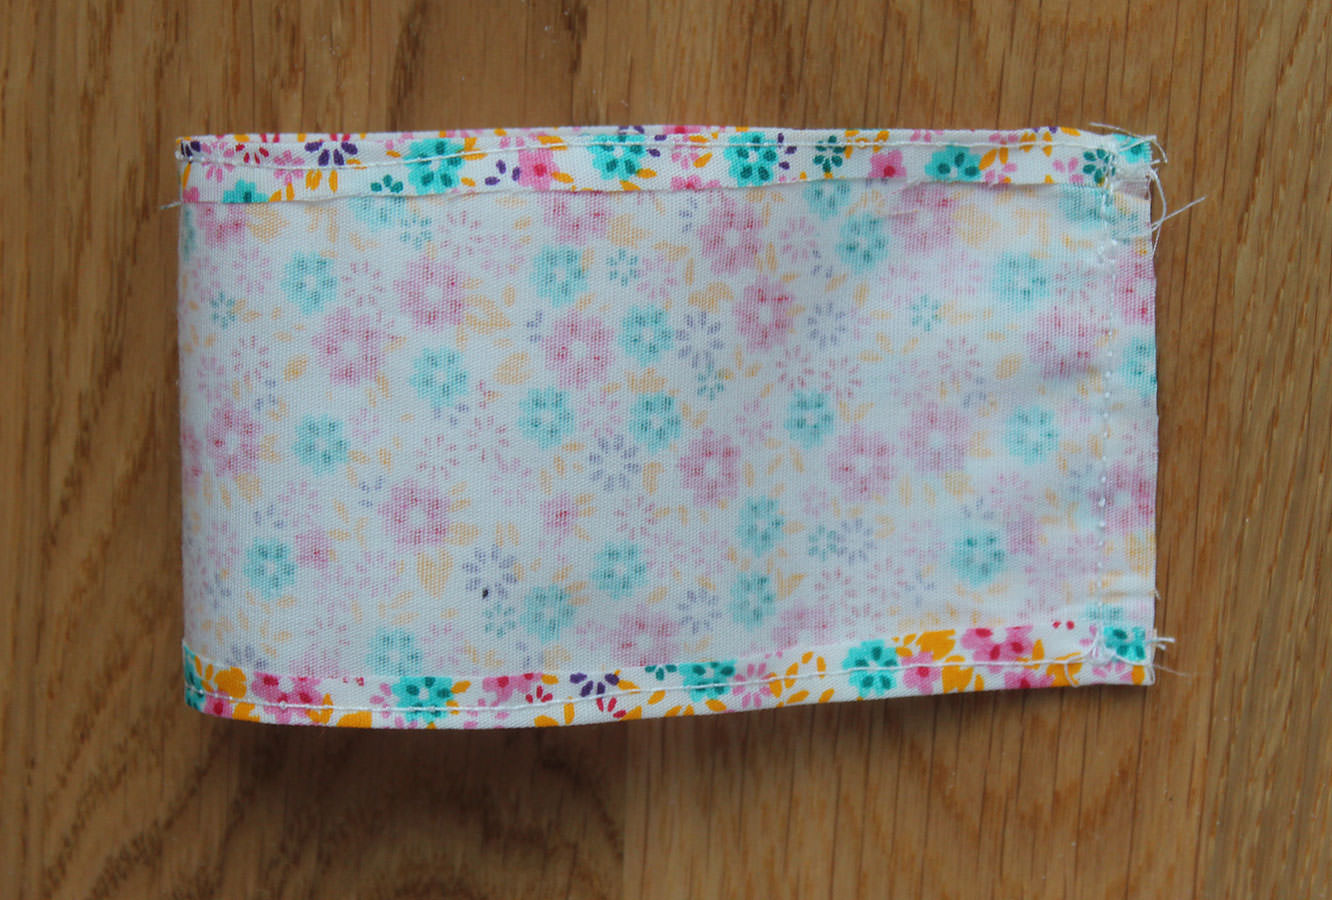
Join the larger piece with right sides facing. Turn it through so the right sides are showing.
Step four
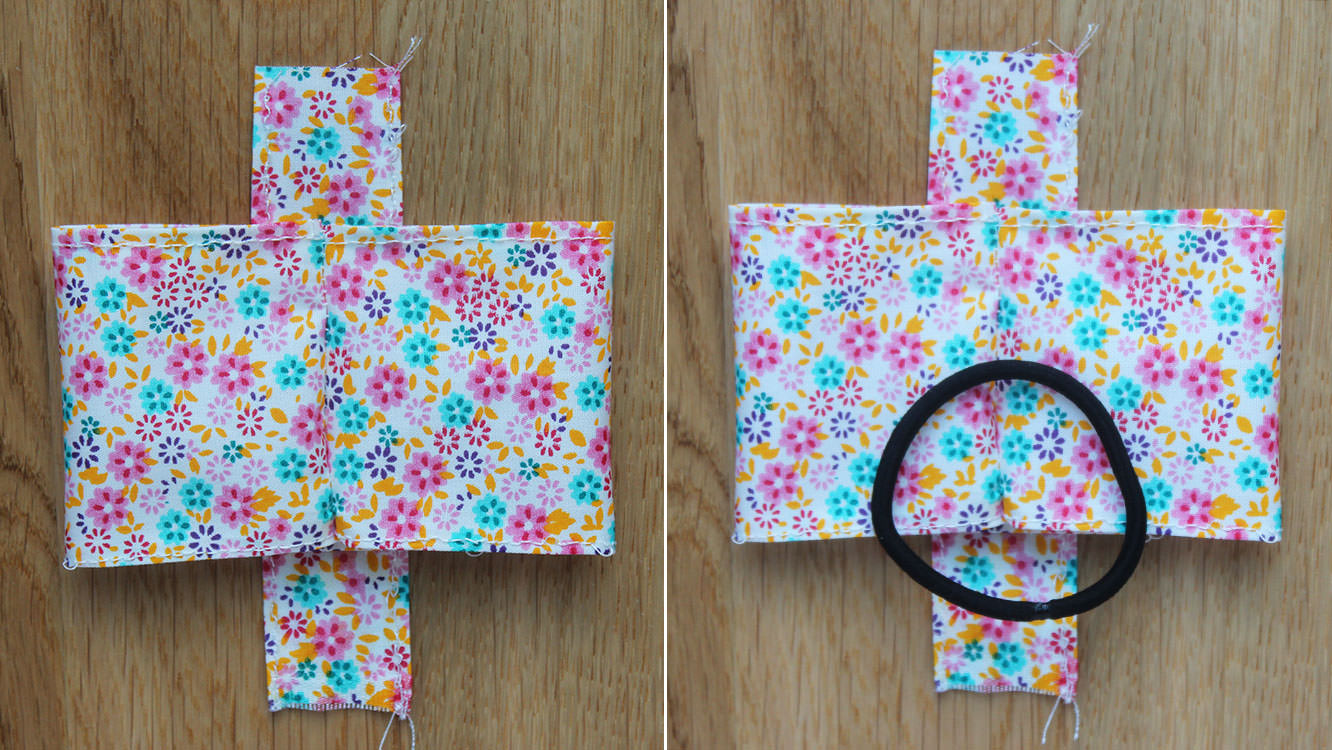
Lie the smaller strip down, right side facing upwards. Place the larger piece on top with the seam running down the centre.
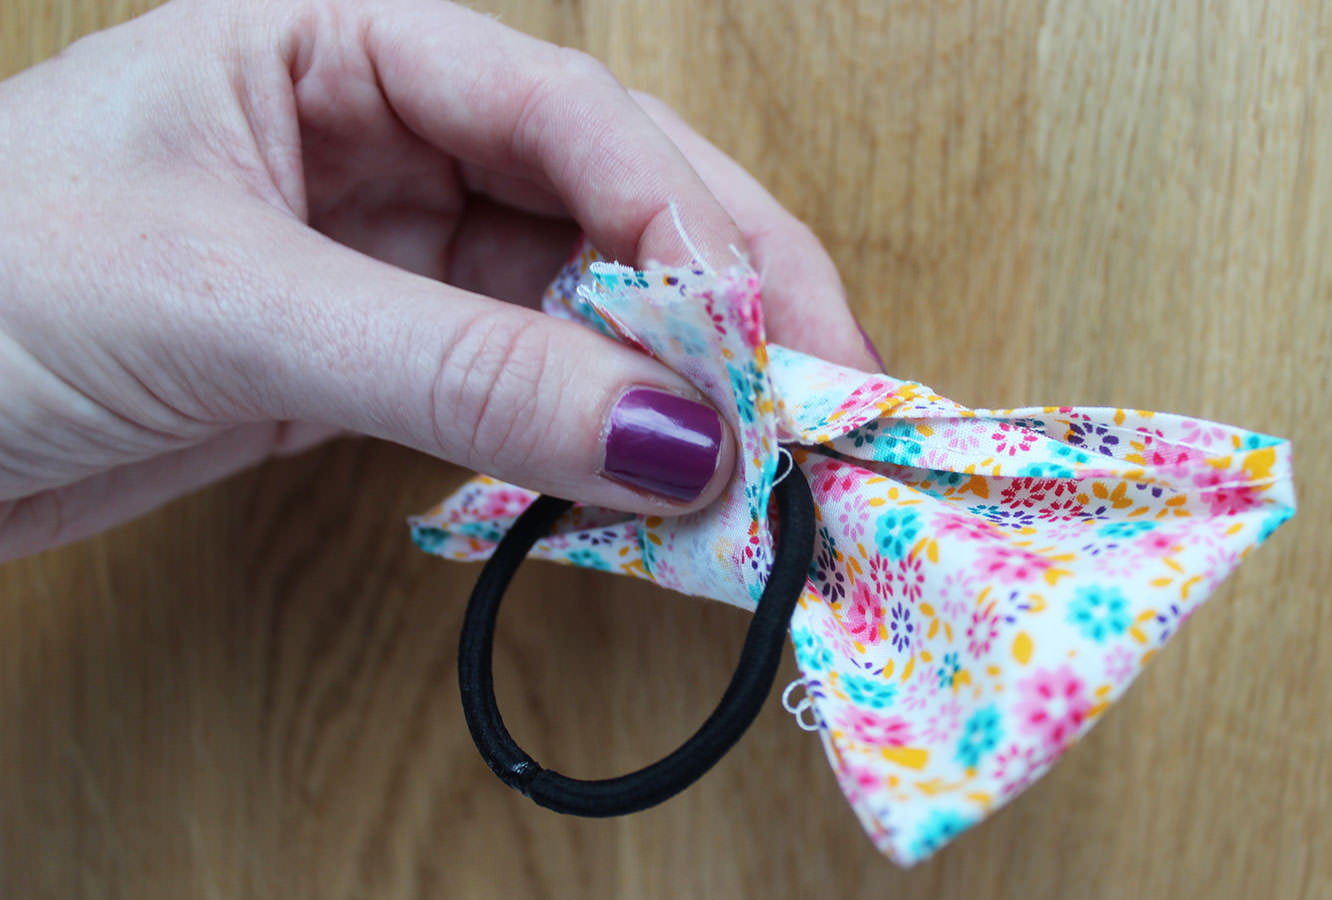
Pop the hairband on top.
Step five
Loop the smaller strip of fabric through the hair band and squeeze it all together. Don’t worry too much about the shape of the bow for now, plenty of time to sort that out later.
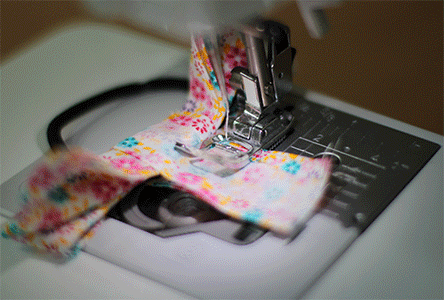
Step six
Sew across the smaller piece of fabric as close to main body of the bow as your machine will allow. That being said, if you are hand sewing (and therefore have a bit more control) do leave a little wiggle room.
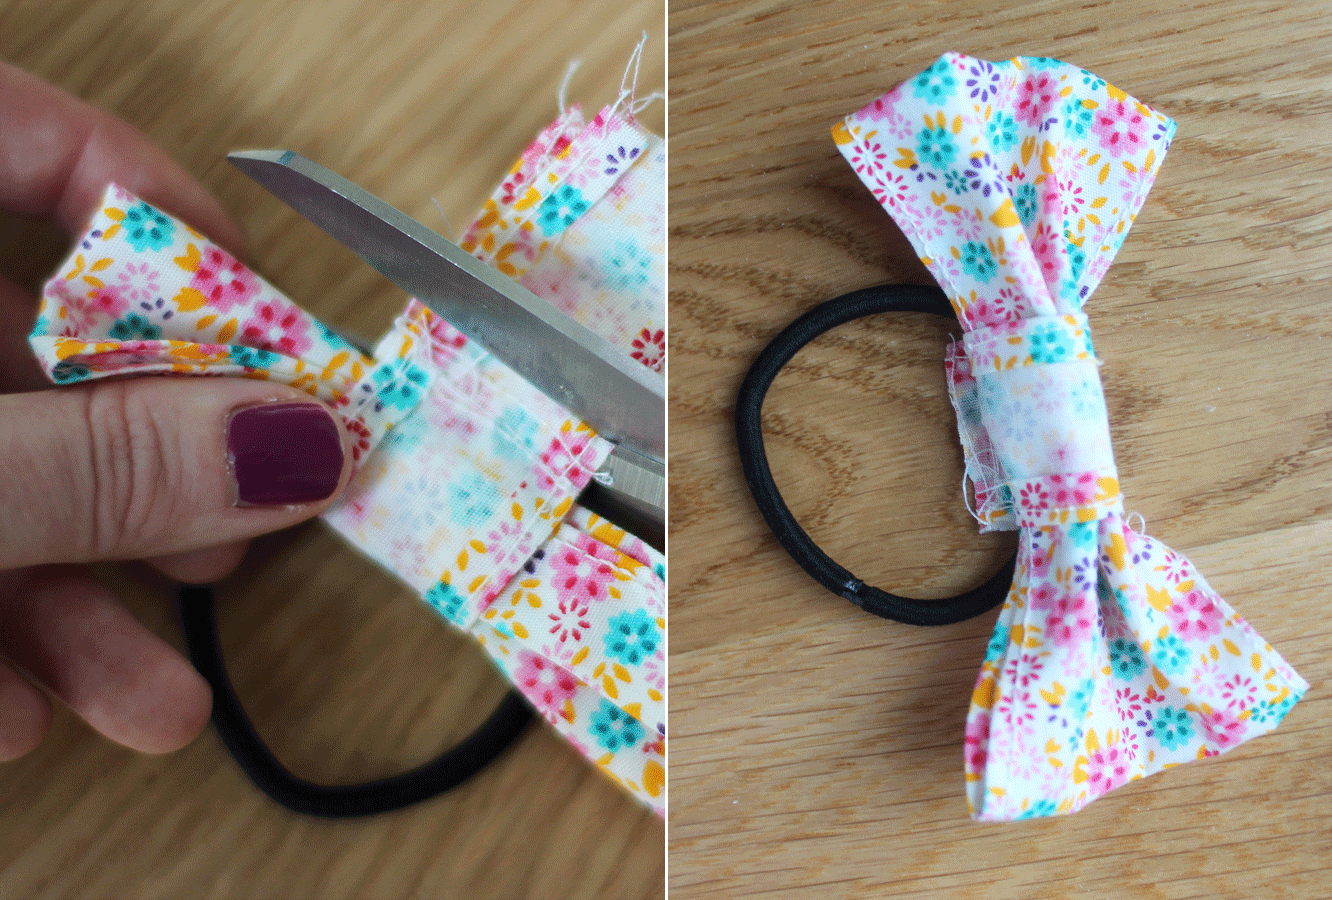
Step seven
Chop off the excess fabric.
Step eight
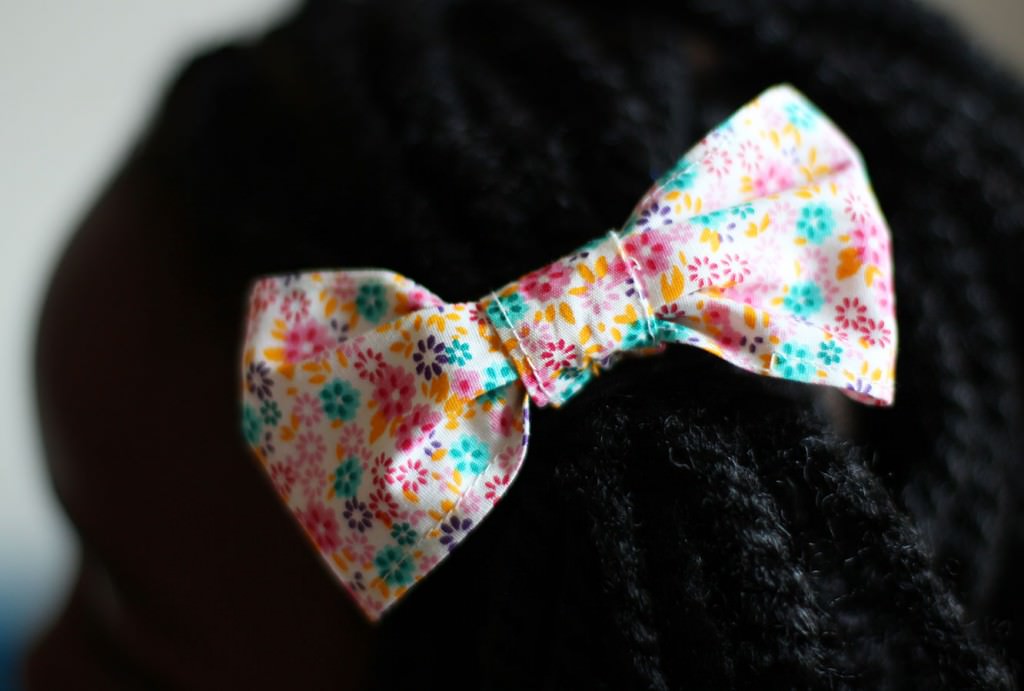
Turn the loop the right way round and attach it to some hair.
This weekend I decided to make a book. It was pretty satisfying holding the finished product, so I definitely encourage you to have a go, even if you never write in it, just put it on a shelf and admire it, that’s what I’m doing at the moment. It was pretty cheap too and will keep you busy for a while (January budget strikes again – you might even have all the ingredients!)
You will need:
A sheet of thick card (this will be your cover)
Good quality paper/thin card (at least 28 sheets)
PVA glue
Fabric/Adhesive fabric roll
Nice quality paper for inside cover
Craft knife and cutting mat (ideally, but scissors will work too)
Needle and thread
Step one
Depending on the size of your thick piece of card you may need to trim your paper sheets. I bought my card from The Range, and it’s artists’ backing board so it came in standard sizes. I got A4, and then realised once I got home that the inside paper was A4 too. Error. You need to cut a spine from your cardboard, so whatever goes inside needs to be smaller to begin with.
Fortunately I have a paper trimmer left over from my A level Art days. So I cut my inside sheets to 25cm x 19cm.
Then you need to score all your sheets in the middle so you get a clean fold. Don’t use the craft knife for this or chances are you’ll slice straight through. Regular scissors are good.
Stick a bit of music on, you’ll be here a little while.
Step two
Fold fold fold.
Put your folded paper into four or more equal size booklets, you need at least four. The number of sheets of paper you need will depend on the thickness of it and the number of pages you want. I’ll let you figure that out. As you can see, I used different pastel coloured papers; take advantage of it being made from scratch and mix it up a little. You could do each booklet in a different colour or alternate them more regularly like I did.
Step three
Poke at least five holes through the fold of each booklet with a needle. Make sure you do this over a blob of blu-tac in true Blue Peter style.
Sew each booklet together using a double threaded needle. You will need a big knot at the end of your thread to stop it from pulling through on your first stitch. I used backstitch and went over mine twice to make it super strong. (If you aren’t sure how to back stitch then have a little google, don’t shy away now…you can do it)
Step four
You will see that the non-fold edges of your booklet don’t line up because they are tucked inside each other. Now, you can leave it like that and just have a jagged (whatever the word is for the opposite to spine), but mine was fairly bad, as I used really thick paper – it was basically card.
So, top tip for you if you don’t own a guollutine (99% of people in the world)…use a bread knife! I know it sounds silly, but after hacking away for ages at the first one with a craft knife to the point where I just couldn’t get a straight edge for the life of me, I was beginning to wish I hadn’t bothered.
Then, eureka moment! Got myself set up on the chopping board with a ruler as the guide and it all ended happily ever after…well…still not quite perfect, but a heck of a lot better than the first one.
Step five
Once your booklets are all sewn and trimmed, hold together with a bulldog clip at the top and bottom, ensuring the spines are level.
Step six
Use the PVA to glue to a scrap of fabric as shown above. If you don’t have spare fabric (I cut up an old pillow case) then a piece of paper will work too, it just won’t be quite so strong.
I used some double sided tape to hem the edges of the fabric at the top and bottom. Leave enough scrap on either side to secure it to the cover well later. There’s no need to hem the long edges as they will be completely covered.
Set aside to dry thoroughly. Overnight if you can.
Step seven
Time to make the cover!
Measure the width of your booklet spines, mark out a strip of card the same width for the spine of the cover.
Then mark out larger pieces for the front and back covers. These should be a centimetre wider than your booklet width and 2cm longer than the height.
Step eight
Using a craft knife and ruler for best results, carefully trim cover pieces and discard any excess card.
Step nine
Size up the fabric allowing for at least 2-3cm around the edges of the whole height and width when laid out as above. Add a little space either side of your spine as shown above.
Now, a note about the material. I got this roll of adhesive fabric that just made this bit so wonderfully easy. It’s like sticky back plastic without the angst, you just peel off the white bit and it sticks really nicely to the card. It was £4.50 for a roll in HobbyCraft, and will cover two books this size with some left over to cover a set of matching pencils or something.
If you are using regular fabric you just need to give it a generous covering in PVA and be more patient waiting for it to dry before moving on.
Step ten
Trim the corners to avoid excess bulk, use fairly wide angles so that all the corners get properly covered. There’s no need for a huge amount of precision here.
Step eleven
Stick the edges down, being sure to pull tight for a nice sharp finish. If you’re using PVA leave to dry.
Step twelve
Line up the spine of your booklet with the cover spine. Stick the paper or fabric flaps to the cover. DO NOT stick the spine itself down or you won’t be able to open the pages properly.
I used double sided tape for this, and that seems to hold really well and eliminates drying time. Again, PVA will work for this too, so just go with what you’ve got available.
Step thirteen
Cut two pieces of card or heavy paper for the inside covers. If this is nice and thick it will cover a world of sins! Also, it’s worth getting hold of something attractive as it adds that little extra when you open it.
This should basically be the same size as one of your folded pages from earlier, so mine was 25cm x 19cm.
Score and fold (score on the outside of the fold so you won’t see it on the end product).
Step fourteen
Stick the inside covers to the book. Again I used double sided tape, if you use PVA for this be careful not to overdo it as your paper will bubble.
Stick to the booklet first, lining it up perfectly with the outside page. Then lift your cover to a 45 degree angle and attach there as well. Close the book and press down. If using PVA leave cover open to dry.
A little close up of the paper I used.
Step fifteen
Give yourself a pat on the back, you just made a BOOK.