Assemble!
So, I have a confession to make, I didn’t actually photograph the assemblage of the big house. All my fingers and toes were required to hold it together until the icing dried, so there was nothing left besides my nose to press the camera trigger.
Instead I whipped up another half batch of dough and made a little one to show you how to, aren’t I lovely?
Things you need:
Royal icing
Piping bag/Strong sandwich bag (snip a corner off to pipe)
Base
Tinfoil
An extra pair of hands
Deep breaths
Step one:
Cover base in tinfoil/something pretty. Tin foil works well because it doesn’t soak up the icing. I used an upturned tray for the bigger one, and stuck ribbon where the tinfoil didn’t quite meet the edges. Chopping boards and baking trays also make a good base (but make sure you don’t need them for Christmas dinner first!) Alternatively you can buy one, but that would just eat into your sweets fund. Nobody wants that.
Step two:
Mix up your royal icing and put in icing bag. It has to be pretty thick, or construction will be hard going. At the same time, make sure you can pipe it without getting hand cramp.
Step three:
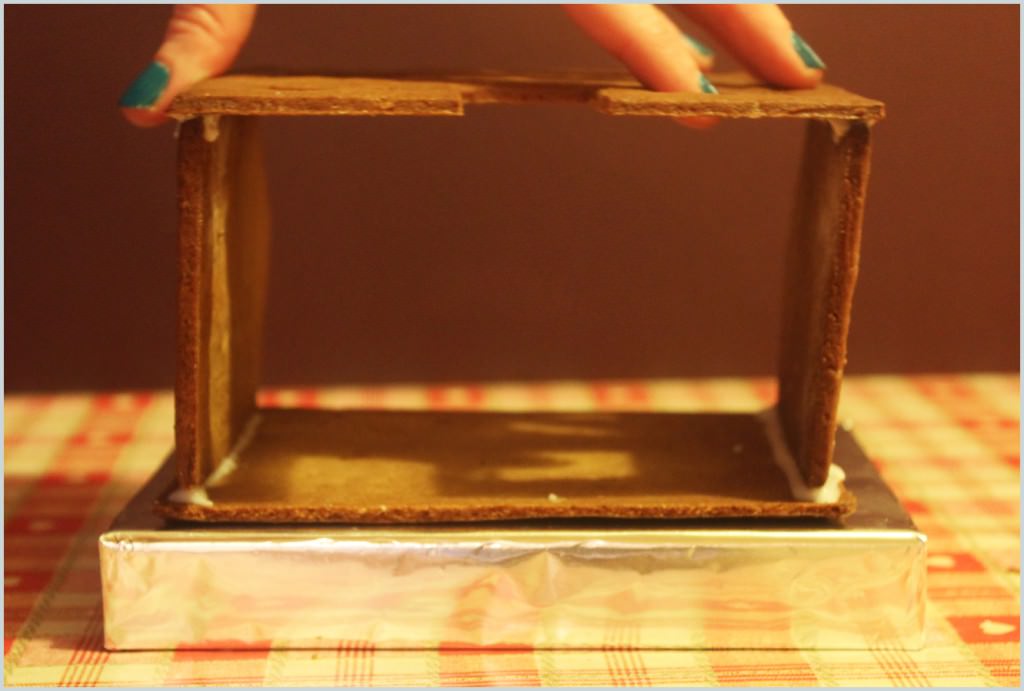
Place back wall on a flat surface (if you use your base you have less far to travel when you flip it). Pipe along the two sides, as shown above.
Step four:
Attach sides and hold for a while until the icing starts to dry, you might want to get another pair of hands involved here, or the salt and pepper shakers to everything in place. Pipe along the top edges.
Step five:
Place the front on top. Definitely don’t drop it on your way over and crack it. That would be really silly.
Step six:
Flip it! This is where with anything bigger, you will need someone else to help.
Now you can see the crack *sob*. So this also happened to my big house, I might show you in the next post, but I’m still deeply saddened by that (the sugar windows stuck to the tray rather than me dropping it but still, a perfectionist’s nightmare). I’m basically a massive klutz. All is not lost though.
At this stage you are unlikely to want to make any more gingerbread. So if this happens you need to make do and mend. This can be done with royal icing, but you’ll get a white line along the cracked bit. A better (albeit more perilous) way to fix the cracks is by making a sugar syrup. Essentially all you need to do is melt down some sugar in a frying pan and voila, you have baking’s version of super glue. Dip the broken pieces into the sugar and stick. Be careful though, definitely not a game for children to play. Sugar syrup is dangerously hot. If you end up dipping your thumb in it, don’t let your gut reaction be to stick it in your mouth to cool it off. That is a most unpleasant experience.
Some people use sugar syrup to put their whole house together, but quite frankly, I value my life more than that, I’m far too clumsy.
Step seven:
Now you have it upright and relatively stable, ice it all over. This looks a bit messier on a little house than a big one, but basically go around all the edges inside and out with icing. You can really go to town on the inside corners as nobody will see them, the more you can reinforce at this stage the better.
Step eight:
Stick the roof on and leave as long as you can to dry before decorating.
Step nine:
Stay tuned for phase three later this week.
Happy festive baking!
Related articles
Gingerbread Architecture: Phase 1
Gingerbread Architecture: The Final Frontier


