Tag: sewing

Santa Claus is coming to town

Two years of fabrefaction.co.uk friends. Yup. THAT HAPPENED. Thank you for the support and the loving, please keep sharing, commenting and messaging me; I love hearing from you and seeing what you’ve made.

In keeping with my first post ever, and the one year anniversary post of this little blog, here’s another lovely advent calendar for you to make.

“Oh but advent starts next week, I don’t have time!” Yes, yes you do. I made this in a day. Less than really when you consider I went out for breakfast and dinner. You could even take the easy way out and glue instead of sew.

This particular calendar is a labour of love for my very hardworking and wonderful sister. Poor duck got jealous of mine once, and this year I thought it was about time she had something a little more permanent so she never forgets again. Thanks for your love and support sib.
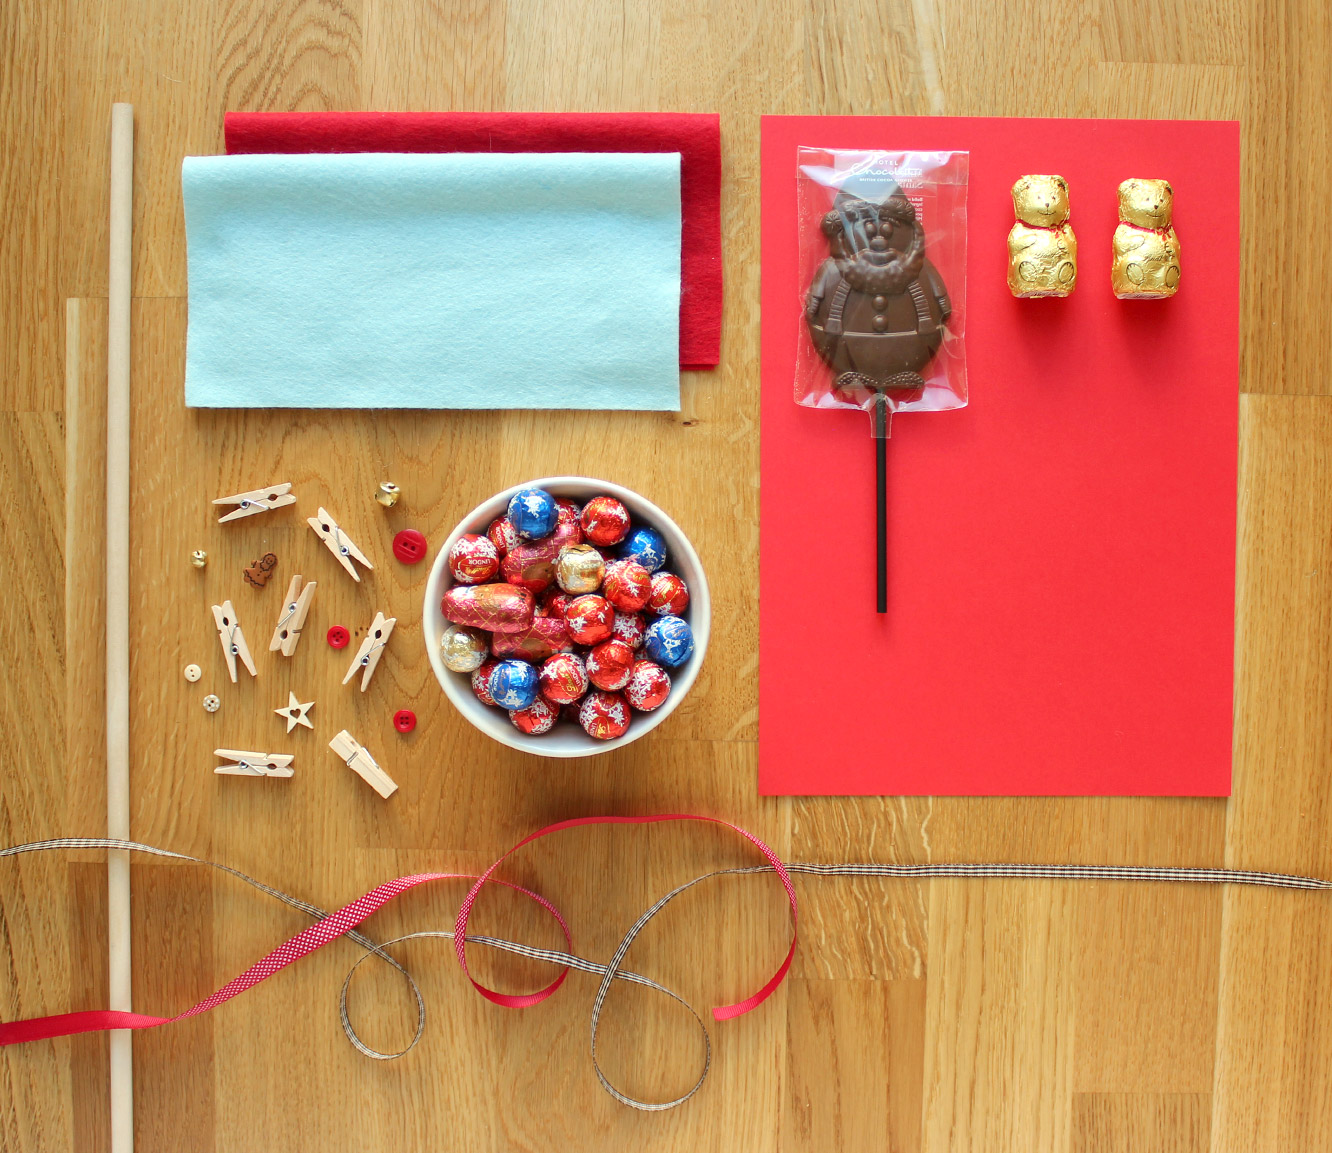
homemade-advent-calendar-mini-stockings-01

You will need

A dowel rod (40cm) (or a wire coat hanger)

Festive looking string or ribbon

Felt (I bought two packs of 5 felt squares from John Lewis, you’d probably need 6 or so A4 sheets)

24-48 chocolates (I used mini Lindor truffles (there are 22 in a bag) and some woodland friends from Waitrose)

Something a bit more special for Christmas eve

24 miniature pegs (I got these from Tiger)

Buttons etc to decorate

FIMO or air dry clay

A marker pen or ink and mini number stamps

This template for the stockings

homemade-advent-calendar-mini-stockings-02

Step one

Depending on the length of your dowel you might need to cut it down. Mark the cut point at 40cm.
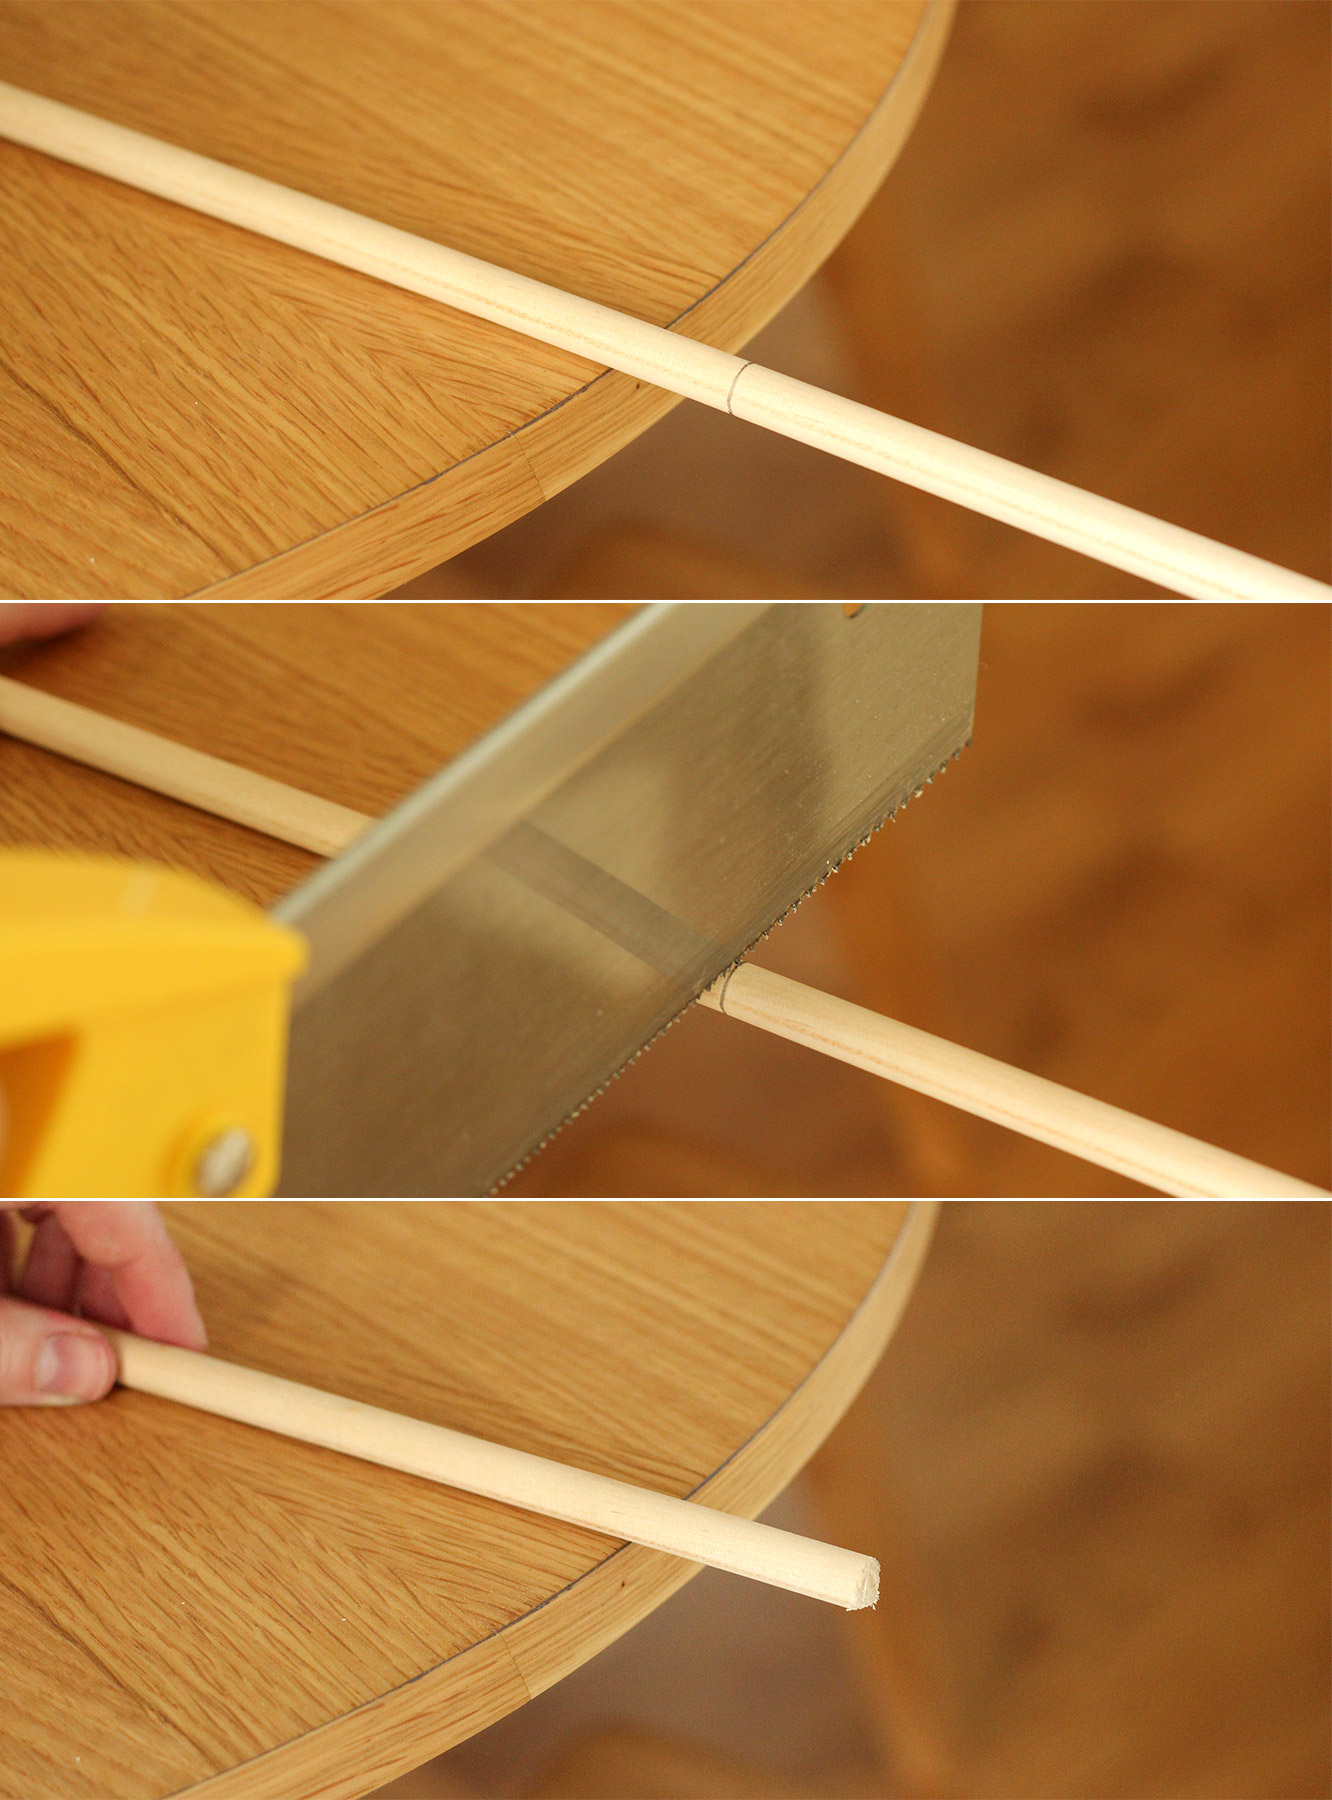
homemade-advent-calendar-mini-stockings-03

Step two

Cut the end of the dowel off. Those of you into wood work (of which I am sure there are plenty) don’t judge me for my saw, I’m relatively confident after using it that it wasn’t the right choice.
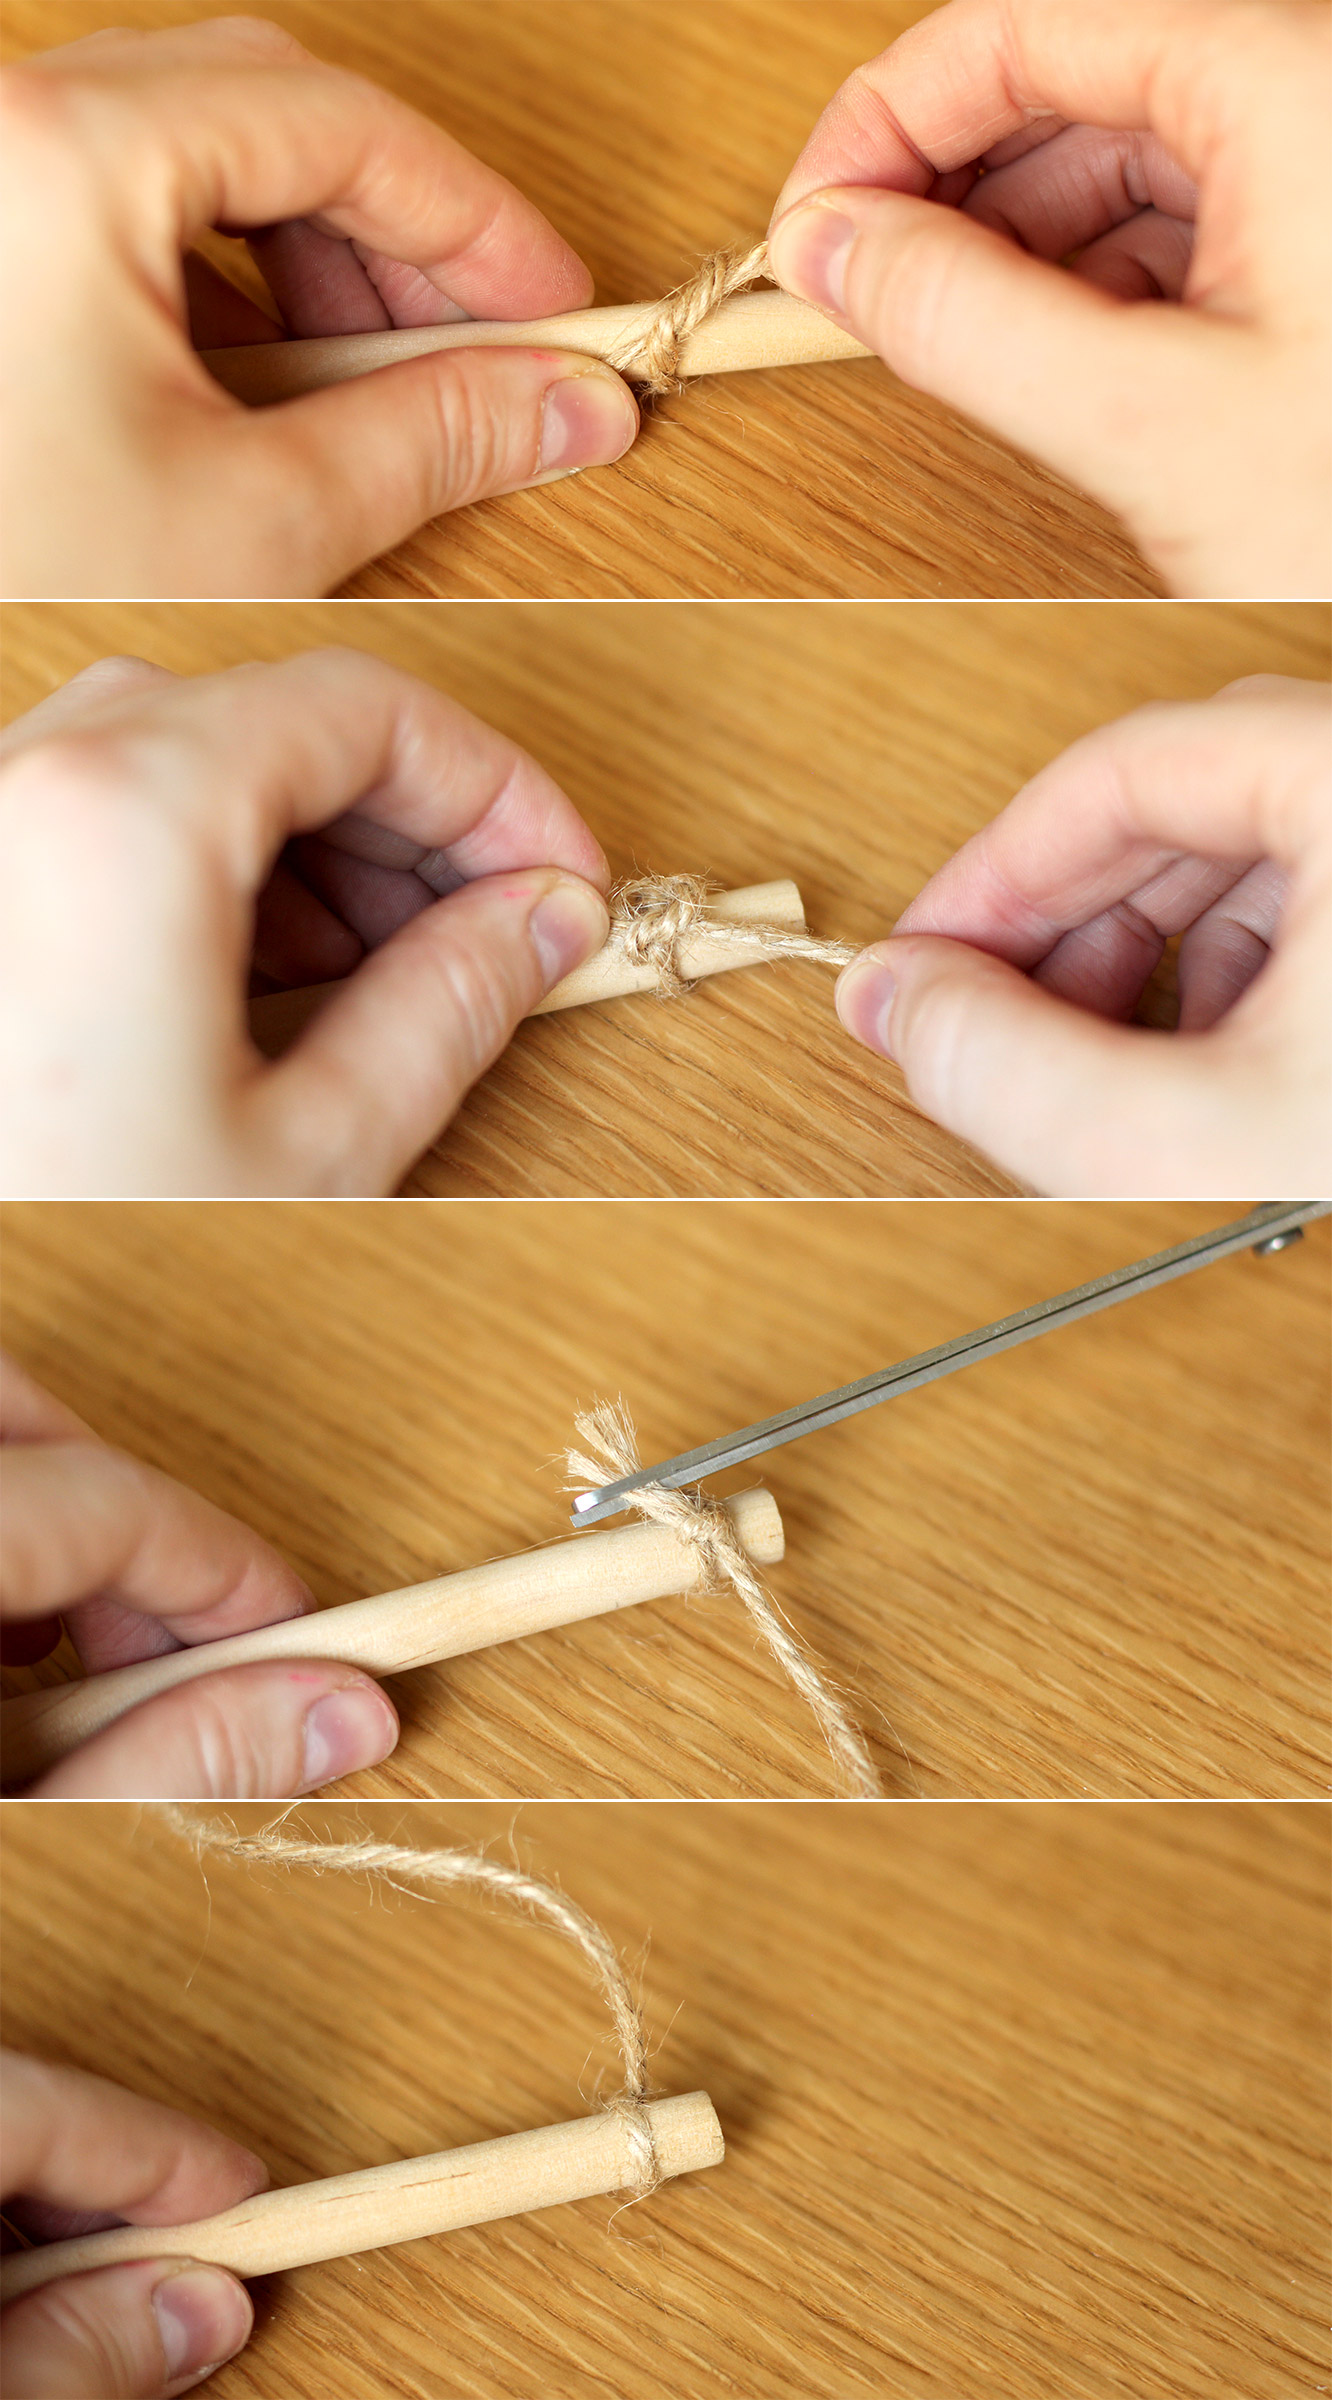
homemade-advent-calendar-mini-stockings-04

Step three

measure a length of twine/string/ribbon about twice the length of the wood and double knot tie it onto either end. You might want to add a little glue to secure it. Make sure to turn it so the knot is at the back.
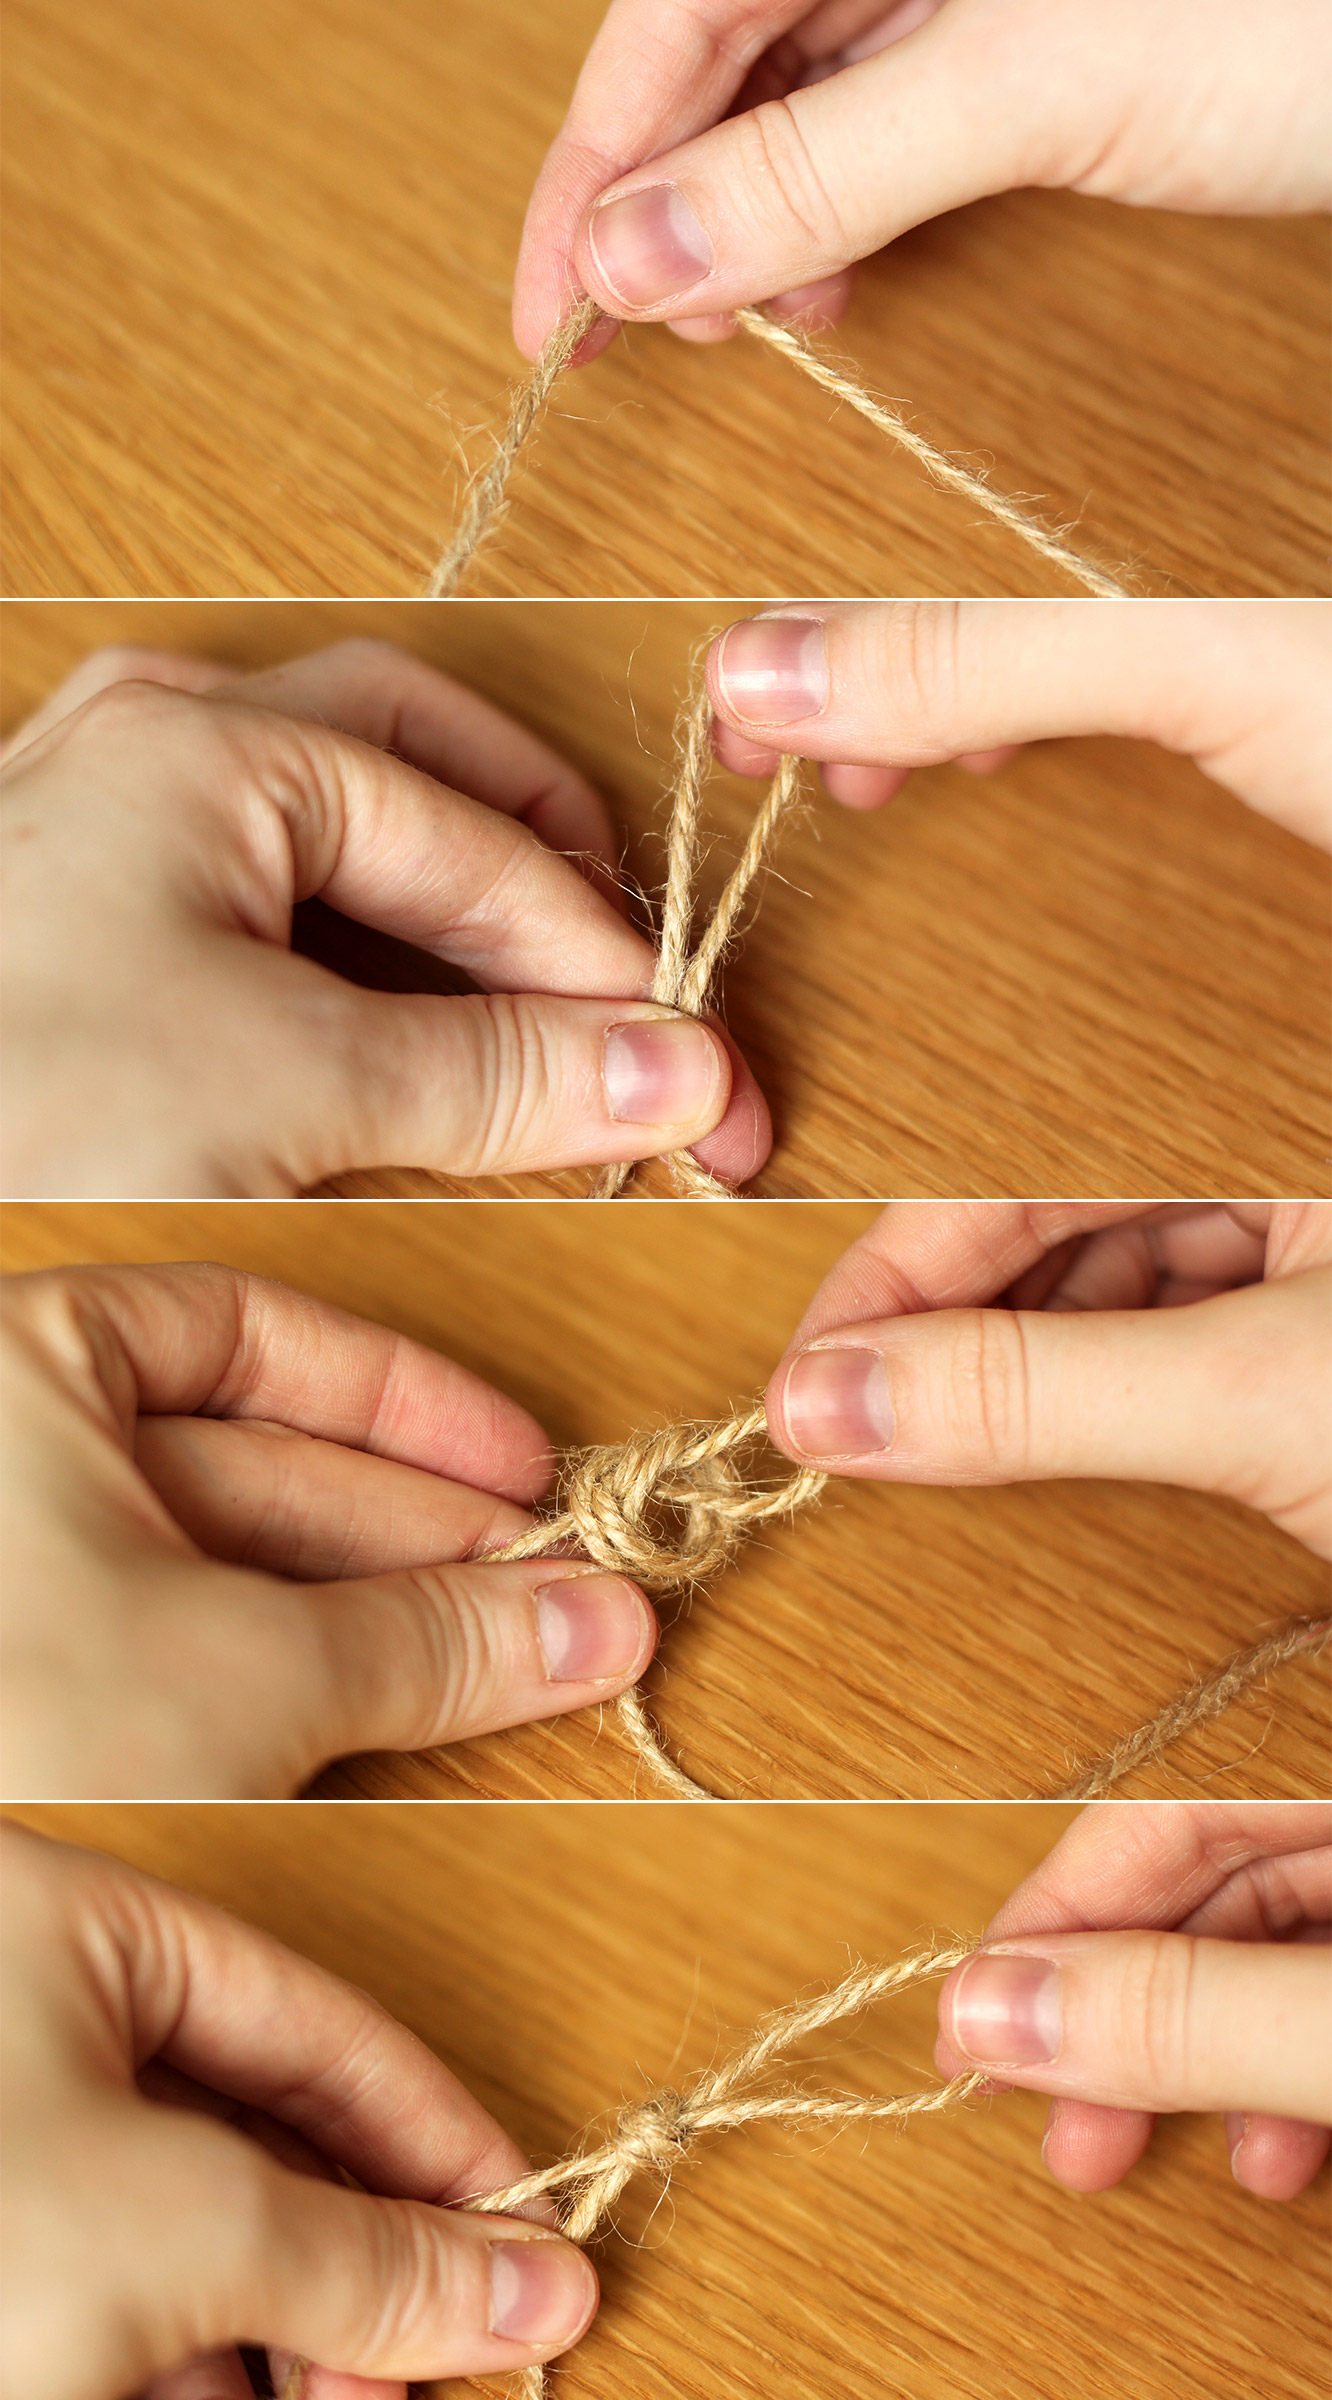
homemade-advent-calendar-mini-stockings-05

Step four

Hold the centre point of the twine and allow the rod to hang off the side of the table. Make sure it’s level and tie a knot in the middle so that you have a loop to use for hanging.
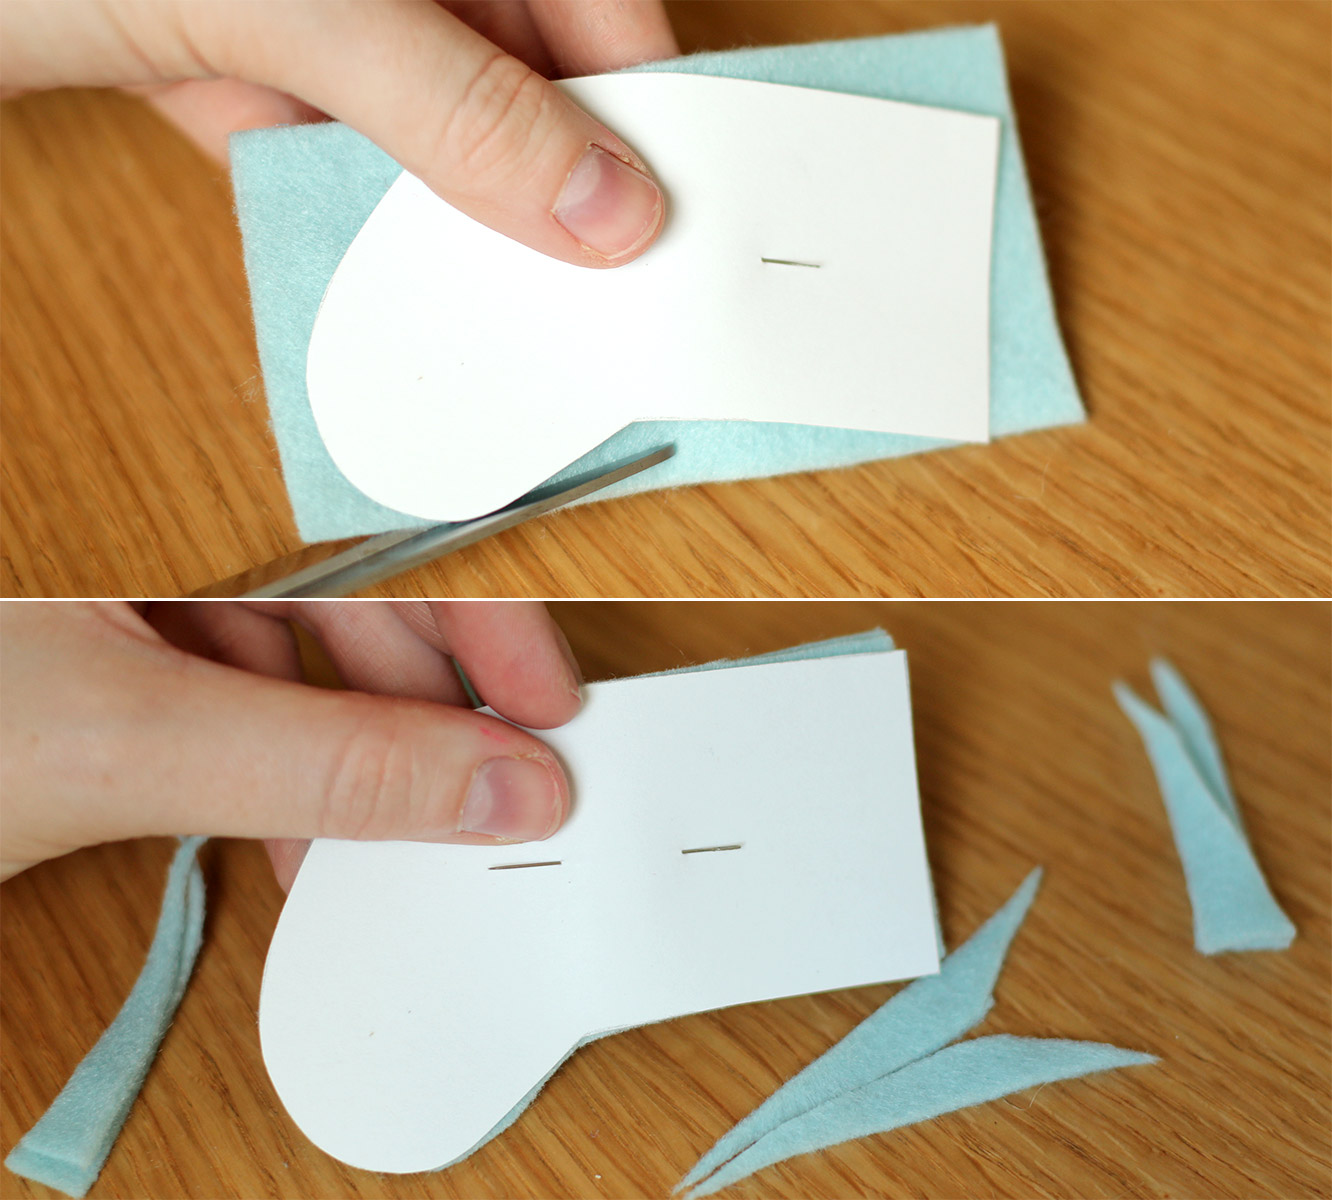
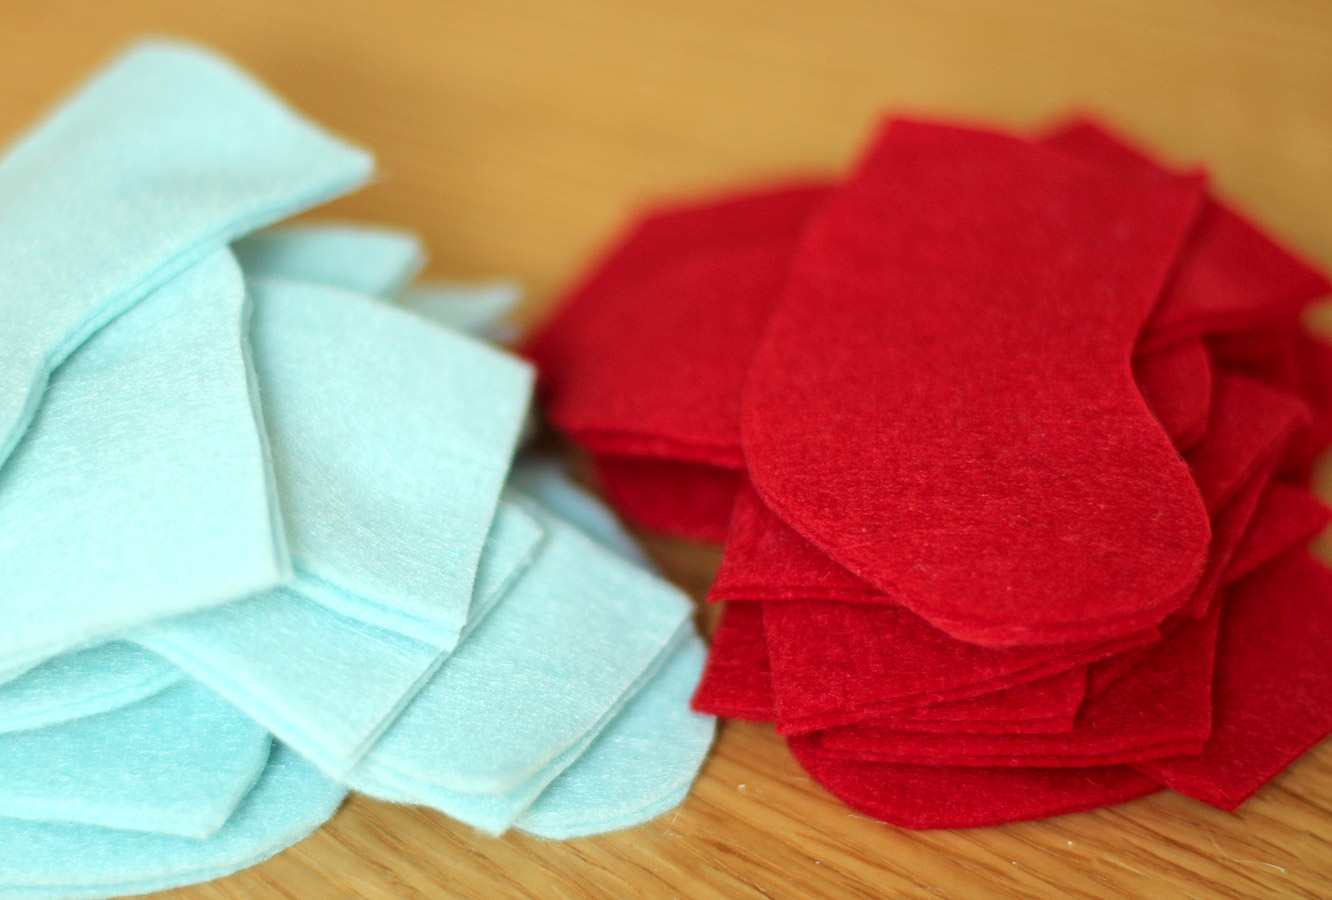
homemade-advent-calendar-mini-stockings-06

Step five

Using the template cut out 23 mini stockings (2 pieces of felt for each). I cut through two layers at a time, and squeezed 8 cut outs from each square of felt. If you bought A4 sheets I imagine you’ll get 10-12.

homemade-advent-calendar-mini-stockings-07

Step six

Keep cutting.

homemade-advent-calendar-mini-stockings-08

Step seven

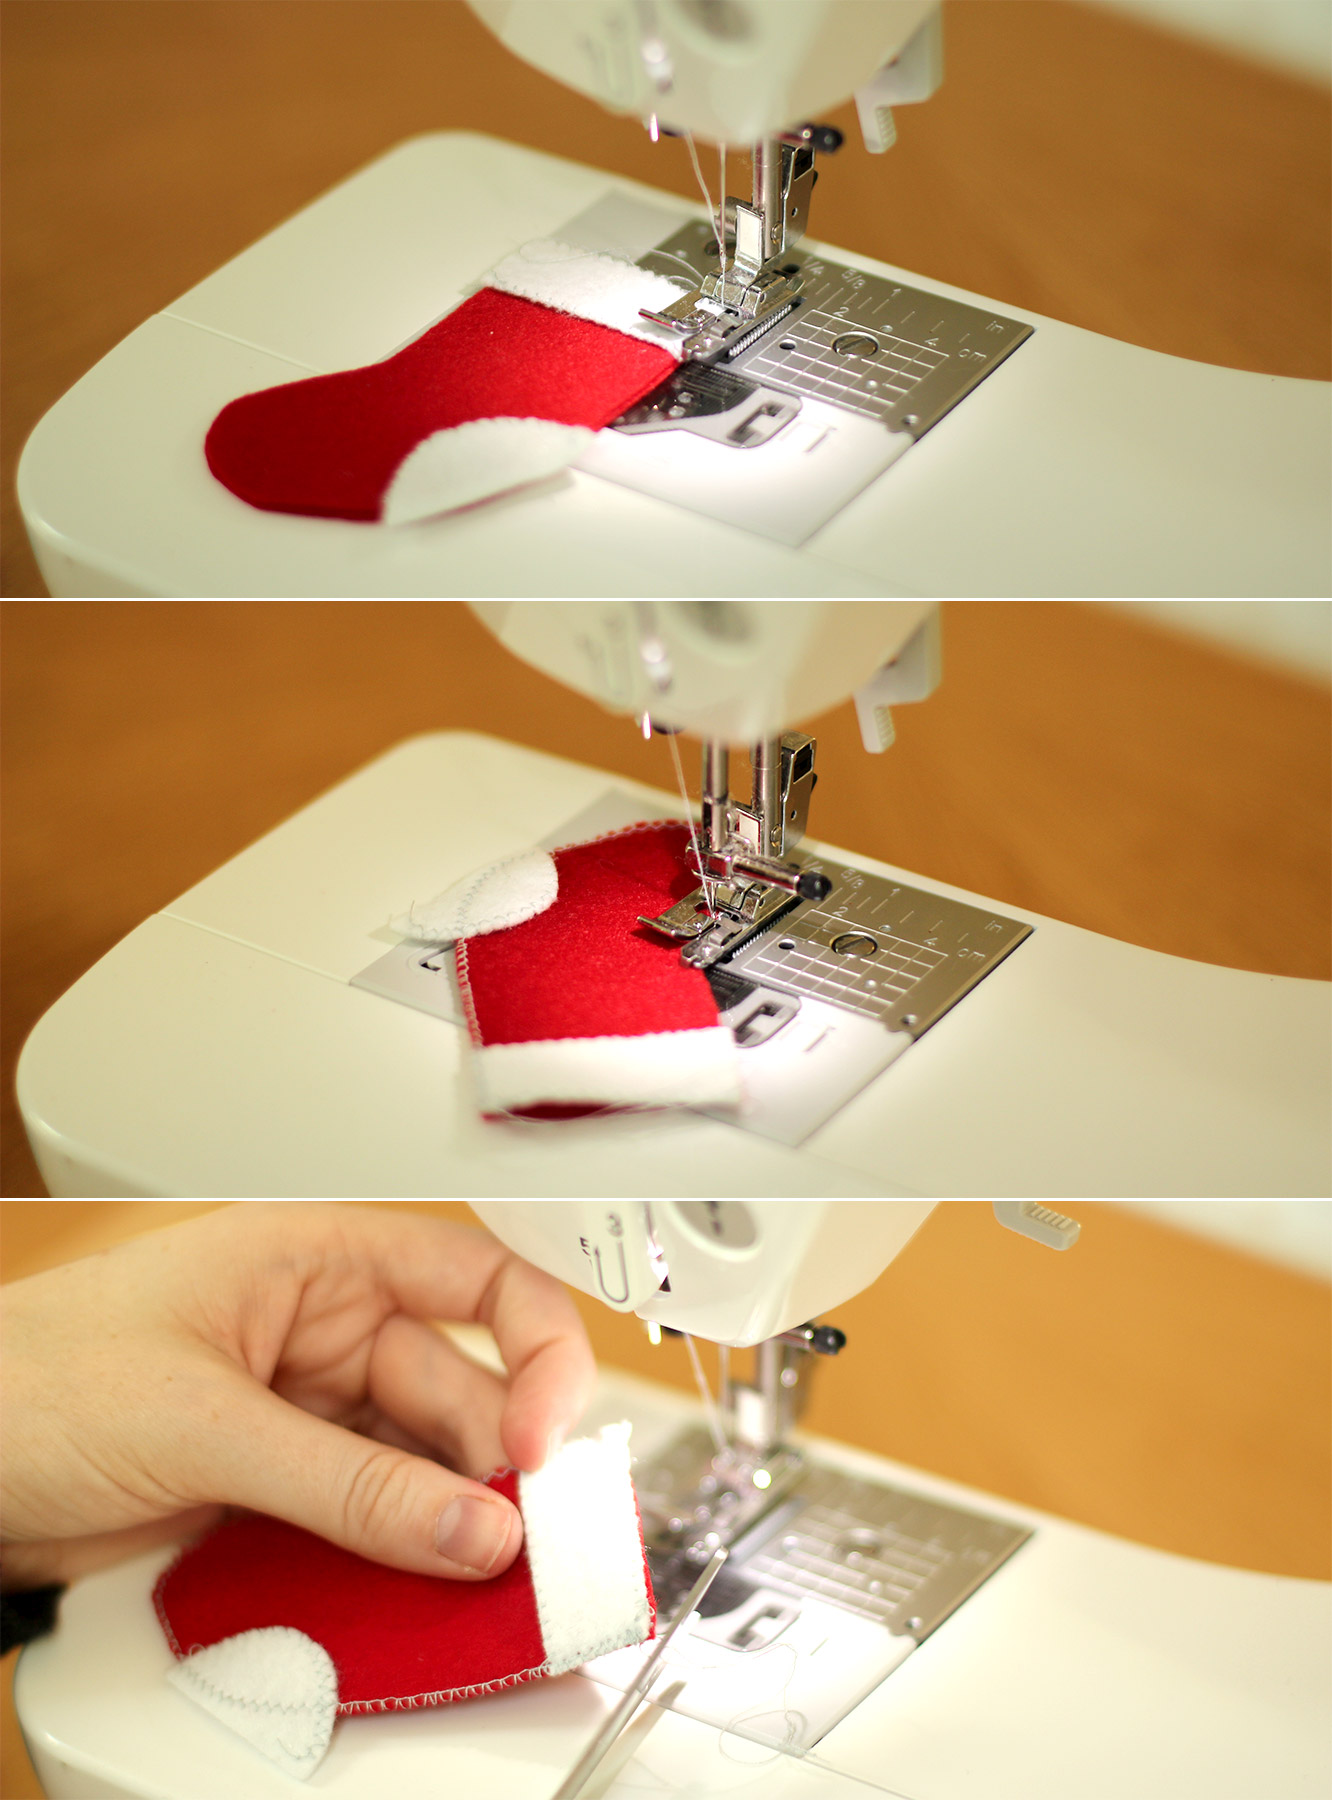
Sew the stockings together using an overlocking or zig zag stitch. I edged the white bits separately before attaching them and left the heel hanging over the edge.

If you are making this for next Christmas, feel free to hand sew. I cover how to blanket stitch here. If you want this ready in time for this advent I recommend borrowing a sewing machine or using glue.

homemade-advent-calendar-mini-stockings-09

Step eight

Cut the excess off the heel of the stocking and any loose threads.

homemade-advent-calendar-mini-stockings-10

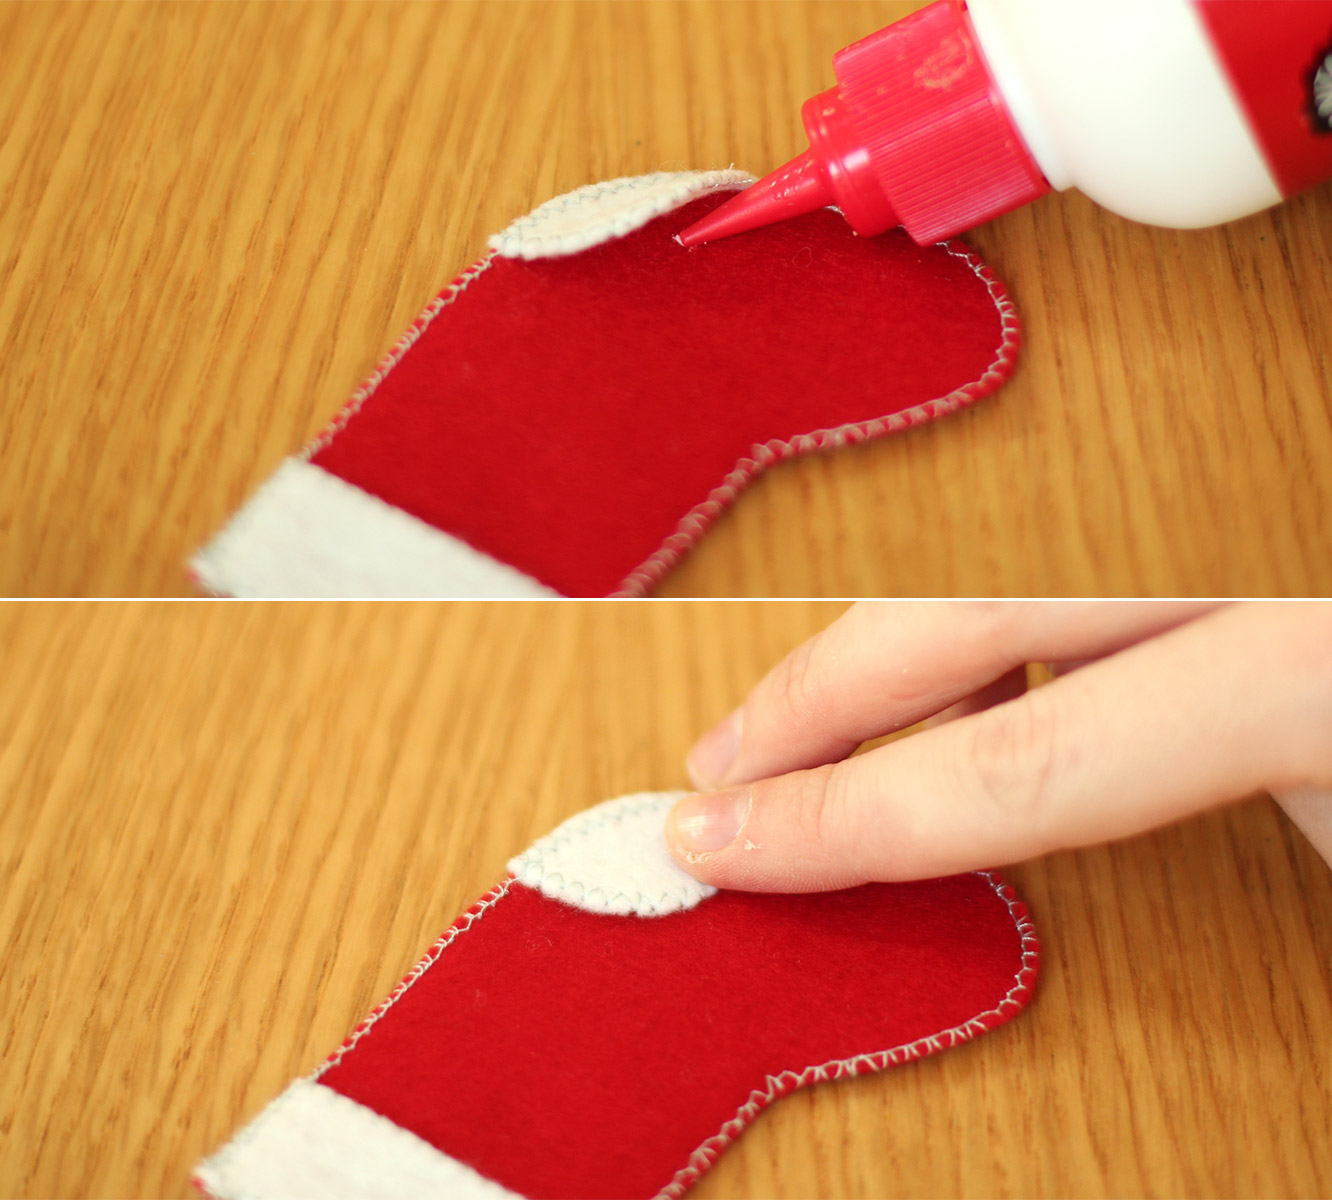
Step eight and a half

(Totally missed this step on the original post)

Secure the heel with a little dab of glue, but make sure it doesn’t soak through and stick the stocking together.
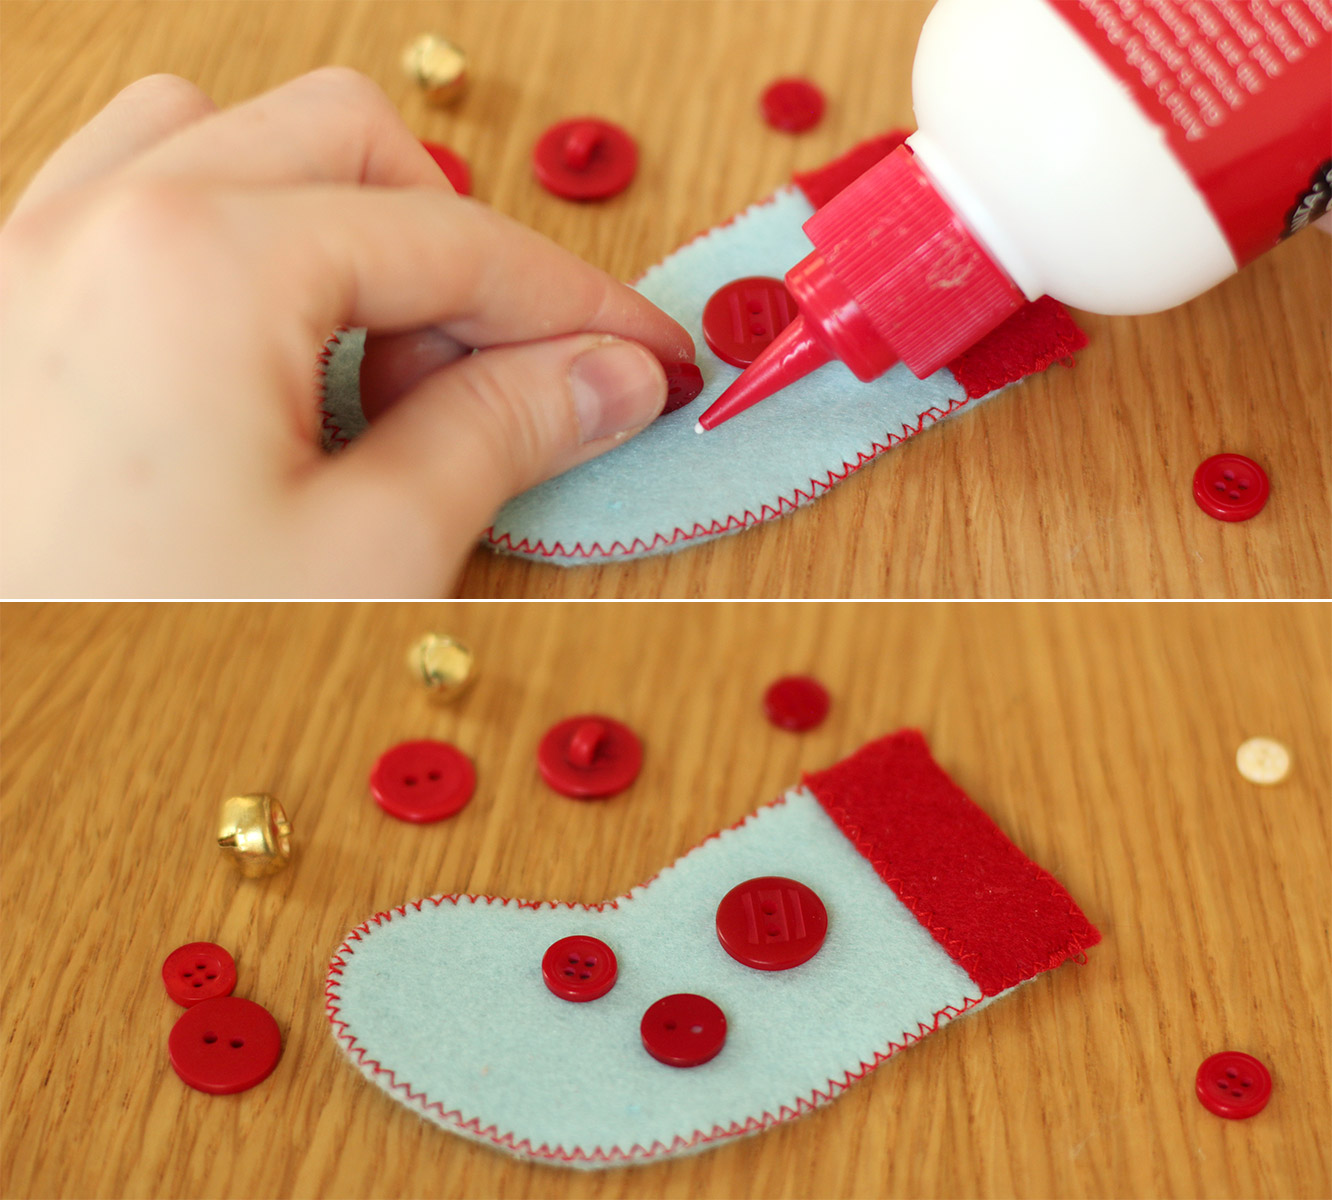
homemade-advent-calendar-mini-stockings-11

Step nine

I decided not to sew heels on all of them as I wanted a bit of variation. So I used some of the embellishments from last year’s advent calendar to decorate. Glue is acceptable here I reckon, otherwise you really need to sew them on before sewing them together.

Repeat until you have 23 little stockings and one big one.
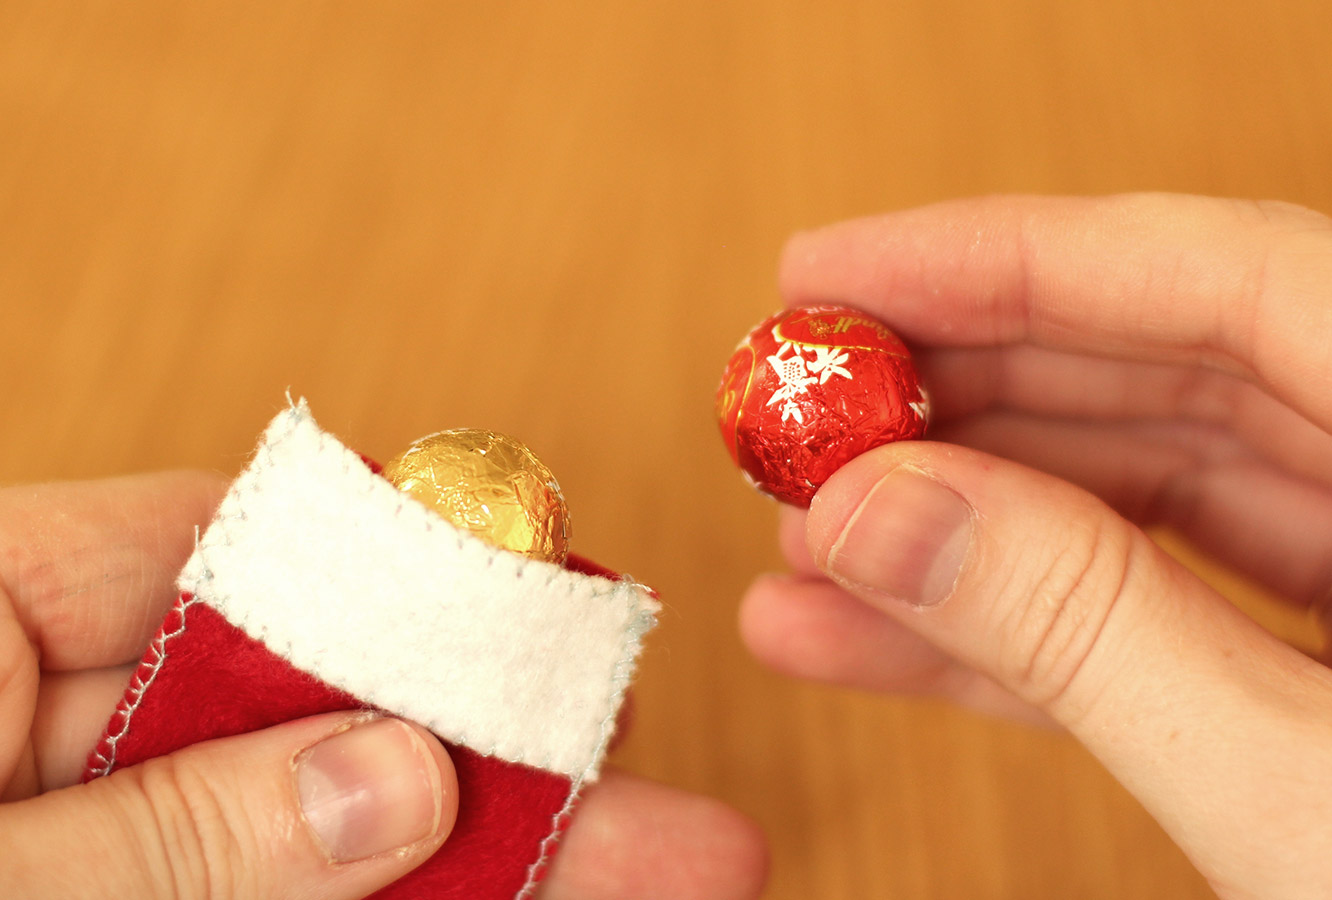
homemade-advent-calendar-mini-stockings-15

Step ten

Fill your little stockings as you go, they look very cute as they stack up.
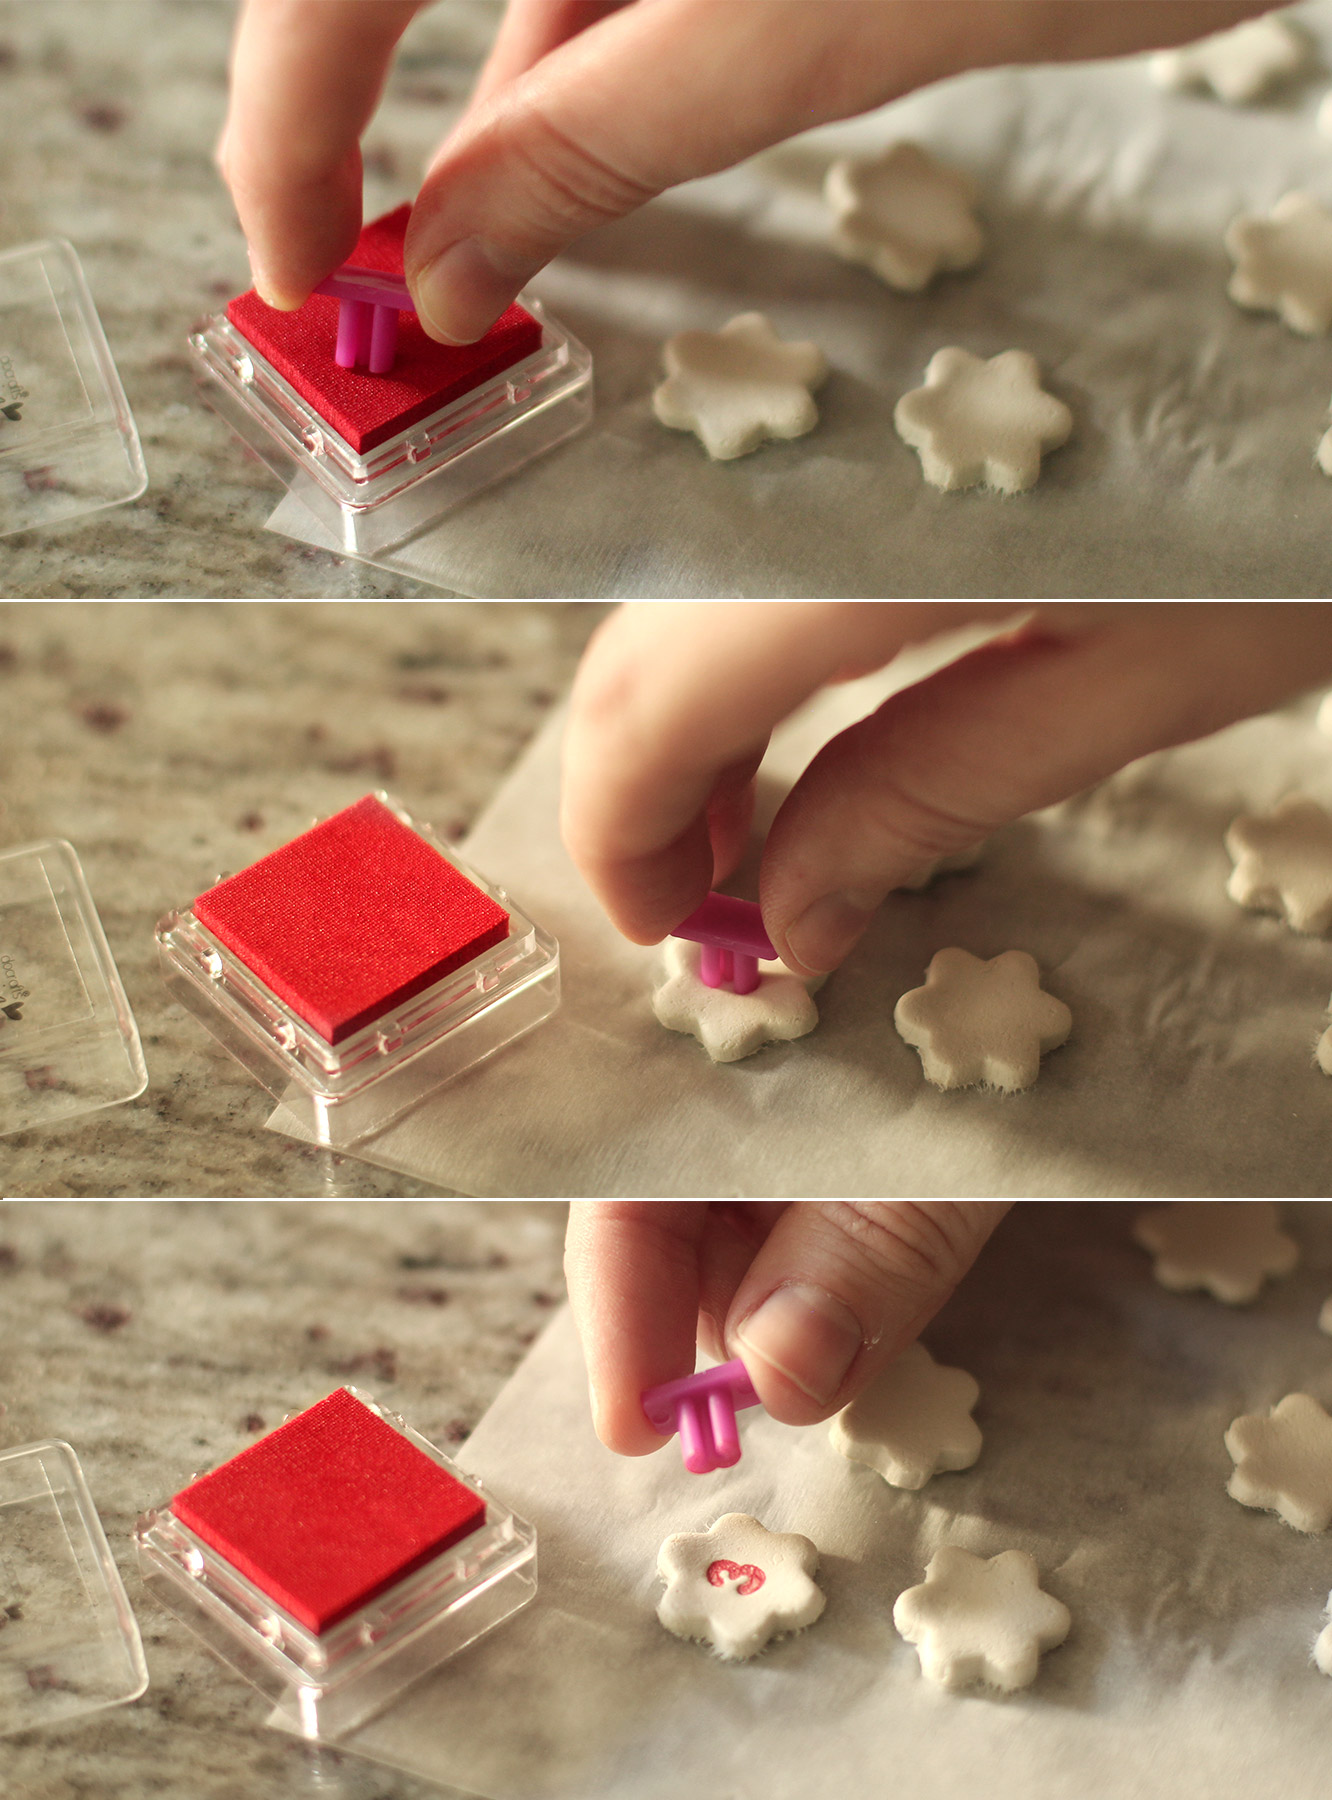
homemade-advent-calendar-mini-stockings-12

Step eleven

After a few learning lessons from last week, I made the number markers with air dry clay. I found it easier to work with than FIMO. It also worked really well to ink the stamps before pressing them into the shapes.

This is entirely optional, you could write the numbers on the pegs, stamp them, make circles of card instead etc etc.
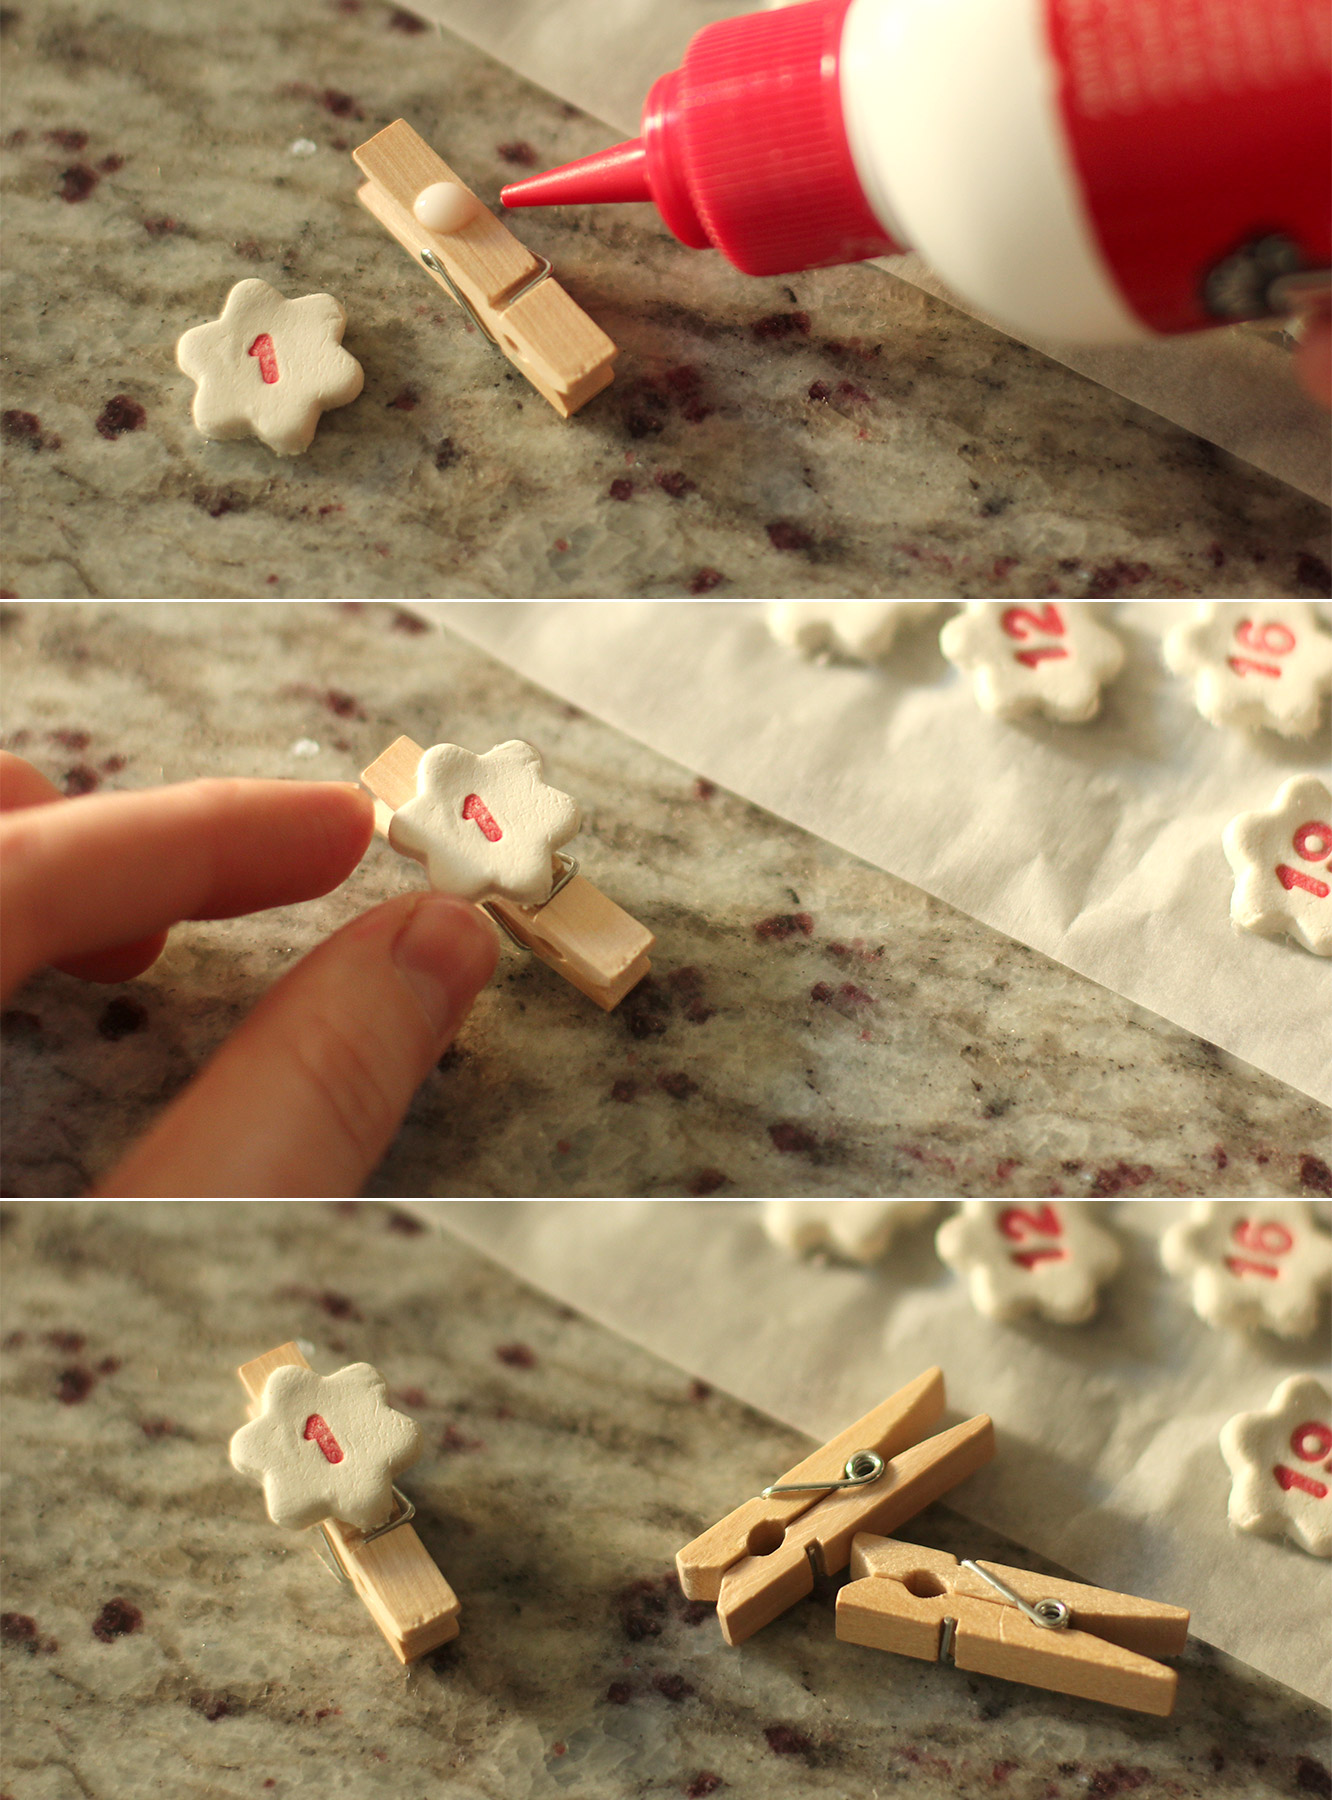
homemade-advent-calendar-mini-stockings-13

Step twelve

Once the shapes have dried out (no cooking required with this clay), stick them to the pegs with enough space at the top to open and shut the peg without squashing them.
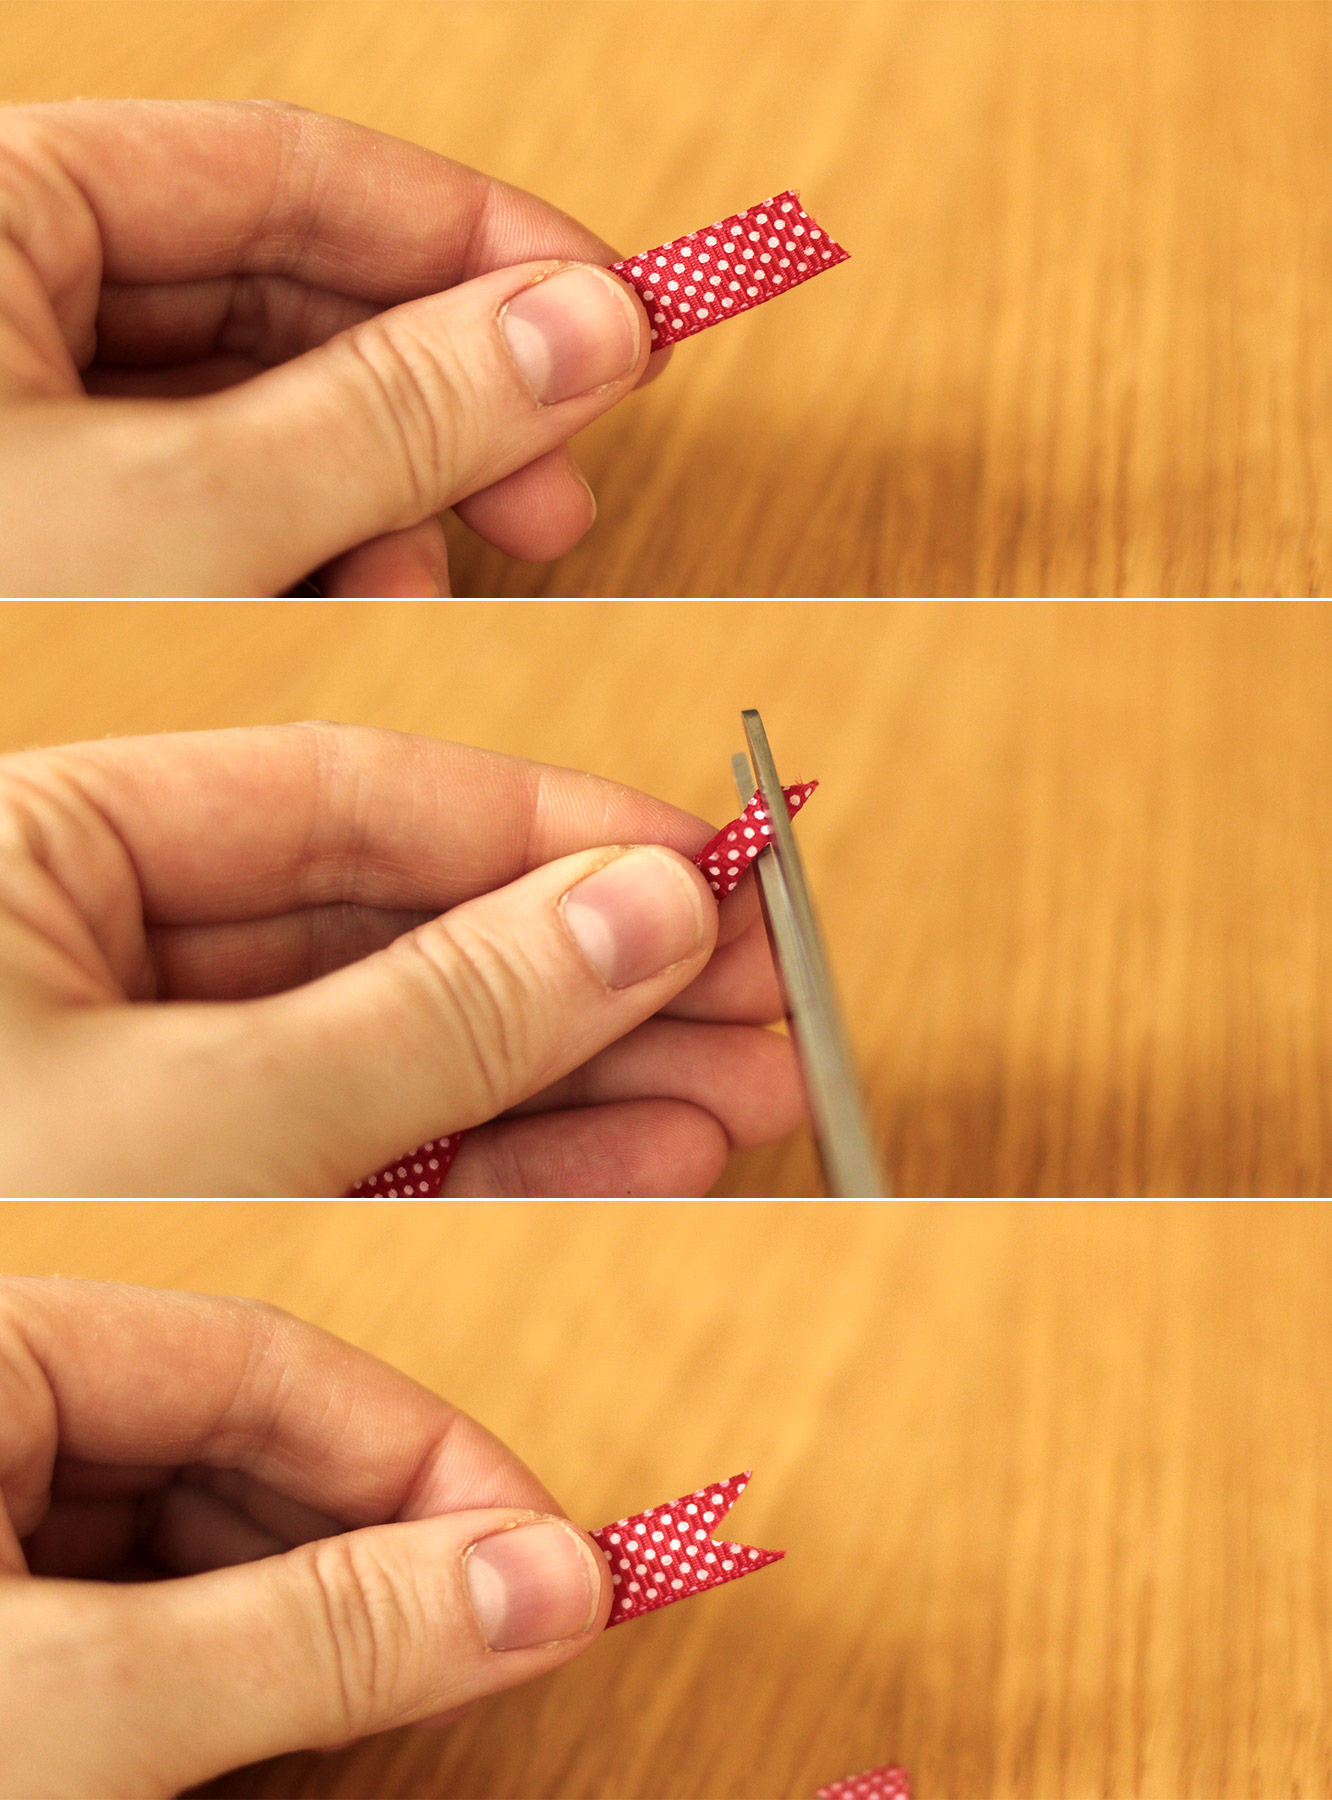
homemade-advent-calendar-mini-stockings-14

Step thirteen

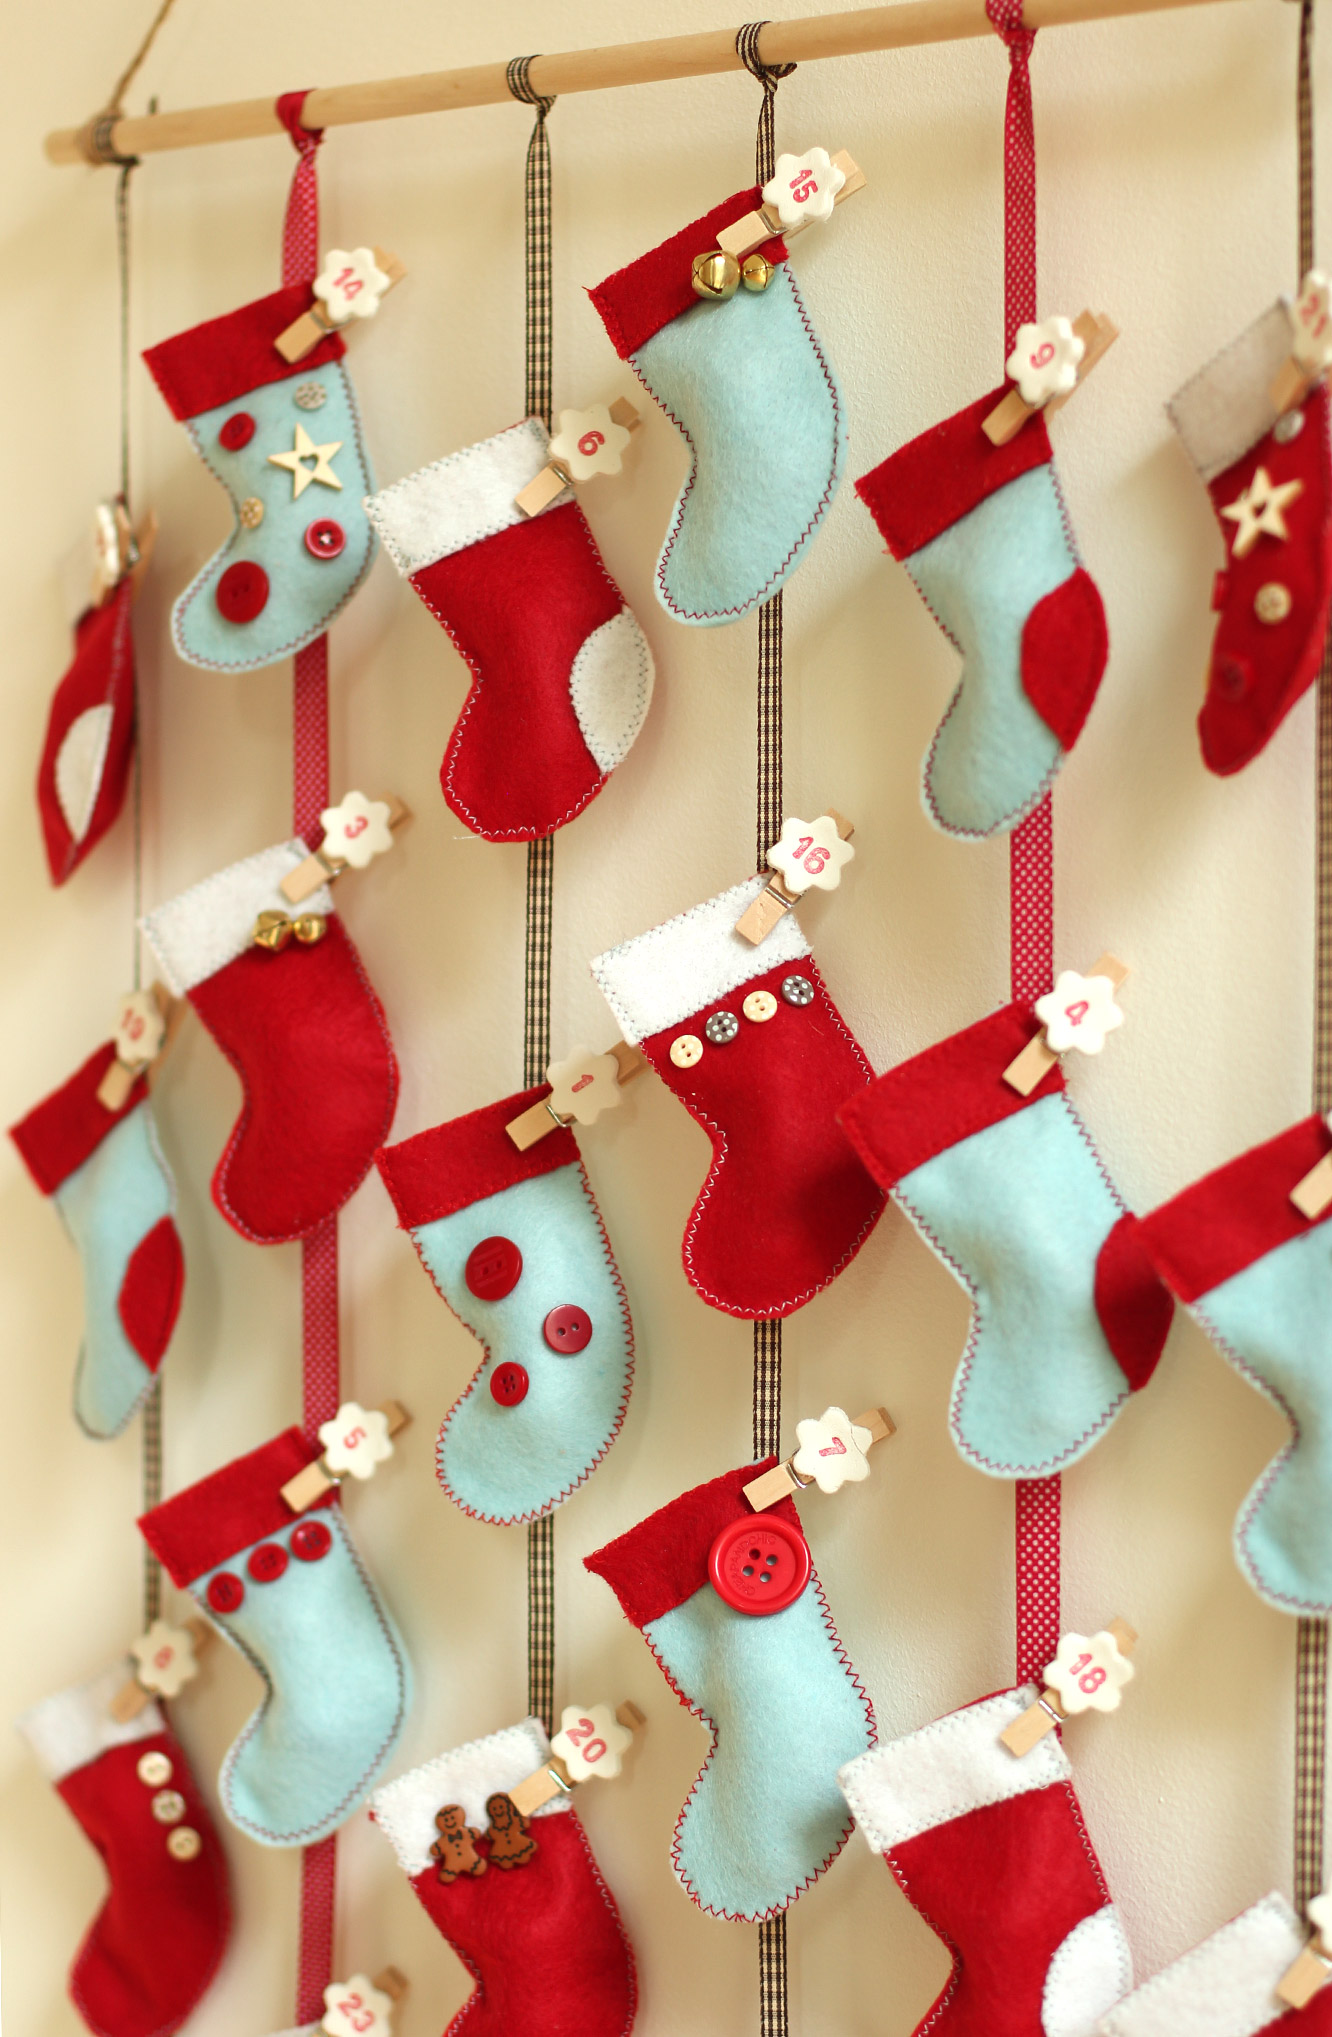
Cut 6 lengths of ribbon. I decided to taper mine at different lengths, as you can see in the final photos. To shape the ends nicely, fold the ribbon in half and cut diagonally on the fold to create a v-shaped cut.

homemade-advent-calendar-mini-stockings-gif

Step fourteen

Tie the ribbons onto the rod and peg the stockings on.

homemade-advent-calendar-mini-stockings-18

homemade-advent-calendar-mini-stockings-17

homemade-advent-calendar-mini-stockings-16

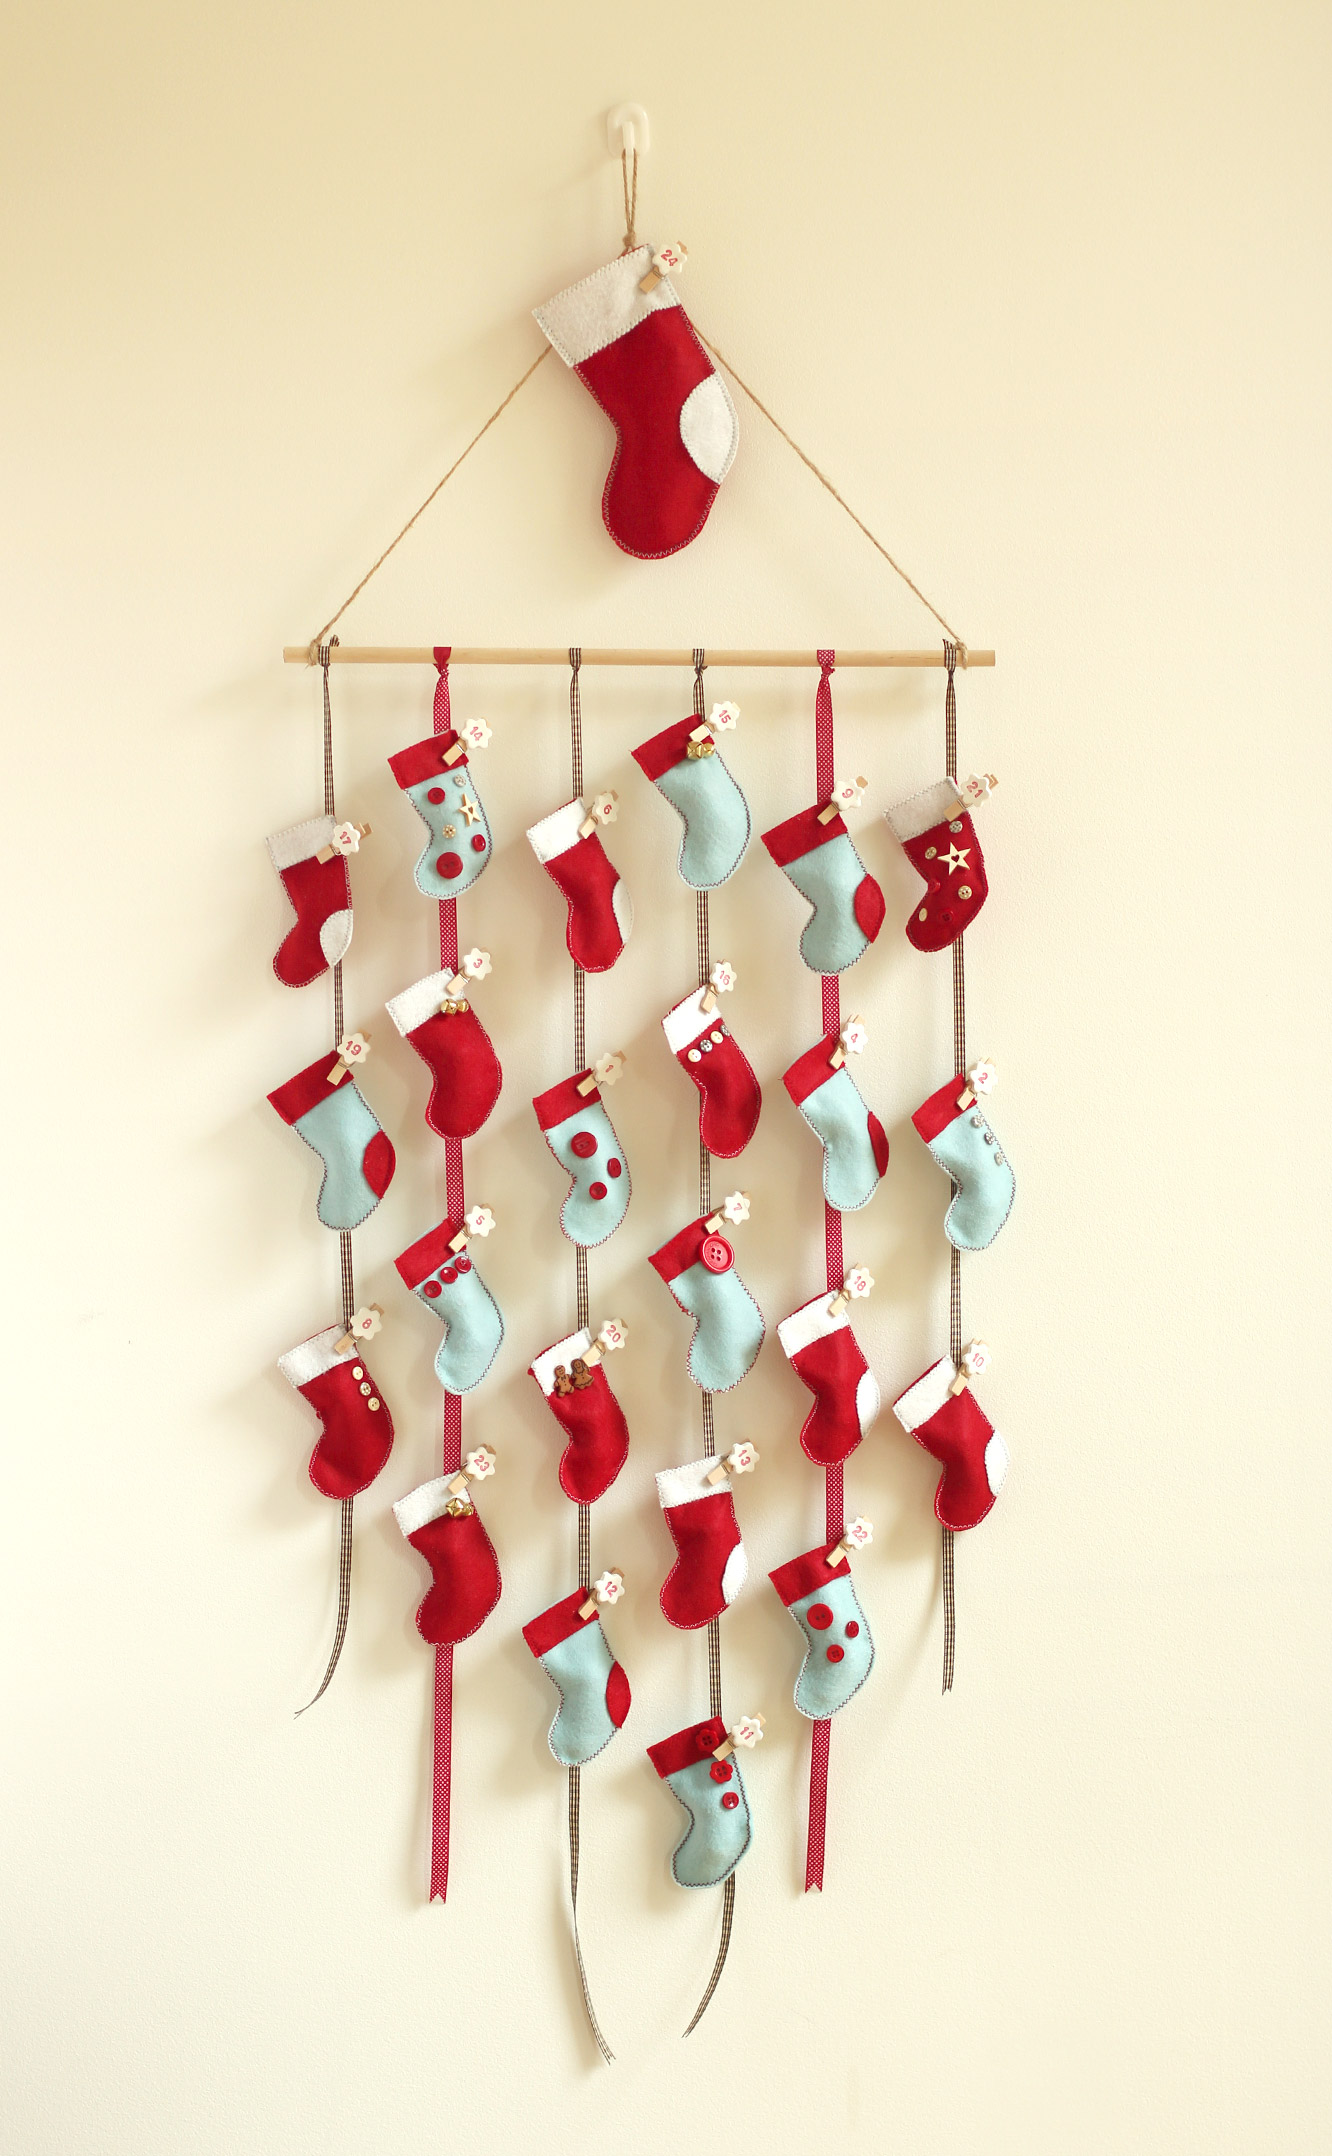
Happy Christmas FiFi xx

Half term hair bands

This half term holiday I had promised two little friends of mine a day in my London pad. They were very excited and had all kinds of crafty plans and ideas to keep us busy.

When thinking about what we could do on a budget, I remembered learning how to sew when not much older than them.

I was pretty impressed with these two; by the end they were using the sewing machine unaided (although for their parents’ benefit – heavily supervised!)

This is a great little project for beginners of any age, but for the reference of anyone planning to do this with children, these two are 7 and 8 and handled it very well. It would certainly be doable if you don’t have a machine too.

how-to-make-hair-bands-bow-1

You will need

Cute fabric

Elasticated hair bands

Needle and thread (or a sewing machine)

how-to-make-hair-bands-bow-2

Step one

Cut two lengths of fabric, one 7cm x 22cm and the other 3.5 cm x 12 cm.

Step two

Sew a small hem along the long edges as shown above.

When doing this with the girls they used the foot while I guided it through at first, then I took a turn with the foot so they could guide, then they took the helm altogether.

how-to-make-hair-bands-bow-4

Step three

Join the larger piece with right sides facing. Turn it through so the right sides are showing.

how-to-make-hair-bands-bow-3

Step four

Lie the smaller strip down, right side facing upwards. Place the larger piece on top with the seam running down the centre.

Pop the hairband on top.

how-to-make-hair-bands-bow-5

Step five

Loop the smaller strip of fabric through the hair band and squeeze it all together. Don’t worry too much about the shape of the bow for now, plenty of time to sort that out later.

how-to-make-hair-bands-bow-gif

Step six

Sew across the smaller piece of fabric as close to main body of the bow as your machine will allow. That being said, if you are hand sewing (and therefore have a bit more control) do leave a little wiggle room.

how-to-make-hair-bands-bow-8

Step seven

Chop off the excess fabric.

how-to-make-hair-bands-bow-6

Step eight

Turn the loop the right way round and attach it to some hair.

how-to-make-hair-bands-bow-7

Just ten more minutes…

Don’t get me wrong, I’m loving that Spring is having a little flirt with us at the moment. The evenings are getting longer and the sun is playing peek-a-boo. At the same time, sometimes you wake up a little bit earlier than intended at the weekend or you just want to shut it all out for a little Sunday nap. So here’s a really quick and easy make for catching some Zzz or maybe adding to a little pamper package for Mother’s Day? More on that later…

how-to-make-eye-mask

You will need

Some pretty scrap fabric (the darker and thicker the better)

Bias binding (mine was 12mm thick)

17″/43cm Elastic

Needle and thread/Sewing machine

Pins

Downloadable template

how-to-make-eye-mask1

Step one

Pin the template to at least two layers of fabric. At this stage you might also want to sandwich a little padding in between, but I didn’t have any to hand so just went without.

I just used some scrap fabric for this make, but I would advise you choose a darker palette than this if you can as it will block out more light.

Cut around the template, leaving a small seam allowance, a couple of mm will do as you aren’t turning inside out.

how-to-make-eye-mask2

Step two

Remove template and re-pin your fabric layers together. You will see I used some of the adhesive fabric I used for my bookbinding tutorial. This was an error. The iron isn’t a huge fan of this material and vice versa. You will see later.

ANYWAY. Sew around the edge to bind all the layers together. Make sure that if you are using patterned fabric the right side is facing out.

how-to-make-eye-mask3

Step three

So, I never knew how to sew on bias binding properly until a few months ago. It changes your life. Seriously.

You will notice that one of the folds in your bias binding is slightly smaller than the other side. You want to open the shorter side out and pin to the edge of your fabric as shown above.

Note that the pins are facing outwards, this is because I was using a sewing machine and this way it just runs straight over, no need to pull them out as you go. If you’re hand sewing you probably want to pin the opposite way so you still have hands left at the end.

how-to-make-eye-mask4

Step four

Sew around the binding, on the outer edge of the fold (see above).

Unpin.

how-to-make-eye-mask5

Step five

Turn the bias binding over and use an iron to press it down (mainly for the benefit of people using a sewing machine)

Pin the elastic under the bias on both sides. You want to adjust this to size depending on who you’re making it for, 17″/43cm was a little on the large side for me so perhaps go a bit smaller or measure round the back of your head from temple to temple. Don’t forget to take a bit of length off so it holds by the stretch.

how-to-make-eye-mask6

Step six

Sew the top of the bias binding as close to the edge as you can. Use a close zigzag stitch to secure elastic to the front of the mask, this will stop any light seeping through the gaps at the sides.

(you can see that the heat of the iron on the adhesive wrinkled my top fabric layer quite a lot, this shouldn’t happen to you!)

how-to-make-eye-mask8

Step seven

3, 2, 1, nap.

Have a great week folks!