Tag: Tutorial

White chocolate and lime moussabub

Hello friends!

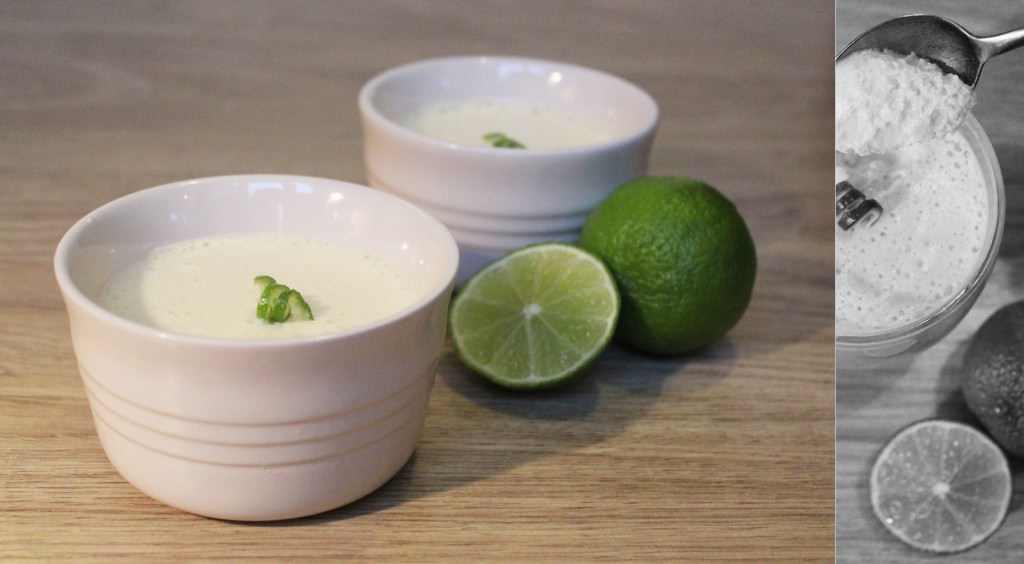
Riding on the success of a chocolate orange mousse I made for Ma’s birthday I thought this weekend would be a perfect time to flex my culinary muscles and invent a new recipe of my very own. It didn’t quite have as many bubbles as the other one I made (you know, from a recipe book by a French pastry chef…) but it was much lighter and fluffier than any syllabub I’ve ever seen. Hence the White Chocolate and Lime Moussabub was born. 

A word of caution – make the day before your soiree, or early morning, as it needs a good few hours to set. Also, if you’re thinking to invite the kind of people who choose a cheeseboard rather than dessert then, a) you probably want to save this one for the sweet tooths instead, and b) de-friend them – there are better people in the world.

ChocolateLimeMousse

You will need:

200g White chocolate

110ml Double cream

40ml Full fat milk

3 eggs (or 2 if on the large side)

55g/2 oz Caster sugar

A lime

(Serves 4-6 depending on the size of your pots and tummies)

ChocolateLimeMousse3

Step one

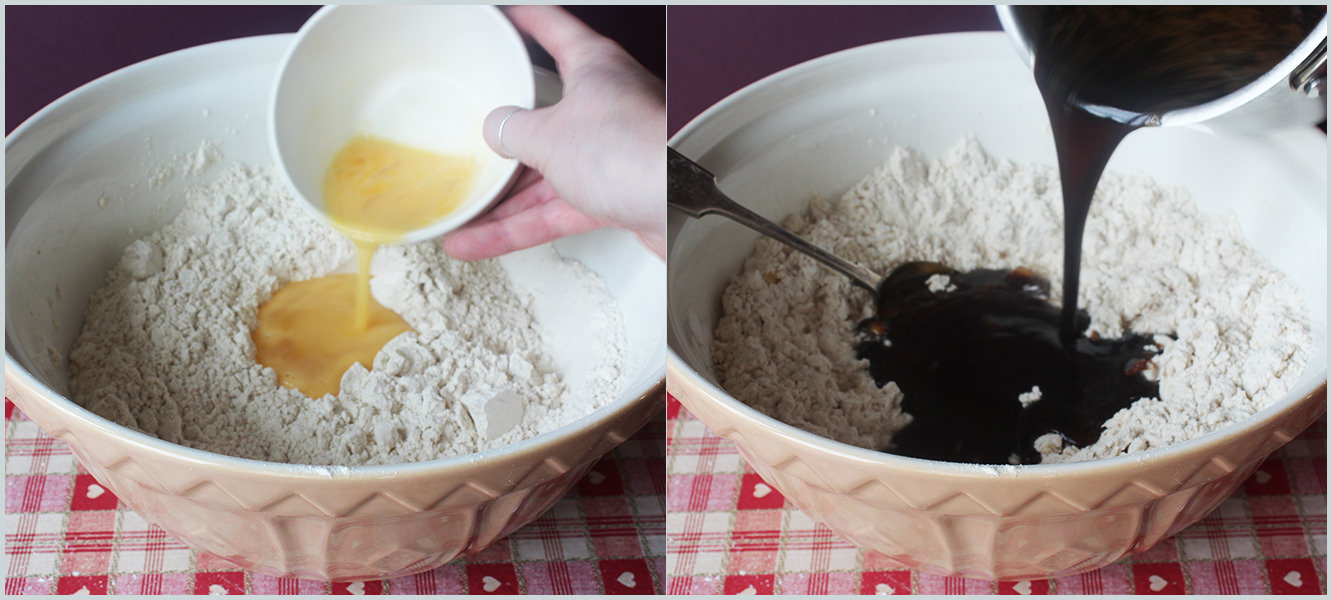
Chop chocolate finely. You will hear this time and again if you decide to follow this blog but it really is easiest to use a bread knife/one with a serrated edge for this. The smaller you can chop the better, as you will be using the cream mix to melt it. Place in a large bowl.

ChocolateLimeMousse2

Step two

Place milk, cream and lime zest in a small saucepan and heat gently on a low heat. If you want to use a strip of the zest for decoration then put to one side now rather than covering in cream… nobody wants that on their pudding.

Once the mixture has started to boil, pour it through a sieve over the white chocolate and stir until fully melted. If the mix cools down before it fully melts the chocolate then you can place the bowl over a pan of boiling water to melt any stubborn bits.

Taste.

I added some lime juice at this stage – just under half the lime. It depends how much of a citrus taste you want, but I found that to be just right. Stir through thoroughly (and now say that out loud ten times as quickly as you can).

ChocolateLimeMousse4

Step three

Separate the egg whites into another bowl. Glass or ceramic is best for this, as plastic bowls can tend to retain some grease, and that will scupper your efforts to whip up your whites.

I tend to crack the egg on the side of the bowl and pass the yolk from shell to shell until all the white has drained away, but whatever works for you.

Keep yolks to one side.

ChocolateLimeMousse5

Step four

Whisk! If you don’t have a hand held whisk or a fancy stand mixer then hopefully the Lord blessed you with strong arms.

When the eggs start to fluff up, add the sugar and keep whisking until they are stiff and glossy. People are a bit precious about egg whites but generally I don’t think there’s anything to freak out about, just slow down a bit when they start to stiffen up – the sugar will help stabilise them and it’s unlikely you’ll go over if you’re looking at what you’re doing.

ChocolateLimeMousse6

Step five

Whisk the egg yolks in. Your mixture should yellow a bit, and will loose a little of its structure – don’t panic!

ChocolateLimeMousse7

Step six

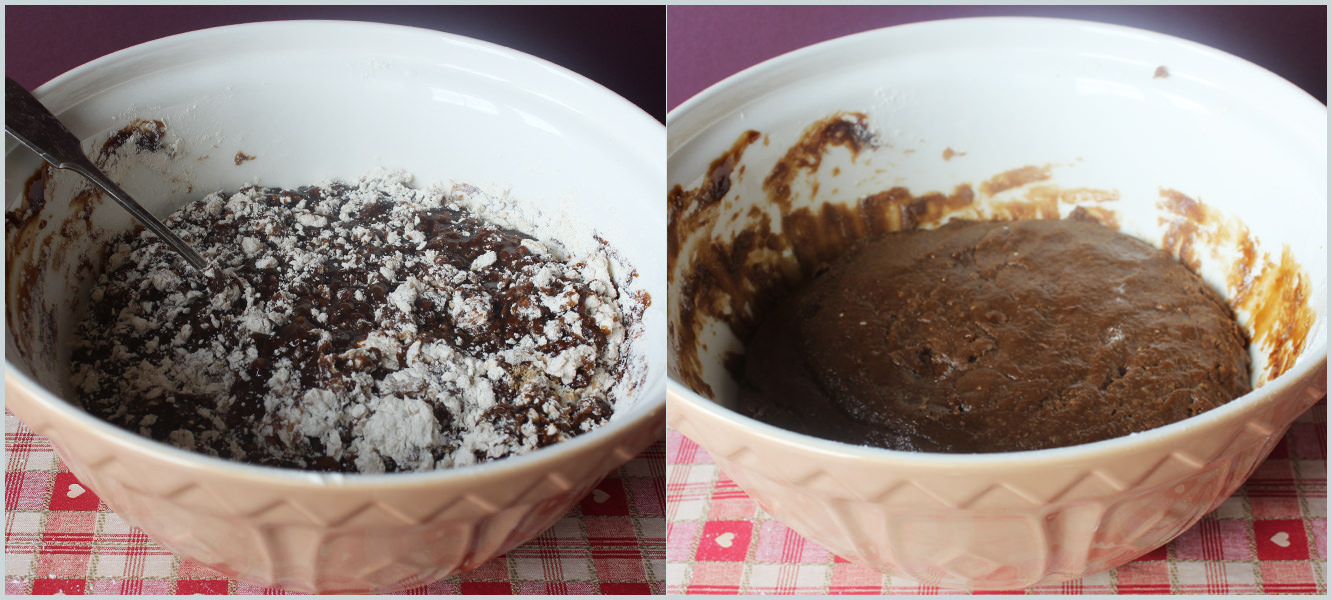
Put a scoop  of your eggs (up to a third) into the chocolate mix and fold in to loosen it up (middle photo). This will help you to not knock out all the air from your moussabub, if you do it all at once you’ll lose your bubbles.

Add the rest of the eggs and gently fold the mixture together. Turn the bowl as you do so it to help you get everything together without flattening it. Patience is a must here.

Step seven

Spoon into serving dishes and put in the fridge (allow at least 4 hours I’d say). Try not to disturb them too much, and no poking, those bubbles are precious!

ChocolateLimeMousse9

Step eight

Remember that bit of lime peel you put aside? Well, it makes lovely whirly bits for the tops. If you have one of those fancy zester tools then you won’t need my hillbilly method, but this is the best thing I could think of!! If you know how the professionals do it then answers on a postcard please.

At least 20 mins before serving make thin strips from your piece of peel. Curl them up and put them in the handle of a peg as shown above. Leave them to sit until you are ready to rock and roll. Place on top of each dessert.

NB: If you make your mousse the night before then either keep your peel in a bit of water and take out to dry an hour before serving, or wrap in tinfoil and put in the fridge. Don’t cut up and coil until just before you want to use it as they will dry out and shrink.

You might also try breaking up a biscuit (ginger would work well) or grating some chocolate on top for a bit of a different texture.

ChocolateLimeMousse8

Step nine

Indulge.

Mrs Claus’ cocoa

It feels wonderful to be tucked up under a blanket when the wind is wailing and the rain is smashing against the window. But if you don’t have one of these in your hands, you’re missing a trick. Calorie counters, you might as well close your browser window…you are not welcome here.

Prepare your stomachs, this is for people who are serious about chocolate. A perfect treat for little elves to take a break from all the Christmas busy.

PeppermintHotChocolate

Things you need:

(Makes two large or three small cups)

300ml Double cream

350ml Full fat milk (2%)

70g Dark chocolate

50g Milk chocolate

Peppermint extract

Candy cane/mini marshmallows/sprinkles to decorate

PeppermintHotChocolate2

Step one:

Chop chocolate finely. I find a bread knife works really well for this, as the serrated edge somehow stops chunks flying all over the place. Put aside in heatproof bowl.

Feel free to adjust the chocolate quantities to your taste. I am not only a chocolate addict but a huge sweet tooth, so I very much orientated the recipe to junkie level.

PeppermintHotChocolate3

Step two and a bit:

Put 200ml of the cream, all of the milk, and the peppermint extract in a pan on the lowest heat. About 1/2 a teaspoon of peppermint extract will suffice, anyone particularly keen on mint can also whip some into the topping.

Speaking of topping, a little tip…my pot of cream was 300ml and also had a handy measuring gauge on the side. So I split 200ml into the pan, 100ml in a bowl and then used the pot to measure out the milk, simples. I got mine from Sainsbo’s, not sure if the other supermarkets do the same, but they should. Even if you don’t have this marker, just do it by sight, one third to two thirds. Use same principle for measuring the chocolate, this should be easy, no scales/measuring jugs allowed.

While the cream and milk are slowly heating, use a whisk (preferably electric – don’t burn and unnecessary calories now) to whip the remaining 100ml of cream until it thickens to a ‘dollop-on-top-of-a-hot-chocolate’ consistency.

Now, I didn’t get a photo of this but you need to heat the mixture until little bubbles cover the surface, and the steam sort of dances over it. You’ll know when you get there – I’m not mental. Make sure you stir regularly and try not to let it boil or burn. Be patient, it will pay off.

Step three:

Pour the hot crilk (cream+milk=crilk) onto the chopped chocolate. Stir quickly with hand whisk until all the chocolate is melted. Ladle into mugs.

The mixture should be hot enough, but if you have asbestos mouth, then you might want to pop in the microwave for 20 seconds, or preheat the mugs with boiling water first.

PeppermintHotChocolate4

Step four:

It already looks (and tastes) super yummy at this stage, and personally I’m not usually one for whipped cream on my hot chocolate. BUT IT’S CHRISTMAS.

Divide the cream you whipped earlier onto your cocoa, and cover with mini marshmallows and sprinkles (mine were another Sainsbury’s buy), stick in a candy cane stirrer and prepare to enjoy.

PeppermintHotChocolate5

(you’re welcome)

Gingerbread architecture: The final frontier

At last, time to decorate.

This is by far the best bit, and your opportunity to hide any blemishes. For me, that was a whacking great crack down the front, the odd broken window pane and some darker than attractive edges. So fill your piping bags, stick on a Christmas film, or phone a good friend using hands-free and enjoy!

There are no steps in this post, just some ideas to get you going.

Things you need:

Royal icing of course (you can use regular but I find royal dries quicker and looks whiter)

Piping bags

Sweets Sweets Sweets

A little tip

When you’re buying your sweets you should have a think about roughly what will go where, specifically in terms of the roof. Make sure you overestimate how much you think you will need, it’s always surprising how quickly everything disappears. Particularly if you adopt a ‘one for the house, one for me’ approach, which is the correct way to do this in case you were wondering.

GingerbreadHouse13

I chose button tiles for my roof. The key is to make sure there is some overhang on your first layer, and then just keep going in lines, overlapping slightly, until you hit the top. Chocolate fingers or matchmakers work for a sort of log cabin look, or I’ve seen shredded wheat for a thatched roof (not sure who would want to eat that though!).

Once I had finished I dusted my roof with some icing sugar snow for a wintery look.

GingerbreadHouse11

The last couple of years I’ve done normal houses, but I’ve decided to start theming them more now I’ve got the hang of it a little bit. So this year’s effort is designed to be an old fashioned sweet shop (it seemed apt given the sugar coma it put me in). Obviously it needed an awning or two! I just coloured some of my icing red and alternated between the two colours until I reached the end. If you want straight lines then the trick is to hover away from the biscuit a bit so you have more control over the direction.

GingerbreadHouse12

What cosy winter hideaway is complete without some snow caught in the window panes? The idea here is to fill one of the corners a little more than the other, which I realised after piping the window in the centre…

And now ladies and gents…the finished article! Complete with flickering fire light (an LED tea light candle pushed through the doorway)

As you can see I bought mainly different coloured and sized circles: chocolate drops, silver balls, smarties and chocolate buttons. I like little dots of icing to decorate with too, but you need to decide what works best for you, it should be fun! I don’t really pre-plan, but buying lots of similar shaped things helps I think.

GingerbreadHouse21

GingerbreadHouse22

GingerbreadHouse24

GingerbreadHouse23

Oh wait!

That’s not all… remember this little guy?

GingerbreadHouse19

Well I decorated him too. The base he was sitting on is actually the lid of a gift box, I won’t show you what’s inside though, incase the recipient is reading this (there needs to be some element of surprise!) This adds a lovely personal touch to any present, or can just be the present in itself!

The front and back are A6 size (A4 paper folded into quarters) and then measure everything else out based on that. You can get at least four of these guys out of one batch of mixture.

Before you go…just one more little idea…

GingerbreadHouse20

A homemade festive gift without the fuss for someone you like, but not an ‘I made you a gingerbread house’ level of like.

To make a tree the easiest thing to do is to get your hands on star shaped biscuit cutters of at least three or four different sizes. You want around 16 or so stars for each tree, then just stack them with icing to stick each layer together. If you don’t have cutters then make some templates to cut round instead (you can do this using auto shapes on the computer). One batch of mixture should make at least 8 I reckon.

Pipe lots of blobs of icing and add silver balls, chocolate drops and smarties for decoration.

I used a candle holder turned upside down for the base, but a disc of cardboard covered in tinfoil would work just fine too. Remember, whatever you use, you aren’t going to get back!

The cellophane I used to wrap it was bought from a florist supplies shop online and was about £3 for the roll, which I’ve been using for various projects for about 2 years!

Cut a big square (bigger than you think), I made one as large as my roll would allow. Place tree on the middle and bring all the corners to meet in the middle. scrunch the remaining edges together and call for help (this will save your little finger aerobics when you’re tying the ribbon). With someone else holding it all together, double knot a few pieces of gift ribbon and curl the ends with scissors. Chop off the messy bits of plastic.

Voila!

Gingerbread architecture: Phase 2

Assemble!

So, I have a confession to make, I didn’t actually photograph the assemblage of the big house. All my fingers and toes were required to hold it together until the icing dried, so there was nothing left besides my nose to press the camera trigger.

Instead I whipped up another half batch of dough and made a little one to show you how to, aren’t I lovely?

Things you need:

Royal icing

Piping bag/Strong sandwich bag (snip a corner off to pipe)

Base

Tinfoil

An extra pair of hands

Deep breaths

GingerbreadHouse14

Step one:

Cover base in tinfoil/something pretty. Tin foil works well because it doesn’t soak up the icing. I used an upturned tray for the bigger one, and stuck ribbon where the tinfoil didn’t quite meet the edges. Chopping boards and baking trays also make a good base (but make sure you don’t need them for Christmas dinner first!) Alternatively you can buy one, but that would just eat into your sweets fund. Nobody wants that.

Step two:

Mix up your royal icing  and put in icing bag. It has to be pretty thick, or construction will be hard going. At the same time, make sure you can pipe it without getting hand cramp.

Step three:

Place back wall on a flat surface (if you use your base you have less far to travel when you flip it). Pipe along the two sides, as shown above.

GingerbreadHouse15

Step four:

Attach sides and hold for a while until the icing starts to dry, you might want to get another pair of hands involved here, or the salt and pepper shakers to everything in place. Pipe along the top edges.

GingerbreadHouse16

Step five:

Place the front on top. Definitely don’t drop it on your way over and crack it. That would be really silly.

GingerbreadHouse17

Step six:

Flip it! This is where with anything bigger, you will need someone else to help.

Now you can see the crack *sob*. So this also happened to my big house, I might show you in the next post, but I’m still deeply saddened by that (the sugar windows stuck to the tray rather than me dropping it but still, a perfectionist’s nightmare). I’m basically a massive klutz. All is not lost though.

At this stage you are unlikely to want to make any more gingerbread. So if this happens you need to make do and mend. This can be done with royal icing, but you’ll get a white line along the cracked bit. A better (albeit more perilous) way to fix the cracks is by making a sugar syrup. Essentially all you need to do is melt down some sugar in a frying pan and voila, you have baking’s version of super glue. Dip the broken pieces into the sugar and stick. Be careful though, definitely not a game for children to play. Sugar syrup is dangerously hot. If you end up dipping your thumb in it, don’t let your gut reaction be to stick it in your mouth to cool it off. That is a most unpleasant experience. 

Some people use sugar syrup to put their whole house together, but quite frankly, I value my life more than that, I’m far too clumsy.

GingerbreadHouse18

Step seven:

Now you have it upright and relatively stable, ice it all over. This looks a bit messier on a little house than a big one, but basically go around all the edges inside and out with icing. You can really go to town on the inside corners as nobody will see them, the more you can reinforce at this stage the better.

Step eight:

Stick the roof on and leave as long as you can to dry before decorating.

Step nine:

Stay tuned for phase three later this week.

Happy festive baking!

Gingerbread architecture: Phase 1

Three and a bit years ago I stumbled across a marvellous young lady called Anna. She gave me the inspiration to start a new Christmas tradition. I implore you to do the same, there is very little as satisfying as creating a freestanding gingerbread structure – and I won’t lie, it helps that you have a year in between to recover and block out all the royal icing acrobatics it took you to get there.

Apologies in advance for some of the slightly odd measurements below, the recipe is a bit inbred at this stage. Original credit goes to Anna, but I’m not convinced she would still want ownership given my Canadian to English translations and elaboration on the method (I lost the original).

GingerbreadHouse1

Things you need:

Plain flour: 1lb 10.5 oz/750g/5 cups

Soft light brown sugar: 5oz/140g/1 cup

Unsalted butter: 7oz/200g/1 cup

Eggs: 2

Treacle: 5 tbsp

Golden syrup: 8 tbsp

Salt: 1 tsp

Baking powder: 1 tsp

Ground ginger: 2 tsp

Cinnamon: 2 tsp

Nutmeg: 1 tsp

Other:

Royal icing: probably 2 boxes

A lot of sweets

A base (I used an upturned tray)

Patience: a generous glug

GingerbreadHouse2

Step one:

Draw out your design on greaseproof paper. I did write down the dimensions of mine but I suspect it ended up in the recycling with a flurry of lists and post-it notes, but it is relatively straightforward maths.

Some tips:

Measure your baking trays and base first. I hope that doesn’t sound too obvious, I’ve had to go back to the drawing board before now, after realising to my disappointment that I don’t own industrial equipment.

When drawing the chimney, draw it directly onto the roof so that it is definitely at the right angle to put on your house later (see photo above left). Don’t forget you need two little rectangles as well, one the same height as the short edge, and one the same as the longer side – they should be the same width.

Draw the front and sides first so you can take the measurements for your roof from those, make sure you add a little for overhang etc.

Mark x2 or x1 and something to identify the pieces on each – they have a tendency to become unrecognisable at some stage.

GingerbreadHouse3

Step two:

Mix together the flour, baking powder, salt and spices. You will need a large bowl.

GingerbreadHouse4

Step three:

Put butter, golden syrup, treacle and sugar into a saucepan and gently heat until sugar has melted.

GingerbreadHouse5

Step four:

Beat the eggs with a fork in a small bowl and mix into flour mixture. Alternatively you can mix them with the treacle and syrup at an earlier stage and not heat these with the butter.

Pour in butter and treacle mixture.

GingerbreadHouse6

Step five:

Stir wet ingredients into dry. Place bowl outside or in the fridge until completely cool.

GingerbreadHouse7

Step six:

Dust a large work surface thoroughly with plain flour. Take a third to half of the mixture and mould into a ball.

Sprinkle dough and rolling pin with more flour and roll out. Make sure you keep turning the dough to keep it as square as possible. You want it to be about 5mm thick.

GingerbreadHouse8

Step seven:

Grease baking trays well and then cut out all your shapes.

A tip with the larger pieces is to define the rough shape and then transfer to baking tray, in order to finish cutting once it’s on the tray. This will stop it stretching when you move it, as it’s fairly important to keep the edges as straight as possible. Of course, if your baking trays hate you as much as mine do, then they will warp themselves in the heat of the oven just to mock you.

When cutting out the chimney, flip the template over so that you can have pieces with right sides facing out all around.

Keep rolling and cutting until you have all the pieces you need.

GingerbreadHouse9

Step eight:

If you want a stained glass window effect then put some boiled sweets in a sandwich bag and pound them to dust with a rolling pin. This takes a bit of welly, so best to do it at a sociable hour to keep the neighbours happy…sorry Audrey…

Fill your window gaps with the crushed sweets.

The bottom-right photo shows you my fatal mistake. For any pieces with windows like these, put greaseproof on the tray first. Otherwise you might have a spot of bother removing it due to its size, fragility, and your patience levels…more on that later.

Step nine:

Bake the pieces in the oven at gas mark 4/180 C/350 F.

Keep an eye on them, as different pieces will bake at different speeds, from 10 mins to 25! It’s always better to go a bit over than under though, as you can cover the darker areas in sweets, but nothing can hide/save a caved in roof because the biscuit was too soft. Having said that, my sister did prop my first roof up with a gingerbread dinosaur when I had that exact problem, so all is never lost.

Step ten:

Stay tuned! I will be posting a guide to assembling and decorating later this week.