Tag: pattern

If you go down to the woods today…

This weekend saw the baby shower of a rather lovely lady by the name of Anna. You may (but probably won’t) remember us celebrating Anna’s hen party a while back, well now she’s about to pop a sprog would you believe?

Anna is a rather large fan of gnomes. Yeah, that was my reaction too, but you learn to embrace it after a while…she’s very endearing that way. Well, our friend Taylor (party planner extraordinaire and all round kindred spirit when it comes to carrying things out to obsessive levels of detail) decided to throw Anna a woodland themed shower. I know right? Cute. I totally took my camera and promptly forgot to take photos of all the lovely things; gingerbread fawns, woodland creature bunting, sausage roll snails and toadstool cupcakes to name just a few.

Anyway, other than baking some little flowerpot grassy gnome type cupcakes, I decided my contribution would be to carry the theme into my present and make a small selection of woodland characters to entertain baby upon her arrival into the world.

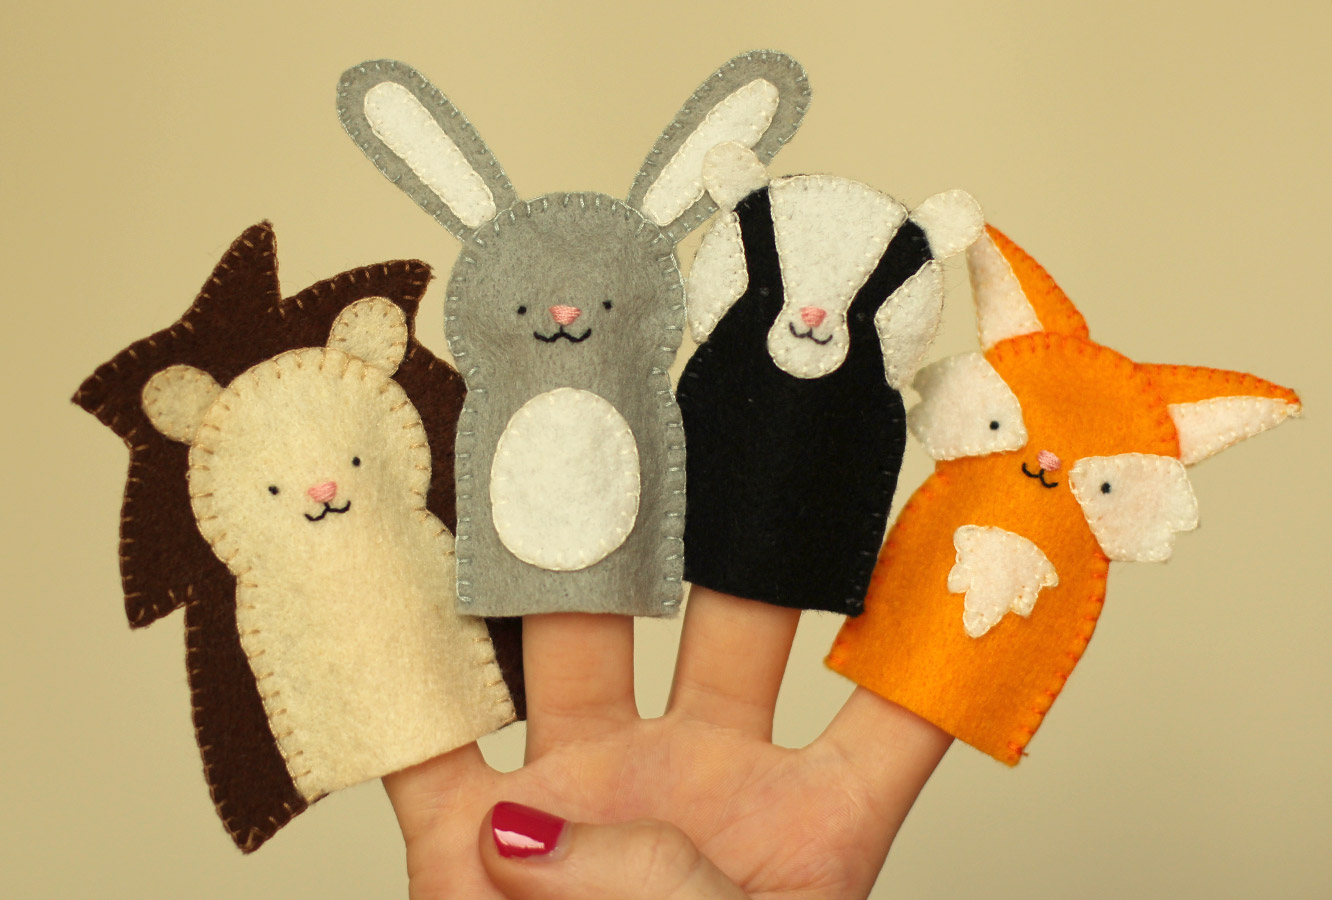
So here’s how to make your very own arsenal of woodland animal finger puppets, with a downloadable template of course.
how-to-make-finger-puppets-01

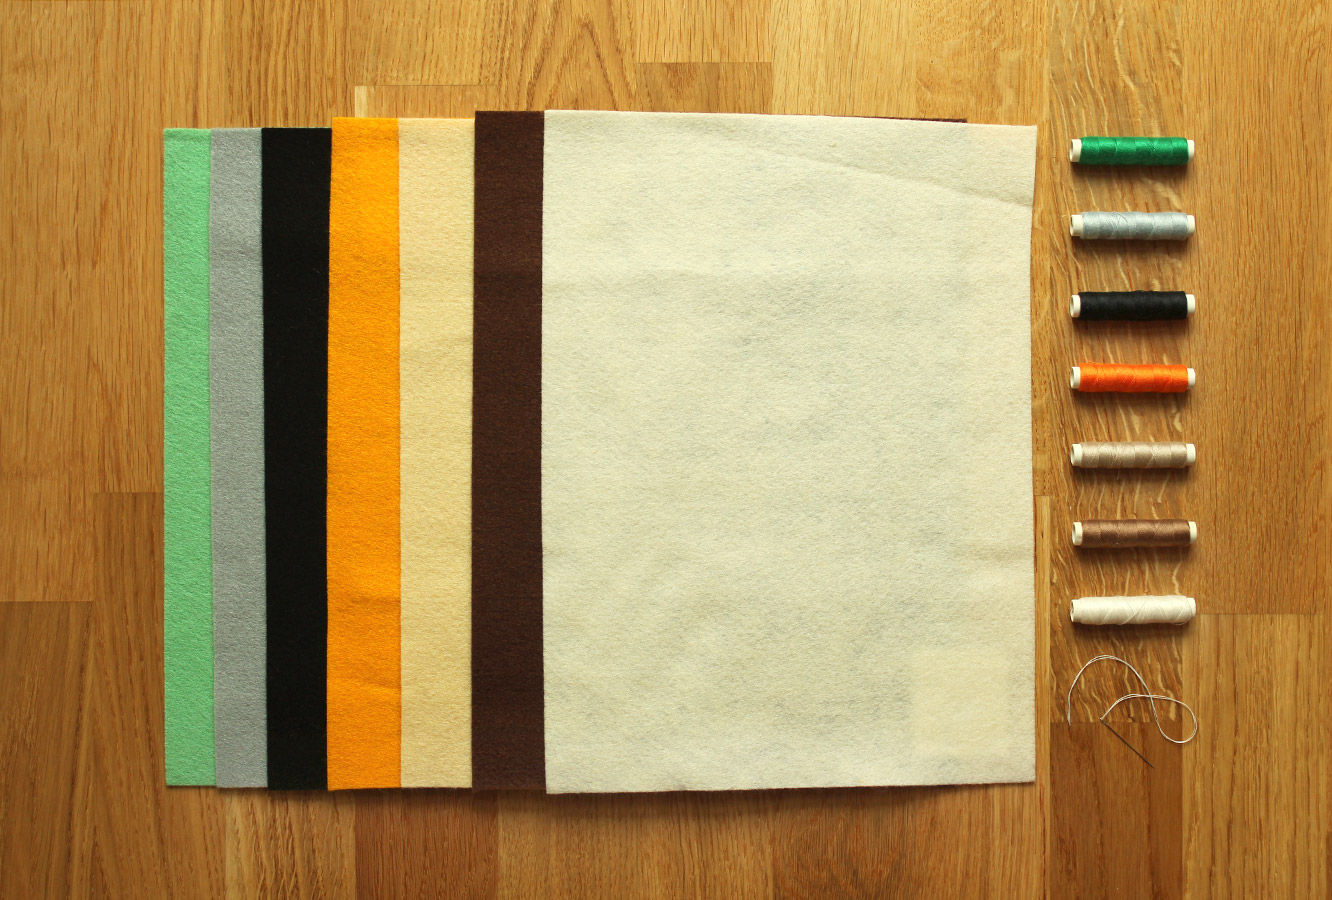
You will need

Felt (for the patterns I have provided you need brown, beige, white, black, grey and orange)

Thread in corresponding colours

A needle

This free downloadable template
how-to-make-finger-puppets-02

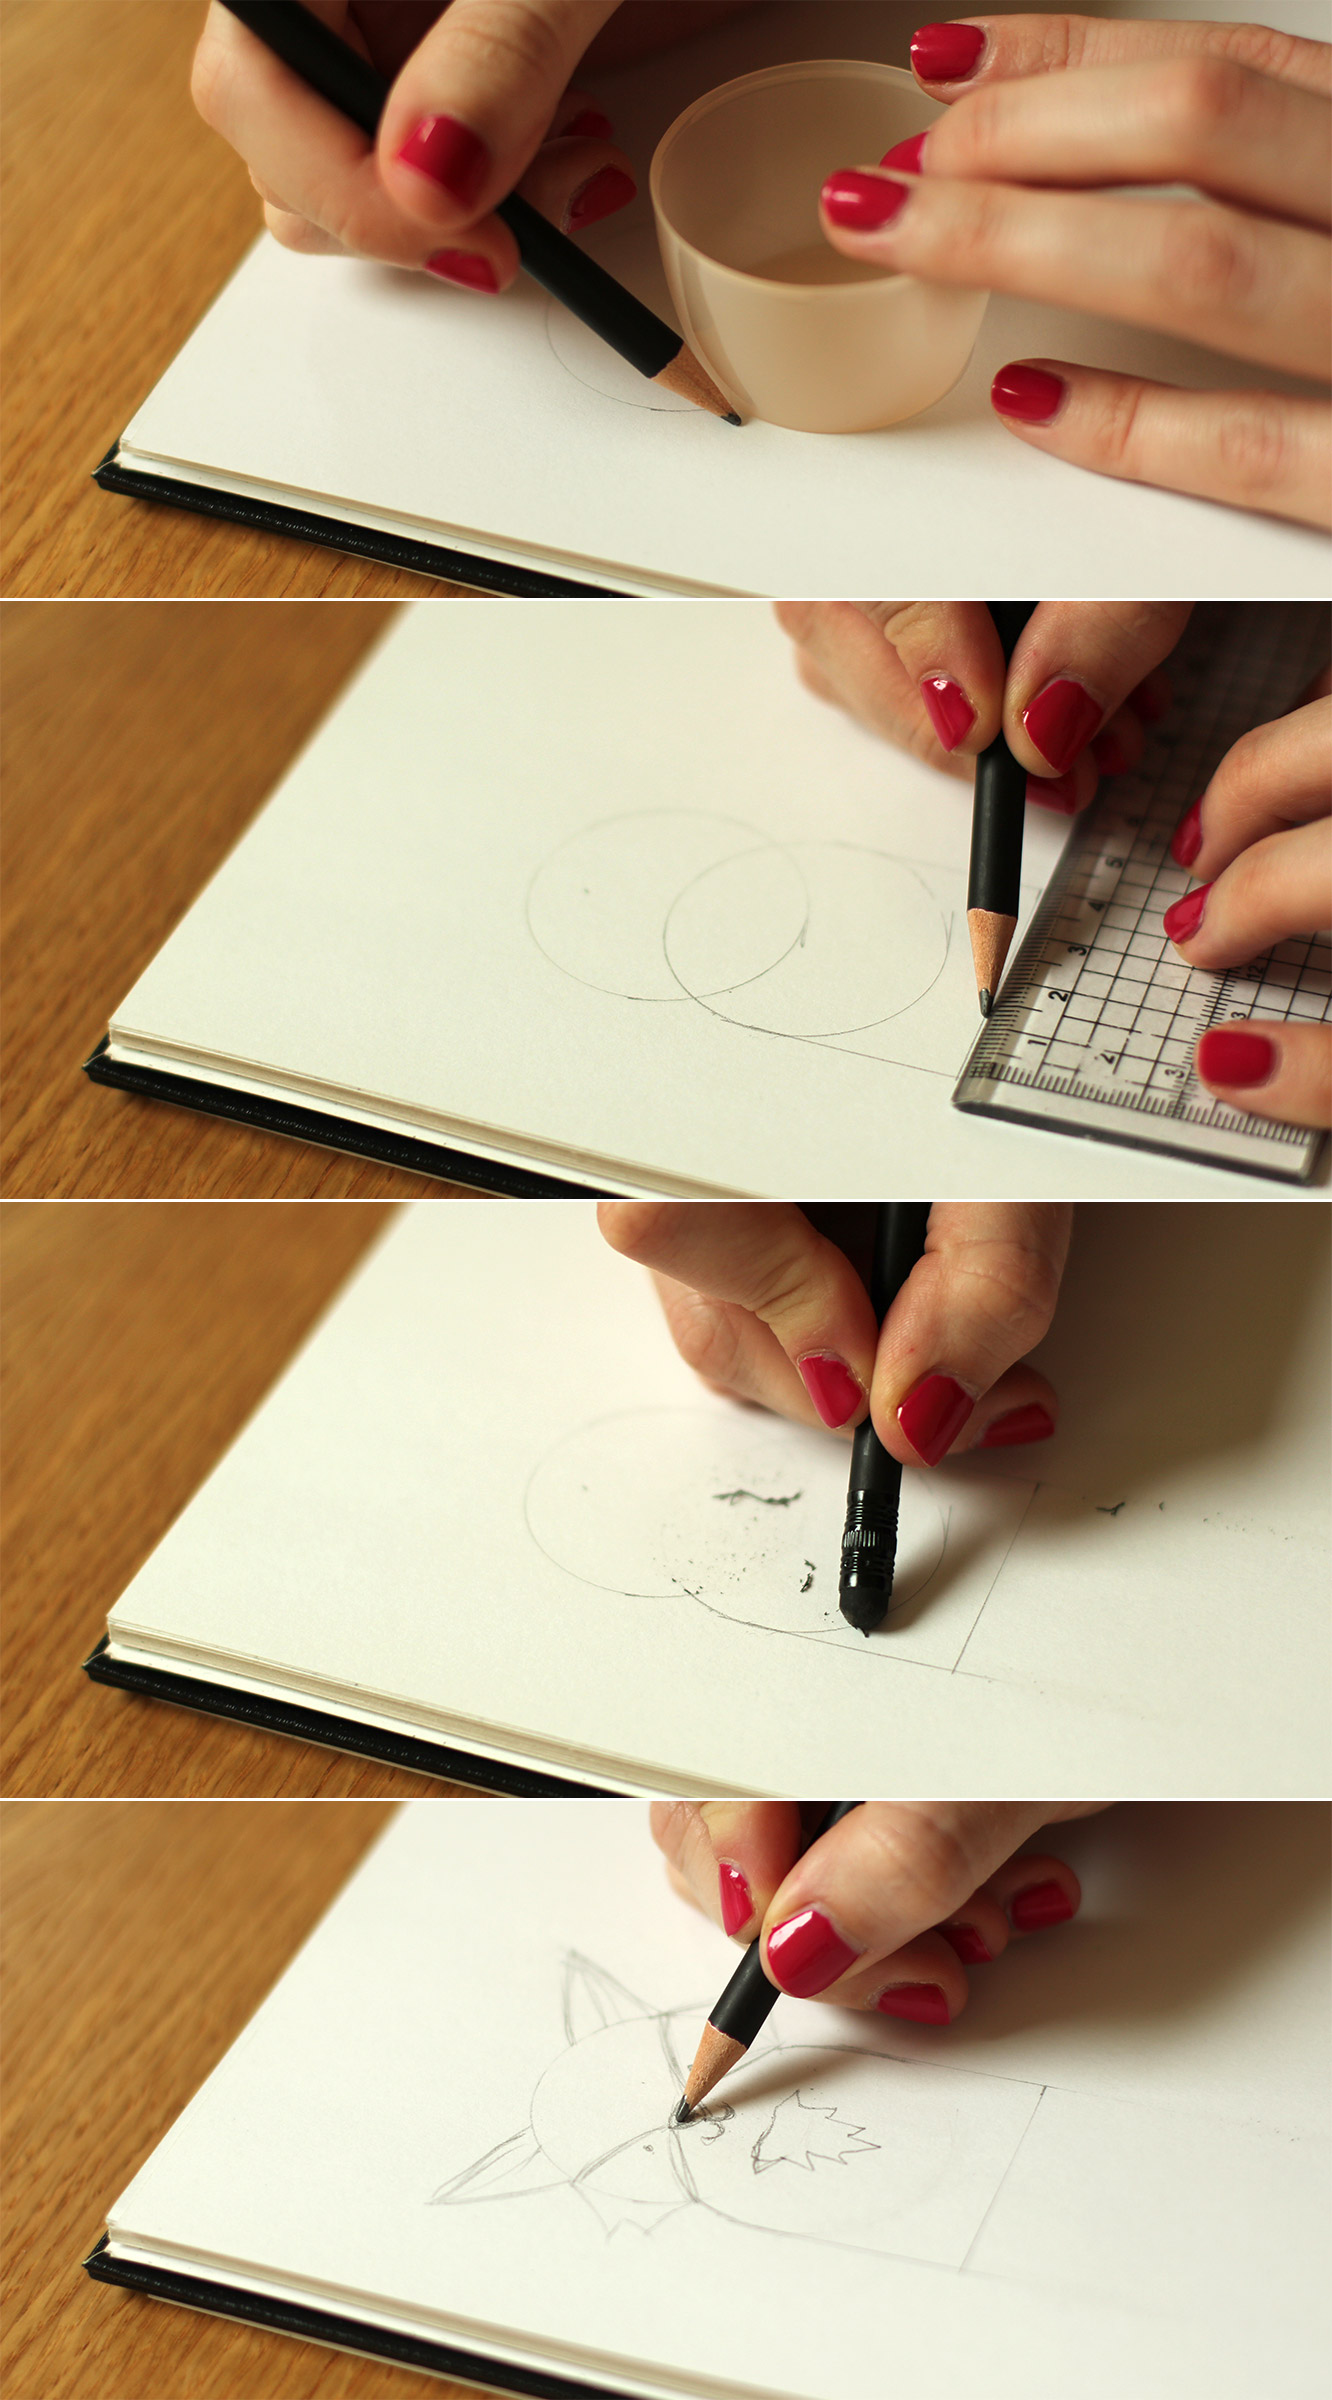
Step one

This is entirely optional. If you want to draw your own characters (or expand on the set I’ve provided) You will need to draw out a few designs. I used a deodorant can lid and a ruler to keep basic shape of my characters consistent.

If you want to cheat you could just trace the shape off the printable and add your own features to it.
how-to-make-finger-puppets-03

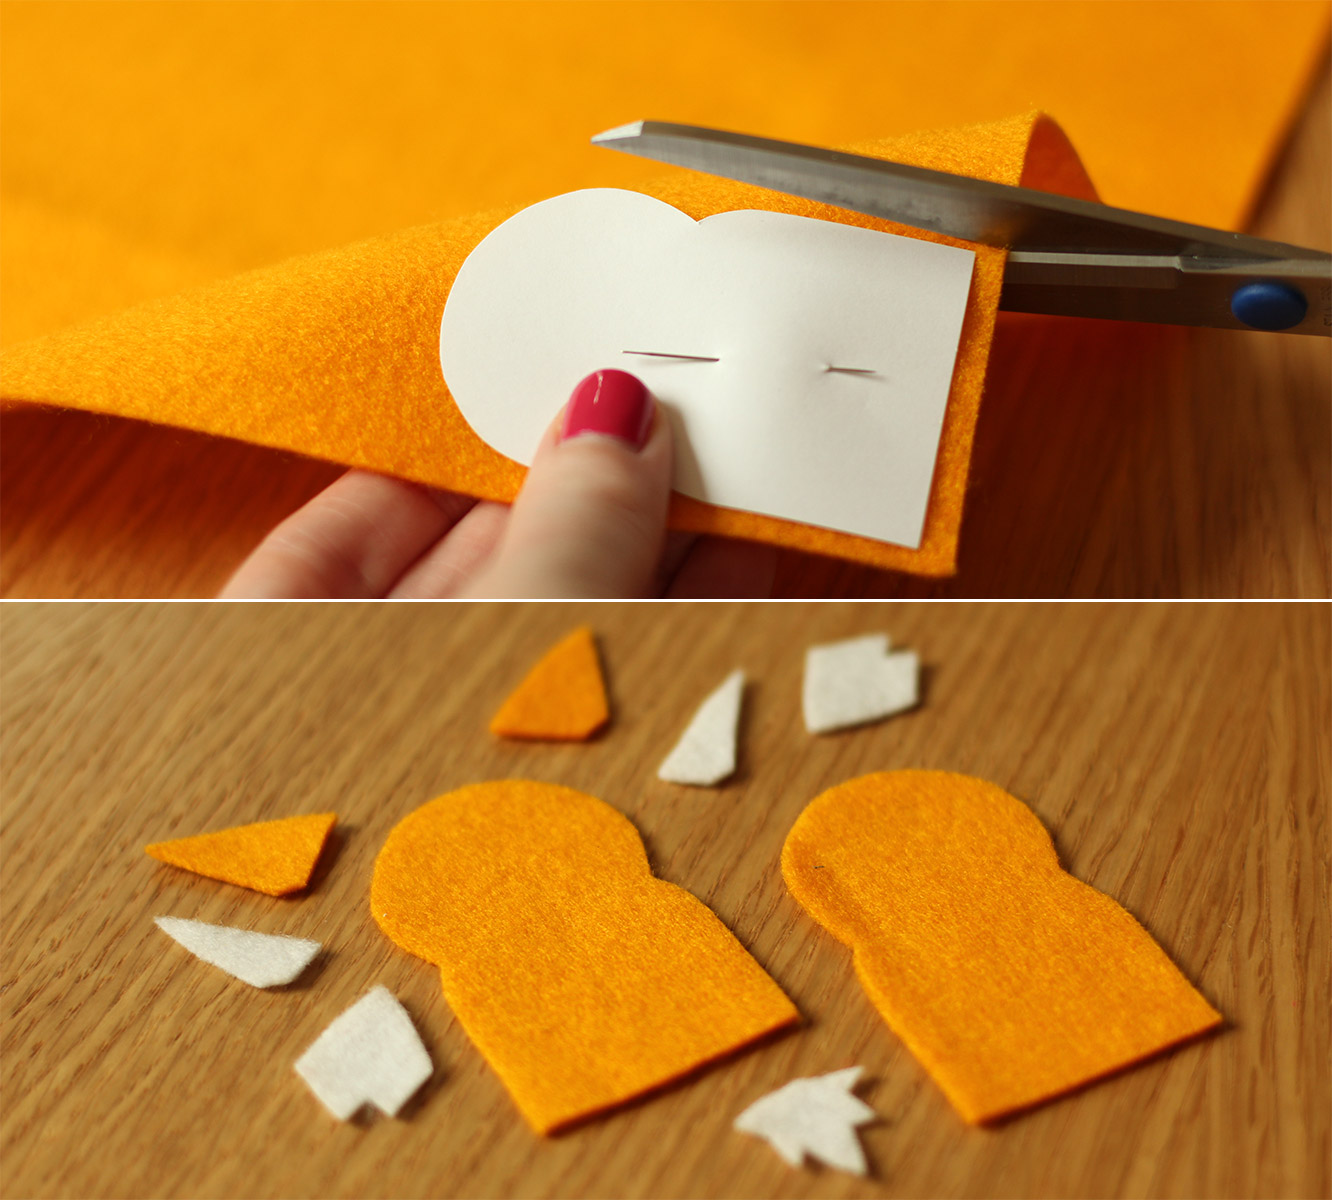
Step two

Cut out all the shapes in the relevant coloured felt.
how-to-make-finger-puppets-04

Step three

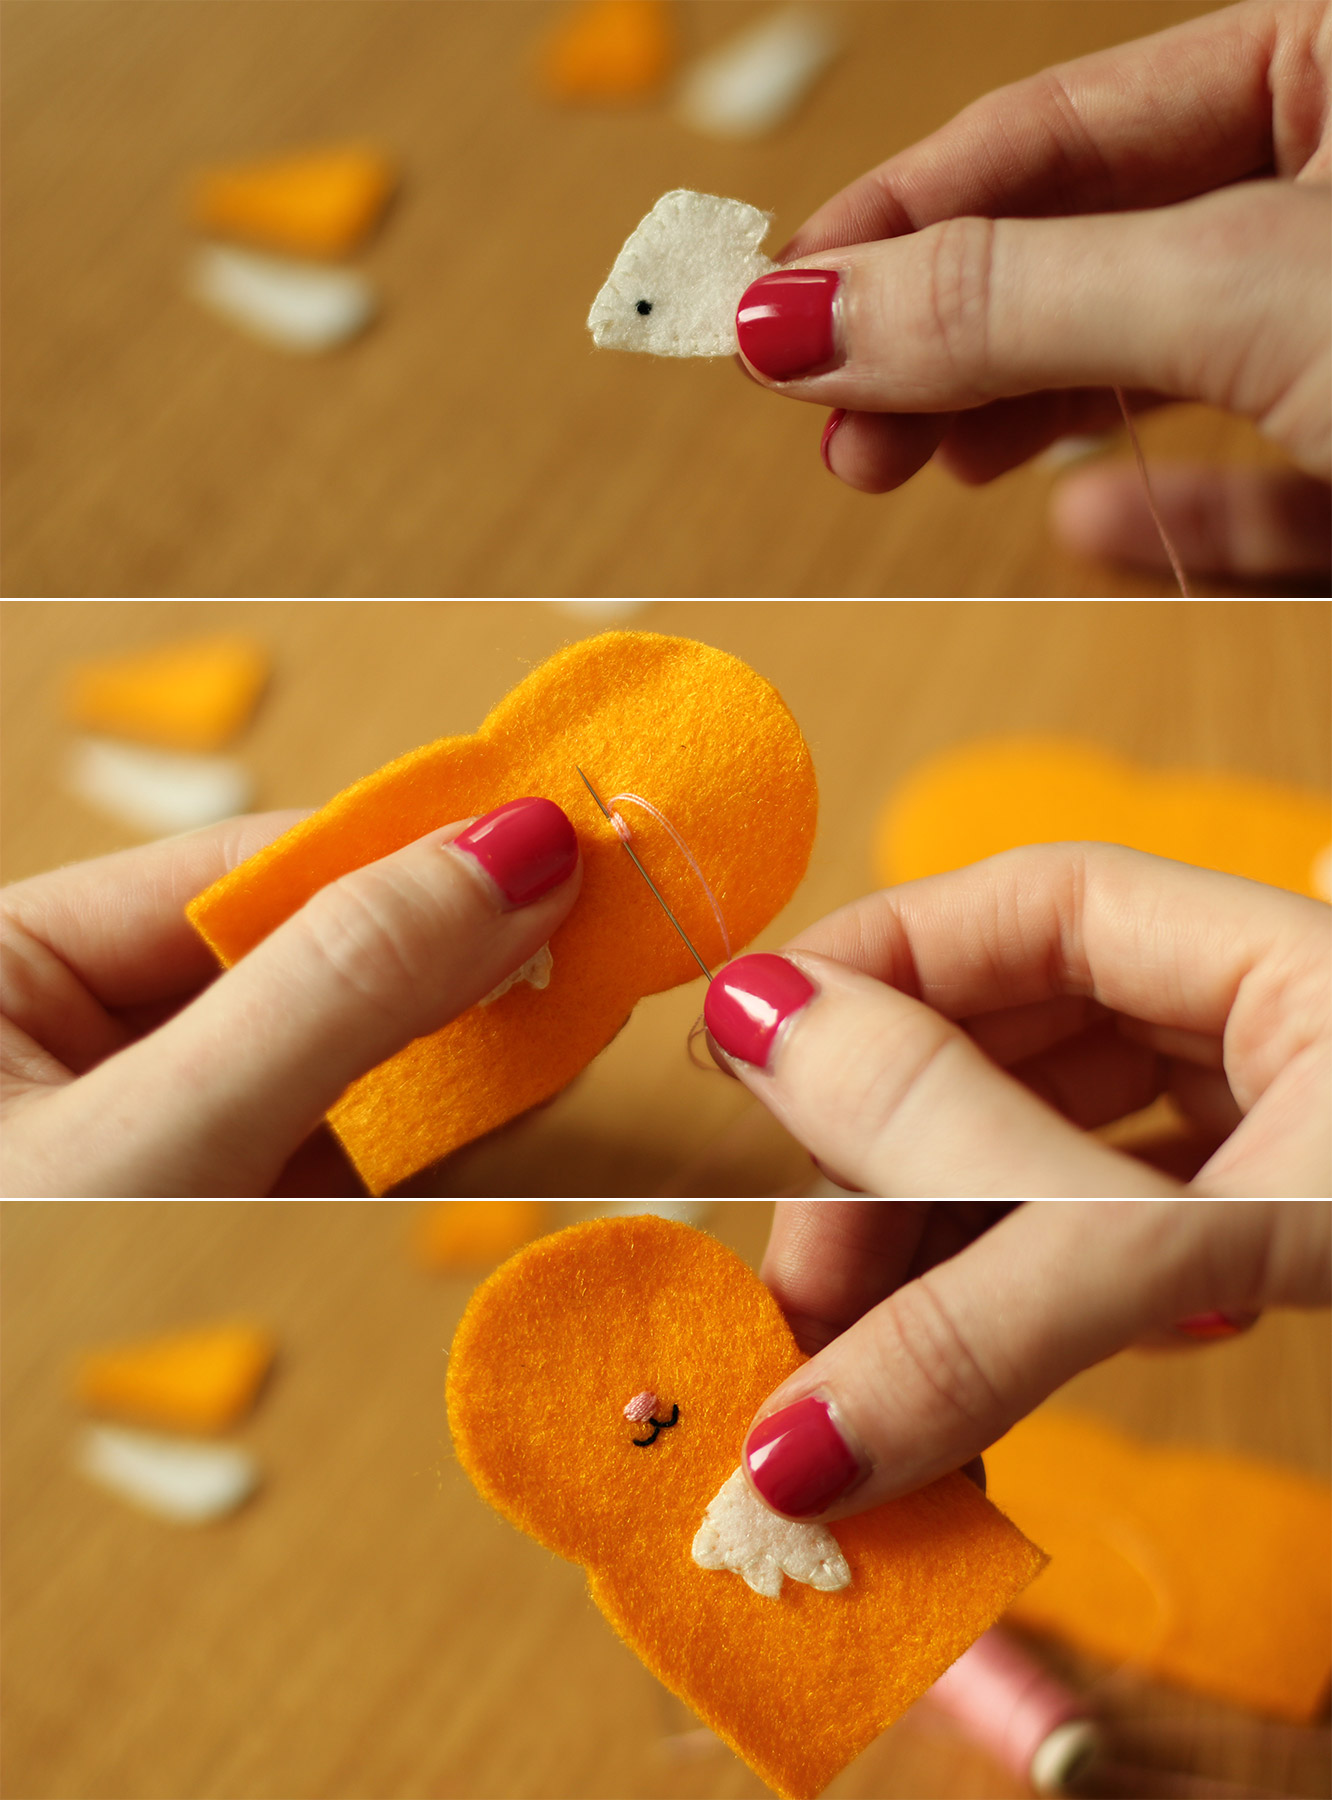
Sew on the faces, I just used simple stitches overlapping them for the noses and just a little line of backstitch for the mouths. No fancy embroidery techniques here.
how-to-make-finger-puppets-05

Step four

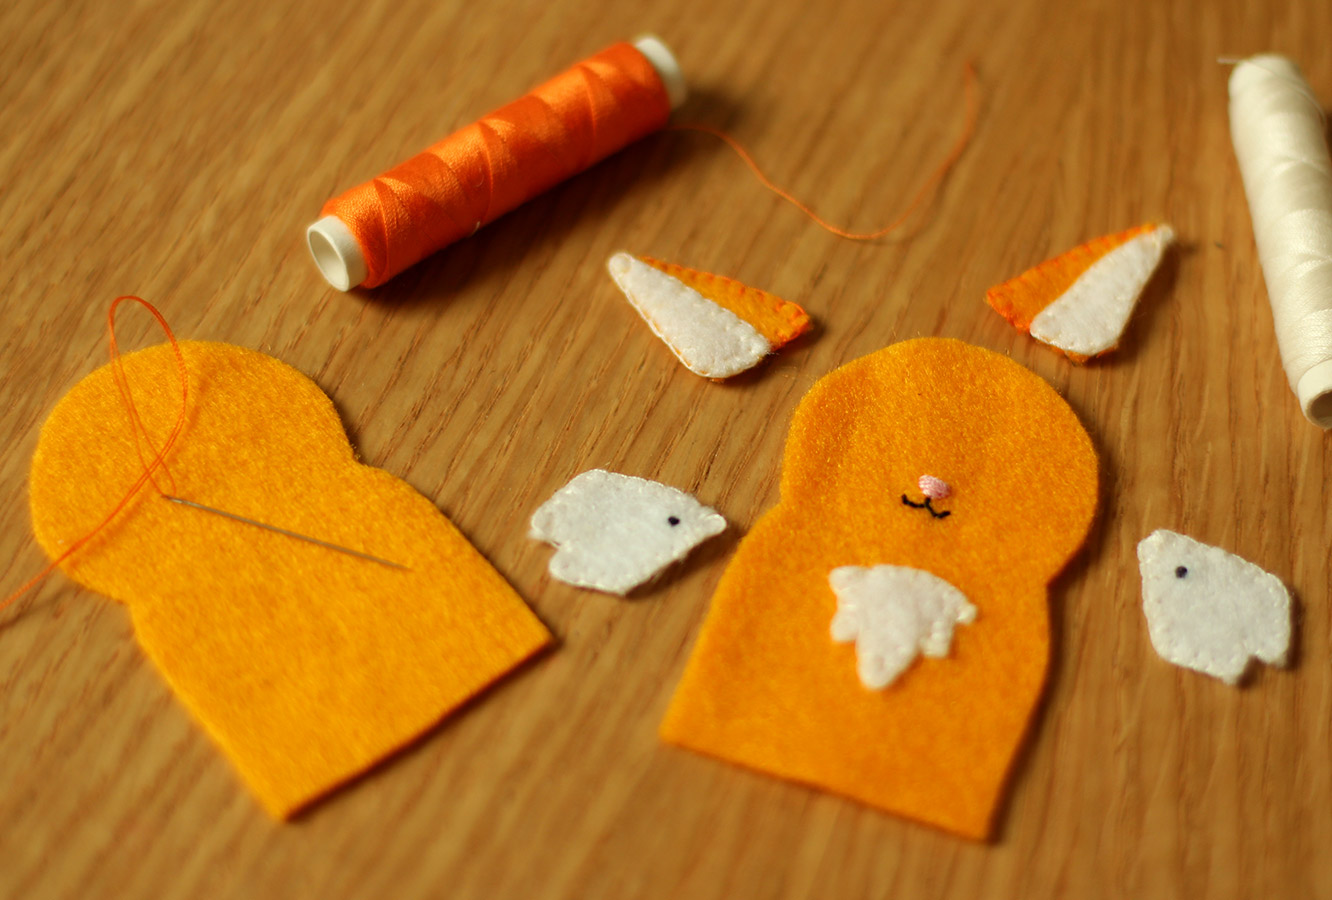
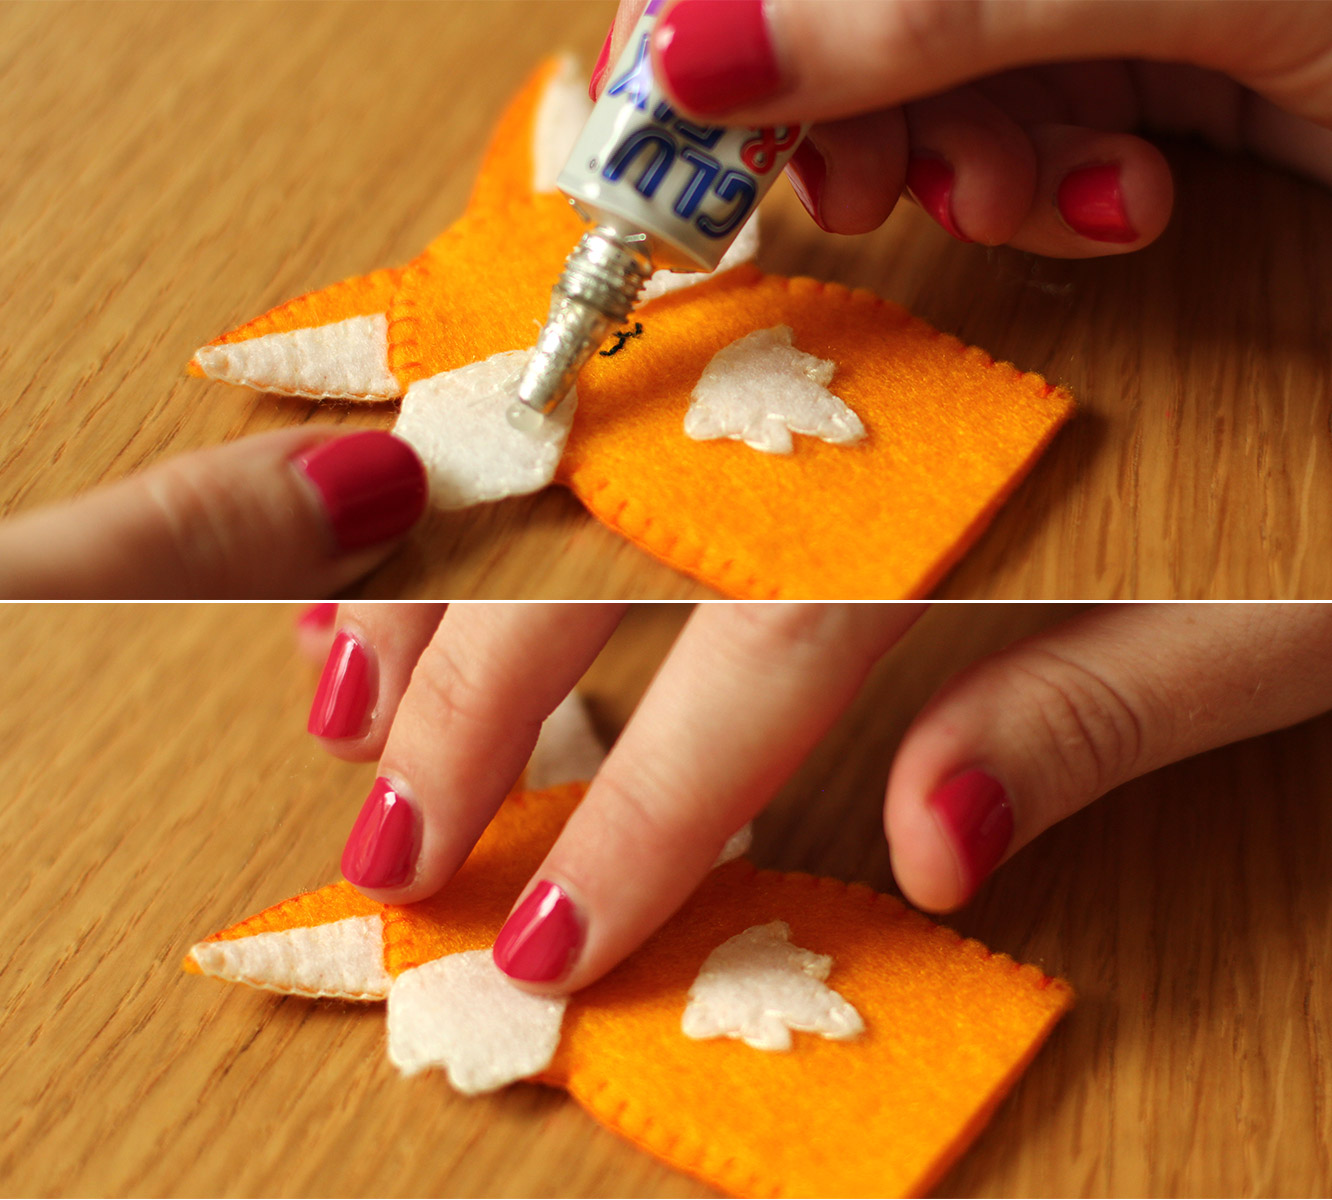
Edge all the remaining features/bits of fur with blanket stitch (see below). You will notice that for the fox I sewed the tummy fur straight onto the puppet but left the cheeks separate to glue on later. With the badger I sewed his cheeks straight on because they followed the shape of his face and I just found it less logistically challenging somehow.
how-to-make-finger-puppets-06

Step five

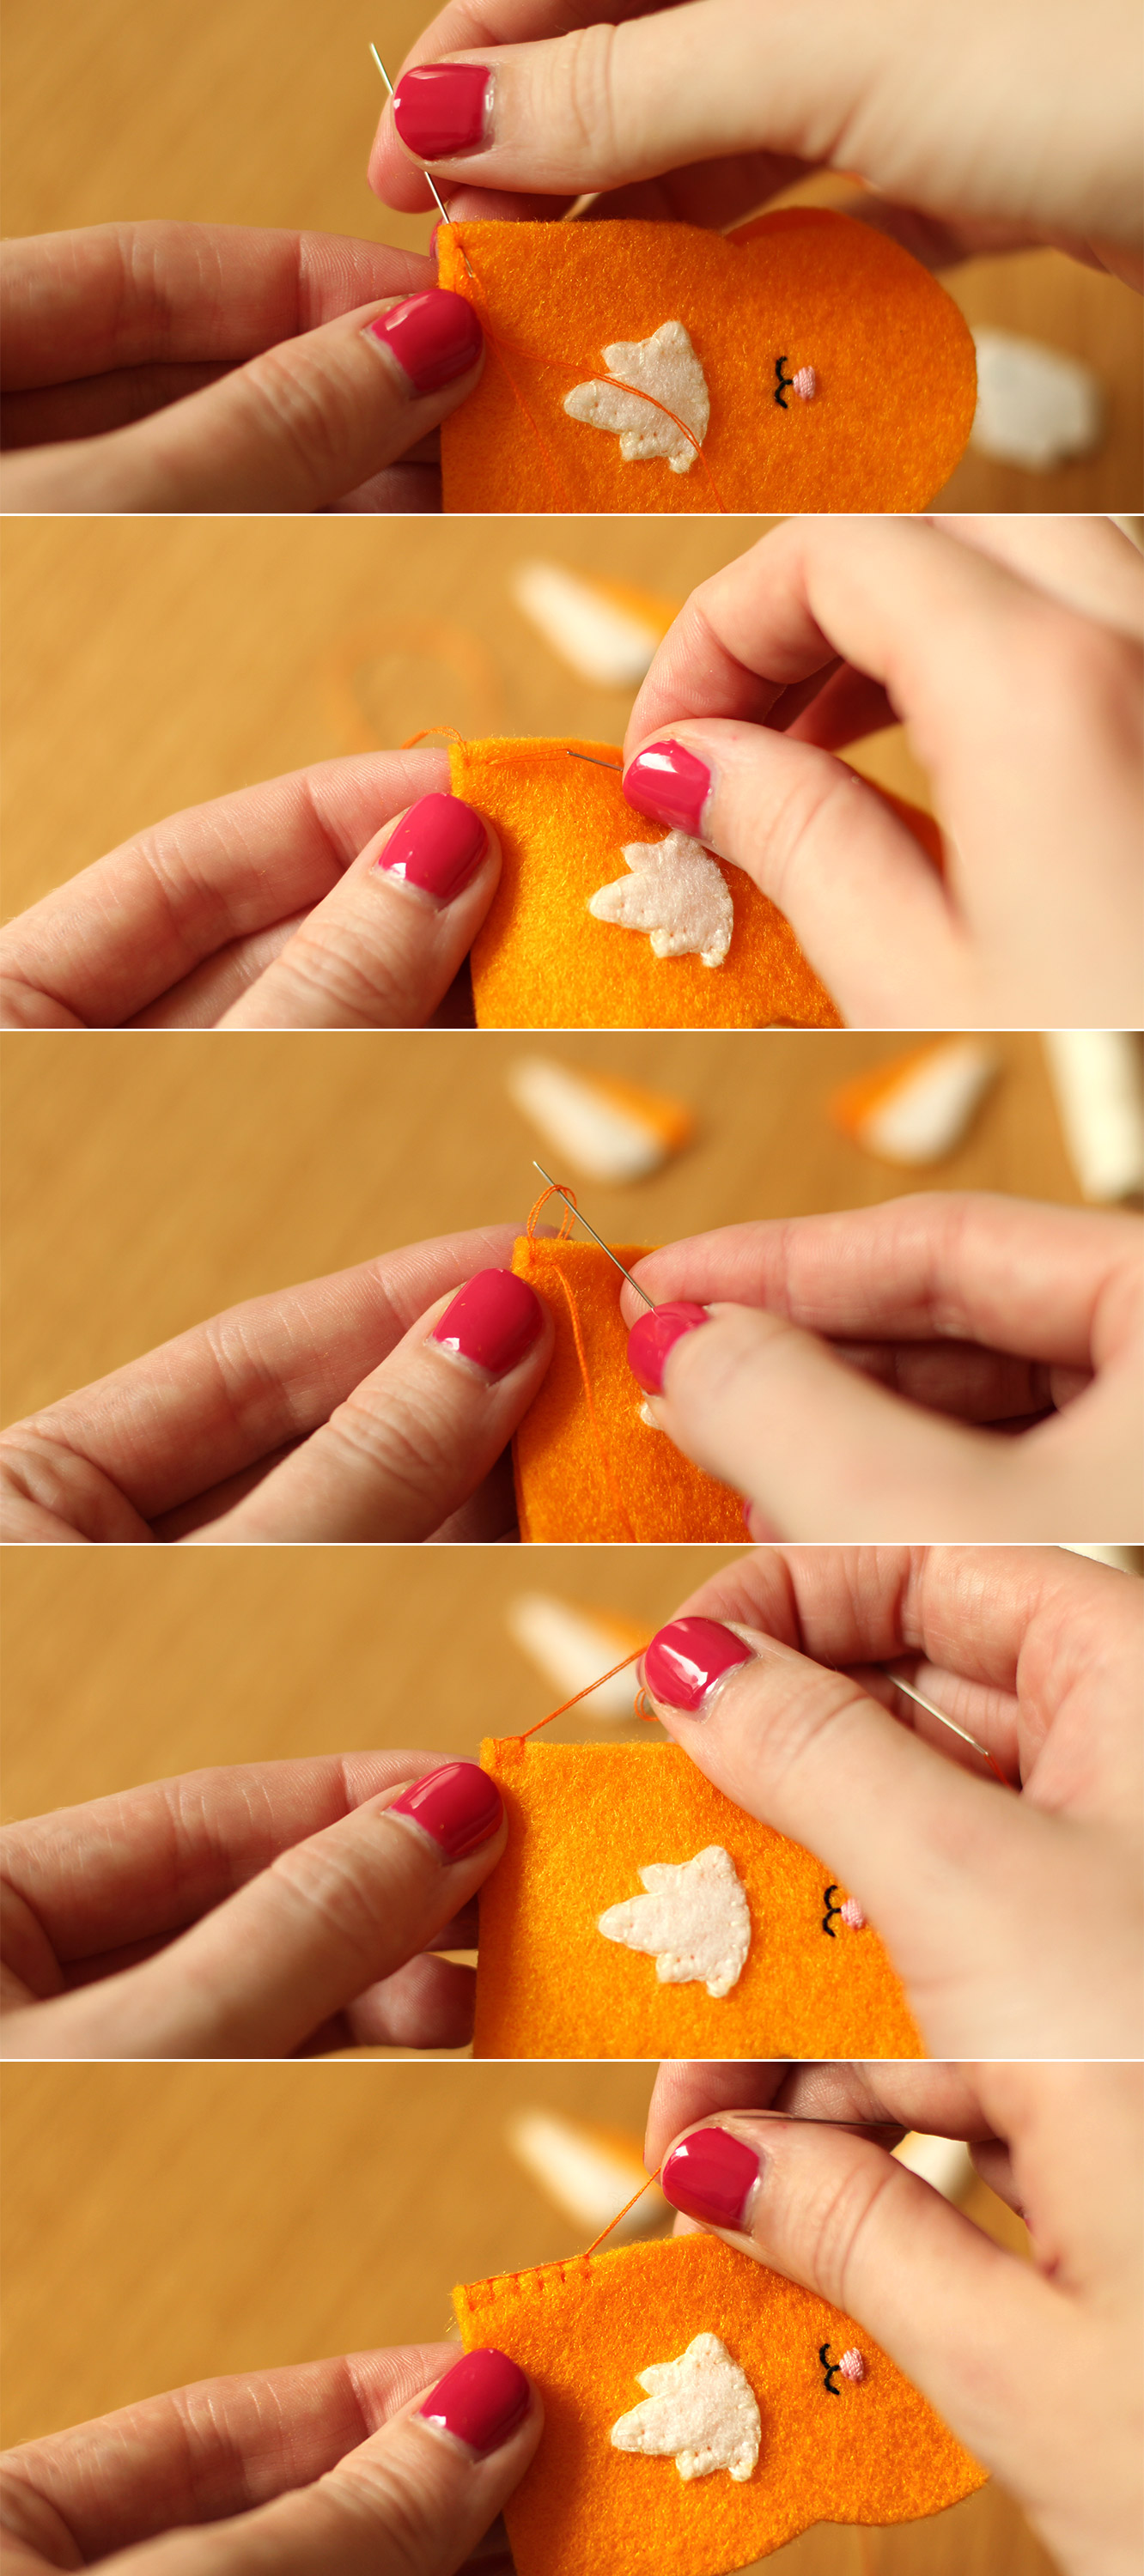
Blanket stitch the back and front of the puppet together. Utilising the memory bank of primary school sewing club for me, thanks Mrs Gothard, nailed it.

You basically need to put the needle through the felt at the height you want your stitching, and as you pull the thread through catch the loop so that it is held at the top. I’m sure the youtube can furnish you with a useful tutorial if my description and photos fail to do the job.

You need to include the ears as you go round, I just came back through at the top of the first stitch so my loop was on top of the felt to keep the effect going. I know, I wouldn’t understand that explanation either.
how-to-make-finger-puppets-07

Step six

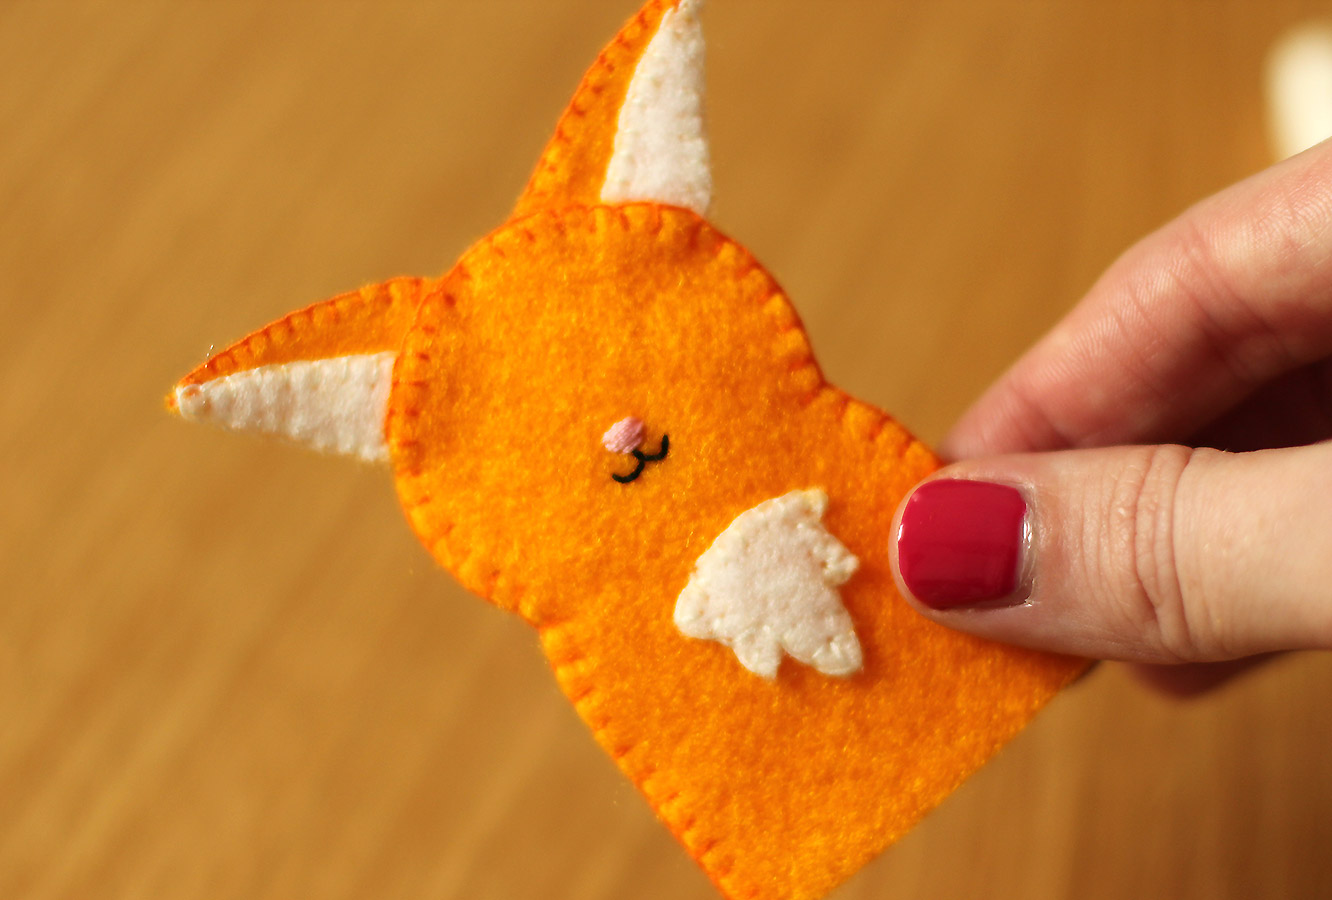
By this point if you’ve managed to follow any of my hapless instructions you will have yourself a blind little fox. On second thoughts, maybe we should have just started with the hedgehog.
how-to-make-finger-puppets-08

Step seven

It’s ok to cheat. Just glue his eyes and fluff on, pop him over a fork or something just to make sure the glue doesn’t soak through and seal him shut.
how-to-make-finger-puppets-gif-01

Step eight

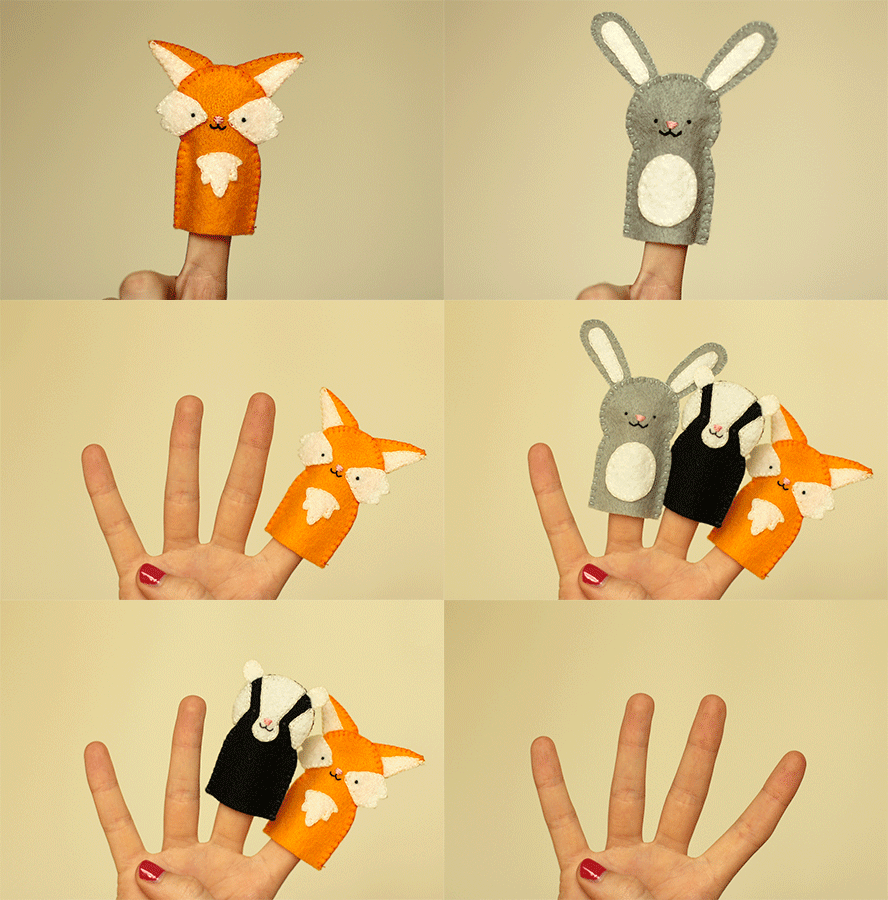
Make your fox some furry little friends.
how-to-make-finger-puppets-09

Look out for Mr Stork

February. For me, the pits of the calendar. Nobody really needs February. It just extends winter for too long, and personally, by the time we’re a week into it I’m ready to bid farewell to the chilly winds and rains and usher in March and April.

This time round however, Spring came early to a very special household. My wonderful friends Hannah and David had a BEAUTIFUL baby boy earlier this month, shaking off the winter blues. I’m head over heels for the little bundle already and can’t wait to see him grow.

As if I needed an excuse to craft eh?

This is a great little project if you already have kiddies and are expecting another, as the older siblings can definitely lend a hand.

For the impatient ones, yes, there is a picture of bubba at the bottom.

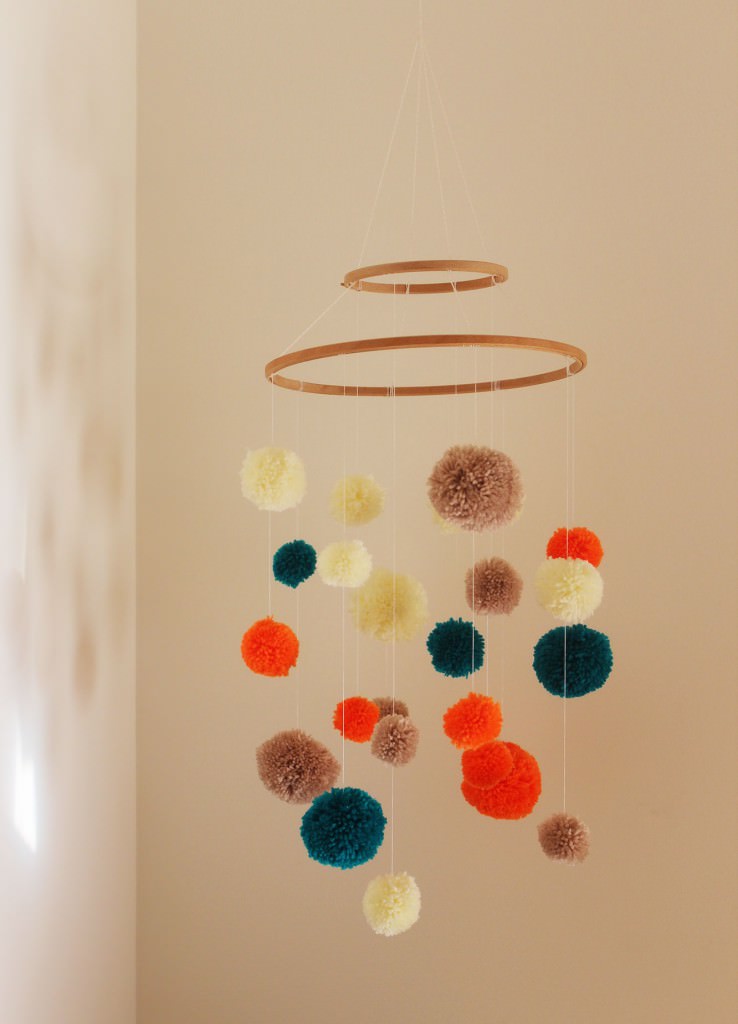
how-to-make-baby-mobile

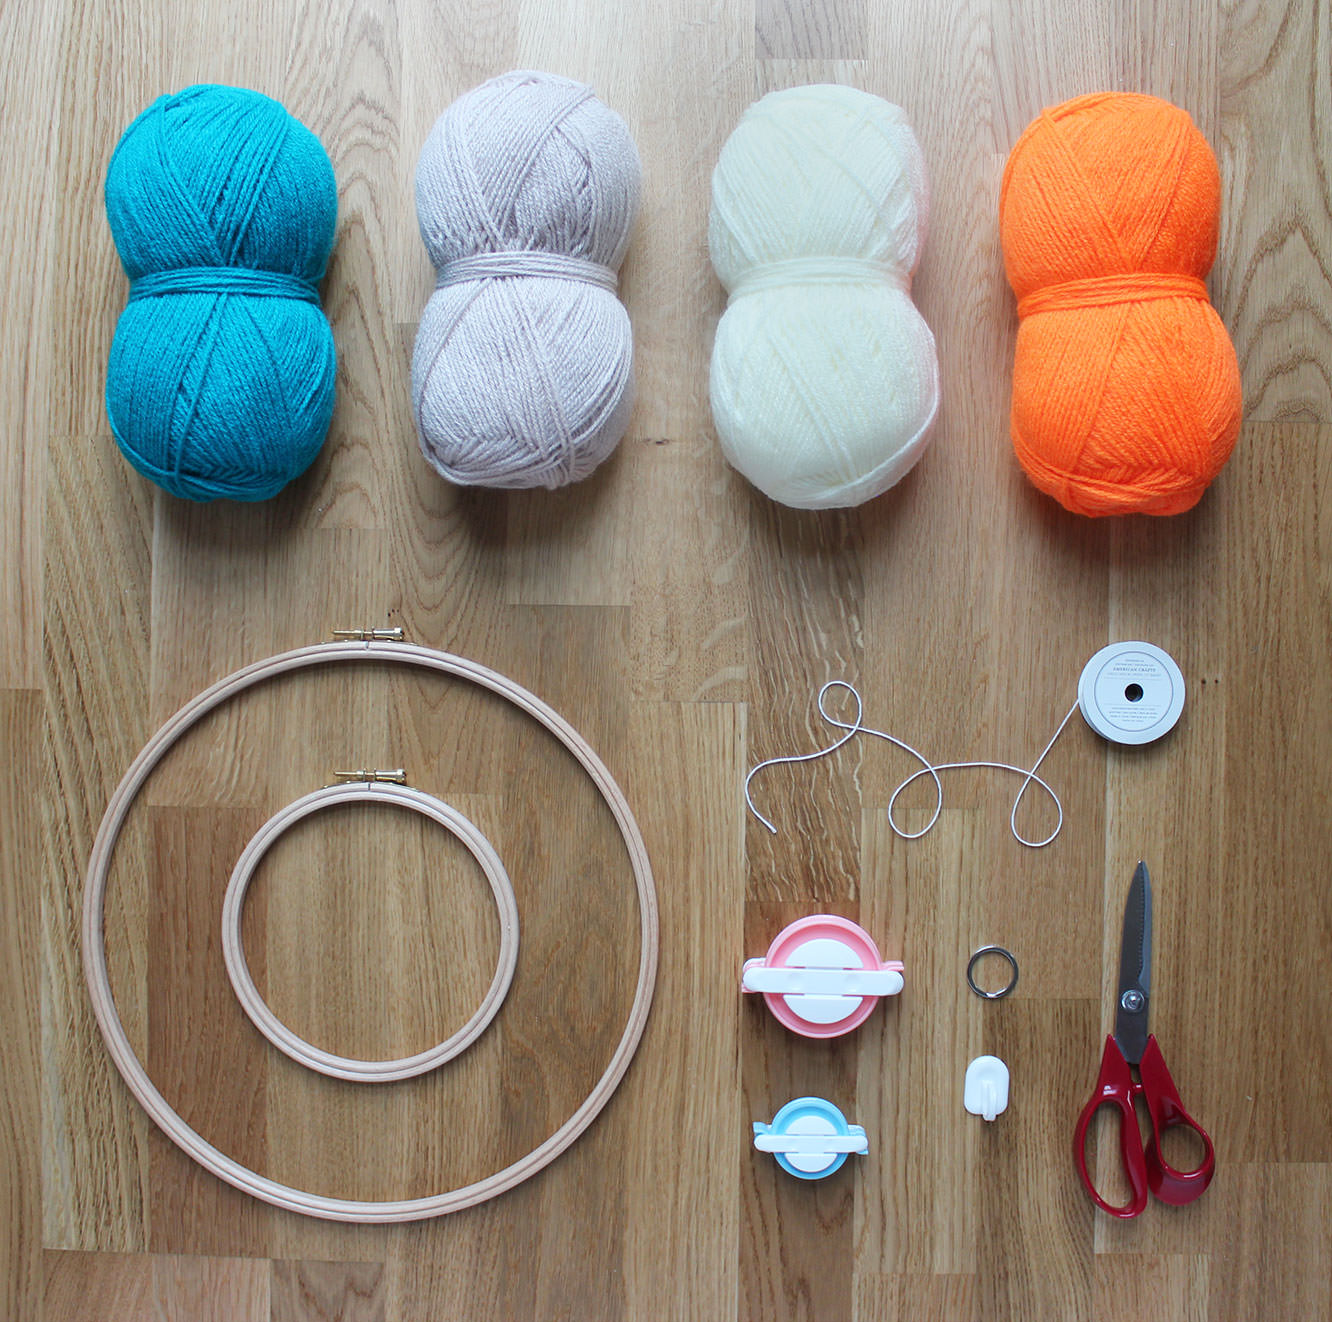
Things you need

12″ Embroidery hoop

9″ Embroidery hoop

Wool in a variety of colours (perfect for using up offcuts)

Pom pom makers in a variety of sizes (or cardboard, see below)

Double sided tape

Needle and thread

A sticky hook

A keyring

2-3m String

how-to-make-baby-mobile-1

Step one

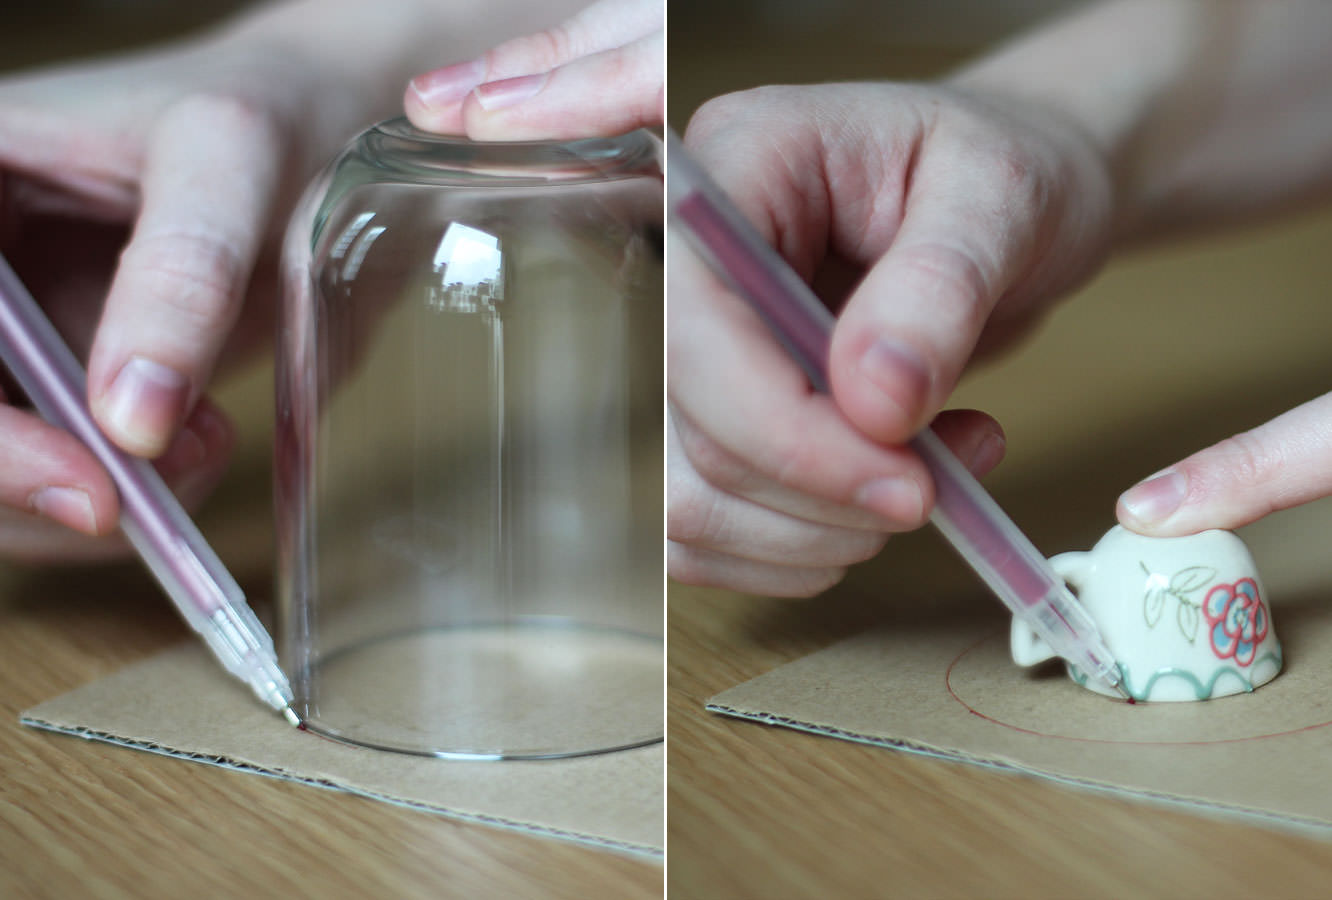
For those of you without pom pom makers (for goodness sake buy some) draw round a variety of circular objects to make differently sized cardboard hoops for your pom poms. You will need to make two hoops per size.

If you have pom pom makers, none of this is for you, skip to step 8 and relish in the fact you loved yourself enough to shell out £4 to save your sanity. All you guys need to do is follow the, in all likelihood hilariously translated, instructions on the back of your packet of pom pom makers. I bought mine on eBay from China, I strongly suggest you do the same.

how-to-make-baby-mobile-2

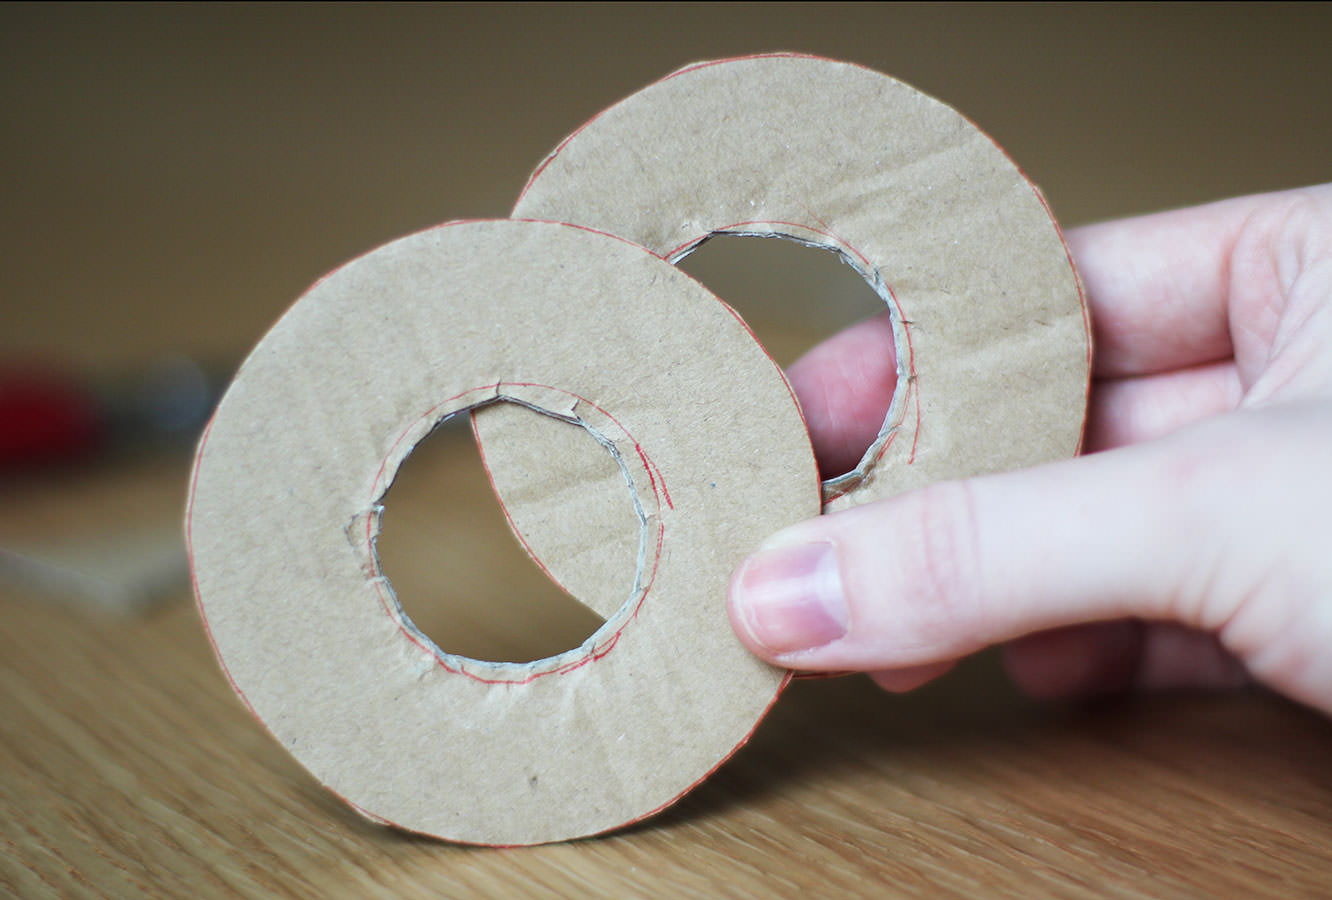
Step two

Cut out the hoops so that you have a hole in the centre. Don’t worry if they’re messy, it won’t impact your poms.

how-to-make-baby-mobile-3

Step three

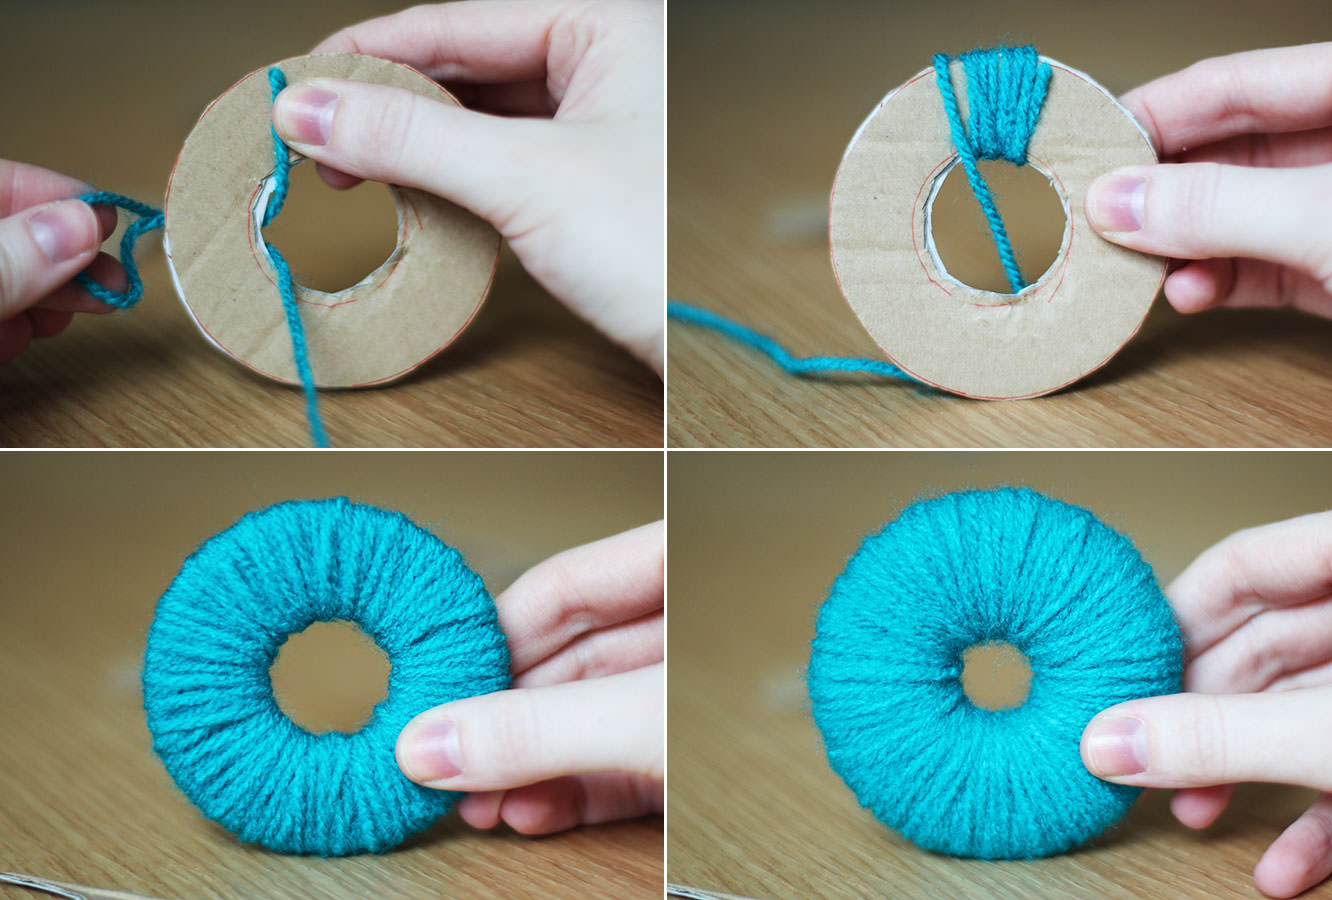
Sandwich the two pieces of cardboard together and wrap lengths of wool around and around.

You do this by pulling the end of the wool through the centre of the disk and back over the edge.

Keep going as long as you can, but essentially the fuller the hole in the middle the plusher your pom pom will be.

how-to-make-baby-mobile-4

Step four

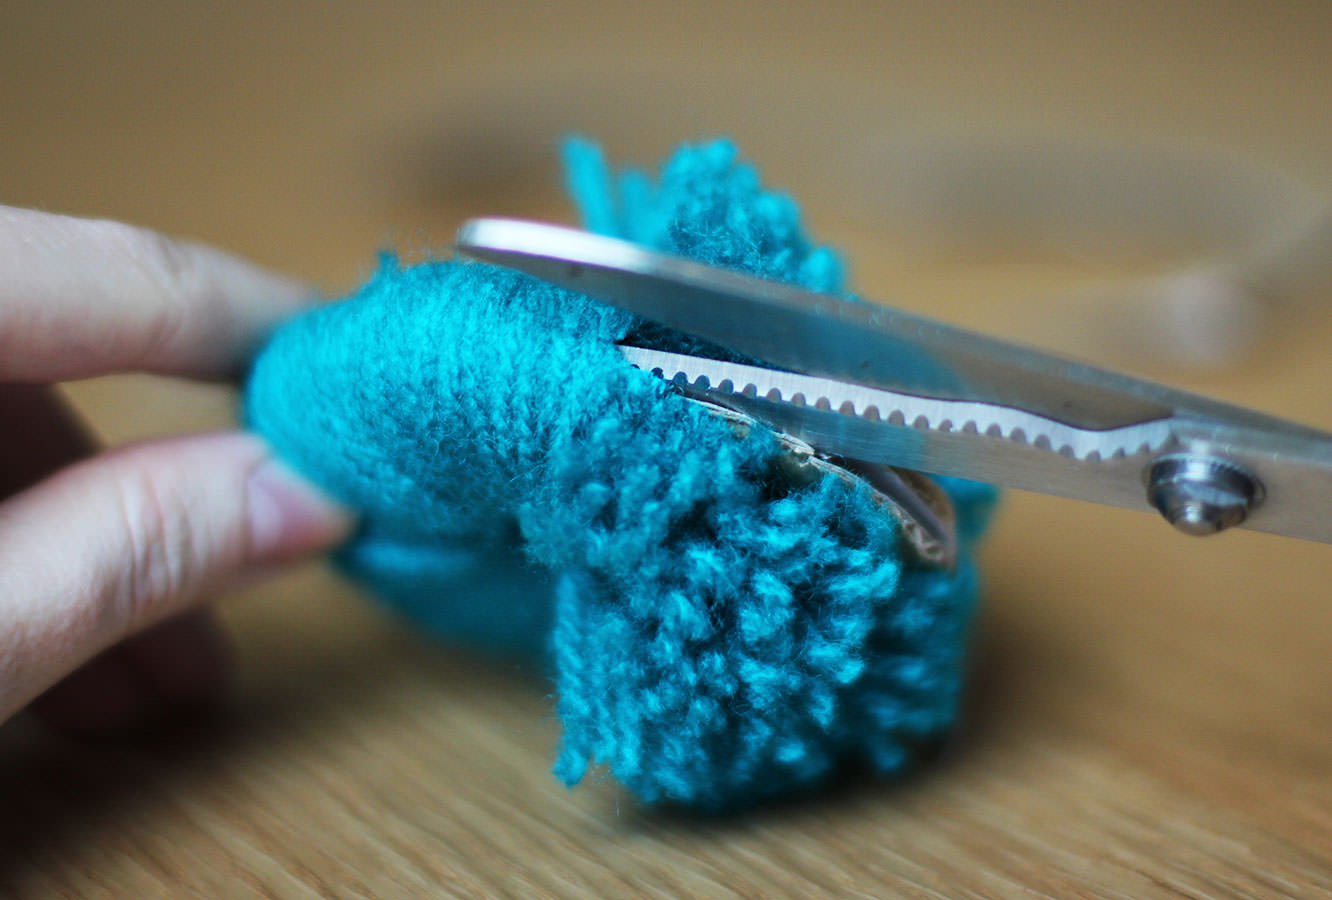
Using scissors cut round the circumference of the ring.

Once you’ve made a few snips you should be able to get the scissors between the two layers of card which then makes this very quick.

how-to-make-baby-mobile-5

Step five

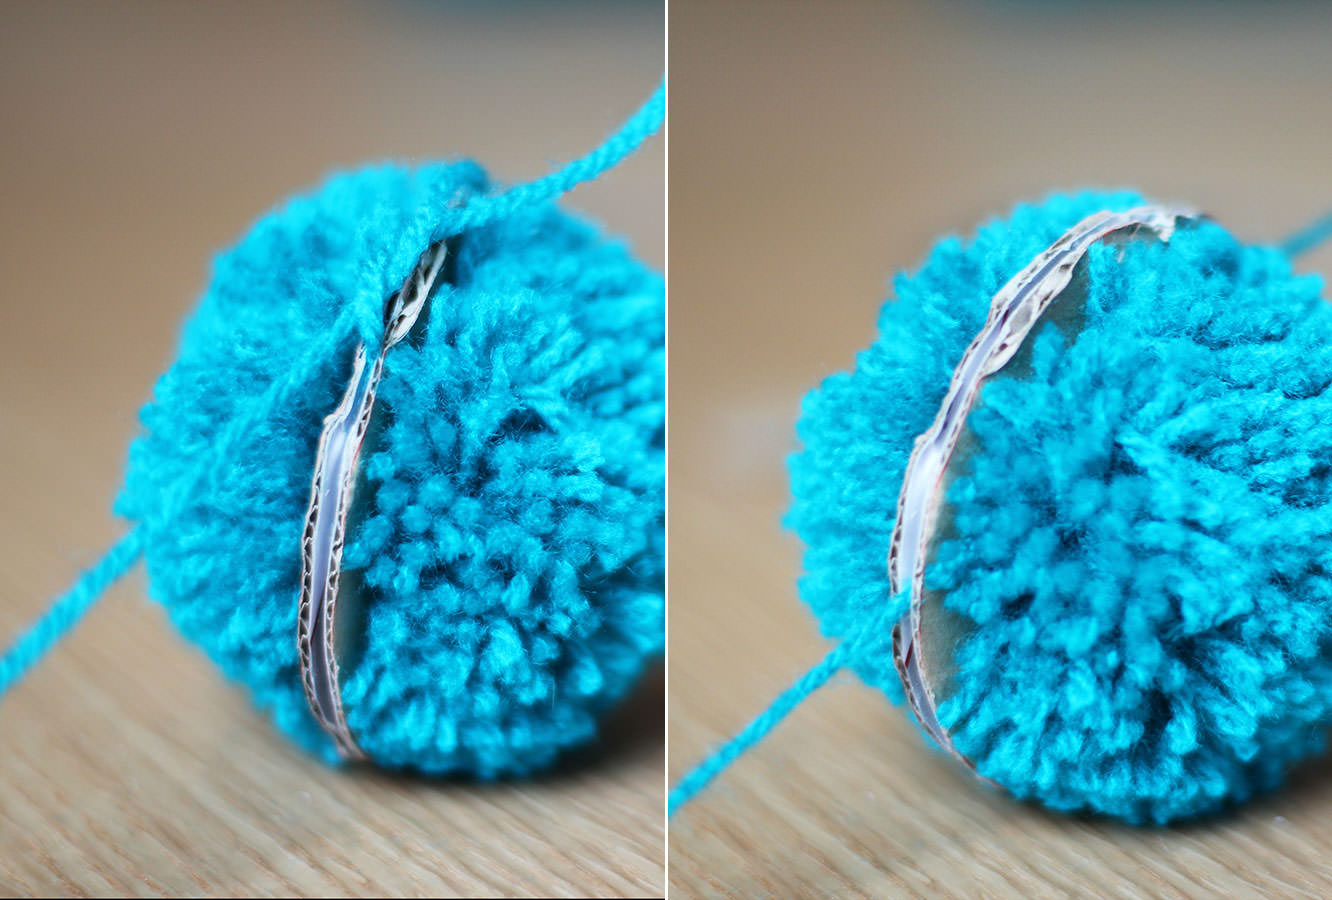
Wrap a length of wool around the edge and tie a knot in between the cardboard layers. I always do a few for good measure.

how-to-make-baby-mobile-6

Step six

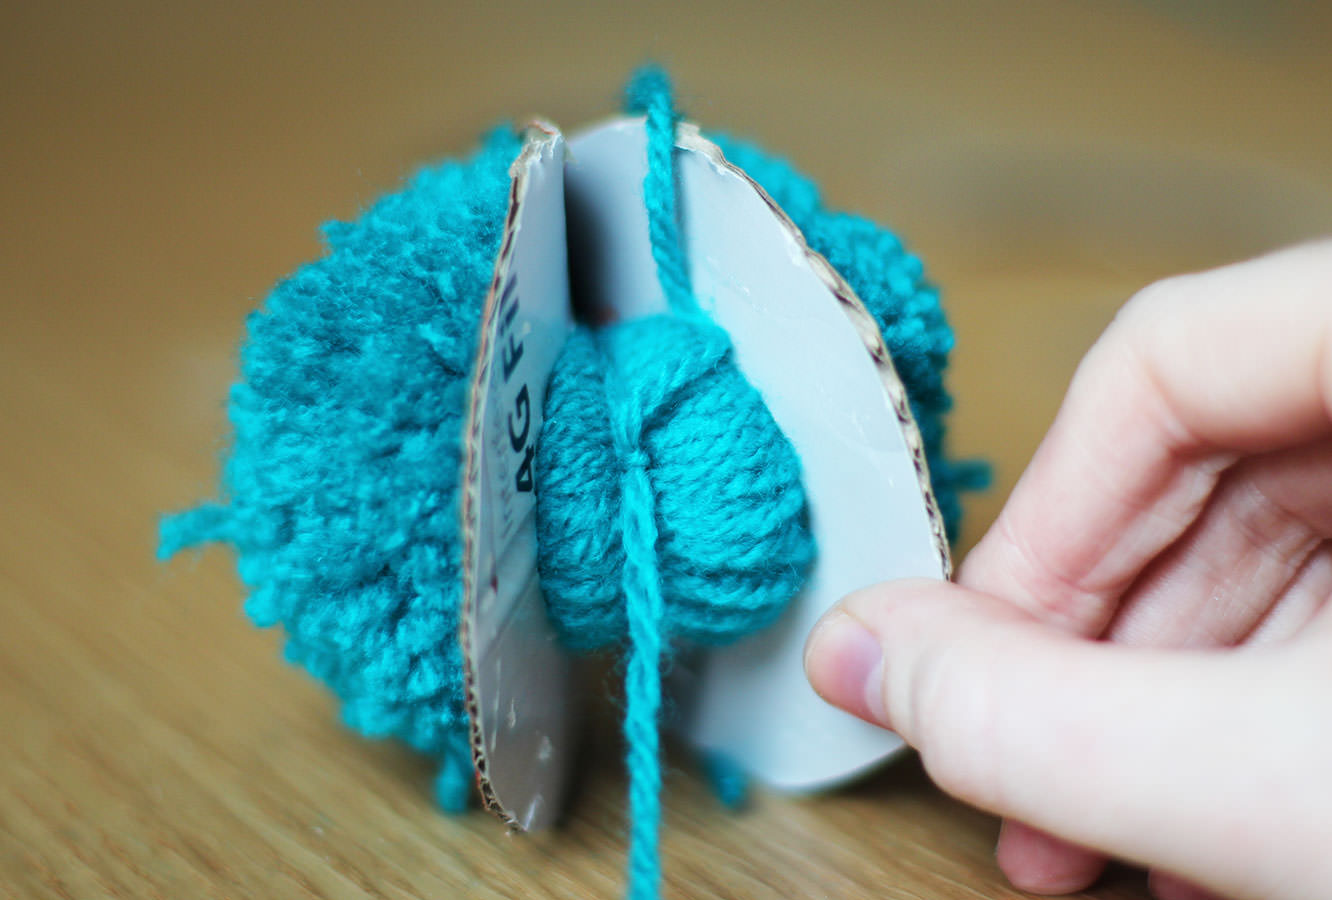
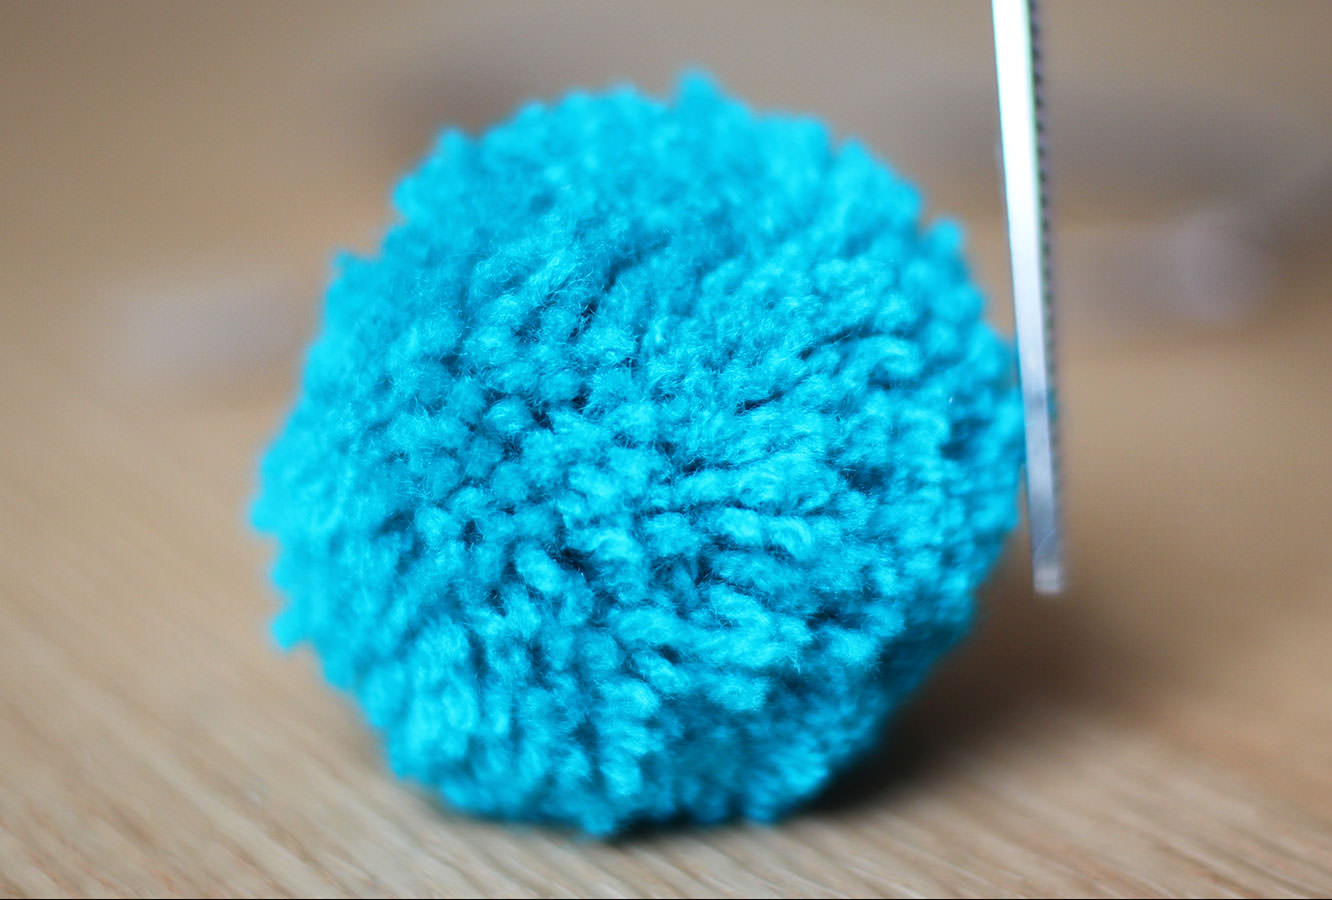
Pull the cardboard rings off to release your pom pom.

how-to-make-baby-mobile-7

Step seven

Trim any straggly bits to neaten it all up.

how-to-make-baby-mobile-gif

Step eight

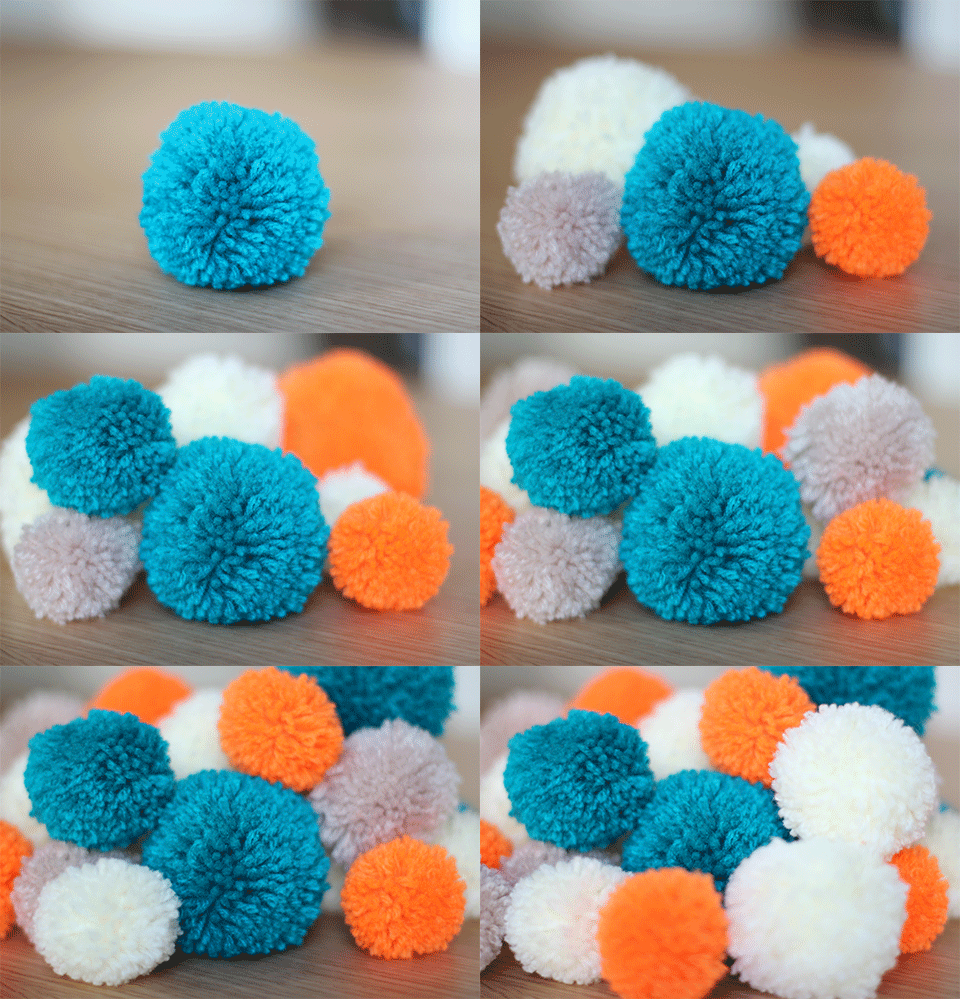
Repeat until you have at least 24 pom poms of different sizes and colours.

how-to-make-baby-mobile-10

Step nine

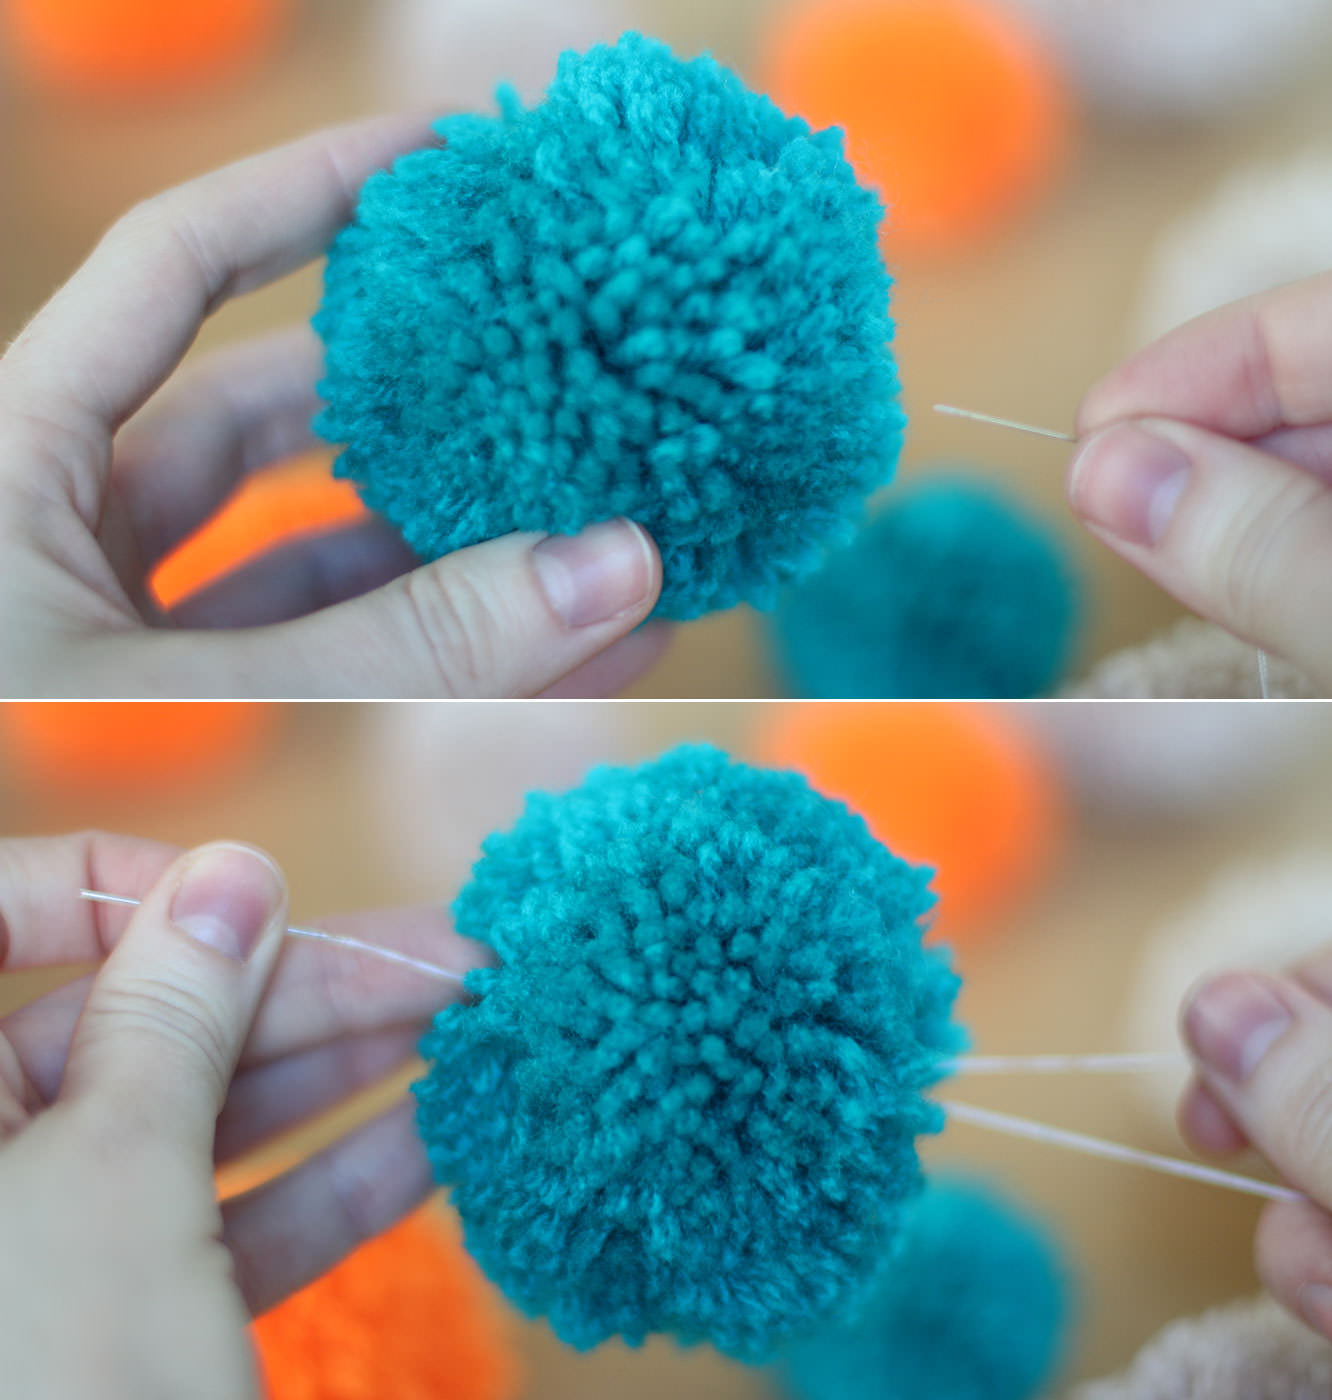
Sew the pom poms to varying lengths of cotton thread in twos (or if you’ve made more, then keep adding them!)

I went back and forth through each pom pom a few times so they didn’t slip down/fall off the end.

I recommend doing this randomly, or you’ll drive yourself crazy! Plus it looks better for baby if they are dotted about as the different levels of perspective means you can see more.

how-to-make-baby-mobile-8

Step ten

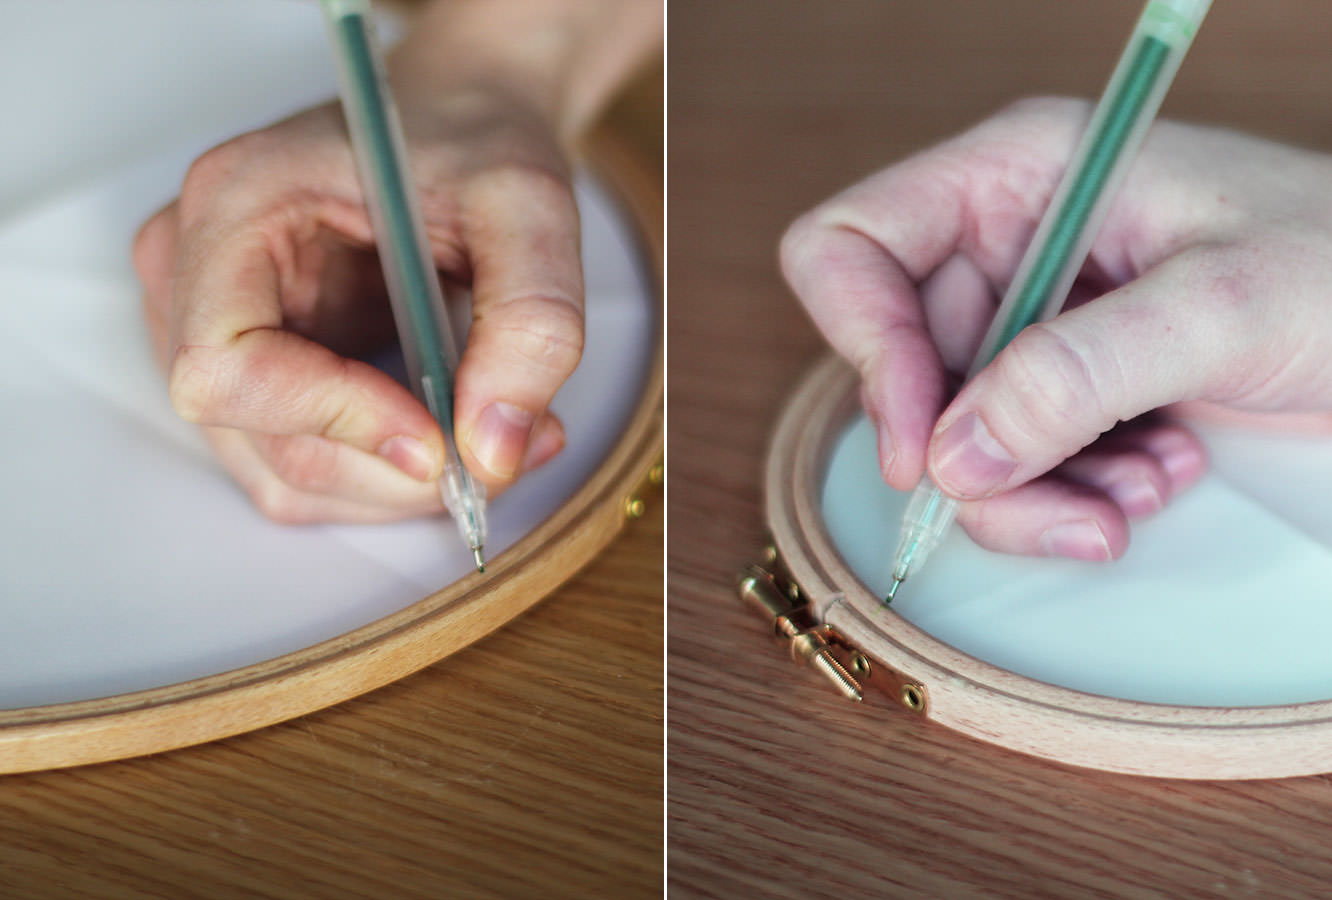
Cut a paper/newspaper circle that fits inside the embroidery hoops. Fold each in half three times so you get 8 equal segments.

Placing the paper circles into the hoops mark out the eighths.

how-to-make-baby-mobile-9

Step eleven

Remove the outer hoops and stick a small strip of double sided tape by each marker.

Step twelve

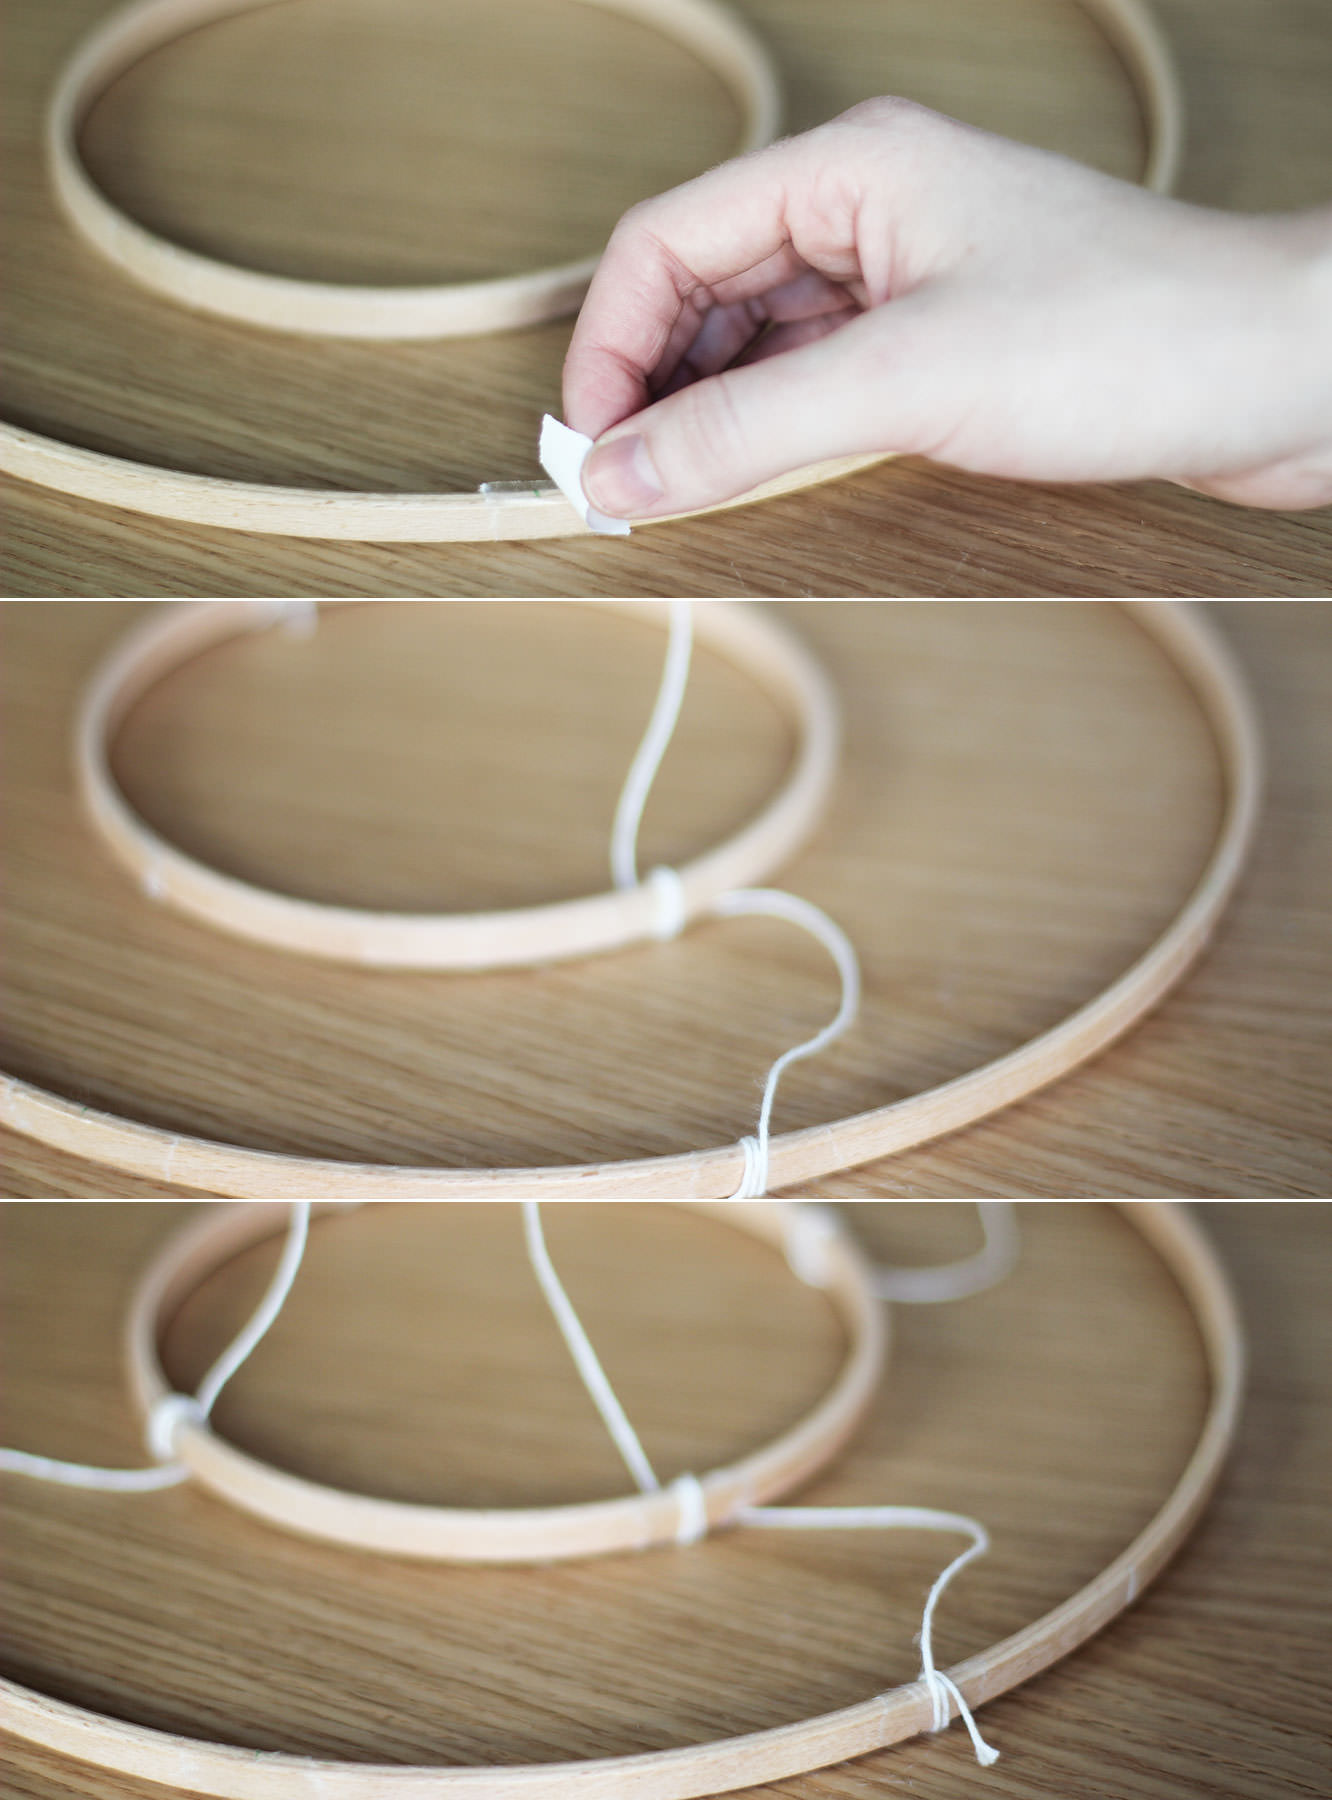
Attach two pieces of string to hang the mobile by. They need to wrap around both the outer and inner hoops and be as even as possible.

Try to make it so that the string comes out from under the hoop at all points. Otherwise you’ll do what I did and put the outer hoop on top, one will be over and the whole thing will hang a bit wonky. Distressed isn’t the word.

how-to-make-baby-mobile-12

Step thirteen

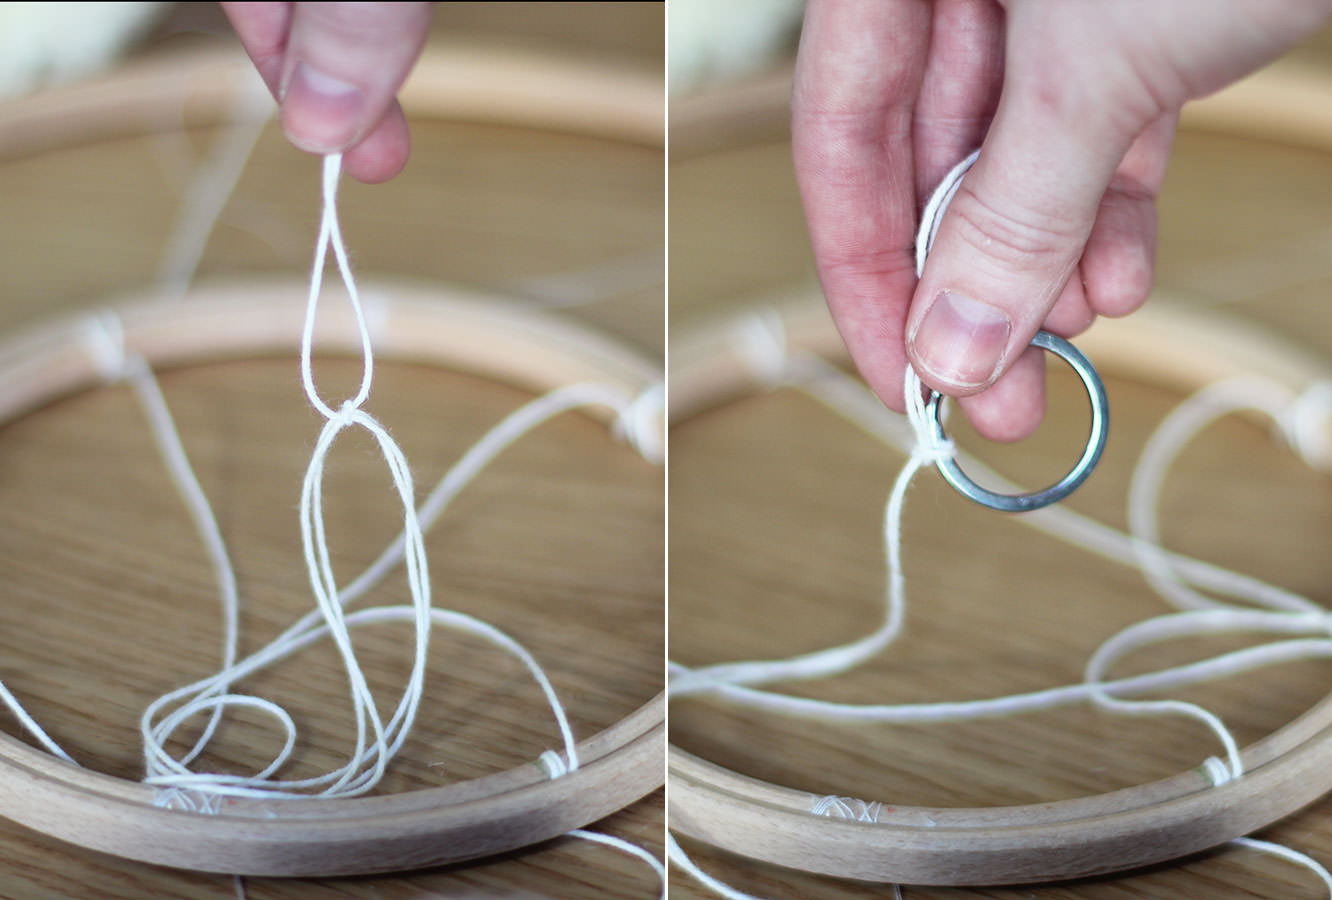
Tie a longish piece of string (this will totally depend on your ceiling to cot distance) to connect the crossed over pieces you just attached to the hoops. Still with me?!

At the other end of that length of string tie a keyring. This is the bit that will enable your mobile to spin round.

Step fourteen

Attach your pom pom lengths, 8 around the outside, 4 around the inside by wrapping the thread round the hoop a few times. The tape should hold them in place quite well.

how-to-make-baby-mobile-11

Step fifteen

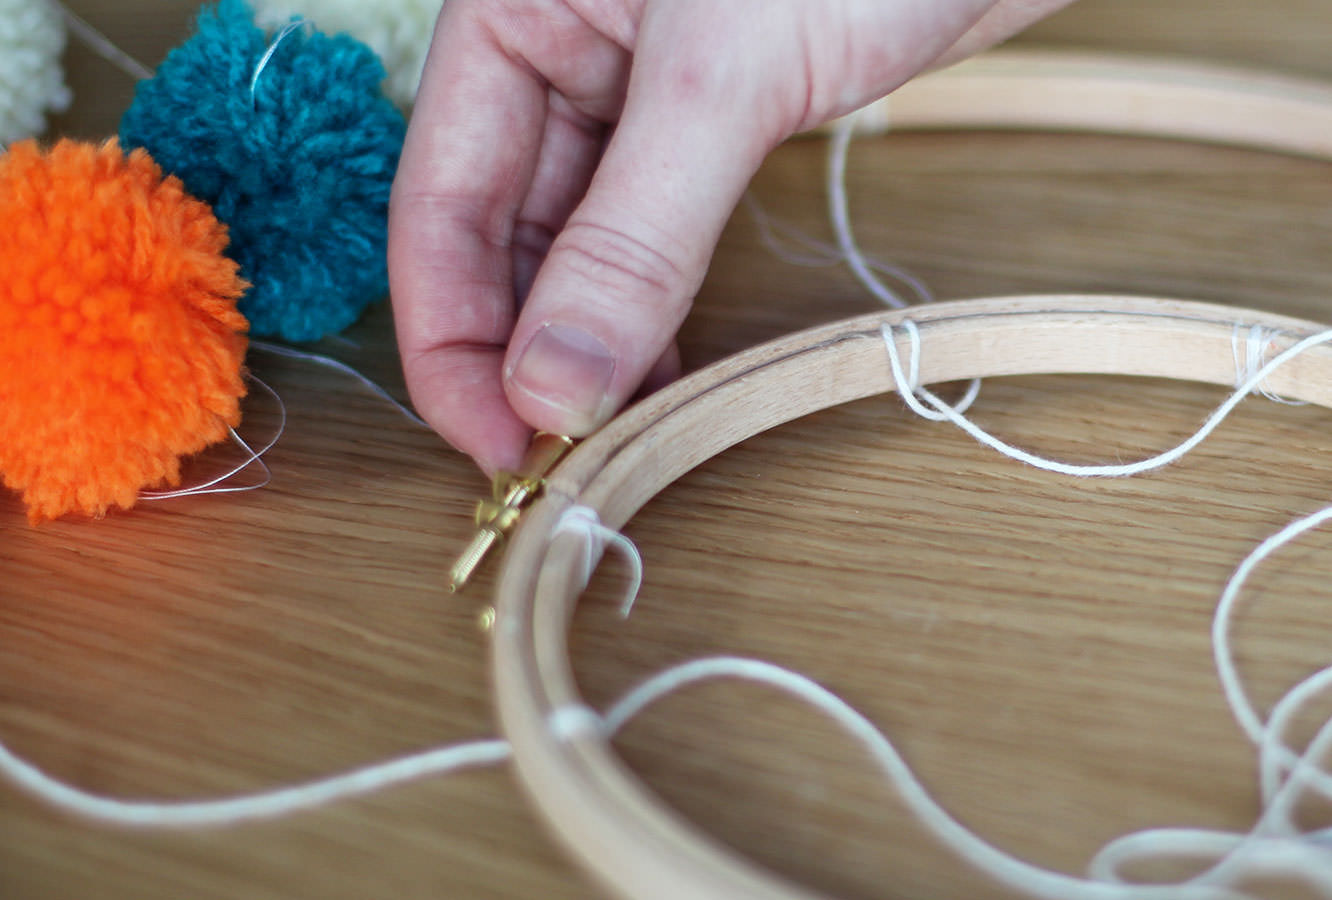
Reattach the outer hoops and tighten.

how-to-make-baby-mobile-13

Step sixteen

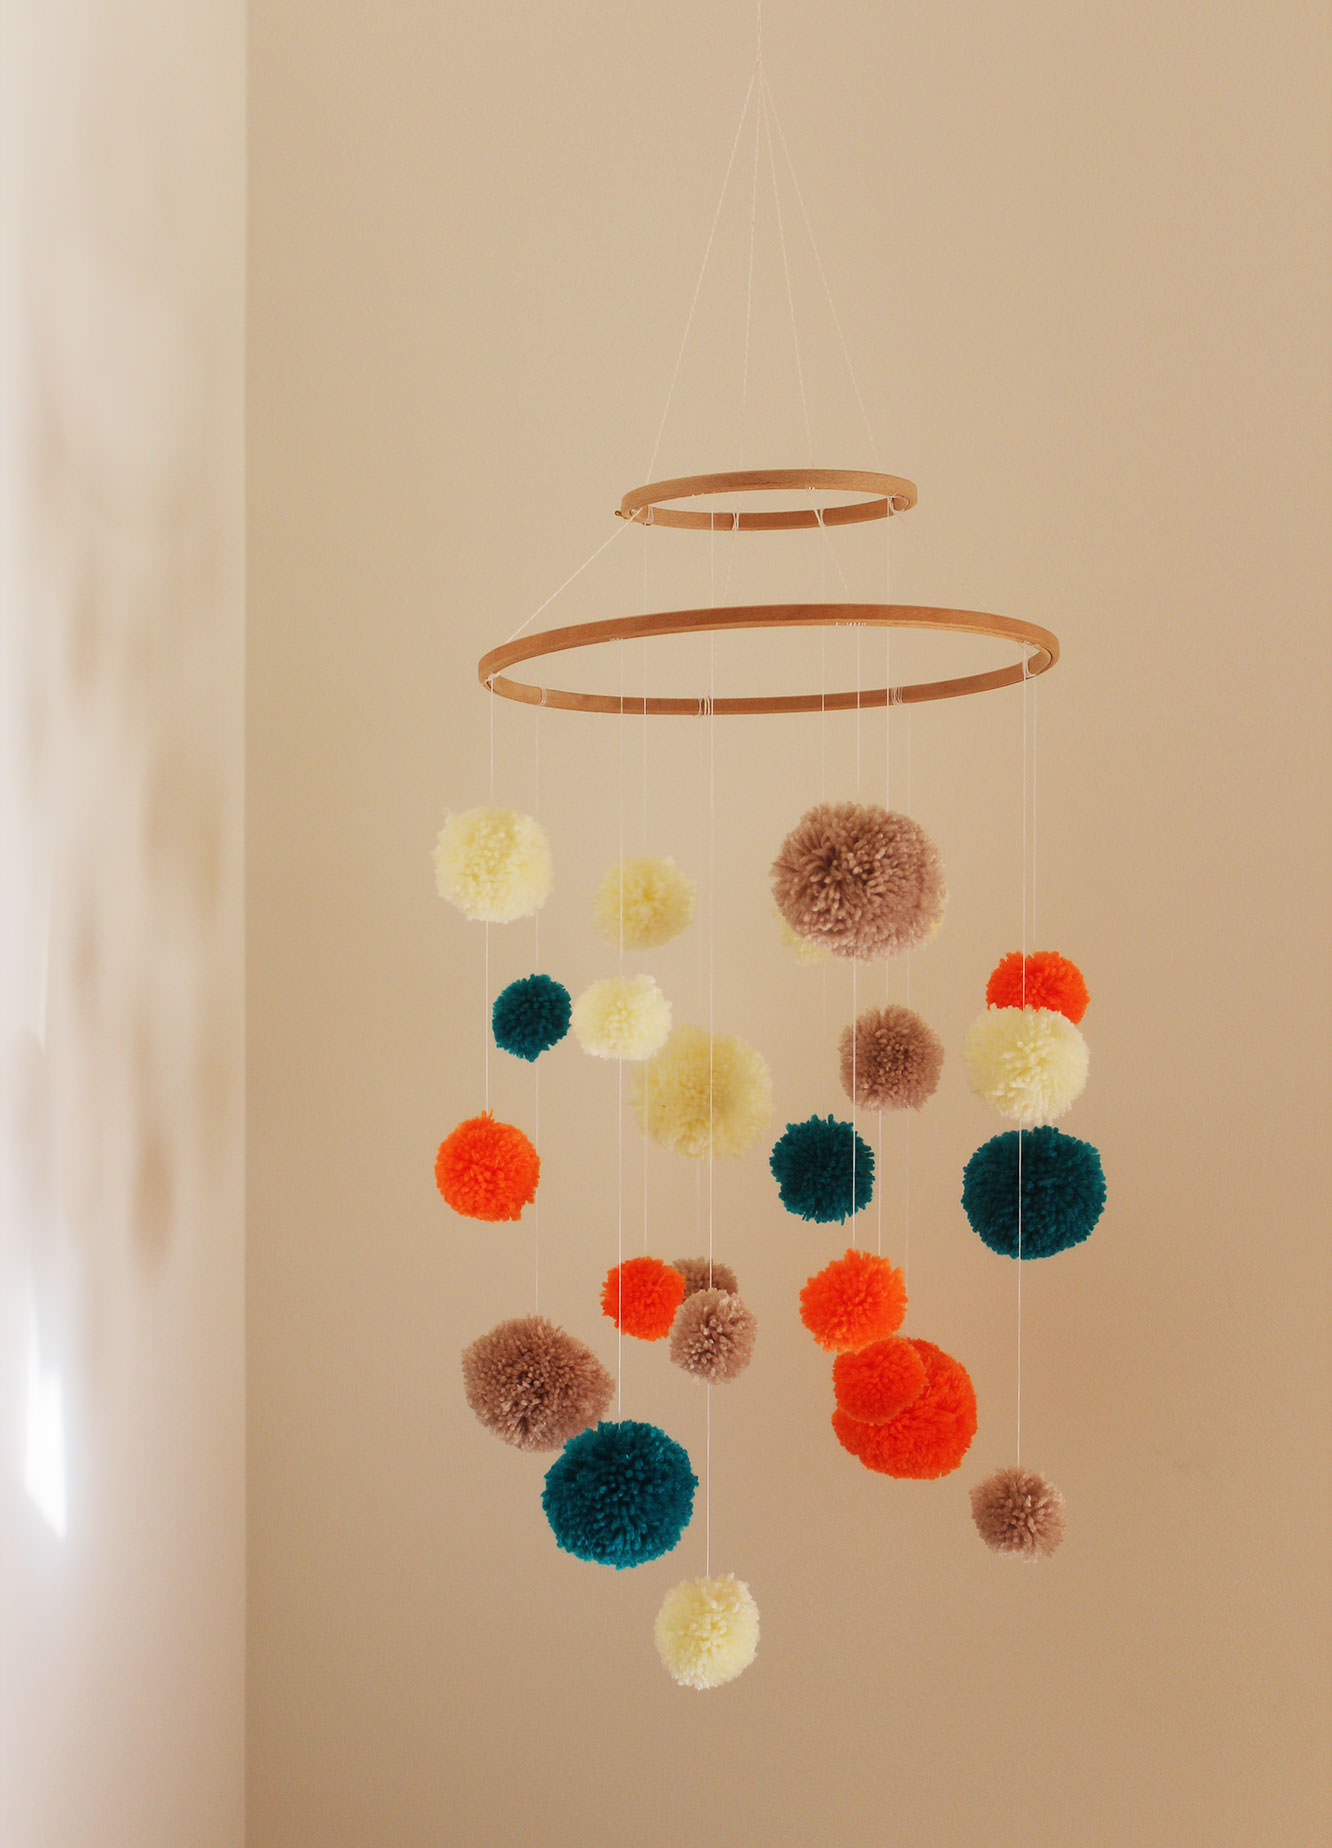
Using the sticky hook hang from the ceiling.

how-to-make-baby-mobile-14

Step seventeen

Lie under it for a little while. It’s relaxing being a baby.

Wait, that’s not all.

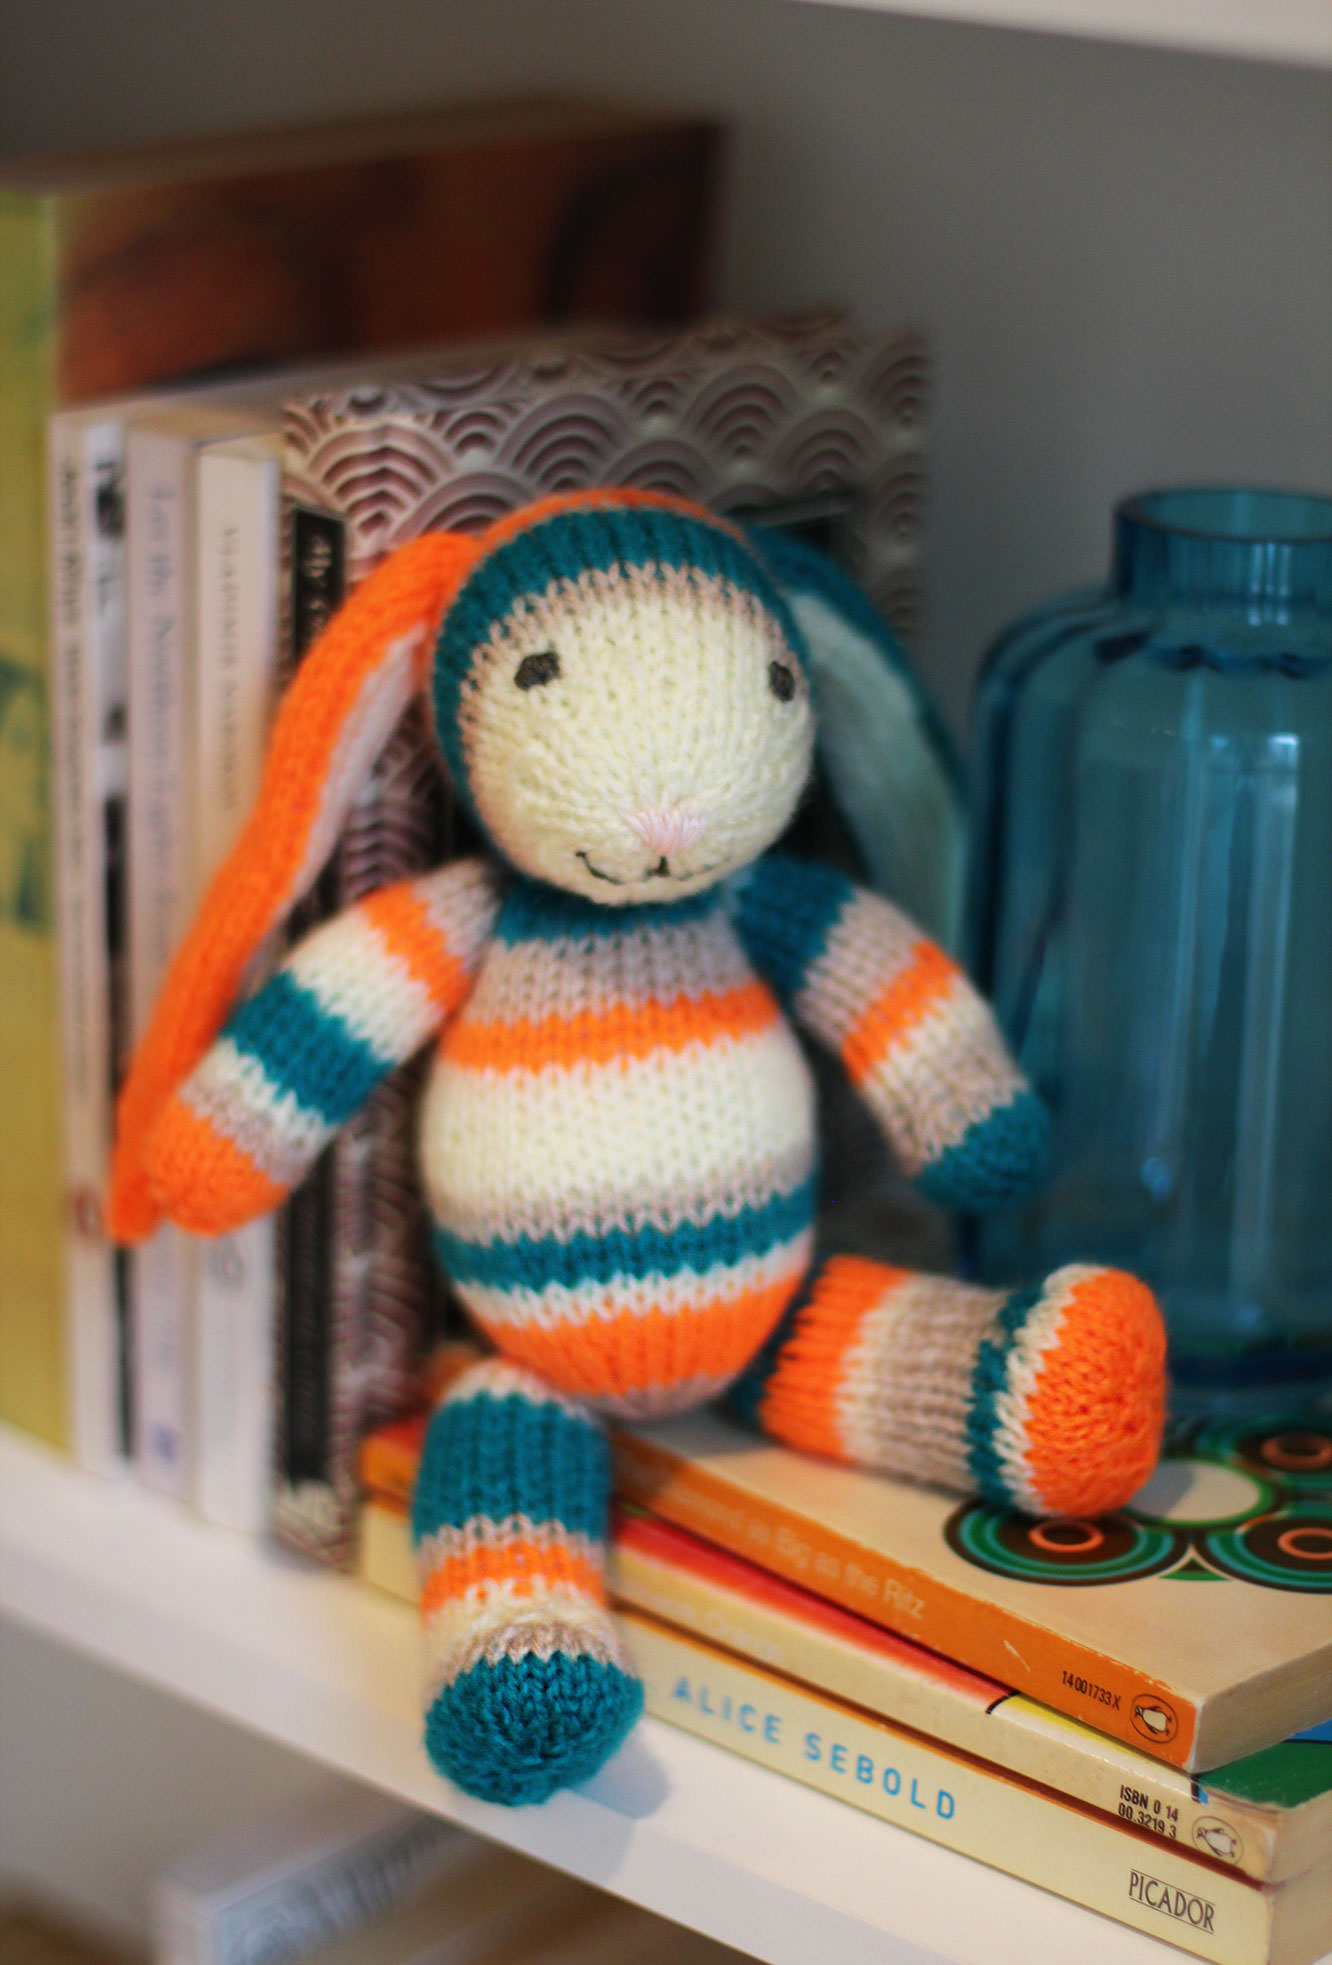
I also couldn’t resist making baby a little friend to match his mobile. Introducing Bernard the bunny.

how-to-make-baby-mobile-15

I haven’t included a step-by-step for Bernard because he’s not my pattern. In fact, this was the first time I’ve ever knitted a ‘creature’ before. He’s not quite the masterpiece I envisaged when I started but full of character and a great beginner knit.

Bernard was knitted from the free fuzzy lamb pattern by Barbara Prime (I just added longer ears). I urge you to visit fuzzymitten.com where you can buy all kinds of super cheap cute and quirky patterns including a bikini clad alpaca and a sloth in a poncho. Barbara’s patterns are adorable and easy to follow.

how-to-make-baby-mobile-17

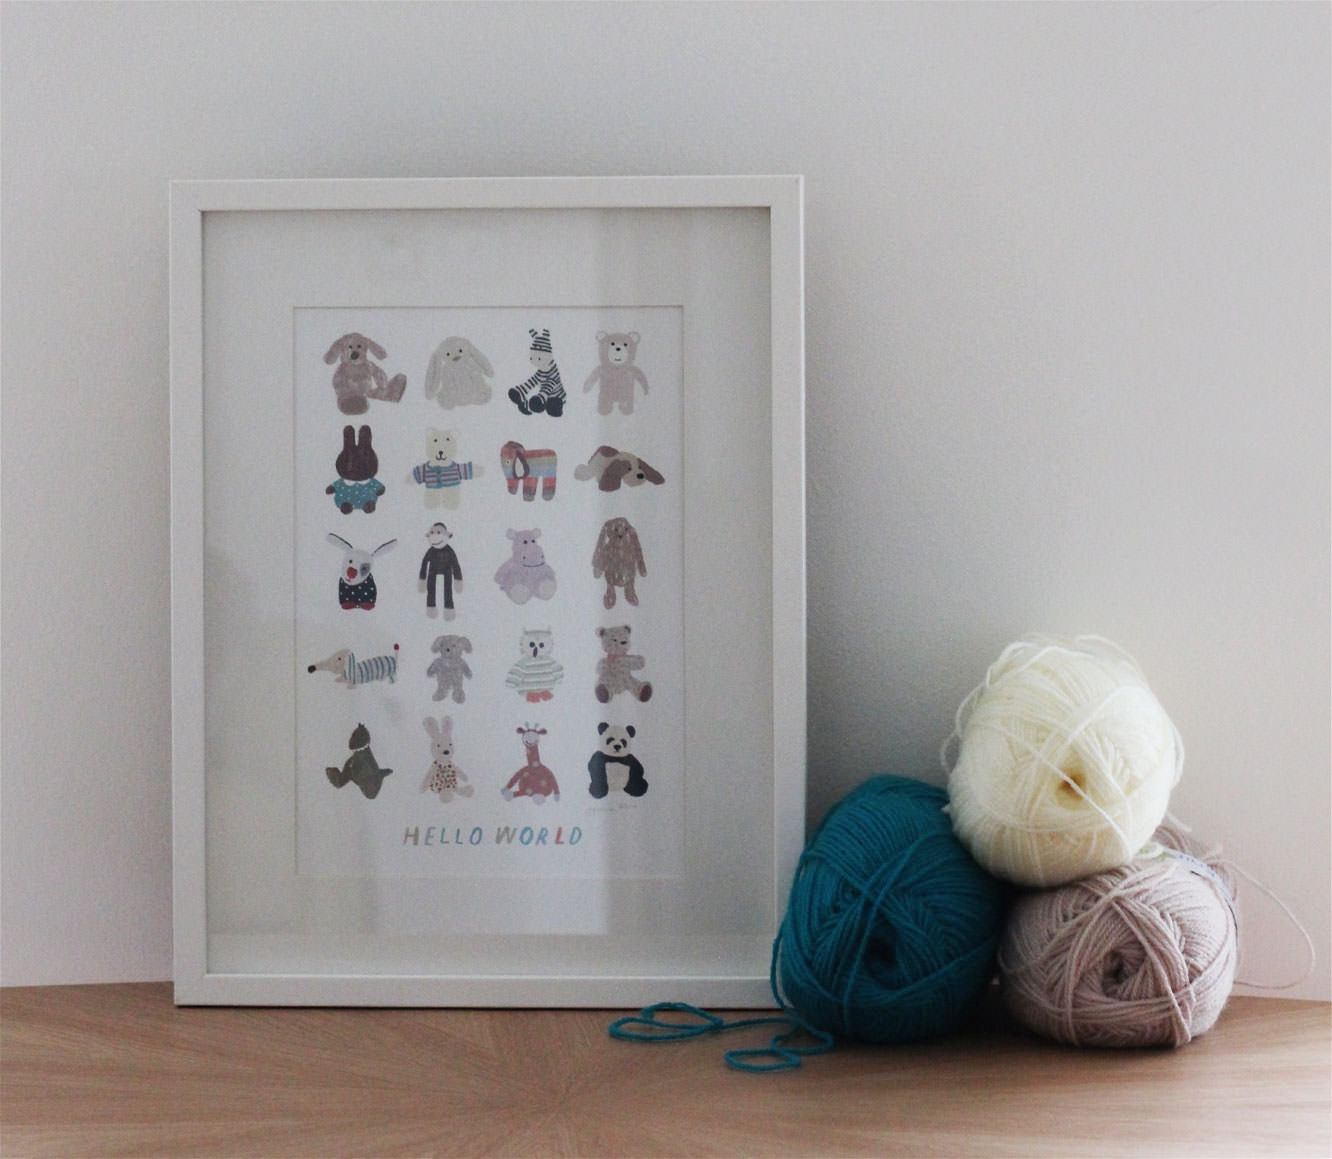
Another plug goes out to Hannah Melin whose ‘Hello World’ print I couldn’t resist at a craft fair just before Christmas. I think it would look lovely on the wall of any nursery.

I should probably make it clear that I’m not being sponsored for either of the above, I just think it’s good to support one’s fellow craftspeople from time to time.

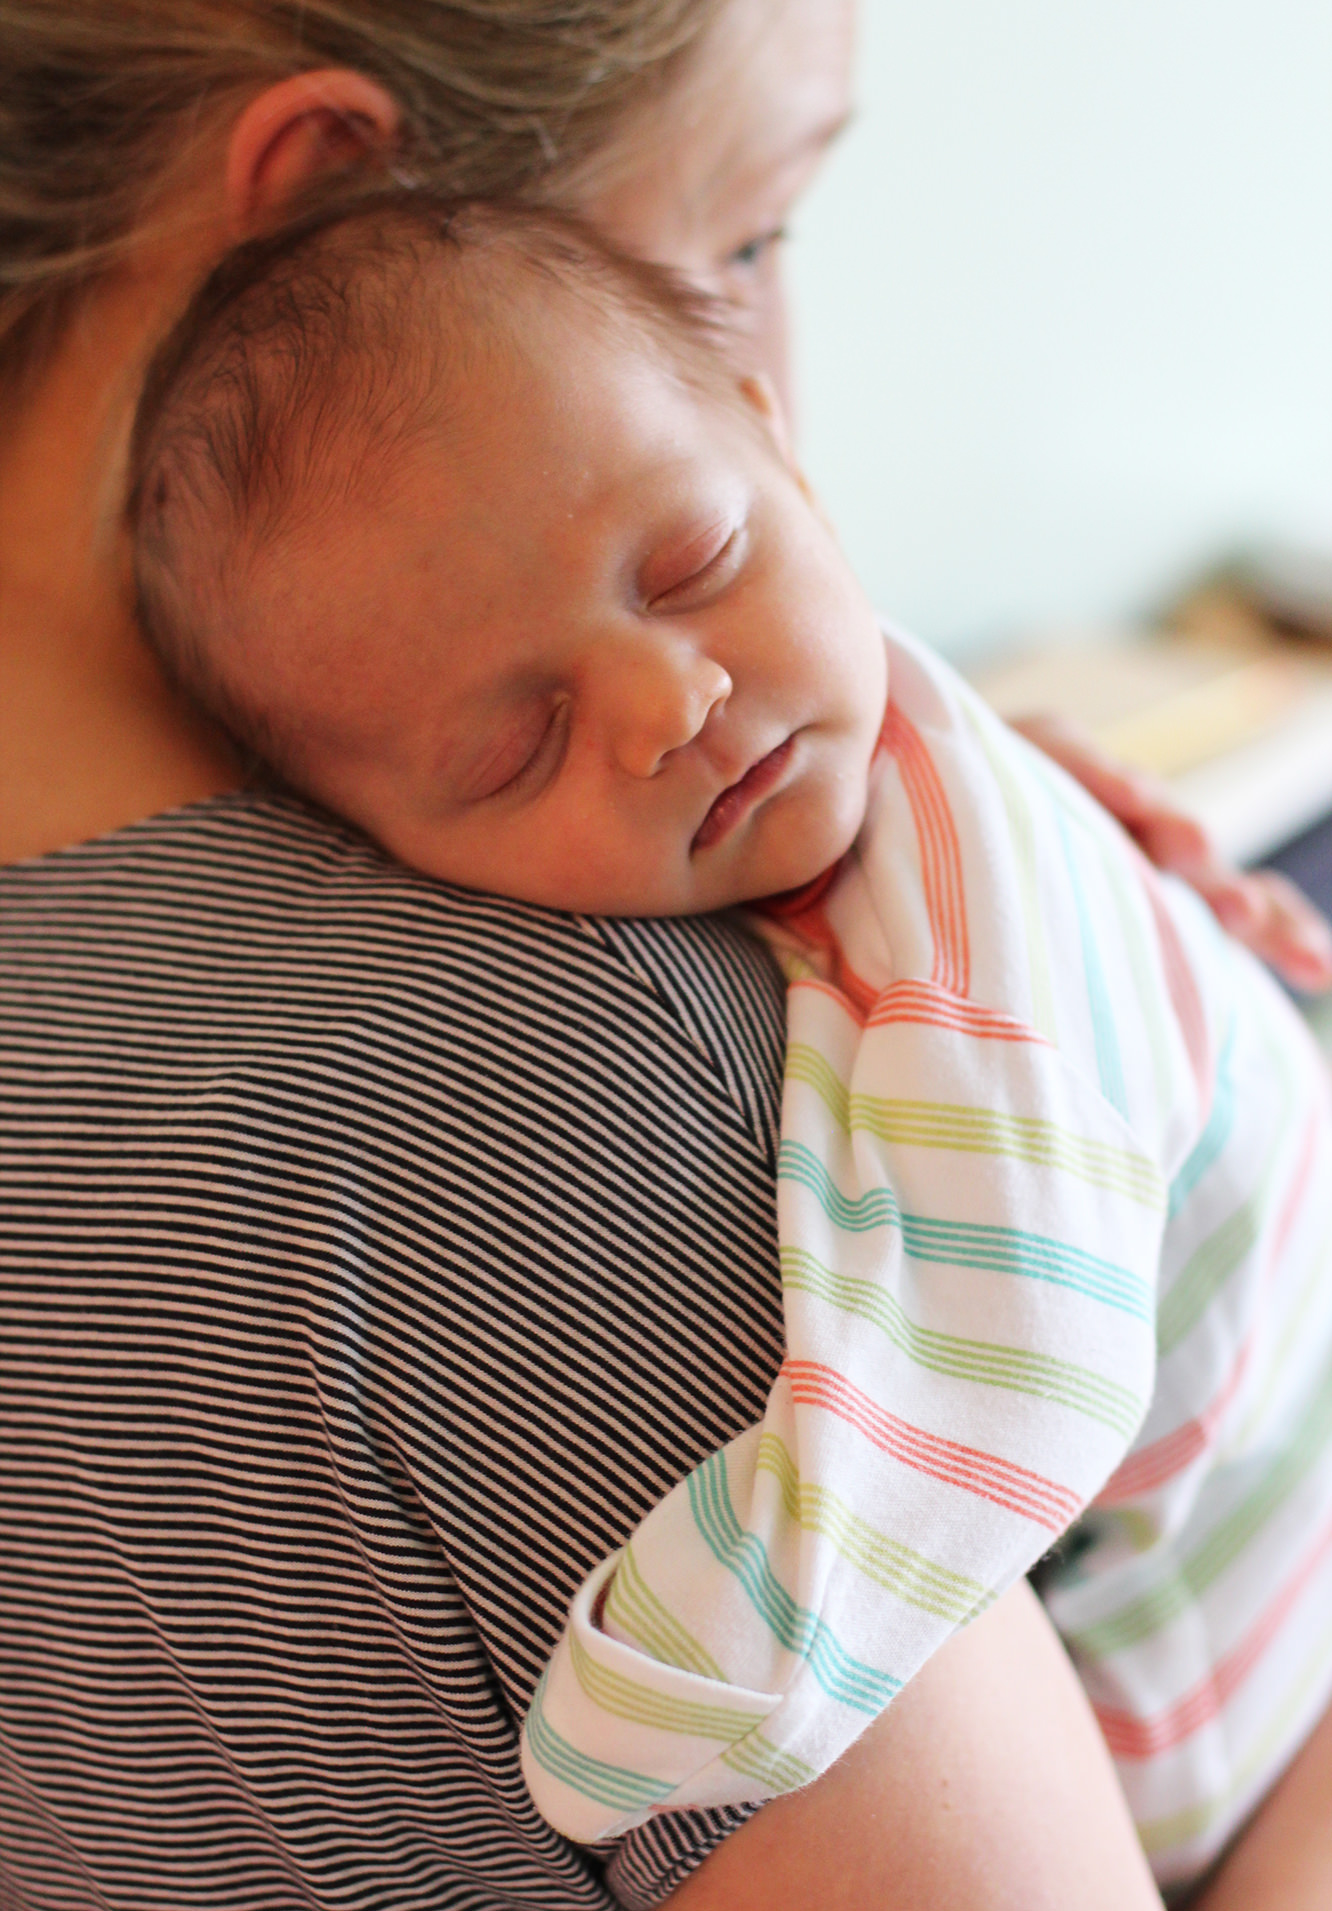
Without further ado, here’s the man of the hour LOOKHOWCUTE.

how-to-make-baby-mobile-16

Snug as a bug

Spring is in the air! Well, not really. It’s actually been so cold that I’ve cracked out the woollens for the first time this winter. BUT, if you get knitting now, you will have a perfect little snood to make the transition from winter to spring a cosy one.

I don’t want any excuses that you don’t know how to knit. I didn’t know how to knit a few years ago. This is a really easy and quick project to get you started. Plus I set up a youtube account to facilitate teaching you, so really, you owe me a try.

free-knitting-pattern-chunky-snood-how-to-10

You will need

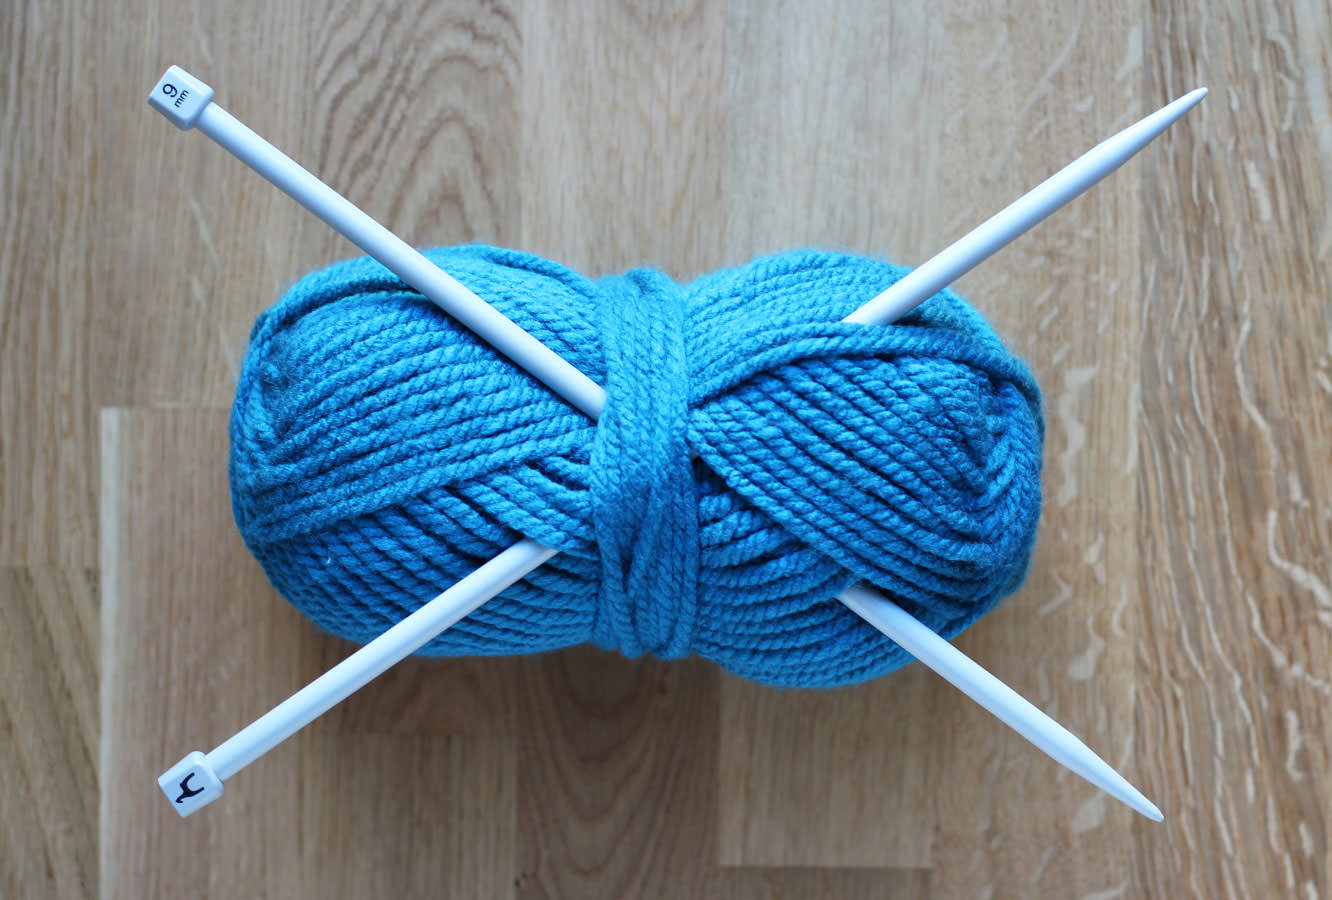
9mm knitting needles

200g of bulky (or extra chunky) wool, my ball was by Patons. If you want a longer/bigger snood, just double up and get 400g.

Pattern

For those of you who know what you’re doing:

co 22 st.

k1, p1 to end of row.

Repeat k1, p1 until close to the end, cast off keeping enough yarn to sew ends together.

free-knitting-pattern-chunky-snood-how-to

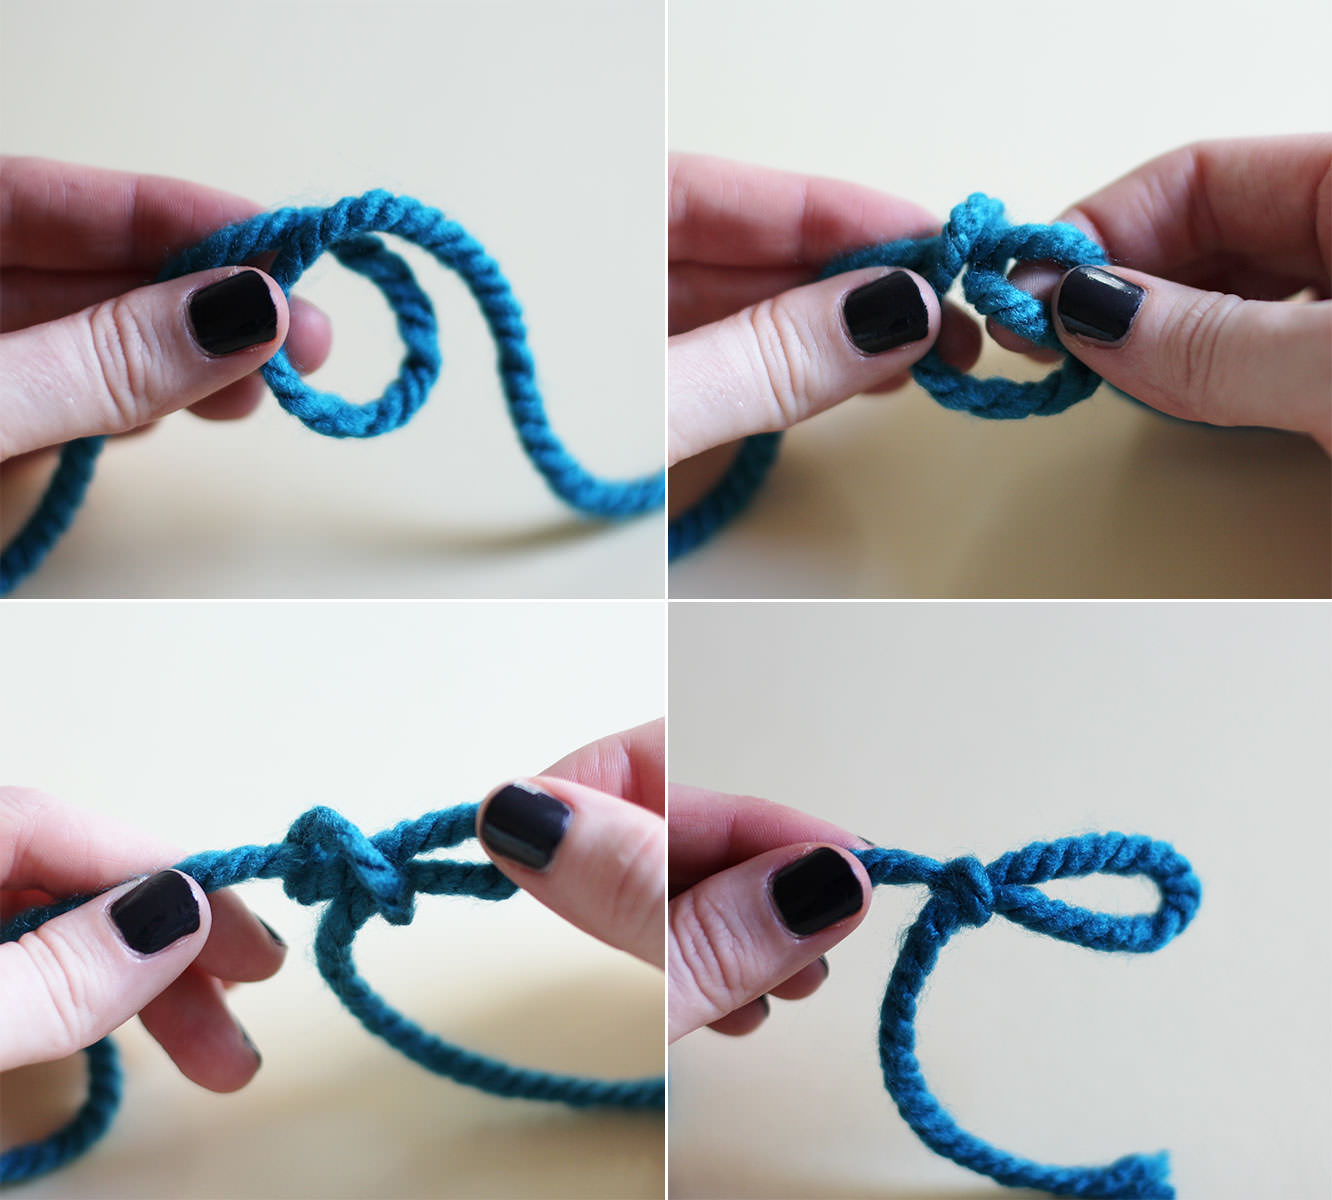
Step one

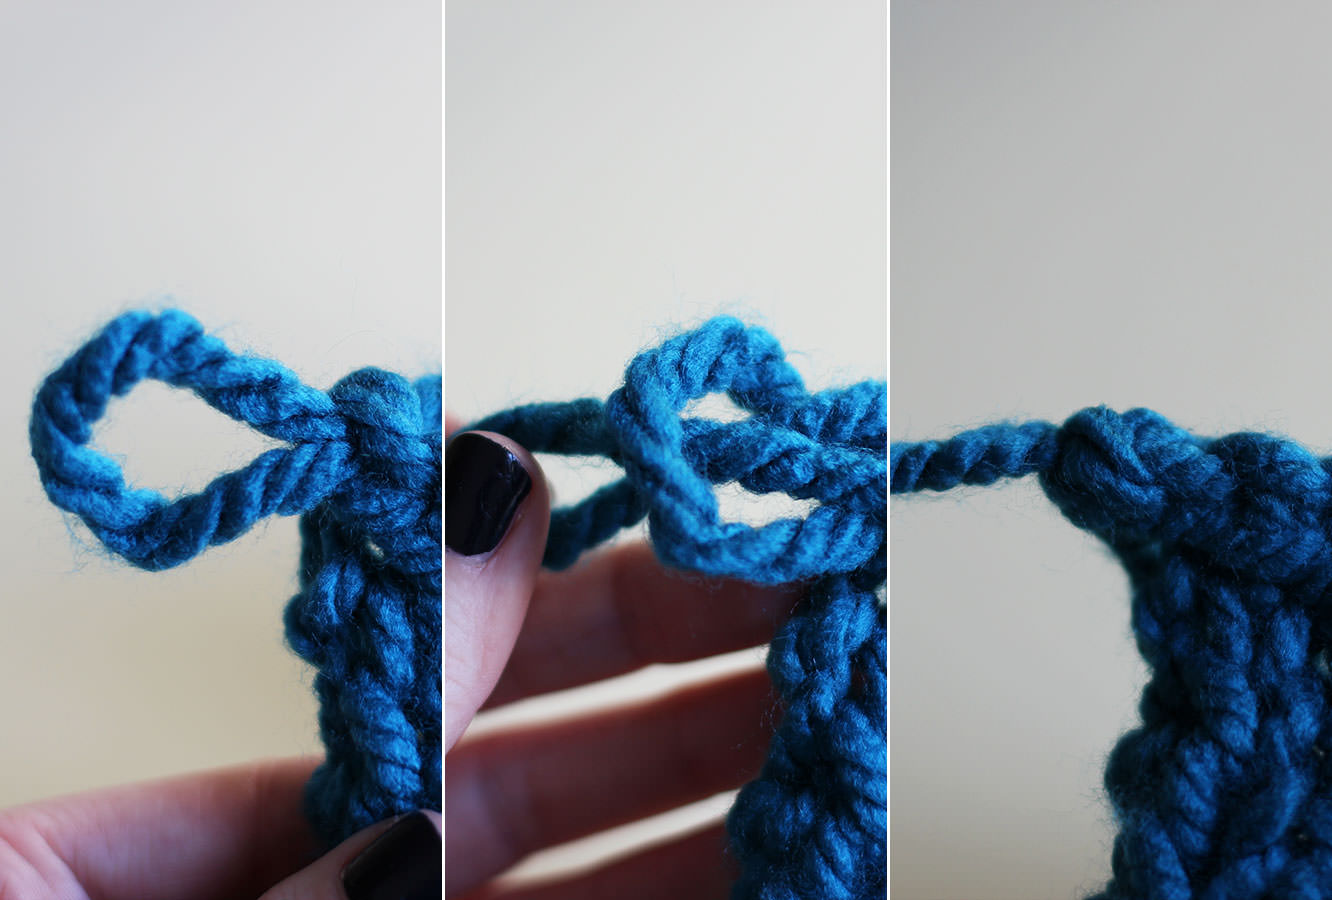
Make a slip knot by overlapping the end of the wool to make a circle and looping it back through.

free-knitting-pattern-chunky-snood-how-to-5

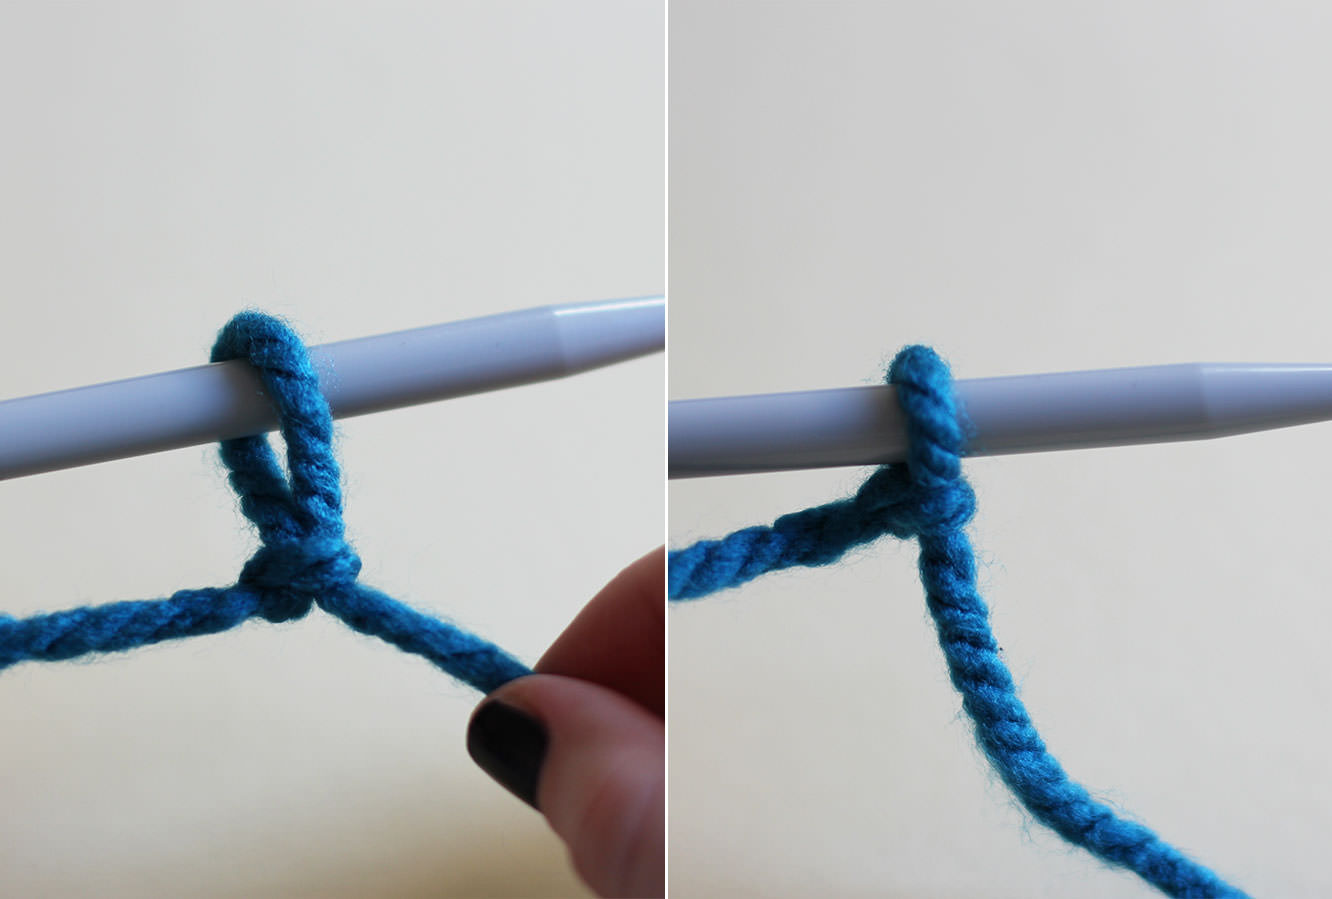
Step two

Place the loop over the end of the knitting needle and pull to tighten.

free-knitting-pattern-chunky-snood-how-to-1

Step three

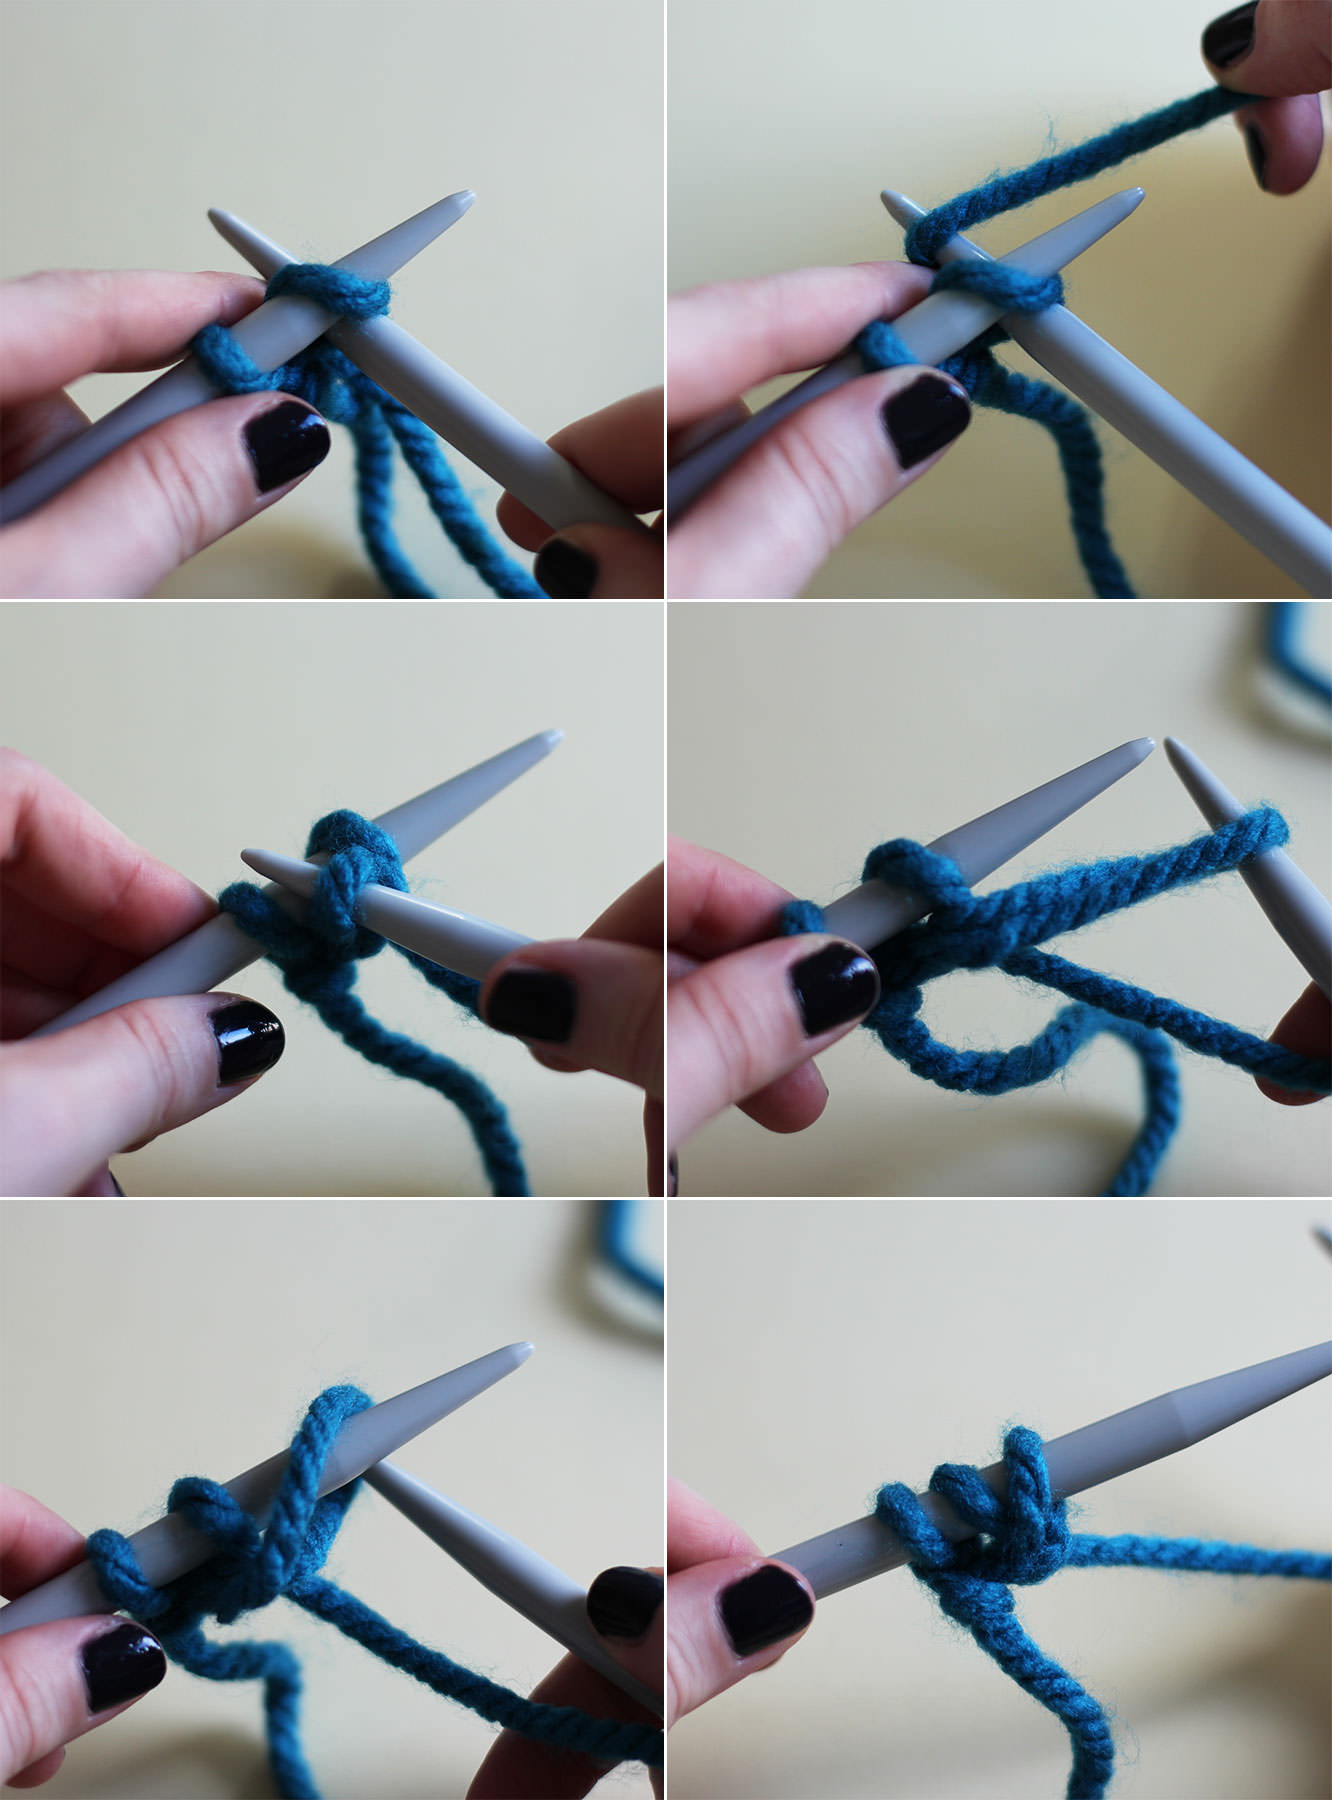
Time to cast on.

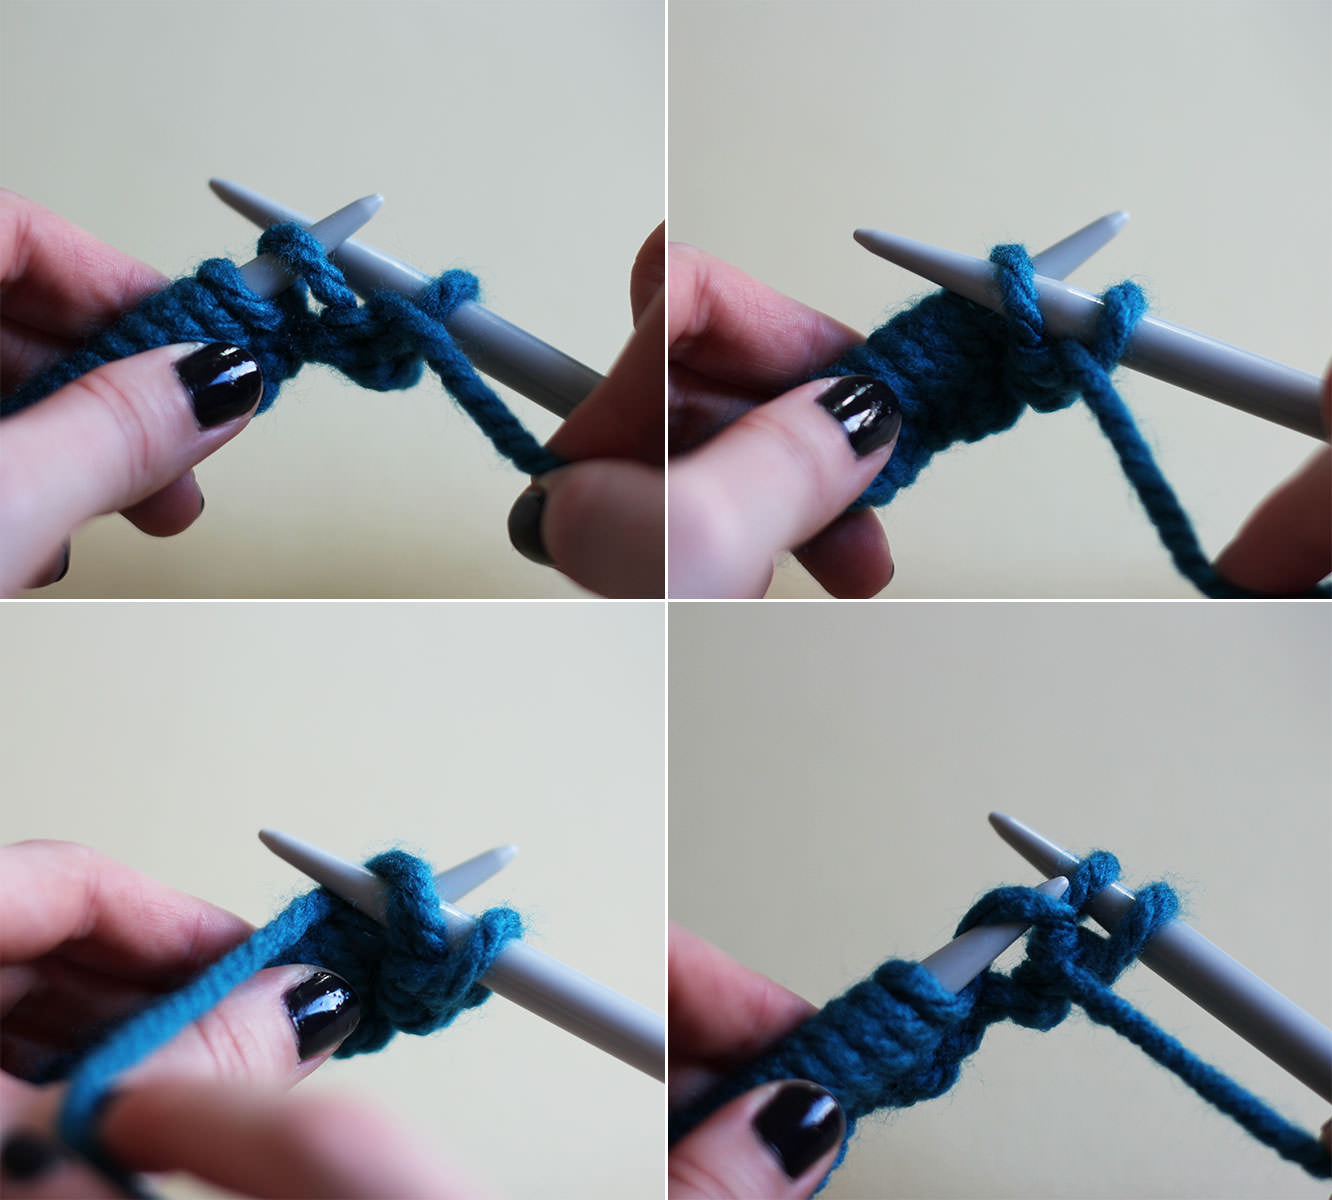
Push the right needle through the loop behind the left one. Wrap the long end of the wool (the bit that leads to the ball) around it so that the wool sits between the two needles.

Pull the right needle under the left, taking the wool with you and through the loop. Tug it through until you can loop it over the end of the left needle and tighten.

Do this 22 times.

free-knitting-pattern-chunky-snood-how-to-2

Step four

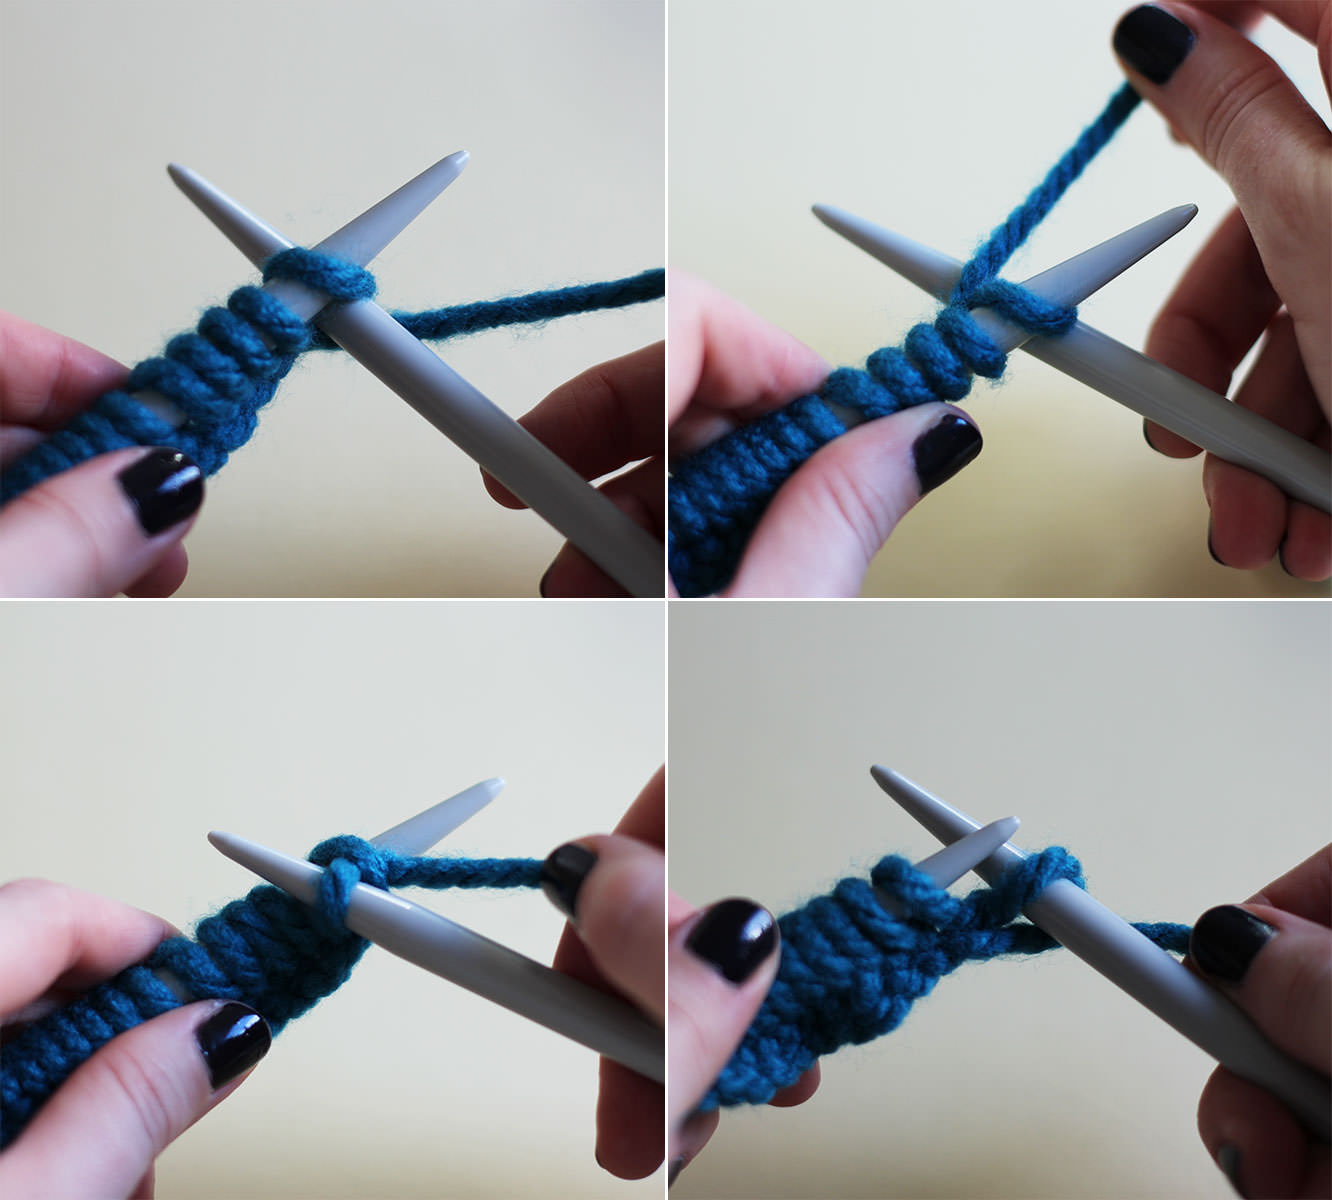
The pattern is just knit one, purl one, they are the two basic stitches.

You knit a stitch basically in the same way as casting on, but instead of hooking it back onto the left needle leave it on the right one.

free-knitting-pattern-chunky-snood-how-to-3

Step five

The second stitch is a purl. For this one place the wool in front of the knitting and push the right needle through the loop in front of the left. Wrap the wool around it and take it through to the back and pull the stitch off.

HAVEN’T GOT A CLUE WHAT I MEAN AND CAN’T UNDERSTAND FROM THE PHOTOS?? That’s ok. I have the youtube.

The video shows a knit, purl, knit, purl sequence. Yeah. I’ll work on my videography skills, but you get the gist.

Step six

Repeat the knit, purl, knit, purl until you get to the end of the row. Turn the knitting round and k1 (knit one), p1 (purl one) until the end. Keep going.

free-knitting-pattern-chunky-snood-how-to-7

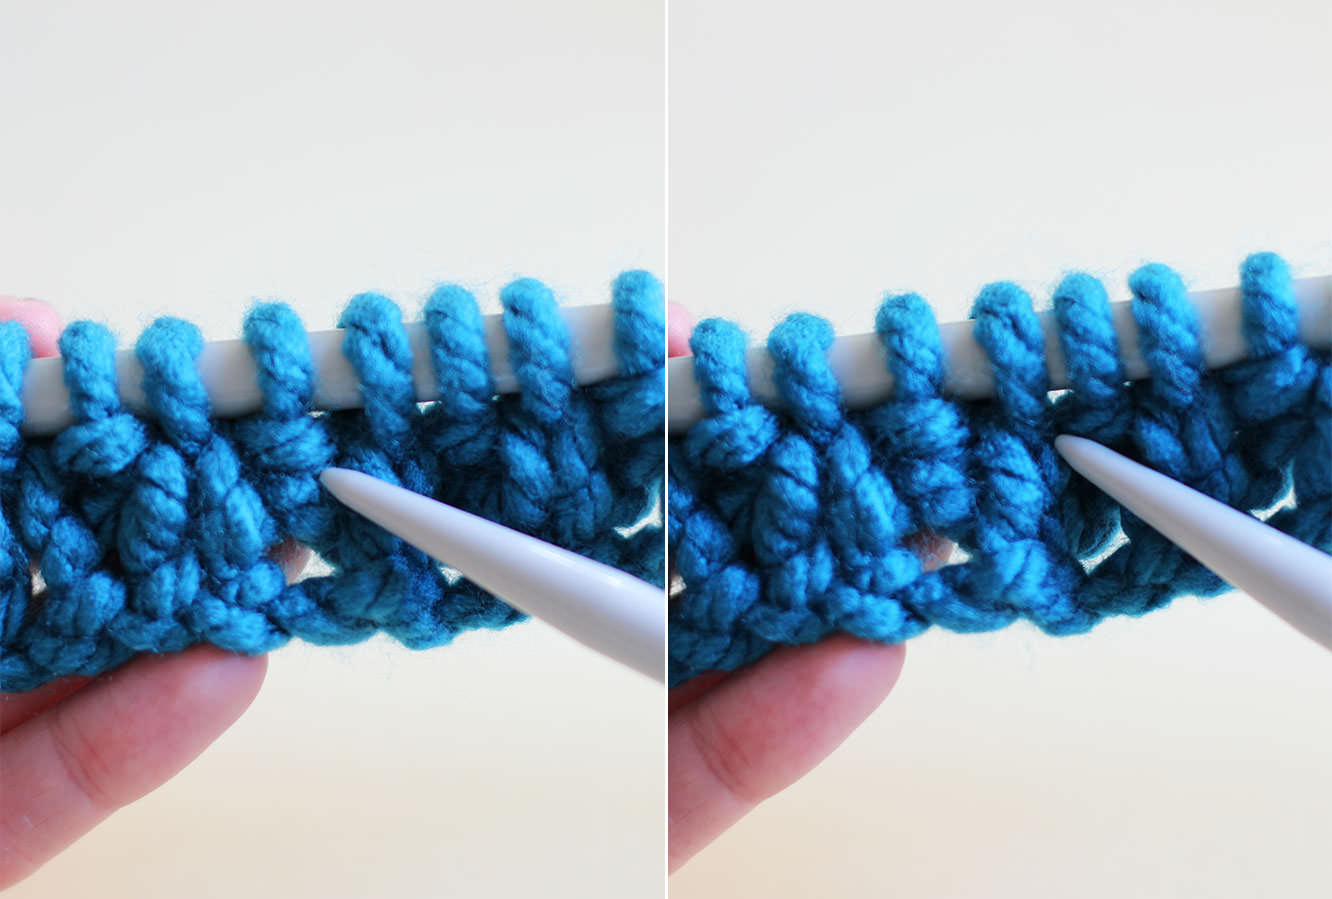
The picture above shows the difference between a knit and a purl just in case you get lost at any point. On the left is a purl, you can see a little bump (sort of like a pearl, geddit?) and on the right is a knit. They are basically the same stitch but in opposite directions.

This is where I got a bit carried away with my new youtube account…

Don’t worry, I know I’m super cool.

free-knitting-pattern-chunky-snood-how-to-4

Step seven

As you get close to the end of the wool you need to make sure you’re keeping enough to cast off and sew your snood together. Once the ball has basically unravelled so you can grab the end without getting in a mess, measure five times the width of the knitting from the end and tie a slip knot to remind you to stop as close as possible to that point.

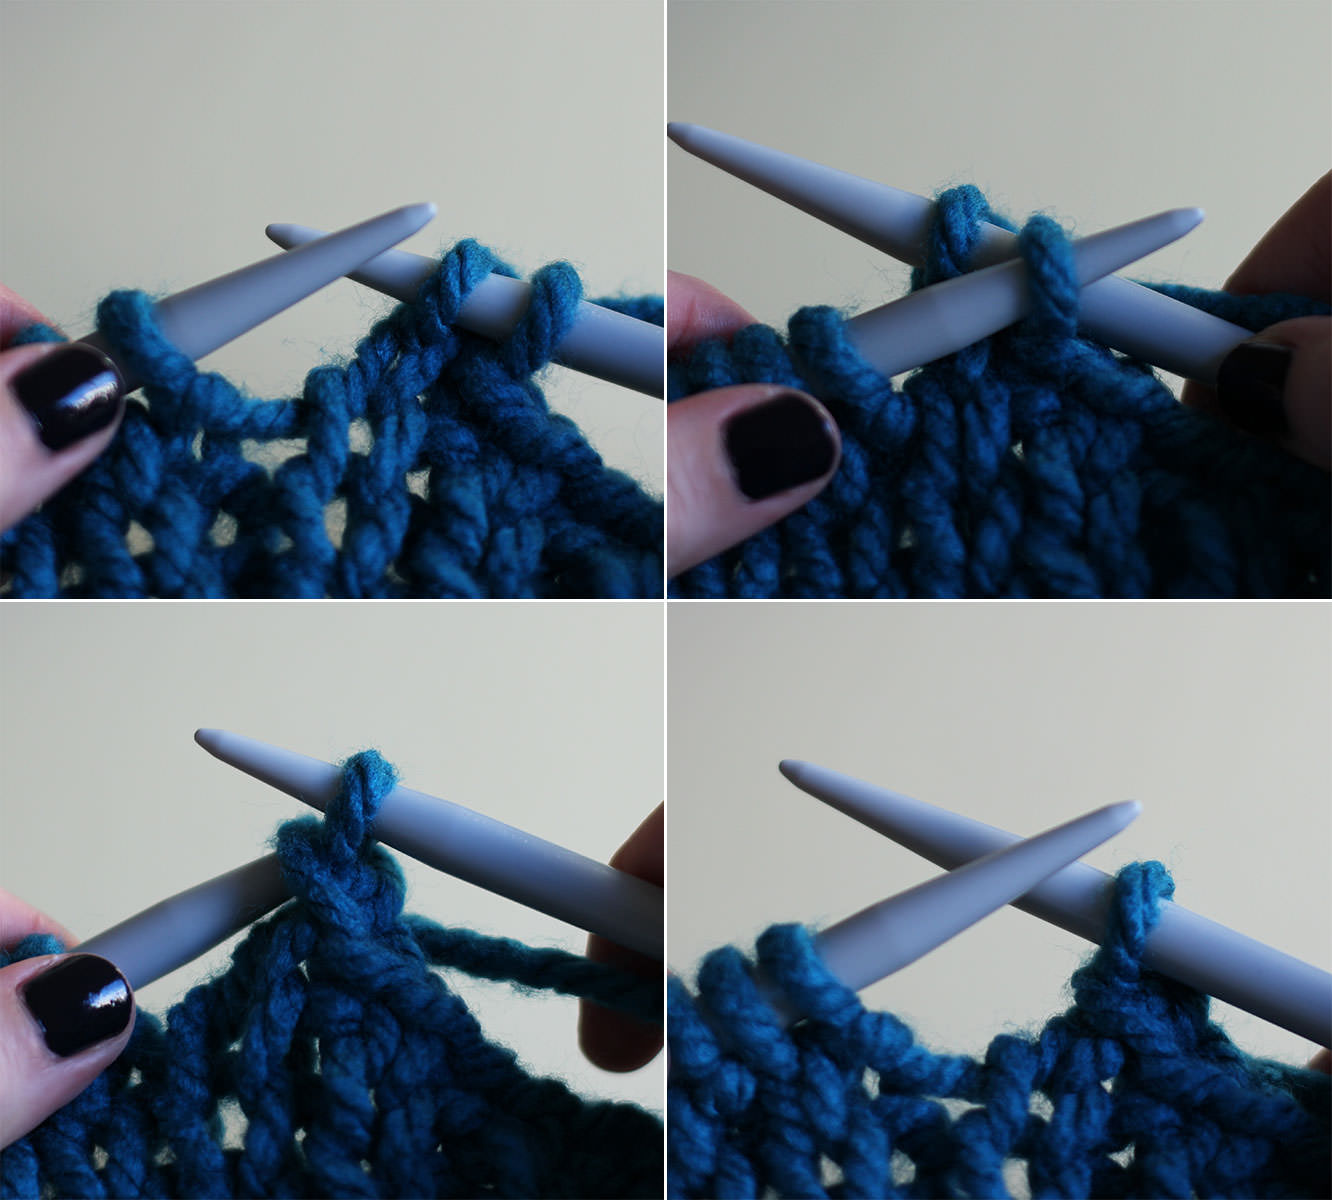
To cast off, knit two, then loop the first over the second. Knit another one and repeat.

Sorry, what’s that? You could really do with another youtube video? Of course.

free-knitting-pattern-chunky-snood-how-to-8

Step eight

Once you get to the last stitch remove the needle and pull the end of the thread through the loop and pull to tighten.

free-knitting-pattern-chunky-snood-how-to-9

Step nine

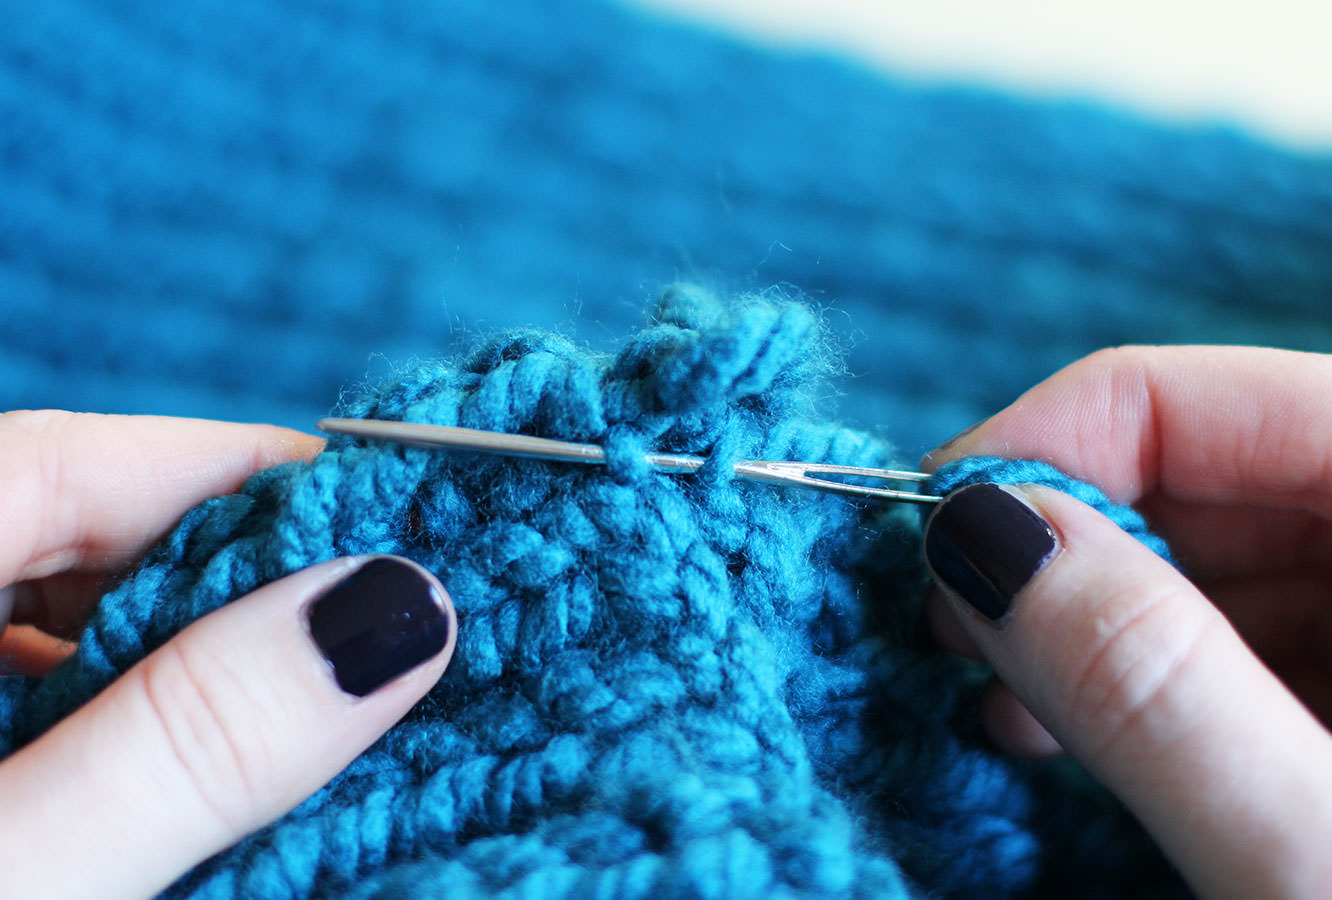
Place the two ends together use a wool needle or a crochet hook to sew together. I find it best to go side to side like this.

After I did this I stretched it using the backs of two chairs, I tend to knit a little tight, you might not need to do that. The other way would be to dampen it and pin it out on the carpet but the chair method just seemed a bit easier.

free-knitting-pattern-chunky-snood-how-to-11

free-knitting-pattern-chunky-snood-how-to-12

Step ten

Put it on your beautiful friend.