Category: Cake

Time for tea

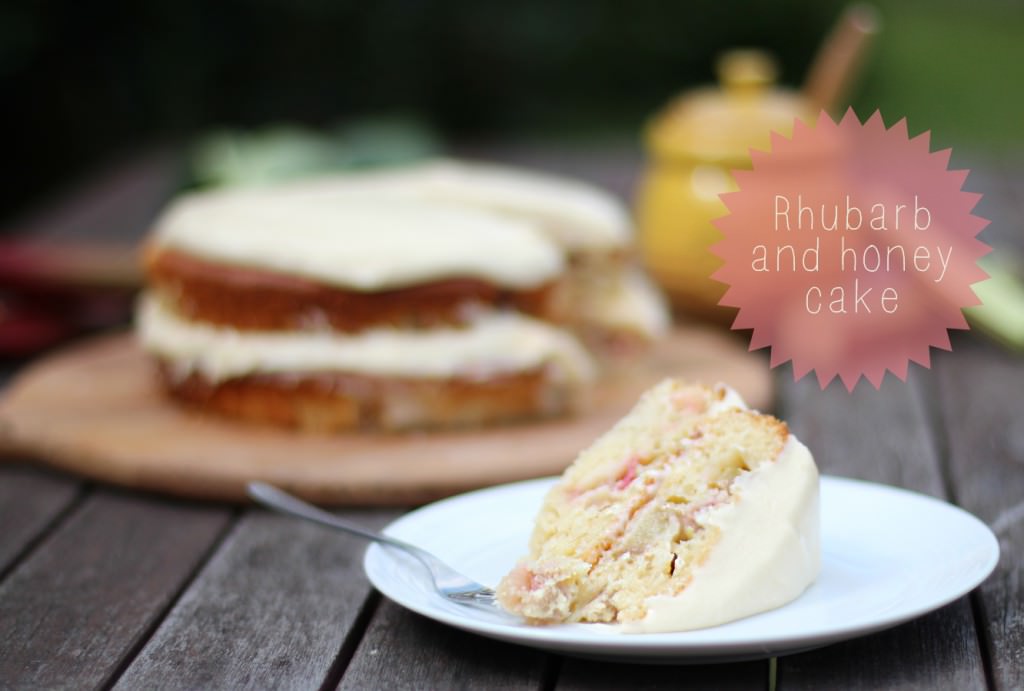
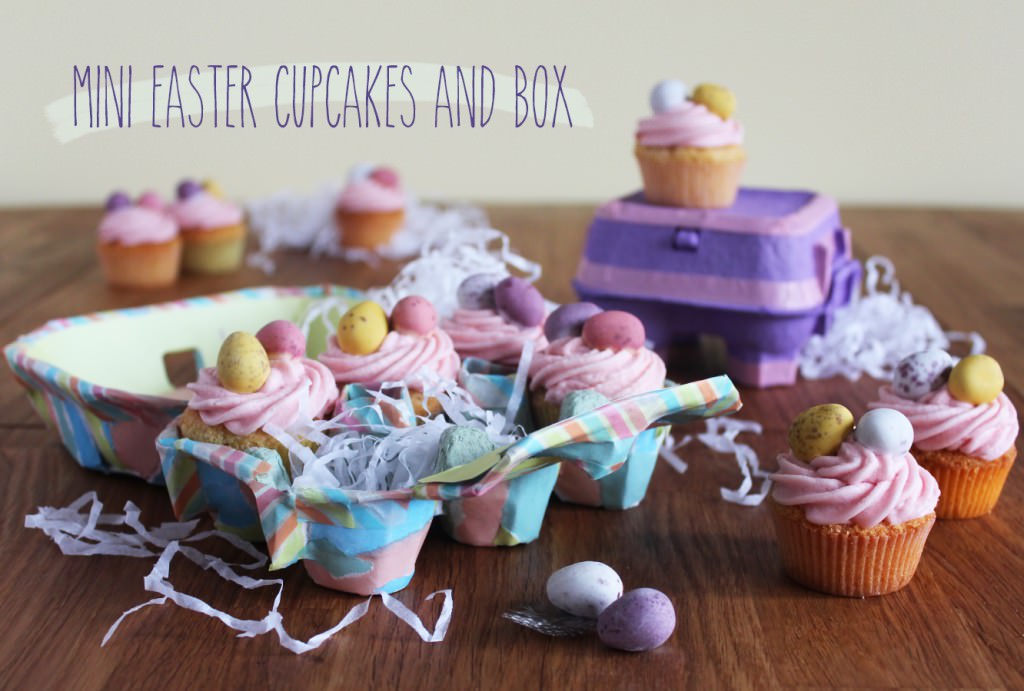
I might have mentioned just a few times all the weddings I’m going to this summer? Just once or twice maybe? The resultant hen/bachelorette/bridal showers are a wonderful excuse to flex my culinary muscles on some afternoon tea sweet treats. So the next couple of weeks feature just that.

There’s one here already if you’re looking to get started, and this little post contains madeleines, a tiny French delight perfect for scoffing with tea. I decided to add some extra flavours to the classic lemon and vanilla, I’m not convinced the French would be too impressed, but you can thank me later.
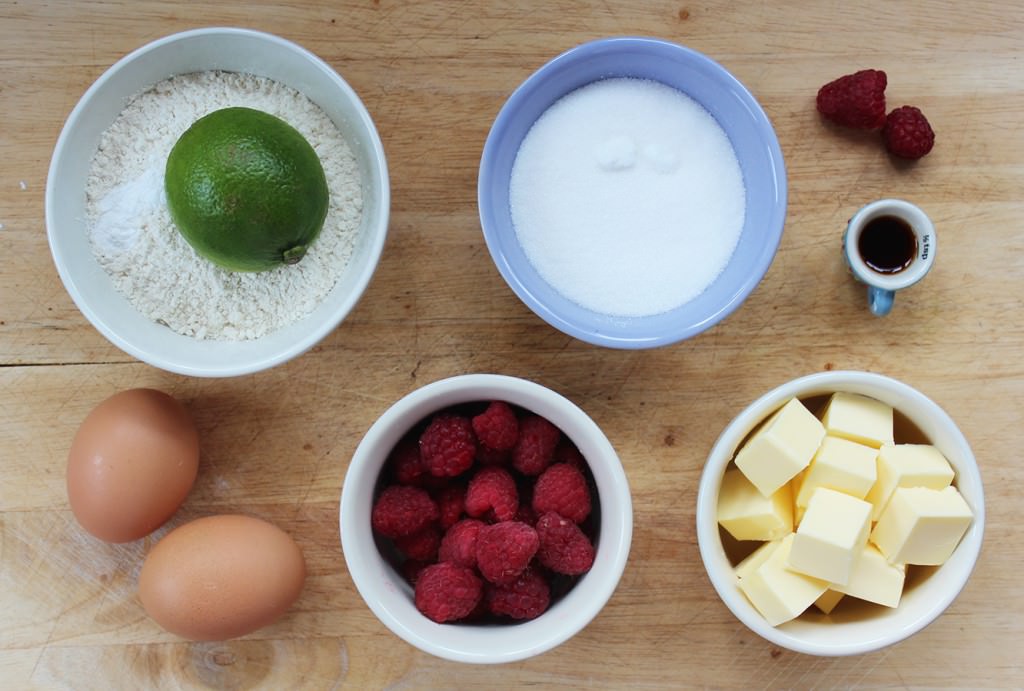
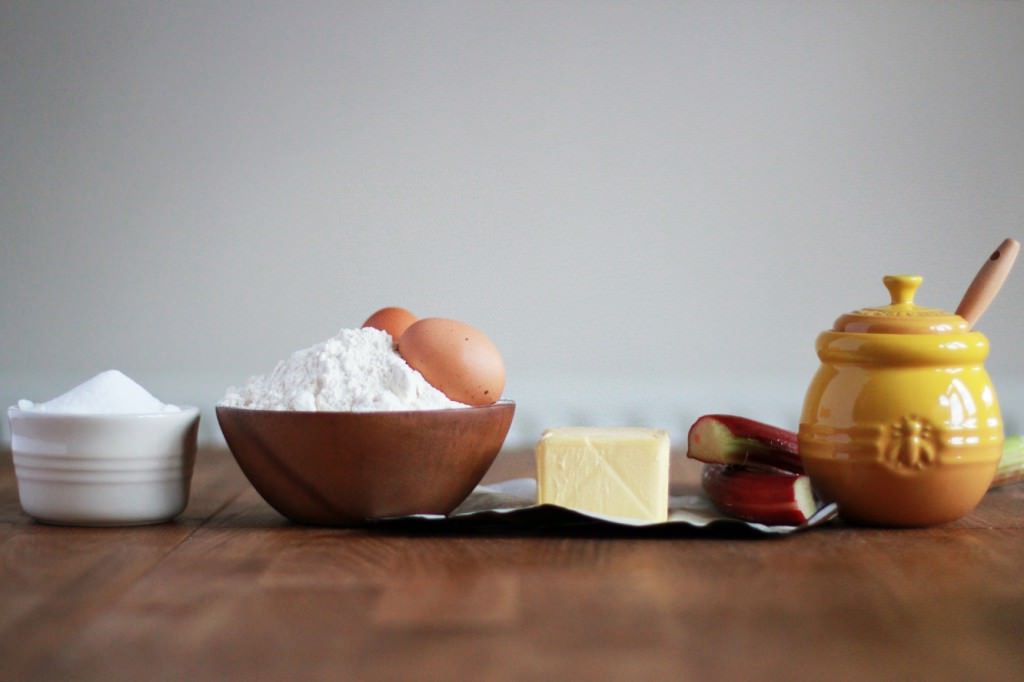
Lime-and-raspberry-madeleines

You will need:

75g/2.5 oz Caster sugar

75g/2.5 oz Plain flour

60g/2 oz Butter

2 eggs

1 tsp Vanilla extract

1 tsp Baking powder

60g/2 oz Raspberries
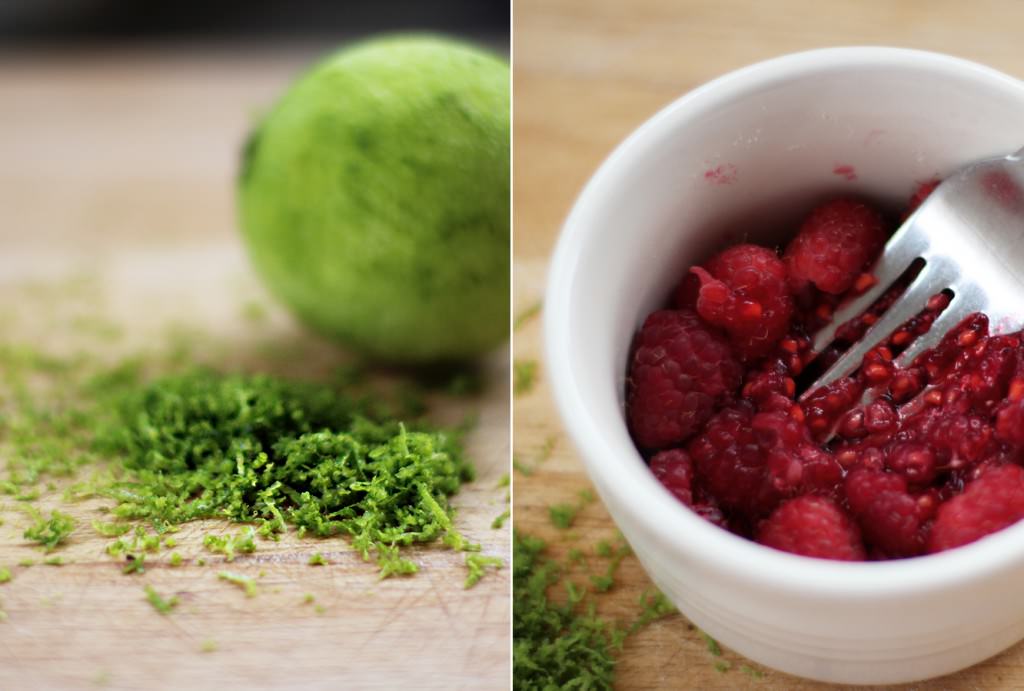
Zest of a lime

200g/7 oz White chocolate

Madeleine mould

Makes 10000000 (I’m sorry I forgot to count, but about 50 mini ones – maybe 25 normal size? Sufficient anyway)
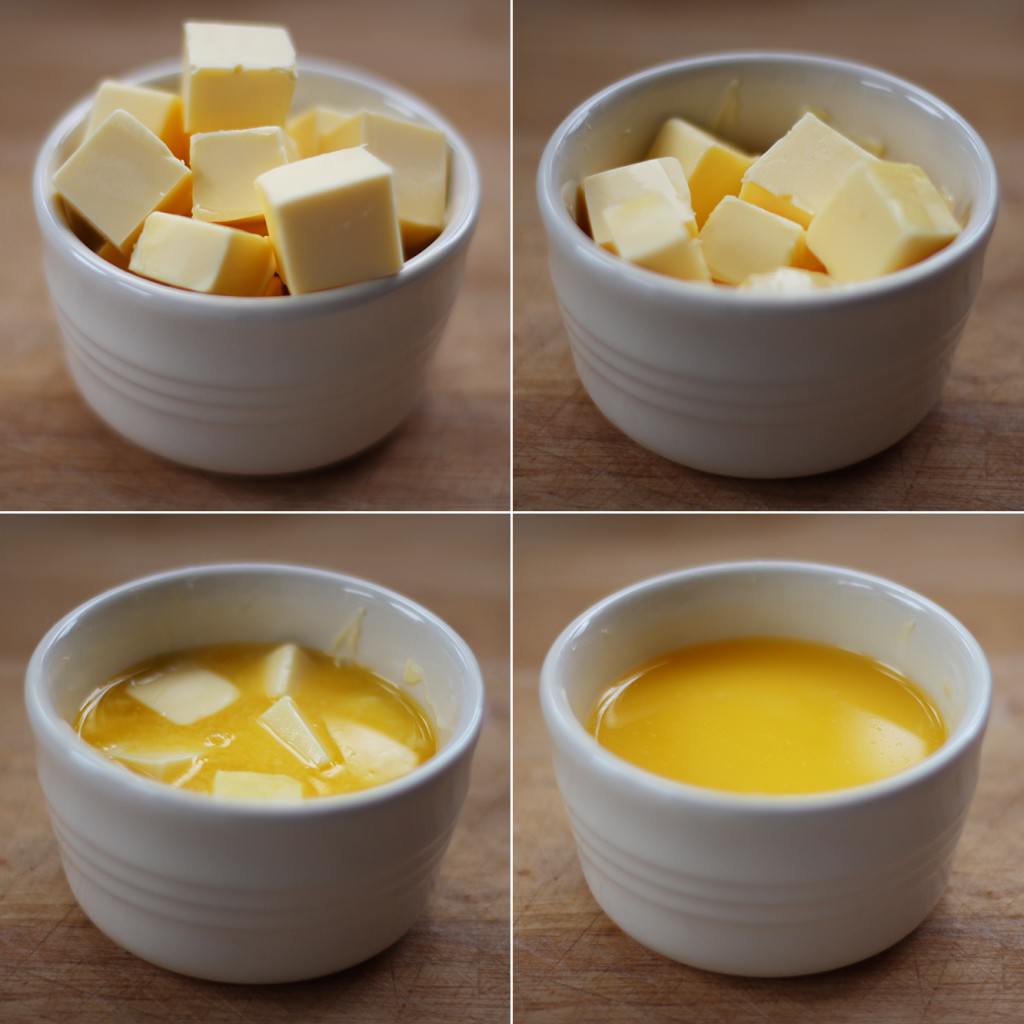
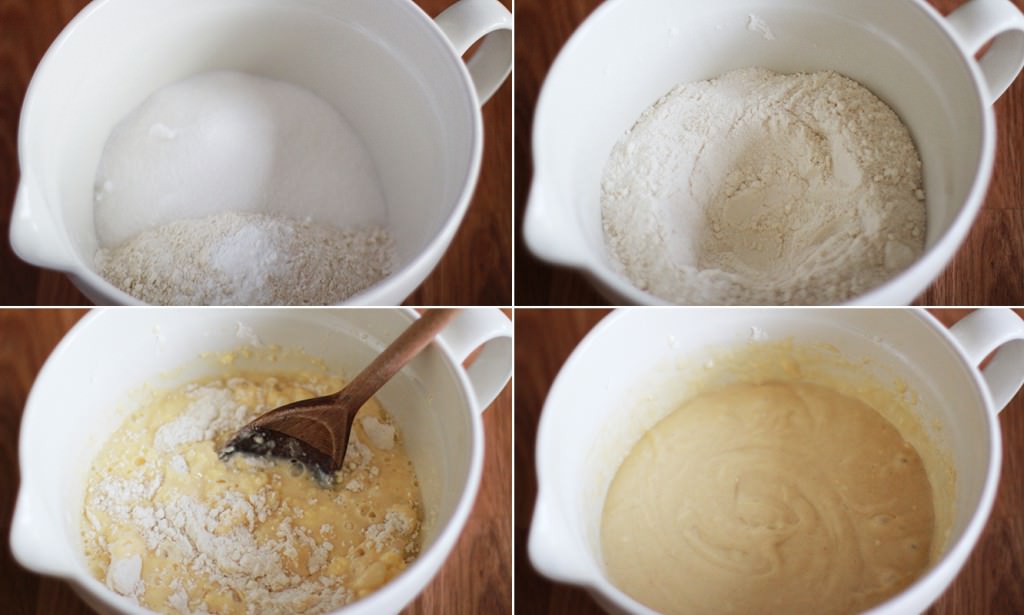
Lime-and-raspberry-madeleines-2

Step one

Melt all of the butter slowly in the microwave. Do this gradually until it’s just melted, none of this burning it until your house smells like popcorn nonsense please.
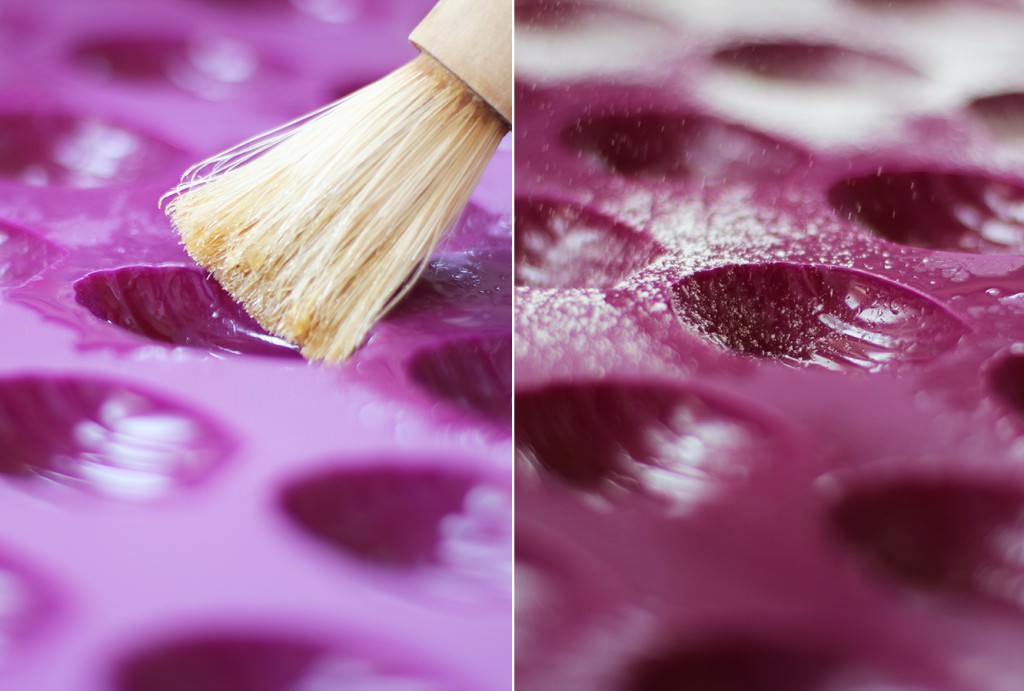
Lime-and-raspberry-madeleines-3

Step two

Use a splash of the butter and a pastry brush (or your (clean) fingers) to grease the mould, then dust with flour. To tell the truth if your mould is silicone I’m not entirely convinced this is necessary.

Lime-and-raspberry-madeleines-4

Step three

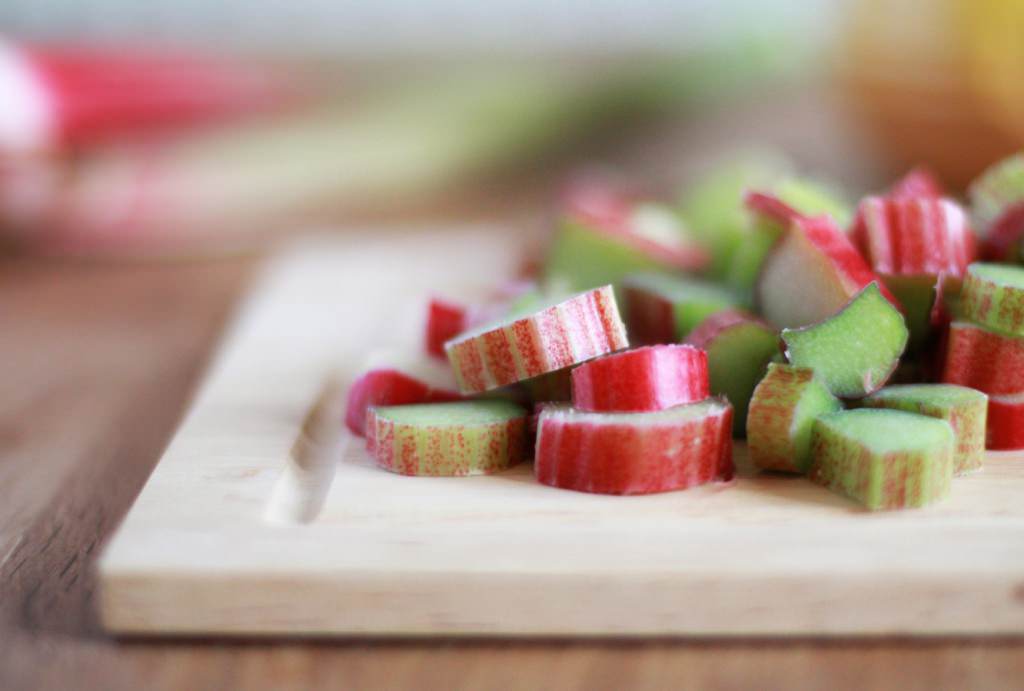
Grate a lime using the finest side of your grater and crush the raspberries with a fork. I was a little over zealous with the crushing, which made my mixture a bit greyish in the end, so don’t overdo it.

Lime-and-raspberry-madeleines-5

Step four

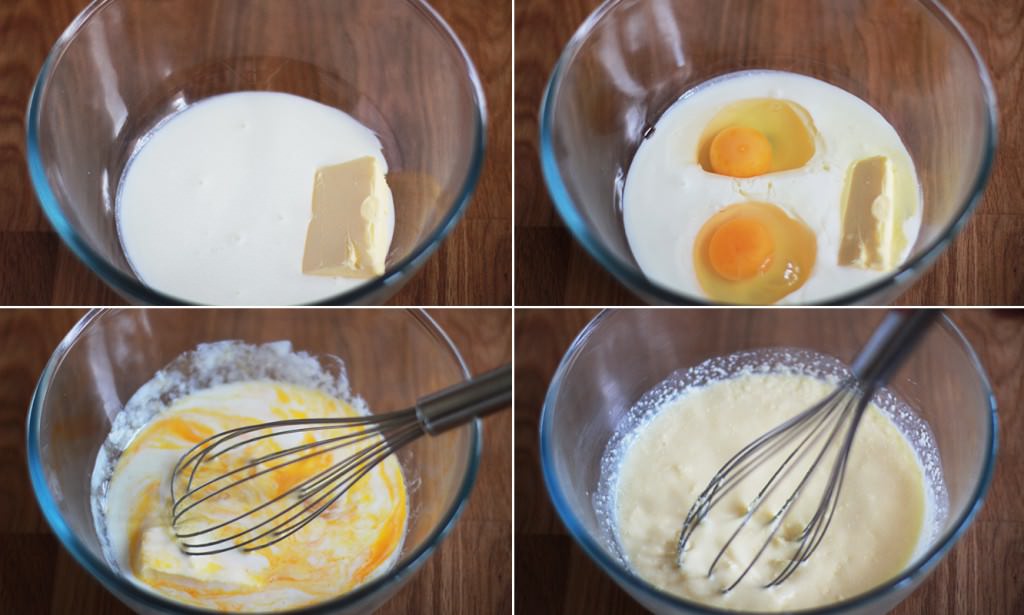
Finally time to make some cake!

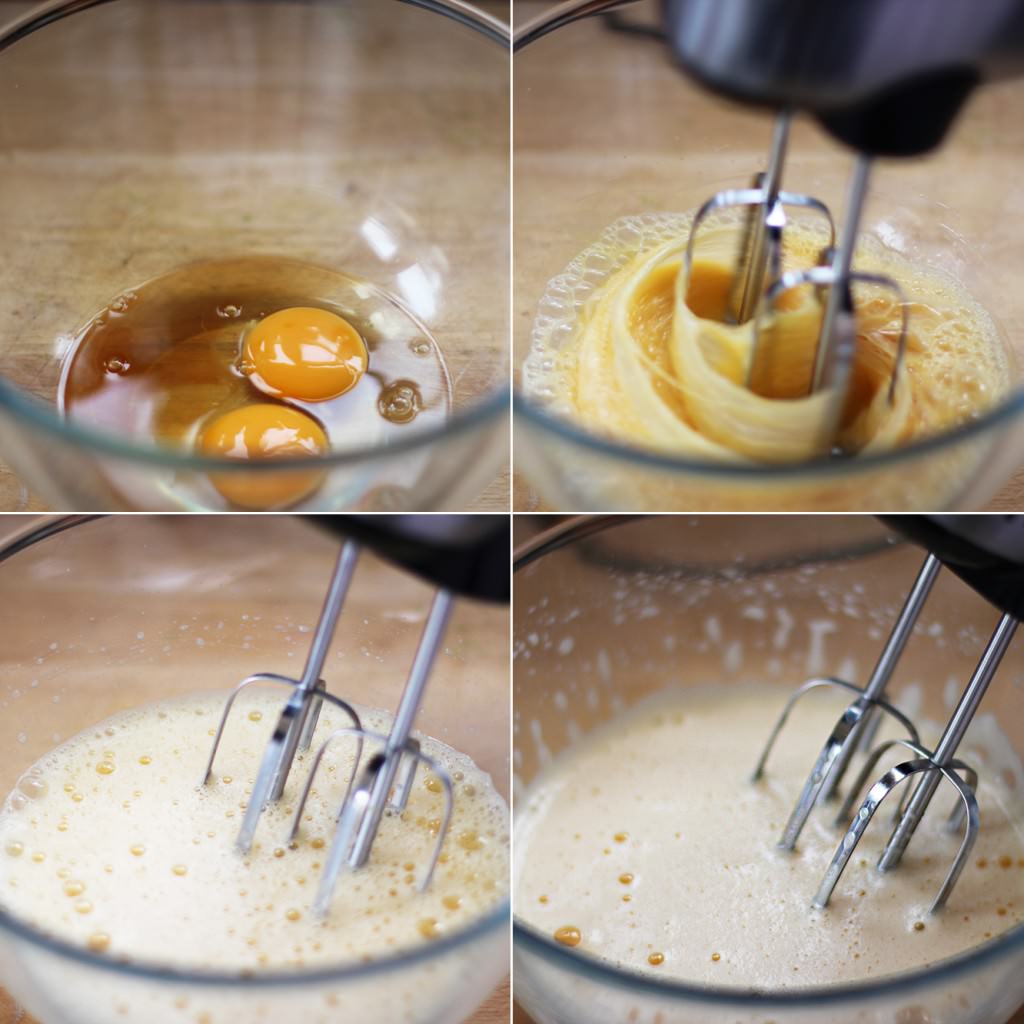
Whisk the eggs until they are light, fluffy and start to thicken. If you don’t know what that means, then whisk them until they look like the bottom right hand picture.

Lime-and-raspberry-madeleines-6

Step five

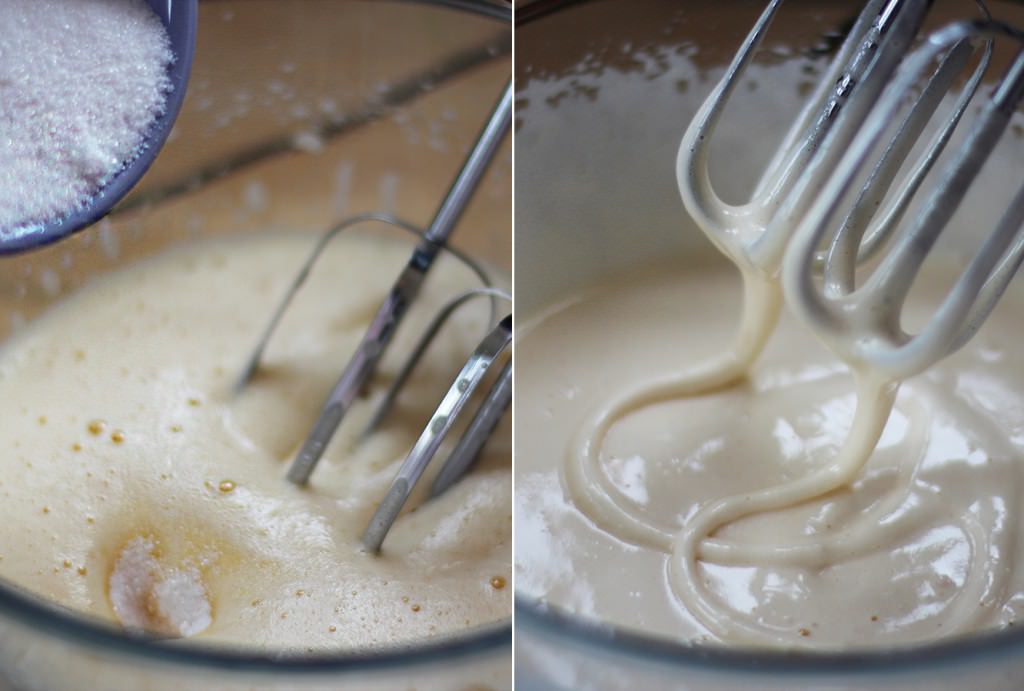
Carry on whisking gradually adding the sugar. The mixture will thicken and will look less bubbly. Keep going until lifting your whisk leaves ribbons of mixture in the bowl.

Lime-and-raspberry-madeleines-7

Step six, seven and eight

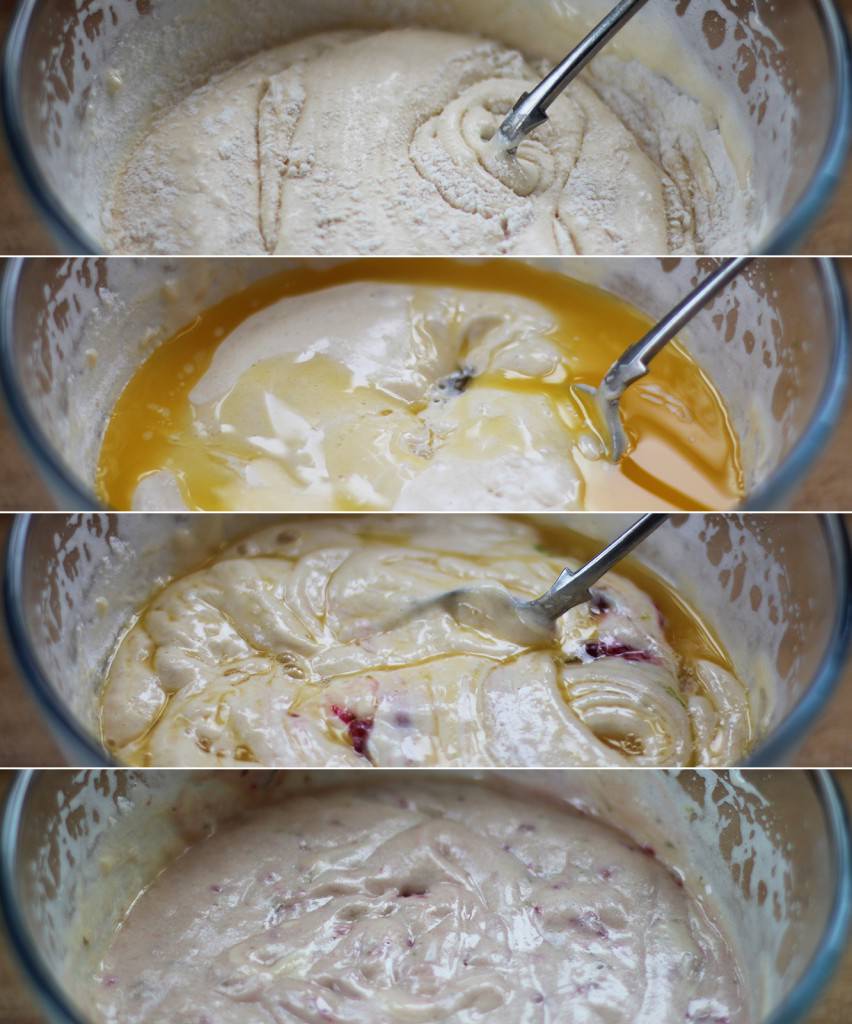
Gently fold in the flour and baking powder with a metal spoon until fully combined.

Add the melted butter. This is weird right? Thanks France…

Whilst folding in the butter add the crushed raspberries, lime zest and vanilla extract. Keep stirring until it’s completely combined. Remember though, softly softly…think about stirring a bowl of baby bunnies.

Lime-and-raspberry-madeleines-8

Step nine

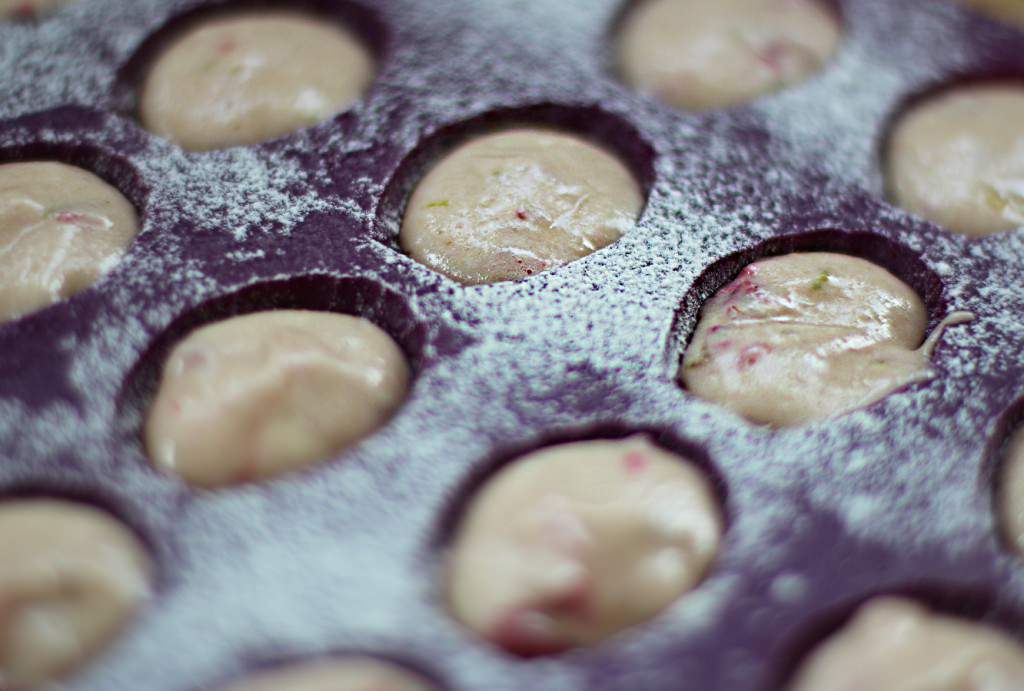
Spoon into mould and cook for 15 minutes on Gas mark 5/190 C/375 F. Leave to cool.
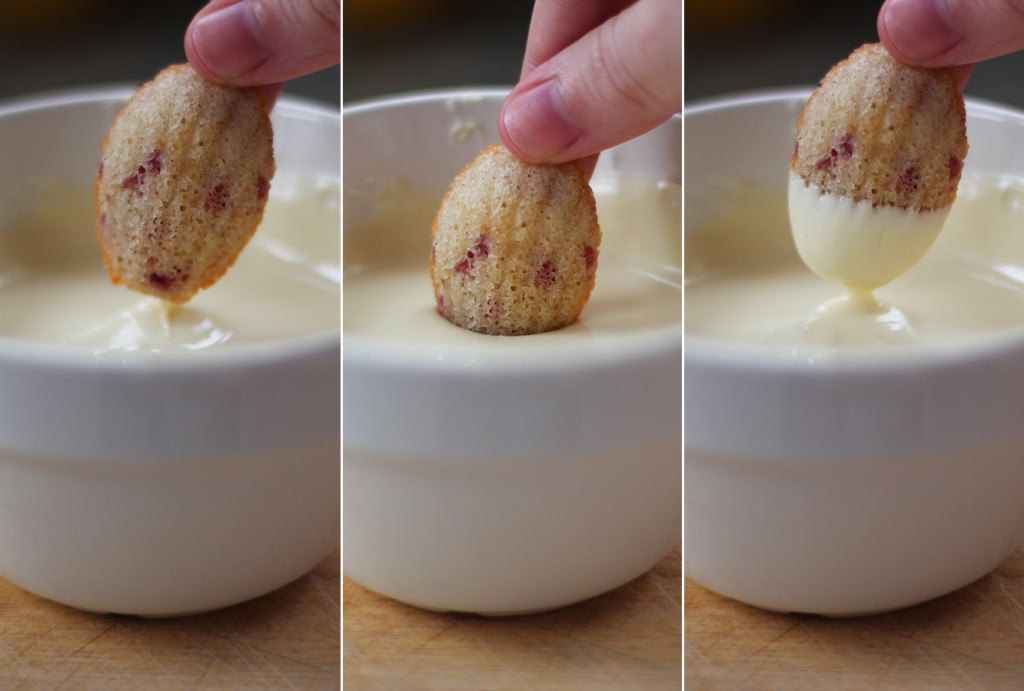
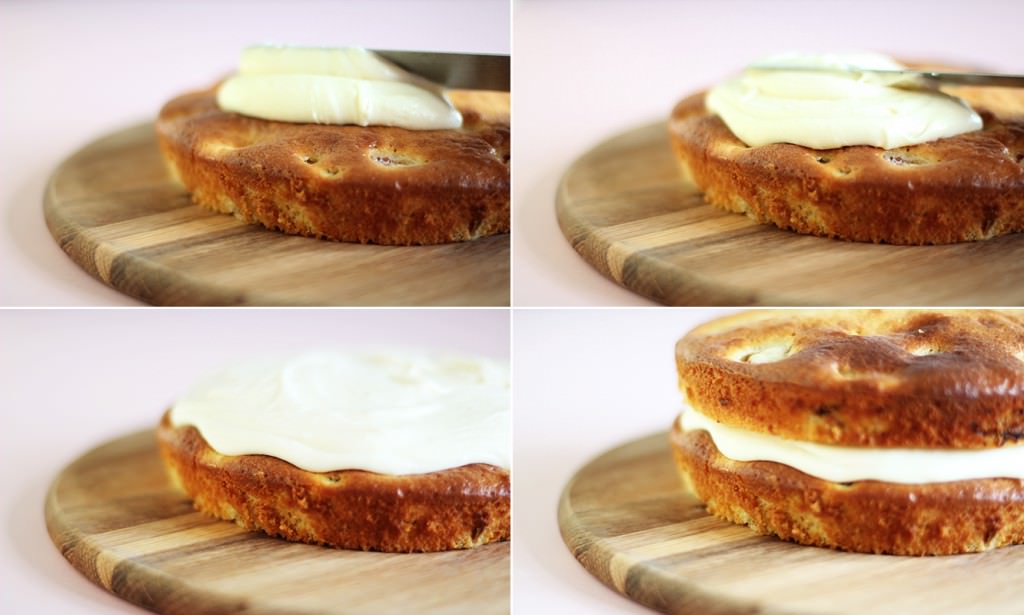
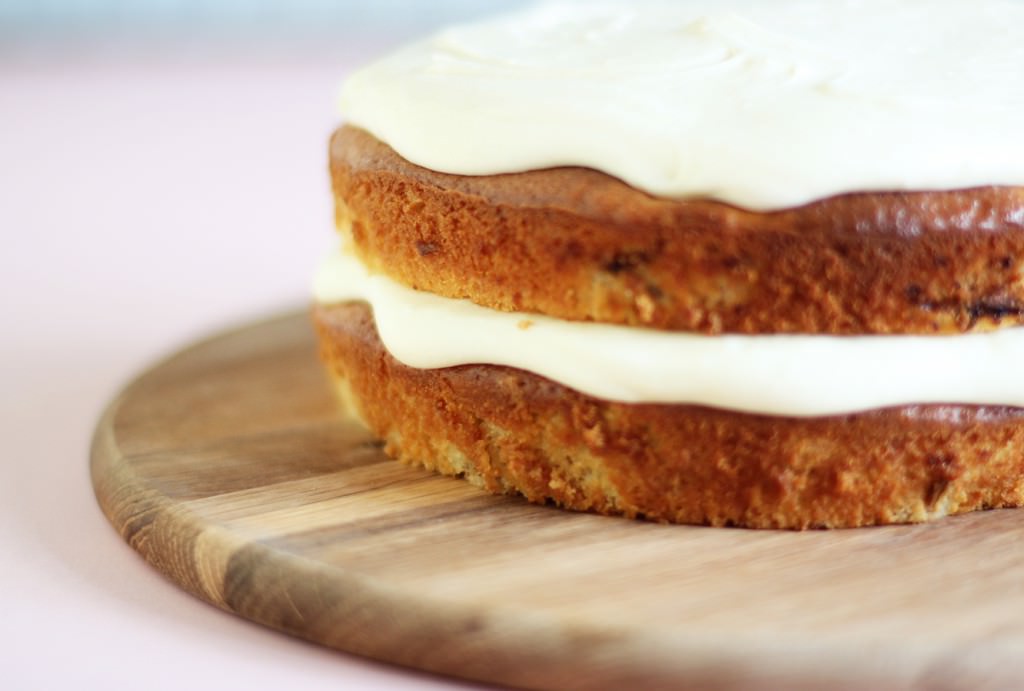
Lime-and-raspberry-madeleines-9

Step ten

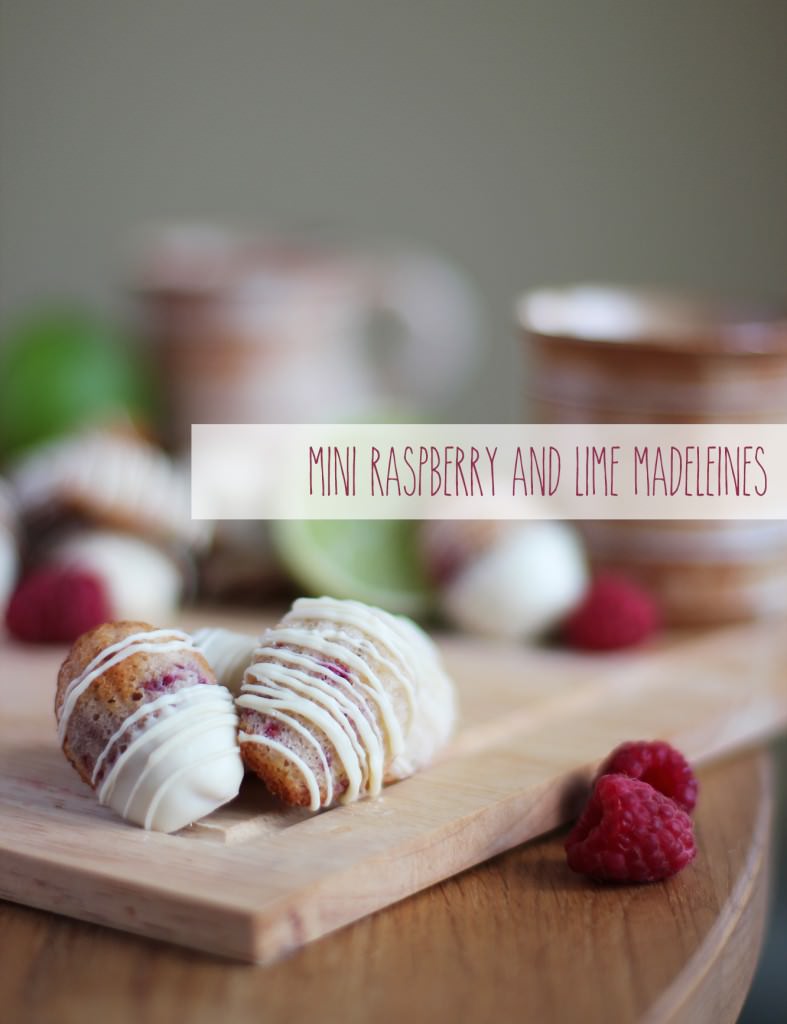
Once your madeleines have cooled melt some white chocolate in the microwave and give them a little dunk. I also used a piping bag and the remaining chocolate to drizzle over them when I was done dipping.

Lime-and-raspberry-madeleines-10

Step eleven

Legitimately use the word voila.


Rhubarb rhubarb rhubarb

Summer for many a gardener means plucking berries from their carefully loved and tended to allotments. Now, in recent years Ma has joined the grow-your-own trend with considerable zeal. To be quite honest this surprised us all immensely, as besides the single hardiest house plant you have ever known (surviving some very aggressive re-potting exercises), everything green that has entered the house since I can remember has wilted before our eyes. It’s a curse. There are no green fingers under this roof.

Fortunately, along with Mother’s rather optimistic plan to convert a section of the garden into a fruit and veg patch, came Ed; one of her colleagues complete with an allotment and a willingness to provide some plants he had given the best possible start in life.

Against all the odds (and I honestly cannot overstate said odds), fruit and vegetables began to grow! This year I decided to combine my love of baking and Mum’s little crop to give you a delicious rhubarb and honey cake recipe.

Don’t turn your nose up until you’ve tried it; I’m a chocolate girl through and through but even I have been back to the kitchen for a second slice of this chap.

First though, I think it’s only fair to offer a little round of applause to the grower for these beauties. Well done Mum, I wish I could say I always believed in you, A*.

rhubarb-honey-cake-recipe-1

rhubarb-honey-cake-recipe-2

You will need

For the cake

250g/9 oz Caster sugar

250g/9oz Self raising flour

200ml Buttermilk

50g/2 oz Butter

2 Large eggs

1tsp Baking powder

350g/12 oz Rhubarb

For the icing

350g/12 oz Icing sugar

150g/5 oz Softened butter

150g/5 oz Honey

50ml Buttermilk

1-2tsp Vanilla Extract

rhubarb-honey-cake-recipe-3

Step one

Combine the buttermilk, eggs and butter.

Don’t worry if it’s a bit ‘curdy’ at this stage, if the butter isn’t super soft that will happen, but it’s not an issue, honest!

rhubarb-honey-cake-recipe-4

Step two

Mix together the sugar, baking powder and flour in a separate bowl. Form a well in the middle.

Step three

Pour the wet ingredients into the dry and stir until smooth. This cake mix is a little more batter-like than your average because of the buttermilk, so if you’re used to something a bit less sloppy, don’t worry.

rhubarb-honey-cake-recipe-5

Step four

Chop up the rhubarb into slices approx 1cm thick. Get rid of any leaves and the weird husk type bits on the bottom if it’s home grown; I also got rid of a few stringy bits, but you don’t need to peel it.

Whether or not your rhubarb is forced (grown out of season) or main crop like Ma’s you don’t need to boil it or add any extra sugar when baking it into a cake like this. The sweetness of the honey and the rest of the sugar in the sponge off-sets the sharper rhubarb taste really well.

rhubarb-honey-cake-recipe-6

Step five

Grease and line two cake tins. Stir rhubarb into the batter and divide between the tins.

Bake on gas mark 4/ 180 C/ 350 F for 30-40 minutes until golden on top and it springs back when you touch the top.

rhubarb-honey-cake-recipe-7

Step six

Beat together the honey, softened butter, icing sugar, buttermilk and vanilla extract to make the buttercream icing.

It’s worth popping this in the fridge for about 30 mins before using.

rhubarb-honey-cake-recipe-8

Step seven

Once the cake has cooled completely, use a palette knife or the back of a spoon to spread half the icing onto the bottom cake. Don’t go right to the edge of the sponge, as the weight of the top cake will push it out a bit further and you don’t want it dribbling down the sides.

rhubarb-honey-cake-recipe-9

Step eight

Cover the top in icing too.

I’ll be honest, I had a little left over, but I kind of made the recipe up as I went along so I’m not sure how to adjust so you have the perfect amount of icing, so you’ll just have to use the rest on some ice-cream or something.

rhubarb-honey-cake-recipe-10

Step nine

Eat until you can’t move.

A little box of joy

In case you hadn’t noticed, Easter is fast approaching. I’m a big fan of Easter, and Spring in general. This year I’m heading to Germany to see some very wonderful people and I can’t wait.

In the meantime though, I’m busy covering everything in mini eggs and thinking up yummy Easter treats for you to get chubby eating. You’re welcome.

This one is great for kids and would make a lovely little present for the relatives or anyone else you might be seeing over the next few weeks.

Mini-Easter-Cupcakes-Recipe-1


You will need

An egg box

Coloured paper/paints

PVA glue

For the cakes

4.5 oz/125g Self raising flour

4.5 oz/125g Butter/margarine (I use stork for most cakes)

4.5 oz/125g Caster sugar

2 eggs

1tsp Vanilla extract

For the decoration

4.5 oz/125g Unsalted butter (room temperature)

2 tbsp Full fat milk

12 oz/350g Icing sugar

Food colouring

1 tsp Vanilla extract

Mini eggs

Mini cupcake/muffin cases

Makes 24

Mini-Easter-Cupcakes-Recipe-2

Step one

Decorate your egg box. This post is just a suggestion, you can paint it, or cover it in glitter, or stick cotton wool balls all over to make it look like a sheep. Your only limit is your imagination, and the fact it’s an egg box…

Rip paper into strips. The thinner the paper the better with this really, as egg boxes, I discovered, are rather lumpy, so thicker papers don’t mould around them so well.

Mix PVA and water together in a bowl that you don’t mind getting temporarily covered in glue. You want about 3 parts PVA to 1 part water (otherwise the egg box will get soggy).

Paint the glue mix onto the surface of the box and stick paper on top. Cover each strip of paper with more glue mix as you go. This is where it all gets very Art Attack. Neil Buchanan made it look so easy…

Keep going until the whole outside is covered and leave somewhere to dry. Make sure you do the box bit a good few hours in advance of using it, ideally the day before.

Mini-Easter-Cupcakes-Recipe-3

At this stage mine looked like the above, and I still thought it was a bit messy.

Mini-Easter-Cupcakes-Recipe-4

Step two

Line the edges with washi tape. I did this to neaten mine up mainly, you possibly won’t have the same issue.

You might notice the purple box in the background…thought I would include a cheats option. That’s the box from those Cadbury’s Egg n’ Spoon things. They are amazing in case you were wondering, and now you have an excuse to buy a pack.

Cut the central doo-dahs so they are level with the rest of the sides.

Line the lid either using the same technique as before, or with cut paper and double sided tape.

Mini-Easter-Cupcakes-Recipe-5

Step three

Time to start on the cakes. I use an electric whisk to make cakes but a wooden spoon and some elbow grease is just as good.

Cream together the margarine and caster sugar. If you’re using butter bring it to room temperature before doing this. You want it to be fluffy and light like the image on the right. Honestly, Stork is the way forward for this. Cheaper too.

Mini-Easter-Cupcakes-Recipe-6

Step four

Quickly whisk/beat in the eggs and vanilla extract and then add the flour.

Stir until you have a smooth thick batter.

Heat oven to gas mark 4/180 C/350 F

Mini-Easter-Cupcakes-Recipe-7

Step five

Fill cake cases with mixture. You want them to be about two thirds full, a few of mine were too full, so if in doubt look at the above and go for a bit less!

Step six

Bake for  about 30 mins on gas mark 4/180 C/350 F. My oven is a touch special so keep an eye on yours, timings may vary.

Leave to cool completely before icing.

Step seven

Whisk together the unsalted butter, icing sugar, milk, and vanilla extract. Add food colouring of your choice.

Now, I don’t usually use a recipe for this so don’t shy away from adding a bit more icing sugar if your icing is too wet or a splash more milk if too dry.

Mini-Easter-Cupcakes-Recipe-8

Step eight

Ice your cakes and pop two mini eggs on top.

I won’t give too many piping tips as I’m still getting the hang of things myself. The general rule though is to keep the piping bag at quite an upright angle and apply even pressure.

Mini-Easter-Cupcakes-Recipe-9

Step nine

Put them in the egg box and make someone’s day that little bit more joyful.

Mini-Easter-Cupcakes-Recipe-10