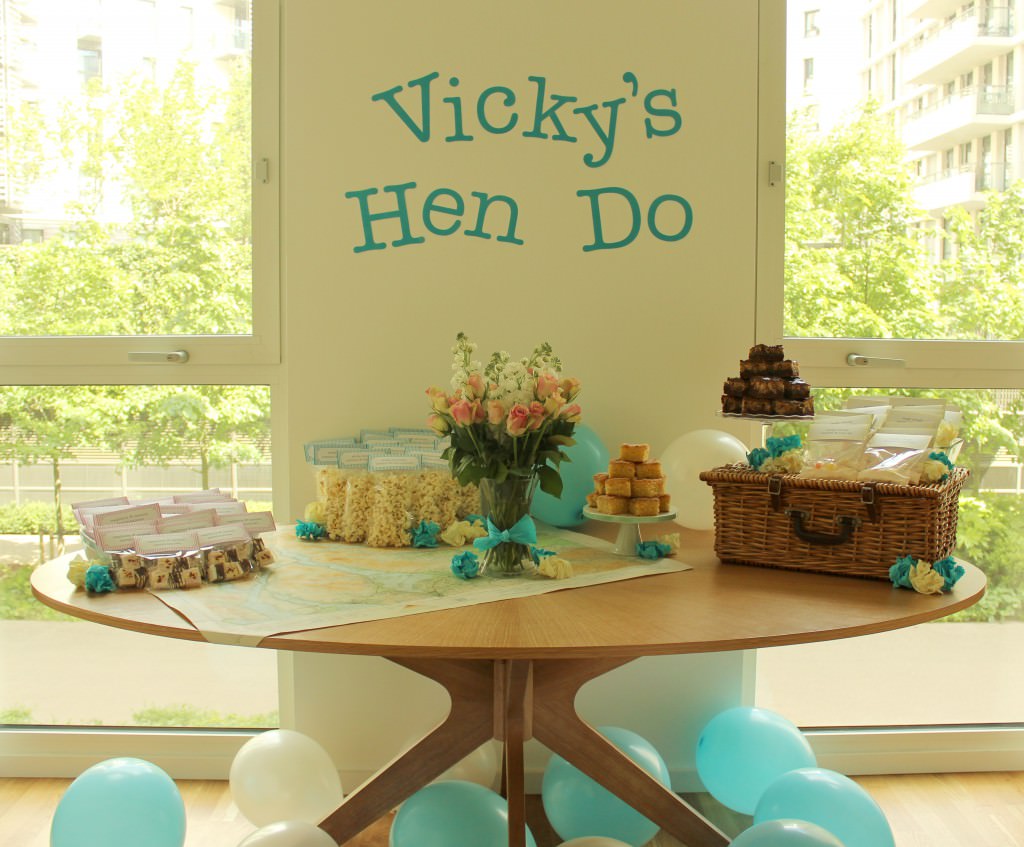
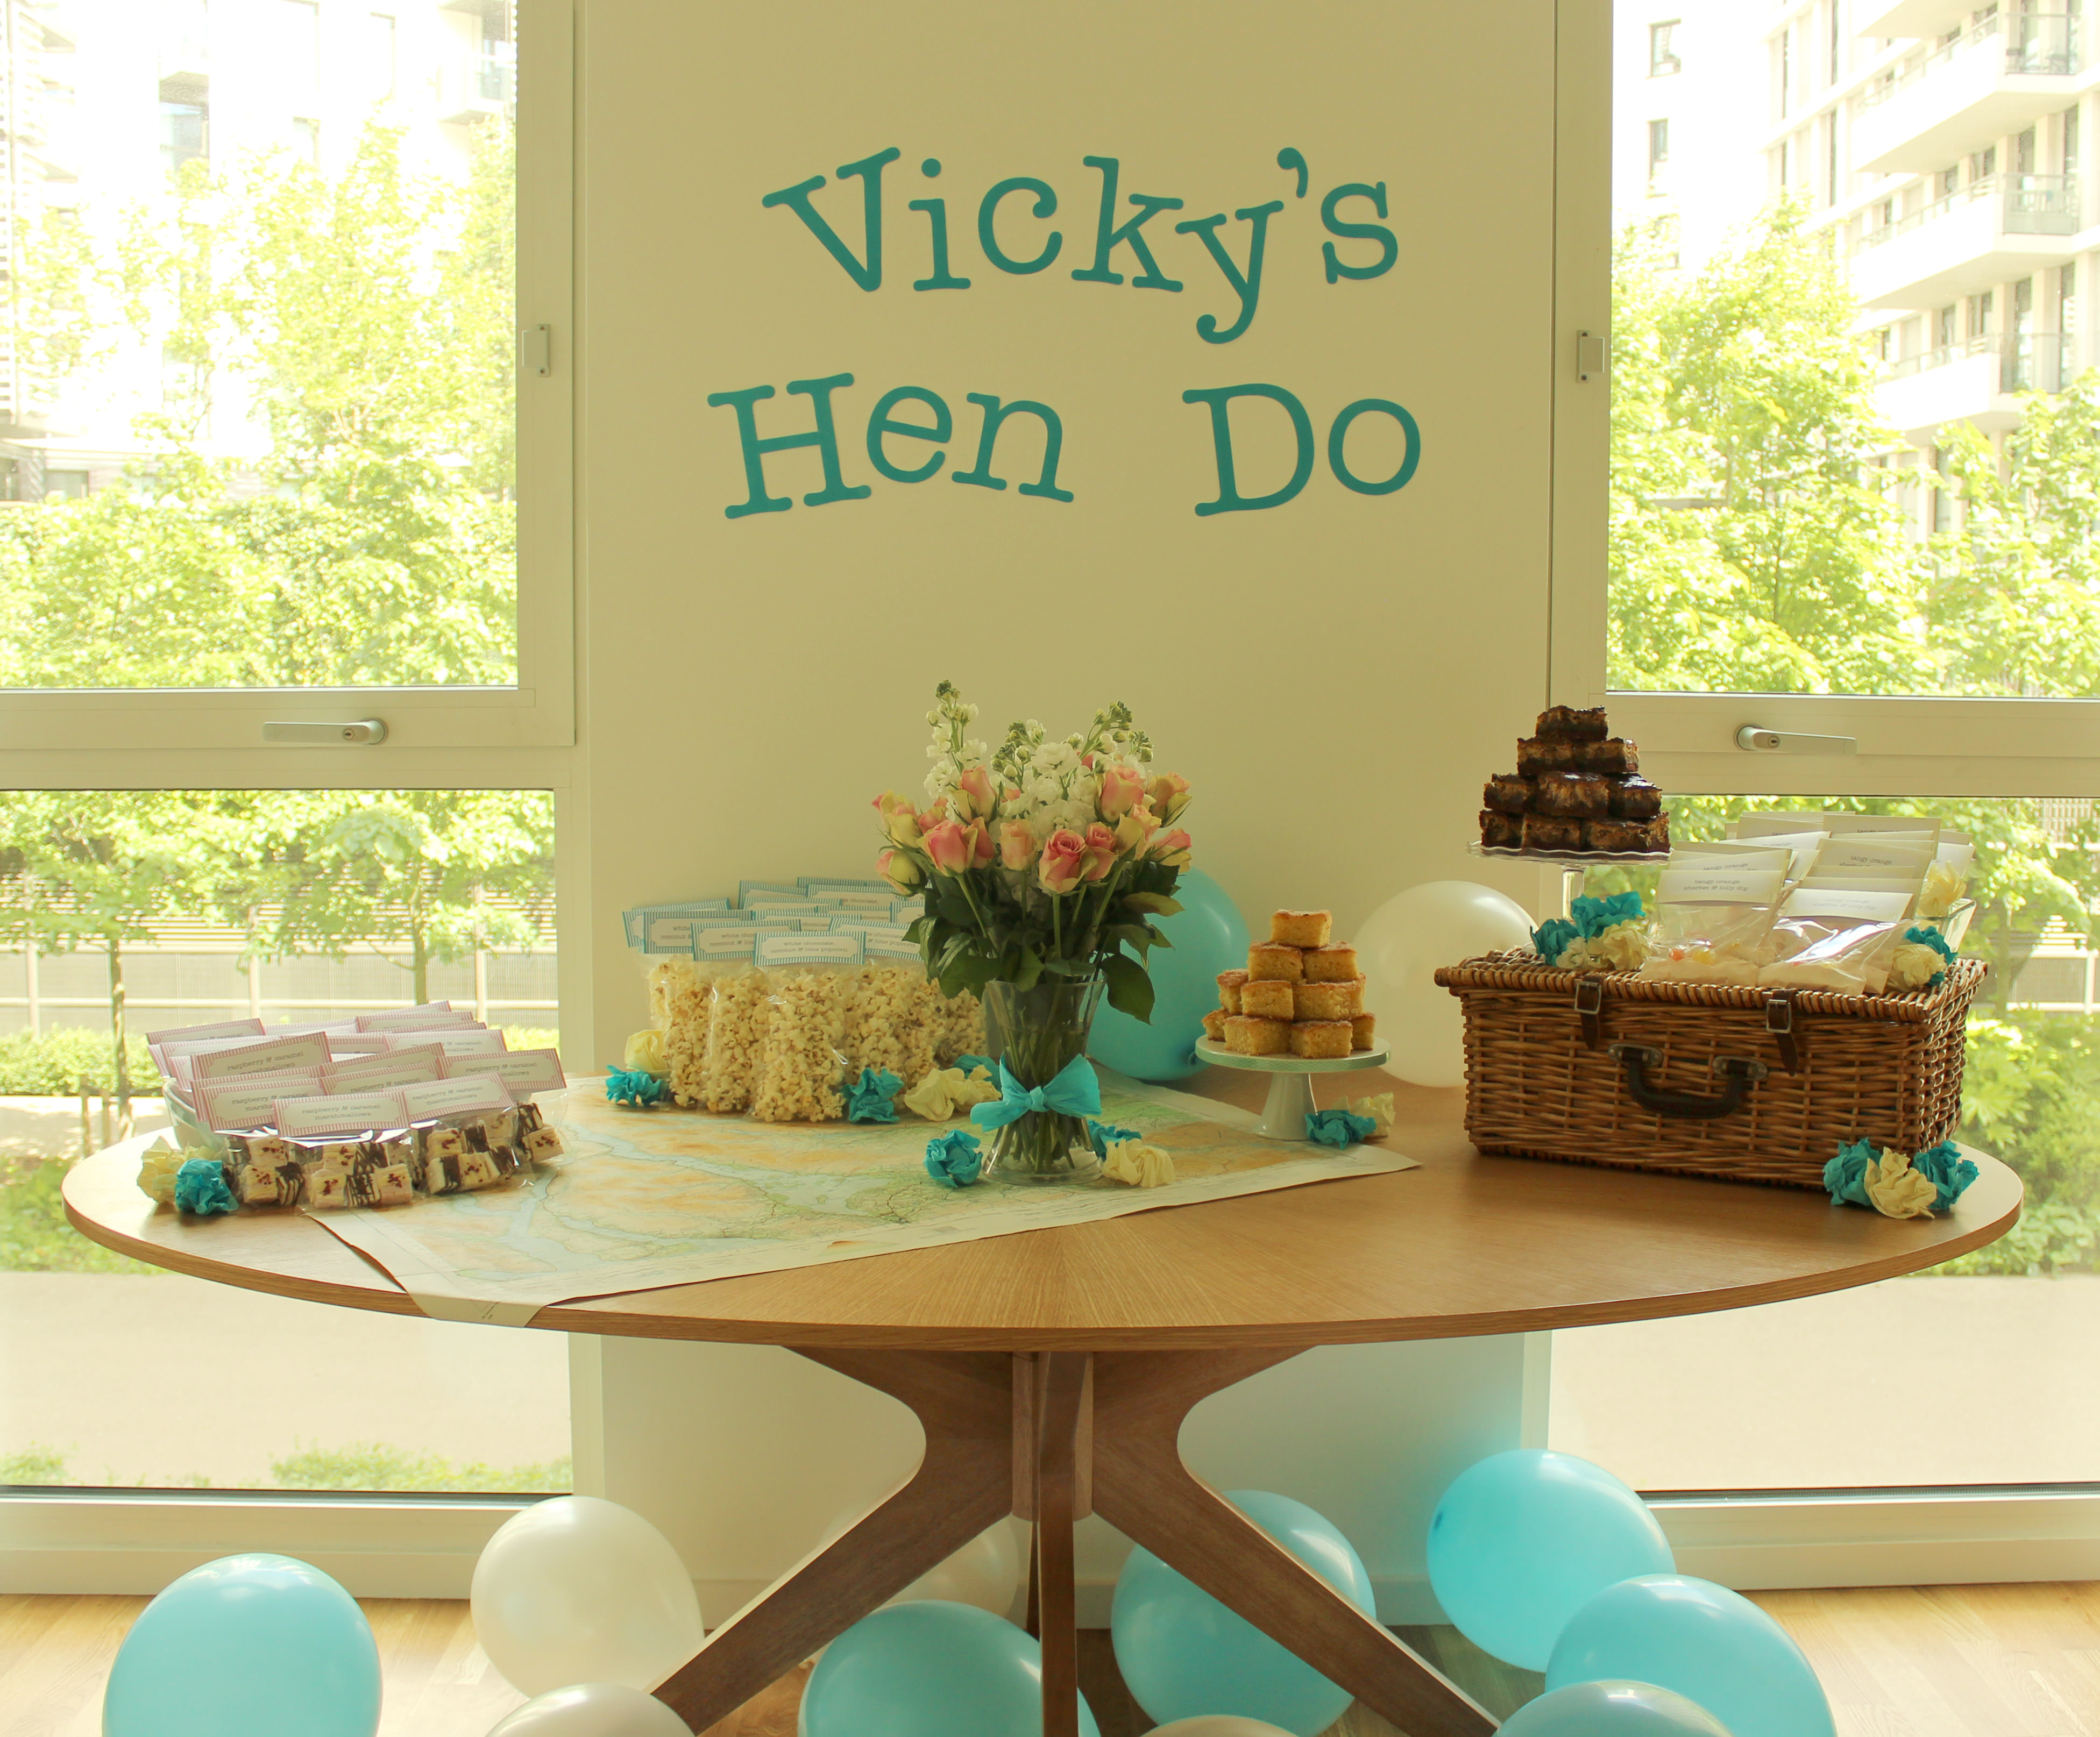
Wrapping up Vicky’s Hen Do this week with the finishing touches. You will have to excuse the fact I just scrunched up crepe paper. The plan was to make flowers, but, you know, it was 2am by the time I got to them.
In case you need a recap of the recipes in this series:
These labels (it’s quite possible your bride’s name isn’t Vicky. I used American Typewriter for the font for the sign)
Step one
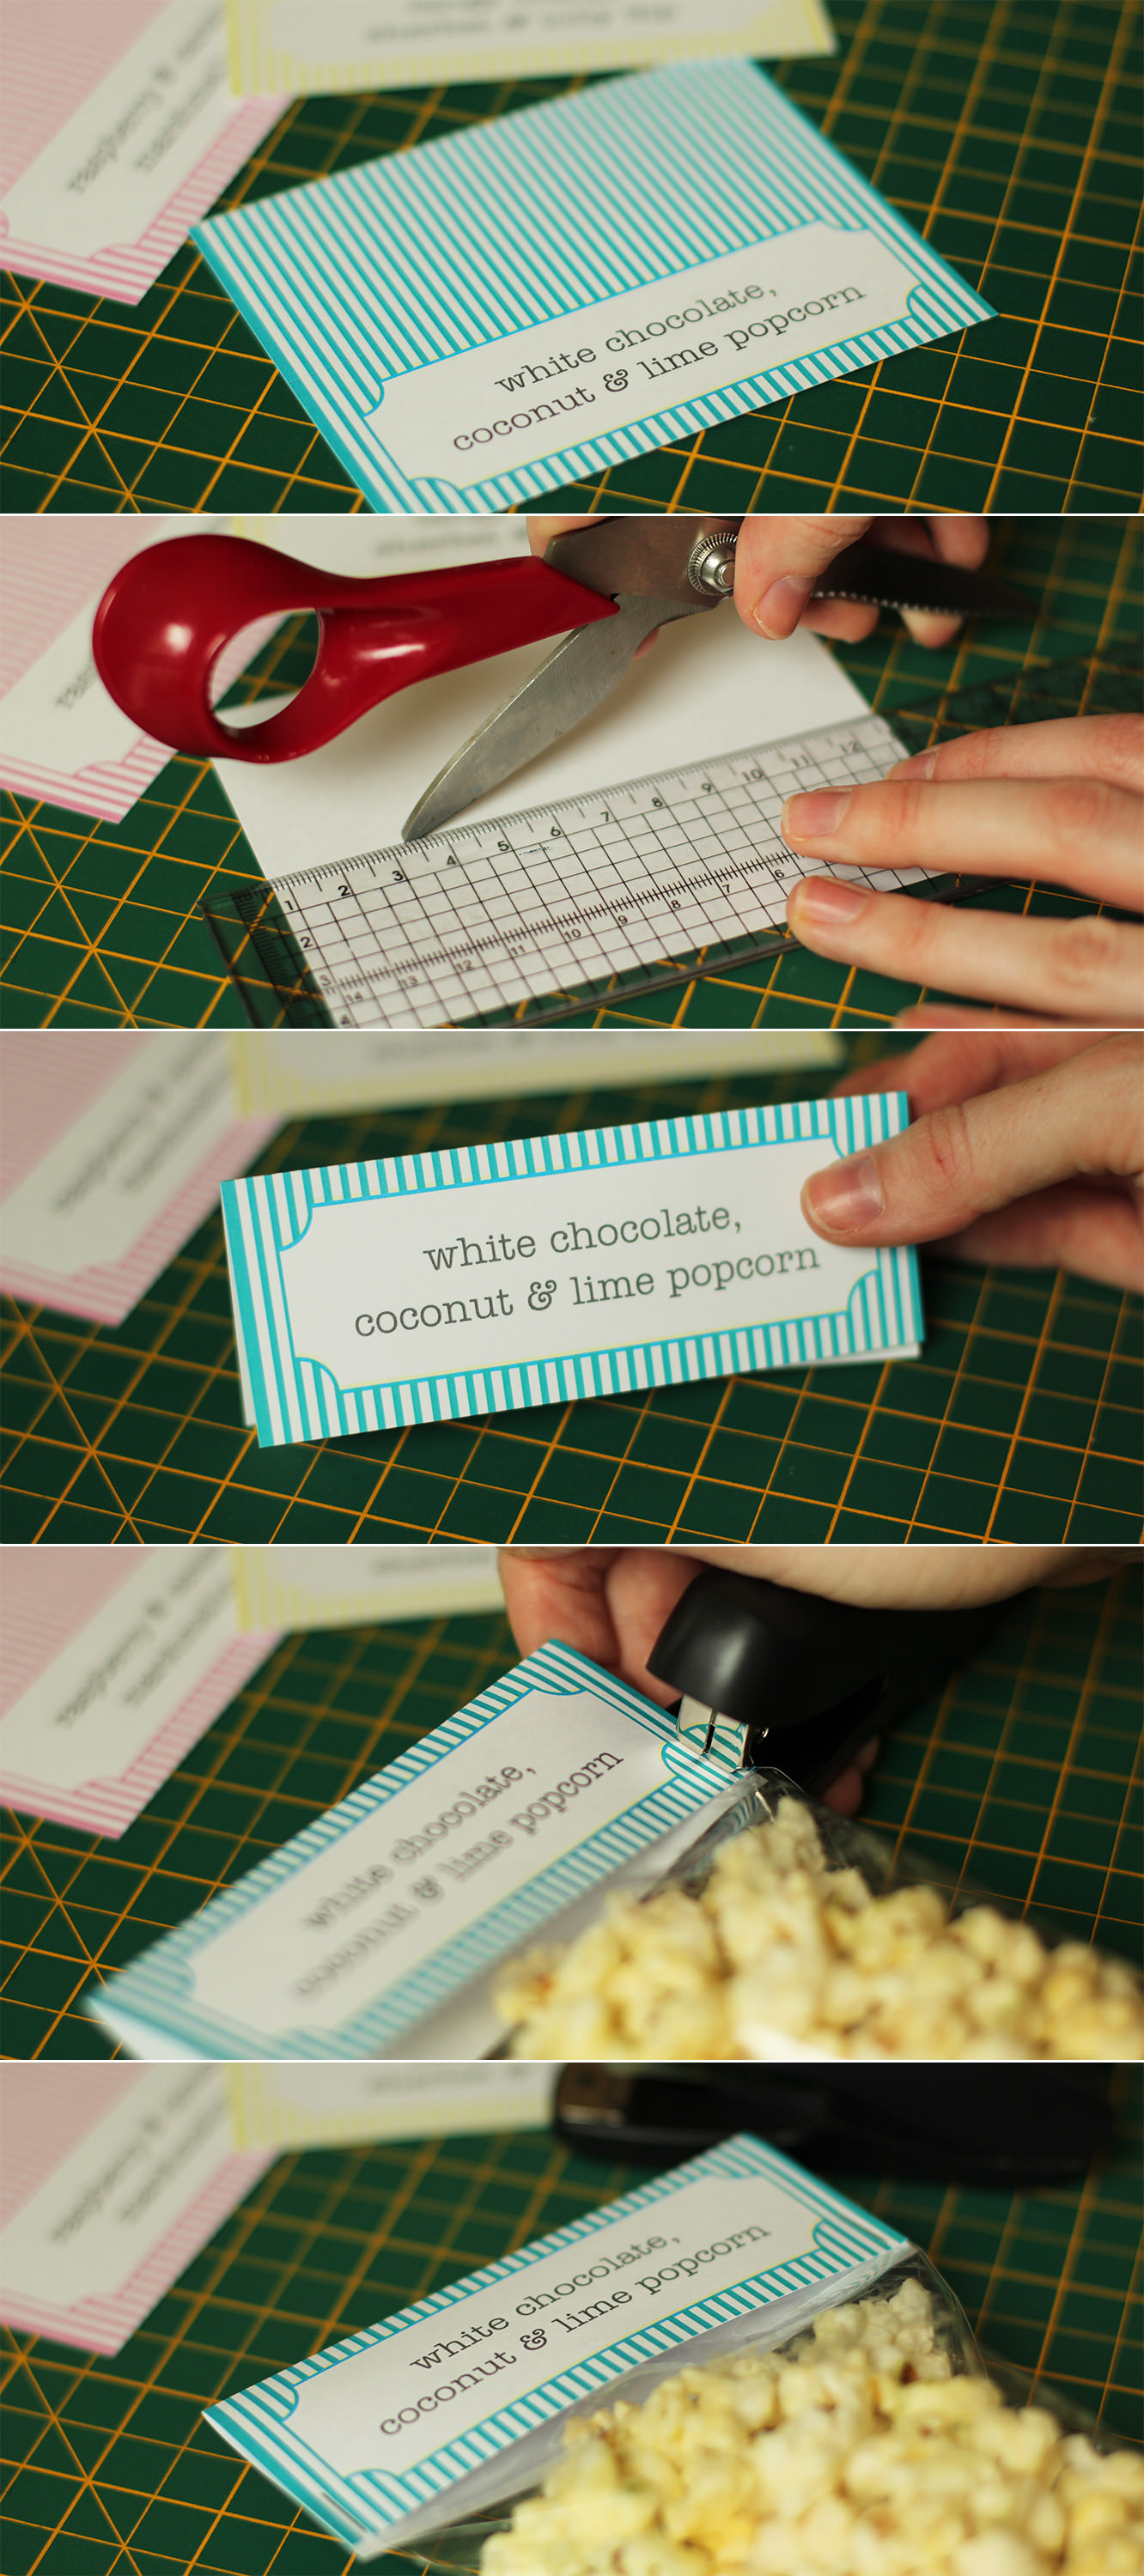
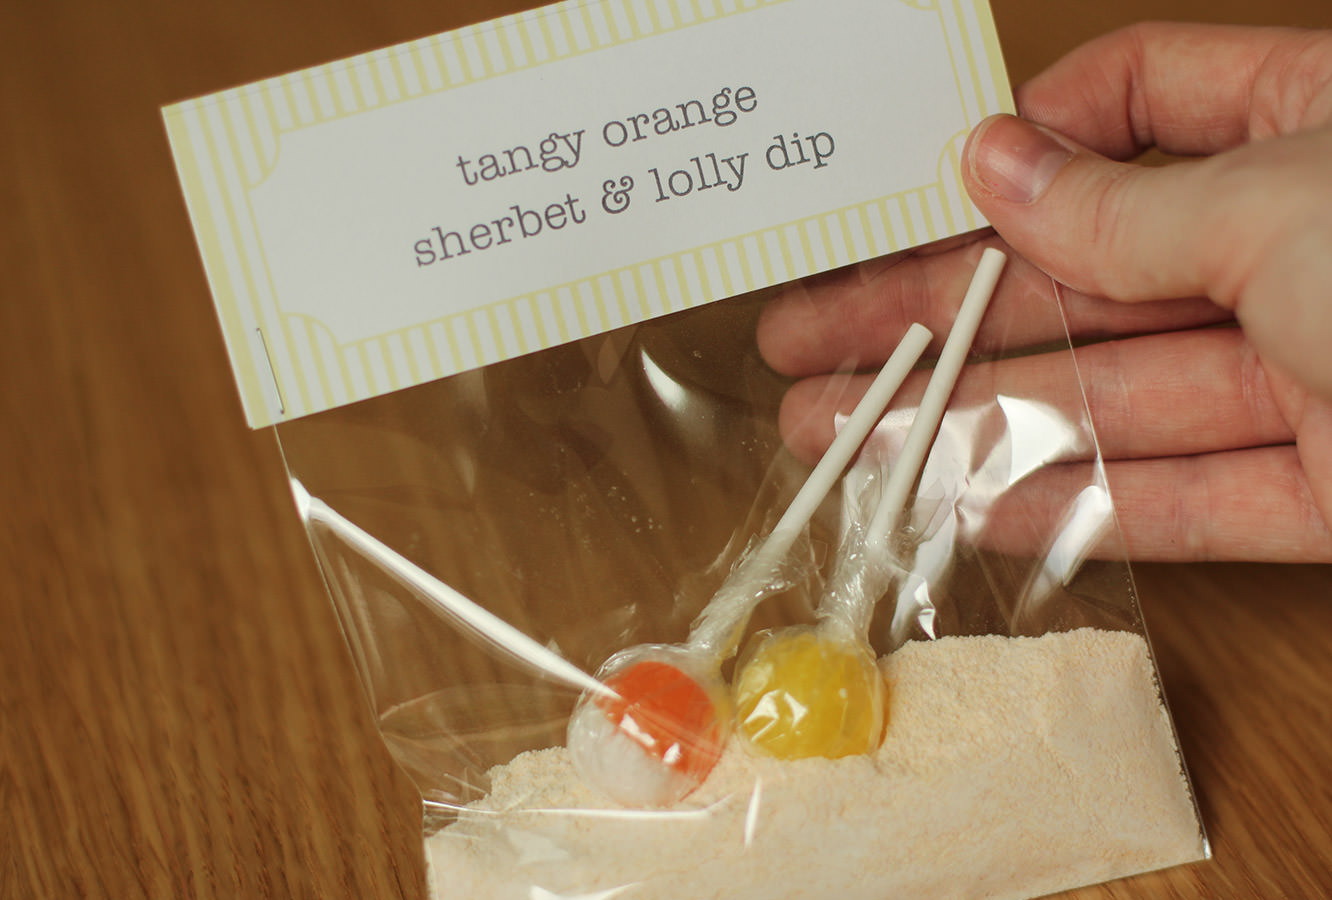
Fill the card bags with your favours.
Step two
Print enough of the labels for the number of favours you have. These templates will fit a DL card bag.
Cut them out and score on the back down the centre. Fold in half.
Fold the top of the bag down and staple the label over the top, ensuring the staple secures the bag shut. This is especially important with the sherbet.
Step three
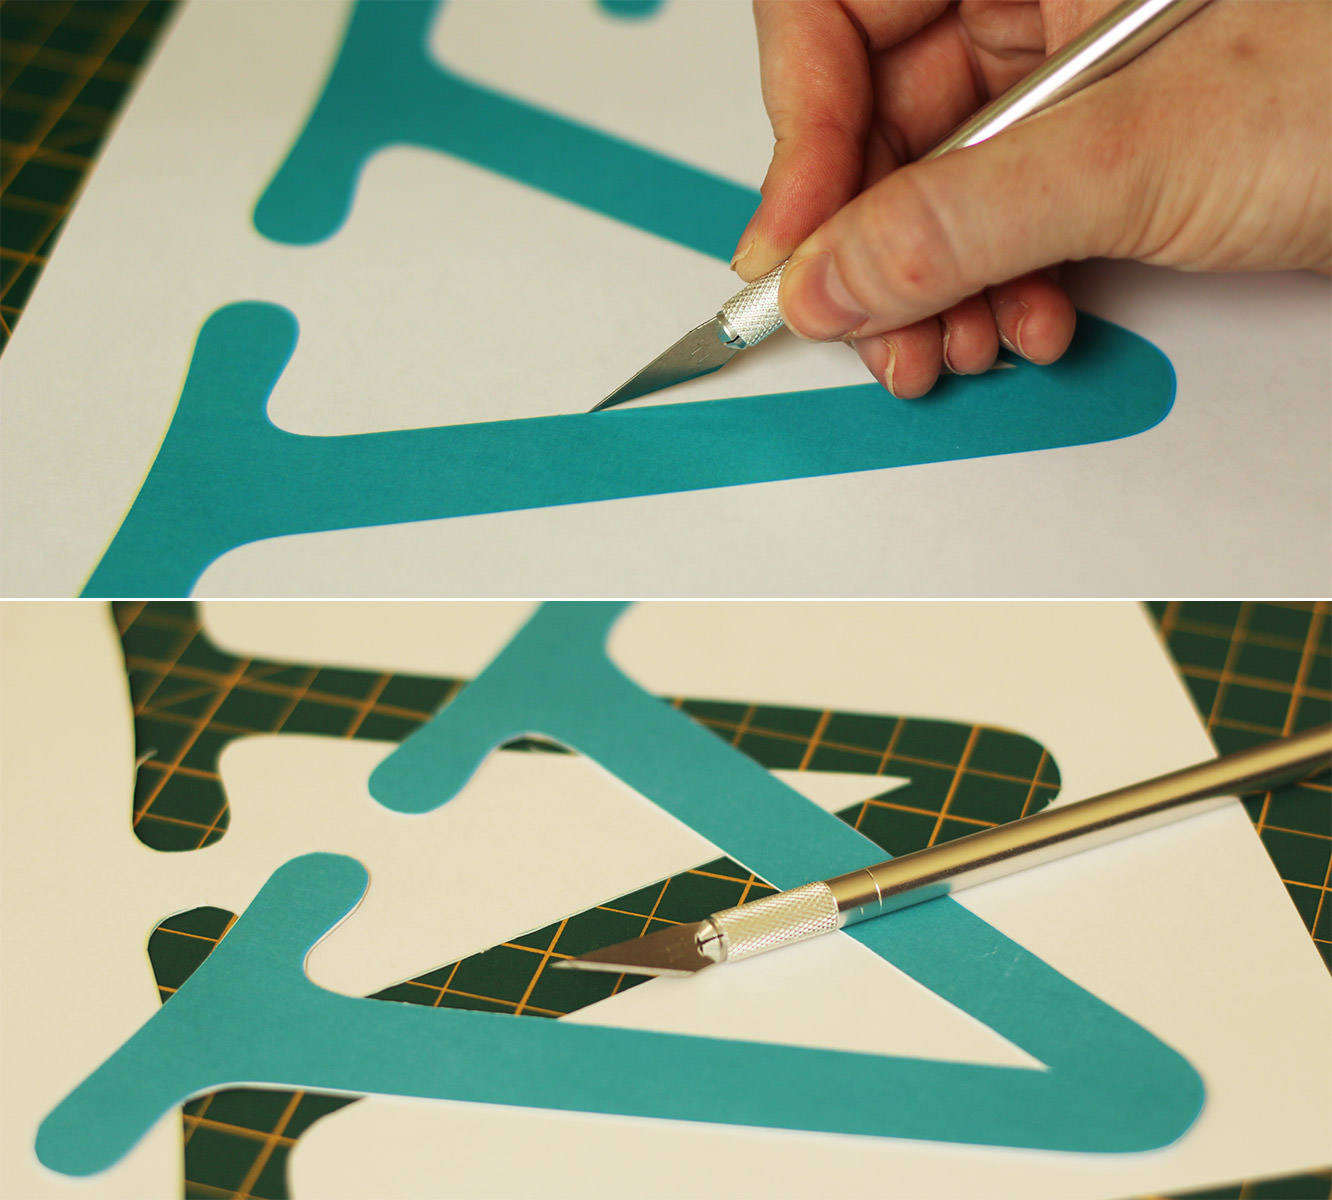
Cut the letters out of for the sign.
Step four
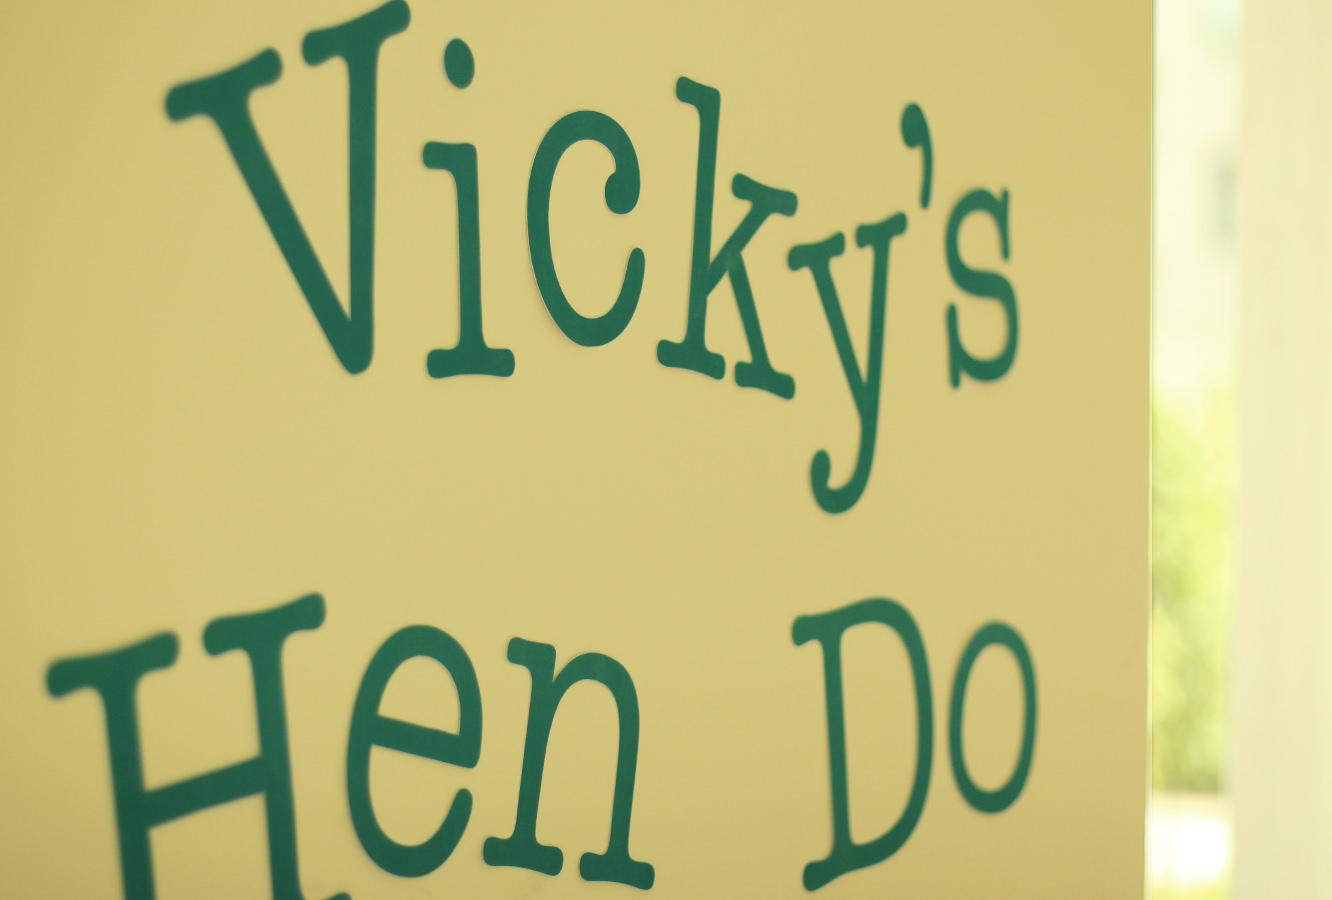
Using blu-tac stick the letters to the wall.
Step five
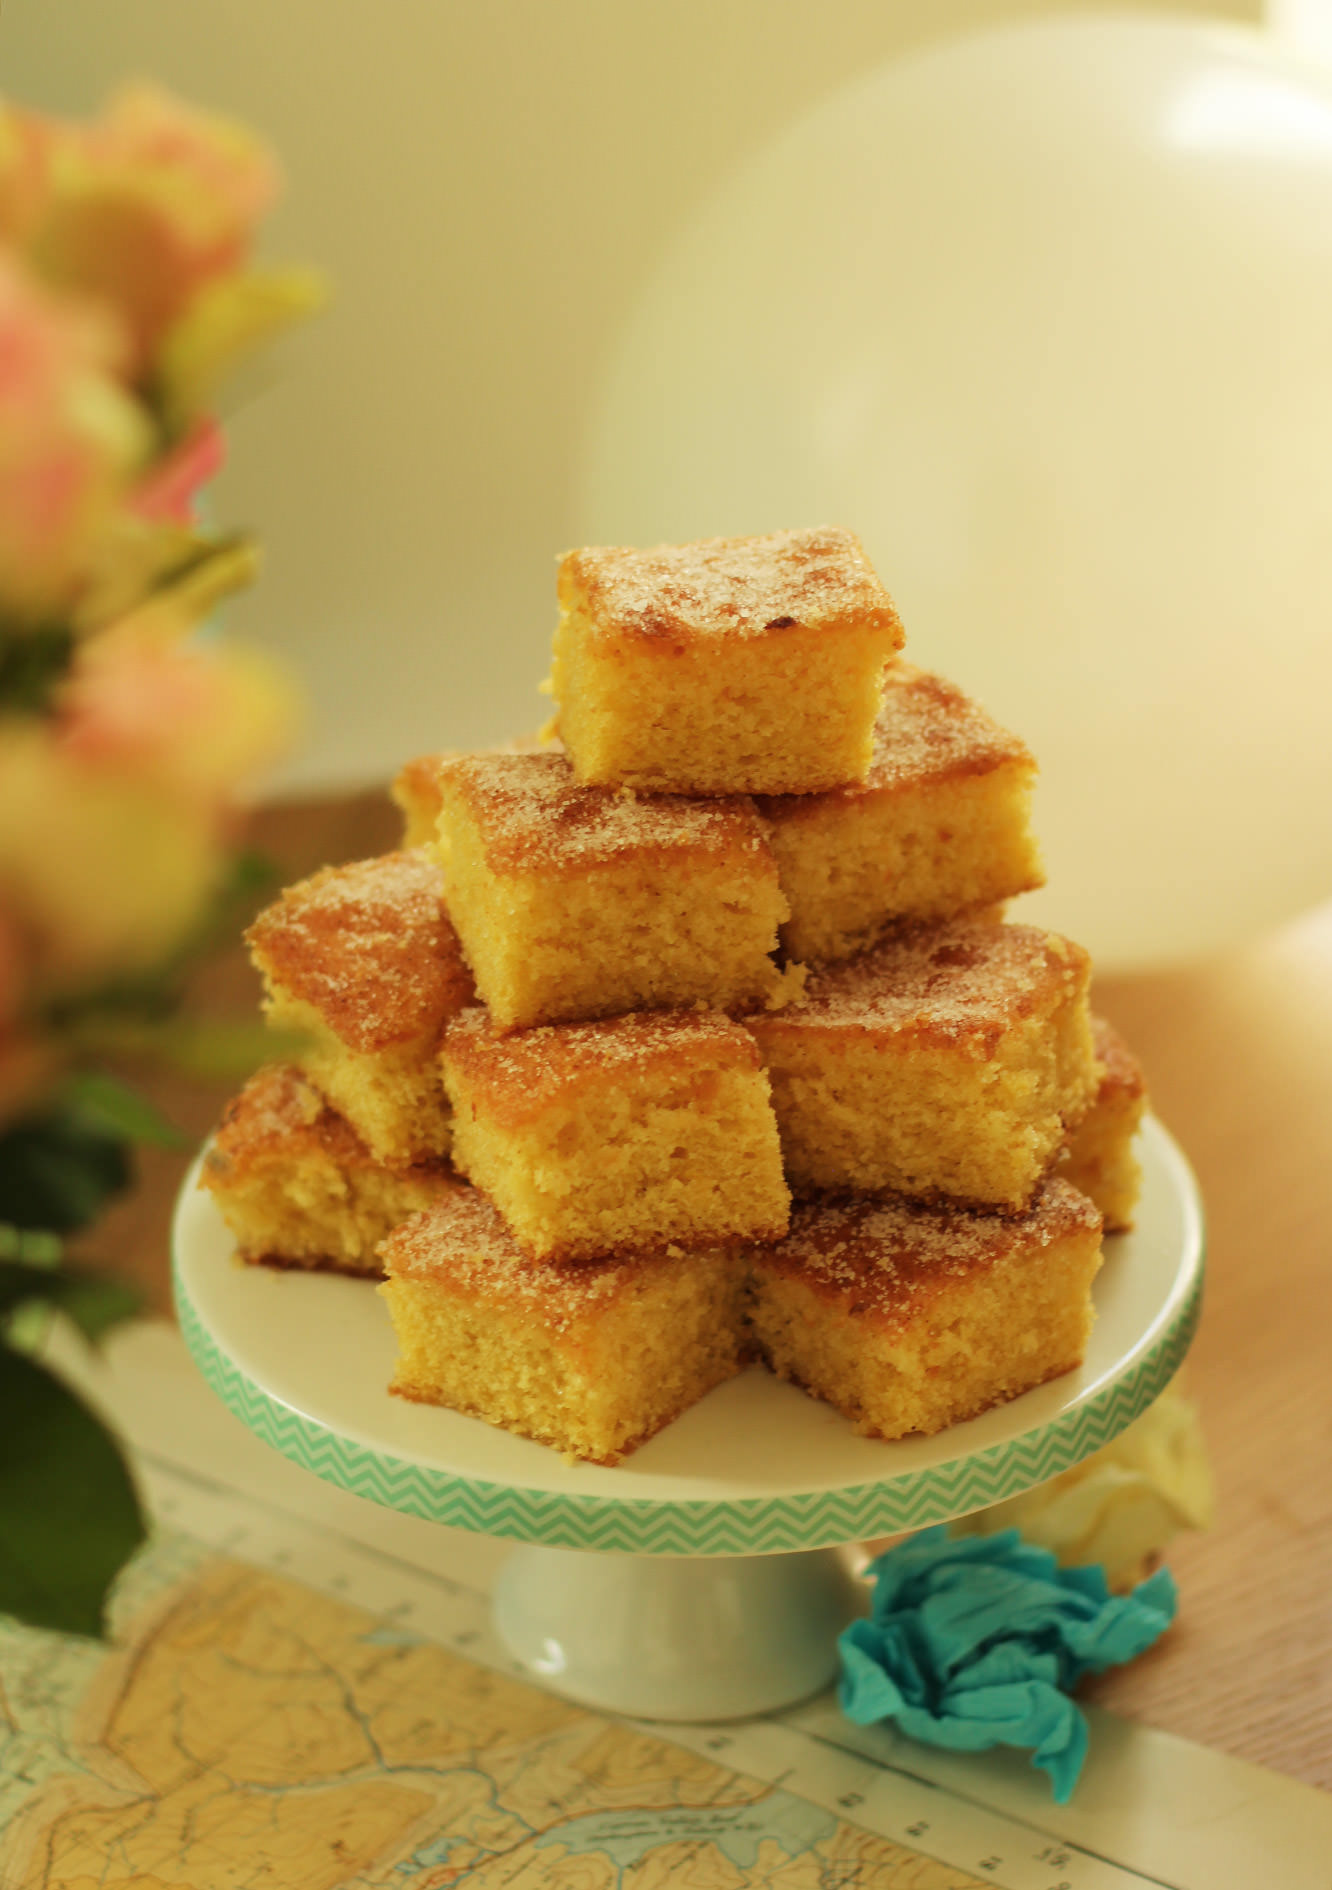
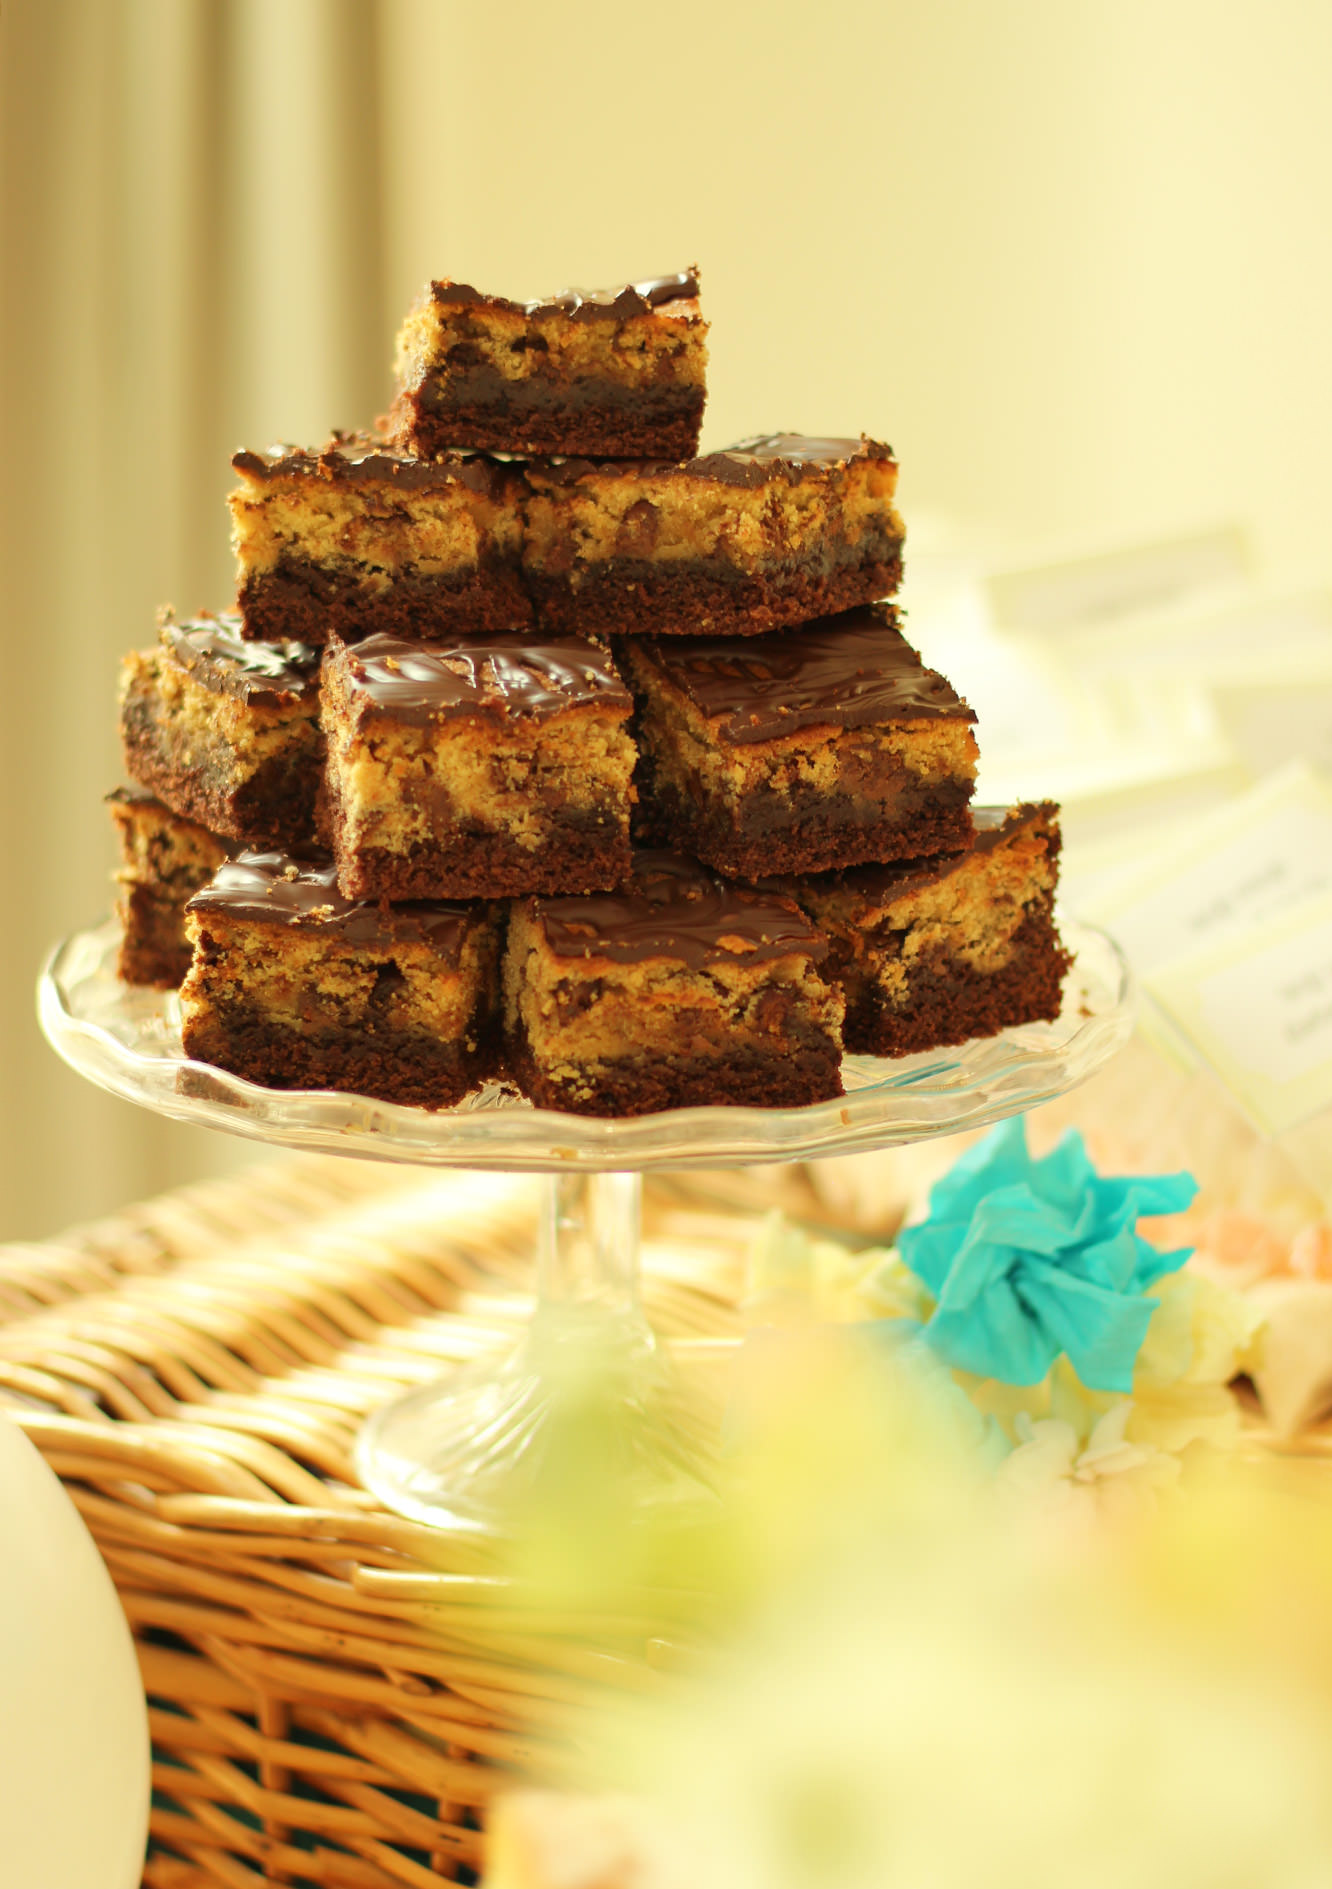
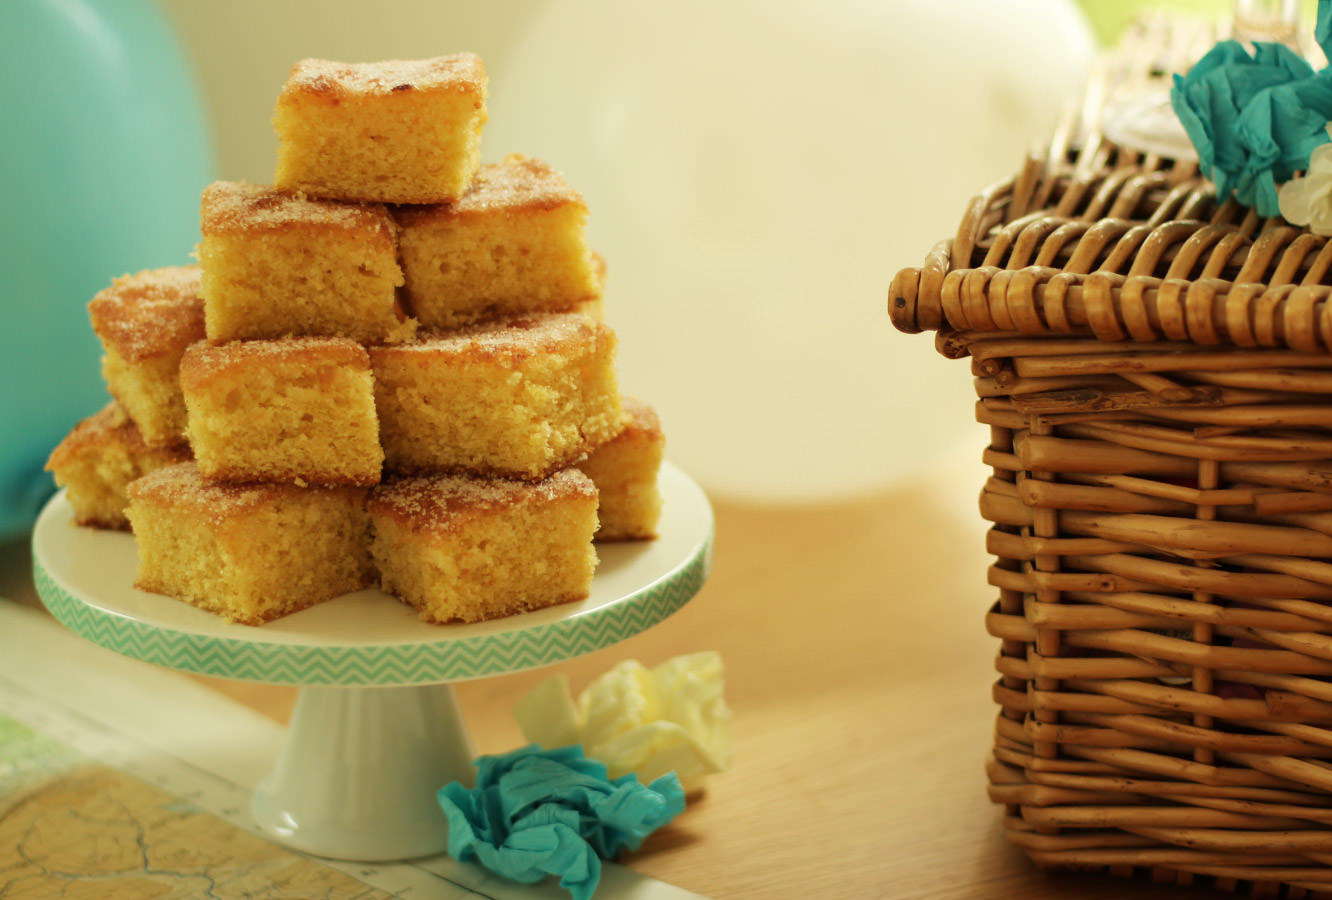
Assemble. You’ll notice I baked a few treats and got some flowers too. The cookie dough brownie recipe has appeared on the blog before, and I’ll get to the lemon drizzle soon.
There you go. All set to throw a lovely hen party/bridal shower of your own.
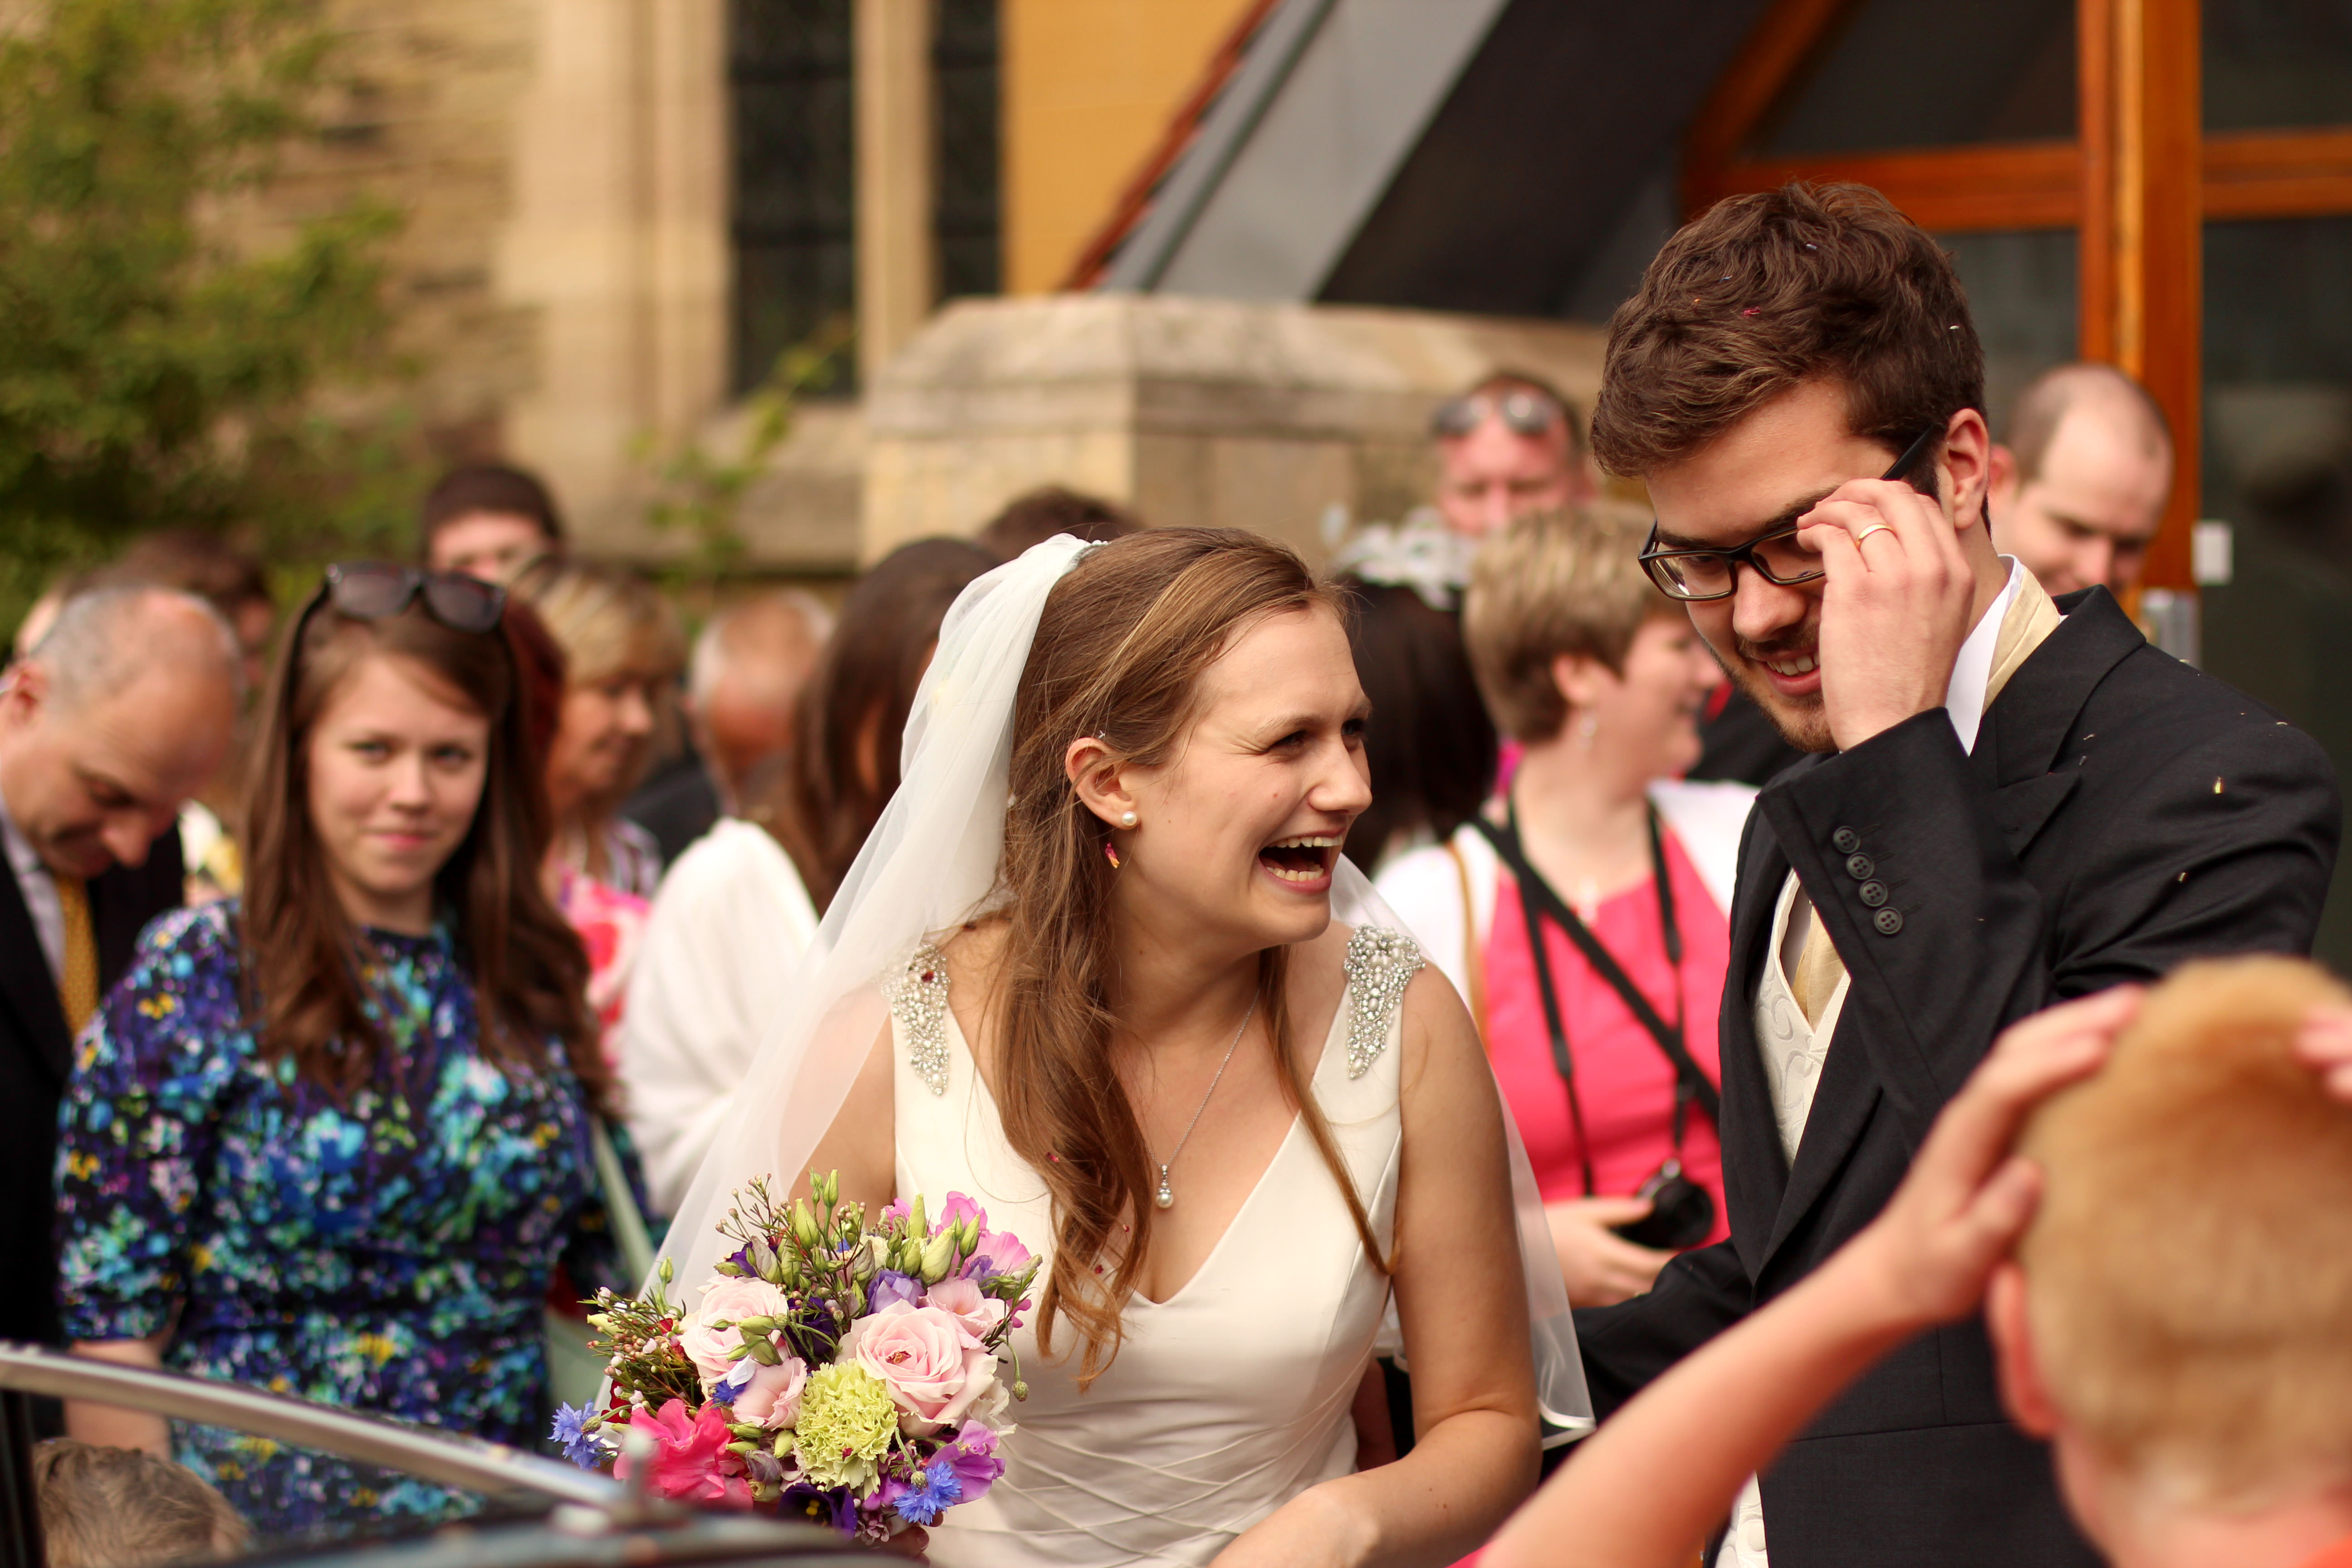
It seems a bit strange to be writing this. Not least because the last few weeks were crazy and I got out of the habit of blogging, but mainly because the hen in question is now a WIFE.
What’s that? You wanna see? Oh ok then, here she is…
As you can see from the size of that smile, we all had a ball. It was an amazing day.
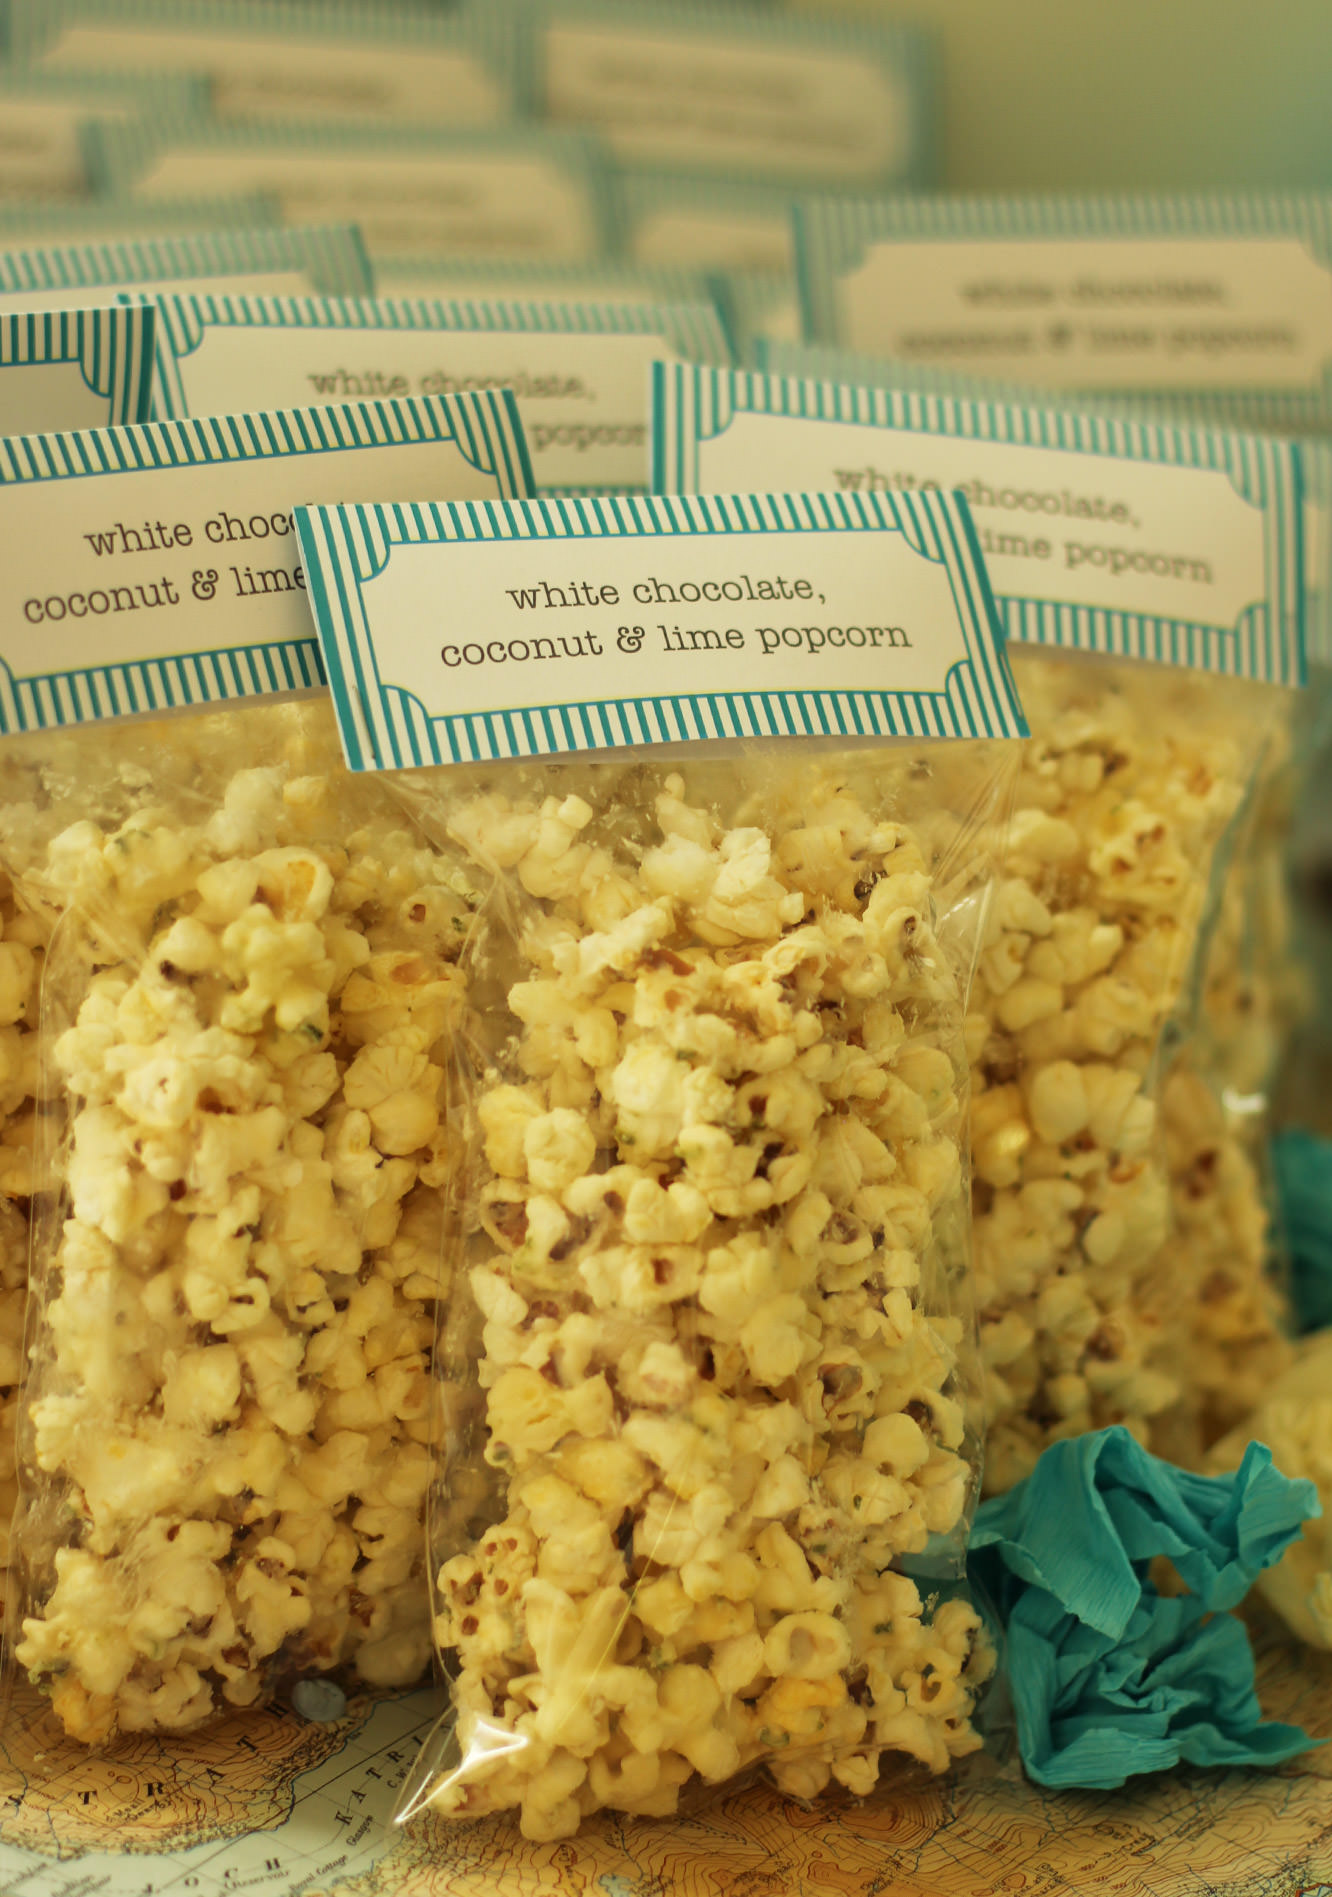
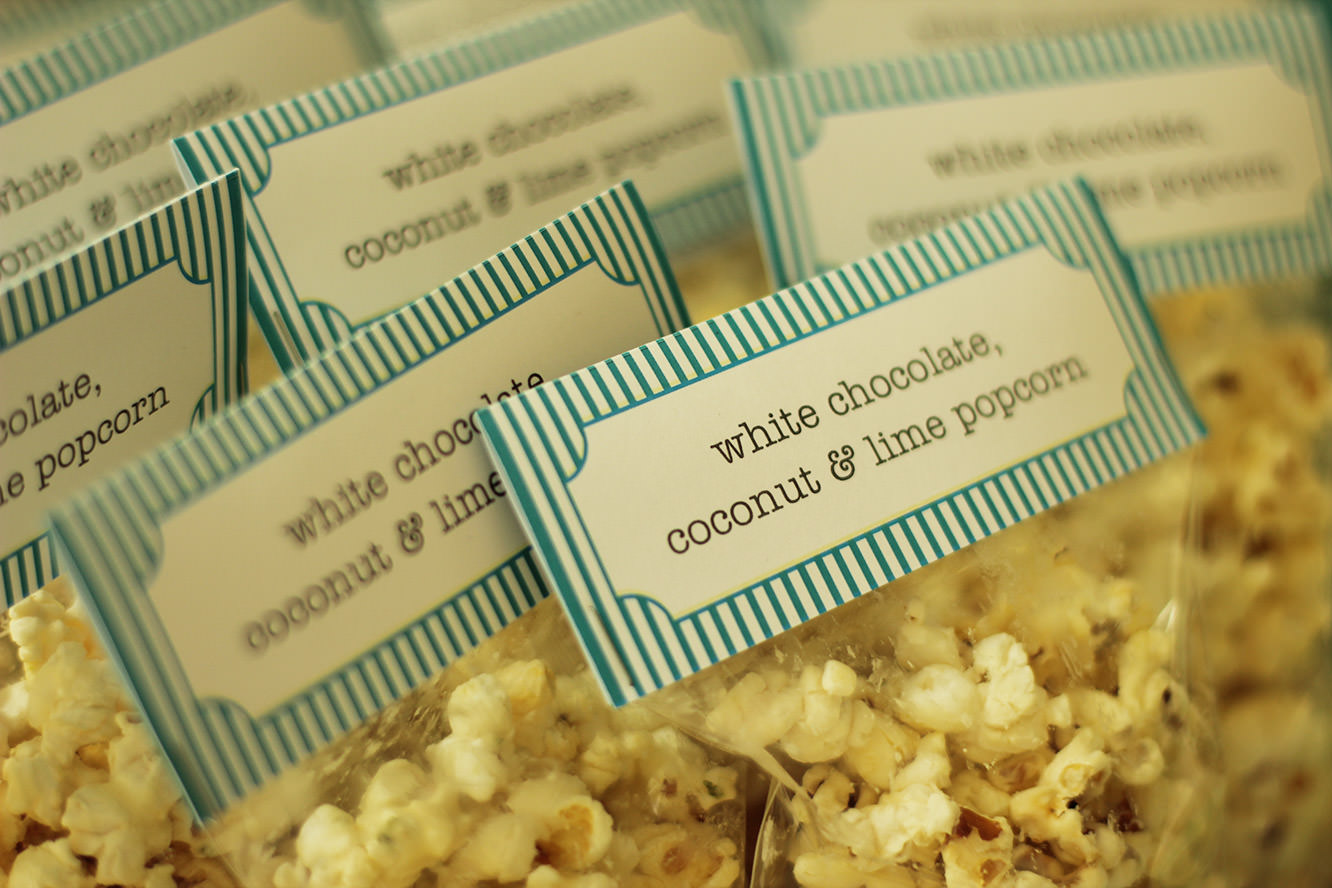
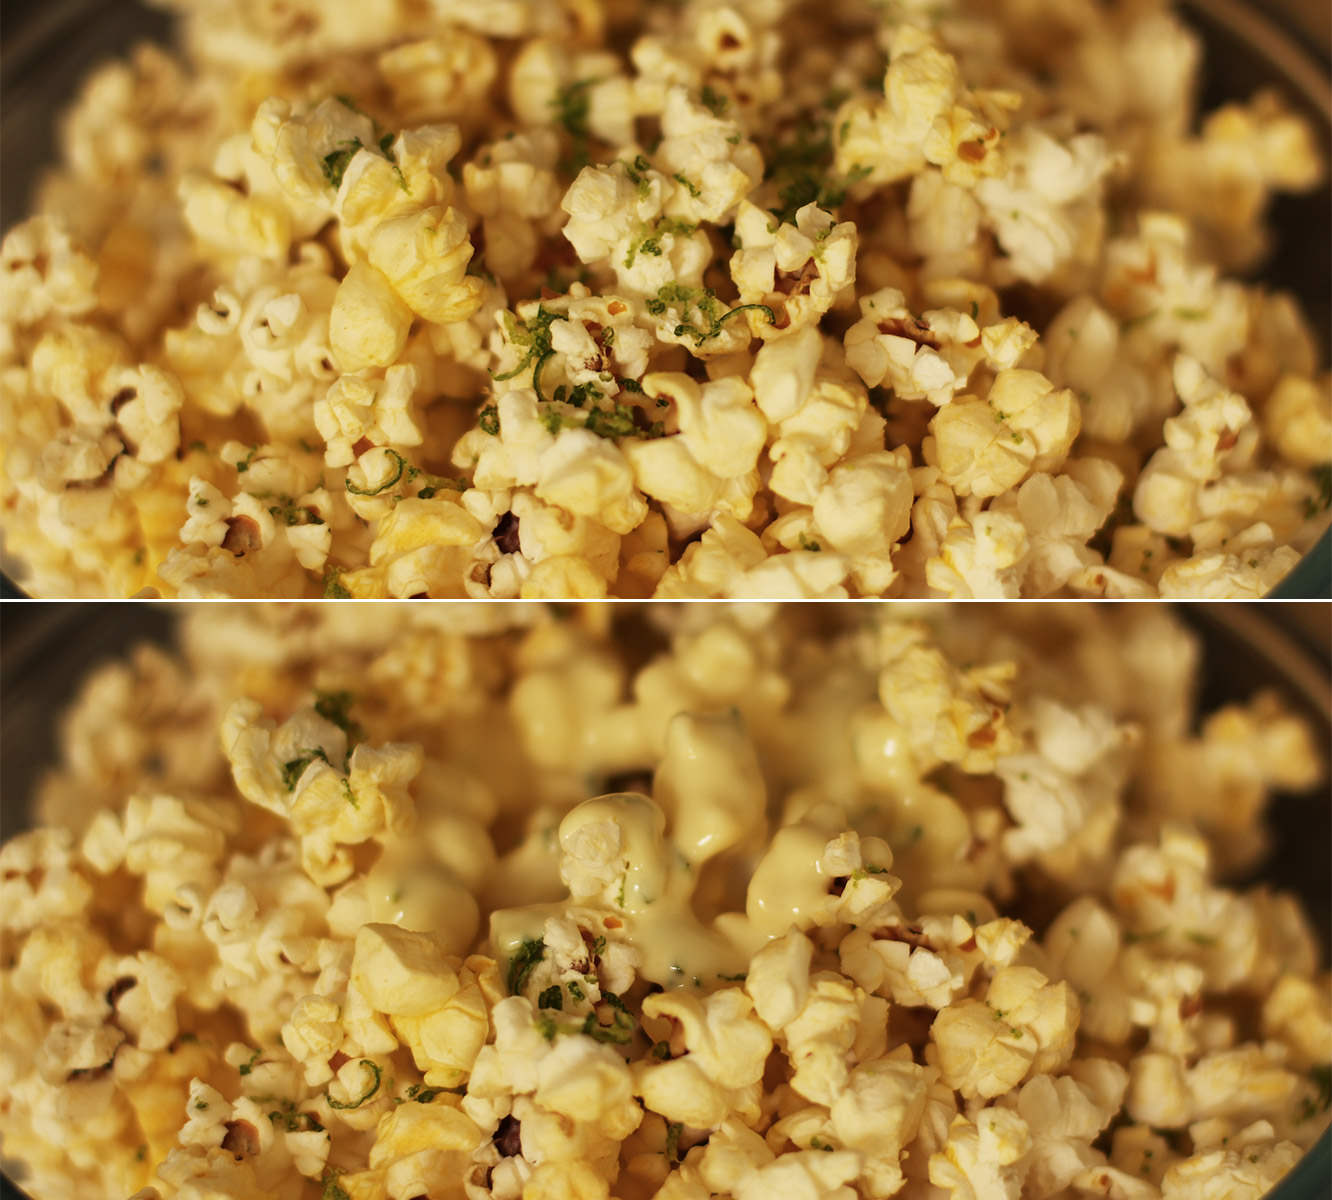
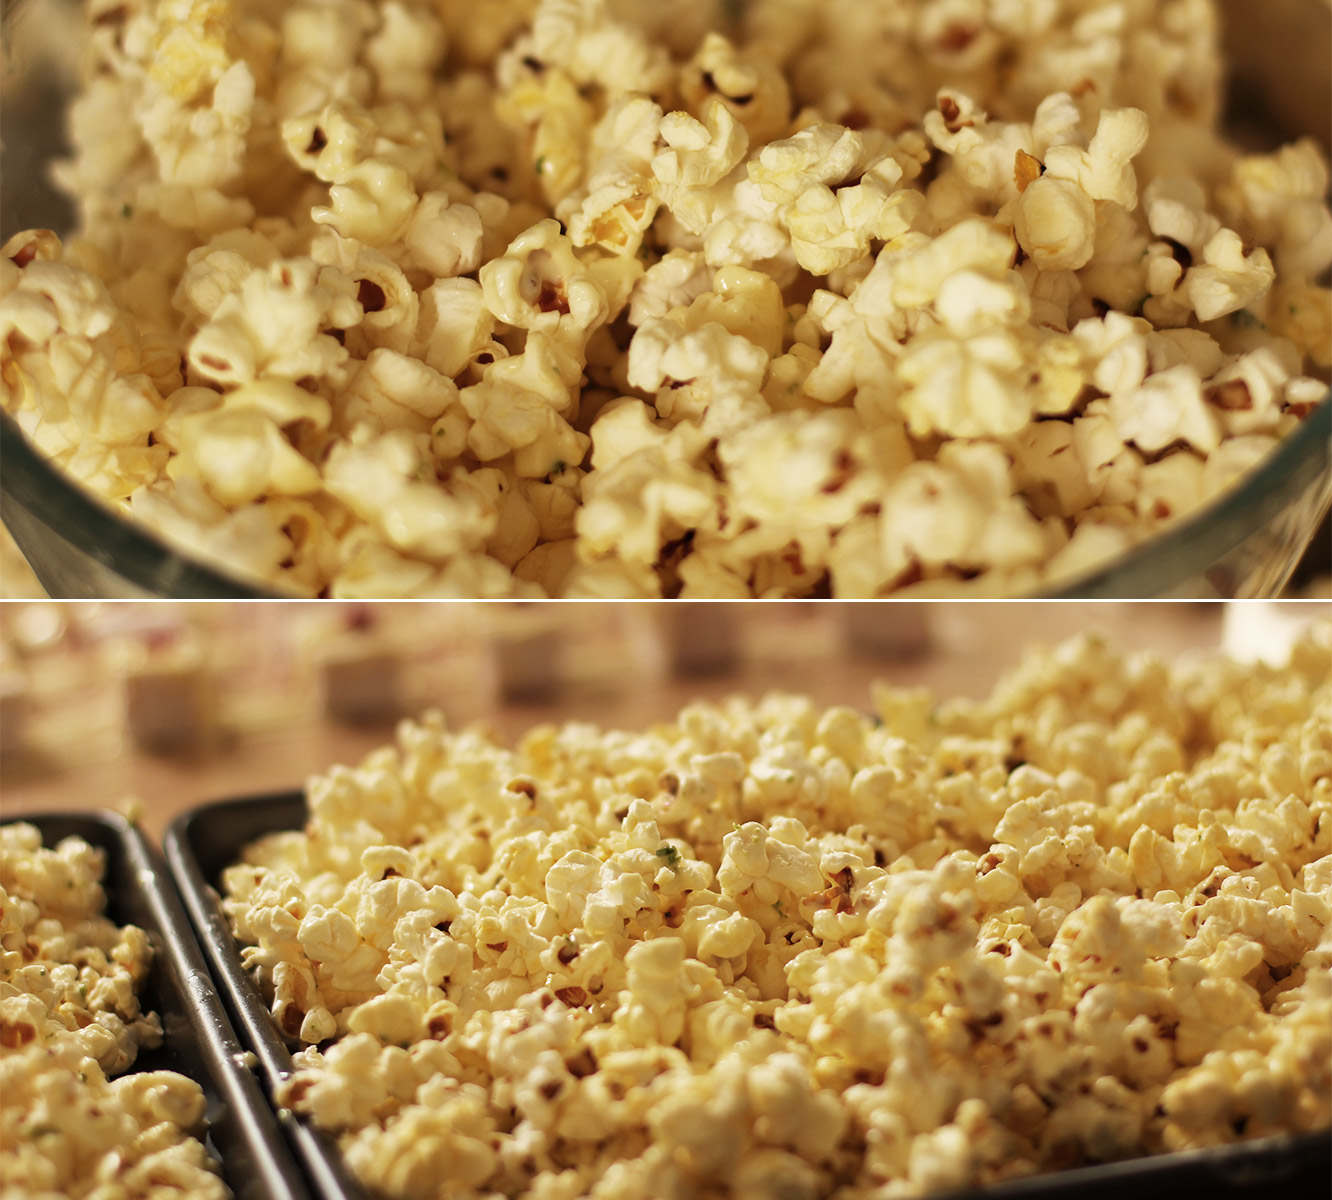
But let’s step back a month or three and finish off her favours. This was without a doubt the guests’ fave recipe so, ladies, all of you who asked me for it, sorry it took so long! Without further ado here is the recipe for white chocolate, lime and coconut popcorn.
Remember to downscale the below if you’re making for a smaller group/movie night.
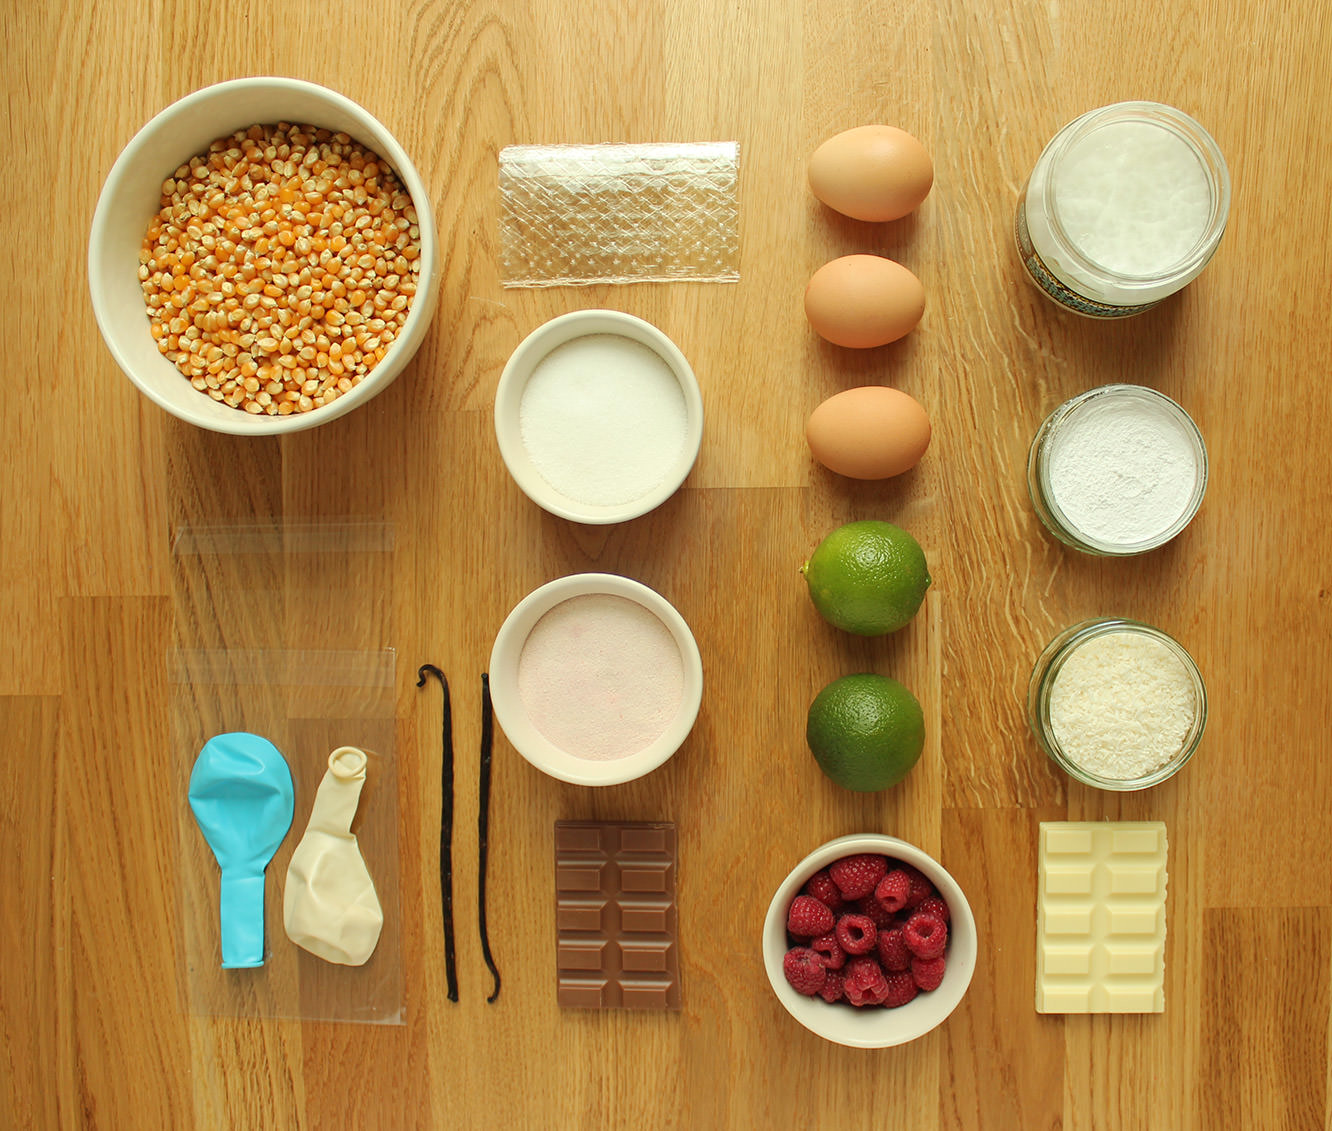
You will need
450g/1lb plain popcorn kernels
600g/1lb 5oz white chocolate
Coconut oil
2 limes (zest)
Step one
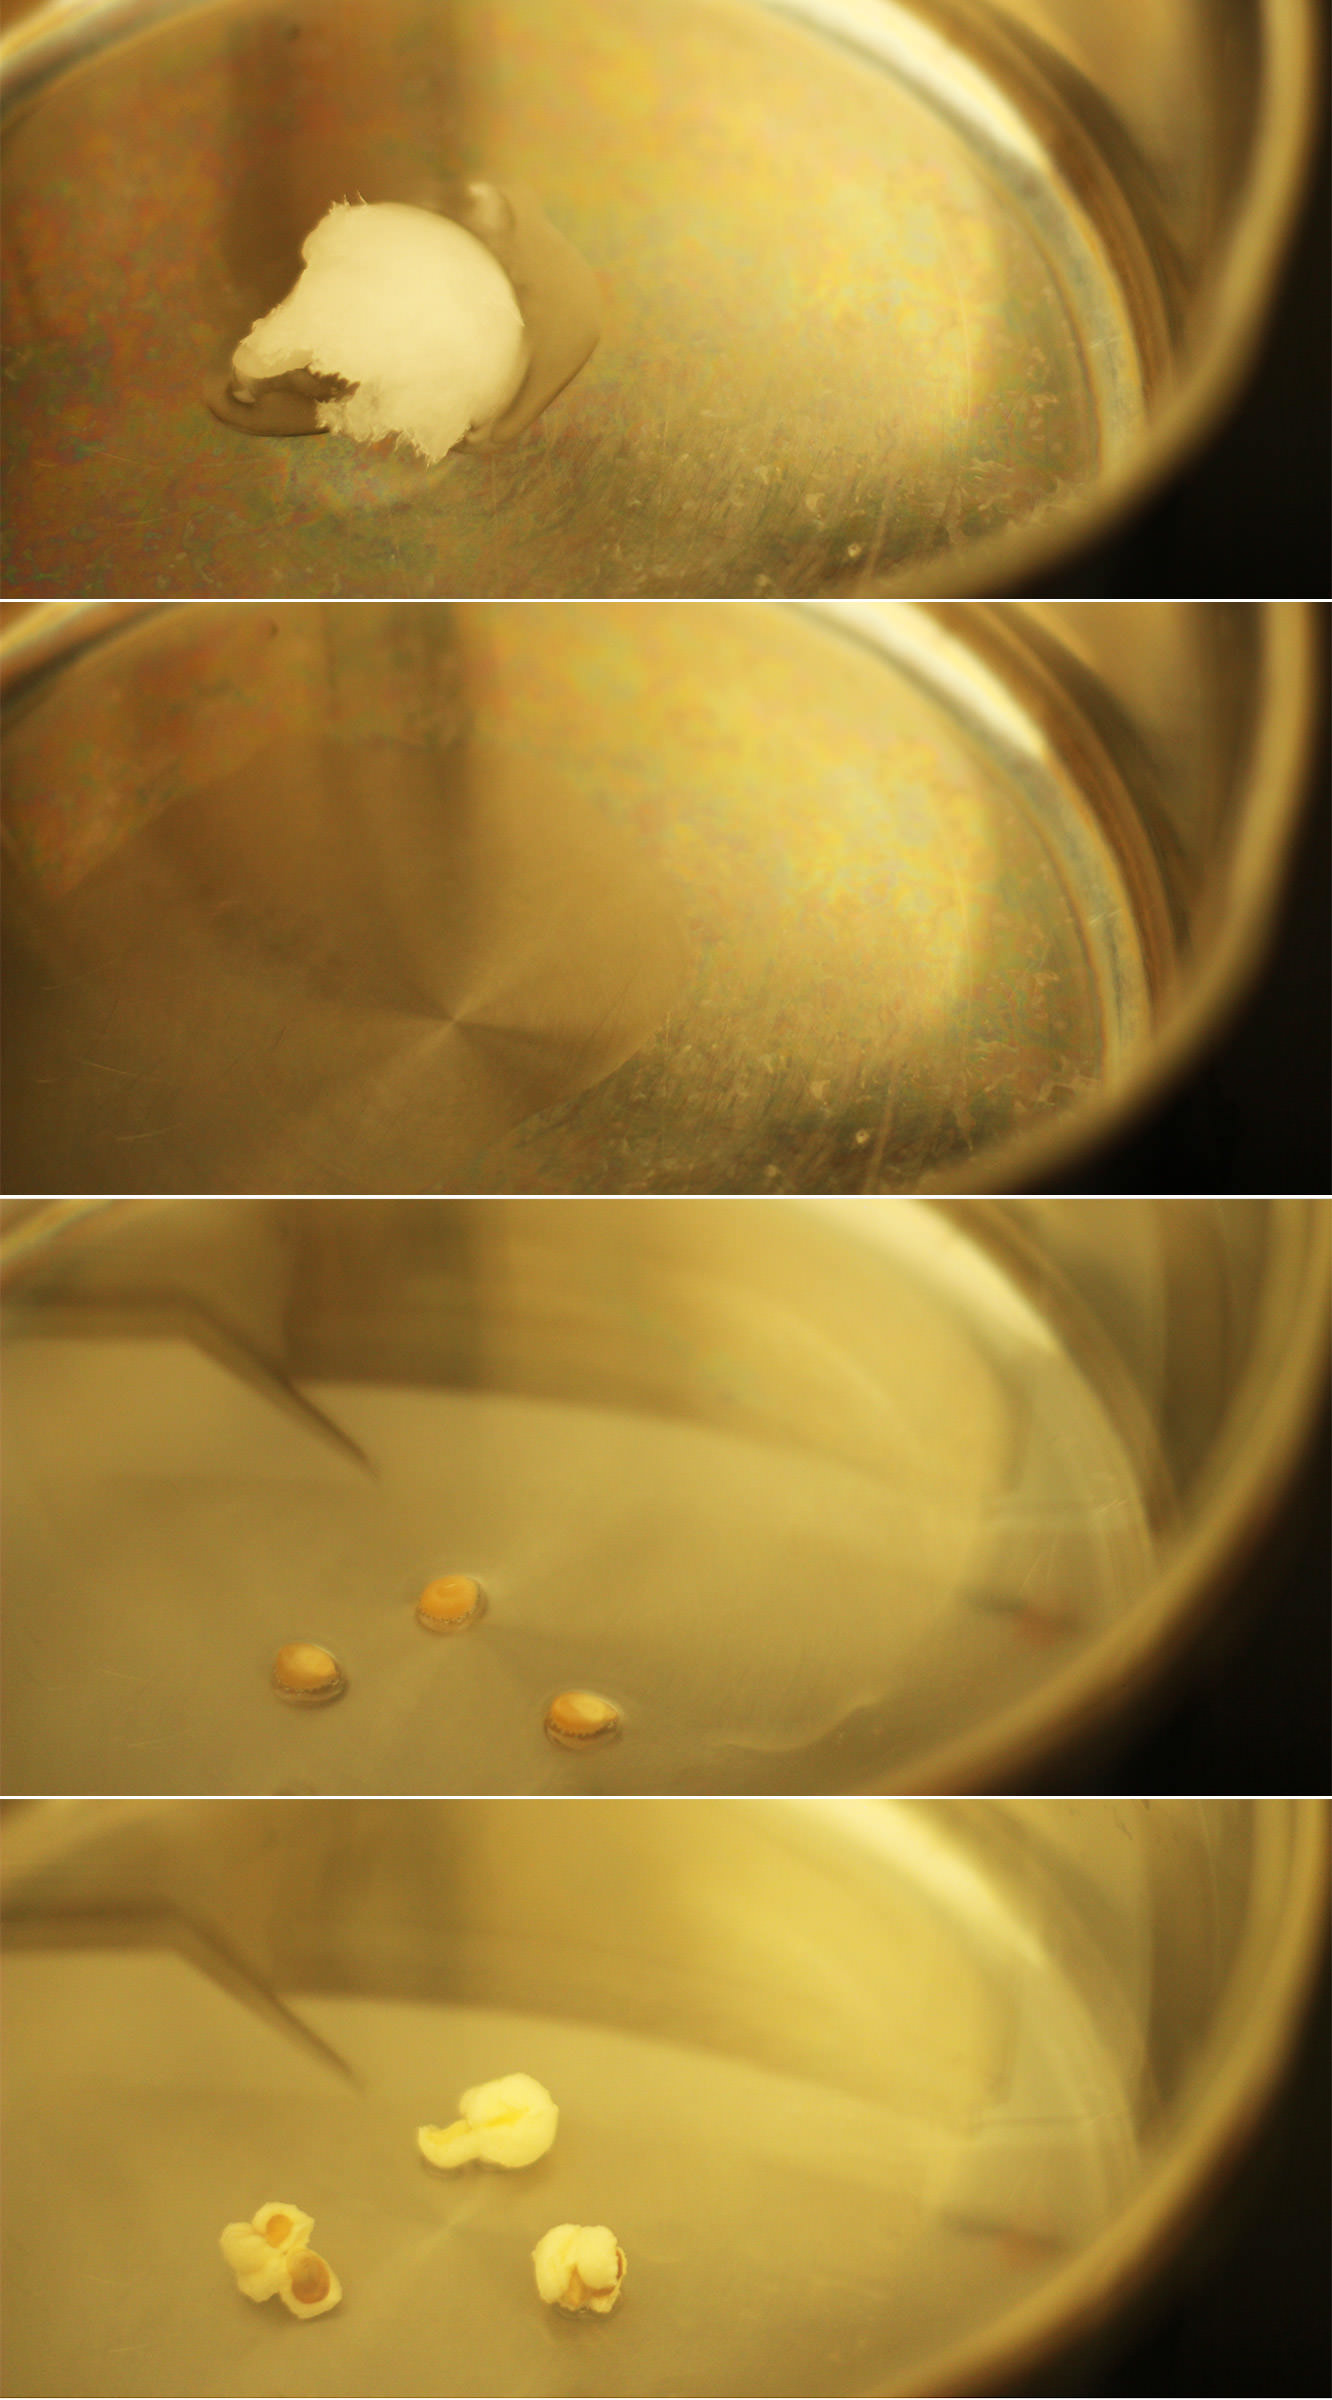
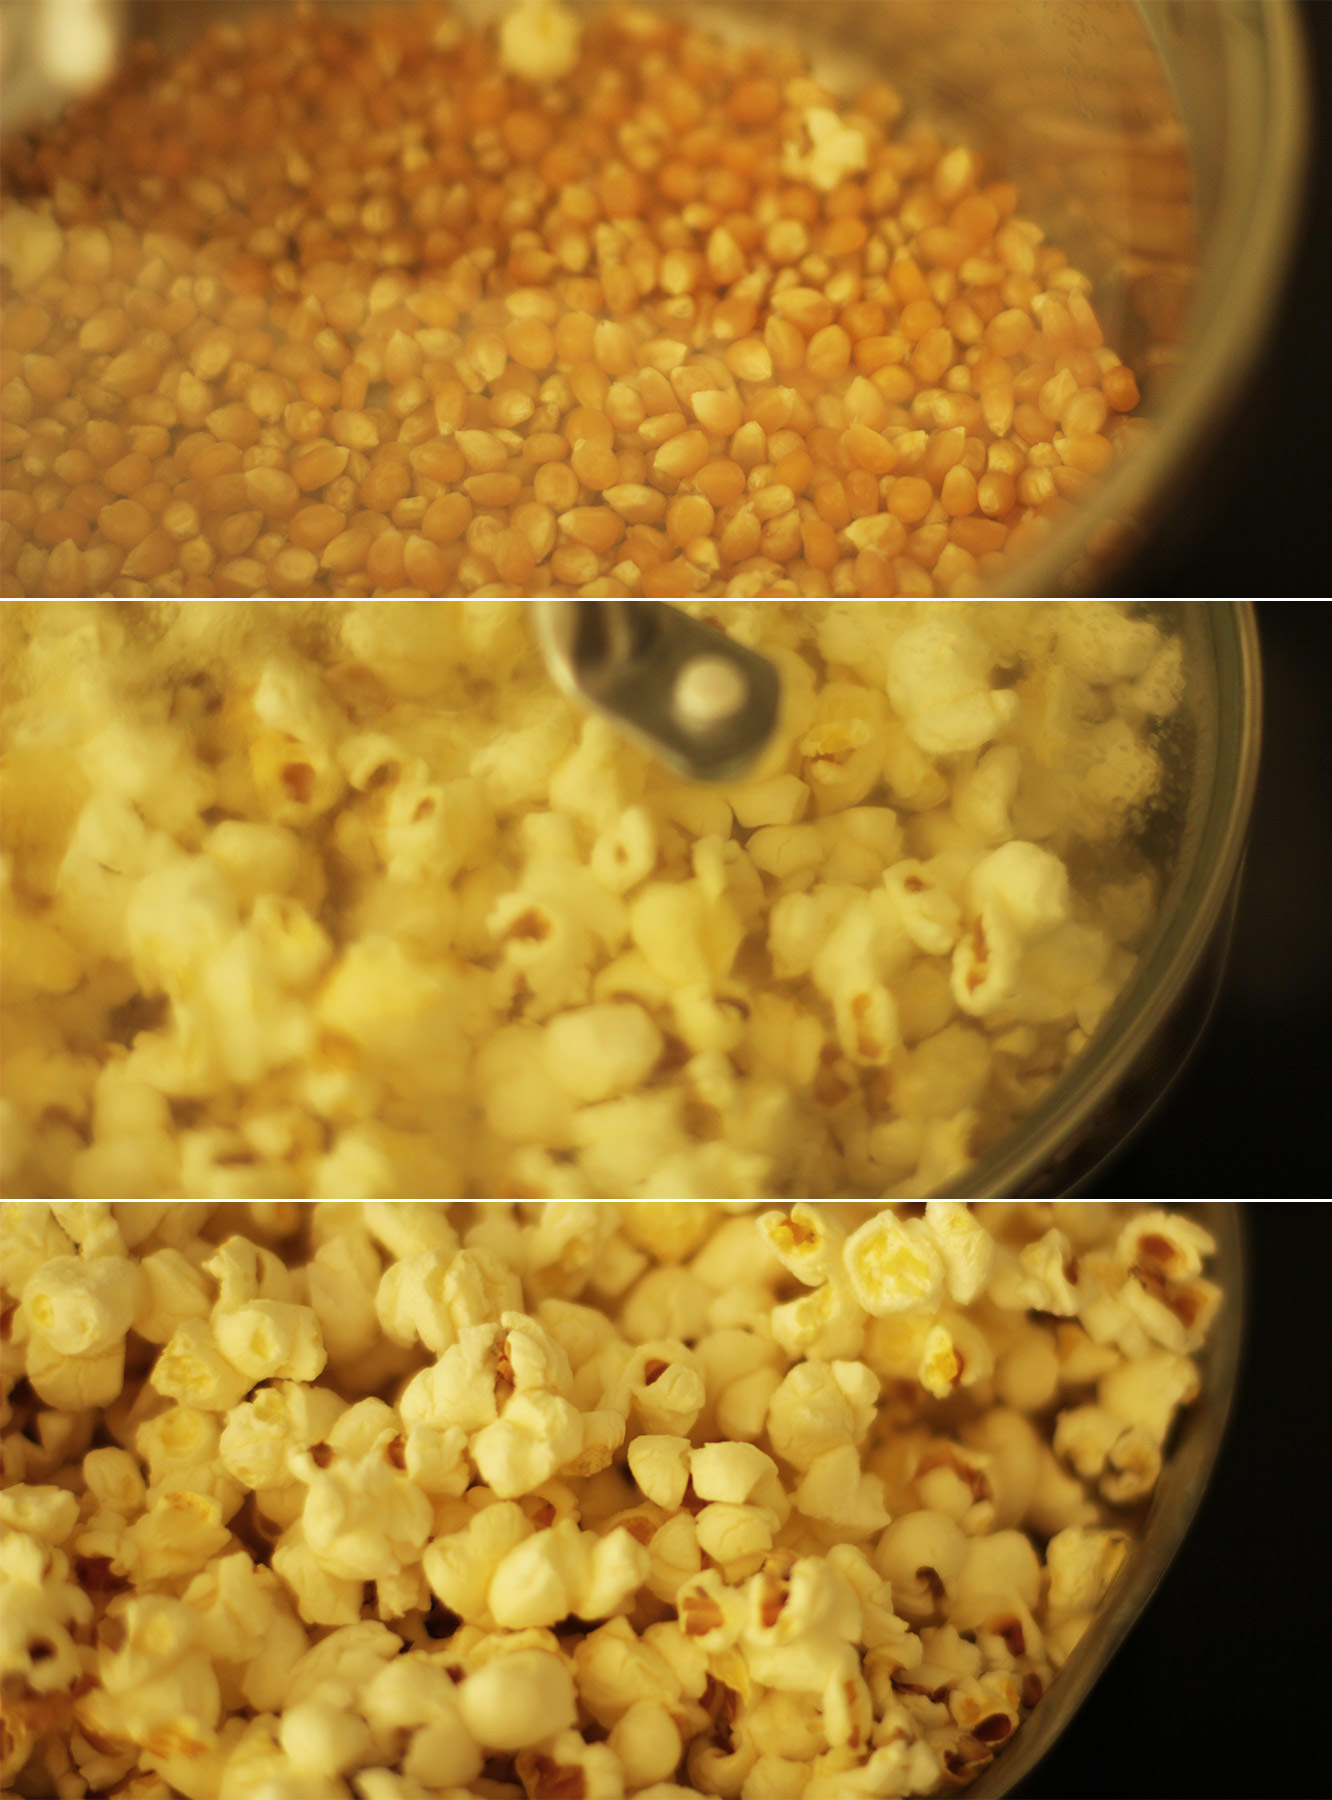
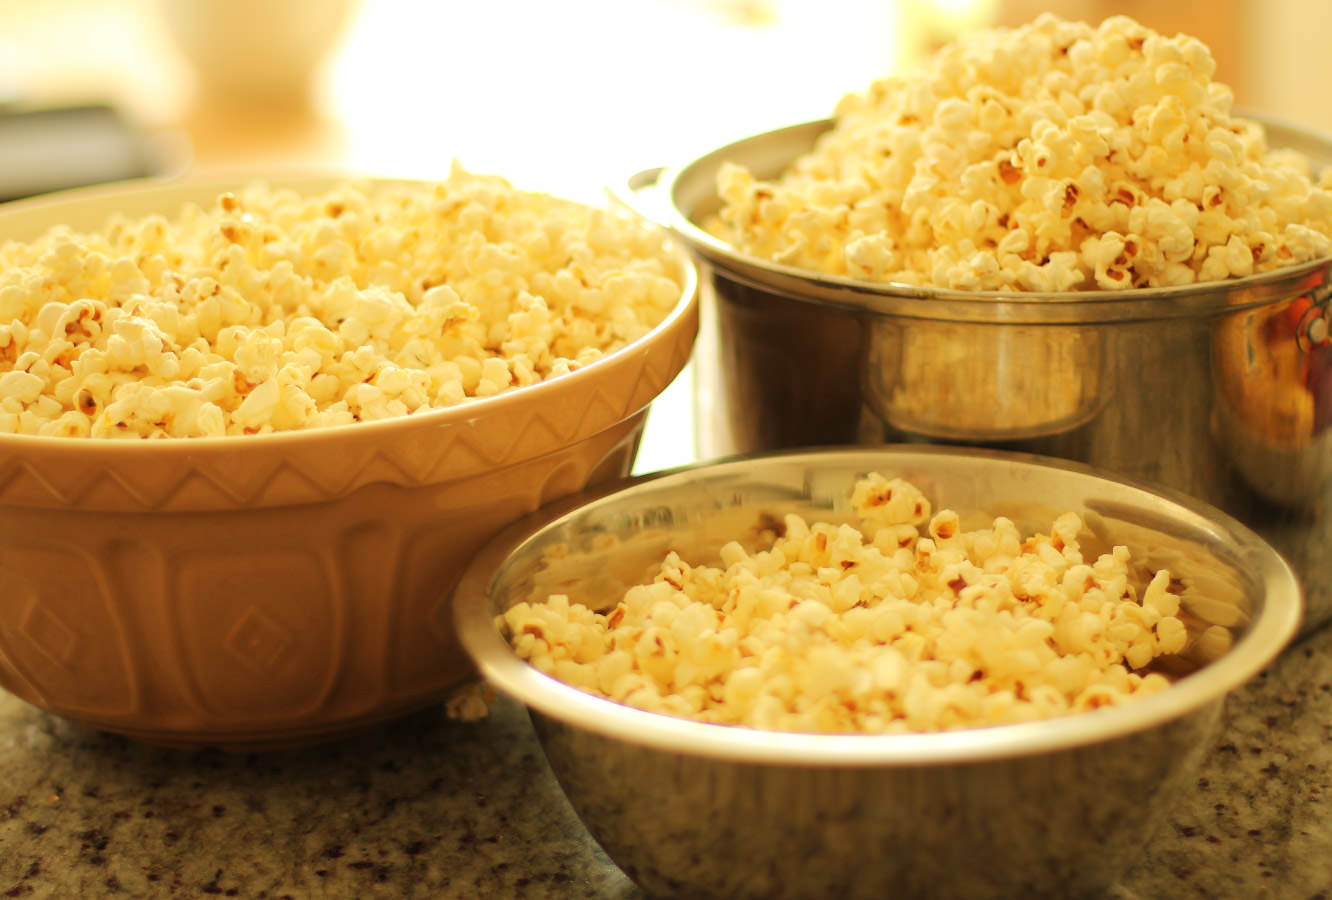
You’re going to want to get a biiiiiig pan (one with a lid unless you want to be finding popcorn in corners for years). You also need several bowls to decant the popcorn into and definitely don’t try to pop it all in one go, I think i did three or four batches.
So. Pop the pan on a med-low heat, and drop a tablespoon of coconut oil in the pan. Add three kernels or so and wait patiently for them to pop.
Don’t put all the kernels in straight away otherwise you will burn some.
Step two
Once the three test kernels have popped pour a load more in to cover the bottom of the pan and replace the lid.
As the kernels start to pop I generally shake the pan a intermittently and hover it above the heat. If the popping slows down, place it fully back on the heat for a few seconds.
When the pan is filling up and there’s a couple of seconds between pops remove it from the heat and pour the popcorn into a bowl.
Step three
Repeat repeat repeat until you’ve used alla that popping corn.
Step four
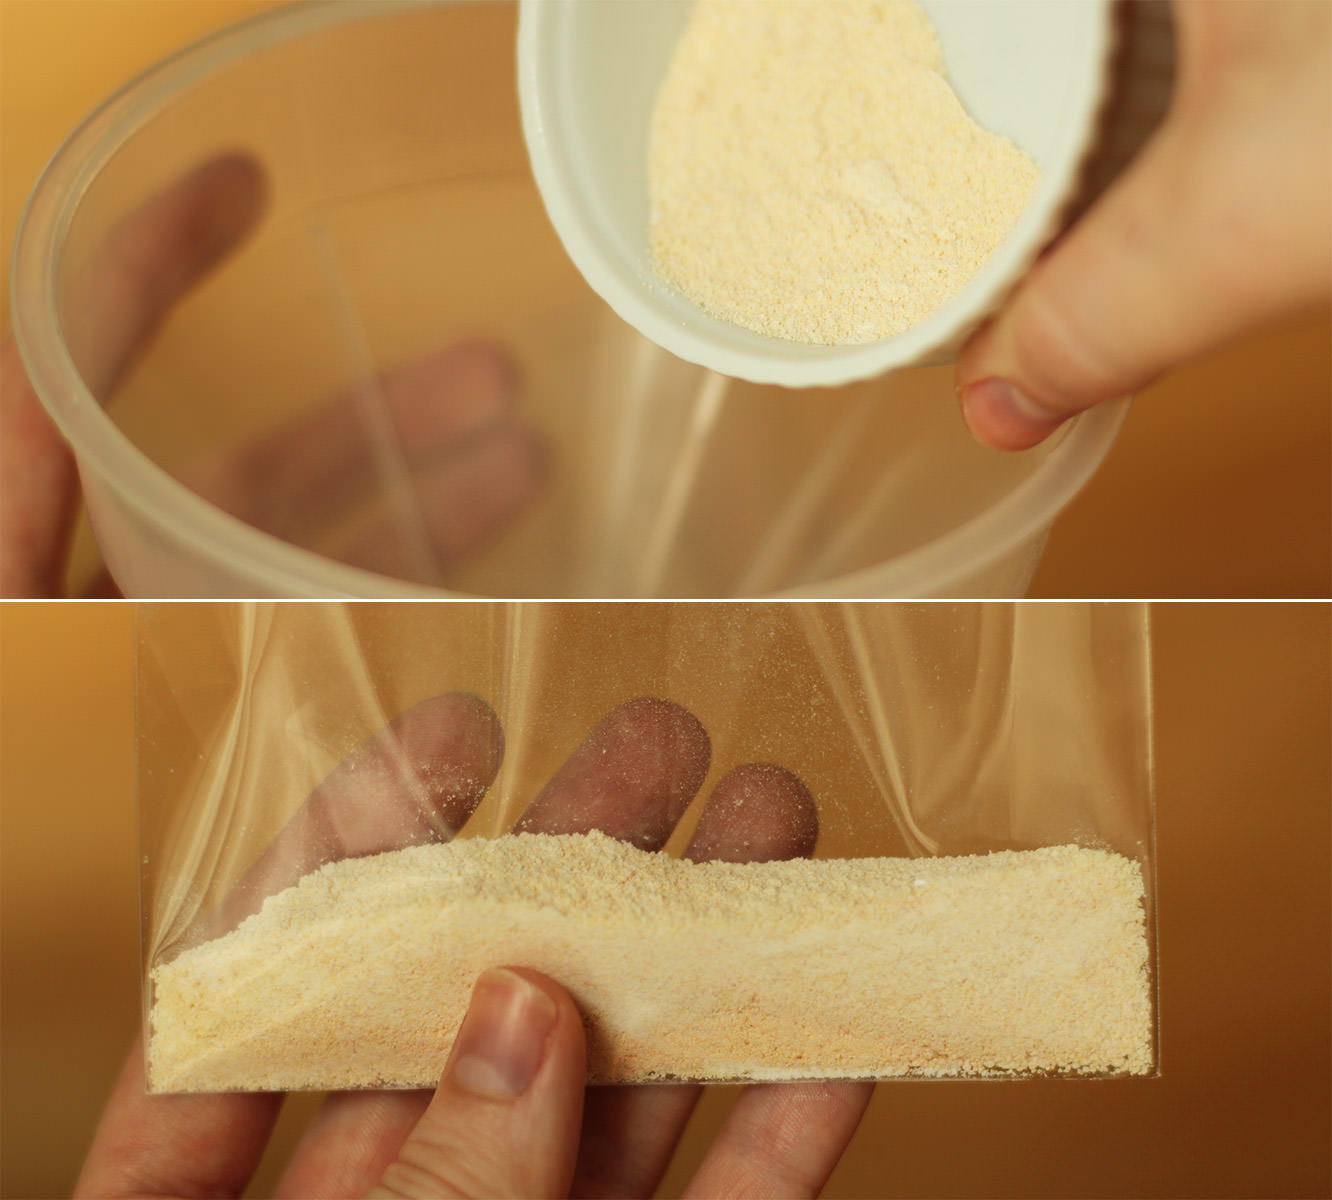
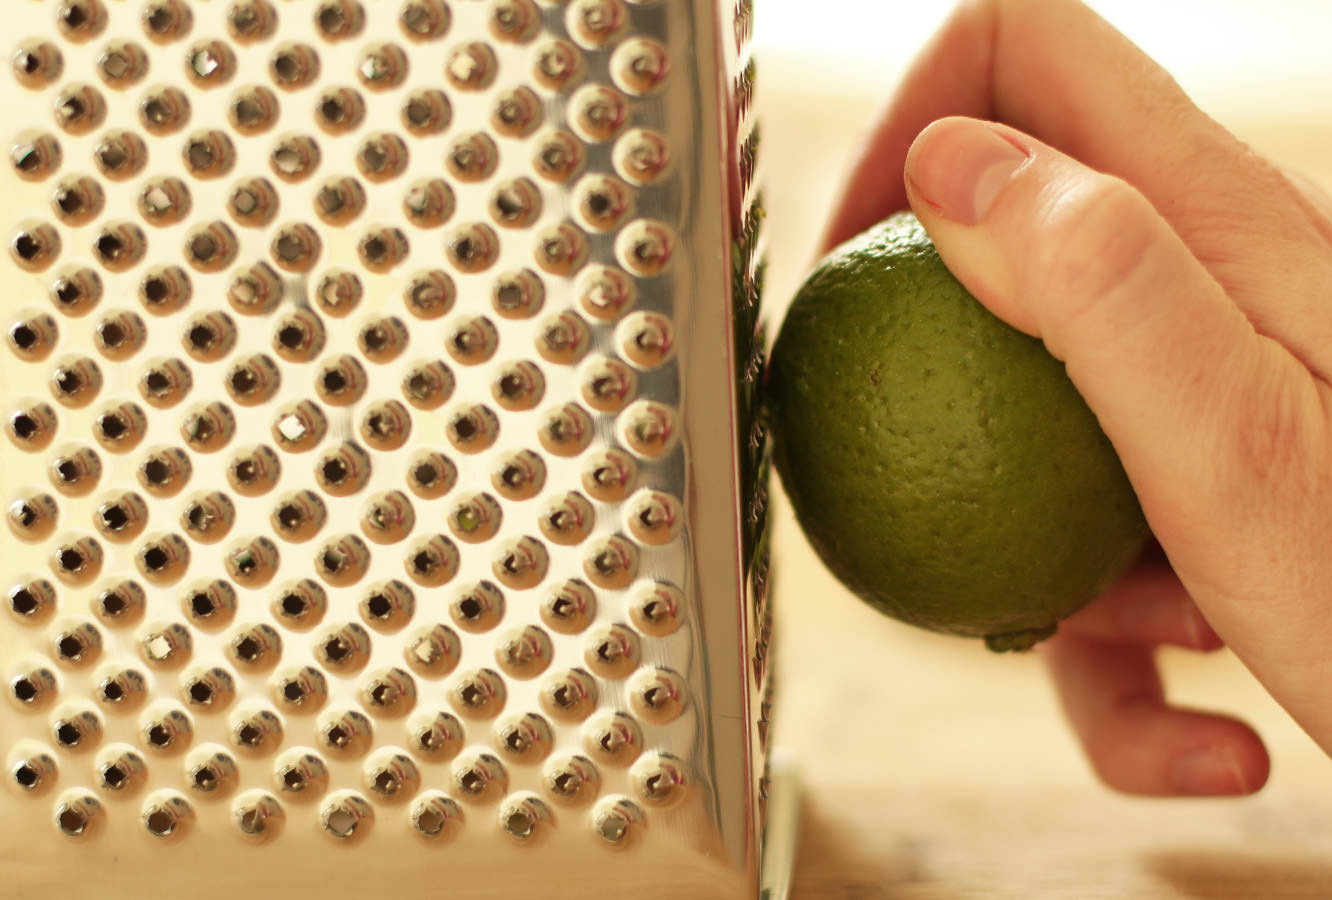
Zest the limes on the smallest ‘setting’ on your grater.
Step five
Melt the white chocolate in a heatproof bowl. As there’s quite a lot of it, it’s really probably better to do this over a pan of boiling water. Otherwise you risk leaving some foil in there, almost blowing up your microwave and burning 600g of chocolate. There might be a small rage blackout to follow.
While the chocolate is still warm stir in a heaped tablespoon of coconut oil.
Step six
This is the tricky bit, you sort of need to distribute the chocolate and lime evenly amongst your batches of popcorn.
Step seven
Stir in the chocolate as well as you can and spread out on baking trays to set. The chocolate won’t fully harden because of the oil but it’s nice that way, I promise.
That’s all folks.
Final instalment next week – the bringing of everything together.
SO. I have been remiss. Friends, stalkers, I’m sorry. I didn’t mean to leave you sans blog for two whole weeks. Finishing off my graphic design portfolio kind of consumed my health, social life, eating habits and ability to hold a conversation.
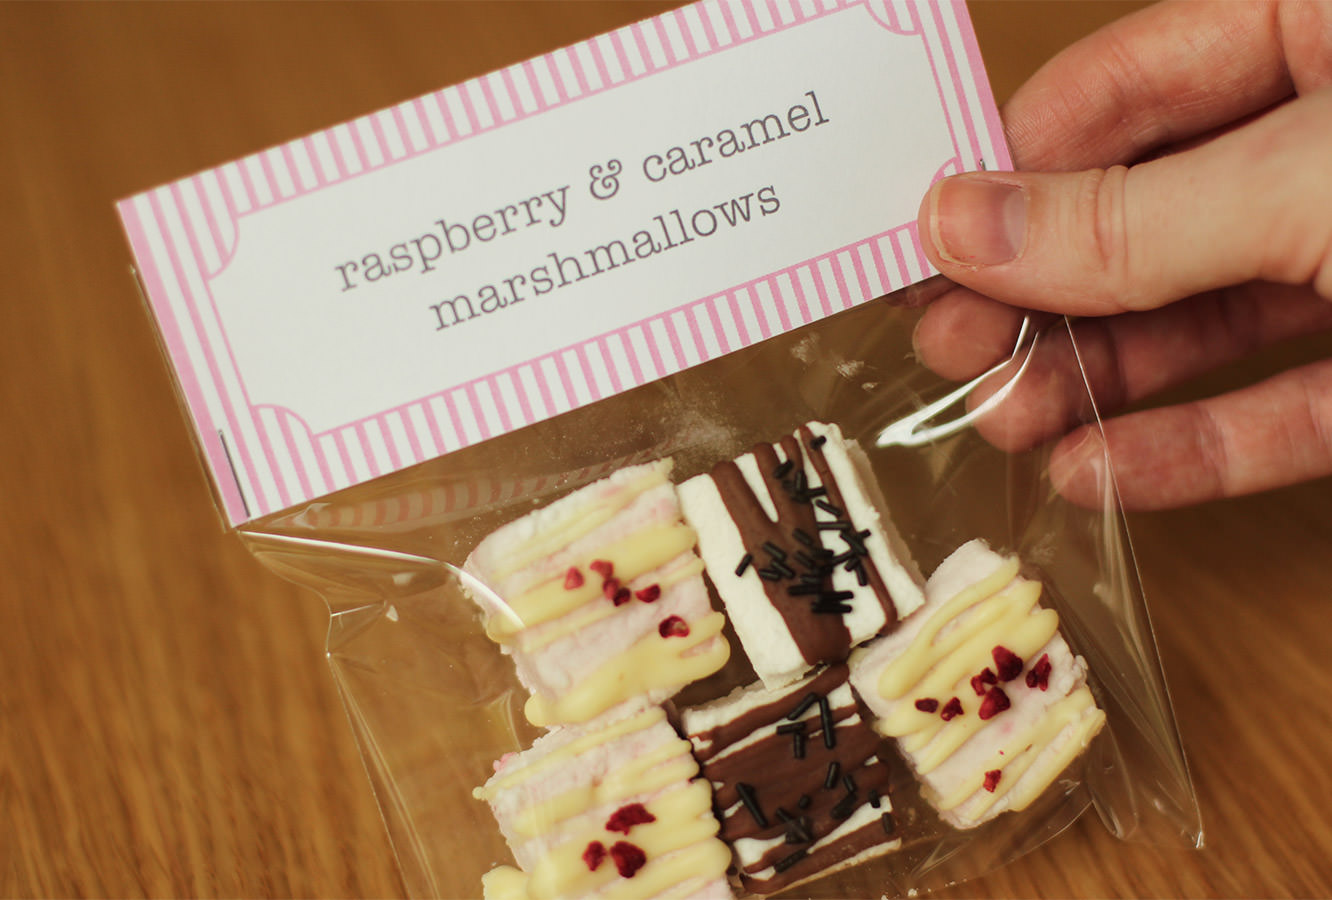
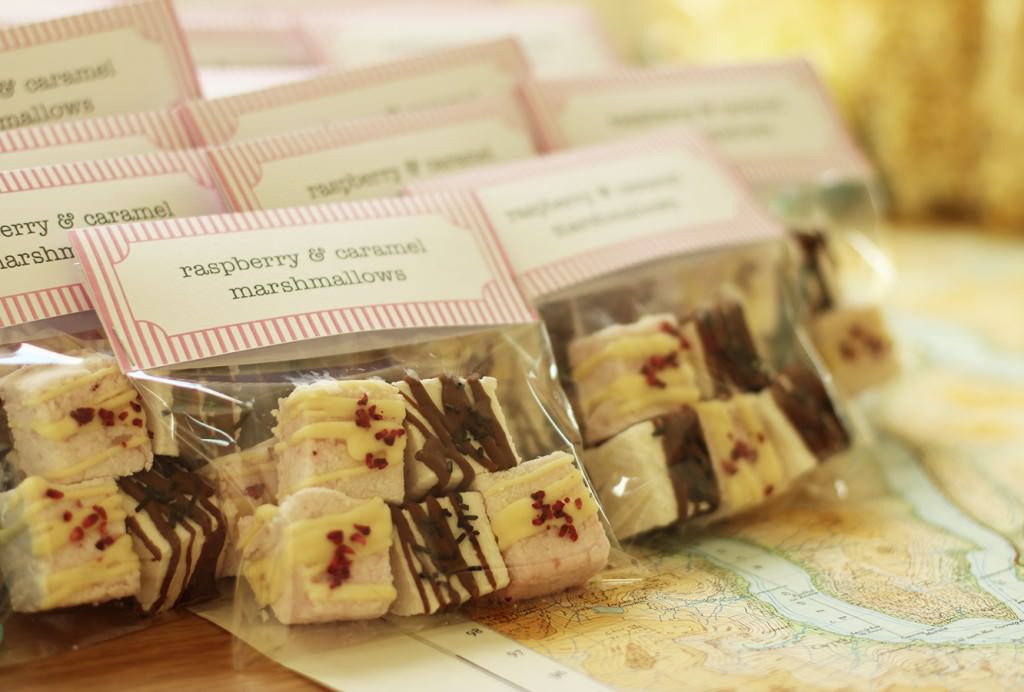
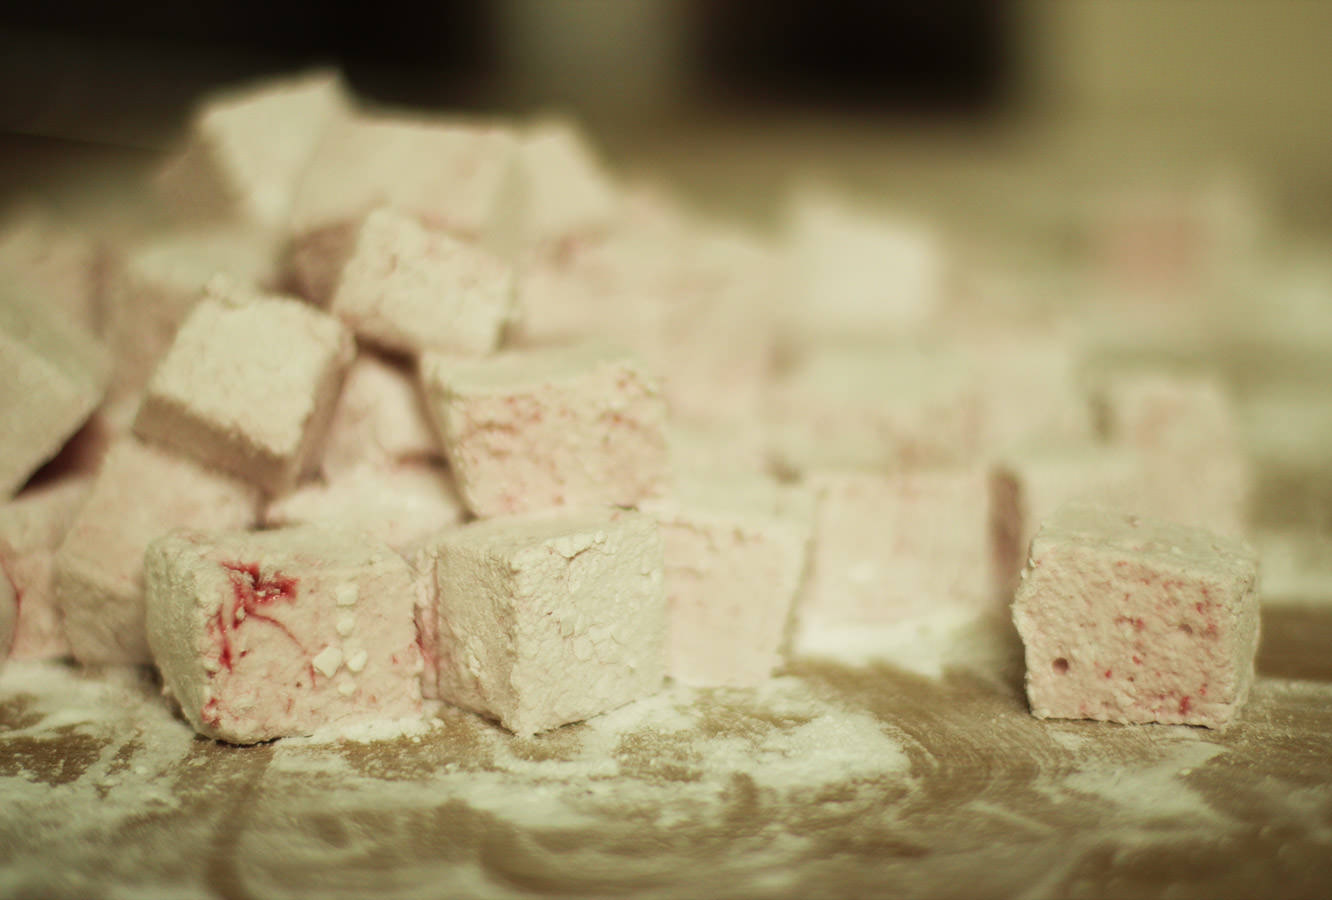
But that’s done now, and I’m back. Picking up where I left off with Vicky’s hen do favours. This week it’s raspberry and white chocolate, and chocolate caramel marshmallows. Not exactly the first time I have made marshmallows on this blog. I really want you to make marshmallows guys.
You will need
For the white chocolate and raspberry marshmallows:
9 gelatine sheets
350g/12 oz granulated sugar
2 egg whites
1 tbsp liquid glucose (you can find this in a squeezy toothpaste type tube in the baking section)
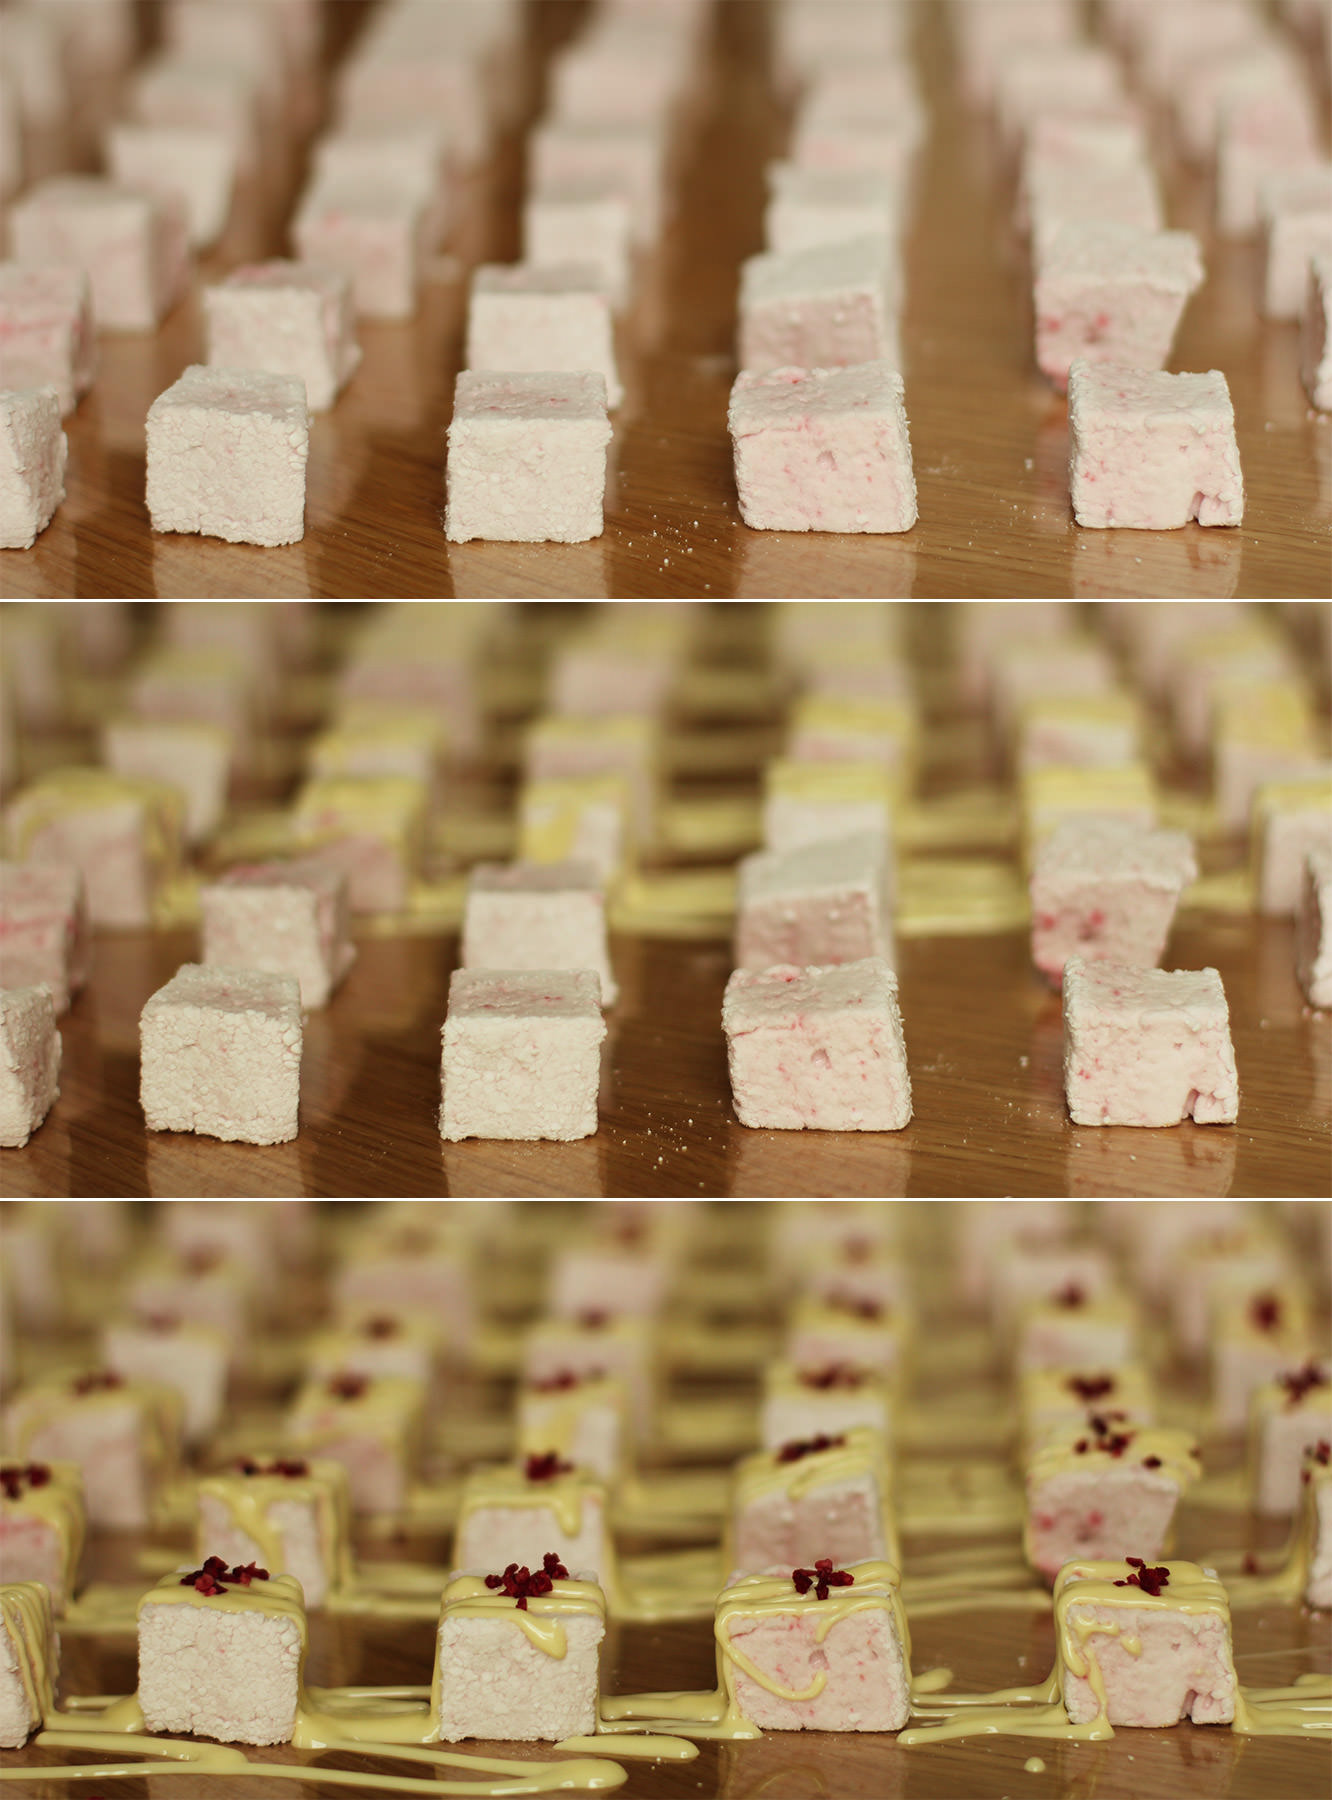
150g/5 oz raspberries
150g/5 oz white chocolate
Freeze dried raspberries (optional)
For the caramel and chocolate marshmallows:
9 gelatine sheets
300g/10.5 oz granulated sugar
2 egg whites
1 tbsp liquid glucose
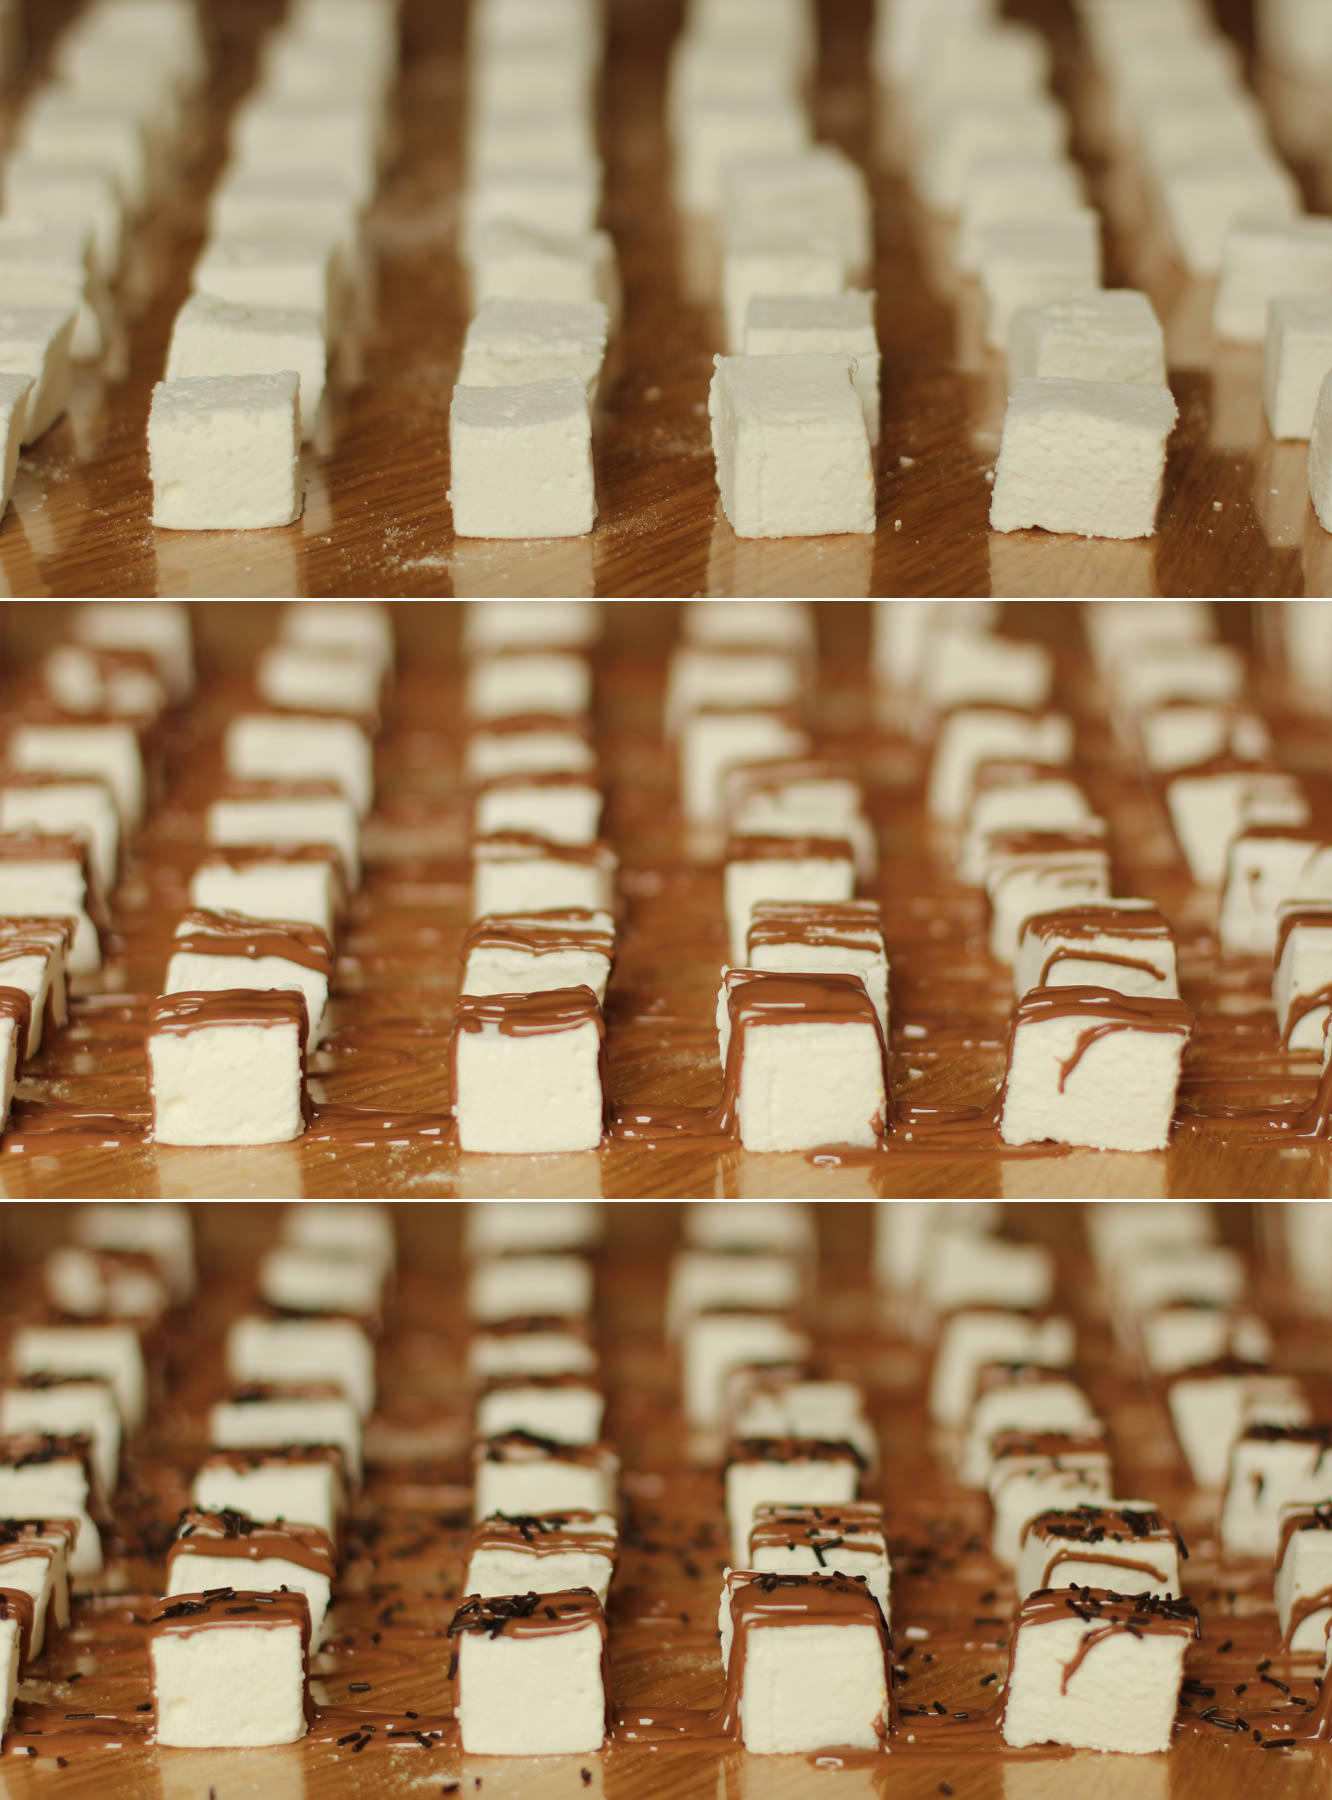
2-3 tsp caramel extract (I got buttery caramel from natural professional flavours at Lakeland)
150g/5 oz milk chocolate
Cellophane card bags x 30
(makes enough for 30 favours, 150+ marshmallows)
I’ll go ahead and walk you through the process for the caramel ones then pop the changes for the raspberry below.
Step one
In a cereal bowl, soak the gelatine in 150ml/5 fl oz cold water. Set aside.
Step two
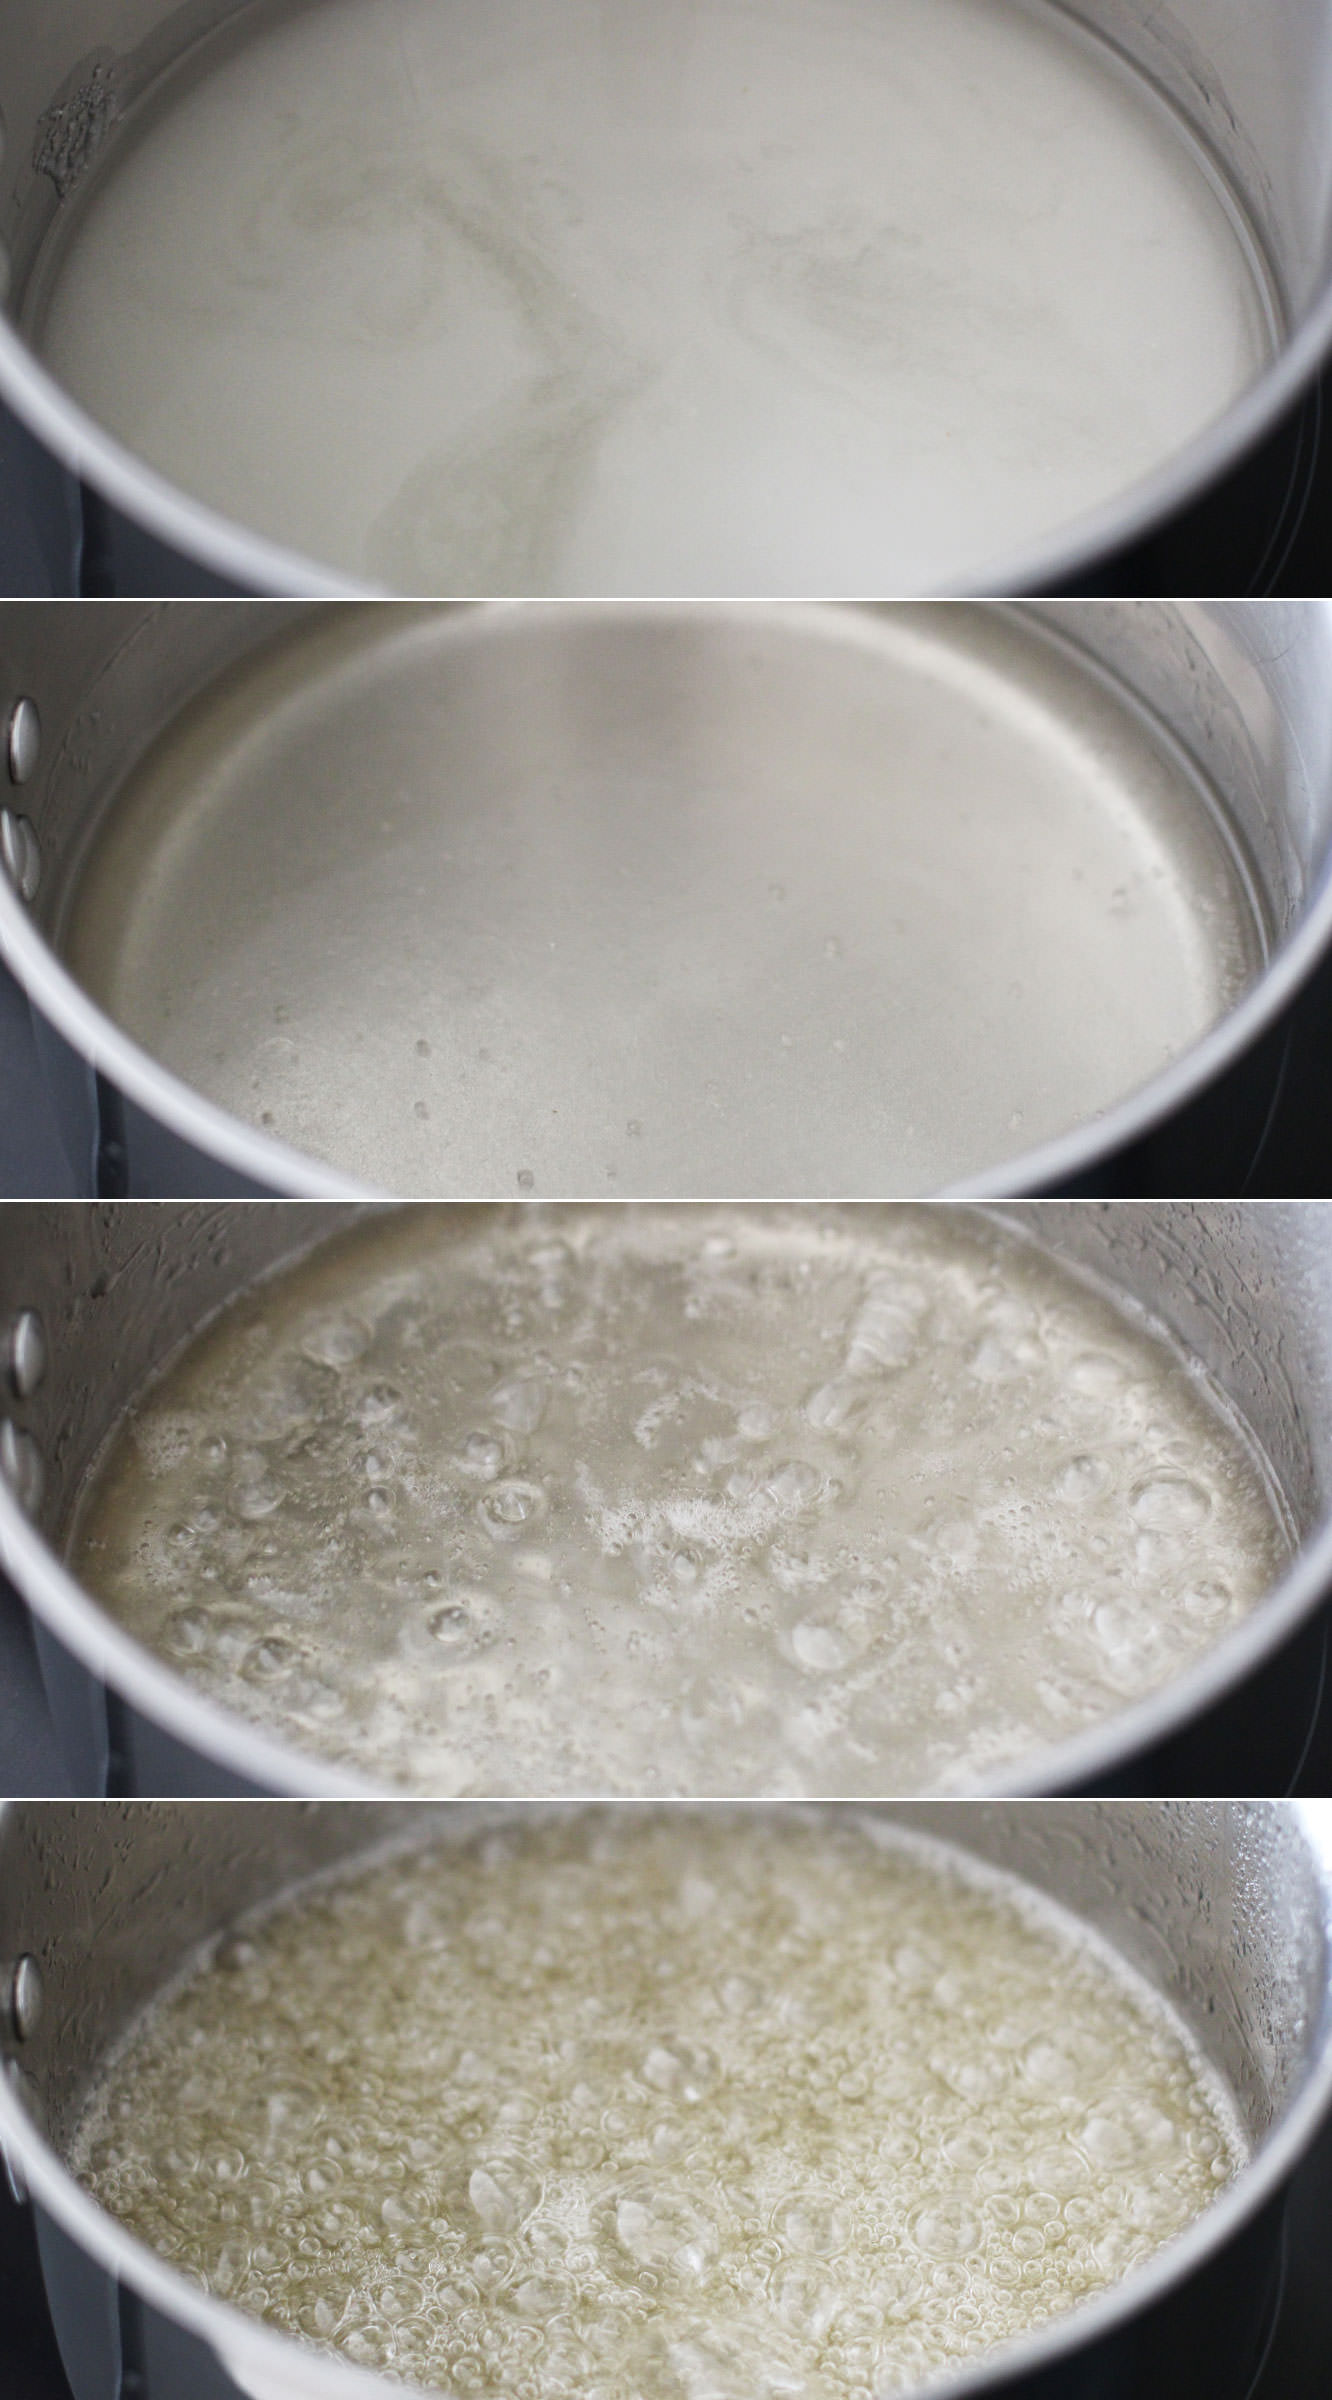
Combine the sugar, 150ml/5 fl oz water (different to the gelatine water) and the liquid glucose in a smallish saucepan.
Allow the sugar to dissolve on a low heat, and then turn it up to medium-high. Watch yourself buddy, you’re boiling sugar right now, don’t hurt it or yourself.
The temperature you want this to get to is 118 C. It will feel like it will never get there, but stay strong.
Step three
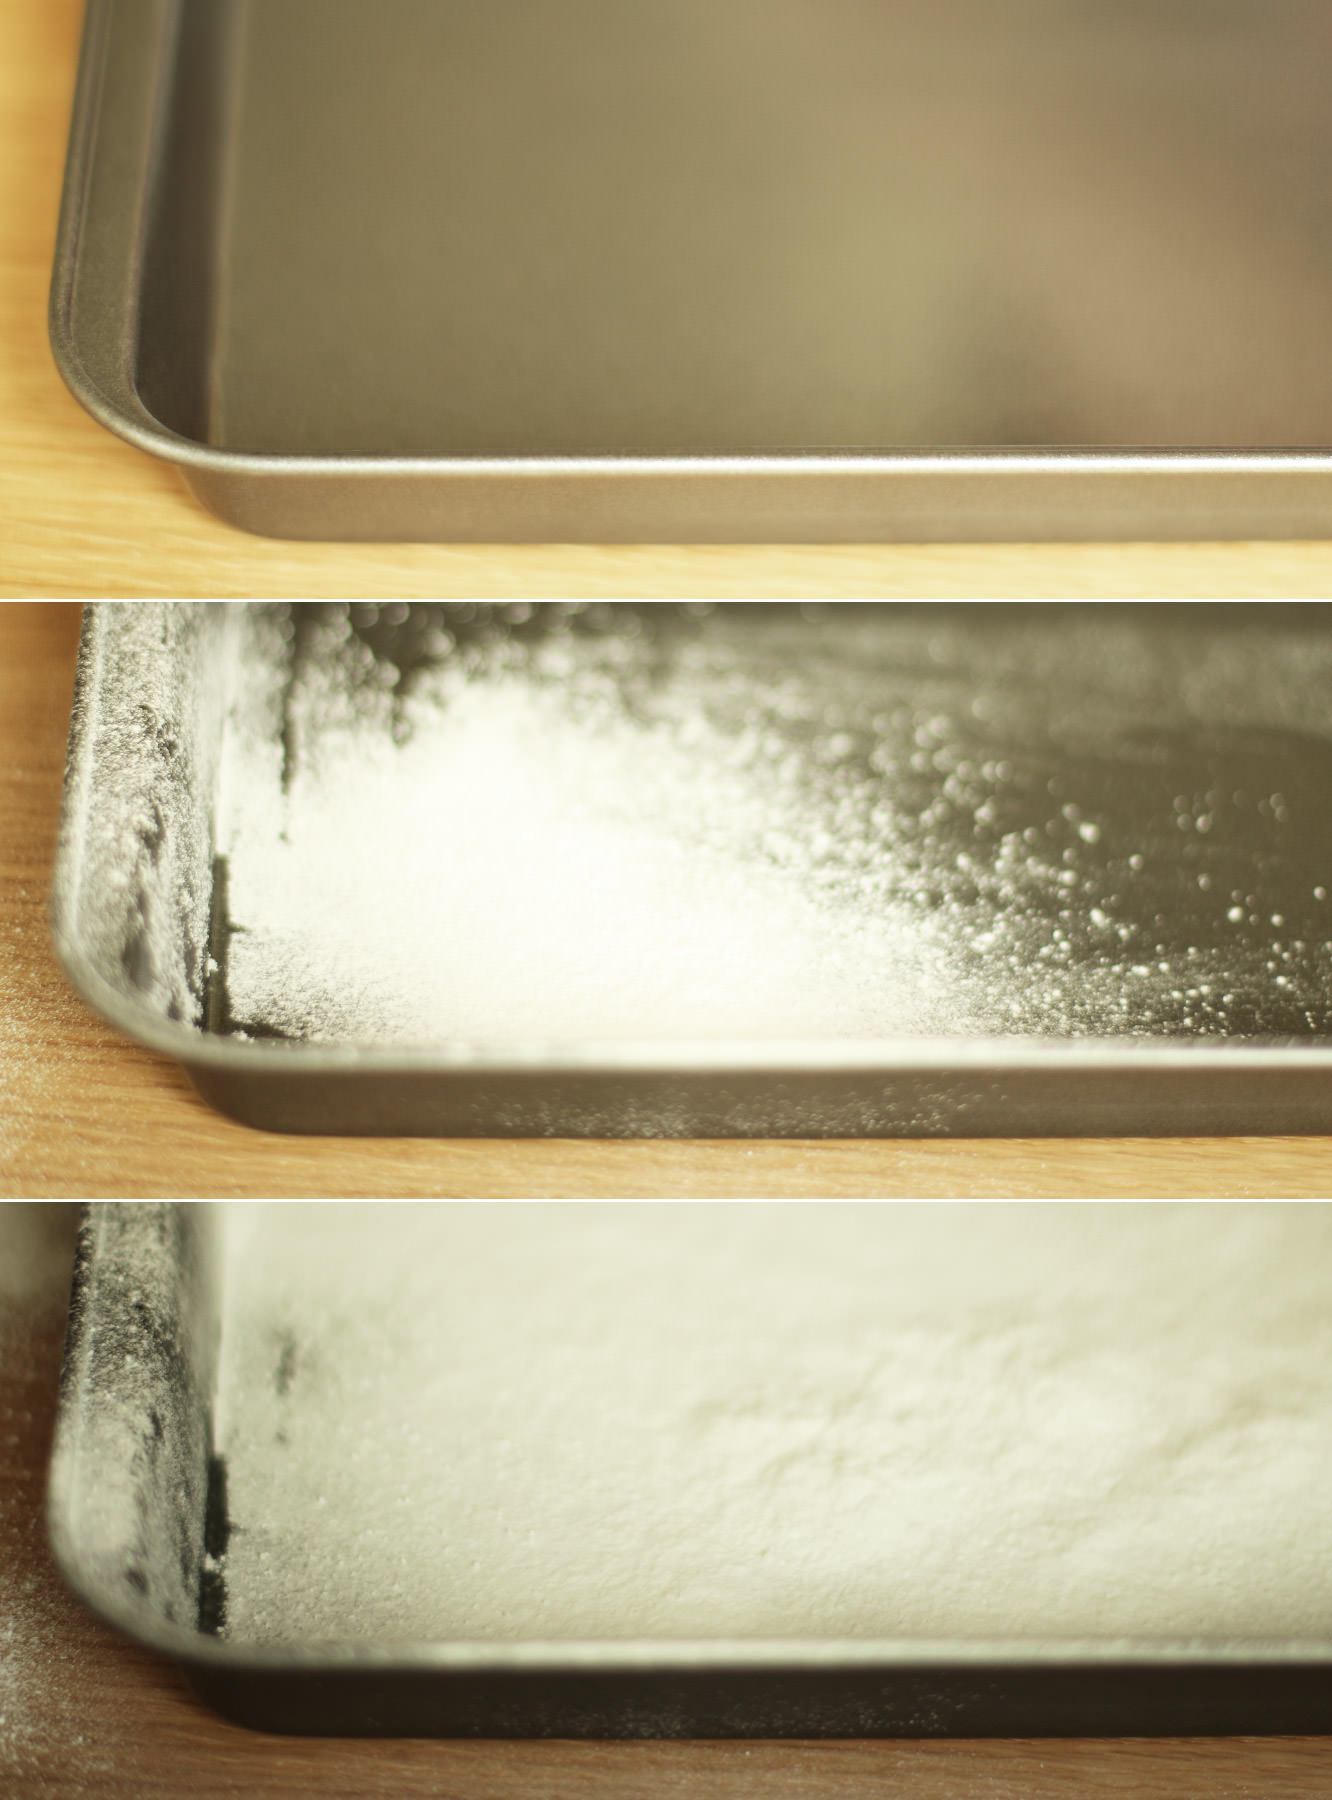
While the sugar is bubbling you can take a moment to dust your brownie tray with icing sugar. Add a small amount of olive oil first so it sticks.
Step four
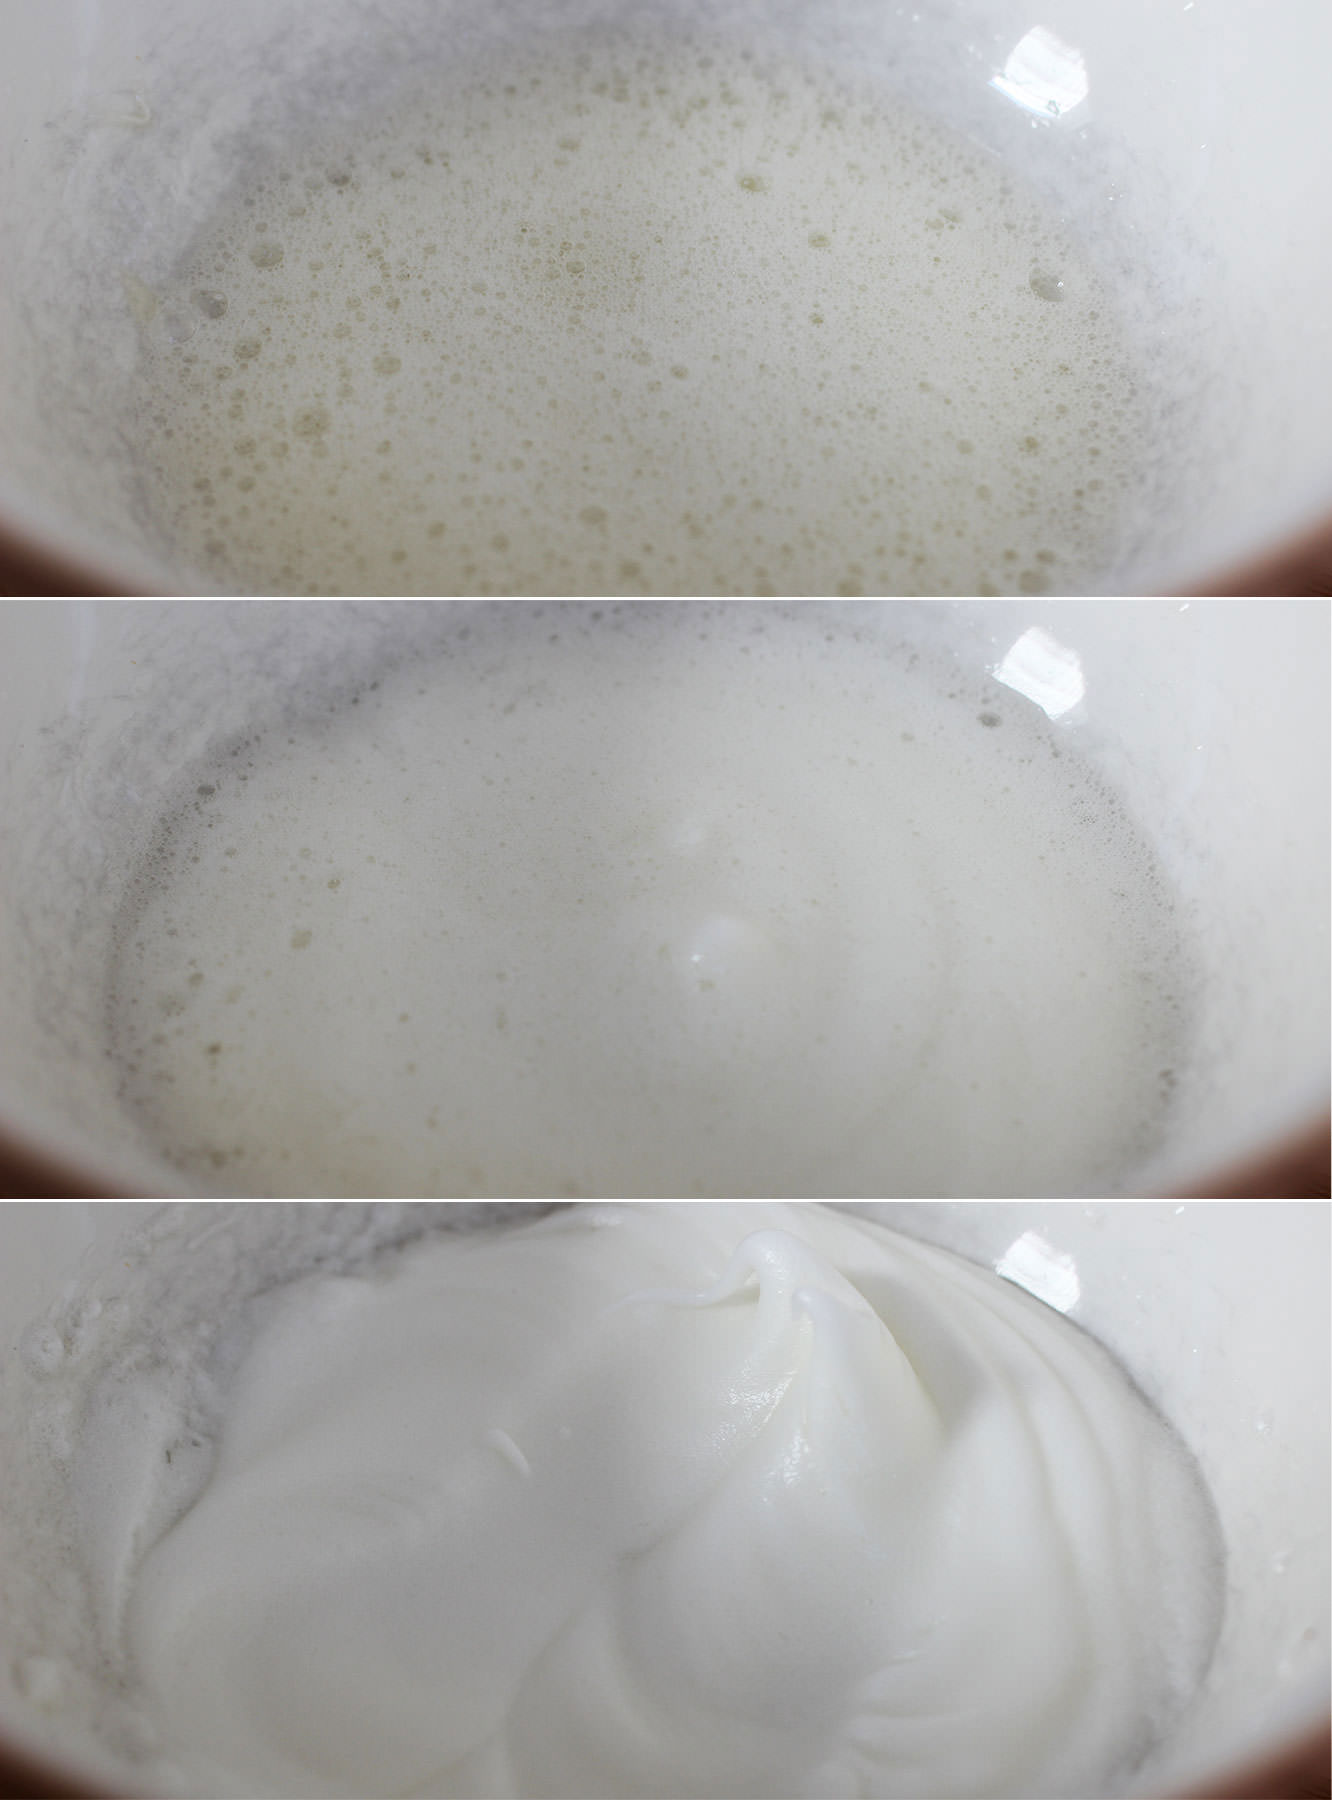
When the sugar gets to somewhere around 112-115C whisk the egg whites into stiff peaks. Take care not to use a ceramic bowl else you will get grey marks like I did. Glass or metal though and you’ll be golden.
Step five
When the sugar reaches 118C take it off the heat.
Squeeze the gelatine out a bit and add it to the sugar mix. It will bubble right up so don’t panic. It should settle pretty quickly.
Step six
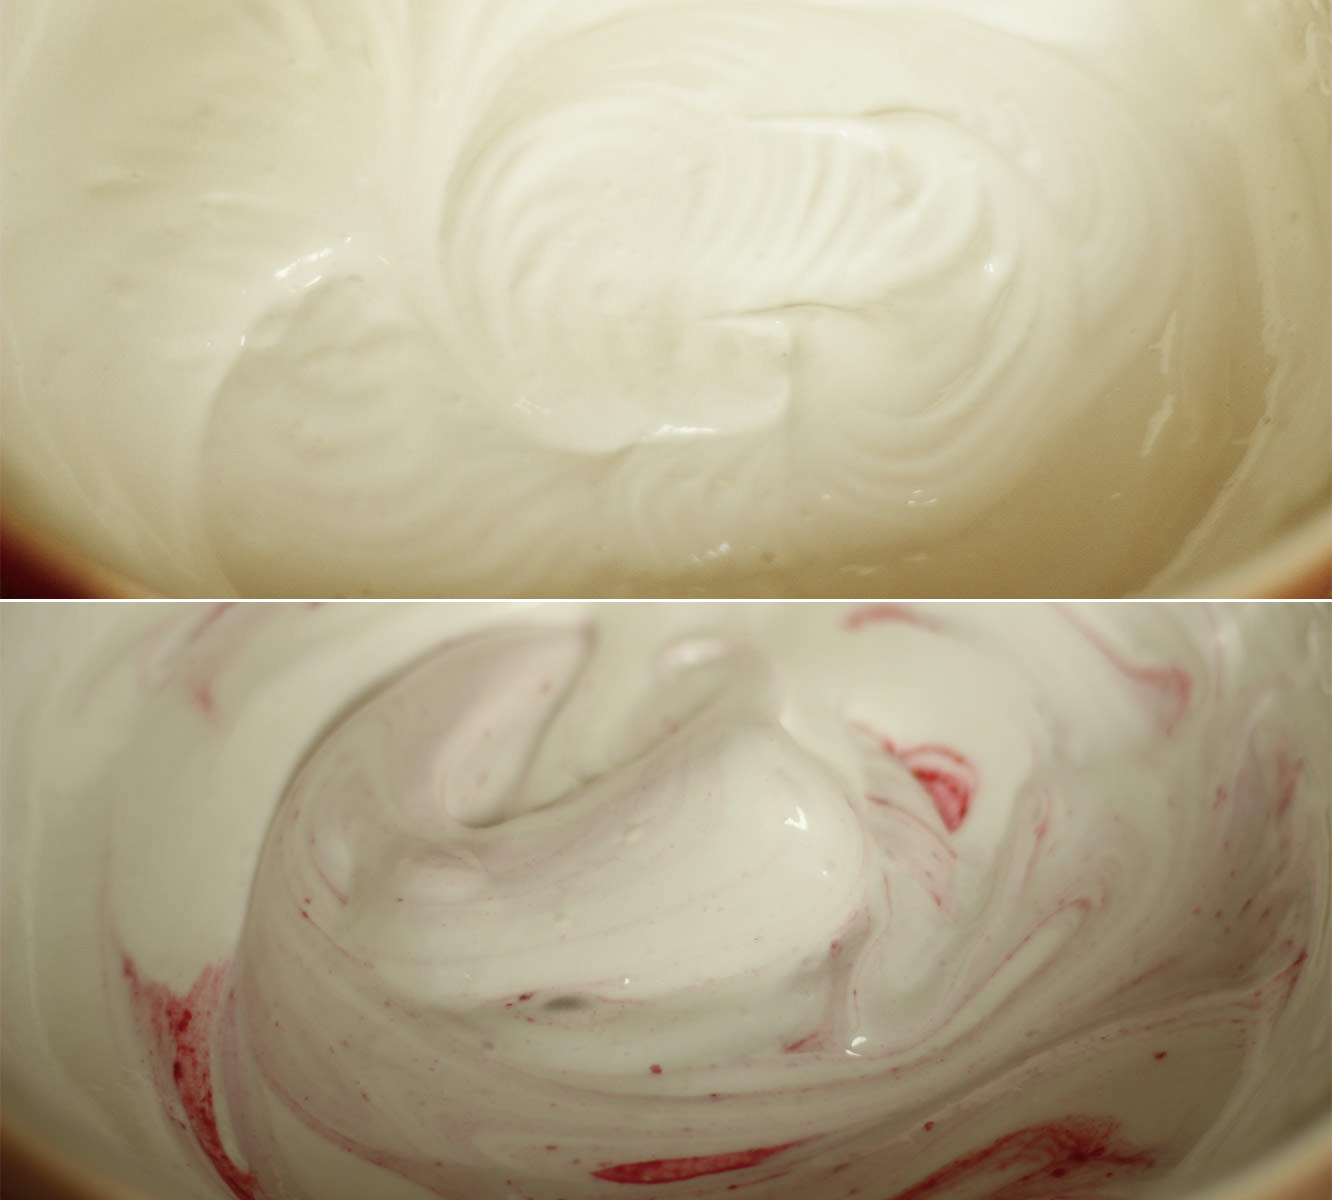
Pour the hot sugar into the eggs, but make sure you’re whisking continually to avoid a big lump of sugar at the bottom of the bowl.
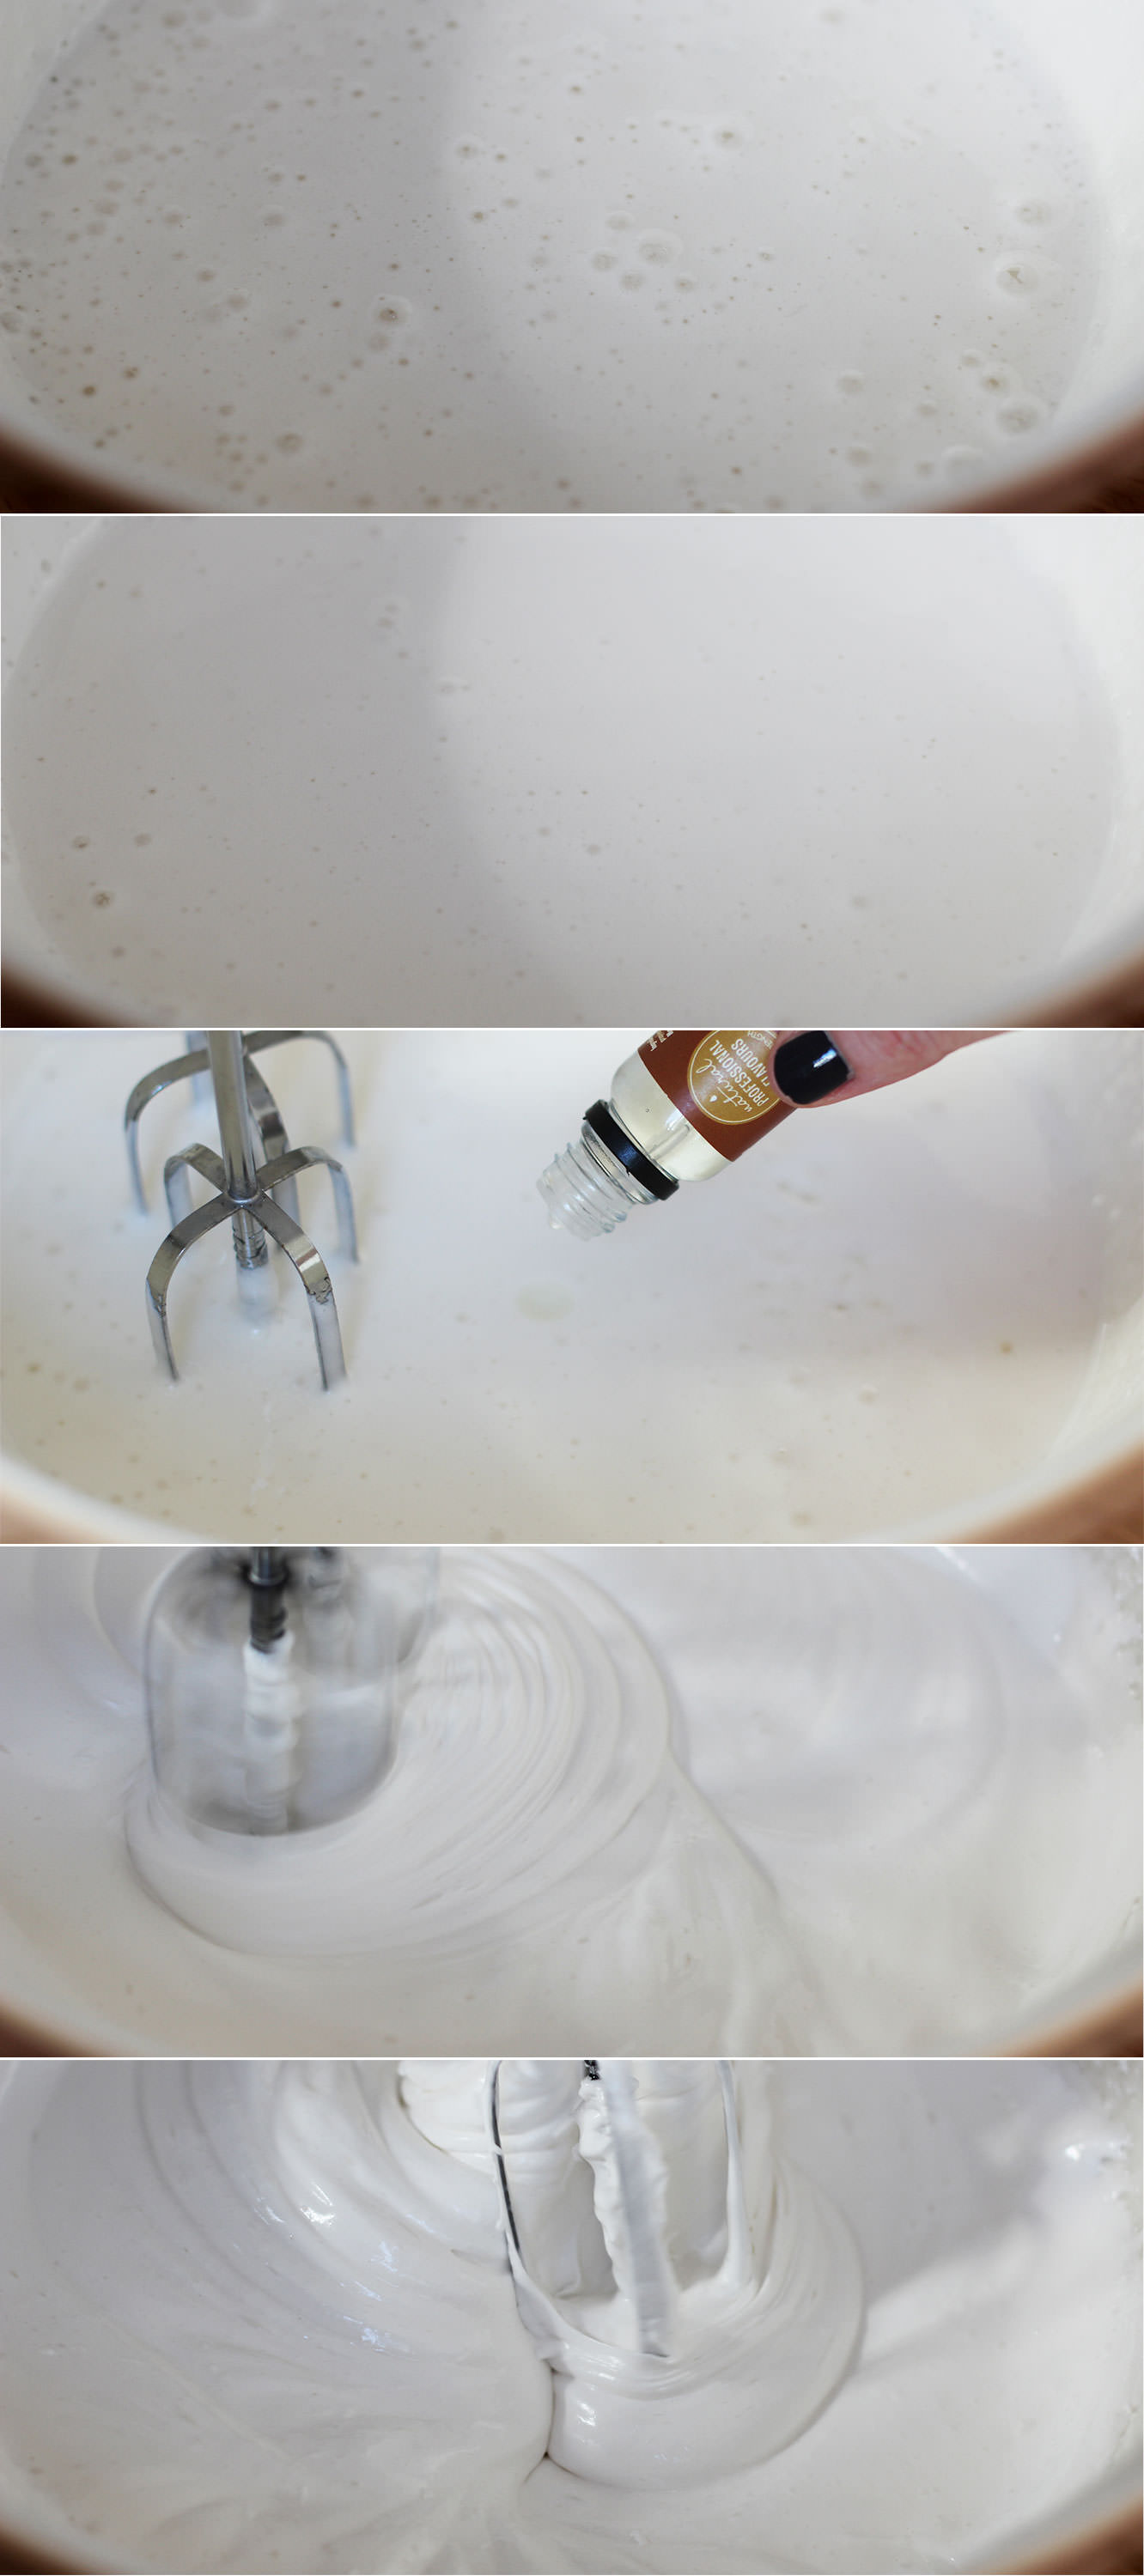
Whisk until the mixture holds its shape well and is quite thick. This can take up to ten minutes.
Somewhere during the whisking (probably when you need to give your arm a rest) add the flavouring. I used buttery caramel (as mentioned in the ingredients) but they will take basically anything you fancy.
Step seven
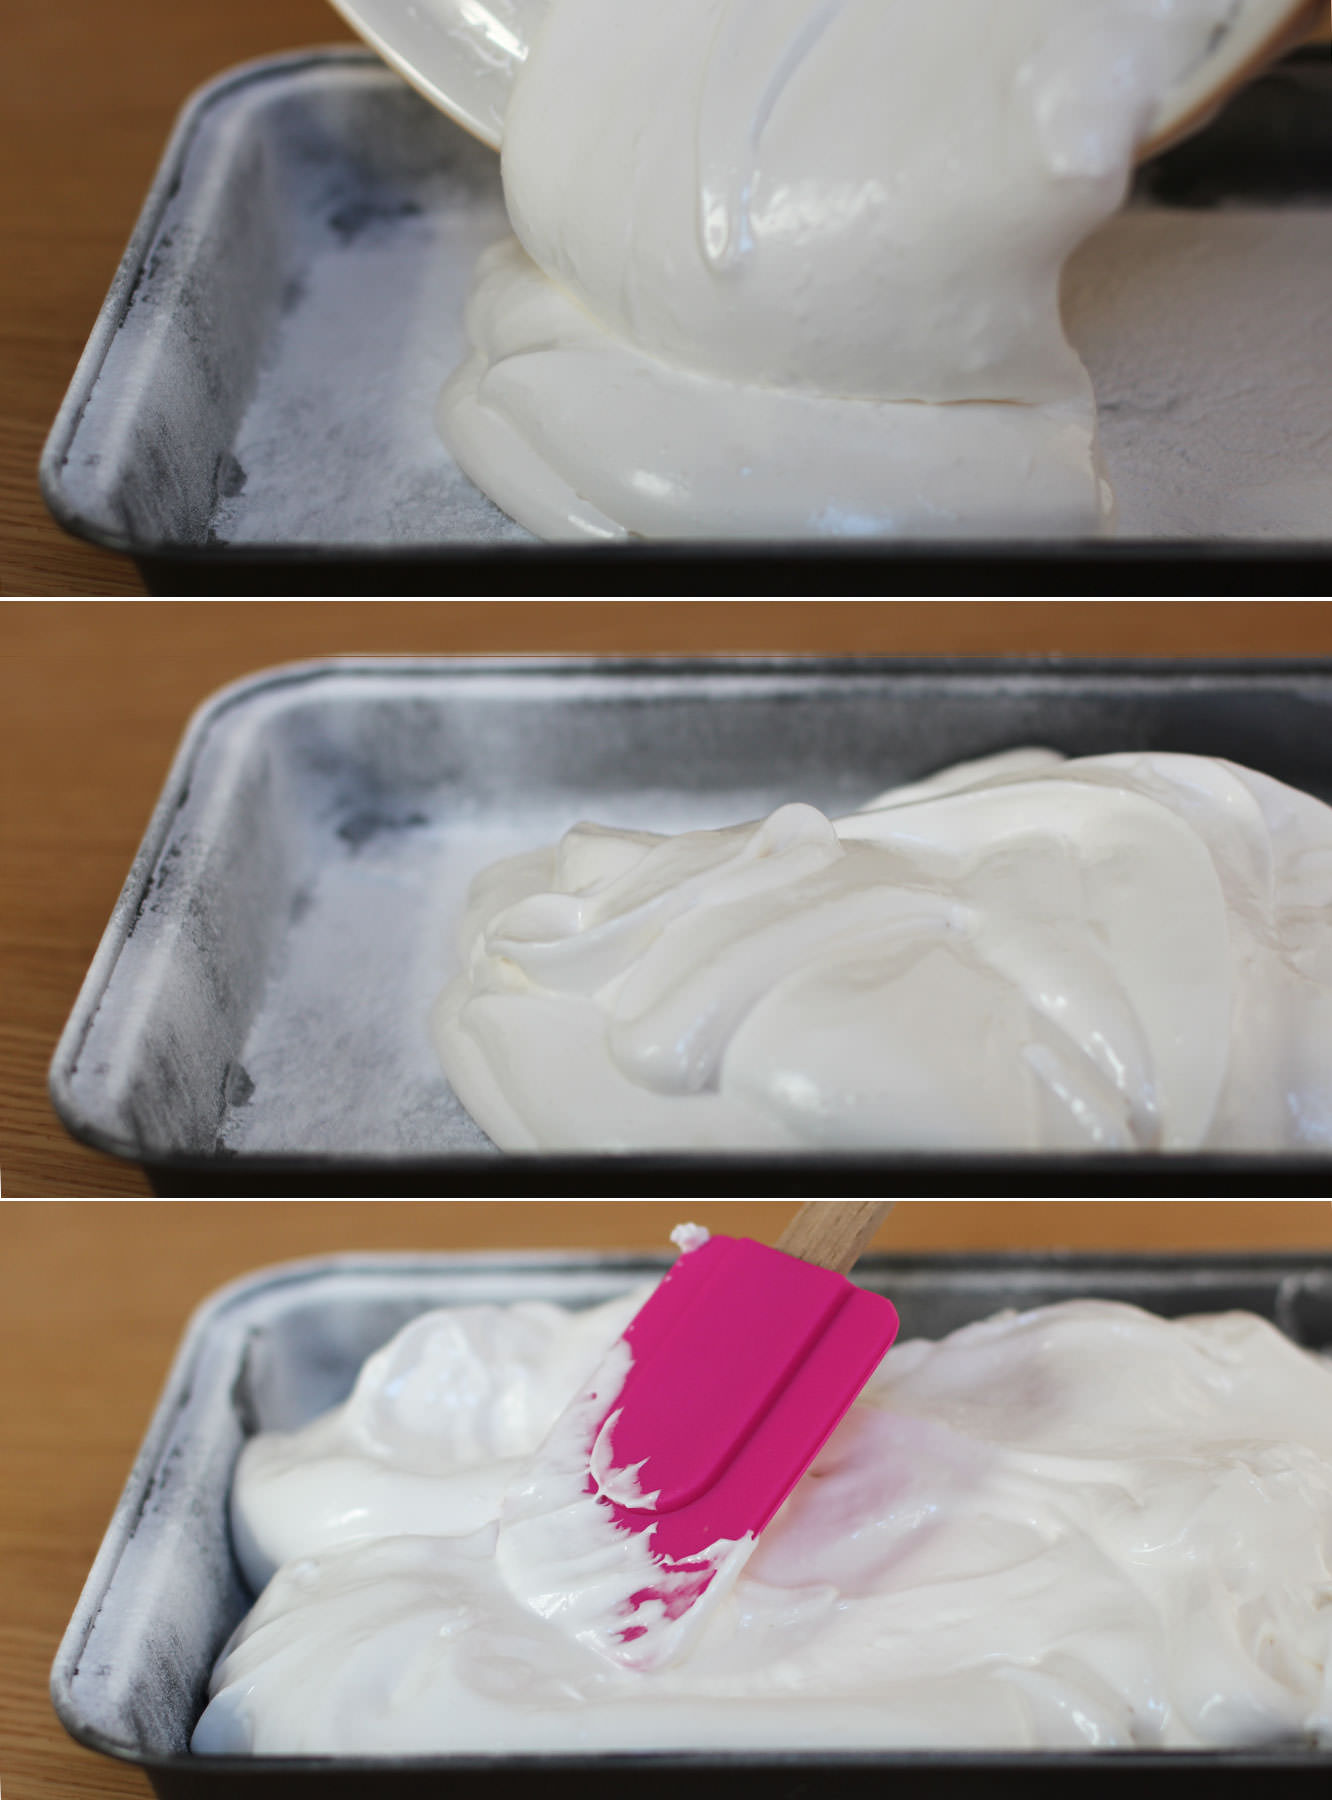
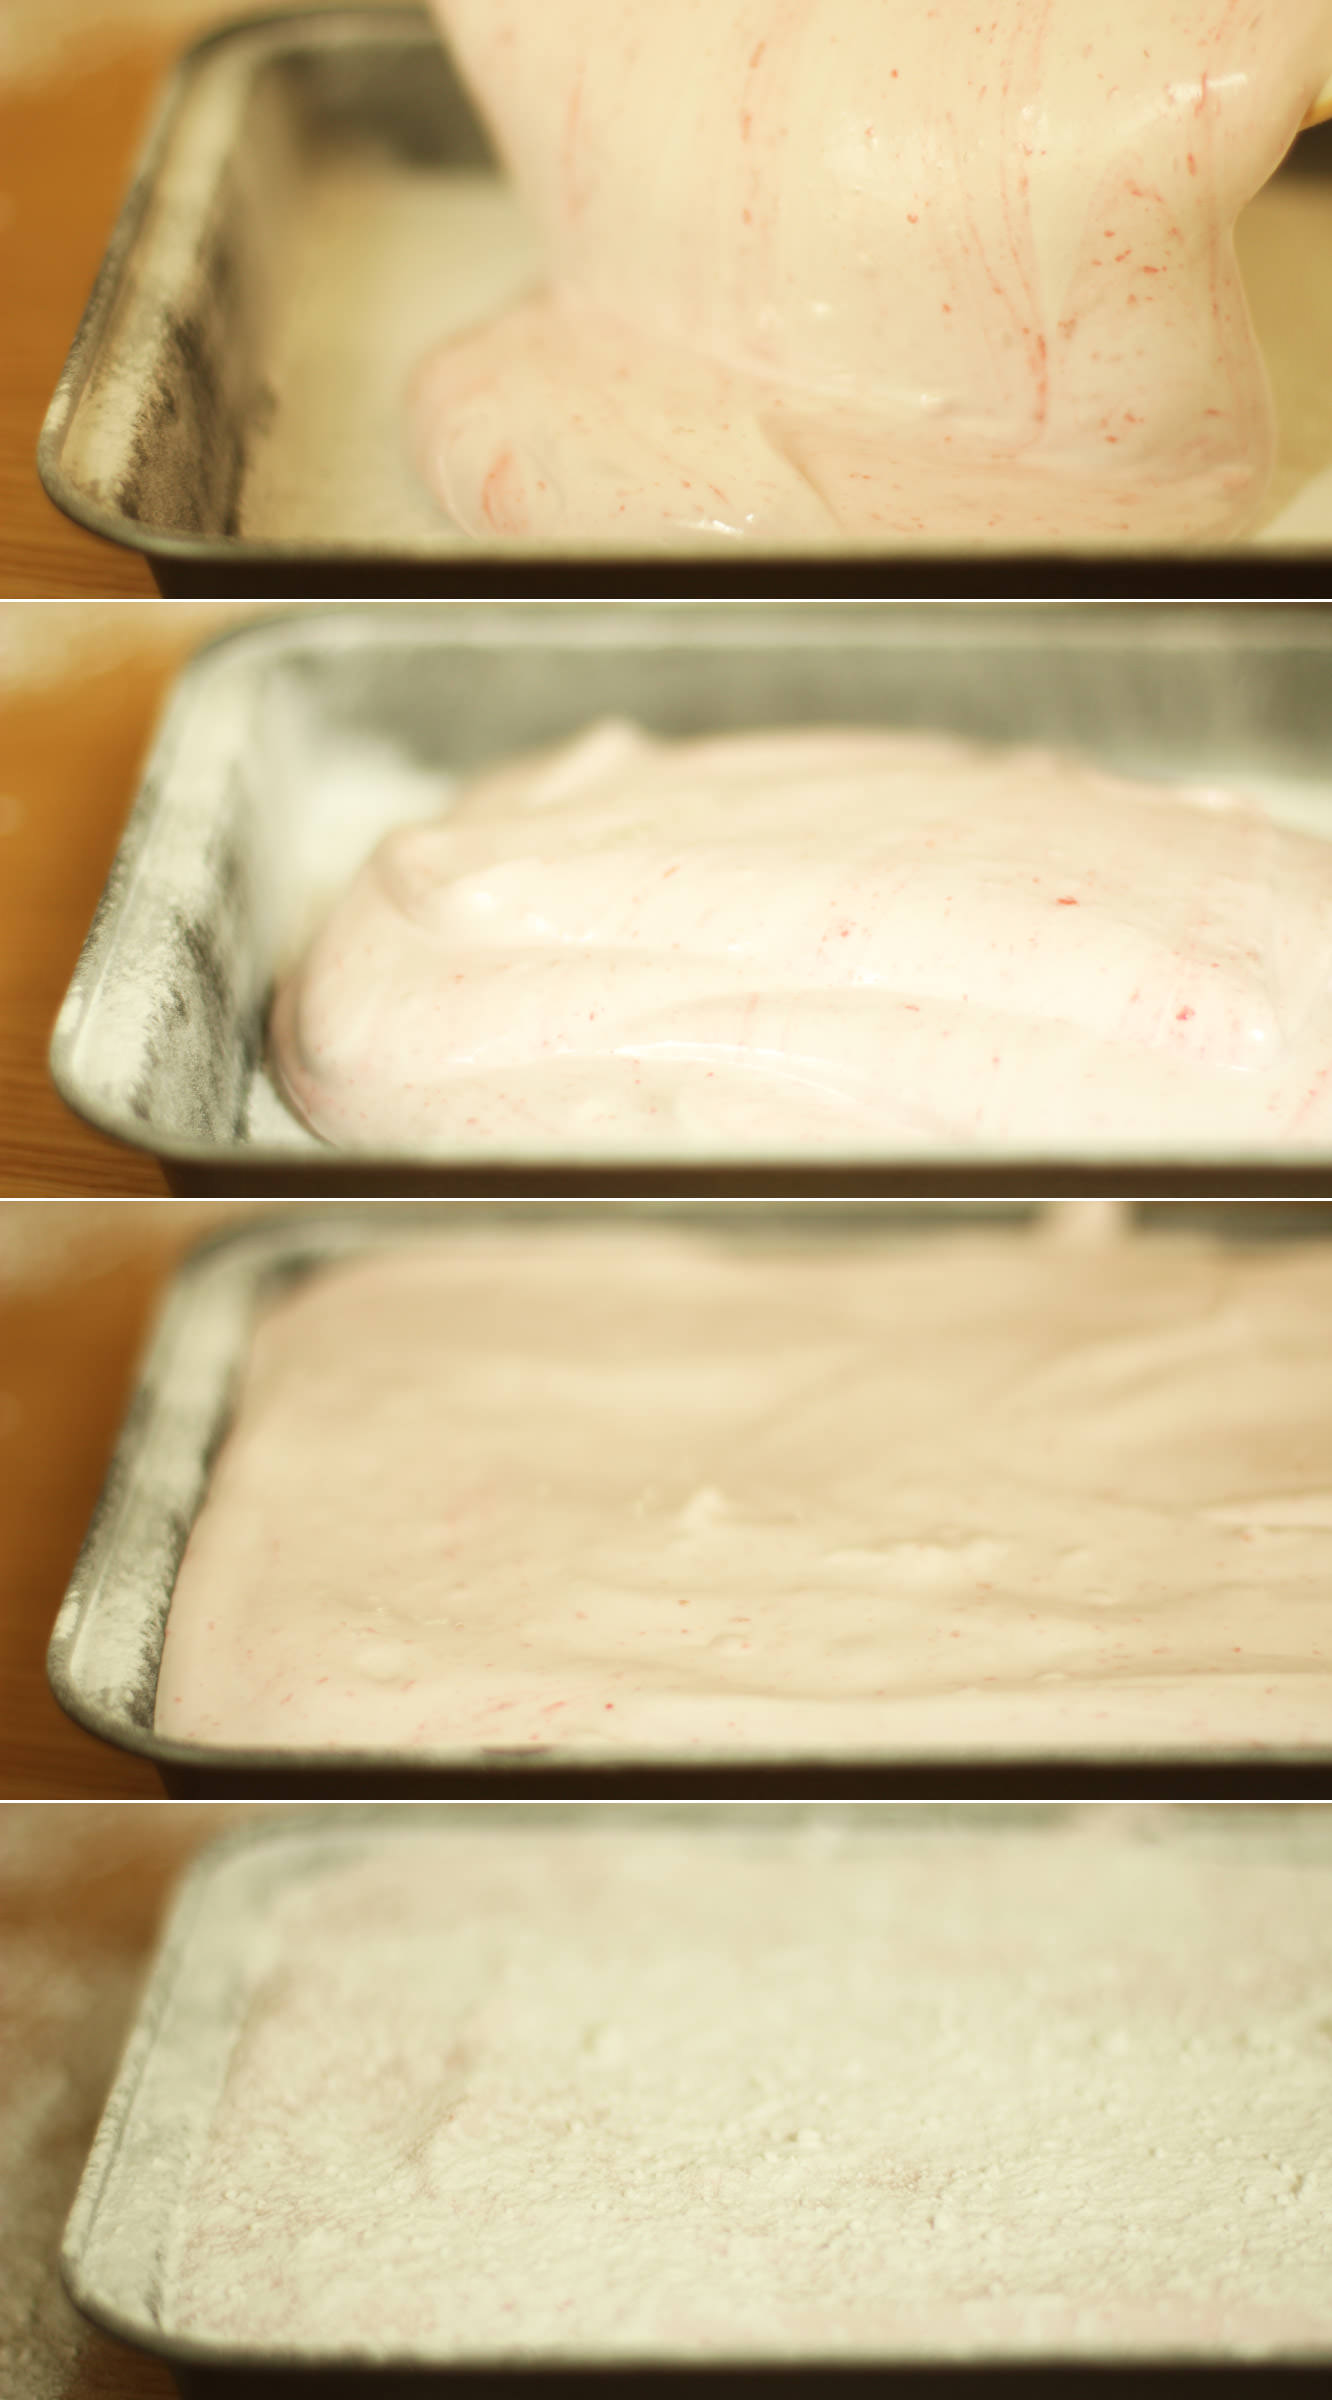
Pour the mixture into the prepared tin and smooth out as much as possible.
Dust with icing sugar and leave to set for about an hour.
For the raspberry and white chocolate marshmallows
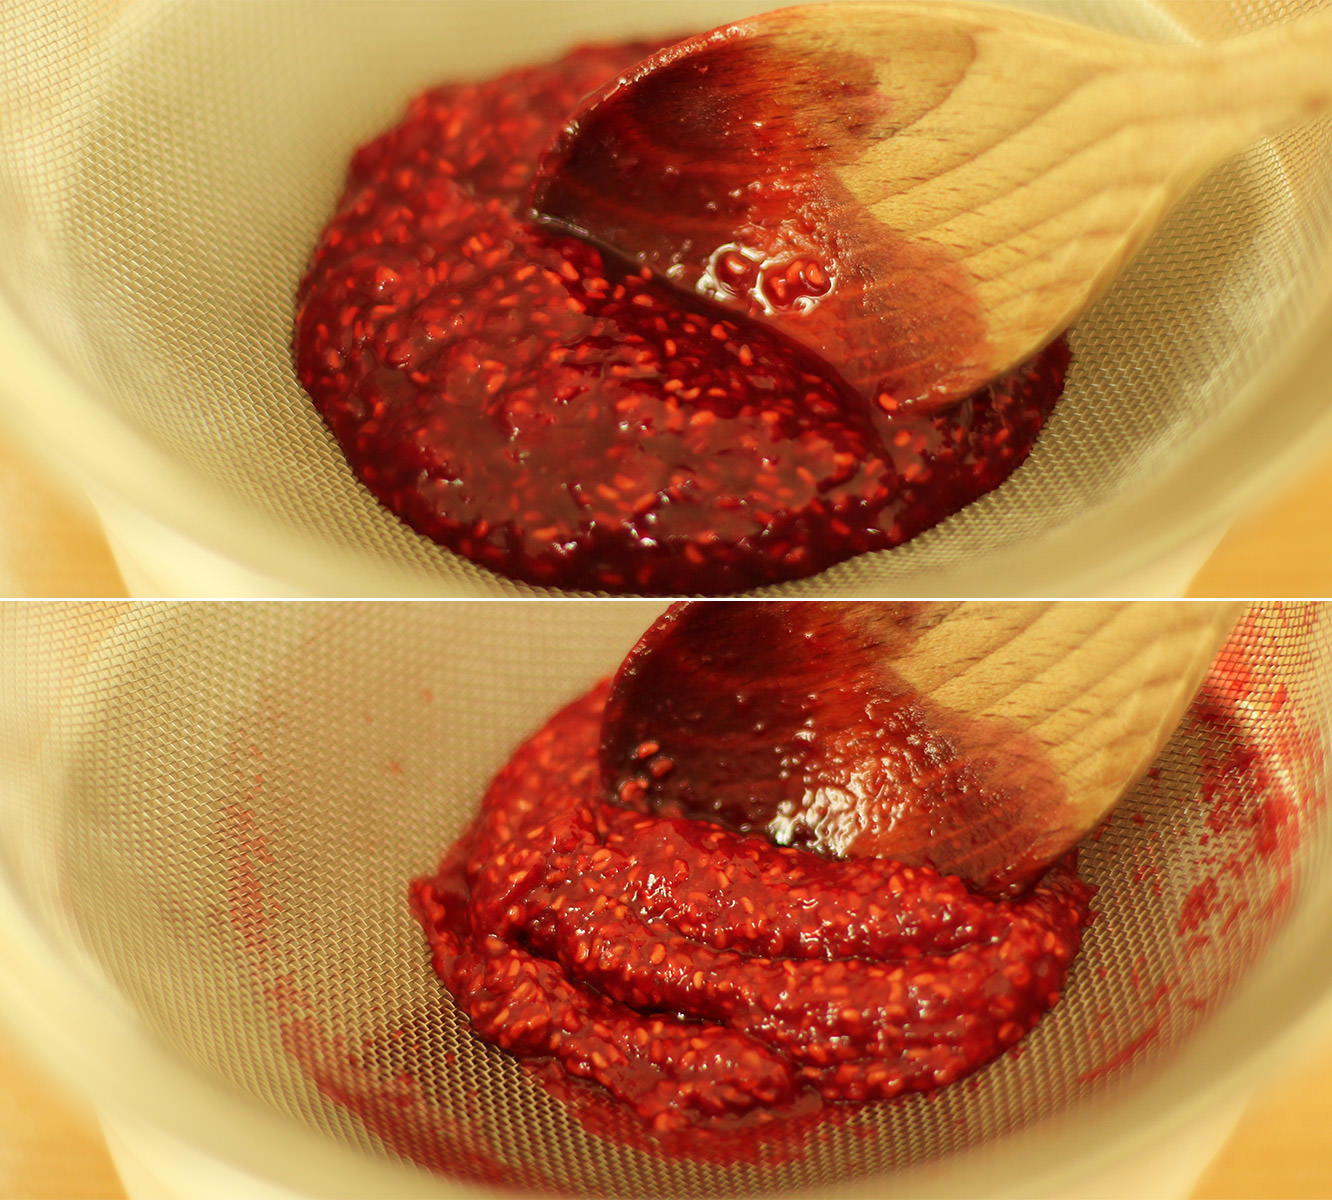
Step eight
Before starting the marshmallow mix make a puree by adding the raspberries, 50g of the granulated sugar and half a tablespoon of water to a small saucepan.
Heat on a low heat until bubbling away happily. Stir while the mixture reduces (looses water) for about 5 minutes.
Step nine
Strain though a sieve to remove the pips. It may need a little stirring for encouragement. Don’t forget to scrape the excess off from the underside of the sieve before throwing away the pips.
Step ten
Follow the same steps at the caramel recipe, but instead of adding the extract, stir in the puree. I saved this to near the end to keep a bit of a ripple effect.
Step eleven
Pour into a second dusted brownie tray and leave to set.
Step twelve
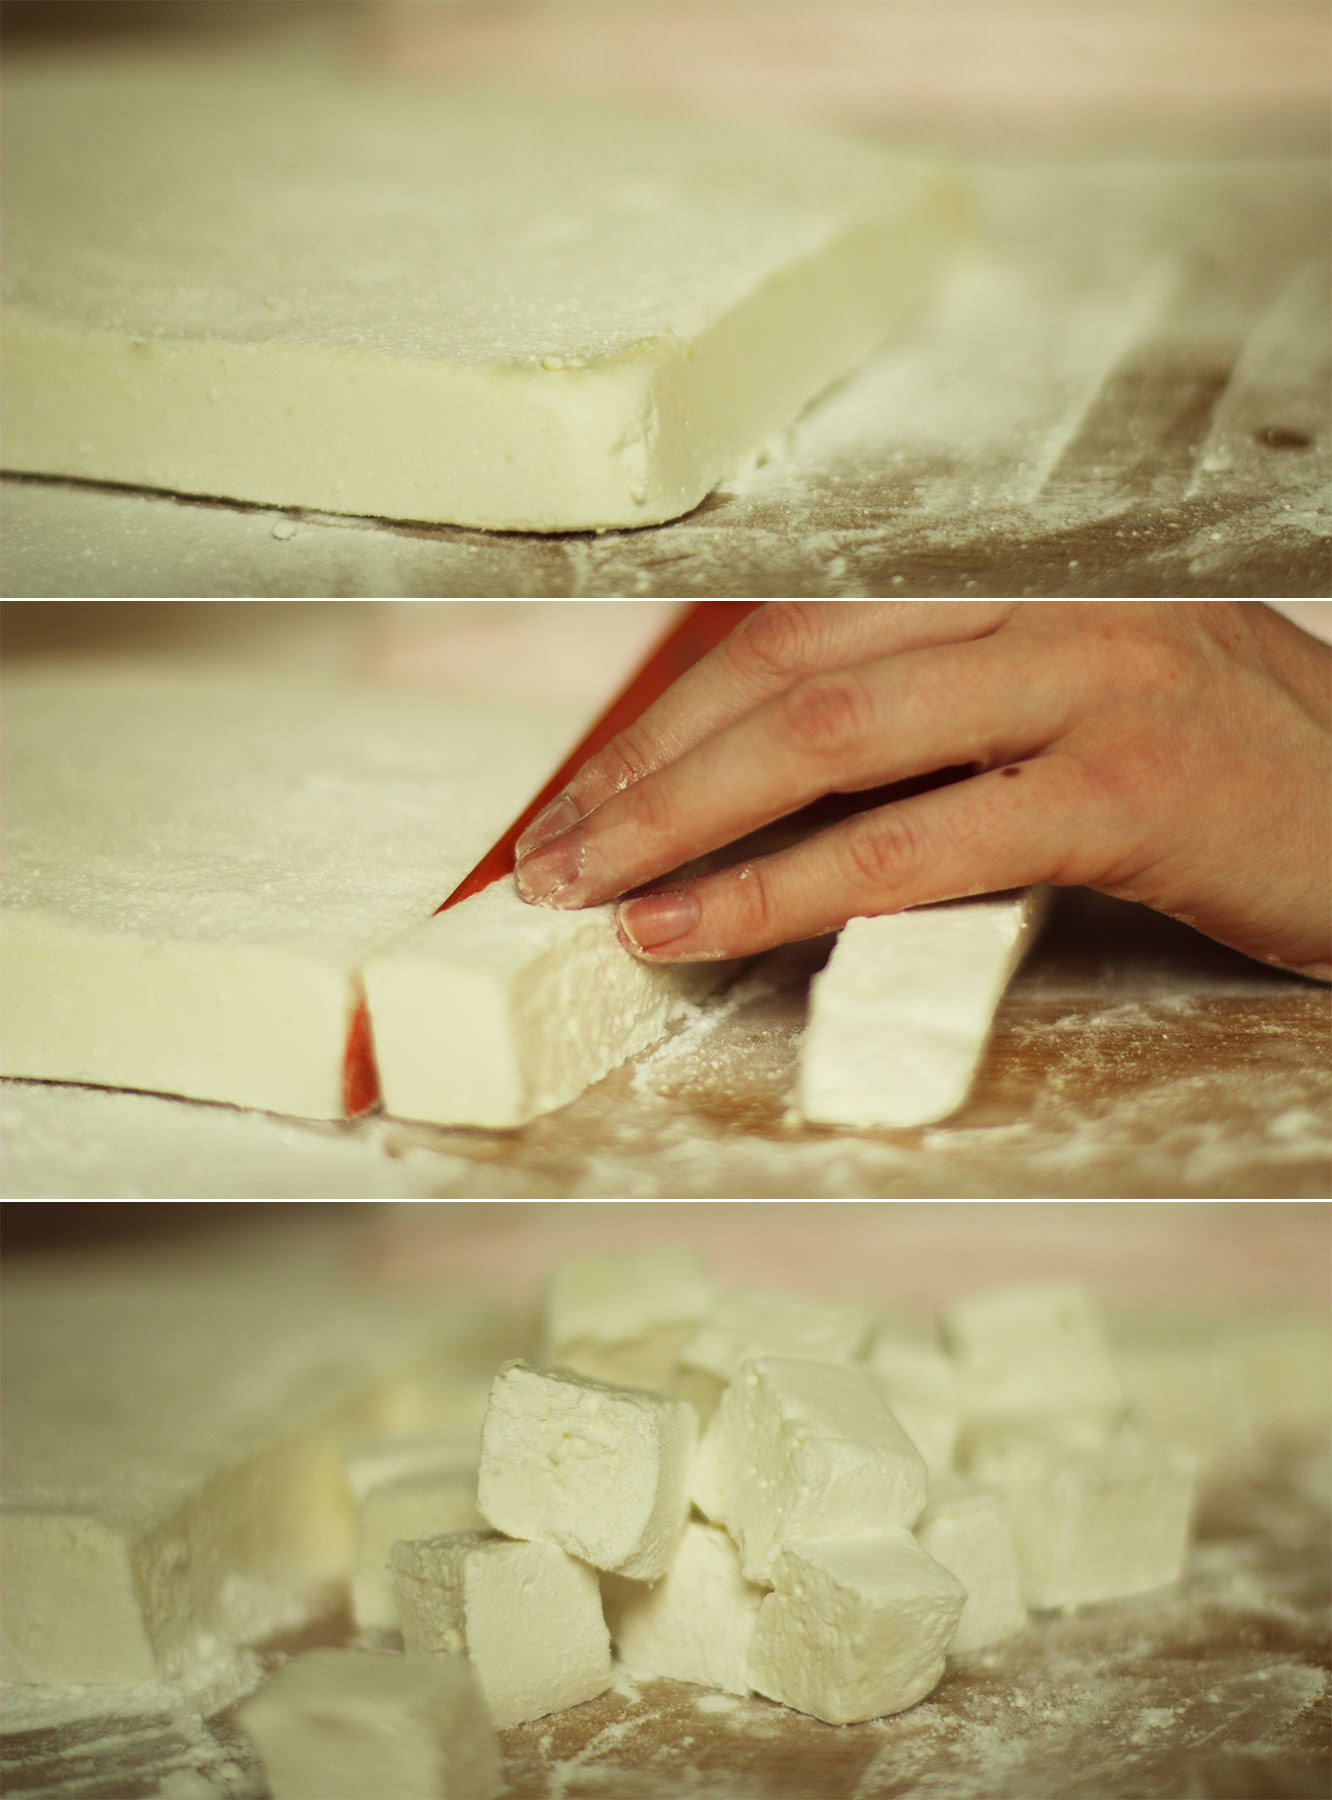
Once the marshmallows have set (at least an hour, preferably more) turn them out onto a surface dusted with icing sugar.
Cut them into cubes, and dust all the sides. Don’t worry if they are a little sticky, they will dry out a bit more.
Try not to eat them all just yet.
Step thirteen
Lay the caramel marshmallows out in rows on greaseproof paper or cellophane and melt the milk chocolate. I used a piping bag to drizzle the chocolate over the marshmallows, you could use a sandwich bag and snip the corner.
Step fourteen
Repeat with the raspberry and white chocolate marshmallows.
Step fifteen
Once the chocolate has set place 5 in each bag, 2 of one flavour, 3 of the other, alternating as you go so you don’t run out of one.
As I mentioned last post I’ll be doing a wrap up post with all the finishing touches, so stay tuned for that. For now, here’s our lovely hen chowing down:
Welcome back chaps, I hope you had a lovely weekend and are now stuffed full of last week’s roulade.
This week’s post is a little more January friendly – it doesn’t involve eating and will help save a few pennies too. Since the Christmas drinks specials season came to an end I’ve been missing a certain honey and almond hot chocolate and planning to concoct something with those flavours for fabrefaction. I didn’t expect it to not be for consumption but there you go.
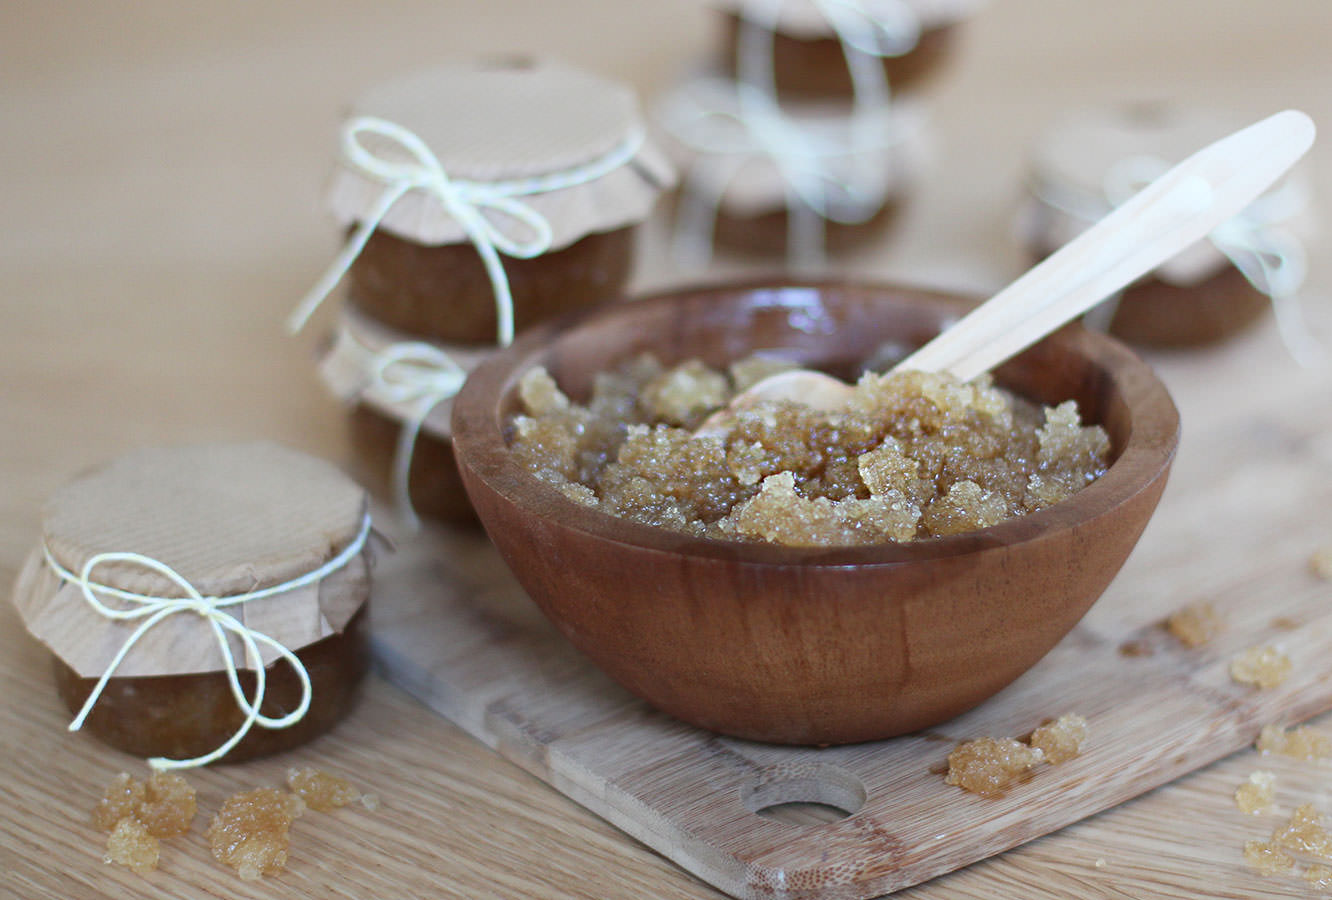
I thought it would be fun to give some favours the ladies who came to our little sleepover last week. This scrub is a great little gift on the cheap and would work well for favours for a hen party/bridal shower or similar.
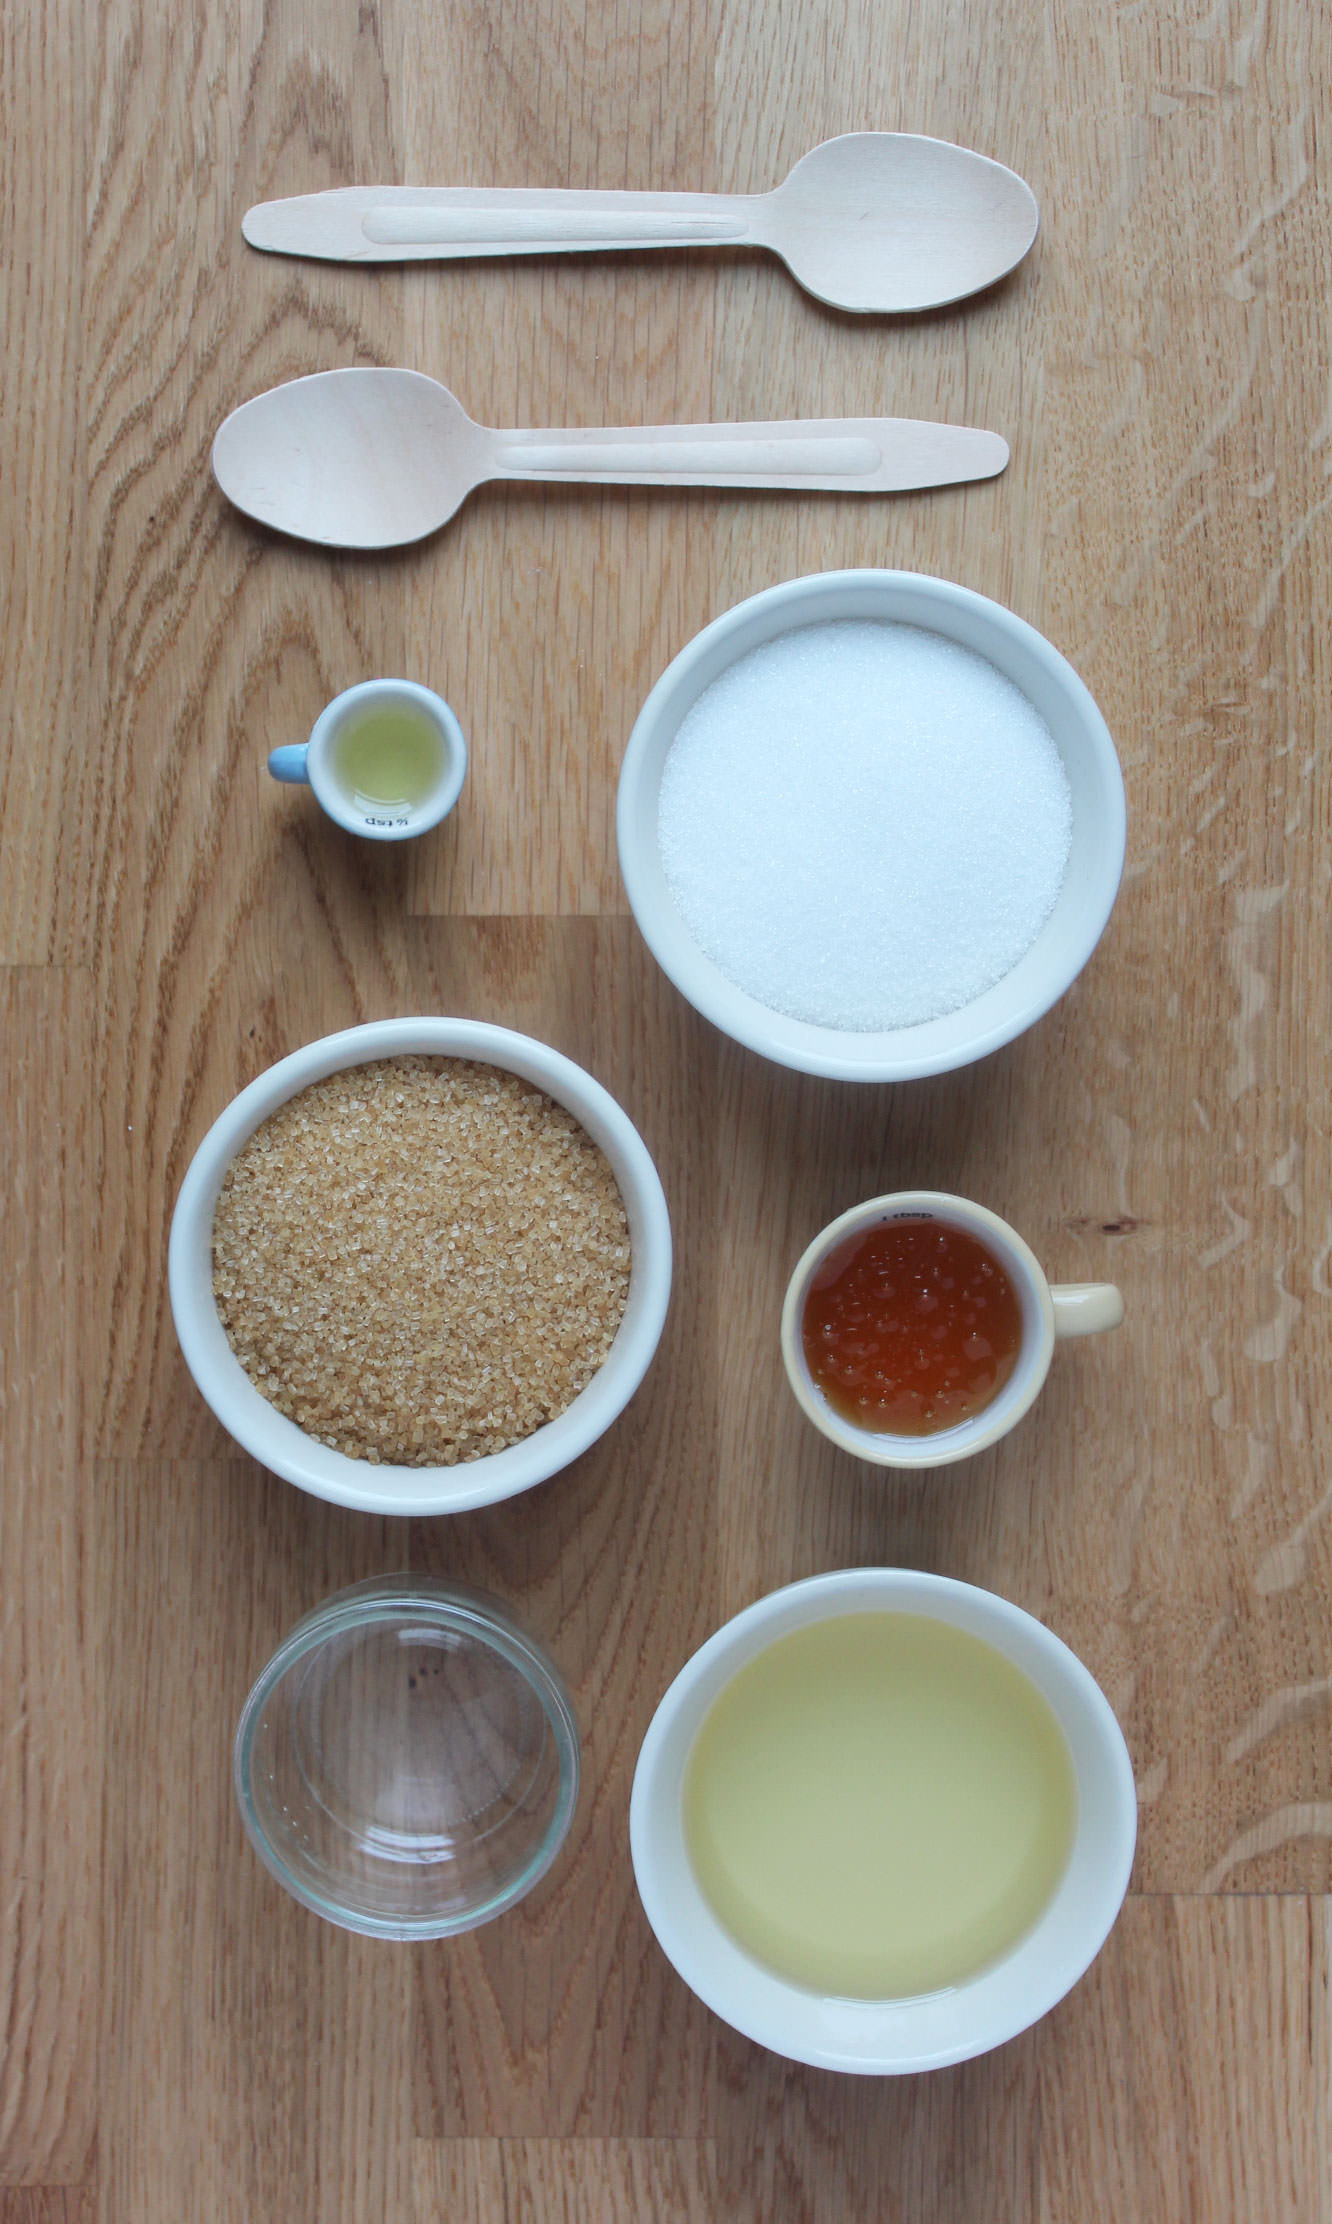
You will need
2 cups Demerara sugar
1 cup Granulated sugar
1/4 cup Walnut oil
1/2 cup Sunflower/vegetable oil
1/2 cup Clear honey
2 tsp Almond extract
(Makes six small jars)
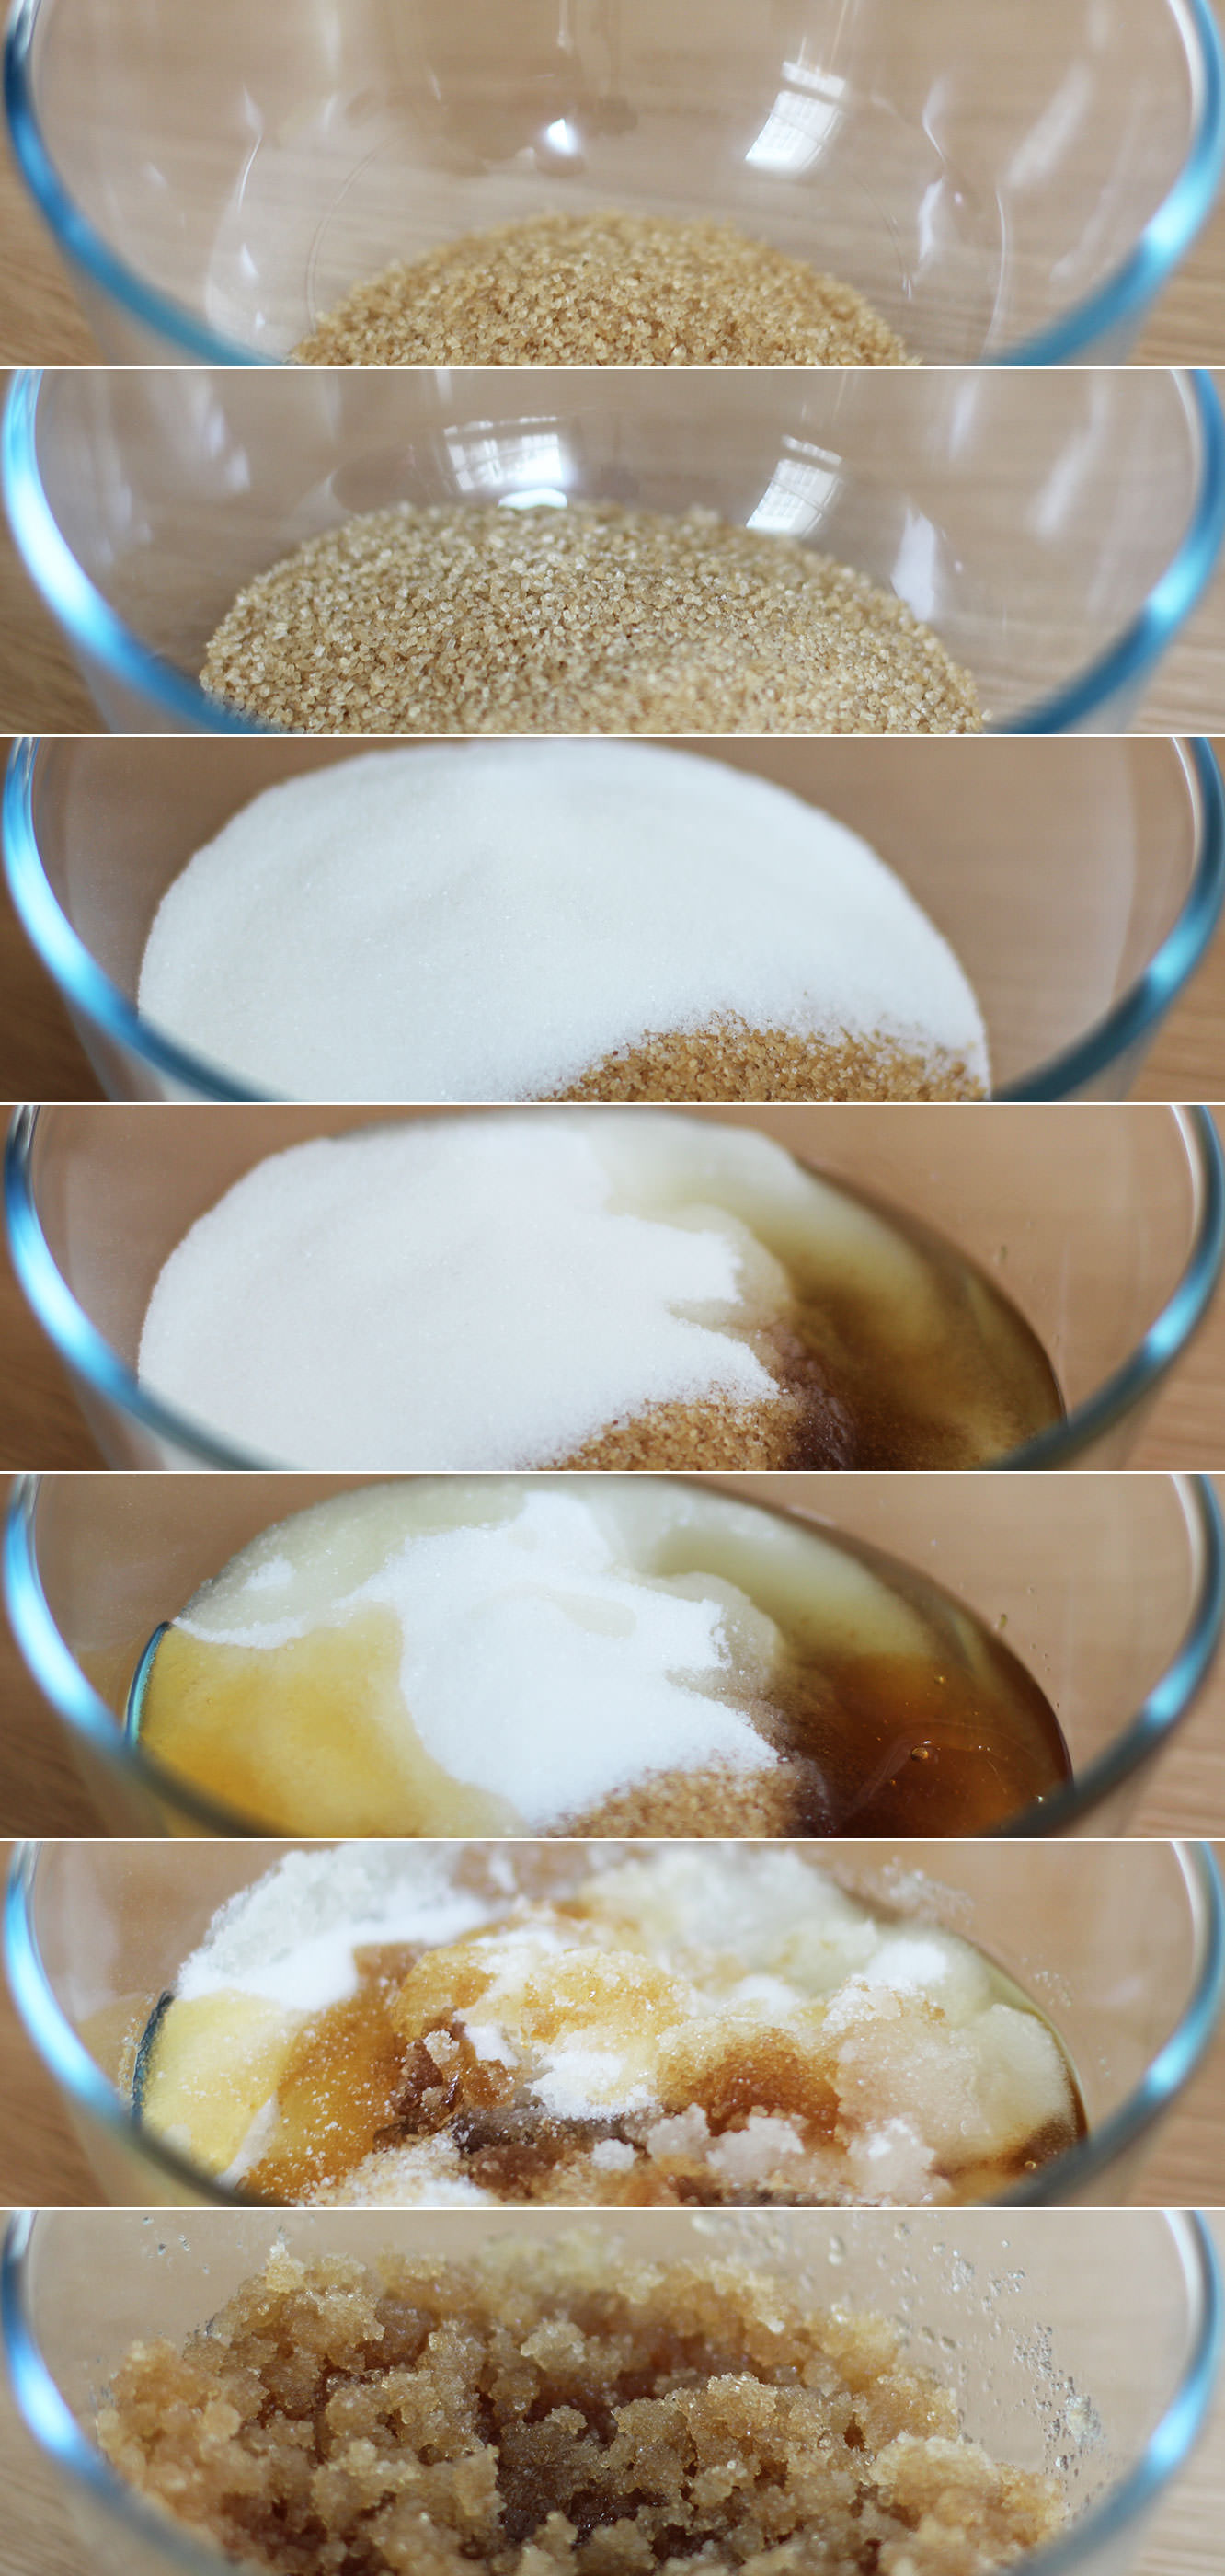
Step one
There really only is one step. I couldn’t even think of a gif this week.
Take all the ingredients and mix them together.
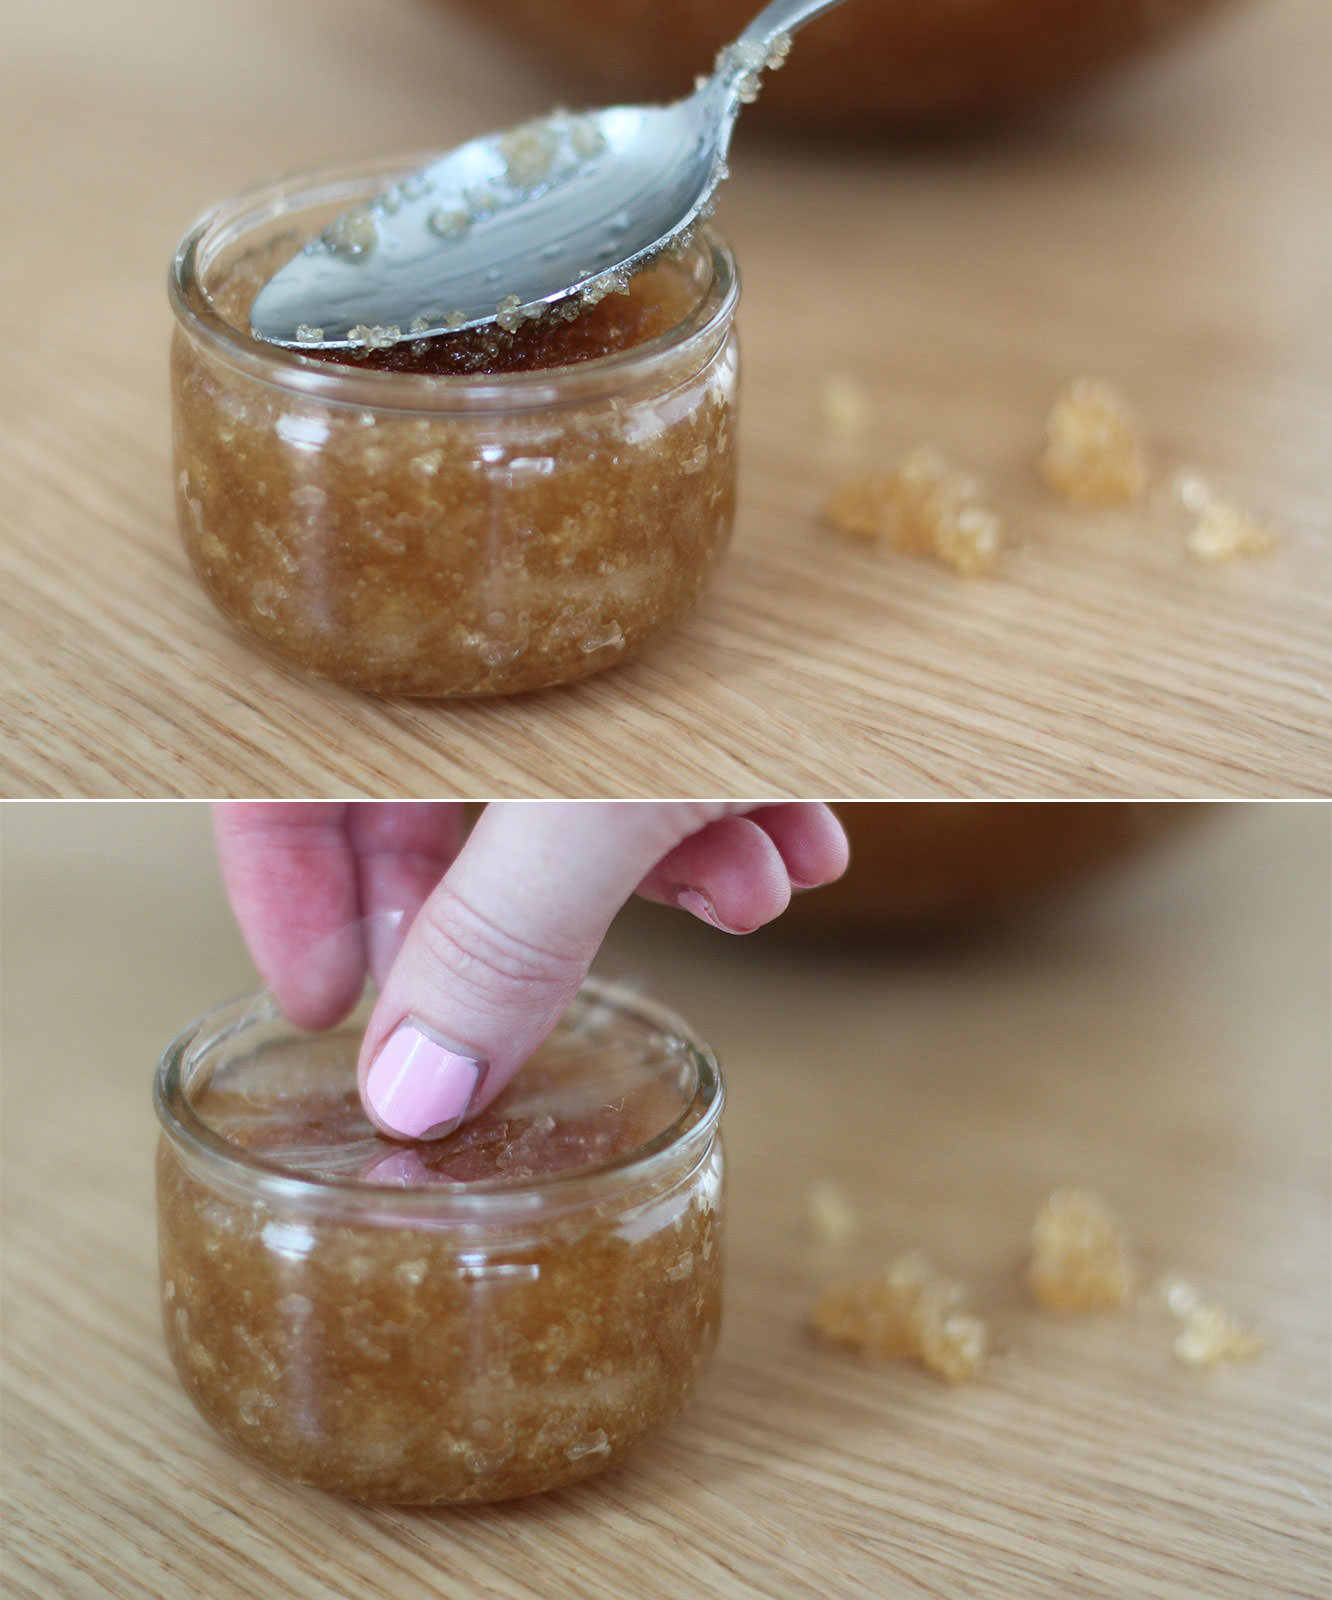
Step two
If you’re gifting these then you might want to use little ramekins or jars. I recommend something with a lid to be honest, I used cellophane to seal the scrub in. I’ll be honest, this was with mixed success – just keep them upright if you go for this option to stop the oil leaking.
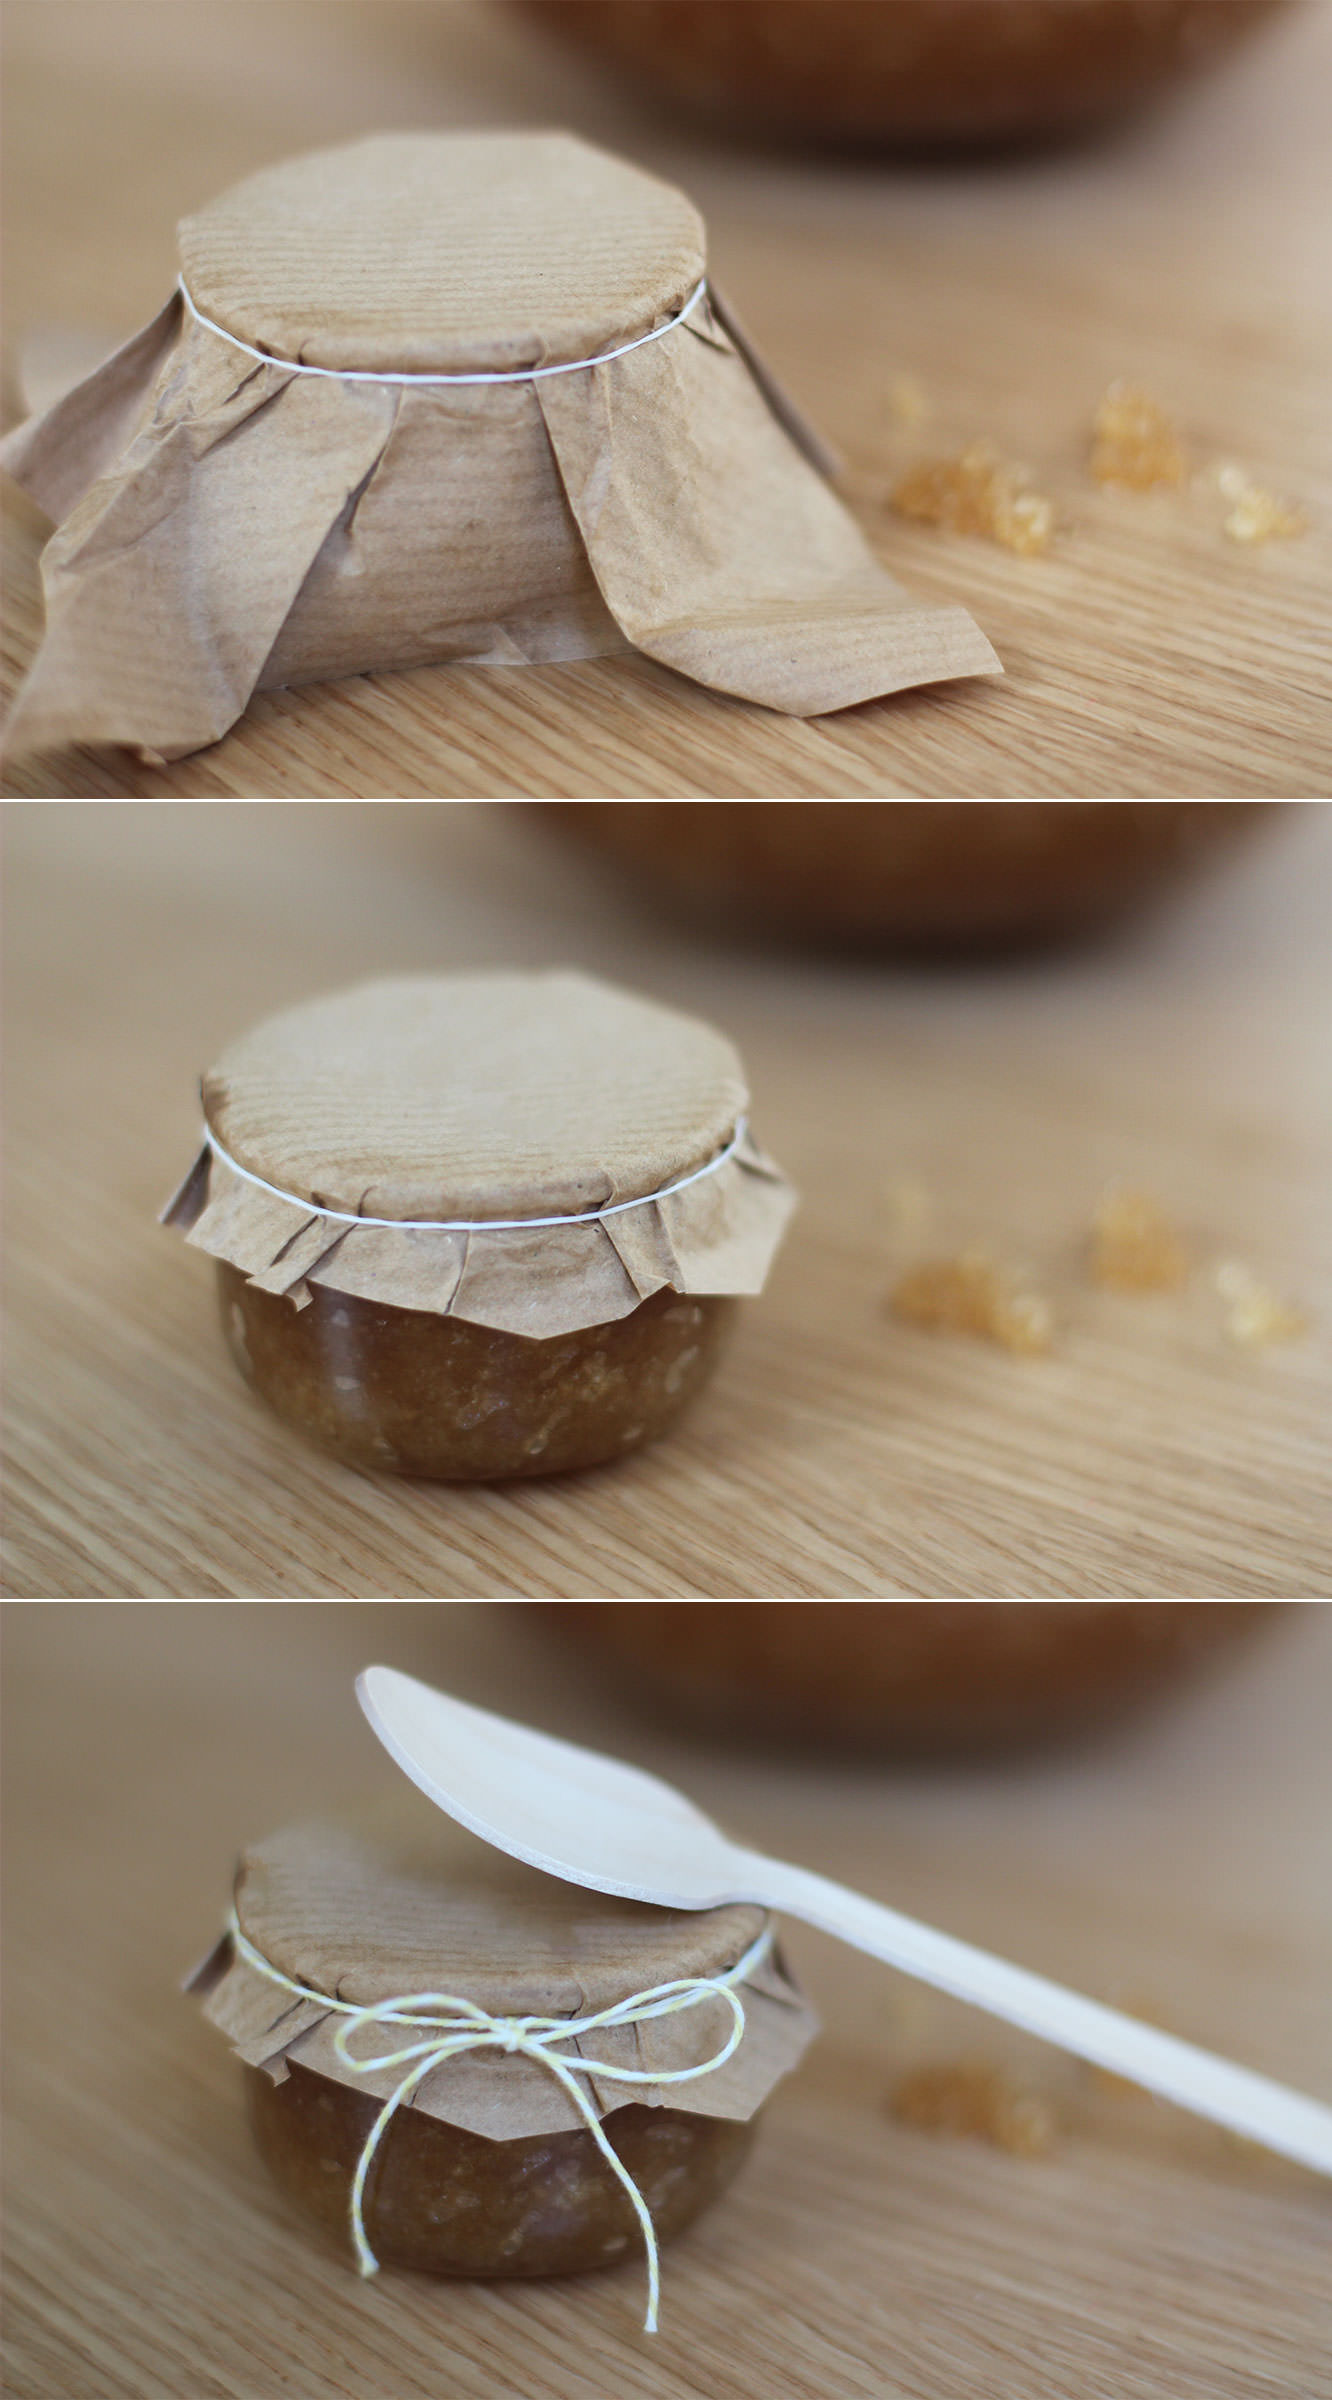
Step three
Using paper or fabric (I thought brown paper added nicely to the natural look and feel) cover the pots.
Make sure it;s a larger piece than required. Fasten with a loom band (find a small child who’s become bored of them and pinch a few).
Step four
Trim the edges of the paper or fabric. If using fabric I recommend pinking shears for the job to stop it fraying.
Step five
Tie a nice piece of string/twine/ribbon around the rim to cover the loom band. Depending on the size of the jar you might want to tie a small wooden spoon to it at this point (the scrub settles and needs a little stir before use).
I left the spoons loose because they looked novelty big in comparison to the jar. If you’re in the UK I got these from Tiger.
Hello there. Sorry for being a bit sporadic with the posts of late. I will get a handle on this eventually I promise!
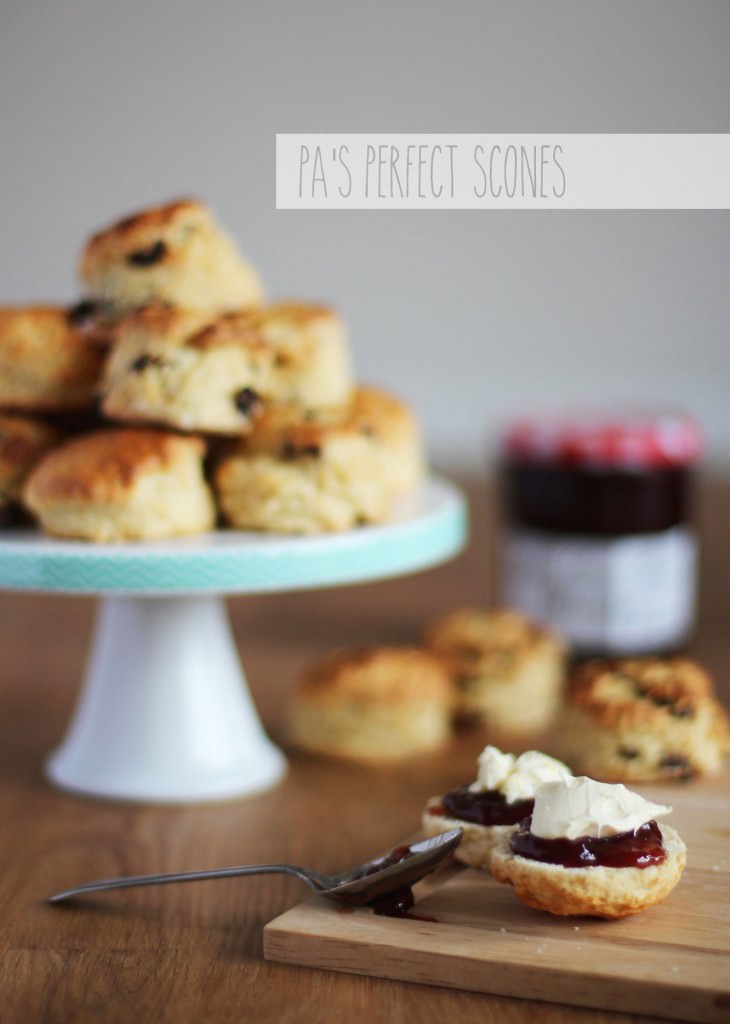
I realised that I kicked off my little afternoon tea series without the bare essential – the scone. Now, my dad happens to be a champion scone maker and he’s given me the honour of letting me share his recipe with you.
So without further ado here goes, enjoy!
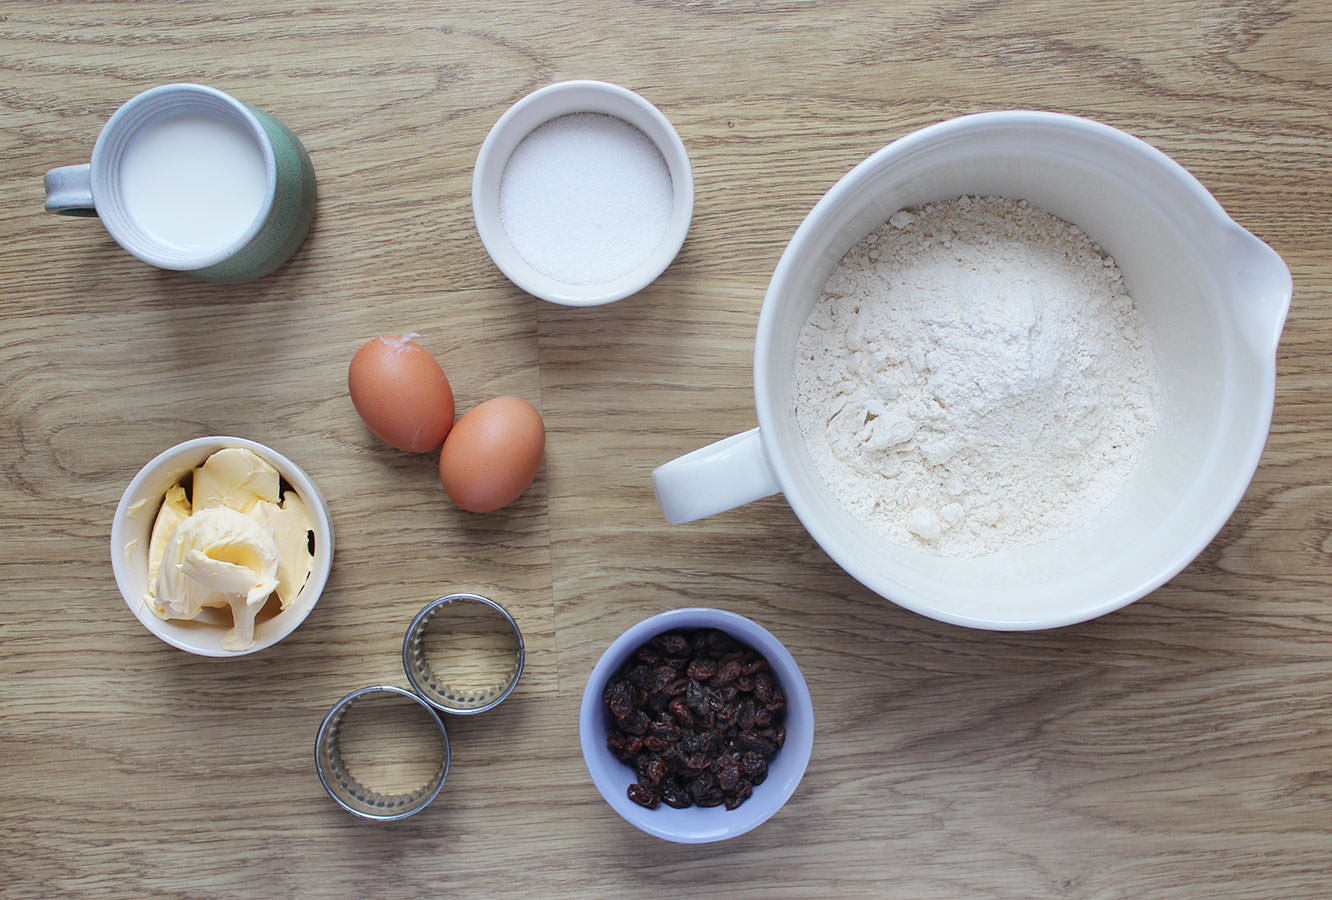
You will need
1lb/450g Self raising flour
4 oz/110g Granulated sugar
4 oz/110g Margarine (I use Stork)
4 oz/110g Raisins/other dried fruit (I split mine into some plain some fruit, so only used half this)
1 egg
Semi-skimmed milk (approz 9fl oz/250ml)
A pinch or two of salt
A 2 inch round cutter (for small scones)
Makes 24 little scones, 12 big if using a bigger cutter.
Step one
Crack the egg into a measuring jug and top up to 10 fluid oz or 250ml with the milk.
Use a fork to combine the egg and milk.
Step two
Mix together the sugar, flour and salt in a decent sized mixing bowl.
Step three
Add the margarine to the dry mixture and rub between your fingers until you have the breadcrumb-like texture in the bottom photo. If you insist on using butter this might take you a little longer, but be patient, you’ll get there.
If you want to do half plain, half fruit then you need to split half the mix into another bowl at this stage.
Step four
Add the fruit (remember to only add half the amount if you’ve split the mix).
Gradually add the wet ingredients, stirring with your hands. Don’t go gung-ho and add the lot, as there’s meant to be some left over! Again, if you’ve split into two halves you need to distribute this evenly across both batches.
Keep adding liquid until the mixture is a bit gluey/sticky but still holds together and isn’t wet.
Step five
Dust a work surface with flour and turn your dough onto it. Pat it down with your hand until it’s a little shorter than your cutter. No rolling pins please.
I would also recommend you take this opportunity to wash your hands and grease a couple of baking trays.
Step six
Dust your cutter with flour and cut as many scones as you can from the dough. I will save you the maths lesson but try to get them as close together as possible as it’s best to not keep working the dough if possible.
Put your scones onto the baking trays; make sure to leave some space as they do grow a bit.
Step seven
Bring together all the scraps and repeat until you have no dough left. Well, you will have a little blob, but that’s for you to eat straight from the oven, so it doesn’t really count.
Step eight
Using the leftover egg and milk mixture, brush the tops of your scones. This will make them go golden in the oven. You can use your (clean) fingers if you don’t have a pastry brush.
Step nine
Pop in the oven (ideally preheated) at gas mark 6/200C/400F for 15-20 minutes. If your oven, like ours, is getting on a bit you might want to turn the trays around halfway through for an even bake.
Step ten
Pop them on the table with the rest of your afternoon tea treats.


 You will need
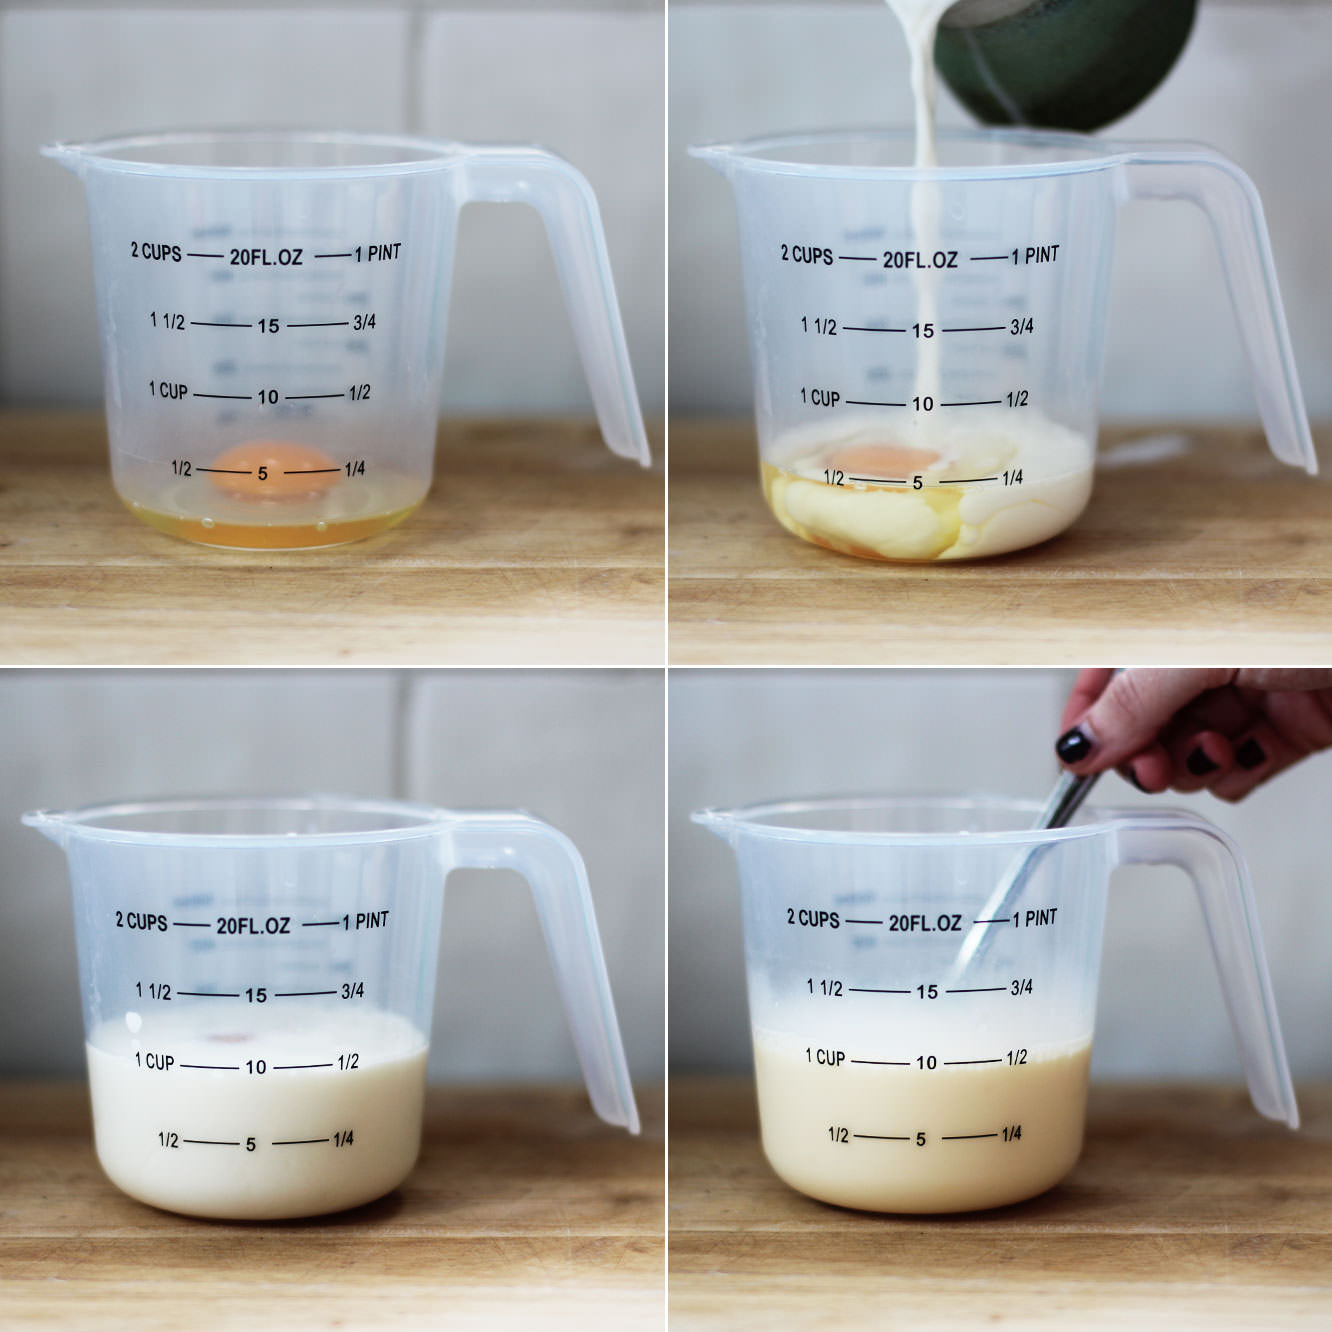 Step one
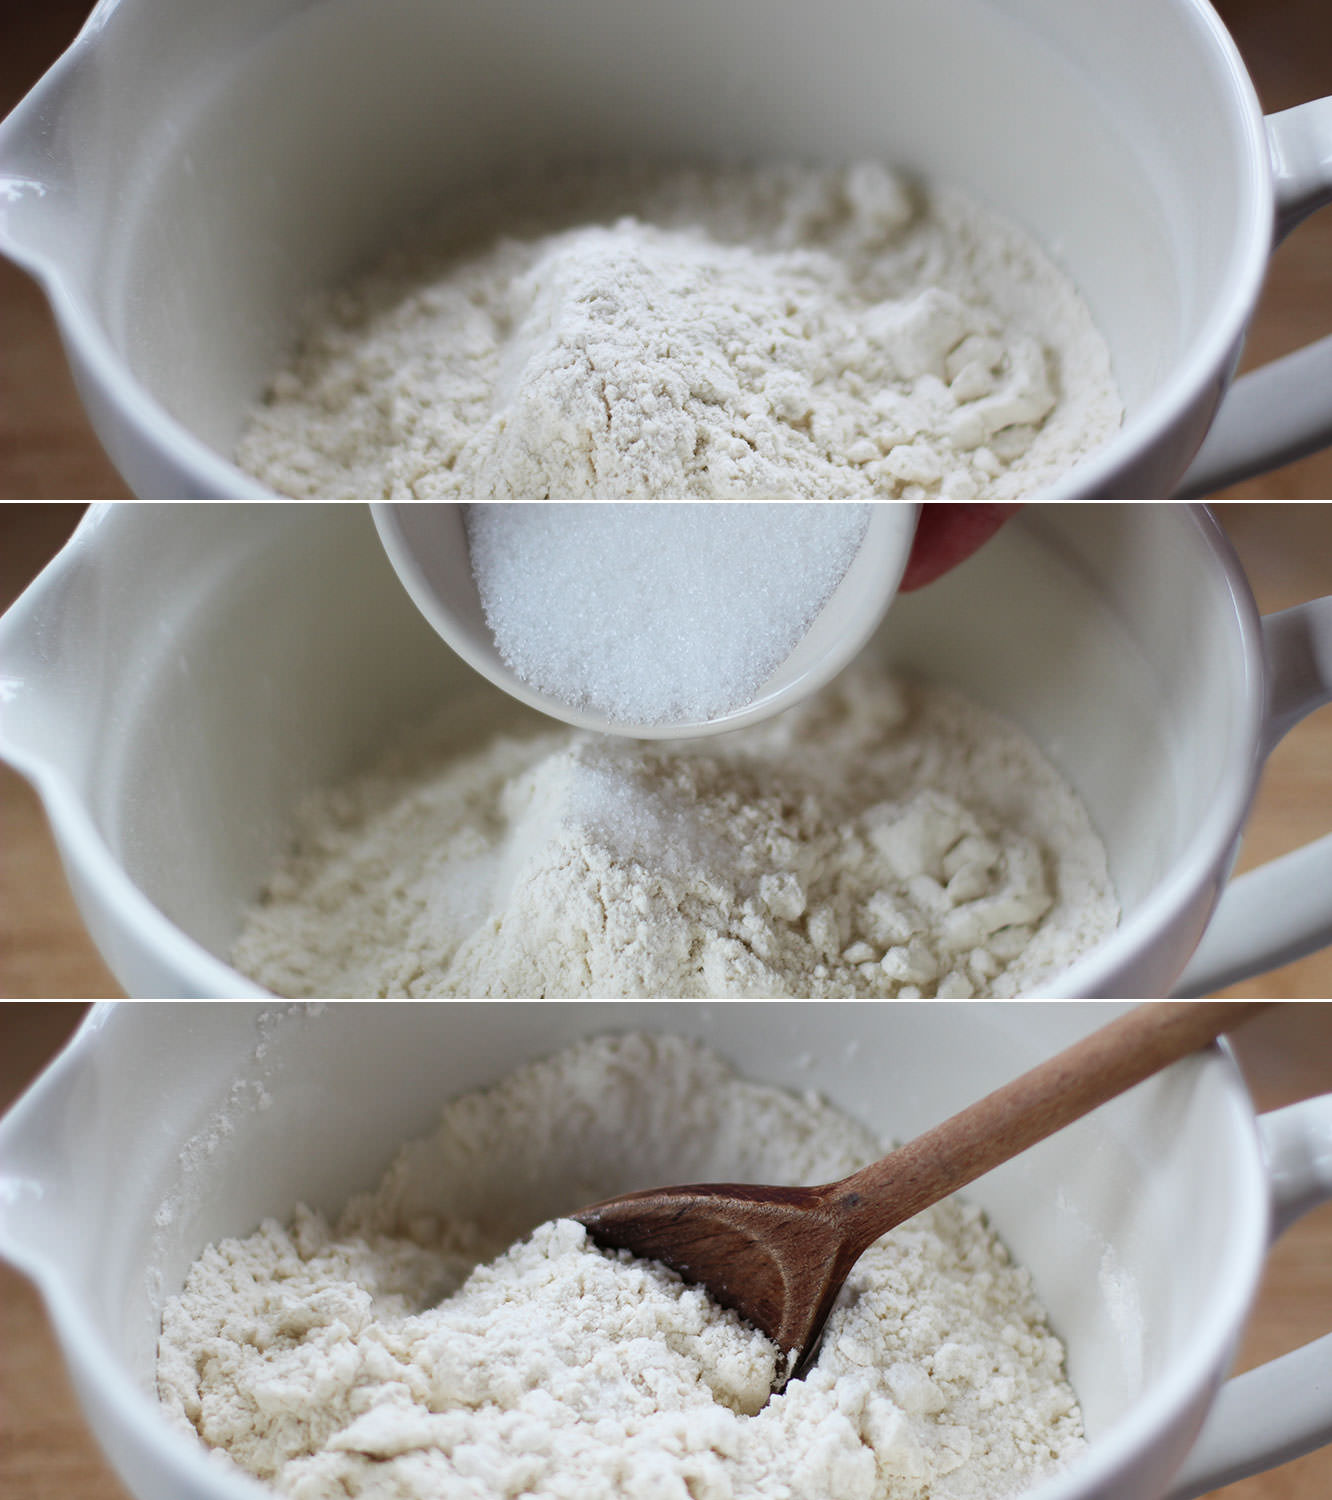 Step two
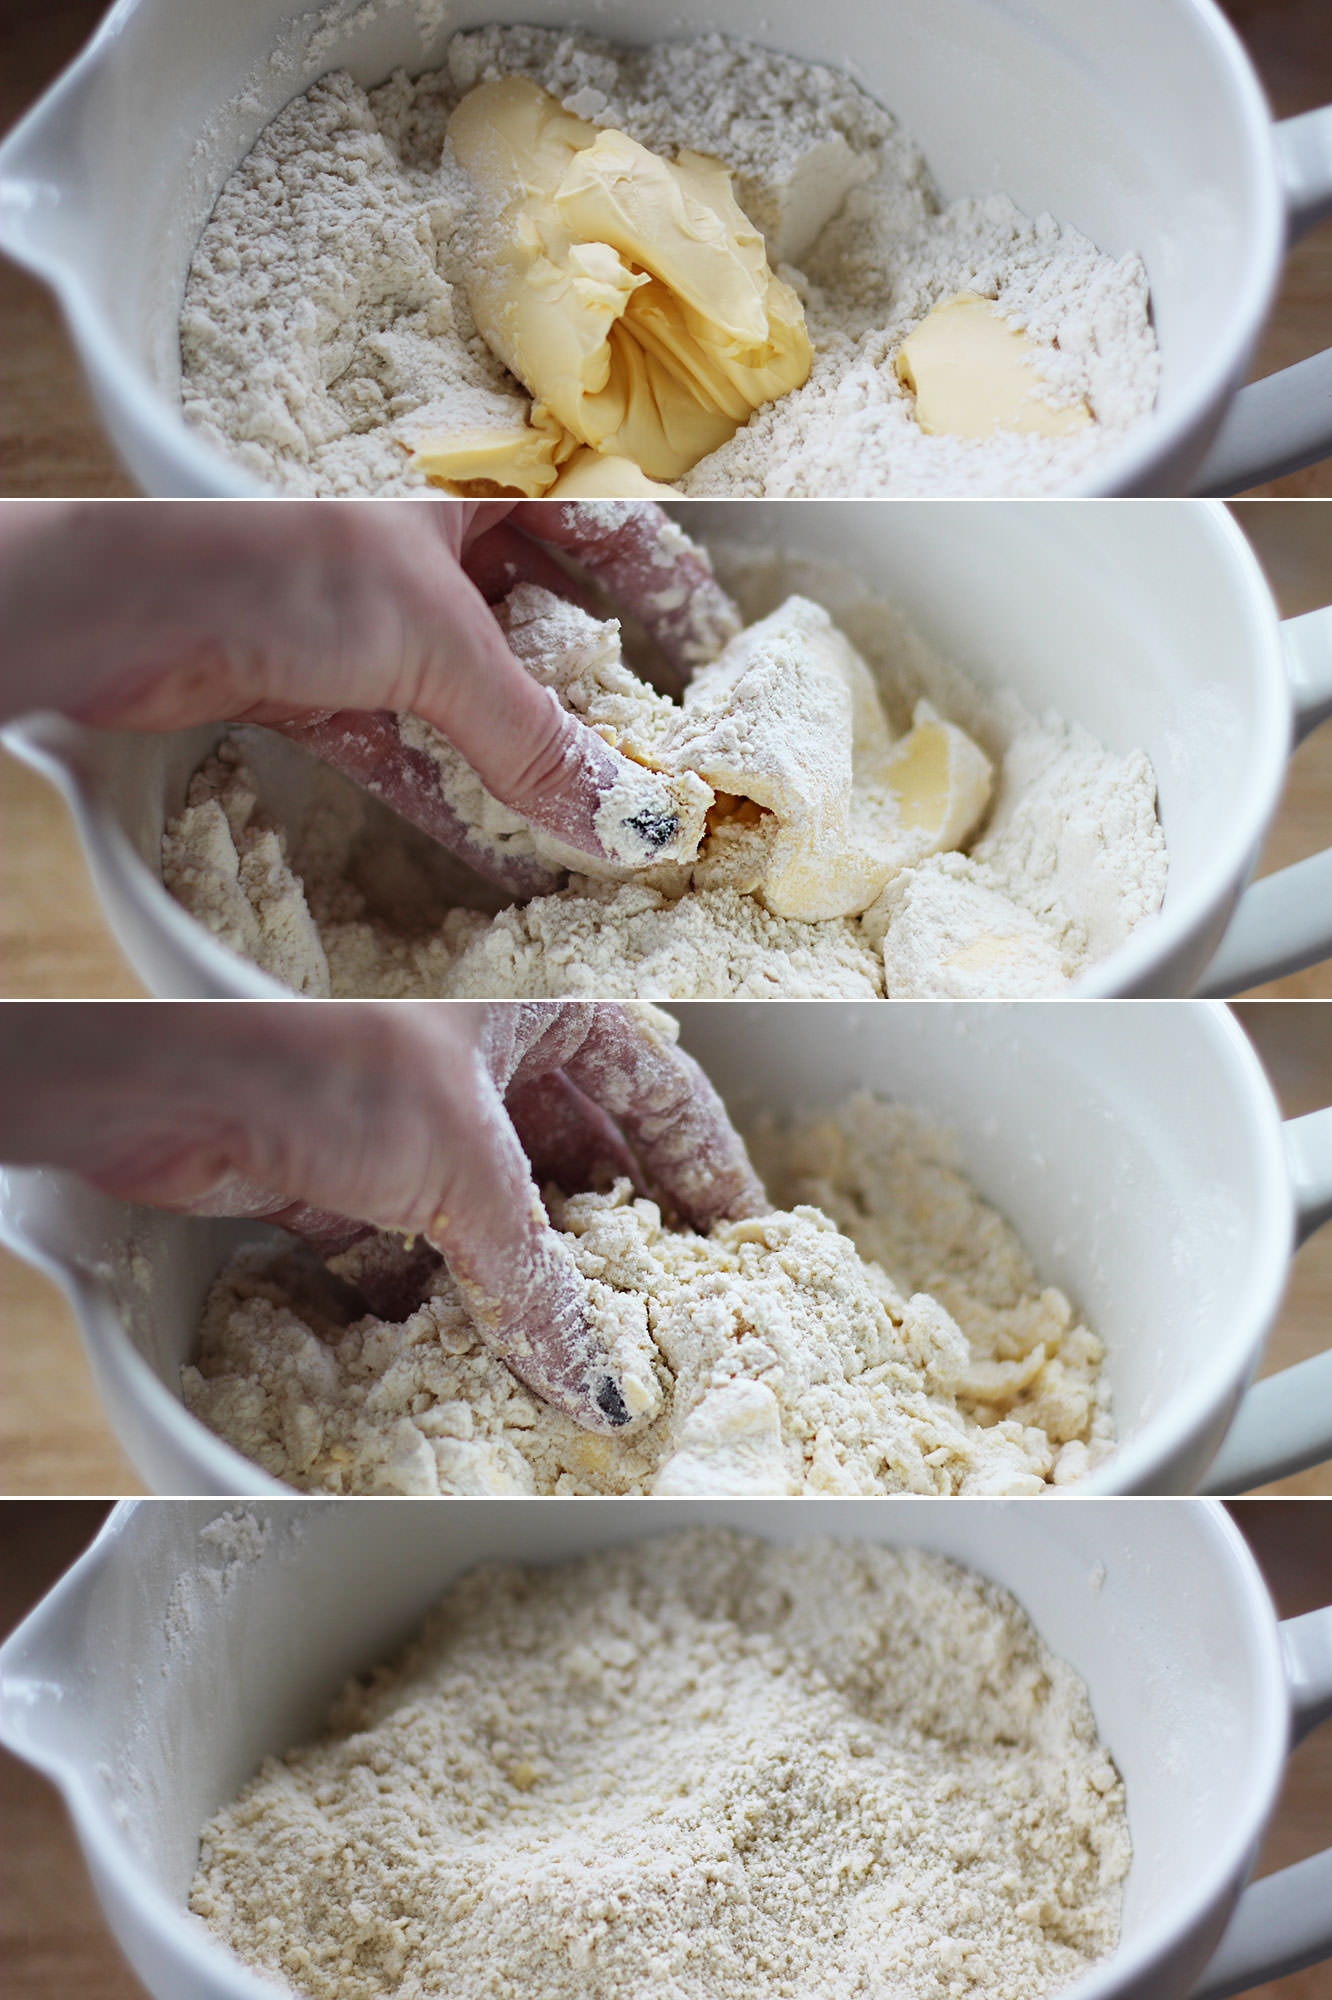 Step three
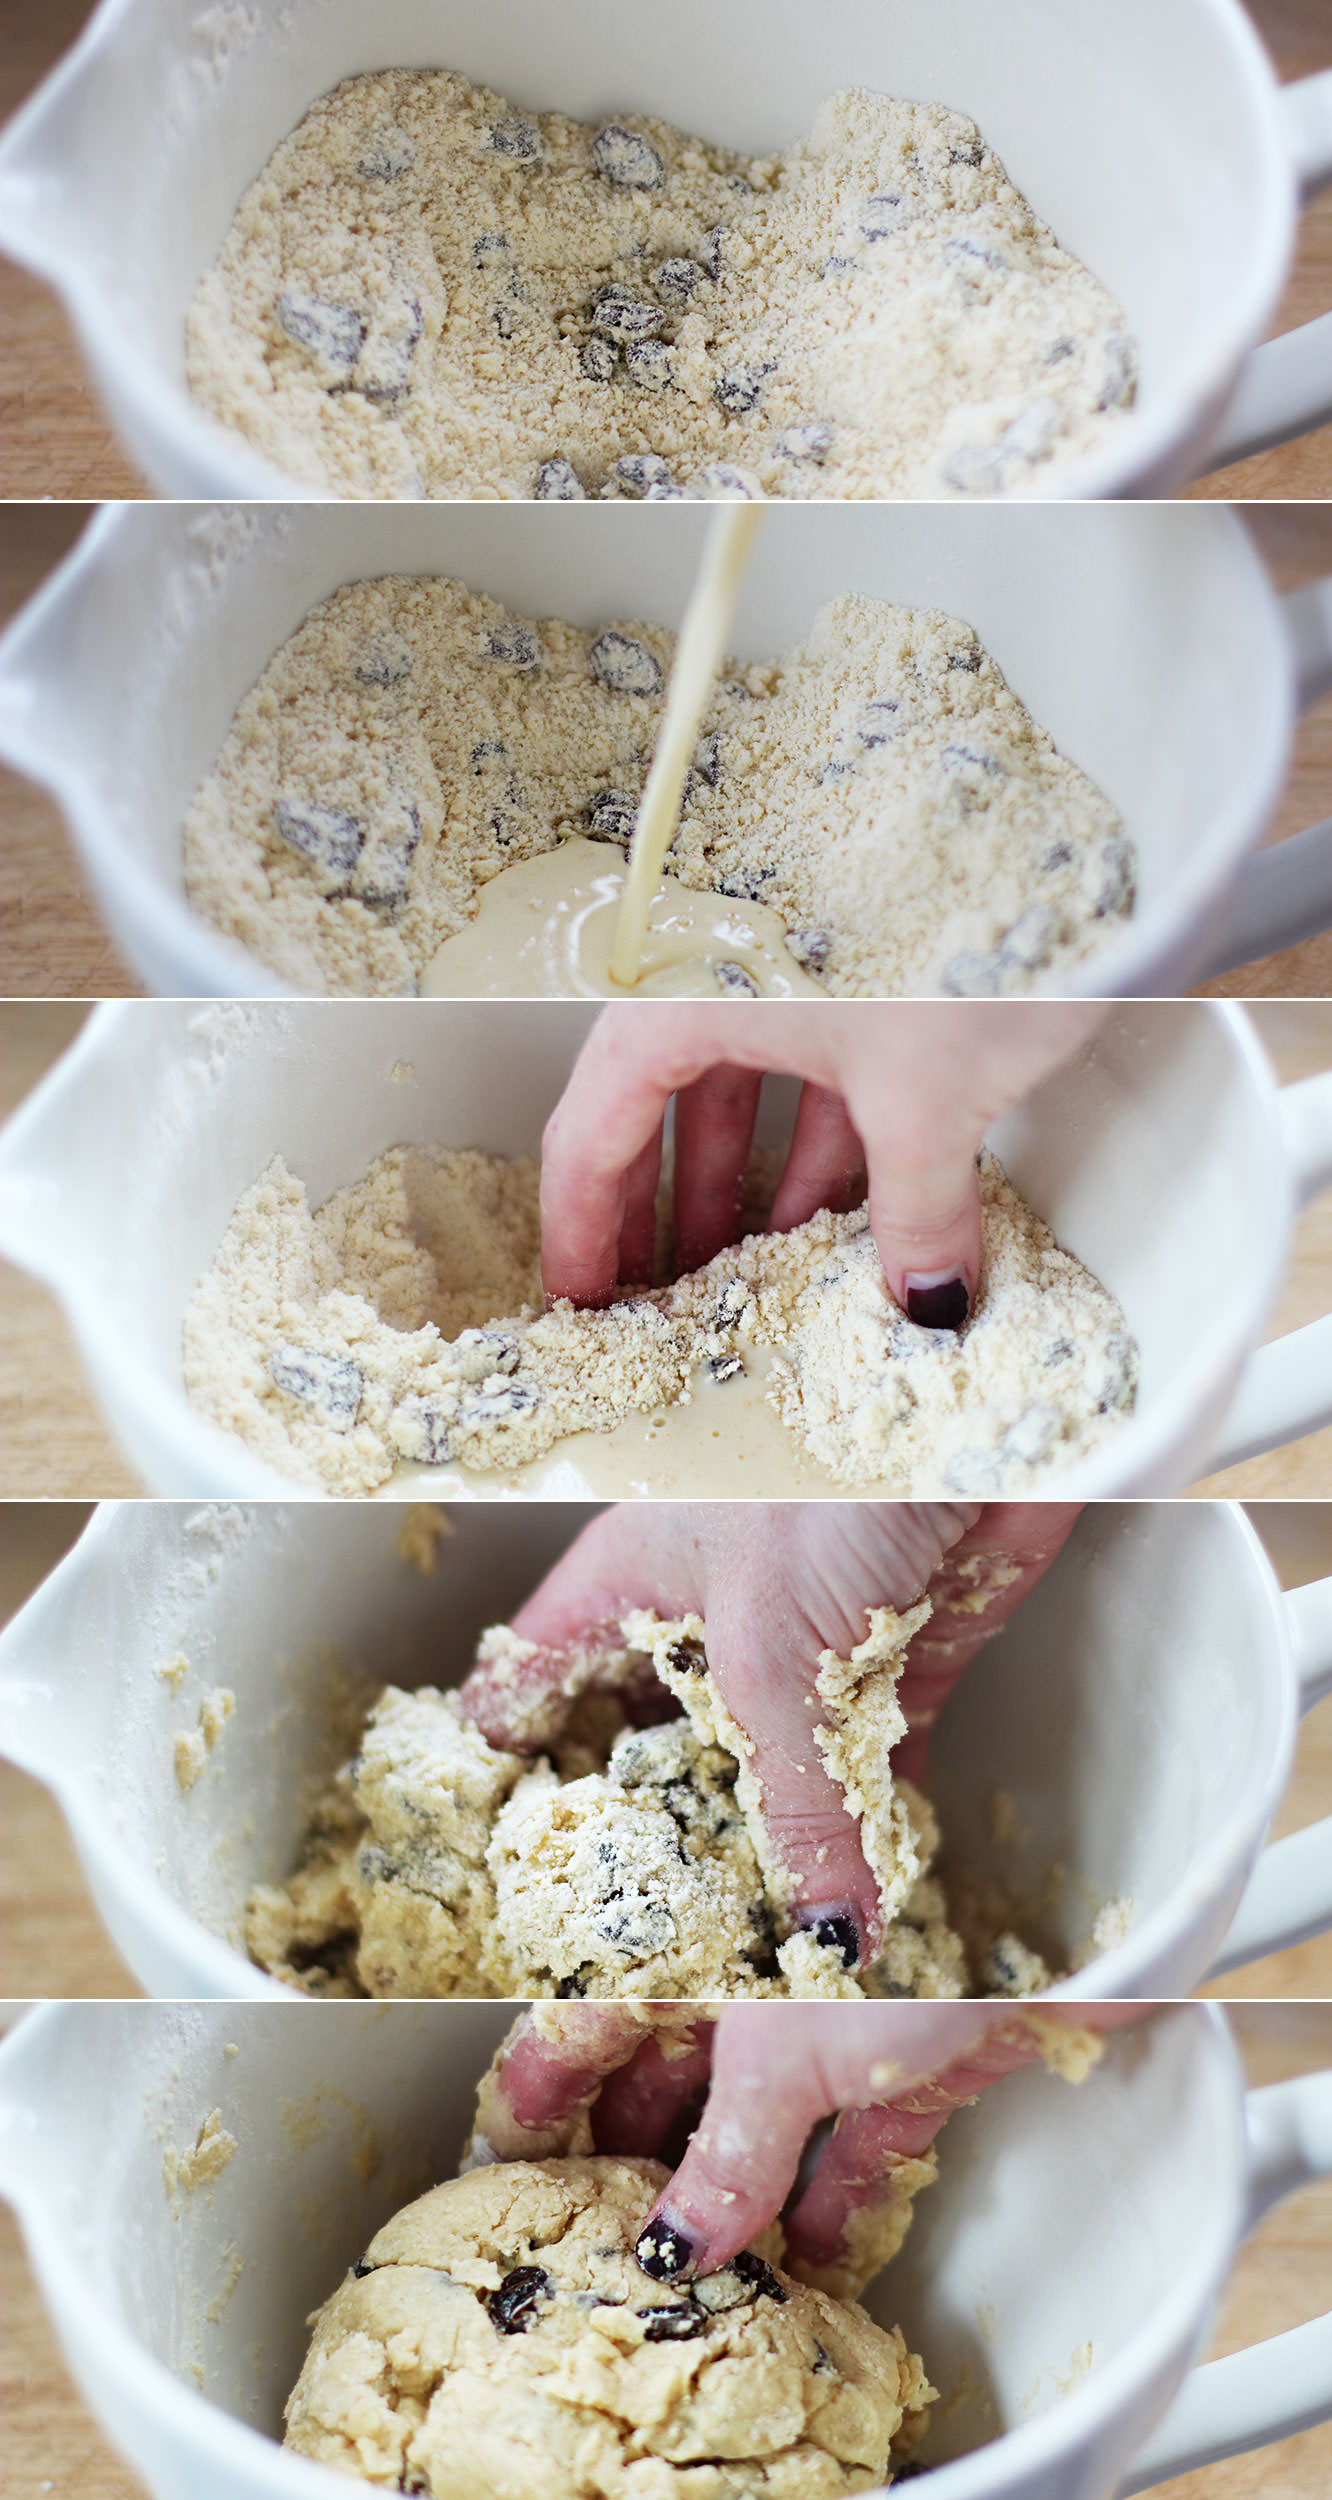 Step four
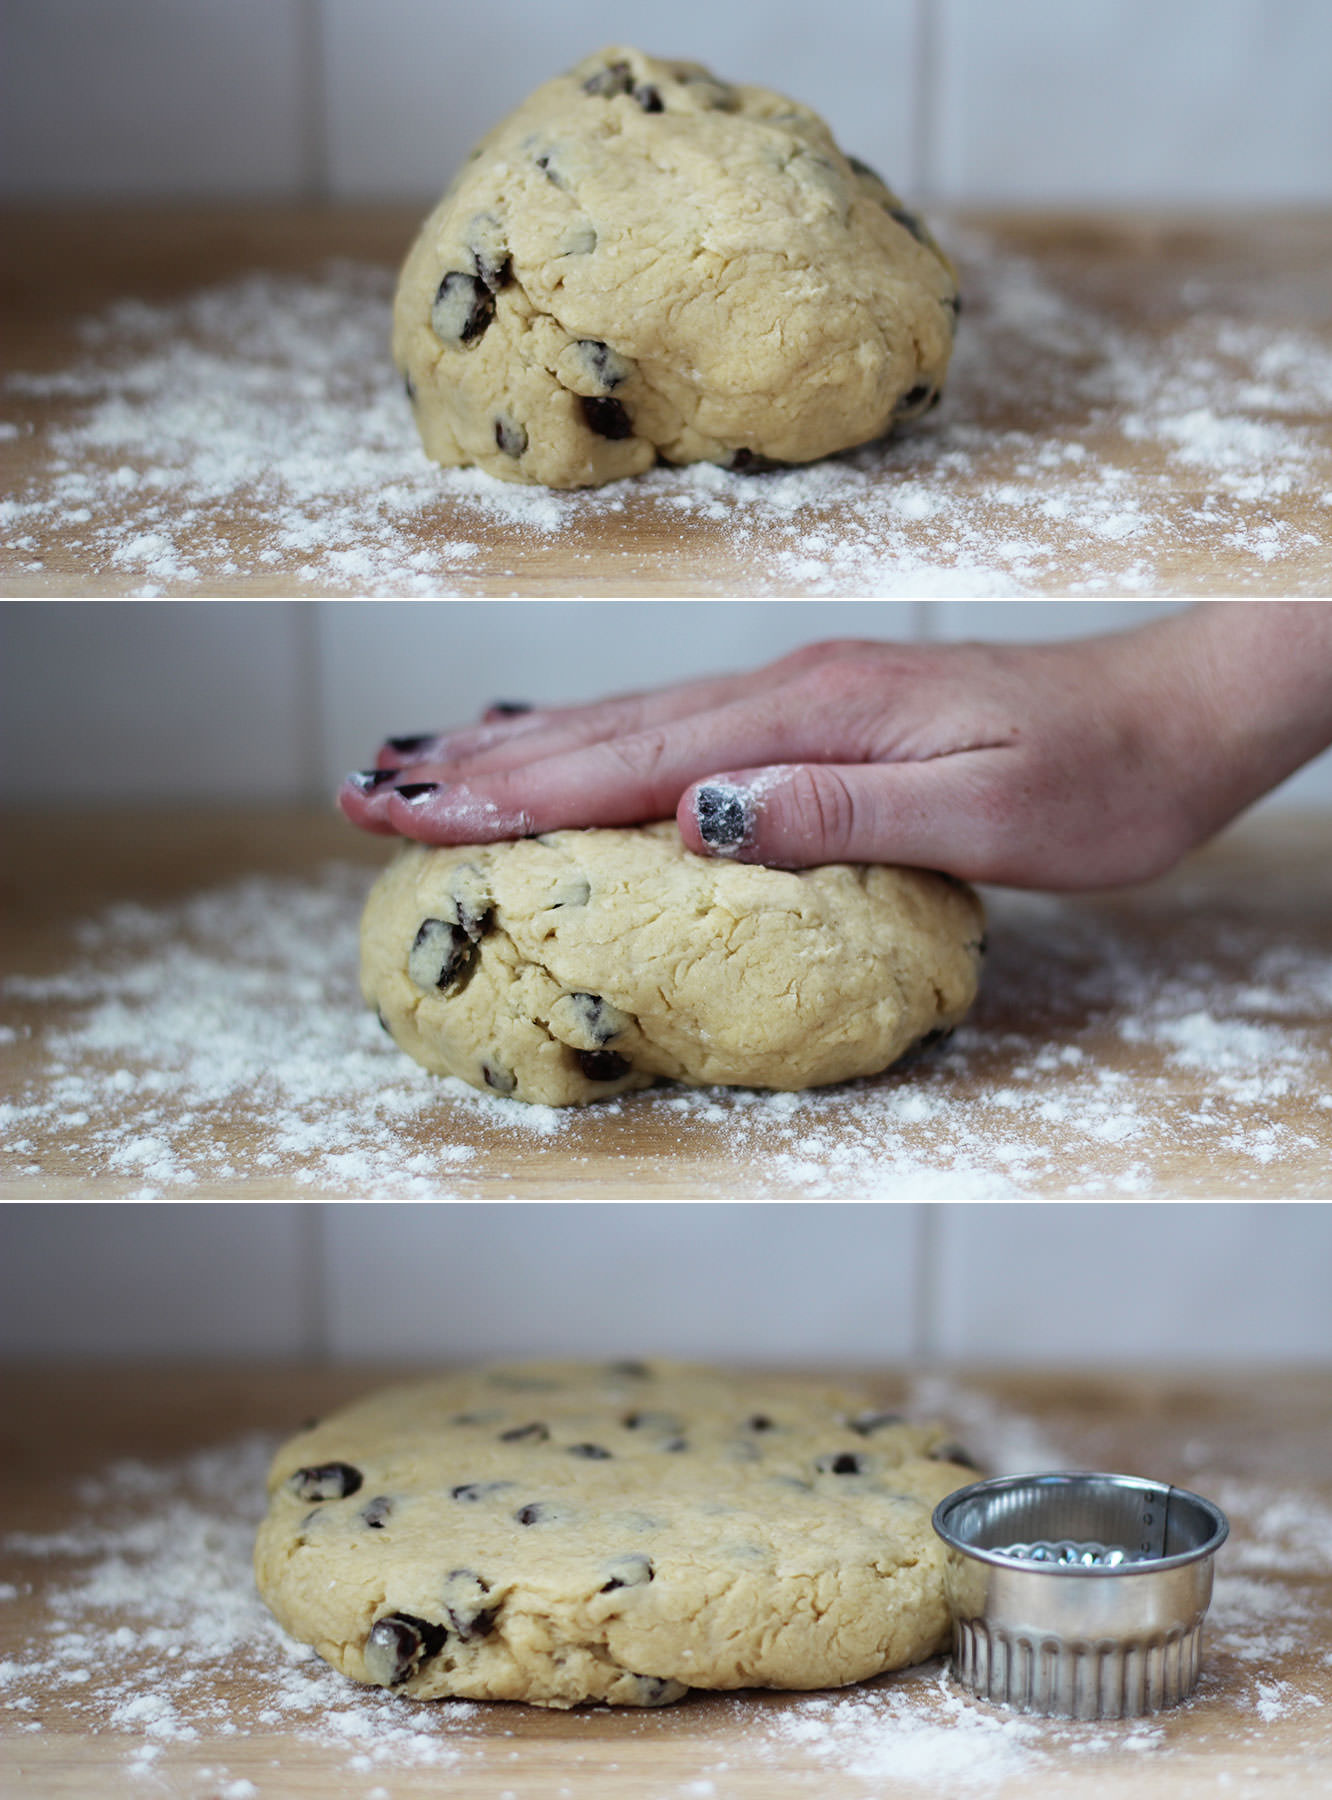 Step five
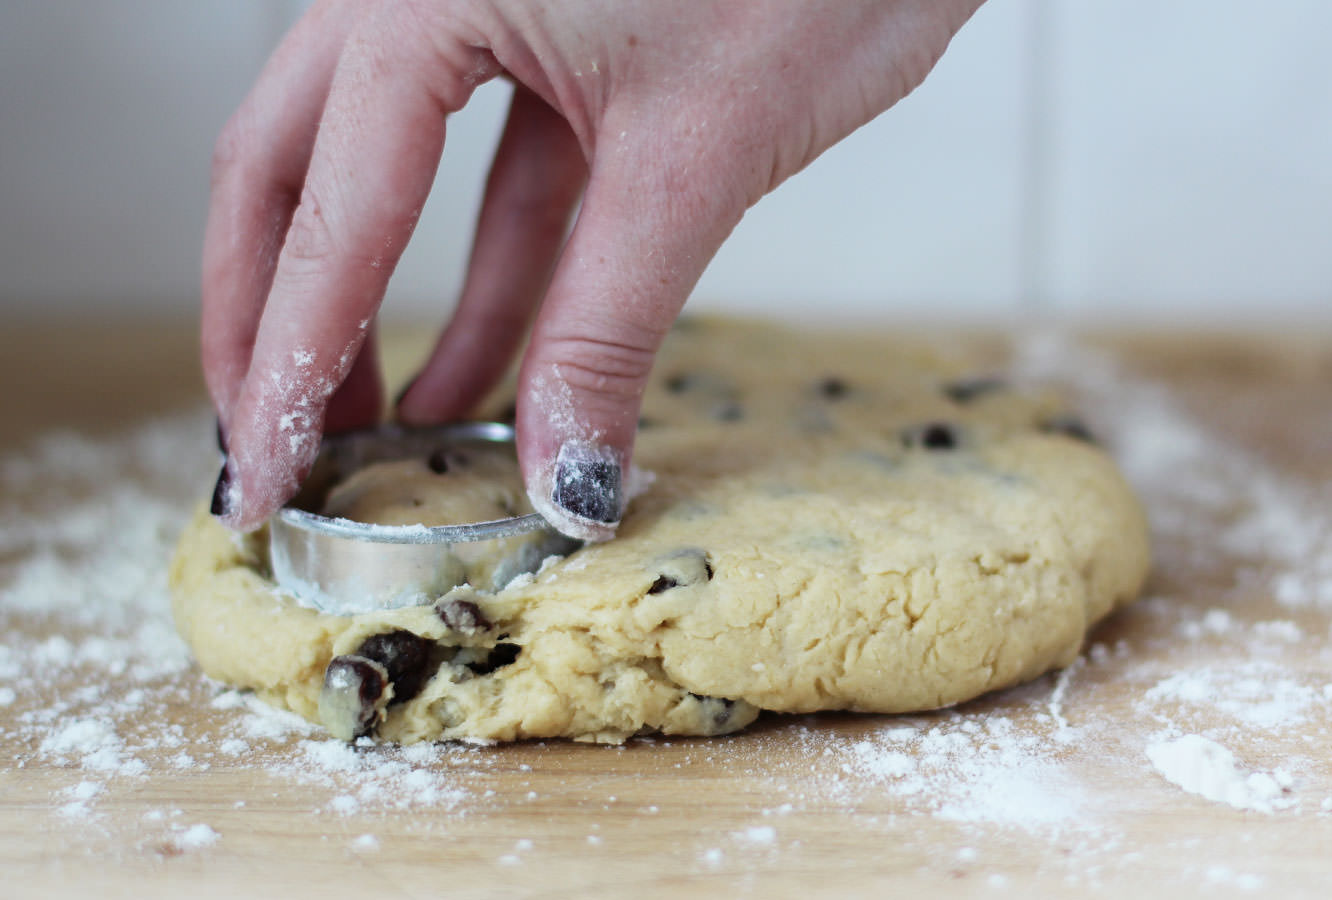 Step six
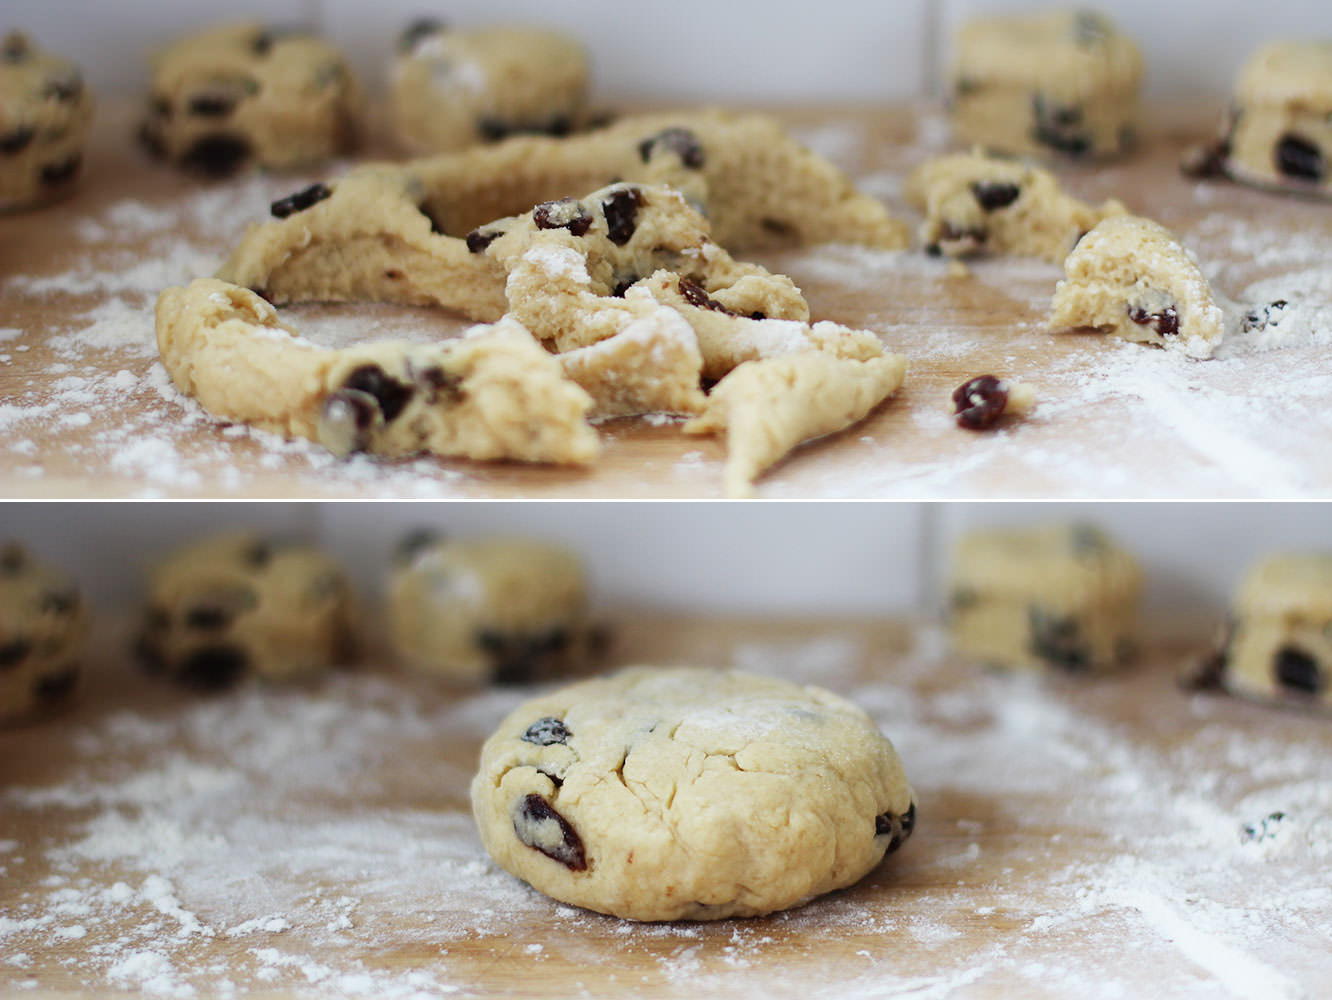 Step seven
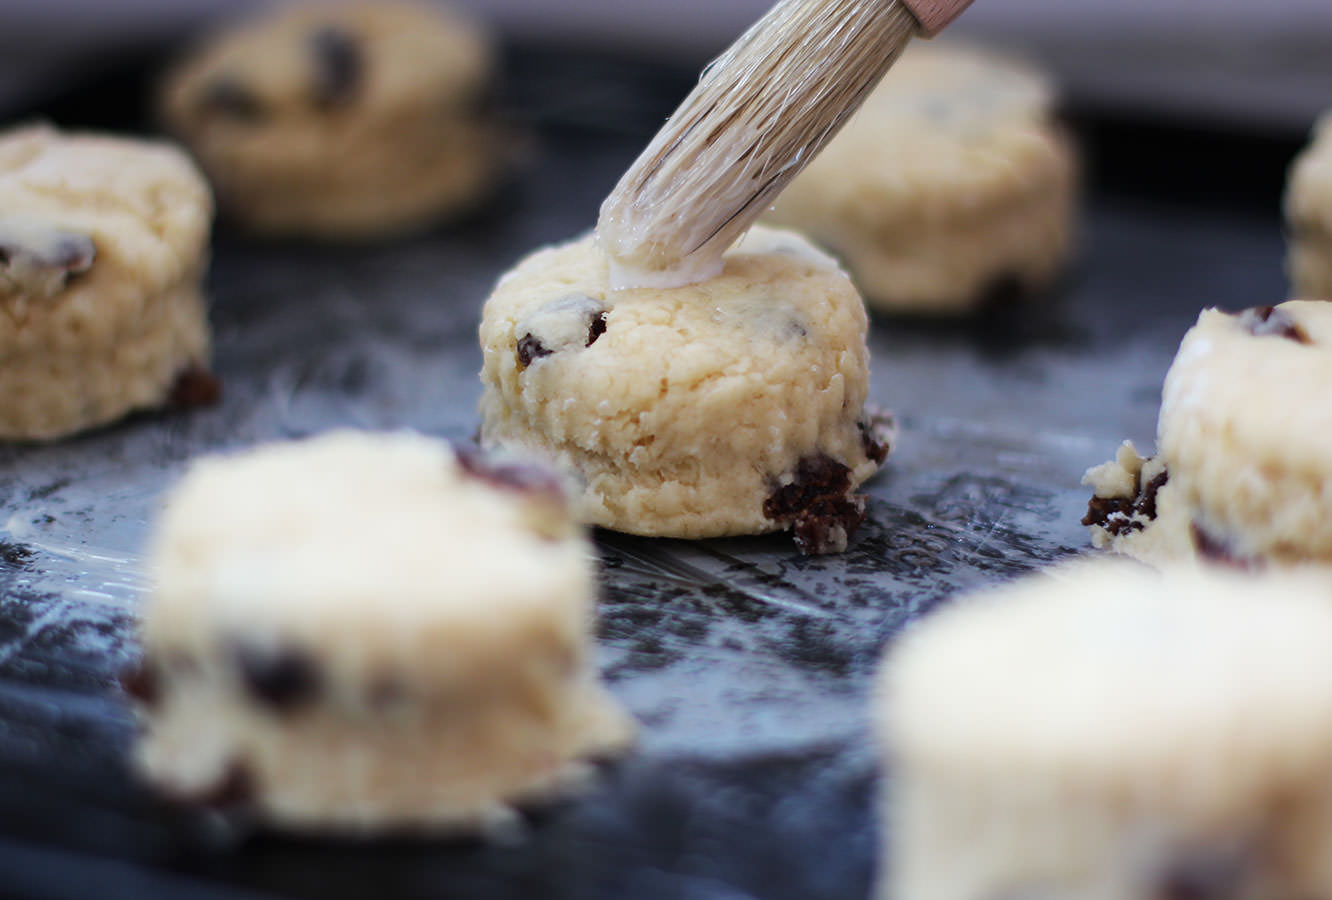 Step eight
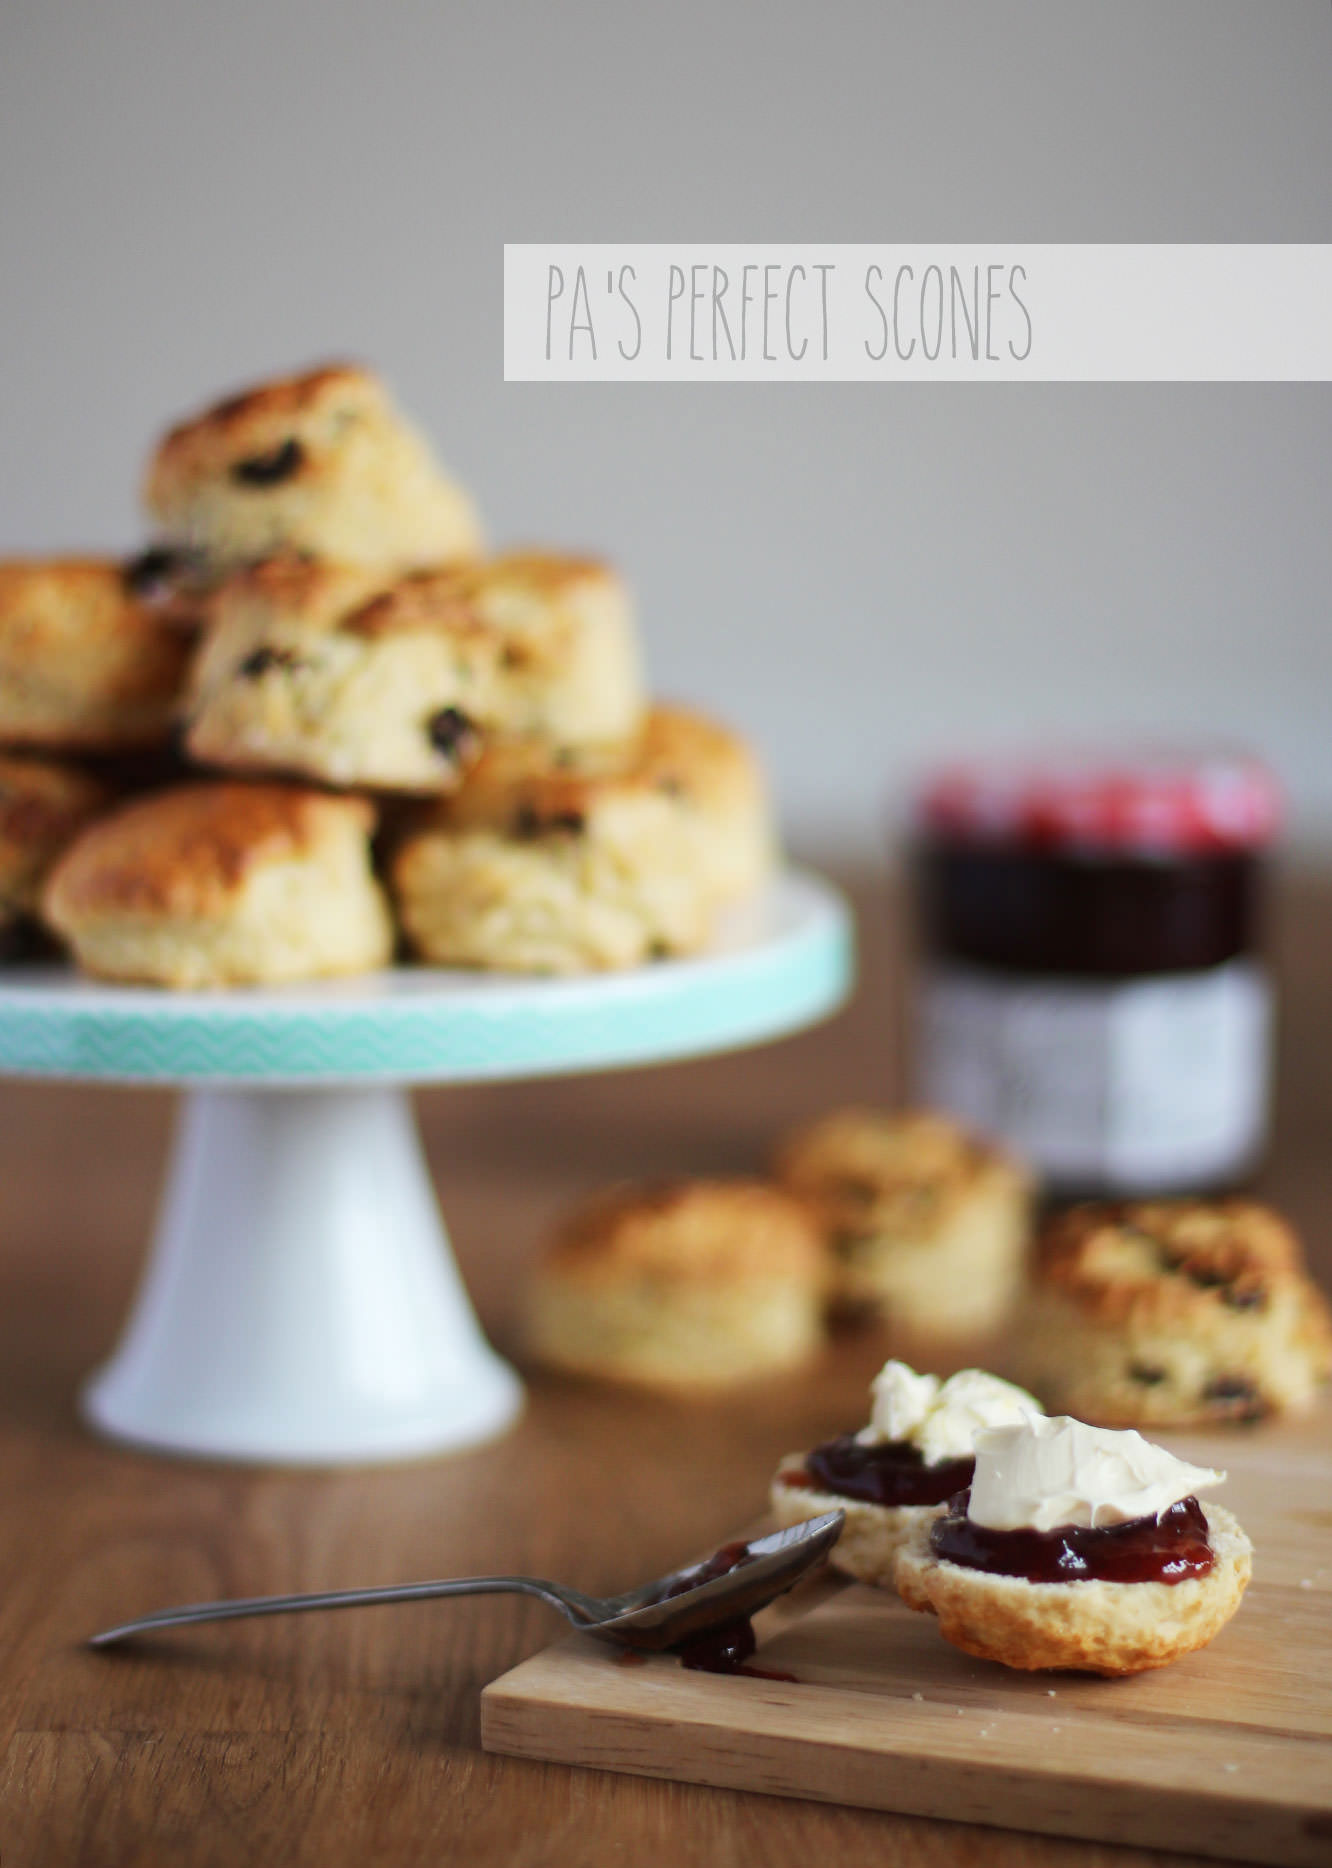 Step ten