Apologies for the day late post friends. I had a miniature pie melt down at the weekend (#myblogginglife) and as a result didn’t fancy posting yesterday. Instead I took an evening of sitting on the kitchen counters with the housemates eating pumpkin pie.
Speaking of the housemates. A while ago one of mine professed herself to be a food innovator. Bold claim? Yes. I thought so. When I asked for proof of this theory, she was ready with it. “Well,” she said calmly, and with an air of smugness, “I’ve had an excellent idea for mince pie truffles”. Lover of mince pies I am. Did I think this idea was a good one, worthy of the self proclaimed food innovator title? No, reader, I did not.
About a week of scorning later (I cannot put words together to explain how disgusting I thought the idea was and how aggressively I communicated that to her) she returned home with a box of mince pies to prove her idea, totally unfazed, a quality all struggling food innovators must no doubt possess. I’m sure Heston could empathise.
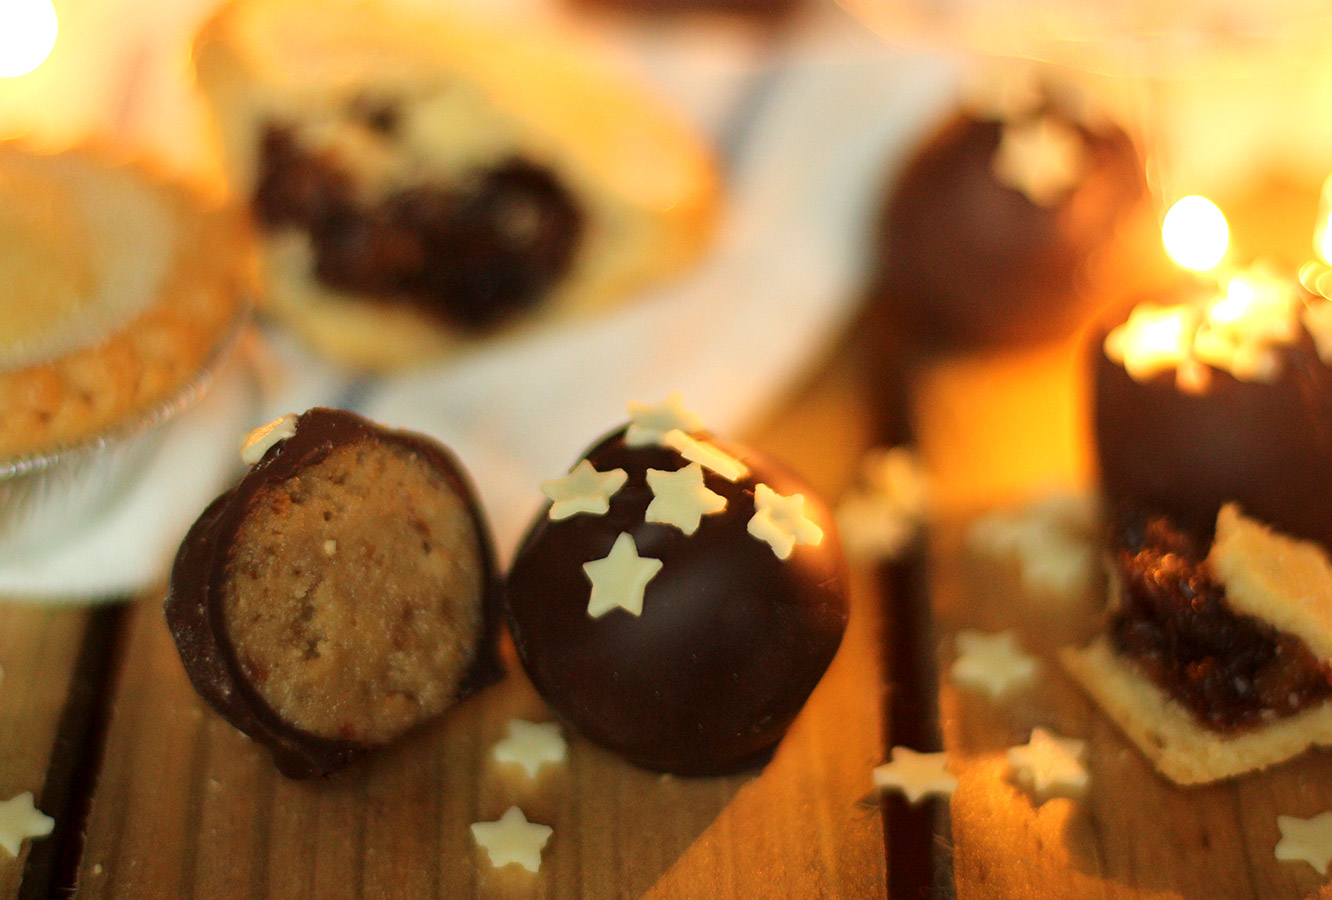
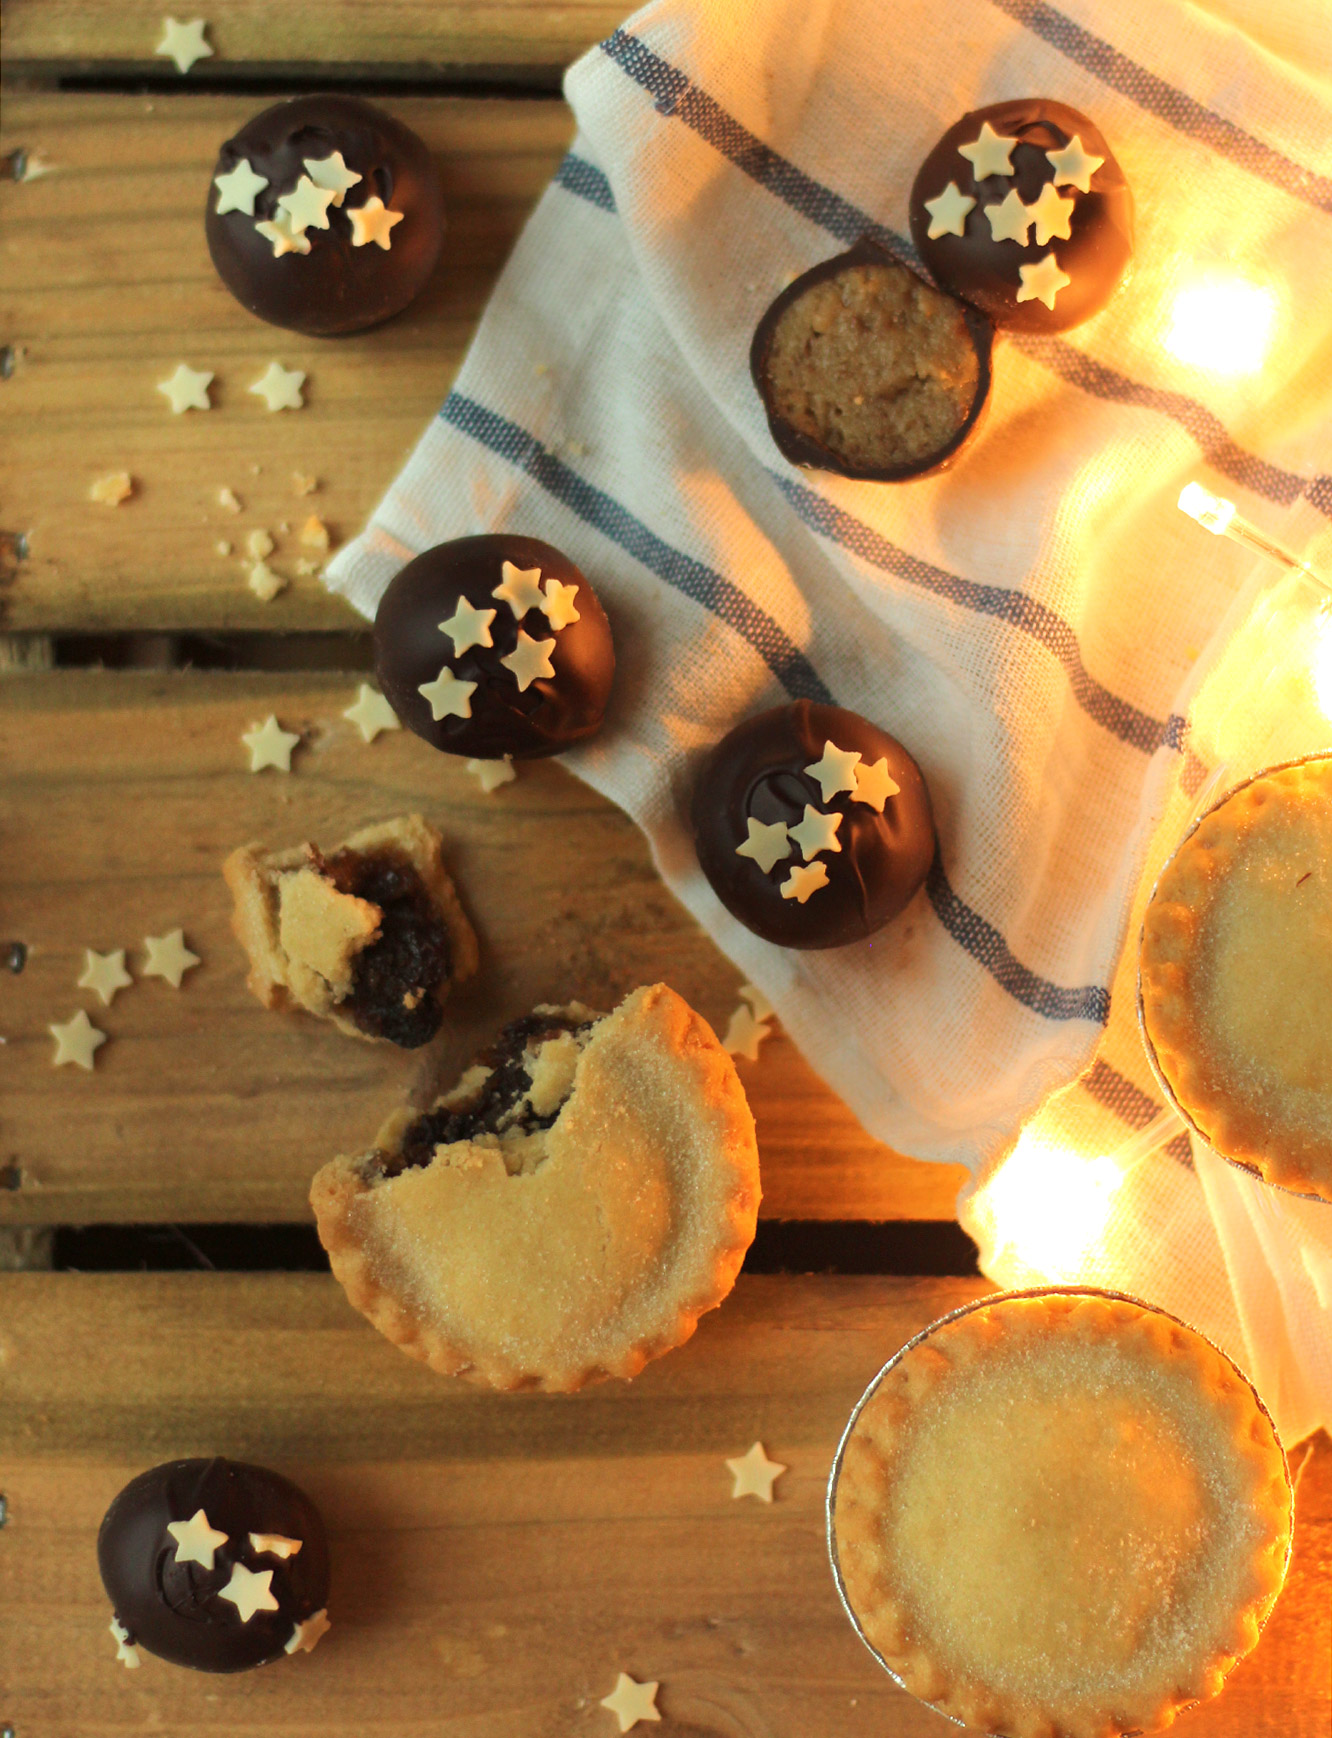
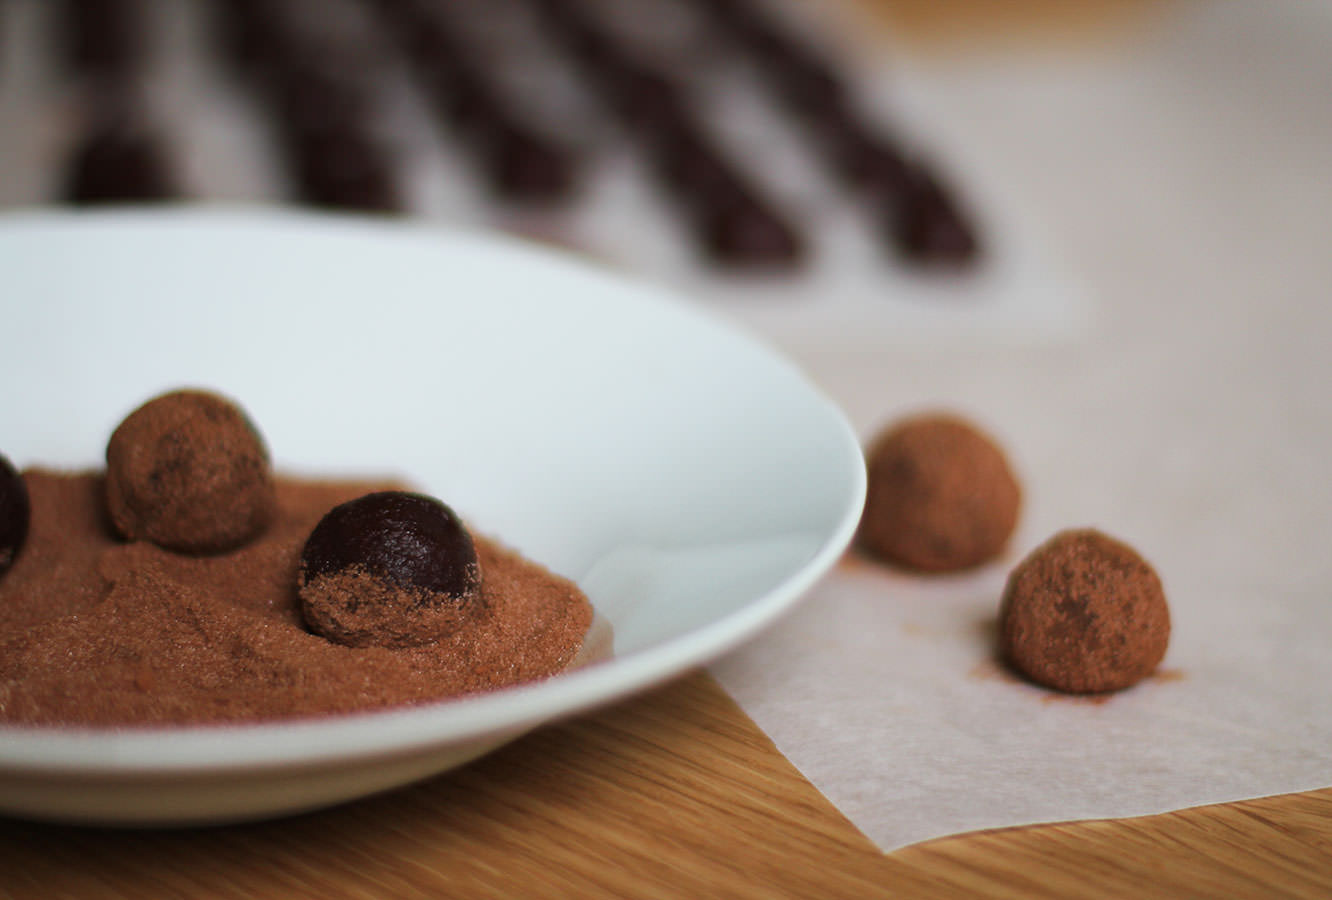
Anyway. Turns out, I like mince pie truffles. You’ll have to trust me on this one. Best eaten from the fridge, sound and look entirely unappetising, ladies and gentlemen, I bring you the recipe for the humble (but great) mince pie truffle.
This post is dedicated to one Ms Afua Addai-Diawuo, food innovator.
You will need
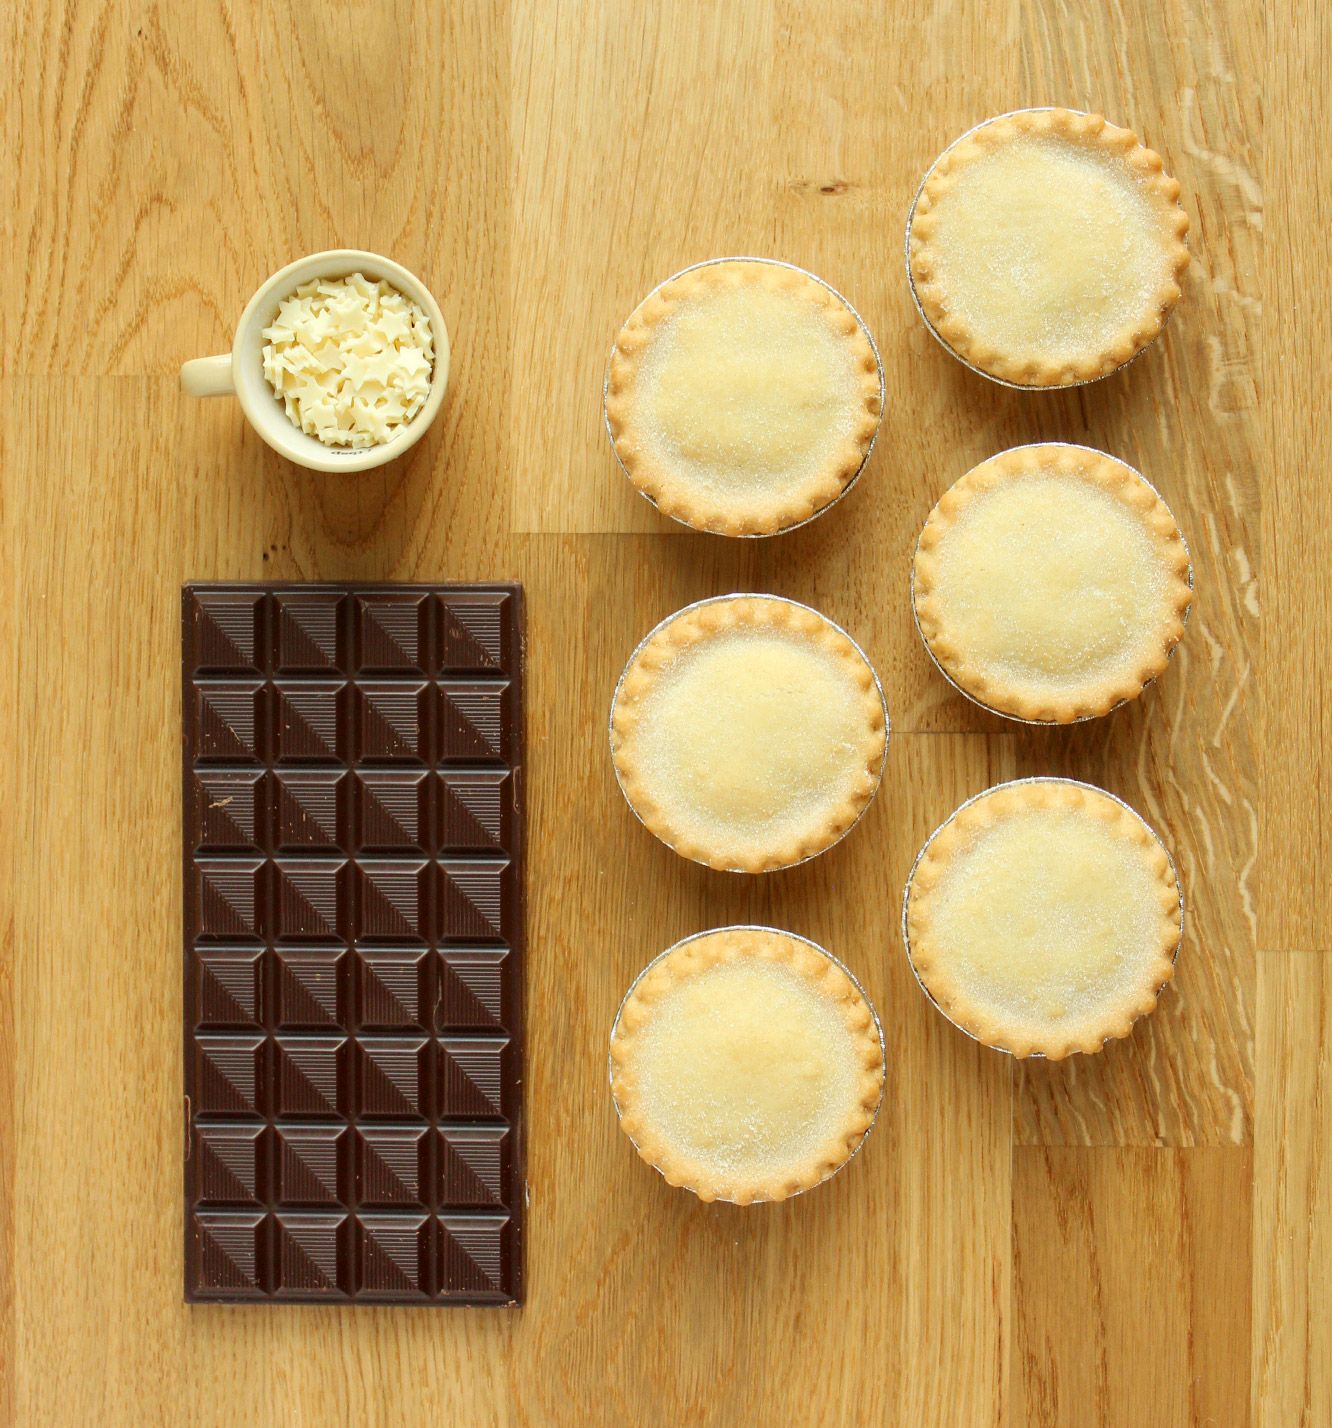
6 mince pies
300g/10.5 oz dark chocolate
Some sprinkles if you have them
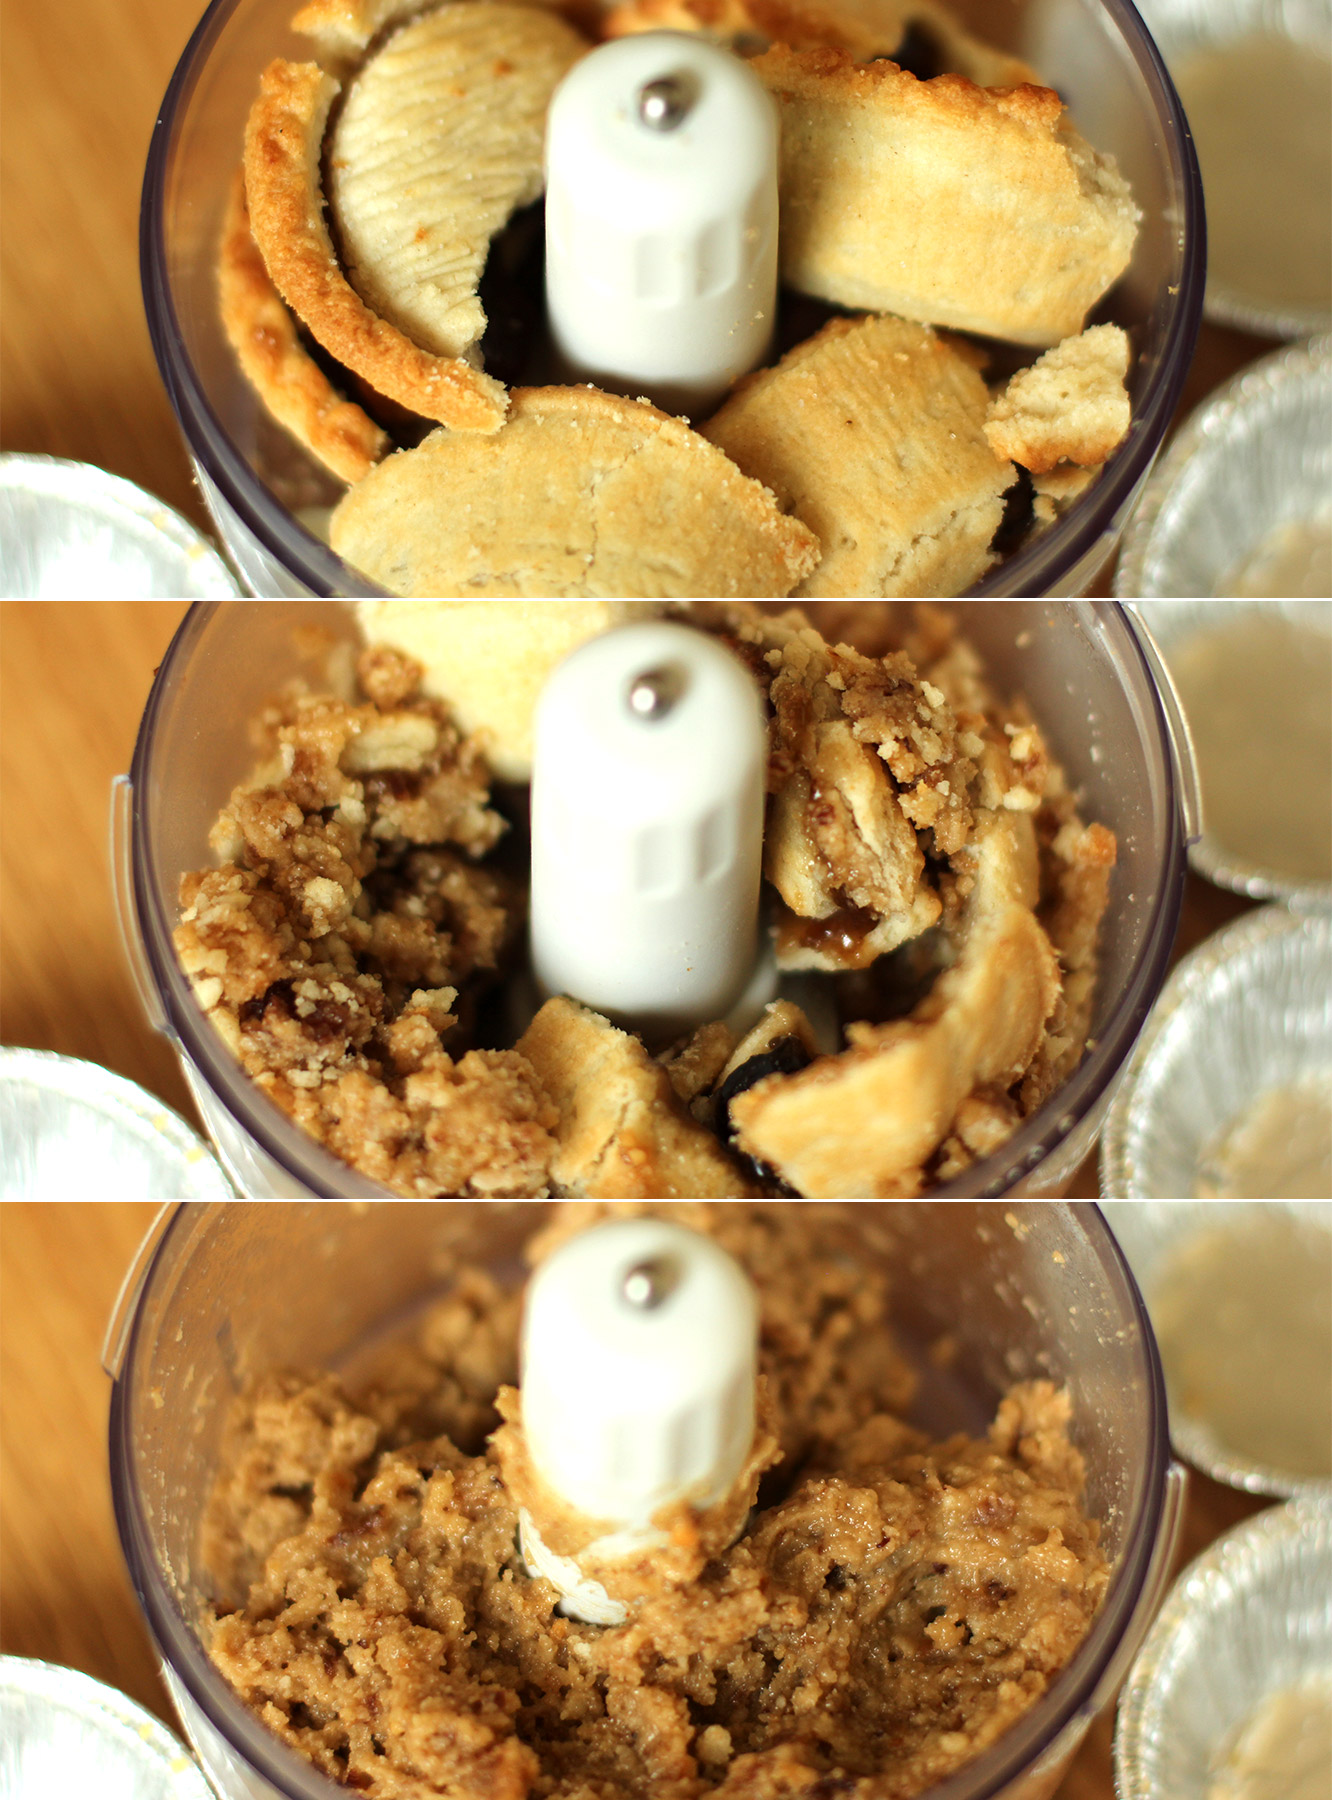
Step one
Using a food processor blitz the mince pies until they are a dough like consistency. It will be very sticky so you will probably need to put the mixture into the freezer for about 30mins to an hour.
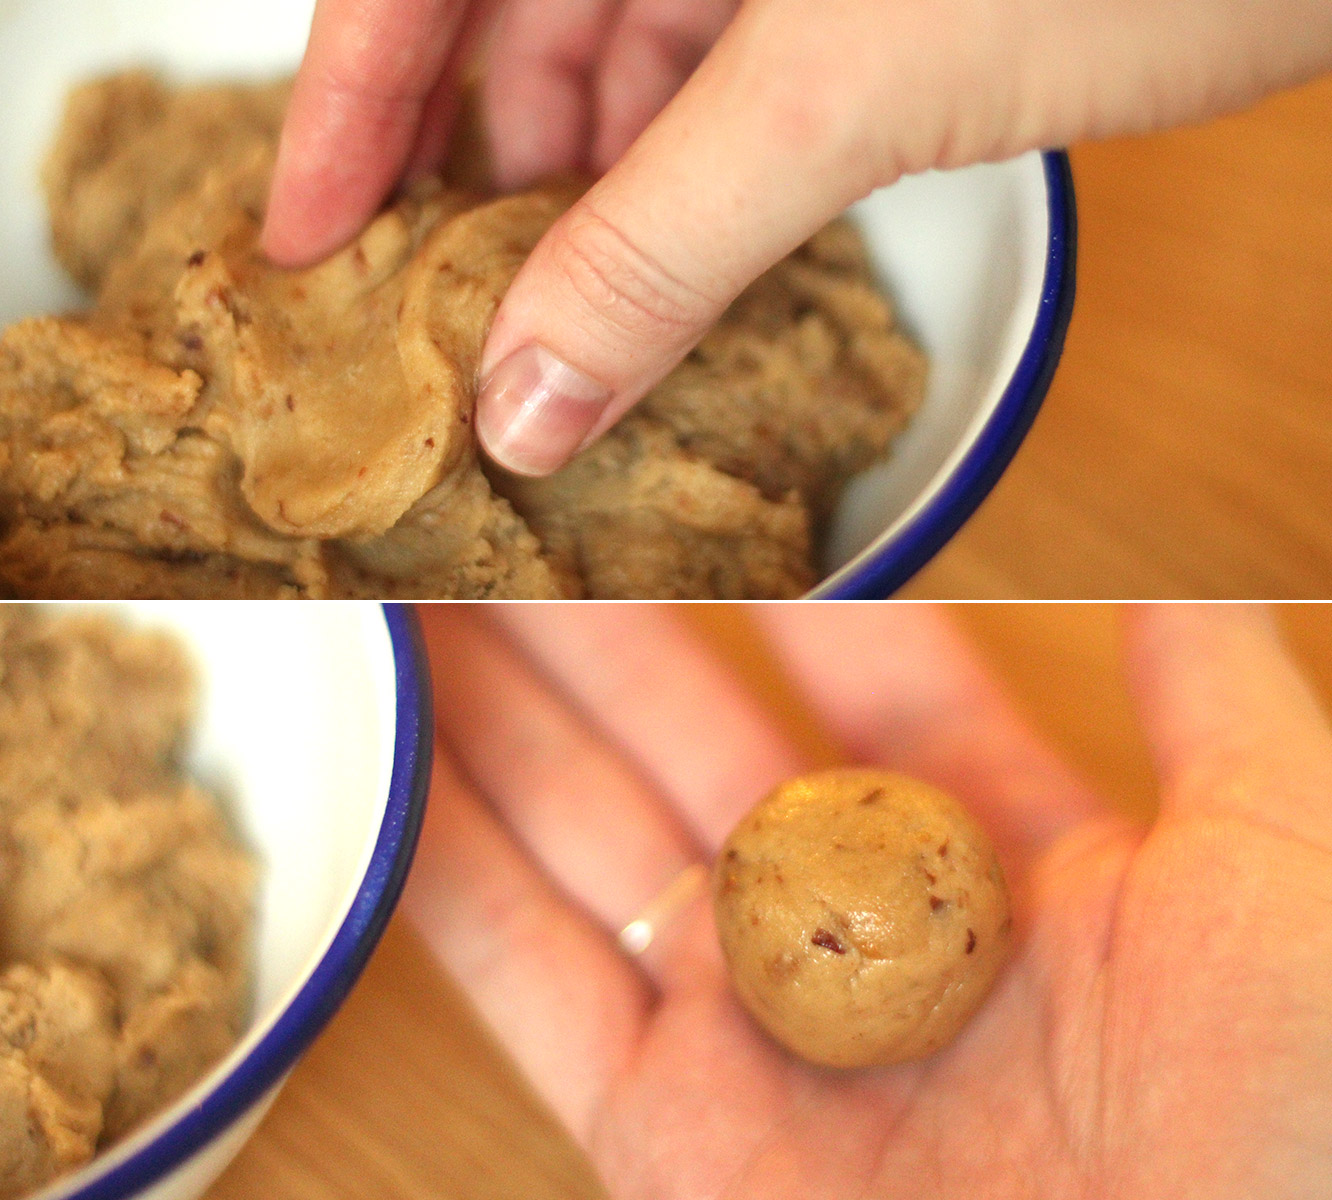
Step two
Roll the dough into evenly sized balls.
Put them back into the freezer for a while longer, until solidified.
Step three
Melt the dark chocolate and dip the truffle centres to coat them and leave them on some cellophane or greaseproof paper to dry.
If you want to see how to dip them, I cover it a little more thoroughly in this post from two weeks ago.
And there we go, early festive treats in three easy steps.
SO. I have been remiss. Friends, stalkers, I’m sorry. I didn’t mean to leave you sans blog for two whole weeks. Finishing off my graphic design portfolio kind of consumed my health, social life, eating habits and ability to hold a conversation.
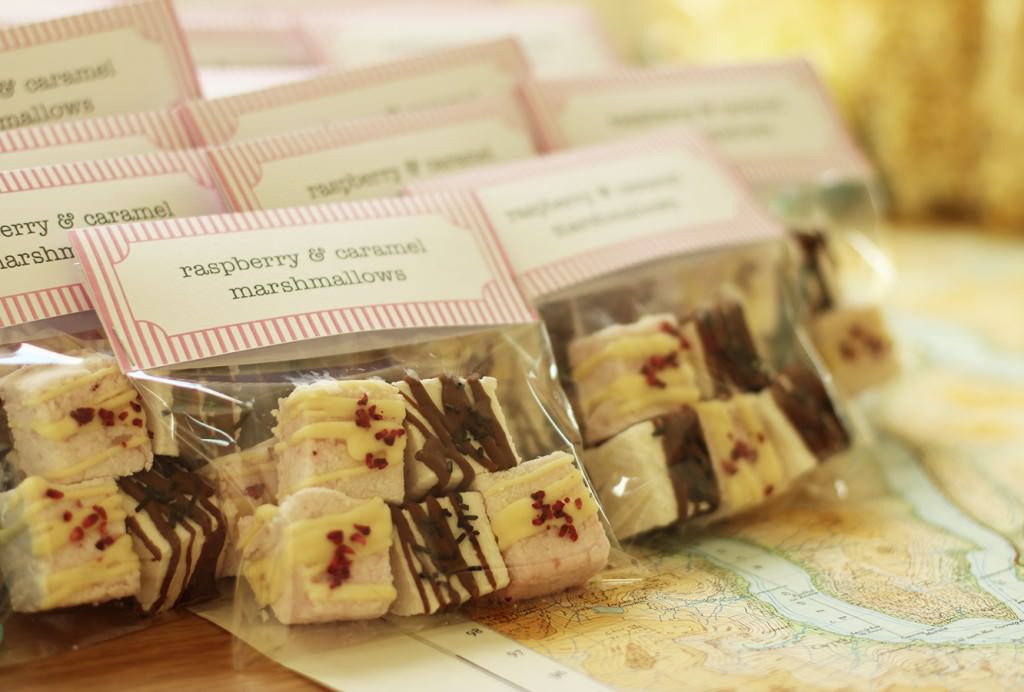
But that’s done now, and I’m back. Picking up where I left off with Vicky’s hen do favours. This week it’s raspberry and white chocolate, and chocolate caramel marshmallows. Not exactly the first time I have made marshmallows on this blog. I really want you to make marshmallows guys.
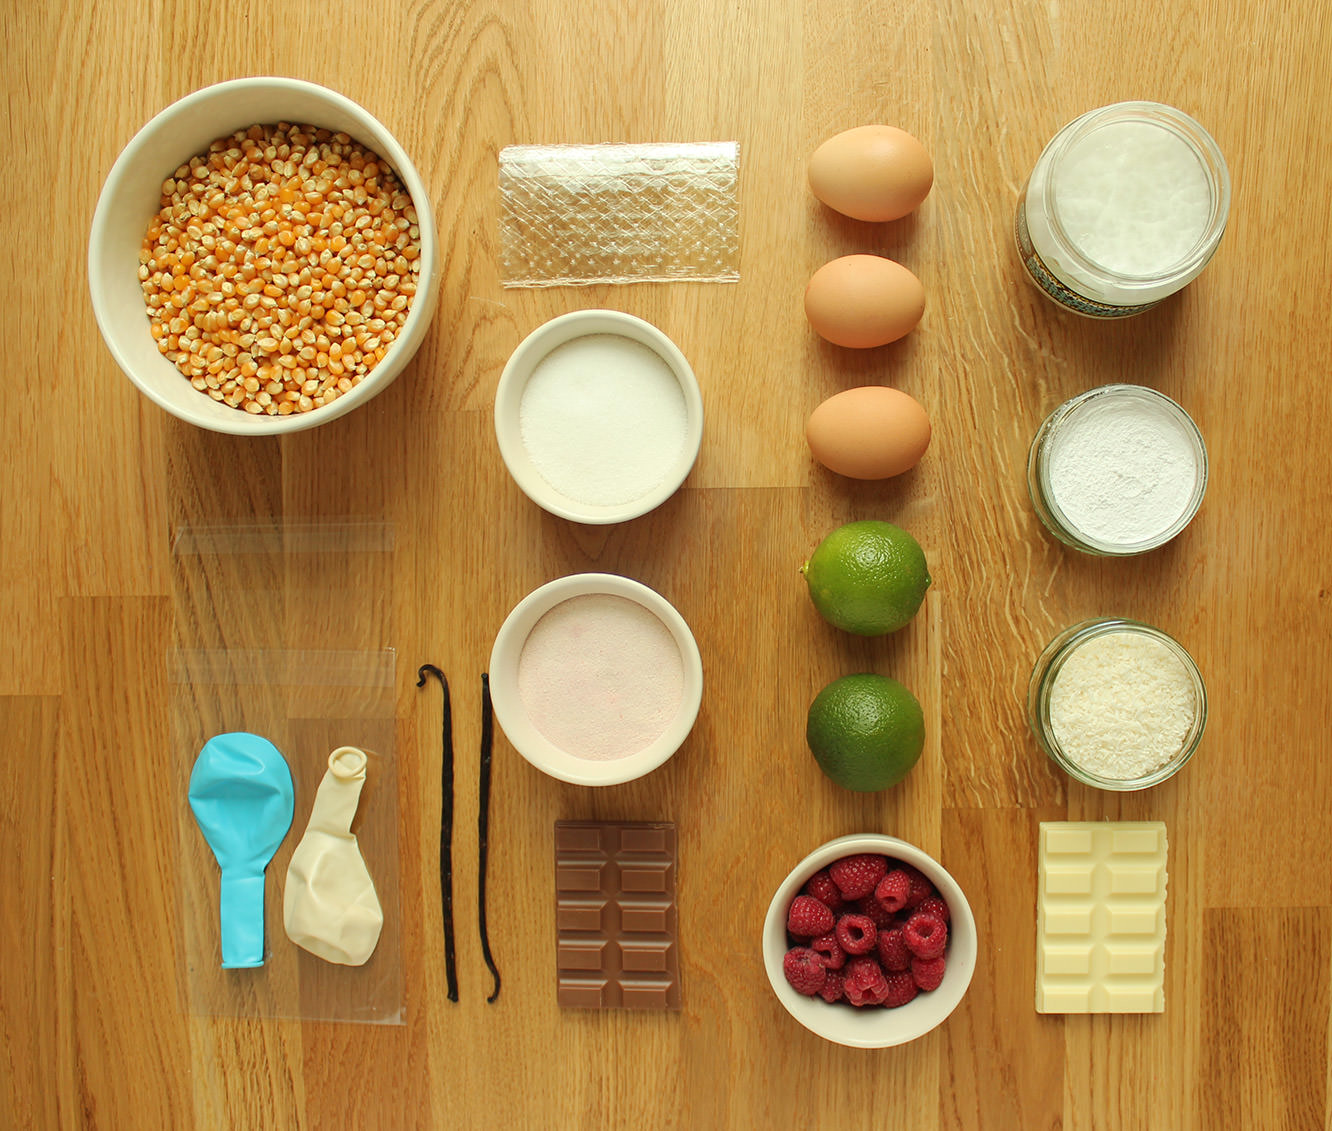
You will need
For the white chocolate and raspberry marshmallows:
9 gelatine sheets
350g/12 oz granulated sugar
2 egg whites
1 tbsp liquid glucose (you can find this in a squeezy toothpaste type tube in the baking section)
150g/5 oz raspberries
150g/5 oz white chocolate
Freeze dried raspberries (optional)
For the caramel and chocolate marshmallows:
9 gelatine sheets
300g/10.5 oz granulated sugar
2 egg whites
1 tbsp liquid glucose
2-3 tsp caramel extract (I got buttery caramel from natural professional flavours at Lakeland)
150g/5 oz milk chocolate
Cellophane card bags x 30
(makes enough for 30 favours, 150+ marshmallows)
I’ll go ahead and walk you through the process for the caramel ones then pop the changes for the raspberry below.
Step one
In a cereal bowl, soak the gelatine in 150ml/5 fl oz cold water. Set aside.
Step two
Combine the sugar, 150ml/5 fl oz water (different to the gelatine water) and the liquid glucose in a smallish saucepan.
Allow the sugar to dissolve on a low heat, and then turn it up to medium-high. Watch yourself buddy, you’re boiling sugar right now, don’t hurt it or yourself.
The temperature you want this to get to is 118 C. It will feel like it will never get there, but stay strong.
Step three
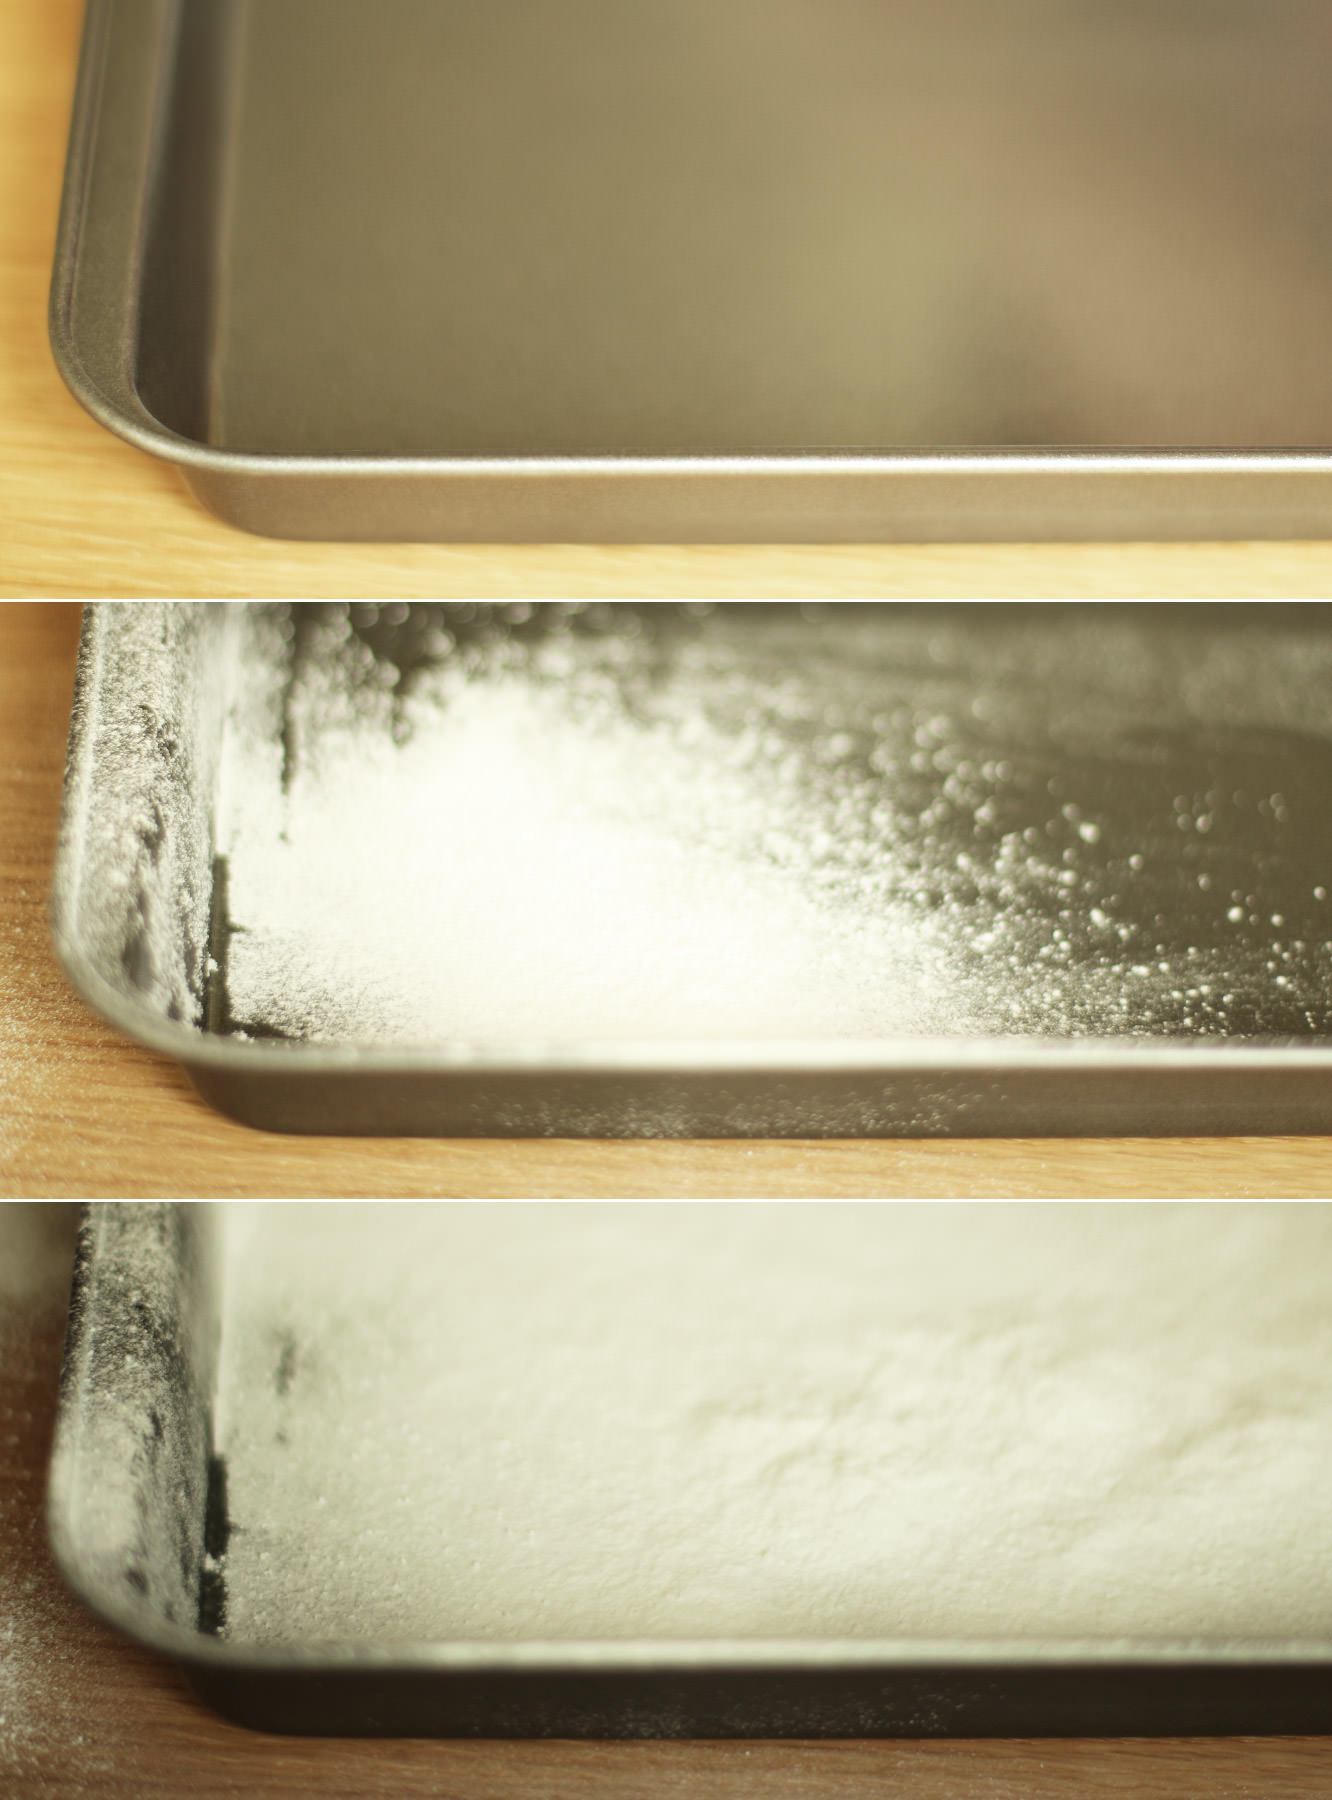
While the sugar is bubbling you can take a moment to dust your brownie tray with icing sugar. Add a small amount of olive oil first so it sticks.
Step four
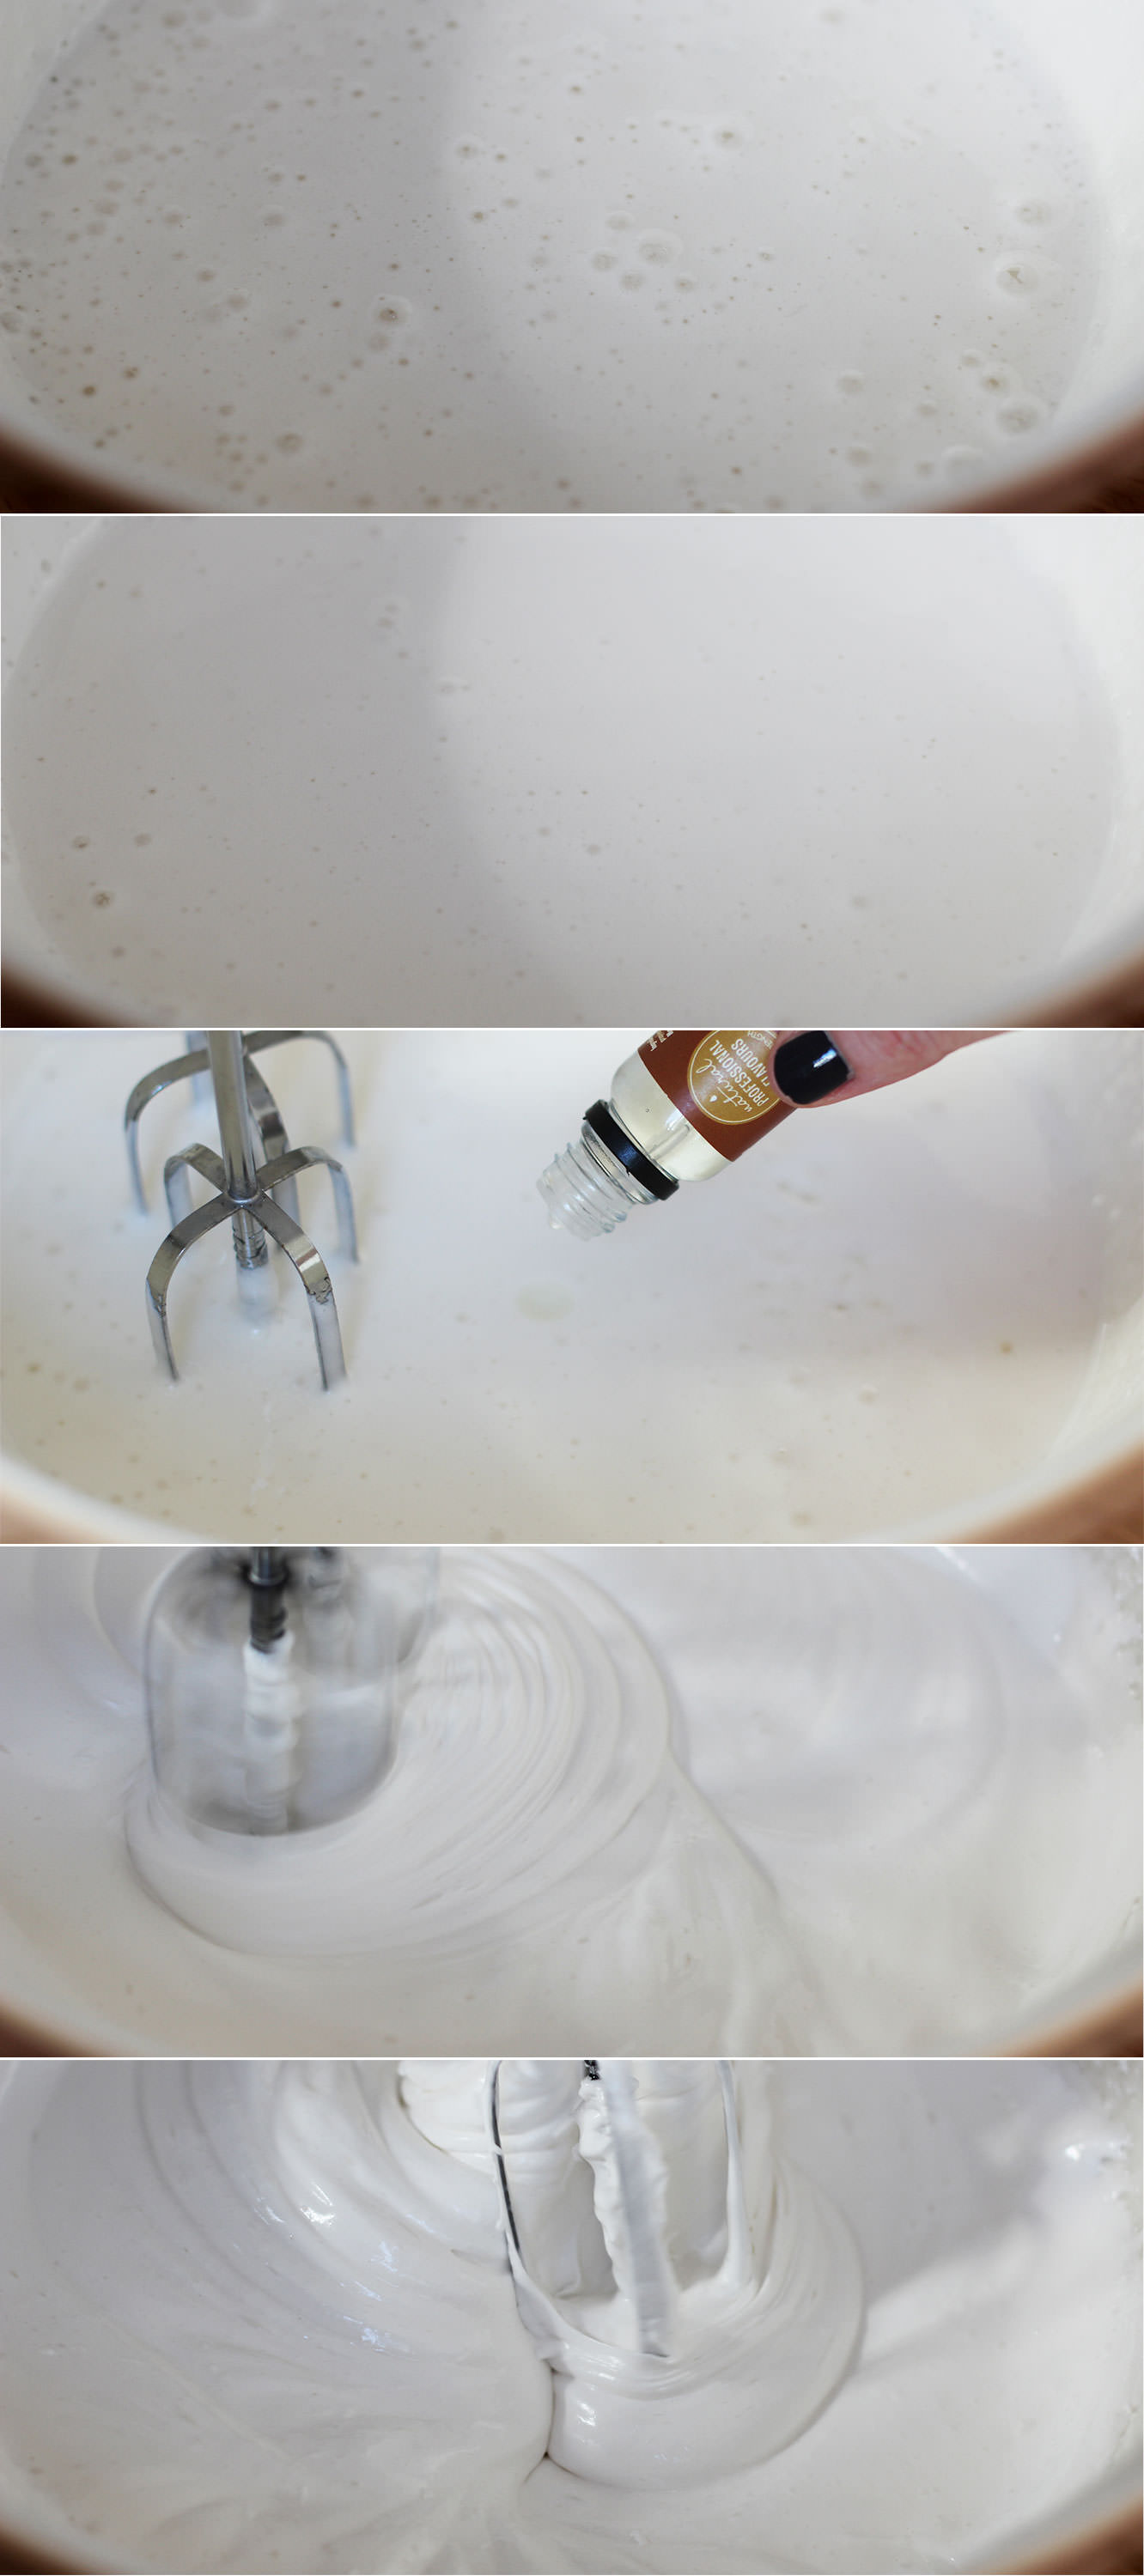
When the sugar gets to somewhere around 112-115C whisk the egg whites into stiff peaks. Take care not to use a ceramic bowl else you will get grey marks like I did. Glass or metal though and you’ll be golden.
Step five
When the sugar reaches 118C take it off the heat.
Squeeze the gelatine out a bit and add it to the sugar mix. It will bubble right up so don’t panic. It should settle pretty quickly.
Step six
Pour the hot sugar into the eggs, but make sure you’re whisking continually to avoid a big lump of sugar at the bottom of the bowl.
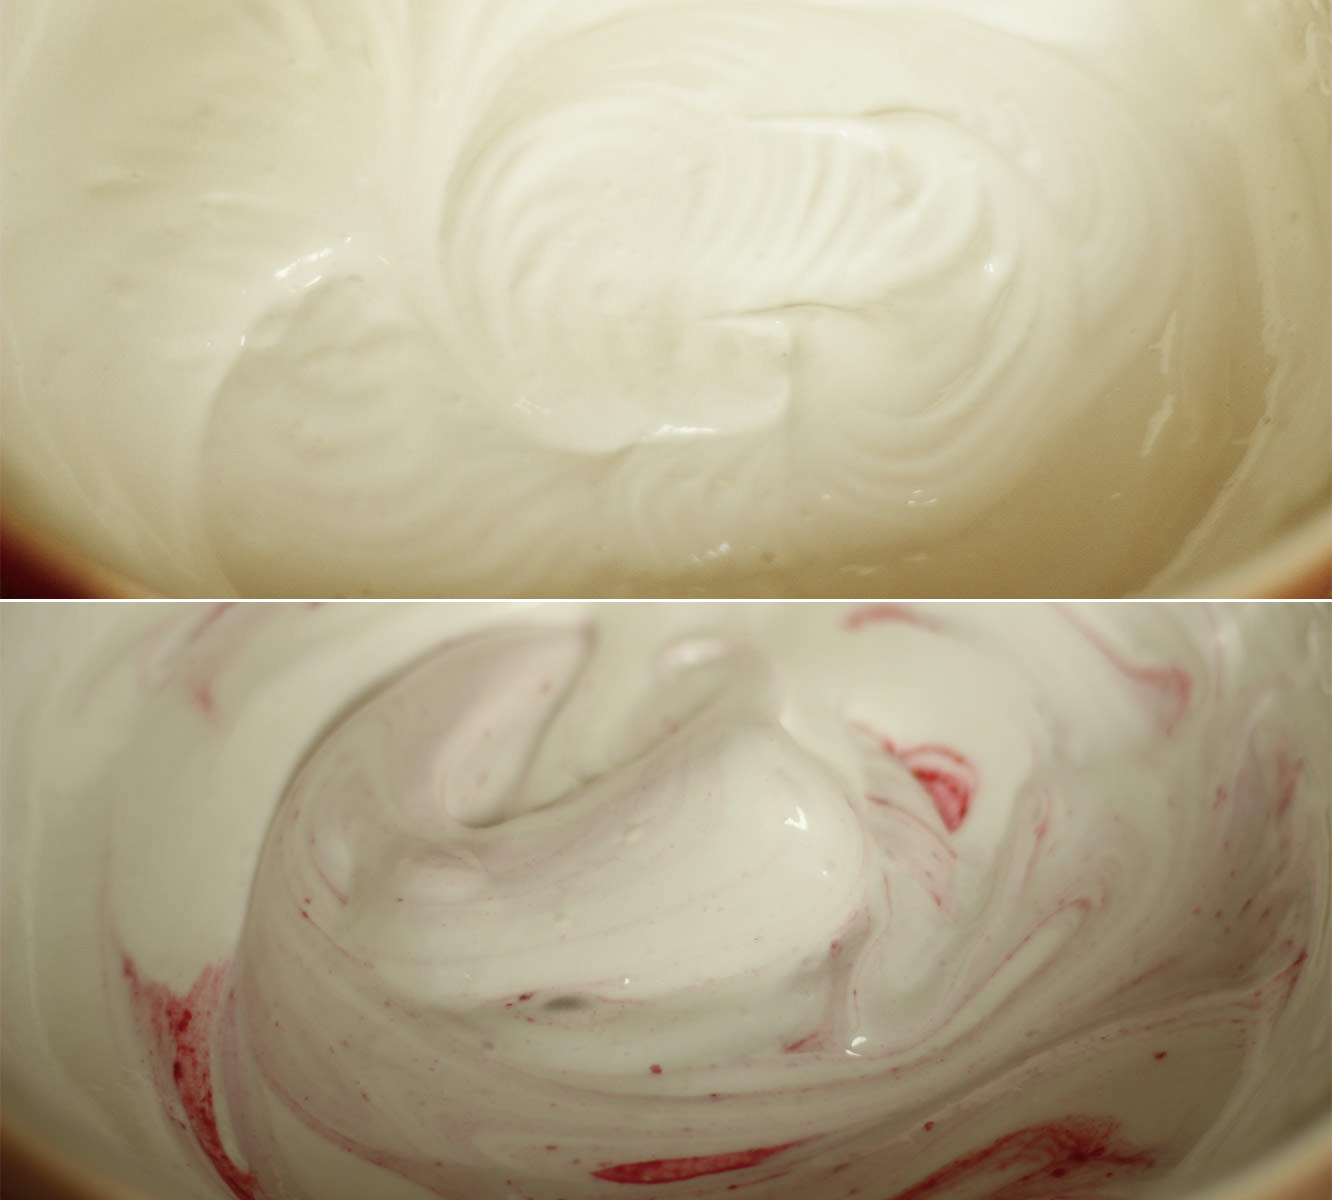
Whisk until the mixture holds its shape well and is quite thick. This can take up to ten minutes.
Somewhere during the whisking (probably when you need to give your arm a rest) add the flavouring. I used buttery caramel (as mentioned in the ingredients) but they will take basically anything you fancy.
Step seven
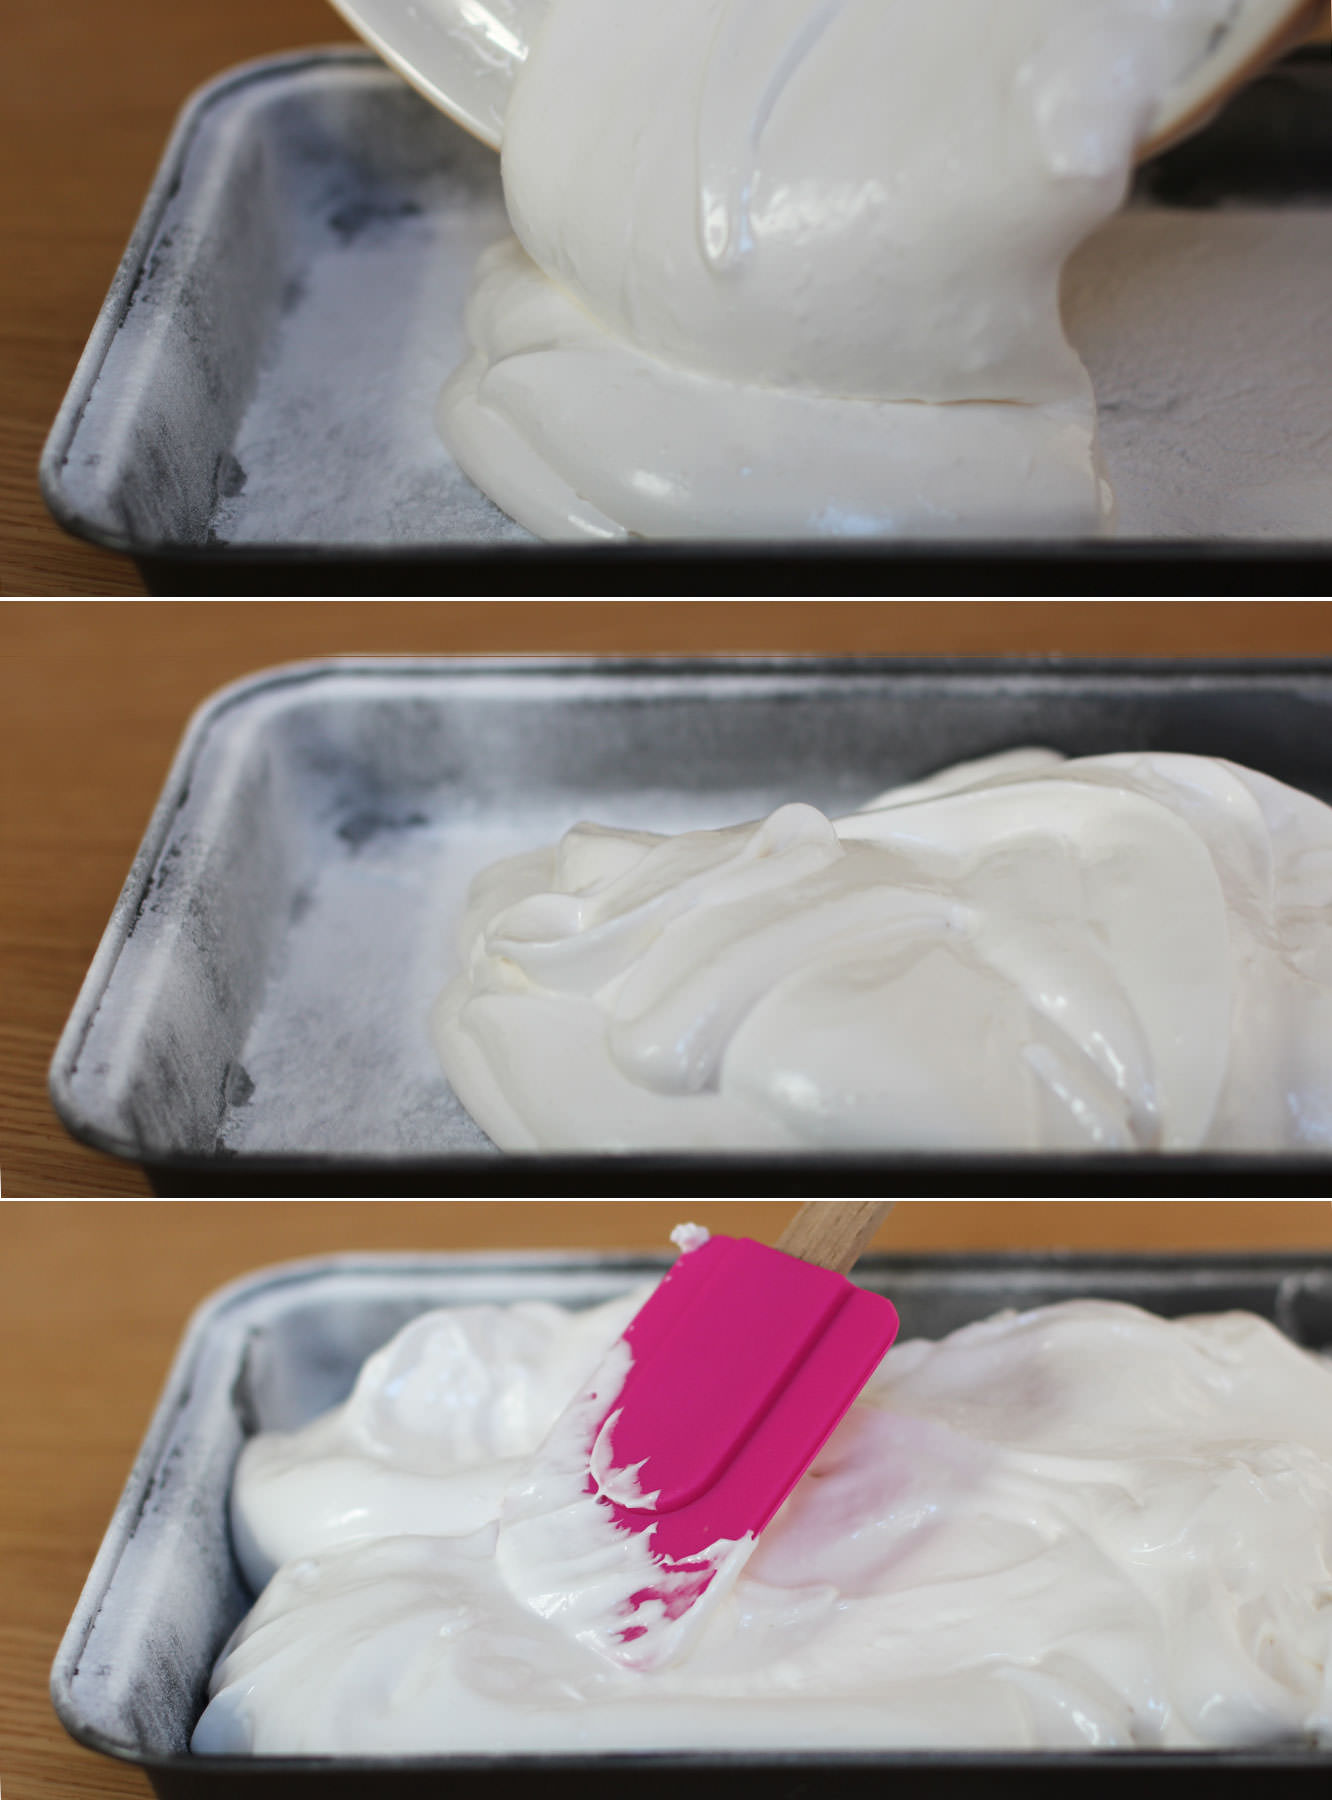
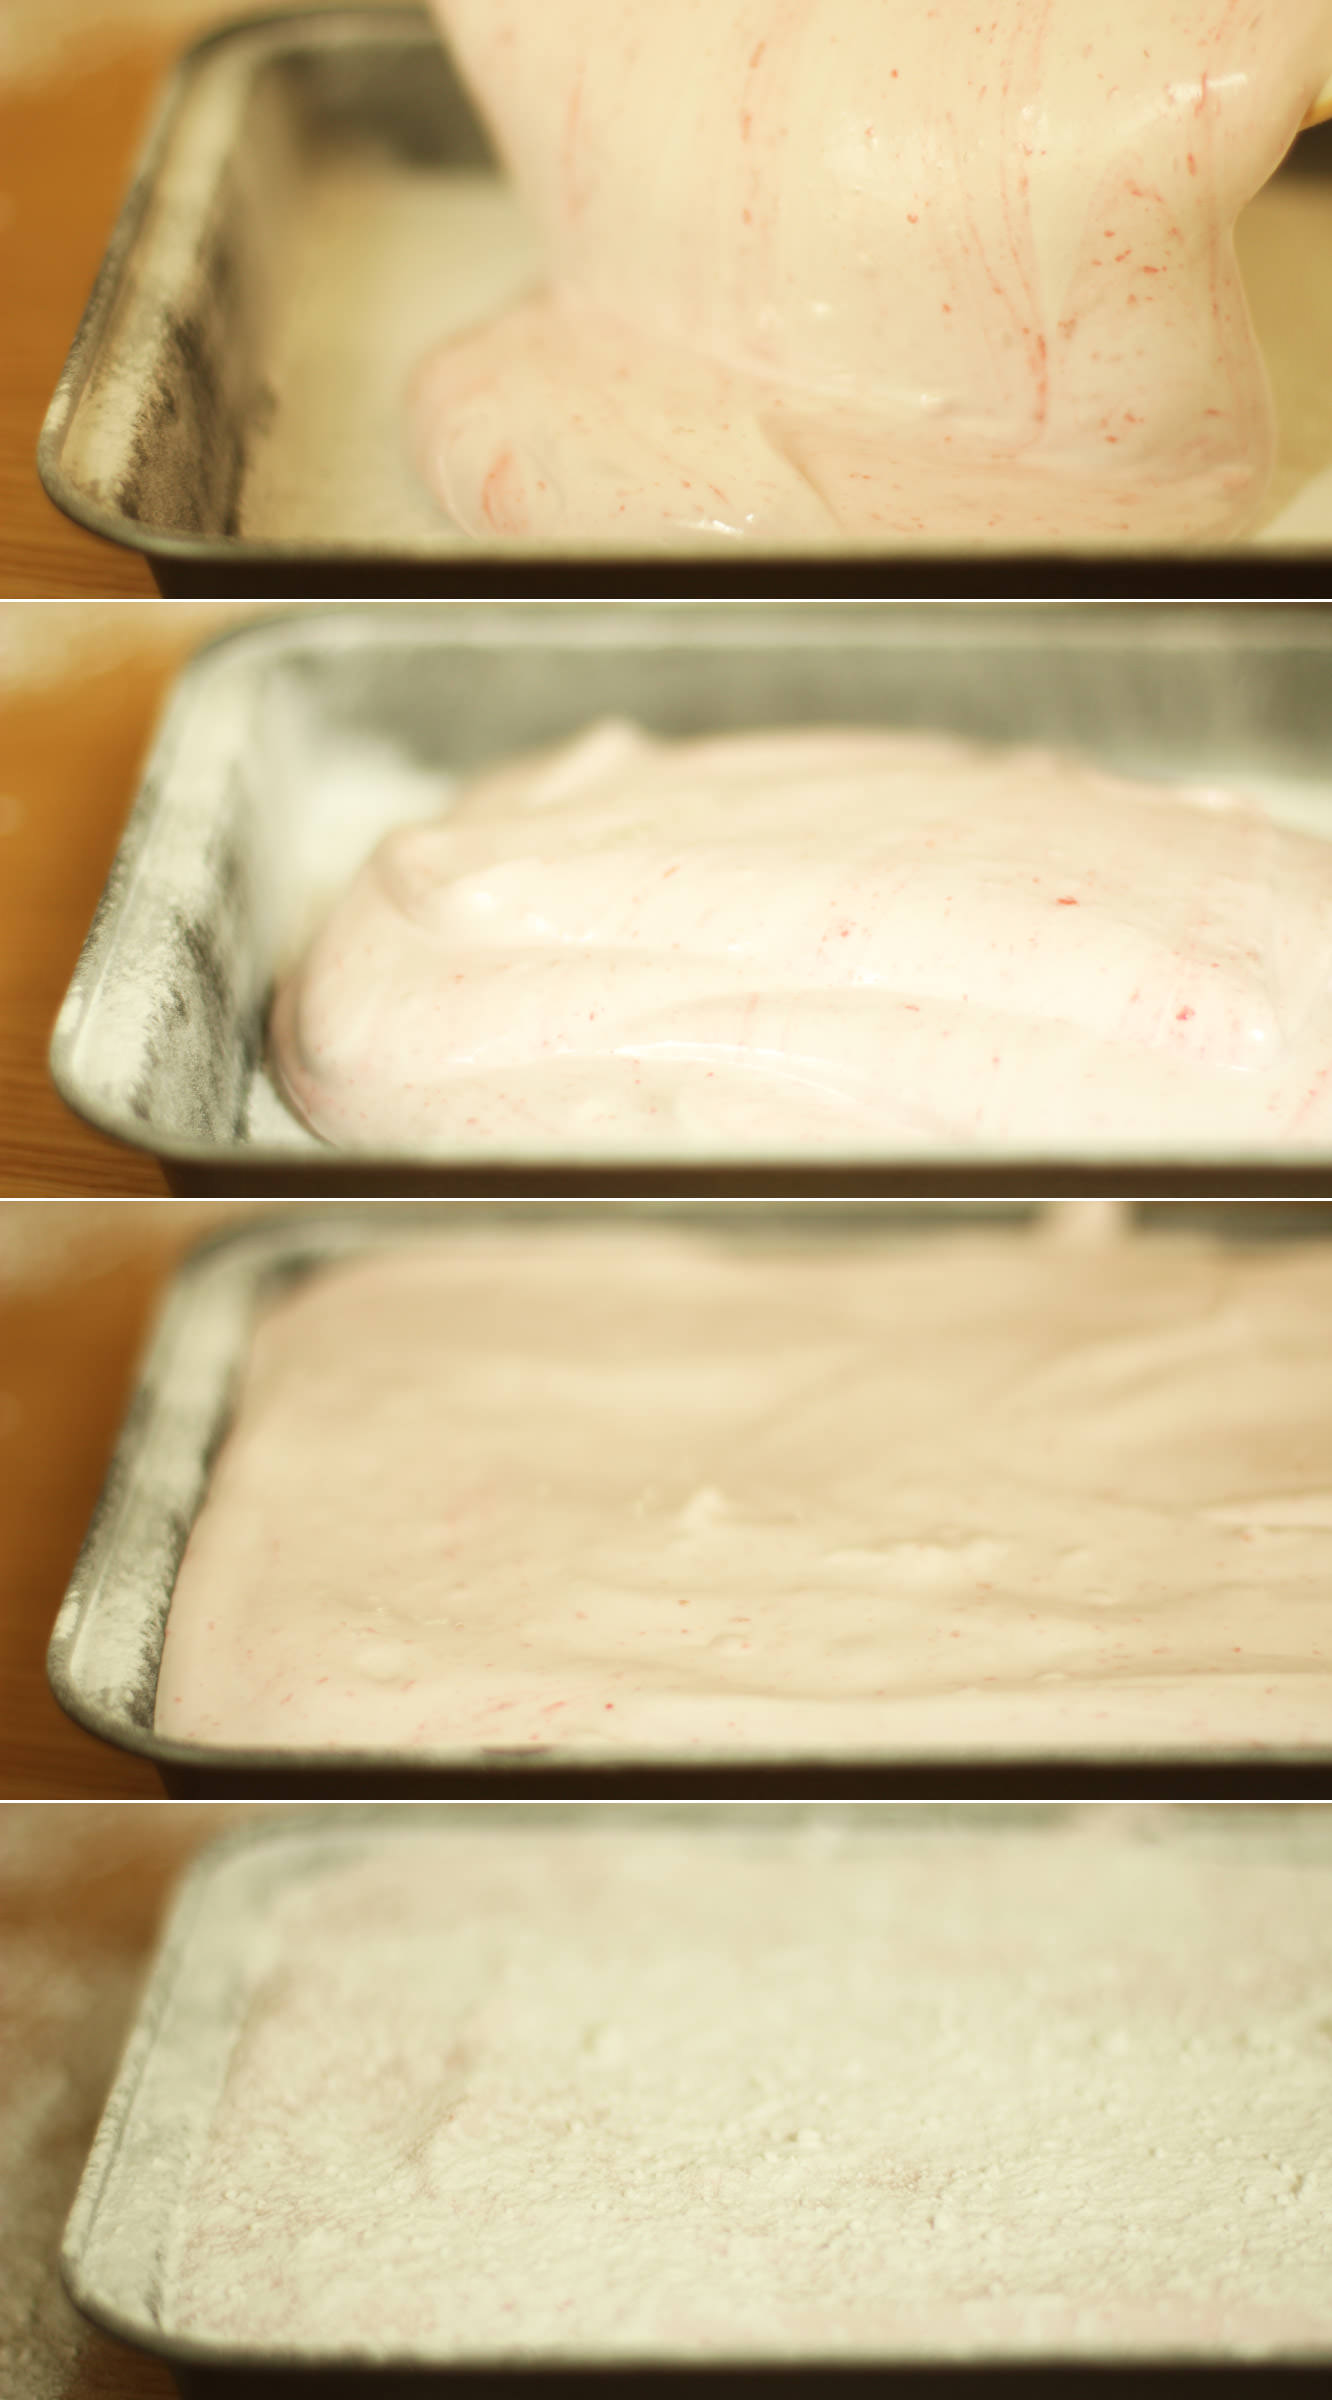
Pour the mixture into the prepared tin and smooth out as much as possible.
Dust with icing sugar and leave to set for about an hour.
For the raspberry and white chocolate marshmallows
Step eight
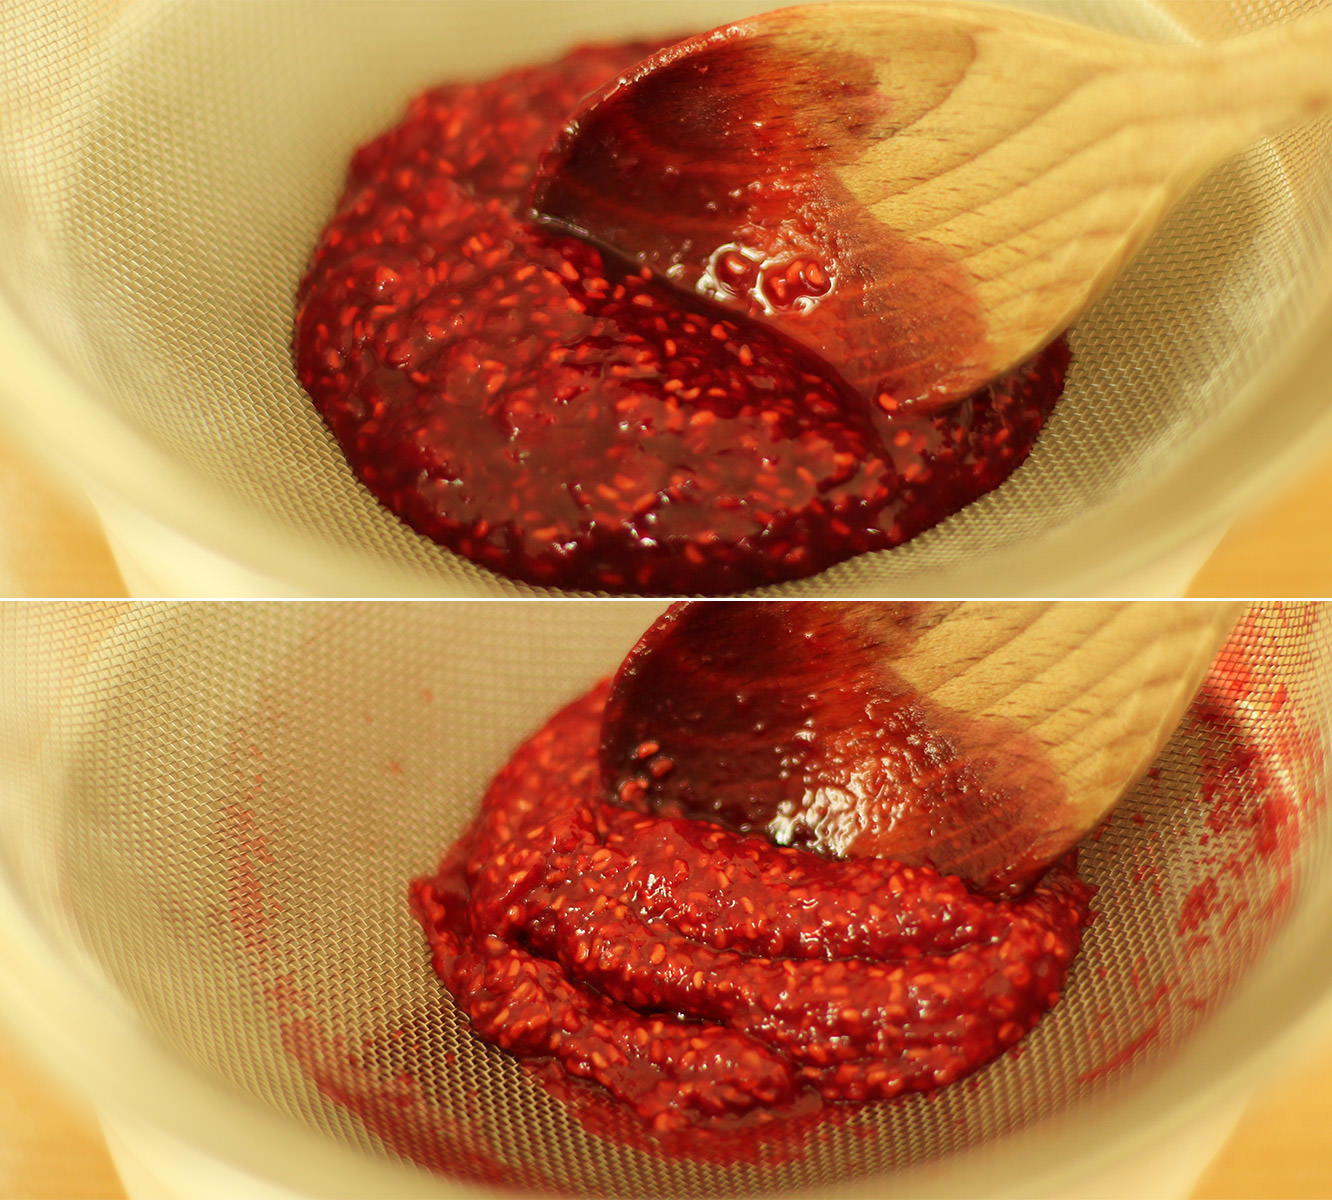
Before starting the marshmallow mix make a puree by adding the raspberries, 50g of the granulated sugar and half a tablespoon of water to a small saucepan.
Heat on a low heat until bubbling away happily. Stir while the mixture reduces (looses water) for about 5 minutes.
Step nine
Strain though a sieve to remove the pips. It may need a little stirring for encouragement. Don’t forget to scrape the excess off from the underside of the sieve before throwing away the pips.
Step ten
Follow the same steps at the caramel recipe, but instead of adding the extract, stir in the puree. I saved this to near the end to keep a bit of a ripple effect.
Step eleven
Pour into a second dusted brownie tray and leave to set.
Step twelve
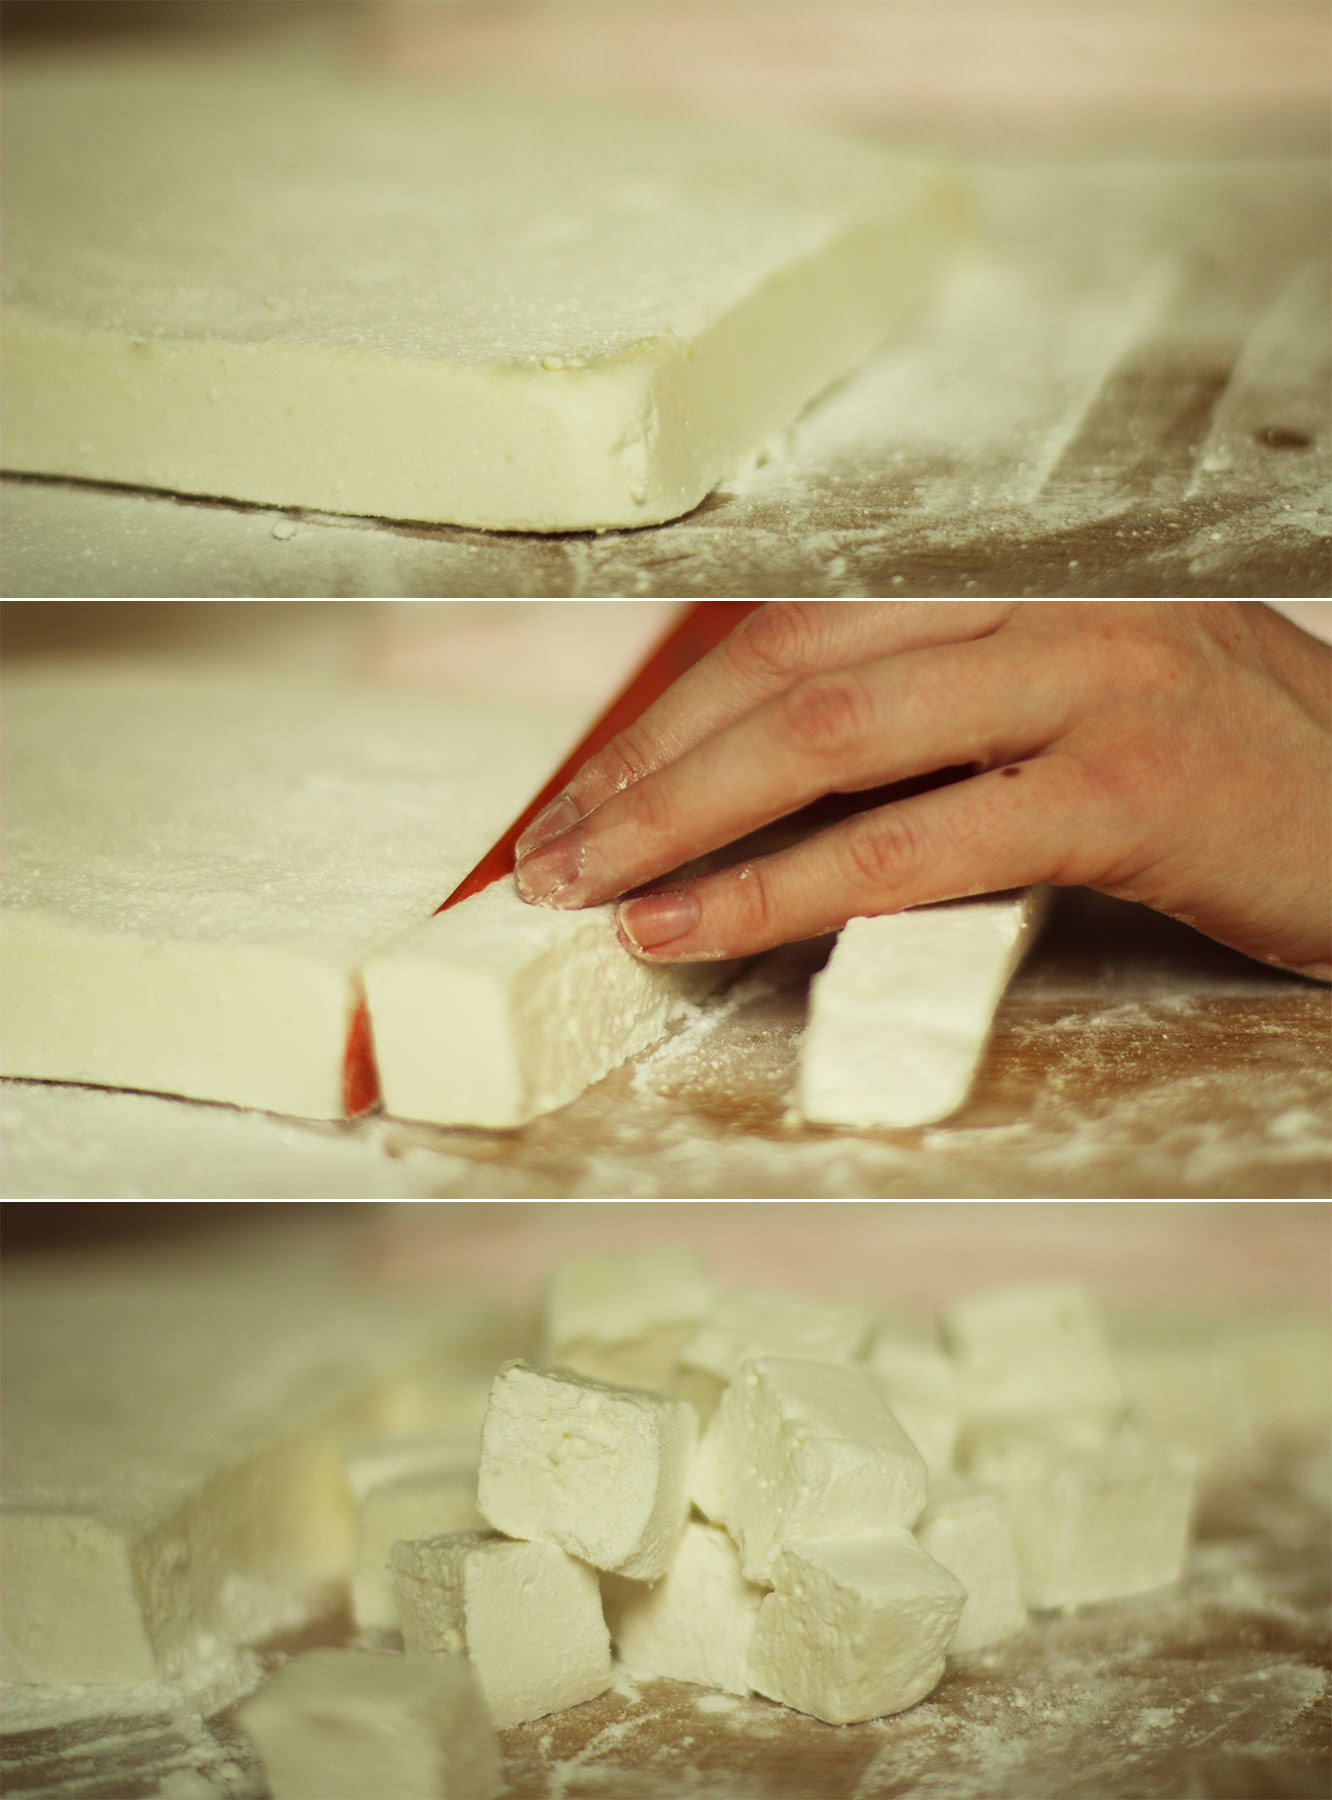
Once the marshmallows have set (at least an hour, preferably more) turn them out onto a surface dusted with icing sugar.
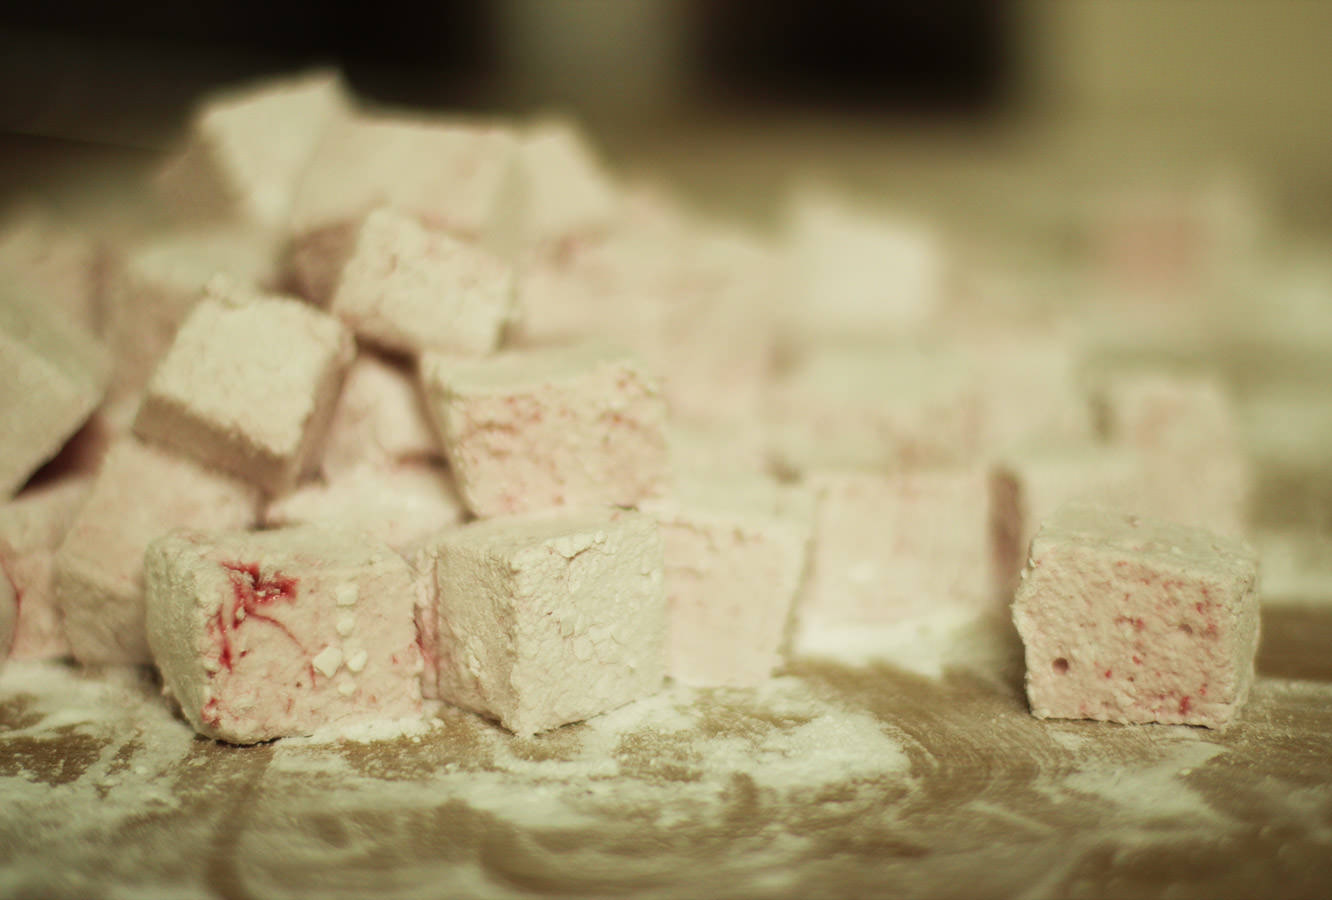
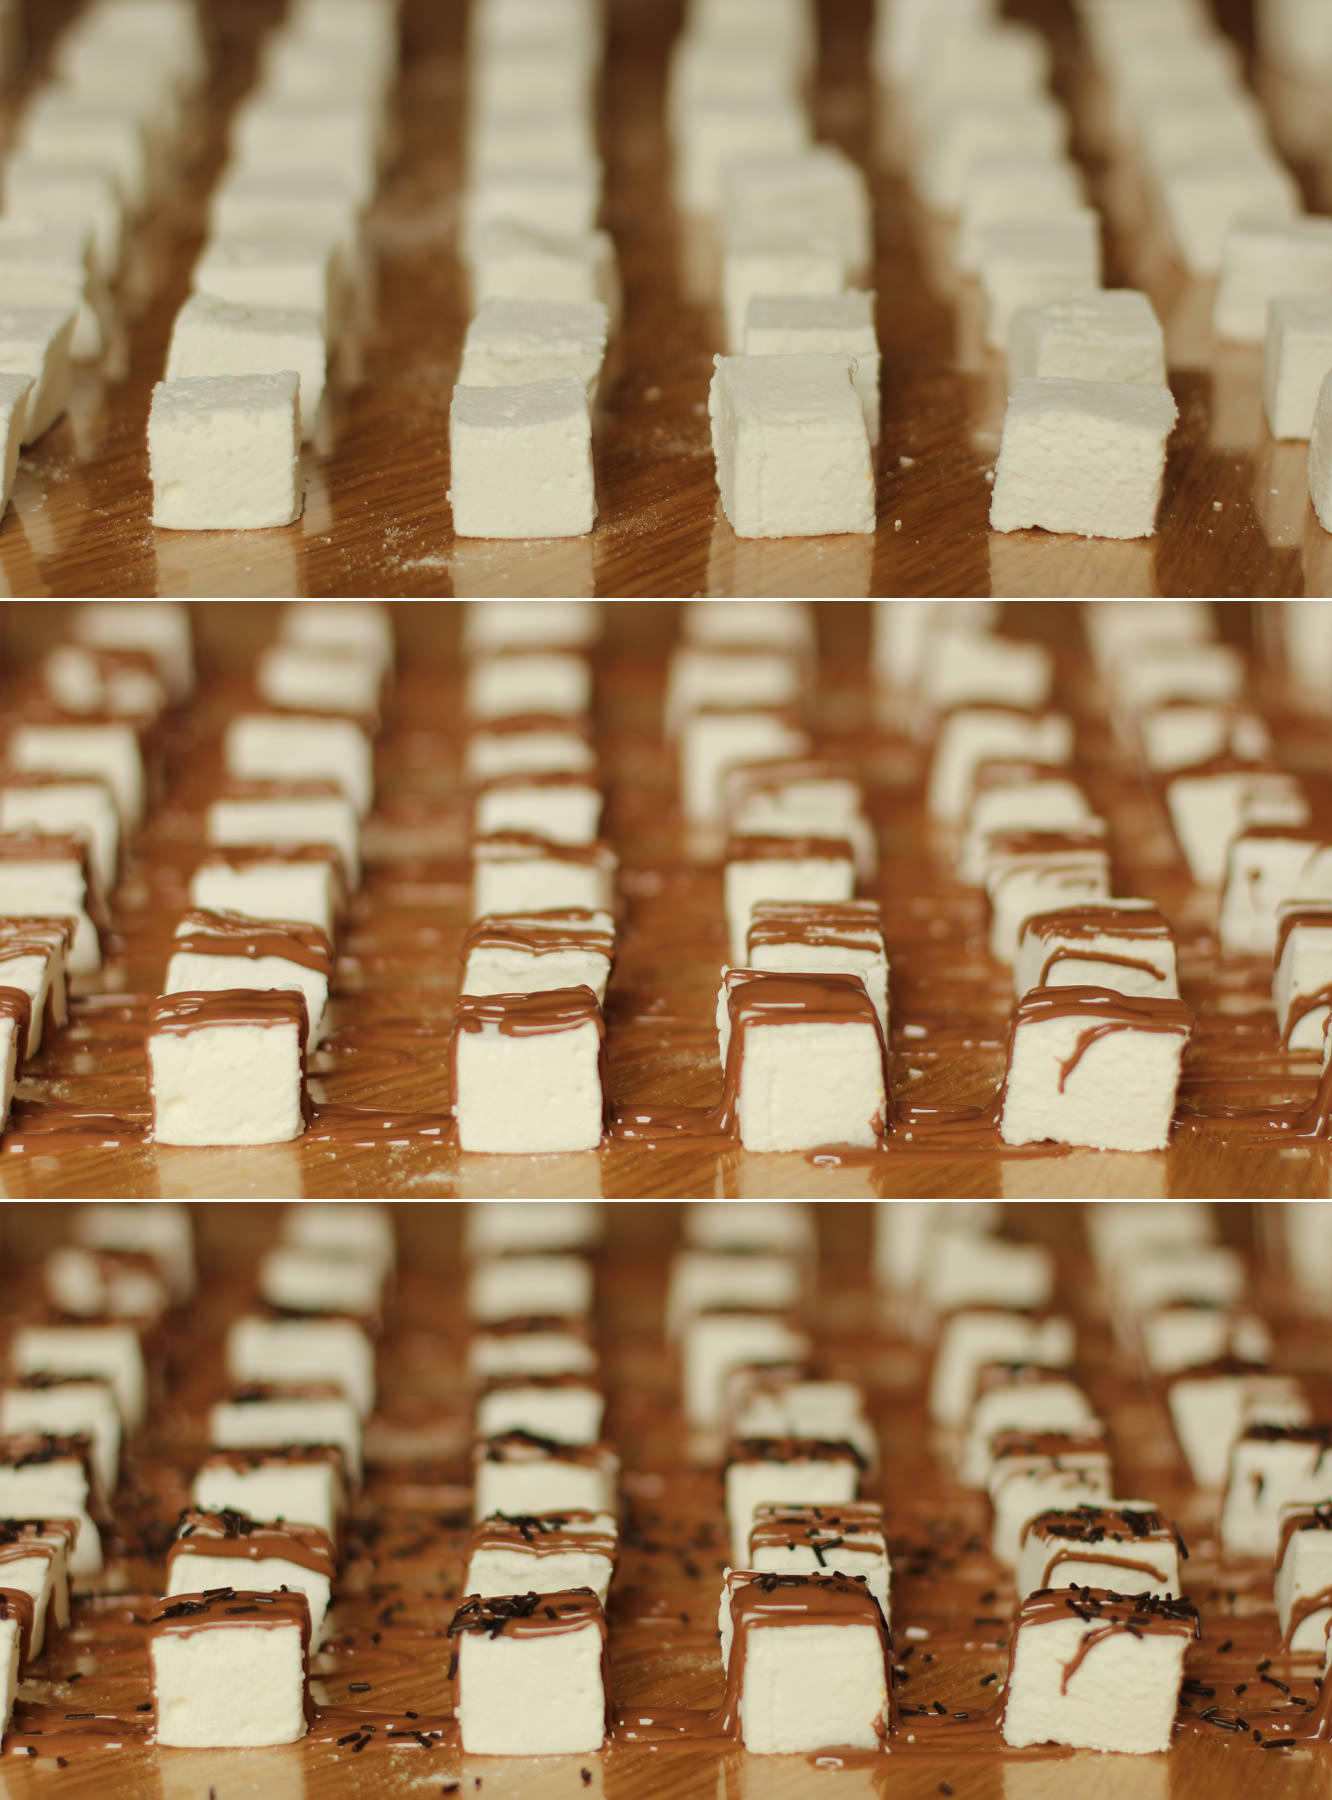
Cut them into cubes, and dust all the sides. Don’t worry if they are a little sticky, they will dry out a bit more.
Try not to eat them all just yet.
Step thirteen
Lay the caramel marshmallows out in rows on greaseproof paper or cellophane and melt the milk chocolate. I used a piping bag to drizzle the chocolate over the marshmallows, you could use a sandwich bag and snip the corner.
Step fourteen
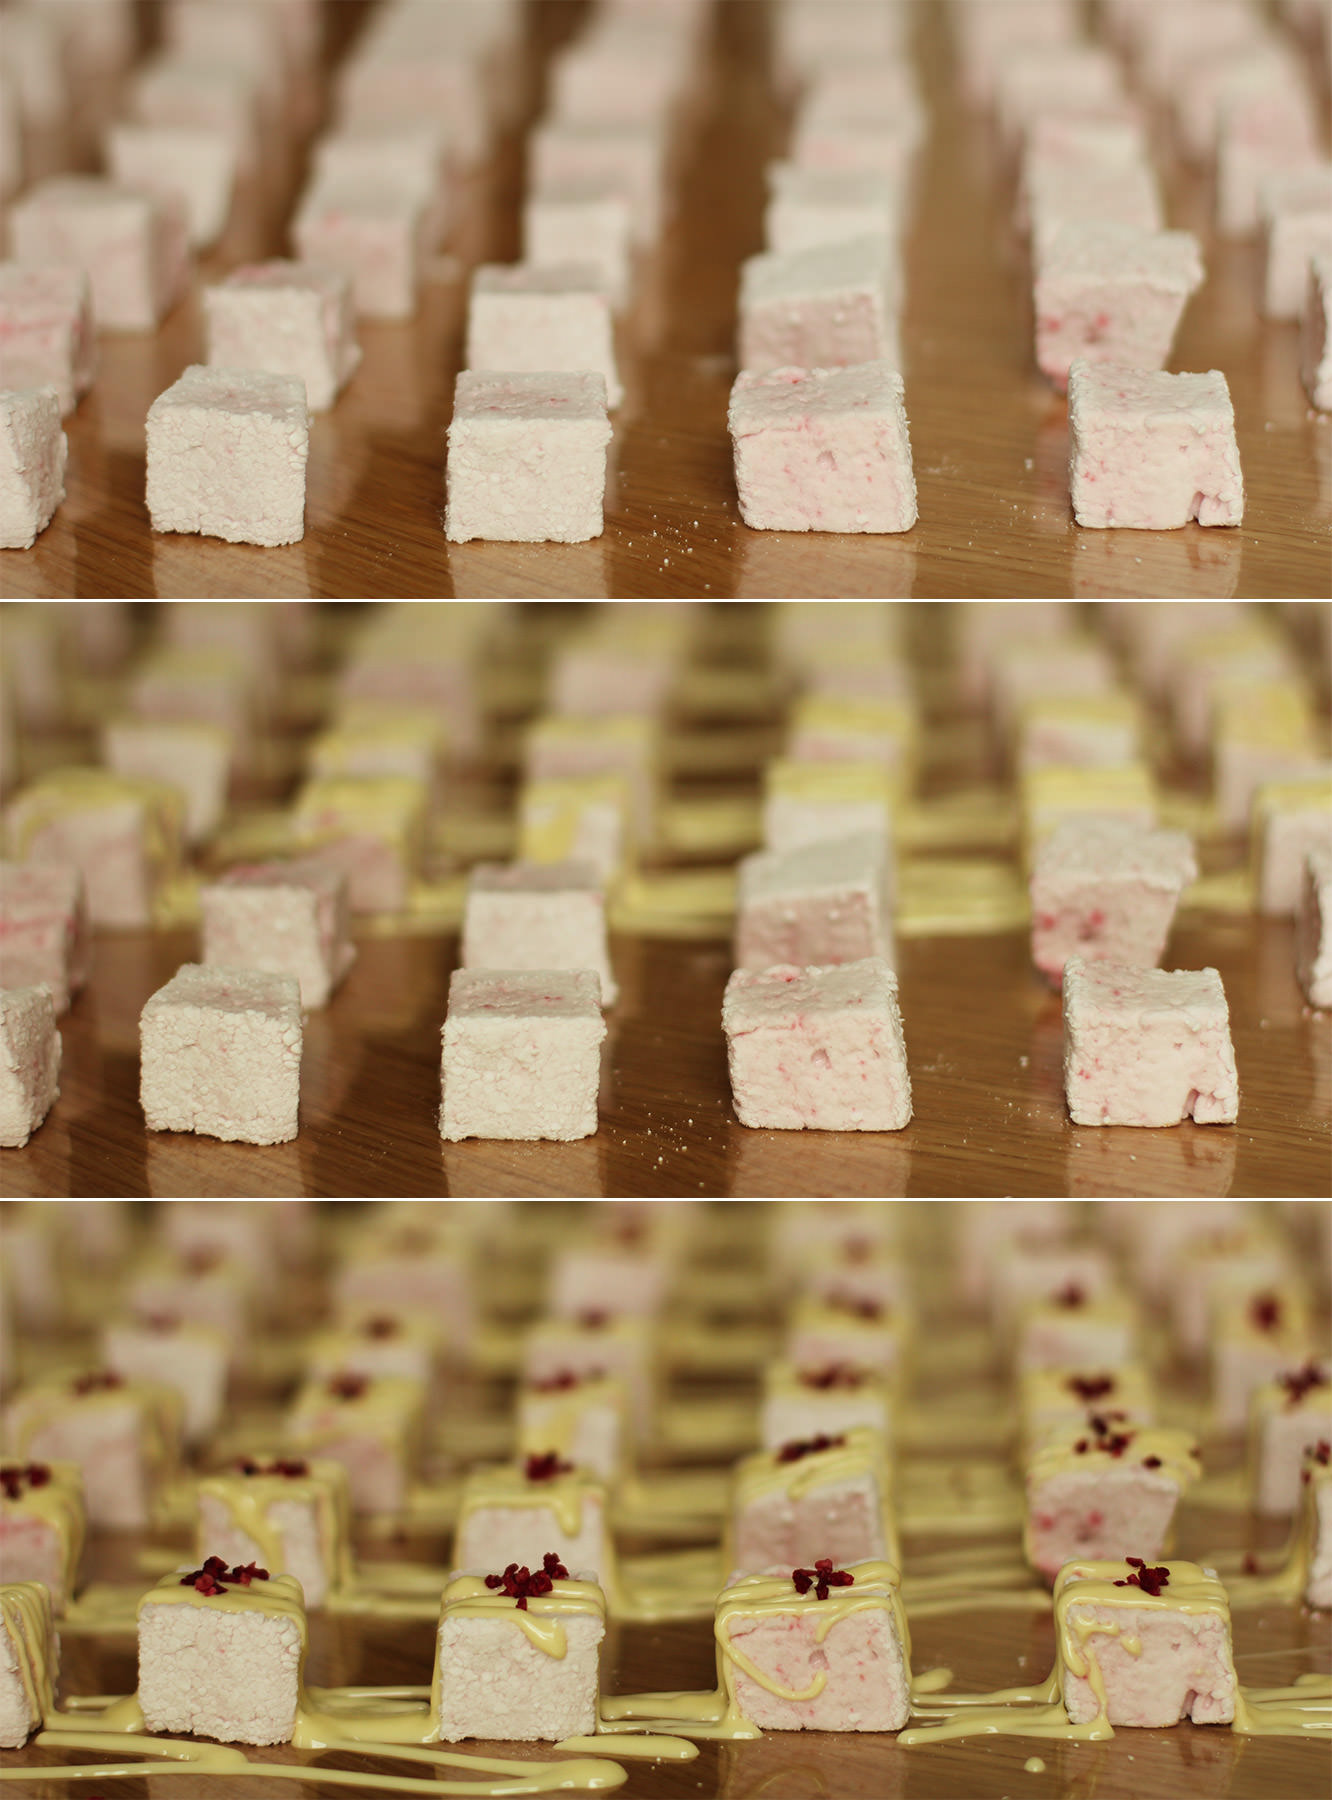
Repeat with the raspberry and white chocolate marshmallows.
Step fifteen
Once the chocolate has set place 5 in each bag, 2 of one flavour, 3 of the other, alternating as you go so you don’t run out of one.
As I mentioned last post I’ll be doing a wrap up post with all the finishing touches, so stay tuned for that. For now, here’s our lovely hen chowing down:
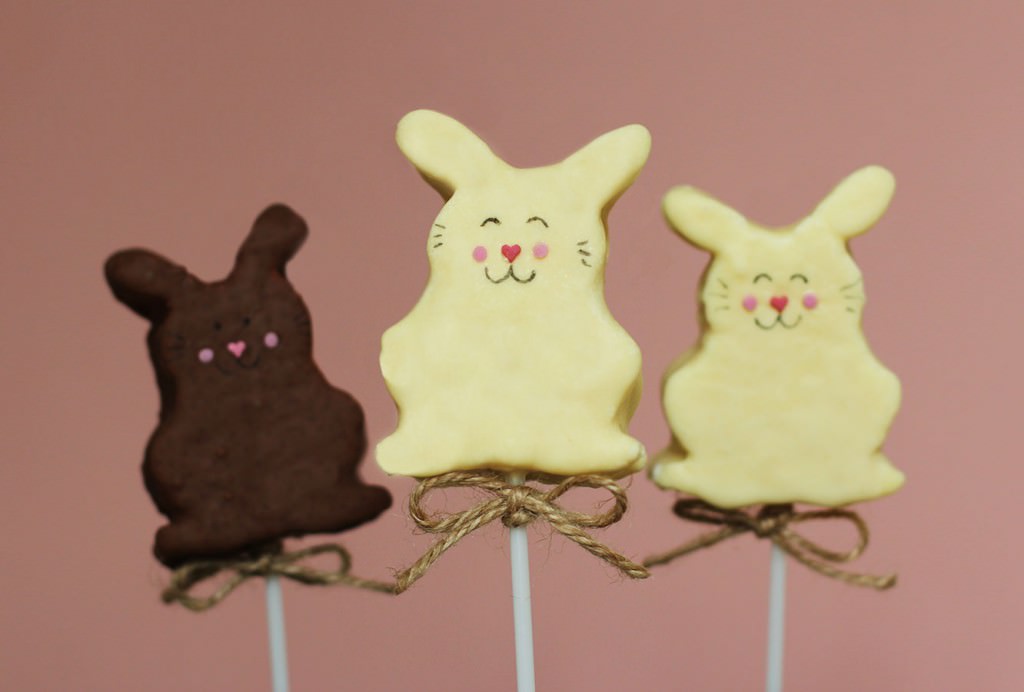
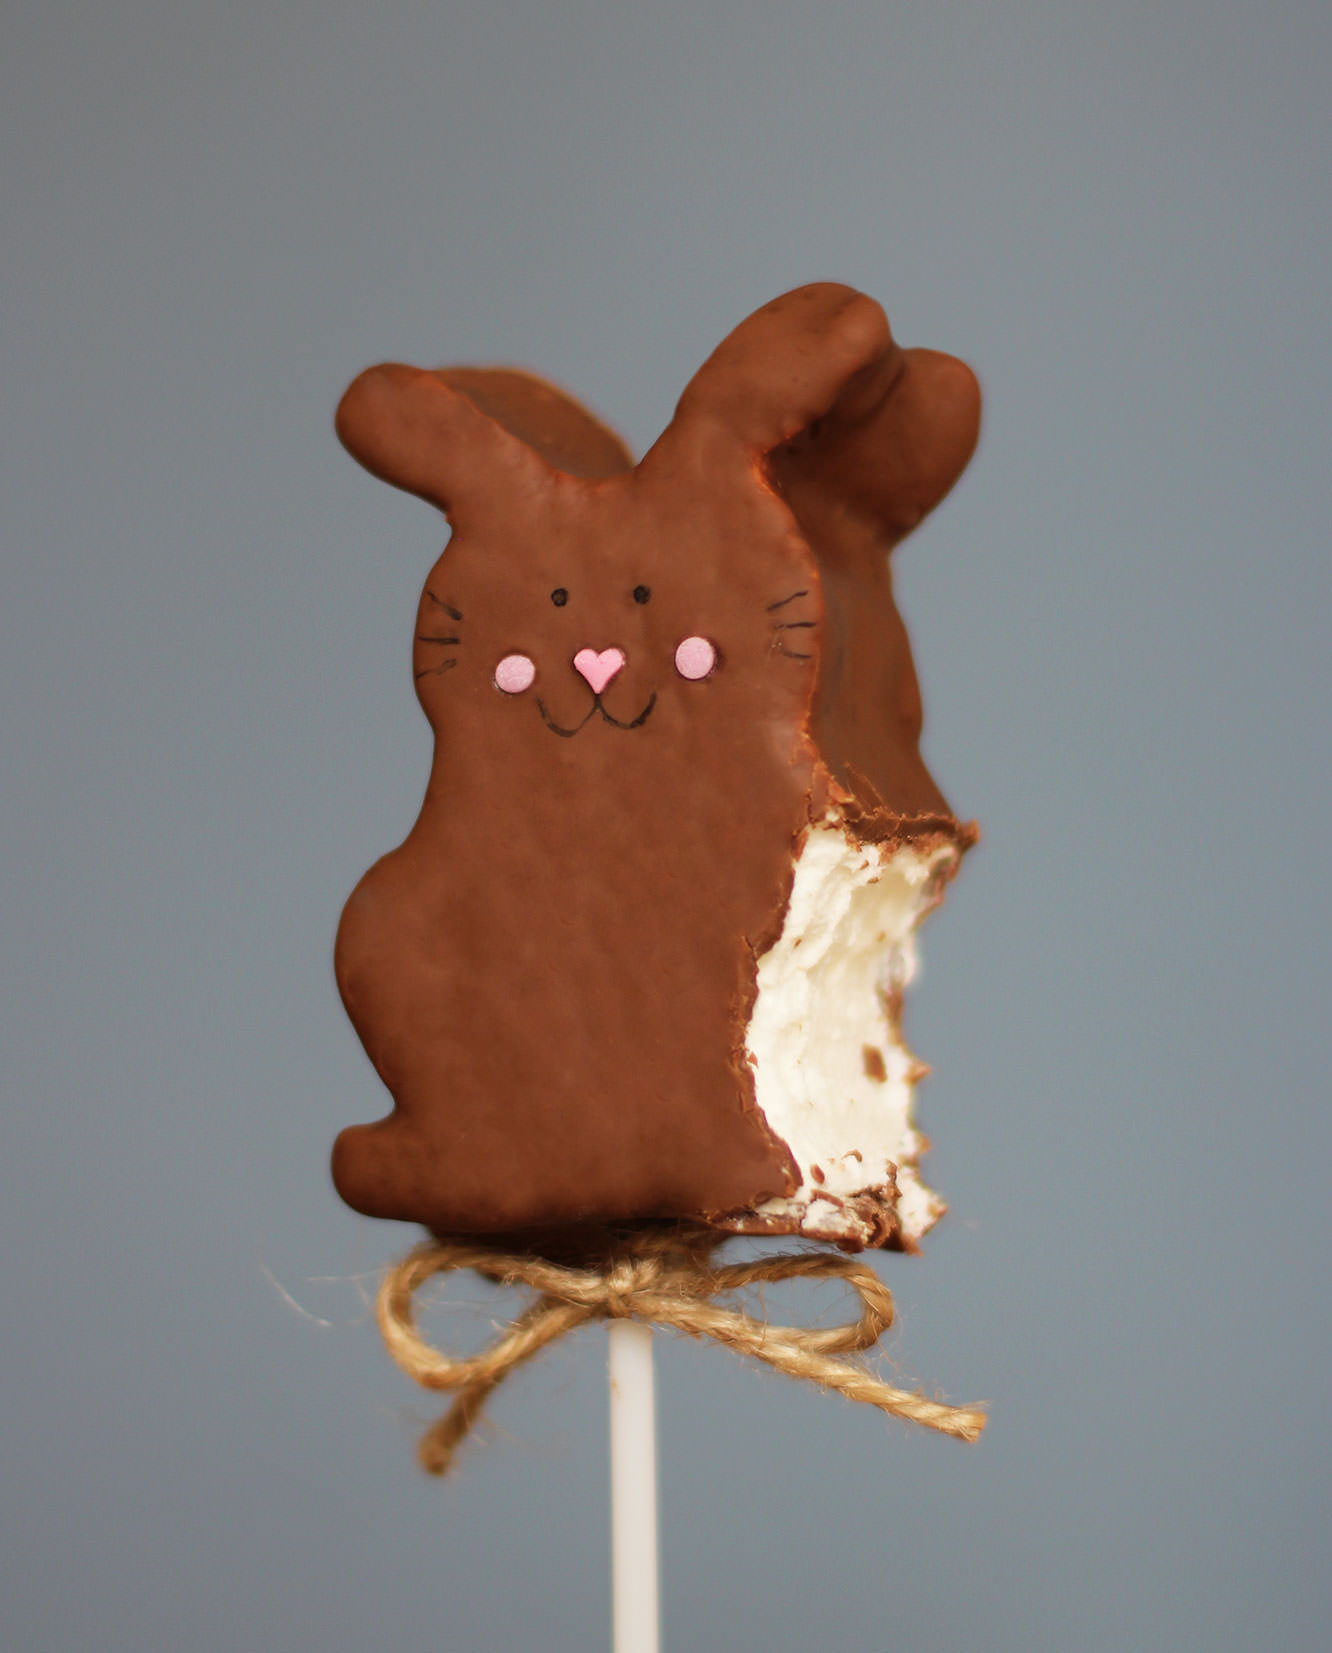
I’ve had these little bunny pops in my mind’s eye for a while now. I’ll precursor this post with saying they don’t look exactly how I imagined. Sure, they do look a bit like Pikachu, but they are scrummy, so I vote worth the time if you’ve a free afternoon and a healthy dose of patience in your arsenal.
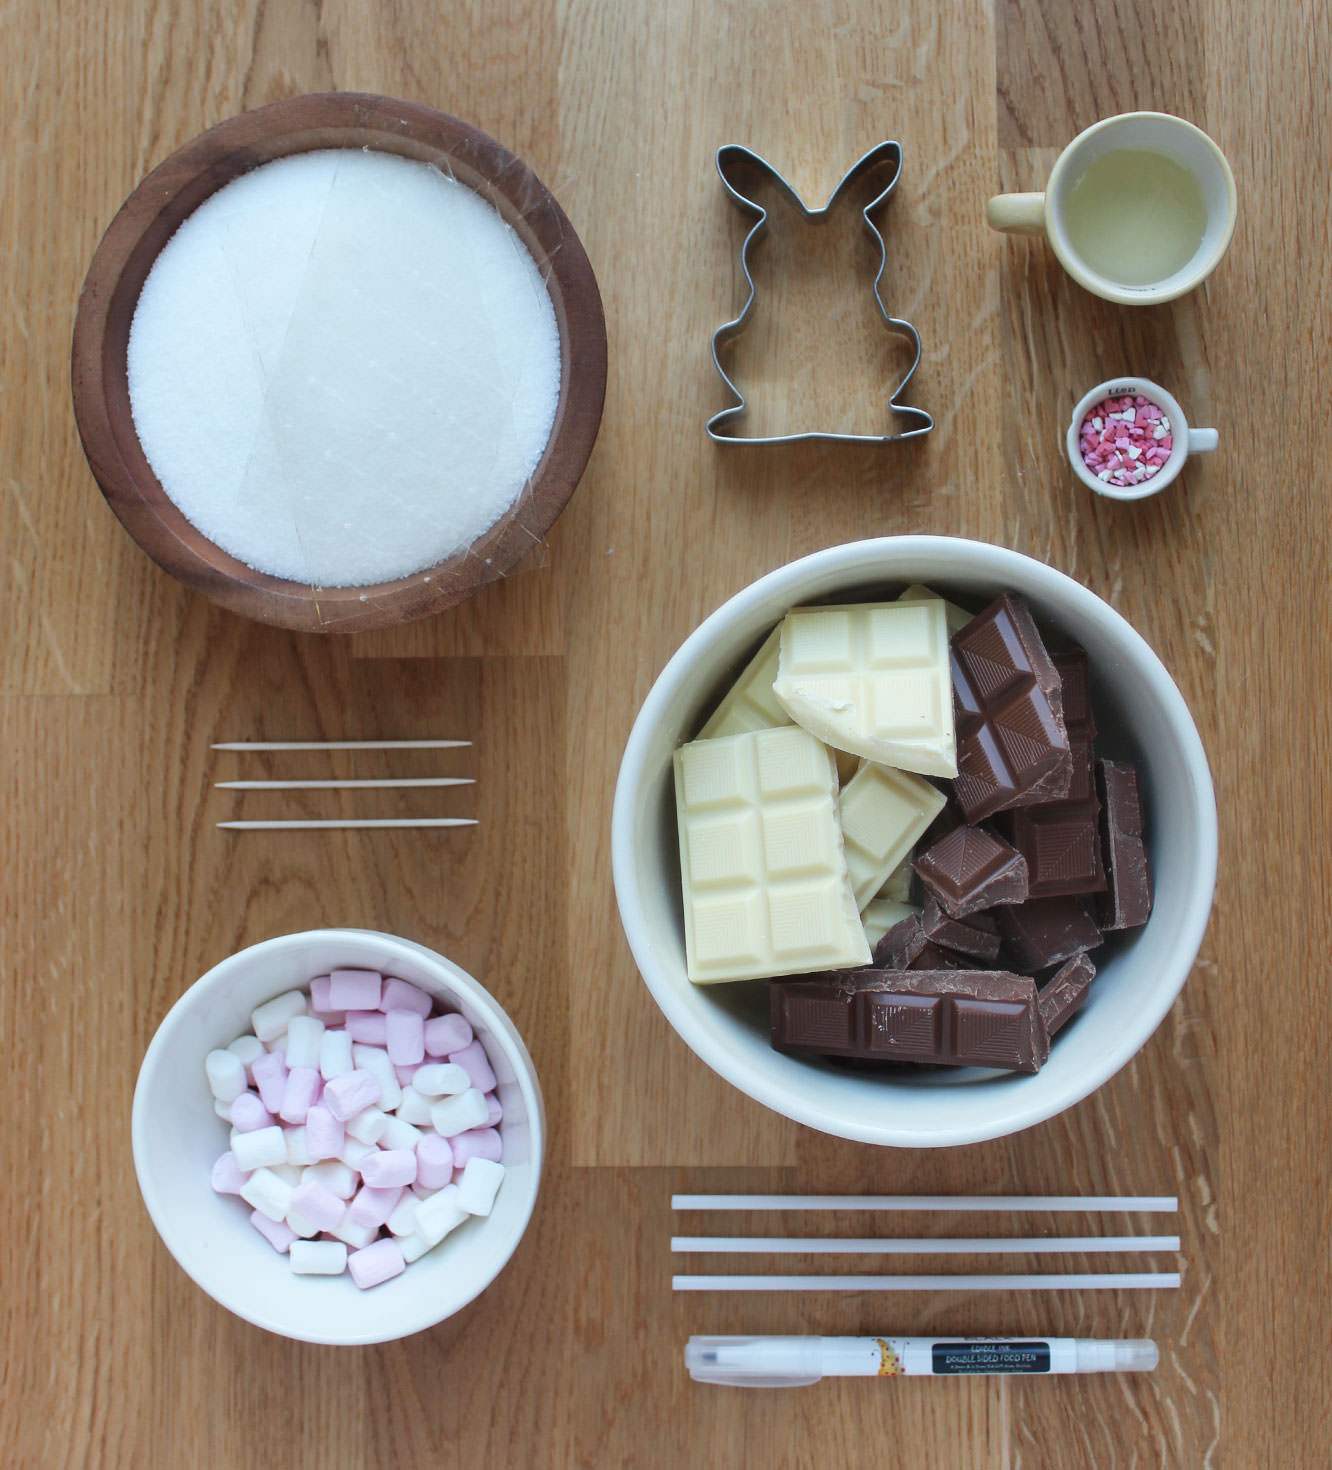
You will need
9 gelatine sheets
300g/10.5 oz granulated sugar
2 egg whites
1 tbsp liquid glucose (you can find this in a squeezy toothpaste type tube in the baking section)
2-3 tsp extract of your choice (but I HIGHLY recommend ‘buttery caramel’ from the natural professional flavours range – bought at Lakeland)
600-800g/1lb 5 oz – 1lb 12 oz chocolate for dipping (having sampled milk and white, I’d go white)
Sugar confetti for faces
Edible ink pen (or melted dark chocolate and a cocktail stick)
Icing sugar for dusting
A sugar thermometer
A bunny cutter (I got this from Amazon)
A handful of mini marshmallows (for fluffy bunny tails)
Cake pop sticks
Step one
In a cereal bowl, soak the gelatine in 150ml/5 fl oz cold water. Set aside.
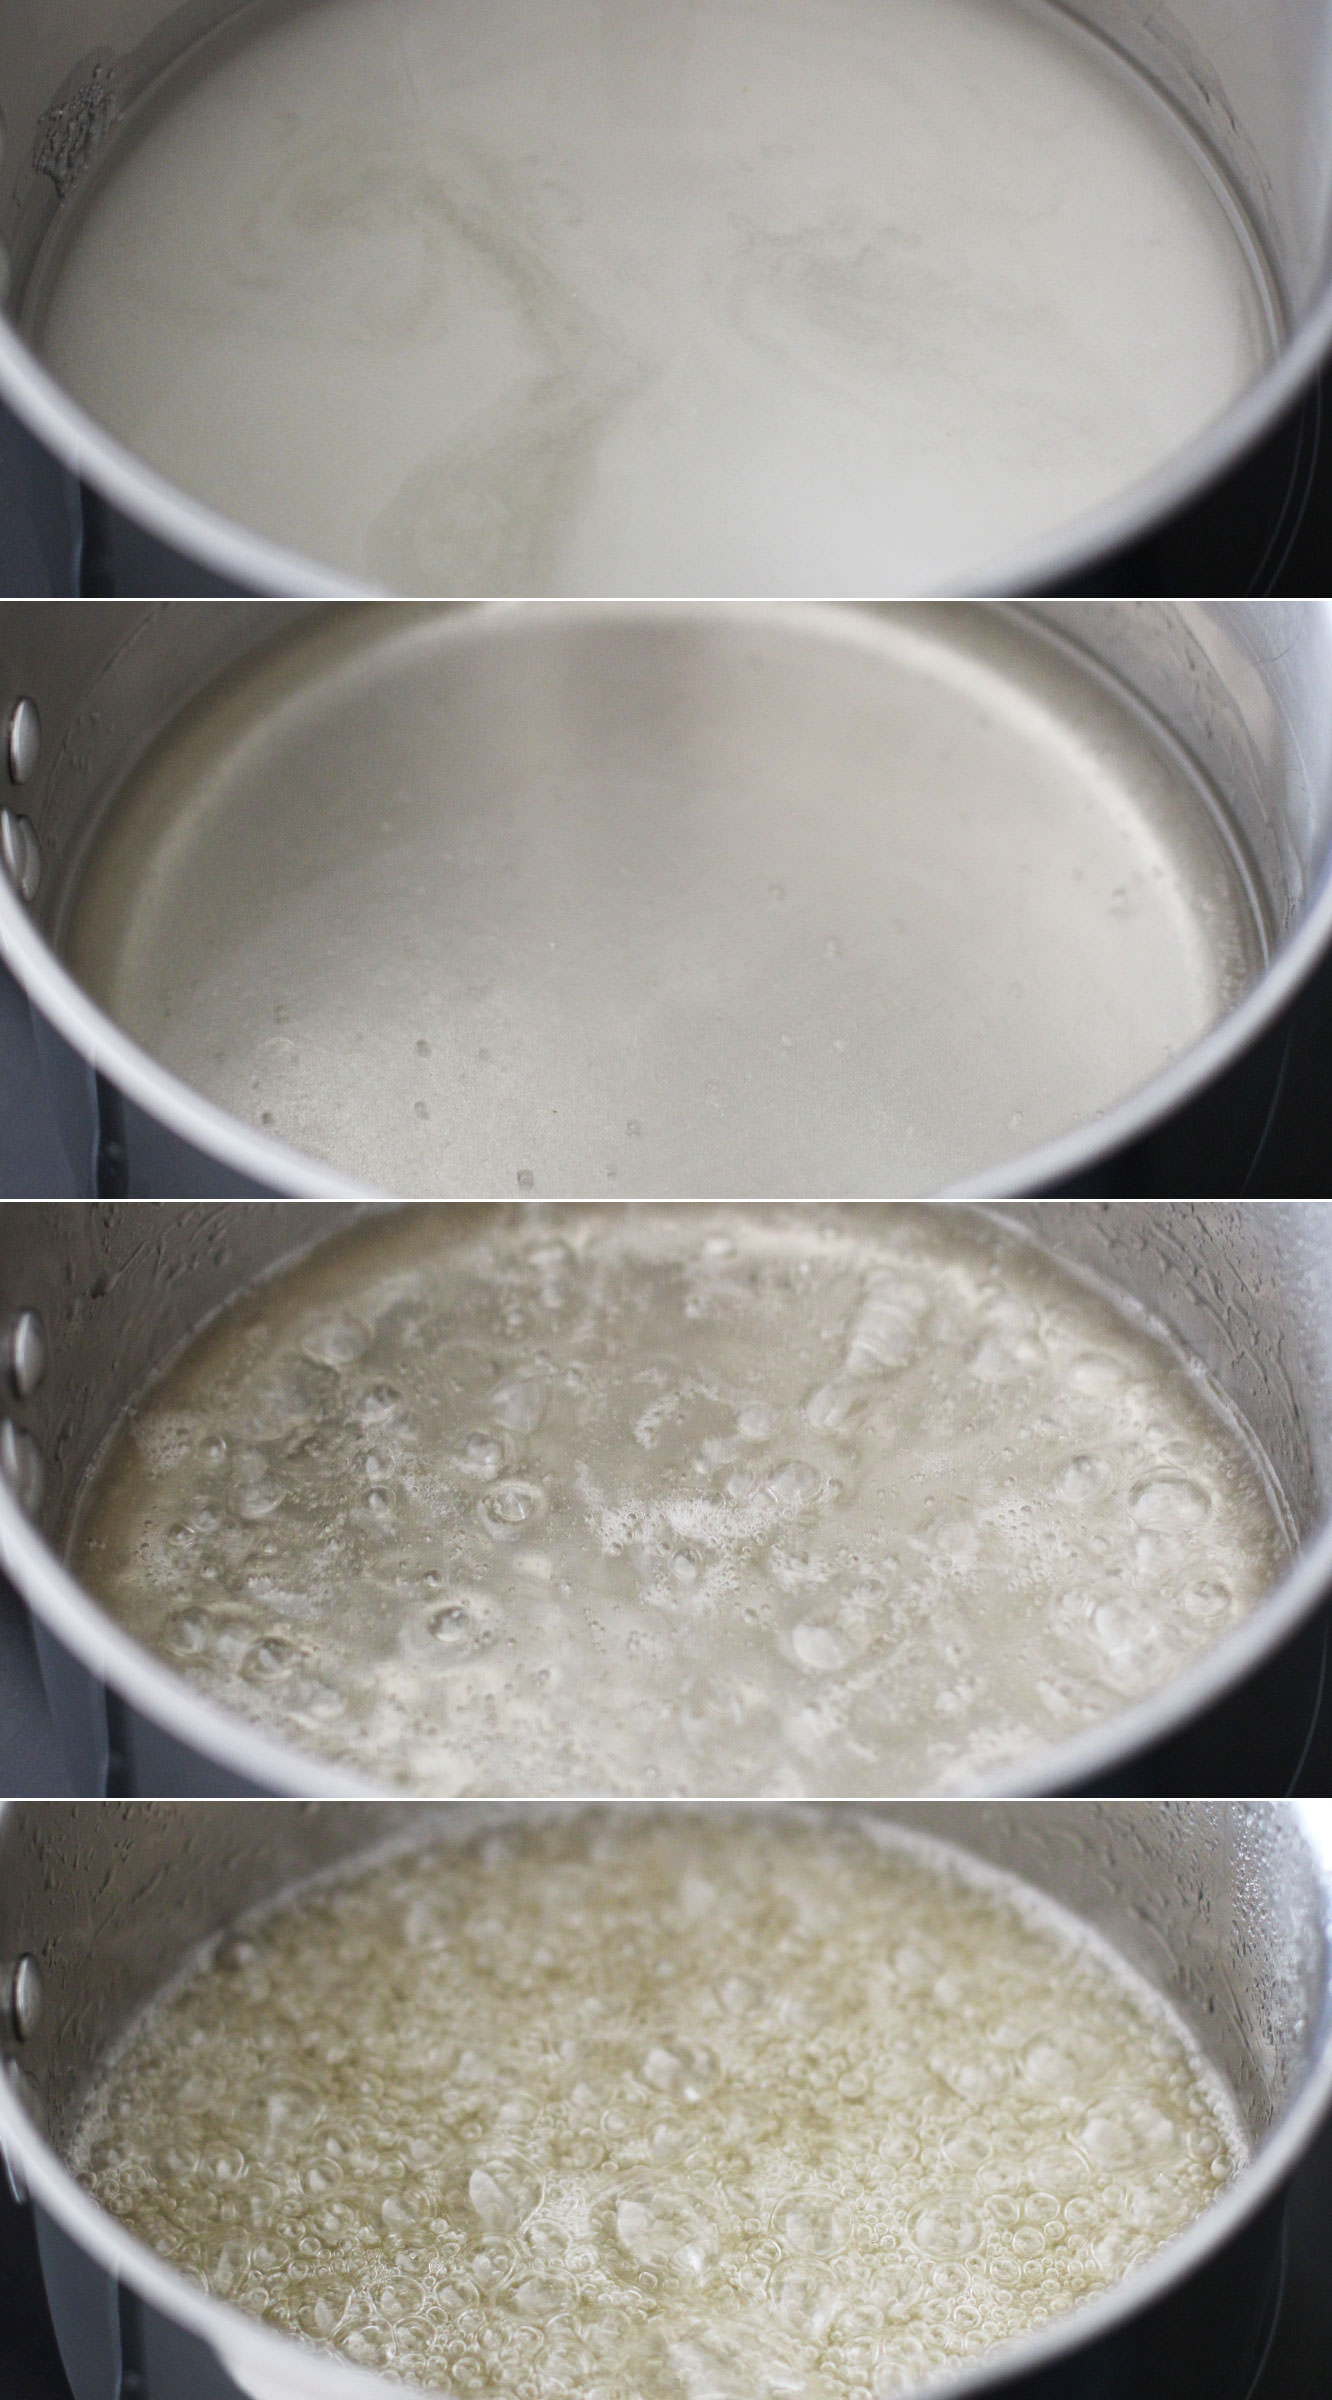
Step two
Combine the sugar, 150ml/5 fl oz water (different to the gelatine water) and the liquid glucose in a smallish saucepan. Allow the sugar to dissolve on a low heat, and then turn it up to medium-high. Be careful not to burn the sugar or any of your extremities.
The temperature you want this to get to is 118 C. It will feel like it will never get there, but stay strong.
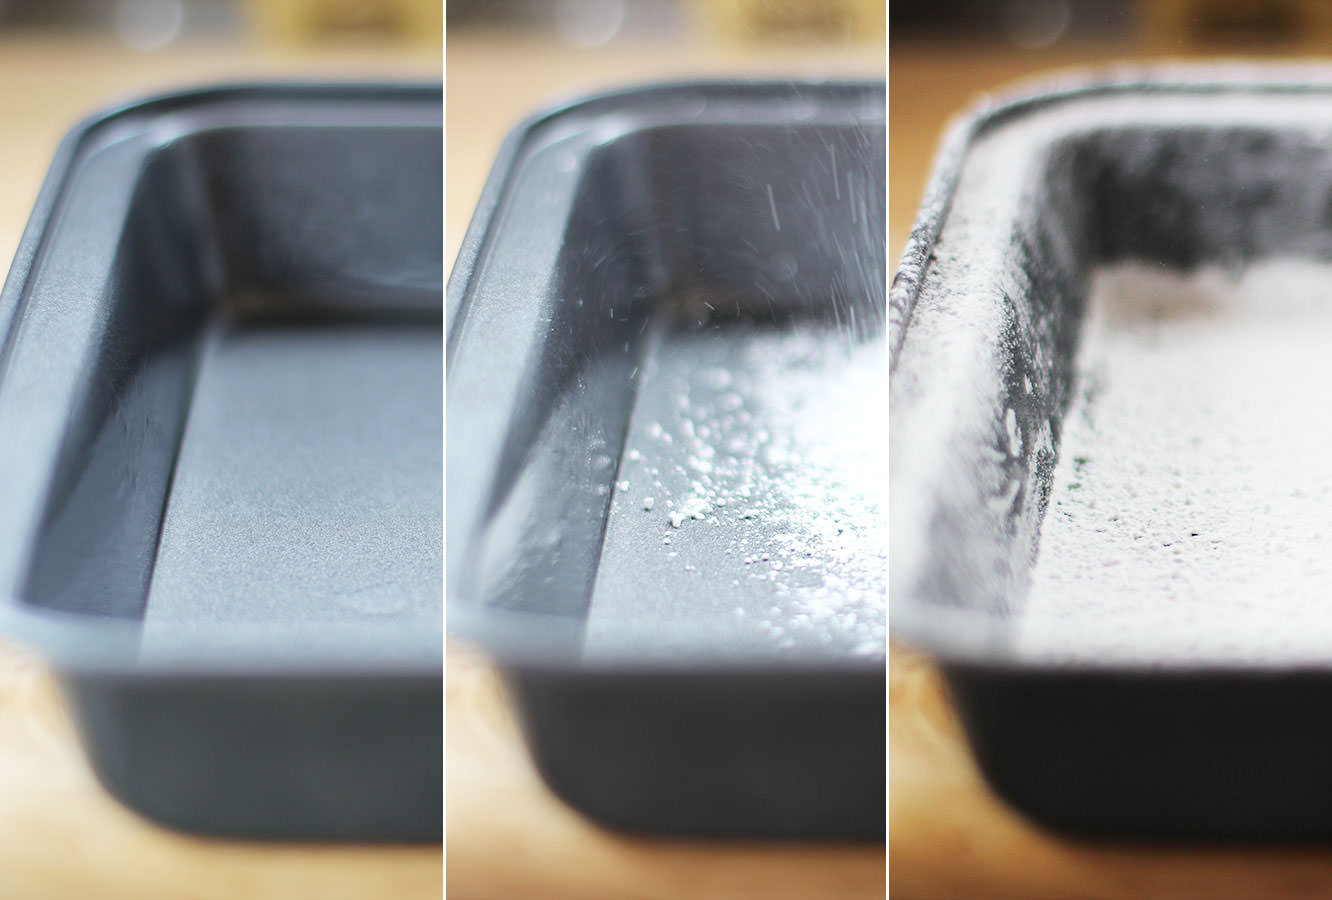
Step three
While the sugar is bubbling away take the opportunity to dust a brownie tin with icing sugar. Use a really small amount of olive oil before dusting to hold the icing sugar to the pan.
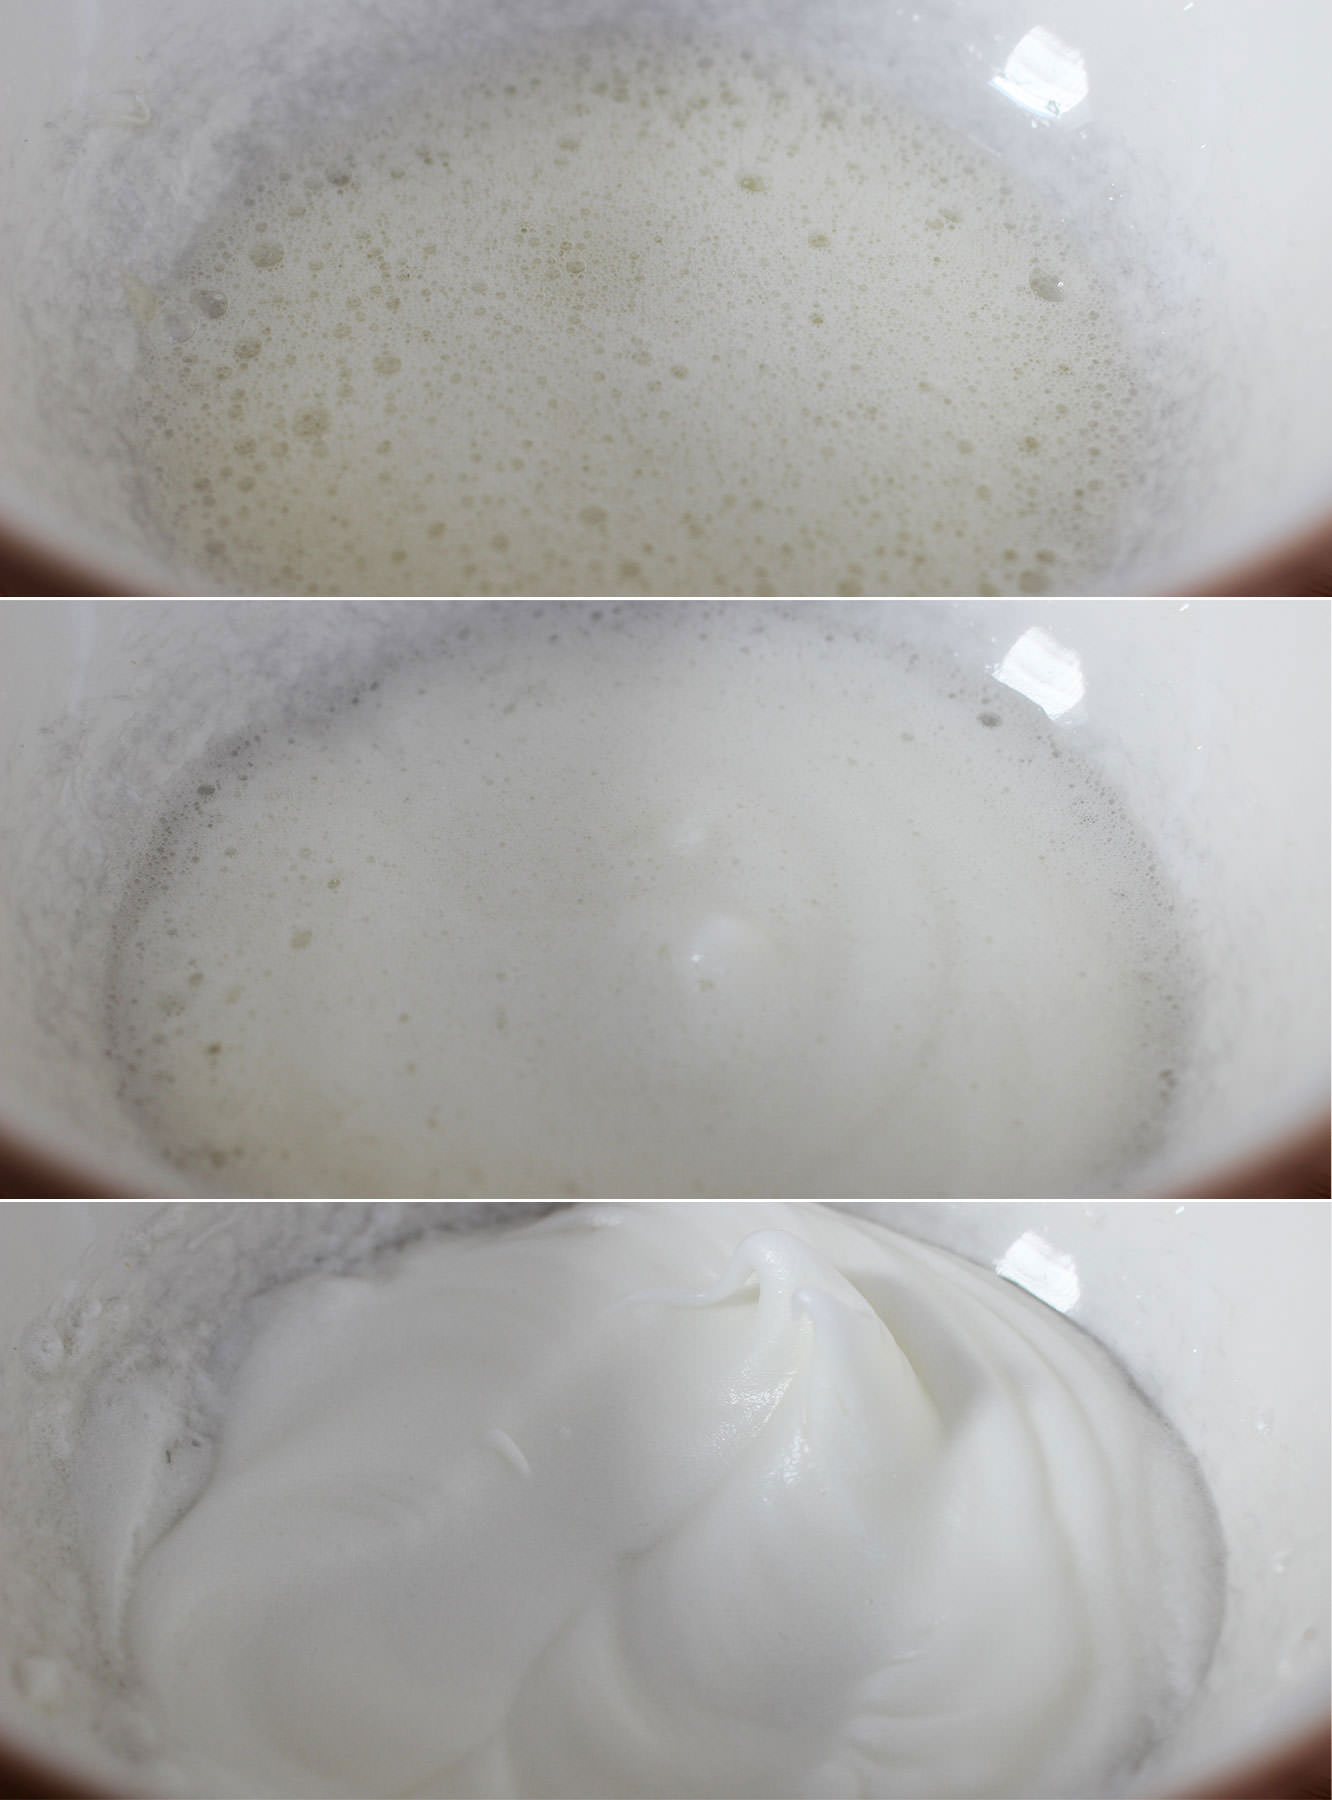
Step four
Place the egg whites in a metal or glass bowl, never plastic. Or you know, if you want to wreck your lovely Mason Cash bowl by using an electric whisk on it, by all means do. Those handsome grey marks? You could have those too.
When the sugar gets to somewhere around 112-115C whisk the egg whites into stiff peaks.
Step five
When the sugar reaches 118C take it off the heat.
Squeeze the gelatine out a bit and add it to the sugar mix. It will bubble right up so don’t panic. It should settle pretty quickly.
Step six
Pour the hot sugar into the eggs, but make sure you’re whisking continually to avoid a big lump of sugar at the bottom of the bowl.
Whisk until the mixture holds its shape well and is quite thick. This can take up to ten minutes.
Somewhere during the whisking (probably when you need to give your arm a rest) add the flavouring. Vanilla extract is lovely in these but they will take basically anything you fancy. Like I said in the ingredients list I really recommend ‘Buttery Caramel’ from the Natural Professional Flavours brand.
Step seven
Pour the mixture into the prepared tin and smooth out as much as possible.
Dust with icing sugar and leave to set for about an hour.
Step eight
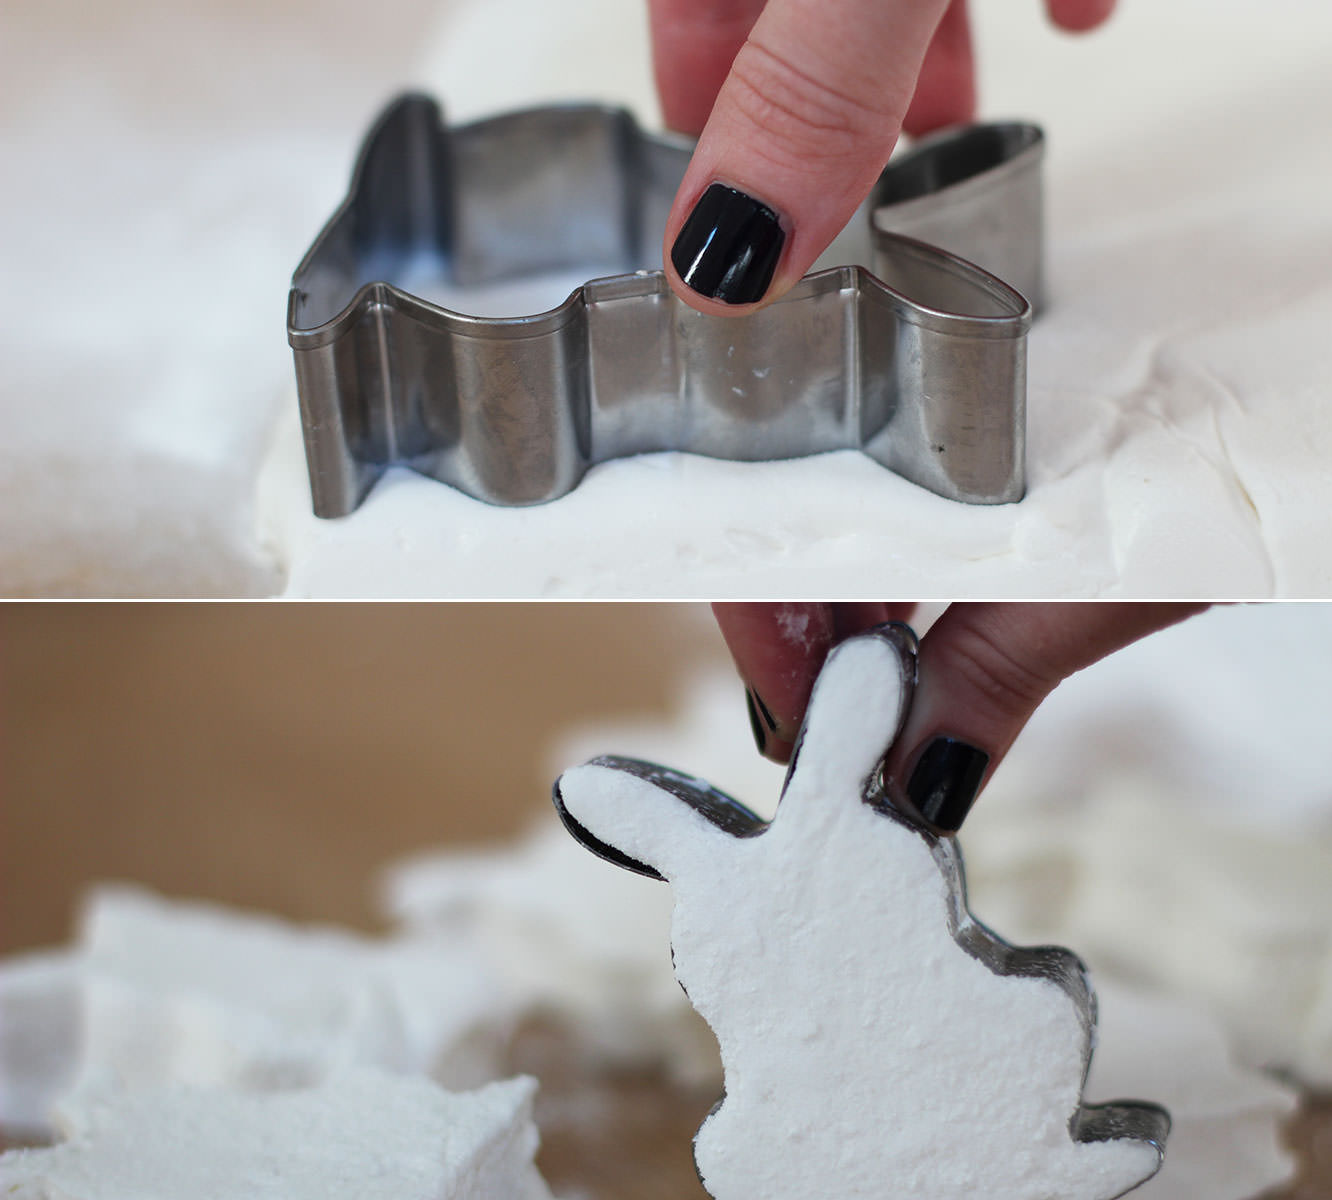
Turn the marshmallow out onto a clean surface.
Cut as many bunnies as you can out of the sheet of marshmallow. This will vary depending on your tin and cutter size. I got nine out of mine.
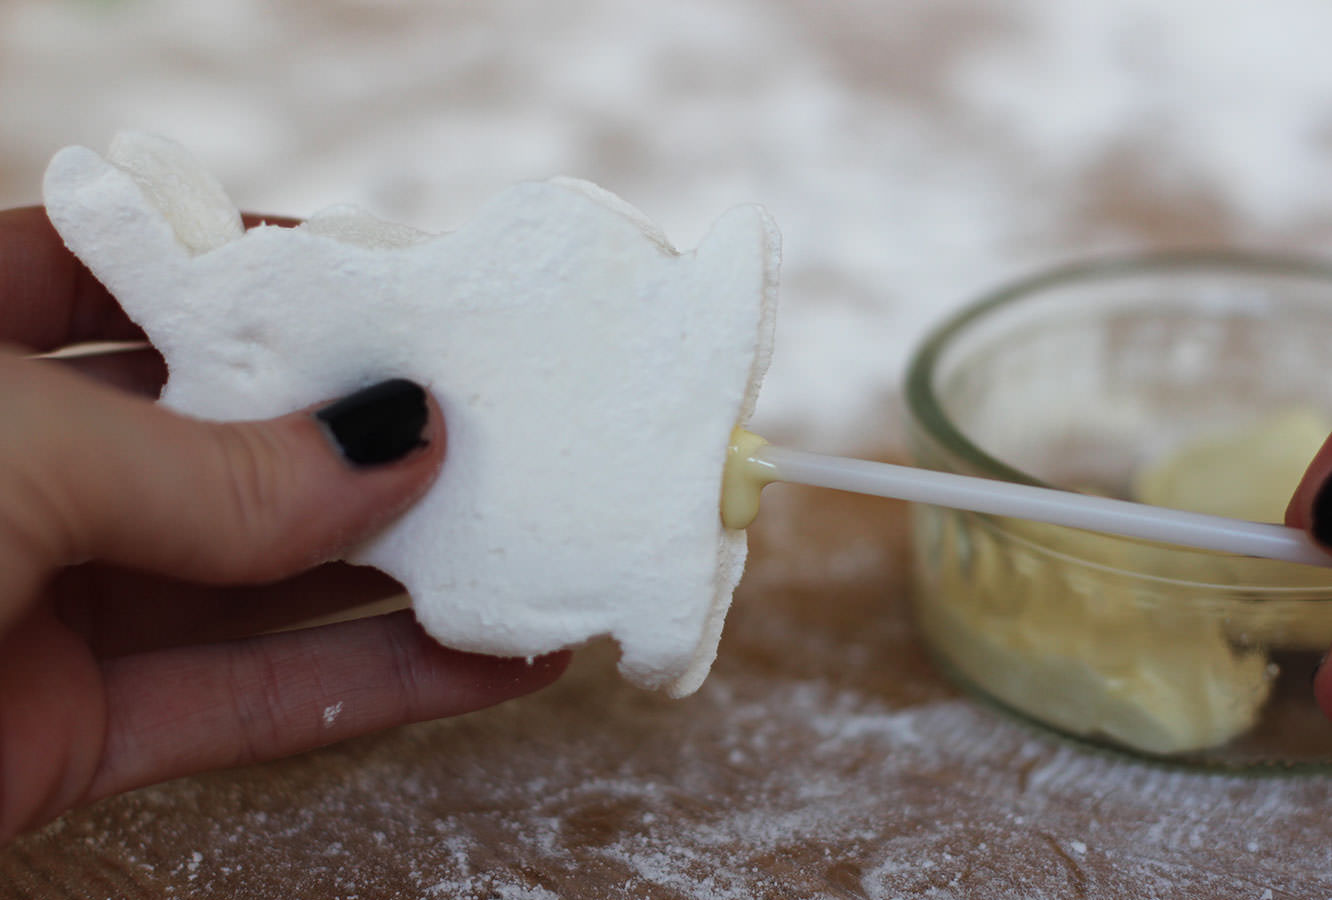
Step nine
Melt a couple of pieces of chocolate in the microwave.
Dip the cake pop sticks in and push them into the bottom of the bunnies. I put mine in up to the head to increase stability. Leave to set.
Step ten
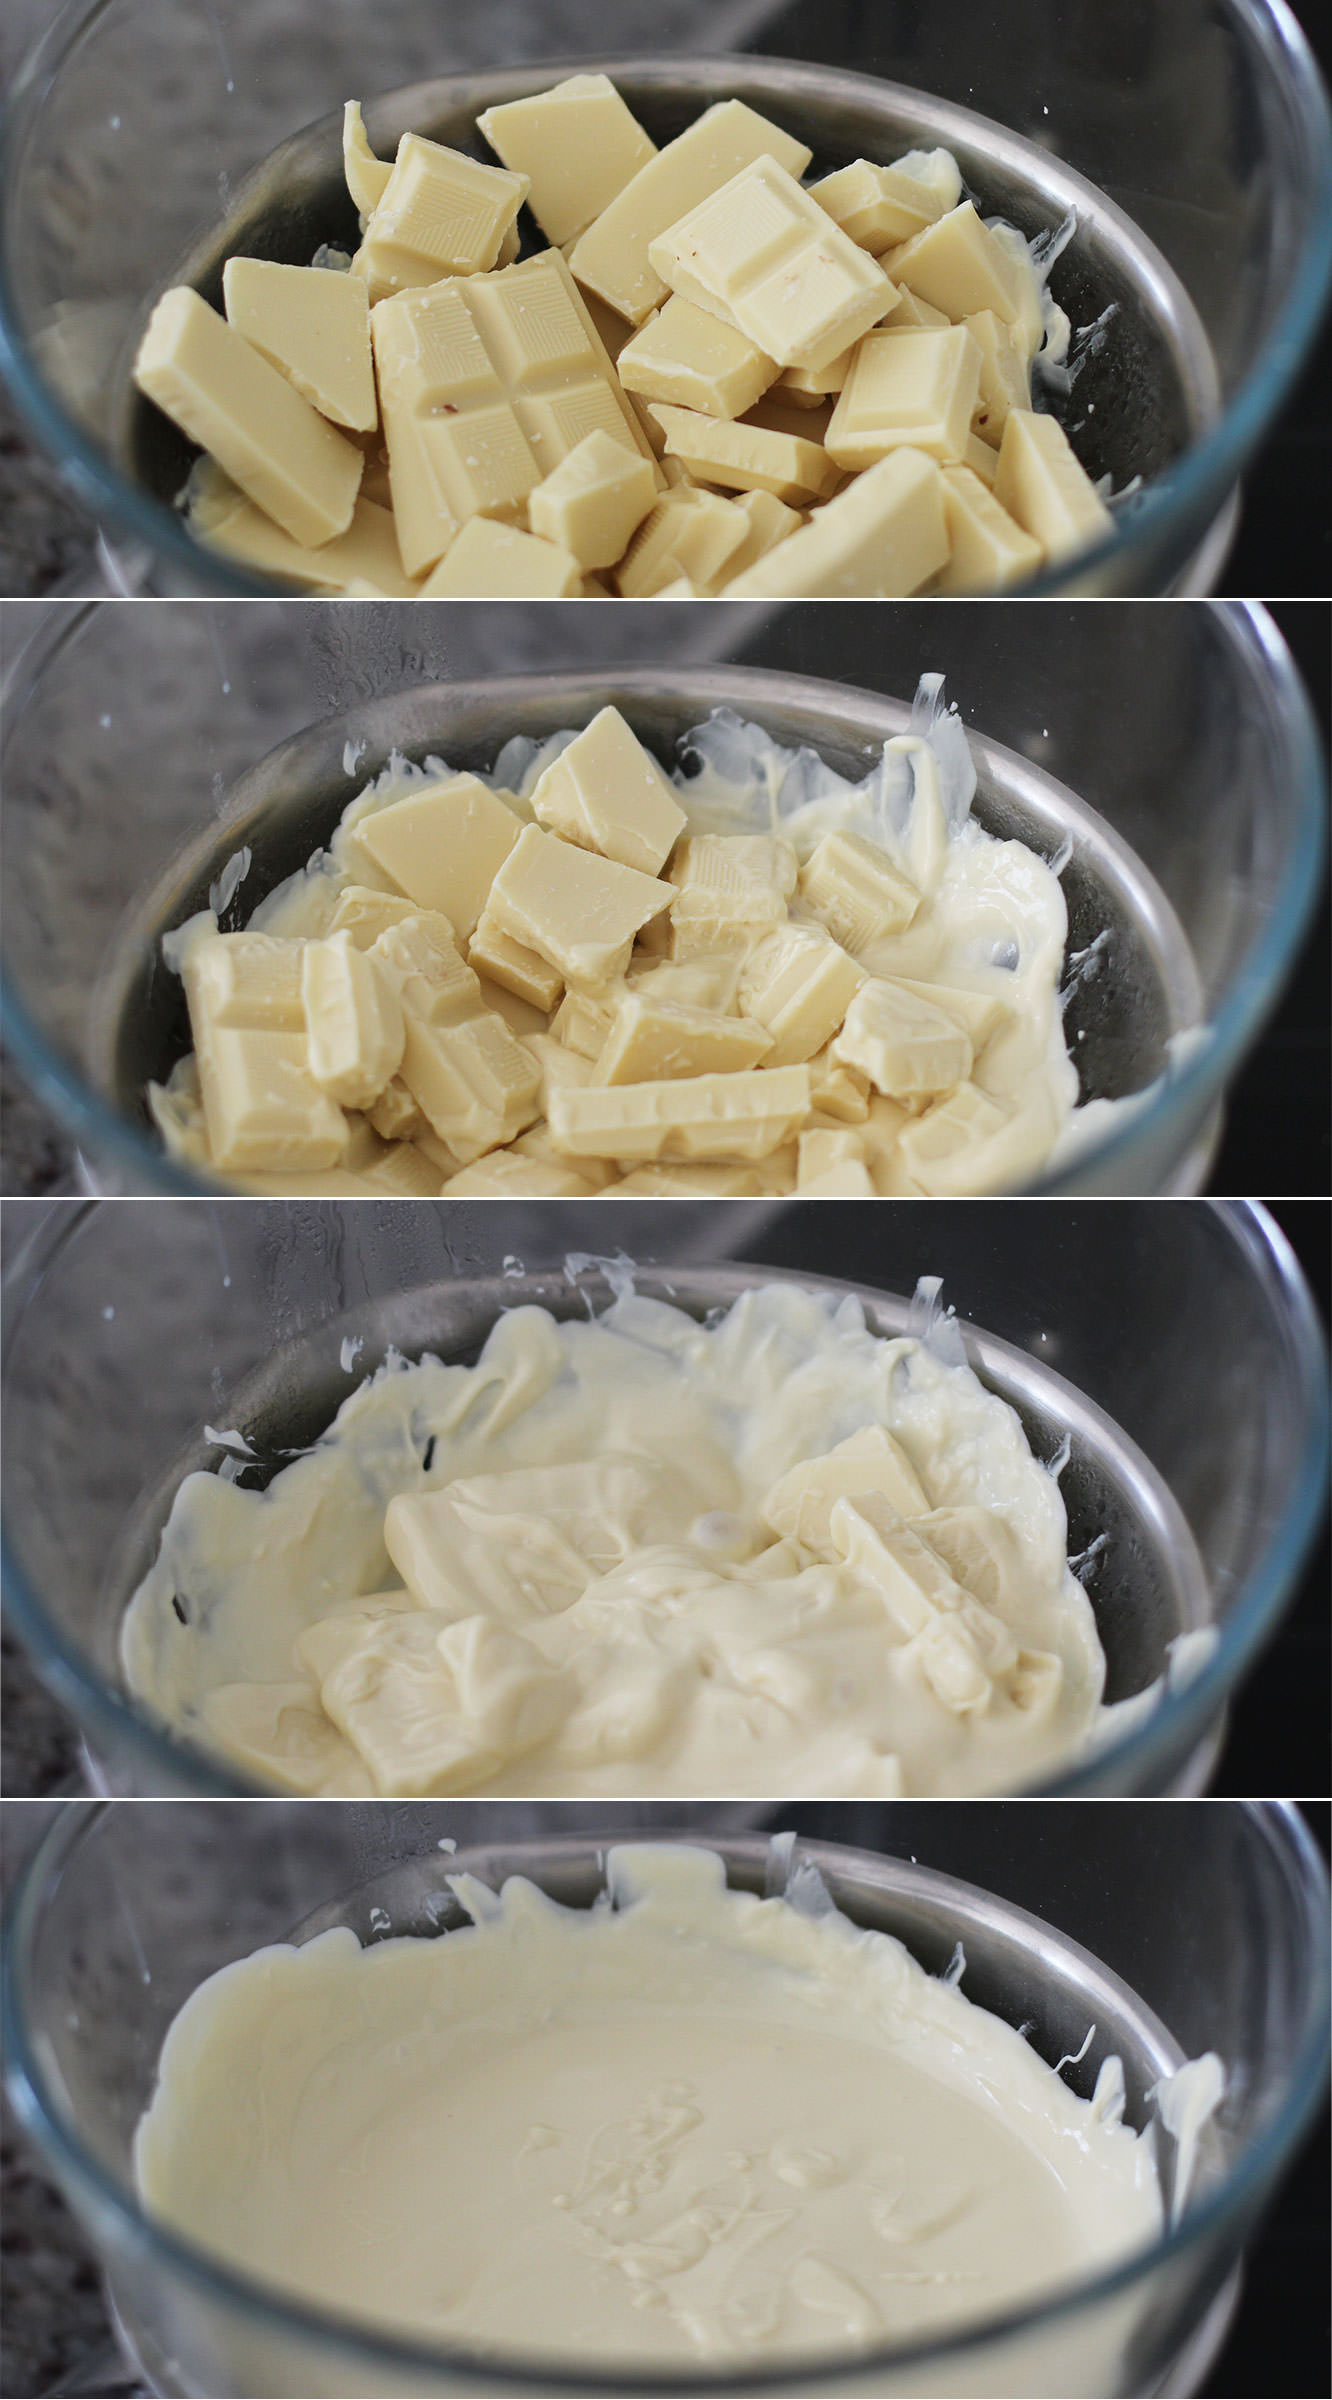
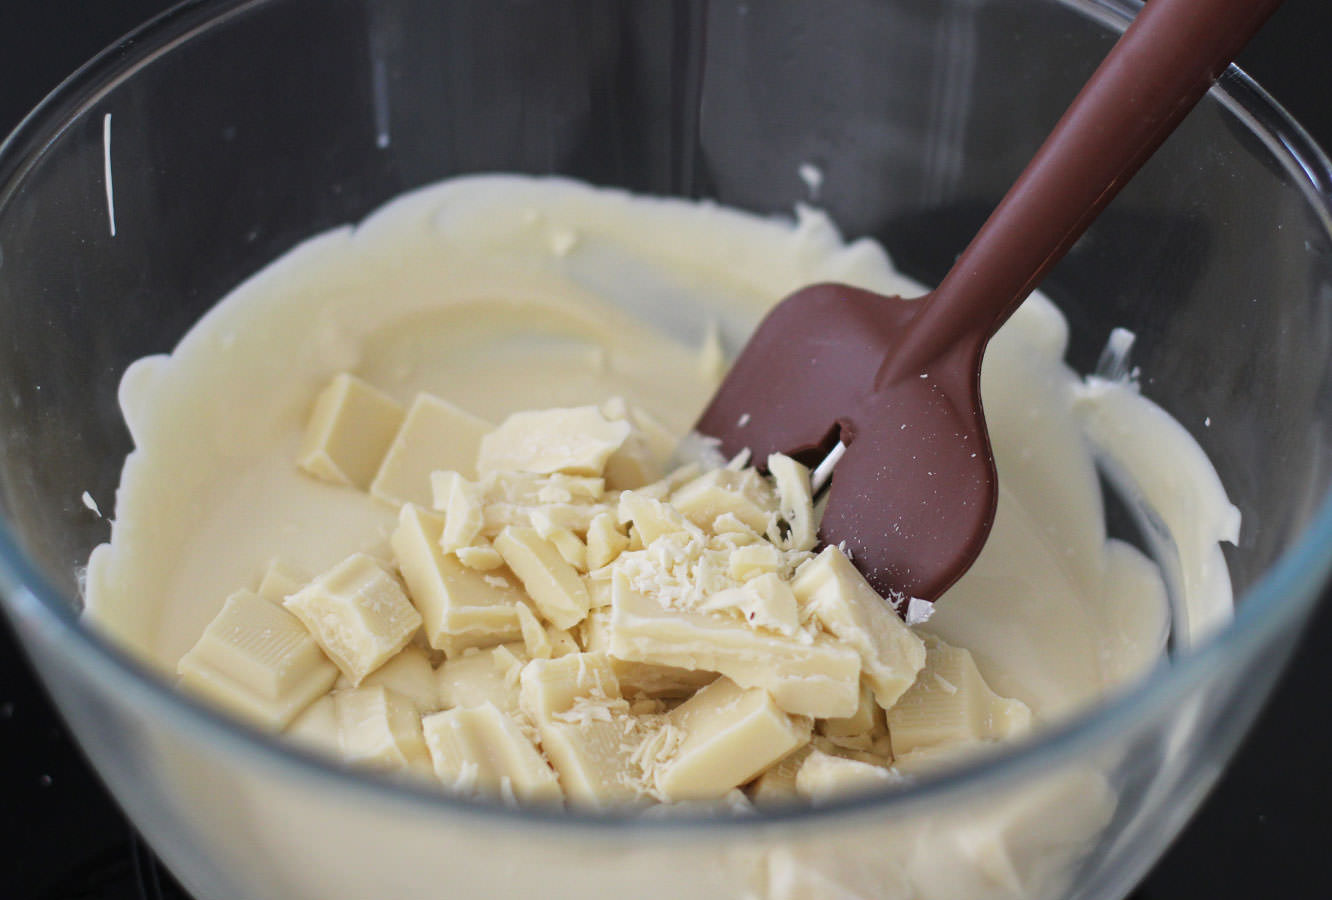
I recommend tempering the chocolate. Then you will get a nice snap when you bite into the pops and you can use the remaining chocolate to do something like this. Don’t feel you have to though, it will work without.
To temper, melt two thirds of the chocolate over a pan of boiling water and allow it to reach 45C. Remove it from the heat and add the rest of the chocolate. This should melt in and cool it down quicker. Stir it to cool down to 25C. Place it back on the heat to get it back up to 28C.
Step eleven
Place the chocolate into a small deep bowl (or I actually found with the milk chocolate that a glass works really well).
Dip the bunnies in and make sure to coat well. Allow excess chocolate to drip off, twirl it round to get an even, smooth coating.
This is where I ran into a spot of difficulty and filled my left hand with bunny pops that were covered in melted chocolate. I suggest you a) get a spare pair of willing hands, b) get a block of florist’s oasis/cake pop stand to stick them in, c) accept the back of them won’t be beautiful and lay them down on cellophane or greaseproof paper.
Step twelve
Once dry, add their little faces and tails. I used a cocktail stick with a small amount of melted chocolate to stick on sugar decorations. I got the little hearts I used for the noses from Tiger, and I can’t be sure about the circles for the cheeks.
I drew the faces on with an edible ink pen I bought online. You could use a cocktail stick and some dark chocolate if you prefer.
Step thirteen
Tie a piece of twine or ribbon around the stick and make a day a little bit happier.
Apparently when I think Mother’s Day blogging I think fudge. It’s a good thing my mum likes fudge. What’s that? You didn’t realise Mother’s day was so soon? I know, right? Me neither. It’s this Sunday for those of you in GB, the rest of you should check your calendars, this is the sneakiest holiday of the year.
This is a super super easy way to make a treat for your Ma. It’s not like the last fudge recipe I posted, which while being totally delicious I’d wager none of you actually made. Well there’s no boiling sugar or a thermometer required for this one, and barely any cooking at all.
You might need to cut this recipe by half or even more, it makes quite a large batch for just one mummy to eat. It can be frozen.
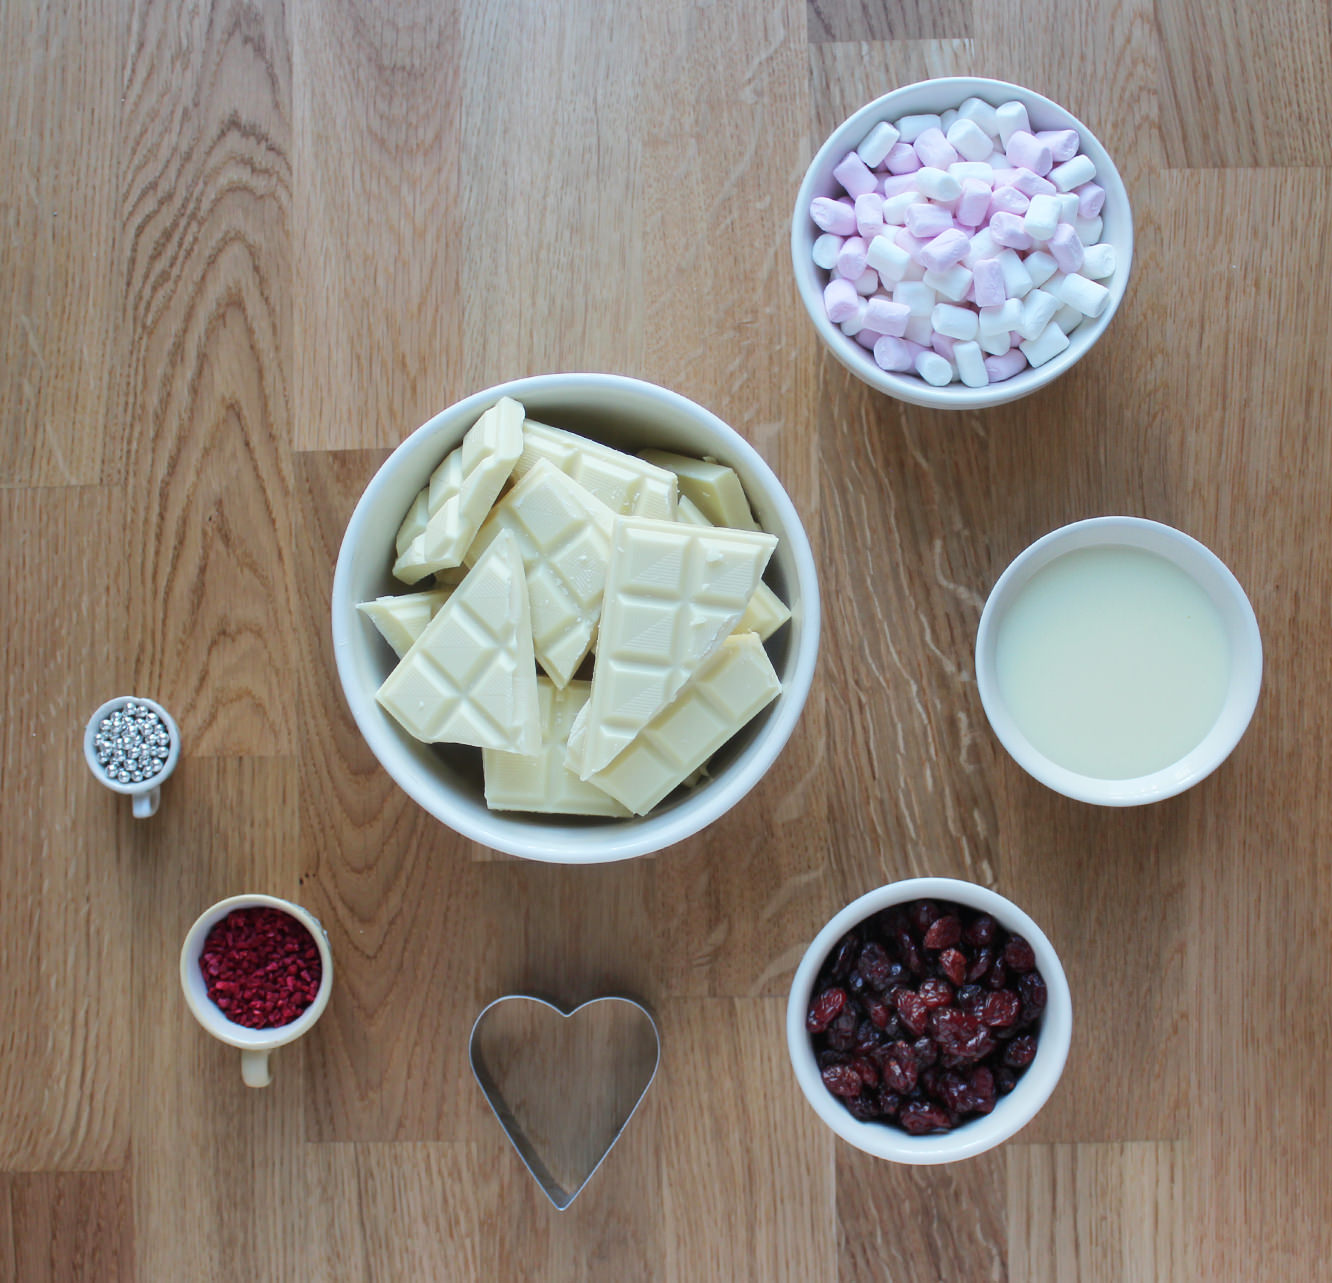
You will need
600g/1 lb 3 oz White chocolate (yeah, this is serious stuff)
397g Condensed milk (1 can basically)
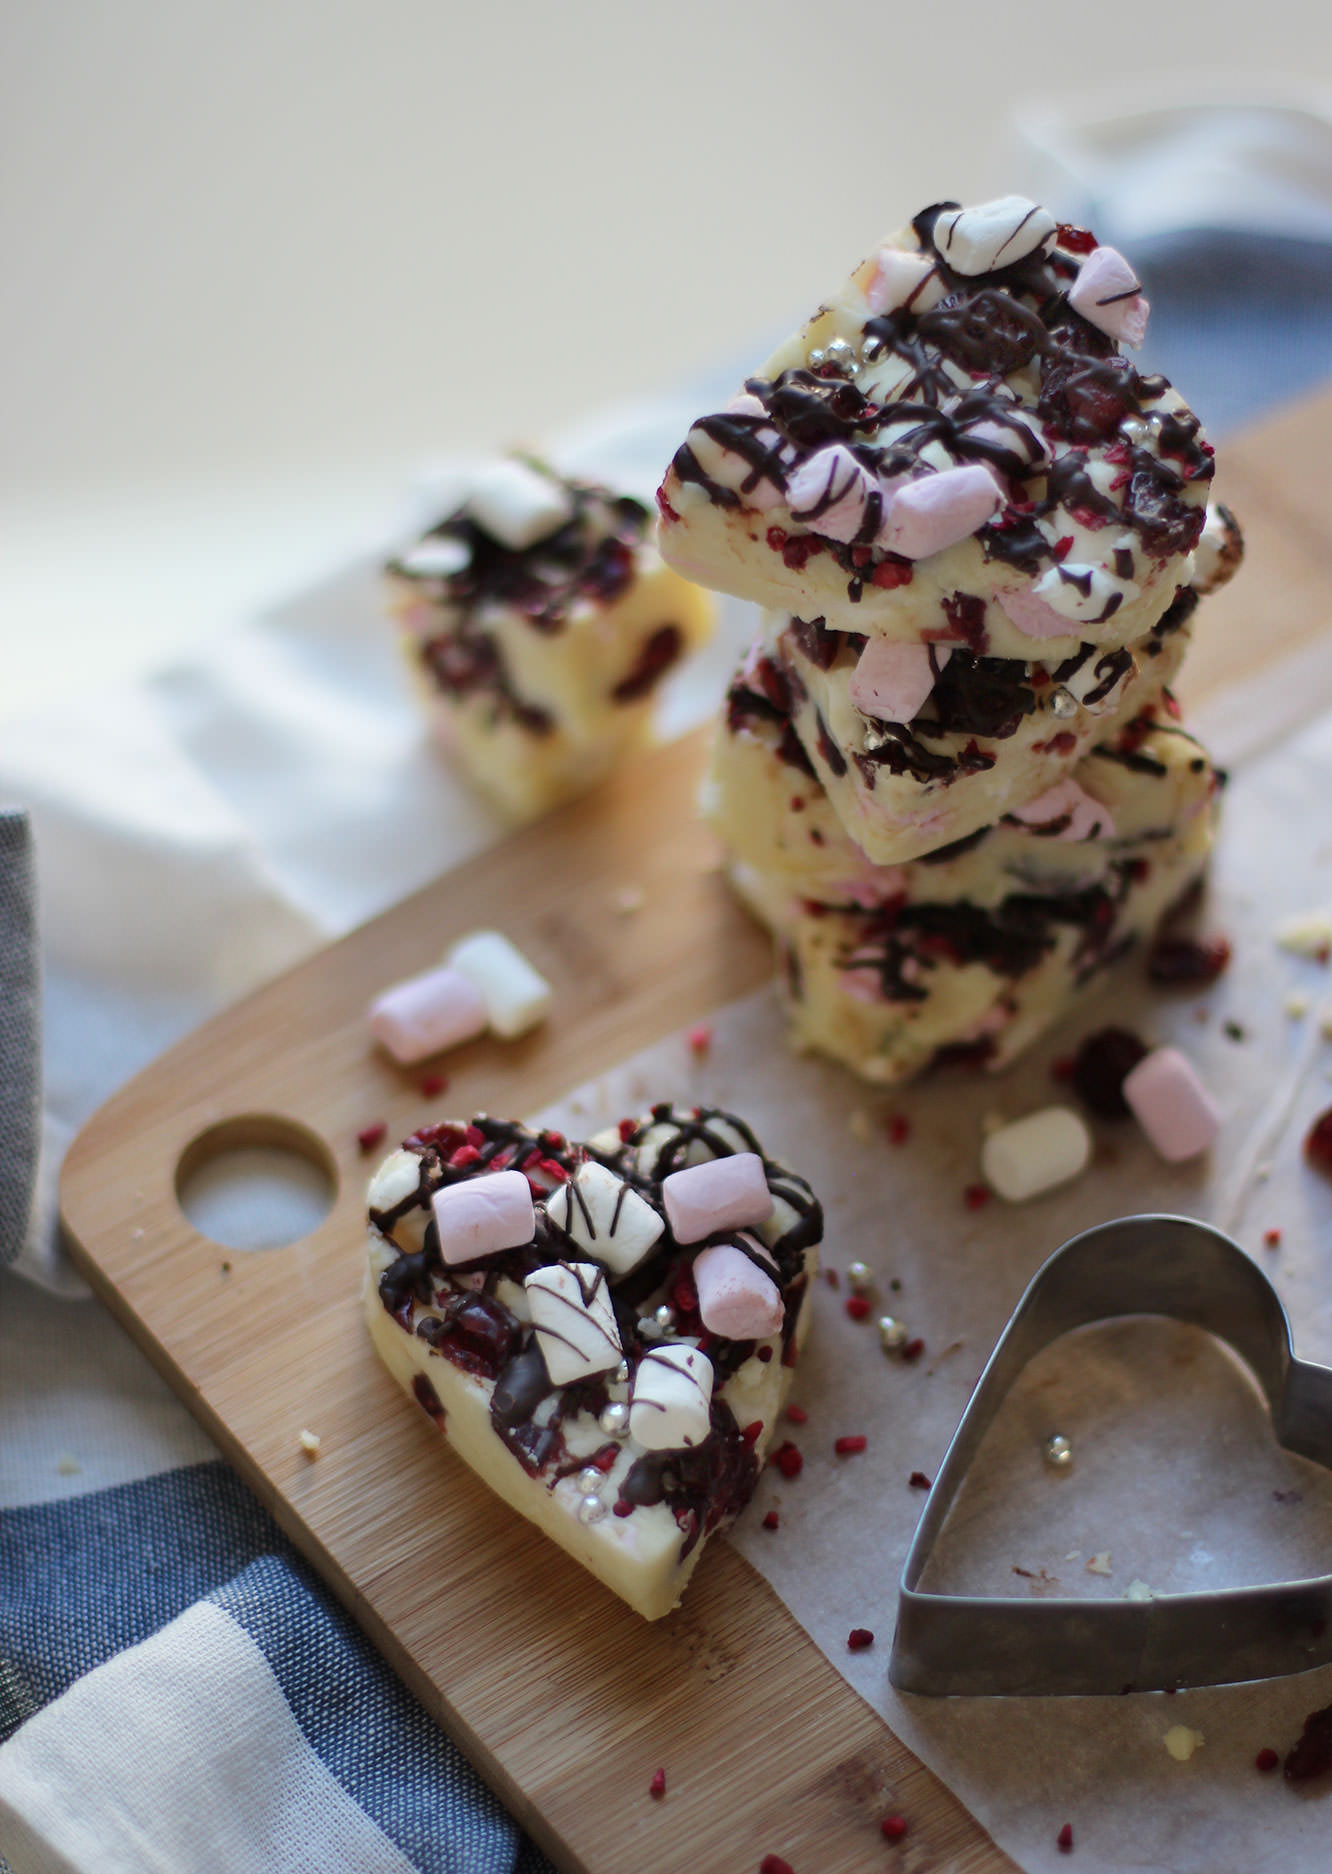
125g/4.5 oz Cranberries
85g/3 oz Mini marshmallows
25g/1 oz Dark chocolate
Other decorations (I used silver balls and freeze dried raspberries because that’s what I had, but any manner of nuts and dried fruits would be acceptable, even as a substitute for the marshmallows and cranberries)
Step one
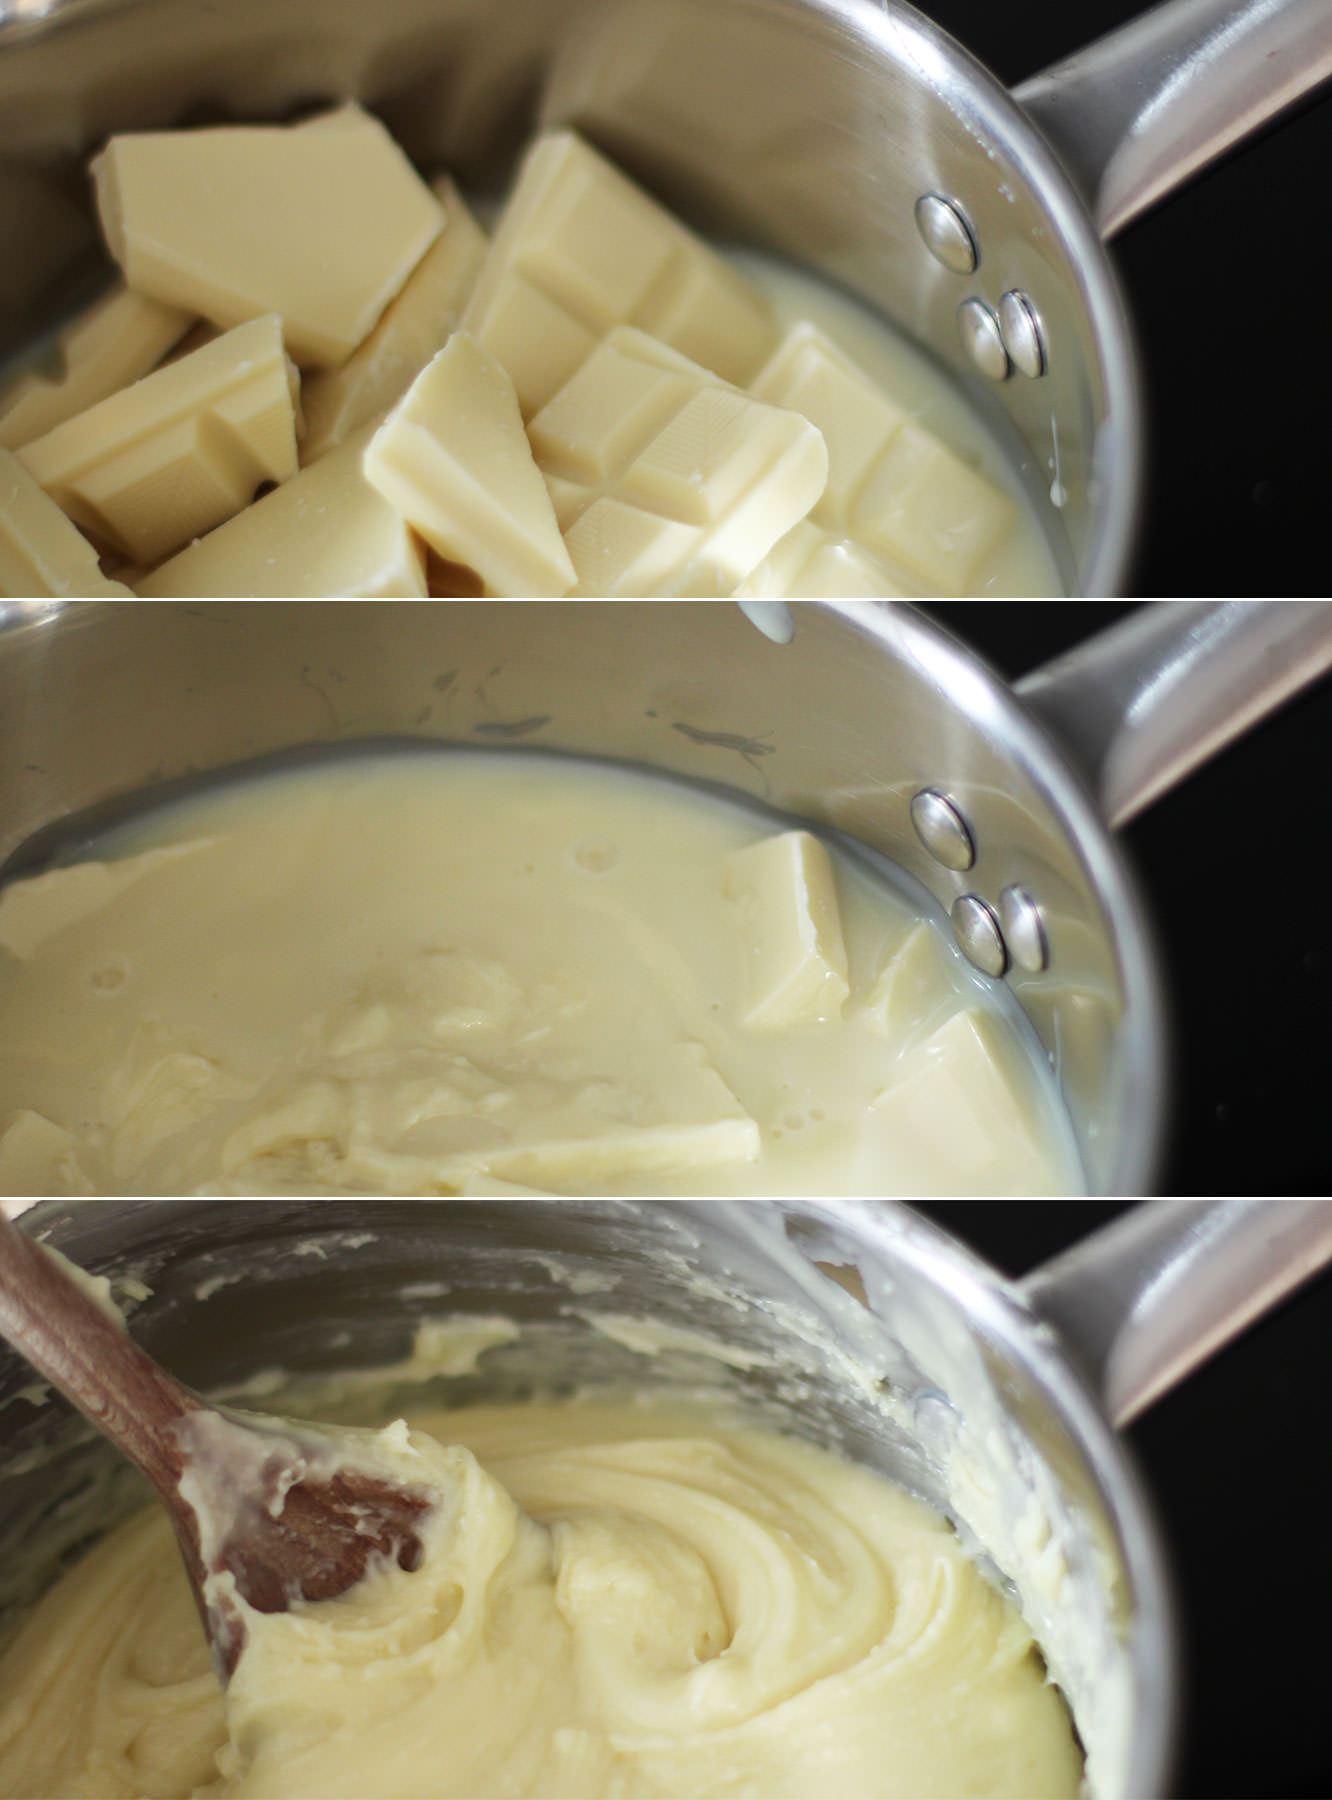
Break the white chocolate into chunks and place in a pan with the tin of condensed milk.
Melt together on a low heat. Once you have a smooth fudge-like mixture, remove from the hob.
Step two
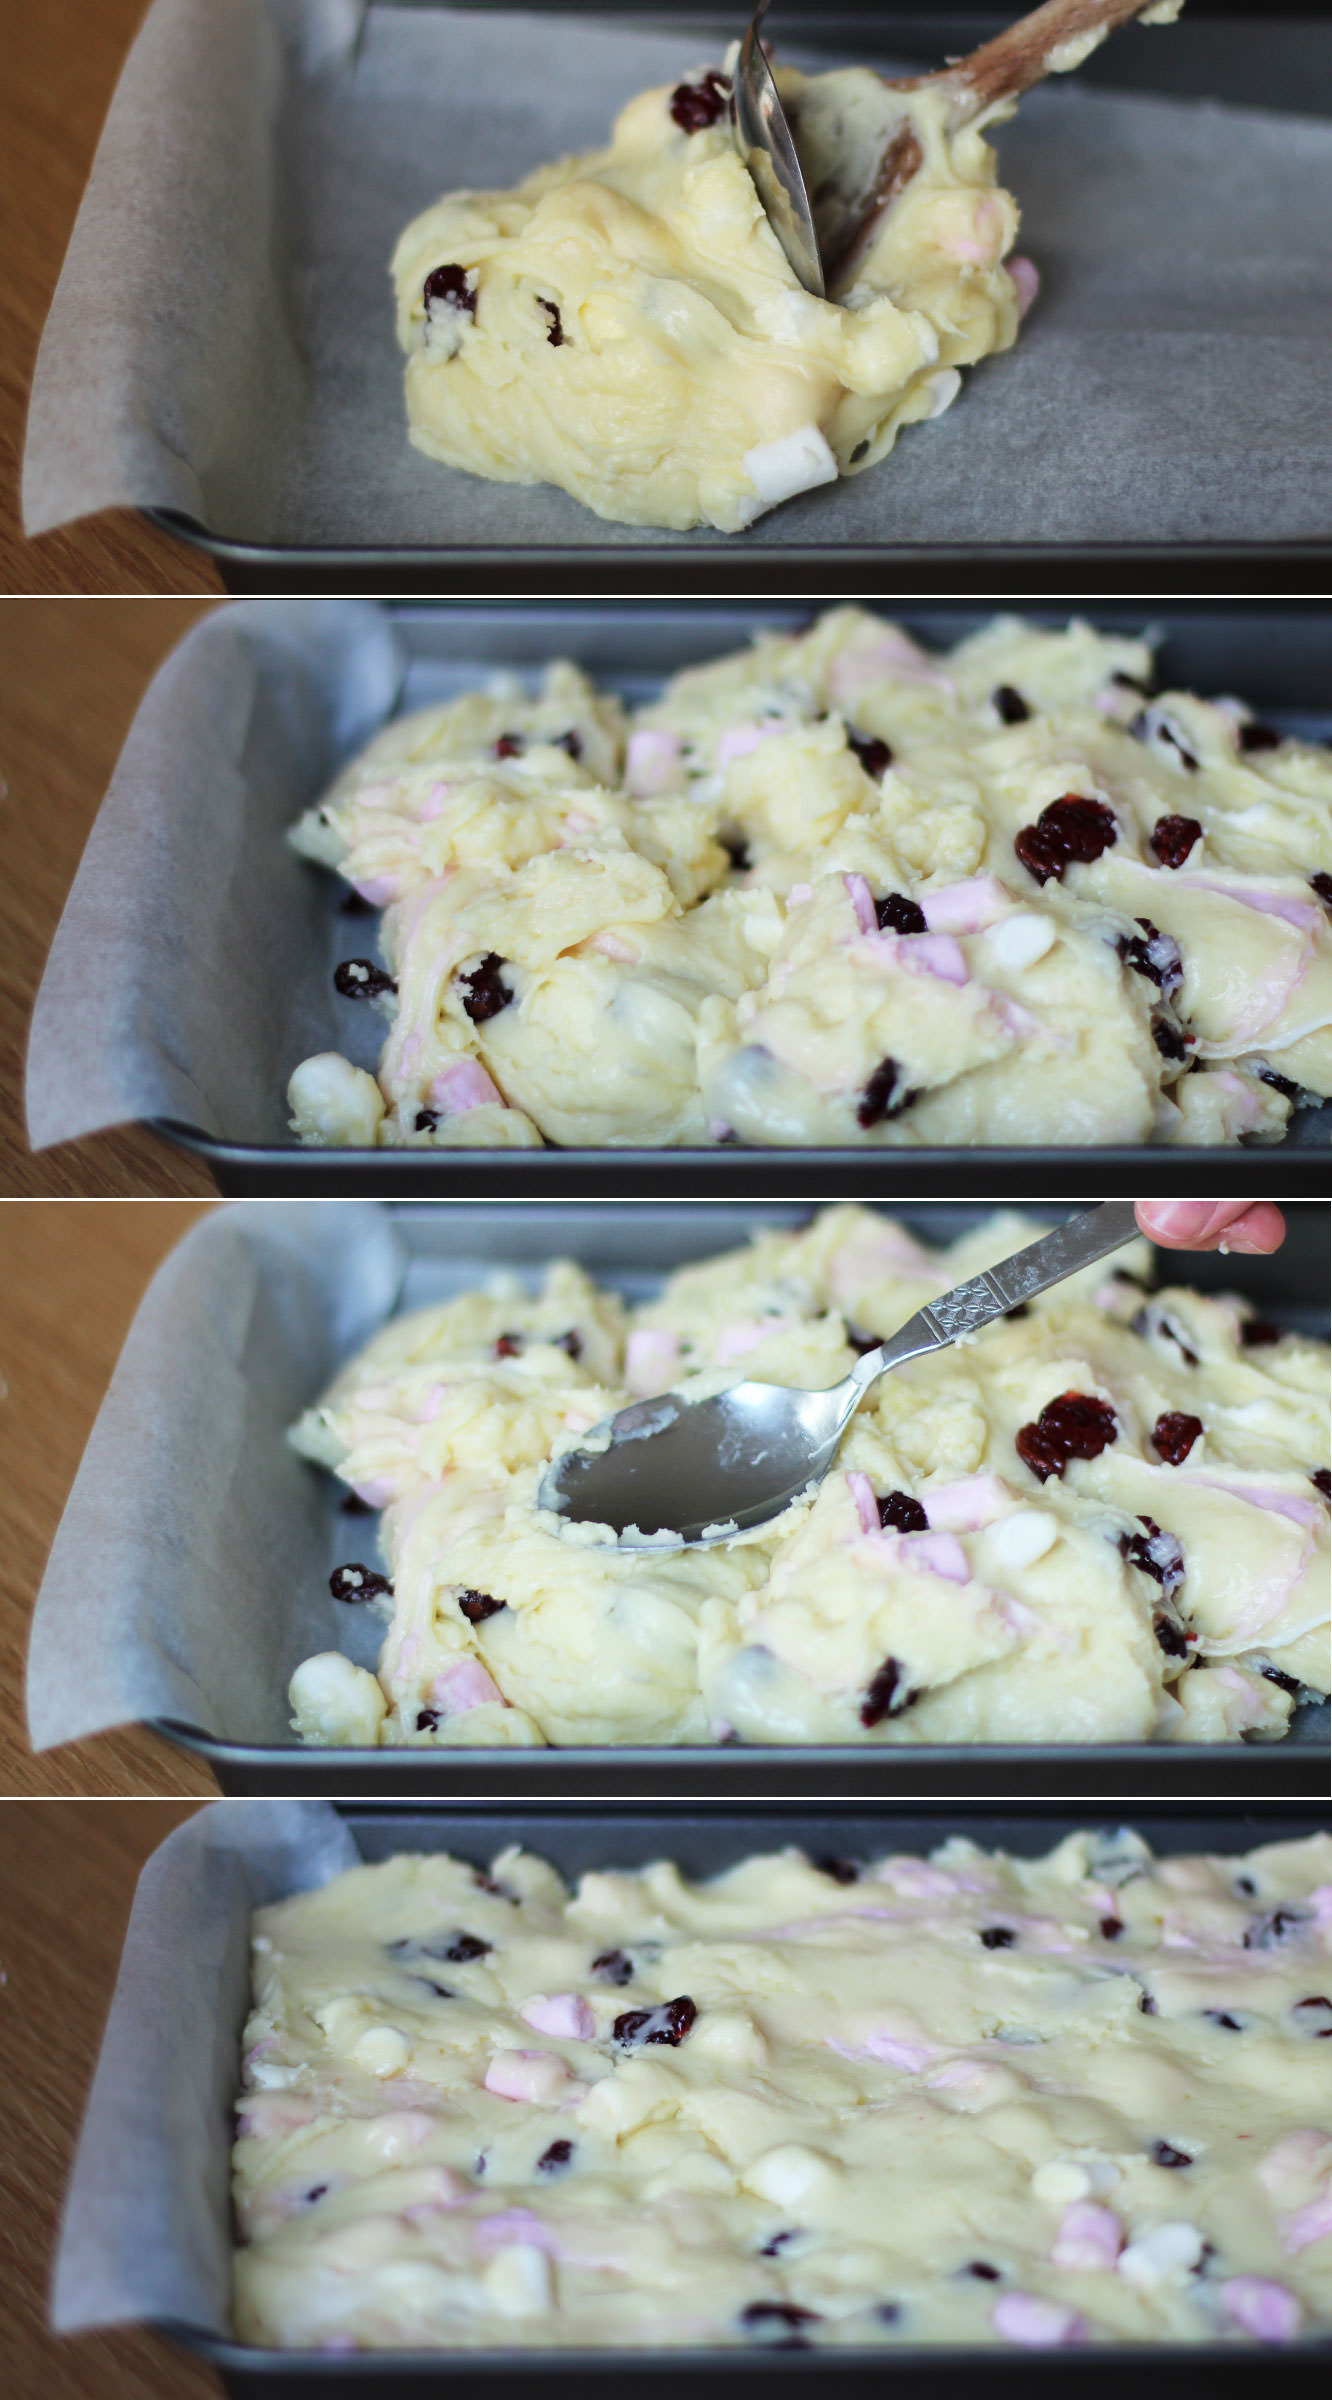
Add two thirds of the cranberries and marshmallows, stir to combine.
Step three
Drop the mixture into a brownie tin lined with greaseproof paper. Push into the corners with the back of a spoon and even the top out a bit.
Step four
Sprinkle the remaining cranberries, the silver balls and freeze-dried raspberries on top and push down slightly so they stick.
The alternative would be to swap this step with the next one so they stick to the chocolate (this would probably also look nicer because you would actually be able to see them rather than hiding them with a load of dark chocolate…). I make the mistakes so you don’t have to.
Step five
Melt the dark chocolate in the microwave and drizzle over the fudge. Sprinkle the remaining marshmallows on top. I had a bit of dark chocolate left so did another layer on top of the marshmallows.
Place in the fridge to allow the whole thing to set.
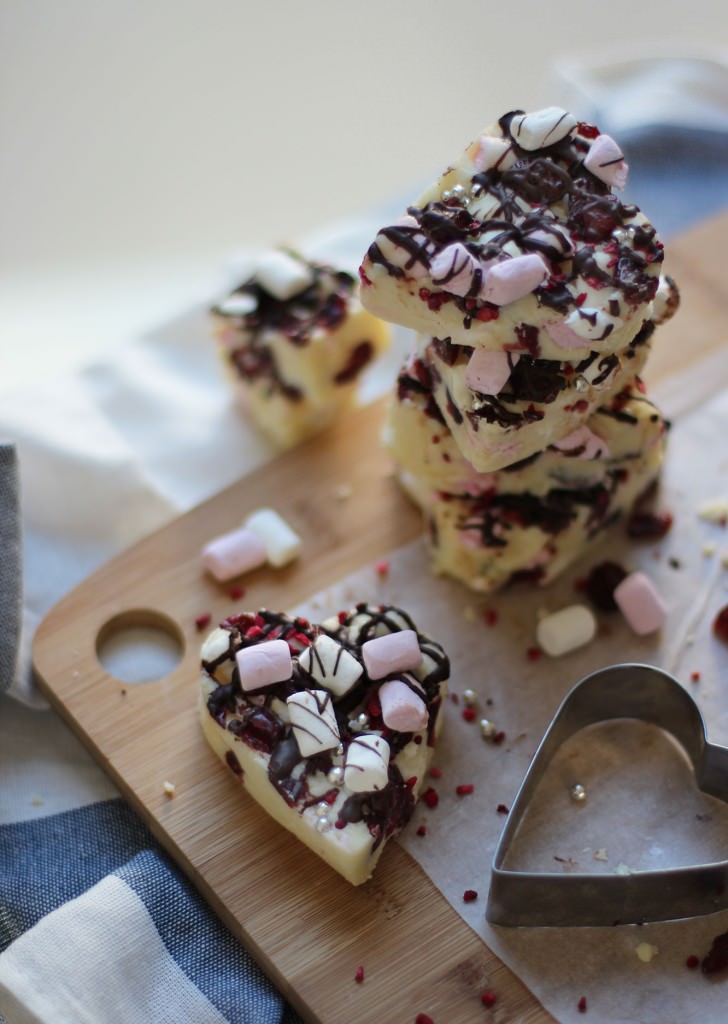
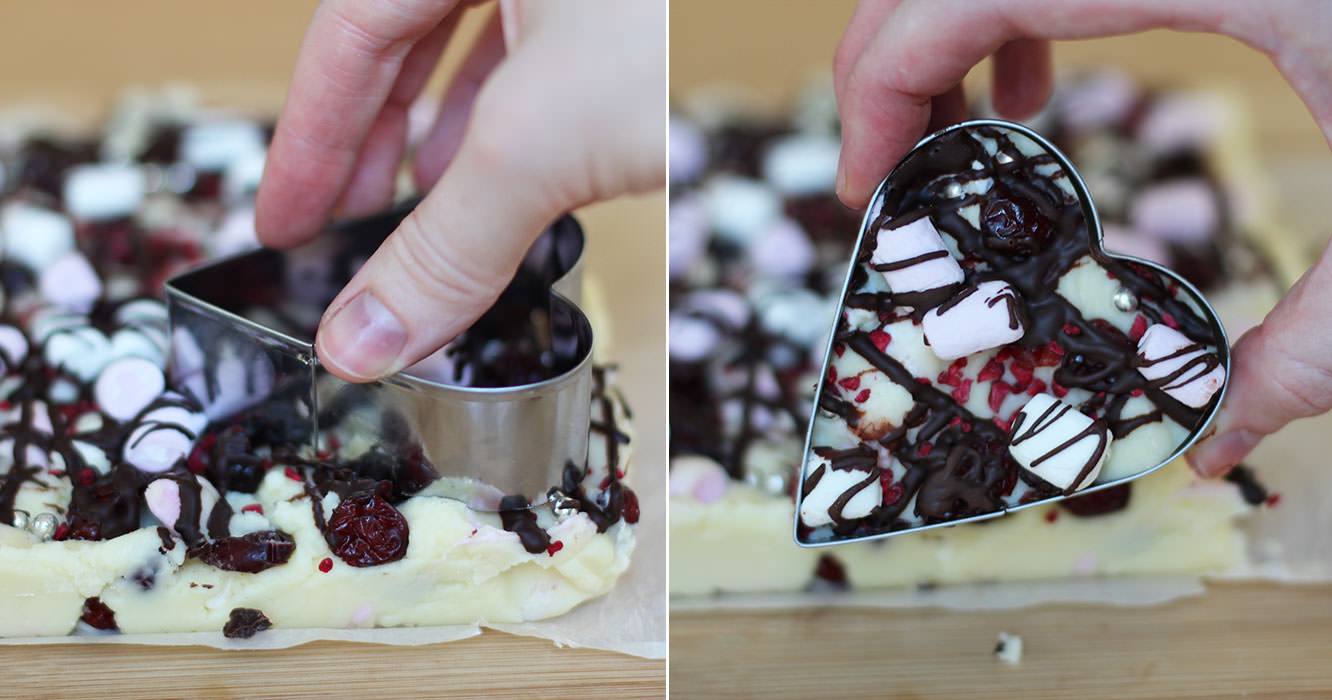
Step six
Using a cutter of your choice (this heart-shaped one was from Lakeland), cut the fudge into pieces. If you don’t have a cutter, then bars or chunks would look nice too.
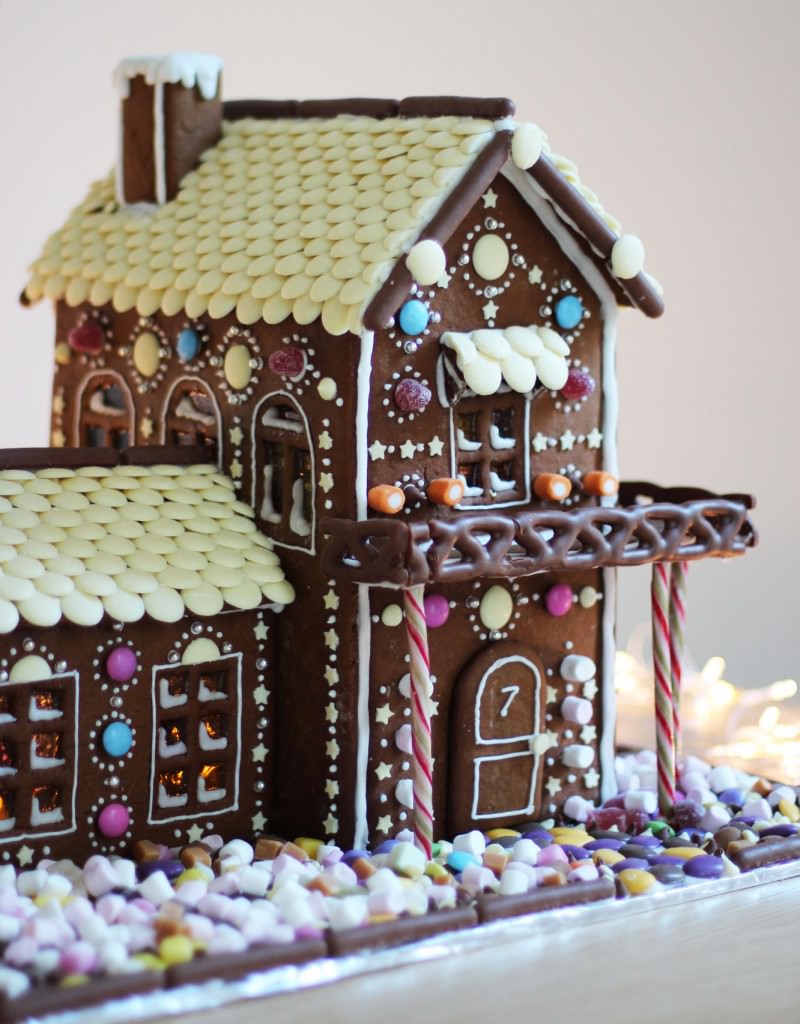
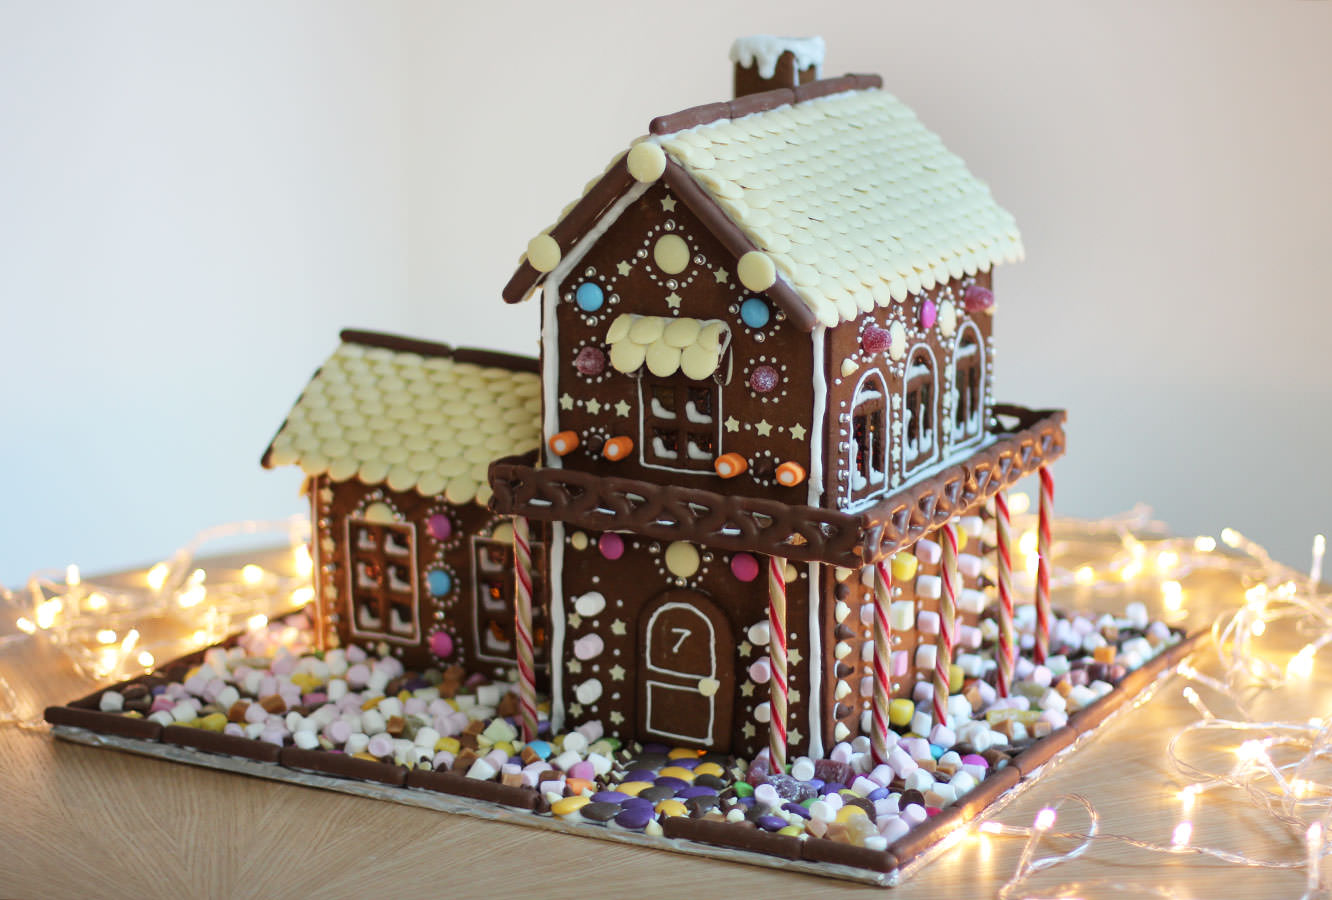
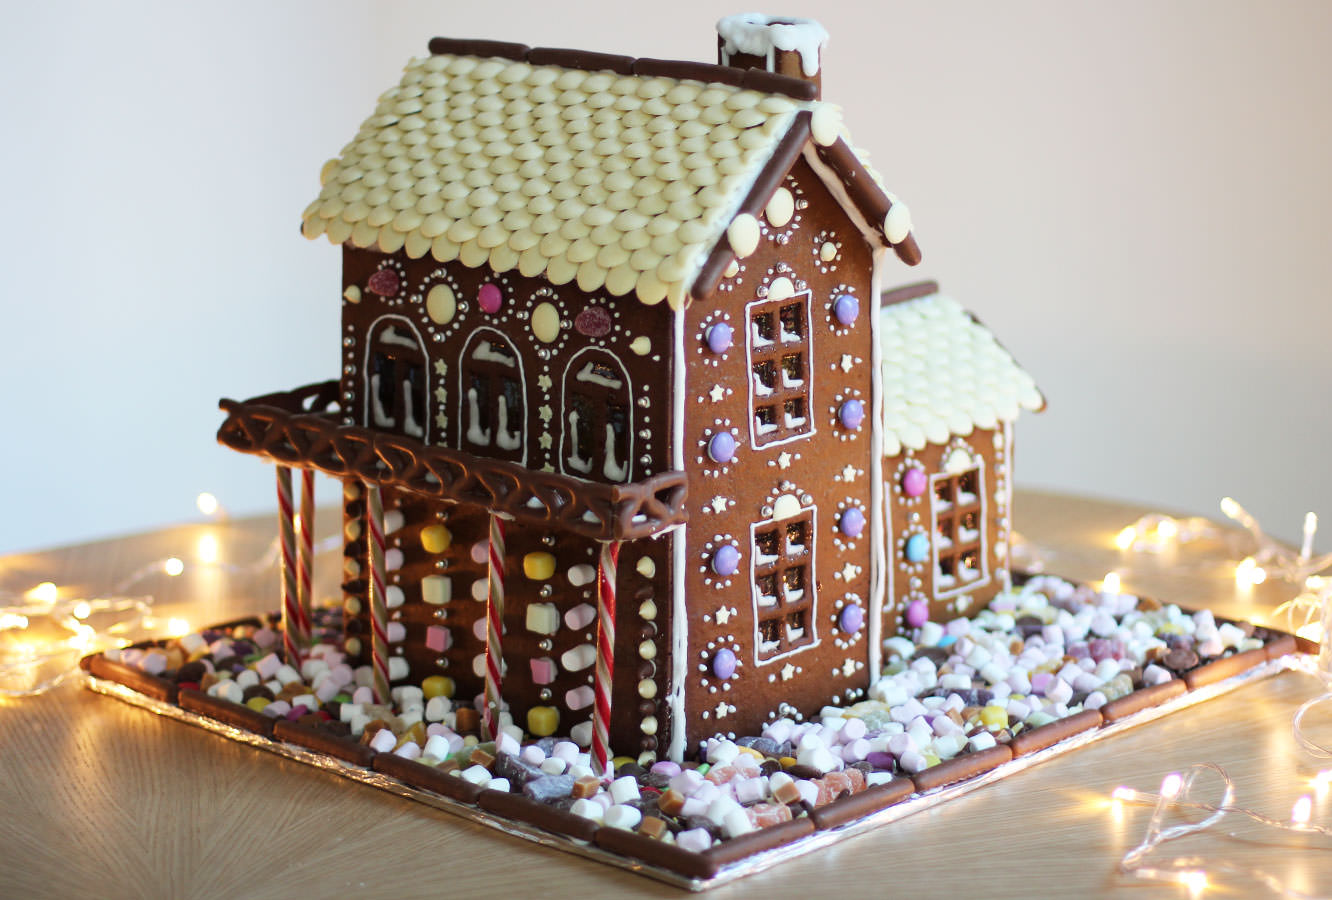
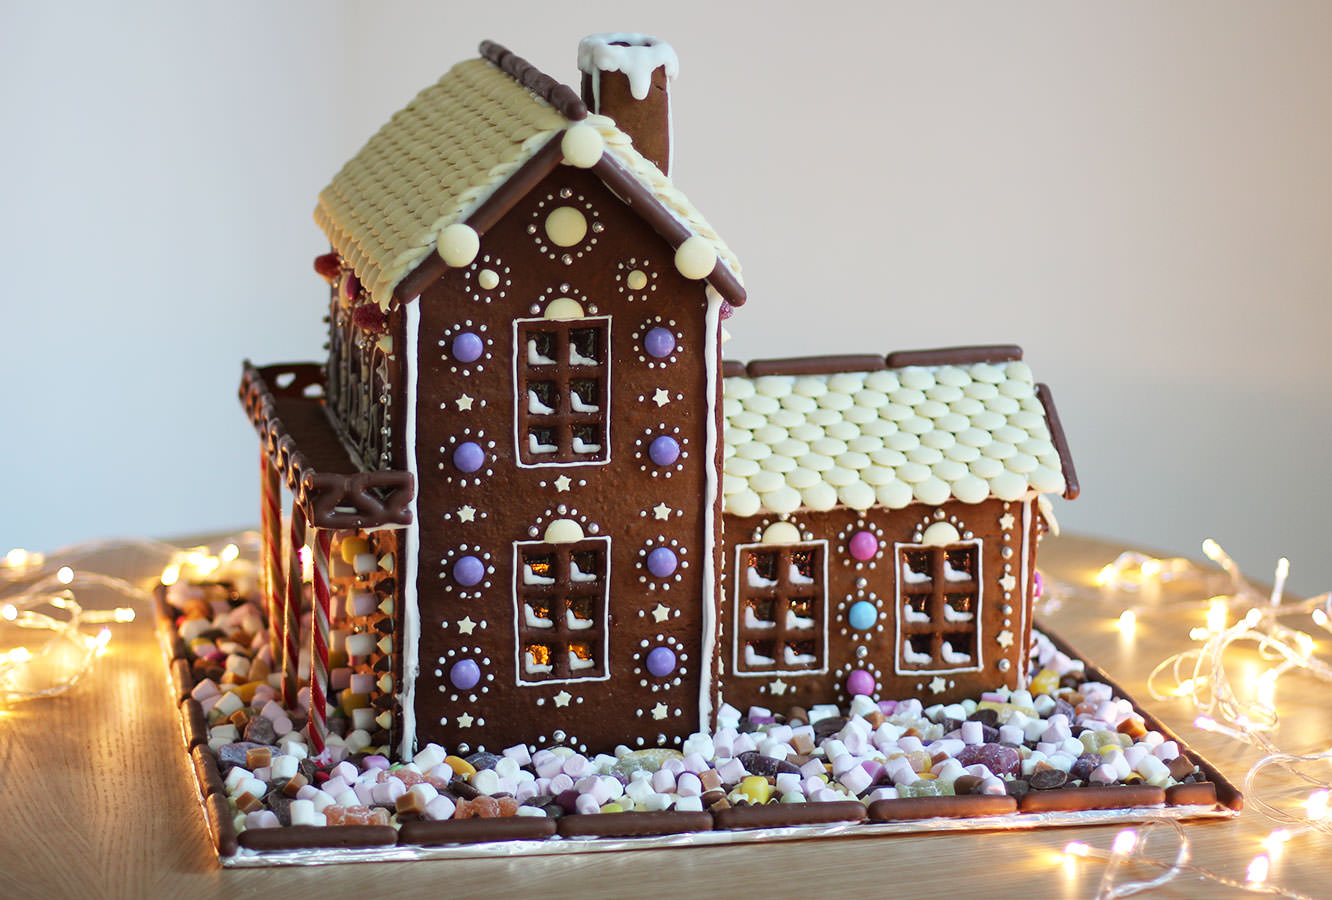
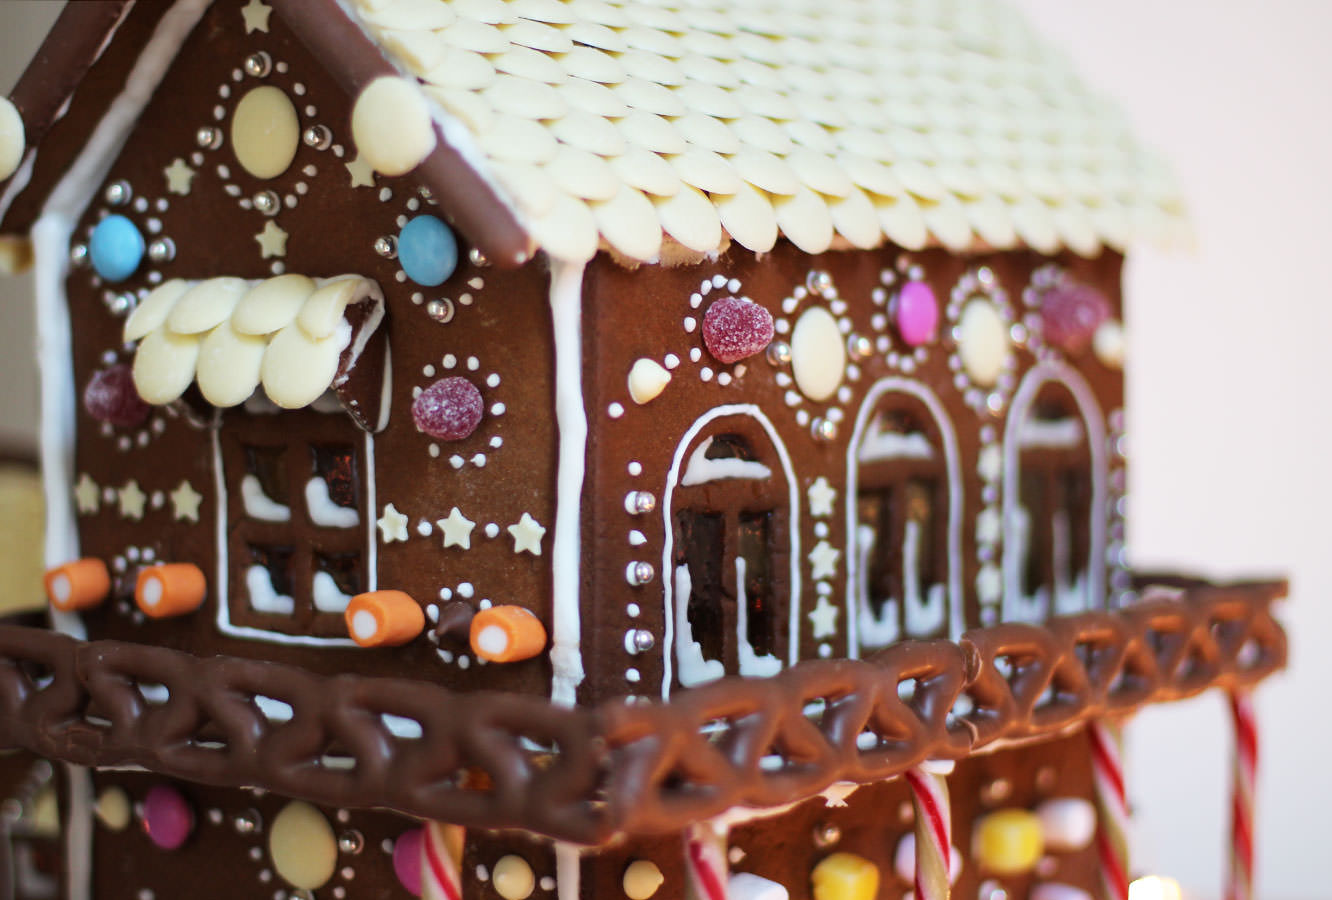
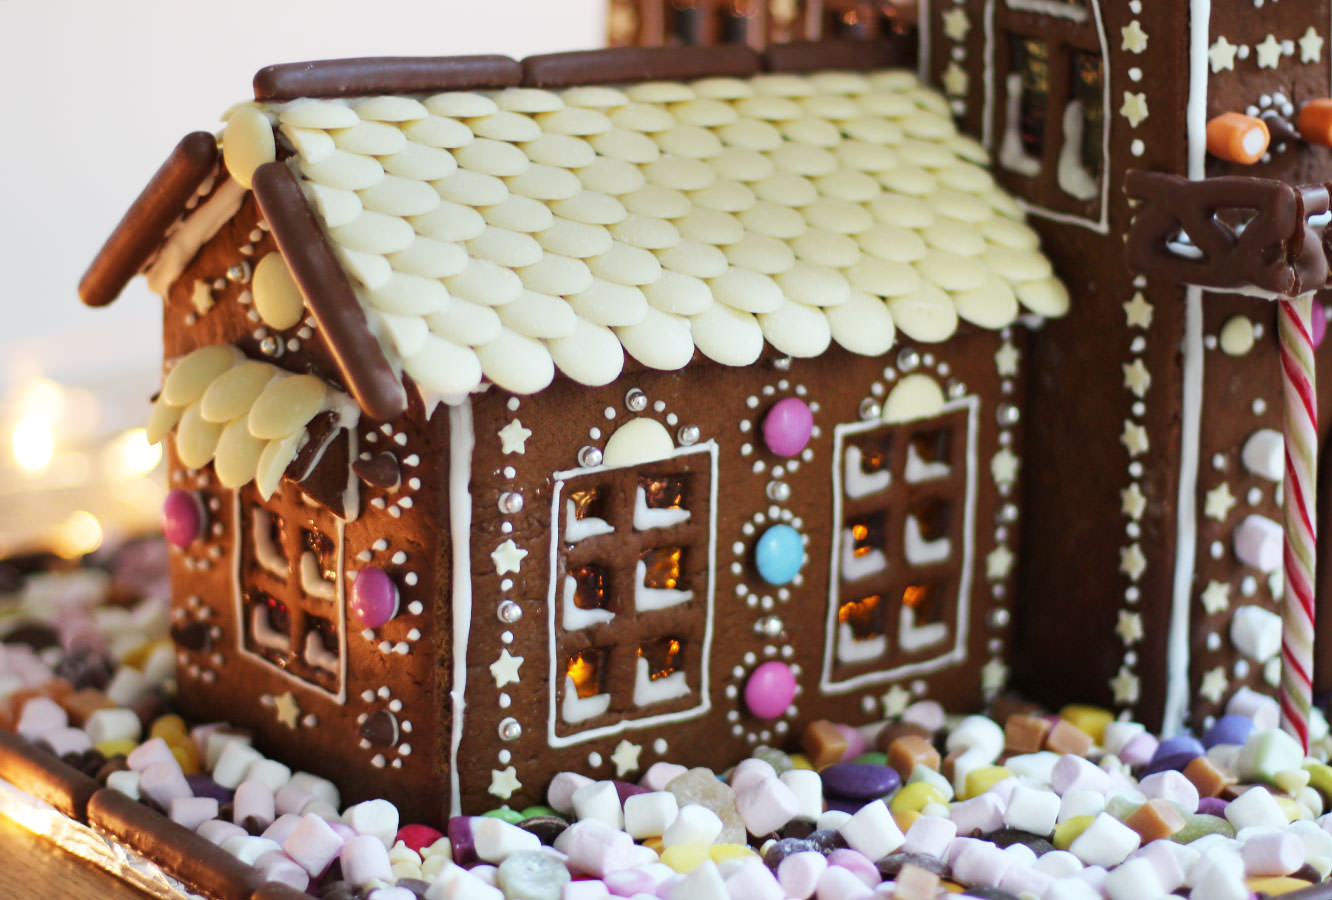
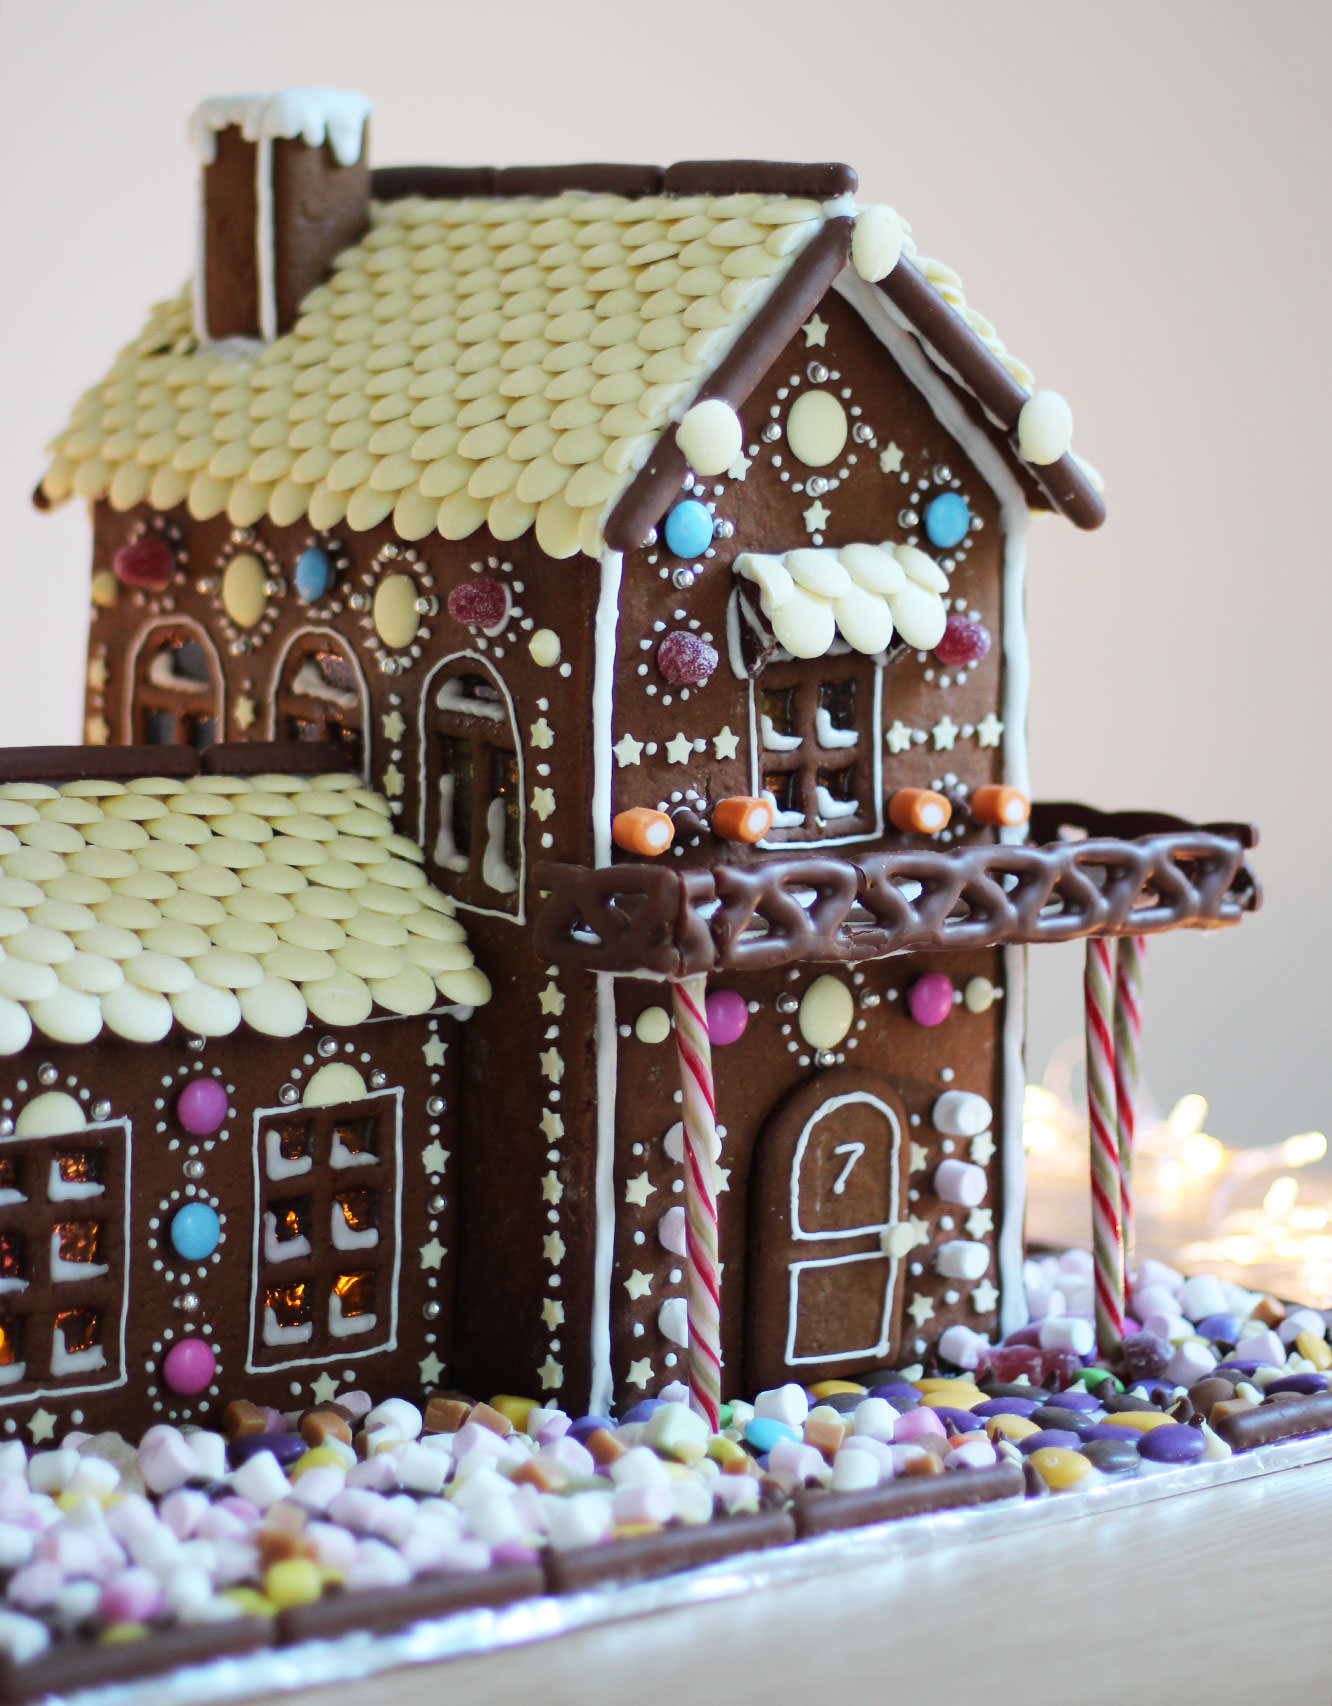
Hello again. Just a little post with some photos of this year’s gingerbread house. I said back in this post that I would start to theme them, which I’m afraid I didn’t have the inspiration for in the end, but it does have a balcony which was my engineering feat of the year.
For those of you looking to squeeze a bit of gingerbread house making into what’s left of Christmas eve, other than needing your head examining, you might find the posts I did last year useful:
Some years (every year) I have grand plans for home made gifts and decorations at Christmas. Rarely does this materialise in the lovely relaxed and whimsical way it looks in my head. Generally I end up covered in the contents of my baking cupboard feeling totally harassed by the number of hampers I’ve decided to make.
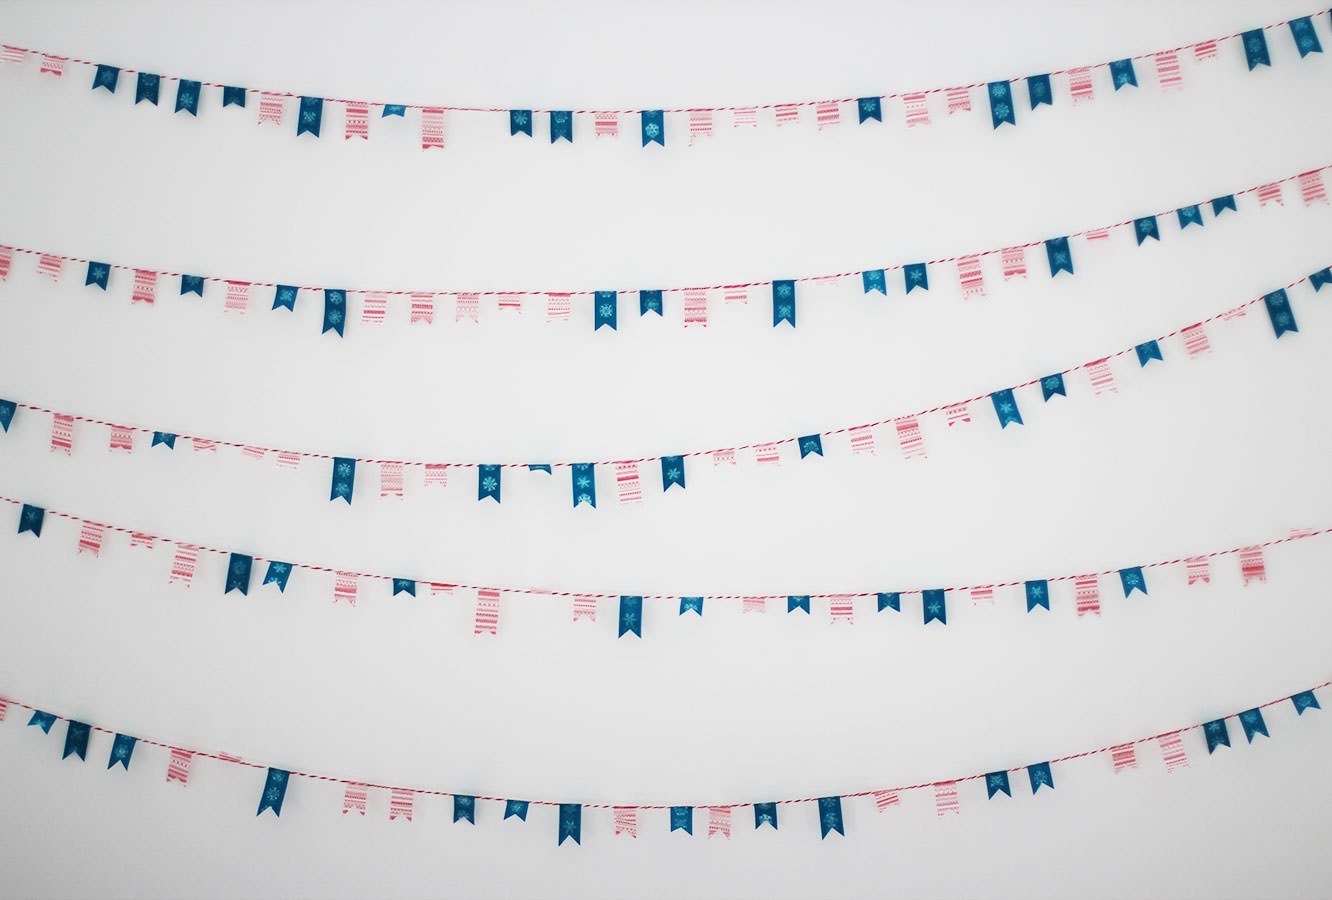
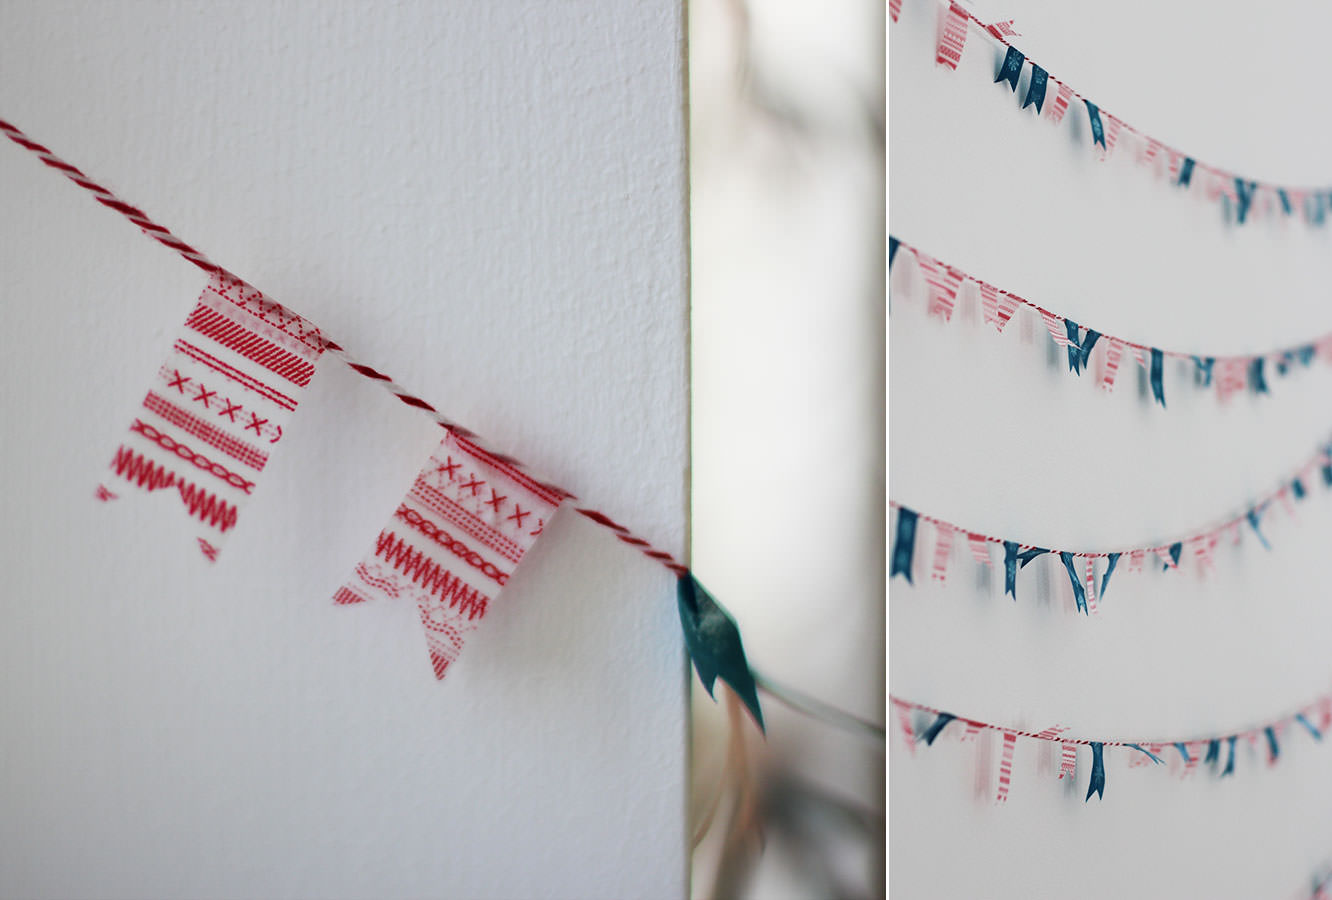
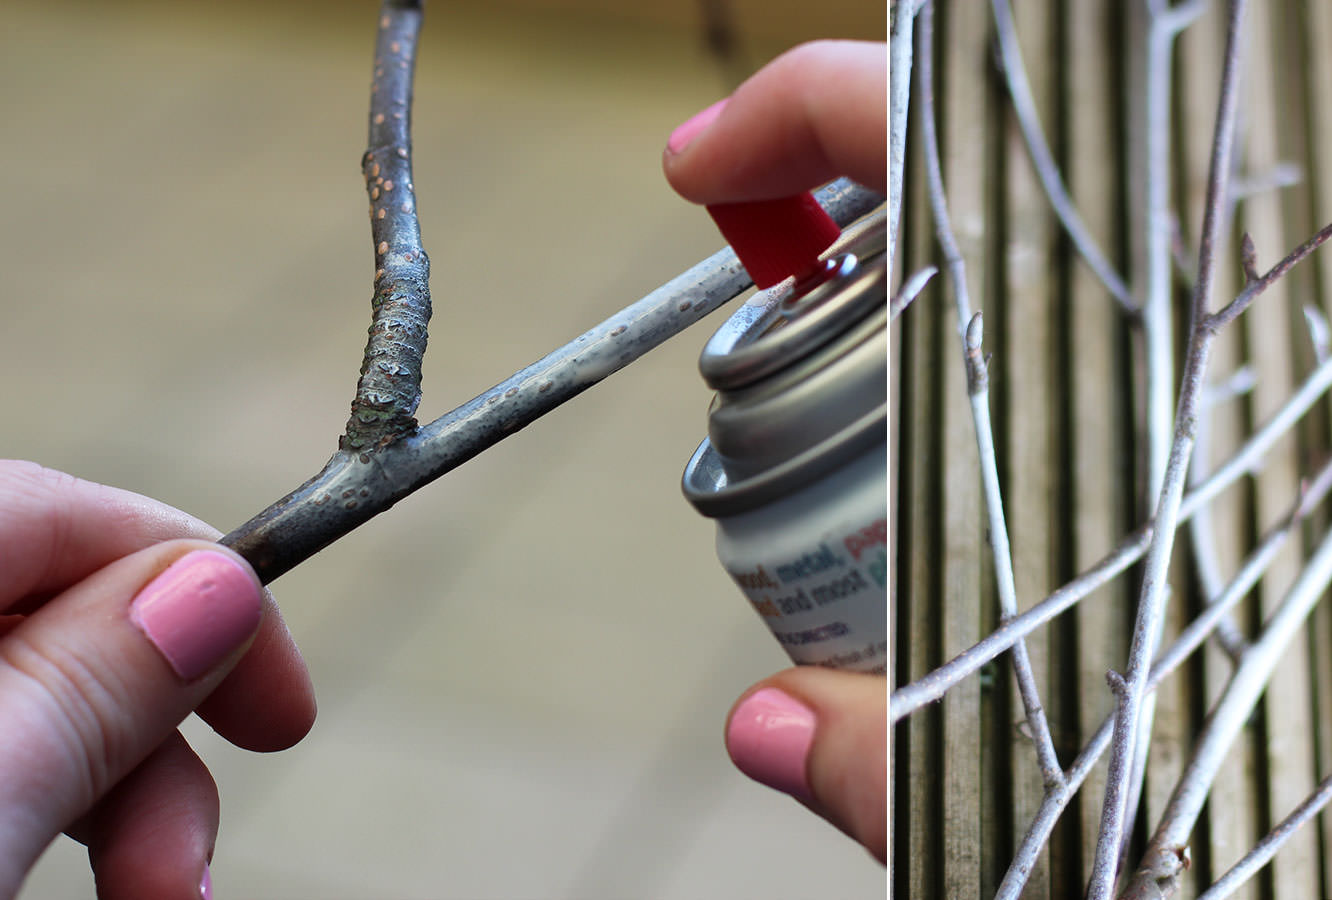
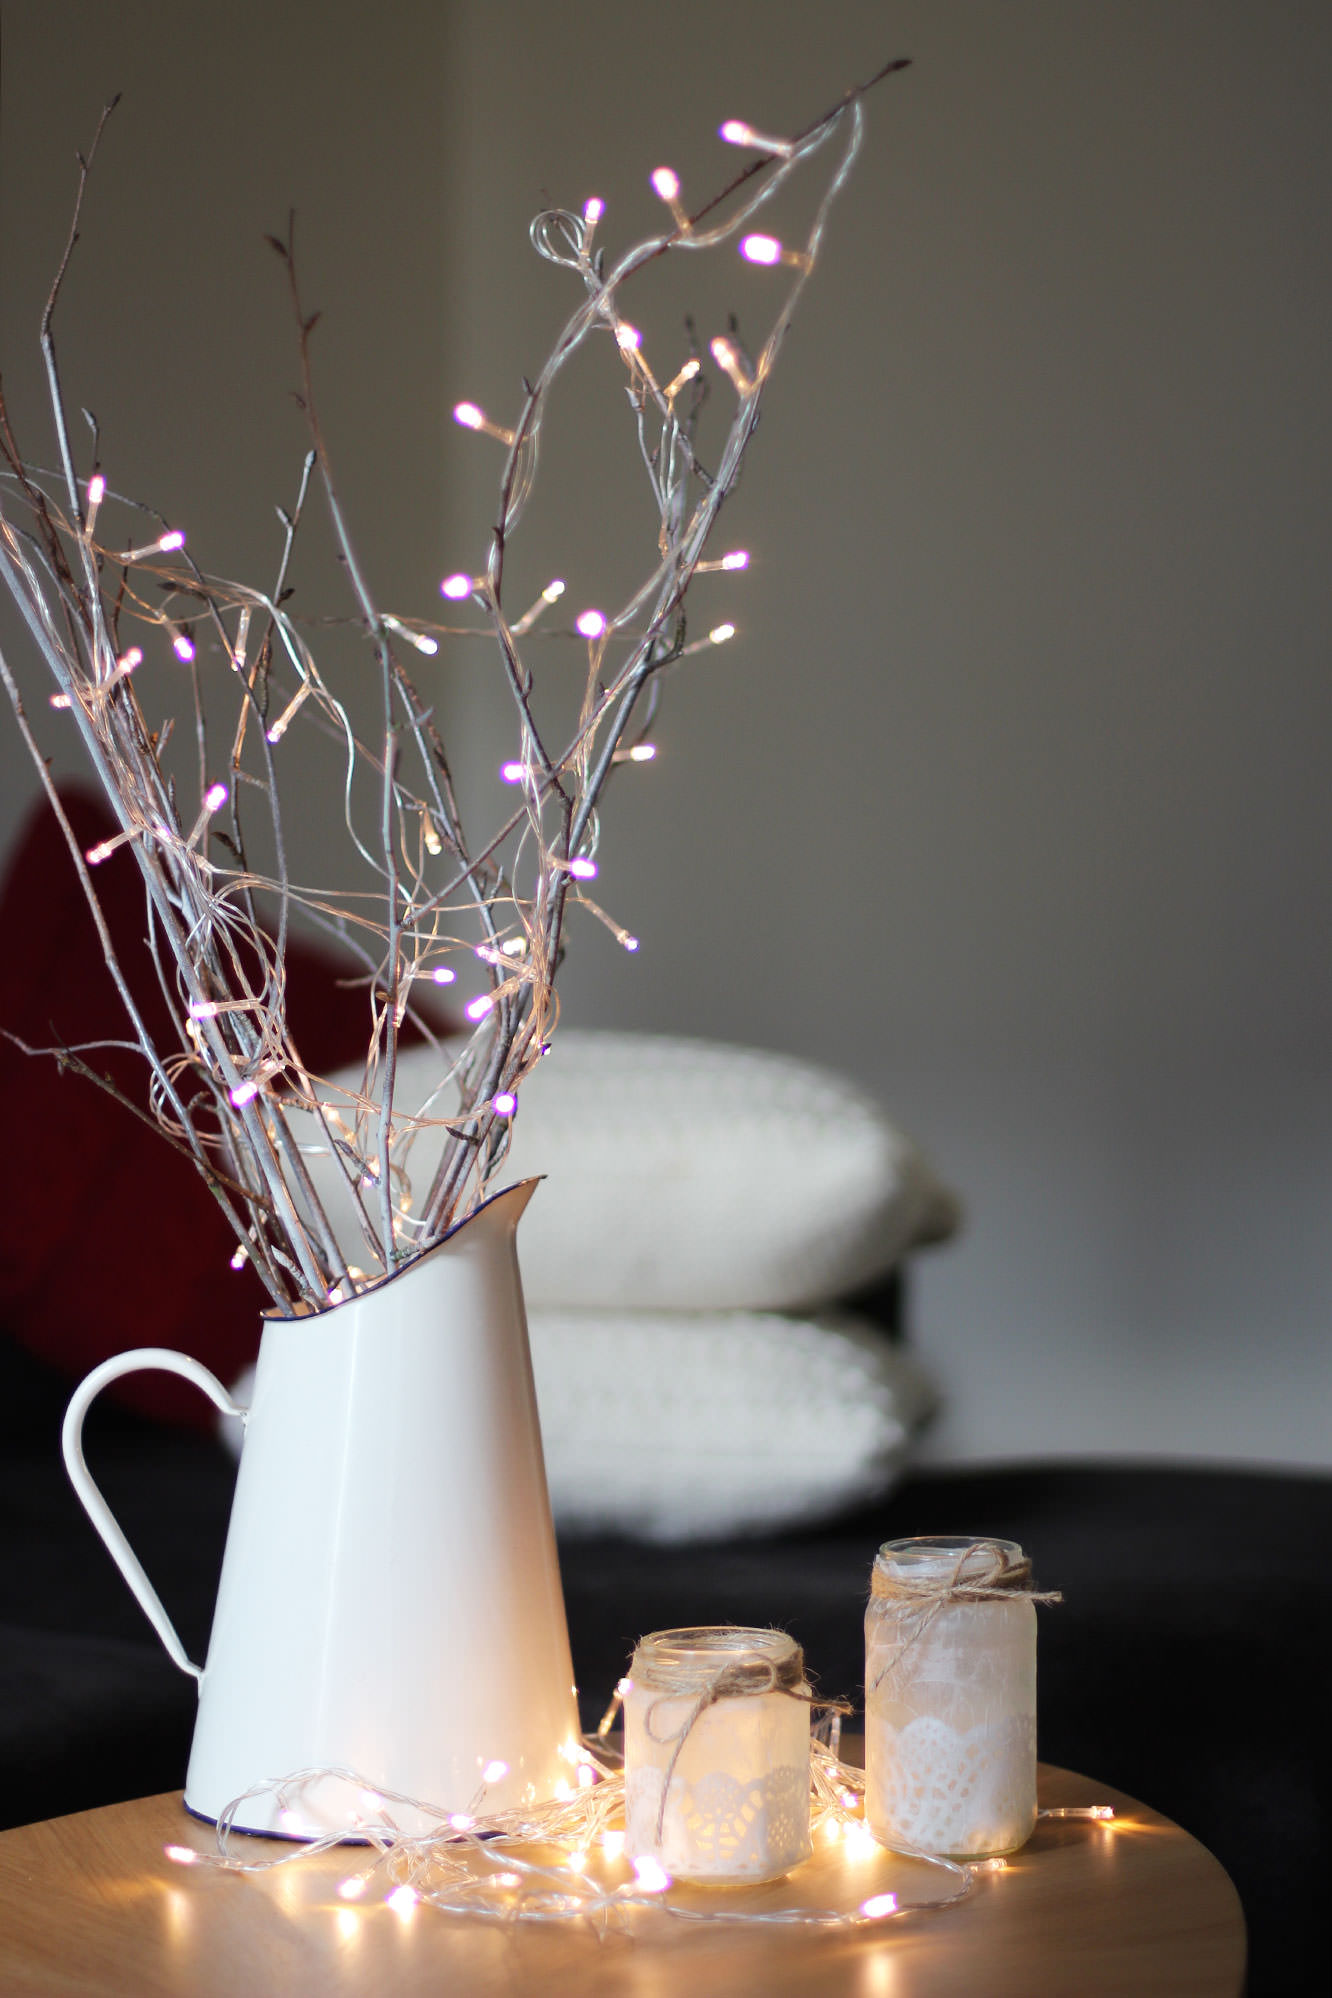
If you’re anything like me, or if you’re completely handmade/craft-phobic in the first place, this one is for you. Three super quick festive crafts to brighten up the house and fill up stockings at the last minute. You don’t need an ounce of artistic/baking ability for any of these. So no excuses.
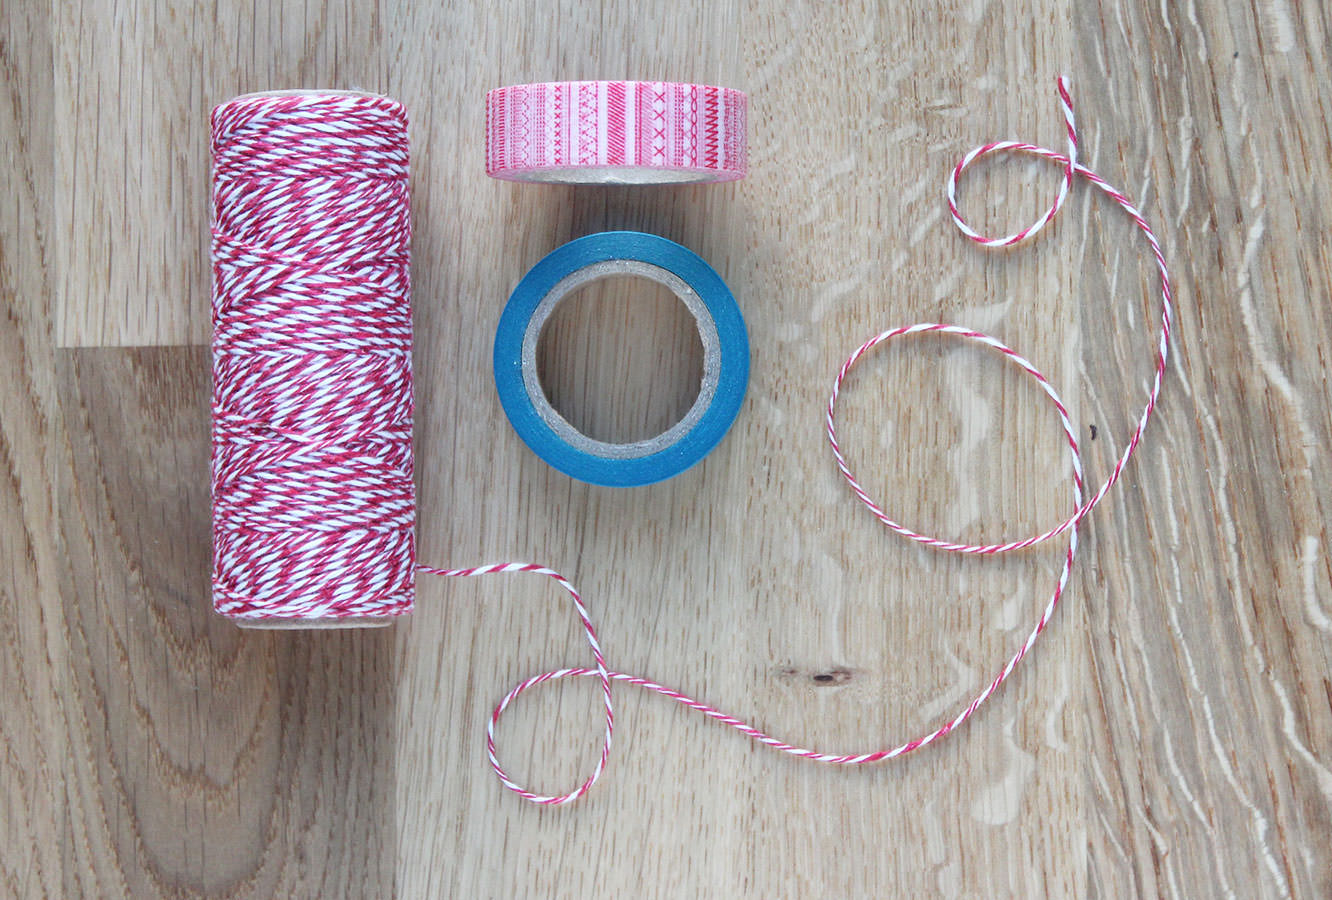
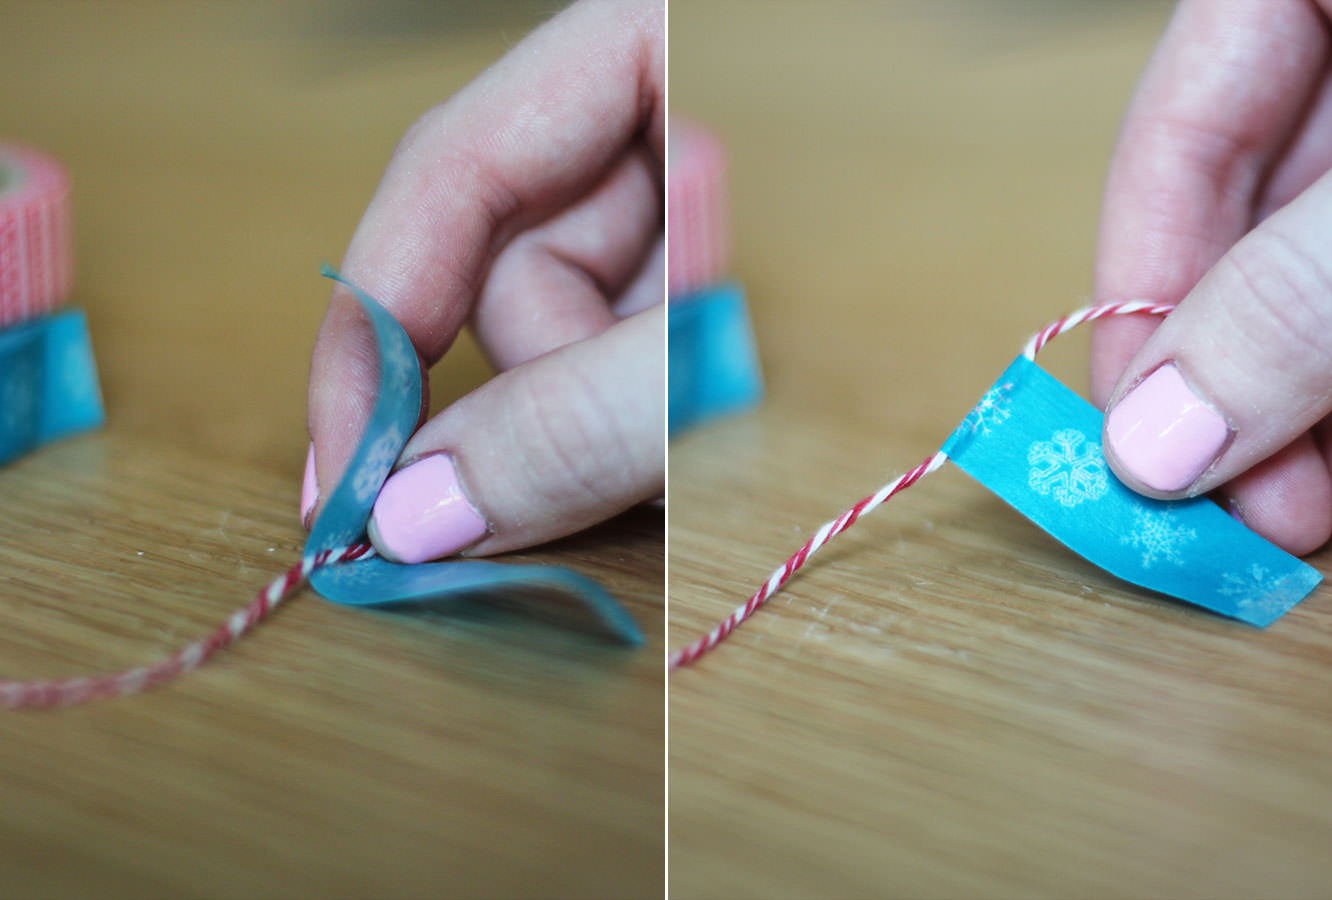
#1: Cute Christmas bunting
You will need
String (I got this two colour spool from Tiger for £1)
Christmassy washi-tape
Step one
Cut a random length of tape and place the string in the middle. If you really want to punish yourself you can try and make them all the same length, but I really like them random and it’s much easier that way too.
For this step I cut loads and stuck them on the edge of the table so I had them ready and did them in batches so I wasn’t constantly cutting one then sticking it etc etc.
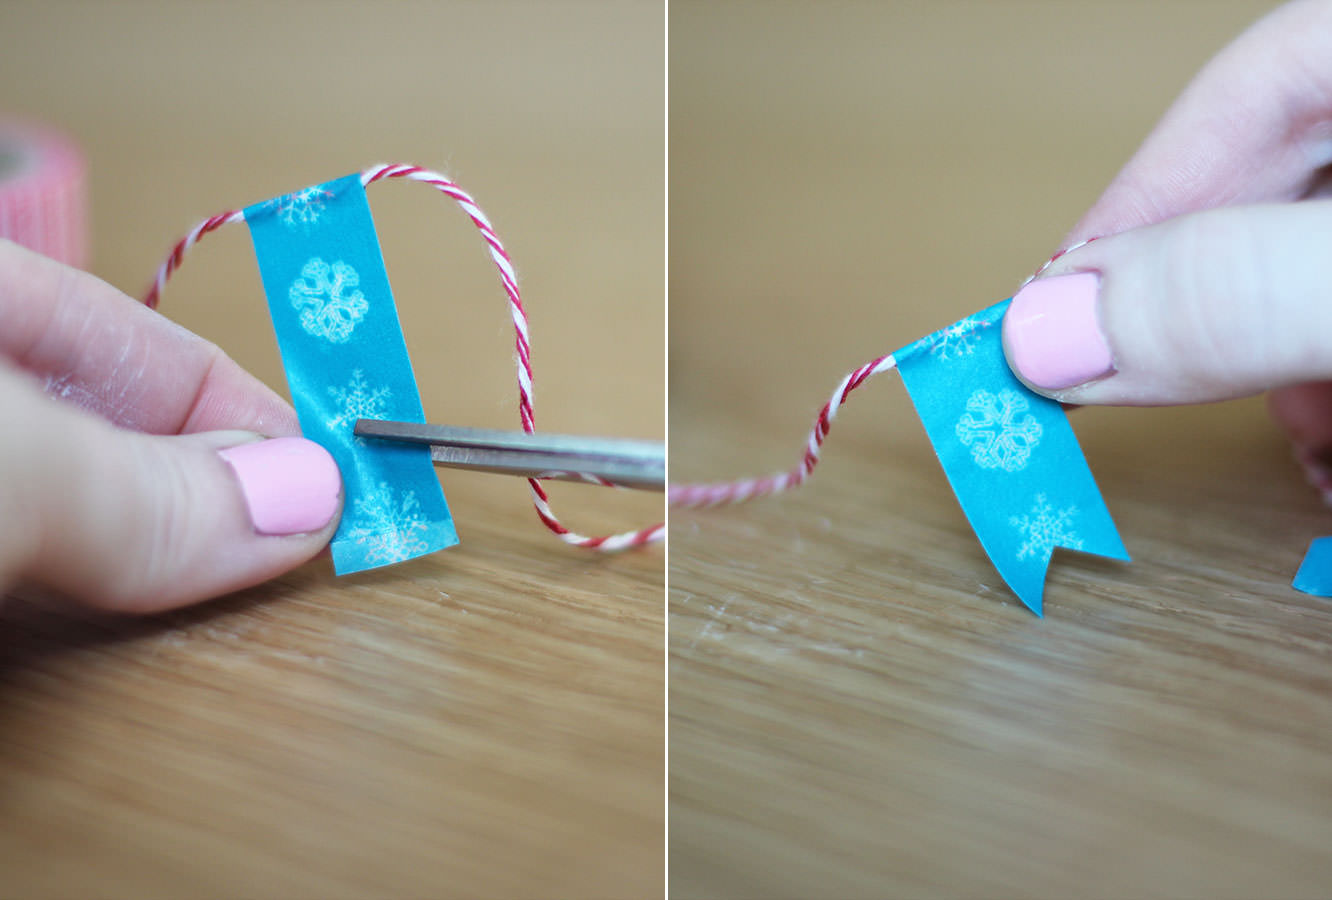
Step two
Fold over the wash tape and stick together. Again, I found it easier to do this step in bulk and then snip them in one go (see below).
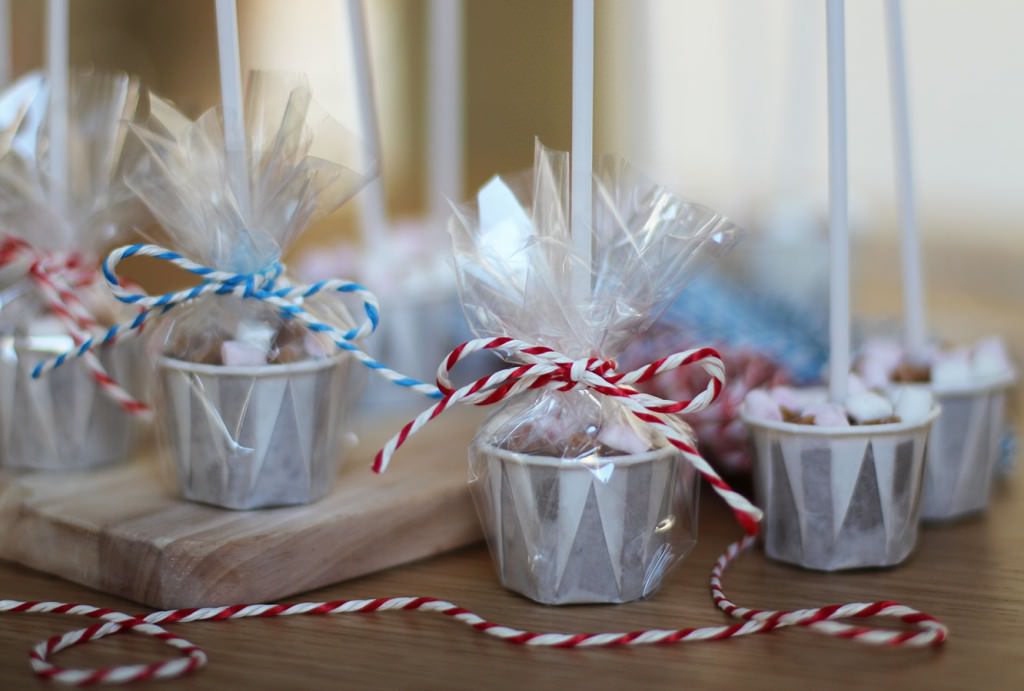
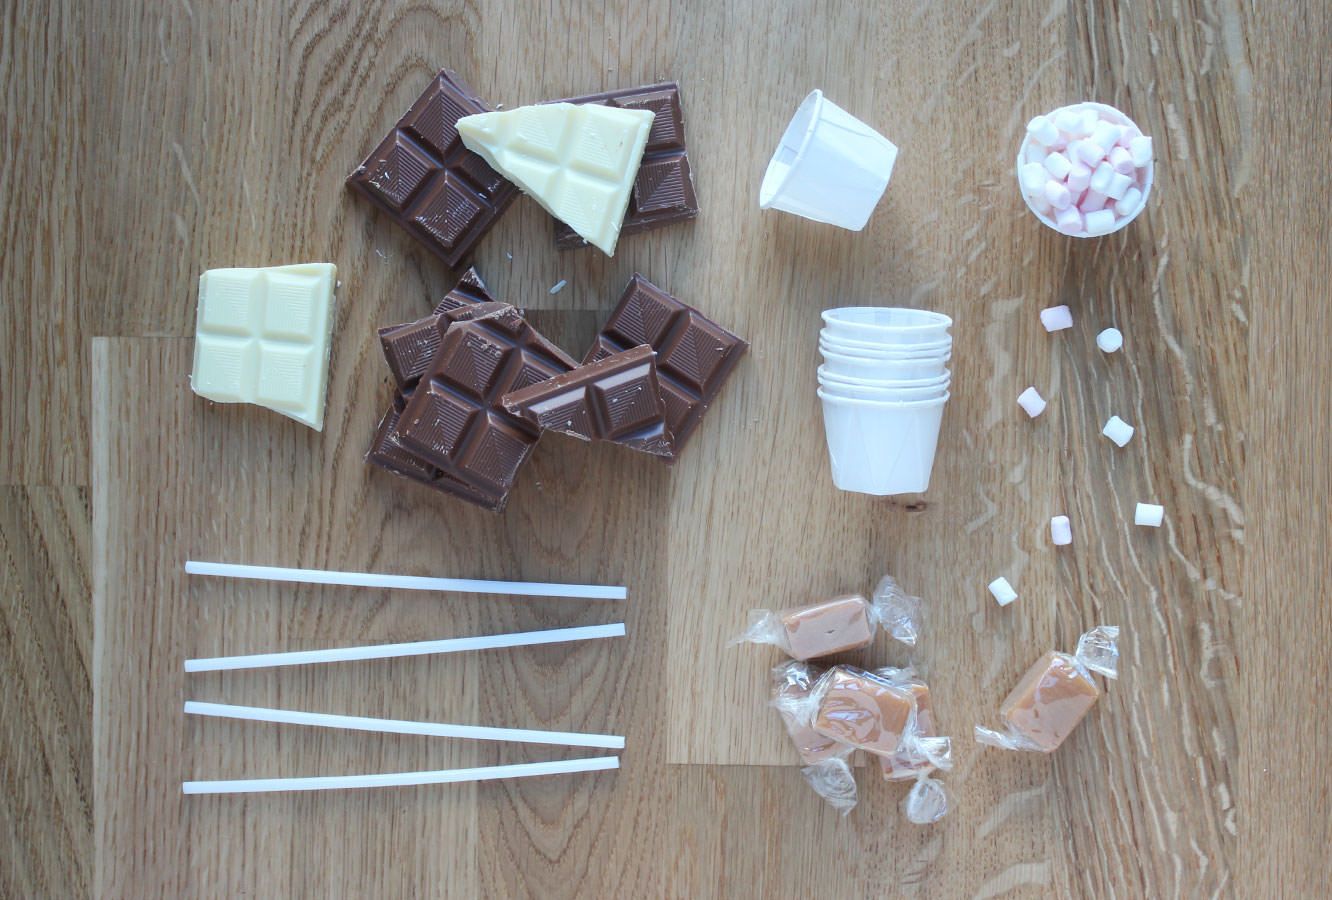
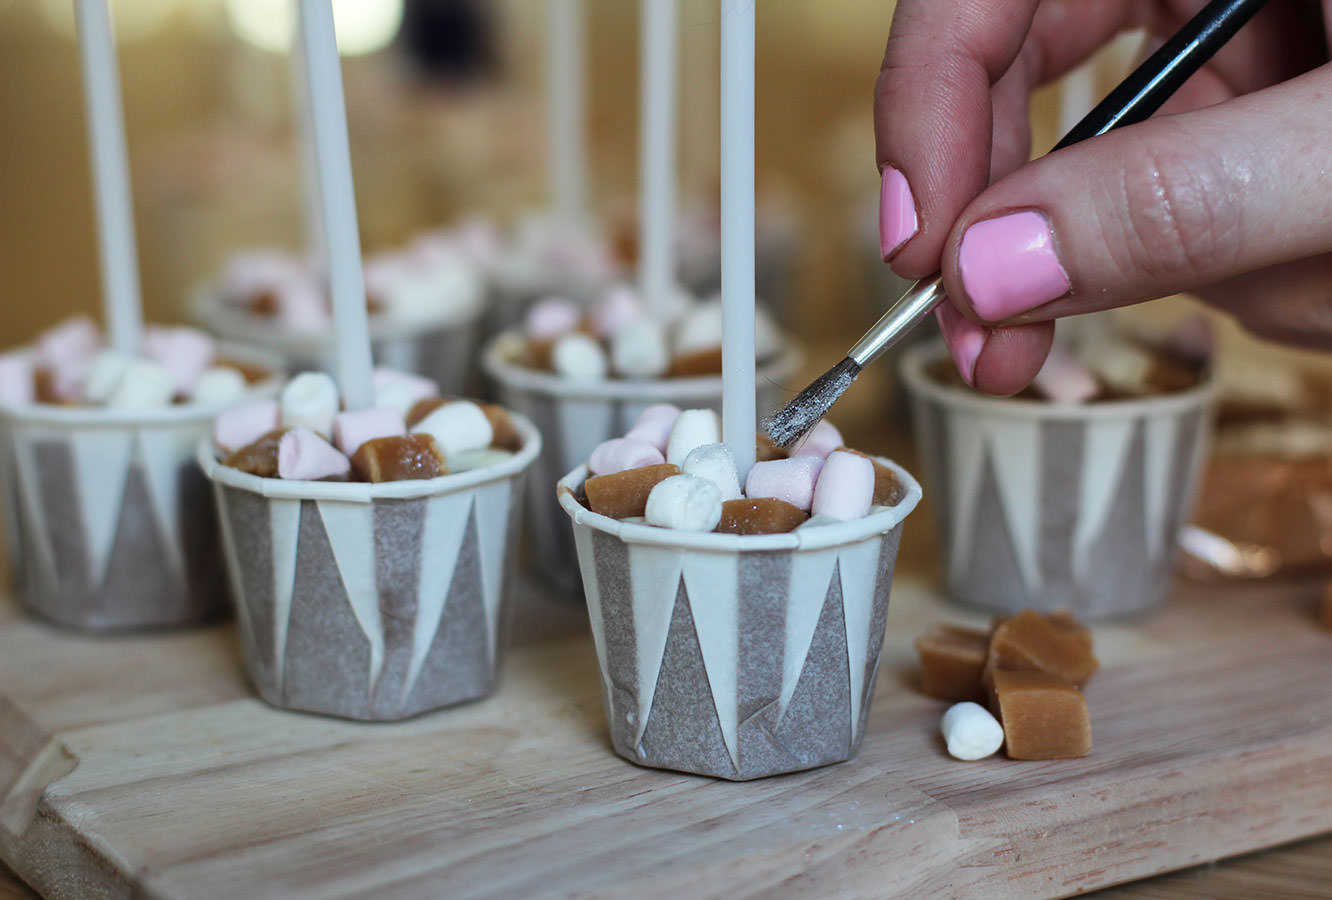
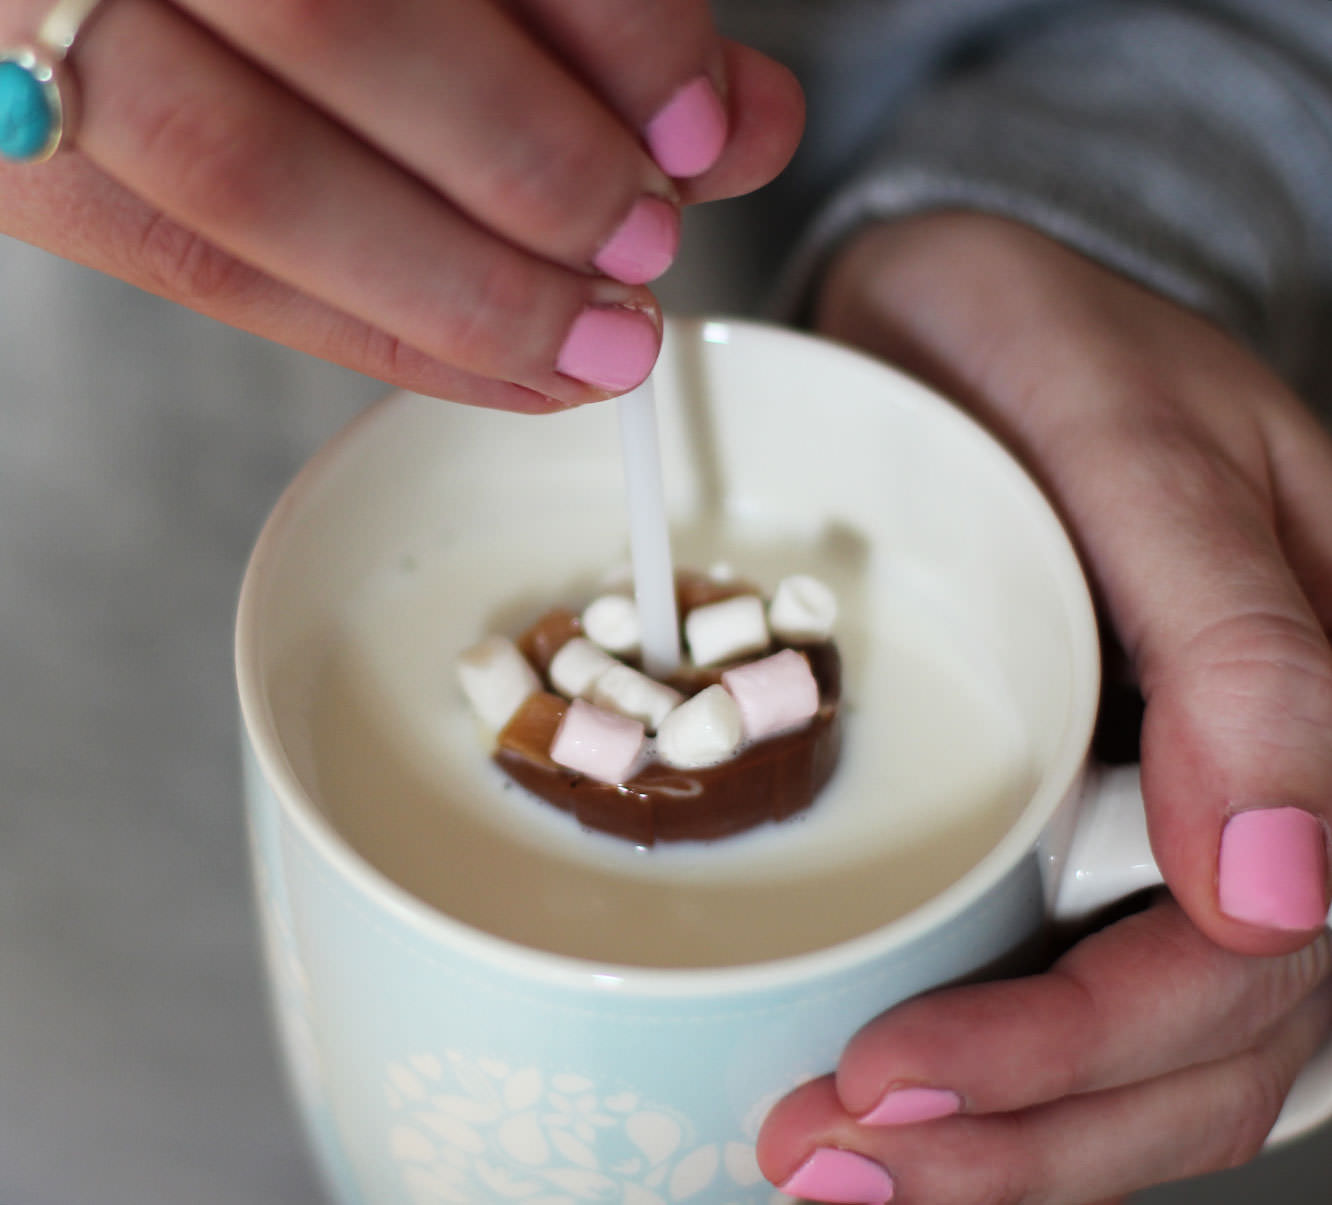
I saw one of these at the shops today, it was £3! These make a great little stocking filler, present topper-upper or gifts for the neighbours. Just swirl into hot milk for a luxury hot chocolate.
You will need
400g/ 14oz Milk chocolate
50g/ 1.5oz White chocolate
Condiment cups (if the closest McDonalds doesn’t have these you can buy them online, or use mini-muffin cases)
Mini mini marshmallows (these tiny fellows are from Waitrose)
Fudge pieces
Cake pop sticks
Edible glitter (optional)
(Makes 10-12. You need roughly 35g chocolate per cup so adjust the above to suit the number of hot chocolates you want to make).
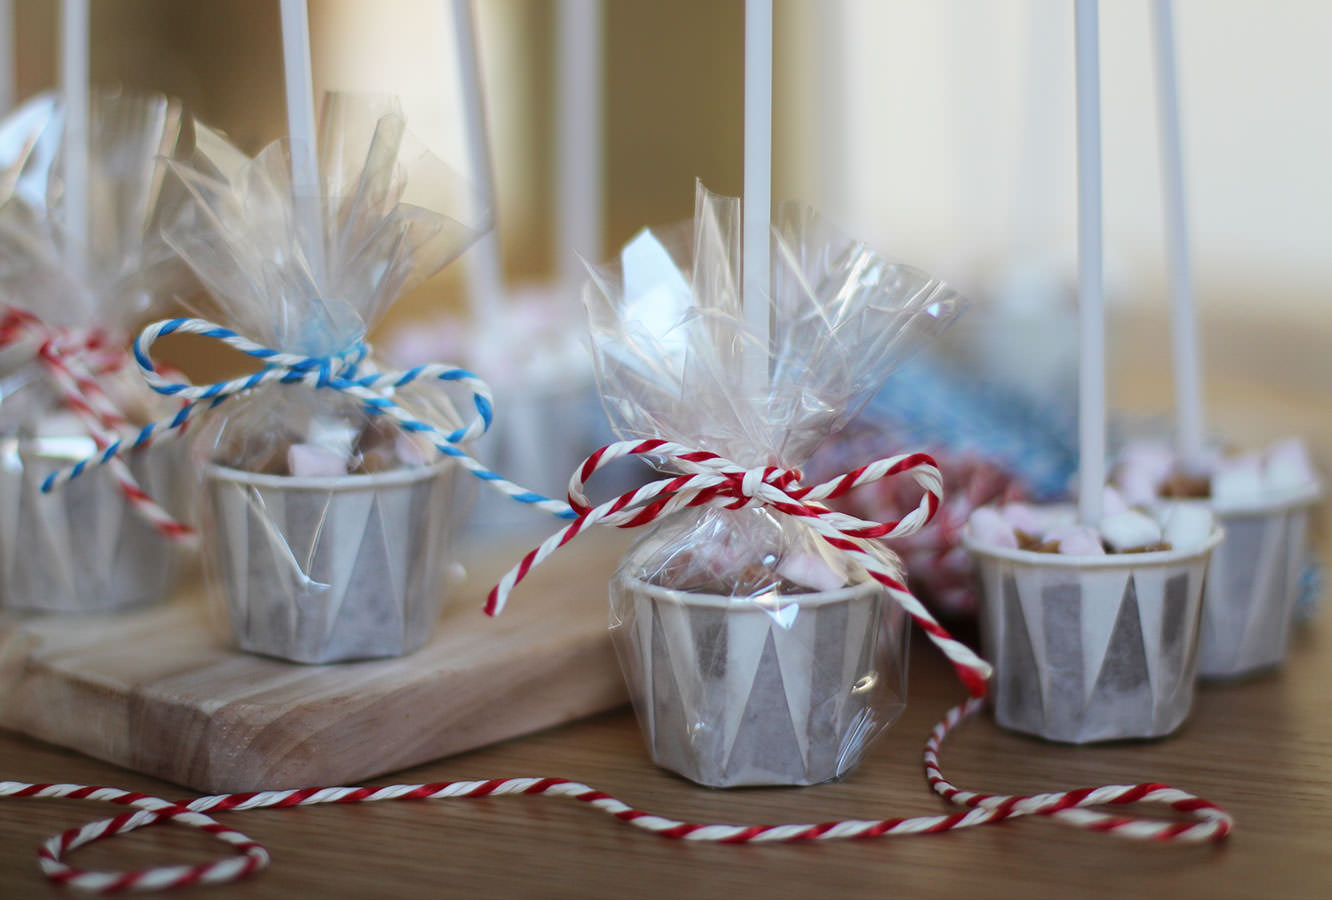
For wrapping
Cellophane roll (available online or from craft shops)
Chrismassy ribbon or string
Step one
Chop the fudge into little chunks so that they’re roughly in proportion with the marshmallows.
Step two
Melt the chocolate slowly in the microwave and put into piping bags. You can temper it if you want, but given that you won’t see much of it, it might not be worthwhile. I go into a bit more detail as to how to temper chocolate here.
Step three
Fill cup to near the brim with milk chocolate. Add a little white and swirl in with a cocktail stick.
Place stick in and surround with fudge and marshmallows.
Leave to set.
Step four
Dust on a little glitter.
Step five
Wrap up. Cut a square of cellophane wrap and place cup in the centre, bring corners up to the middle and secure. I used a loom band to do this, you could use a small elastic band or go straight in with the ribbon/string.
Trim off the corners and ‘foof’.
Go on. There must be one spare you can treat yourself to?
This week two celebrations collided when my lovely teacher at college had a special birthday and we crept ever closer to the 25th December. Thankfully, teach didn’t mind the seasonally confused gift – Happy Birthday Lana!
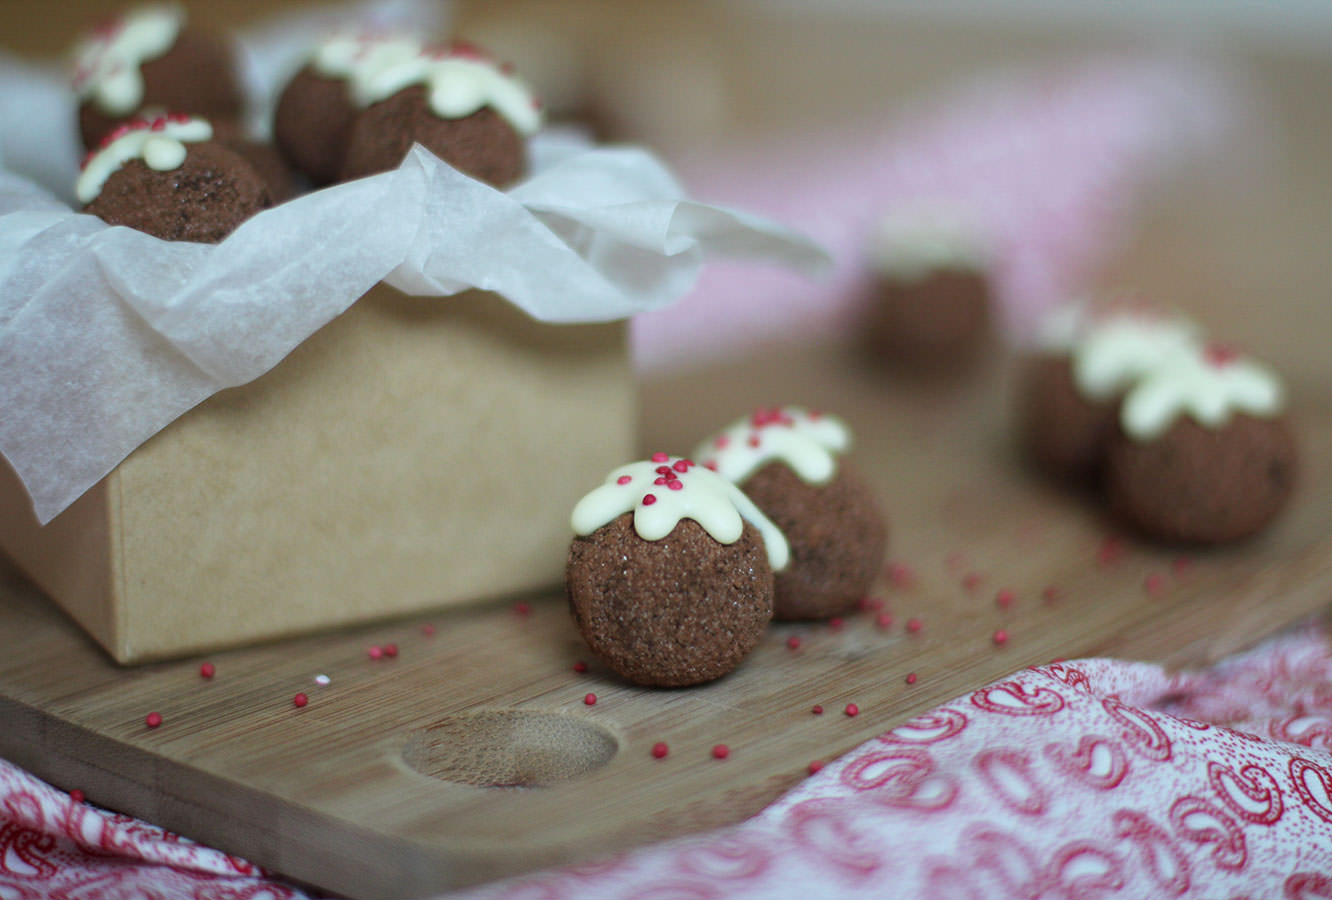
This week it’s Christmas pudding truffles, surprisingly easy to make, and with a large yield they are perfect for last minute gifts on a budget.
You will need
300g/10.5 oz Dark chocolate
100g/3.5 oz White chocolate
300ml/10.5 fl oz Double cream
30g/1 oz Unsalted butter
Red sprinkles
Cocoa and caster sugar for dusting
(Makes 60-70)
Step one
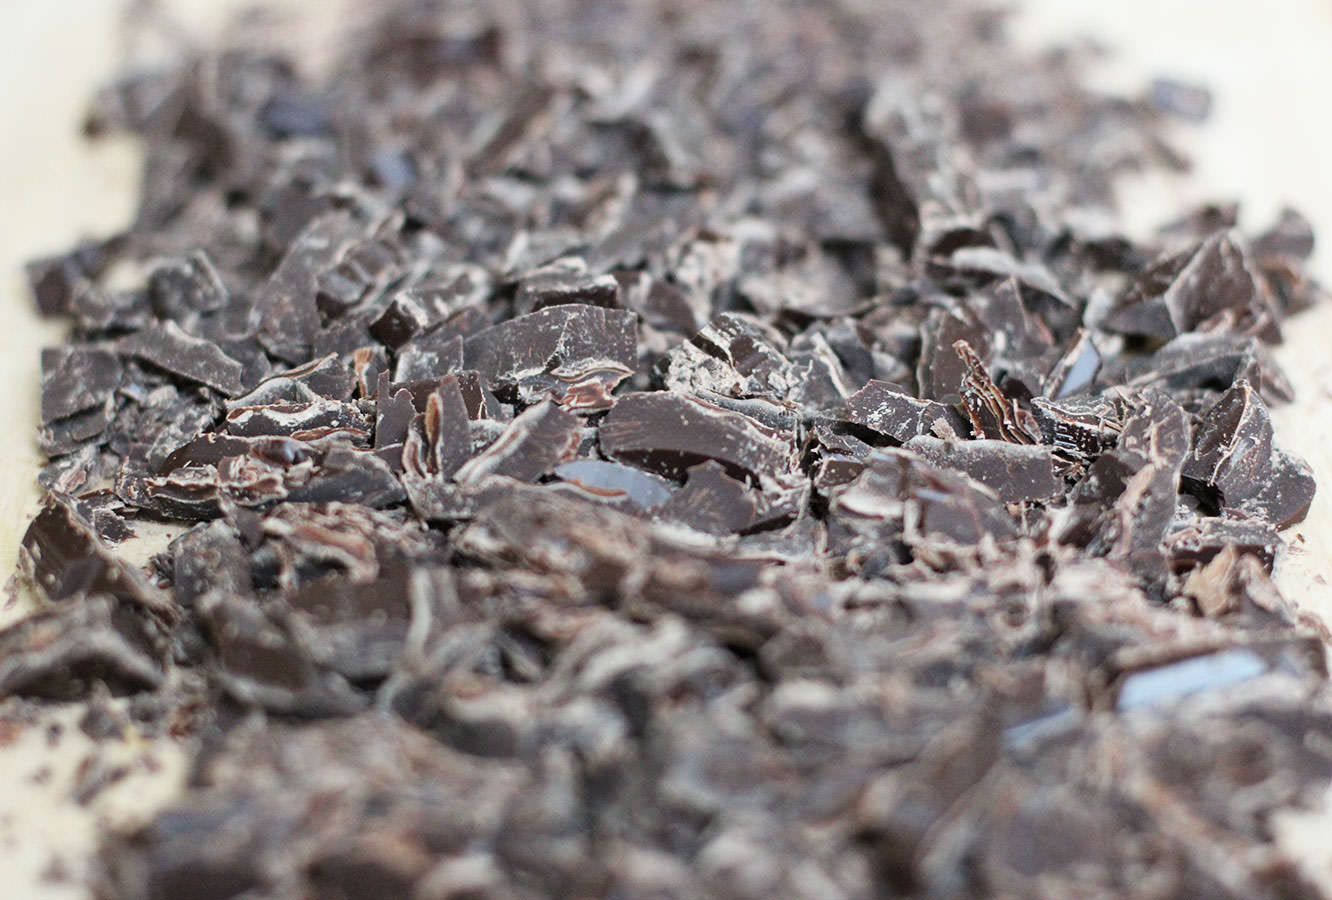
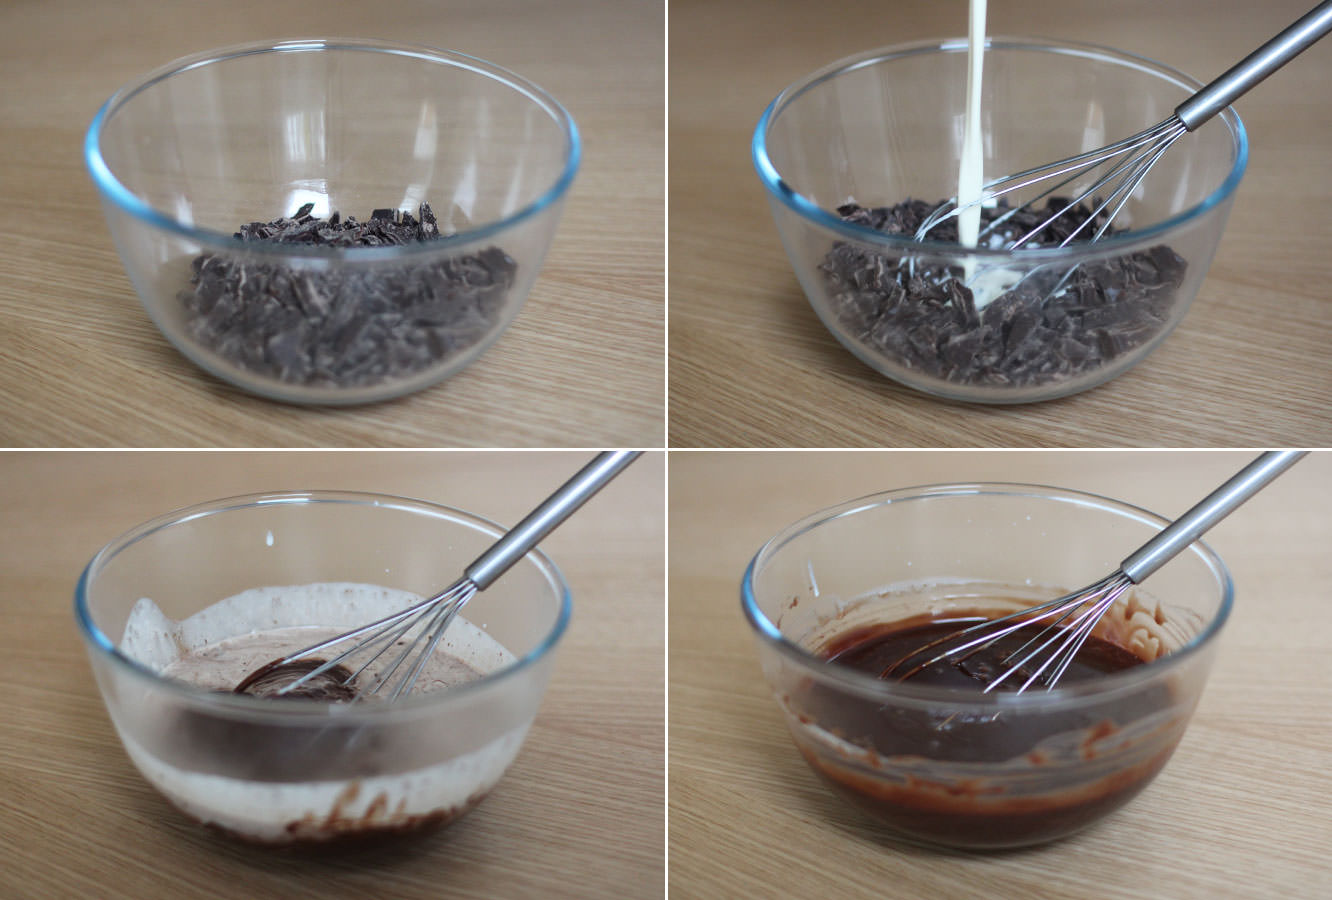
Chop the dark chocolate finely using a bread knife. Resist the urge to eat it all.
Step two
Heat the cream and butter gently in a saucepan. Wait until it starts to bubble and steam dances across the surface. There is no need to let it boil, as Mary Berry always says – chocolate melts in a child’s pocket.
Step three
Take the cream off the heat and whisk into the chocolate until fully melted. Place in the fridge to speed up the setting process.
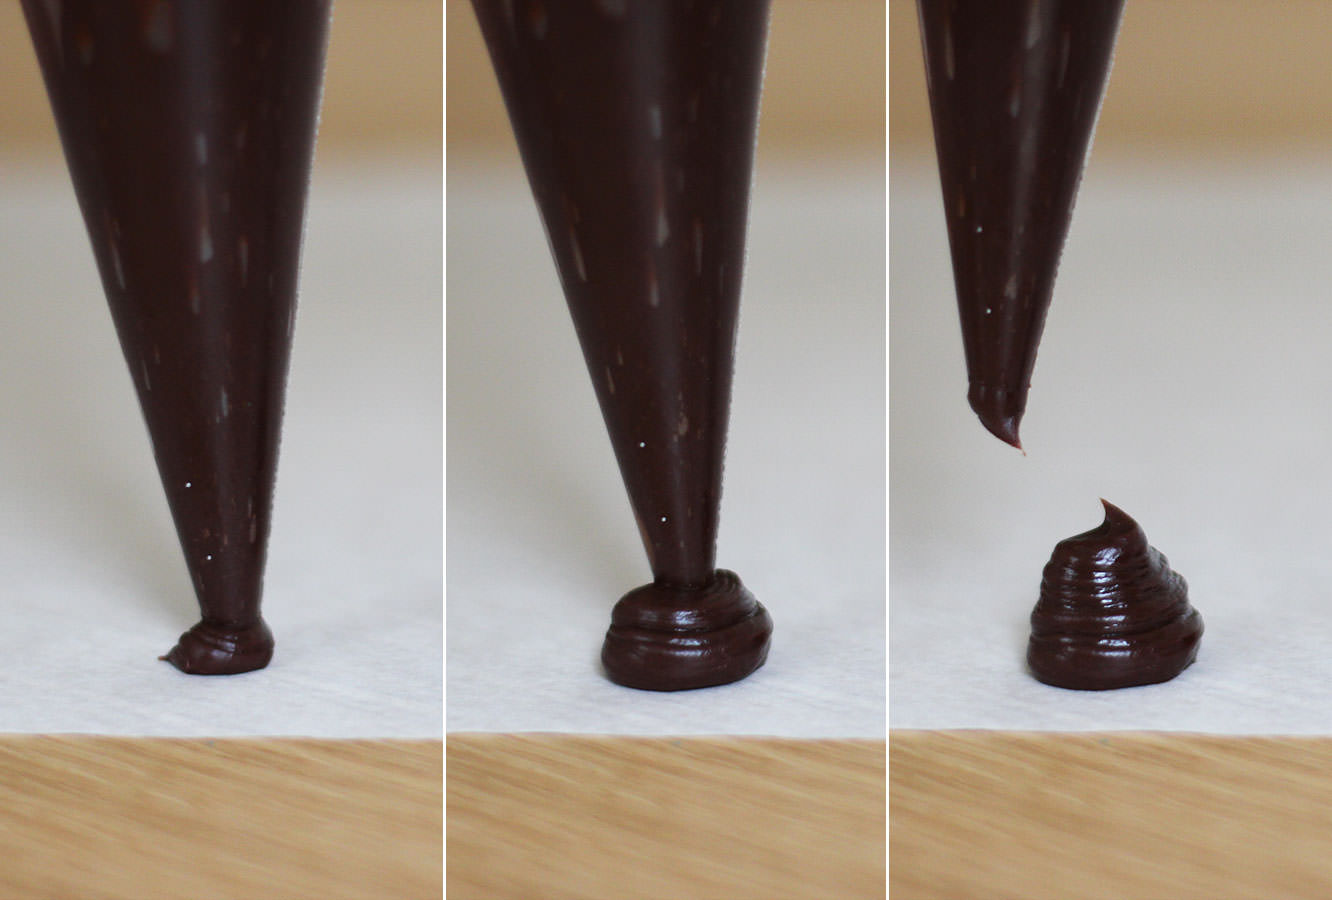
Step four
Check regularly on the truffle mix, don’t let it harden fully. Once a spoonful holds its shape when dropped onto the rest of the mixture it’s pipe-able.
Place into a piping bag, and, holding it perpendicular to the greaseproof paper (which you have put down as instructed, um, nowhere in this post) squeeze downwards. Don’t worry if these are a bit misshapen, it’s just to make sure they’re roughly the same size.
Step five
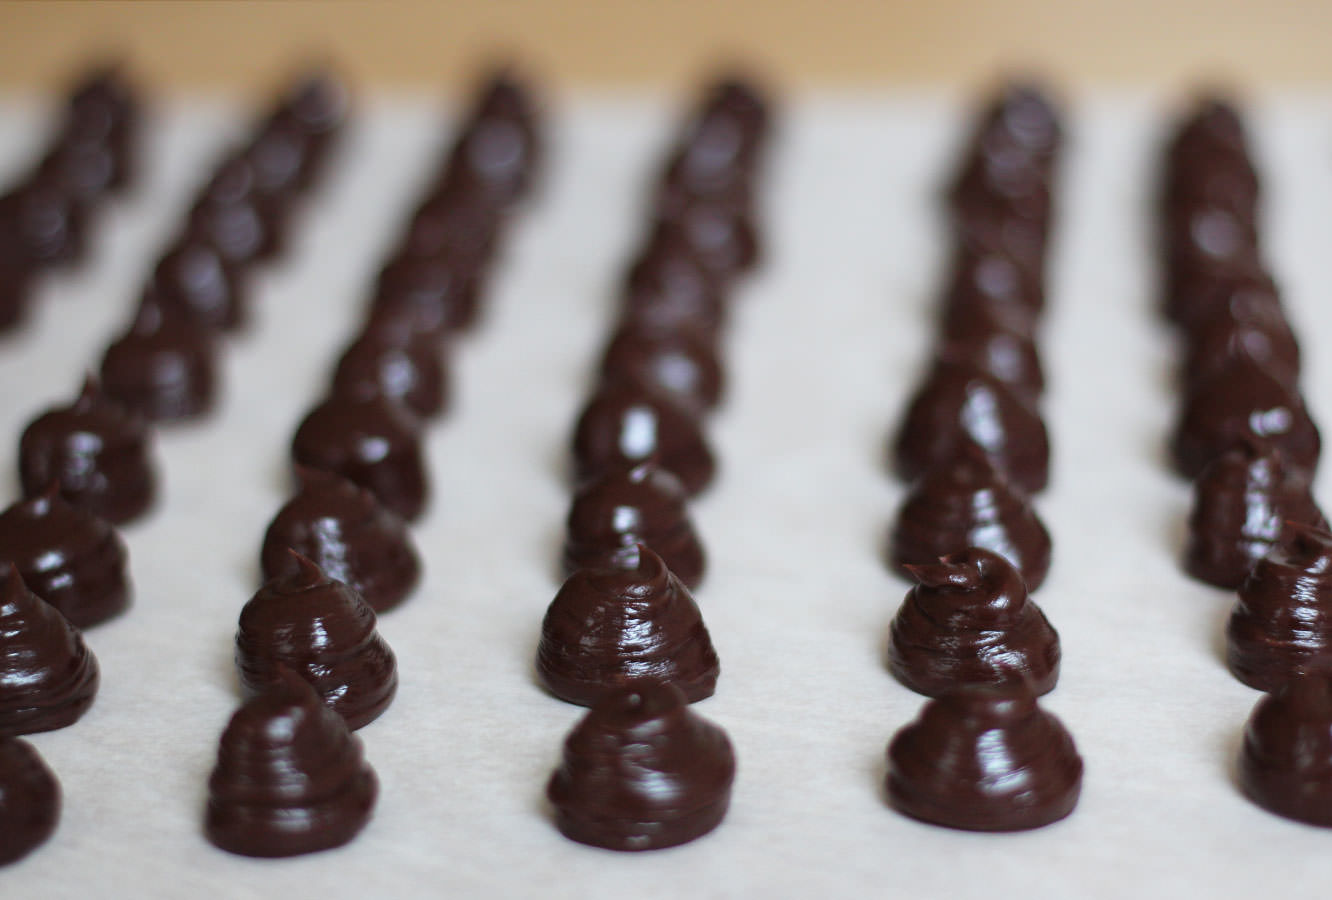
Pipe pipe pipe.
Leave to set a bit longer, preferably with a window open to cool the truffle down quickly. The truffles won’t thank your winter central heating.
Step six
When the truffles are set roll them into balls. You will need fairly cold hands for this, so rinse them in cold water.
Step seven
Dust the truffles in cocoa and caster sugar. I mixed these at random so I’m not sure on quantities, but I used about two thirds caster sugar to a third cocoa powder.
I dusted as I rolled, as hands warm the outside of the truffles so the caster sugar will stick.
Step eight
Melt the white chocolate slowly in the microwave, pipe little splodges and drop some red sprinkles on top. I got these from Sainsbury’s, so not too hard to track down.
Leave the white chocolate to set and pack away your truffles into little bags or boxes and spread the Christmas (or Birthday) cheer!
A couple of months ago my lovely housemate got engaged. A couple of weeks ago we celebrated that fact.
I decided I wanted to make some party food. Given that we’re fast approaching Christmas (I mean, it’s the 17th November already, what?) this little series of posts should furnish your party season with delightful nibbles and may double as last minute Christmas present/hostess gifts.
This one falls into the second category, so get online and buy yourself some cellophane bags and a roll of ribbon, your colleagues and your milk man will never have been happier. Well, I hope their lives are better than that, but either way, there won’t be any disappointment, and that’s all anyone’s looking for at Christmas.
Things you need
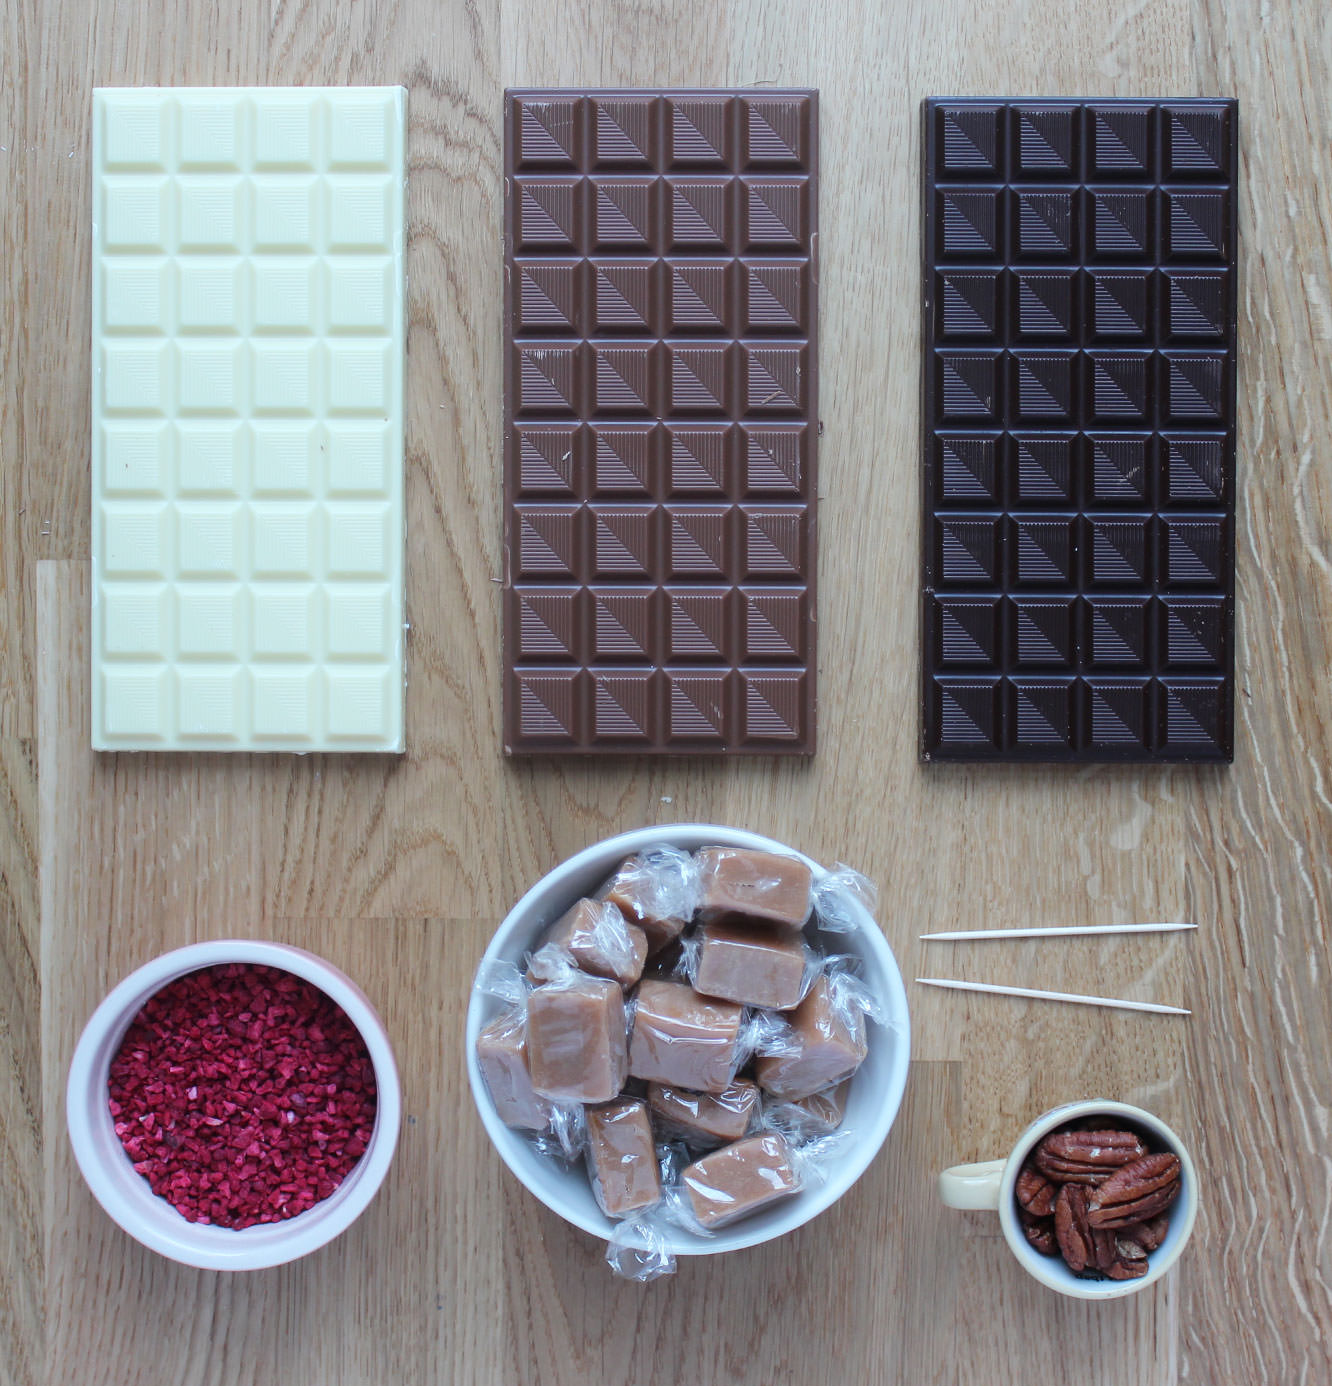
200g/7 oz White chocolate
200g/7 oz Milk chocolate
200g/7 oz Dark chocolate
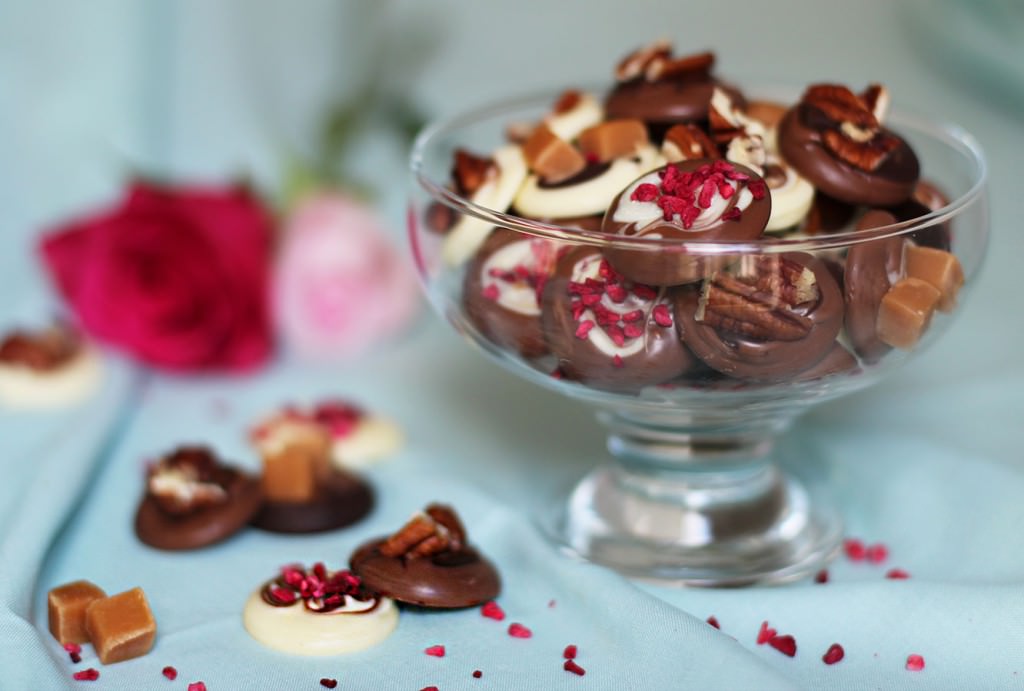
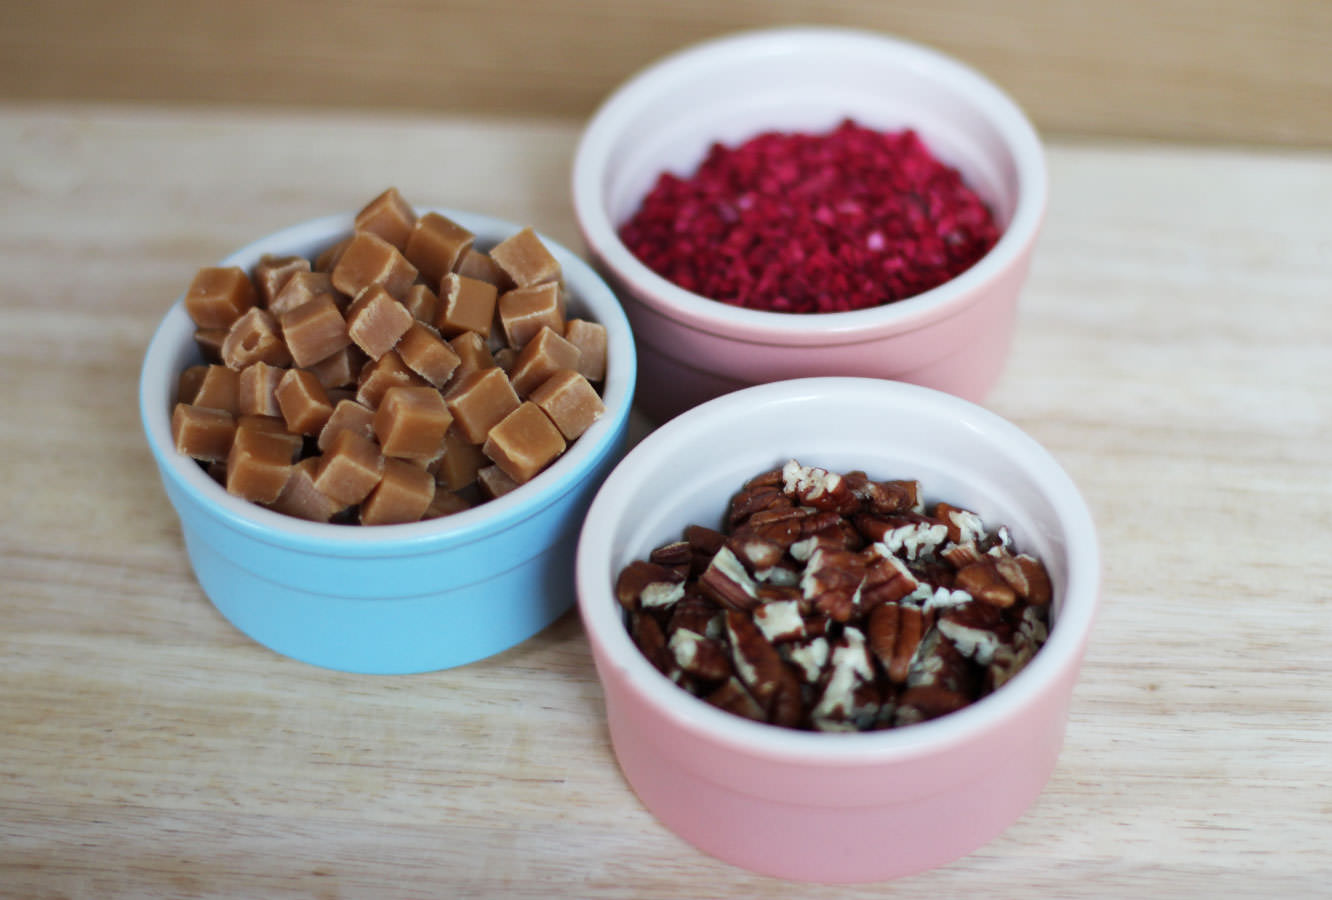
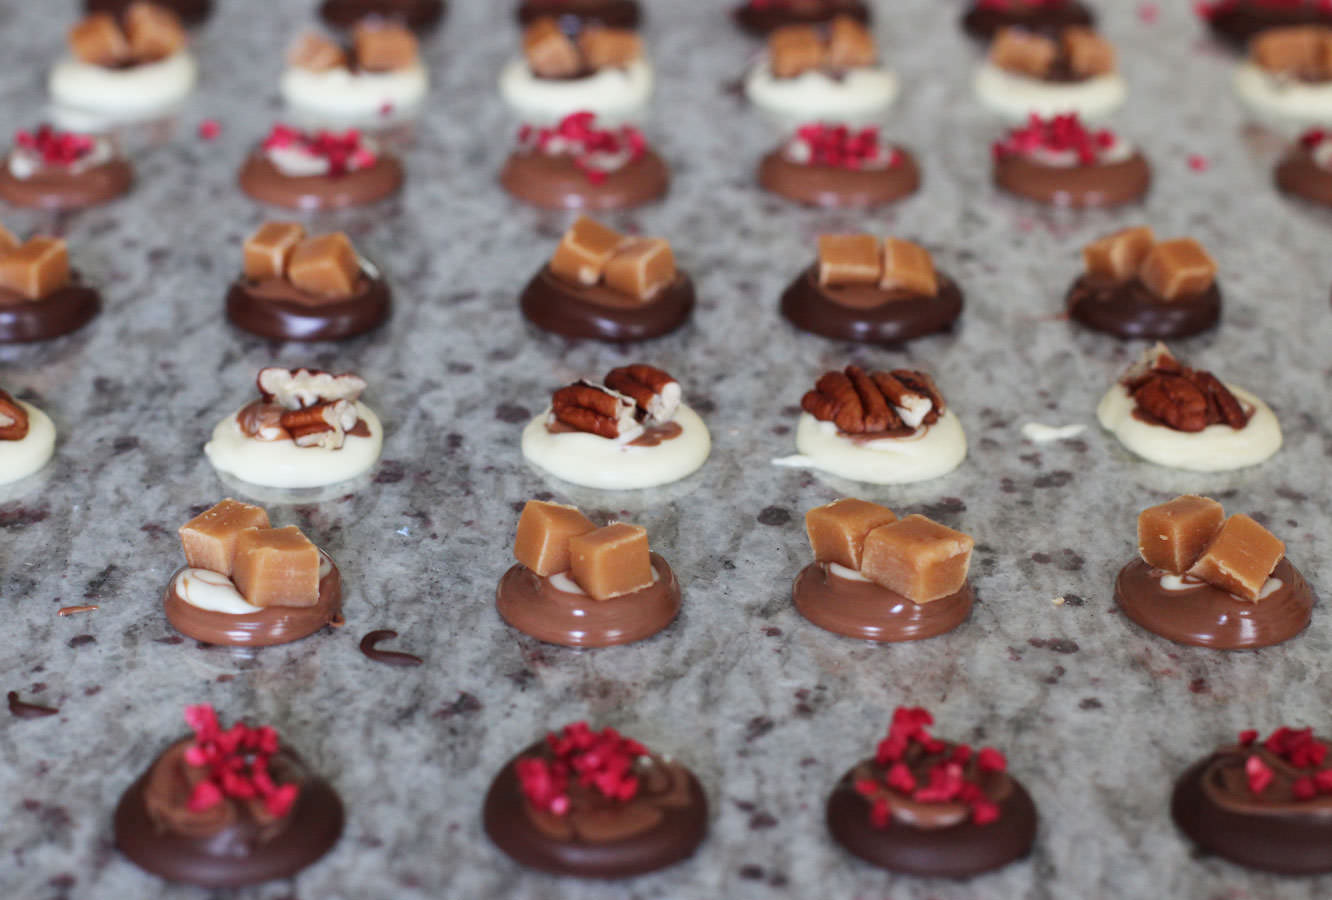
Decorations (I used freeze dried raspberries, fudge pieces and pecans)
Cocktail sticks
Piping bags or strong sandwich bags.
Cellophane (from a florist or a craft shop, or you can use greaseproof but the bottoms won’t be shiny)
Food thermometer (ideally)
Step 0.5
Prepare your toppings if they need preparing. I wanted my drops to be quite small so I chopped up my fudge and pecans.
Step one
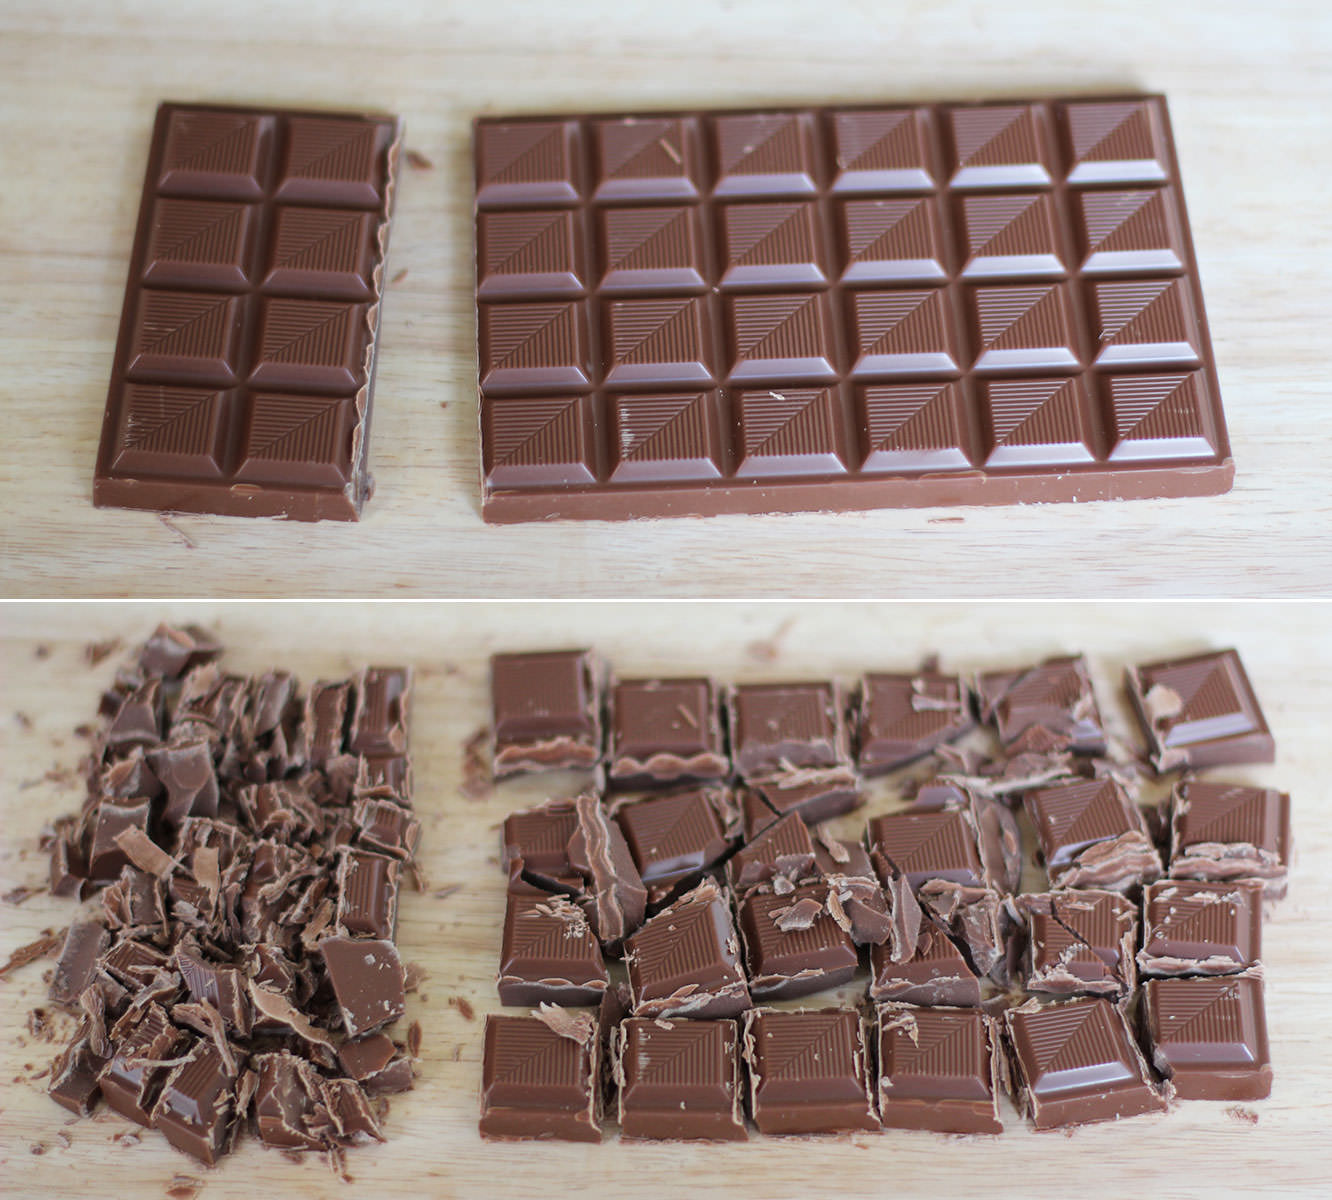
Now. This is the first time I have actually tempered chocolate. It was easier than I expected and well worth it for the shiny finish. I encourage it. I also encourage the purchase of a thermospatula. I’m not being paid to say that, it’s changed my life (in a small but significant way).
If you’re joining me on the tempering train you need to split the chocolate into a third/two thirds split. Ignore the photo above and just chop it all into big chunks. I learned as I went with this one.
Step two
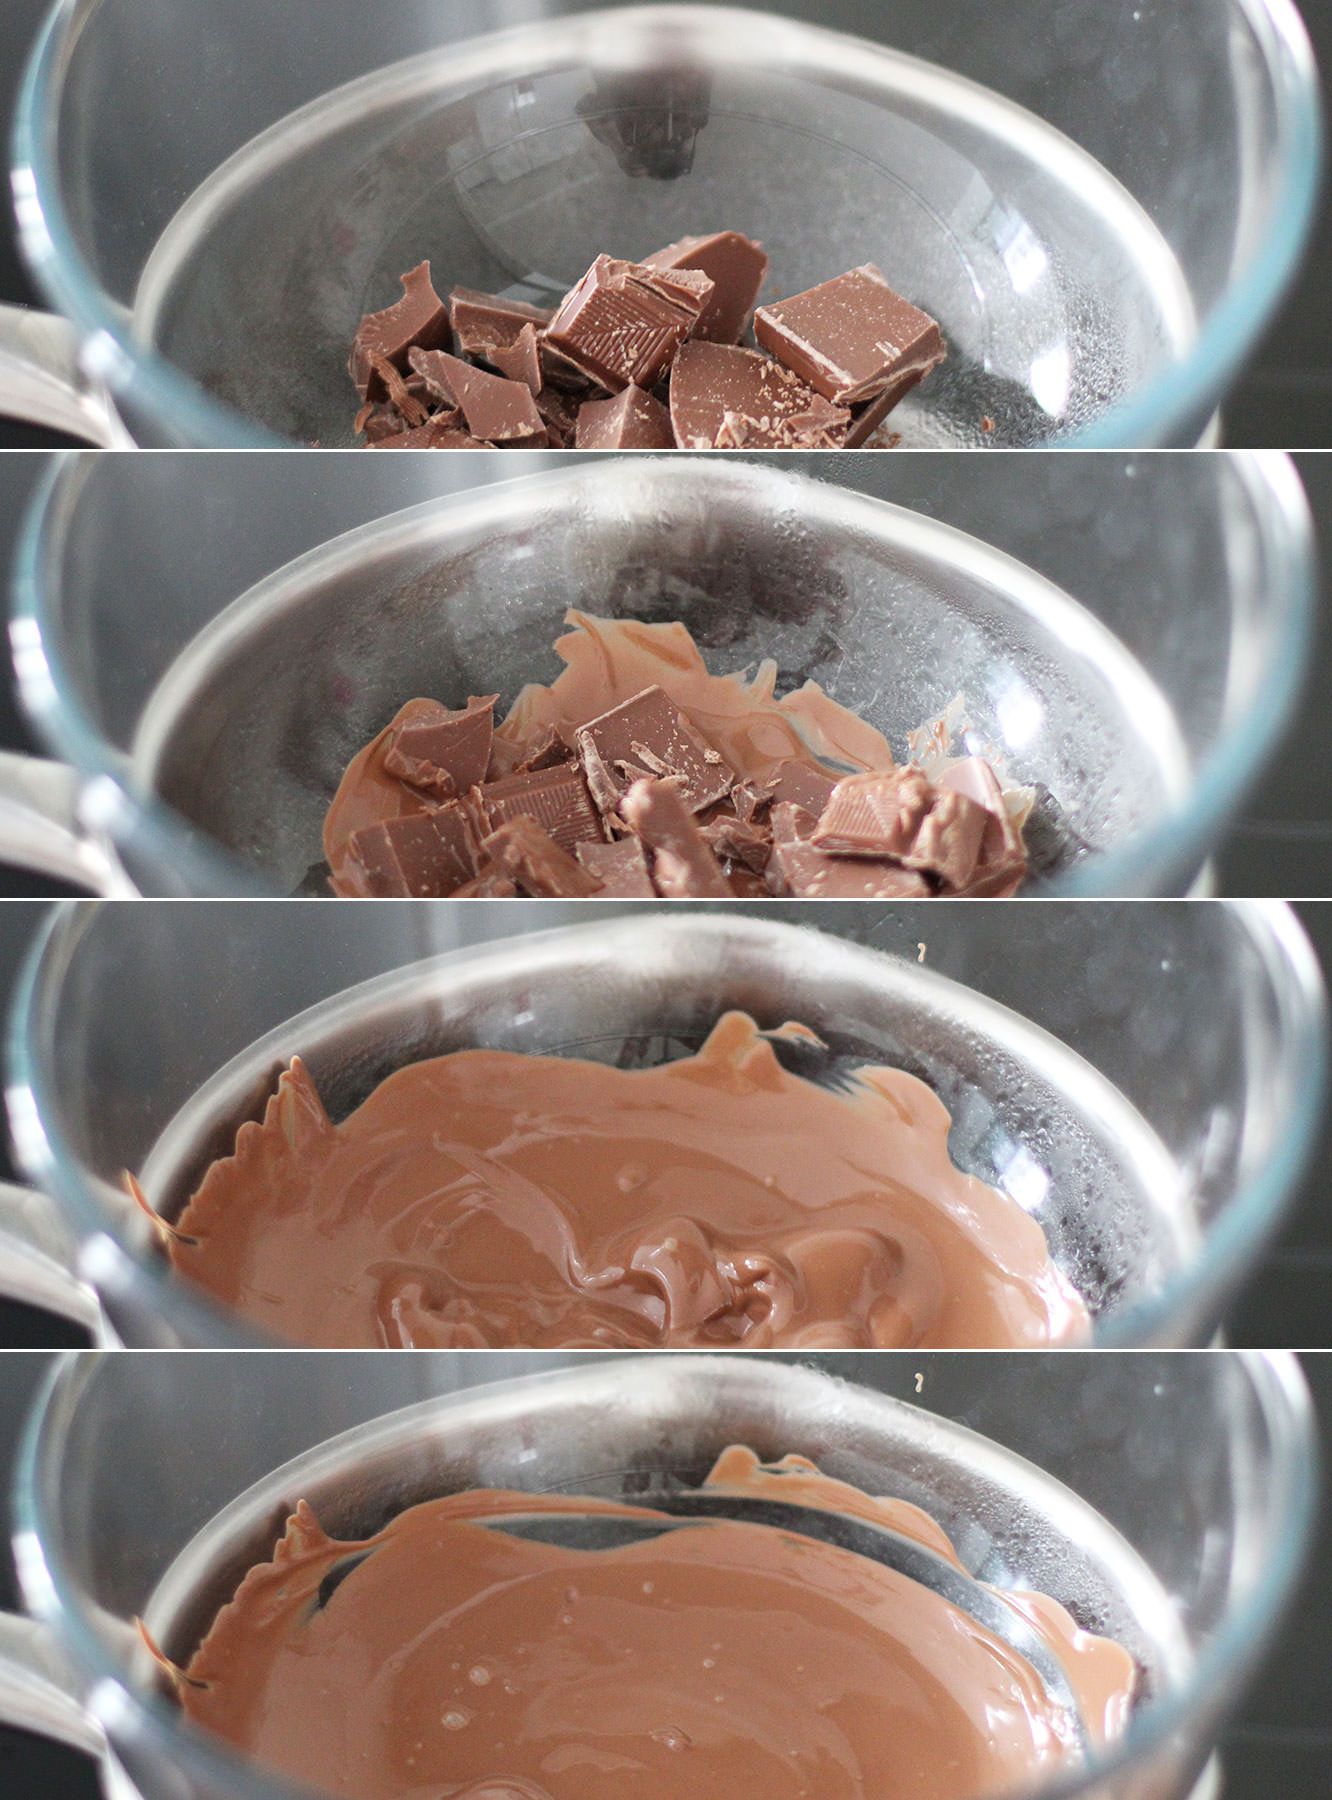
Place a heatproof bowl over a pan of simmering water; make sure the water isn’t touching the pan.
Add two thirds of the chocolate and allow to melt slowly. Stir occasionally. Mainly so you can feel like you’re doing something productive.
Bring to 45 degrees C and remove from the heat.
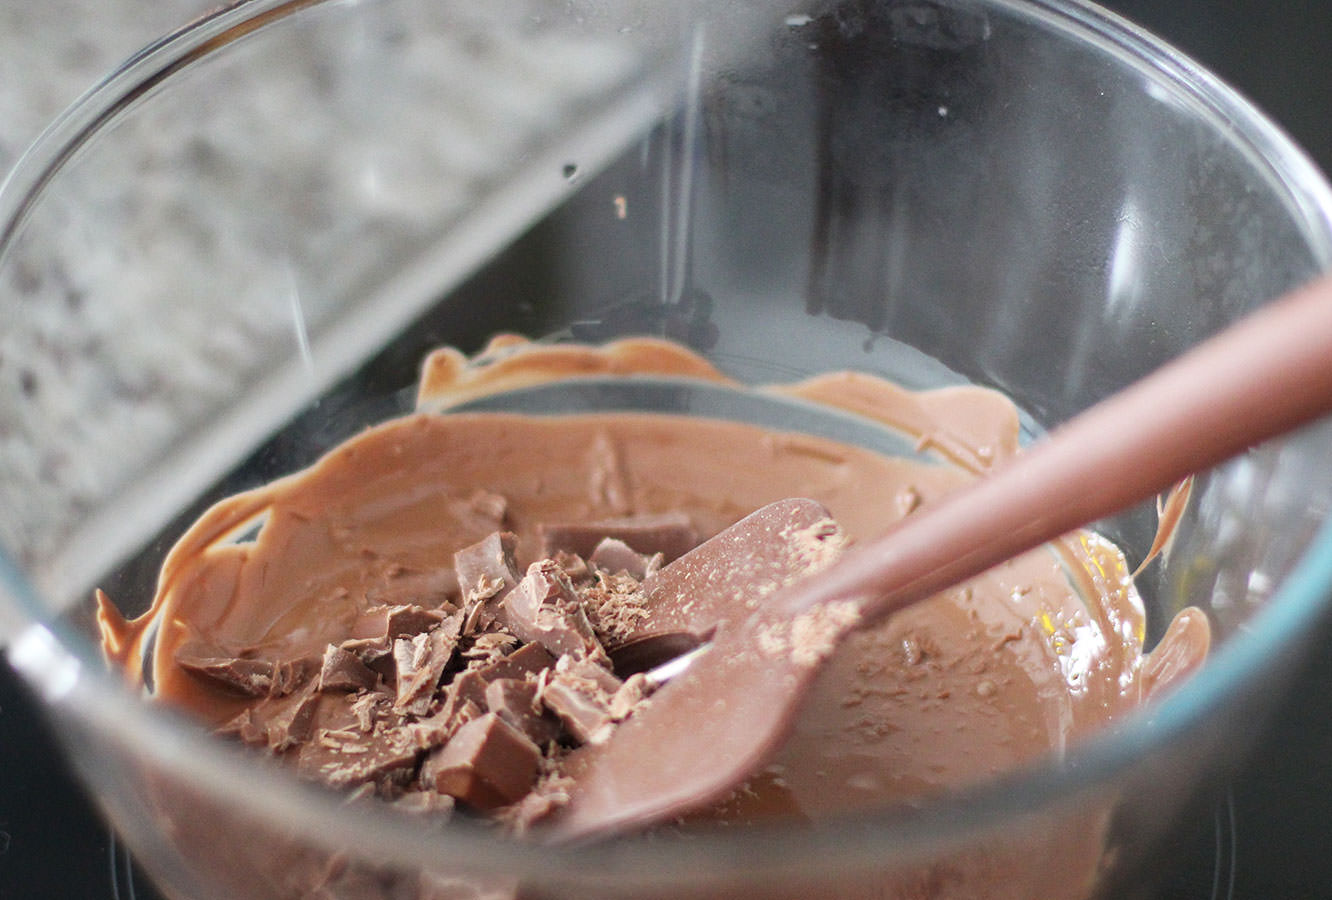
Step three
Add the rest of the chocolate and stir until its melted in. Keep stirring until the whole lot has cooled to 28 degrees C.
Step four
Place back on the heat and bring to 32 degree C.
Step five
Take back off the heat and dry the bottom of the bowl with a tea towel. Trust me, you don’t want water in your chocolate.
Step six
Pour into a piping bag.
Don’t trim the end yet. In fact, once you have twisted the opening to close it you should push any chocolate in the tip end back towards the rest, otherwise it will cool and solidify there while you’re tempering the rest.
Step seven
Repeat with the rest of the chocolate.
Step eight
Lay down the cellophane and start piping.
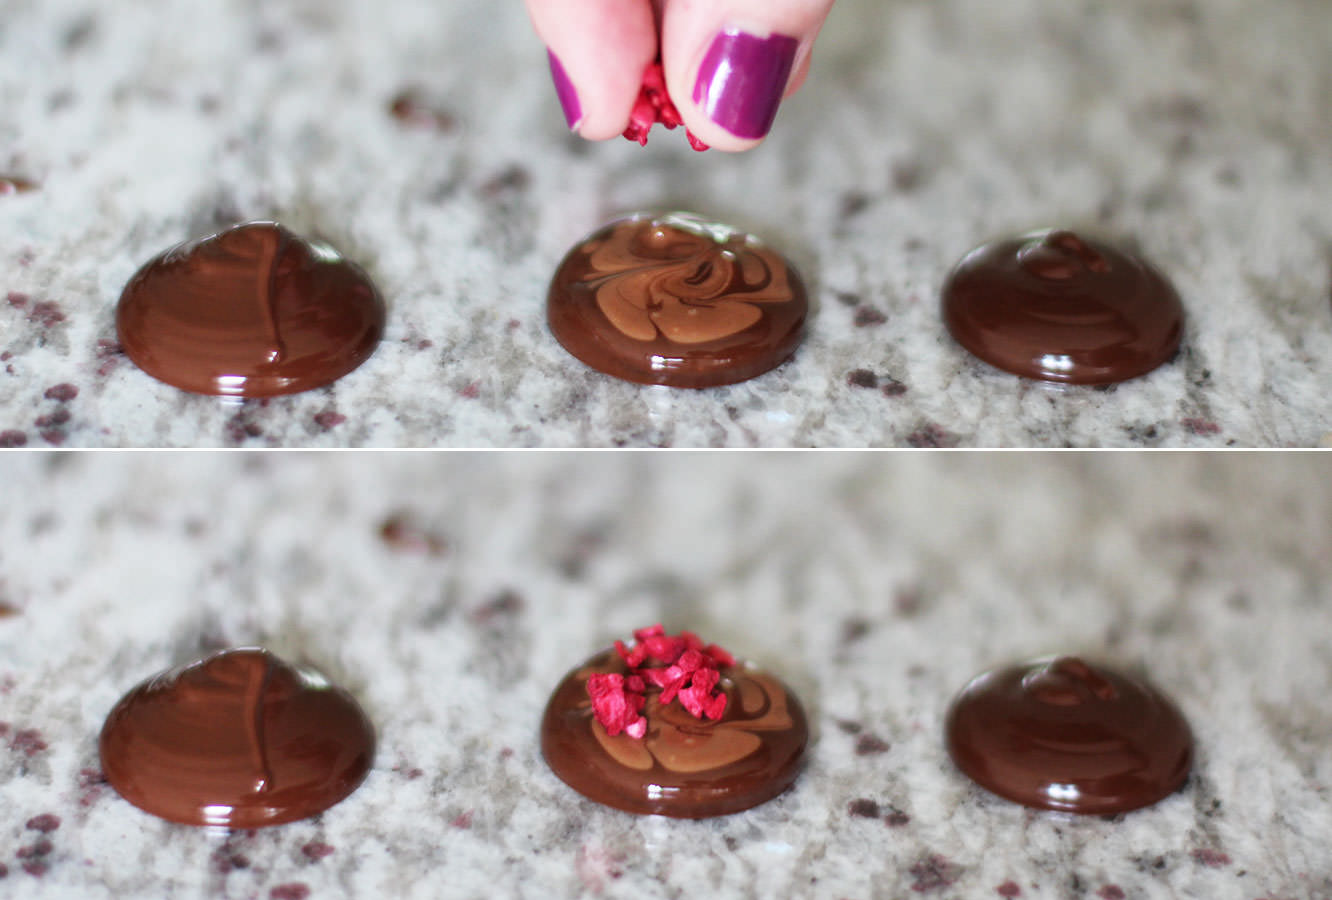
You want to hold the piping bag at a 90 degree angle to the table and squeeze. The chocolate will flood into a lovely little pool.
Add a small blob of another colour on top and swirl about with a cocktail stick to create a marbled effect.
Step nine
Sprinkle your decorations on top.
Some cranberries would go down well for christmas drops, but I was explicitly instructed not to buy any. These freeze dried raspberries looked rather pretty and tasted good too. See children? Compromise isn’t always bad.
Step ten
Keep going until you run out of chocolate/the will to live. But look…so shiny. You did well to temper it, it was worth it after all.
Another little post about our half term day of fun. I hope you will forgive the lack of photos given I was supervising two little humans at the time.
I had promised my little friends that we would take a trip to the cinema during our visit, but it turned out there was nothing worth going to the cinema for.
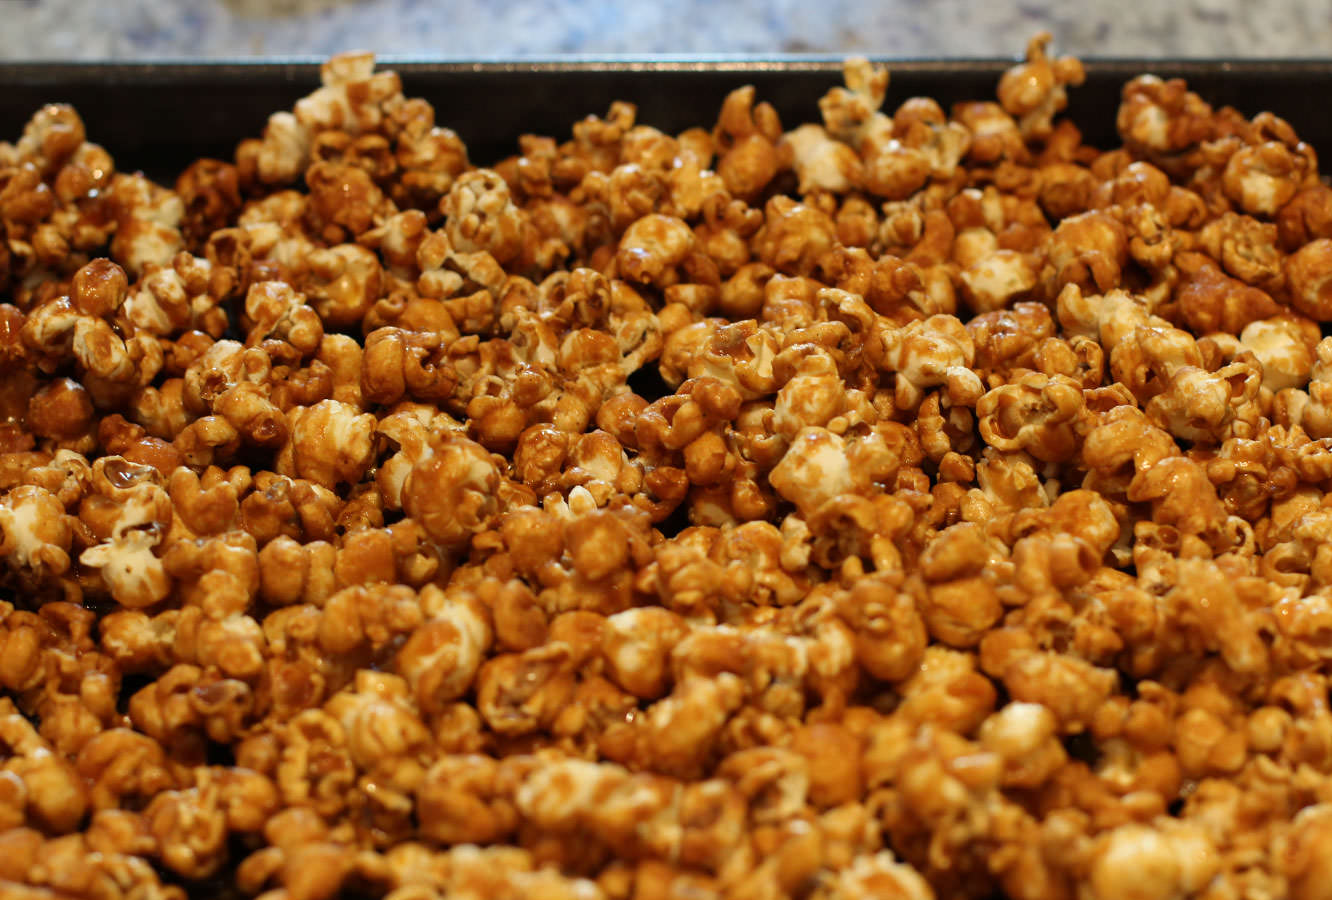
Ever the crafter I decided we would recreate our own home cinema experience. I conjured up a recipe for toffee popcorn and made some popcorn boxes and tickets.
Pop the popcorn. If you’re using kernels and it’s the first time you’ve done it then you need to add some butter or unflavoured oil to a large saucepan and one or two kernels. Once they’ve popped you can add the rest.
When the majority of the corn is popped (the pan will be full), remove the pan from the heat and place the corn in a bowl. Get rid of any unpopped kernels.
Step two
Heat the butter, syrup and sugar in a pan until bubbling. Turn down to a simmer cook for 5 minutes, keep stirring so that it doesn’t catch.
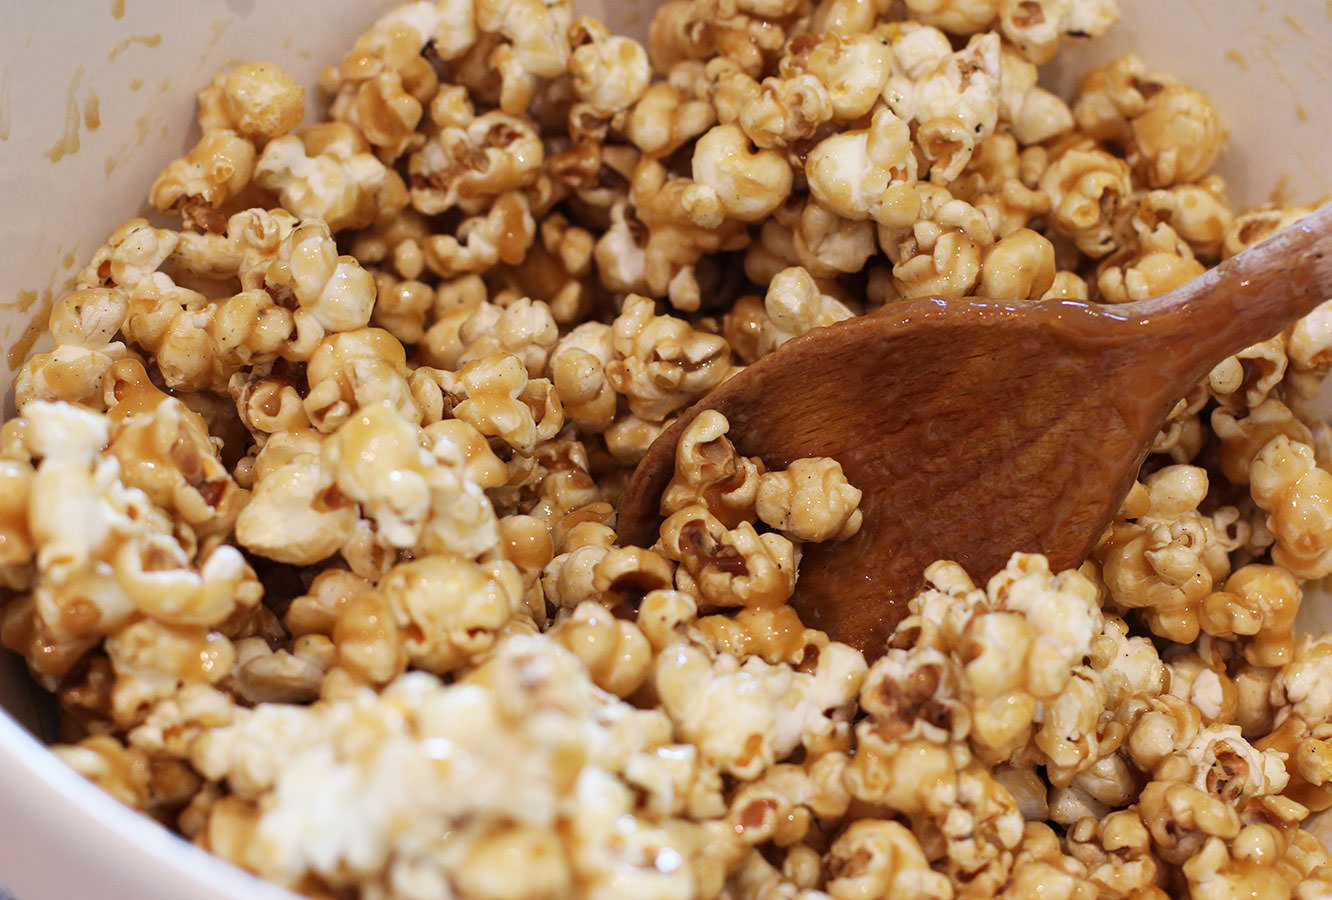
Step three
Stir the toffee into the popcorn.
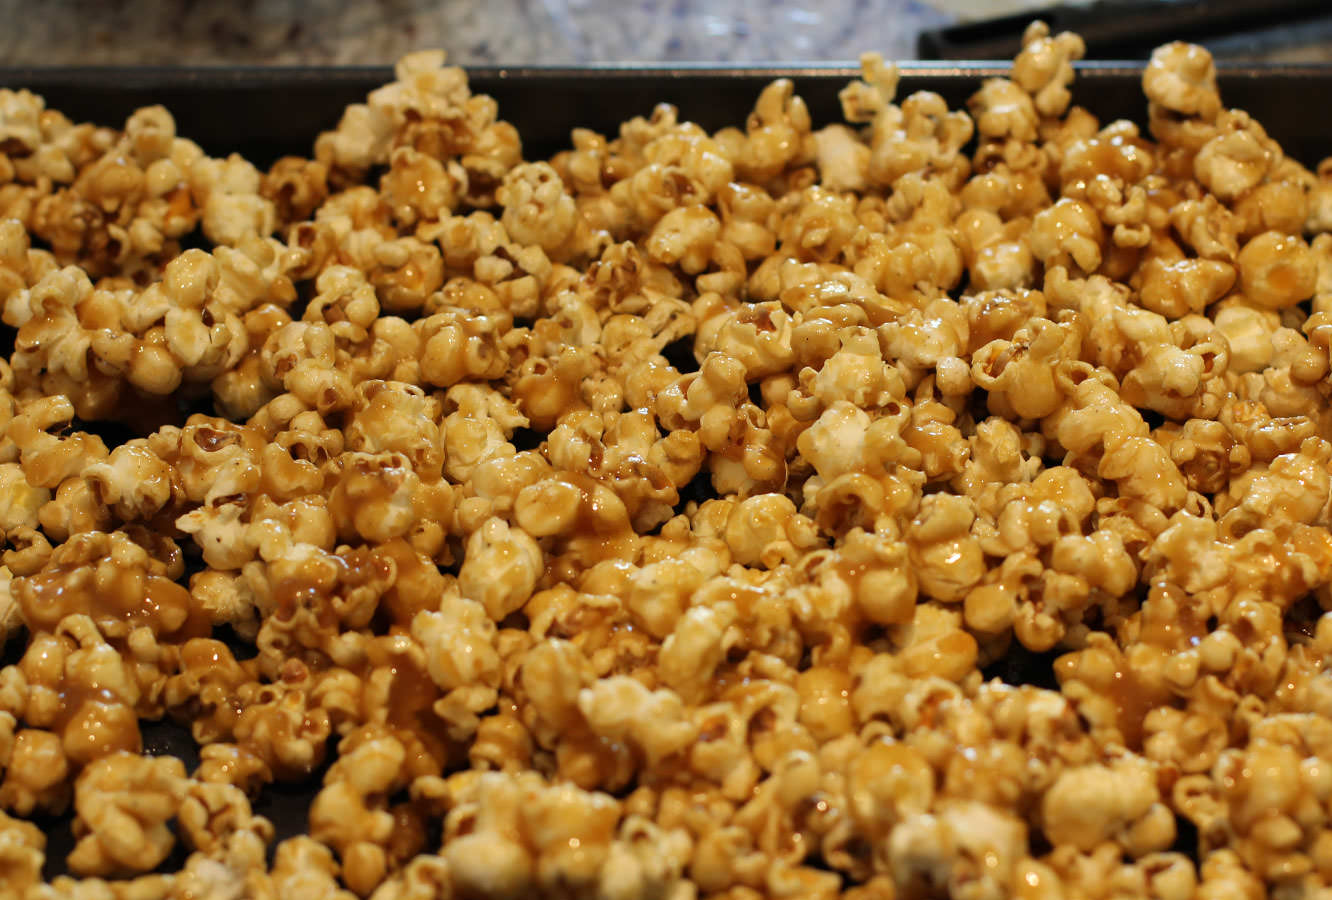
Step four
Spread out on a large baking tray. You only really want one layer of corn to stop too much of it sticking together.
Step five
Bake until golden (about 25 mins) on 180 degrees C/gas mark 4/350 F.
Leave to cool so that it crisps up.
Step six
While the popcorn is cooling, assemble the boxes and cut out the tickets. The kiddies can help with this, or you could do it in advance.
Step seven
Put your feet up and enjoy the film. Or do what I did and placate the children with sweets and clean up feverishly in the background.
Given that I’m doing a little afternoon tea series I thought I would share a recipe that I adapted for a lovely lady’s bridal shower recently. It’s a little less traditional than your average, but nice and light, definitely a worthwhile addition to any afternoon tea table. In honour of said bride-to-be I made these marshmallows maple flavoured as she hails from a distant land (Canada).
Some speculation as to whether or not marshmallows are easy enough to make trickled around the bridal shower. My answer in case you are wondering, is that they aren’t the most straightforward, but definitely do-able, and very satisfying. These guys make your house smell incredible too, so if you’re tempted, give it a go!
Disclaimer: don’t make these for vegetarians or you will be met with narrowed eyes. On the upside, they are great for the gluten free. Unless they are vegetarian.
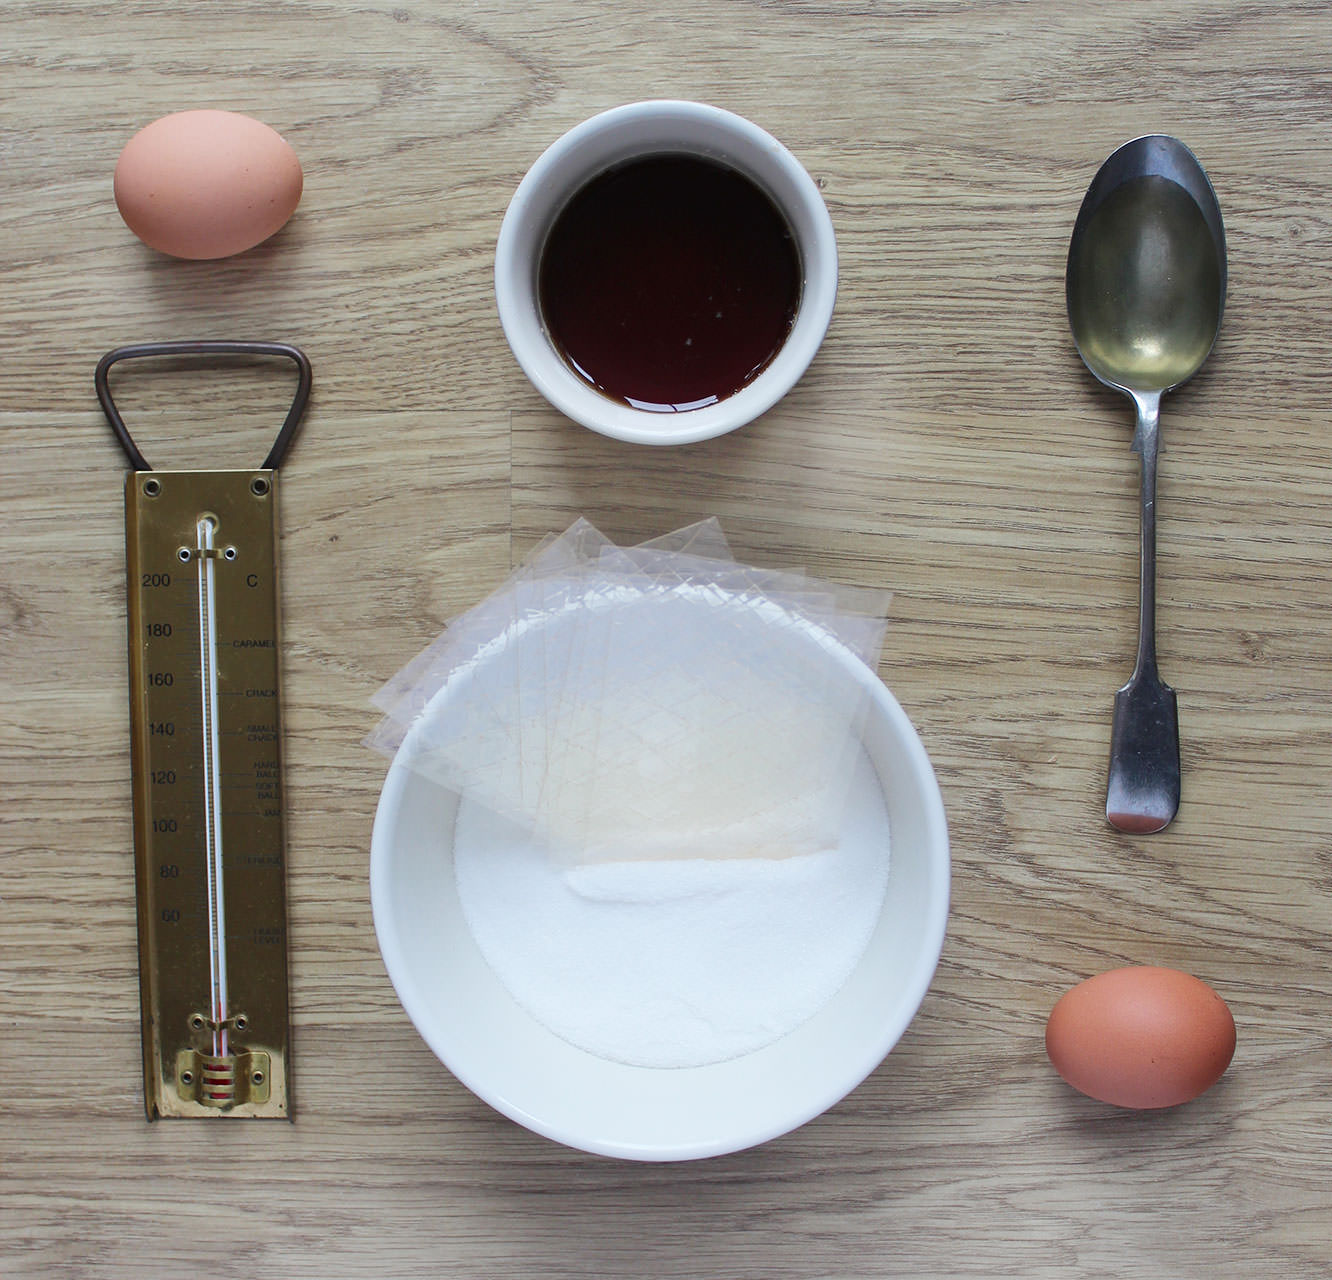
You will need
9 Gelatine sheets
300g/10.5 oz Granulated sugar
100g/3.5 oz Maple syrup
100g/3.5 oz Milk chocolate
2 Egg whites
1 tbsp Liquid glucose (you can find this in a squeeze toothpaste type tube in the baking section)
1 tsp Vanilla extract
Icing sugar
A sugar thermometer
Step one
Lightly oil a deep baking tray/brownie tin. Dust with icing sugar and set aside.
Step two
Put the gelatine sheets in 150ml/3.5 fl oz cold water and leave to soak. I snapped mine in half, but don’t break them up any more than that.
Step three
Put the sugar, glucose and maple syrup in a saucepan (the heavier the better). Add 150ml/3.5 fl oz water and put on a low heat.
Patience is key here as you will feel like eternity is passing you by while you’re waiting for it to get to the right temperature. It’s worth doing this stage slowly so you don’t burn the sugar etc etc. Make sure you have some snacks to hand.
It will smell so good you will want to put your face in it. Don’t.
Step four
When the thermometer reaches about 115C/230F start beating the egg whites. Do this in a glass/metal bowl, as plastic ones tend to be a bit oily, no matter how hard you scrub them.
Step five
When the thermometer reaches 127C/260F turn the heat off and add the soaked gelatine. Don’t add the excess water though, just fish it out and give it a little squeeze. When you do this you will forgive me for not having a photo of it; the mixture fizzes and bubbles in quite an intimidating fashion.
Step six
Get the whisk going in the eggs again, and slowly pour the hot sugar mixture into them as you go. Move the beaters continually so that you don’t end up with a lump of hard sugar at the bottom of the bowl.
Step seven
Add vanilla extract and keep whisking.
Step eight
Whisk some more.
Step nine
Have someone come and support your arm if you need to, but keep on whisking my friend.
Step ten
When the mixture (about 10 minutes later) becomes really thick and gloopy it’s time to stop. Hallelujah. A good measure for this is when bottom of the bowl (on the outside) has cooled down.
Step eleven
Pour the marshmallow into the brownie tin you prepared earlier.
Step twelve
Dust the top with icing sugar and leave to set for a few hours. This is your opportunity to go and see the doctor about the muscle death in your right arm. (Kidding).
Step thirteen
Turn the marshmallow out onto a clean surface with a satisfying flump.
Use a bread knife to cut it into long strips and then cubes. The trick is to make your strips as wide as your mallows are deep to get square(ish) shapes. Dust all the sides in icing sugar as you go.
Generally I find I don’t need any extra icing sugar for this, as a lot comes off the top when you turn it out.
Step fourteen
Place the cubes on a sheet of greaseproof paper. Melt the milk chocolate (slowly in a microwave) and using a piping bag drizzle them lightly. Leave to dry and you’re done!
There we have it. Maple marshmallows. Nowhere near as difficult to make as I made them sound, I promise.


 You will need
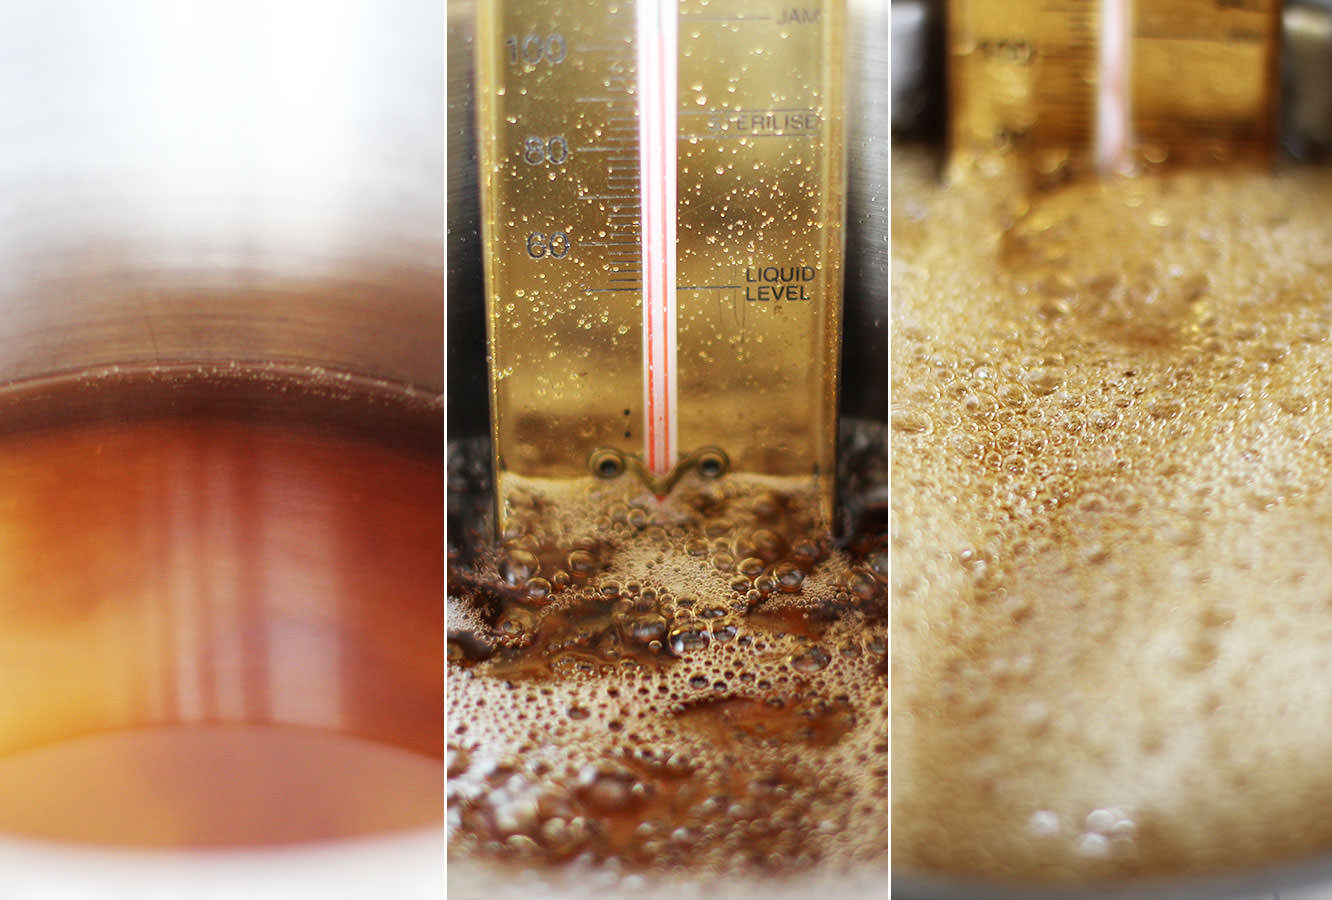 Step three
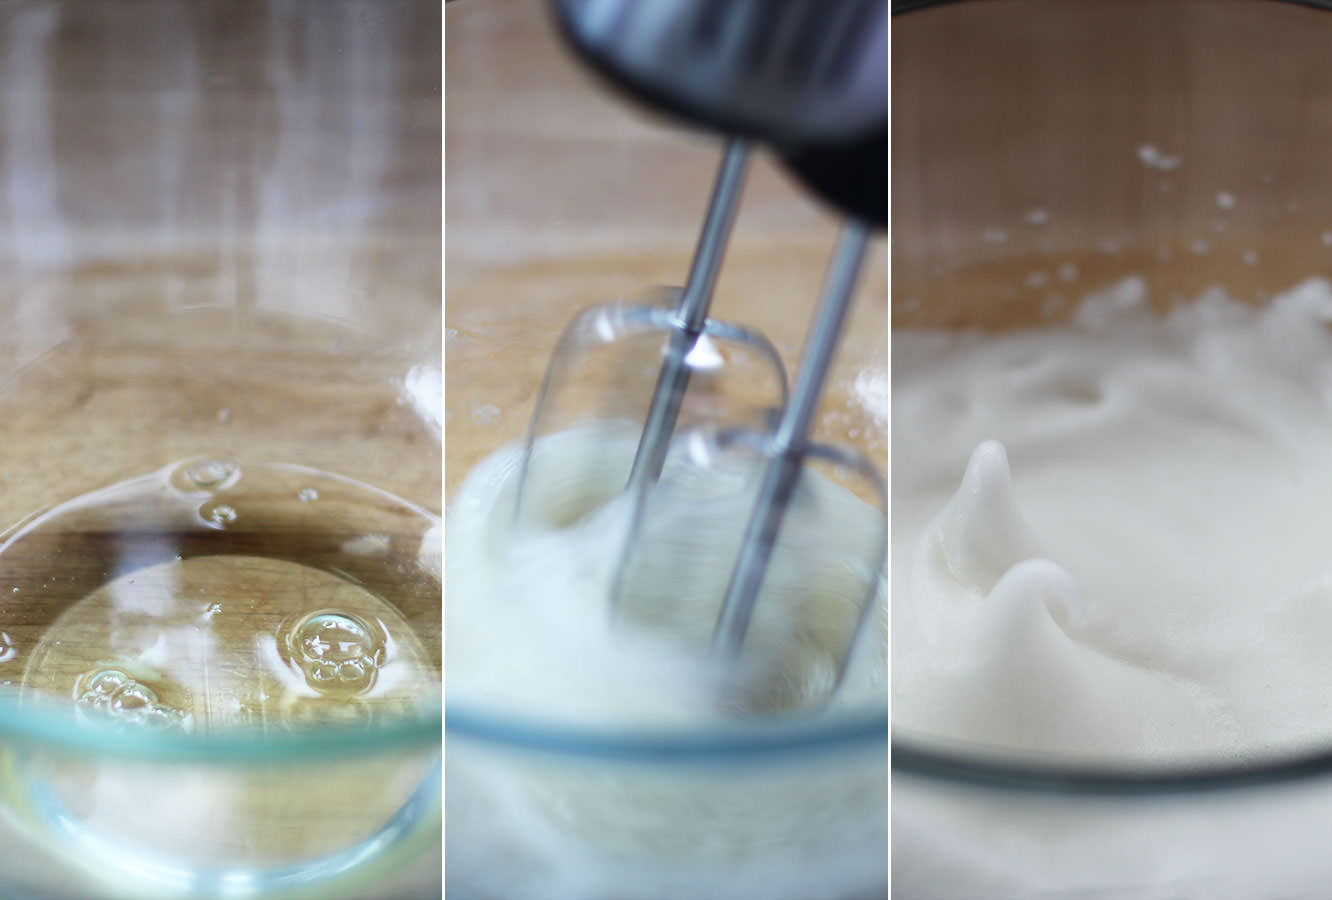 Step four
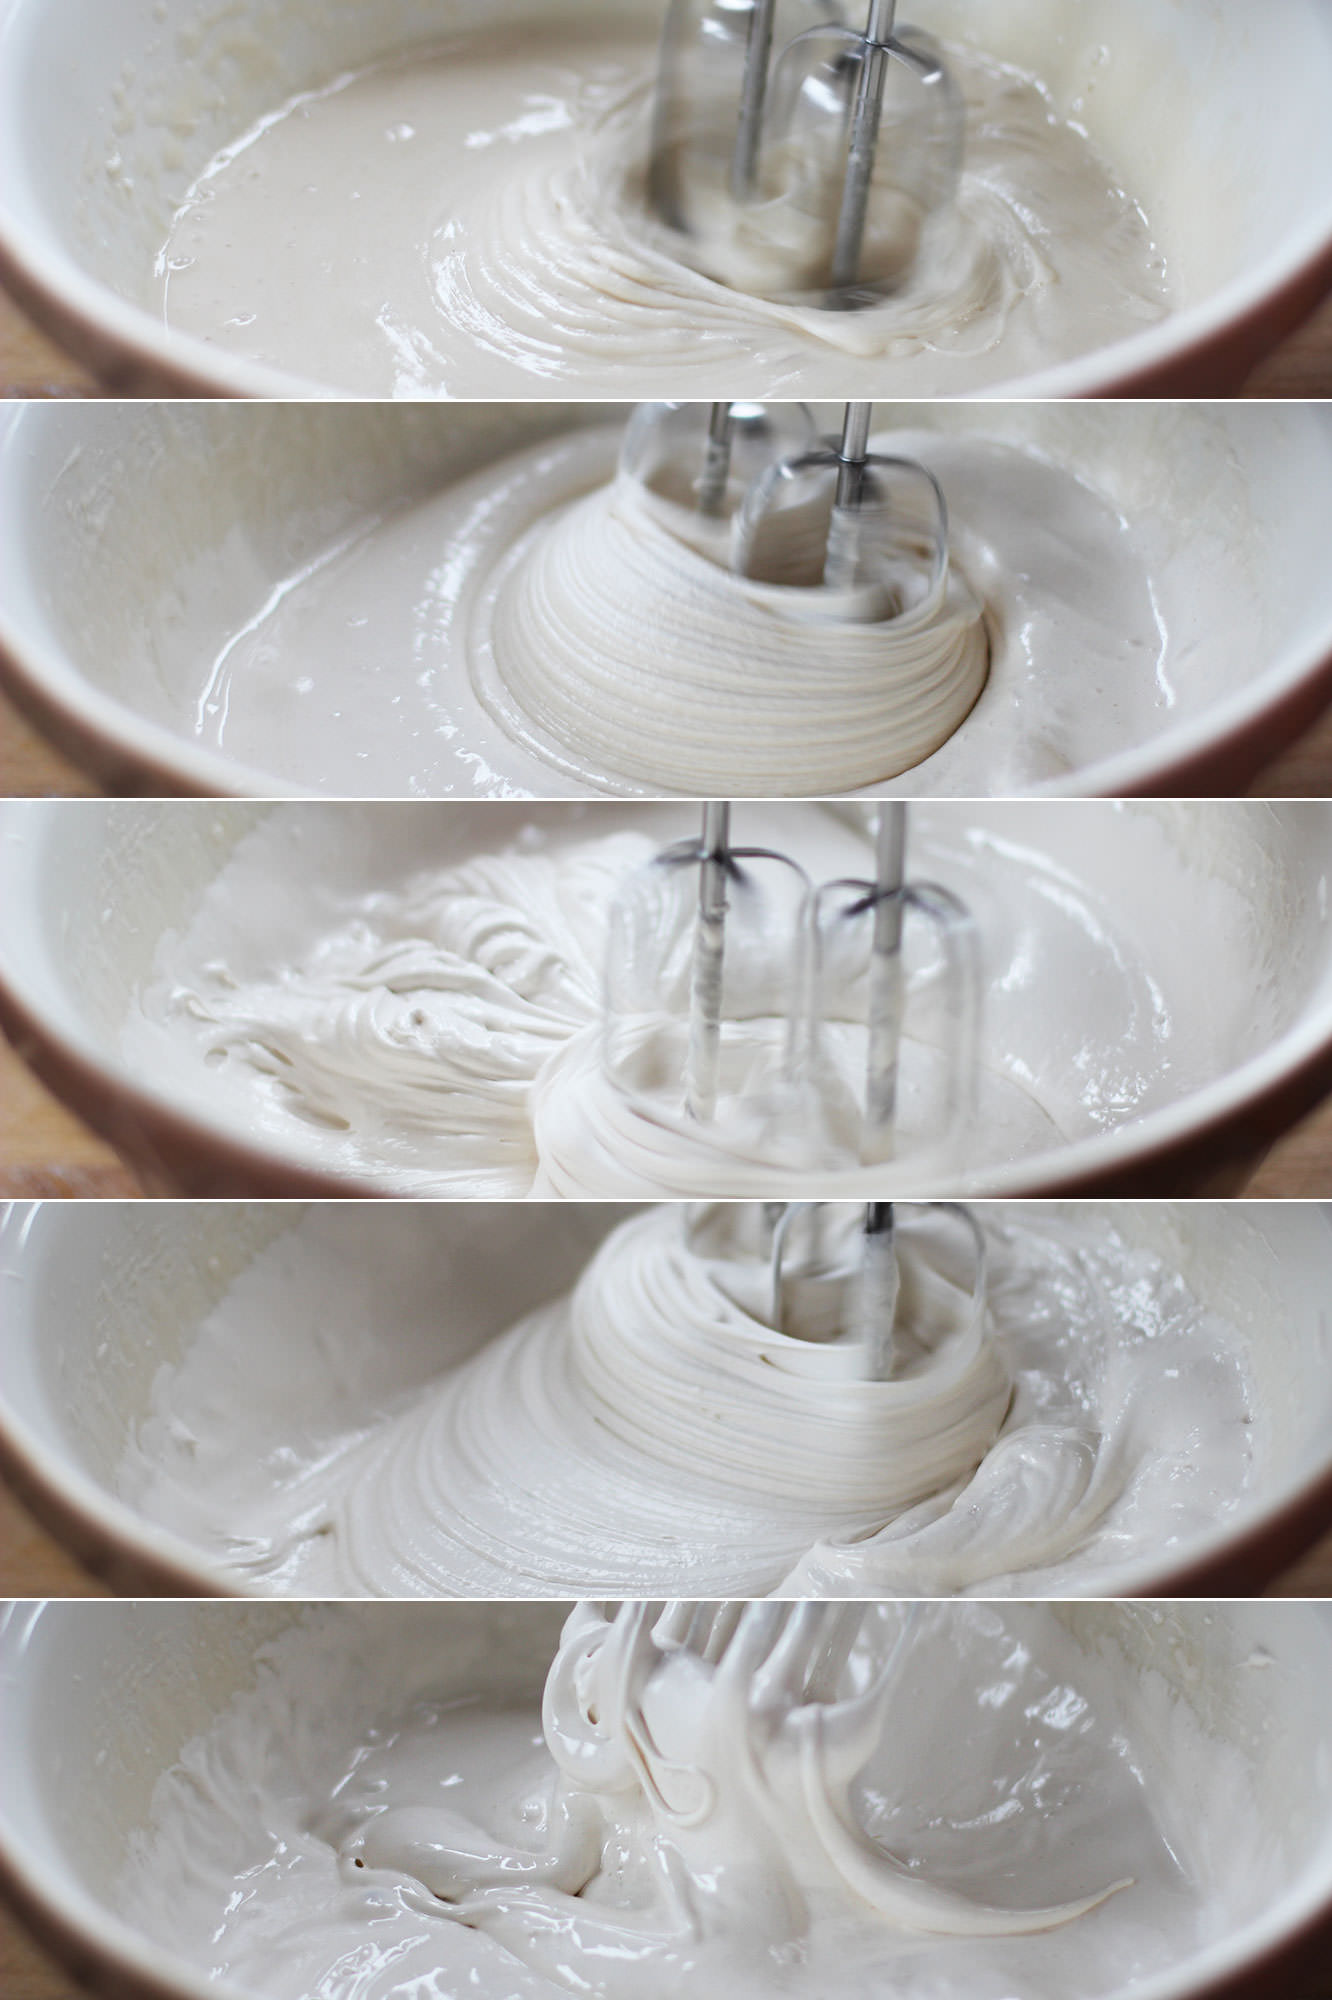 Step seven
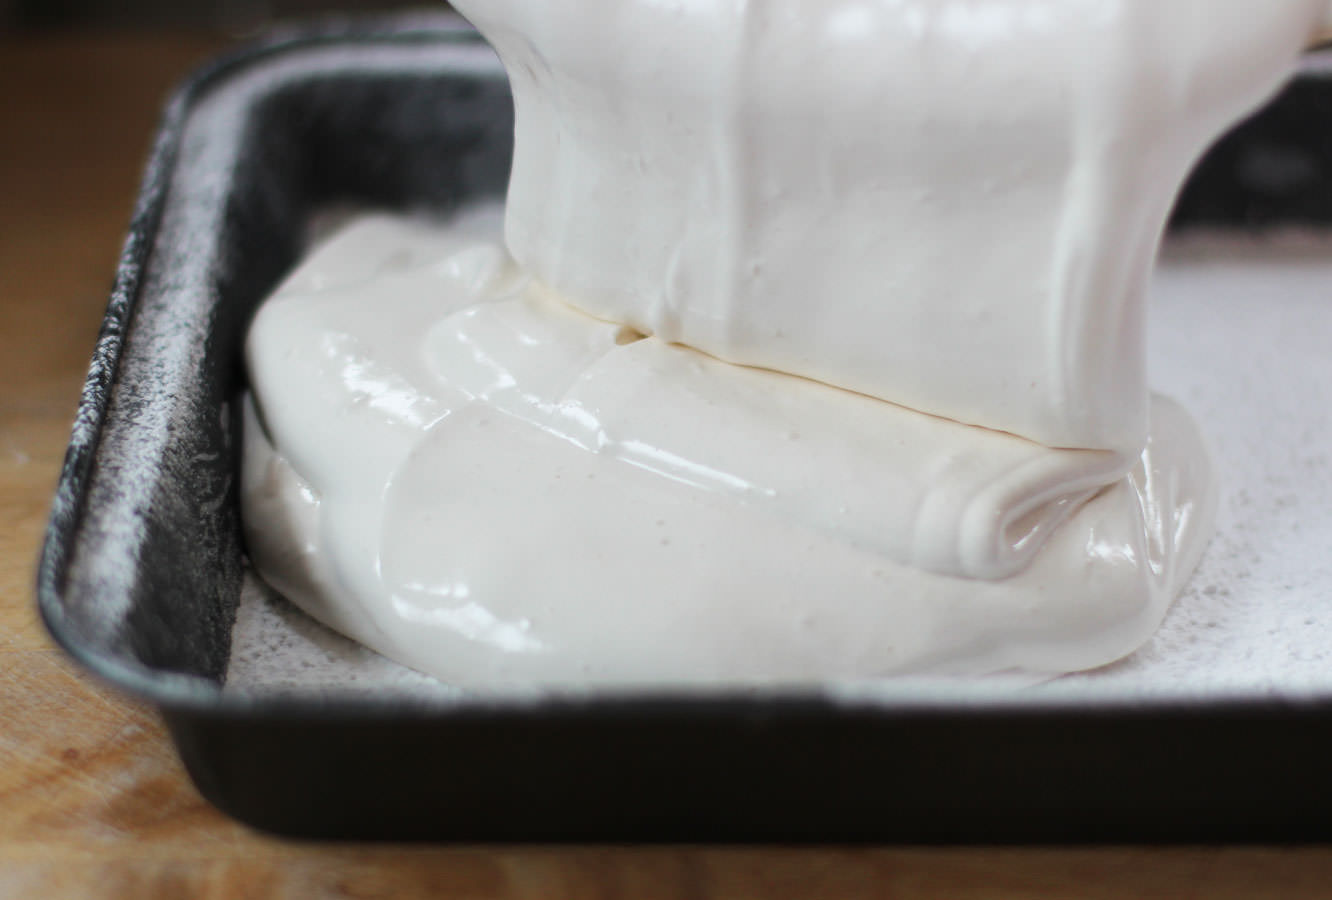 Step eleven
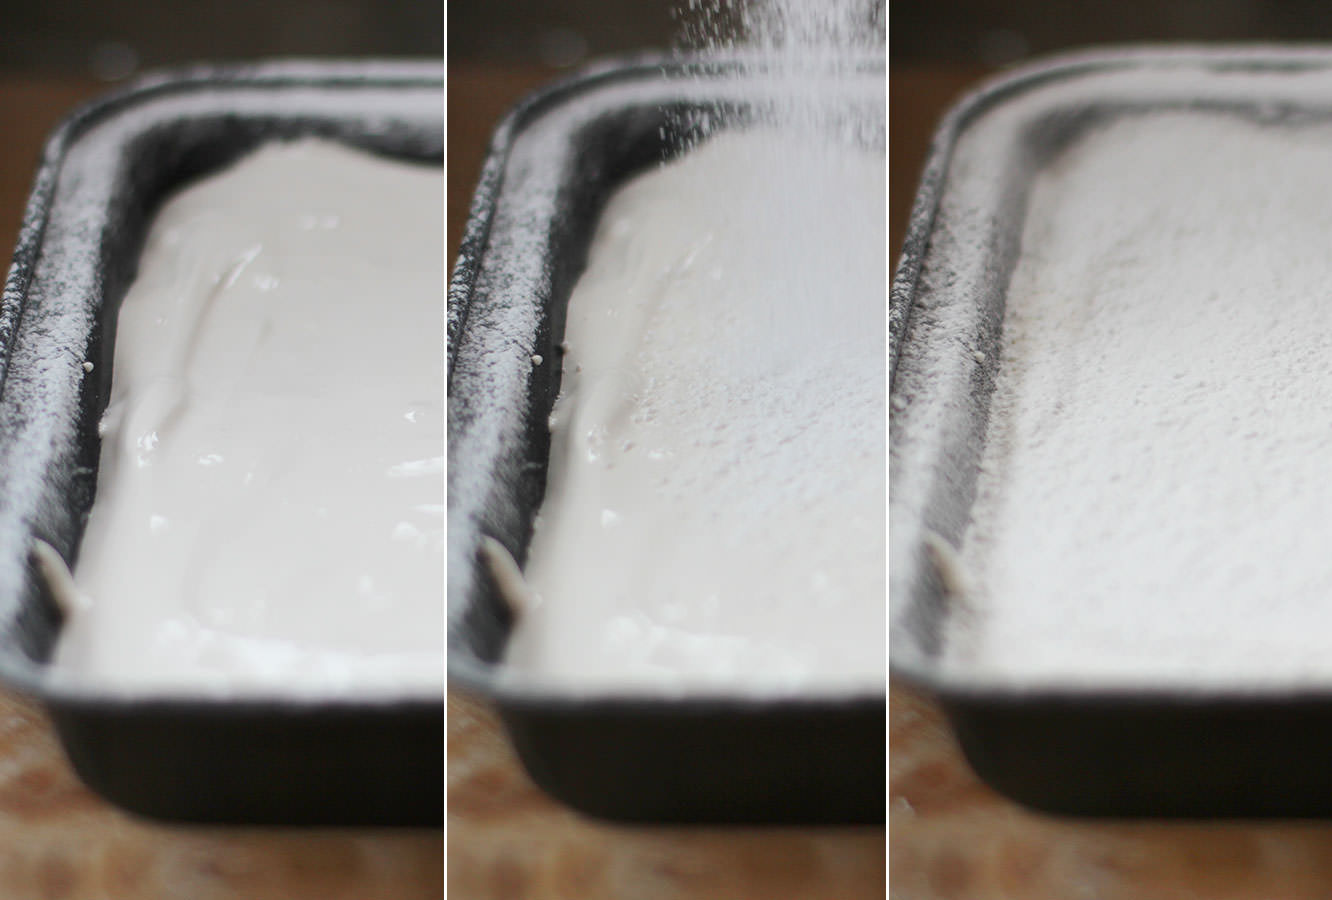 Step twelve
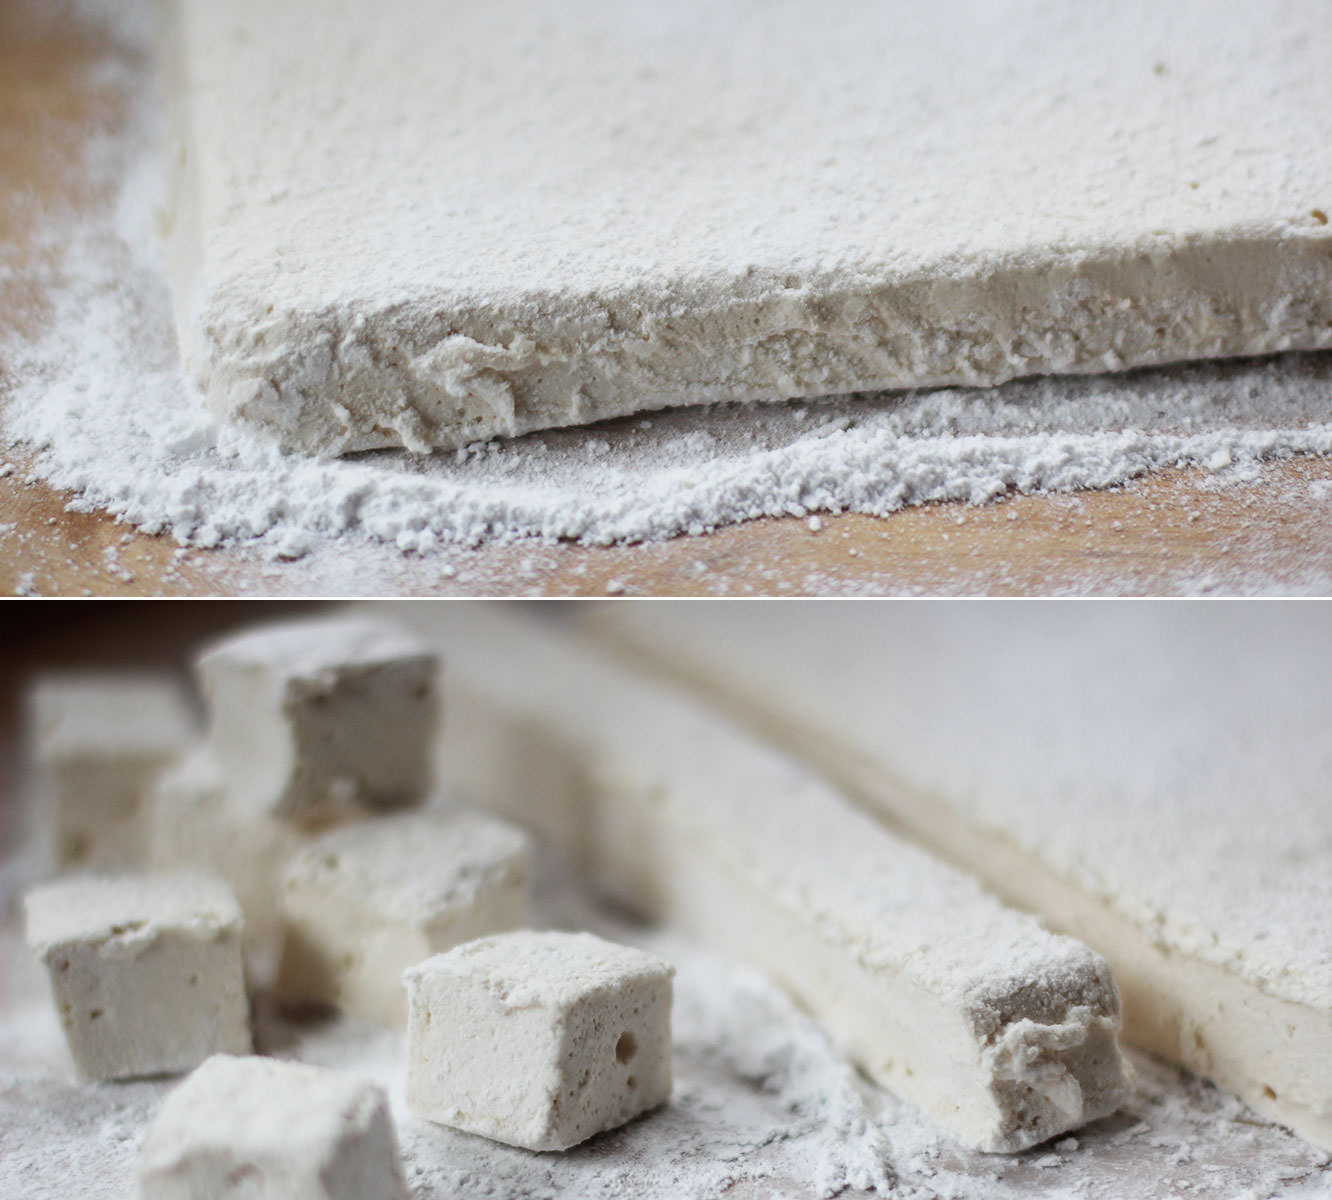 Step thirteen
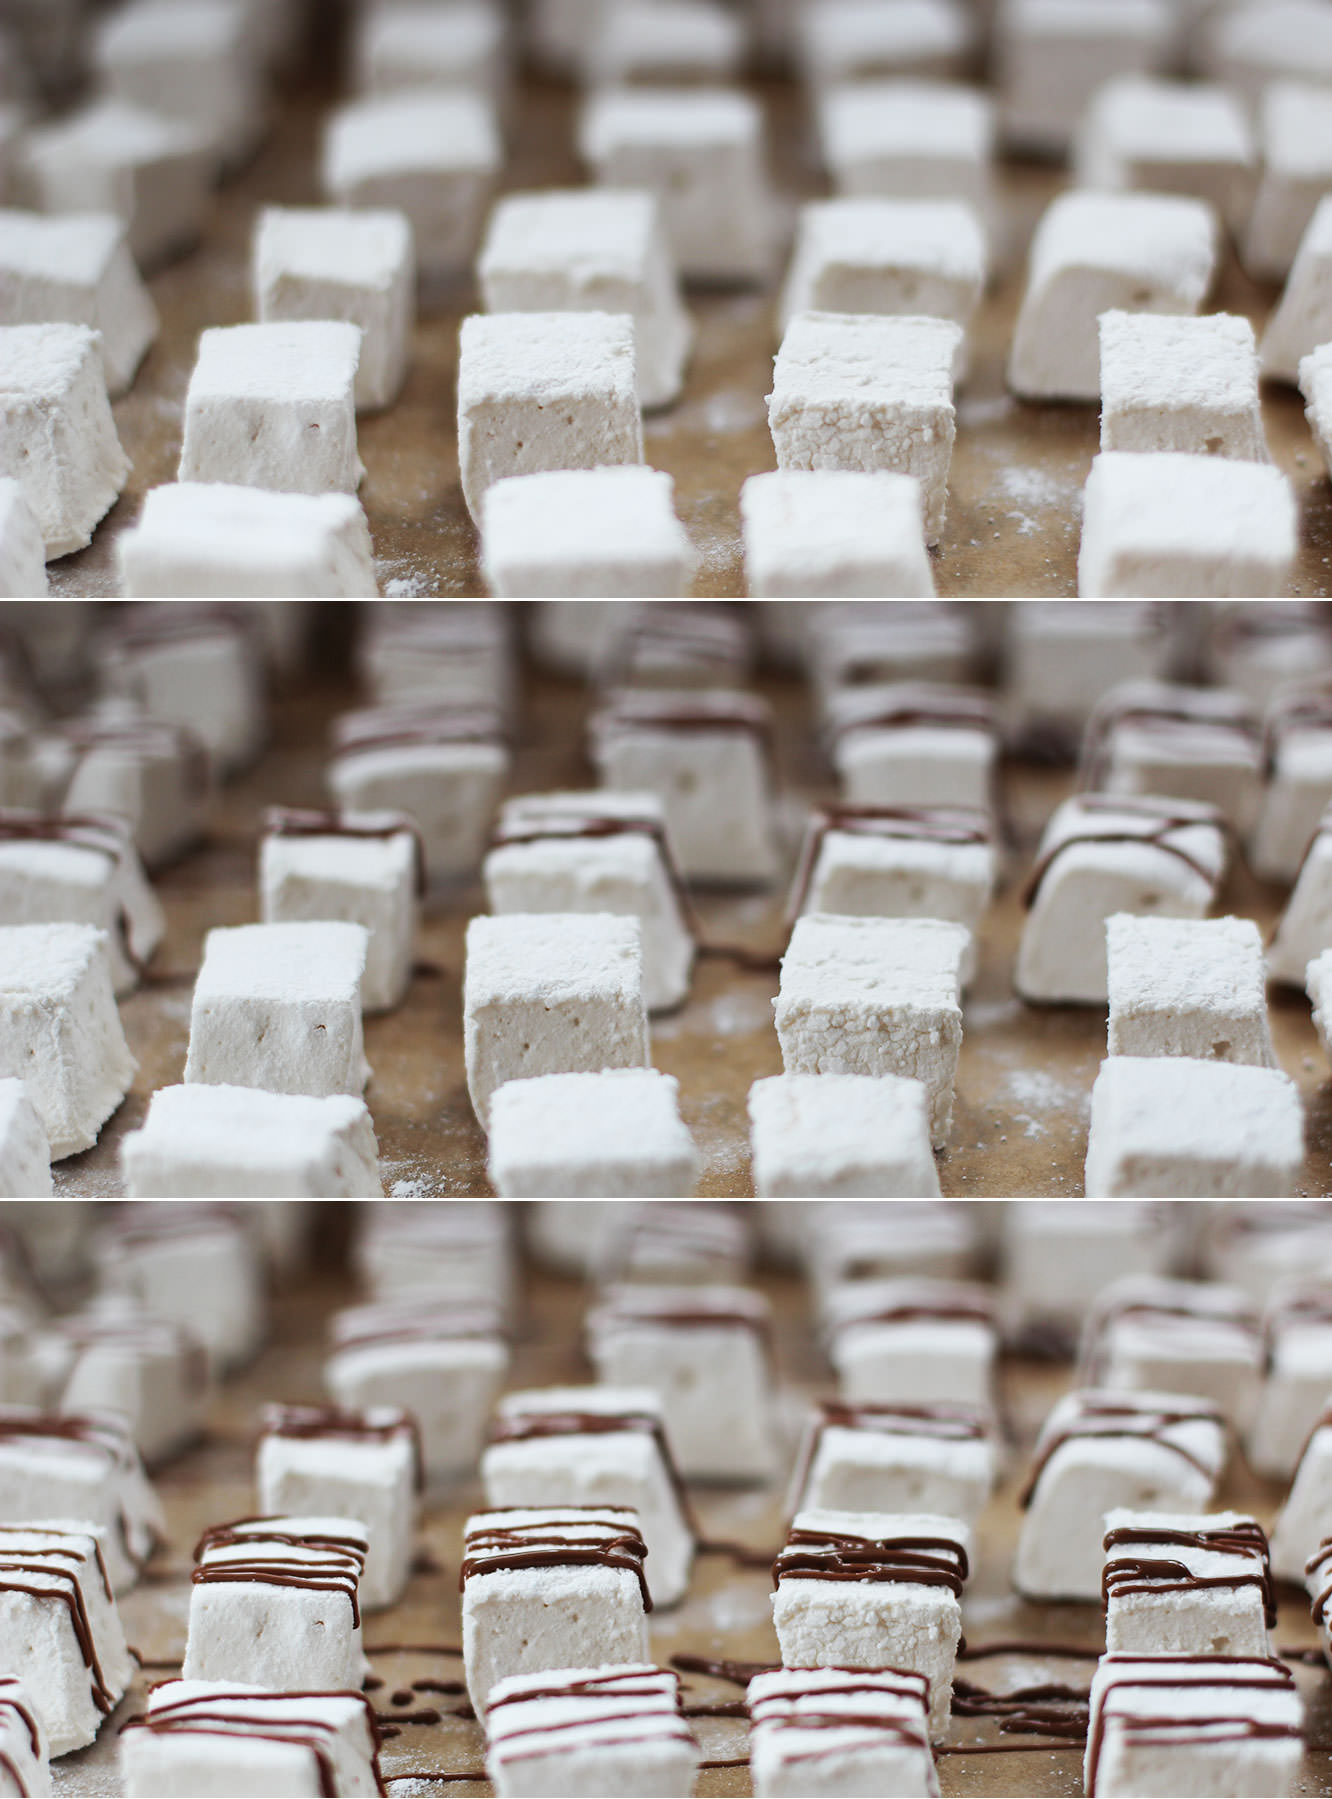 Step fourteen
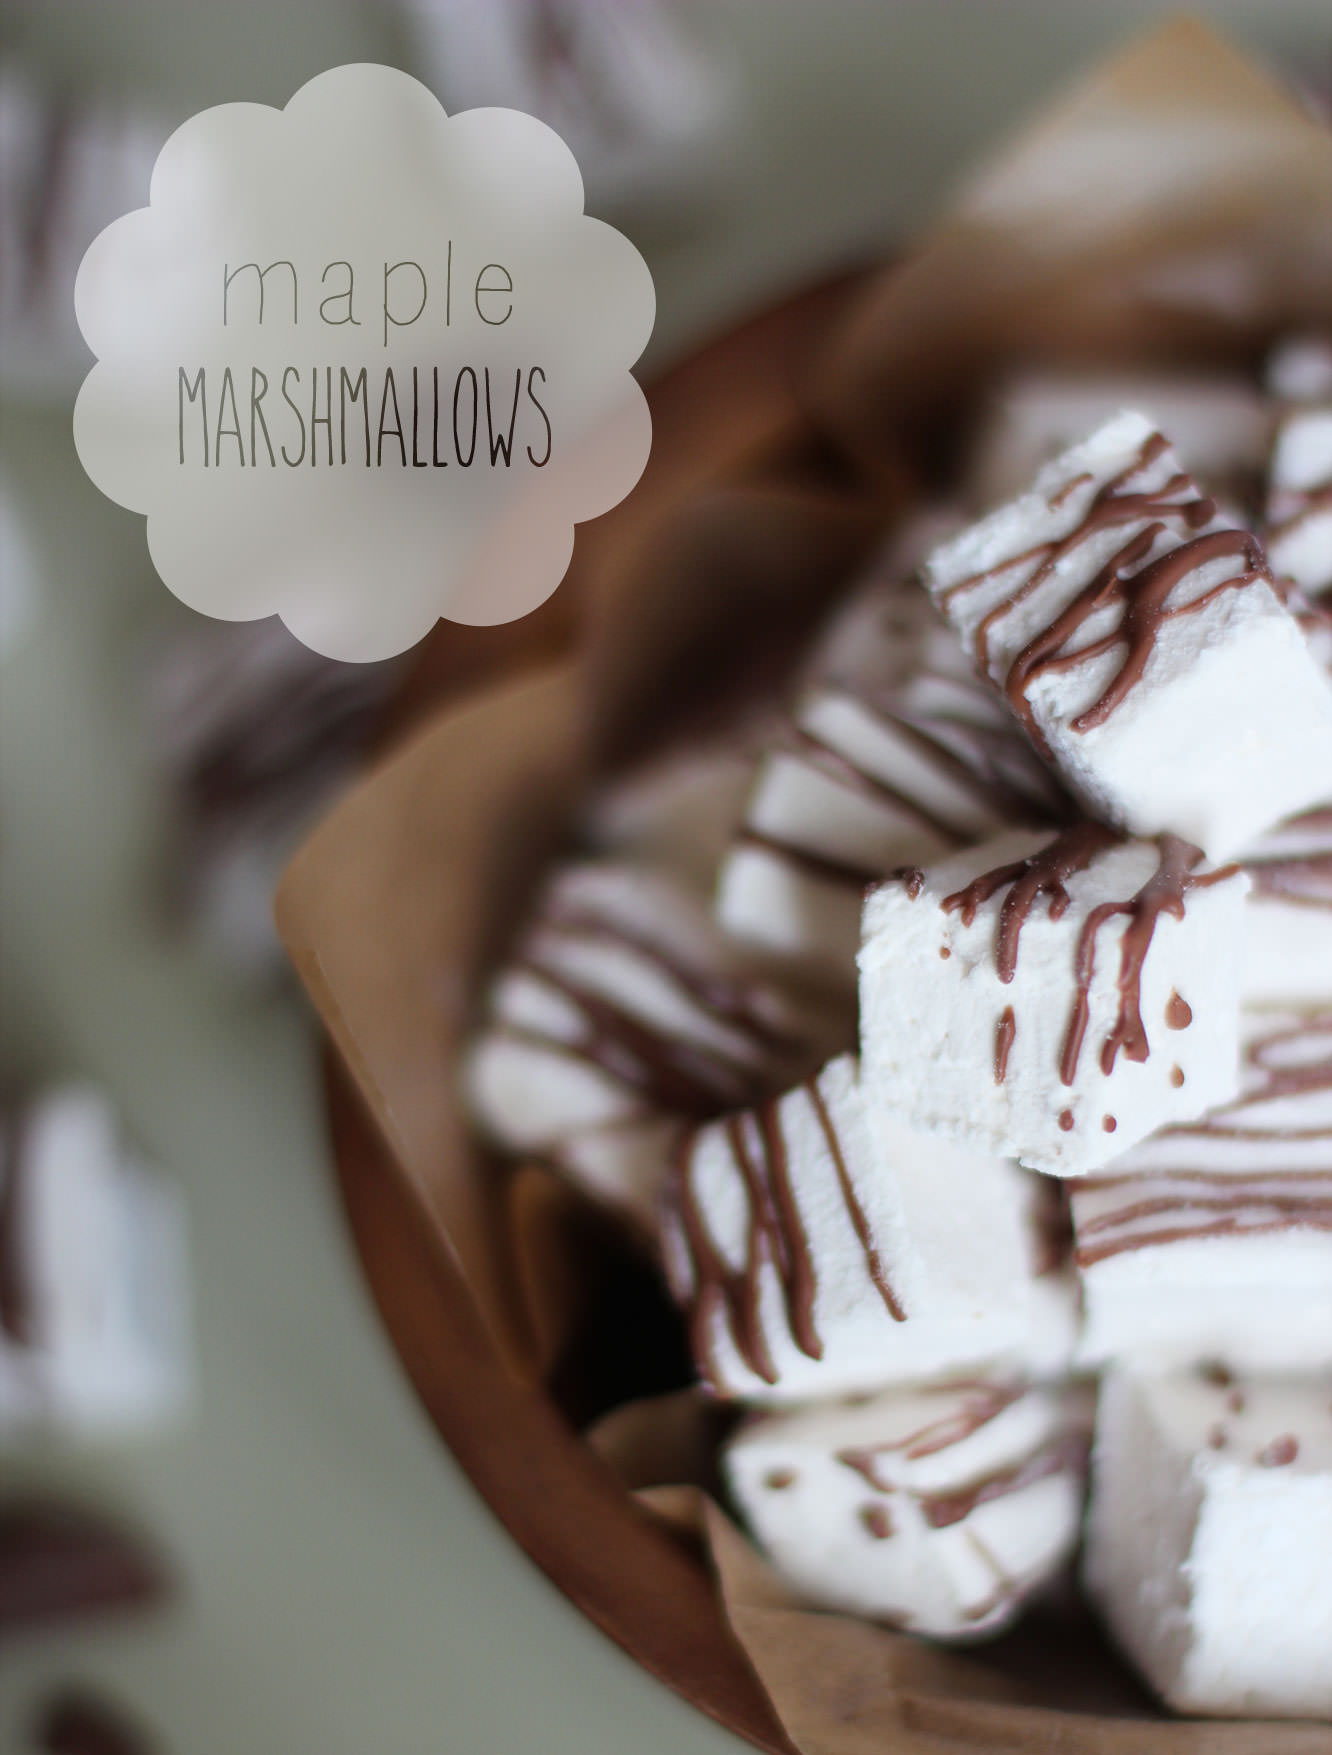 There we have it. Maple marshmallows. Nowhere near as difficult to make as I made them sound, I promise.