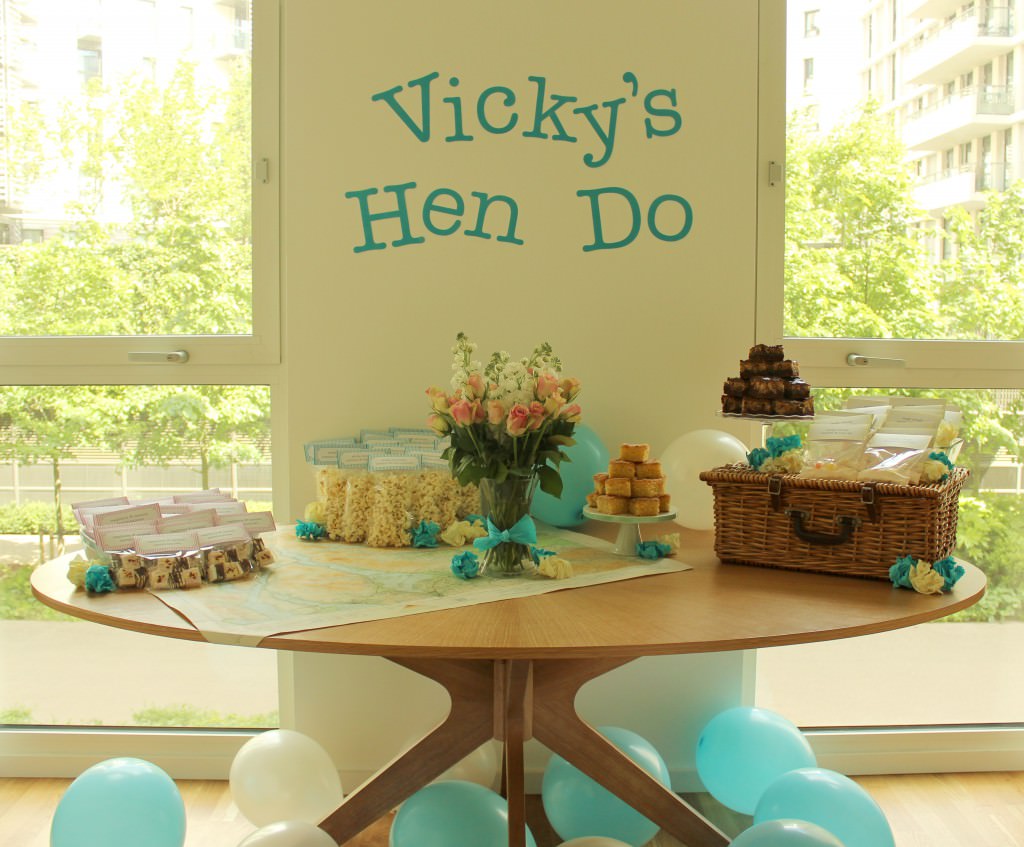
Wrapping up Vicky’s Hen Do this week with the finishing touches. You will have to excuse the fact I just scrunched up crepe paper. The plan was to make flowers, but, you know, it was 2am by the time I got to them.
In case you need a recap of the recipes in this series:
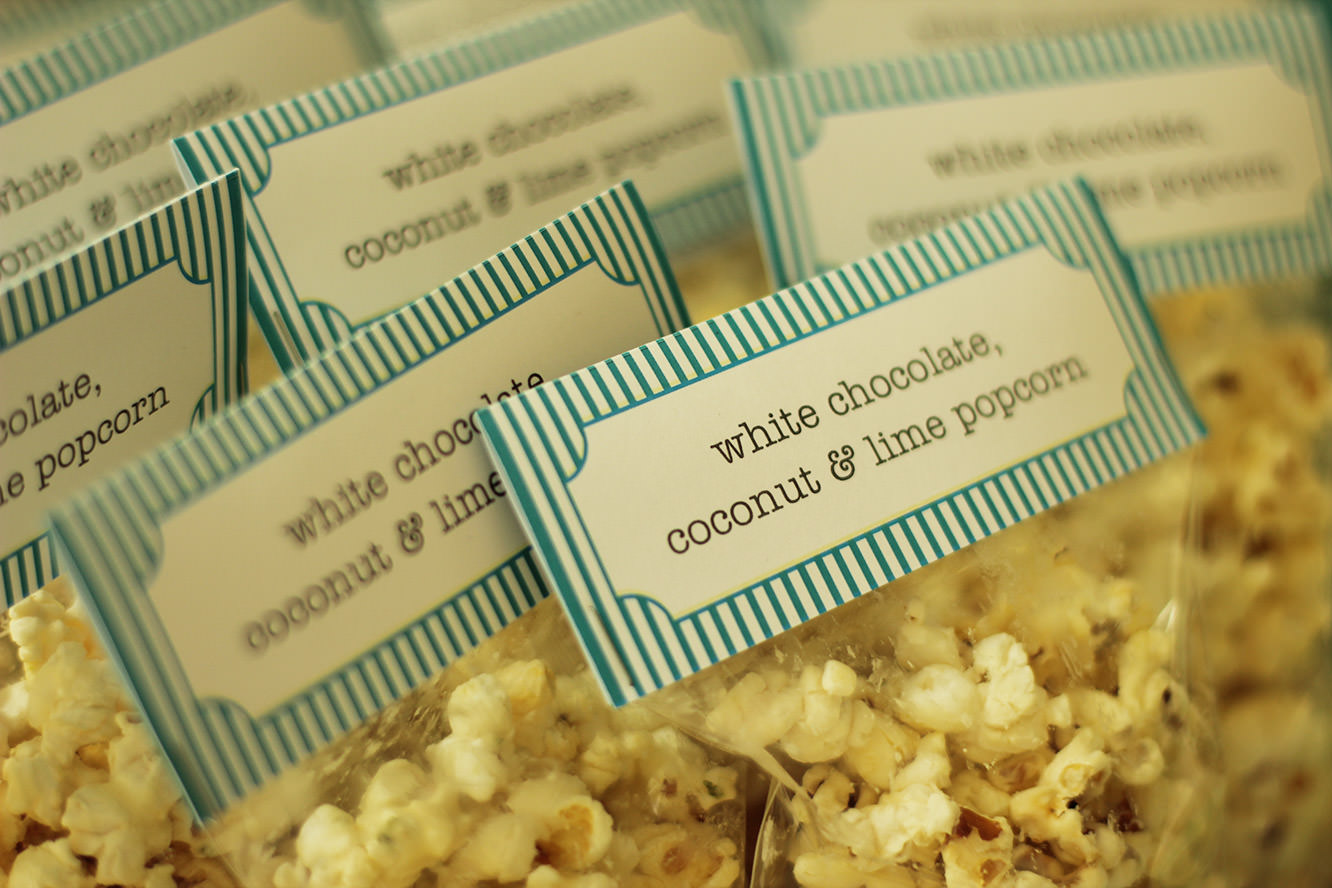
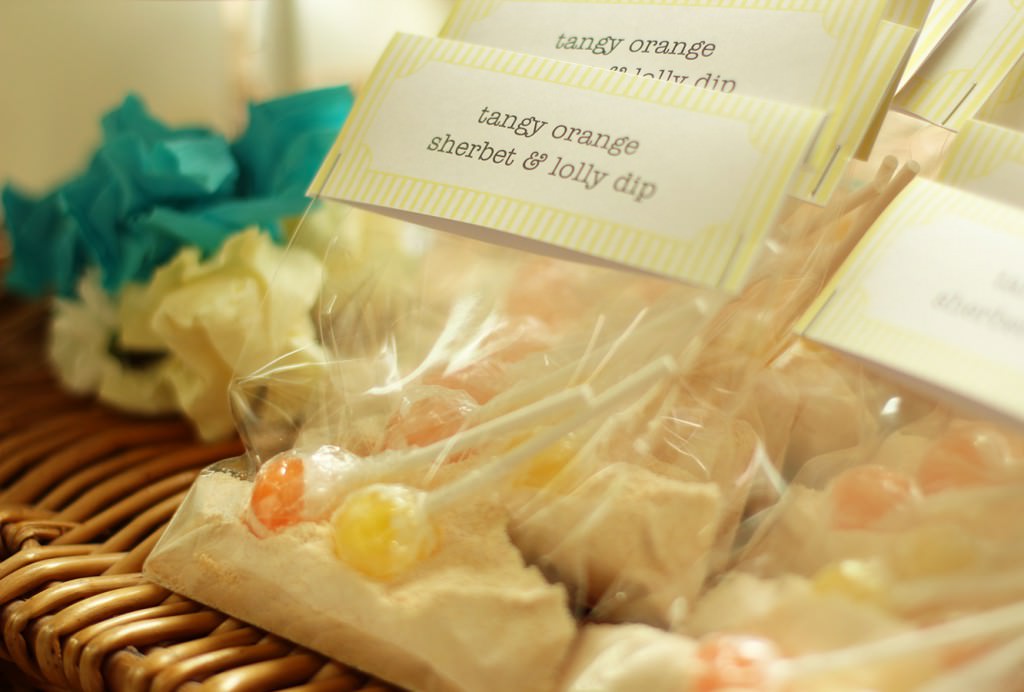
These labels (it’s quite possible your bride’s name isn’t Vicky. I used American Typewriter for the font for the sign)
Step one
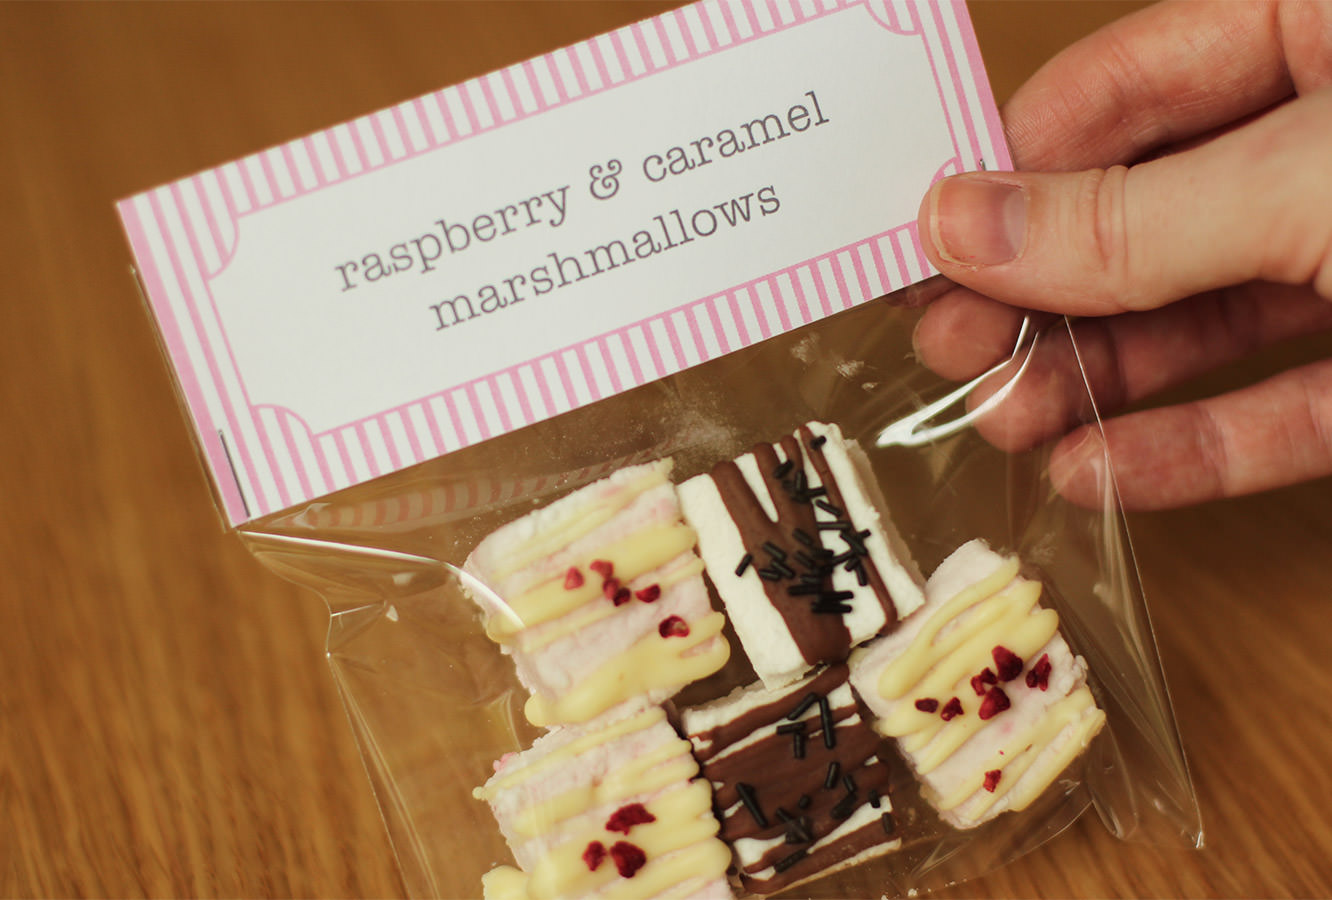
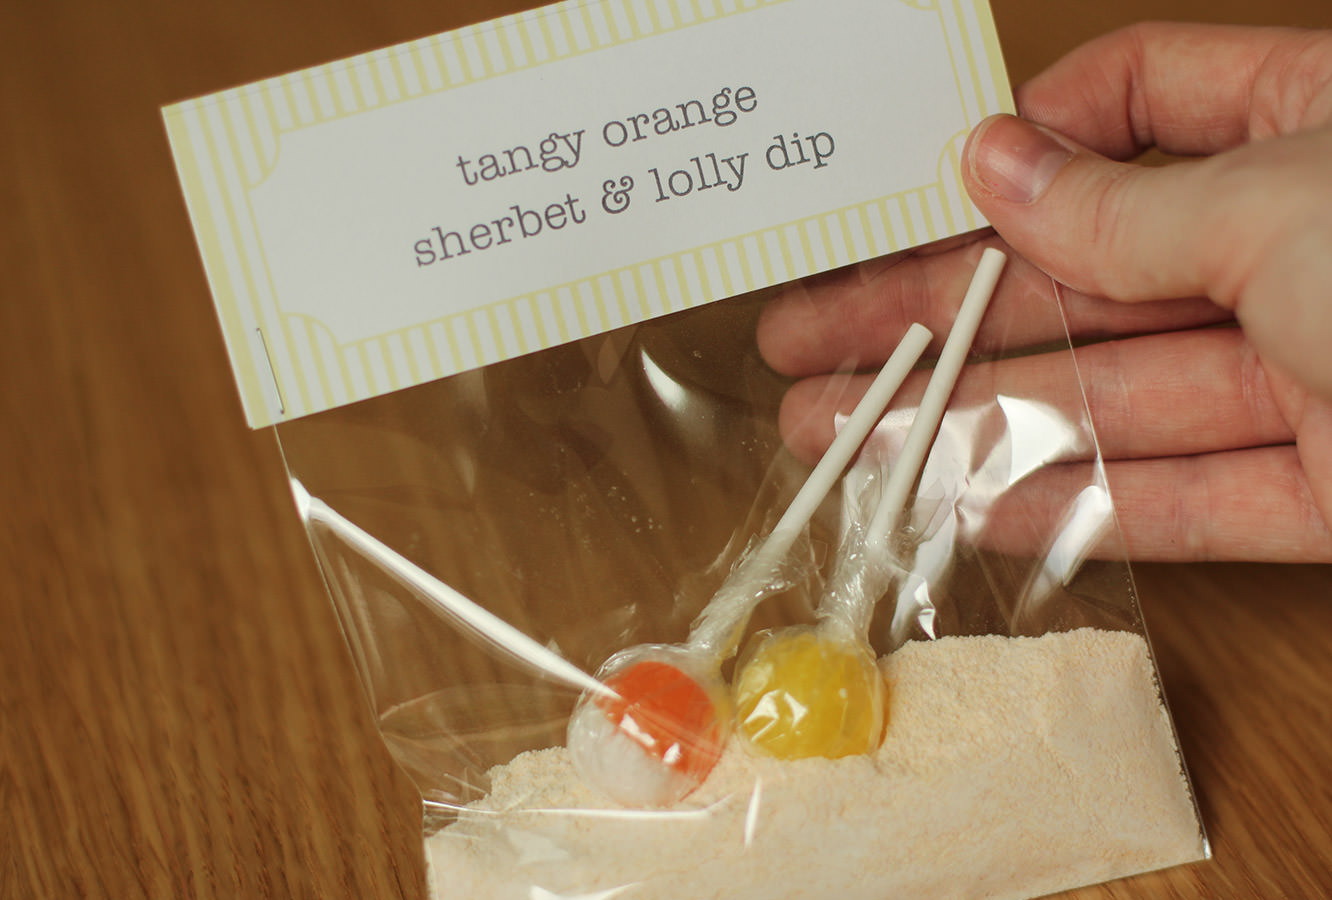
Fill the card bags with your favours.
Step two
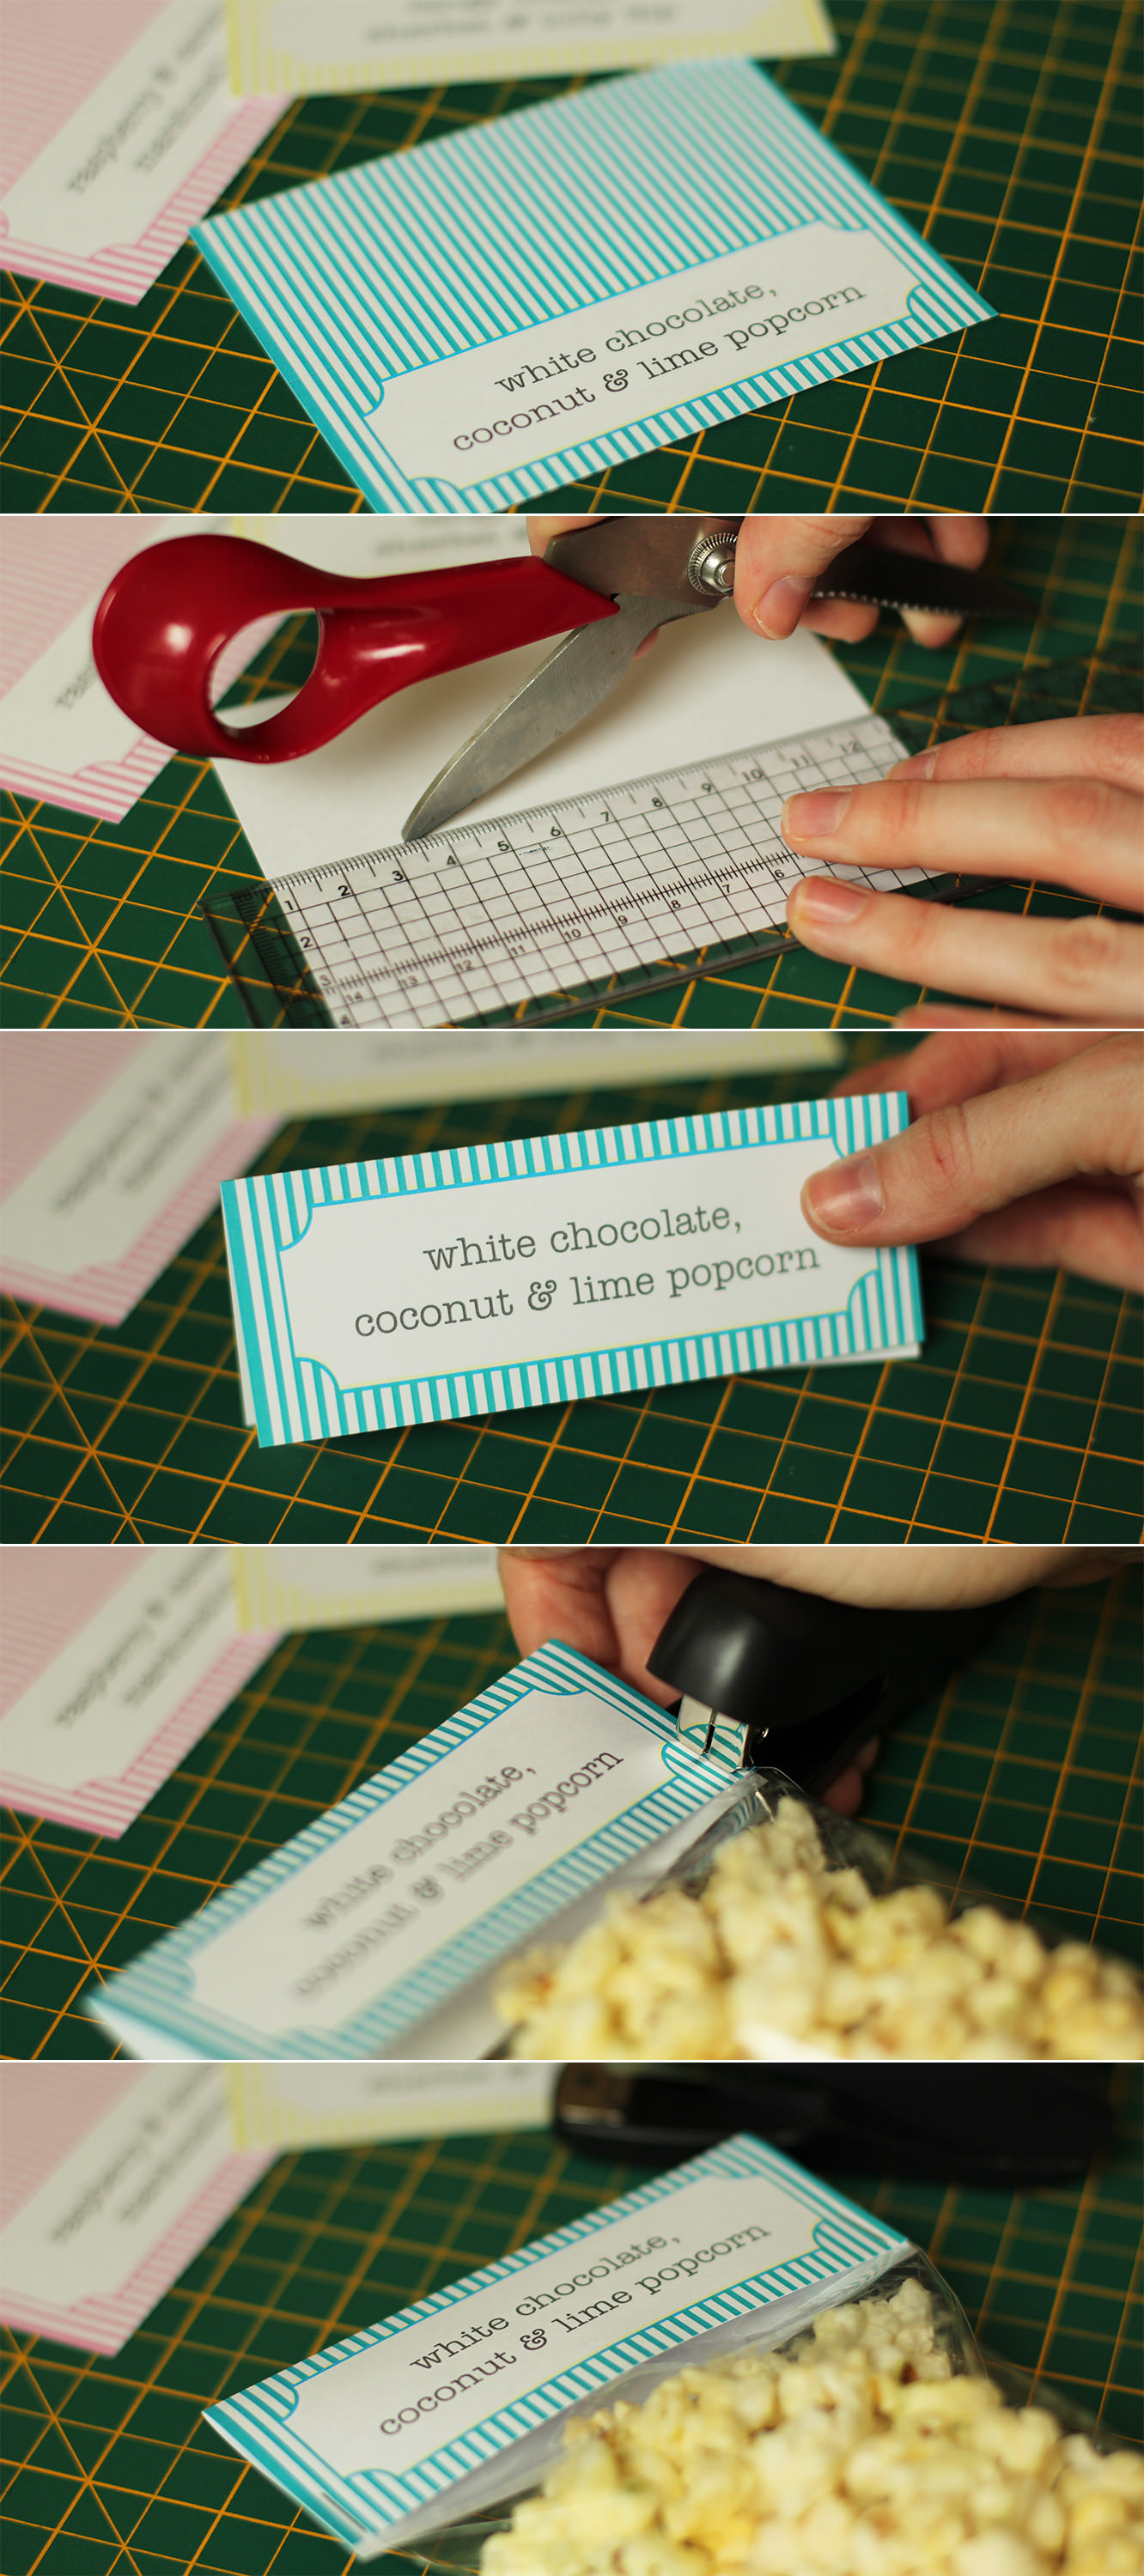
Print enough of the labels for the number of favours you have. These templates will fit a DL card bag.
Cut them out and score on the back down the centre. Fold in half.
Fold the top of the bag down and staple the label over the top, ensuring the staple secures the bag shut. This is especially important with the sherbet.
Step three
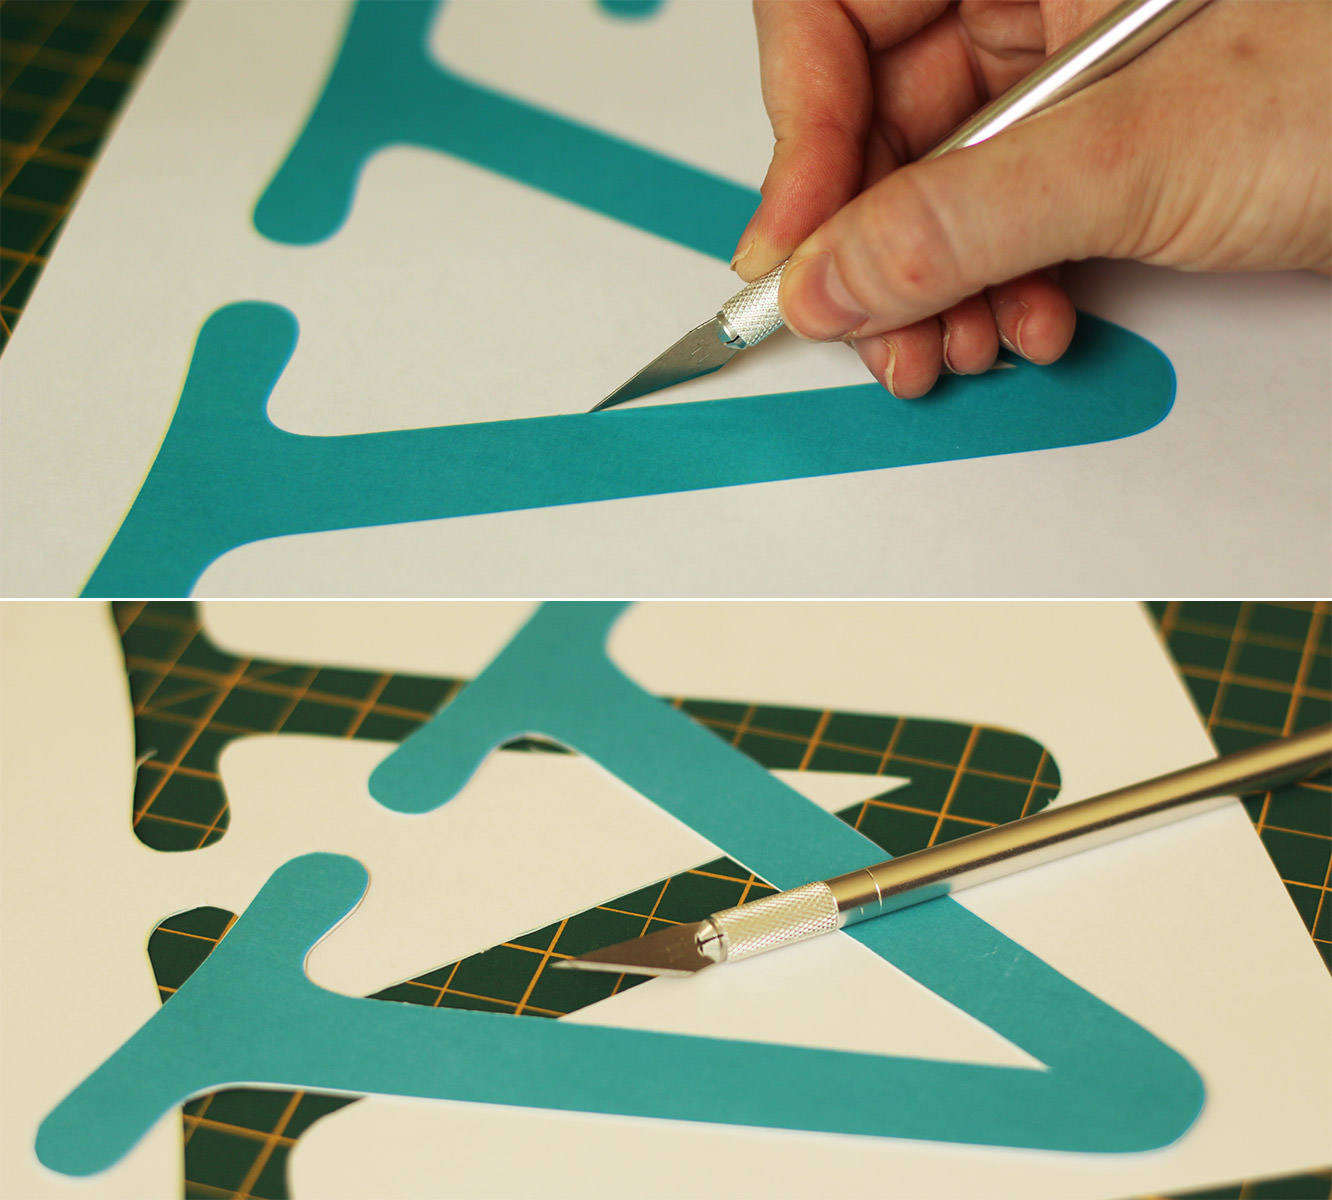
Cut the letters out of for the sign.
Step four
Using blu-tac stick the letters to the wall.
Step five
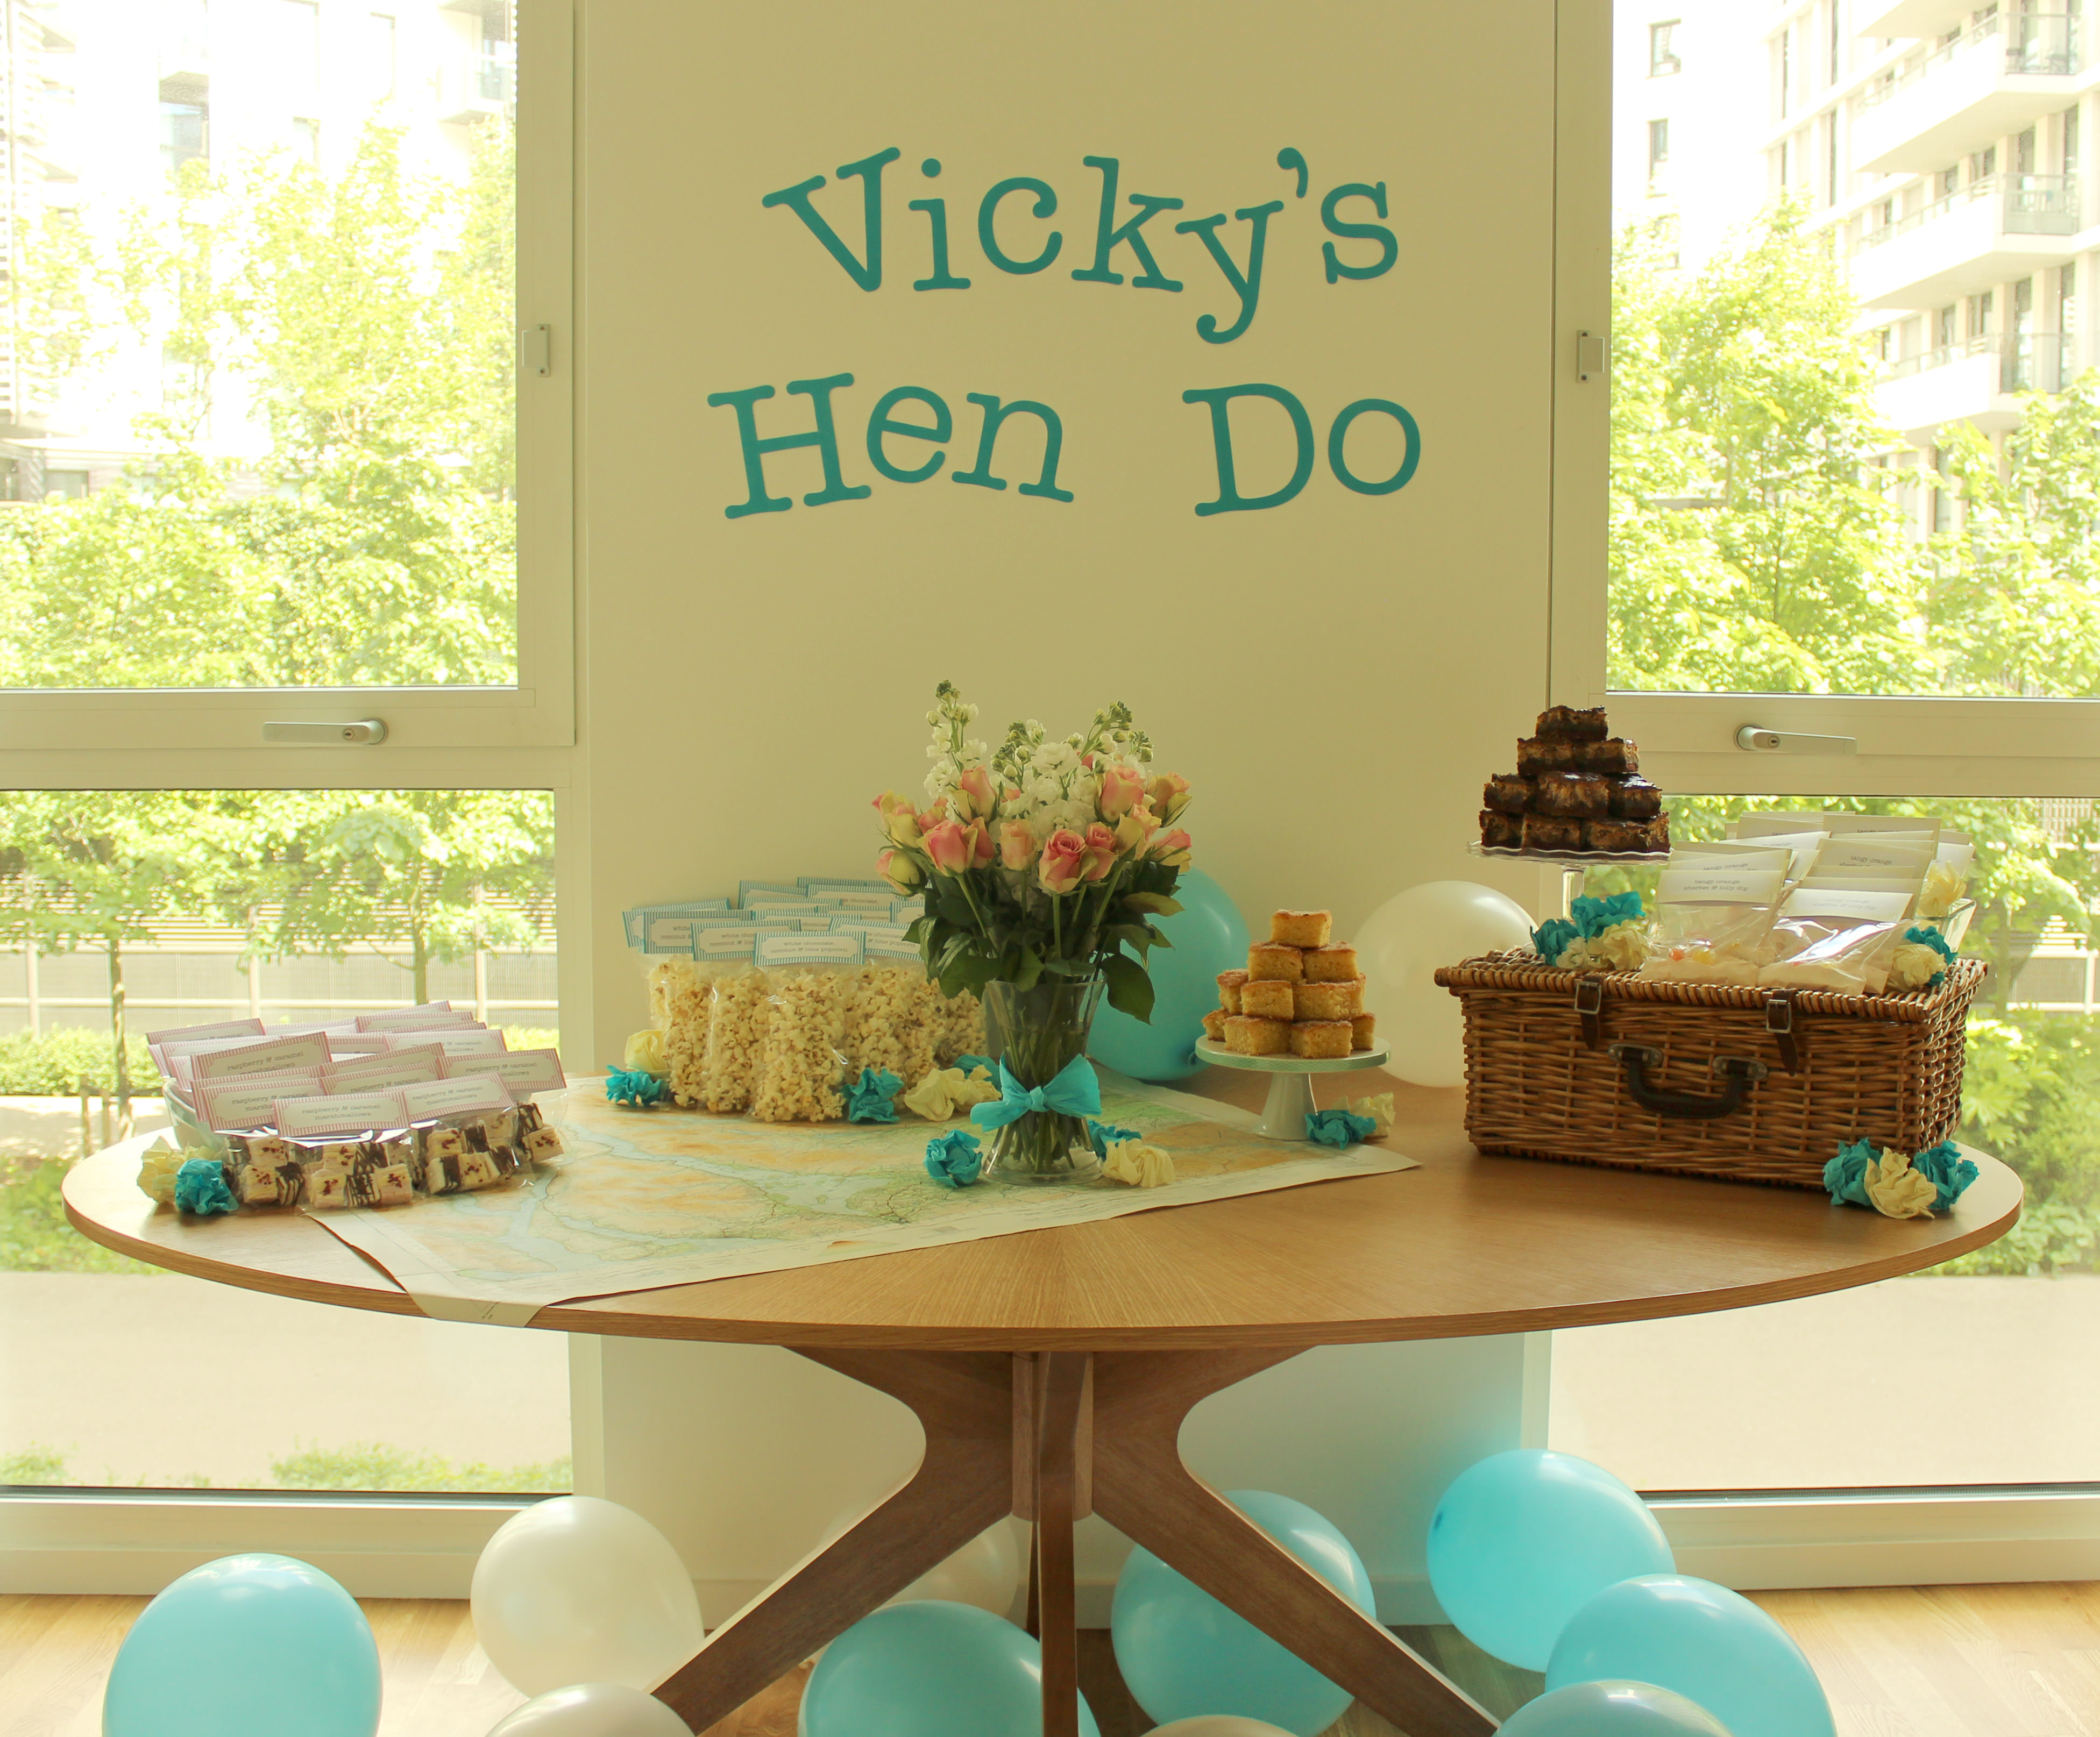
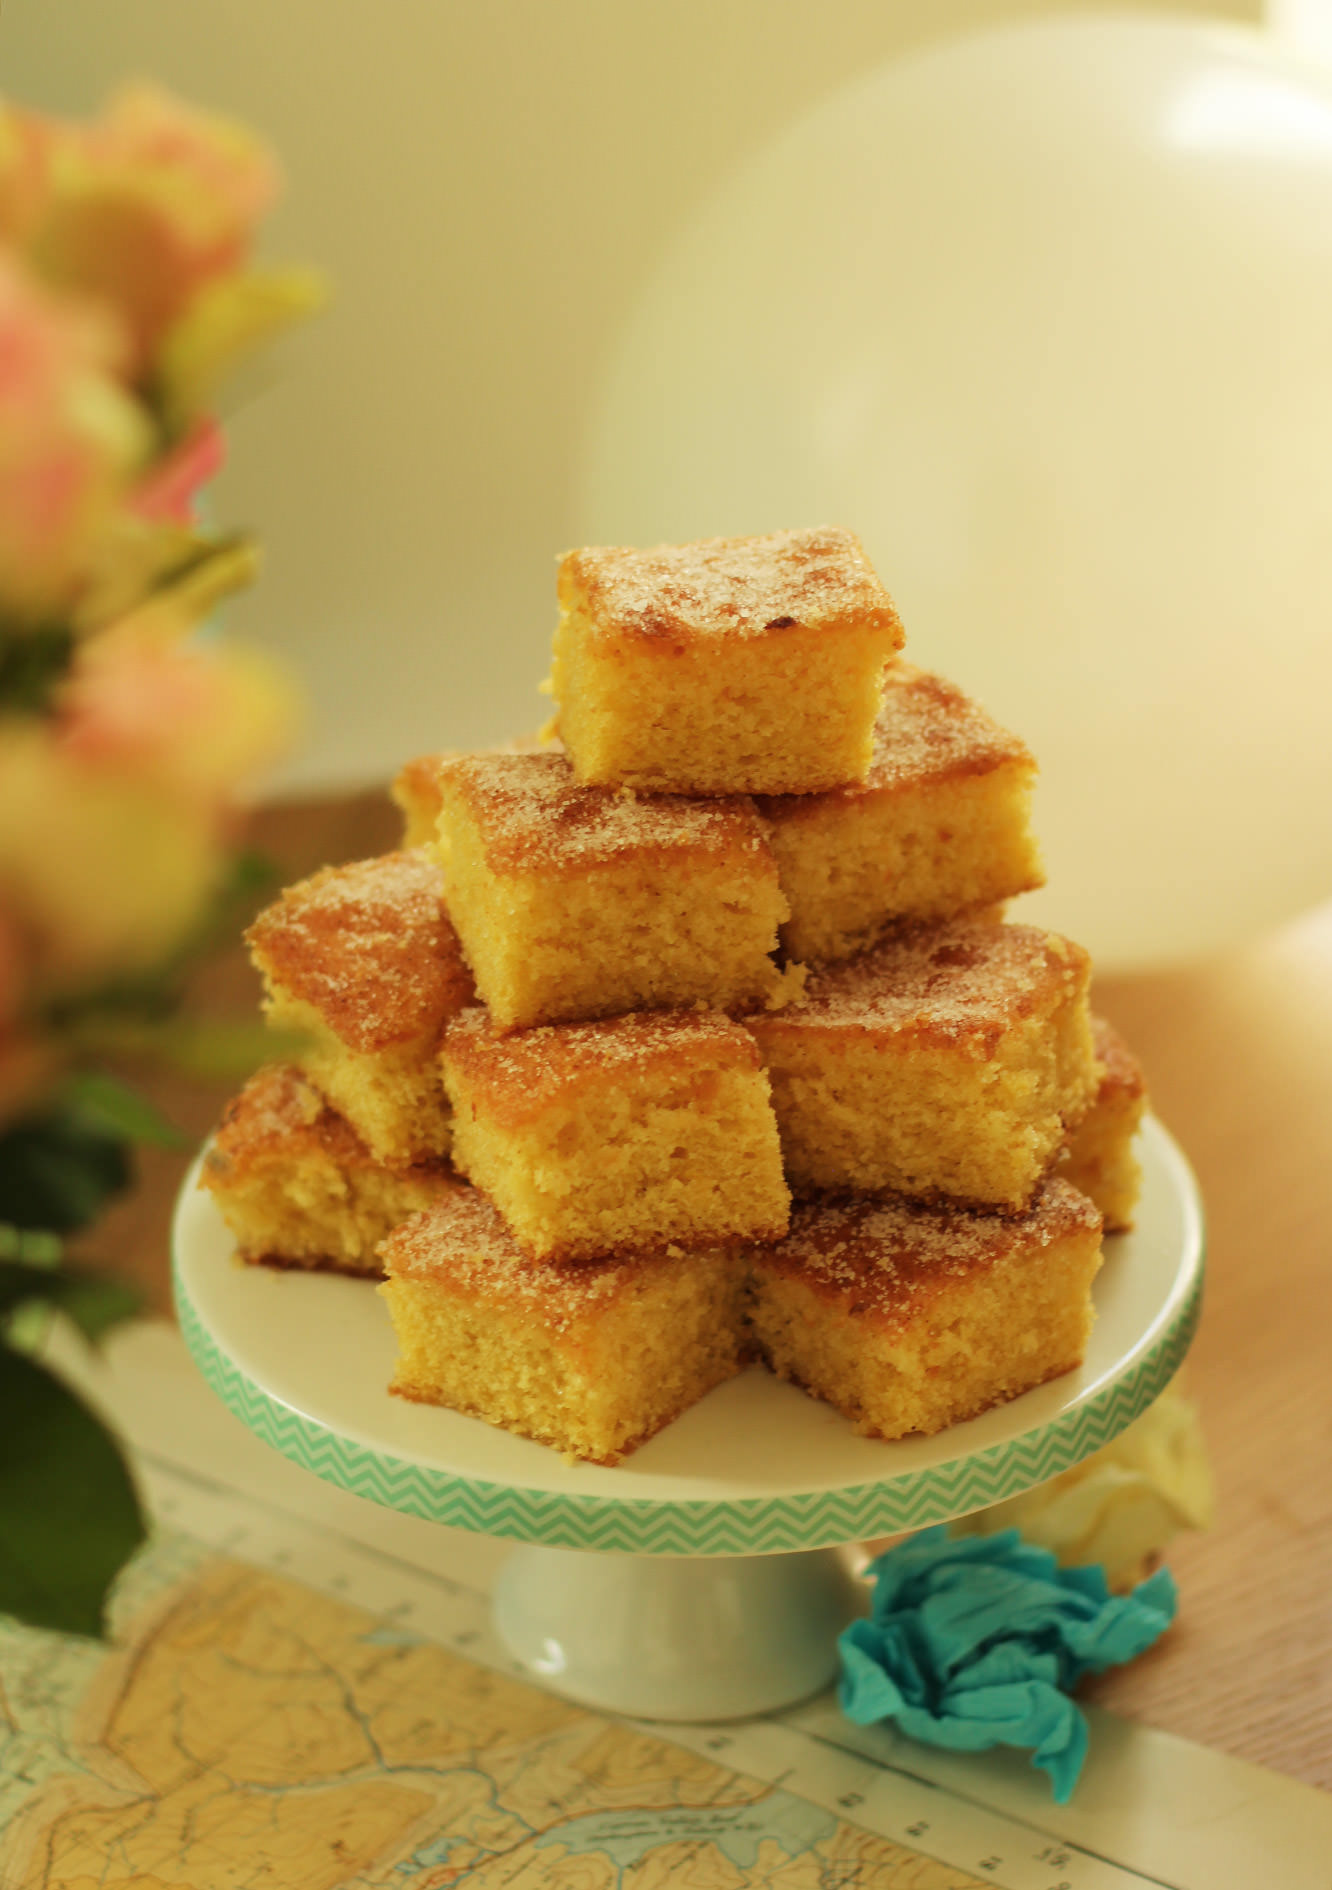
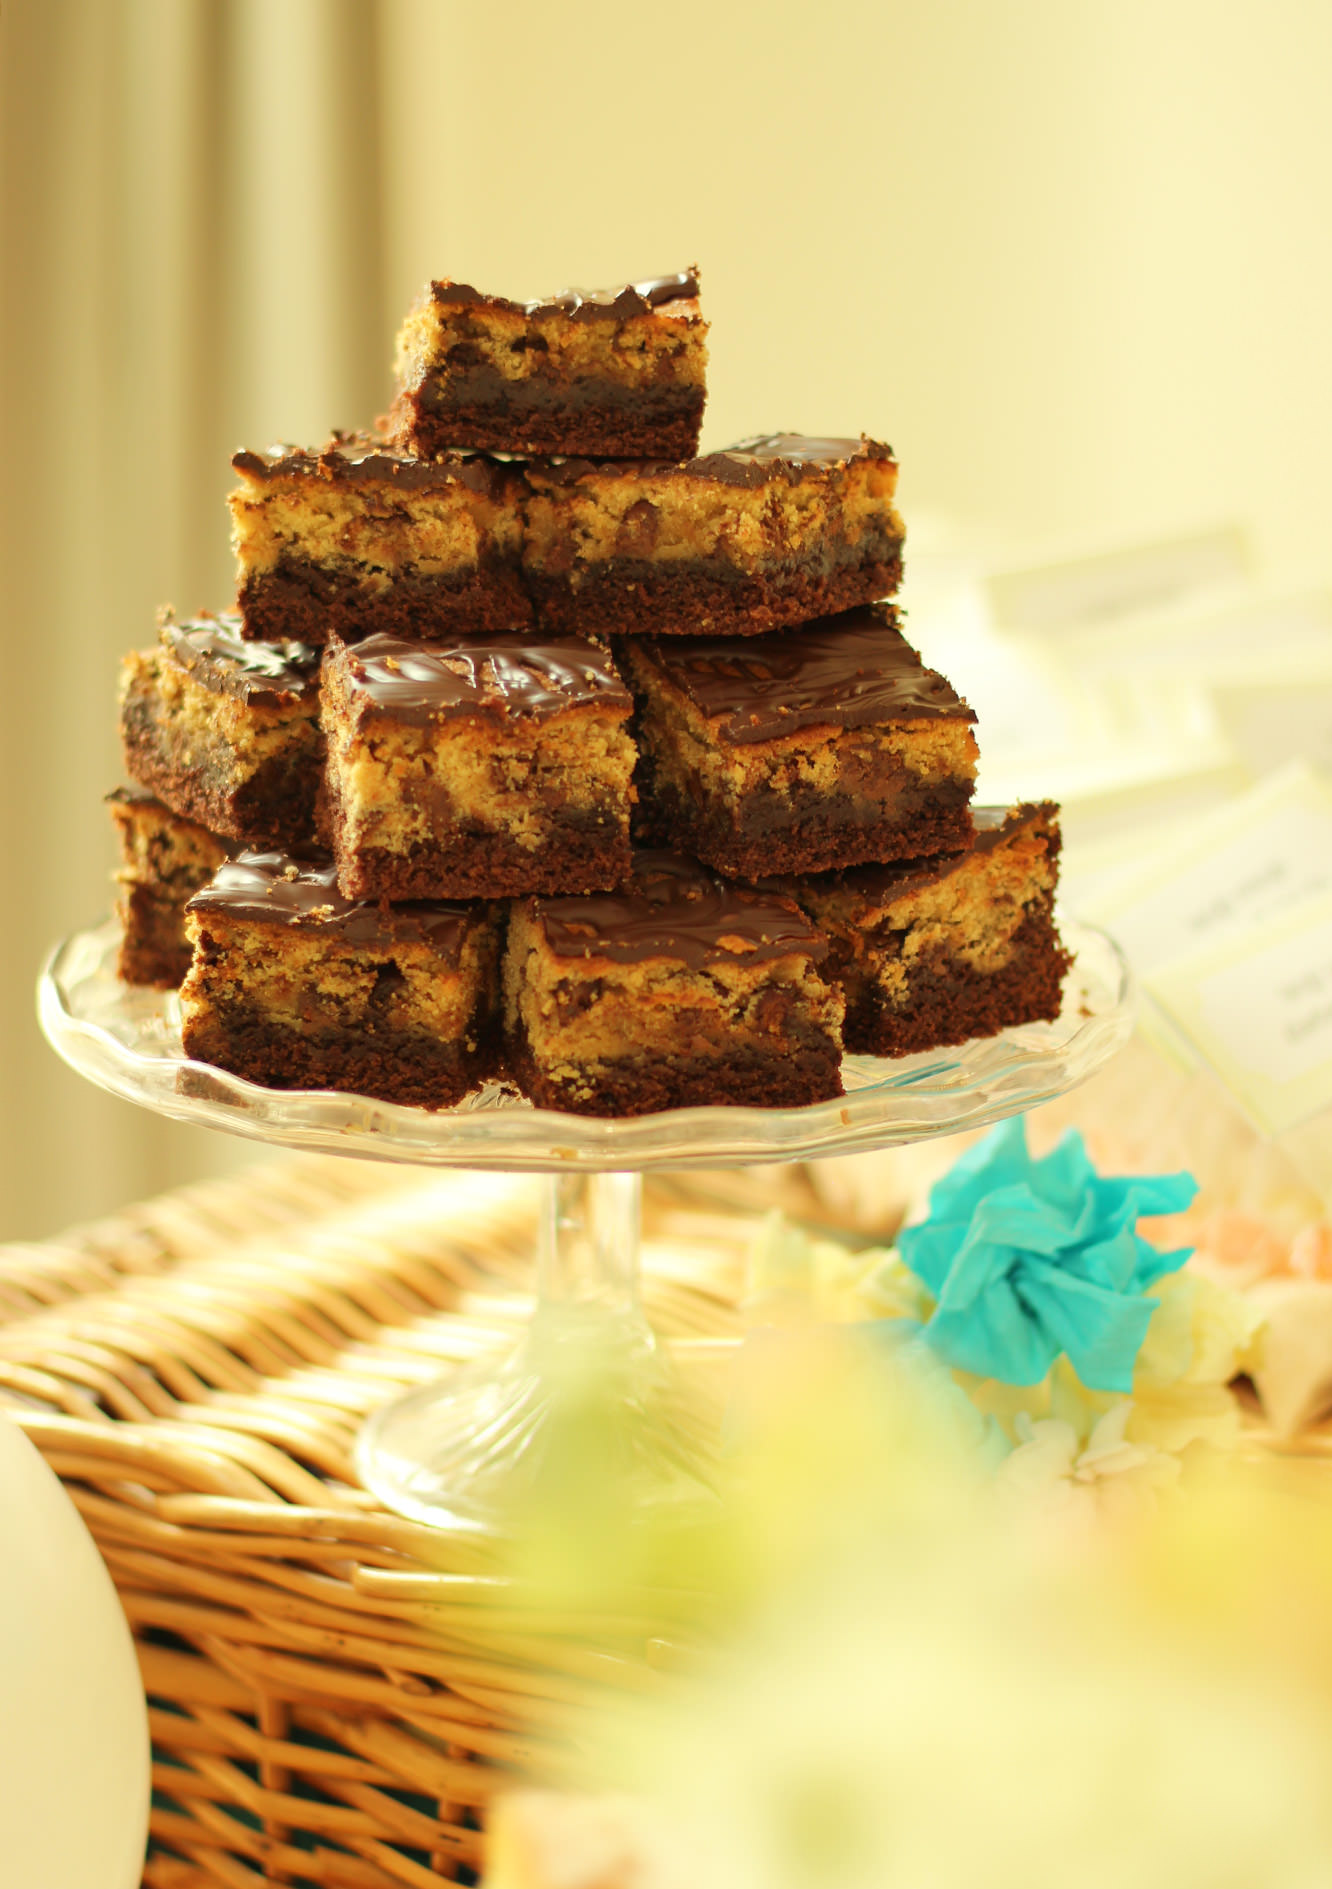
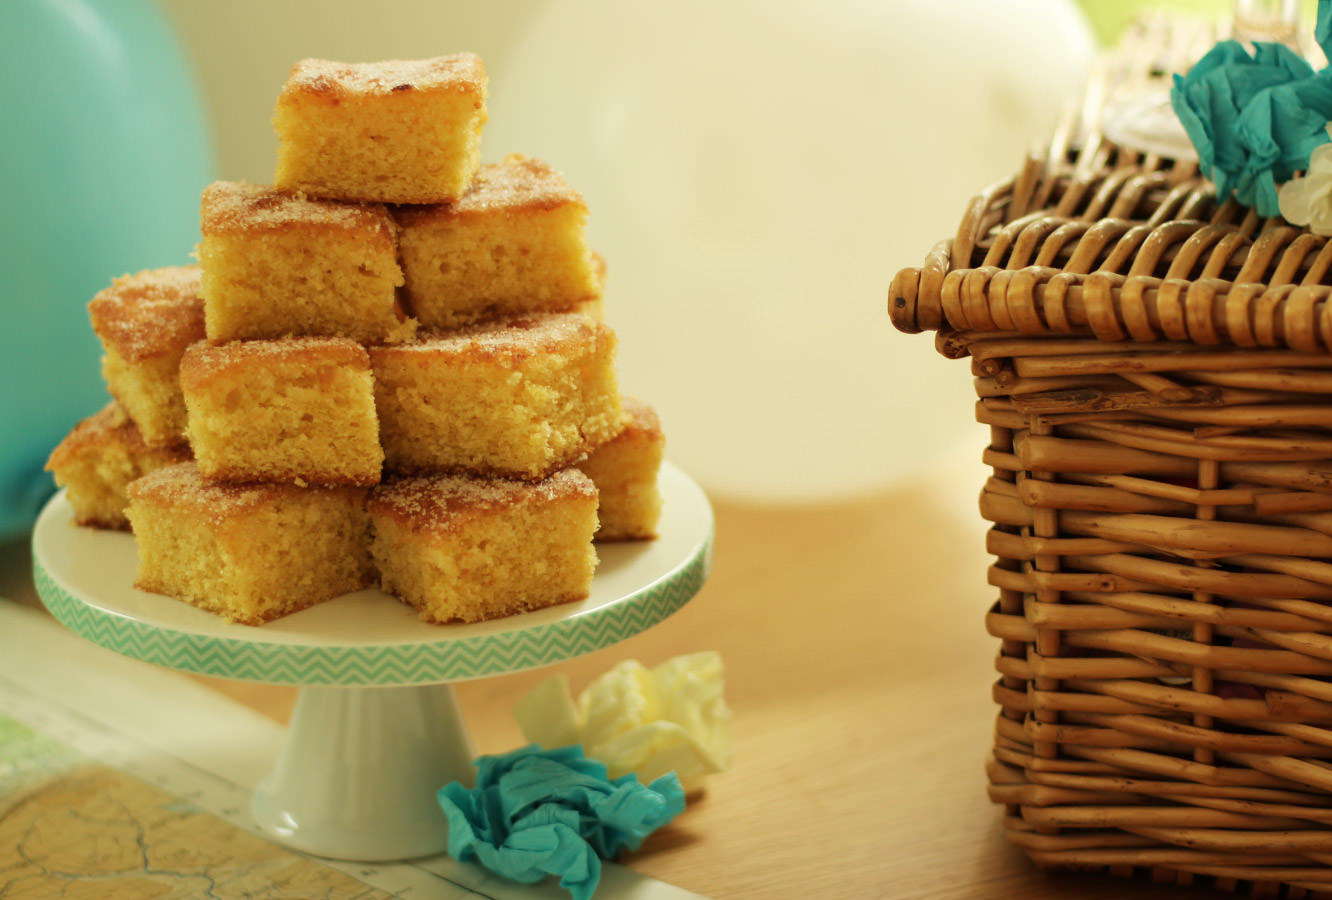
Assemble. You’ll notice I baked a few treats and got some flowers too. The cookie dough brownie recipe has appeared on the blog before, and I’ll get to the lemon drizzle soon.
There you go. All set to throw a lovely hen party/bridal shower of your own.
It seems a bit strange to be writing this. Not least because the last few weeks were crazy and I got out of the habit of blogging, but mainly because the hen in question is now a WIFE.
What’s that? You wanna see? Oh ok then, here she is…
As you can see from the size of that smile, we all had a ball. It was an amazing day.
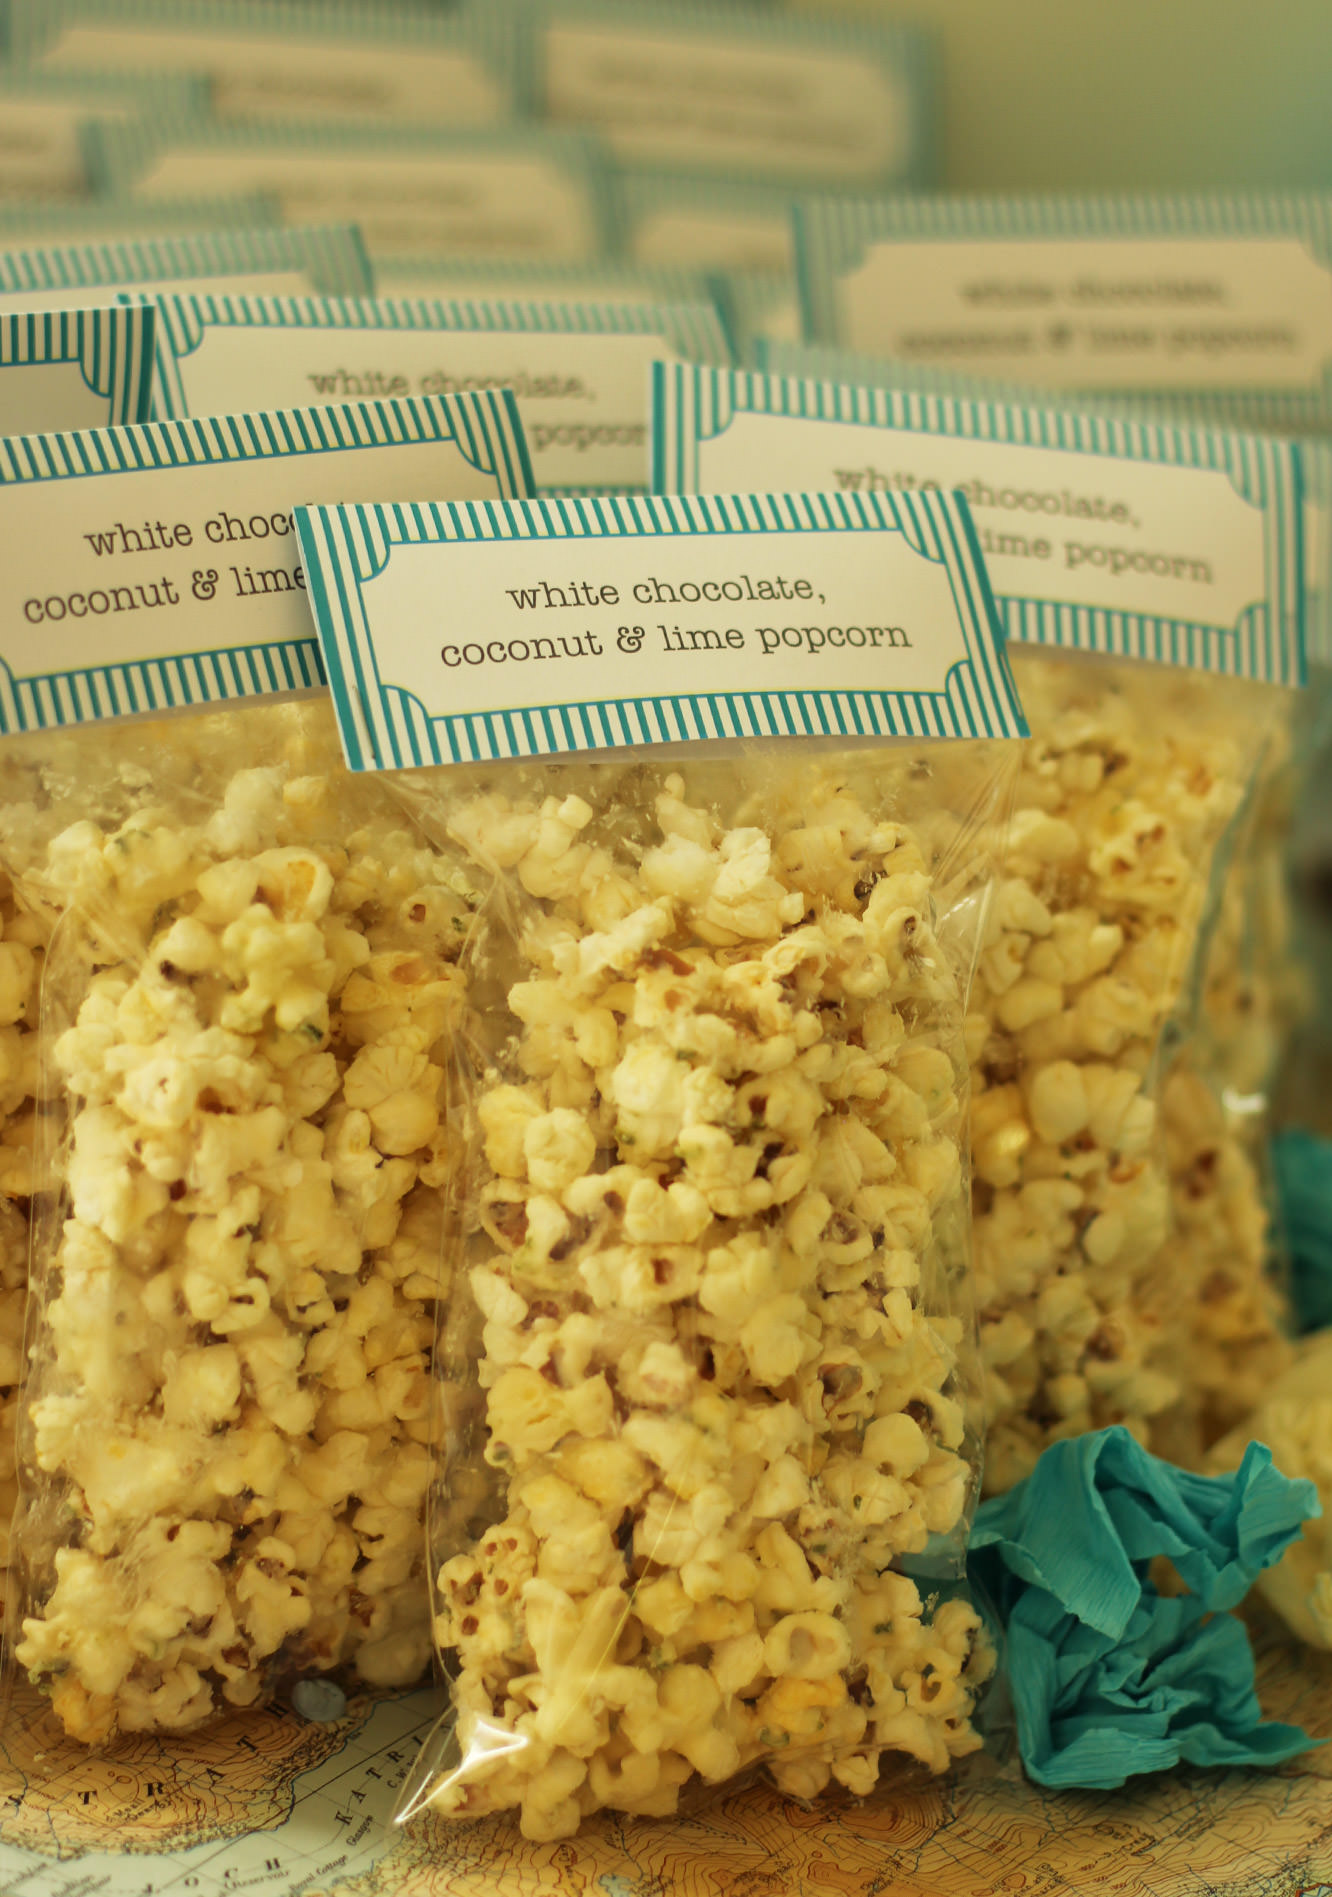
But let’s step back a month or three and finish off her favours. This was without a doubt the guests’ fave recipe so, ladies, all of you who asked me for it, sorry it took so long! Without further ado here is the recipe for white chocolate, lime and coconut popcorn.
Remember to downscale the below if you’re making for a smaller group/movie night.
You will need
450g/1lb plain popcorn kernels
600g/1lb 5oz white chocolate
Coconut oil
2 limes (zest)
Step one
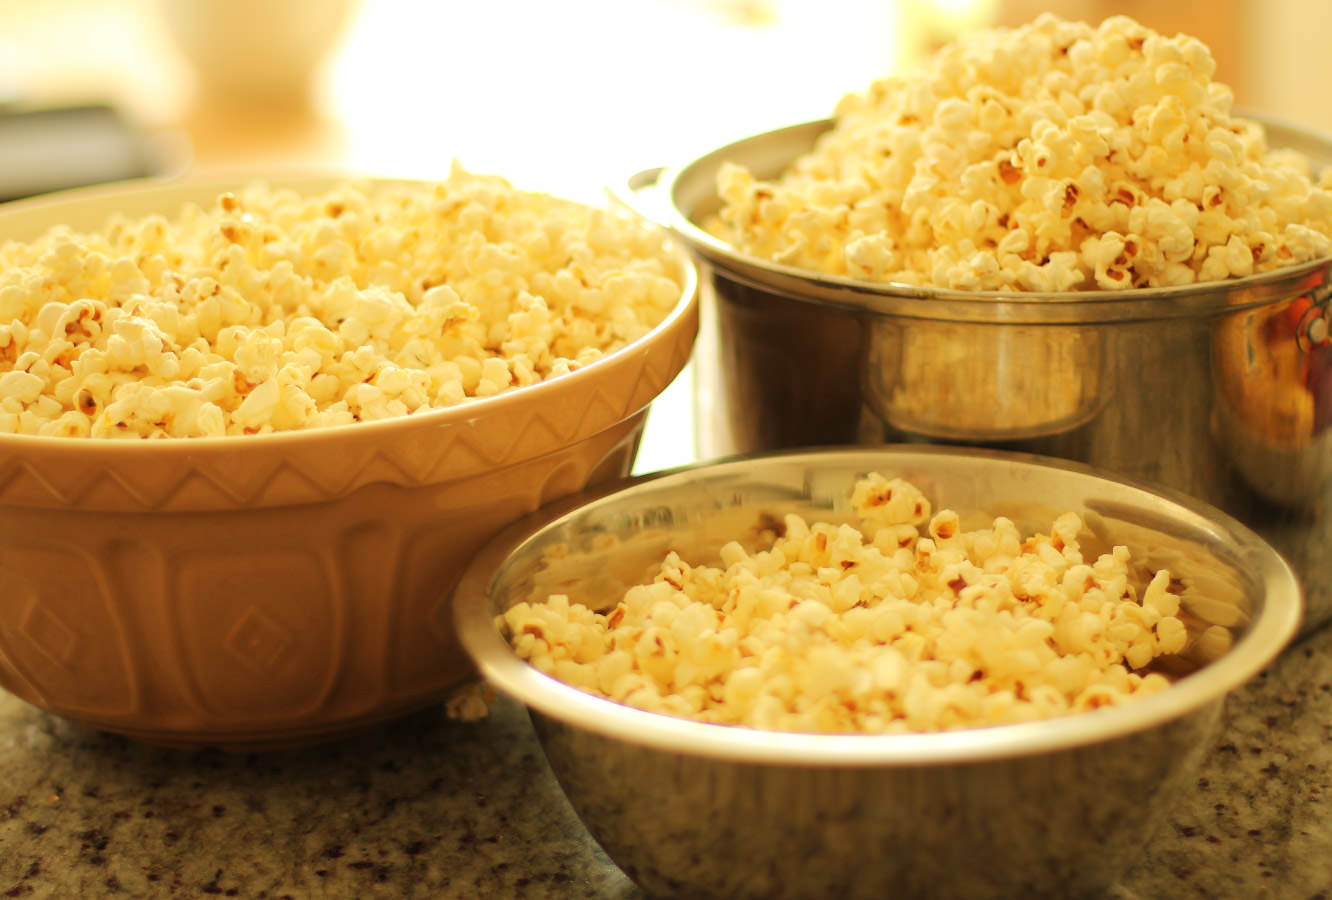
You’re going to want to get a biiiiiig pan (one with a lid unless you want to be finding popcorn in corners for years). You also need several bowls to decant the popcorn into and definitely don’t try to pop it all in one go, I think i did three or four batches.
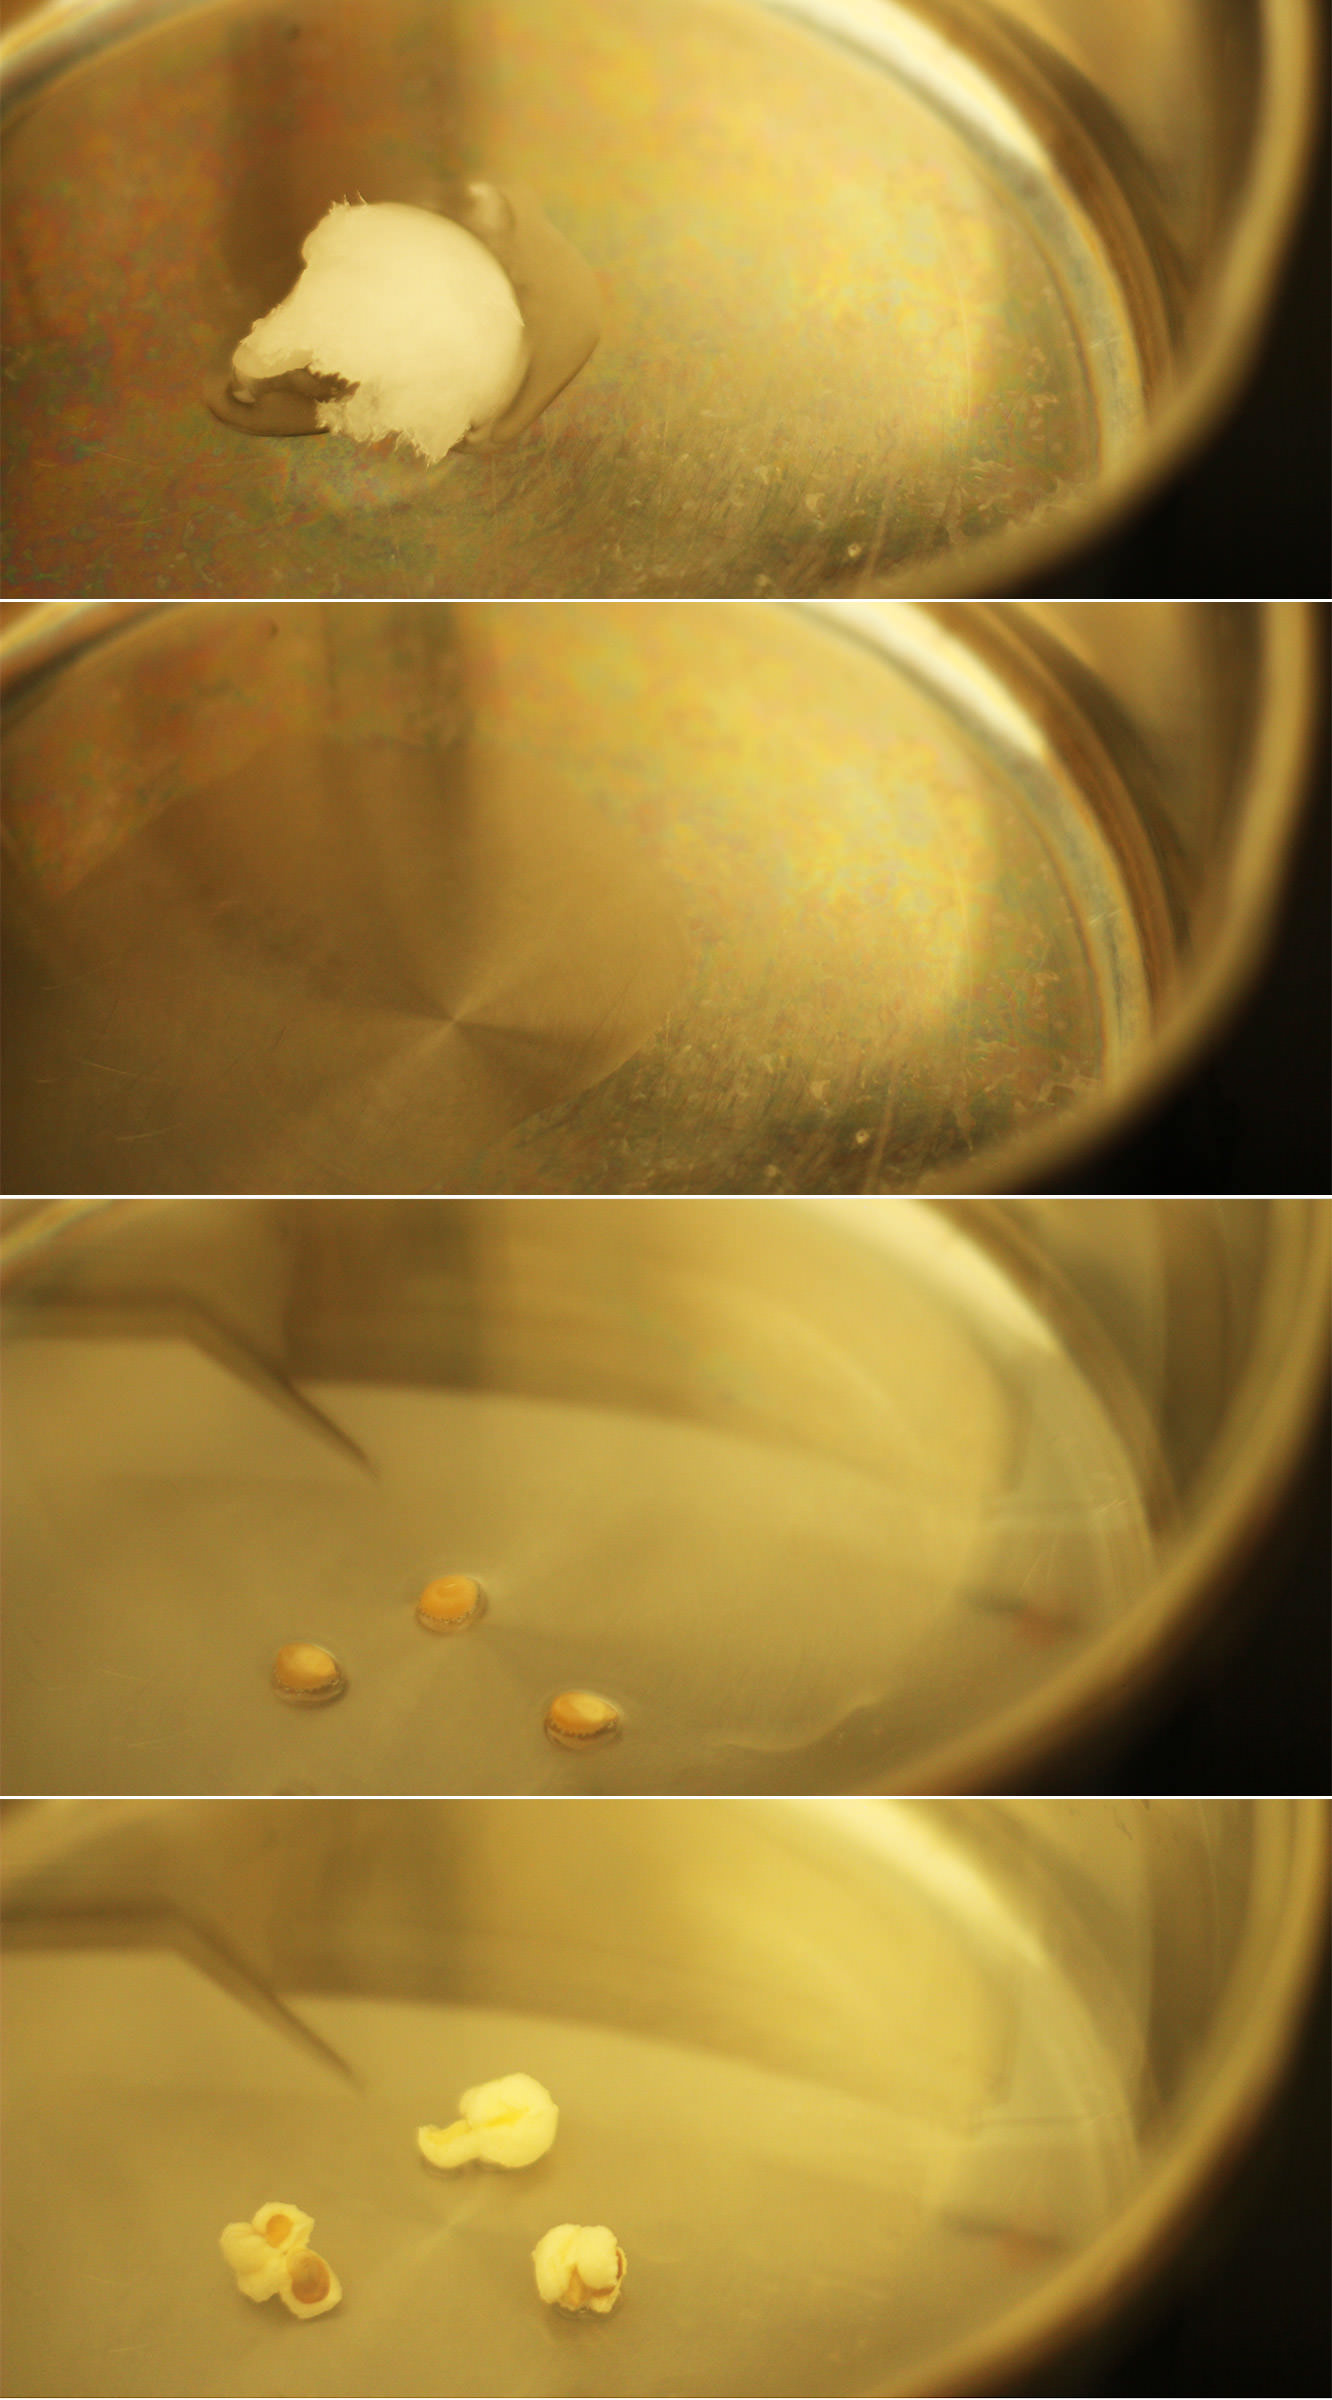
So. Pop the pan on a med-low heat, and drop a tablespoon of coconut oil in the pan. Add three kernels or so and wait patiently for them to pop.
Don’t put all the kernels in straight away otherwise you will burn some.
Step two
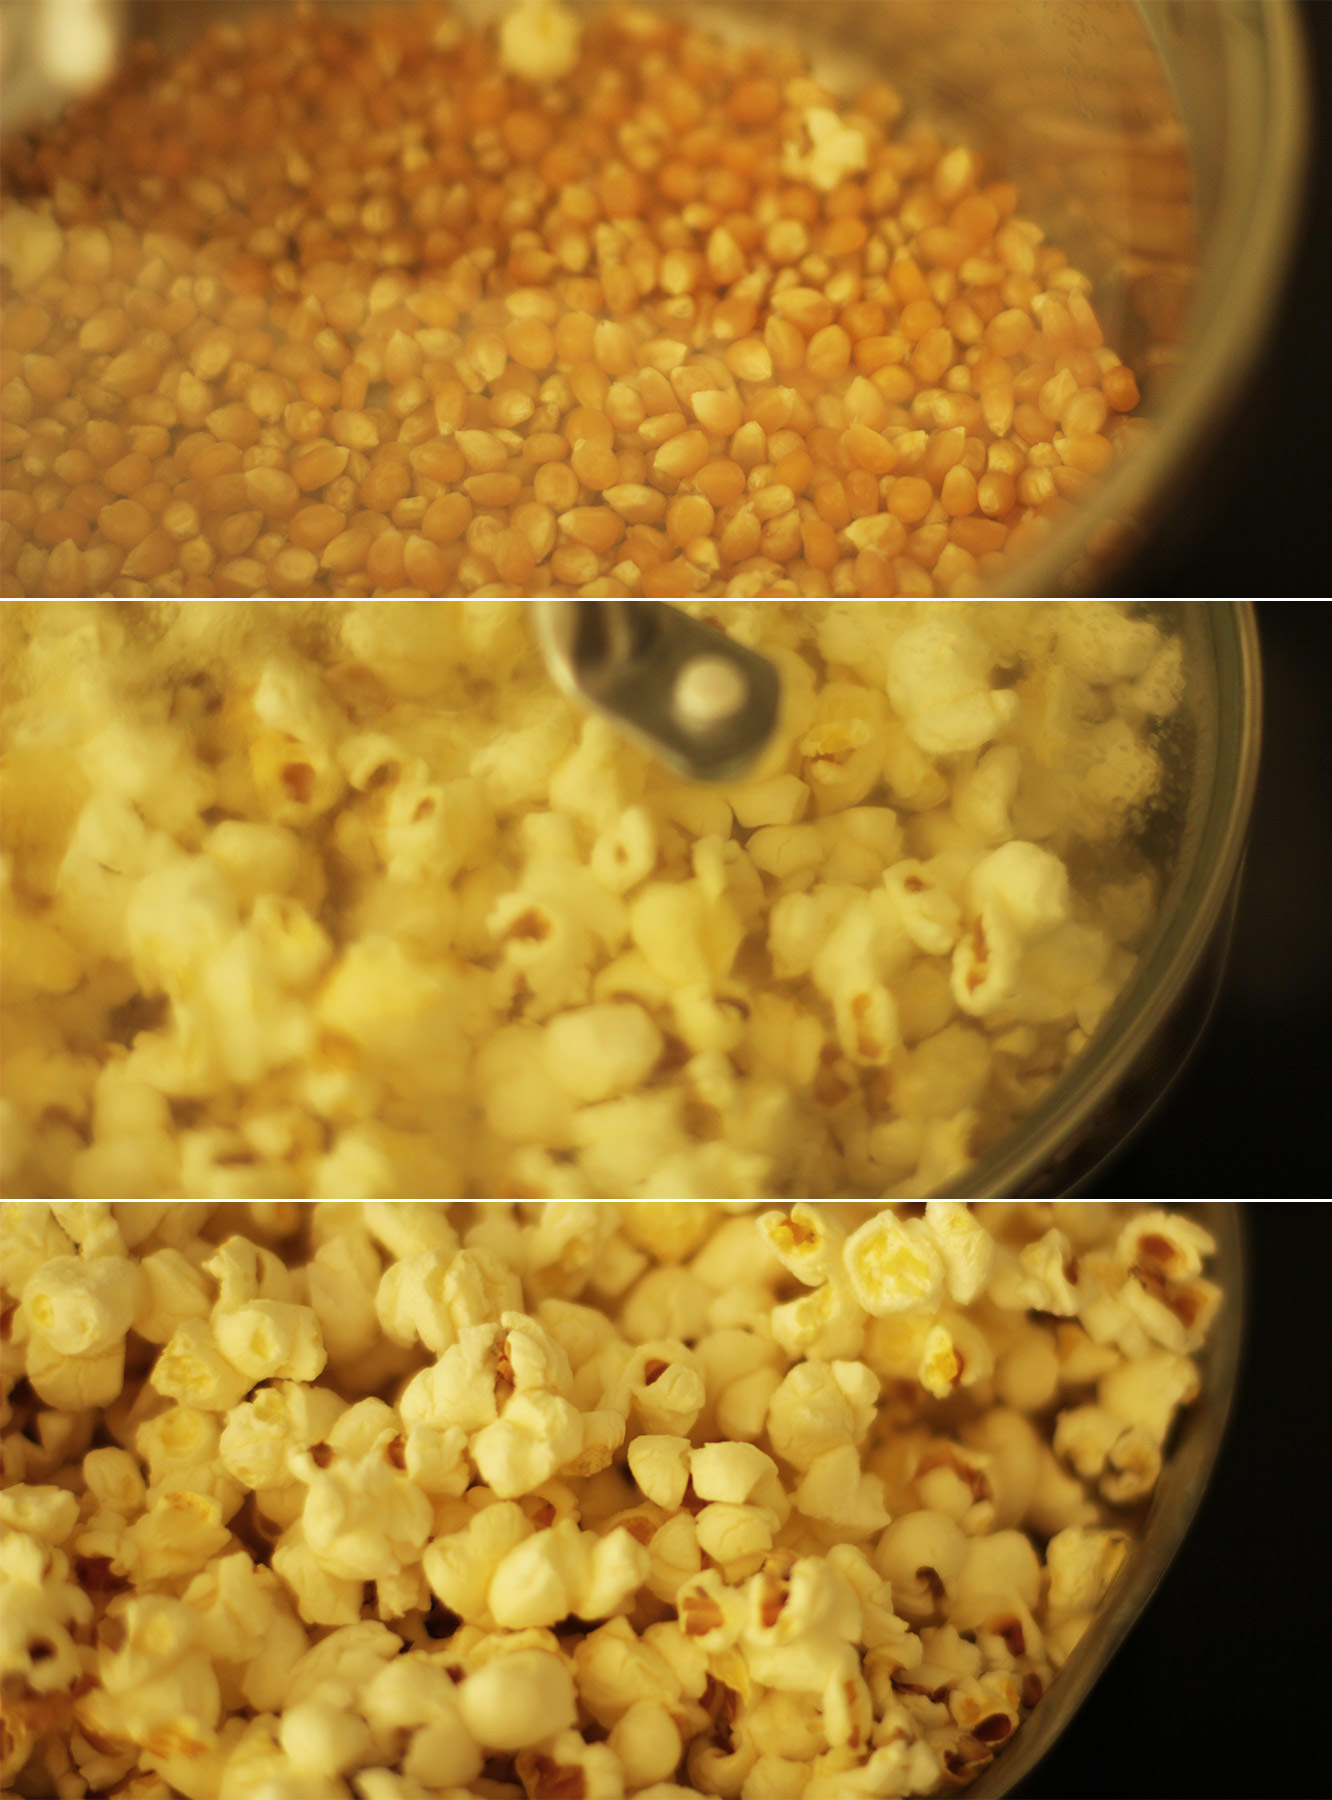
Once the three test kernels have popped pour a load more in to cover the bottom of the pan and replace the lid.
As the kernels start to pop I generally shake the pan a intermittently and hover it above the heat. If the popping slows down, place it fully back on the heat for a few seconds.
When the pan is filling up and there’s a couple of seconds between pops remove it from the heat and pour the popcorn into a bowl.
Step three
Repeat repeat repeat until you’ve used alla that popping corn.
Step four
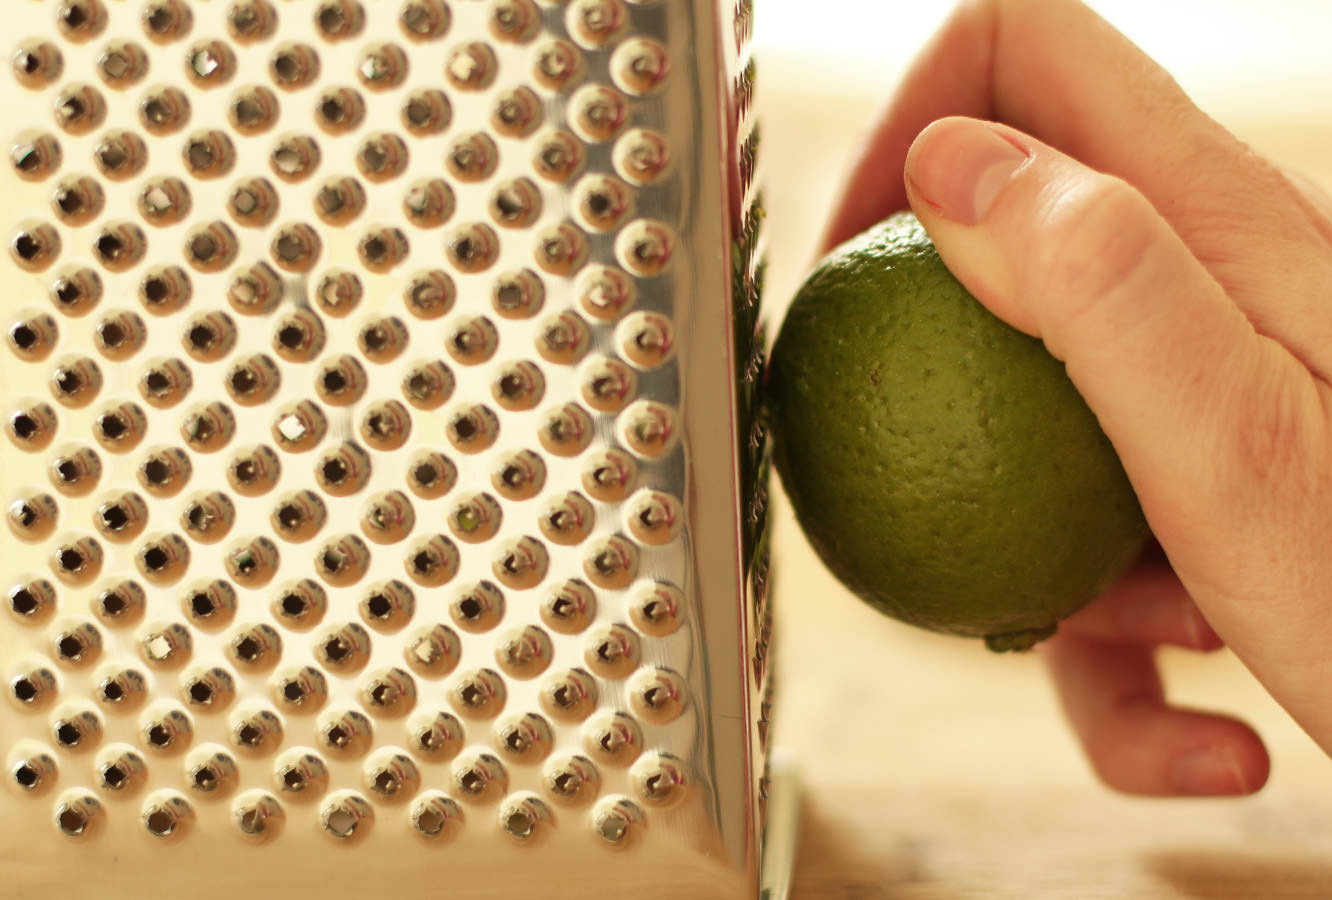
Zest the limes on the smallest ‘setting’ on your grater.
Step five
Melt the white chocolate in a heatproof bowl. As there’s quite a lot of it, it’s really probably better to do this over a pan of boiling water. Otherwise you risk leaving some foil in there, almost blowing up your microwave and burning 600g of chocolate. There might be a small rage blackout to follow.
While the chocolate is still warm stir in a heaped tablespoon of coconut oil.
Step six
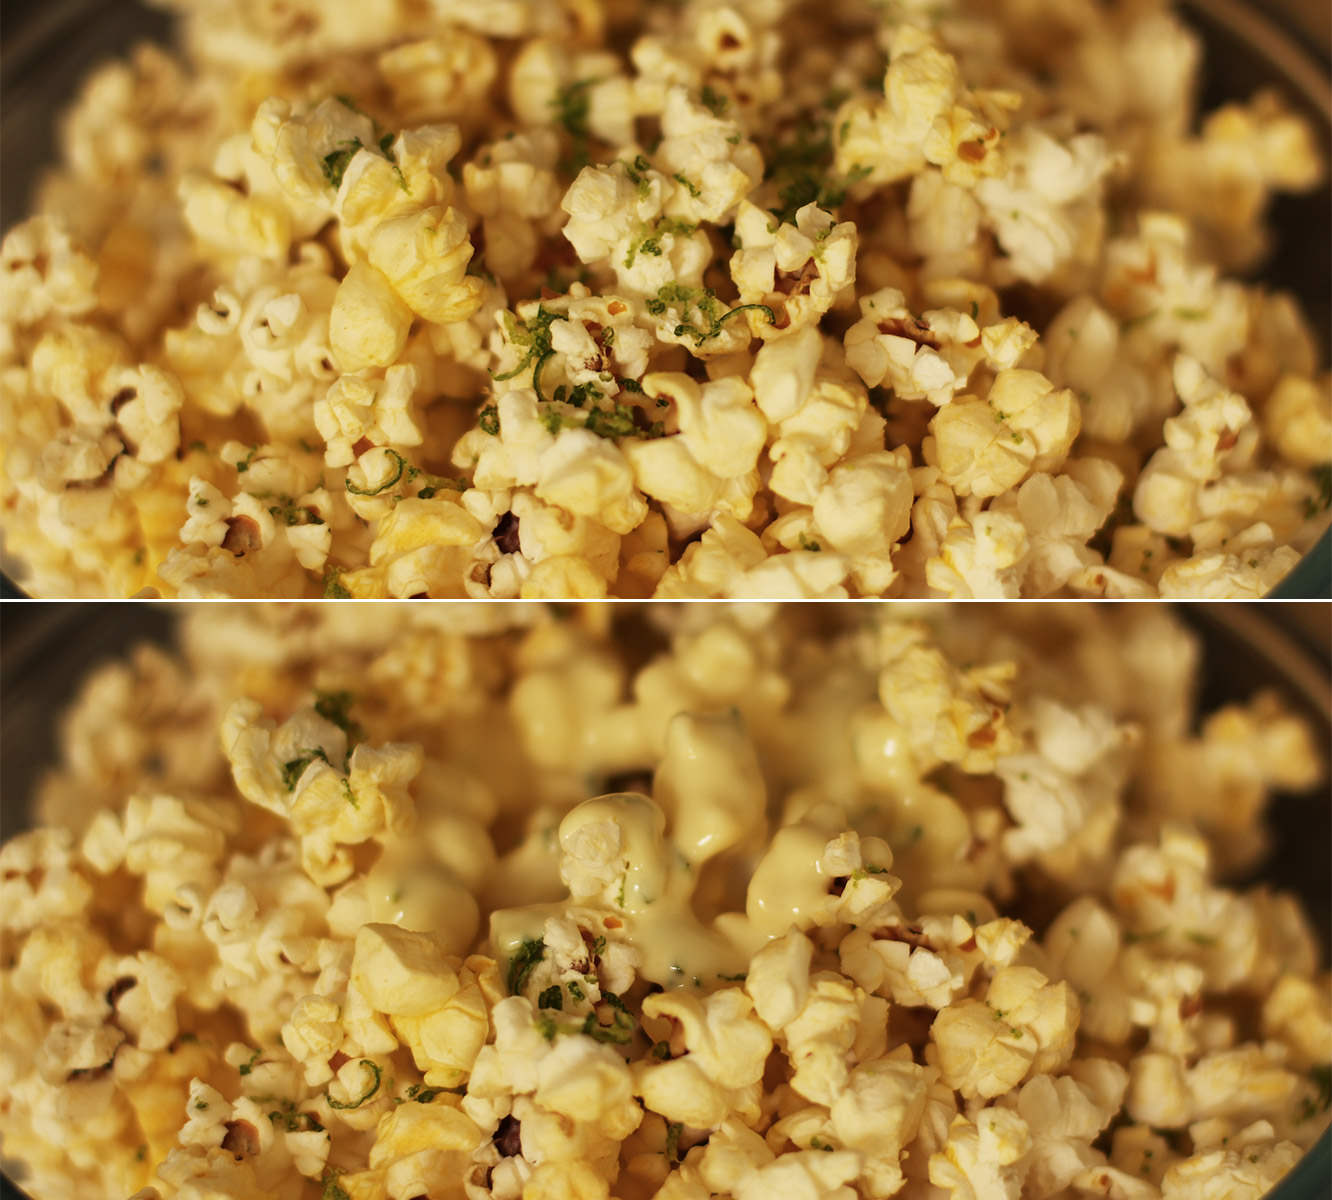
This is the tricky bit, you sort of need to distribute the chocolate and lime evenly amongst your batches of popcorn.
Step seven
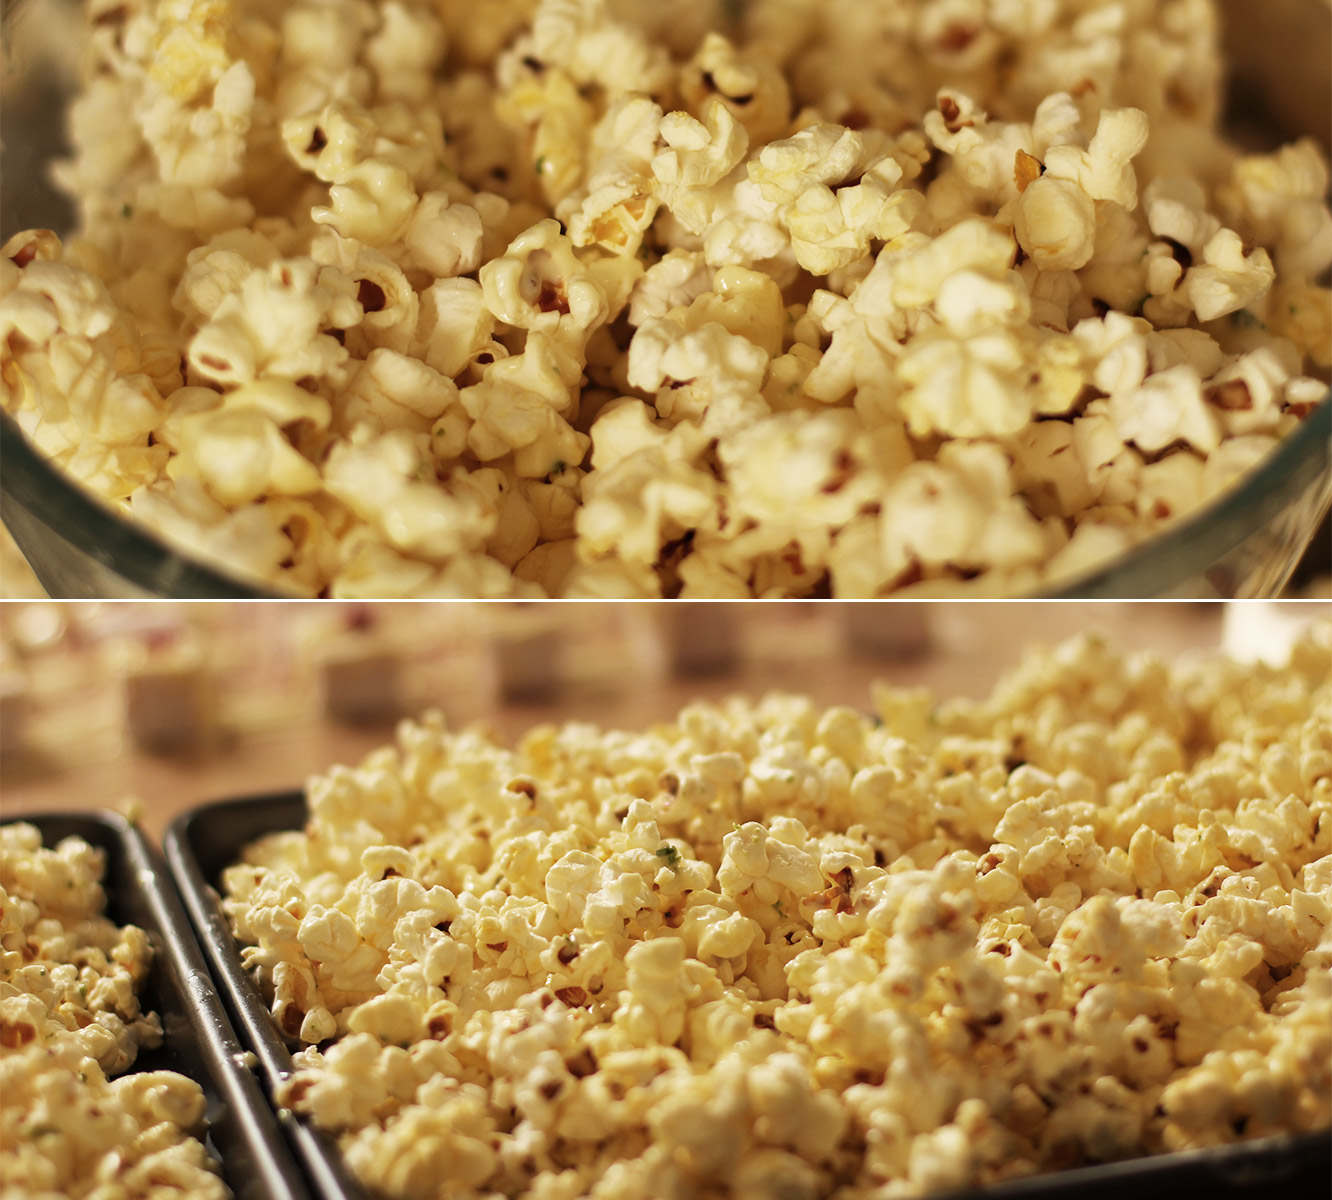
Stir in the chocolate as well as you can and spread out on baking trays to set. The chocolate won’t fully harden because of the oil but it’s nice that way, I promise.
That’s all folks.
Final instalment next week – the bringing of everything together.
Hi there. First off, apologies are in order. I missed my Monday night slot this week. I am deeply entrenched in finishing my portfolio and got really, really, involved in designing a book cover, more on that another time.
ANYWAY. My lovely housemate Vicky had her Hen Party a few weekends ago. Sadly I had something I had booked up a year in advance to go to so I couldn’t make it. Sad face. Instead I thought I would leave Vicky a little surprise on the dining table so she’d know I was thinking of her while she partied on down with her hens.
This is a little four part series, showing you how to make three different little hen/bachelorette party favours at home; the final post will detail all the finishing touches. You might prefer to use them as wedding favours or for childrens’ parties instead.
Heads up: I made 30 of each recipe, so if you’re looking to make a sweet treat for an evening in, divide, divide, divide the quantities of the recipe, don’t send me the bill for your fillings.
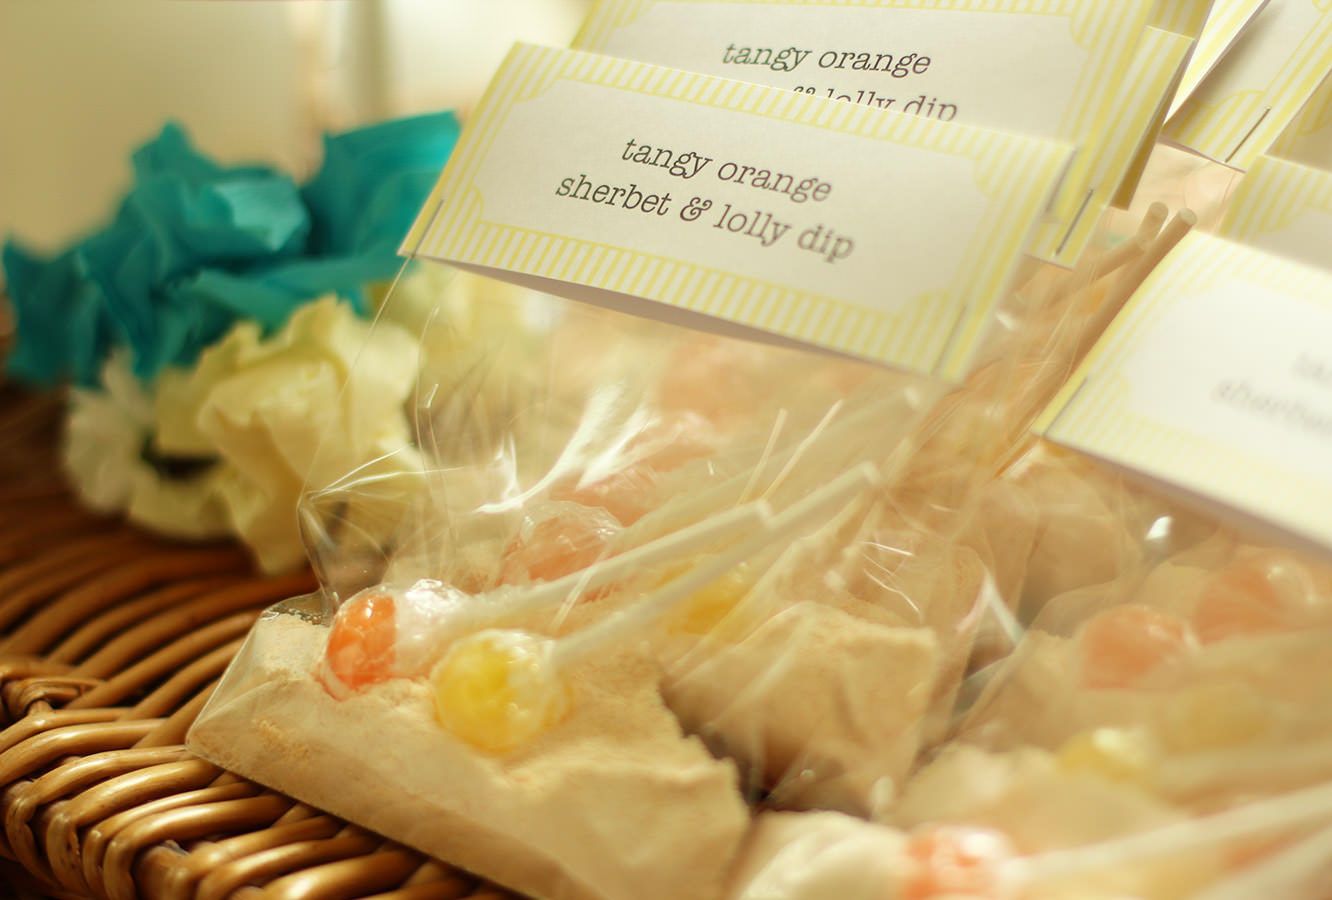
We’re kicking off this week with a recipe for orange sherbet. I just need to clarify for the sake of my US (and possibly Canadian?) readership, we mean something different when we say sherbet. You mean sorbet. We mean sherbet.
You will need
300g/10.5 oz Icing sugar
300g/10.5 oz Granulated sugar
175g/6 oz Caster sugar
125g/4.5 oz Orange jelly powder (again, America, you mean jelly when you say jello)
1-2 tsp Yellow food colouring
1 tsp Orange extract
60 small, or 30 regular sized lollipops
Cellophane DL card bags
(makes 30)
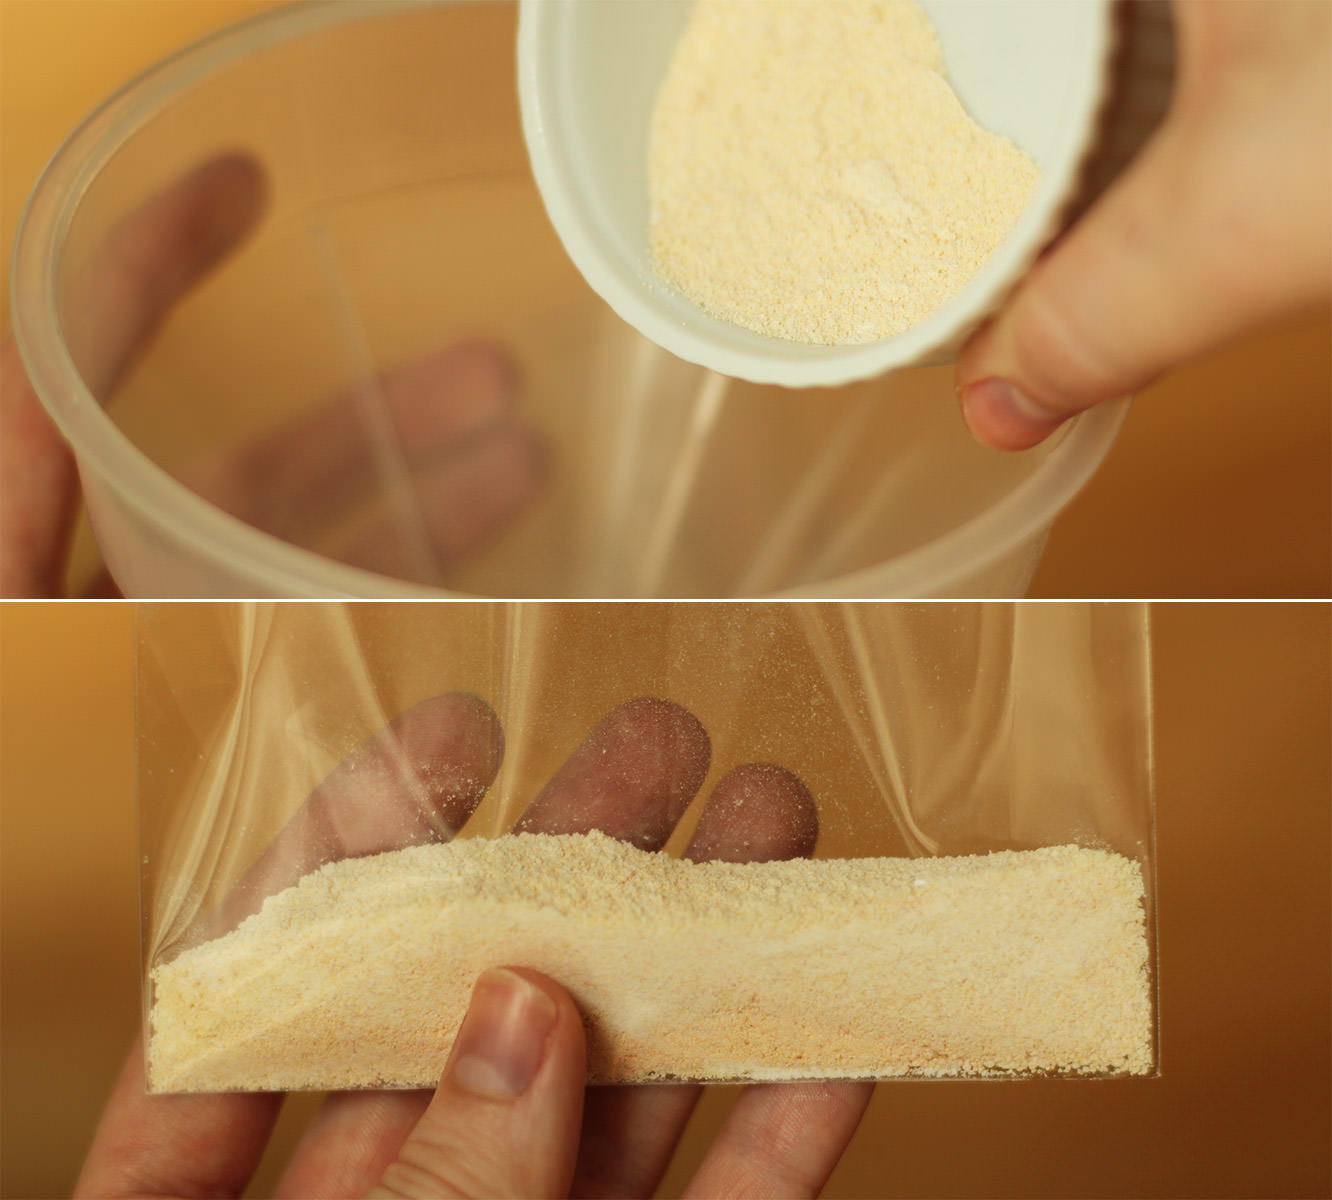
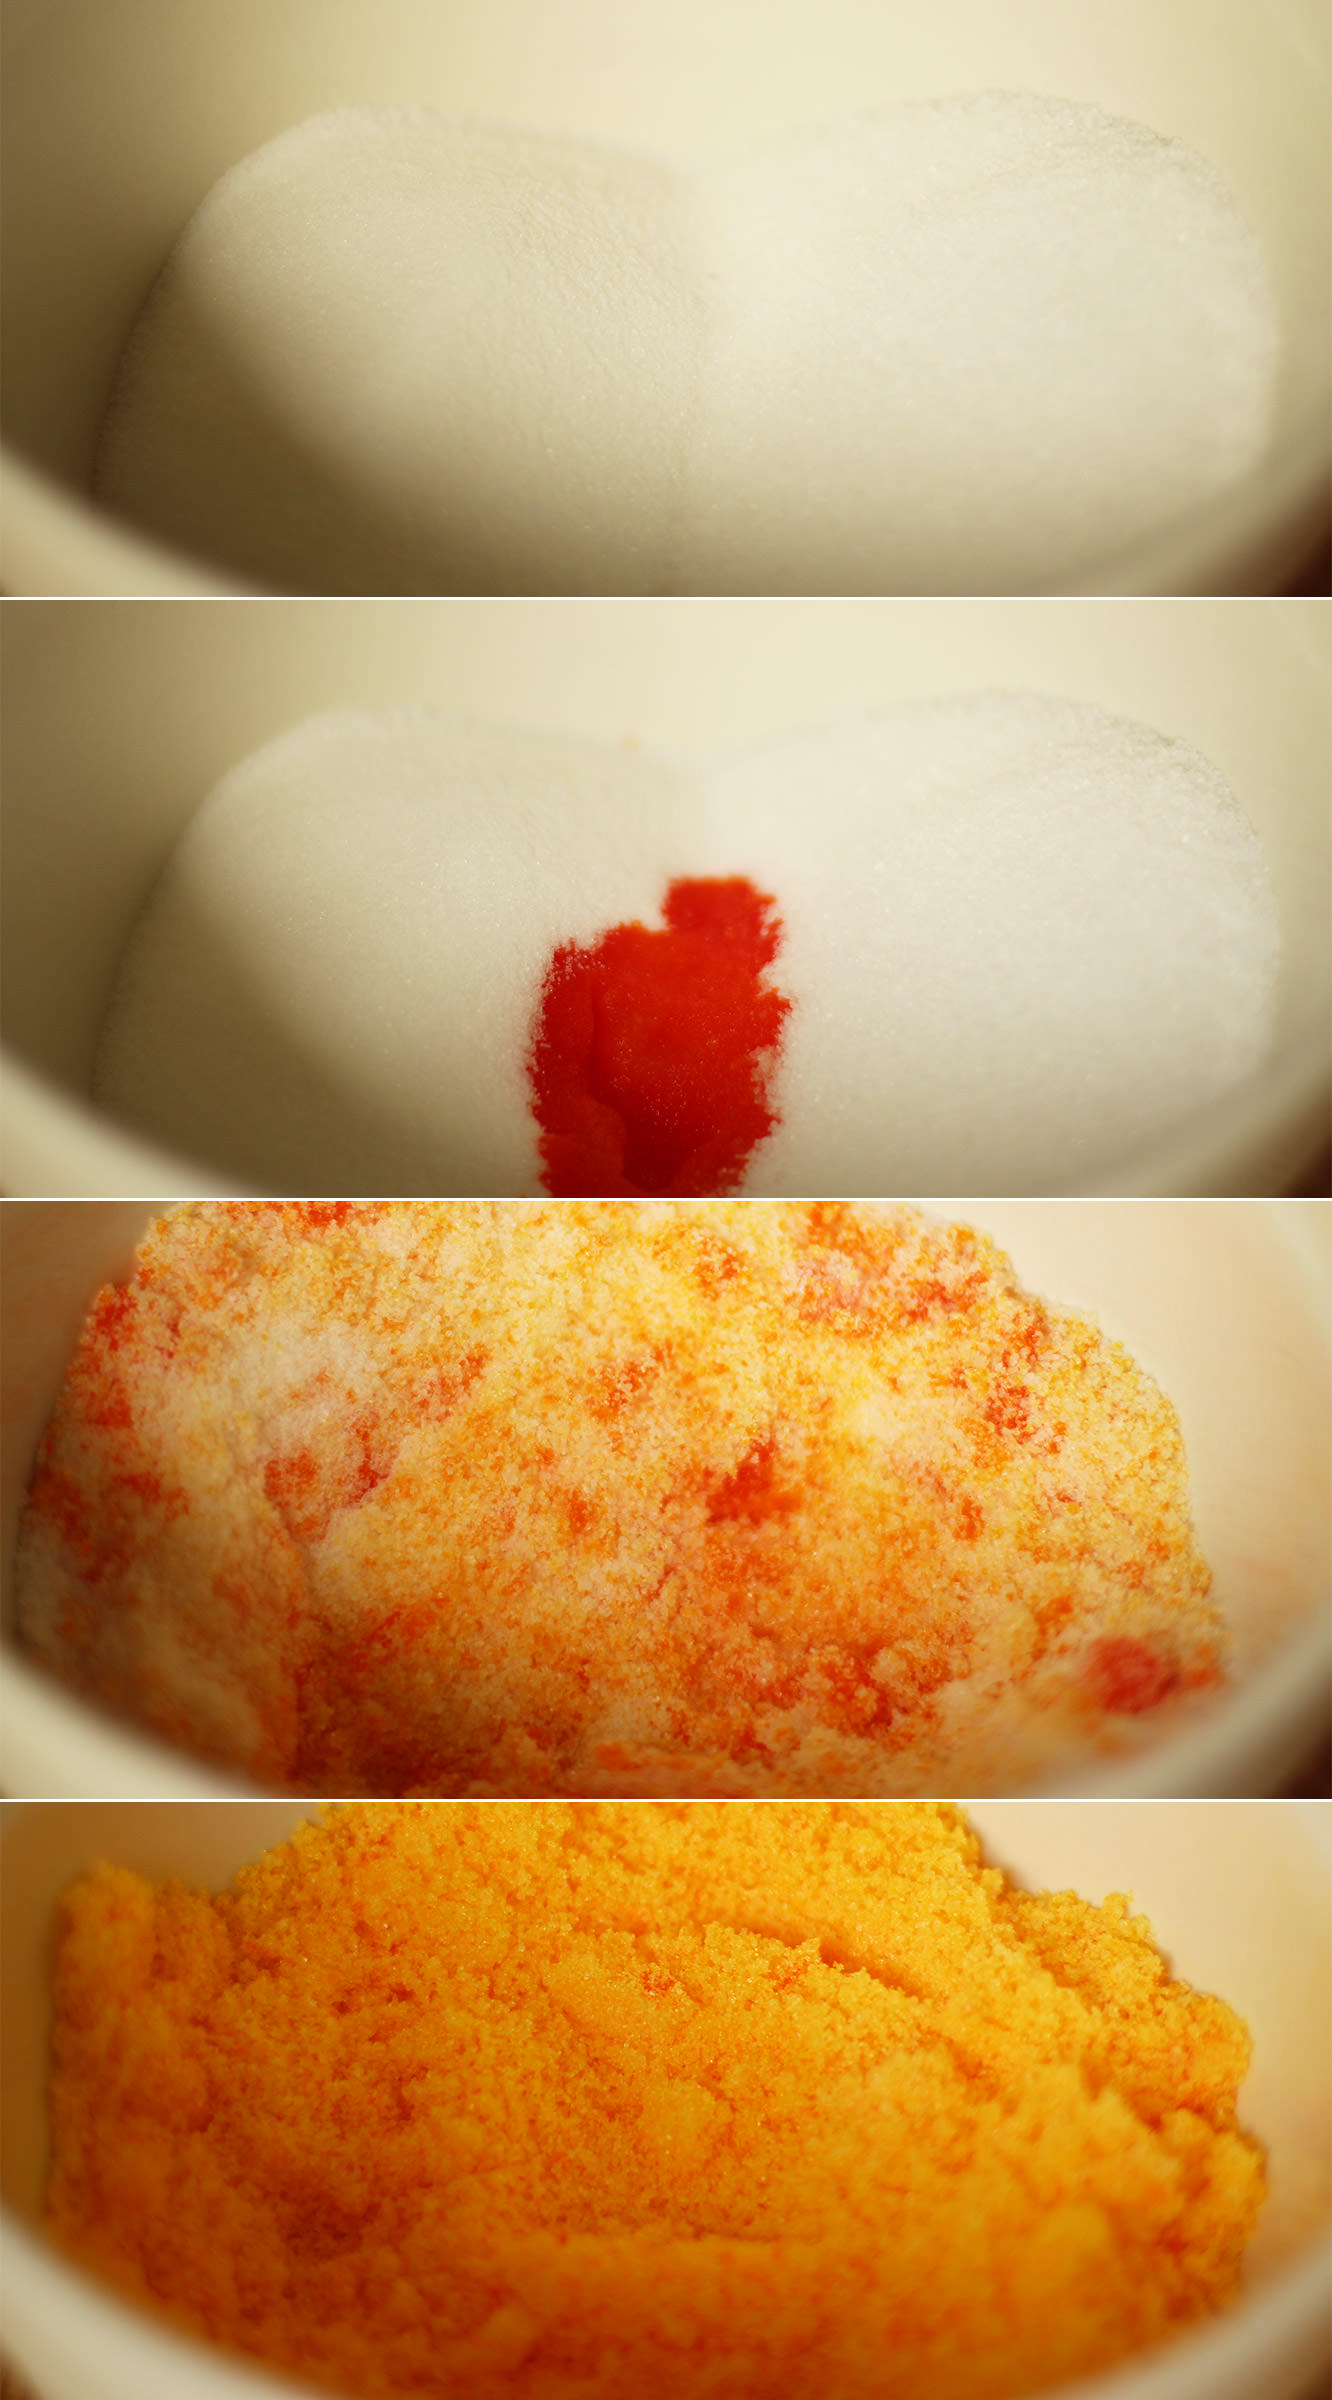
Step one
Mix together the granulated and caster sugars with the orange extract and colouring. If you want it to be a really bright colour, go for 2 tsp, I wanted a more subtle yellowy-orange so went for one.
Just in case you think I’ve lost it…the colour dilutes when you add the other ingredients.
Step two
Add the jelly powder and stir again until fully combined. Give it a little taste at this point. For a stronger flavour add more jelly or more flavouring, but for the record, I think you’ll be set.
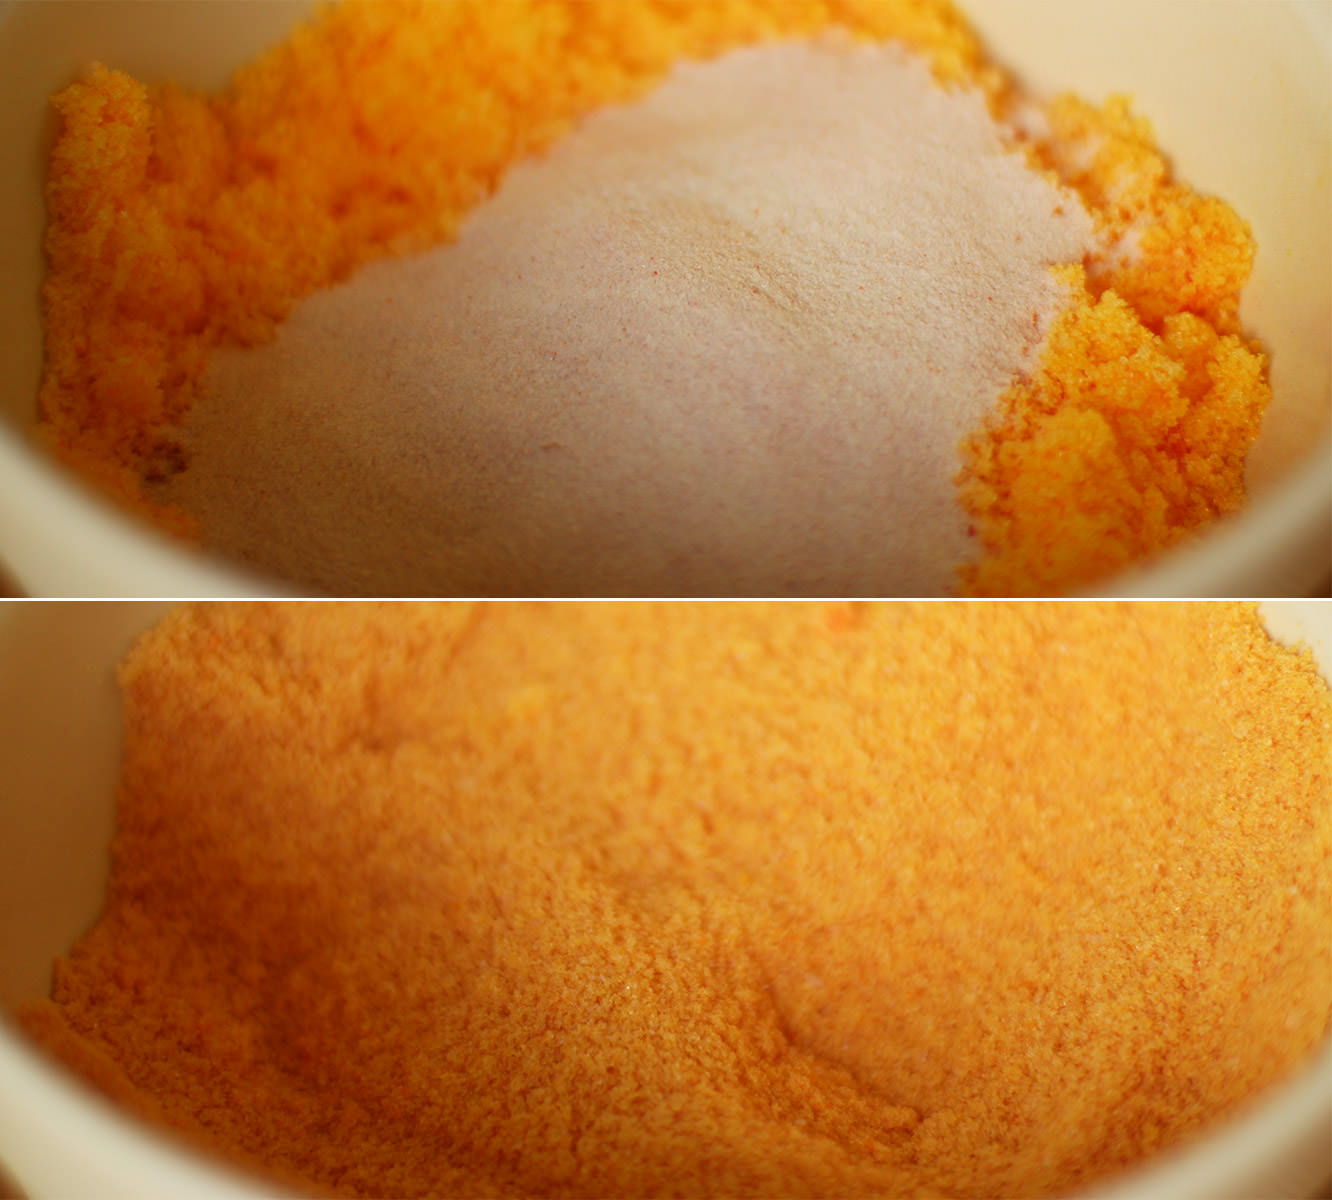
Step three
Add the icing sugar and mix again thoroughly. See, now you you know what I mean about the colour? Nice and subtle isn’t it?
Step four
Weigh 30g portions and pour into the card bags.
That’s where I’m leaving you for today I’m afraid folks, the finishing off will be in my round up post in a few weeks. The suspense is killing you I know.
In the meantime, just when you thought you weren’t even getting a gif this week. Here’s a tinker in her dungarees:
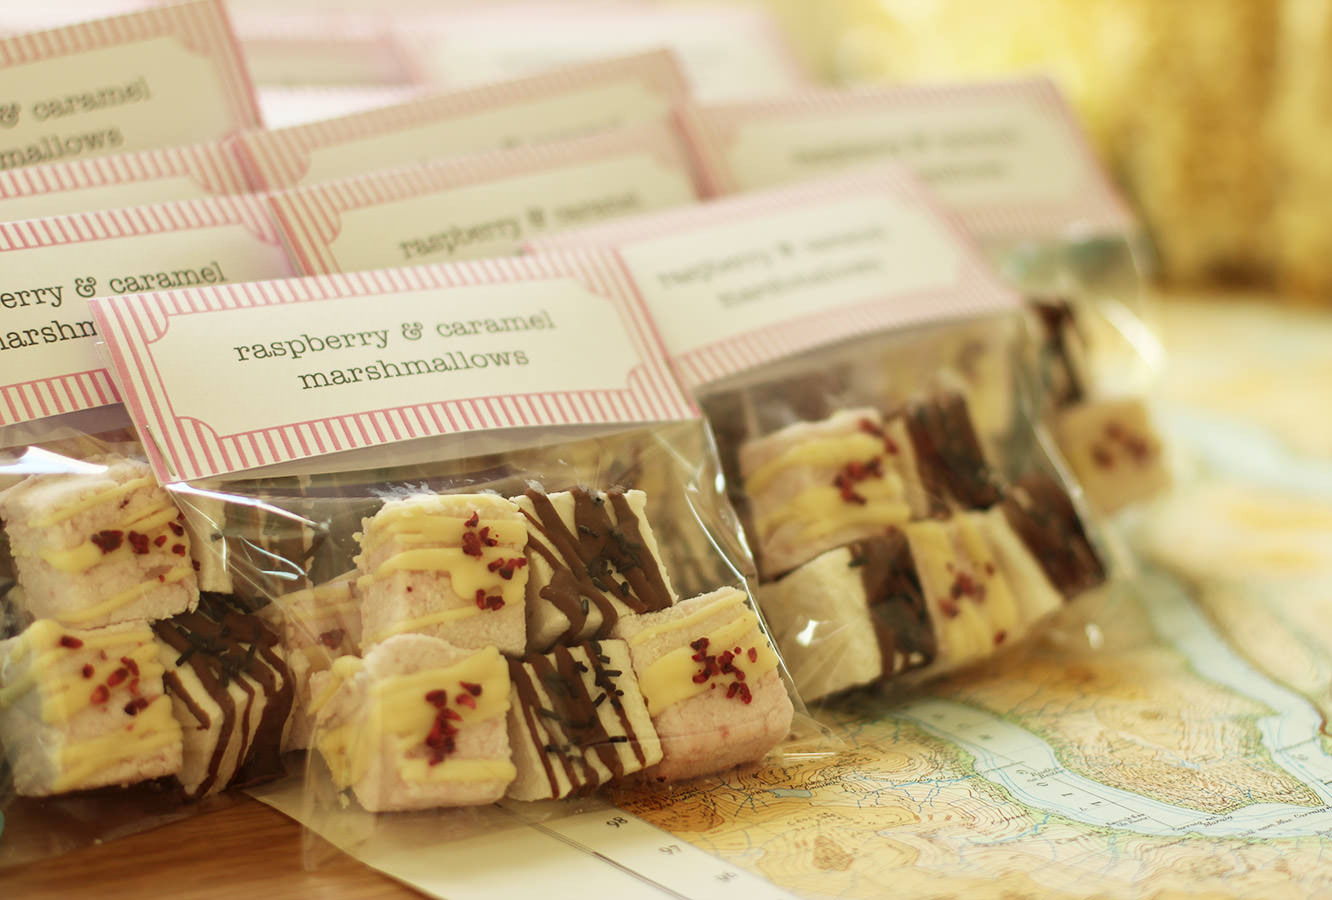
Given that I’m doing a little afternoon tea series I thought I would share a recipe that I adapted for a lovely lady’s bridal shower recently. It’s a little less traditional than your average, but nice and light, definitely a worthwhile addition to any afternoon tea table. In honour of said bride-to-be I made these marshmallows maple flavoured as she hails from a distant land (Canada).
Some speculation as to whether or not marshmallows are easy enough to make trickled around the bridal shower. My answer in case you are wondering, is that they aren’t the most straightforward, but definitely do-able, and very satisfying. These guys make your house smell incredible too, so if you’re tempted, give it a go!
Disclaimer: don’t make these for vegetarians or you will be met with narrowed eyes. On the upside, they are great for the gluten free. Unless they are vegetarian.
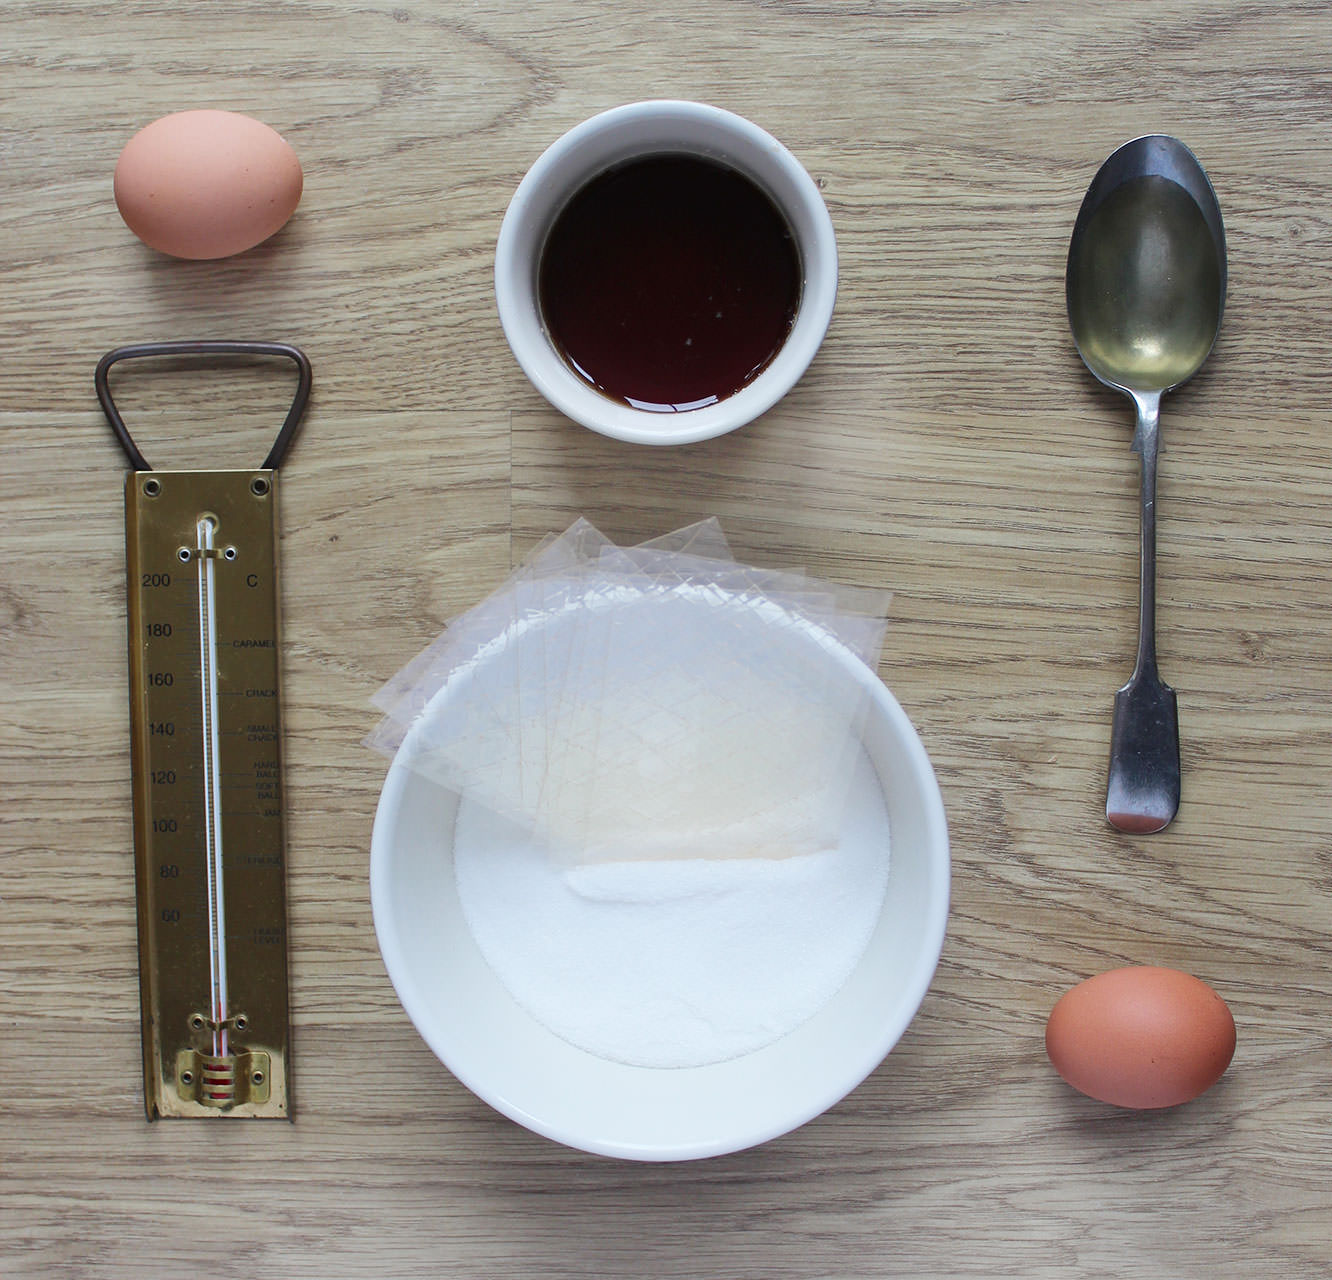
You will need
9 Gelatine sheets
300g/10.5 oz Granulated sugar
100g/3.5 oz Maple syrup
100g/3.5 oz Milk chocolate
2 Egg whites
1 tbsp Liquid glucose (you can find this in a squeeze toothpaste type tube in the baking section)
1 tsp Vanilla extract
Icing sugar
A sugar thermometer
Step one
Lightly oil a deep baking tray/brownie tin. Dust with icing sugar and set aside.
Step two
Put the gelatine sheets in 150ml/3.5 fl oz cold water and leave to soak. I snapped mine in half, but don’t break them up any more than that.
Step three
Put the sugar, glucose and maple syrup in a saucepan (the heavier the better). Add 150ml/3.5 fl oz water and put on a low heat.
Patience is key here as you will feel like eternity is passing you by while you’re waiting for it to get to the right temperature. It’s worth doing this stage slowly so you don’t burn the sugar etc etc. Make sure you have some snacks to hand.
It will smell so good you will want to put your face in it. Don’t.
Step four
When the thermometer reaches about 115C/230F start beating the egg whites. Do this in a glass/metal bowl, as plastic ones tend to be a bit oily, no matter how hard you scrub them.
Step five
When the thermometer reaches 127C/260F turn the heat off and add the soaked gelatine. Don’t add the excess water though, just fish it out and give it a little squeeze. When you do this you will forgive me for not having a photo of it; the mixture fizzes and bubbles in quite an intimidating fashion.
Step six
Get the whisk going in the eggs again, and slowly pour the hot sugar mixture into them as you go. Move the beaters continually so that you don’t end up with a lump of hard sugar at the bottom of the bowl.
Step seven
Add vanilla extract and keep whisking.
Step eight
Whisk some more.
Step nine
Have someone come and support your arm if you need to, but keep on whisking my friend.
Step ten
When the mixture (about 10 minutes later) becomes really thick and gloopy it’s time to stop. Hallelujah. A good measure for this is when bottom of the bowl (on the outside) has cooled down.
Step eleven
Pour the marshmallow into the brownie tin you prepared earlier.
Step twelve
Dust the top with icing sugar and leave to set for a few hours. This is your opportunity to go and see the doctor about the muscle death in your right arm. (Kidding).
Step thirteen
Turn the marshmallow out onto a clean surface with a satisfying flump.
Use a bread knife to cut it into long strips and then cubes. The trick is to make your strips as wide as your mallows are deep to get square(ish) shapes. Dust all the sides in icing sugar as you go.
Generally I find I don’t need any extra icing sugar for this, as a lot comes off the top when you turn it out.
Step fourteen
Place the cubes on a sheet of greaseproof paper. Melt the milk chocolate (slowly in a microwave) and using a piping bag drizzle them lightly. Leave to dry and you’re done!
There we have it. Maple marshmallows. Nowhere near as difficult to make as I made them sound, I promise.
Hello there. Sorry for being a bit sporadic with the posts of late. I will get a handle on this eventually I promise!
I realised that I kicked off my little afternoon tea series without the bare essential – the scone. Now, my dad happens to be a champion scone maker and he’s given me the honour of letting me share his recipe with you.
So without further ado here goes, enjoy!
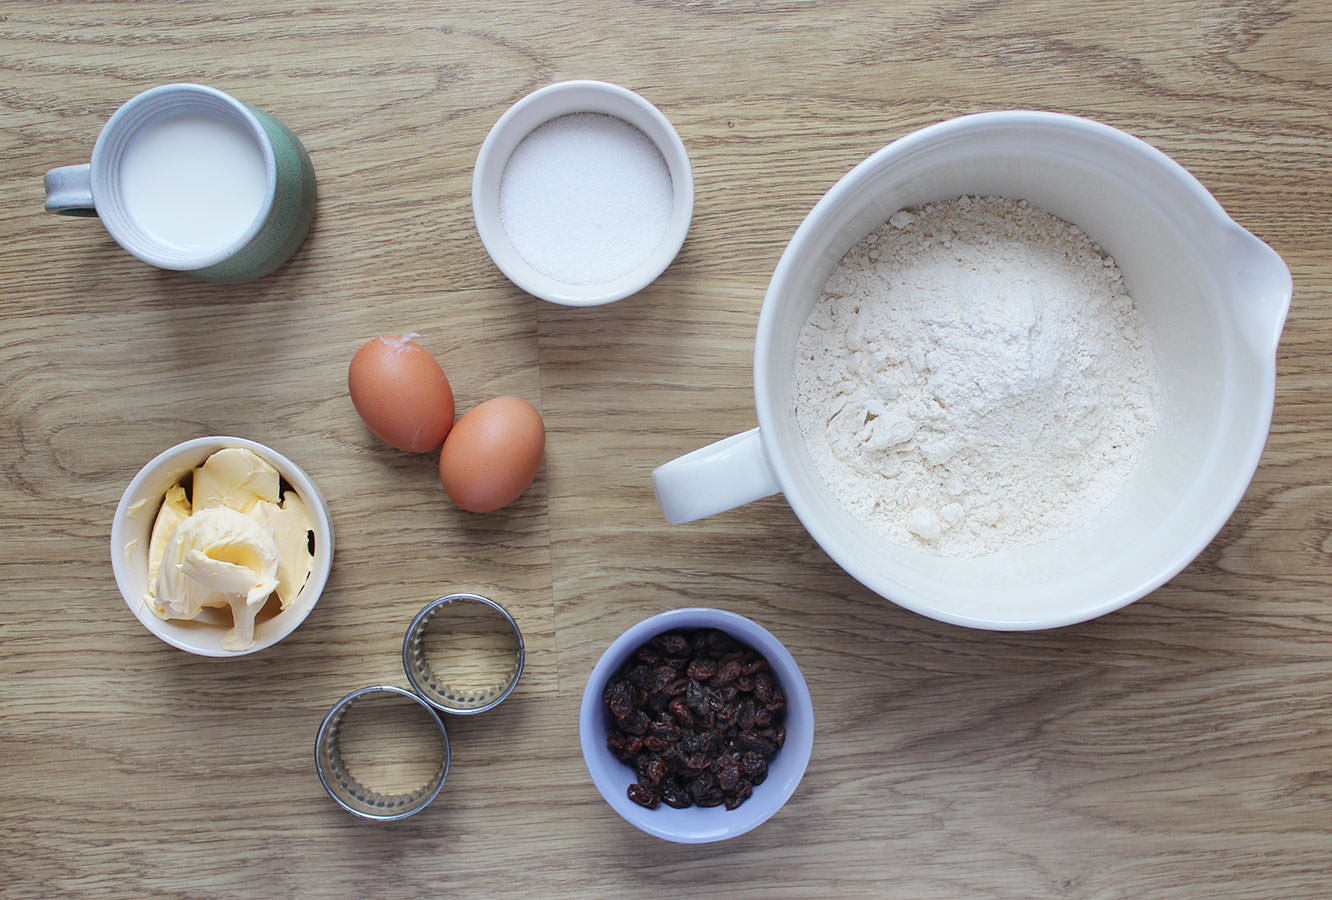
You will need
1lb/450g Self raising flour
4 oz/110g Granulated sugar
4 oz/110g Margarine (I use Stork)
4 oz/110g Raisins/other dried fruit (I split mine into some plain some fruit, so only used half this)
1 egg
Semi-skimmed milk (approz 9fl oz/250ml)
A pinch or two of salt
A 2 inch round cutter (for small scones)
Makes 24 little scones, 12 big if using a bigger cutter.
Step one
Crack the egg into a measuring jug and top up to 10 fluid oz or 250ml with the milk.
Use a fork to combine the egg and milk.
Step two
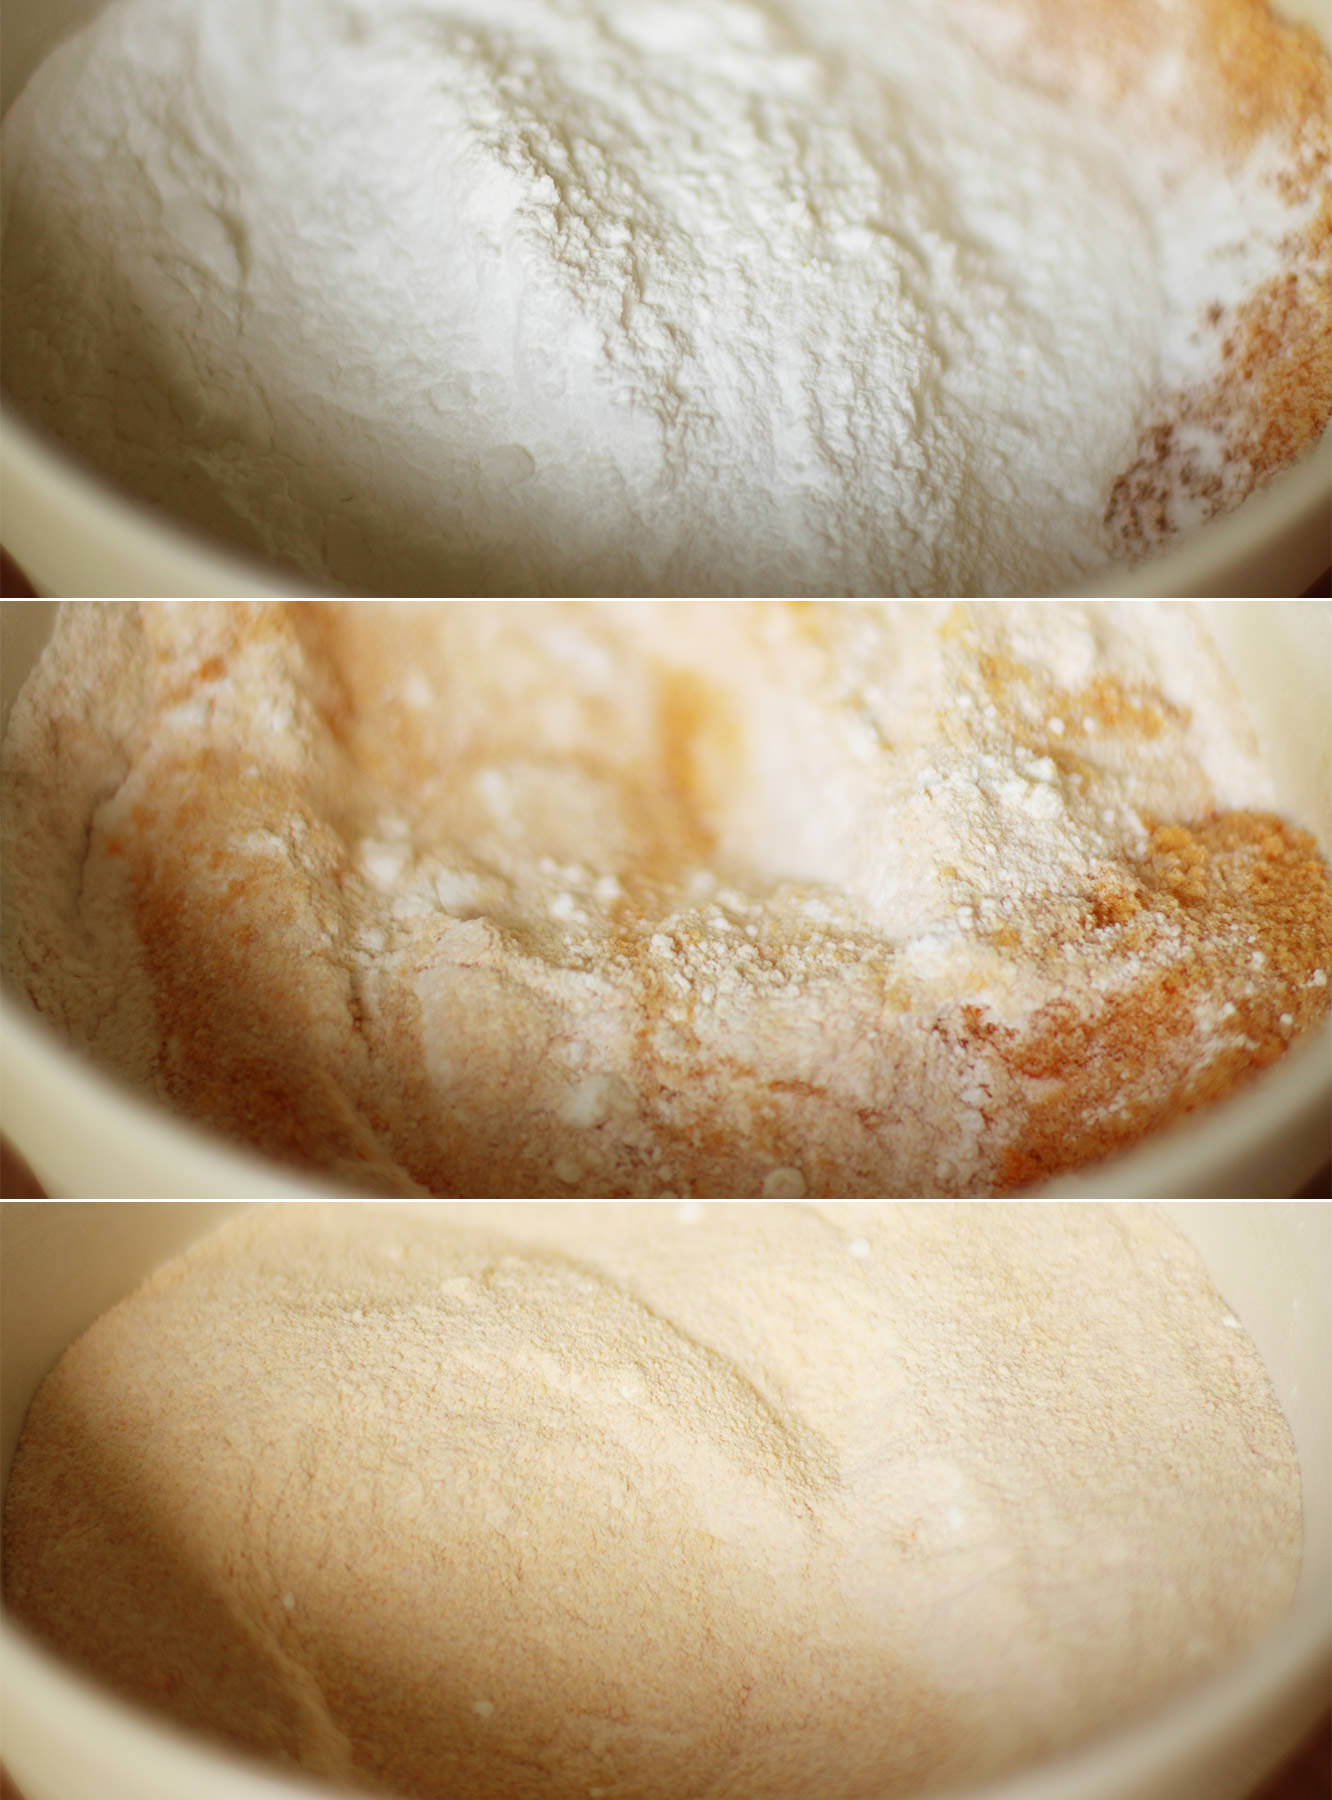
Mix together the sugar, flour and salt in a decent sized mixing bowl.
Step three
Add the margarine to the dry mixture and rub between your fingers until you have the breadcrumb-like texture in the bottom photo. If you insist on using butter this might take you a little longer, but be patient, you’ll get there.
If you want to do half plain, half fruit then you need to split half the mix into another bowl at this stage.
Step four
Add the fruit (remember to only add half the amount if you’ve split the mix).
Gradually add the wet ingredients, stirring with your hands. Don’t go gung-ho and add the lot, as there’s meant to be some left over! Again, if you’ve split into two halves you need to distribute this evenly across both batches.
Keep adding liquid until the mixture is a bit gluey/sticky but still holds together and isn’t wet.
Step five
Dust a work surface with flour and turn your dough onto it. Pat it down with your hand until it’s a little shorter than your cutter. No rolling pins please.
I would also recommend you take this opportunity to wash your hands and grease a couple of baking trays.
Step six
Dust your cutter with flour and cut as many scones as you can from the dough. I will save you the maths lesson but try to get them as close together as possible as it’s best to not keep working the dough if possible.
Put your scones onto the baking trays; make sure to leave some space as they do grow a bit.
Step seven
Bring together all the scraps and repeat until you have no dough left. Well, you will have a little blob, but that’s for you to eat straight from the oven, so it doesn’t really count.
Step eight
Using the leftover egg and milk mixture, brush the tops of your scones. This will make them go golden in the oven. You can use your (clean) fingers if you don’t have a pastry brush.
Step nine
Pop in the oven (ideally preheated) at gas mark 6/200C/400F for 15-20 minutes. If your oven, like ours, is getting on a bit you might want to turn the trays around halfway through for an even bake.
Step ten
Pop them on the table with the rest of your afternoon tea treats.
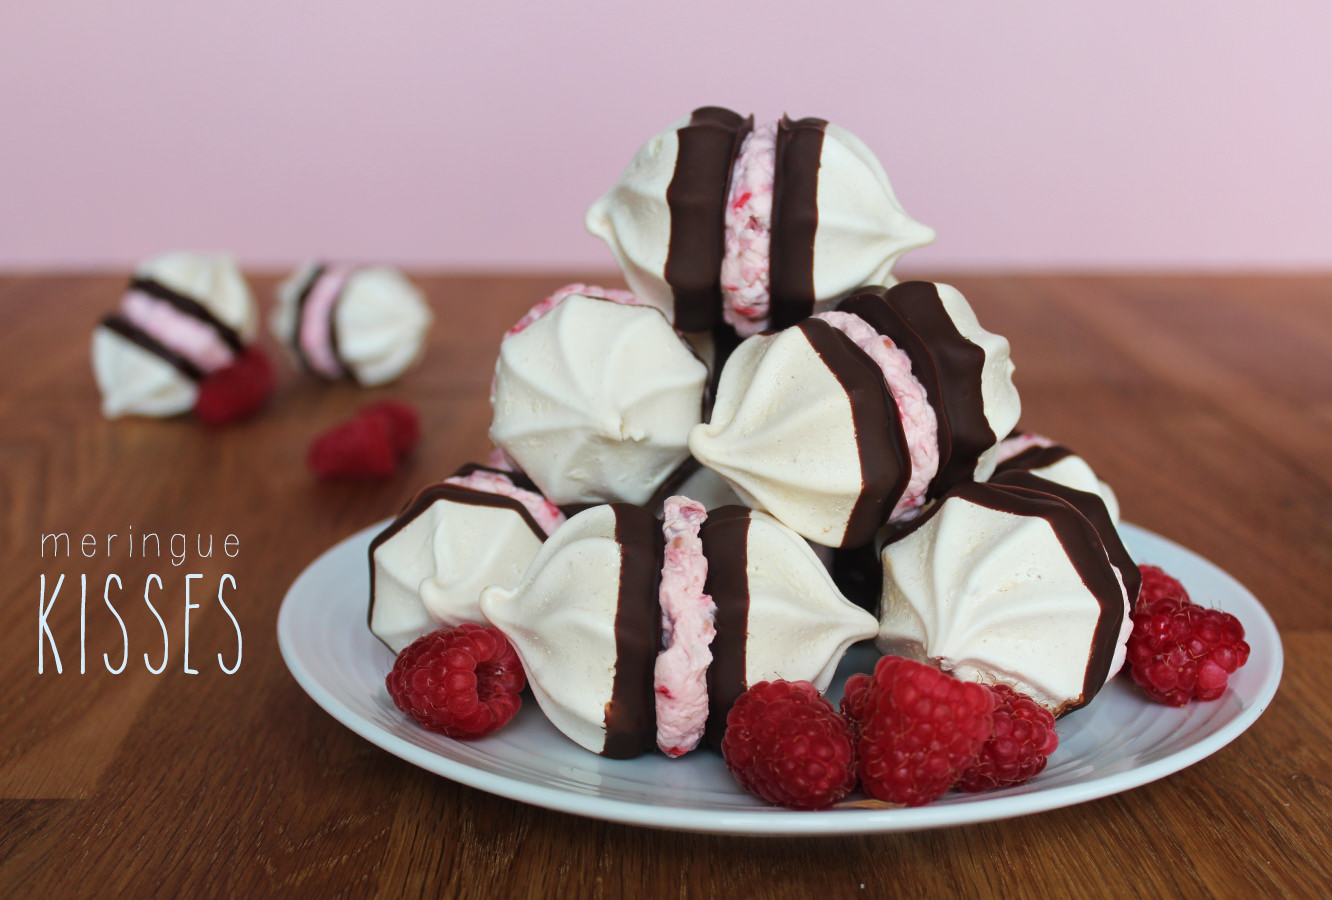
Recently I have been partying down with some of the lovely hens (bachelorettes for those of you across the pond) in my life who are getting married this summer. My friends are definitely going wedding crazy at the moment, and with hen parties springing up every other weekend I thought I would put together a yummy recipe for any keen party planners, or any of you who fancied a new afternoon tea recipe.
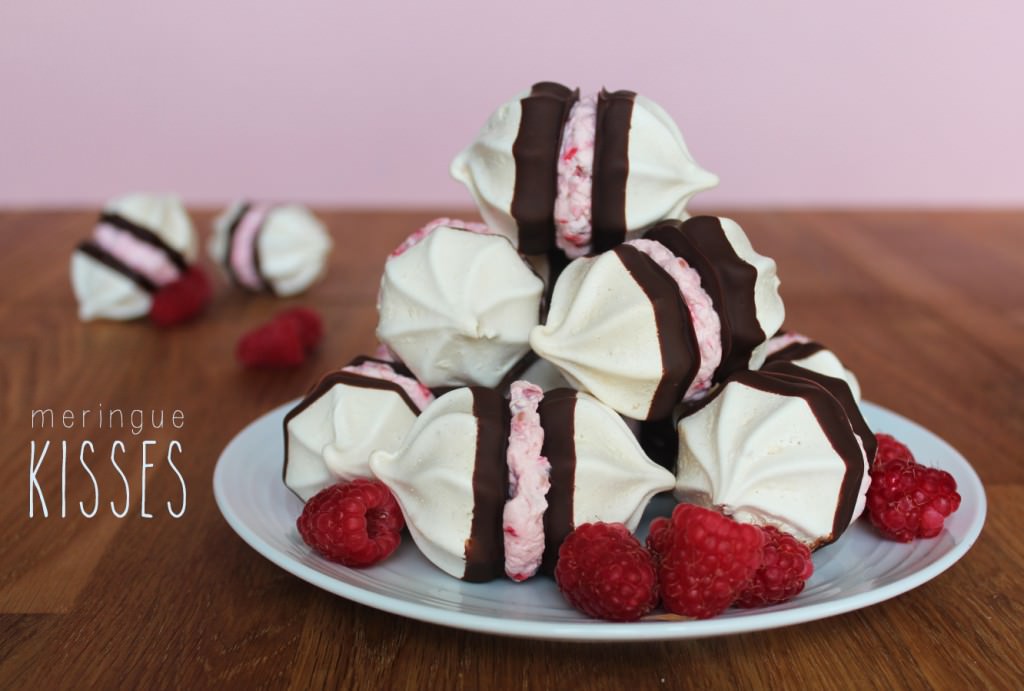
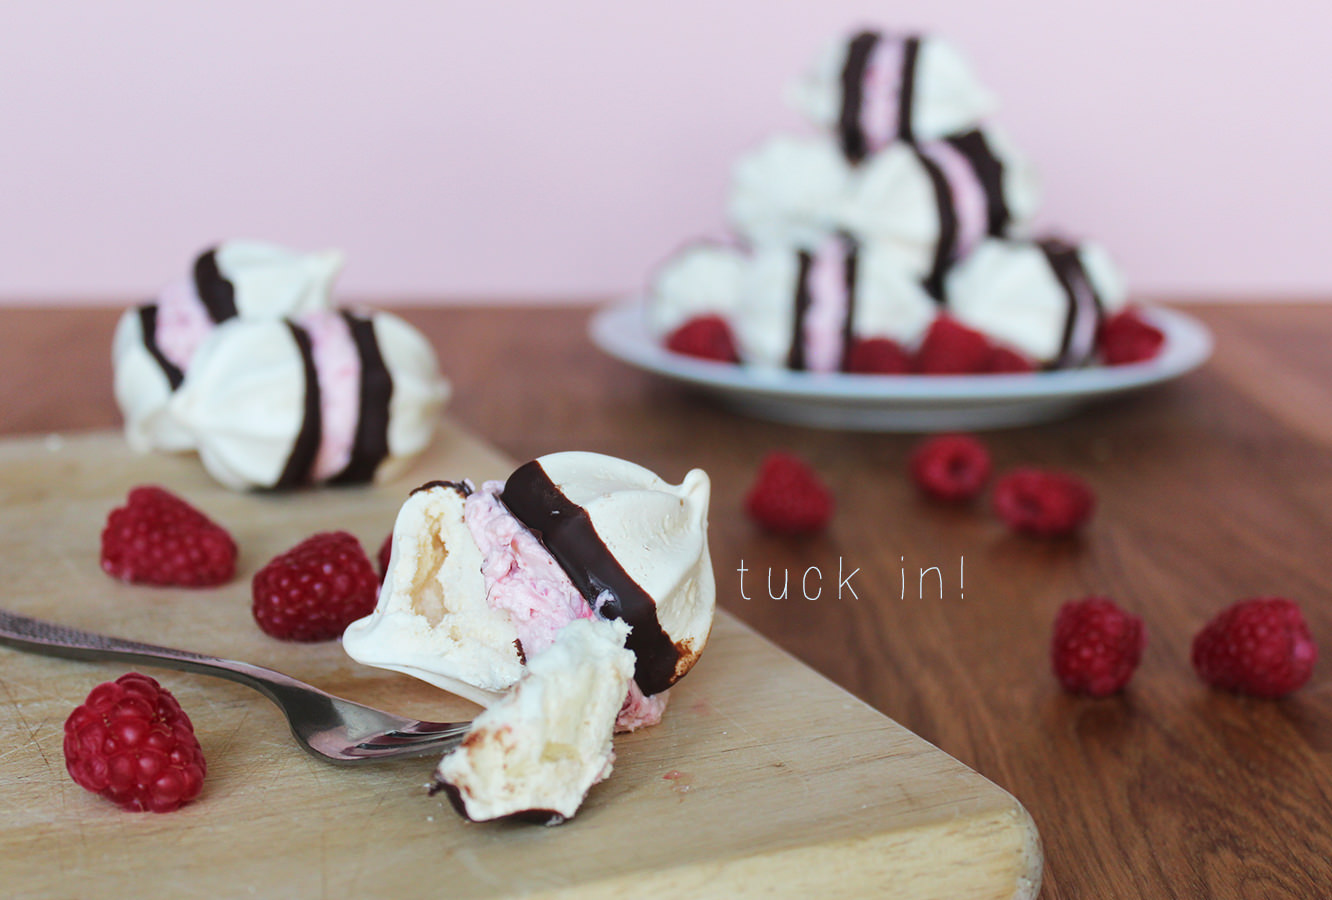
Introducing these lovely little meringue kisses. Although any of the wedding party who are on diets might want to look away now…
You will need
2 egg whites
110g/4 oz caster sugar
100g/3.5 oz dark chocolate
150ml double cream
75g/2.5 oz raspberries
Makes 20
Step one
Separate eggs whites into a glass or metal mixing bowl (plastic tends to hold a bit of grease, gross I know, but this will stop your egg whites fluffing like they should).
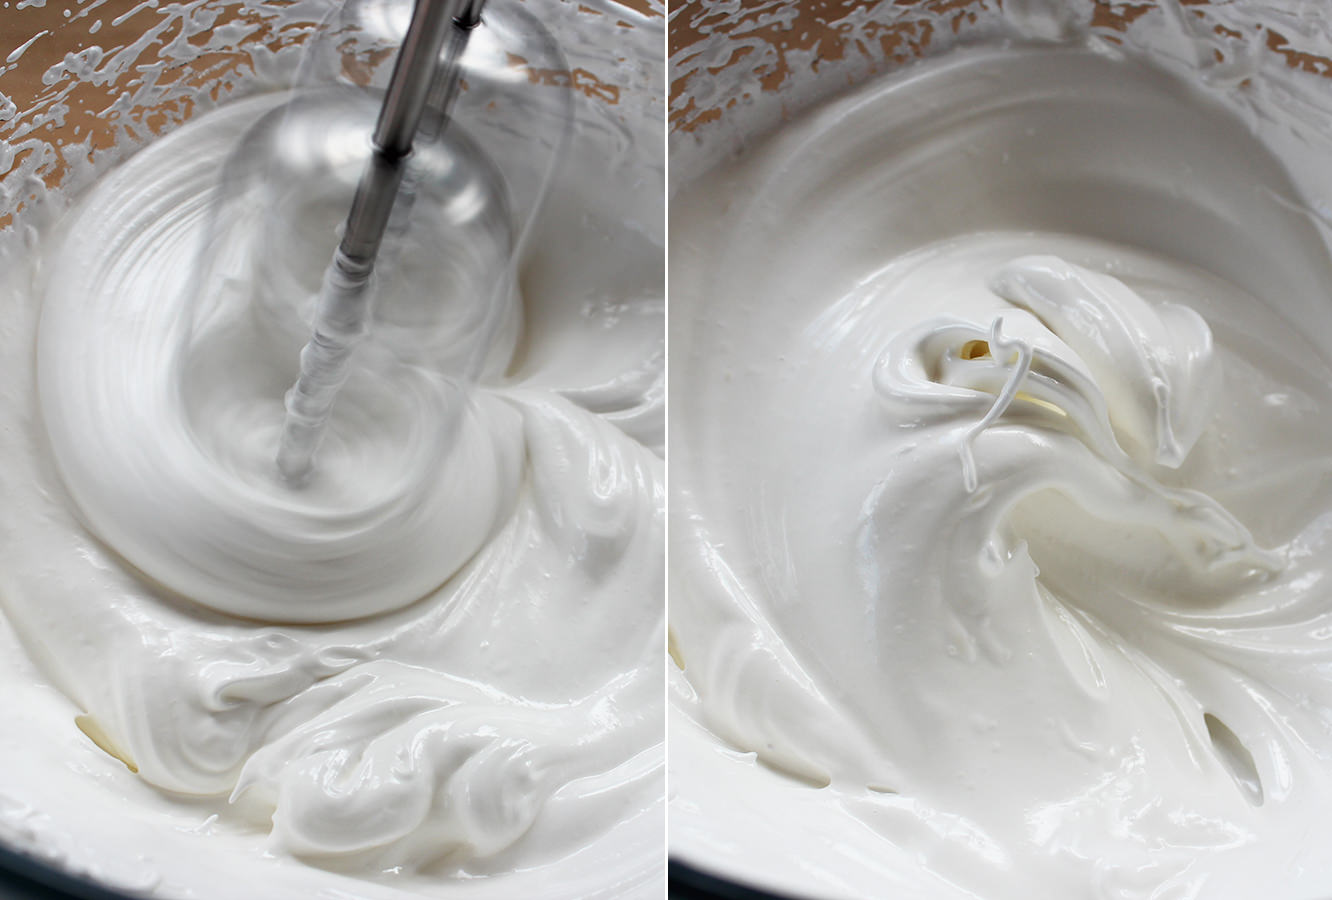
Use an electronic whisk (or a really strong arm) to whip the whites until they double in size and start to stiffen up.
Once they look kind of like the third photo start adding in the sugar as you whisk.
Step one and a half
Keep whisking until you have what’s known in the biz as stiff peaks. If you’re a bit unsure, turn your bowl upside down, if your mix doesn’t fall out then you’re good to go, if it does then I’m sorry.
Step two
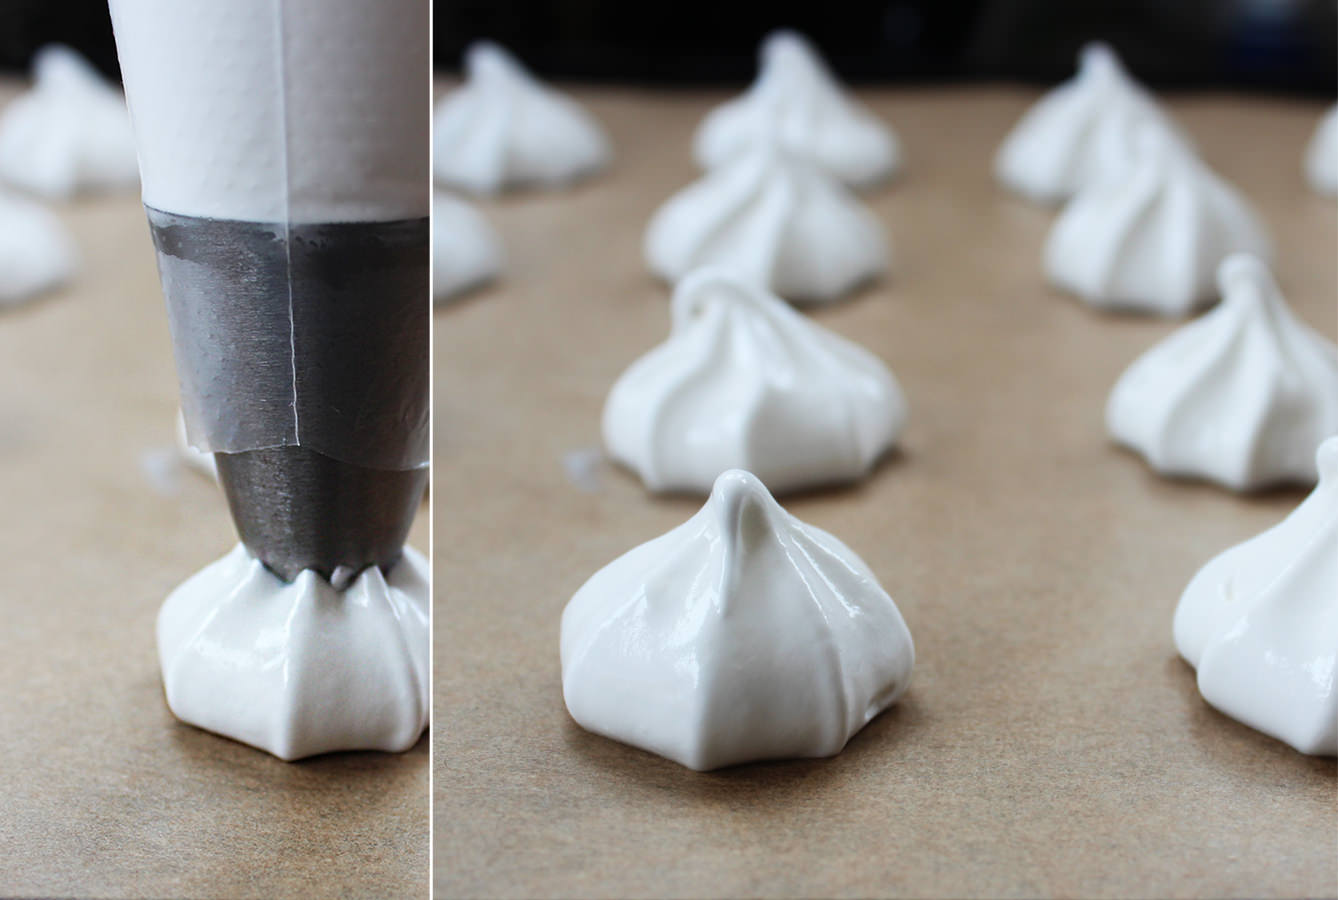
Cover two baking trays in greaseproof paper or baking parchment. Don’t whatever you do grease this, use a dab of meringue in each corner to secure it to the tray.
Fill a piping bag with the meringue mix and pipe lots of little blobs. Hold the piping bag about 2cm away from the tray at a 90 degree angle and squeeze down, once your meringue has reached the desired spread (say 4cm wide?) pull away quickly.
Remember to pipe in pairs, no odd numbers, and leave a little space for these to expand.
Step three
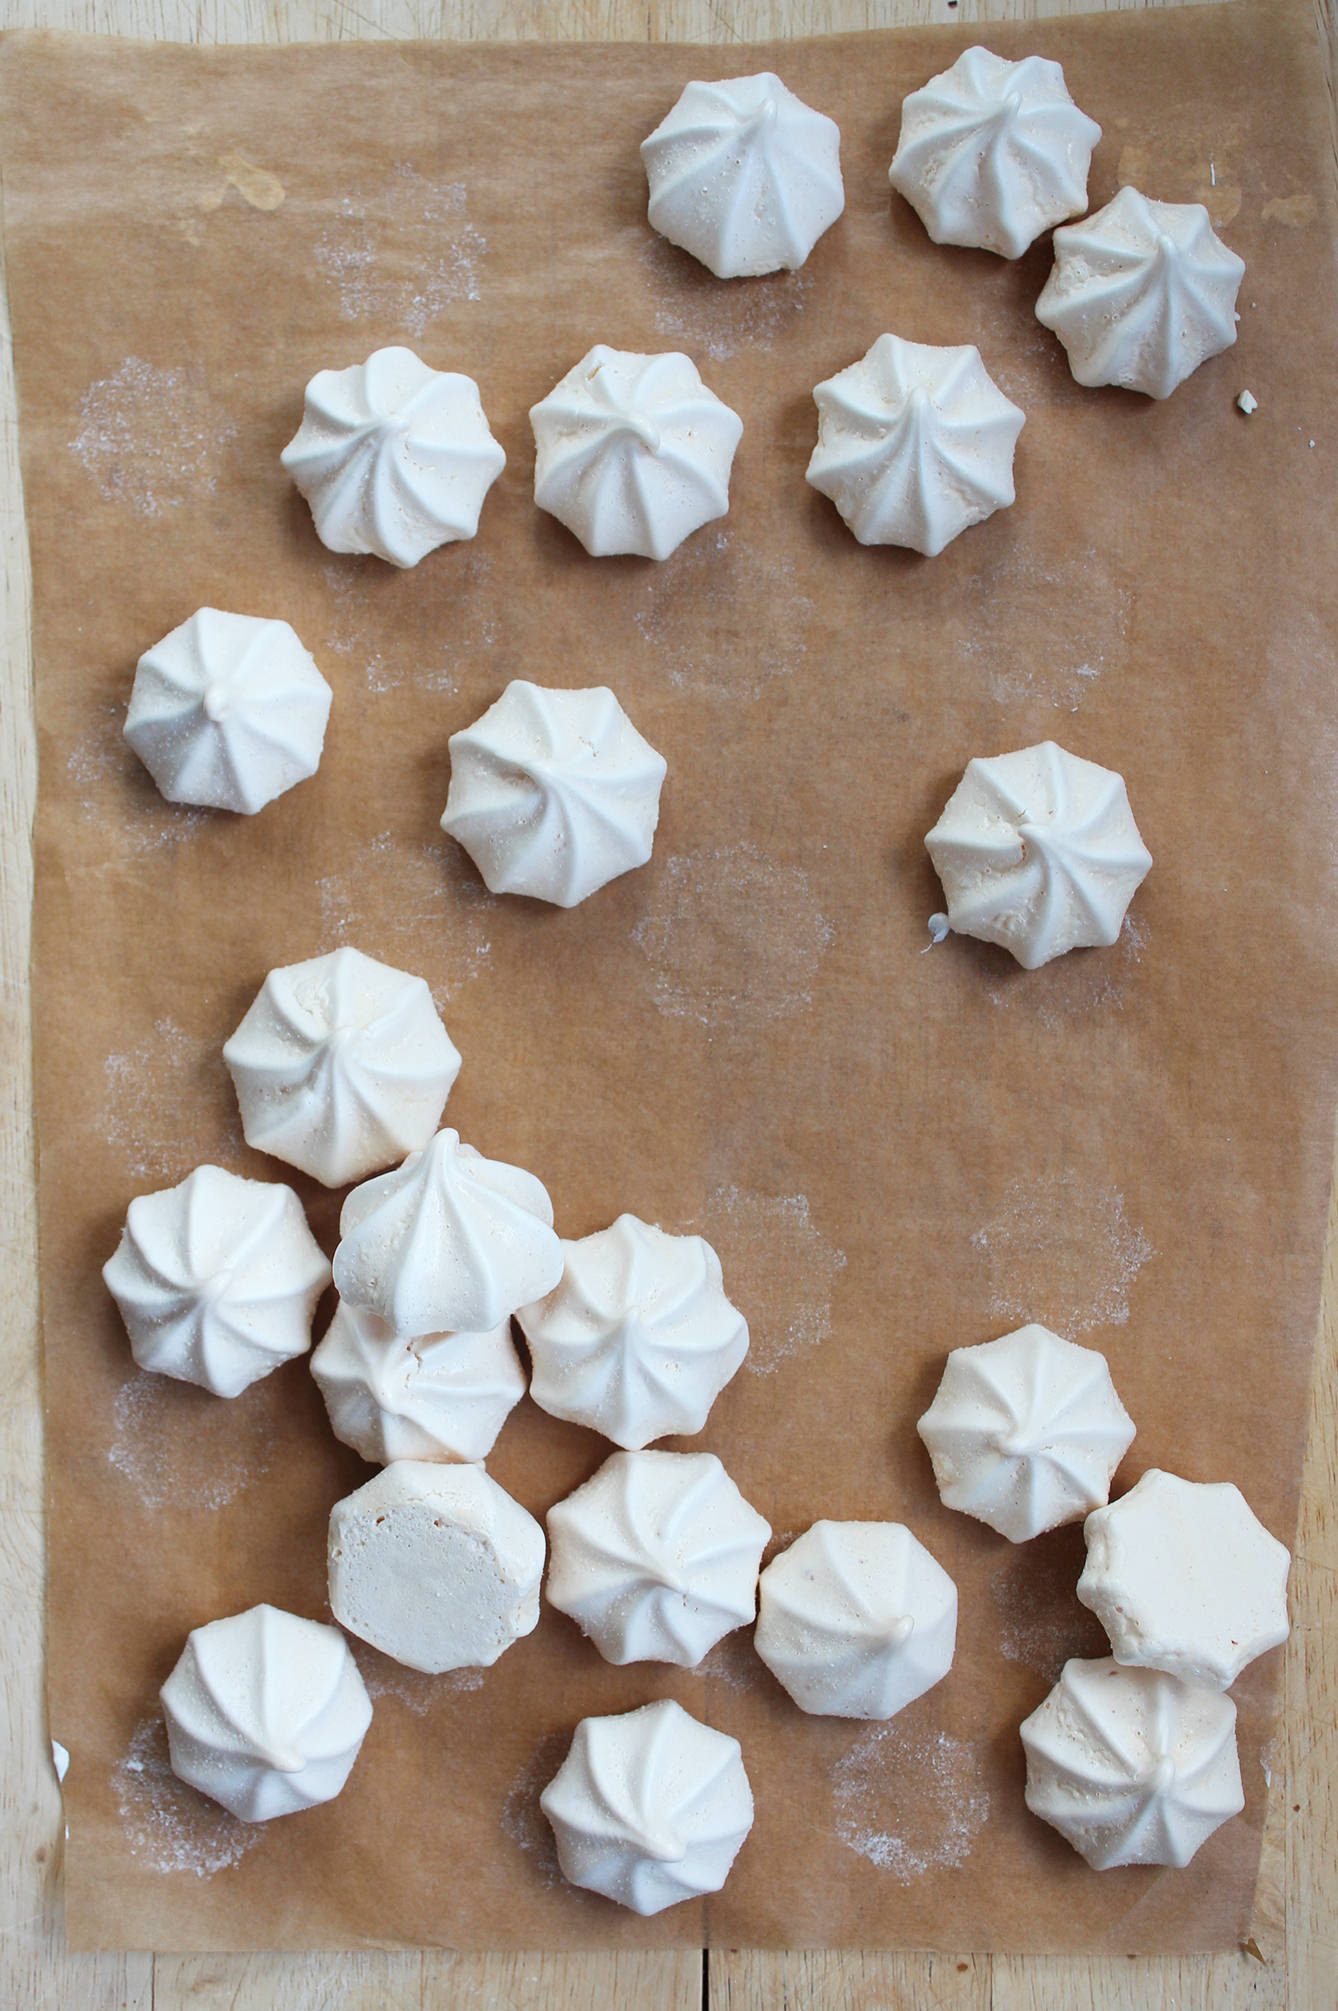
Bake.
Gas Mark 1/2, 130 degrees C or 250 degree F for 40 minutes to an hour. I know, that’s really unhelpful, but I sort of went jogging, and my oven is a law unto itself.
Once you can see they’ve grown and have developed shells, turn the oven off and wait for it to cool before removing them. If you need to take a peek by opening the oven door, try not to throw it wide, or your meringues will crack.
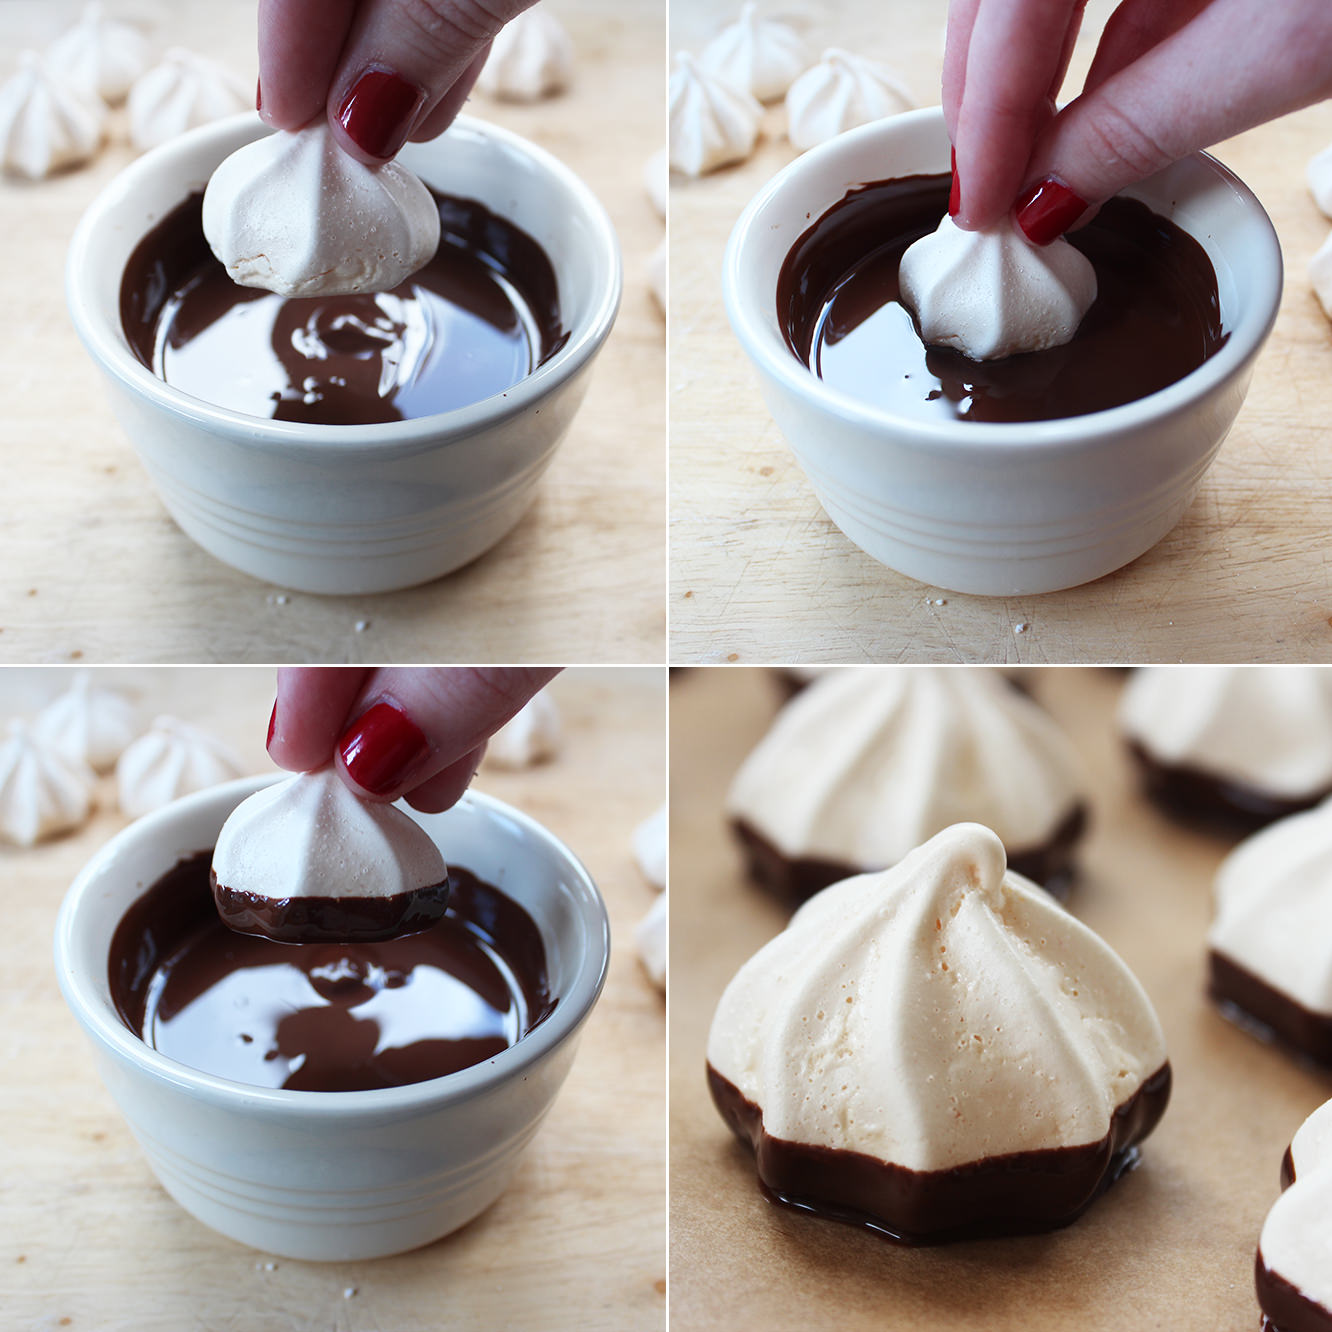
Step four
Melt the dark chocolate in a small bowl/ramekin. Do this gradually in the microwave so you don’t burn the chocolate.
Dip each meringue so that the bottom an a little bit of the side is covered. Sit on greaseproof paper and leave to set.
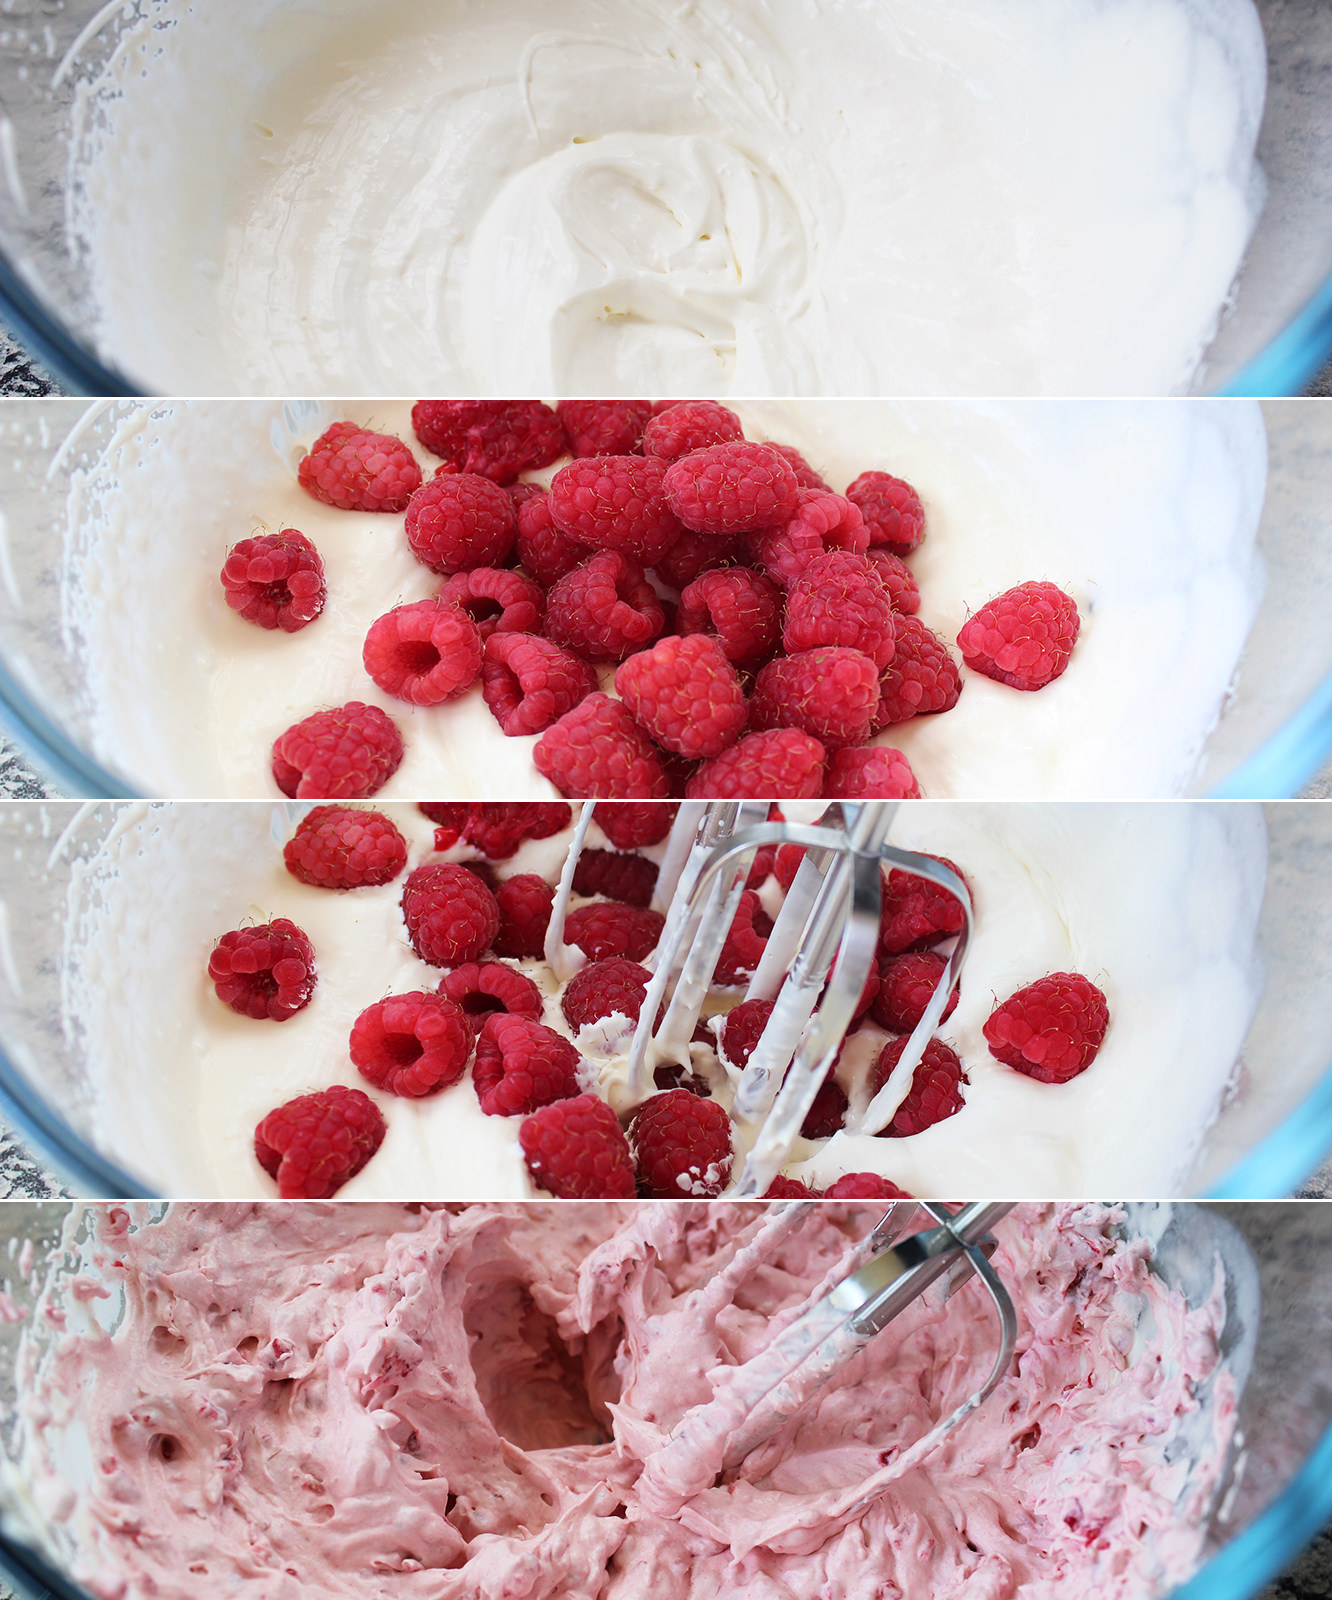
Step five
Whisk the double cream until it has doubled in size and is beginning to hod it’s shape.
Add the raspberries and whisk some more. This is pretty satisfying for some reason.
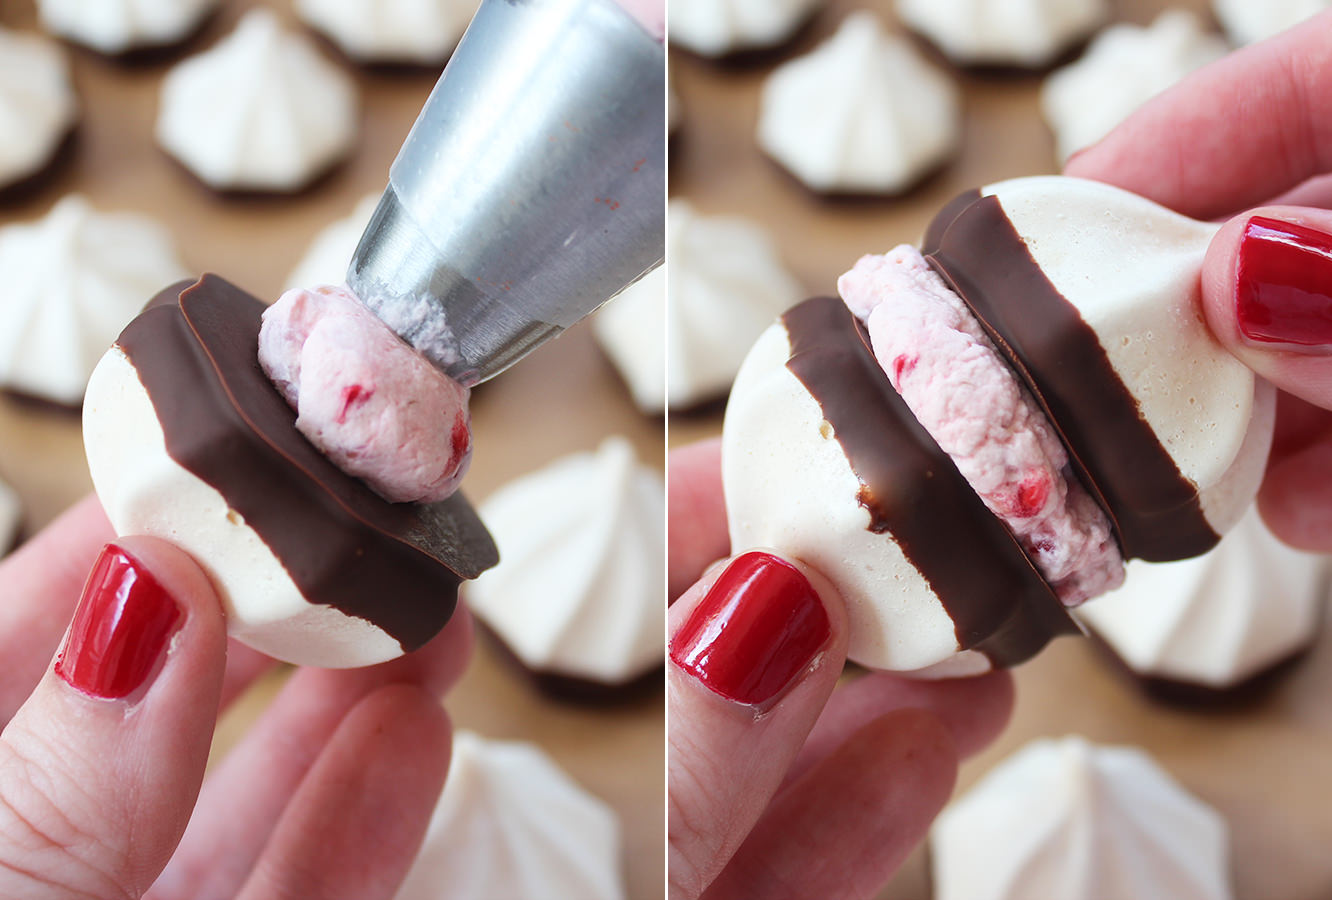
Step six
Pipe the raspberry cream onto a shell and squish another one on top. Repeat until finished.


 You will need
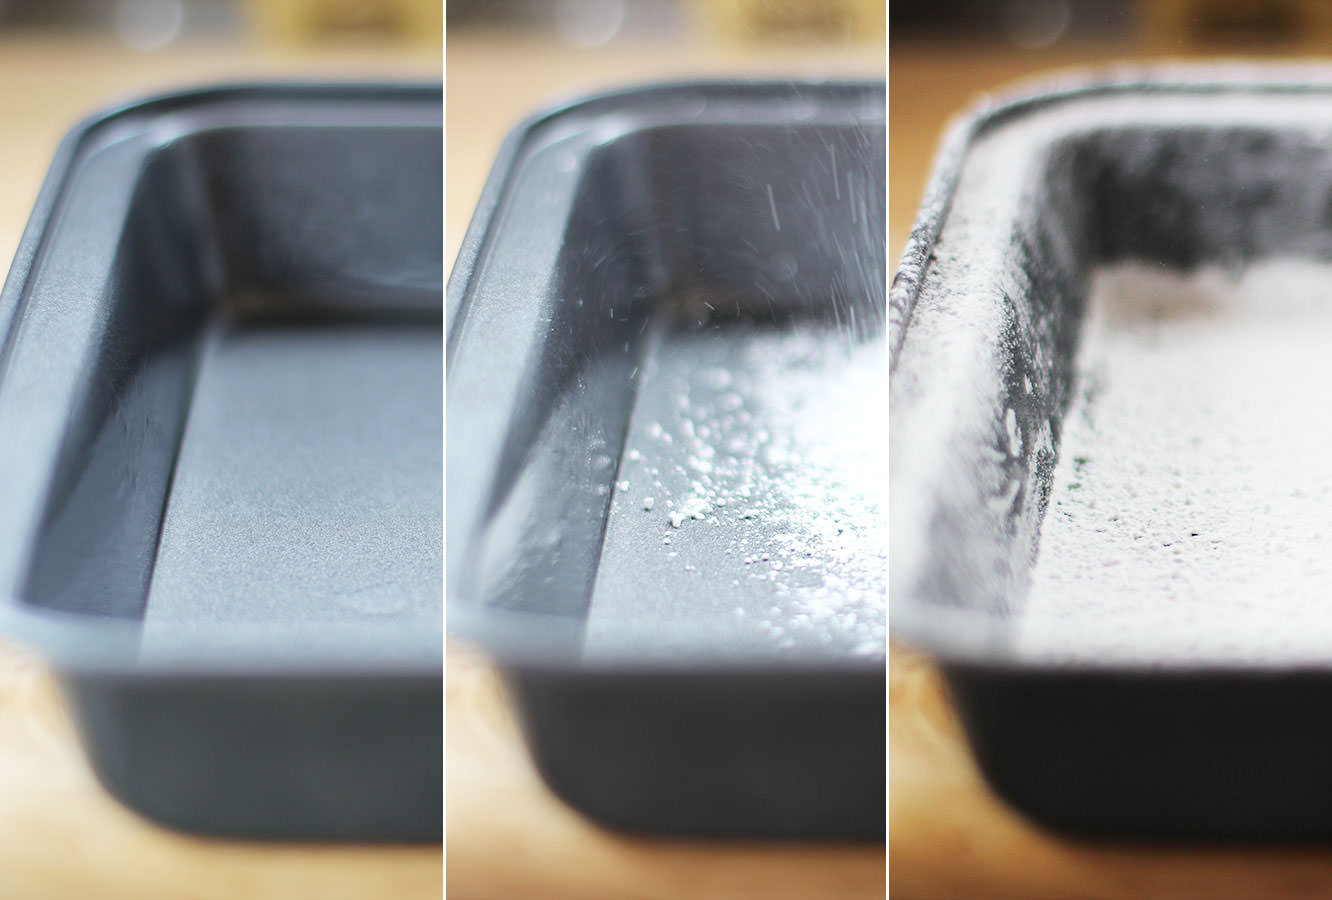 Step one
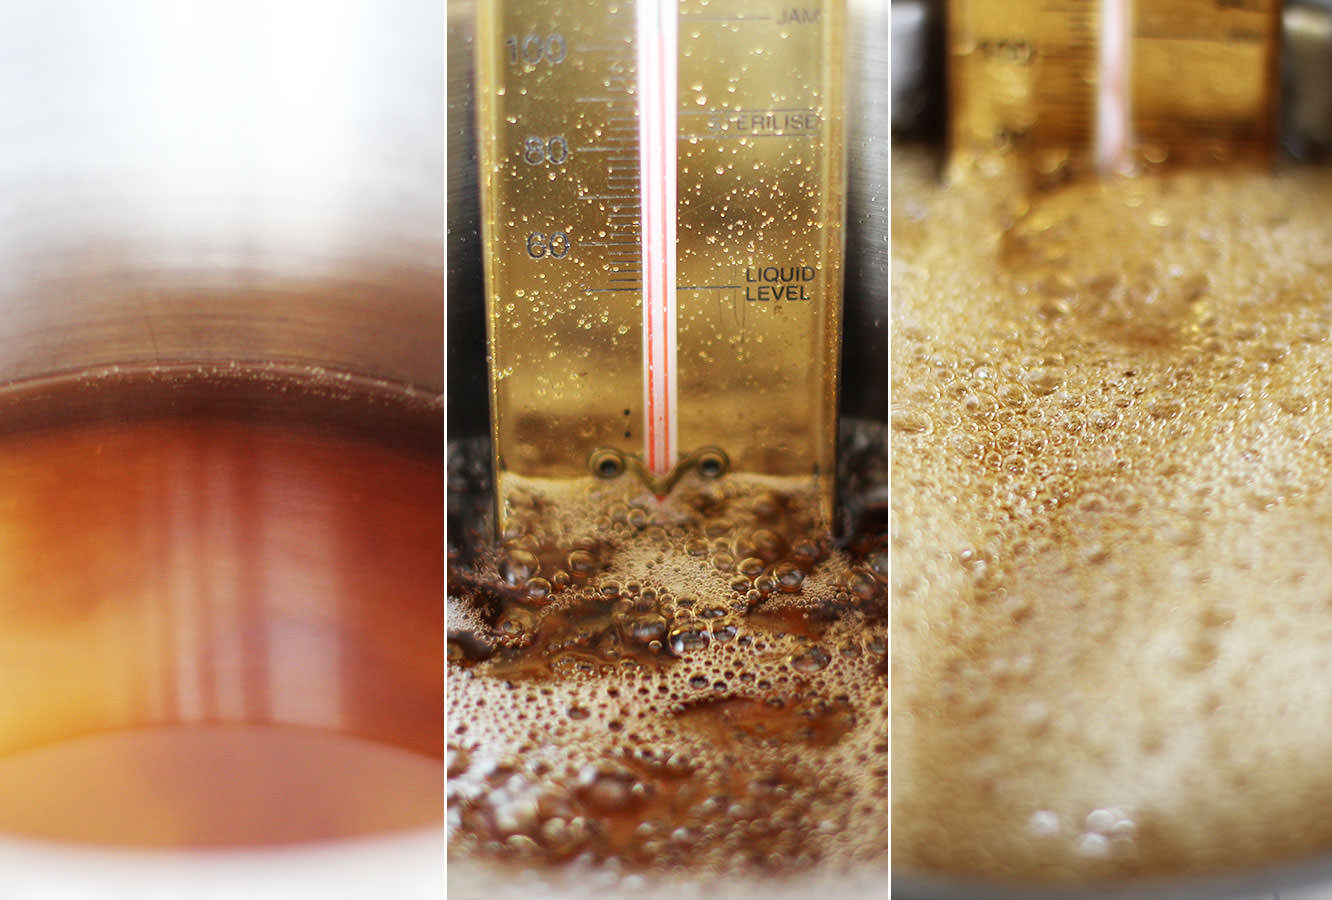 Step three
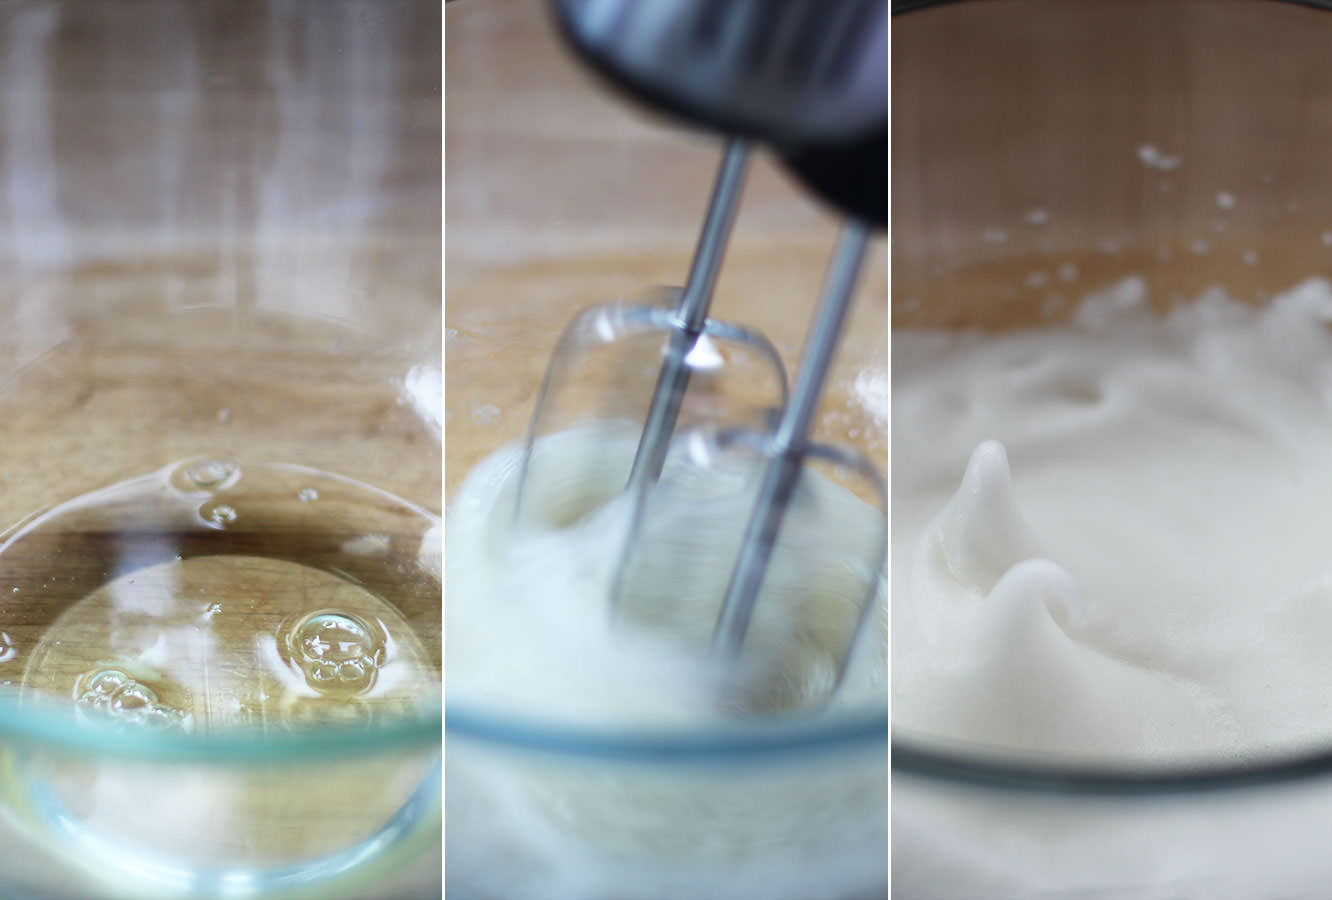 Step four
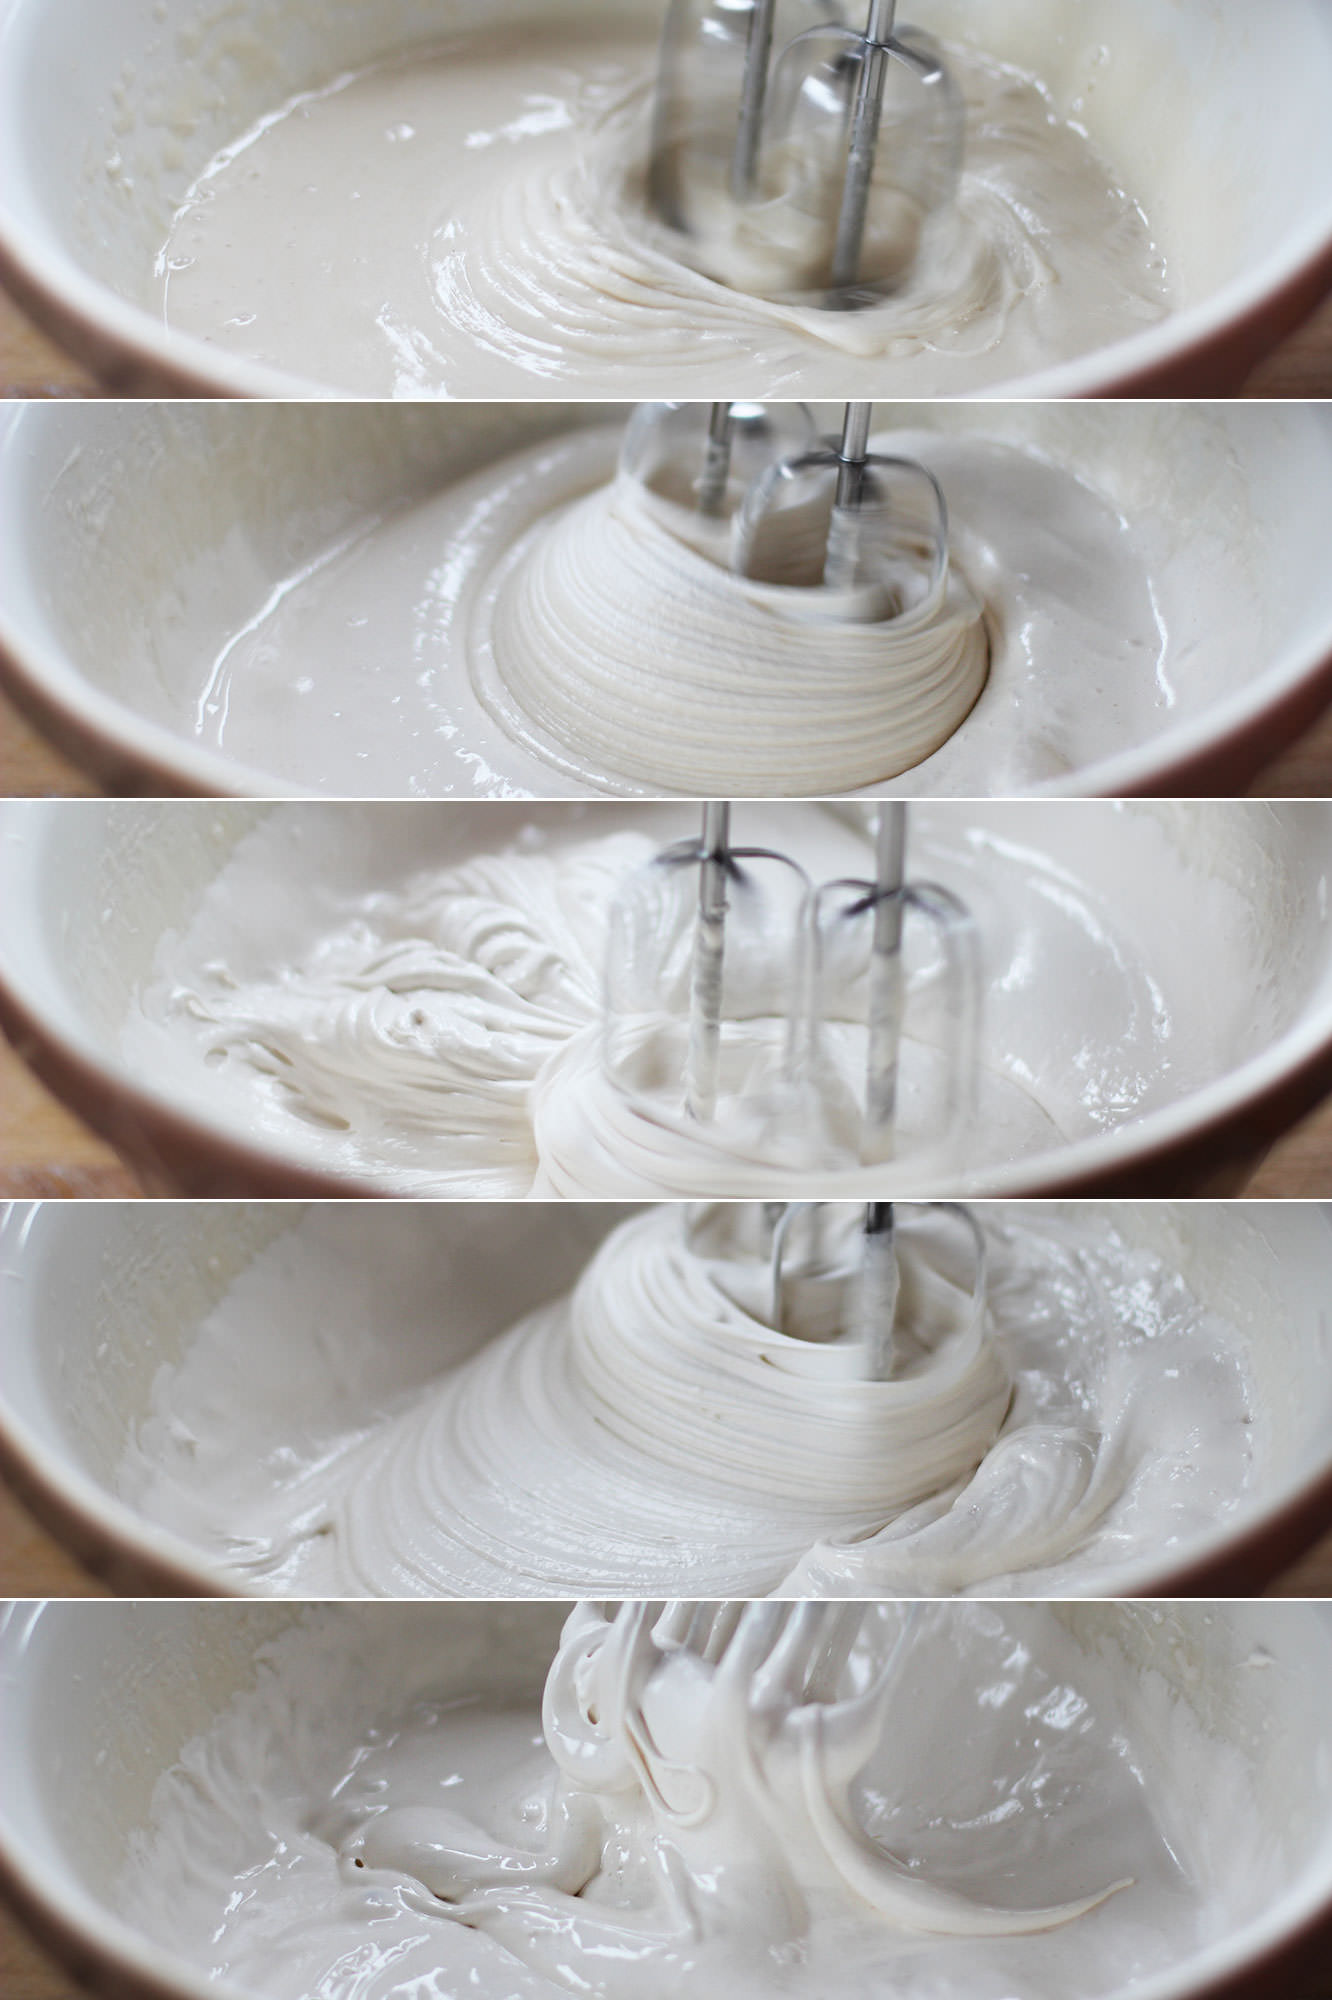 Step seven
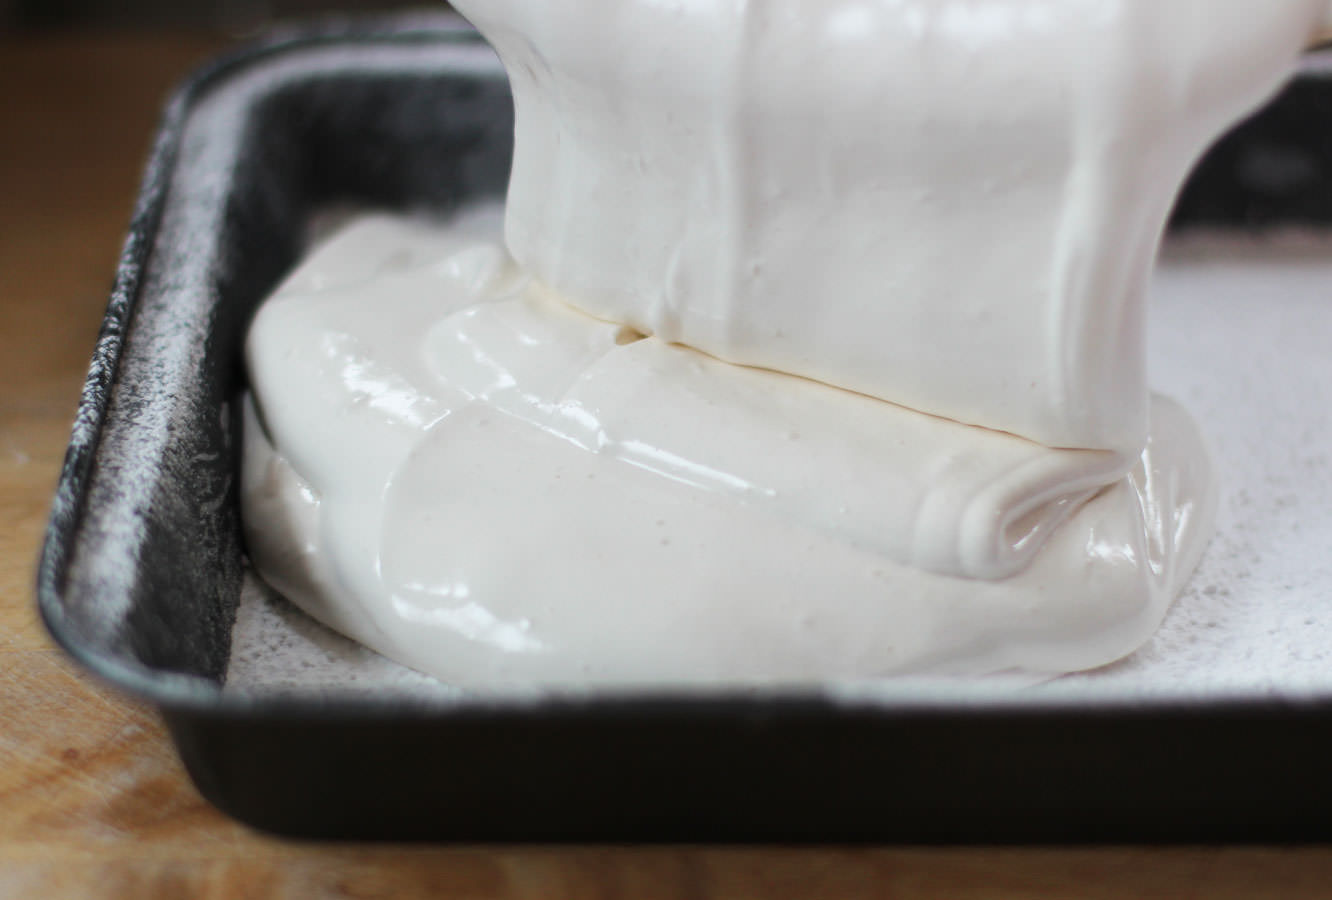 Step eleven
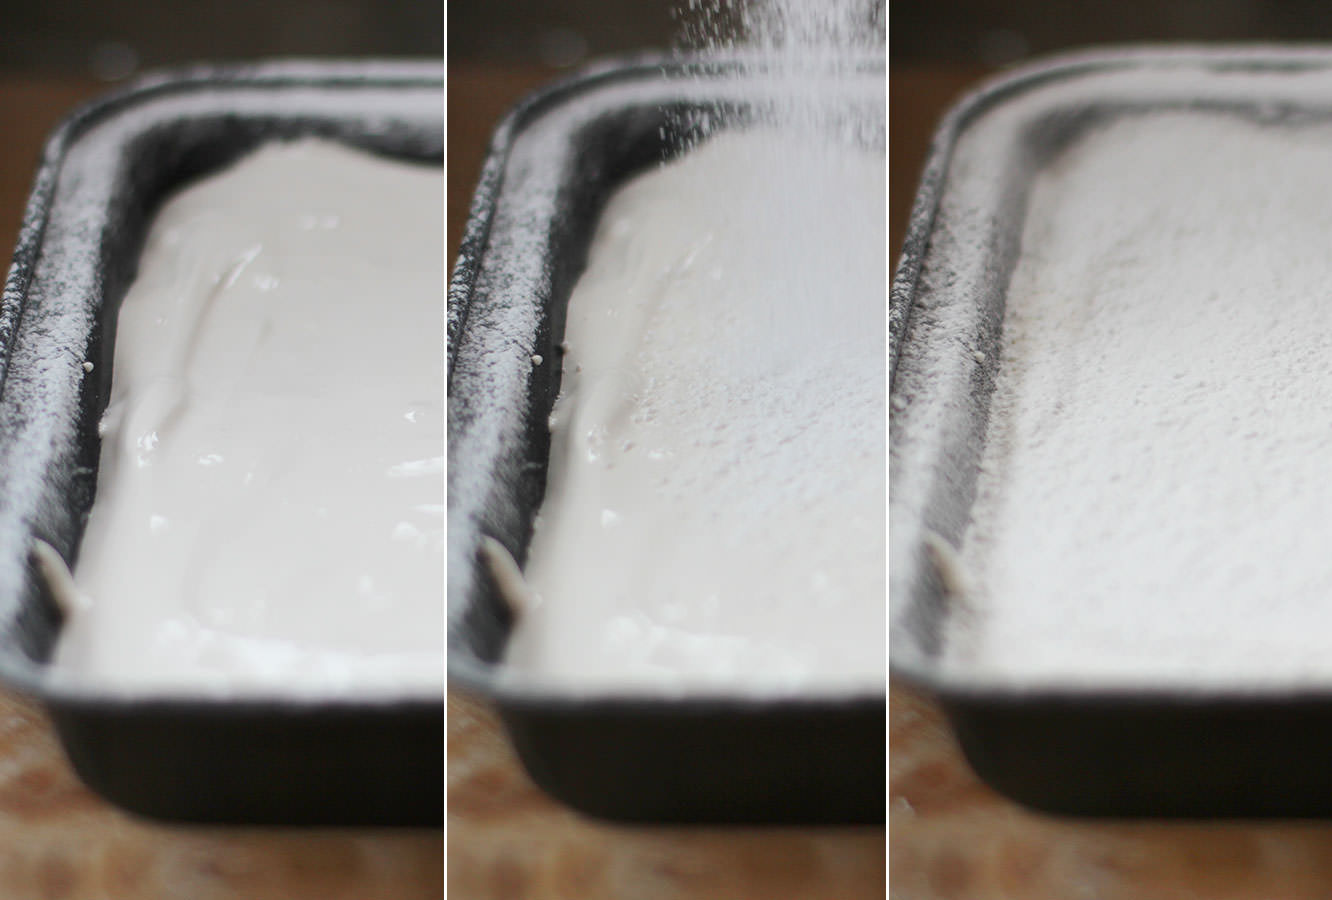 Step twelve
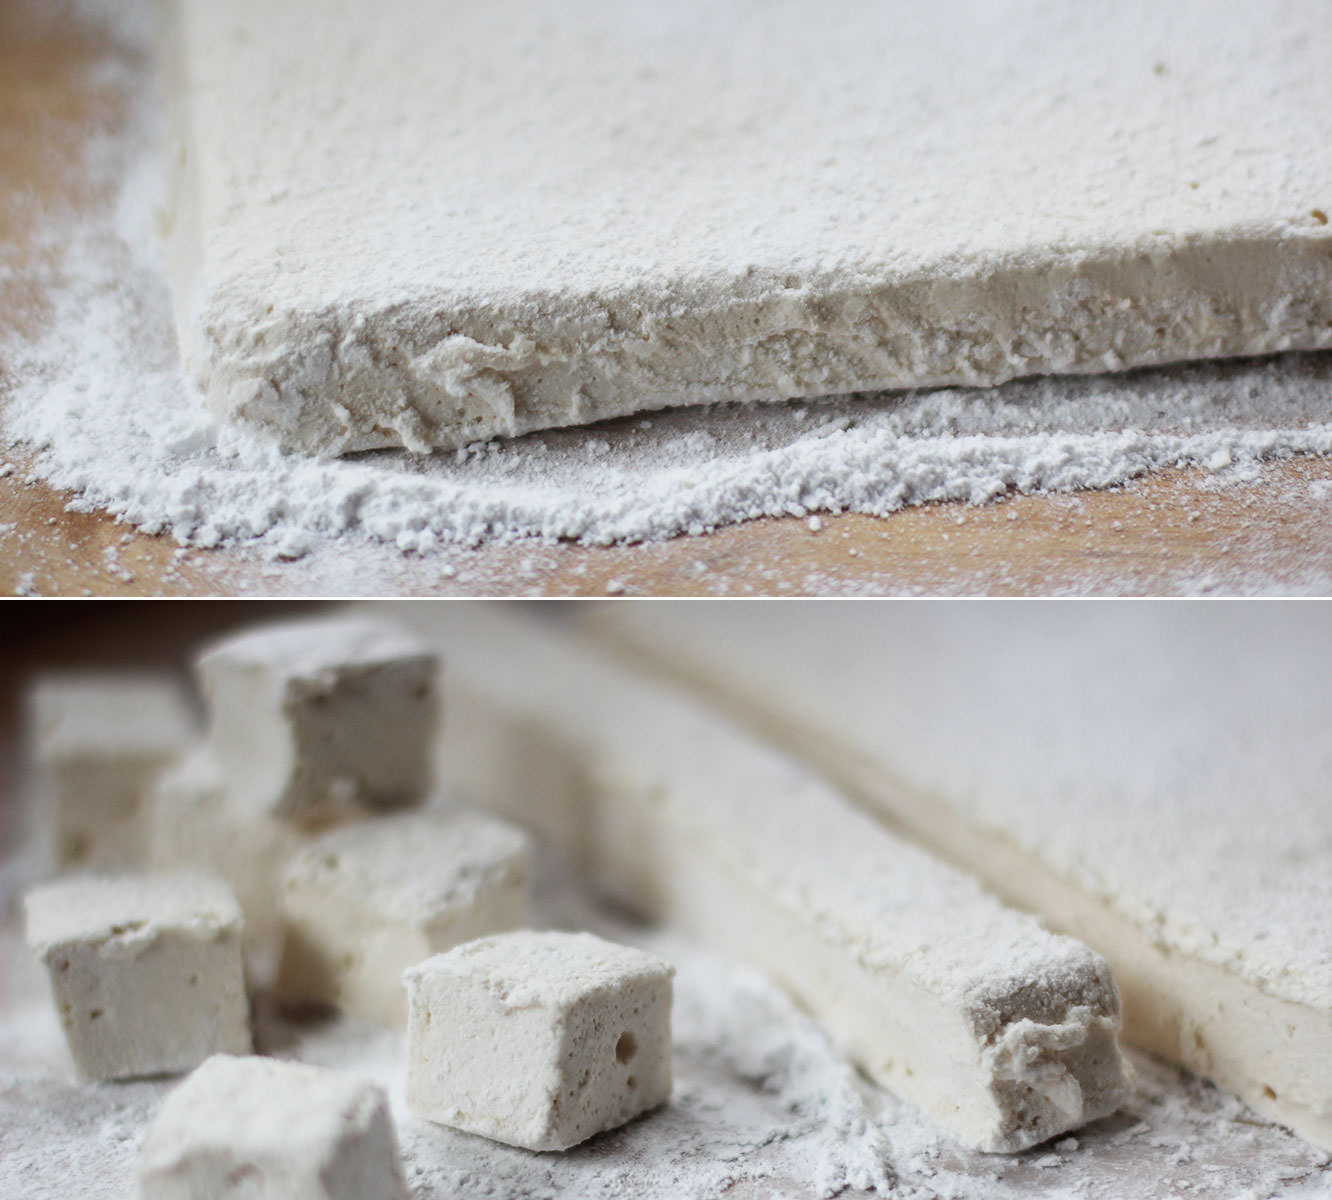 Step thirteen
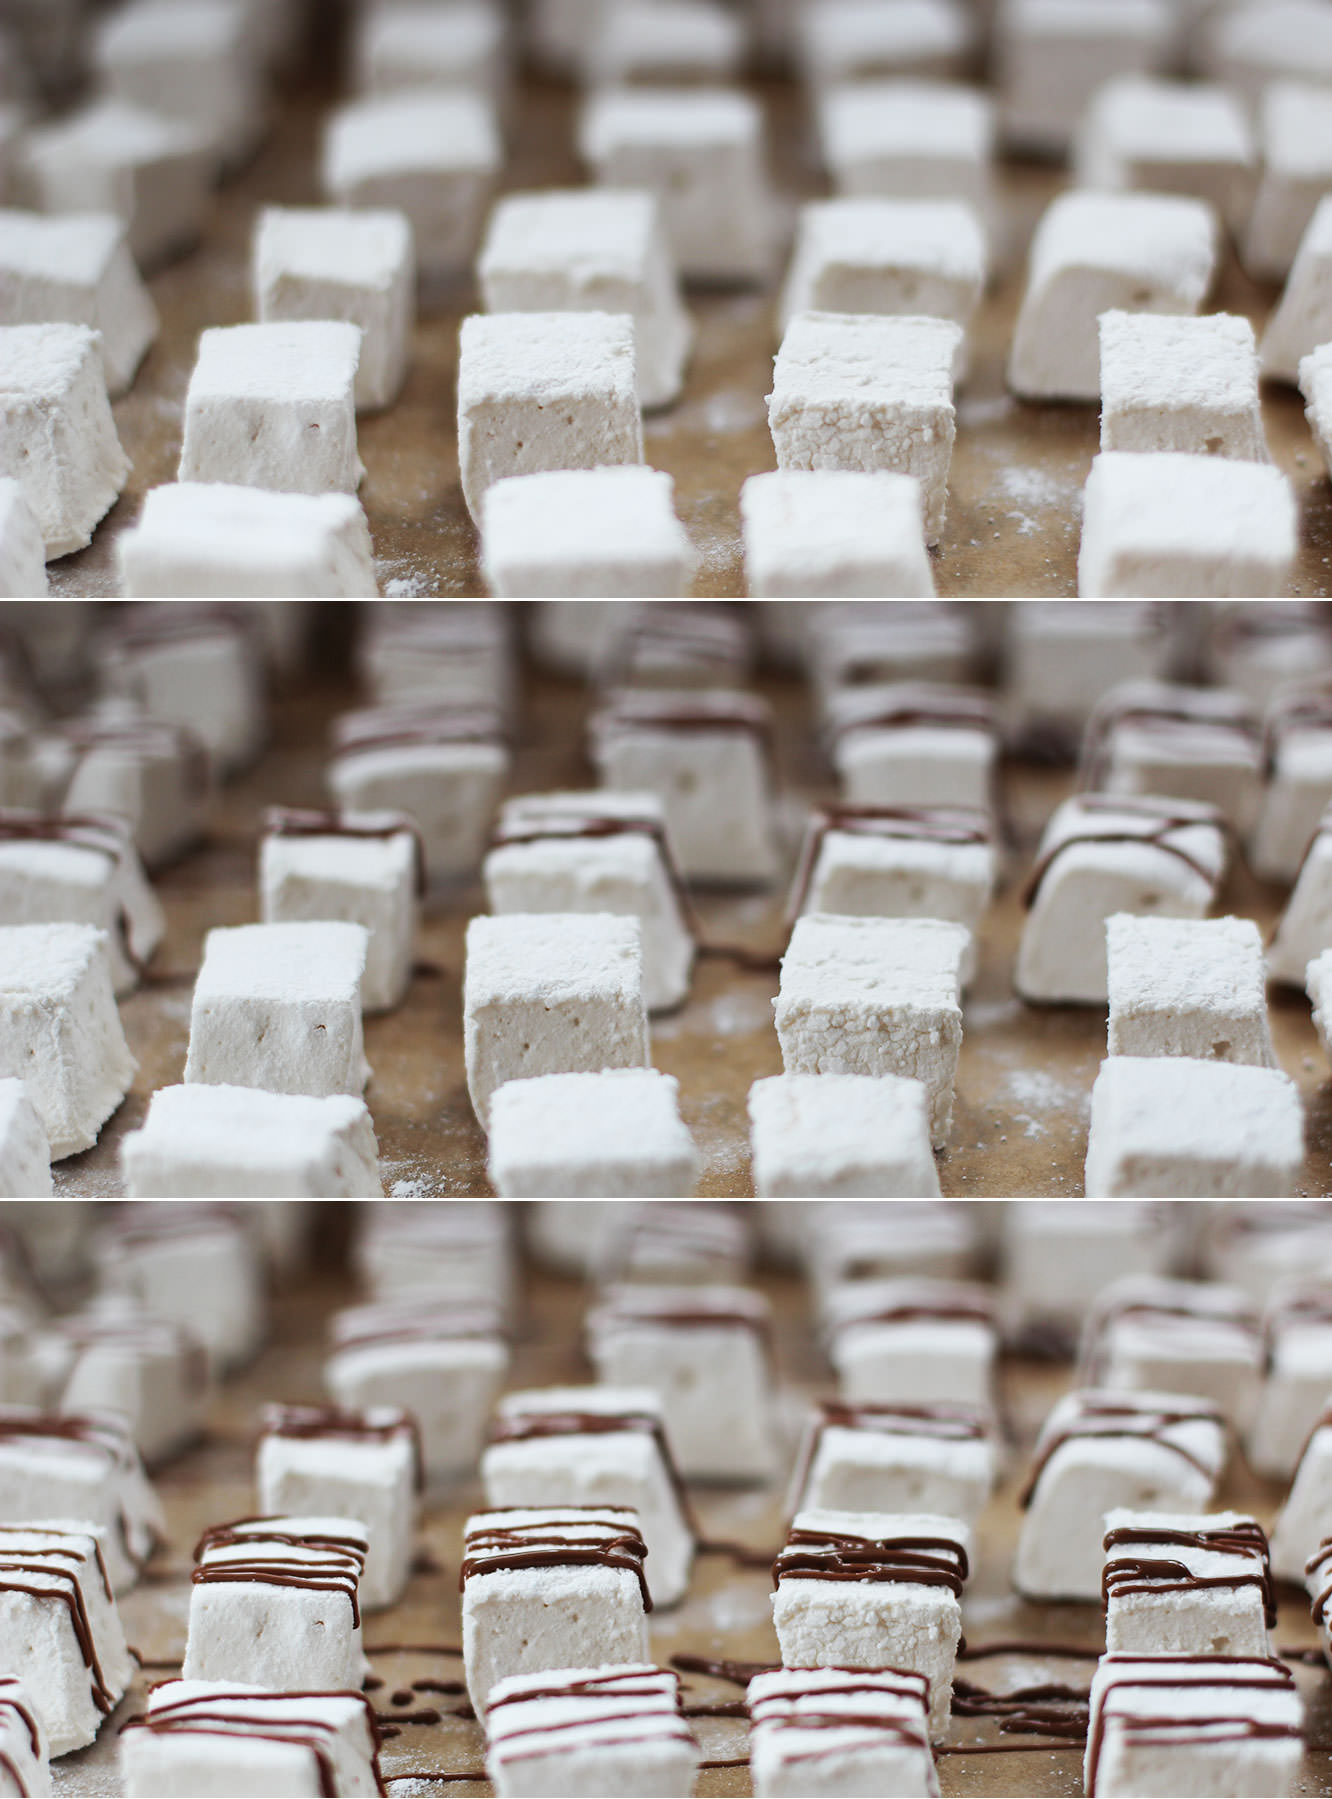 Step fourteen
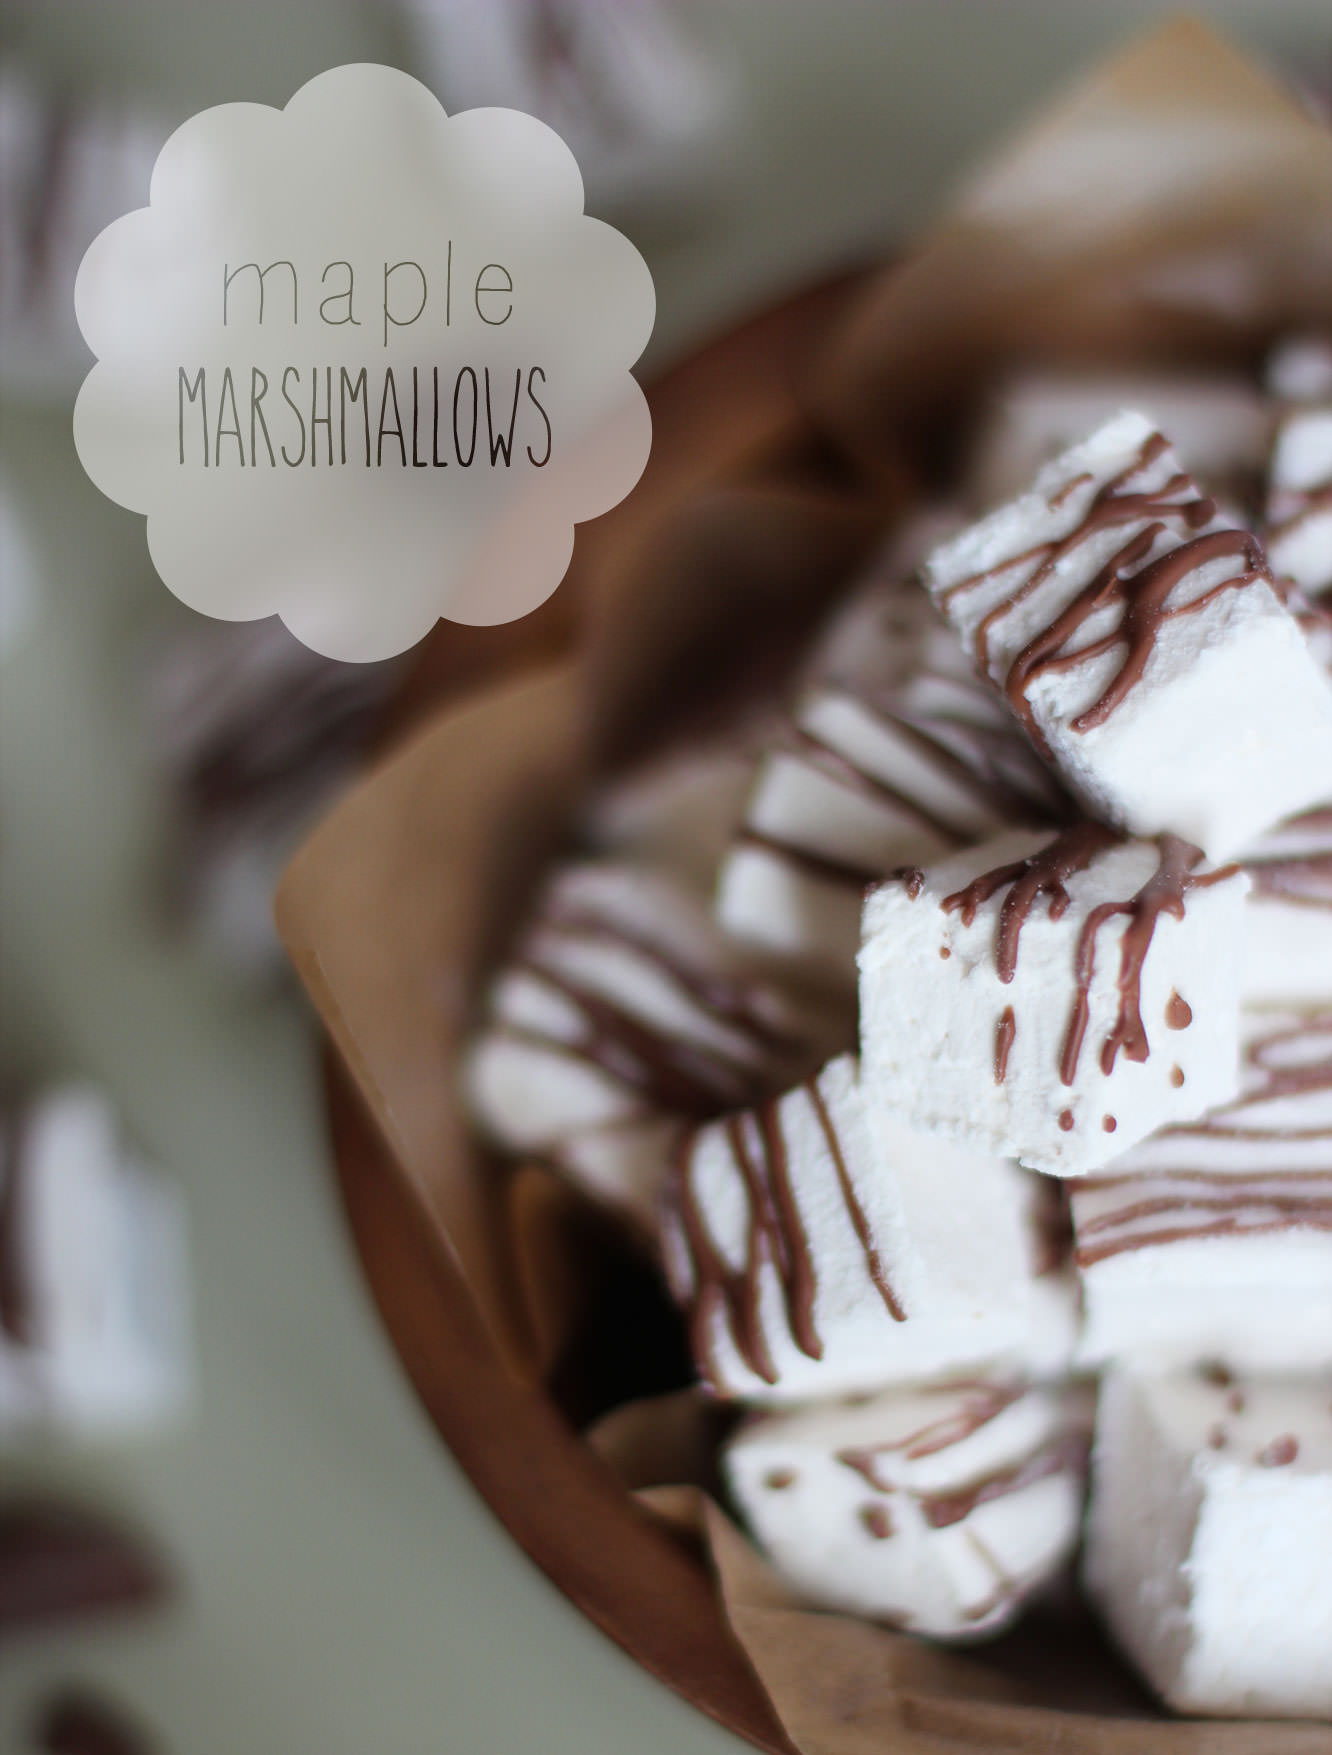 There we have it. Maple marshmallows. Nowhere near as difficult to make as I made them sound, I promise.
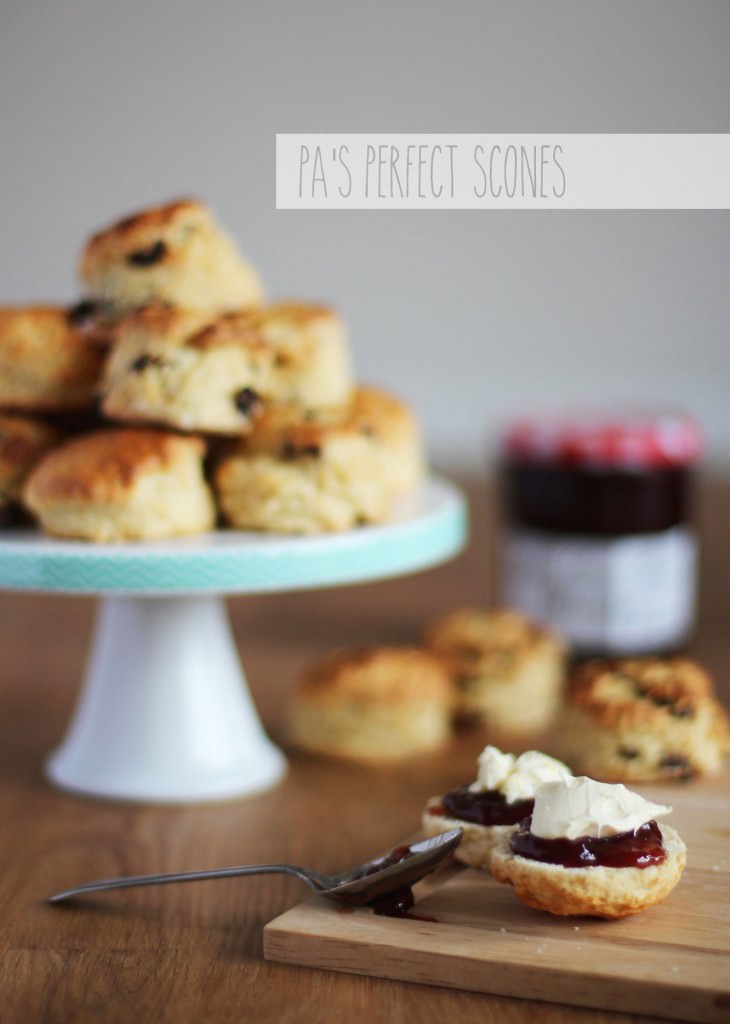
 You will need
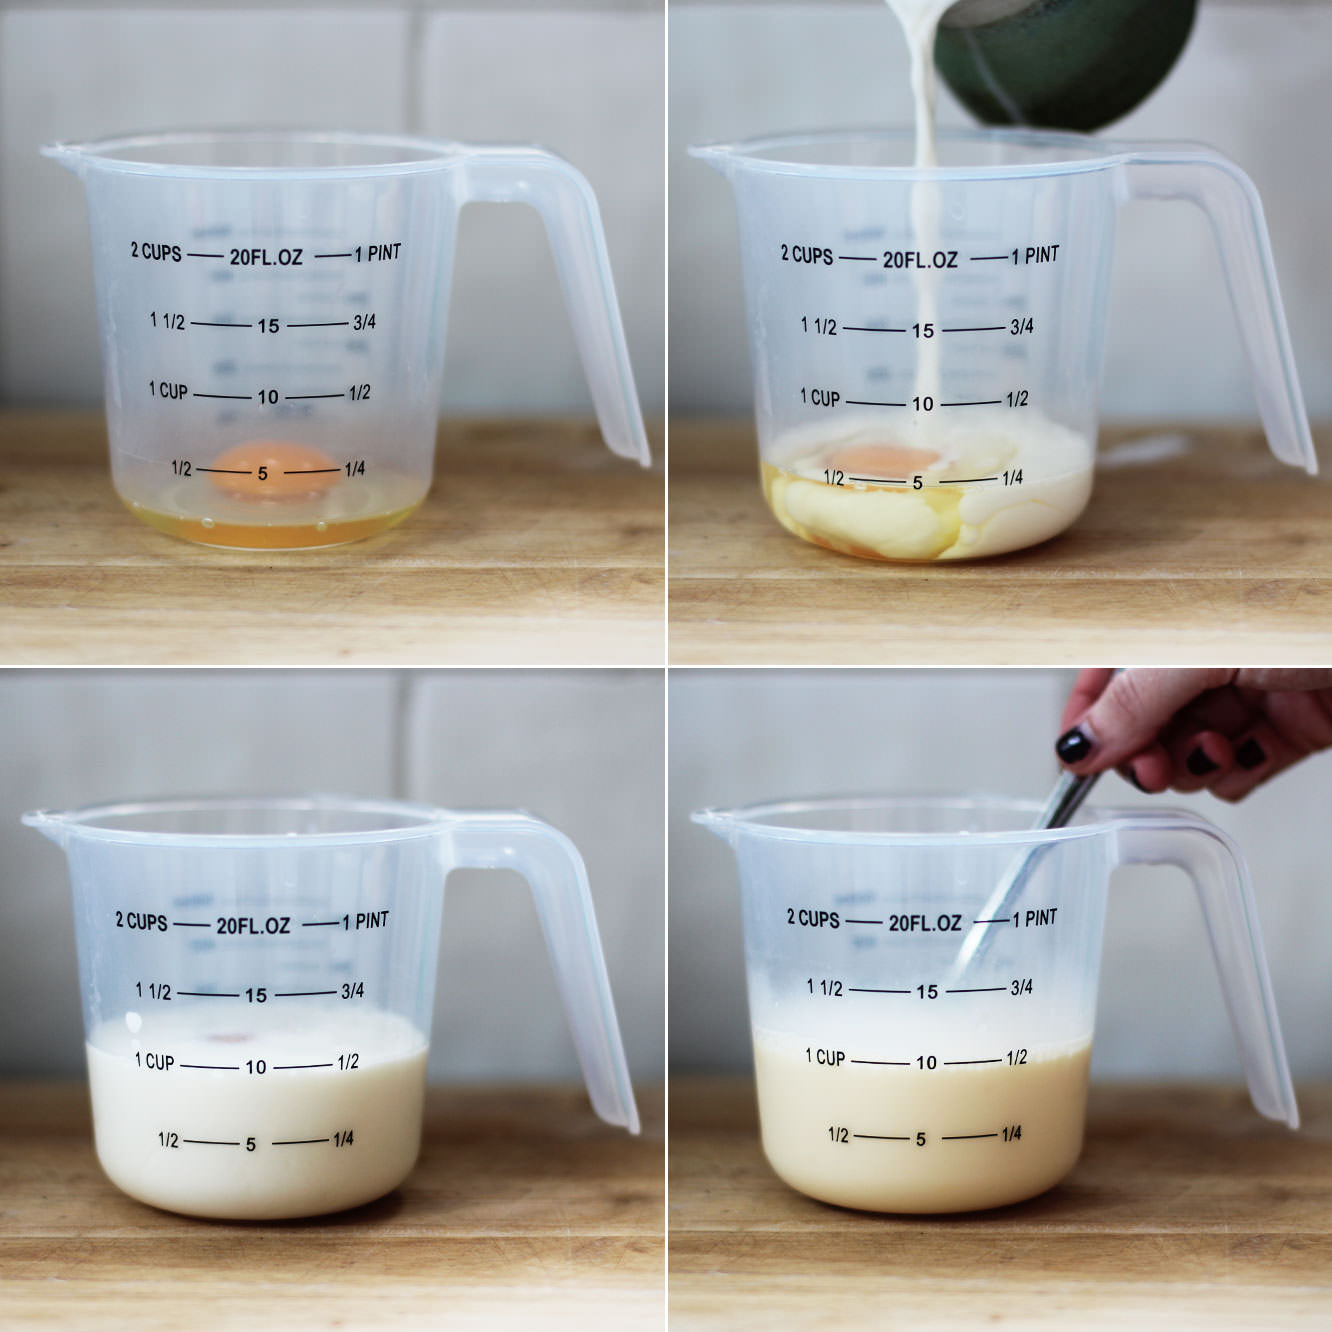 Step one
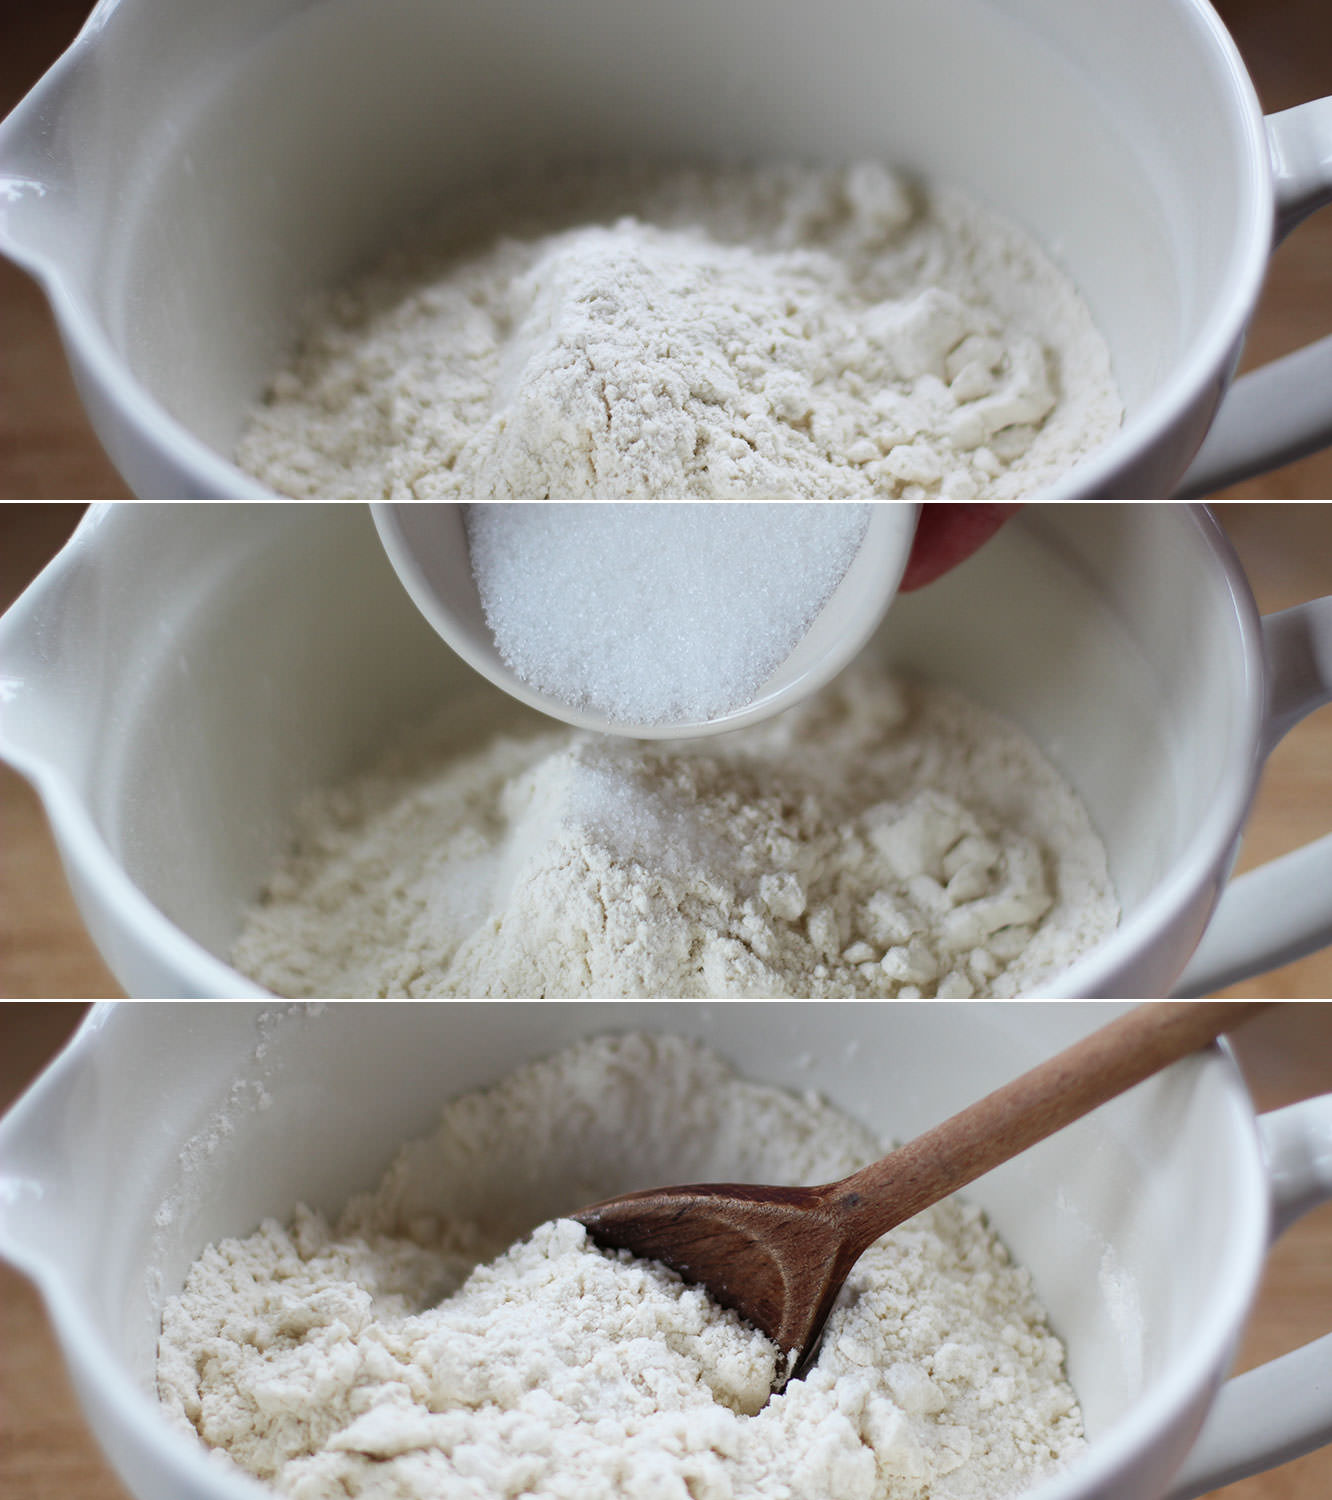 Step two
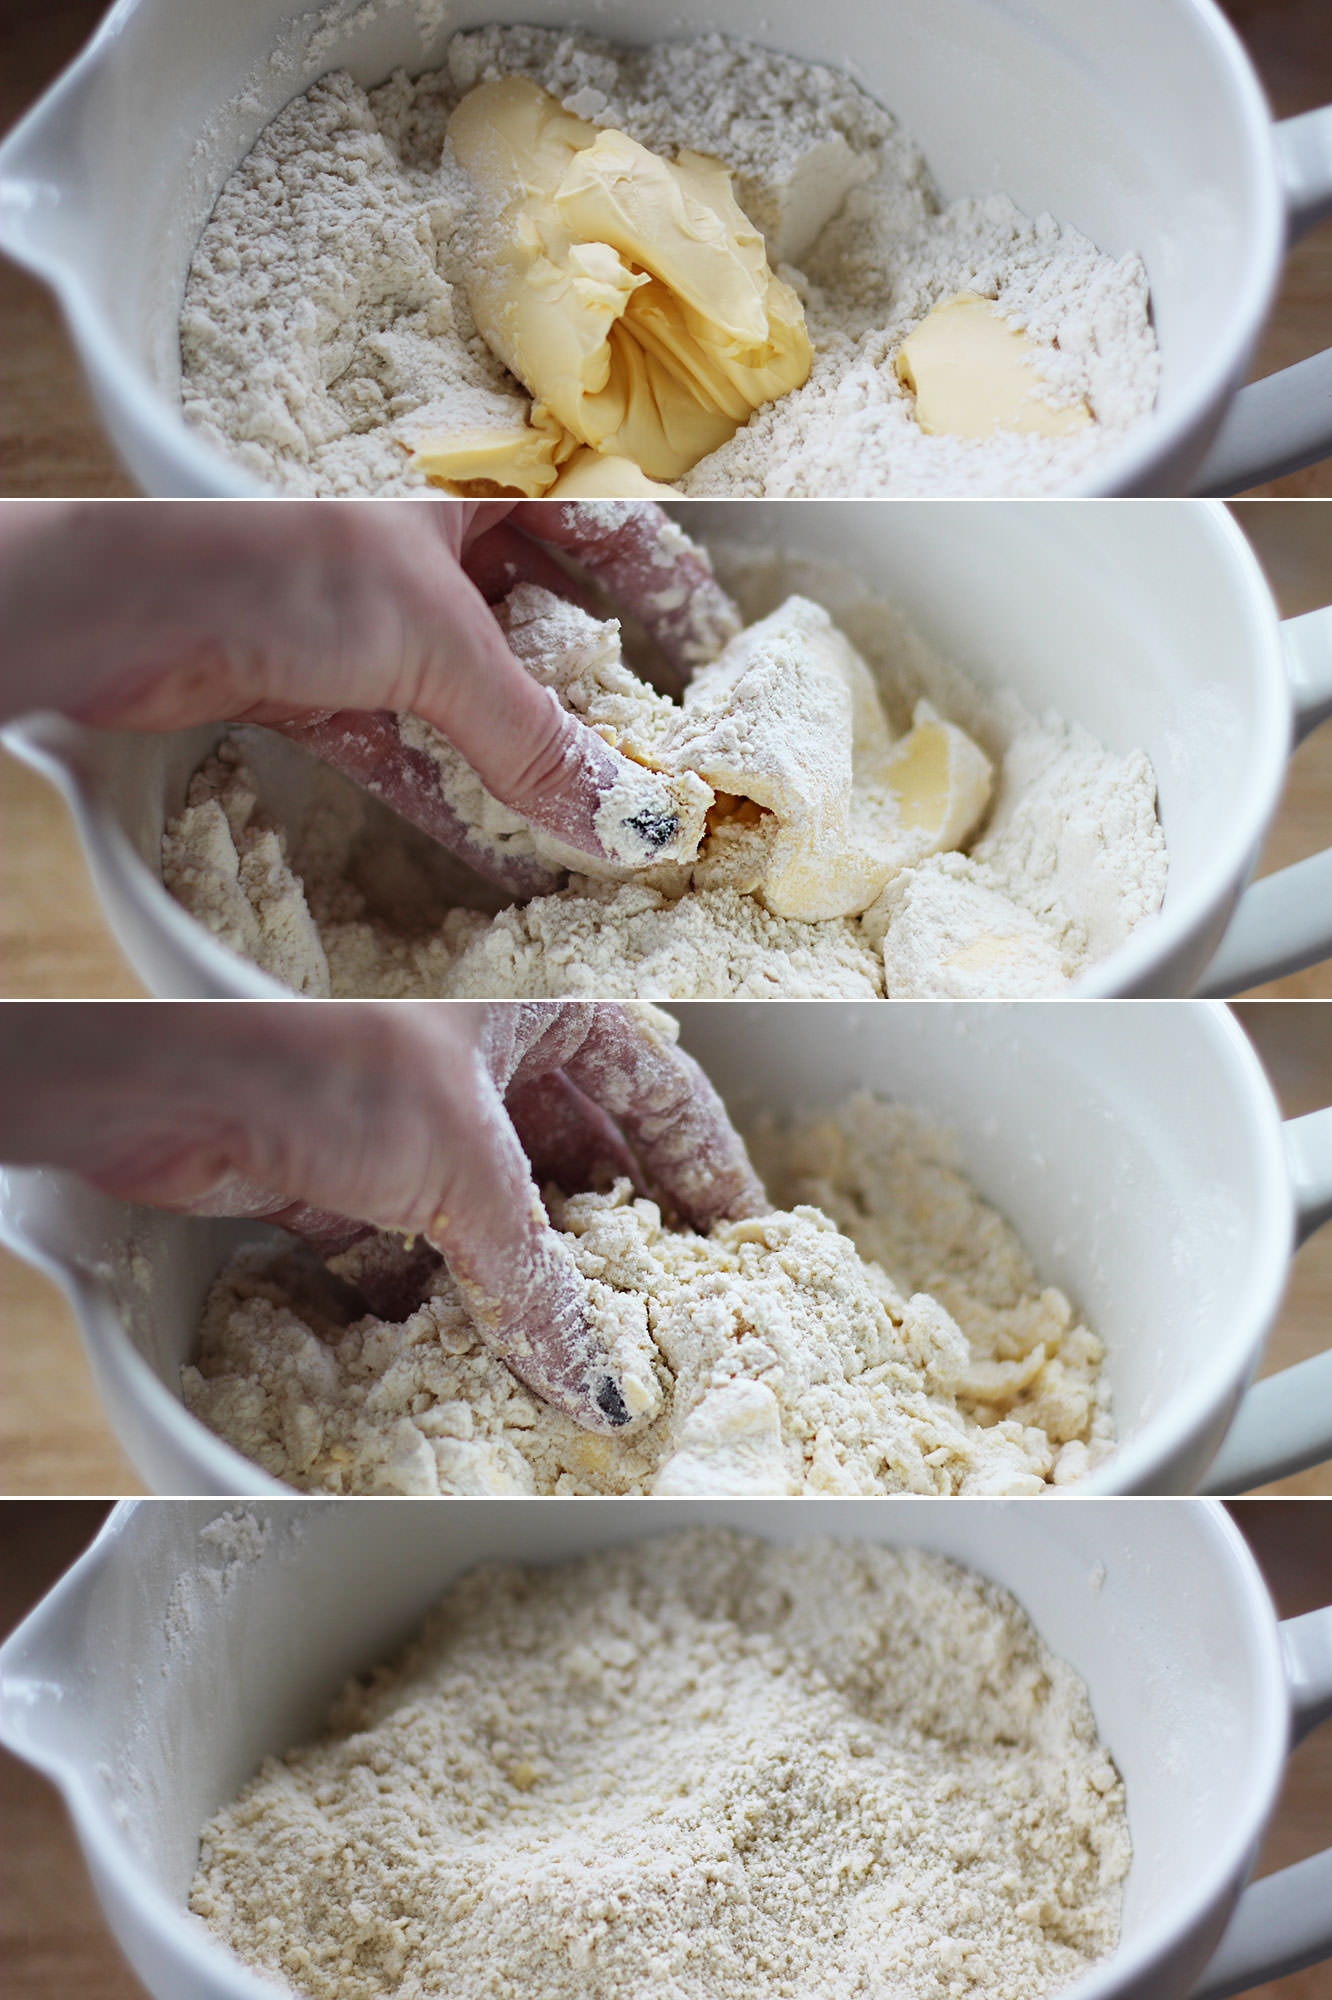 Step three
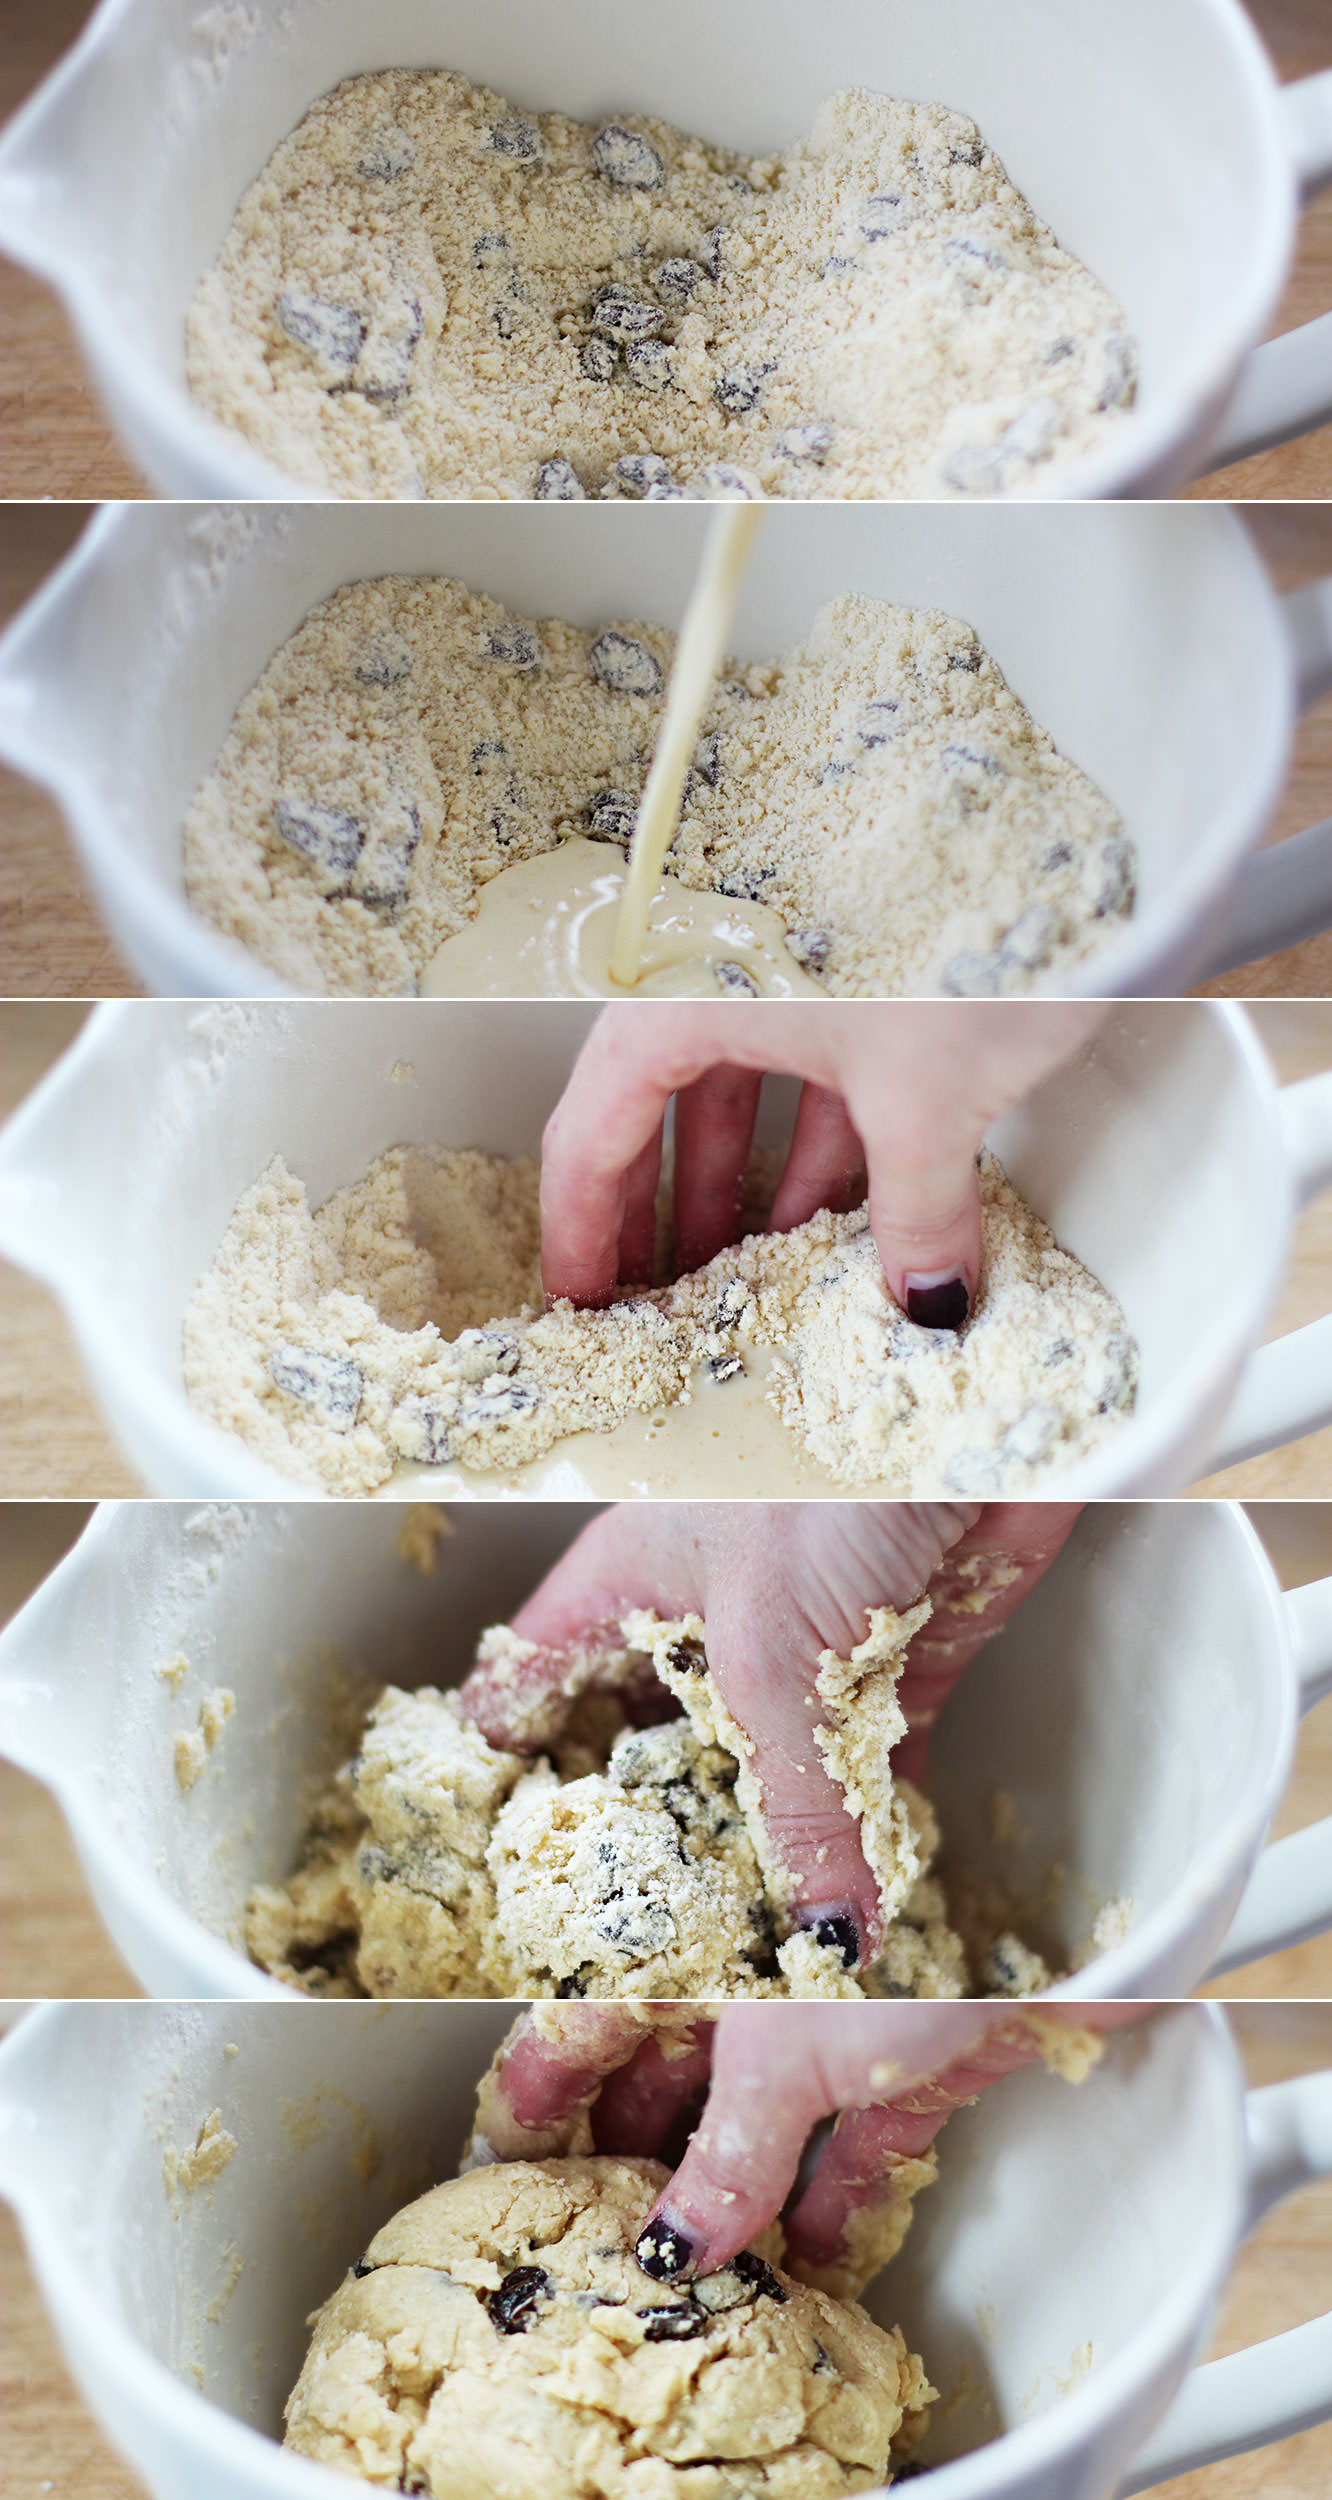 Step four
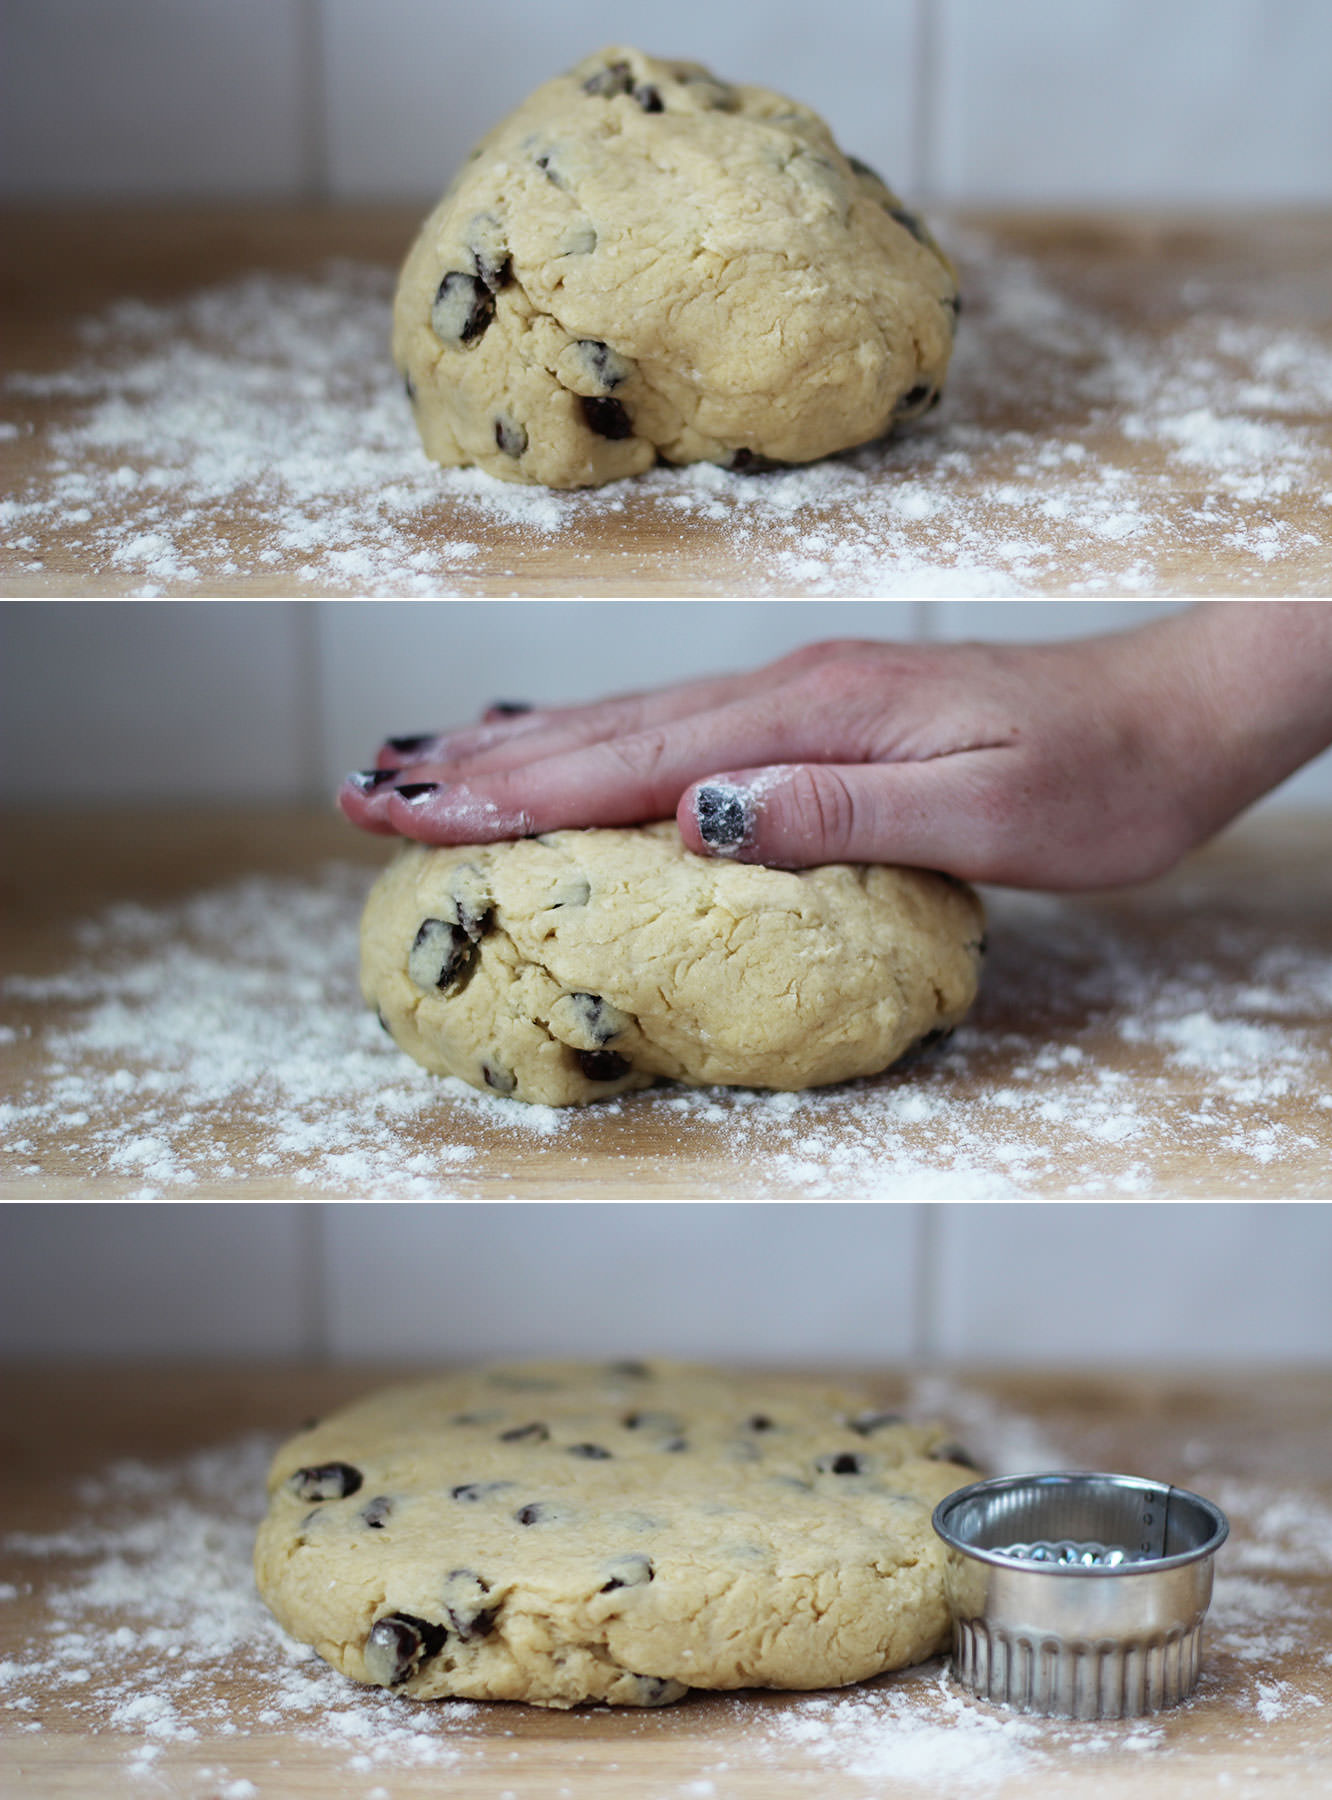 Step five
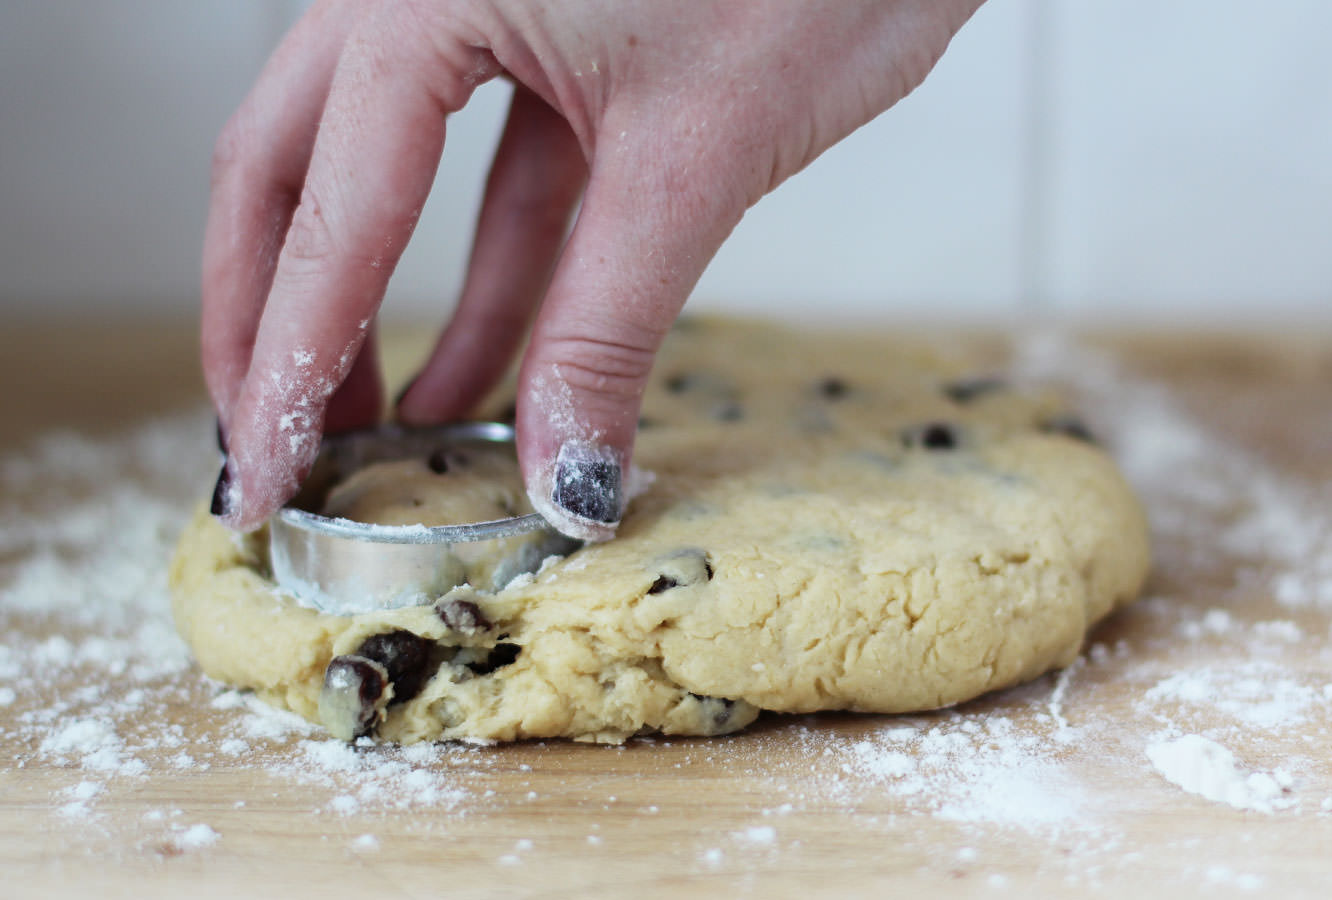 Step six
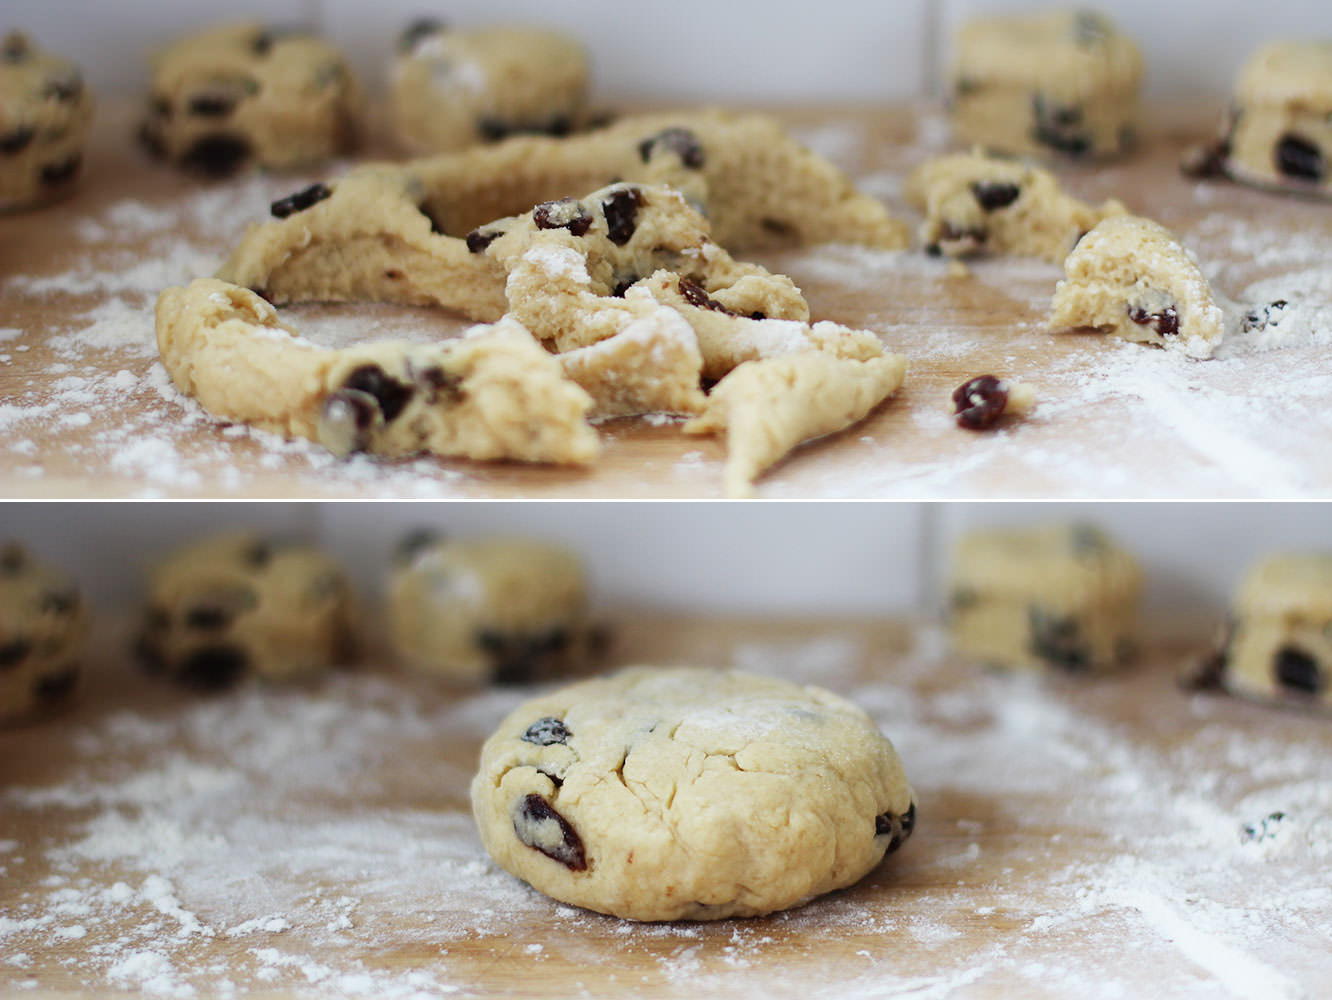 Step seven
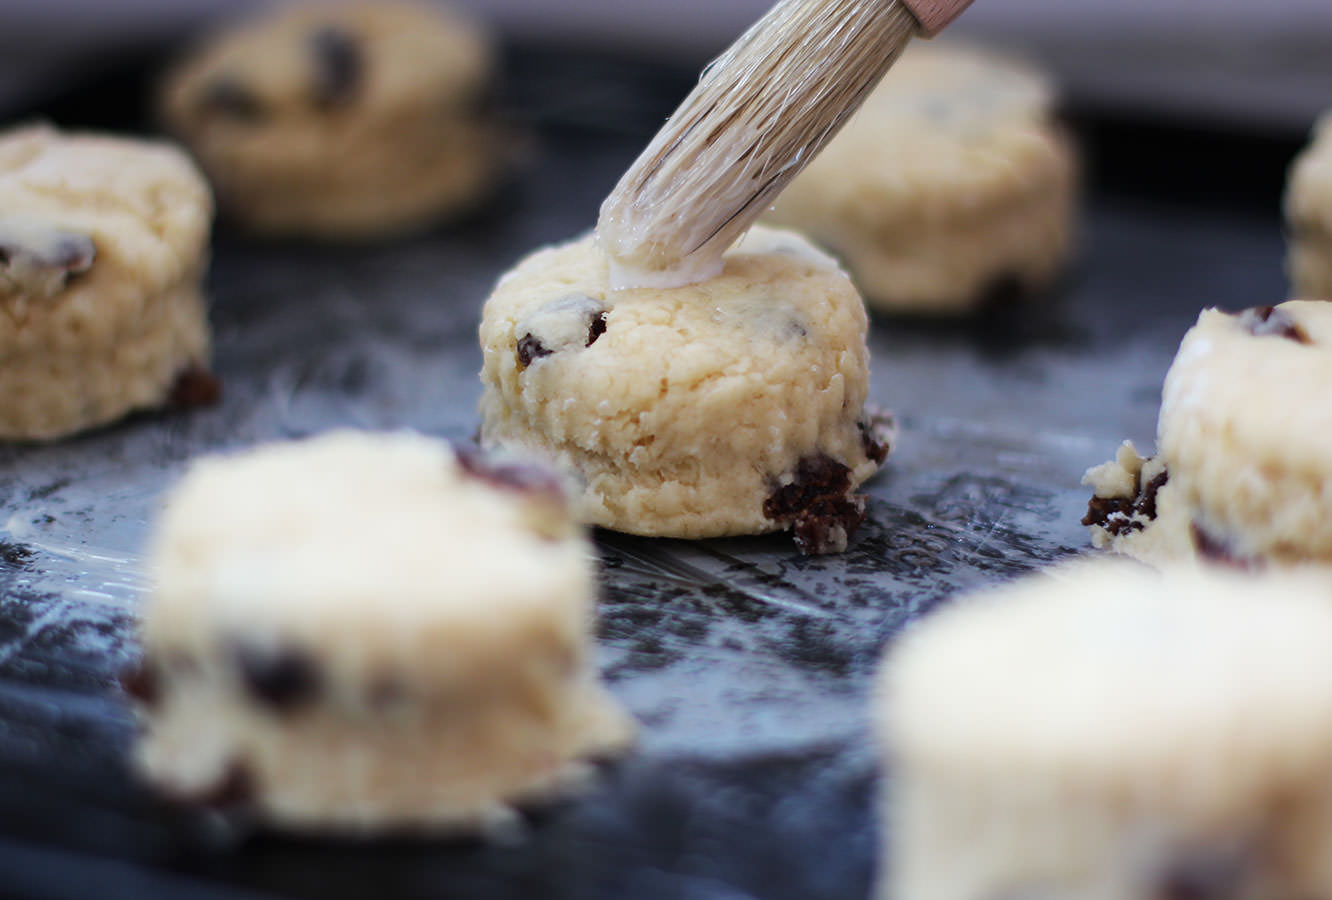 Step eight
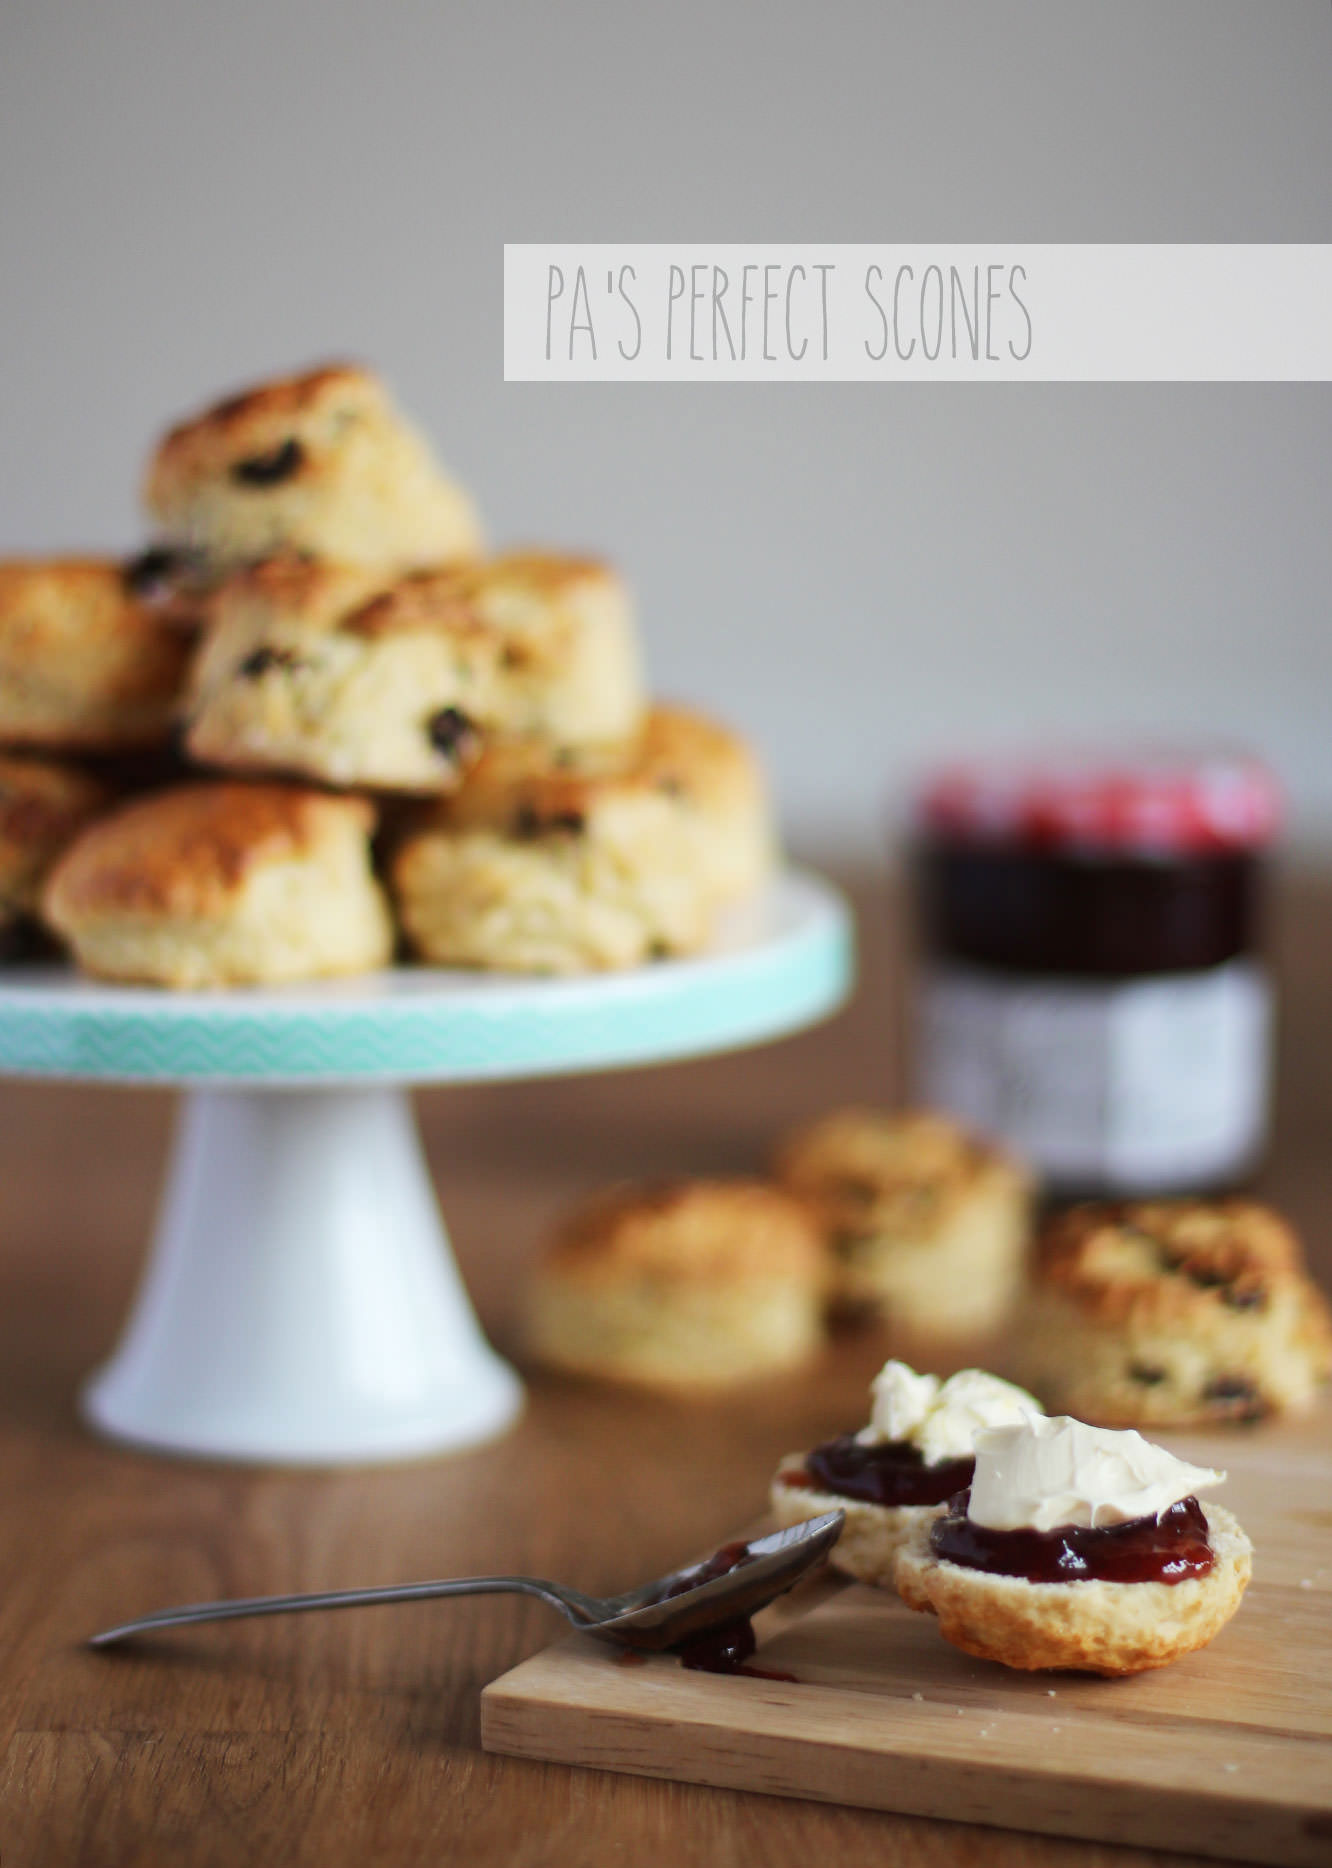 Step ten