Sorry, what’s that? IT’S PANCAKE DAY TOMORROW? Or maybe if you read this on a Tuesday it’s pancake day today. Or maybe if you’re reading this in a few months time pancake day is nowhere nearby, and if that’s the case there’s nothing stopping you from making pancakes anyway. Especially when they taste THIS good.
I don’t think there can ever be enough pancakes, so I bring you not one, not two, but three recipes this week. And with three recipes comes three gifs. I know, I spoil you.
My fellow Europeans will have to excuse me for edging towards the North American style of pancake (you can add more flavours this way, but I assure you I’m still a die hard fan of our traditional flat friends). Those of you across the pond will also have to excuse me for not adding sugar and melted butter and all that nonsense to the mix.
These are a hybrid, somewhere half way between. Maybe this is what happens in Iceland or Greenland, who knows?
Enough ramble. LET’S. GET. FLIPPING.
Who am I kidding? I’m far too anxious to flip them.
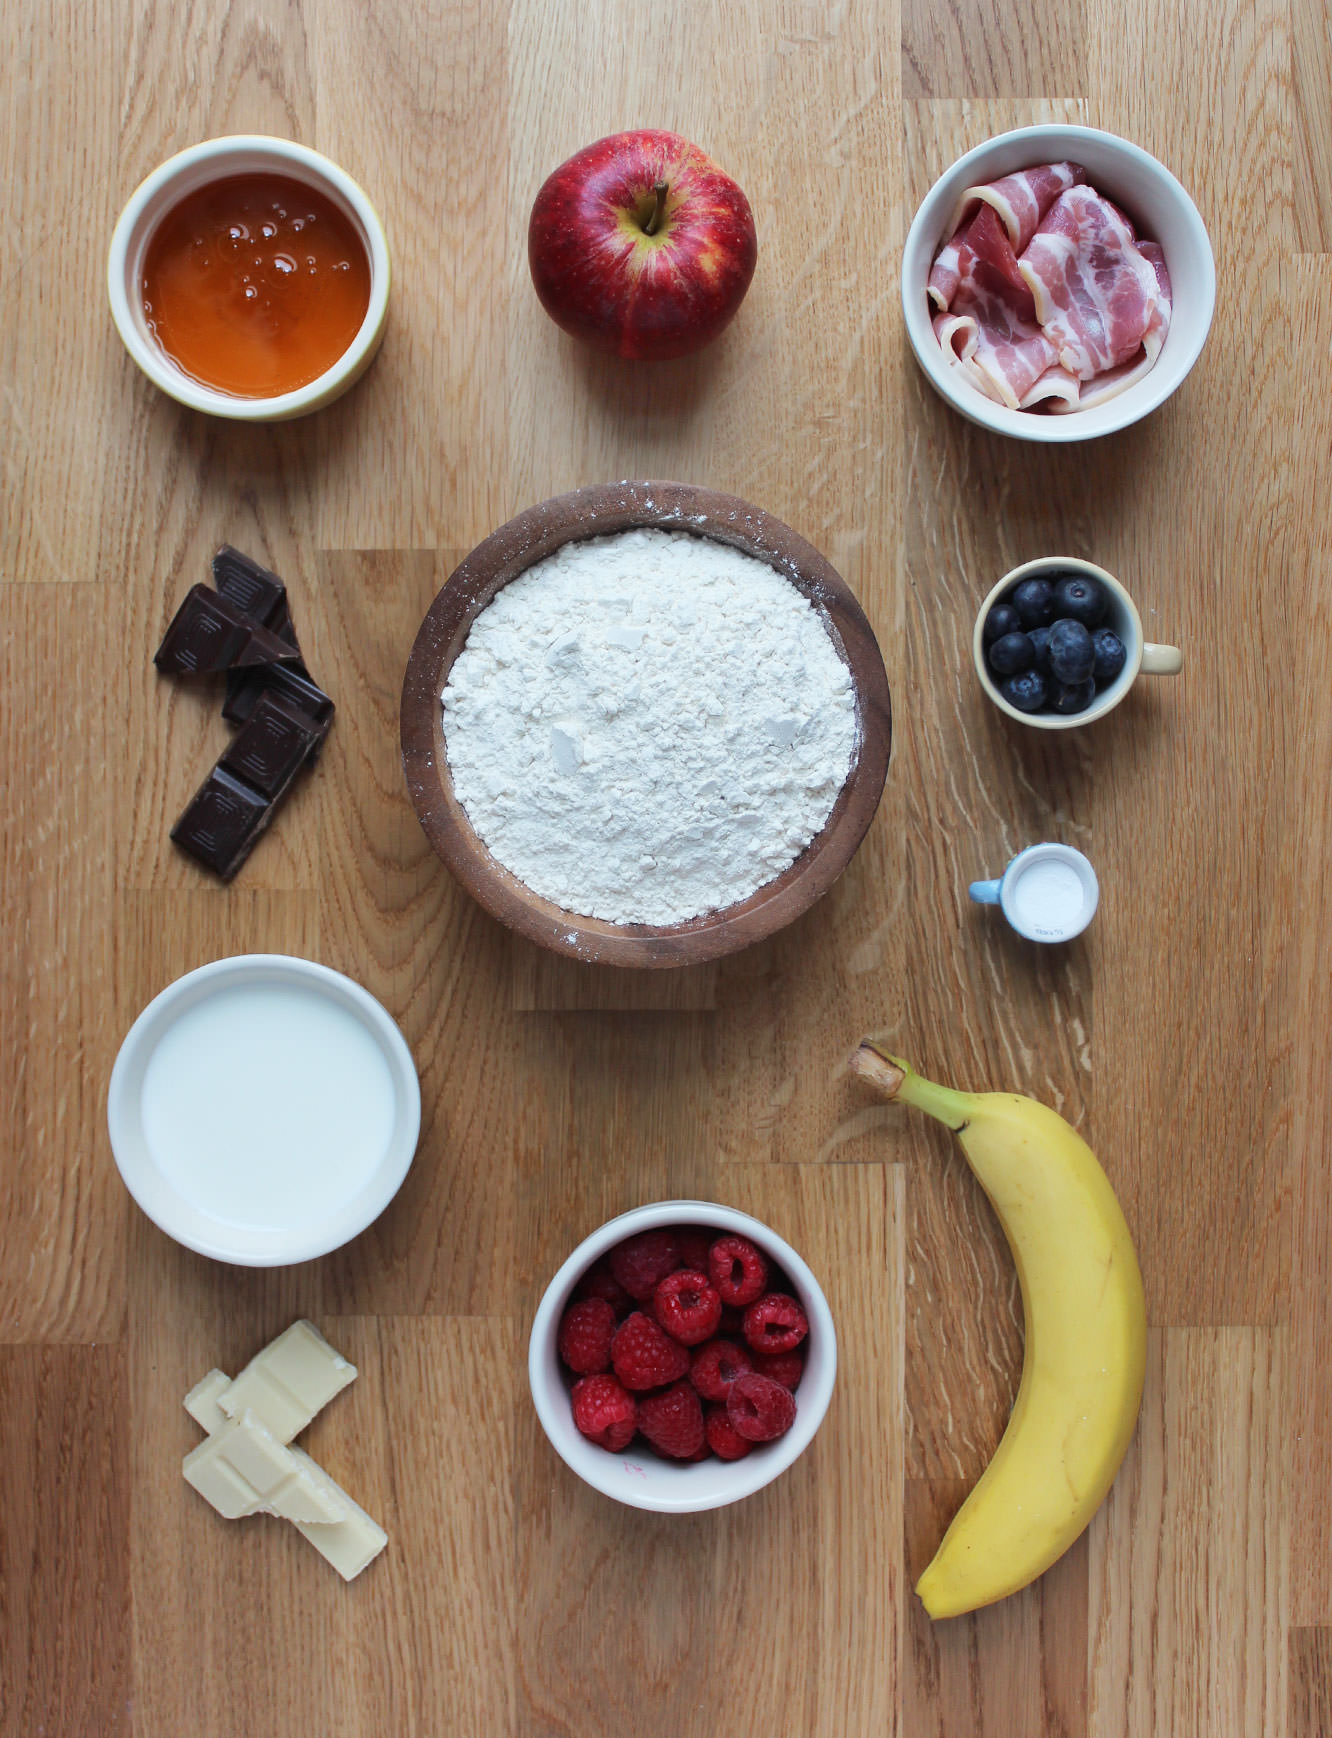
You will need
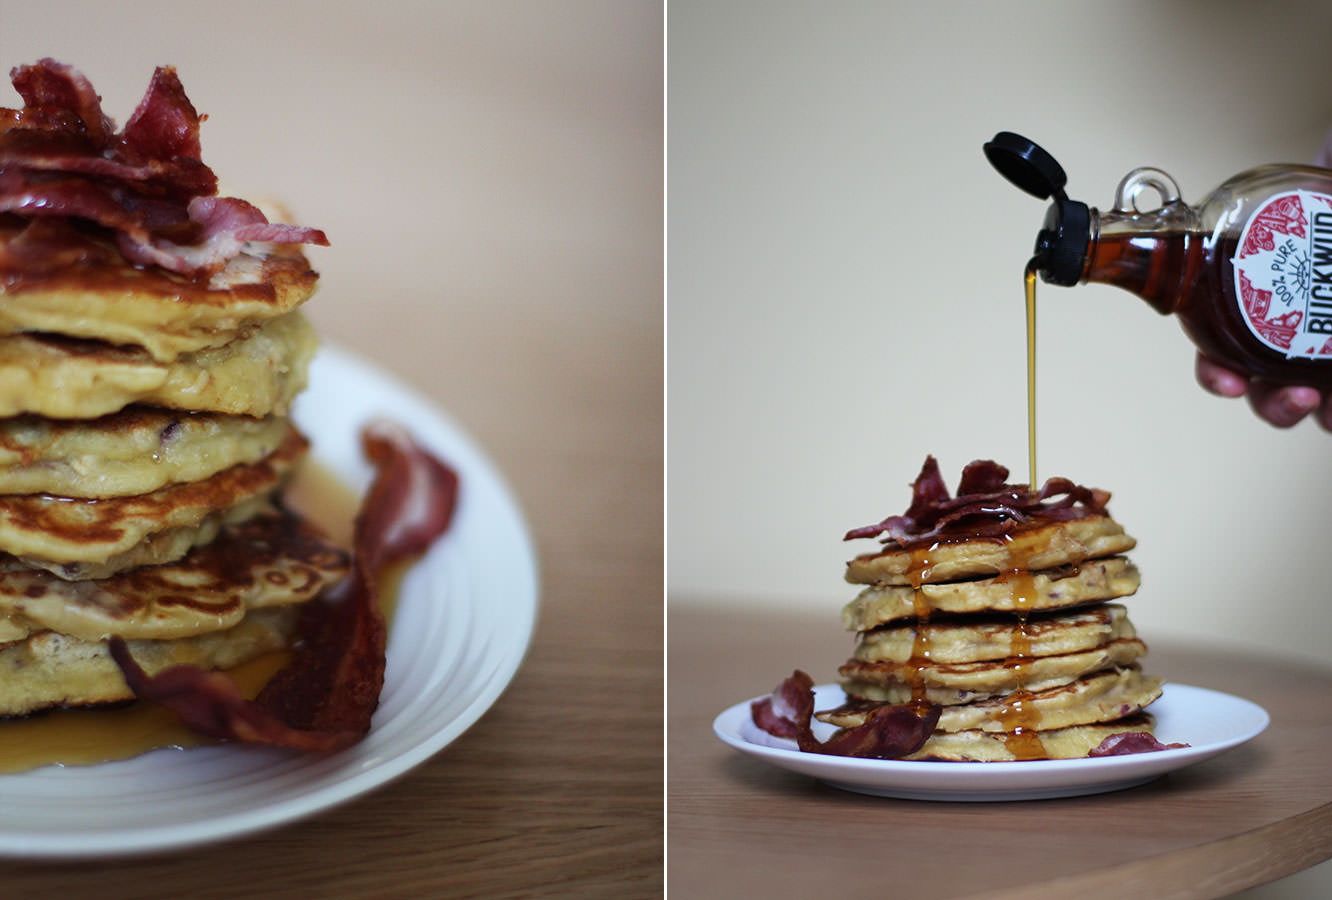
Apple, maple and bacon pancakes
1 cup Plain flour
1 cup Full fat milk
1 Apple
1 Egg
1 tsp Baking powder
Bacon and maple syrup to serve (adjust to your own preference)
White chocolate and raspberry pancakes
1 cup Plain flour
1 cup Full fat milk
1 cup Raspberries
1 Egg
1 tsp Baking powder
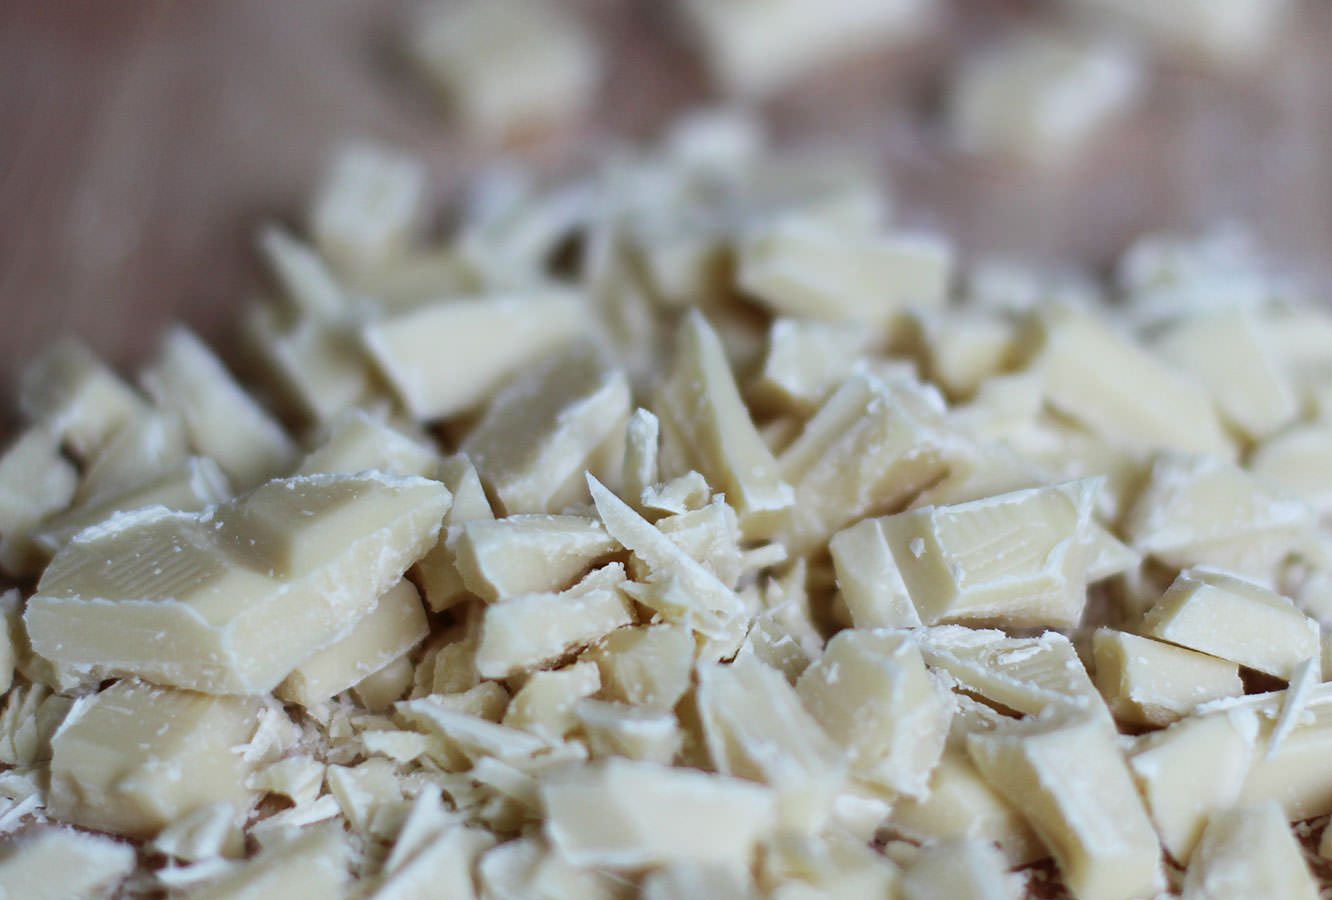
100g/3.5 oz White chocolate
50g/1.5 oz Dark chocolate to serve
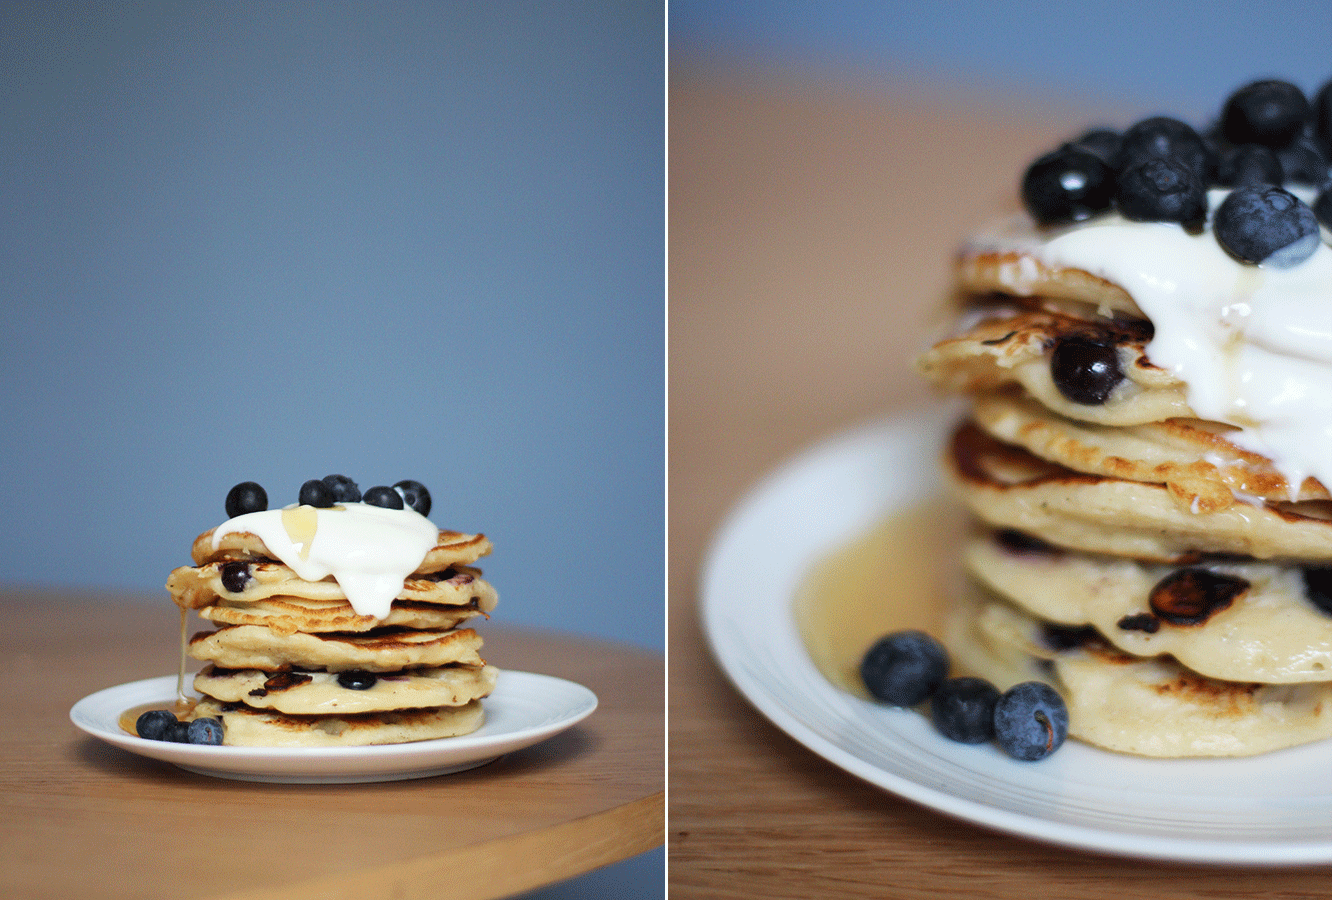
Banana and blueberry buttermilk almond pancakes
1 cup Plain flour
1 tub Buttermilk (284ml)
1 Egg
1 tsp Baking powder
1/2 tsp Almond extract
2 Bananas
1/2 cup Blueberries
More blueberries, some natural yoghurt and honey to serve
NB: The process is the same for all three recipes, however, the banana ones use buttermilk instead of regular milk. This makes a much thicker, goopier mixture.
All the recipes make 6-8 pancakes depending on their size.
Apple, maple and bacon pancakes
Step one
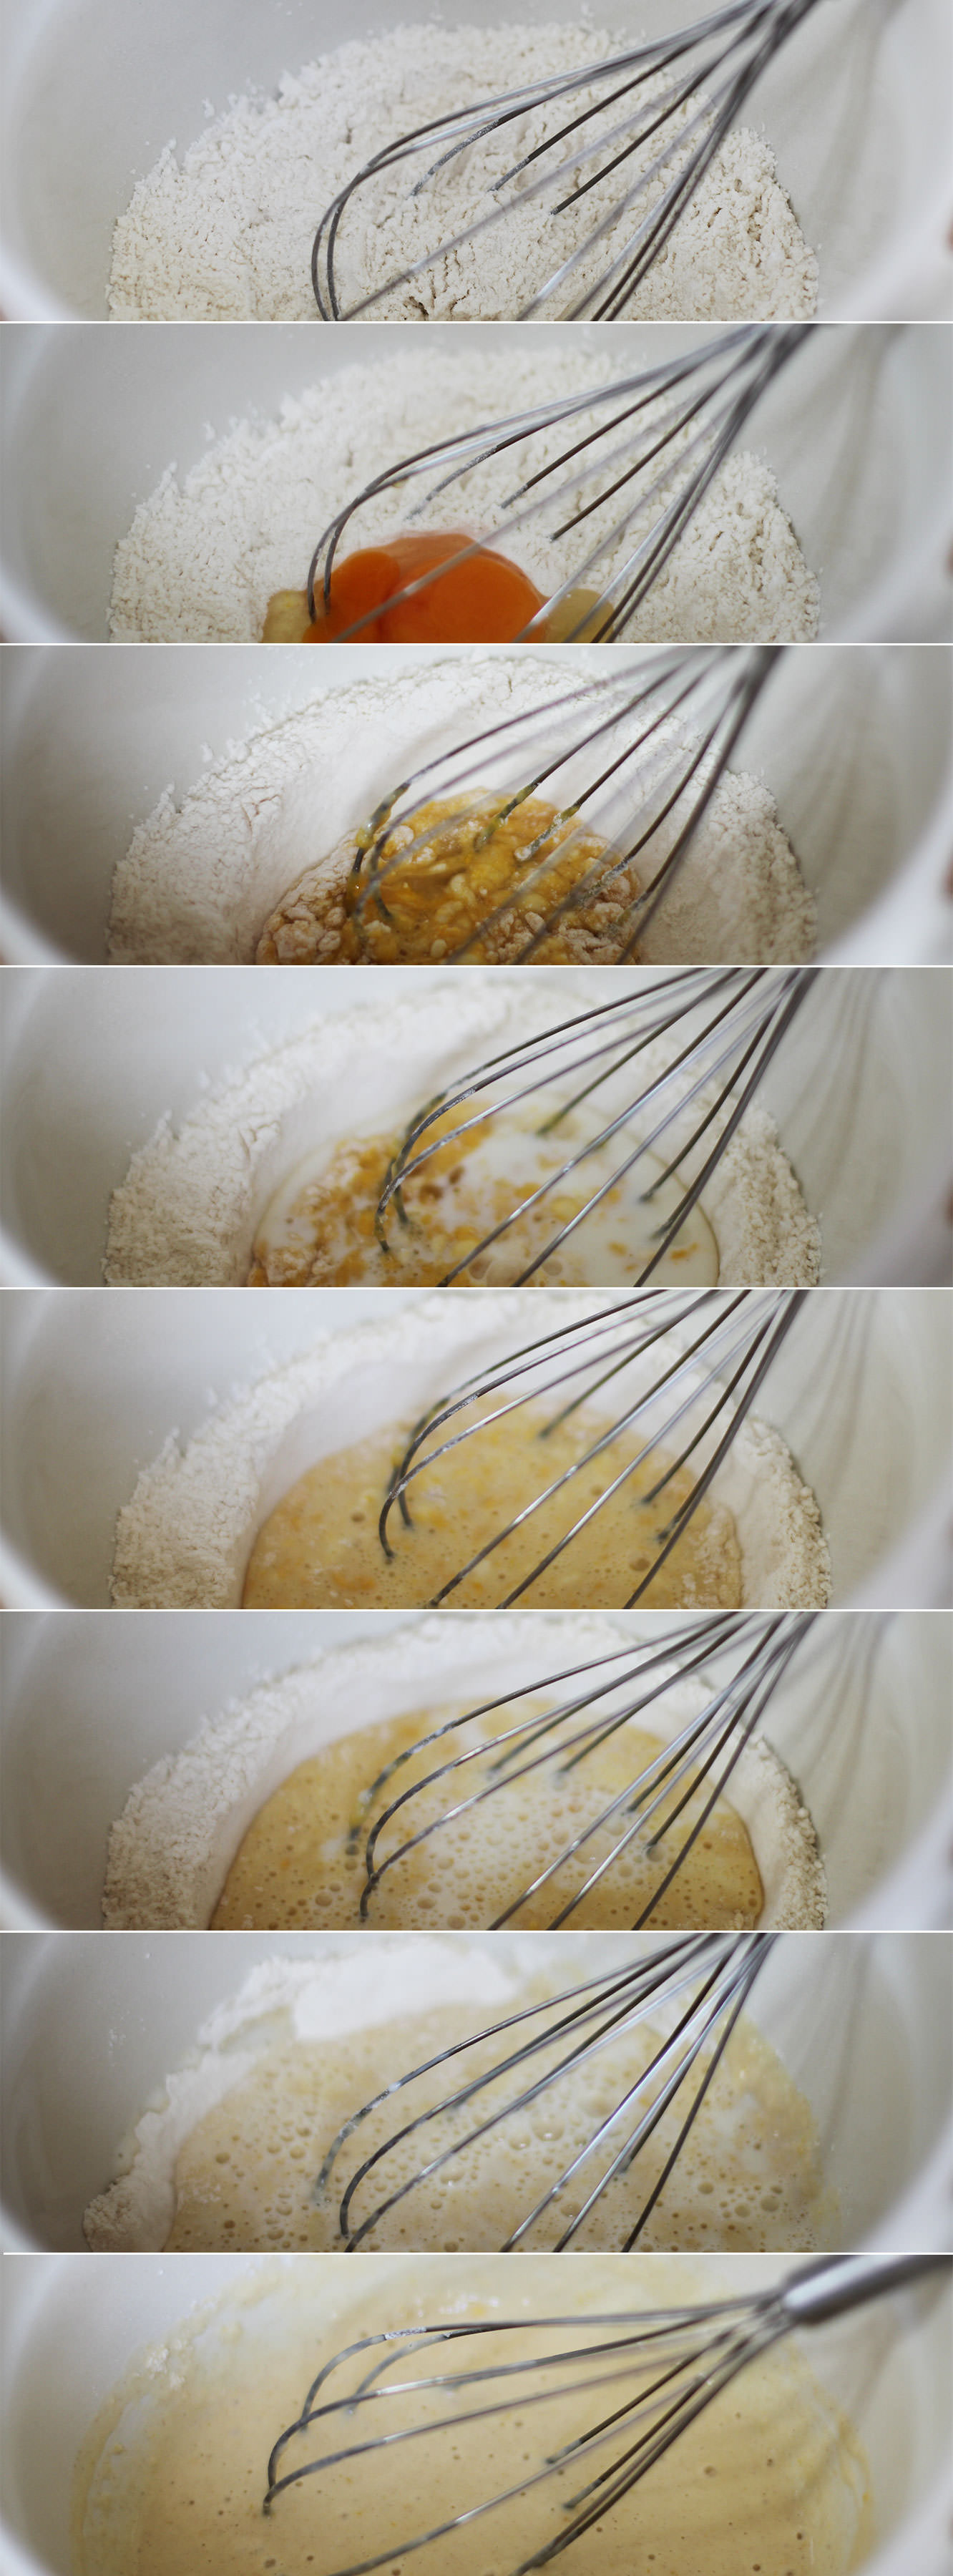
Whisk together the flour and baking powder and make a well in the middle for the egg.
The way to make smooth pancakes is to whisk little circles to gradually include the flour. Slowly add the milk a third at a time and continue making circles until all the flour is mixed in.
Step two
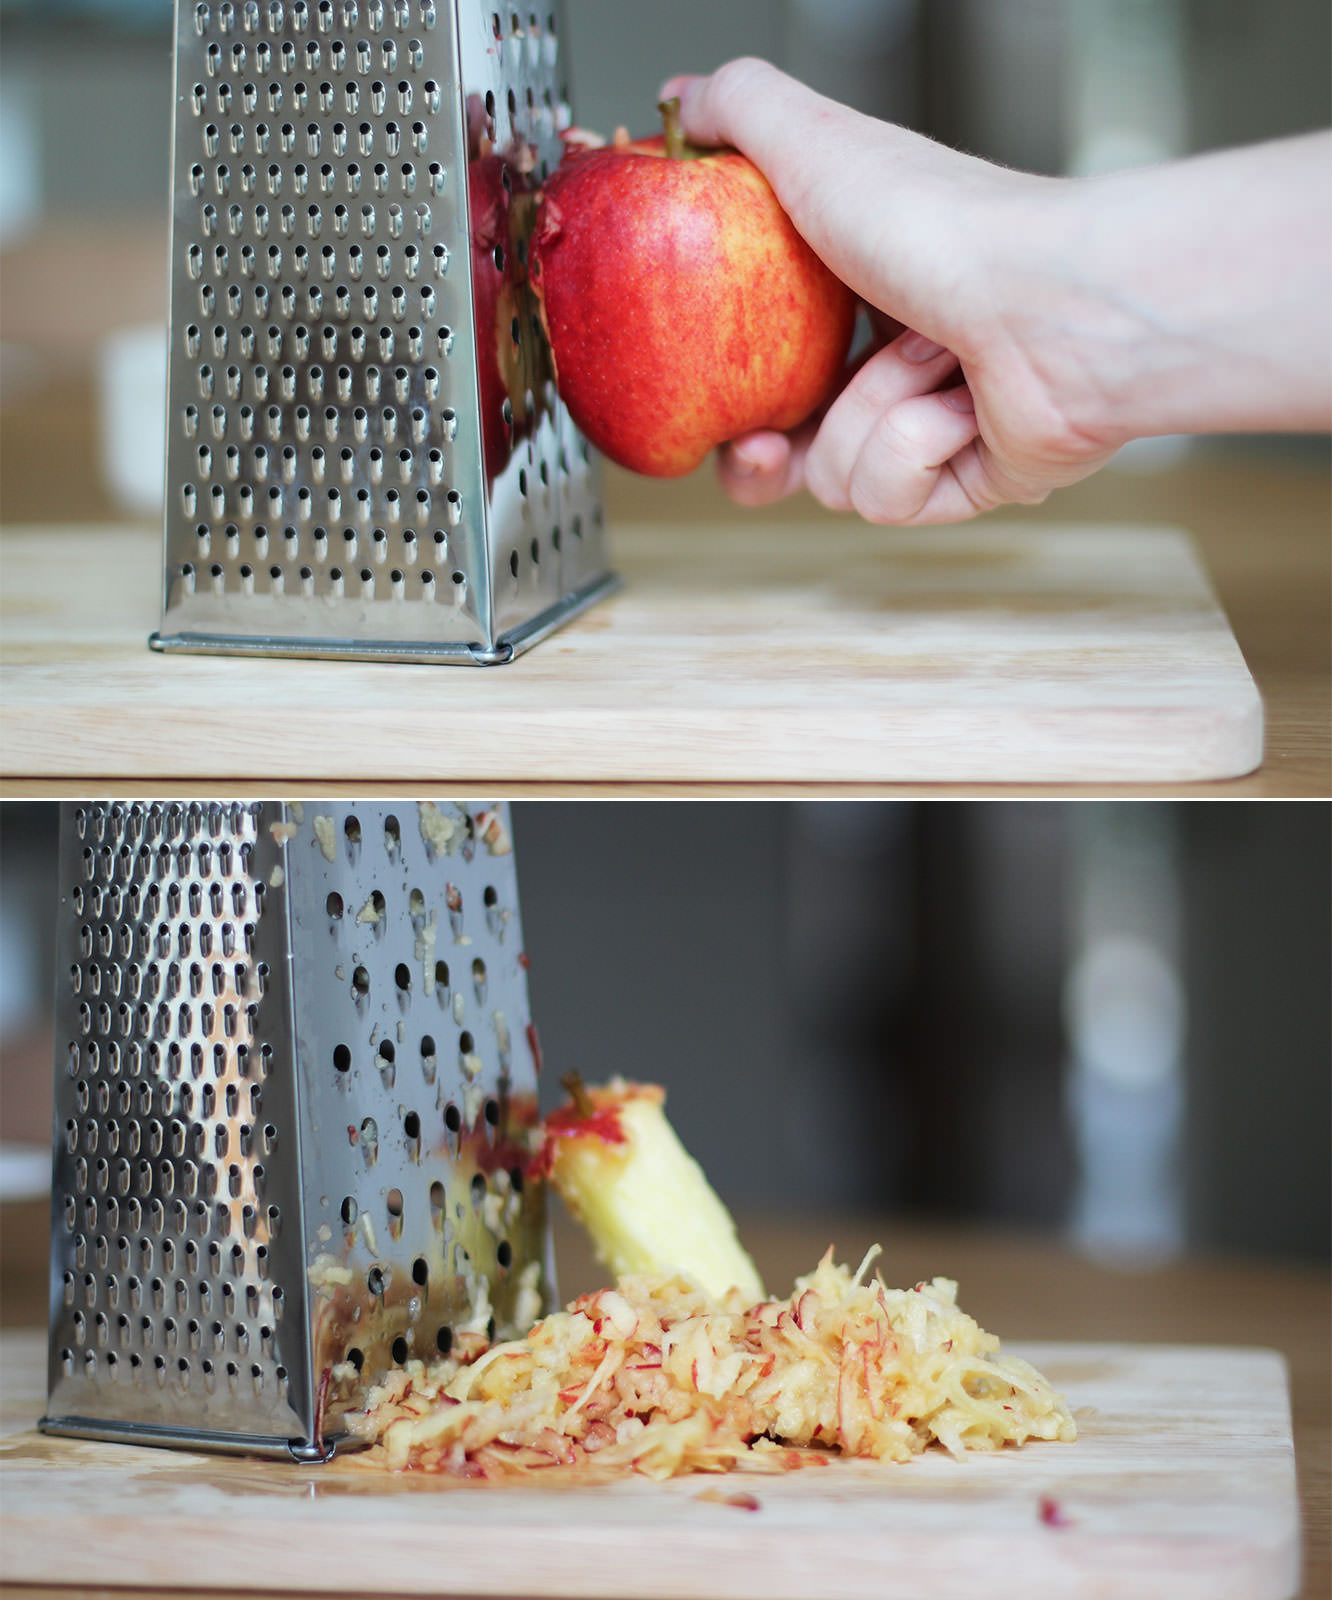
Grate the apple until you get to the core and add to the pancake batter.
Step three
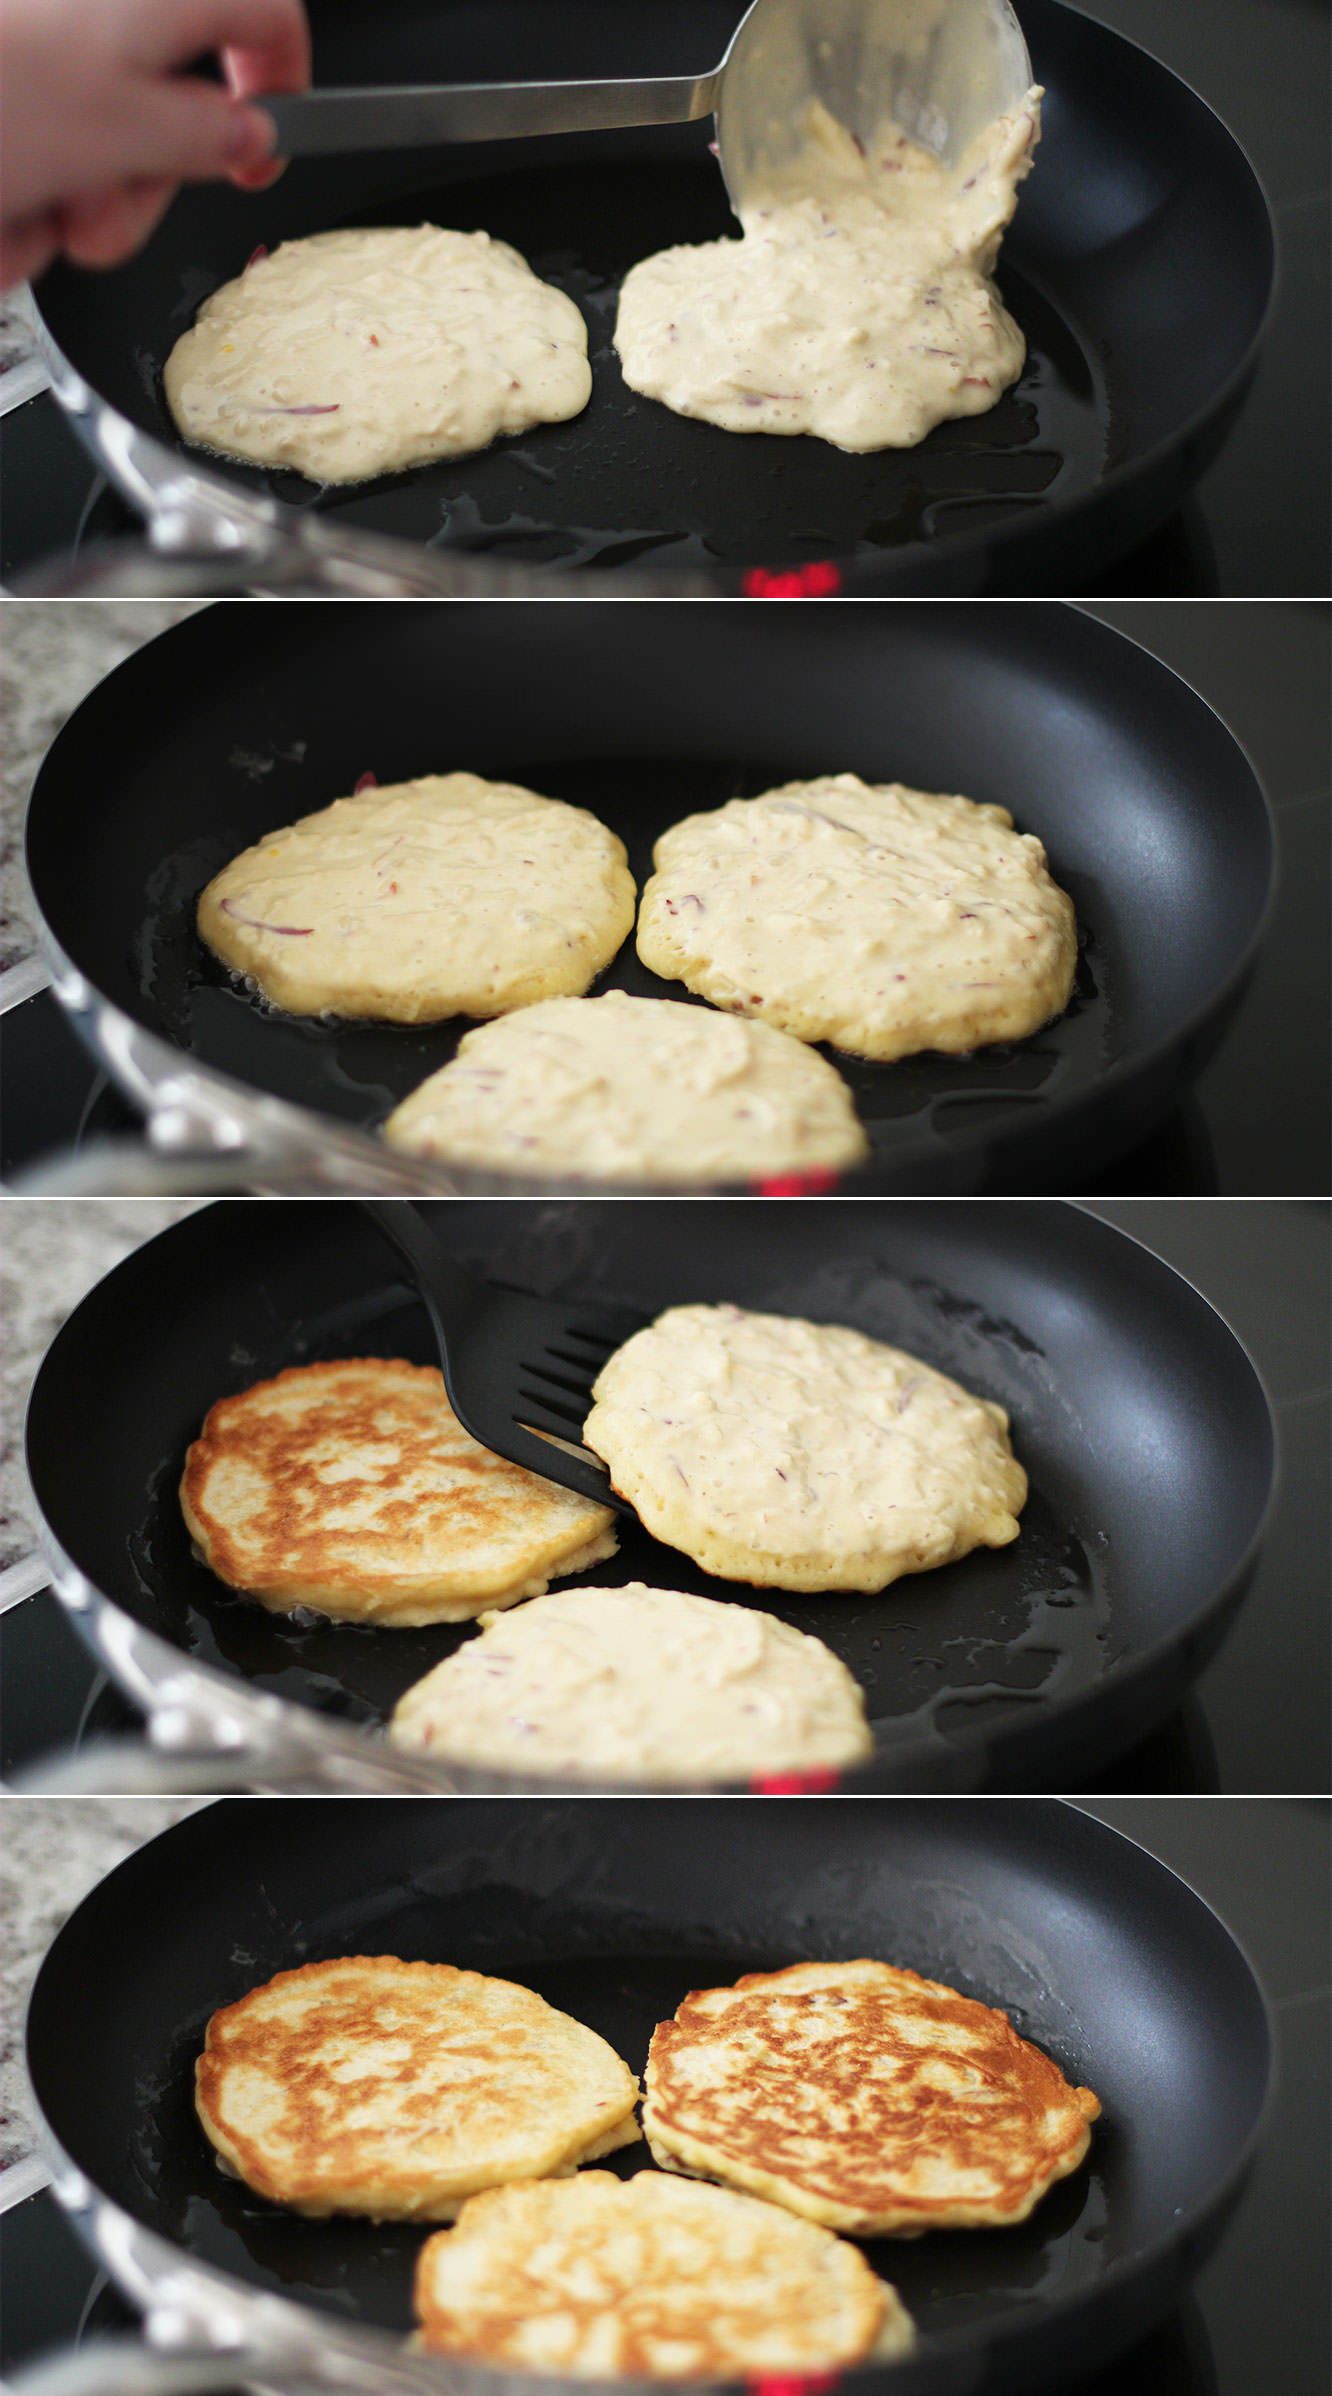
Using a tablespoon or so of vegetable oil, fry the pancakes until you start to see lots of little bubbles on the surface.
FLIP FLIP FLIP.
Step four
If you’re wanting bacon with this (and unless you’re a vegetarian, you are wanting bacon) then you’ll want to have that grilling or frying off at the same time.
Right. One down, two to go.
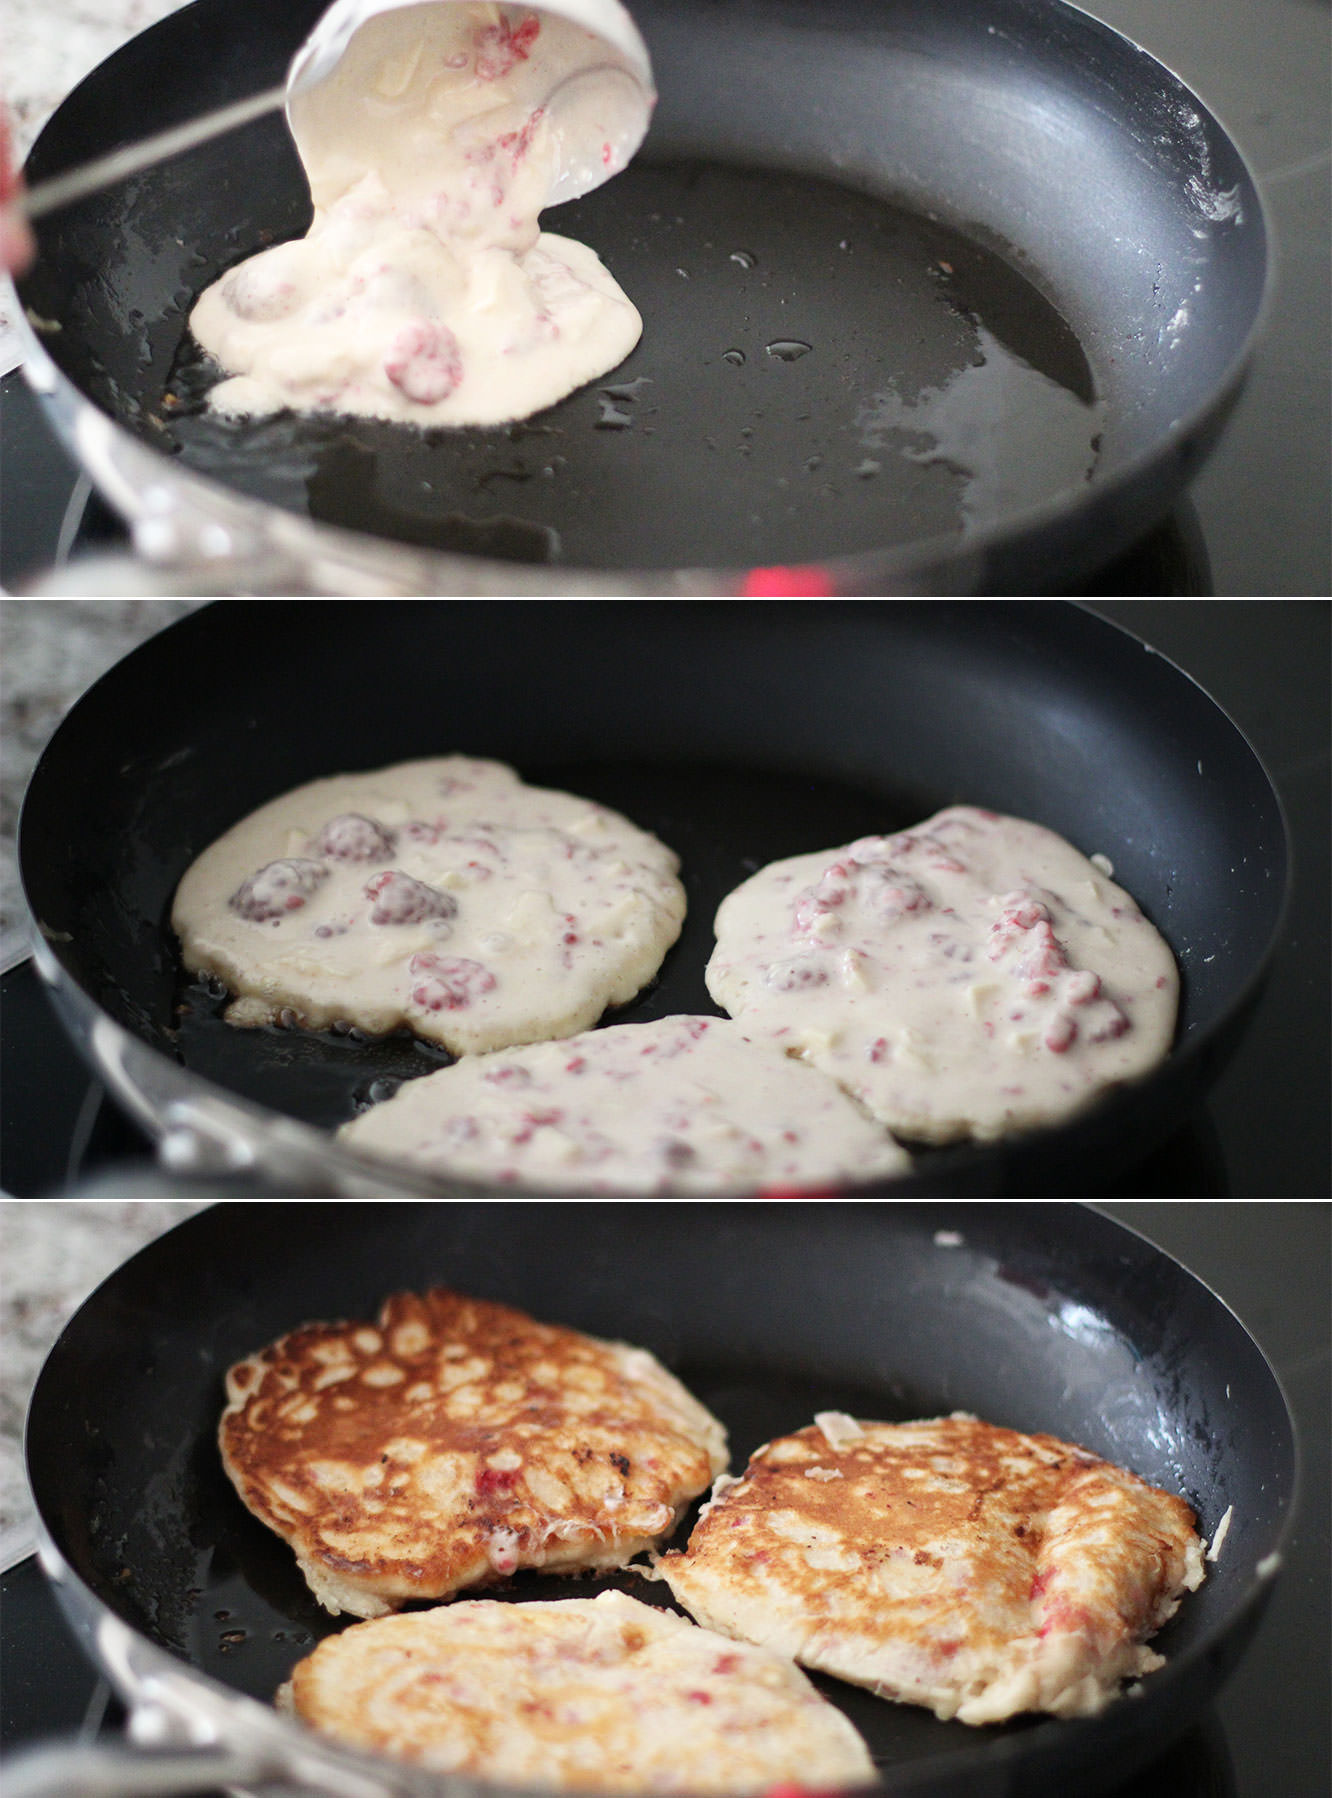
White chocolate and raspberry pancakes
Step one
Refer to step one of apple, maple and bacon recipe.
Step two
Chop the white chocolate into smallish chunks.
Step three
Stir the raspberries and chocolate into the batter. I squashed a few of them with the back of the spoon.
Step four
Cook em off.
You will find this mix a little runnier than the last one from a combo of the raspberry juice and the melting white chocolate.
Step five
Put the dark chocolate in a small bowl in the microwave and melt gradually, 20-30 seconds at a time.
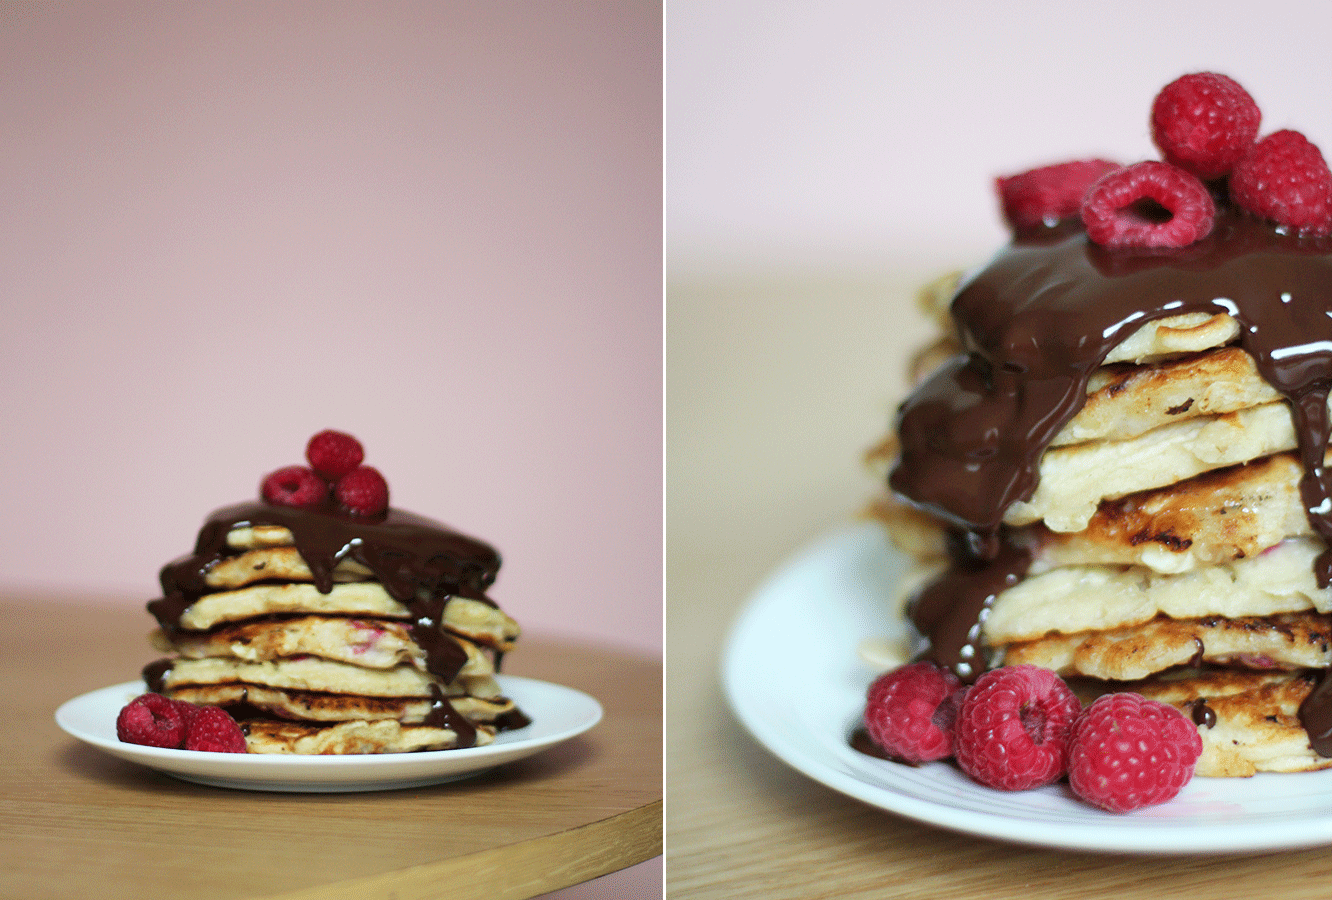
Step six
Stack them, cover in dark chocolate, enjoy.
Banana and blueberry buttermilk almond pancakes
Step one
Repeat the usual step one, you’re a pro by now. This time the buttermilk rather than the milk will make a thicker texture. Don’t forget to include the almond extract.
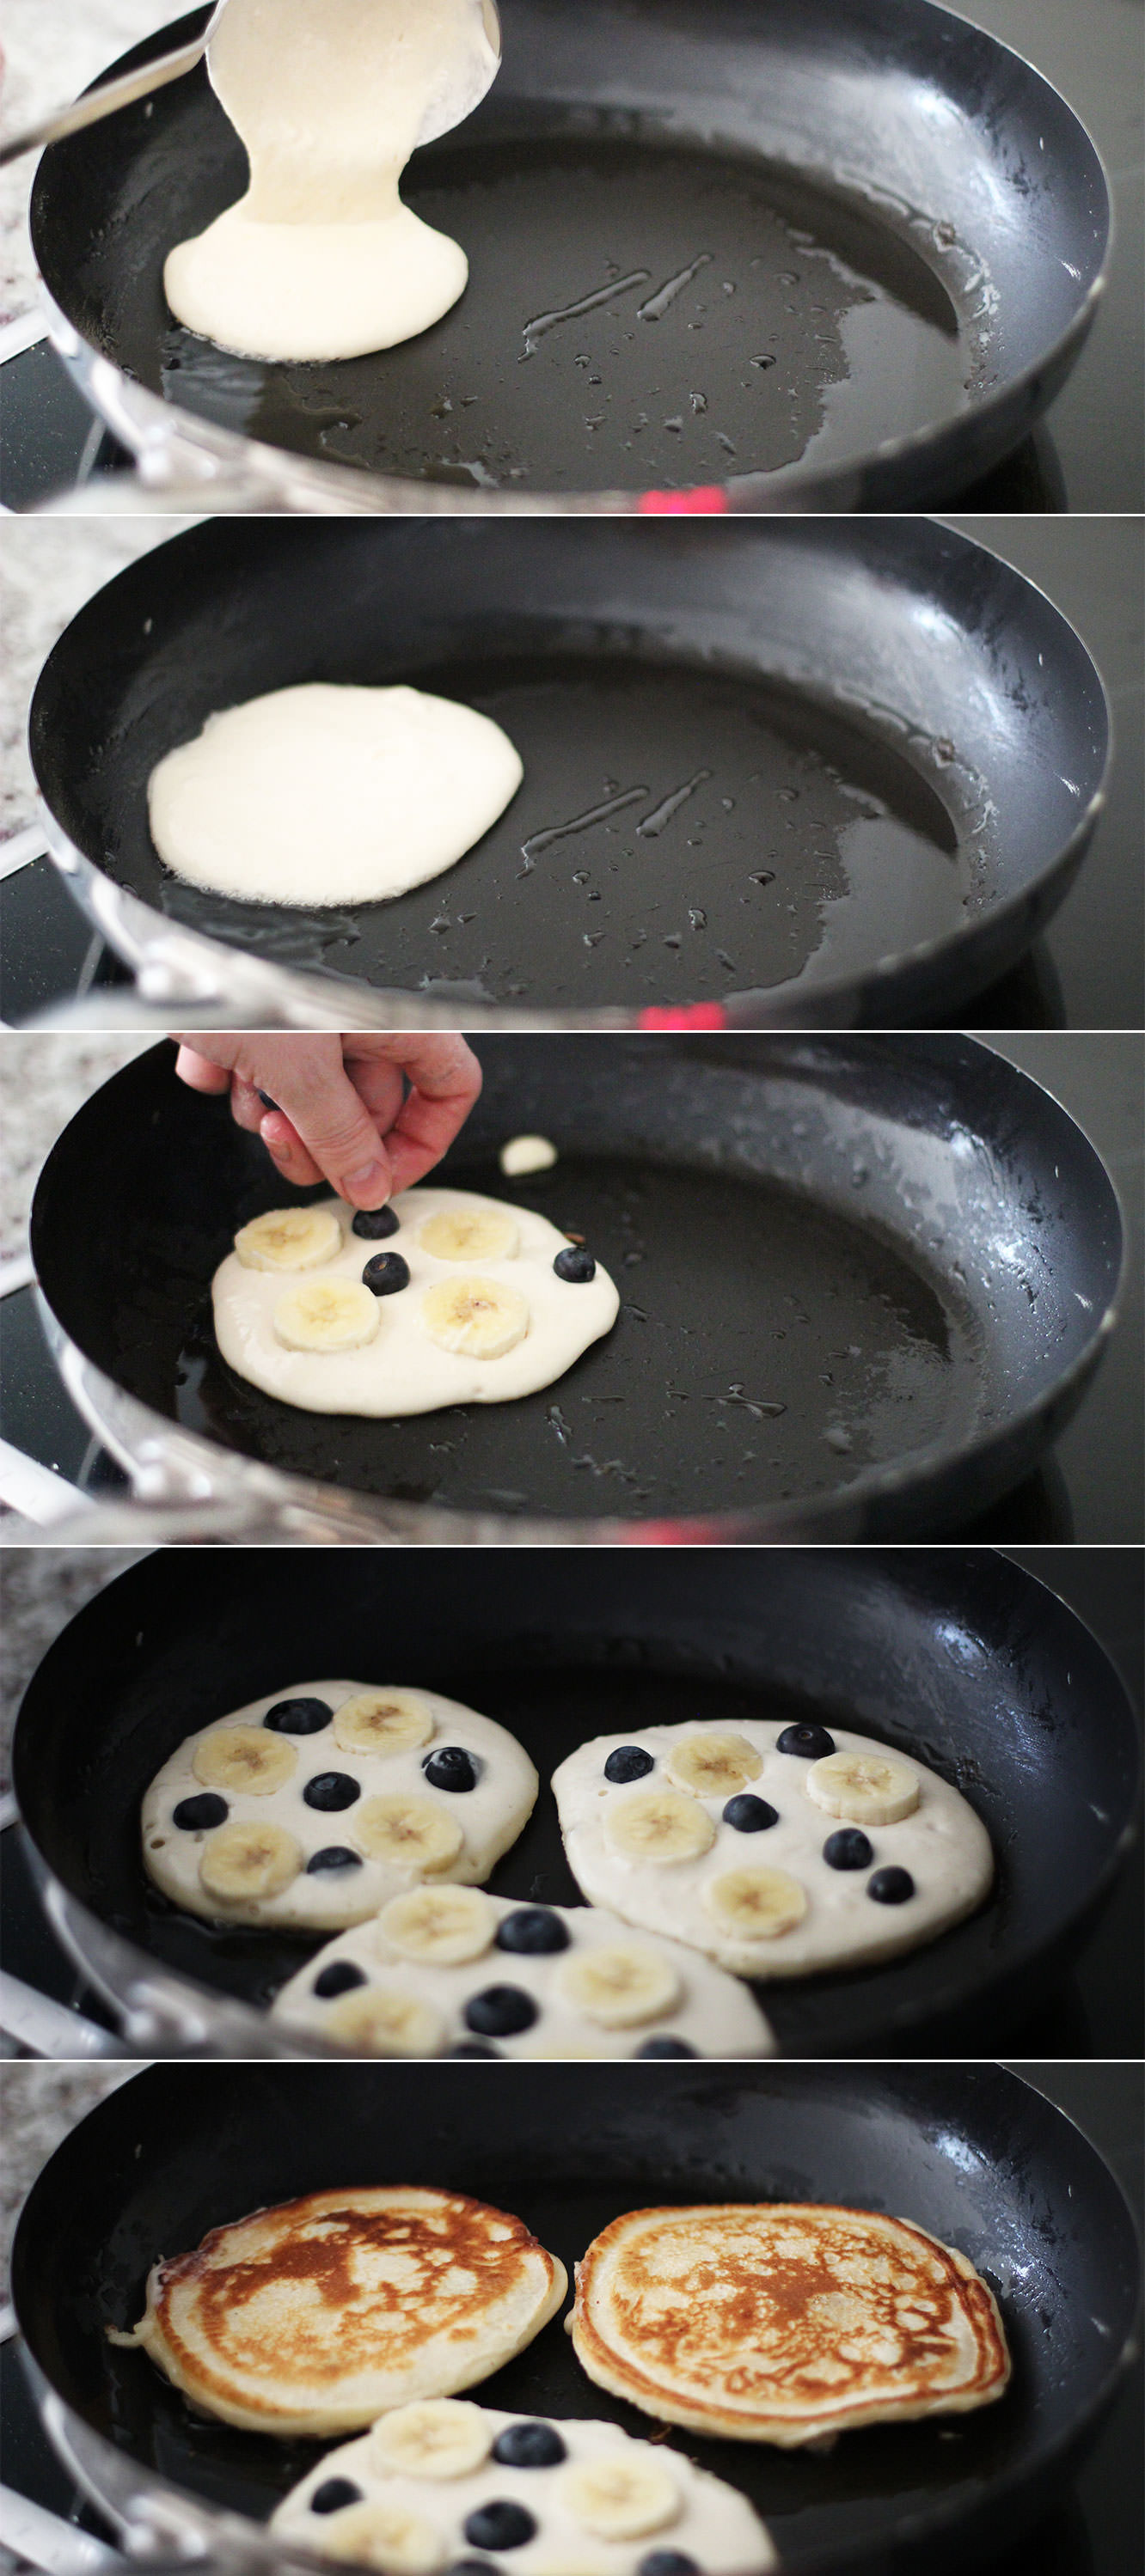
Step two
Spoon a pancake into the pan and place slices of banana and some blueberries onto the surface. Push them down a little so they don’t fall out when you flip them.
Step three
Pour some honey and natural yoghurt on top.
Eat until you can’t move.