SO. I have been remiss. Friends, stalkers, I’m sorry. I didn’t mean to leave you sans blog for two whole weeks. Finishing off my graphic design portfolio kind of consumed my health, social life, eating habits and ability to hold a conversation.
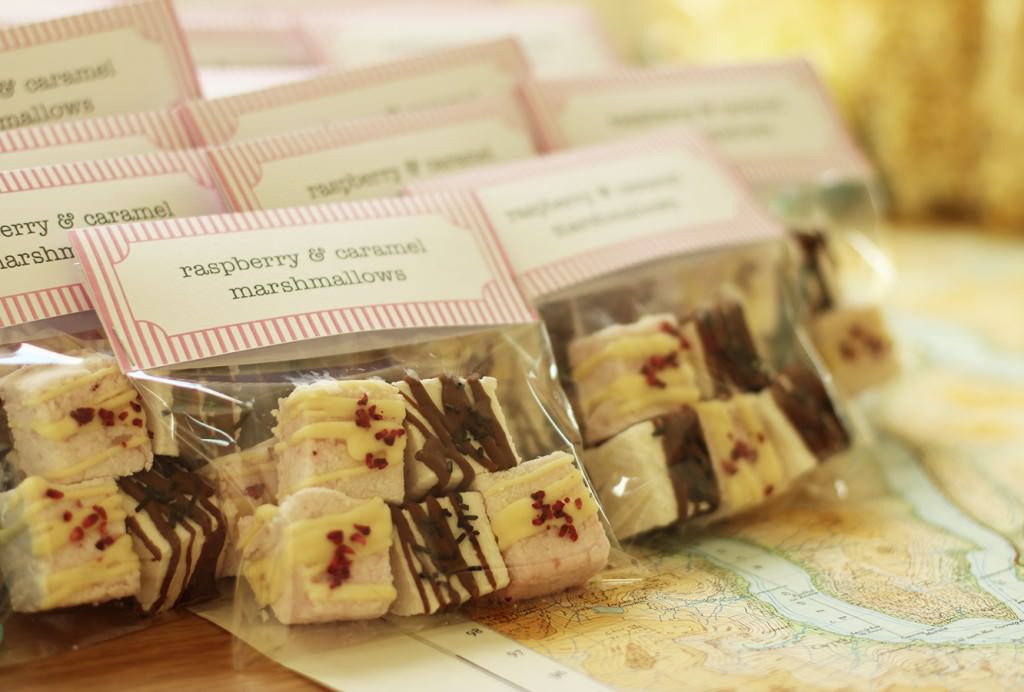
But that’s done now, and I’m back. Picking up where I left off with Vicky’s hen do favours. This week it’s raspberry and white chocolate, and chocolate caramel marshmallows. Not exactly the first time I have made marshmallows on this blog. I really want you to make marshmallows guys.
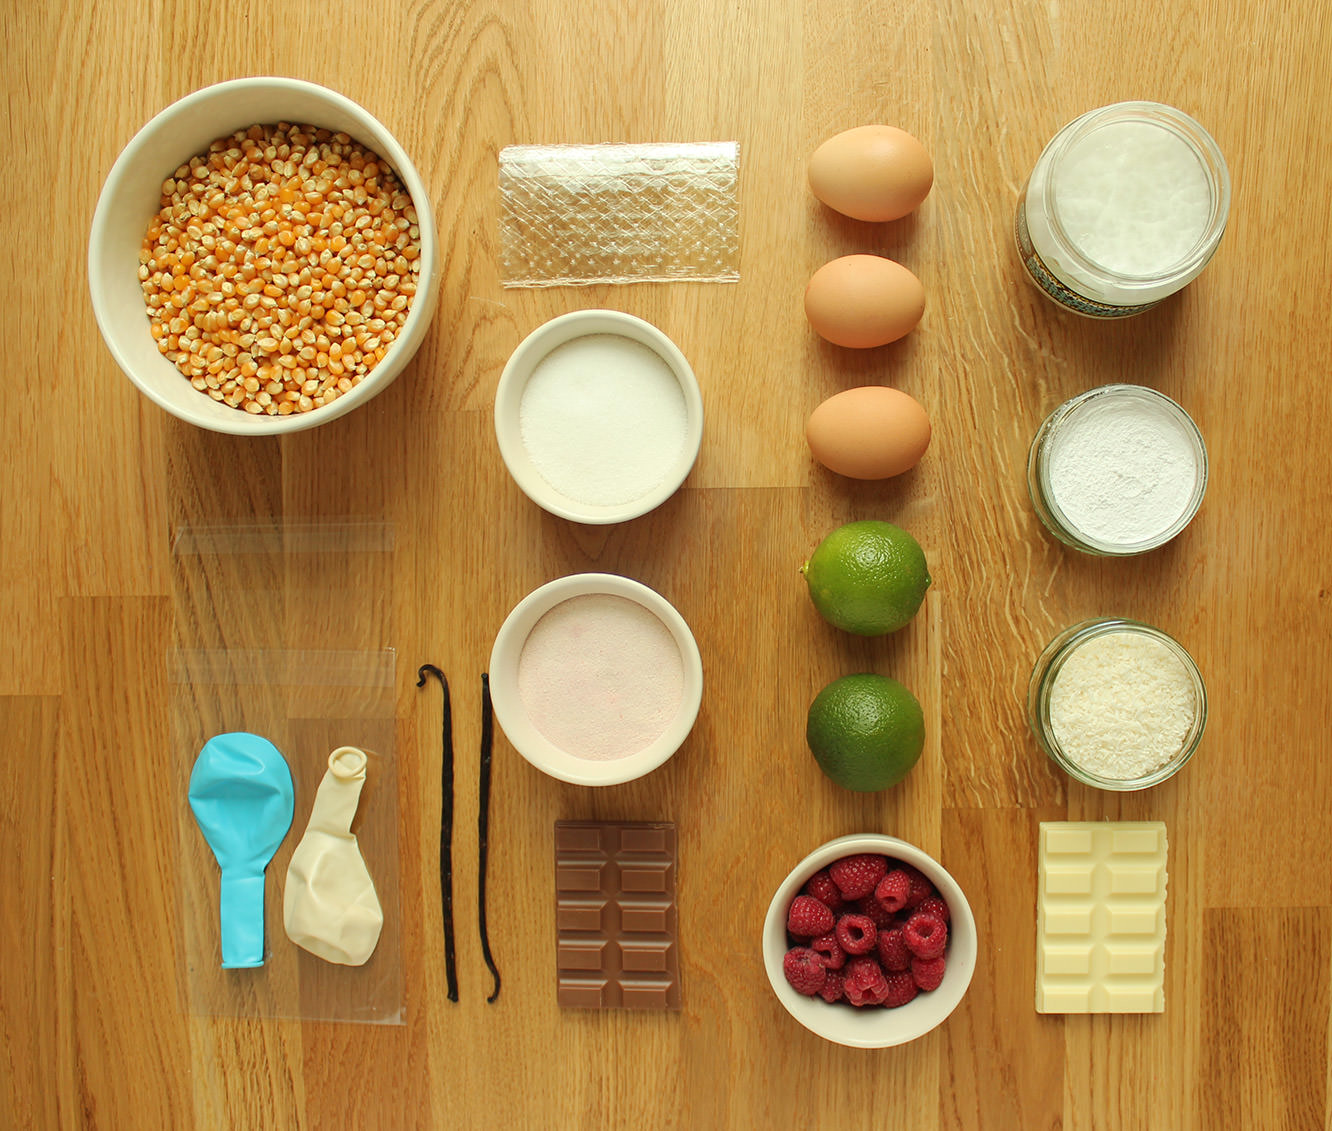
You will need
For the white chocolate and raspberry marshmallows:
9 gelatine sheets
350g/12 oz granulated sugar
2 egg whites
1 tbsp liquid glucose (you can find this in a squeezy toothpaste type tube in the baking section)
150g/5 oz raspberries
150g/5 oz white chocolate
Freeze dried raspberries (optional)
For the caramel and chocolate marshmallows:
9 gelatine sheets
300g/10.5 oz granulated sugar
2 egg whites
1 tbsp liquid glucose
2-3 tsp caramel extract (I got buttery caramel from natural professional flavours at Lakeland)
150g/5 oz milk chocolate
Cellophane card bags x 30
(makes enough for 30 favours, 150+ marshmallows)
I’ll go ahead and walk you through the process for the caramel ones then pop the changes for the raspberry below.
Step one
In a cereal bowl, soak the gelatine in 150ml/5 fl oz cold water. Set aside.
Step two
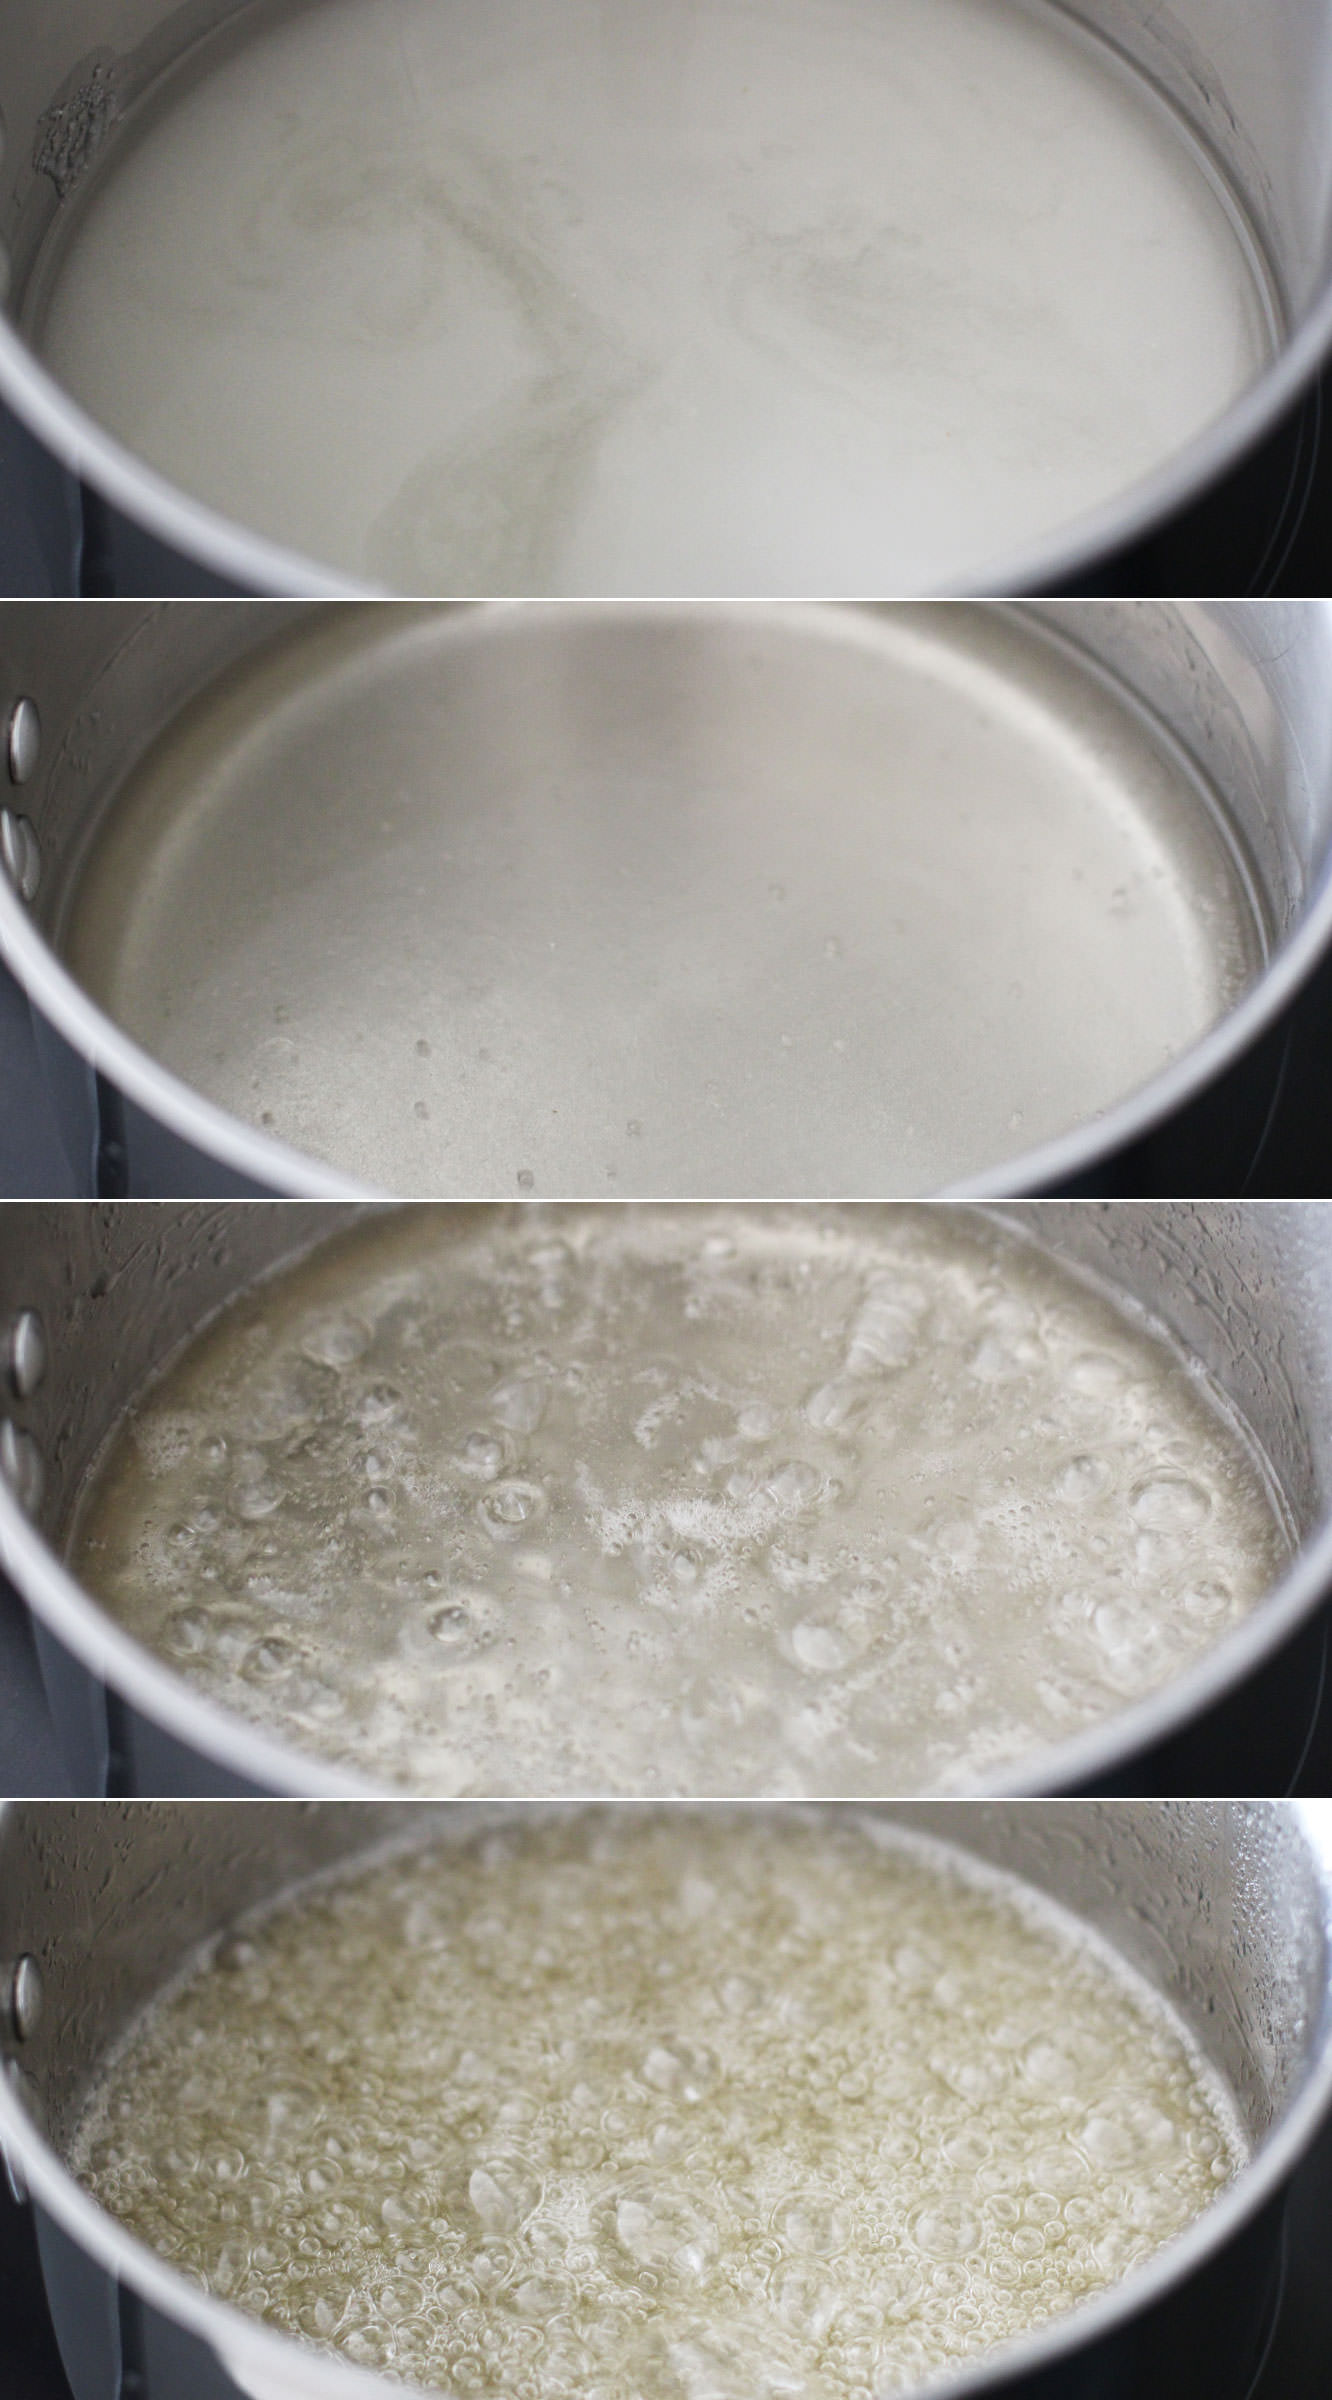
Combine the sugar, 150ml/5 fl oz water (different to the gelatine water) and the liquid glucose in a smallish saucepan.
Allow the sugar to dissolve on a low heat, and then turn it up to medium-high. Watch yourself buddy, you’re boiling sugar right now, don’t hurt it or yourself.
The temperature you want this to get to is 118 C. It will feel like it will never get there, but stay strong.
Step three
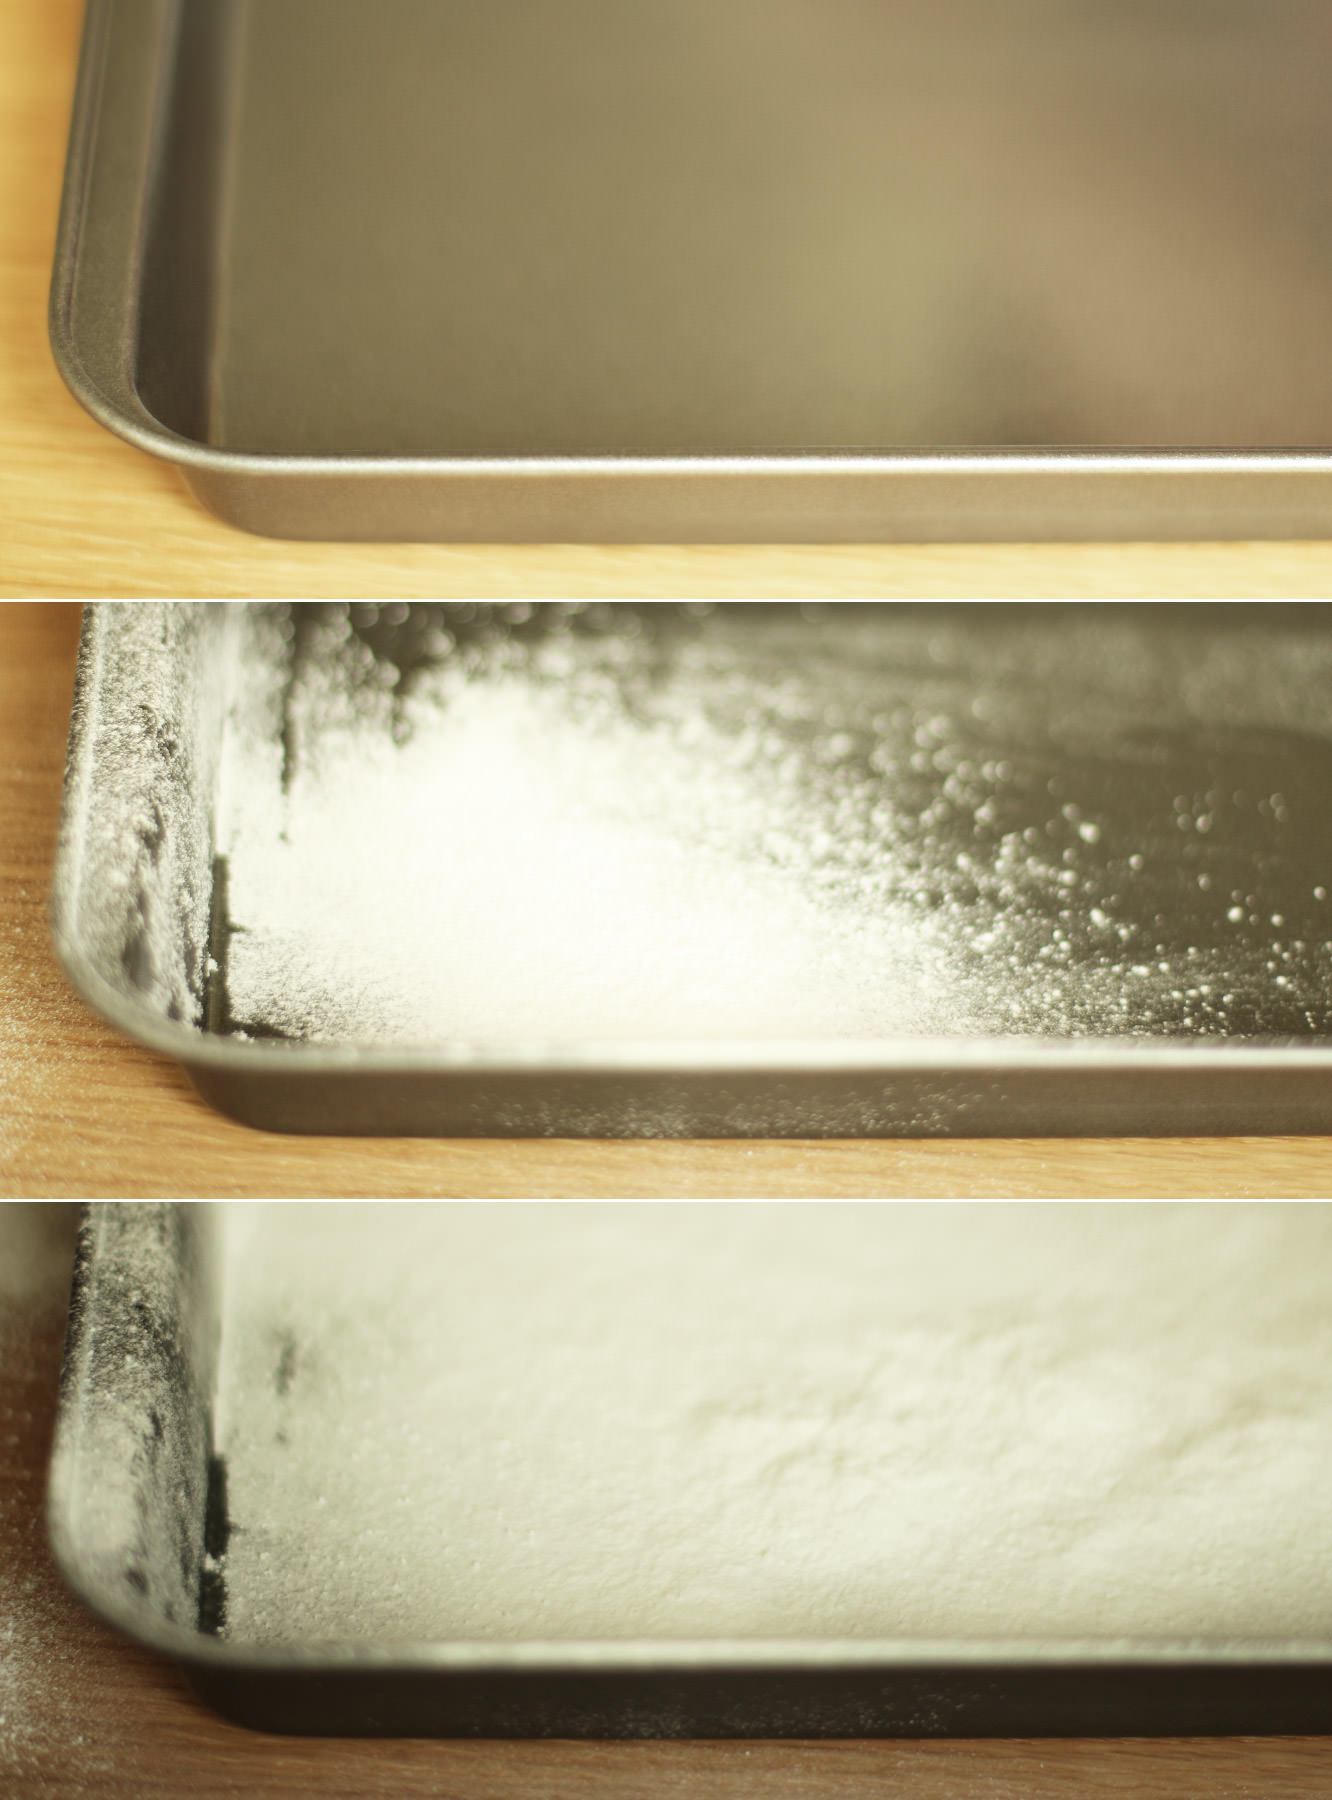
While the sugar is bubbling you can take a moment to dust your brownie tray with icing sugar. Add a small amount of olive oil first so it sticks.
Step four
When the sugar gets to somewhere around 112-115C whisk the egg whites into stiff peaks. Take care not to use a ceramic bowl else you will get grey marks like I did. Glass or metal though and you’ll be golden.
Step five
When the sugar reaches 118C take it off the heat.
Squeeze the gelatine out a bit and add it to the sugar mix. It will bubble right up so don’t panic. It should settle pretty quickly.
Step six
Pour the hot sugar into the eggs, but make sure you’re whisking continually to avoid a big lump of sugar at the bottom of the bowl.
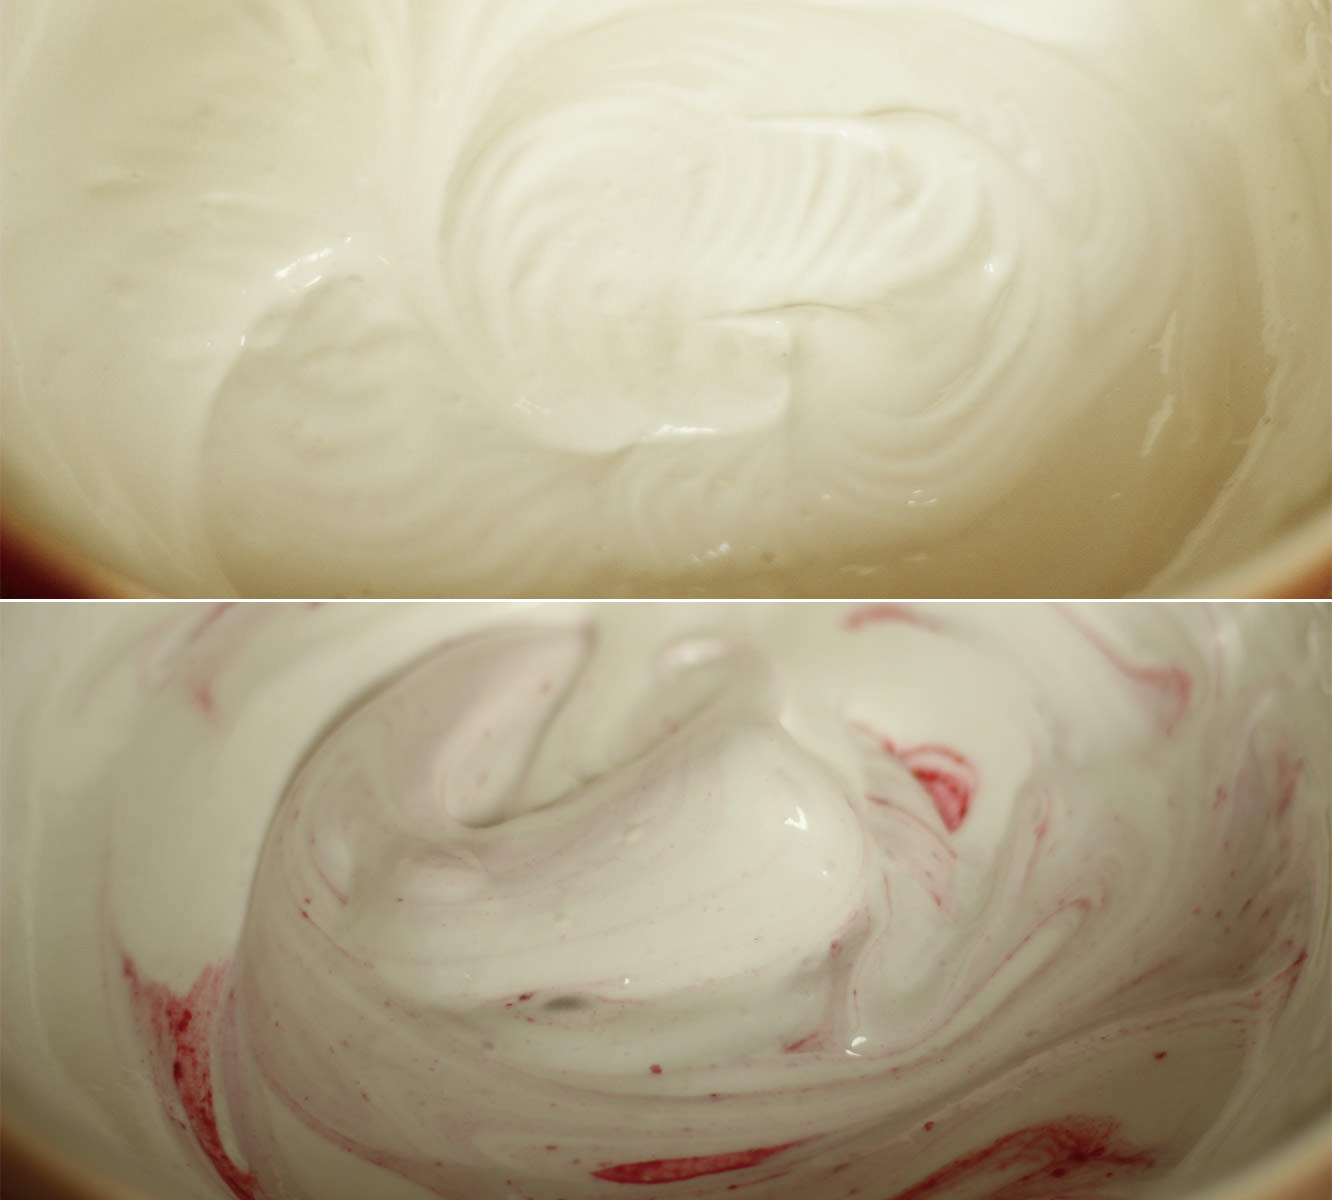
Whisk until the mixture holds its shape well and is quite thick. This can take up to ten minutes.
Somewhere during the whisking (probably when you need to give your arm a rest) add the flavouring. I used buttery caramel (as mentioned in the ingredients) but they will take basically anything you fancy.
Step seven
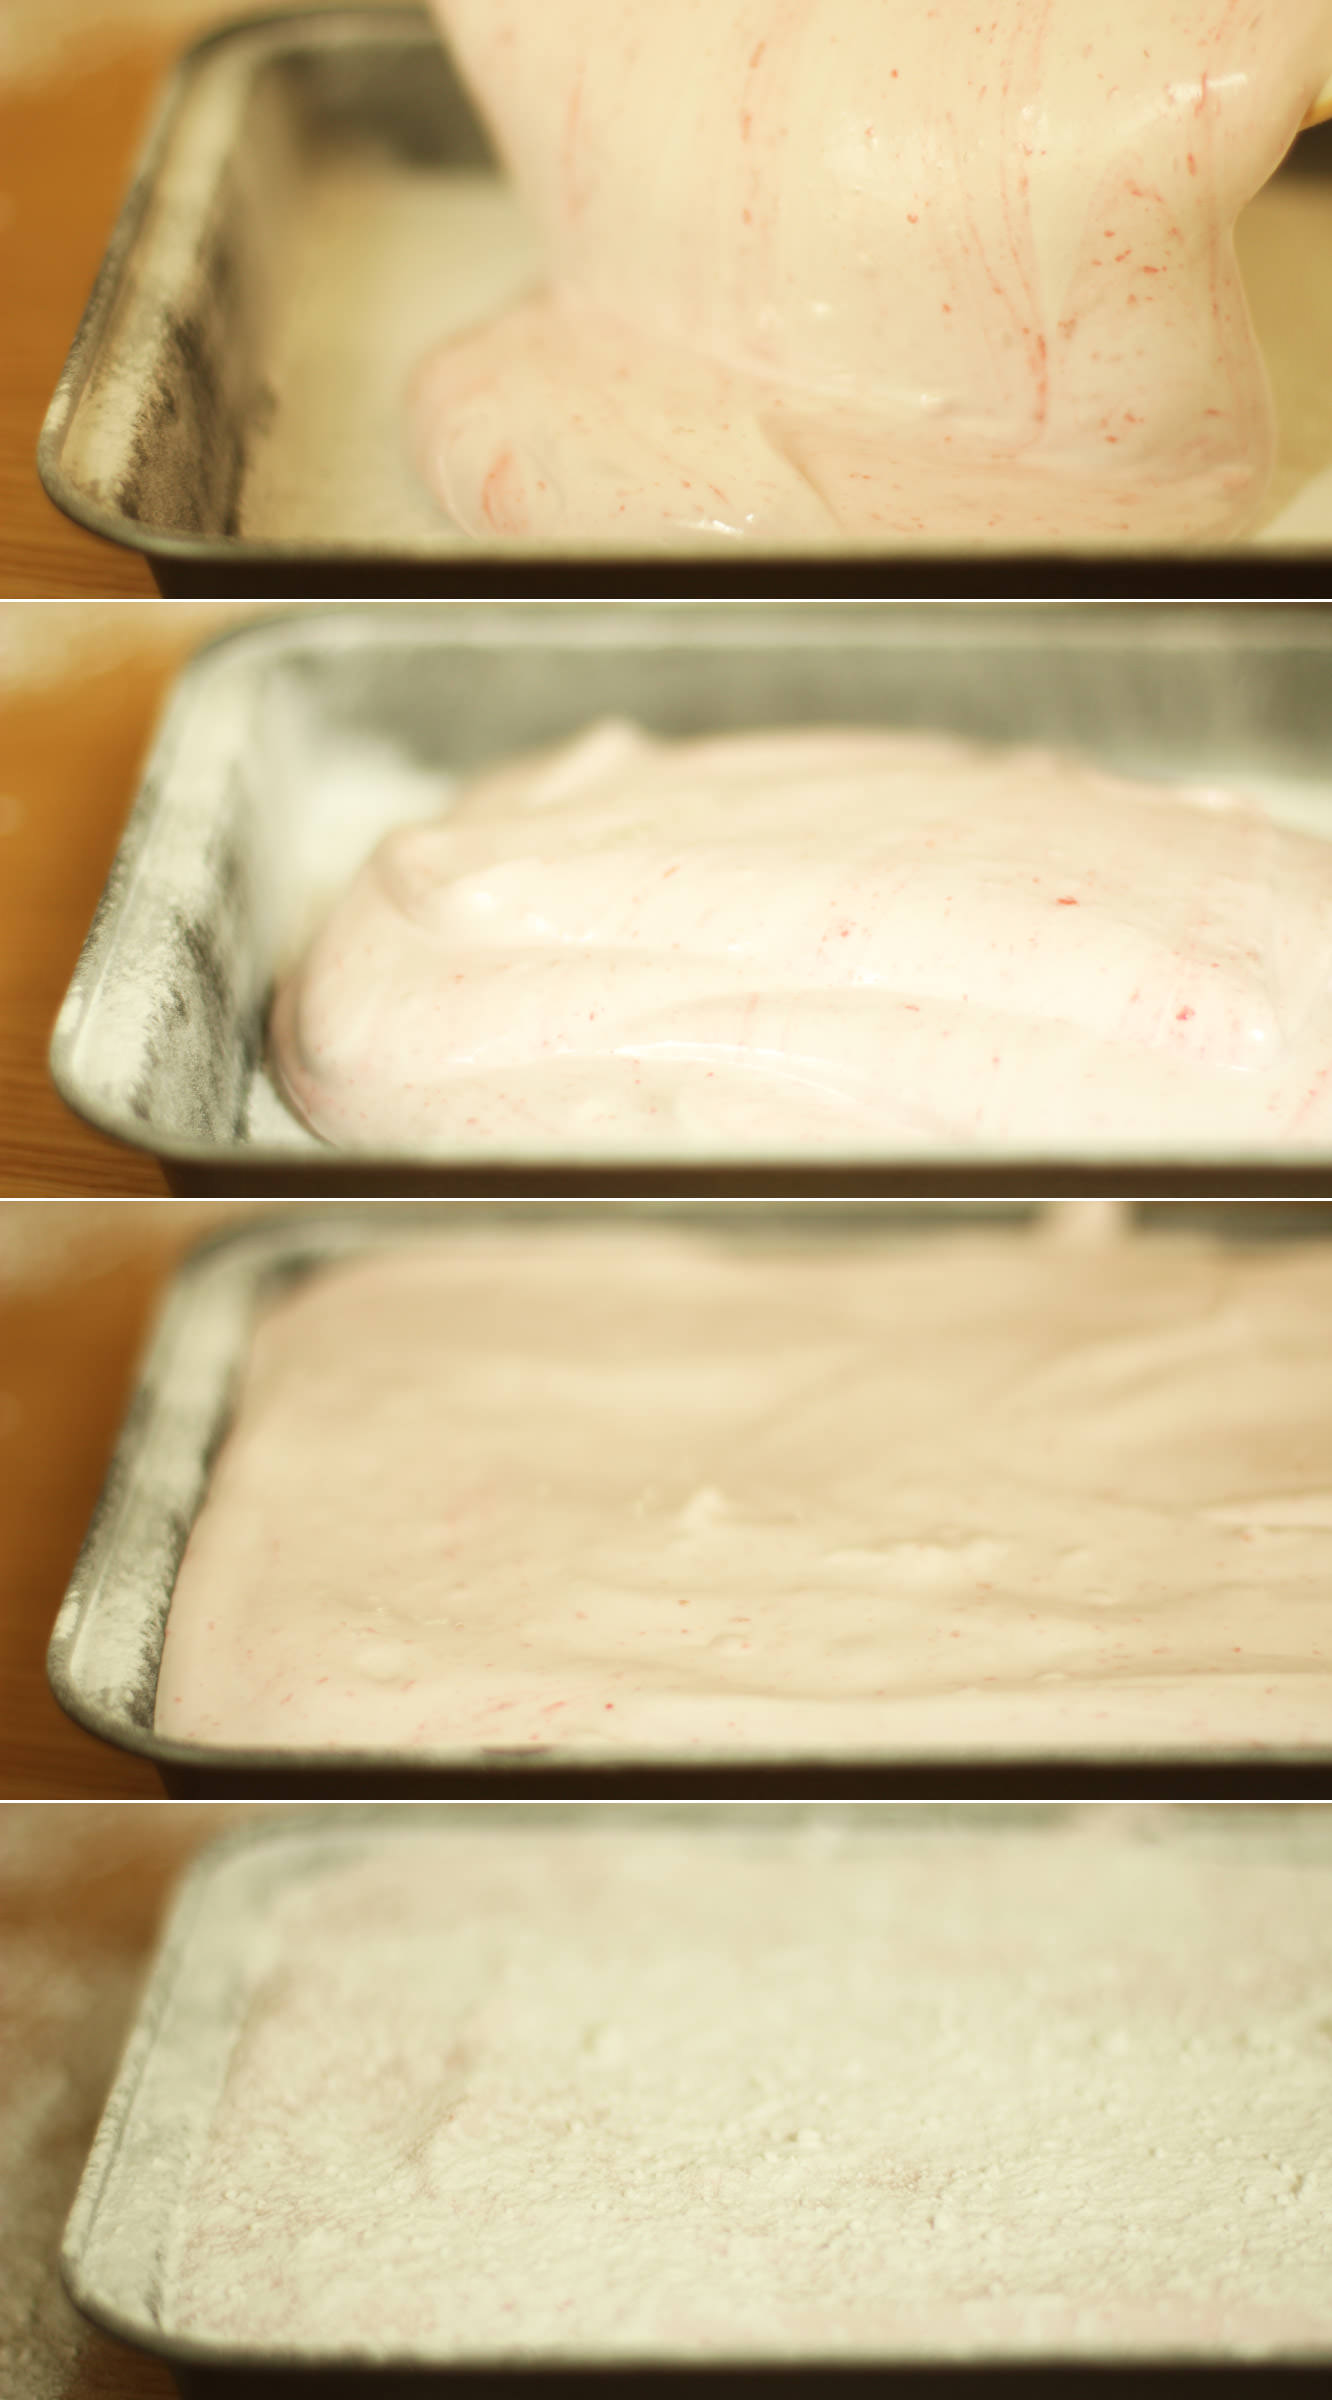
Pour the mixture into the prepared tin and smooth out as much as possible.
Dust with icing sugar and leave to set for about an hour.
For the raspberry and white chocolate marshmallows
Step eight
Before starting the marshmallow mix make a puree by adding the raspberries, 50g of the granulated sugar and half a tablespoon of water to a small saucepan.
Heat on a low heat until bubbling away happily. Stir while the mixture reduces (looses water) for about 5 minutes.
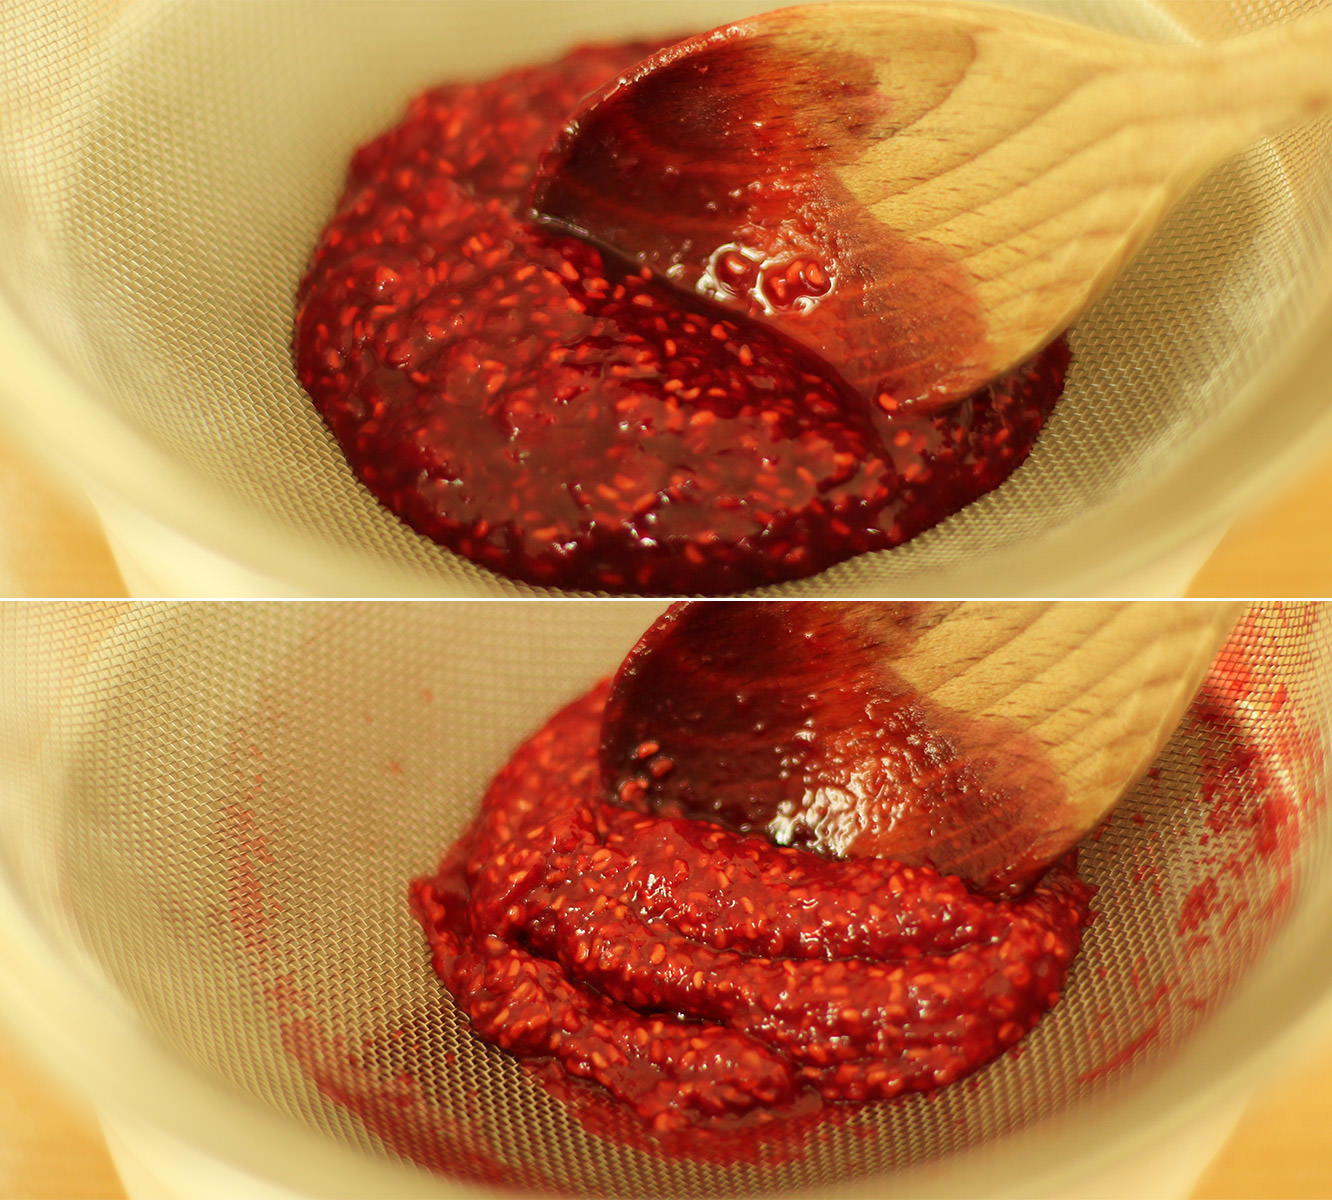
Step nine
Strain though a sieve to remove the pips. It may need a little stirring for encouragement. Don’t forget to scrape the excess off from the underside of the sieve before throwing away the pips.
Step ten
Follow the same steps at the caramel recipe, but instead of adding the extract, stir in the puree. I saved this to near the end to keep a bit of a ripple effect.
Step eleven
Pour into a second dusted brownie tray and leave to set.
Step twelve
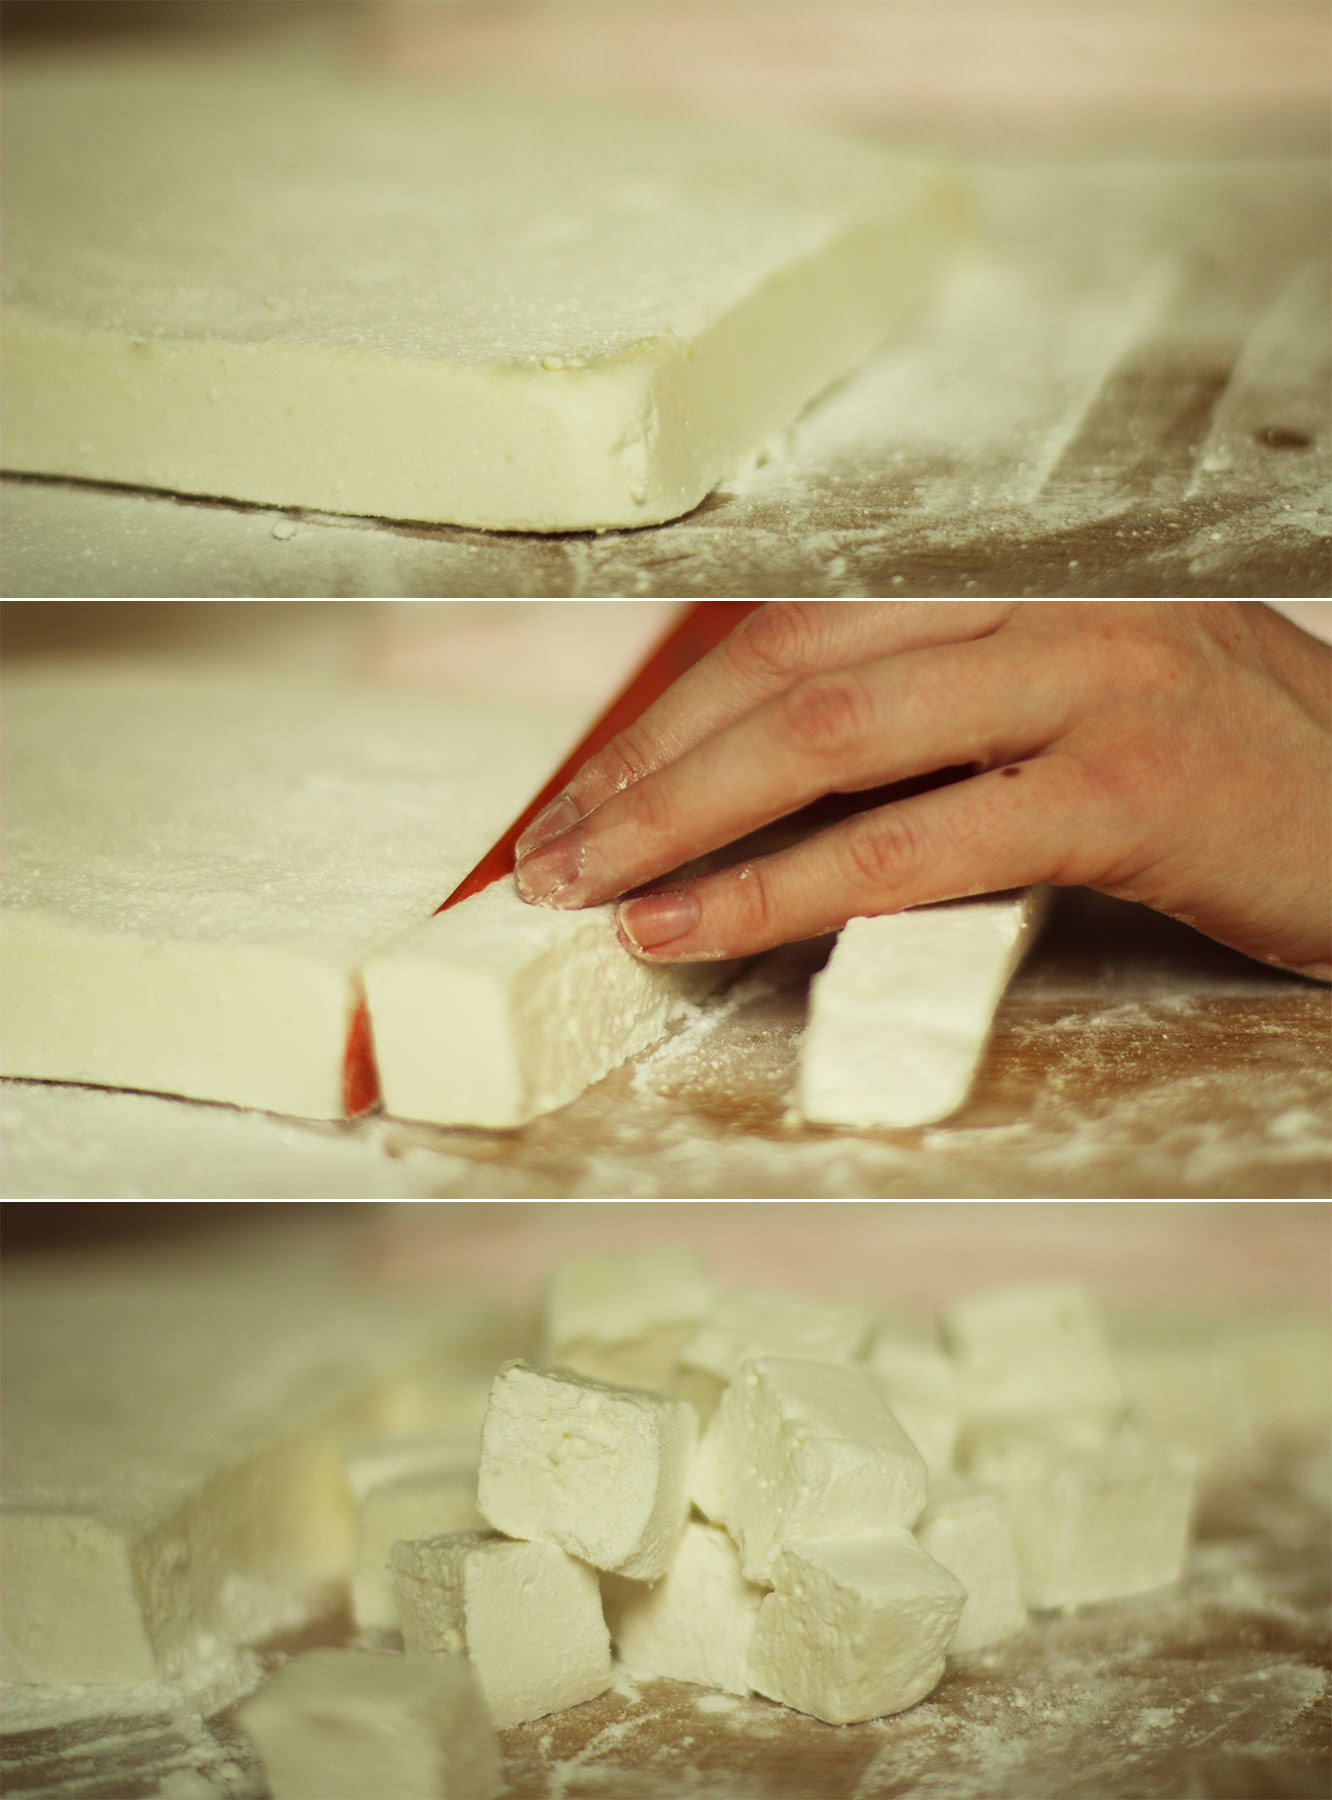
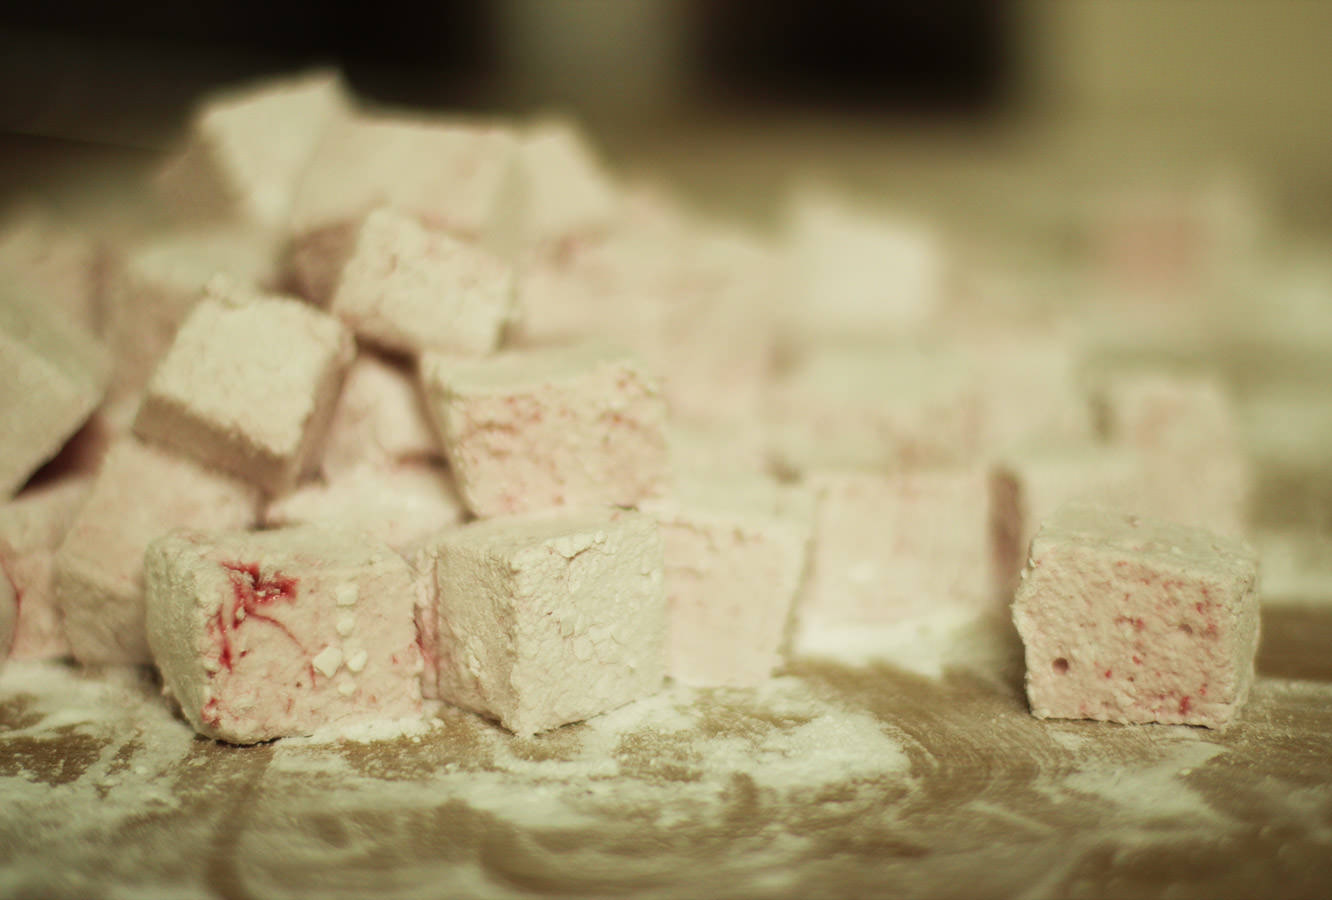
Once the marshmallows have set (at least an hour, preferably more) turn them out onto a surface dusted with icing sugar.
Cut them into cubes, and dust all the sides. Don’t worry if they are a little sticky, they will dry out a bit more.
Try not to eat them all just yet.
Step thirteen
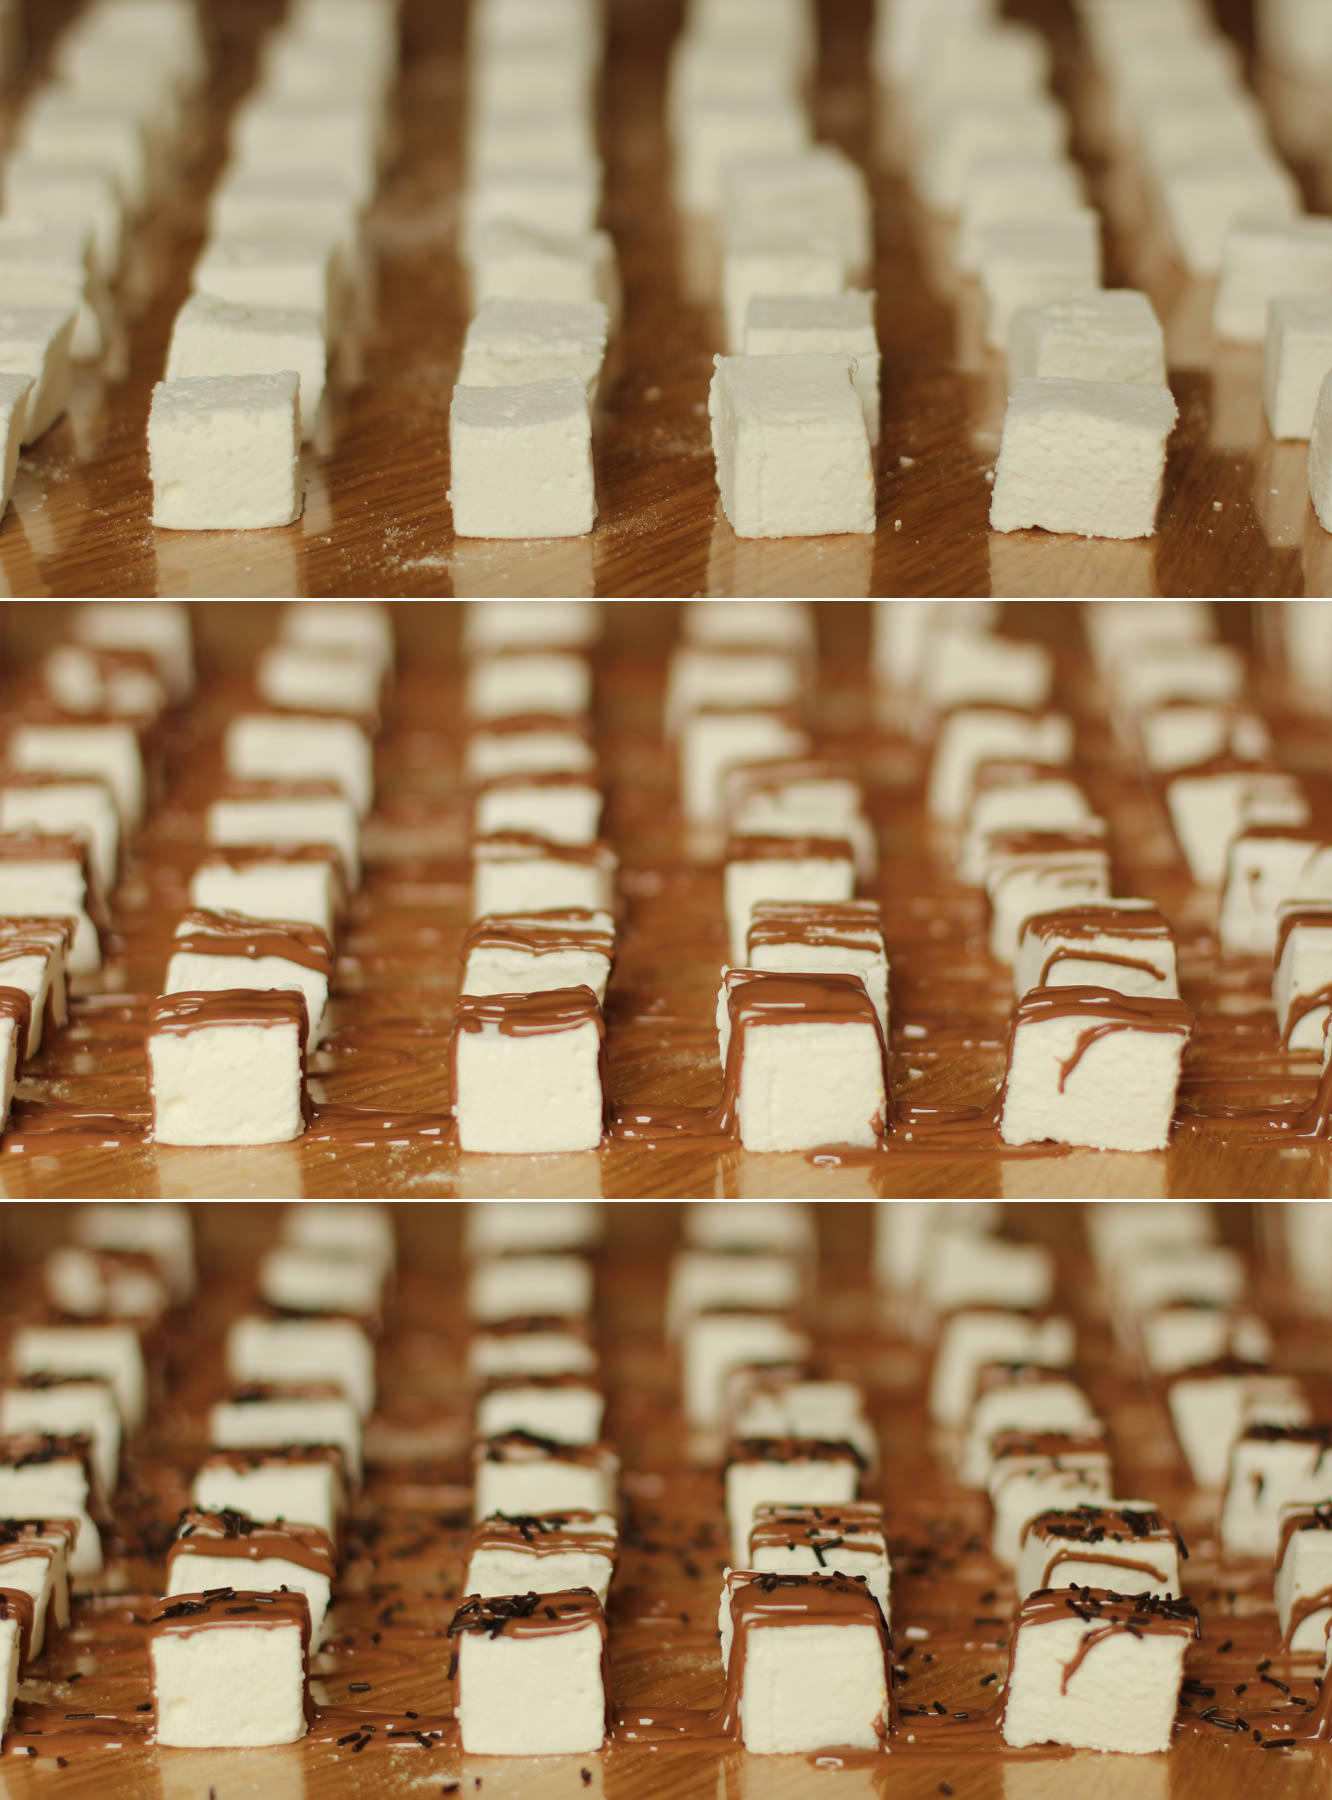
Lay the caramel marshmallows out in rows on greaseproof paper or cellophane and melt the milk chocolate. I used a piping bag to drizzle the chocolate over the marshmallows, you could use a sandwich bag and snip the corner.
Step fourteen
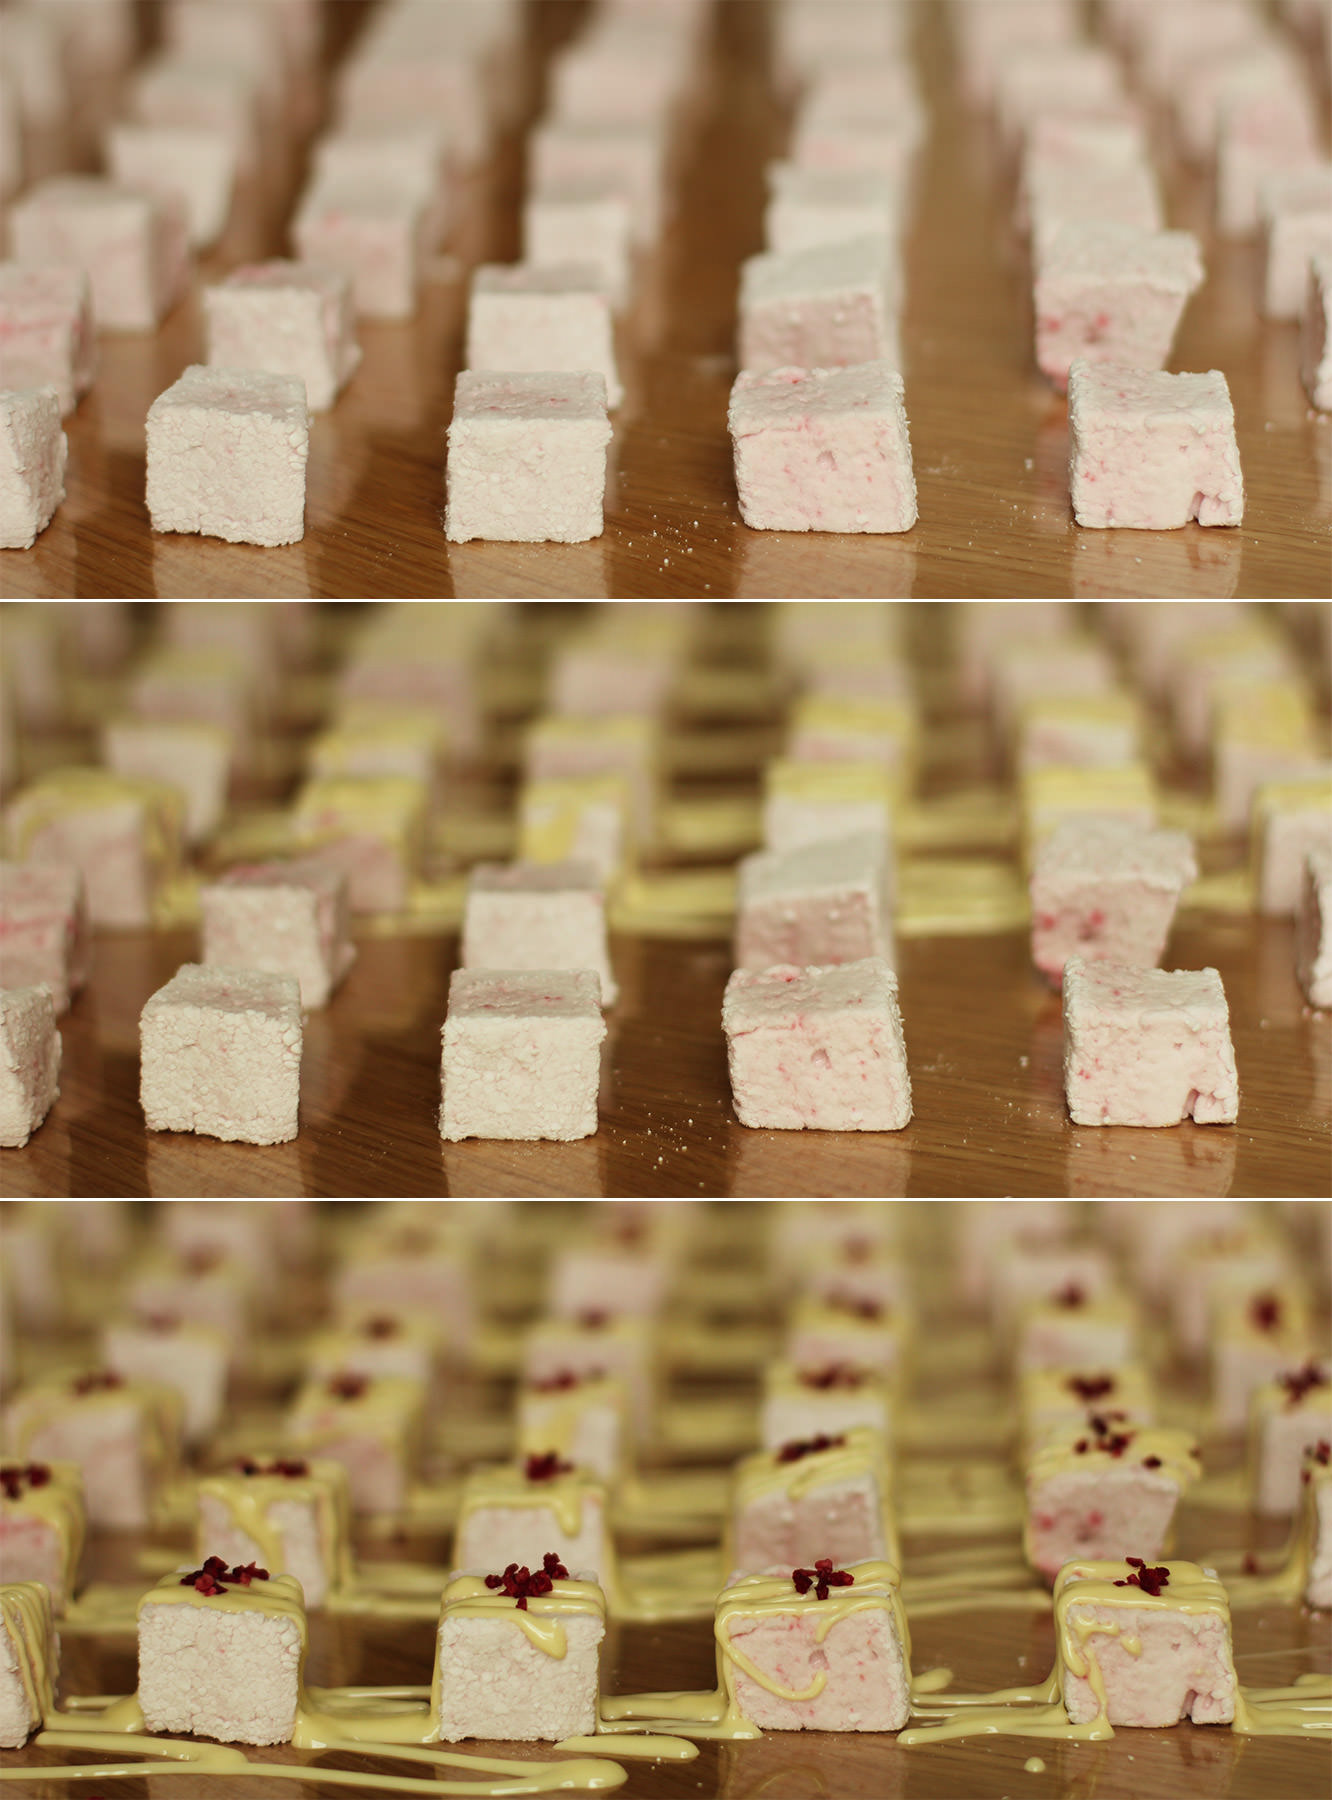
Repeat with the raspberry and white chocolate marshmallows.
Step fifteen
Once the chocolate has set place 5 in each bag, 2 of one flavour, 3 of the other, alternating as you go so you don’t run out of one.
As I mentioned last post I’ll be doing a wrap up post with all the finishing touches, so stay tuned for that. For now, here’s our lovely hen chowing down:
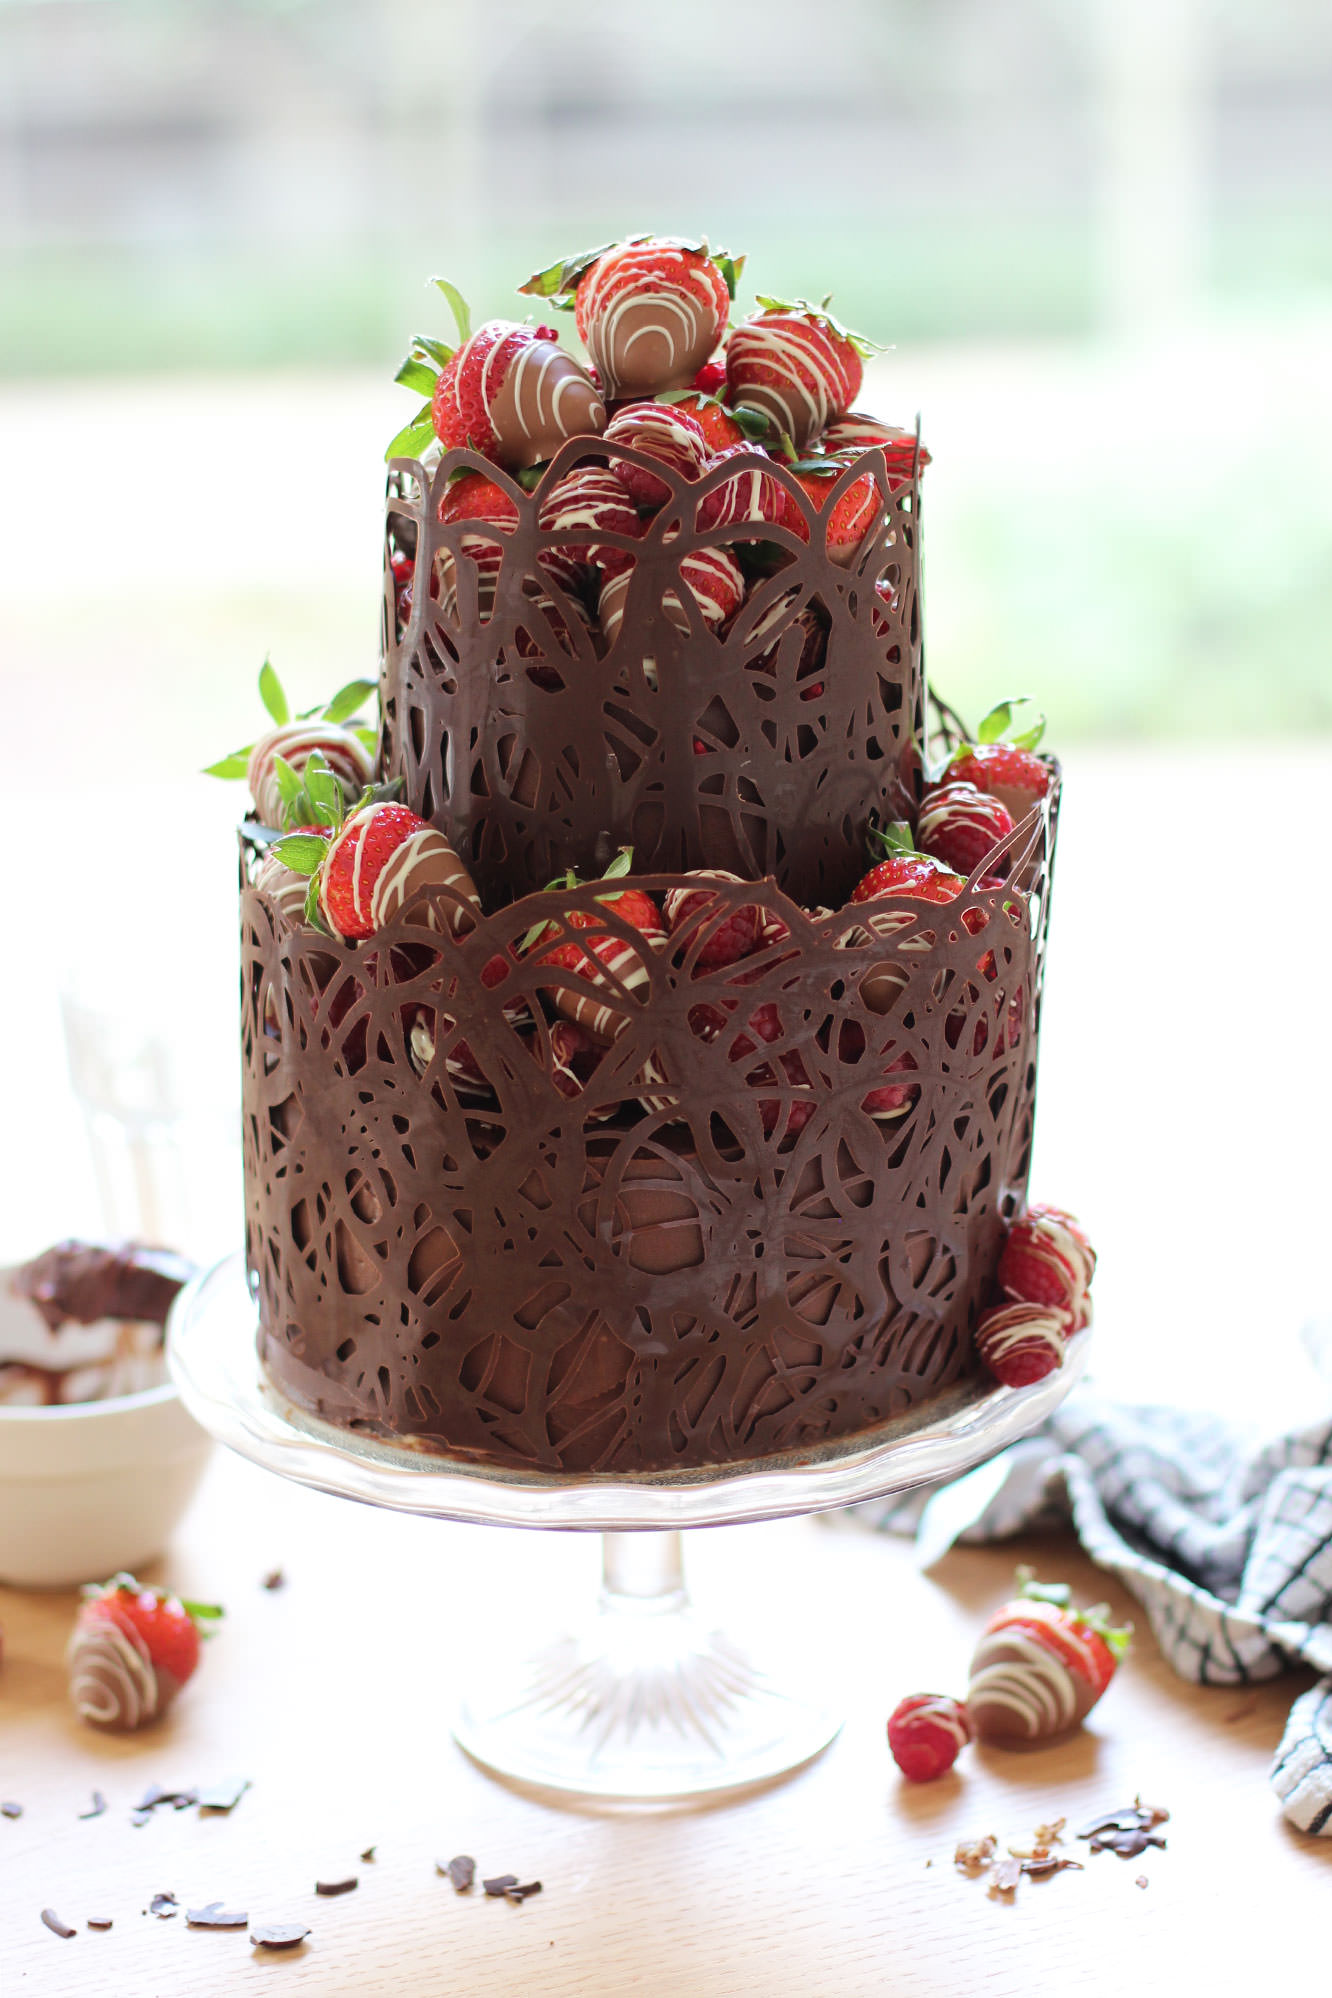
A couple of weeks ago one of my favourite colleagues had a special birthday, so for a special birthday we needed a special cake.
I had only attempted one two tier cake before and had never made the chocolate collar you’ll see below. Sure this cake was a bit more effort than your average victoria sponge, but if you’ve got a few hours and a bit of patience and determination this is very much possible.
I present to you a full step-by-step recipe for a two tiered chocolate fudge cake with salted caramel buttercream, decorated with a dark chocolate collar and chocolate dipped berries. I just wanted to say that out loud. Look away if you don’t like chocolate. This won’t please you.
Happy birthday Jane!
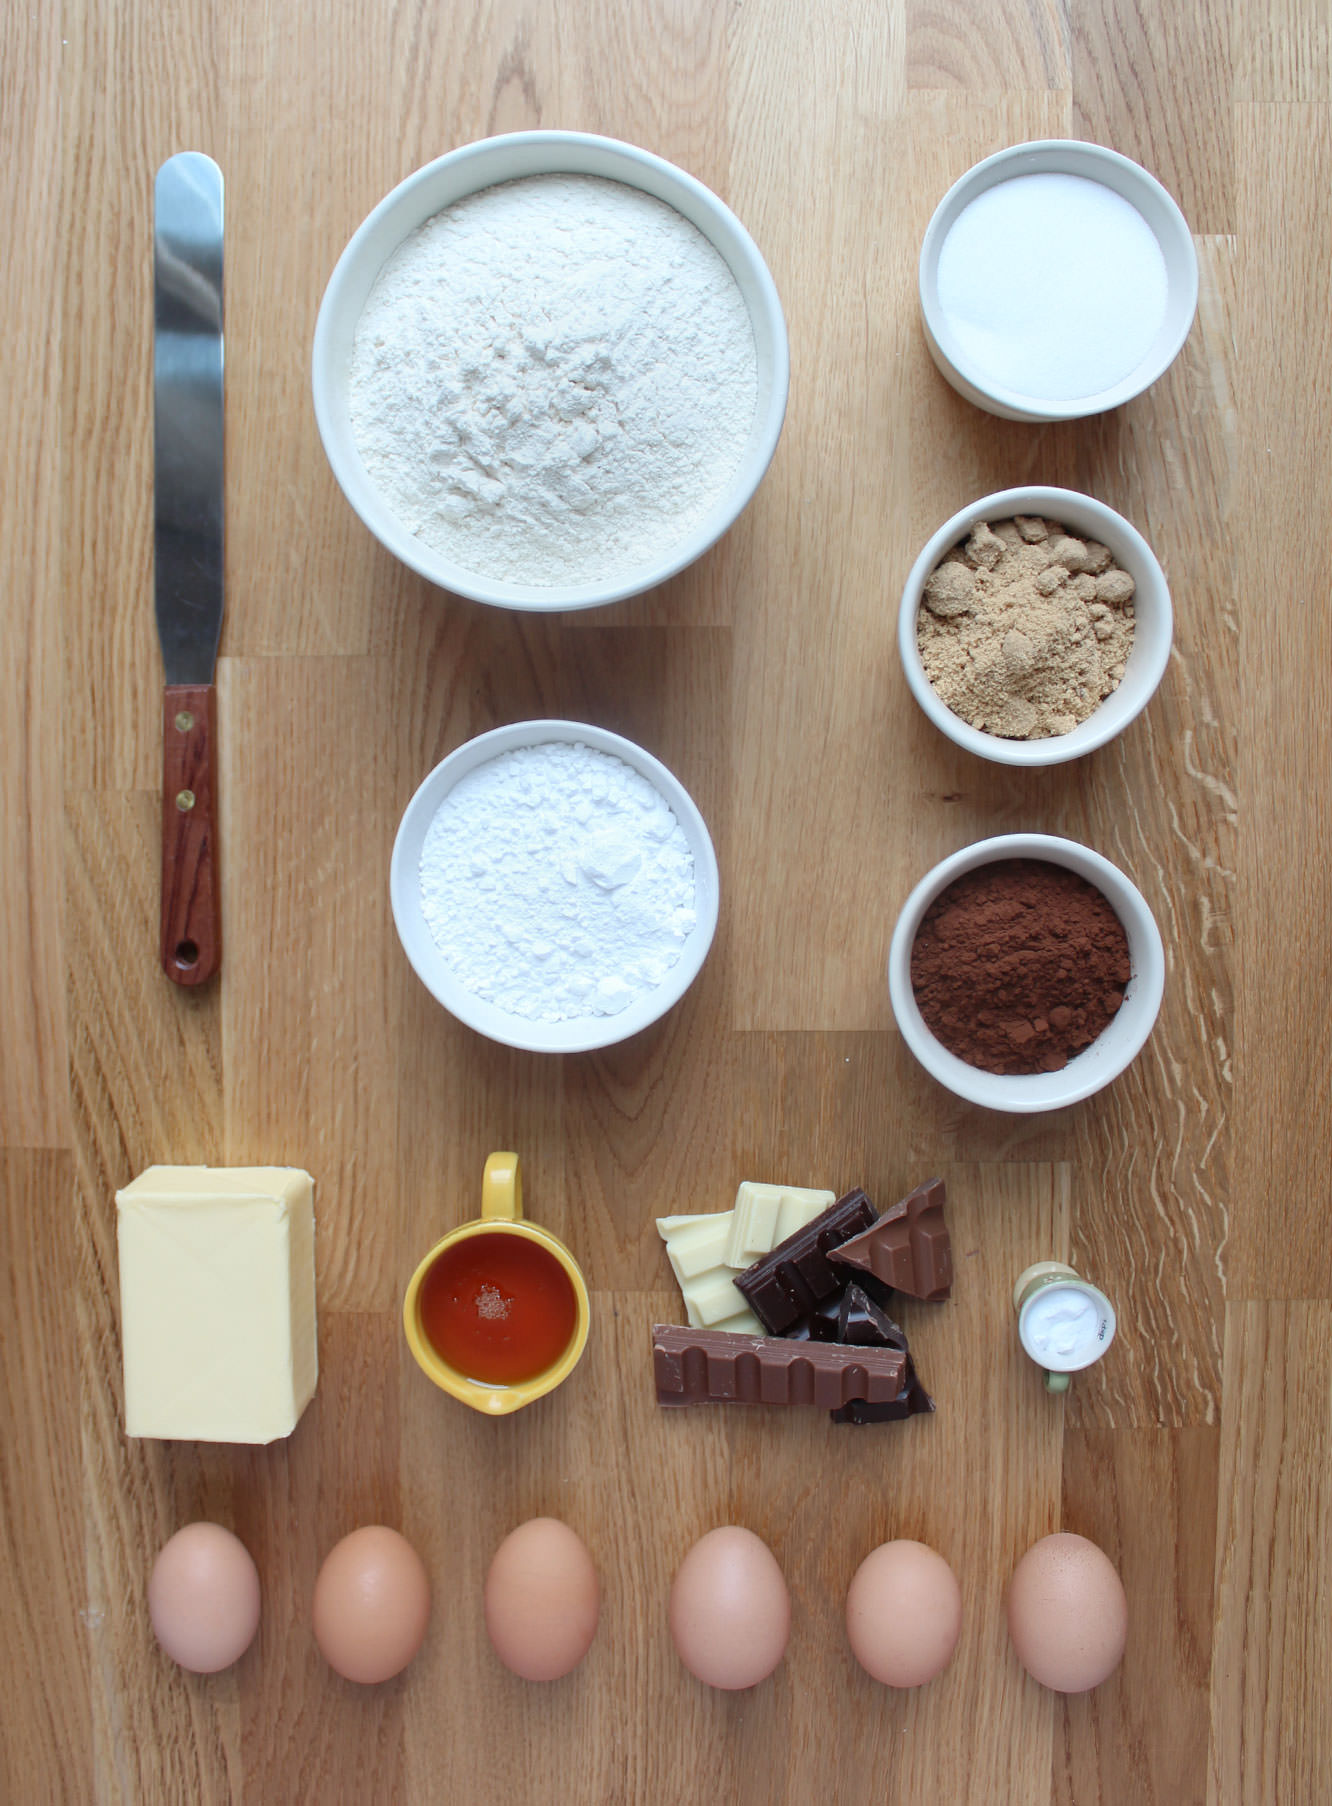
You will need
For the cake:
380g/13.5 oz caster sugar
380g/13.5 oz unsalted butter or margarine (I use stork)
325g/11.5 oz self raising flour
6 eggs
55g/2 oz cocoa powder
1 1/2 tsp bicarbonate of soda
For the salted caramel buttercream:
400g/14 oz icing sugar
250g/9 oz butter
80g/3 oz soft brown sugar
100ml/3.5 fl oz double cream
2 tbsp golden syrup
2 tsp salt
For the chocolate fudge icing:
225g/8 oz unsalted butter
200g/7 oz plain chocolate
100g/3.5 oz milk chocolate
2 tbsp golden syrup
200ml/6.5 fl oz double cream
For the decorations:
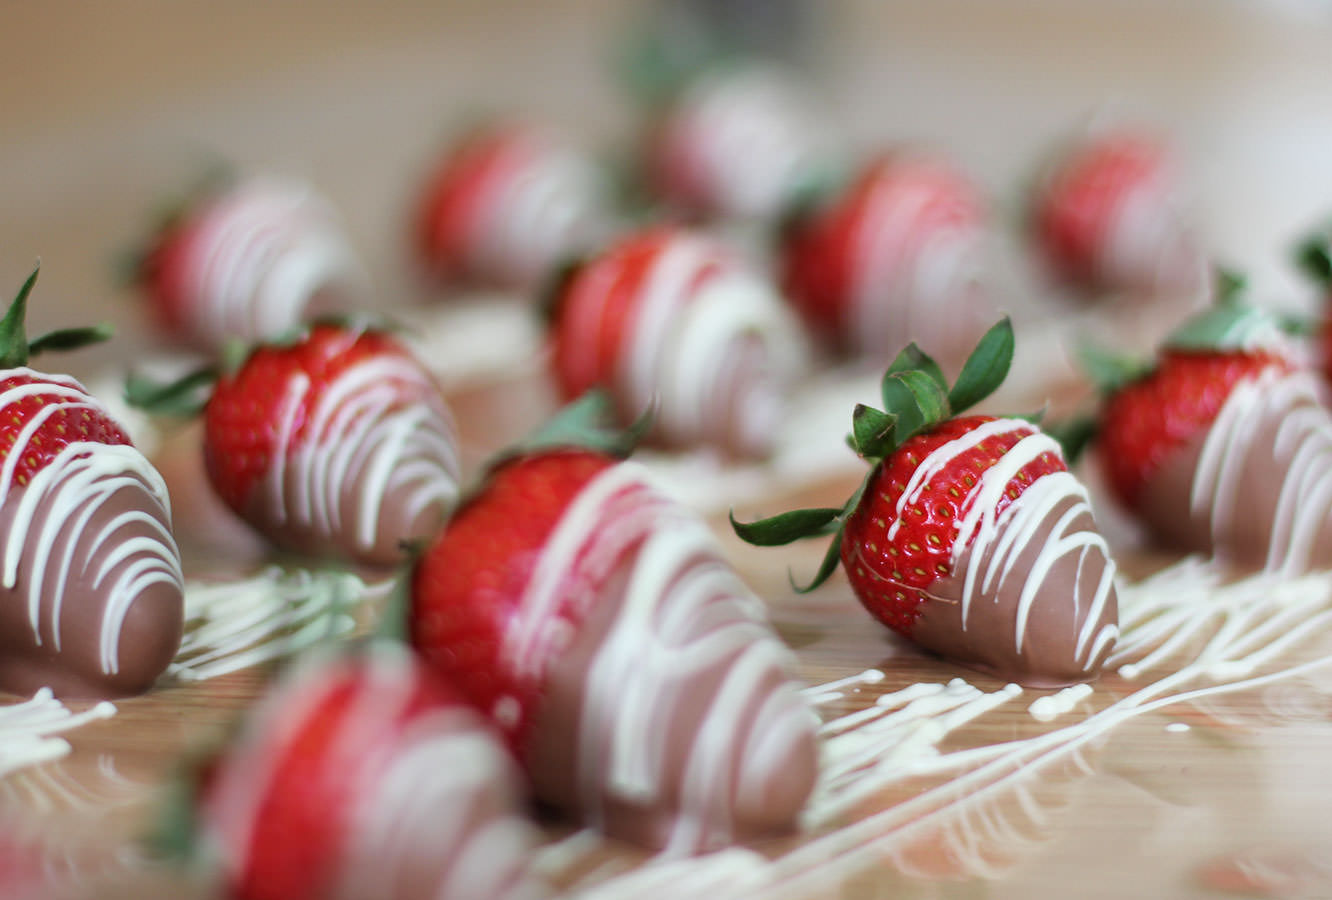
1 packet strawberries (sorry I didn’t look at weight)
2 packets of raspberries (about 500g)
200g/7 oz plain chocolate
200g/7 oz milk chocolate
100g/3.5 oz white chocolate
(for the chocolate amounts are the best approximates I can make, I bought a LOT of chocolate. I strongly recommend Sainbury’s Belgian cooking chocolate if you are in the UK, definitely do not buy that scot block stuff)
Other:
Cake tin bottom tier – 1 x 7 inch (3.5 inches deep)
Cake tin top tier – 2 x 5 inch (1.5 inches deep)
Cake boards – 1 x 8 inch, 1 x 5 inch
Sticks/straws for support. I used cake pop sticks, but wooden dowling or special cake making supports would be fine. Make sure they are at least 4 inches so you can cut them to size.
Palette knife
Sugar thermometer (not 100% essential but I recommend tempering the chocolate)
Cellophane
Piping bags
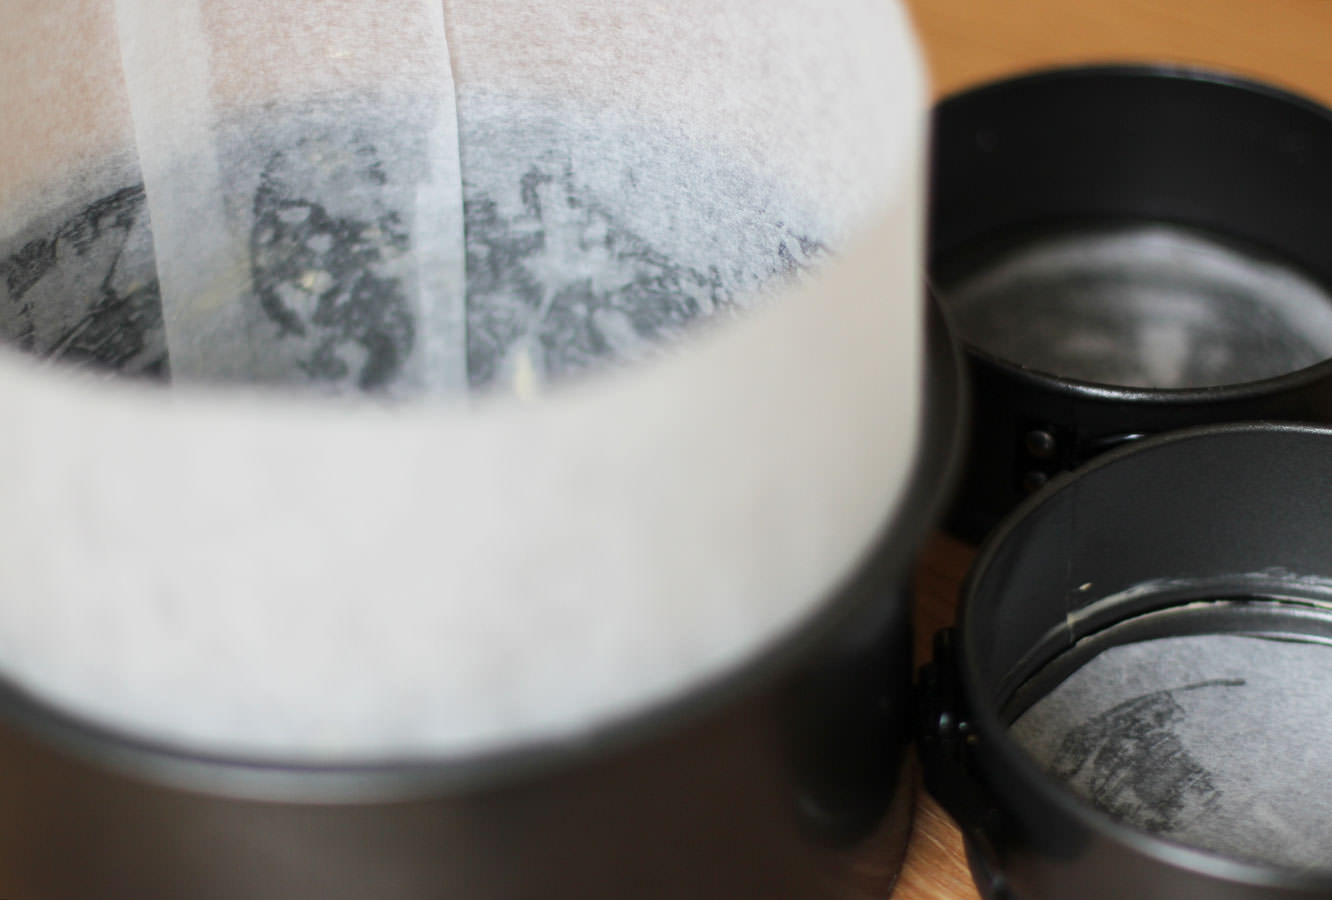
Step one
Grease and line the tins.
Note how I created a bit of a collar on the larger tin from greaseproof. This is to help stop the sides of the cake catching while the inside bakes as it’s essentially double the thickness.
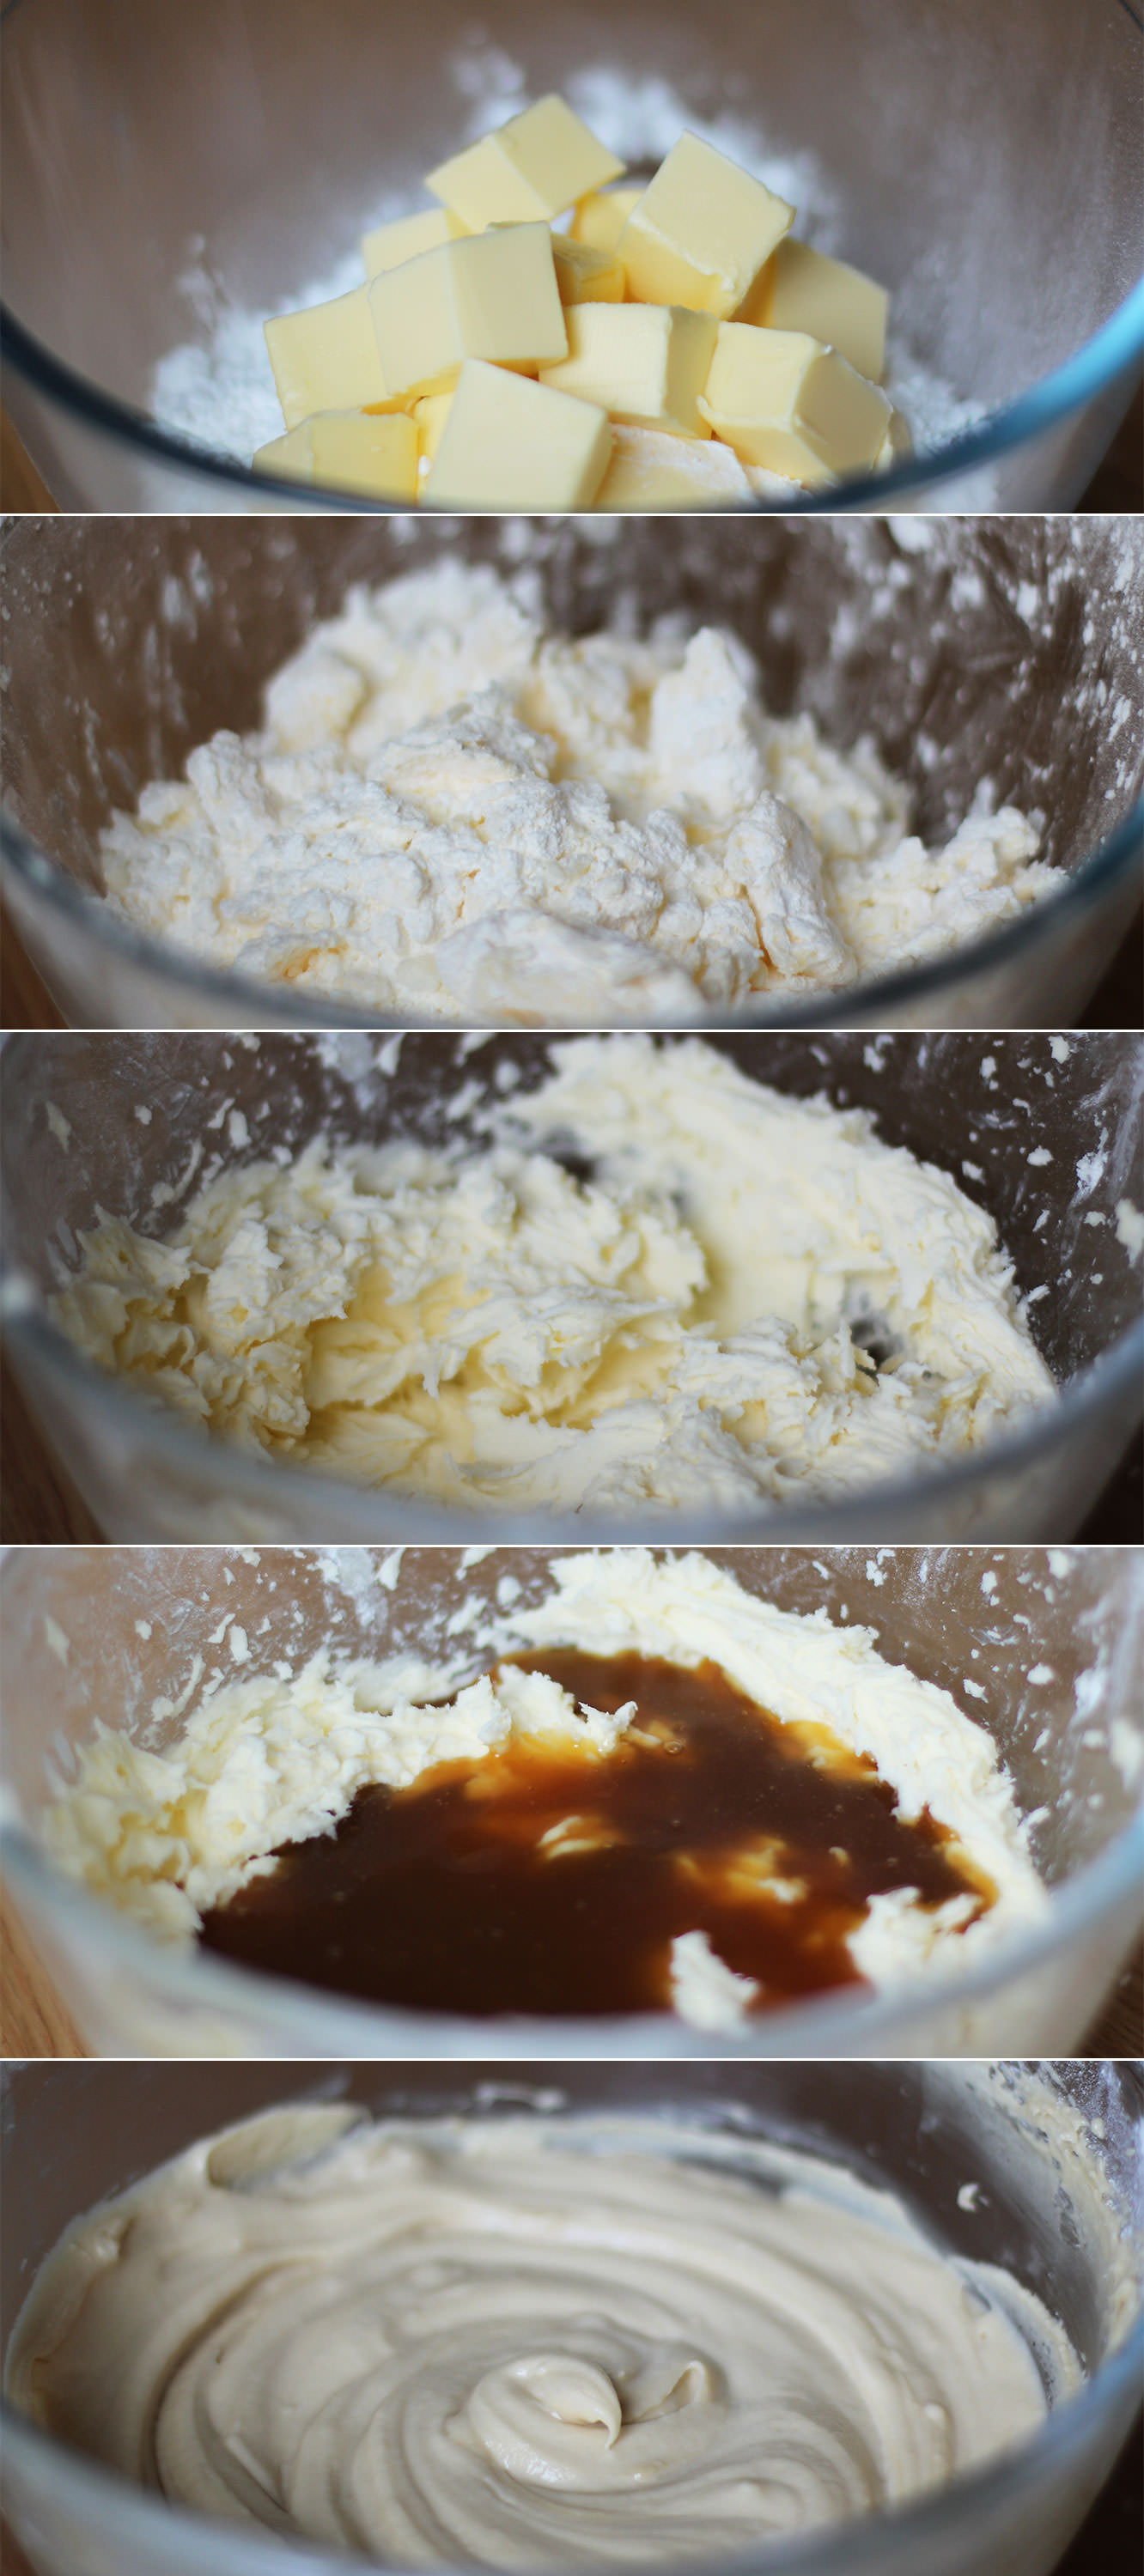
Step two
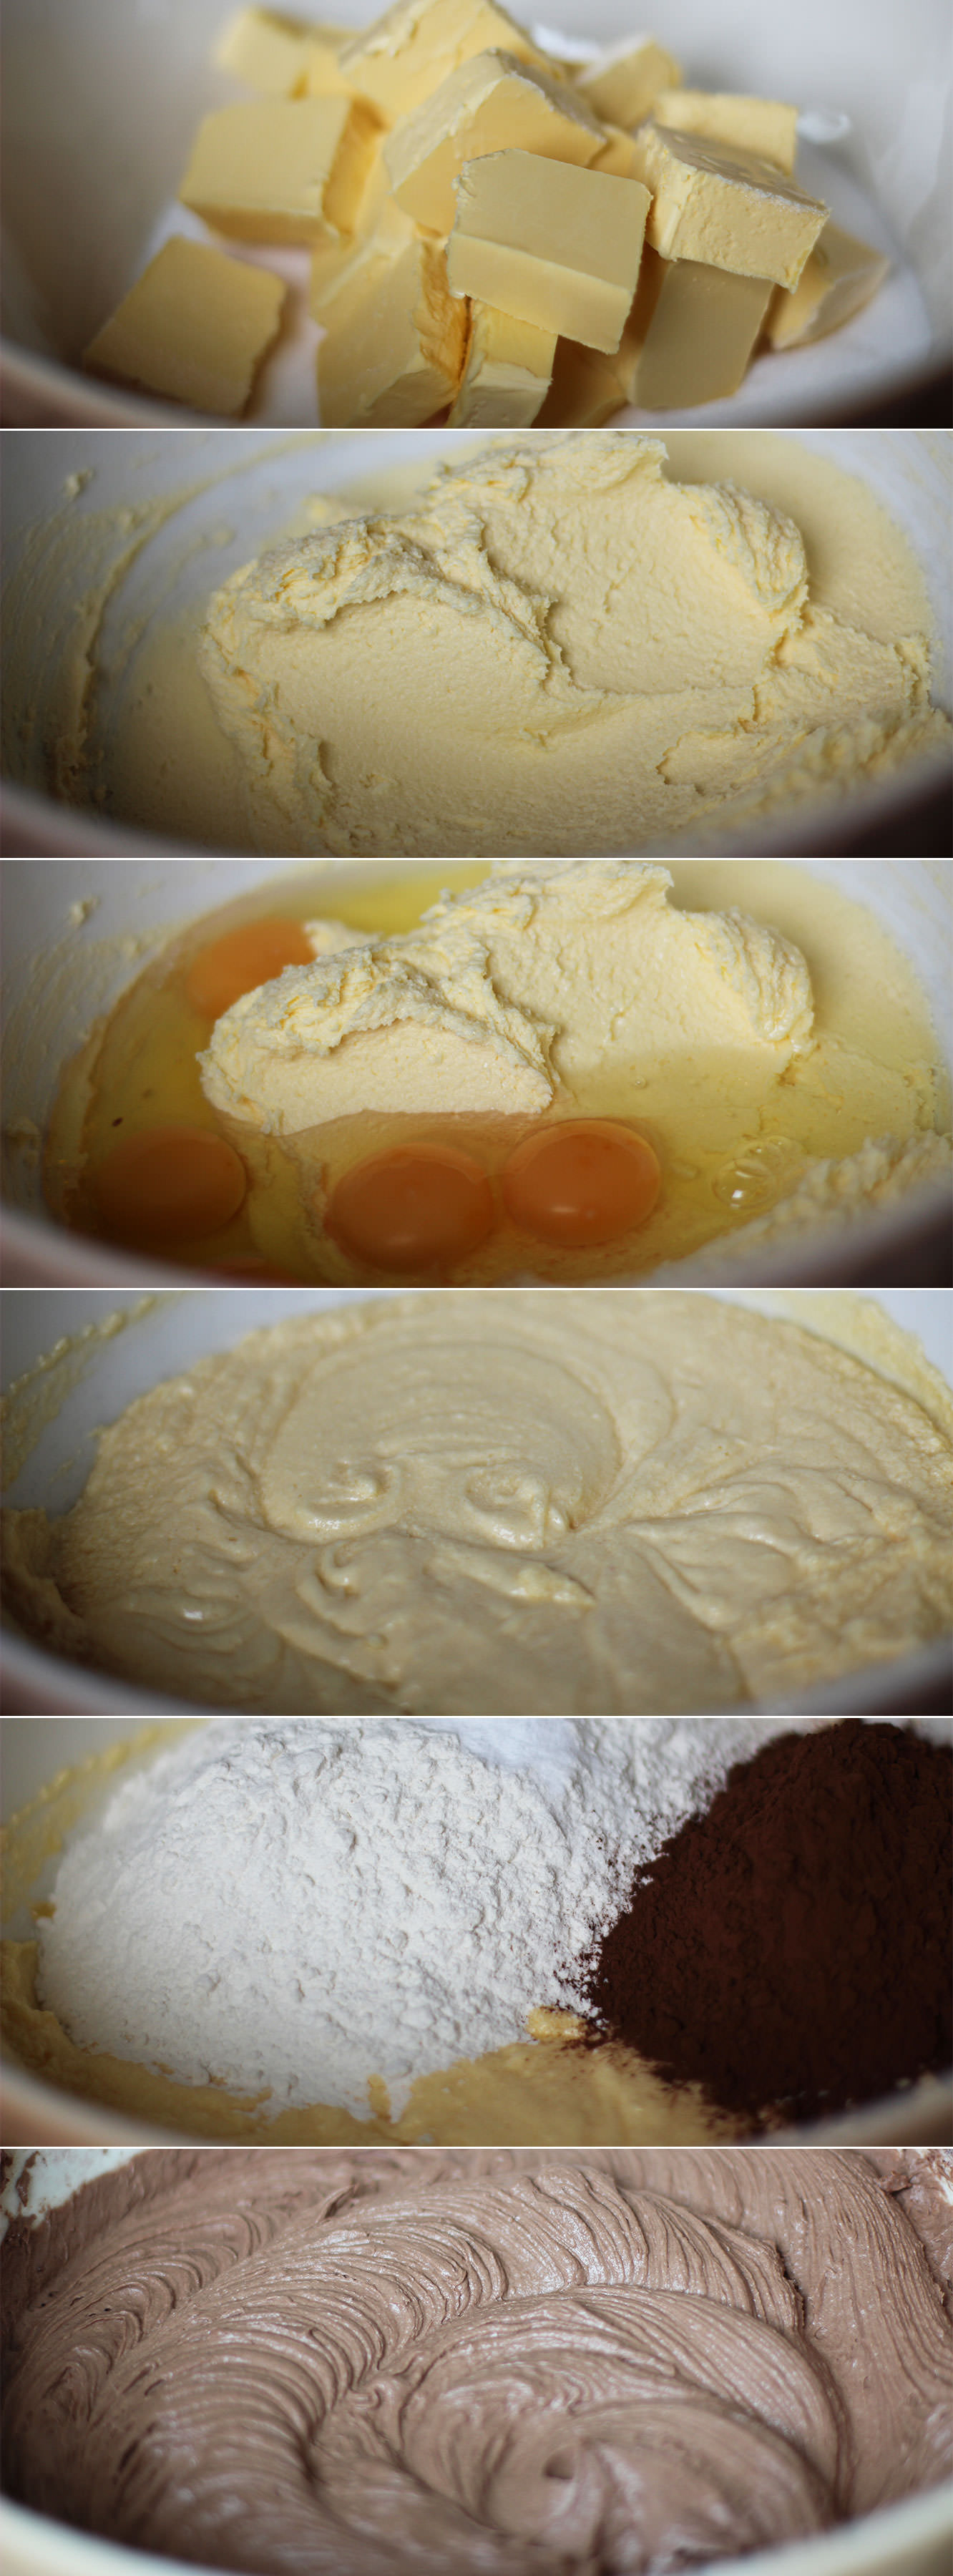
Whisk together the butter and sugar with an electric whisk, or a wooden spoon and some elbow grease, until smooth.
I used a block of stork for this, but I prefer the softer version you can get in a tub, you don’t have to wait for it to come to room temperature first that way. Margarine works just fine for cakes, I think it makes them fluffier.
You might want to use a tea towel over the bowl to avoid everything getting covered in sugar and butter.
Step three
Add all the eggs and whisk until combined.
Step four
In go the flour, bicarbonate of soda and cocoa powder.
Stir gently to start mixing the dry ingredients in first before turning the whisk on, you don’t want to choke on flour, that’s not a good way to go. It also means you will never get to eat this cake.
Step five
Divide into the tins.
Bake in the oven on 180C/350F/gas mark 4. This is where it’s a little tricky as the little cakes need a lot less time but you don’t want to open the oven much or your big cake will sink.
I say give the big cake about 30 minutes on its own, and then opening the door as little as possible add the smaller ones for the next 20 minutes. You will then need to test the cakes by sticking a sharp knife, or a cake tester if you have one. If this comes out clean (or with the odd crumb) you’re all good. If not give them another 5-10 minutes.
Step six
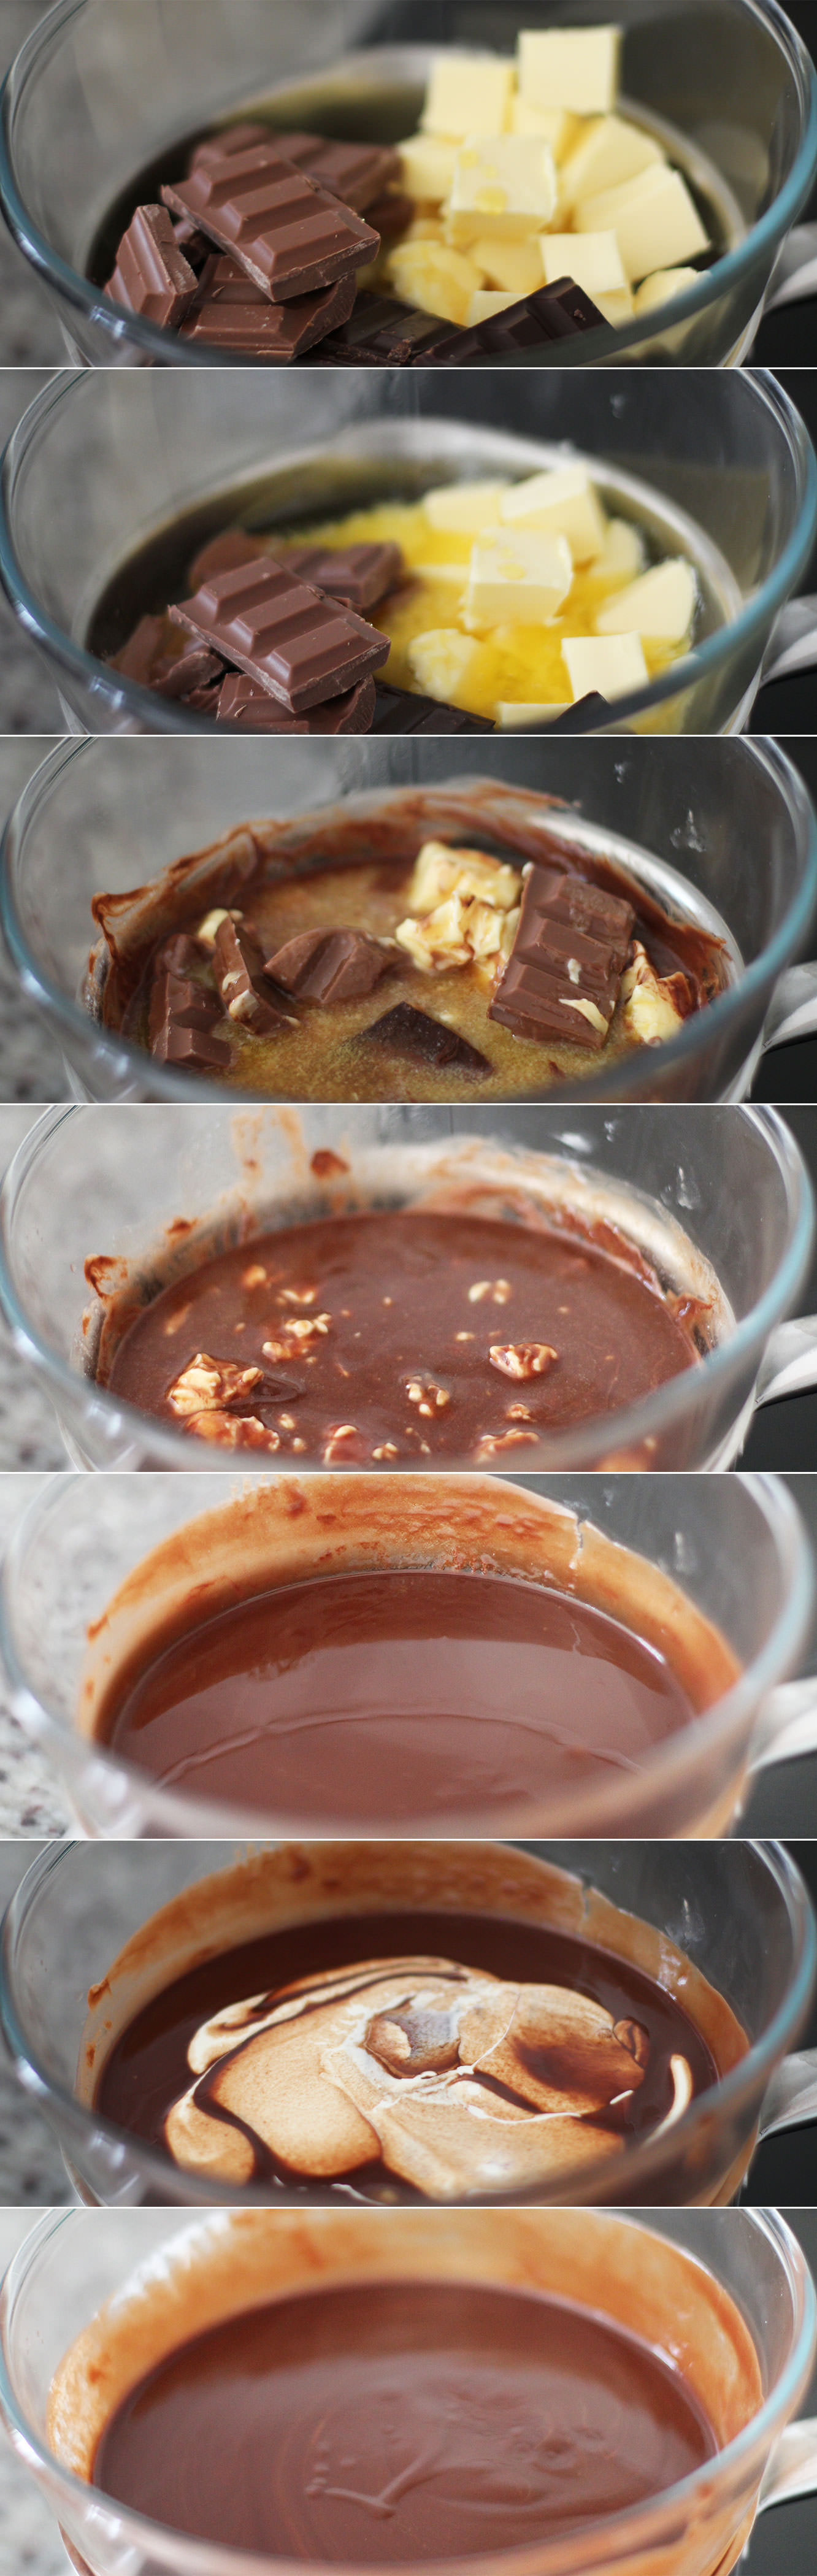
While the cakes are in the oven make the icing as both, but particularly the chocolate, need time to cool.
Place a heatproof bowl over a pan of barely simmering water. Add the butter (real butter this time), chocolate and golden syrup. Melt until smooth.
Remove from heat and stir in the cream quickly. Take the bowl off the pan and place somewhere cool and dry.
I don’t really suggest the fridge because you might forget it (like I did) and then you have to wait for it to warm up enough to spread. But that being said, the fridge is a viable option, just keep an eye on it.
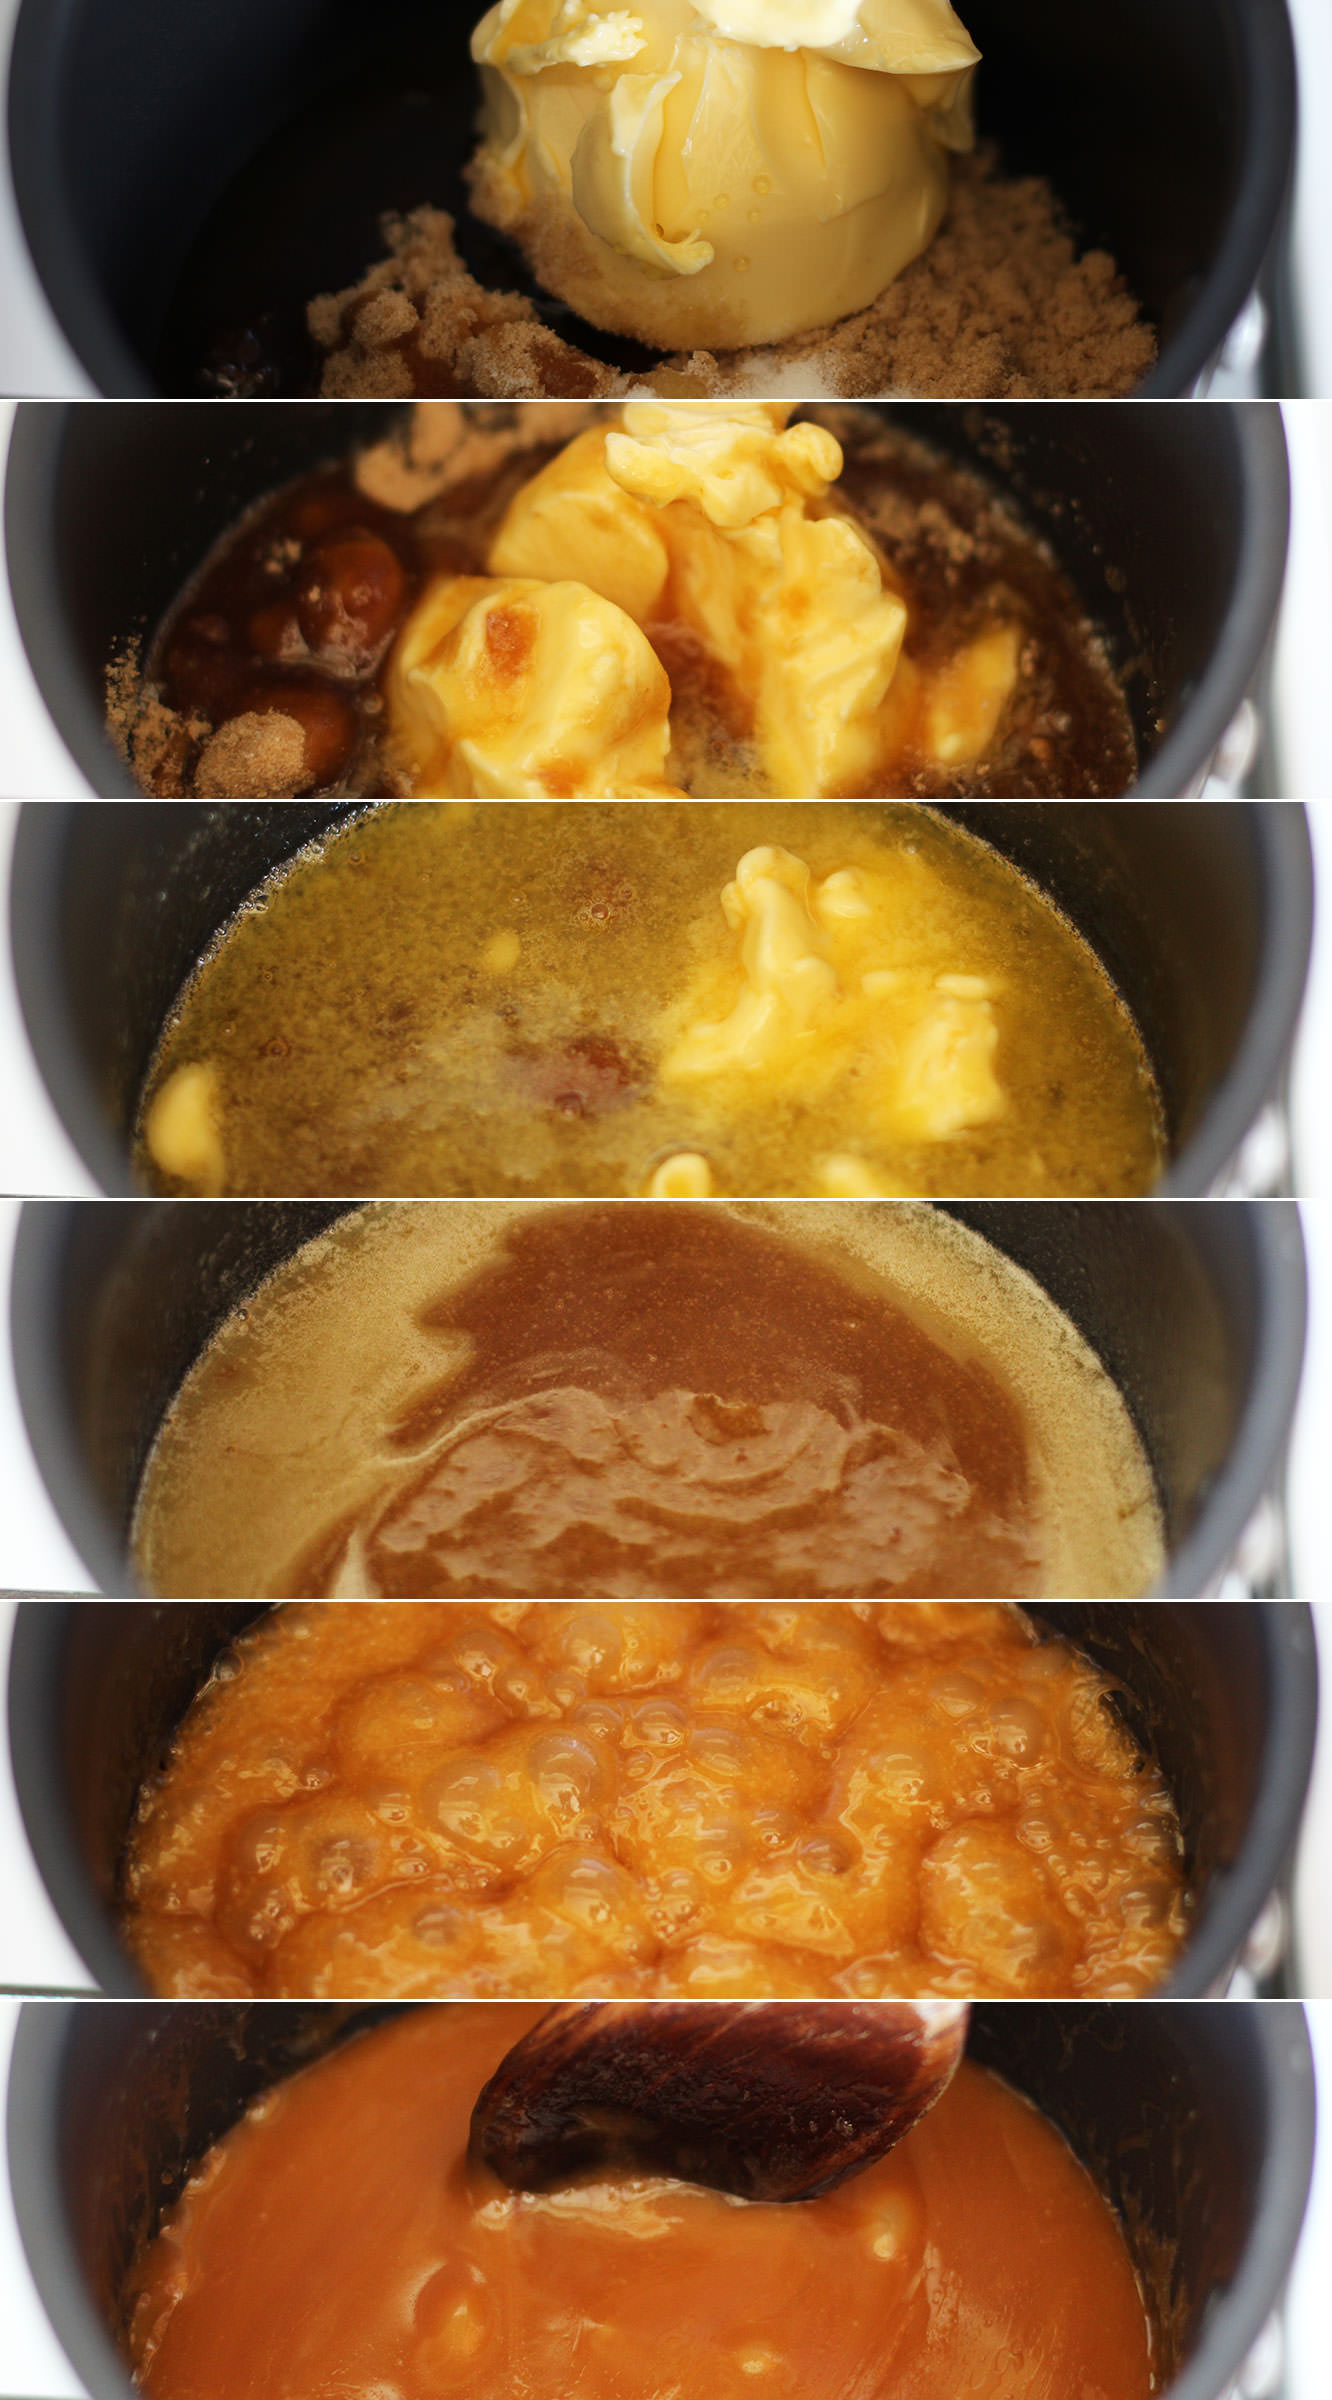
Step seven
For the salted caramel buttercream melt together 100g of the butter, the brown sugar, golden syrup and salt. Do this slowly and then bring the heat up to a simmer.
Simmer for 10 minutes. Stir regularly so that it doesn’t catch and burn. Leave to cool down for about half an hour or so.
Step eight
Stir in the 100ml cream and leave to cool further.
Step nine
Whisk the icing sugar and 150g of butter together with the salt. Definitely cover the bowl with the tea towel this time. I find if my butter is not quite soft enough it helps to rub it in a bit with clean hands first. There is NOwhere icing sugar won’t go when you use an electric whisk.
Step ten
Add the caramel and whisk again until smooth. Don’t worry if the caramel is still a little warm, just leave your buttercream to cool in the fridge for a bit. But again, don’t forget about it or it won’t be spreadable.
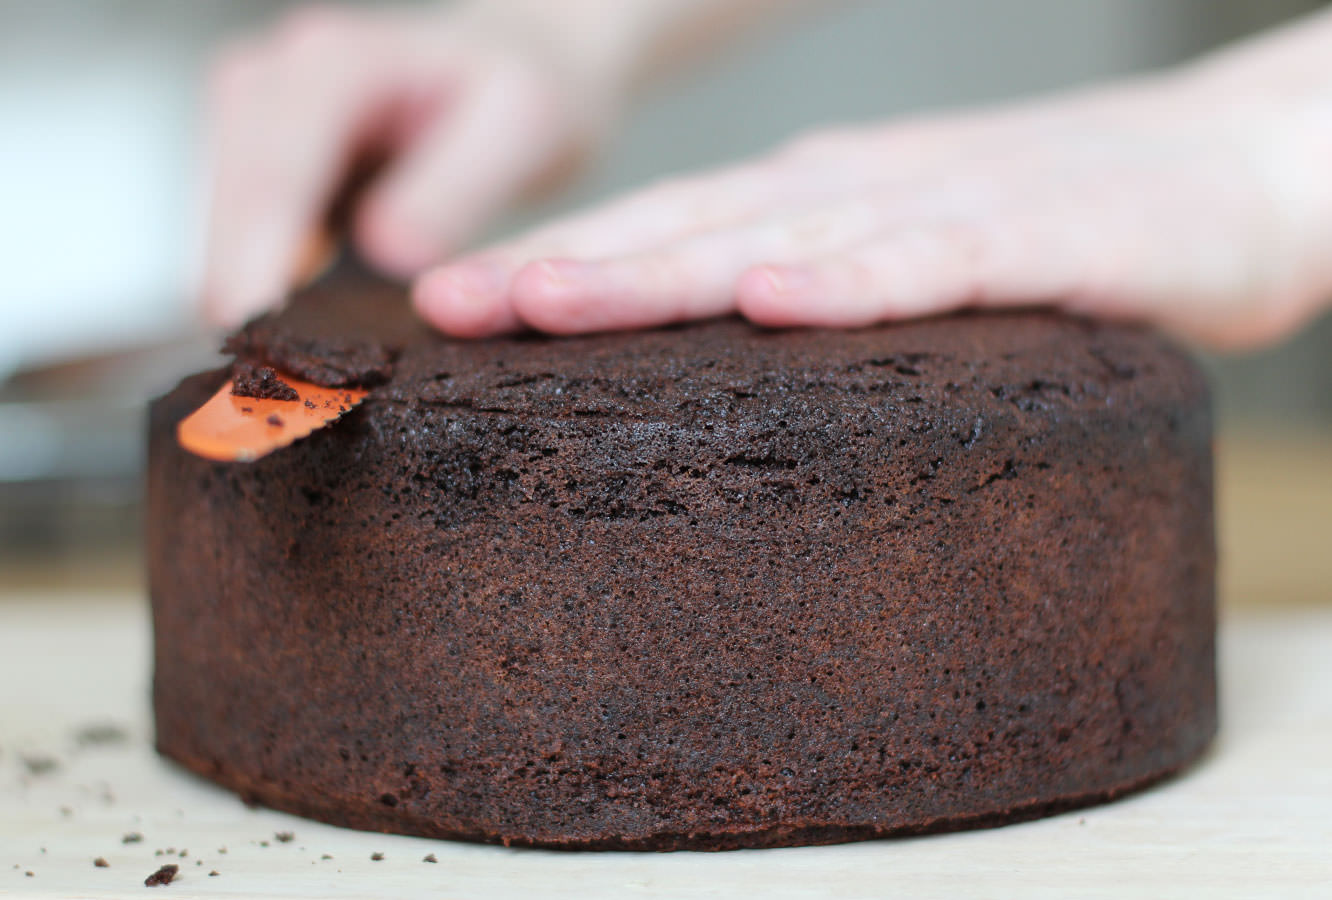
Step eleven
When your cakes have completely cooled prepare them for icing. You need to lop the top off the large one until it’s as flat as possible on top. So much of this cake is covered in decoration that you can get away with a little bit of wonky though so don’t panic if it’s not prefect. Having said that the flatter the better so the top tier sits straight. NO PRESSURE.
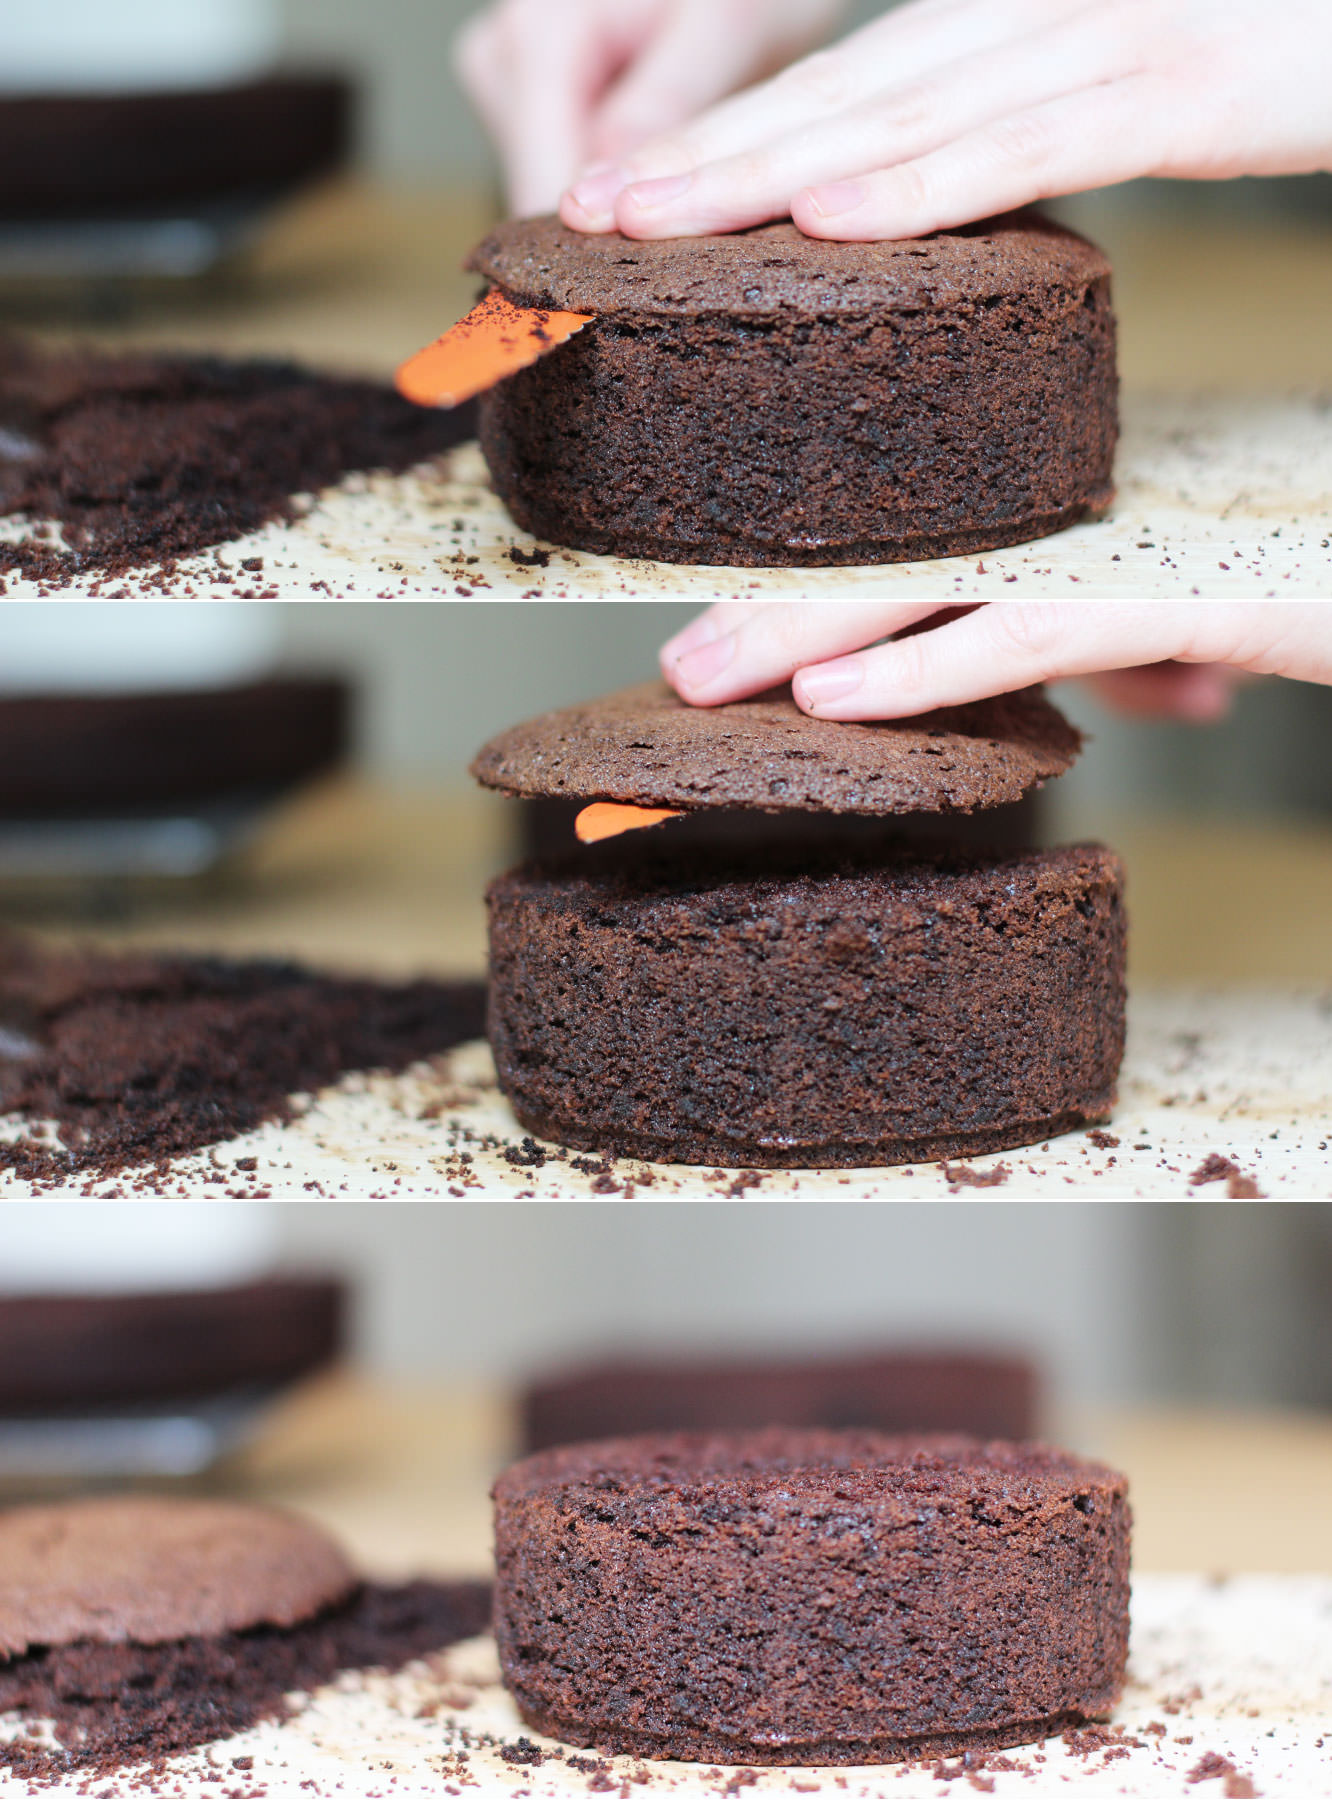
Step twelve
Cut the cake in the middle. Try to do this evenly by scoring it the whole way round first. Just keep going round in circles, getting further in each time until you’re all the way through.
Step thirteen
Level out the tops of the small cakes. I would be lying if I said I didn’t spread some icing on the offcuts and eat them.
Step fourteen
Using a palette knife ice the cakes.
First place a bit of buttercream on the cake base to stick the cake to it. Start with the caramel buttercream and ice the middle and the top. Don’t worry if bits splurge out the sides.
Smooth these out around the sides with the palette knife, gradually adding buttercream here and there to create the sharpest sides you can. Some parts will have a thicker coating than others, this layer is made to contain all the crumbs (hence the name crumb layer) and to even out the shape a bit. It’s not going to be pretty.
Place in the fridge for about an hour before starting the chocolate.
Ice the chocolate on in the same way, neatening as you go. For the most part it will be covered up, so it really doesn’t need to be too smooth.
Step fifteen
Cover the small cake in the same way.
Place both in the fridge while you prepare the decorations.
Step sixteen
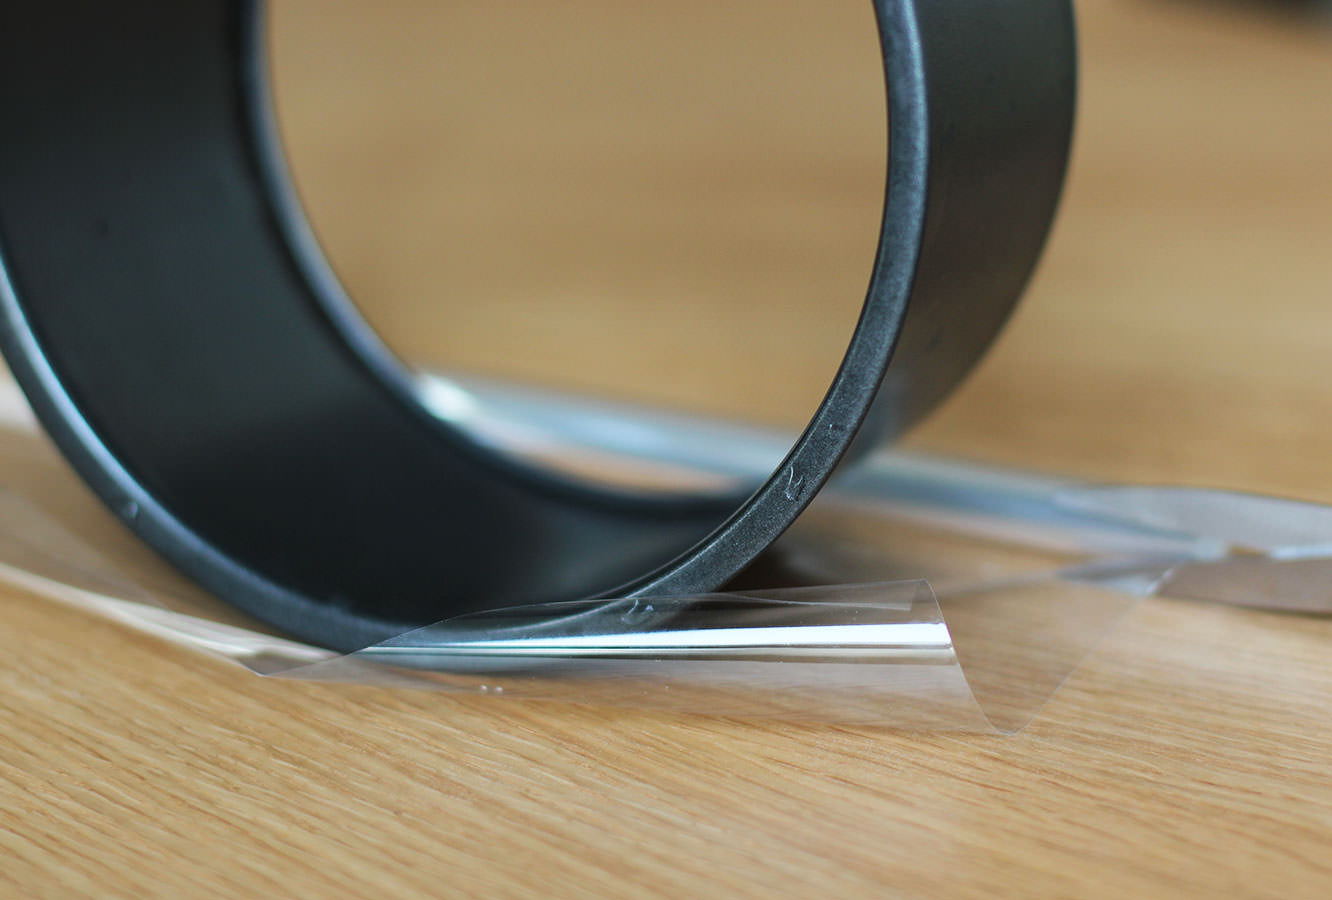
Using the tins as a guide cut a strip of the cellophane for both the top and bottom layer. You want these to be quite close to the size of the chocolate collar, so tall enough that you will have about 5cm/two inches taller than the cake, and wide enough to match the circumference. You can quickly check this against the cake to ensure it will fit.
Don’t forget to cut one for the top tier and one for the bottom, bearing in mind your top tier cake is twice as tall as the tin.
Step seventeen
Temper 200g dark chocolate. Don’t look at me like that…you are really going to want to do this so you have shiny chocolate on the collar.
First melt 125g of the chocolate in a heatproof bowl over a pan of simmering water. Let it get to 55C/131F before removing from the heat.
Chop the remaining chocolate and stir into the melted mix to aid the cool down process. Stir continually until it cools to 28C/82F. I found a good way to speed this up a bit. Put cold water in a large saucepan and the bowl on top. You’re welcome.
Place the bowl back on the heat and bring it to 31C/88F. Your chocolate is tempered.
Be warned – if you’re doing a different type of chocolate the temperatures are different:
Milk – 45C/113F original melt, 27C/81F cool down, 29C/84F
White – 45C/113F original melt, 26C/79F cool down, 28C/82F
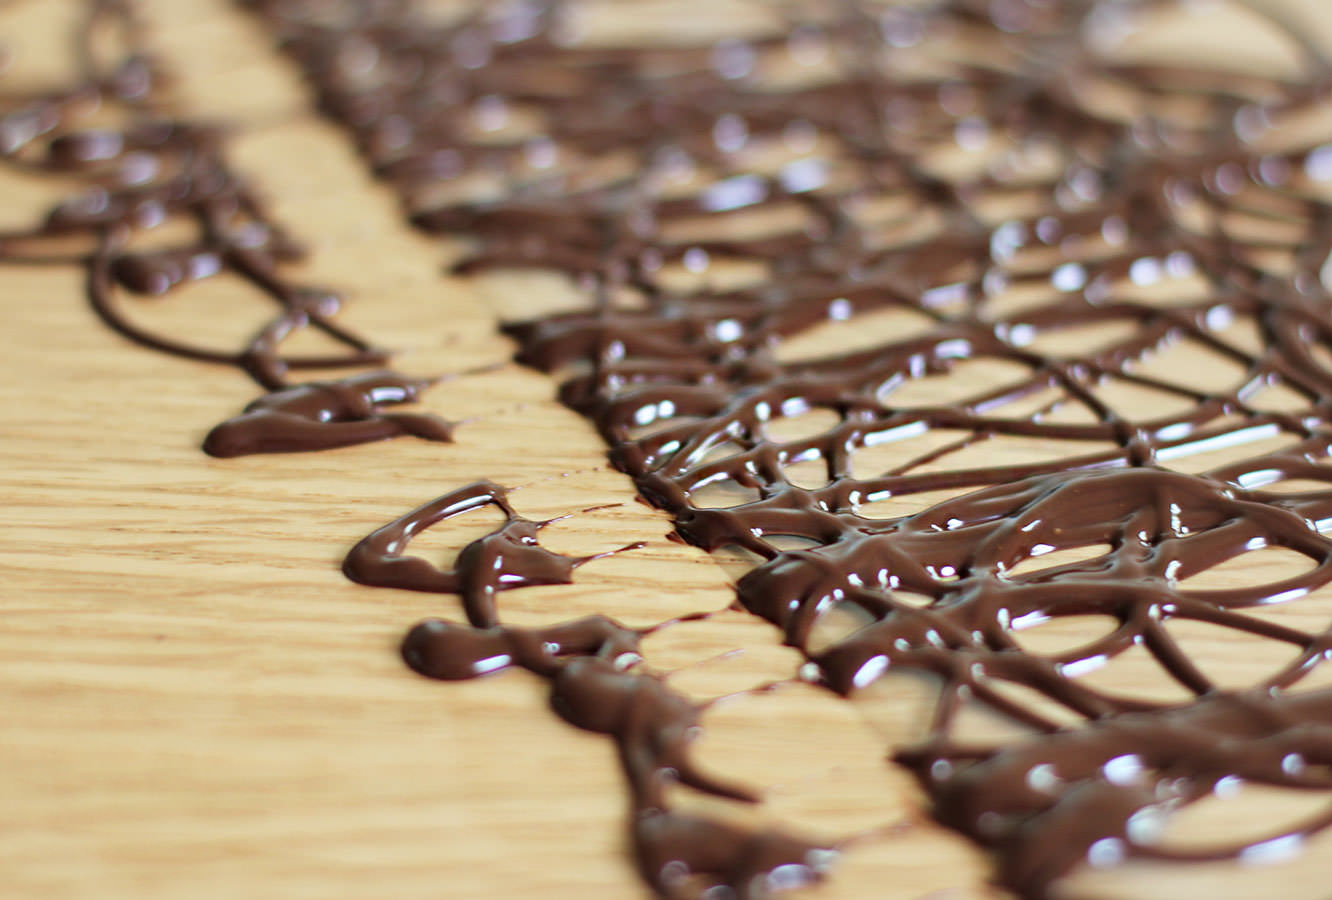
Step eighteen
Place chocolate in a piping bag and using circular motions cover the cellophane with swirls. Go over the bottom edge onto the work surface but ensure the top stays on the cellophane so it’s ‘whirly’.
Step nineteen
When it has started to dry pull the cellophane away so the bottom is clear of the extra overlap bits.
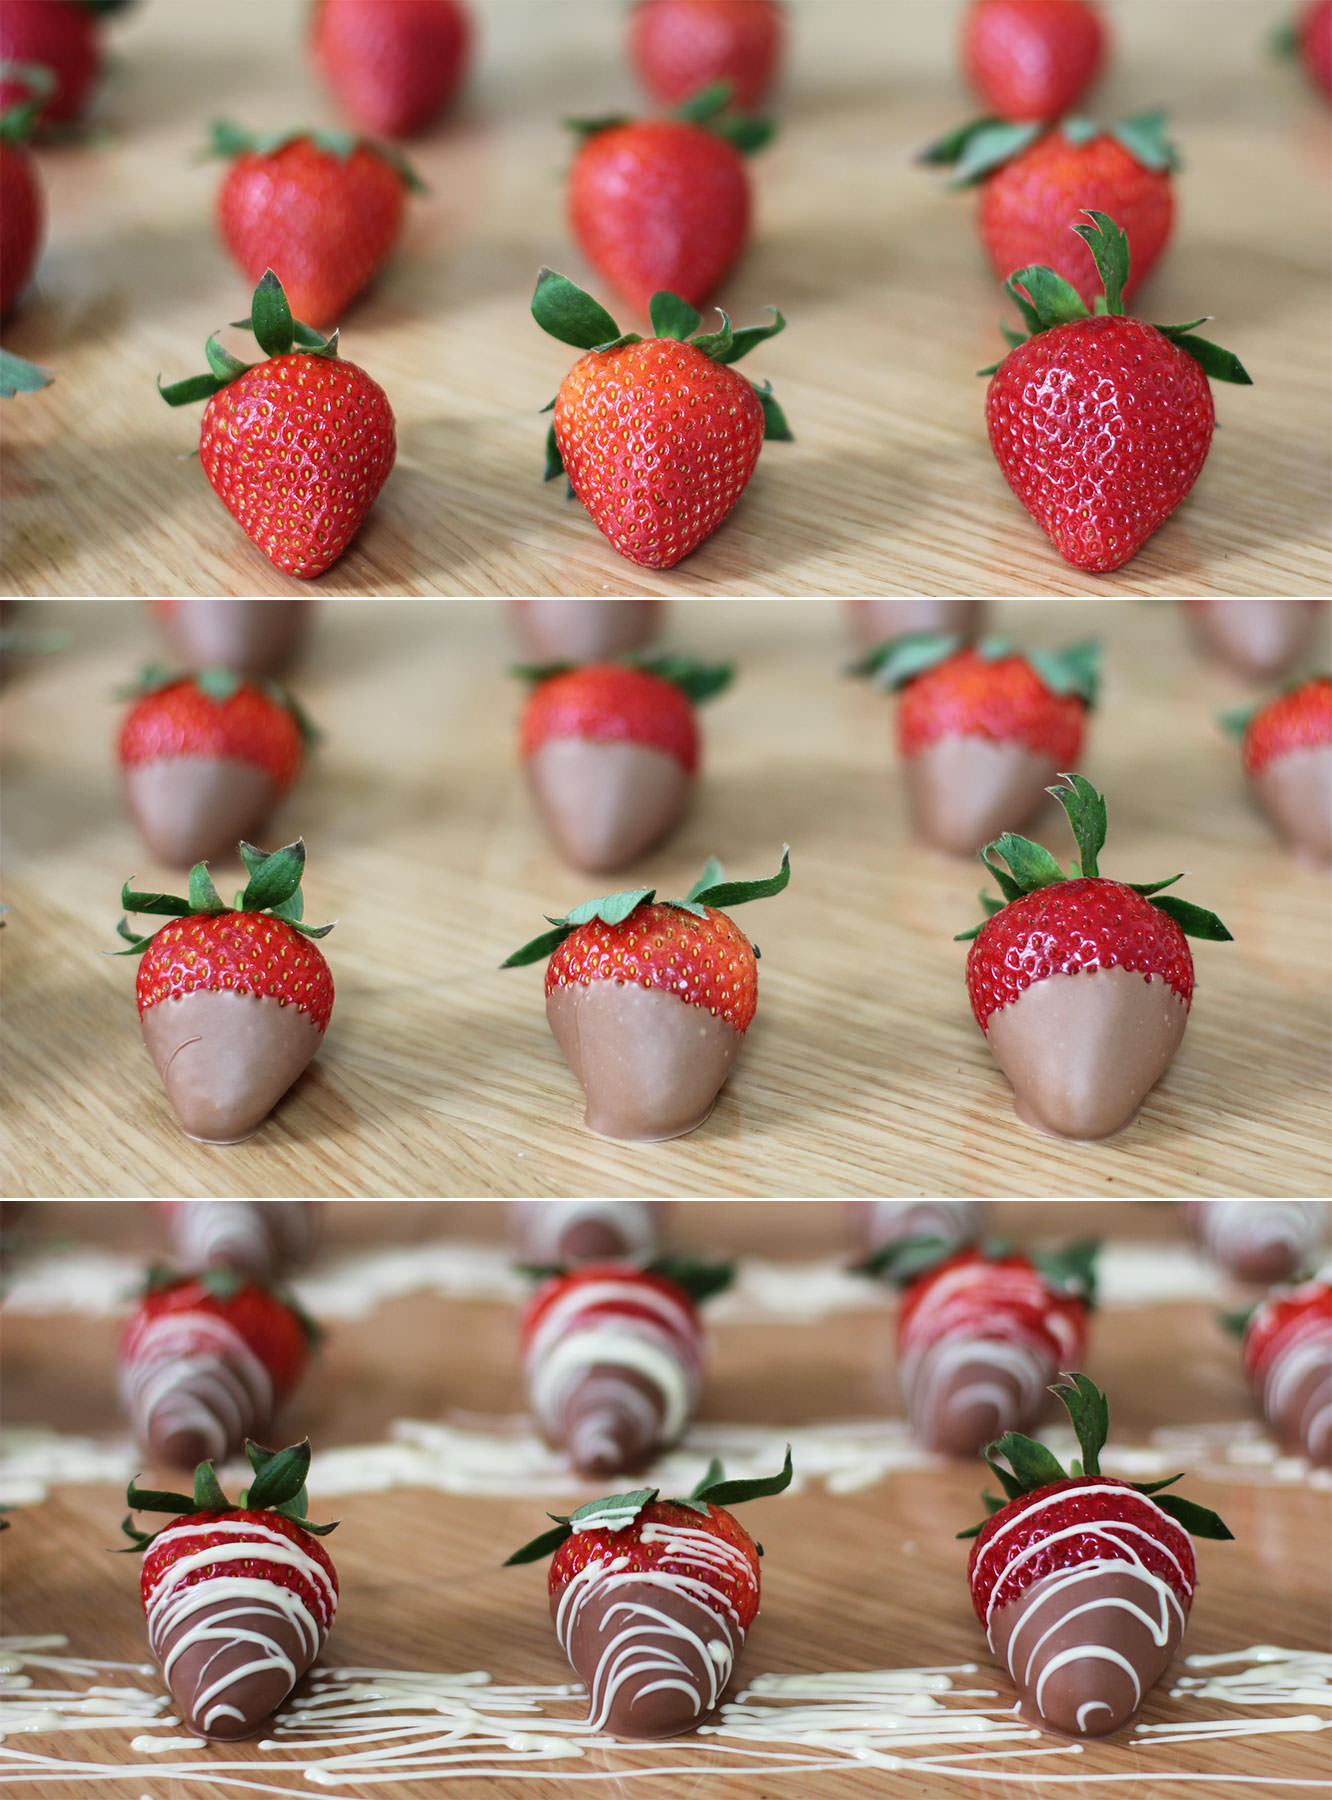
Step twenty
Melt (preferably temper) the milk chocolate. Dip the strawberries in half way and leave to set on some more cellophane.
Melt the white chocolate (no real need to temper this) and place in a piping bag. swing the bag back and forth to drizzle the white chocolate over the top.
Step twenty one
Drizzle the raspberries with white and milk chocolate. You can dip them if you want to, but, really? I know this is taking a while, but do you have that kind of time??
Step twenty two
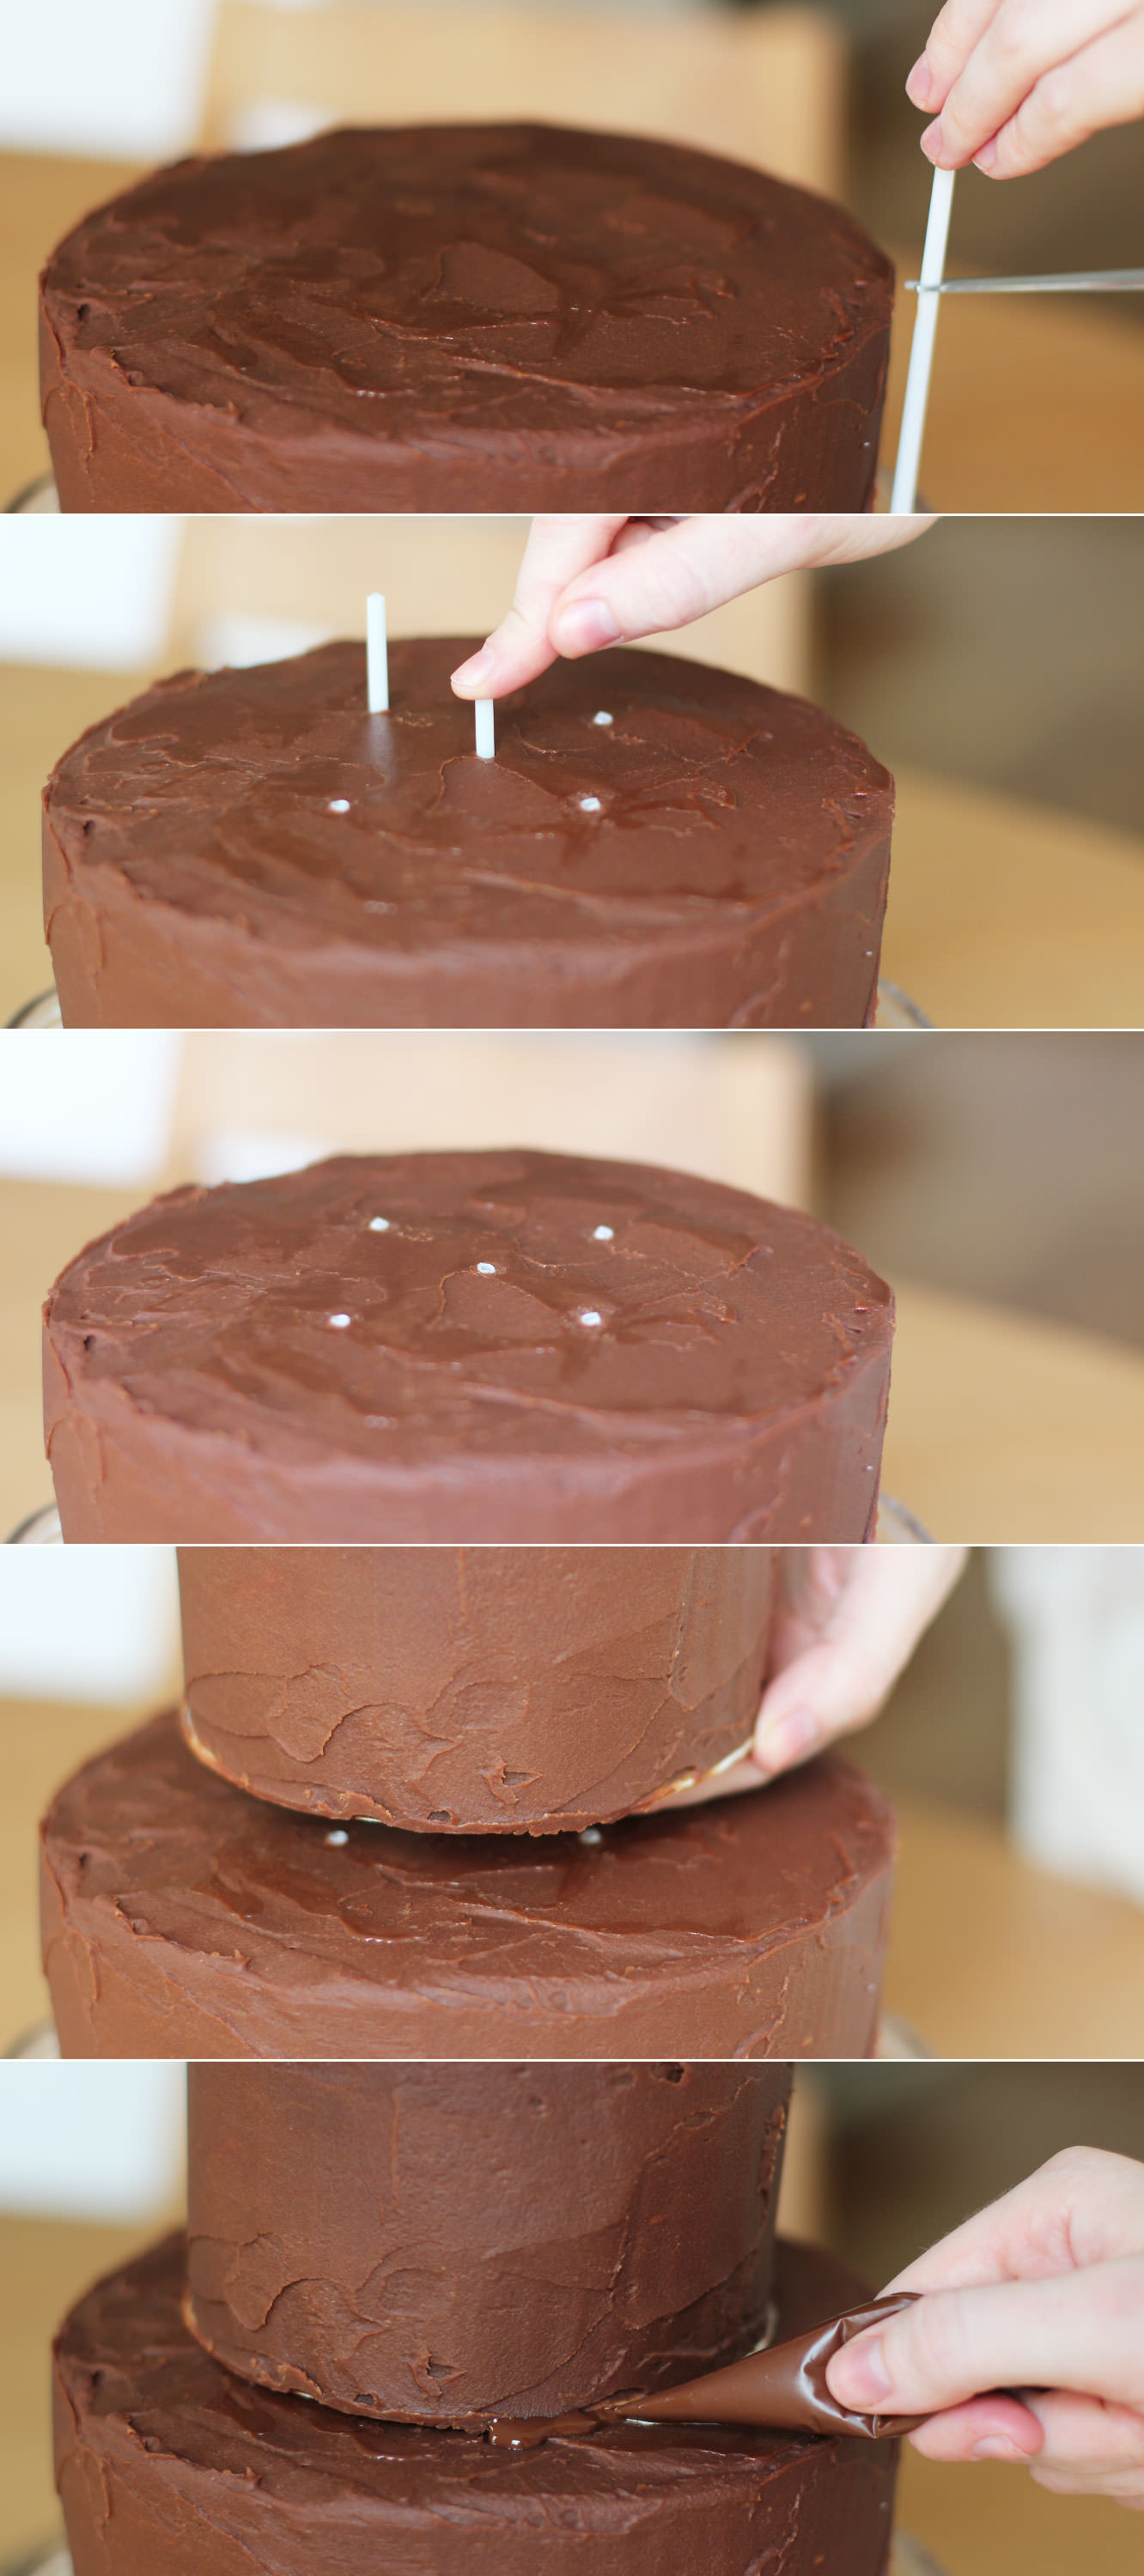
Get the cakes out of the fridge to assemble.
Cut the sticks to size and push through the bottom layer where the top tier will sit.
Place it on top.
I then secured this a bit further with the remaining dark chocolate I had. It will be covered up so no big deal if it’s messy.
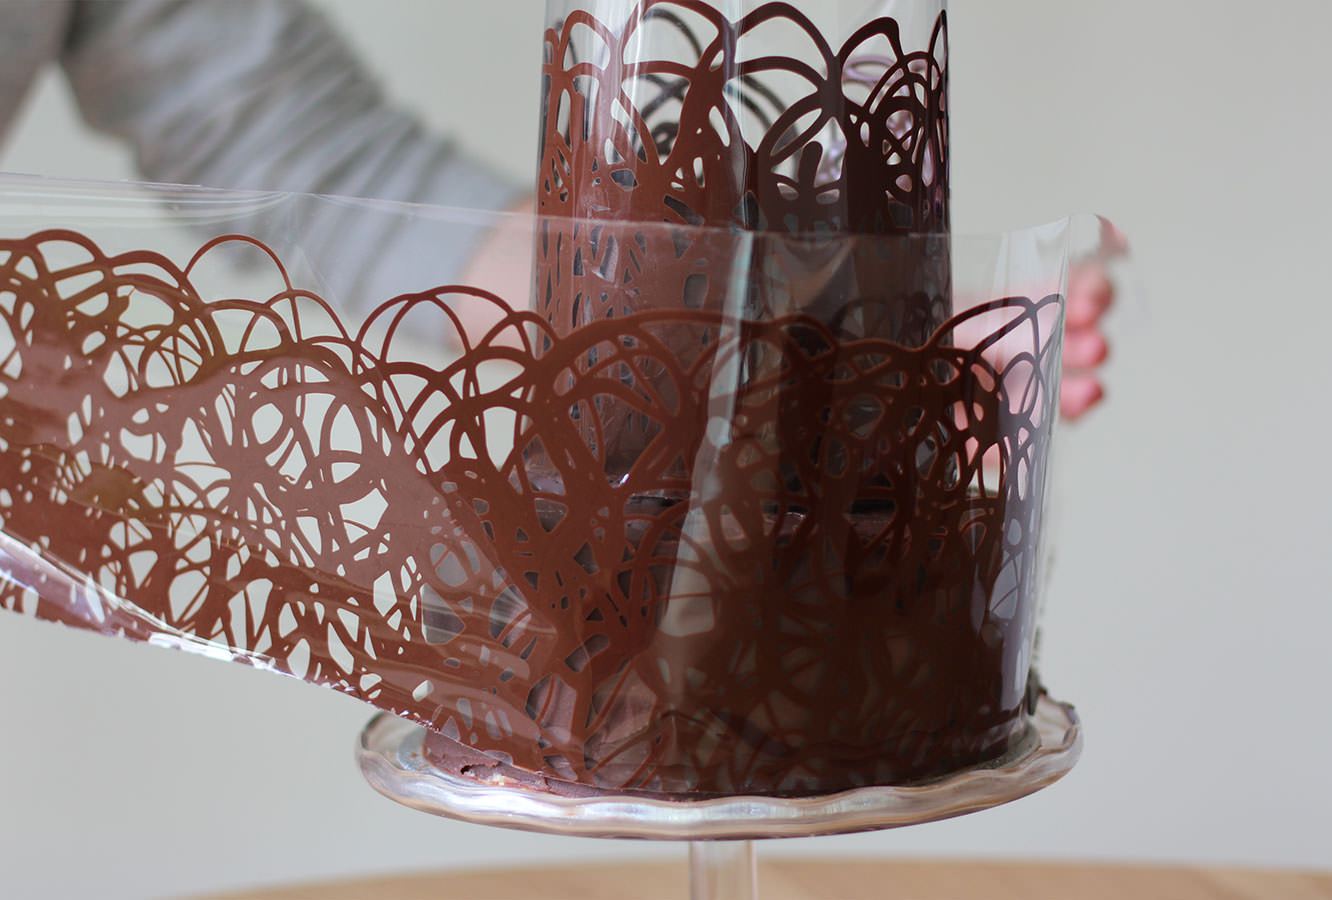
Step twenty three
When the collars become touch dry, (meaning if you gently touch the surface you shouldn’t get chocolate on your finger, but what’s underneath is still not set) wrap them around the cake.
LEAVE THE CELLOPHANE ON. Sorry for shouting. But please. Walk away and don’t touch it for a while. Maybe leave a window open if it’s a cool day to help the process along.
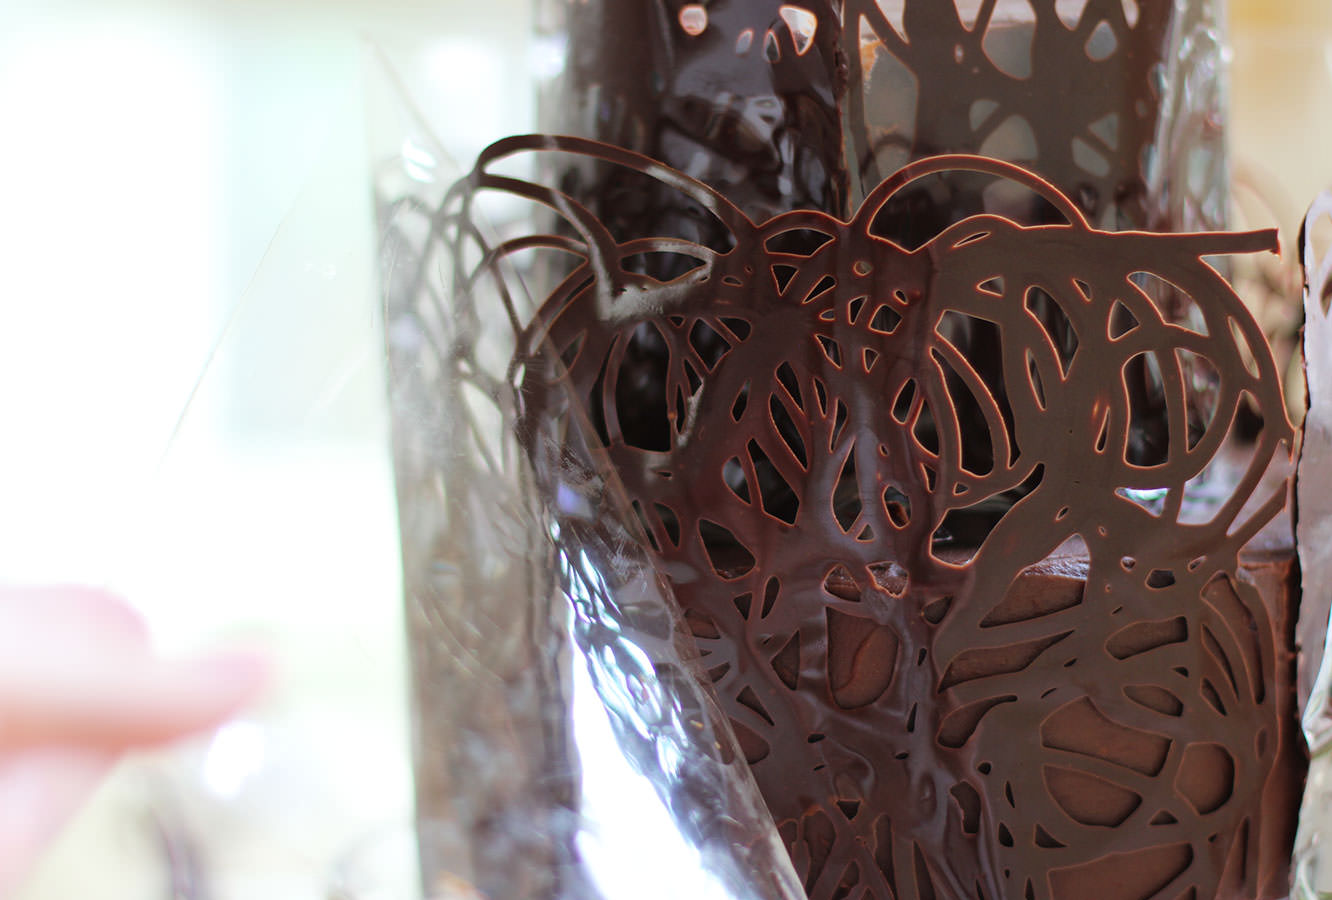
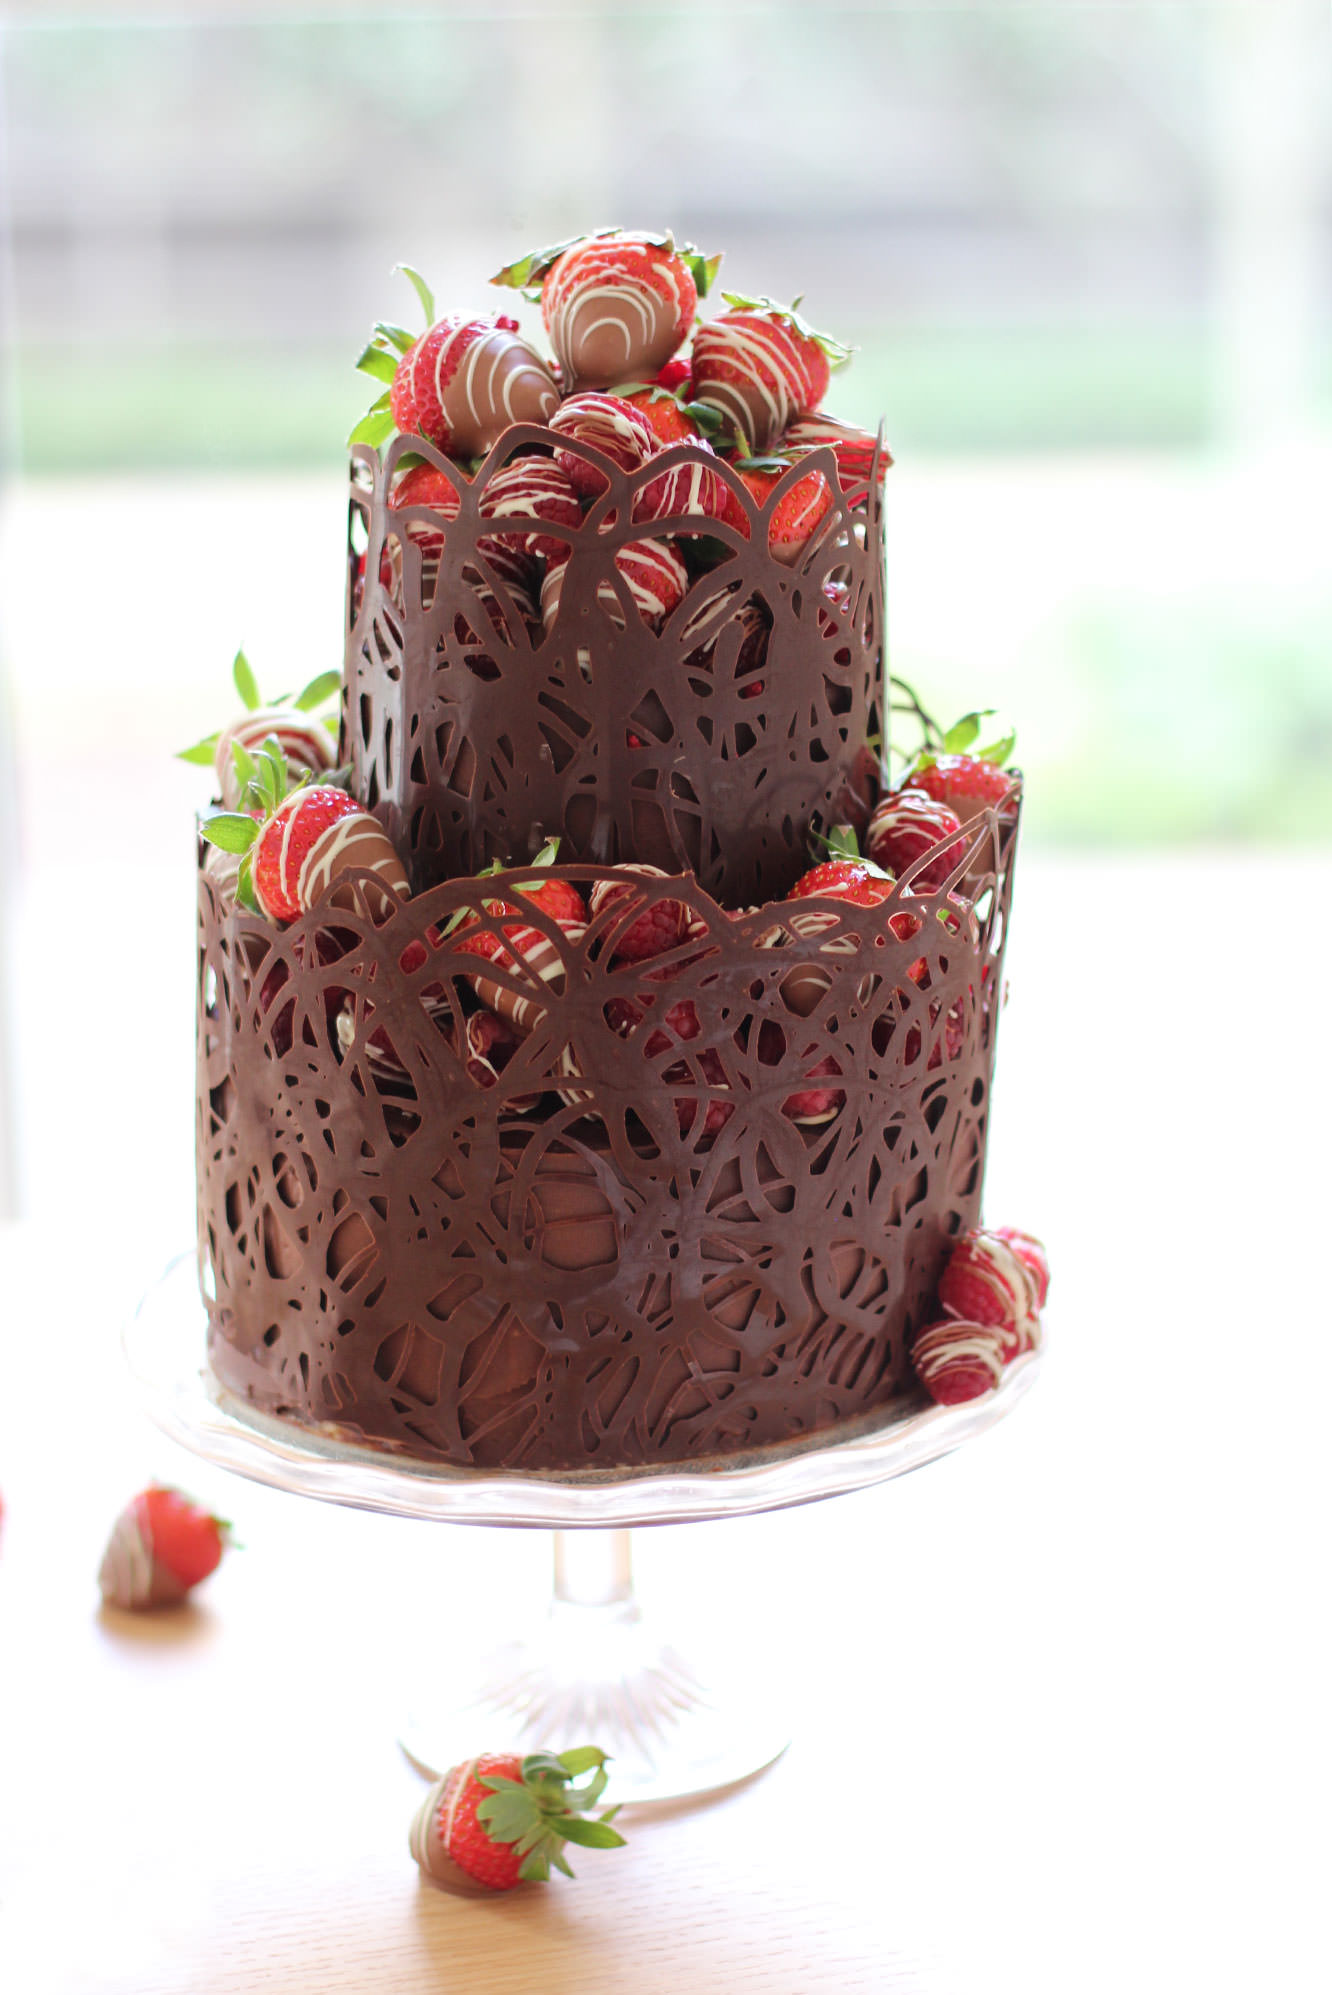
Step twenty four
When you’re feeling brave slowly peel off the cellophane to reveal your beautiful shiny chocolate collar. I was pretty excited at this point I must confess.
Step twenty five
Fill with the fruit and make someone’s occasion that bit happier.
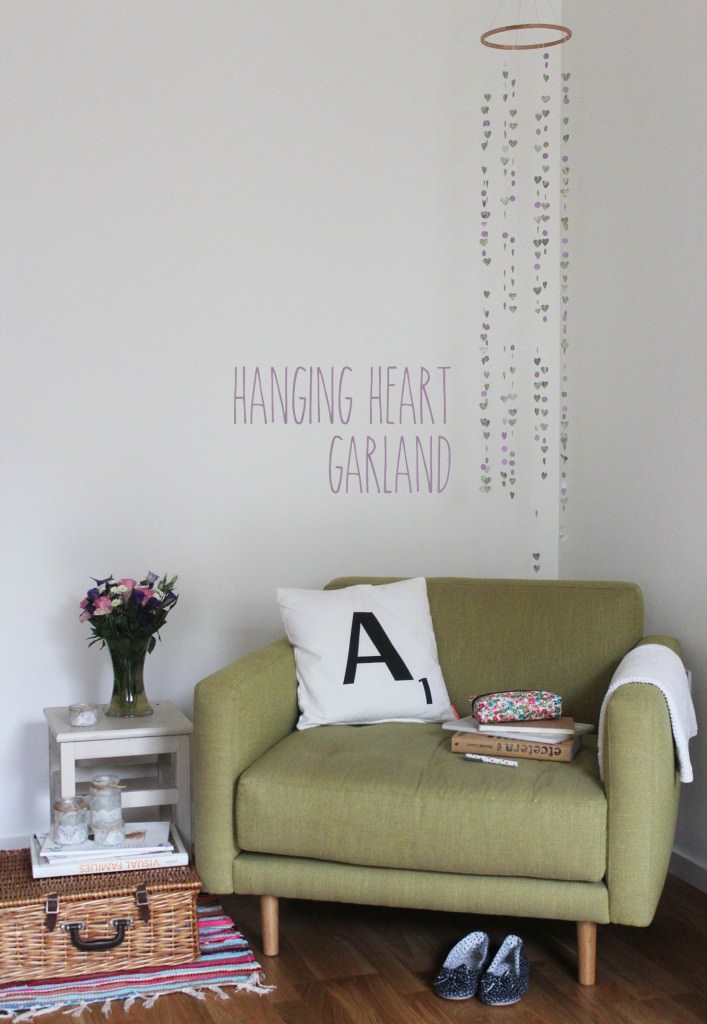
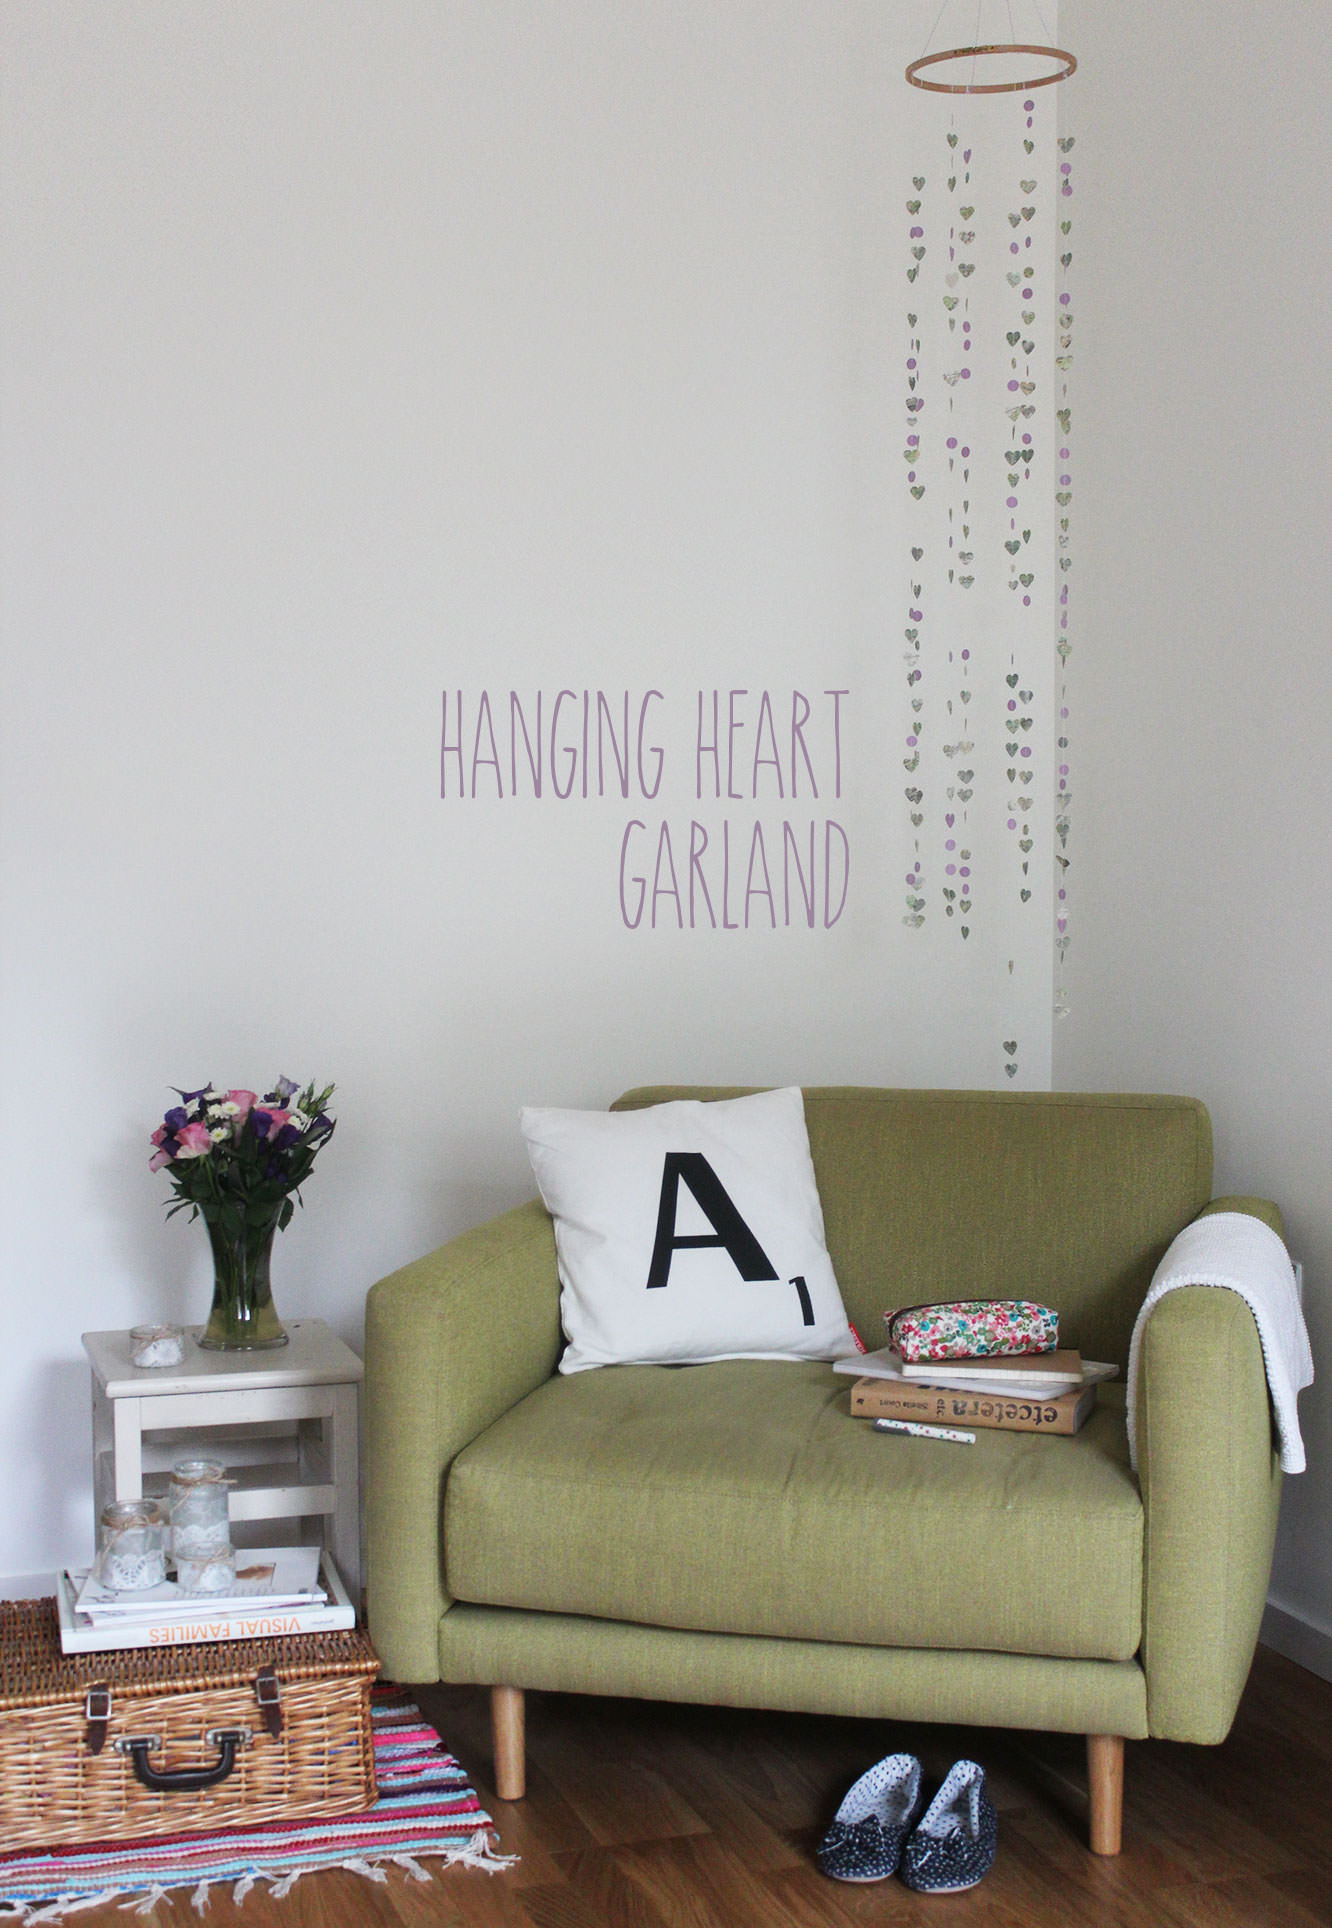
Just when you (and I) thought I was going to stop going on about my wedding filled life, one of my best friends decided to get married in December. Of course being a little bit obsessed with her and with craft, I set about thinking up some decoration ideas.
The bride in question hasn’t got a huge budget, so whether you’re due down the aisle yourself, know someone who is, or just fancy brightening up a corner of your living room you won’t be too out of pocket with this one.
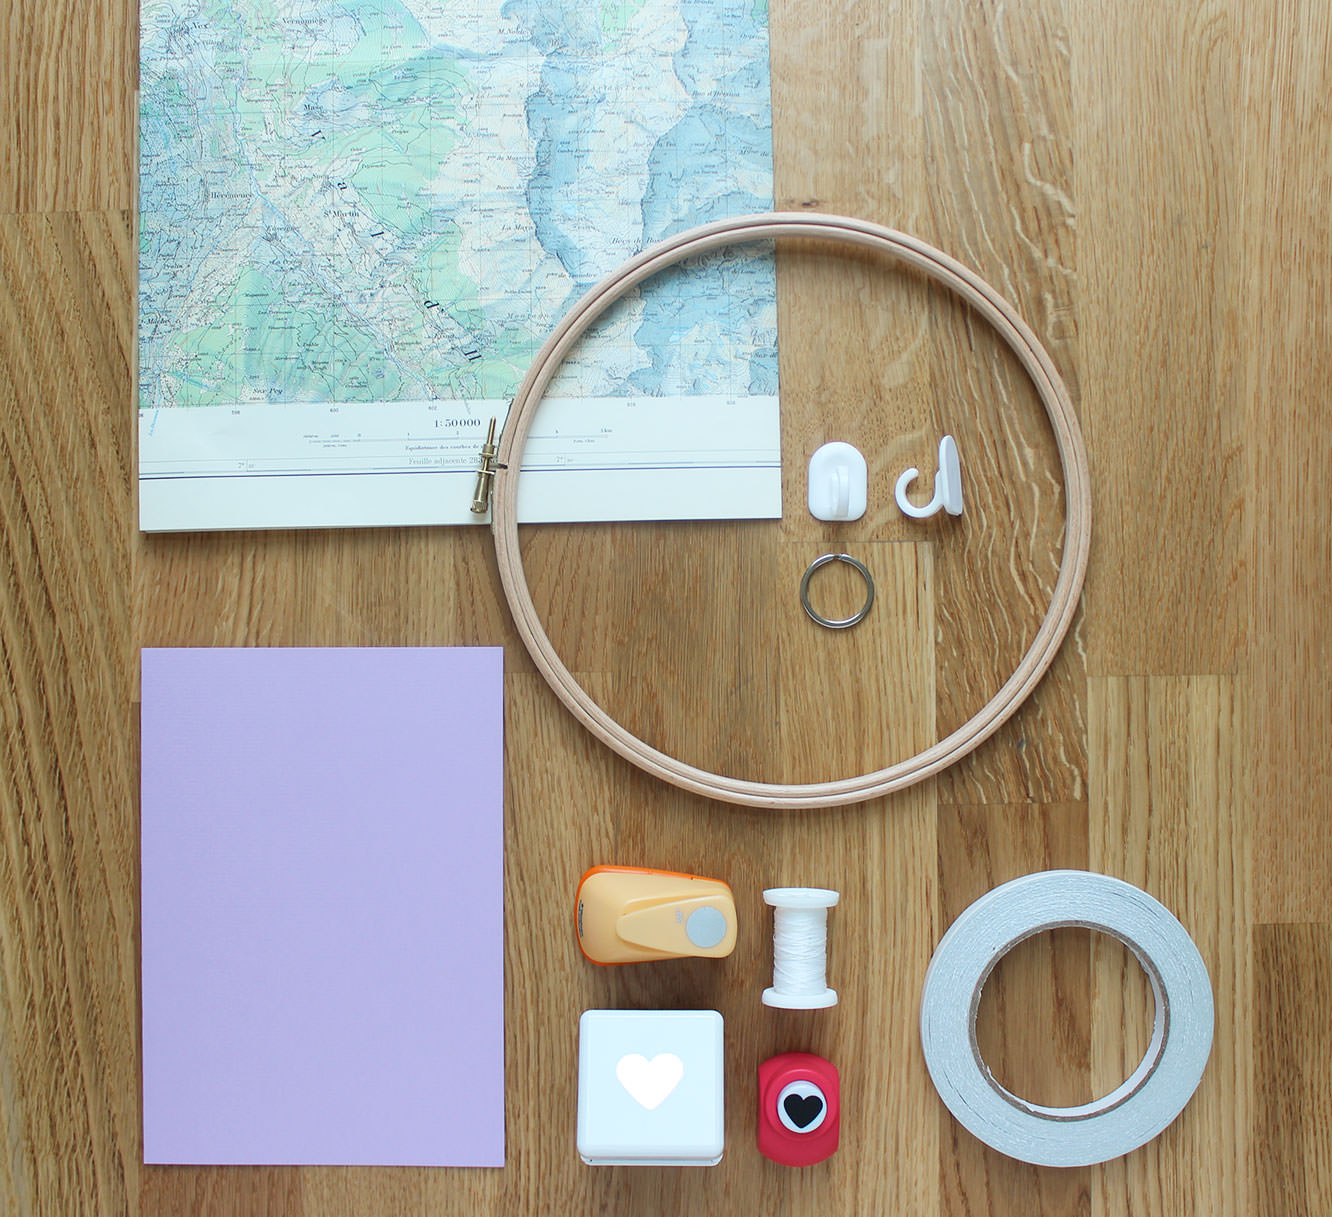
You will need
An embroidery hoop (mine was 9″ from John Lewis for about £2, they are probably even cheaper elsewhere)
Cotton thread
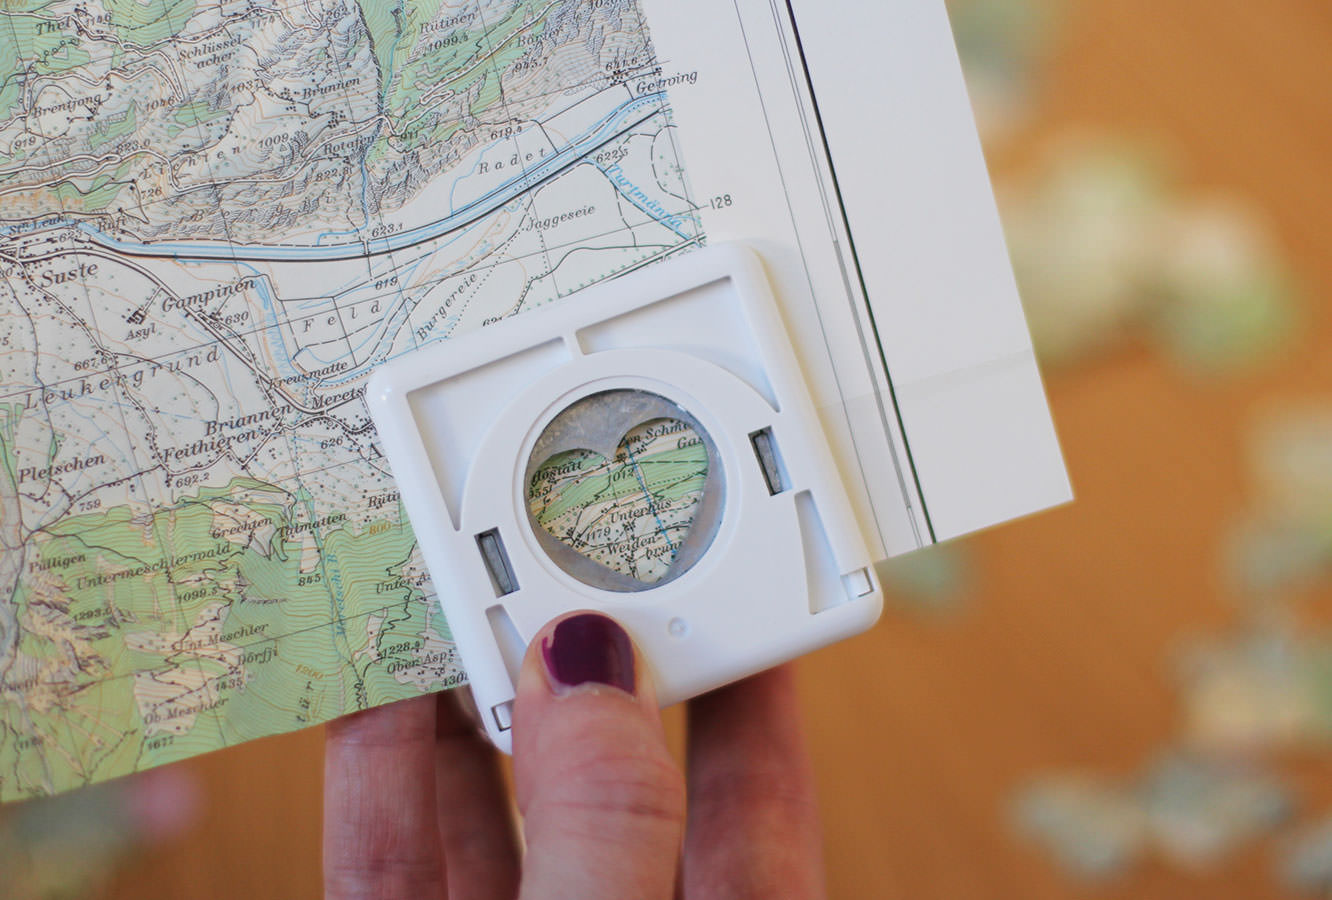
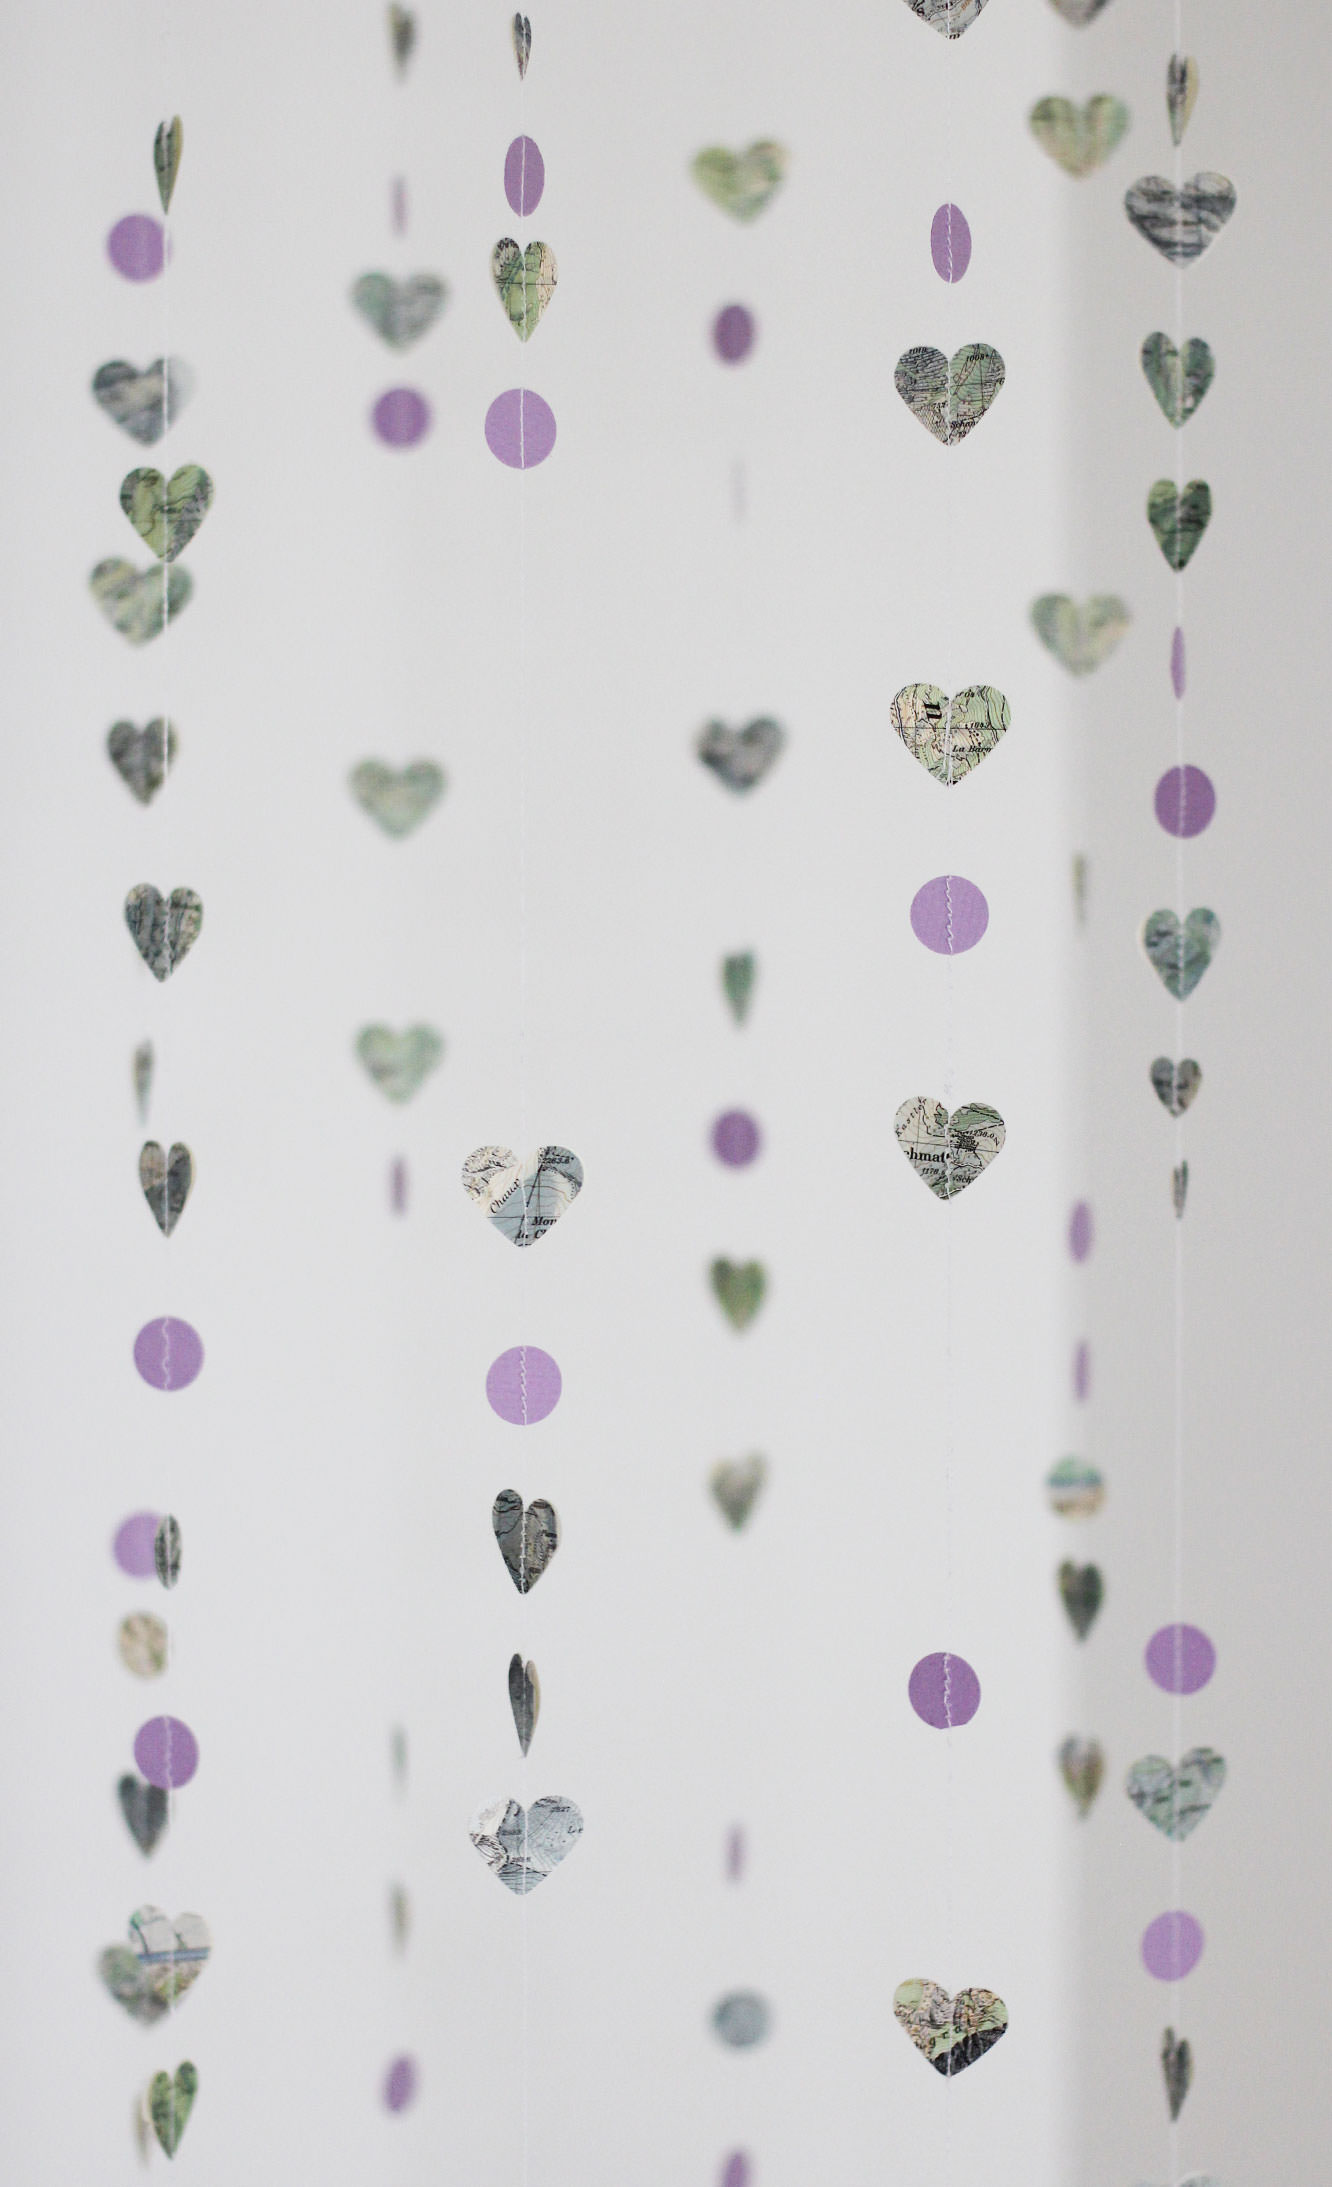
Card/paper of your chosen pattern and colour (I was very fortunate to have an old map that had lots of dark blues and sage greens matching the colour scheme perfectly)
Double sided tape (not totally essential)
Craft punches of whatever shape and size you like the most
A ring from an old keyring
A sticky hook (I bought these from Wilkinsons; make sure you choose one with a very round hook as you are sticking it to the ceiling, not a wall, and you don’t want your decorations to slip off and come crashing down)
Step one
Use the craft punch(es) to cut out loads of your chosen shapes. Meg wanted hearts for her wedding but this could easily work with stars or leaves or something too. I also used some circles and smaller hearts to vary the design slightly. I got a bit cross with the small heart punch though so they are few and far between…
I used the punch upside-down to make sure my shapes were whole and that I wasn’t wasting any paper.
Step two
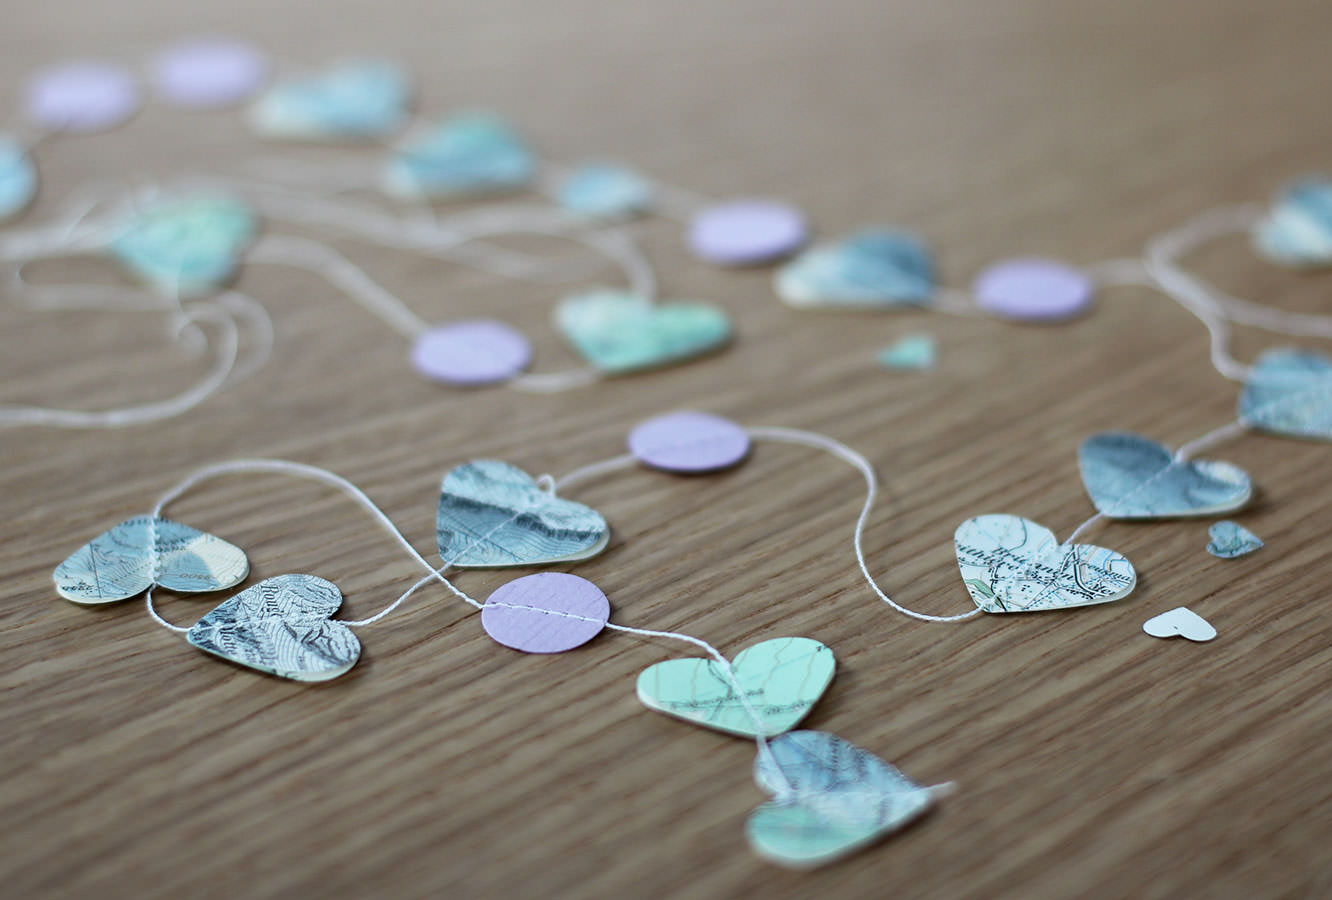
Keep cutting until you have a big old mound of them. I decided I didn’t want to have the white back of the map showing so needed to cut twice as many as I thought I would use so I could put them back to back. Of course if you’re using coloured card or double sided paper then you won’t have the same issue.
Step three
If you’ve got a sewing machine, run your shapes through it until you have a long string of hearts. I decided not to measure mine as I wanted them to all finish at slightly different lengths and for the shapes to be unevenly spaced. It will cause you a lot less stress doing it that way too!
If you don’t have a sewing machine use double sided tape or glue to stick matching shapes back to back with the thread running through the middle.
Make sure you leave a generous length of thread at the top to tie onto the hoop later.
Step four
Make several more strings like this. I think eight is the perfect number, but you might choose to experiment if your hoop is smaller/bigger than mine.
Step five
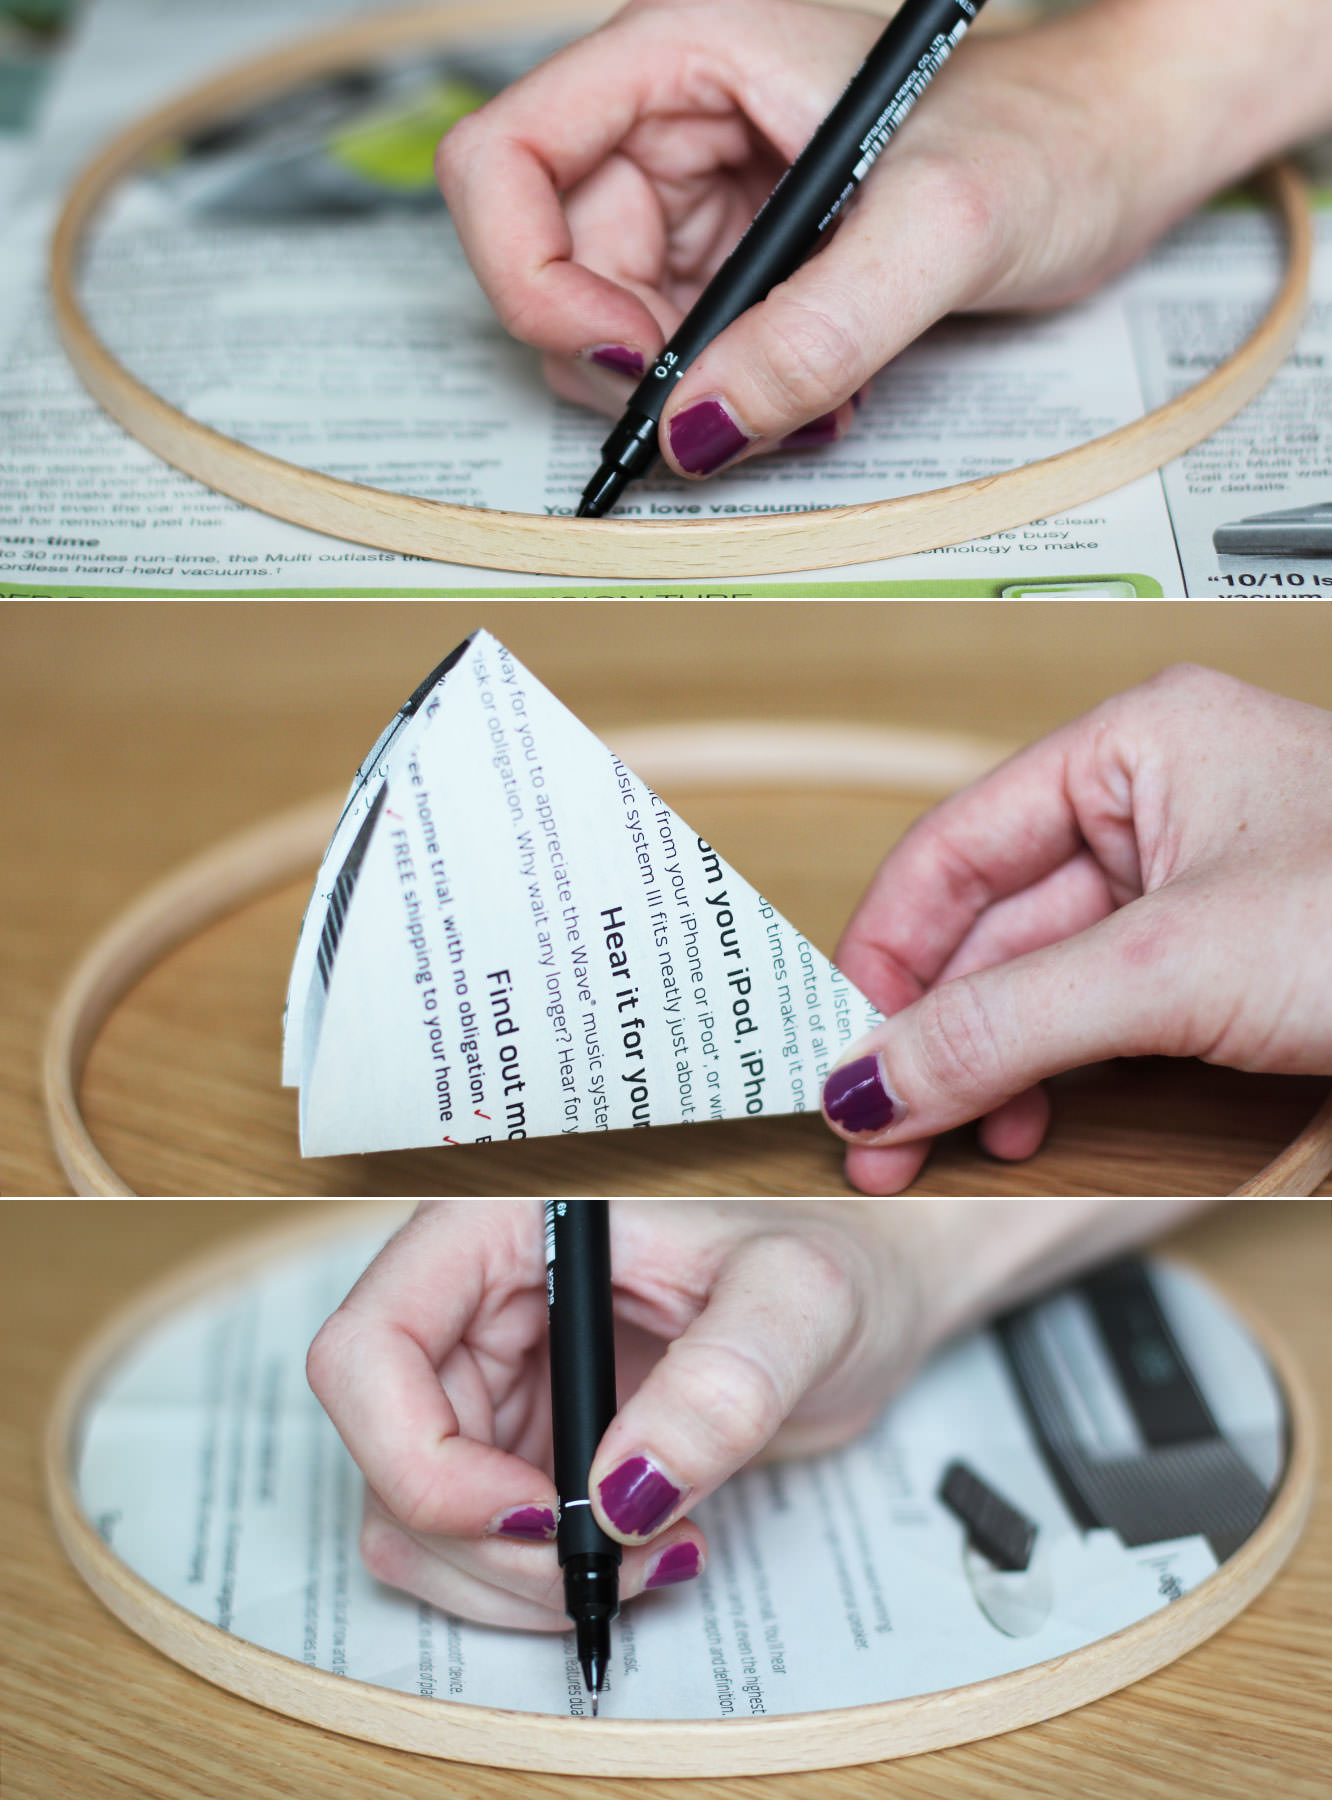
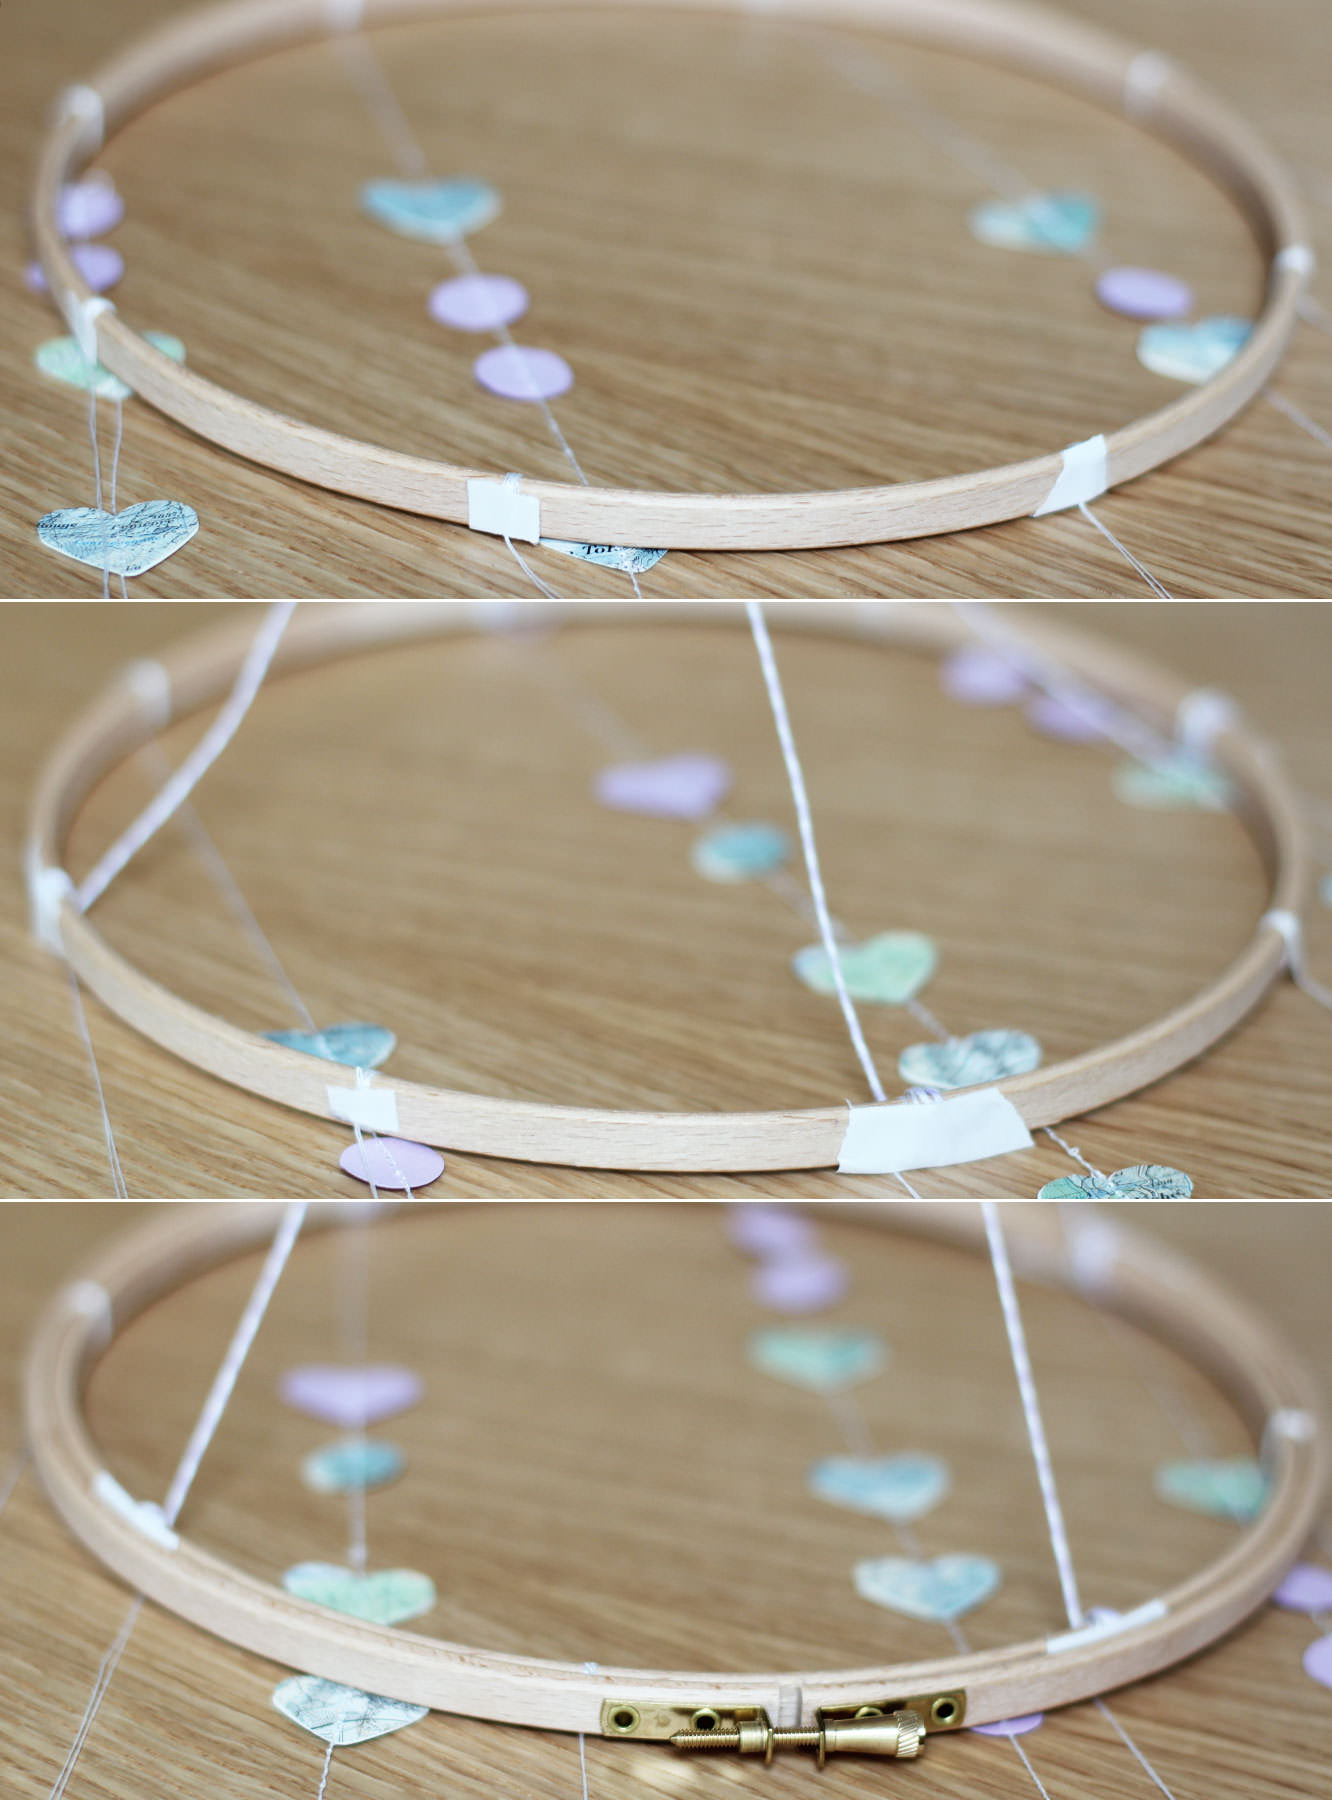
Remove the inner circle from your embroidery hoop and mark even spaces around the circumference.
I did this by tracing the circle onto newspaper and cutting it out. Then I folded the paper circle in half three times giving me an eighth sized segment. After unfolding I just used the fold marks as guides for my marking out.
Step six
Wrap the top of each length of garland around the hoop several times at the marked points. Secure with tape on the outside of the hoop.
Step seven
Using two lengths of slightly stronger thread/string if you have it; make a cross for hanging. Attach so that there is thread at the 12, 3, 6 and 9 o’clock points of the hoop.
I also then tied a single length of thread to the place the hanging cross lengths overlapped, and attached the ring of a keyring to that. I wanted the garland to spin around gently, and this won’t happen if you use the crossed threads to hang it by.
Step seven and a half
Unscrew the larger hoop part way to loosen it, place it over the top of the inner hoop and tighten as much as possible.
Step eight
Affix the sticky hook to desired space on the ceiling and hang.
Oh hi. Thanks for stopping by. This week I’ve been putting together a little DIY project for all you people getting married this summer. Or basically anyone who likes candles. I can’t tell you just how ridiculously easy this is and it takes no time at all, so no excuses, unless you are scared of fire.
You will need
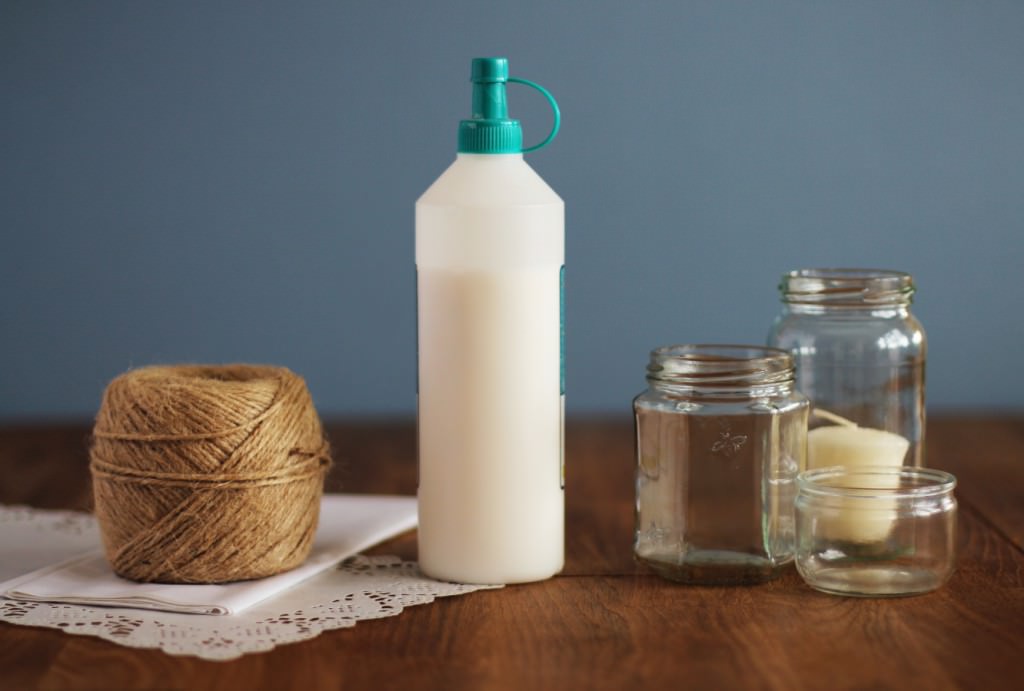
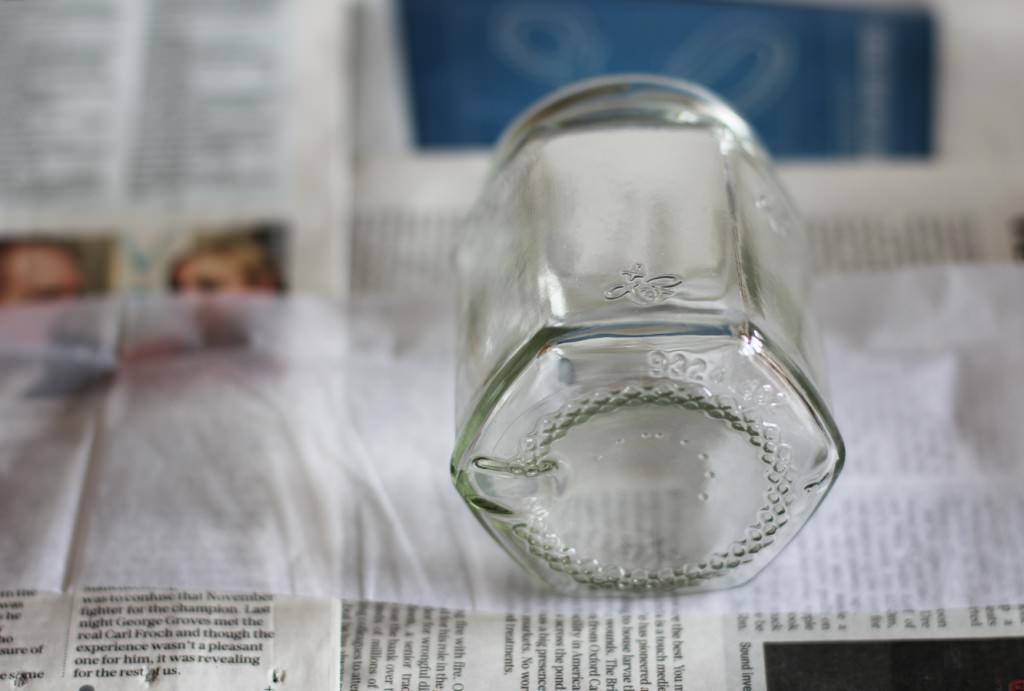
All the jam jars and glass pots you can find (a great excuse to go to France and gorge on those chocolate puddings, and a perfectly reasonable level of dedication to your craft)
Tea lights/small candles
White tissue paper
Paper doilies
Some kind of nice rustic string or ribbon (mine was from hobby craft)
PVA glue
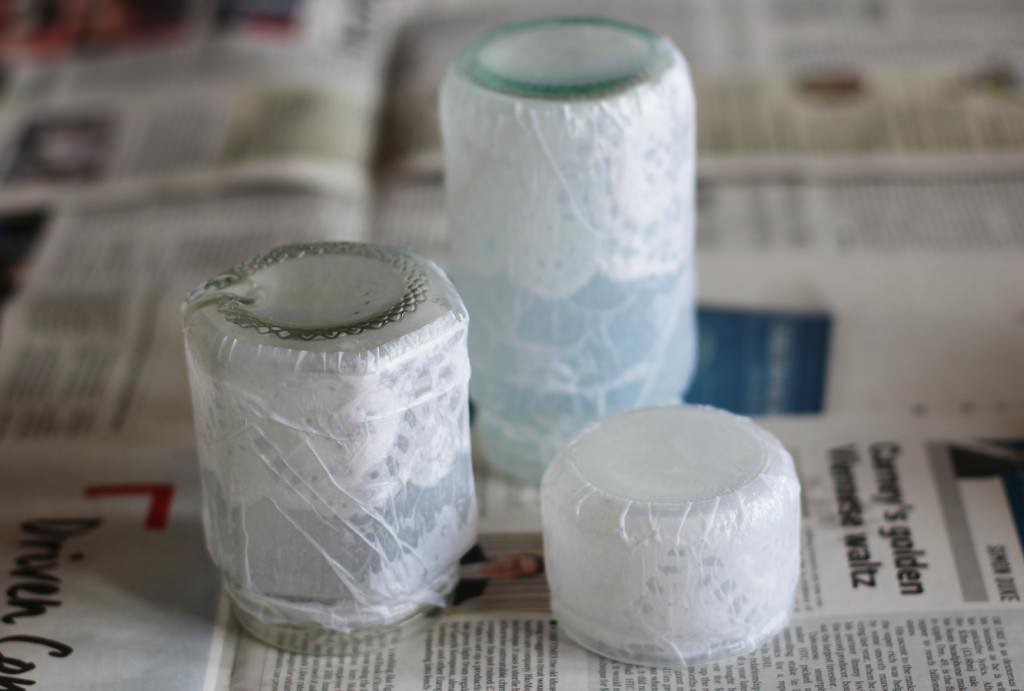
Step one
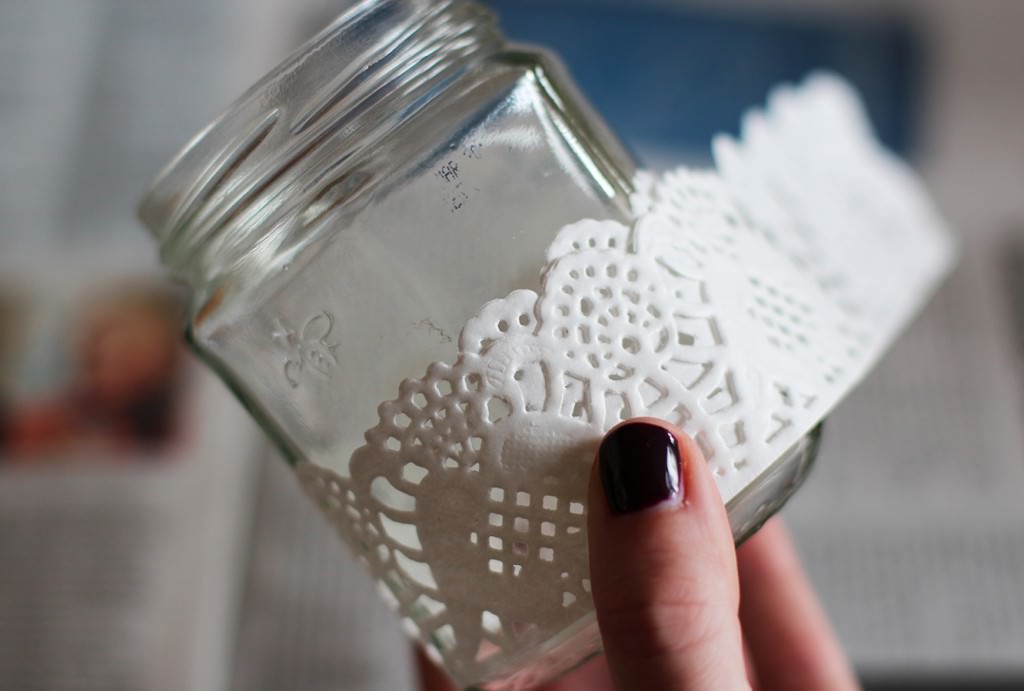
Cut the lacy bit of the doily off so you have a long strip. I found these rectangular ones in a bits and bobs shop which are ideal for wrapping round in a straight line.
Step two
Measure the circumference of your jam jar and cut the doily strip to size. Pro tip: when you cut it go with the natural curve of the pattern, rather than a straight line, as even if you have some overlap the join will be far less obvious.
Step three
Use the jar as a measure to cut a strip of tissue paper (one sheet thick) to match the height and circumference. You don’t need to be too exact as the tissue molds easily with the glue.
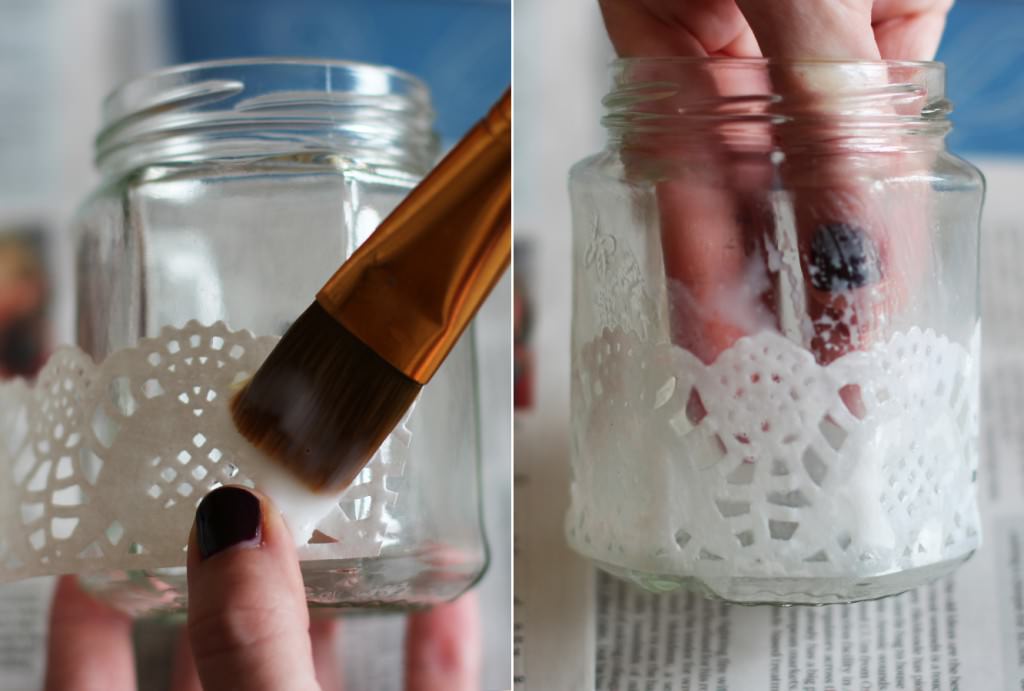
Step four
Using a mixture of PVA glue and water (about two thirds PVA to one third water) stick the doily around the bottom of the jar as shown. I put the doily onto the jar dry and then just painted over the top which worked perfectly. Pro tip #2: I know, I know, I’m spoiling you today…once you’re about half way round the doily will hold to the jar by itself so you can put your non paintbrushing hand inside it to hold steady and avoid getting glue all over yourself.
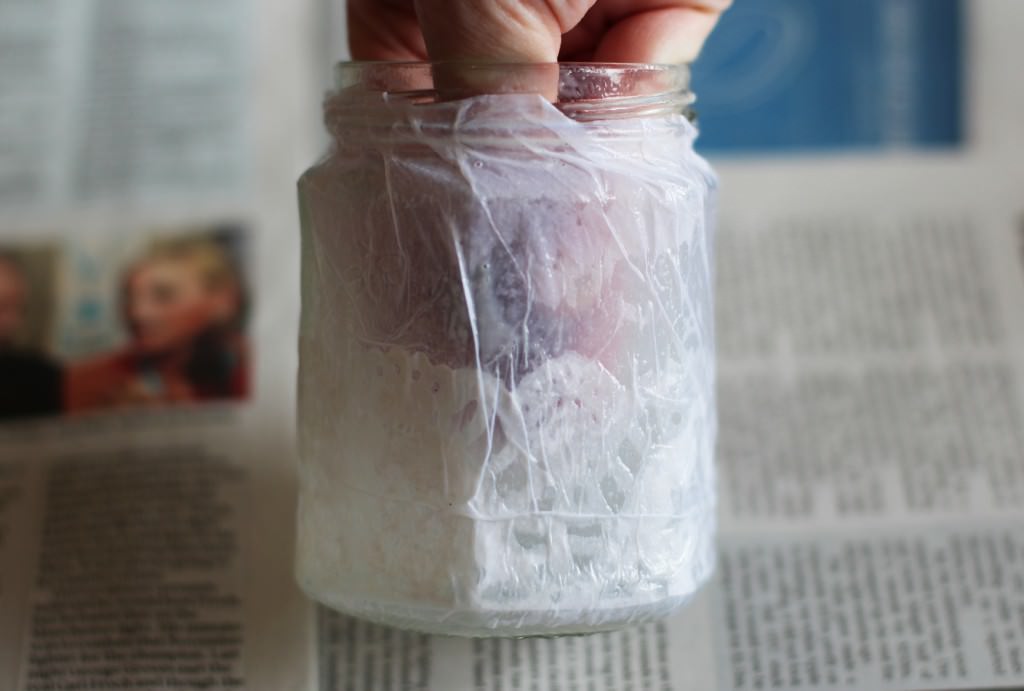
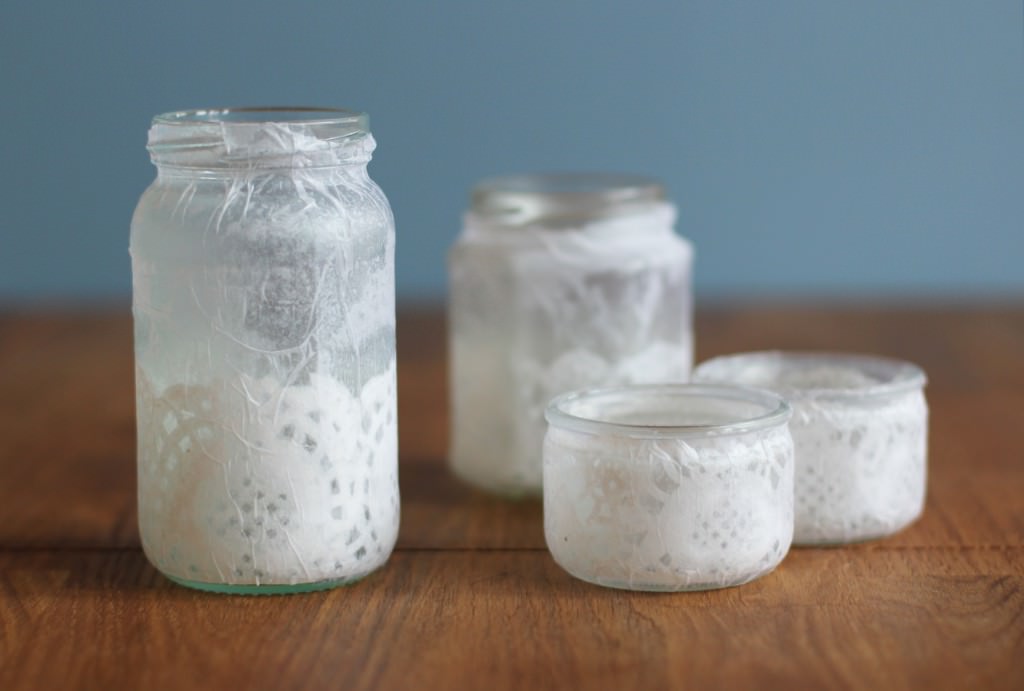
Step five
Repeat with the tissue paper, pushing it into the contours of the jar as you go. Don’t worry if it looks really scruffy at this point; it will be alright on the night.
Step six
Leave upside down to dry (or on whichever is the least gluey end!)
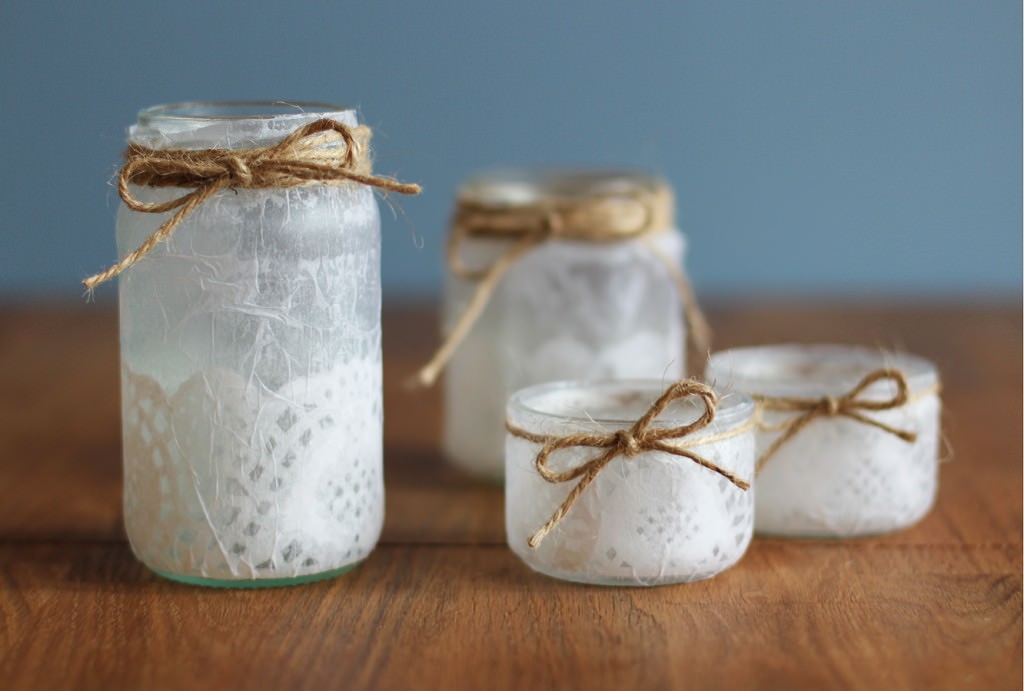
Step seven
Once dry, tie some lovely little bows around the necks of your candle holders. If you made a mess of the necks in the gluing phase you can use this opportunity to wrap the string around several times and pretend it’s all part of the design.
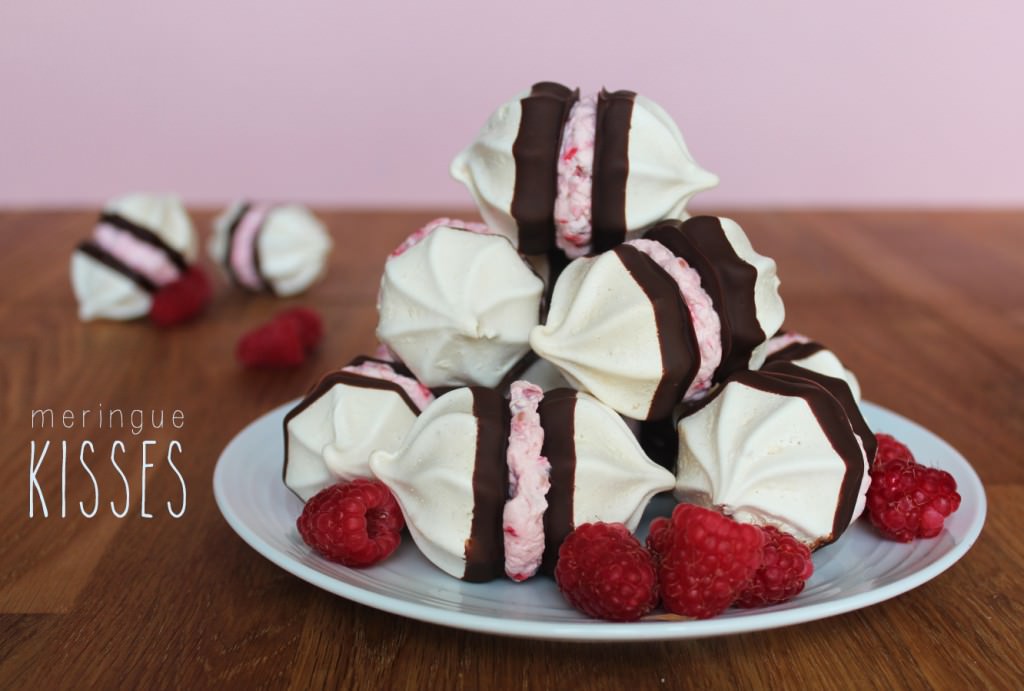
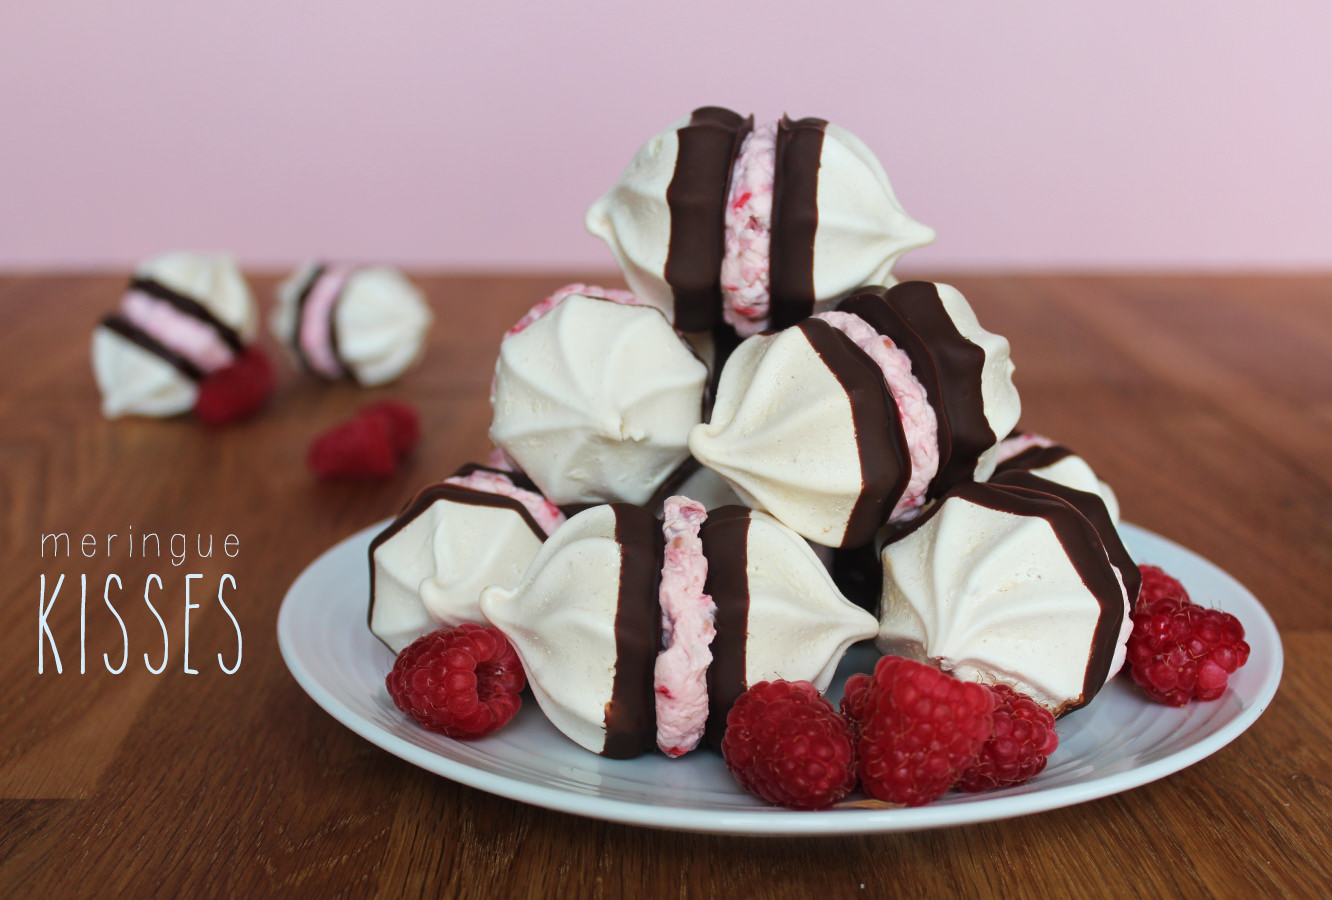
Recently I have been partying down with some of the lovely hens (bachelorettes for those of you across the pond) in my life who are getting married this summer. My friends are definitely going wedding crazy at the moment, and with hen parties springing up every other weekend I thought I would put together a yummy recipe for any keen party planners, or any of you who fancied a new afternoon tea recipe.
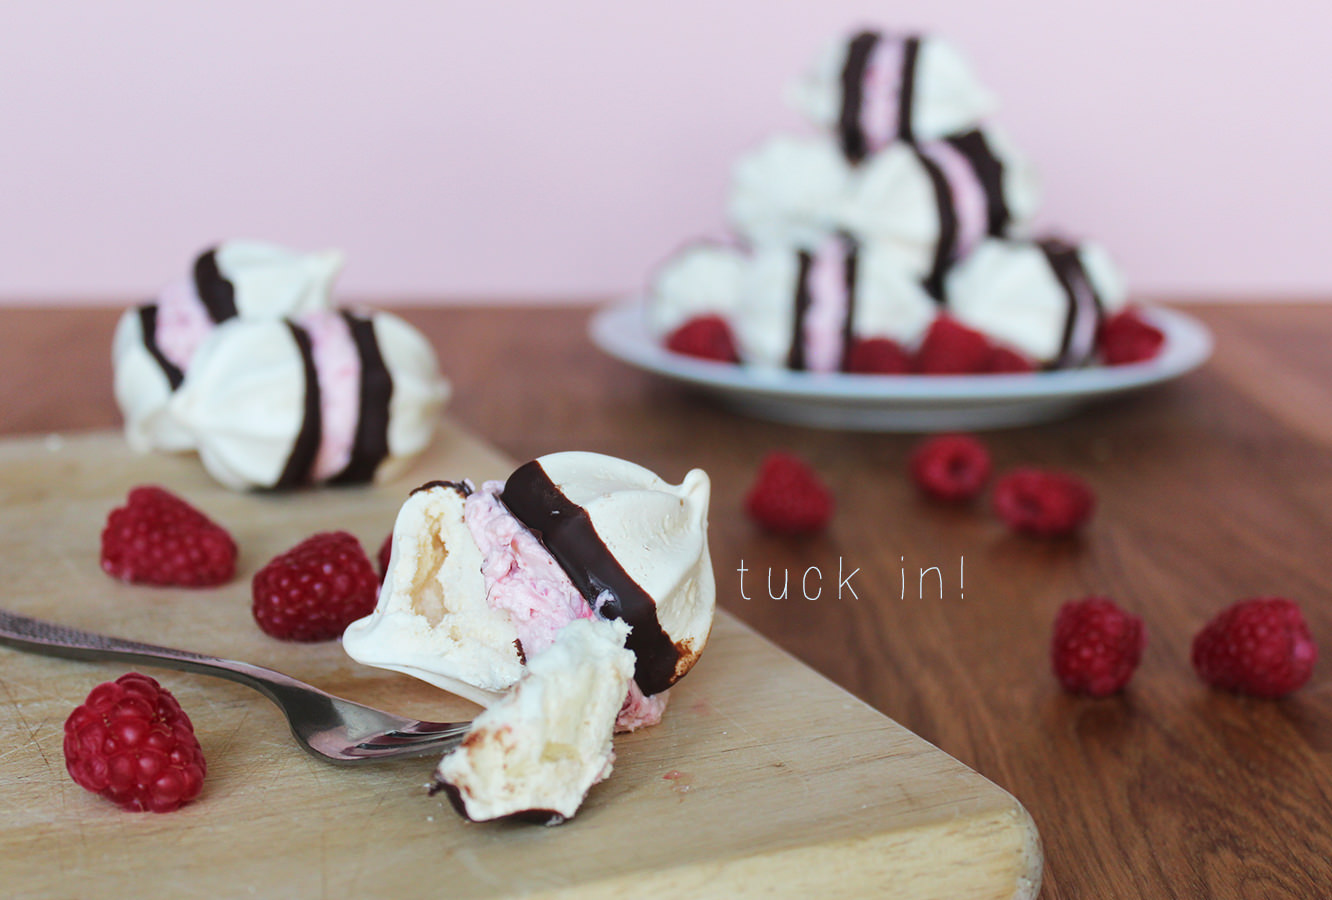
Introducing these lovely little meringue kisses. Although any of the wedding party who are on diets might want to look away now…
You will need
2 egg whites
110g/4 oz caster sugar
100g/3.5 oz dark chocolate
150ml double cream
75g/2.5 oz raspberries
Makes 20
Step one
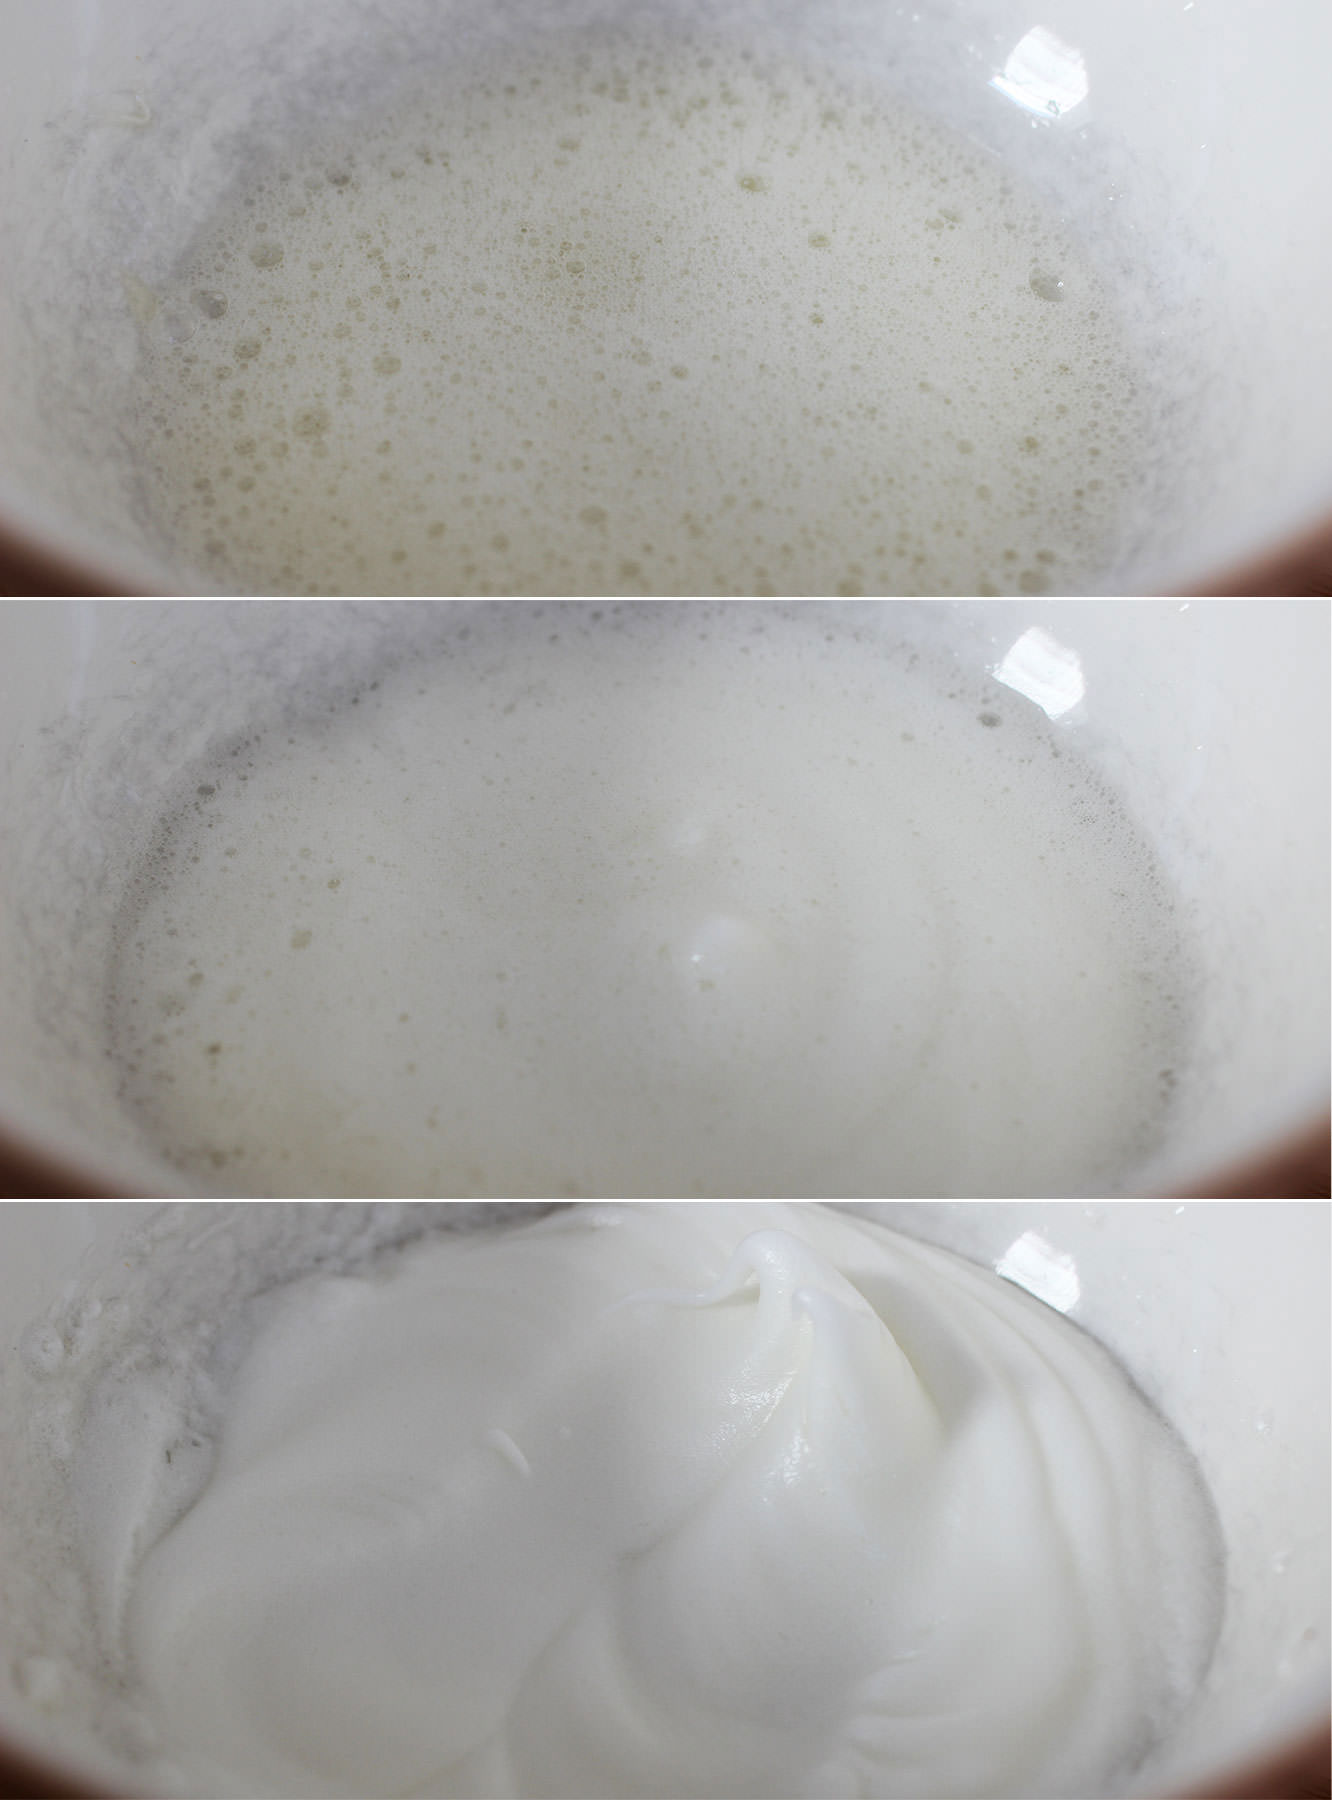
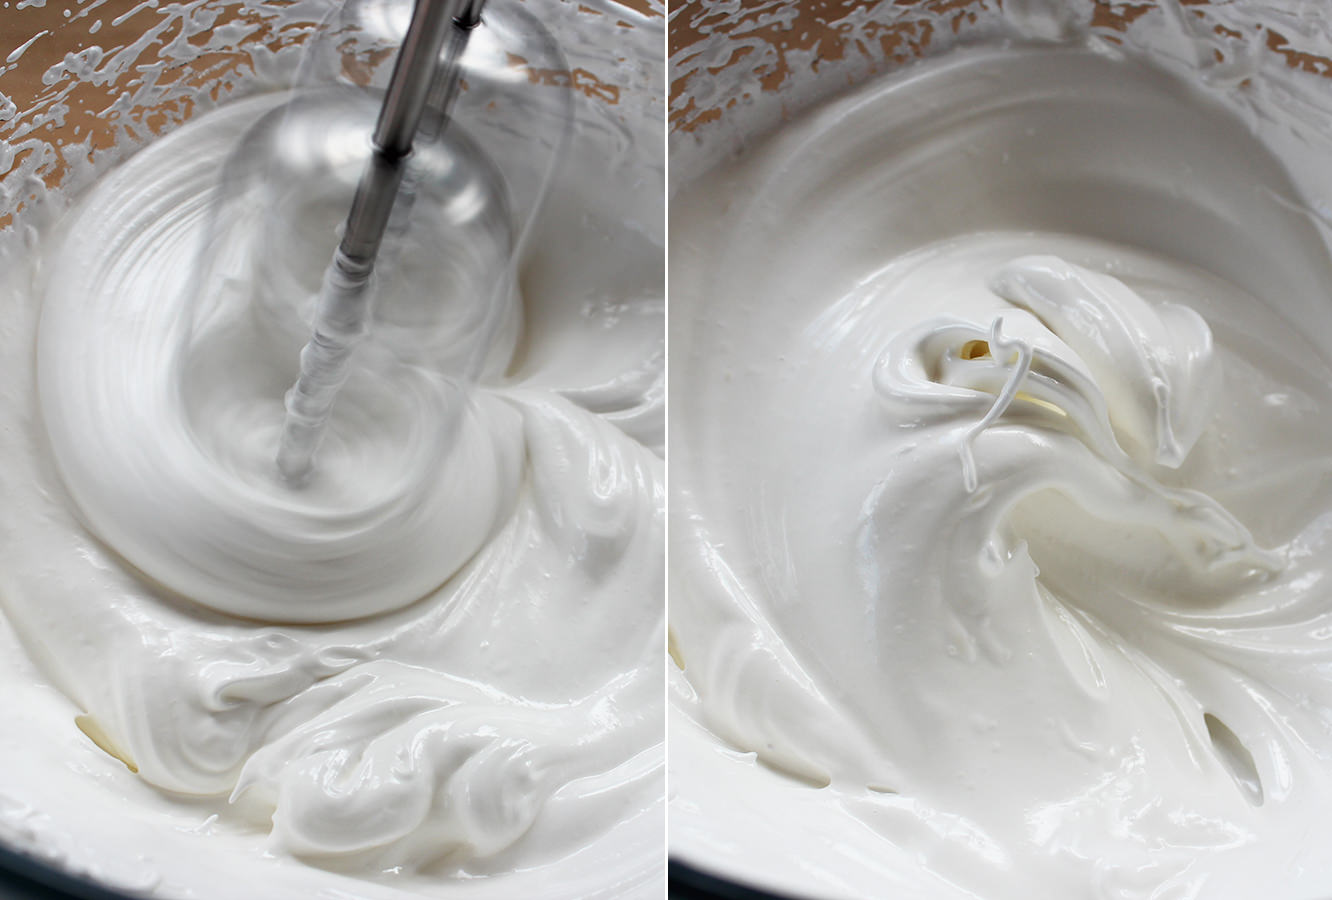
Separate eggs whites into a glass or metal mixing bowl (plastic tends to hold a bit of grease, gross I know, but this will stop your egg whites fluffing like they should).
Use an electronic whisk (or a really strong arm) to whip the whites until they double in size and start to stiffen up.
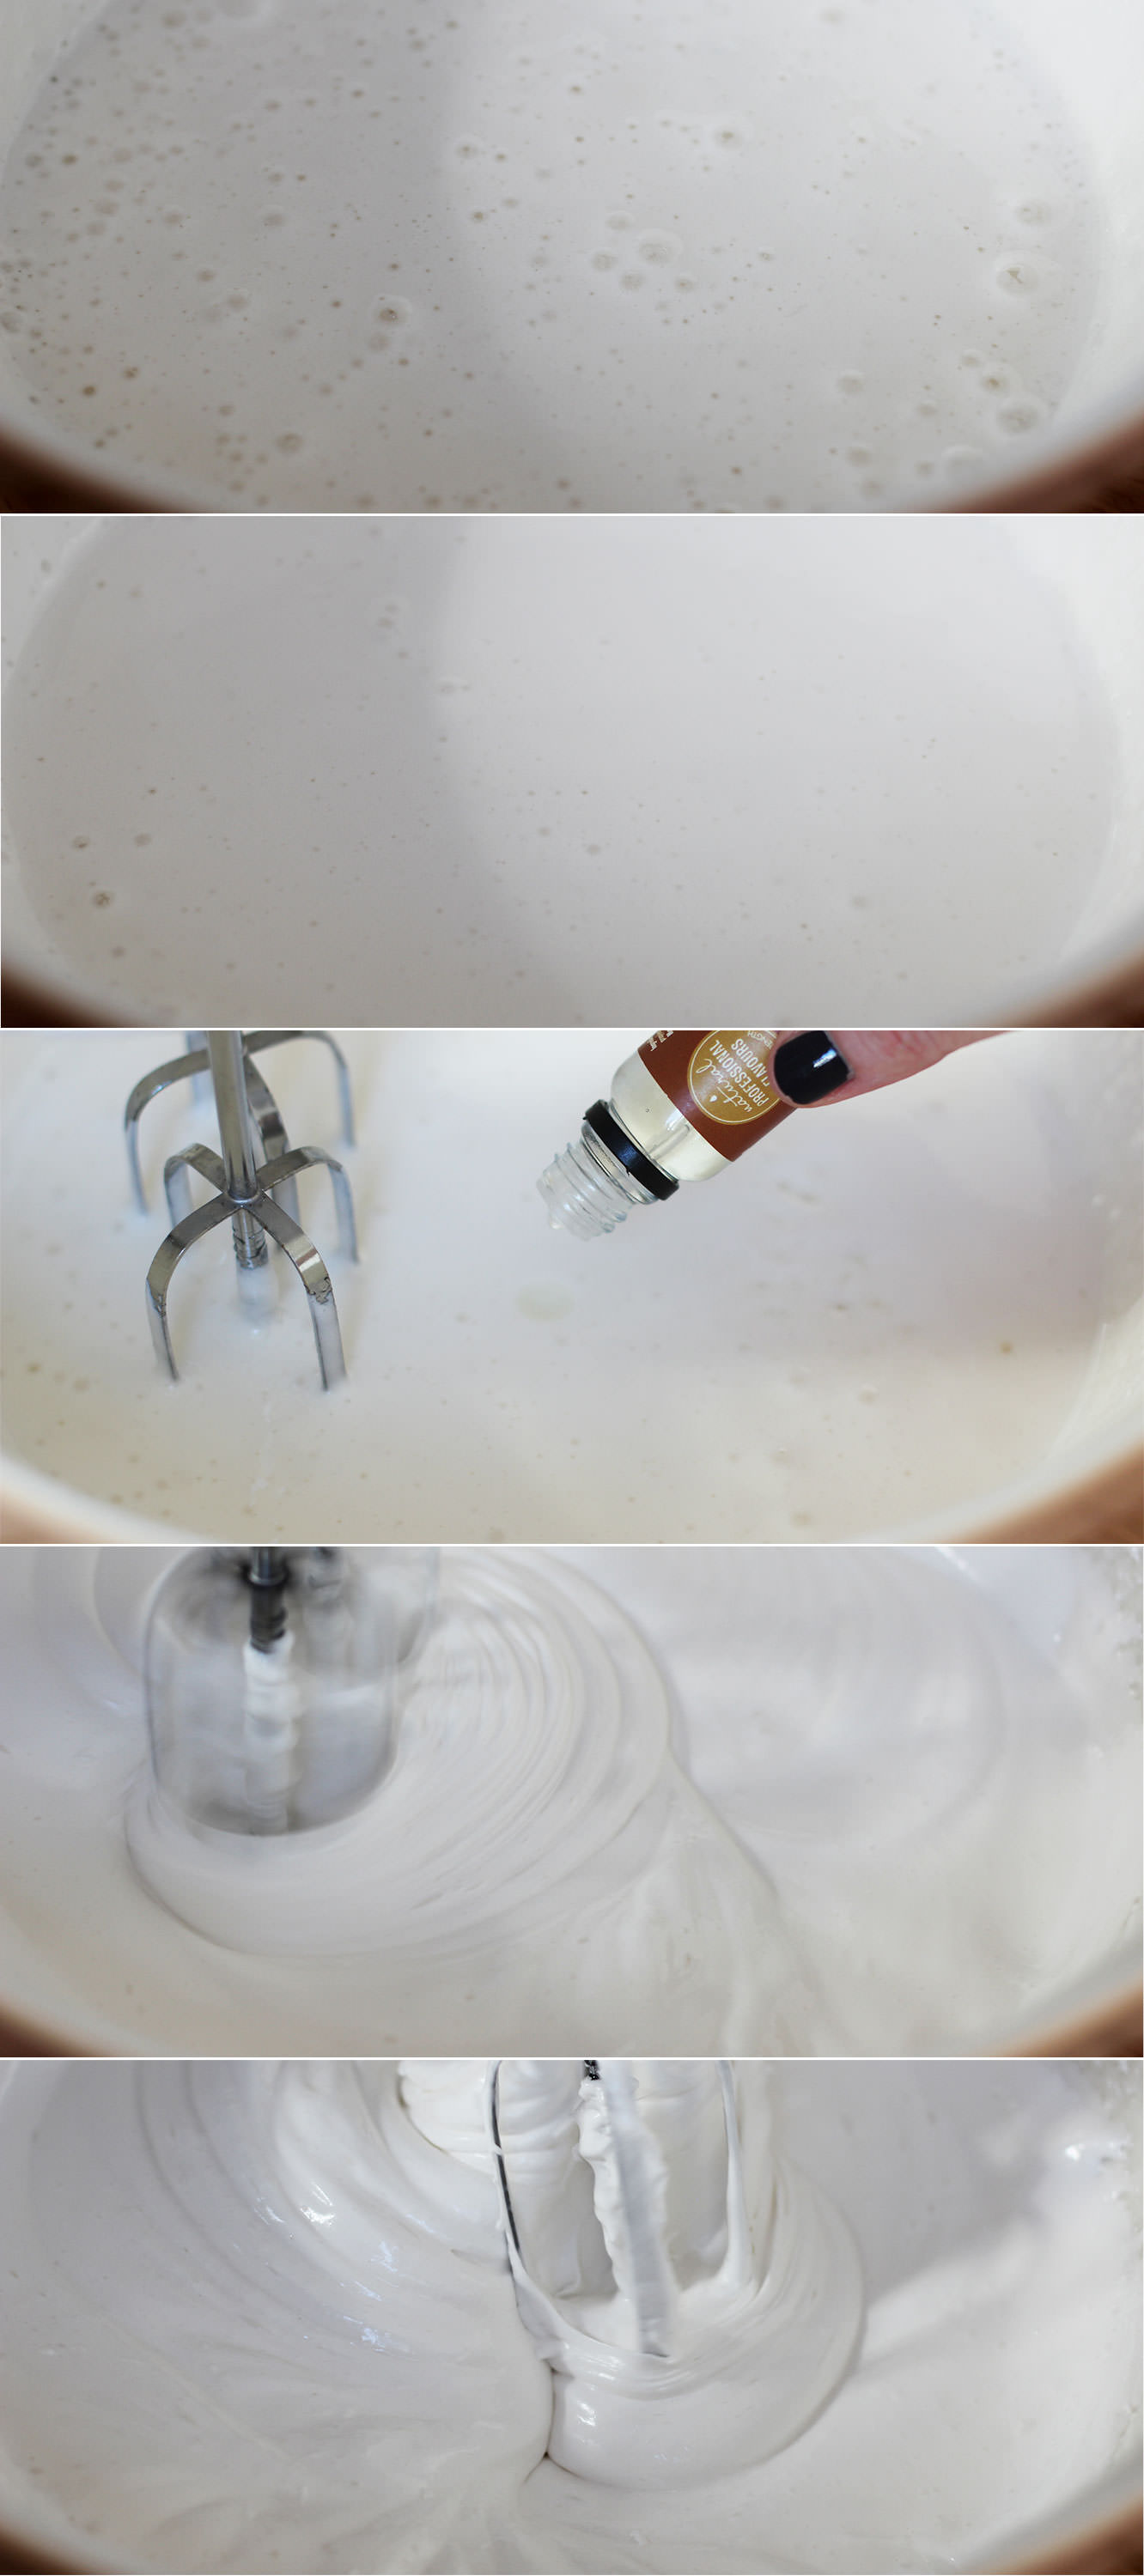
Once they look kind of like the third photo start adding in the sugar as you whisk.
Step one and a half
Keep whisking until you have what’s known in the biz as stiff peaks. If you’re a bit unsure, turn your bowl upside down, if your mix doesn’t fall out then you’re good to go, if it does then I’m sorry.
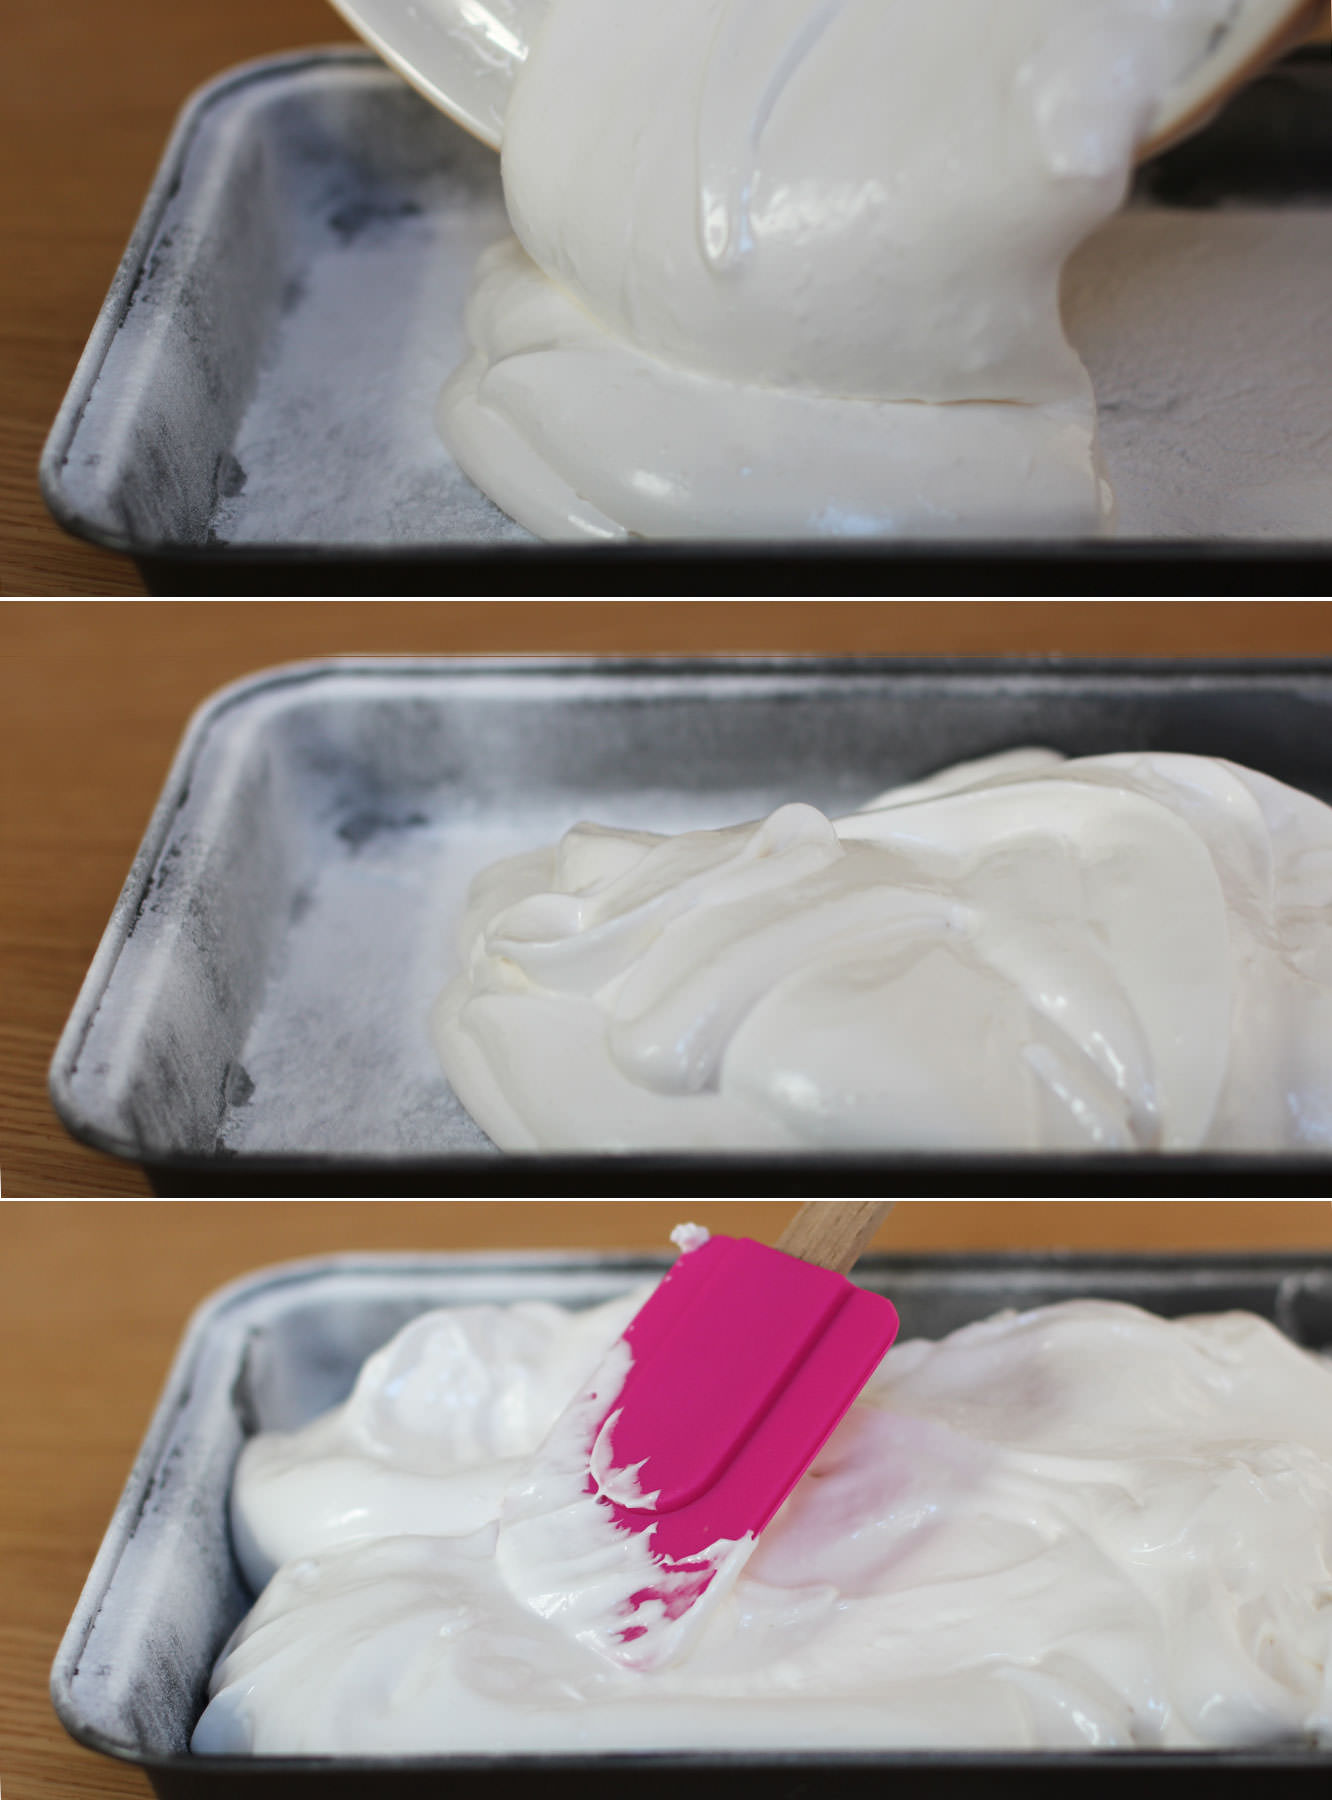
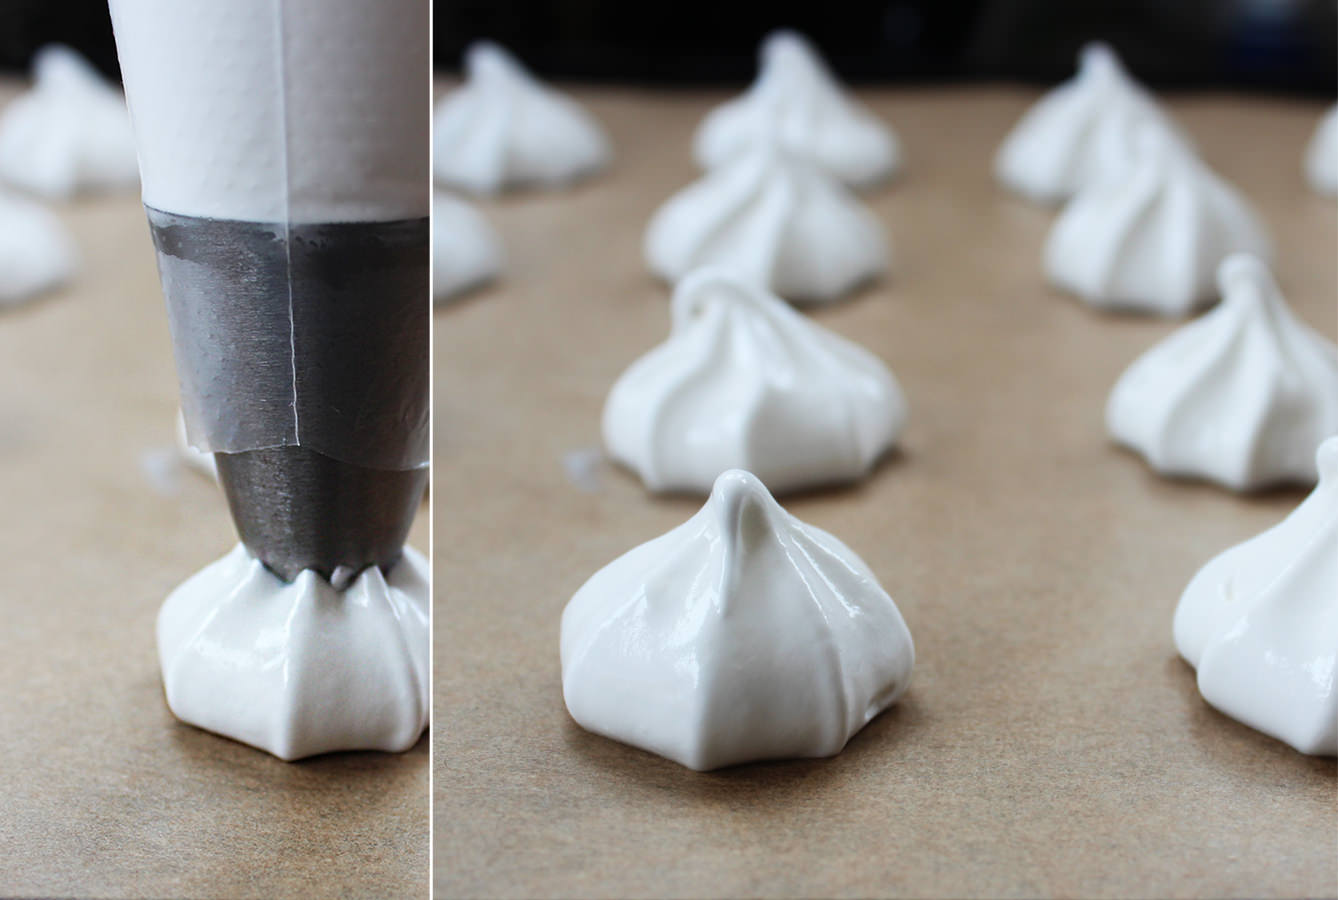
Step two
Cover two baking trays in greaseproof paper or baking parchment. Don’t whatever you do grease this, use a dab of meringue in each corner to secure it to the tray.
Fill a piping bag with the meringue mix and pipe lots of little blobs. Hold the piping bag about 2cm away from the tray at a 90 degree angle and squeeze down, once your meringue has reached the desired spread (say 4cm wide?) pull away quickly.
Remember to pipe in pairs, no odd numbers, and leave a little space for these to expand.
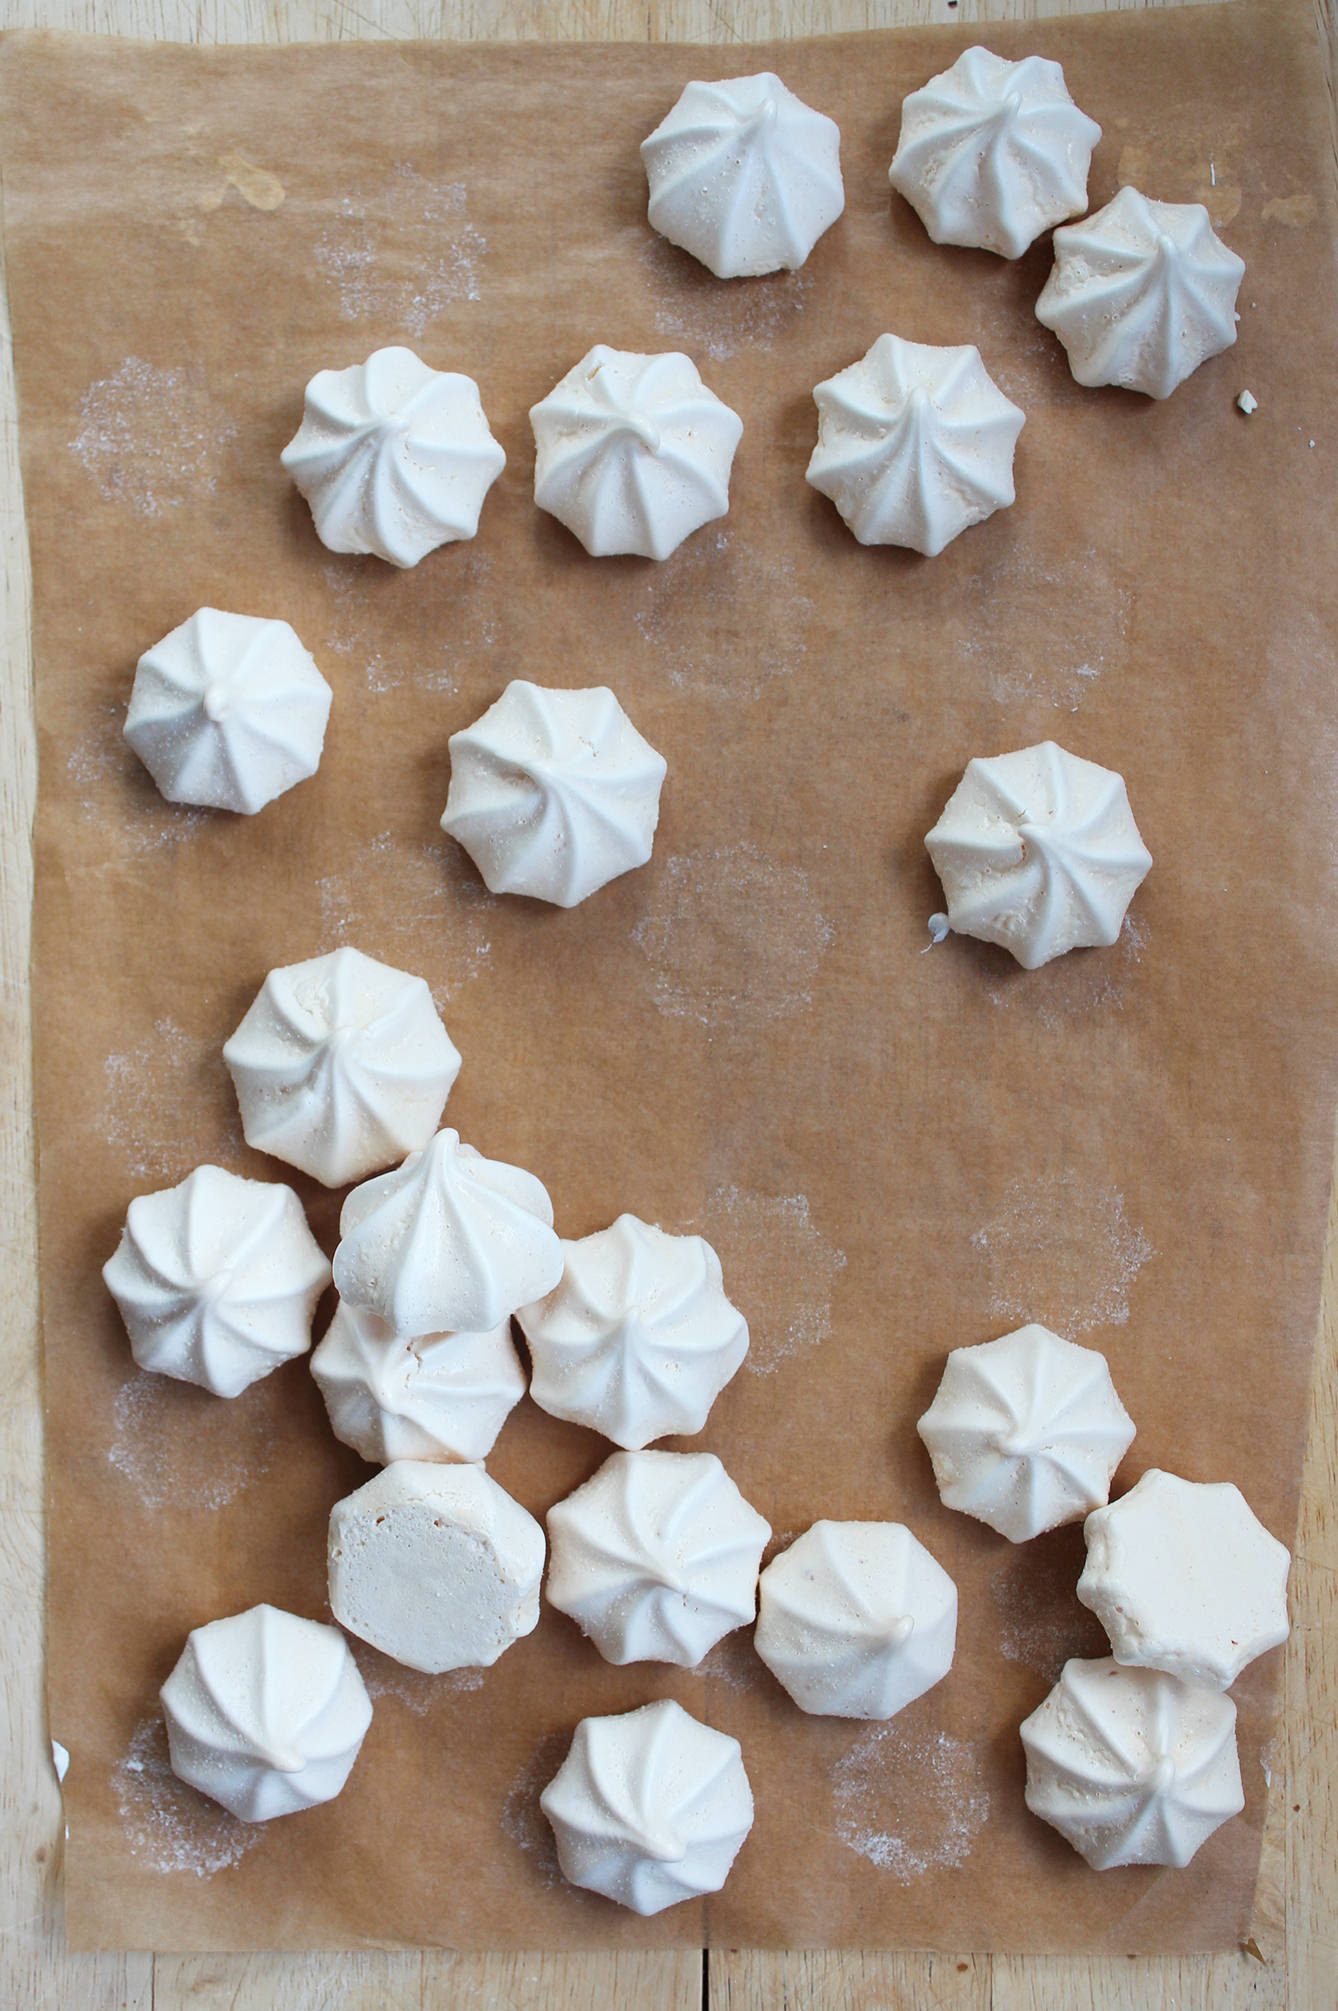
Step three
Bake.
Gas Mark 1/2, 130 degrees C or 250 degree F for 40 minutes to an hour. I know, that’s really unhelpful, but I sort of went jogging, and my oven is a law unto itself.
Once you can see they’ve grown and have developed shells, turn the oven off and wait for it to cool before removing them. If you need to take a peek by opening the oven door, try not to throw it wide, or your meringues will crack.
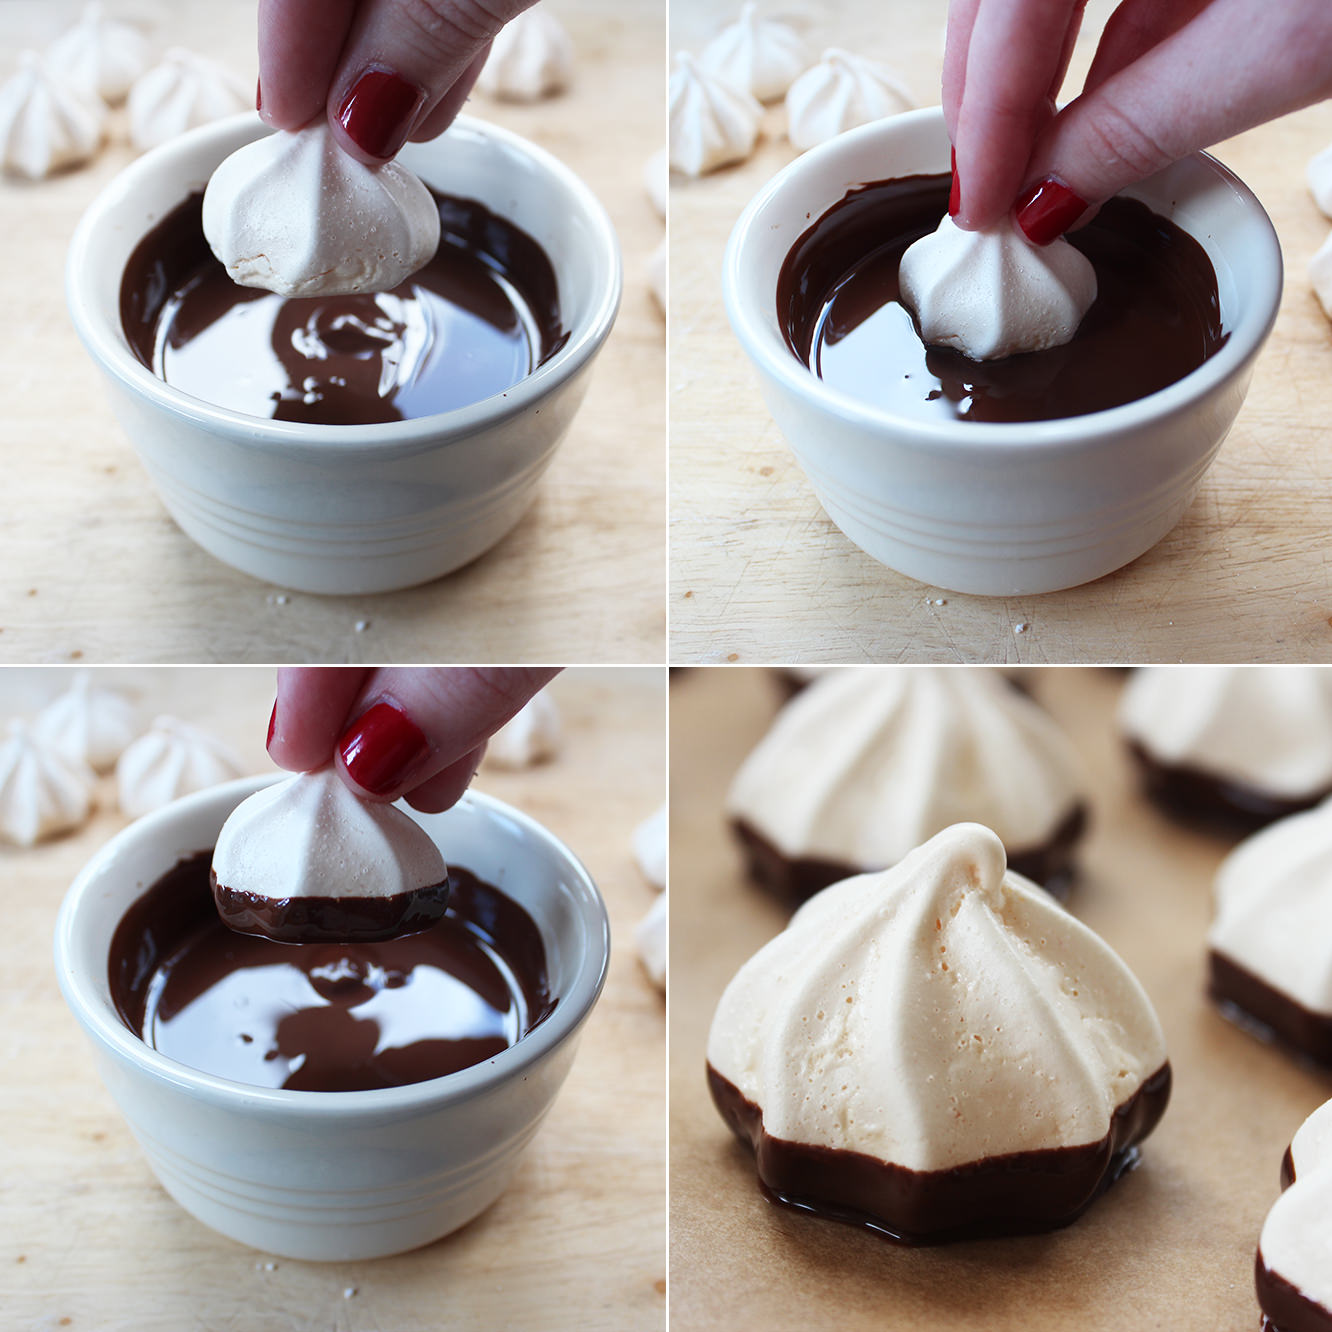
Step four
Melt the dark chocolate in a small bowl/ramekin. Do this gradually in the microwave so you don’t burn the chocolate.
Dip each meringue so that the bottom an a little bit of the side is covered. Sit on greaseproof paper and leave to set.
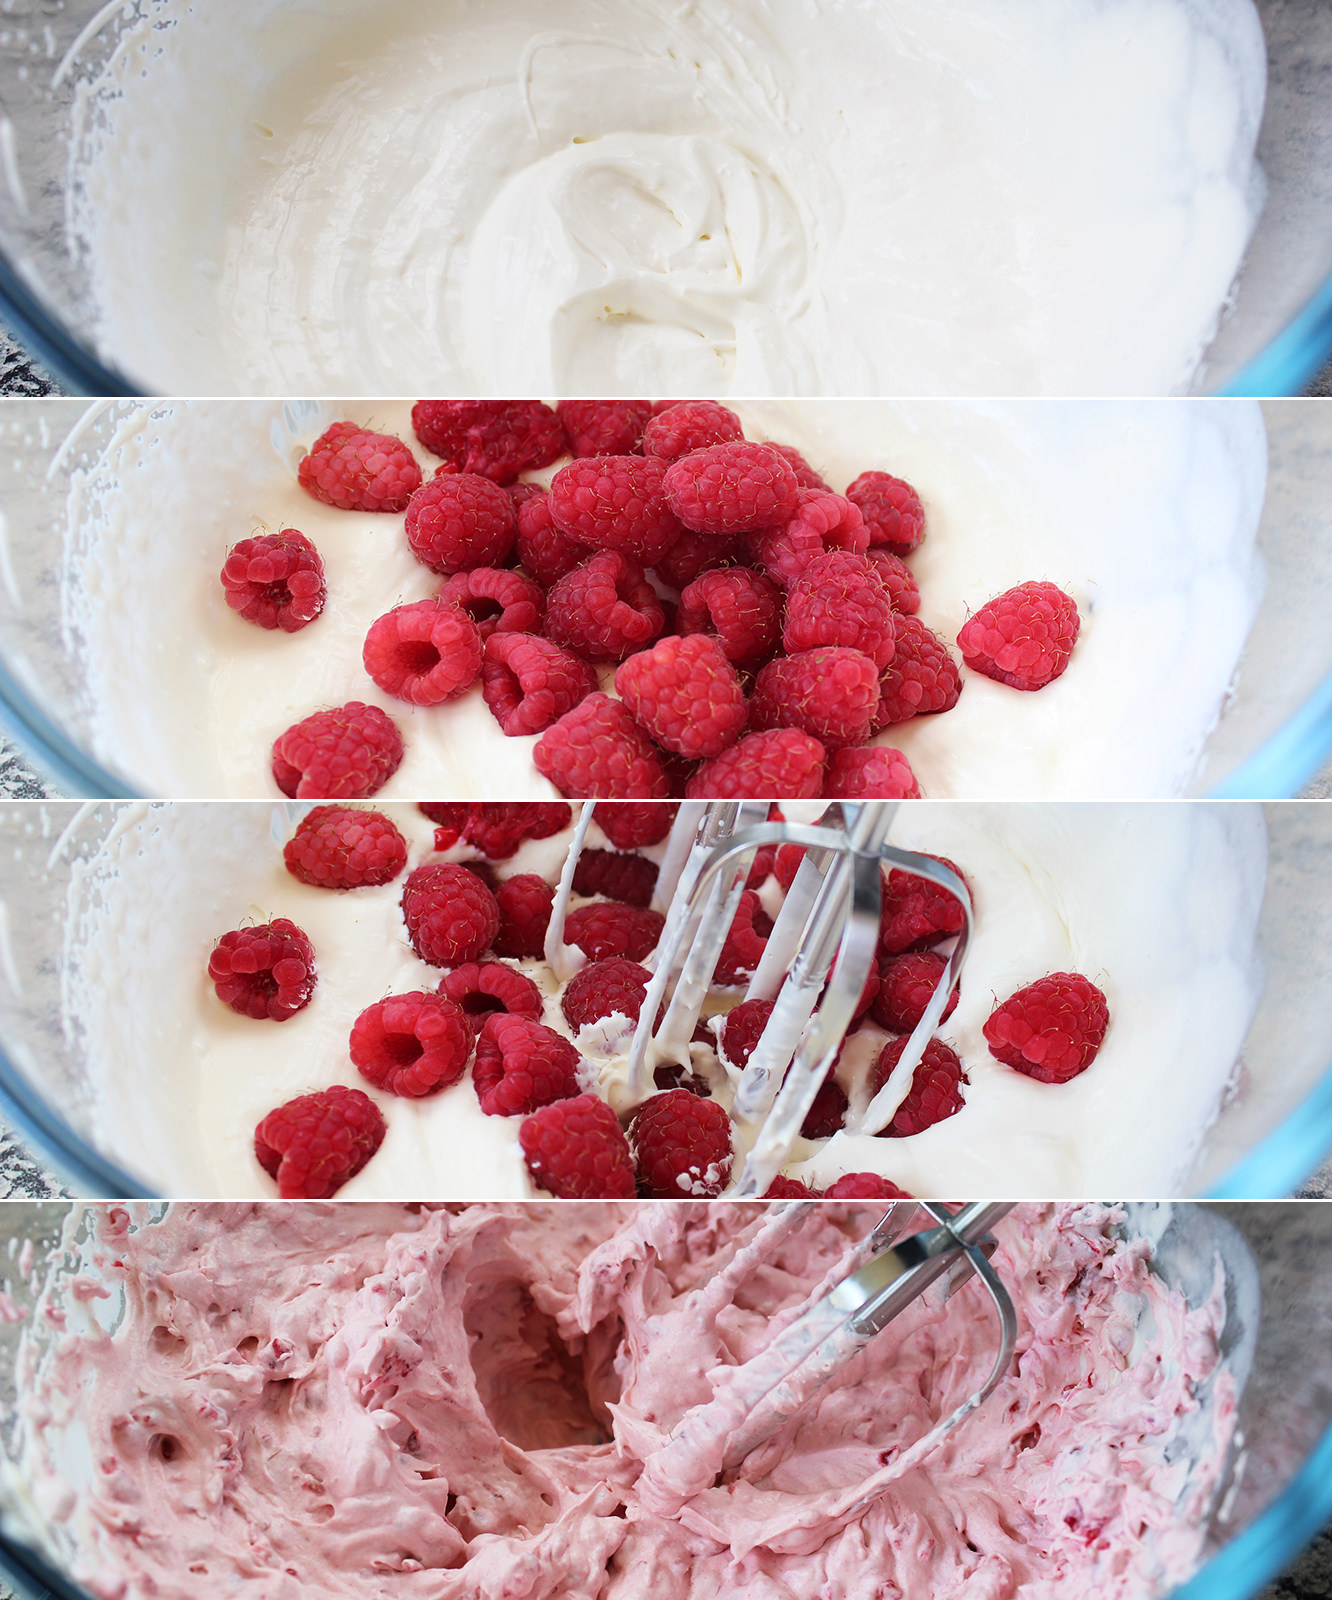
Step five
Whisk the double cream until it has doubled in size and is beginning to hod it’s shape.
Add the raspberries and whisk some more. This is pretty satisfying for some reason.
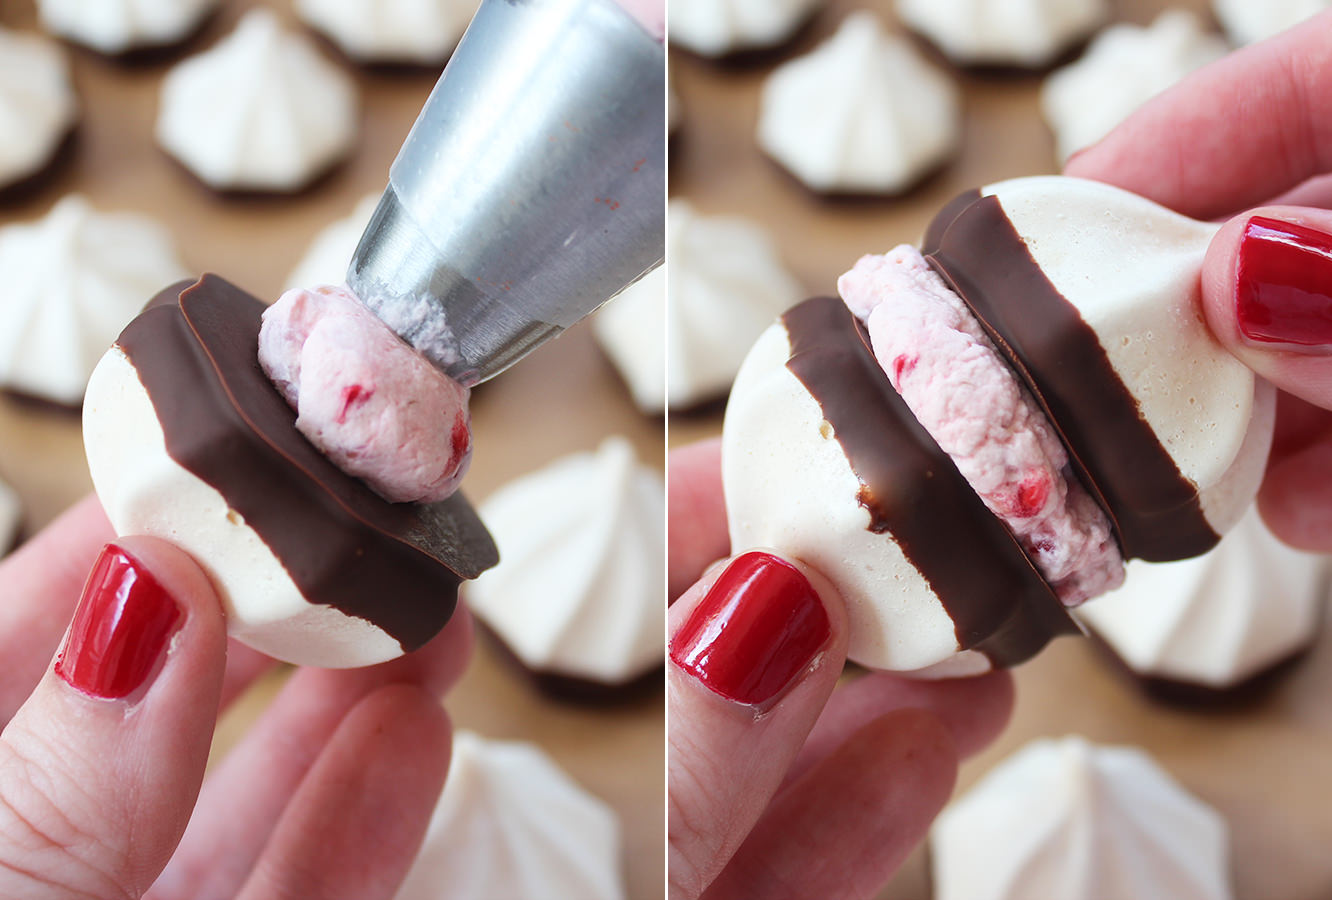
Step six
Pipe the raspberry cream onto a shell and squish another one on top. Repeat until finished.