I’m so sorry for going MIA recently. As I’m sure you can imagine, making all those gingerbread houses took it out of me a little.
The original plan was to spend my Christmas break stacking up posts for this blog-a-log, as it’s been a bit tricky keeping up with a full time job with no reserve stash of posts to fall back on. In reality all I was capable of at Christmas was eating lots and sleeping more.
So, friends, I’ve made a decision. I need a little break, a hiatus, a small pause.
Sometimes a person gets a bit stuck, and I feel a bit stuck. Trying to think of posts, getting the everything together, figuring out the time amongst work and social life, and fighting the short winter hours for good photos…it’s not easy. I want this to keep being fun, for me, and for you. I’m not willing to sacrifice the quality, or what I’m trying to do by having fewer photos or less frequent posts.
In the meantime, feel free to drop me an email and let me know what you’d like to see more of this year, or perhaps a tweet, a comment, or an owl if you’re at Hogwarts.
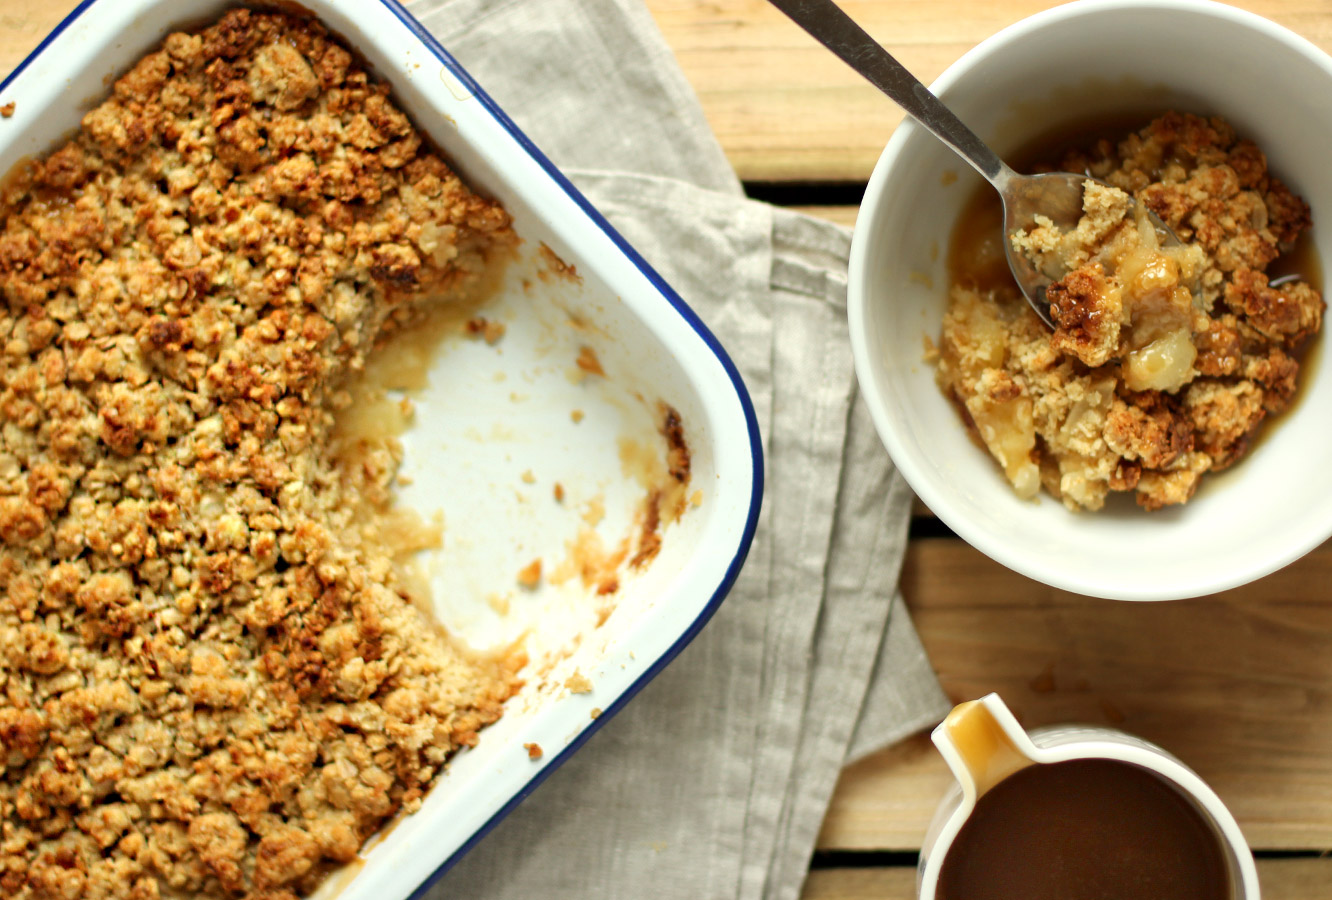
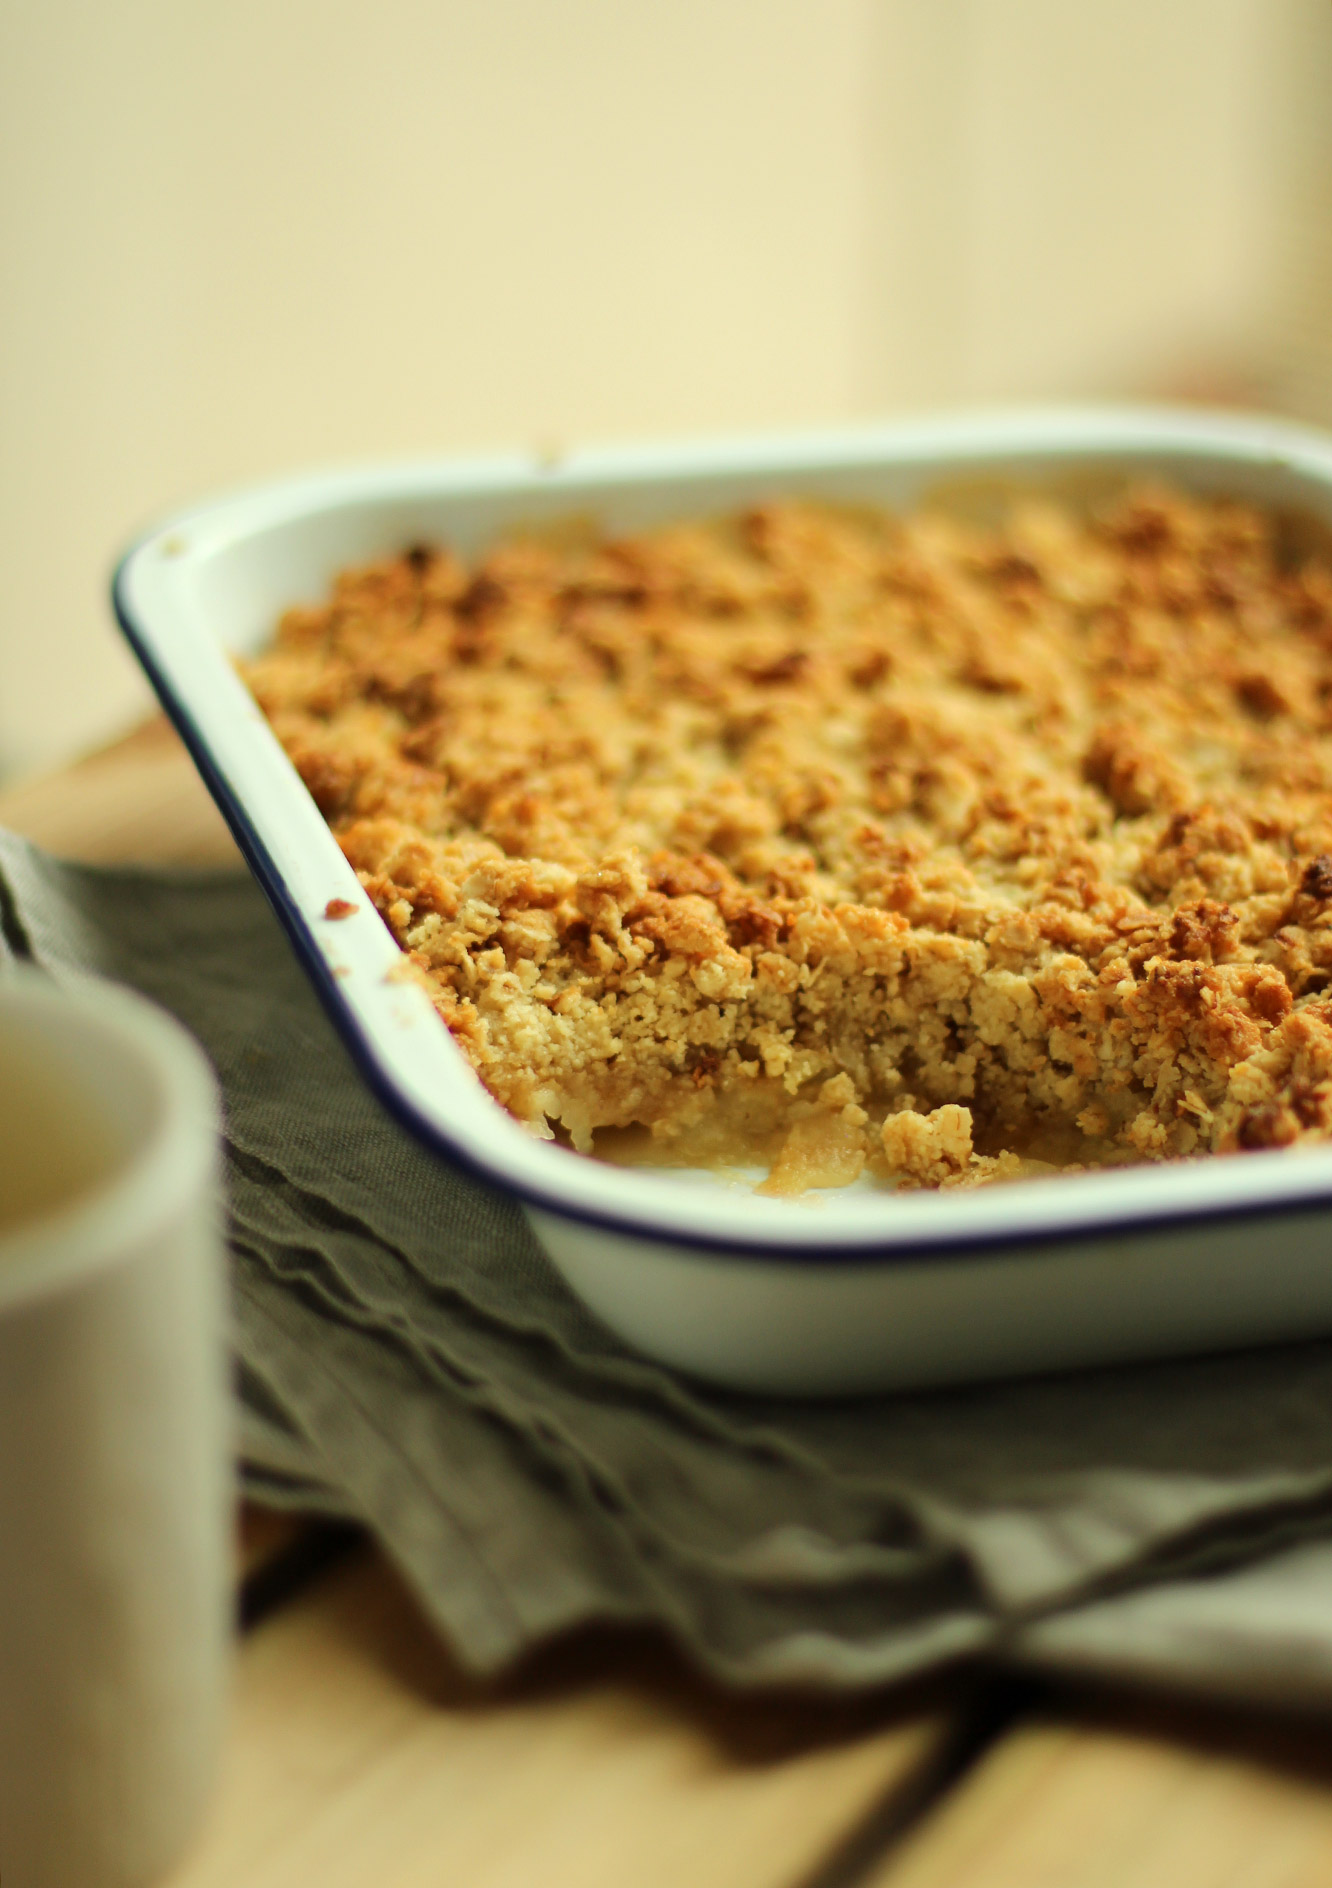
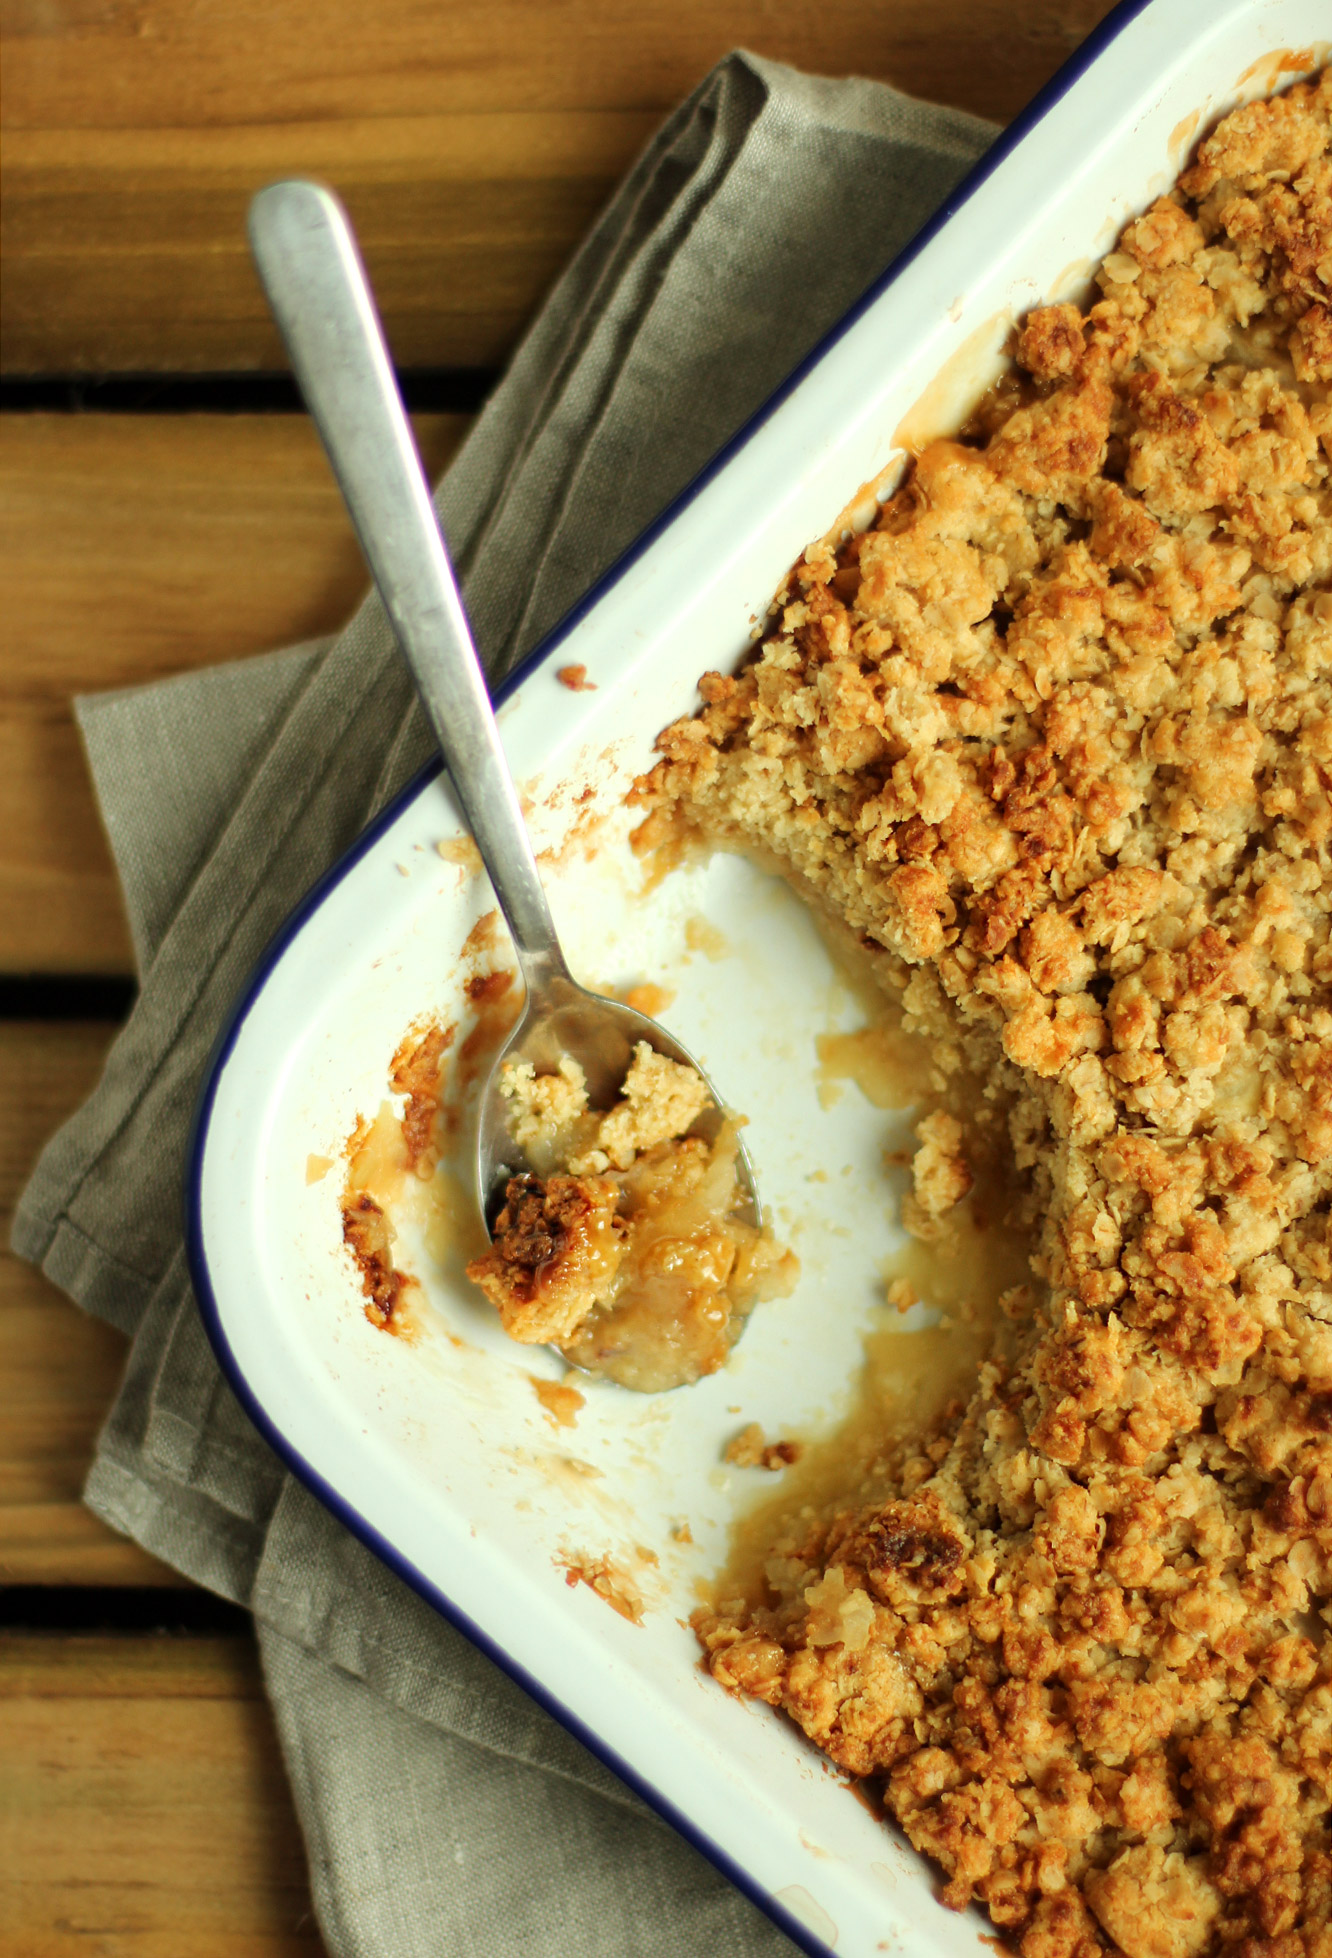
When it comes to autumn blogging, I just can’t get away from apple related ideas. It’s a well known fact that toffee flavours go well with apple so I thought I might wheel out the salted caramel recipe for this week’s post.
We had this after a large roast on Sunday and it was the perfect pud for a cosy autumn afternoon. One of my housemates (self proclaimed crumble connoisseur) called it “the zenith of desserts”, just saying, perhaps this crumble is not so humble after all.
The great thing about crumble is that it’s so quick to make and you can do it in advance, either cooked or uncooked and pop it in the fridge until you need it.
You will need
For the crumble:
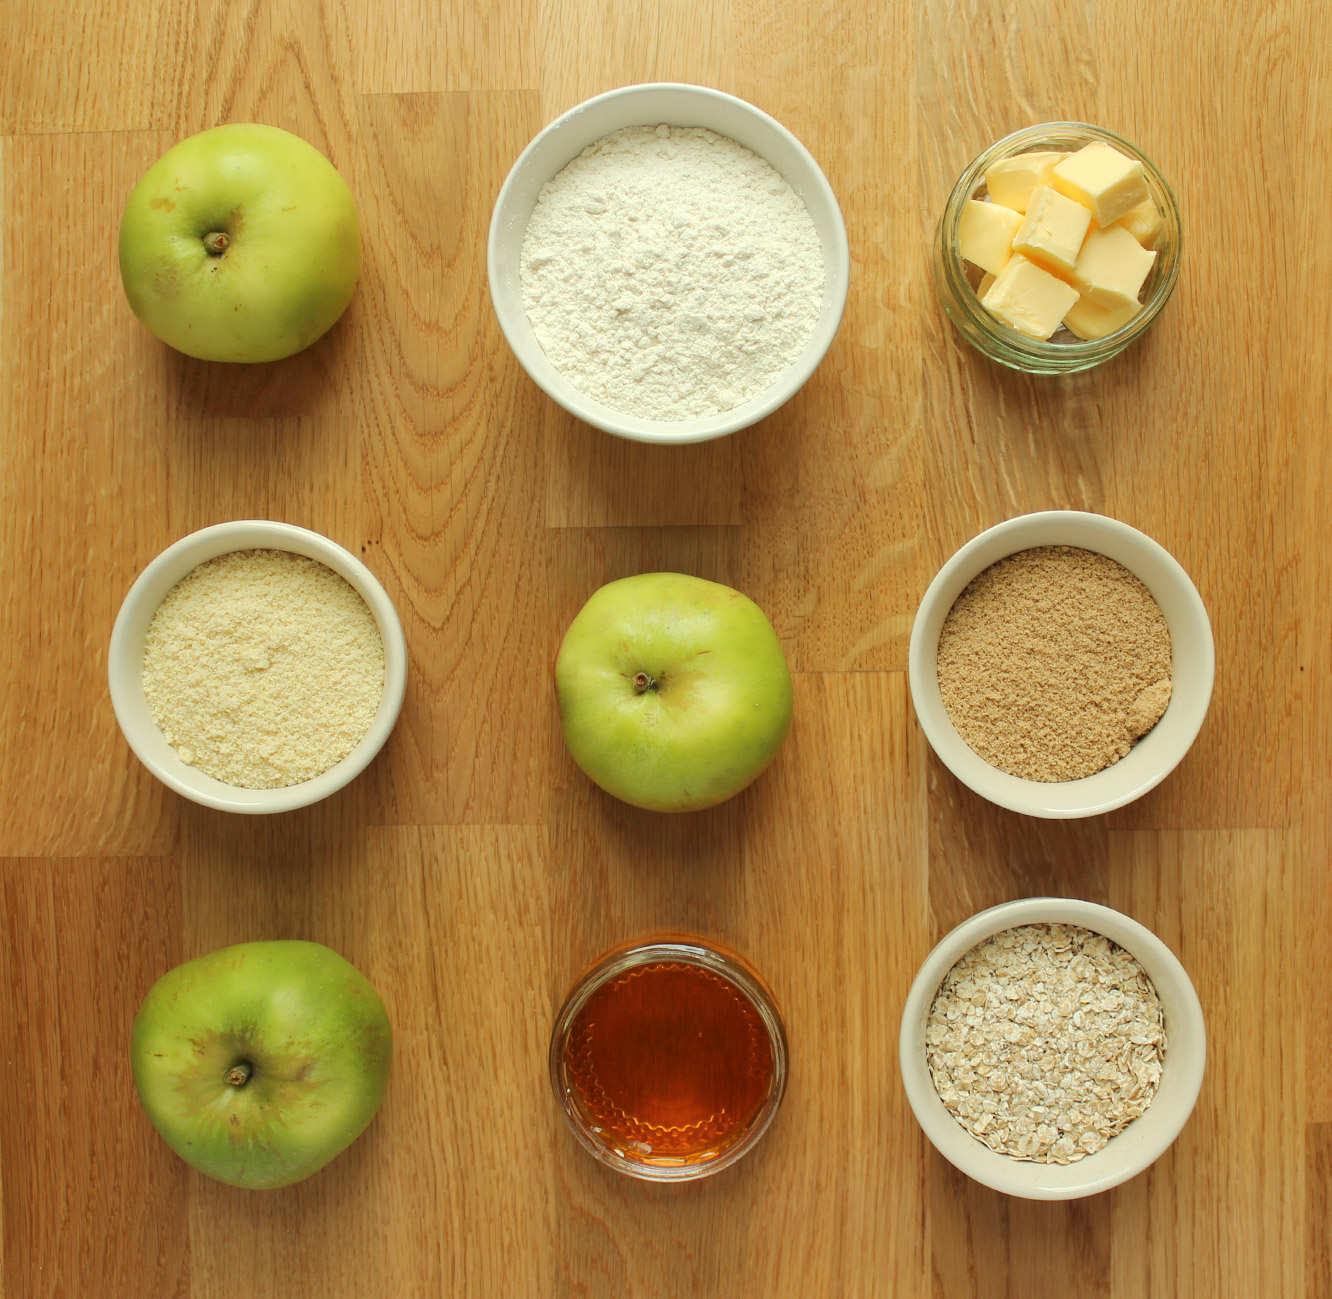
140g/5 oz unsalted butter
125g/4.5 oz porridge oats
75g/2.75 oz ground almonds
50g/1.75 oz plain flour
50g/1.75 oz caster sugar
2 tbsp clear honey
4 cooking apples (bramley)
For the salted caramel:
100g/3.5 oz salted butter
80g/3 oz soft brown sugar
100ml/3.5 fl oz double cream
2 tbsp golden syrup
2 tsp salt
(Serves 6)
Apologies to those of you who spotted the missing ingredients list for a while there!
Step one
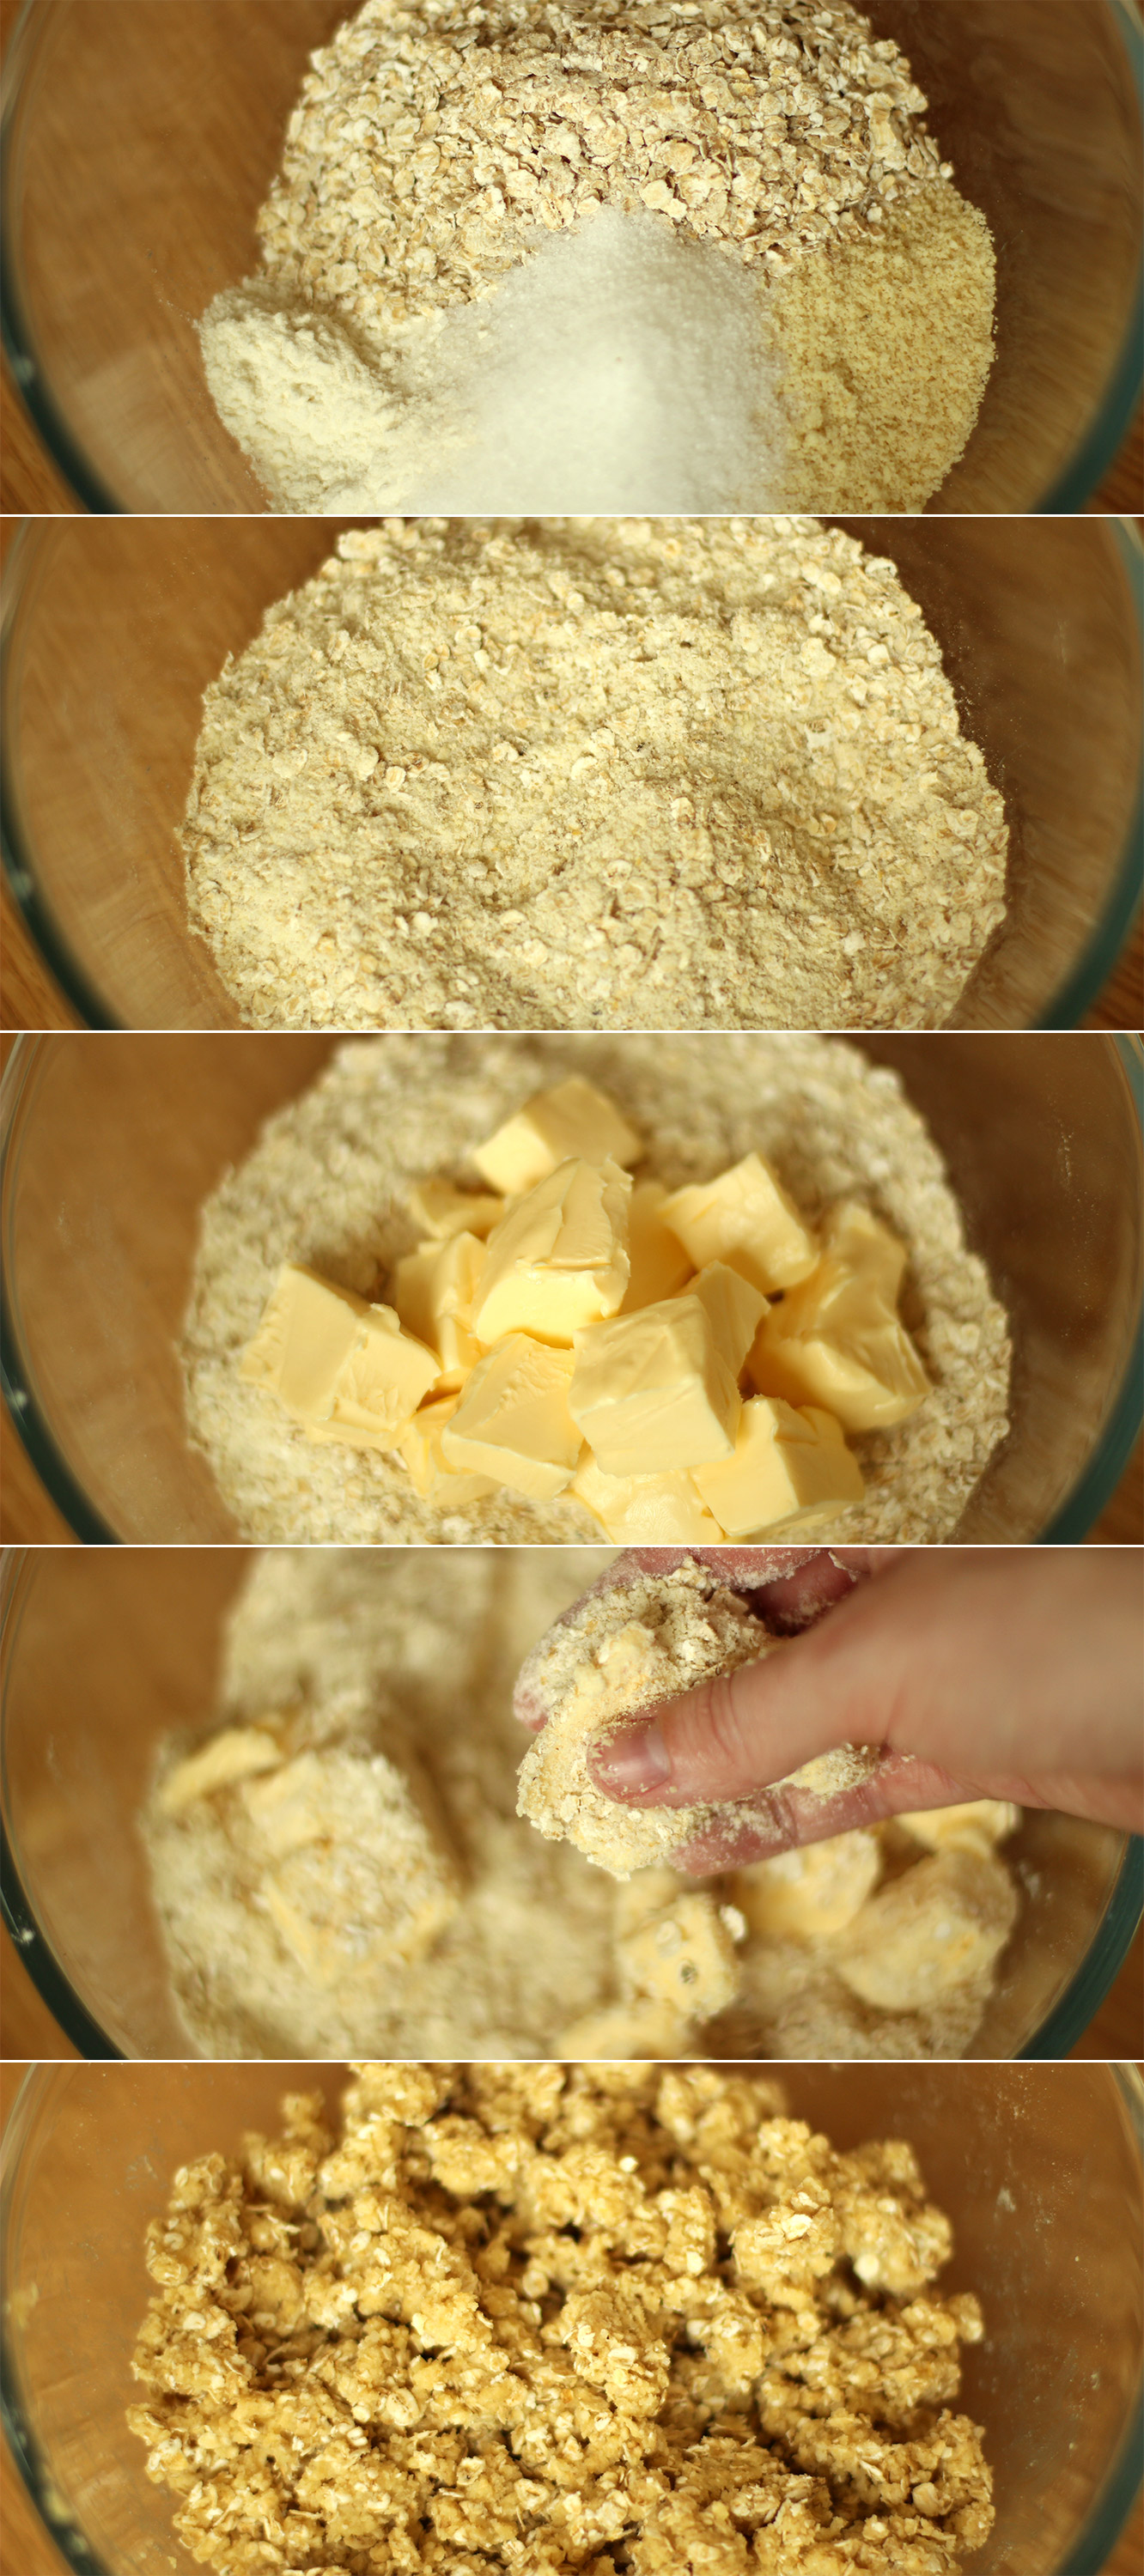
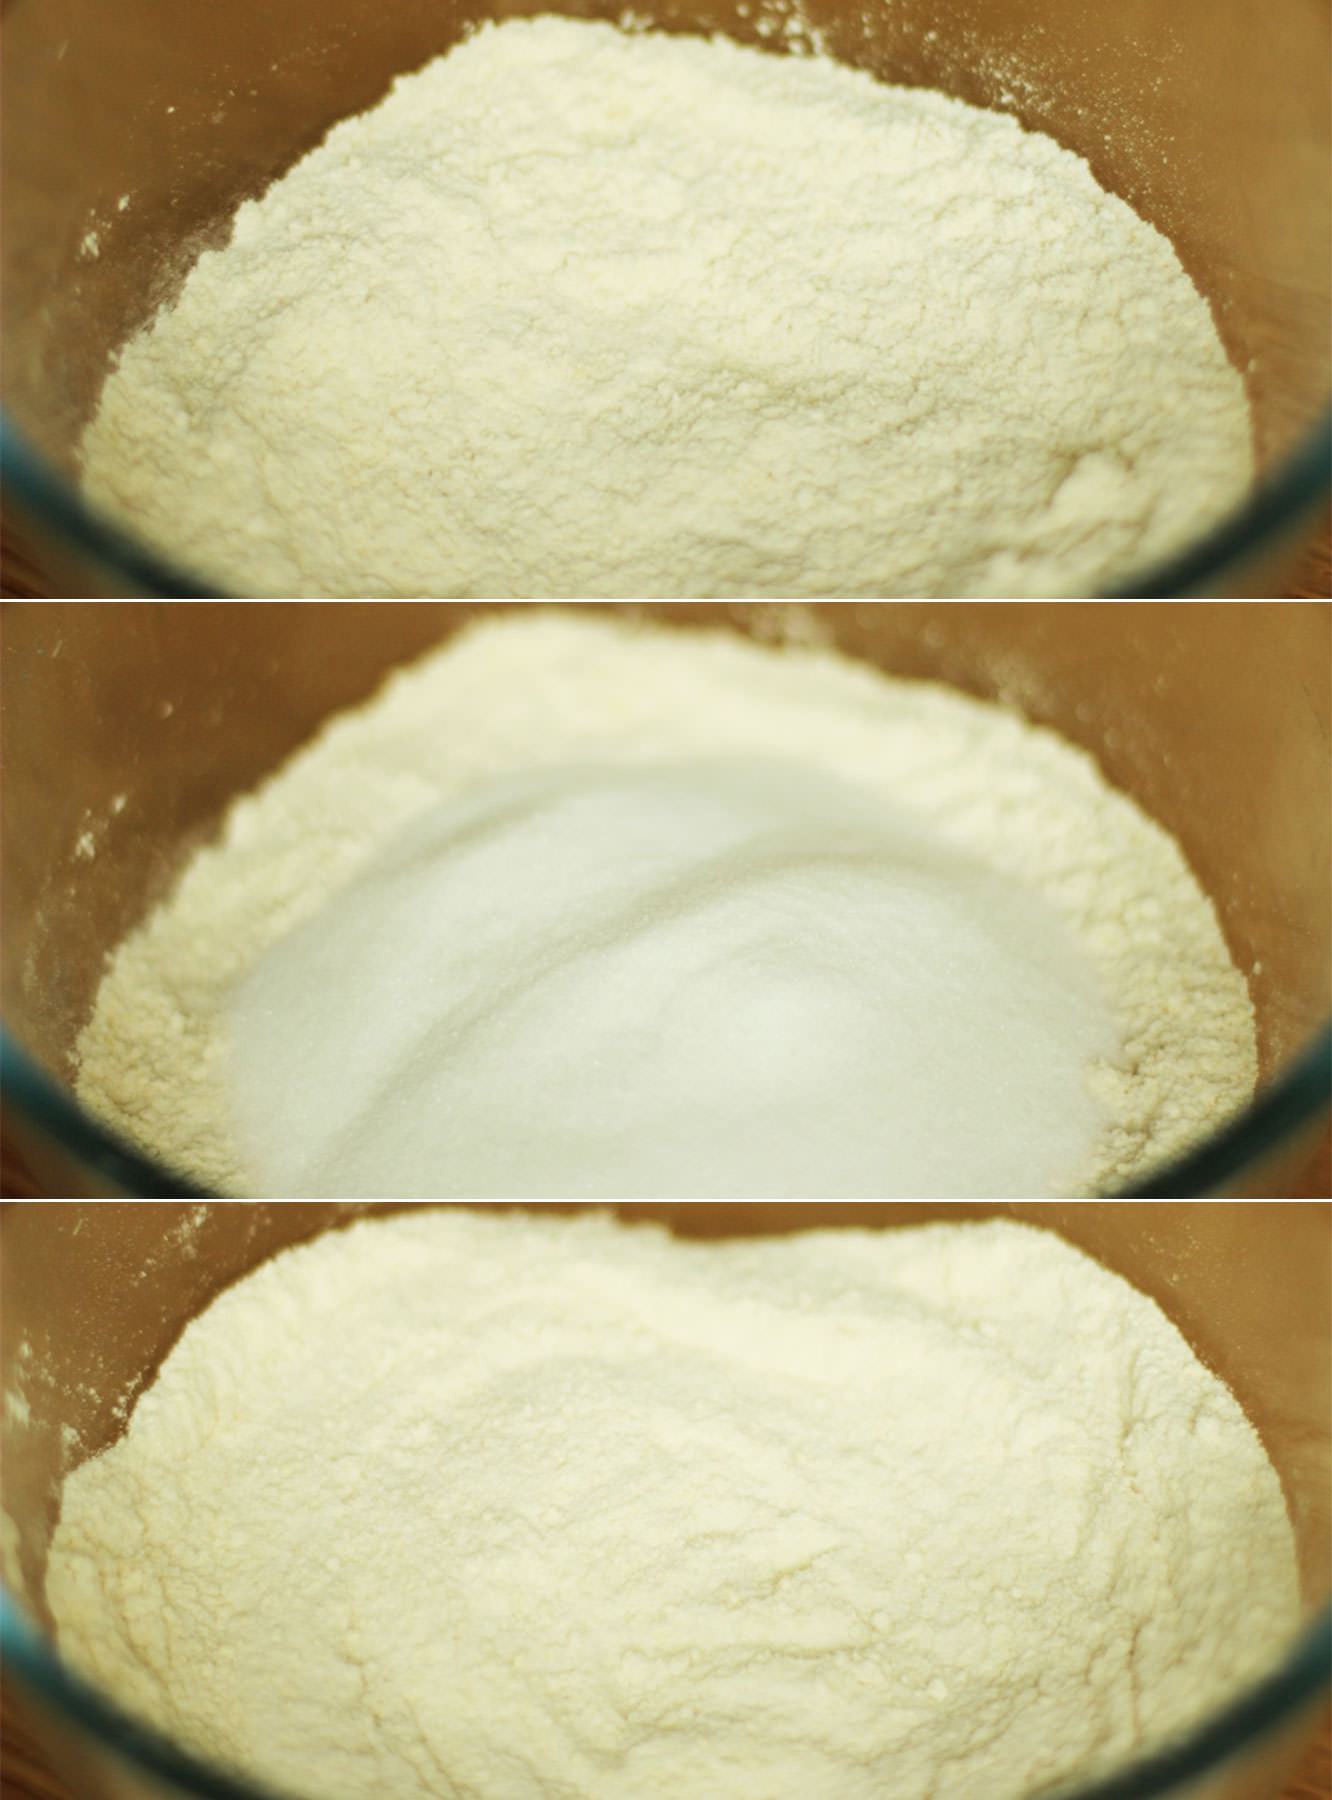
Mix together the dry ingredients for the crumble topping (almonds, flour, oats and sugar).
Step two
Rub in the butter with your hands, it’s better if it’s cold as the mix will breadcrumb a bit more. Mine was a little on the soft side because I got distracted and left it on the counter for a while.
Step three
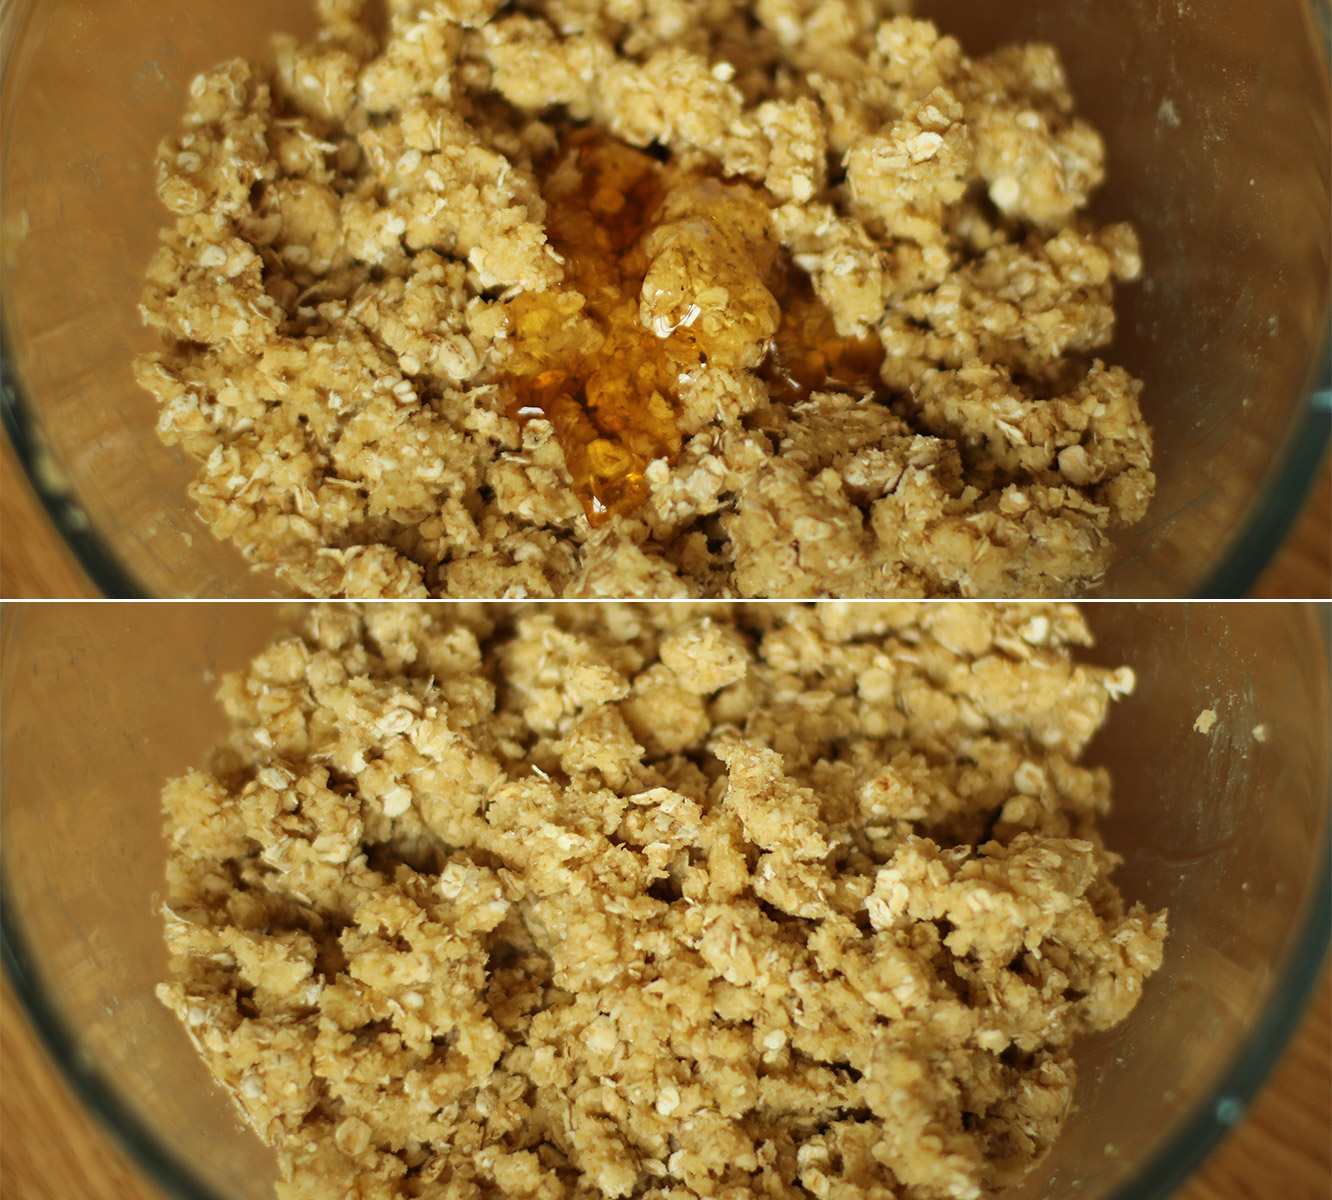
Add the honey and mix in with a wooden spoon.
Put it in the fridge until needed.
Step four
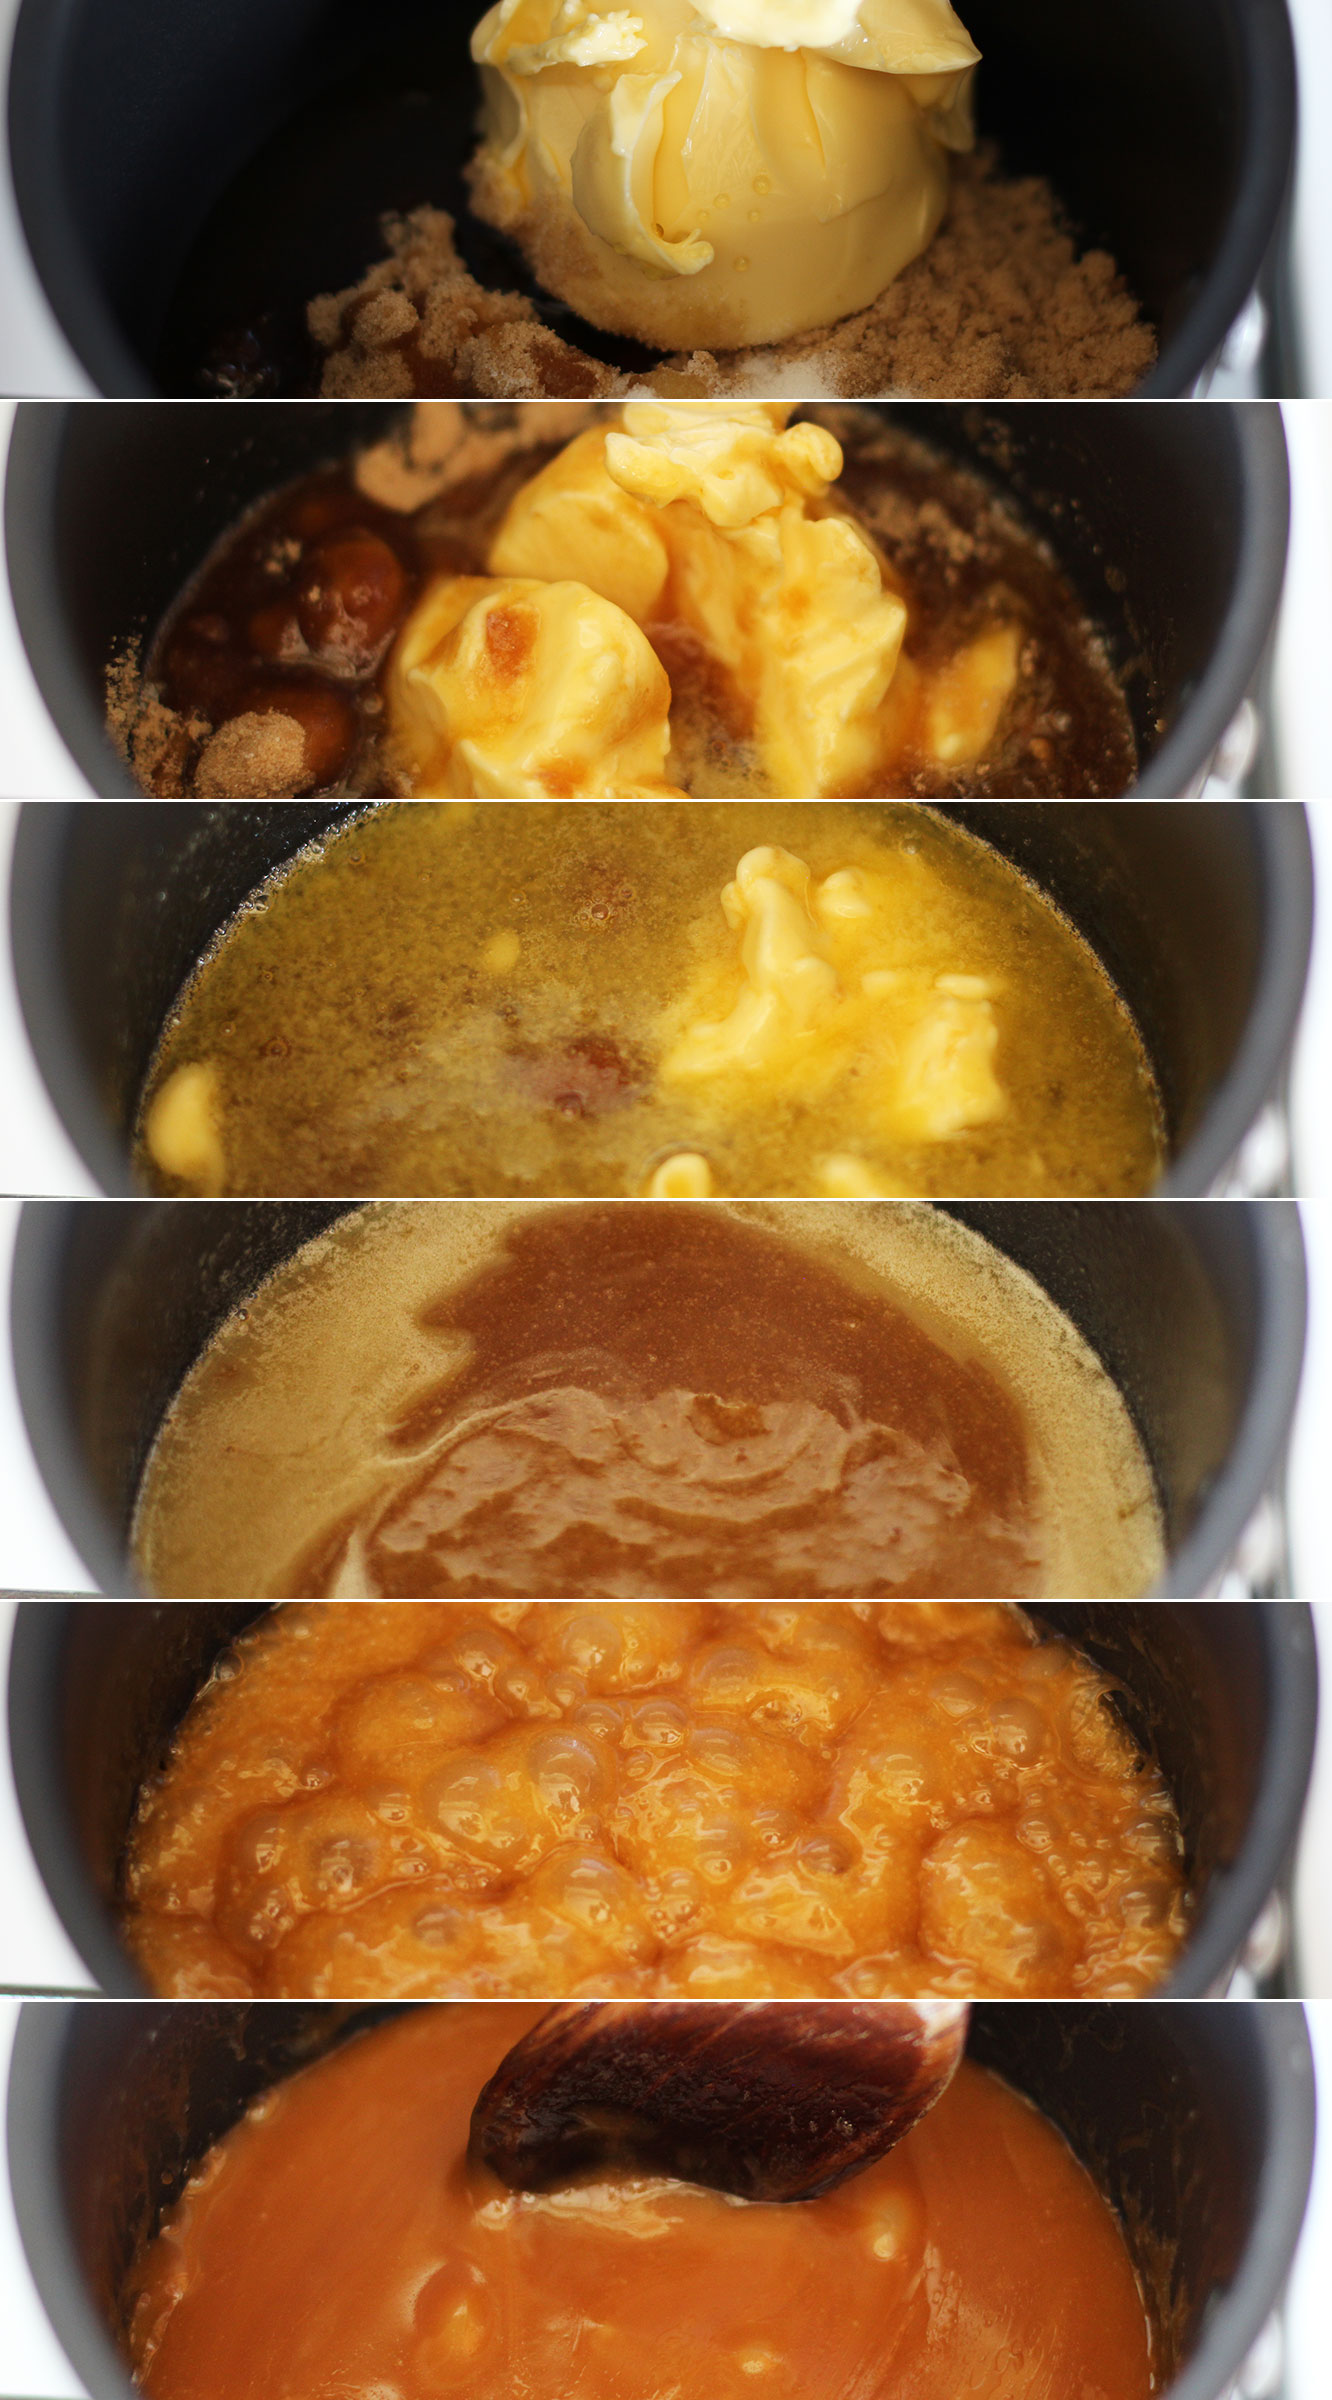
Place all the ingredients for the salted caramel into a saucepan (minus the cream).
Heat gently until the butter is melted and the sugar dissolved and then bring to a simmer. Simmer for about 10 minutes. Stir regularly so that it doesn’t catch and burn. Leave to cool for fifteen minutes to half an hour.
Step five
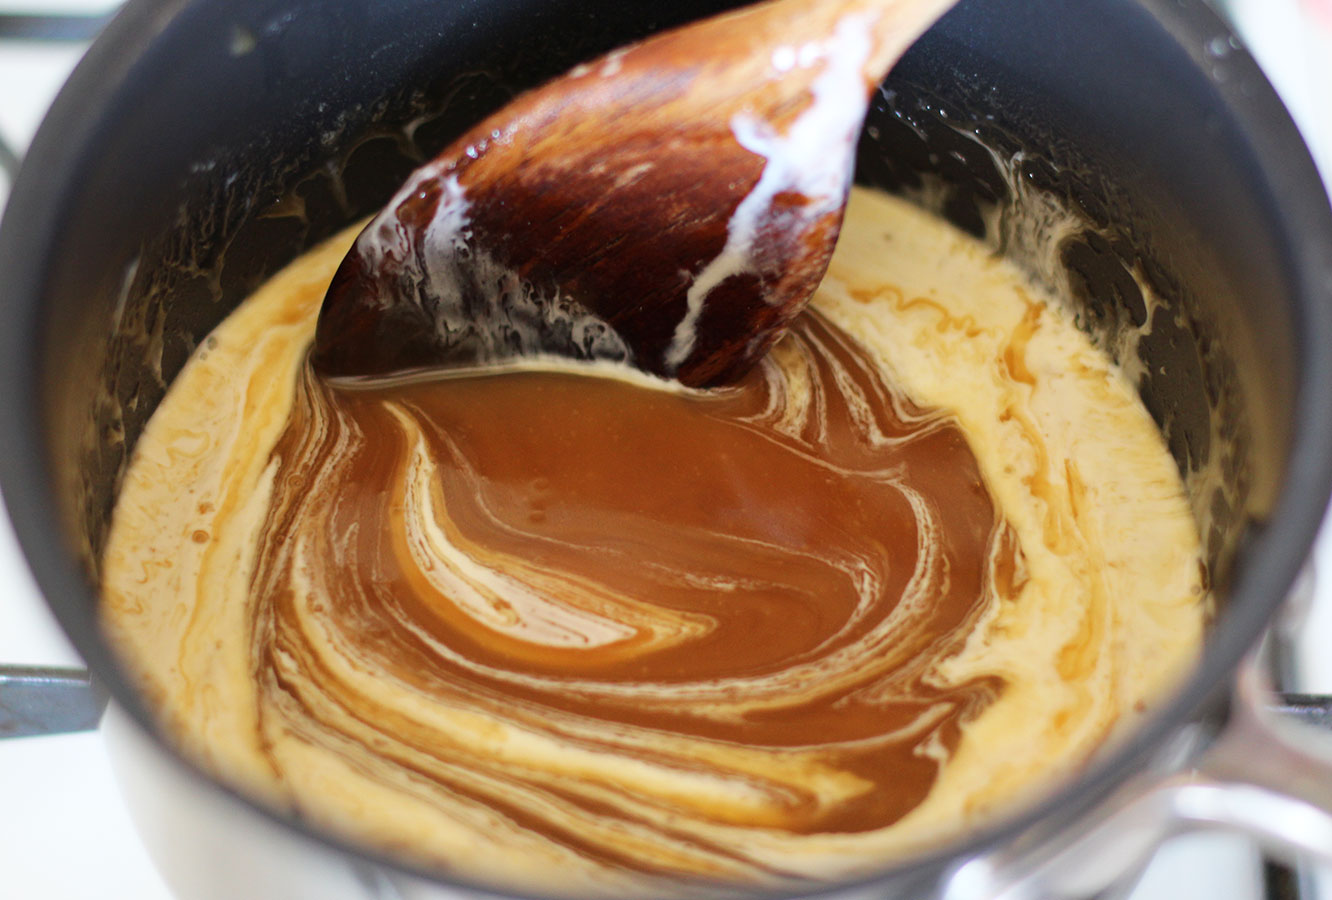
Once the caramel has cooled for a little while add the cream and stir until combined.
Step six
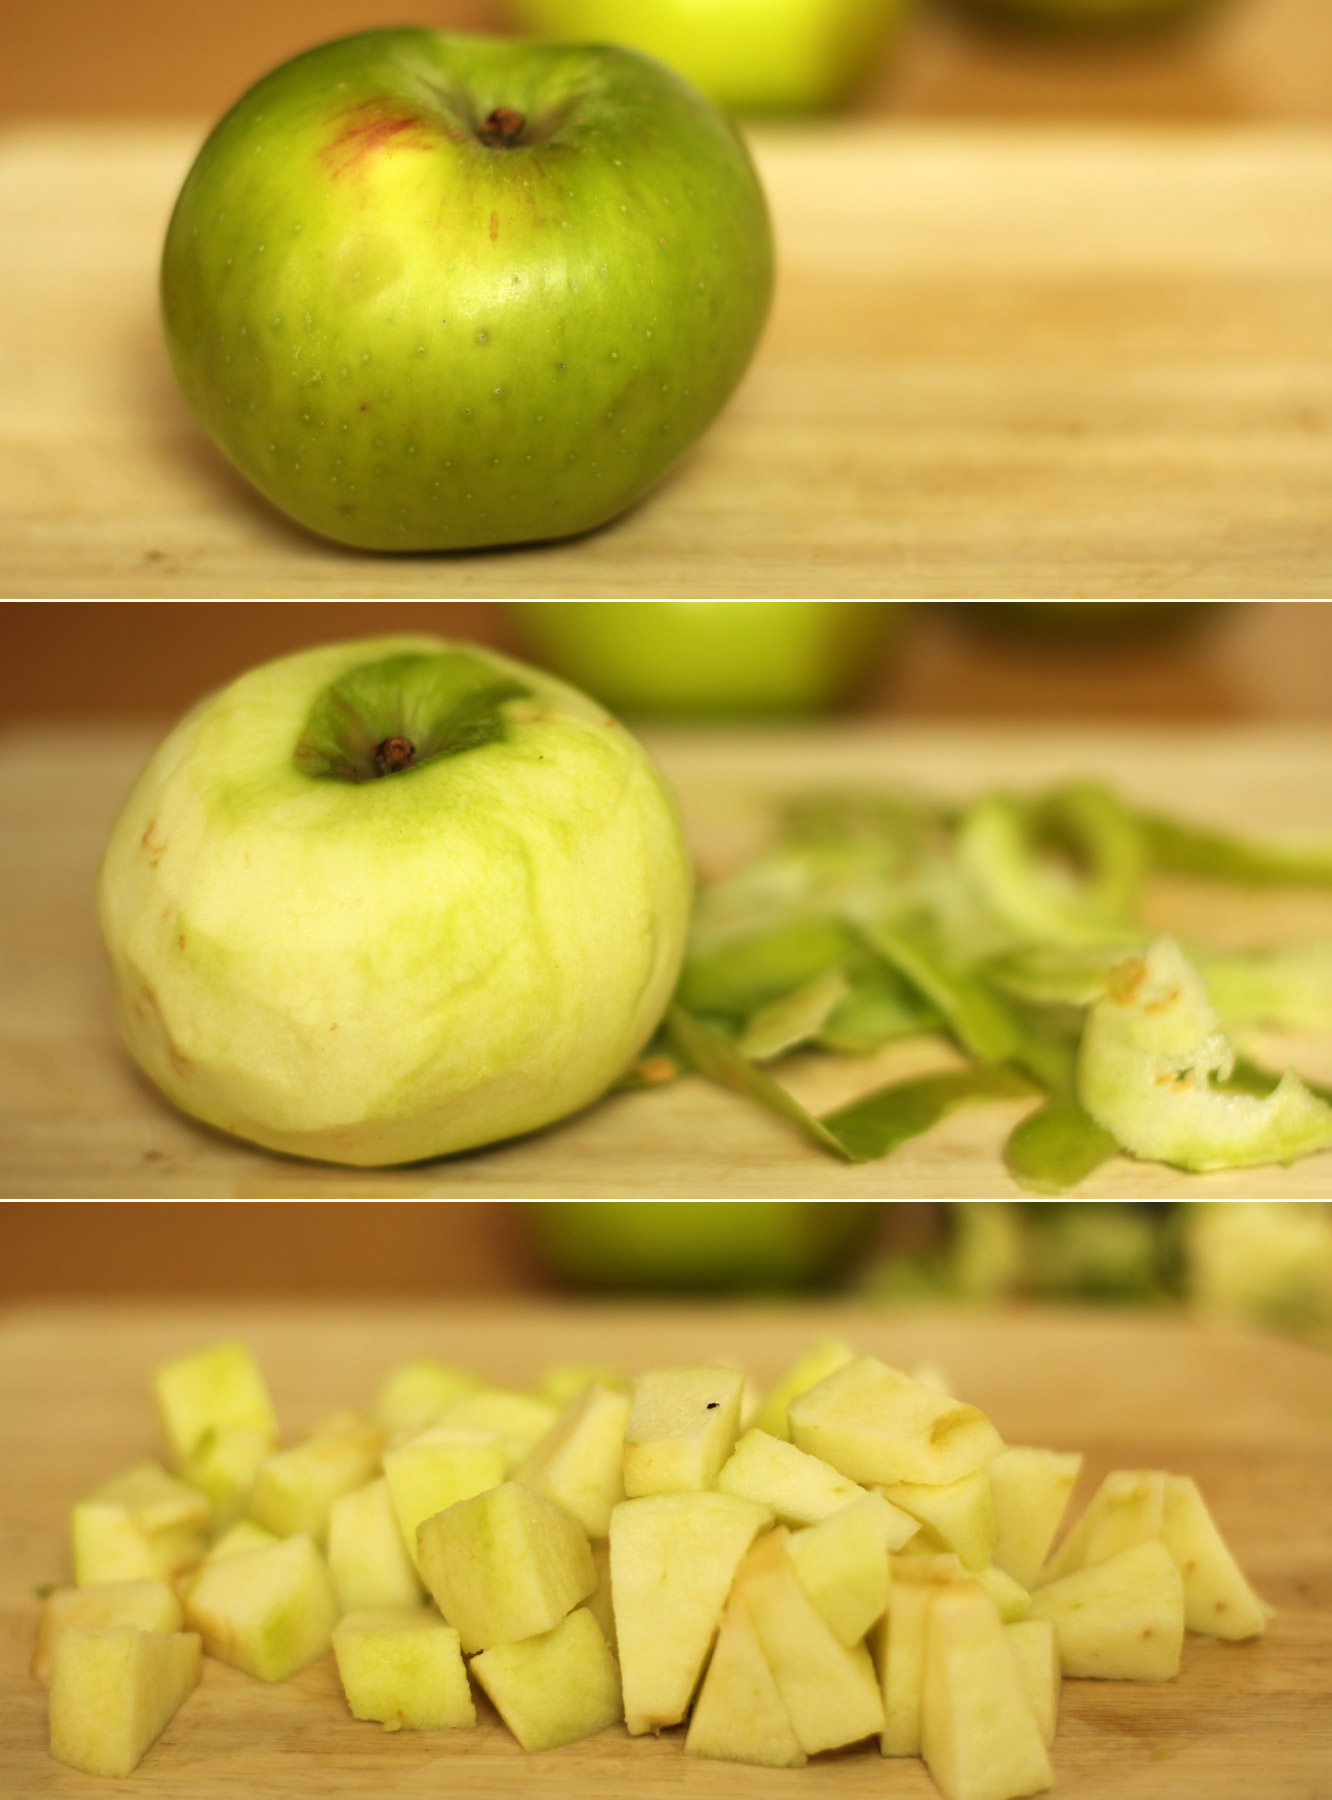
Peel and chop the apples.
Step seven
Put the apples in the bottom of your dish, sprinkle with a little light brown sugar. Pour just a third to a half of the caramel sauce over the apples and cover with the crumble mixture.
Hi there. First off, apologies are in order. I missed my Monday night slot this week. I am deeply entrenched in finishing my portfolio and got really, really, involved in designing a book cover, more on that another time.
ANYWAY. My lovely housemate Vicky had her Hen Party a few weekends ago. Sadly I had something I had booked up a year in advance to go to so I couldn’t make it. Sad face. Instead I thought I would leave Vicky a little surprise on the dining table so she’d know I was thinking of her while she partied on down with her hens.
This is a little four part series, showing you how to make three different little hen/bachelorette party favours at home; the final post will detail all the finishing touches. You might prefer to use them as wedding favours or for childrens’ parties instead.
Heads up: I made 30 of each recipe, so if you’re looking to make a sweet treat for an evening in, divide, divide, divide the quantities of the recipe, don’t send me the bill for your fillings.
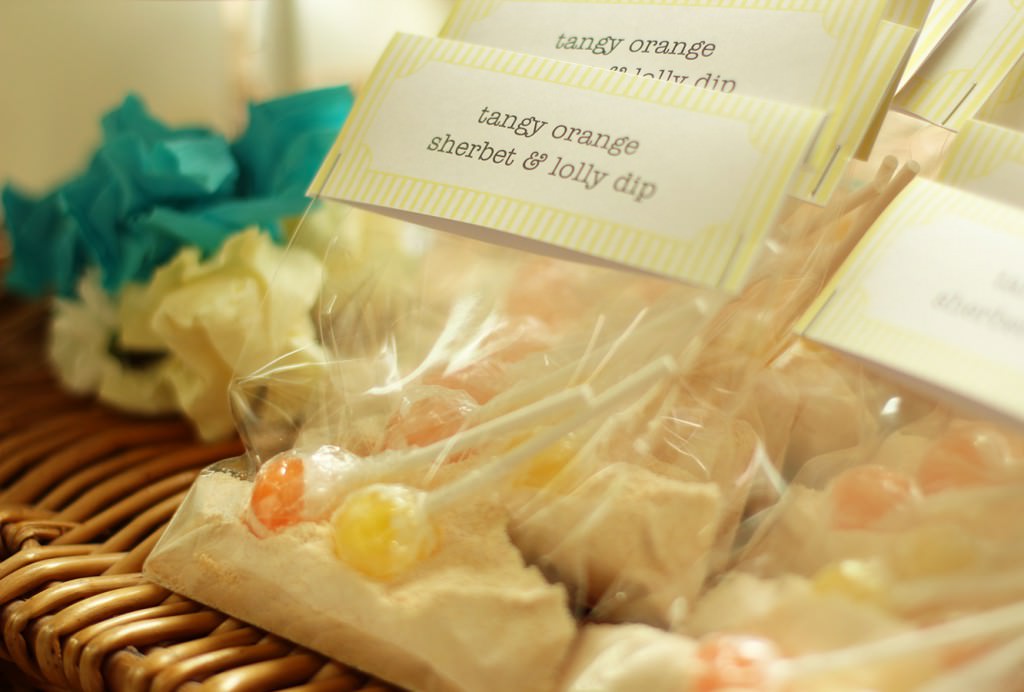
We’re kicking off this week with a recipe for orange sherbet. I just need to clarify for the sake of my US (and possibly Canadian?) readership, we mean something different when we say sherbet. You mean sorbet. We mean sherbet.
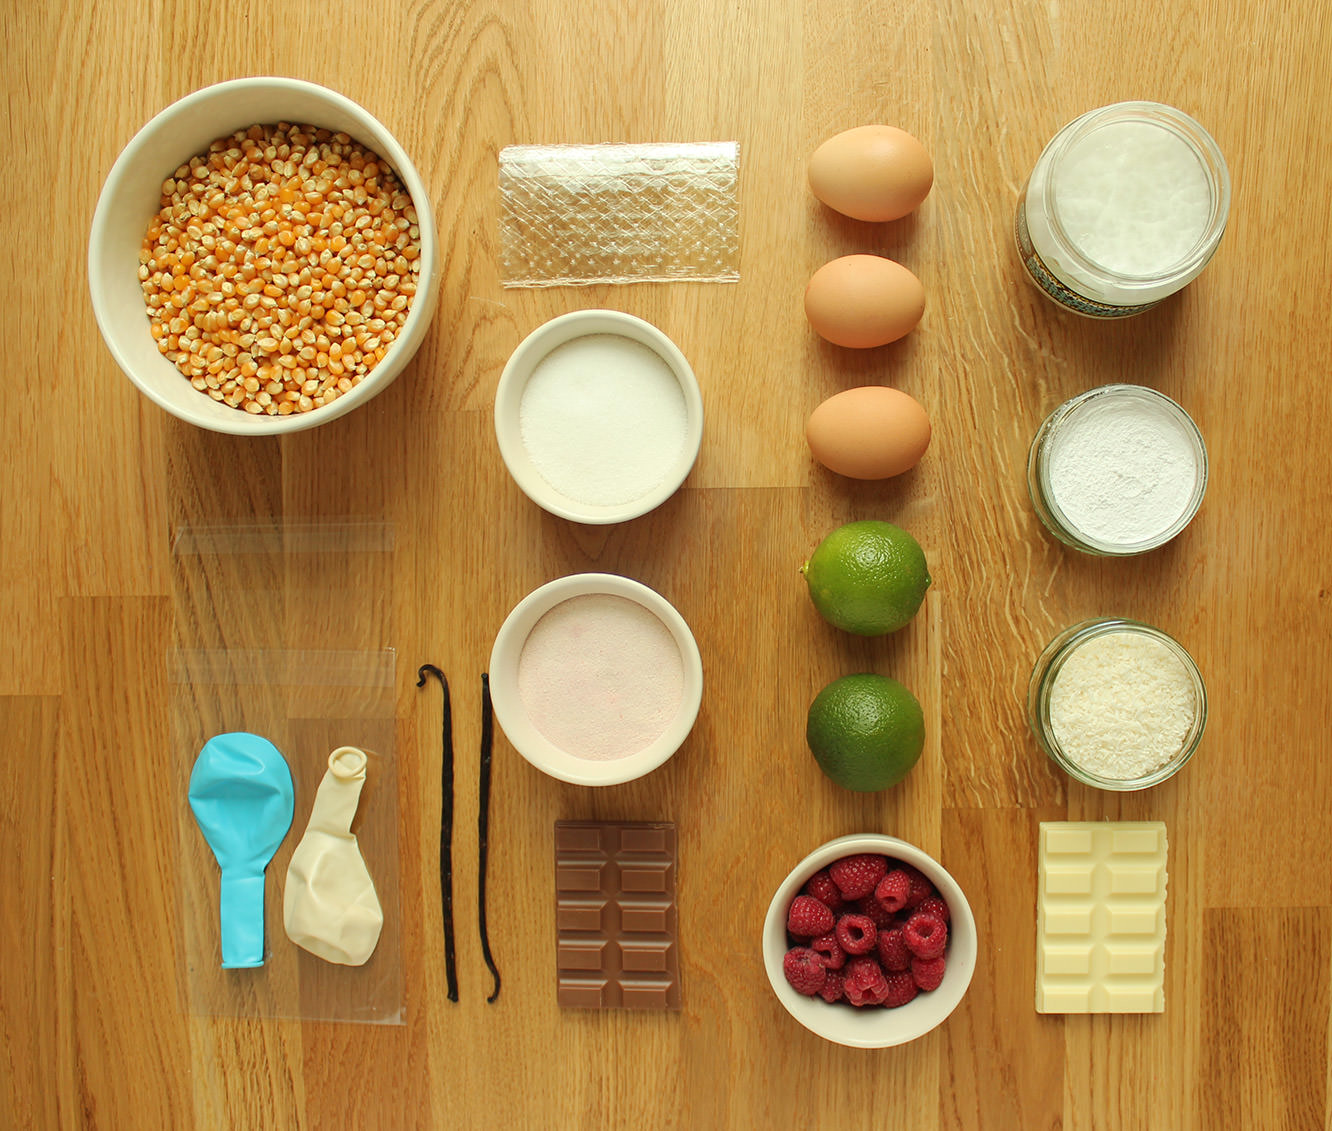
You will need
300g/10.5 oz Icing sugar
300g/10.5 oz Granulated sugar
175g/6 oz Caster sugar
125g/4.5 oz Orange jelly powder (again, America, you mean jelly when you say jello)
1-2 tsp Yellow food colouring
1 tsp Orange extract
60 small, or 30 regular sized lollipops
Cellophane DL card bags
(makes 30)
Step one
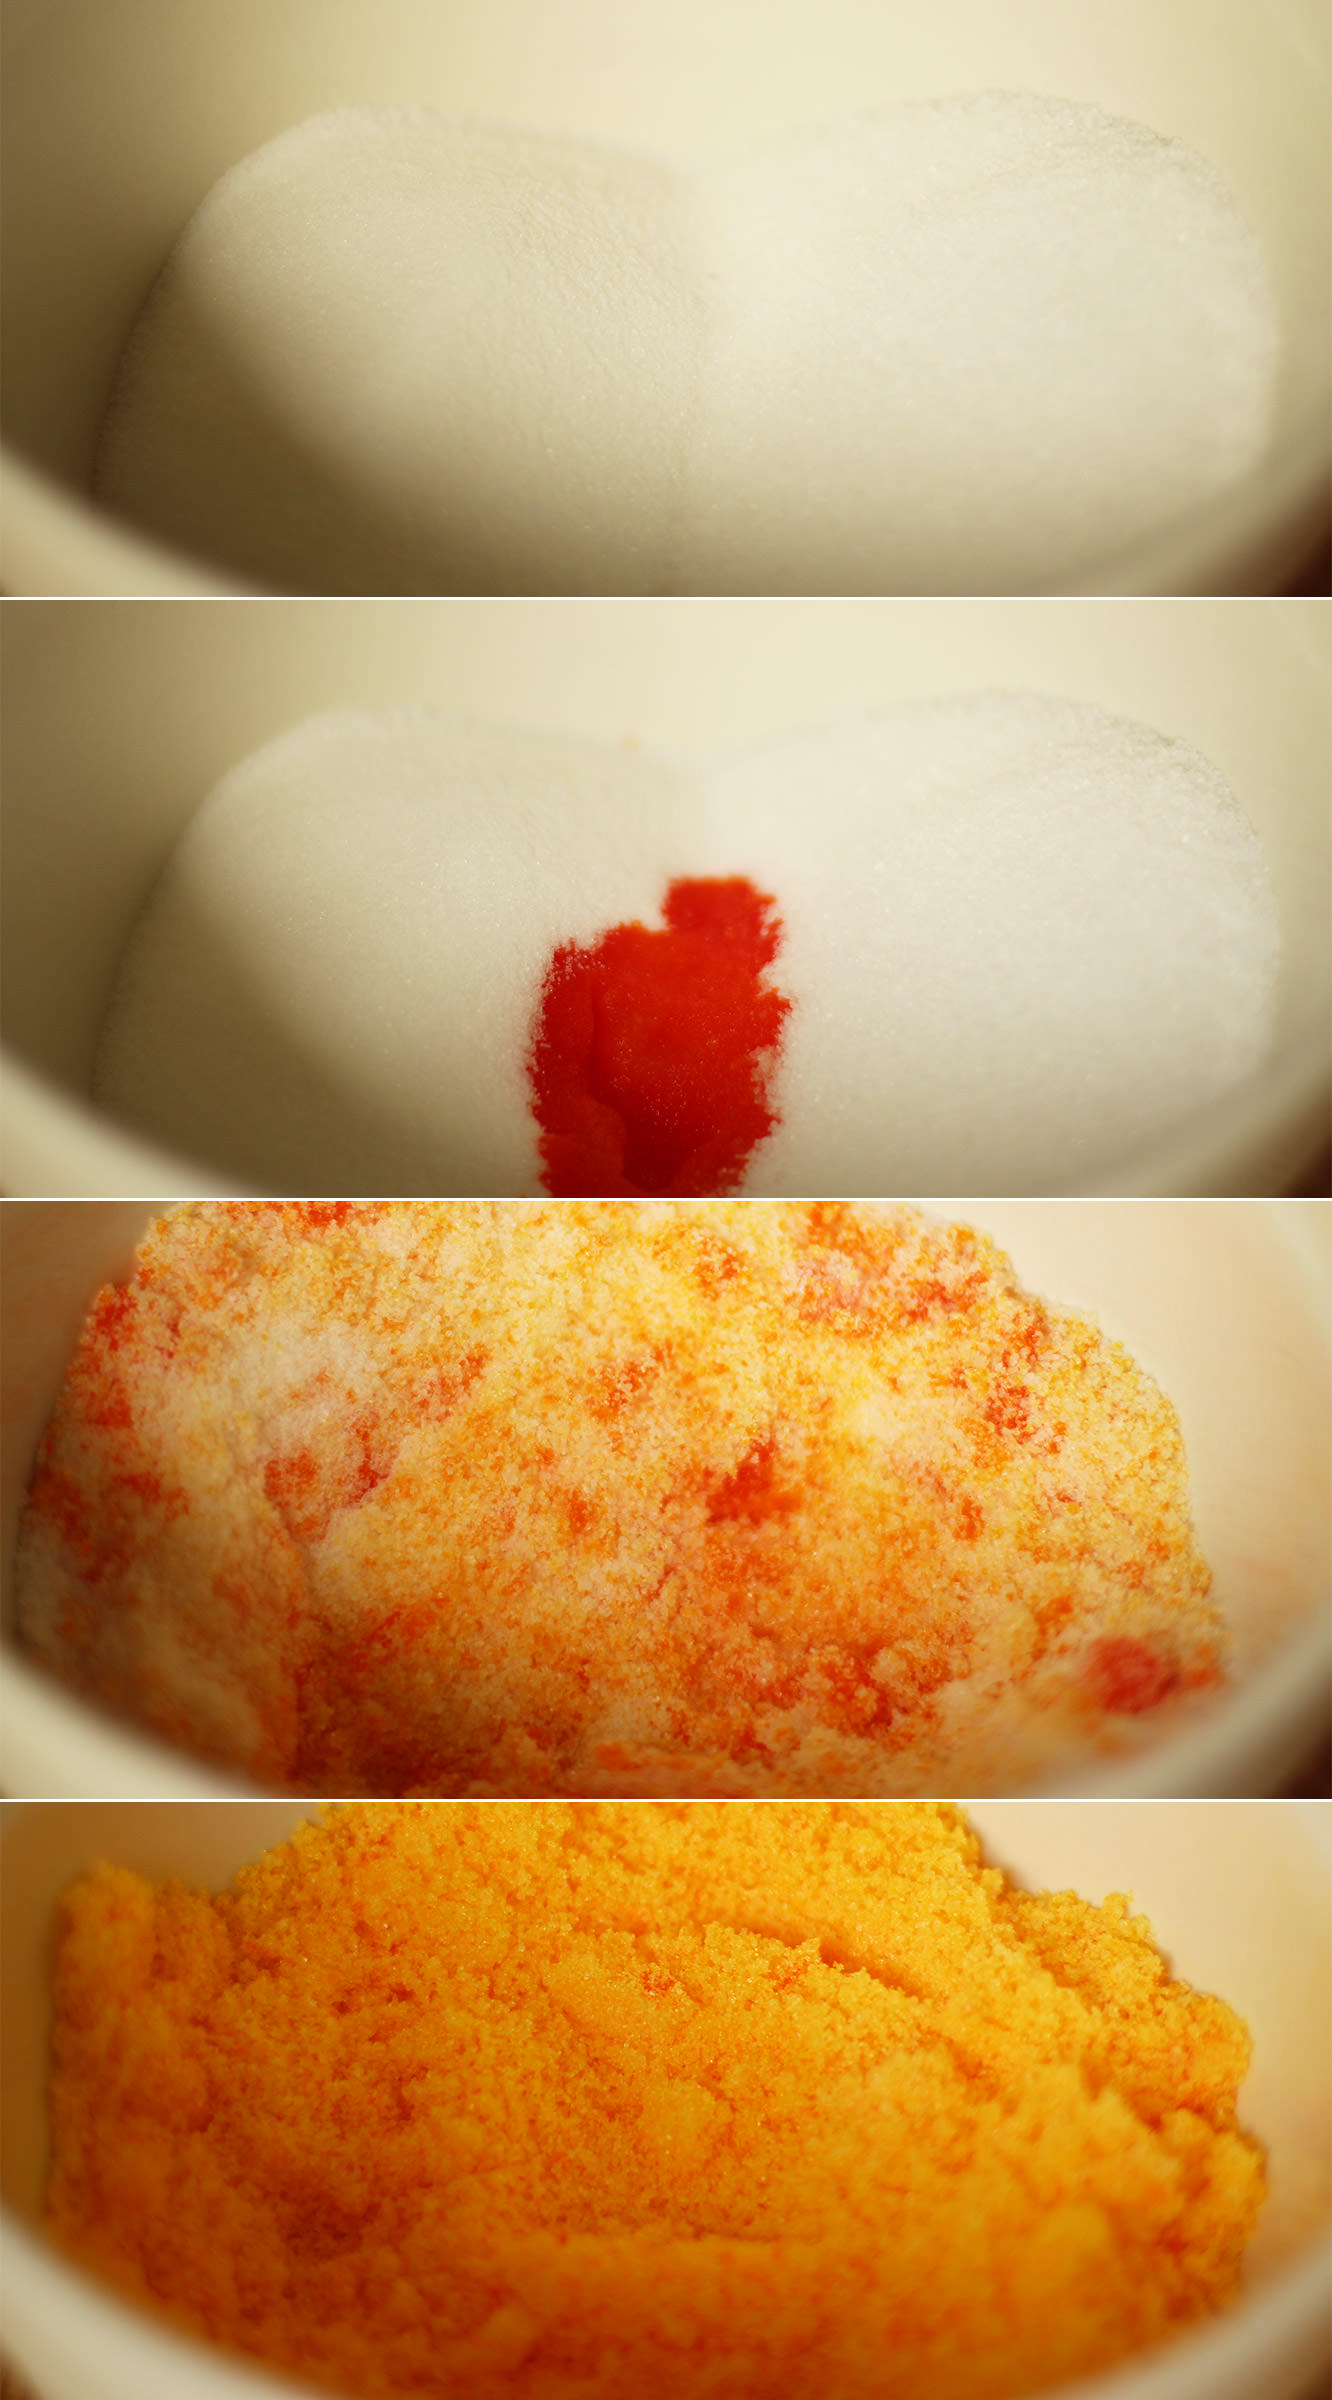
Mix together the granulated and caster sugars with the orange extract and colouring. If you want it to be a really bright colour, go for 2 tsp, I wanted a more subtle yellowy-orange so went for one.
Just in case you think I’ve lost it…the colour dilutes when you add the other ingredients.
Step two
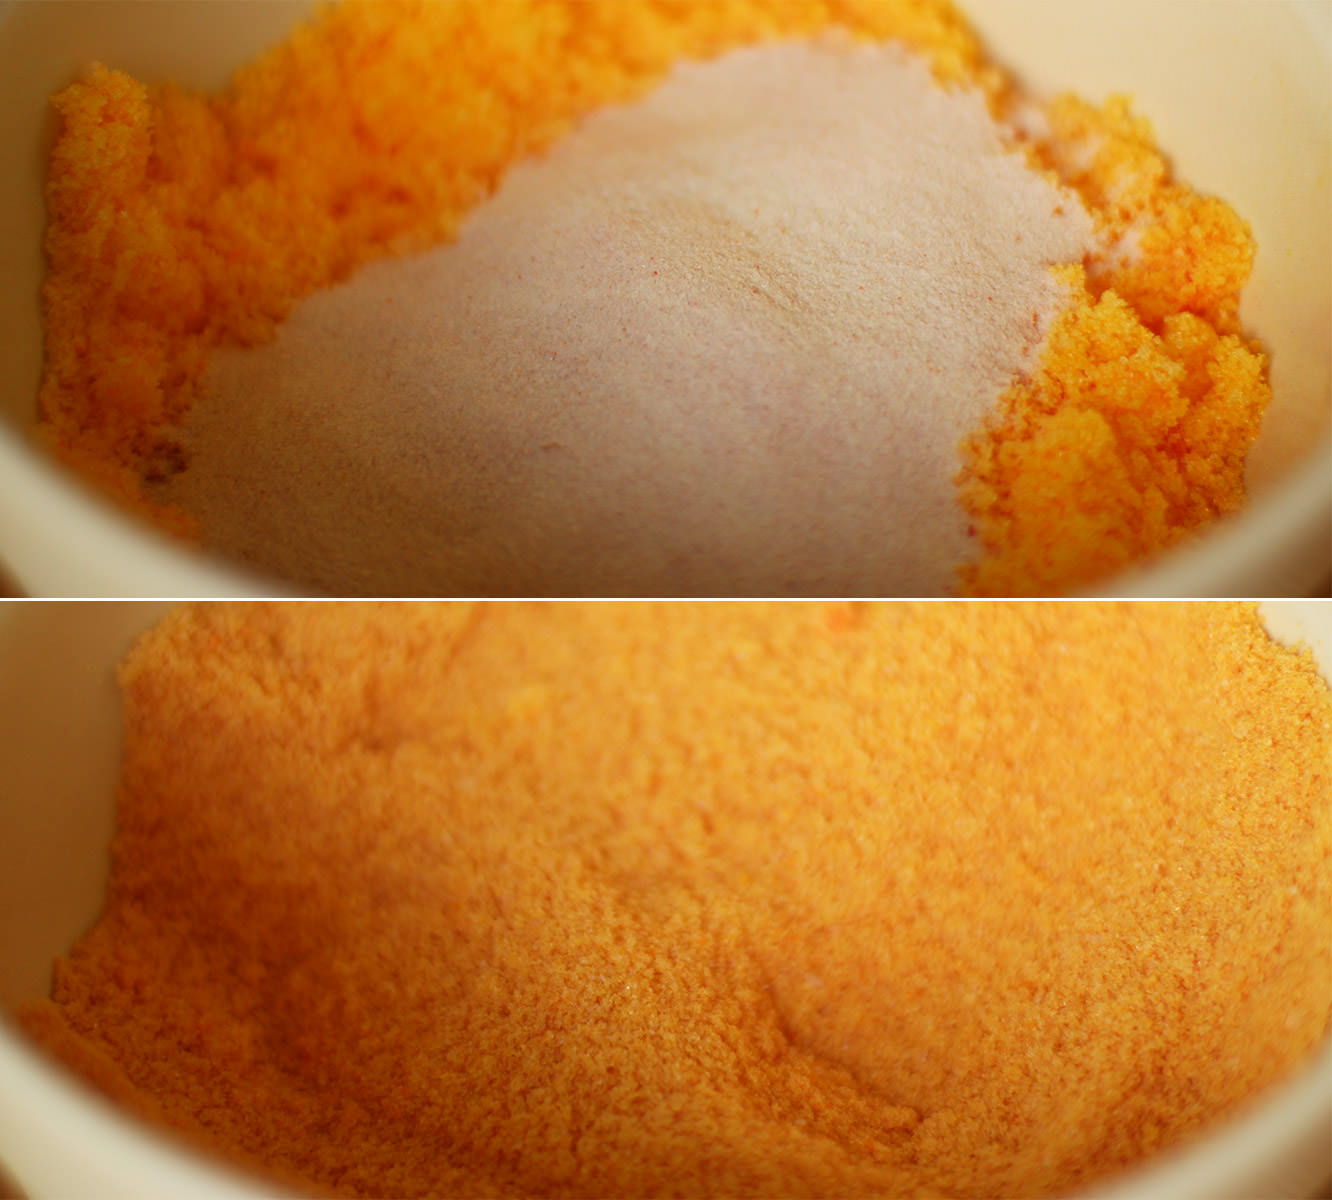
Add the jelly powder and stir again until fully combined. Give it a little taste at this point. For a stronger flavour add more jelly or more flavouring, but for the record, I think you’ll be set.
Step three
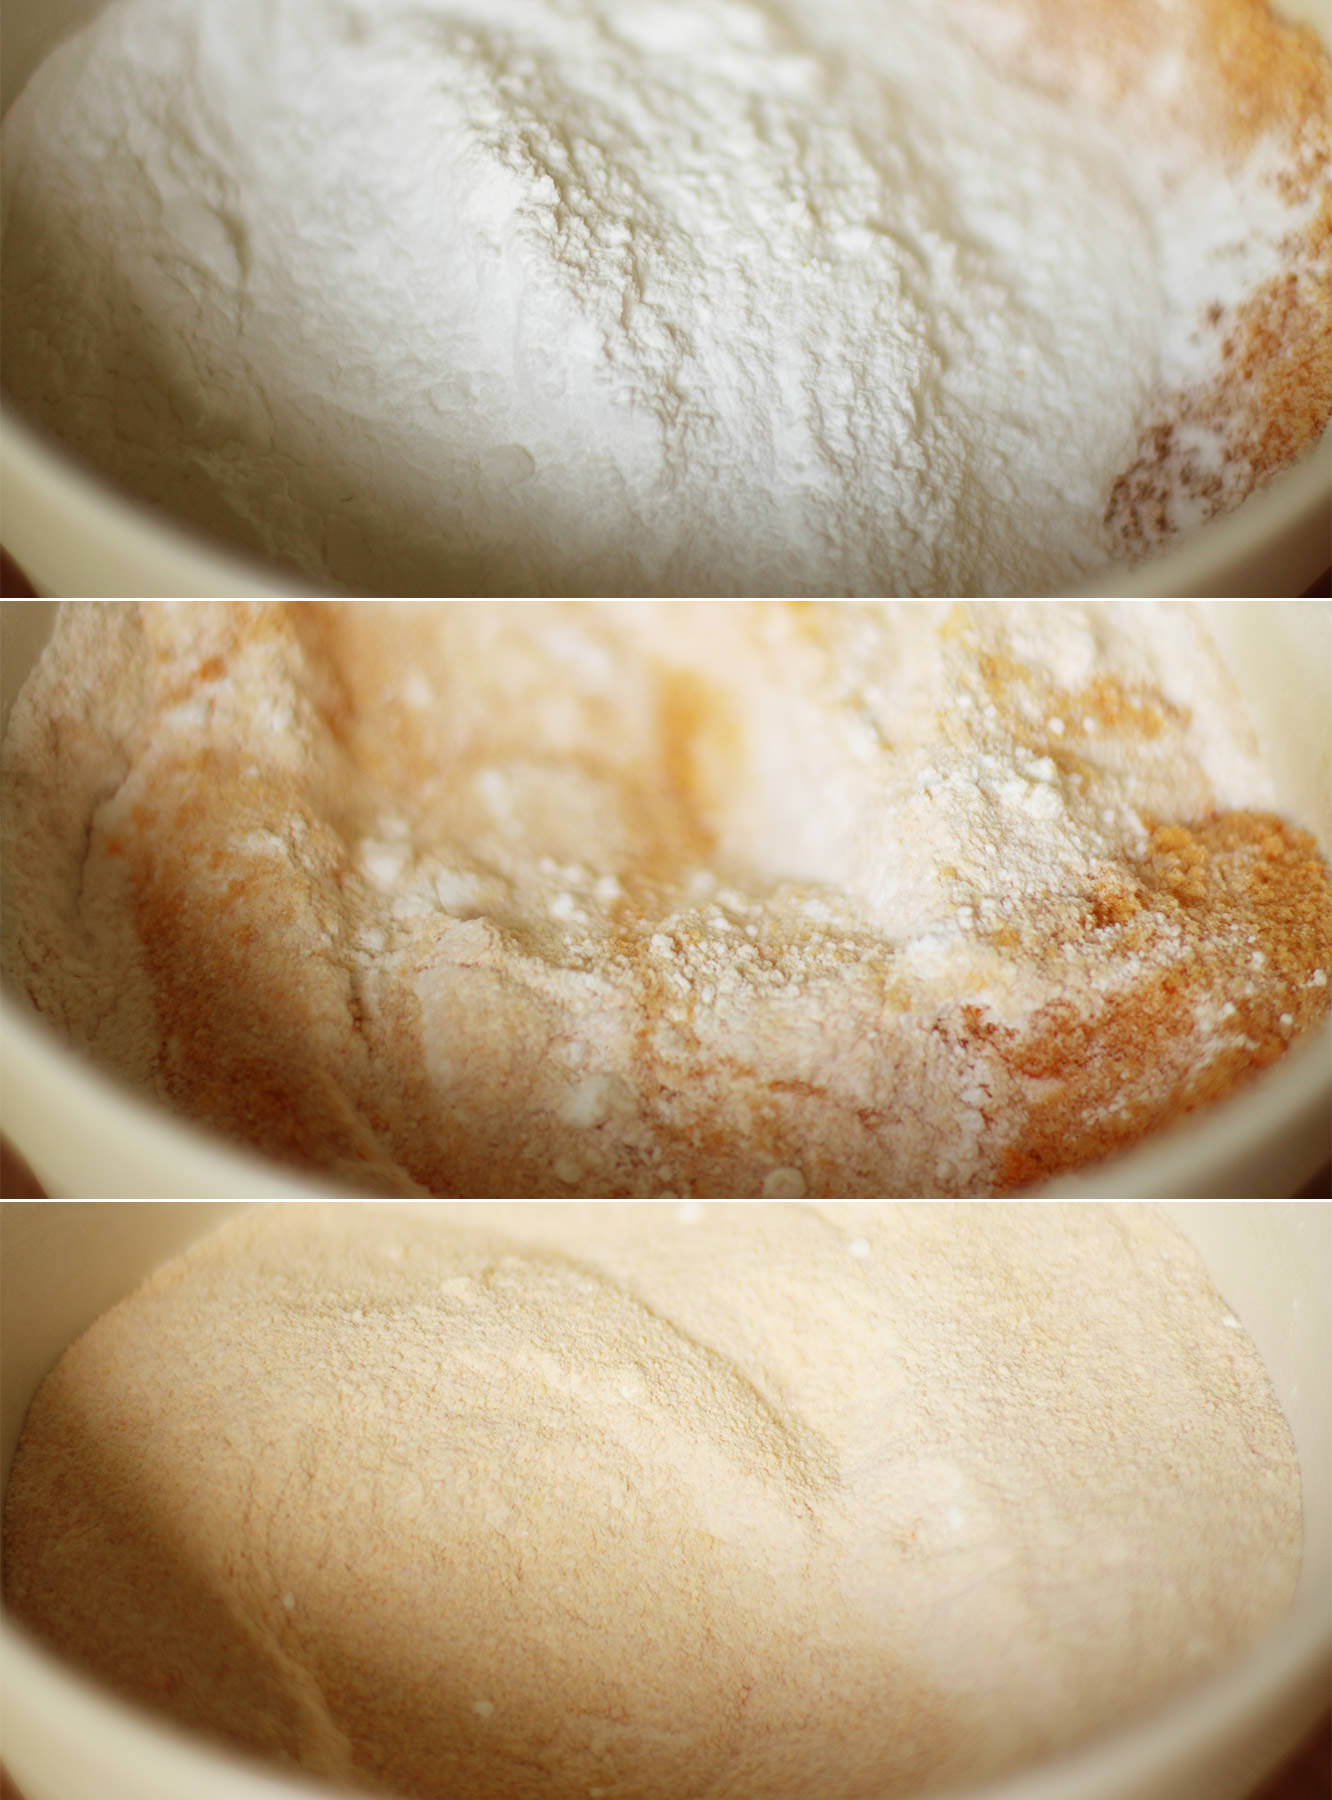
Add the icing sugar and mix again thoroughly. See, now you you know what I mean about the colour? Nice and subtle isn’t it?
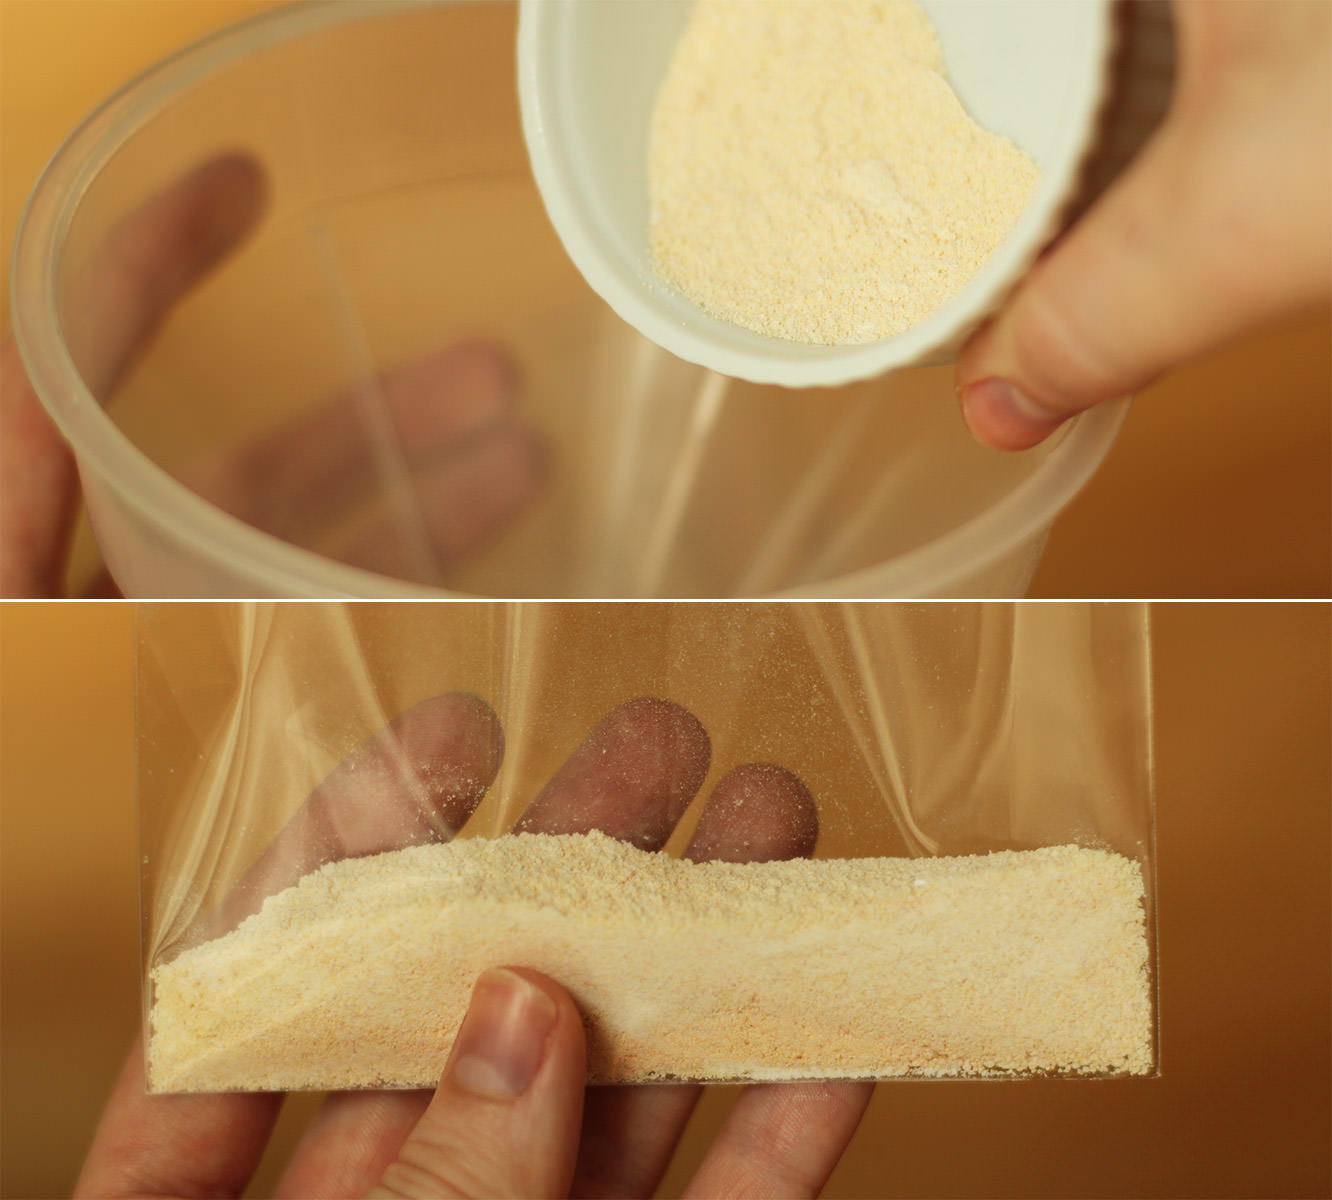
Step four
Weigh 30g portions and pour into the card bags.
That’s where I’m leaving you for today I’m afraid folks, the finishing off will be in my round up post in a few weeks. The suspense is killing you I know.
In the meantime, just when you thought you weren’t even getting a gif this week. Here’s a tinker in her dungarees:
Hullo again. I’ve decided to start a small series. I know, I can smell your excitement from here.
I will probably break it up a little every so often because it has one main theme (cupcakes) and I don’t want to bore. Not that cupcakes could ever be boring right?
The other day I was handed a Bakewell tart on the street (by a man in a co-op uniform, don’t worry, I’m not taking sweets from strangers). It’s been a while since I had a Bakewell tart, and you know what? I actually quite enjoyed it.
Then the thought struck me…a series of British sweets/puds baked into cupcakes is just what this blog needs.
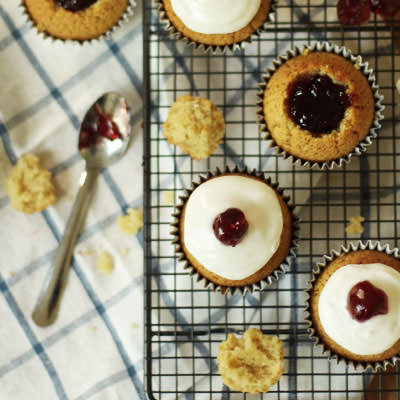
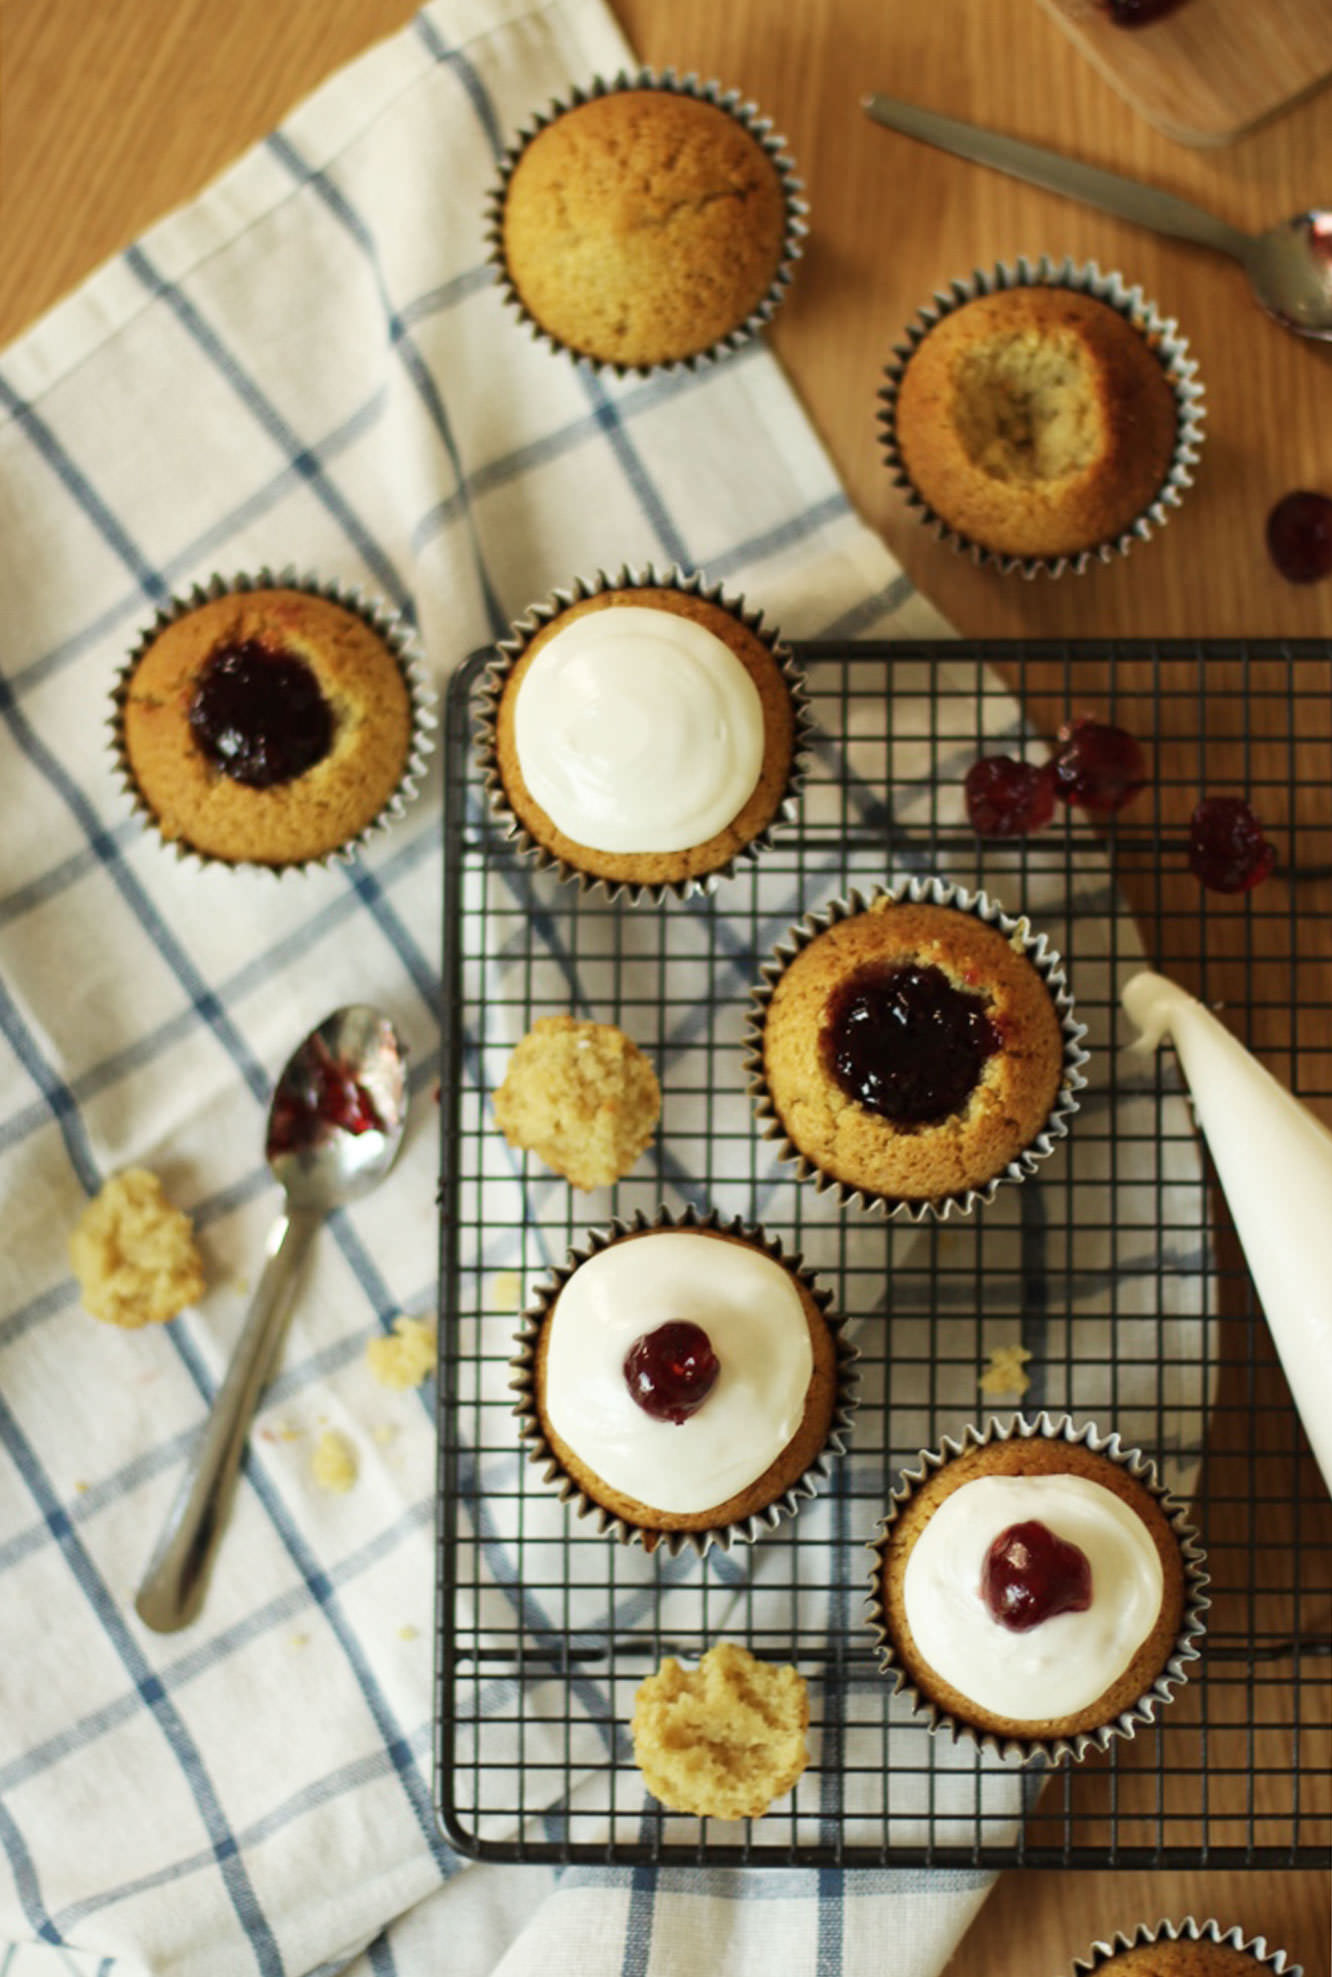
For anyone who doesn’t know, a Bakewell tart has a pastry case, full of frangipane (almond), cherry jam and is topped with a thick layer of icing and half a glacé cherry.
So without further ado let’s kick off with an easy peasy Bakewell tart cupcake, which are also handily dairy free for our lactose intolerant friends.
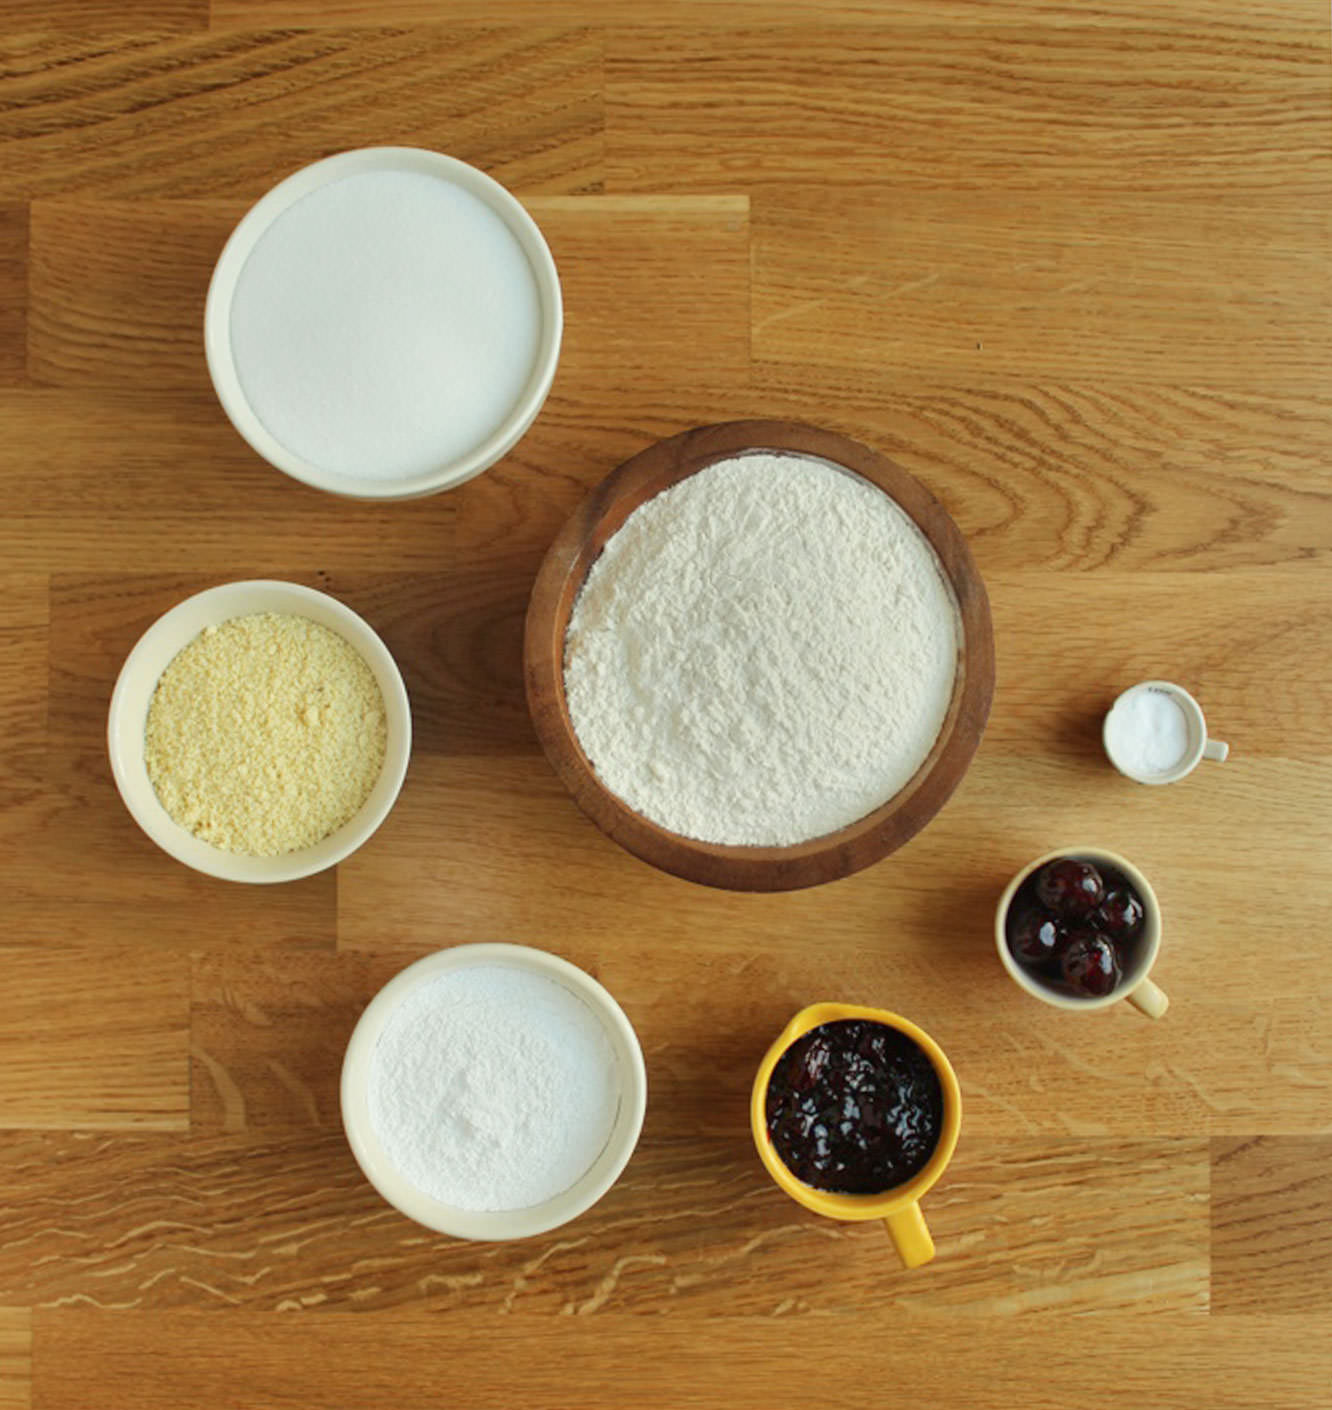
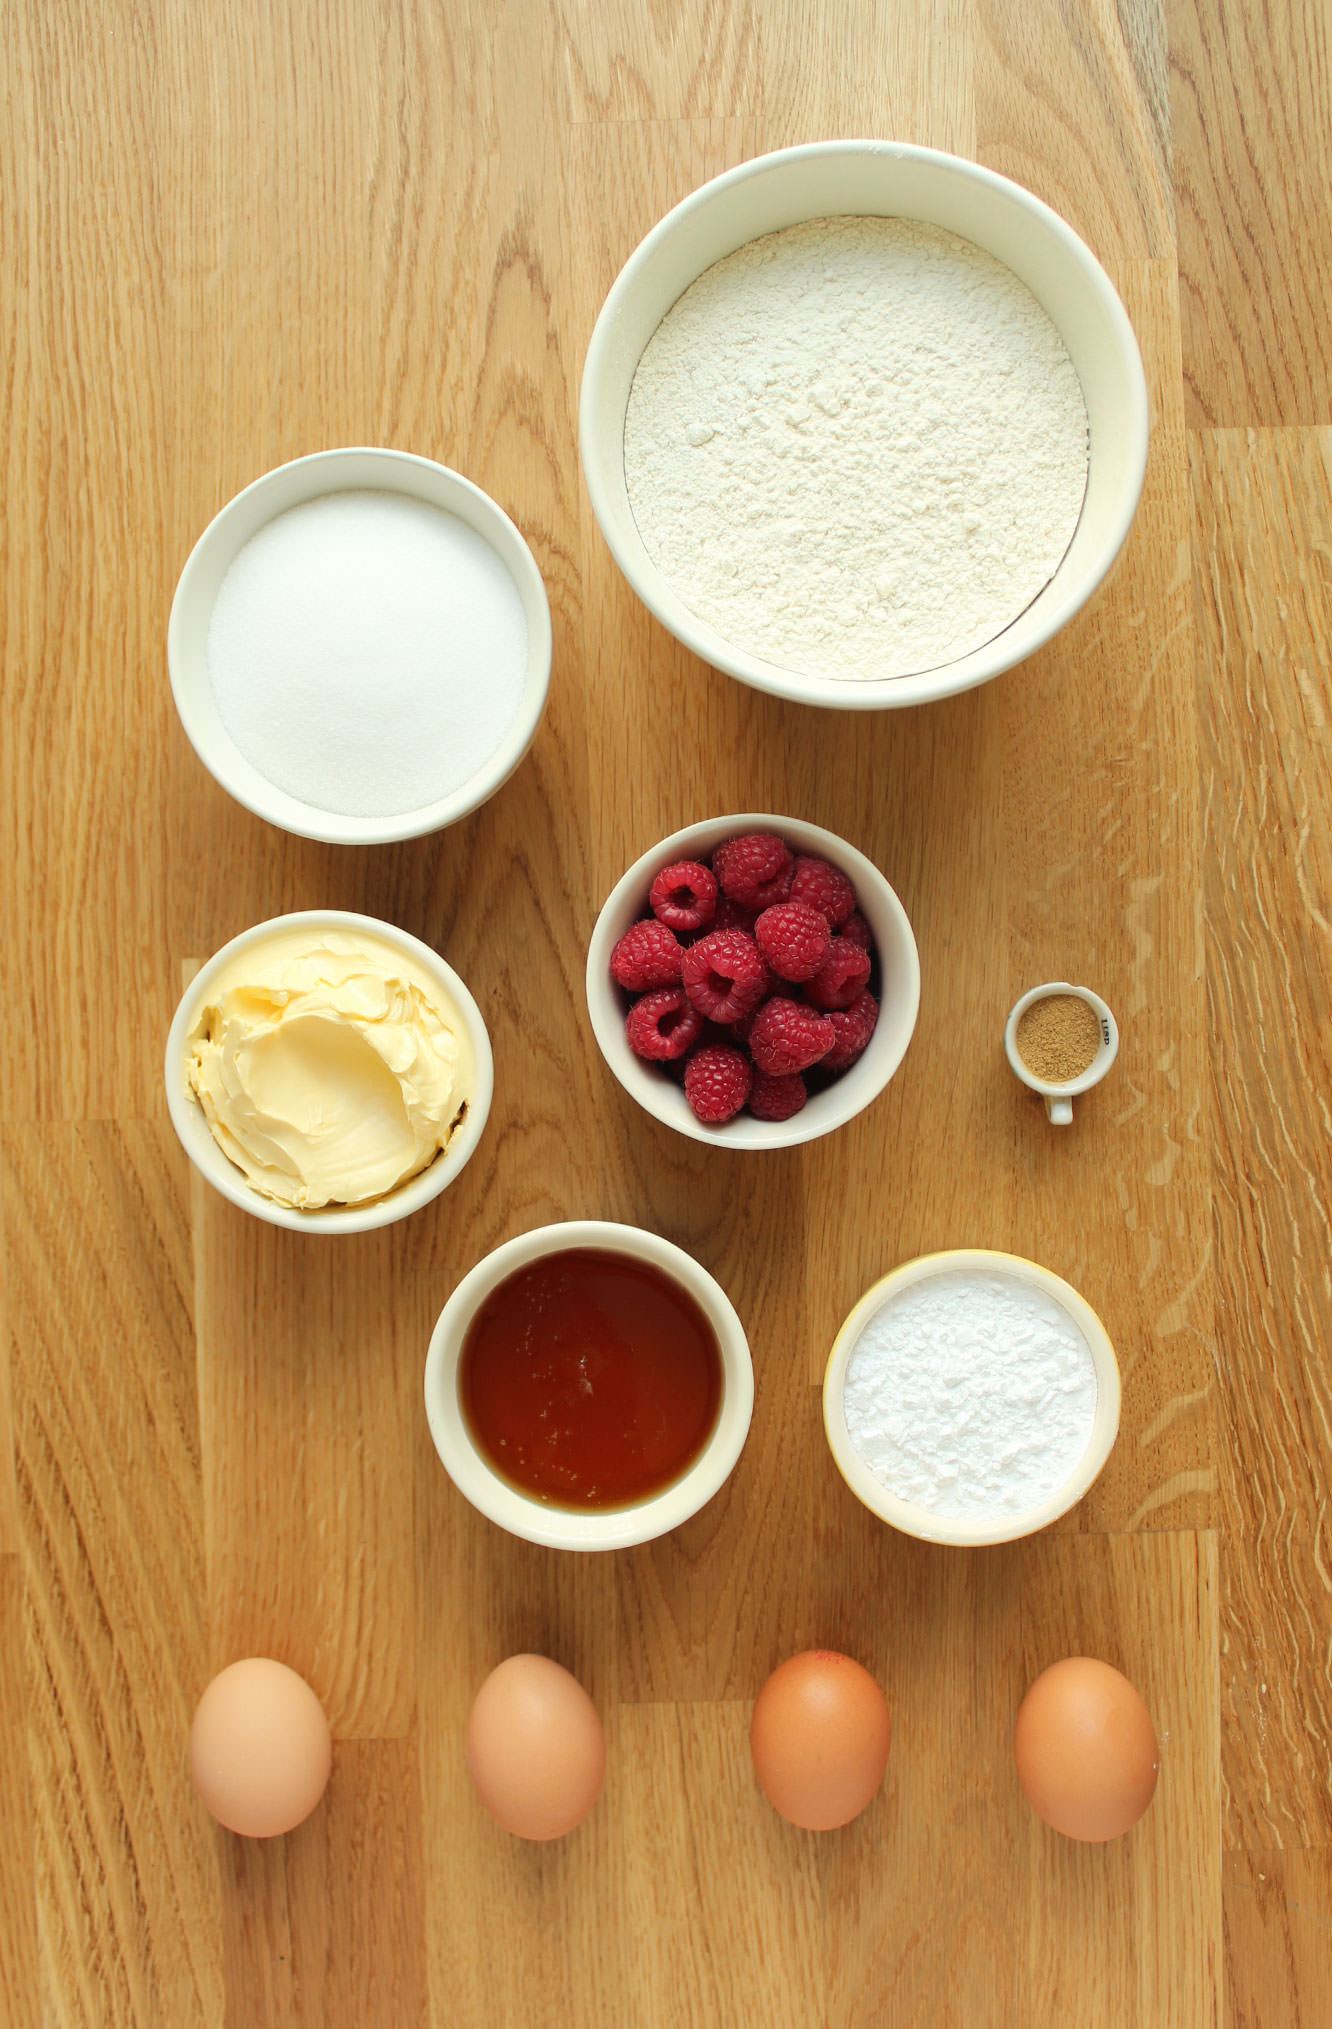
Things you need
200g/7 oz plain flour
200g/7 oz caster sugar
50g/1.75 oz ground almonds
5 tbsp vegetable oil
250ml/6.5 fl oz cold water
1 tsp vanilla extract
2 tsp almond extract
1 tsp bicarbonate of soda
1 tsp white vinegar (I won’t lie…I actually used cider vinegar, because I wasn’t about to buy a whole bottle for a single teaspoon)
To decorate:
Icing sugar (royal icing works well if you have it)
6 glacé cherries
Cherry jam
Silver foil cupcake cases (to add that authentic touch)
(Makes 12 cupcakes)
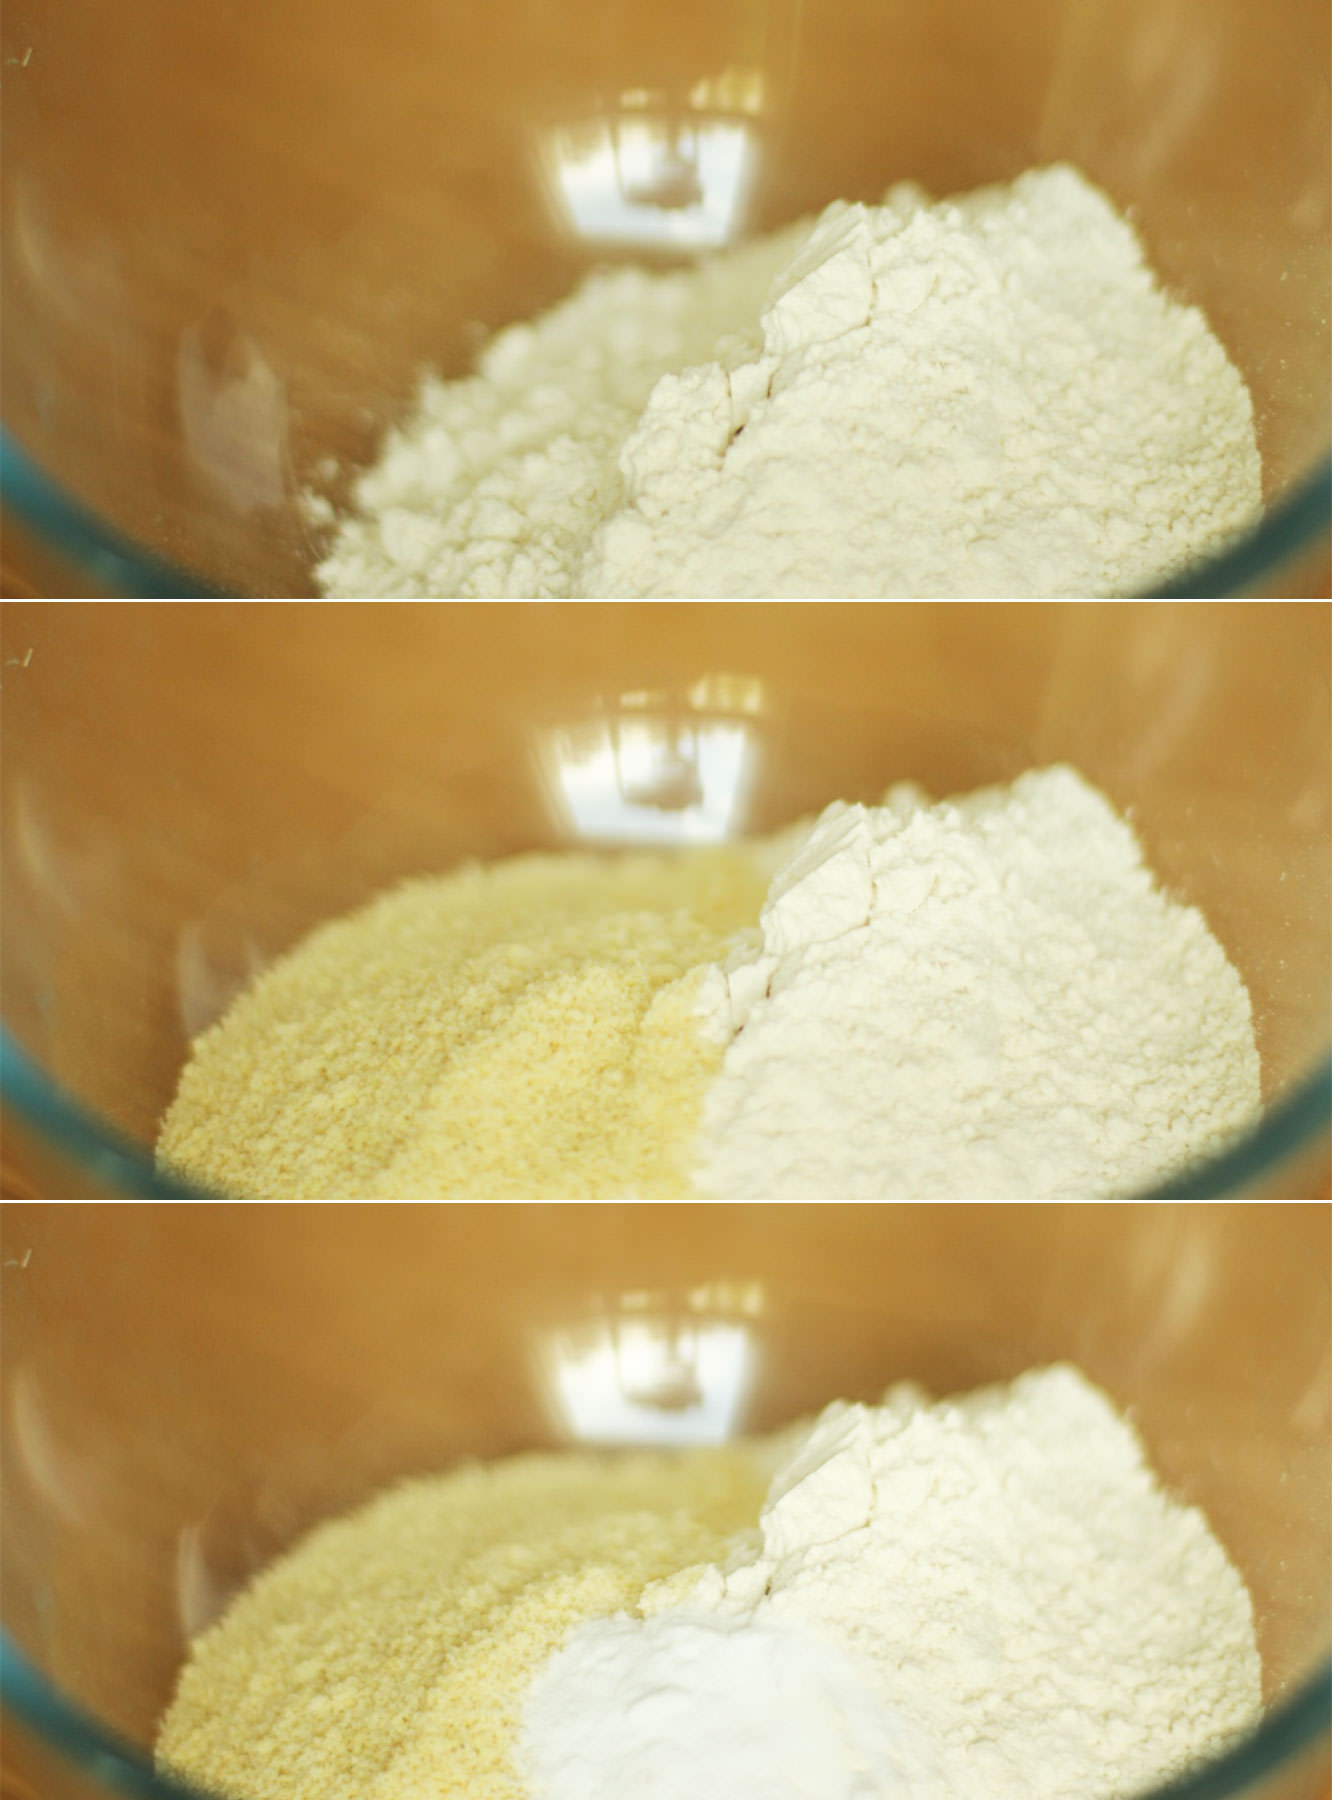
Step one
Mix together the flour, almonds and baking powder.
Step two
Add the caster sugar and stir again until combined. Yup, this is SUCH an easy recipe that I gave that its own step.
Step three
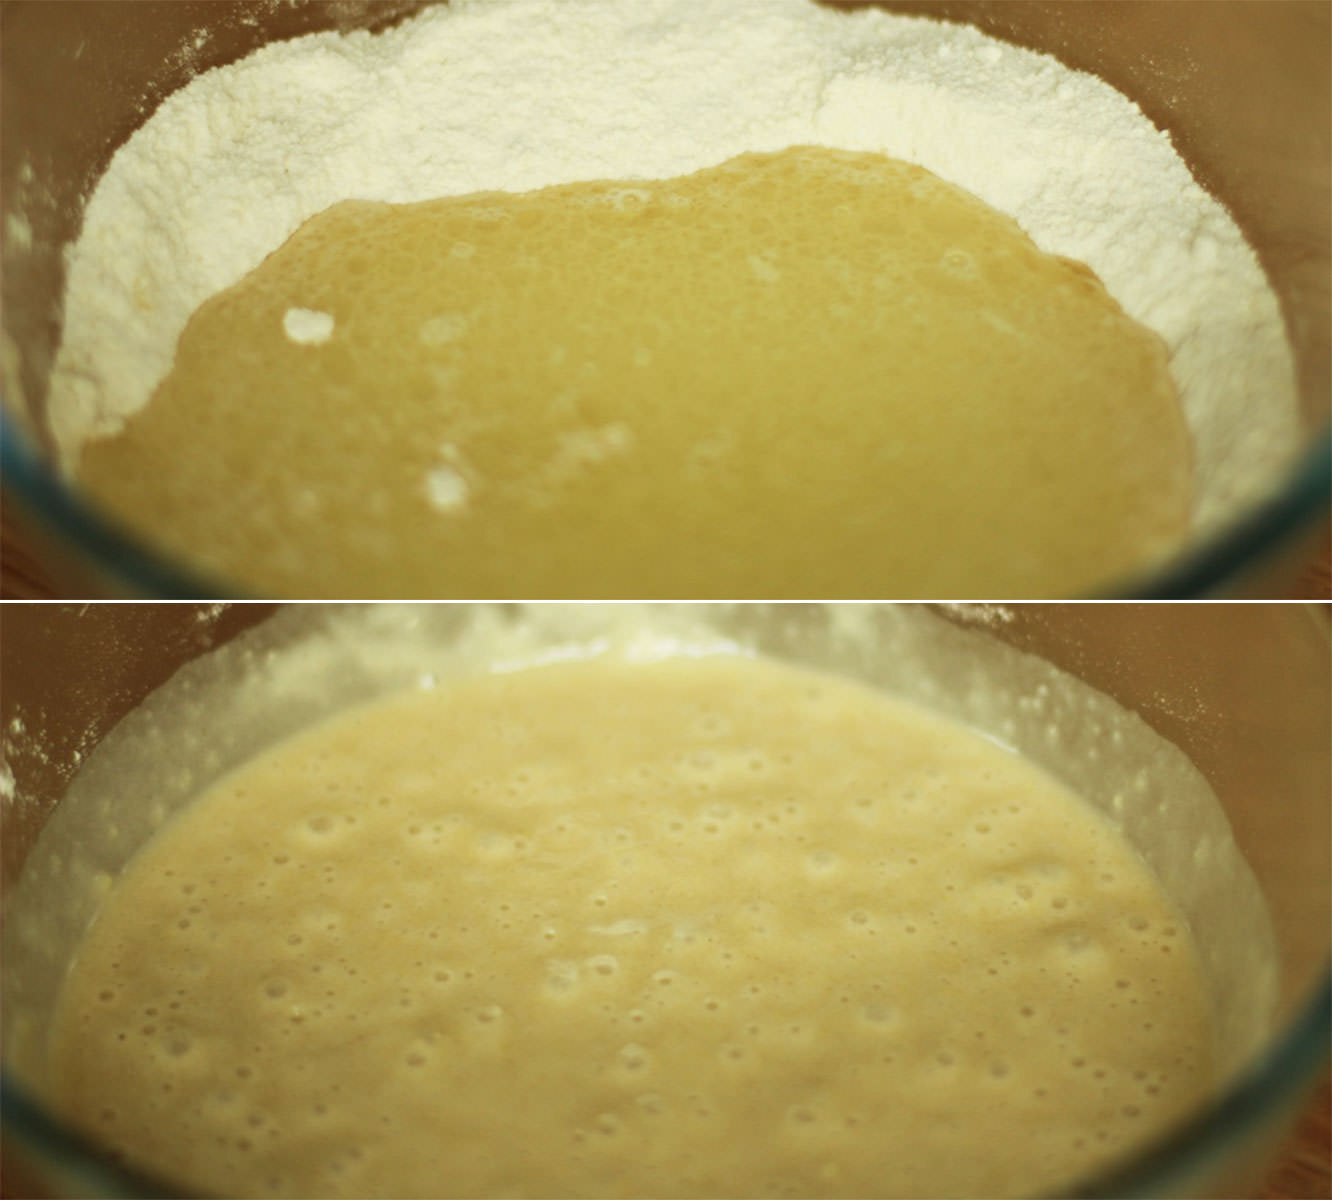
Make a well in the middle and add the water, oil, vinegar and extracts.
Using a hand whisk make small circular motions until all the flour mix is gradually incorporated. Doing it that way will reduce the number of lumps.
Step four
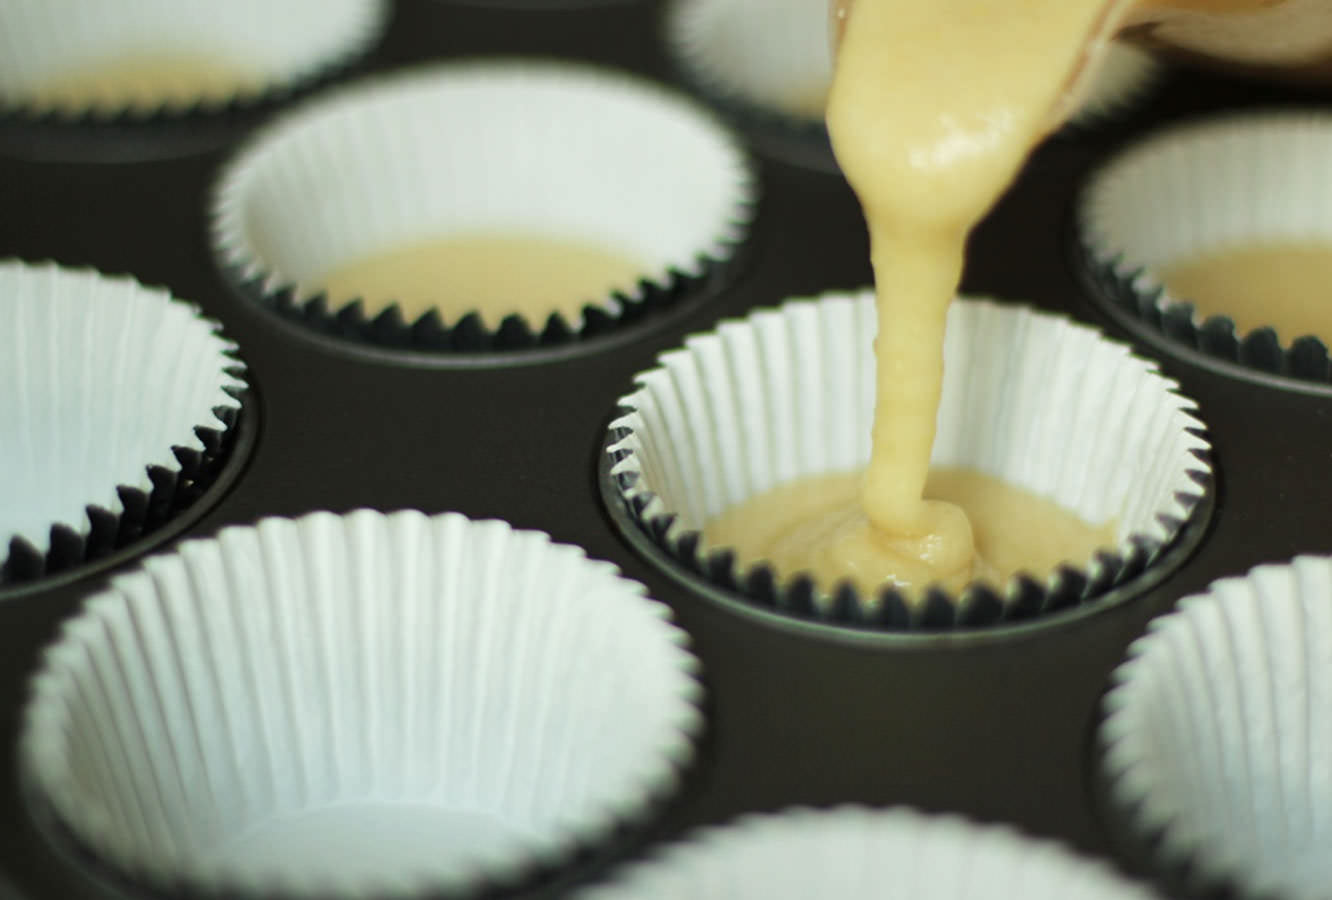
Using a jug distribute the mixture evenly between 12 cupcake cases. Trust me. You will want a jug.
Bake on gas mark 4/180C/350F for 20-25 minutes until they spring back when touched.
Step five
Cut a circular section out of the middle with a small knife and fill with cherry jam. Remove excess sponge from the bit you removed and put the lid back on.
Step six
Mix some icing sugar with water until you have quite a thick consistency. Royal icing is good for this because it’s thicker and more opaque generally.
Pipe onto the cupcake, try to get it as round as you can.
Another week another birthday. This time round it’s my lovely housemate who is bravely entering her mid-twenties; just another excuse for me to get in the kitchen.
Earlier in the week Vicky (the birthday girl in question), Matt (the fiance) and I, had sat down to watch The Princess Bride (a hilarious farce of a film), and we cracked open some Crabbie’s. It was such a lovely little evening, and I thought I would bake the experience into a cake to commemorate the little one’s birth.
Crabbie’s, for anyone who doesn’t know (more fool you), is alcoholic ginger beer. This particular batch was raspberry flavoured, and nobody was more surprised than me to discover how nicely ginger and raspberry complement each other. Add to that a honey and vanilla icing and you’ve got a birthday cake fit for any 24 year old.
You will need
For the cake:
255g/9 oz self raising flour
255g/9 oz caster sugar
255g/9 oz margarine/butter (I use stork for cakes)
4 eggs
2 tsp ground ginger (add a bit more if you want a really strong ginger taste, 2 tsp is nice and subtle)
1 tsp vanilla extract/paste
1 tsp bicarbonate of soda
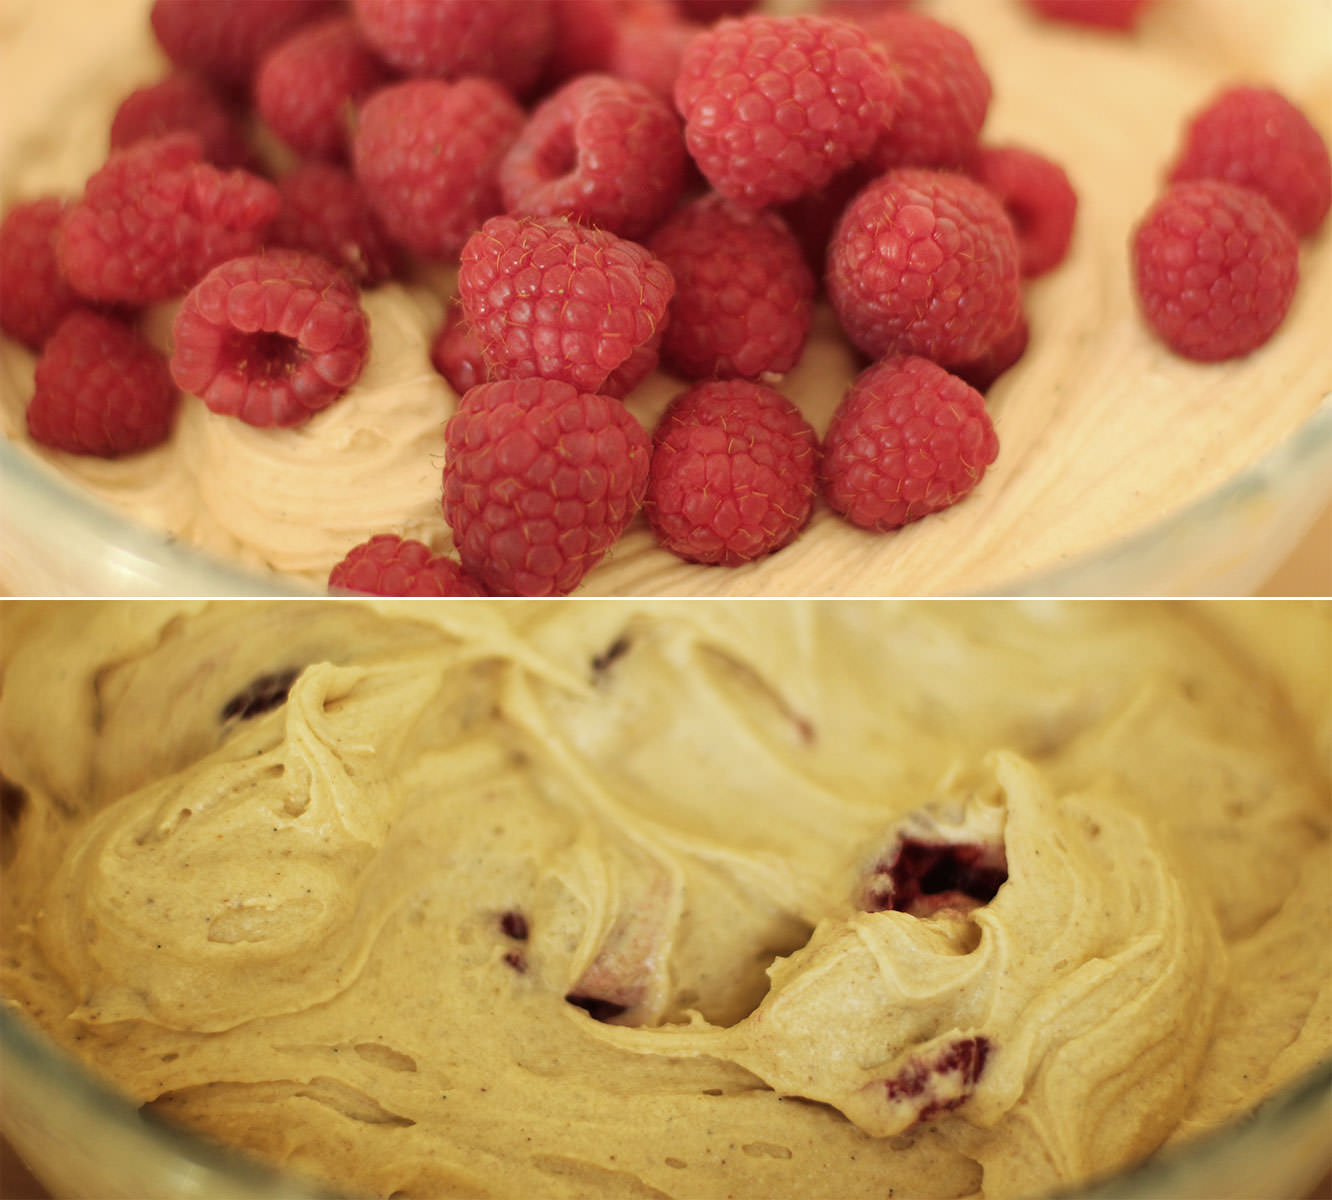
200g/7 oz raspberries
For the icing/decoration:
350g/12 oz icing sugar
150g/5 oz softened butter
170g/6 oz honey
1-2 tsp vanilla extract/paste (or even a pod if you have one so you get the lovely flecks)
100g/3.5 oz raspberries
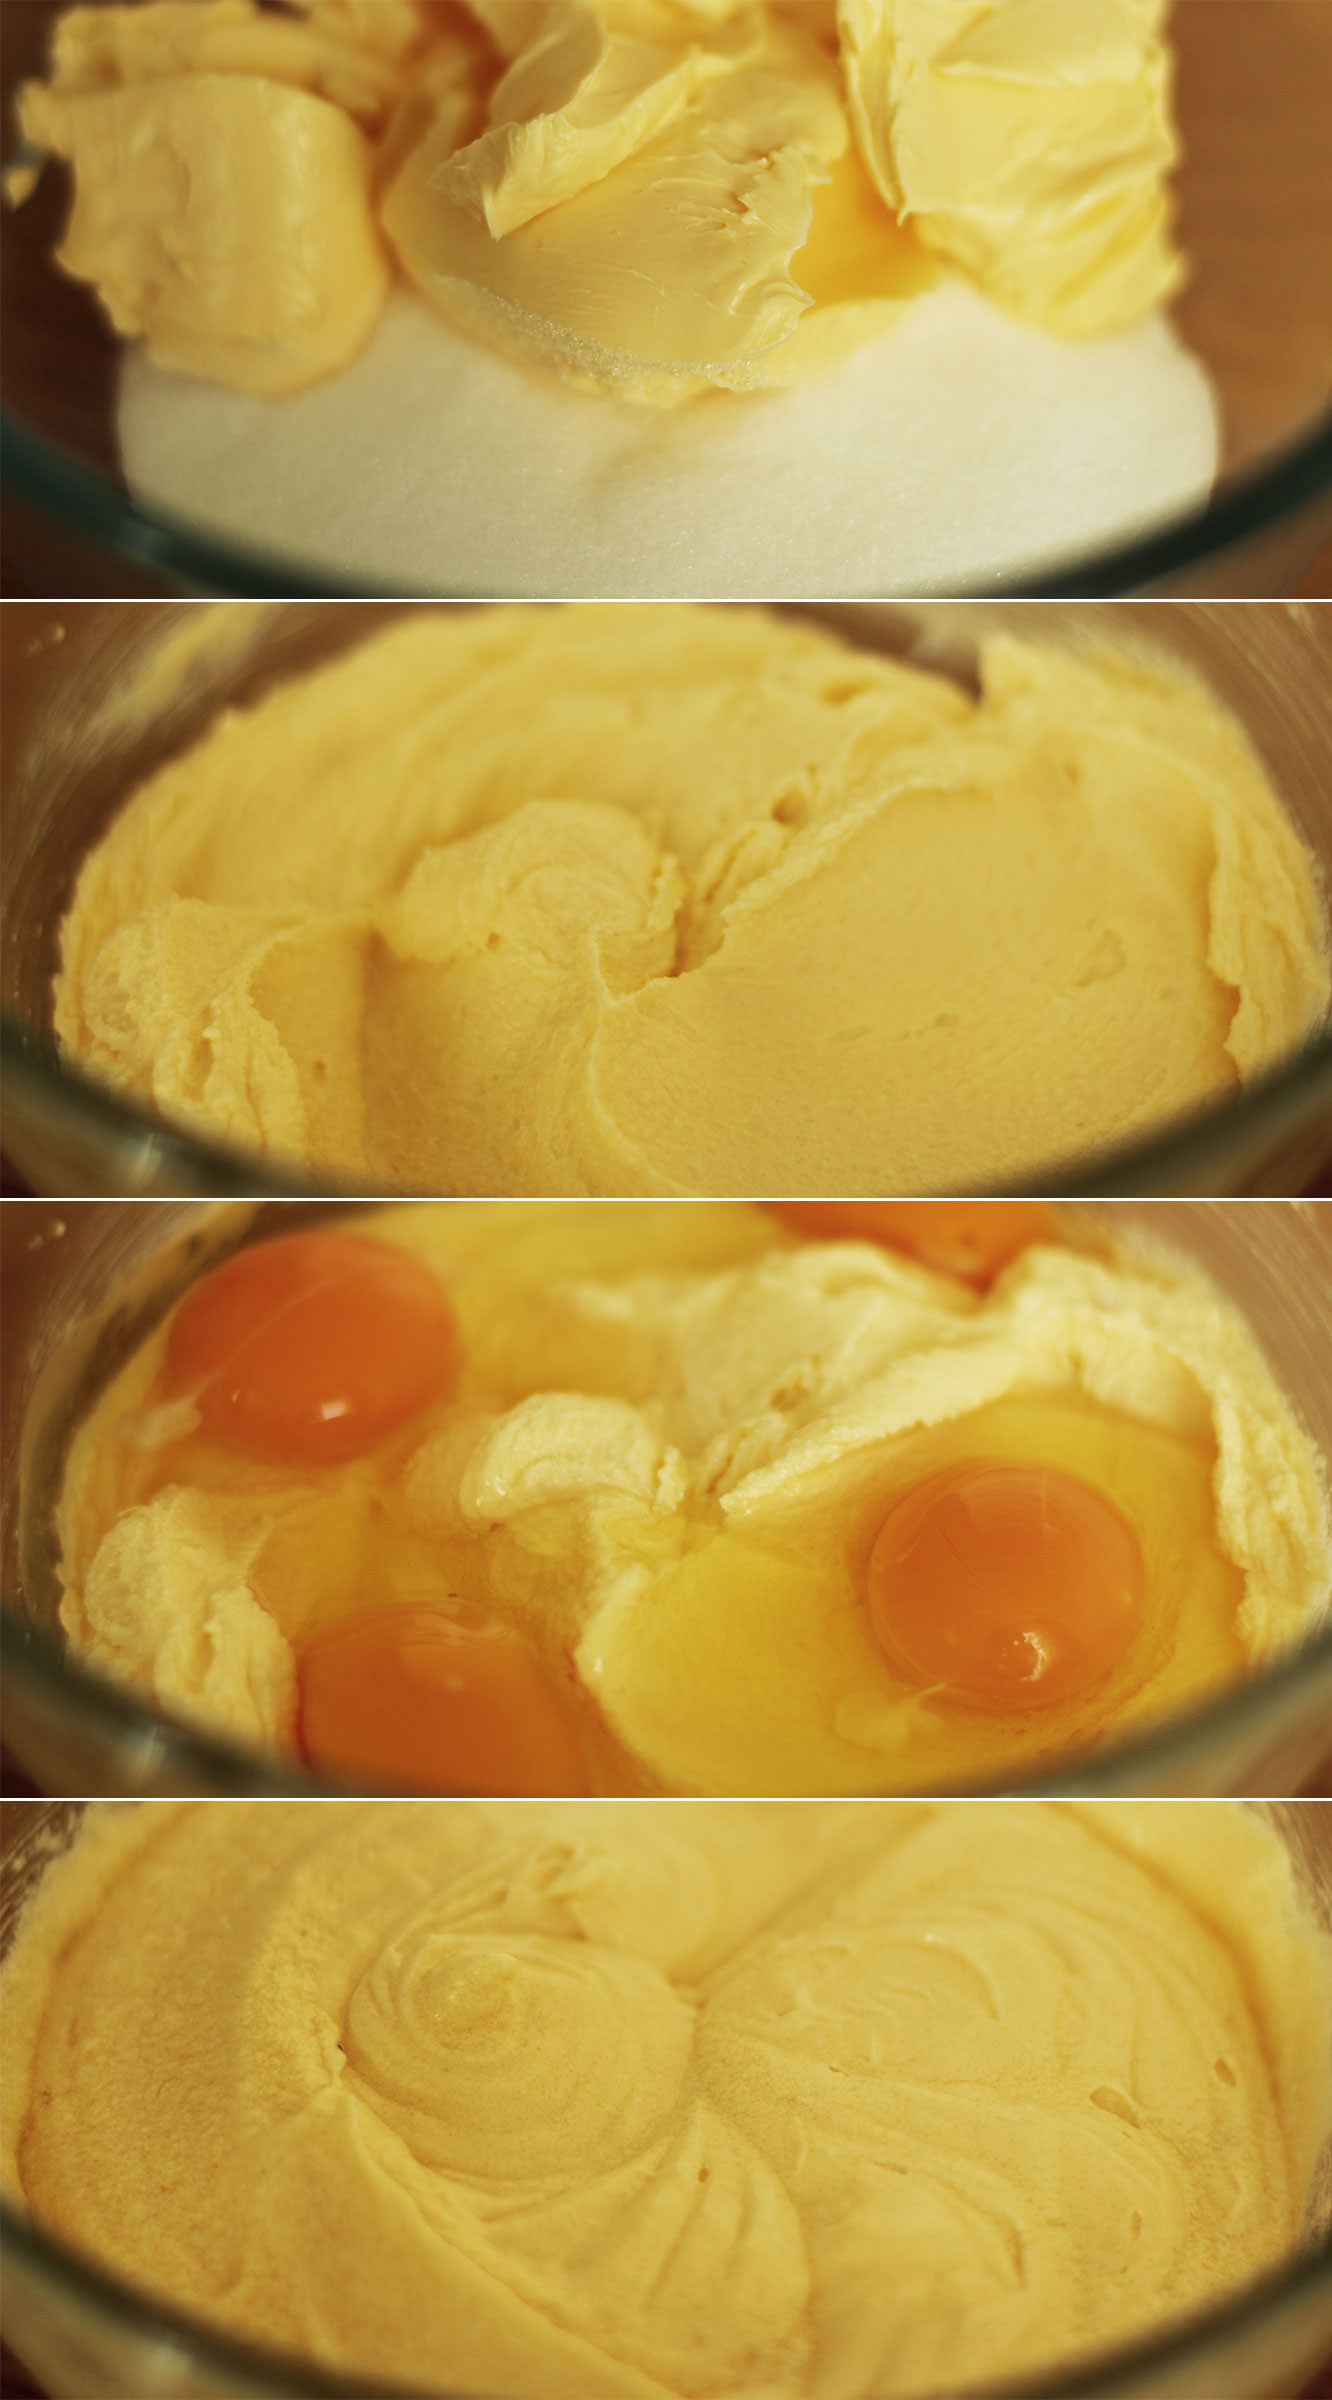
Step one
Using an electric whisk beat together the margarine and sugar until well blended and fluffy.
Step two
Add the eggs and beat again until combined. It looks a little split at this stage (see those little lumps at the sides) but you don’t need to worry, the flour never fails to sort that out.
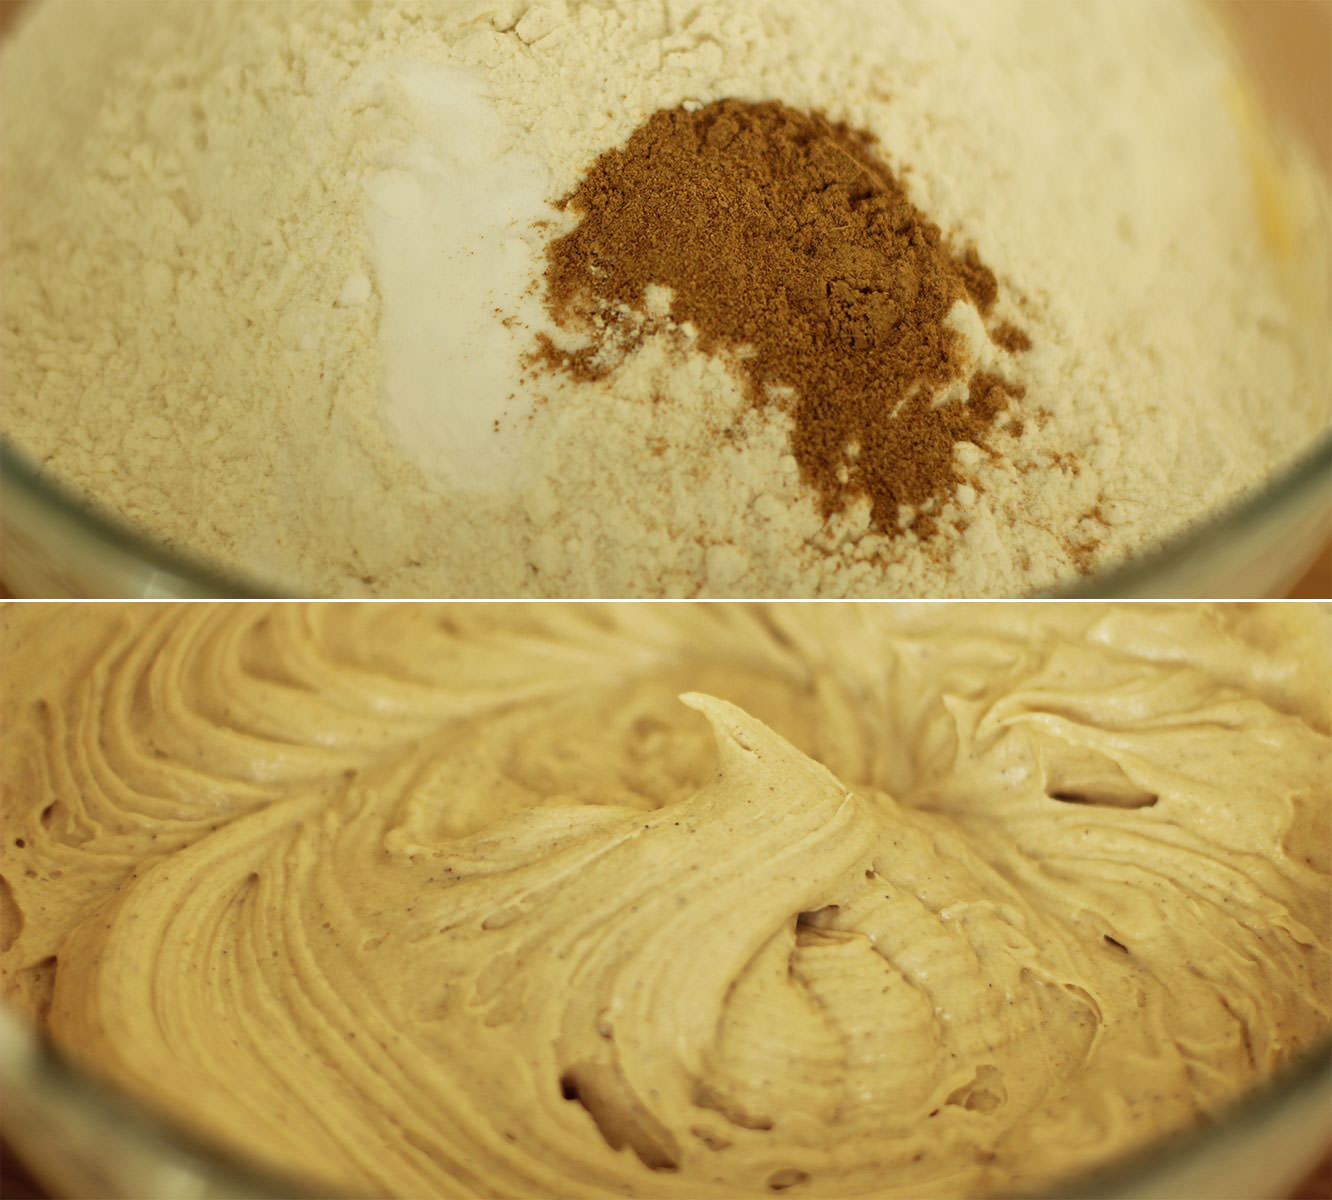
Step three
Add the flour, bicarbonate of soda and ginger and whisk again until smooth.
I also added the vanilla at this point which is in the form great paste my friend brought me back from Vanuatu, tastes delicious and has the beans in it. If you aren’t swinging by the South Pacific any time soon and don’t fancy the investment in a pod or some paste then extract will do the trick.
Step four
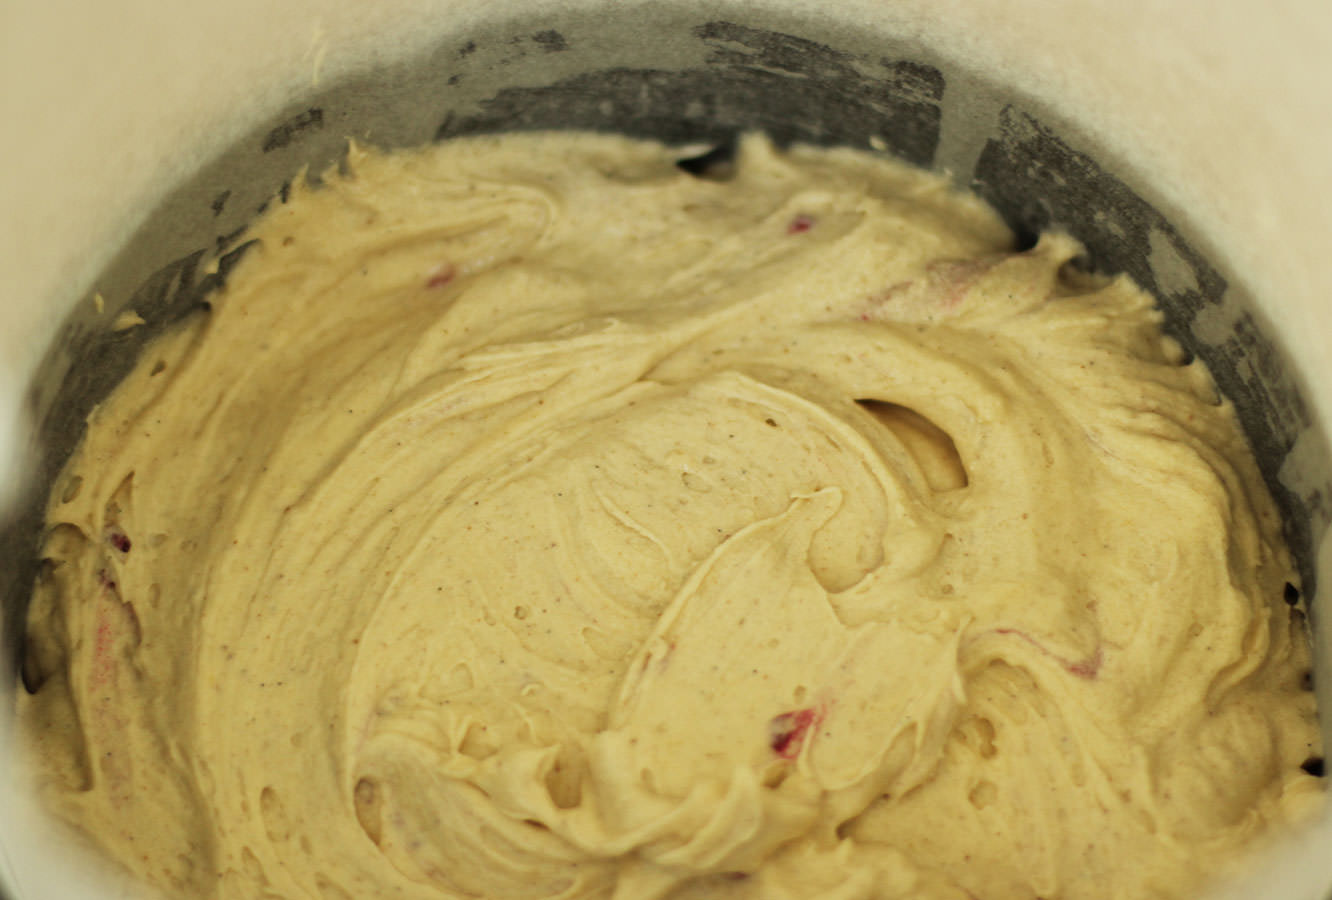
Add the raspberries and stir them in with a wooden spoon. I crushed some of them with the back of the spoon against the side of the bowl to help distribute them a little better.
Step five
Spoon into a greased and lined tin, or two tins. Bake on 180C/350F/gas mark 4.
If you are just using a single tin you need about 45-55 minutes and make sure you line the sides so that the greaseproof protects the sides and top of the cake from burning. If you are using two separate tins 35-40 minutes should do the trick, and you only need to line the bottoms of the tins.
Step six
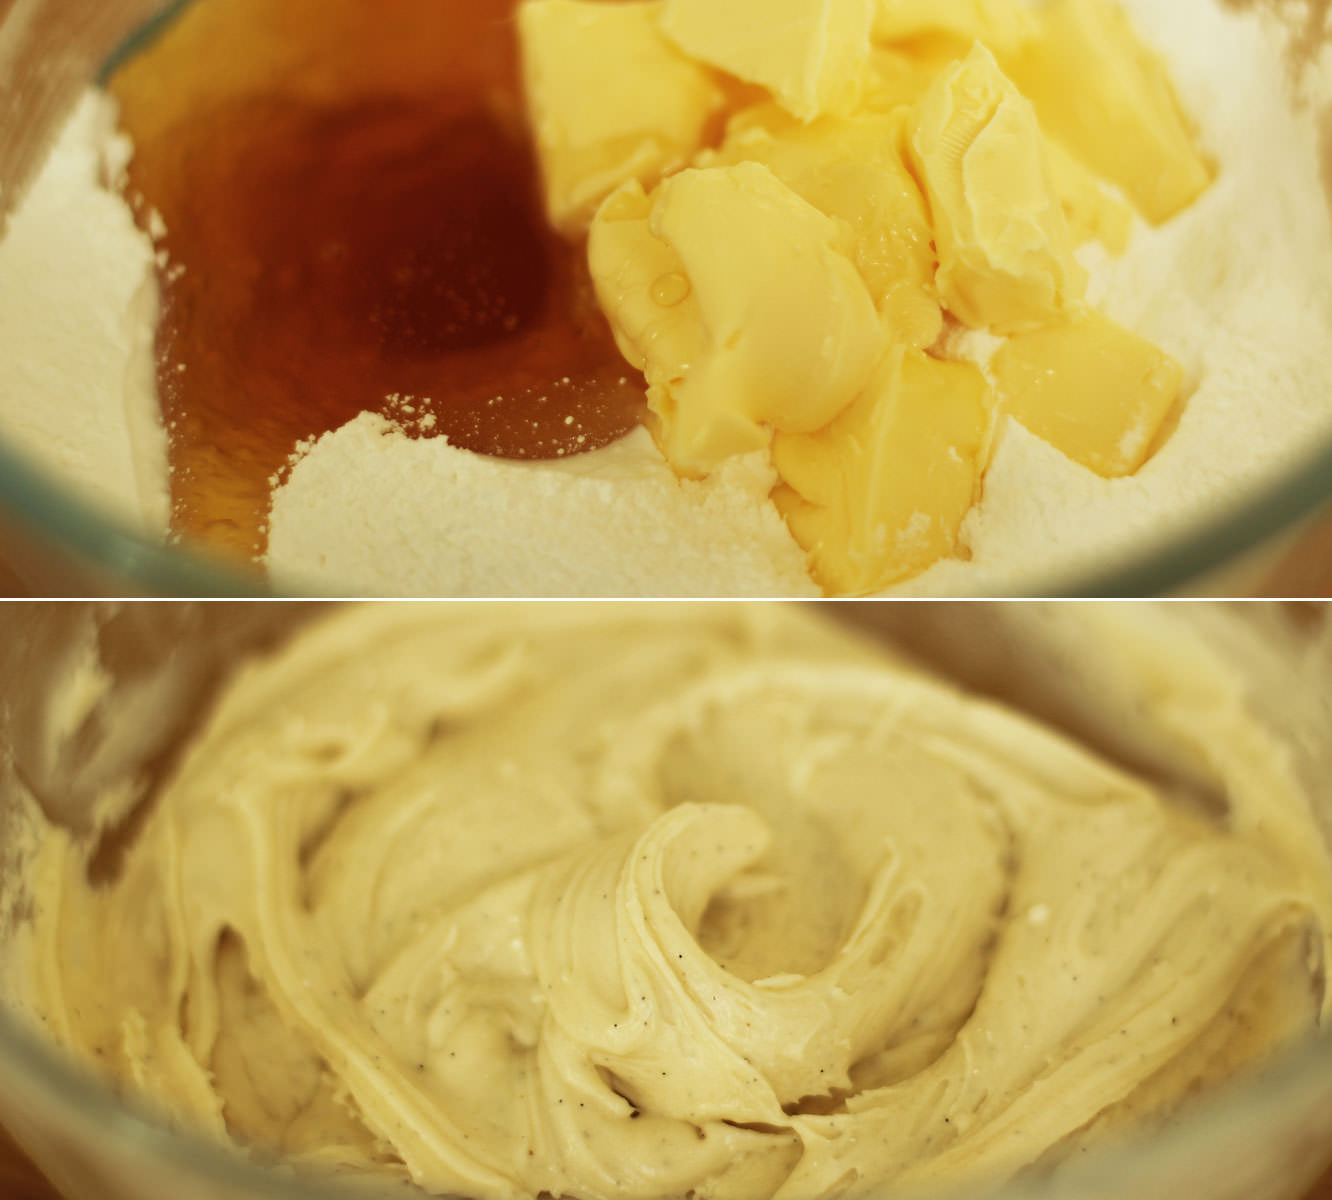
Whisk together the butter, icing sugar, vanilla and honey for the icing. Cover the bowl with a tea towel before turning on the whisk so you don’t get covered in icing sugar.
Step seven
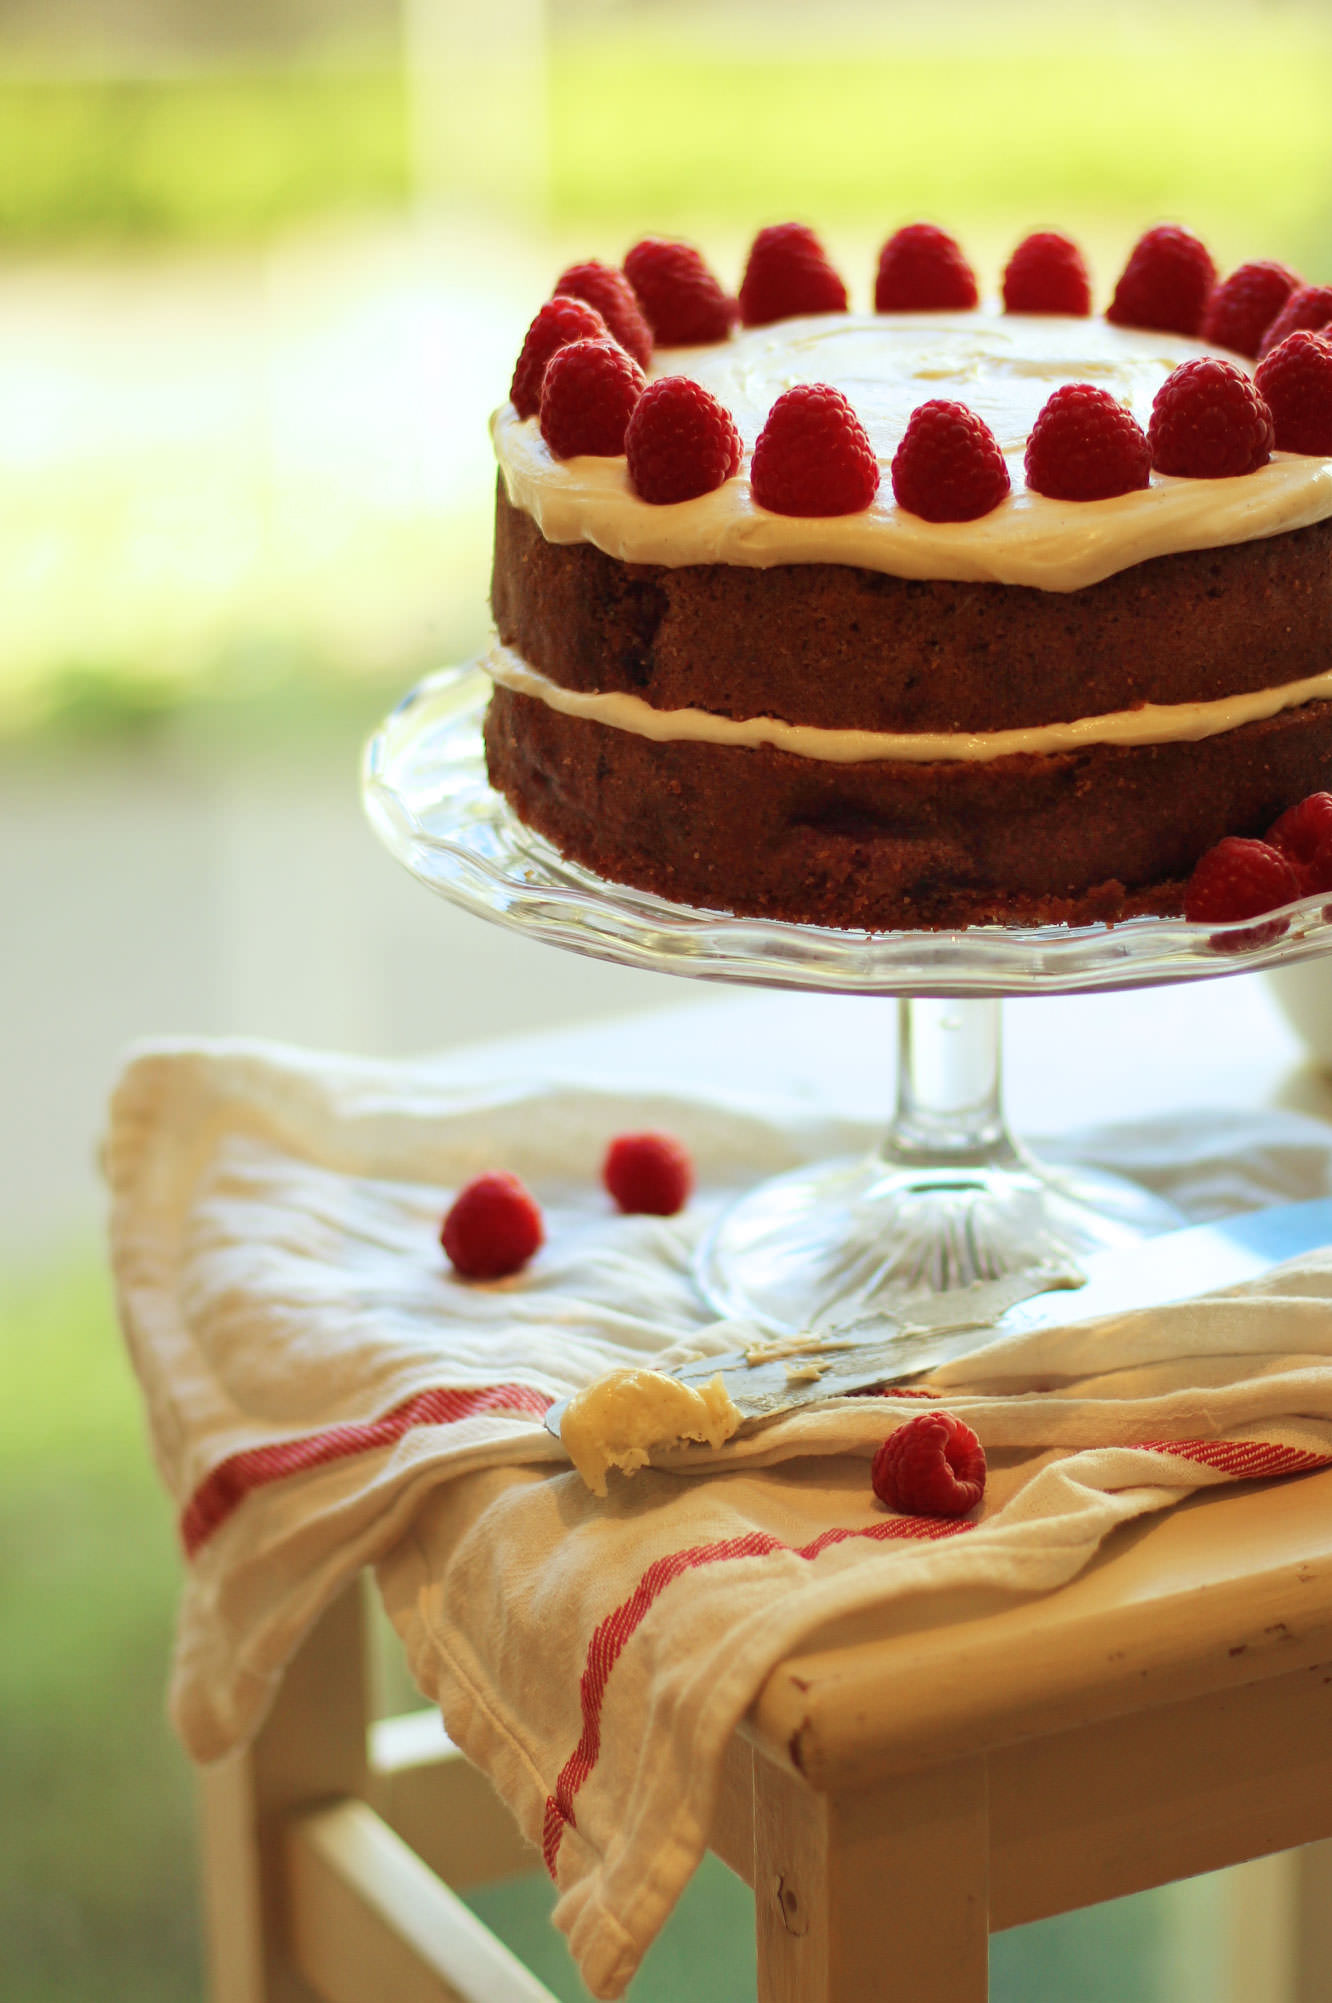
Once the cake has completely cooled assemble it. Use just under half the icing in the middle and the rest on top.
I then decorated with the remaining raspberries, but feel free to get creative!
A couple of weeks ago one of my favourite colleagues had a special birthday, so for a special birthday we needed a special cake.
I had only attempted one two tier cake before and had never made the chocolate collar you’ll see below. Sure this cake was a bit more effort than your average victoria sponge, but if you’ve got a few hours and a bit of patience and determination this is very much possible.
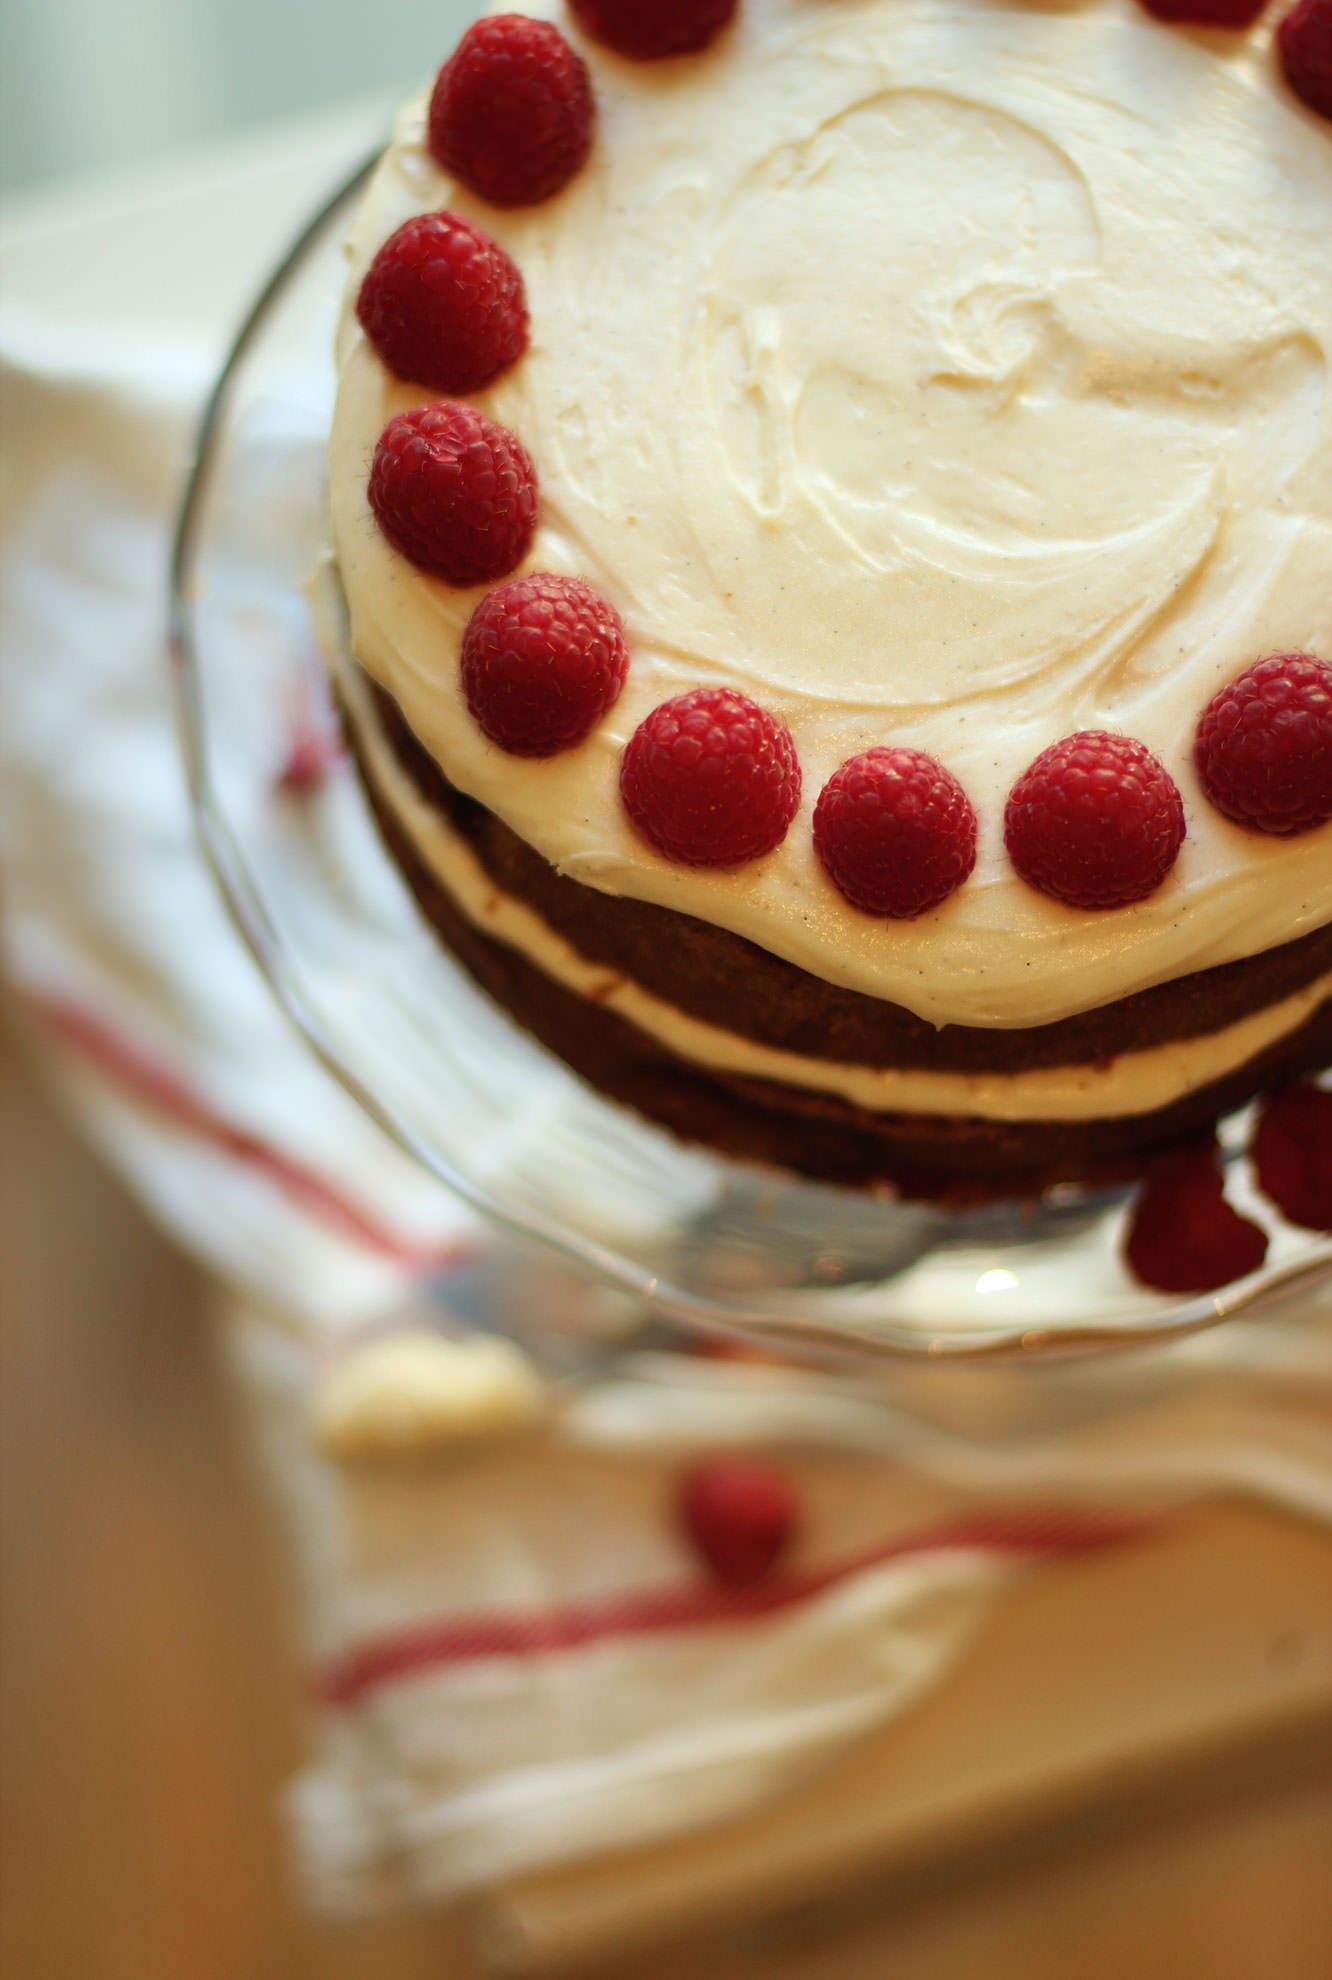
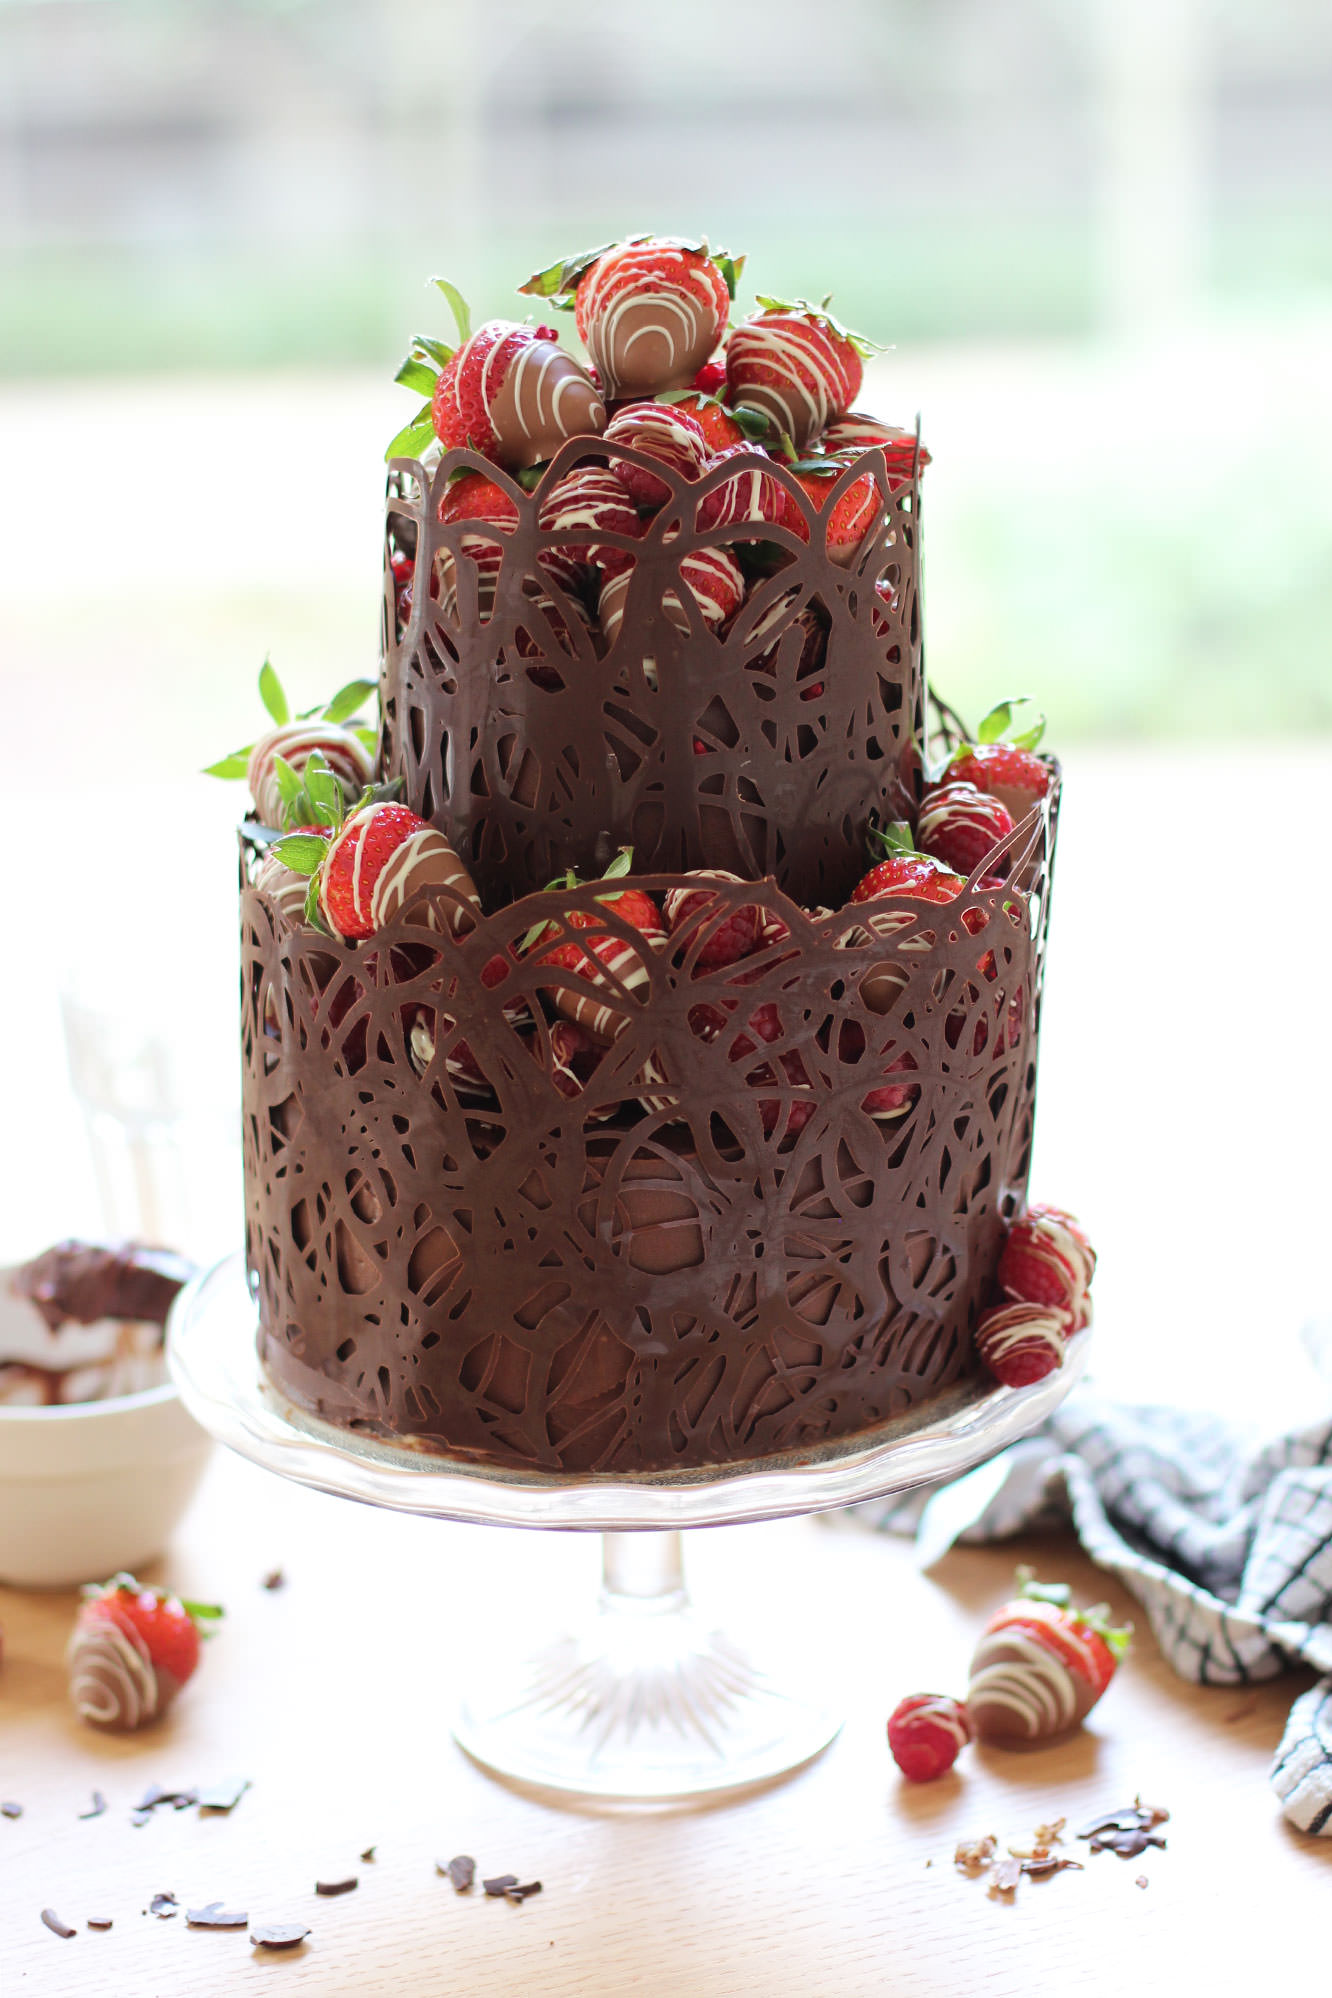
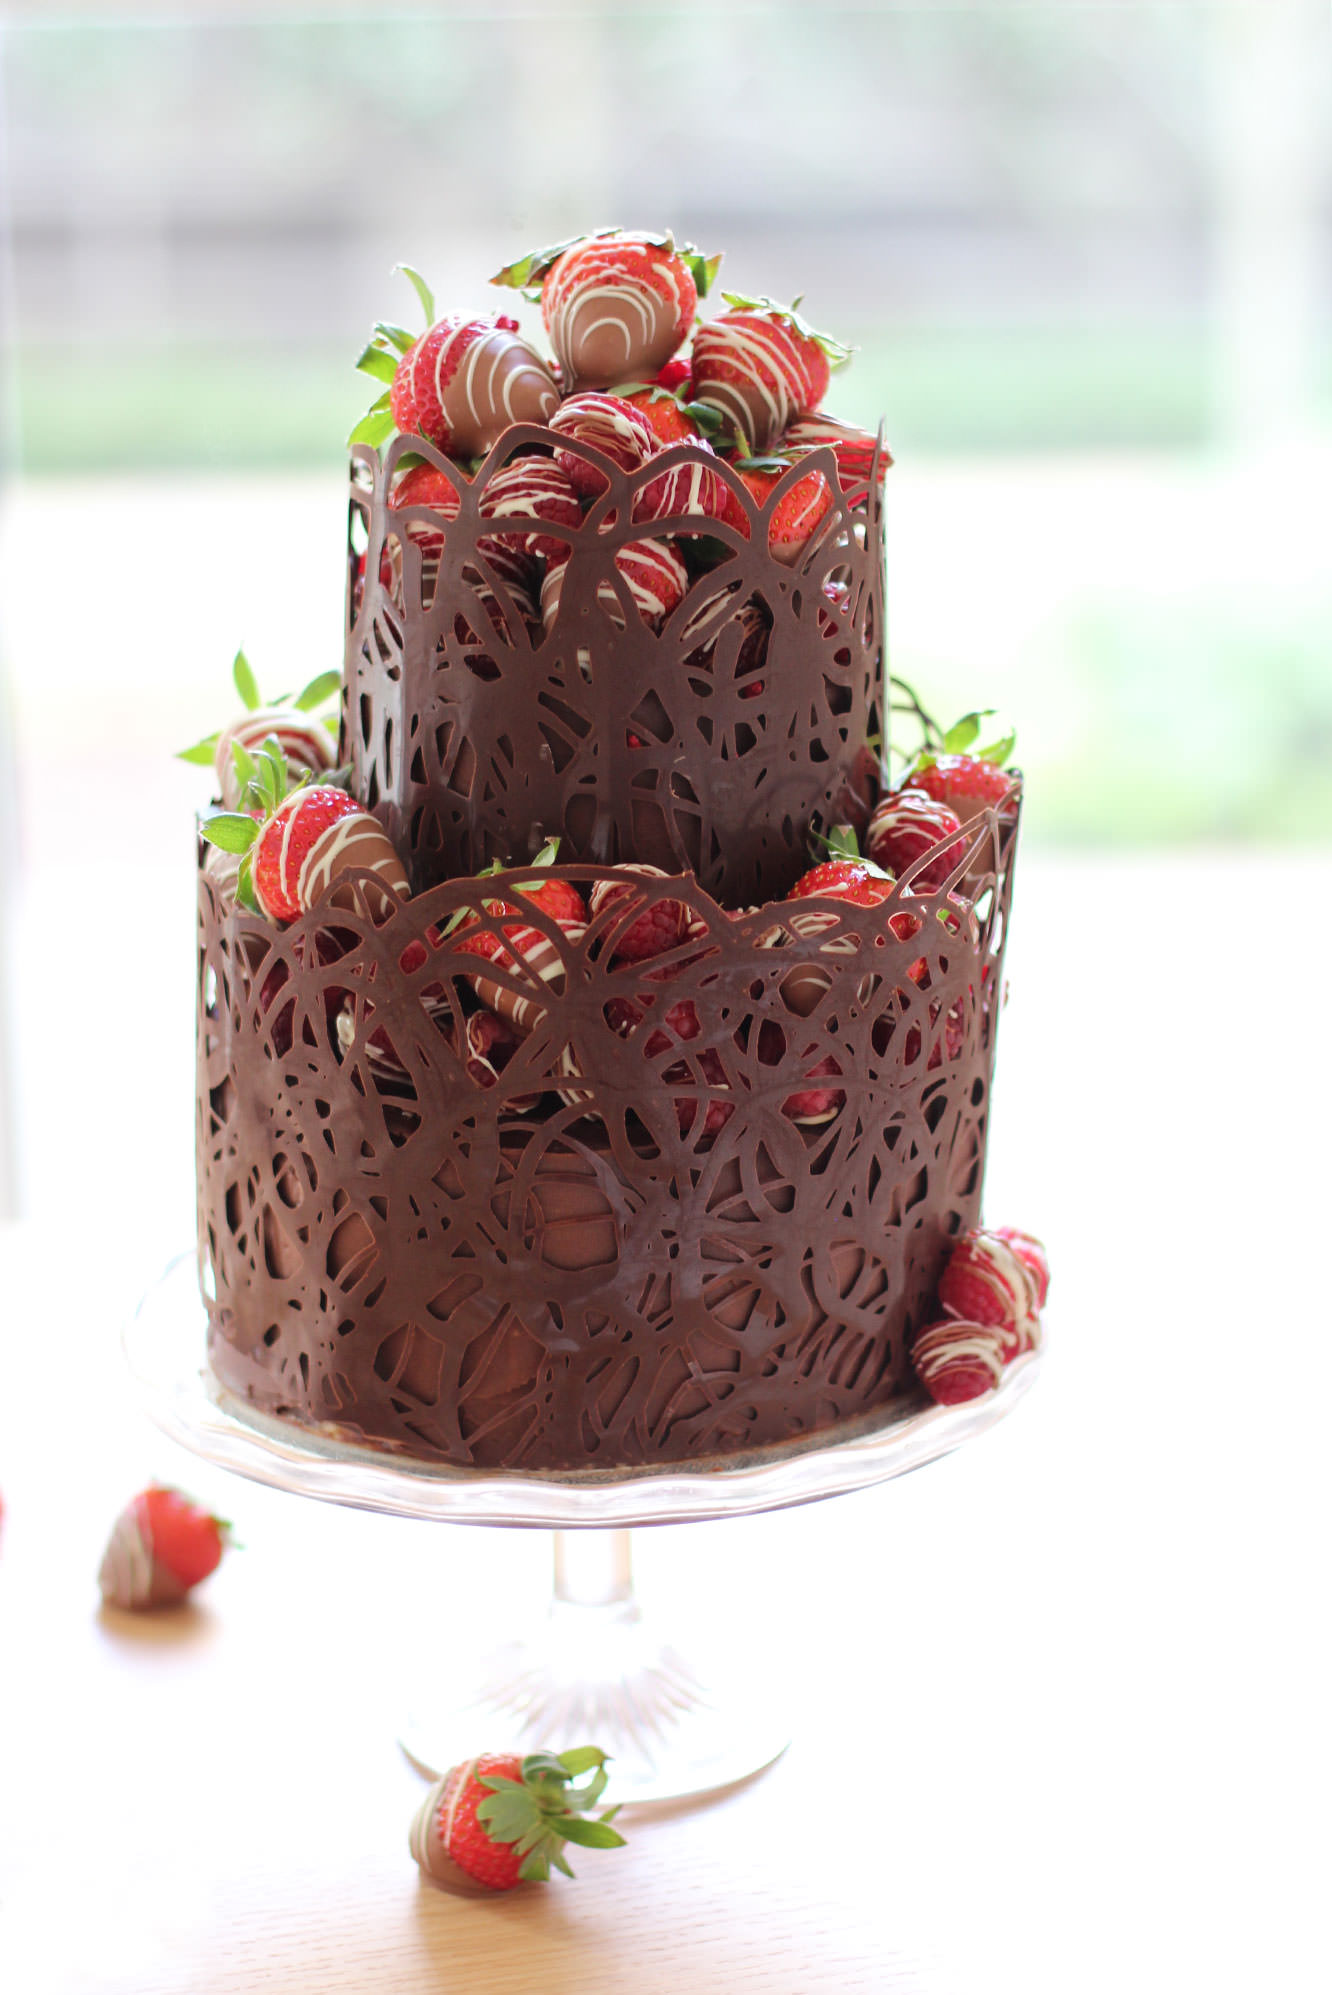
I present to you a full step-by-step recipe for a two tiered chocolate fudge cake with salted caramel buttercream, decorated with a dark chocolate collar and chocolate dipped berries. I just wanted to say that out loud. Look away if you don’t like chocolate. This won’t please you.
Happy birthday Jane!
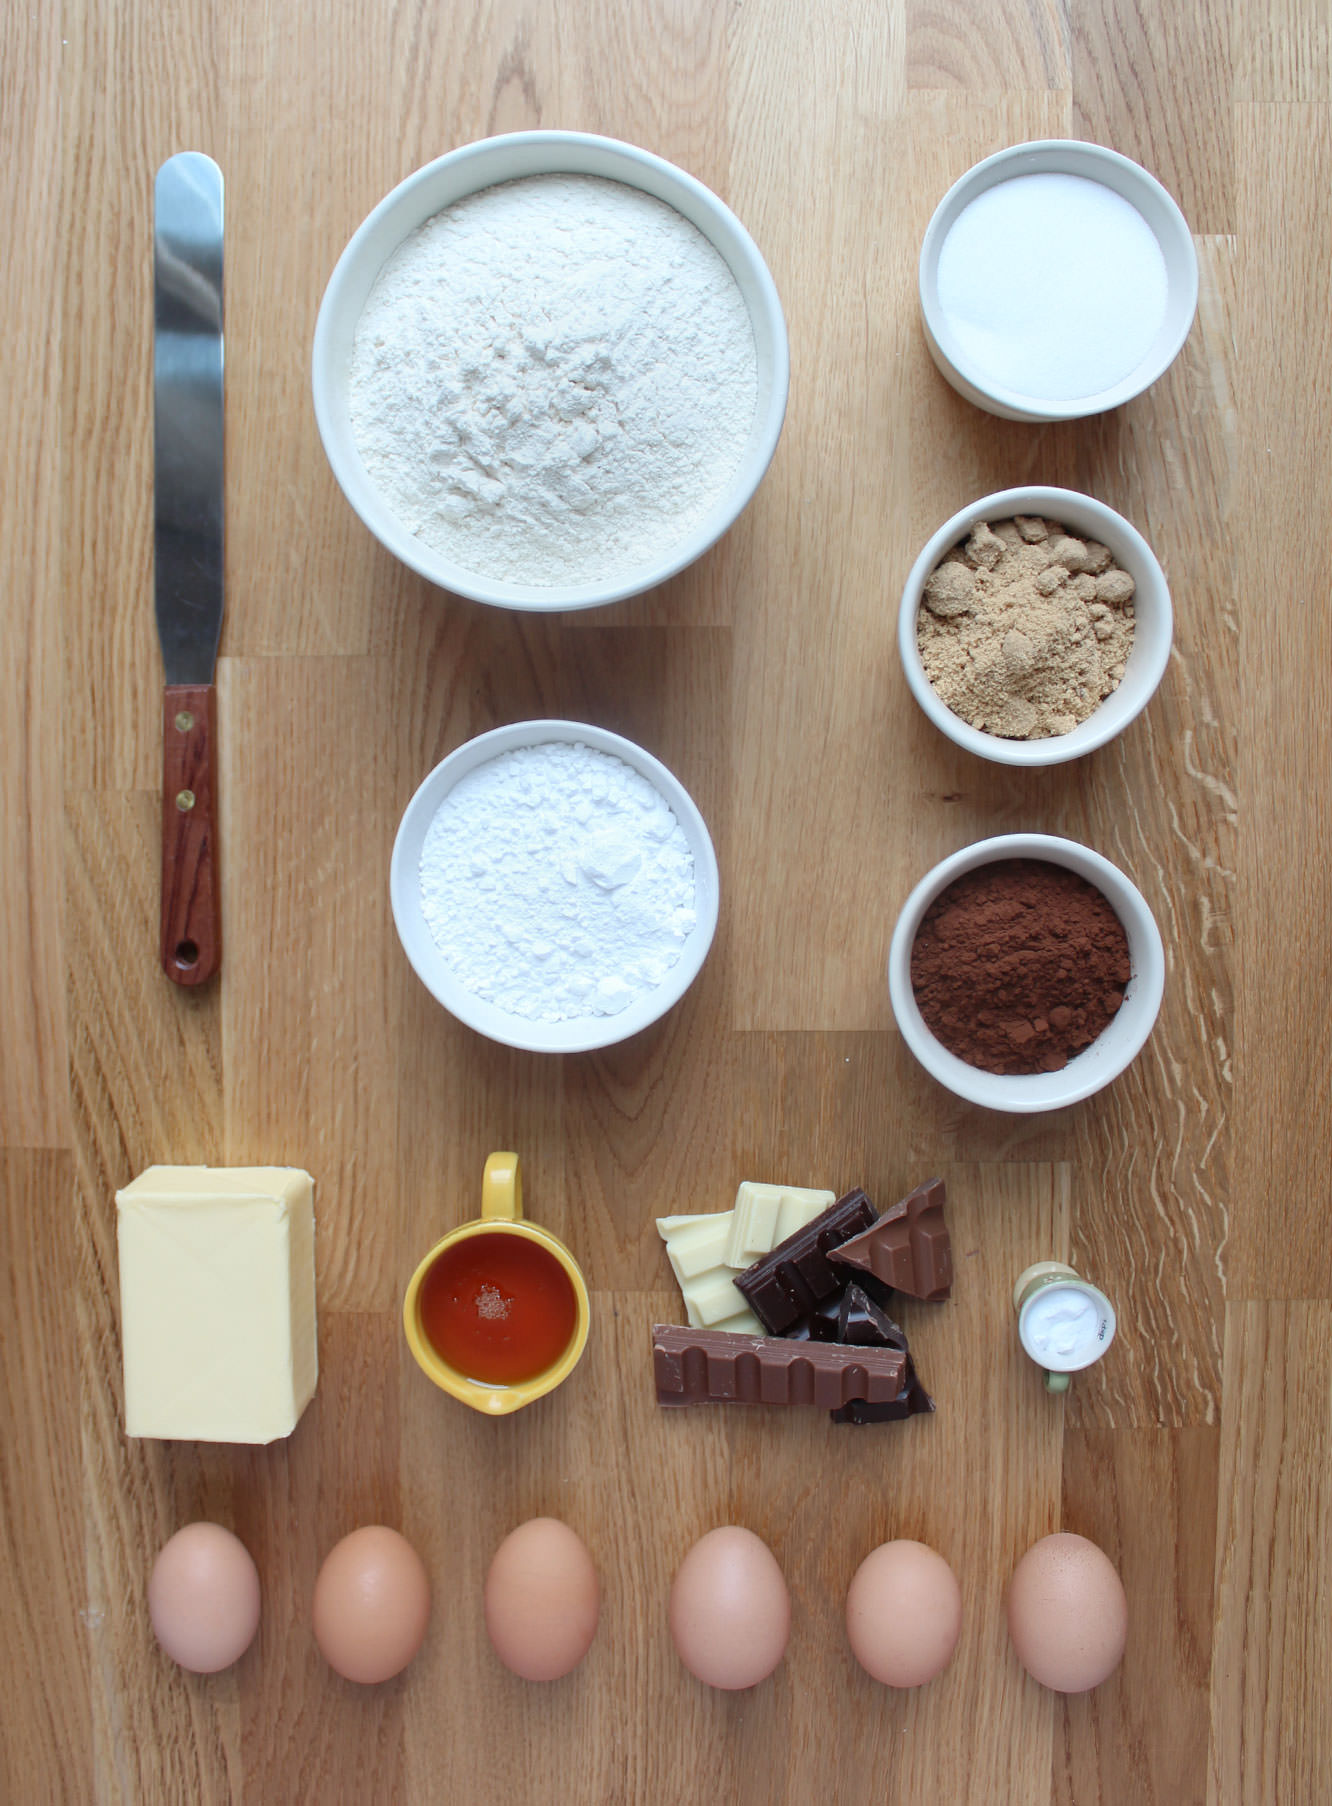
You will need
For the cake:
380g/13.5 oz caster sugar
380g/13.5 oz unsalted butter or margarine (I use stork)
325g/11.5 oz self raising flour
6 eggs
55g/2 oz cocoa powder
1 1/2 tsp bicarbonate of soda
For the salted caramel buttercream:
400g/14 oz icing sugar
250g/9 oz butter
80g/3 oz soft brown sugar
100ml/3.5 fl oz double cream
2 tbsp golden syrup
2 tsp salt
For the chocolate fudge icing:
225g/8 oz unsalted butter
200g/7 oz plain chocolate
100g/3.5 oz milk chocolate
2 tbsp golden syrup
200ml/6.5 fl oz double cream
For the decorations:
1 packet strawberries (sorry I didn’t look at weight)
2 packets of raspberries (about 500g)
200g/7 oz plain chocolate
200g/7 oz milk chocolate
100g/3.5 oz white chocolate
(for the chocolate amounts are the best approximates I can make, I bought a LOT of chocolate. I strongly recommend Sainbury’s Belgian cooking chocolate if you are in the UK, definitely do not buy that scot block stuff)
Other:
Cake tin bottom tier – 1 x 7 inch (3.5 inches deep)
Cake tin top tier – 2 x 5 inch (1.5 inches deep)
Cake boards – 1 x 8 inch, 1 x 5 inch
Sticks/straws for support. I used cake pop sticks, but wooden dowling or special cake making supports would be fine. Make sure they are at least 4 inches so you can cut them to size.
Palette knife
Sugar thermometer (not 100% essential but I recommend tempering the chocolate)
Cellophane
Piping bags
Step one
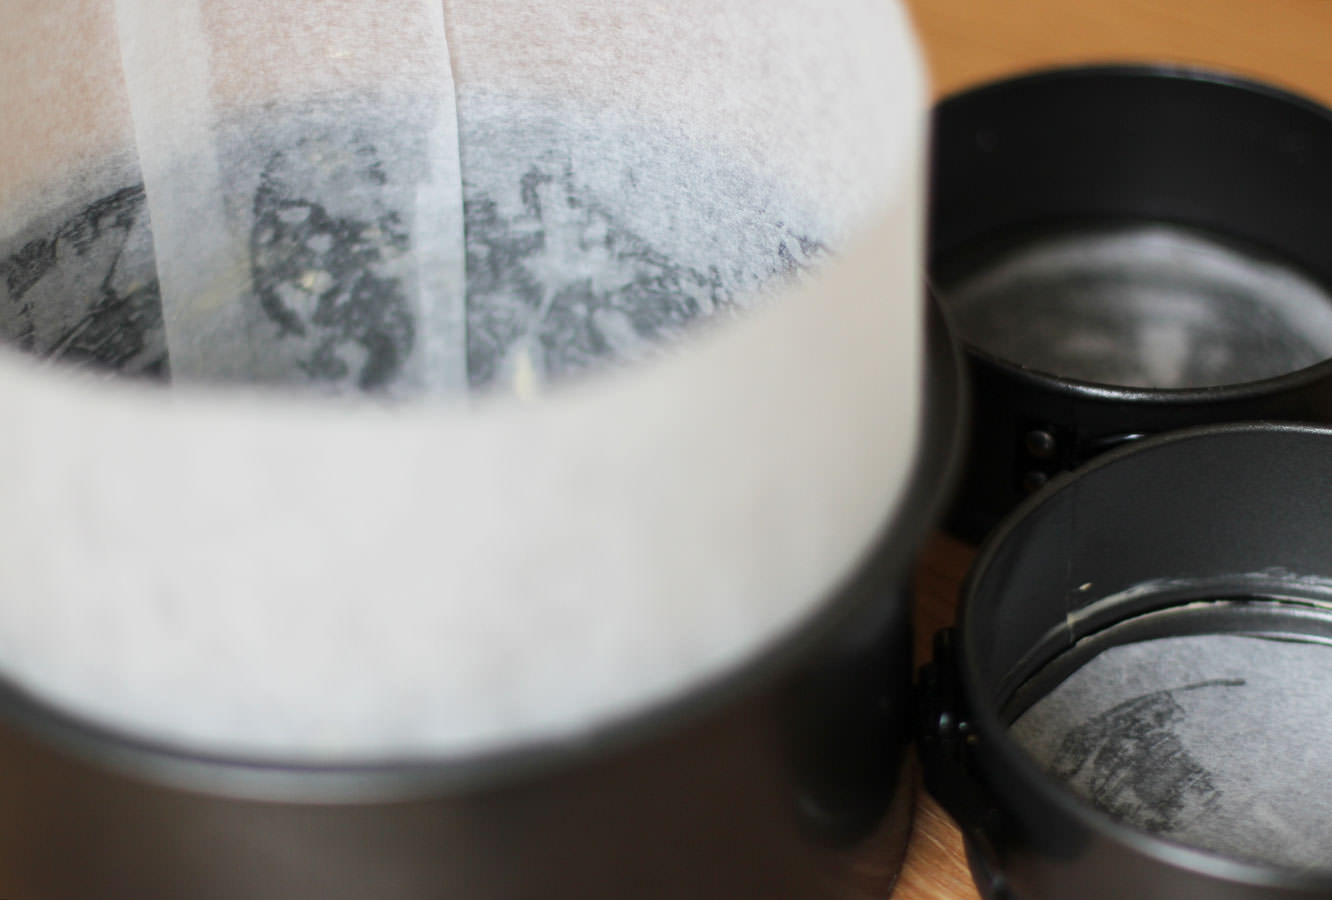
Grease and line the tins.
Note how I created a bit of a collar on the larger tin from greaseproof. This is to help stop the sides of the cake catching while the inside bakes as it’s essentially double the thickness.
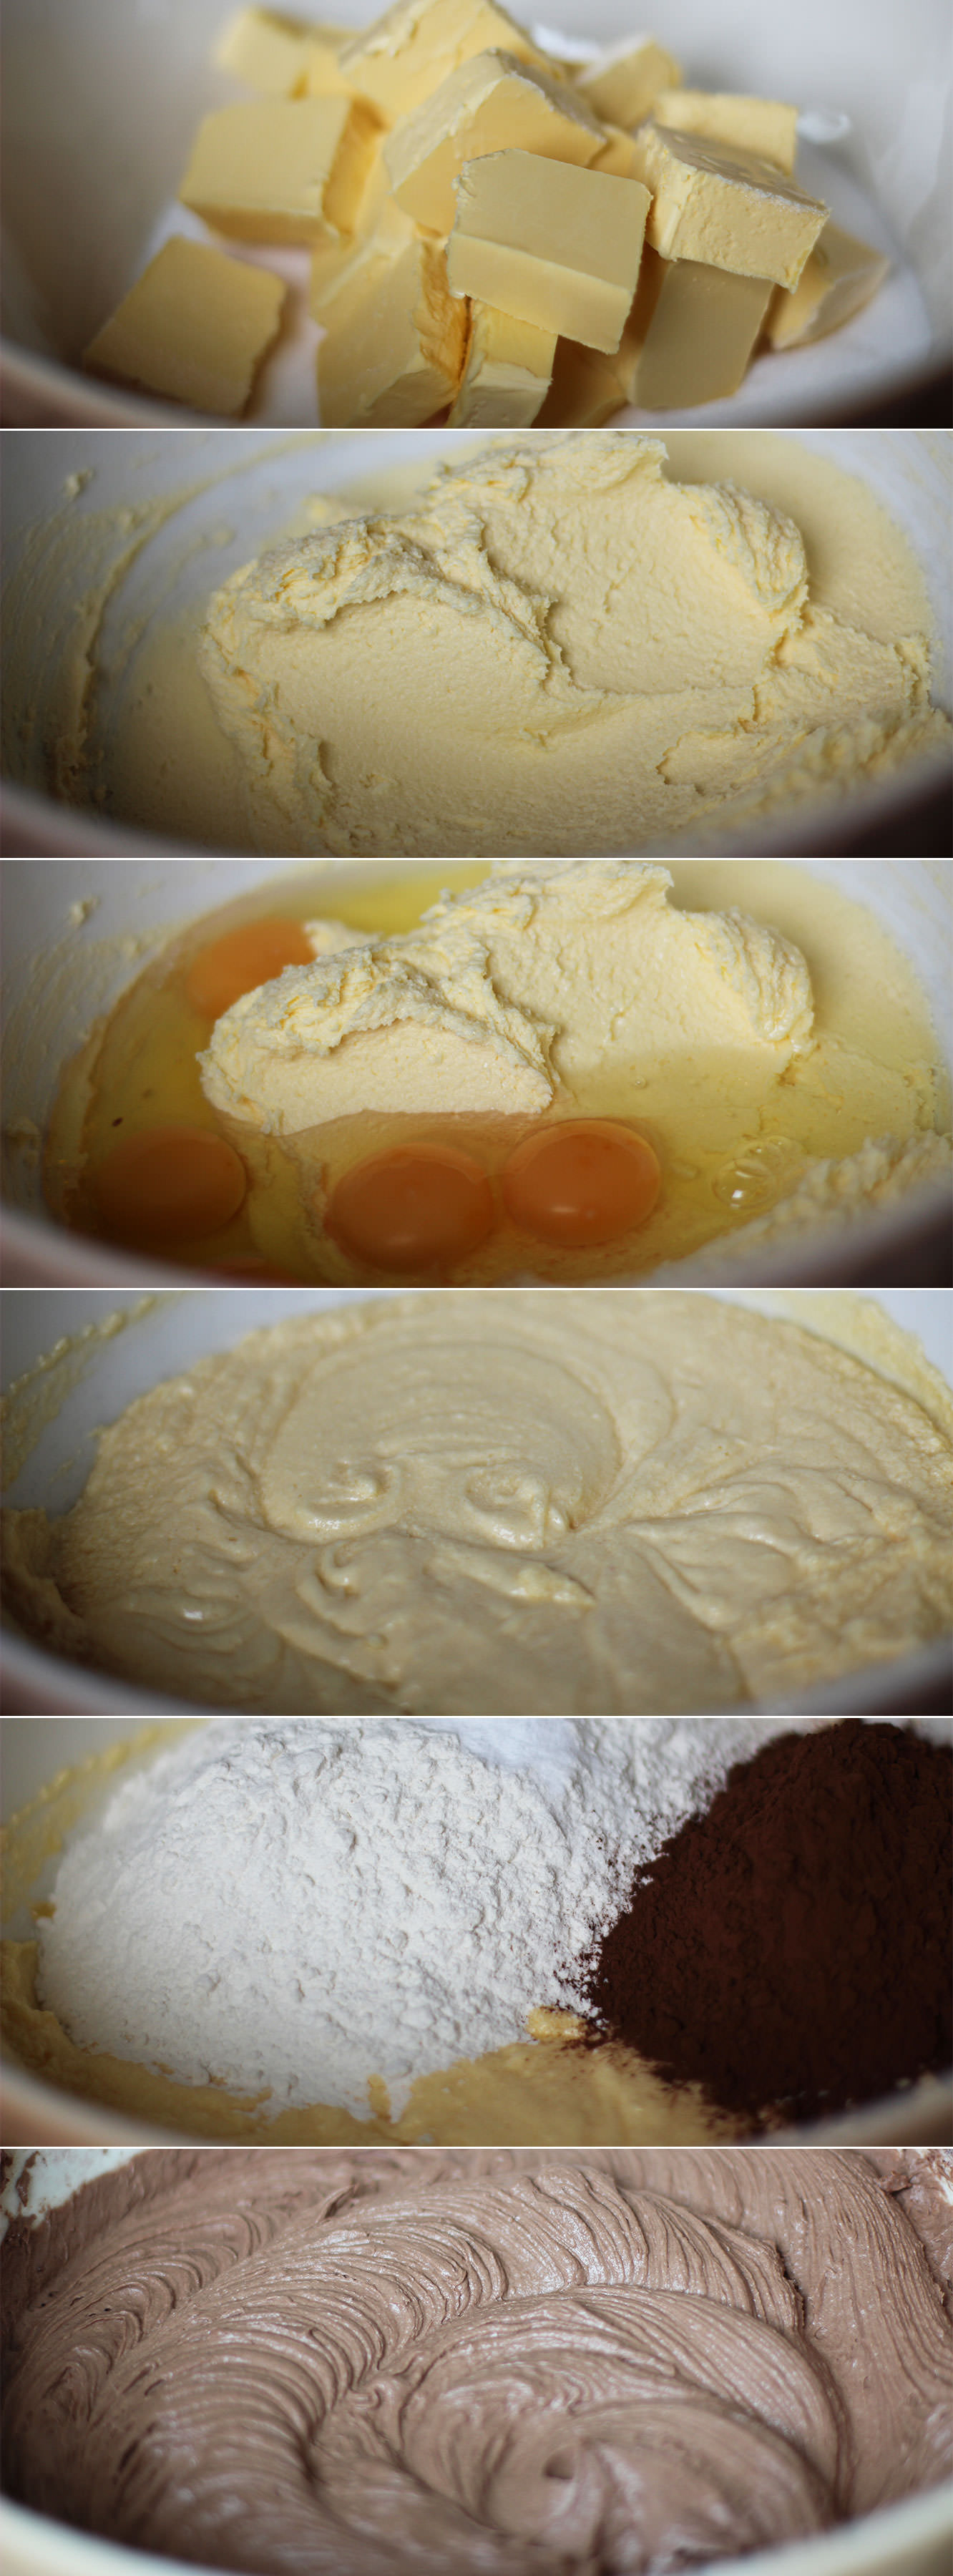
Step two
Whisk together the butter and sugar with an electric whisk, or a wooden spoon and some elbow grease, until smooth.
I used a block of stork for this, but I prefer the softer version you can get in a tub, you don’t have to wait for it to come to room temperature first that way. Margarine works just fine for cakes, I think it makes them fluffier.
You might want to use a tea towel over the bowl to avoid everything getting covered in sugar and butter.
Step three
Add all the eggs and whisk until combined.
Step four
In go the flour, bicarbonate of soda and cocoa powder.
Stir gently to start mixing the dry ingredients in first before turning the whisk on, you don’t want to choke on flour, that’s not a good way to go. It also means you will never get to eat this cake.
Step five
Divide into the tins.
Bake in the oven on 180C/350F/gas mark 4. This is where it’s a little tricky as the little cakes need a lot less time but you don’t want to open the oven much or your big cake will sink.
I say give the big cake about 30 minutes on its own, and then opening the door as little as possible add the smaller ones for the next 20 minutes. You will then need to test the cakes by sticking a sharp knife, or a cake tester if you have one. If this comes out clean (or with the odd crumb) you’re all good. If not give them another 5-10 minutes.
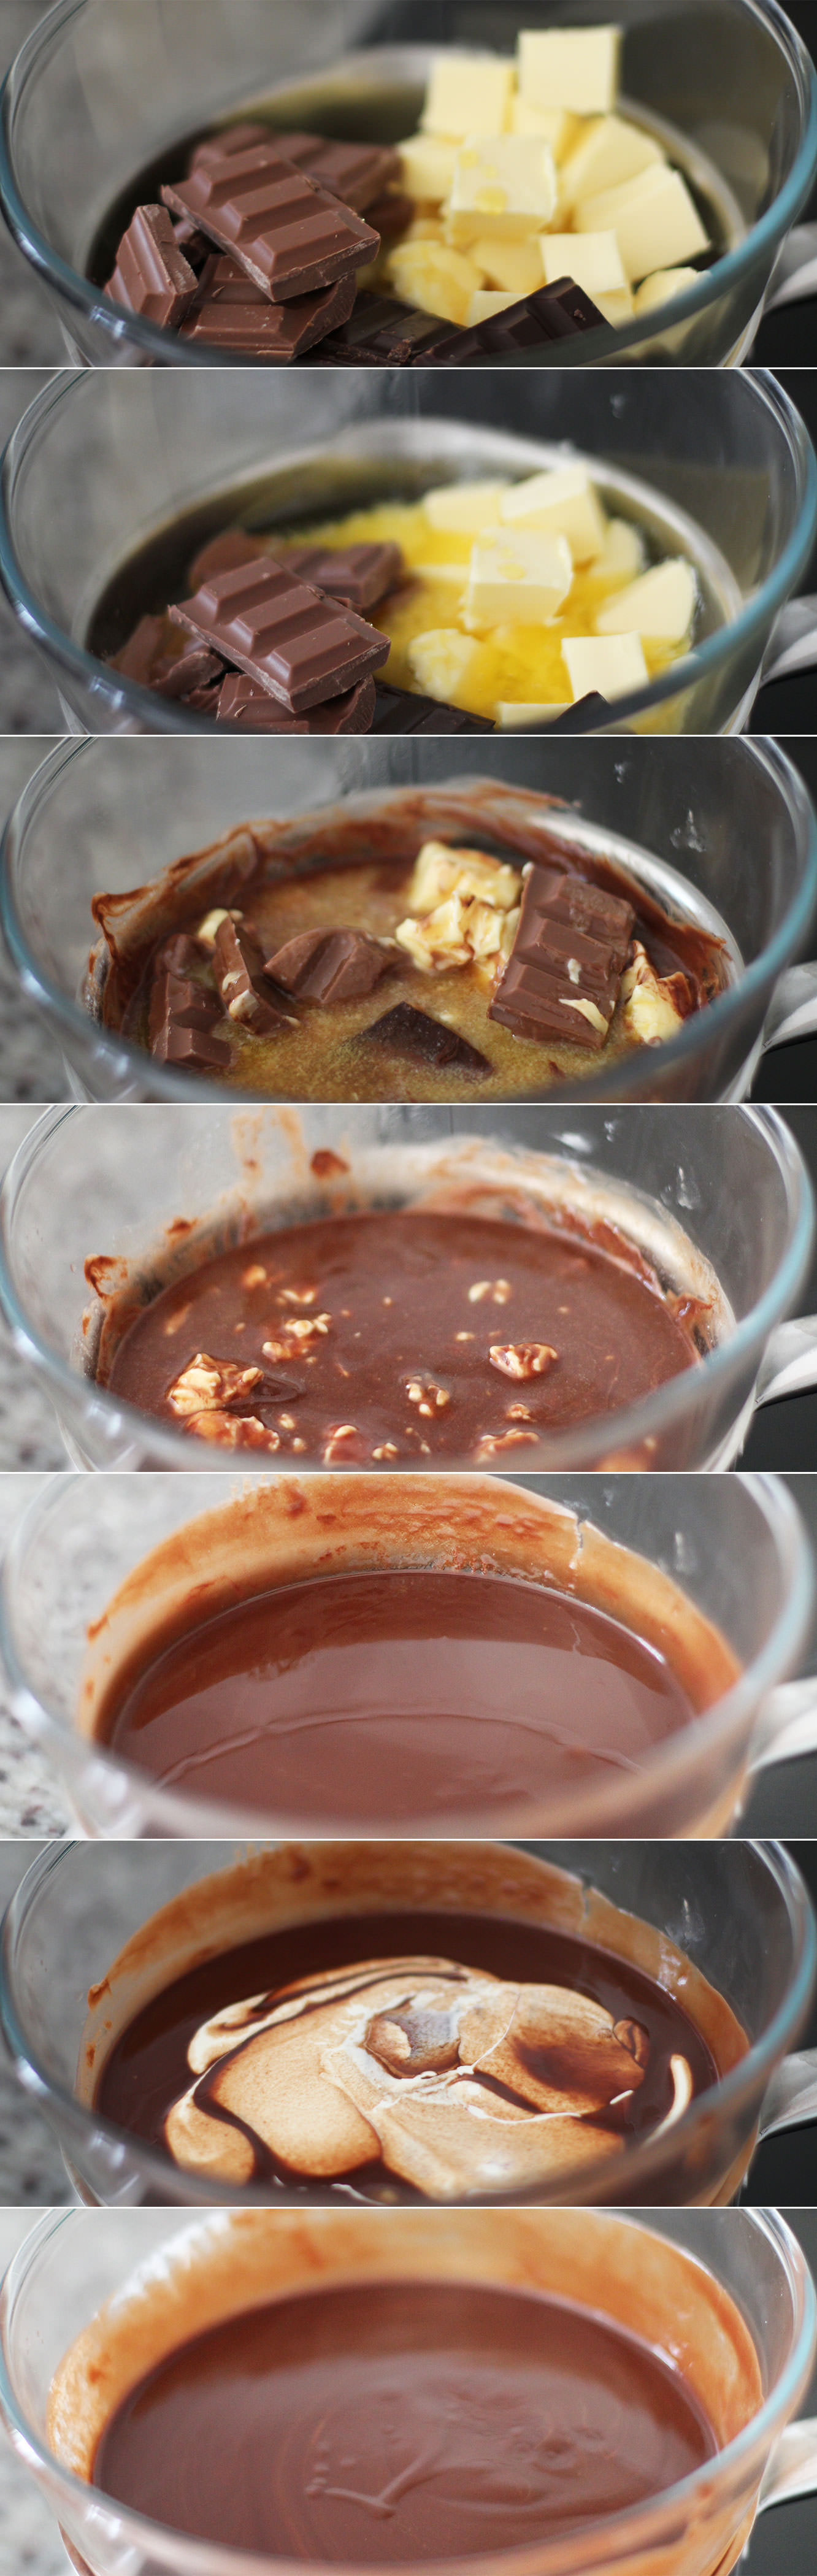
Step six
While the cakes are in the oven make the icing as both, but particularly the chocolate, need time to cool.
Place a heatproof bowl over a pan of barely simmering water. Add the butter (real butter this time), chocolate and golden syrup. Melt until smooth.
Remove from heat and stir in the cream quickly. Take the bowl off the pan and place somewhere cool and dry.
I don’t really suggest the fridge because you might forget it (like I did) and then you have to wait for it to warm up enough to spread. But that being said, the fridge is a viable option, just keep an eye on it.
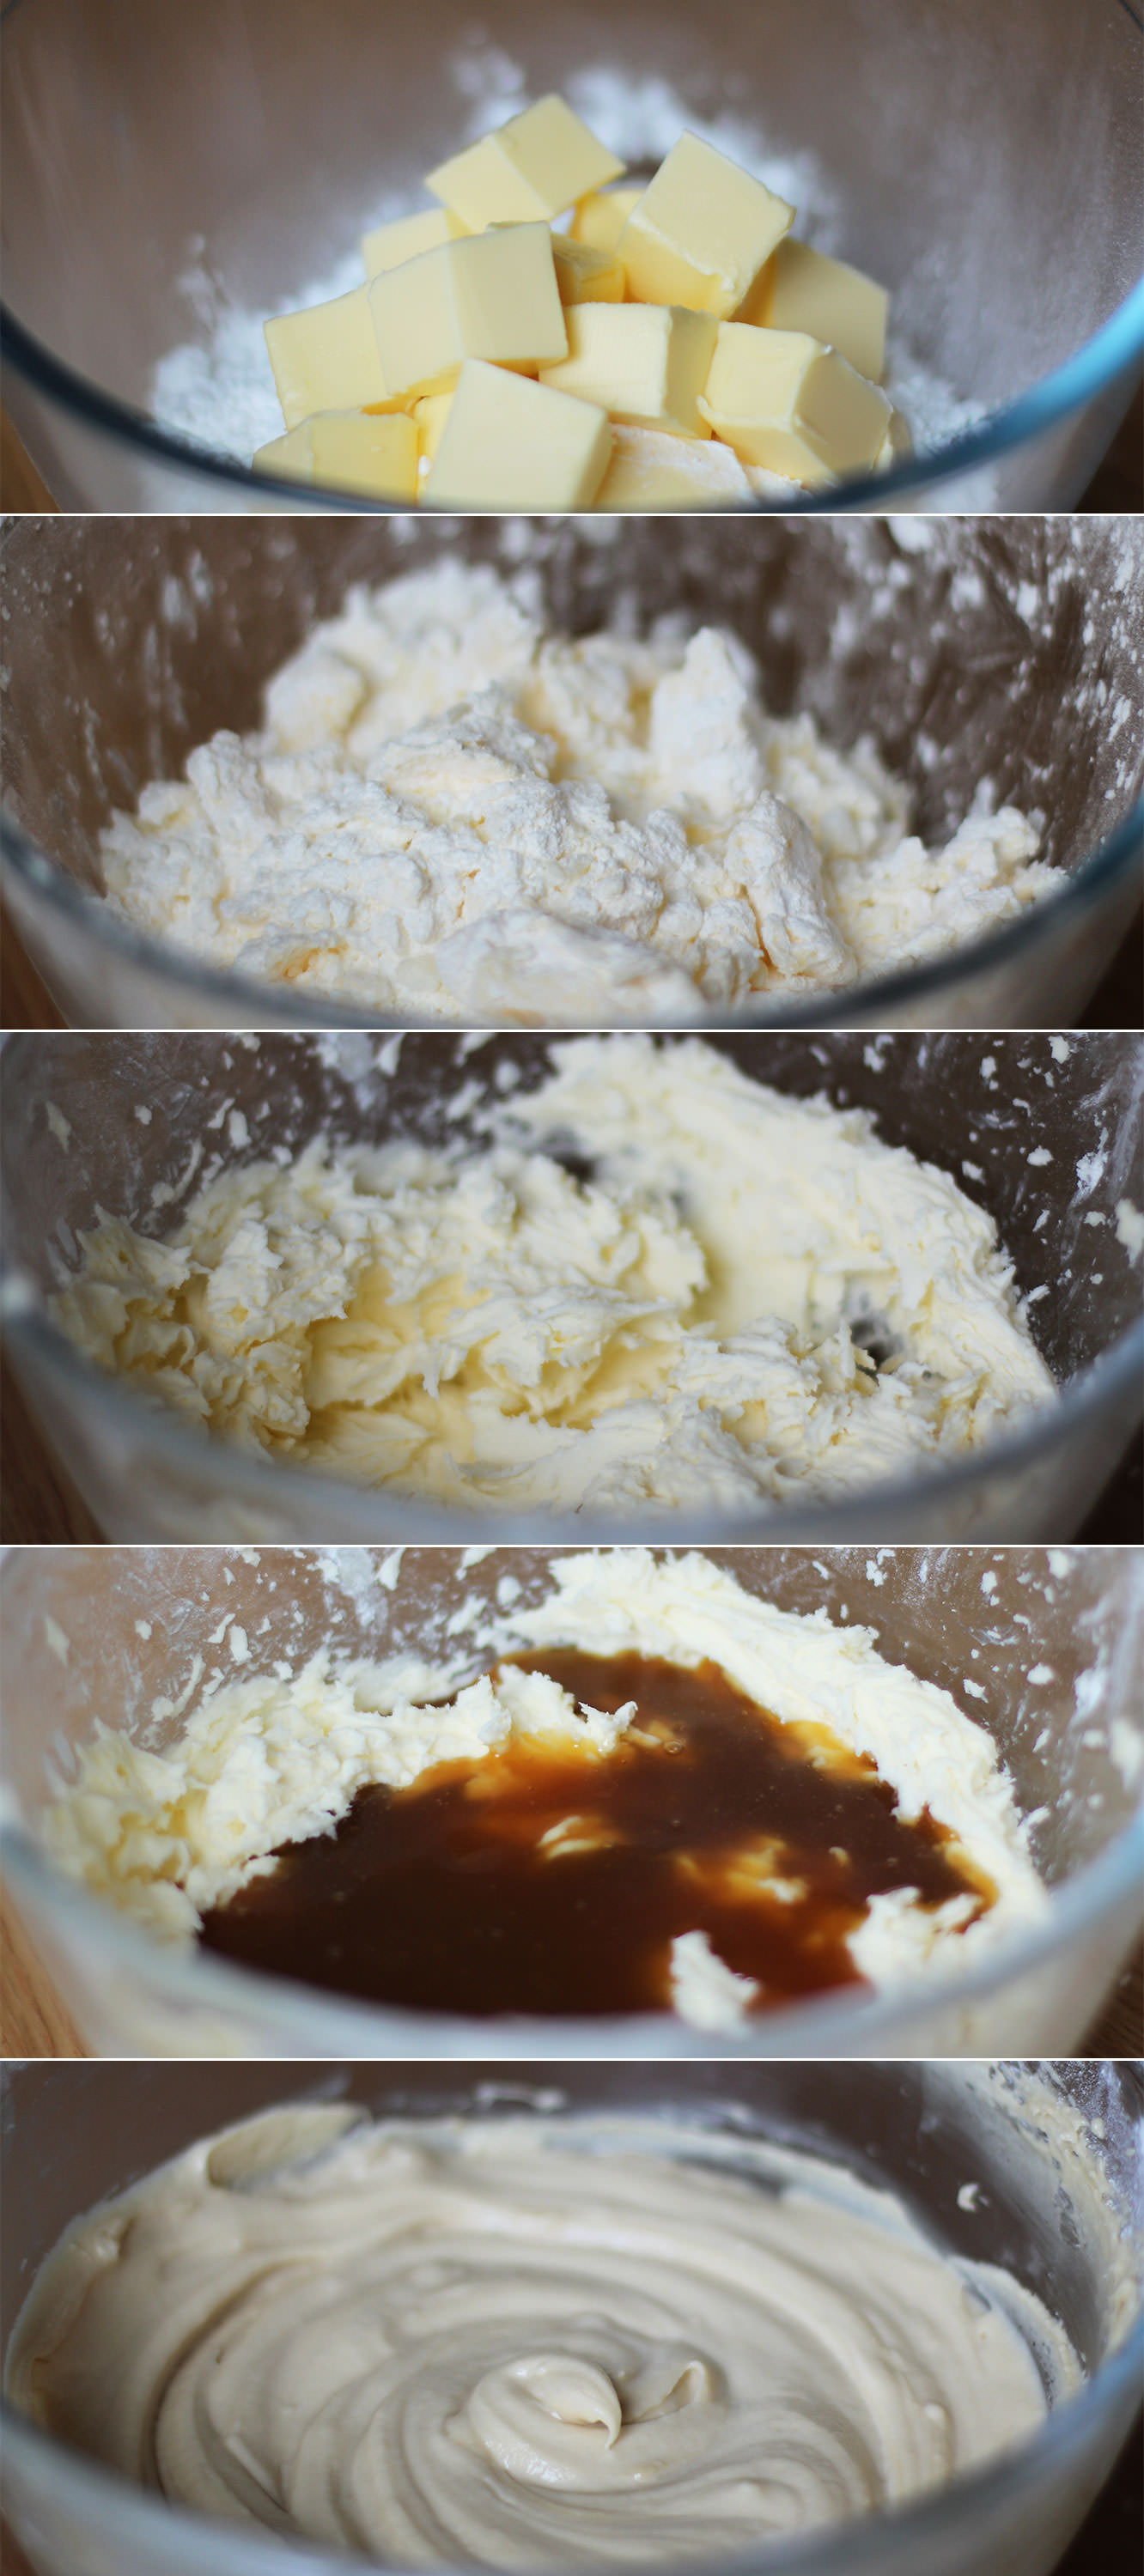
Step seven
For the salted caramel buttercream melt together 100g of the butter, the brown sugar, golden syrup and salt. Do this slowly and then bring the heat up to a simmer.
Simmer for 10 minutes. Stir regularly so that it doesn’t catch and burn. Leave to cool down for about half an hour or so.
Step eight
Stir in the 100ml cream and leave to cool further.
Step nine
Whisk the icing sugar and 150g of butter together with the salt. Definitely cover the bowl with the tea towel this time. I find if my butter is not quite soft enough it helps to rub it in a bit with clean hands first. There is NOwhere icing sugar won’t go when you use an electric whisk.
Step ten
Add the caramel and whisk again until smooth. Don’t worry if the caramel is still a little warm, just leave your buttercream to cool in the fridge for a bit. But again, don’t forget about it or it won’t be spreadable.
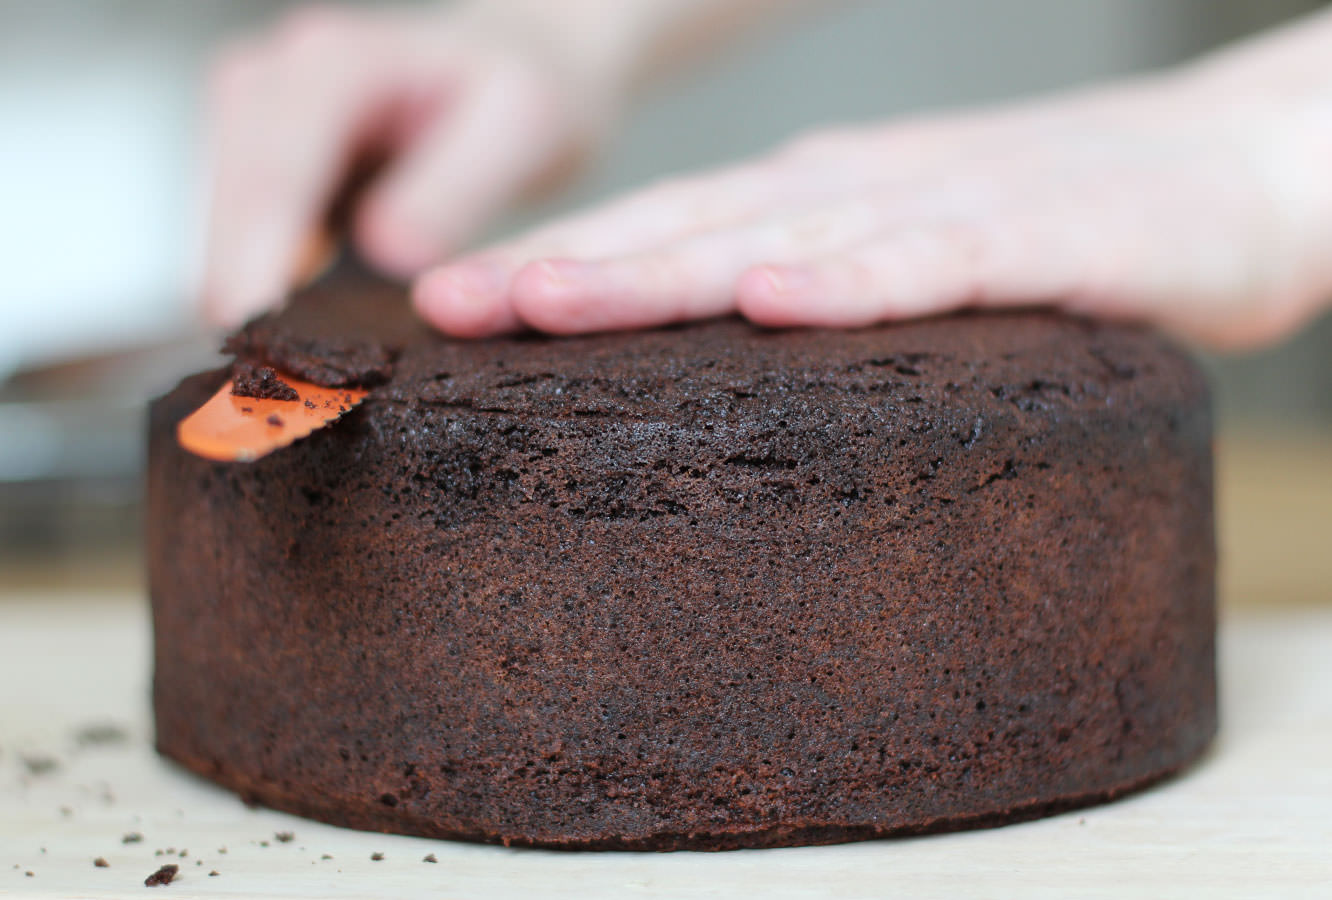
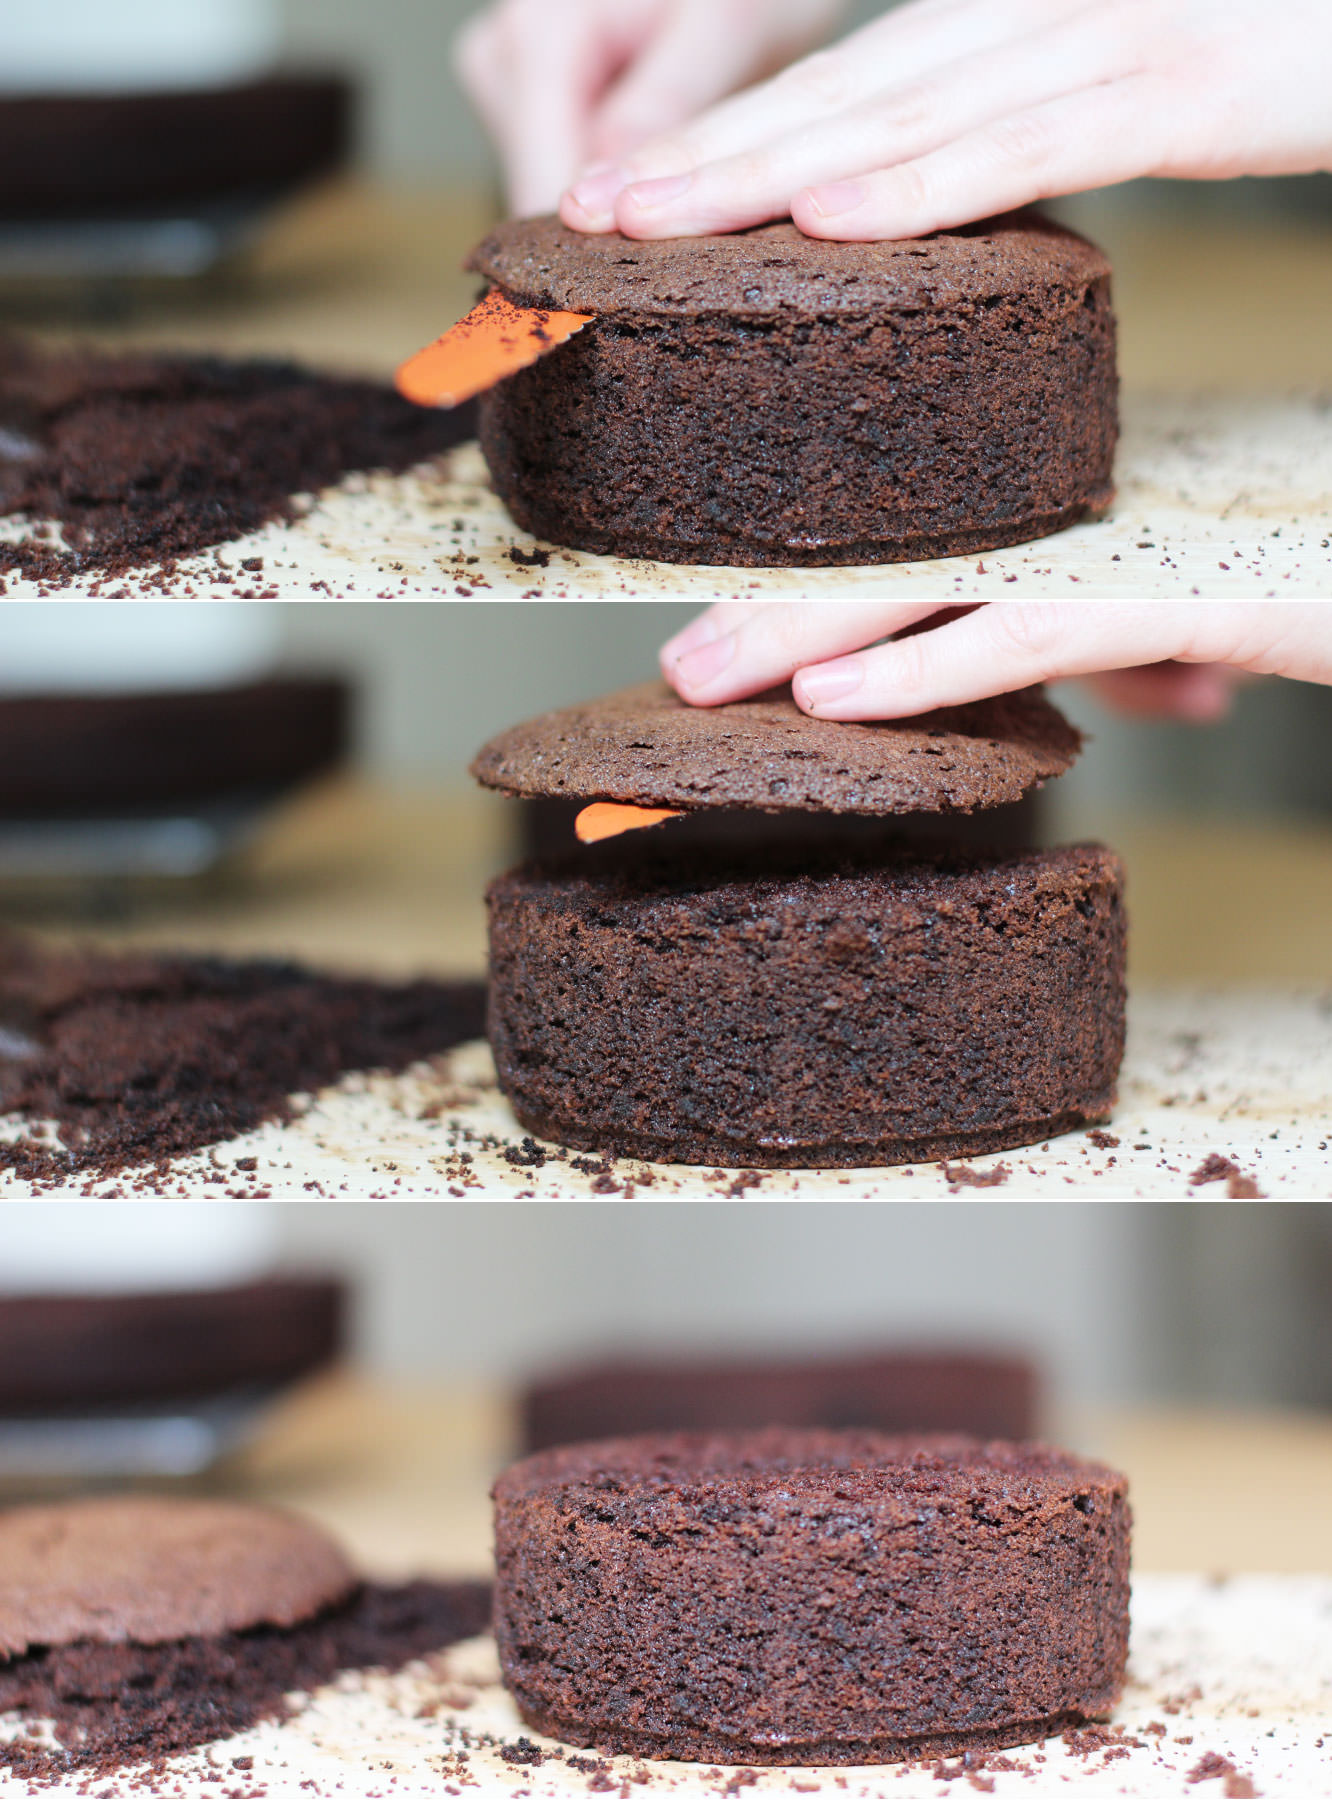
Step eleven
When your cakes have completely cooled prepare them for icing. You need to lop the top off the large one until it’s as flat as possible on top. So much of this cake is covered in decoration that you can get away with a little bit of wonky though so don’t panic if it’s not prefect. Having said that the flatter the better so the top tier sits straight. NO PRESSURE.
Step twelve
Cut the cake in the middle. Try to do this evenly by scoring it the whole way round first. Just keep going round in circles, getting further in each time until you’re all the way through.
Step thirteen
Level out the tops of the small cakes. I would be lying if I said I didn’t spread some icing on the offcuts and eat them.
Step fourteen
Using a palette knife ice the cakes.
First place a bit of buttercream on the cake base to stick the cake to it. Start with the caramel buttercream and ice the middle and the top. Don’t worry if bits splurge out the sides.
Smooth these out around the sides with the palette knife, gradually adding buttercream here and there to create the sharpest sides you can. Some parts will have a thicker coating than others, this layer is made to contain all the crumbs (hence the name crumb layer) and to even out the shape a bit. It’s not going to be pretty.
Place in the fridge for about an hour before starting the chocolate.
Ice the chocolate on in the same way, neatening as you go. For the most part it will be covered up, so it really doesn’t need to be too smooth.
Step fifteen
Cover the small cake in the same way.
Place both in the fridge while you prepare the decorations.
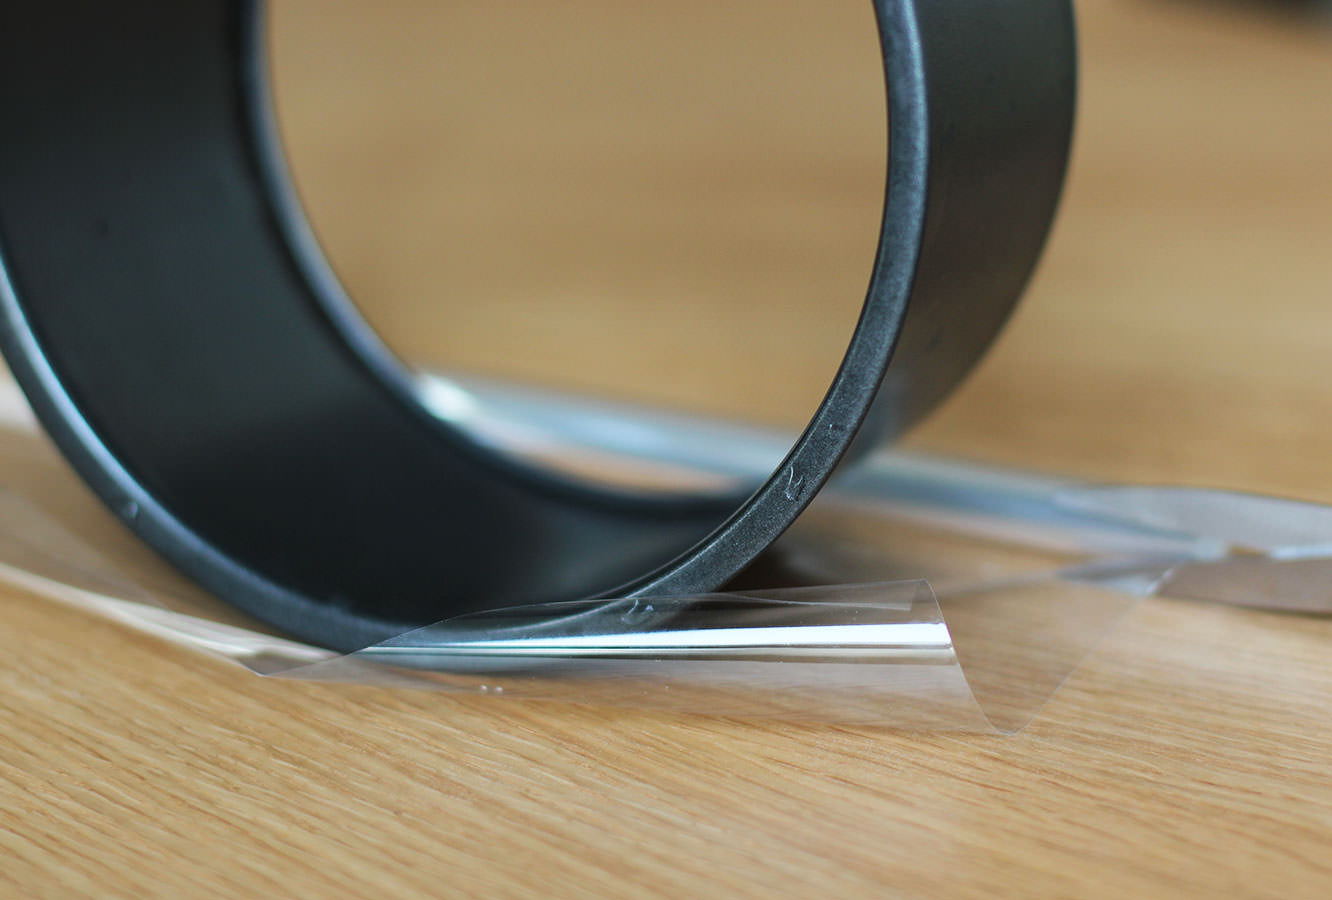
Step sixteen
Using the tins as a guide cut a strip of the cellophane for both the top and bottom layer. You want these to be quite close to the size of the chocolate collar, so tall enough that you will have about 5cm/two inches taller than the cake, and wide enough to match the circumference. You can quickly check this against the cake to ensure it will fit.
Don’t forget to cut one for the top tier and one for the bottom, bearing in mind your top tier cake is twice as tall as the tin.
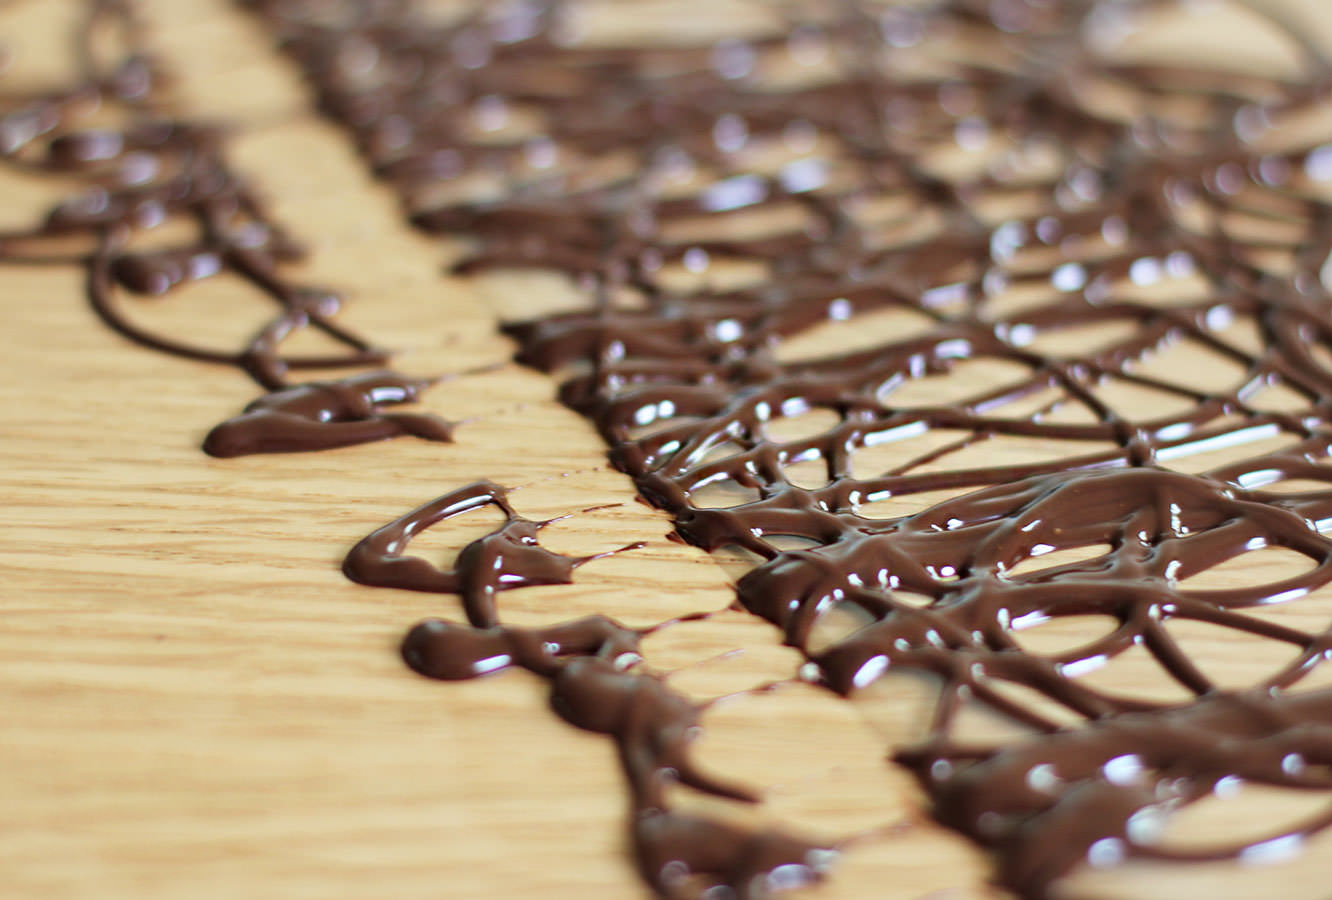
Step seventeen
Temper 200g dark chocolate. Don’t look at me like that…you are really going to want to do this so you have shiny chocolate on the collar.
First melt 125g of the chocolate in a heatproof bowl over a pan of simmering water. Let it get to 55C/131F before removing from the heat.
Chop the remaining chocolate and stir into the melted mix to aid the cool down process. Stir continually until it cools to 28C/82F. I found a good way to speed this up a bit. Put cold water in a large saucepan and the bowl on top. You’re welcome.
Place the bowl back on the heat and bring it to 31C/88F. Your chocolate is tempered.
Be warned – if you’re doing a different type of chocolate the temperatures are different:
Milk – 45C/113F original melt, 27C/81F cool down, 29C/84F
White – 45C/113F original melt, 26C/79F cool down, 28C/82F
Step eighteen
Place chocolate in a piping bag and using circular motions cover the cellophane with swirls. Go over the bottom edge onto the work surface but ensure the top stays on the cellophane so it’s ‘whirly’.
Step nineteen
When it has started to dry pull the cellophane away so the bottom is clear of the extra overlap bits.
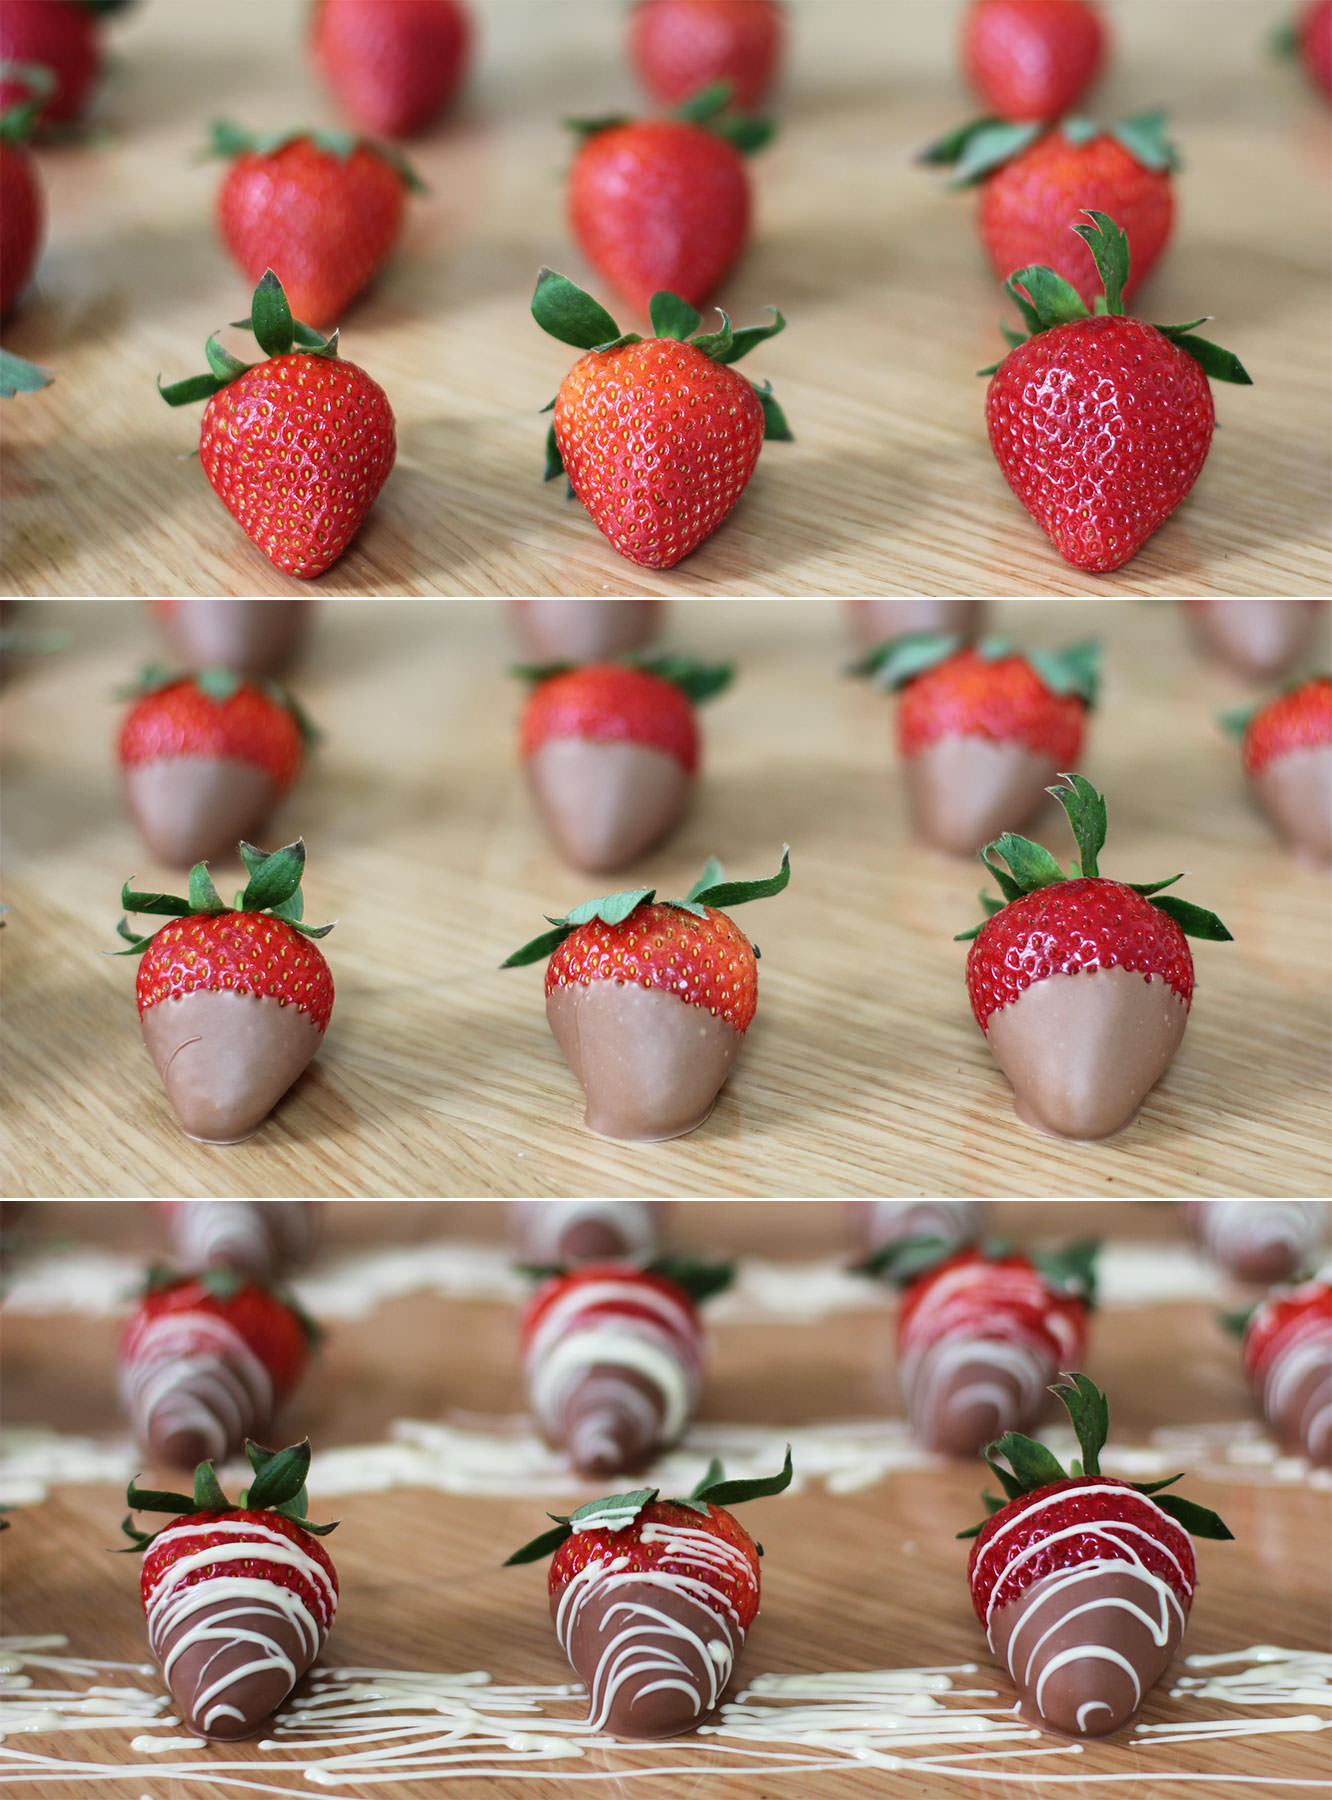
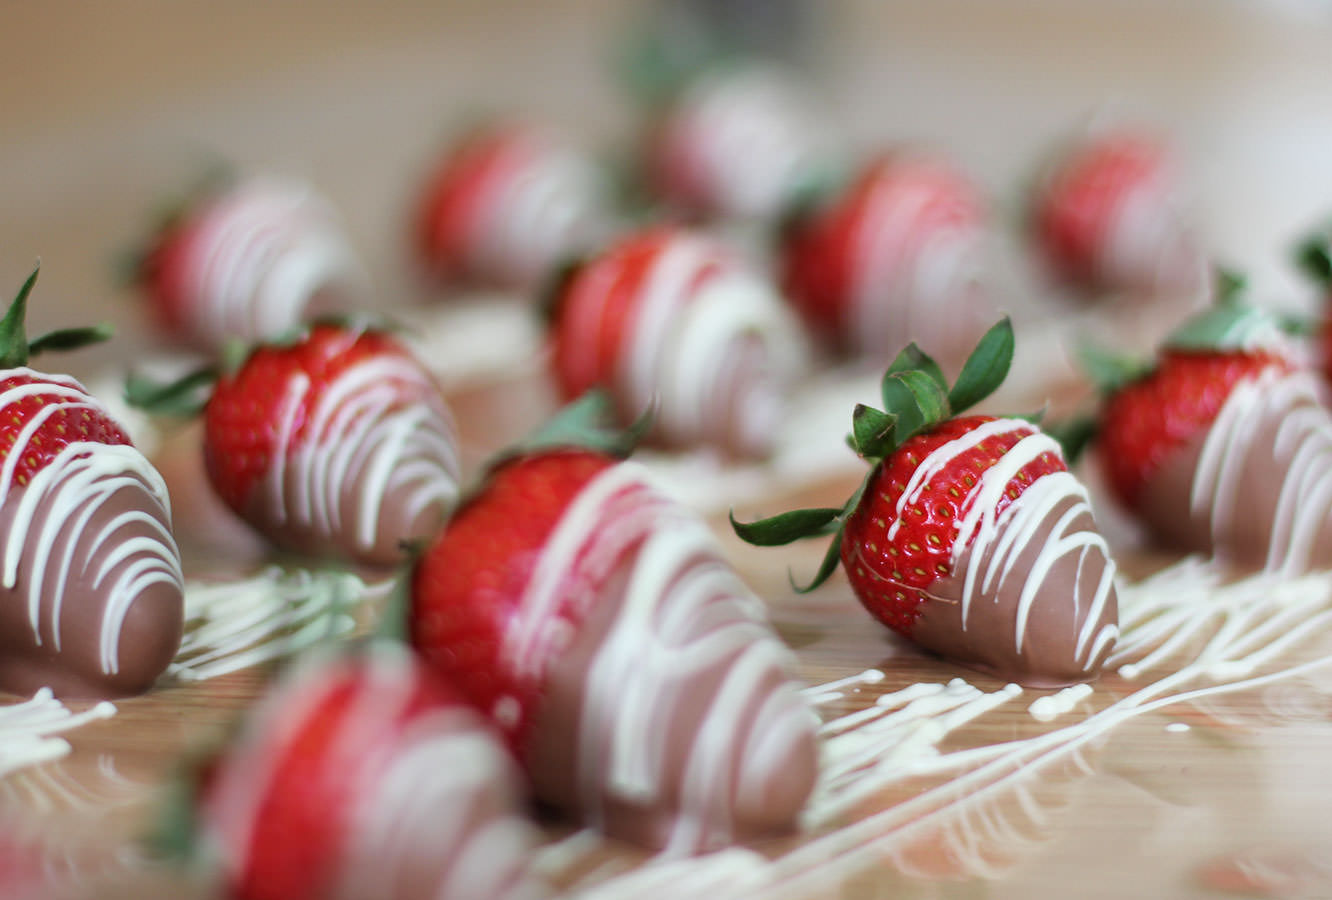
Step twenty
Melt (preferably temper) the milk chocolate. Dip the strawberries in half way and leave to set on some more cellophane.
Melt the white chocolate (no real need to temper this) and place in a piping bag. swing the bag back and forth to drizzle the white chocolate over the top.
Step twenty one
Drizzle the raspberries with white and milk chocolate. You can dip them if you want to, but, really? I know this is taking a while, but do you have that kind of time??
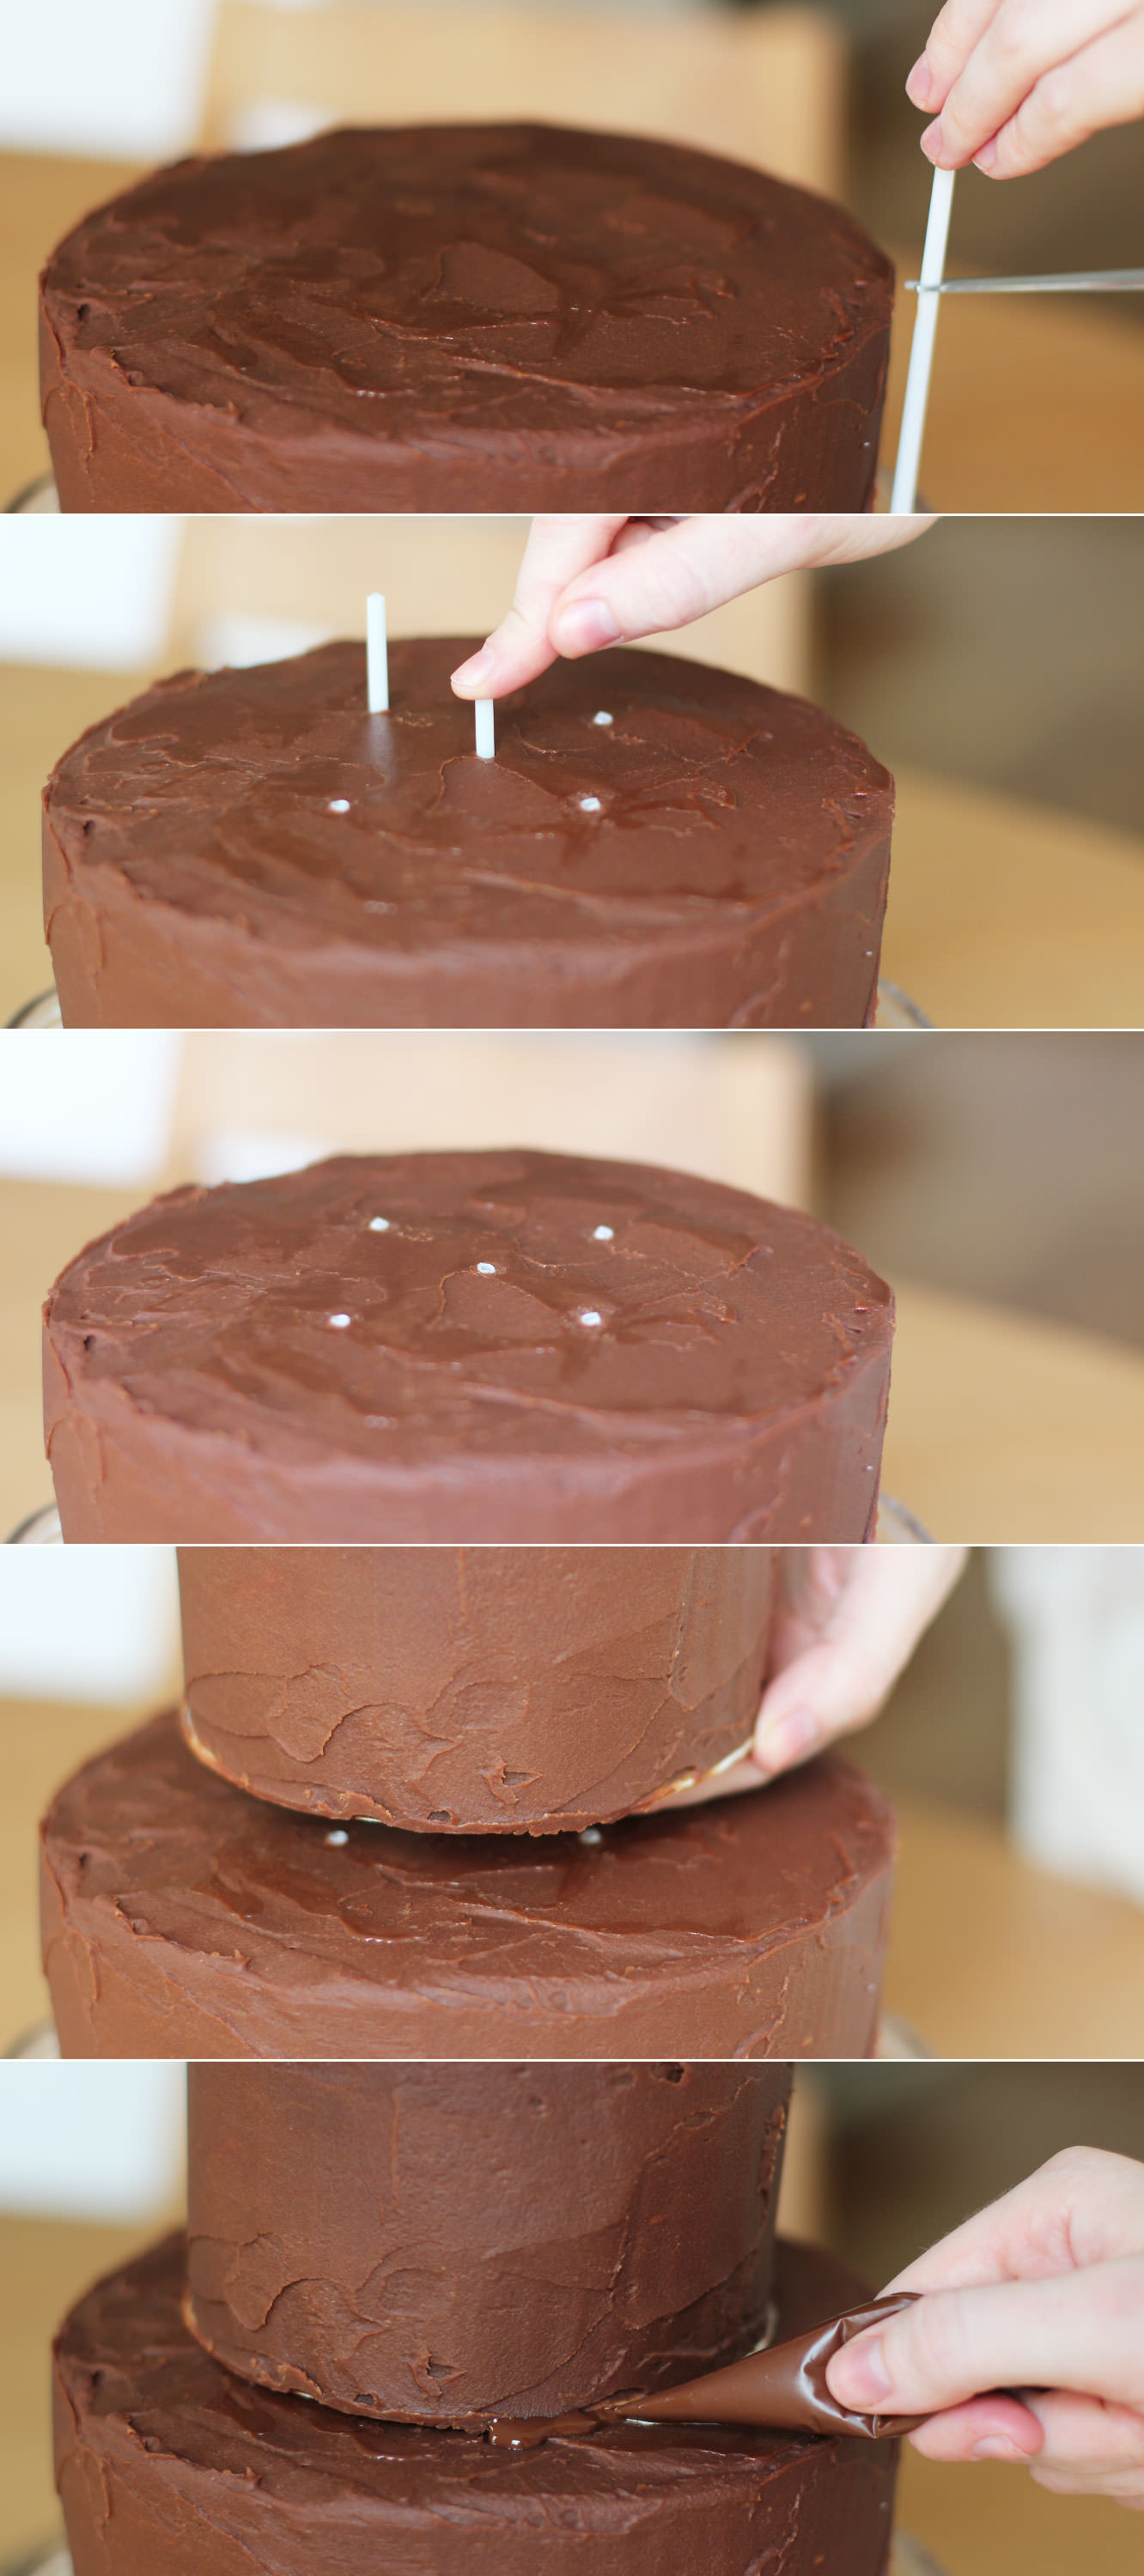
Step twenty two
Get the cakes out of the fridge to assemble.
Cut the sticks to size and push through the bottom layer where the top tier will sit.
Place it on top.
I then secured this a bit further with the remaining dark chocolate I had. It will be covered up so no big deal if it’s messy.
Step twenty three
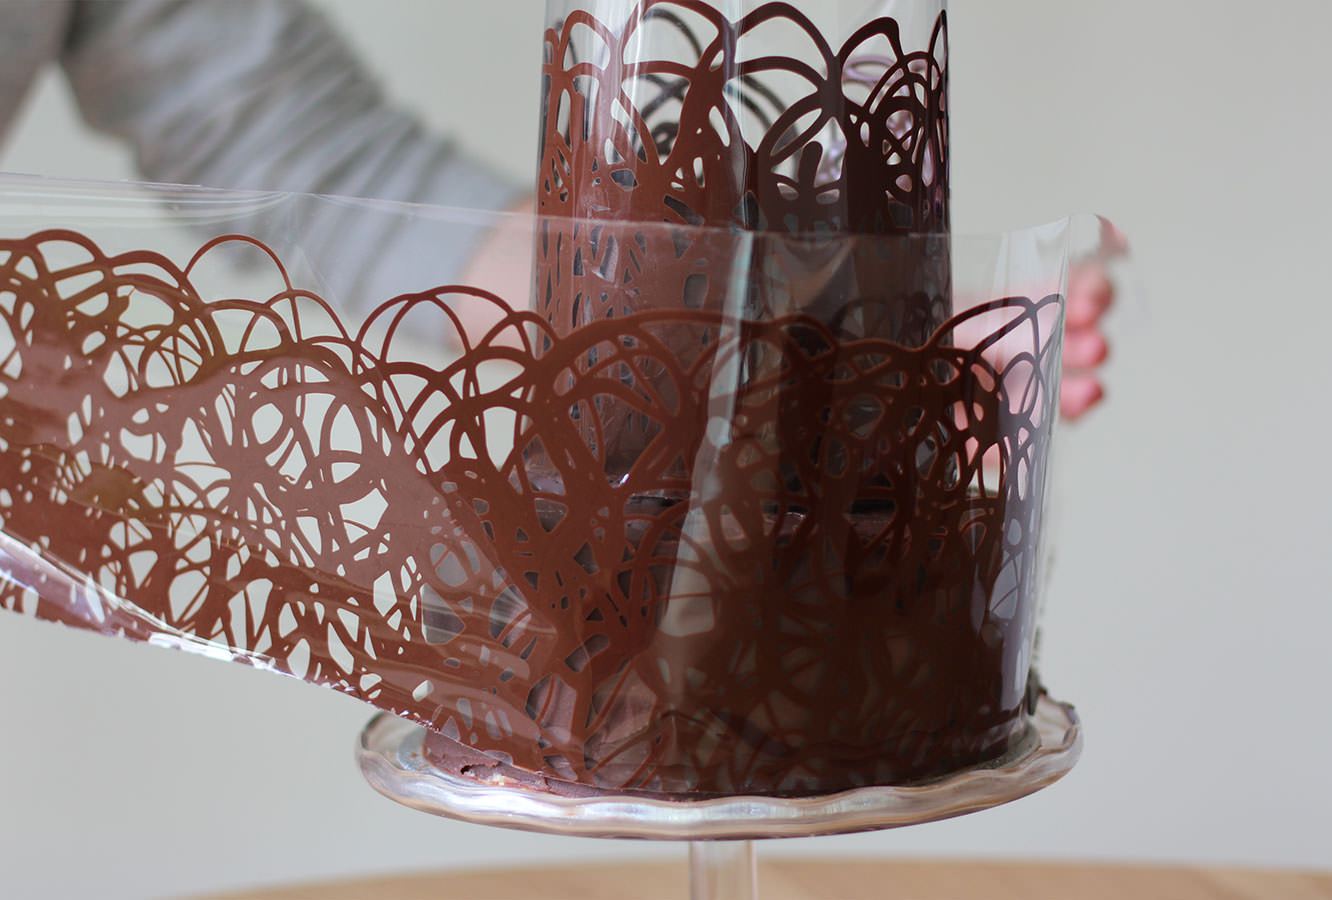
When the collars become touch dry, (meaning if you gently touch the surface you shouldn’t get chocolate on your finger, but what’s underneath is still not set) wrap them around the cake.
LEAVE THE CELLOPHANE ON. Sorry for shouting. But please. Walk away and don’t touch it for a while. Maybe leave a window open if it’s a cool day to help the process along.
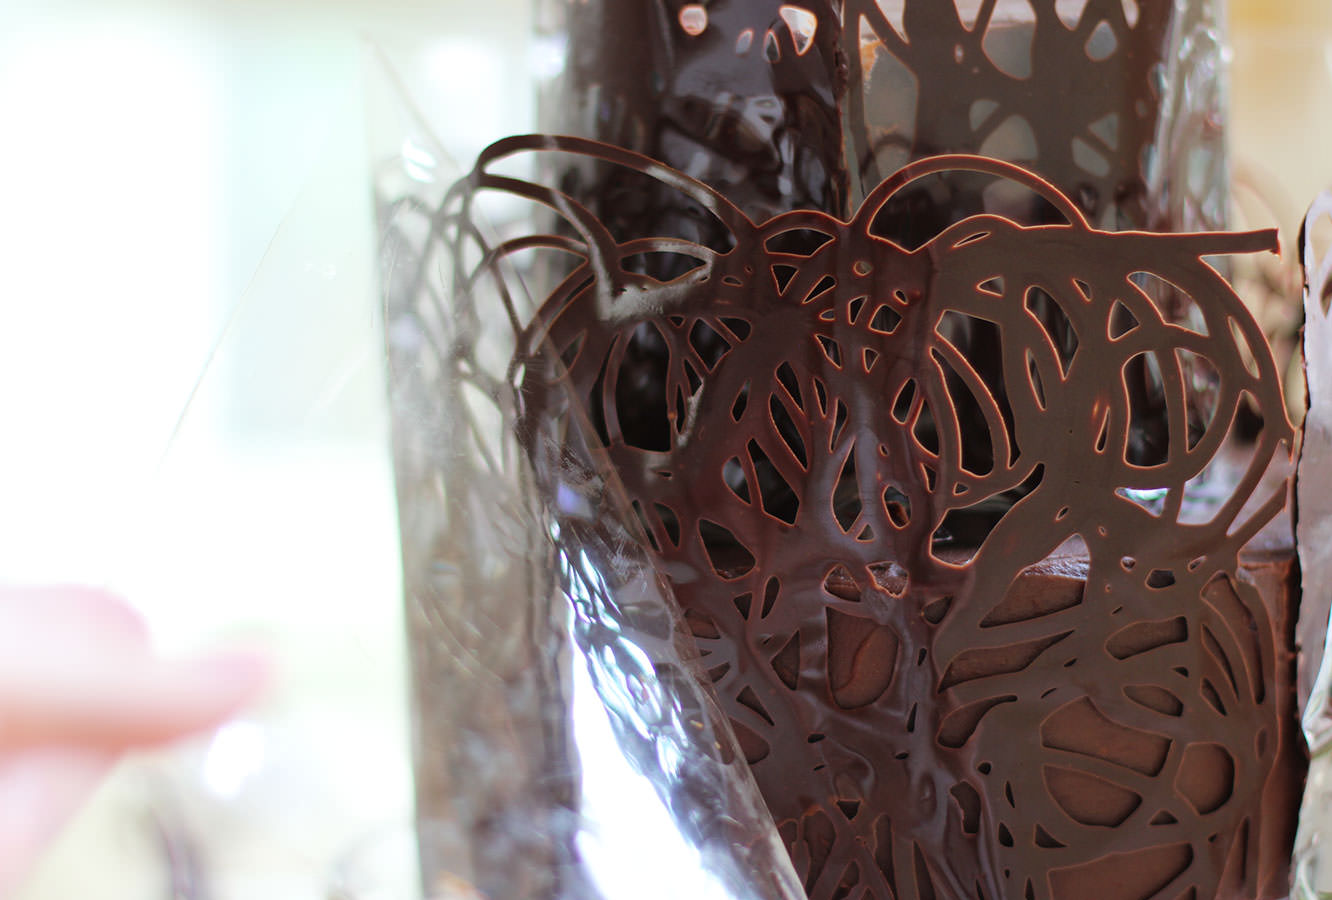
Step twenty four
When you’re feeling brave slowly peel off the cellophane to reveal your beautiful shiny chocolate collar. I was pretty excited at this point I must confess.
Step twenty five
Fill with the fruit and make someone’s occasion that bit happier.
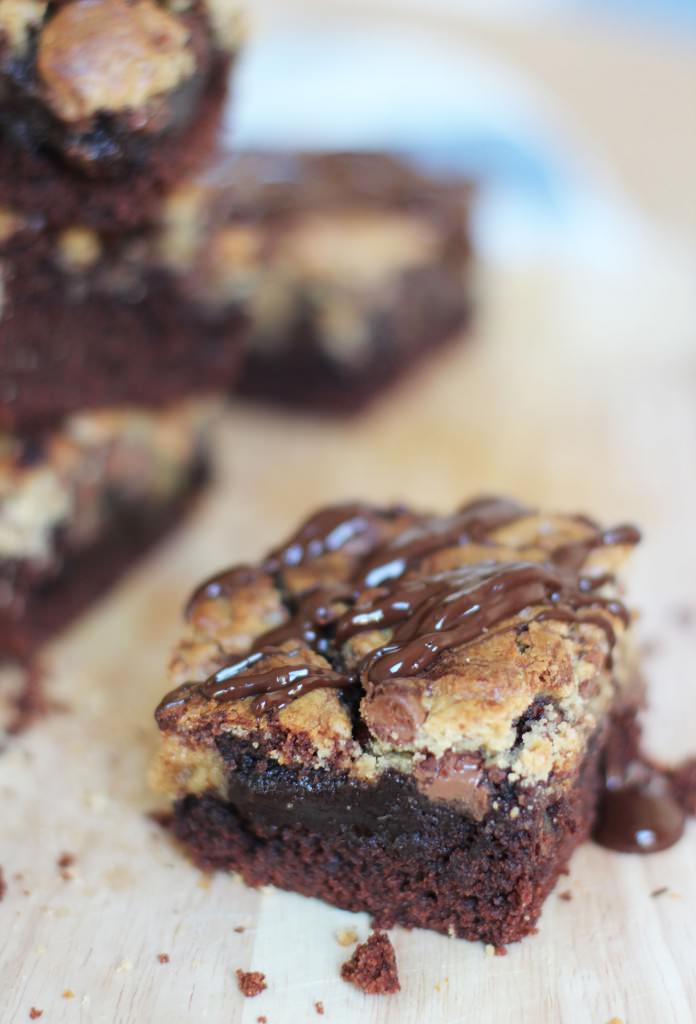
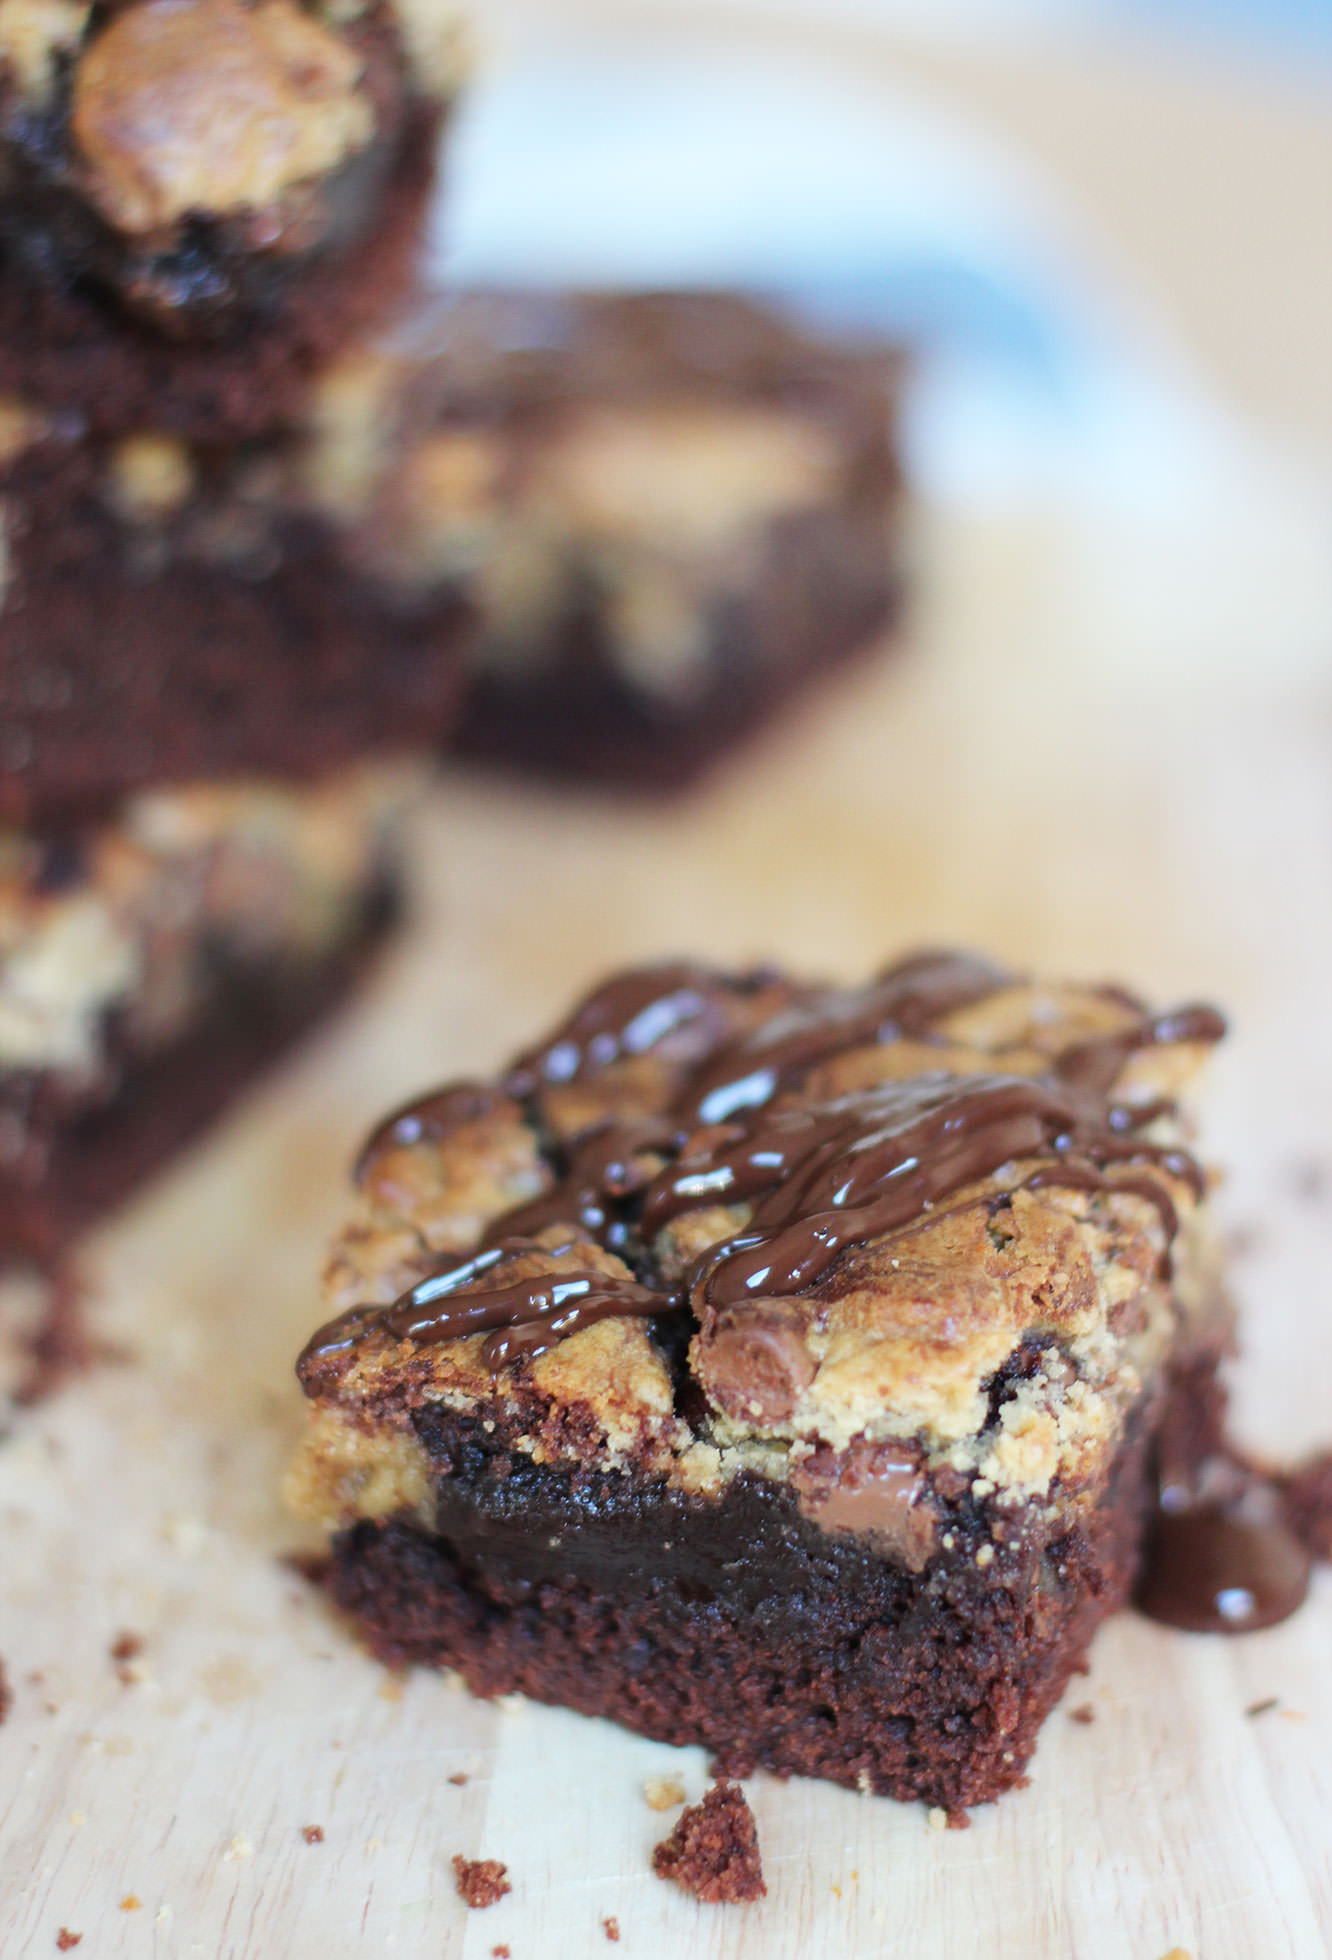
I used to make a cheat’s version of this recipe with two packet mixes, and recently I just thought to myself, ‘I wonder if this would taste better if I made the batters from scratch’. Oh boy does it.
You just have to find an excuse to make this and eat it warm from the oven with some ice cream. It’s very easy and quite a bit more impressive than regular brownies.
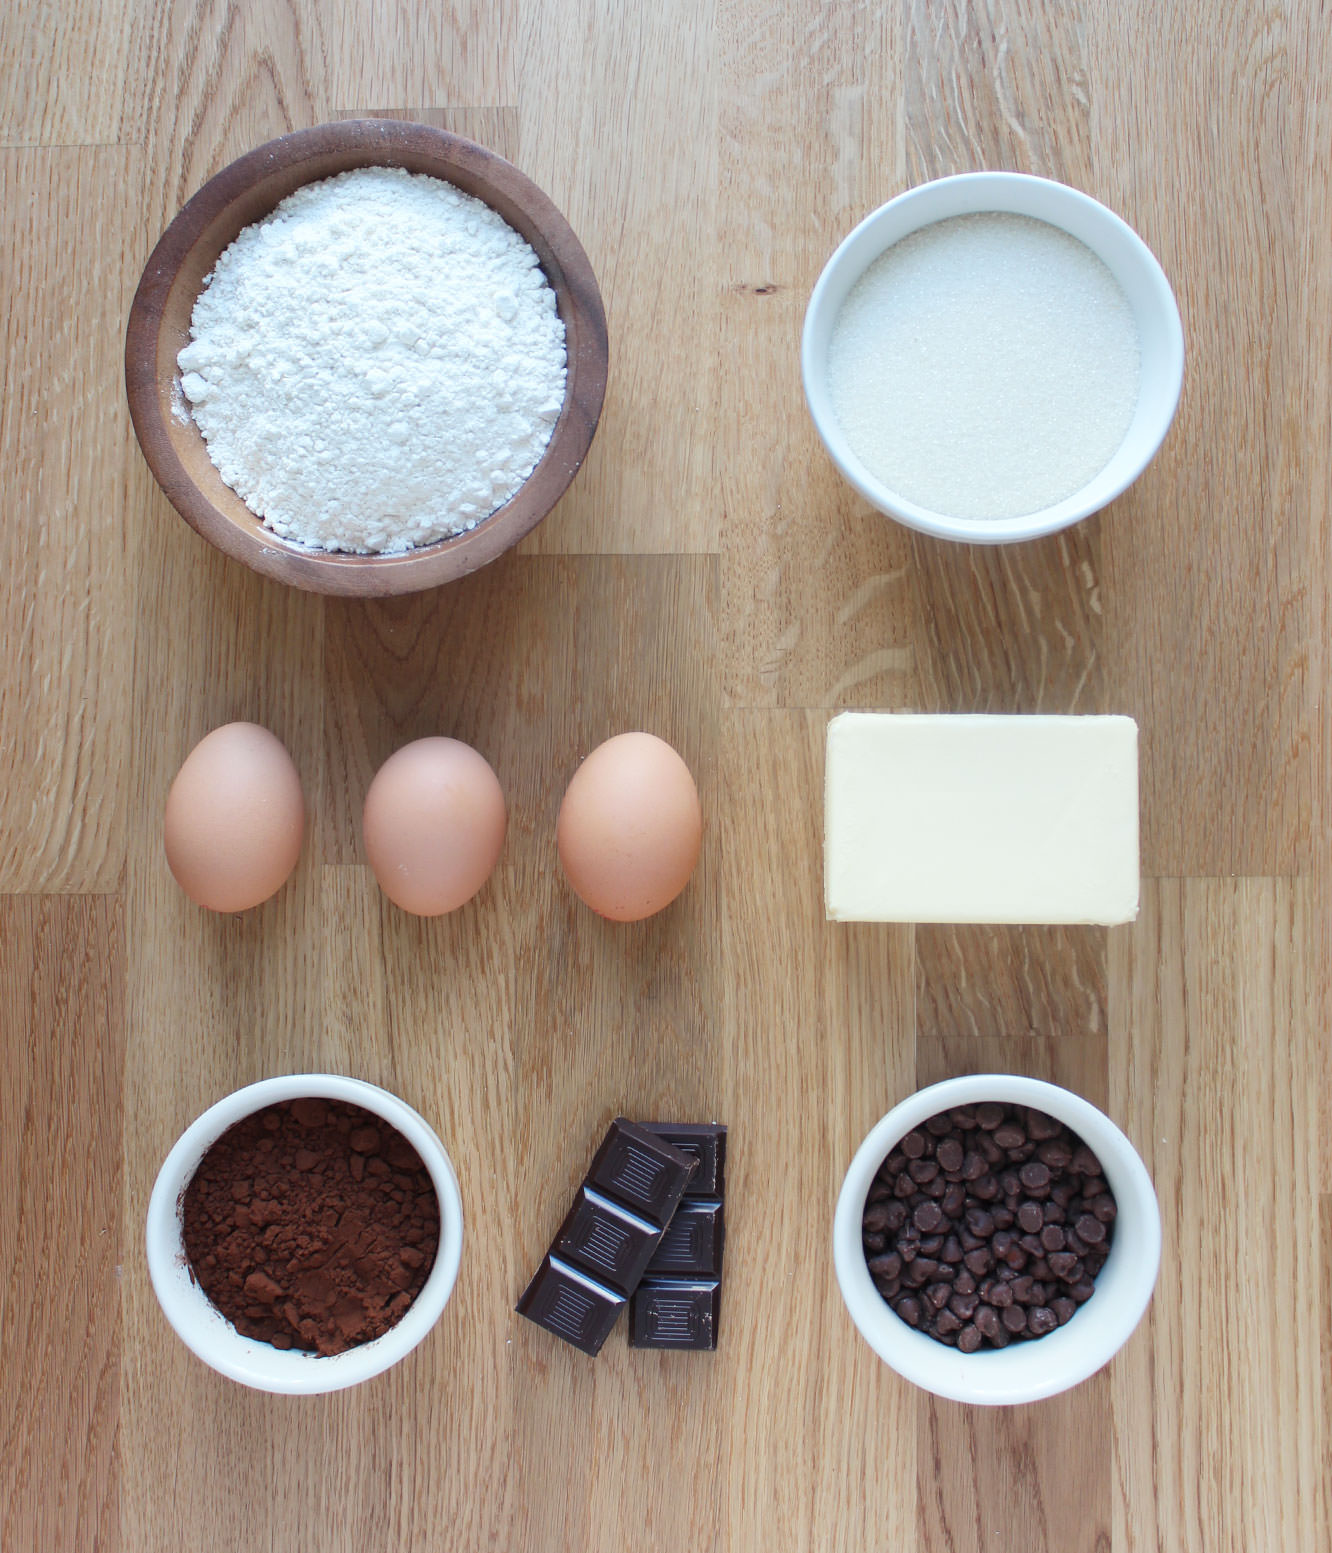
You will need
For the brownie batter:
300g/10.5 oz Caster sugar (golden if you have it)
170g/6 oz Unsalted butter
170g/6 oz Plain flour
45g/1.5 oz Cocoa powder
3 Eggs
1/2 tsp Baking powder
For the cookie dough:
170g/6 oz Plain flour
100g/3.5 oz Soft light brown sugar
100g/3.5 oz Milk chocolate chips
60g/2 oz Unsalted butter
1 Egg
1 tbsp Golden syrup
1/2 tsp Baking powder
Extra
45g/1.5 oz Dark chocolate
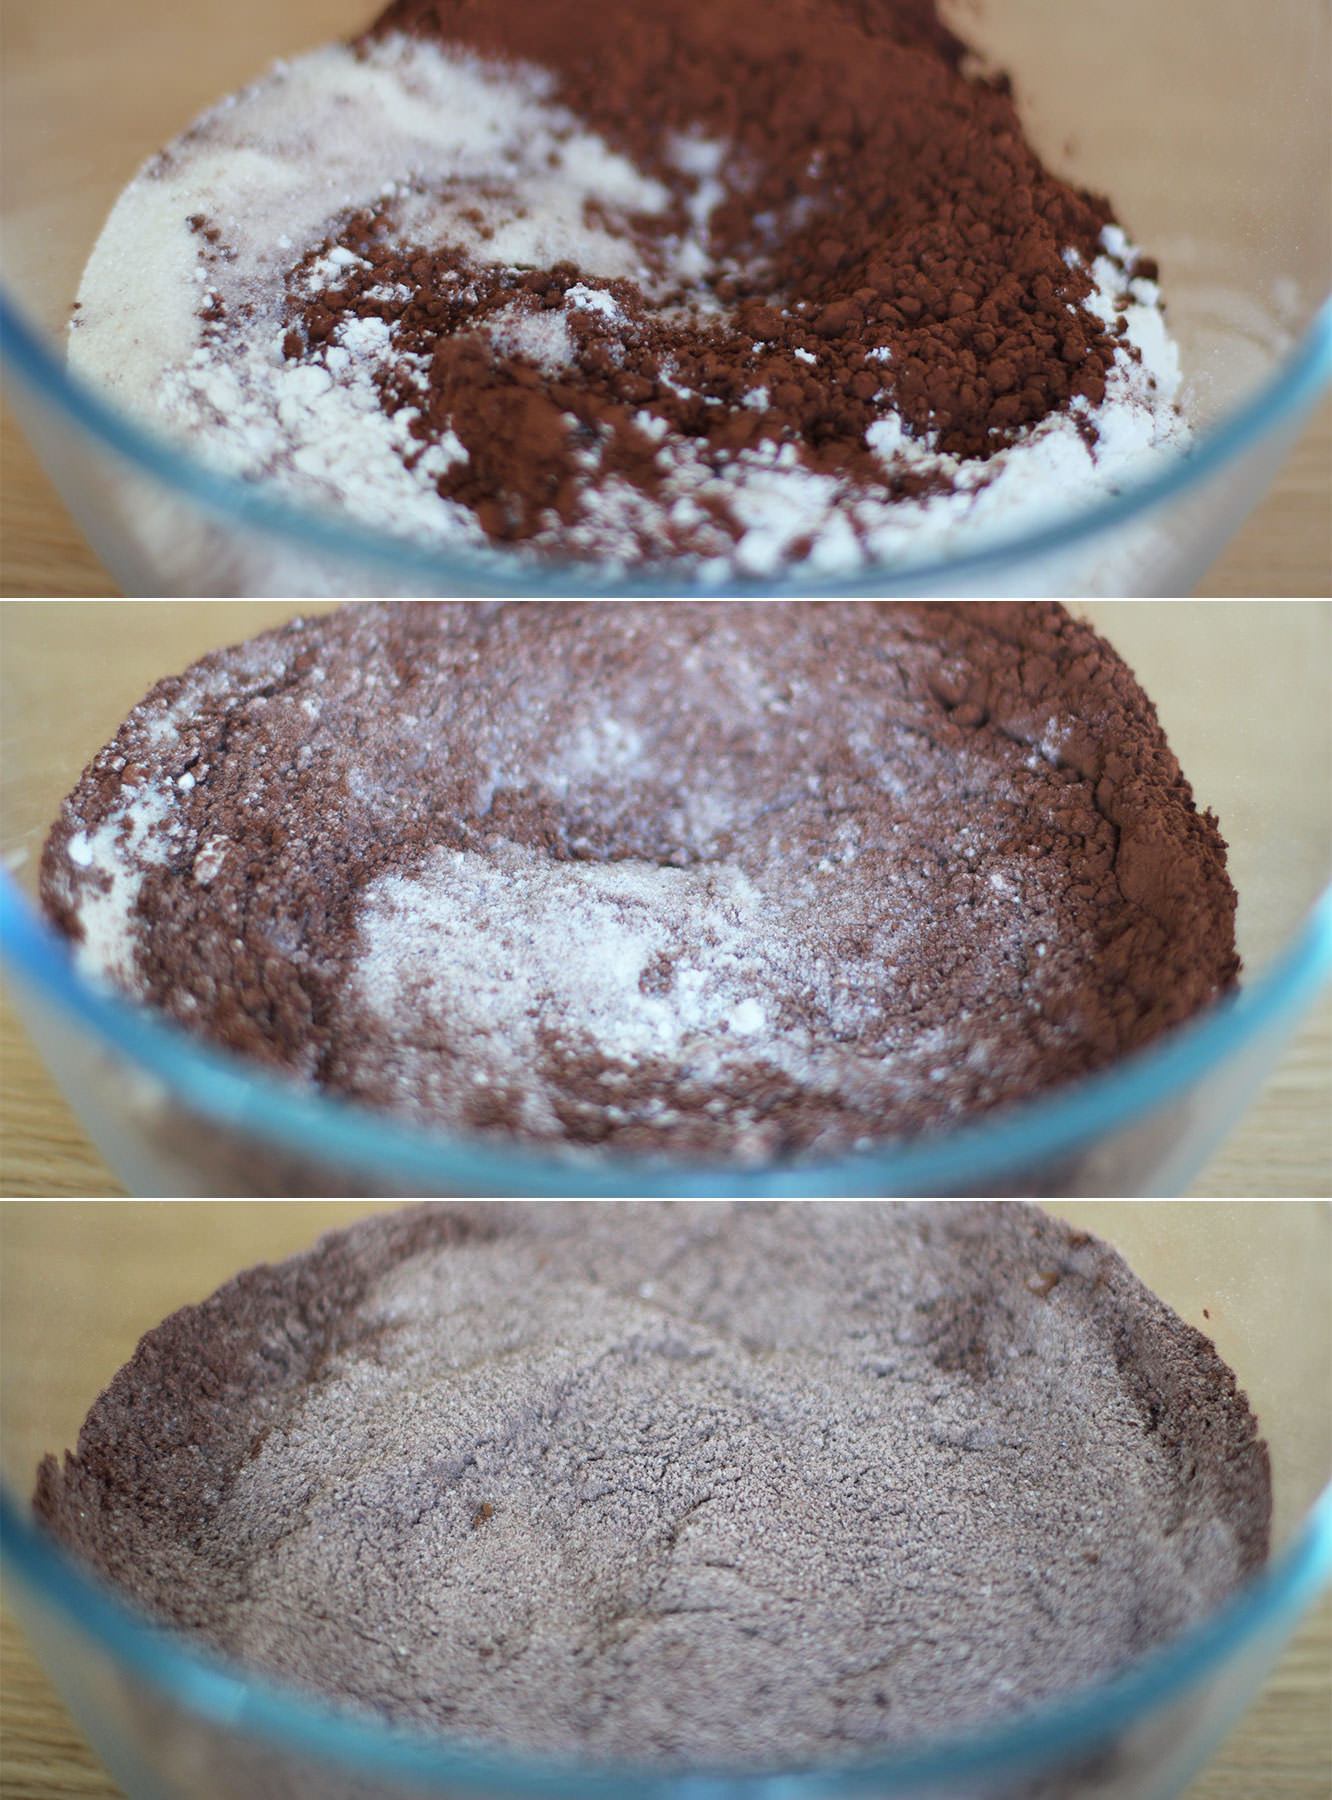
Step one
Starting with the brownie batter, mix together the baking powder, sugar, flour and cocoa powder.
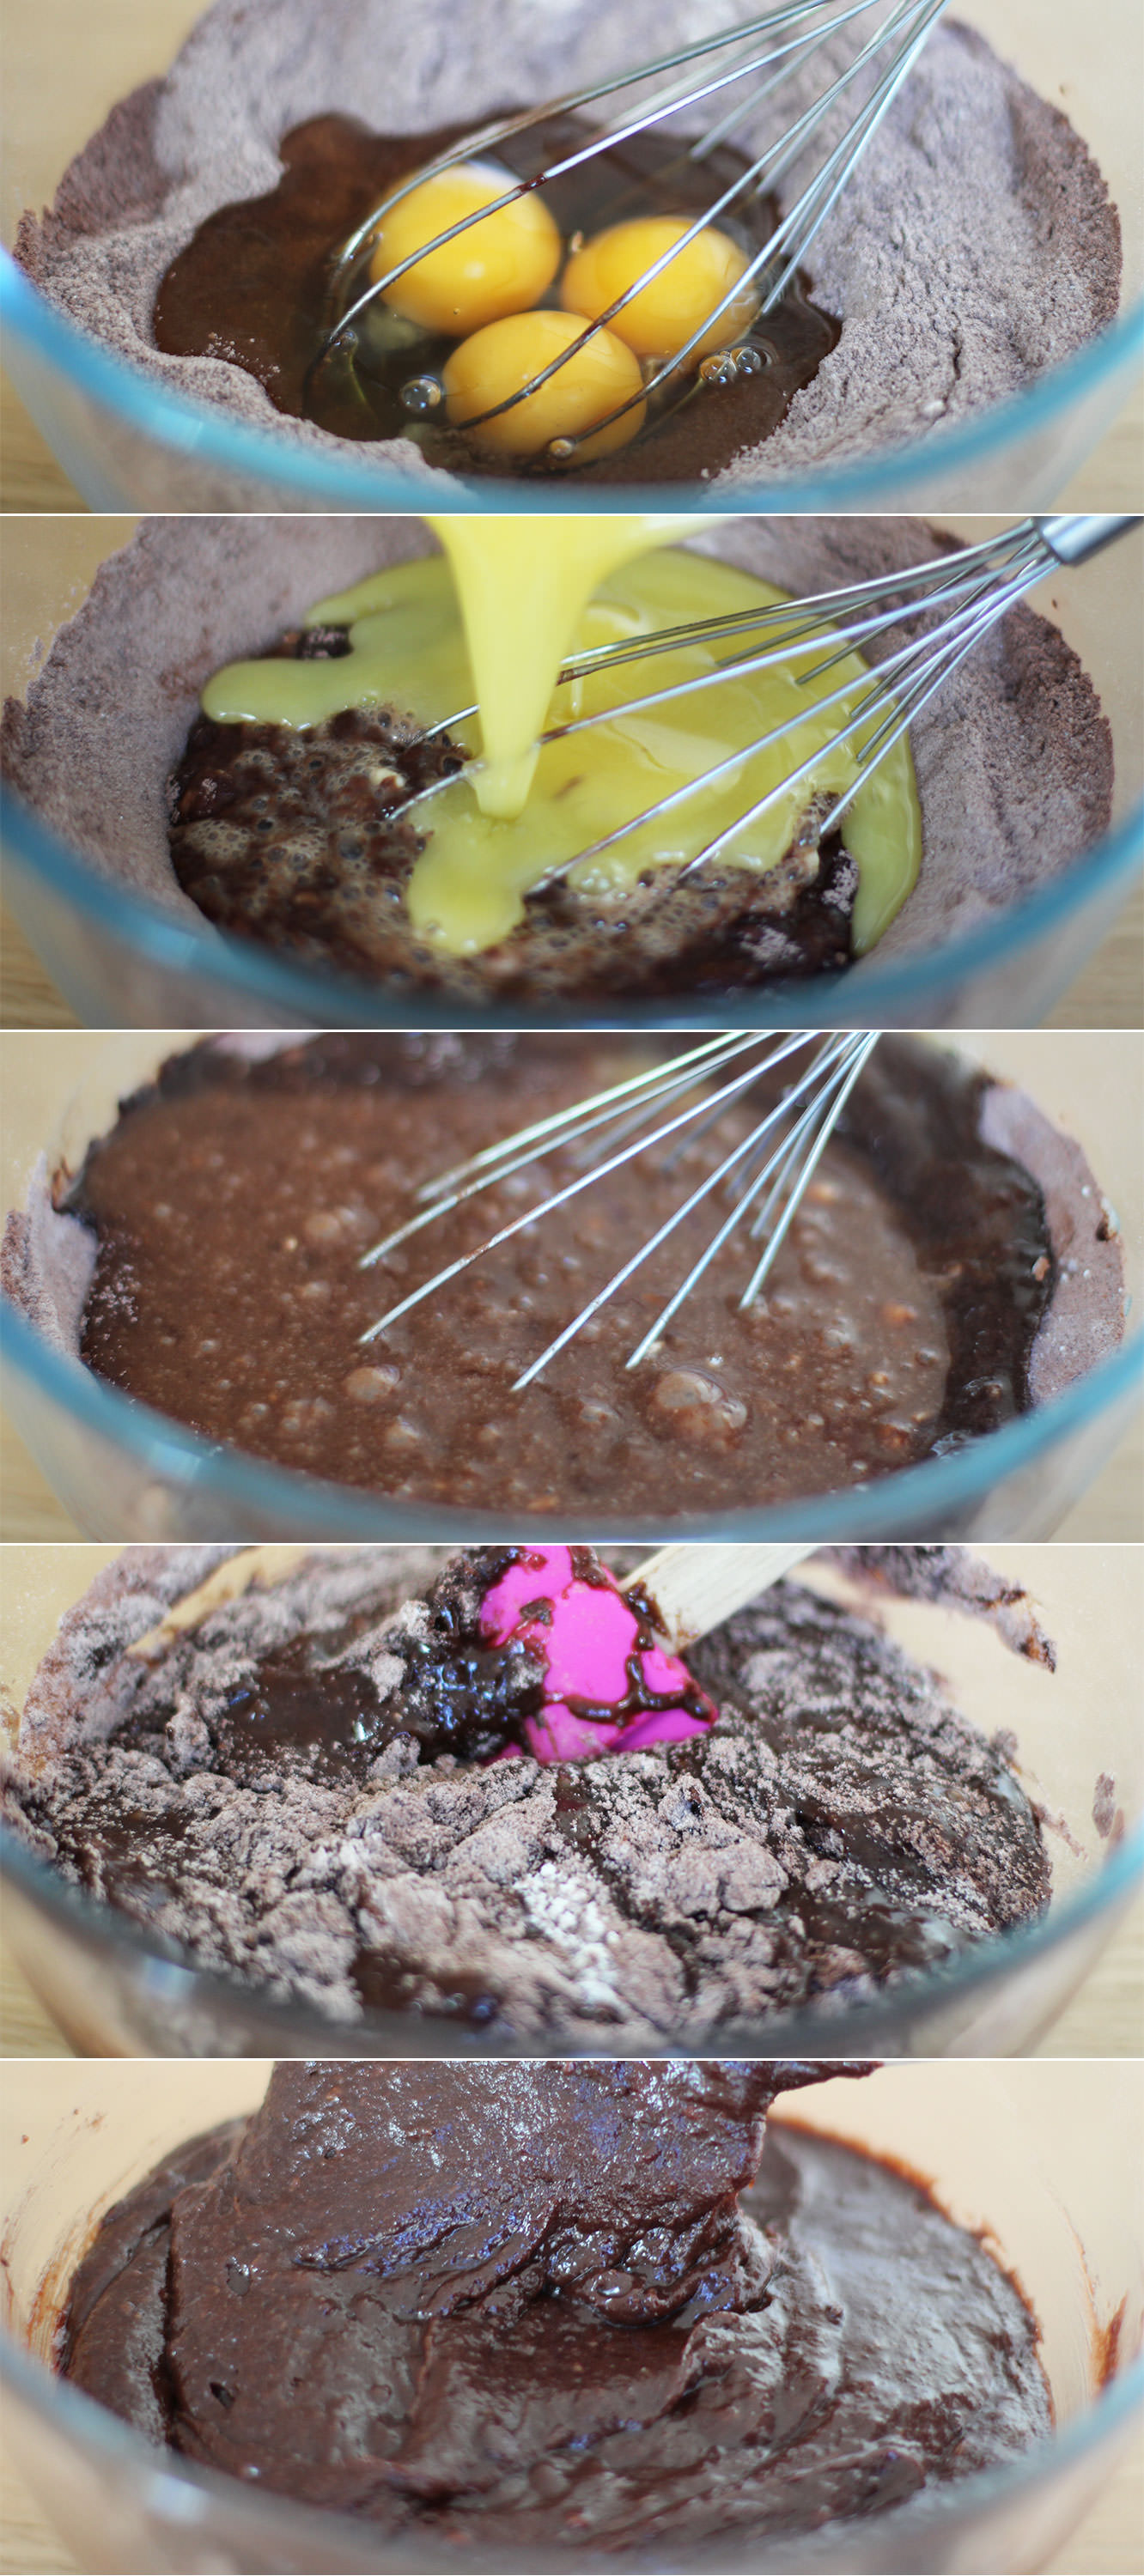
Step two
Make a well in the middle of your dry ingredients and add the eggs. Using a hand whisk, combine gradually using small circles in the centre of the batter.
Step three
Melt the butter in the microwave. Only until it has just about dissolved mind, or it will cook the eggs and this is not intended to be a recipe for scrambled egg brownie.
Step four
Add the butter into the mixture and continue with your little circles until most of the flour is combined, then use a spatula or wooden spoon to fold in the rest.
Step five
Pour into a greased and lined brownie tray and gently spread into the corners.
Get a teaspoon and eat a bit. You know you want to.
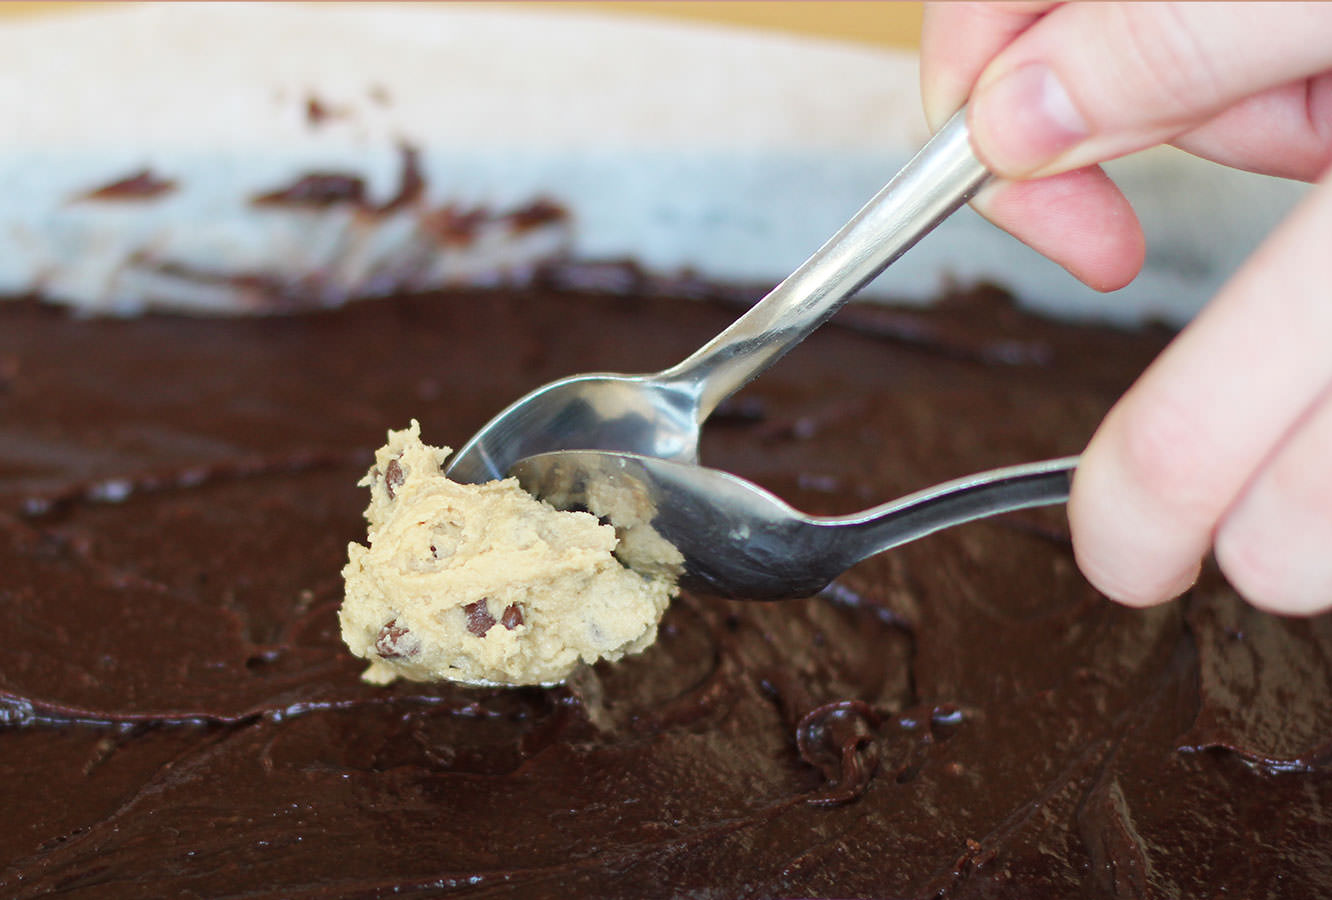
Moving on to the cookie dough…
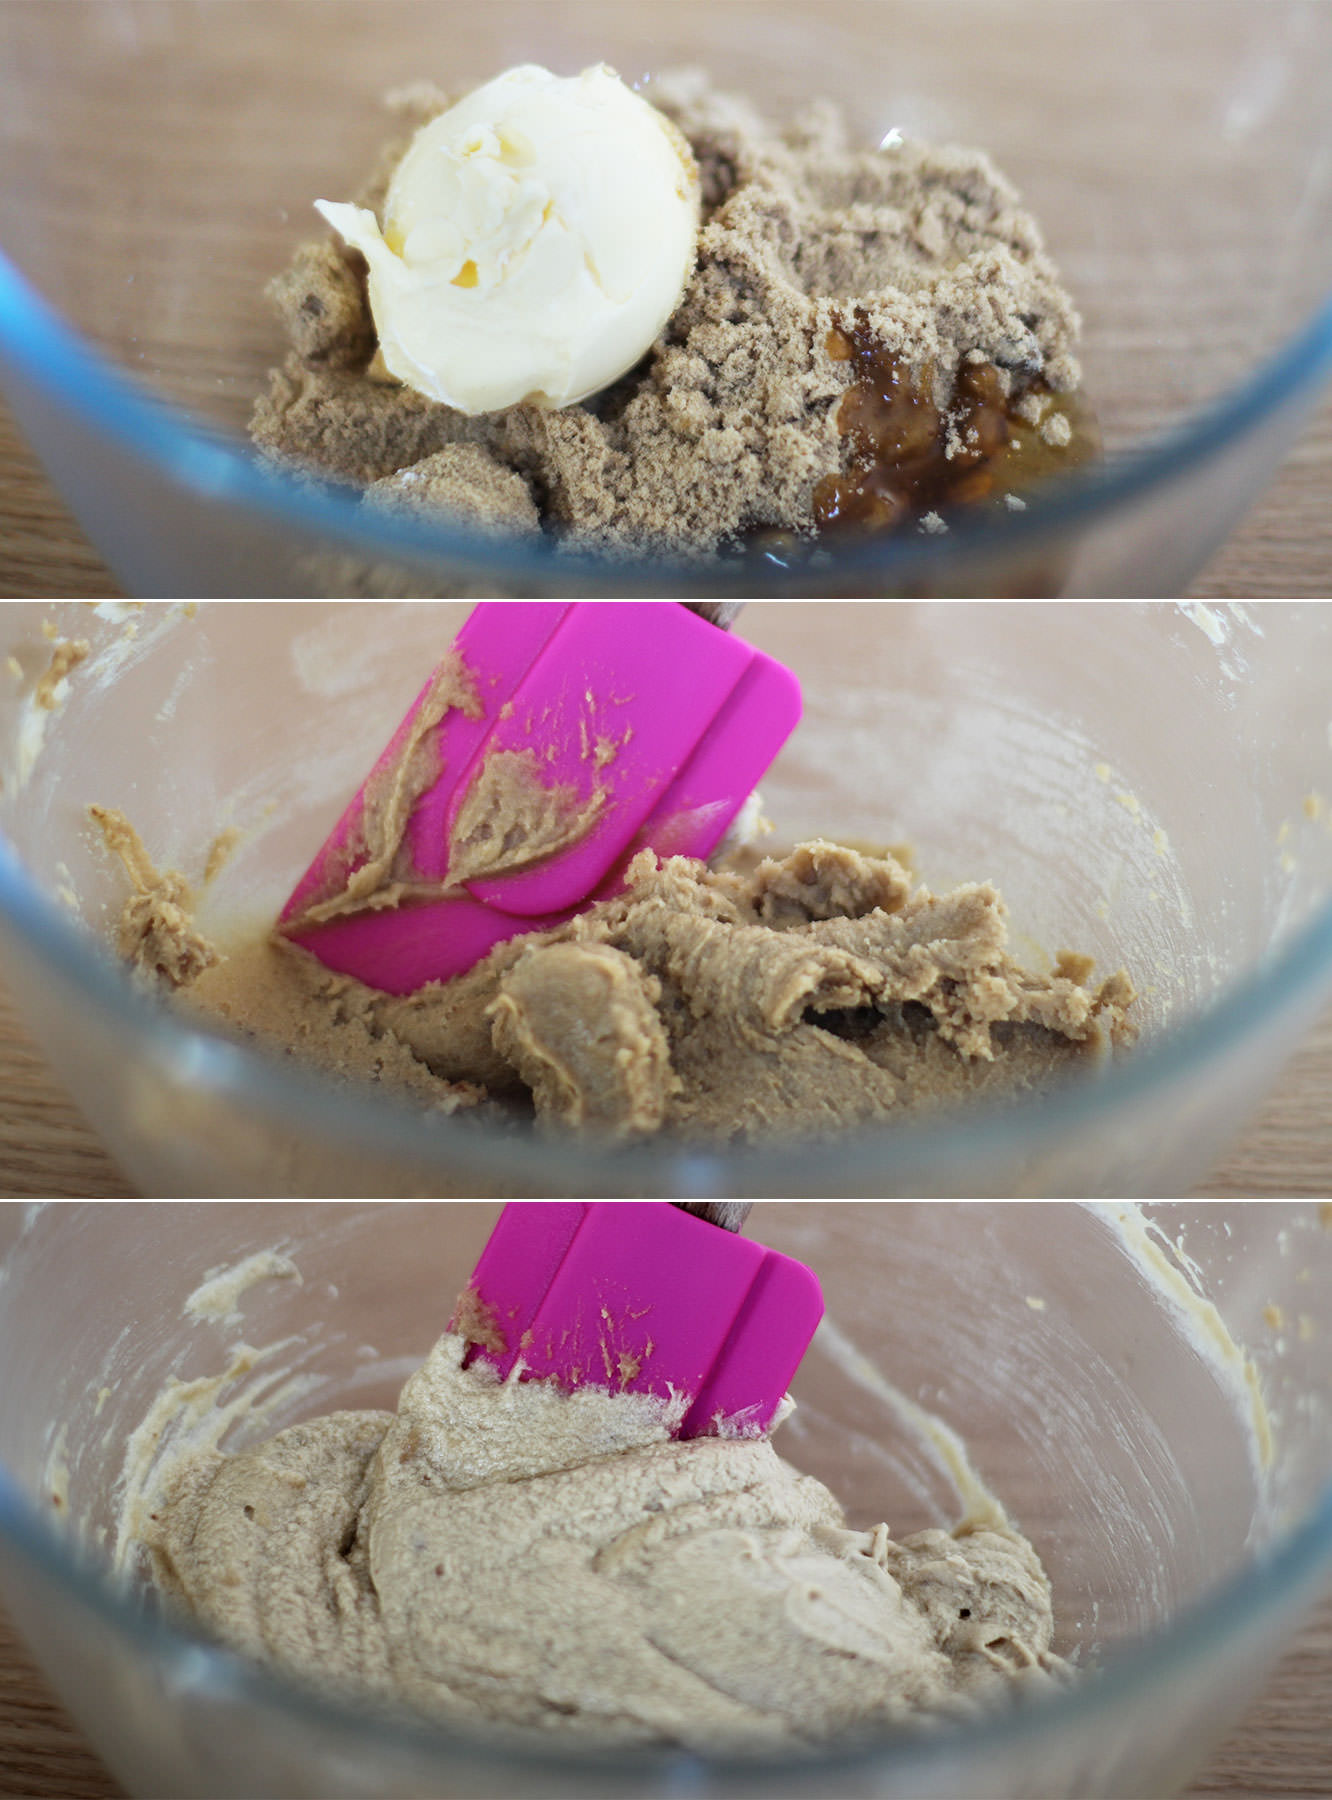
Step six
Beat together the butter, soft brown sugar and golden syrup. You might find it easier/quicker to use an electric whisk.
Step seven
Beat in the egg until pale, light and fluffy.
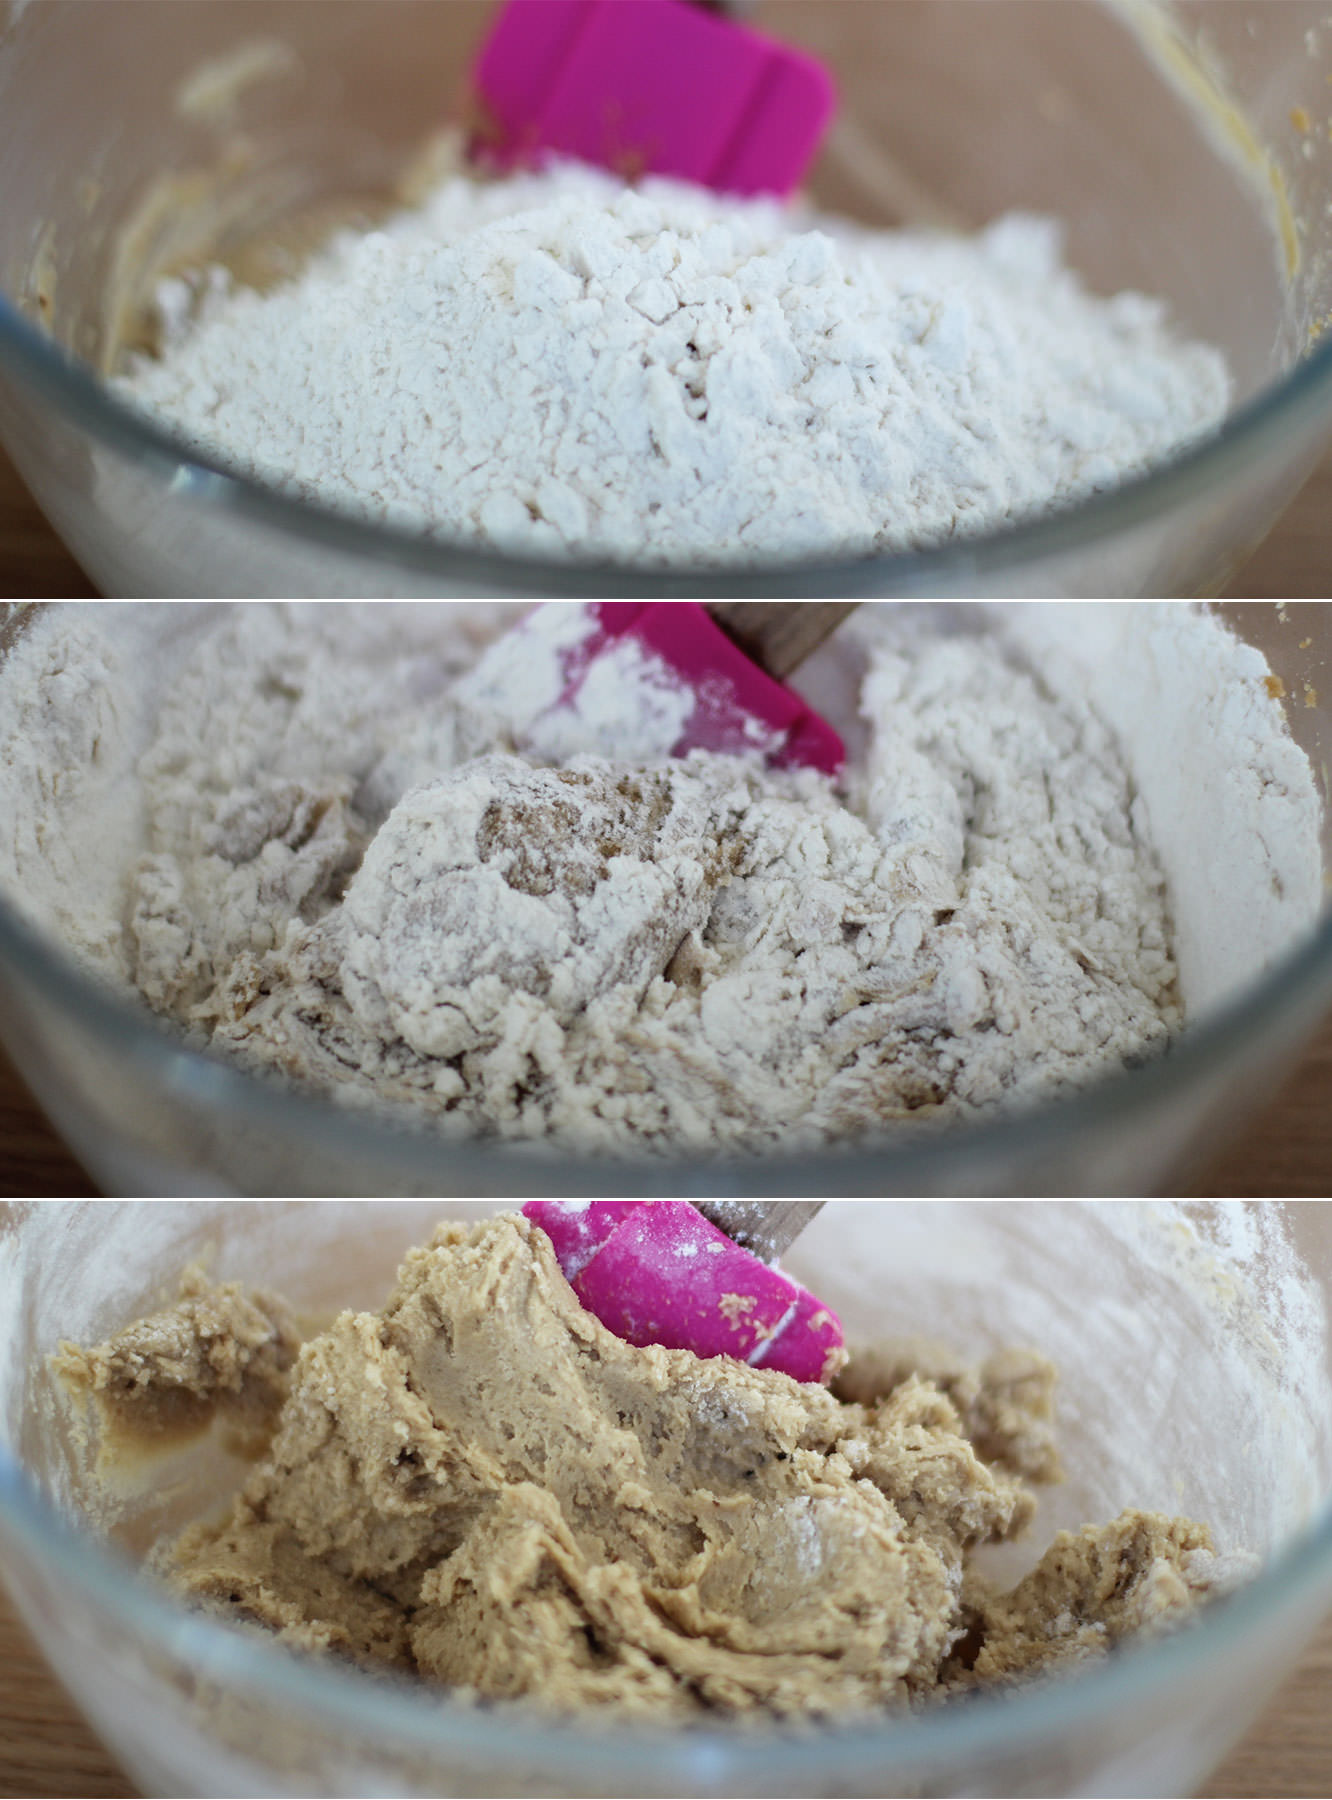
Step eight
Fold in the flour and baking powder until you have a smooth dough.
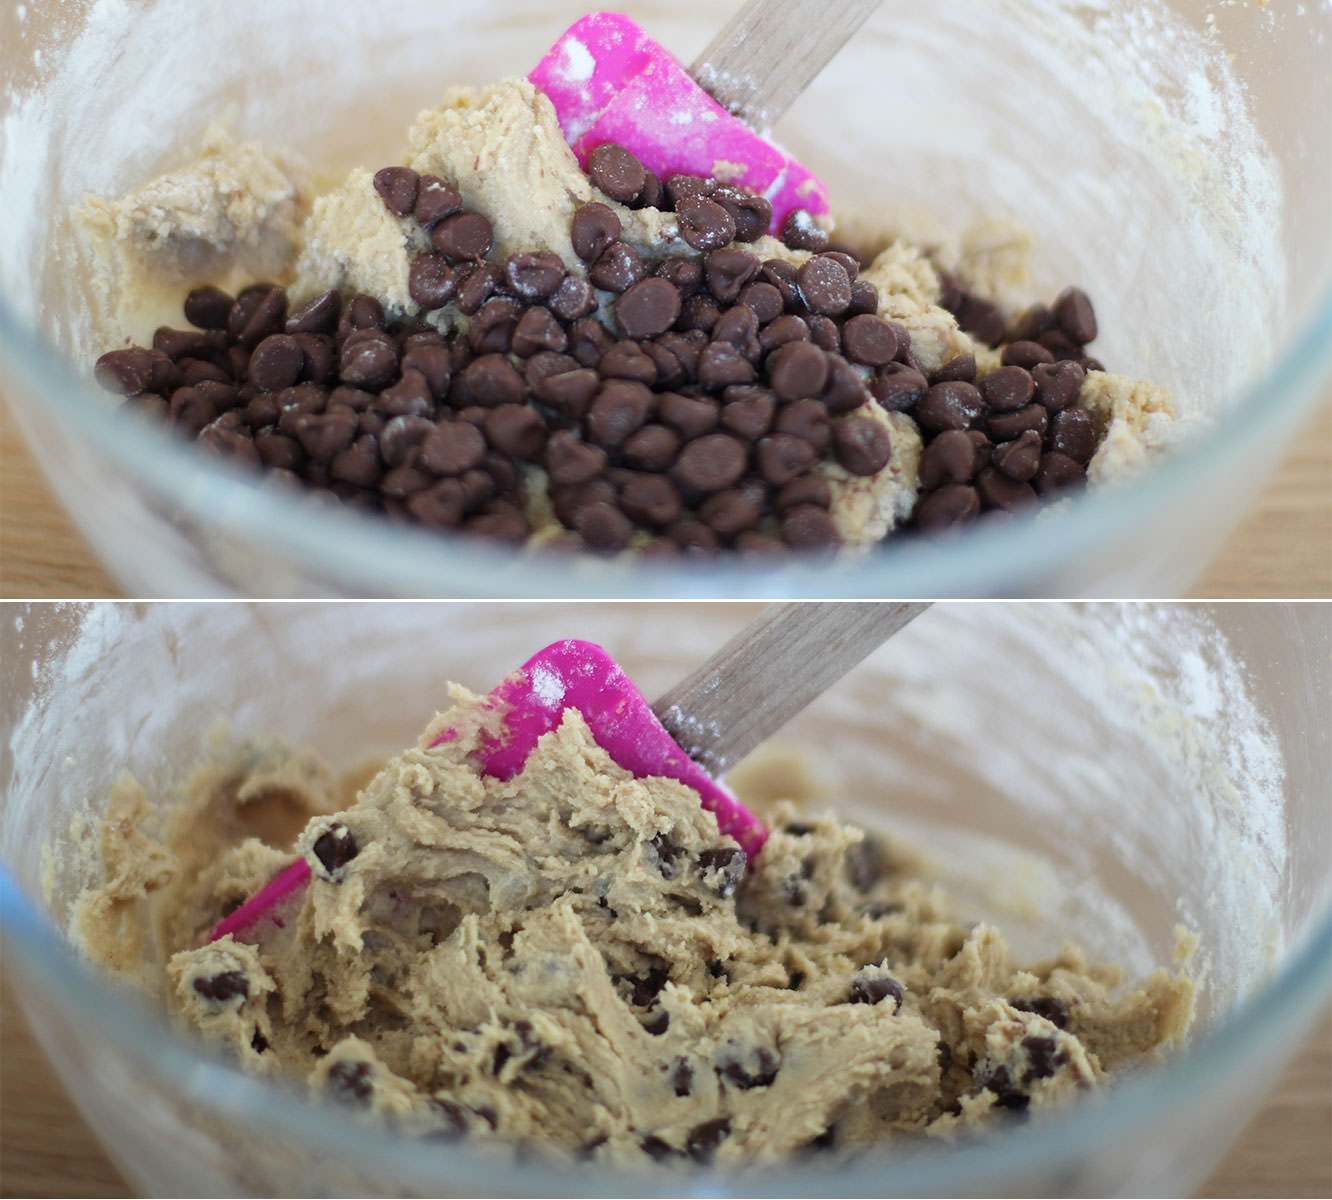
Step nine
Add the chocolate chips.
Time for another little taste.
Step ten
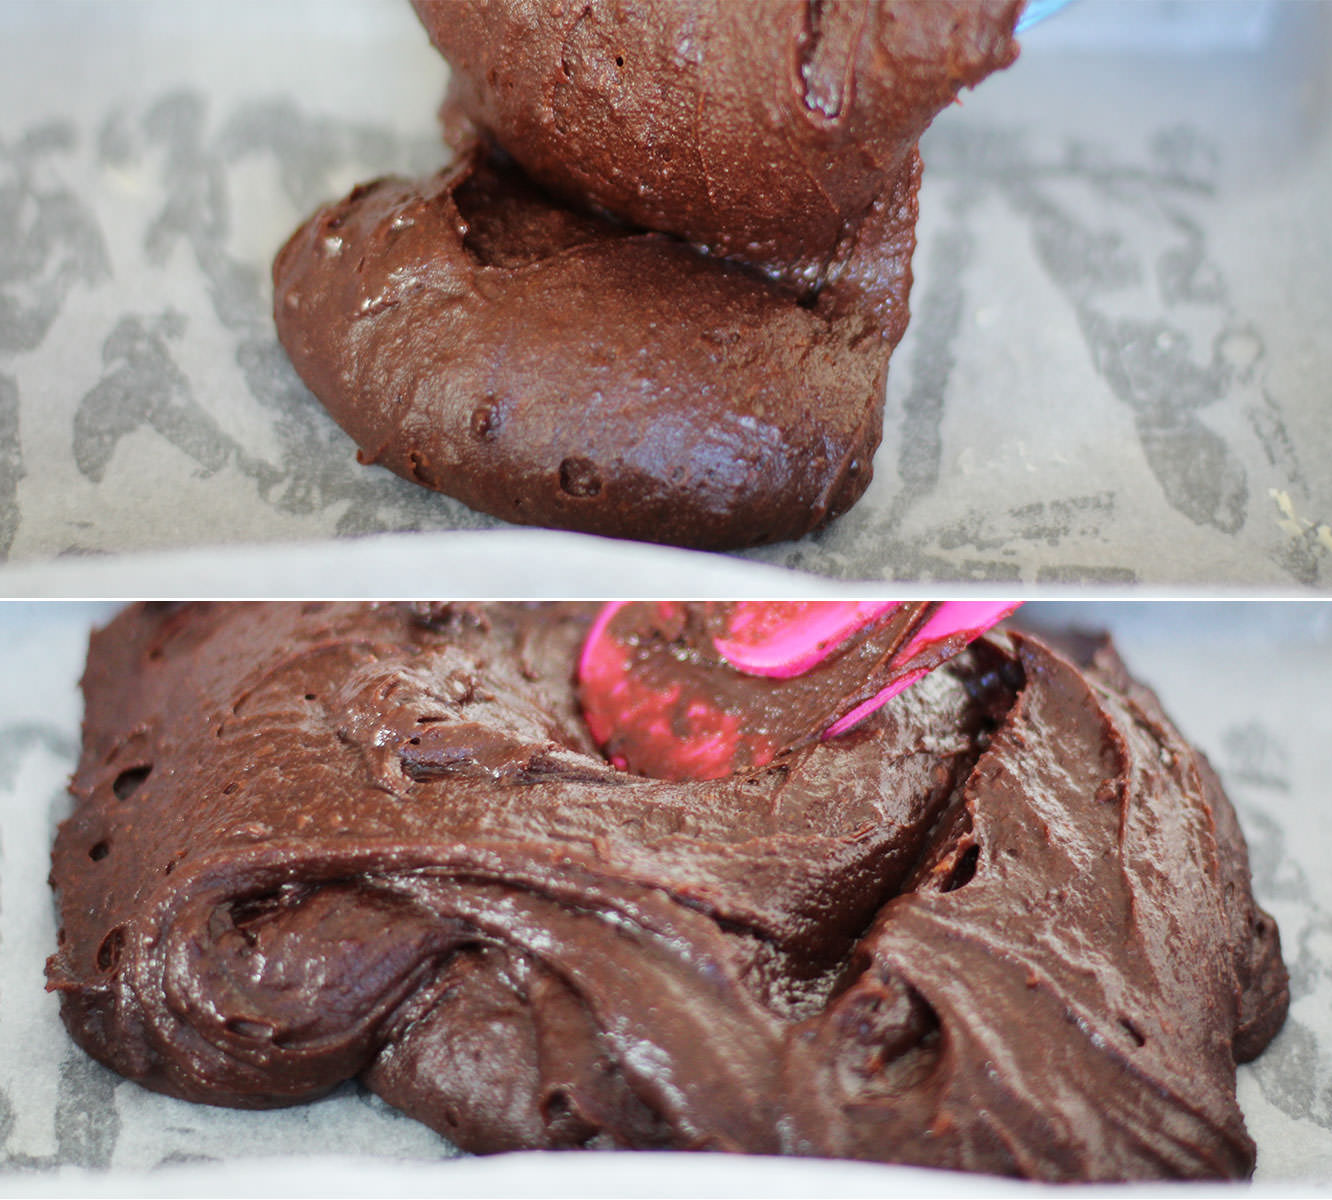
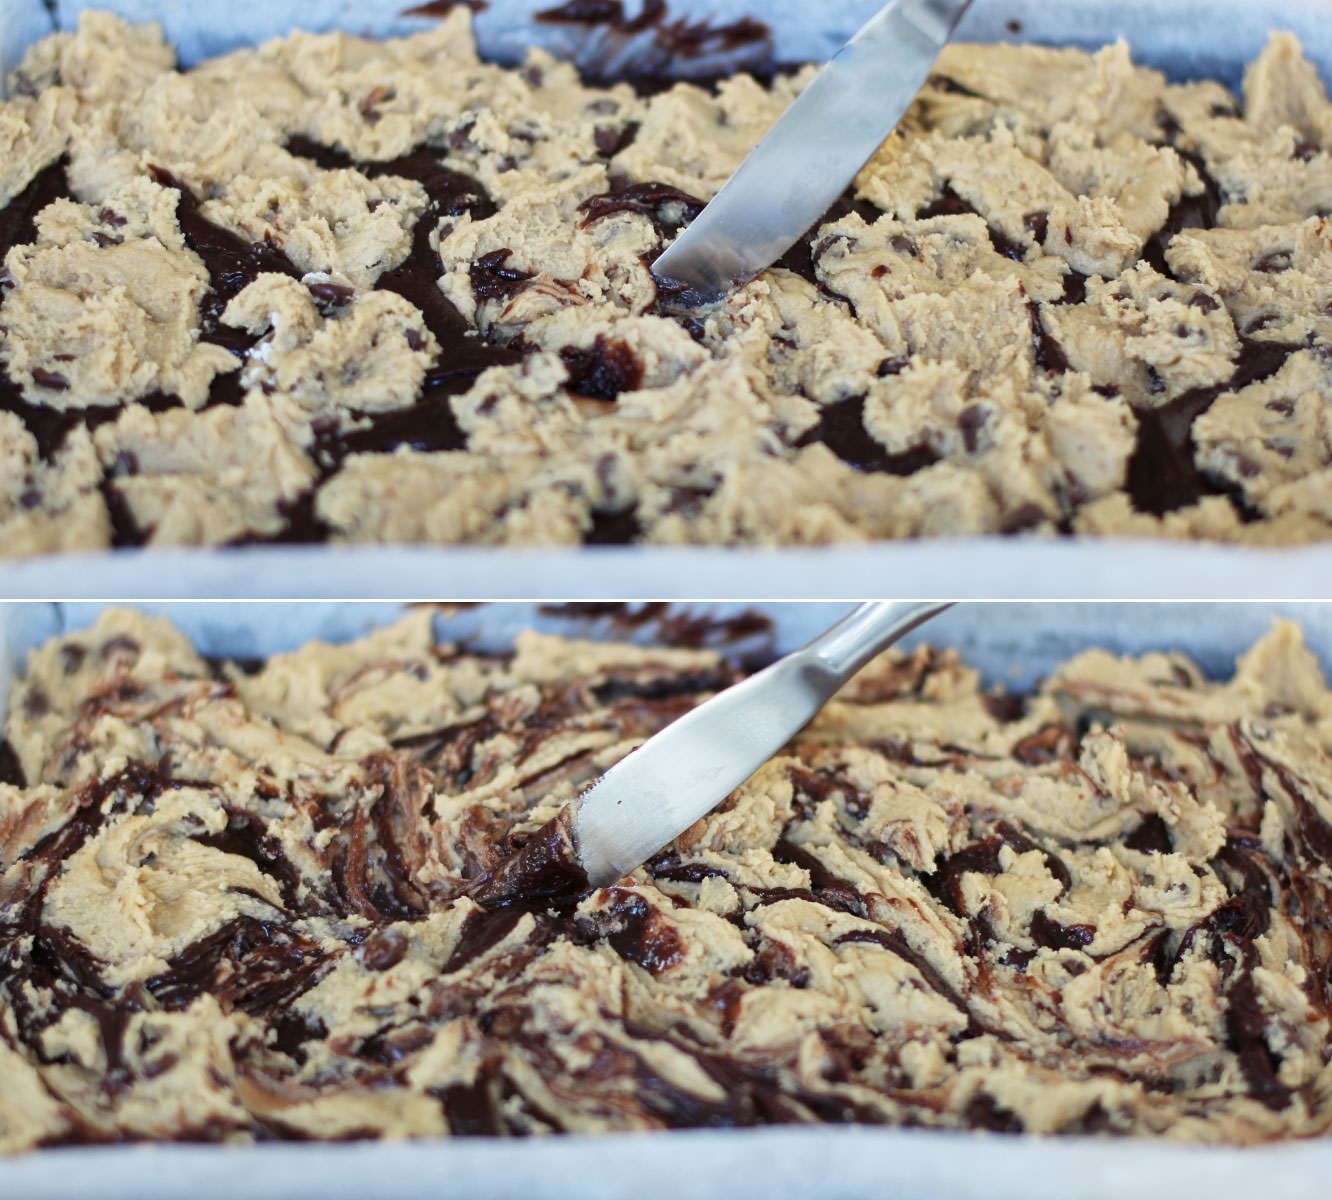
Using a pair of teaspoons drop blobs of the batter onto the surface of the brownie mixture.
Step eleven
Push the cookie dough blobs down a bit with the back of a spoon and use a butter knife to make a marbled effect on top.
Step twelve
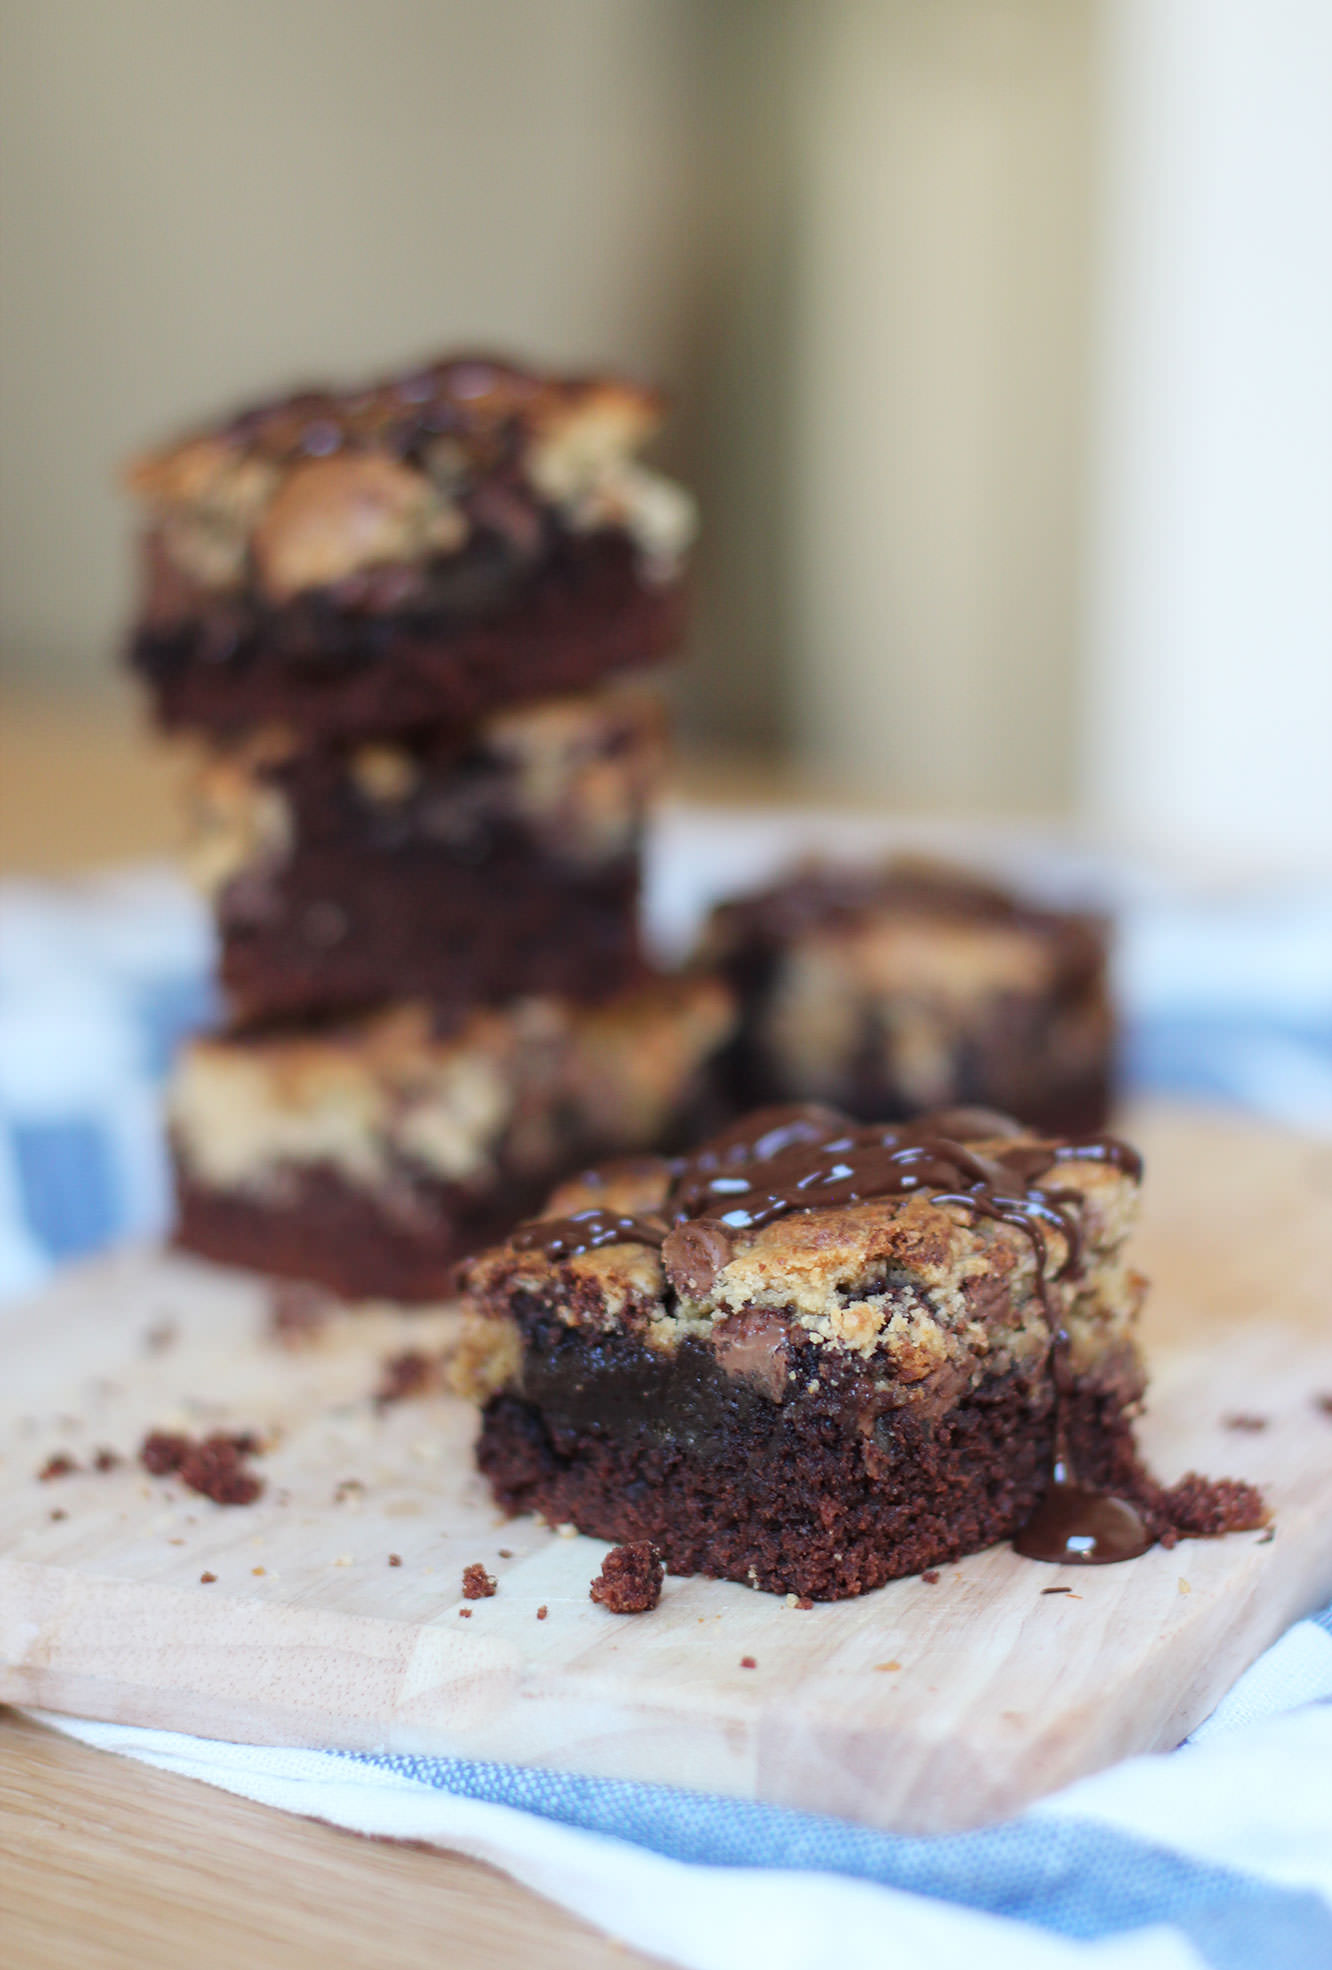
Bake in the oven for 30-35 minutes on 180C/350F/gas mark 4. You want there to still be a bit of fudgey chocolate between the brownie and cookie so be careful not to over do it.
Step thirteen
Melt the dark chocolate in the microwave and drizzle over with a spoon.
Sorry, what’s that? IT’S PANCAKE DAY TOMORROW? Or maybe if you read this on a Tuesday it’s pancake day today. Or maybe if you’re reading this in a few months time pancake day is nowhere nearby, and if that’s the case there’s nothing stopping you from making pancakes anyway. Especially when they taste THIS good.
I don’t think there can ever be enough pancakes, so I bring you not one, not two, but three recipes this week. And with three recipes comes three gifs. I know, I spoil you.
My fellow Europeans will have to excuse me for edging towards the North American style of pancake (you can add more flavours this way, but I assure you I’m still a die hard fan of our traditional flat friends). Those of you across the pond will also have to excuse me for not adding sugar and melted butter and all that nonsense to the mix.
These are a hybrid, somewhere half way between. Maybe this is what happens in Iceland or Greenland, who knows?
Enough ramble. LET’S. GET. FLIPPING.
Who am I kidding? I’m far too anxious to flip them.
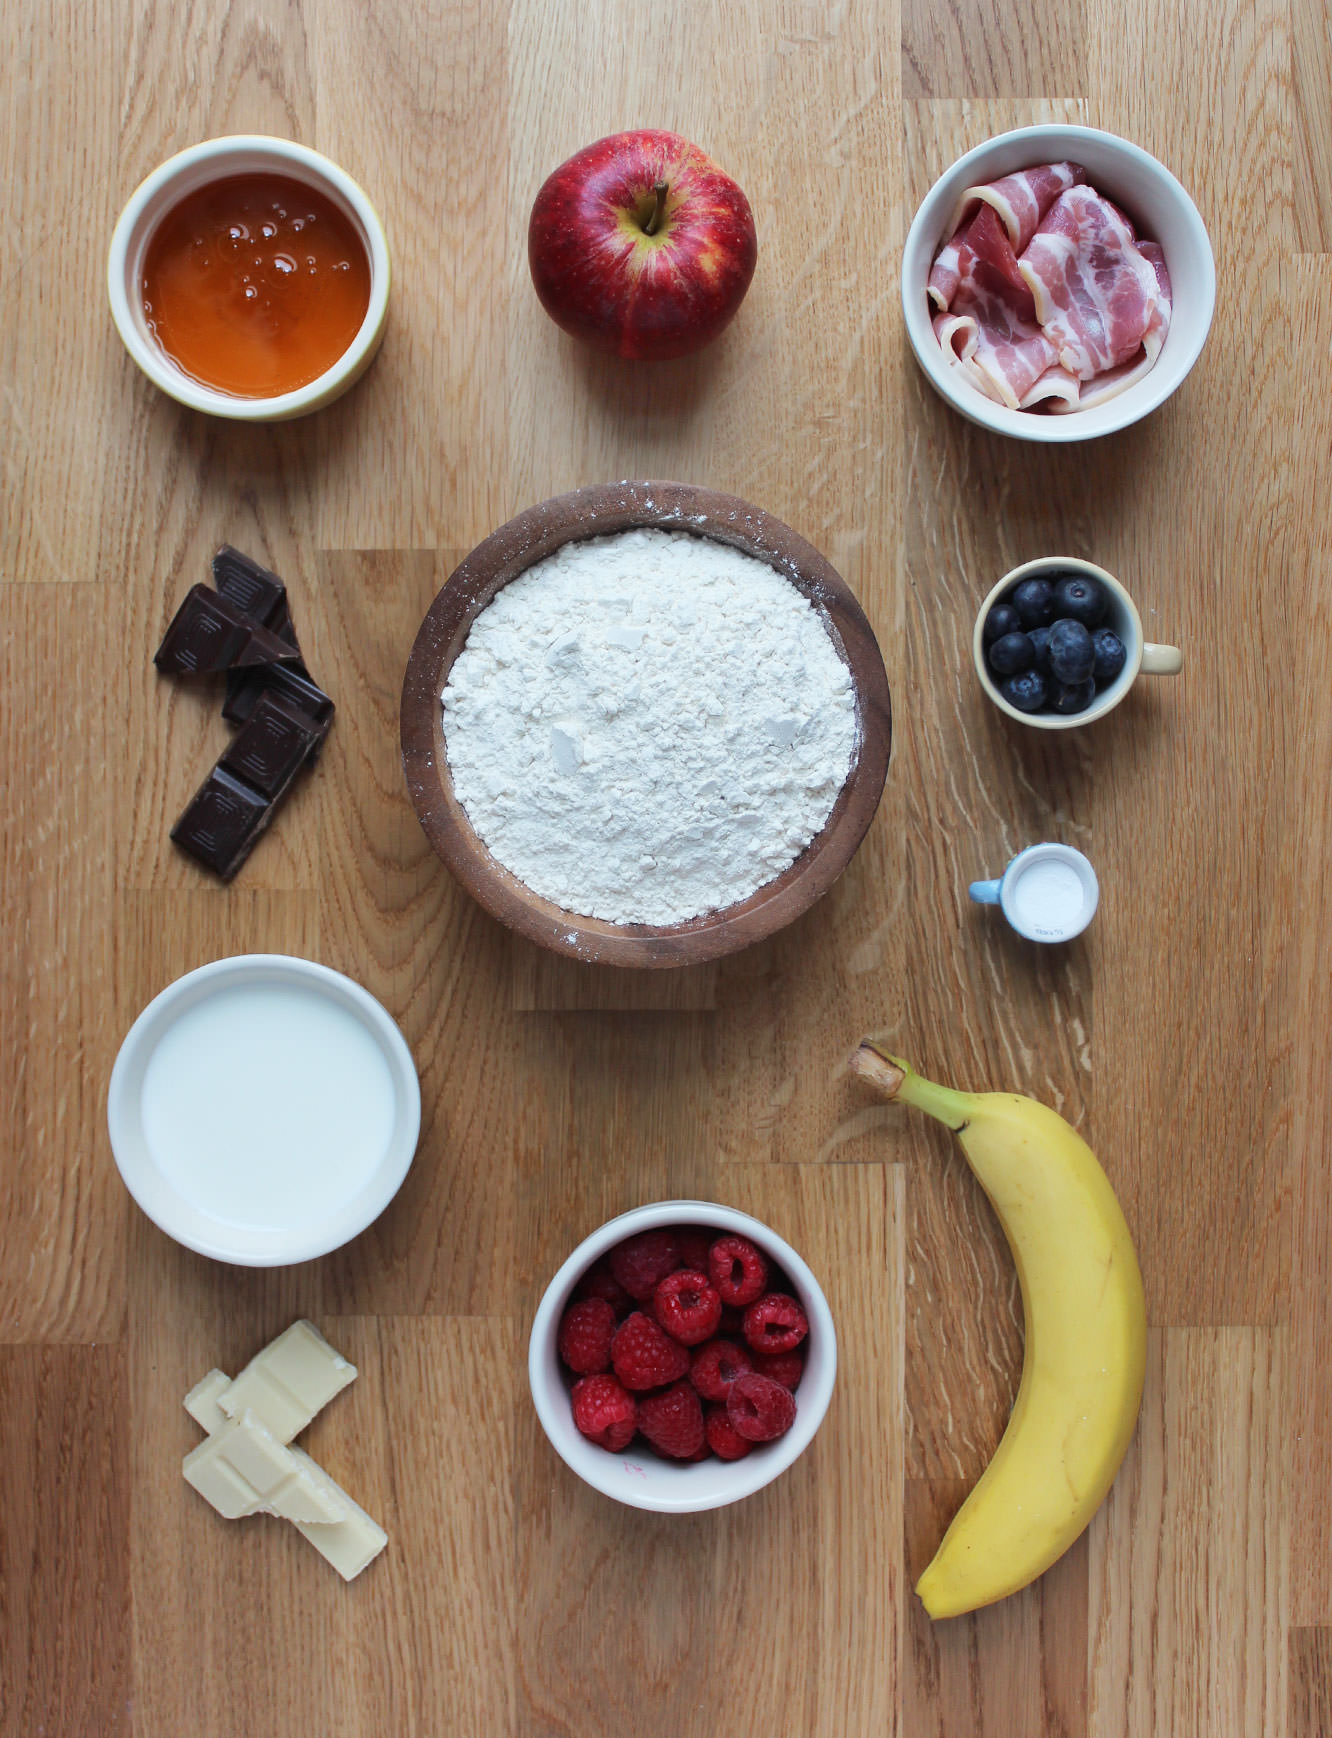
You will need
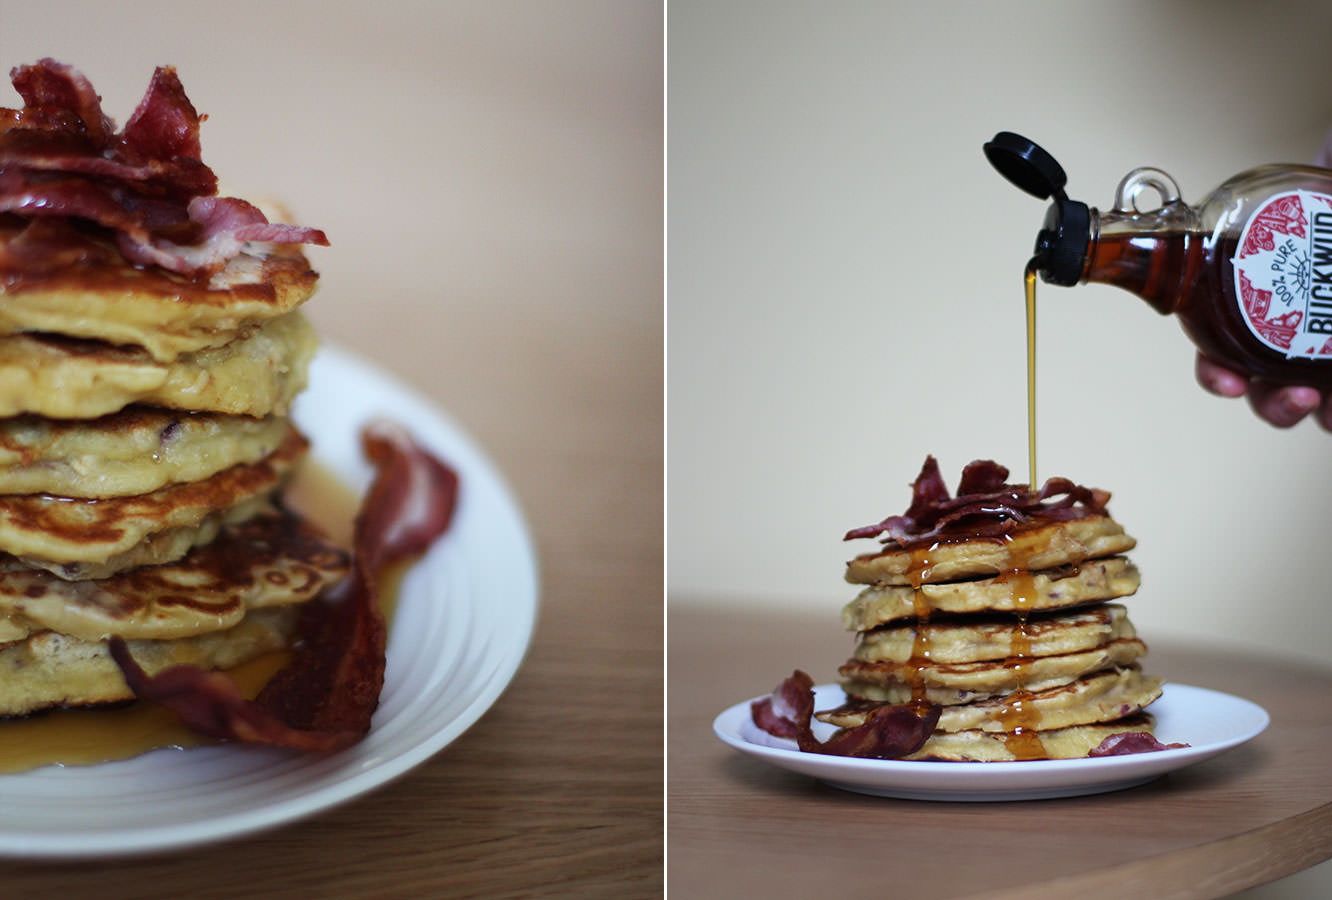
Apple, maple and bacon pancakes
1 cup Plain flour
1 cup Full fat milk
1 Apple
1 Egg
1 tsp Baking powder
Bacon and maple syrup to serve (adjust to your own preference)
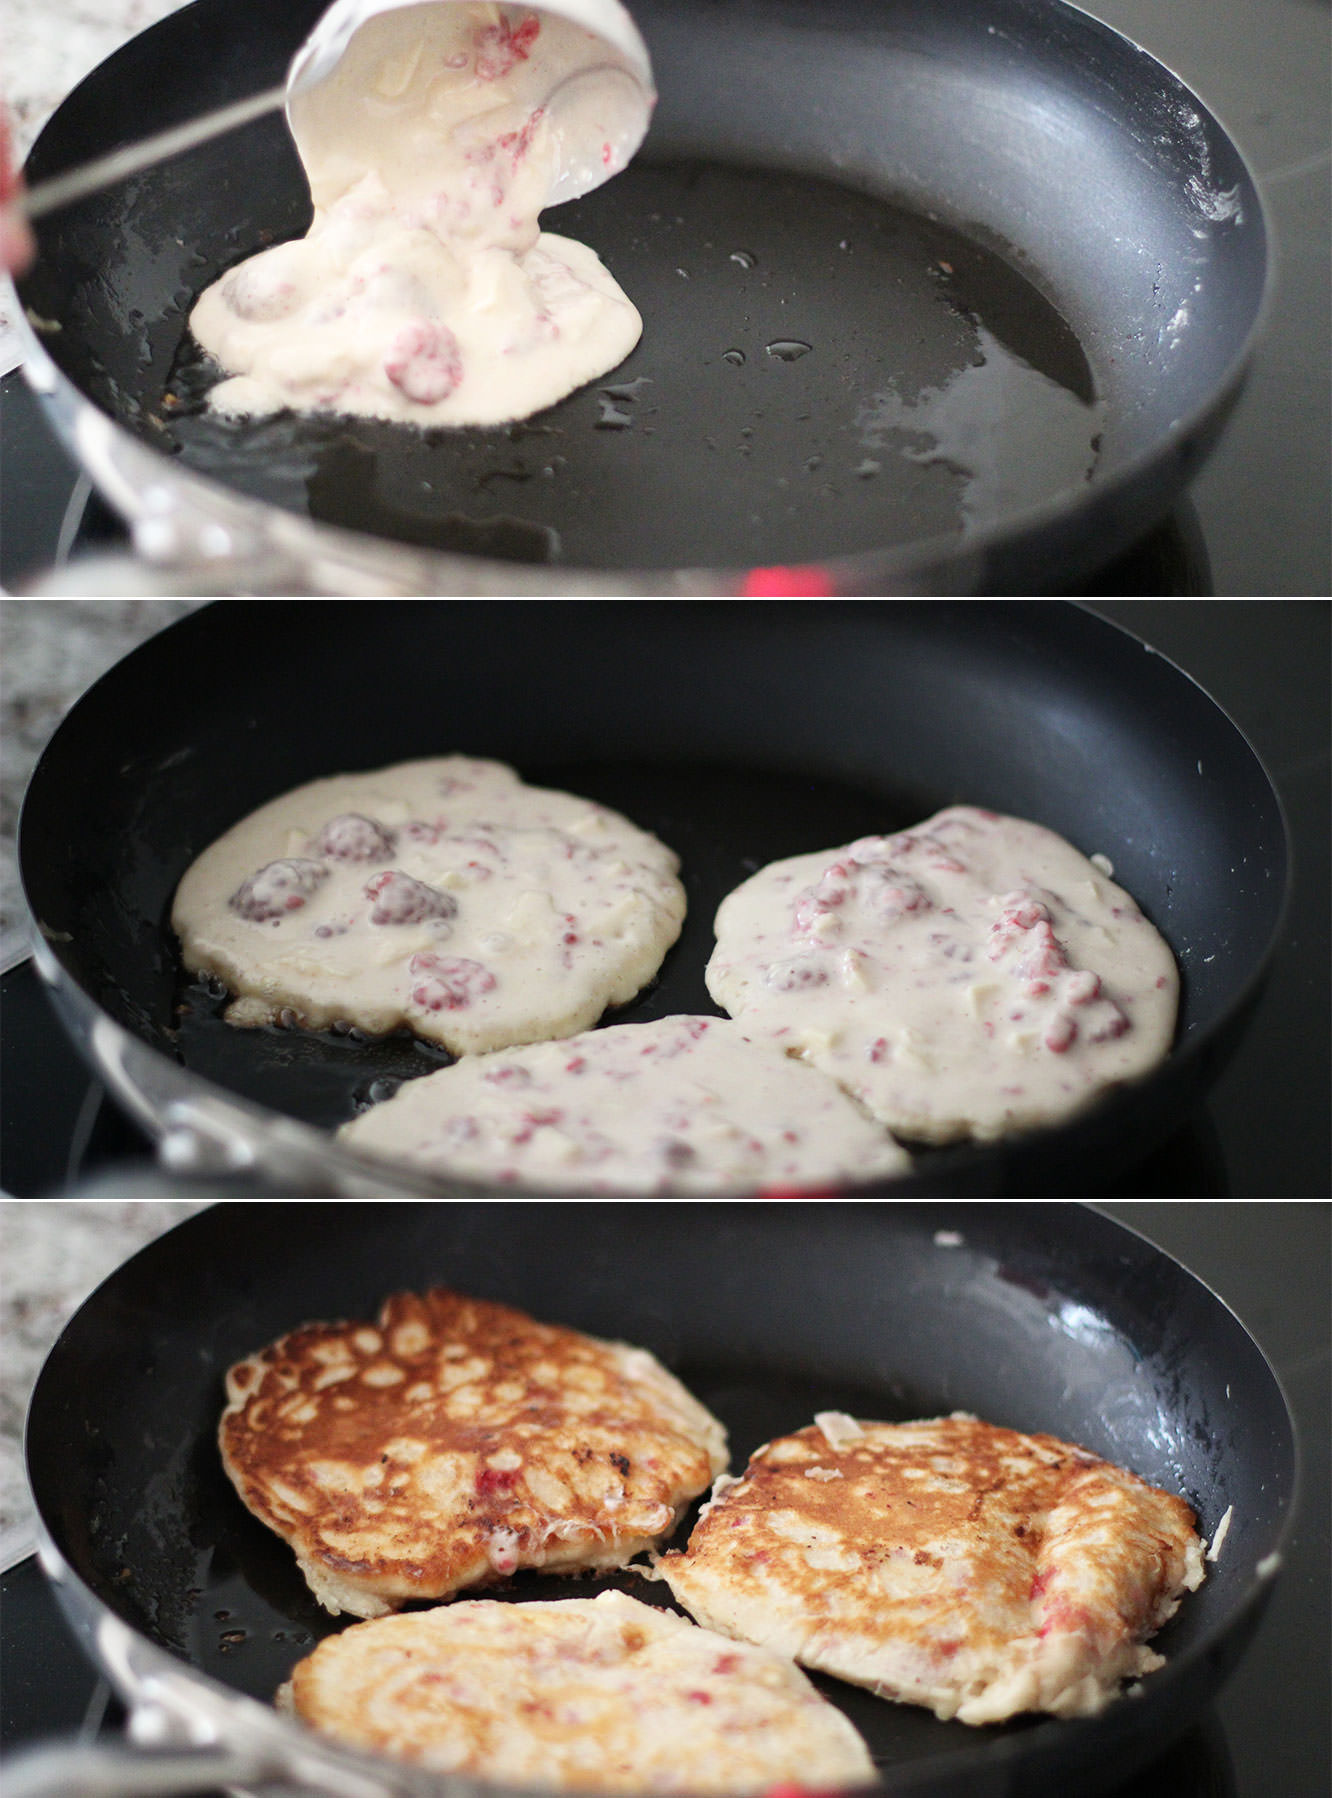
White chocolate and raspberry pancakes
1 cup Plain flour
1 cup Full fat milk
1 cup Raspberries
1 Egg
1 tsp Baking powder
100g/3.5 oz White chocolate
50g/1.5 oz Dark chocolate to serve
Banana and blueberry buttermilk almond pancakes
1 cup Plain flour
1 tub Buttermilk (284ml)
1 Egg
1 tsp Baking powder
1/2 tsp Almond extract
2 Bananas
1/2 cup Blueberries
More blueberries, some natural yoghurt and honey to serve
NB: The process is the same for all three recipes, however, the banana ones use buttermilk instead of regular milk. This makes a much thicker, goopier mixture.
All the recipes make 6-8 pancakes depending on their size.
Apple, maple and bacon pancakes
Step one
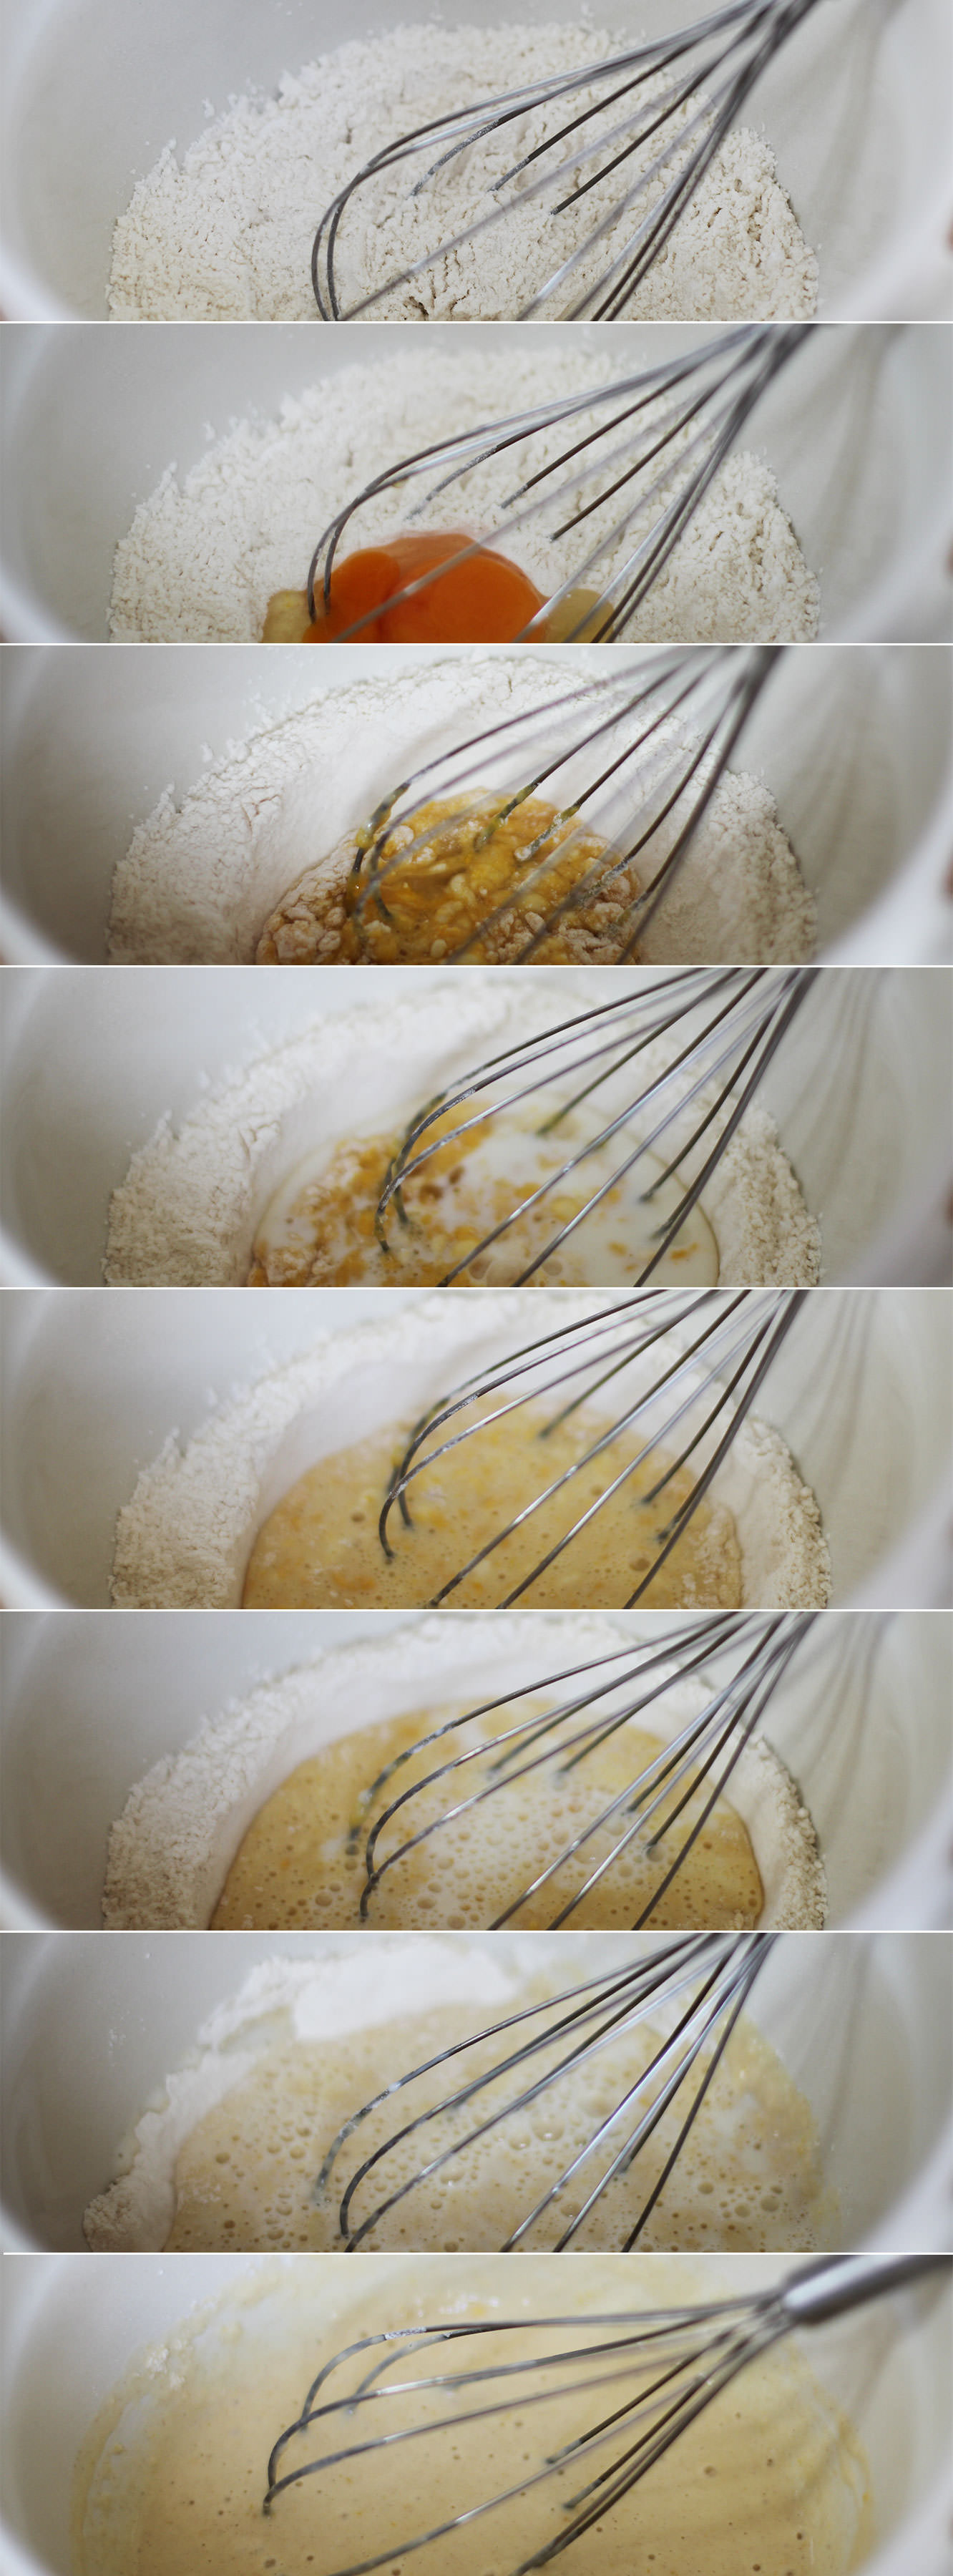
Whisk together the flour and baking powder and make a well in the middle for the egg.
The way to make smooth pancakes is to whisk little circles to gradually include the flour. Slowly add the milk a third at a time and continue making circles until all the flour is mixed in.
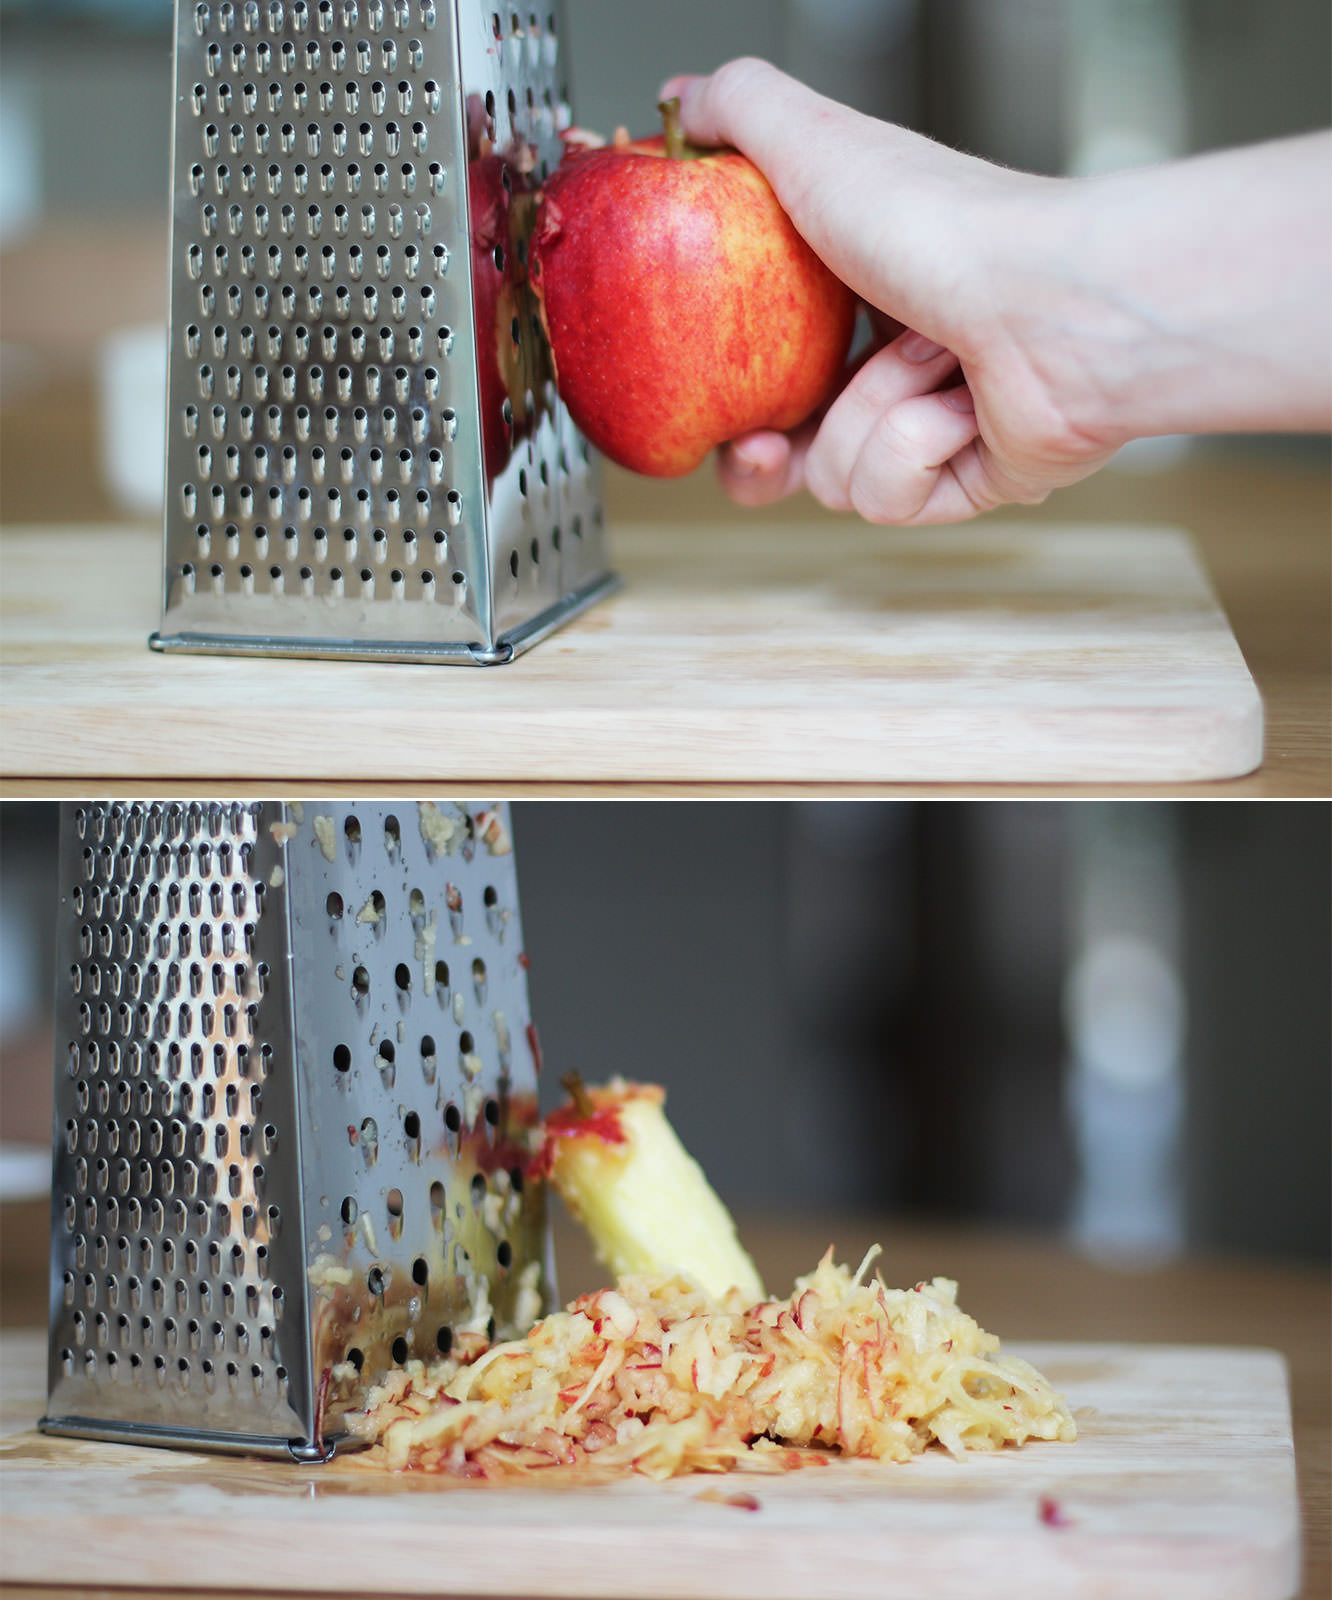
Step two
Grate the apple until you get to the core and add to the pancake batter.
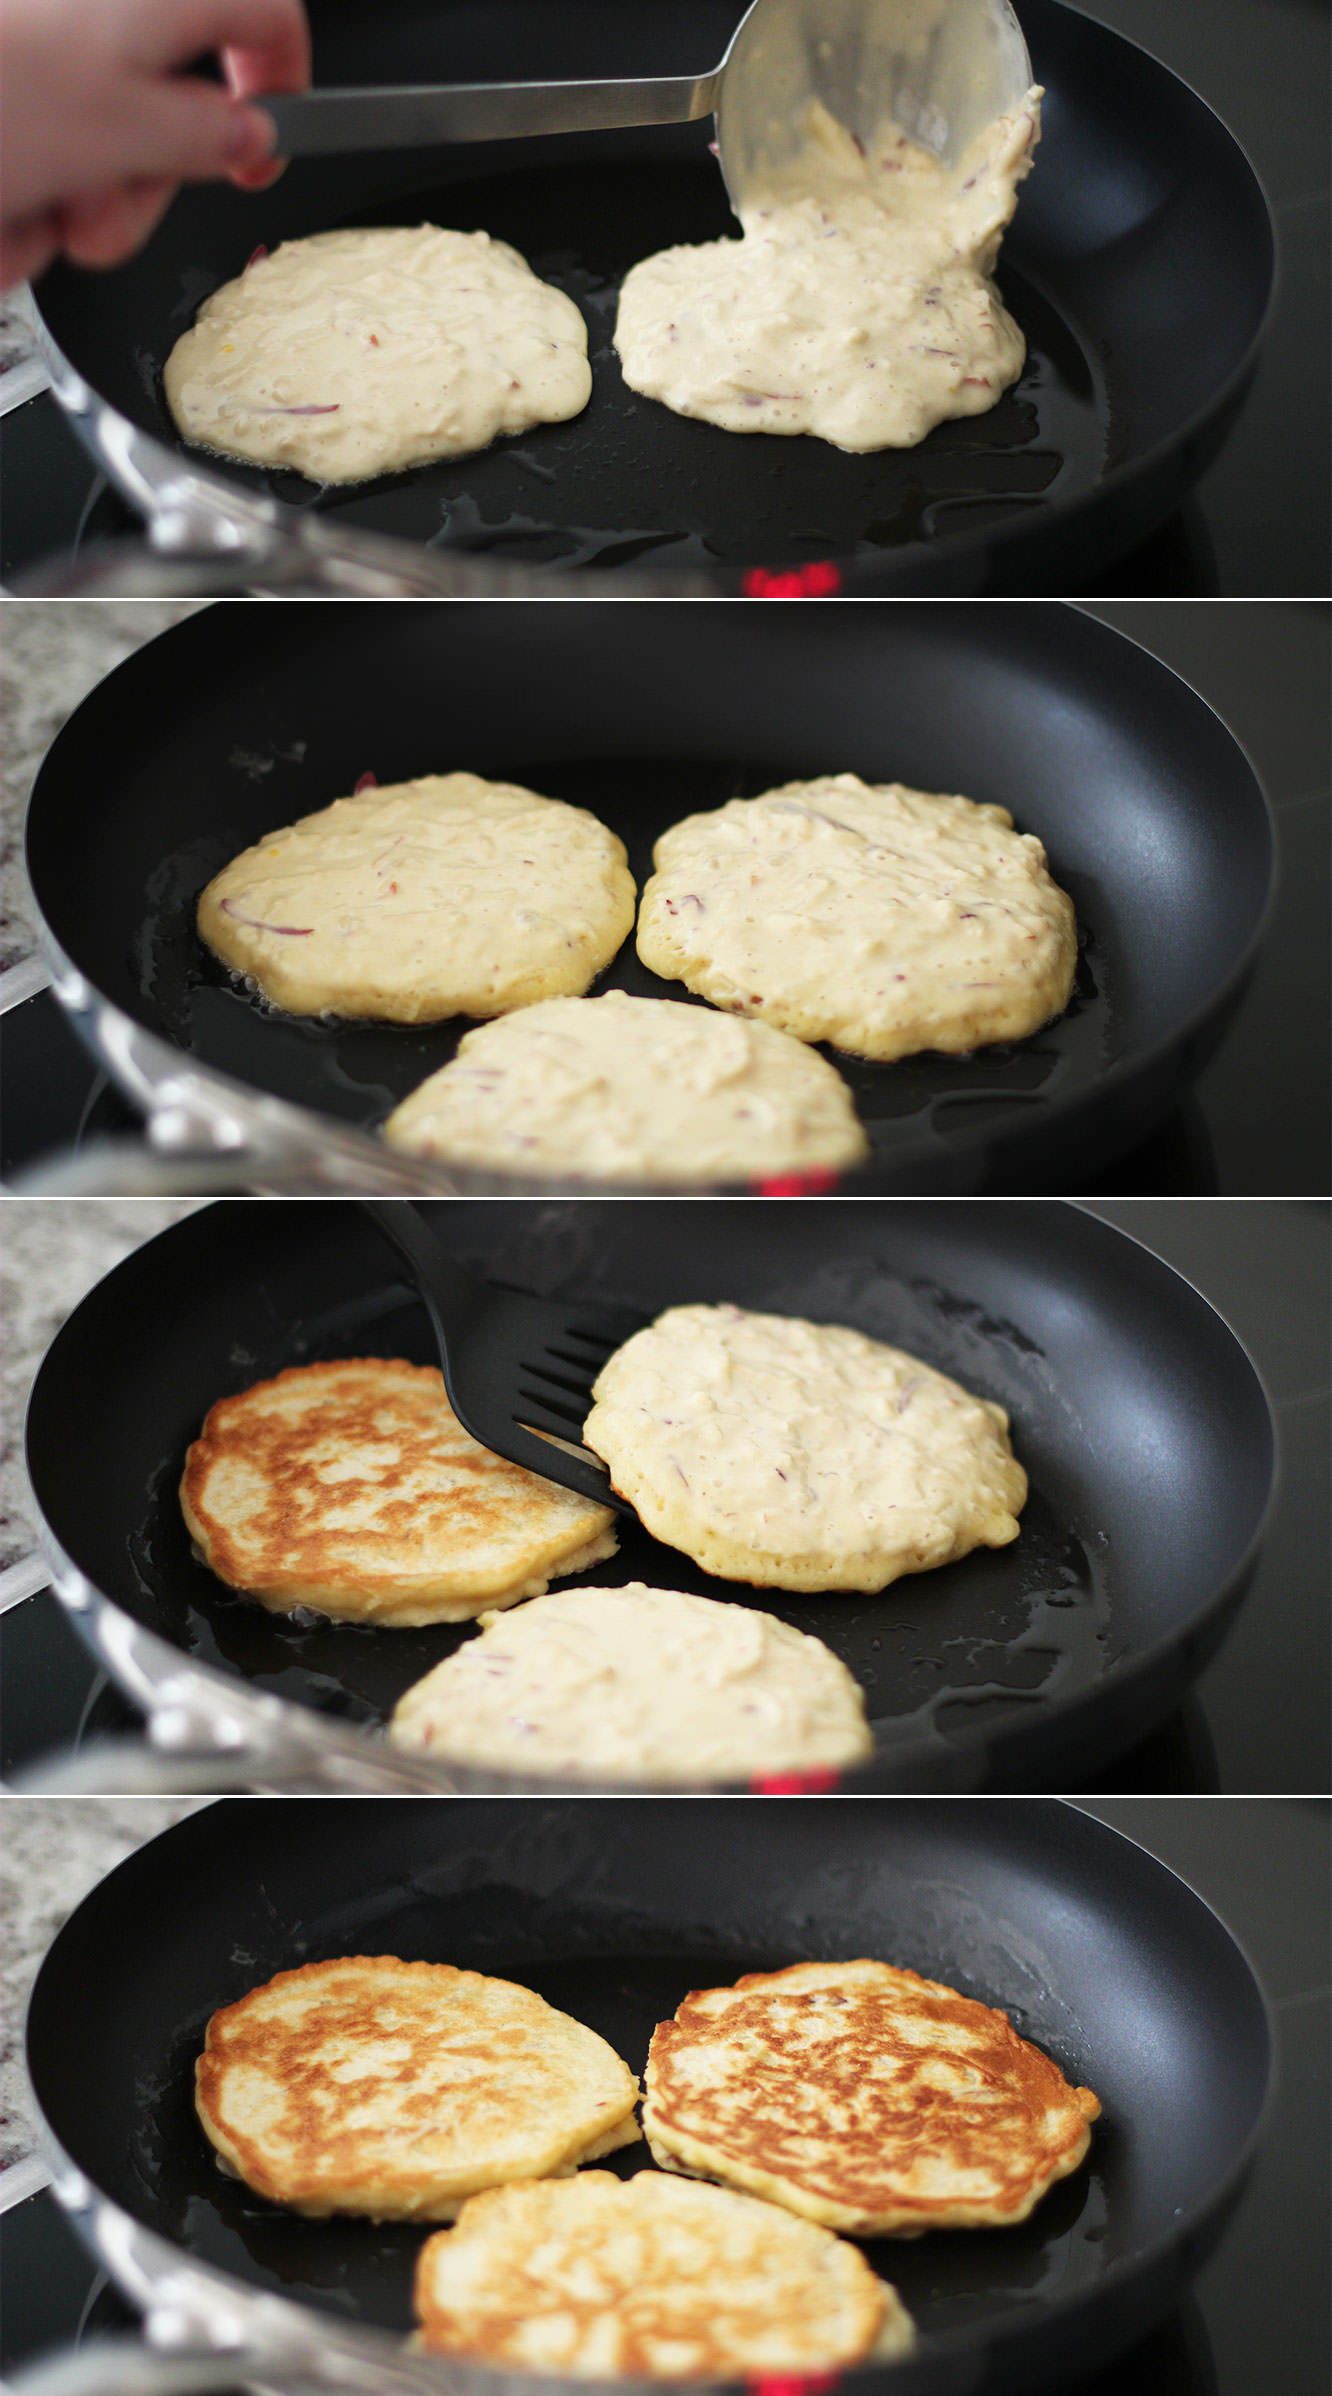
Step three
Using a tablespoon or so of vegetable oil, fry the pancakes until you start to see lots of little bubbles on the surface.
FLIP FLIP FLIP.
Step four
If you’re wanting bacon with this (and unless you’re a vegetarian, you are wanting bacon) then you’ll want to have that grilling or frying off at the same time.
Right. One down, two to go.
White chocolate and raspberry pancakes
Step one
Refer to step one of apple, maple and bacon recipe.
Step two
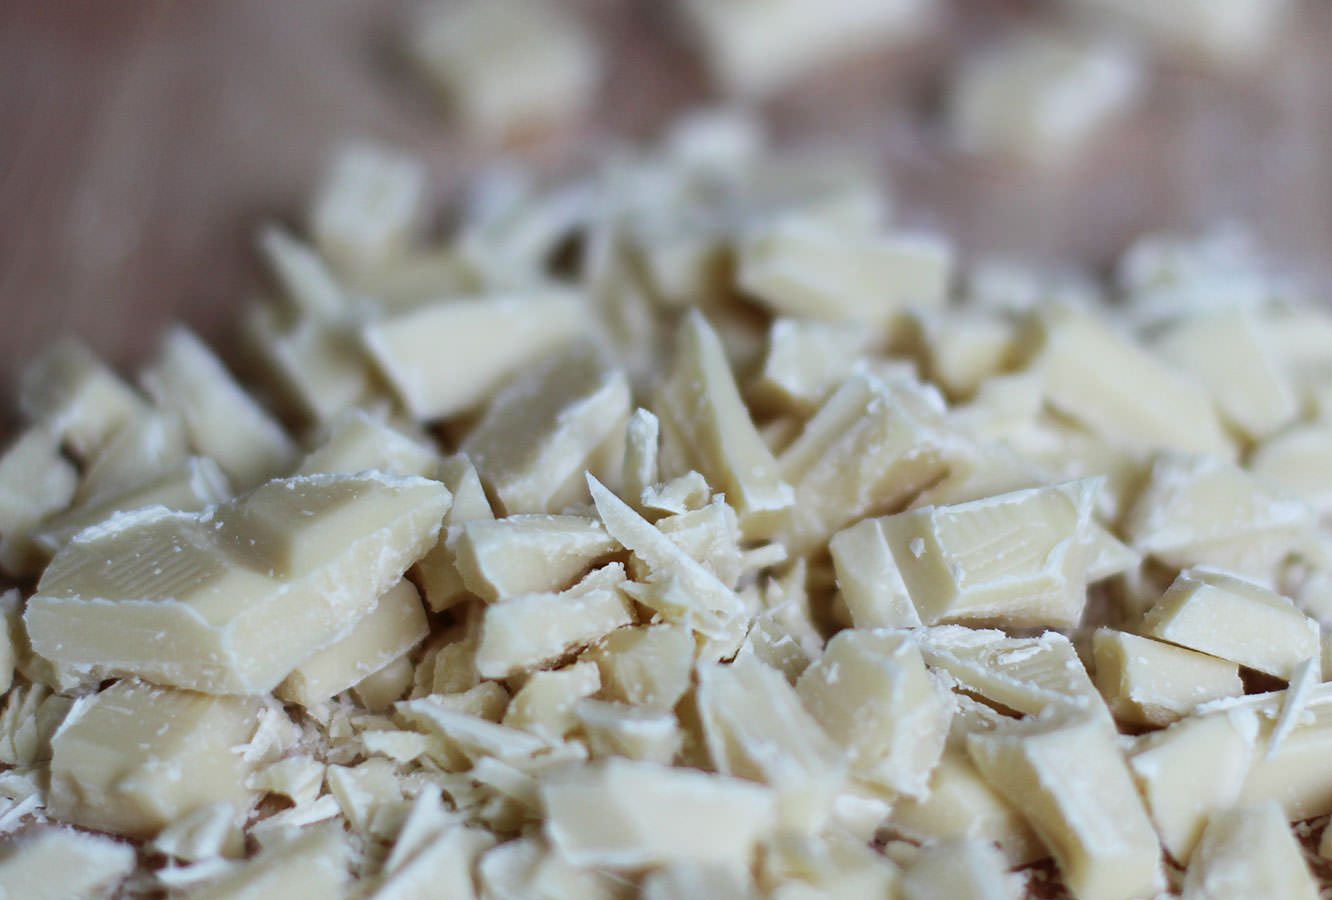
Chop the white chocolate into smallish chunks.
Step three
Stir the raspberries and chocolate into the batter. I squashed a few of them with the back of the spoon.
Step four
Cook em off.
You will find this mix a little runnier than the last one from a combo of the raspberry juice and the melting white chocolate.
Step five
Put the dark chocolate in a small bowl in the microwave and melt gradually, 20-30 seconds at a time.
Step six
Stack them, cover in dark chocolate, enjoy.
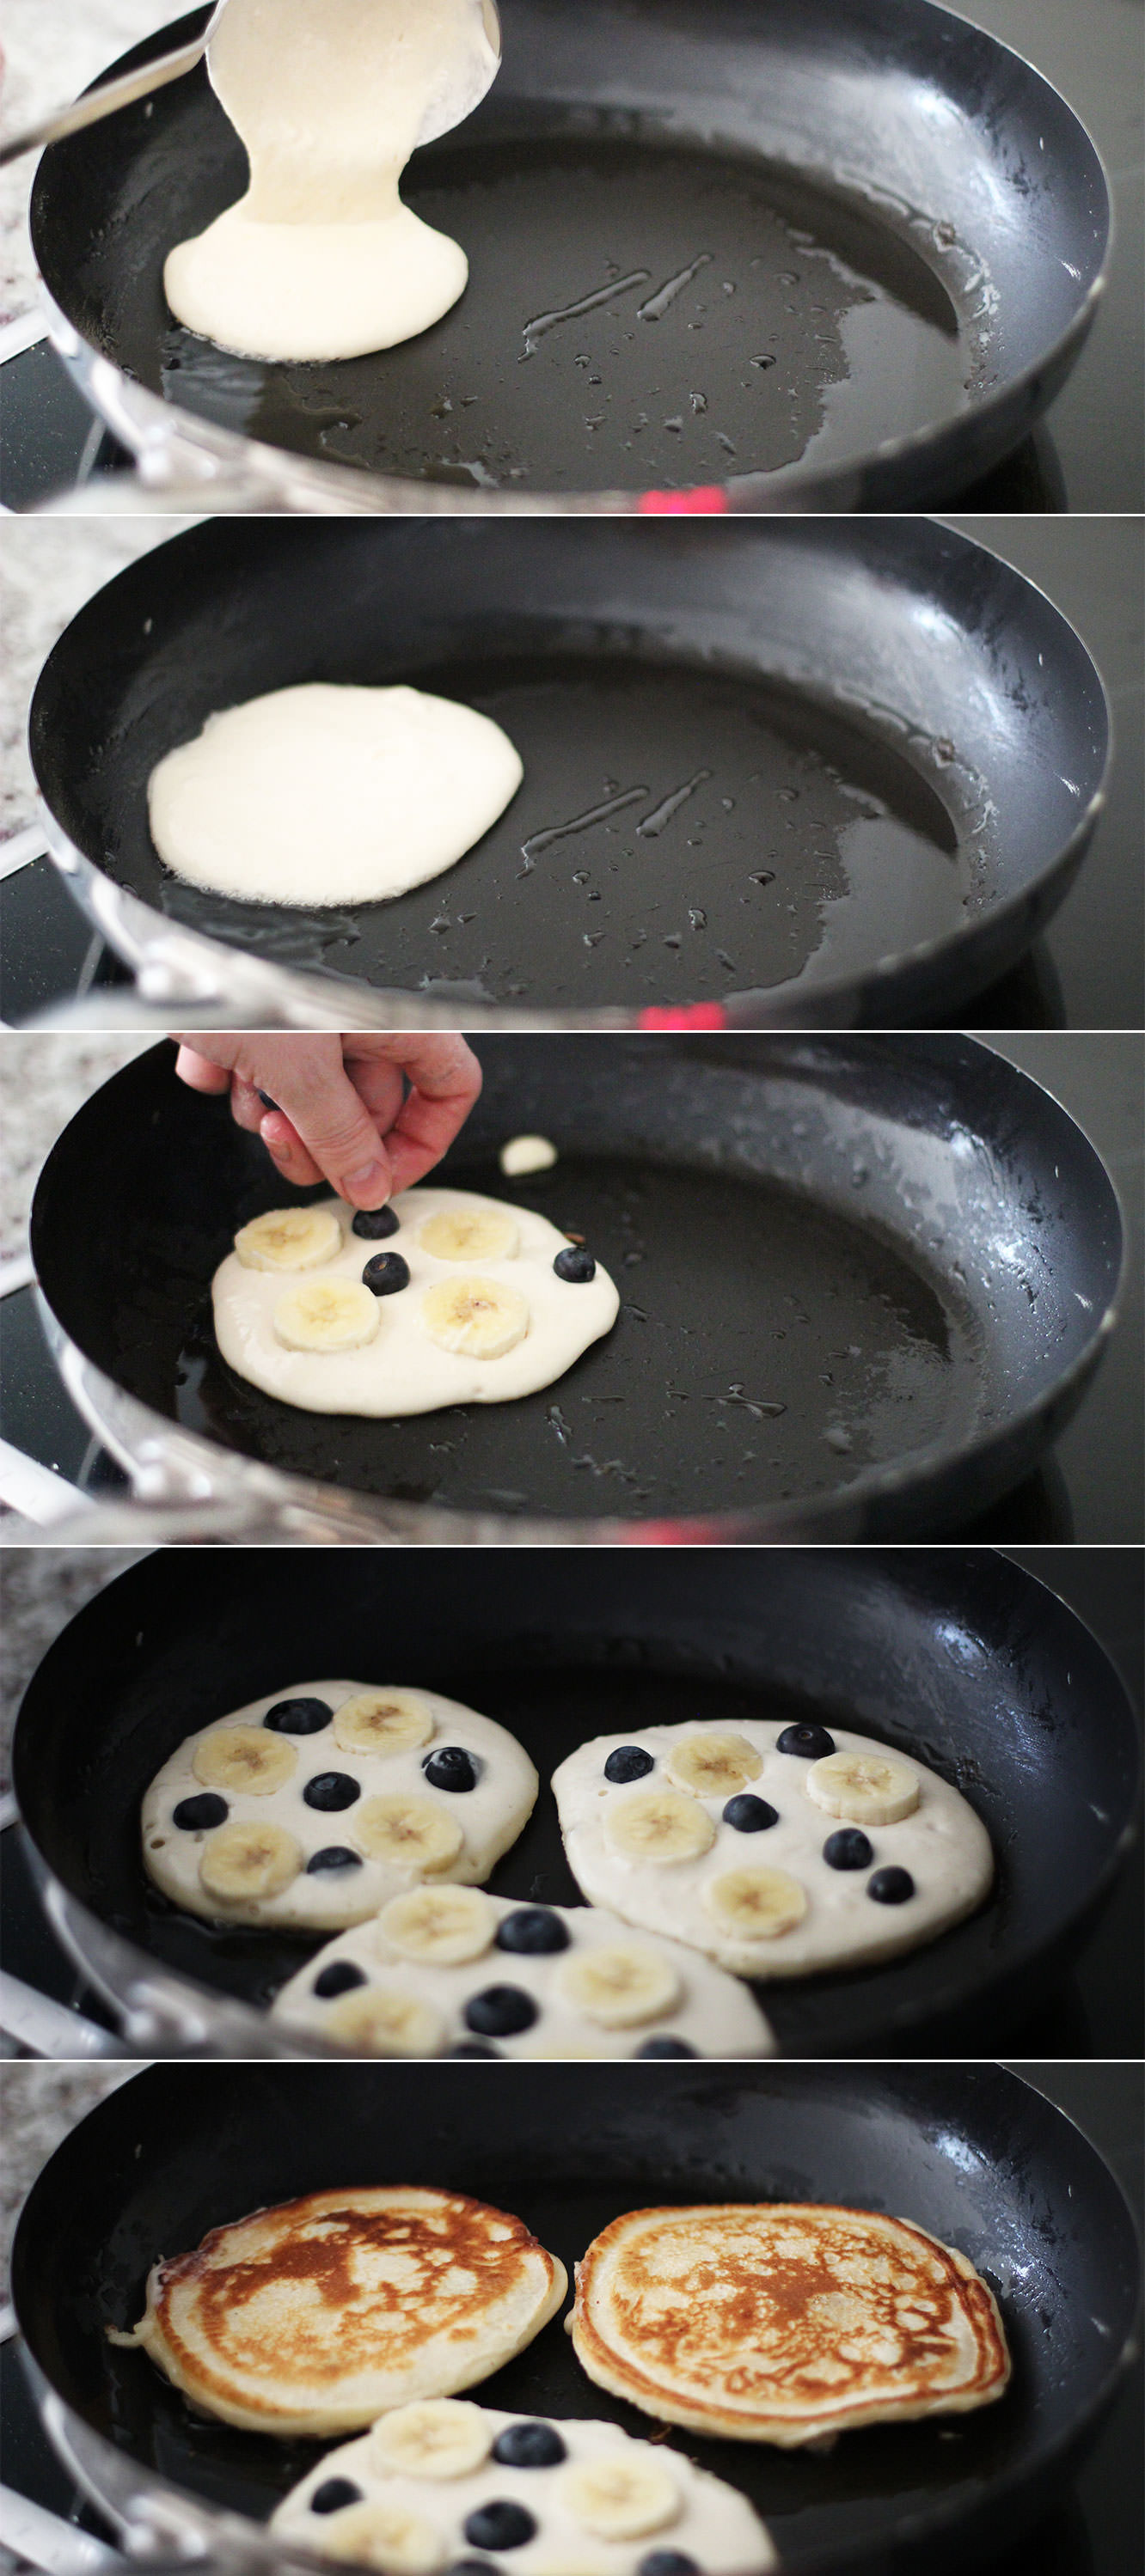
Banana and blueberry buttermilk almond pancakes
Step one
Repeat the usual step one, you’re a pro by now. This time the buttermilk rather than the milk will make a thicker texture. Don’t forget to include the almond extract.
Step two
Spoon a pancake into the pan and place slices of banana and some blueberries onto the surface. Push them down a little so they don’t fall out when you flip them.
Spring is in the air! Well, not really. It’s actually been so cold that I’ve cracked out the woollens for the first time this winter. BUT, if you get knitting now, you will have a perfect little snood to make the transition from winter to spring a cosy one.
I don’t want any excuses that you don’t know how to knit. I didn’t know how to knit a few years ago. This is a really easy and quick project to get you started. Plus I set up a youtube account to facilitate teaching you, so really, you owe me a try.
You will need
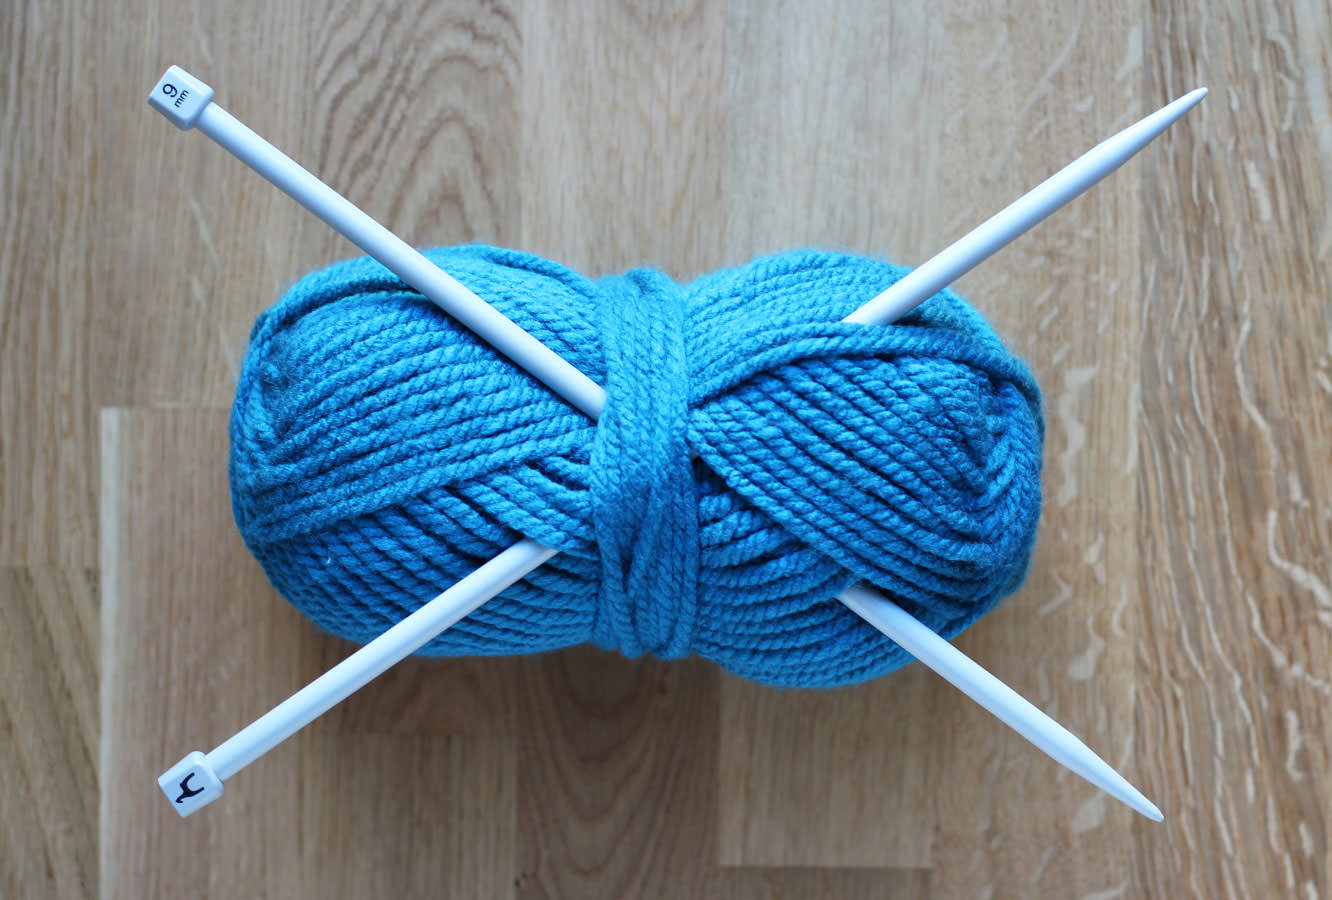
9mm knitting needles
200g of bulky (or extra chunky) wool, my ball was by Patons. If you want a longer/bigger snood, just double up and get 400g.
Pattern
For those of you who know what you’re doing:
co 22 st.
k1, p1 to end of row.
Repeat k1, p1 until close to the end, cast off keeping enough yarn to sew ends together.
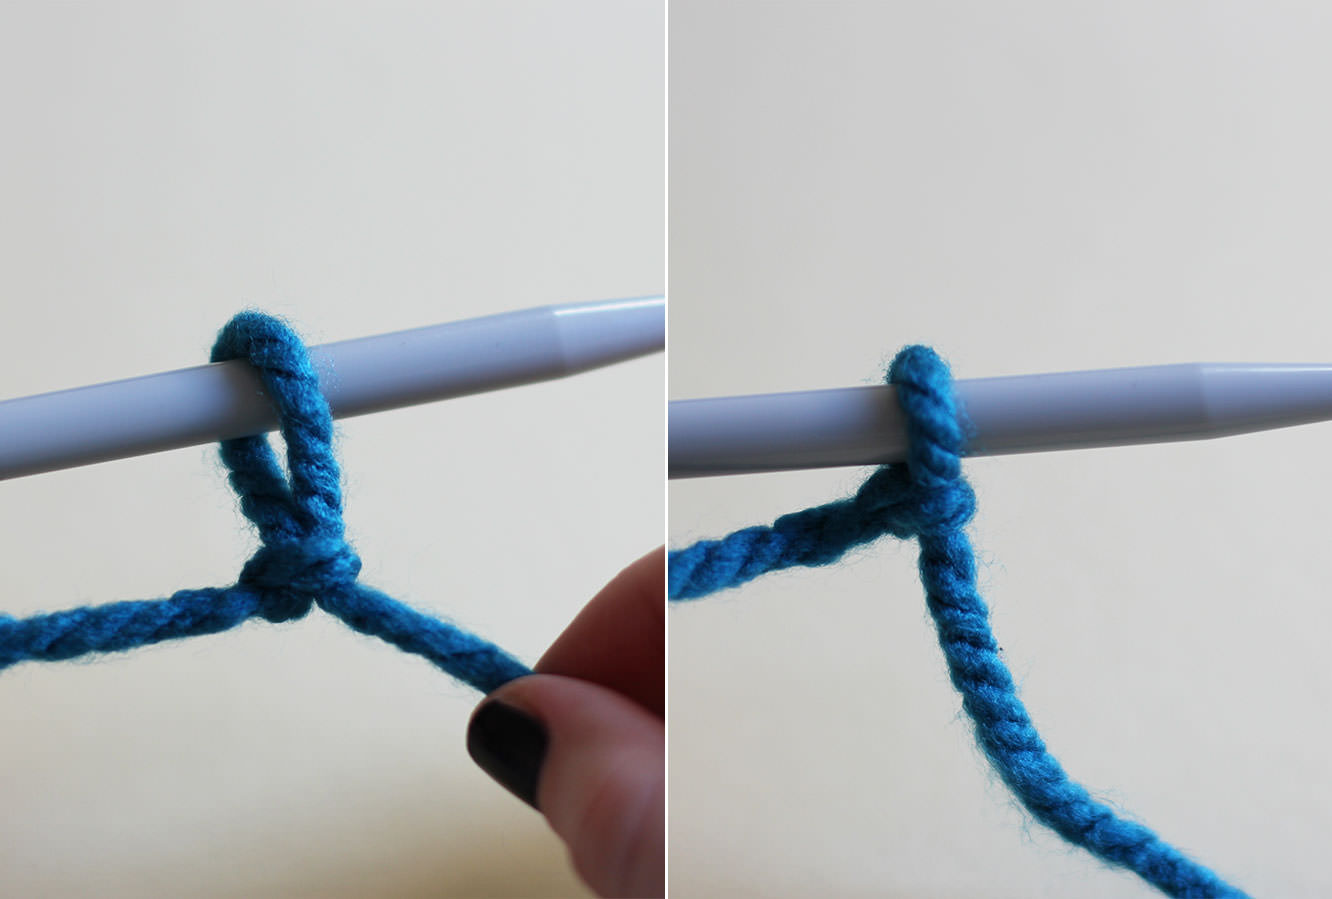
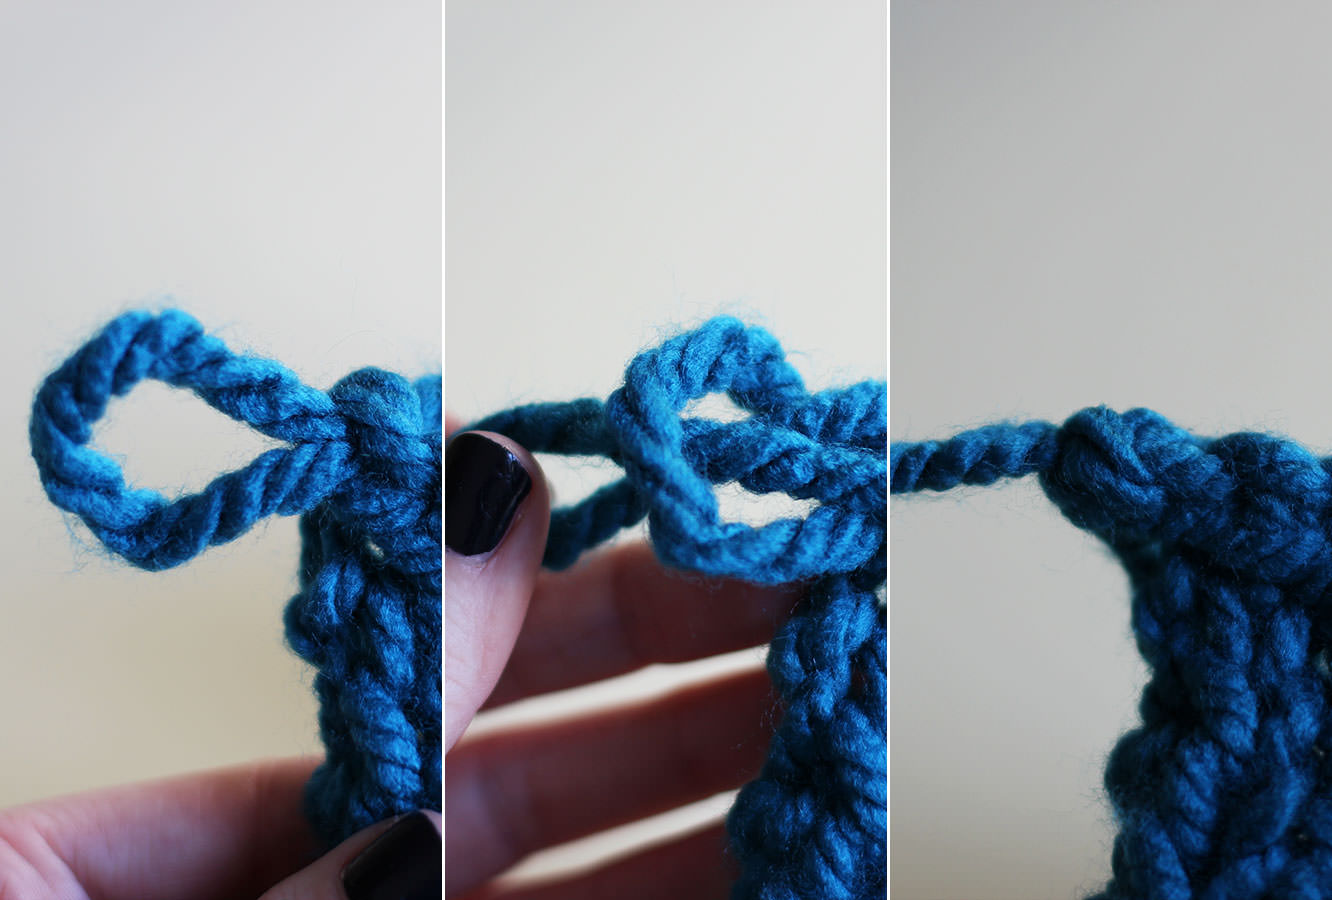
Step one
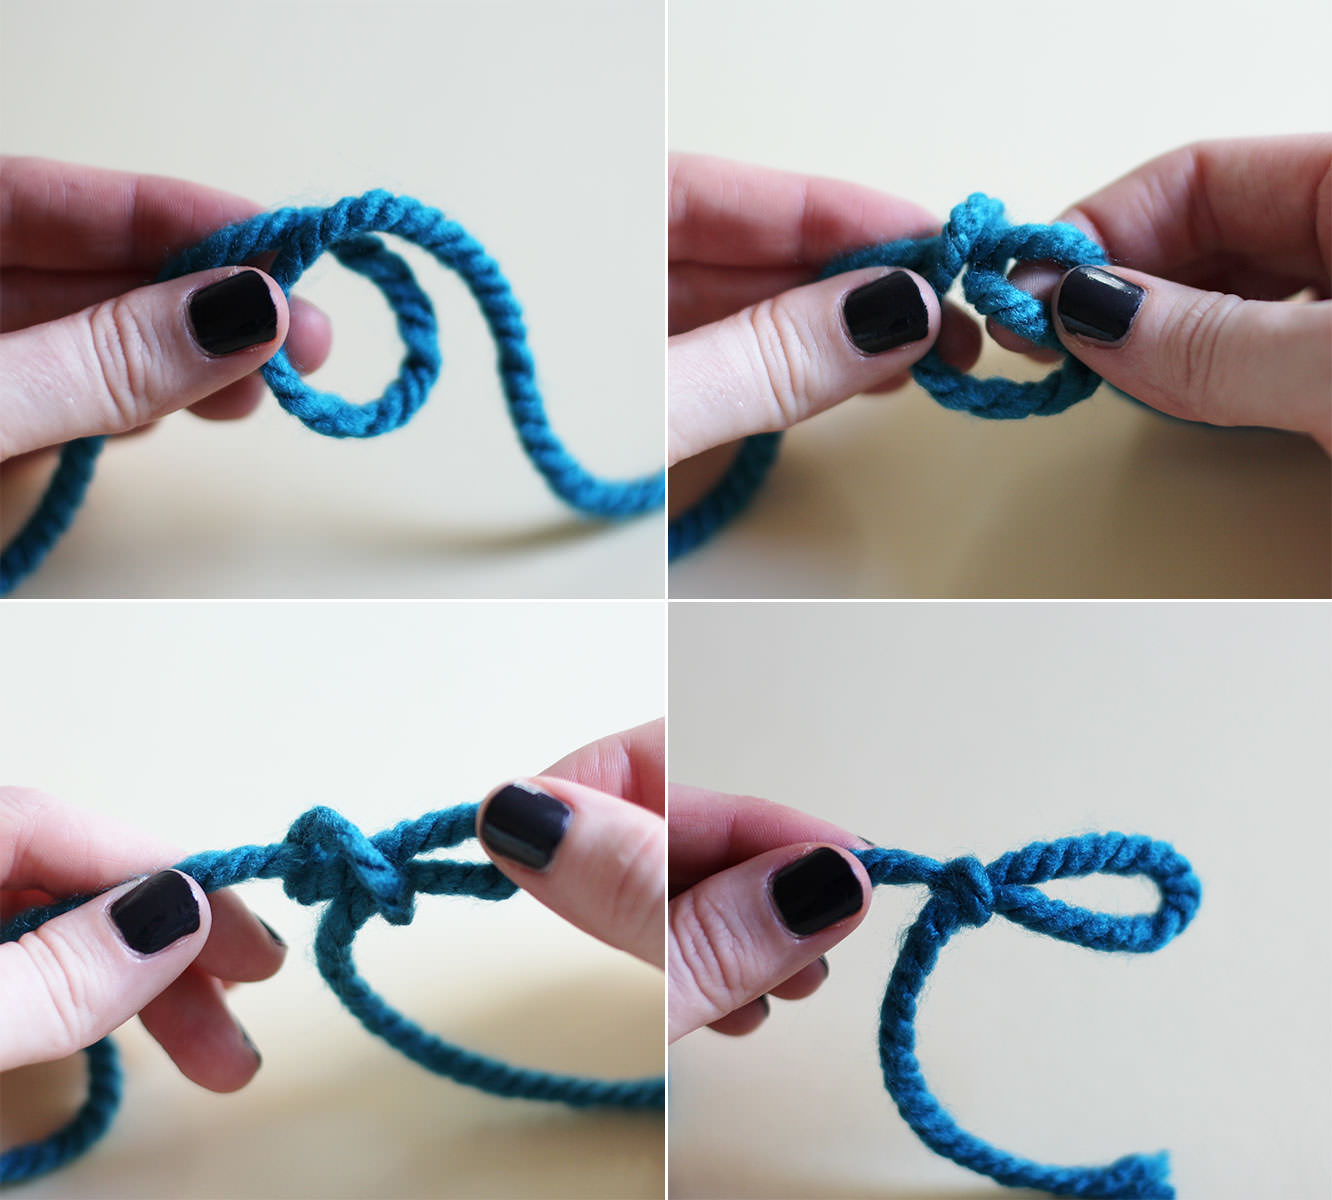
Make a slip knot by overlapping the end of the wool to make a circle and looping it back through.
Step two
Place the loop over the end of the knitting needle and pull to tighten.
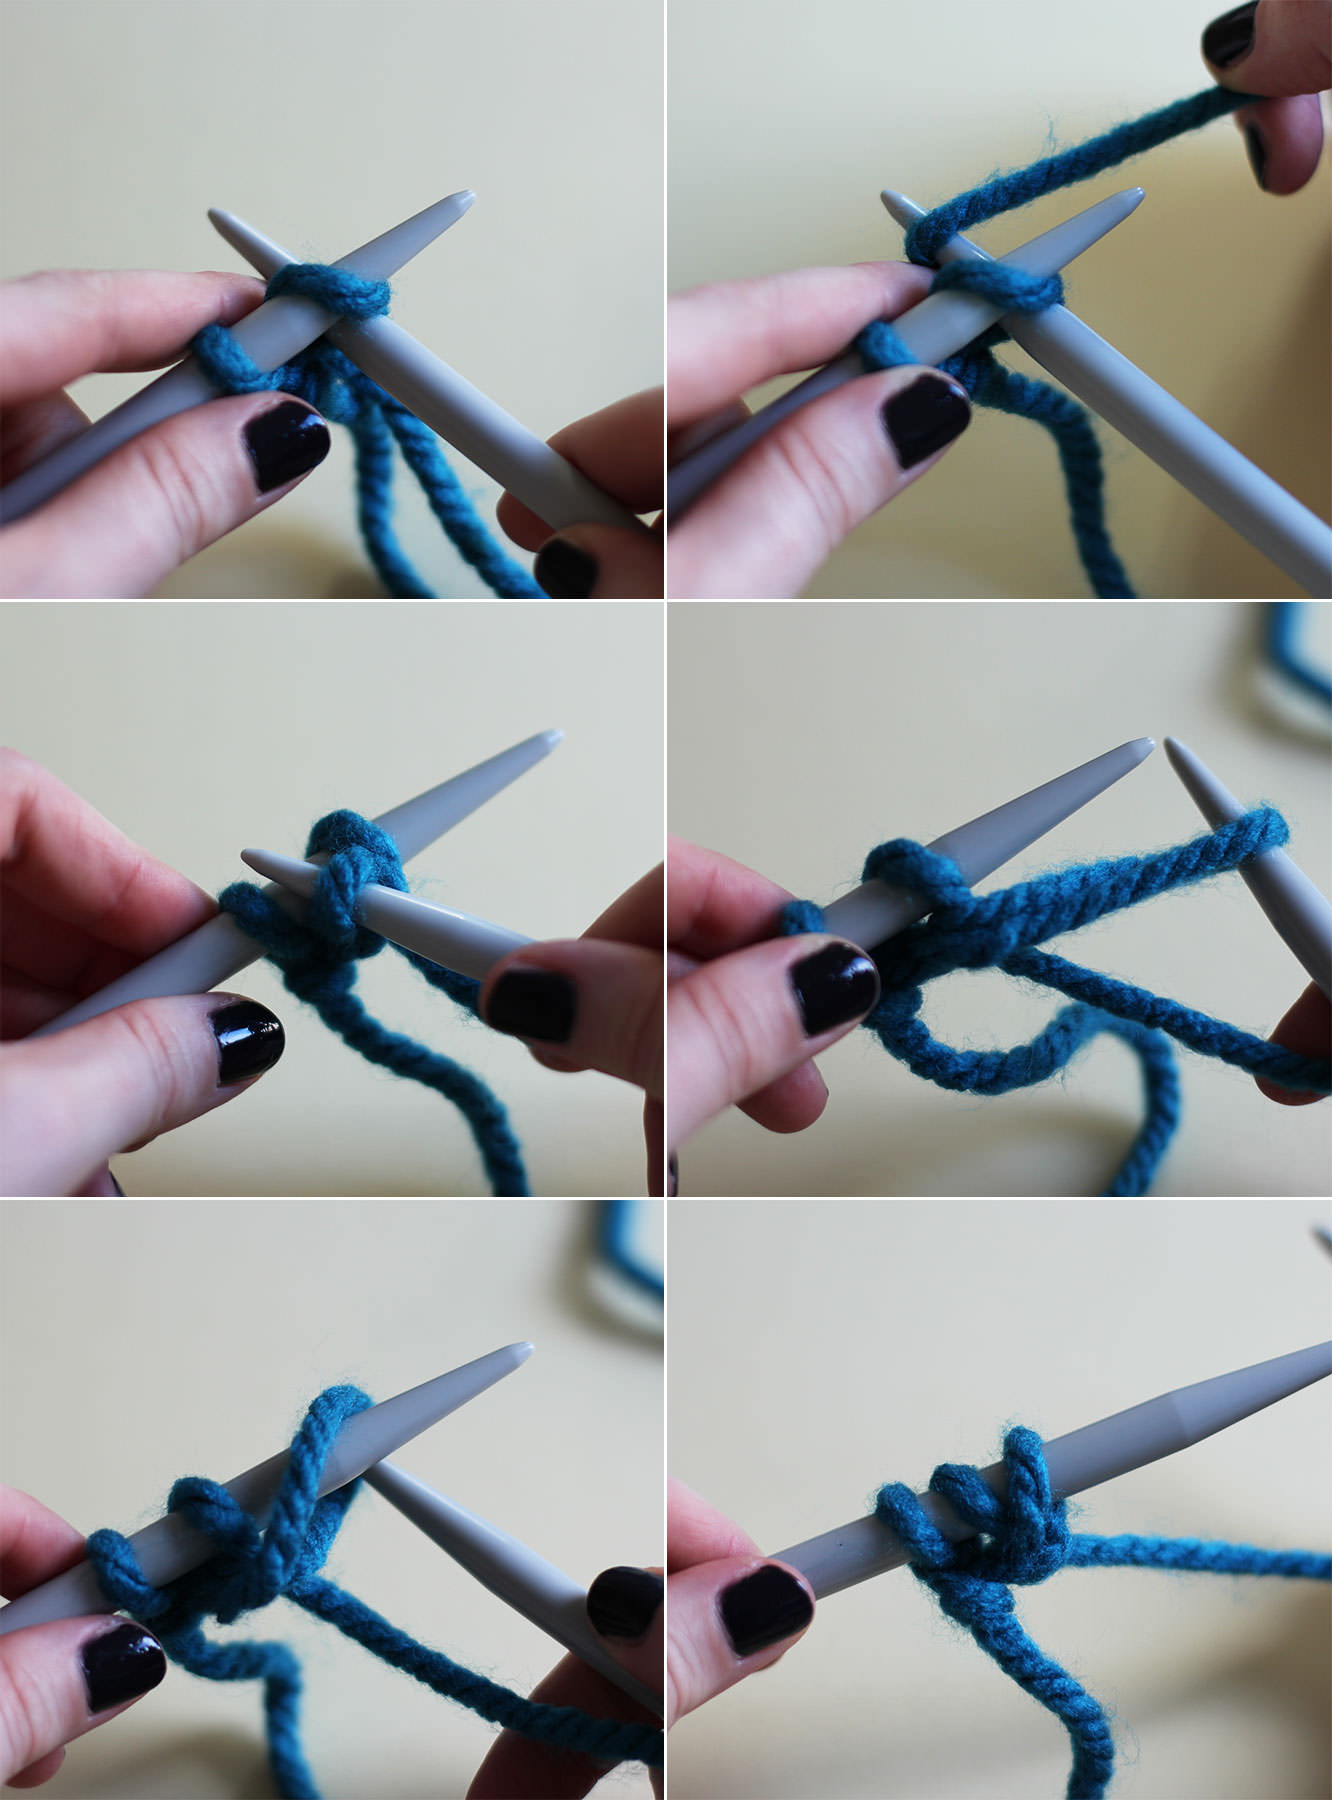
Step three
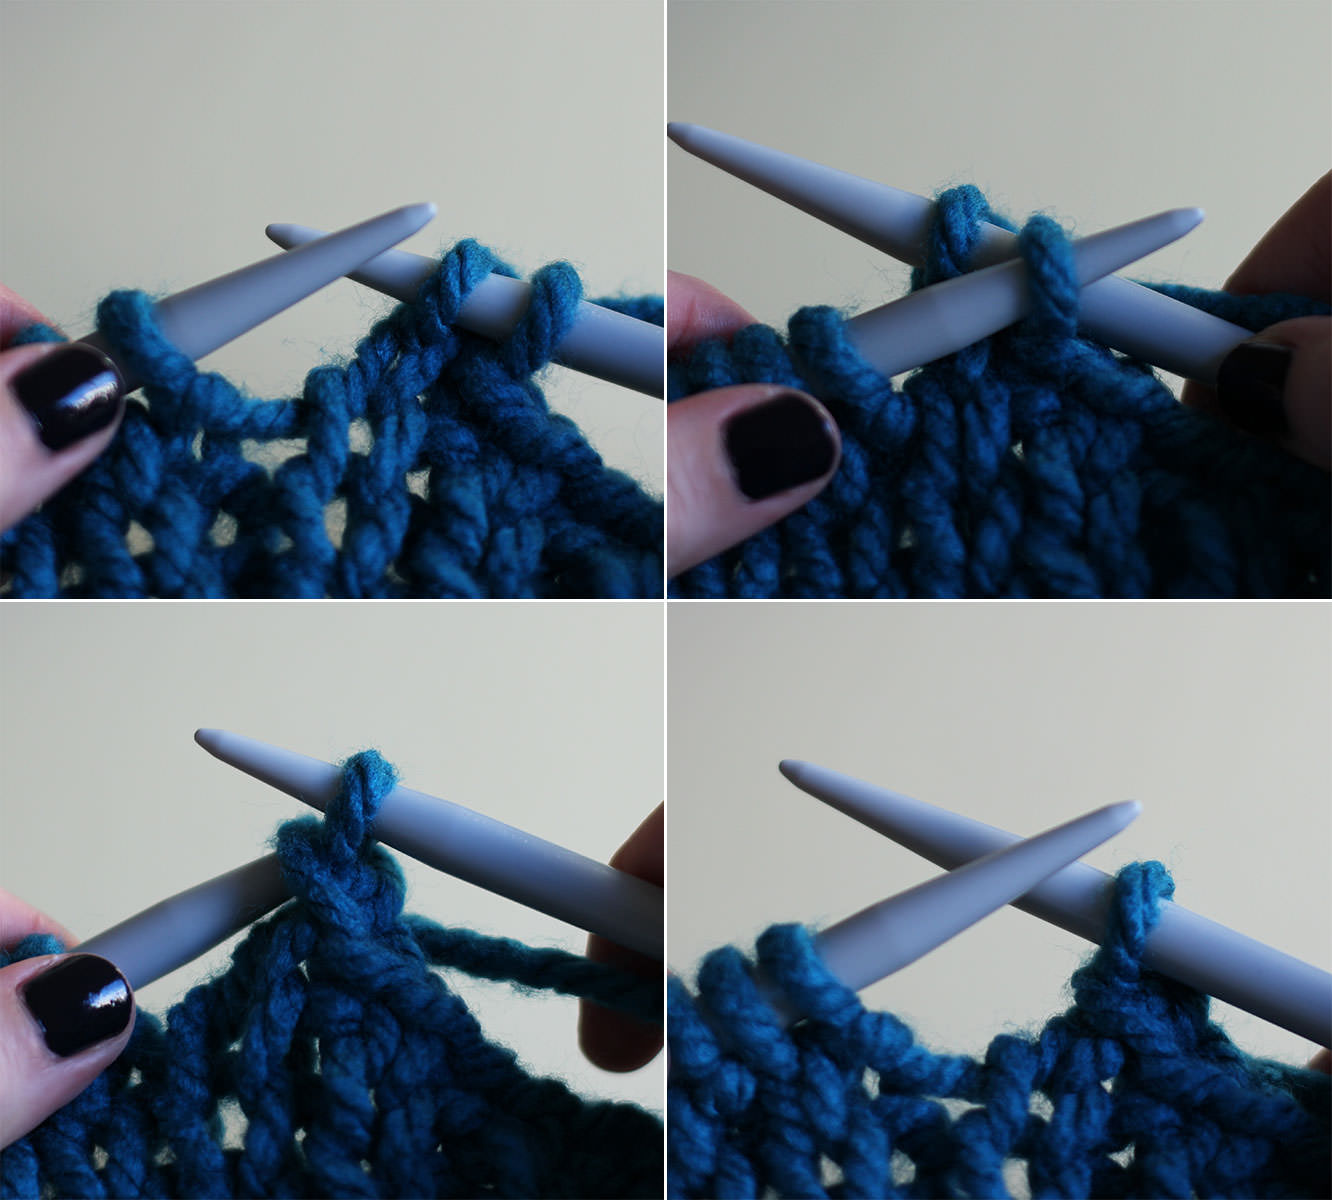
Time to cast on.
Push the right needle through the loop behind the left one. Wrap the long end of the wool (the bit that leads to the ball) around it so that the wool sits between the two needles.
Pull the right needle under the left, taking the wool with you and through the loop. Tug it through until you can loop it over the end of the left needle and tighten.
Do this 22 times.
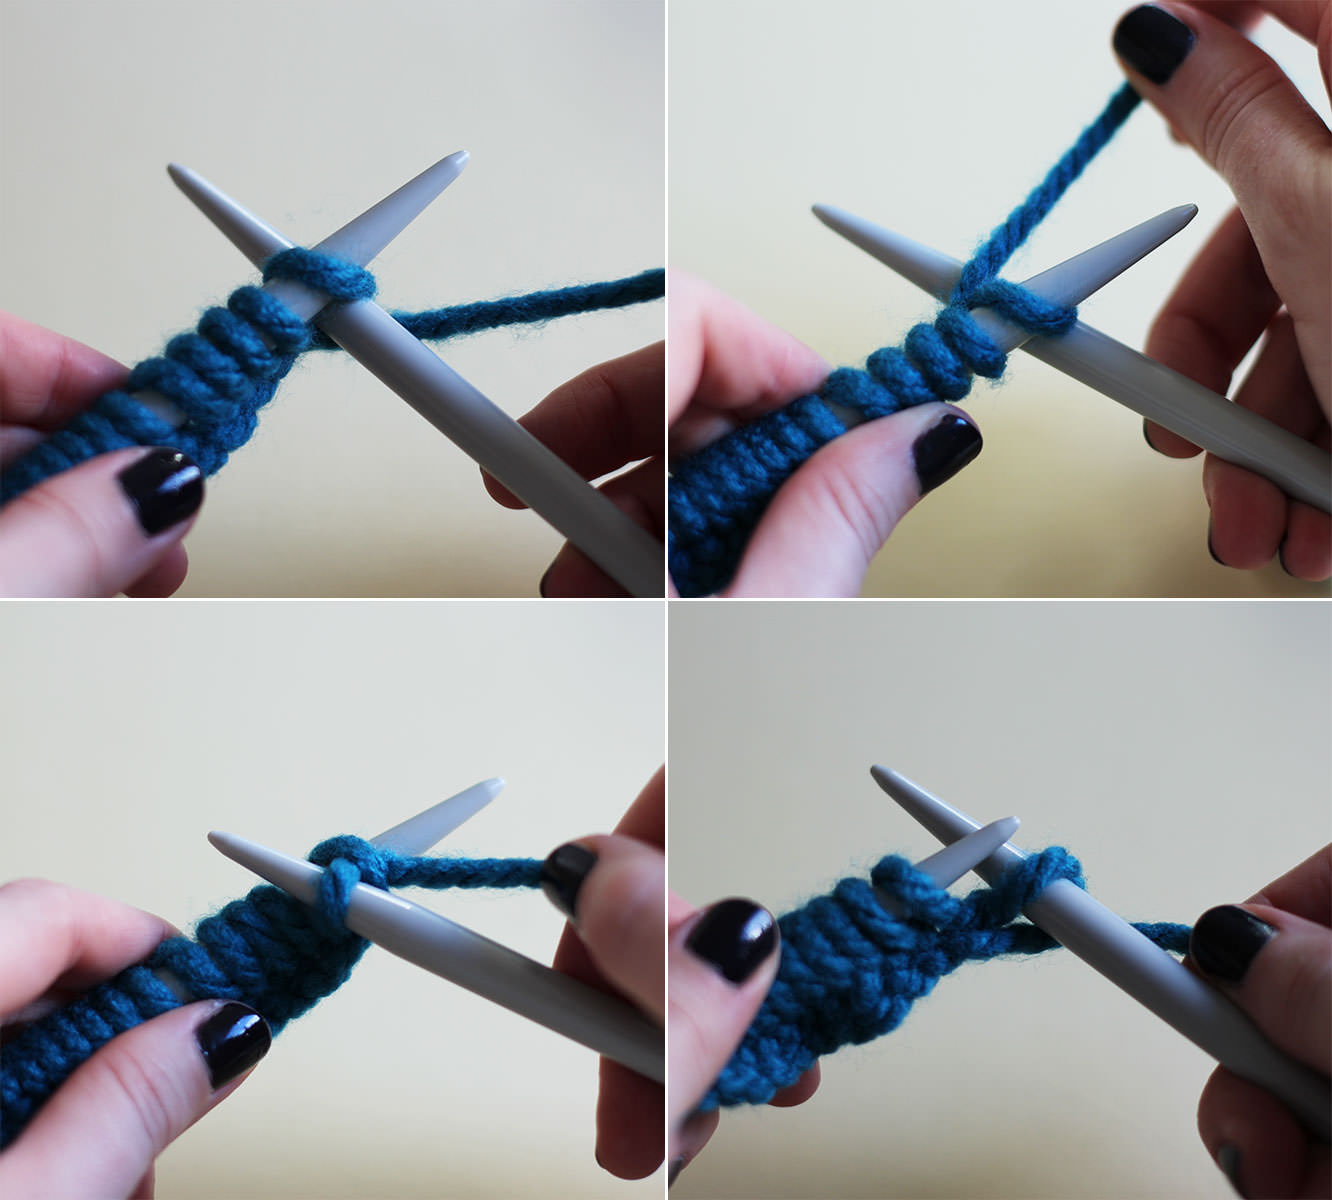
Step four
The pattern is just knit one, purl one, they are the two basic stitches.
You knit a stitch basically in the same way as casting on, but instead of hooking it back onto the left needle leave it on the right one.
Step five
The second stitch is a purl. For this one place the wool in front of the knitting and push the right needle through the loop in front of the left. Wrap the wool around it and take it through to the back and pull the stitch off.
HAVEN’T GOT A CLUE WHAT I MEAN AND CAN’T UNDERSTAND FROM THE PHOTOS?? That’s ok. I have the youtube.
The video shows a knit, purl, knit, purl sequence. Yeah. I’ll work on my videography skills, but you get the gist.
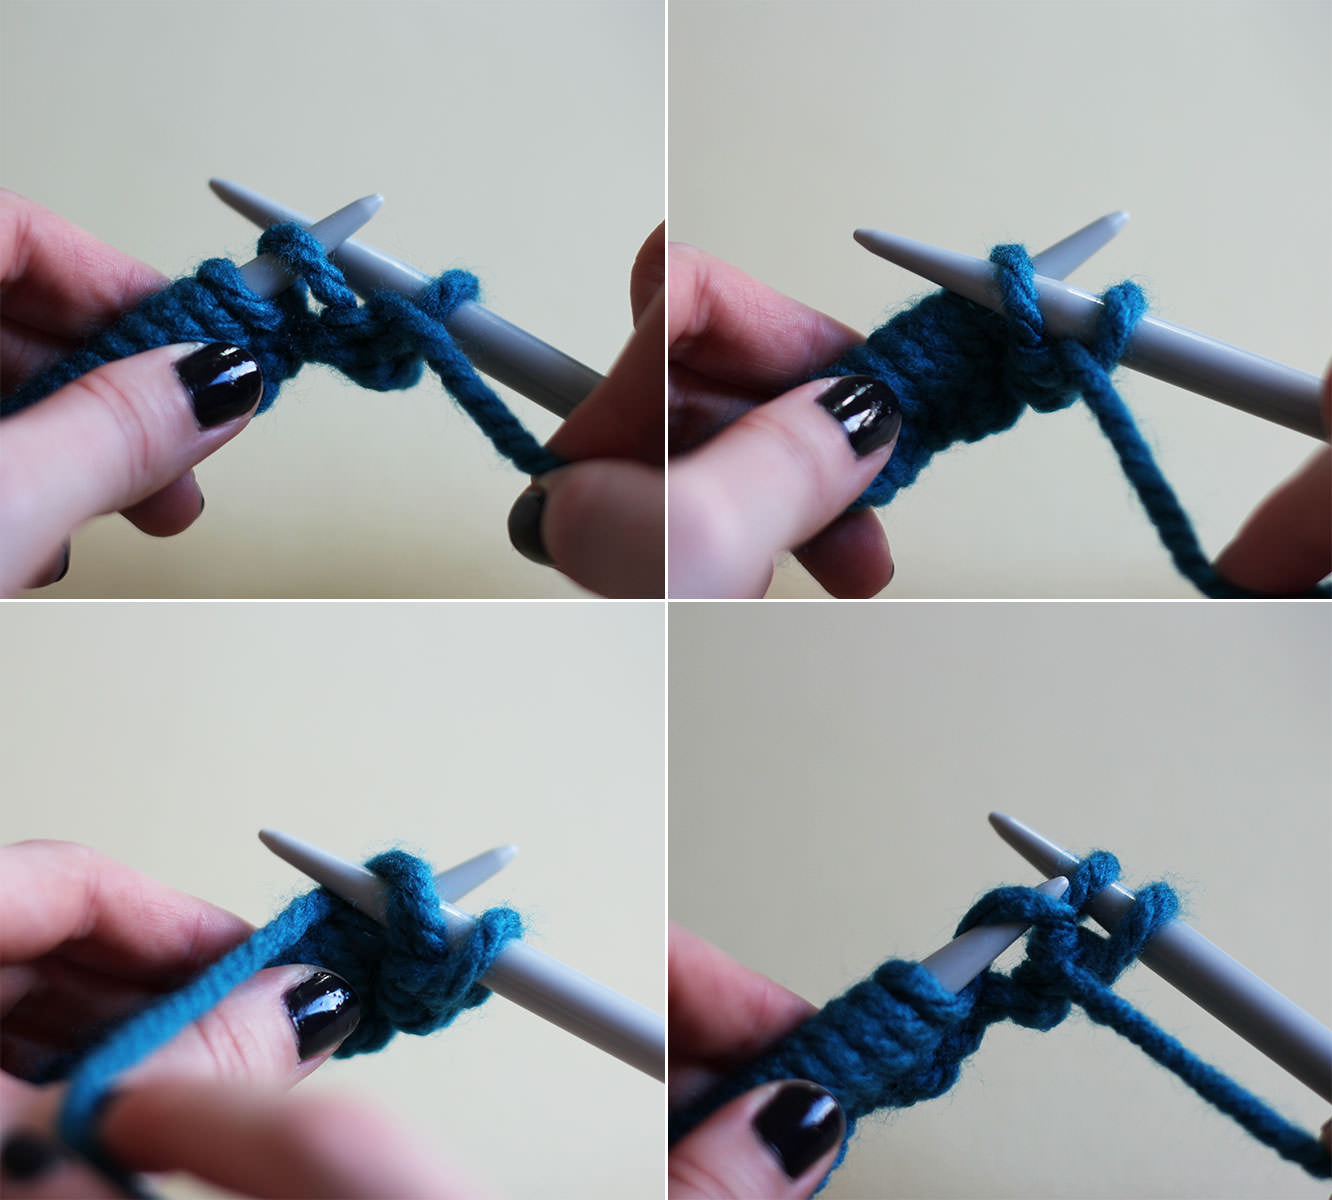
Step six
Repeat the knit, purl, knit, purl until you get to the end of the row. Turn the knitting round and k1 (knit one), p1 (purl one) until the end. Keep going.
The picture above shows the difference between a knit and a purl just in case you get lost at any point. On the left is a purl, you can see a little bump (sort of like a pearl, geddit?) and on the right is a knit. They are basically the same stitch but in opposite directions.
This is where I got a bit carried away with my new youtube account…
Don’t worry, I know I’m super cool.
Step seven
As you get close to the end of the wool you need to make sure you’re keeping enough to cast off and sew your snood together. Once the ball has basically unravelled so you can grab the end without getting in a mess, measure five times the width of the knitting from the end and tie a slip knot to remind you to stop as close as possible to that point.
To cast off, knit two, then loop the first over the second. Knit another one and repeat.
Sorry, what’s that? You could really do with another youtube video? Of course.
Step eight
Once you get to the last stitch remove the needle and pull the end of the thread through the loop and pull to tighten.
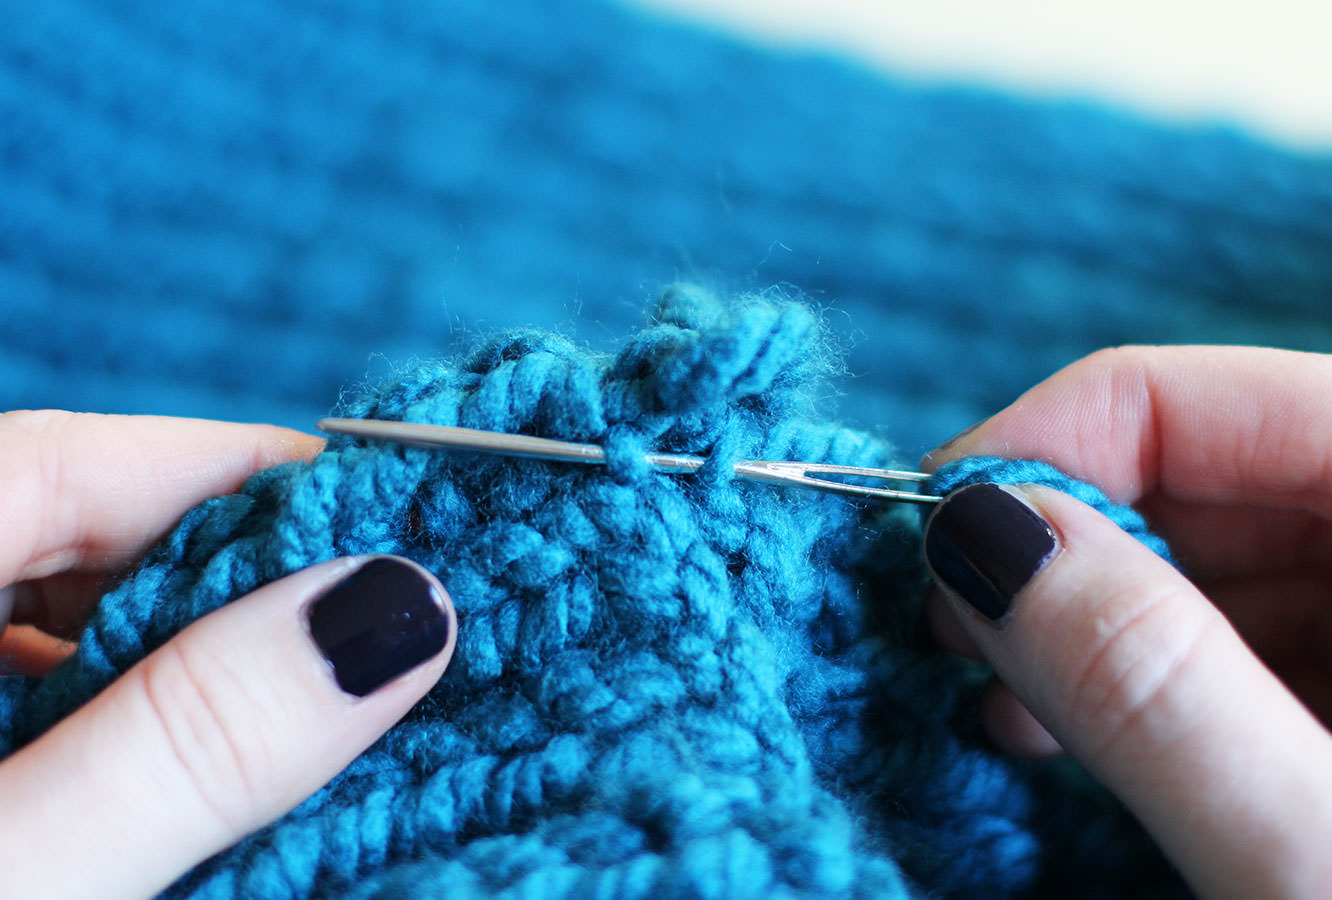
Step nine
Place the two ends together use a wool needle or a crochet hook to sew together. I find it best to go side to side like this.
After I did this I stretched it using the backs of two chairs, I tend to knit a little tight, you might not need to do that. The other way would be to dampen it and pin it out on the carpet but the chair method just seemed a bit easier.
Welcome back chaps, I hope you had a lovely weekend and are now stuffed full of last week’s roulade.
This week’s post is a little more January friendly – it doesn’t involve eating and will help save a few pennies too. Since the Christmas drinks specials season came to an end I’ve been missing a certain honey and almond hot chocolate and planning to concoct something with those flavours for fabrefaction. I didn’t expect it to not be for consumption but there you go.
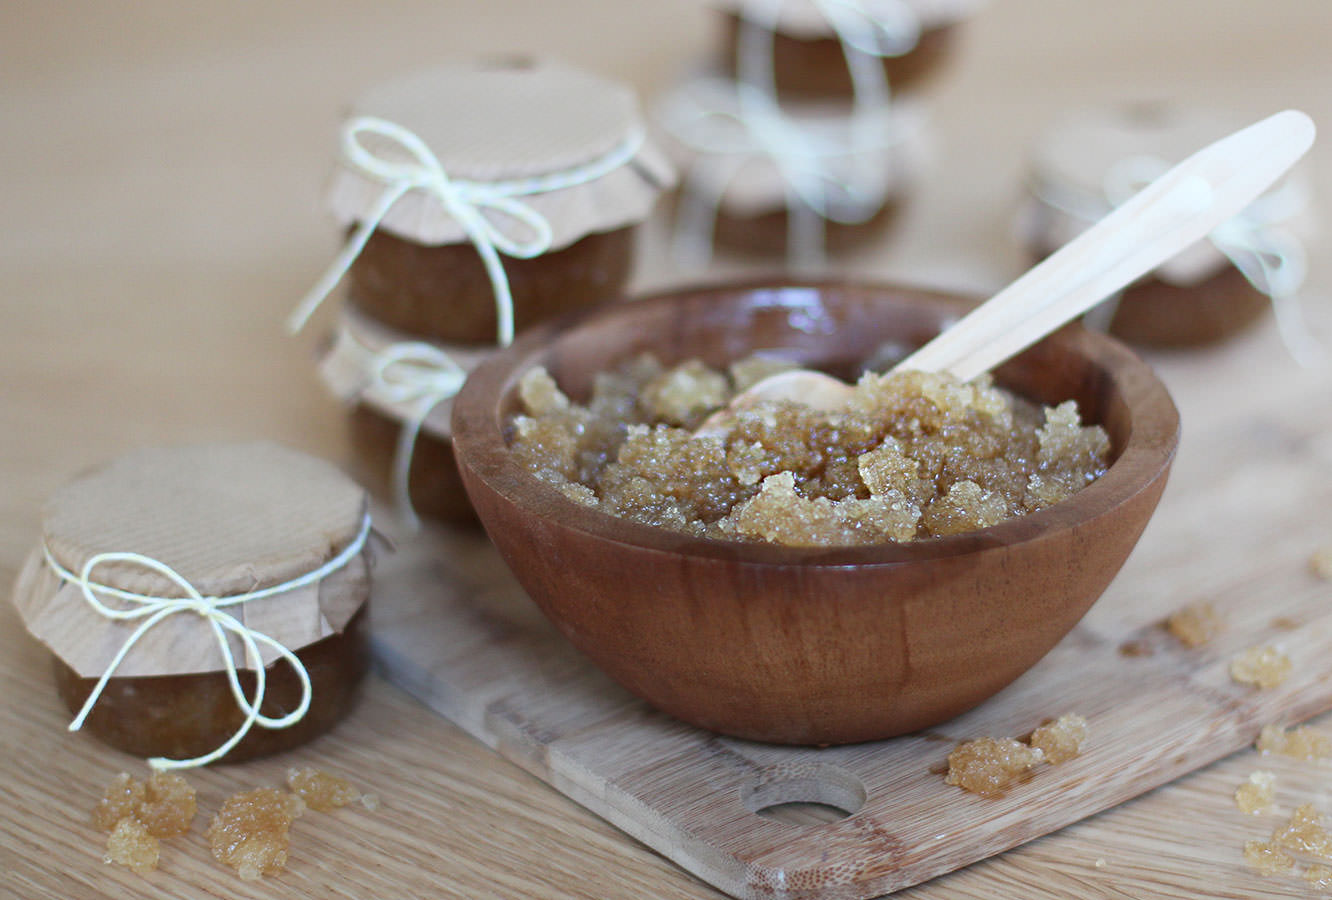
I thought it would be fun to give some favours the ladies who came to our little sleepover last week. This scrub is a great little gift on the cheap and would work well for favours for a hen party/bridal shower or similar.
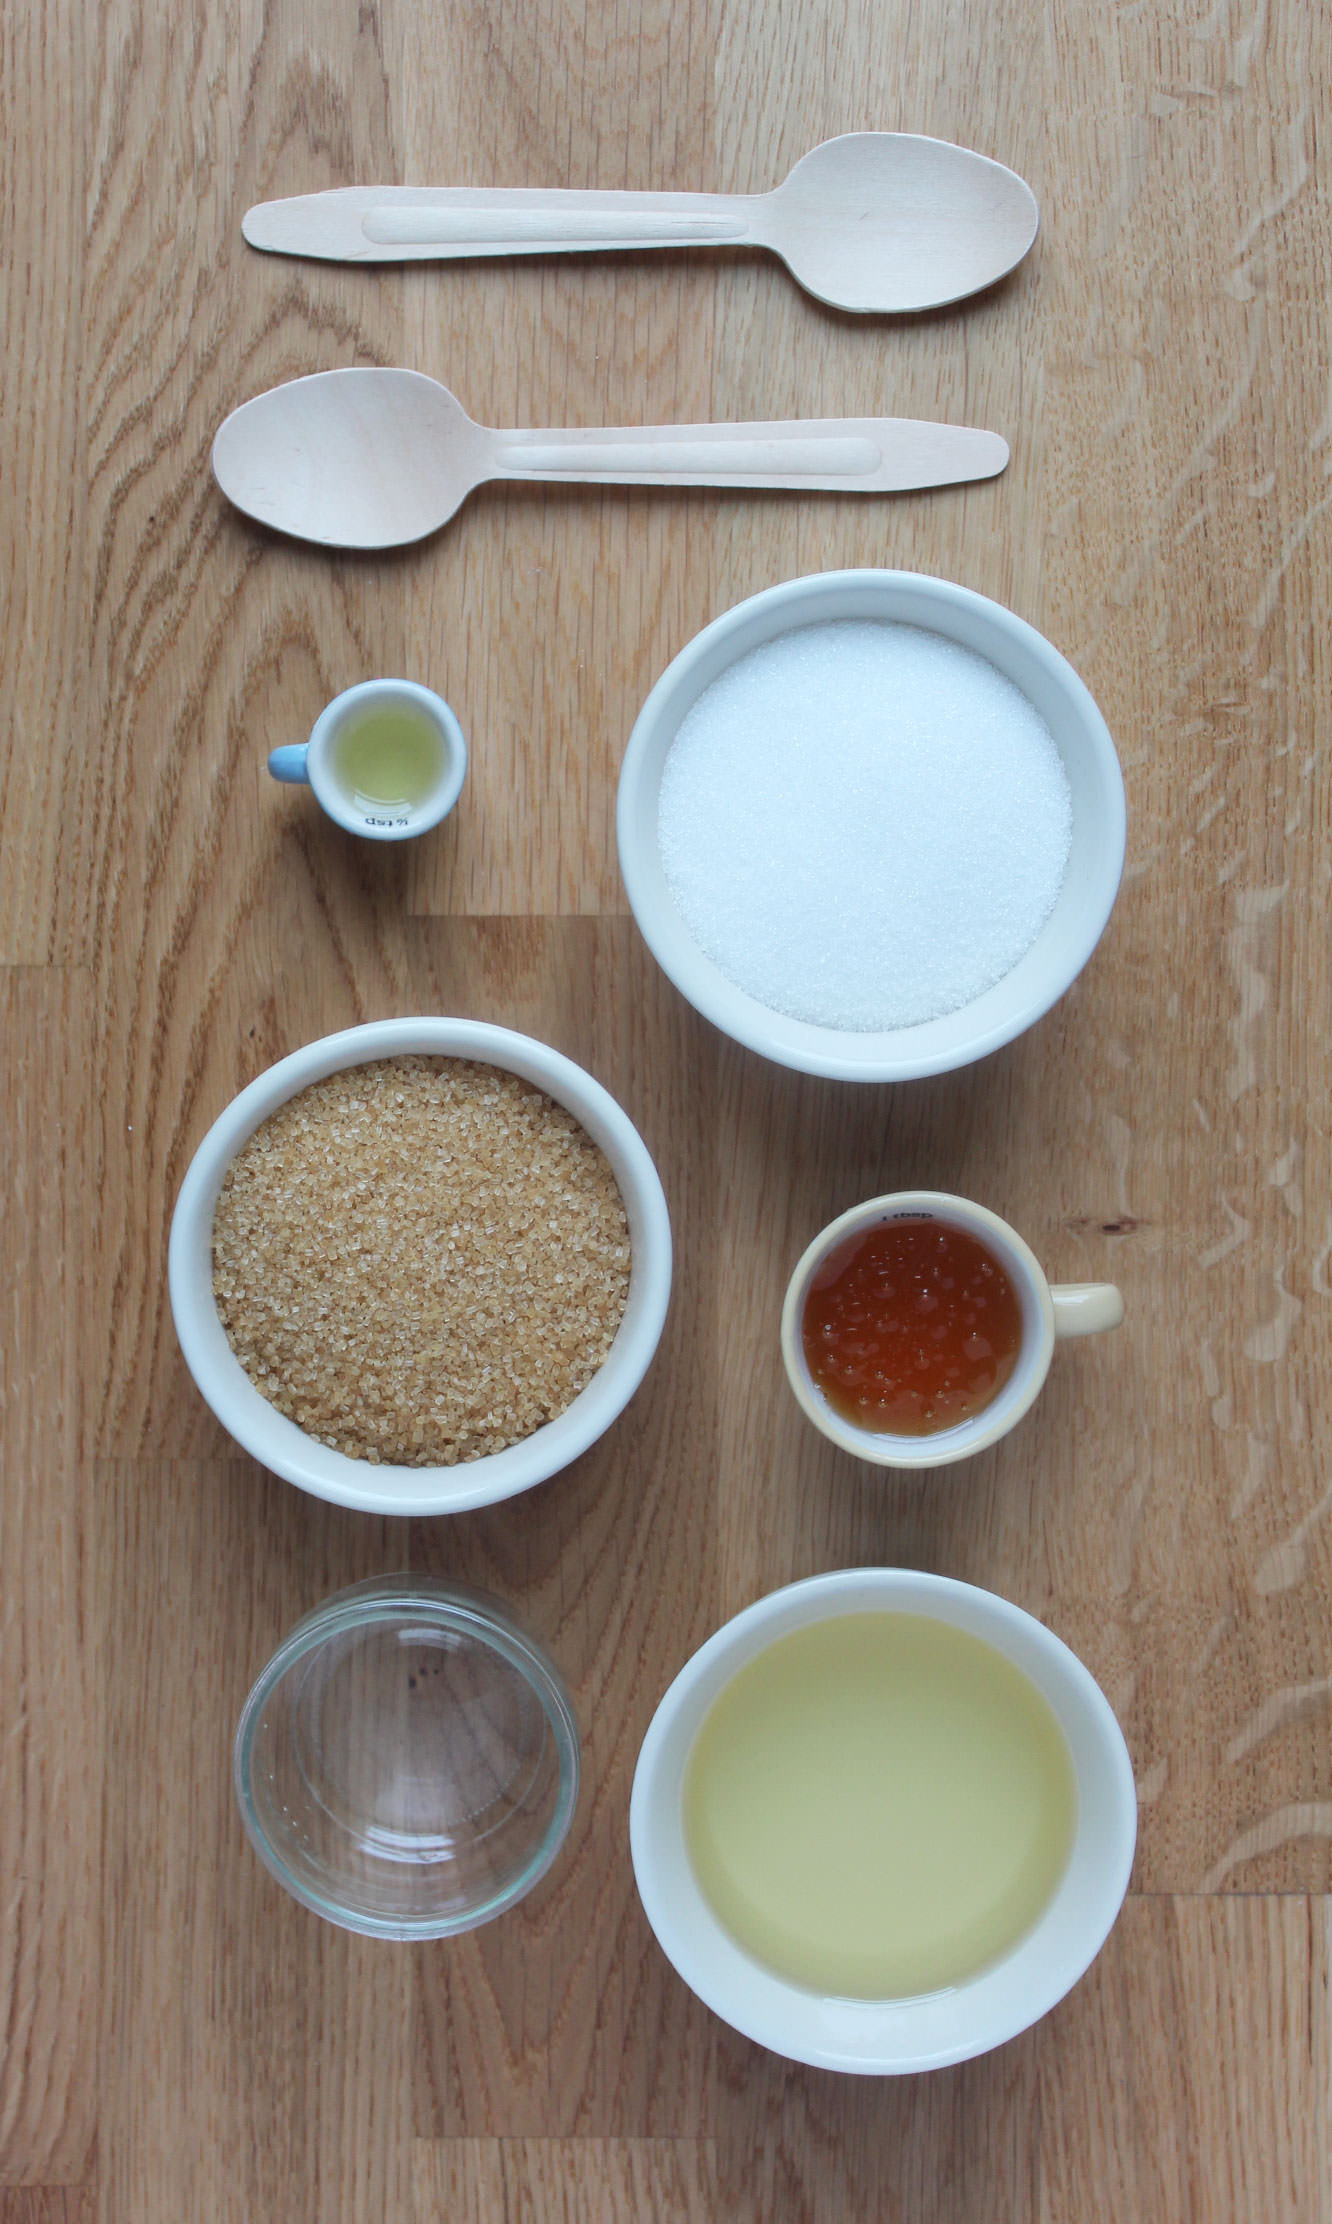
You will need
2 cups Demerara sugar
1 cup Granulated sugar
1/4 cup Walnut oil
1/2 cup Sunflower/vegetable oil
1/2 cup Clear honey
2 tsp Almond extract
(Makes six small jars)
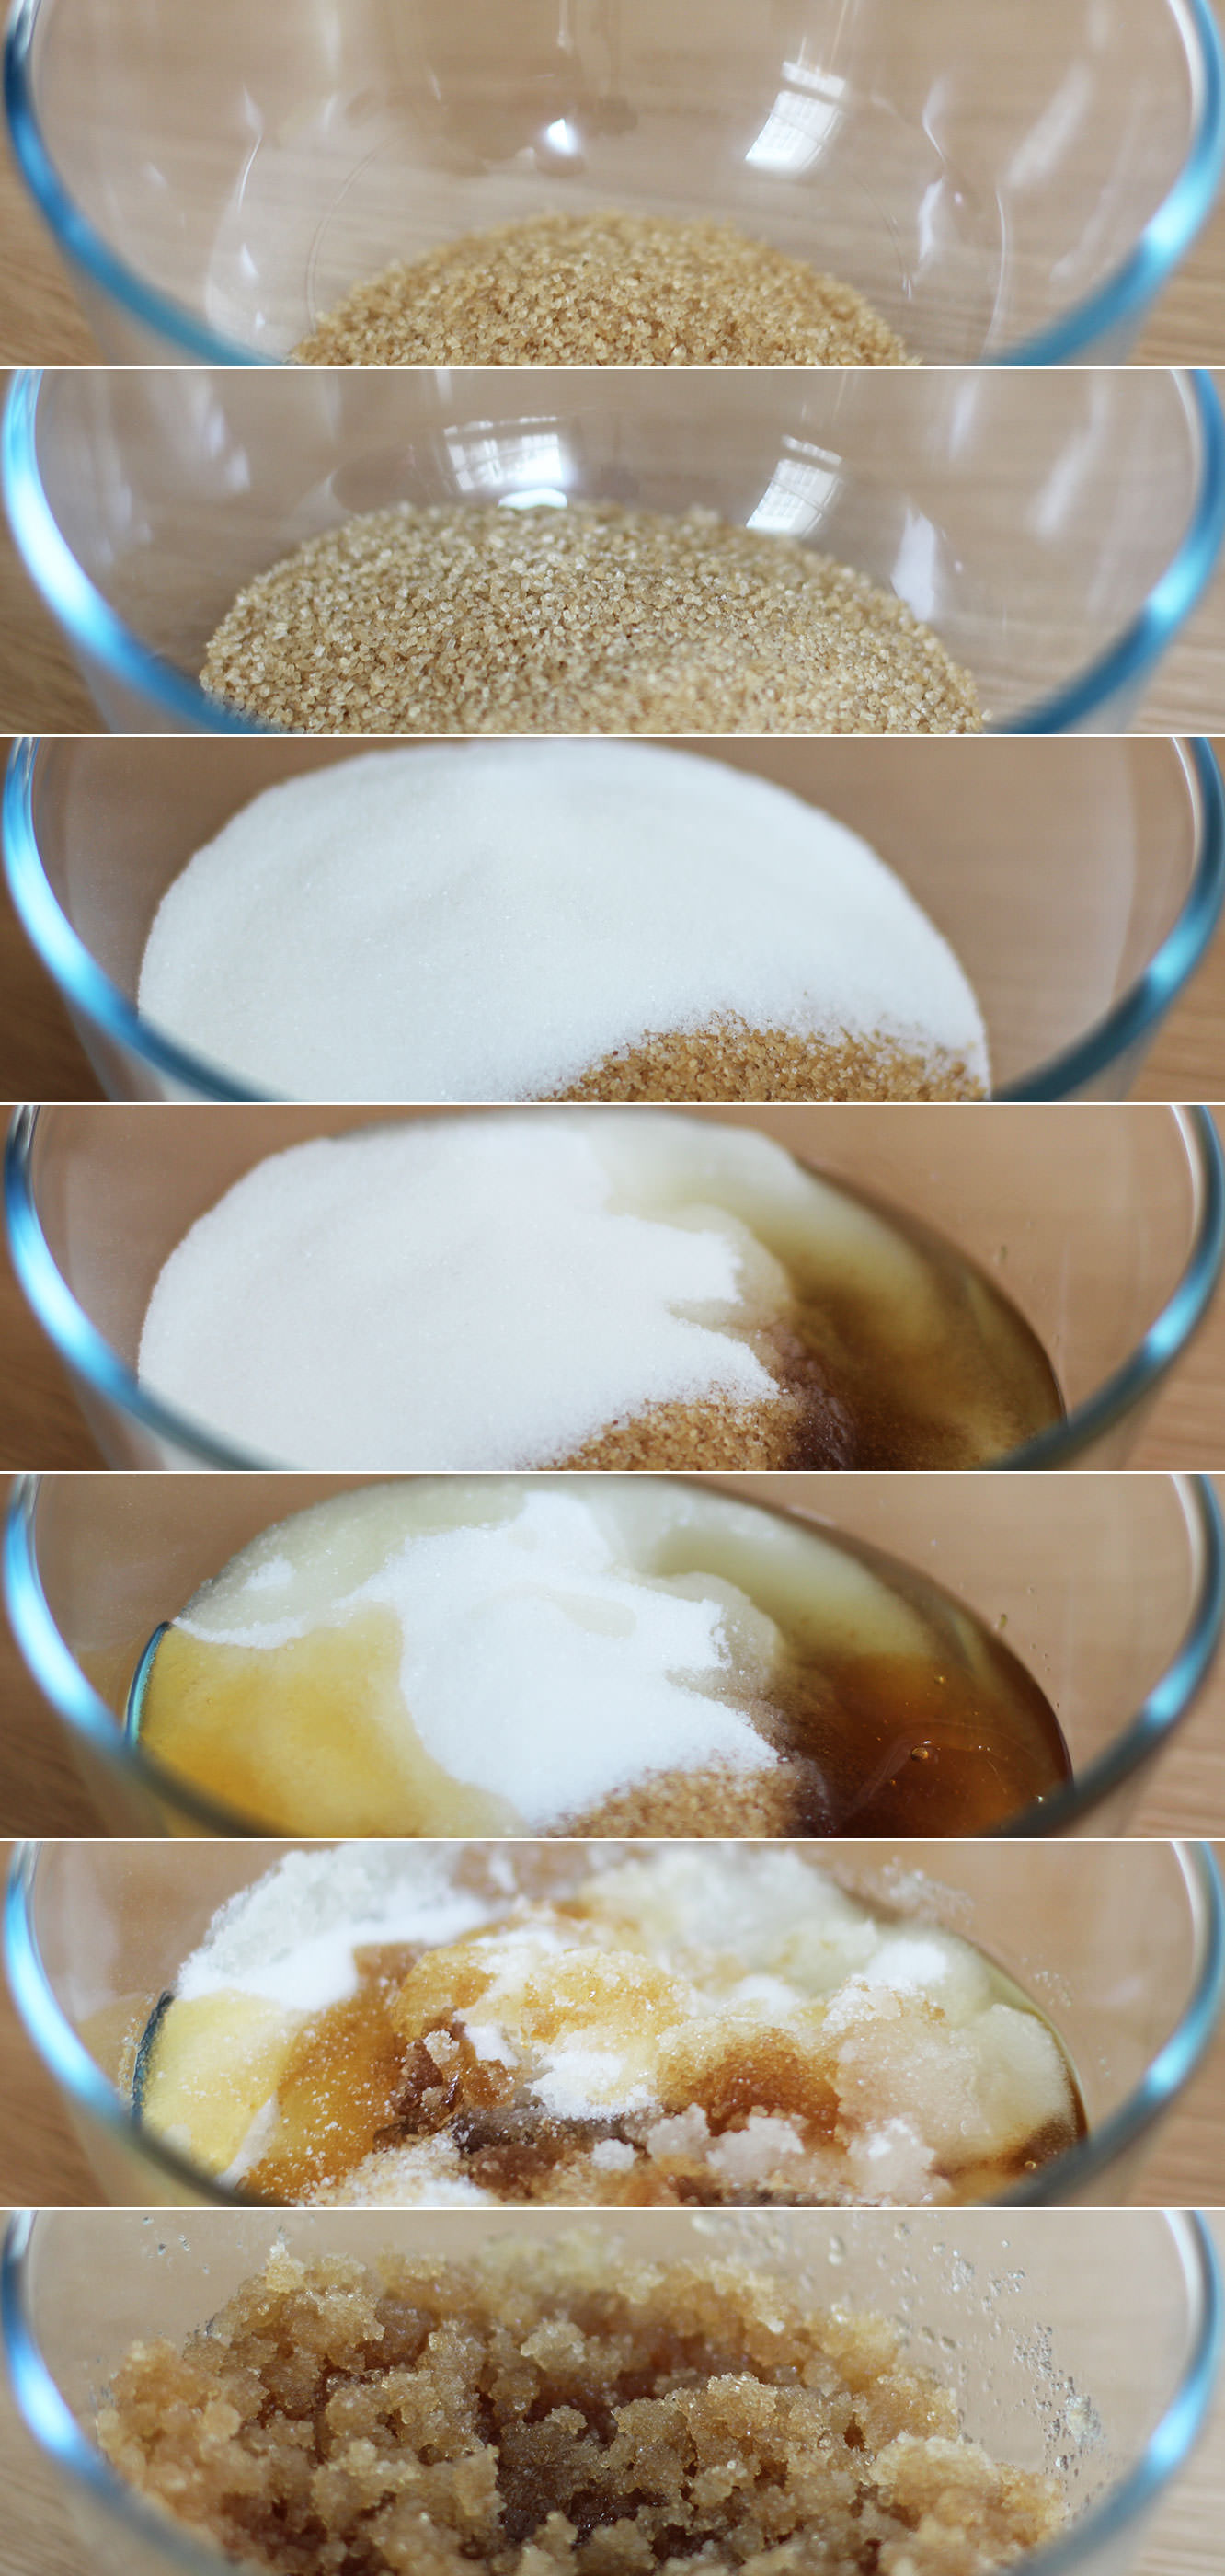
Step one
There really only is one step. I couldn’t even think of a gif this week.
Take all the ingredients and mix them together.
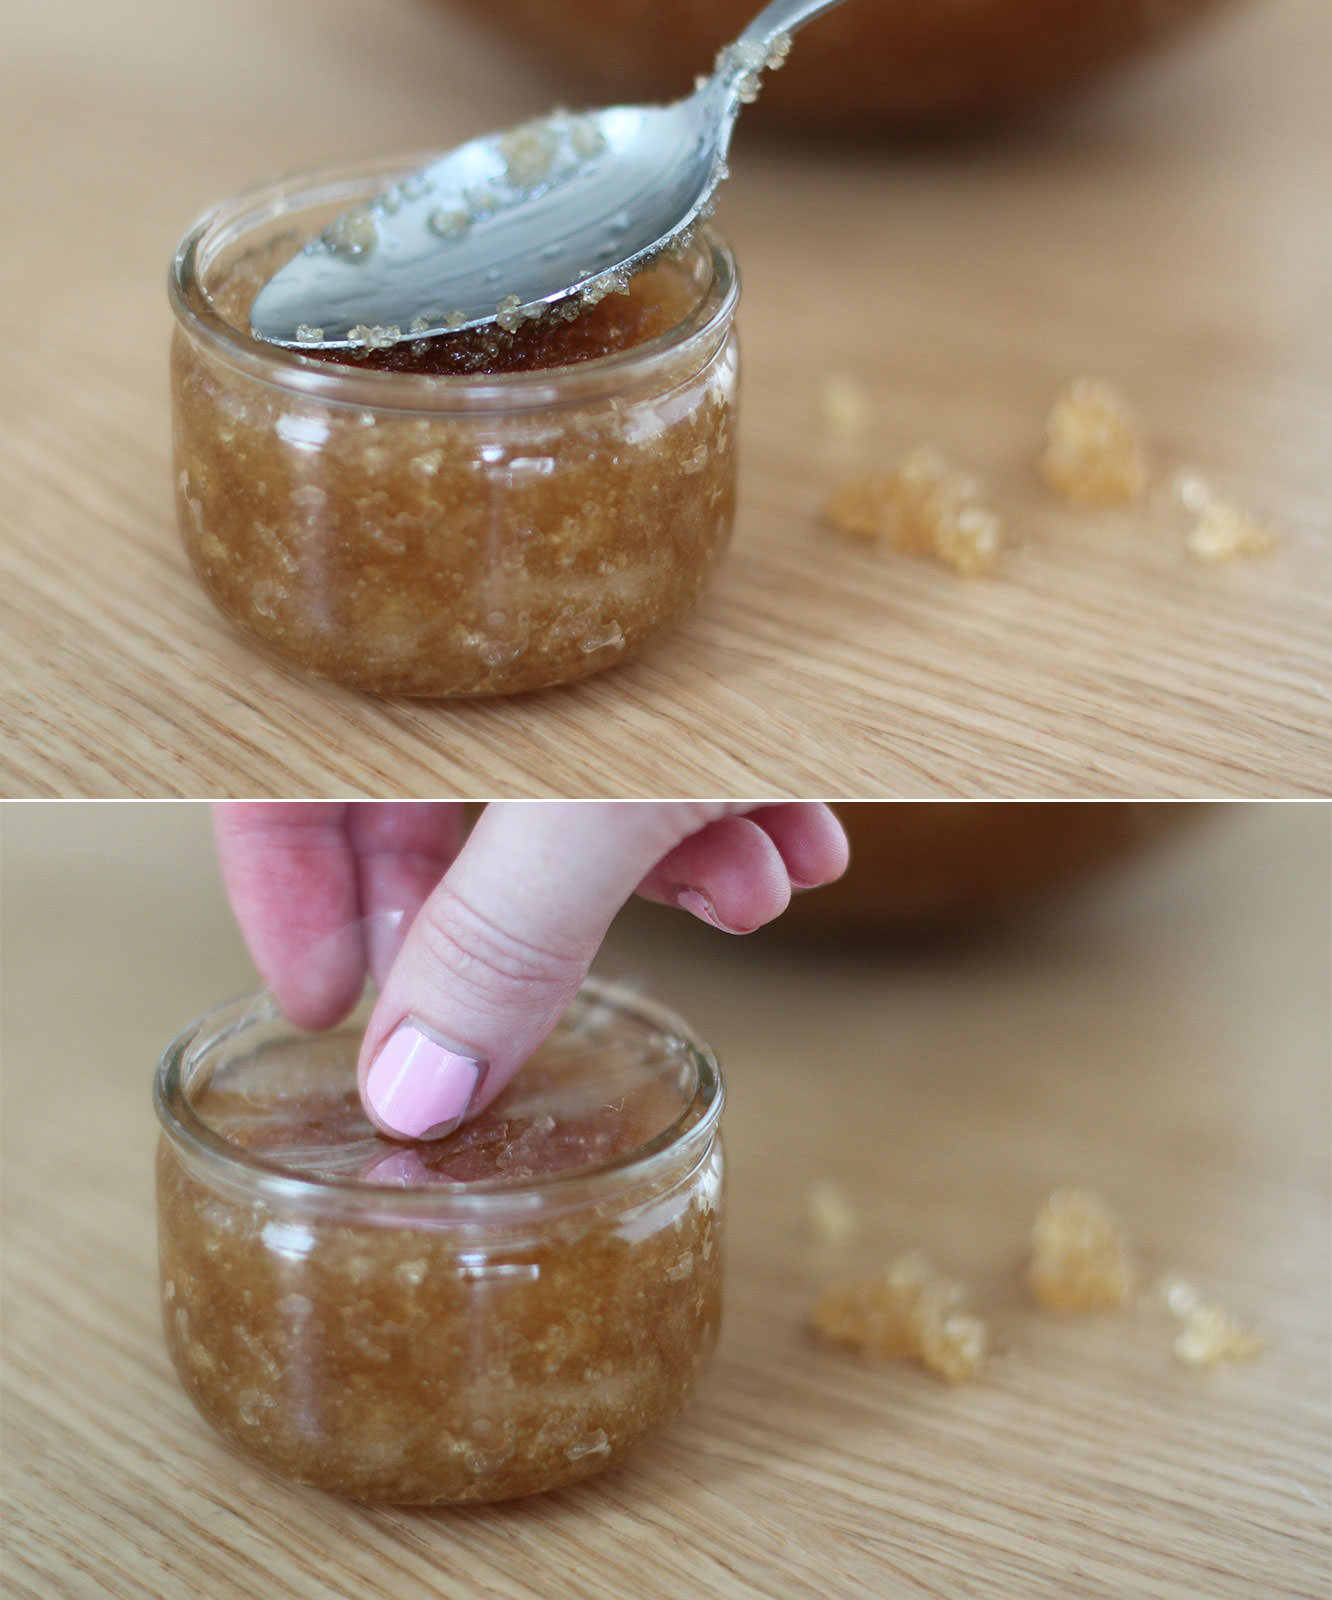
Step two
If you’re gifting these then you might want to use little ramekins or jars. I recommend something with a lid to be honest, I used cellophane to seal the scrub in. I’ll be honest, this was with mixed success – just keep them upright if you go for this option to stop the oil leaking.
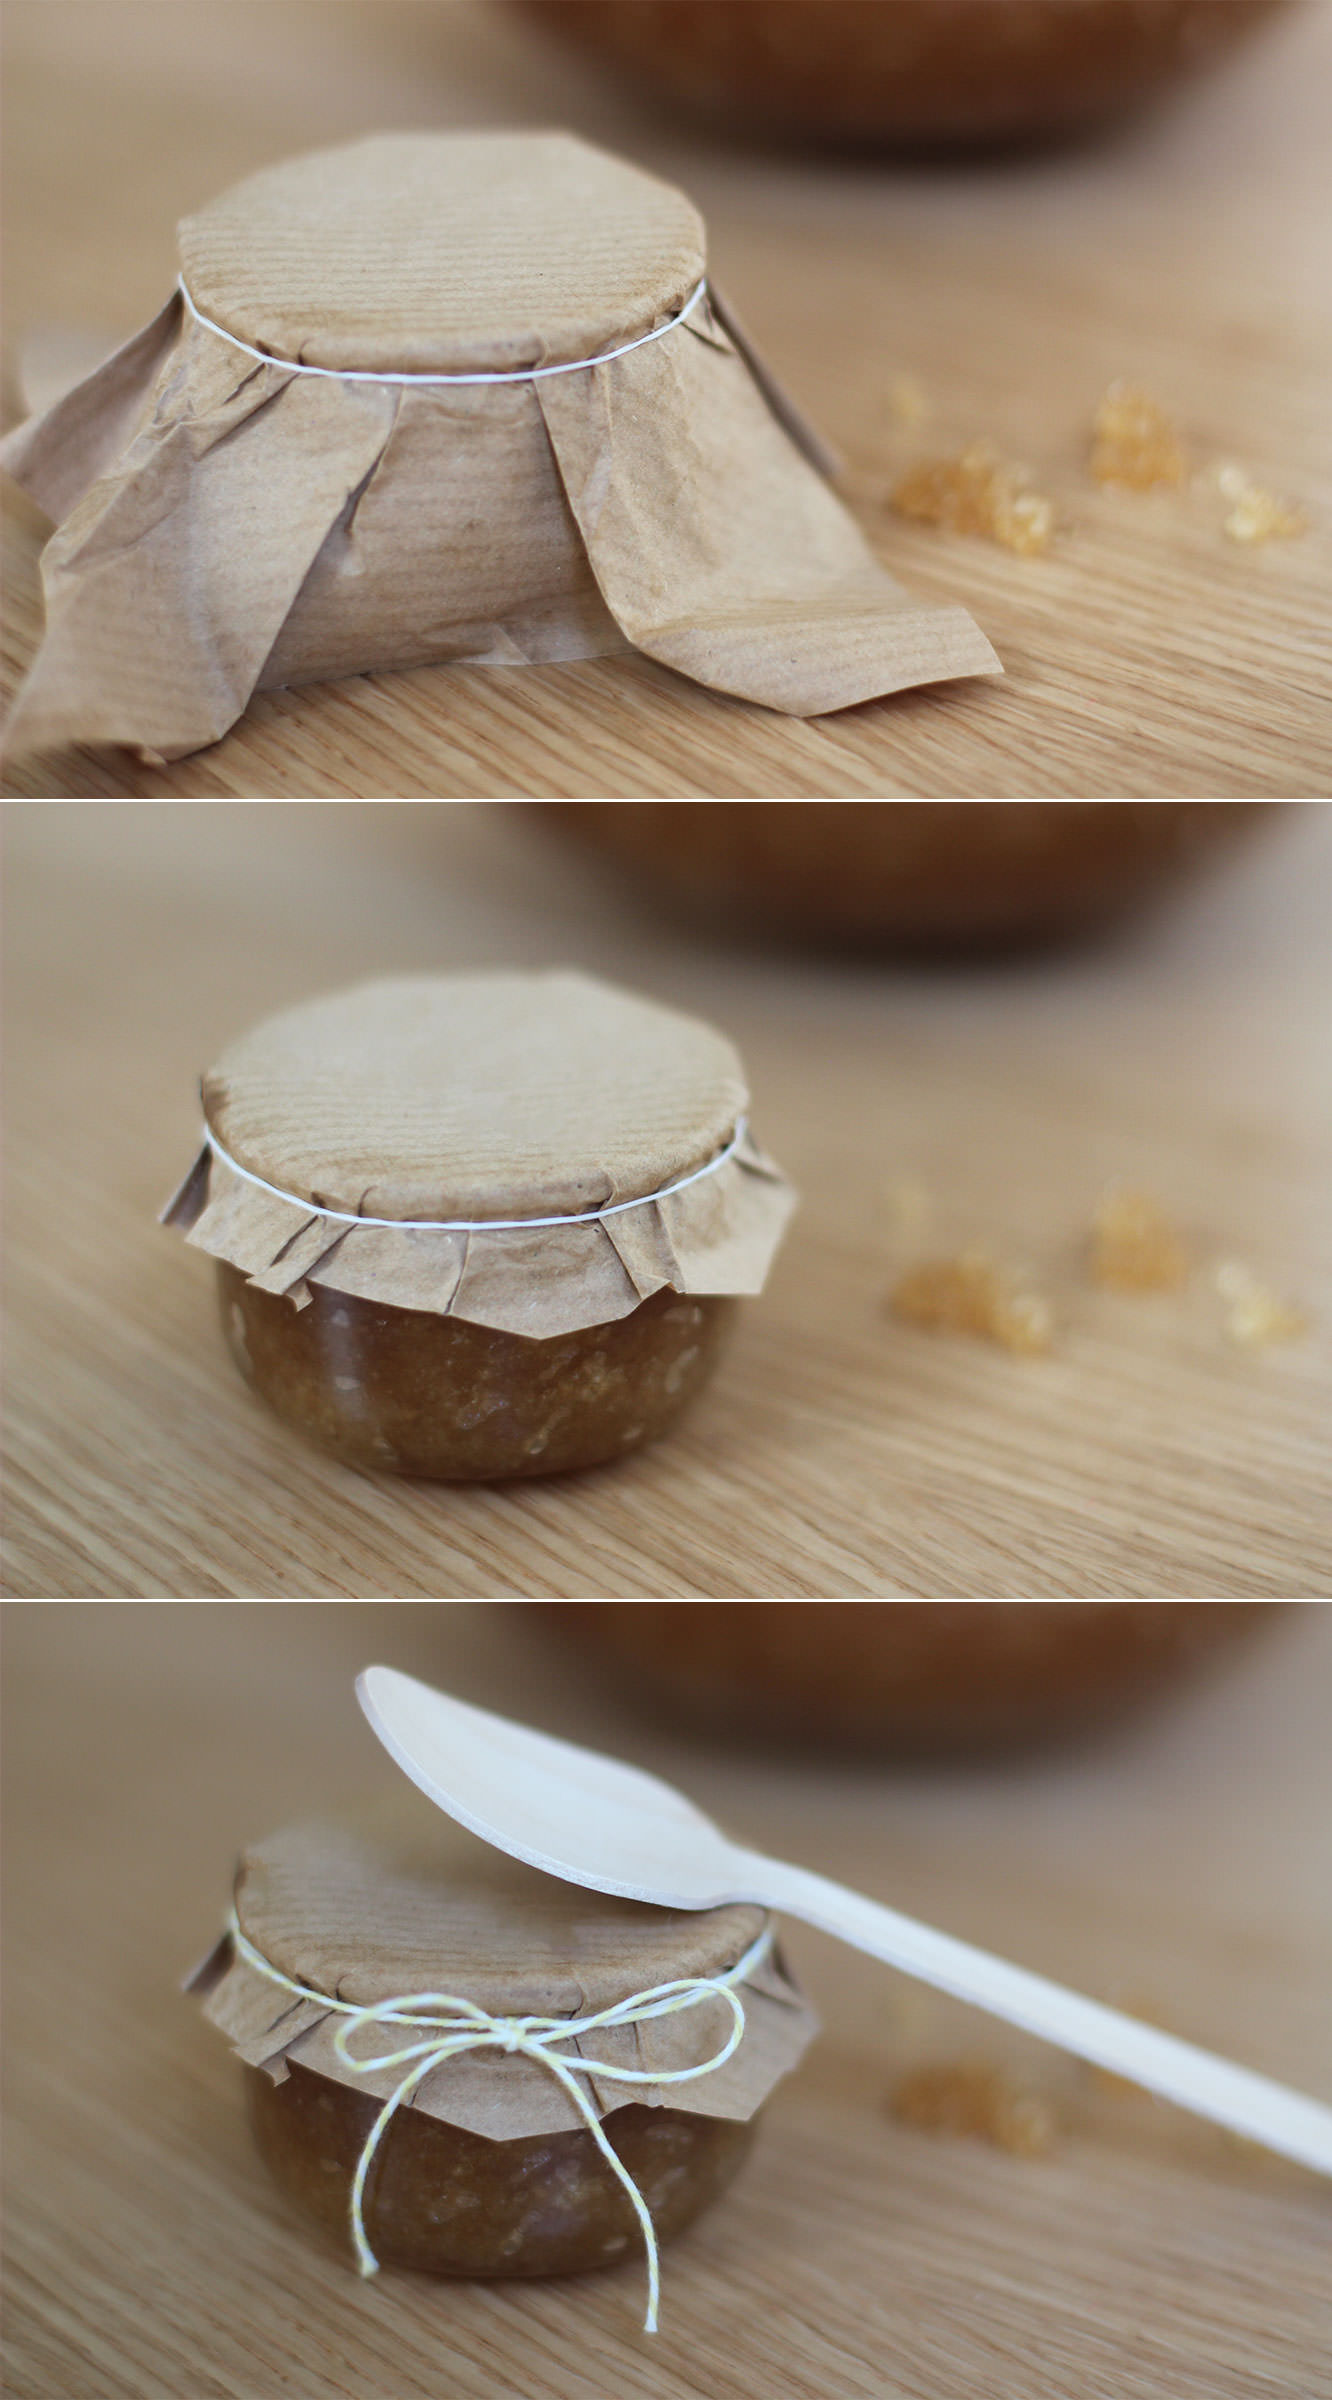
Step three
Using paper or fabric (I thought brown paper added nicely to the natural look and feel) cover the pots.
Make sure it;s a larger piece than required. Fasten with a loom band (find a small child who’s become bored of them and pinch a few).
Step four
Trim the edges of the paper or fabric. If using fabric I recommend pinking shears for the job to stop it fraying.
Step five
Tie a nice piece of string/twine/ribbon around the rim to cover the loom band. Depending on the size of the jar you might want to tie a small wooden spoon to it at this point (the scrub settles and needs a little stir before use).
I left the spoons loose because they looked novelty big in comparison to the jar. If you’re in the UK I got these from Tiger.