Tag: baking

O little town of gingerbread

So this is later than the usual Monday night. But I hope you’ll forgive me when you see the contents, and when you remember it’s December and that I now have a full-time job.

SPEAKING OF WHICH, I have been fortunate enough to join a team full of kind and kooky misfits, who have made the last three months super fun.

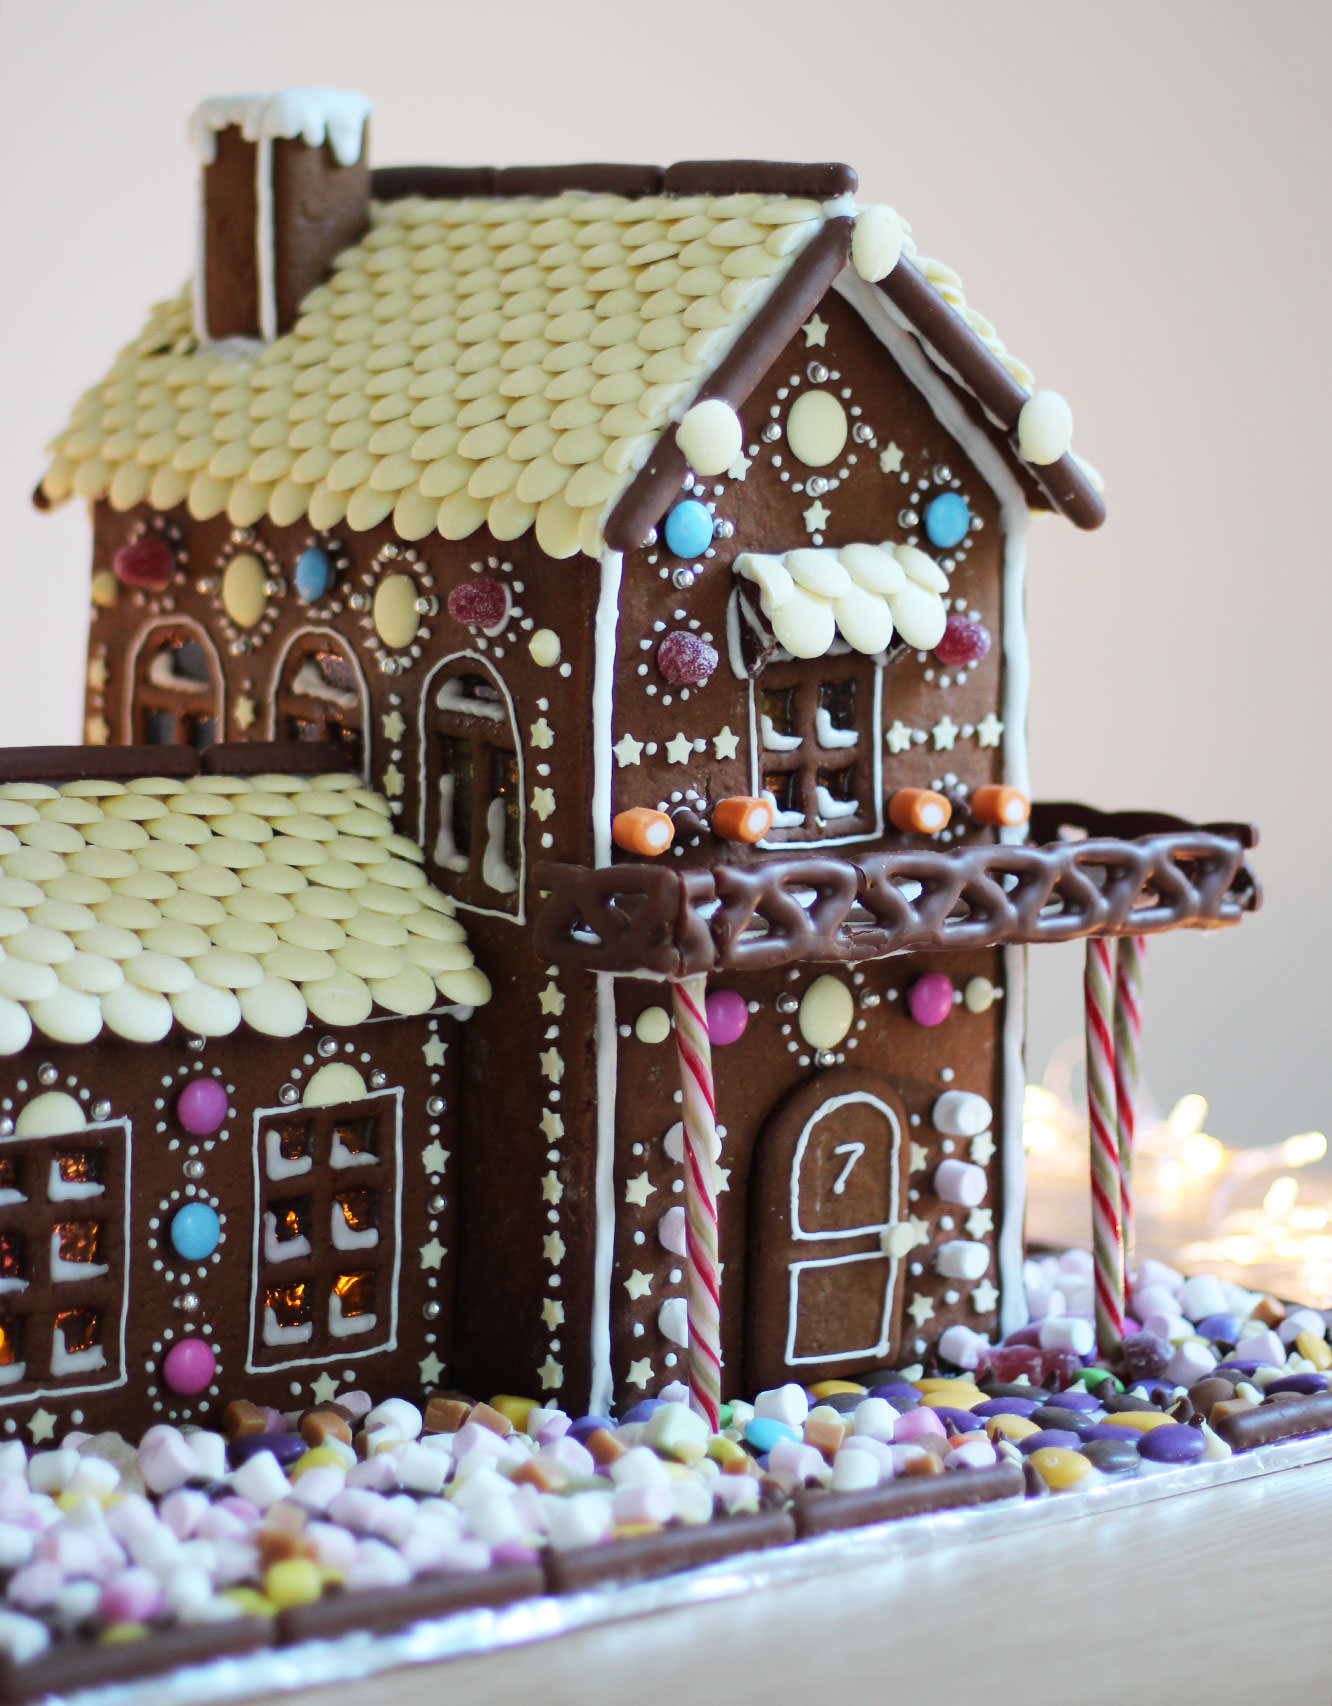
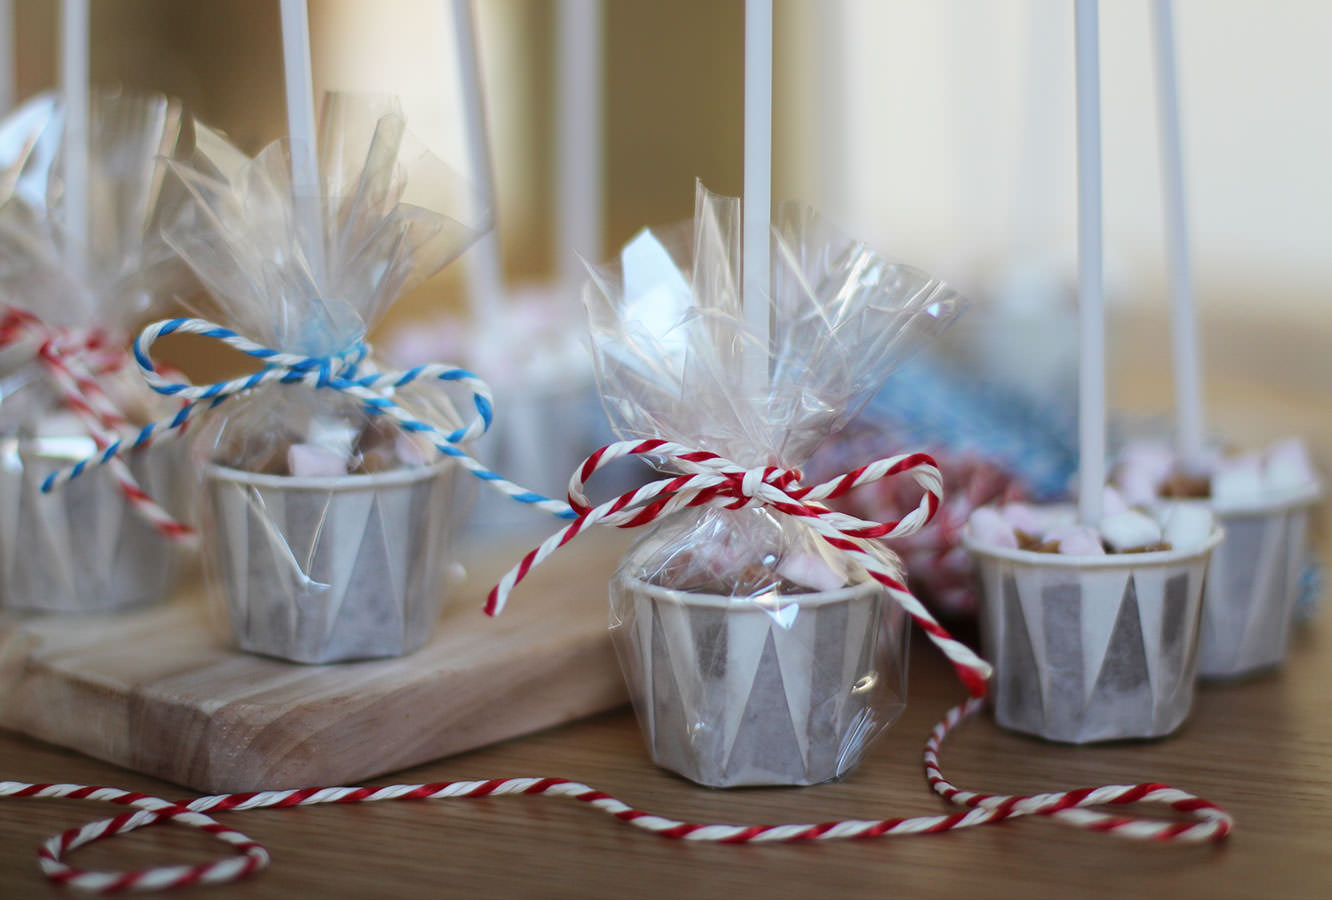
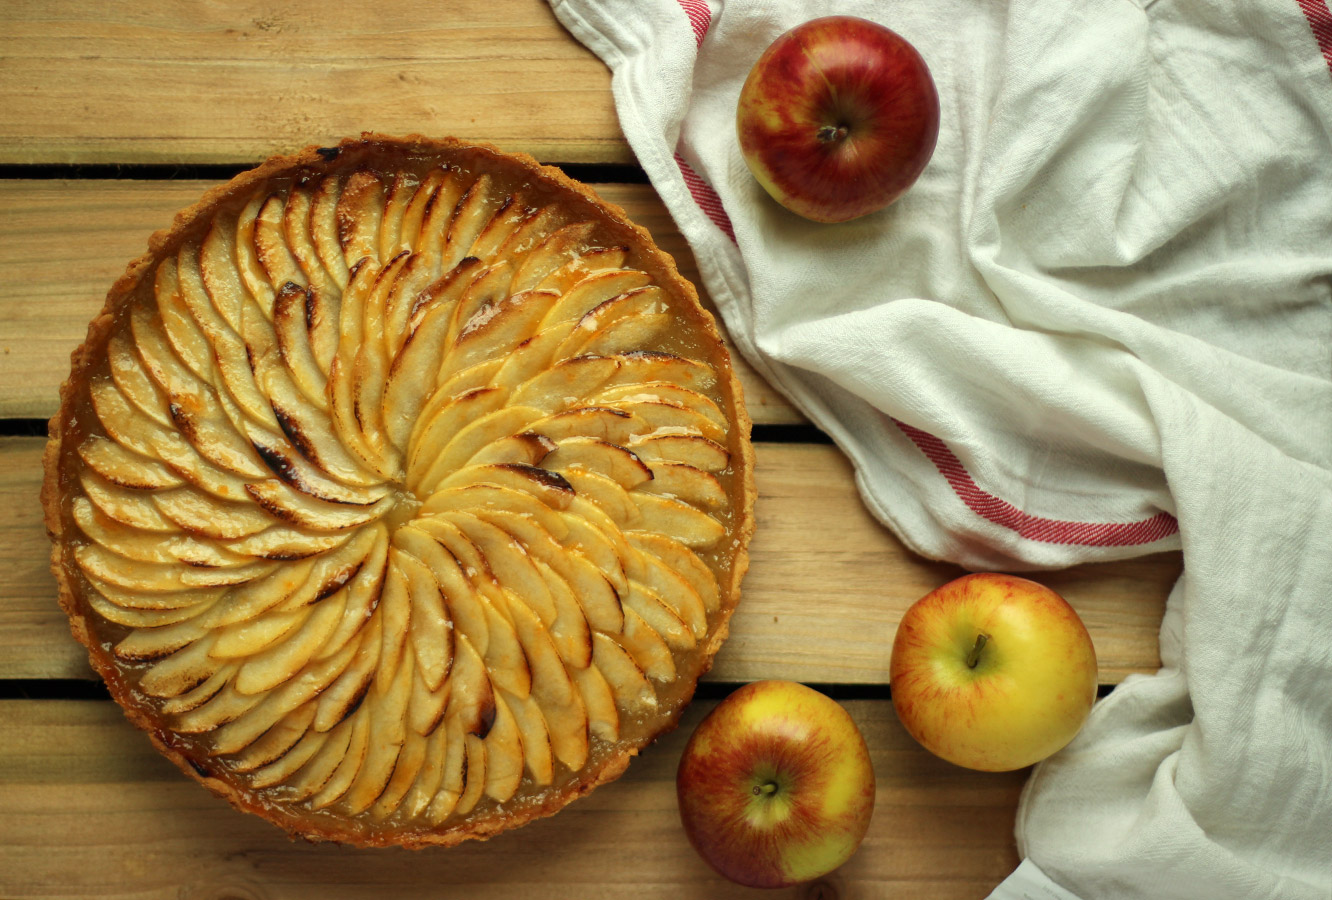
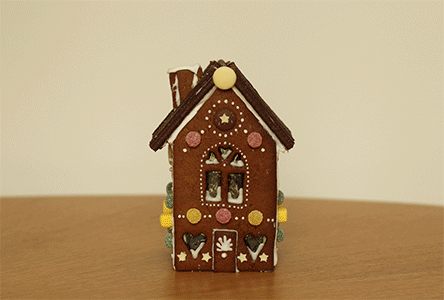
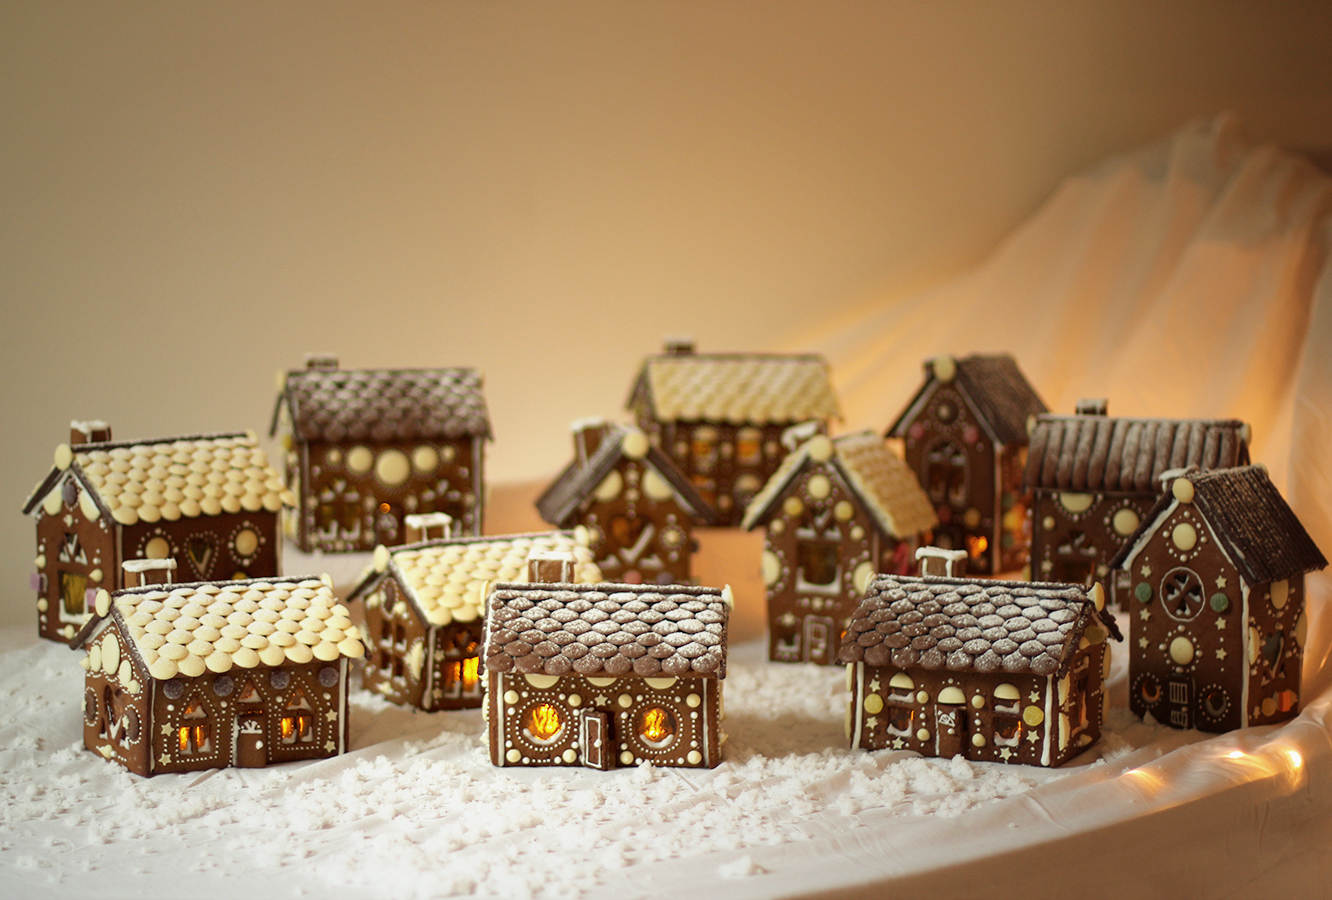
This year, when considering my yearly gingerbread offering I deliberated over how I might transport one into work to share the joy. But when you make gingerbread houses like this and this and get the central line tube to work, even the thought of attempting that makes you sweat.

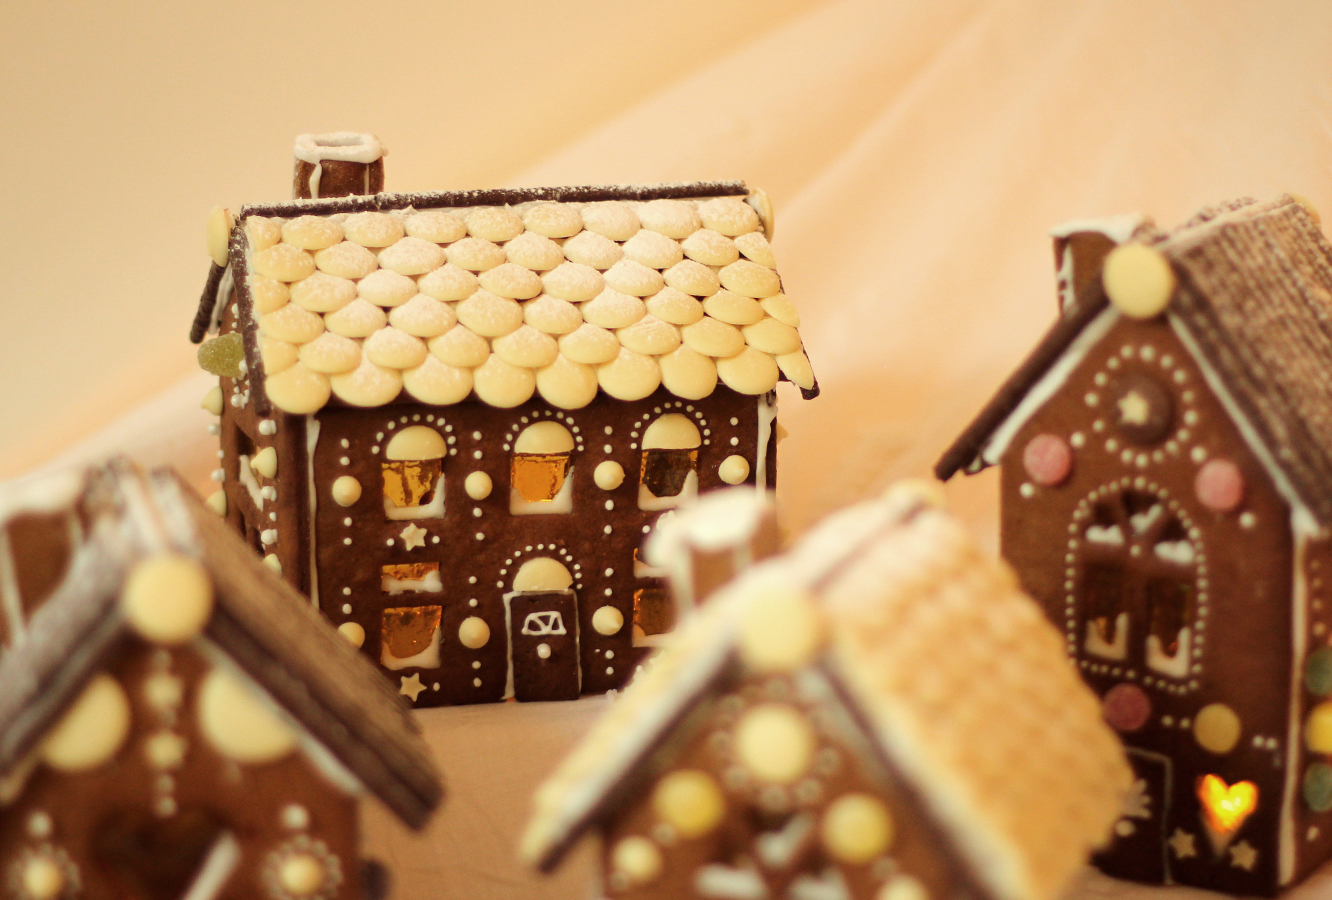
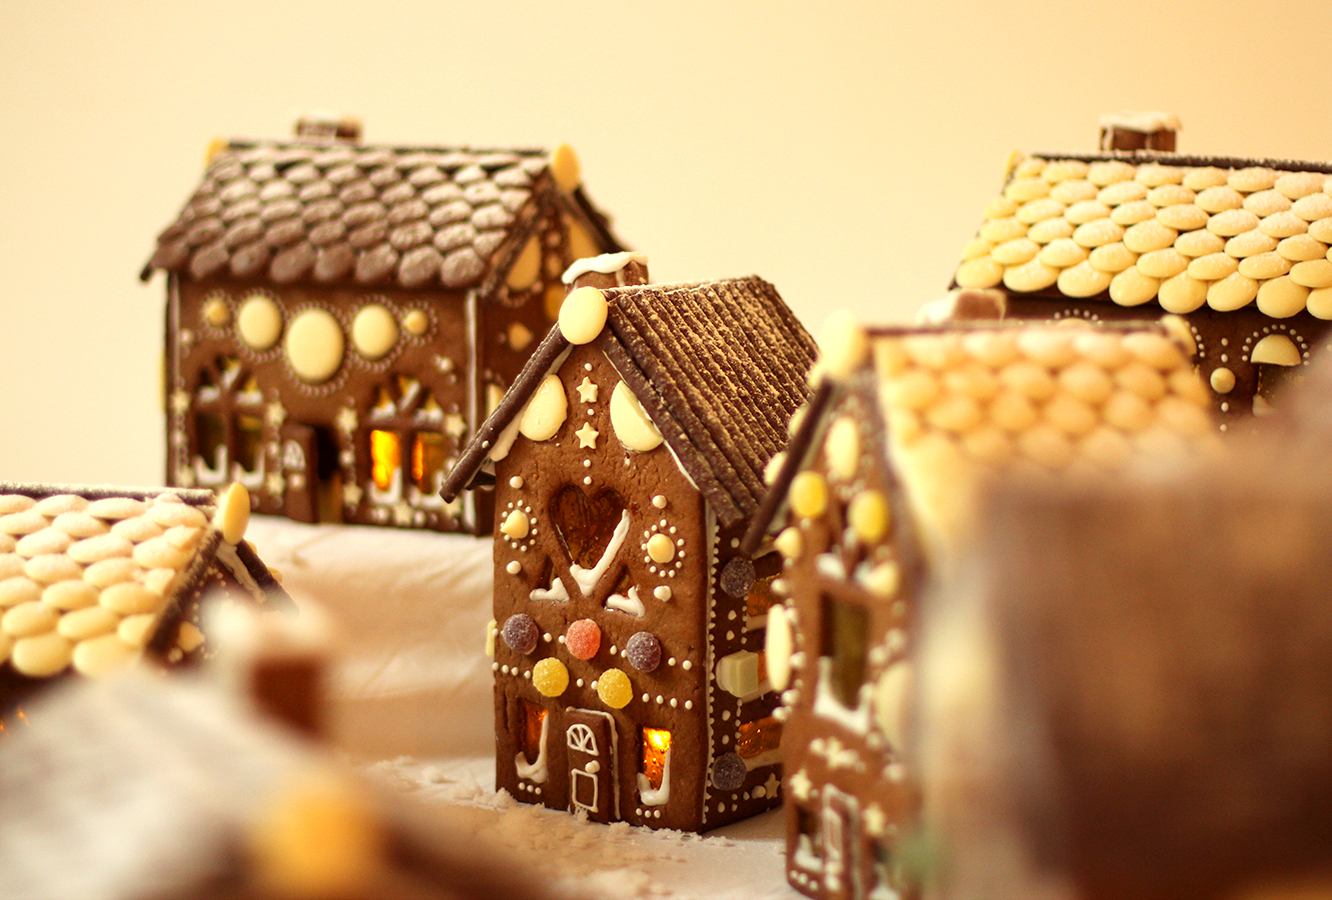
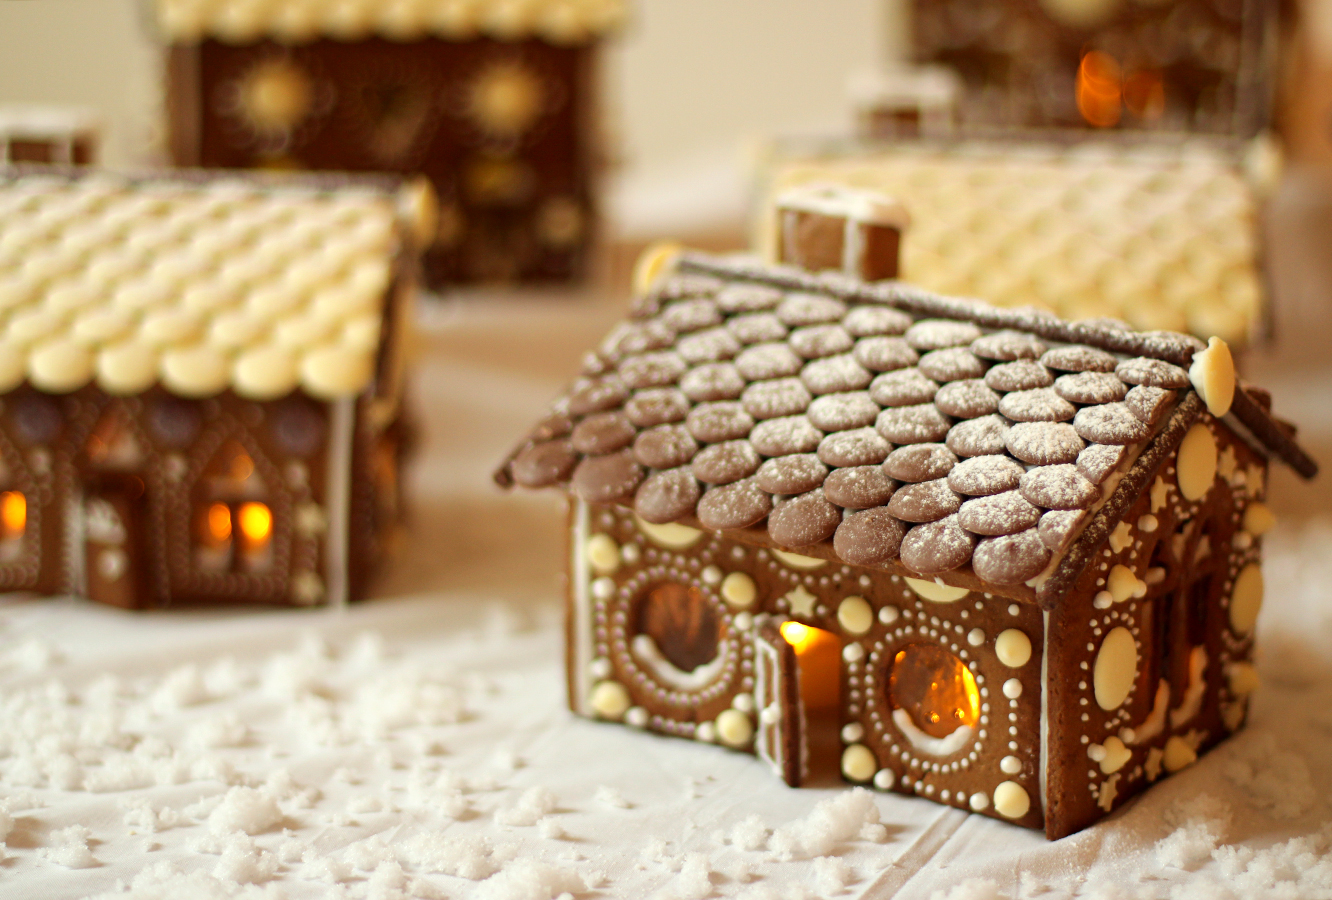
The obvious answer? Make little ones for everyone. Sure. That’s not mental at all.
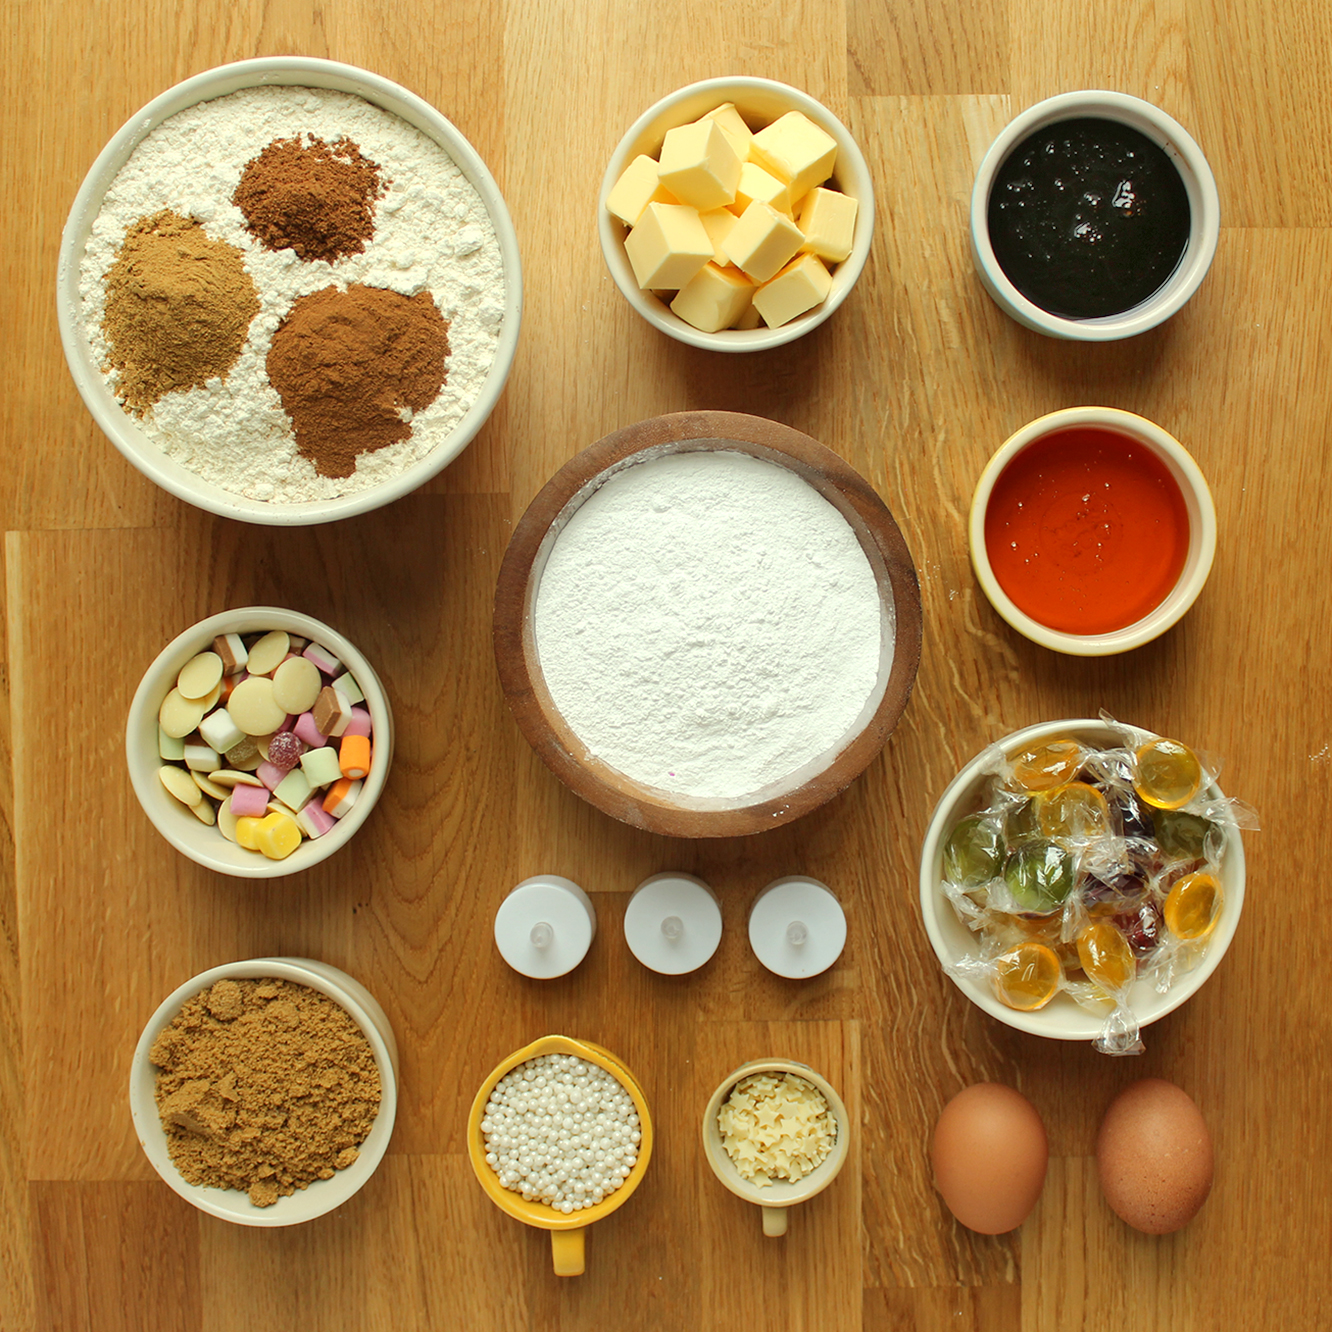
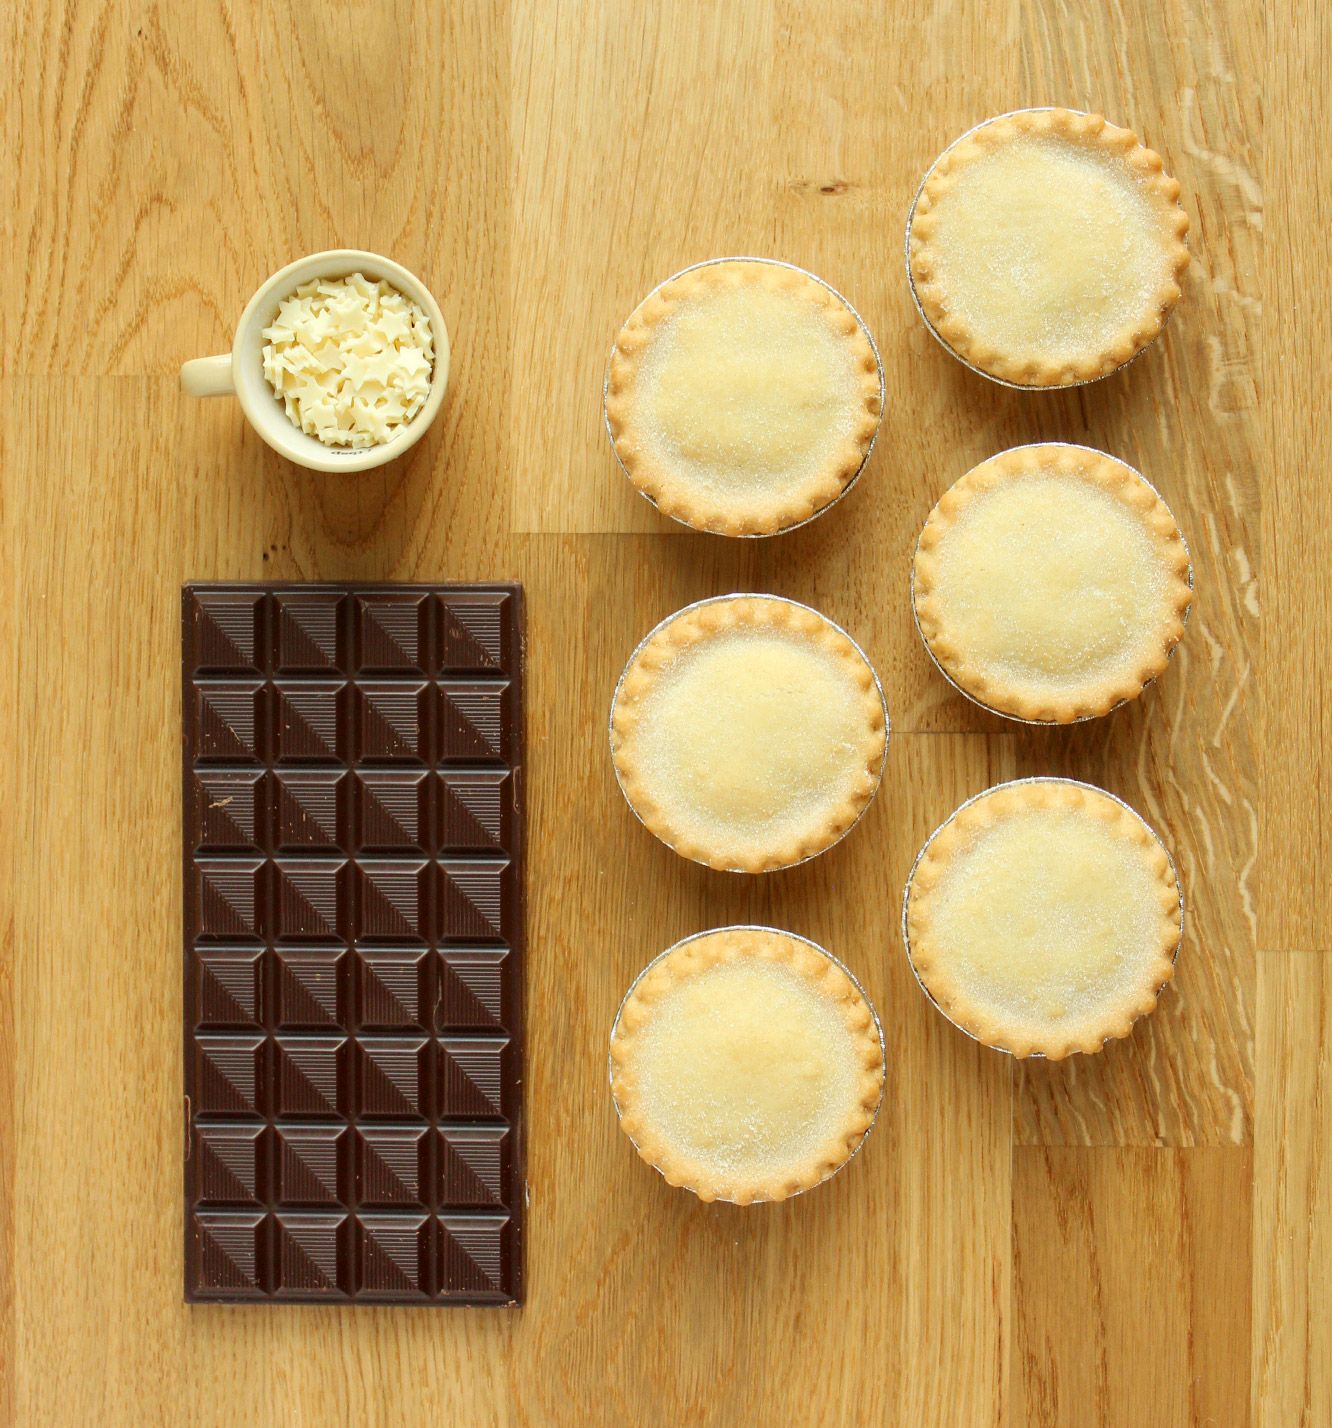
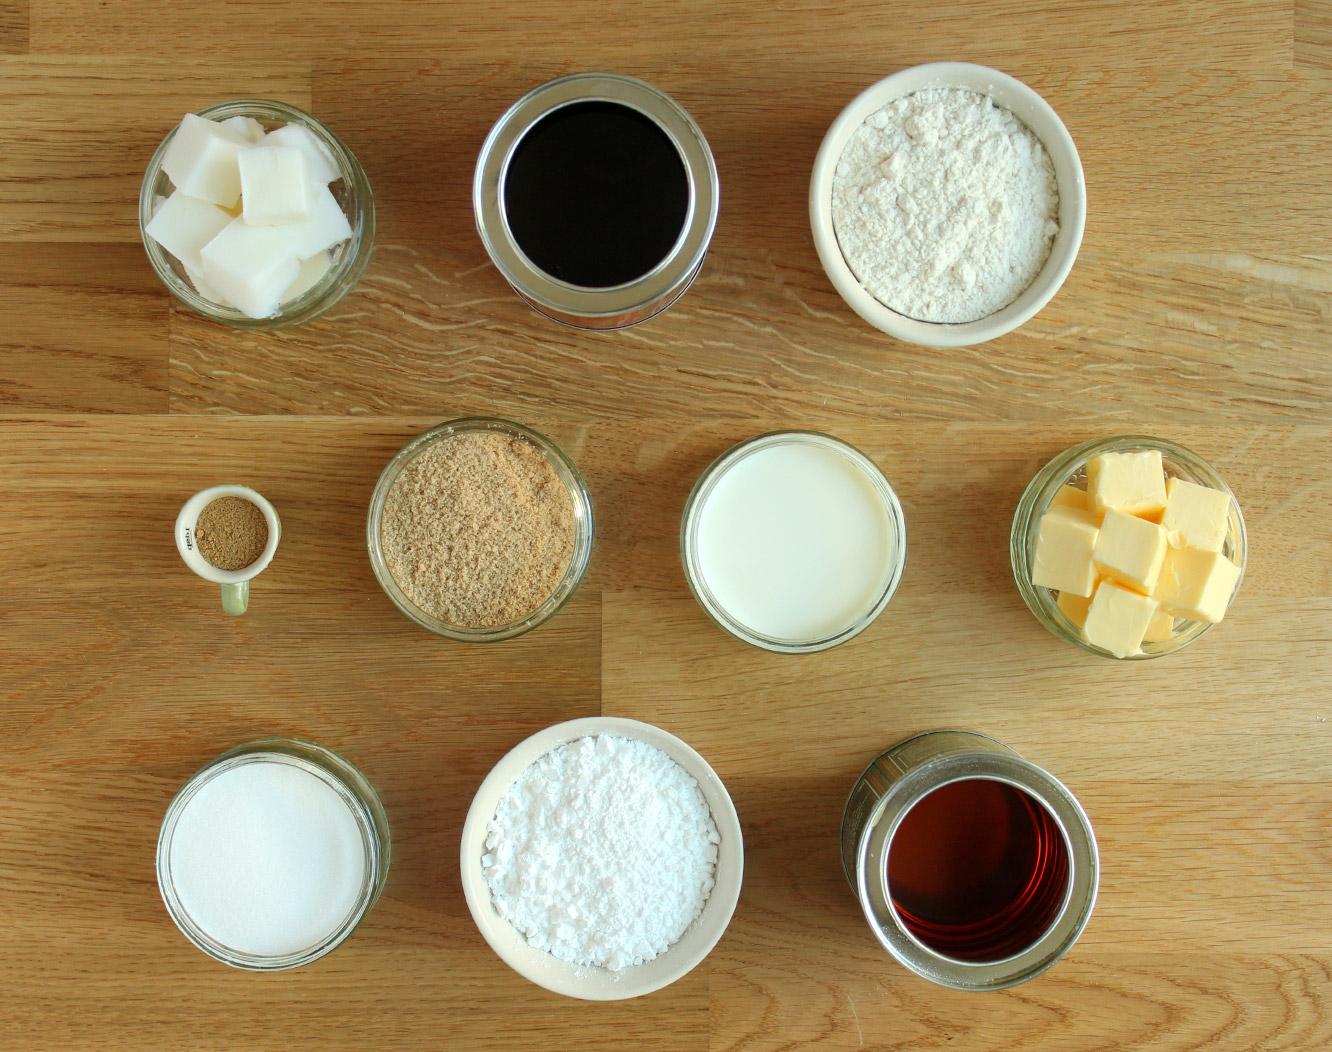
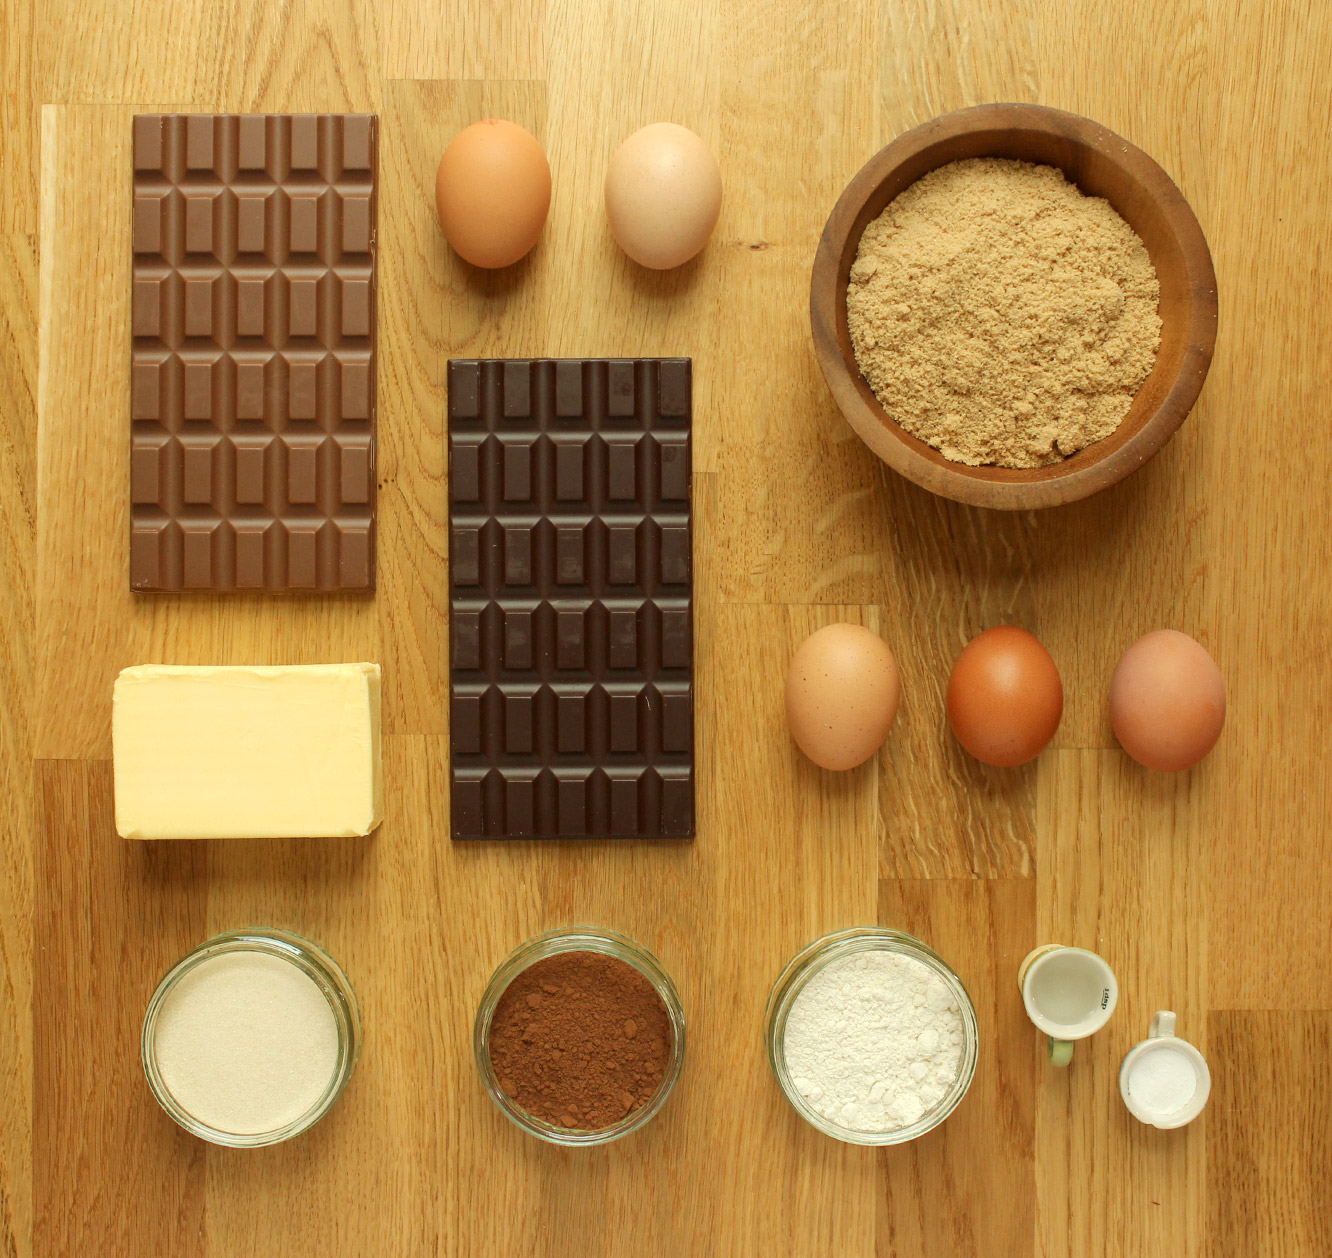
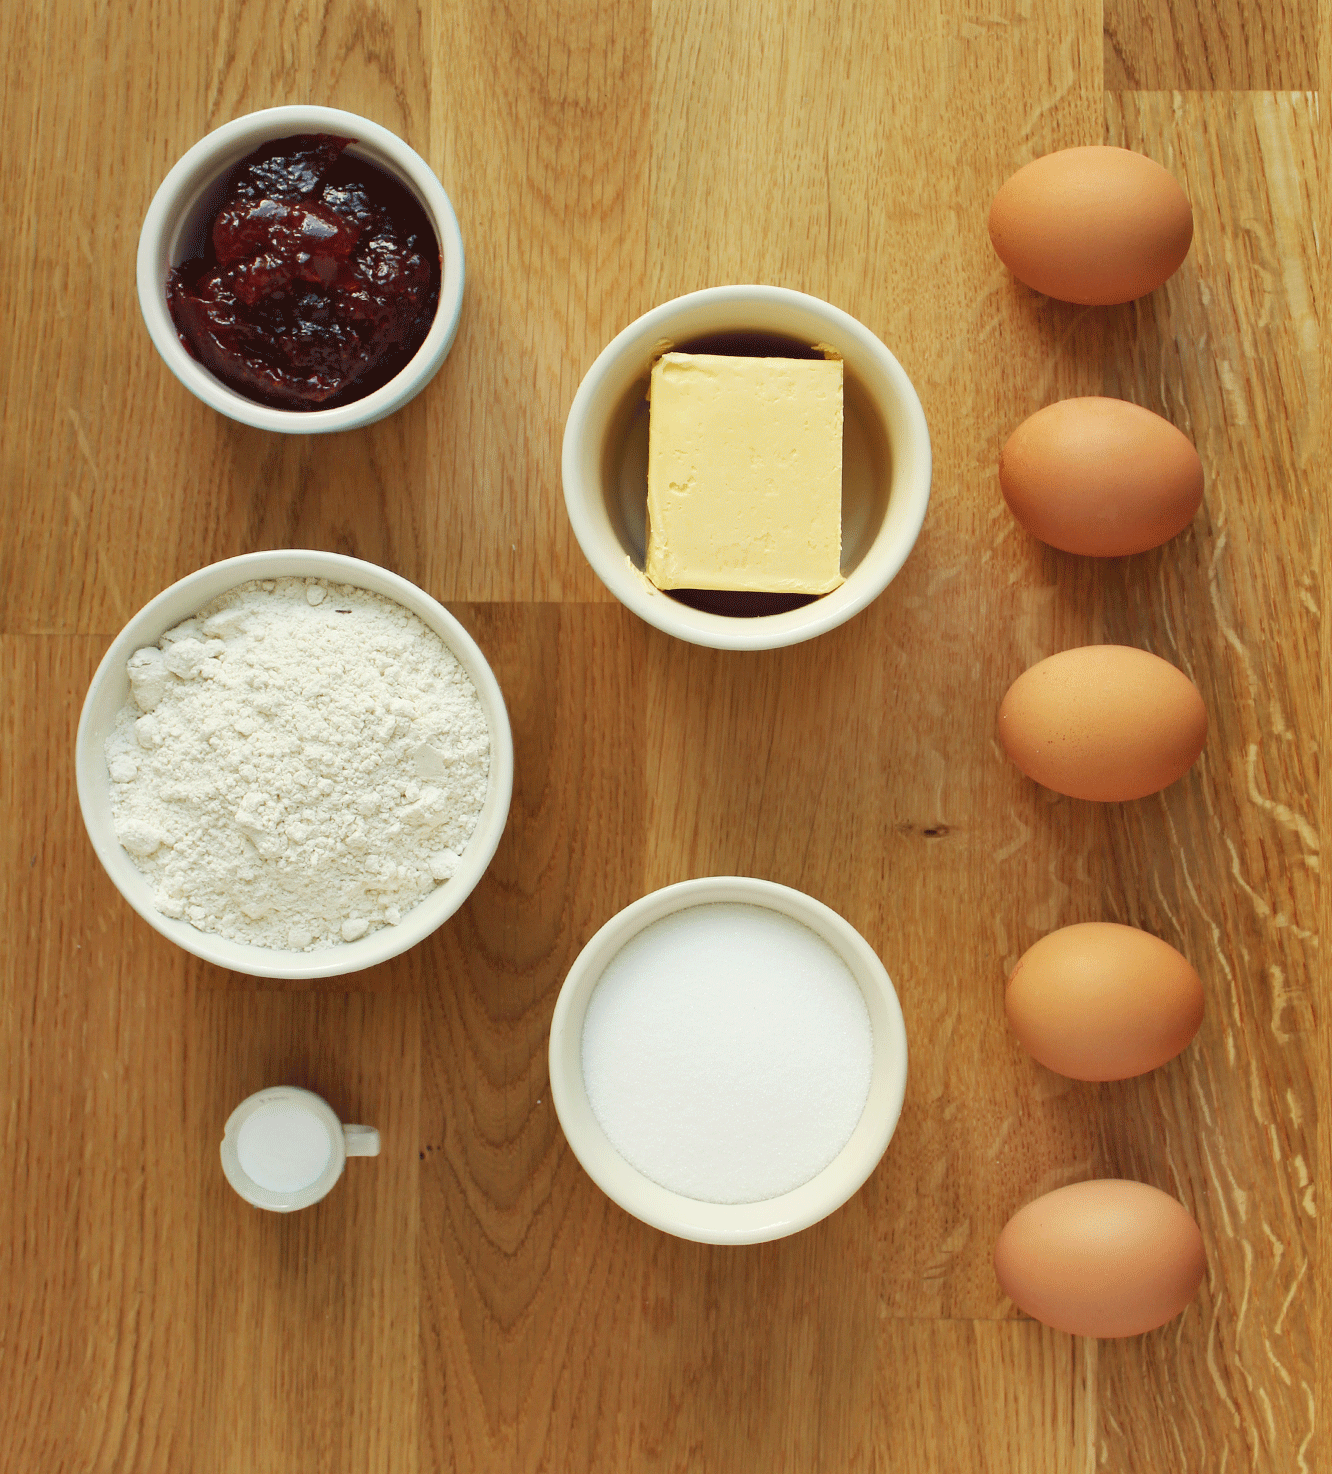
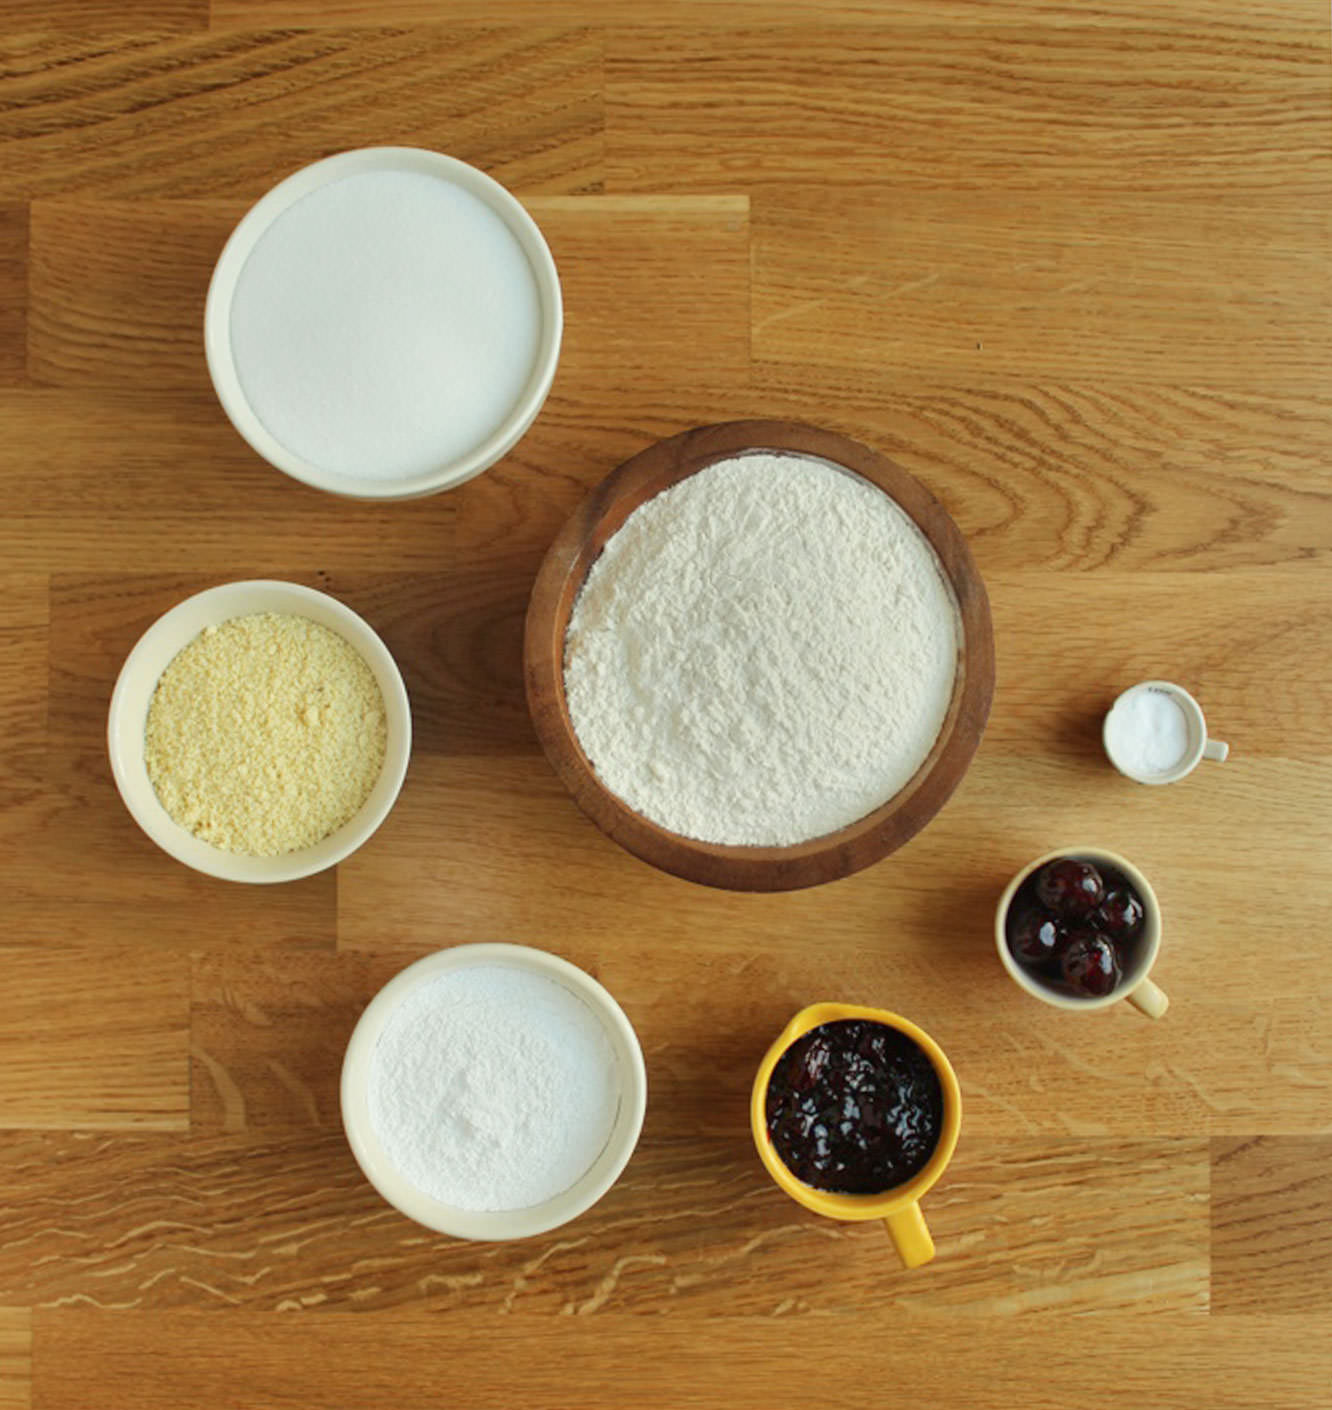
gingerbread-house-village-recipe-guide-01

You will need:

1lb 10.5 oz/750g/5 cups plain flour

5oz/140g/1 cup soft brown sugar

7oz/200g/1 cup unsalted butter

2 eggs

5 tbsp treacle

8 tbsp golden syrup

1 tsp salt

1 tsp baking powder

2 tsp ground ginger

2 tsp cinnamon

1 tsp nutmeg

A box of royal icing (read notes below)

The template

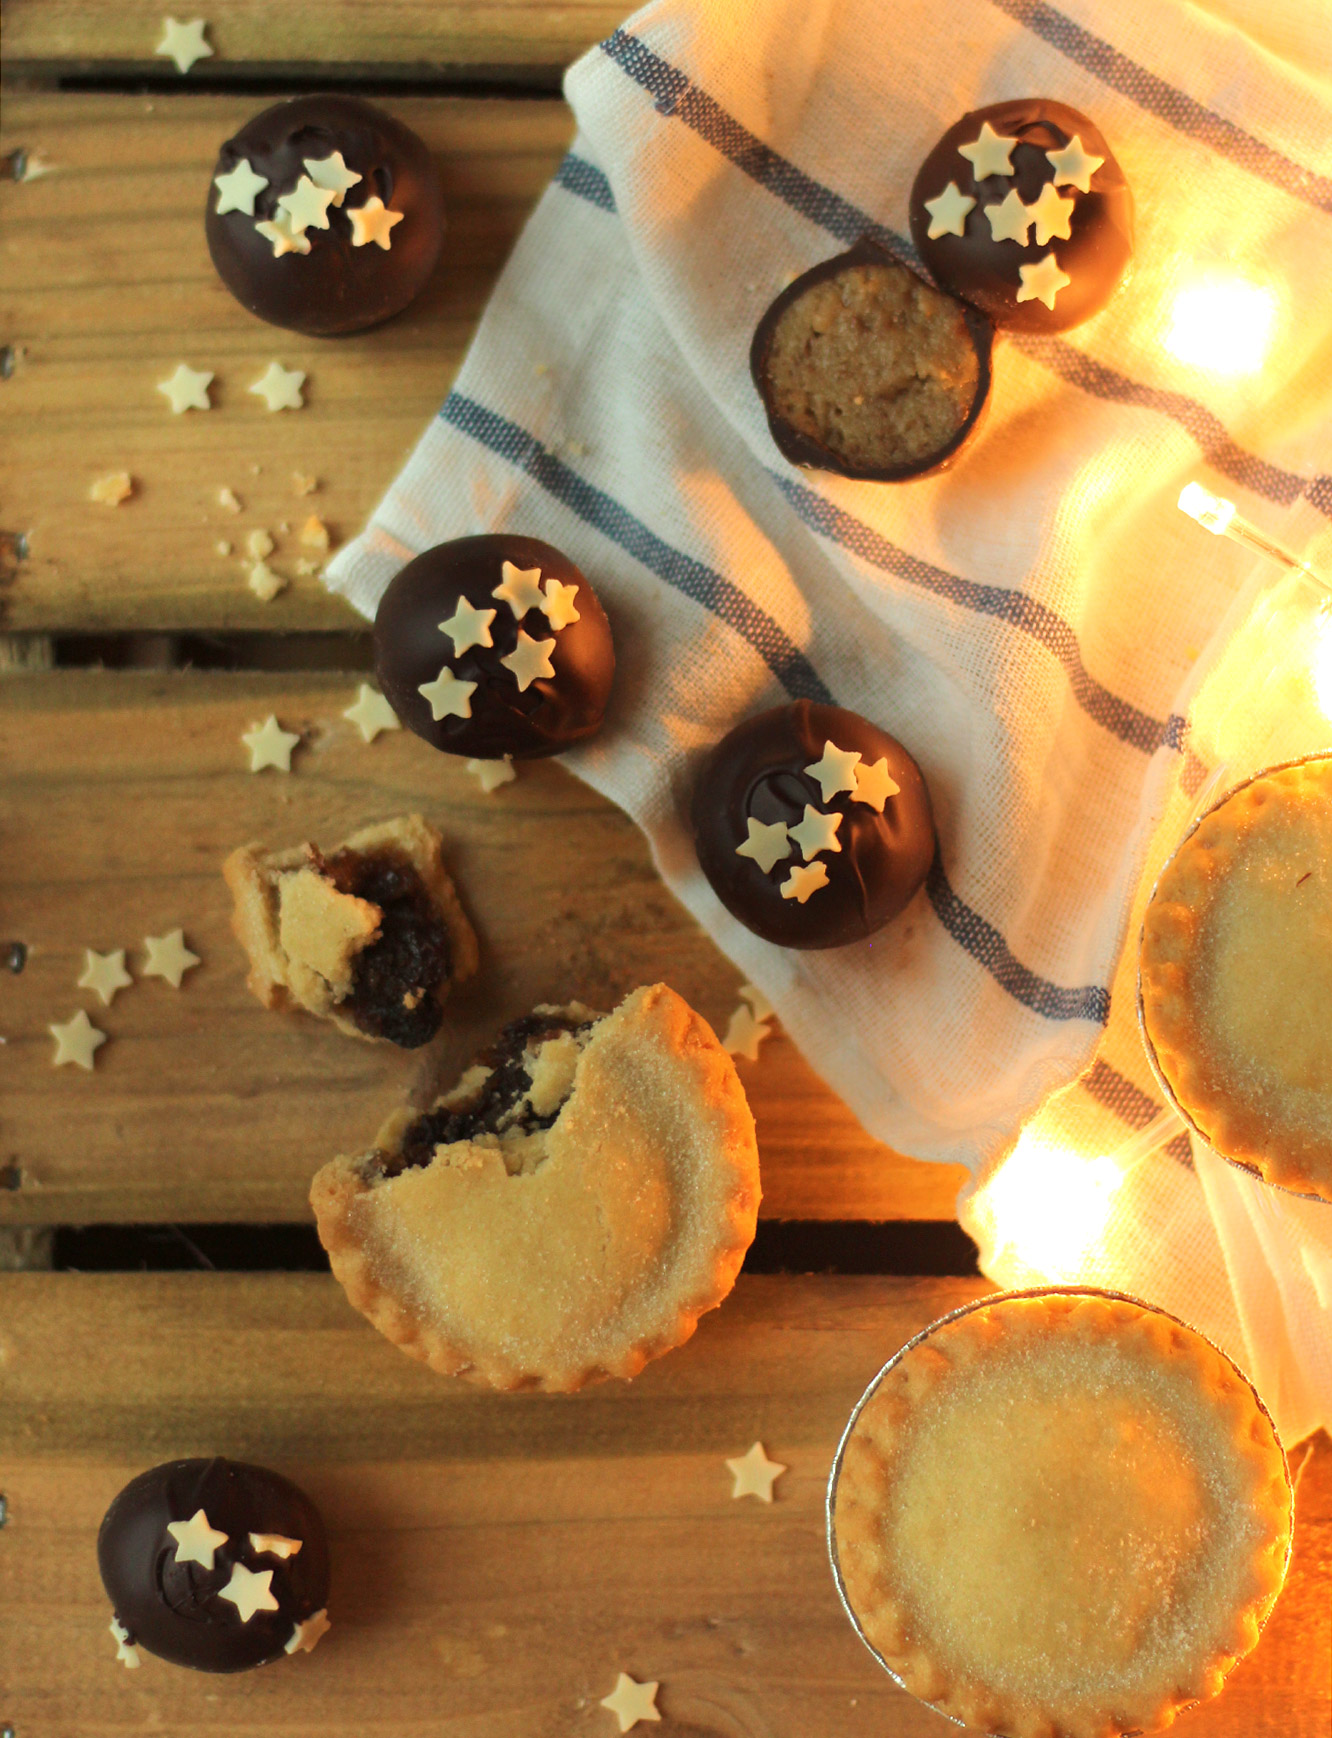
ALL THE SWEETS (including boiled sweets for the windows)

LED tea lights if you want it to look like there’s a fire on inside

Some notes:

  • The quantities above make 4 little houses. Yes, I made 3 batches of mixture. It will make about one medium to large house, both the links in the blurb above required a batch and a quarter or so.
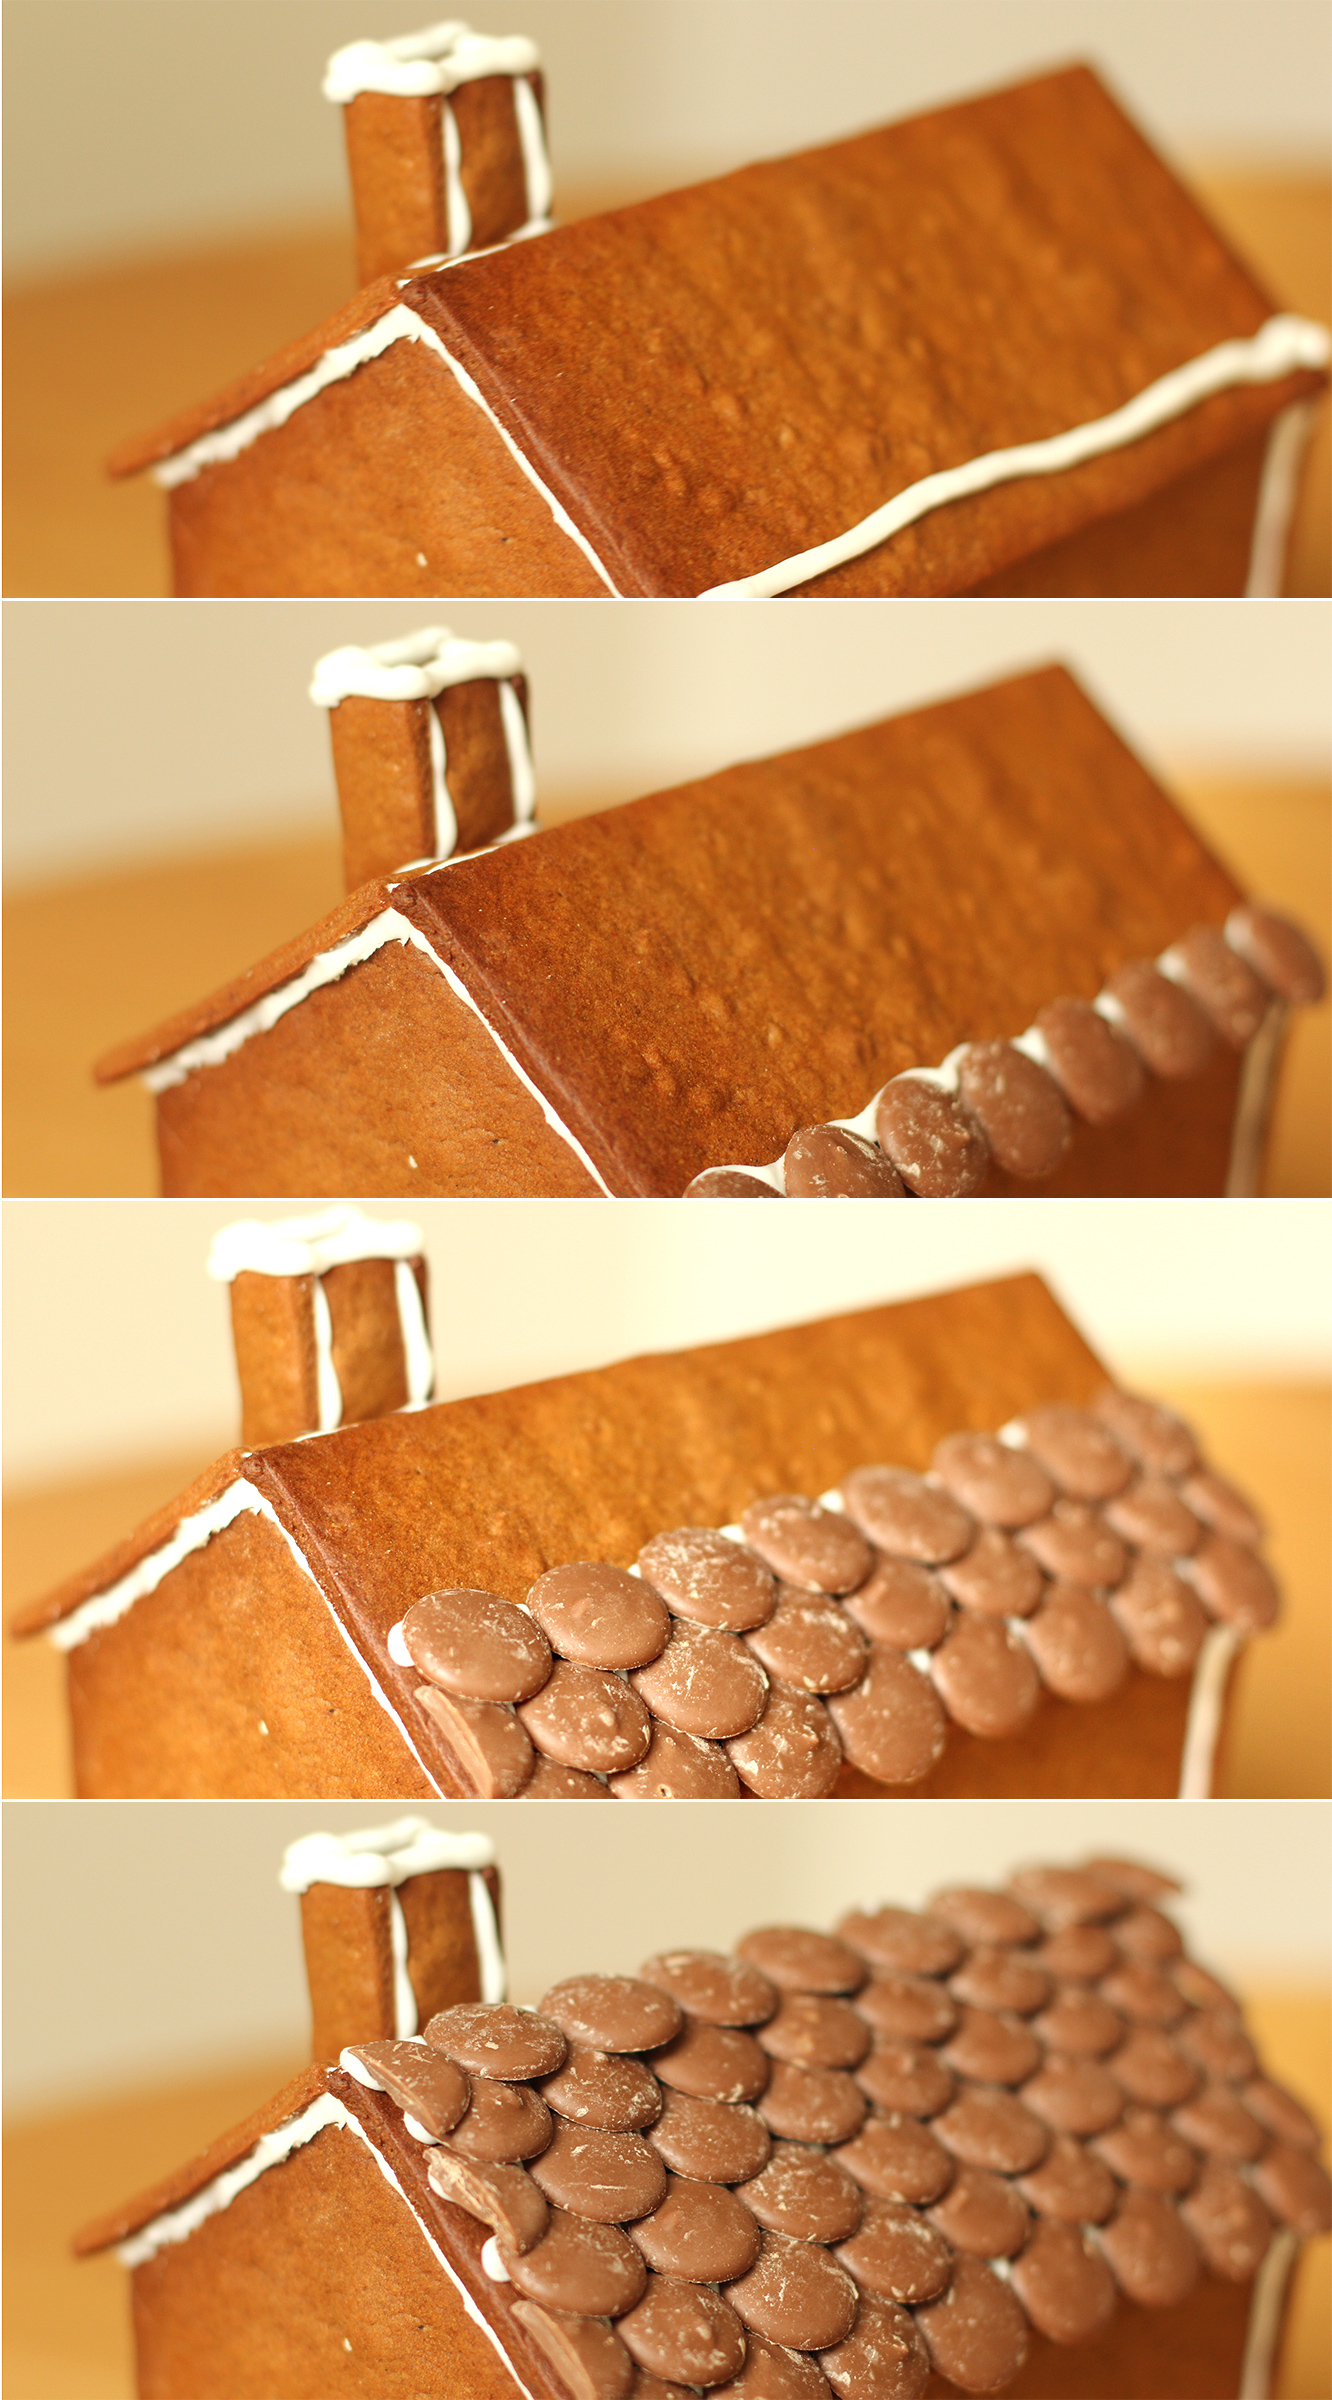
  • For the roofs I use either chocolate buttons, fingers or matchmakers. The roof on house one is the right size for chocolate finger biscuits, matchmakers are great because they are long, but they are narrow so you need quite a few. Roughly it works out like this per roof for these templates: one box of matchmakers, two boxes of fingers, and two bags of buttons (based on Sainsbury’s own 3 for £1 bags)
  • You need a lot of royal icing, get a few boxes, I used 3 for 12 houses.
  • For the bases I use a thick cardboard box covered in tinfoil. You could buy a cake board, but then you have to work out if your house will fit, or make it to fit the board. I prefer to make the base to fit the house, less restrictive that way.
  • For a bit of advice on template making for bigger houses click here
  • You are unlikely to complete all this in one day, as you need to let the dough cool before rolling it out, just a little FYI.
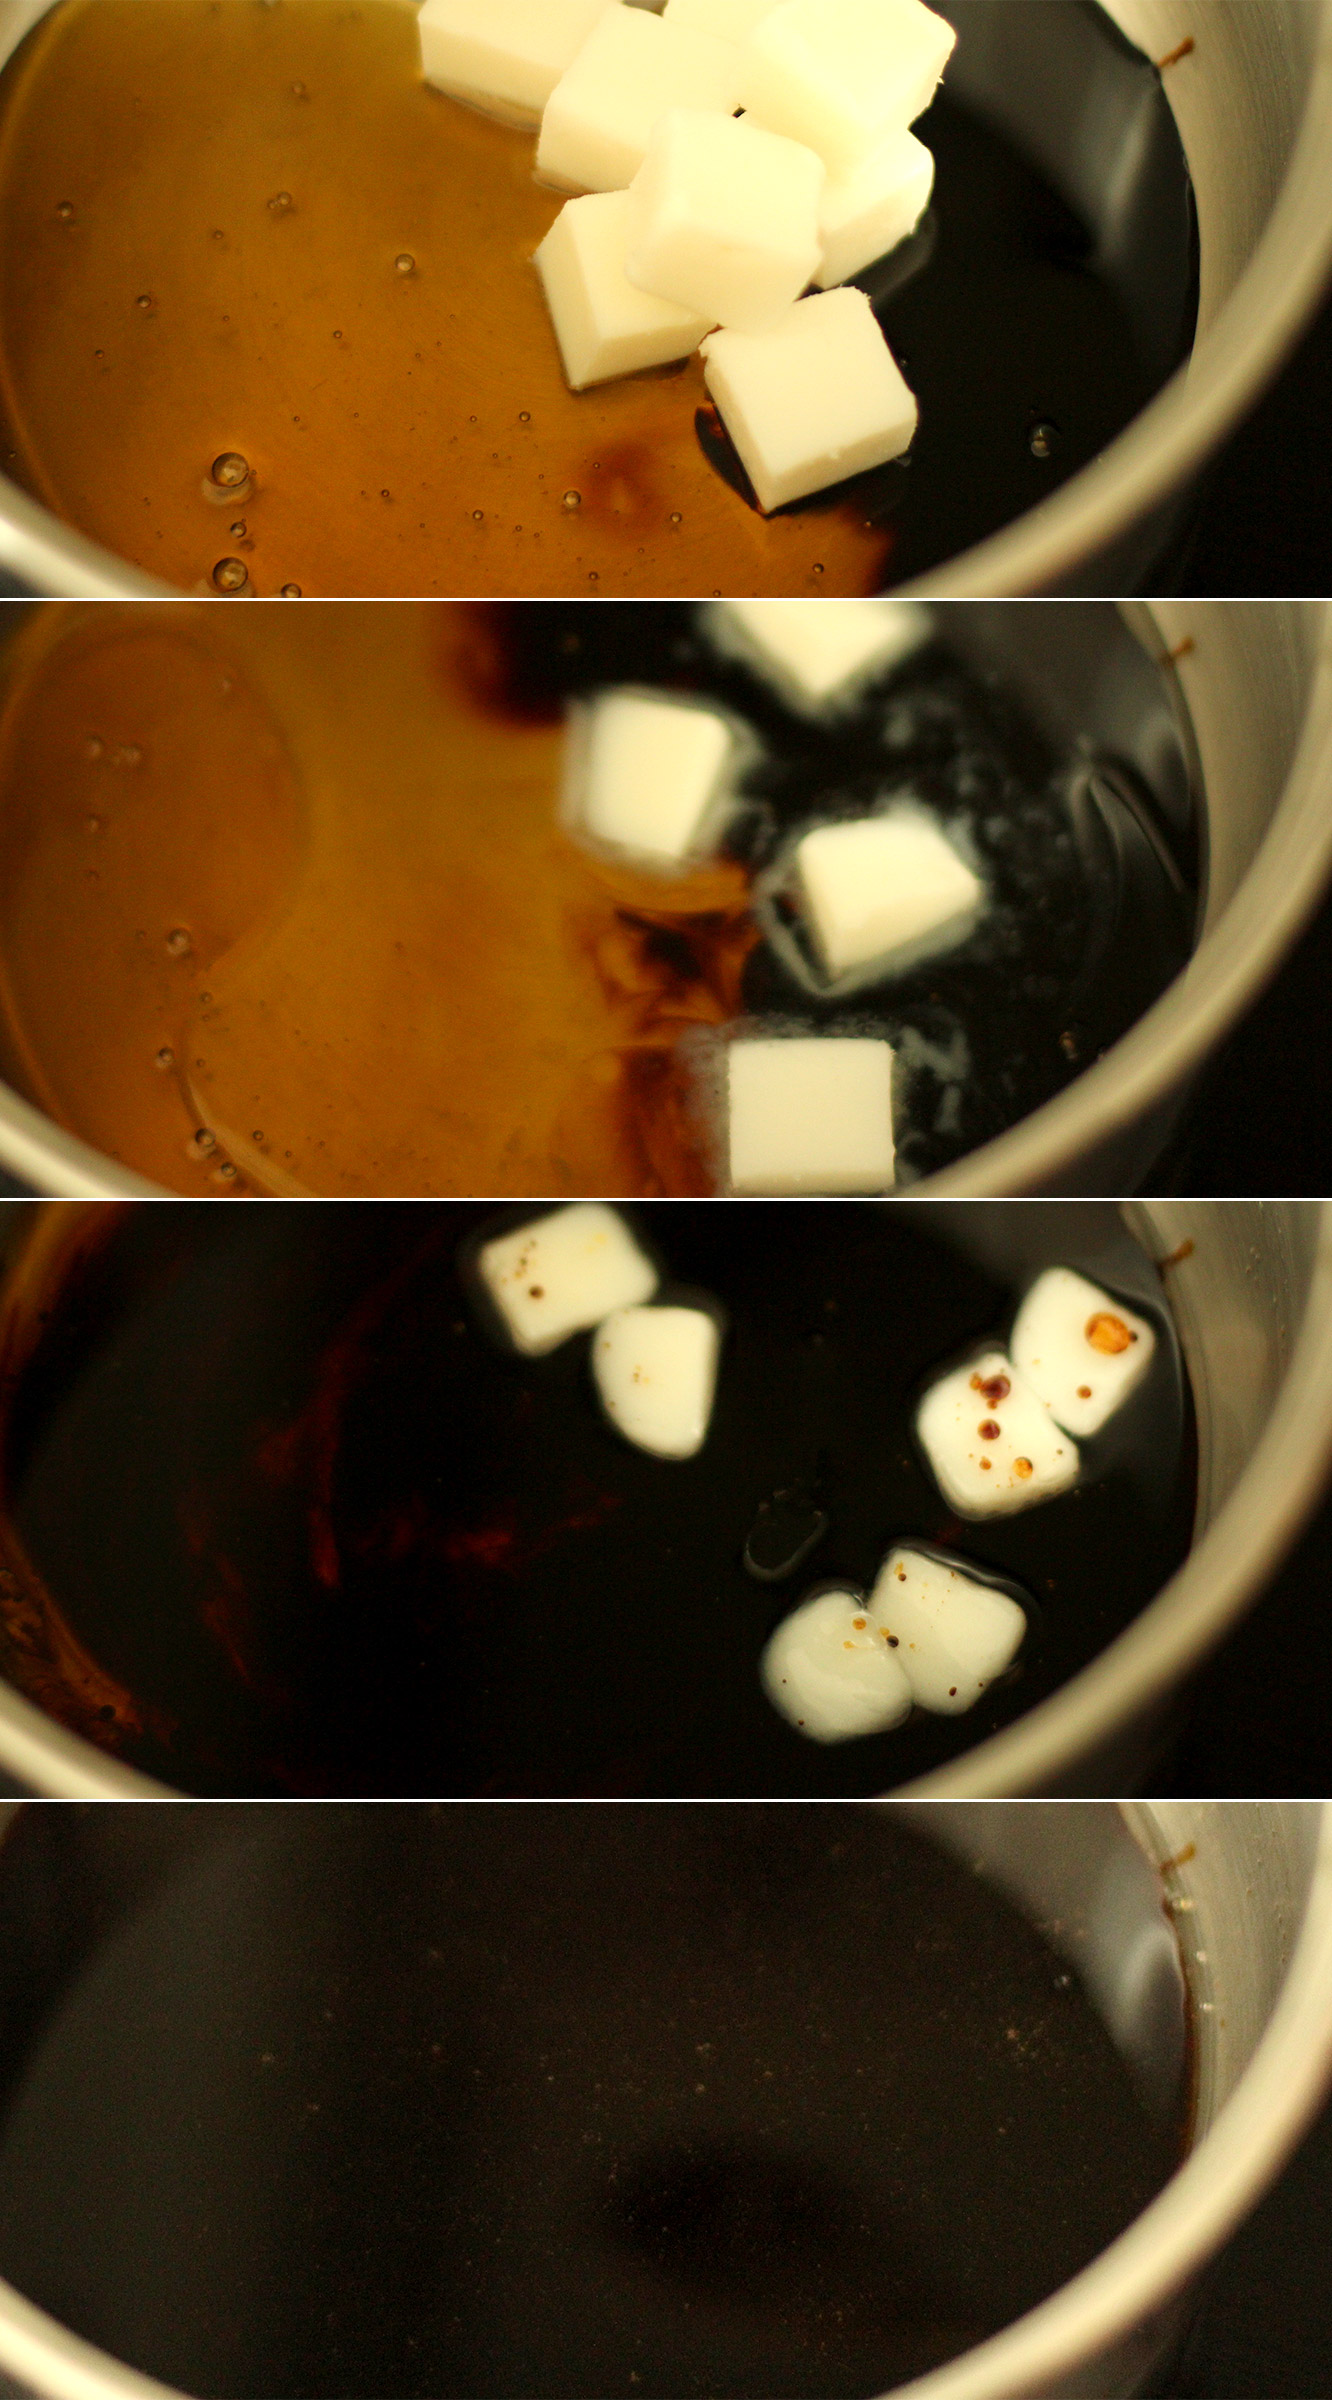
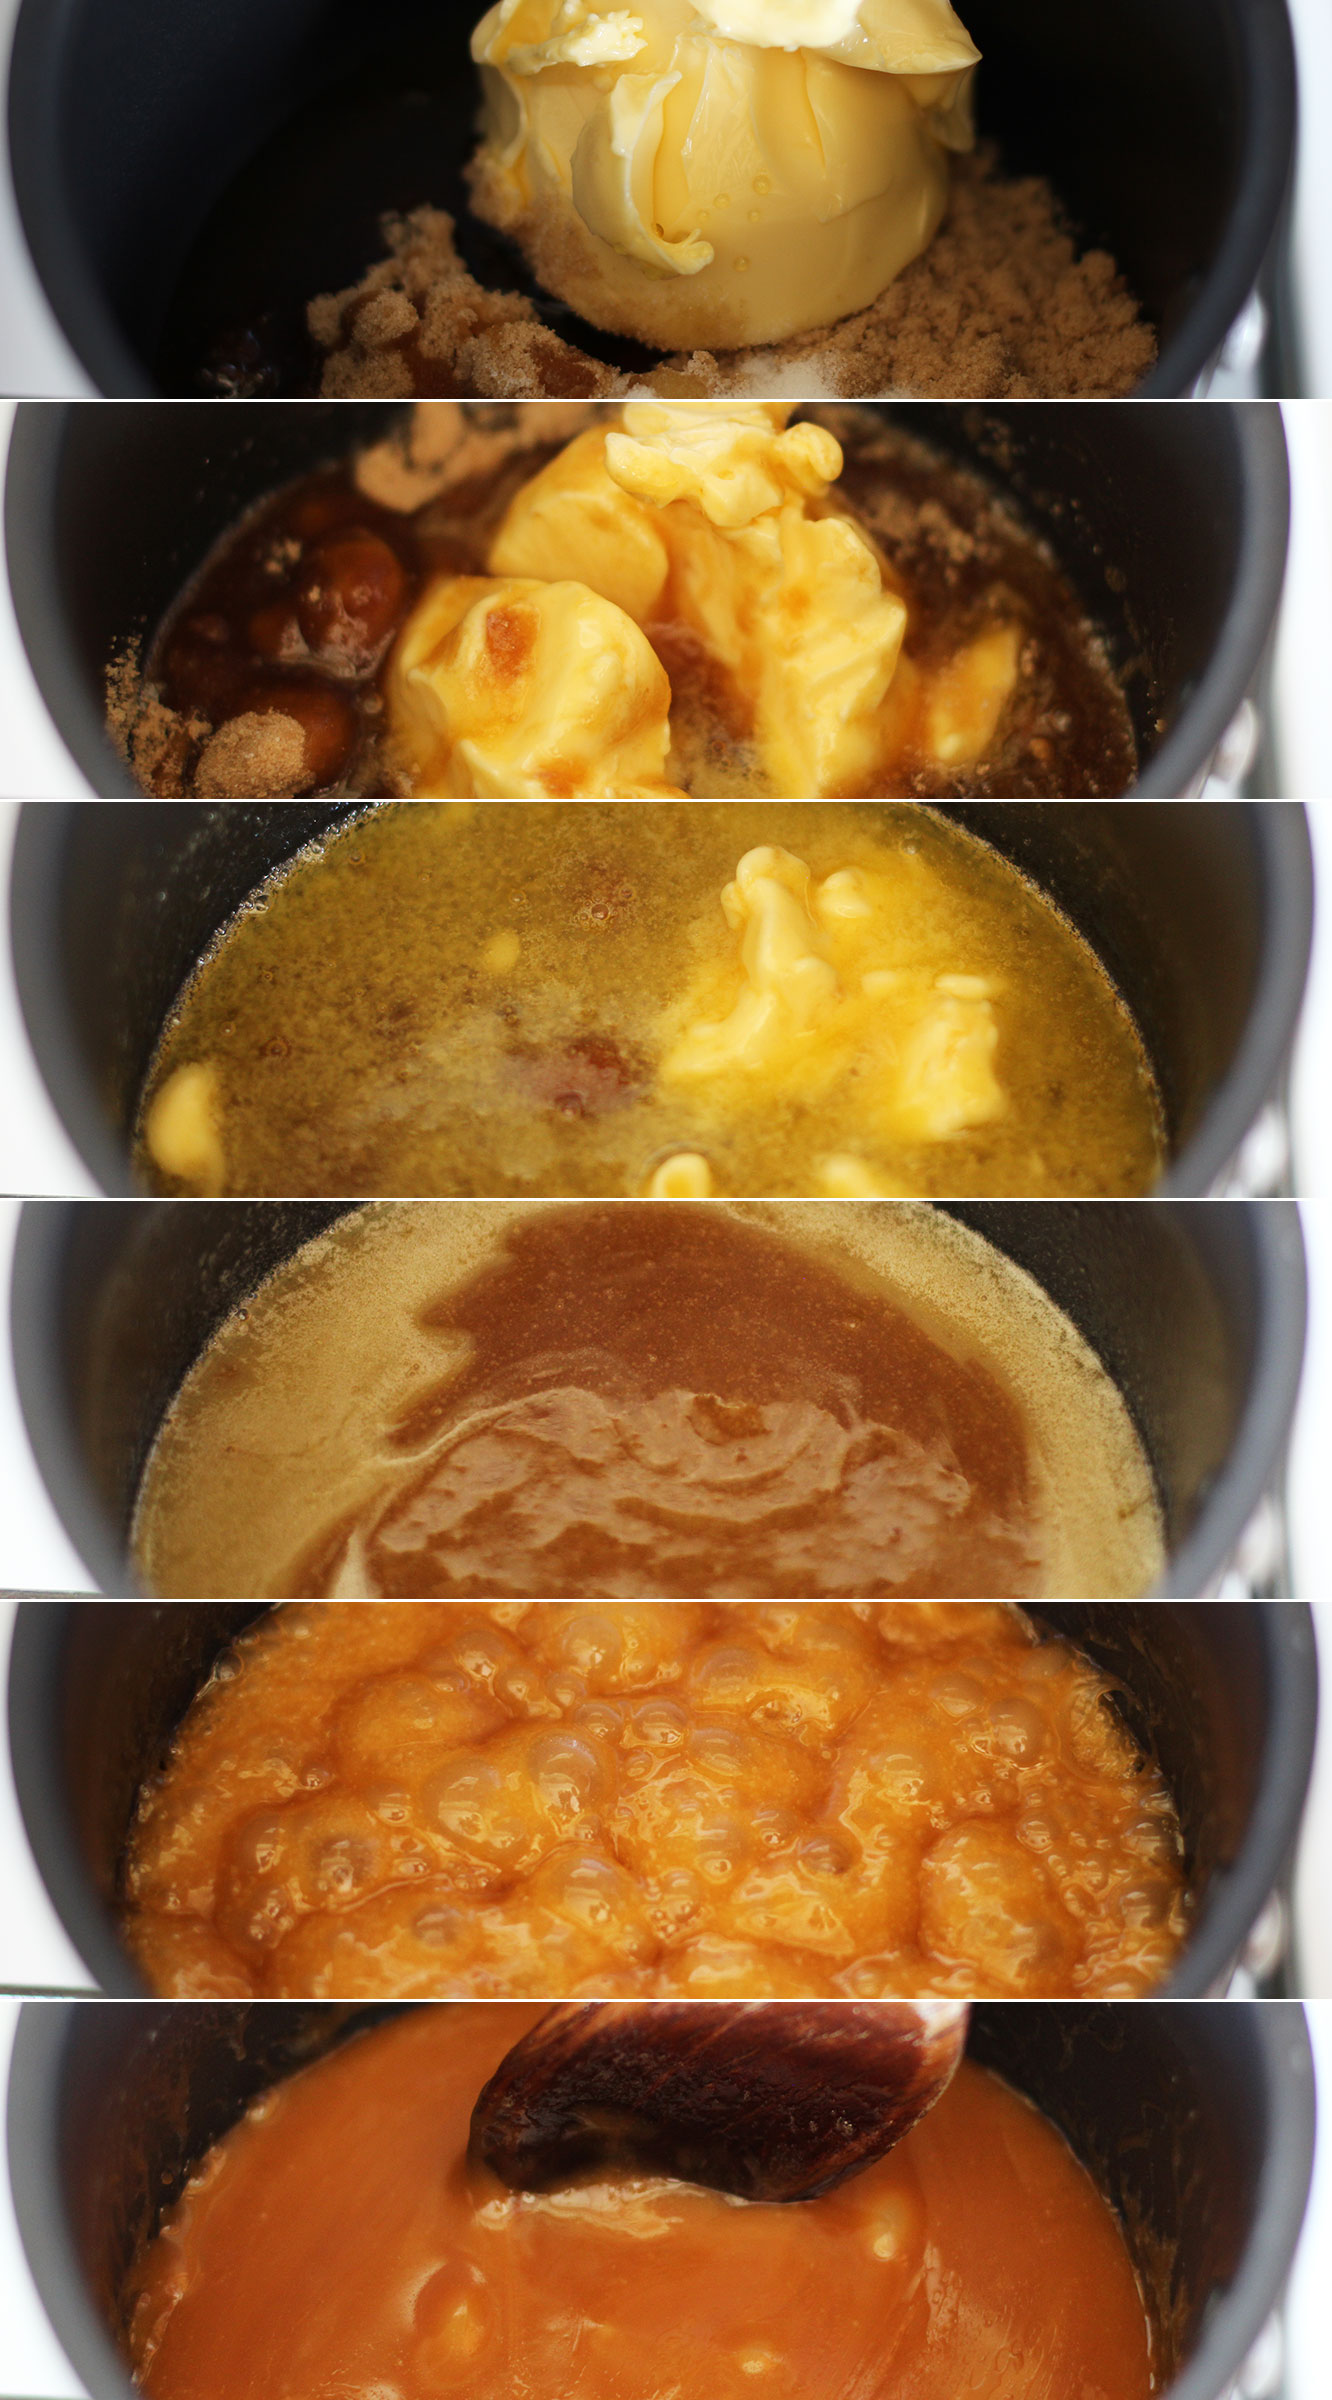
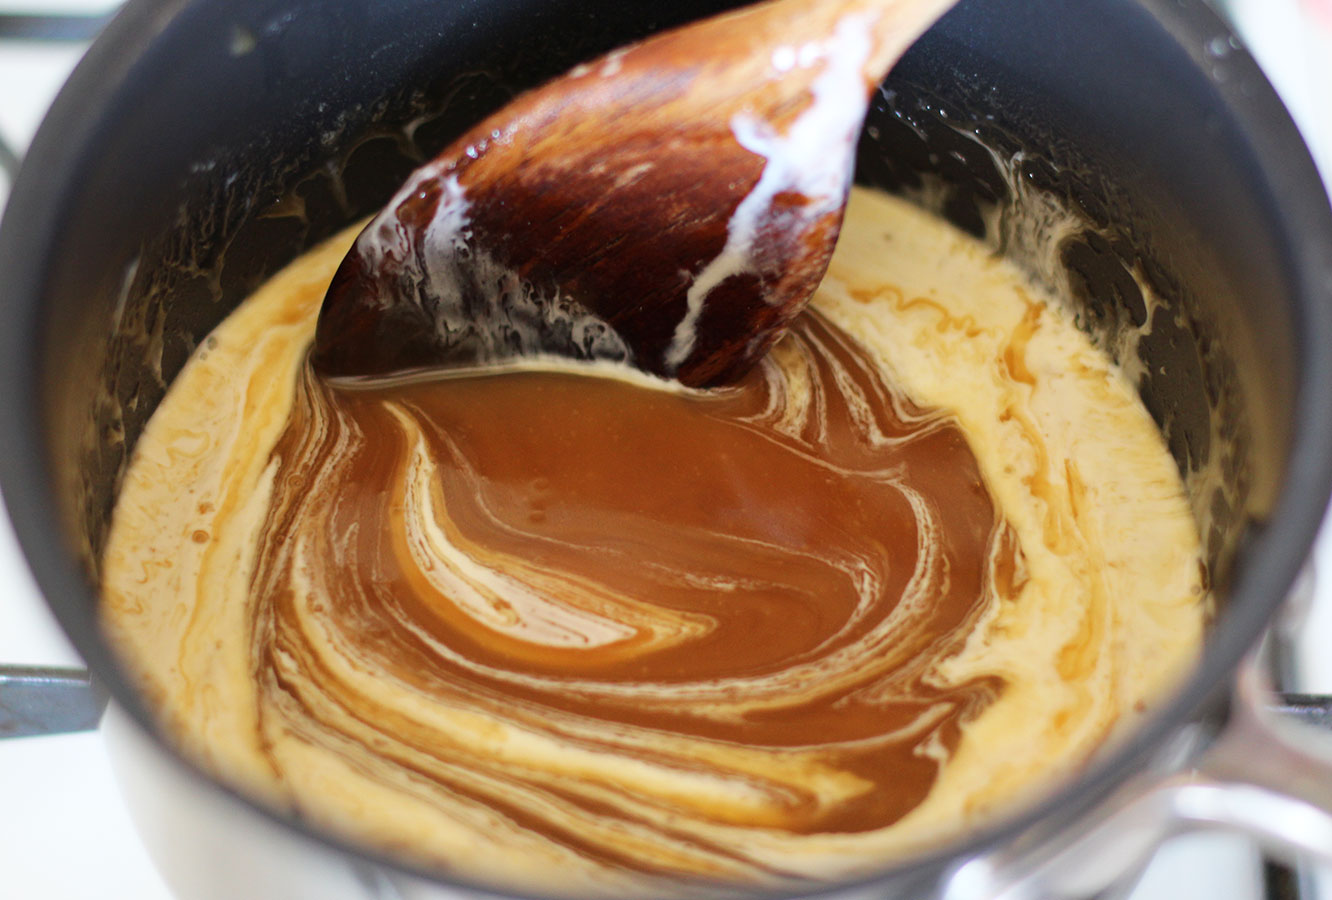
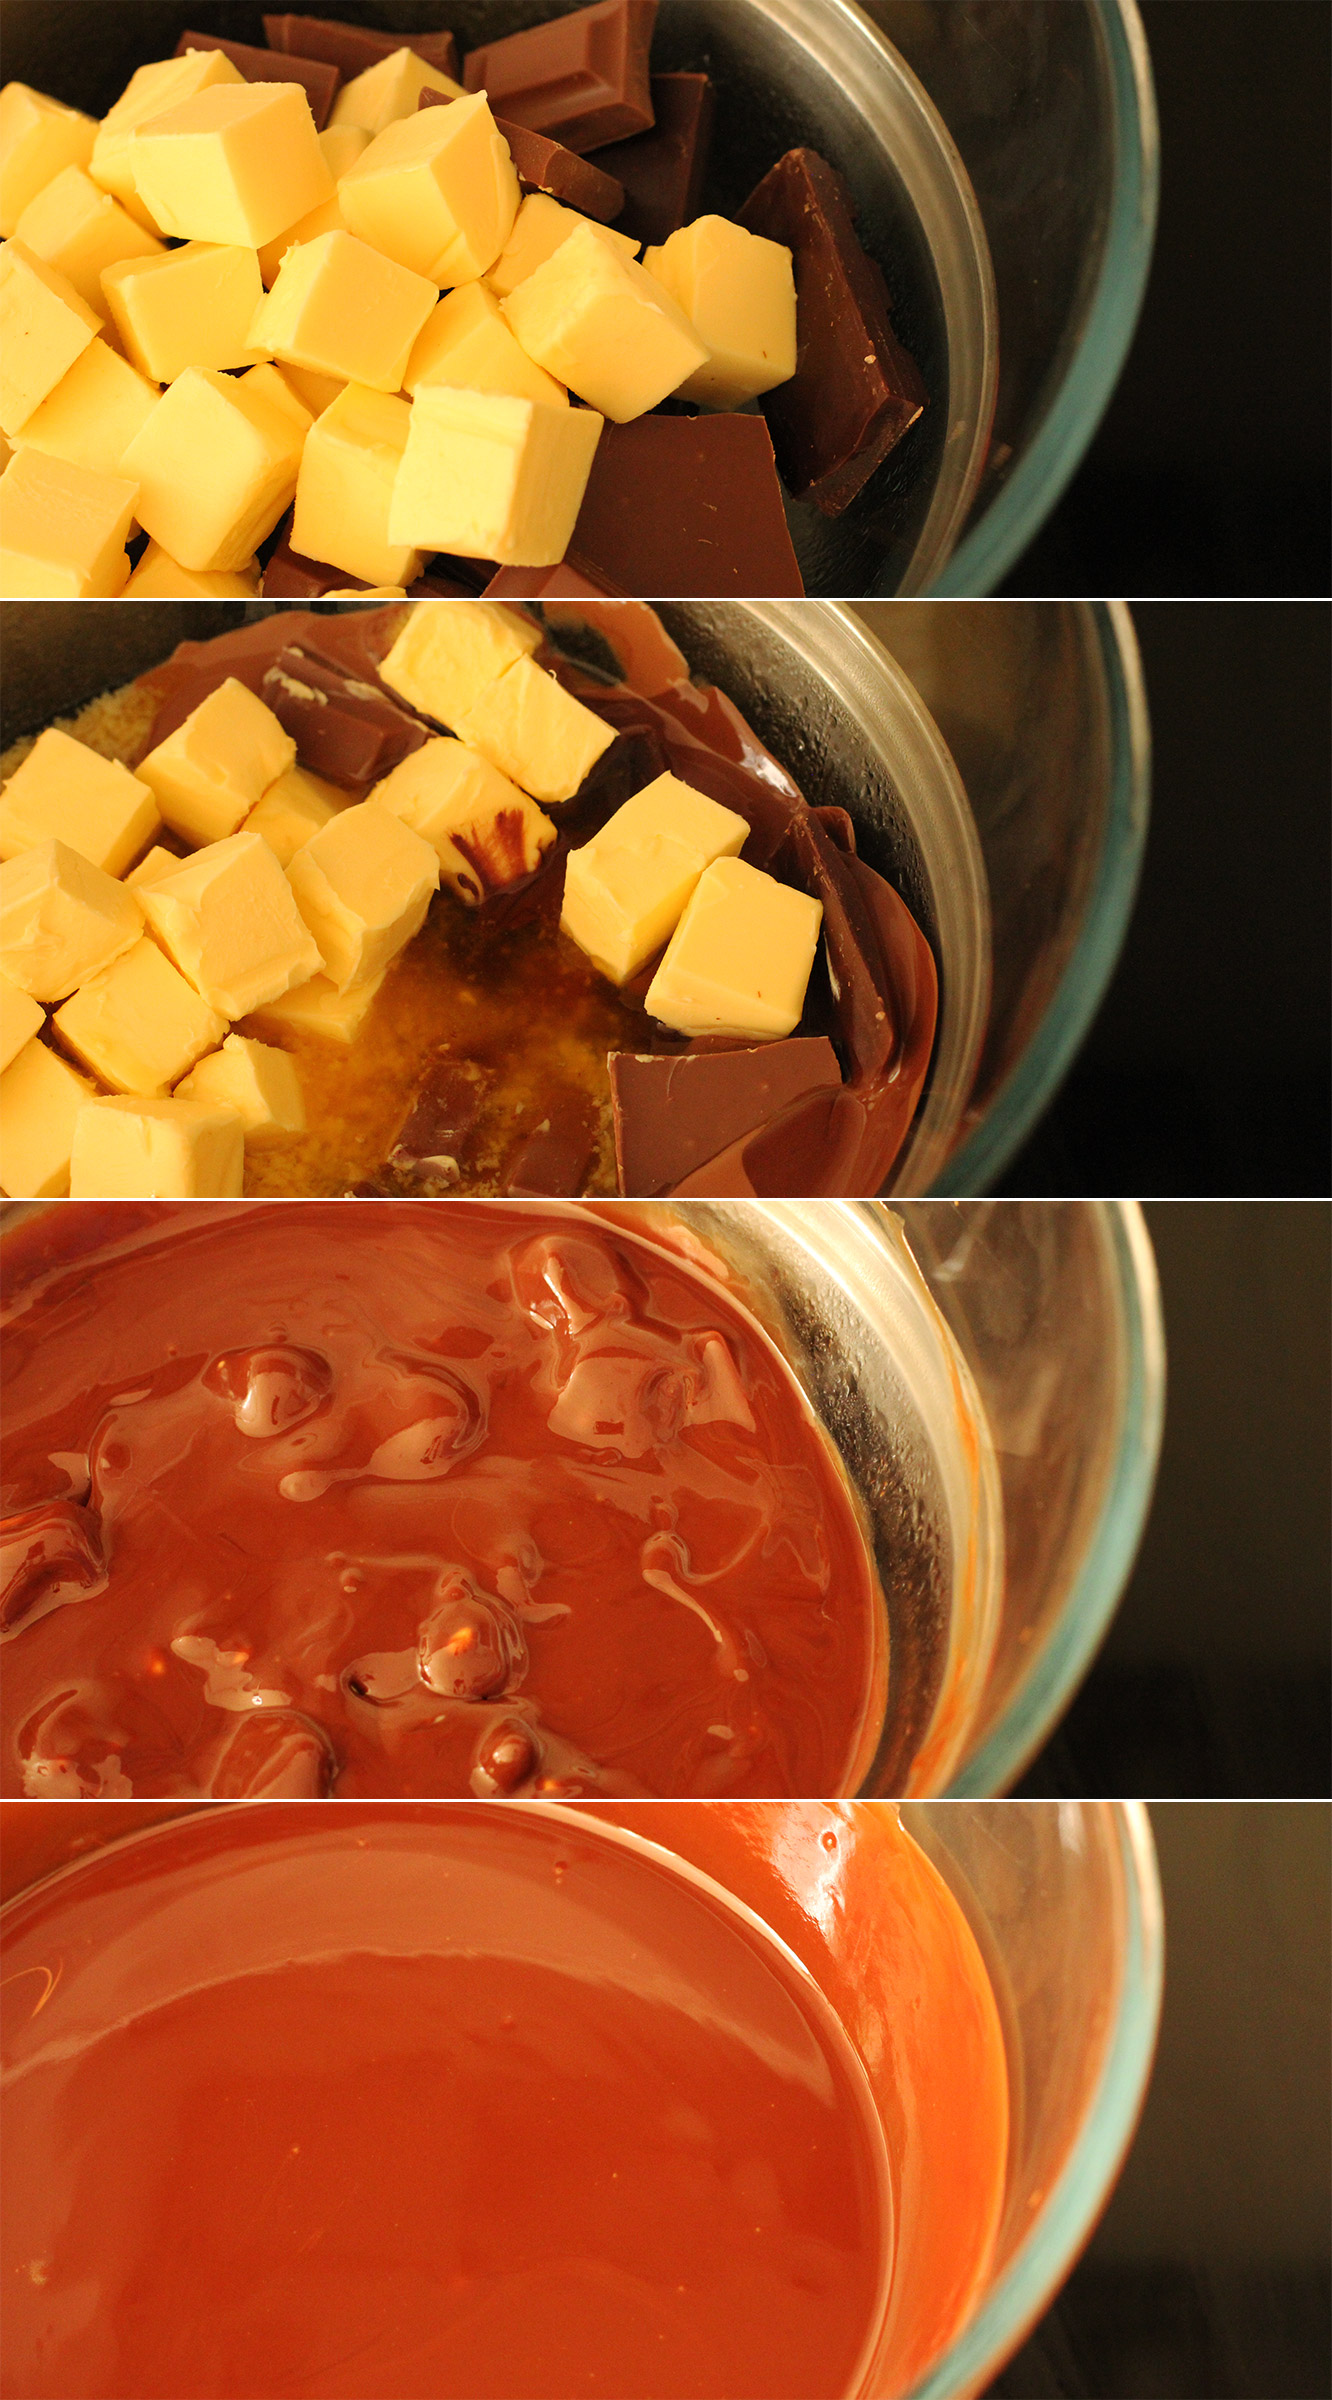
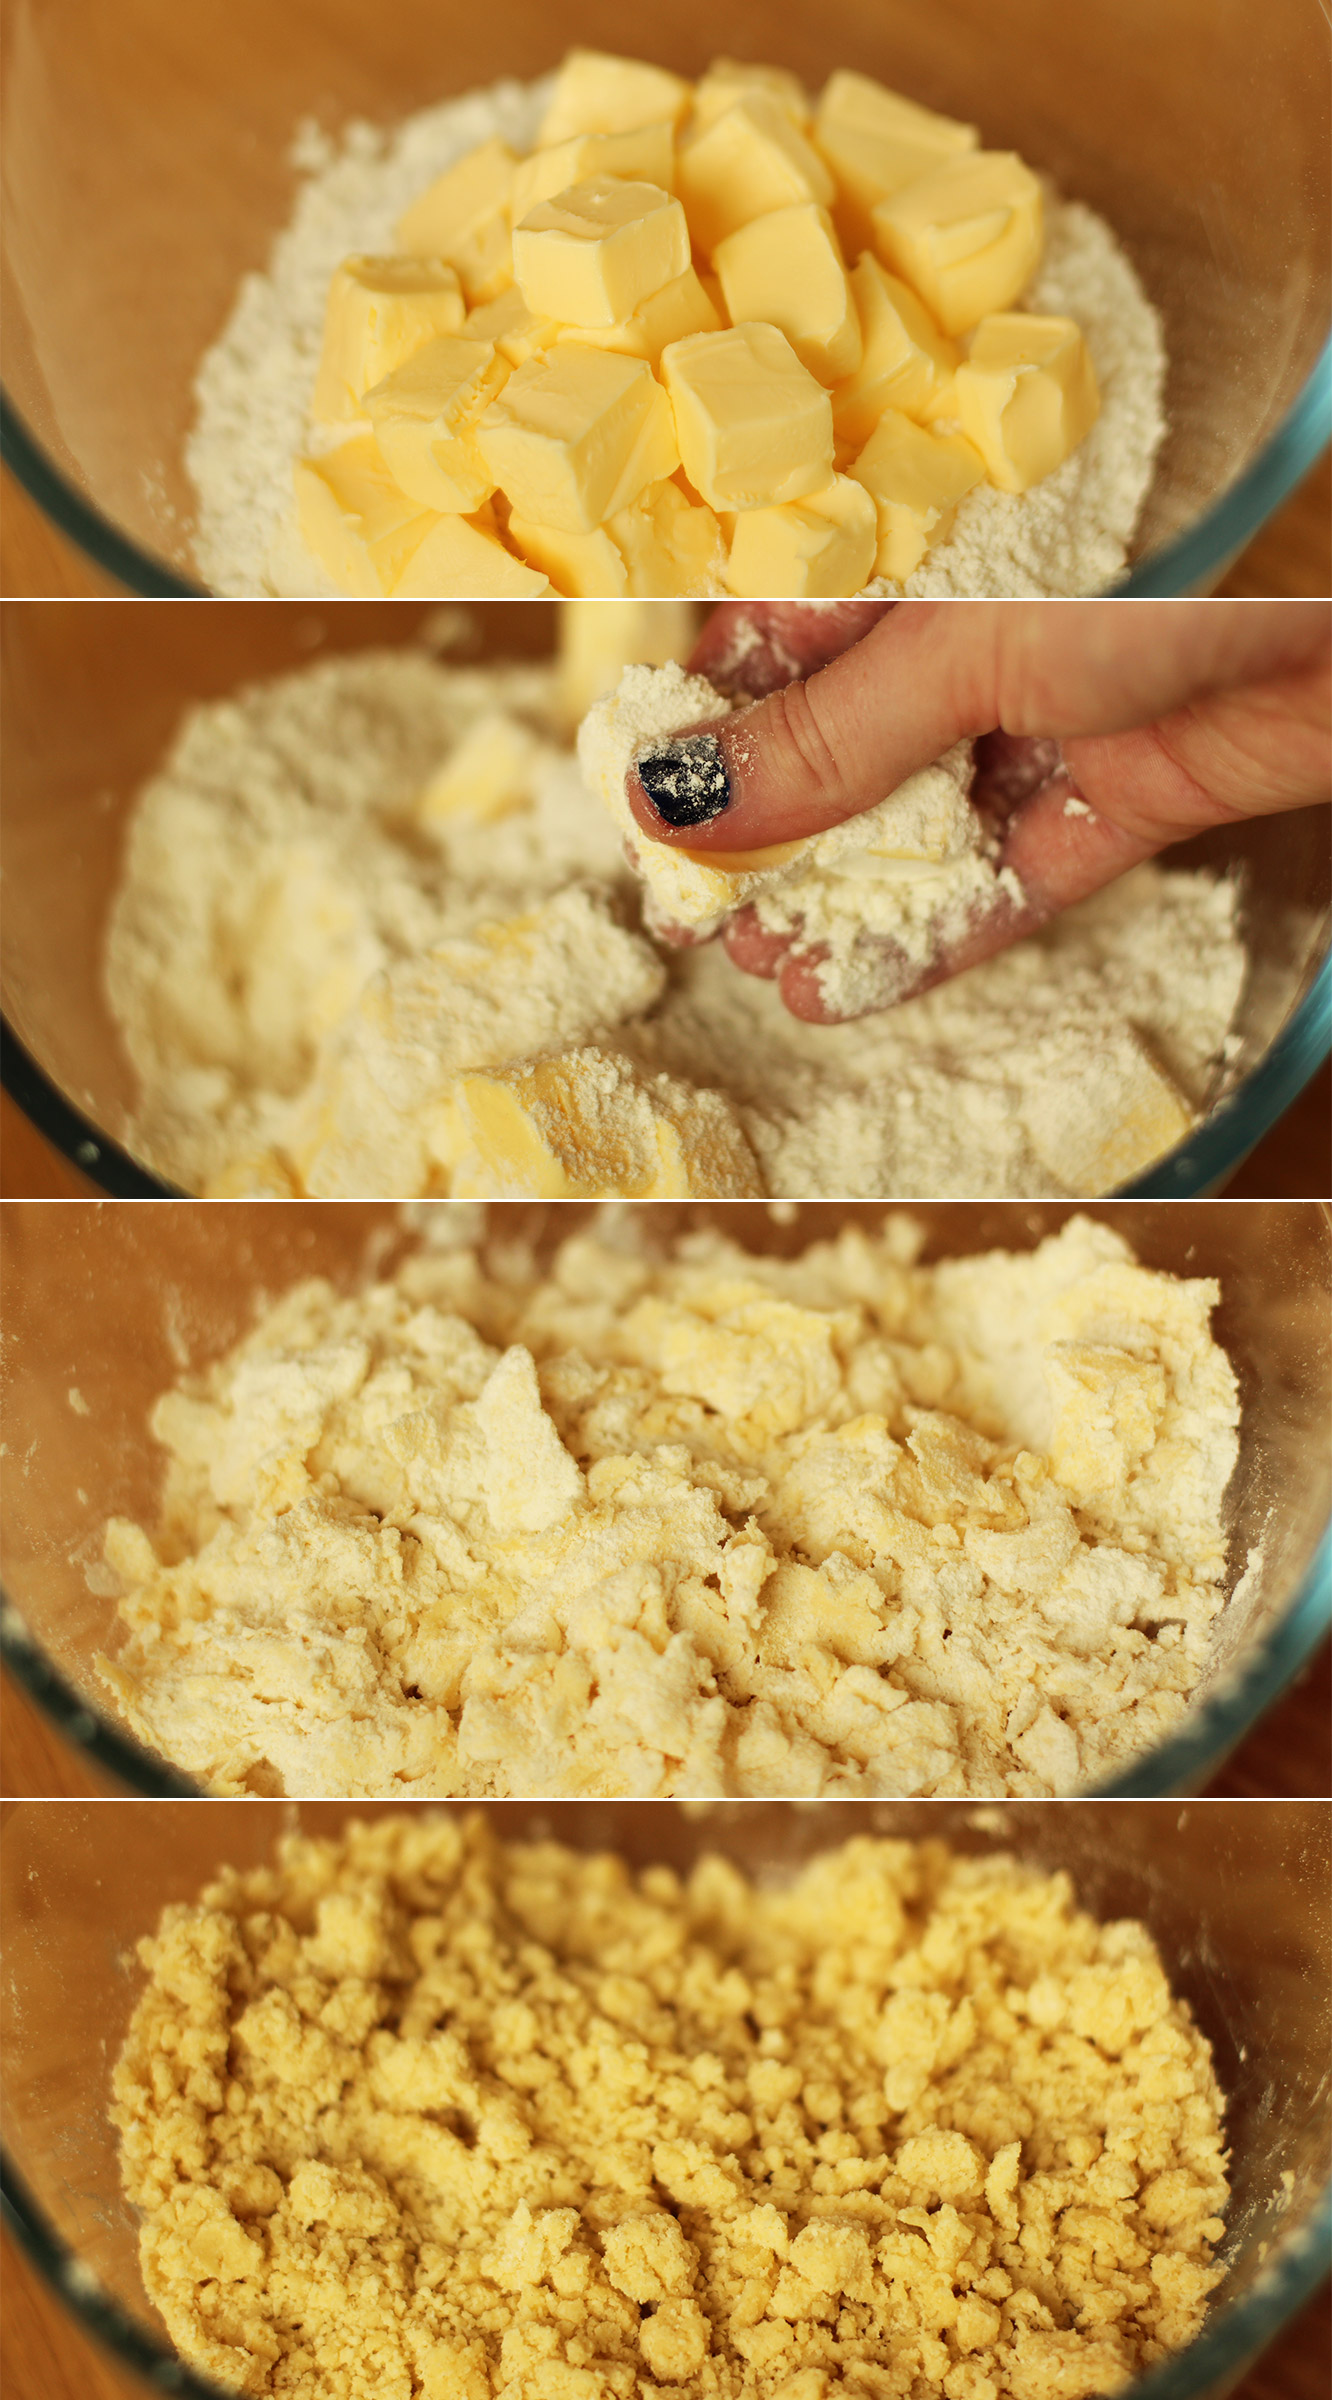
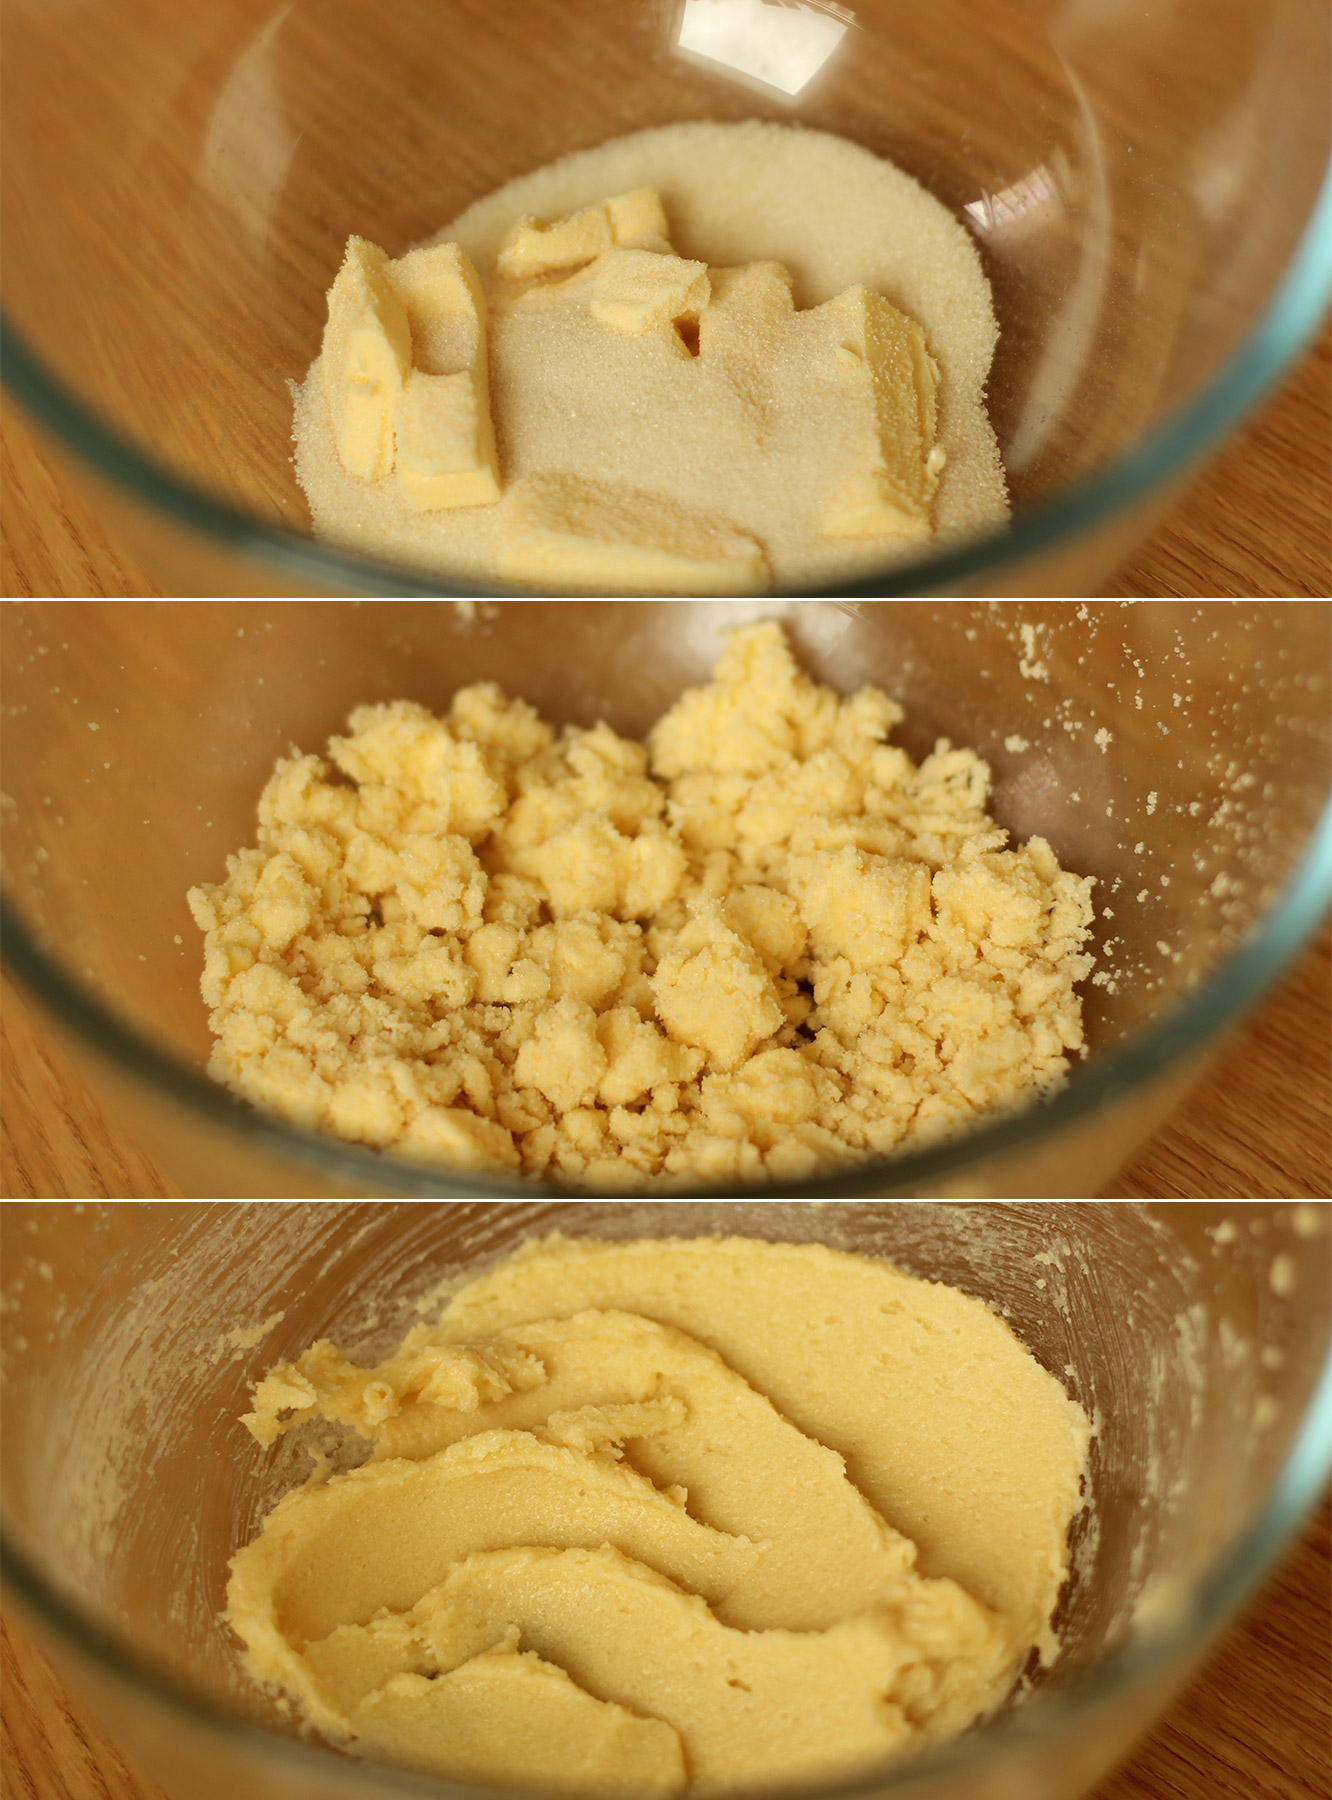
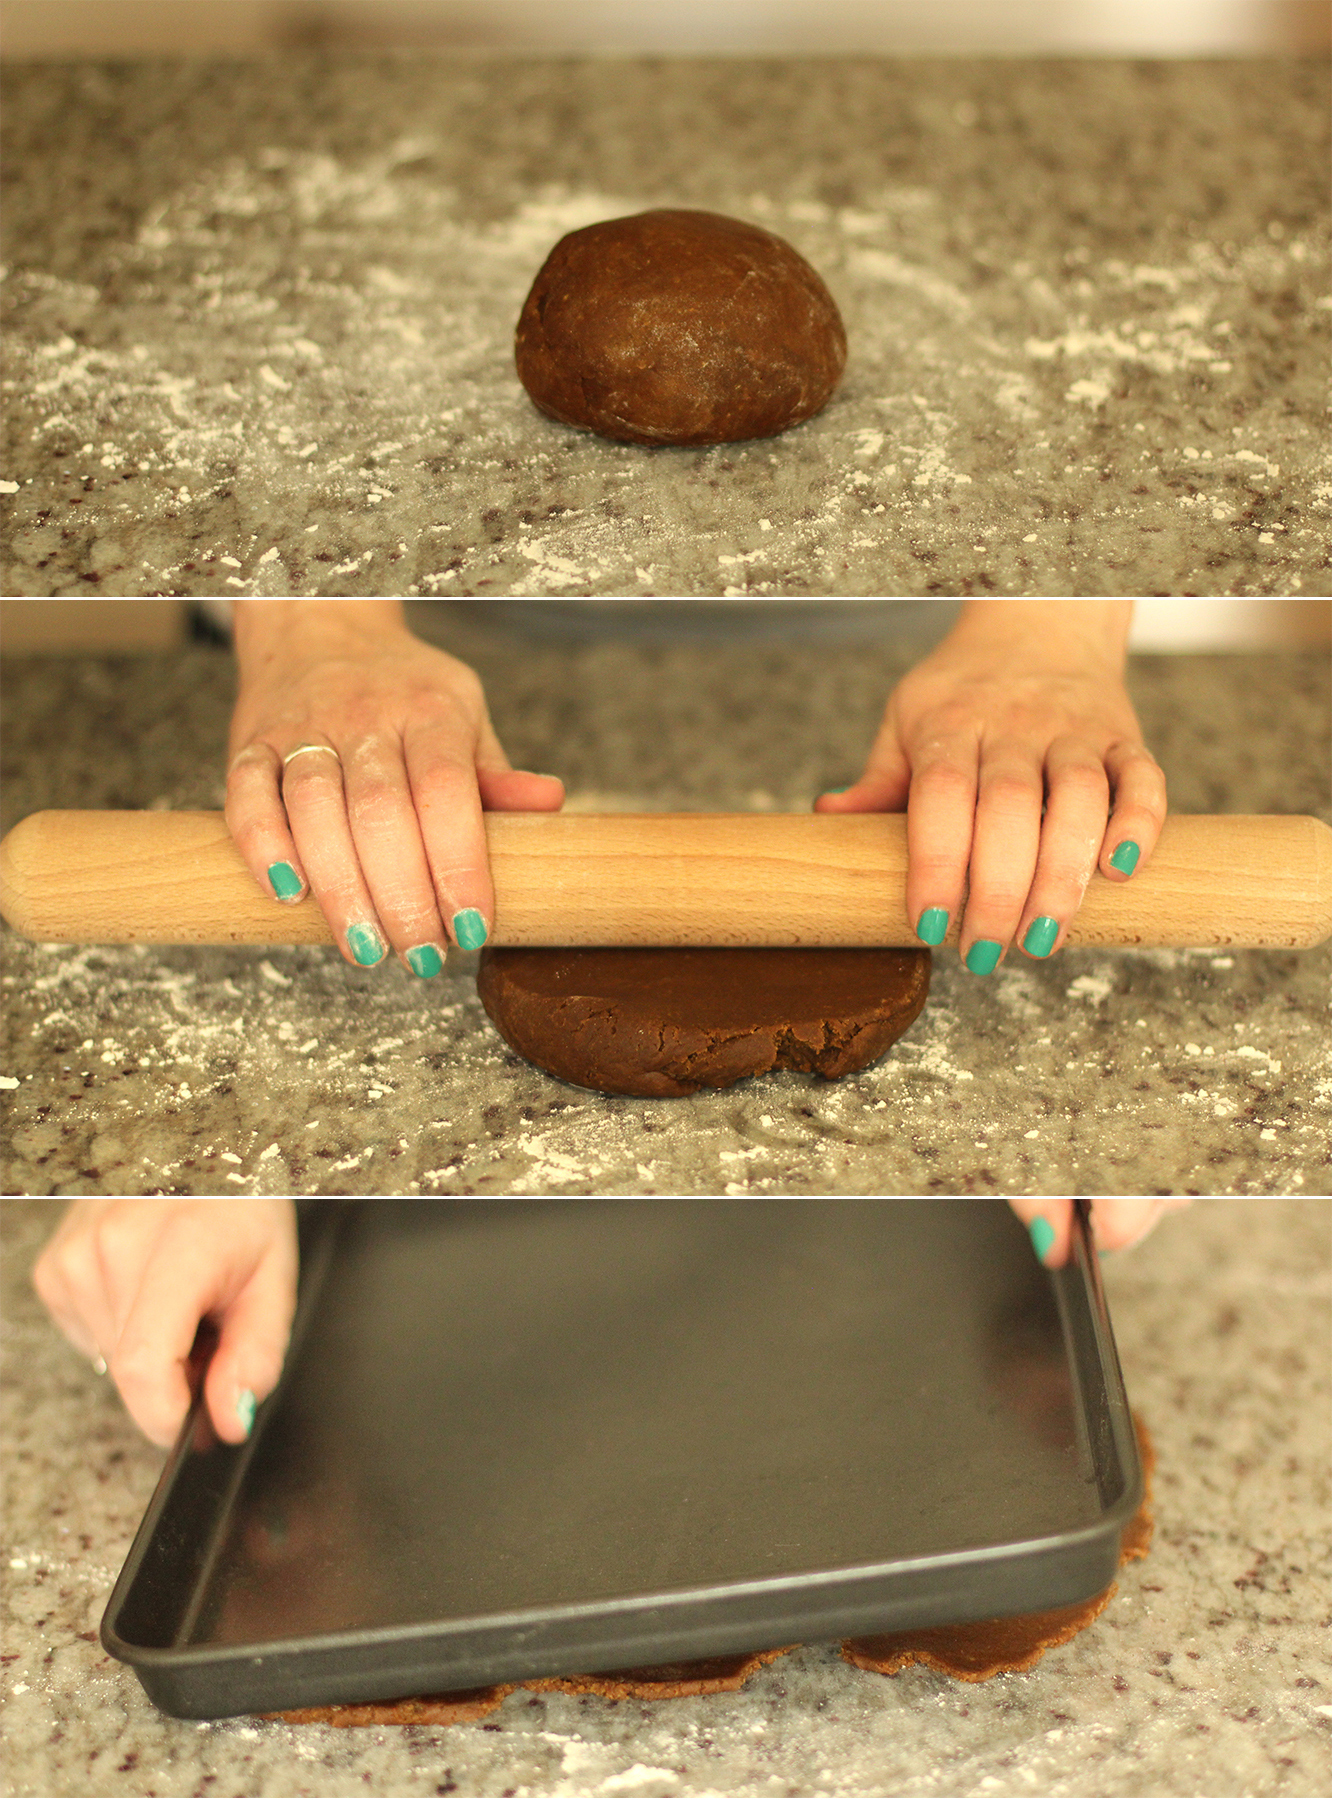
gingerbread-house-village-recipe-guide-02

Step one

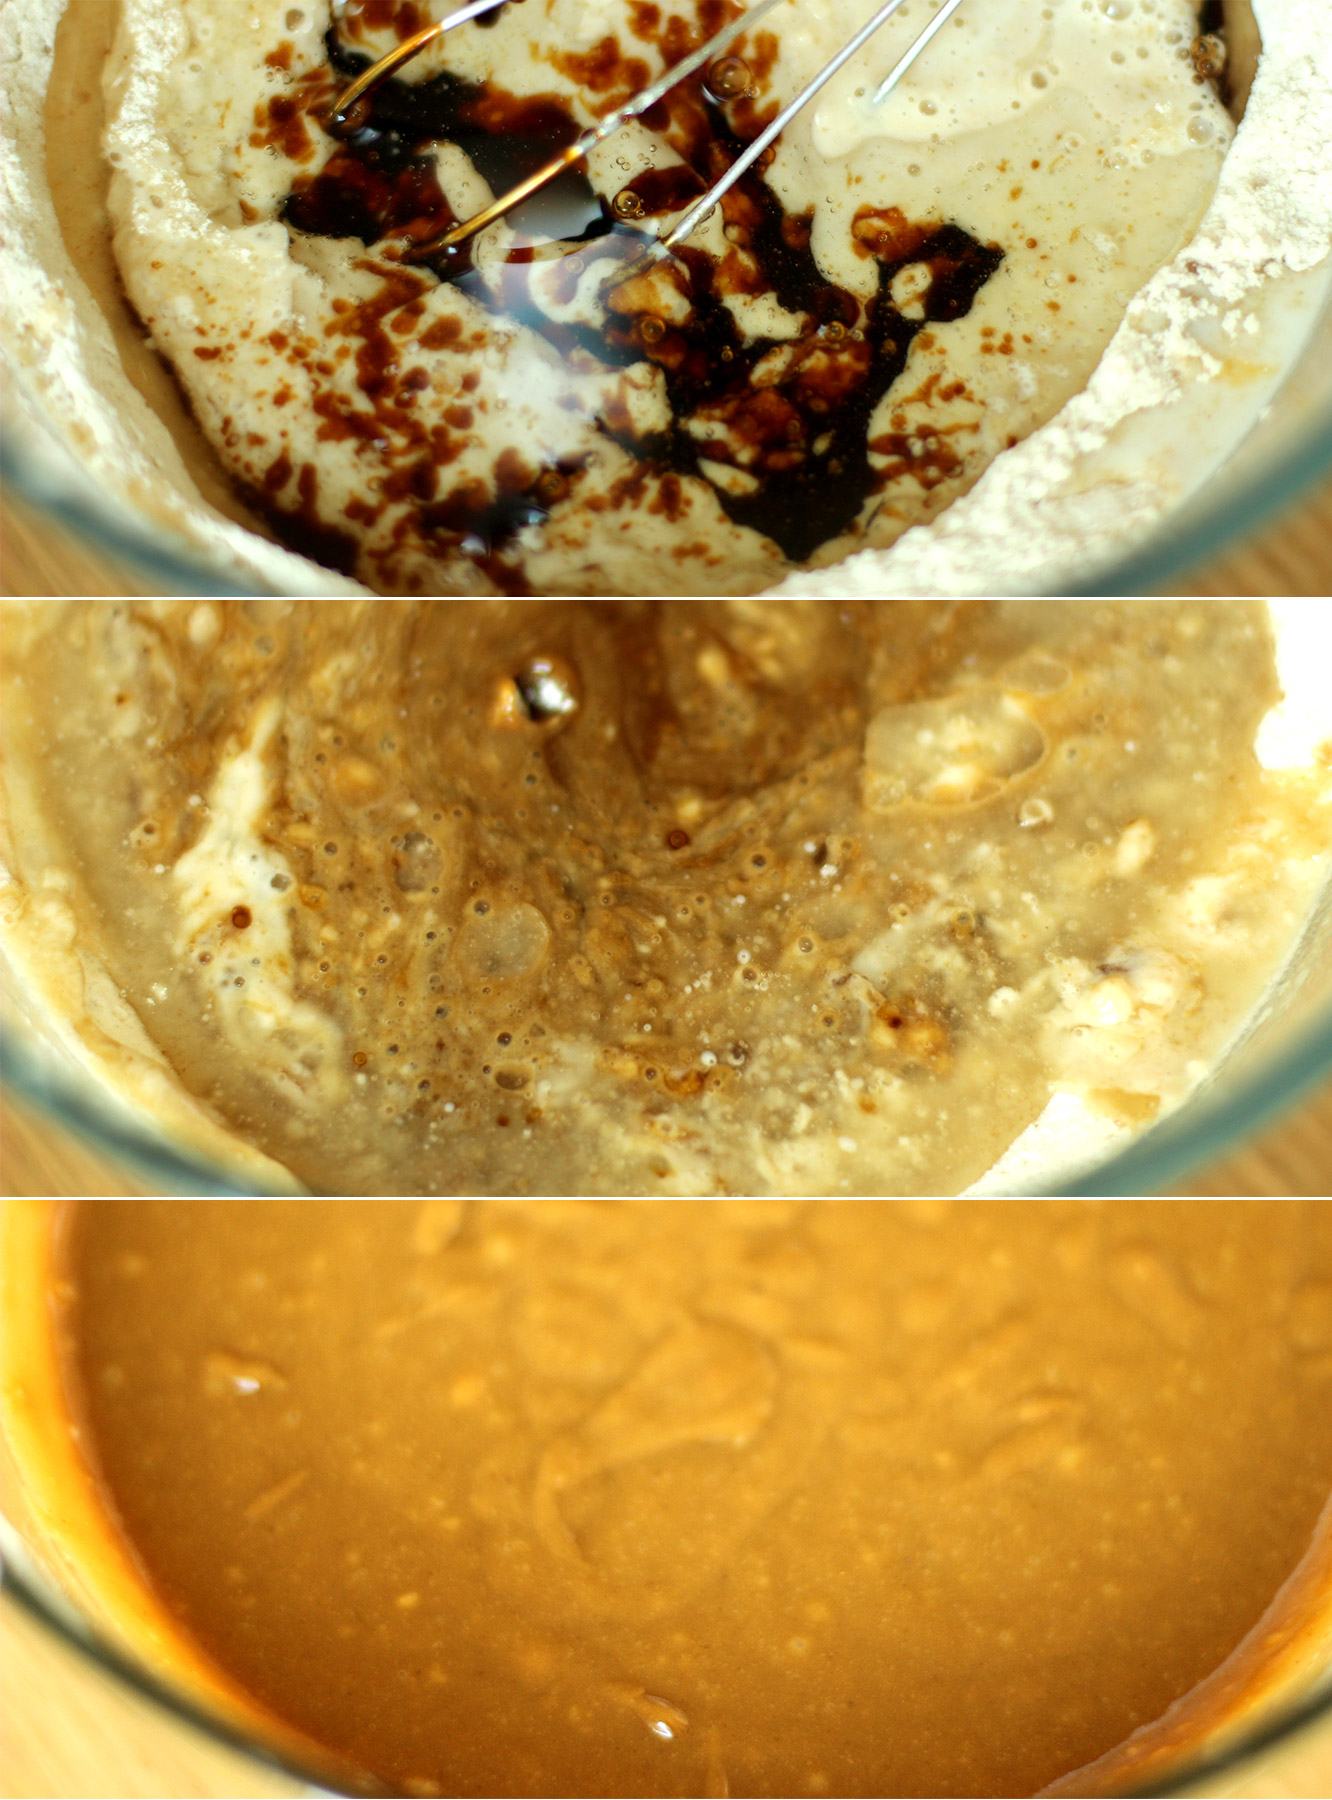
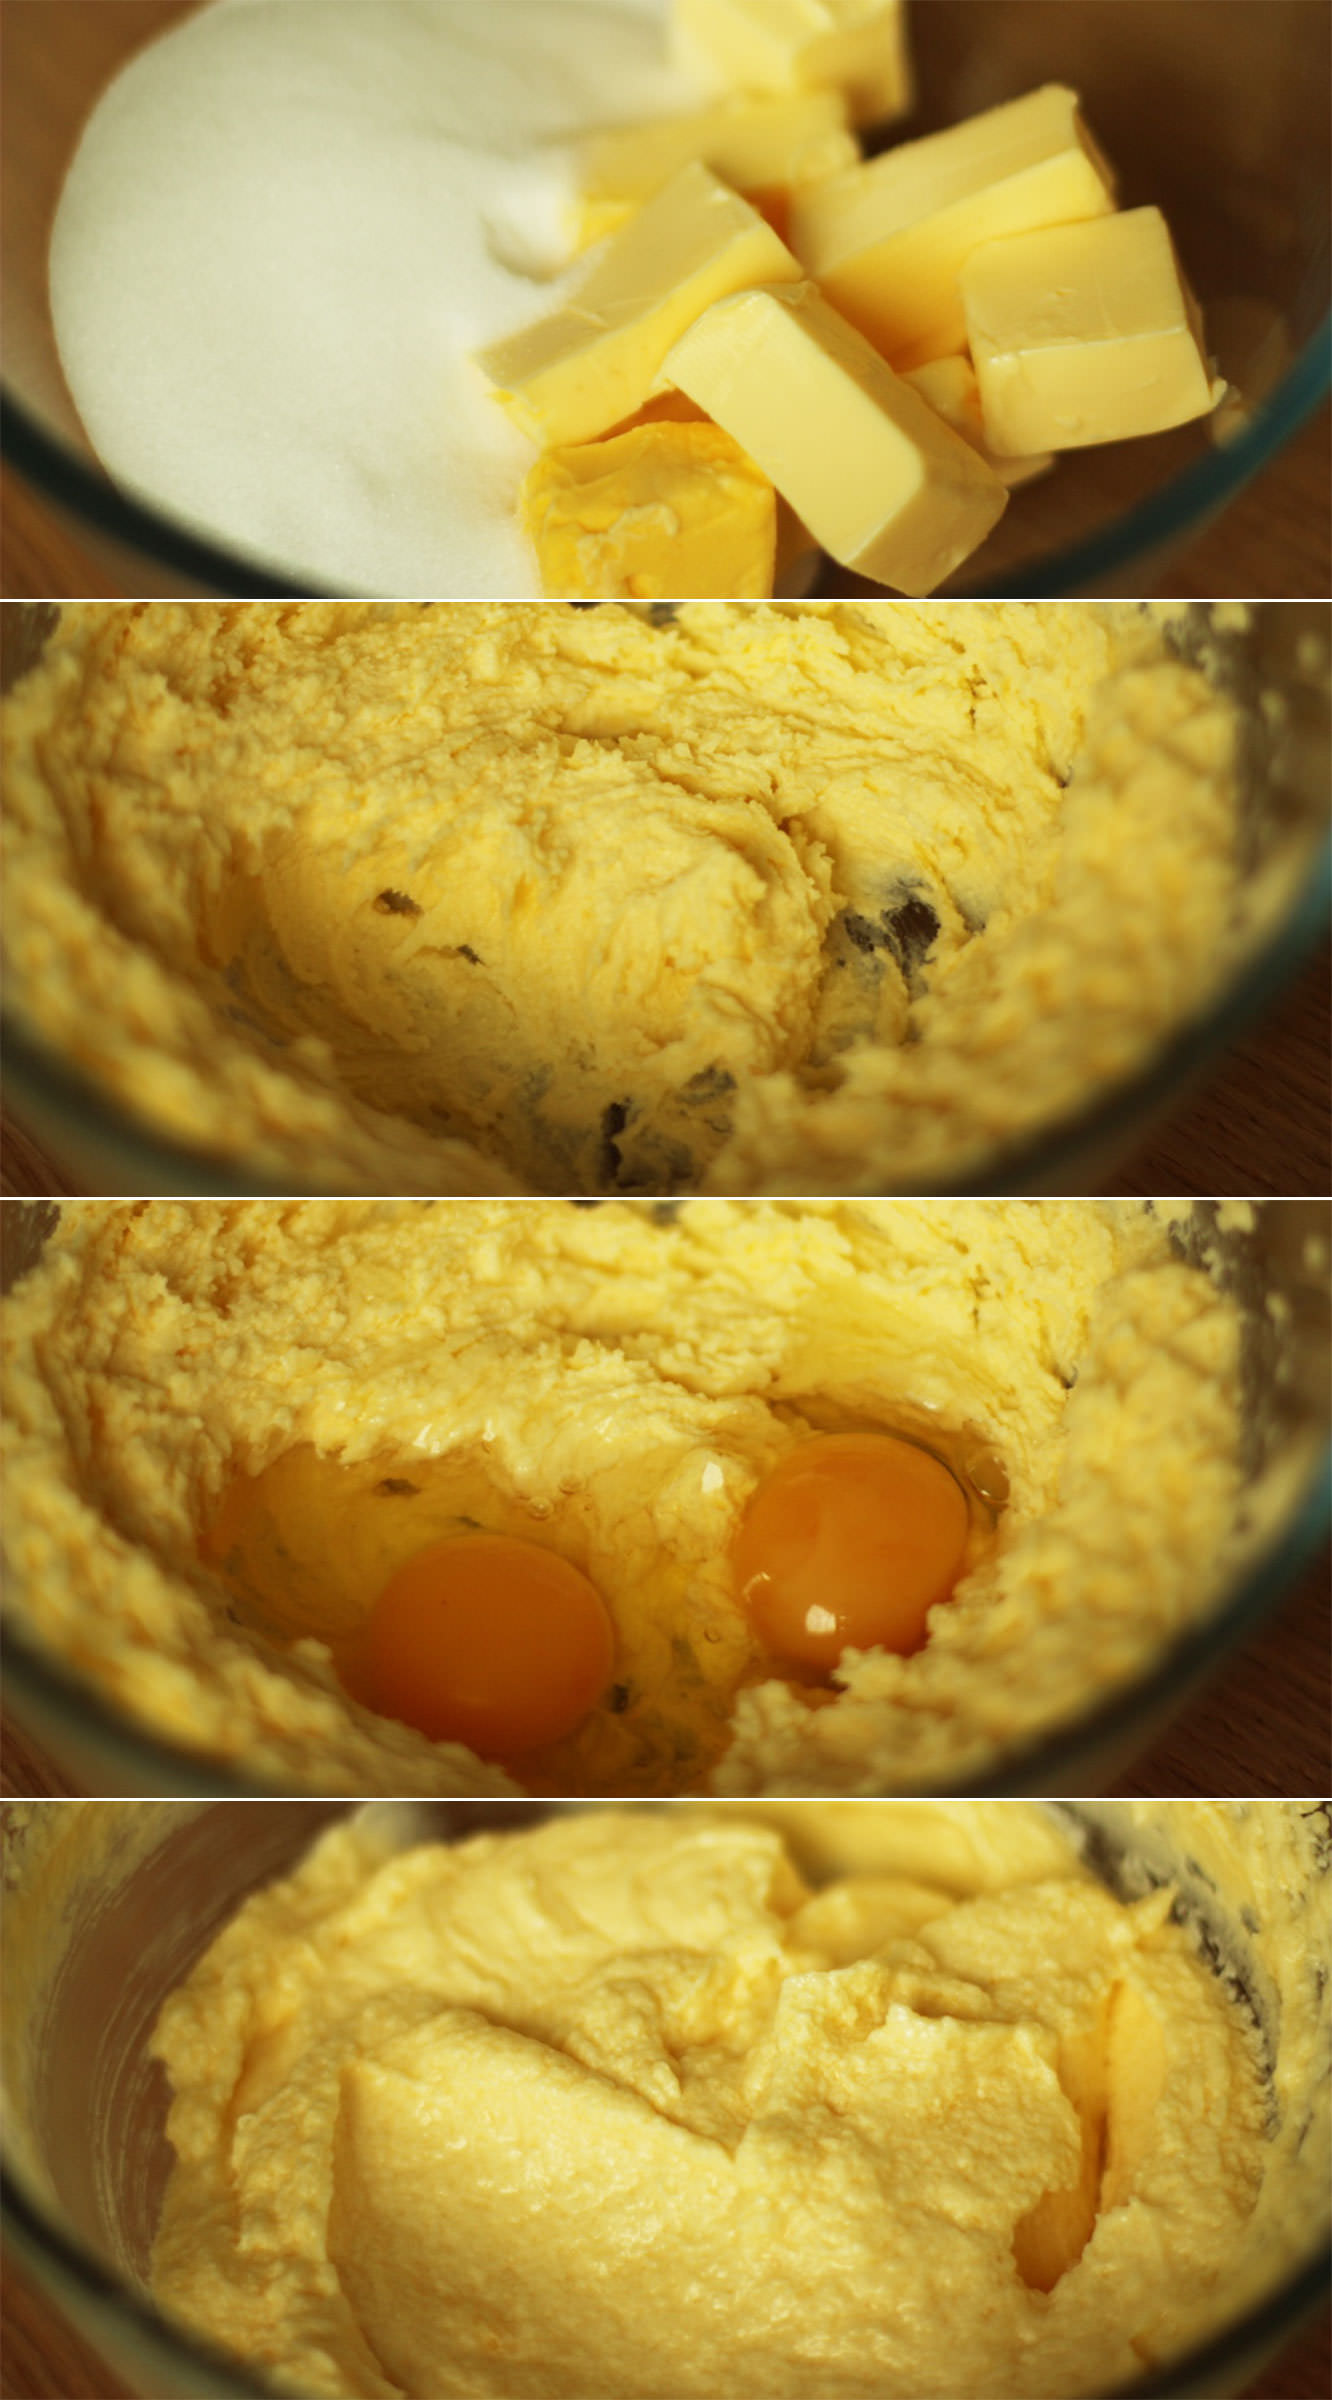
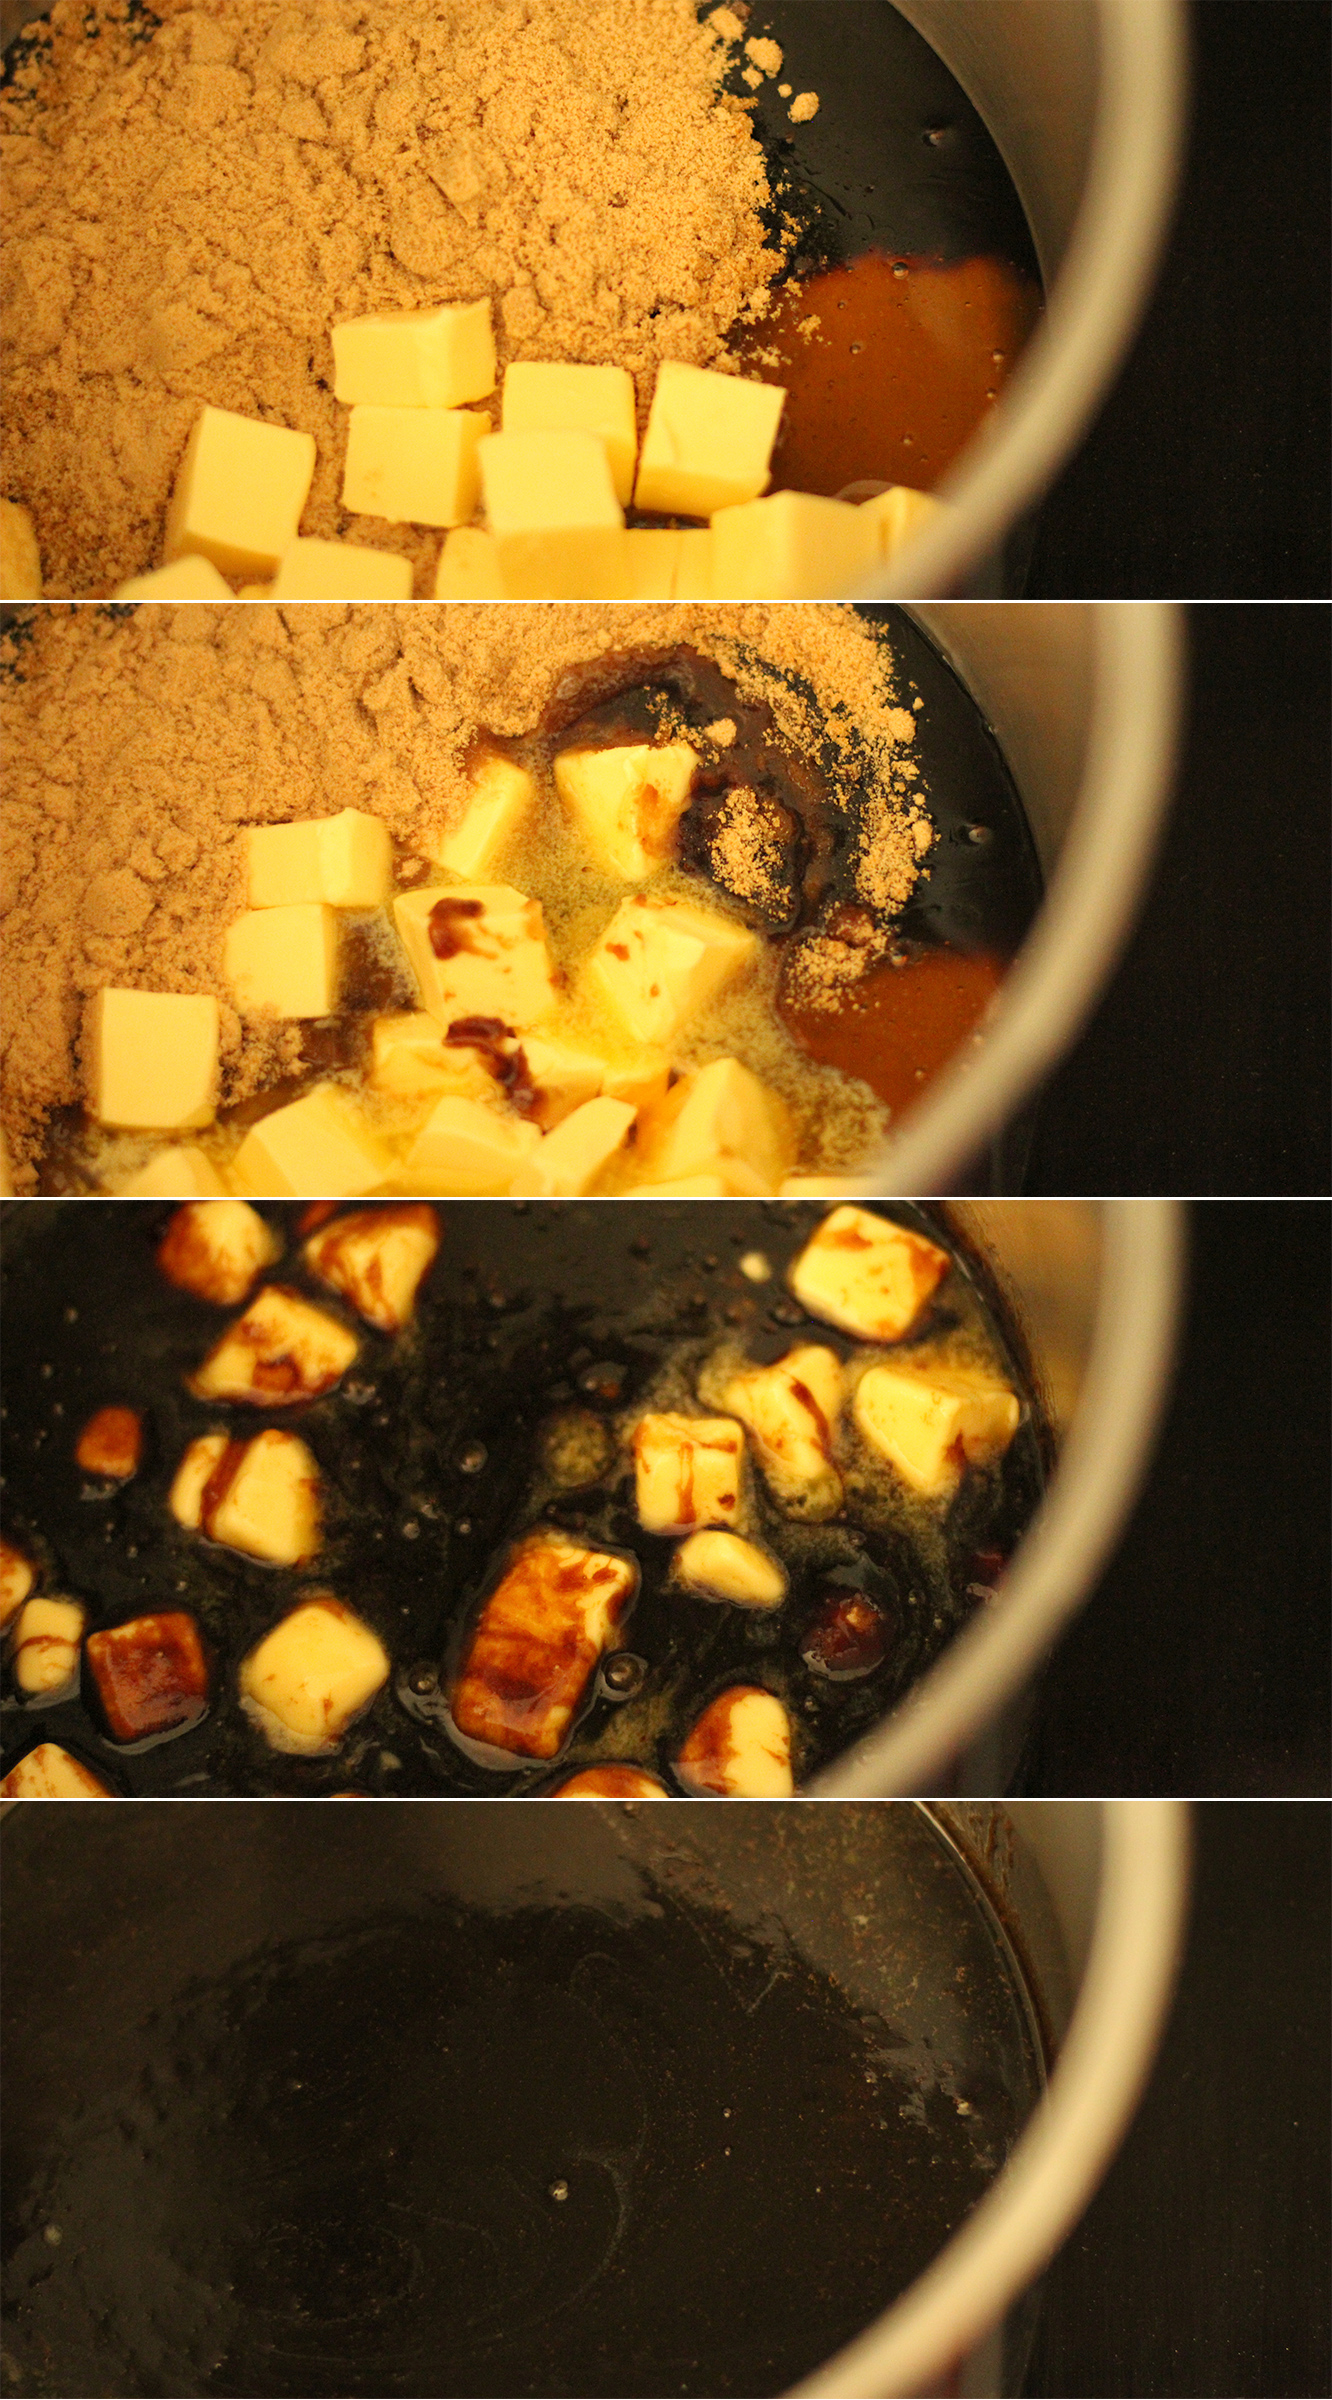
In a saucepan melt together the butter, treacle, sugar and golden syrup. Try not to let it get too hot.
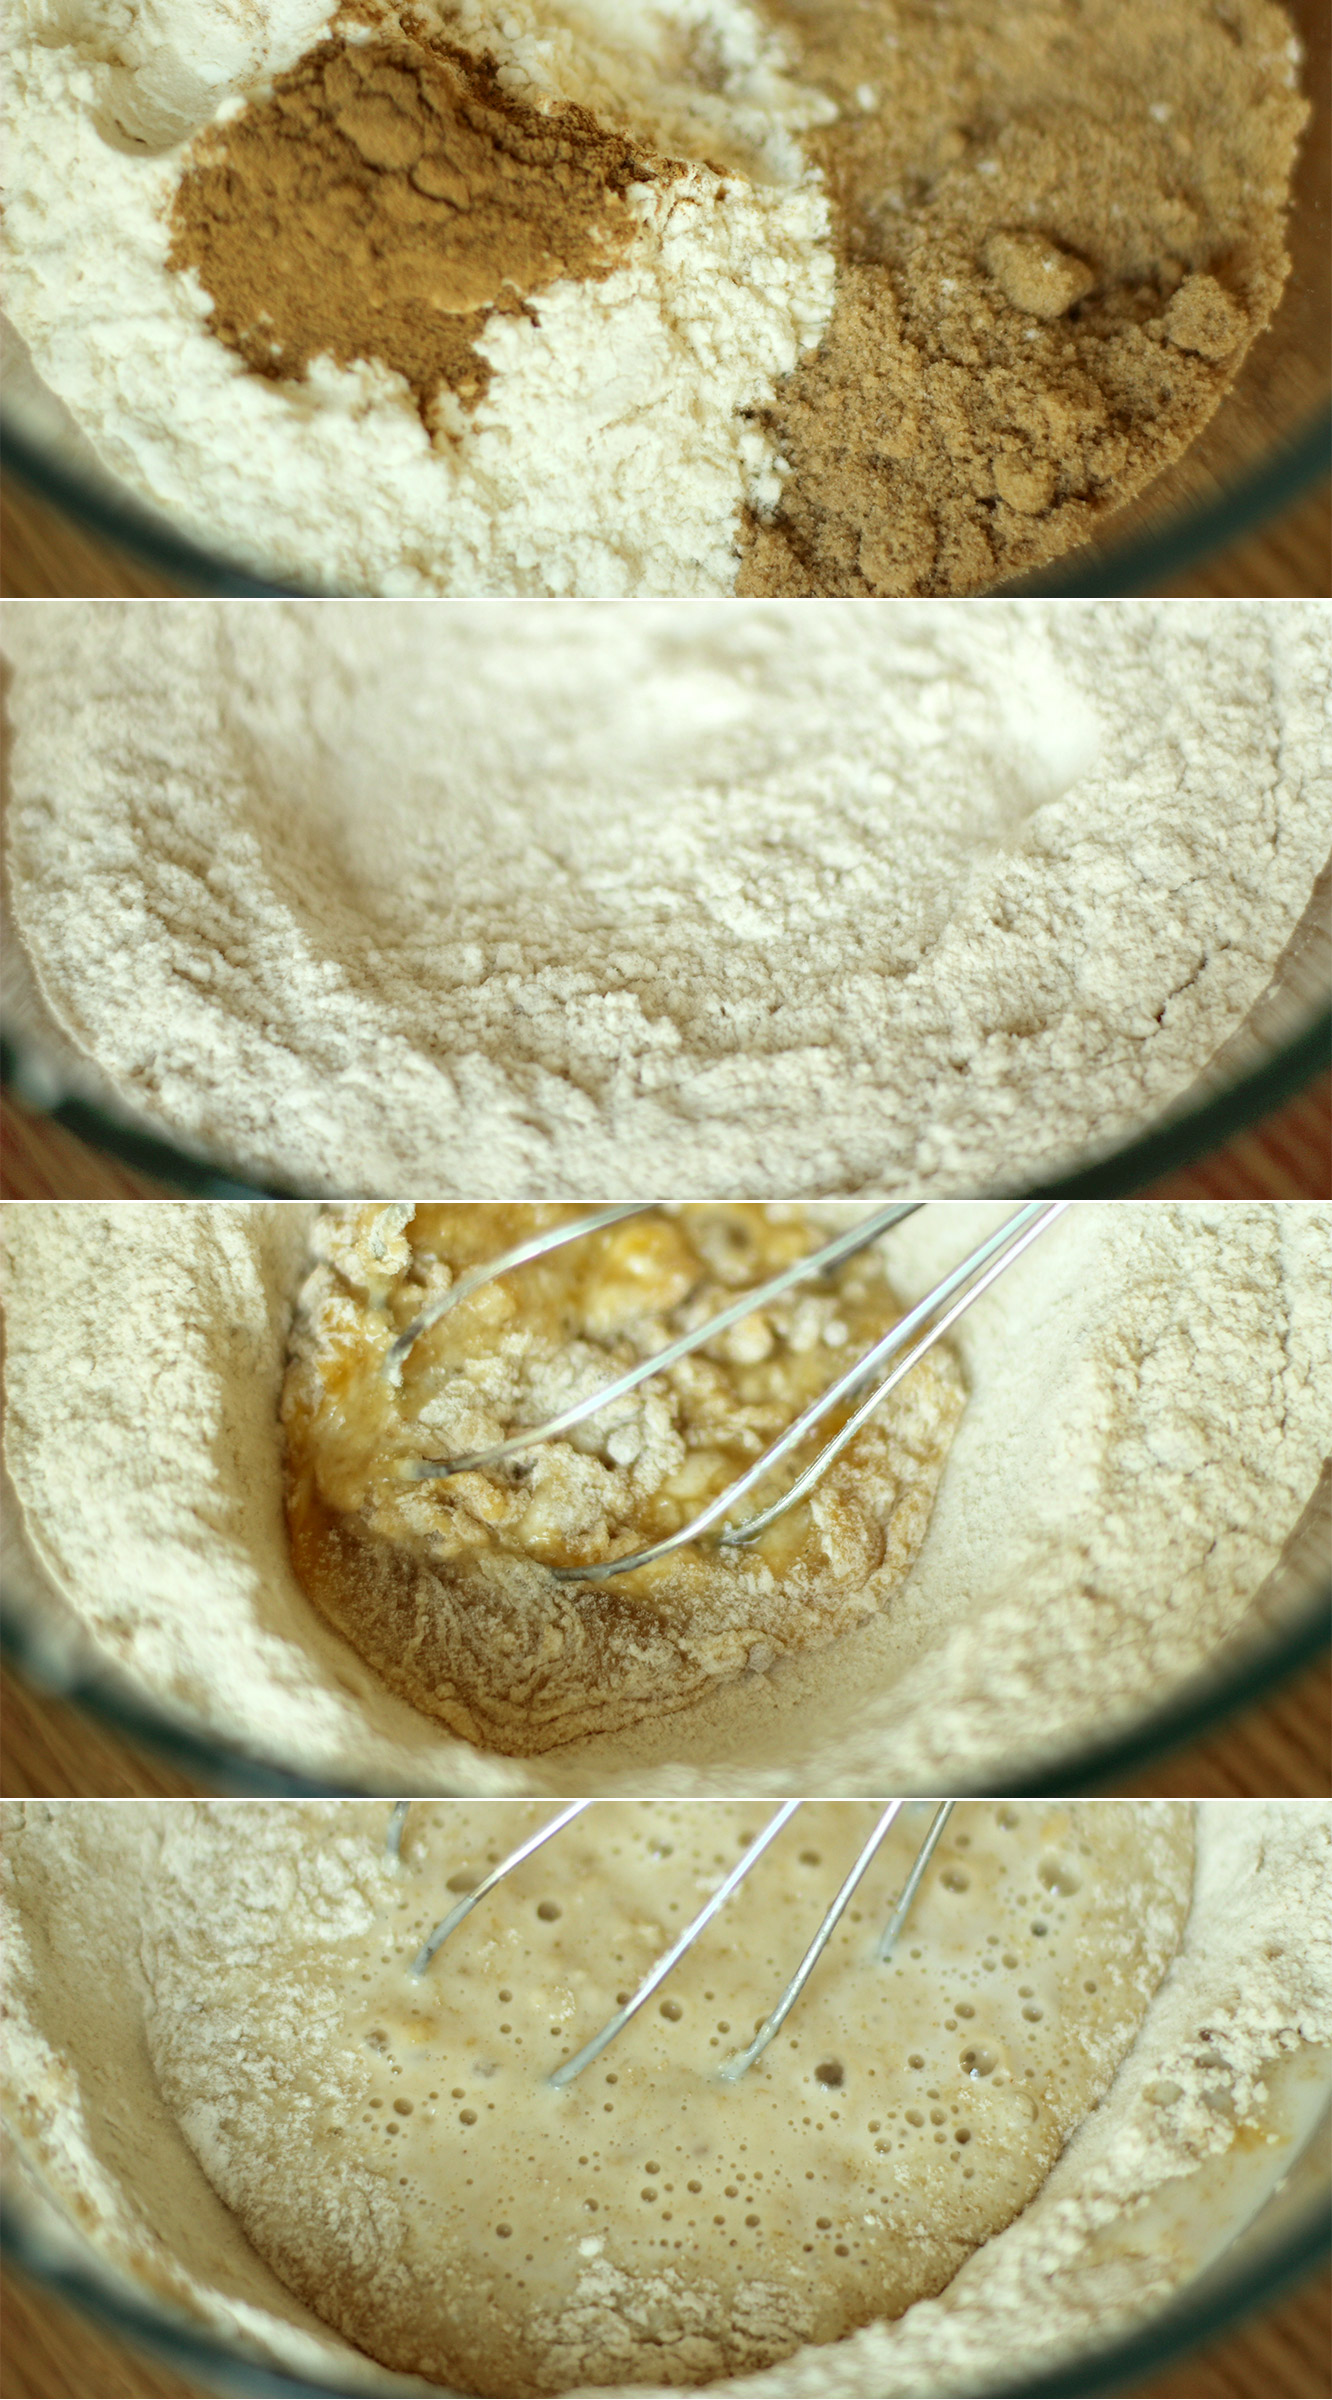
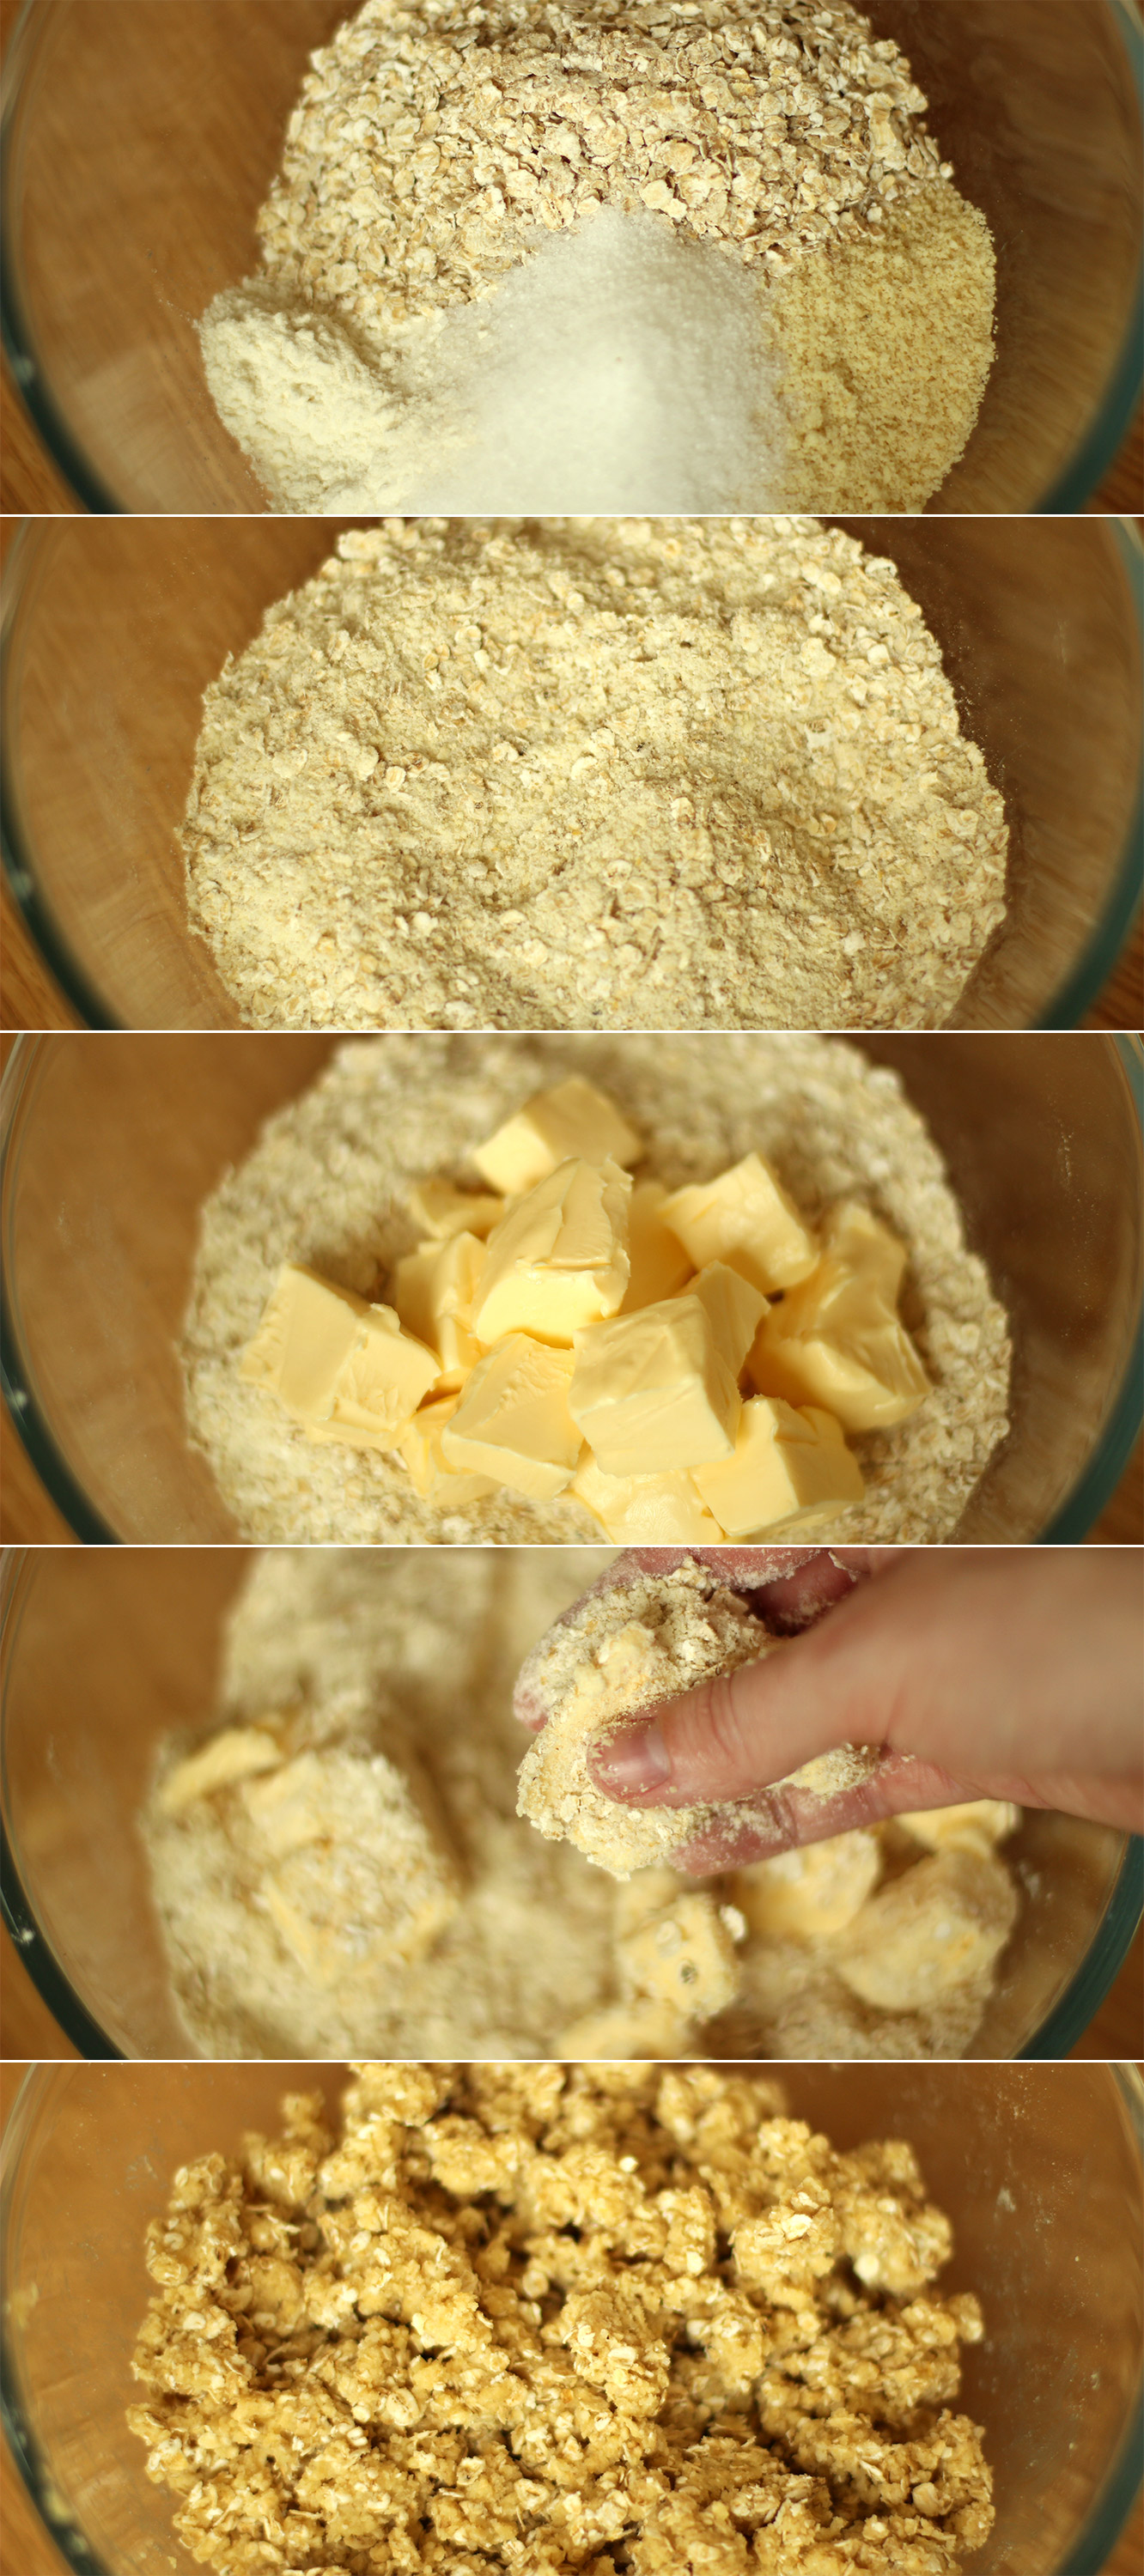
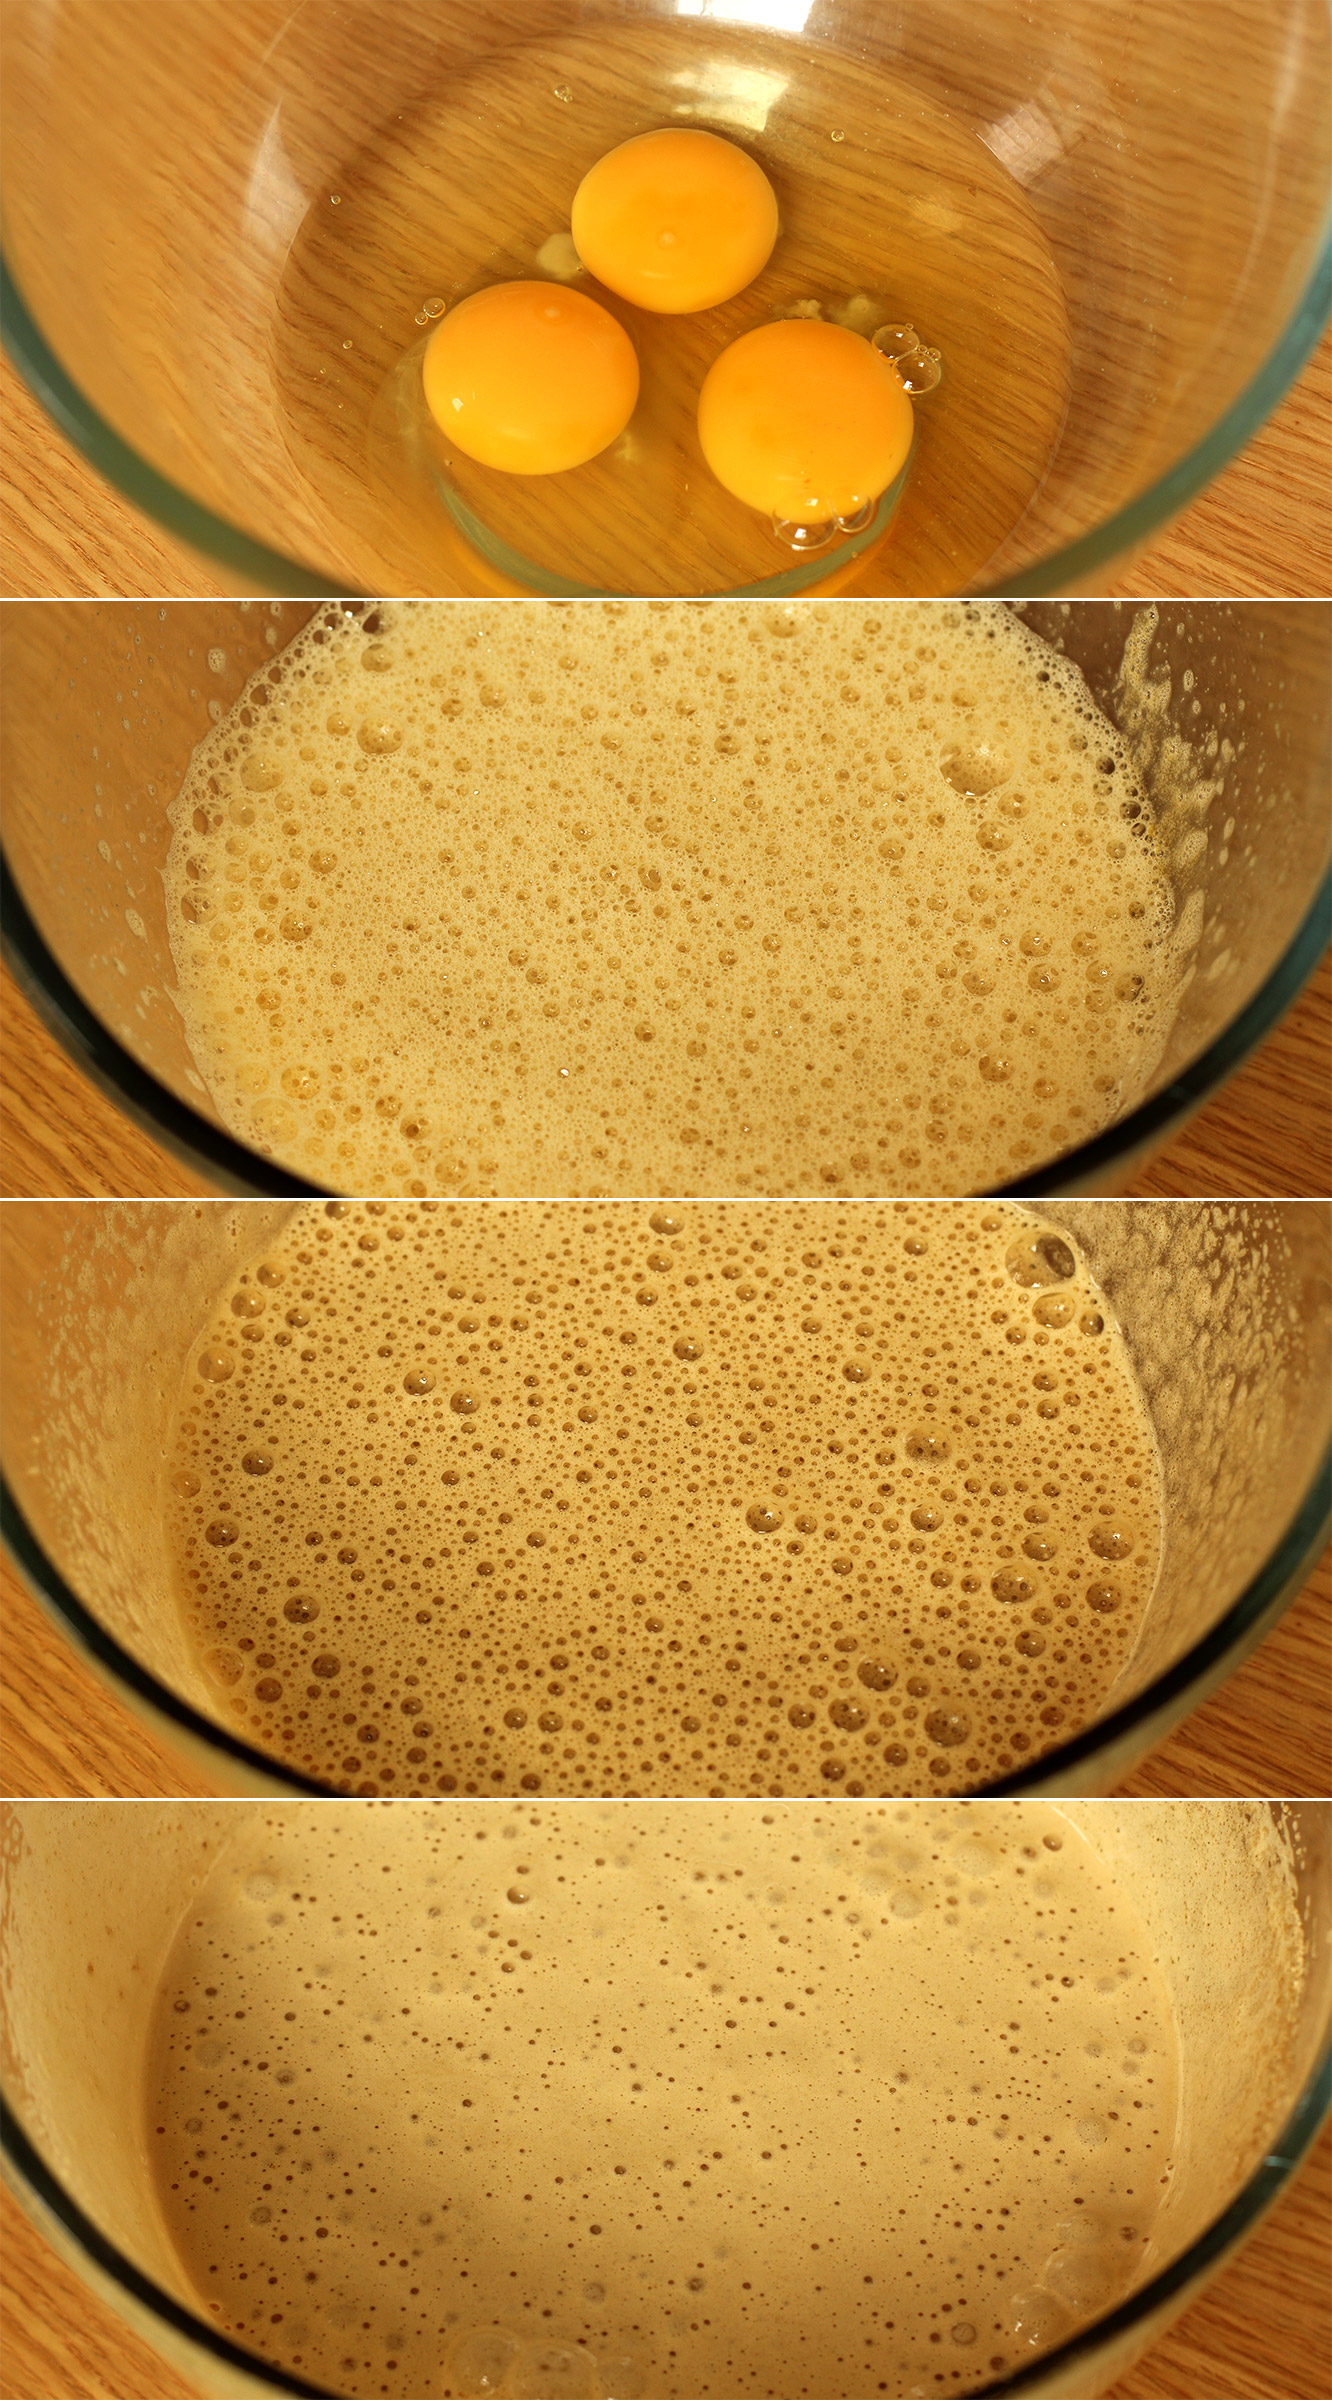
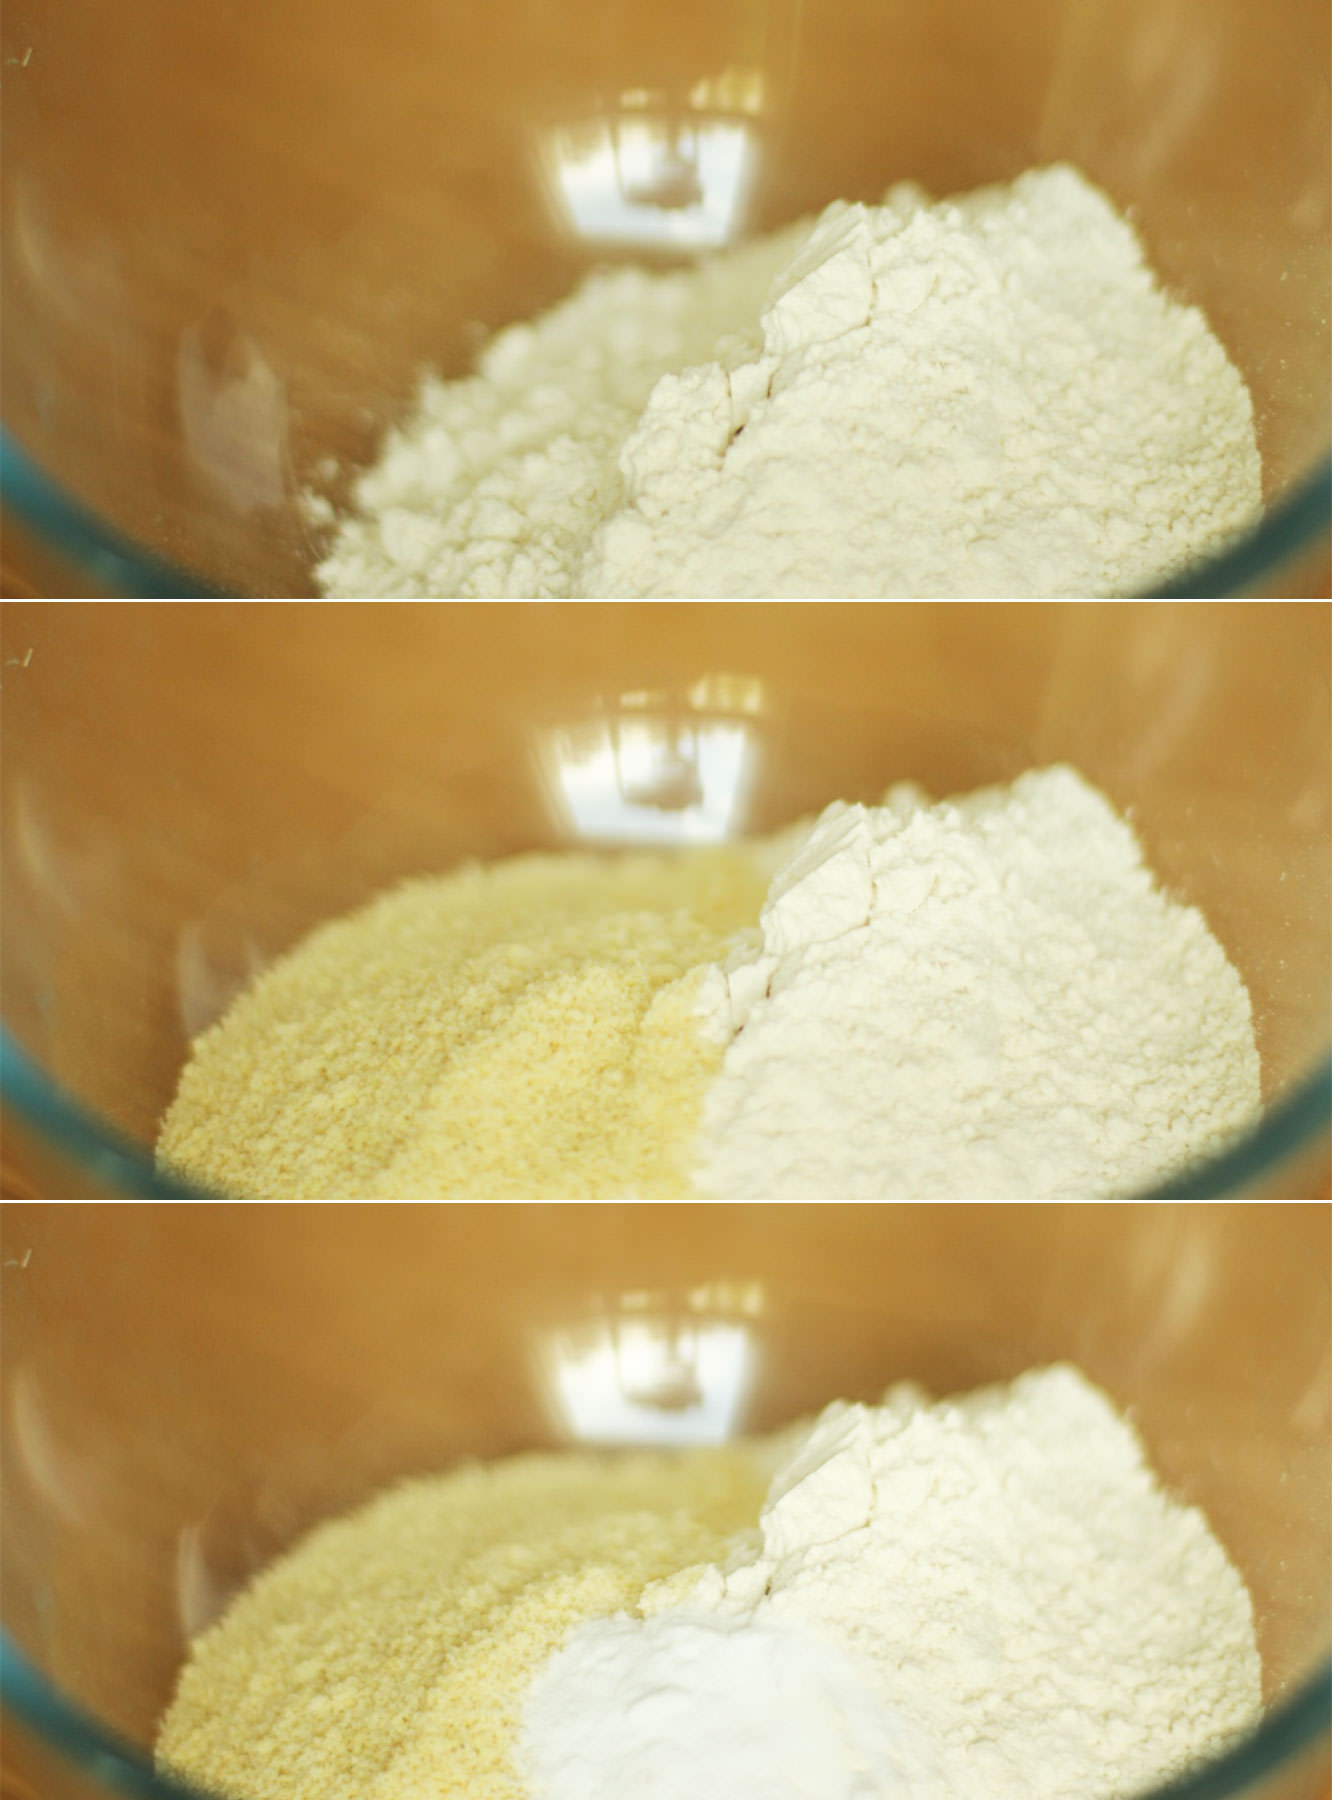
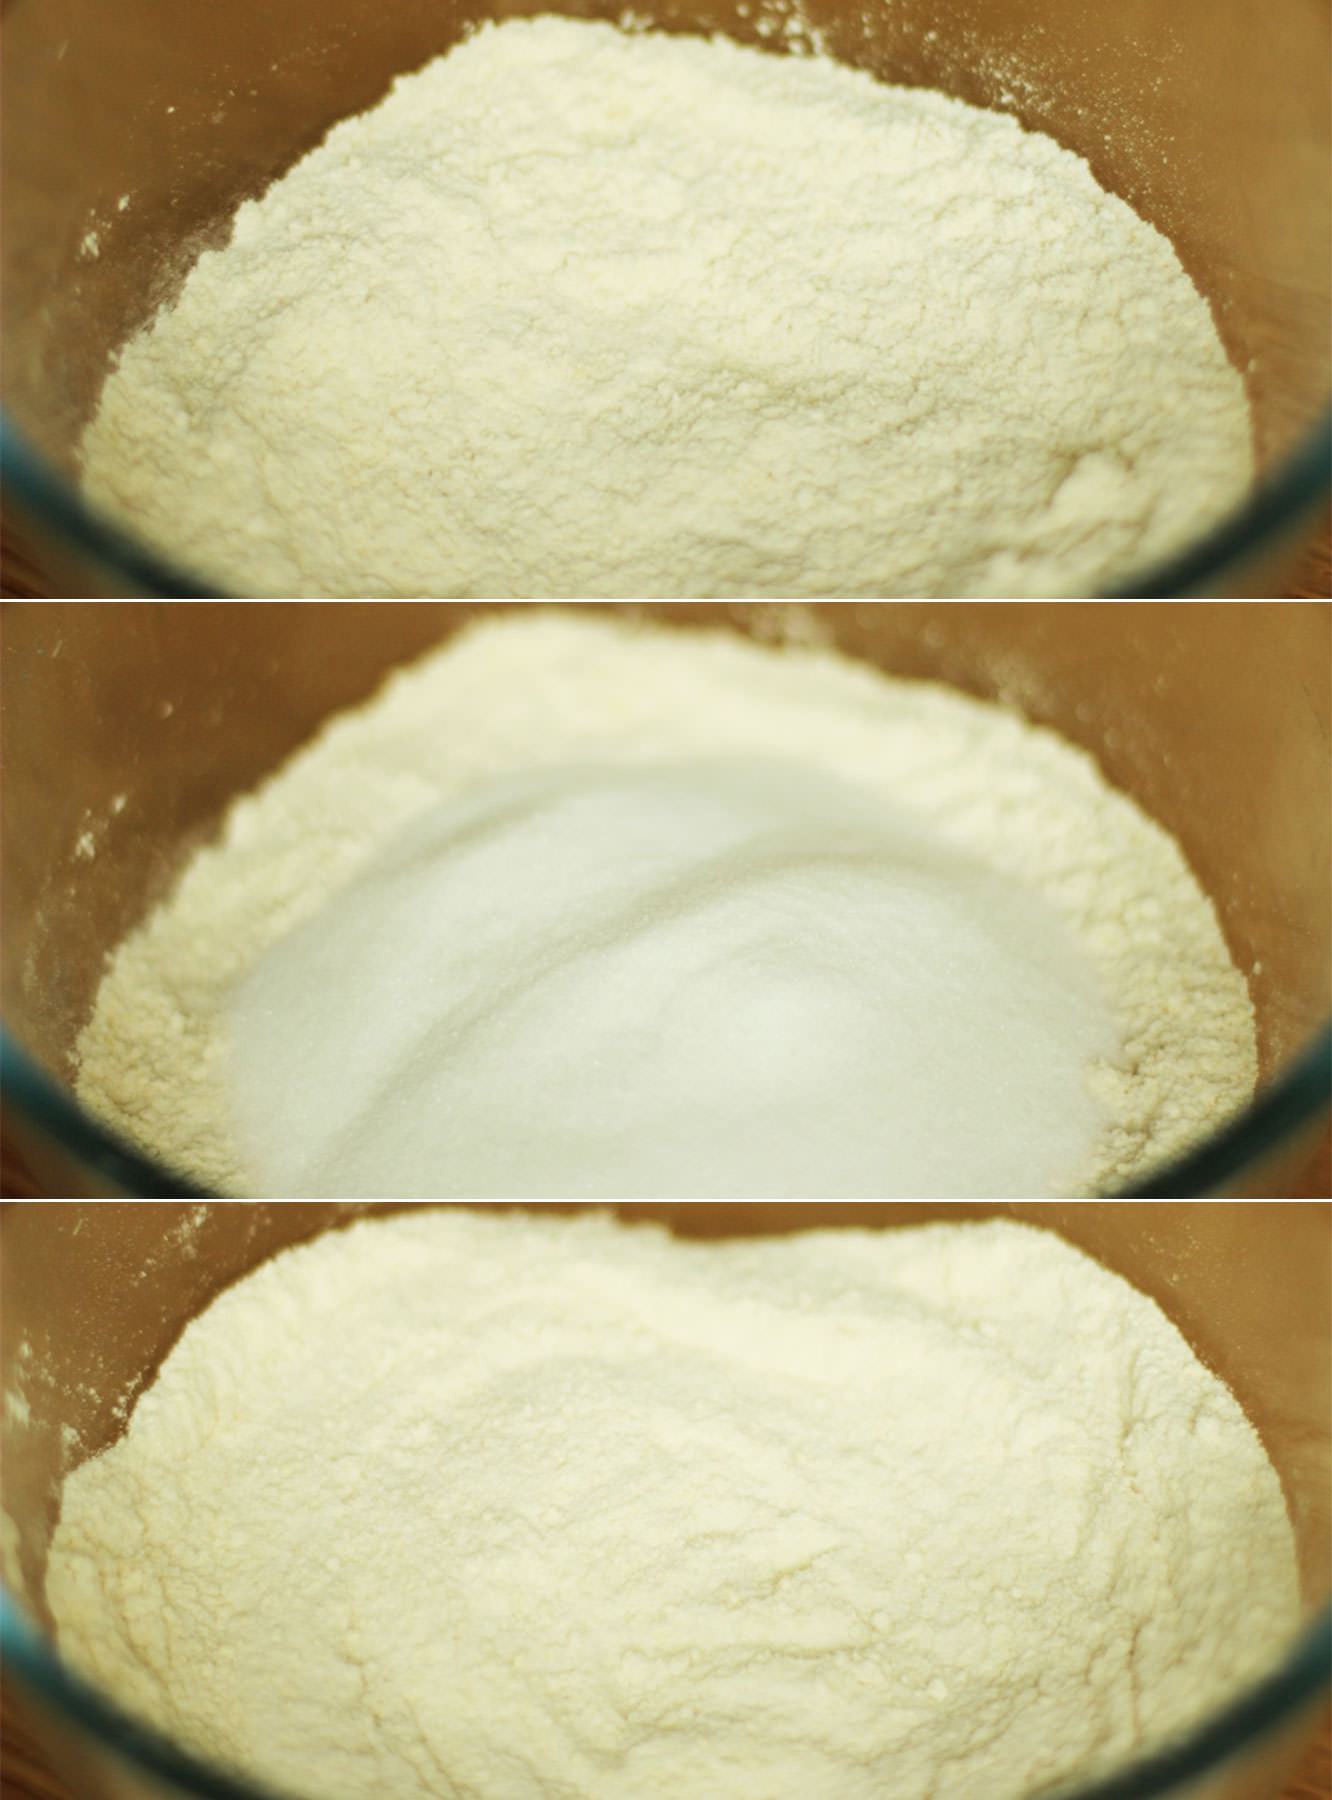
gingerbread-house-village-recipe-guide-03

Step two

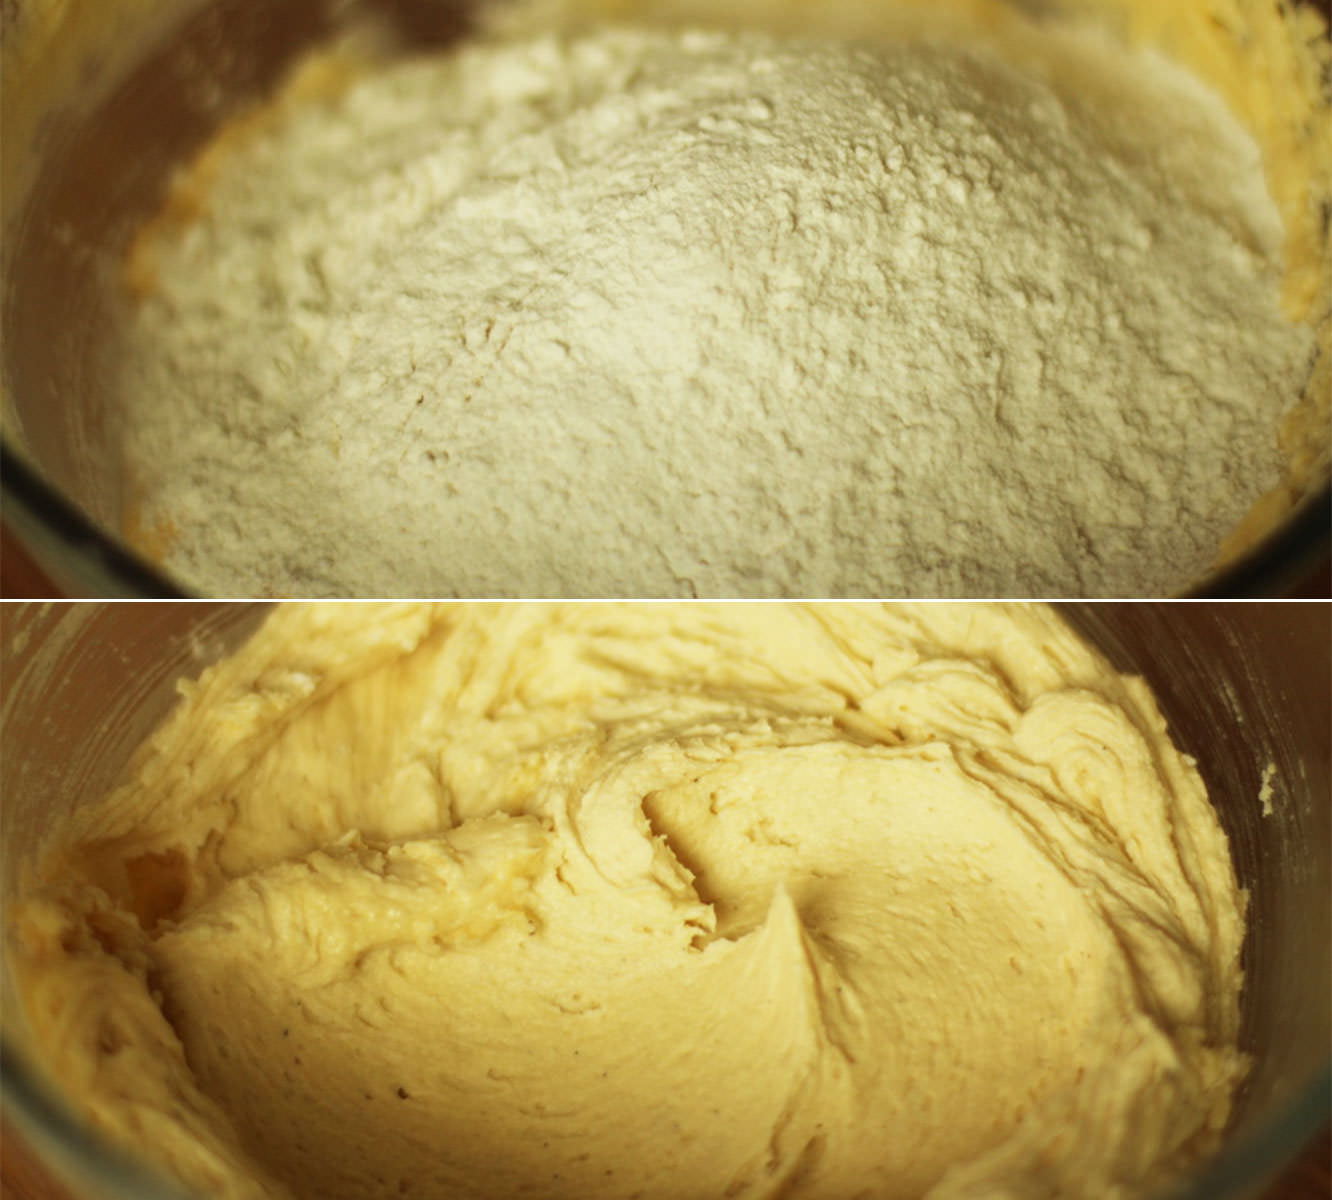
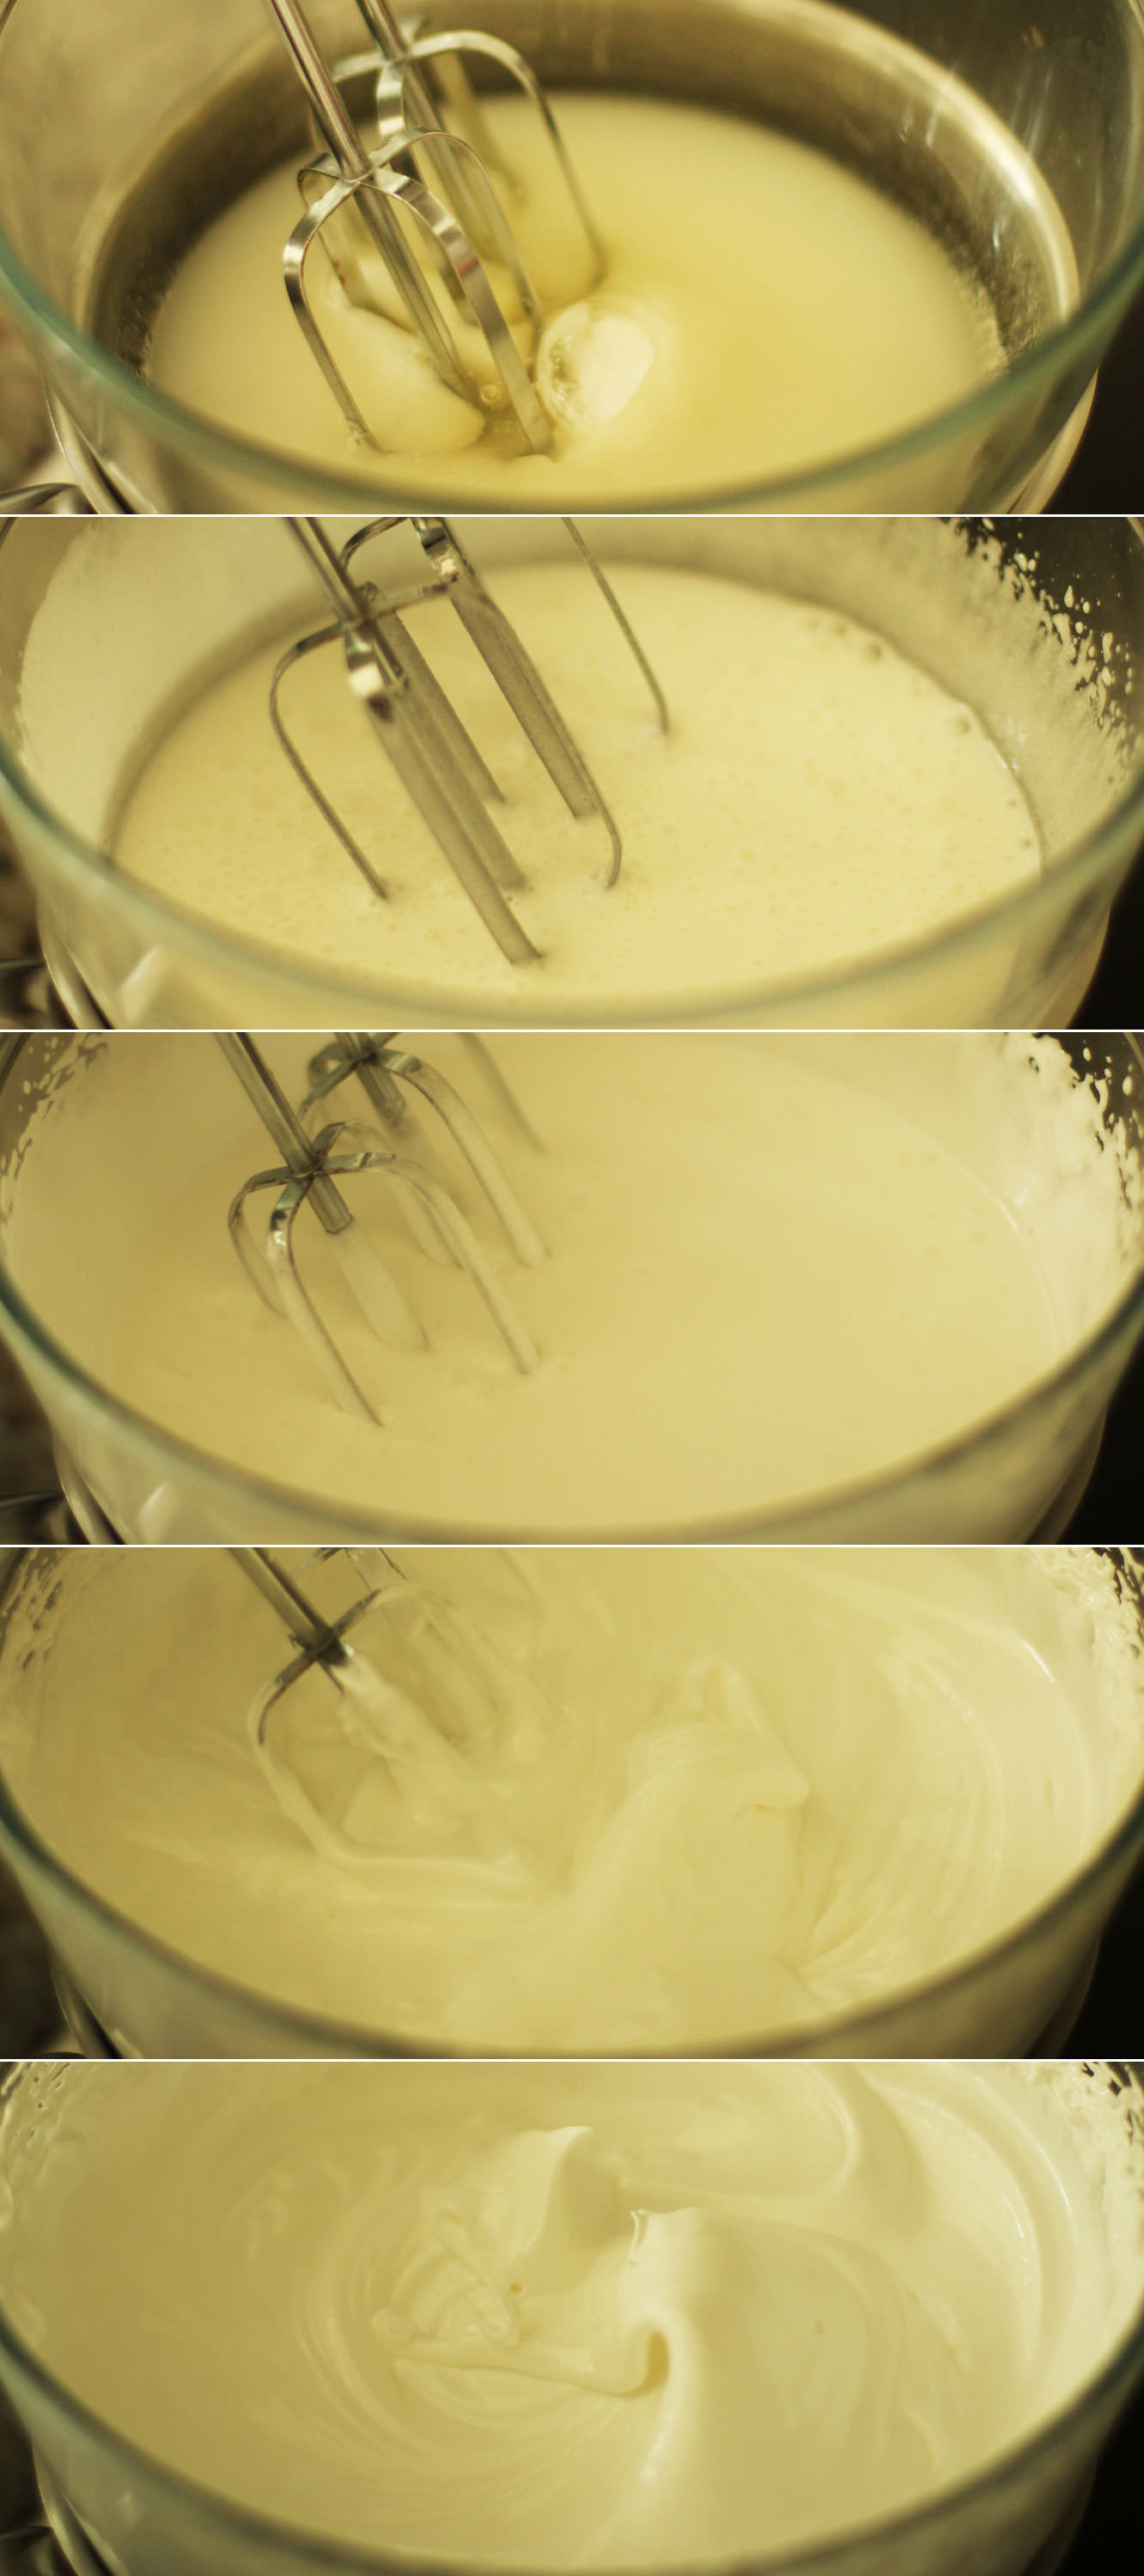
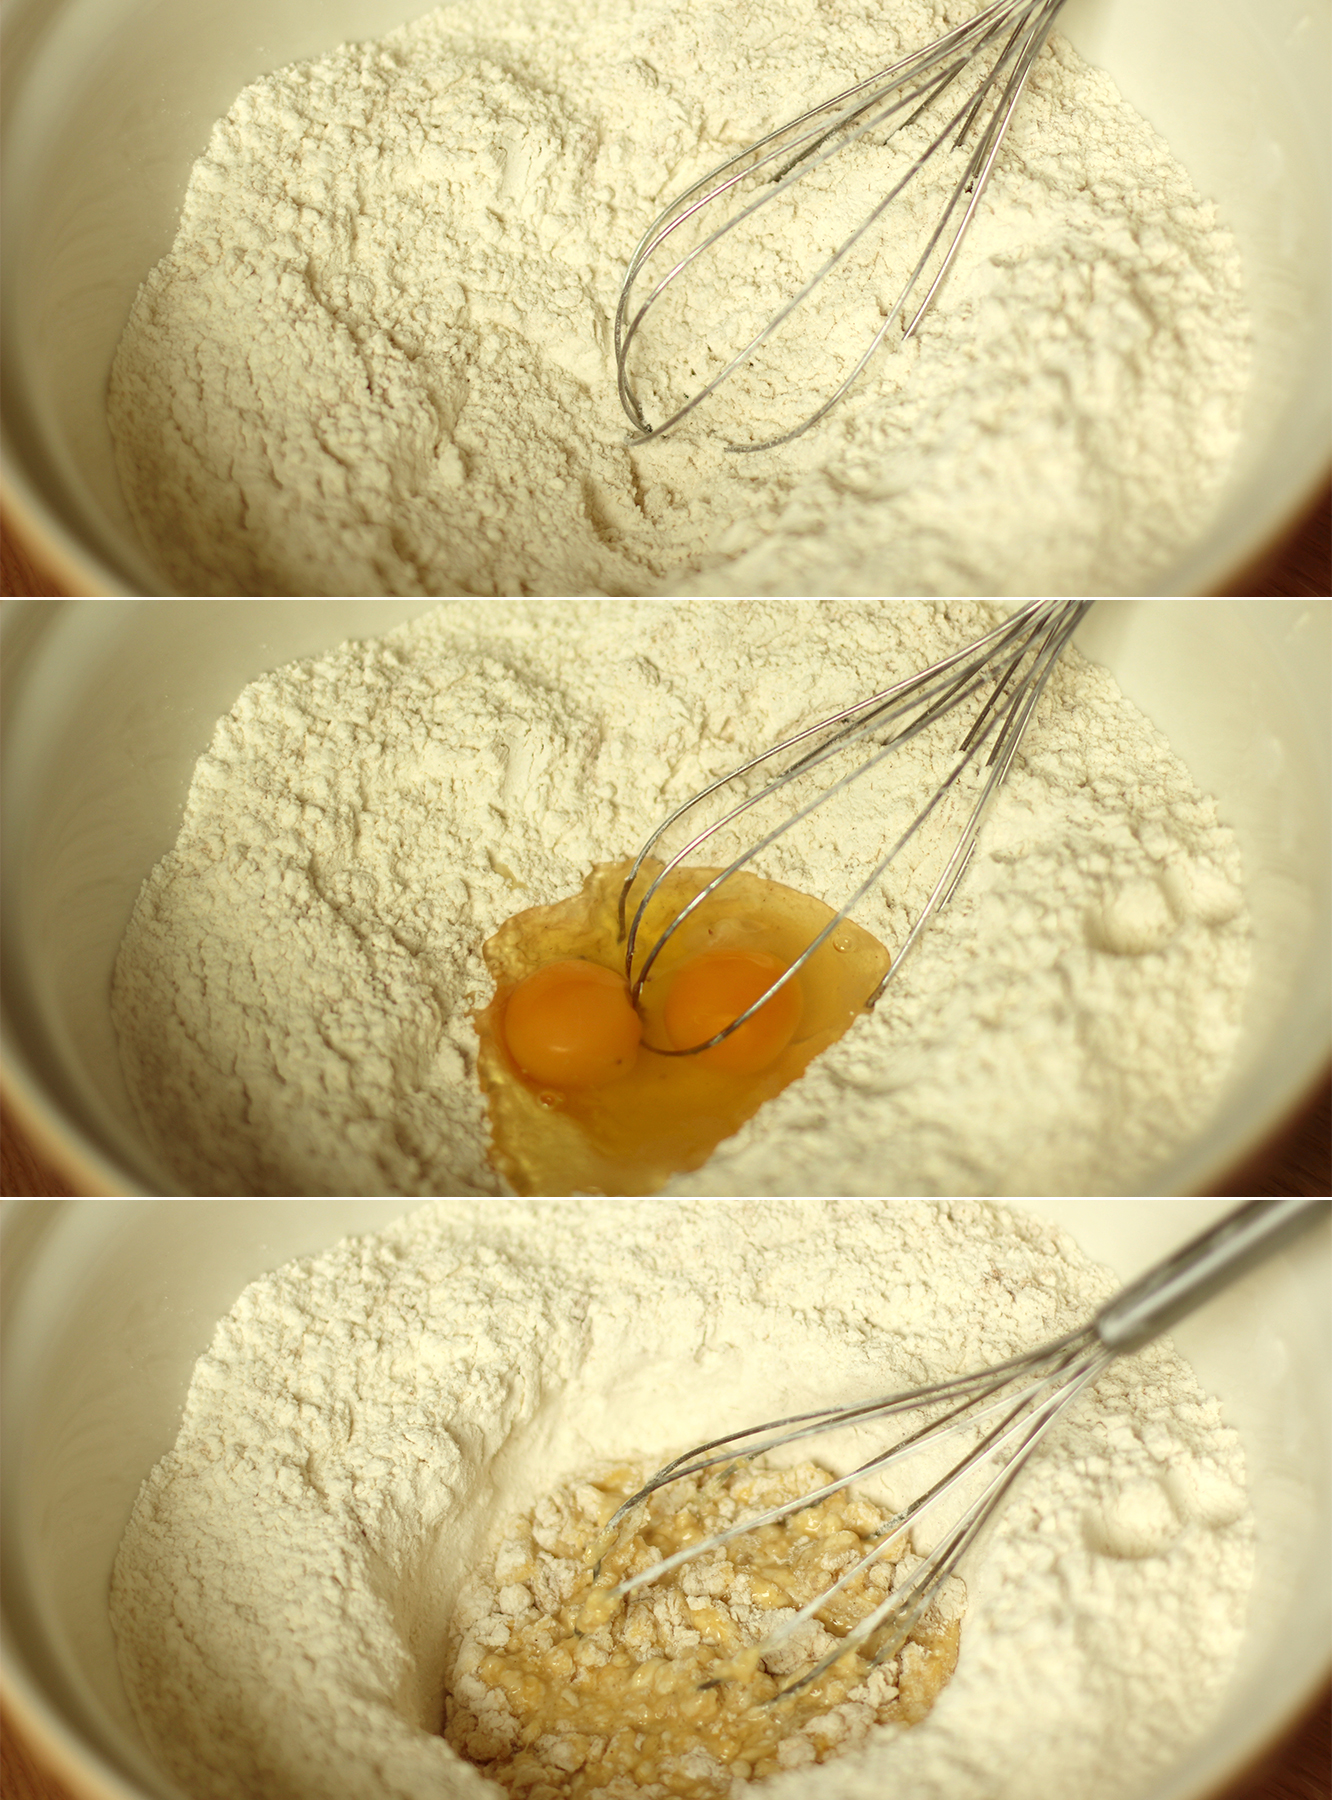
Mix together the spices, salt and flour together and make a well in the middle. Add the eggs and use a hand whisk to break them up. Start making small circles to incorporate the flour.
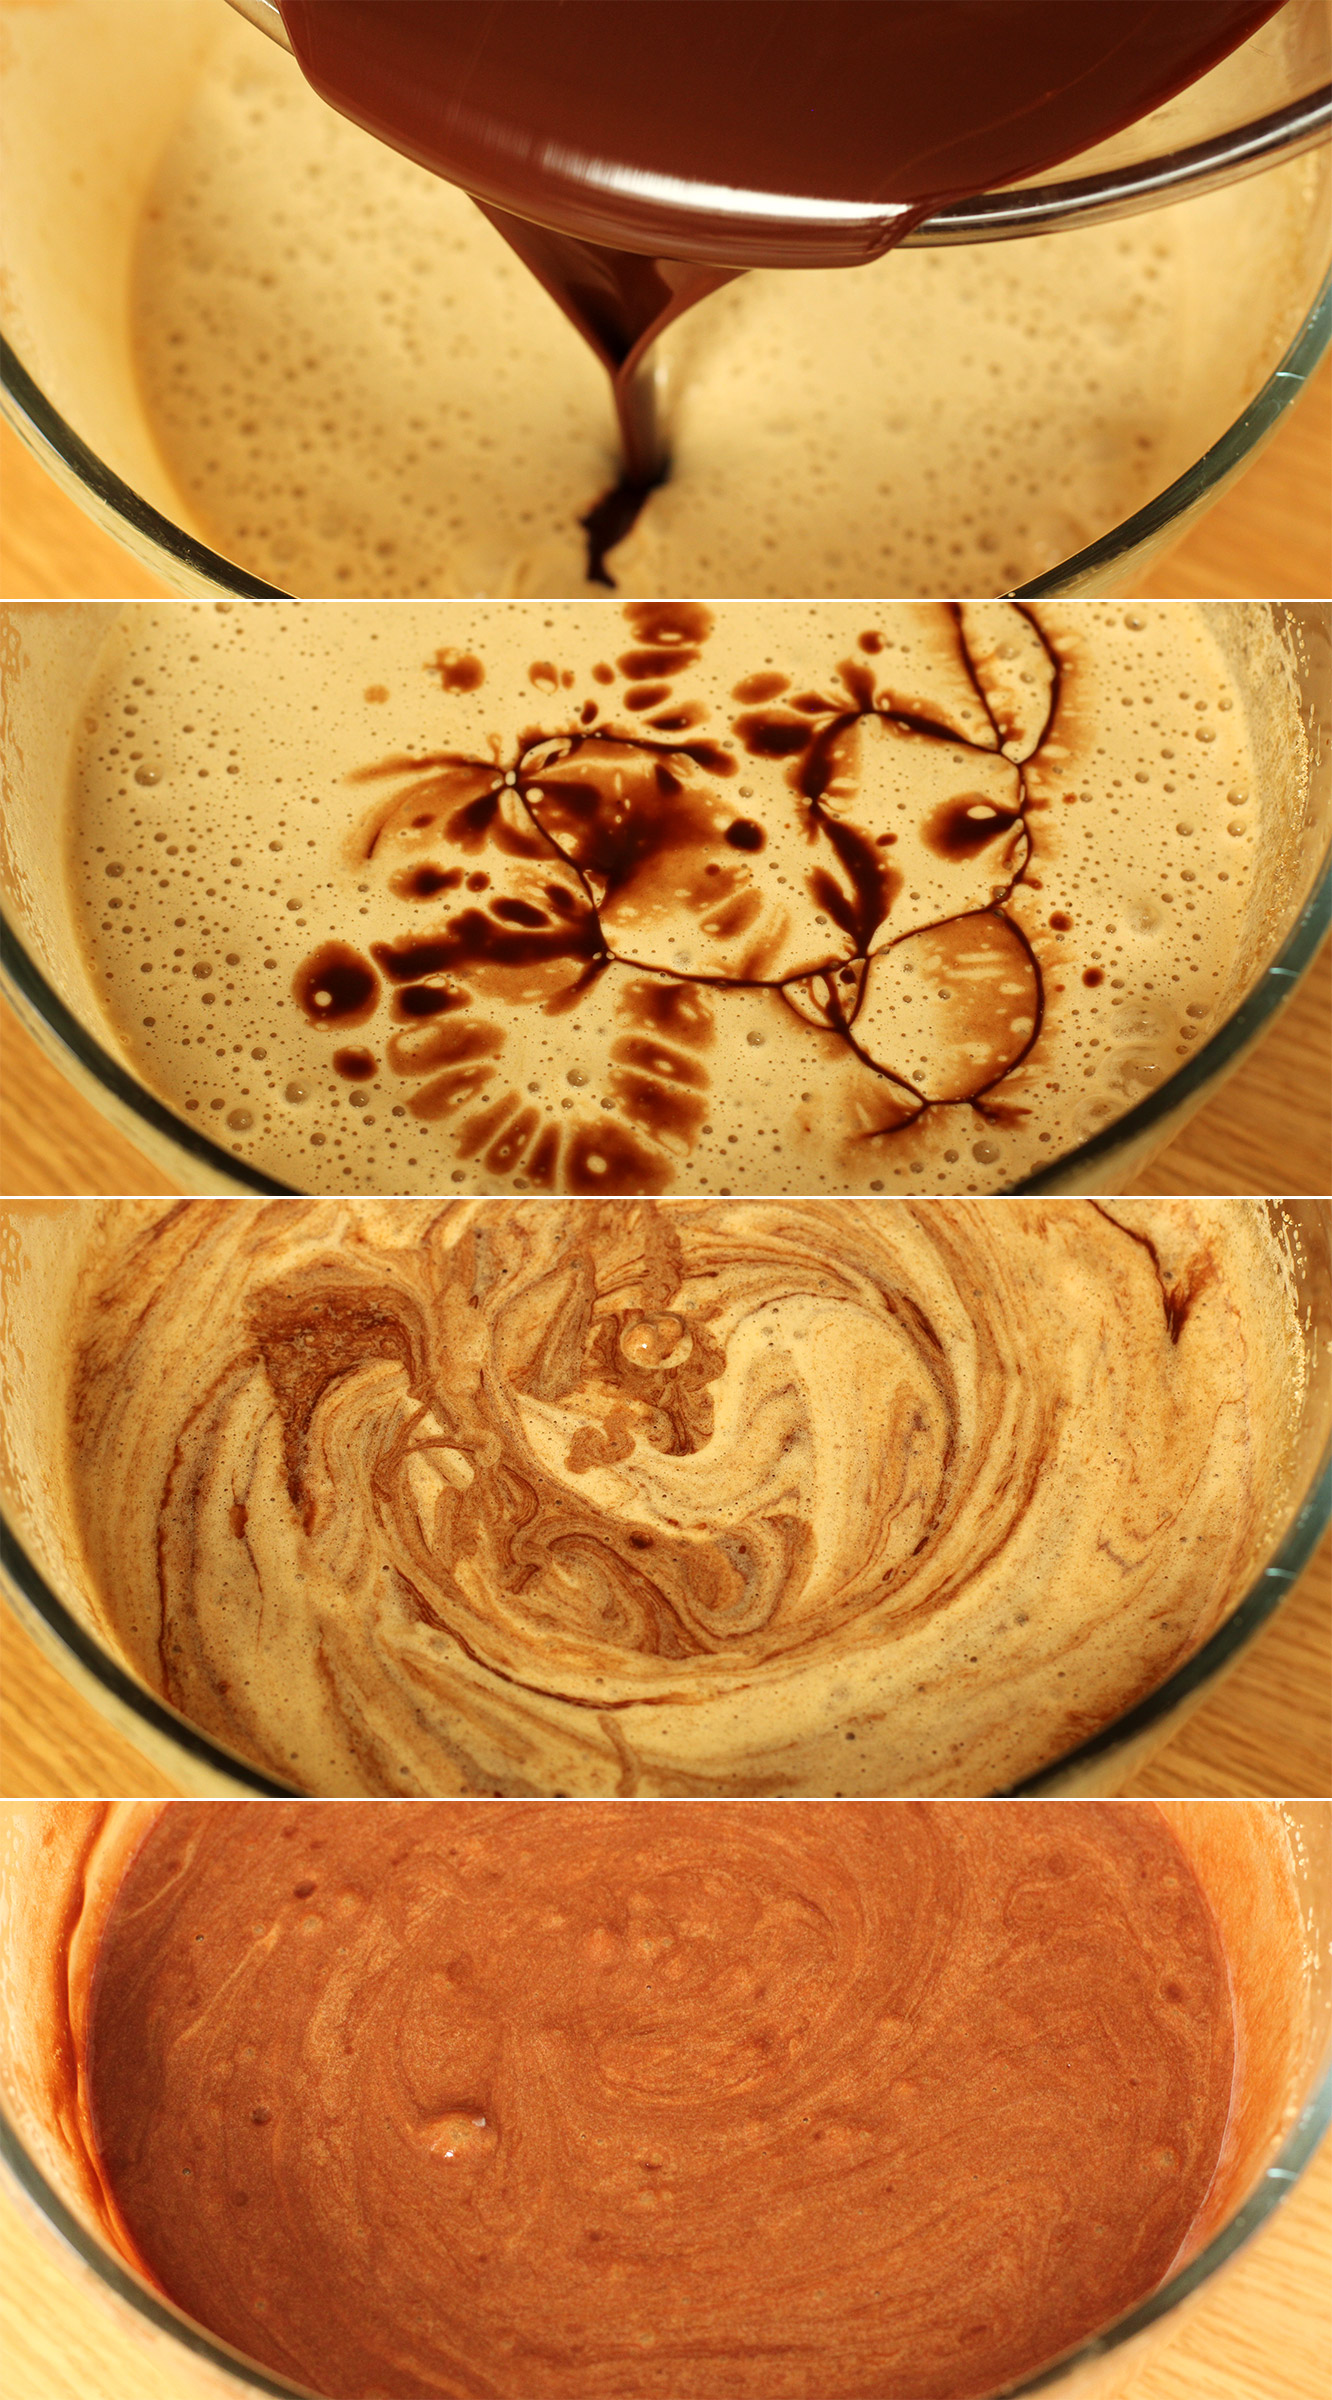
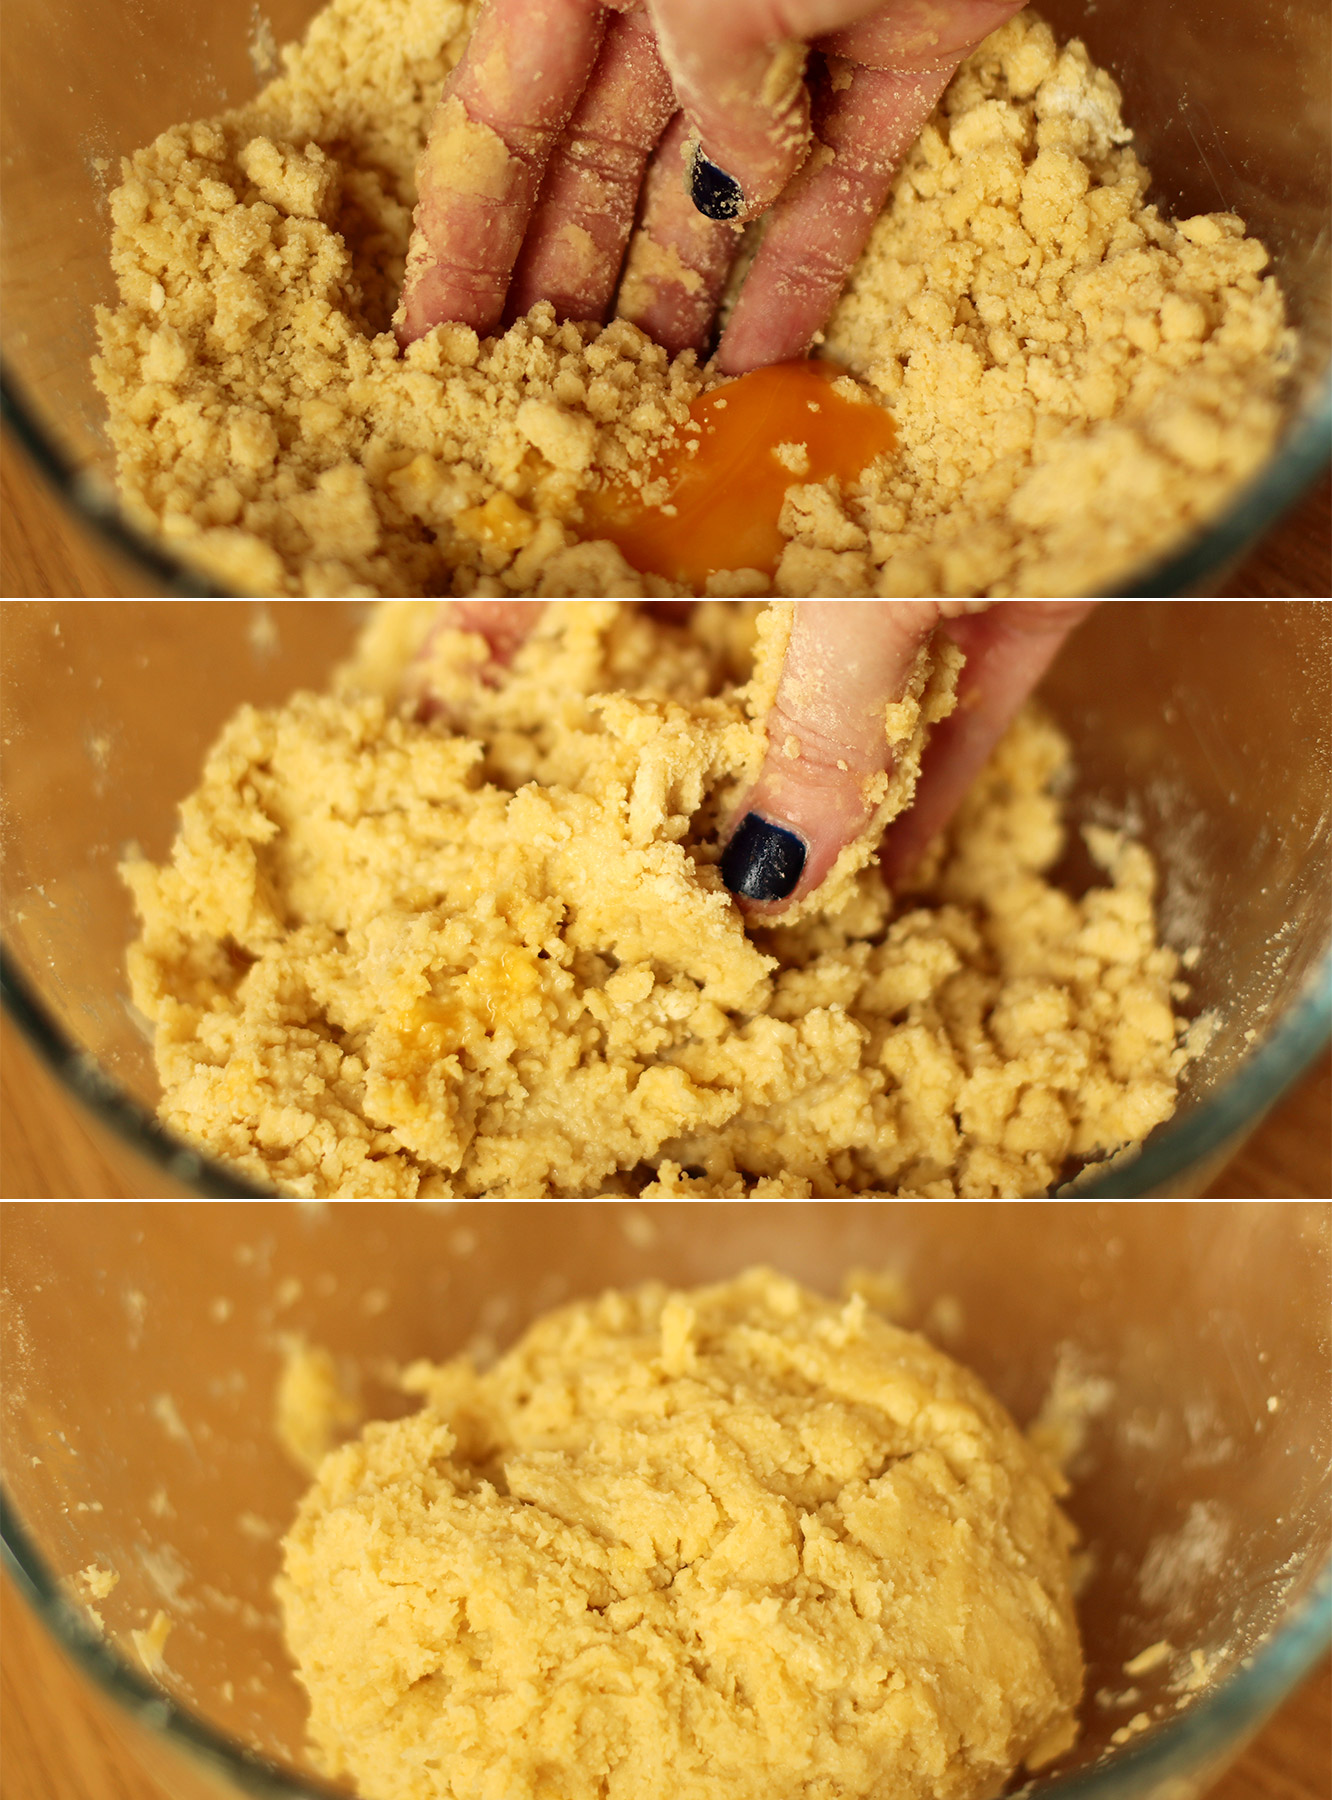
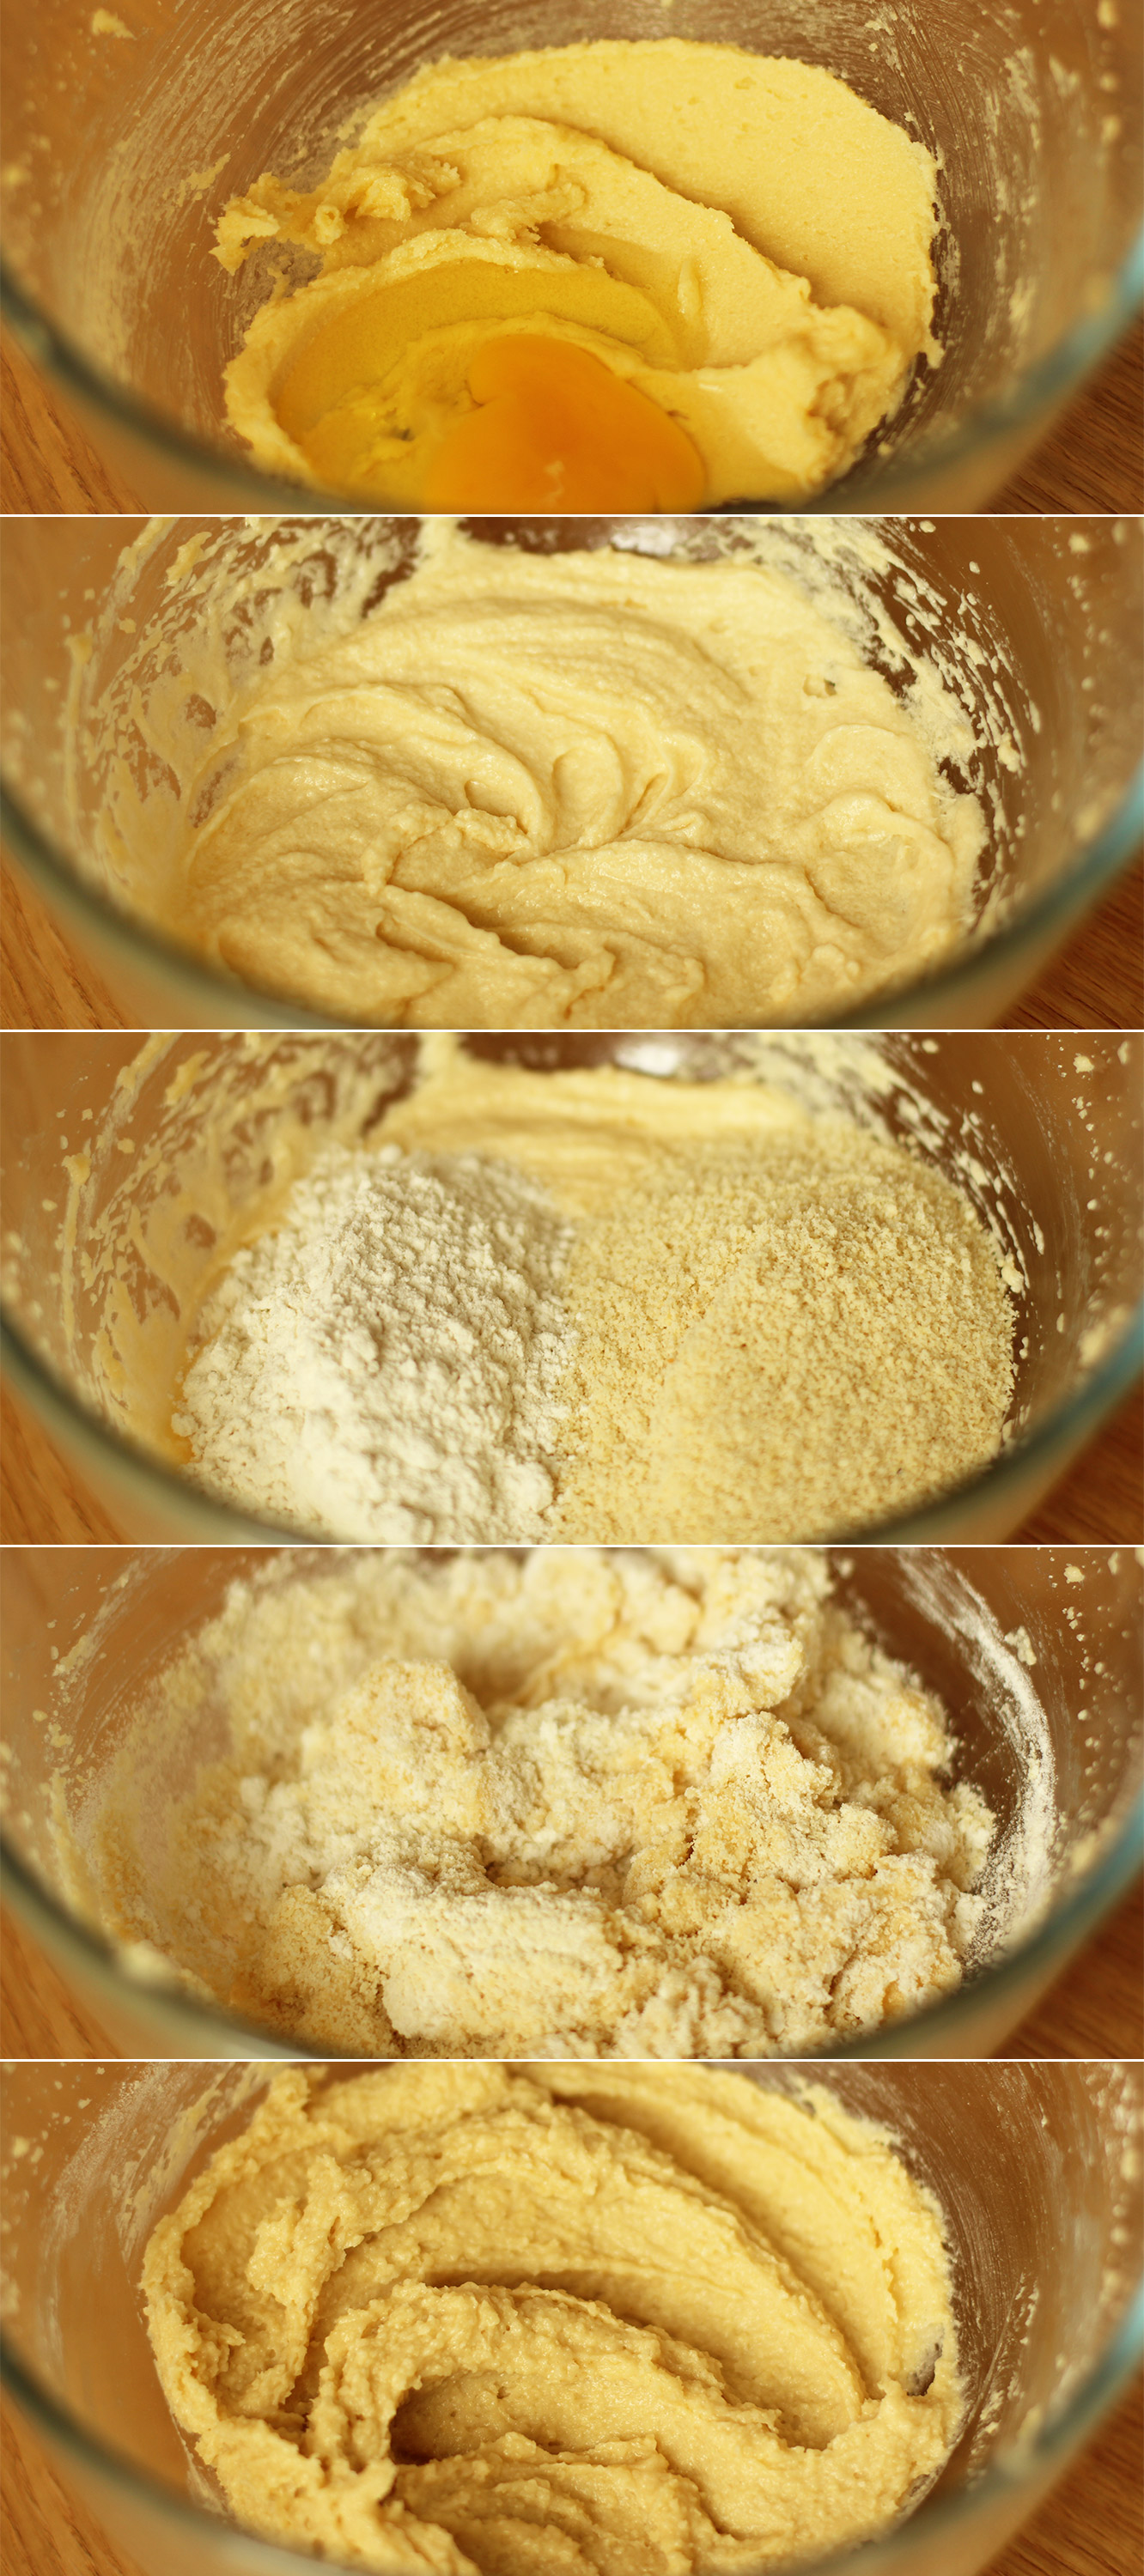
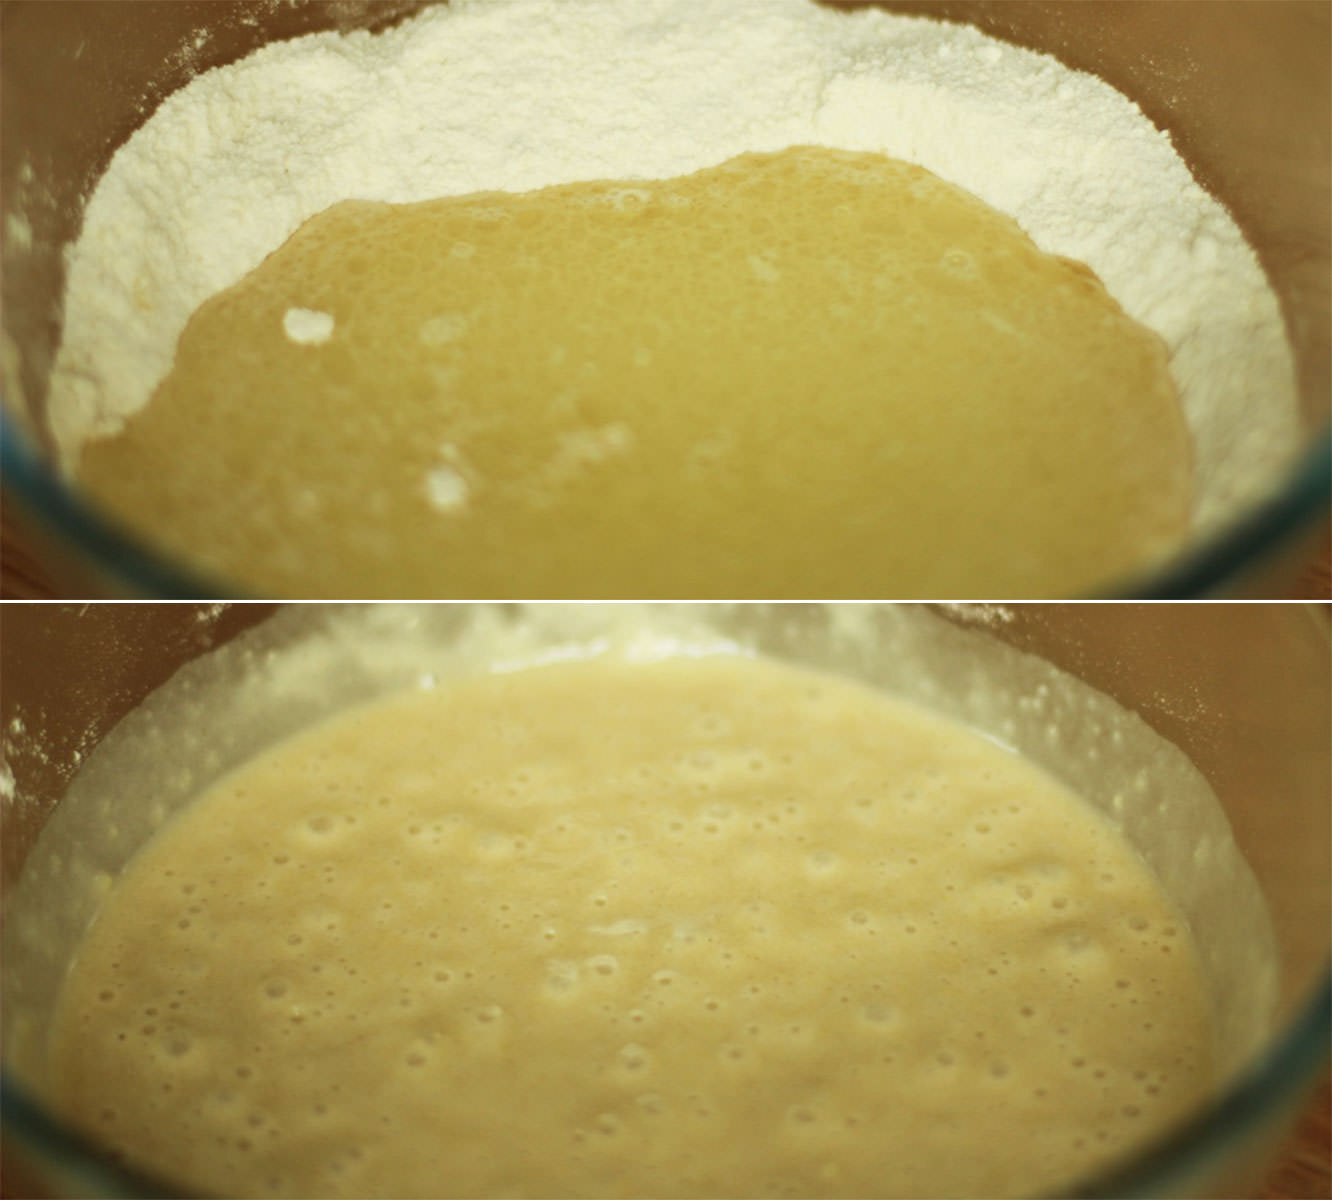
gingerbread-house-village-recipe-guide-04

Step three

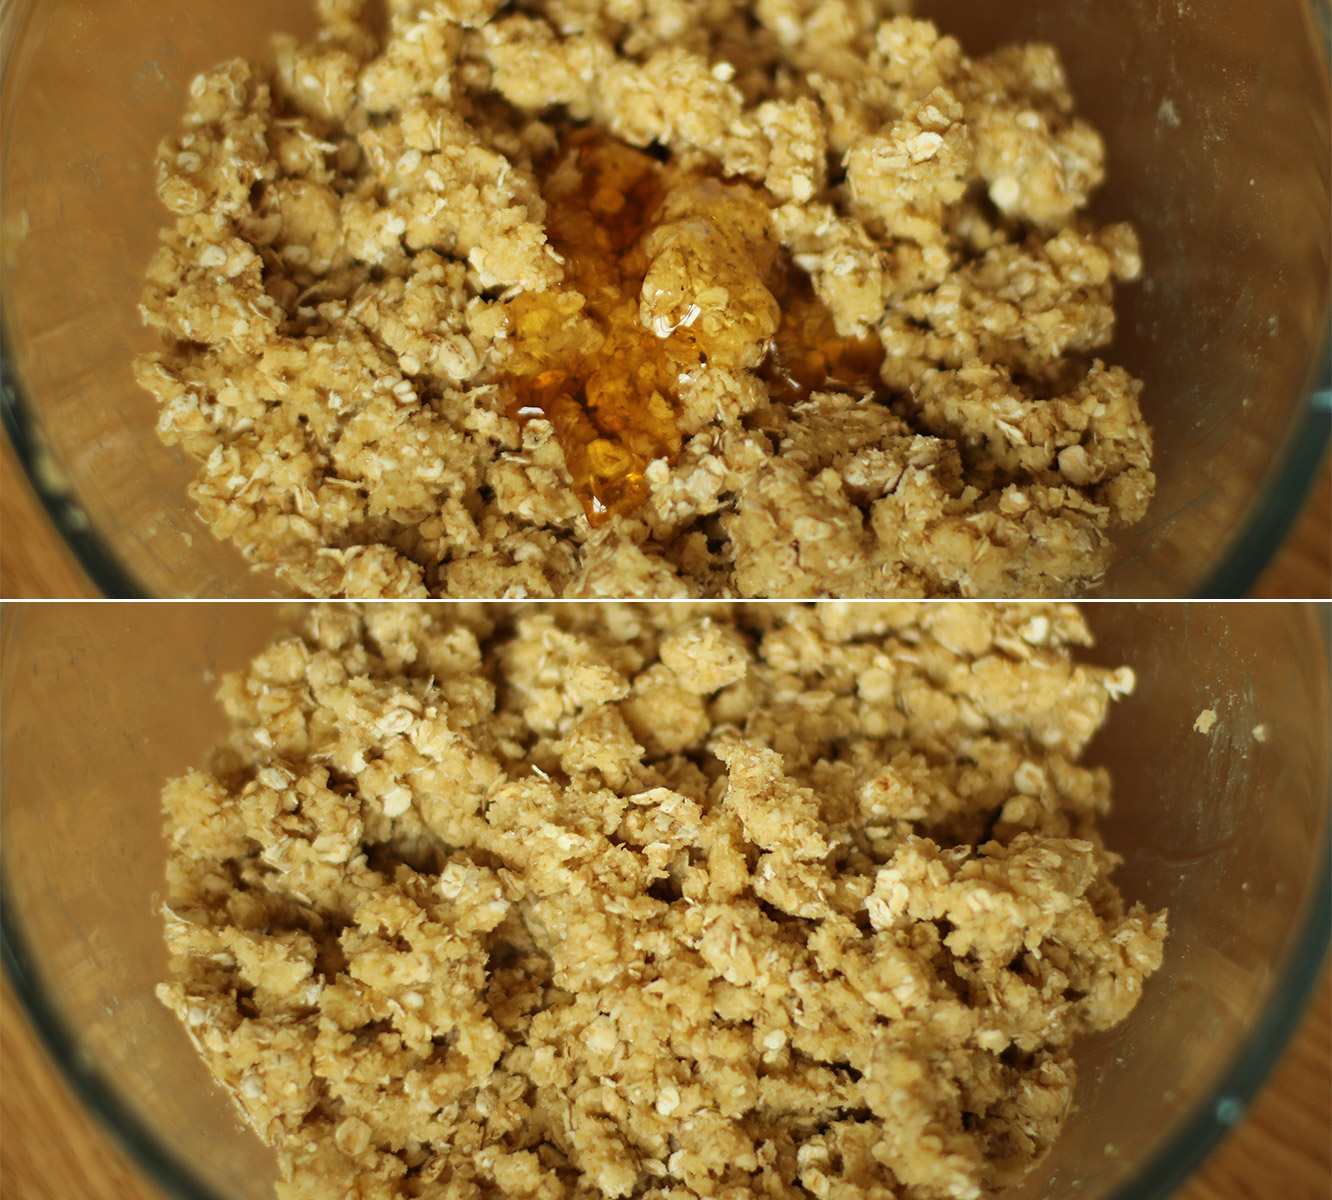
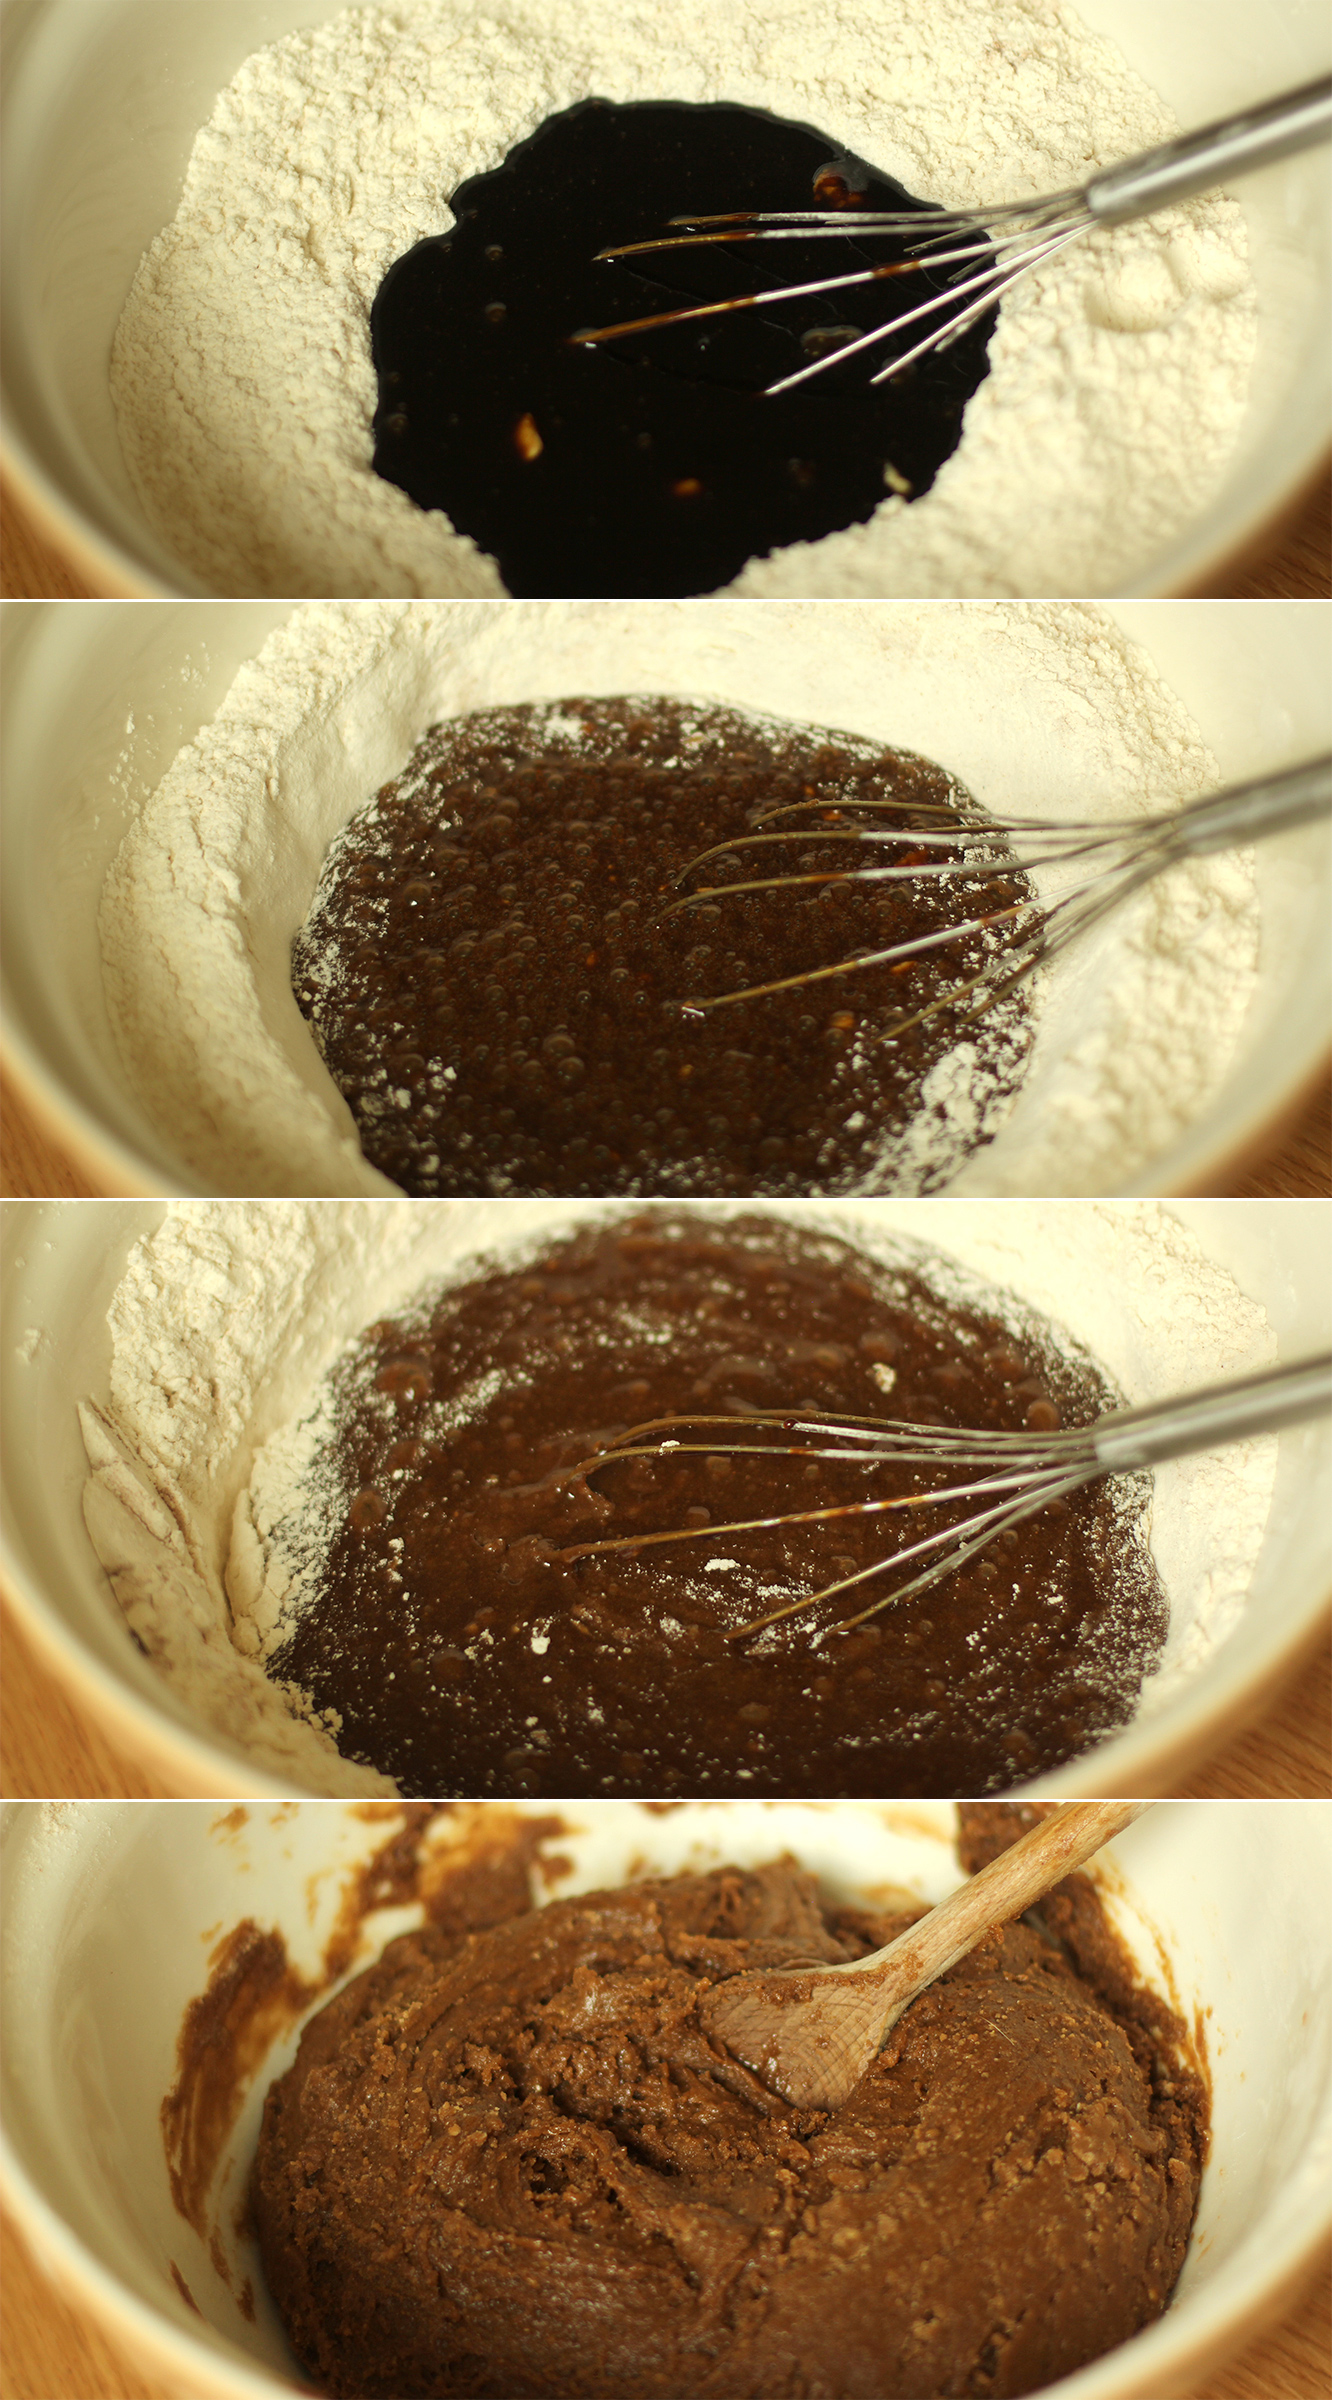
Pour the treacle mix into the well and continue mixing with the whisk for as long as you can until it becomes too hard to stir. Swap the whisk for a wooden spoon until fully combined.

Allow to cool. Put it outside if it’s cold or in the fridge to speed up the process. It will be sticky but don’t add more flour.
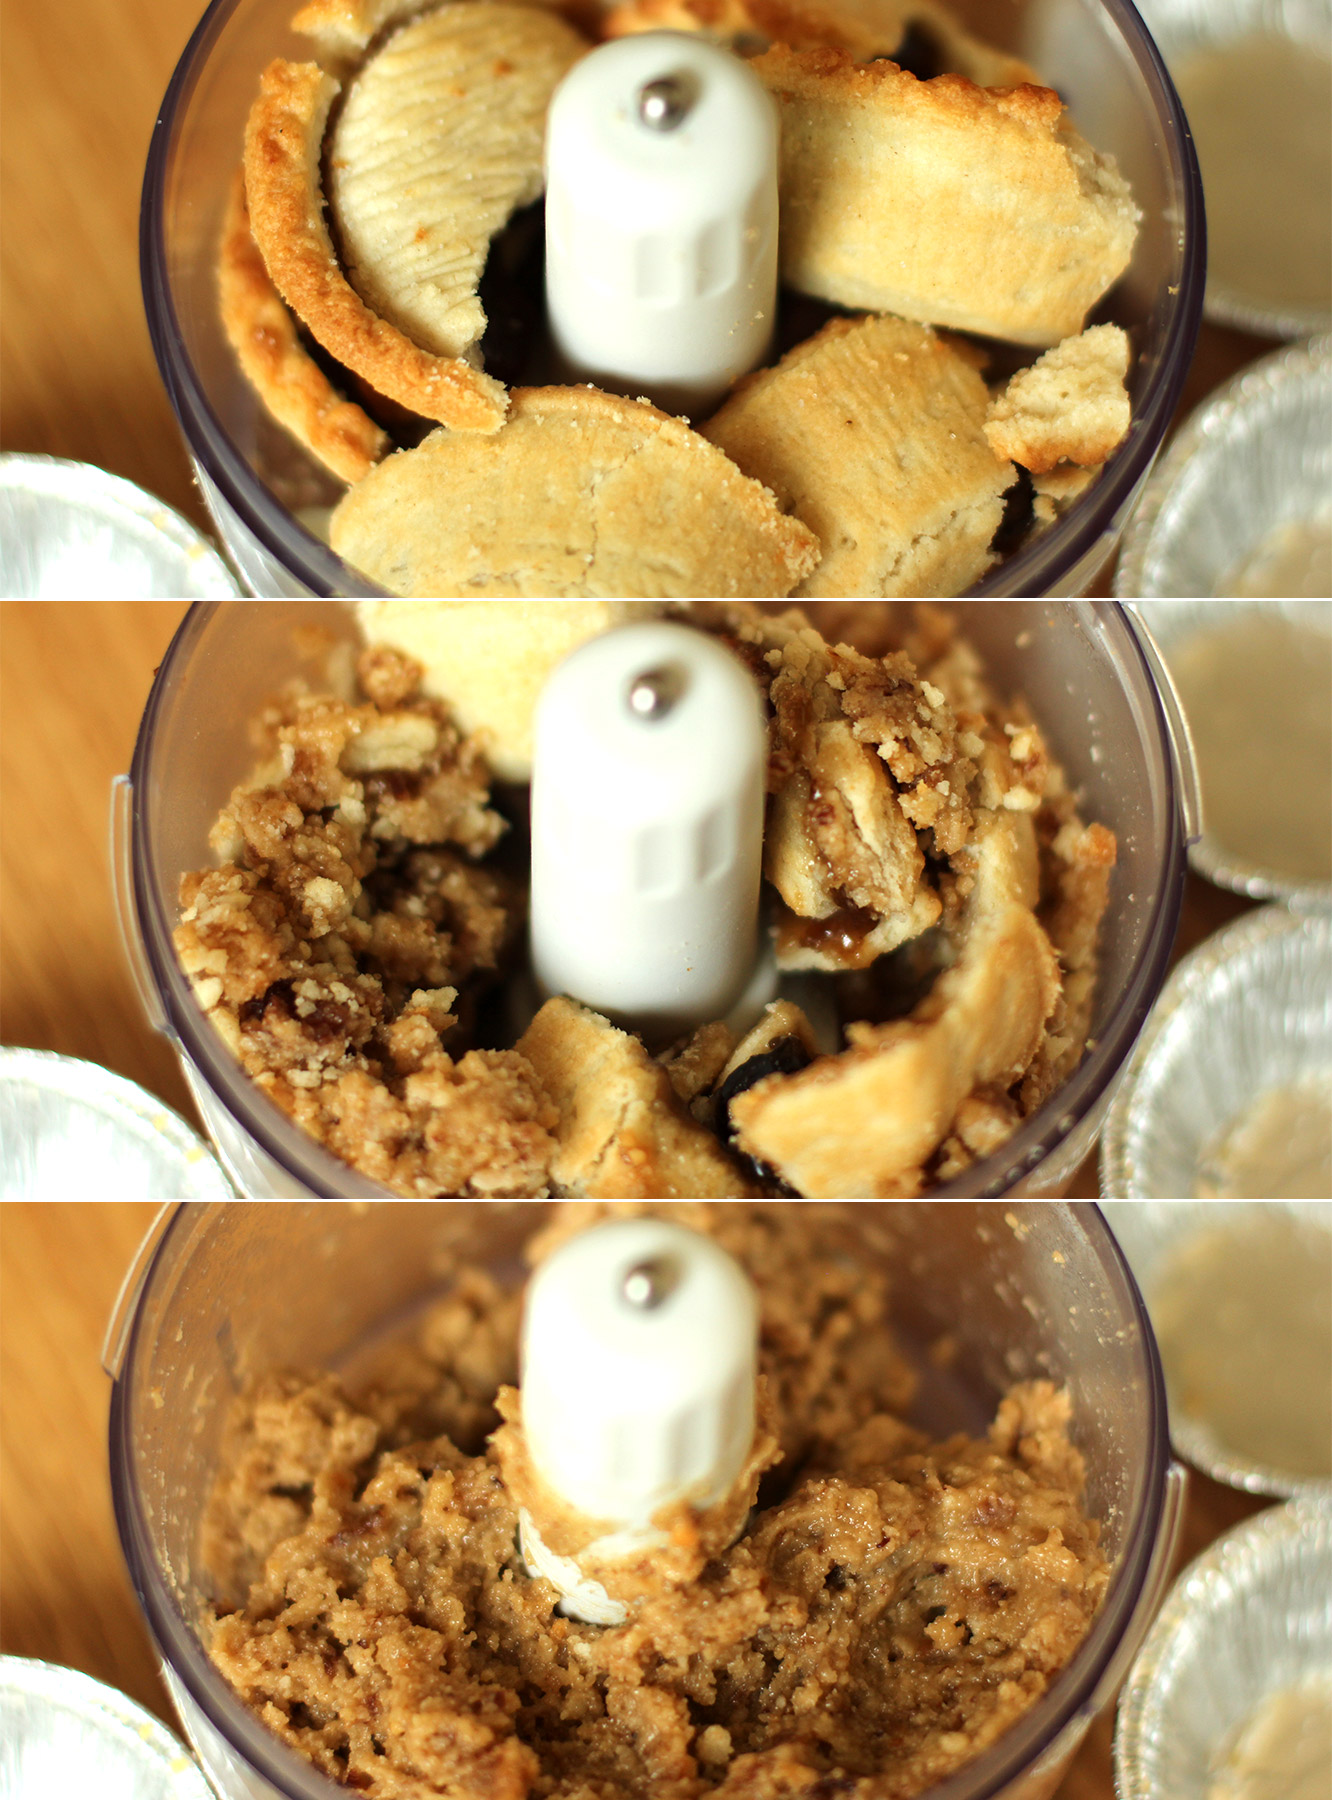
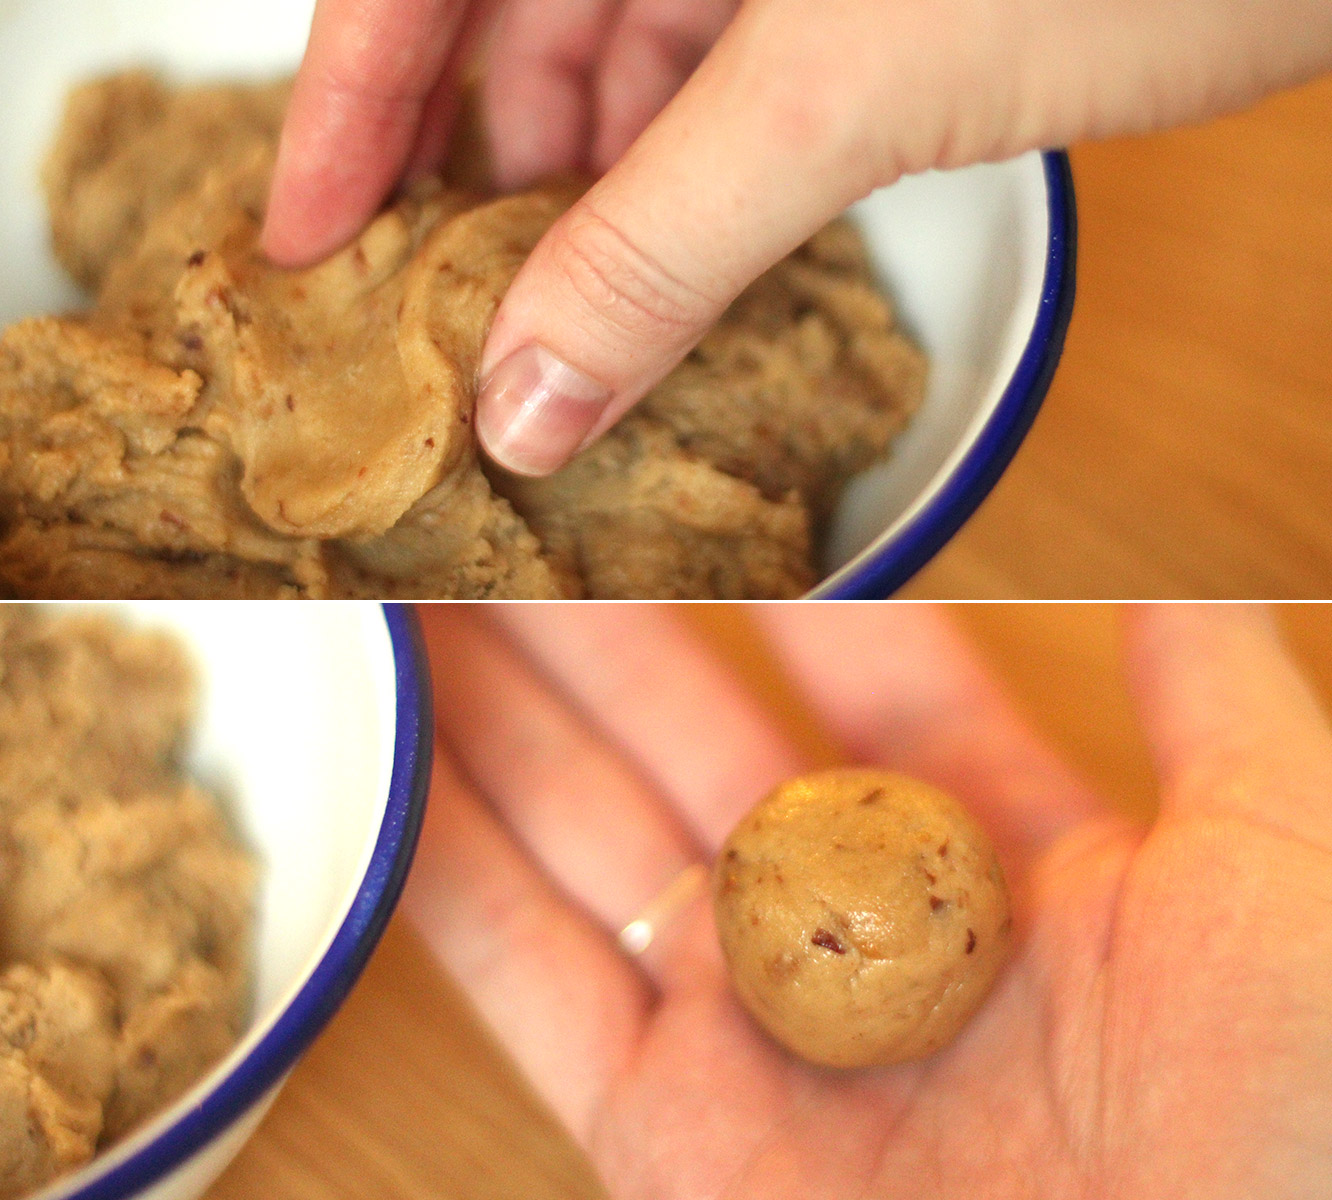
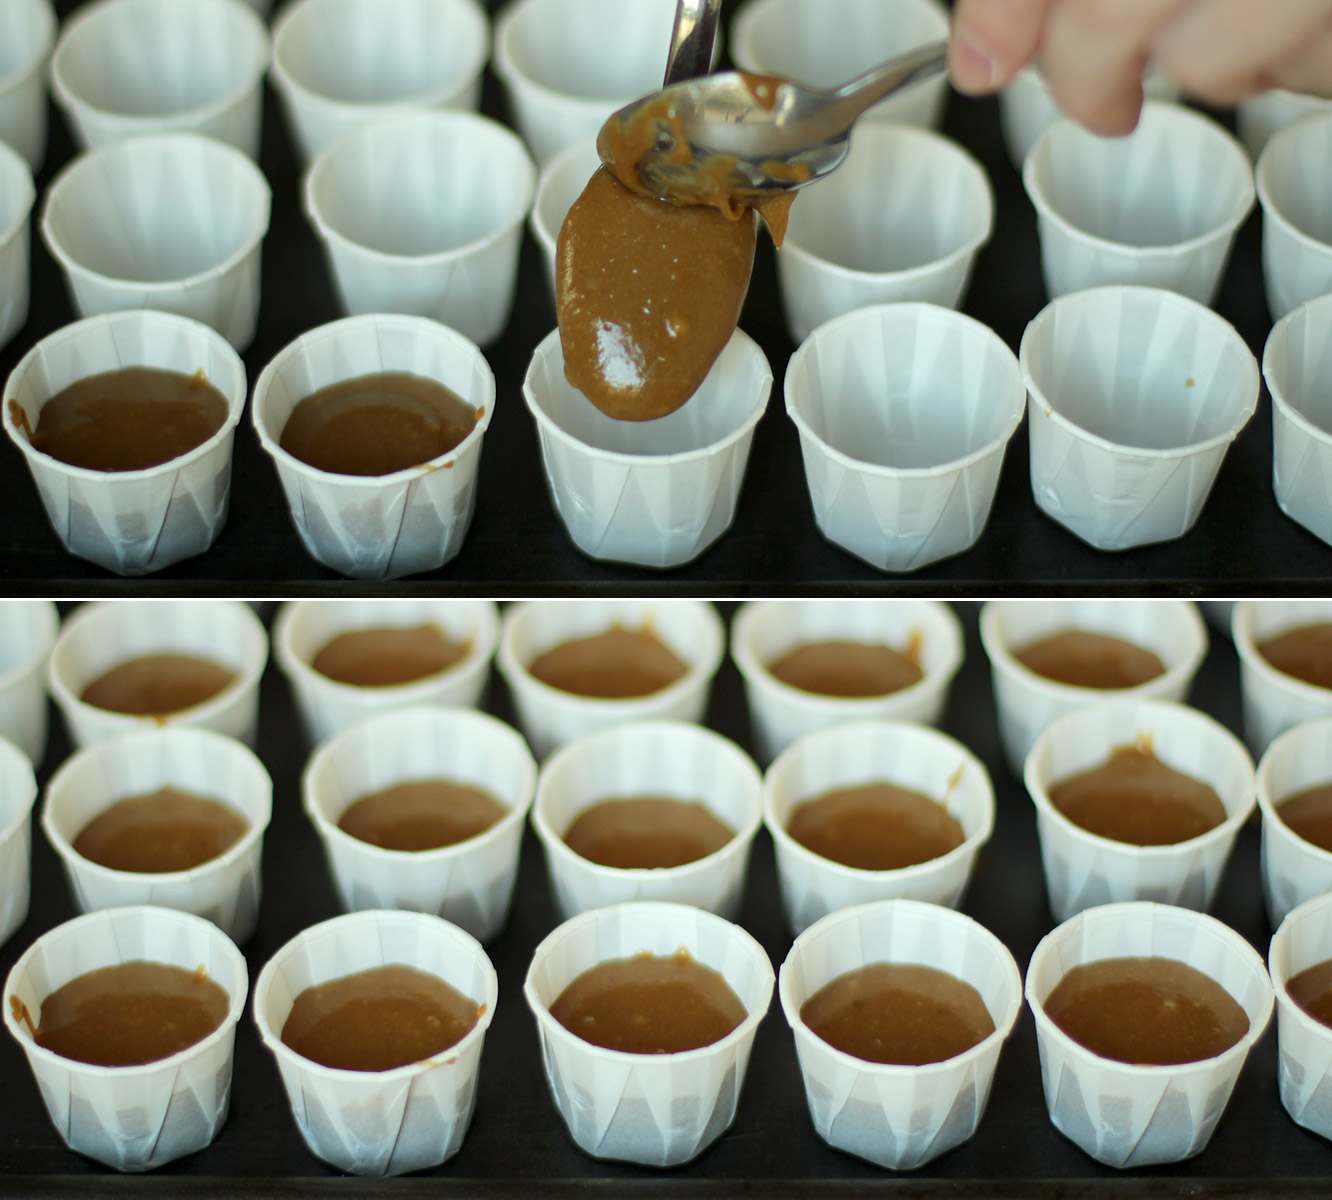
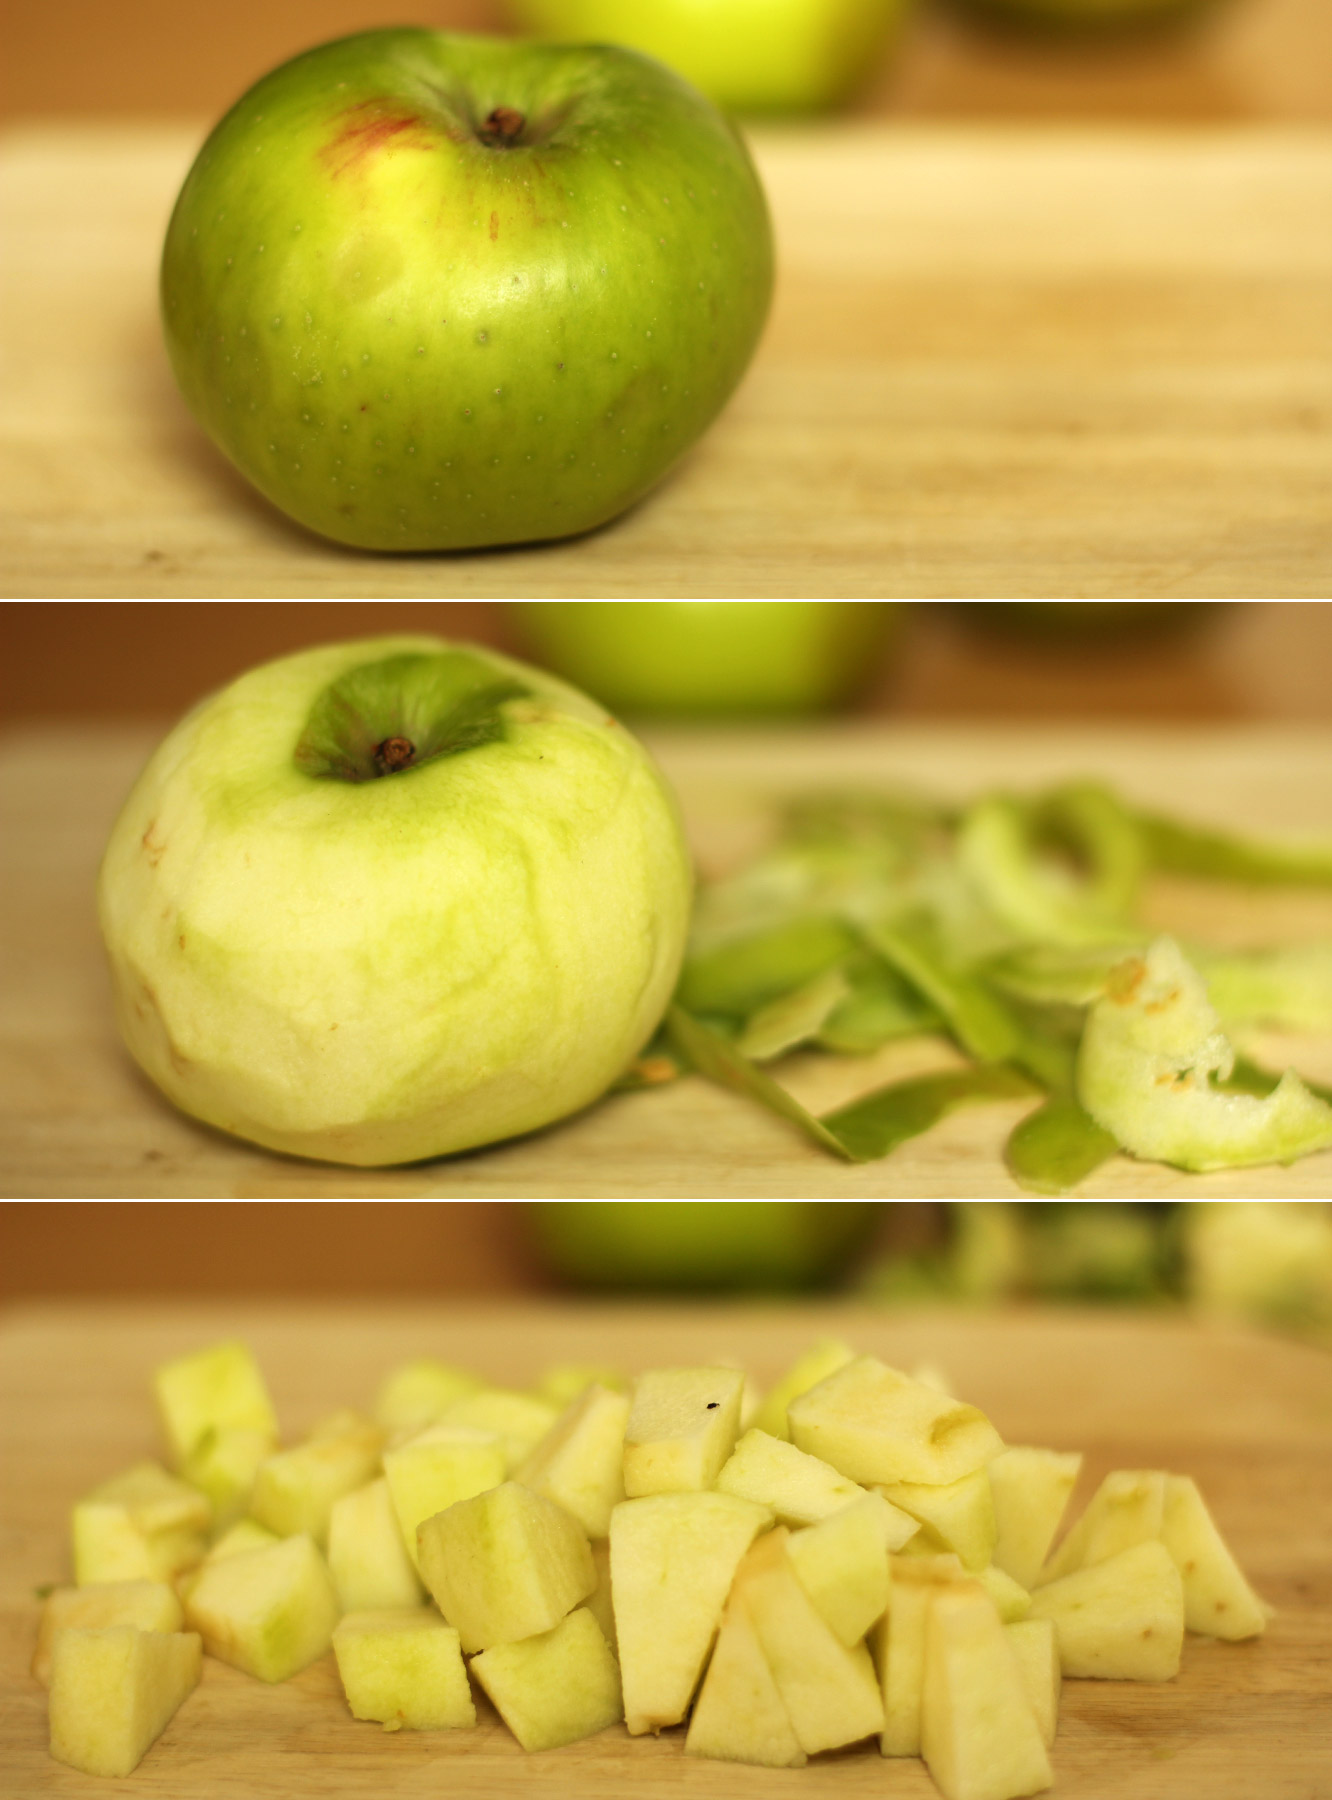
gingerbread-house-village-recipe-guide-05

Step four

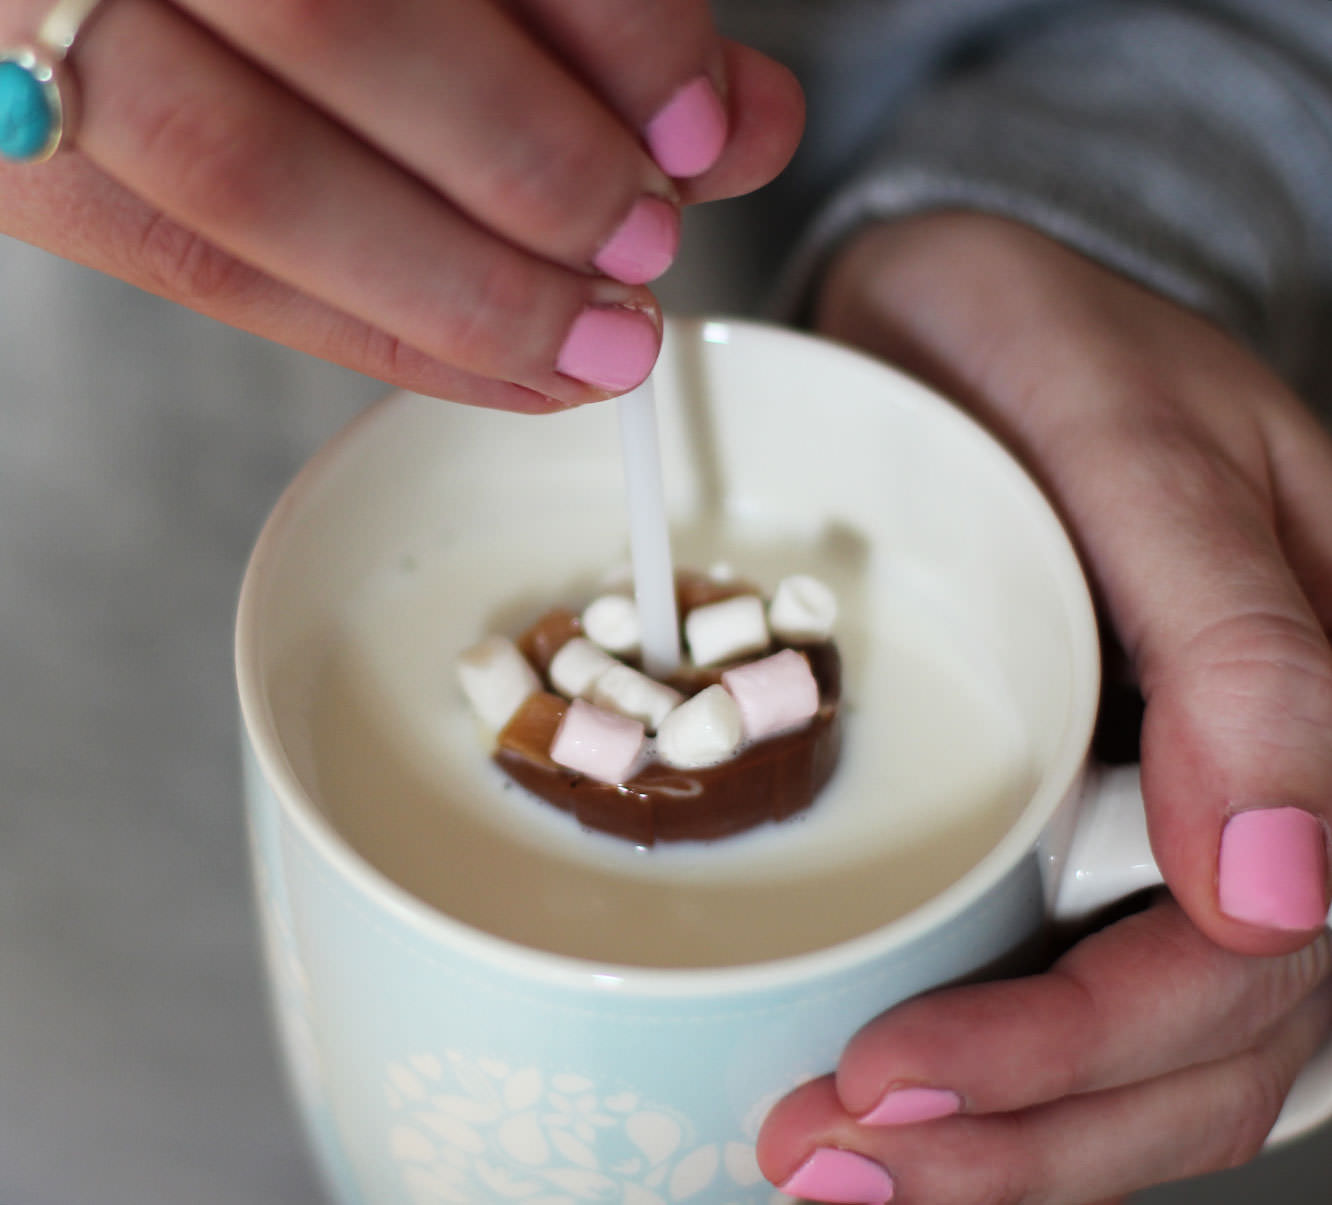
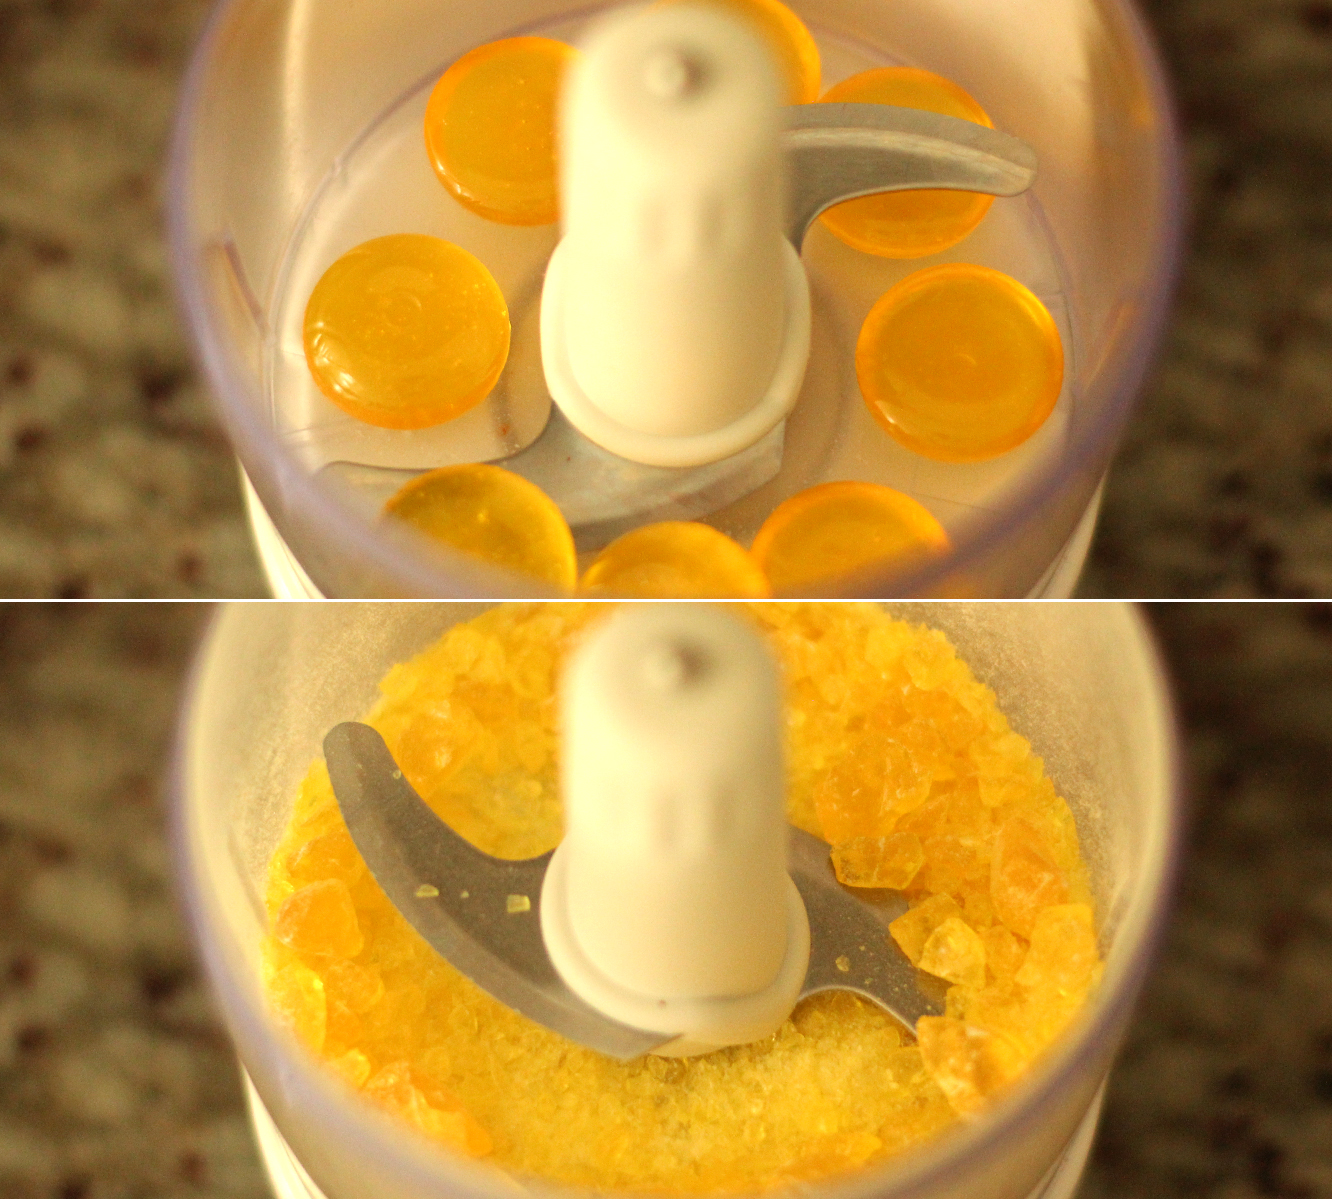
Bash up hard boiled sweets with a rolling pin in a sandwich bag, or use this life changing gadget, the mini food processor, to mush them instead.

gingerbread-house-village-recipe-guide-06

Step five

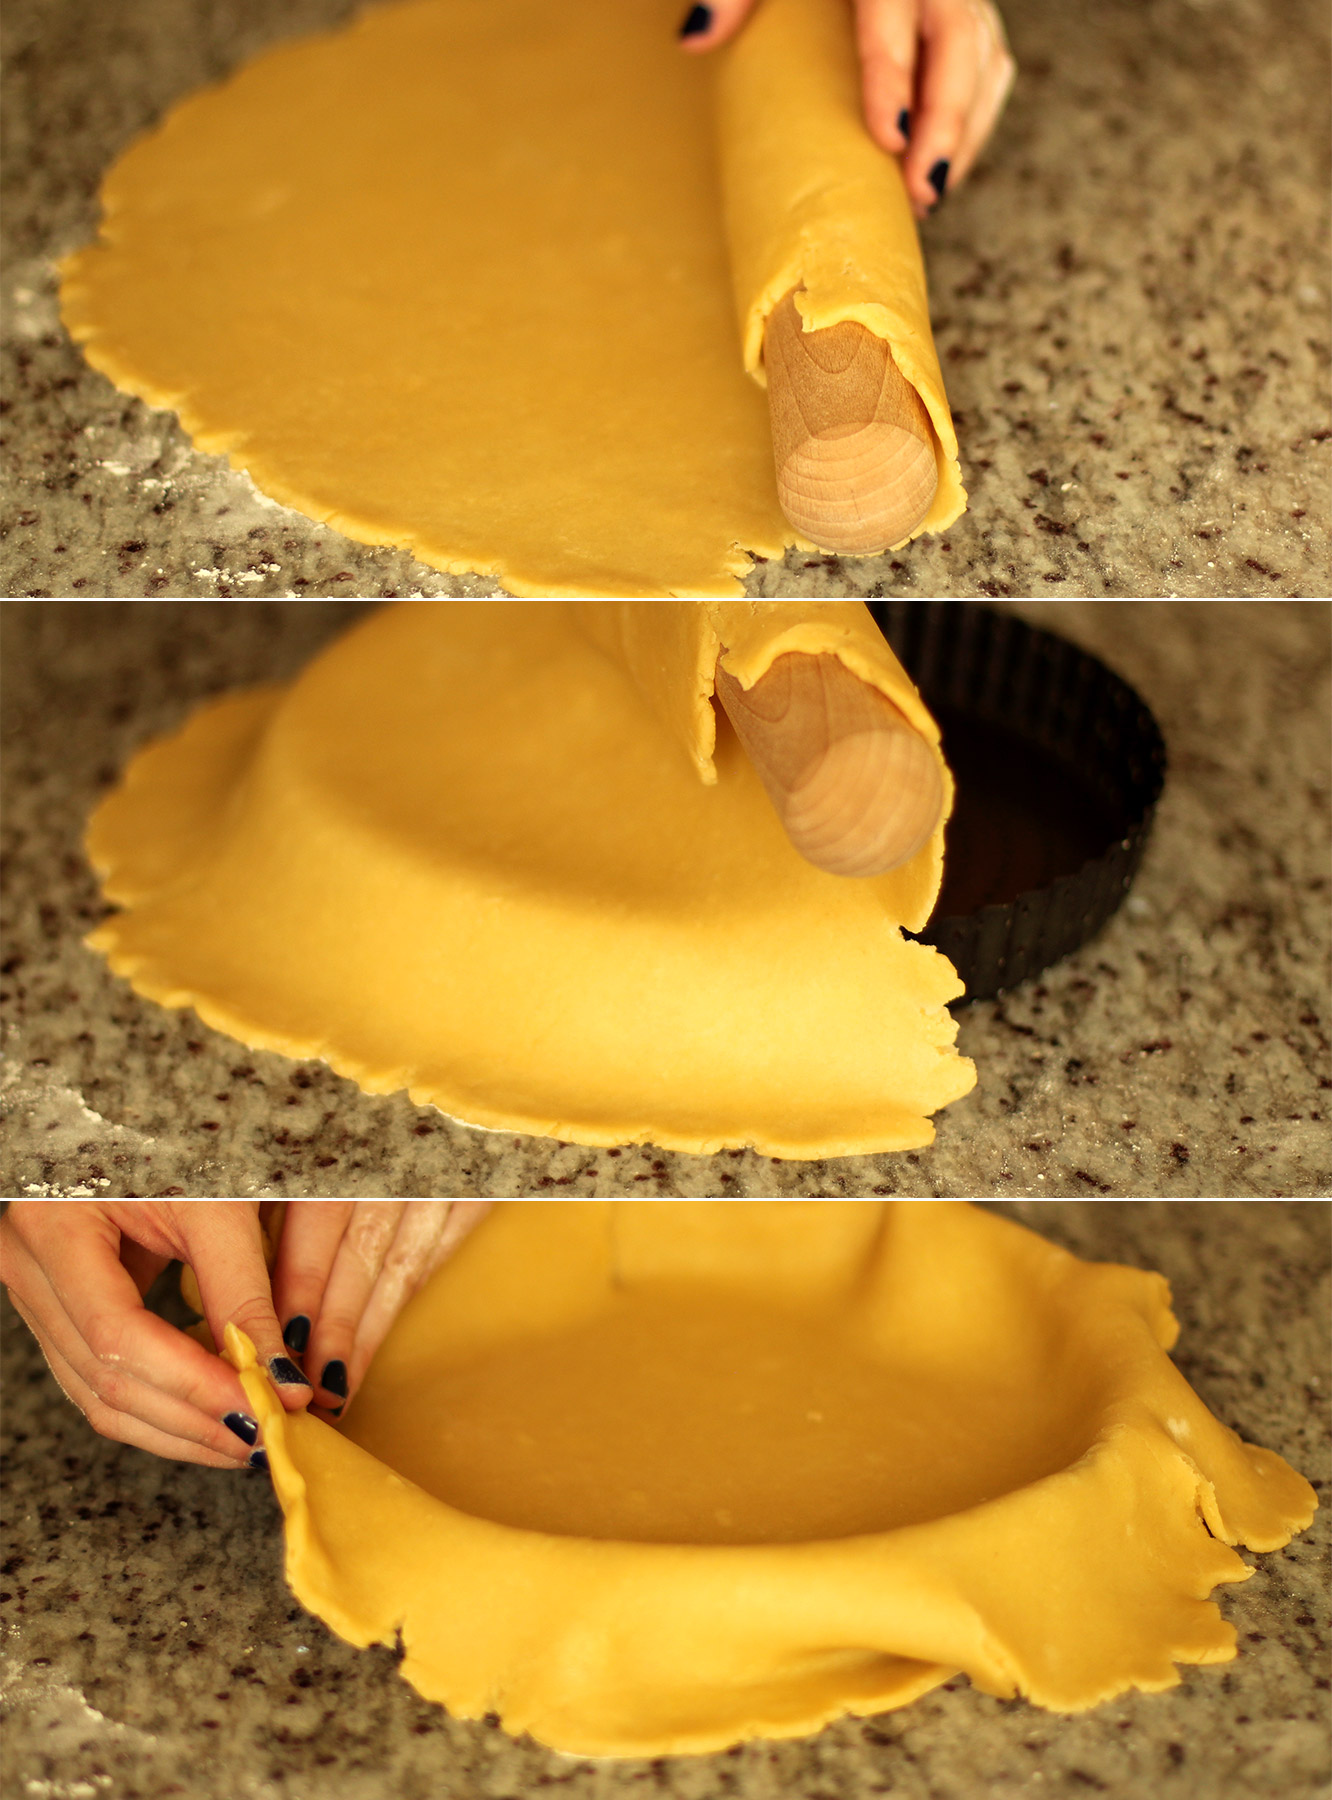
Once the dough has cooled it’s time to roll out the houses. Big, flat baking trays are best for this.

Flour a surface and roll out the dough in batches. You will probably need to use a knife and a metal spoon to extract the mix from the bowl. Don’t fight it, it’s a winning formula structure-wise.

Roll a piece of dough to the same size as your tray for maximum efficiency re:oven space.
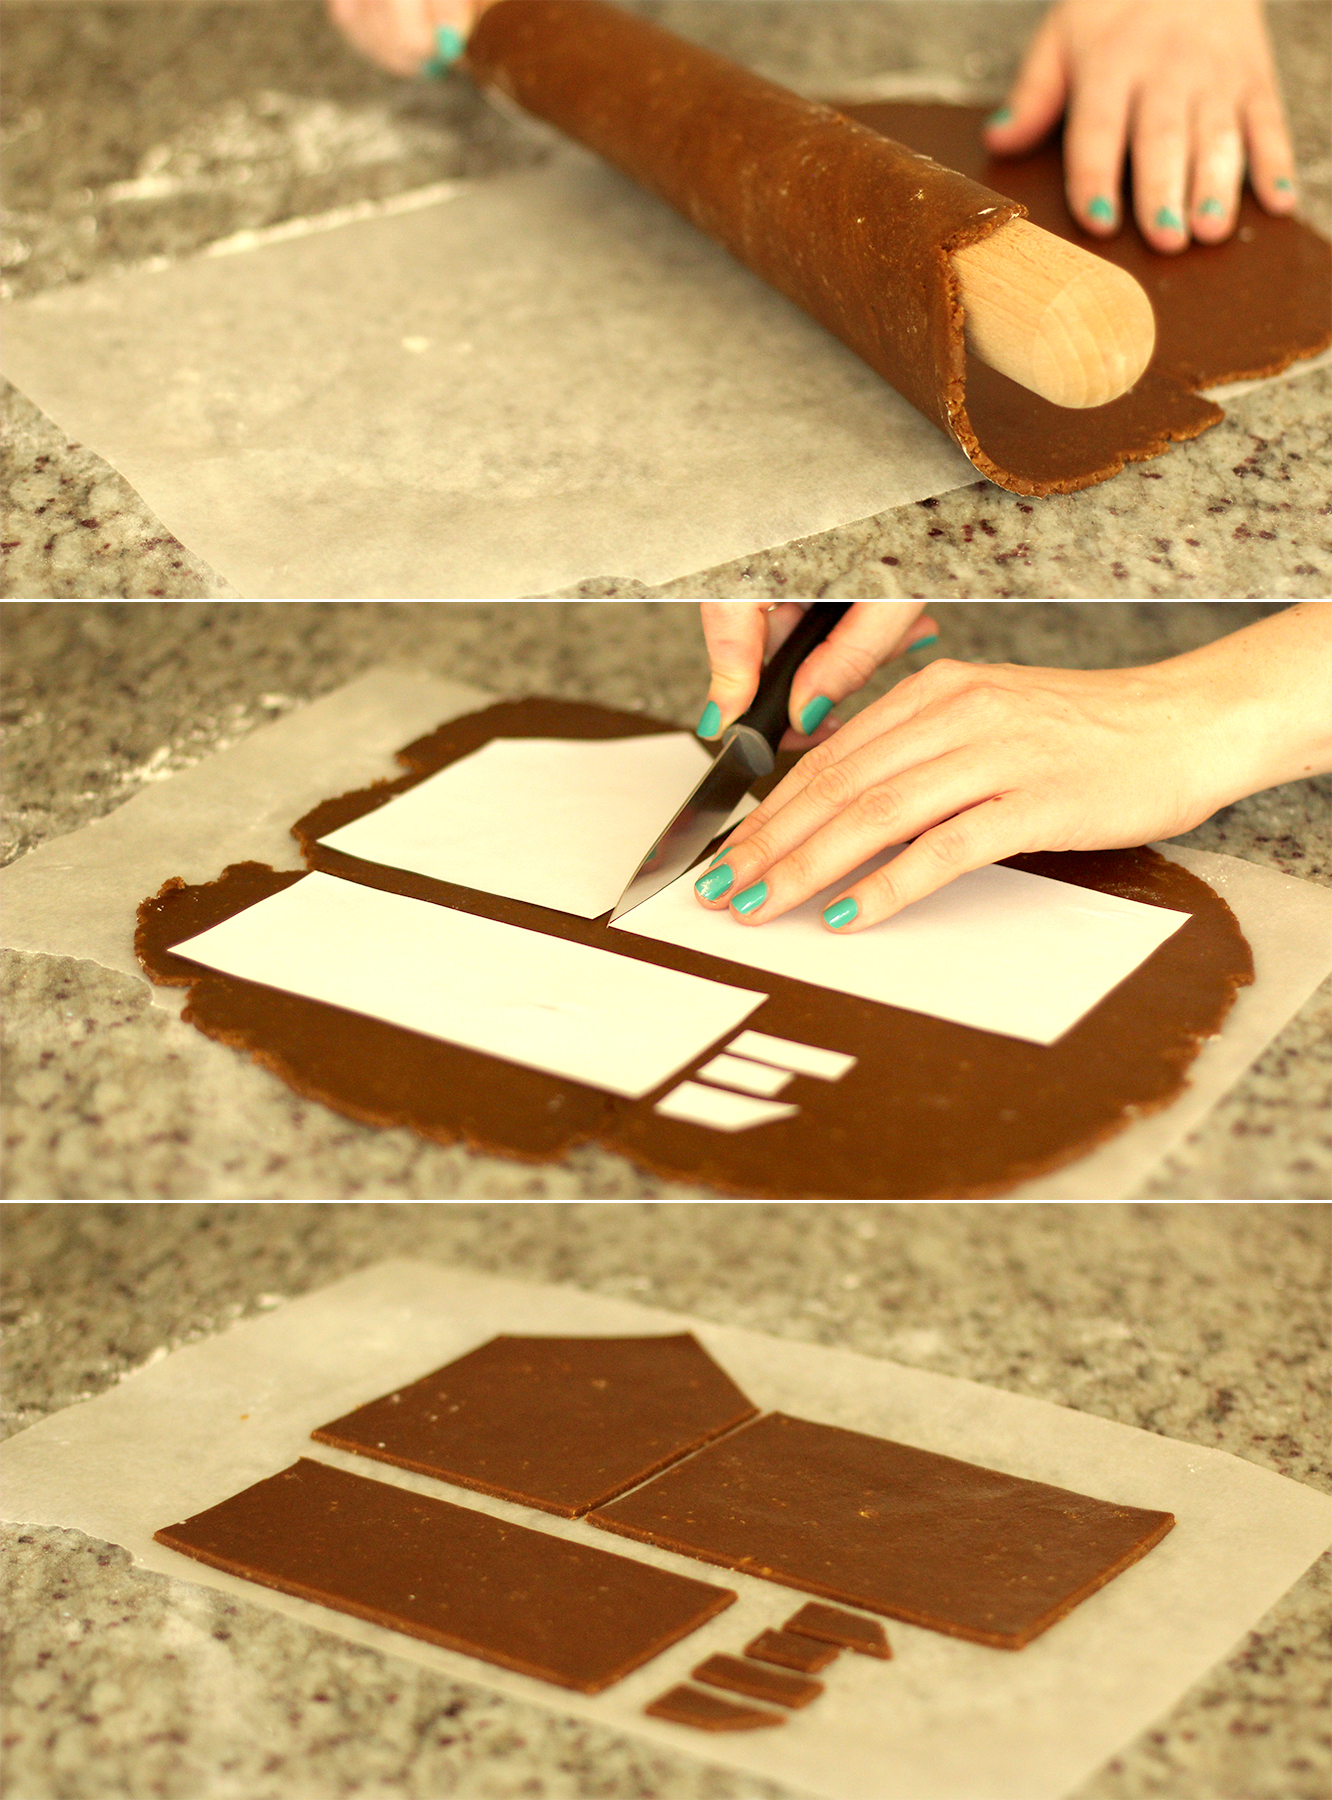
gingerbread-house-village-recipe-guide-07

Step six

Use the rolling pin to lift the gingerbread onto a piece of gingerbread the size of your tray. It is essential to do this before cutting; it stops you stretching individual pieces out of shape when you move them.

Use the templates and a knife to cut the panels out. Contrary to the image above it’s best to do batches of the same shape – that way the bake is the right amount of time for that sized piece. The most obvious way to explain that little ramble is that the chimney pieces will cook a lot quicker than the side panel for example.

gingerbread-house-village-recipe-guide-08

Step seven

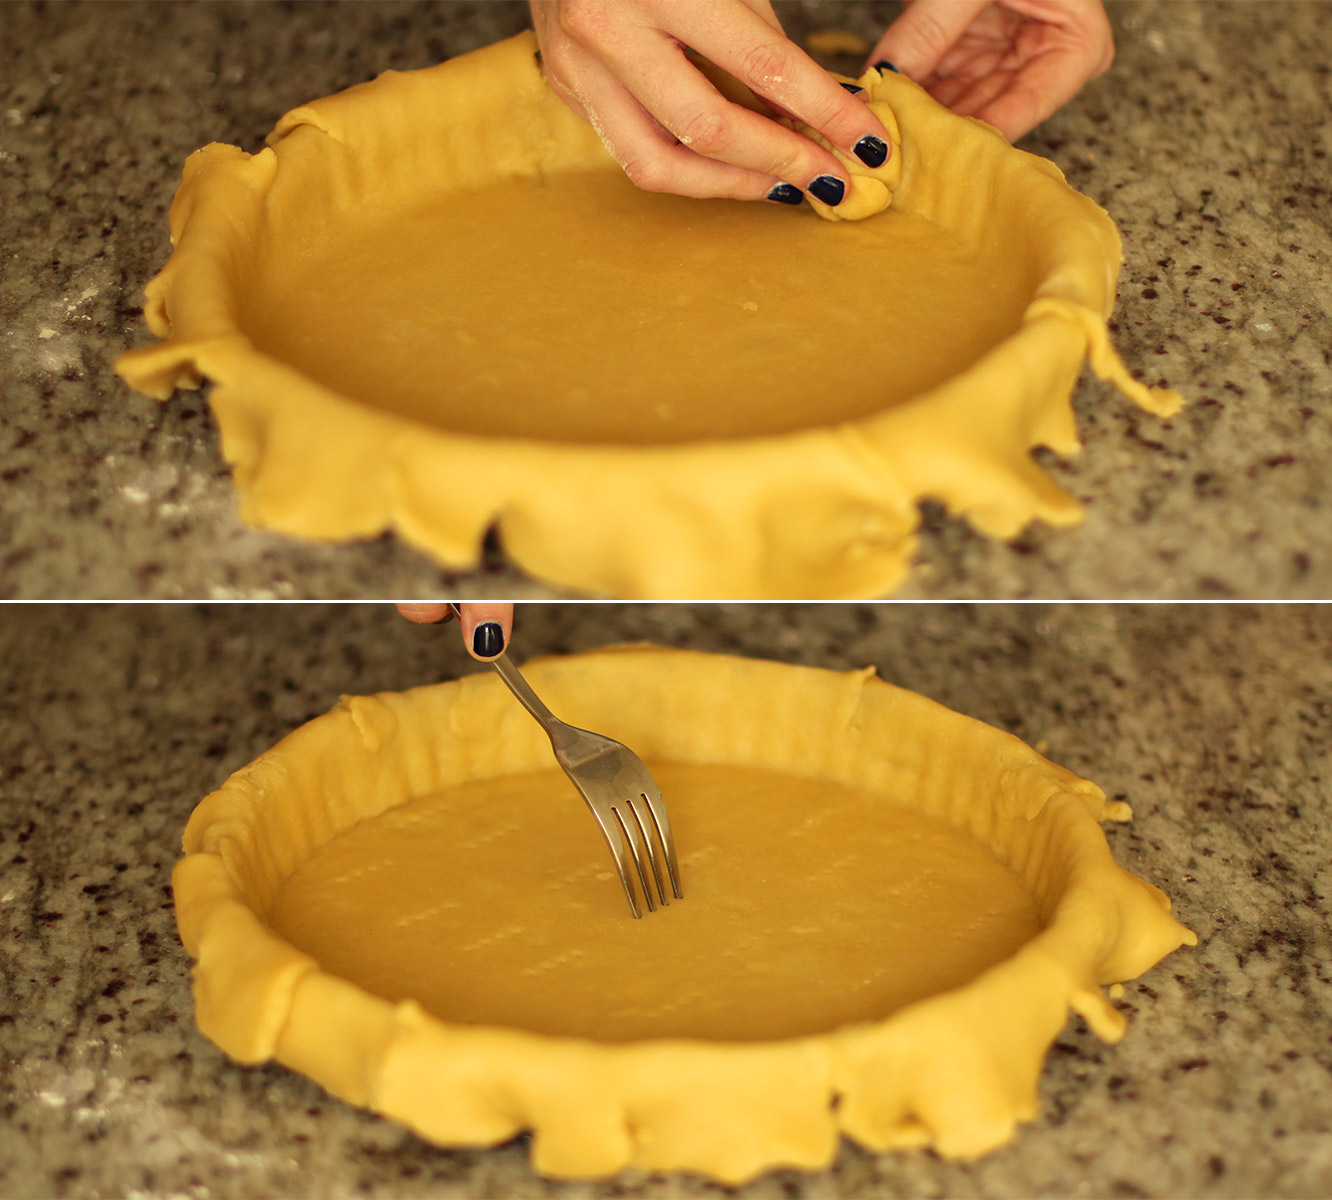
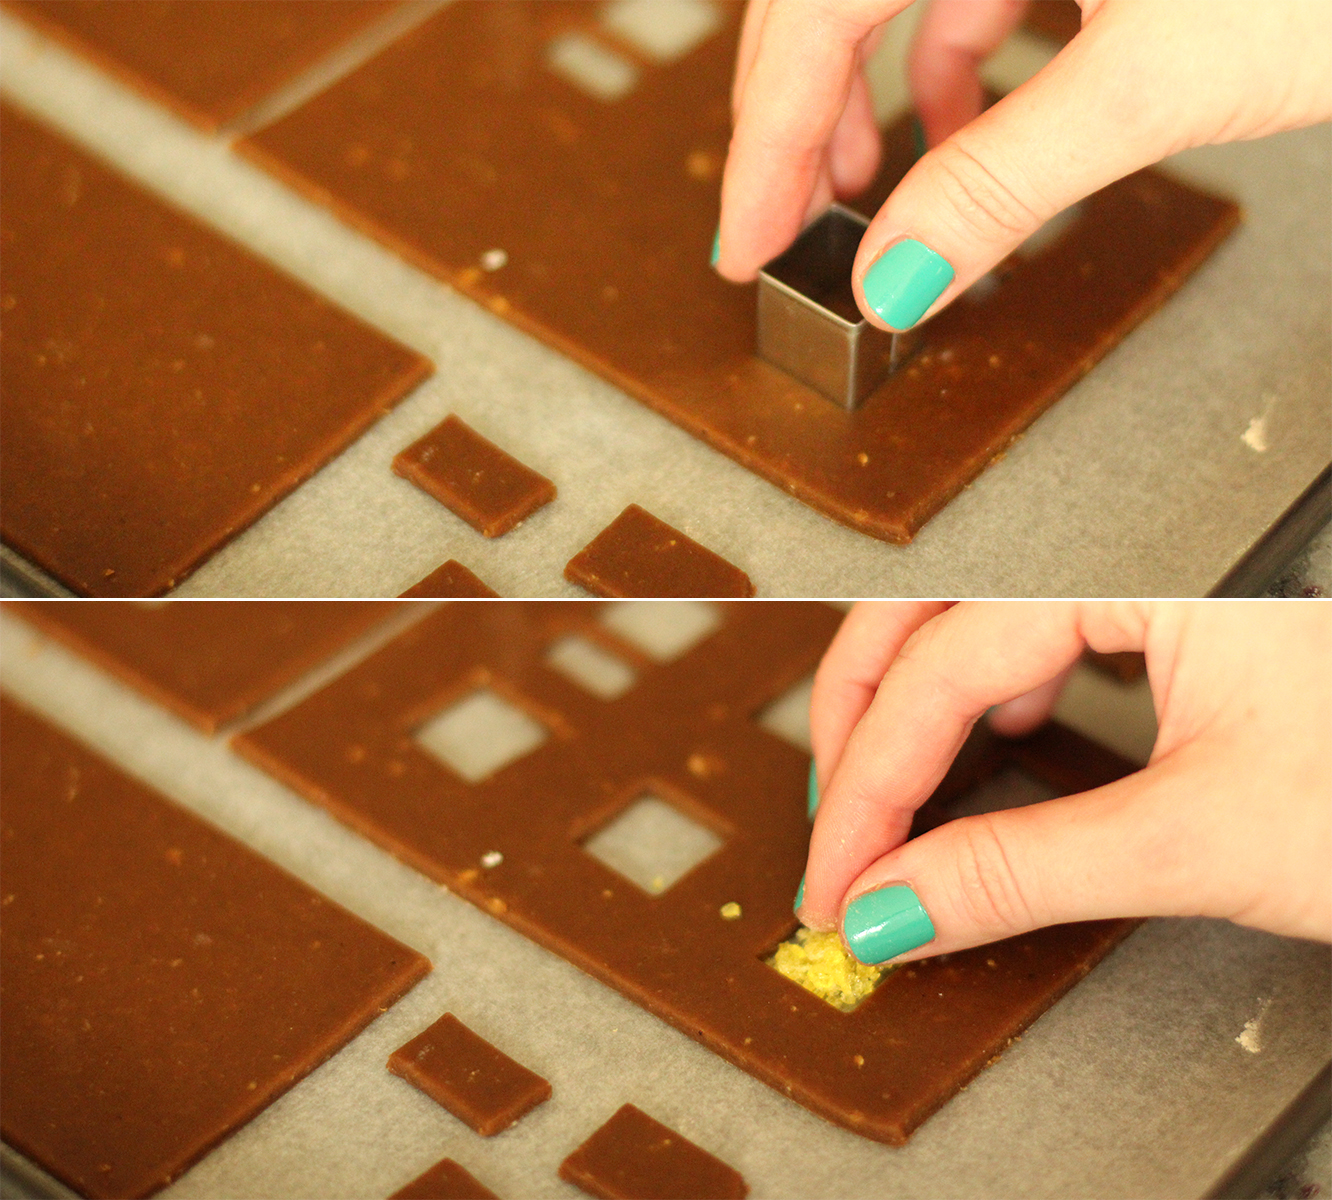
Transfer the gingerbread onto the tray and cut out window shapes. This year I invested in a little cutter set of different shapes and sizes. It was amazing. Total gingerbread game changer.

Fill the gaps with the sweet crumbs. This is why you need baking paper. Otherwise the sweets melt and glue your house to the tray.

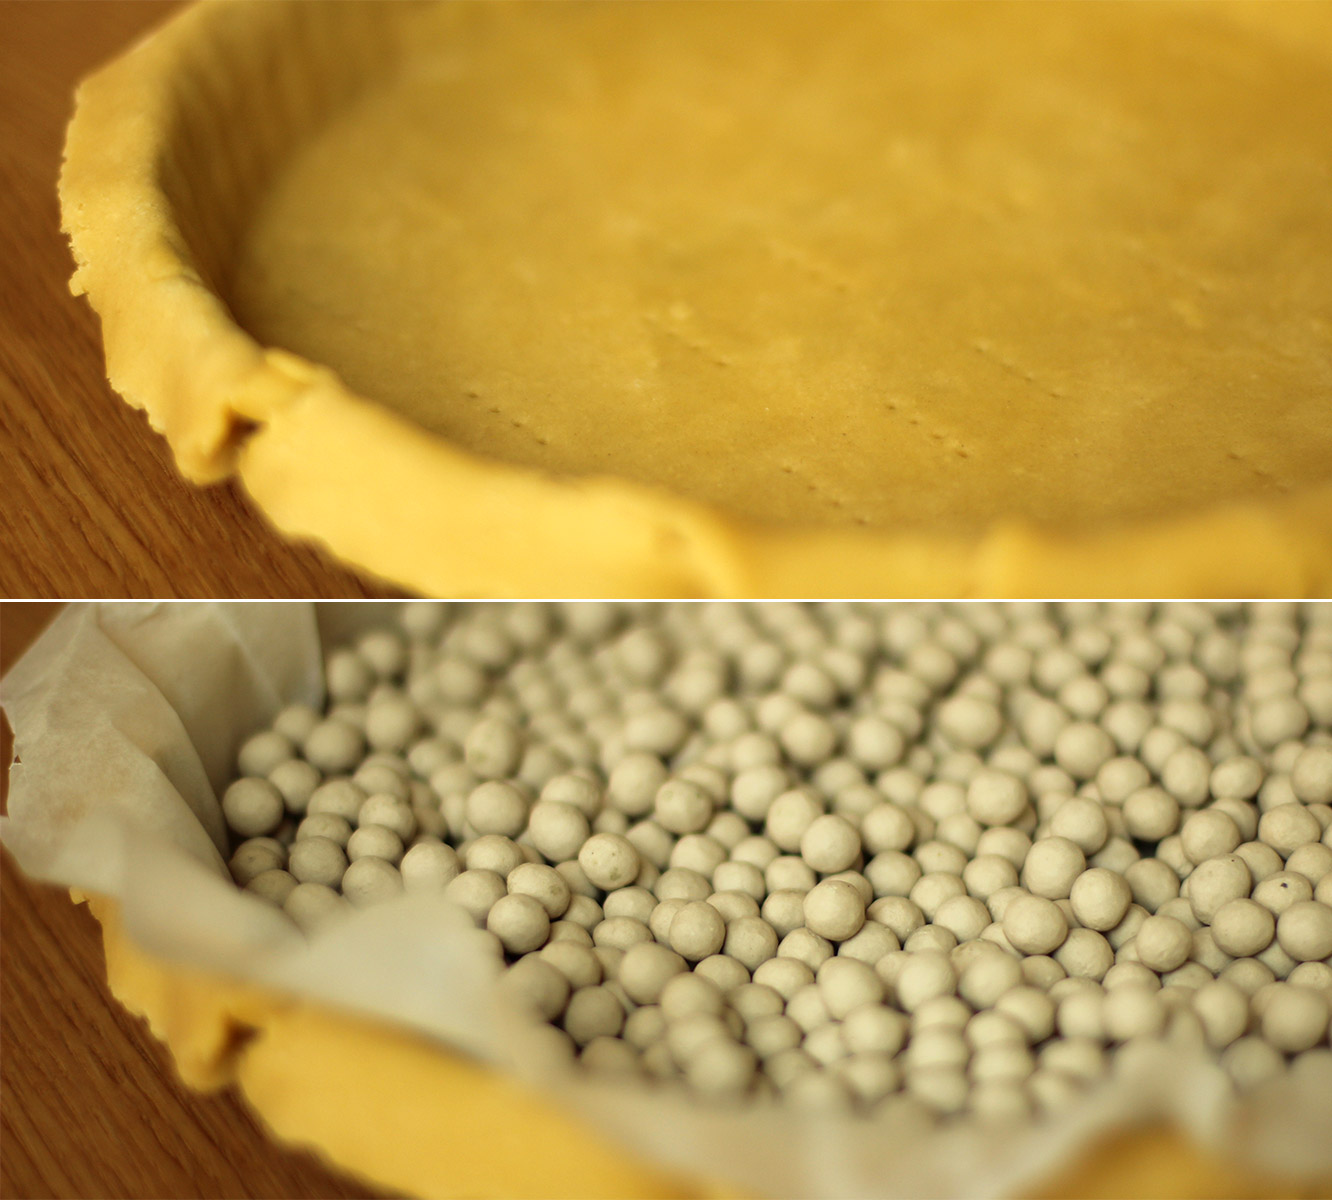
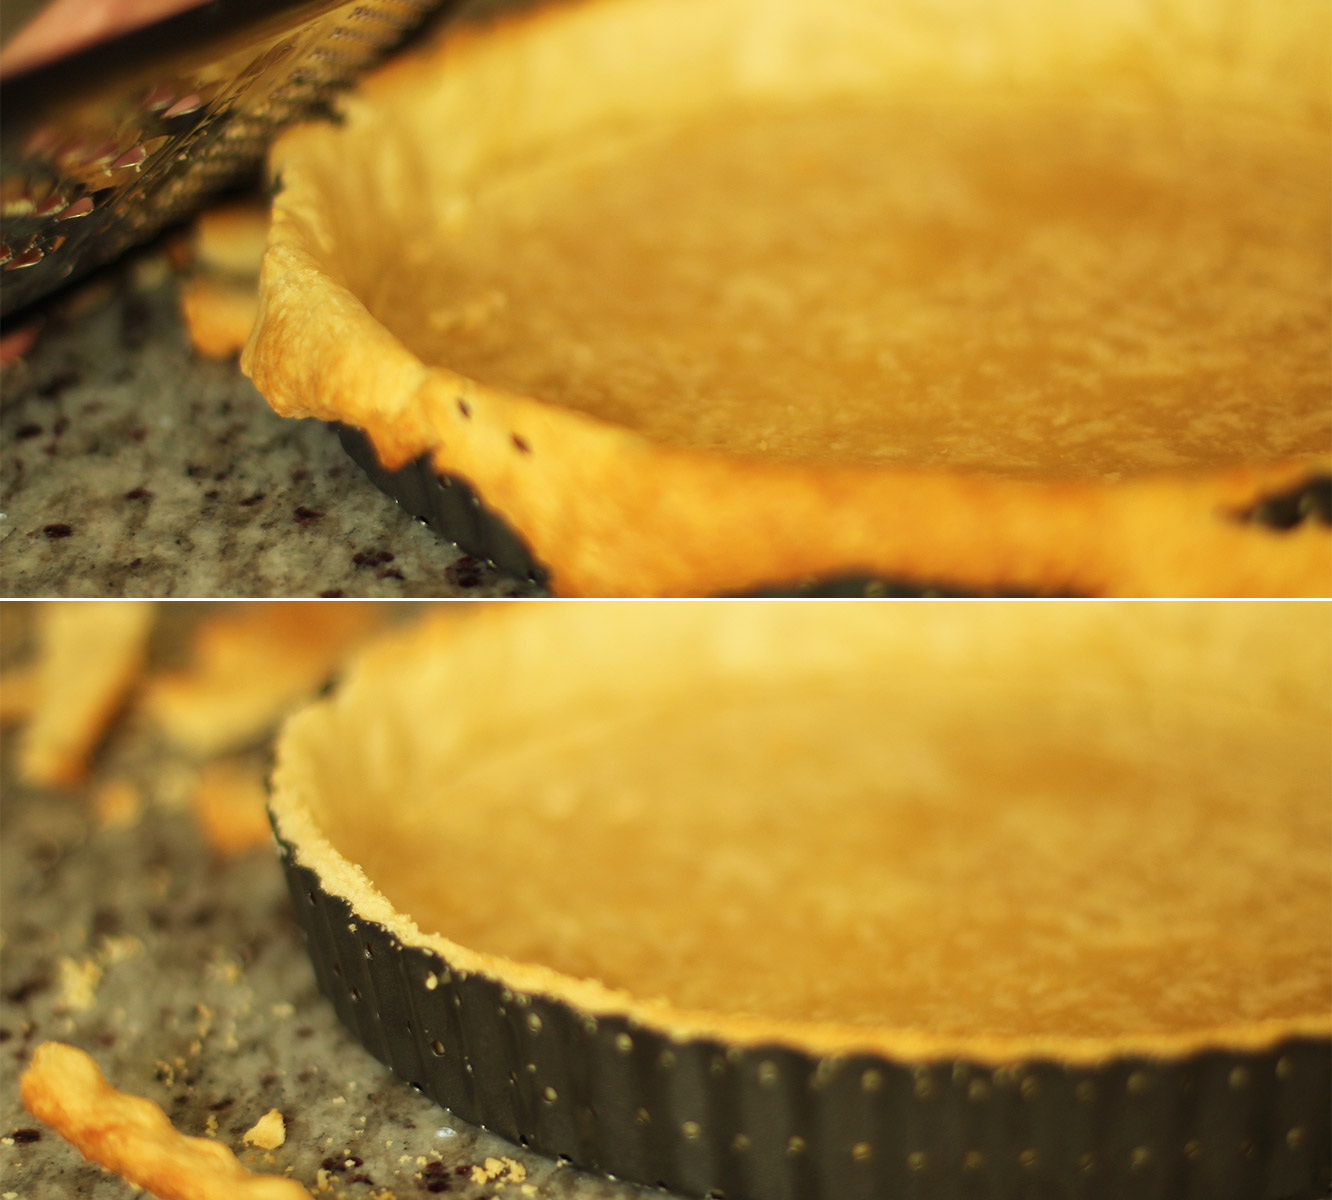
Bake on 180C/gas mark 4/350F for 10-15 minutes. Over-cooked is preferable as they need to be able to stand up, and they will get softer as they sit out.

gingerbread-house-village-recipe-guide-10

Step eight

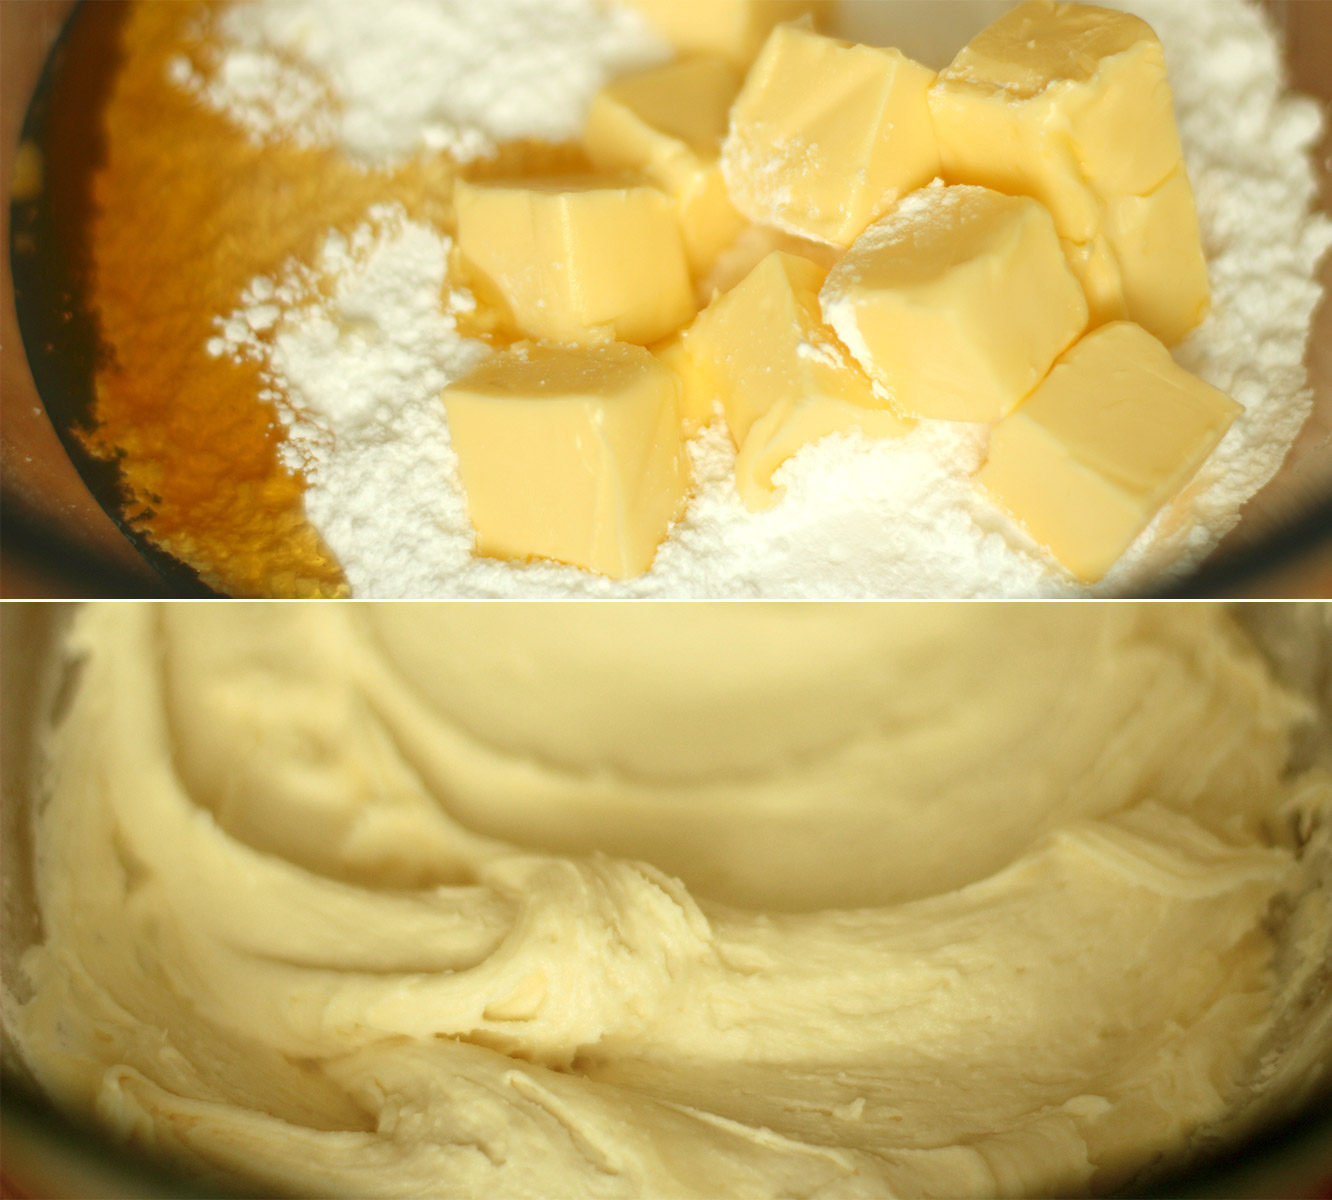
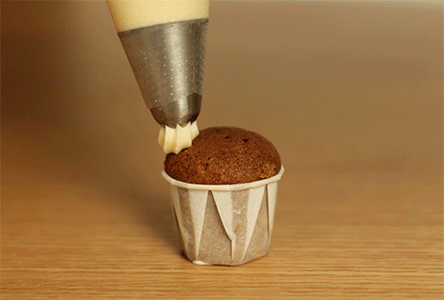
Time to assemble. Mix together the royal icing making sure it’s really thick, it will stick better and dry quicker if it’s opaque white and not that sticky to touch.

If you’re making a big house, have a spare pair of hands at the ready and/or a lot of glasses and bottles to prop things against.

These little ones are actually really easy to put together in comparison.

Start with one side flat on the table. Pipe two even strips along each edge. Stick the two matching sides to this piece, propping them up with a glass so you have your hands free.

gingerbread-house-village-recipe-guide-10

Step nine

Pipe along the top edges and stick the final side piece on the top.
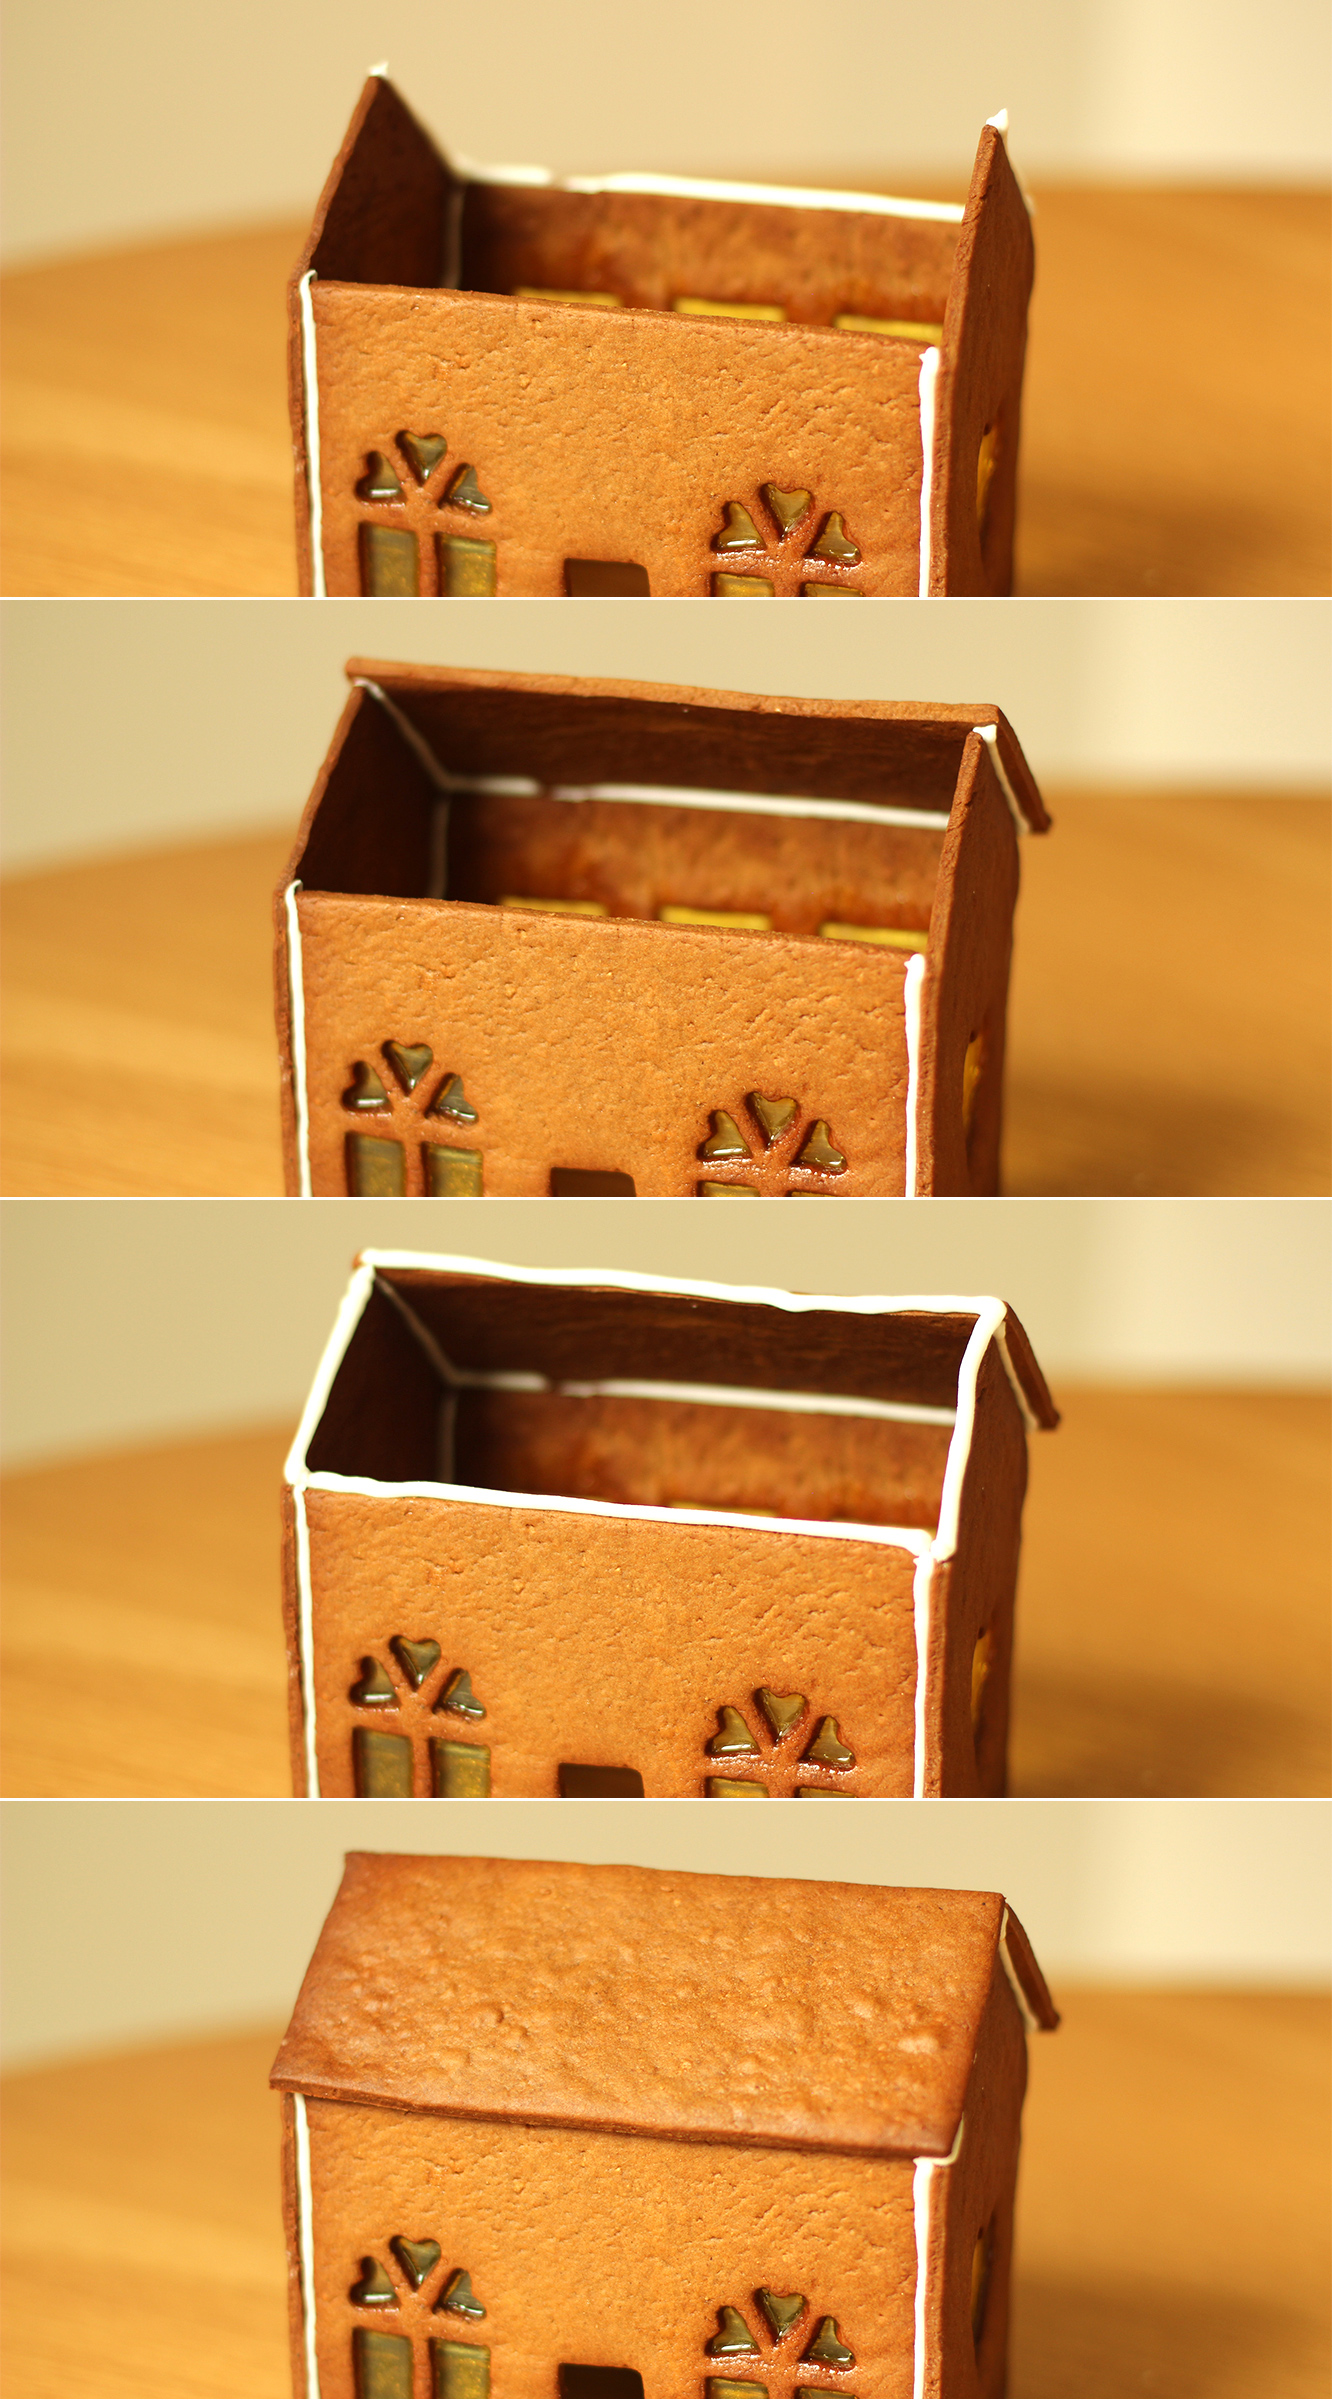
gingerbread-house-village-recipe-guide-11

Step ten

Flip the house upright. If you’re making a big house put it straight on the base at this stage and pipe on the inside corners to re-inforce the house. Less important with these little guys. They are actually great ‘starter houses’. Yes I do a bit hate myself that I say that, and many of my other tips with ZERO irony.

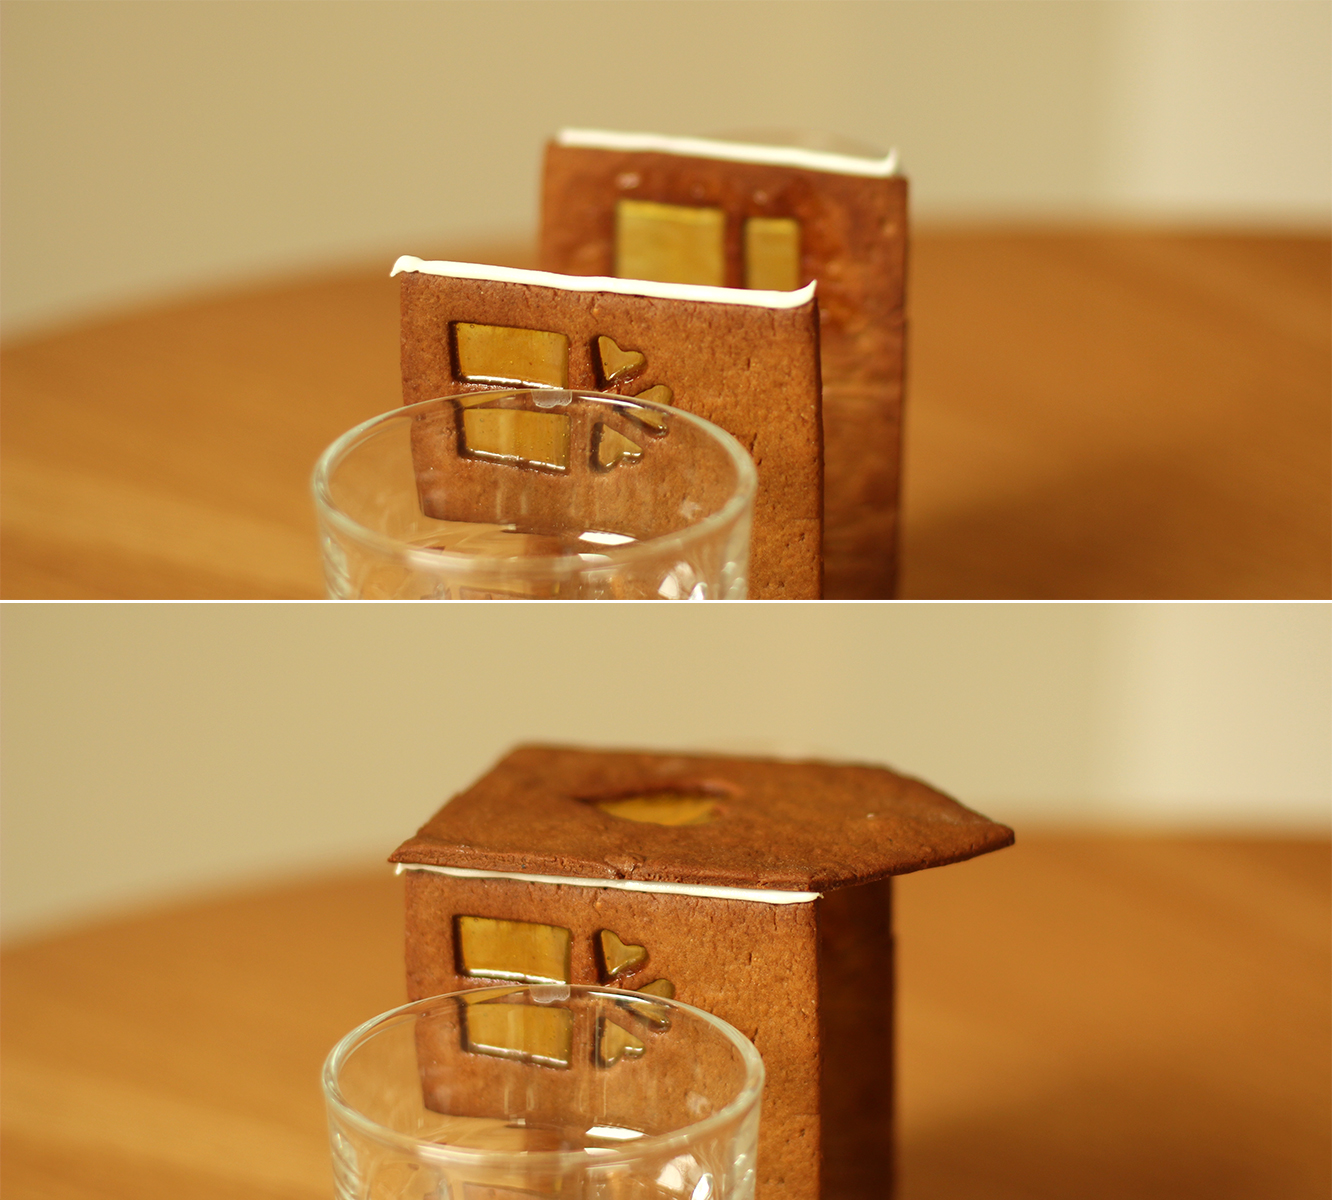
Pipe along the back sloped edges and the back. Stick down a roof panel. The straighter edge should be at the top, as you are more likely to cover irregularities at the bottom with a bit of overhang.

Pipe the top of the roof, the sides and edge. Stick the other roof panel down.
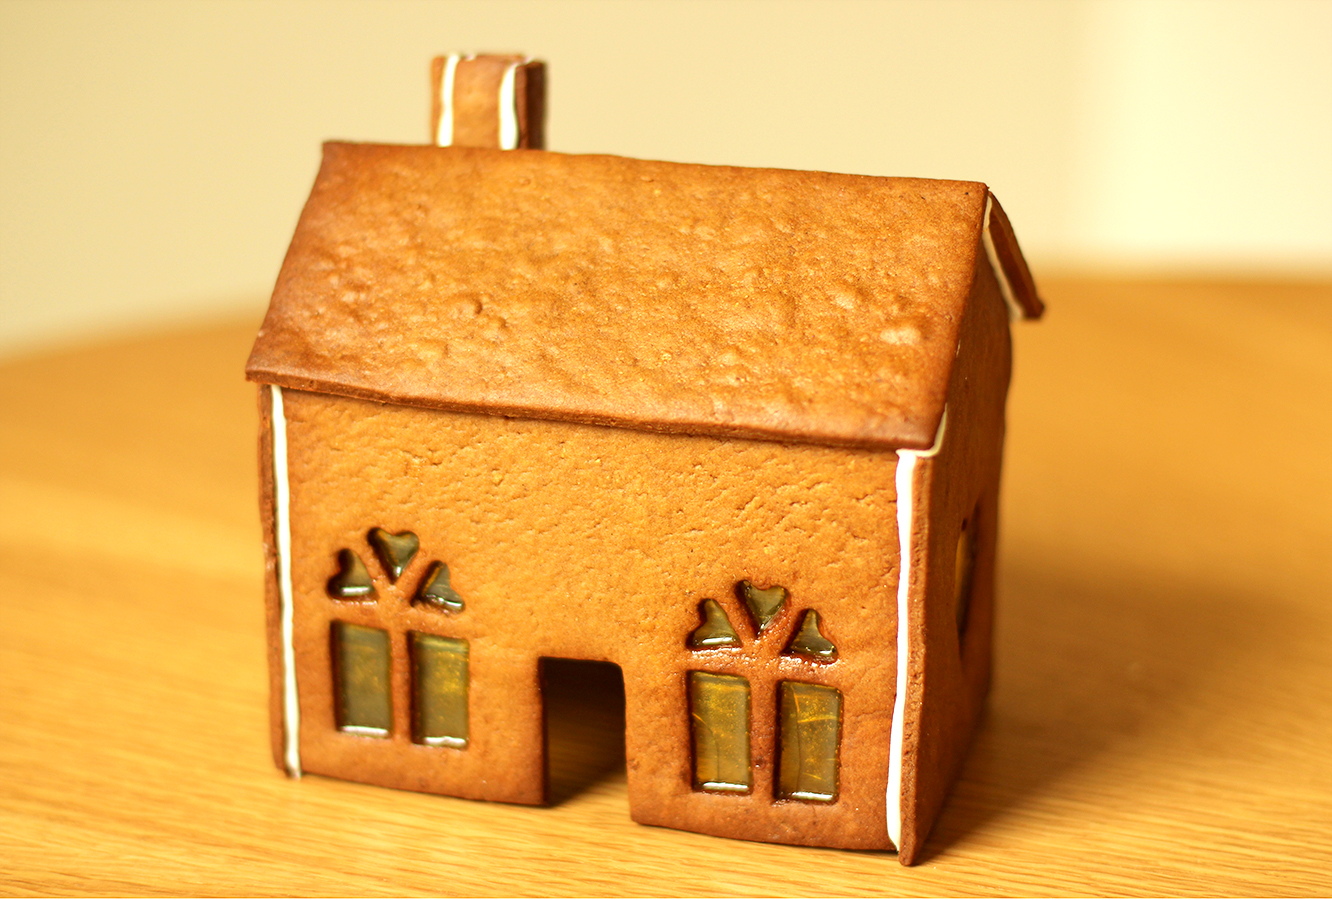
gingerbread-house-village-recipe-guide-12

Step eleven

Make the chimney in the same way, and attach it to the roof.

gingerbread-house-village-recipe-guide-13

Step twelve

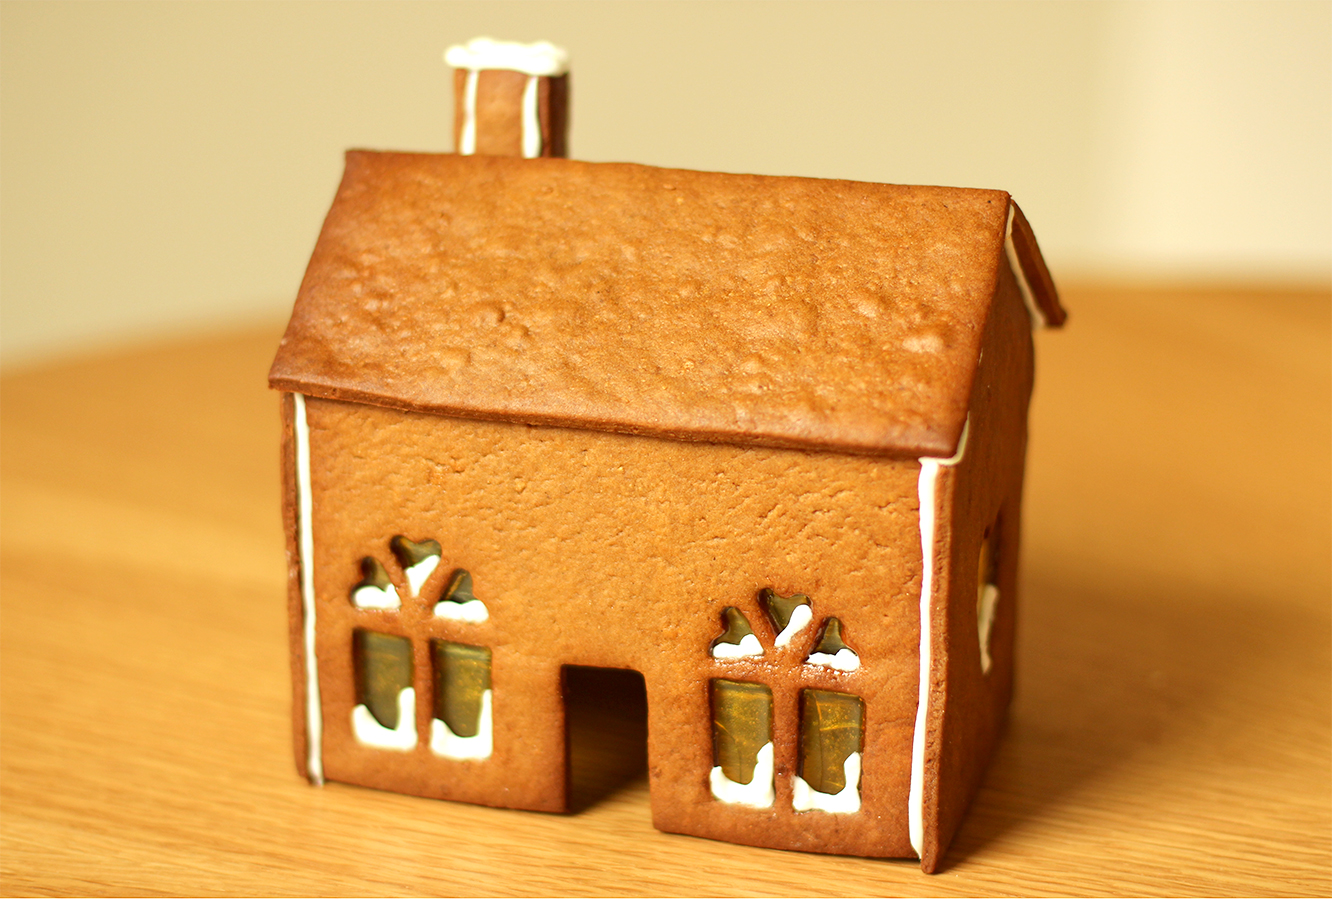
Pipe some snow in the windows while the piping bag still has quite a thick opening.

gingerbread-house-village-recipe-guide-14

Step thirteen

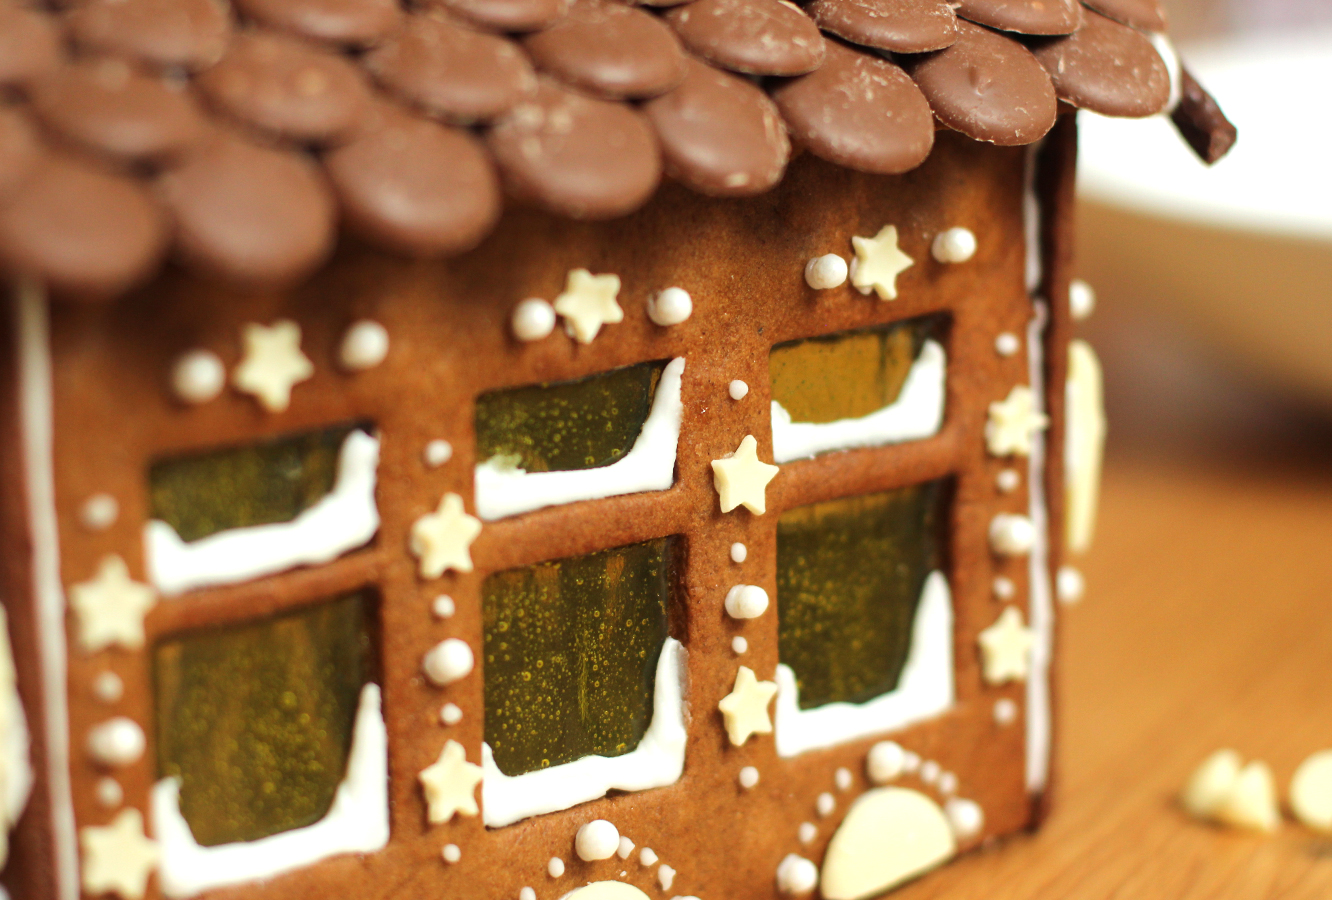
Start tiling! Make sure the first layer overhangs the bottom of the roof, and build up subsequent layers by overlapping them as shown.
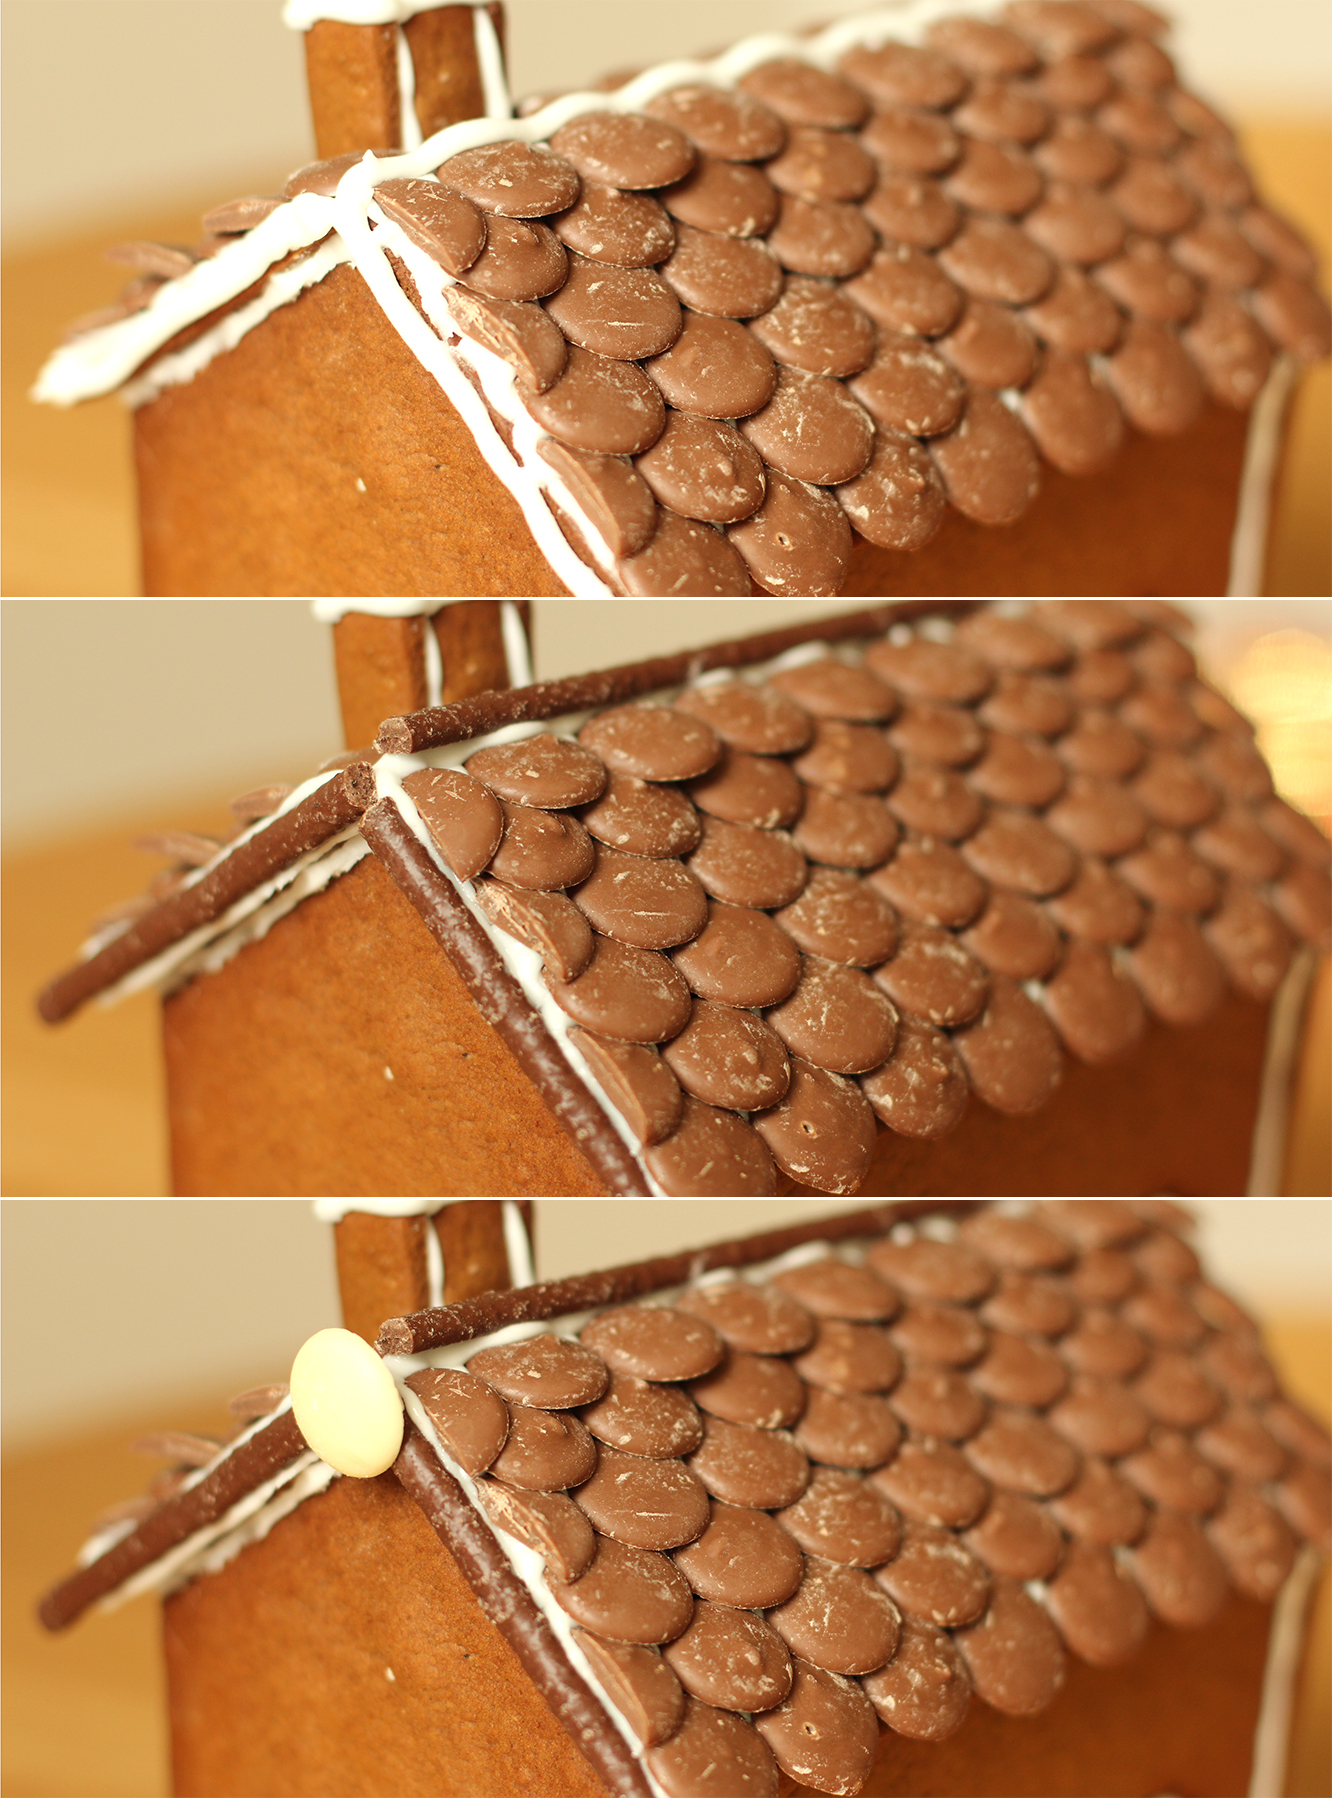
gingerbread-house-village-recipe-guide-15

Step fourteen

Neaten up the edges with chocolate fingers or matchmakers and a chocolate button or two. A row of dolly mixtures along the top, or mini marshmallows looks cute too.

gingerbread-house-village-recipe-guide-16

Step fifteen

Continue to decorate the sides and the back. I find a much narrower nozzle on the piping bag is good for this. I like putting these little dots around things.

gingerbread-house-village-recipe-guide-18

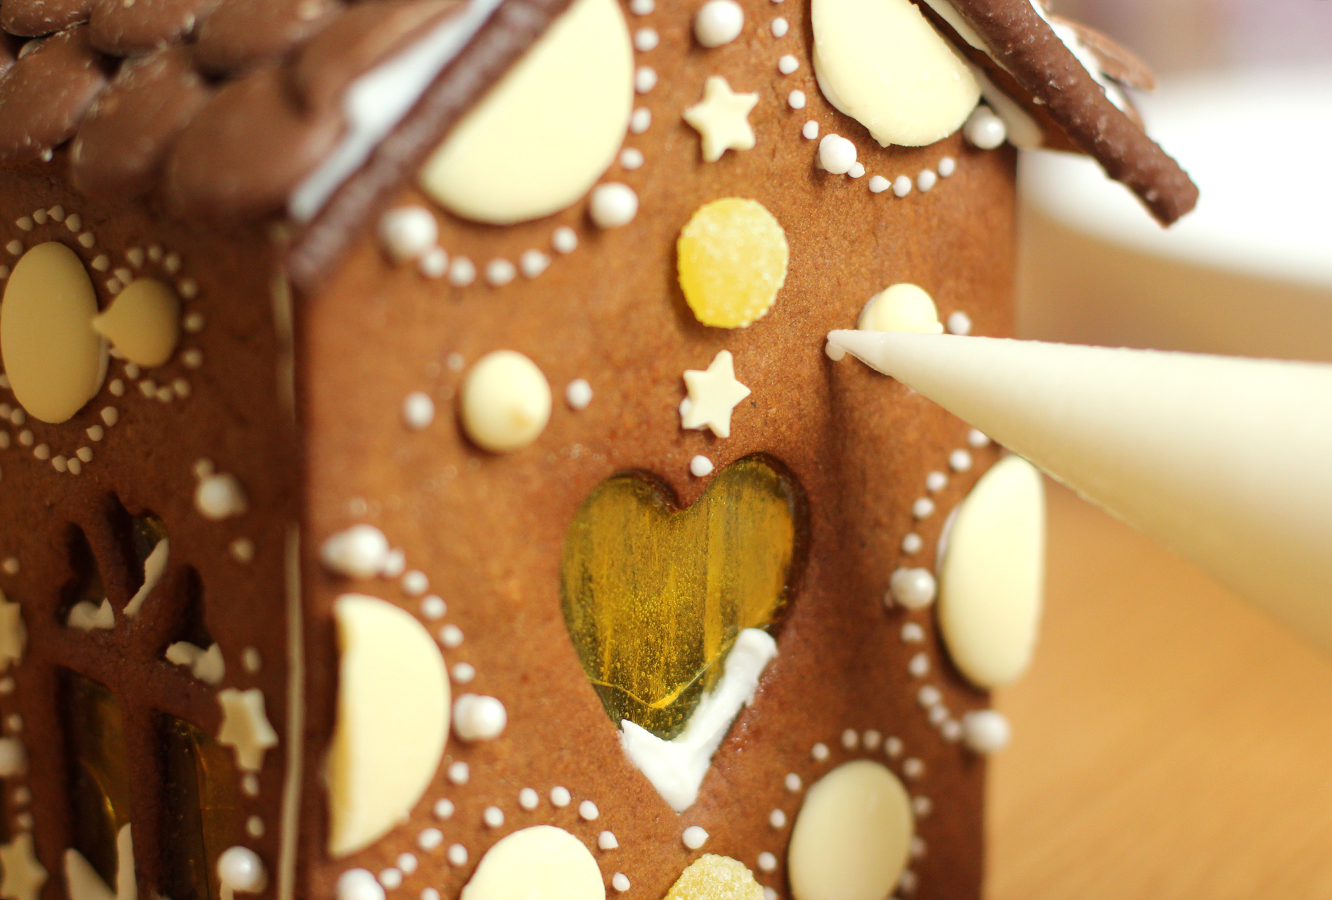
This year I used a lot of white chocolate buttons, I don’t have much choice in the local small supermarkets nearby. Silver balls, mini stars, chocolate drops and other round sweets are amongst my favourites for the decorations.

gingerbread-house-village-recipe-guide-19

gingerbread-house-village-recipe-guide-20

Step sixteen

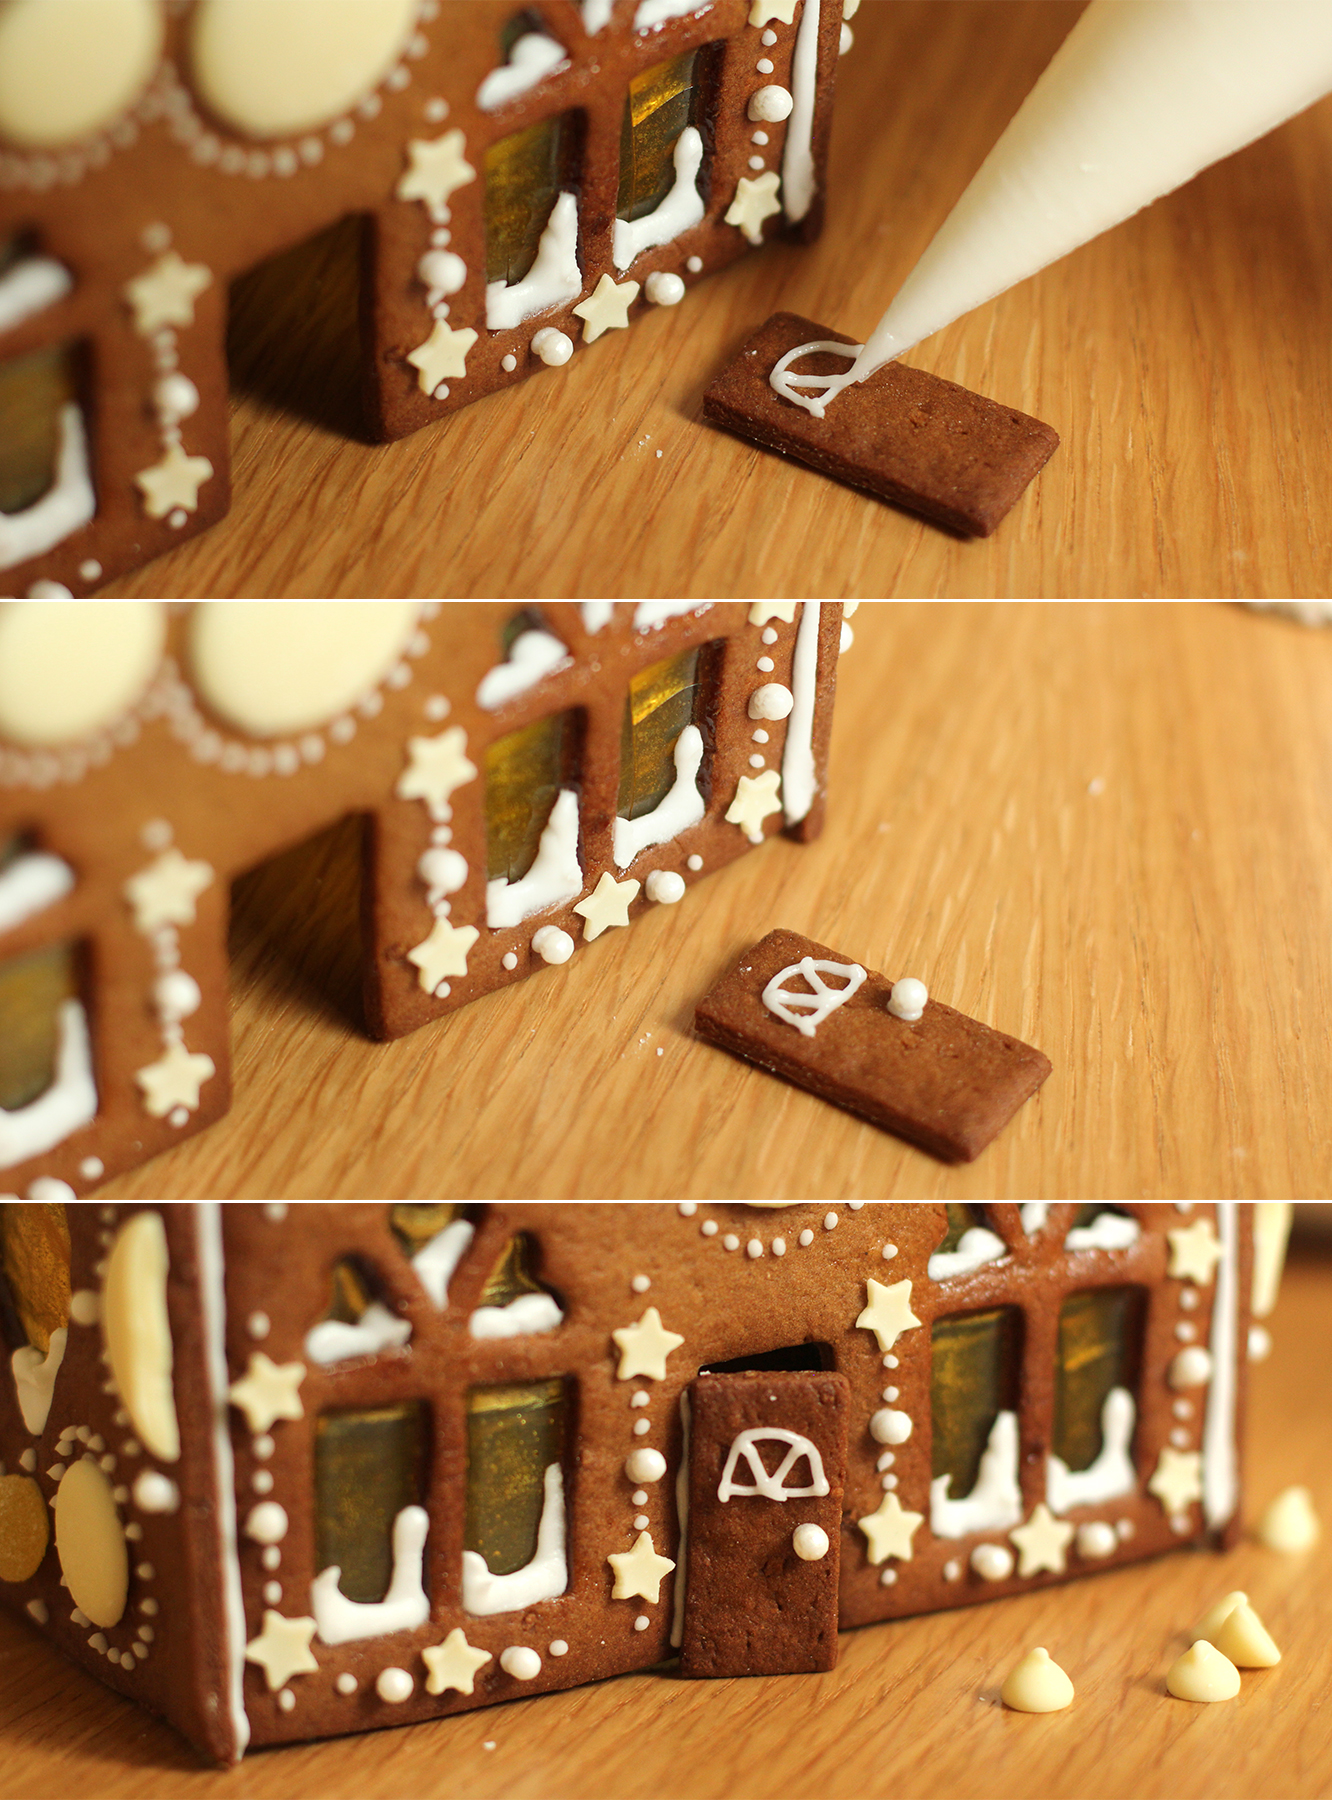
Don’t forget the little door! I wouldn’t attach it at this stage if you are doing a big house, because you need to squeeze the tea lights through it. The little ones can just be placed over the top of them as they don’t need to be attached to a base at this stage.

gingerbread-house-village-recipe-guide-gif

Step seventeen

Keep making them.

gingerbread-house-village-recipe-guide-25

gingerbread-house-village-recipe-guide-24
gingerbread-house-village-recipe-guide-22

gingerbread-house-village-recipe-guide-21

Here’s a snap of me (with the reddest face, thanks blushing reflex) that was insisted upon, and all but one of us (come back Saskia!) in the obligatory family photo.

gingerbread-house-village-recipe-guide-27

gingerbread-house-village-recipe-guide-26

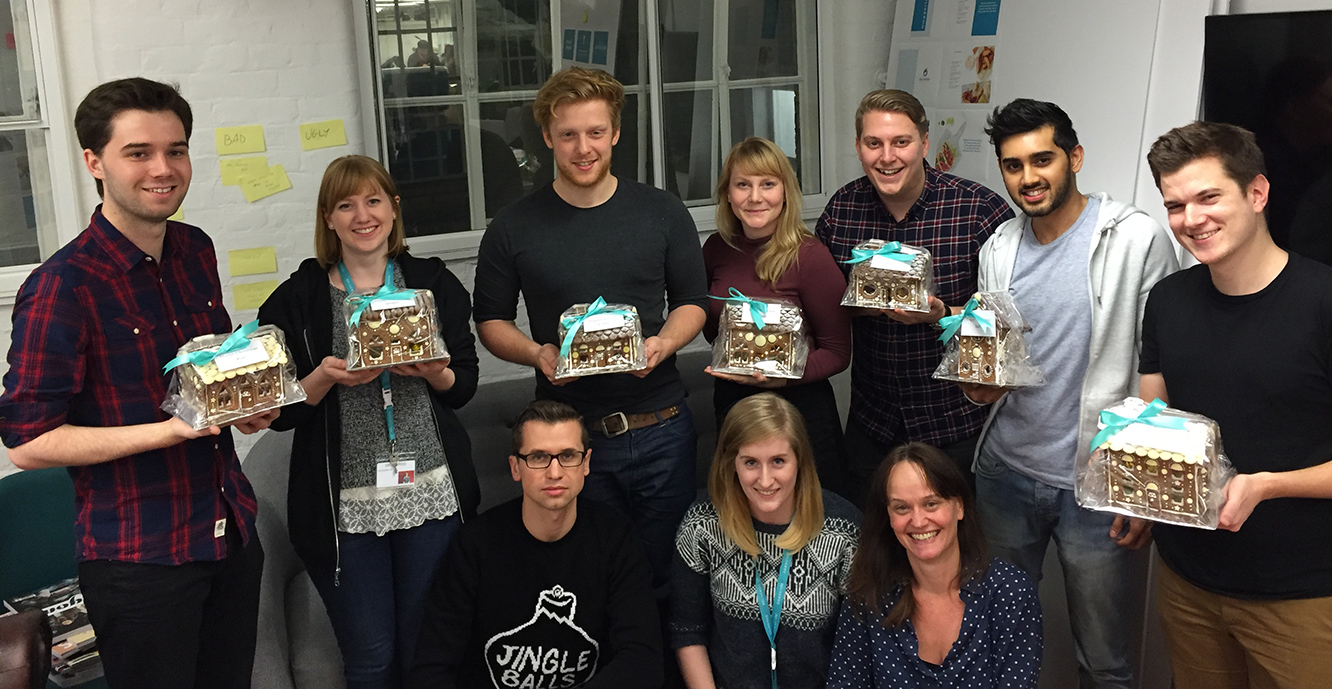
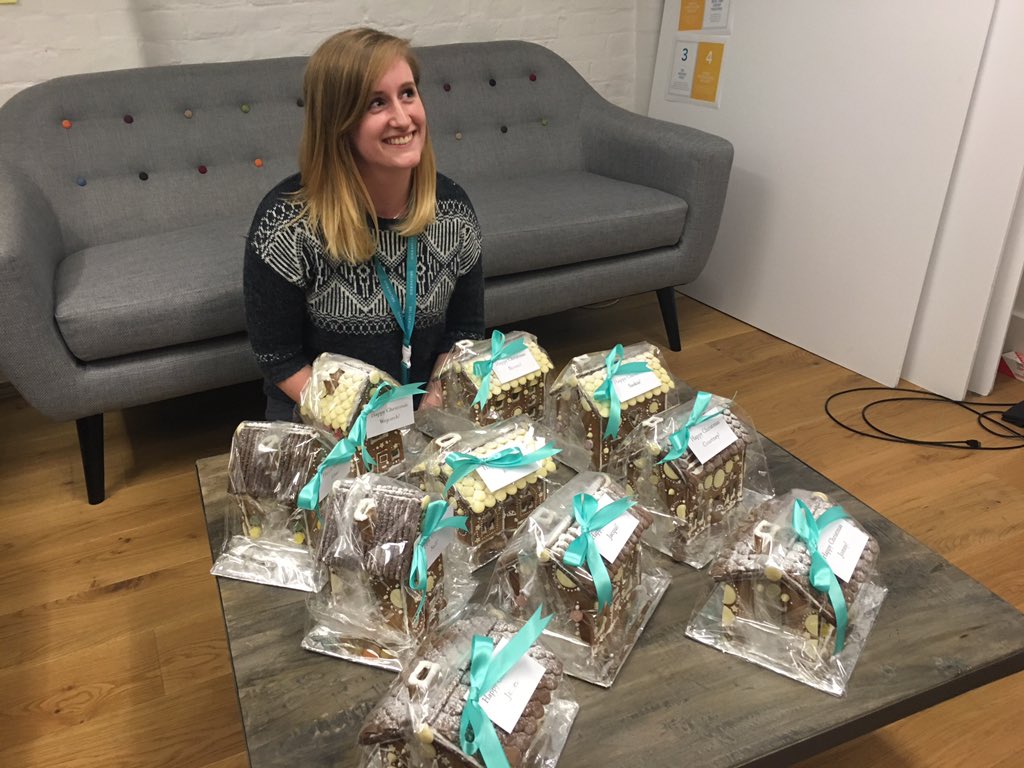
How did I get them into work? A special train, a suitcase and some blankets.


Last Christmas I gave you my blog

Hi all, massive sorrys this week as I’m afraid I went away for the weekend. Working full time again and running out of my little stash of ready posts has meant that I’m empty handed so far as new ideas go this week.

BUT, fear not, for I have now been blogging for two whooooole years. I also quite like Christmas. Here are a few ideas from the last couple of years to keep you ticking over until next week.

Mince Pie Truffles

mince-pie-truffles-05

Modelling clay tags/ornaments

homemade-fimo-christmas-decoration-tag-09

Twig decoration

sprayed-branches-cheap-home-christmas-decoration-2

Washi tape bunting

washi-tape-christmas-bunting-4

Chocolate pudding truffles

christmas-pudding-truffles-recipe-8

Lino print cards

lino-cut-christmas-card-joy-11

Peppermint hot chocolate

PeppermintHotChocolate5

Christmas character lollies

ChristmasLollies10

Gingerbread house

gingerbread-house-2014-recipe-4

Hot chocolate stirrers

homemade-hot-chocolate-stirrer-gift-5 homemade-hot-chocolate-stirrer-gift-4

Grown up milk and cookies

mars-bar-baileys-cocktail-whoopie-pie-cookie-5

Food innovation at its finest

Apologies for the day late post friends. I had a miniature pie melt down at the weekend (#myblogginglife) and as a result didn’t fancy posting yesterday. Instead I took an evening of sitting on the kitchen counters with the housemates eating pumpkin pie.

Speaking of the housemates. A while ago one of mine professed herself to be a food innovator. Bold claim? Yes. I thought so. When I asked for proof of this theory, she was ready with it. “Well,” she said calmly, and with an air of smugness, “I’ve had an excellent idea for mince pie truffles”. Lover of mince pies I am. Did I think this idea was a good one, worthy of the self proclaimed food innovator title? No, reader, I did not.

About a week of scorning later (I cannot put words together to explain how disgusting I thought the idea was and how aggressively I communicated that to her) she returned home with a box of mince pies to prove her idea, totally unfazed, a quality all struggling food innovators must no doubt possess. I’m sure Heston could empathise.

Anyway. Turns out, I like mince pie truffles. You’ll have to trust me on this one. Best eaten from the fridge, sound and look entirely unappetising, ladies and gentlemen, I bring you the recipe for the humble (but great) mince pie truffle.

This post is dedicated to one Ms Afua Addai-Diawuo, food innovator.

mince-pie-truffles-01

You will need

6 mince pies

300g/10.5 oz dark chocolate

Some sprinkles if you have them

mince-pie-truffles-02

Step one

Using a food processor blitz the mince pies until they are a dough like consistency. It will be very sticky so you will probably need to put the mixture into the freezer for about 30mins to an hour.

mince-pie-truffles-03

Step two

Roll the dough into evenly sized balls.

Put them back into the freezer for a while longer, until solidified.

mince-pie-truffles-gif

Step three

Melt the dark chocolate and dip the truffle centres to coat them and leave them on some cellophane or greaseproof paper to dry.

If you want to see how to dip them, I cover it a little more thoroughly in this post from two weeks ago.

mince-pie-truffles-04

mince-pie-truffles-05

And there we go, early festive treats in three easy steps.

Oh hey honey

October 31st. 19C in London, beautiful sunshine.

November 1st. Fog, cold, winter has arrived.

Don’t you just love the British weather?! Its unpredictability is a constant irritation to me but I do adore the seasons. I’m very glad I don’t live somewhere that’s variations on one temperature all year round.

It’s starting to feel a little festive this week at Fabrefaction HQ. It’s bonfire night on Thursday, and we are having a housewarming party this weekend to welcome the new housies. It would be rude not to provide our guests with some treats, and even ruder not to acknowledge the approach of Mr Frost.

So here we are, the perfect recipe to bridge autumn and winter, mini gingerbread and honey cupcakes. If you don’t fancy the hassle you could always make this as a traybake, perhaps doubling the recipe (I halved it).

ginger-and-honey-cupcake-recipe-1

You will need

For the cake:

250g/9 oz plain flour

100g/3.5 oz golden syrup

75g/2.5 oz light soft brown sugar

75g/2.5 oz lard (yes, lard)

40g/1.5 oz treacle

140ml/4.5 fl oz milk

1 egg

1 tsp ground ginger (feel free to add more)

1 tsp bicarbonate of soda

For the icing:

300g/10.5 oz icing sugar

150g/5.25 oz unsalted butter

6 tbsp runny honey

For the sugar shards:

100g/3.5 oz caster sugar

(makes 35 mini cakes)

ginger-and-honey-cupcake-recipe-2

Step one

Melt the lard, golden syrup and treacle over a low heat.

Yes the lard will separate and create a glossy sheen on the surface, and yes you will think how unappetising it looks, but trust me on this one…it’s one of those recipes passed from generation to generation in my family, I’m just giving it a little facelift and daren’t replace the lard, just in case somehow Grandma is watching.

ginger-and-honey-cupcake-recipe-3

Step two

Combine the sugar, ginger, flour and bicarbonate of soda.

Make a well in the middle and start to whisk in the egg. Stop when you get to the consistency in the third picture down because otherwise you risk making lumps you won’t be able to get out.

Step three

Pop the milk in the microwave to heat for 30 seconds to a minute until warm. Add to the centre of the mixture and continue to whisk gently until the milk and the egg are combined, but again don’t try and mix in all the flour.

ginger-and-honey-cupcake-recipe-4

Step four

Pour in the melted treacle, golden syrup and lard mix and stir until it’s all mixed together.

ginger-and-honey-cupcake-recipe-5

Step five

Spoon the mixture into your cases. I got a bulk order of these paper condiment cups last year for the hot chocolate stirrers I made for Christmas. I will NEVER find a way to use them all up.

If you have normal mini cupcake/muffin cases the same rules apply, about a teaspoon and a half of mixture in each. You will probably need to put them in a muffin tin though. These little cases had enough of their own structure so I put them on a baking tray.

Bake for 15 minutes on 180C/gas mark 4/350F.

ginger-and-honey-cupcake-recipe-6

Step six

Whisk together the icing/frosting ingredients, make sure to cover your bowl with a tea towel; icing sugar will make your kitchen sticky for weeks otherwise.

Step seven

Confession time. I didn’t photograph this stage. Partly because I was a bit grumpy, partly because my camera was running out of battery and partly because my level of clumsiness, hot sugar and baking selfies are not a strong combination. Forgive me.

All you need to do to make the decorative caramel shards is gently heat the caster sugar in a saucepan until the vast majority has melted and turned caramel in colour. Don’t stir, don’t swish, just wait.

Remove from heat and lay out a sheet of greaseproof paper. With a fork trail the caramel back and forth across the paper. It will need to cool a little until it is stringy enough to do this, but it will get there. You don’t have to make individual cake toppers, just criss cross to make one massive one and break it up to get the shards.

It’s waaaaaay easier than you’d think and super effective looking.

(If you aren’t eating your cakes that day I recommend saving this step until the day of. I’m freeing most of mine bare and decorating them on party day)

ginger-and-honey-cupcake-recipe-gif

Step eight

Ice your cakes however you please, I’m a diehard fan of the piping bag. I sprinkled a little bit of cinnamon on mine before adding the caramel shards.

ginger-and-honey-cupcake-recipe-8

ginger-and-honey-cupcake-recipe-7

Enjoy!


The humble crumble

When it comes to autumn blogging, I just can’t get away from apple related ideas. It’s a well known fact that toffee flavours go well with apple so I thought I might wheel out the salted caramel recipe for this week’s post.

We had this after a large roast on Sunday and it was the perfect pud for a cosy autumn afternoon. One of my housemates (self proclaimed crumble connoisseur) called it “the zenith of desserts”, just saying, perhaps this crumble is not so humble after all.

The great thing about crumble is that it’s so quick to make and you can do it in advance, either cooked or uncooked and pop it in the fridge until you need it.

apple-salted-caramel-crumble-recipe

You will need

For the crumble:

140g/5 oz unsalted butter

125g/4.5 oz porridge oats

75g/2.75 oz ground almonds

50g/1.75 oz plain flour

50g/1.75 oz caster sugar

2 tbsp clear honey

4 cooking apples (bramley)

For the salted caramel:

100g/3.5 oz salted butter

80g/3 oz soft brown sugar

100ml/3.5 fl oz double cream

2 tbsp golden syrup

2 tsp salt

(Serves 6)

Apologies to those of you who spotted the missing ingredients list for a while there!

apple-salted-caramel-crumble-recipe-1

Step one

Mix together the dry ingredients for the crumble topping (almonds, flour, oats and sugar).

Step two

Rub in the butter with your hands, it’s better if it’s cold as the mix will breadcrumb a bit more. Mine was a little on the soft side because I got distracted and left it on the counter for a while.

apple-salted-caramel-crumble-recipe-2

Step three

Add the honey and mix in with a wooden spoon.

Put it in the fridge until needed.

apple-salted-caramel-crumble-recipe-4

Step four

Place all the ingredients for the salted caramel into a saucepan (minus the cream).

Heat gently until the butter is melted and the sugar dissolved and then bring to a simmer. Simmer for about 10 minutes. Stir regularly so that it doesn’t catch and burn. Leave to cool for fifteen minutes to half an hour.

apple-salted-caramel-crumble-recipe-5

Step five

Once the caramel has cooled for a little while add the cream and stir until combined.

apple-salted-caramel-crumble-recipe-3

Step six

Peel and chop the apples.

apple-salted-caramel-crumble-recipe-gif

Step seven

Put the apples in the bottom of your dish, sprinkle with a little light brown sugar. Pour just a third to a half of the caramel sauce over the apples and cover with the crumble mixture.

Step eight

Bake with on 180C/350F/gas mark 4 for 40 minutes.

Boom. The zenith of desserts.

apple-salted-caramel-crumble-recipe-6

apple-salted-caramel-crumble-recipe-7

apple-salted-caramel-crumble-recipe-8

Until next time.


Choco-mania

It has been too long without a post featuring chocolate, hasn’t it? That question was rhetorical.

In case you hadn’t noticed from perusing this blog, I’m a pretty big fan of the stuff. If you bake these then you will be too, or a bigger fan at the end of it. They are gooey, rich and wonderful even if I do say so myself.

Welcome, friend, to death by chocolate brownie meringue cupcakes.

chocolate-meringue-brownie-cupcake-recipe-1

You will need

For the brownie:

250g/9 oz unsalted butter

250g/9 oz soft brown sugar (either light or dark is fine)

200g/7 oz dark chocolate

150g/5.5 oz milk chocolate

85g/3 oz plain flour

3 eggs

1 tsp baking powder

For the meringue

300g/10.5 oz golden caster sugar

100g/3.5 oz cocoa powder

6 egg whites

1-2 tsp cornflour

(makes 16-18)

chocolate-meringue-brownie-cupcake-recipe-2

Step one

Place a heatproof bowl over a pan of simmering water and add the dark and milk chocolate along with the butter. Remove from the heat once fully melted.

chocolate-meringue-brownie-cupcake-recipe-3

Step two

Whisk the eggs with an electric whisk, adding the sugar as you go in thirds. Keep whisking until the mix starts to thicken and goes glossy. Thin ribbons of the mixture should remain visible on the surface when you remove the beaters.

chocolate-meringue-brownie-cupcake-recipe-4

Step three

Pour the melted chocolate mixture into the eggs and stir gently with a metal spoon or a spatula until well combined.

chocolate-meringue-brownie-cupcake-recipe-5

Step three and a half

A careful reader spotted I missed out this step, thanks Gill!

Gently fold in the flour and baking powder.

chocolate-meringue-brownie-cupcake-recipe-6

Step four

Using a jug, fill the cupcake cases between two-thirds and three quarters full.

Bake in a preheated oven on 180C/gas mark 4/350F for 25 minutes.

chocolate-meringue-brownie-cupcake-recipe-7

Step five

With about 5 minutes to go on the baking of the brownies, make the meringues.

Add a third of the golden caster sugar to the egg whites and start to whisk them until they are stiff. Basically, when you can turn the bowl upside down without anything falling out you’re good to go.

chocolate-meringue-brownie-cupcake-recipe-8

Step six

Beat in the rest of the sugar for another minute or two.

Step seven

Fold in the cocoa and cornflour. Do this as if you are stirring a bowl of kittens. Try not to hurt your meringue.

chocolate-meringue-brownie-cupcake-recipe-9

Step eight

Remove the brownies from the oven. Don’t worry, they sink, one day I might bother to adjust the recipe accordingly to stop that happening but they are so tasty the way they are.

Scoop the meringue onto the cupcakes, you can pipe them if you’re feeling fancy/getting to the piping nozzles wouldn’t involve the contents of your cupboard falling on your head.

Step nine

Return to the oven and turn it down to 140C/gas mark 1/275F. Bake for a further 30 minutes. Then turn the oven off but leave the door closed and allow to cool inside the oven for as long as you can resist them.

chocolate-meringue-brownie-cupcake-recipe-10

Step ten

You probably bought your chocolate in 200g bars, meaning that if you haven’t scoffed it already you will have 50g milk chocolate left over. Melt this down and drizzle on top.

If you’ve eaten it already, there’s no shame in that, and your cakes will still be delicious.

chocolate-meringue-brownie-cupcake-recipe-gif

I thought the gif this week should benefit me. So for the sake of the blog I just HAD to eat one.

chocolate-meringue-brownie-cupcake-recipe-11

chocolate-meringue-brownie-cupcake-recipe-13

chocolate-meringue-brownie-cupcake-recipe-12

See you next week pals.

Crisp autumn pie

I realise it’s been a while since I did something quite fancy, and while people seem to prefer to make the easy ones, there’s definitely some love for the posts with lots of steps too.

With the return of my favourite season (I’m really fair-skinned, so shoot me if I don’t adore summer like the rest of you) and a little dinner party this weekend, I figured the only way to round off my housemate’s uh-mazing main course was with a little homage to the apple.

Without further ado here’s a recipe for a rather yummy apple and frangipane tart.

apple-frangipane-almond-tart-pie-1

You will need

For the pastry:

300g/10.5 oz plain flour

170g/6 oz unsalted butter

30g/1 oz golden caster sugar

50ml/1.75 fl oz milk

1 egg yolk

A pinch of salt

For the frangipane:

70g/2.5 oz ground almonds

60g/2 oz unsalted butter

50g/1.75 oz golden caster sugar

40g/1.5 oz plain flour

1 egg

1-2 tsp almond extract (optional, but apple will likely overpower the almond a bit)

For the apple filling:

3 bramley cooking apples

100g/3.5 oz golden caster sugar

10g/0.5 oz unsalted butter

50ml/1.75 oz water

2-3 tbsp clear honey

For the topping:

4-5 braeburn apples (probably any eating apples would work)

2-3 tbsp apricot jam (for the glaze)

(My dish was 25cm and for quiches/pies, but there would be enough pastry and filling to do a slightly larger, shallower tart, perhaps up to 29cm or so).

apple-frangipane-almond-tart-pie-2

Step one

Start by making the sweet shortcrust pastry.

First cube the butter and pop that into the plain flour. Using your fingers, rub the butter and flour together to get a crumb-like texture.

The colder your butter the better and the smaller the crumbs you will be able to get. My house is waaaaaaarm, so as you can see, mine was a tad lumpy at this stage.

If you have a food processor I am led to believe you can do this bit in that very quickly and easily. But we can’t all be posh like you so (clean) fingers are just fine too.

apple-frangipane-almond-tart-pie-3

Step two

Stir in the caster sugar.

apple-frangipane-almond-tart-pie-4

Step three

Make a well in the middle for the milk and egg yolk. Fairly sure you can guess what’s next…put yolk and milk in said well.

Bring the mixture together with your hands. It may be a bit crumbly so you can tip it onto a worktop and knead it together slightly to combine, but be careful not to over work it.

Wrap it in clingfilm and put it in the fridge for at least an hour.

apple-frangipane-almond-tart-pie-5

Step four

Frangipane making time. Using an electric whisk (or a wooden spoon and some strong arms) beat together the butter and sugar until smooth and fluffy.

apple-frangipane-almond-tart-pie-6

Step five

Add the egg and beat again with the whisk.

Stir in the almonds, almond extract and the flour.

Voila. Set aside.

apple-frangipane-almond-tart-pie-7

Step six

Prepare the stewed apple filling. Being by peeling and chopping the three bramley apples. If you have a bit of lemon juice handy a quick squeeze will keep the chopped ones pale while you see to the rest.

apple-frangipane-almond-tart-pie-8

Step seven

Put the chopped apples in a saucepan with the butter, honey, water and sugar. Bring to a medium-low heat and stir occasionally until the apples are mostly broken down. You want a pulp really (an appetising thought, I know).

apple-frangipane-almond-tart-pie-9

Step eight

Remove the pastry from the fridge (providing an hour has passed). Place onto a lightly floured surface (you don’t want to add much more flour to the mix if you can help it).

Roll the pastry out as evenly as you can, until your chosen dish can sit in the middle with an inch or two on all sides. You don’t really want your pastry to be thicker than 5mm.

apple-frangipane-almond-tart-pie-10

Step nine

Transfer your pastry by rolling it at least half of it up onto your rolling pin and unrolling it over the top of your dish.

I then needed to lift the edges back up and place them back in to tease them better into the corners. Do this gently so as not to tear it. Having said that, I was a bit heavy handed and tears can be fixed quit easily by sticking a bit of excess pastry on top.

apple-frangipane-almond-tart-pie-11

Step ten

Rip a bit of pastry off the overlap and use it to press the crust further into the crevices.

Use a fork to pierce the base of the pie, this will help the pastry stay flat in the oven.

Pop him back in the fridge for another 20-30 minutes.

apple-frangipane-almond-tart-pie-12

Step eleven

While the pastry is chilling again, peel and slice the braeburns/eating apples. You need to do this carefully as it will be the making or breaking of how your pie looks (no pressure). Try to peel nice and evenly and cut the apples as thinly as you can.

Have a large tupperware filled with cold water nearby to put your cut slices into, which will stop them from browning, again, if you have any lemon juice a few drops wouldn’t go amiss but not essential.

Pre-heat the oven to 180C/gas mark 4/350F

apple-frangipane-almond-tart-pie-13

Step eleven

Remove the pie from the fridge and trim some of the excess pastry off the sides but still leave an overlap.

Place some baking paper in the pie and fill with baking beans. If you don’t have any then rice works too, and most dried lentils/pulses really.

Place on a baking tray and bake for 15 minutes.

apple-frangipane-almond-tart-pie-14

Step twelve

Using a grater remove the excess pastry at this stage. Doing it this way helps to avoid your pastry shrinking in the oven.

apple-frangipane-almond-tart-pie-gif

Step thirteen

FILL.

First spoon in the frangipane and spread out, followed by the stewed apple puree mixture.

Finally add your eating apples. Start with the outside and work inwards. Make sure your apples overlap each other quite a bit; the cooking process reduces the water so they will shrink and flatten out.

Bake for another hour on 180C/350F/gas mark 4. I advise checking in at regular intervals after 30 minutes as every oven is different.

apple-frangipane-almond-tart-pie-15

Step fourteen

Pop a few tablespoons of apricot jam in the microwave for 10-20 seconds (keep your eye on it as it’s sugary and will heat up quickly). Brush over the surface of the tart, being careful not to move the apples around, spoiling your lovely design.

apple-frangipane-almond-tart-pie-17

apple-frangipane-almond-tart-pie-18

apple-frangipane-almond-tart-pie-16

Step fifteen

Get a scoop of vanilla ice-cream on that guy.

You can reheat your pie in the oven or individual slices in the microwave if you aren’t eating it straight away.

Until next time. x

Witty title here

Burning the midnight oil to bring you this week’s British favourite. The reason being is that my rather lovely friend took me along to a screen printing workshop for a little birthday treat tonight. If you want to have a cheeky stalk there’s a *few* pictures on Instagram.

Back to this week though, and the question of a another cupcake and a few bananas. Of course, it’s about time the classic banoffee pie made an appearance in this little series. There’re few things that pair better than banana and caramel in my opinion, so it took quite a lot of focus not to just make the toffee filling and skip off to the garden with a bowl of banana to suffocate in sauce. I mean, if you’re going to eat fruit, do it right.

So, without further ado, here go the banoffee pie cupcakes.

banoffee-pie-cupcake-recipe-01

You will need

For the cakes:

140g/5 oz self raising flour

140g/5 oz caster sugar

140g/5 oz unsalted butter/margarine

2 eggs

2 ripe-over ripe bananas

1 tsp baking powder

For the filling:

200g/7 oz sweetened condensed milk (half a tin)

100g/3.5 oz soft brown sugar

100g/3.5 oz unsalted butter (used salted if you prefer salted caramel to a more dulce de leche/toffee flavour)

50ml/1.75 fl oz double cream

For the frosting/icing

350g/12.5 oz icing sugar

250g/9 oz unsalted butter (room temperature)

150ml/5 fl oz double cream

Vanilla essence/paste/pod

(makes 12)

banoffee-pie-cupcake-recipe-02

Step one

Using an electric whisk if you have one, a wooden spoon if not, beat together the butter/margarine and caster sugar until light and fluffy. I use Stork margarine for sponge as it’s pretty cheap and does the trick well.

Step two

Chop up the banana. You can mash it if you want but the whisk kinda does the work for you so why bother? The riper the bananas the more intense the flavour.

Add the eggs and banana to the mix and whisk until combined.

Step three

Whisk in the flour and baking powder, stir it in a little first with the beaters to prevent a mushroom cloud of flour hitting you in the face.

banoffee-pie-cupcake-recipe-04

Step four

Distribute the mixture evenly between 12 cupcake/muffin cases. Usually about two rounded dessert spoons in each is a nice amount.

Step five

Bake on gas mark 4/350F/180C for 20-25 minutes until golden brown and springy to the touch.

banoffee-pie-cupcake-recipe-06

Step six

While the cakes are in the oven, make the filling by combining all the ingredients in a small/medium saucepan.

Gently melt the mixture on a low heat and then turn it up to medium. Boil slowly for 7-10 minutes stirring the whole time. See those flecks in my mix? Took my eyes off the prize.

Allow to cool completely before use.

banoffee-pie-cupcake-recipe-03

Step seven

Combine the icing ingredients by gently stirring the icing sugar and butter together before putting the whisk on the lowest setting. Add the cream and the vanilla once they’ve started to combine. The double cream will thicken it nicely and add a lightness to the texture.

It’s really yummy but probably not the best for piping consistency, so I wouldn’t dream up fancy decoration with this one. That’s pretty consistent with a banoffee pie anyway, when was the last time you saw a pretty one of those? Yeah. Exactly.

banoffee-pie-cupcake-recipe-gif

Step eight

If you’ve been following this series so far then you know the drill by now. Cut a hole in the cupcake with a small sharp knife and discard the middle bit, keeping only the lid. Fill with the toffee sauce and replace the cake lid. Spread the icing on top and grate over a little chocolate for an authentic look.

banoffee-pie-cupcake-recipe-05


banoffee-pie-cupcake-recipe-08


banoffee-pie-cupcake-recipe-07

Bon(offee) apetit!


The only good thing to come from Eton*

Eton Mess. One of the best summer puds going. You might disagree with me, but you would be wrong. There’s nothing quite like strawberries and meringue where this person is concerned. I’ll even put down my chocolate for it. Though, most likely, if I’m at a barbecue, I’m just skipping the savoury to make way for the chocolate option and the Eton Mess.

Enough of my complete incapacity to avoid sweet things. Onto this week’s British favourites cupcake instead. Probably unsurprisingly given my rambling introduction it’s the recipe for Eton Mess cupcakes.

This recipe uses seven minute swiss meringue frosting. It’s the first time I’ve made it and it was pretty darn easy, so definitely give it a bash. I did notice that over a couple of days it hardens and basically becomes a meringue, and mine was a touch gritty. I think the best thing to do is make them and allow to sit out for a couple of hours so the outside hardens a little but the inside is still fluffy and smooth. A make on the day jobby if you can I reckon.

*Any association to real persons, living or dead, is purely coincidental.

eton-mess-cupcake-recipe-0

You will need

For the cake:

185g/6.5 oz self raising flour

185g/6.5 oz butter/margarine (I use Stork)

185g/6.5 oz caster sugar

3 eggs

1 tsp bicarbonate of soda

1 tsp vanilla extract/paste

For the centre:

Strawberry jam (yeah, I cheated. feel 100% free to make your own, I tip my hat to you)

For the frosting/icing:

2 egg whites

225g/8oz caster sugar

1/2 tsp cream of tartar

75ml/2.5 fl oz water

If you’re fancy like me then some freeze dried strawberries to sprinkle wouldn’t go amiss.

(makes 12)

eton-mess-cupcake-recipe-1

Step one

Whisk together the margarine and caster sugar until the mix is light and fluffy. If you are using butter then make sure it’s room temperature else the sugar will fly everywhere and you will just have a block of butter stuck in the middle of your whisk.

I used some strange hybrid which was Stork in a block form. Curious.

Step two

Add the eggs and whisk again until combined. Don’t worry if the mixture looks split, there’s just too much liquid at this stage. Time to add the flour.

eton-mess-cupcake-recipe-2

Step three

Add the vanilla, flour and bicarbonate of soda and beat with your electric whisk until smooth as above.

eton-mess-cupcake-recipe-3

Step four

Distribute the mixture evenly between 12 cupcake cases. Usually about two rounded dessert spoons into each case does the trick.

Bake on 180C/gas mark 4/350F for 25 minutes until golden and springy to the touch.

eton-mess-cupcake-recipe-6

Step five

It’s seven minute frosting time.

Don’t get scared, I’ve been meaning to try this for ages but kept putting it off because I thought it looked like a pain. In fact, the hardest part was separating the eggs, and it’s so satisfying to pipe. I think I’m maybe a bit too into baking…

Anyway. Put the water, sugar, cream of tartar and egg whites into a heatproof bowl. This should be placed over a pan of simmering water. Don’t let the water touch the bottom of the bowl.

Whisk, for, you guessed it, seven minutes. It should be able to hold its own shape and not fall off the whisk when you lift it. If it’s not stiff enough just keep whisking for another minute or two.

I wouldn’t really recommend this if you don’t have an electric whisk.

eton-mess-cupcake-recipe-gif

Step six

Cut a hole in the middle of your cupcakes with a small sharp knife. Remove the pointy bit, just keeping the top. Place excess cake in mouth.

Fill the hole with jam and place the lid back on.

Fill a piping bag with the swiss meringue frosting and pipe on in your preferred way. I used a fairly standard star shaped nozzle for this.

Sprinkle with freeze dried strawberries, or maybe pop a fresh one on there if you have some going.

eton-mess-cupcake-recipe-4

eton-mess-cupcake-recipe-5

Enjoy!

Oh you tart.

Hullo again. I’ve decided to start a small series. I know, I can smell your excitement from here.

I will probably break it up a little every so often because it has one main theme (cupcakes) and I don’t want to bore. Not that cupcakes could ever be boring right?

The other day I was handed a Bakewell tart on the street (by a man in a co-op uniform, don’t worry, I’m not taking sweets from strangers). It’s been a while since I had a Bakewell tart, and you know what? I actually quite enjoyed it.

Then the thought struck me…a series of British sweets/puds baked into cupcakes is just what this blog needs.

For anyone who doesn’t know, a Bakewell tart has a pastry case, full of frangipane (almond), cherry jam and is topped with a thick layer of icing and half a glacé cherry.

So without further ado let’s kick off with an easy peasy Bakewell tart cupcake, which are also handily dairy free for our lactose intolerant friends.

cherry-bakewell-tart-cupcake-recipe-1

Things you need

200g/7 oz plain flour

200g/7 oz caster sugar

50g/1.75 oz ground almonds

5 tbsp vegetable oil

250ml/6.5 fl oz cold water

1 tsp vanilla extract

2 tsp almond extract

1 tsp bicarbonate of soda

1 tsp white vinegar (I won’t lie…I actually used cider vinegar, because I wasn’t about to buy a whole bottle for a single teaspoon)

To decorate:

Icing sugar (royal icing works well if you have it)

6 glacé cherries

Cherry jam

Silver foil cupcake cases (to add that authentic touch)

(Makes 12 cupcakes)

cherry-bakewell-tart-cupcake-recipe-2

Step one

Mix together the flour, almonds and baking powder.

cherry-bakewell-tart-cupcake-recipe-3

Step two

Add the caster sugar and stir again until combined. Yup, this is SUCH an easy recipe that I gave that its own step.

cherry-bakewell-tart-cupcake-recipe-4

Step three

Make a well in the middle and add the water, oil, vinegar and extracts.

Using a hand whisk make small circular motions until all the flour mix is gradually incorporated. Doing it that way will reduce the number of lumps.

cherry-bakewell-tart-cupcake-recipe-5

Step four

Using a jug distribute the mixture evenly between 12 cupcake cases. Trust me. You will want a jug.

Bake on gas mark 4/180C/350F for 20-25 minutes until they spring back when touched.

cherry-bakewell-tart-cupcake-recipe-gif

Step five

Cut a circular section out of the middle with a small knife and fill with cherry jam. Remove excess sponge from the bit you removed and put the lid back on.

Step six

Mix some icing sugar with water until you have quite a thick consistency. Royal icing is good for this because it’s thicker and more opaque generally.

Pipe onto the cupcake, try to get it as round as you can.

Step seven

Pop half a glacé cherry on top.

TADA

cherry-bakewell-tart-cupcake-recipe-6

Jaffa cakes, you’re next.