I realise it’s been a while since I did something quite fancy, and while people seem to prefer to make the easy ones, there’s definitely some love for the posts with lots of steps too.
With the return of my favourite season (I’m really fair-skinned, so shoot me if I don’t adore summer like the rest of you) and a little dinner party this weekend, I figured the only way to round off my housemate’s uh-mazing main course was with a little homage to the apple.
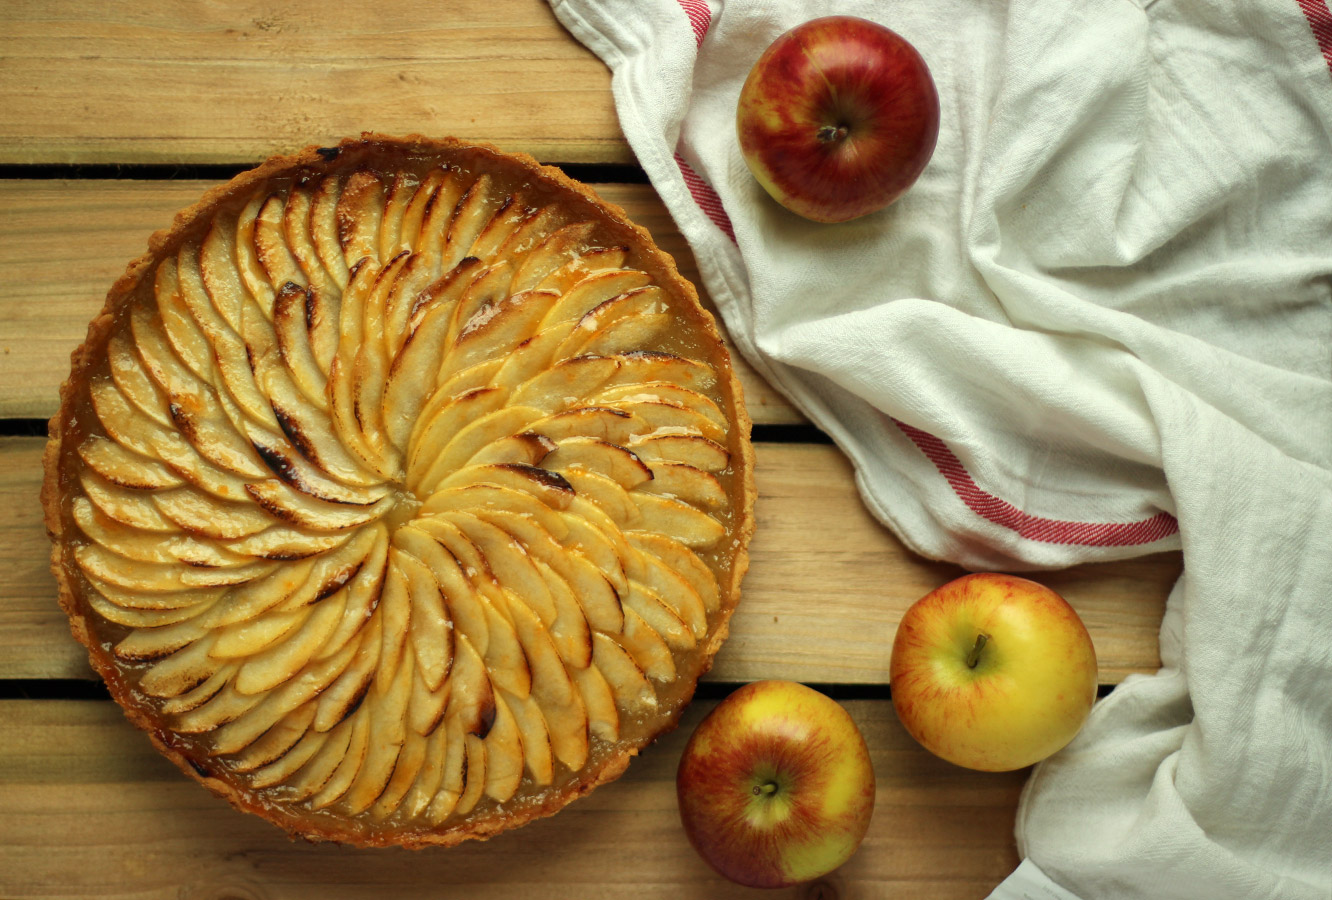
Without further ado here’s a recipe for a rather yummy apple and frangipane tart.
You will need
For the pastry:
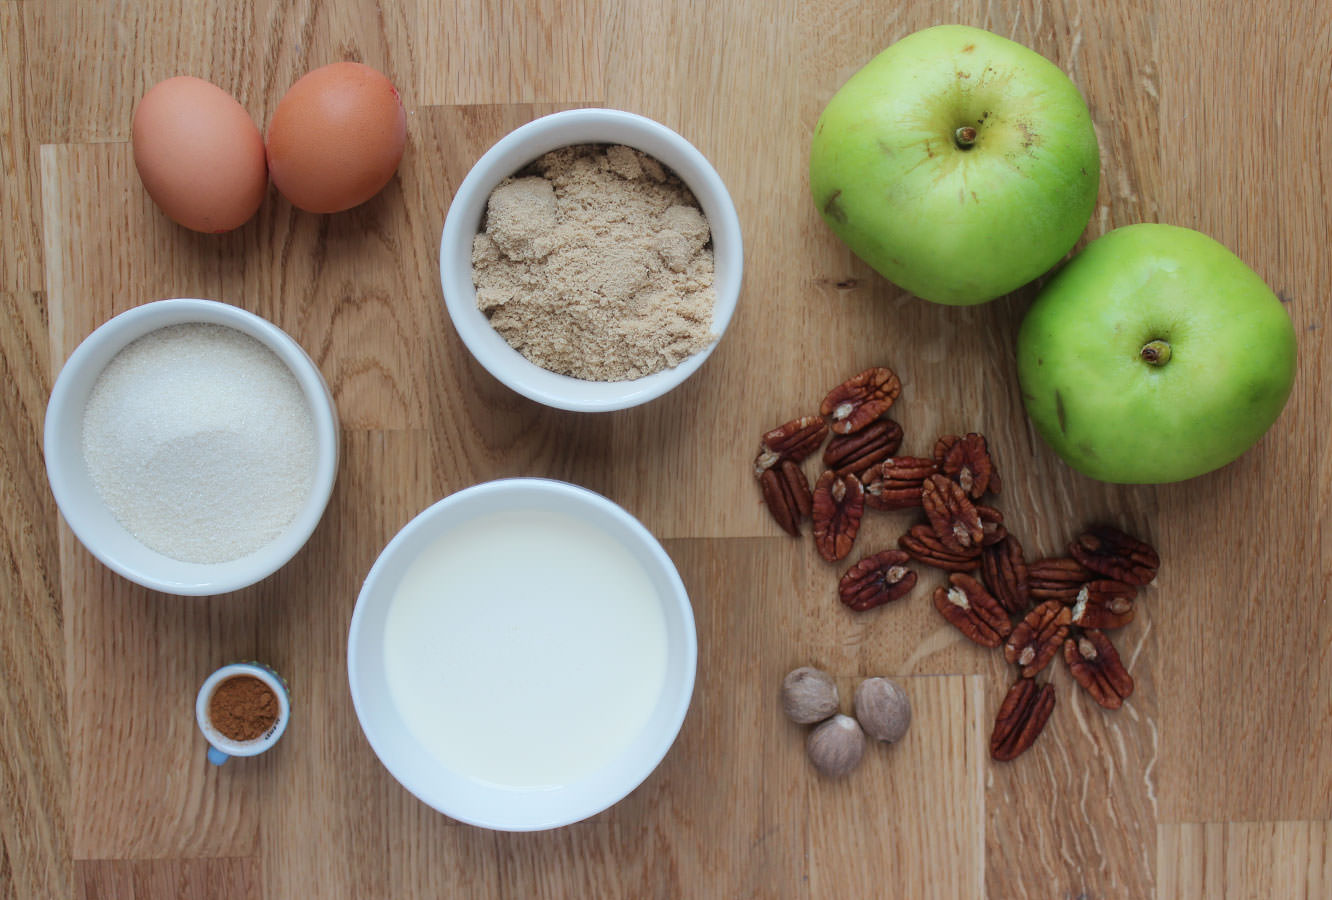
300g/10.5 oz plain flour
170g/6 oz unsalted butter
30g/1 oz golden caster sugar
50ml/1.75 fl oz milk
1 egg yolk
A pinch of salt
For the frangipane:
70g/2.5 oz ground almonds
60g/2 oz unsalted butter
50g/1.75 oz golden caster sugar
40g/1.5 oz plain flour
1 egg
1-2 tsp almond extract (optional, but apple will likely overpower the almond a bit)
For the apple filling:
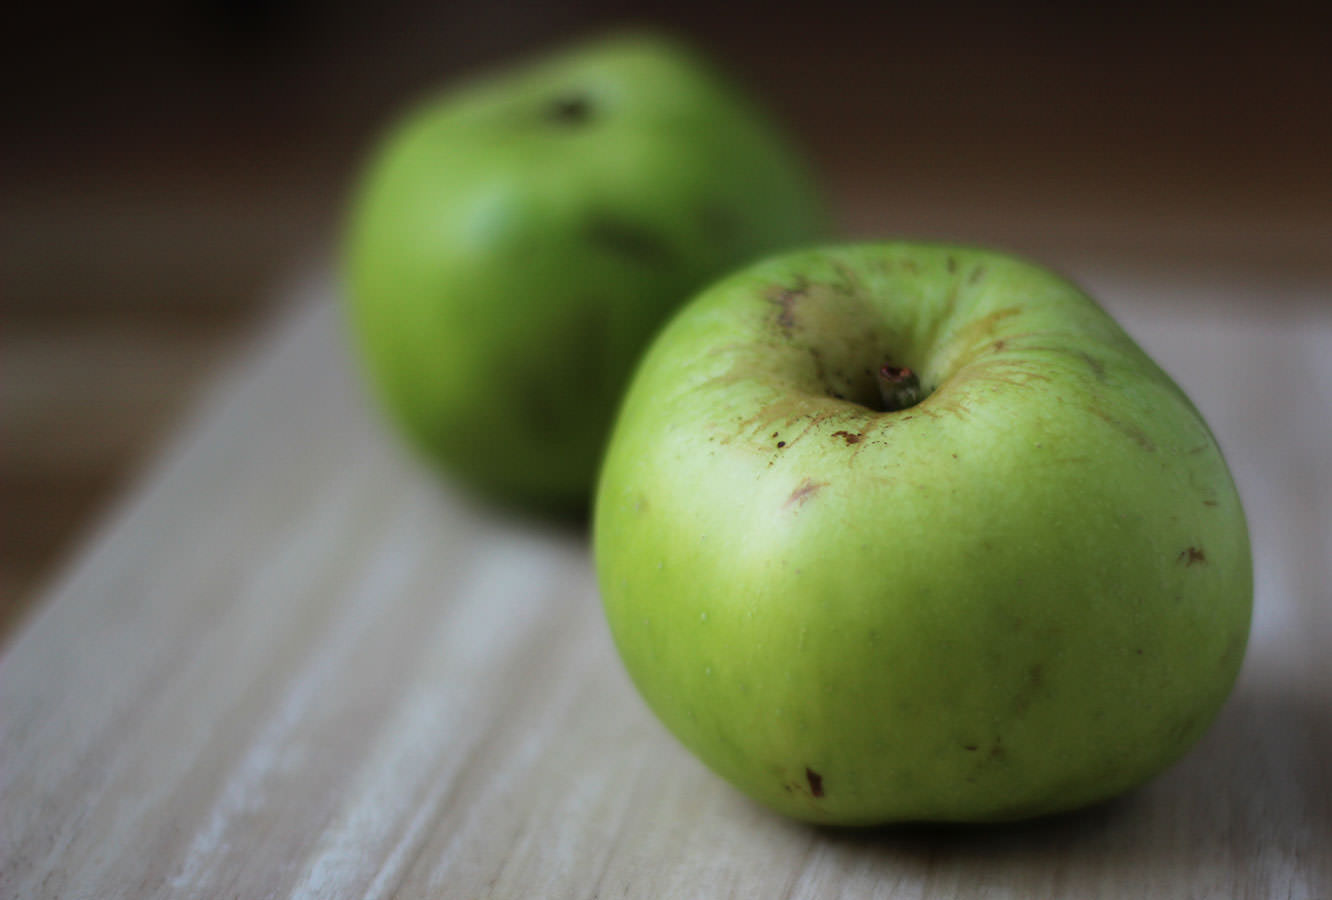
3 bramley cooking apples
100g/3.5 oz golden caster sugar
10g/0.5 oz unsalted butter
50ml/1.75 oz water
2-3 tbsp clear honey
For the topping:
4-5 braeburn apples (probably any eating apples would work)
2-3 tbsp apricot jam (for the glaze)
(My dish was 25cm and for quiches/pies, but there would be enough pastry and filling to do a slightly larger, shallower tart, perhaps up to 29cm or so).
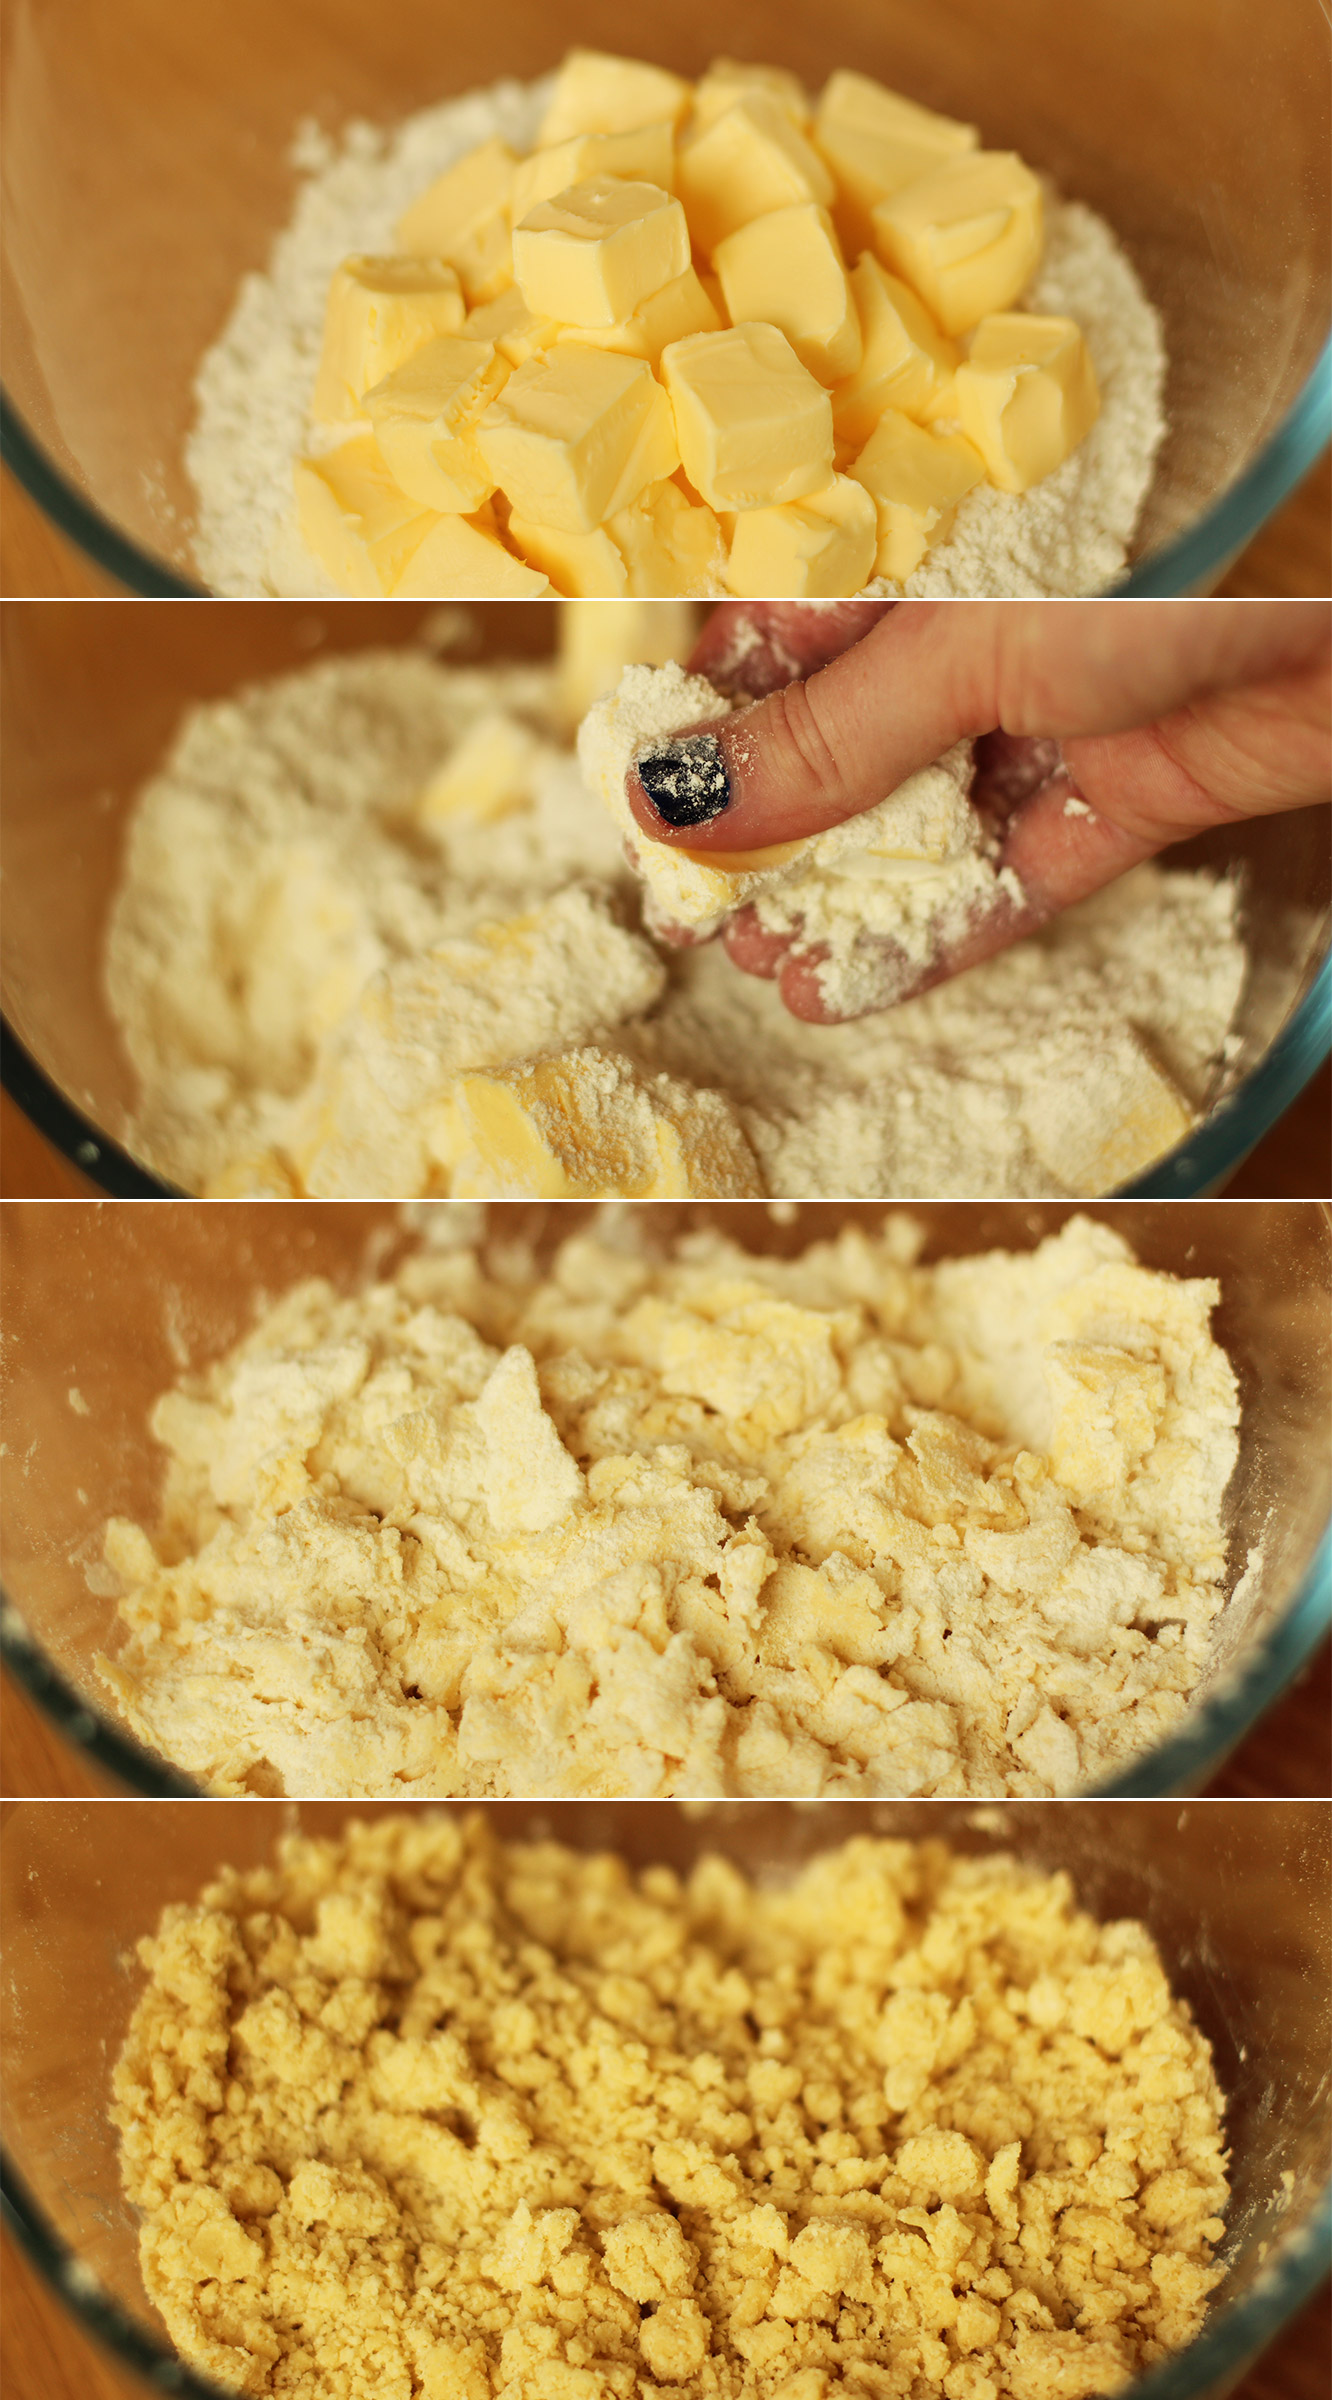
Step one
Start by making the sweet shortcrust pastry.
First cube the butter and pop that into the plain flour. Using your fingers, rub the butter and flour together to get a crumb-like texture.
The colder your butter the better and the smaller the crumbs you will be able to get. My house is waaaaaaarm, so as you can see, mine was a tad lumpy at this stage.
If you have a food processor I am led to believe you can do this bit in that very quickly and easily. But we can’t all be posh like you so (clean) fingers are just fine too.

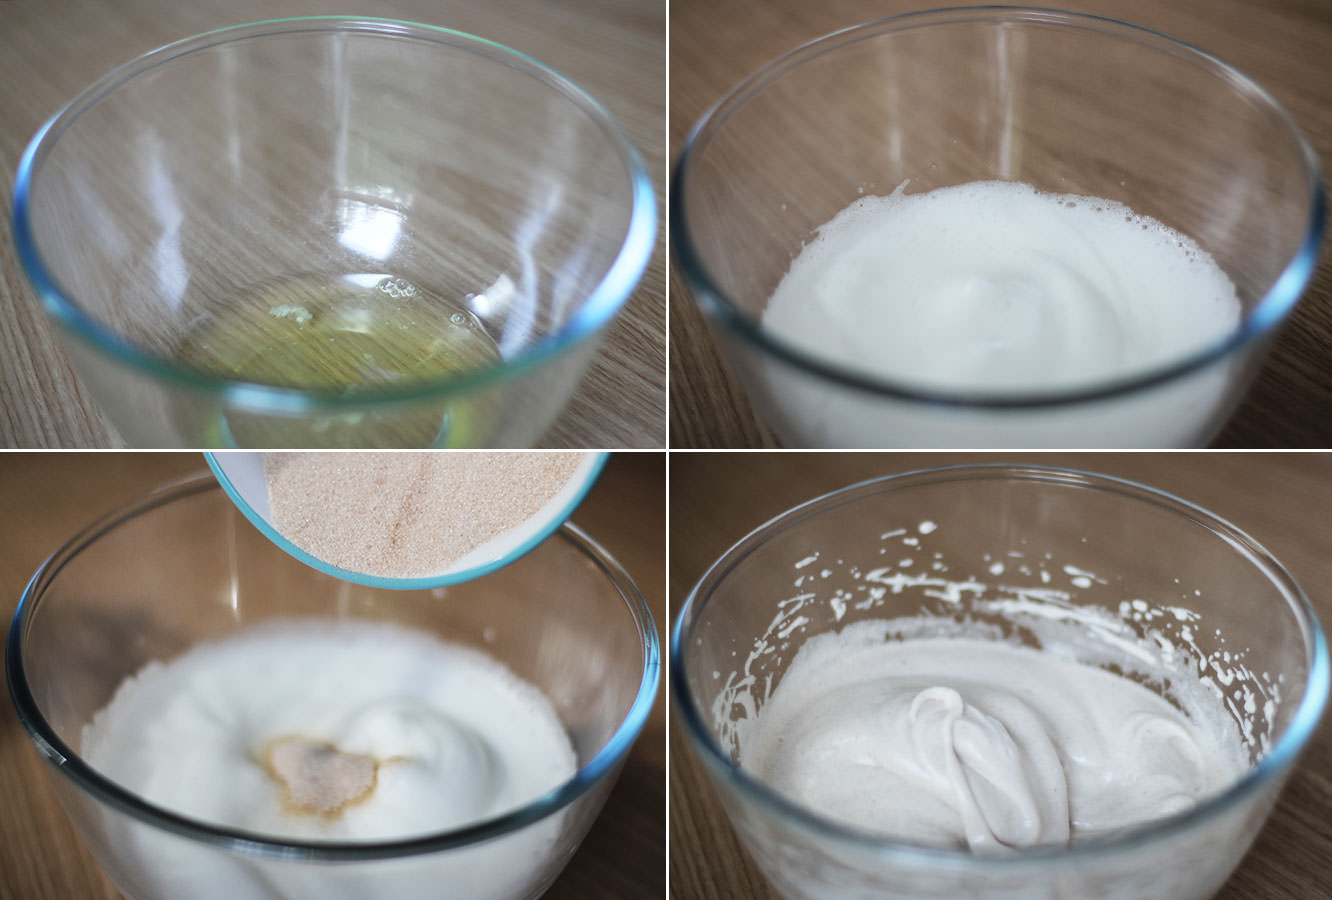
Step two
Stir in the caster sugar.
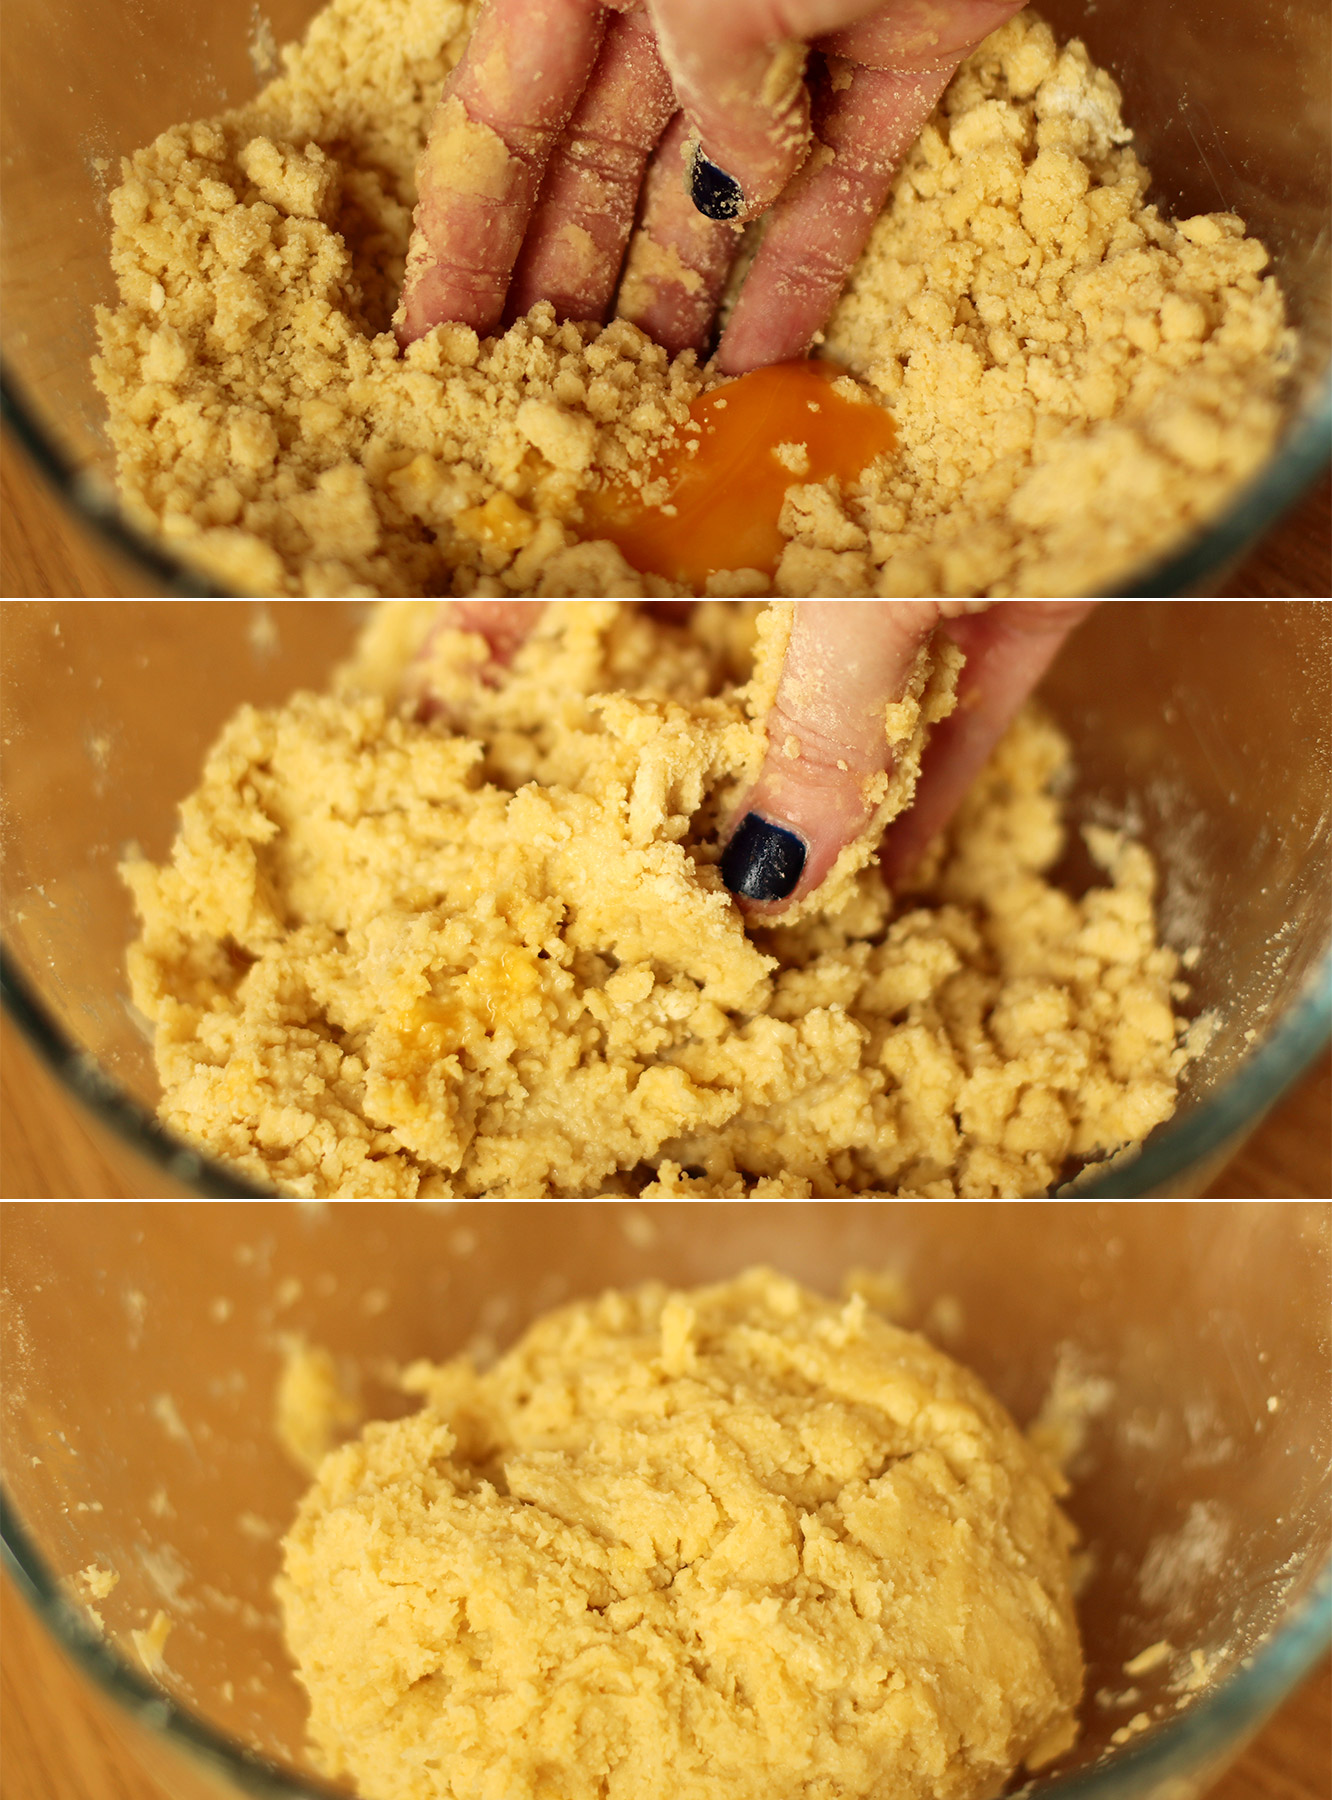
Step three
Make a well in the middle for the milk and egg yolk. Fairly sure you can guess what’s next…put yolk and milk in said well.
Bring the mixture together with your hands. It may be a bit crumbly so you can tip it onto a worktop and knead it together slightly to combine, but be careful not to over work it.
Wrap it in clingfilm and put it in the fridge for at least an hour.
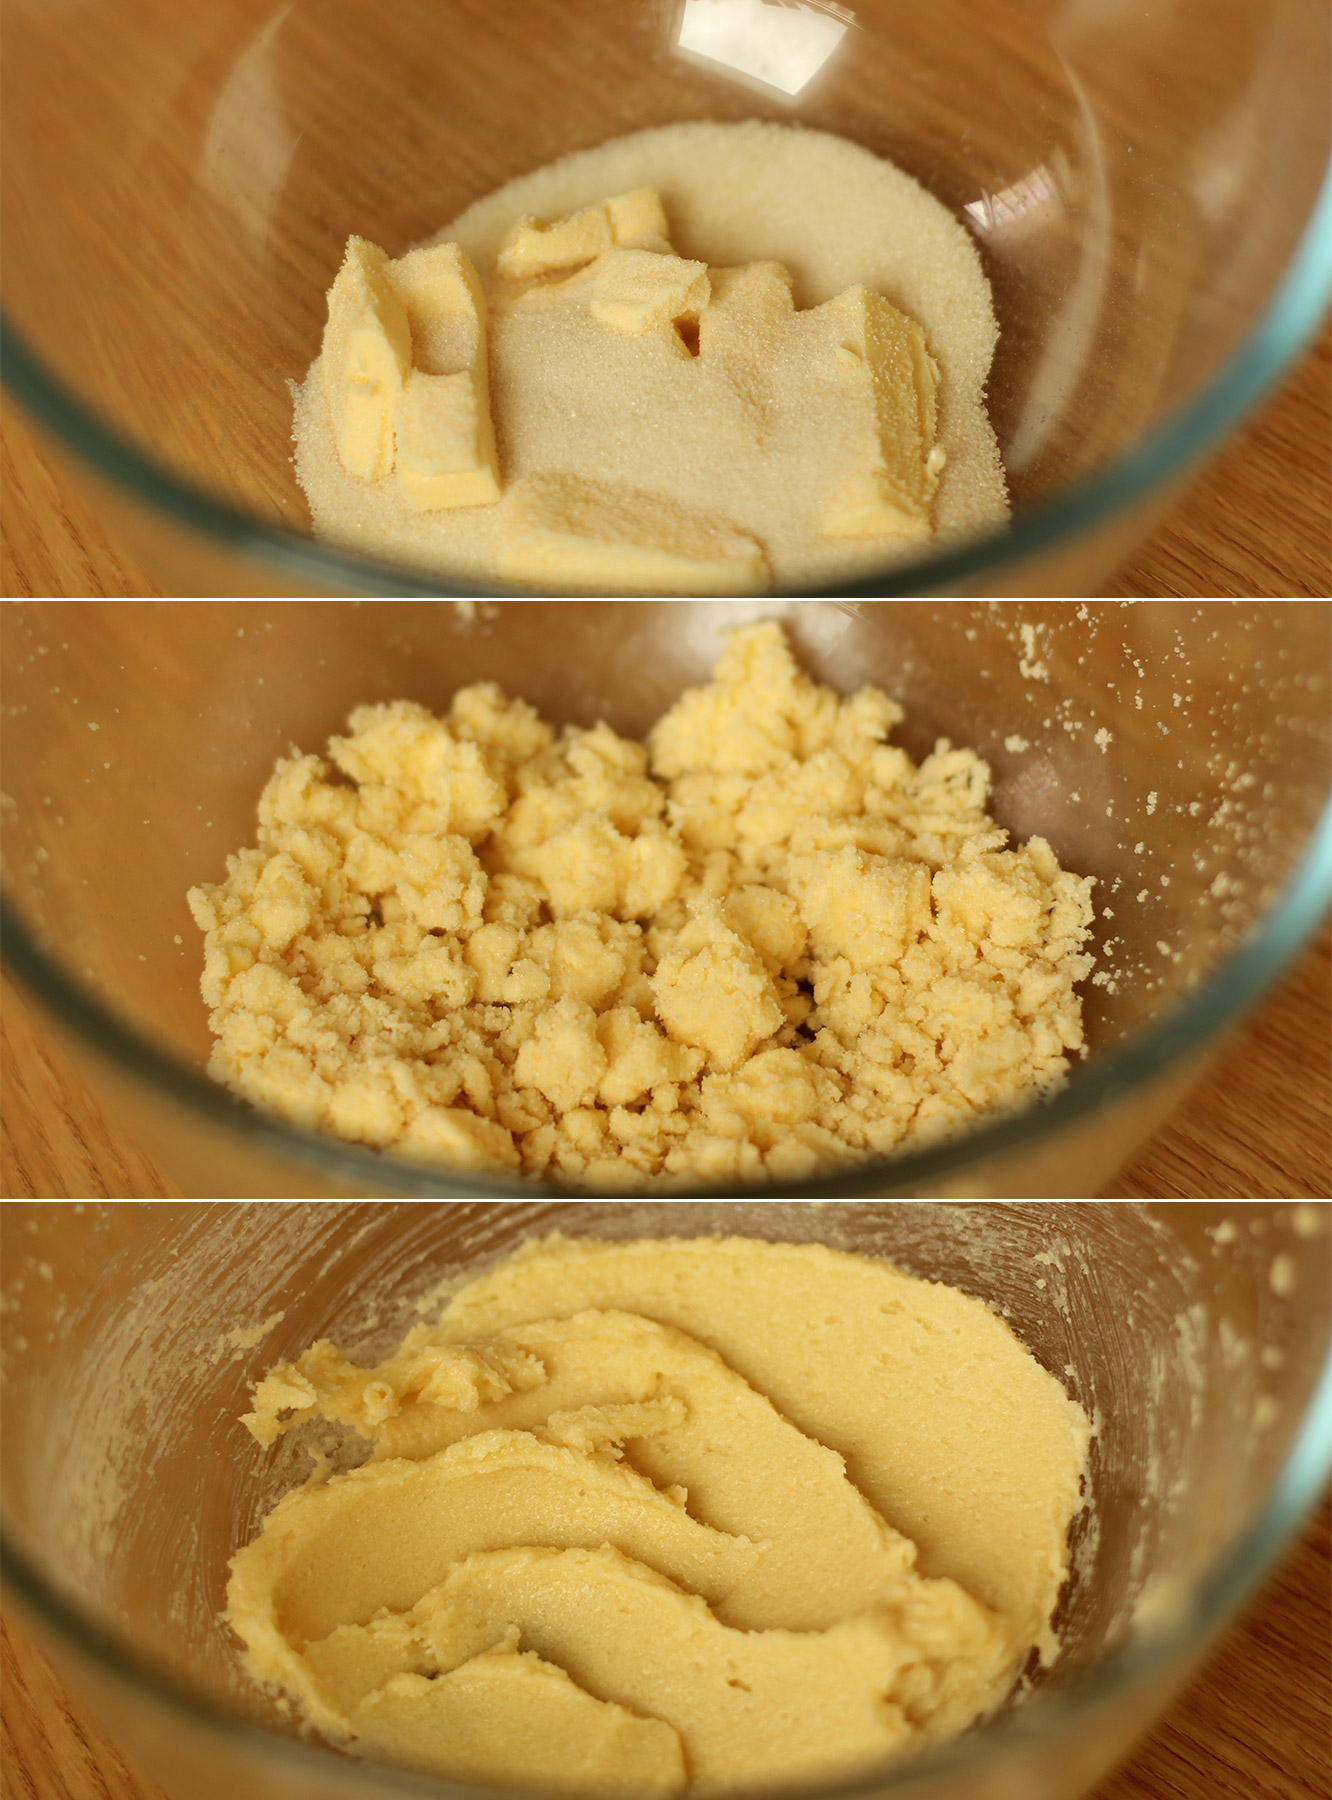
Step four
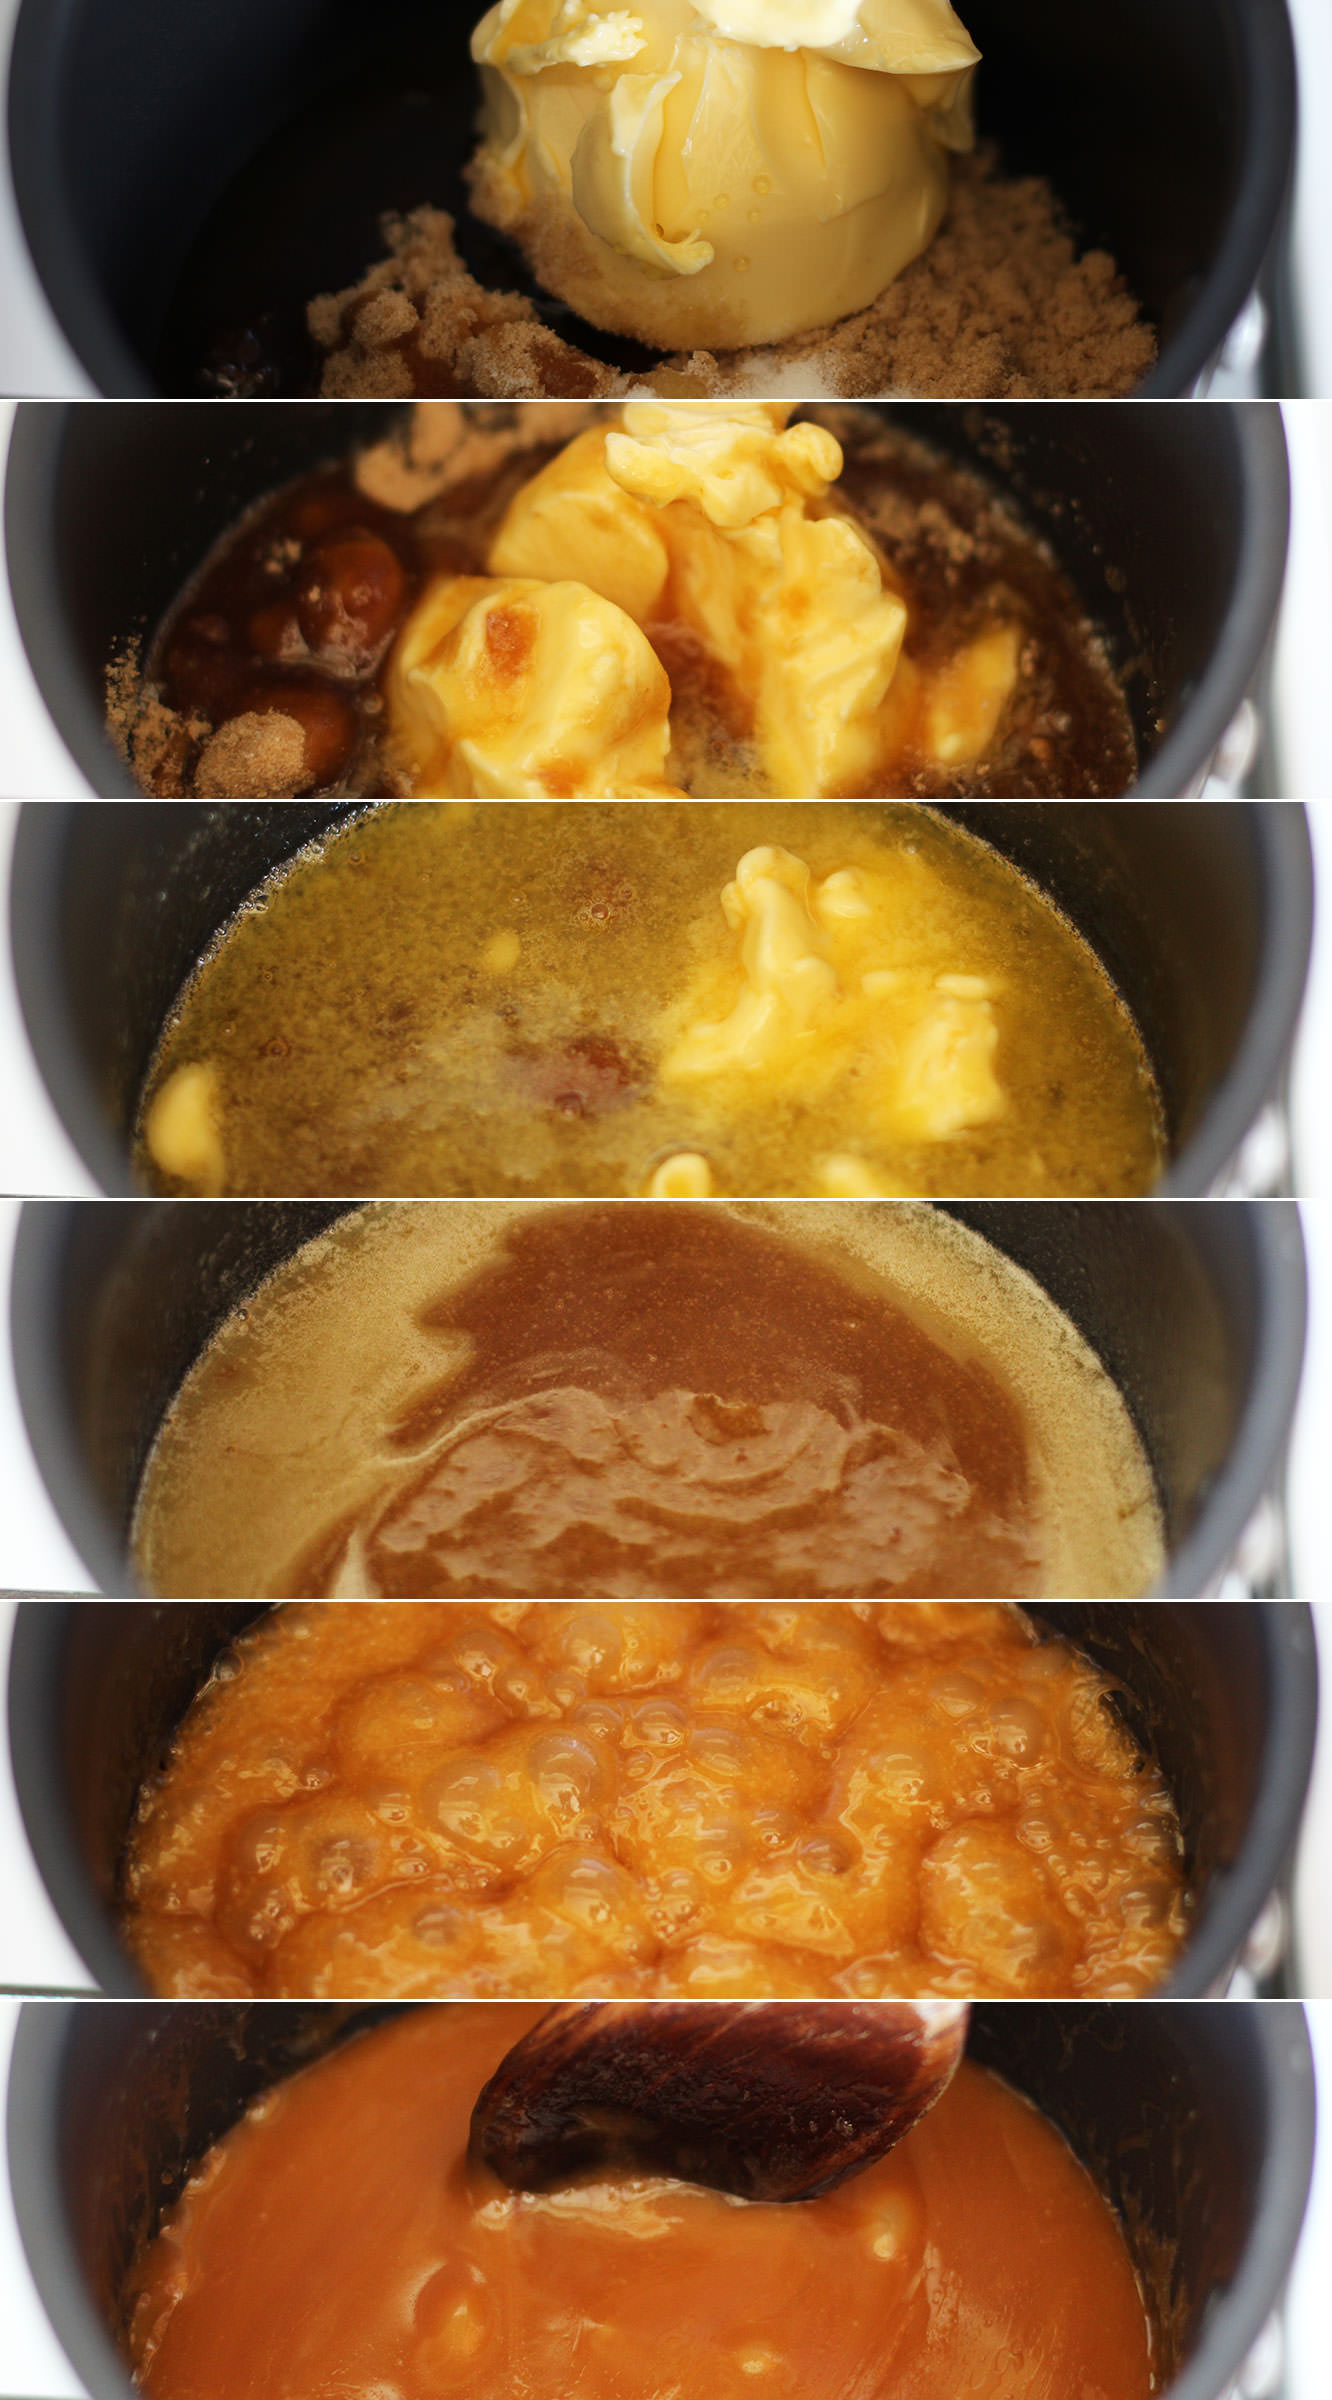
Frangipane making time. Using an electric whisk (or a wooden spoon and some strong arms) beat together the butter and sugar until smooth and fluffy.
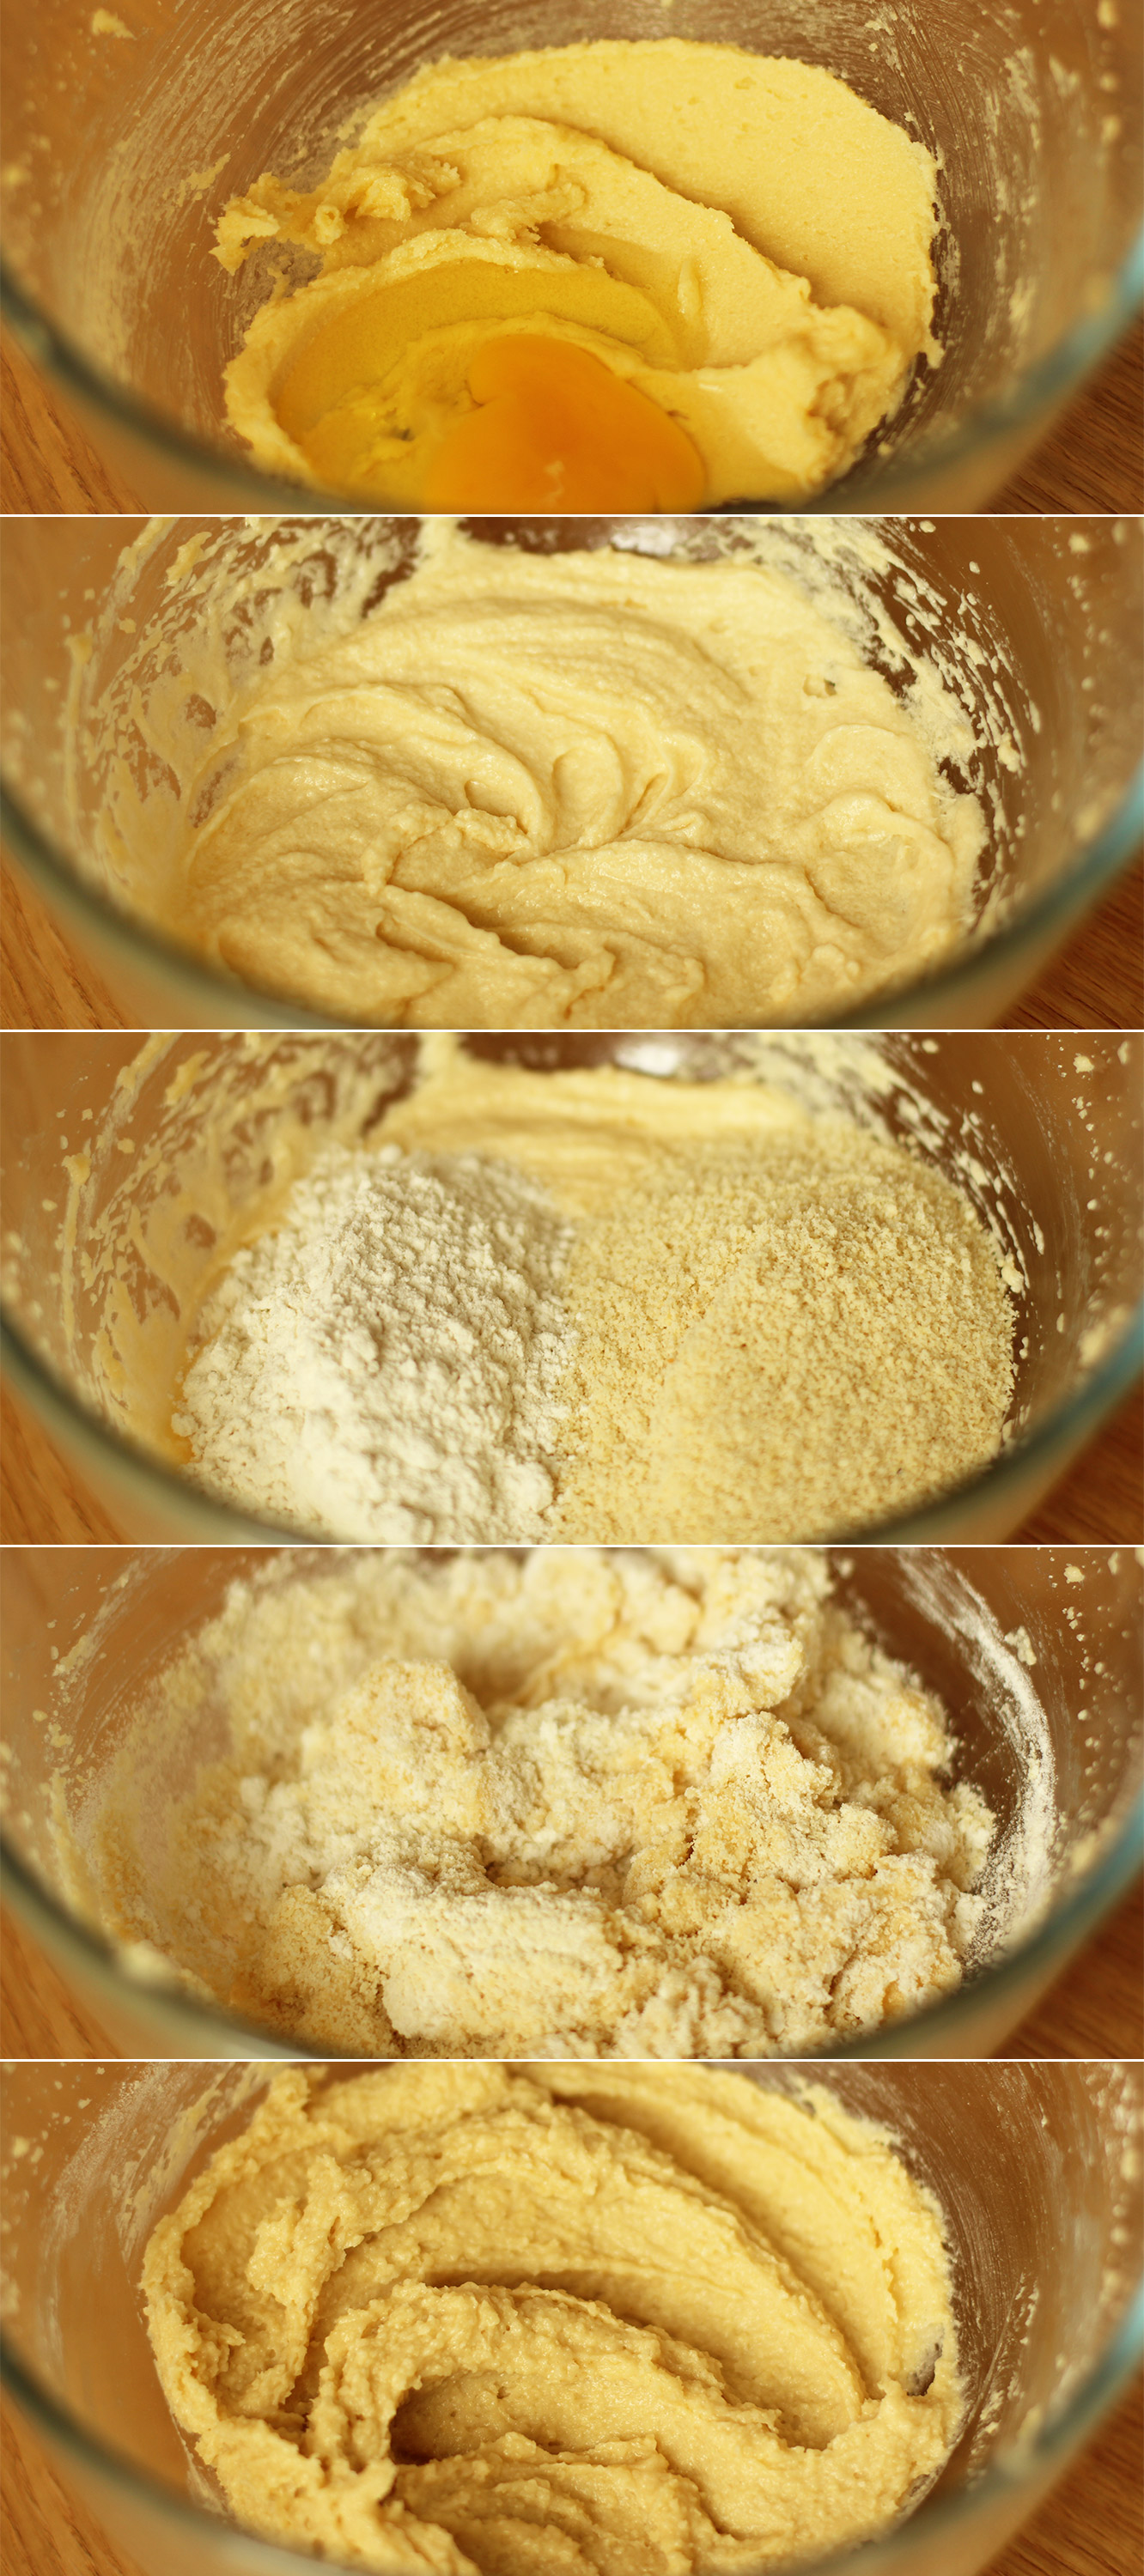
Step five
Add the egg and beat again with the whisk.
Stir in the almonds, almond extract and the flour.
Voila. Set aside.
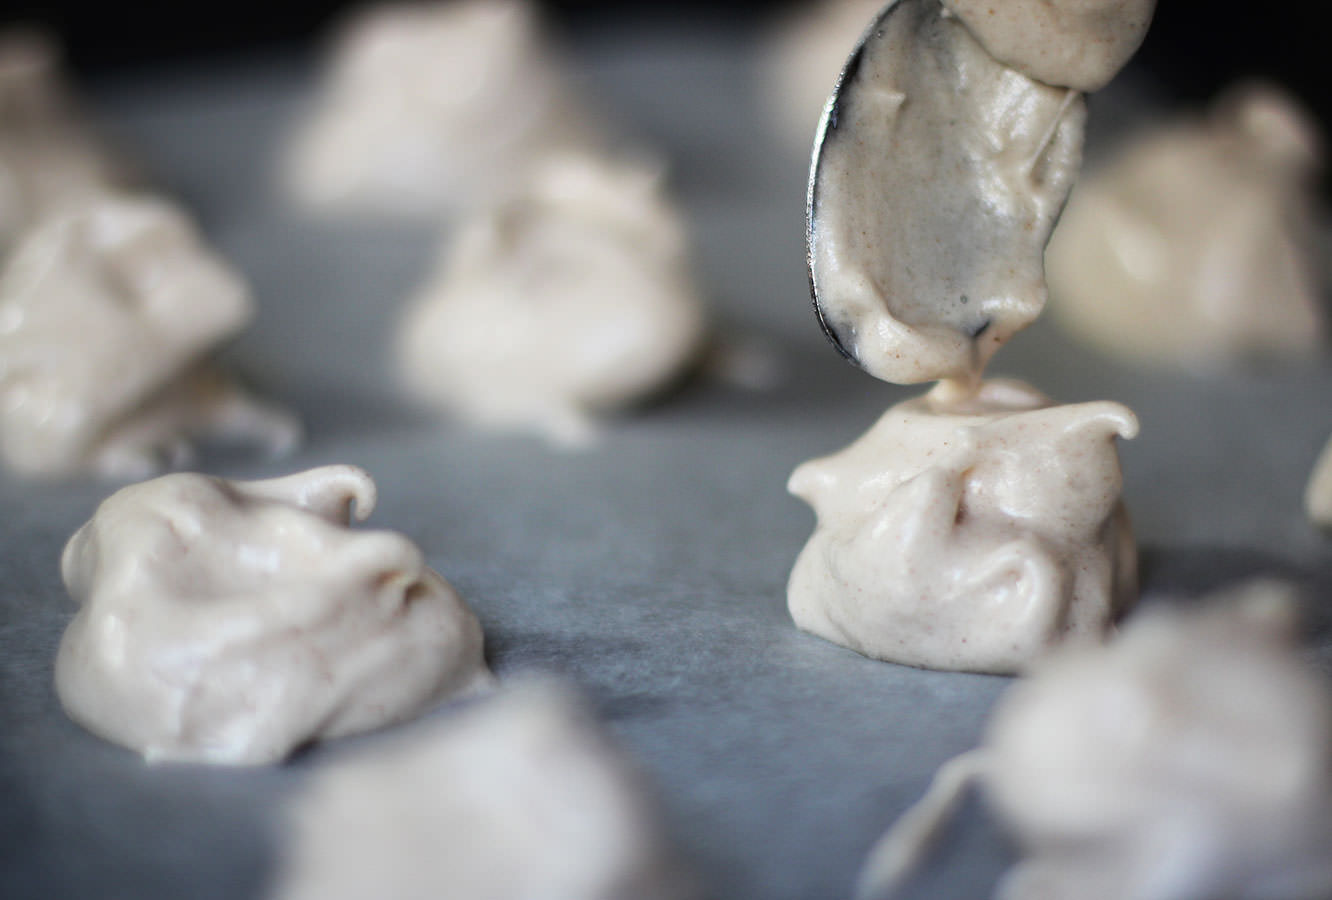
Step six
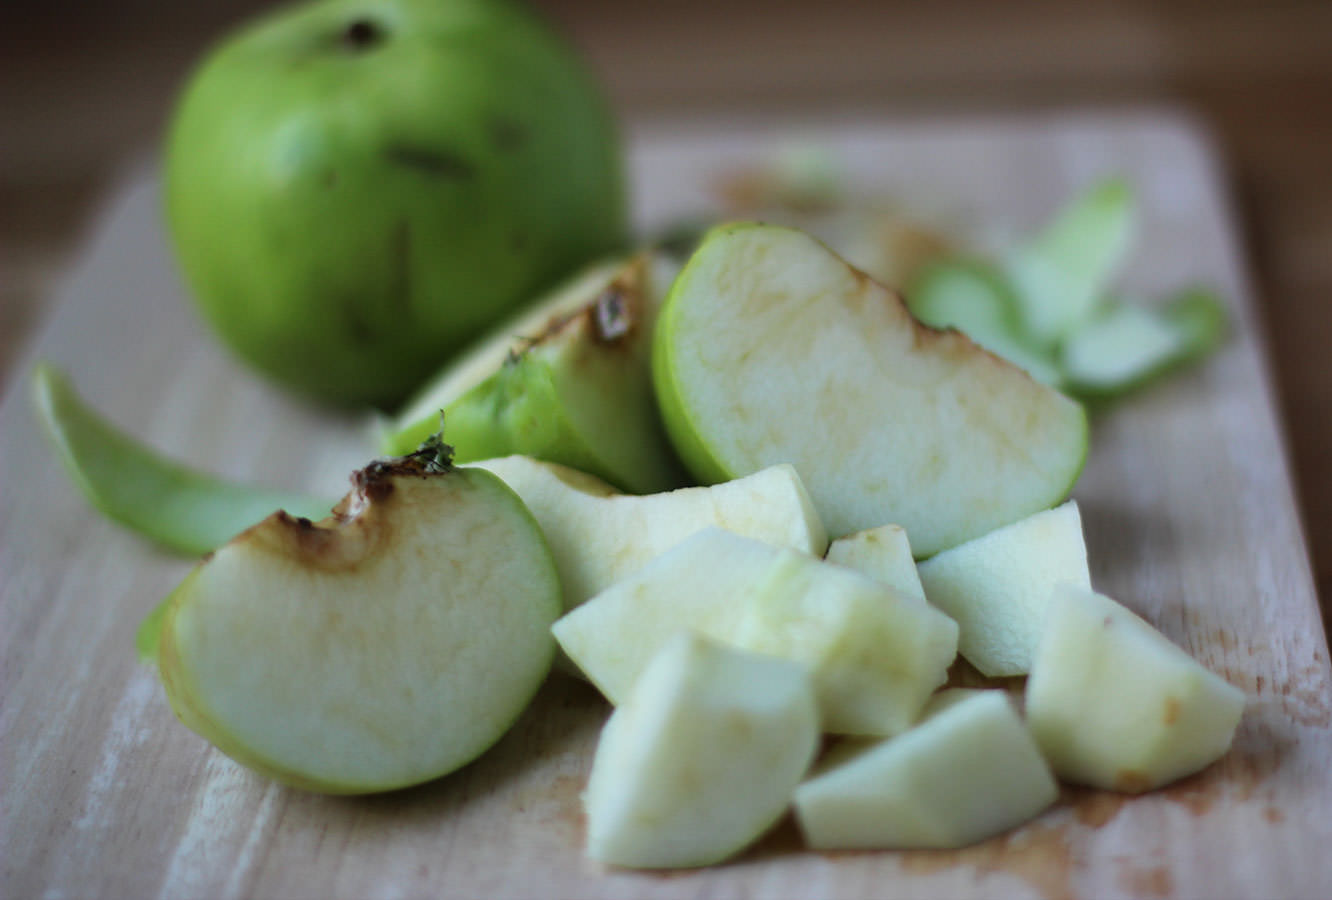
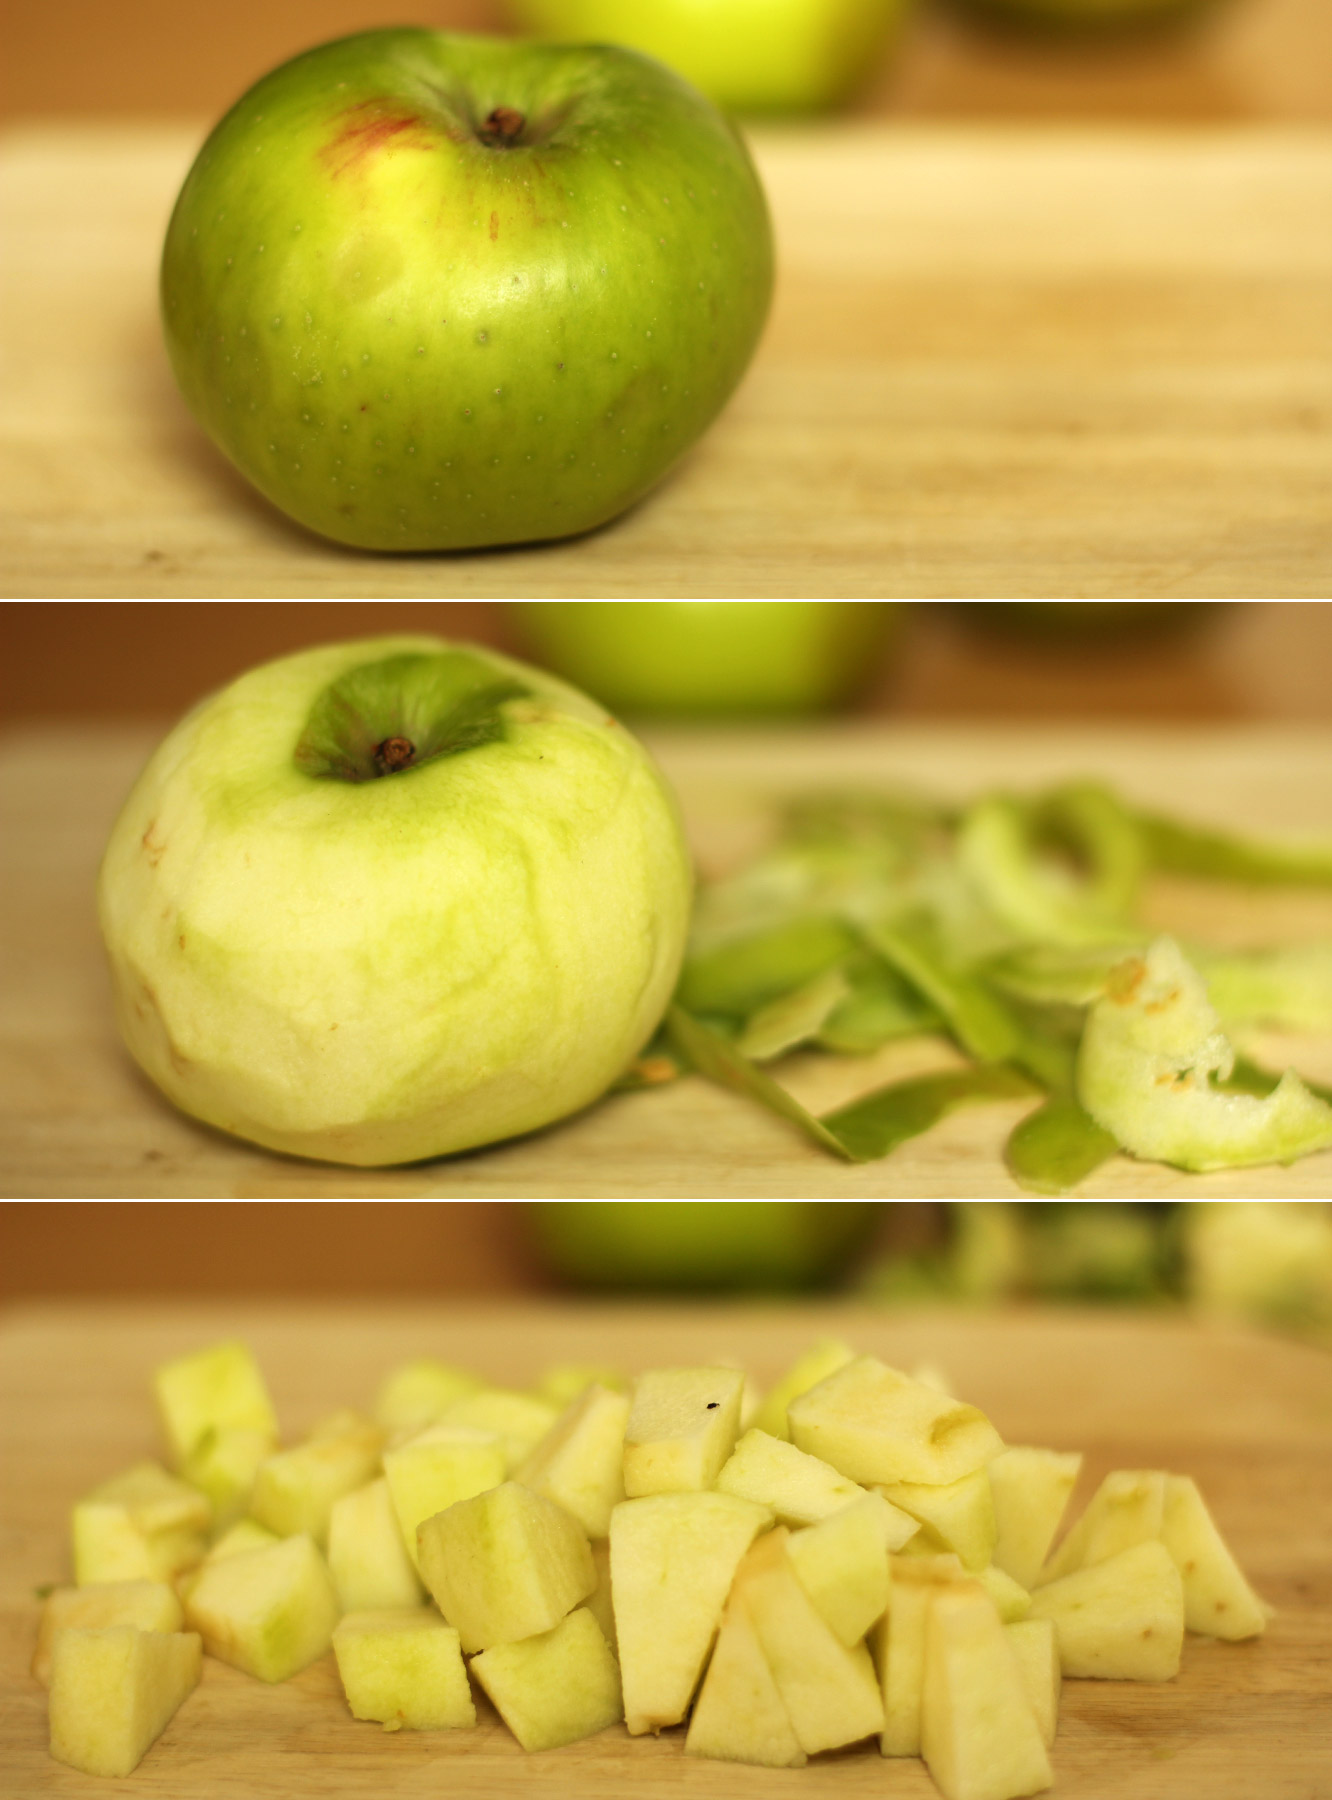
Prepare the stewed apple filling. Being by peeling and chopping the three bramley apples. If you have a bit of lemon juice handy a quick squeeze will keep the chopped ones pale while you see to the rest.
Step seven
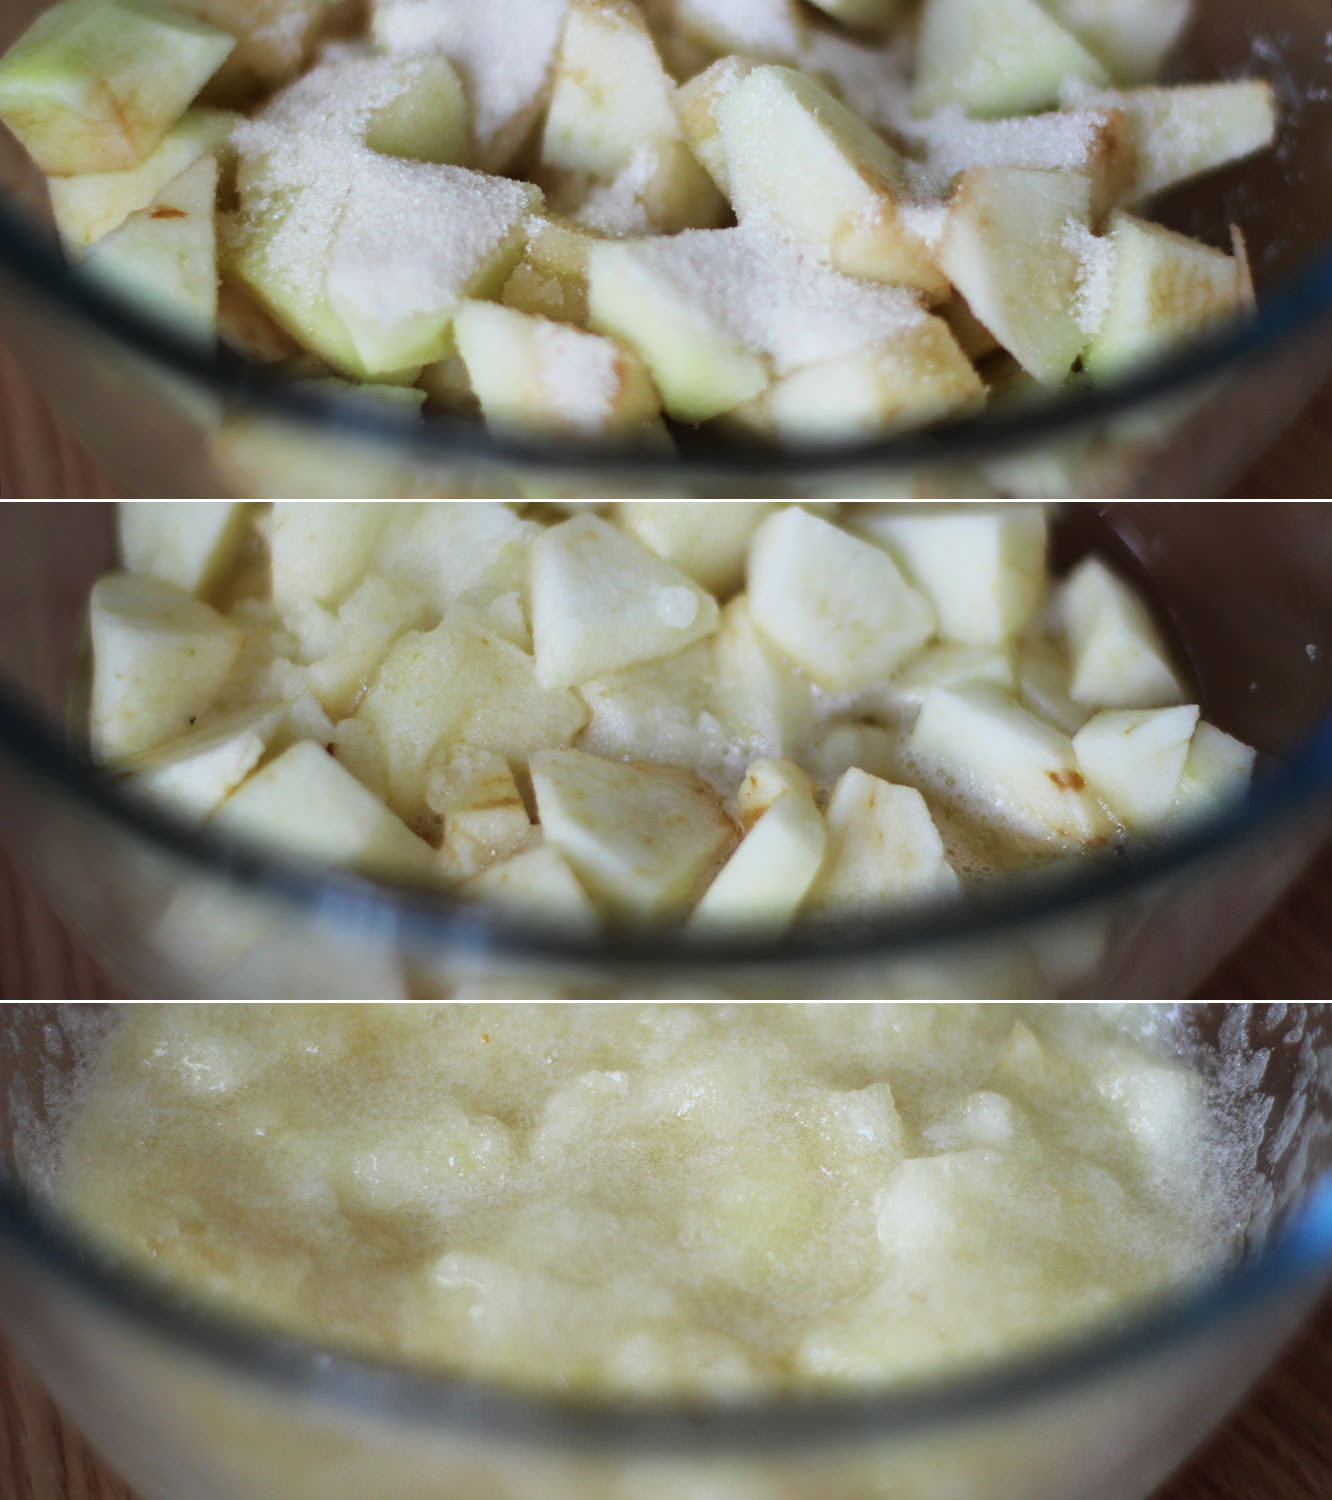
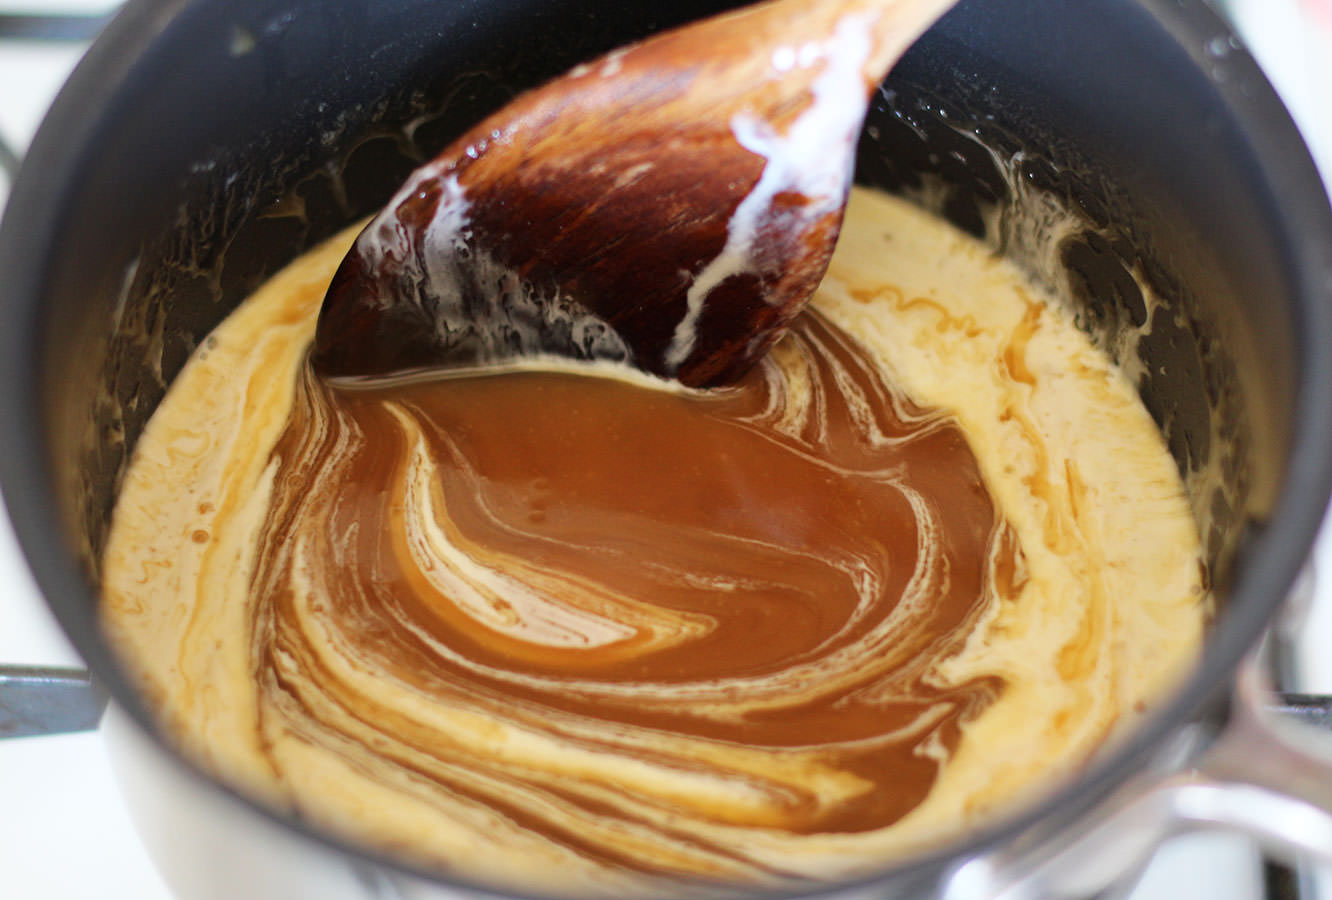
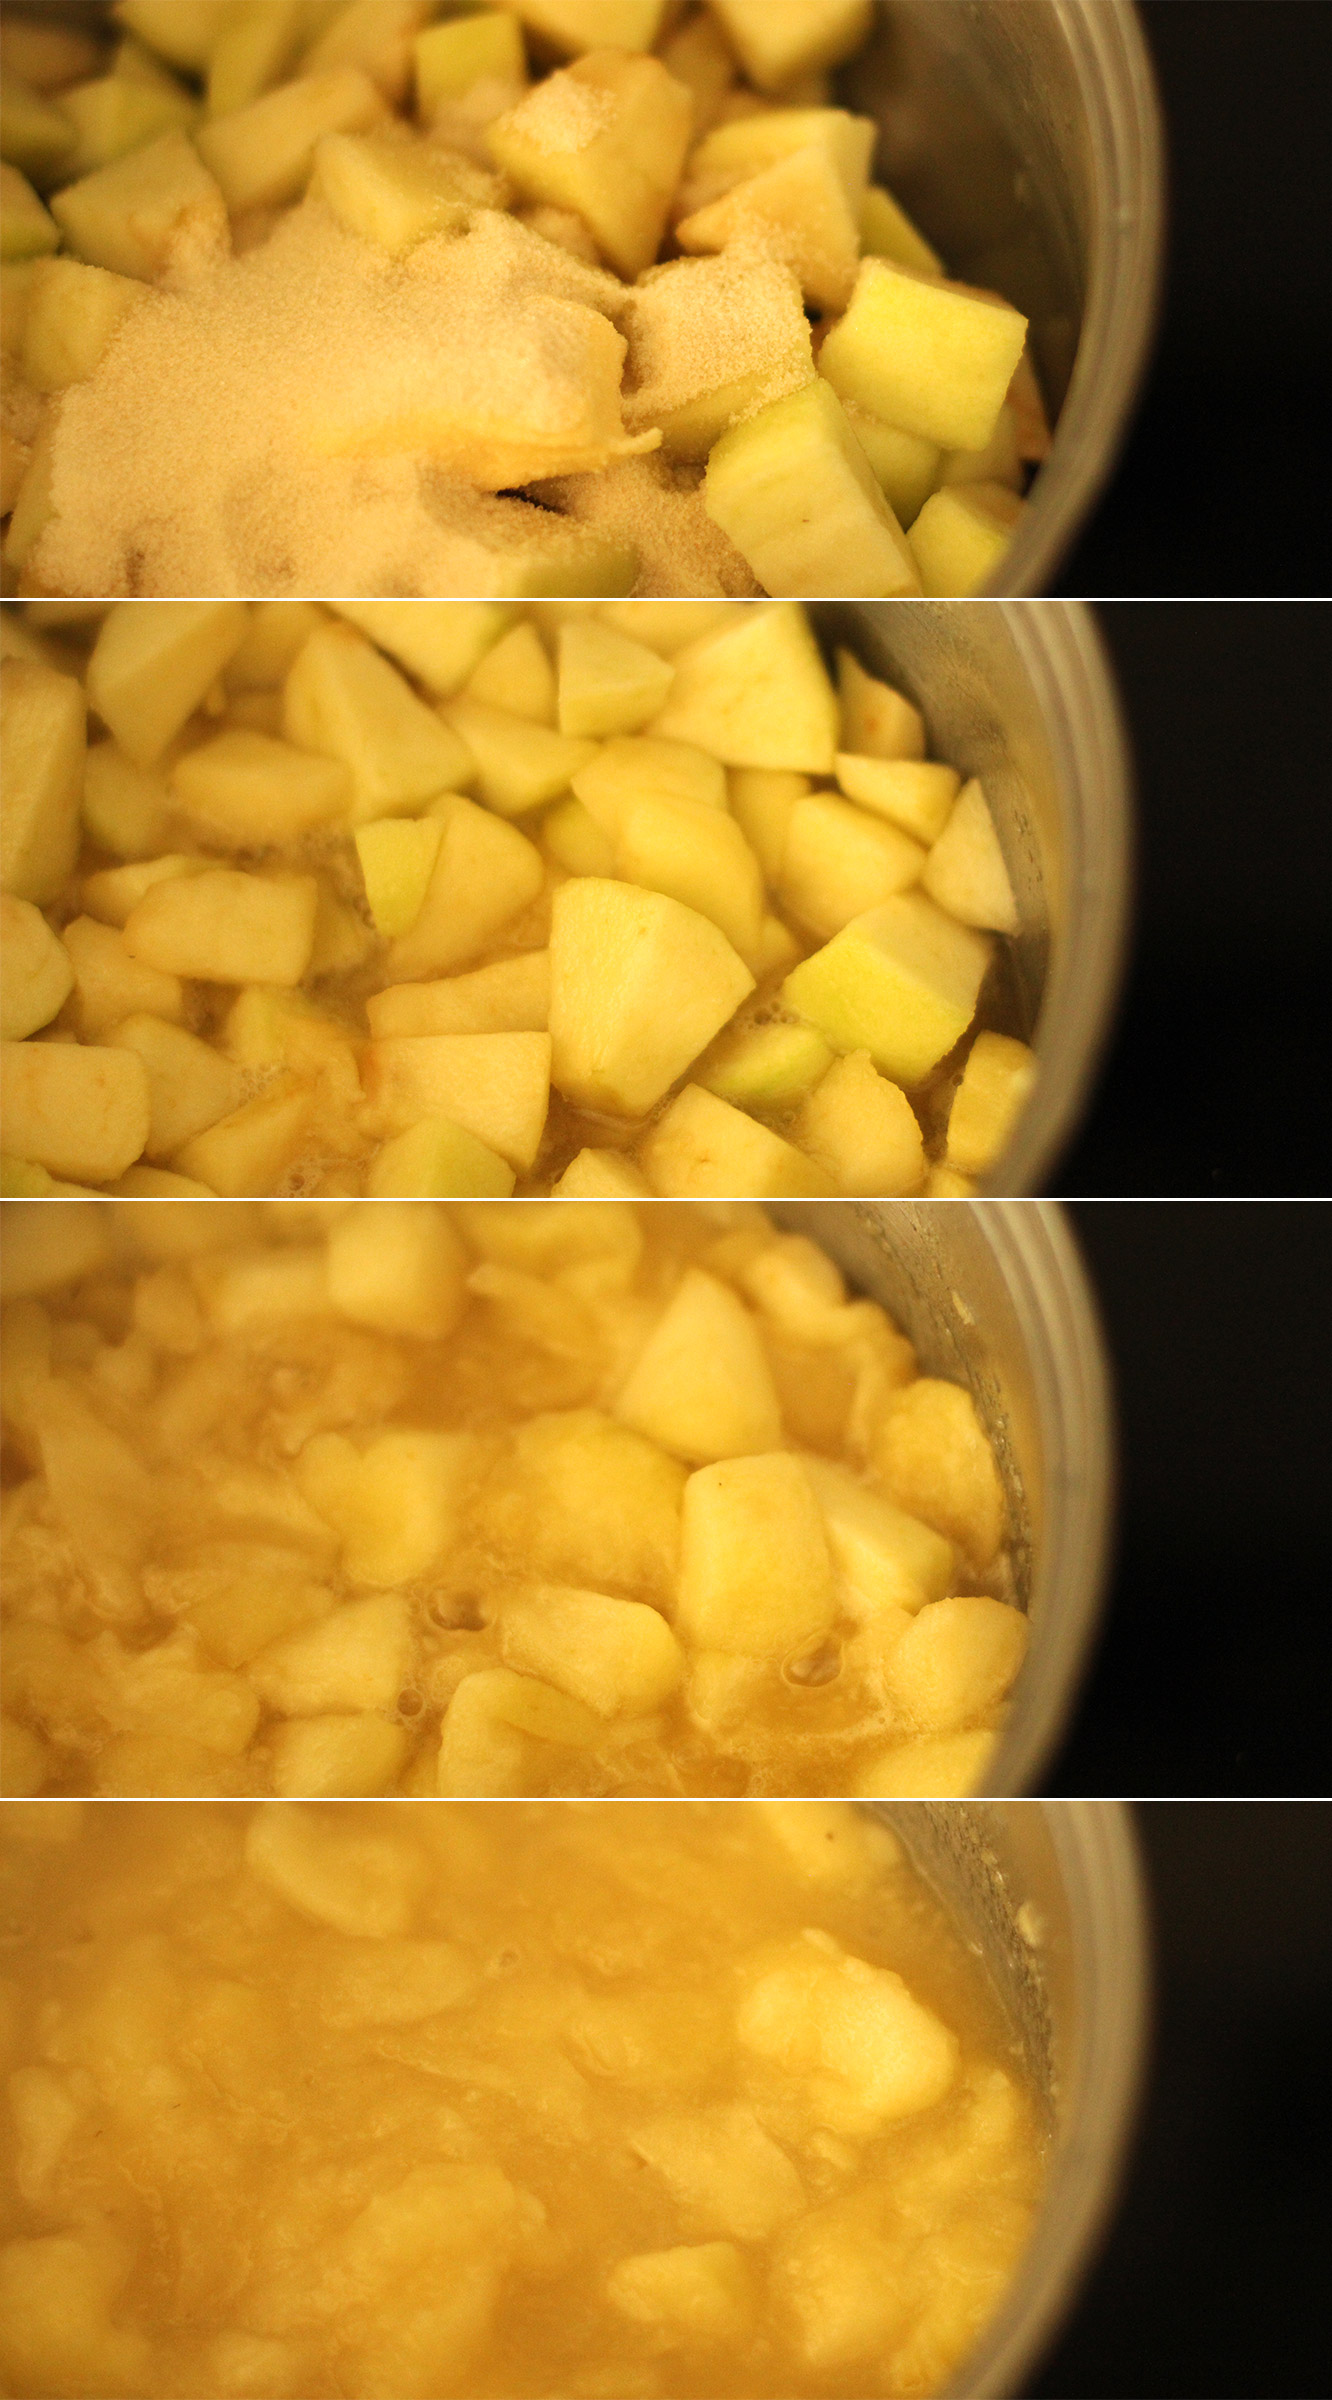
Put the chopped apples in a saucepan with the butter, honey, water and sugar. Bring to a medium-low heat and stir occasionally until the apples are mostly broken down. You want a pulp really (an appetising thought, I know).

Step eight
Remove the pastry from the fridge (providing an hour has passed). Place onto a lightly floured surface (you don’t want to add much more flour to the mix if you can help it).
Roll the pastry out as evenly as you can, until your chosen dish can sit in the middle with an inch or two on all sides. You don’t really want your pastry to be thicker than 5mm.
Step nine
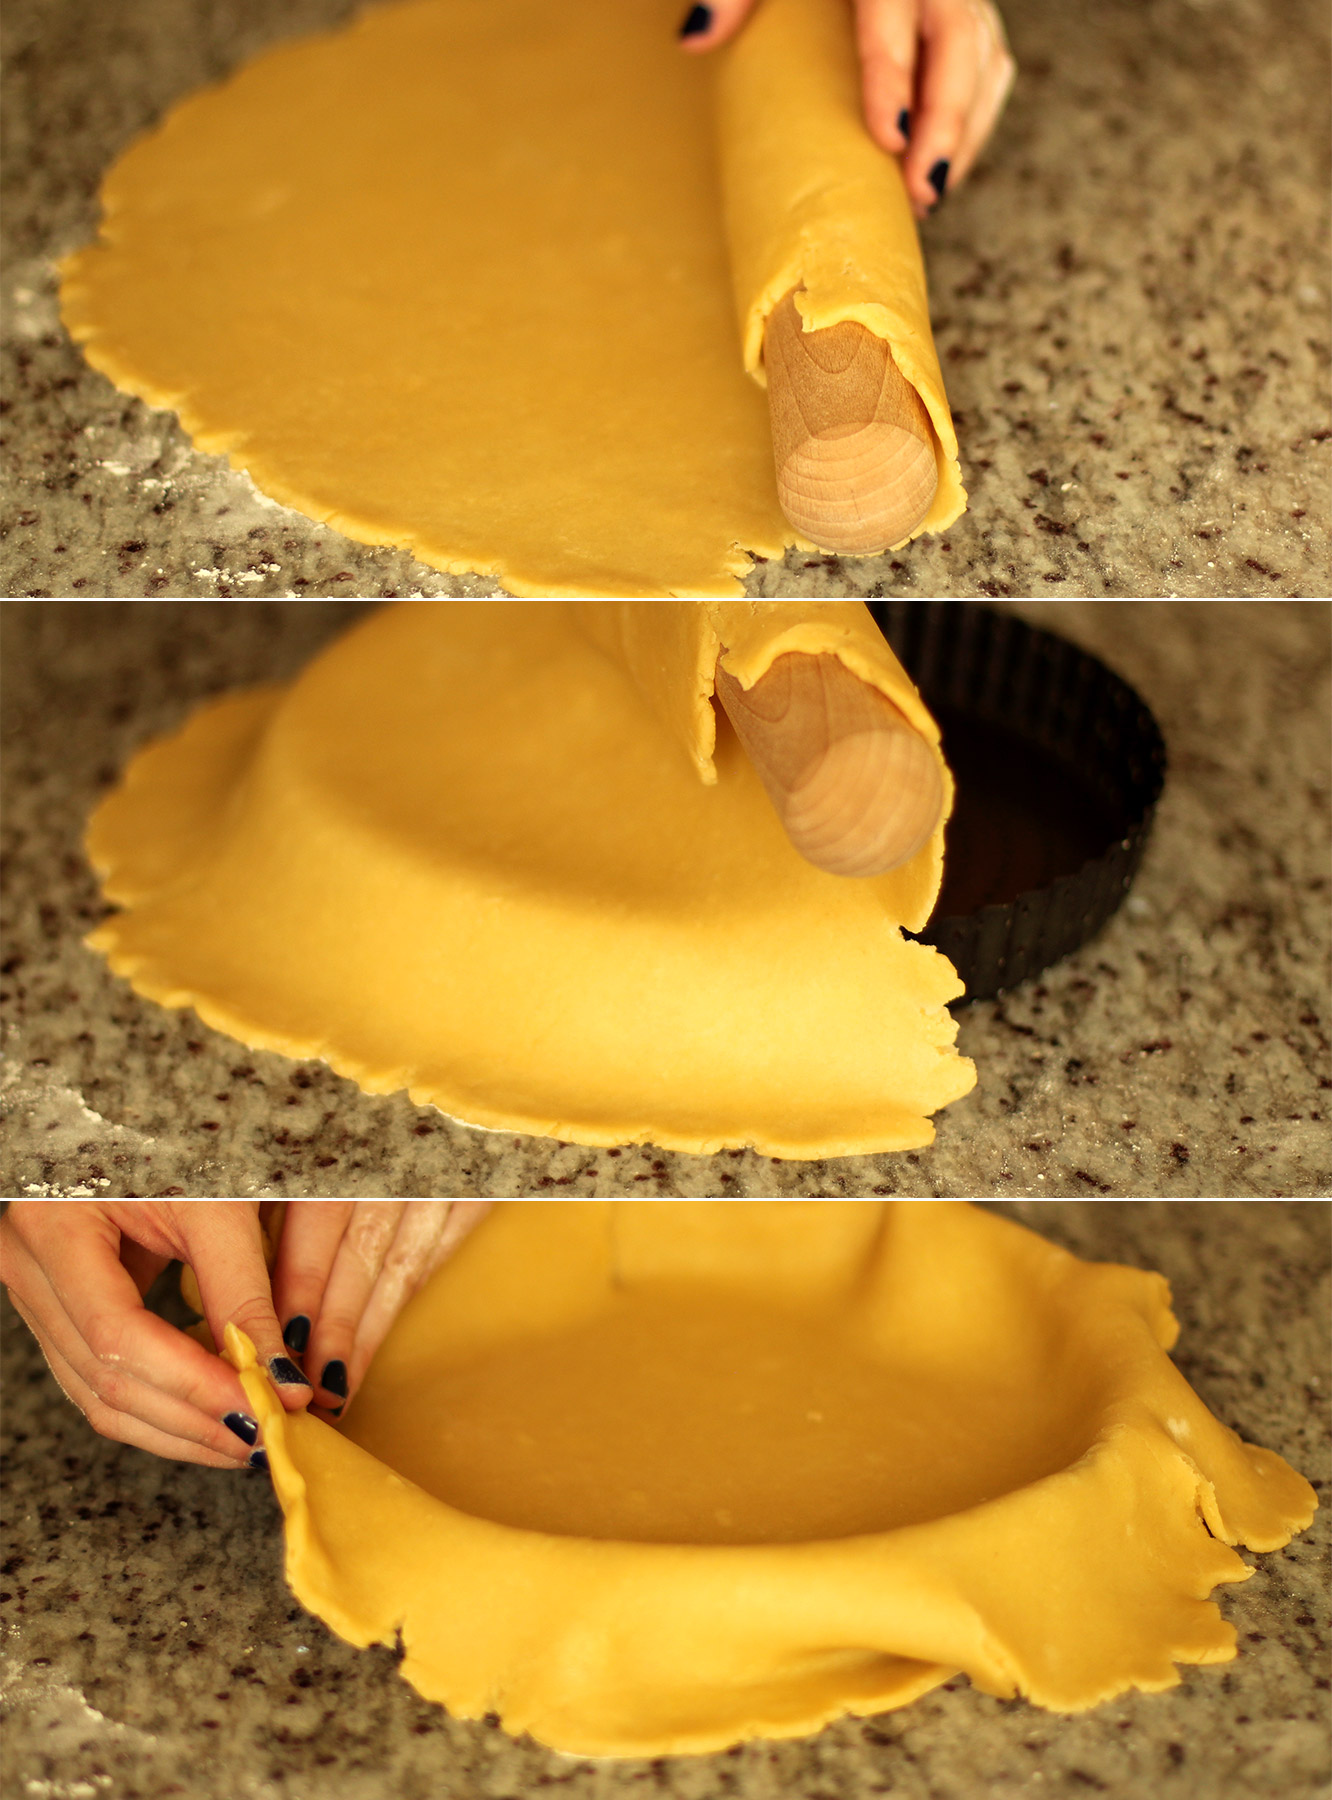
Transfer your pastry by rolling it at least half of it up onto your rolling pin and unrolling it over the top of your dish.
I then needed to lift the edges back up and place them back in to tease them better into the corners. Do this gently so as not to tear it. Having said that, I was a bit heavy handed and tears can be fixed quit easily by sticking a bit of excess pastry on top.
Step ten
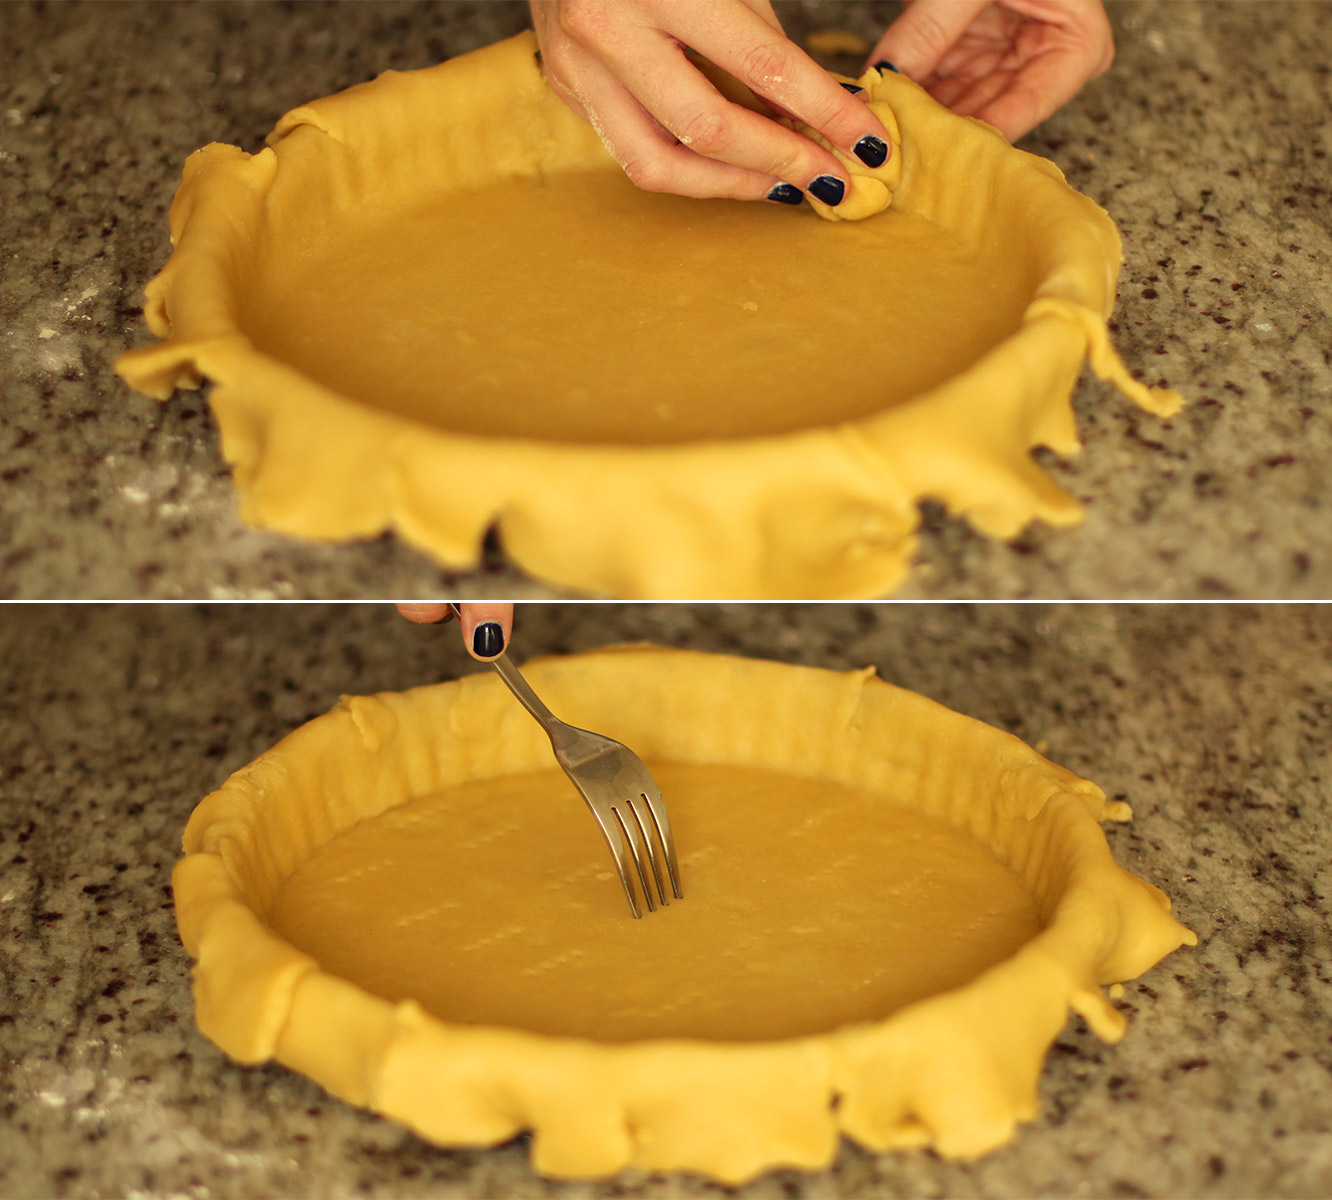
Rip a bit of pastry off the overlap and use it to press the crust further into the crevices.
Use a fork to pierce the base of the pie, this will help the pastry stay flat in the oven.
Pop him back in the fridge for another 20-30 minutes.

Step eleven
While the pastry is chilling again, peel and slice the braeburns/eating apples. You need to do this carefully as it will be the making or breaking of how your pie looks (no pressure). Try to peel nice and evenly and cut the apples as thinly as you can.
Have a large tupperware filled with cold water nearby to put your cut slices into, which will stop them from browning, again, if you have any lemon juice a few drops wouldn’t go amiss but not essential.
Pre-heat the oven to 180C/gas mark 4/350F
Step eleven
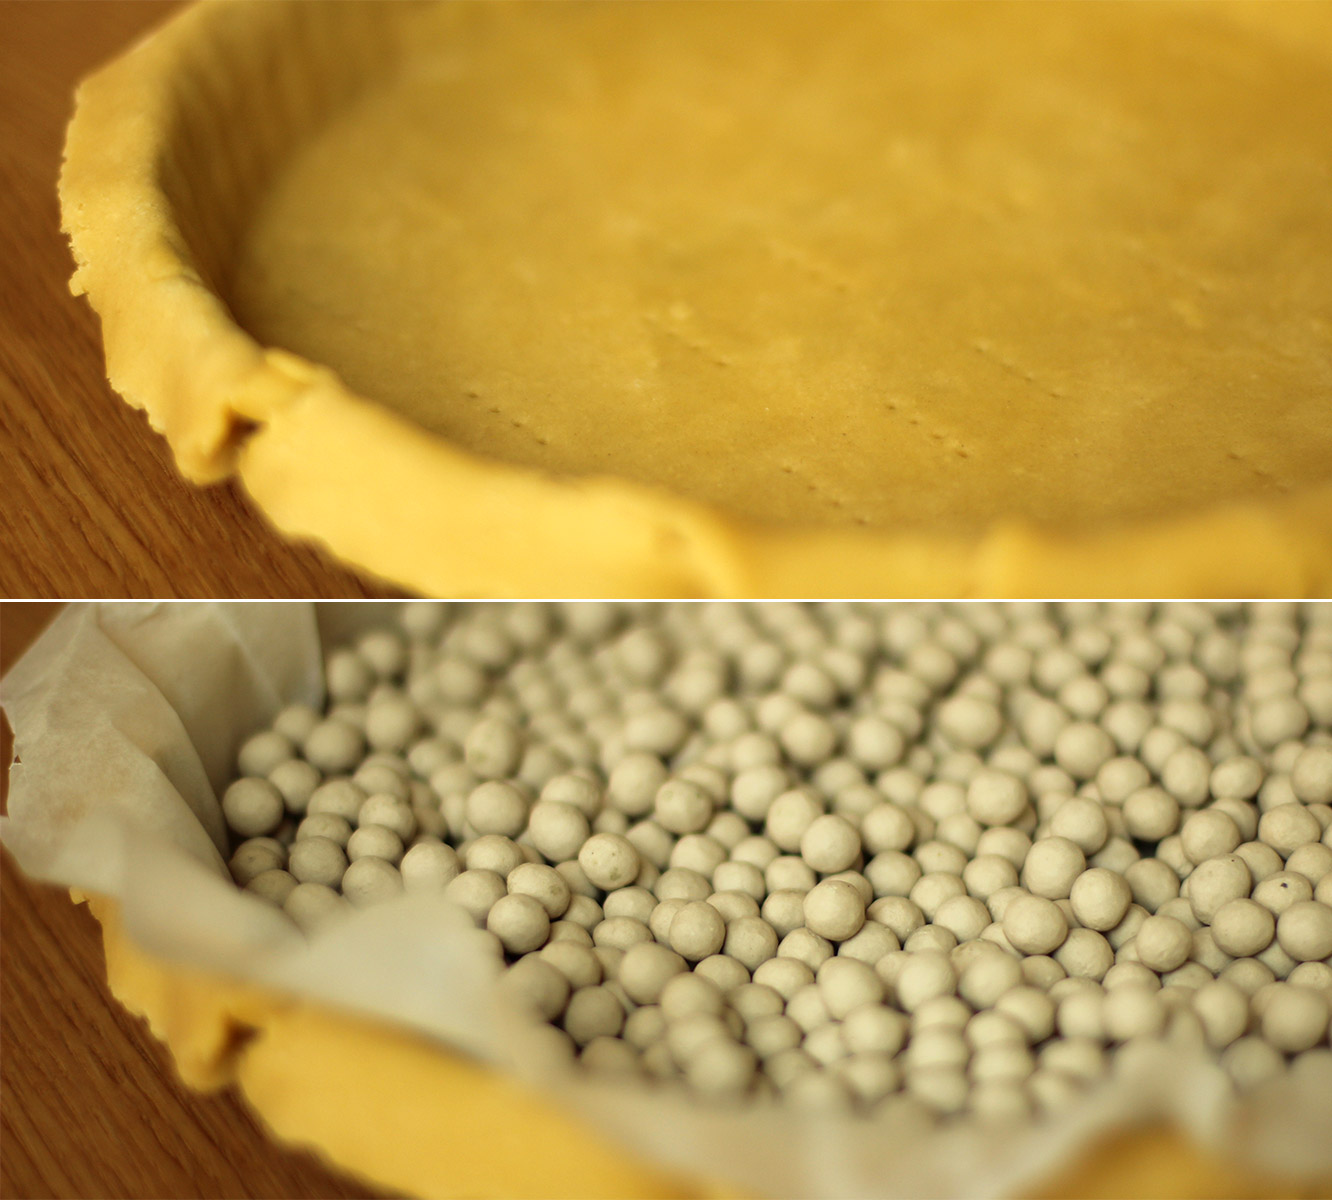
Remove the pie from the fridge and trim some of the excess pastry off the sides but still leave an overlap.
Place some baking paper in the pie and fill with baking beans. If you don’t have any then rice works too, and most dried lentils/pulses really.
Place on a baking tray and bake for 15 minutes.
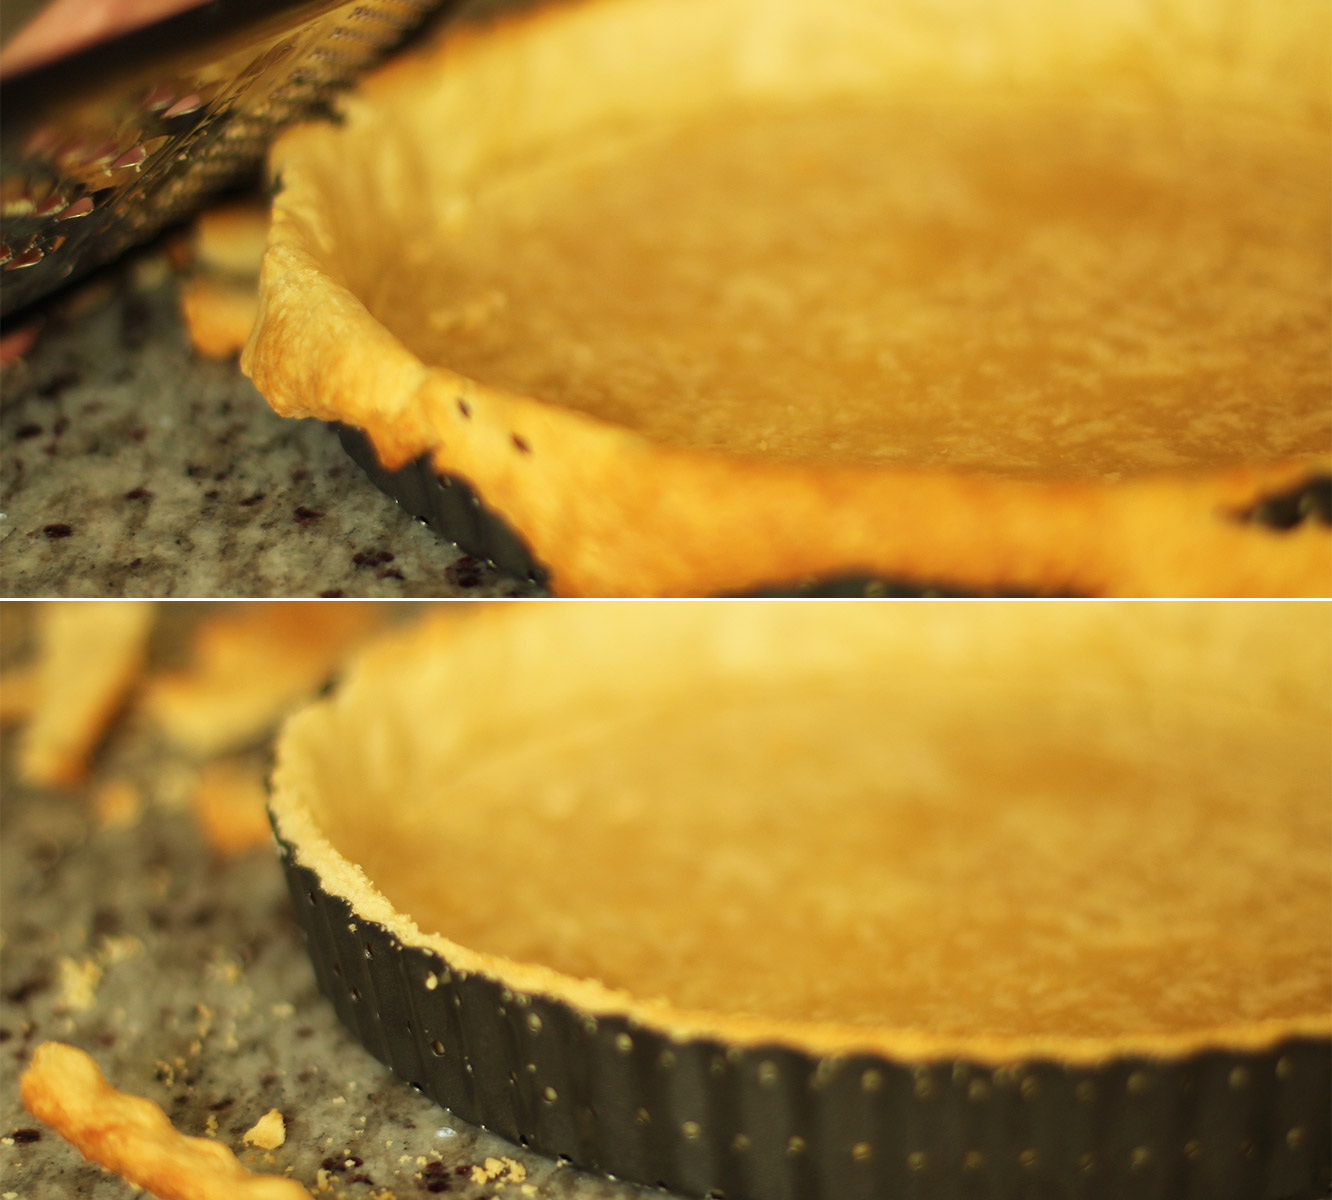
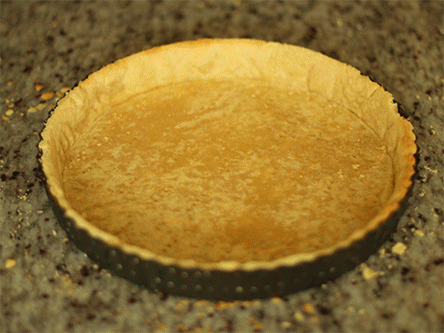
Step twelve
Using a grater remove the excess pastry at this stage. Doing it this way helps to avoid your pastry shrinking in the oven.
Step thirteen
FILL.
First spoon in the frangipane and spread out, followed by the stewed apple puree mixture.
Finally add your eating apples. Start with the outside and work inwards. Make sure your apples overlap each other quite a bit; the cooking process reduces the water so they will shrink and flatten out.
Bake for another hour on 180C/350F/gas mark 4. I advise checking in at regular intervals after 30 minutes as every oven is different.
Step fourteen
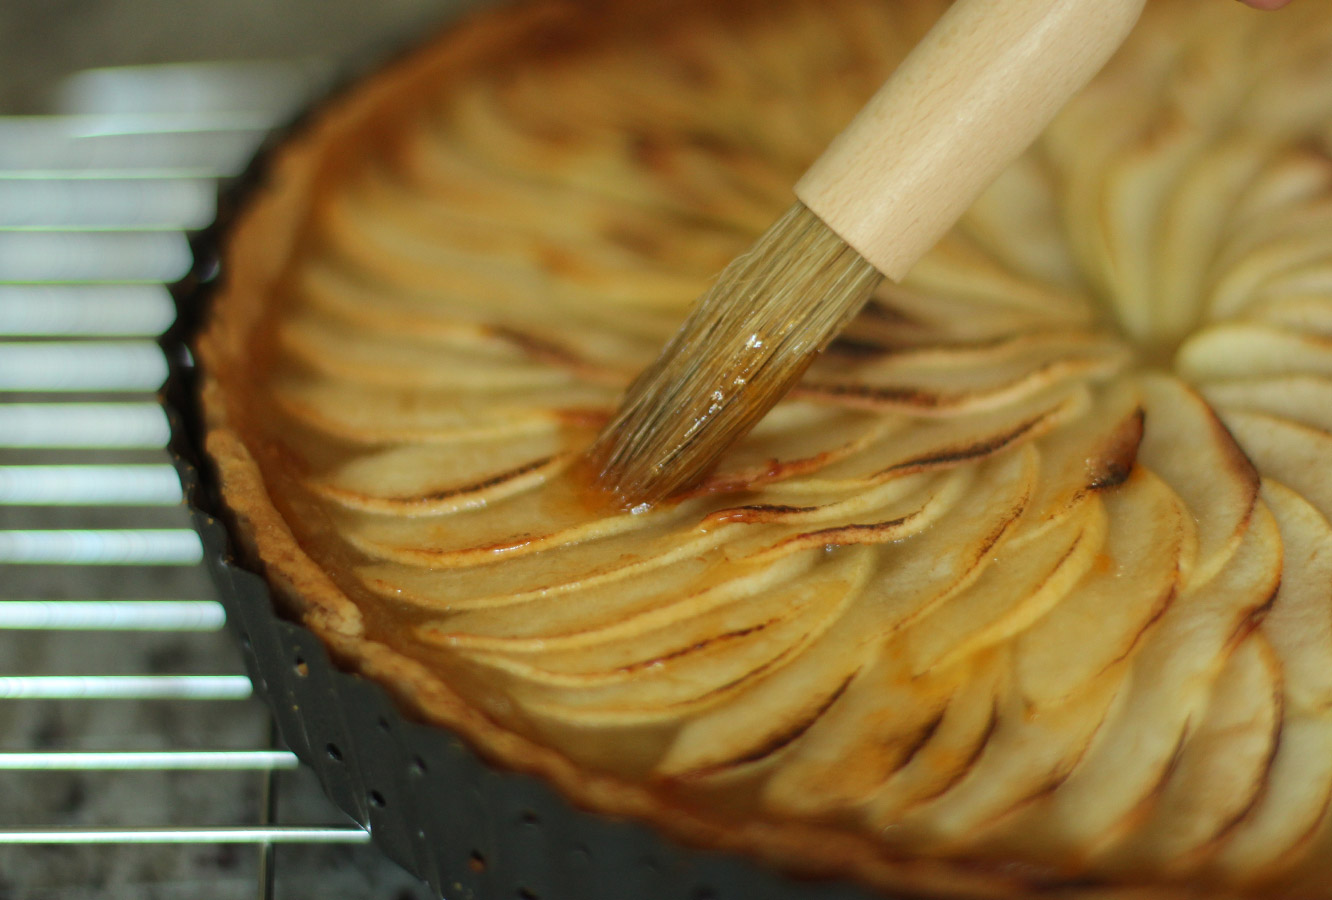
Pop a few tablespoons of apricot jam in the microwave for 10-20 seconds (keep your eye on it as it’s sugary and will heat up quickly). Brush over the surface of the tart, being careful not to move the apples around, spoiling your lovely design.

Step fifteen
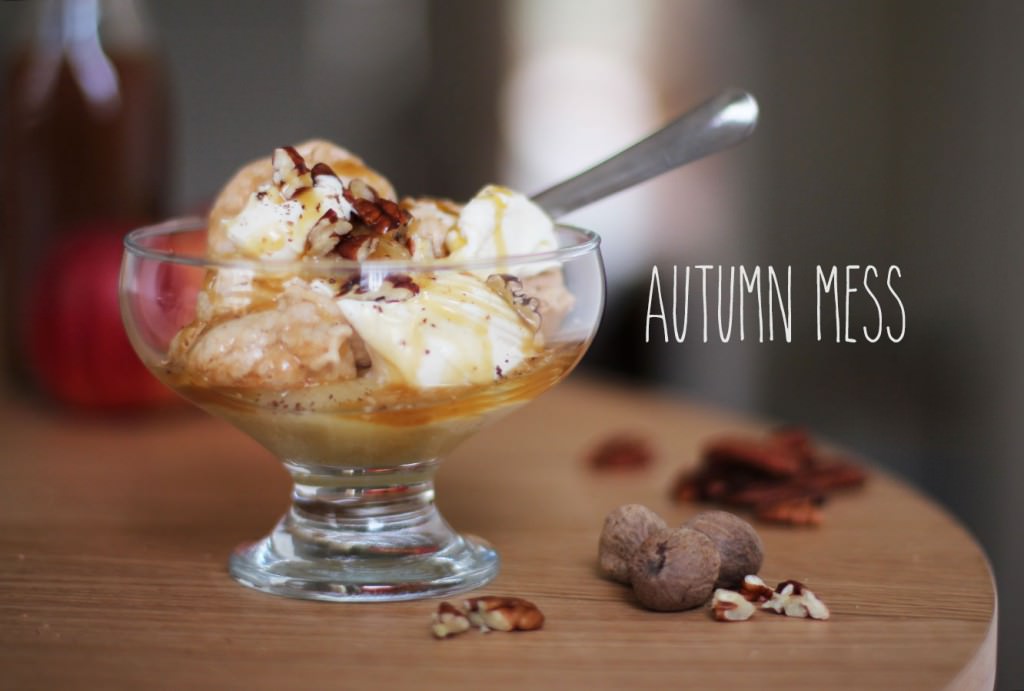
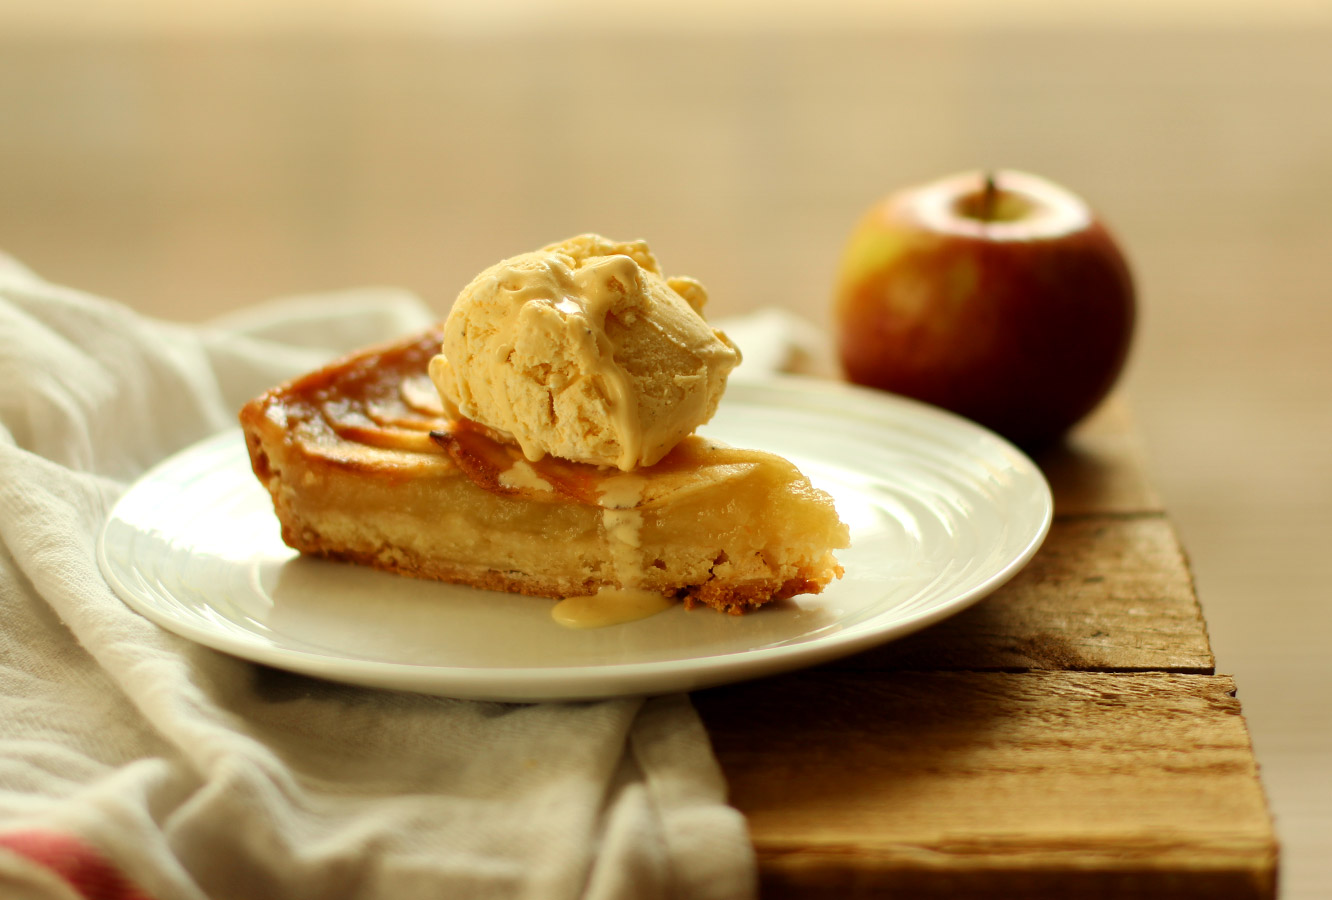
Get a scoop of vanilla ice-cream on that guy.
You can reheat your pie in the oven or individual slices in the microwave if you aren’t eating it straight away.
Until next time. x


 Step two