Tag: Party

Oh hey honey

October 31st. 19C in London, beautiful sunshine.

November 1st. Fog, cold, winter has arrived.

Don’t you just love the British weather?! Its unpredictability is a constant irritation to me but I do adore the seasons. I’m very glad I don’t live somewhere that’s variations on one temperature all year round.

It’s starting to feel a little festive this week at Fabrefaction HQ. It’s bonfire night on Thursday, and we are having a housewarming party this weekend to welcome the new housies. It would be rude not to provide our guests with some treats, and even ruder not to acknowledge the approach of Mr Frost.

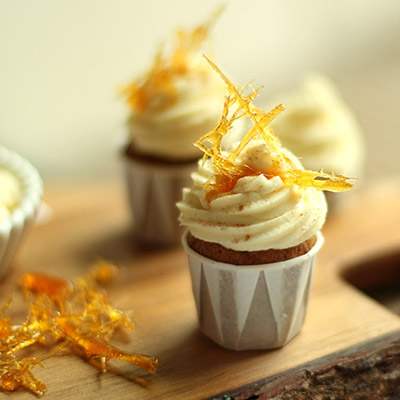
So here we are, the perfect recipe to bridge autumn and winter, mini gingerbread and honey cupcakes. If you don’t fancy the hassle you could always make this as a traybake, perhaps doubling the recipe (I halved it).
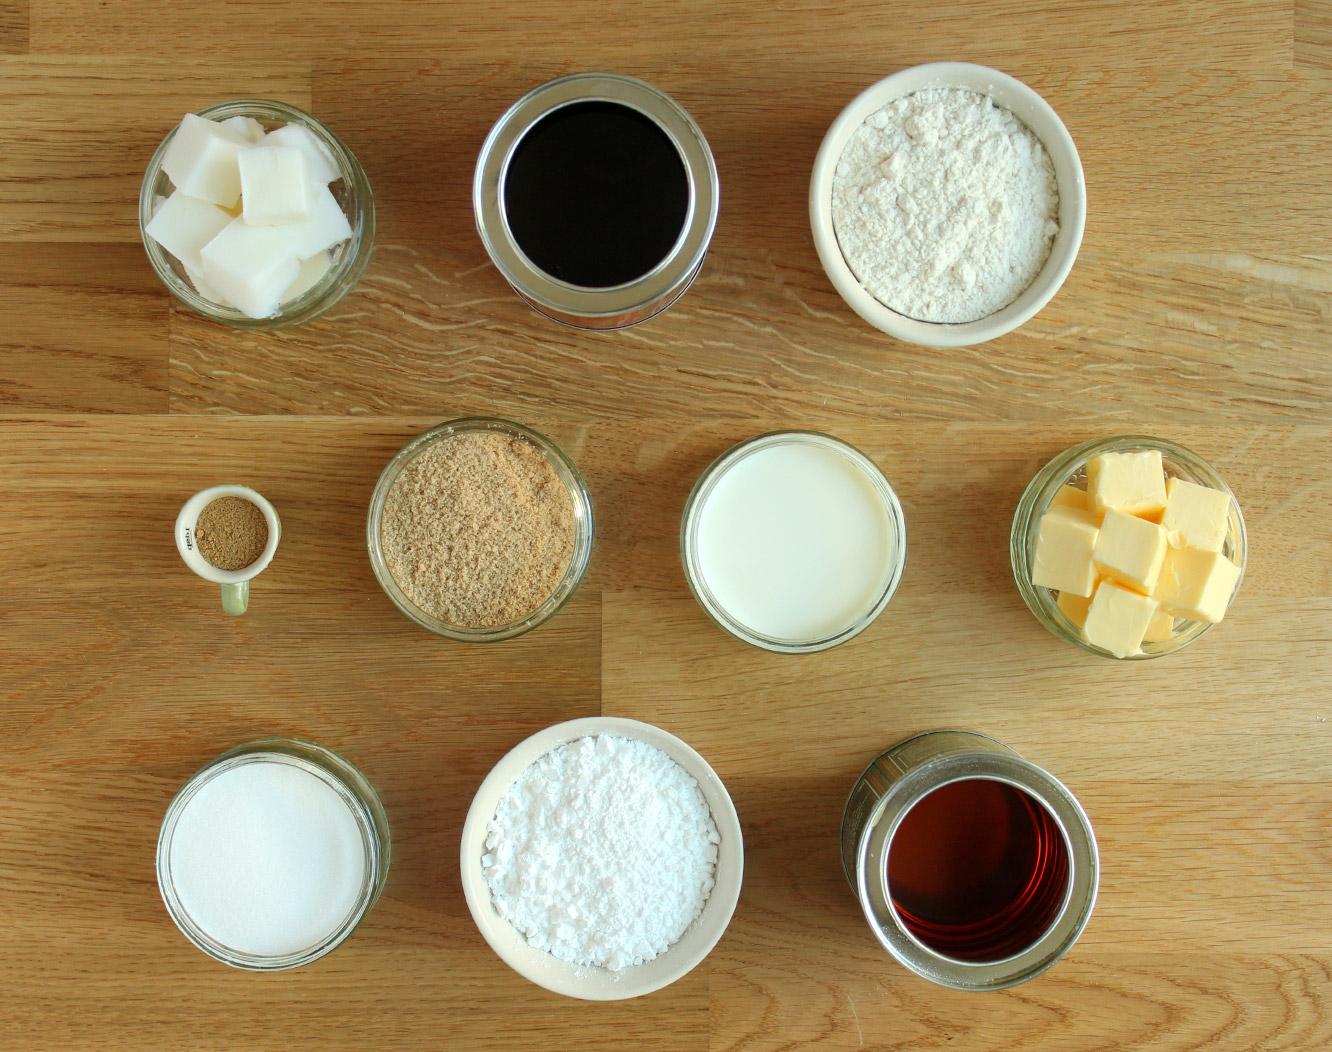
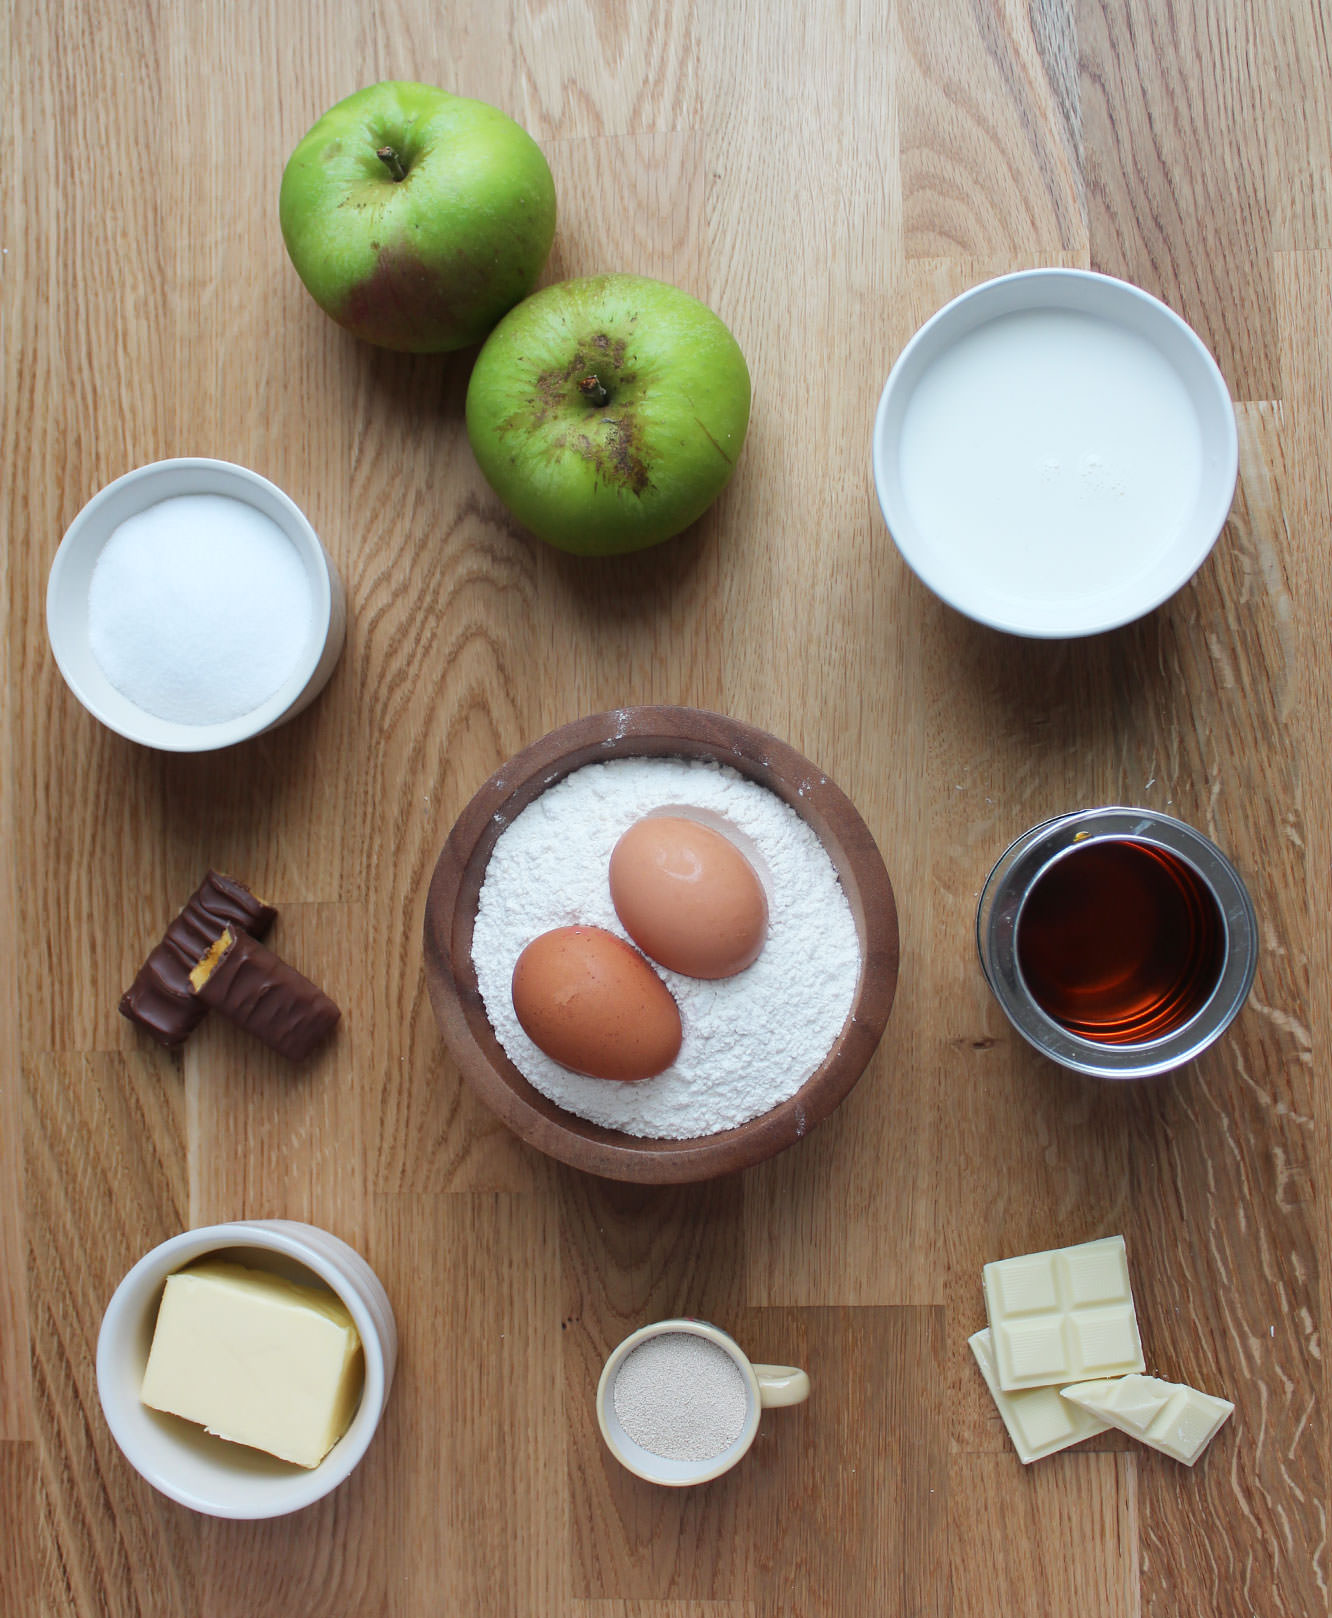
ginger-and-honey-cupcake-recipe-1

You will need

For the cake:

250g/9 oz plain flour

100g/3.5 oz golden syrup

75g/2.5 oz light soft brown sugar

75g/2.5 oz lard (yes, lard)

40g/1.5 oz treacle

140ml/4.5 fl oz milk

1 egg

1 tsp ground ginger (feel free to add more)

1 tsp bicarbonate of soda

For the icing:

300g/10.5 oz icing sugar

150g/5.25 oz unsalted butter

6 tbsp runny honey

For the sugar shards:

100g/3.5 oz caster sugar

(makes 35 mini cakes)
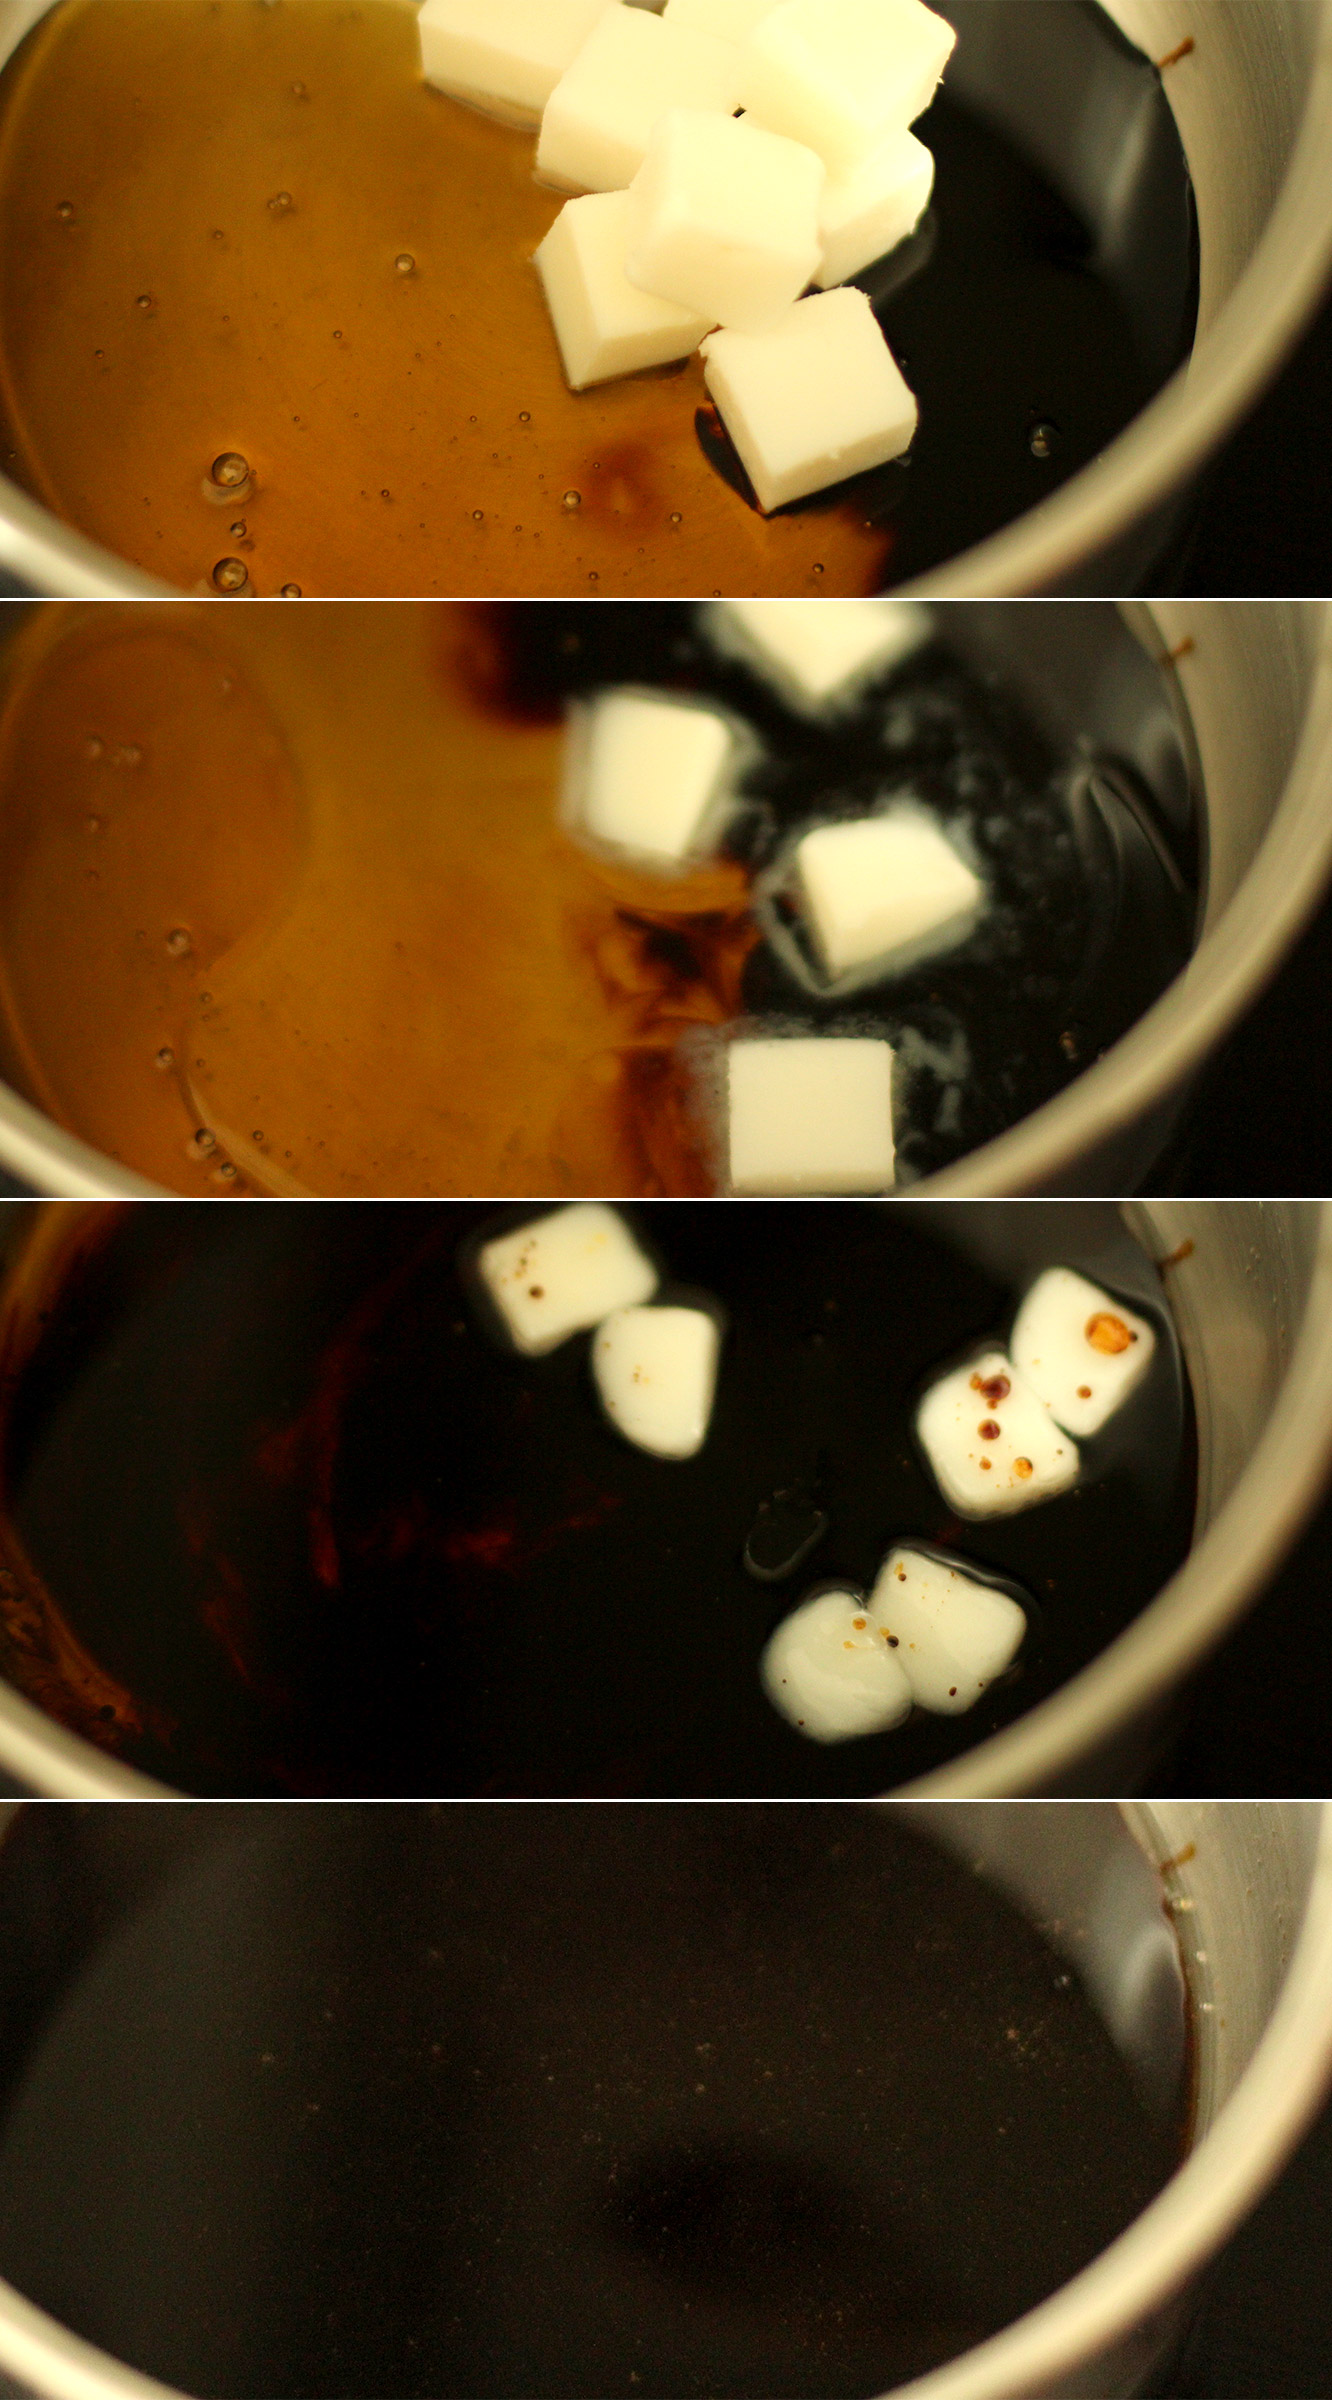
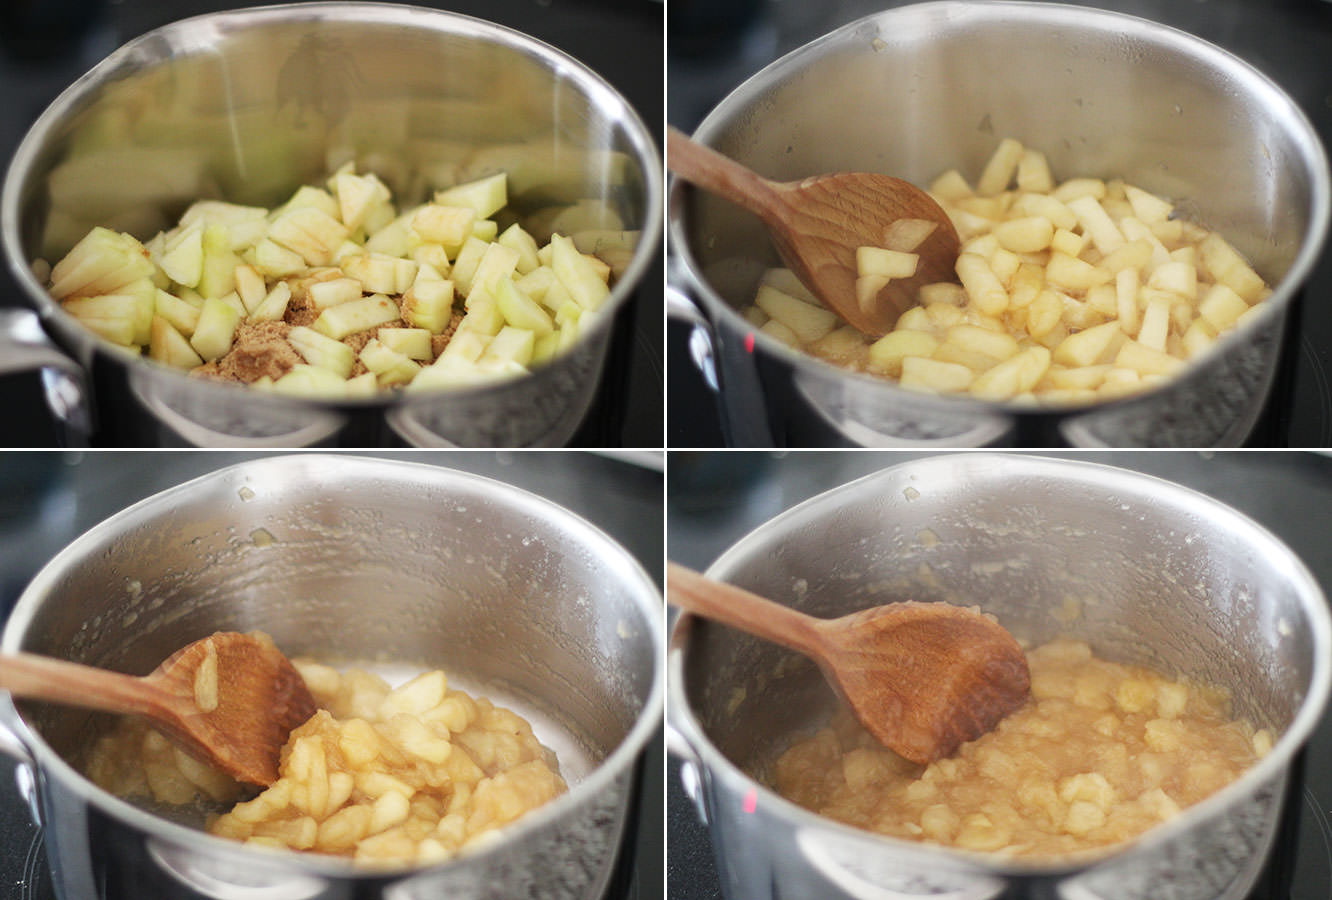
ginger-and-honey-cupcake-recipe-2

Step one

Melt the lard, golden syrup and treacle over a low heat.

Yes the lard will separate and create a glossy sheen on the surface, and yes you will think how unappetising it looks, but trust me on this one…it’s one of those recipes passed from generation to generation in my family, I’m just giving it a little facelift and daren’t replace the lard, just in case somehow Grandma is watching.
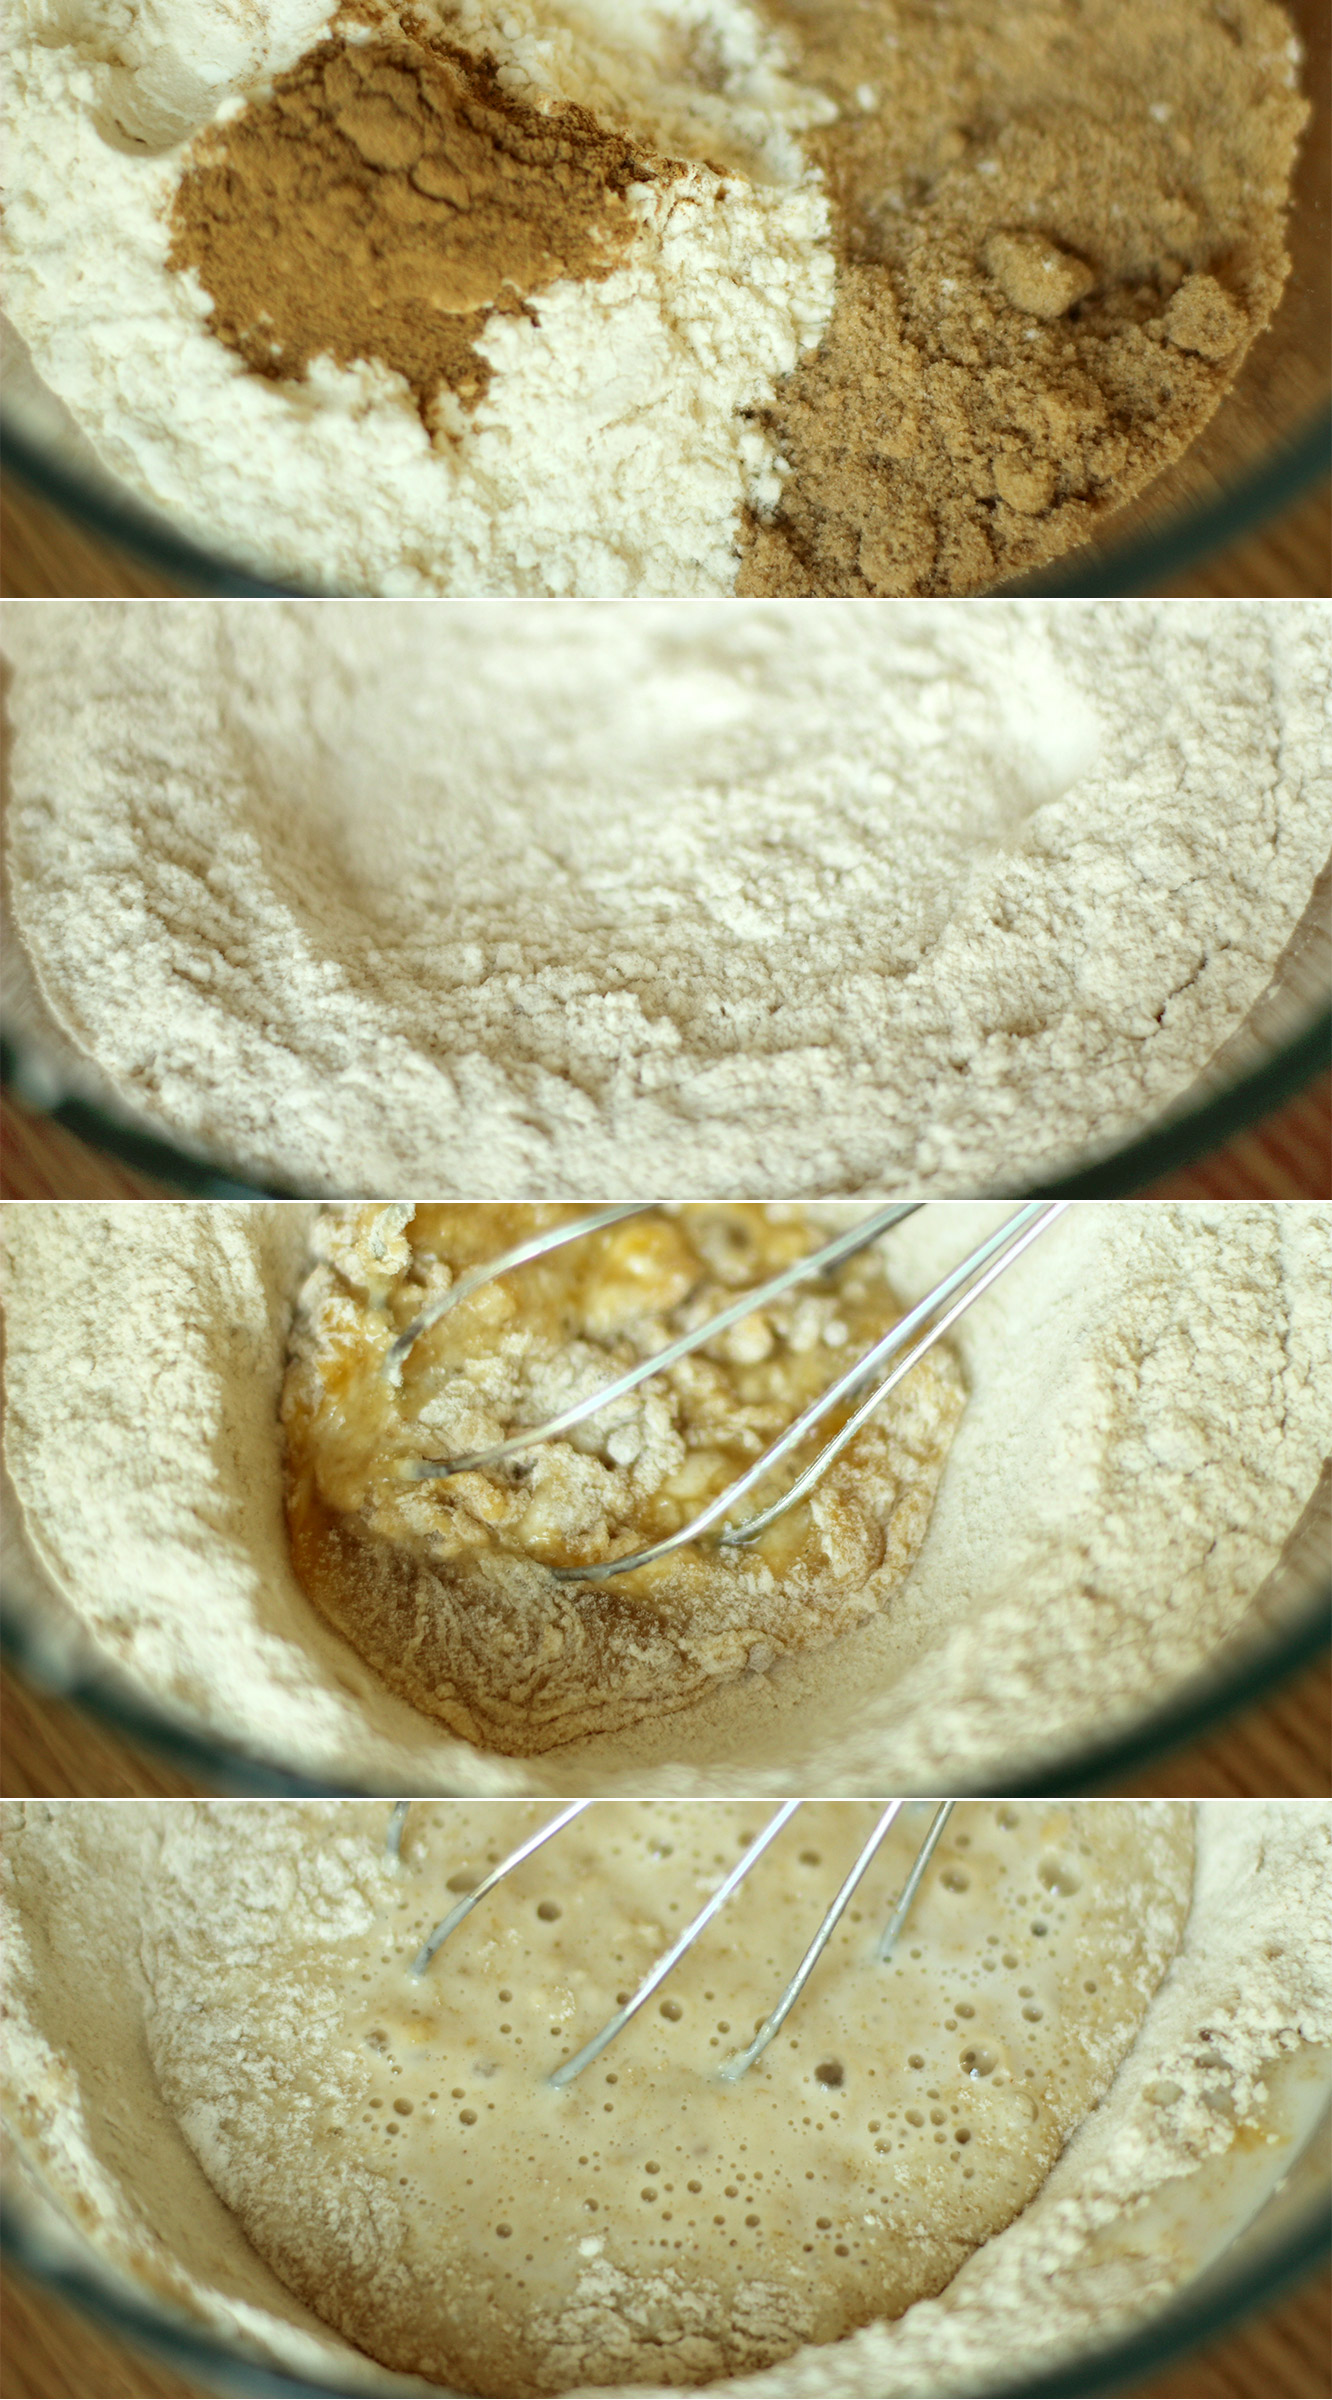
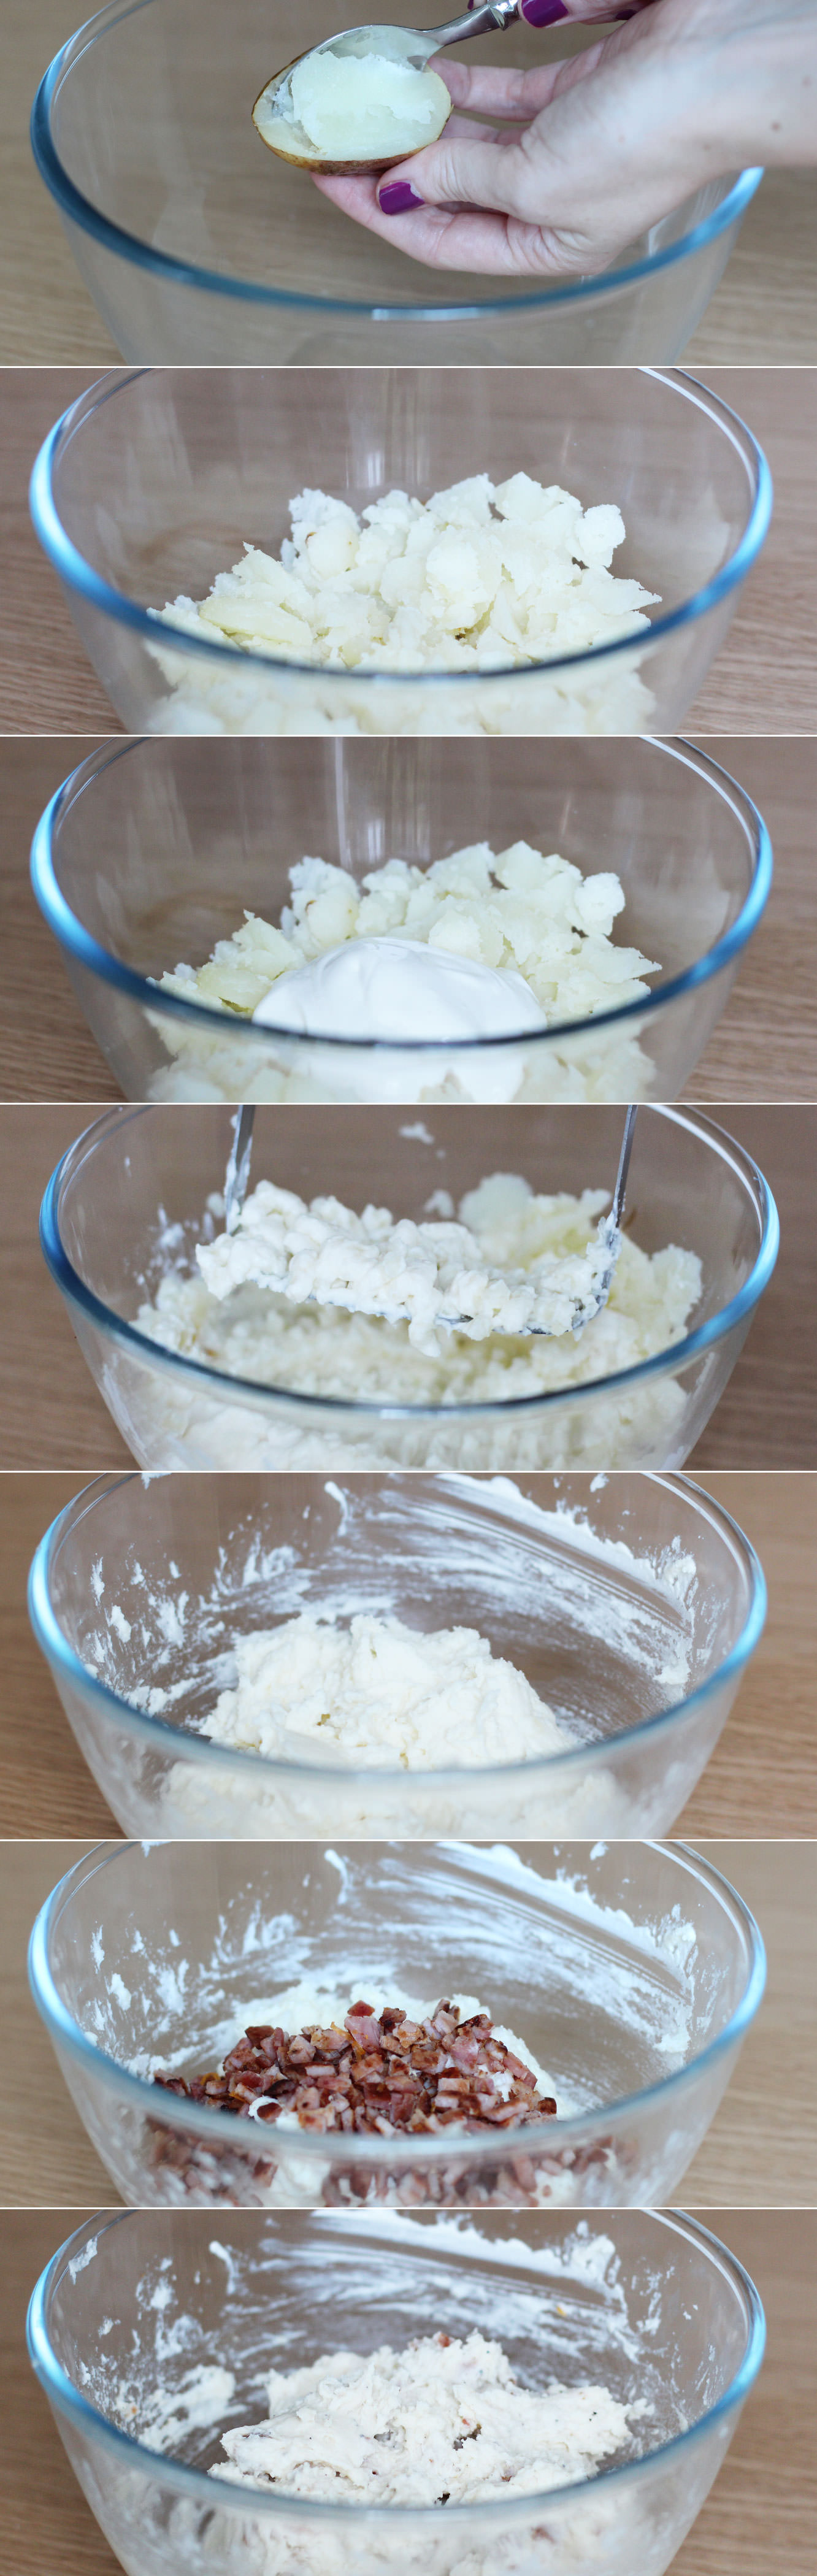
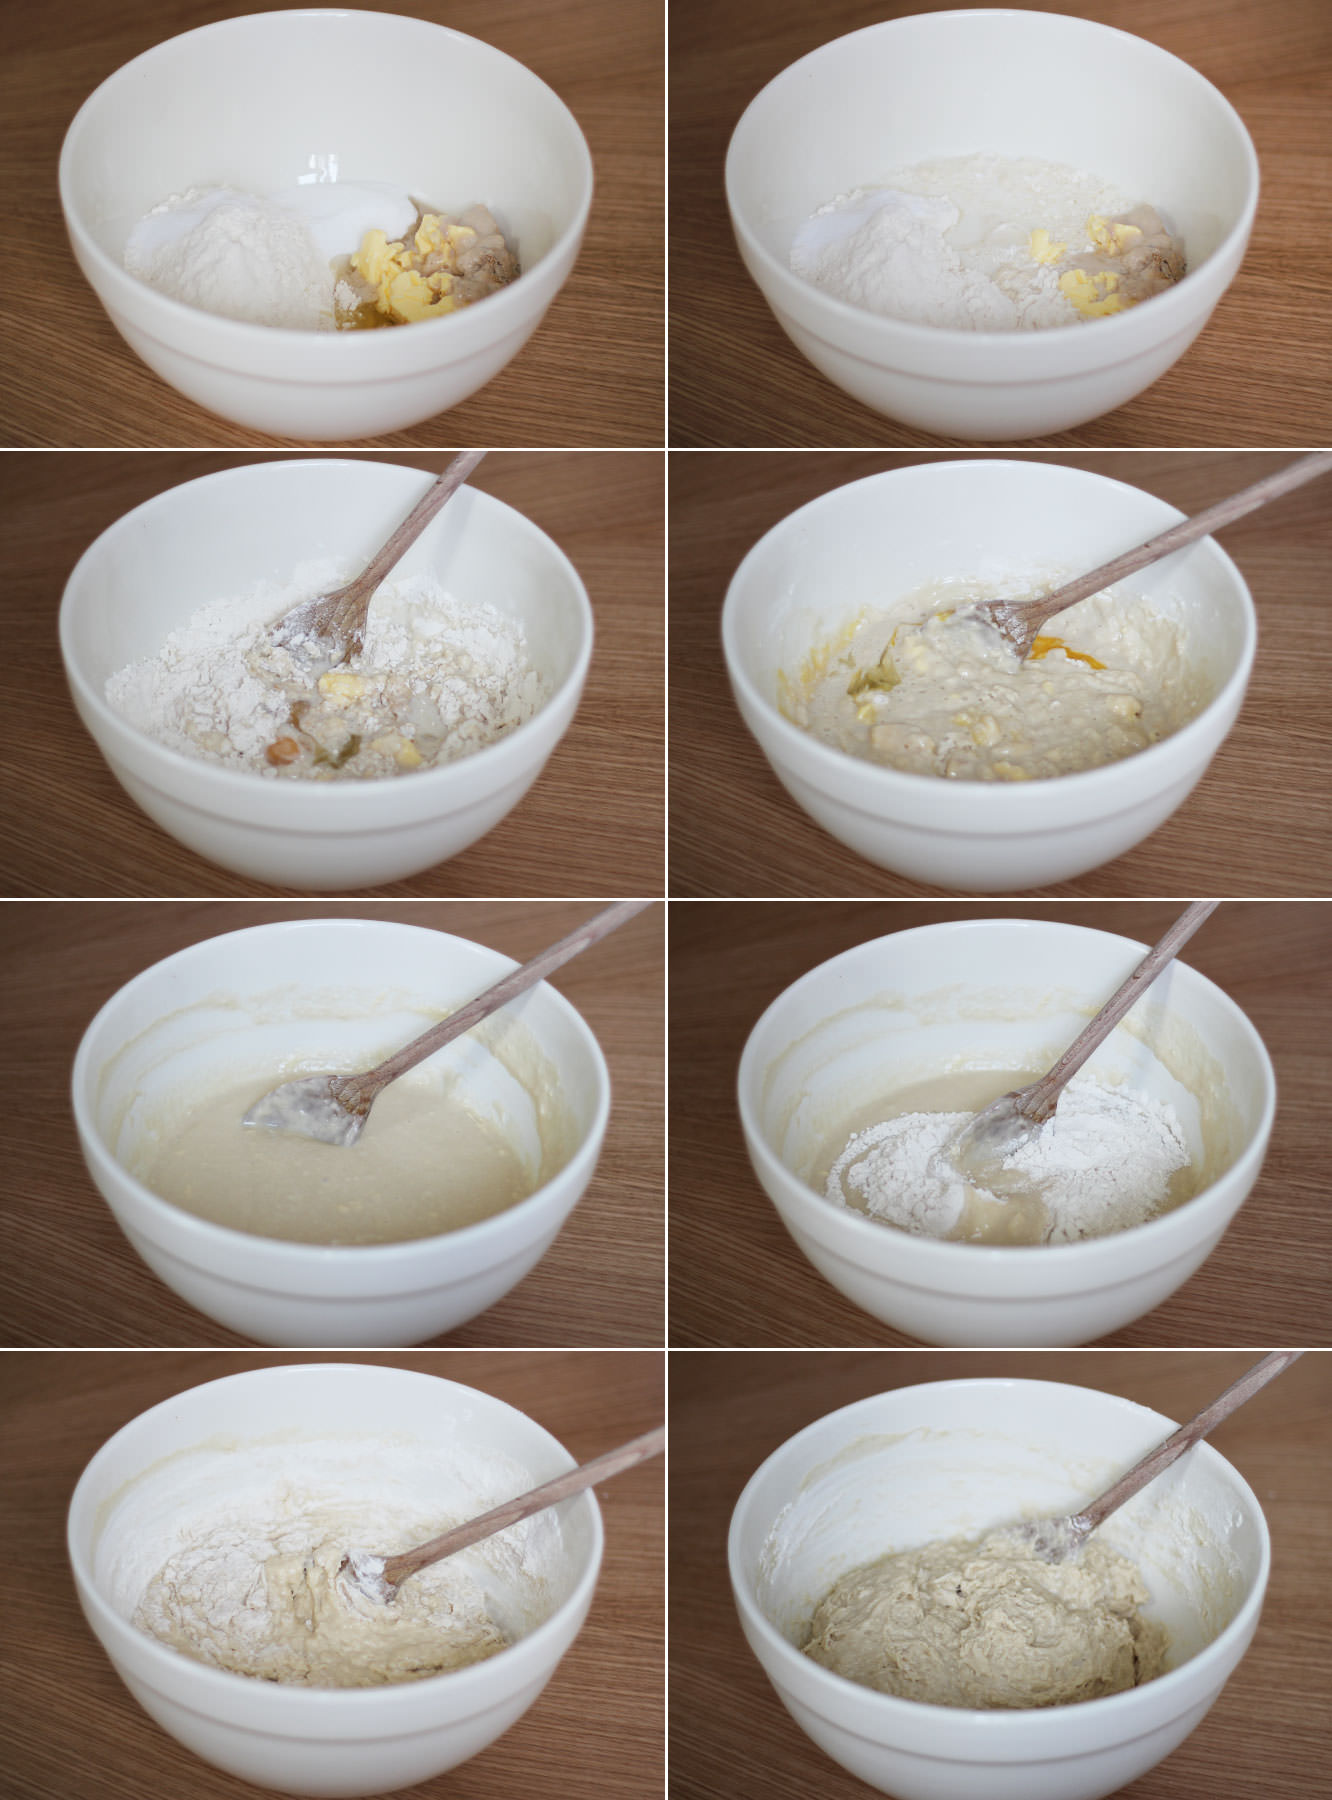
ginger-and-honey-cupcake-recipe-3

Step two

Combine the sugar, ginger, flour and bicarbonate of soda.

Make a well in the middle and start to whisk in the egg. Stop when you get to the consistency in the third picture down because otherwise you risk making lumps you won’t be able to get out.

Step three

Pop the milk in the microwave to heat for 30 seconds to a minute until warm. Add to the centre of the mixture and continue to whisk gently until the milk and the egg are combined, but again don’t try and mix in all the flour.
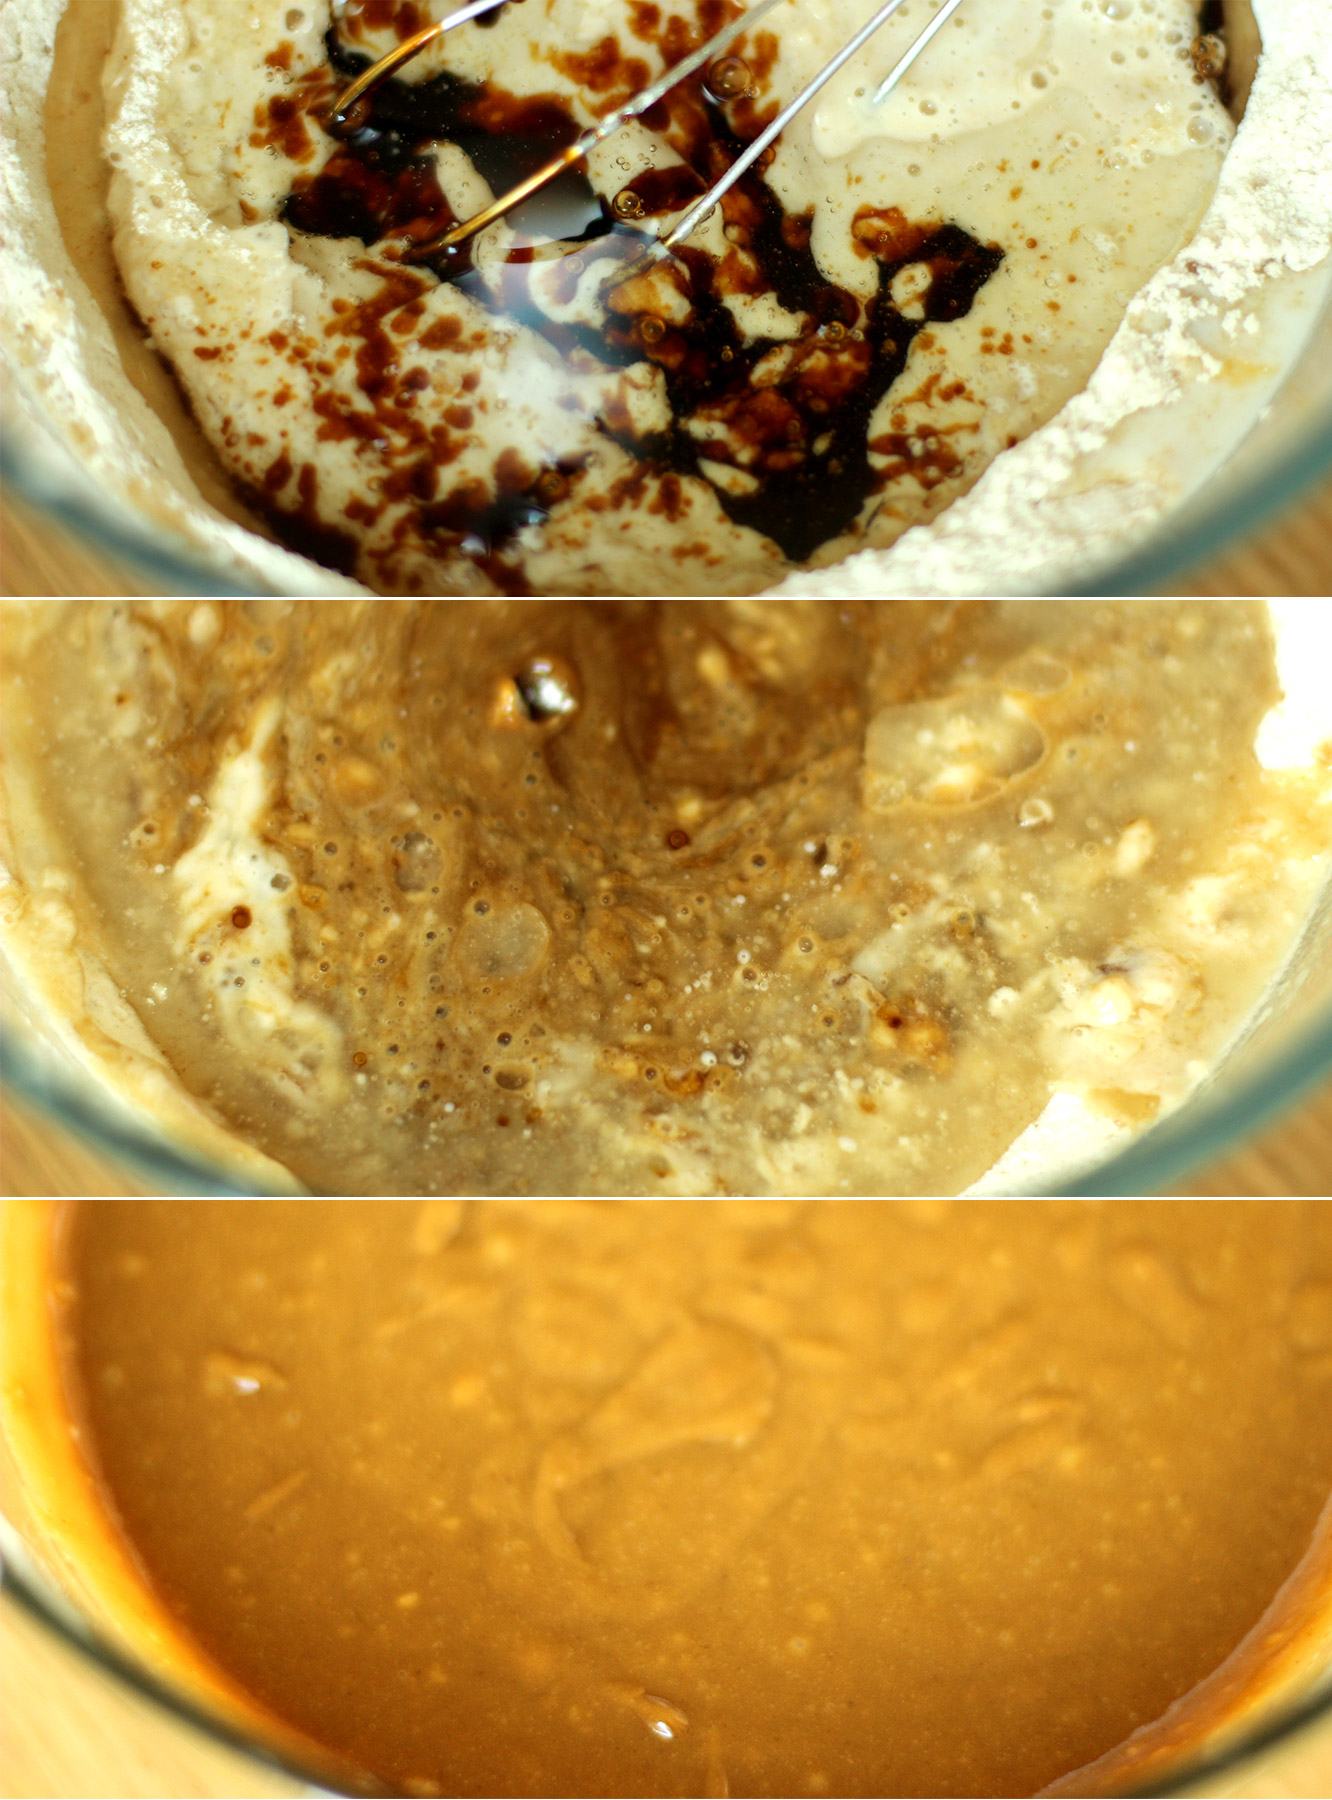
ginger-and-honey-cupcake-recipe-4

Step four

Pour in the melted treacle, golden syrup and lard mix and stir until it’s all mixed together.
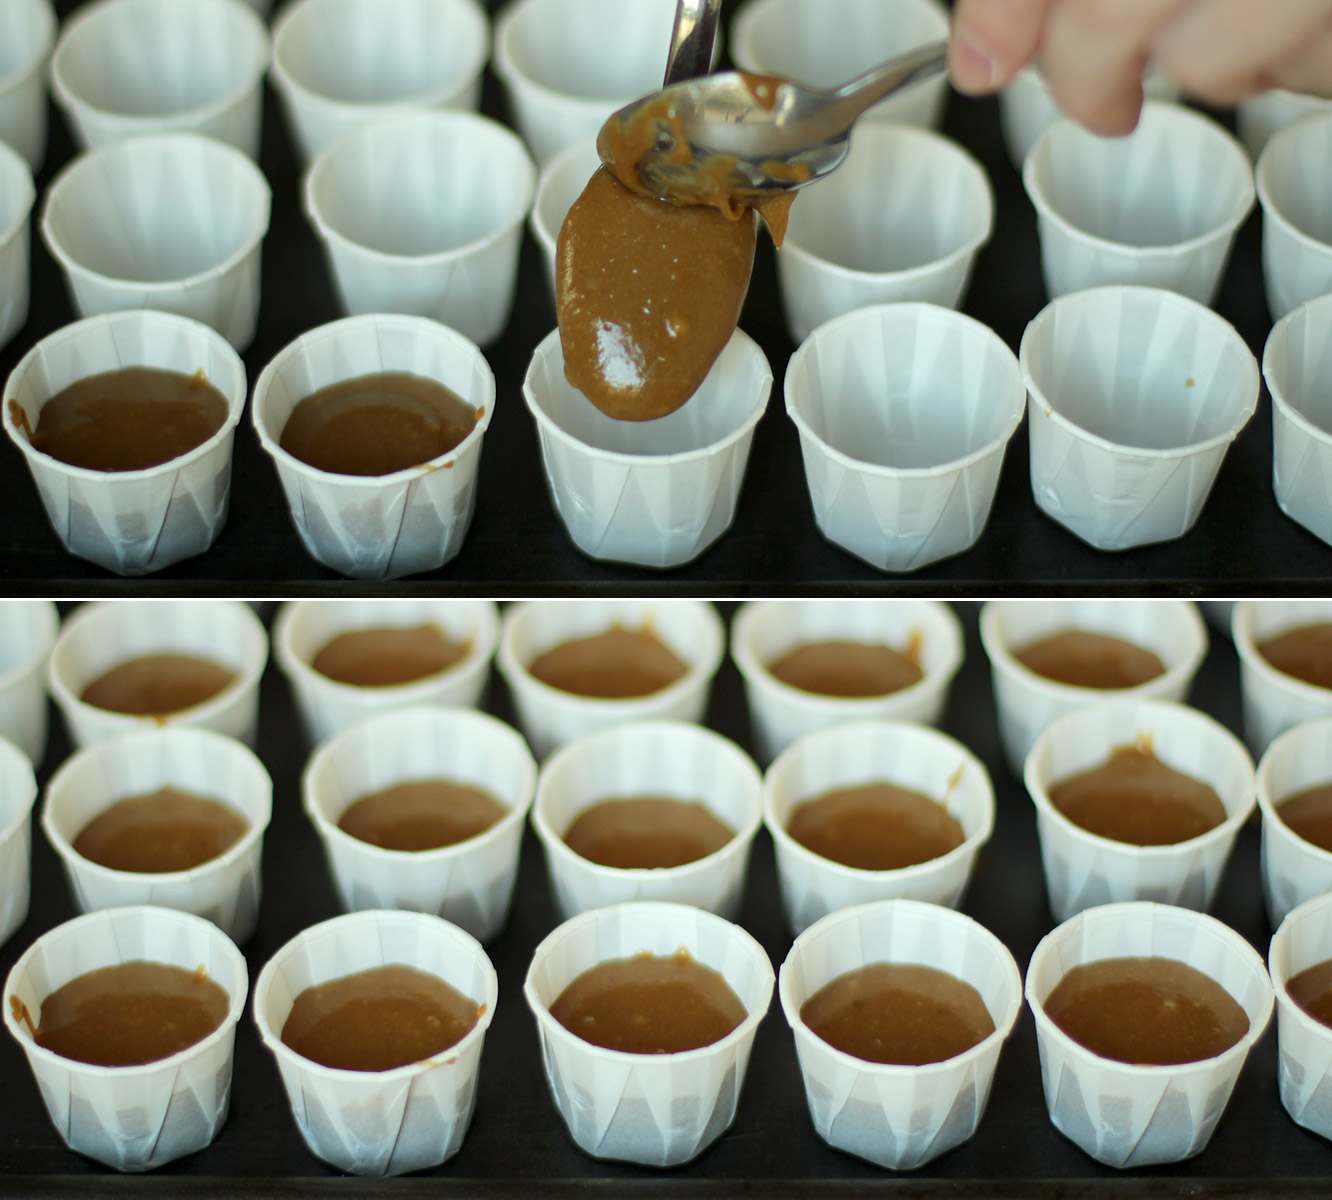
ginger-and-honey-cupcake-recipe-5

Step five

Spoon the mixture into your cases. I got a bulk order of these paper condiment cups last year for the hot chocolate stirrers I made for Christmas. I will NEVER find a way to use them all up.

If you have normal mini cupcake/muffin cases the same rules apply, about a teaspoon and a half of mixture in each. You will probably need to put them in a muffin tin though. These little cases had enough of their own structure so I put them on a baking tray.

Bake for 15 minutes on 180C/gas mark 4/350F.
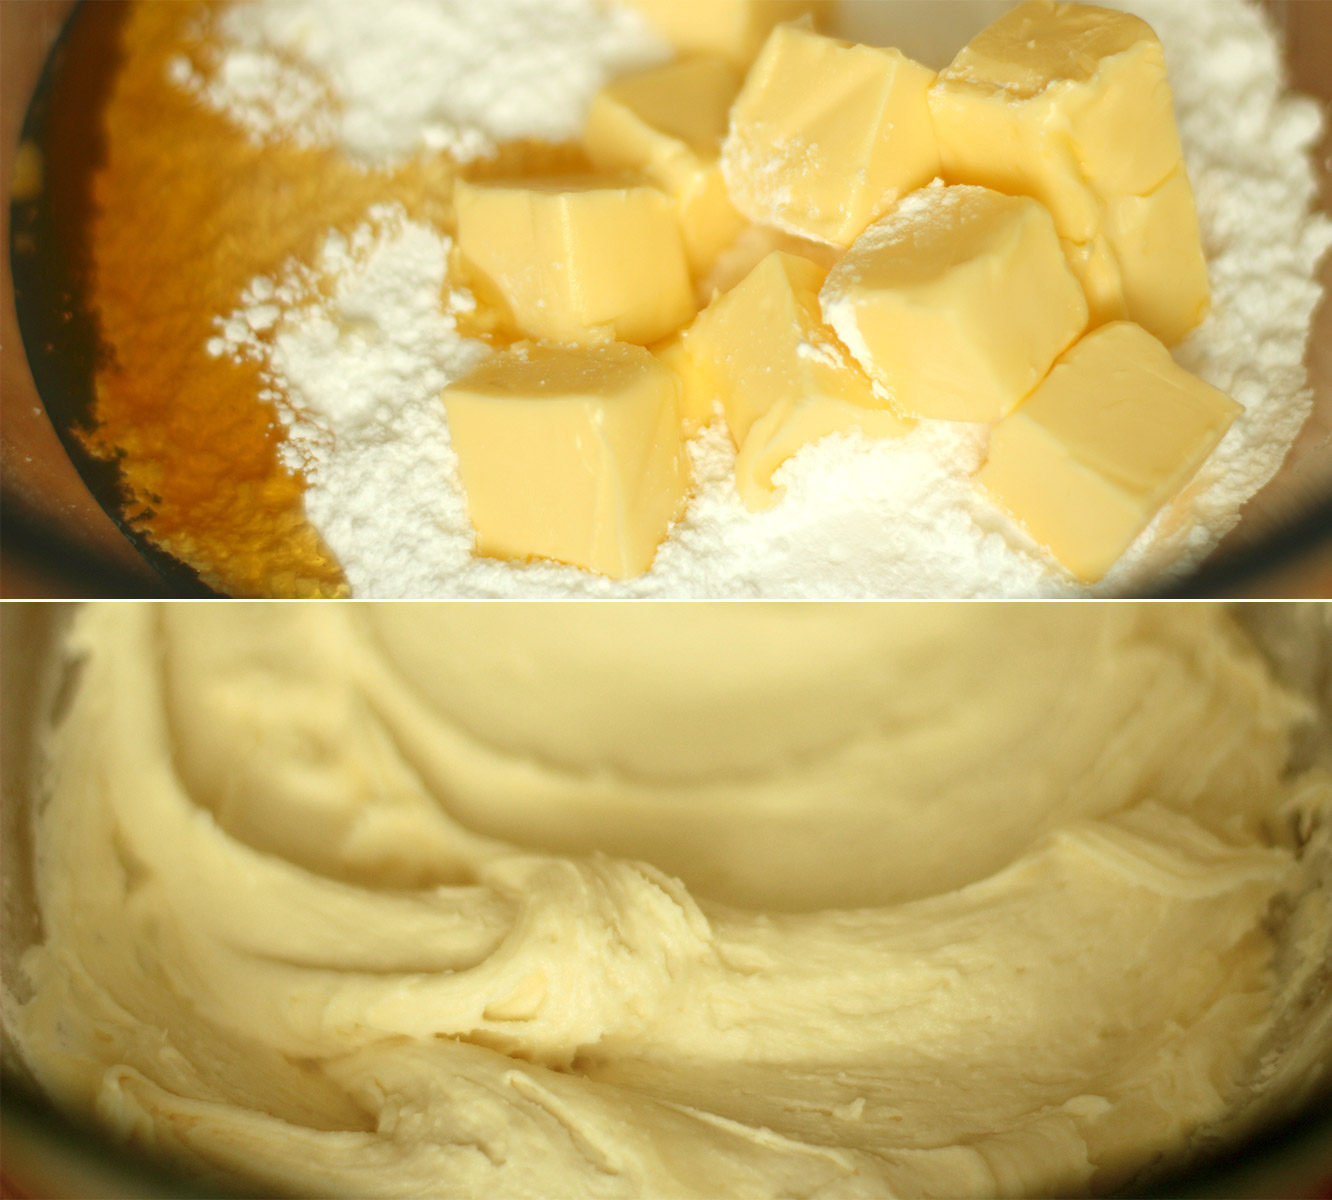
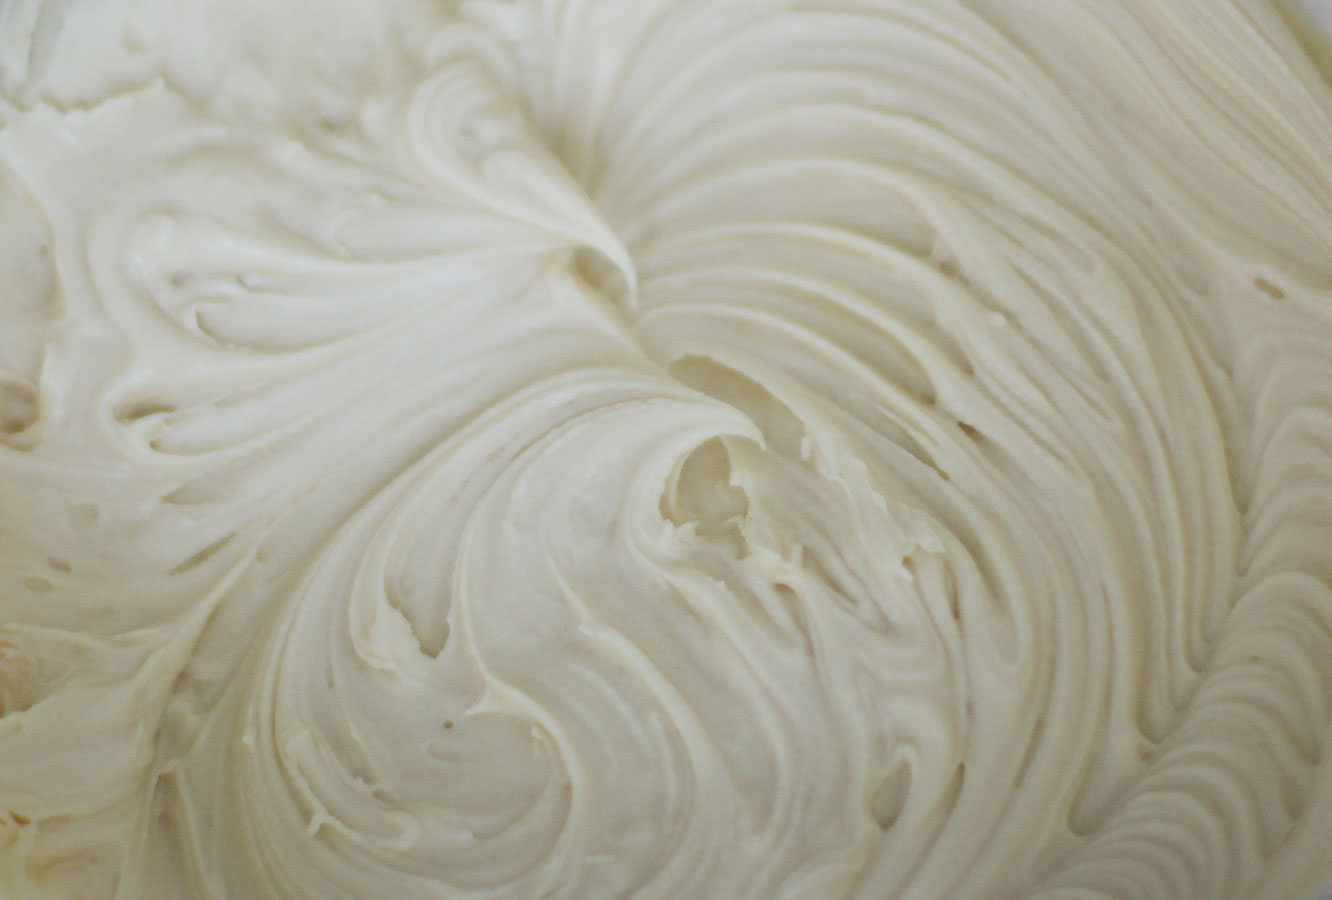
ginger-and-honey-cupcake-recipe-6

Step six

Whisk together the icing/frosting ingredients, make sure to cover your bowl with a tea towel; icing sugar will make your kitchen sticky for weeks otherwise.

Step seven

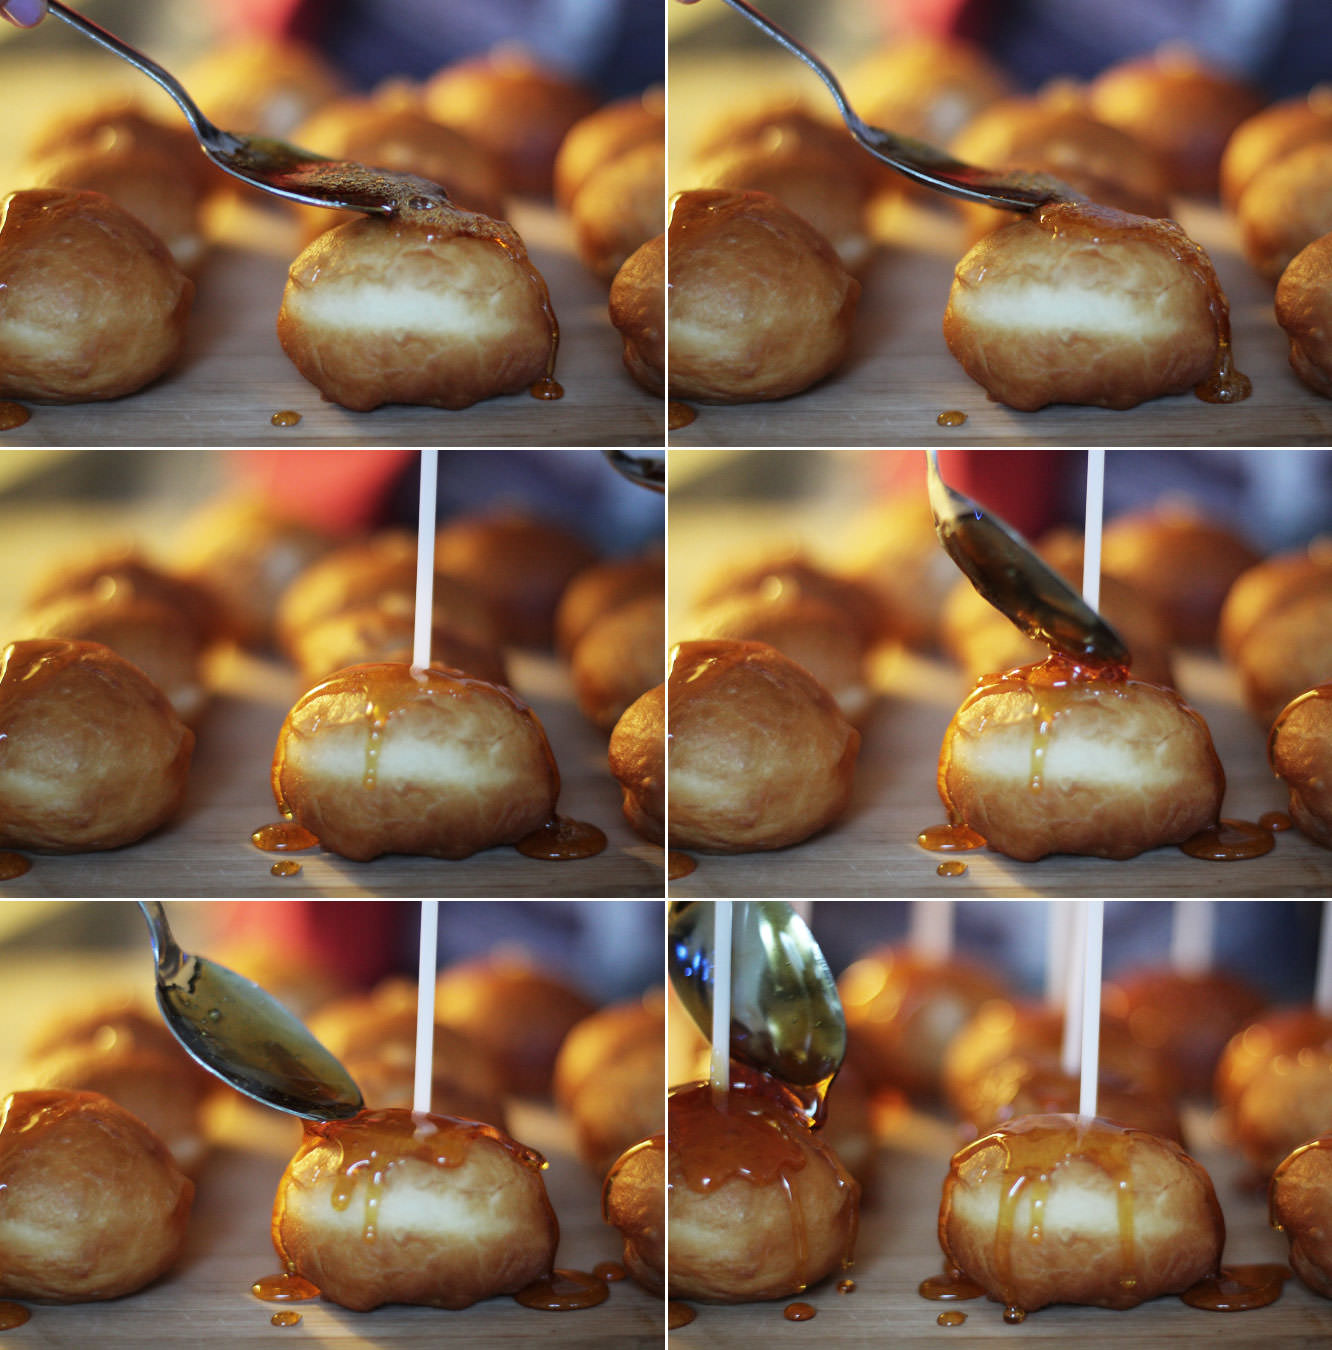
Confession time. I didn’t photograph this stage. Partly because I was a bit grumpy, partly because my camera was running out of battery and partly because my level of clumsiness, hot sugar and baking selfies are not a strong combination. Forgive me.

All you need to do to make the decorative caramel shards is gently heat the caster sugar in a saucepan until the vast majority has melted and turned caramel in colour. Don’t stir, don’t swish, just wait.

Remove from heat and lay out a sheet of greaseproof paper. With a fork trail the caramel back and forth across the paper. It will need to cool a little until it is stringy enough to do this, but it will get there. You don’t have to make individual cake toppers, just criss cross to make one massive one and break it up to get the shards.

It’s waaaaaay easier than you’d think and super effective looking.

(If you aren’t eating your cakes that day I recommend saving this step until the day of. I’m freeing most of mine bare and decorating them on party day)

ginger-and-honey-cupcake-recipe-gif

Step eight

Ice your cakes however you please, I’m a diehard fan of the piping bag. I sprinkled a little bit of cinnamon on mine before adding the caramel shards.
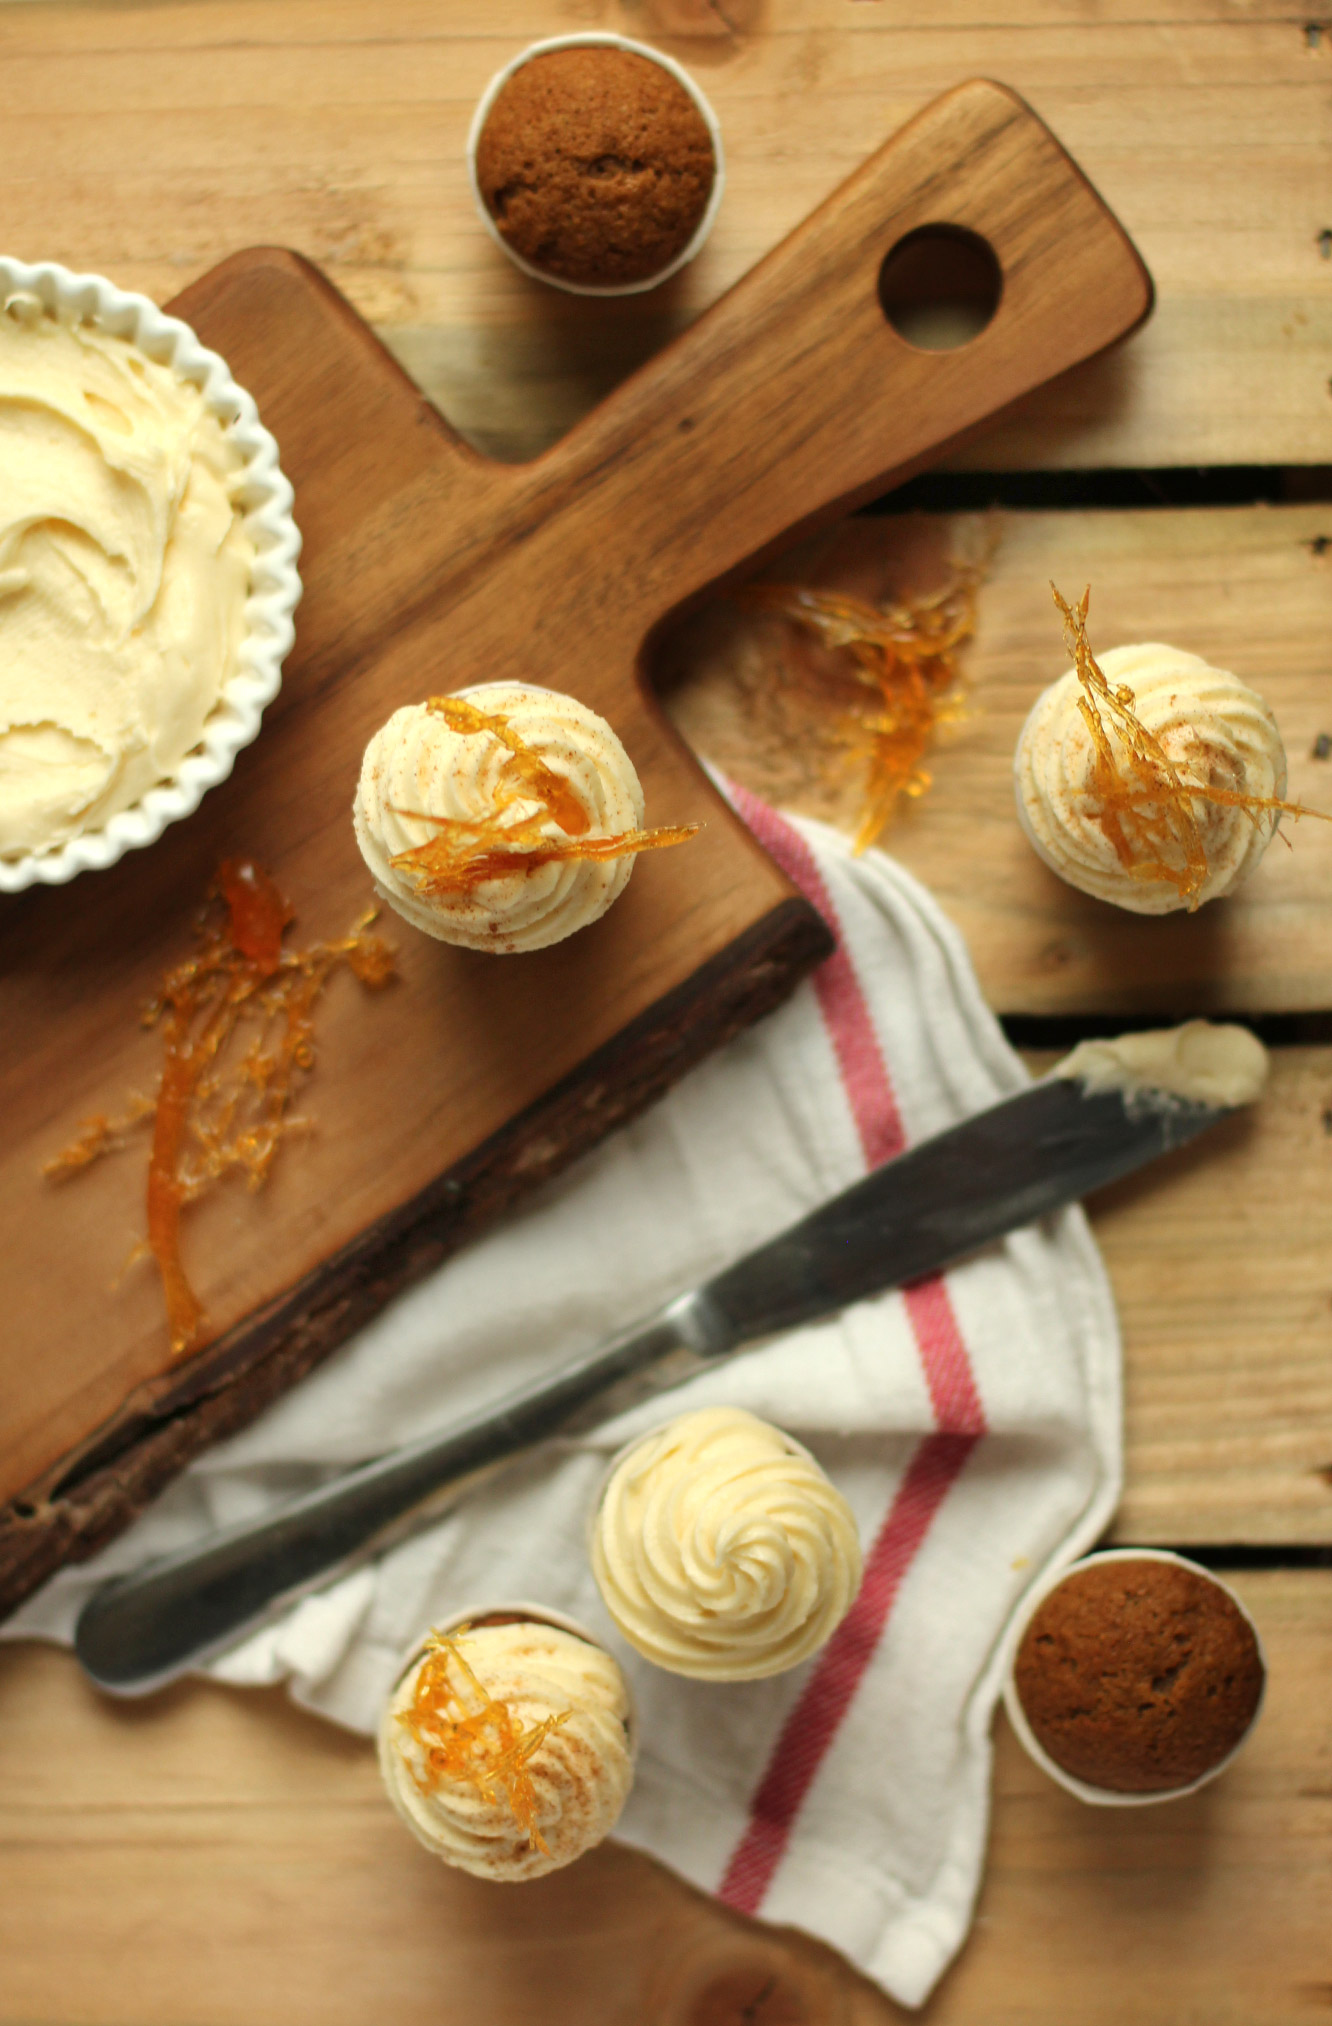
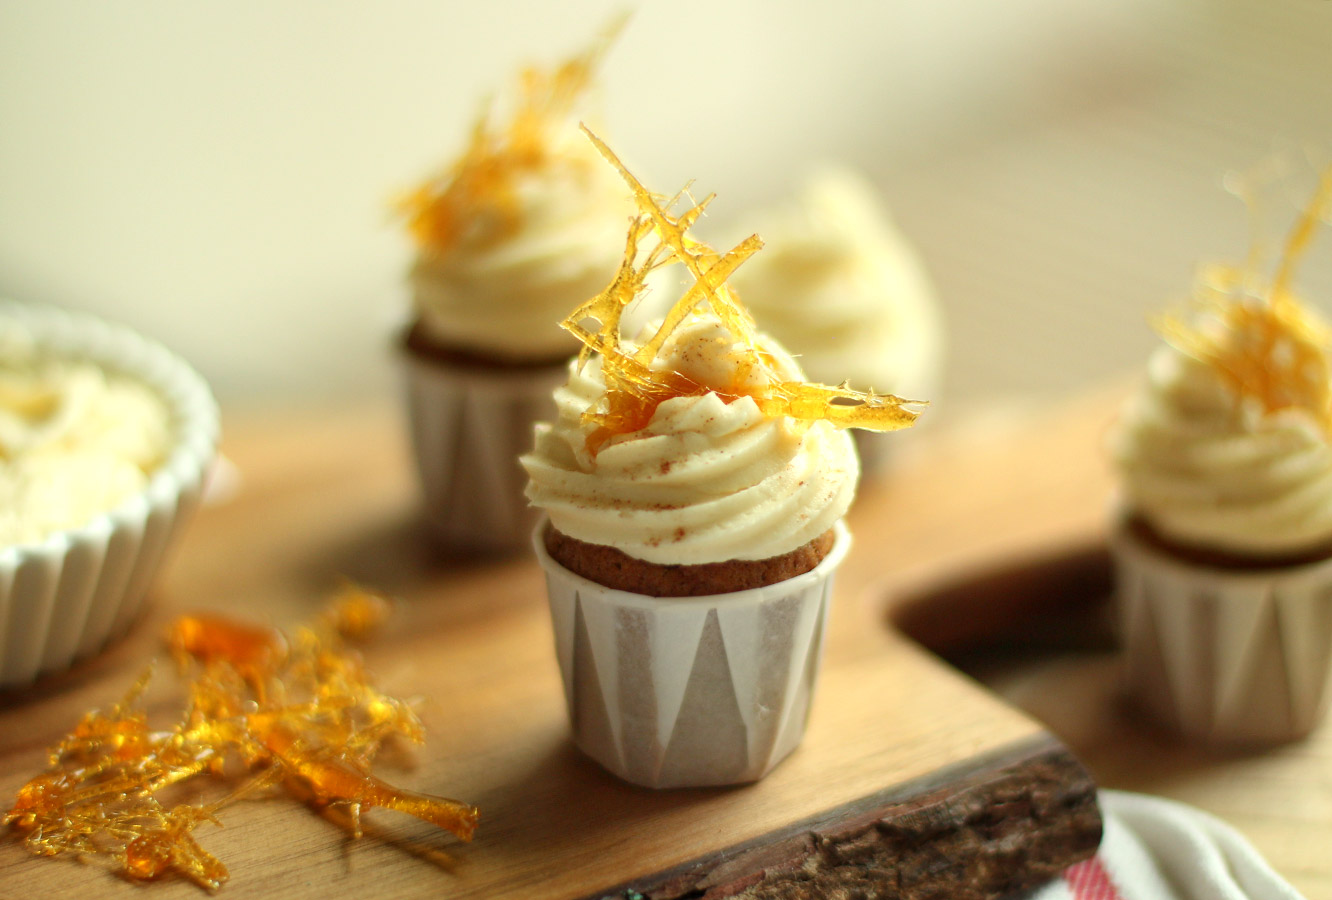
ginger-and-honey-cupcake-recipe-8

ginger-and-honey-cupcake-recipe-7

Enjoy!


Banner-tastic

I’m finally going to wrap up my little series of posts from Matt and Vicky’s engagement party this week. I know, you didn’t think there could possibly be more right? Well, no party is complete without a banner.

Just in case their guests forgot, I made a little congratulations banner. A congrats banner, let’s be honest, congratulations is a long word.

home-made-party-congratulations-banner

You will need

Some pretty paper or card

A craft knife and a cutting mat (or chopping board)

Double-sided tape

String

home-made-party-congratulations-banner-2

Step one

Using a chunky font, type out the message for your banner. I think this was Futura in case you want to copy exactly (but then you would also need to find a Matt and a Vicky to congratulate).

home-made-party-congratulations-banner-3

Step two

Cut out little flag shapes big enough to house your letters, remember to leave at least half a centimetre at the top to fold over.

These are super simple to get even, just draw a rectangle with a line down the centre and then draw two diagonals from the corner to the same point on the central line. Use the first one as a template.

home-made-party-congratulations-banner-4

Step three

Glue the front of the letters and stick them face down on the back of each flag.

Use a craft knife to cut around the edge of the letter. The child in me was bizarrely satisfied by punching these out.

When cutting out letters like A and O which have a counter in them remember to keep a small stem so you don’t totally hollow them out.

home-made-party-congratulations-banner-5

Step four

Using open scissors score the top of the flag (on the back) to create a fold.

home-made-party-congratulations-banner-6

Step five

Stick double sided tape inside the fold, making sure it’s right to the top edge. Place the string in the fold and stick down.

Step six

Repeat until you have a full sentiment.

home-made-party-congratulations-banner-7

Ta da!

Miniature carb loading

So. Guys. 2015 happened. Happy New Year to you all!

Probably the last thing all you resolution makers need is this blog post. Just know that deep down I support your diet, but if you ever want to fall off the wagon in a carb-tacular way, I’m here for you, holding mini filled potato skins.

These bitesize chaps were more of the nibbles I made for Matt and Vicky’s party and they disappeared pretty quickly, despite being a bit of a random addition to the table. I know Vicky’s brother has been waiting on tenterhooks for this blog post. Edward, apologies for the delay.

mini-filled-potato-skins-recipe-1

You will need

15 New potatoes

3 Rashers of smoked bacon (or a couple of spring onions if you’re a veggie)

300ml Sour cream

100g/5 oz Red Leicester/Double Gloucester/Cheddar cheese

Salt and pepper

mini-filled-potato-skins-recipe-2

Step one

Using the finest setting on your grater grate the cheese so you’re ready to go. The last thing you need is hold ups preventing you from eating these sooner.

Cook the bacon until crispy and trim into tiny tiny pieces. Scissors are key.

Step two

Put the new potatoes in a roasting tin with a blob of butter and cook on gas mark 6/200C/400F for 45 minutes. Keep an eye on them, but honestly, I’d like to meet a man who has managed to overcook a jacket potato.

mini-filled-potato-skins-recipe-3

Step three

Once the potatoes are cool enough to handle cut them in half and scoop out the potato inside. Get as much out as you can without ripping the skins. Place the empty skins back into the roasting tin in a somewhat orderly fashion.

Step four

Add 150-200ml of the sour cream to the potato and season. Mash until smooth/you loose the will to make filled potato skins at all. But seriously though, don’t give up, that’s the key to smooth mash.

You might need to add a little more sour cream, but save some for dipping.

Step five

Stir in the bacon.

Step six

Avoid the urge to just eat mix with a spoon. Or does everyone else not love mashed potato as much as me?

mini-filled-potato-skins-recipe-gif

Step seven

Refill the potato skins and sprinkle the cheese on top.

Step eight

Put back into the oven until they are fully reheated and the cheese has melted.

mini-filled-potato-skins-recipe-4

Step nine

Eat all thirty before anyone else arrives.

Munchies

A while back I started a small ‘series’ courtesy of Matt and Vicky’s engagement party. I didn’t get very far, because Christmas. Sorry about that. In case you haven’t seen it, the first post is here.

So, in honour of NYE and the parties you’ll all be throwing and in need of nibbles for, here’s a couple of quick and easy last minute bites for the table: some sausage wheels and cheese puff pastry bites.

There’s a lot of cheating in this recipe. I’m not one for making my own puff pastry. Apparently I’m not even one for seasoning my own food now either.

easy-quick-puff-pastry-party-nibbles-1

You will need

500g packet of puff pastry

400g/ 14oz of sausage meat (I bought packet of pre-seasoned/flavoured stuff from Waitrose. Zero regrets)

75g/ 2.5oz grated parmesan

1 egg

A generous pinch of salt

easy-quick-puff-pastry-party-nibbles-2

Step one

Divide pastry into halves.

easy-quick-puff-pastry-party-nibbles-3

Step two

Roll out one of the halves until it’s about a centimetre thick.

easy-quick-puff-pastry-party-nibbles-4

Step three

Sprinkle half the parmesan onto the pastry. Fold it into thirds and roll out a little. Fold into thirds again in the opposite direction and roll again until square.

Be careful not to over work it.

easy-quick-puff-pastry-party-nibbles-5

Step four

Cut into small rectangles and twist to make little bow tie looking shapes. If my ailing memory serves me correctly I believe this made around 25-30.

easy-quick-puff-pastry-party-nibbles-6

Step five

Place on a baking tray and sprinkle with more parmesan and some salt.

Bake on 180C/ gas mark 4/ 350F for about 45 minutes. You need to keep an eye on them as they can look done on the outside and not be cooked the whole way through.

easy-quick-puff-pastry-party-nibbles-7

Step six

Roll out the second half of the pastry until it’s about 5mm thick.

Step seven

Spread the sausage meat out across the surface of the pastry. Leave a gap of 1-2cm on the long edge.

Step eight

Whisk the egg in a small bowl with a fork. Using a pastry brush (or your clean fingers) spread the egg along the gap you left in step seven.

Step nine

Roll the pastry up, the egg should help the edge to seal.

easy-quick-puff-pastry-party-nibbles-8

Step ten

Cut slices of the sausage about 1.5cm thick.

easy-quick-puff-pastry-party-nibbles-9

Step eleven

Place on a greased baking tray and cook with the cheese bites.

easy-quick-puff-pastry-party-nibbles-10

Step twelve

Serve fresh from the oven and try not to eat them all before the guests arrive.

Count up count down

There’s lots of things happening right now. The first one to mention is that fabrefaction TURNS 1 TODAY! I know, crazy right? I will leave any sentimental ramblings to my new year post, but it seems mad to me that my first little blog about an advent calendar made from egg boxes was only a year ago.

The other major thing that’s happening is that MEGAN IS GETTING MARRIED. In 12 days no less. Gawsh.

In honour of this we had a hen party last weekend in beautiful Bath. For part of the afternoon we had time to kill and every activity we looked up was crazy expensive or not available etc etc. After some deliberation it was suggested that I conjure up something to do.

So in honour of Meg’s wedding, fabrefaction’s birthday, and being as close as we are to December, it seemed like the perfect opportunity to use our make shift craft workshop to make an heirloom for Meg and Olly to obligingly hang at Christmas…at least as long as we’re friends…which will be forever, so…

DISCLAIMER: This post isn’t so much the usual step-by-step, more a little inspiration and a few tips along the way.

homemade-advent-calendar-hen-party-craft-1

You will need

These little drawstring bags (or some like them)

24 little pegs (I got mine from Tiger, they’ve got numbered ones at the moment too)

3m ribbon to hang the pegs off

A whole plethora of Christmas themed haberdashery (The Range and Hobbycraft furnished us nicely)

A team of Santa’s little helpers

homemade-advent-calendar-hen-party-craft-2

Now it depends how crazy you are, I rate as ‘very’ on the scale when it comes to craft. Cool kid I know.

Well, I didn’t quite fancy the thought of the hens free styling the numbers because I think a little bit of consistency helps the overall look of this kind of thing. Yes, I did tell them that as an introduction, and yes, I do have problems.

I printed the numbers in a chubby font to begin with using them as a template on felt.

homemade-advent-calendar-hen-party-craft-3

If you don’t trust yourself to hold and cut at the same time turn the numbers upside down and draw round them very lightly. Then you won’t have pen marks when you turn them over. I was a bit heavy handed with the pen at first, so be warned.

homemade-advent-calendar-hen-party-craft-4

I love a little blanket stitch on Christmassy craft. You basically need to put the needle through the felt at the height you want your stitching, and as you pull the thread through catch the loop so that it is held at the top.

homemade-advent-calendar-hen-party-craft-5

Voila. Not fiddly at all. Nope.

homemade-advent-calendar-hen-party-craft-6

If you are cutting regular fabric use pinking shears (the zig zag ones) so it doesn’t fray. Otherwise you may have to hem it all. The alternative if you don’t own pinking shears and don’t want to sew is to use felt, or just chance it with the fraying (but then we can’t be friends).

How cute are those little gingerbread buttons?! It helped to hold them down where I wanted them and half turn the bag inside out to sew.

homemade-advent-calendar-hen-party-craft-7

I found it best to sew any details onto the individual items and then glue them down using a few dabs of PVA. You can be a lot more precise that way.

homemade-advent-calendar-hen-party-craft-8

One down. Twenty three to go. Time to rope in some helpers…

homemade-advent-calendar-hen-party-craft-9

Everyone got involved with the gluing action so don’t be ashamed. I loved little Rudolph with his number 11 antlers.

homemade-advent-calendar-hen-party-craft-10

A few more.

homemade-advent-calendar-hen-party-craft-11

The whole shebang! I love the way this turned out, and now Meg has a keepsake from some of her favourite people.

Thank you for visiting my little space of internets. It’s kept me going all year, here’s to another.

Katie.

Drip drop

A couple of months ago my lovely housemate got engaged. A couple of weeks ago we celebrated that fact.

I decided I wanted to make some party food. Given that we’re fast approaching Christmas (I mean, it’s the 17th November already, what?) this little series of posts should furnish your party season with delightful nibbles and may double as last minute Christmas present/hostess gifts.

This one falls into the second category, so get online and buy yourself some cellophane bags and a roll of ribbon, your colleagues and your milk man will never have been happier. Well, I hope their lives are better than that, but either way, there won’t be any disappointment, and that’s all anyone’s looking for at Christmas.

chocolate-drop-party-nibbles

Things you need

200g/7 oz White chocolate

200g/7 oz Milk chocolate

200g/7 oz Dark chocolate

Decorations (I used freeze dried raspberries, fudge pieces and pecans)

Cocktail sticks

Piping bags or strong sandwich bags.

Cellophane (from a florist or a craft shop, or you can use greaseproof but the bottoms won’t be shiny)

Food thermometer (ideally)

chocolate-drop-party-nibbles-1

Step 0.5

Prepare your toppings if they need preparing. I wanted my drops to be quite small so I chopped up my fudge and pecans.

chocolate-drop-party-nibbles-2

Step one

Now. This is the first time I have actually tempered chocolate. It was easier than I expected and well worth it for the shiny finish. I encourage it. I also encourage the purchase of a thermospatula. I’m not being paid to say that, it’s changed my life (in a small but significant way).

If you’re joining me on the tempering train you need to split the chocolate into a third/two thirds split. Ignore the photo above and just chop it all into big chunks.  I learned as I went with this one.

chocolate-drop-party-nibbles-3

Step two

Place a heatproof bowl over a pan of simmering water; make sure the water isn’t touching the pan.

Add two thirds of the chocolate and allow to melt slowly. Stir occasionally. Mainly so you can feel like you’re doing something productive.

Bring to 45 degrees C and remove from the heat.

chocolate-drop-party-nibbles-5

Step three

Add the rest of the chocolate and stir until its melted in. Keep stirring until the whole lot has cooled to 28 degrees C.

Step four

Place back on the heat and bring to 32 degree C.

Step five

Take back off the heat and dry the bottom of the bowl with a tea towel. Trust me, you don’t want water in your chocolate.

Step six

Pour into a piping bag.

Don’t trim the end yet. In fact, once you have twisted the opening to close it you should push any chocolate in the tip end back towards the rest, otherwise it will cool and solidify there while you’re tempering the rest.

Step seven

Repeat with the rest of the chocolate.

chocolate-drop-party-nibbles-gif

Step eight

Lay down the cellophane and start piping.

You want to hold the piping bag at a 90 degree angle to the table and squeeze. The chocolate will flood into a lovely little pool.

Add a small blob of another colour on top and swirl about with a cocktail stick to create a marbled effect.

chocolate-drop-party-nibbles-6

Step nine

Sprinkle your decorations on top.

Some cranberries would go down well for christmas drops, but I was explicitly instructed not to buy any. These freeze dried raspberries looked rather pretty and tasted good too. See children? Compromise isn’t always bad.

chocolate-drop-party-nibbles-7

Step ten

Keep going until you run out of chocolate/the will to live. But look…so shiny. You did well to temper it, it was worth it after all.

chocolate-drop-party-nibbles-8

Step eleven

Go forth and make someone’s day.

Dough-nutty

You might notice there’s a different pair of disembodied hands in the post this week. That’s because my lovely housemate was on half term, and ever since we watched this year’s GBBO we have wanted to make our own doughnuts (I’ve been informed donut is the wrong way to spell it). Thanks for your help Vicky and for very patiently allowing me to photograph the occasion.

We’re having a little get together for bonfire/fireworks night on Wednesday and we thought we would make some appropriately themed treats. We bring to you a doughnut double whammy, flavoured with toffee apple and cinder toffee.

Disclaimer – these aren’t quick to make, but they are IN-credible, I was very sad to put them into the freezer, and I hope they emerge as delicious as they went in.

toffee-apple-cinder-toffee-dougnut-recipe

You will need

Please note: doughnut recipe makes 30, so the extra flavourings recipes are for 15 of each. If you want to make just one of the versions you will need to double the quantities of the fillings and toppings or halve the doughnut mix.

For the doughnuts:

350ml/12 fl oz Warm full fat milk

700g/1lb 8 oz Strong white bread flour

2 Eggs

70g/2.5 oz Unsalted butter

100g/3.5 oz Caster sugar

1 tsp Salt

14g/0.5 oz Dried yeast

50ml Warm water

For the toffee apple version:

2 Bramley (cooking) apples

3 tbsp Soft light brown sugar

1 tbsp Water

300g/10.5 oz Granulated sugar

6 tbsp Water

For the cinder toffee version:

200g/7 oz White chocolate

2 Crunchie bars/some cinder toffee

1.5-2 tbsp Golden syrup

1.5-2 tbsp Full fat milk

150g/5.5 oz Icing sugar

50g/3.5 oz Unsalted butter

1 tsp Vanilla extract

Extras:

1.5 litres/50 fl oz Vegetable oil for frying

15 Cake pop sticks for the ‘toffee apples’

Flavour injector (if you don’t have one of these, a long thin piping nozzle should also work)

toffee-apple-cinder-toffee-dougnut-recipe-1

Step one

Put the yeast in the warm water and wait until frothy.

Step two

Combine half the flour with the rest of the dough ingredients (including the yeast froth). Remember to put the yeast and the salt on opposite sides of the bowl, they don’t get on.

Step three

When the batter is smooth, gradually add the rest of the flour and stir. The dough should be sticky but not impossible to work with. Vicky and I found we had to add a lot of flour in kneading so I’ve adjusted the recipe for y’all.

toffee-apple-cinder-toffee-dougnut-recipe-2

Step four

Turn the dough out onto a floured surface and knead for 5-10 minutes. It’ll still be quite sticky, don’t sweat it.

toffee-apple-cinder-toffee-dougnut-recipe-3

Step five

Place in a lightly oiled bowl and leave to rise for an hour or until doubled in size. While that’s going on you can prepare your toppings and fillings.

toffee-apple-cinder-toffee-dougnut-recipe-6

Step six

For the puree which will fill the toffee apple doughnuts, peel and chop the apples into small chunks.

toffee-apple-cinder-toffee-dougnut-recipe-7

Step seven

Place the apples in a saucepan with the 3 tablespoons of soft brown sugar and 1 tablespoon of water. Heat on medium until the apples have reduced.

Step eight

If you have one, use a food processor to liquidise the apple mixture. If you don’t, do what we did and use a potato masher and then pass the mix through a sieve.

toffee-apple-cinder-toffee-dougnut-recipe-8

Step nine

To make the filling for the cinder toffee donuts combine the butter, icing sugar, milk, golden syrup and vanilla extract. Whisk until smooth and set aside.

toffee-apple-cinder-toffee-dougnut-recipe-4

Step ten

Tip the risen dough onto a floured work surface. Squeeze into a long sausage shape and chop into 30 pieces.

toffee-apple-cinder-toffee-dougnut-recipe-5

Step eleven

Roll into balls and leave on a tray to prove for another hour. Make sure you leave plenty of space. The picture above was before these rose, and they almost filled the tray after.

toffee-apple-cinder-toffee-dougnut-recipe-9

Step twelve

About 20 minutes before the doughnuts have finished their second rise, begin to heat the oil.

It’s beyond important that you heat the oil really slowly on a low heat to avoid risking a pan fire. There’s no reason to worry as long as you heat this gradually.

Test your oil heat with little pieces of a doughnut. When the sample floats and bubbles straight away you’re good to go.

toffee-apple-cinder-toffee-dougnut-recipe-10

Step thirteen

Fry the doughnuts in batches, you will get a good idea when to turn them pretty quickly, it only takes a few minutes for them to get golden.

Leave your doughnuts to rest on a few sheets of kitchen roll which will soak up any excess oil.

toffee-apple-cinder-toffee-dougnut-recipe-11

Step fourteen

When the doughnuts are completely cooled inject 15 of them with the apple puree and 15 with the cinder toffee filling.

We went in at the top because we knew we were going to cover the holes, otherwise you would use the side. For those of you with a flavour injector (and of course that will be most of you…) we did 10 ml per doughnut.

toffee-apple-cinder-toffee-dougnut-recipe-gif

Step fifteen

For the cinder toffee doughnuts you need to crush up the crunchie bars (easily done when they’re in their wrappers) and melt the white chocolate. Do this slowly in the microwave to avoid burning it.

Dip the doughnuts  in the chocolate to coat the upside down top, and sprinkle with crunchie pieces. Leave to one side for the chocolate to set.

toffee-apple-cinder-toffee-dougnut-recipe-12

Step fifteen

Make a hard caramel by combining the 300g of granulated sugar and 6 tbsp water in a saucepan.

Heat on a low-medium heat until the mixture takes on a dark honey colour. Do not stir it as the sugar will crystallise. I’m afraid I did this by eye so I don’t have a temperature, but use the pictures above for a reference point for the colour and you’ll be fine, it’s not an exact science.

Remove from heat and cool by dipping the bottom of the saucepan in a mixing bowl full of cold water.

Spoon over the top of the doughnuts. I did one layer on each and popped the sticks in, then went back once the caramel got a little thicker (this happens as it cools) to do another and to secure the sticks in place.

toffee-apple-cinder-toffee-dougnut-recipe-13

toffee-apple-cinder-toffee-dougnut-recipe-14

Step sixteen

Chow down.

We’re gonna have a party tonight

Welcome back!

You might remember my mentioning I went on a little trip to Germany recently? I went a-visiting a wonderful little family who I miss very much. Capitalising on their crafty house guest there were some birthday preparations to be done. So aside from baking over 70 cupcakes (very popular little chap) there was the small matter of inviting other little people to come and eat them.

They were throwing a garden party with lots of traditional German party games, I really wish I’d have stuck around a bit longer to join in! So Mr Freddie and I crafted some invites that were fun and festive and will adapt to any theme or themeless party you’ve got going on.

kids-birthday-party-hat-invites

You will need

A4 Card/thick paper (one per guest and an extra for the birthday boy/girl)

Bits and bobs to decorate with

Glue

Scissors

String

A small child with an upcoming birthday

This template

kids-birthday-party-hat-invites-2

Step one

Draw round the template onto each piece of card and cut out a hat for each guest, not forgetting one for the birthday boy or girl.

Step two

Use a hole punch or something sharp poke holes in each hat (as marked on the template).

Step three

Using an open pair of scissors and a ruler score along the dotted line to create a flap.

kids-birthday-party-hat-invites-3

Step four

Decorate! Use your (or your child’s) imagination, Freds and I used foam shapes, stickers and glitter that mummy already had in stock. We also cut some shapes out from the left over card so as not to waste anything.

You can use whatever you can get your hands on, cut outs from old magazines/buttons/feathers/draw pictures or each child’s name. Your only limit is the attention span of the child in question!

(don’t decorate the flap)

kids-birthday-party-hat-invites-4

Step five

Cut two lengths of string for each hat. Use the child you already have in stock to get an idea of length, you need to be able to tie a bow under their chins. Doing it this way rather than one loop means they are adjustable for each guest.

kids-birthday-party-hat-invites-5 copy

Step six

Add the party details on the other side and voila! Your hats are ready to give out. Each guest is in charge of assembling their hat and bringing it with them to the party (worth having one or two spare just in case!)

To stick together just glue the flap (with the hat right side up) and stick underneath the opposite edge.

Step seven

PARTY ON

Let’s party like it’s 2014

I don’t know about you but I’m always taken by surprise when New Year rolls around, I’m so distracted by Christmas it’s a bit ‘oh! there you are’ on NYE.

If your experience is anything like mine you’ll need a make which is easy on the budget and low hassle. I present to you cut out party hats.

PartyHat1

You will need:

A4 coloured card/paper (one sheet per hat)

Glue/Double sided tape

Scissors

Elastic/String/Wool

PartyHat2

Step one

Cut a corner off your sheet, at a 45 degree angle. Don’t worry if you don’t have a protractor – just fold a scrap piece of paper to a point on one of the corners and use as a guide.

PartyHat3

Step two

Make the first fold by matching your cut edge to the top edge of the paper. Essentially making a point from that wide angle you just created.

PartyHat4

Step three

Fold at least twice more. My paper was quite thick so this is as far as mine would go without forcing it, but feel free to keep folding.

PartyHat5

Step four

Find the shortest edge going across your hat, and cut the excess off at this point.

PartyHat6

Step five

Unfold to check your curve is ok, if not neaten any points with scissors.

PartyHat7

Step six

Fold back up and make your cuts. This is generally easier with paper but then if you over cut you weaken your hat so keep a good balance!

Make sure you keep a line at the bottom in tact so you can add your string and wear your hat.

PartyHat8

Step seven:

Unfold and survey your masterpiece.

Iron this flat or leave under a heavy box/book for a few hours. The thinner your paper/card the more of your creases you will get out, but don’t worry too much, you won’t really notice on the finished item.

PartyHat9

Step eight

Retrieve that discarded corner from earlier, and cut a strip from the longest edge.

Cover in glue or double sided tape and assemble your hat. I then cut a second strip and stuck inside to strengthen the hold.

PartyHat10

Step nine

Bit of a Blue Peter moment here…place bit of blu tac/banana under your hat edge and use something sharp to make a hole. Repeat on opposite side.

Now, I had some elastic lying around. If you do too, measure it under your chin and round the sides of your head, but make sure to cut it slightly shorter than this distance so that there’s some pull to keep it in place. Push through the hole and tie a knot on the inside.

If you don’t have elastic do not despair; string or thin wool will work too, you can just do two long strips and tie in a bow under your chin.

Step ten

Put on head, have great time.

PartyHat12

PartyHat11