Category: Dessert

Nesting

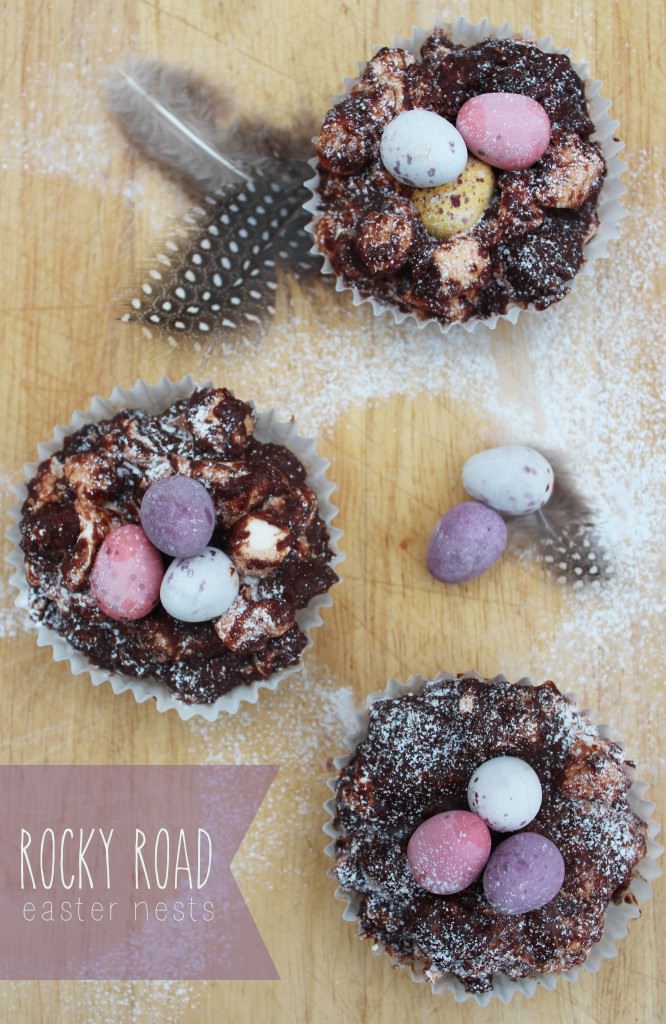
It’s such a lovely time of year, the sun is shining and the shops are full of mini eggs. What’s not to love?

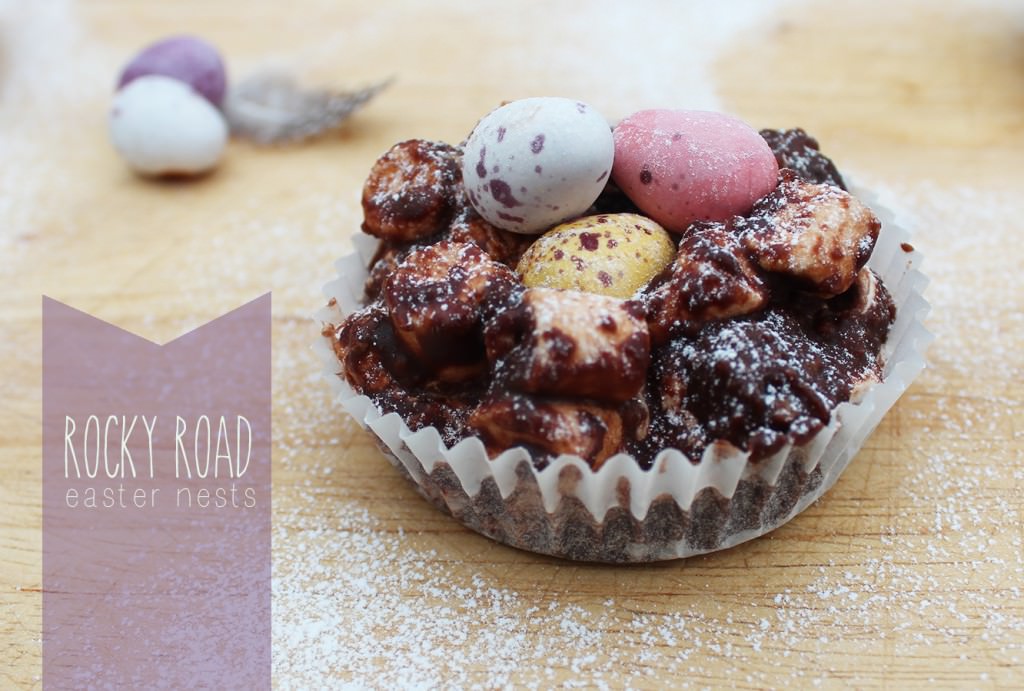
This little idea popped into my head when I was putting out the snacks for an open day (I sort of swing by a university law school and do admissions in my spare time/to get paid). Anyway, after opening the rice crispy bites, and popping one in my mouth (it’s good manners to make sure everything is in order for the guests) I moved on to unpacking the rocky road. BINGO. Rocky road Easter nests were born!

As if that hasn’t sold it well enough to you, these look far more realistic than your regular festive treat, and you will never touch a box of shredded wheat again once you’ve tried them. Just as easy to make with kiddies and more ingredients so more fun to be had.

Rocky-Road-Easter-Nests

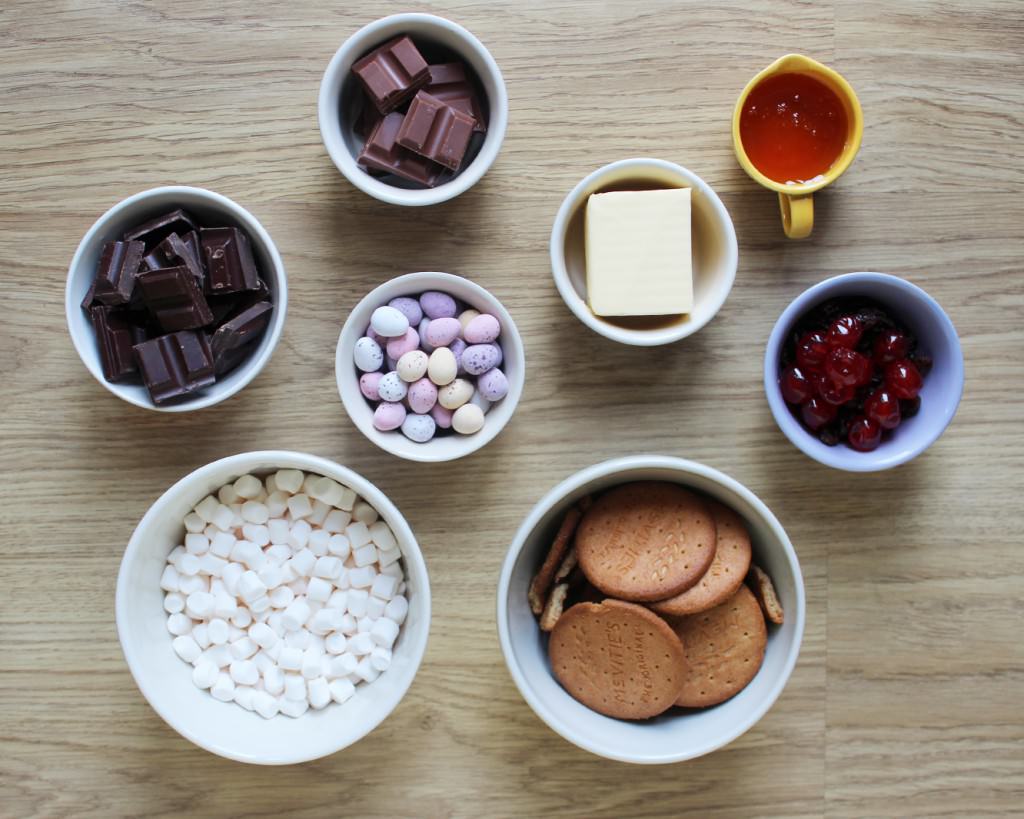
You will need

200g/7 oz Dark chocolate

100g/3.5 oz Milk chocolate

125g/4.5 oz Unsalted butter

3 tbsp Golden syrup

200g/7 0z Digestive biscuits

100g/3.5 oz Mini marshmallows

Generous handful of seedless raisins

 15 Glace cherries (cut into quarters)

Bag of mini eggs

Fairy cake cases

Icing sugar to dust

Makes 15

Rocky-Road-Easter-Nests-2

Step one

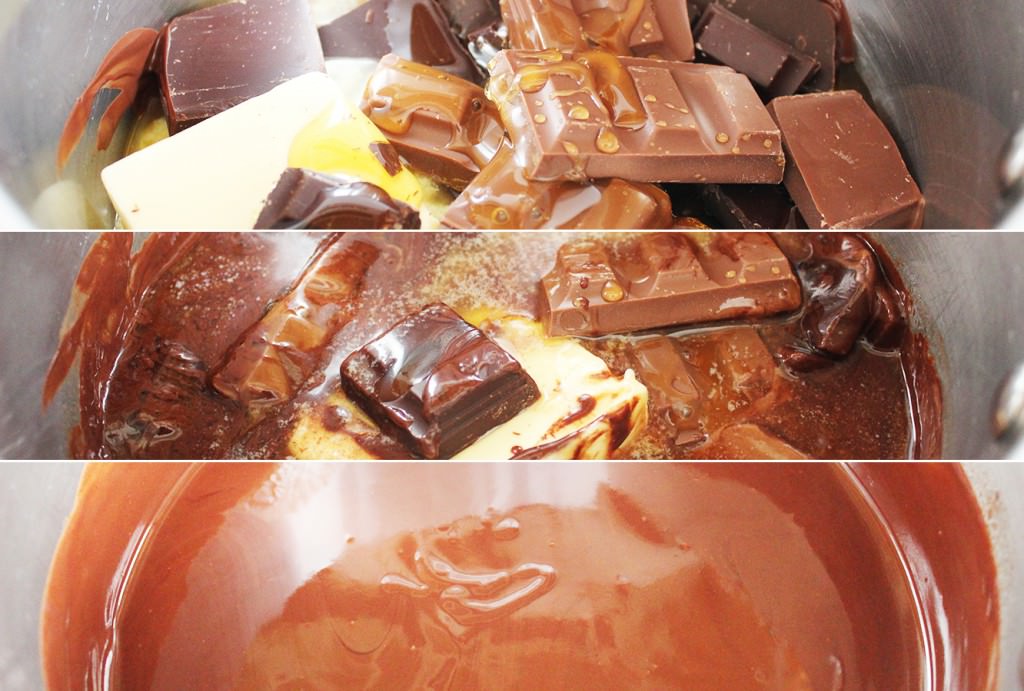
Melt the dark chocolate, milk chocolate, butter and golden syrup in a sauce pan.

Go slowly, burning chocolate is one of life’s saddest occurrences.

Rocky-Road-Easter-Nests-3

Step two

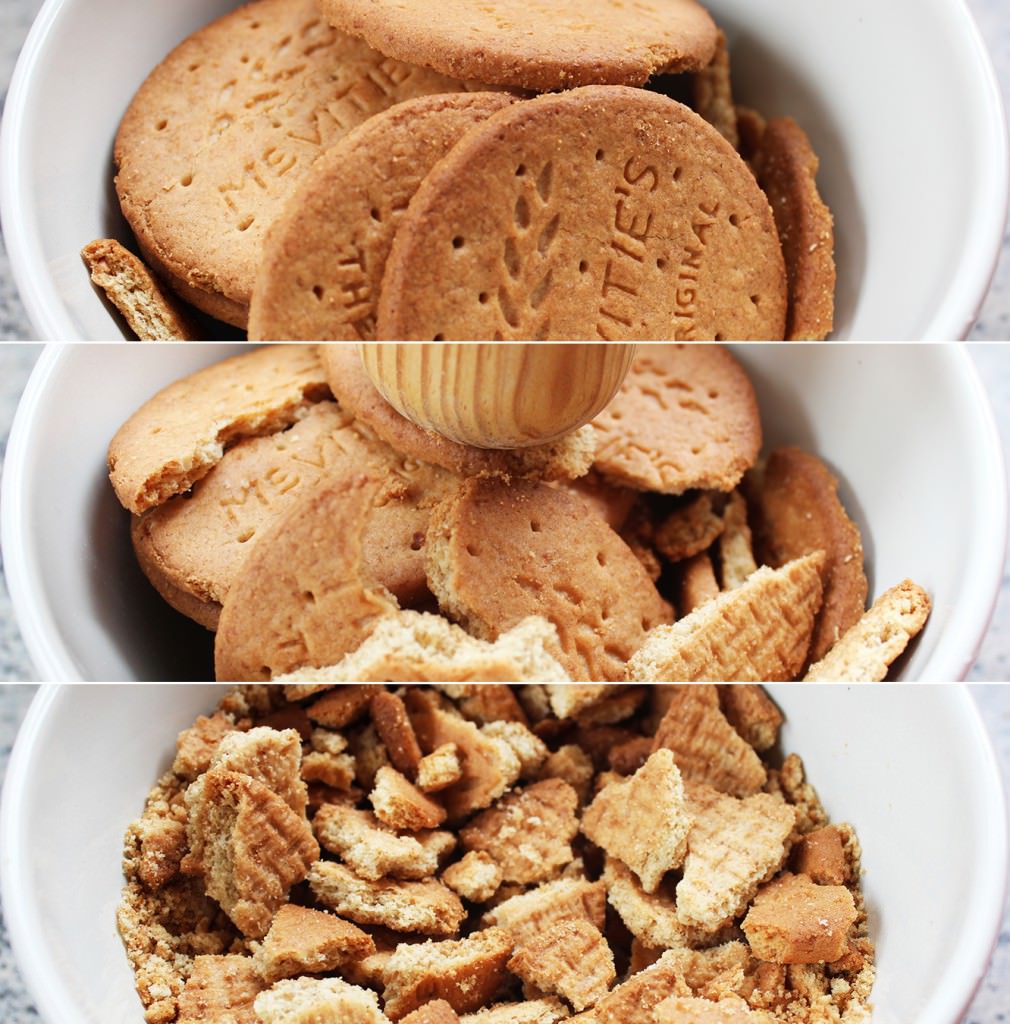
While the chocolate is melting, but without getting too distracted, crush up the digestive biscuits with the end of a rolling pin.

Or your fist if you’re having a particularly bad day.

Rocky-Road-Easter-Nests-4

Step three

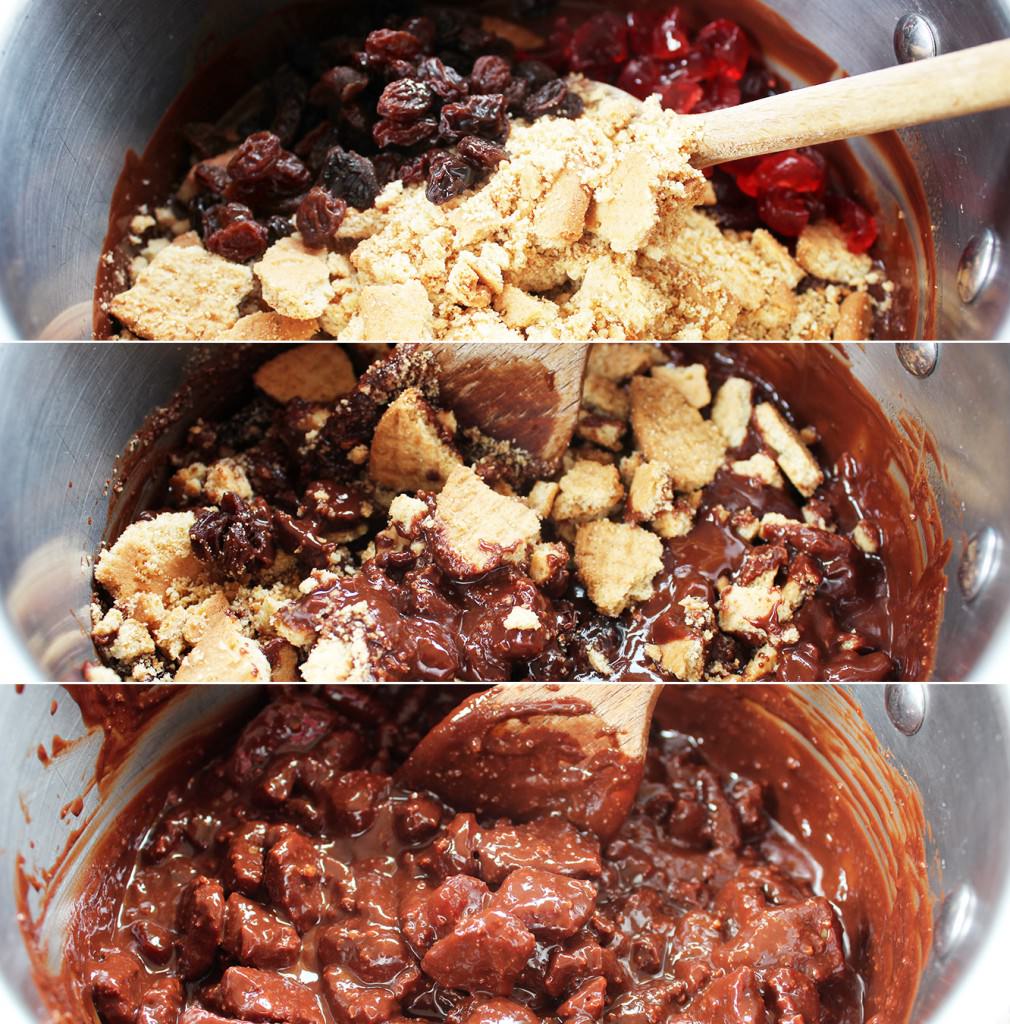
Stir the biscuit, cherries and raisins into the chocolate. Leave the marshmallows alone for the moment.

In case you weren’t gifted with common sense, this should be off the heat by now.

Set to one side.

Rocky-Road-Easter-Nests-5

Step four

This is the clever bit, or at least I like to think so.

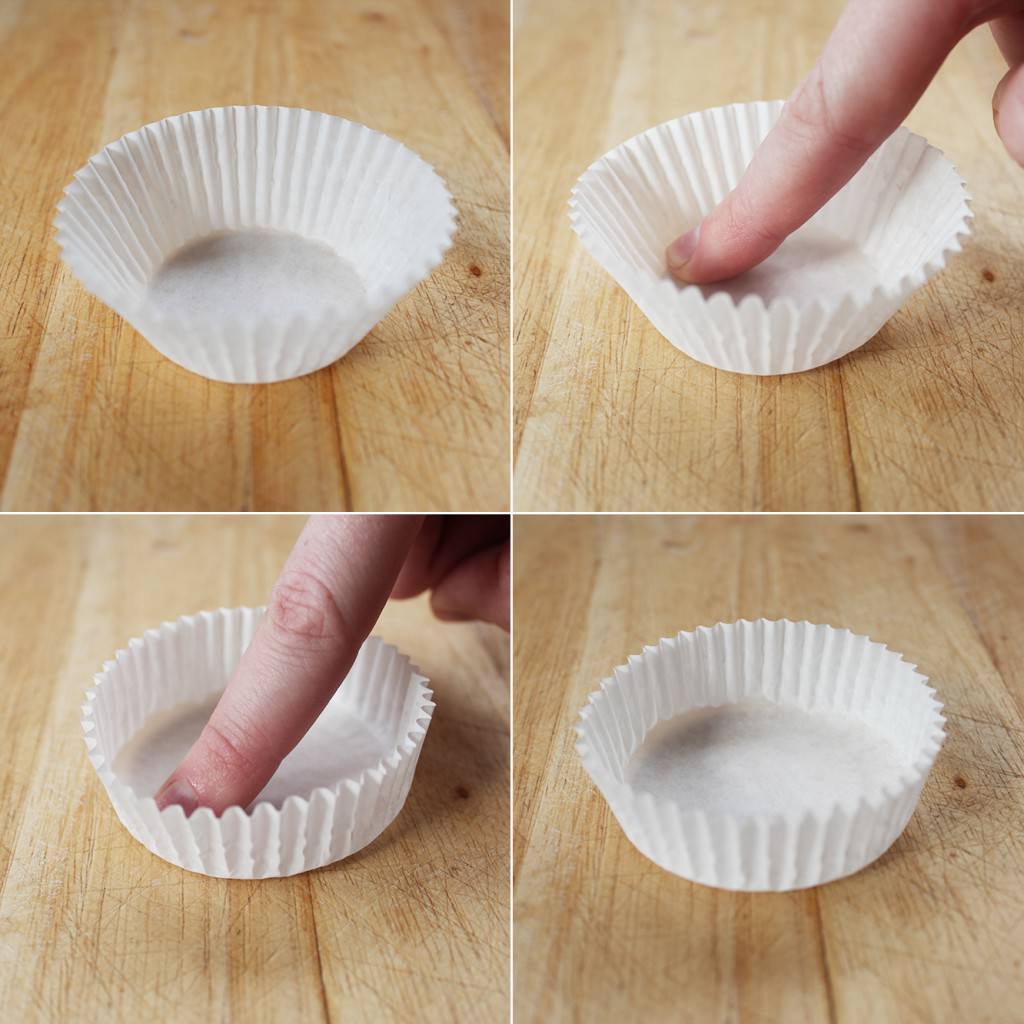
I figured nests aren’t the strange conical shape of cupcake cases, and I didn’t want to end up mail ordering some weird and wonderful baking cases that met my specifications, so I just adapted the regular ones.

I say regular, but I’m not convinced these are actually universal. Before America convinced us that muffin-sized cakes covered in mountains of buttercream (the cupcake we know and love) were the way forward, us Brits had a more modest little bun – the fairy cake. Do other countries have these too? Answers on a post card please.

Anyway, my dear ma has been chastising me about using up the many a fairy cake case we have gathering dust in the cupboard while I burn through the muffin cases to make my cupcakes. They just aren’t cool anymore mum.

Until now.

The fairy cake cases are the perfect size for this, although, of course, whatever size you have should work the same way (you will just have a slightly different number of nests at the end).

Basically you just run your finger around the inside edge of the case in circles until it opens out and has short straight walls as pictured.

Rocky-Road-Easter-Nests-6

Step four

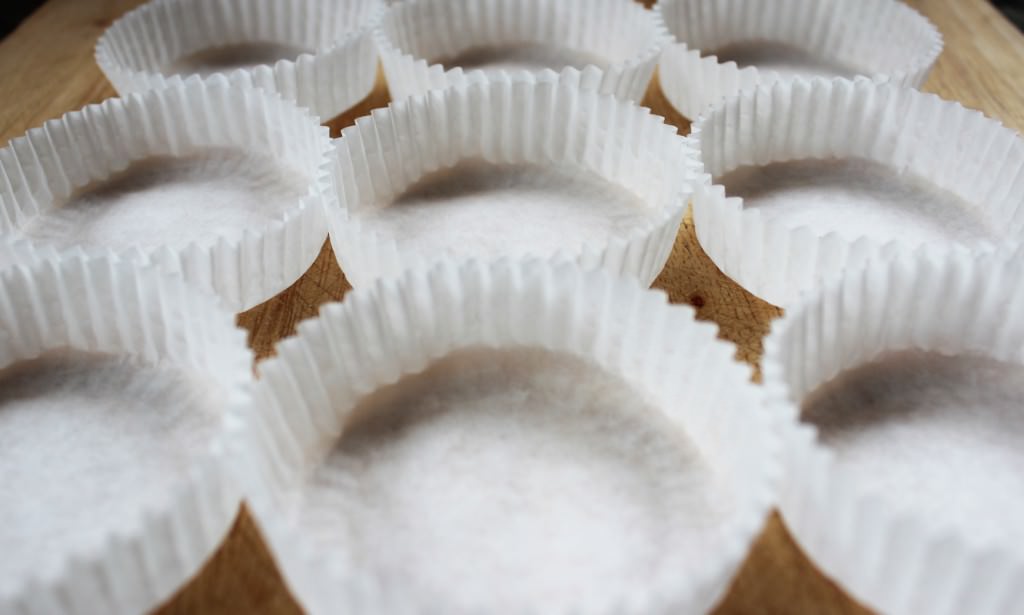
Repeat x 15

Rocky-Road-Easter-Nests-7

Step five

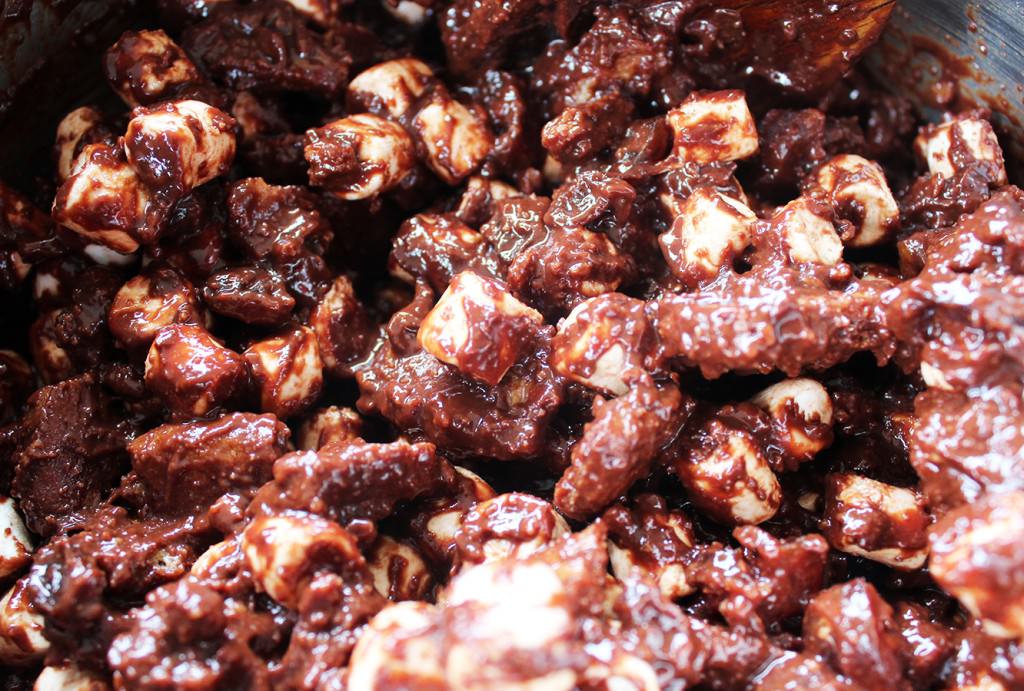
The chocolate mix should now have cooled sufficiently to not melt your marshmallows to mush.

Stir them in…you will still have to work fairly quickly.

Rocky-Road-Easter-Nests-8

Step six

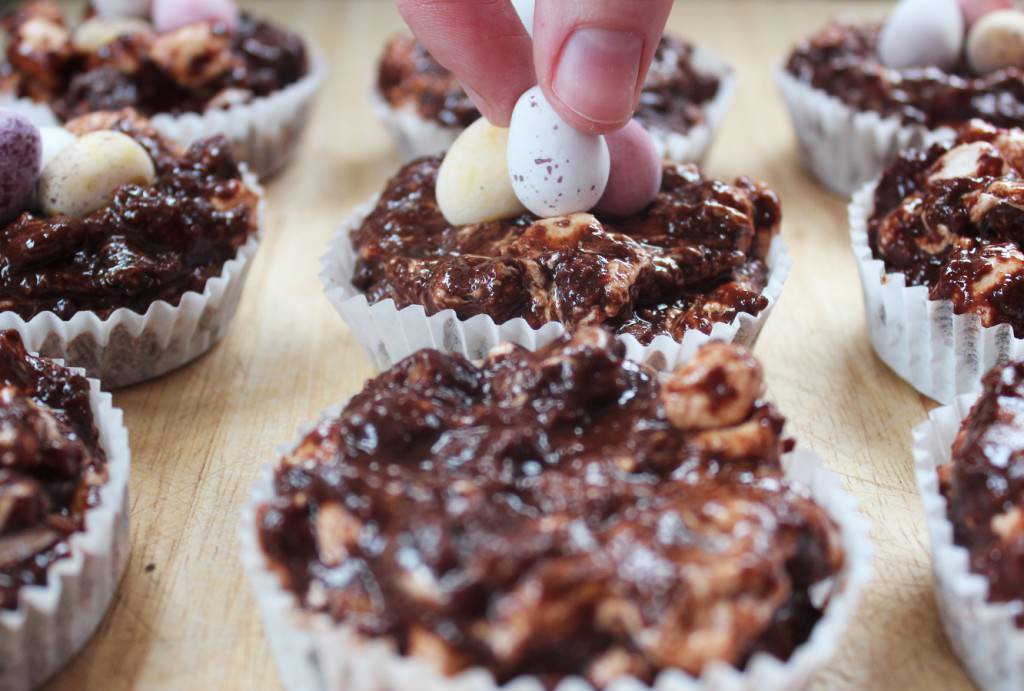
Spoon mixture into cases and stick eggs in the nests. Don’t be tight, give at least three to each one.

Step seven

Put in the fridge to set.

Dust in icing sugar before serving, you can afford to be a bit more liberal than I was. After I’d taken the pictures I dropped the spoon on one and it actually looked a lot better with a heavier dusting.

Rocky-Road-Easter-Nests-10

Rocky-Road-Easter-Nests-9

Step eight

Get chubby.

Have a great week guys!

Oh, and you may have noticed I’ve moved my site – I’m trying to figure out what impact that has on the people who were already following me, I’ll keep you posted!

Fudge for mama

Hello there, apologies for the short blogging hiatus; life happens sometimes, but I appreciate you sticking with me.

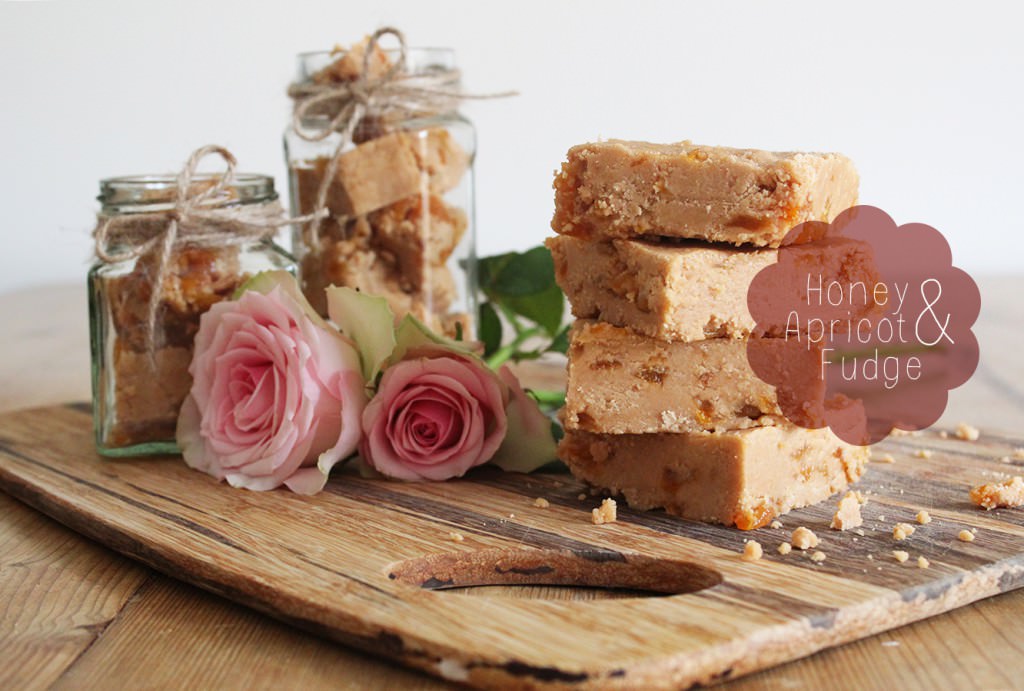
This weekend I went to stay with my friend Beth before she goes on her trip. Being as Mother’s Day is so near (this Sunday for those of you in the UK), B and I thought we would make some fudge for our mummys.

Whether or not you have Mother’s Day coming up, I urge you to have a go with making fudge. It’s a bit of a rascal but there’s lots to feel good about when you get it right, I’ve made quite a lot in my life time and so hopefully some of the below will help you avoid some of the fudging pitfalls.

Just a heads up, the batch below is fairly large, so unless you’re making it with a friend or for your Grandma too, you may want to cut the quantities in half.

how-to-make-honey-fudge-8

how-to-make-honey-fudge-1

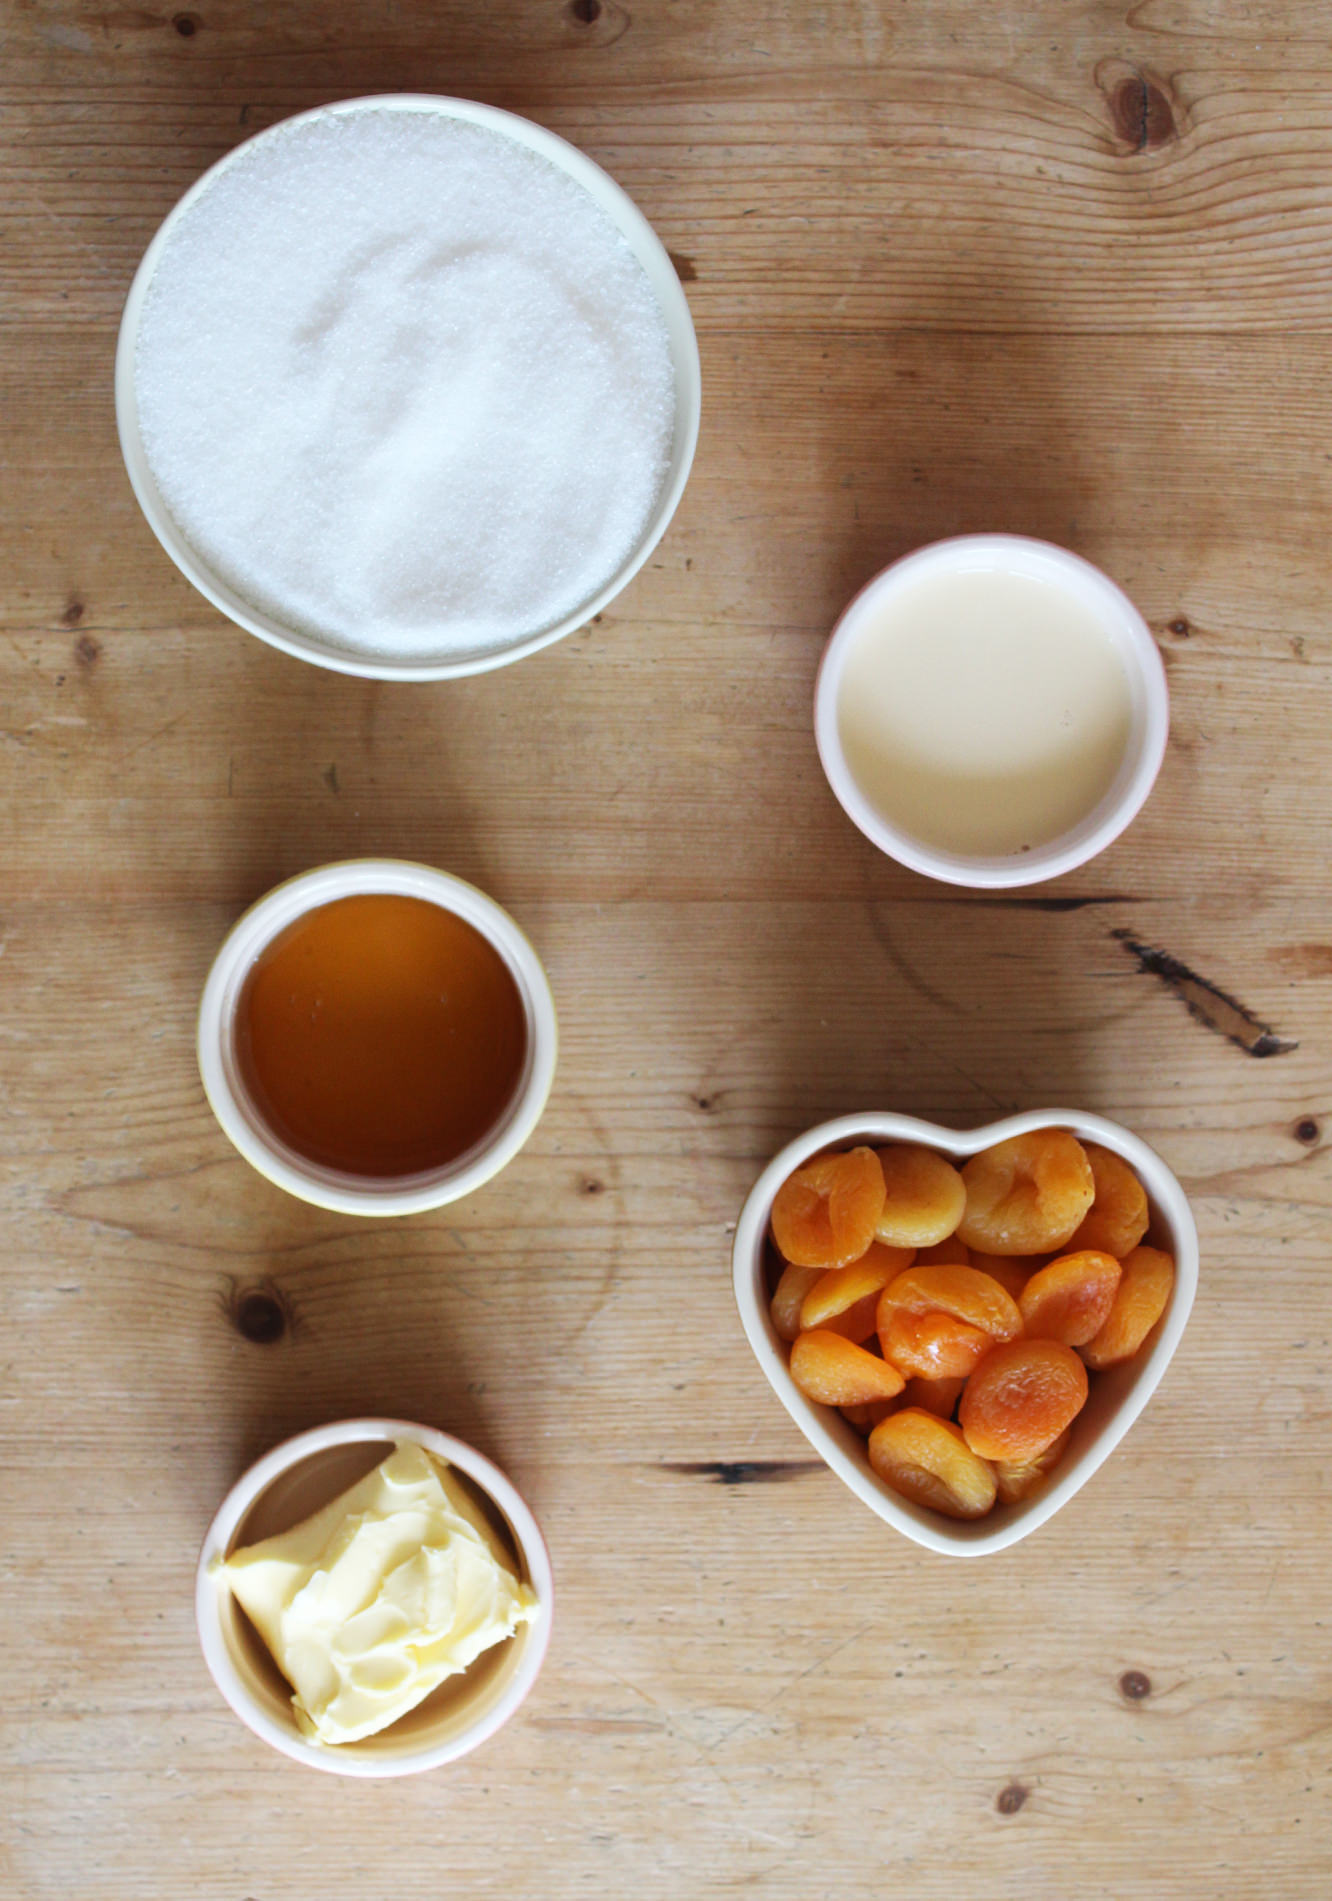
You will need

1kg/2lb Granulated sugar

280g/10 floz Evaporated milk

120g/4 oz Clear honey

120g/4oz Salted butter

250g/9oz Dried apricots

1tsp of Liquid glucose (if you have it – not essential – but great)

Tray bake tin lined with greaseproof paper

Sugar thermometer (essential)

how-to-make-honey-fudge-2

Step one

Combine all the ingredients (minus the apricots) into a large heavy bottomed pan.

At home I use the pressure cooker, and at Beth’s we discovered this casserole dish worked pretty well. The pan should be quite large as the mixture will bubble up, and the sturdier it is the less likely your fudge is to scorch.

how-to-make-honey-fudge-3

how-to-make-honey-fudge-4

Step two

Melt ingredients on a reeeaaallly low heat.

Seriously. As low as your cooker goes. Impatience will not help you here.

This ensures all the sugar is dissolved before it boils, and should help to prevent sugar crystals forming.

You should stir gently to stop the mixture burning on the bottom of the pan. Pop your thermometer in at this point too.

This was the first outing of my rather swish thermospatula, above, so I could stir and measure the temperature at the same time. I know, I need to get out more.

how-to-make-honey-fudge-5

Step two and a half

Keep the fudge on a low heat, stirring gently.

It will begin to boil as above. Resist the urge to put your face in it, as good as it smells, that won’t end well for you.

This is where the thicker your pan the better, as this boiling stage should take around 10-15 minutes ideally. You want your fudge to reach soft ball stage on the thermometer or 115 degrees. Patience is the key here. You should the fudge thicken up and get darker evenly.

Step three (optional)

Once your fudge has reached 115 degrees pour immediately into an empty saucepan. Some fudge people will disagree with me here, as faffing about with fudge can cause crystallisation in the sugar. However, I’ve found that if I leave it in the original pan it carries on cooking and can become brittle. The trick is to do it straight away and don’t scrape the pan out or stir it once transferred.

Now, DO NOT TOUCH. Don’t allow pets, children or interfering family members near the fudge mix for at least half an hour. Preferably you want to wait until the thermometer hits about 50 degrees, but when I did this for a craft fair a few years ago I didn’t have the time to hang around, and found that half an hour was generally enough.

how-to-make-honey-fudge-6

Step four

While you wait, use scissors to chop the apricots into tiny pieces. These are an optional addition and can be substituted depending on your mum’s tastes. You may want to add a different dried fruit, some chopped nuts, or chocolate instead.

how-to-make-honey-fudge-7

Step five

Get a wooden spoon, summons all your arm power, and beat the mixture. If you have a stand mixer, you’re laughing at this stage, because it can take up to 15 mins sometimes…

About 5-7 minutes into your beating add the apricots (warning, if using chocolate chips you want to add them as late as possible so they don’t melt completely).

Keep going until the fudge becomes very thick, you still need it to be soft enough to spoon into the tin, so try not to take it too far. I didn’t have the chance to photograph this, so you will need to take your best guess. Here’s a clue though, your arm will be hurting you by now.

Step six

Spoon into your lined tin and leave to set.

how-to-make-honey-fudge-9

Ta da! You’ve done it!
Stack ’em high!

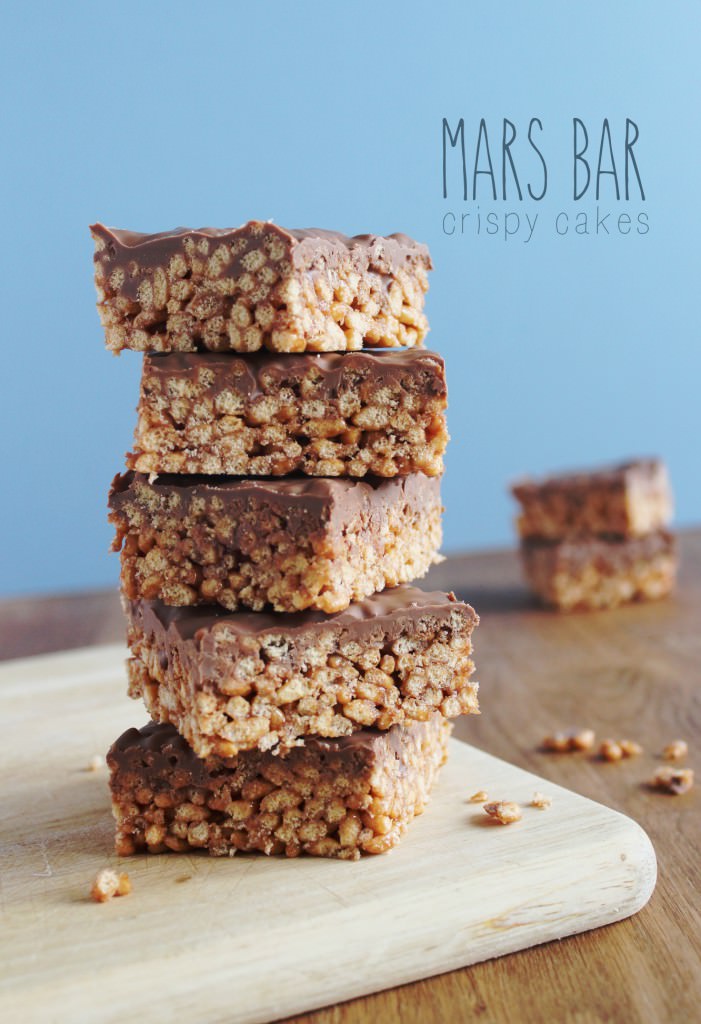
If your country doesn’t stock Mars bars then I am truly sorry…for these are delicious, and you will probably never experience the joy of tasting one. If you live in the UK then get down to your local newsagent, there’s no time to be wasting.

A little disclaimer before I begin: the combination of the fact that a) I was making these for a charity bake sale and b) I couldn’t find a regular 4 pack of Mars bars means that the recipe below is rather substantial. Divide in half or into thirds if you are baking these for home and don’t fancy obesity as a life choice (you won’t be able to stop eating them).

mars-bar-crispy-cake

You will need

6 Mars bars

3 tbsp Golden syrup

250g Unsalted butter

9 cups of Rice crispies

(this is basically a whole box – I used the cheap Tesco knock off kind, no need to break the bank)

400g Milk chocolate

An appointment with your GP to test your blood sugar levels.

Makes 24 (at least)

mars-bar-crispy-cake-2

Step one

Chop up the Mars bar.

Oh go on then, there’s at least one piece going spare…

mars-bar-crispy-cake-3

Step two

Put Mars, butter, and golden syrup in a pan on a medium heat to melt.

Those fluffy bits in the middle of the Mars bars take what feels like forever to melt, but they do get there, just keep stirring, and maybe stick a bit of Dragon’s Den on or something.

mars-bar-crispy-cake-4

Step three

Put most of the rice puffs in a big bowl. I always hold a few cups back to add later, as this isn’t an exact Science so you won’t always need them all.

Pour the melted mixture over the puffs. You probably deserve another little taste at this point.

mars-bar-crispy-cake-5

Step four

Stir together until rice crispies are evenly covered. It’s up to you whether to add the rest that you kept to one side or not, I added the whole lot to mine.

mars-bar-crispy-cake-6

Step five

Line a couple of tray bake tins with foil and distribute your mixture accordingly. Again, it’s up to you how deep/shallow you want your crispy cakes to be, so choose your tins with that in mind.

mars-bar-crispy-cake-7

Step six

Squash the mixture down with the back of a spoon until it fills the various crevices (or with your hands when you get tired of doing it the PC way – wash them first though, there are some standards to be upheld).

Make sure the mixture is squashed down firmly or it will all fall apart later. Literally.

mars-bar-crispy-cake-8

Step seven

Melt the milk chocolate and cover the top of the crispy cakes evenly. Again this will sort of depend on what tin you use and what consistency you want as to how much you need, as you want enough to cover it all. If you chose a shallower tin then you’ll need a bit more chocolate and so on.

mars-bar-crispy-cake-9

Step eight

Cut the crispy cakes into slices now before it all sets up, it’s just all a bit easier that way.

mars-bar-crispy-cake-10

Step nine

Devour.

Happy Monday all.

Churronimoooo

Hmm, blogging Monday seems to gradually becoming blogging Tuesday, apologies chaps.

I’ve been on my travels up and down the country recently (well, mainly side to side actually). So not a huge amount of crafting has been a-happening.

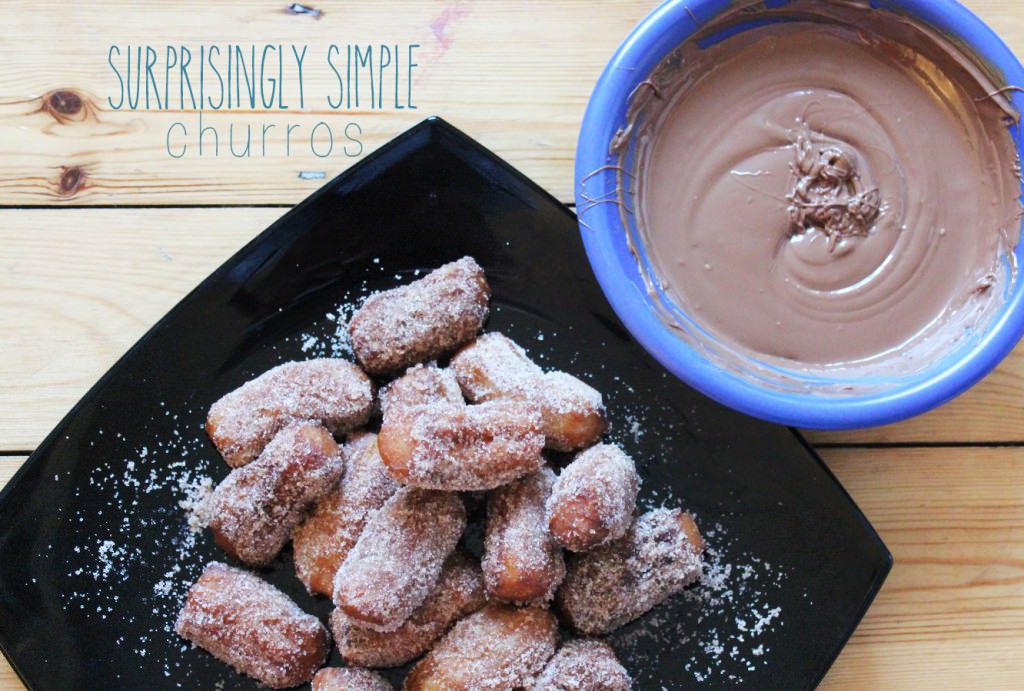
One such weekend was spent with some of my bests in NW London, and at brunch time I took my camera out and started snapping. We decided that churros bites  were the order of the day (if you don’t know what churros are, then you’ve not really lived yet, fact).

None of us had made them before and at least one of us was terrified by the prospect of a pan fire (no deep fat fryer for us). It was actually gob-smackingly easy and very fun, so go on, have a go.

how-to-make-churros-1

You will need

1 cup Water

2 and 1/2 tbsp Caster sugar (plus some for coating)

1/2 tsp Salt

1 cup Plain flour

1L Vegetable oil

Ground cinnamon (for coating)

100-200g Chocolate (for dipping)

Serves 4 (recipe sourced at allrecipes.com)

how-to-make-churros-2

Step one

In a saucepan combine the cup of water, 2 and 1/2 tablespoons of sugar, salt, and 2 tbsp vegetable oil.

Heat over a medium heat until sugar has dissolved and mixture comes to the boil.

how-to-make-churros-4

Step two

Take water off the heat and pour in a cup of plain flour.

how-to-make-churros-5

Step two and a half

Stir stir stir.

The mix will a) get too heavy for a whisk very quickly b) get very lumpy very quickly c) look plain wrong.

Persevere though, if you keep mixing you will manage to smooth it out considerably in a matter of minutes. I promise.

how-to-make-churros-6

Step three

Heat the rest of the oil in a sizeable pan. SLOWLY.

You want it to be on no more than a medium heat the whole time, and this will take a while. You know the oil is at the right temperature when you drop a little mixture in and it bubbles and floats rather than sinking to the bottom.

how-to-make-churros-7

Step four

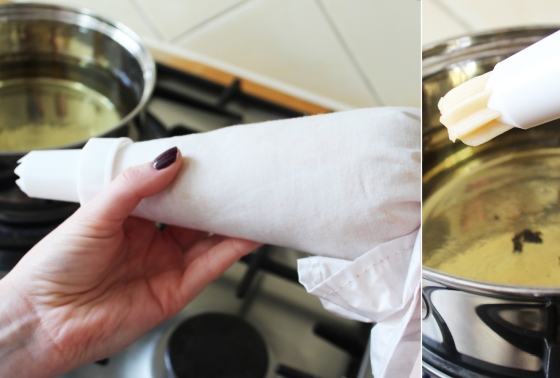
Fill a large piping bag with the mix and squeeze to the end.

A star shaped nozzle will give you the most authentic looking churros, but I would advise a fairly small one. Ours was the biggest in the pack, and the chunkiness turned our churros into churros bites fairly early on…we didn’t want to end up with only 4 massive ones…less space for the chocolate that way.

how-to-make-churros-8

Step five

Pipe into the pan. We had one person piping and another using a pair of scissors to snip the mixture in at a desired length. Manageable with one person though I suspect – if you don’t have a helper.

This is where you need to keep an eye on the heat because if you’re not careful you risk cooking/burning the outside and then having uncooked dough within. We learned by doing on this one!

So keep the pan on a low-medium heat and just cook them by eye. Even the most novice chef can see when one of these is ready.

how-to-make-churros-9

Step six

Lift the churros out of the pan and drain on a plate covered with a few sheets of kitchen roll.

A slotted spoon would be ideal for this if you have one.

how-to-make-churros-10

Step seven

Cover another plate in caster sugar and cinnamon (adjust quantities to taste), and roll drained churros around until coated in the mix.

how-to-make-churros-11

Step eight

Stack em high!

how-to-make-churros-12

Step nine

While the churros are cooking, draining, and being coated, task somebody with melting the chocolate.

Do this in the microwave and don’t get impatient. A 30 second blast followed by some 10 seconds with stirring in between will do the trick.

how-to-make-churros-14

Step ten

Eat until you can’t move.

White chocolate and lime moussabub

Hello friends!

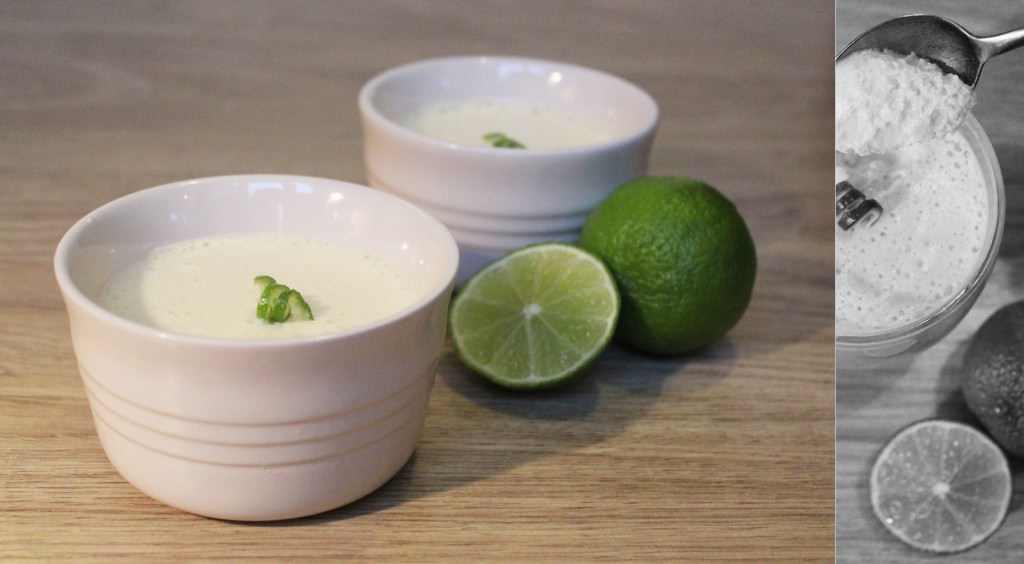
Riding on the success of a chocolate orange mousse I made for Ma’s birthday I thought this weekend would be a perfect time to flex my culinary muscles and invent a new recipe of my very own. It didn’t quite have as many bubbles as the other one I made (you know, from a recipe book by a French pastry chef…) but it was much lighter and fluffier than any syllabub I’ve ever seen. Hence the White Chocolate and Lime Moussabub was born. 

A word of caution – make the day before your soiree, or early morning, as it needs a good few hours to set. Also, if you’re thinking to invite the kind of people who choose a cheeseboard rather than dessert then, a) you probably want to save this one for the sweet tooths instead, and b) de-friend them – there are better people in the world.

ChocolateLimeMousse

You will need:

200g White chocolate

110ml Double cream

40ml Full fat milk

3 eggs (or 2 if on the large side)

55g/2 oz Caster sugar

A lime

(Serves 4-6 depending on the size of your pots and tummies)

ChocolateLimeMousse3

Step one

Chop chocolate finely. You will hear this time and again if you decide to follow this blog but it really is easiest to use a bread knife/one with a serrated edge for this. The smaller you can chop the better, as you will be using the cream mix to melt it. Place in a large bowl.

ChocolateLimeMousse2

Step two

Place milk, cream and lime zest in a small saucepan and heat gently on a low heat. If you want to use a strip of the zest for decoration then put to one side now rather than covering in cream… nobody wants that on their pudding.

Once the mixture has started to boil, pour it through a sieve over the white chocolate and stir until fully melted. If the mix cools down before it fully melts the chocolate then you can place the bowl over a pan of boiling water to melt any stubborn bits.

Taste.

I added some lime juice at this stage – just under half the lime. It depends how much of a citrus taste you want, but I found that to be just right. Stir through thoroughly (and now say that out loud ten times as quickly as you can).

ChocolateLimeMousse4

Step three

Separate the egg whites into another bowl. Glass or ceramic is best for this, as plastic bowls can tend to retain some grease, and that will scupper your efforts to whip up your whites.

I tend to crack the egg on the side of the bowl and pass the yolk from shell to shell until all the white has drained away, but whatever works for you.

Keep yolks to one side.

ChocolateLimeMousse5

Step four

Whisk! If you don’t have a hand held whisk or a fancy stand mixer then hopefully the Lord blessed you with strong arms.

When the eggs start to fluff up, add the sugar and keep whisking until they are stiff and glossy. People are a bit precious about egg whites but generally I don’t think there’s anything to freak out about, just slow down a bit when they start to stiffen up – the sugar will help stabilise them and it’s unlikely you’ll go over if you’re looking at what you’re doing.

ChocolateLimeMousse6

Step five

Whisk the egg yolks in. Your mixture should yellow a bit, and will loose a little of its structure – don’t panic!

ChocolateLimeMousse7

Step six

Put a scoop  of your eggs (up to a third) into the chocolate mix and fold in to loosen it up (middle photo). This will help you to not knock out all the air from your moussabub, if you do it all at once you’ll lose your bubbles.

Add the rest of the eggs and gently fold the mixture together. Turn the bowl as you do so it to help you get everything together without flattening it. Patience is a must here.

Step seven

Spoon into serving dishes and put in the fridge (allow at least 4 hours I’d say). Try not to disturb them too much, and no poking, those bubbles are precious!

ChocolateLimeMousse9

Step eight

Remember that bit of lime peel you put aside? Well, it makes lovely whirly bits for the tops. If you have one of those fancy zester tools then you won’t need my hillbilly method, but this is the best thing I could think of!! If you know how the professionals do it then answers on a postcard please.

At least 20 mins before serving make thin strips from your piece of peel. Curl them up and put them in the handle of a peg as shown above. Leave them to sit until you are ready to rock and roll. Place on top of each dessert.

NB: If you make your mousse the night before then either keep your peel in a bit of water and take out to dry an hour before serving, or wrap in tinfoil and put in the fridge. Don’t cut up and coil until just before you want to use it as they will dry out and shrink.

You might also try breaking up a biscuit (ginger would work well) or grating some chocolate on top for a bit of a different texture.

ChocolateLimeMousse8

Step nine

Indulge.