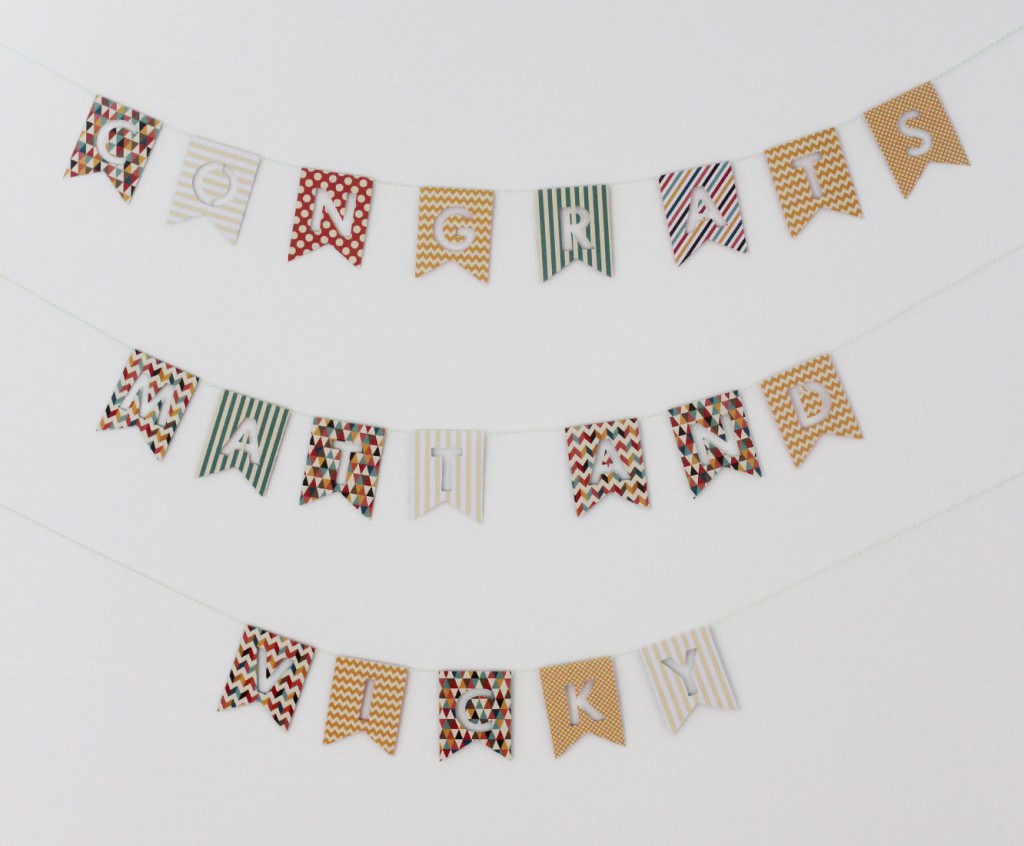
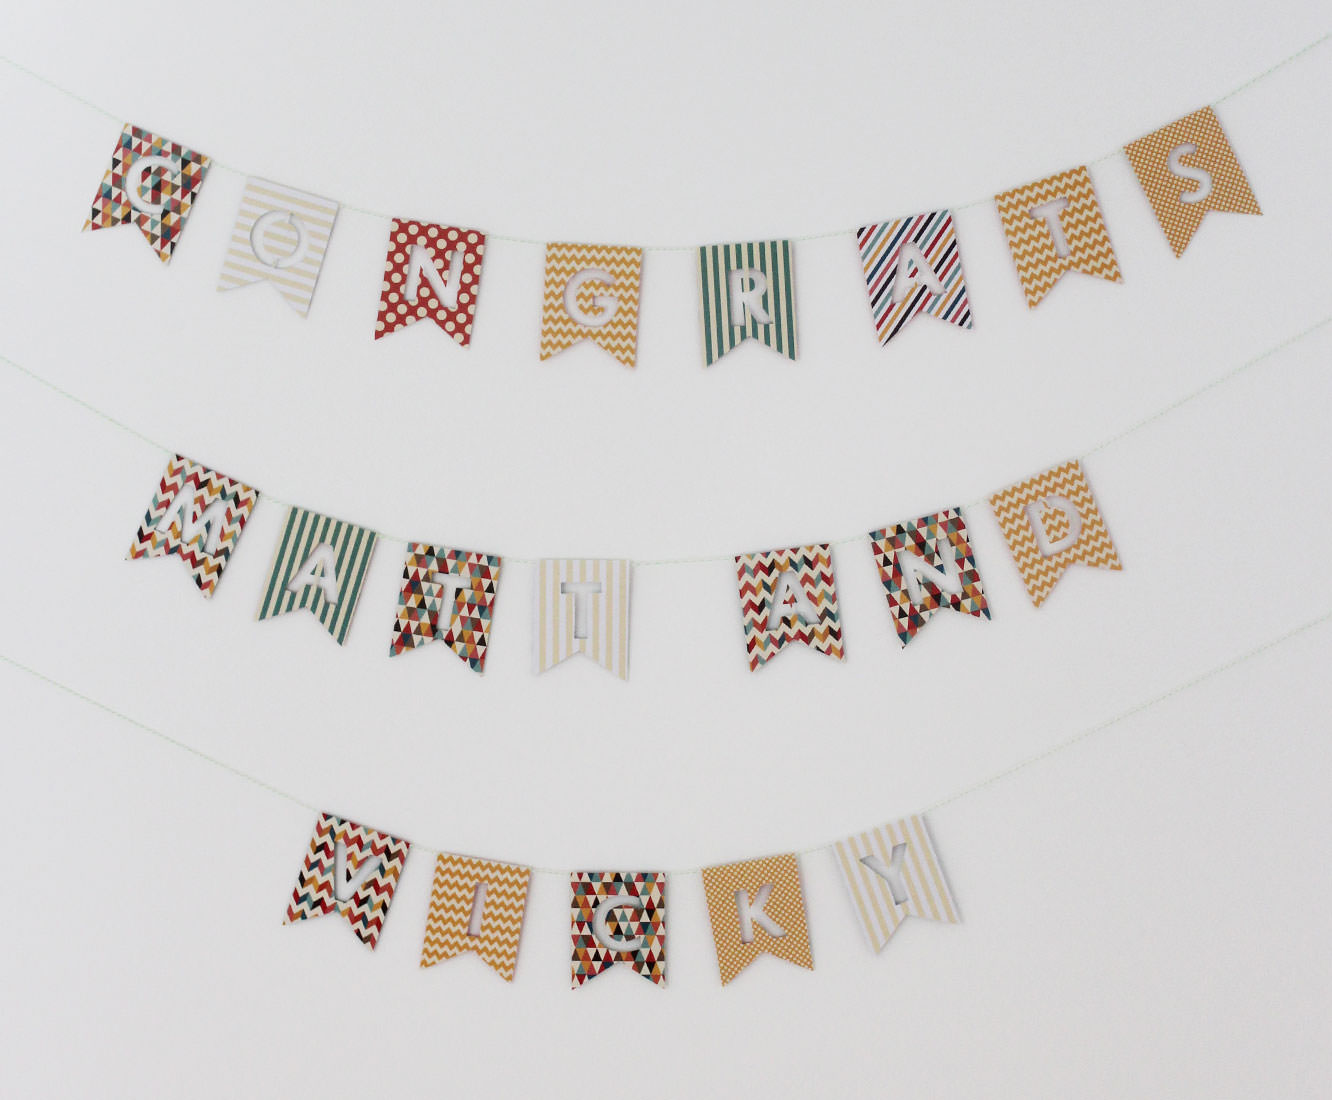
I’m finally going to wrap up my little series of posts from Matt and Vicky’s engagement party this week. I know, you didn’t think there could possibly be more right? Well, no party is complete without a banner.
Just in case their guests forgot, I made a little congratulations banner. A congrats banner, let’s be honest, congratulations is a long word.
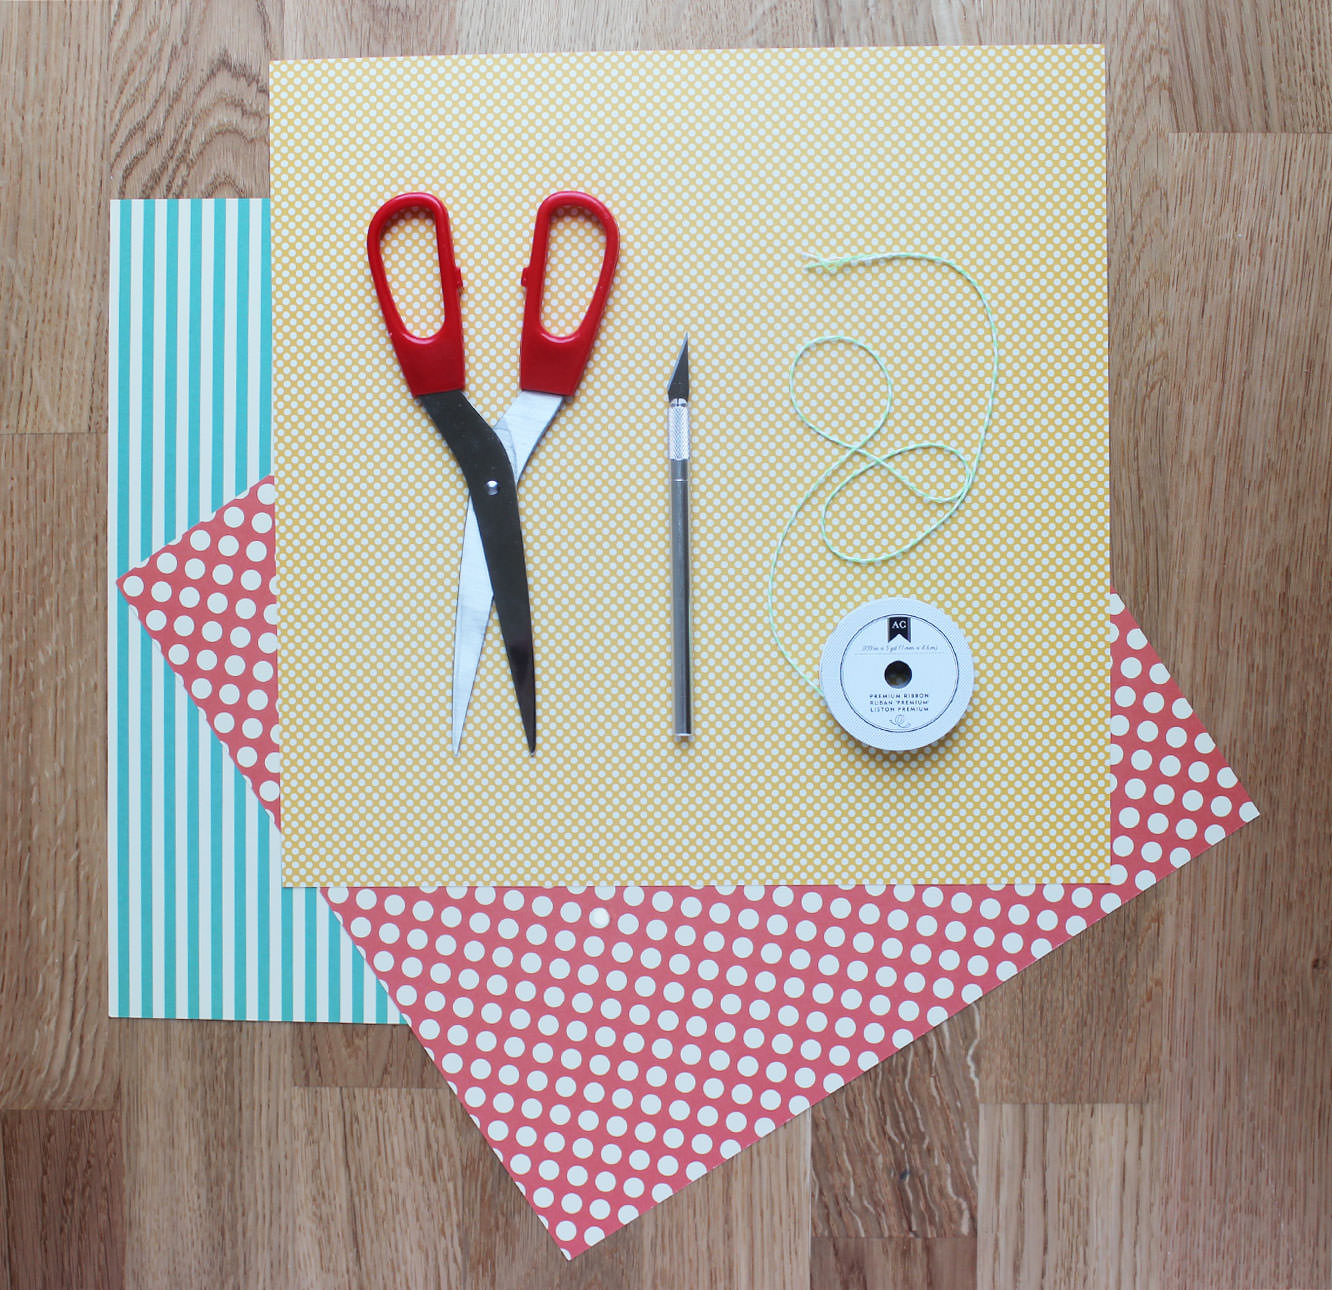
You will need
Some pretty paper or card
A craft knife and a cutting mat (or chopping board)
Double-sided tape
String
Step one
Using a chunky font, type out the message for your banner. I think this was Futura in case you want to copy exactly (but then you would also need to find a Matt and a Vicky to congratulate).
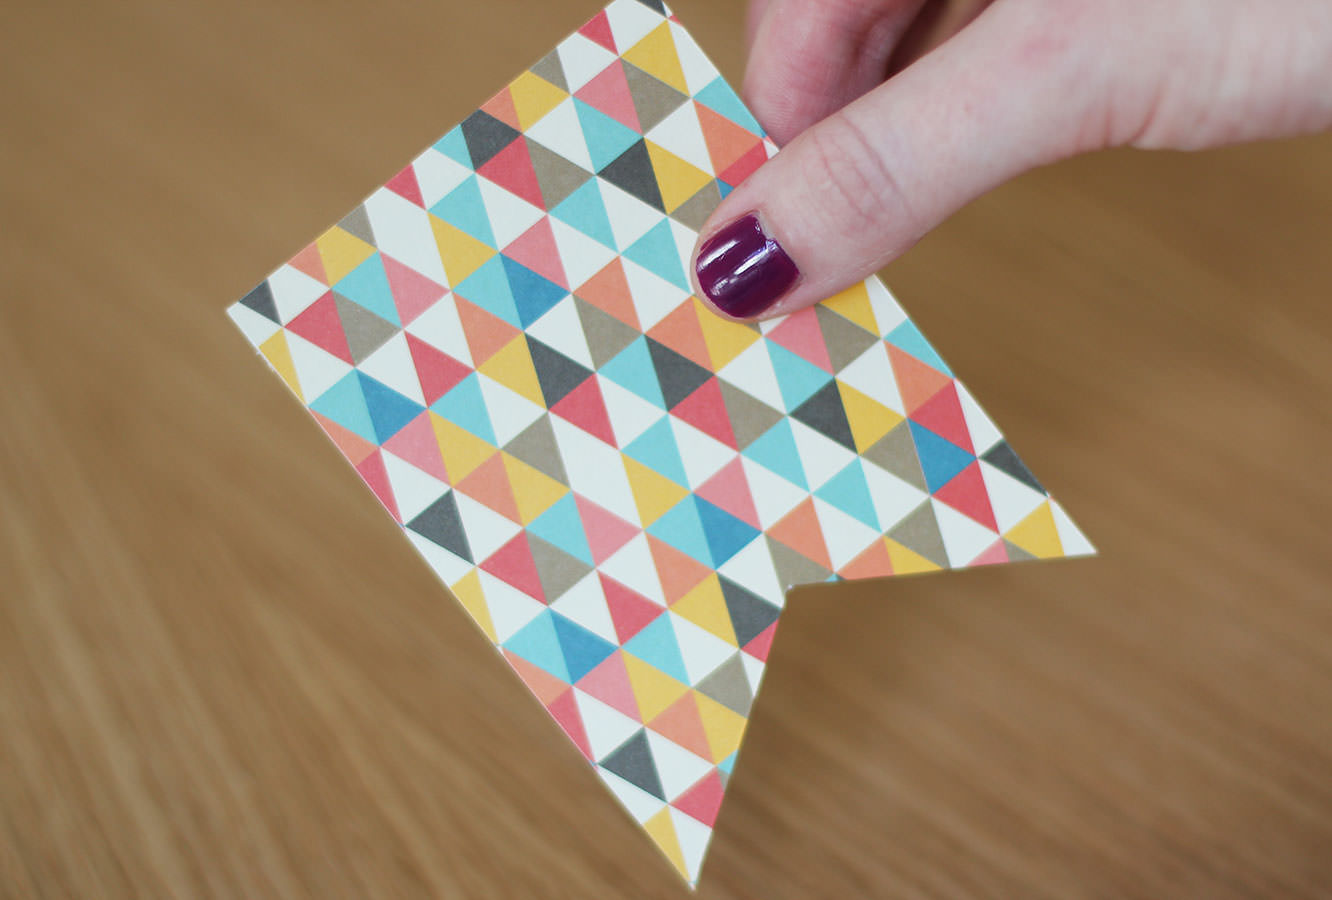
Step two
Cut out little flag shapes big enough to house your letters, remember to leave at least half a centimetre at the top to fold over.
These are super simple to get even, just draw a rectangle with a line down the centre and then draw two diagonals from the corner to the same point on the central line. Use the first one as a template.
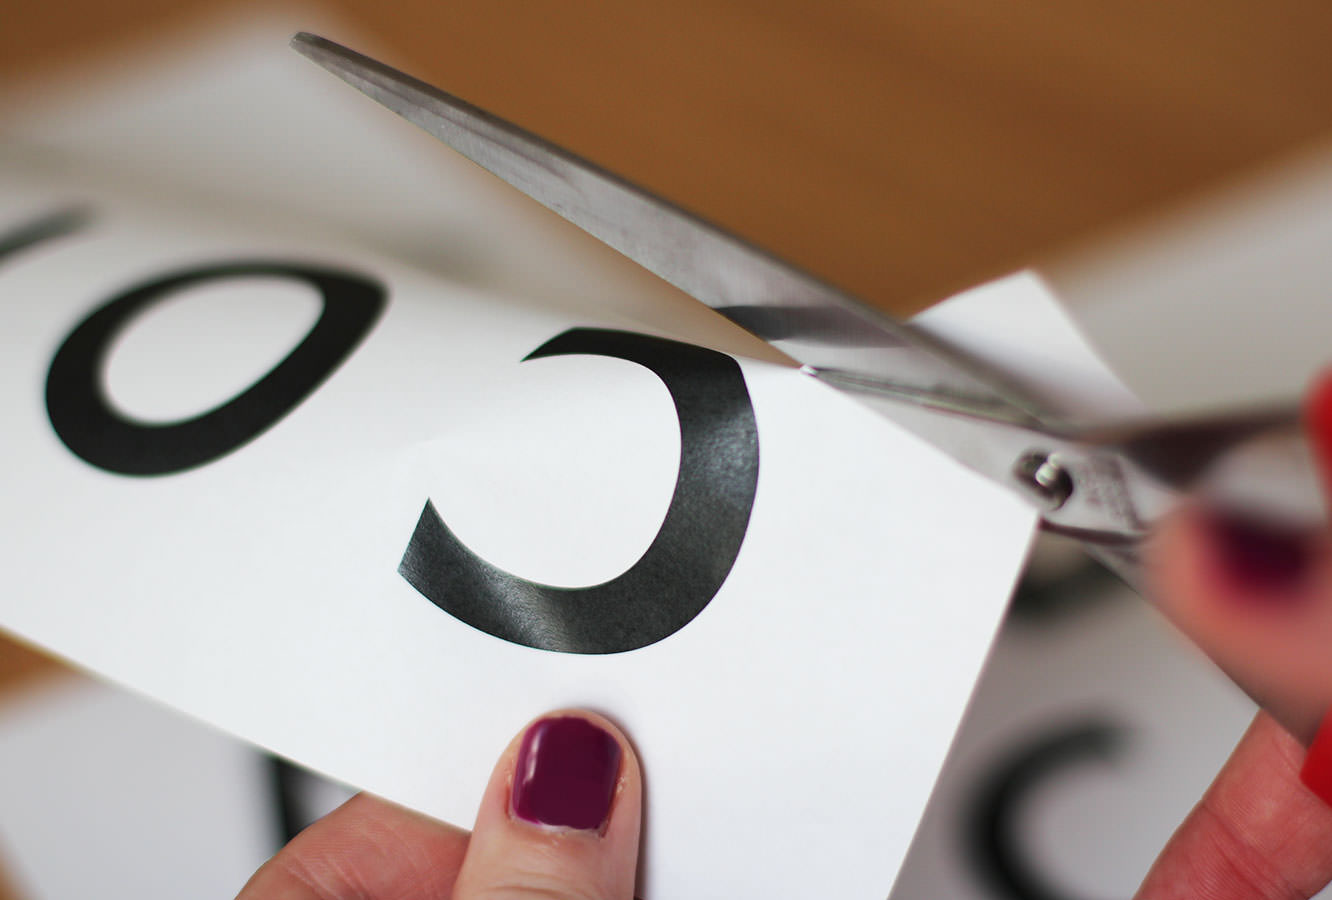
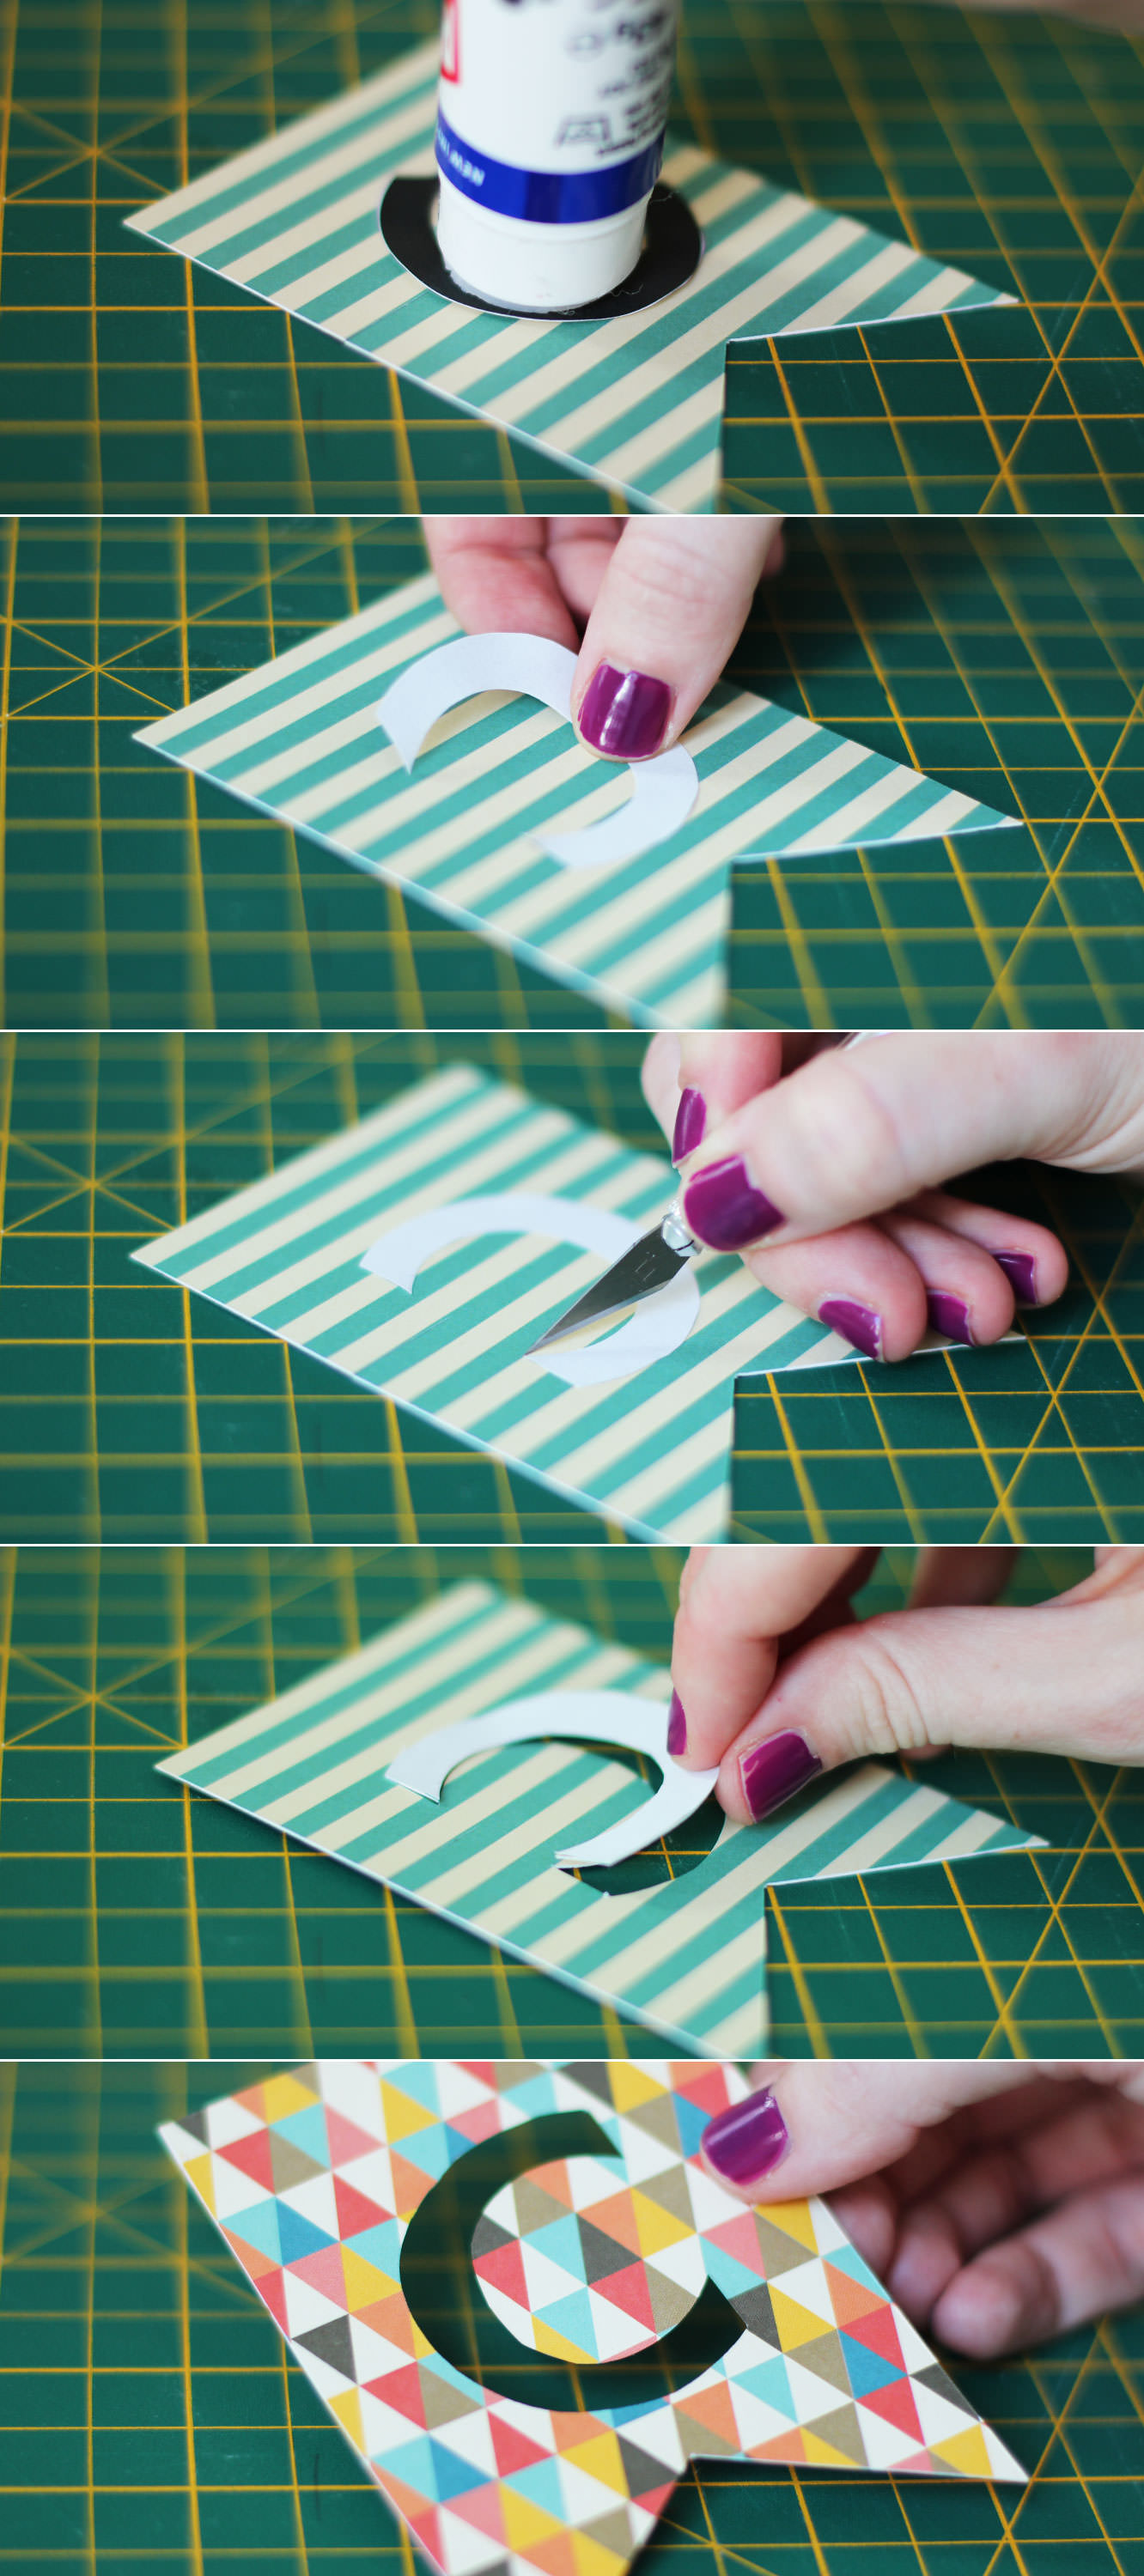
Step three
Glue the front of the letters and stick them face down on the back of each flag.
Use a craft knife to cut around the edge of the letter. The child in me was bizarrely satisfied by punching these out.
When cutting out letters like A and O which have a counter in them remember to keep a small stem so you don’t totally hollow them out.
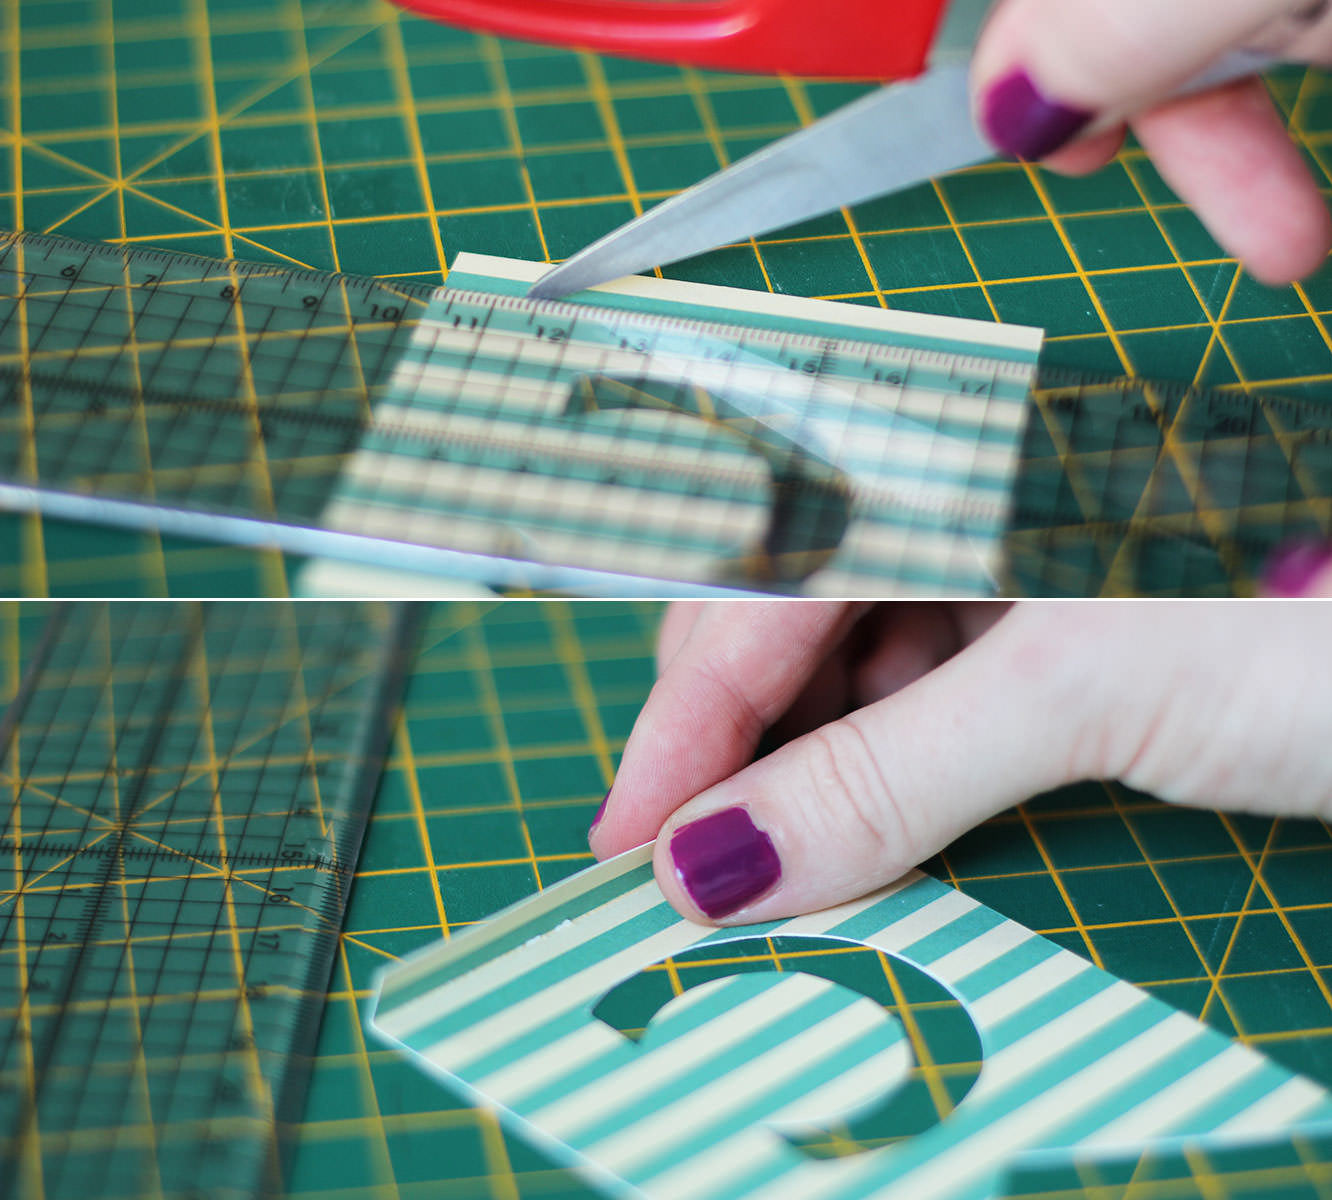
Step four
Using open scissors score the top of the flag (on the back) to create a fold.
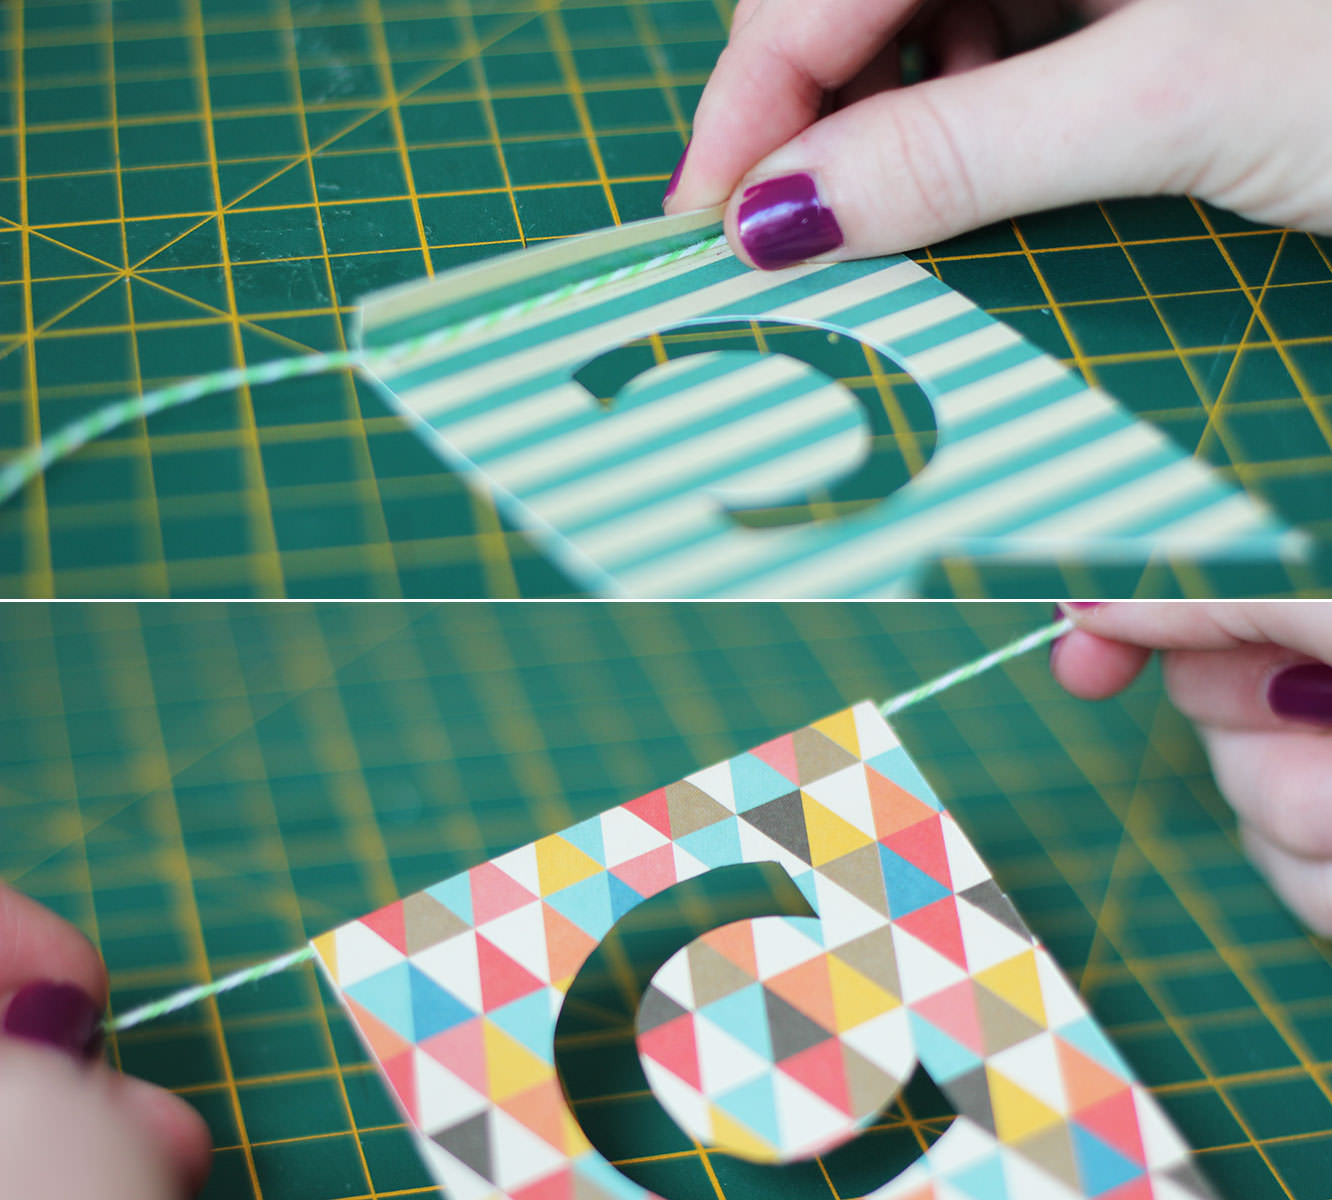
Step five
Stick double sided tape inside the fold, making sure it’s right to the top edge. Place the string in the fold and stick down.
Another little post about our half term day of fun. I hope you will forgive the lack of photos given I was supervising two little humans at the time.
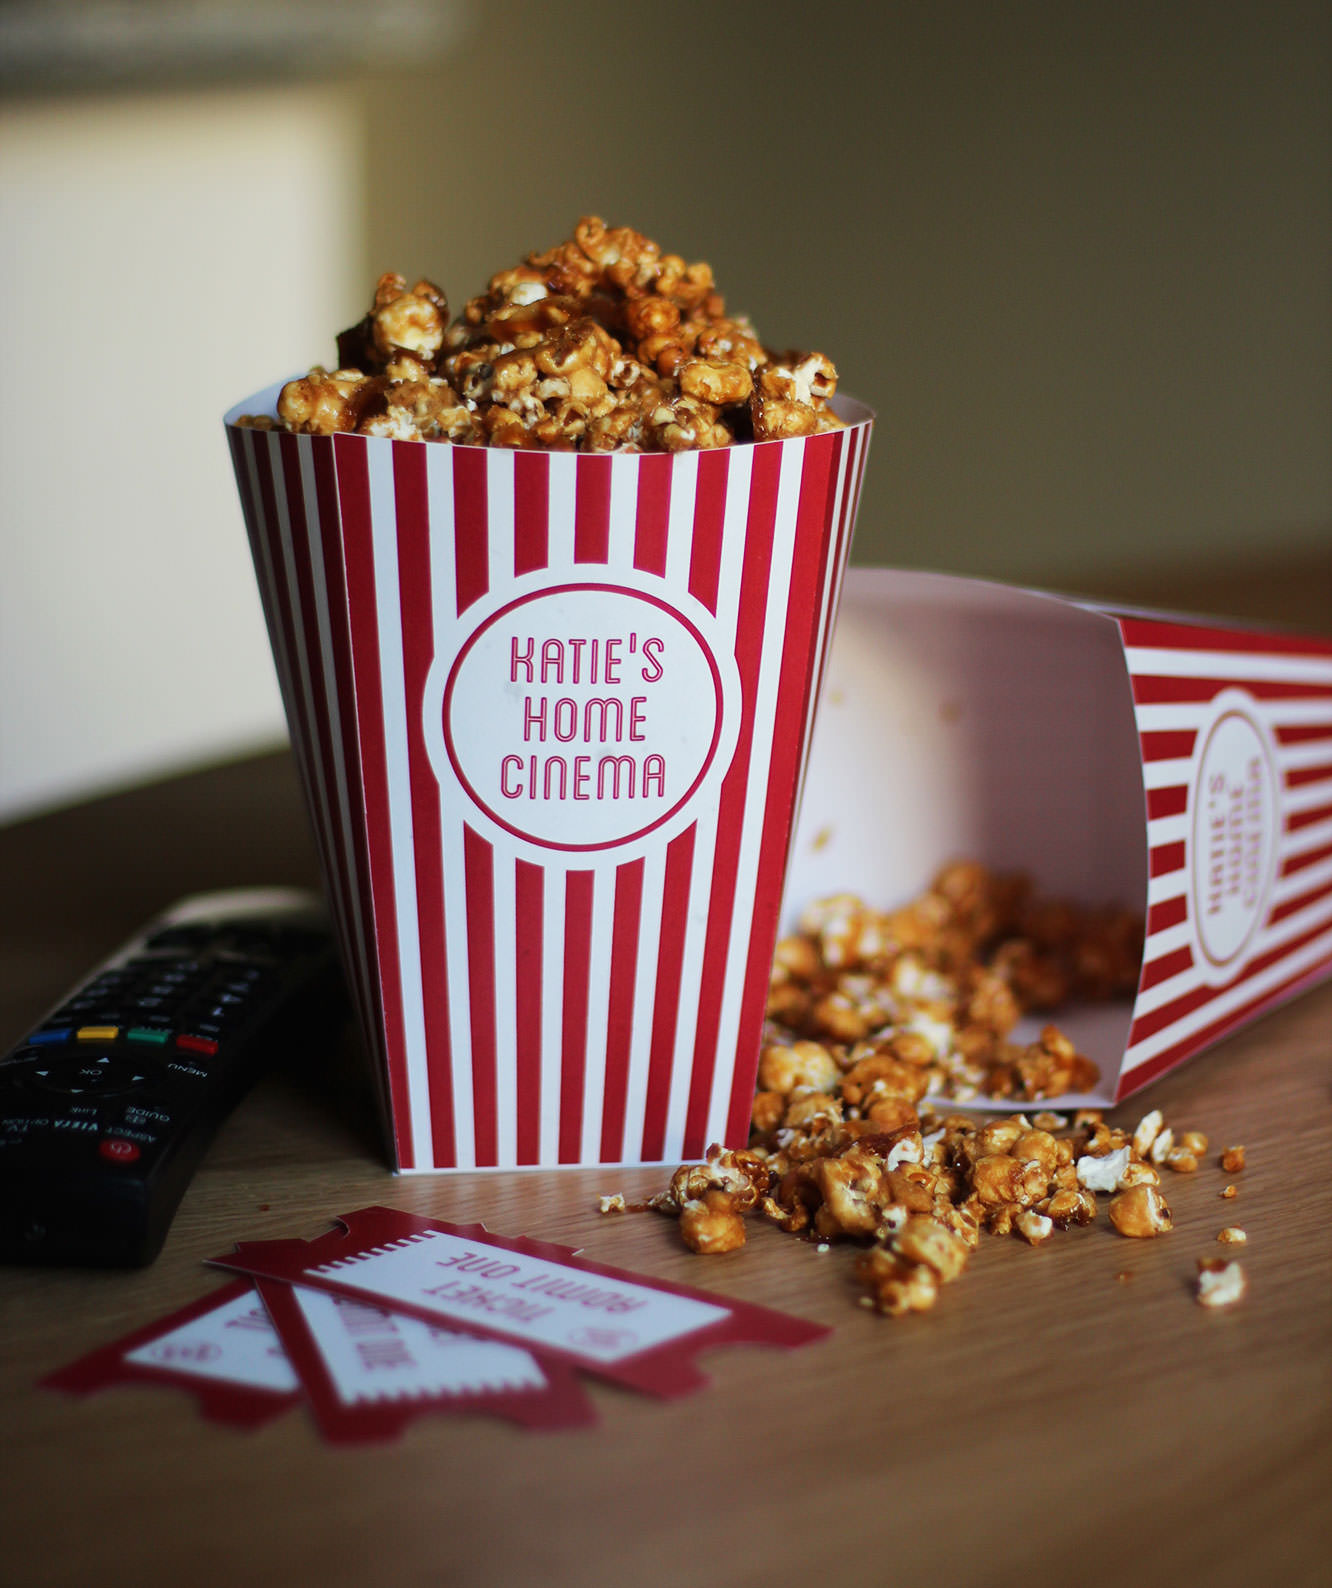
I had promised my little friends that we would take a trip to the cinema during our visit, but it turned out there was nothing worth going to the cinema for.
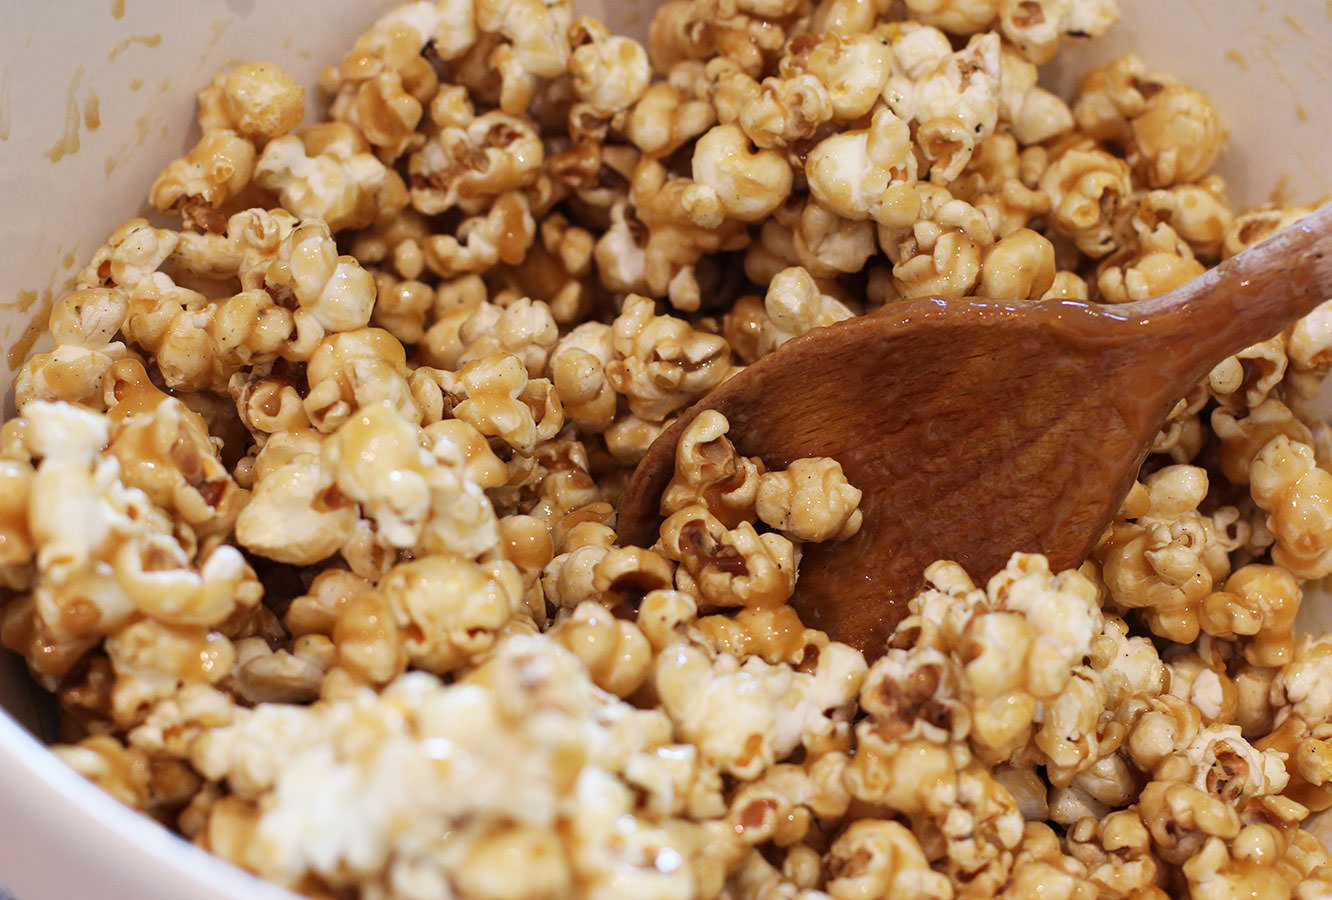
Ever the crafter I decided we would recreate our own home cinema experience. I conjured up a recipe for toffee popcorn and made some popcorn boxes and tickets.
Pop the popcorn. If you’re using kernels and it’s the first time you’ve done it then you need to add some butter or unflavoured oil to a large saucepan and one or two kernels. Once they’ve popped you can add the rest.
When the majority of the corn is popped (the pan will be full), remove the pan from the heat and place the corn in a bowl. Get rid of any unpopped kernels.
Step two
Heat the butter, syrup and sugar in a pan until bubbling. Turn down to a simmer cook for 5 minutes, keep stirring so that it doesn’t catch.
Step three
Stir the toffee into the popcorn.
Step four
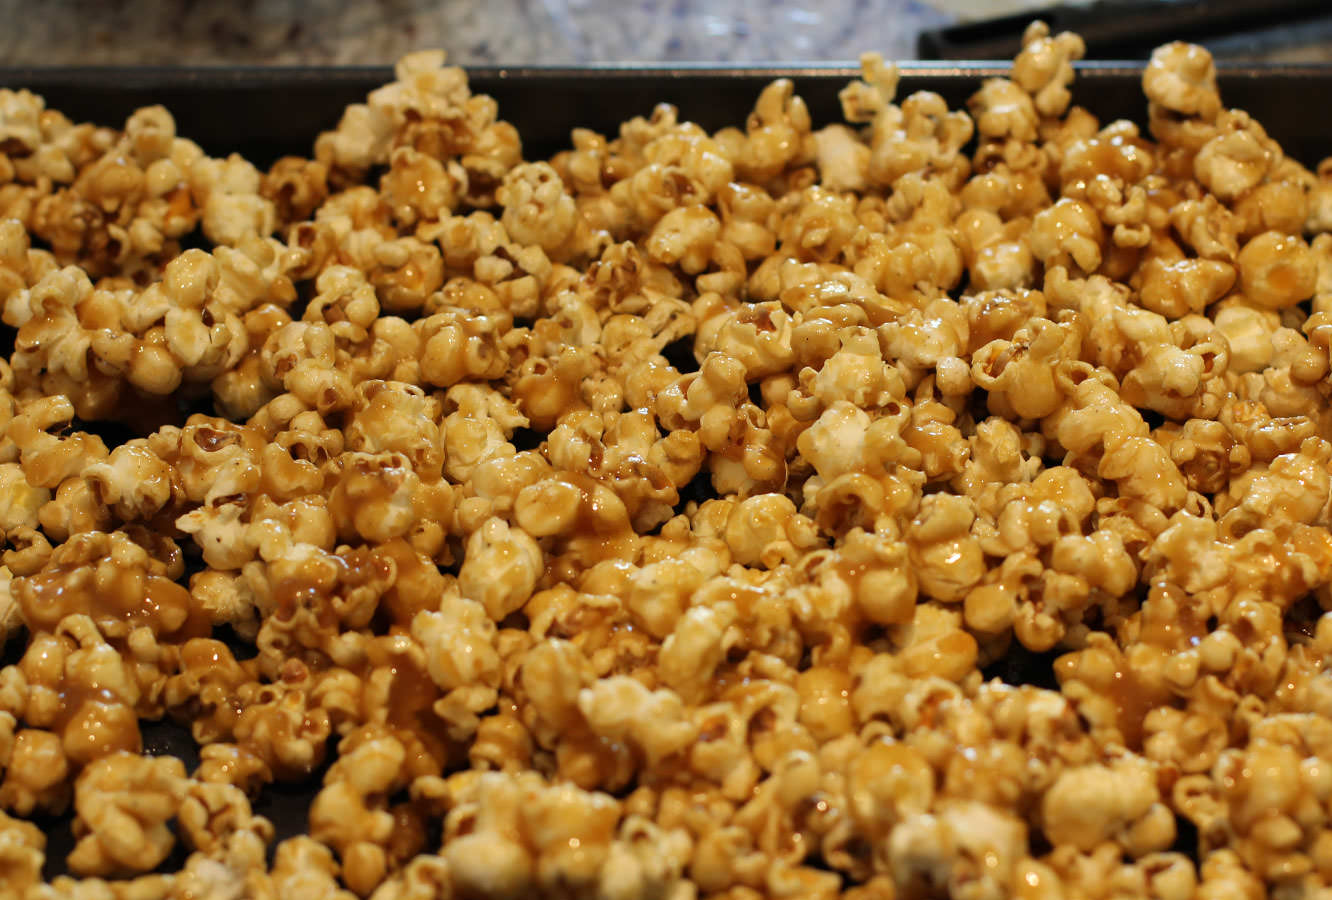
Spread out on a large baking tray. You only really want one layer of corn to stop too much of it sticking together.
Step five
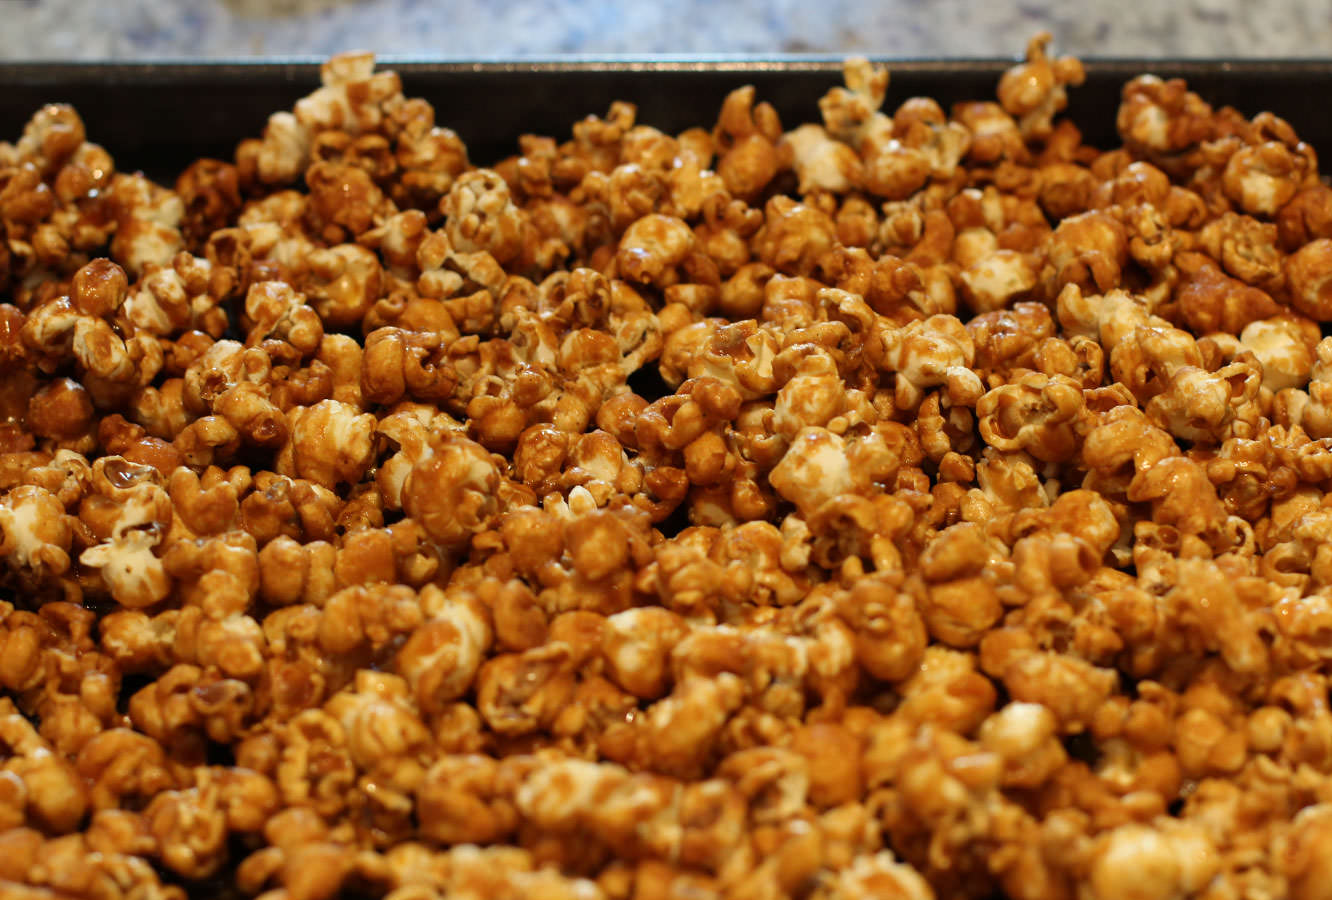
Bake until golden (about 25 mins) on 180 degrees C/gas mark 4/350 F.
Leave to cool so that it crisps up.
Step six
While the popcorn is cooling, assemble the boxes and cut out the tickets. The kiddies can help with this, or you could do it in advance.
Step seven
Put your feet up and enjoy the film. Or do what I did and placate the children with sweets and clean up feverishly in the background.
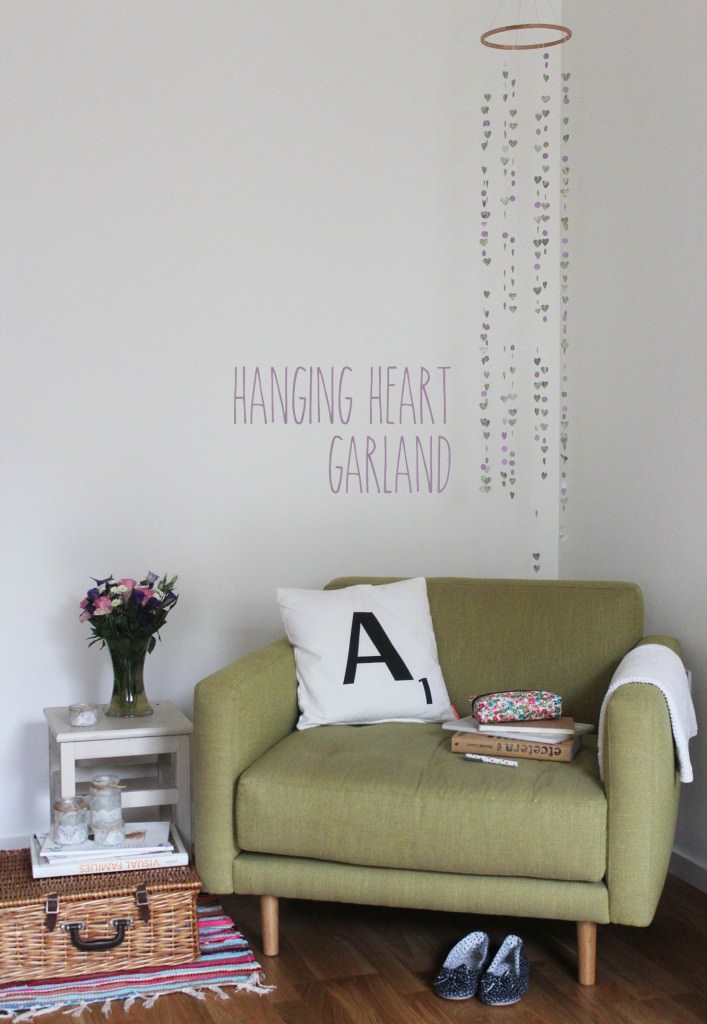
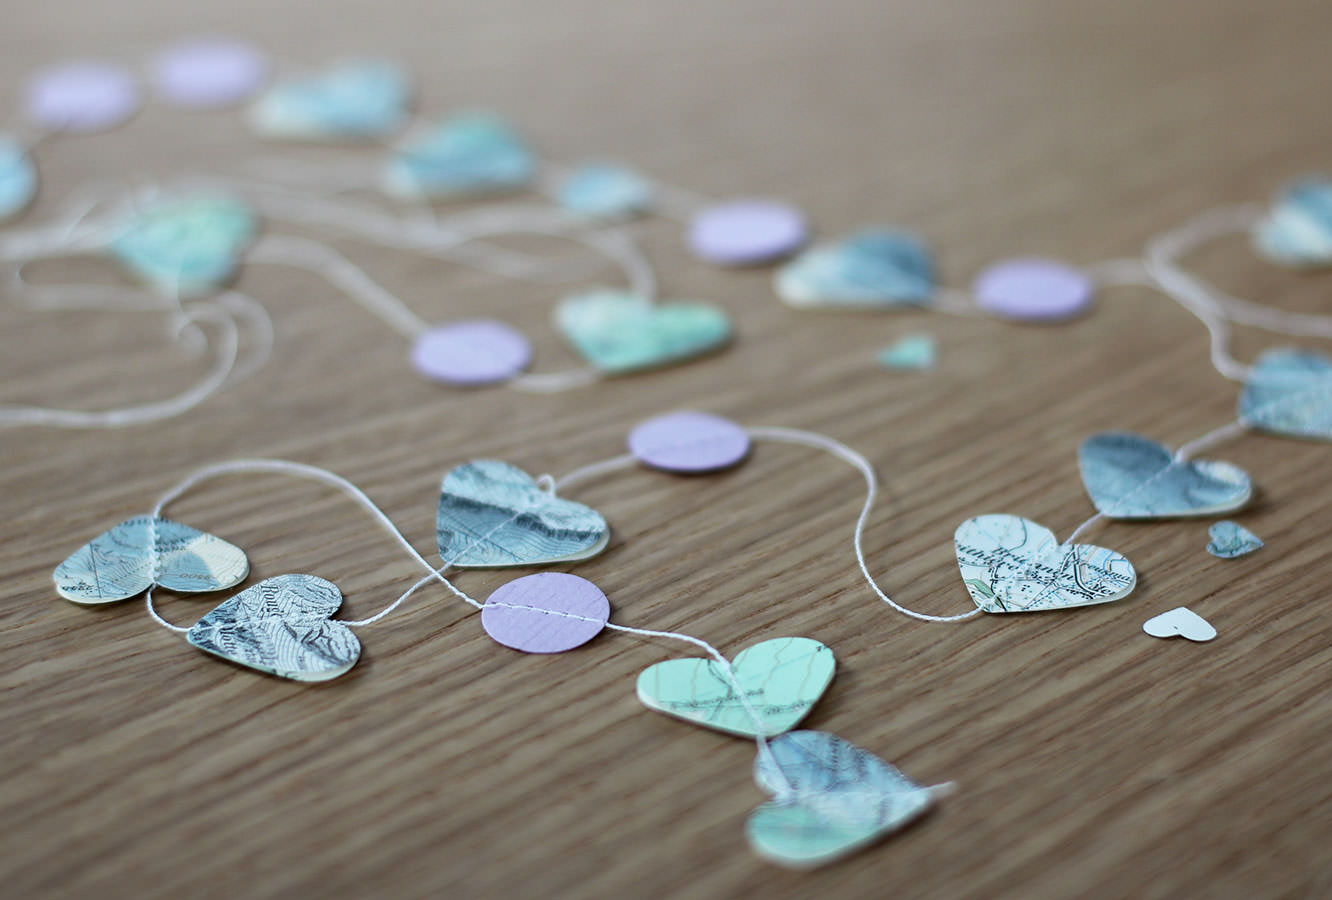
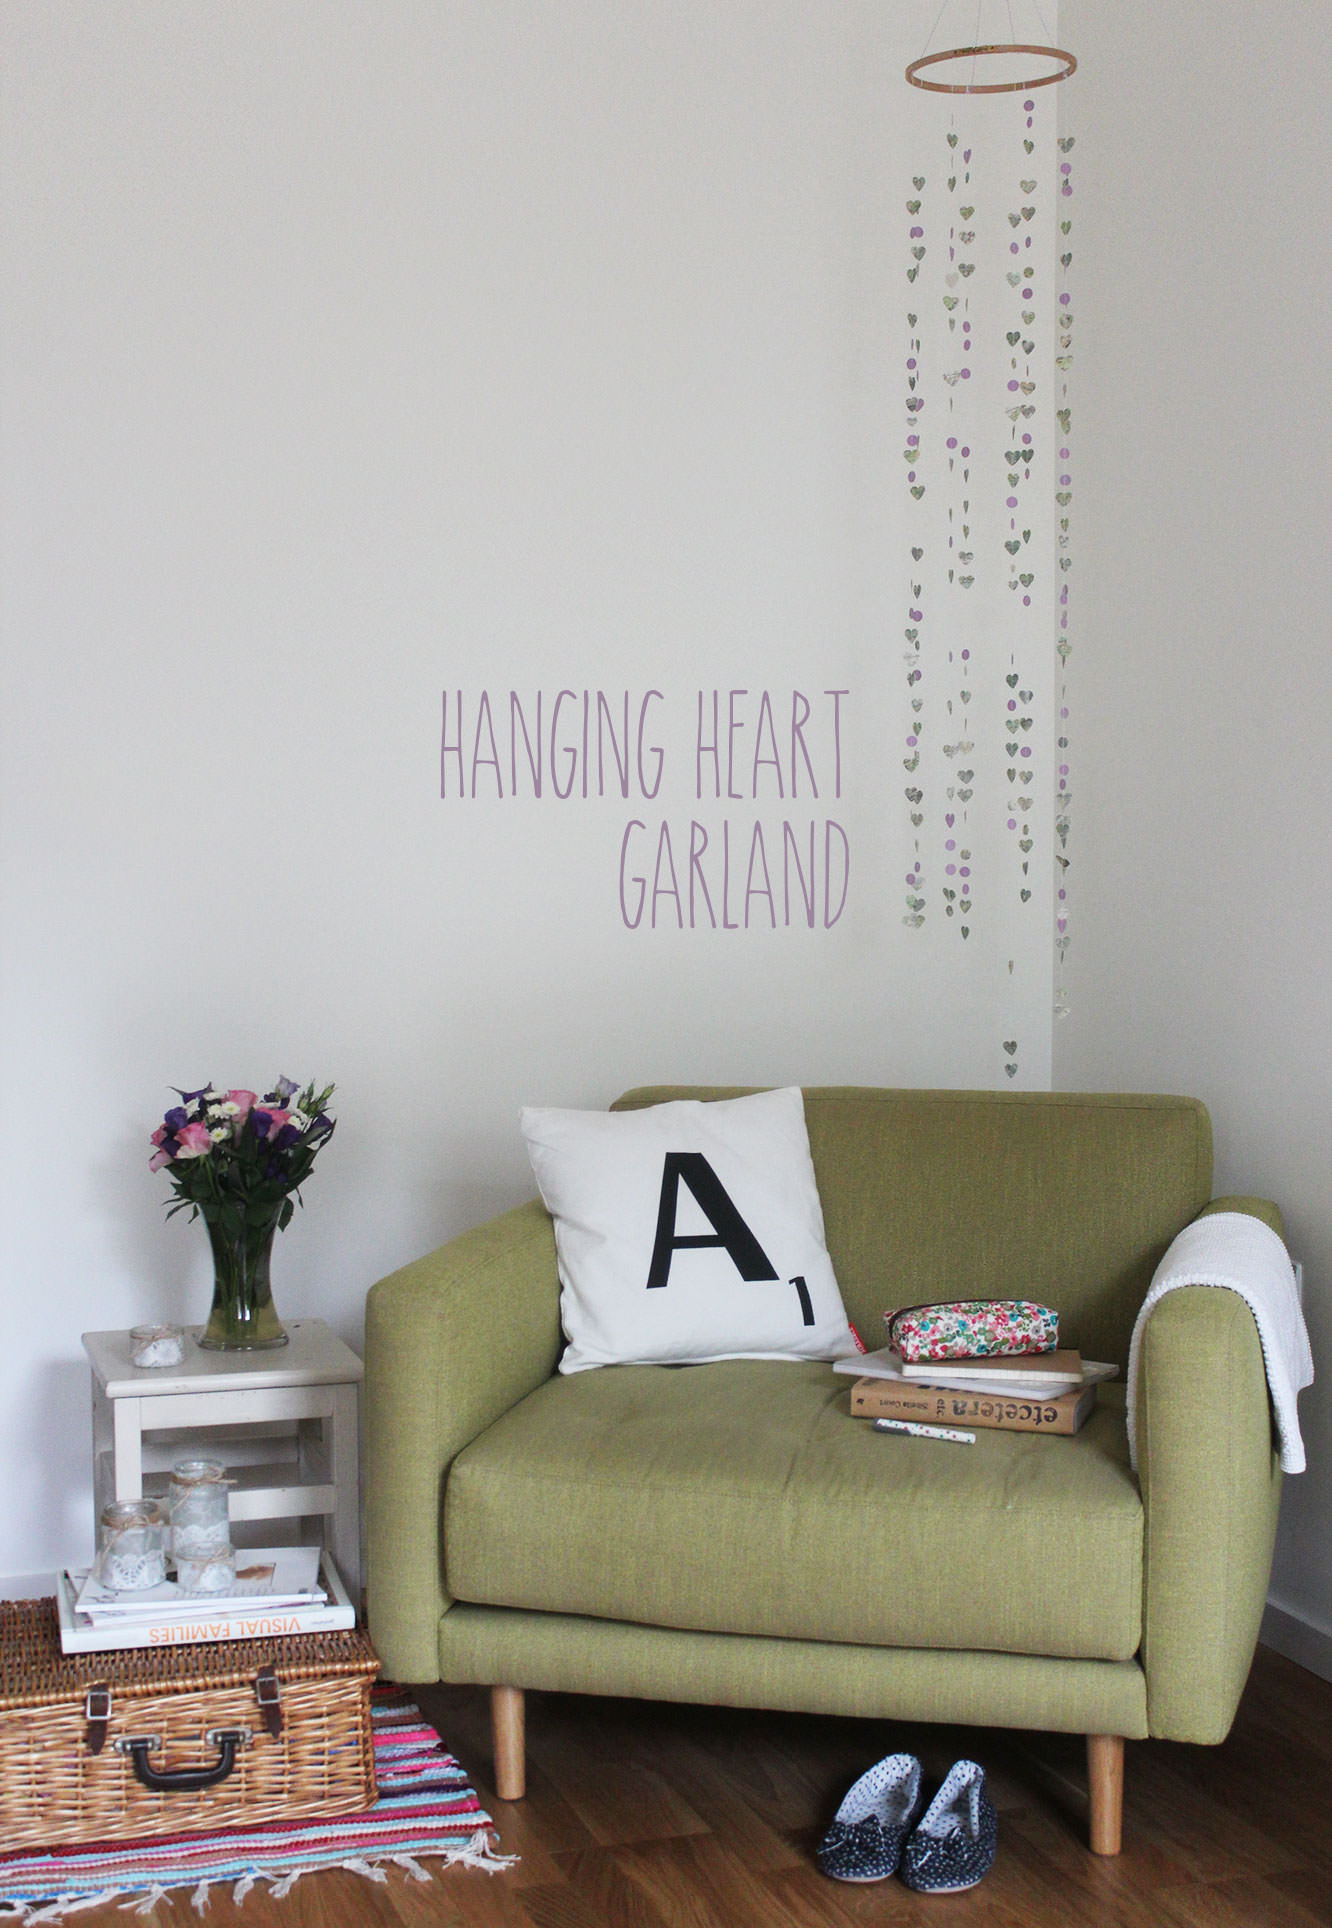
Just when you (and I) thought I was going to stop going on about my wedding filled life, one of my best friends decided to get married in December. Of course being a little bit obsessed with her and with craft, I set about thinking up some decoration ideas.
The bride in question hasn’t got a huge budget, so whether you’re due down the aisle yourself, know someone who is, or just fancy brightening up a corner of your living room you won’t be too out of pocket with this one.
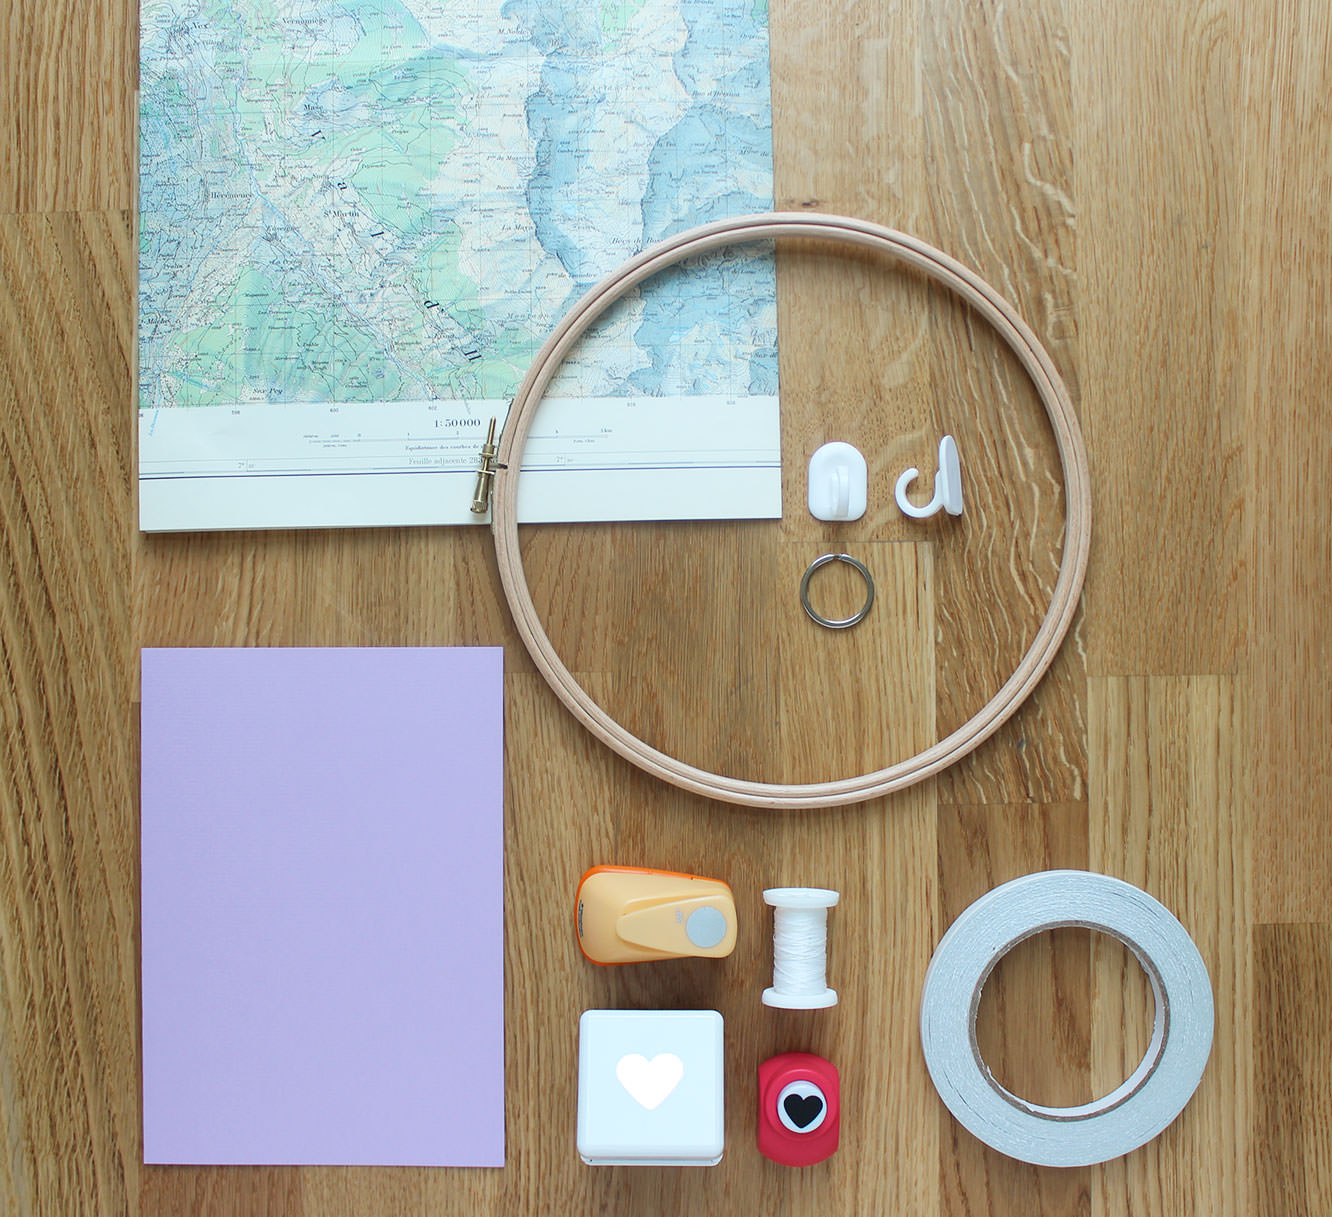
You will need
An embroidery hoop (mine was 9″ from John Lewis for about £2, they are probably even cheaper elsewhere)
Cotton thread
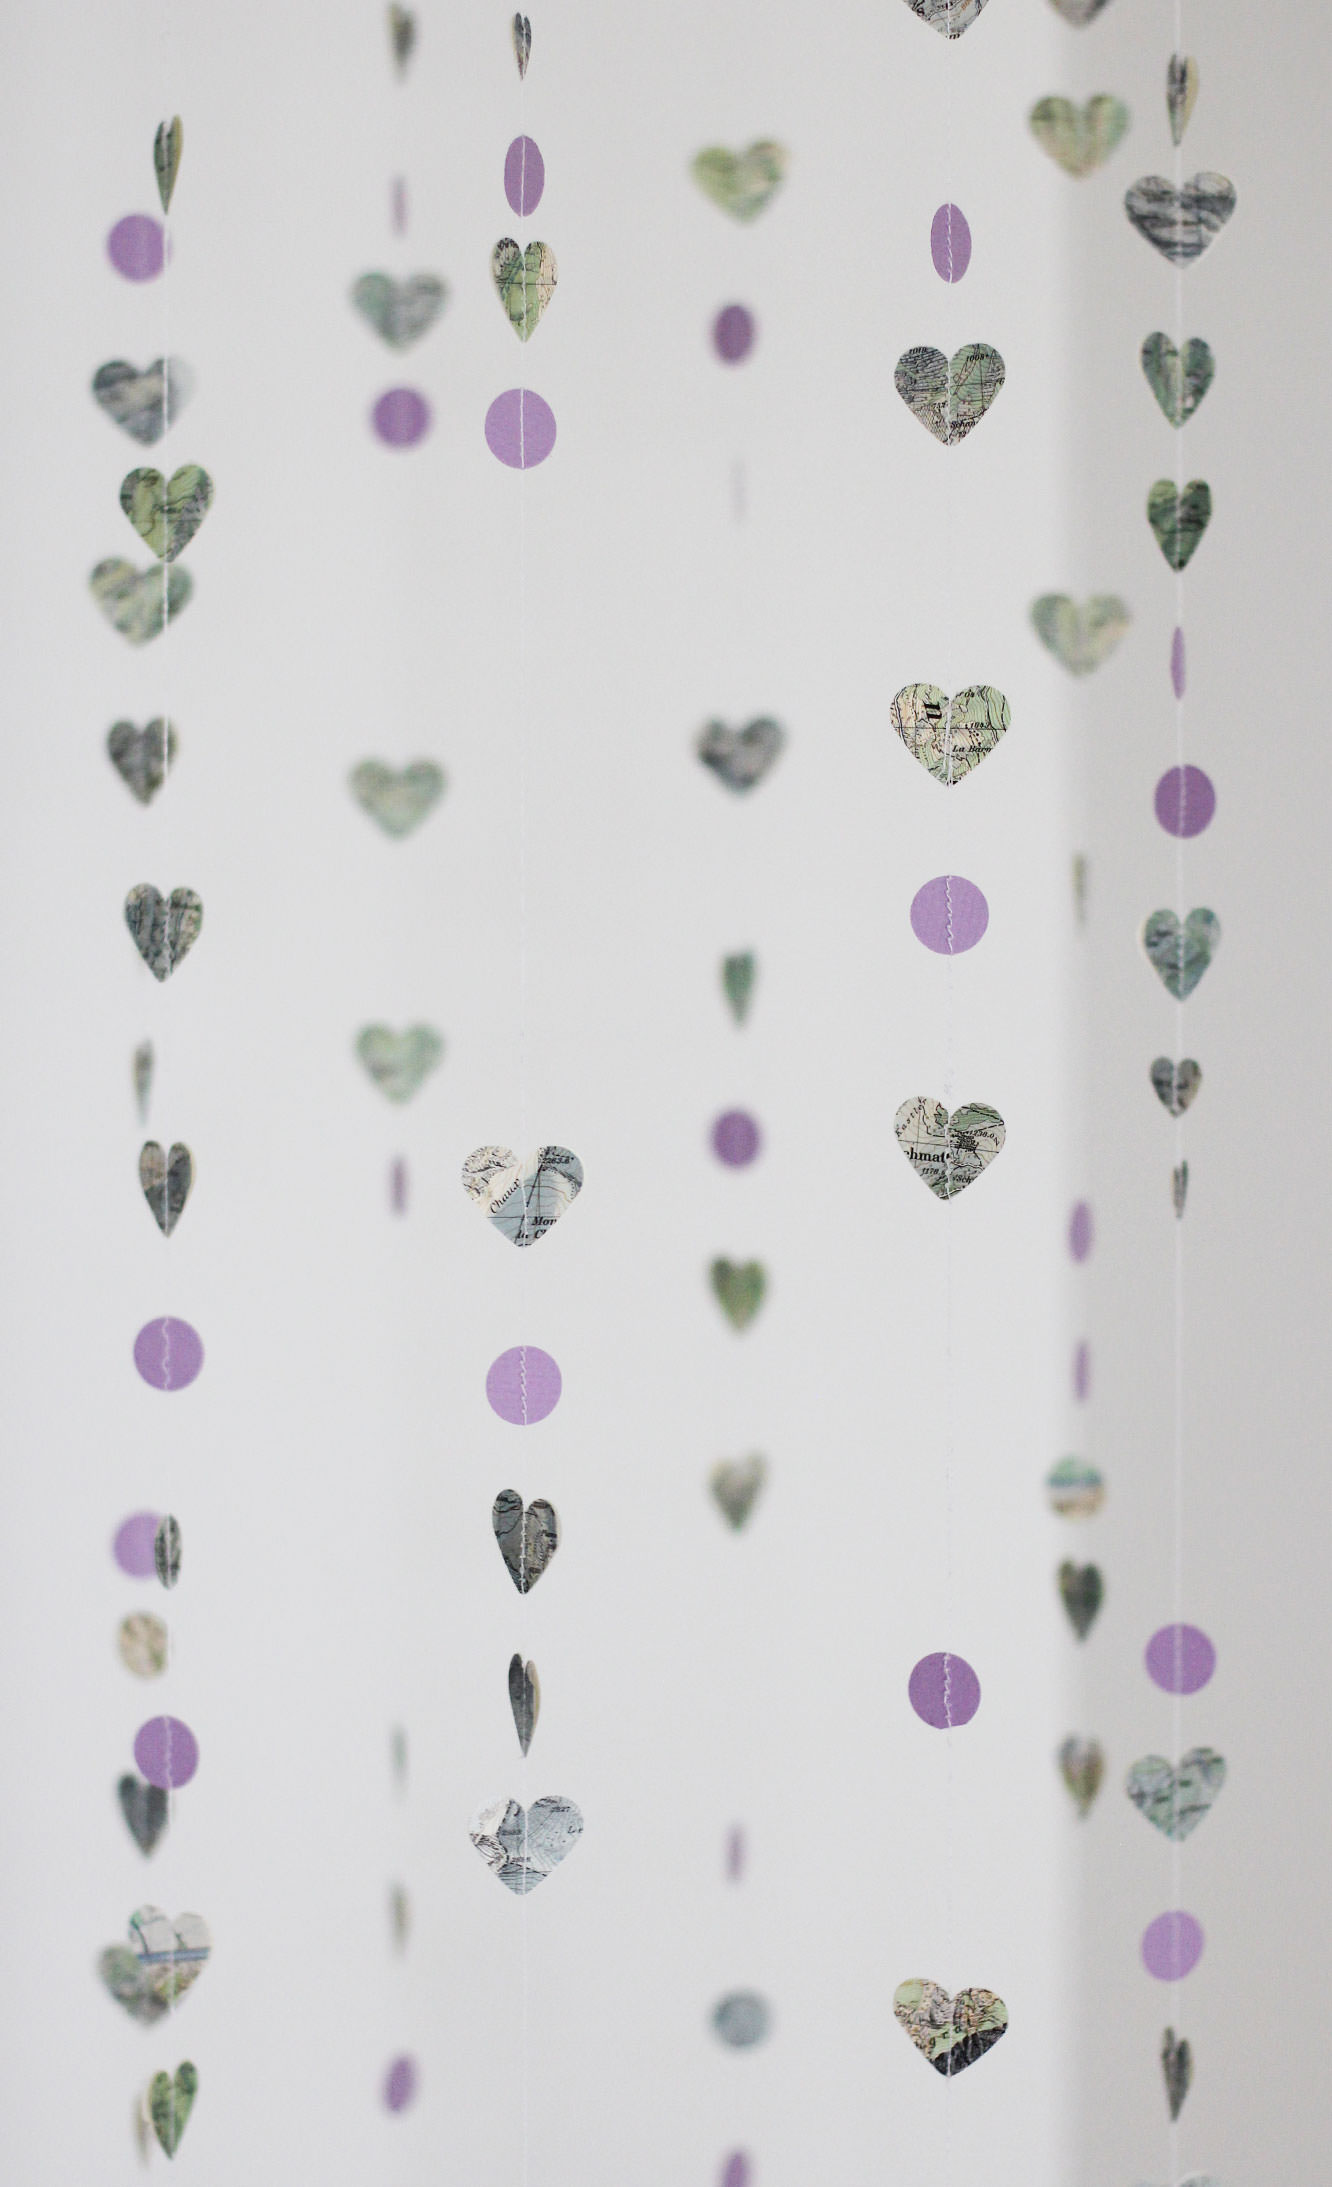
Card/paper of your chosen pattern and colour (I was very fortunate to have an old map that had lots of dark blues and sage greens matching the colour scheme perfectly)
Double sided tape (not totally essential)
Craft punches of whatever shape and size you like the most
A ring from an old keyring
A sticky hook (I bought these from Wilkinsons; make sure you choose one with a very round hook as you are sticking it to the ceiling, not a wall, and you don’t want your decorations to slip off and come crashing down)
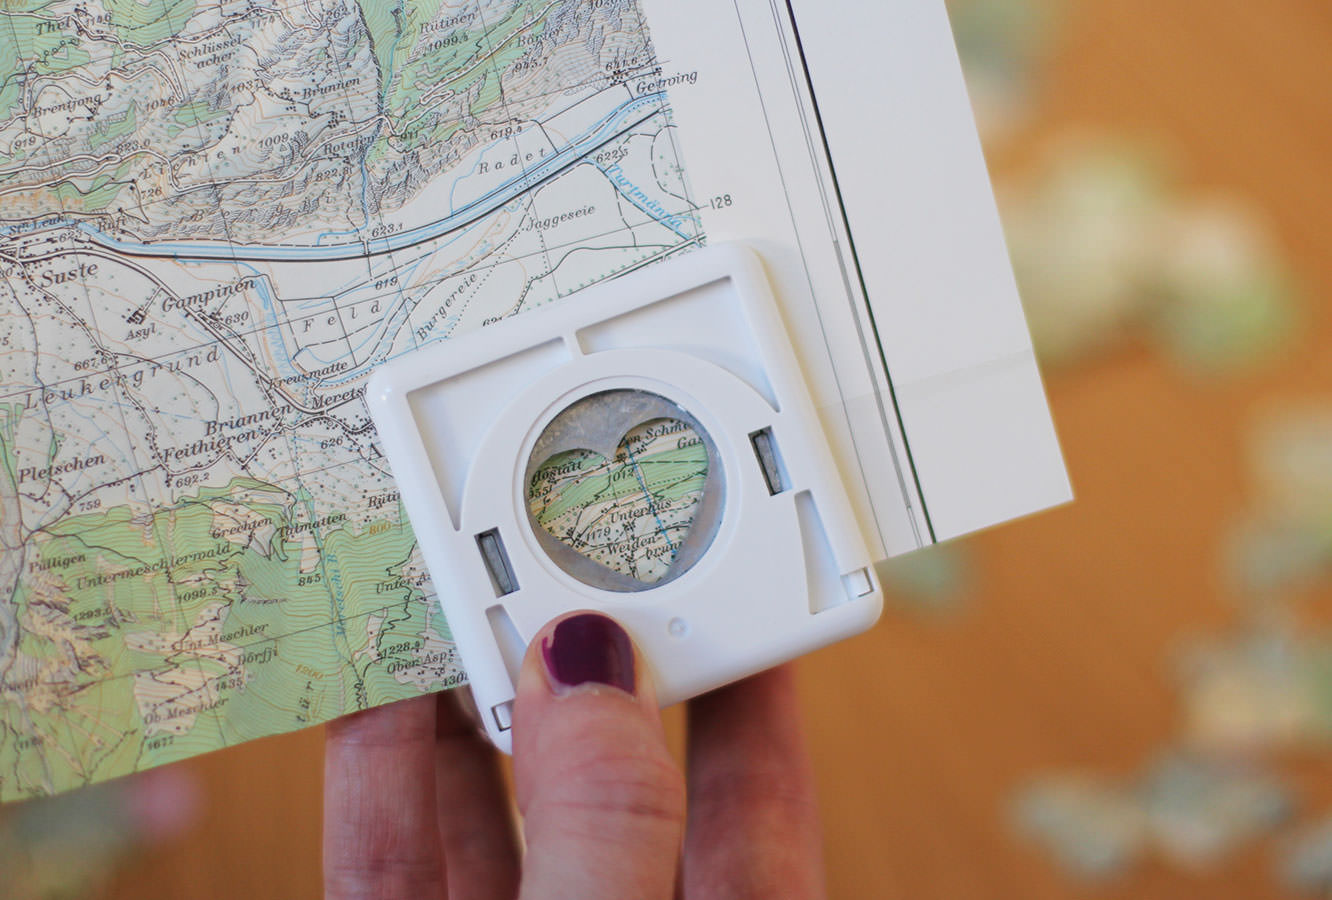
Step one
Use the craft punch(es) to cut out loads of your chosen shapes. Meg wanted hearts for her wedding but this could easily work with stars or leaves or something too. I also used some circles and smaller hearts to vary the design slightly. I got a bit cross with the small heart punch though so they are few and far between…
I used the punch upside-down to make sure my shapes were whole and that I wasn’t wasting any paper.
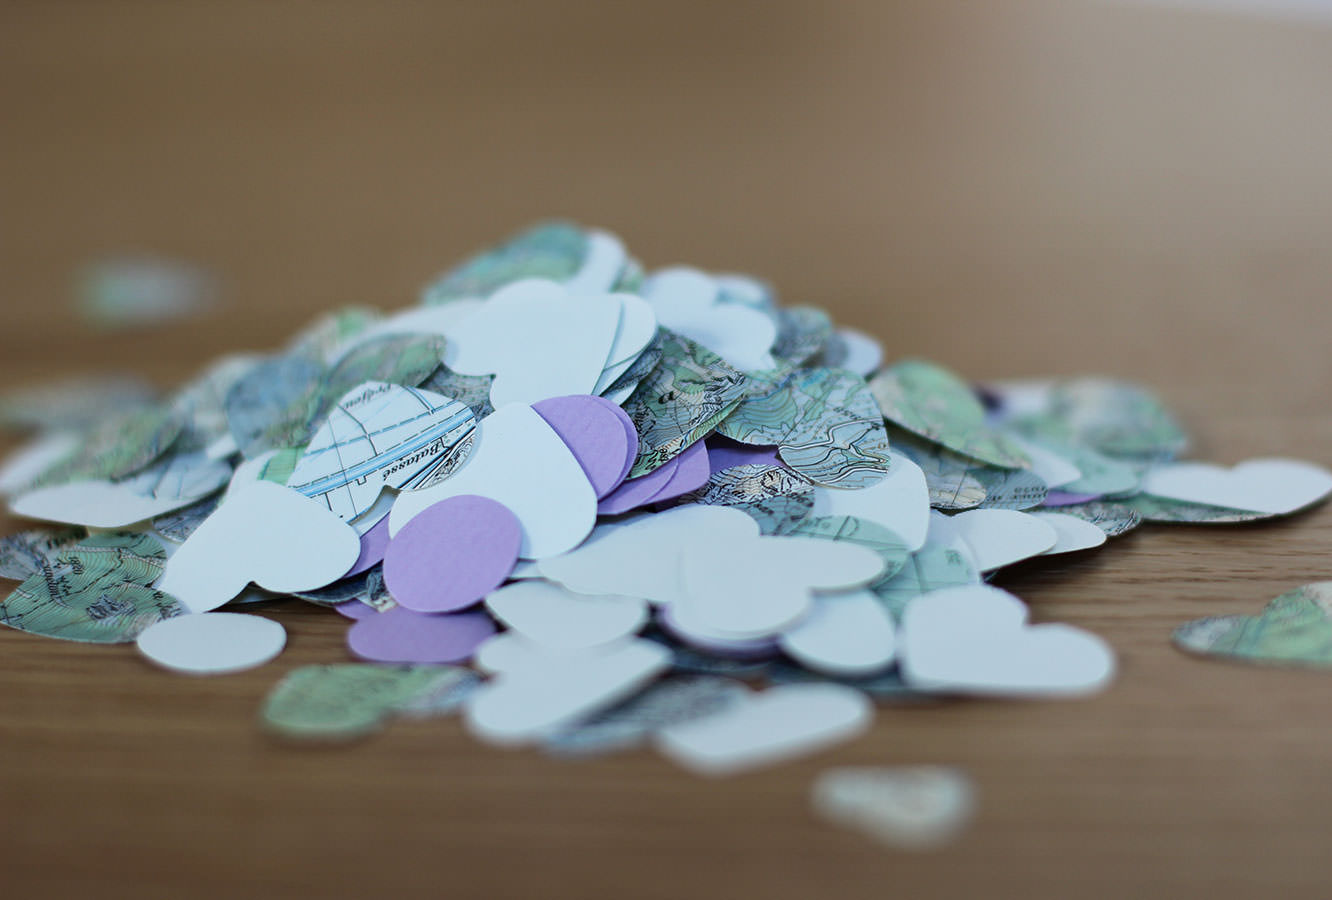
Step two
Keep cutting until you have a big old mound of them. I decided I didn’t want to have the white back of the map showing so needed to cut twice as many as I thought I would use so I could put them back to back. Of course if you’re using coloured card or double sided paper then you won’t have the same issue.
Step three
If you’ve got a sewing machine, run your shapes through it until you have a long string of hearts. I decided not to measure mine as I wanted them to all finish at slightly different lengths and for the shapes to be unevenly spaced. It will cause you a lot less stress doing it that way too!
If you don’t have a sewing machine use double sided tape or glue to stick matching shapes back to back with the thread running through the middle.
Make sure you leave a generous length of thread at the top to tie onto the hoop later.
Step four
Make several more strings like this. I think eight is the perfect number, but you might choose to experiment if your hoop is smaller/bigger than mine.
Step five
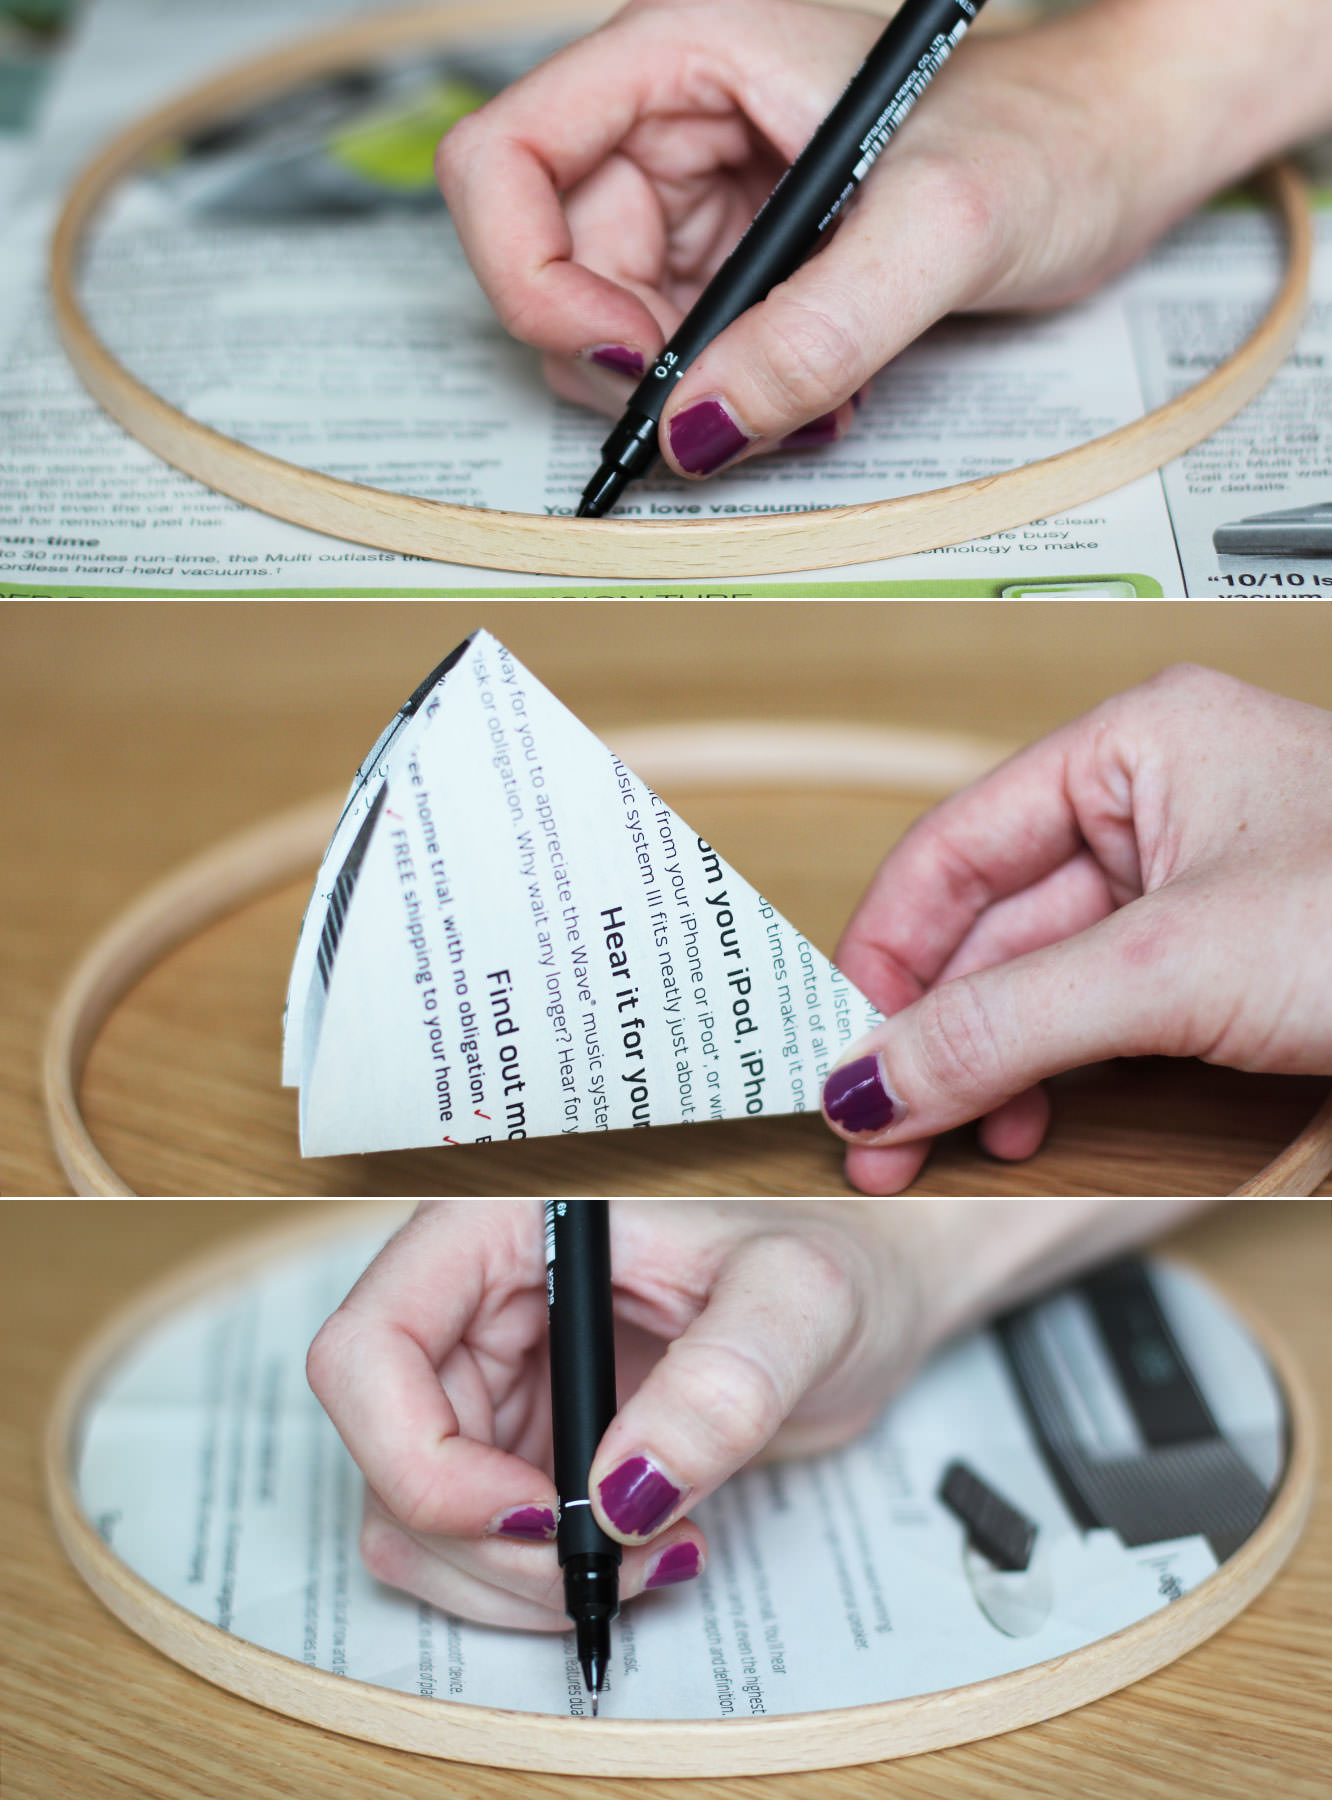
Remove the inner circle from your embroidery hoop and mark even spaces around the circumference.
I did this by tracing the circle onto newspaper and cutting it out. Then I folded the paper circle in half three times giving me an eighth sized segment. After unfolding I just used the fold marks as guides for my marking out.
Step six
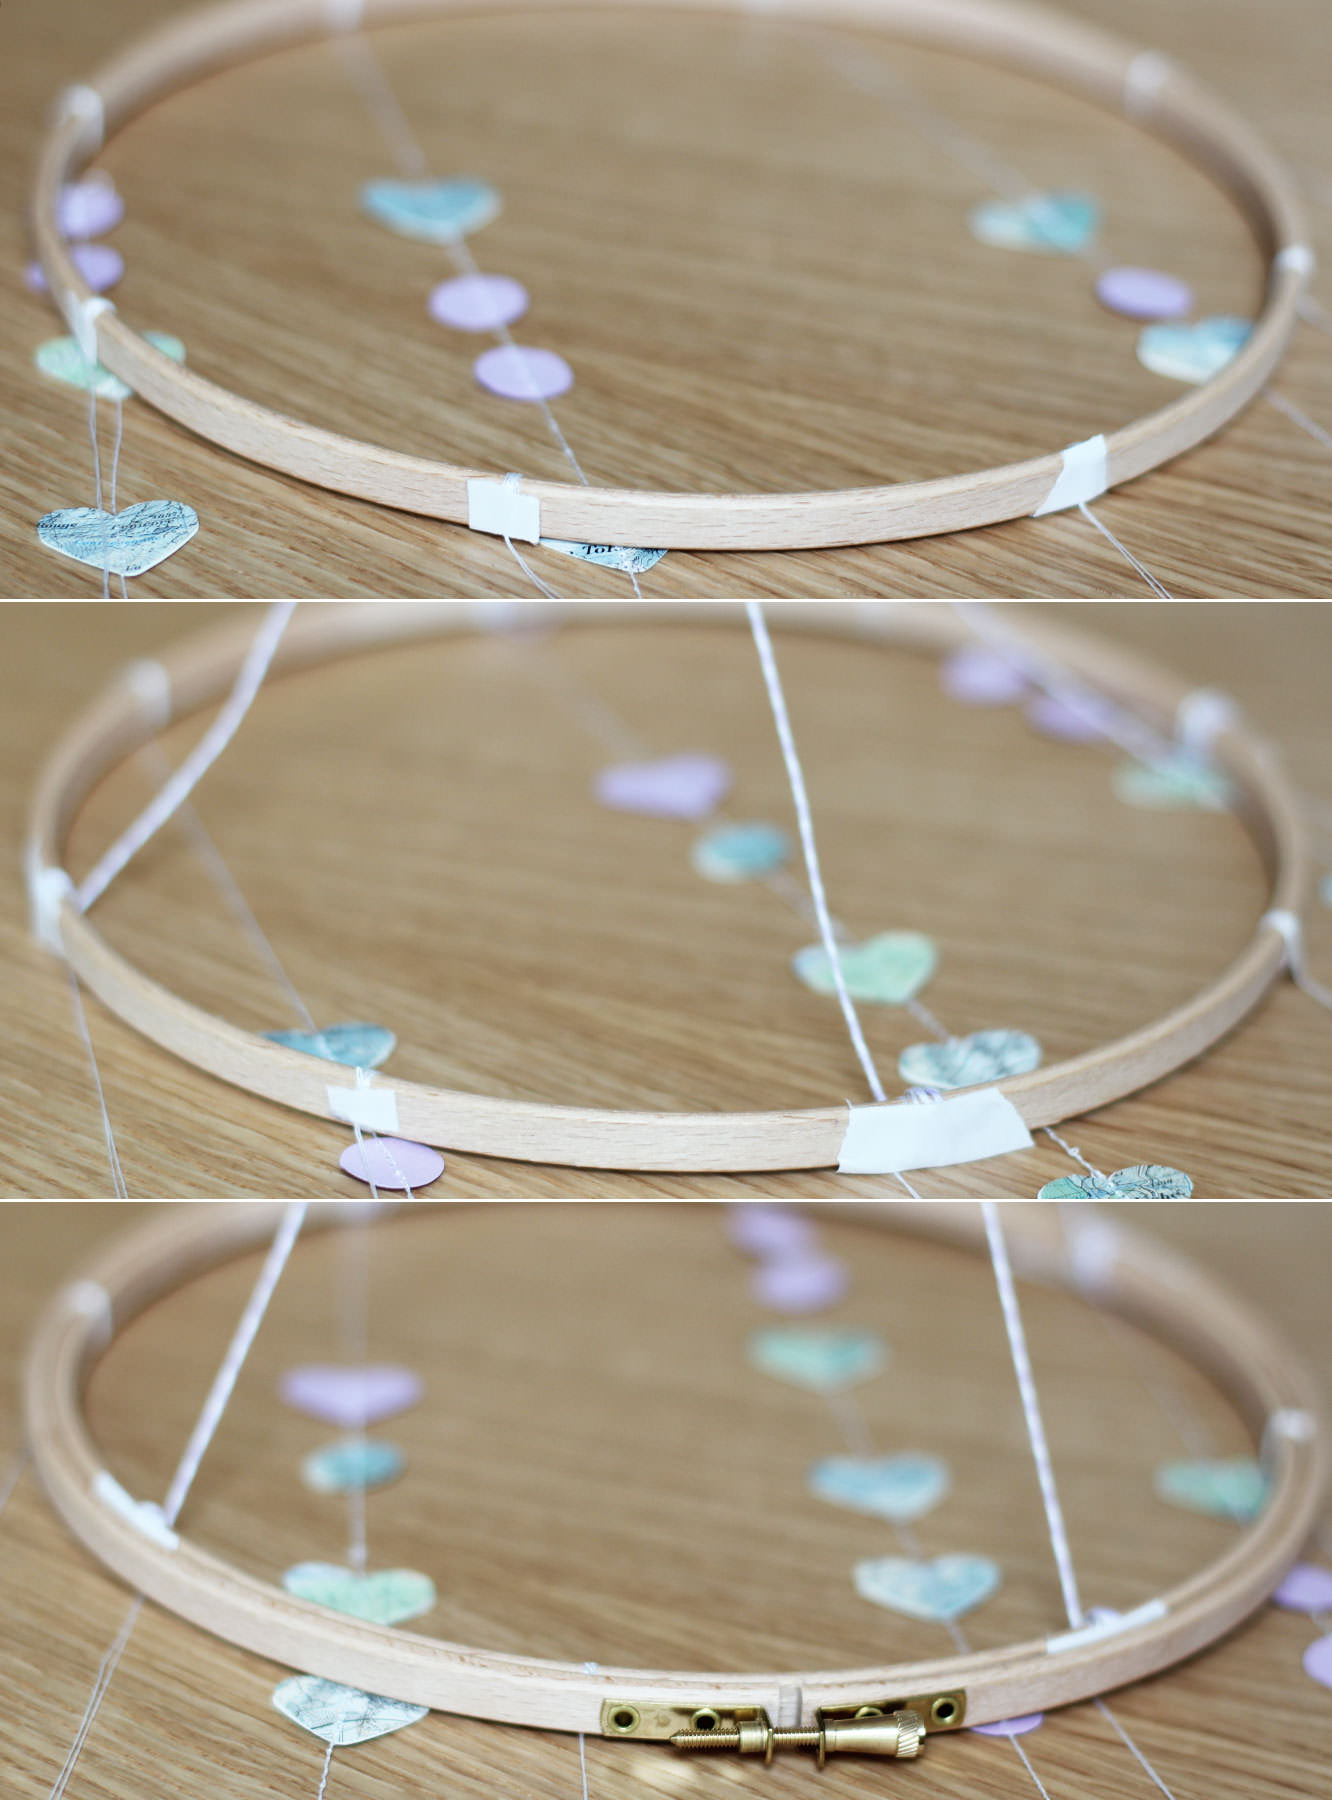
Wrap the top of each length of garland around the hoop several times at the marked points. Secure with tape on the outside of the hoop.
Step seven
Using two lengths of slightly stronger thread/string if you have it; make a cross for hanging. Attach so that there is thread at the 12, 3, 6 and 9 o’clock points of the hoop.
I also then tied a single length of thread to the place the hanging cross lengths overlapped, and attached the ring of a keyring to that. I wanted the garland to spin around gently, and this won’t happen if you use the crossed threads to hang it by.
Step seven and a half
Unscrew the larger hoop part way to loosen it, place it over the top of the inner hoop and tighten as much as possible.
Step eight
Affix the sticky hook to desired space on the ceiling and hang.
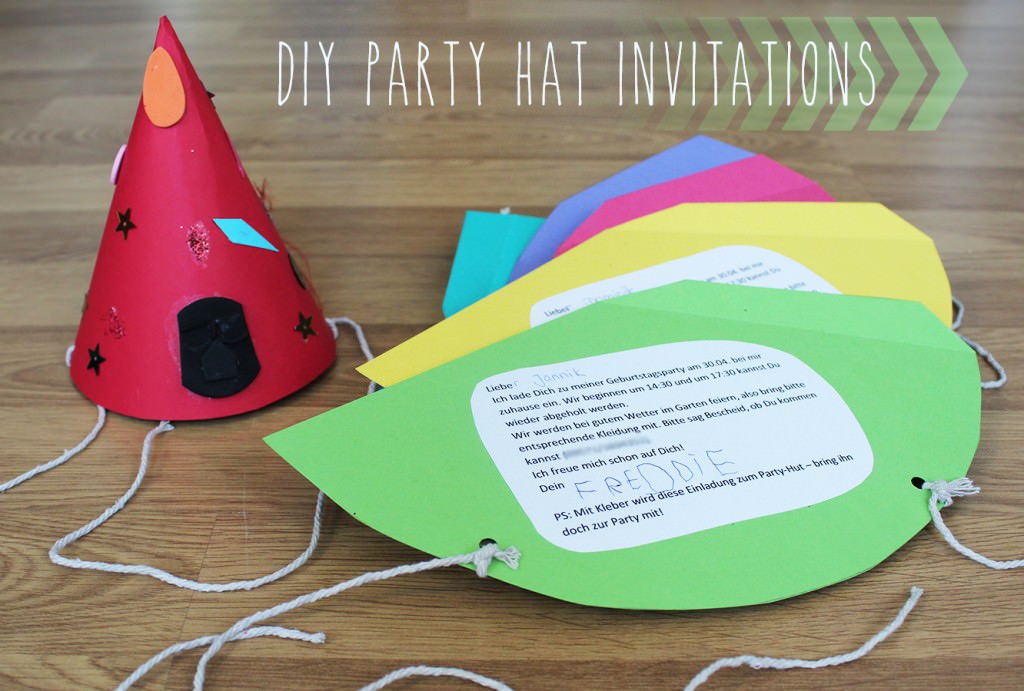
You might remember my mentioning I went on a little trip to Germany recently? I went a-visiting a wonderful little family who I miss very much. Capitalising on their crafty house guest there were some birthday preparations to be done. So aside from baking over 70 cupcakes (very popular little chap) there was the small matter of inviting other little people to come and eat them.
They were throwing a garden party with lots of traditional German party games, I really wish I’d have stuck around a bit longer to join in! So Mr Freddie and I crafted some invites that were fun and festive and will adapt to any theme or themeless party you’ve got going on.
You will need
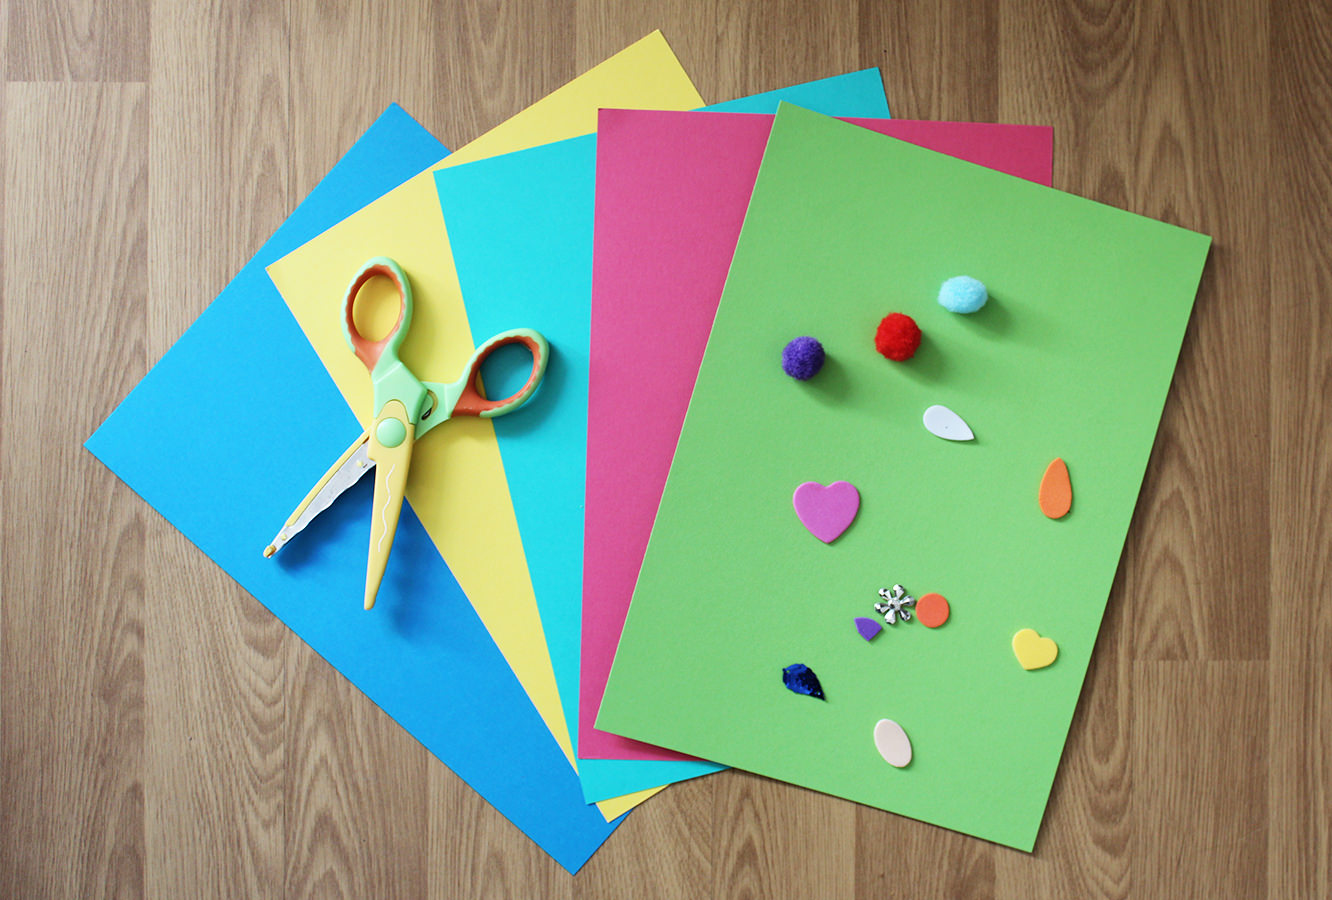
A4 Card/thick paper (one per guest and an extra for the birthday boy/girl)
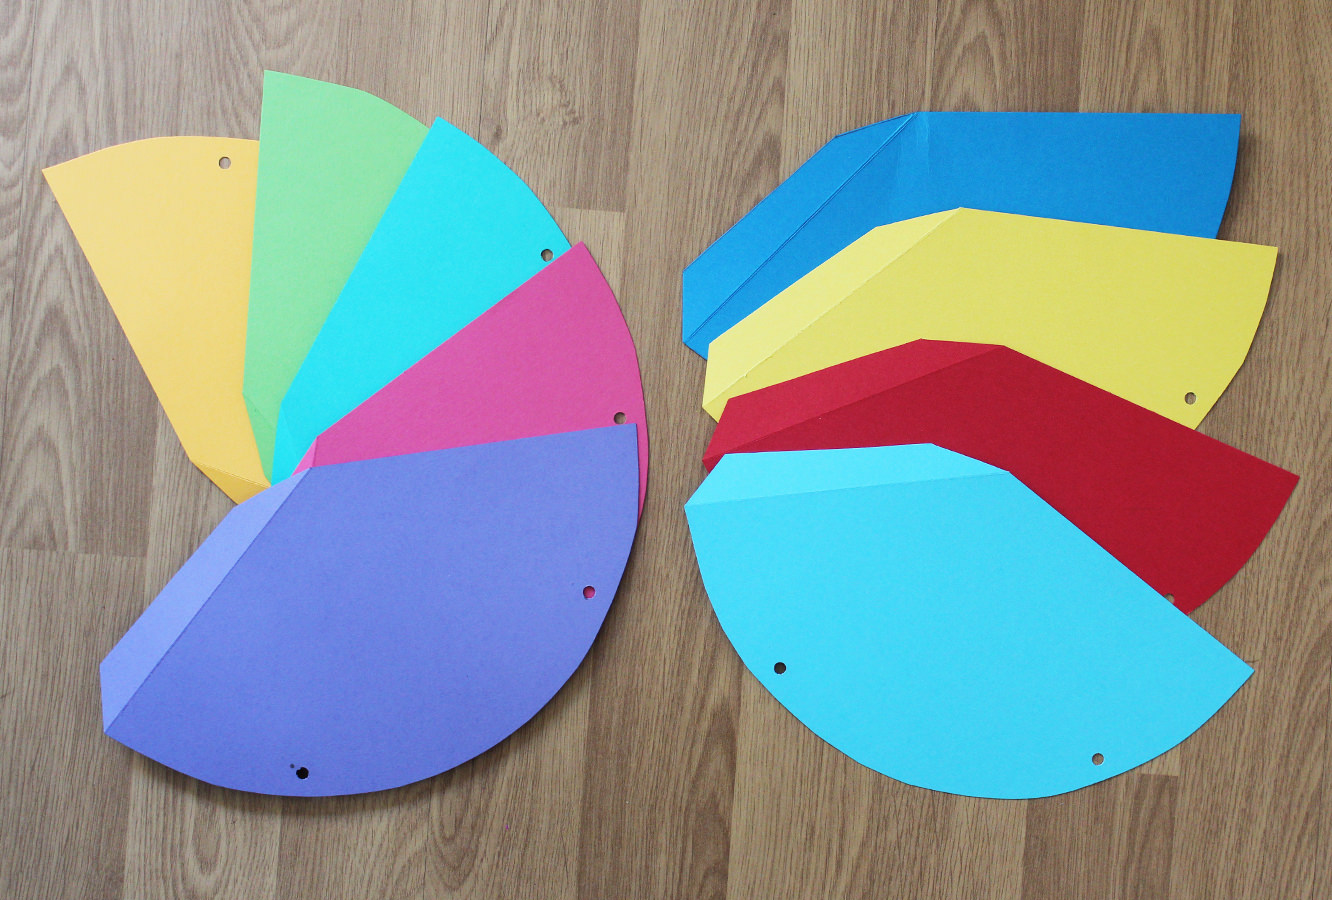
Draw round the template onto each piece of card and cut out a hat for each guest, not forgetting one for the birthday boy or girl.
Step two
Use a hole punch or something sharp poke holes in each hat (as marked on the template).
Step three
Using an open pair of scissors and a ruler score along the dotted line to create a flap.
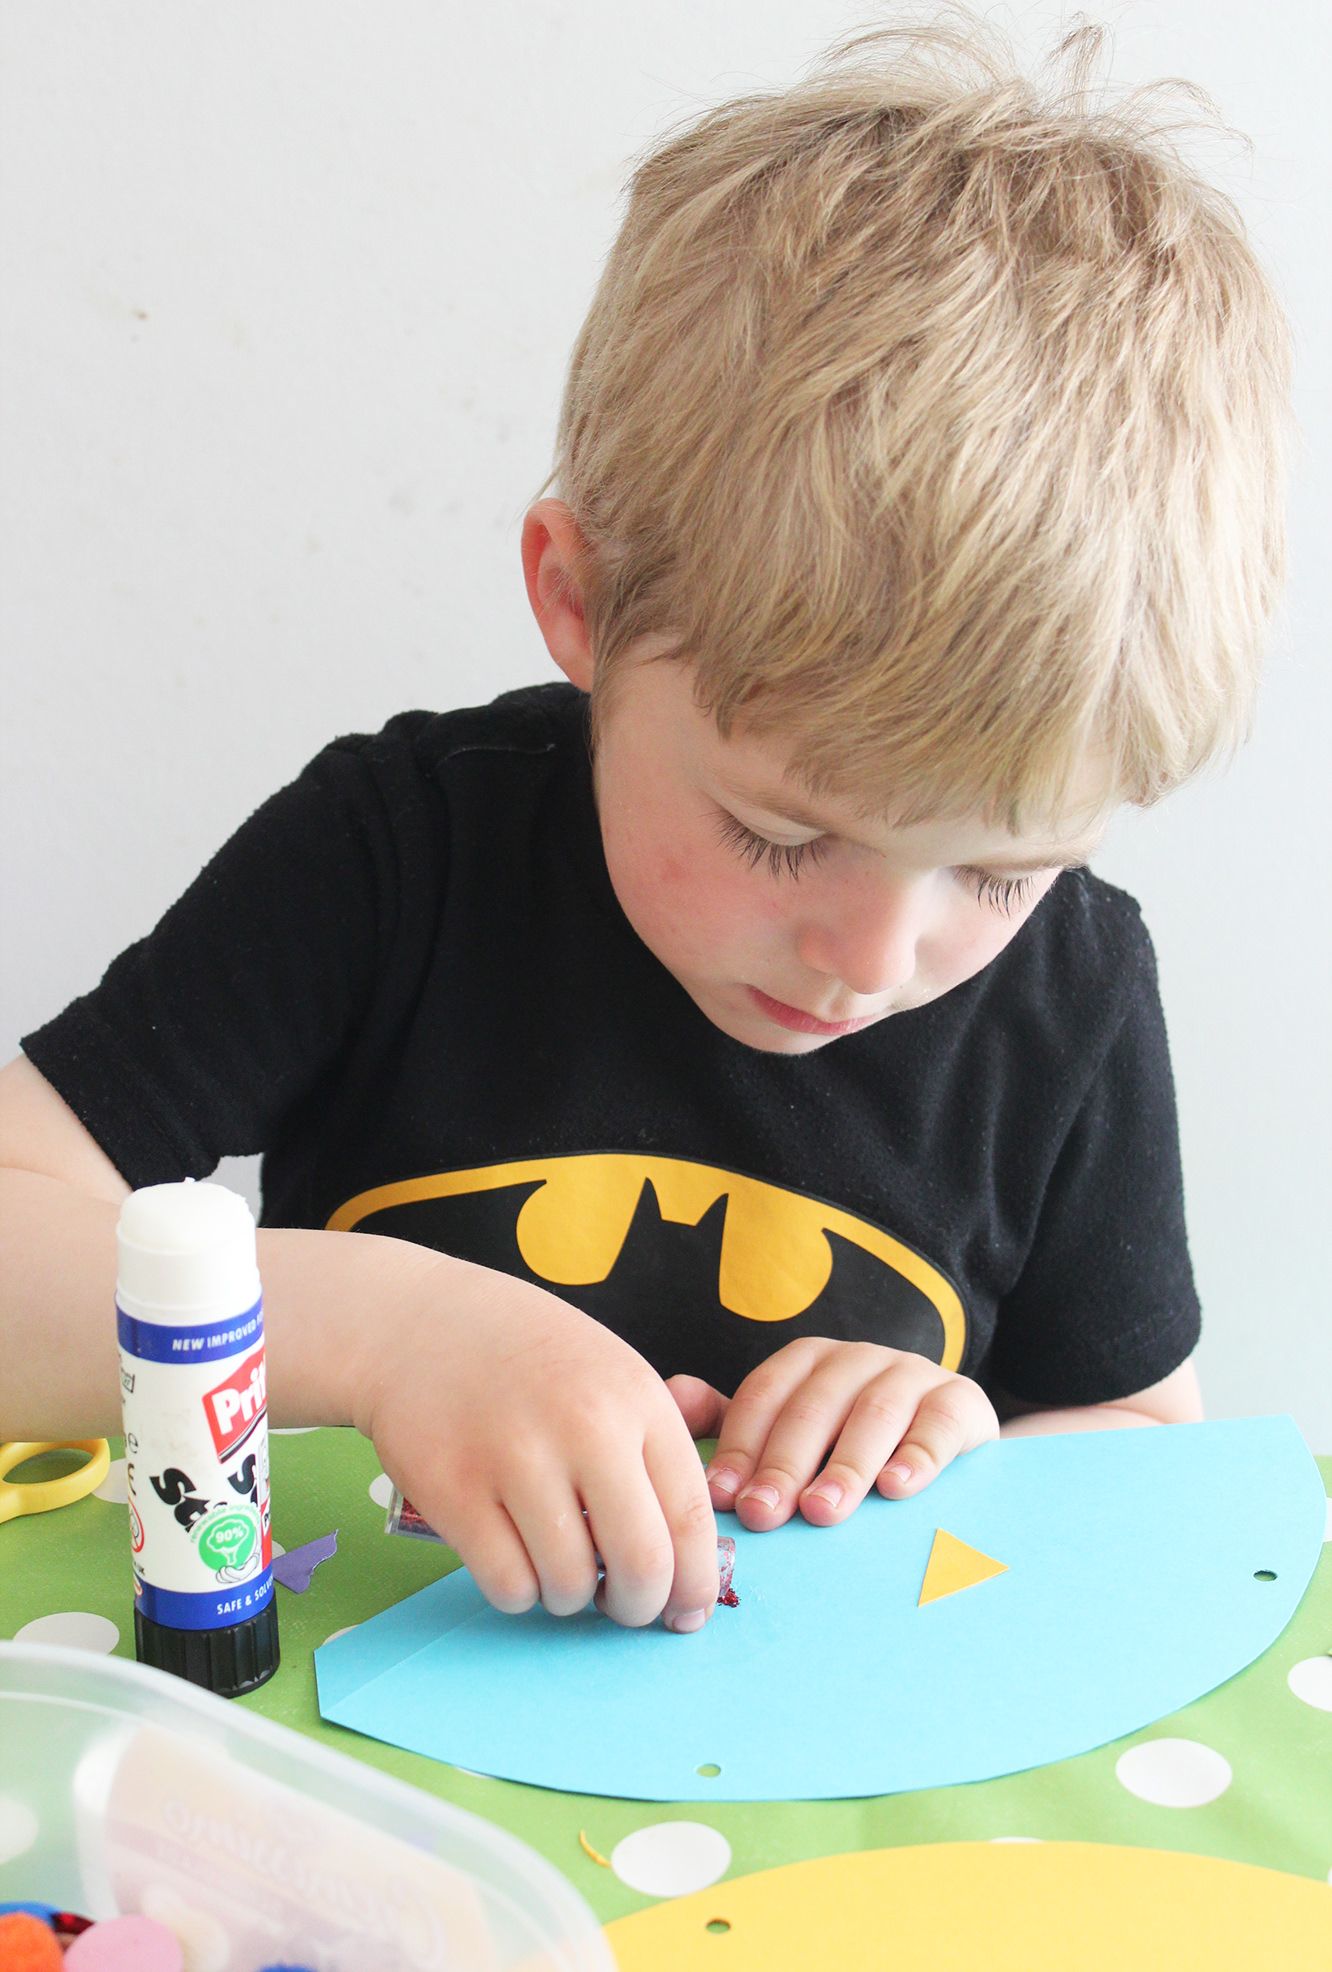
Step four
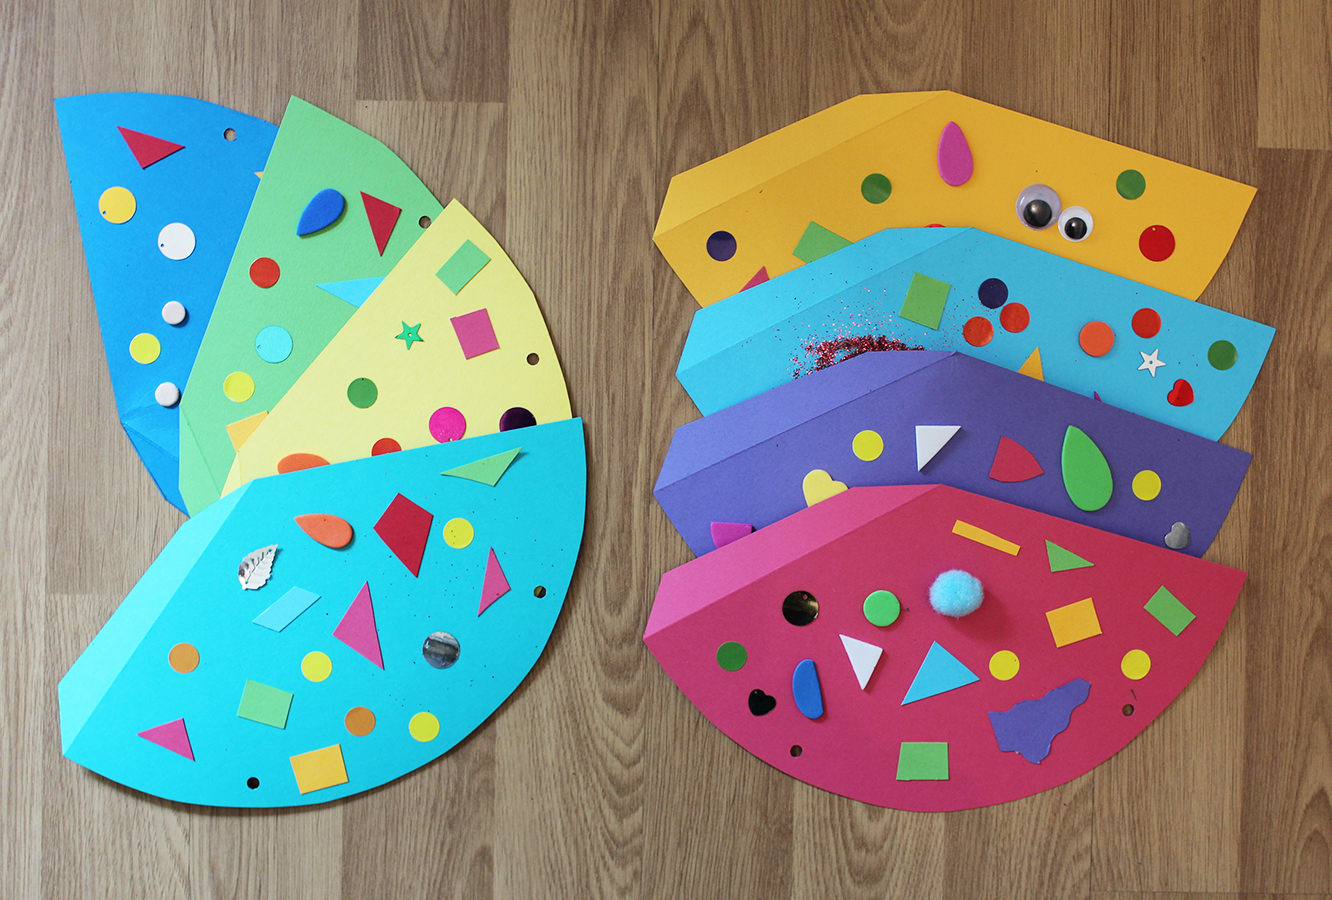
Decorate! Use your (or your child’s) imagination, Freds and I used foam shapes, stickers and glitter that mummy already had in stock. We also cut some shapes out from the left over card so as not to waste anything.
You can use whatever you can get your hands on, cut outs from old magazines/buttons/feathers/draw pictures or each child’s name. Your only limit is the attention span of the child in question!
(don’t decorate the flap)
Step five
Cut two lengths of string for each hat. Use the child you already have in stock to get an idea of length, you need to be able to tie a bow under their chins. Doing it this way rather than one loop means they are adjustable for each guest.
Step six
Add the party details on the other side and voila! Your hats are ready to give out. Each guest is in charge of assembling their hat and bringing it with them to the party (worth having one or two spare just in case!)
To stick together just glue the flap (with the hat right side up) and stick underneath the opposite edge.
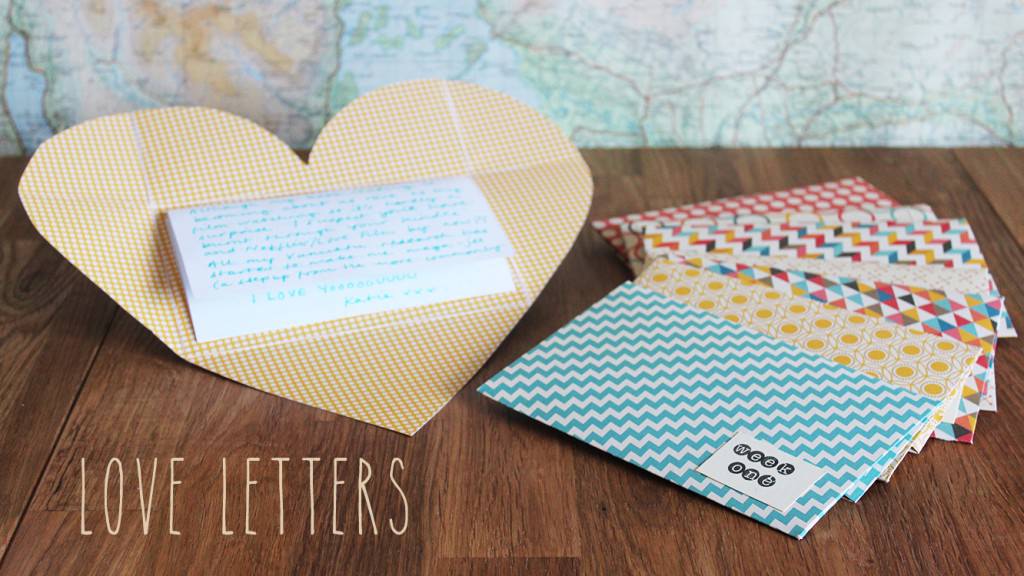
Yo. Another Monday, another blog from me. It’s sort of a cheat really, as it’s a spin off from this present I made for my friend Beth a few months ago. I made one for each week she was away travelling, I hope she’s having as much fun reading them as I had writing them. I MISS her.
I’ve been reflecting a whole lot lately on what wonderful friends I have. Beth is truly one of life’s diamonds (I promise I’m not usually this cheesy).
So if you have a special someone in your life, take a moment to make them a little love letter and let them know how much they are valued.
You will need
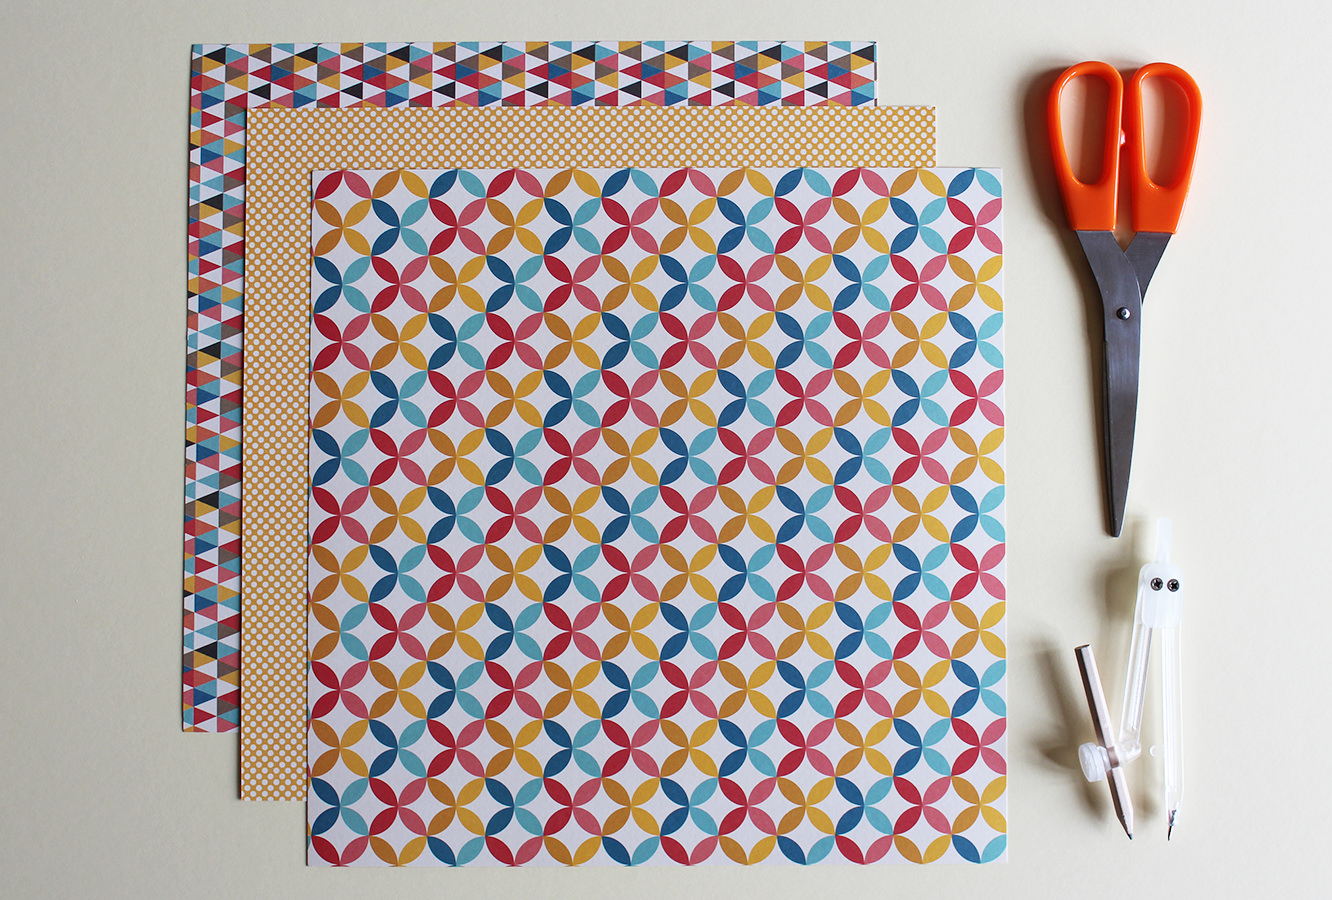
Large pieces of pretty card/paper (mine are scrapbook sheets 12″x 12″)
Something round/set of compasses
Scissors
The outpourings of your heart
Step one
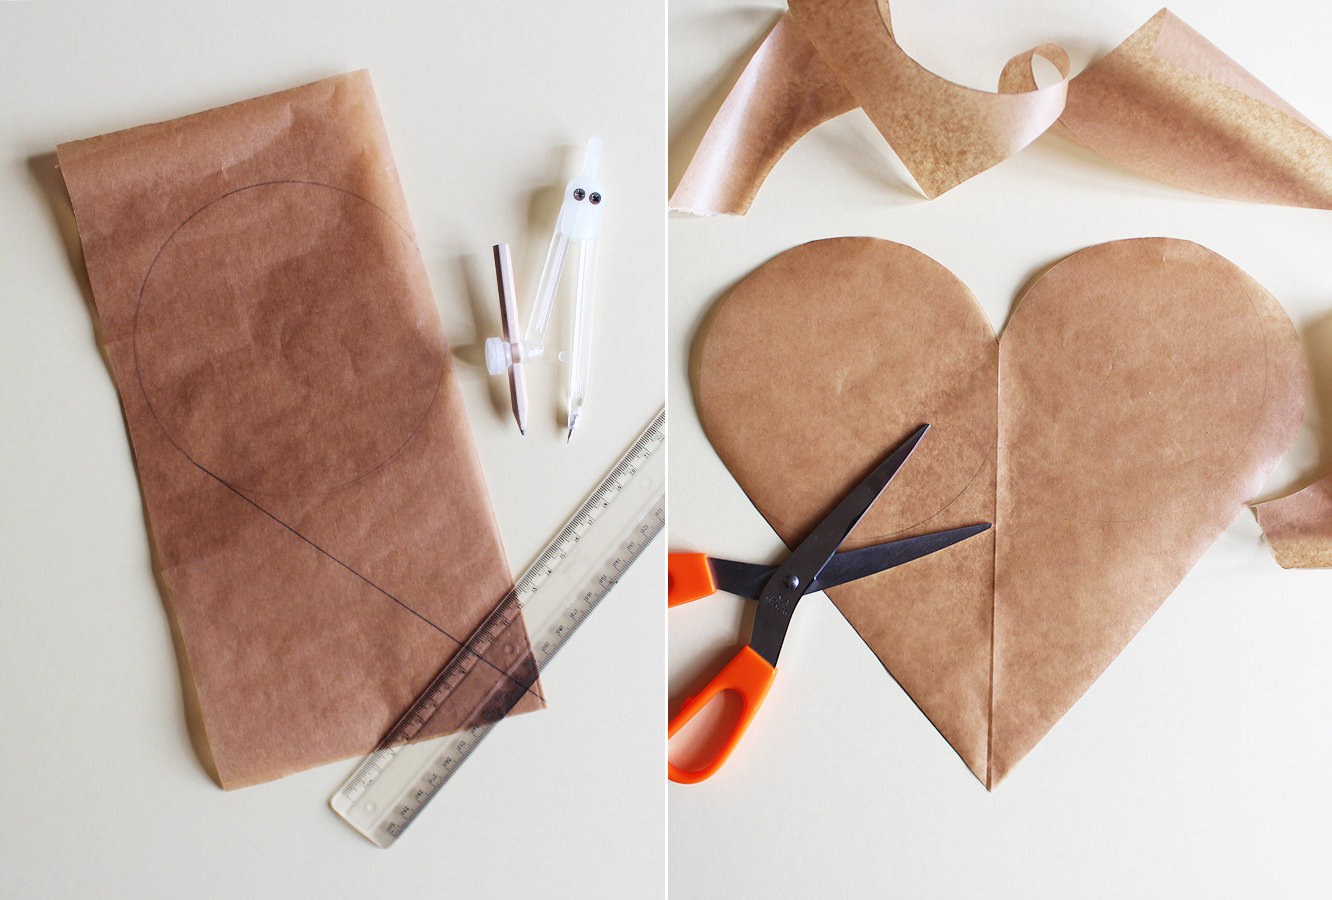
Using a piece of plain paper/newspaper/greaseproof the same size as your proper paper, make a heart template.
I did this by folding the template paper in half and drawing a circle to almost full width. Then use a ruler and draw a line from the edge of the circle towards the fold to make a point.
Cut out and unfold. Voila.
Step two
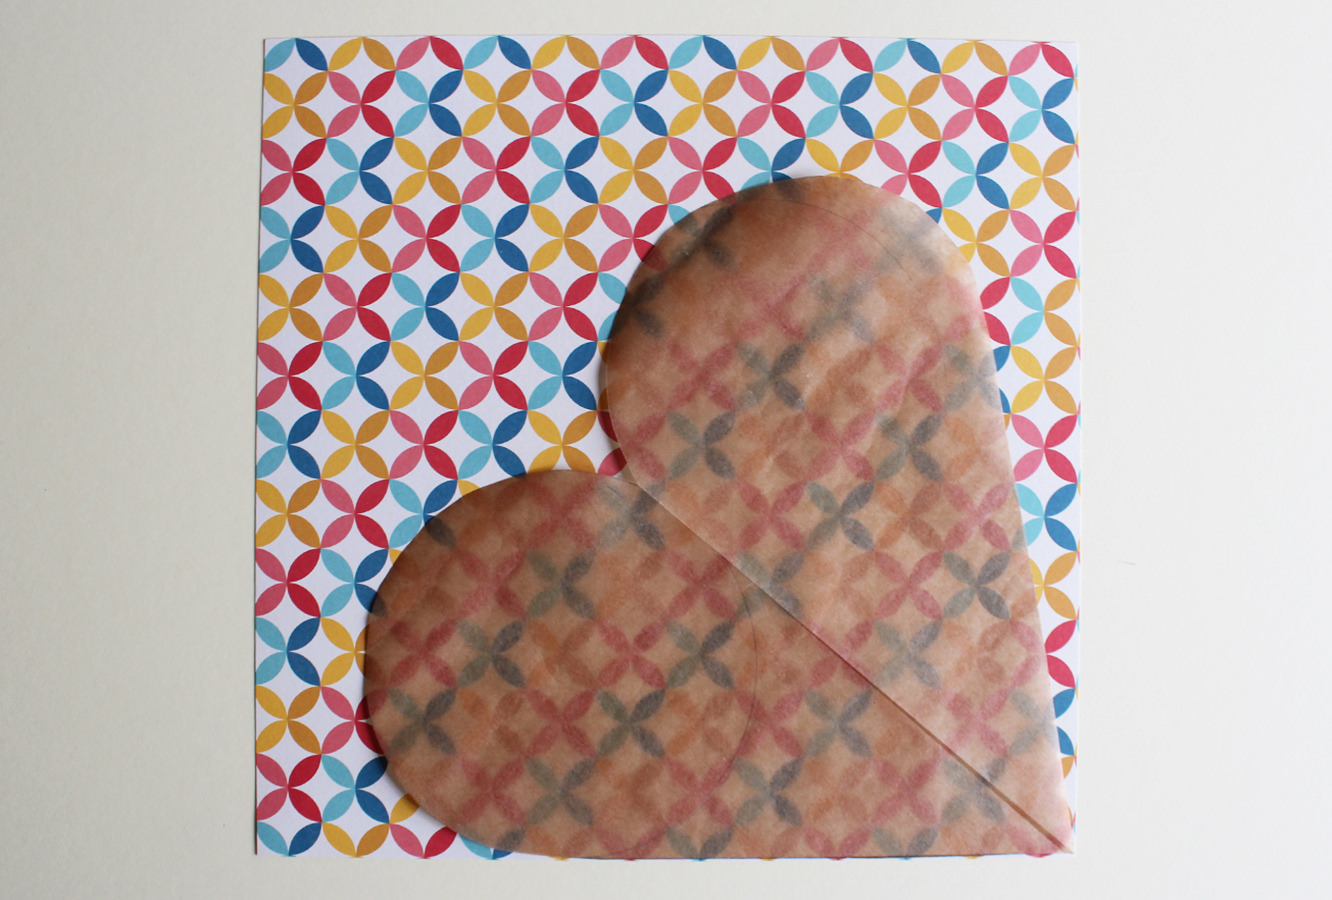
Draw round the template on your nice paper/card. Don’t be a peasant – use pencil.
Step three
Cut out as many as you need. I appreciate for you guys this might just be one, not everyone fancies their friends as much as I do.
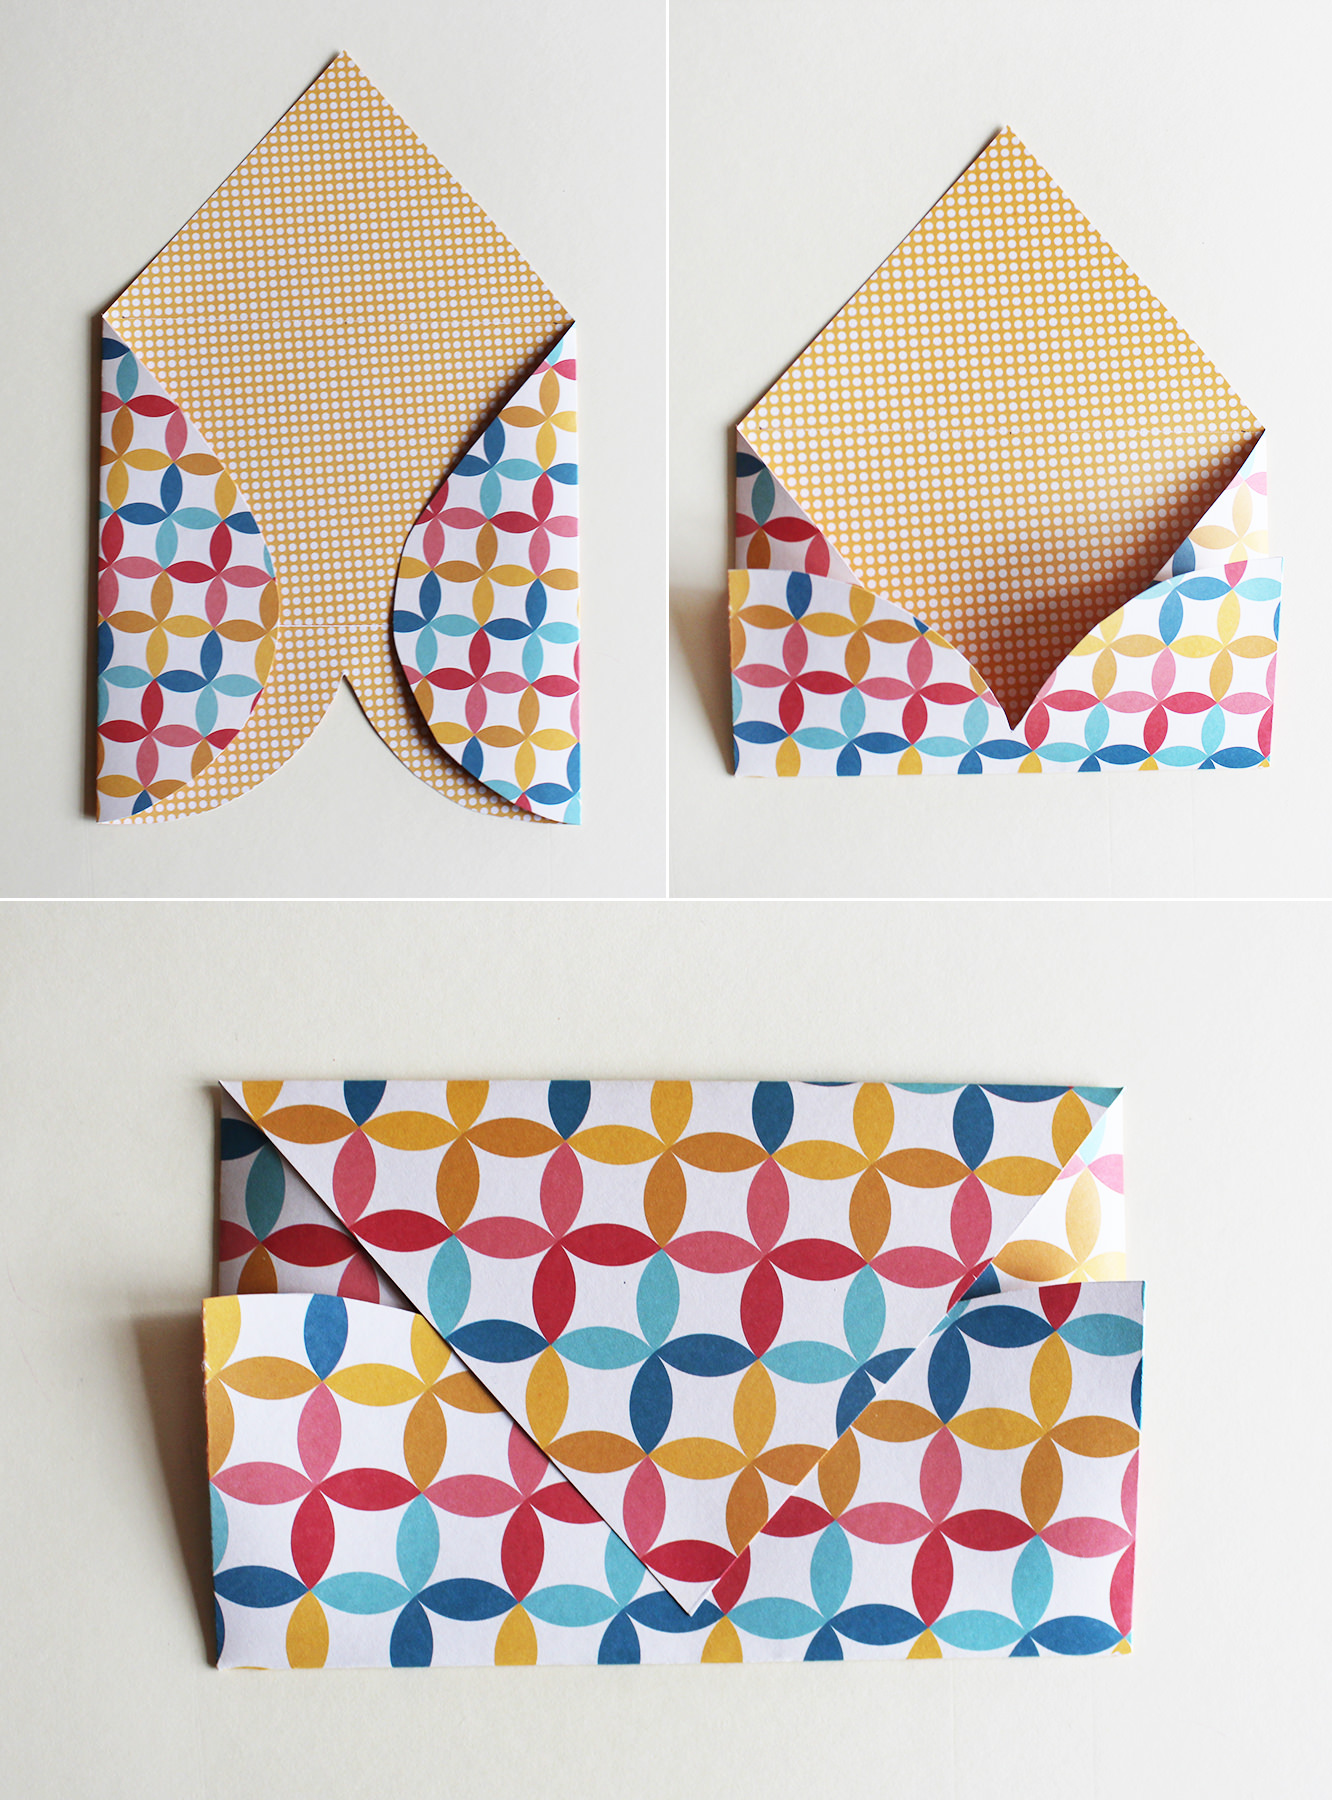
Step four
Turn the heart around so the point is facing away from you, and fold the sides in. You might want to use the scissor blades to score the lines first if you are using thicker stock.
Fold the domed bits up to make the bottom of the envelope. Finally, fold the point down to make the flap.
A disclaimer for this step is to practice on the template version first so you have the right dimensions, to make sure your envelope doesn’t have any gaps. You’ll see what I mean.
Step six
Write away.
I folded strips of A4 and stuck one section to the back of the heart so it kind of pulls out. You might prefer to write straight onto the it if your paper doesn’t have such busy patterns.
I stuck a button on each of mine to close them.
Enjoy telling people the people you love that they are great!
Well hi. Apologies for being MIA, sometimes the blog falls victim to life’s unpredictability, but I’m back, and thanks for sticking with it.
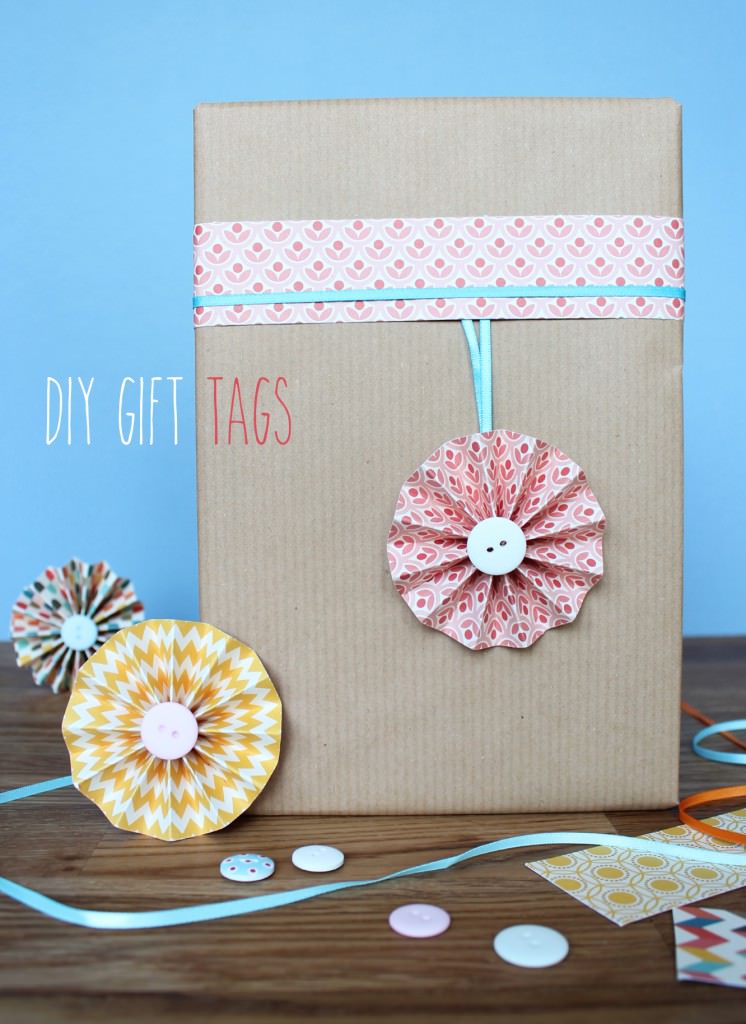
I had a birthday recently, so in honour of my stepping over the early-mid twenties boundary *weeps silently* I have devised an excellent little make to help your gifts stand out from the crowd. You can make a load of these up in one go so that you have a good stock of supplies to whip out at a moment’s notice.
You will need
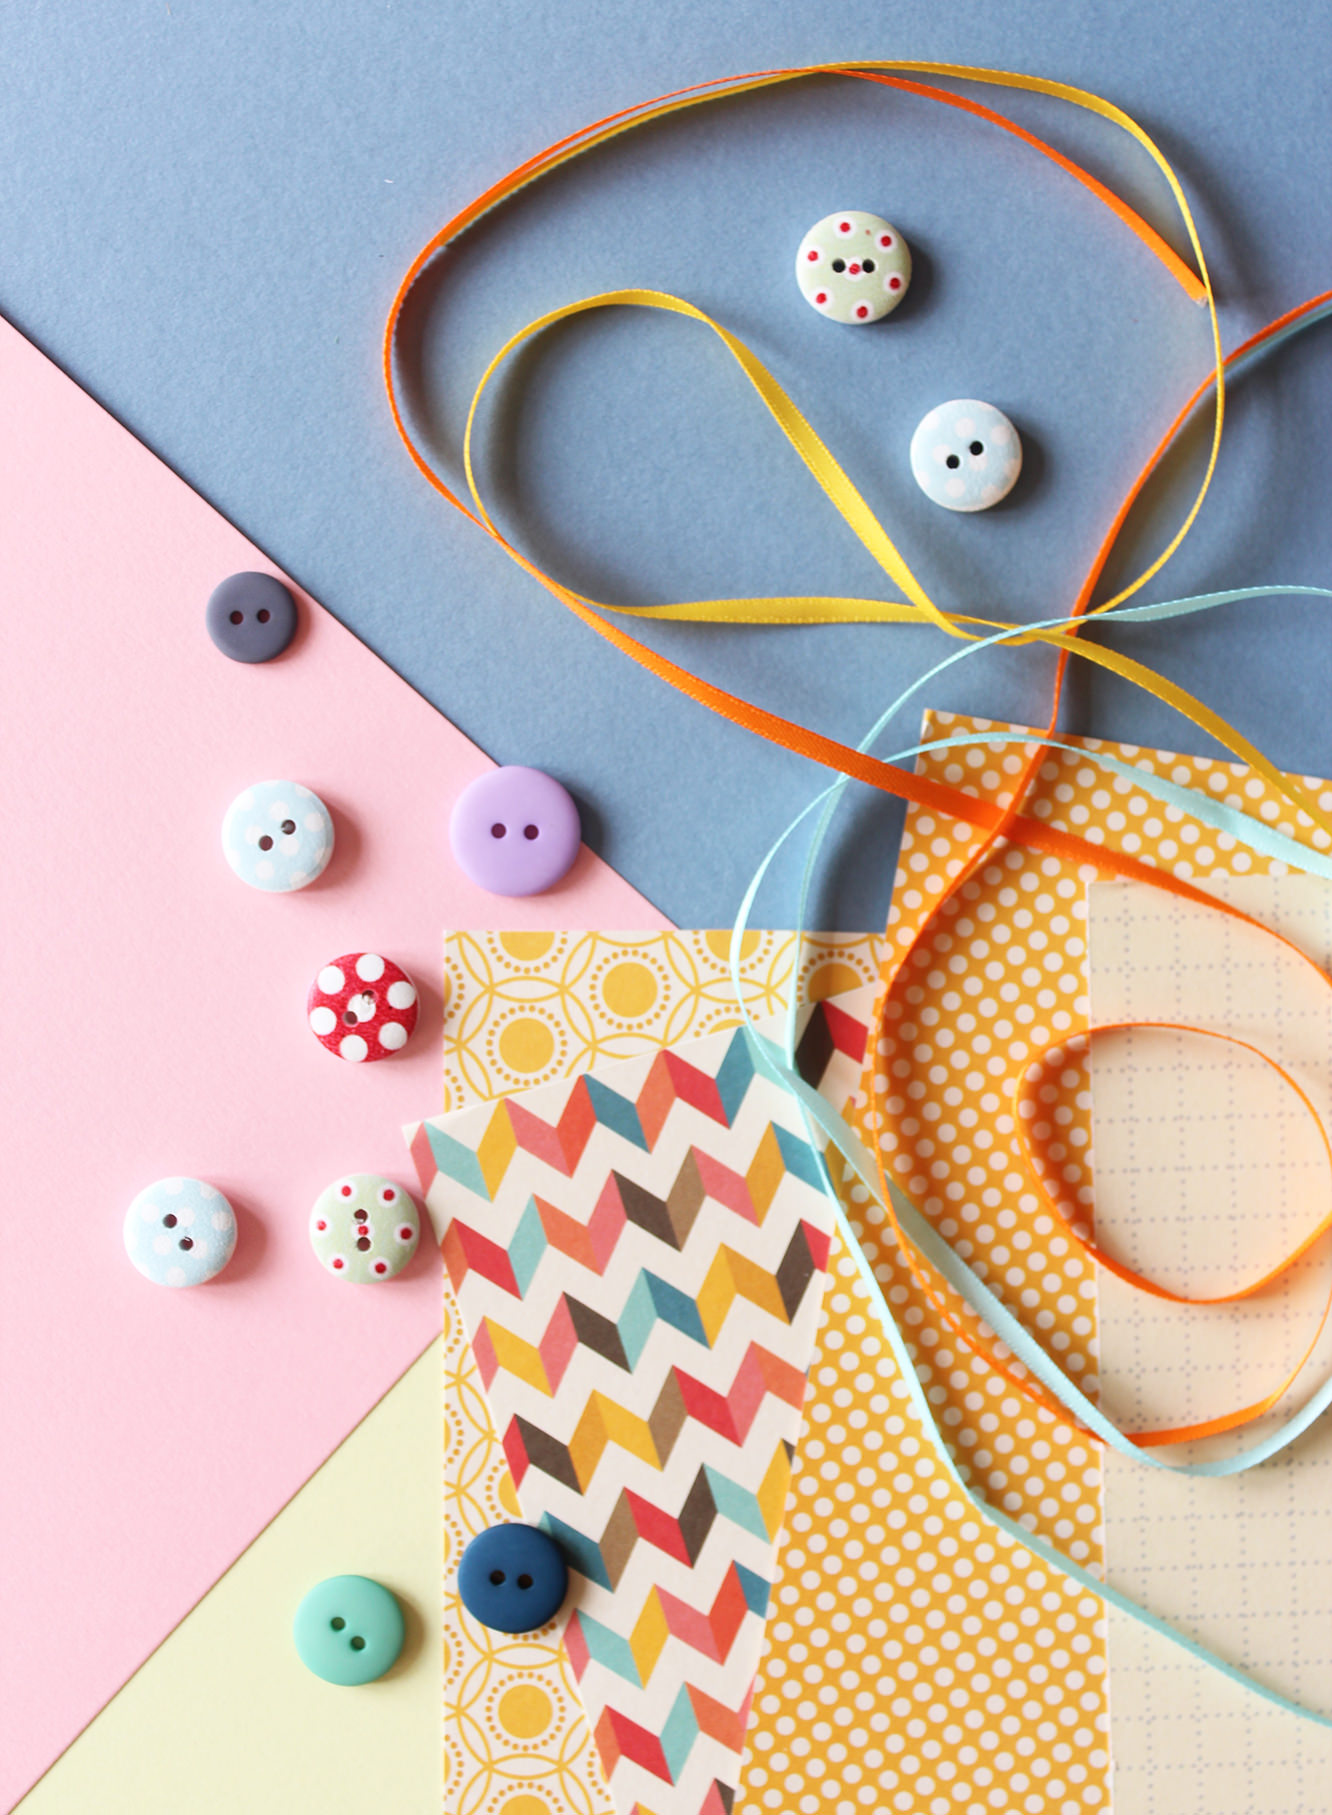
Cheerful patterned paper
Some plain card or paper
Buttons
Ribbon
Strong quick drying glue
Step one
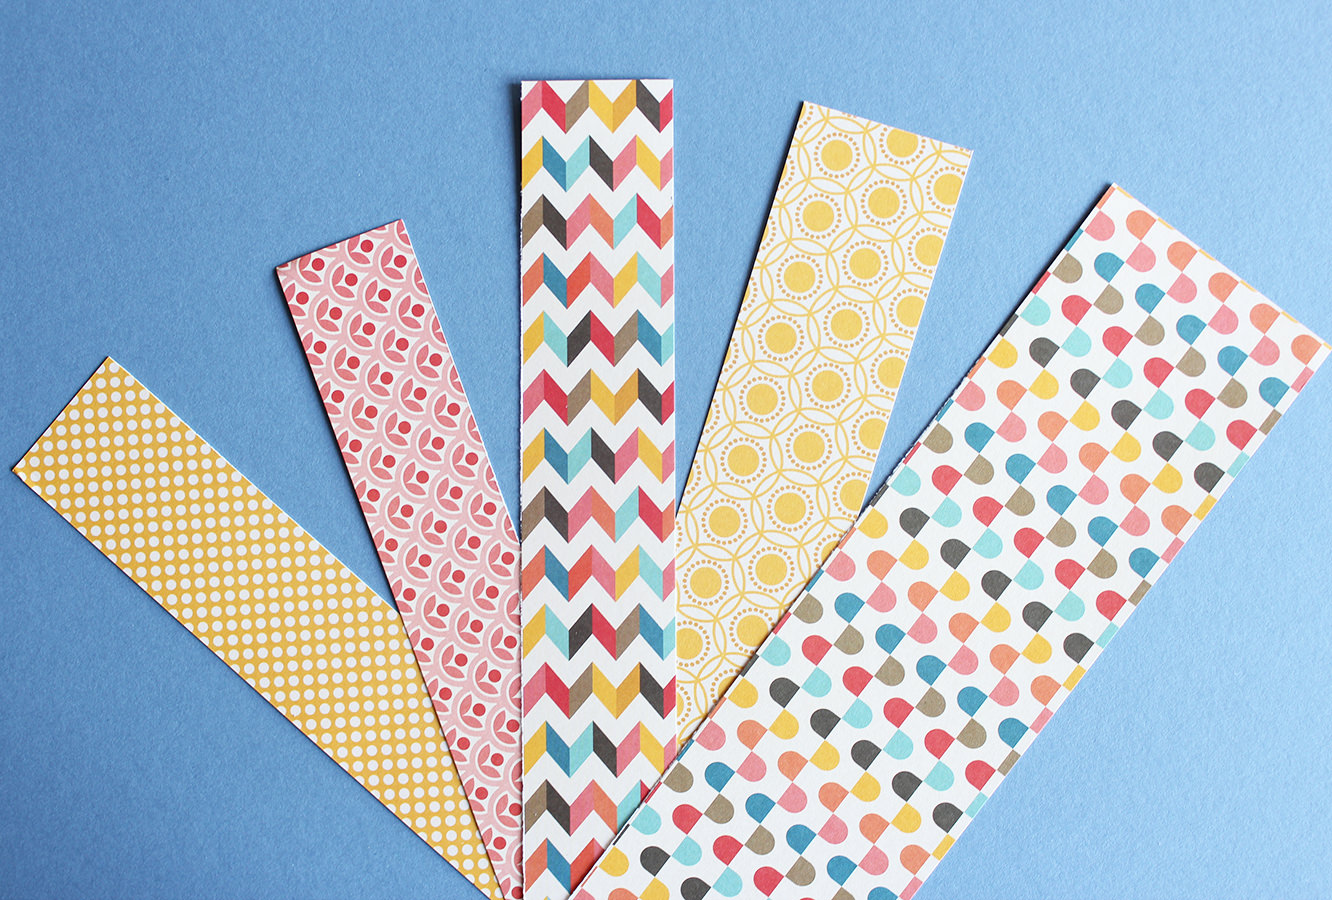
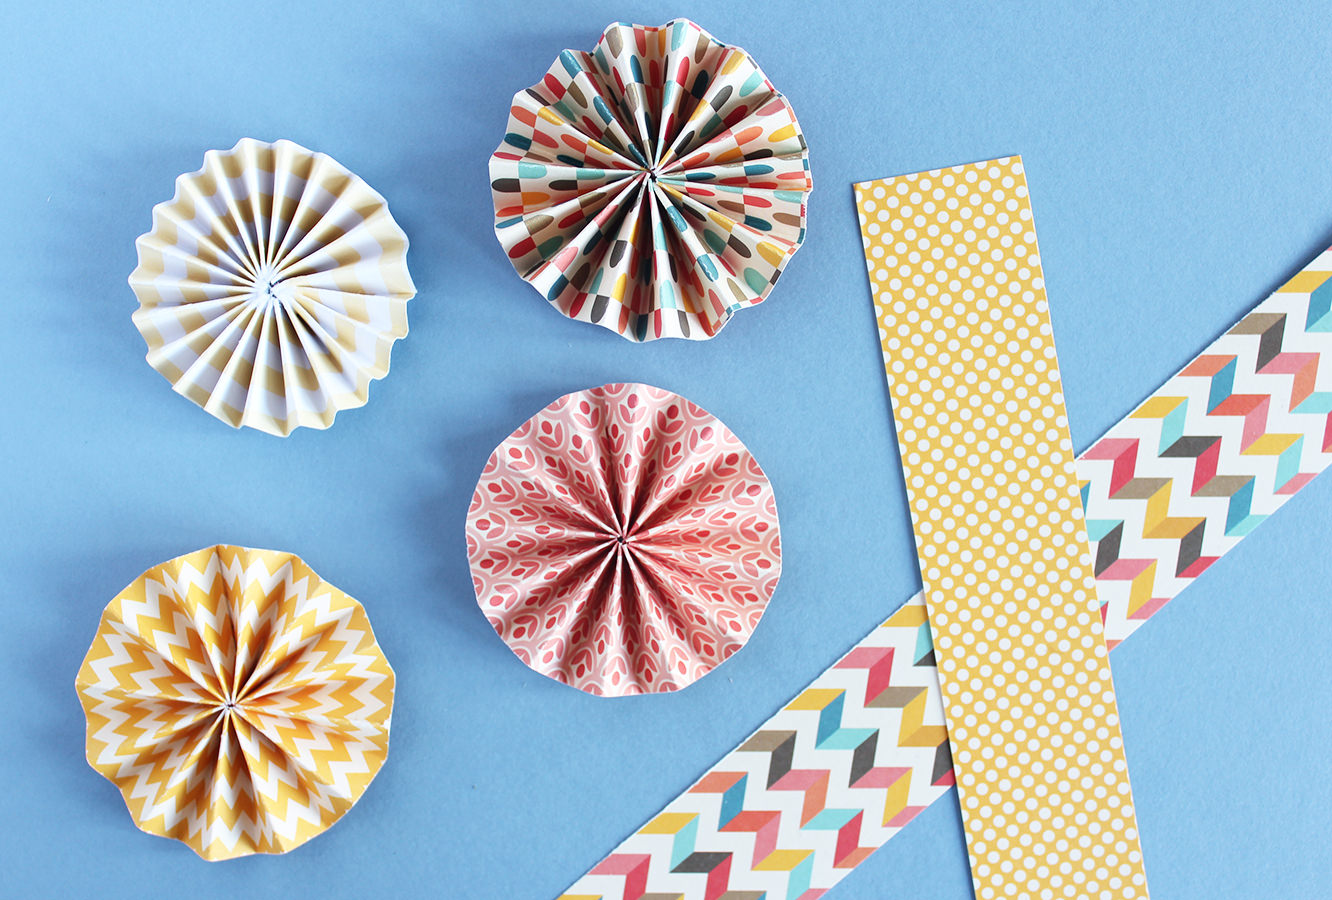
Cut your paper into long strips.
The width is up to you, but bear in mind it will be the radius of your tag. I found the thicker the strip, the longer it needs to be to work (I didn’t deserve my Maths GCSE for not knowing that instinctually) so you may need to tape two strips together if you want big tags.
All will become clear.
Step two
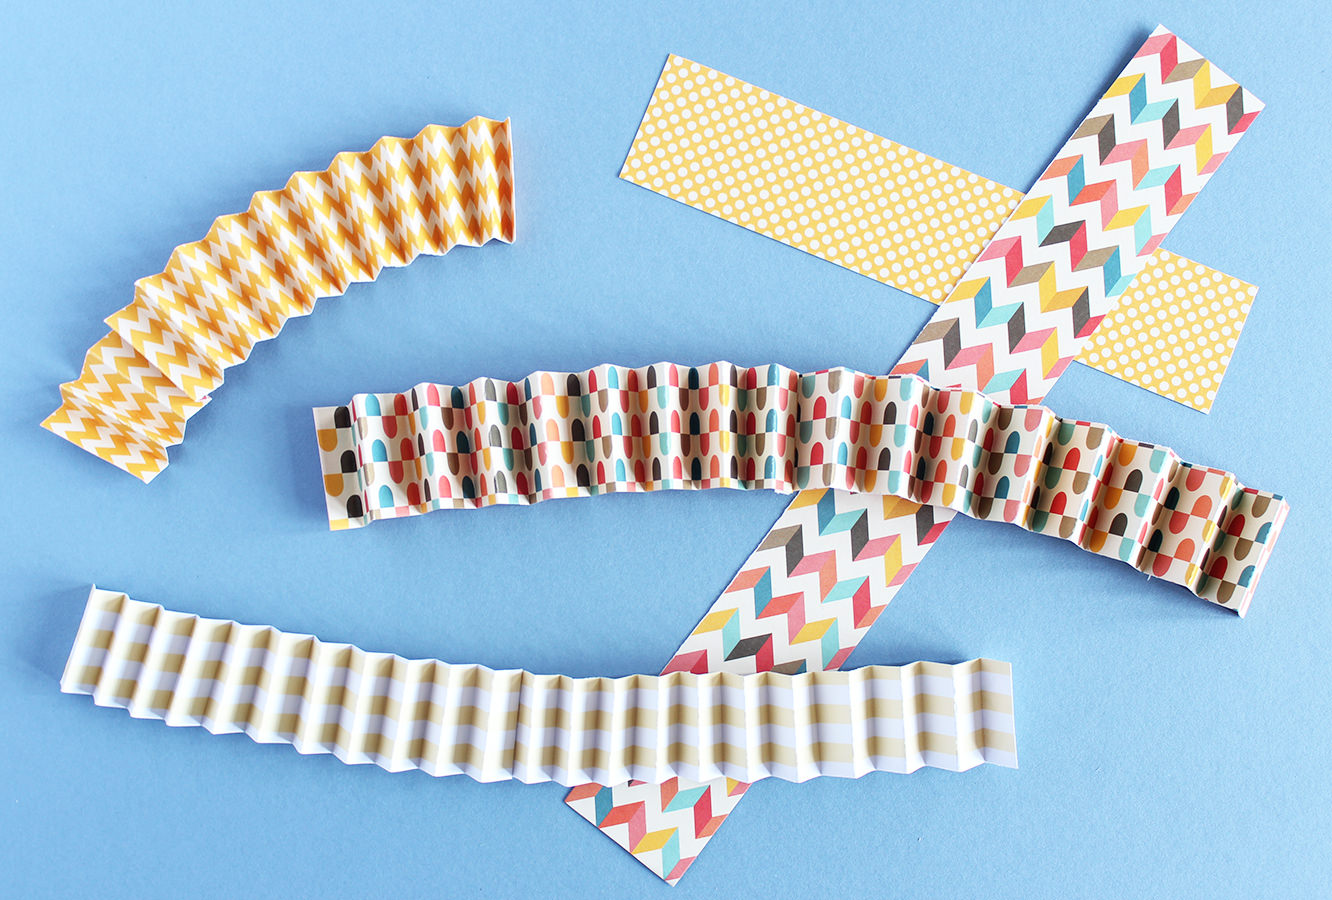
Fold the strips into a concertina (one bit forward, one back, just like in primary school when you made paper fans).
Step three
Stick together the two ends of each strip so that you have the star shape type things above.
Step four
Pick up your stars and push the top edges into the middle to make these circular flowery fan things.
Put a small dab of strong glue on the centre and hold until stuck (I mean super glue really, I have zero patience for anything else, and glue burns to prove it). On that note, be careful it doesn’t drip all the way through the middle while you’re holding it – unless you want a charming new finger accessory.
Step five
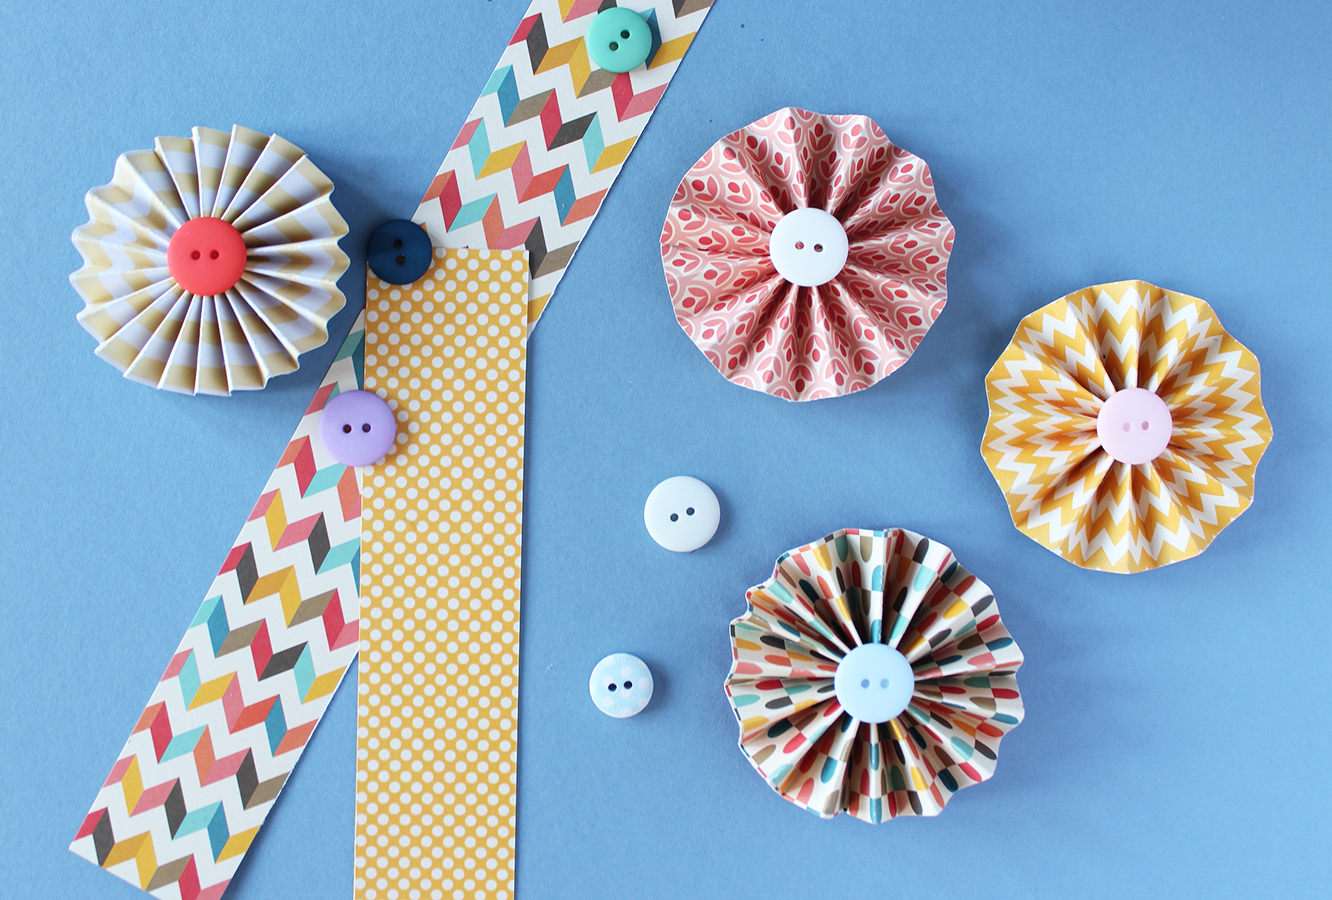
Stick a button over the join in the middle.
Step six
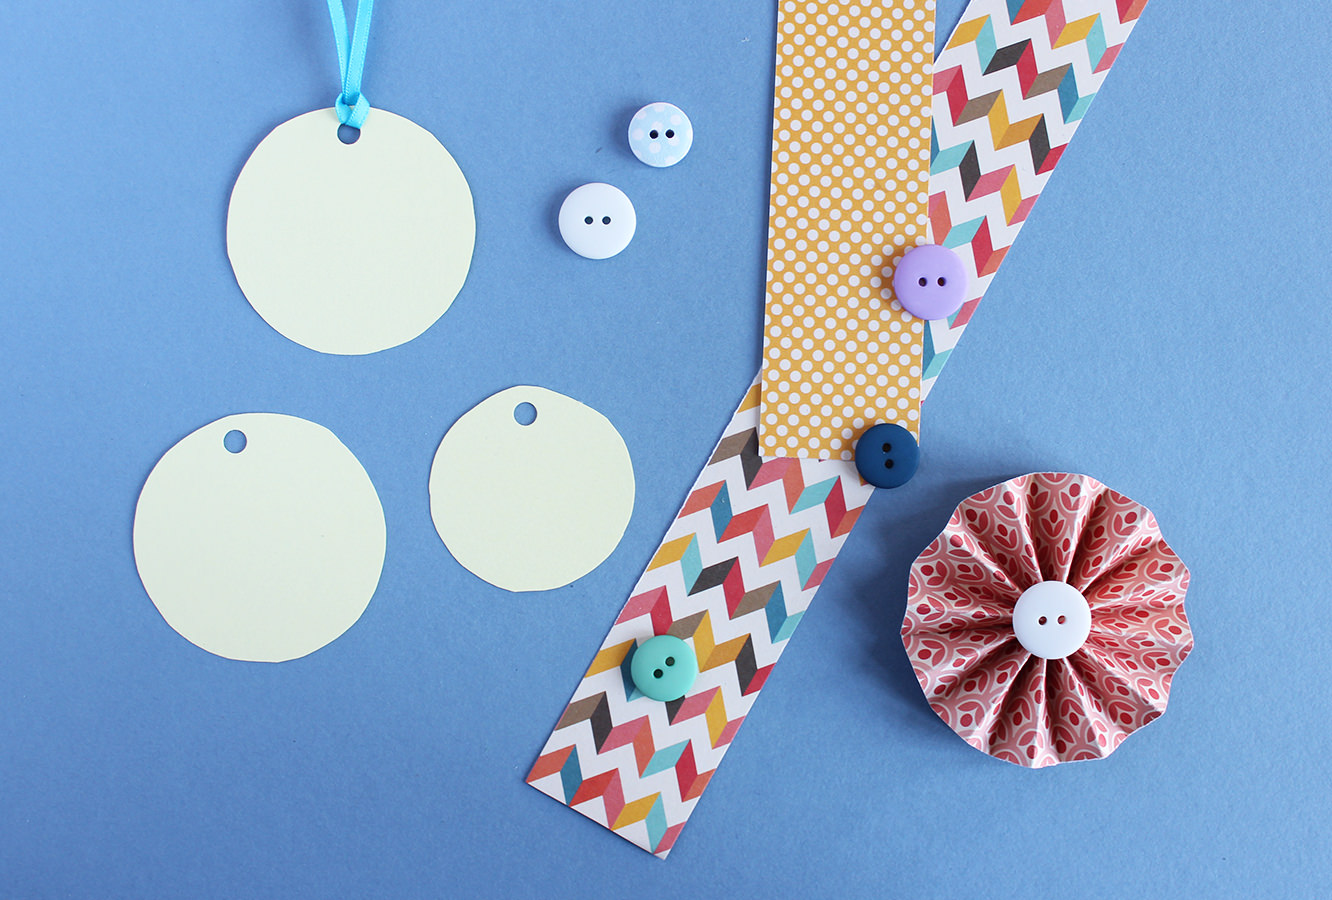
Find something circular that matches the size of your tags (or use a set of compasses). You want the circle to be a bit smaller than the tag itself.
Cut said circles out from plain coloured card and use a hole punch to make, well, a hole.
Loop a short length of ribbon through the hole.
Step seven
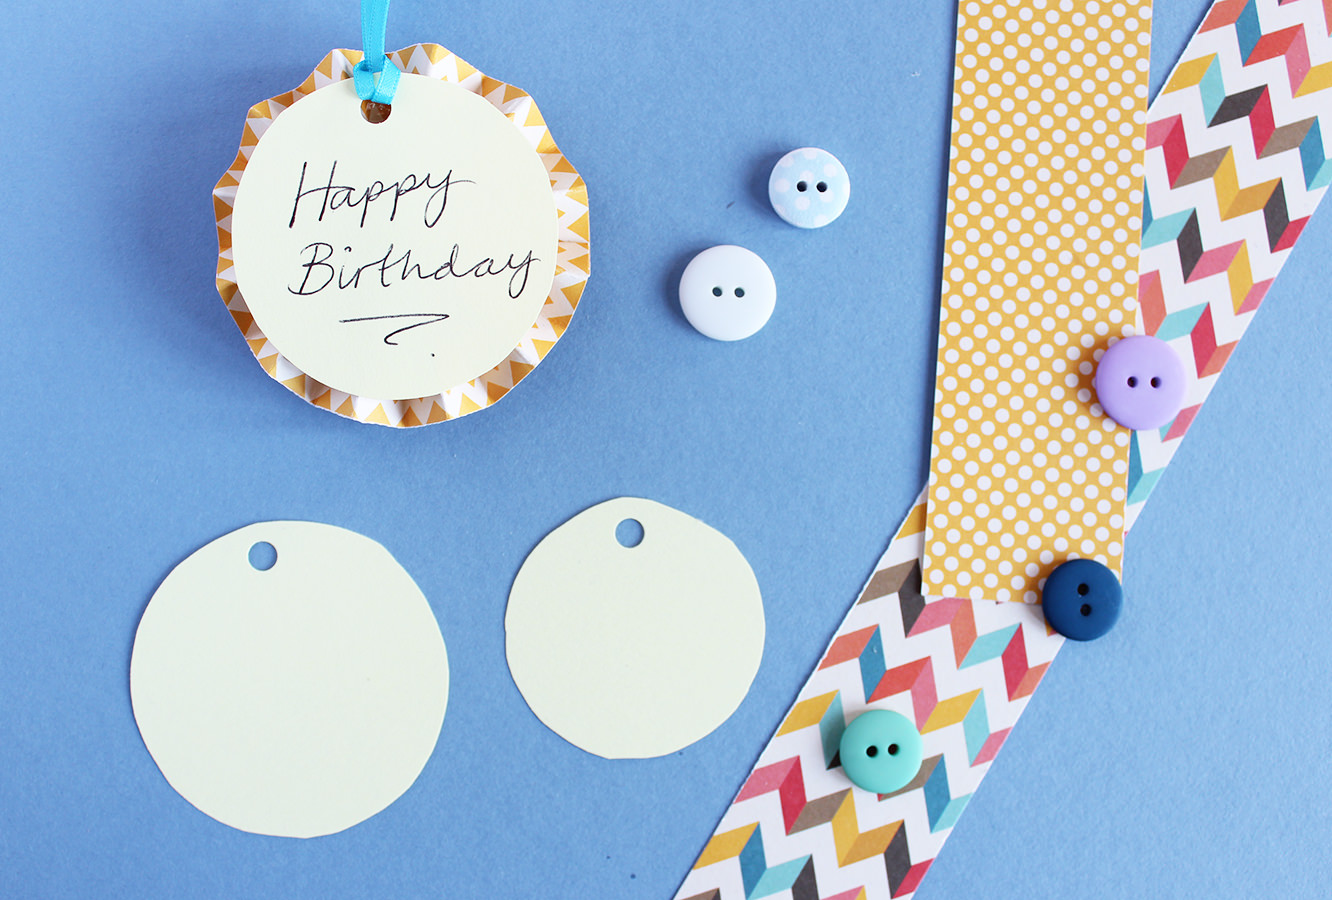
Stick the card disks to the backs of the tags using double sided tape or glue.
Write your meaningful and heartfelt congratulations that the birthday person is still alive on the reverse.
Affix to gift.
Step eight
Smugly produce your beautifully tagged gift at the appropriate moment.
So, I missed Monday blog day. Apologies, but there was some urgent badge making to see to, for a very special nearly 8 year old who’s mum was tearing her hair out looking for an 8th birthday pin. Katie and her dusty old badge-it to the rescue.
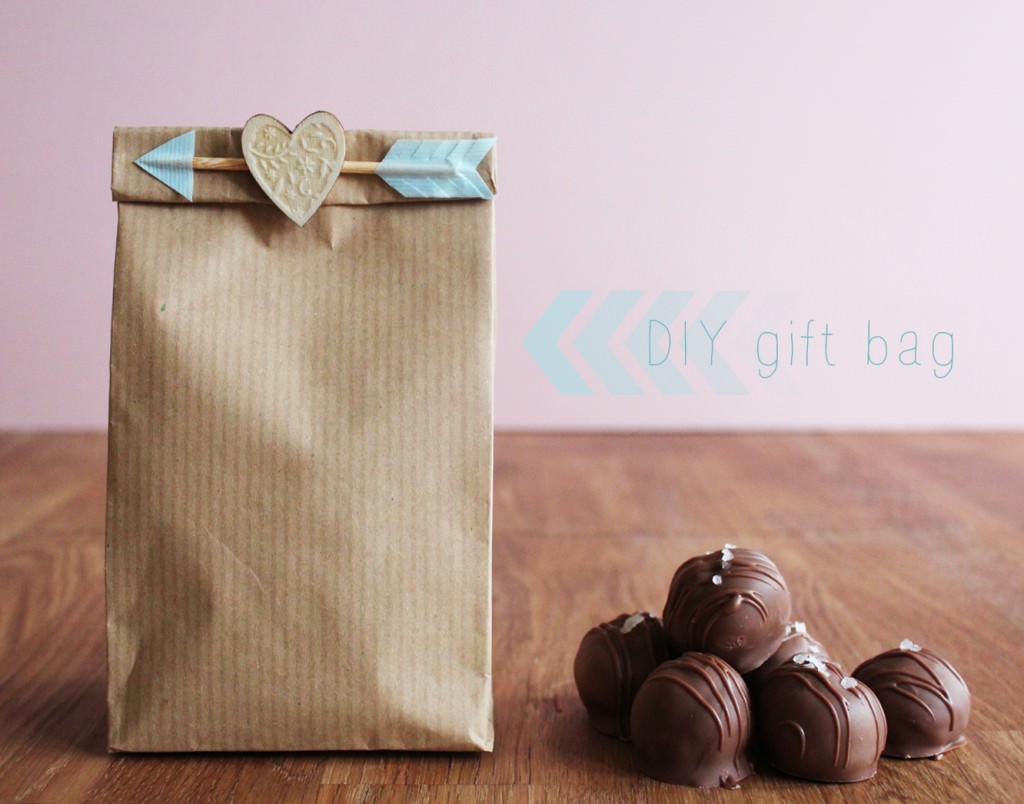
Now to business…I know you spent your weekend making those lovely truffles and need something to gift them in. Here’s how to make a little bag. I warn you, it’s not really the industry approved method (I’ll do a tutorial for that another time) but it does the trick and is super quick and easy.
Step one
Choose your paper, I’m a sucker for a bit of brown parcel paper, but as long as it’s relatively thick you’re good to go with whatever takes your fancy.
Find a box whose dimensions match the rough size and shape you want your bag to be.
Cut paper to size as if you are wrapping a gift, but leave a little extra on the long side so you have some to fold down to close the bag.
Step two
Wrap the long side first. Fold over the edge that will appear on top so that it’s nice and neat and stick down with glue or double sided tape.
Step three
I don’t really want to patronise you and tell you how to wrap a parcel particularly when the above isn’t even the best. But wrap the bottom of the box, but make sure you leave the other end open!
Step four
Pull box out of the wrapping so you have the basic bag shape. You can go ahead and use it now (see I told you it was quick and easy) but I prefer to make it look a bit more authentic.
Pinch the edges to make crisper folds.
Step five
This step was a little difficult to photograph, but basically you want to create a fold in the centre of the long side. Put your index finger in between your two folds and use your thumb and middle finger to sort of pinch it together.
Step six
Fold the bottom under as shown above. This will give you the little triangular type bits, and also means that you can make a few and store them flat until you need them.
(note triangle bit I was talking about above – I’m not mad)
Step nine
For Valentine’s day decoration I used a wooden BBQ skewer. Chop with a pair of garden clippers to about the width of the bag.
Step ten
Use a bit of washi tape to create the feather of cupid’s arrow. Stick a bit on both sides and trim as above.
Step eleven
Fold down the opening of the bag and cut two slits through all layers of paper. Push arrow through to secure.
Step twelve
Use washi tape to make an arrowhead and secure to the end.
Step thirteen
Stick a heart over the centre.
In all honesty I am not a huge fan of this, but I think it’s probably partly because the woods don’t match. You could cut one out of coloured paper or card if you don’t have a little wooden heart in your supplies. Just make sure you don’t do what I did; hold it up first to see if you like the look of it rather than sticking it on and wishing you hadn’t.
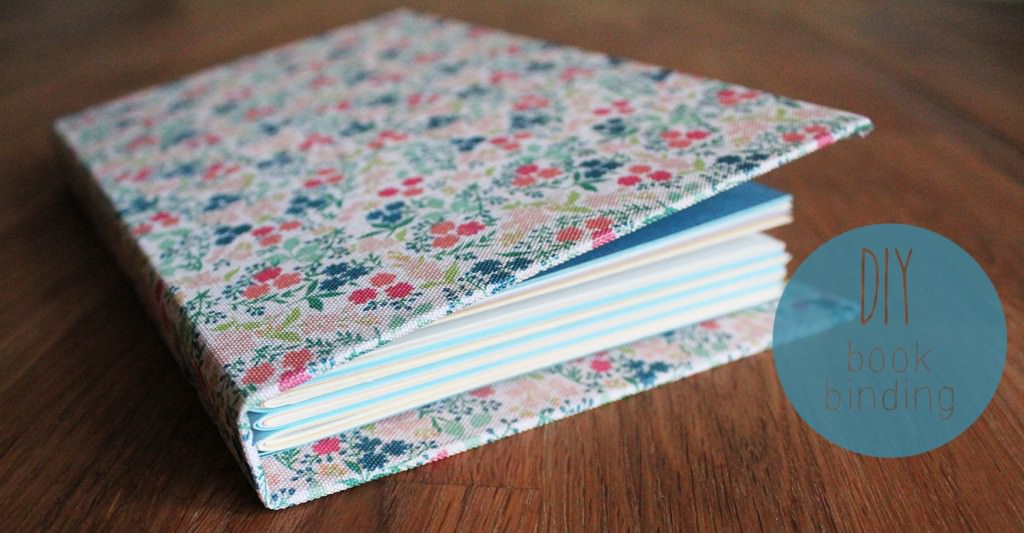
This weekend I decided to make a book. It was pretty satisfying holding the finished product, so I definitely encourage you to have a go, even if you never write in it, just put it on a shelf and admire it, that’s what I’m doing at the moment. It was pretty cheap too and will keep you busy for a while (January budget strikes again – you might even have all the ingredients!)
You will need:
A sheet of thick card (this will be your cover)
Good quality paper/thin card (at least 28 sheets)
PVA glue
Fabric/Adhesive fabric roll
Nice quality paper for inside cover
Craft knife and cutting mat (ideally, but scissors will work too)
Needle and thread
Step one
Depending on the size of your thick piece of card you may need to trim your paper sheets. I bought my card from The Range, and it’s artists’ backing board so it came in standard sizes. I got A4, and then realised once I got home that the inside paper was A4 too. Error. You need to cut a spine from your cardboard, so whatever goes inside needs to be smaller to begin with.
Fortunately I have a paper trimmer left over from my A level Art days. So I cut my inside sheets to 25cm x 19cm.
Then you need to score all your sheets in the middle so you get a clean fold. Don’t use the craft knife for this or chances are you’ll slice straight through. Regular scissors are good.
Stick a bit of music on, you’ll be here a little while.
Step two
Fold fold fold.
Put your folded paper into four or more equal size booklets, you need at least four. The number of sheets of paper you need will depend on the thickness of it and the number of pages you want. I’ll let you figure that out. As you can see, I used different pastel coloured papers; take advantage of it being made from scratch and mix it up a little. You could do each booklet in a different colour or alternate them more regularly like I did.
Step three
Poke at least five holes through the fold of each booklet with a needle. Make sure you do this over a blob of blu-tac in true Blue Peter style.
Sew each booklet together using a double threaded needle. You will need a big knot at the end of your thread to stop it from pulling through on your first stitch. I used backstitch and went over mine twice to make it super strong. (If you aren’t sure how to back stitch then have a little google, don’t shy away now…you can do it)
Step four
You will see that the non-fold edges of your booklet don’t line up because they are tucked inside each other. Now, you can leave it like that and just have a jagged (whatever the word is for the opposite to spine), but mine was fairly bad, as I used really thick paper – it was basically card.
So, top tip for you if you don’t own a guollutine (99% of people in the world)…use a bread knife! I know it sounds silly, but after hacking away for ages at the first one with a craft knife to the point where I just couldn’t get a straight edge for the life of me, I was beginning to wish I hadn’t bothered.
Then, eureka moment! Got myself set up on the chopping board with a ruler as the guide and it all ended happily ever after…well…still not quite perfect, but a heck of a lot better than the first one.
Step five
Once your booklets are all sewn and trimmed, hold together with a bulldog clip at the top and bottom, ensuring the spines are level.
Step six
Use the PVA to glue to a scrap of fabric as shown above. If you don’t have spare fabric (I cut up an old pillow case) then a piece of paper will work too, it just won’t be quite so strong.
I used some double sided tape to hem the edges of the fabric at the top and bottom. Leave enough scrap on either side to secure it to the cover well later. There’s no need to hem the long edges as they will be completely covered.
Set aside to dry thoroughly. Overnight if you can.
Step seven
Time to make the cover!
Measure the width of your booklet spines, mark out a strip of card the same width for the spine of the cover.
Then mark out larger pieces for the front and back covers. These should be a centimetre wider than your booklet width and 2cm longer than the height.
Step eight
Using a craft knife and ruler for best results, carefully trim cover pieces and discard any excess card.
Step nine
Size up the fabric allowing for at least 2-3cm around the edges of the whole height and width when laid out as above. Add a little space either side of your spine as shown above.
Now, a note about the material. I got this roll of adhesive fabric that just made this bit so wonderfully easy. It’s like sticky back plastic without the angst, you just peel off the white bit and it sticks really nicely to the card. It was £4.50 for a roll in HobbyCraft, and will cover two books this size with some left over to cover a set of matching pencils or something.
If you are using regular fabric you just need to give it a generous covering in PVA and be more patient waiting for it to dry before moving on.
Step ten
Trim the corners to avoid excess bulk, use fairly wide angles so that all the corners get properly covered. There’s no need for a huge amount of precision here.
Step eleven
Stick the edges down, being sure to pull tight for a nice sharp finish. If you’re using PVA leave to dry.
Step twelve
Line up the spine of your booklet with the cover spine. Stick the paper or fabric flaps to the cover. DO NOT stick the spine itself down or you won’t be able to open the pages properly.
I used double sided tape for this, and that seems to hold really well and eliminates drying time. Again, PVA will work for this too, so just go with what you’ve got available.
Step thirteen
Cut two pieces of card or heavy paper for the inside covers. If this is nice and thick it will cover a world of sins! Also, it’s worth getting hold of something attractive as it adds that little extra when you open it.
This should basically be the same size as one of your folded pages from earlier, so mine was 25cm x 19cm.
Score and fold (score on the outside of the fold so you won’t see it on the end product).
Step fourteen
Stick the inside covers to the book. Again I used double sided tape, if you use PVA for this be careful not to overdo it as your paper will bubble.
Stick to the booklet first, lining it up perfectly with the outside page. Then lift your cover to a 45 degree angle and attach there as well. Close the book and press down. If using PVA leave cover open to dry.
A little close up of the paper I used.
Step fifteen
Give yourself a pat on the back, you just made a BOOK.
Let me take you on a journey. It all starts back in 2006 when Pa and I first went to the Wildlife Photographer of the Year exhibition at the Natural History Museum. This becomes an annual event.
Fast forward to 2013, and I visit a marvellous German zoo. The Germans sure know how to do a zoo. I walk into a dark room and floor to ceiling there’s all these manatees just gazing back through the glass, floating and grinning. (I’m sure they were grinning). And I just stand there super impressed by how insane they are, so friendly looking that they are both the ugliest and cutest thing in the world. I could have stayed there all day (and not just because it was 36C outside and my skin is almost see-through) That tank of manatees was like a giant lava lamp. I mean, what?
December rolls round and we hit the exhibit, and behold, this glorious photo by Douglas Seifert. By now I’m in love. (officially this is a dugong not a manatee, but I’m no marine biologist, these things are just as wonderful)
Travelling Companions by Douglas Seifert (USA)
And now to the present day. I’ve started a blog and I’m planning projects. I think about potential subjects. I have to say, if any animals are owning the craft scene right now it’s whales and foxes. If you don’t believe me just search Pinterest for DIY whale/fox. They are in VOGUE. But I’m not the only one who watched Black Fish right? And I’m even more sure I’m not the only one with a conspiracy theory about the urban takeover being planned by our furry orange friends.
Manatees would never.
So I present to you Sea Cow Stamps. We’re setting a new trend here folks go with me on this.
Along with the above justifications, it’s no secret January is rough on the financials. So this little postlet is a little something you can do for about £3, or 50p if you already have a pad of ink somewhere in the recesses of your crafting supplies.
You will need:
A sheet of craft foam
An ink pad
Glue
Something to stick your stamp to
Craft knife and cutting mat/Scissors
Step one
Draw your design onto the foam with a pencil, try not to press too hard or you will alter the texture of your stamp.
Just draw it how you want to see it stamped in the end…don’t worry if you have a few tries, just remember which line you want to cut. I modelled mine on this snap I found on google images, I find it sometimes helpsto have a reference point.
If you’re doing this with kids try to encourage them to avoid fiddly lines etc, as you’re going to end up being the guy carving the foam all afternoon not them…
Step two
Cut out your design with a craft knife or scissors. Either is fine.
Step three
Pop your shape out of the foam and flip over. This is your chance to neaten up, I used nail scissors for accuracy. If you’re doing lines and facial features spend a little time on this bit. The pencil free side is the one you will be applying ink to.
I discovered that everything I had cut was a lot more obvious when I stamped, so don’t worry if your lines look a bit thin, you can always take more away, but you can’t put it back. It’s sort of like a haircut in that way…
Step four
Stick your shapes onto something, pencil side down (remember they need to be back to front because you’re going to flip it over).
The more solid a base the better really. I decided to do this a couple of days after bin day and there was only newspaper and toilet roll in the recycling bin. So I pinched the box from my dad’s muesli (you’re welcome dad). Honestly? This was less than ideal. The flatter and firmer your base is, the less ink you will get transferring that isn’t part of your picture, and the better force you will have to stamp with.
If you know someone handy, ask them to chop you some wood pieces. I plan on migrating these chaps over to wood at some point, I just need to get myself a saw, which I’m sure will be music to boyfriend’s ears…I’m not clumsy AT ALL.
Step five
STAMP!
This is fun. My advice – cover the table in newspaper and have a few practice goes before you go for the real thing. You’ll find if your stamps are as big as mine you need to put the stamp on some newspaper, turn the pad over and sort of dab it on, quite liberally.
Use the side of your fist to rub the stamp onto your card. Sometimes they come out better than others, I’m still yet to get exactly what I want, so just enjoy it.
If you want to do lots of different colours start with the lightest first and wipe off any excess ink with a baby wipe between colours.
I made cards with mine, see below, but I also have plans to put the whole scene together on some brown paper for gift wrap at some point, and I’m sure there’s a whole load of other things to decorate too.
I also plan to digitise my little buddies so you can print them and use them for your own. But I need to be waaay better than I am at graphics software before that happens, so I’m afraid it may take a little while.
The best thing about this project is that you can make a full set of your own stationary. Check out the envelope below. I made a speech bubble for the address, and popped the little guy on the back.
If anyone is curious about the text on the cards above, and is UK based, I got the alphabet stamps from The Range. They do loads of little alphabet blocks with different fonts and THEY ARE ONLY 99p EACH. They are my Pokemon. Literally, never go to HobbyCraft again.
Have a wonderful week chaps.
DISCLAIMER: I reserve the right to make fox or whale themed crafts in the future.


