So. Guys. 2015 happened. Happy New Year to you all!
Probably the last thing all you resolution makers need is this blog post. Just know that deep down I support your diet, but if you ever want to fall off the wagon in a carb-tacular way, I’m here for you, holding mini filled potato skins.
These bitesize chaps were more of the nibbles I made for Matt and Vicky’s party and they disappeared pretty quickly, despite being a bit of a random addition to the table. I know Vicky’s brother has been waiting on tenterhooks for this blog post. Edward, apologies for the delay.
You will need
15 New potatoes
3 Rashers of smoked bacon (or a couple of spring onions if you’re a veggie)
300ml Sour cream
100g/5 oz Red Leicester/Double Gloucester/Cheddar cheese
Salt and pepper
Step one
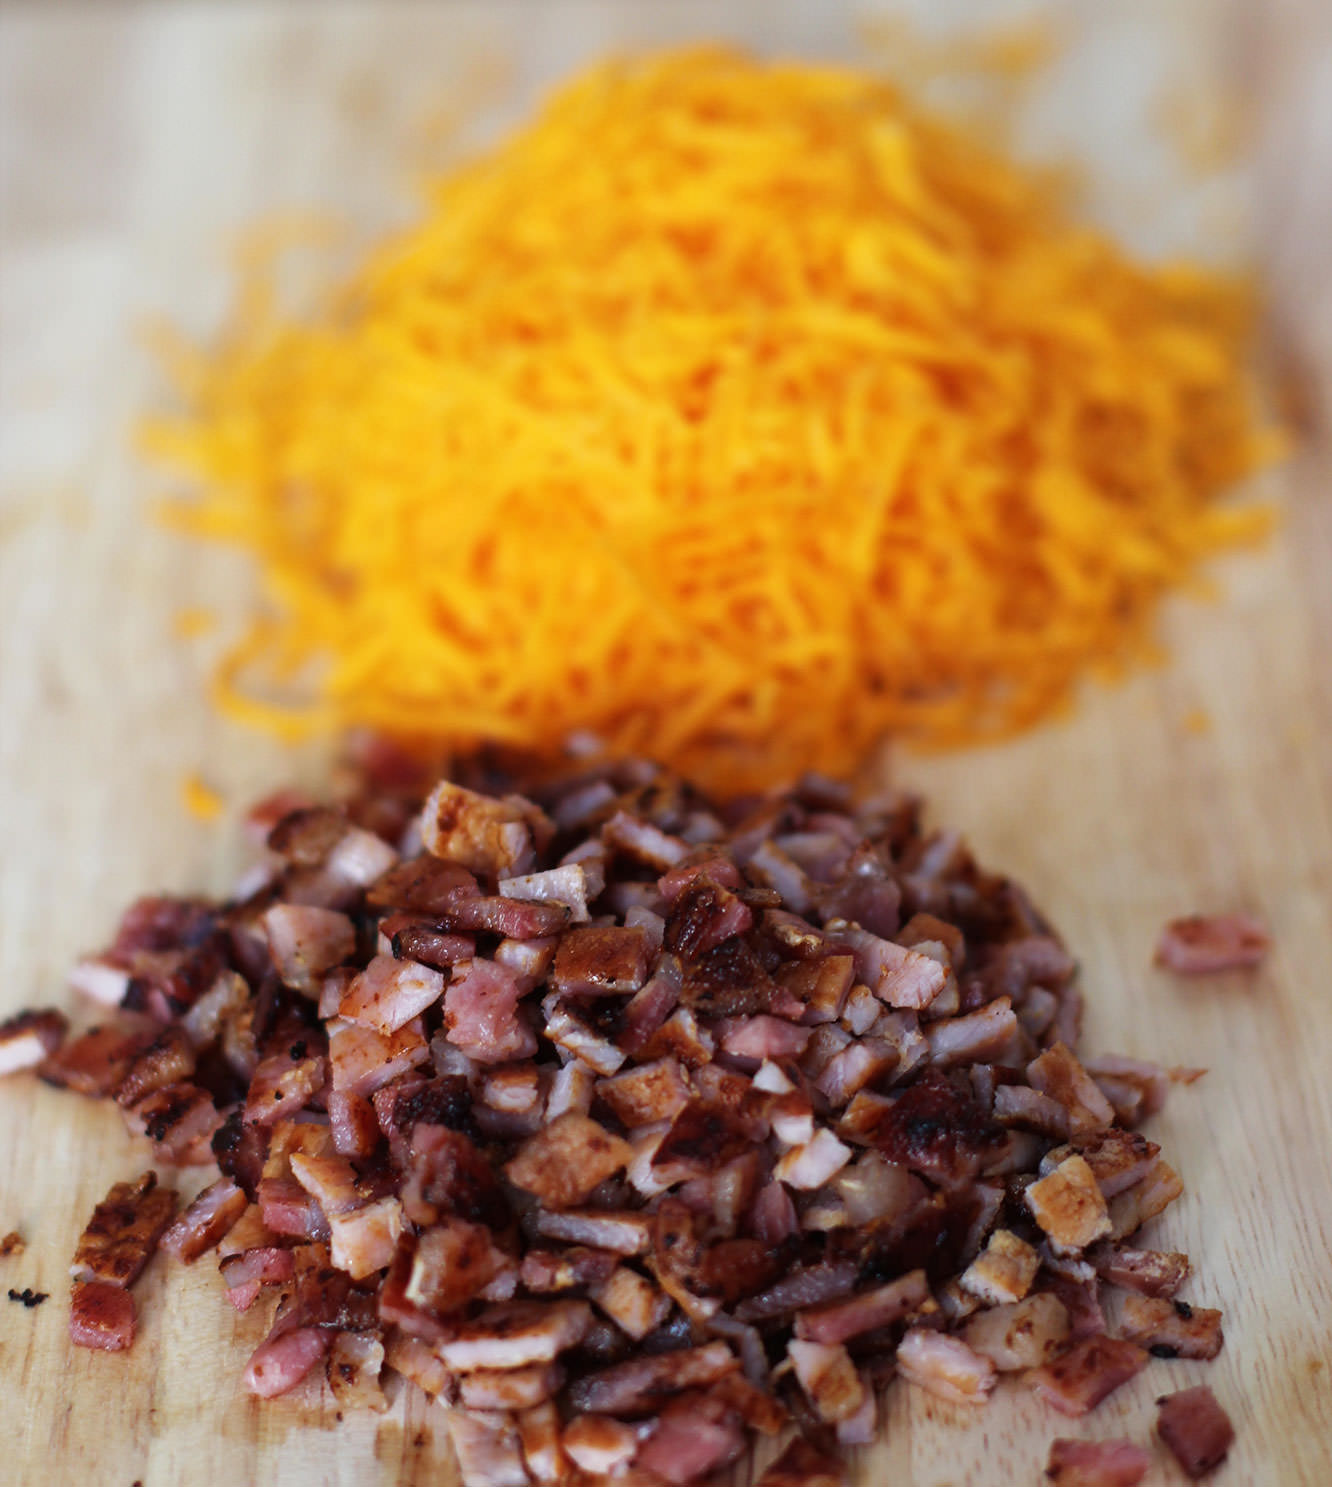
Using the finest setting on your grater grate the cheese so you’re ready to go. The last thing you need is hold ups preventing you from eating these sooner.
Cook the bacon until crispy and trim into tiny tiny pieces. Scissors are key.
Step two
Put the new potatoes in a roasting tin with a blob of butter and cook on gas mark 6/200C/400F for 45 minutes. Keep an eye on them, but honestly, I’d like to meet a man who has managed to overcook a jacket potato.
Step three
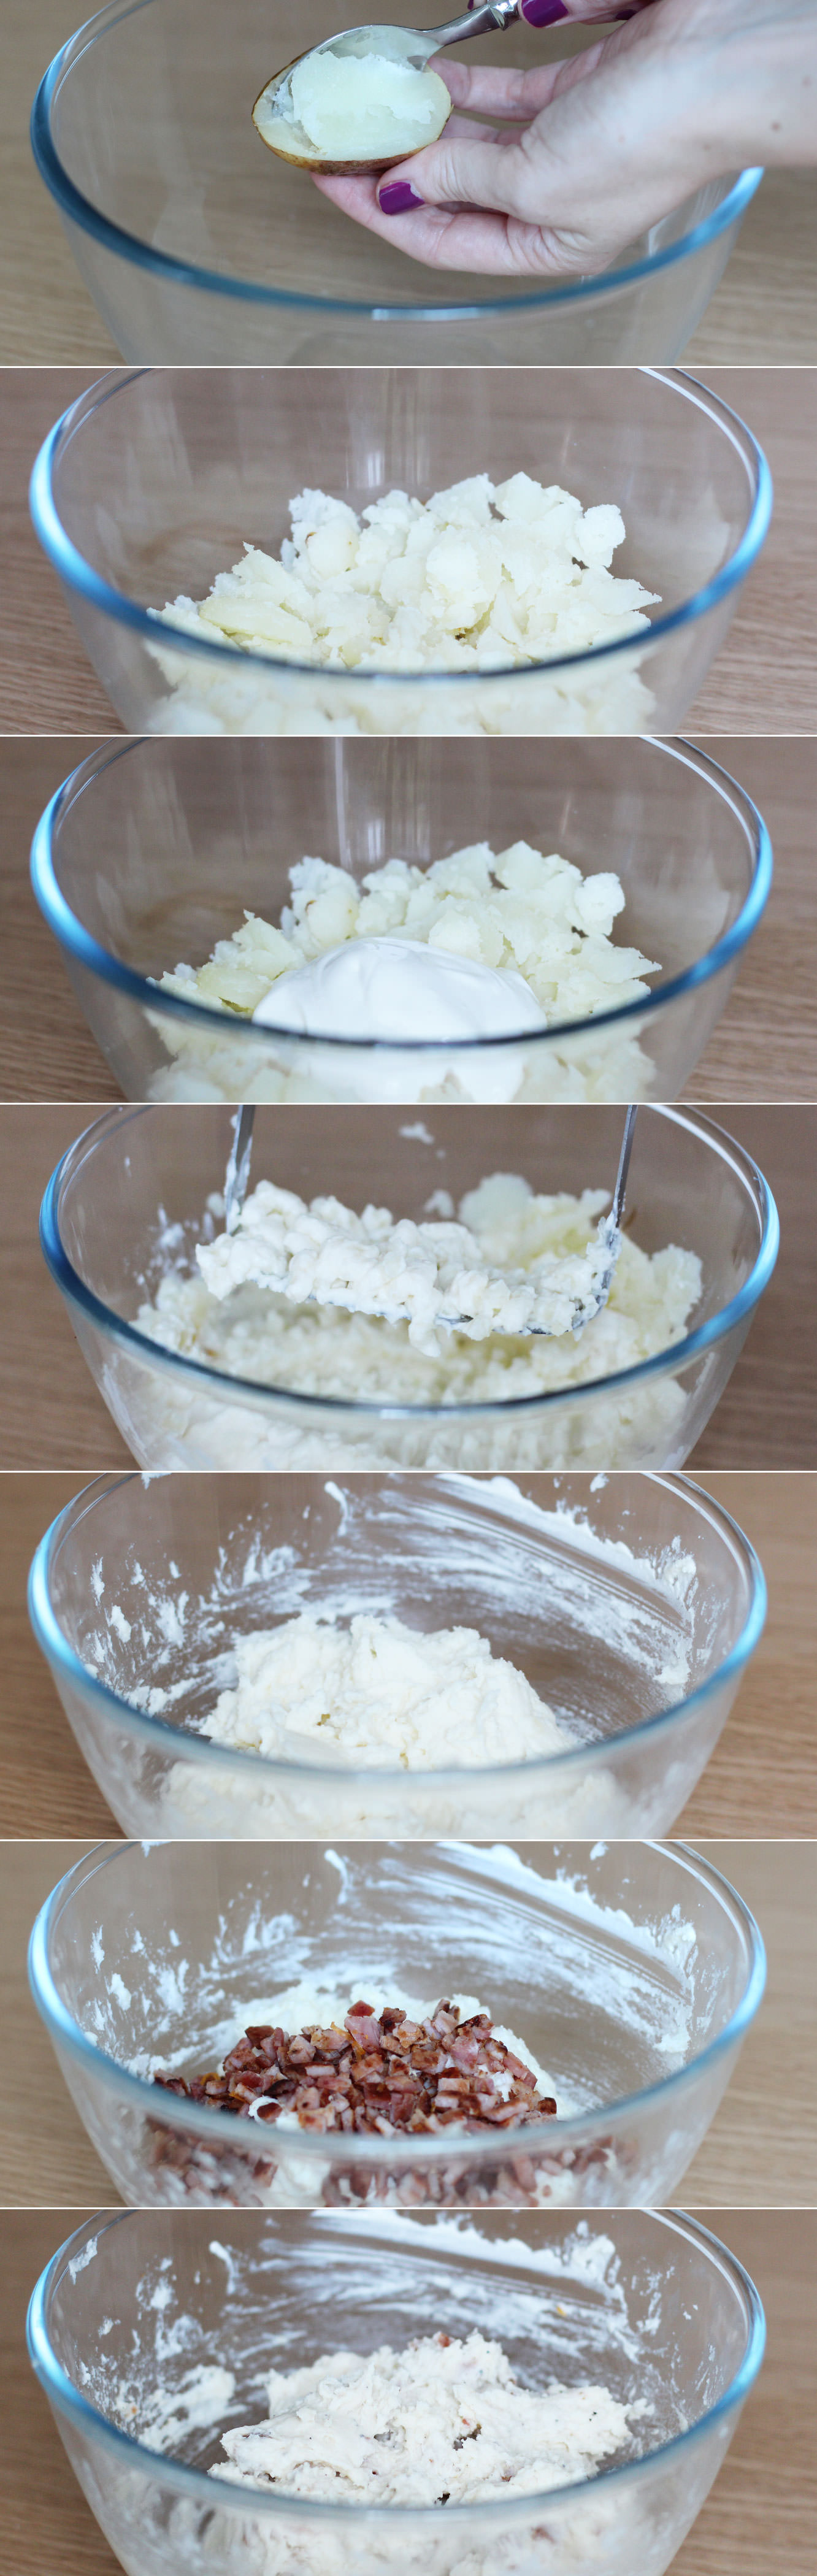
Once the potatoes are cool enough to handle cut them in half and scoop out the potato inside. Get as much out as you can without ripping the skins. Place the empty skins back into the roasting tin in a somewhat orderly fashion.
Step four
Add 150-200ml of the sour cream to the potato and season. Mash until smooth/you loose the will to make filled potato skins at all. But seriously though, don’t give up, that’s the key to smooth mash.
You might need to add a little more sour cream, but save some for dipping.
Step five
Stir in the bacon.
Step six
Avoid the urge to just eat mix with a spoon. Or does everyone else not love mashed potato as much as me?
Step seven
Refill the potato skins and sprinkle the cheese on top.
Step eight
Put back into the oven until they are fully reheated and the cheese has melted.
A while back I started a small ‘series’ courtesy of Matt and Vicky’s engagement party. I didn’t get very far, because Christmas. Sorry about that. In case you haven’t seen it, the first post is here.
So, in honour of NYE and the parties you’ll all be throwing and in need of nibbles for, here’s a couple of quick and easy last minute bites for the table: some sausage wheels and cheese puff pastry bites.
There’s a lot of cheating in this recipe. I’m not one for making my own puff pastry. Apparently I’m not even one for seasoning my own food now either.
You will need
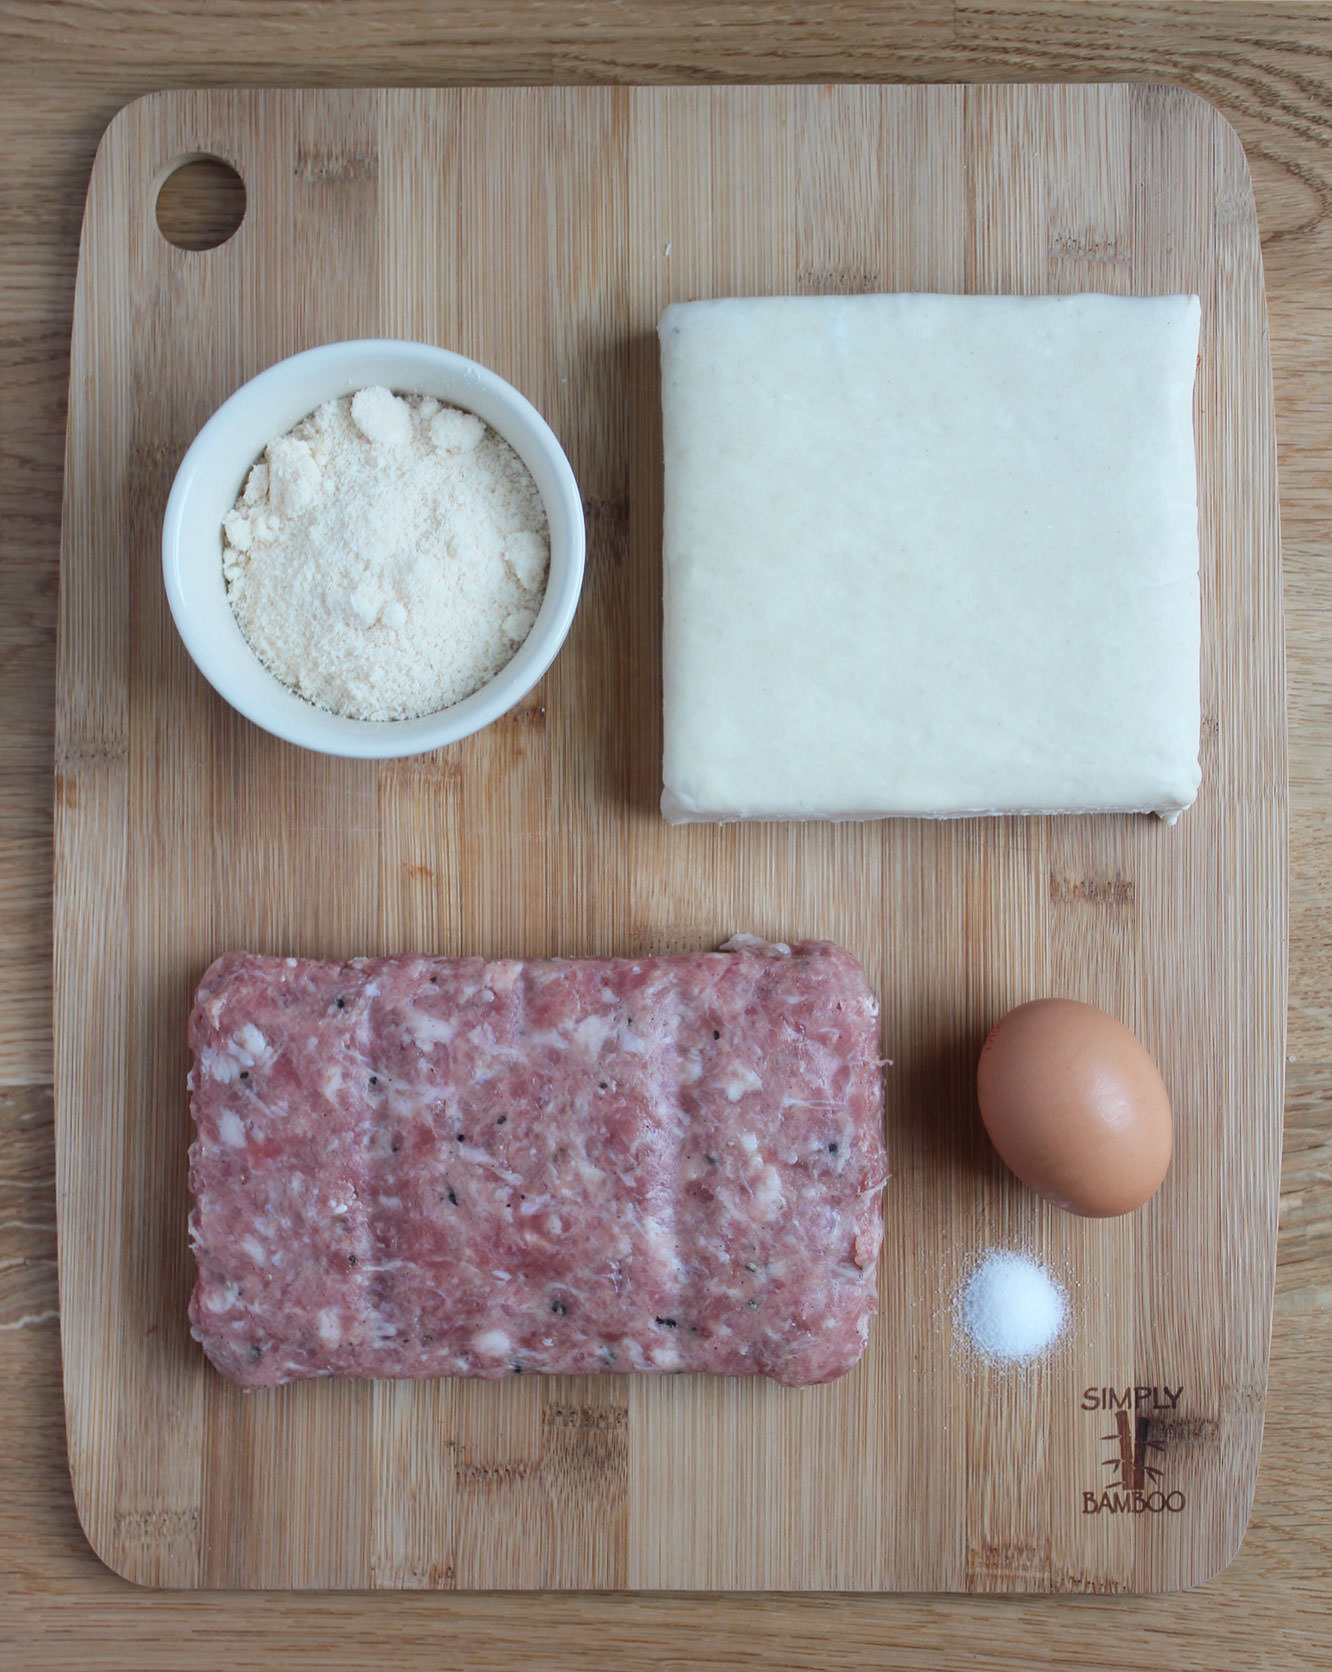
500g packet of puff pastry
400g/ 14oz of sausage meat (I bought packet of pre-seasoned/flavoured stuff from Waitrose. Zero regrets)
75g/ 2.5oz grated parmesan
1 egg
A generous pinch of salt
Step one
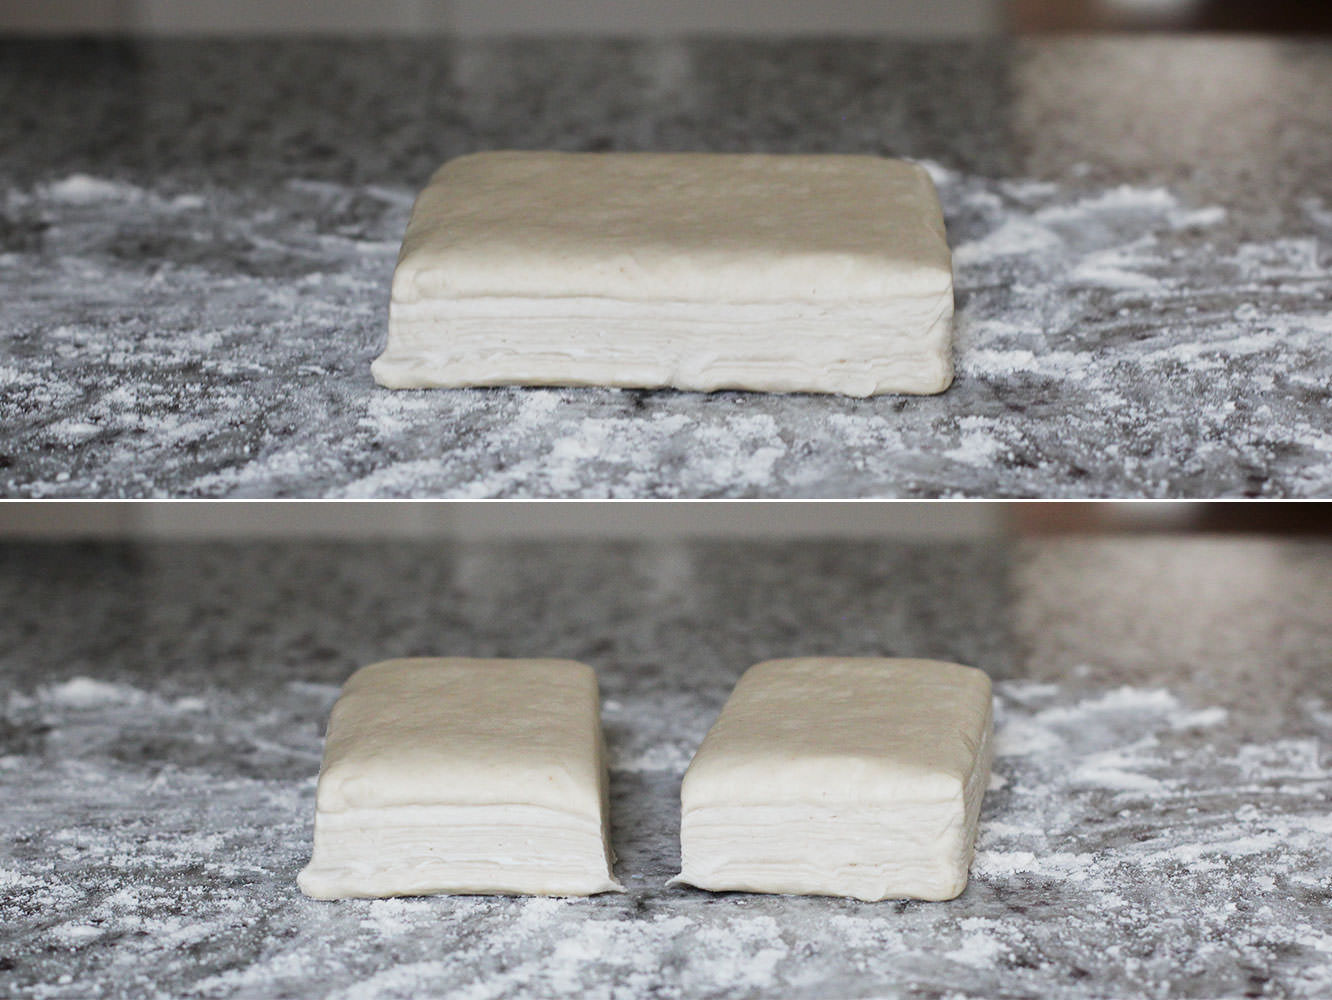
Divide pastry into halves.
Step two
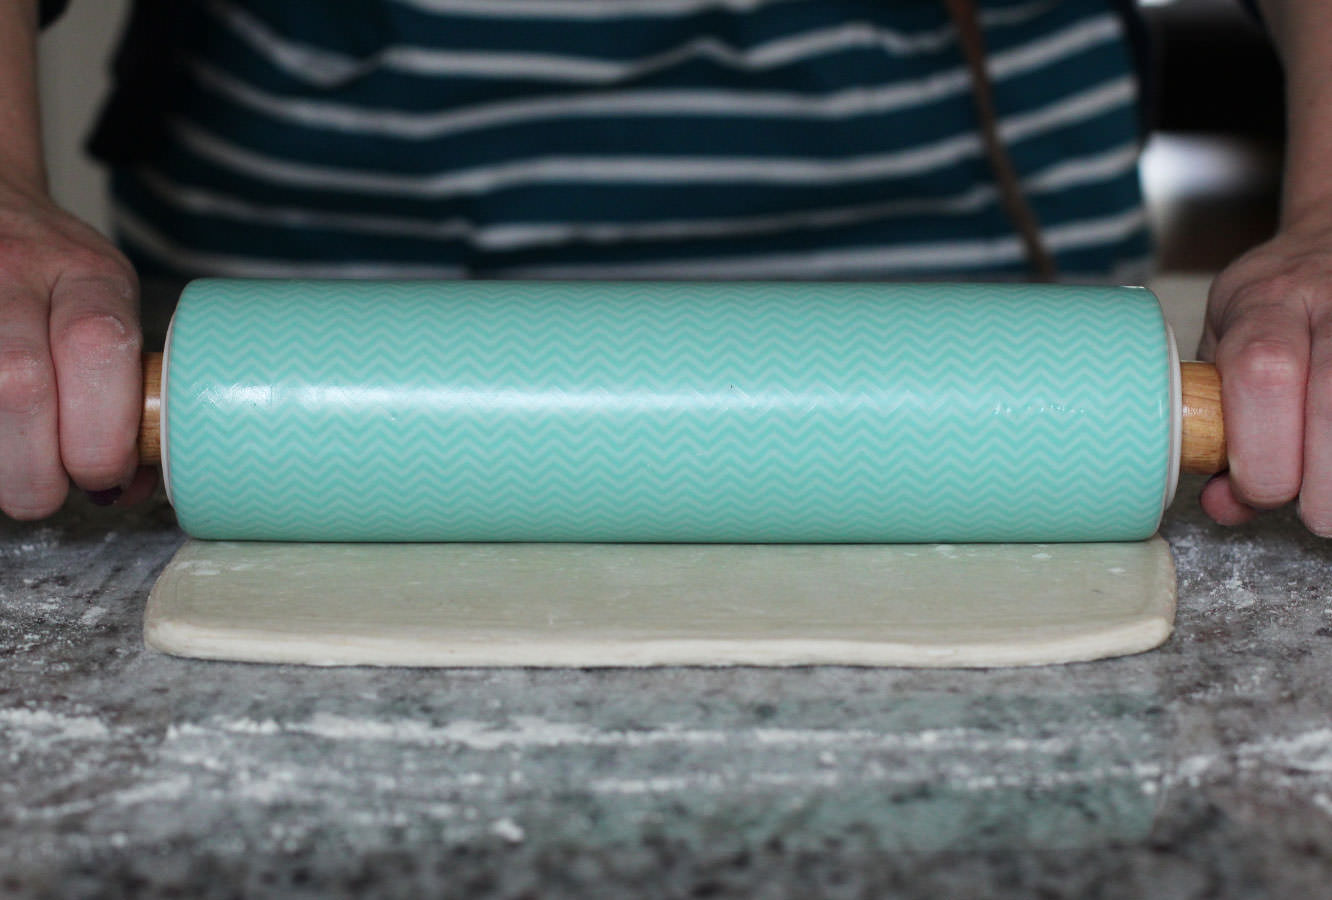
Roll out one of the halves until it’s about a centimetre thick.
Step three
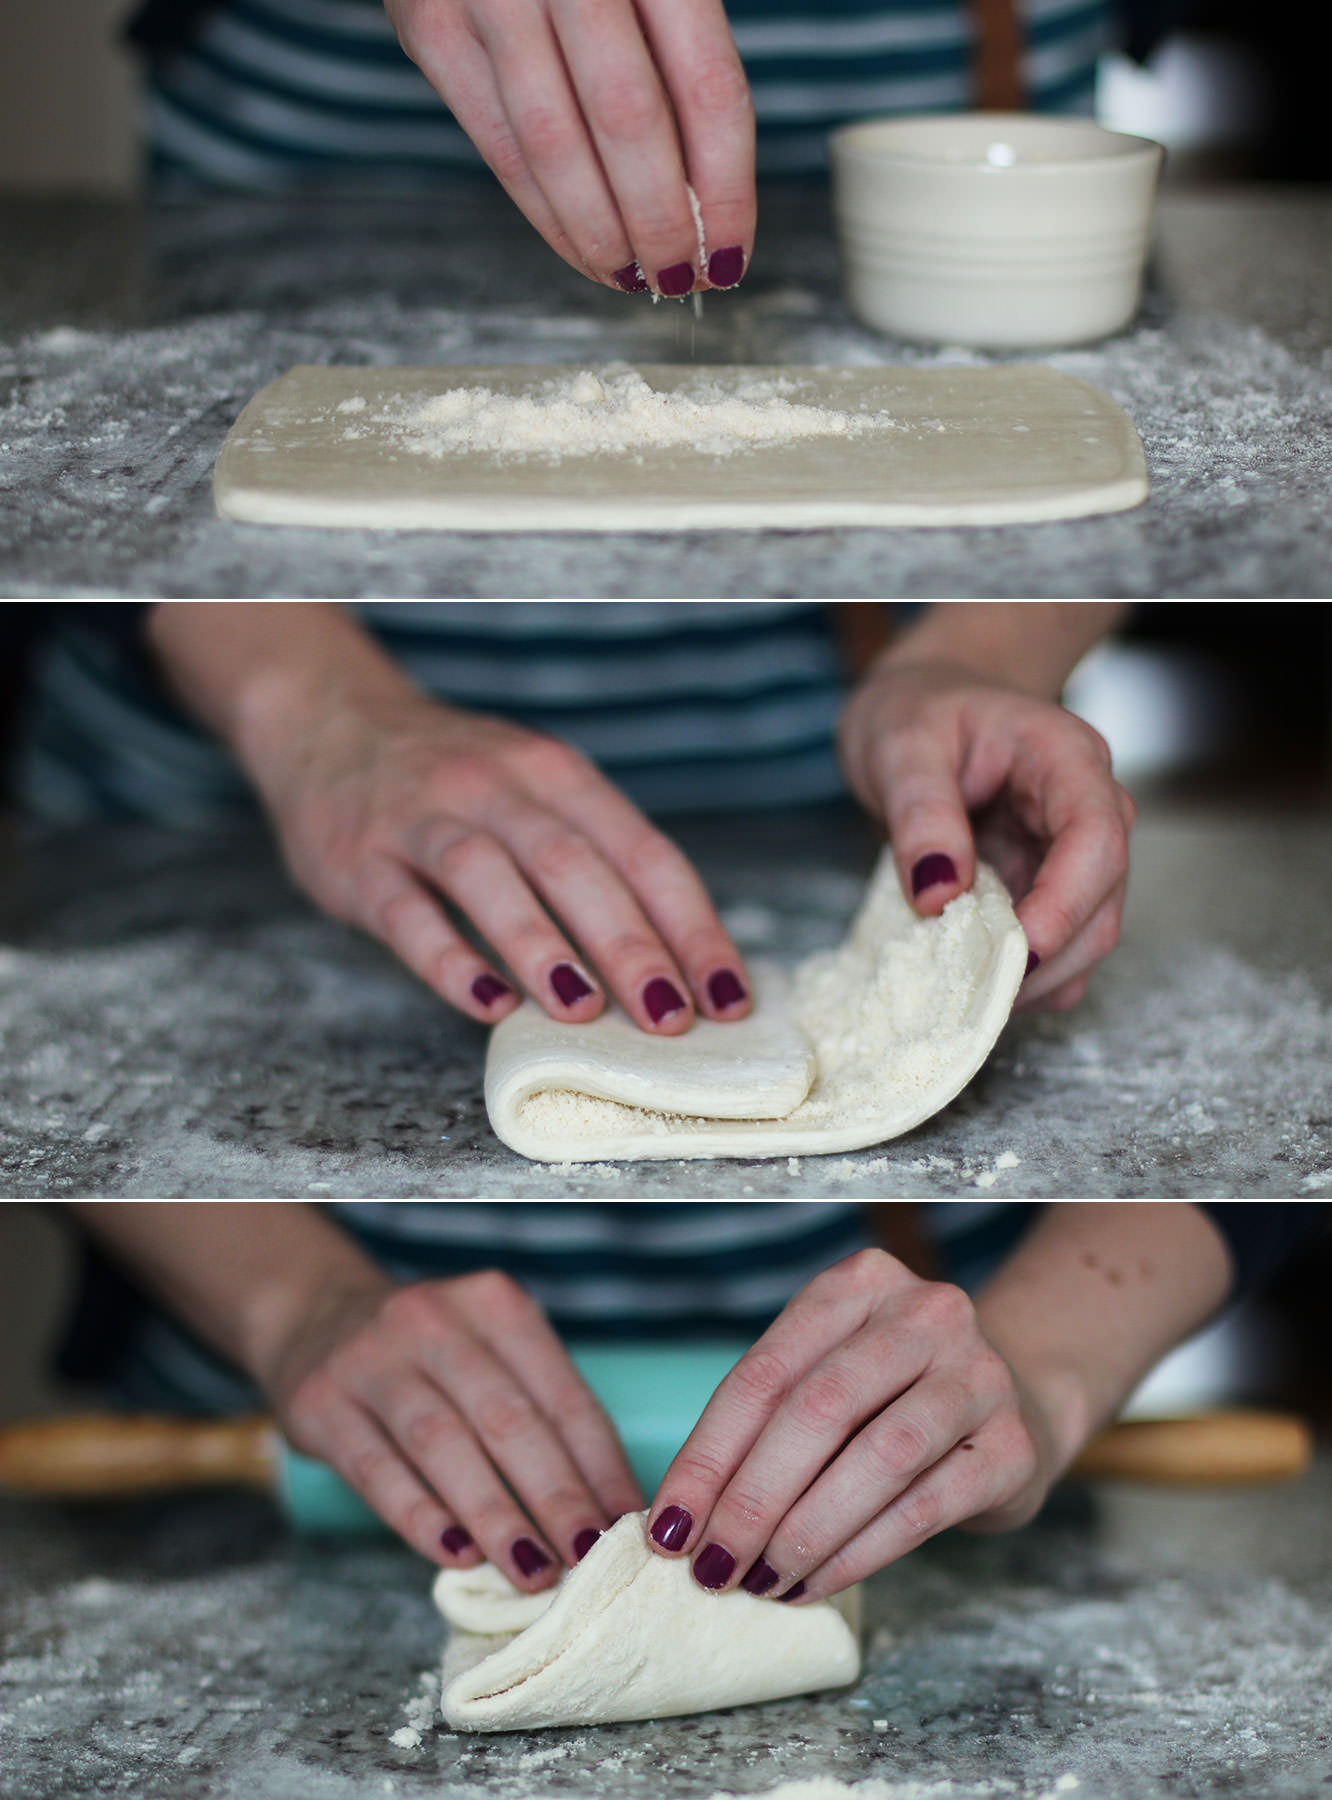
Sprinkle half the parmesan onto the pastry. Fold it into thirds and roll out a little. Fold into thirds again in the opposite direction and roll again until square.
Be careful not to over work it.
Step four
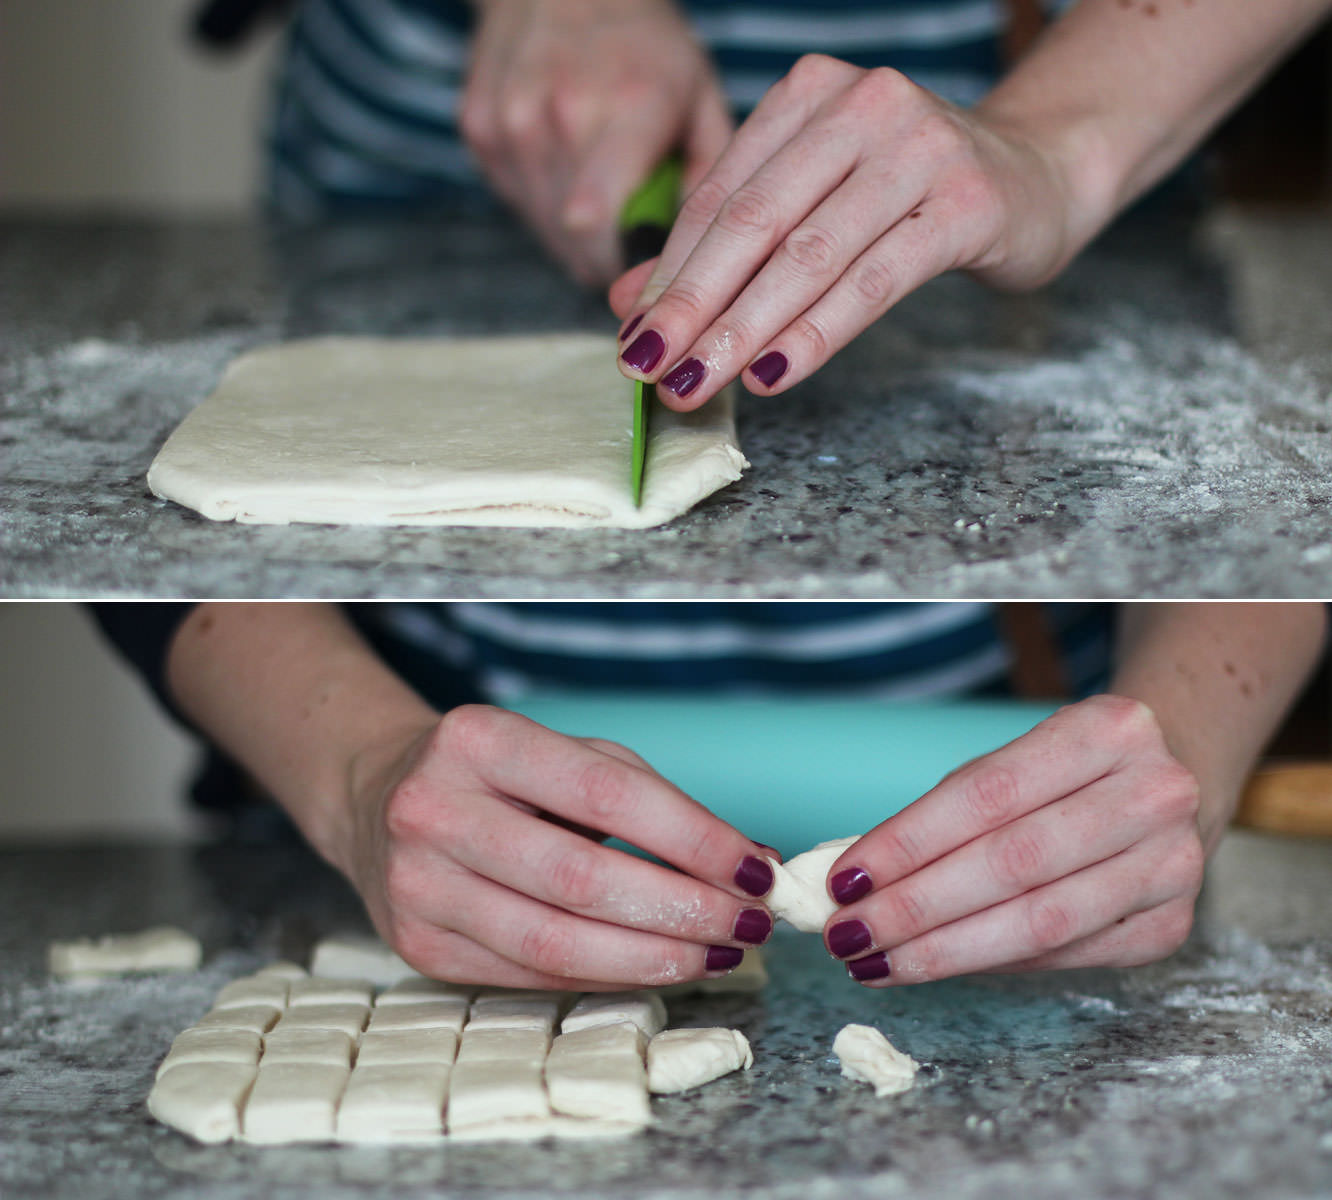
Cut into small rectangles and twist to make little bow tie looking shapes. If my ailing memory serves me correctly I believe this made around 25-30.
Step five
Place on a baking tray and sprinkle with more parmesan and some salt.
Bake on 180C/ gas mark 4/ 350F for about 45 minutes. You need to keep an eye on them as they can look done on the outside and not be cooked the whole way through.
Step six
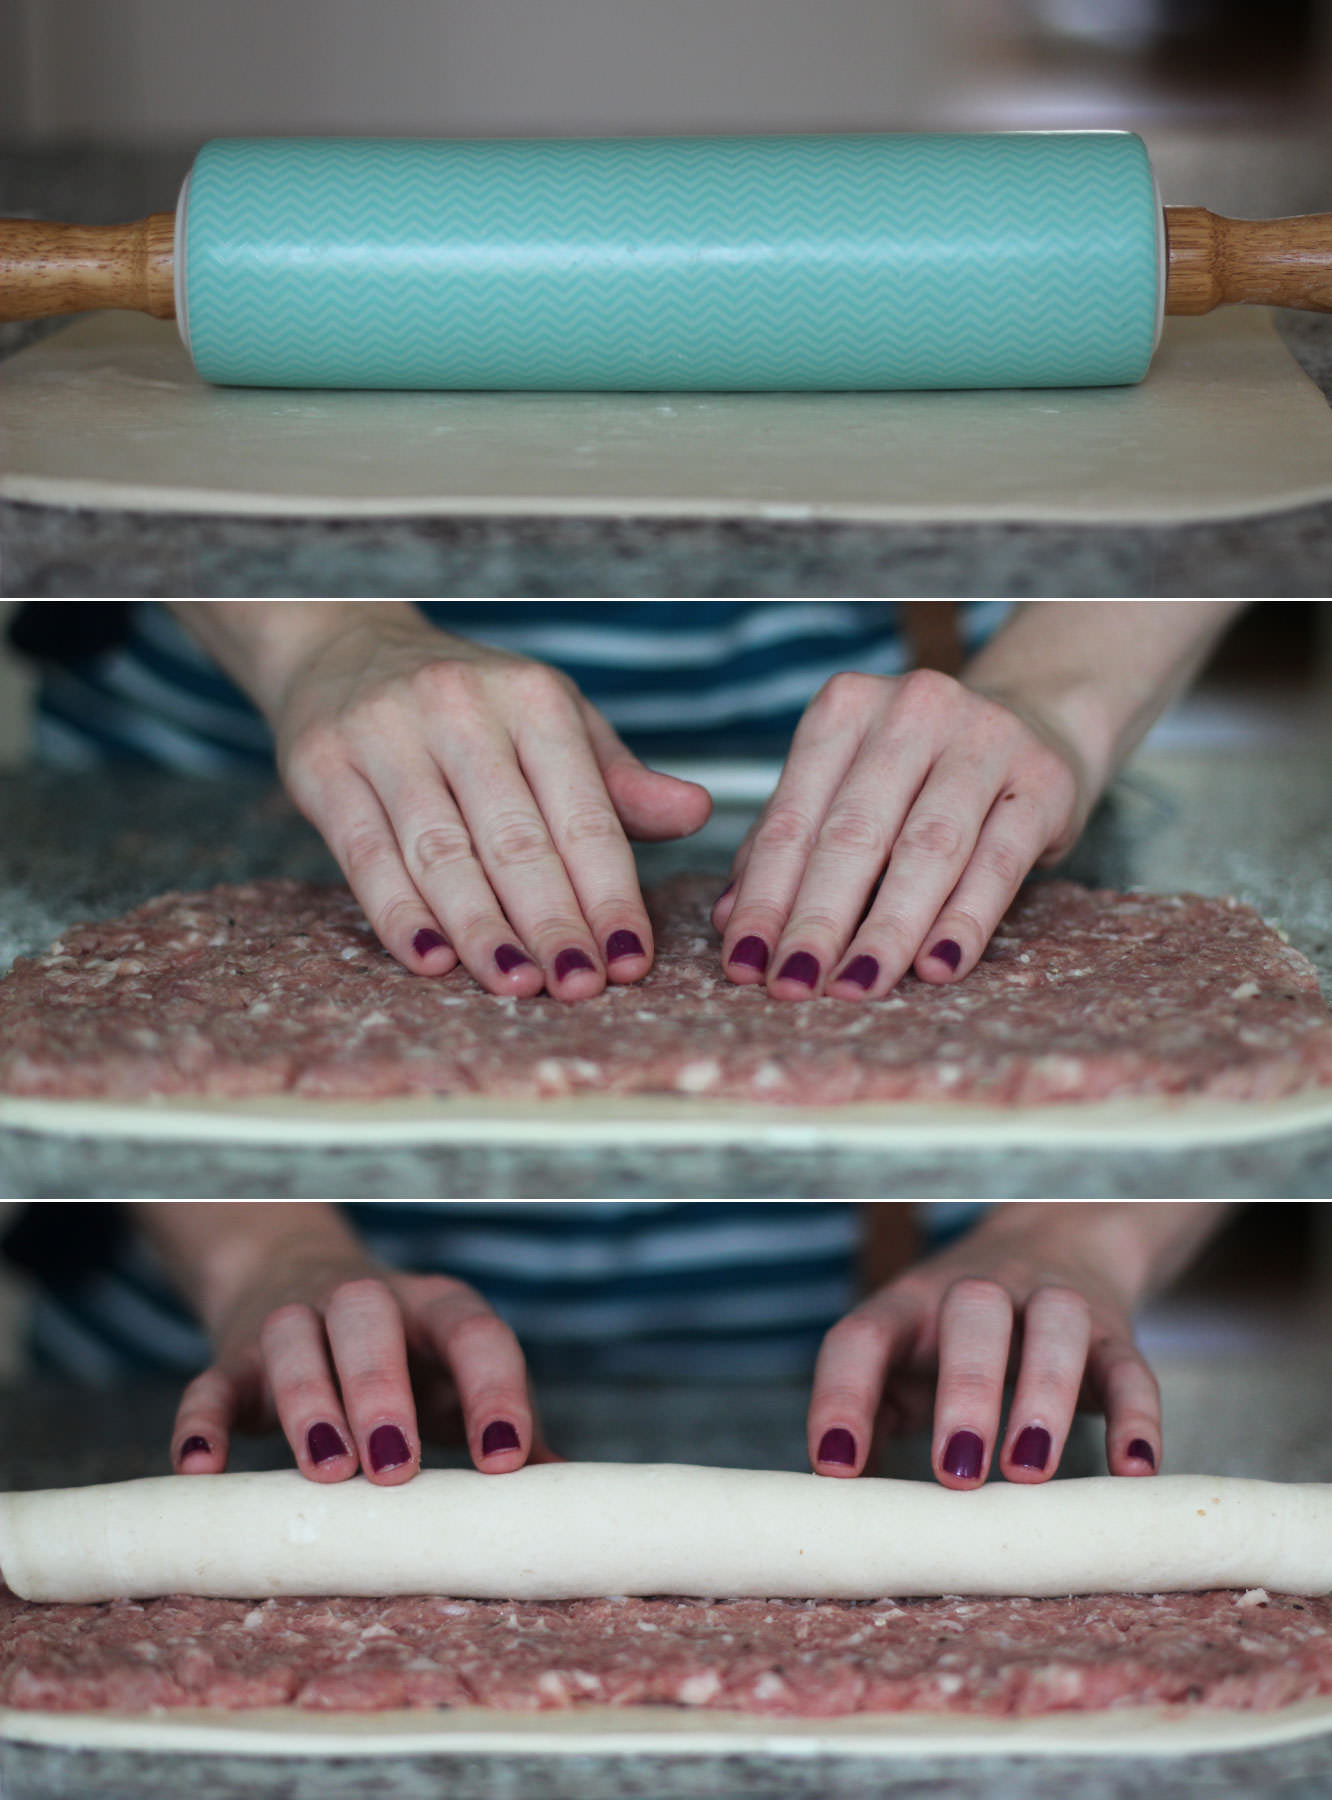
Roll out the second half of the pastry until it’s about 5mm thick.
Step seven
Spread the sausage meat out across the surface of the pastry. Leave a gap of 1-2cm on the long edge.
Step eight
Whisk the egg in a small bowl with a fork. Using a pastry brush (or your clean fingers) spread the egg along the gap you left in step seven.
Step nine
Roll the pastry up, the egg should help the edge to seal.
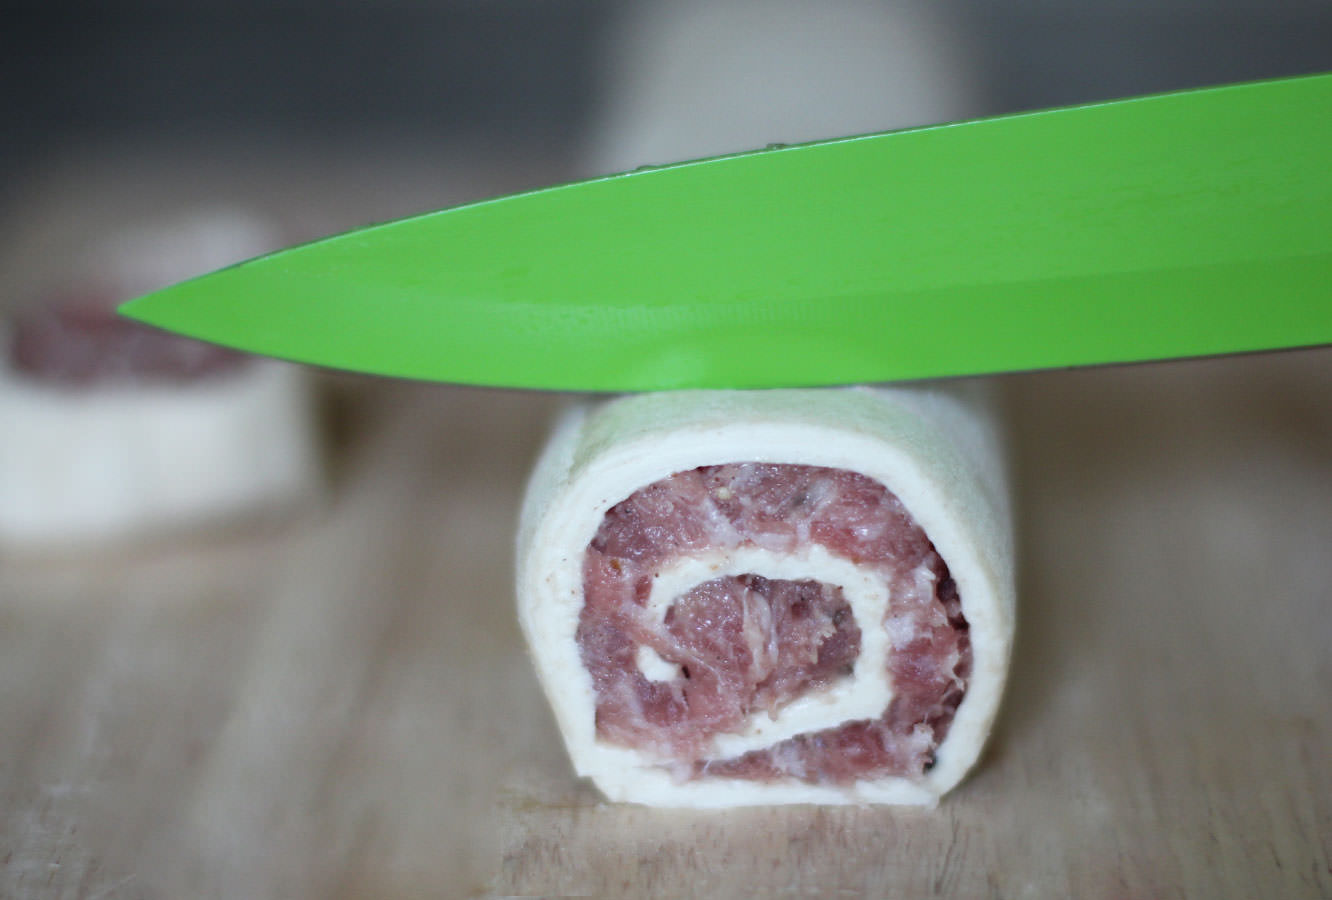
Step ten
Cut slices of the sausage about 1.5cm thick.
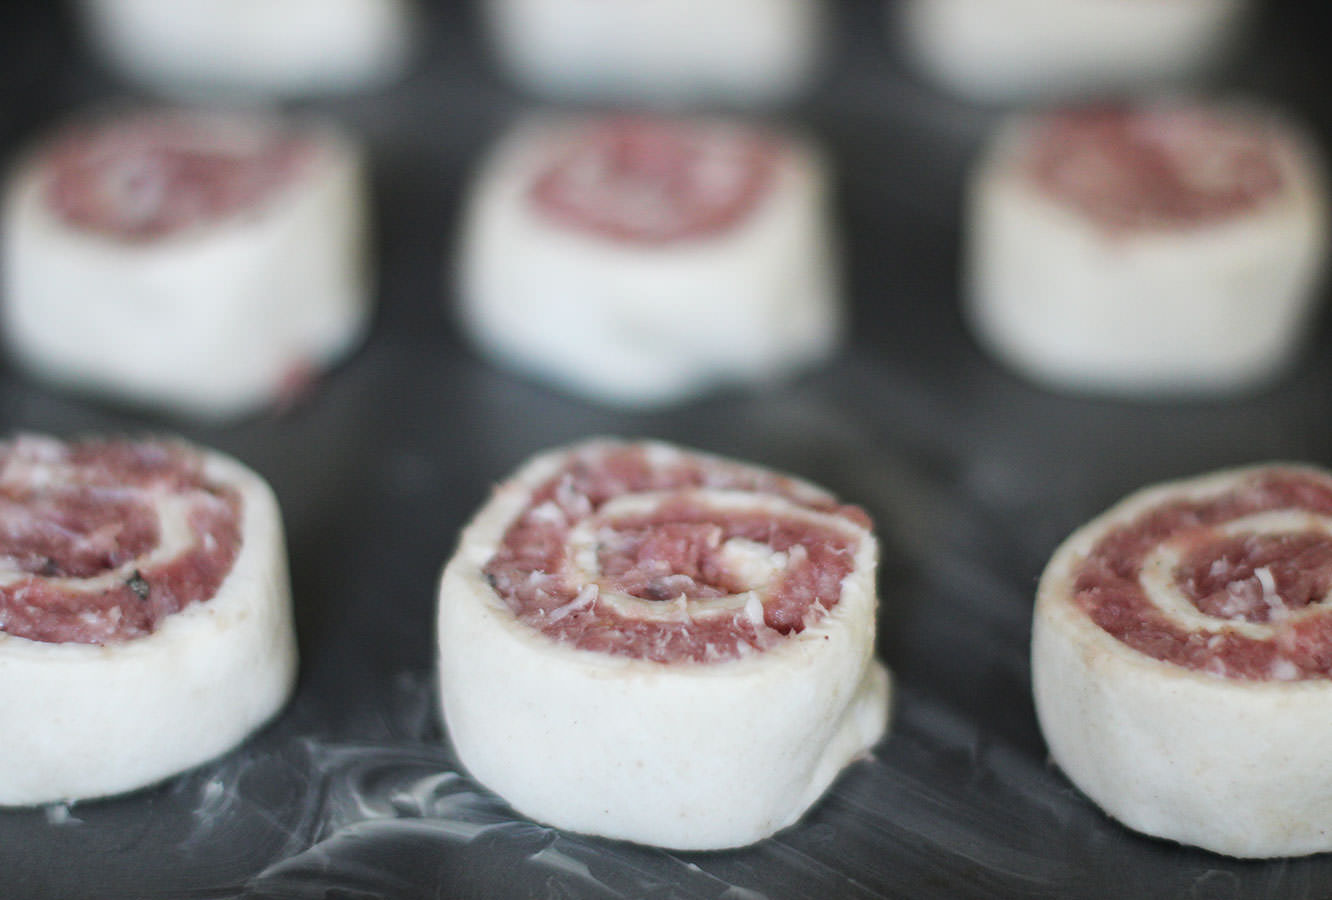
Step eleven
Place on a greased baking tray and cook with the cheese bites.
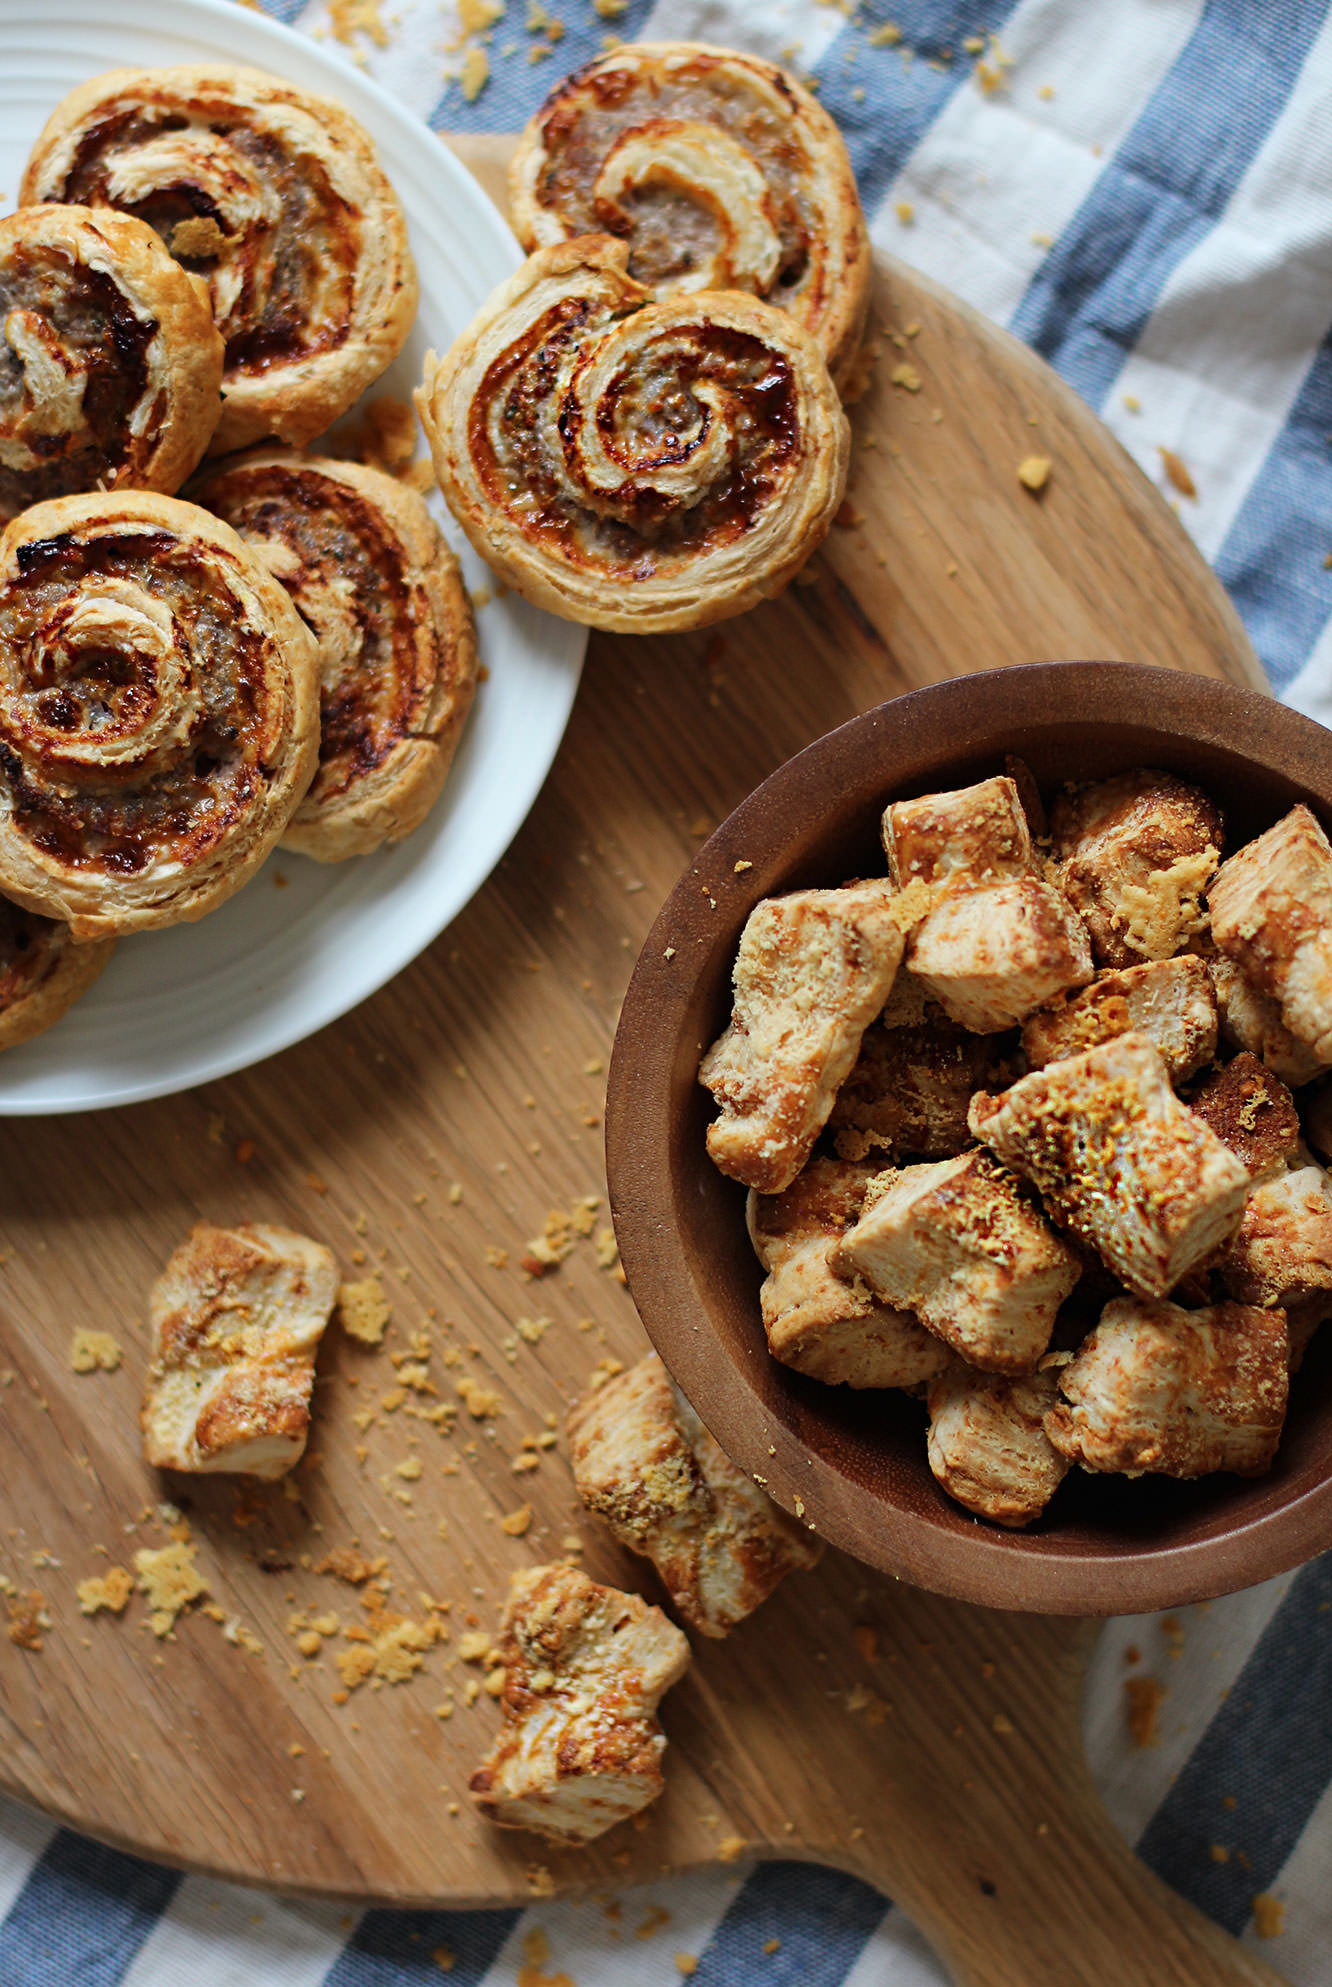
Step twelve
Serve fresh from the oven and try not to eat them all before the guests arrive.
Some years (every year) I have grand plans for home made gifts and decorations at Christmas. Rarely does this materialise in the lovely relaxed and whimsical way it looks in my head. Generally I end up covered in the contents of my baking cupboard feeling totally harassed by the number of hampers I’ve decided to make.
If you’re anything like me, or if you’re completely handmade/craft-phobic in the first place, this one is for you. Three super quick festive crafts to brighten up the house and fill up stockings at the last minute. You don’t need an ounce of artistic/baking ability for any of these. So no excuses.
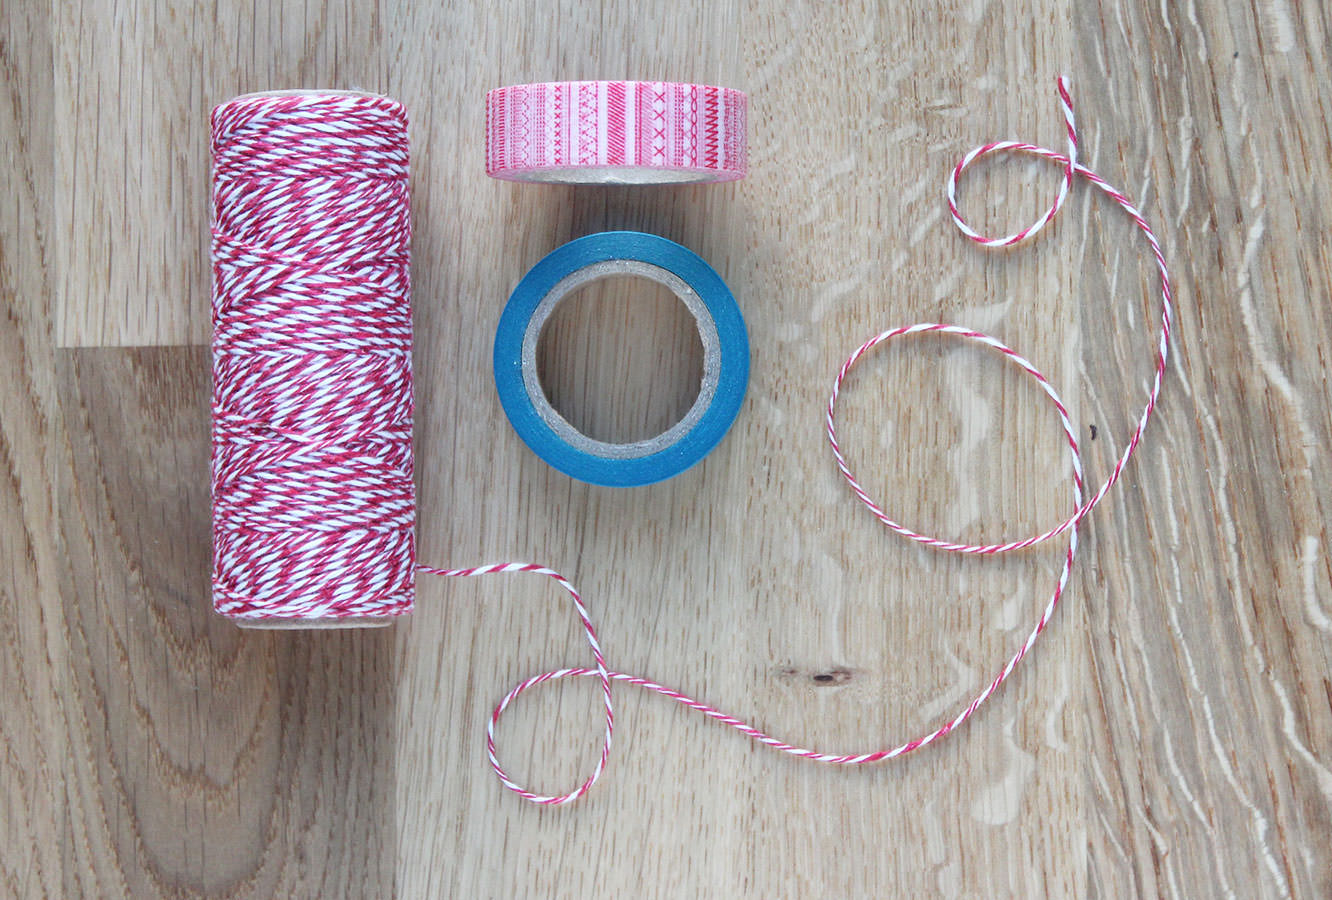
#1: Cute Christmas bunting
You will need
String (I got this two colour spool from Tiger for £1)
Christmassy washi-tape
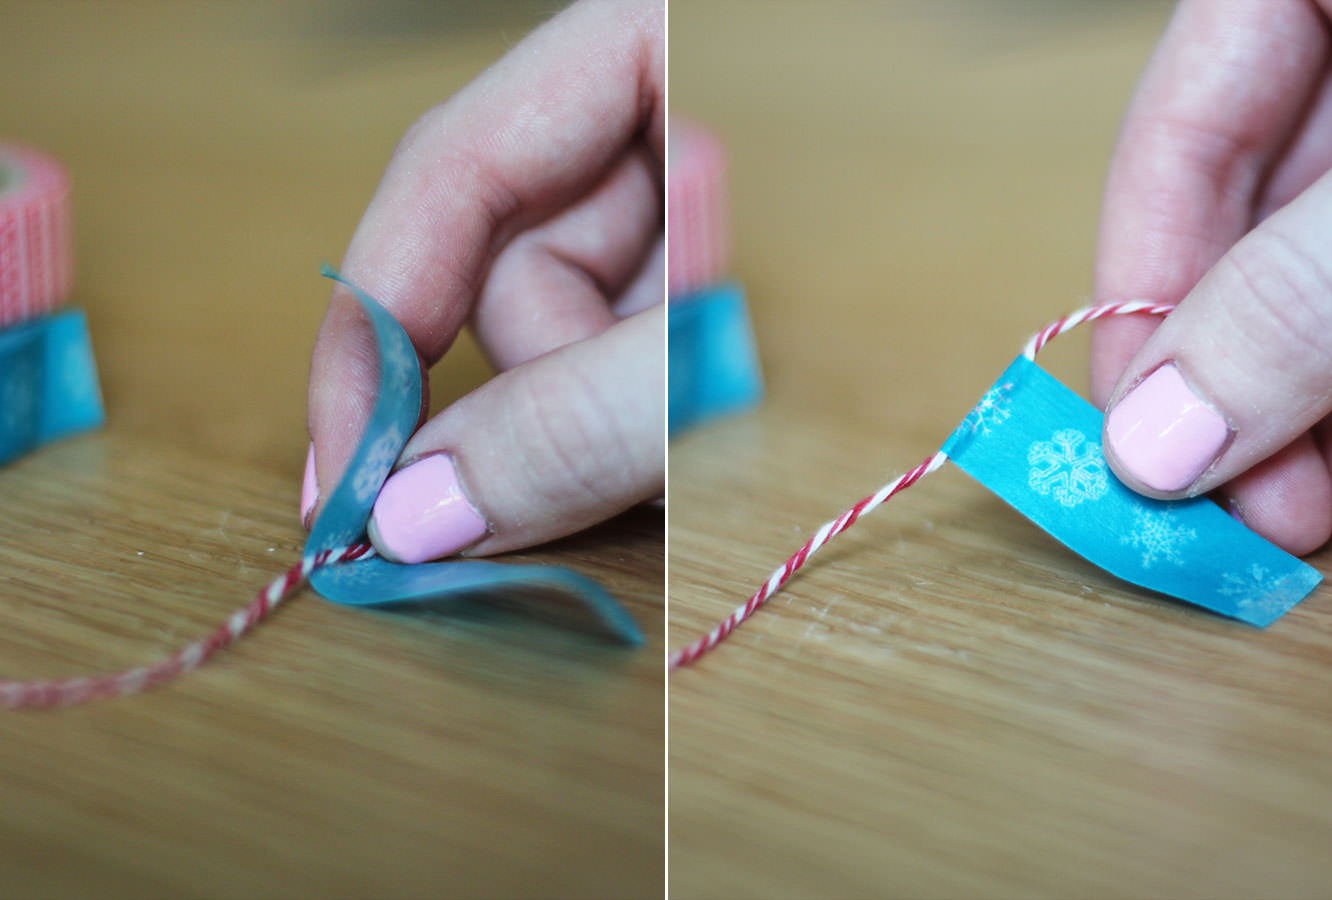
Step one
Cut a random length of tape and place the string in the middle. If you really want to punish yourself you can try and make them all the same length, but I really like them random and it’s much easier that way too.
For this step I cut loads and stuck them on the edge of the table so I had them ready and did them in batches so I wasn’t constantly cutting one then sticking it etc etc.
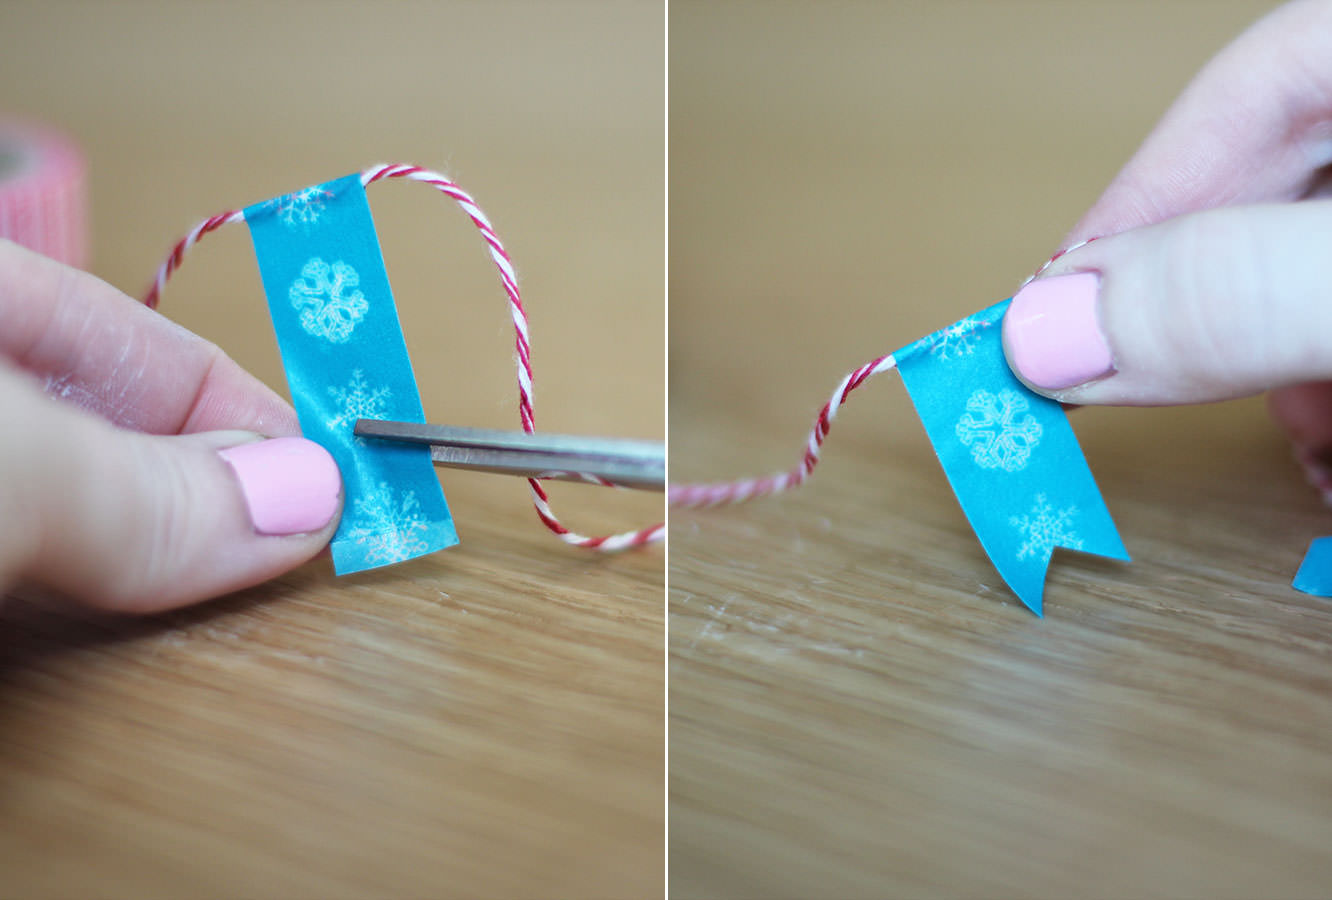
Step two
Fold over the wash tape and stick together. Again, I found it easier to do this step in bulk and then snip them in one go (see below).
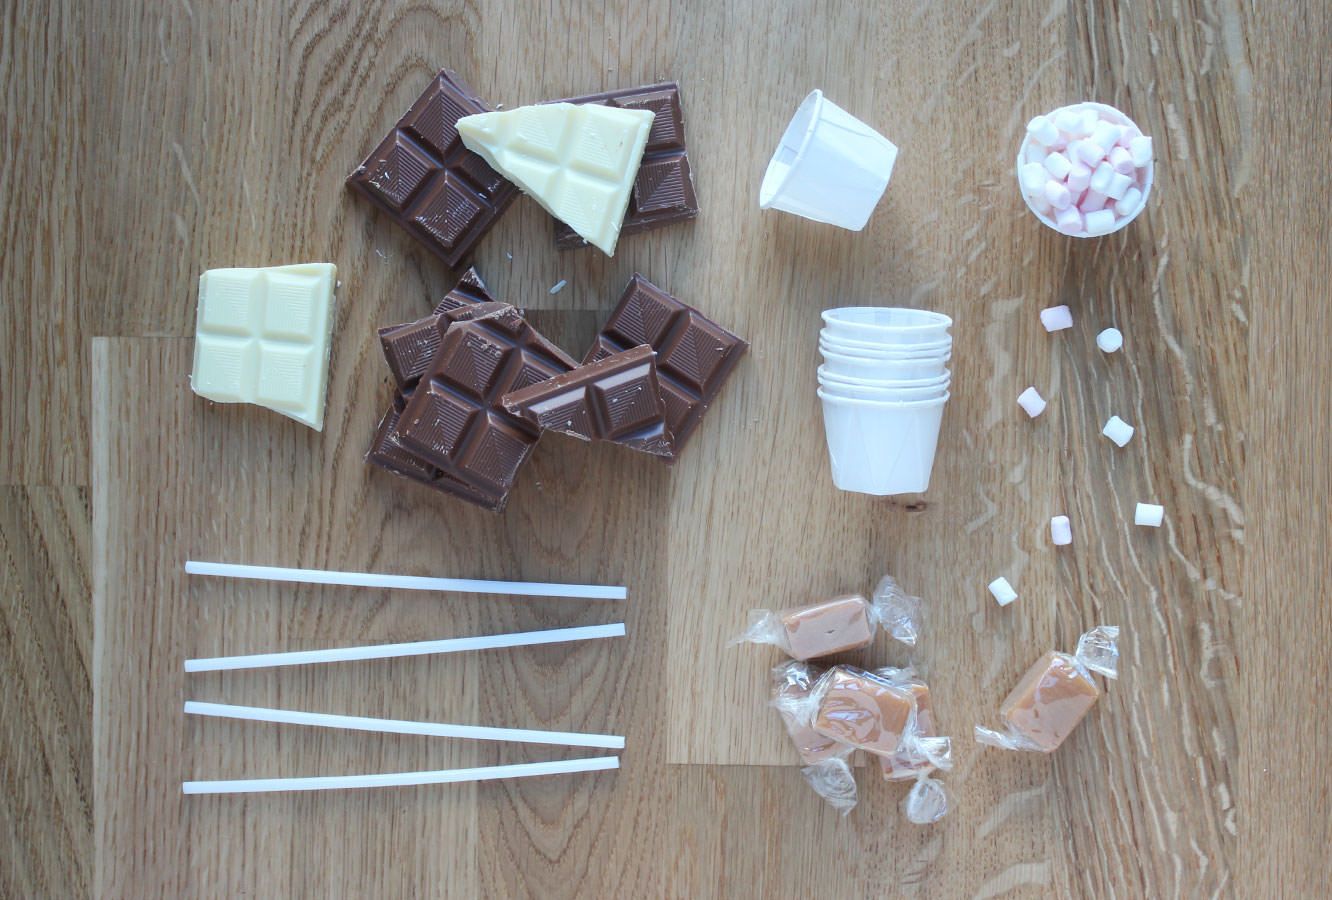
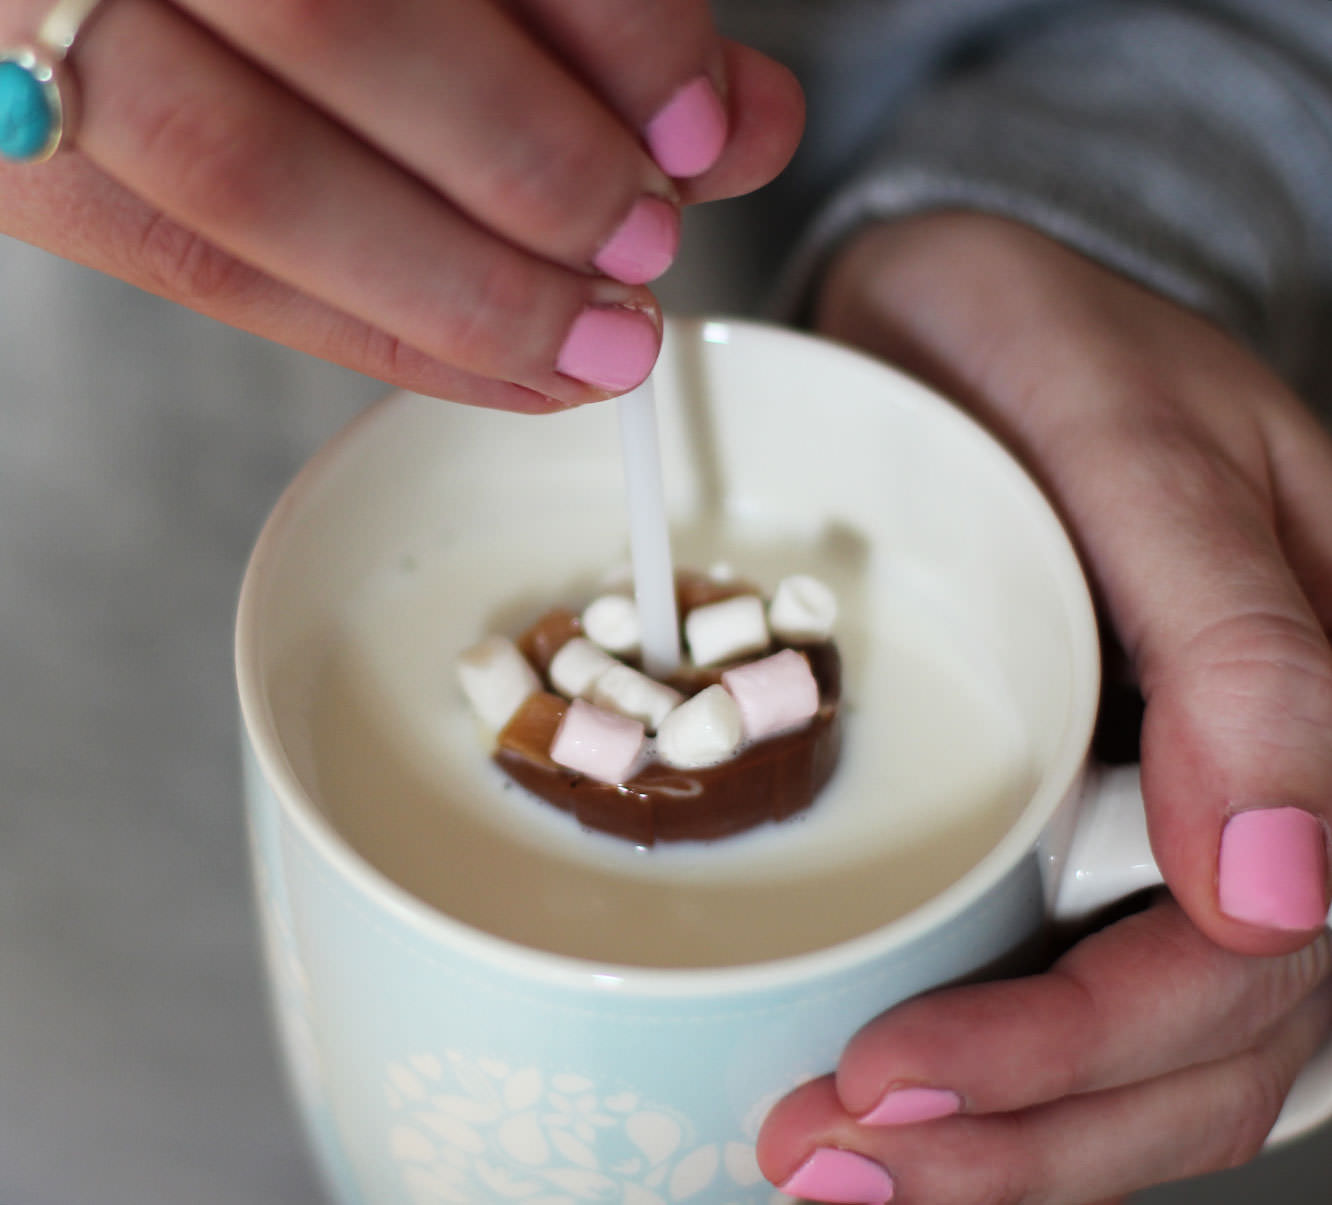
I saw one of these at the shops today, it was £3! These make a great little stocking filler, present topper-upper or gifts for the neighbours. Just swirl into hot milk for a luxury hot chocolate.
You will need
400g/ 14oz Milk chocolate
50g/ 1.5oz White chocolate
Condiment cups (if the closest McDonalds doesn’t have these you can buy them online, or use mini-muffin cases)
Mini mini marshmallows (these tiny fellows are from Waitrose)
Fudge pieces
Cake pop sticks
Edible glitter (optional)
(Makes 10-12. You need roughly 35g chocolate per cup so adjust the above to suit the number of hot chocolates you want to make).
For wrapping
Cellophane roll (available online or from craft shops)
Chrismassy ribbon or string
Step one
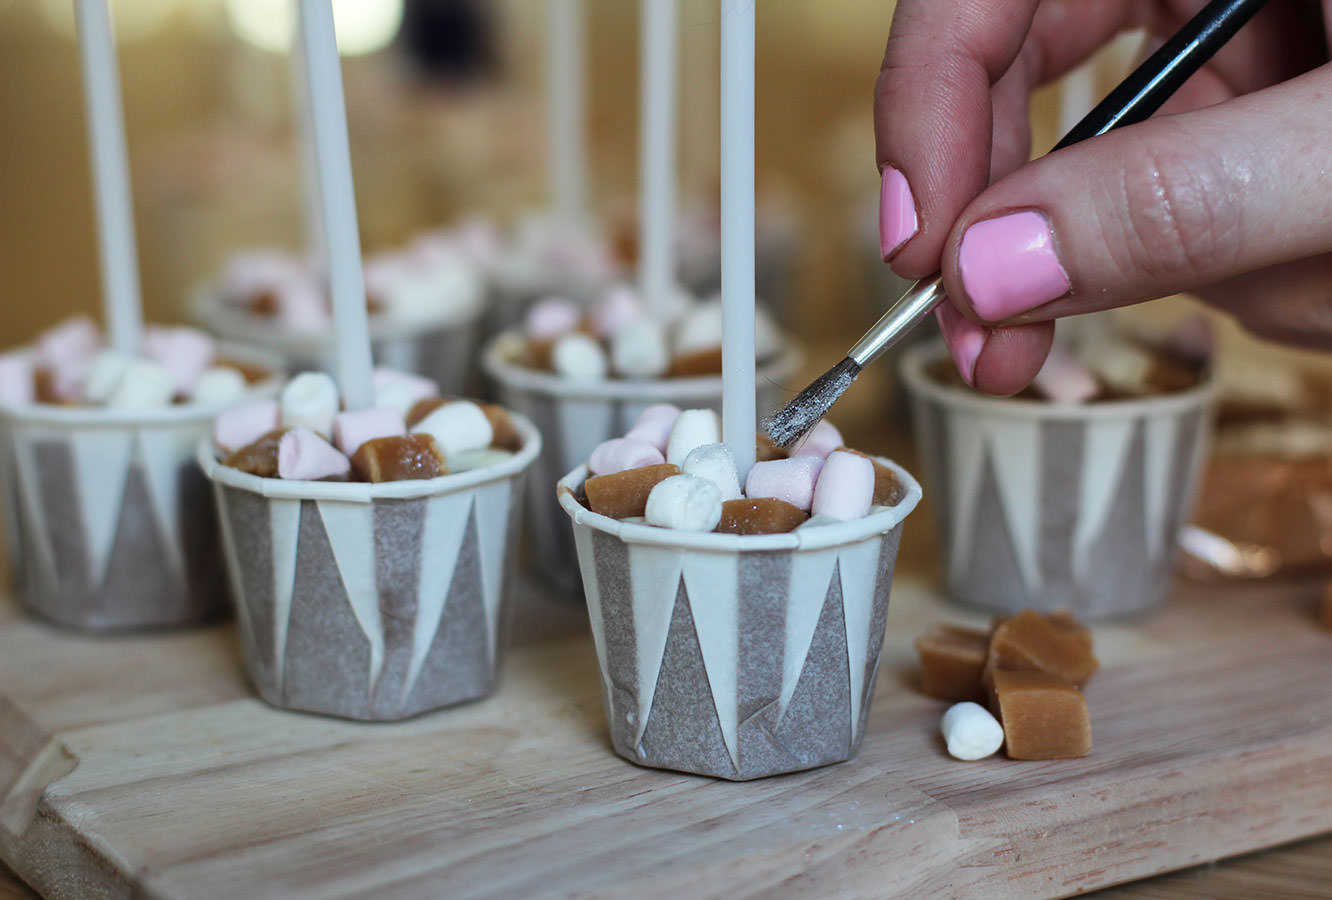
Chop the fudge into little chunks so that they’re roughly in proportion with the marshmallows.
Step two
Melt the chocolate slowly in the microwave and put into piping bags. You can temper it if you want, but given that you won’t see much of it, it might not be worthwhile. I go into a bit more detail as to how to temper chocolate here.
Step three
Fill cup to near the brim with milk chocolate. Add a little white and swirl in with a cocktail stick.
Place stick in and surround with fudge and marshmallows.
Leave to set.
Step four
Dust on a little glitter.
Step five
Wrap up. Cut a square of cellophane wrap and place cup in the centre, bring corners up to the middle and secure. I used a loom band to do this, you could use a small elastic band or go straight in with the ribbon/string.
Trim off the corners and ‘foof’.
Go on. There must be one spare you can treat yourself to?
This week we found ourselves in a bit of a fix. The plan was fondue, but somebody (Peter) forgot to book it. I was a bit sad when I discovered this (months of over eating to stretch my stomach for the big occasion) still, I couldn’t stay grumpy for long, as the gentleman concerned got himself to John Lewis and bought a fondue set. Sometimes it really pays off to have housemates with ridiculous boyfriends.
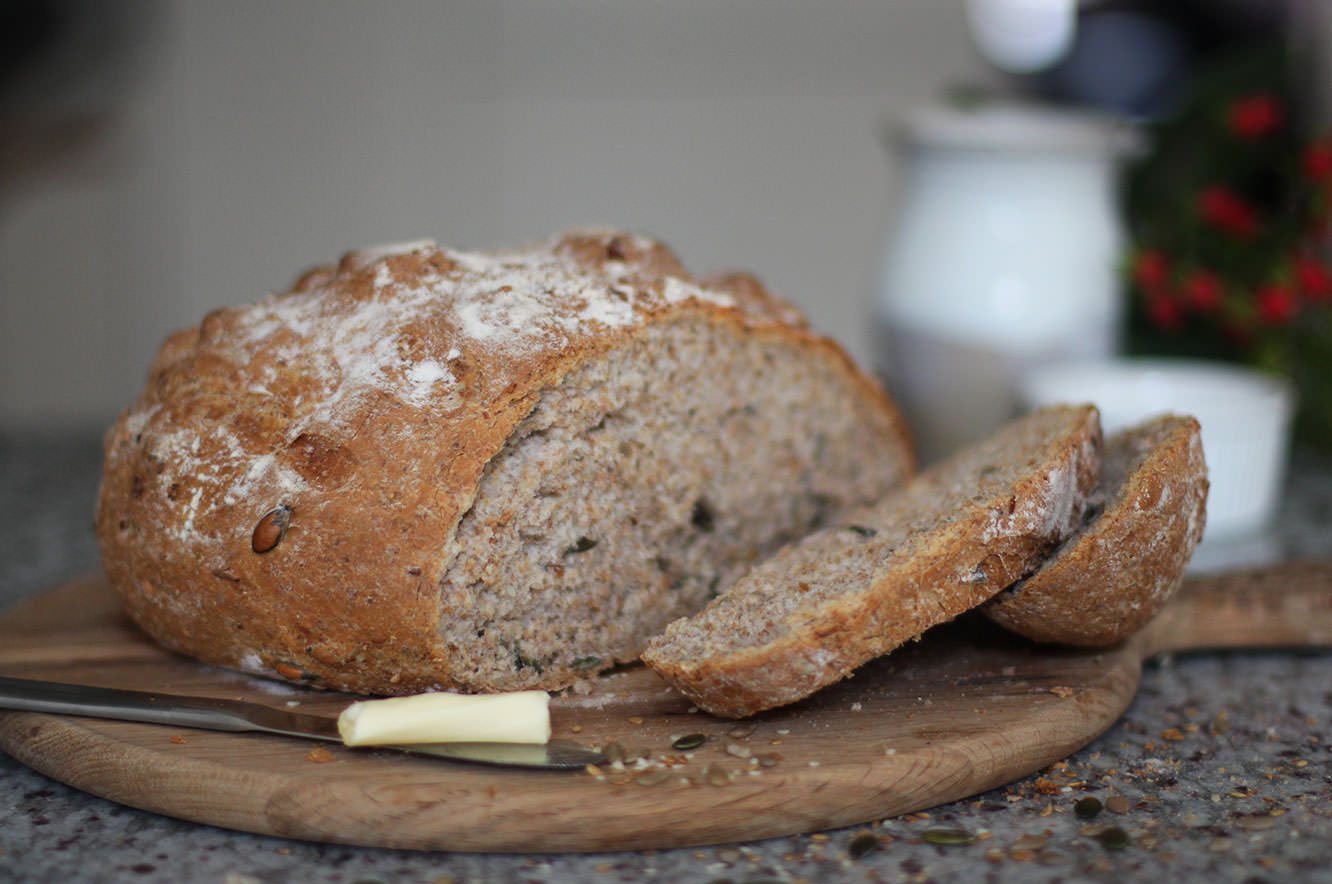
When I got word that fondue was back on, I figured I would contribute a little something to the dipping pot. So here’s a double whammy post. My seeded granary wonder bread, Pete’s (mainly Nigella’s) cheese fondue.
You will need
For the bread:
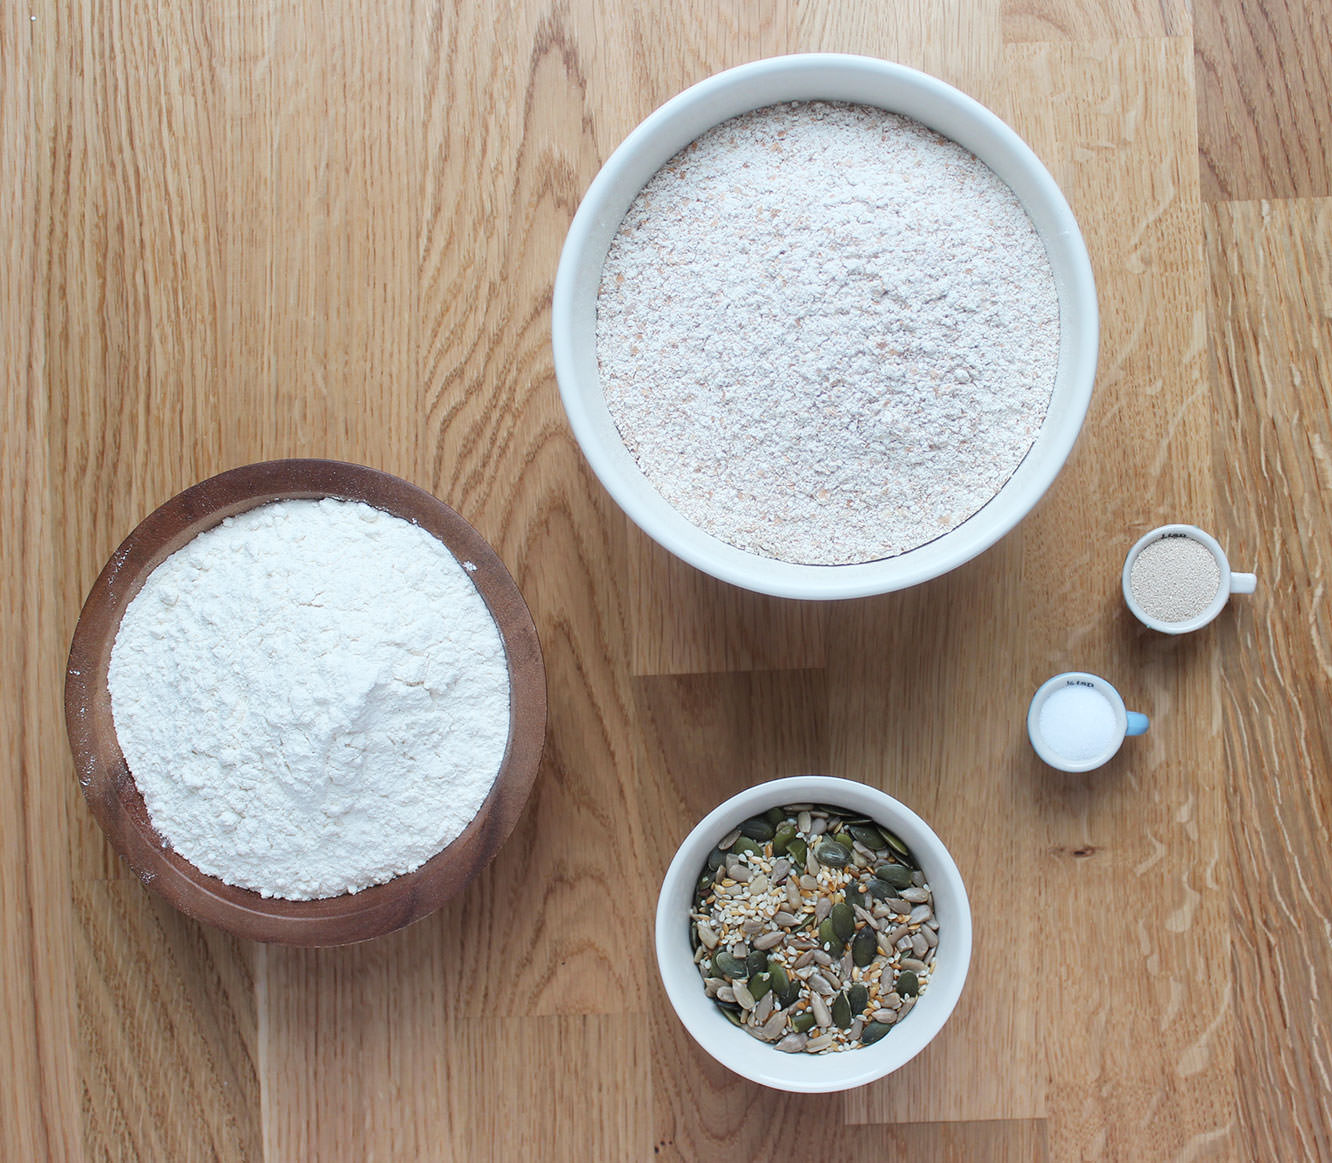
300g/10.5 oz Wholemeal bread flour
200g/7 oz Strong white bread flour
150g/5 oz Mixed seeds
300ml/10 fl oz Cold water
7g Dried yeast
7g Salt
For the fondue:
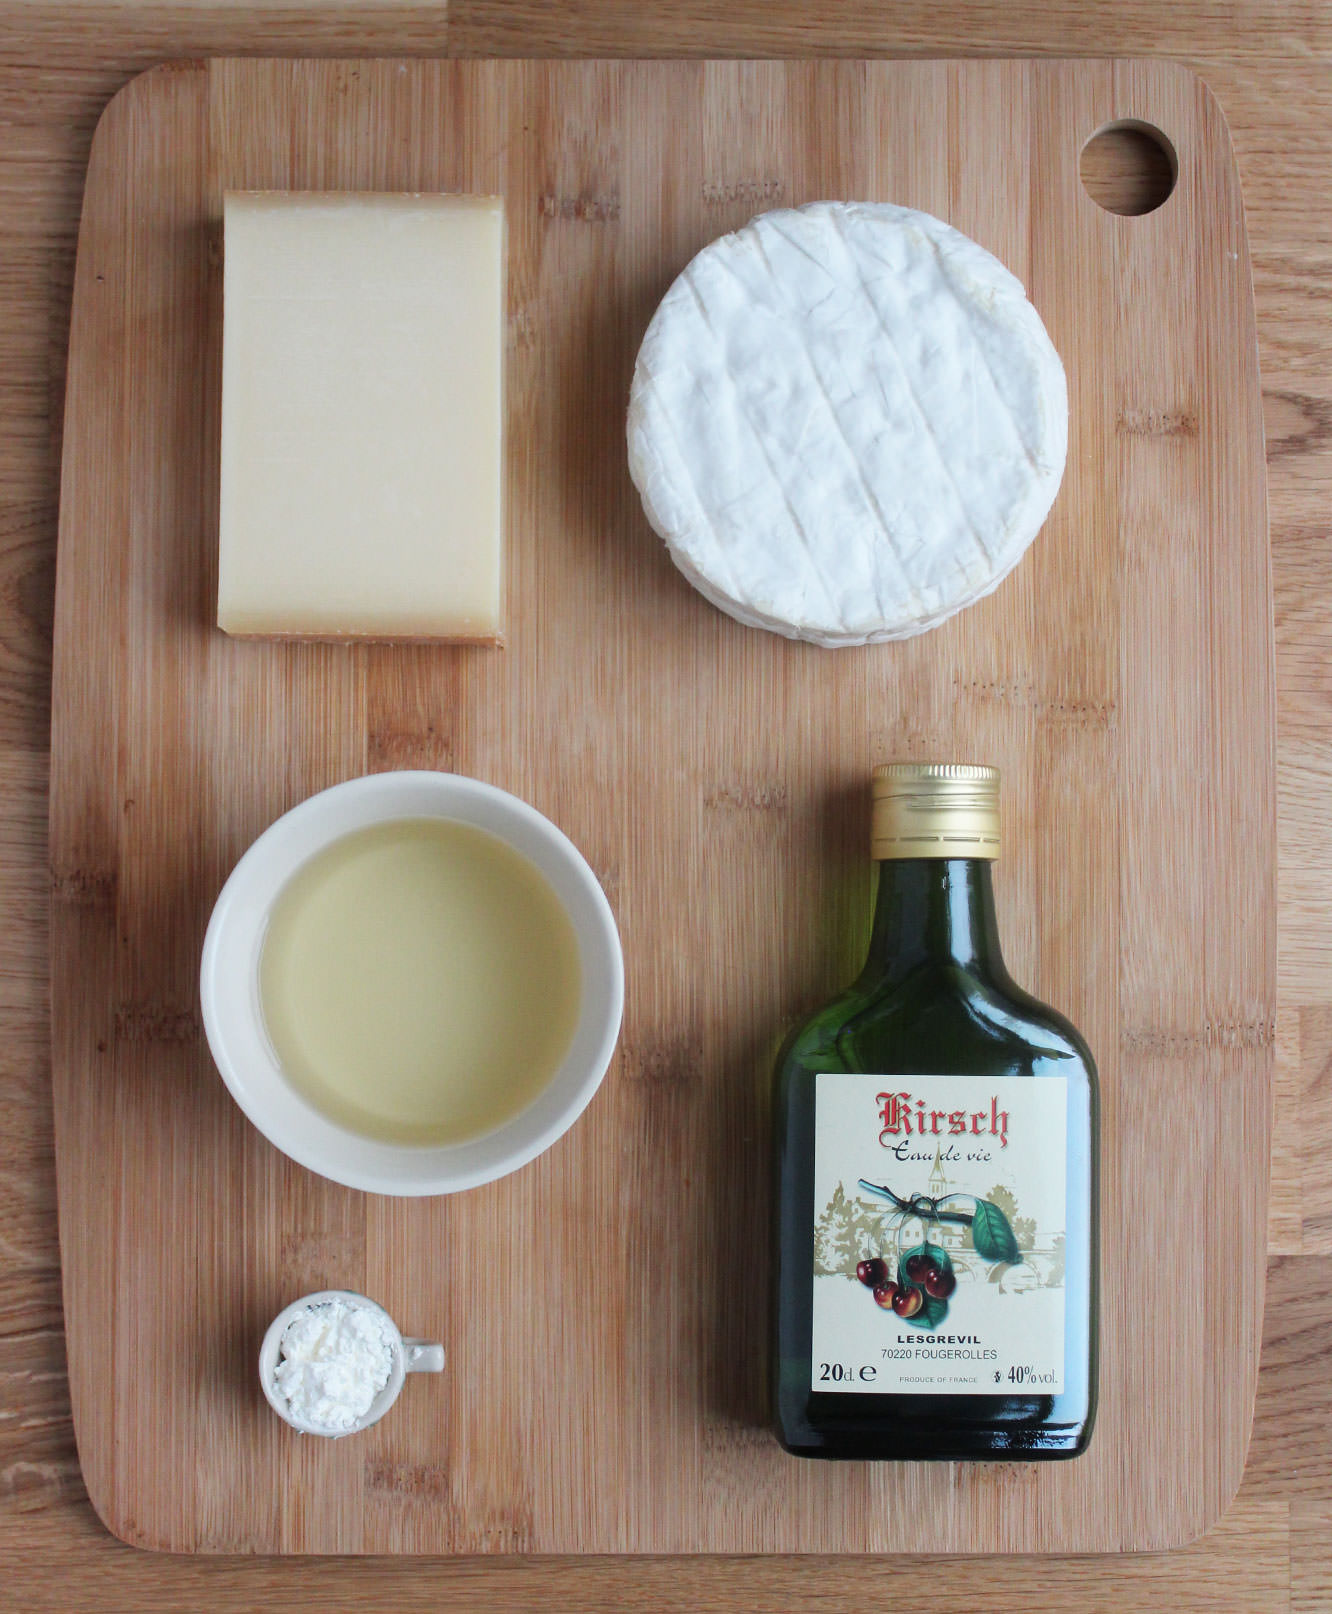
400g/14 oz Gruyere cheese
400g/14 oz Camembert (although after doing this, P and I think you’re safer with Emmental as it has a more similar melting point to Gruyere)
400ml/13.5 fl oz White wine (just buy the one that is most reduced from the highest price)
4 Tablespoons Kirsch
3 Teaspoons cornflour
Clove of garlic
Some charcuterie, just because.
(Serves 6)
Step one
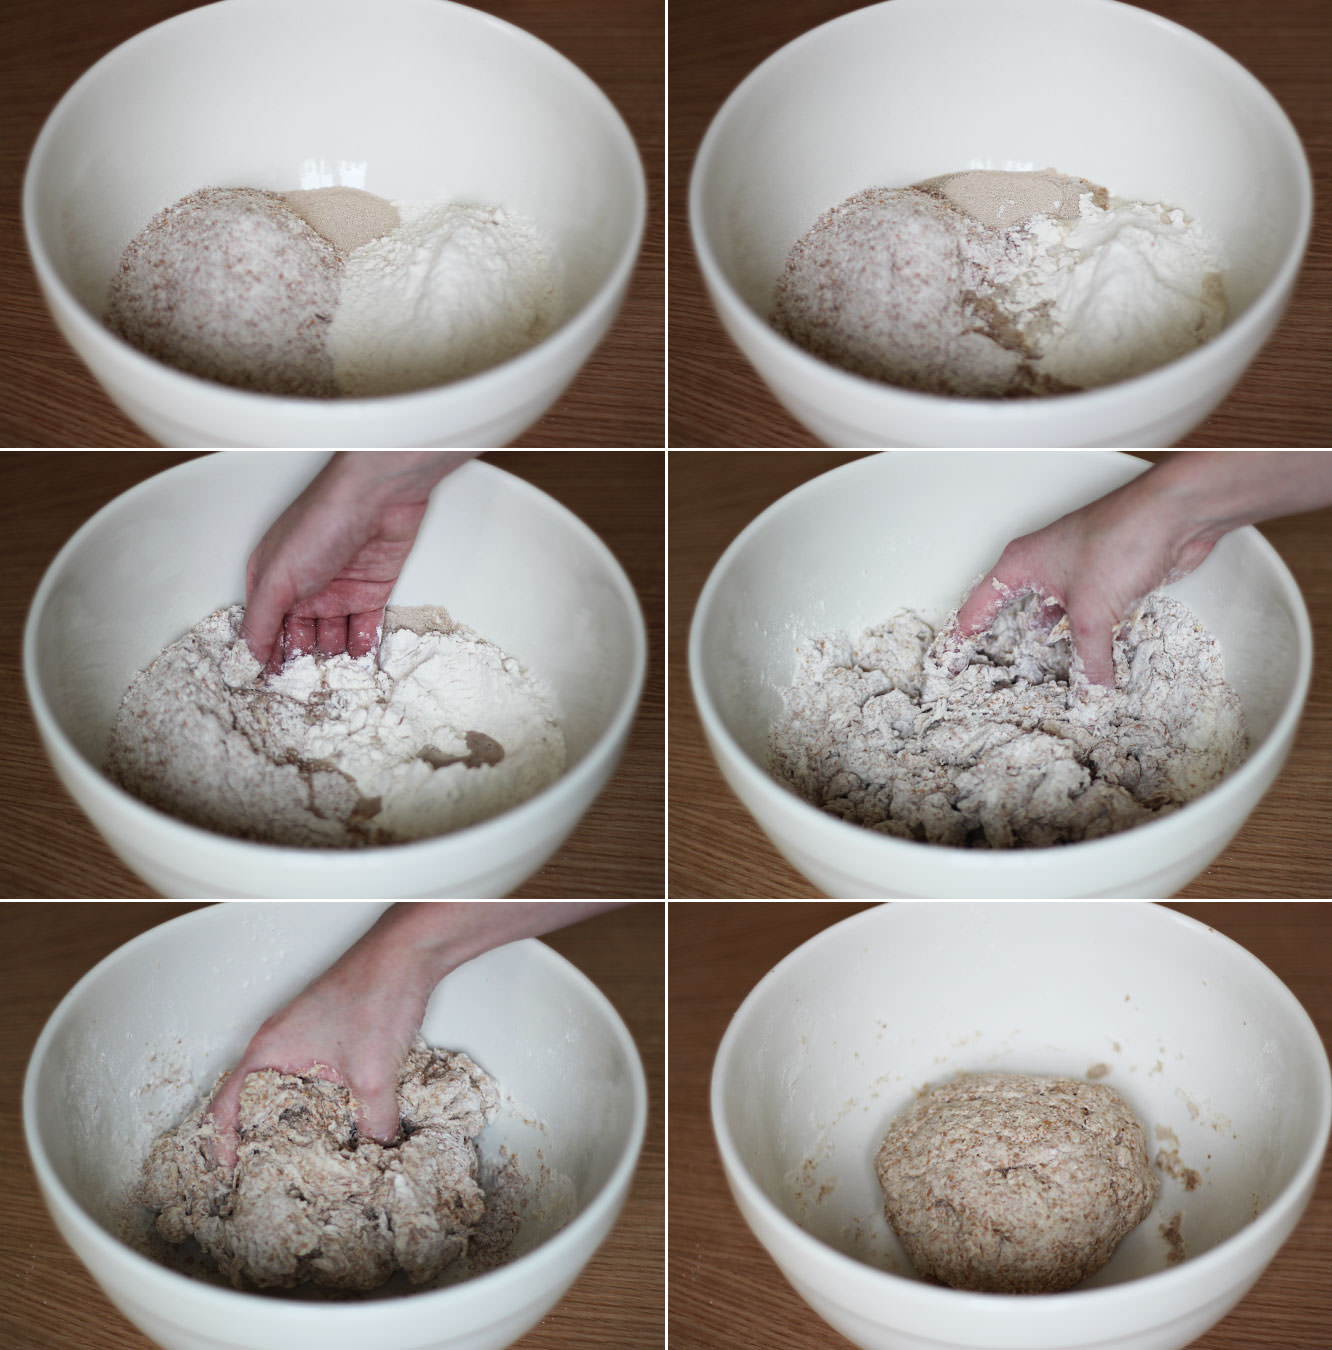
Combine the two bread flours salt and yeast in a bowl. Keep the yeast and salt as far apart as you can. The salt has a nasty track record for bullying the yeast.
Step two
Add the water and mix with your hand until combined. You don’t need the water to be warm, at least that’s what Paul Hollywood says on EVERY EPISODE OF BAKE OFF. Something about the protein structure. I’m inclined to bow to his superior knowledge.
You may need to add a tiny splash more water if your dough isn’t coming together.
Step three
Lightly cover your work surface with olive oil so that you don’t add loads more flour to the dough as you go. Another Hollywood gem.
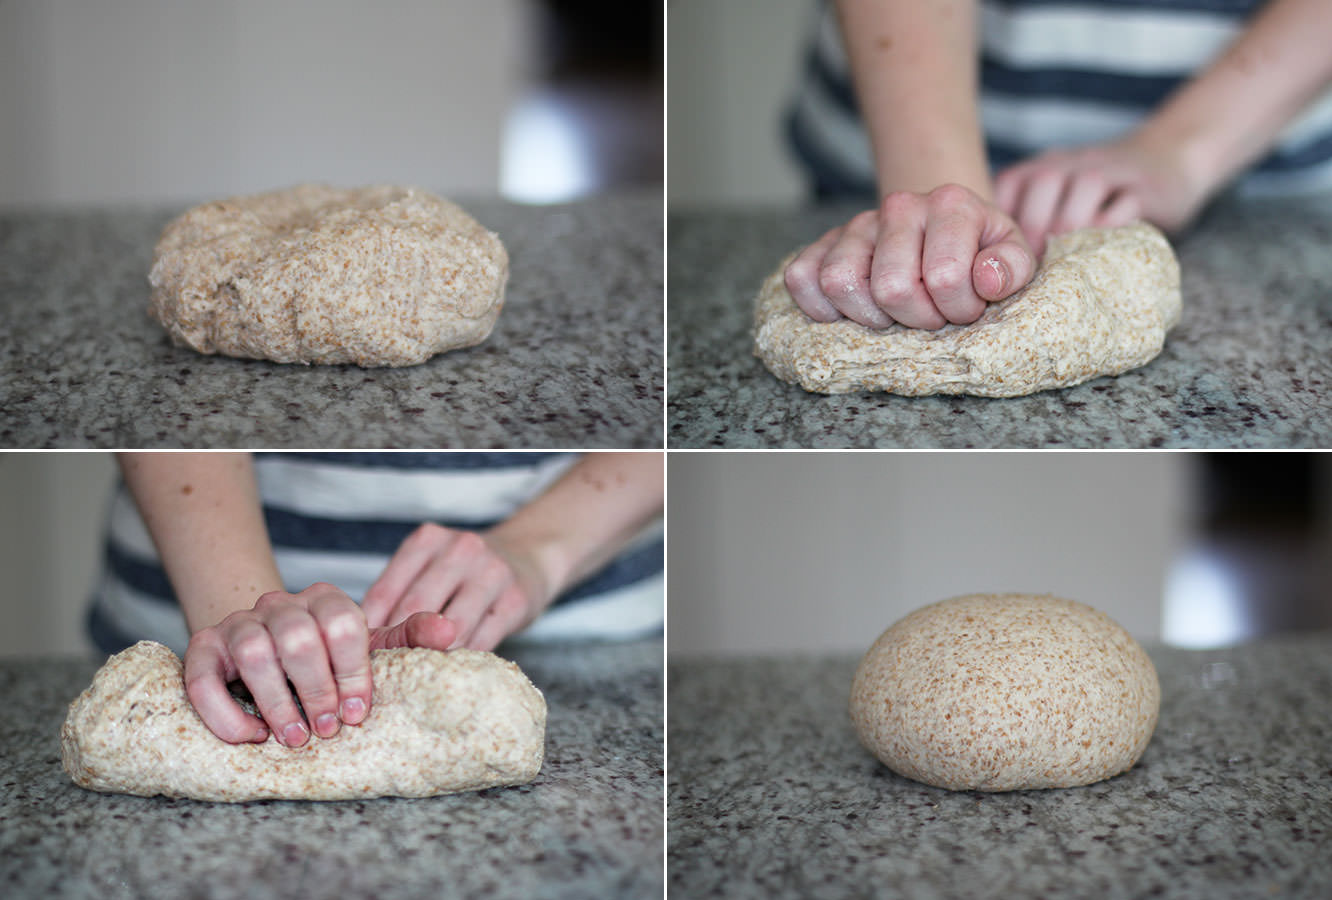
Knead the dough by pushing it forward as far as it will go and then folding it back. Turn and stretch again. Repeat repeat repeat.
At first the dough will be fairly brittle and will break as you do this. Don’t worry, it will get softer and more stretchy as you go. It will also merge back together more easily (you’ll know what I mean when you get there)
As it’s wholemeal flour you need to keep going on this for about 15 minutes, it should form a much smoother ball that the one you started with when you’re done.
Step four
Lightly oil a bowl and place dough in. Cover with clingfilm and leave for an hour to rise.
Step five
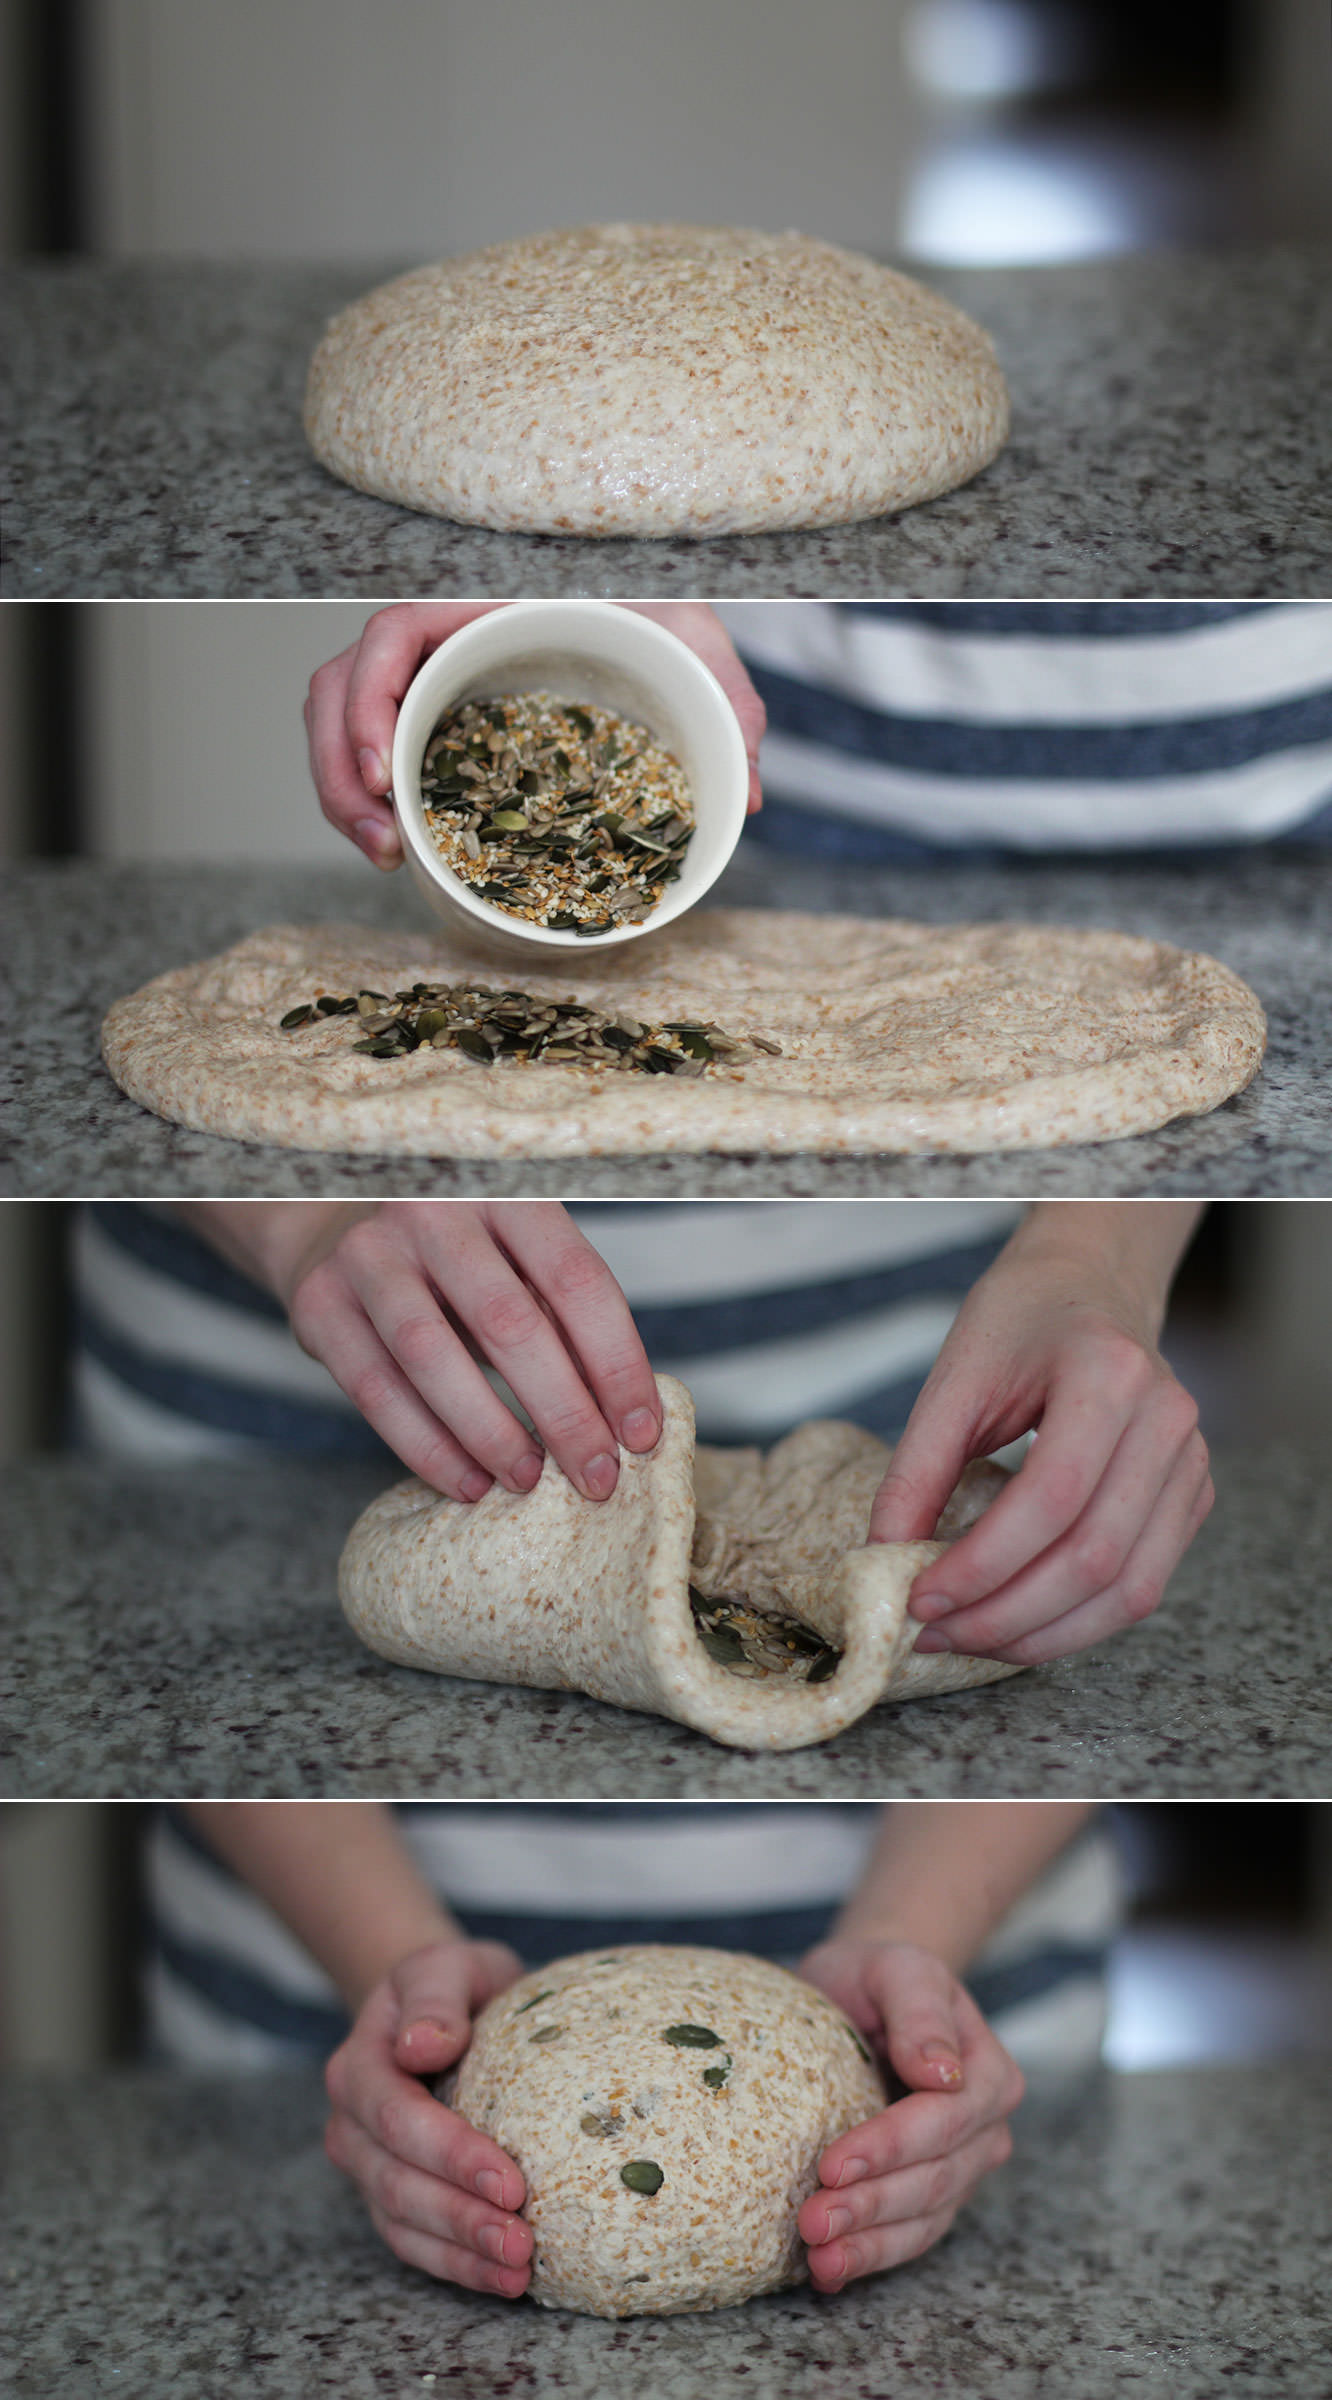
Turn dough back out onto the work surface (it’s ok if you have an overwhelming urge to put your face in it – I mean, don’t actually do it, but thinking it doesn’t make you weird).
Flatten out with your fingers (or your fist if you need a small moment of therapy). Add the mixed seeds evenly over the surface of the mix. You will feel like you have a lot, but they disappear quite quickly.
Fold the corners and sides back into the middle and knead for a minute or so until the seeds are distributed throughout.
Scoop your hands around the edges to form the dough into a ball.
Step six
Dust a large baking tray with flour and place the dough on top. Slash the top in a criss cross pattern and sprinkle the top with a bit more flour.
Leave for another hour to prove.
Step seven
Bake on 200C/gas mark 6/400F for 40-45 minutes. Keep an eye on it as it bakes incase any of the edge starts to catch.
Turn the bread over when you think it’s done and tap on the bottom. If it sounds quite hollow then you’re good.
Step eight
Try to resist biting right into the loaf. It’s time to make the fondue.
Step nine
Make sure your fondue set is ready to go and the table is set. You’re going to want to eat straight away when you see a pot of melted cheese.
Step ten
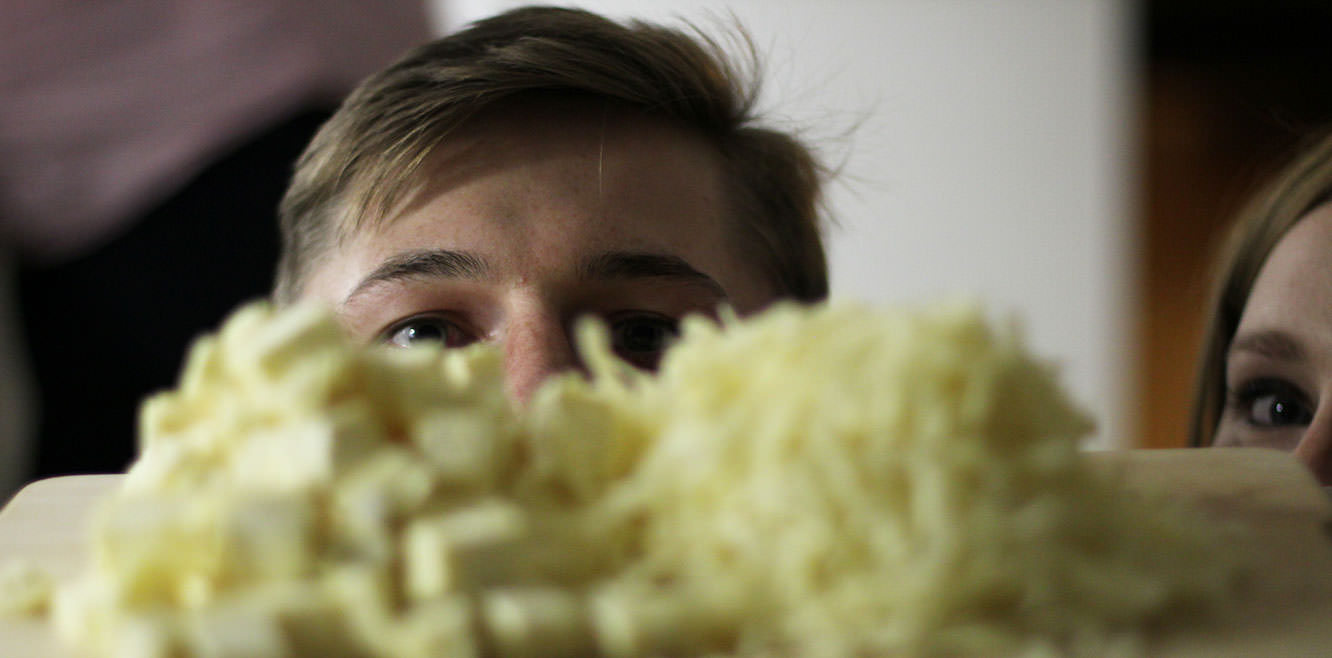
Grate the Gruyere and chop up the Camembert (although I really do recommend you use Emmental instead, the Camembert took a loooooong time to melt and was insanely rich). You will have MOUNTAINS of the stuff. Pete’s actually 6’3″…
Step eleven
Put a the wine into a saucepan on a medium heat. Bring this to a point just before it starts to simmer and start adding the cheese, stirring with a whisk and allowing it to melt in stages.
Step twelve
Once all the cheese has melted pop in the garlic and season to taste. Bring the heat up to a bubble and keep whisking until it is combined with the wine (though again – Camembert wasn’t co-operating fully with us on this one). Finally add the Kirsch and cornflour (probably best to mix the two beforehand so the cornflour doesn’t clump up).
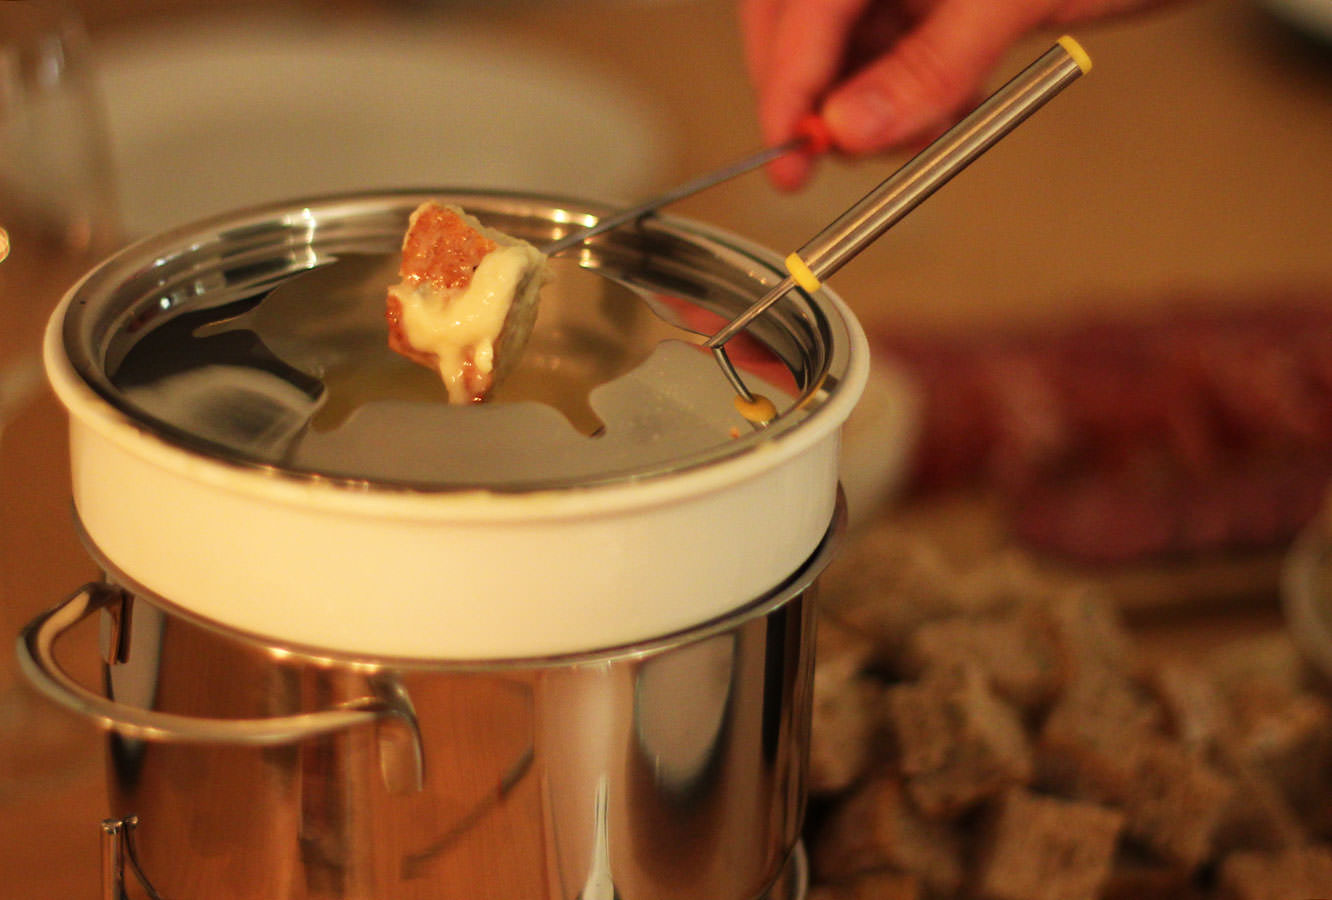
Turn the heat down and allow to thicken for a few minutes before removing from the hob and pouring into the fondue pot. Light the burner/candle underneath.
Step thirteen
Sink into a very well deserved and rather disgusting cheese coma.
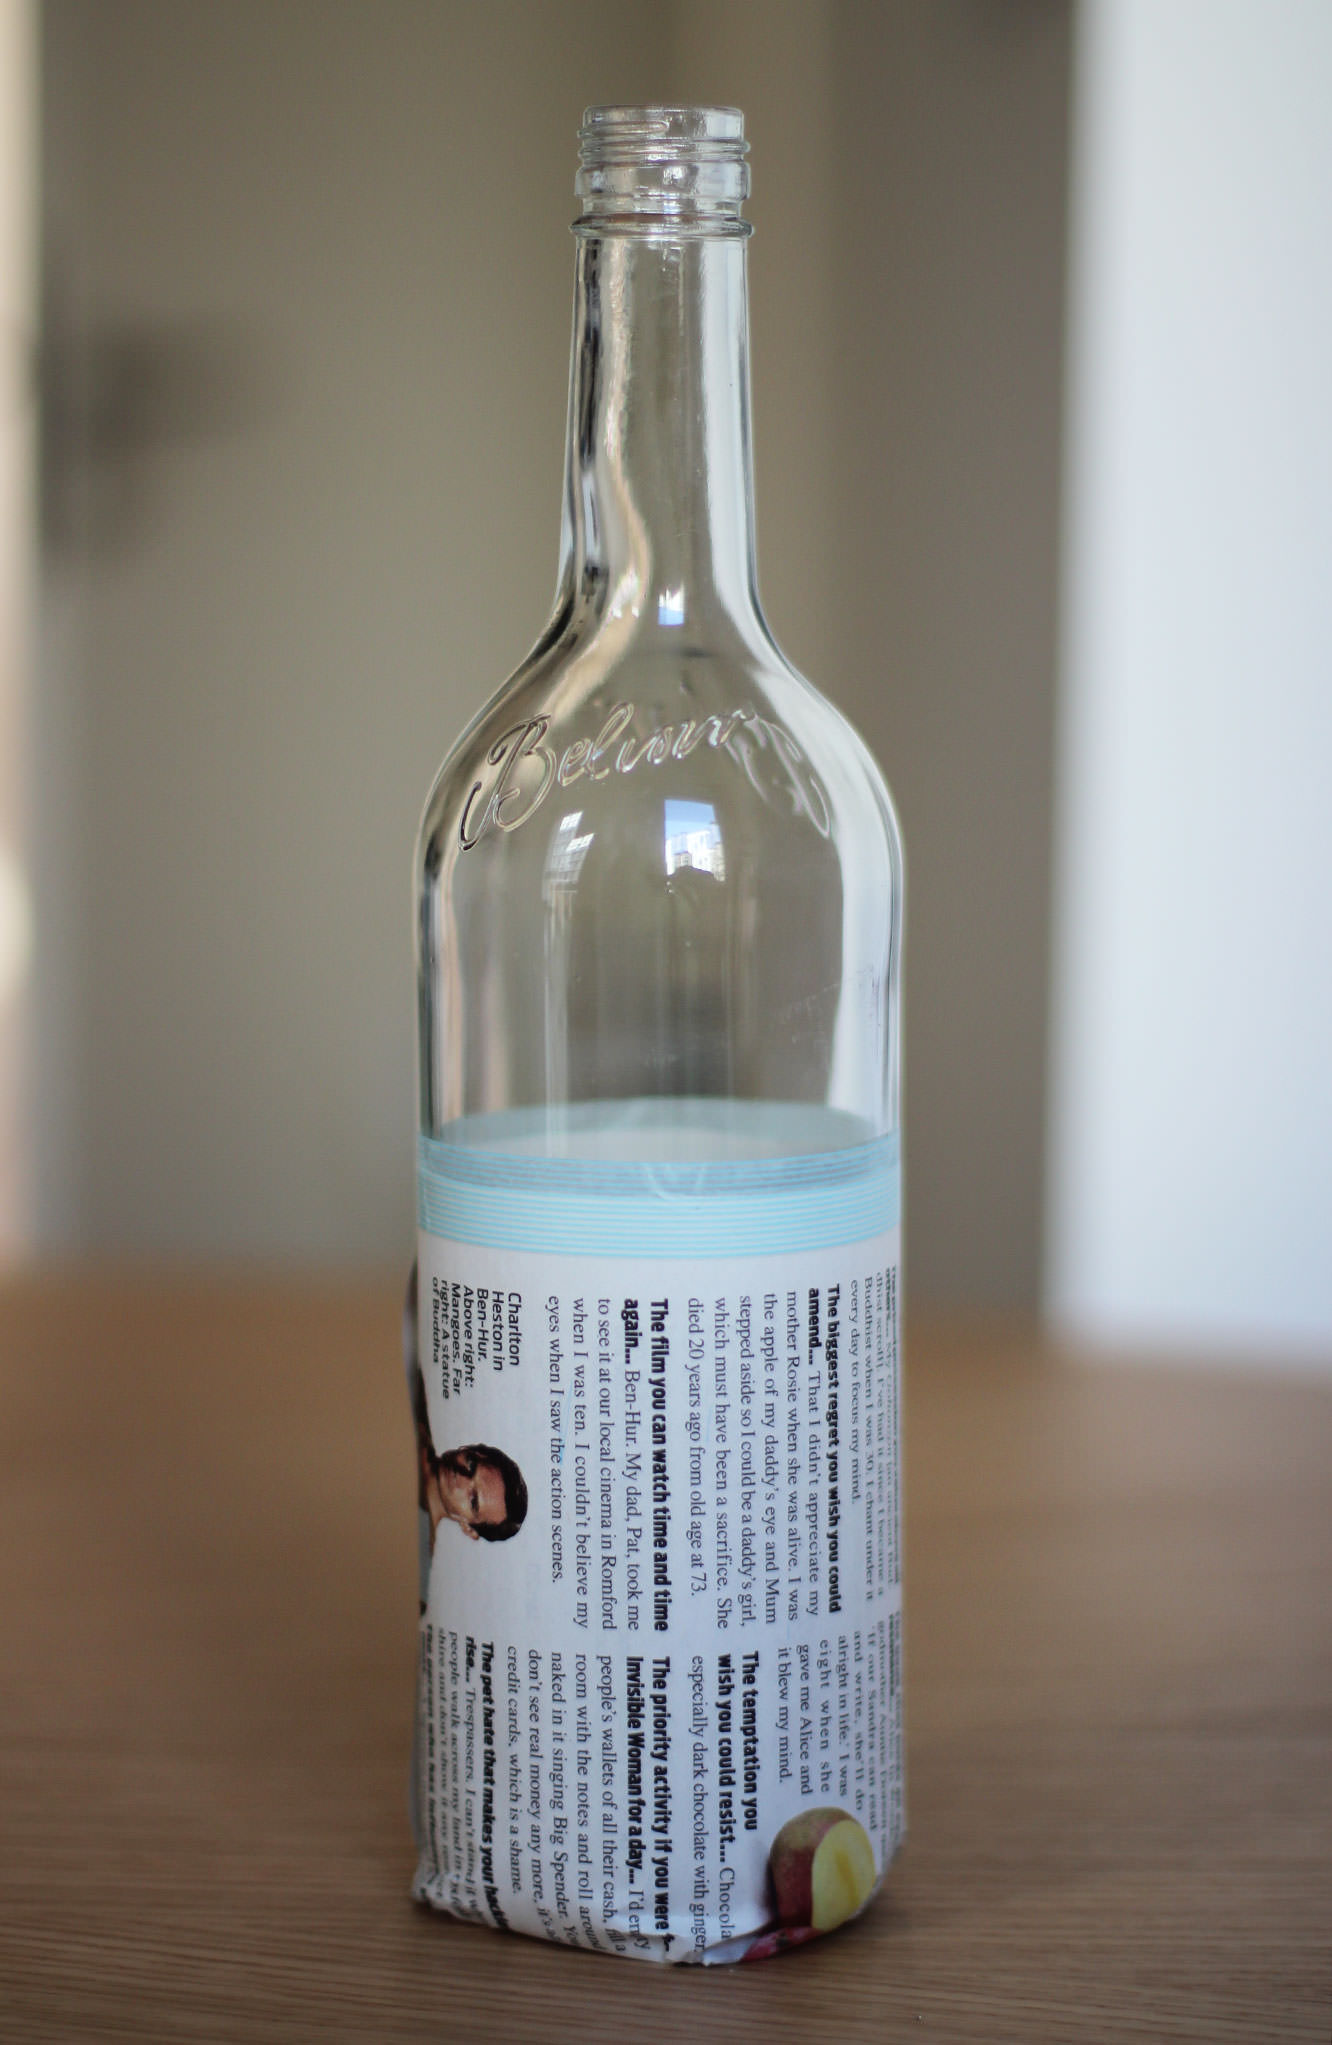
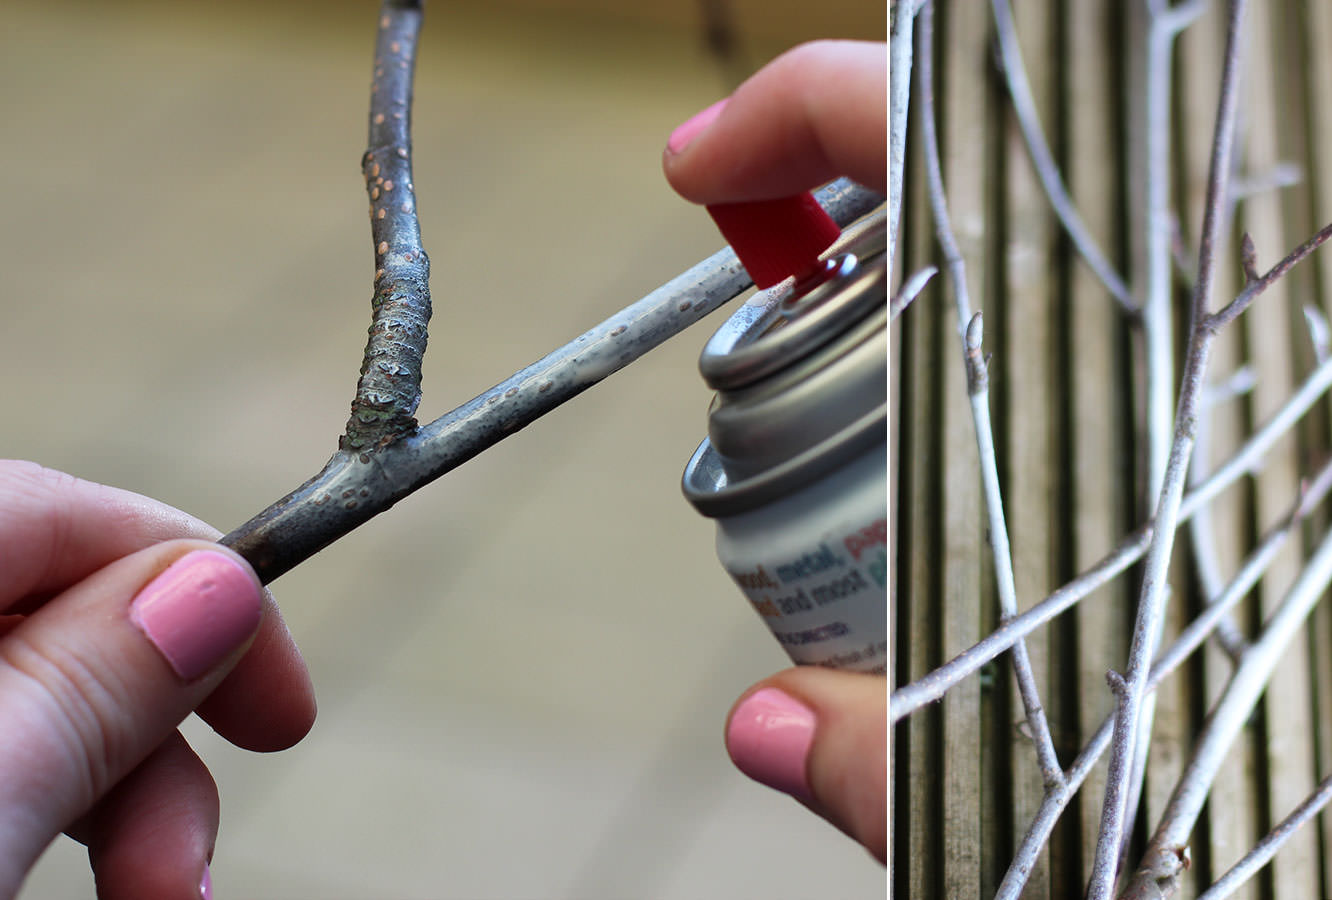
Winter is fast approaching and it’s time to get cosy. Cosy equals candles. At least it does this week, because I had left over spray paint from my mat making, and I really like spray painting things. Like really like it. In an unhealthy way.
This is a pretty easy quick make, and is satisfyingly effective. I recommend it for adding a bit of pizazz at a dinner party or even for sticking a couple of flower stems in rather than candles.
You will need
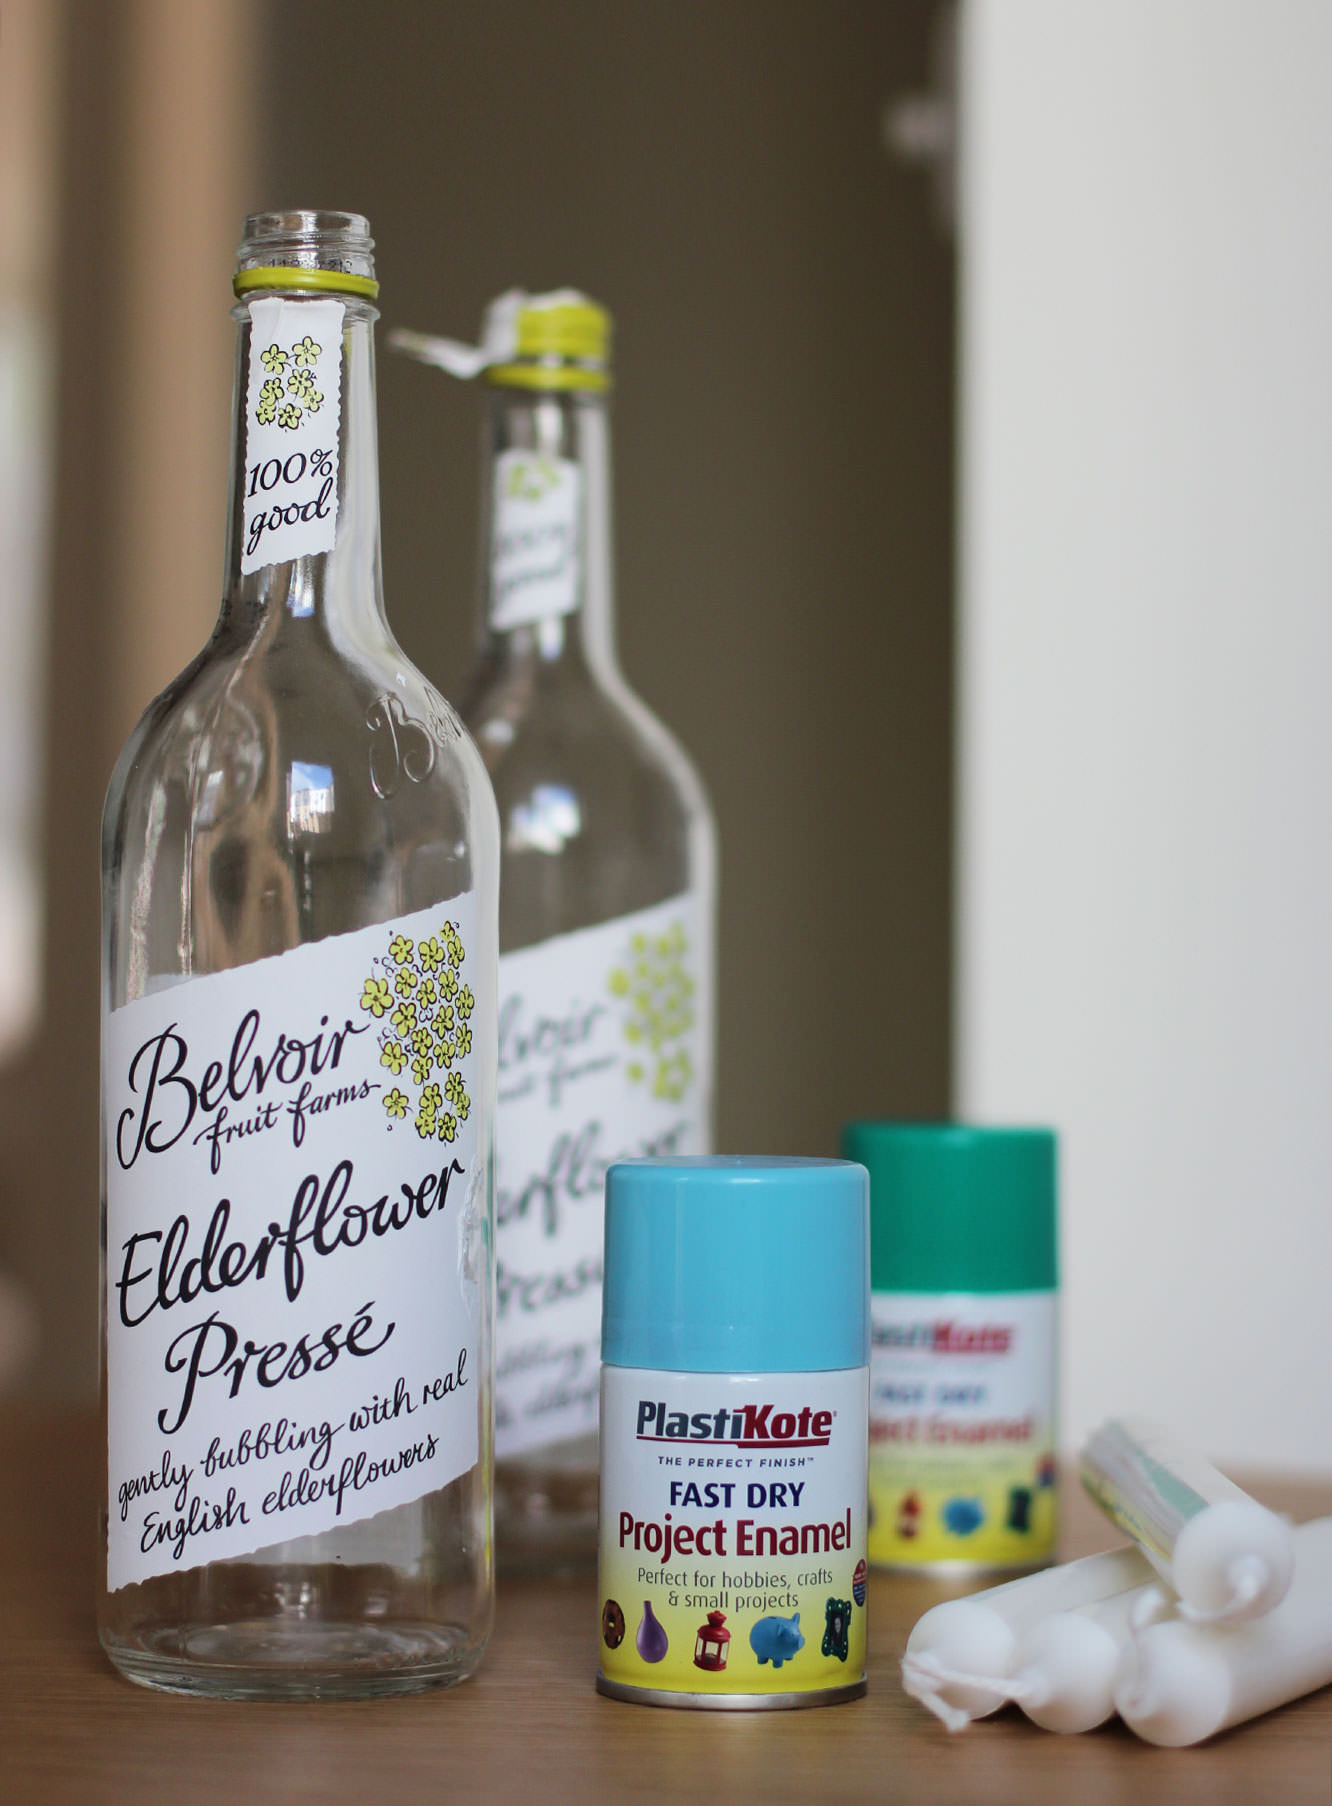
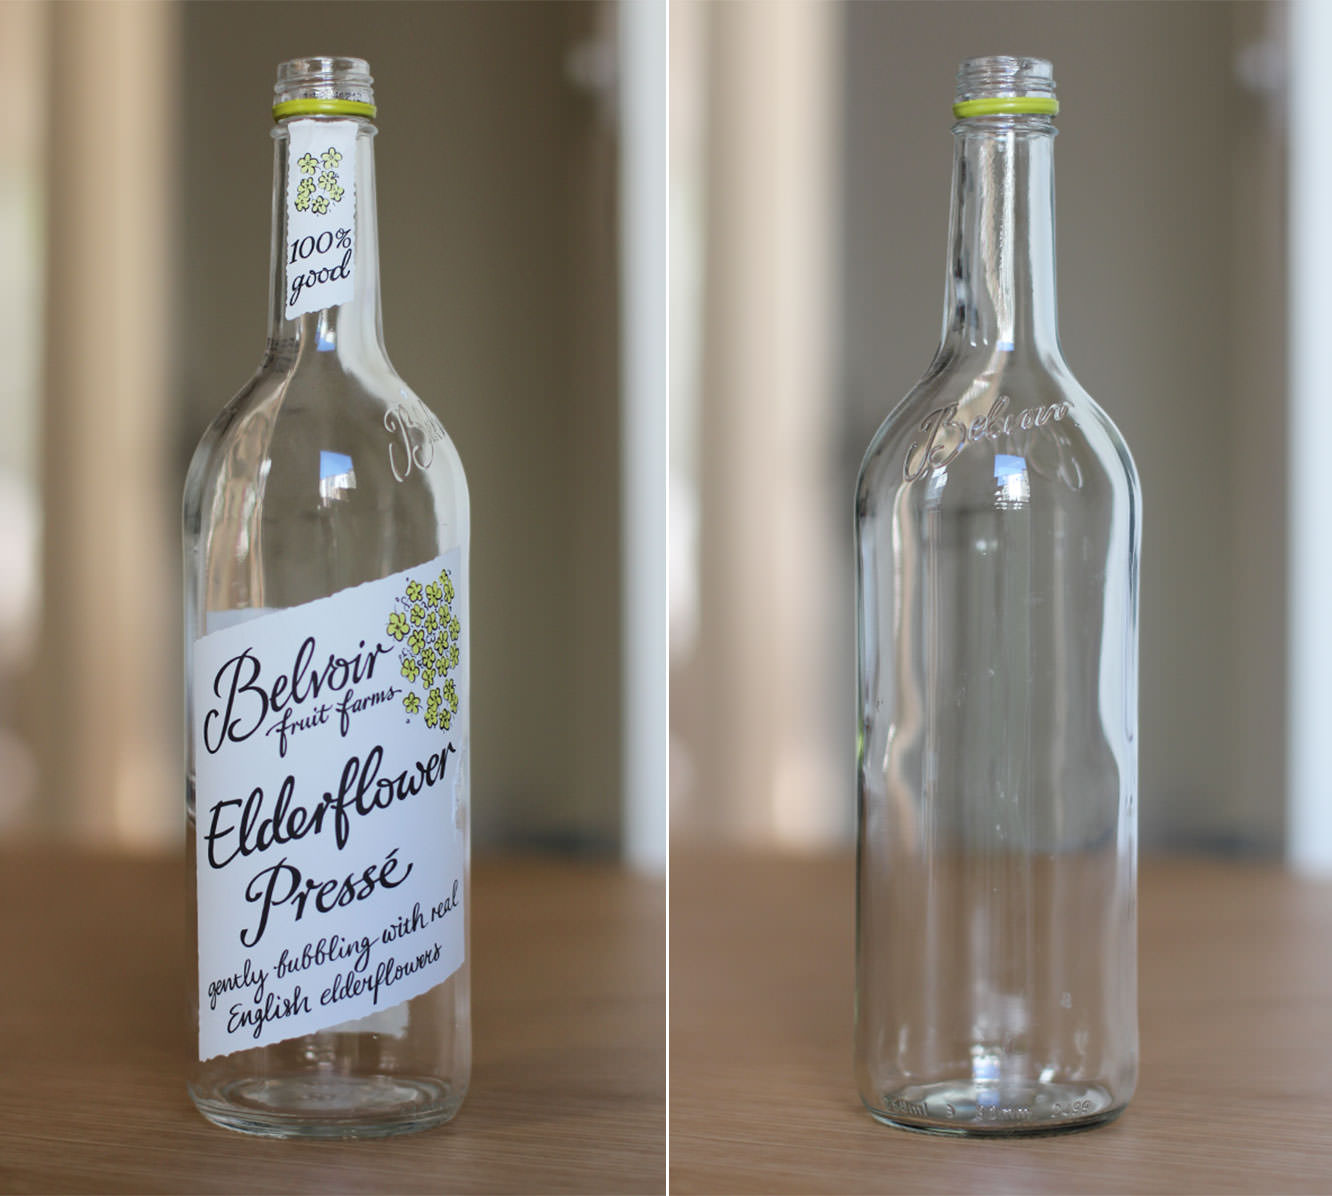
Clear glass bottles
White or cream dinner candles
Spray paint of your desired colour(s)
Newspaper and masking/washi tape
Step one
If your bottles have labels like mine did then you need to pour boiling water over them to soak alla that off.
They drink a lot of posh juice at work so I got these bad boys for free. You could also buy some from the home brew section of a Lakeland/Wilko’s; if that’s you, advance to step three and collect £200 as you pass Go.
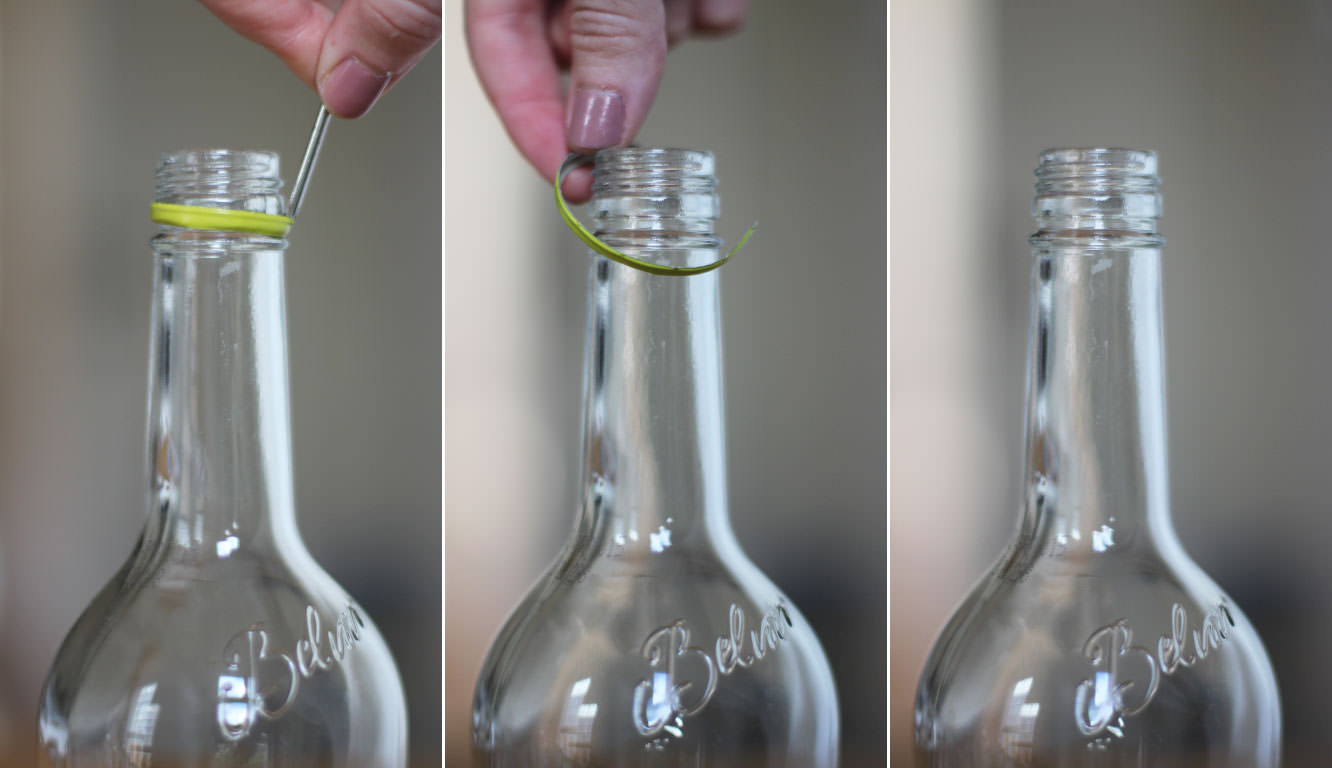
Step two
If you’re using recycled juice/wine bottles then stick a little screwdriver or a knife in the metal bit and prise it off. It’s worth not being lazy and skipping this step.
Step three
Wrap the tops or bottoms of your bottles in newspaper, securing it with wash tape or masking tape which would be a lot cheaper if you have it to hand. As you can see, I didn’t.
The more care you take over this the better as you want the lines to be as straight as possible. Otherwise your OCD friends won’t enjoy your company at your dinner party; they will be too distracted by your wonky candle holders. They will be totally justified in this.
Step four
Go outside and put down some newspaper. Obviously the best time to do this is on a dry day, but let’s just see how well the British weather co-operates with you…
Shake the can of spray paint and hold about 20cm/8 inches away. Spray thoroughly until the bottle has an even, opaque colour.
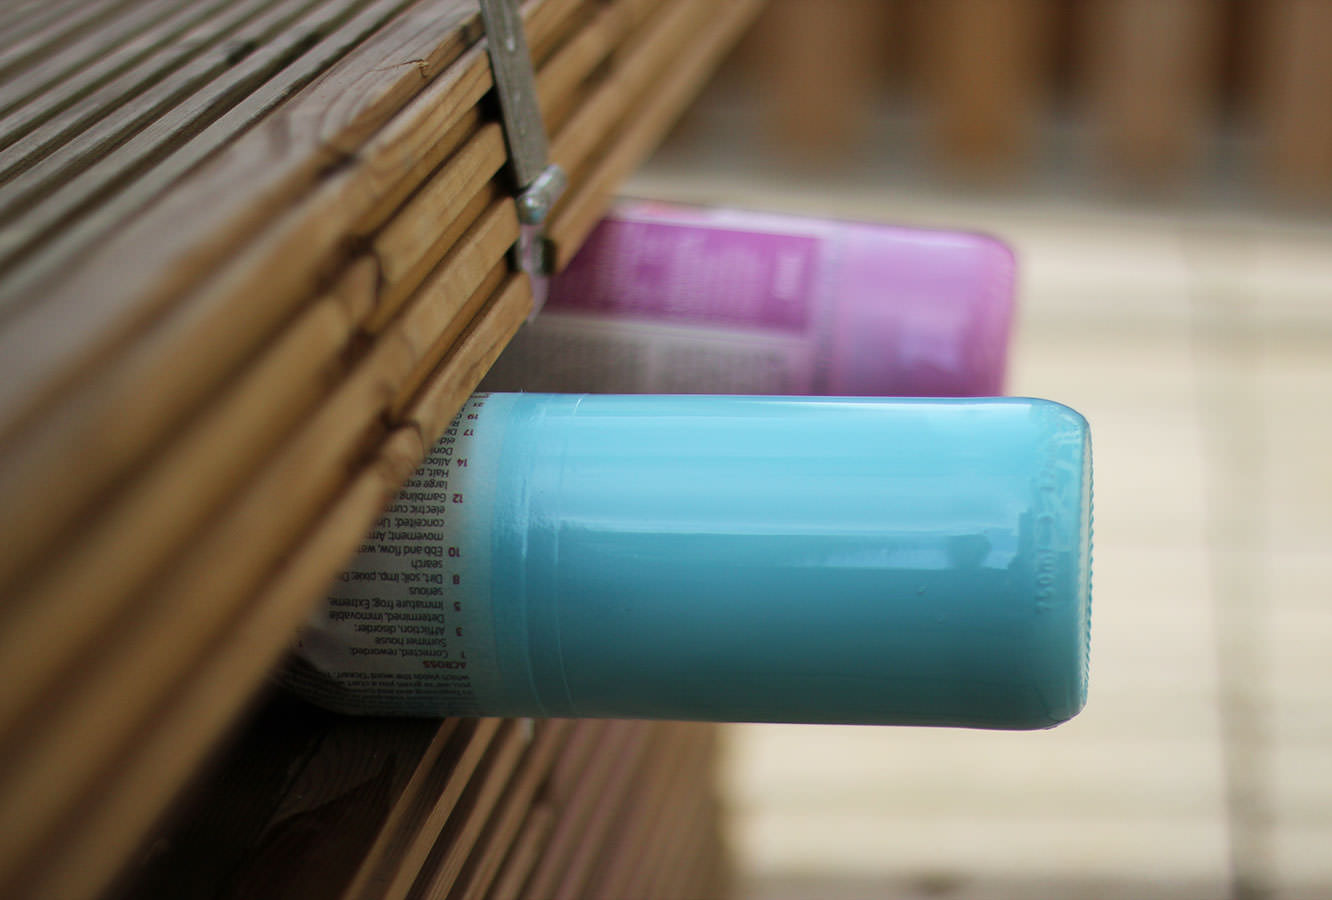
Leave to dry.
Step four – bonus tip
If you’ve wrapped the top of the bottle rather than the bottom, I found the easiest way was to hold the neck in my hand and spray while holding it.
In order to dry it you need to find something to wedge between so it’s sides/the bottom won’t touch anything else. You could just hold it as they don’t take long to dry at all, but I found this storage chest/bench in the garden was just the ticket.
Step five
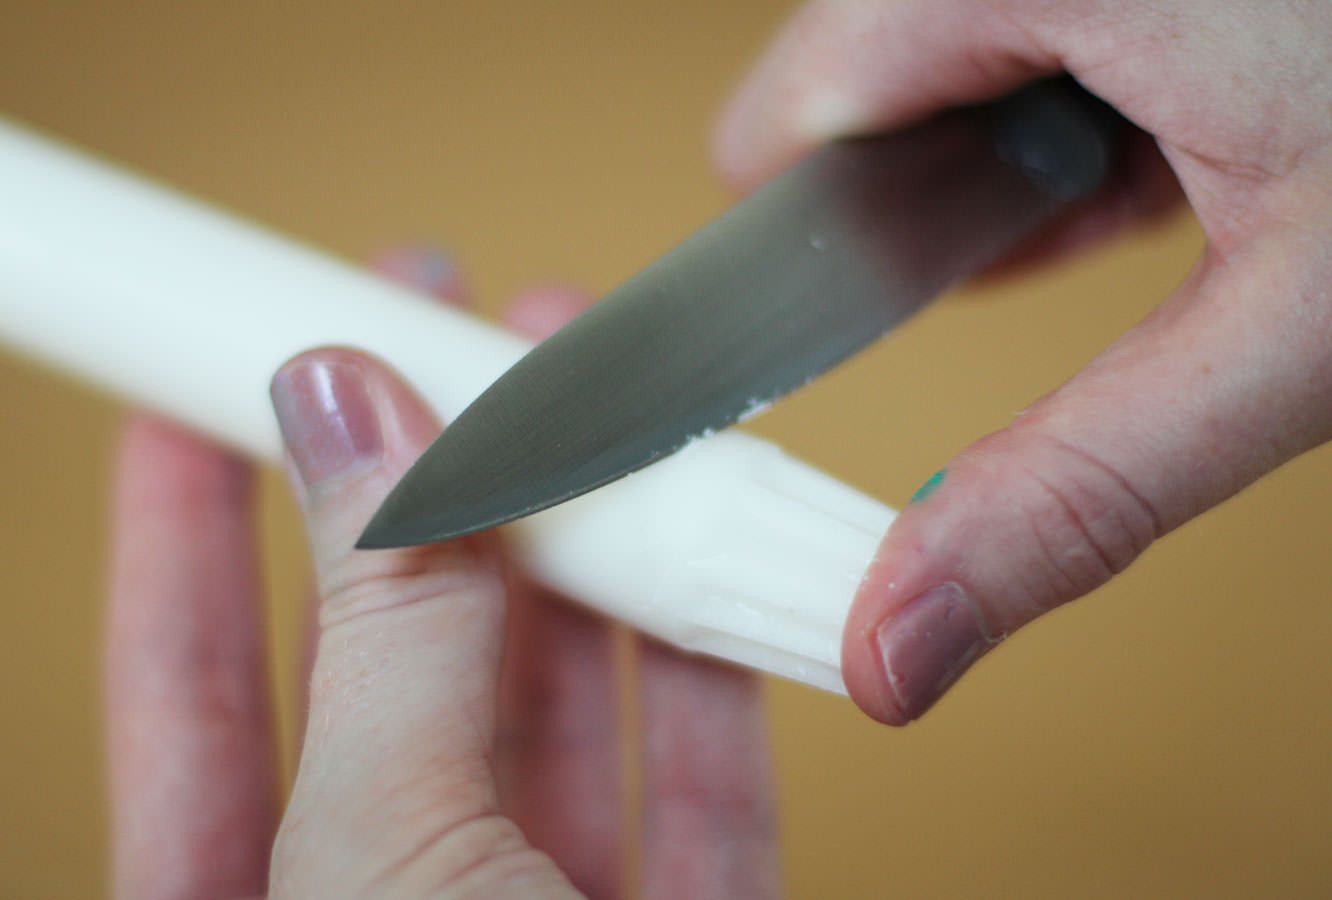
Whilst your bottles are drying you might need to do a little candle whittling. Mine had really handy grooves in them already but unfortunately were still a little on the large side, so I had to trim them down.
Just for the sake of everyone who knows how clumsy I am and would reel in horror at this picture, I still have all ten digits.
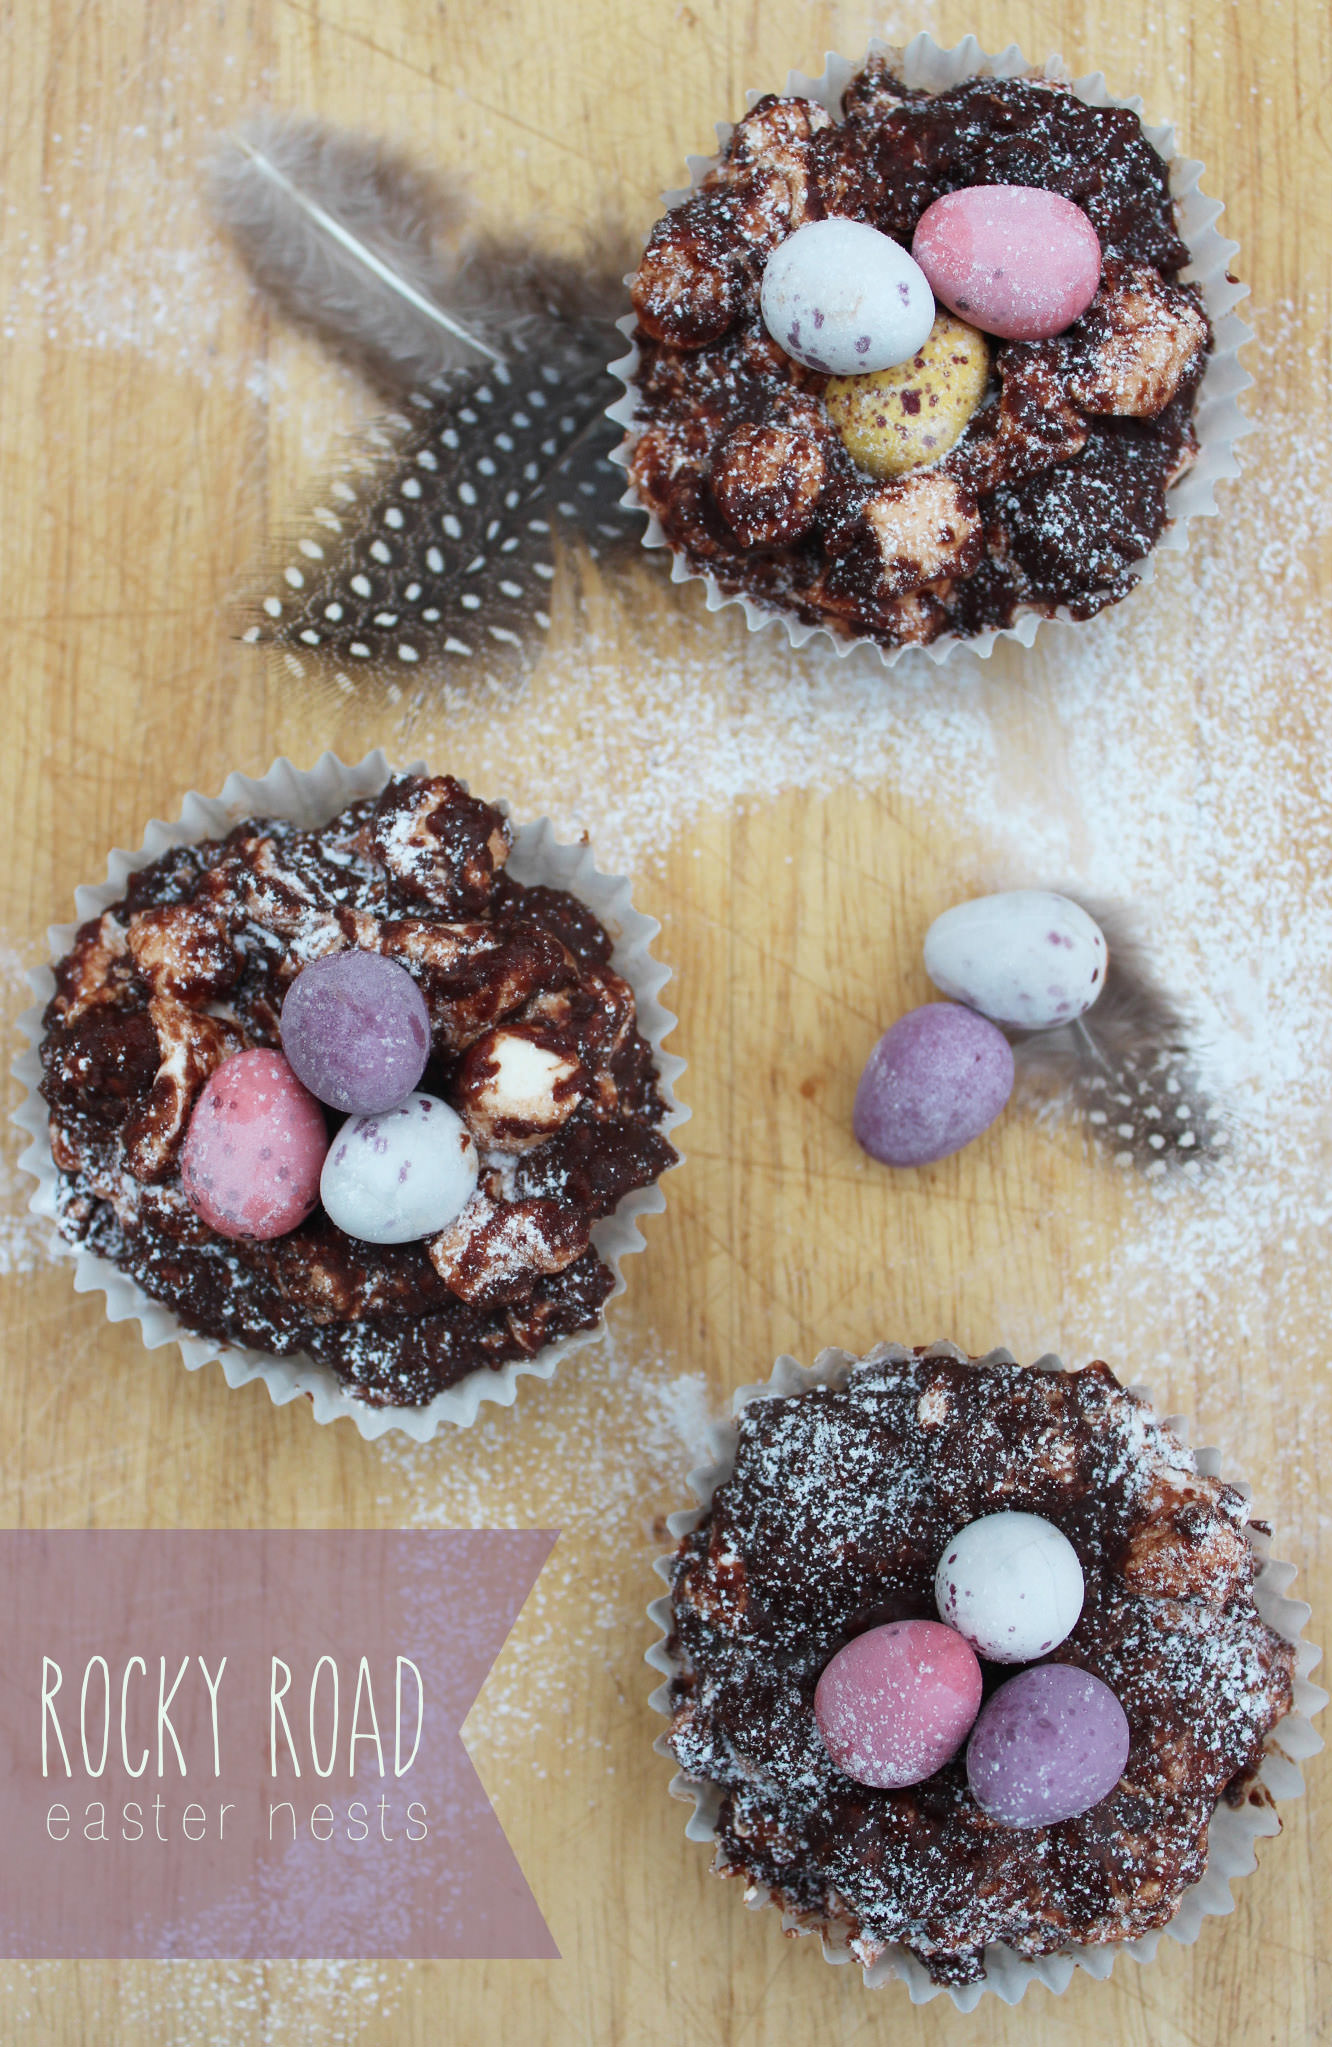
It’s such a lovely time of year, the sun is shining and the shops are full of mini eggs. What’s not to love?
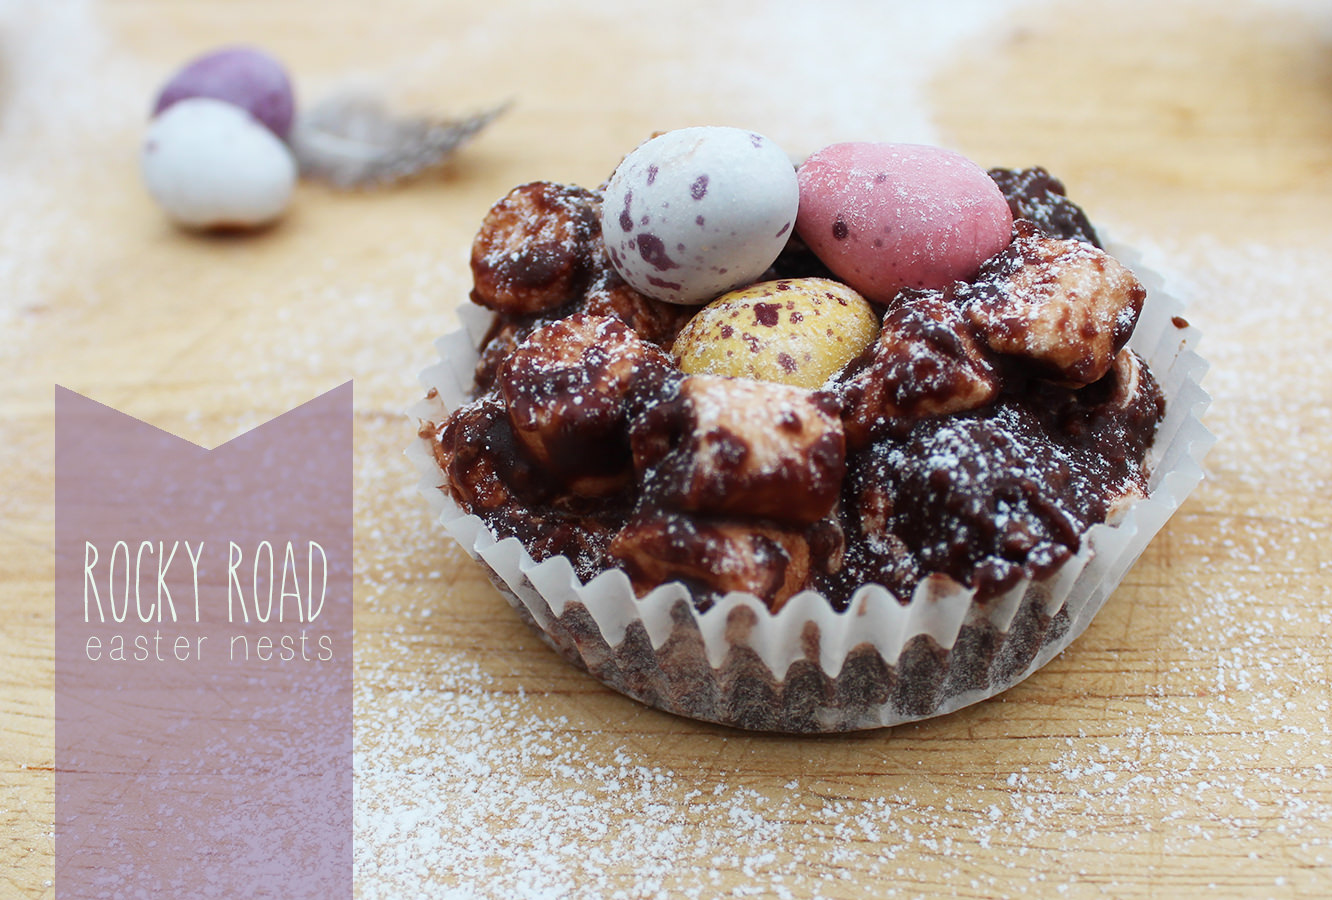
This little idea popped into my head when I was putting out the snacks for an open day (I sort of swing by a university law school and do admissions in my spare time/to get paid). Anyway, after opening the rice crispy bites, and popping one in my mouth (it’s good manners to make sure everything is in order for the guests) I moved on to unpacking the rocky road. BINGO. Rocky road Easter nests were born!
As if that hasn’t sold it well enough to you, these look far more realistic than your regular festive treat, and you will never touch a box of shredded wheat again once you’ve tried them. Just as easy to make with kiddies and more ingredients so more fun to be had.
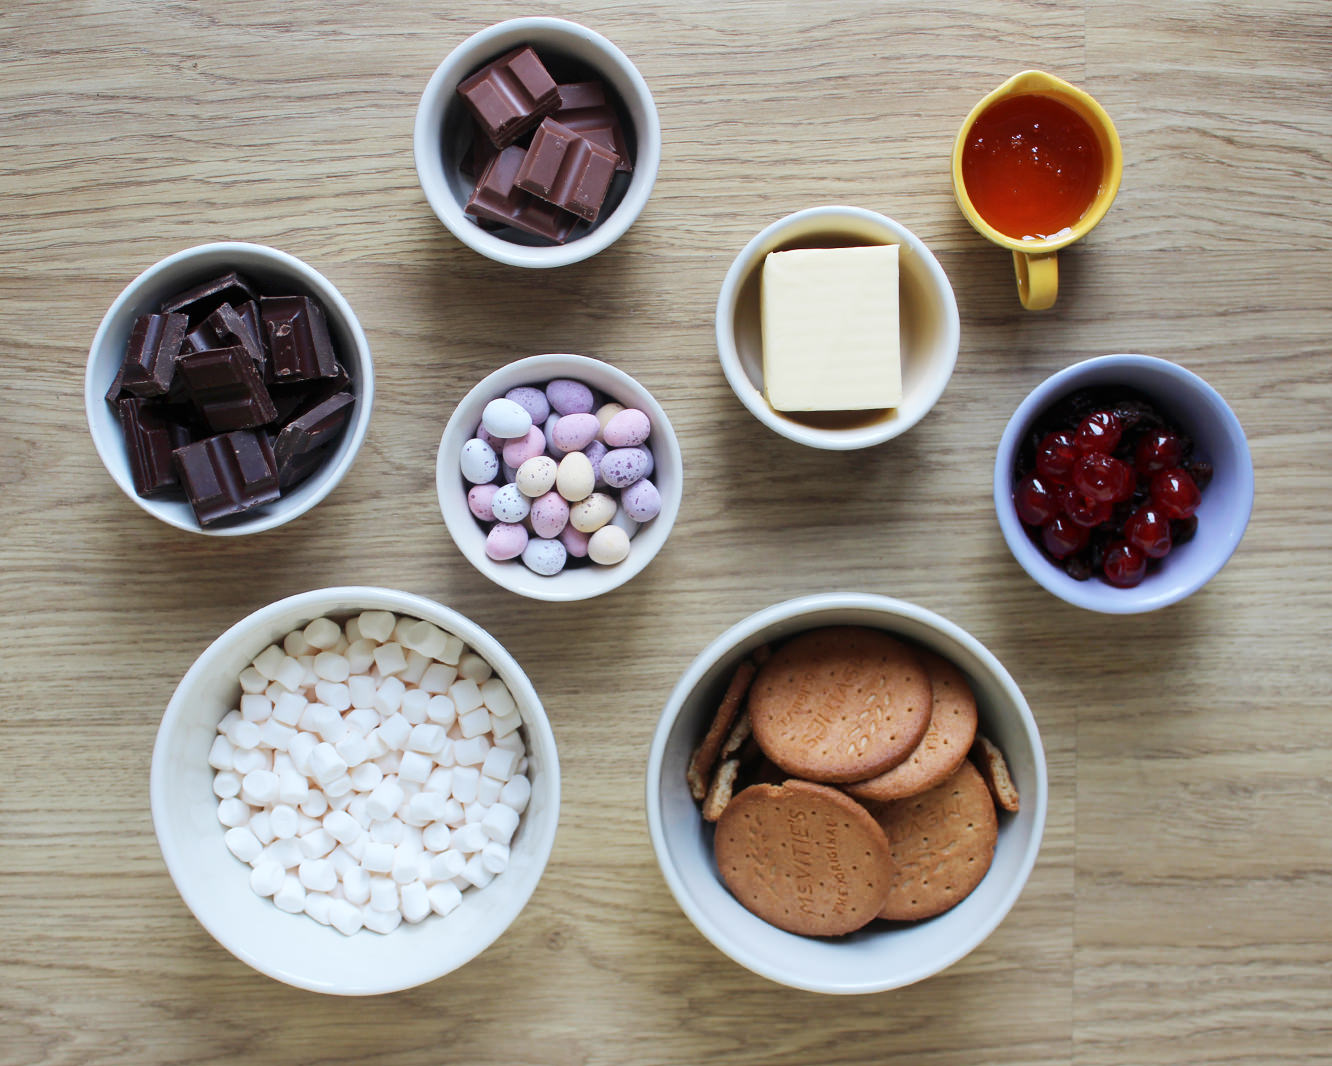
You will need
200g/7 oz Dark chocolate
100g/3.5 oz Milk chocolate
125g/4.5 oz Unsalted butter
3 tbsp Golden syrup
200g/7 0z Digestive biscuits
100g/3.5 oz Mini marshmallows
Generous handful of seedless raisins
15 Glace cherries (cut into quarters)
Bag of mini eggs
Fairy cake cases
Icing sugar to dust
Makes 15
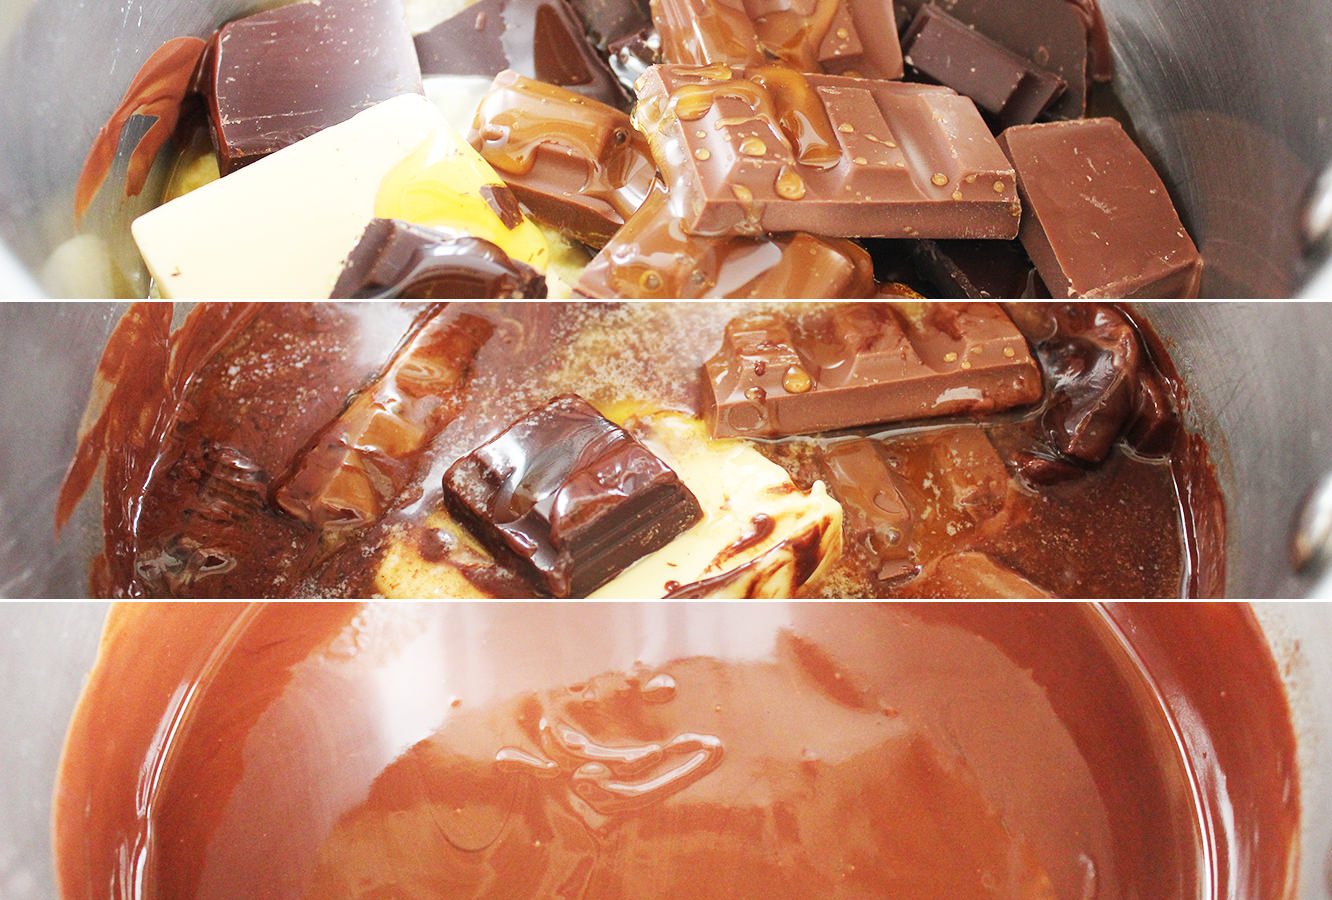
Step one
Melt the dark chocolate, milk chocolate, butter and golden syrup in a sauce pan.
Go slowly, burning chocolate is one of life’s saddest occurrences.
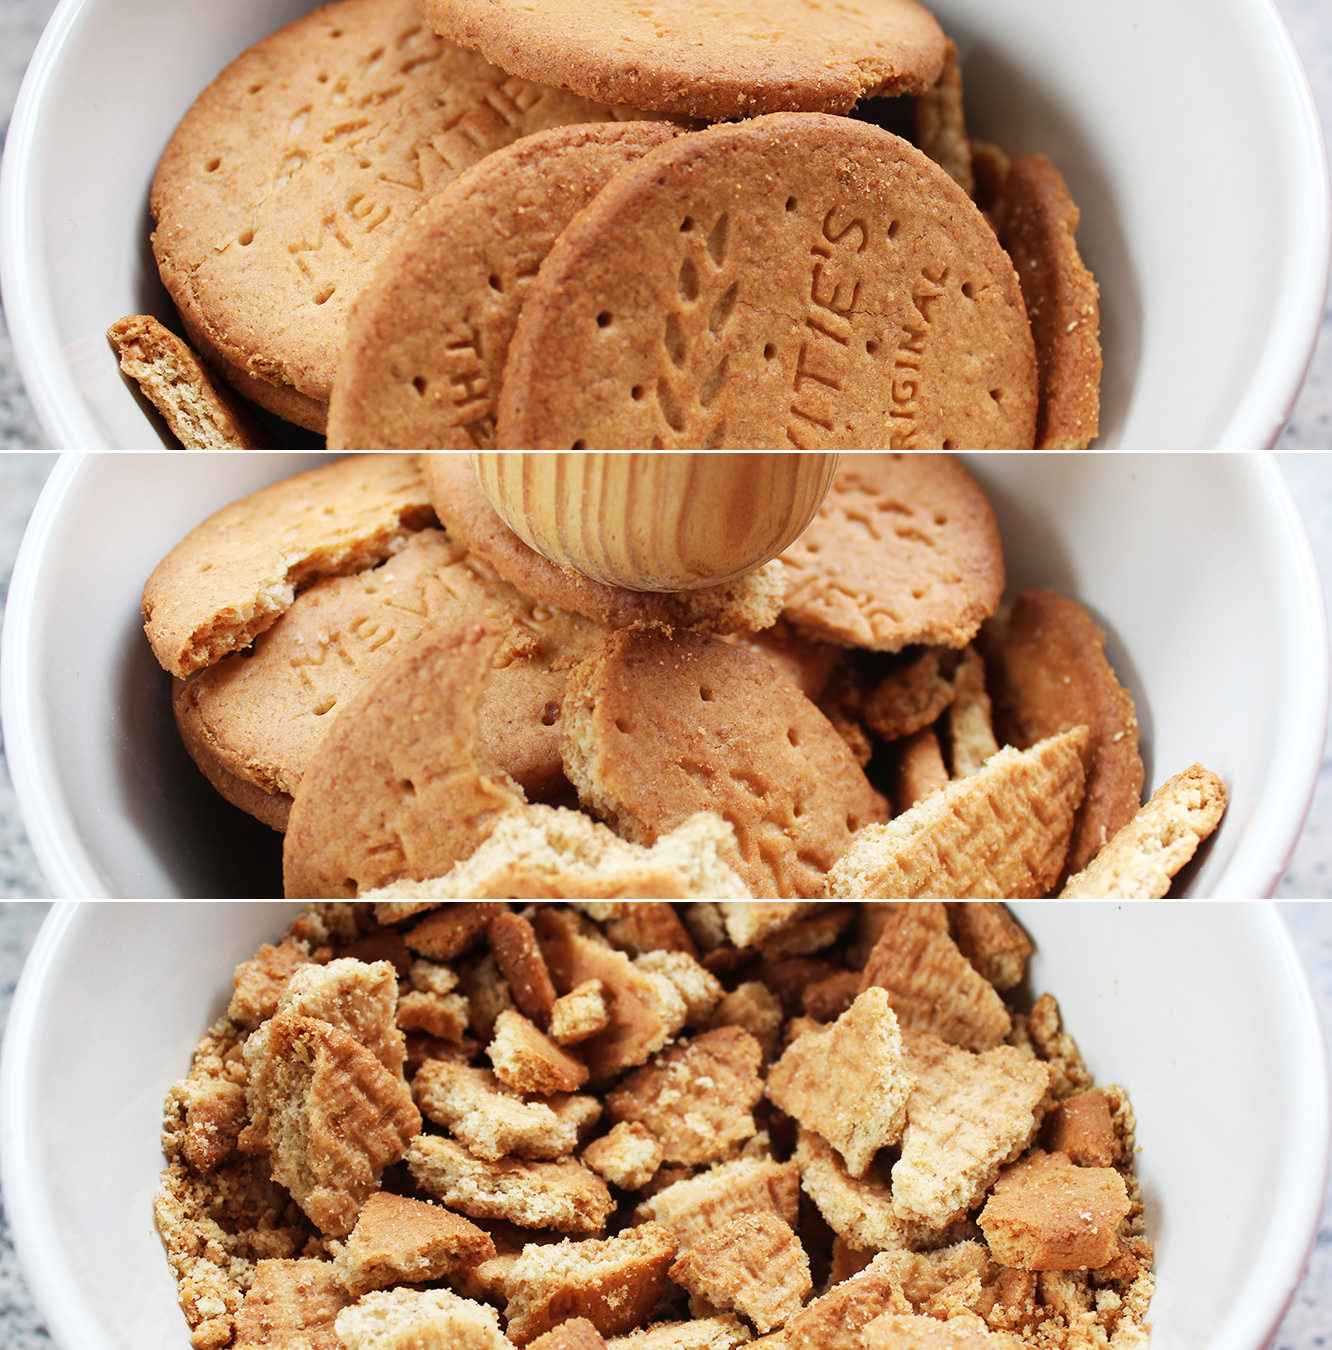
Step two
While the chocolate is melting, but without getting too distracted, crush up the digestive biscuits with the end of a rolling pin.
Or your fist if you’re having a particularly bad day.
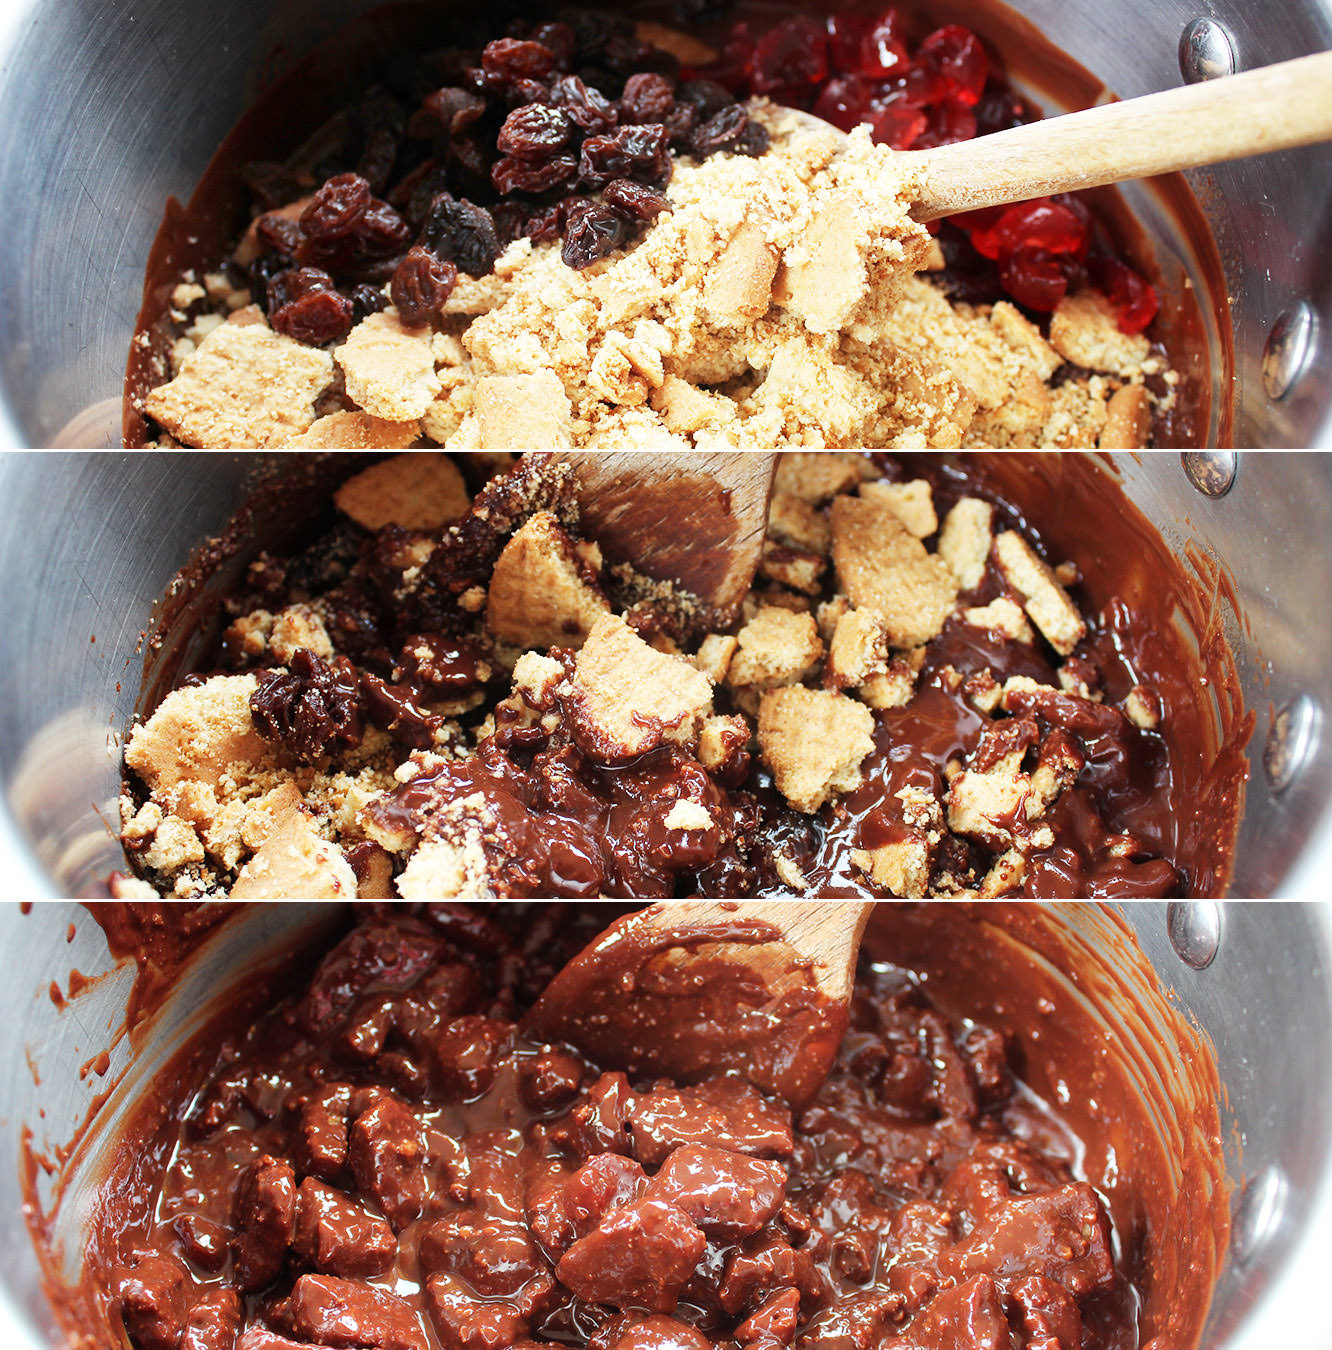
Step three
Stir the biscuit, cherries and raisins into the chocolate. Leave the marshmallows alone for the moment.
In case you weren’t gifted with common sense, this should be off the heat by now.
Set to one side.
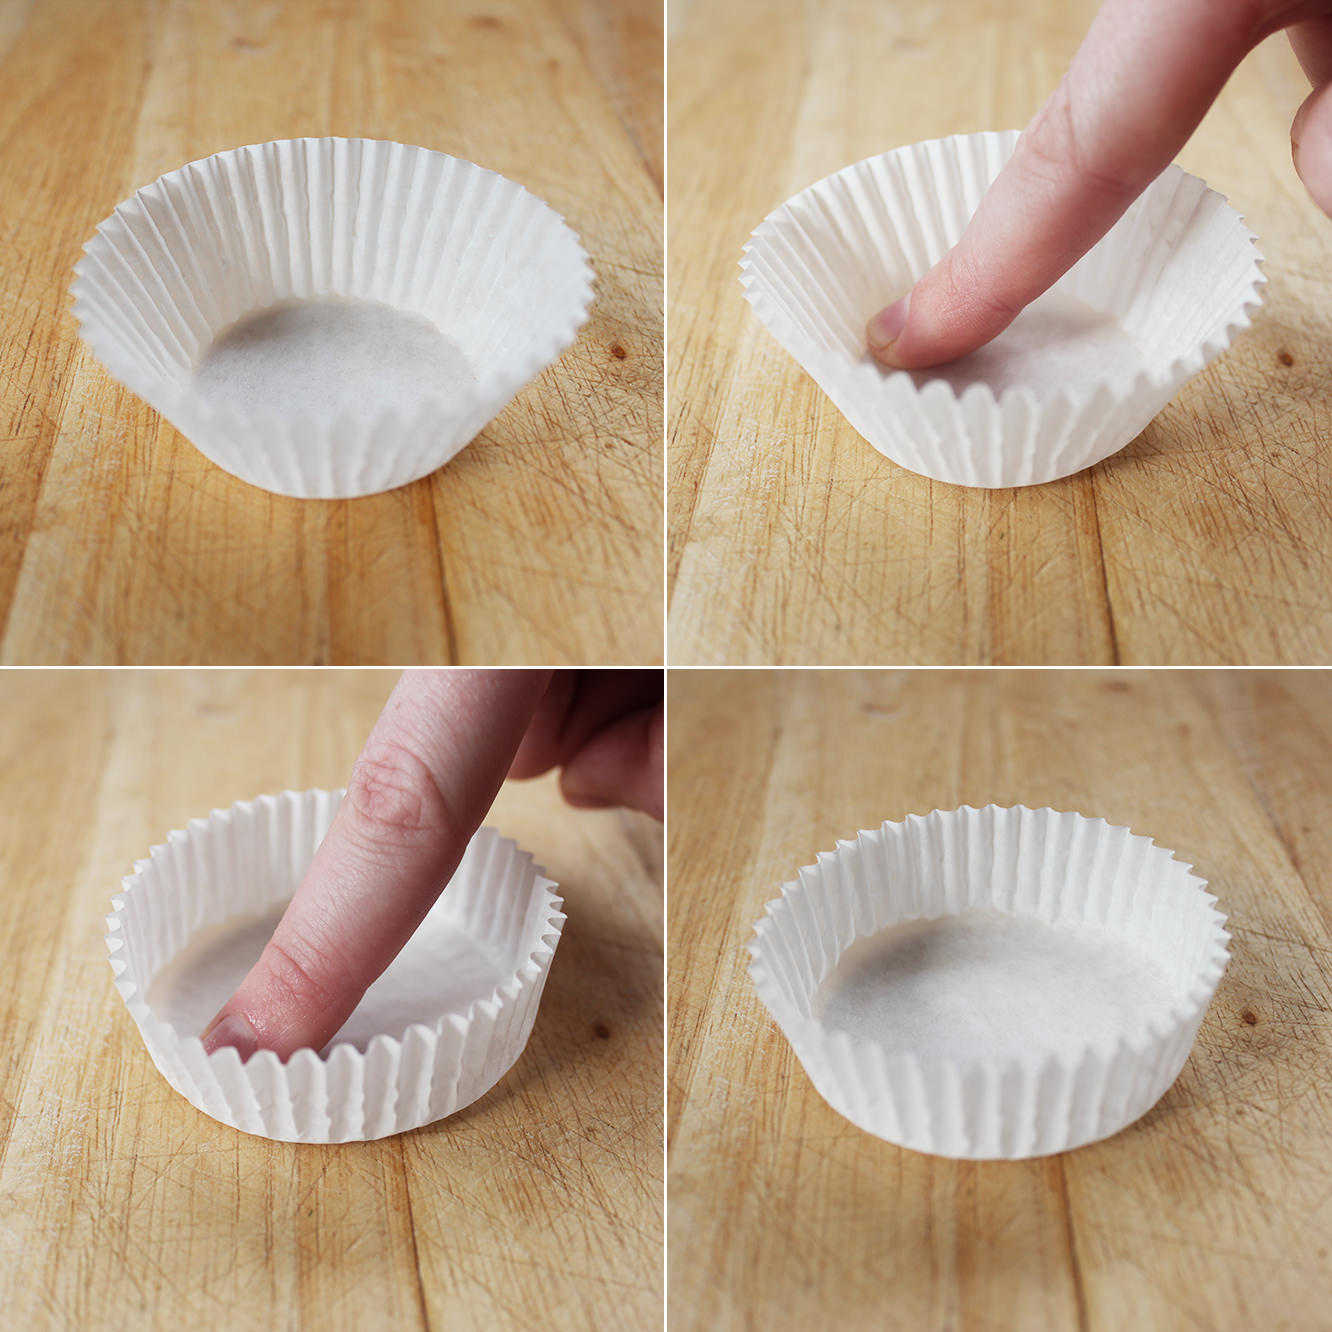
Step four
This is the clever bit, or at least I like to think so.
I figured nests aren’t the strange conical shape of cupcake cases, and I didn’t want to end up mail ordering some weird and wonderful baking cases that met my specifications, so I just adapted the regular ones.
I say regular, but I’m not convinced these are actually universal. Before America convinced us that muffin-sized cakes covered in mountains of buttercream (the cupcake we know and love) were the way forward, us Brits had a more modest little bun – the fairy cake. Do other countries have these too? Answers on a post card please.
Anyway, my dear ma has been chastising me about using up the many a fairy cake case we have gathering dust in the cupboard while I burn through the muffin cases to make my cupcakes. They just aren’t cool anymore mum.
Until now.
The fairy cake cases are the perfect size for this, although, of course, whatever size you have should work the same way (you will just have a slightly different number of nests at the end).
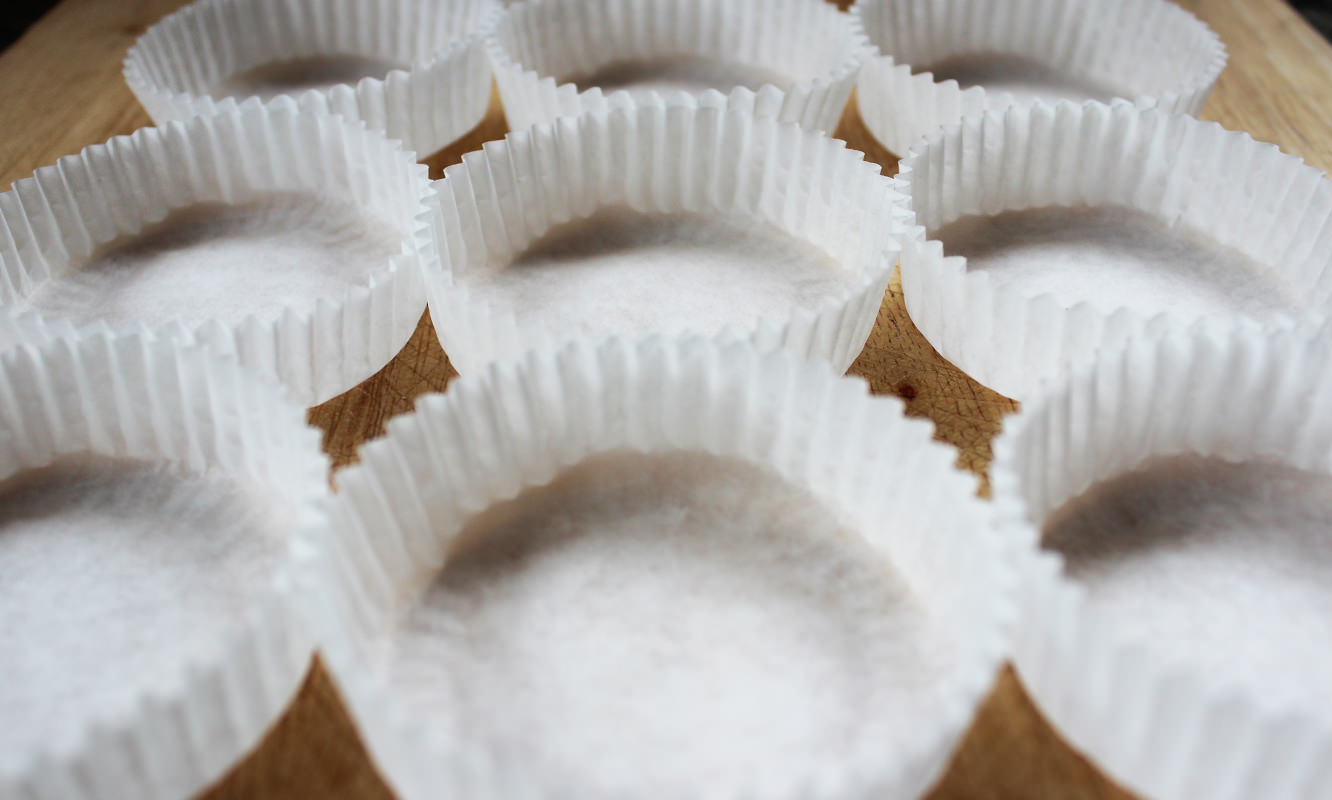
Basically you just run your finger around the inside edge of the case in circles until it opens out and has short straight walls as pictured.
Step four
Repeat x 15
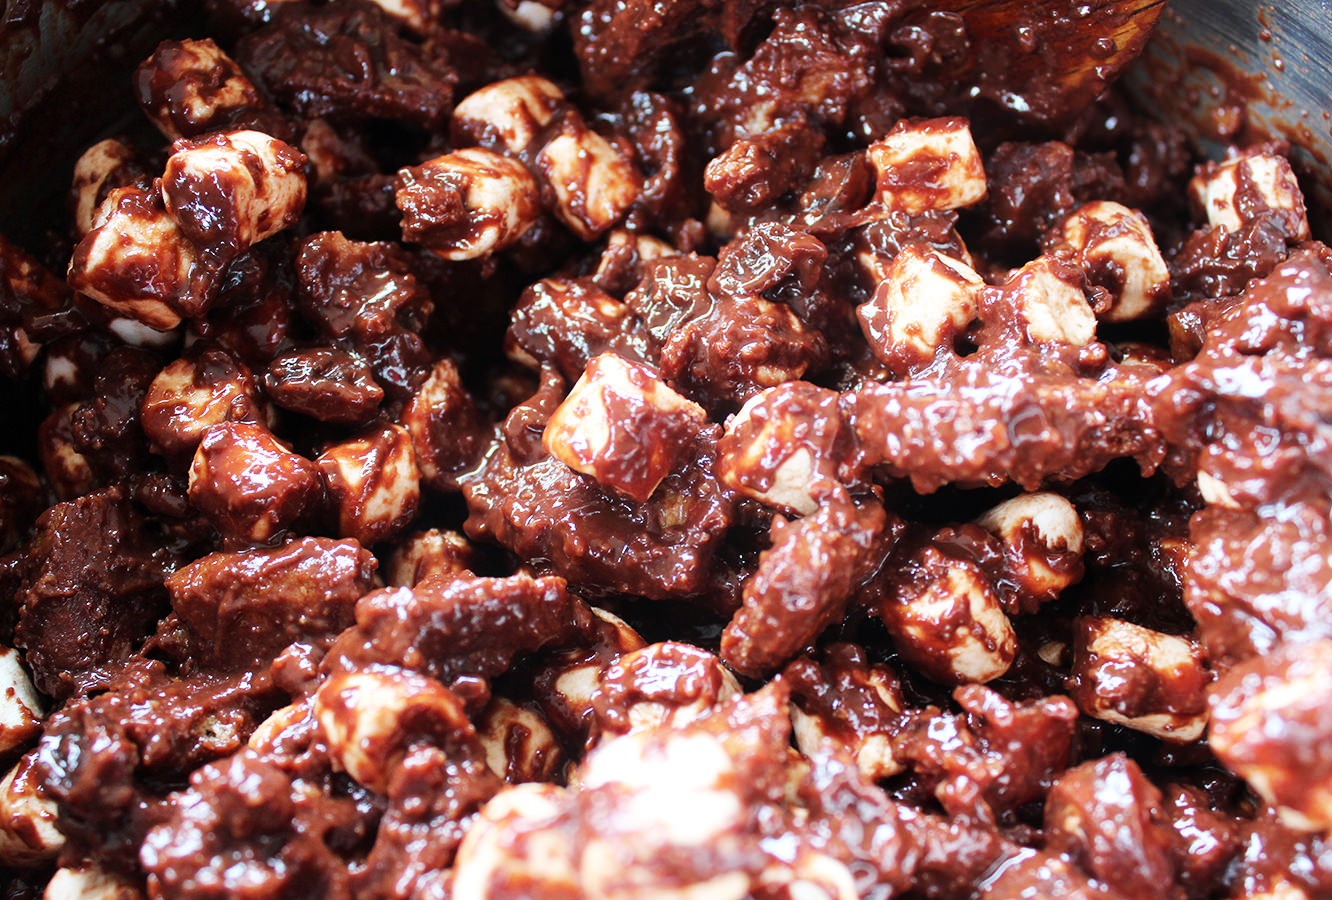
Step five
The chocolate mix should now have cooled sufficiently to not melt your marshmallows to mush.
Stir them in…you will still have to work fairly quickly.
Step six
Spoon mixture into cases and stick eggs in the nests. Don’t be tight, give at least three to each one.
Step seven
Put in the fridge to set.
Dust in icing sugar before serving, you can afford to be a bit more liberal than I was. After I’d taken the pictures I dropped the spoon on one and it actually looked a lot better with a heavier dusting.
Step eight
Get chubby.
Have a great week guys!
Oh, and you may have noticed I’ve moved my site – I’m trying to figure out what impact that has on the people who were already following me, I’ll keep you posted!
Don’t get me wrong, I’m loving that Spring is having a little flirt with us at the moment. The evenings are getting longer and the sun is playing peek-a-boo. At the same time, sometimes you wake up a little bit earlier than intended at the weekend or you just want to shut it all out for a little Sunday nap. So here’s a really quick and easy make for catching some Zzz or maybe adding to a little pamper package for Mother’s Day? More on that later…
You will need
Some pretty scrap fabric (the darker and thicker the better)
Pin the template to at least two layers of fabric. At this stage you might also want to sandwich a little padding in between, but I didn’t have any to hand so just went without.
I just used some scrap fabric for this make, but I would advise you choose a darker palette than this if you can as it will block out more light.
Cut around the template, leaving a small seam allowance, a couple of mm will do as you aren’t turning inside out.
Step two
Remove template and re-pin your fabric layers together. You will see I used some of the adhesive fabric I used for my bookbinding tutorial. This was an error. The iron isn’t a huge fan of this material and vice versa. You will see later.
ANYWAY. Sew around the edge to bind all the layers together. Make sure that if you are using patterned fabric the right side is facing out.
Step three
So, I never knew how to sew on bias binding properly until a few months ago. It changes your life. Seriously.
You will notice that one of the folds in your bias binding is slightly smaller than the other side. You want to open the shorter side out and pin to the edge of your fabric as shown above.
Note that the pins are facing outwards, this is because I was using a sewing machine and this way it just runs straight over, no need to pull them out as you go. If you’re hand sewing you probably want to pin the opposite way so you still have hands left at the end.
Step four
Sew around the binding, on the outer edge of the fold (see above).
Unpin.
Step five
Turn the bias binding over and use an iron to press it down (mainly for the benefit of people using a sewing machine)
Pin the elastic under the bias on both sides. You want to adjust this to size depending on who you’re making it for, 17″/43cm was a little on the large side for me so perhaps go a bit smaller or measure round the back of your head from temple to temple. Don’t forget to take a bit of length off so it holds by the stretch.
Step six
Sew the top of the bias binding as close to the edge as you can. Use a close zigzag stitch to secure elastic to the front of the mask, this will stop any light seeping through the gaps at the sides.
(you can see that the heat of the iron on the adhesive wrinkled my top fabric layer quite a lot, this shouldn’t happen to you!)
If your country doesn’t stock Mars bars then I am truly sorry…for these are delicious, and you will probably never experience the joy of tasting one. If you live in the UK then get down to your local newsagent, there’s no time to be wasting.
A little disclaimer before I begin: the combination of the fact that a) I was making these for a charity bake sale and b) I couldn’t find a regular 4 pack of Mars bars means that the recipe below is rather substantial. Divide in half or into thirds if you are baking these for home and don’t fancy obesity as a life choice (you won’t be able to stop eating them).
You will need
6 Mars bars
3 tbsp Golden syrup
250g Unsalted butter
9 cups of Rice crispies
(this is basically a whole box – I used the cheap Tesco knock off kind, no need to break the bank)
400g Milk chocolate
An appointment with your GP to test your blood sugar levels.
Makes 24 (at least)
Step one
Chop up the Mars bar.
Oh go on then, there’s at least one piece going spare…
Step two
Put Mars, butter, and golden syrup in a pan on a medium heat to melt.
Those fluffy bits in the middle of the Mars bars take what feels like forever to melt, but they do get there, just keep stirring, and maybe stick a bit of Dragon’s Den on or something.
Step three
Put most of the rice puffs in a big bowl. I always hold a few cups back to add later, as this isn’t an exact Science so you won’t always need them all.
Pour the melted mixture over the puffs. You probably deserve another little taste at this point.
Step four
Stir together until rice crispies are evenly covered. It’s up to you whether to add the rest that you kept to one side or not, I added the whole lot to mine.
Step five
Line a couple of tray bake tins with foil and distribute your mixture accordingly. Again, it’s up to you how deep/shallow you want your crispy cakes to be, so choose your tins with that in mind.
Step six
Squash the mixture down with the back of a spoon until it fills the various crevices (or with your hands when you get tired of doing it the PC way – wash them first though, there are some standards to be upheld).
Make sure the mixture is squashed down firmly or it will all fall apart later. Literally.
Step seven
Melt the milk chocolate and cover the top of the crispy cakes evenly. Again this will sort of depend on what tin you use and what consistency you want as to how much you need, as you want enough to cover it all. If you chose a shallower tin then you’ll need a bit more chocolate and so on.
Step eight
Cut the crispy cakes into slices now before it all sets up, it’s just all a bit easier that way.


 Step two