Apologies for the day late post friends. I had a miniature pie melt down at the weekend (#myblogginglife) and as a result didn’t fancy posting yesterday. Instead I took an evening of sitting on the kitchen counters with the housemates eating pumpkin pie.
Speaking of the housemates. A while ago one of mine professed herself to be a food innovator. Bold claim? Yes. I thought so. When I asked for proof of this theory, she was ready with it. “Well,” she said calmly, and with an air of smugness, “I’ve had an excellent idea for mince pie truffles”. Lover of mince pies I am. Did I think this idea was a good one, worthy of the self proclaimed food innovator title? No, reader, I did not.
About a week of scorning later (I cannot put words together to explain how disgusting I thought the idea was and how aggressively I communicated that to her) she returned home with a box of mince pies to prove her idea, totally unfazed, a quality all struggling food innovators must no doubt possess. I’m sure Heston could empathise.
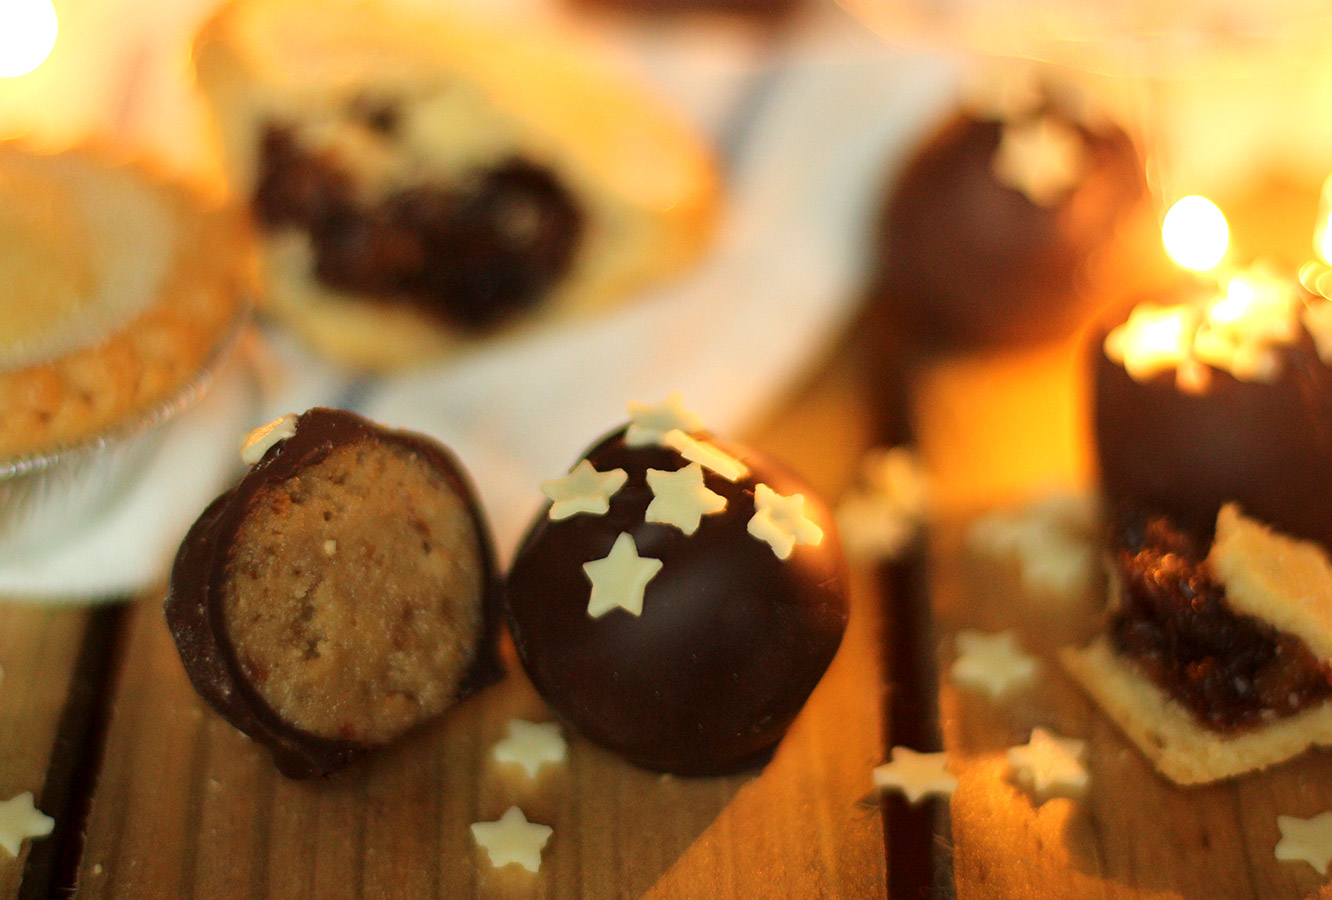
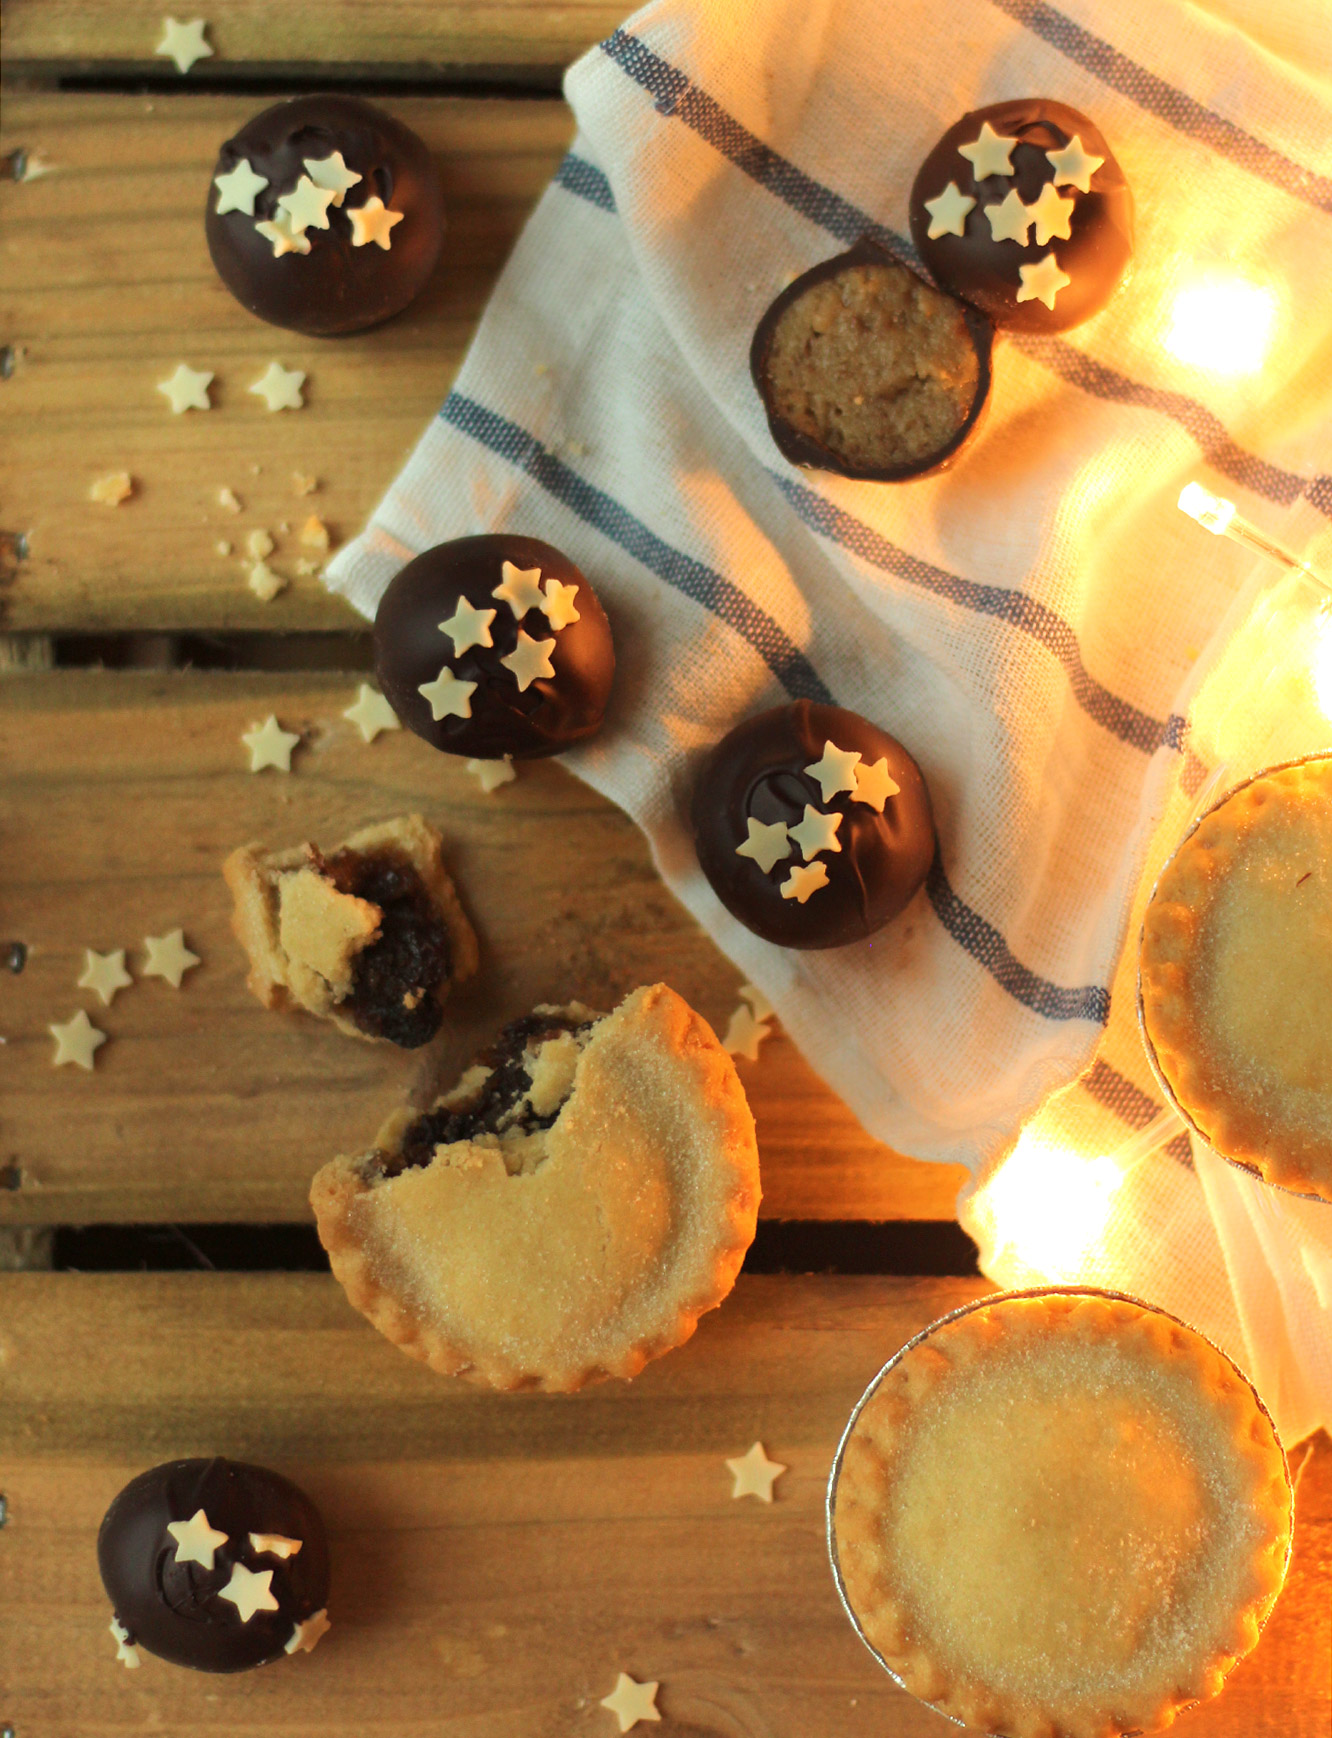
Anyway. Turns out, I like mince pie truffles. You’ll have to trust me on this one. Best eaten from the fridge, sound and look entirely unappetising, ladies and gentlemen, I bring you the recipe for the humble (but great) mince pie truffle.
This post is dedicated to one Ms Afua Addai-Diawuo, food innovator.
You will need
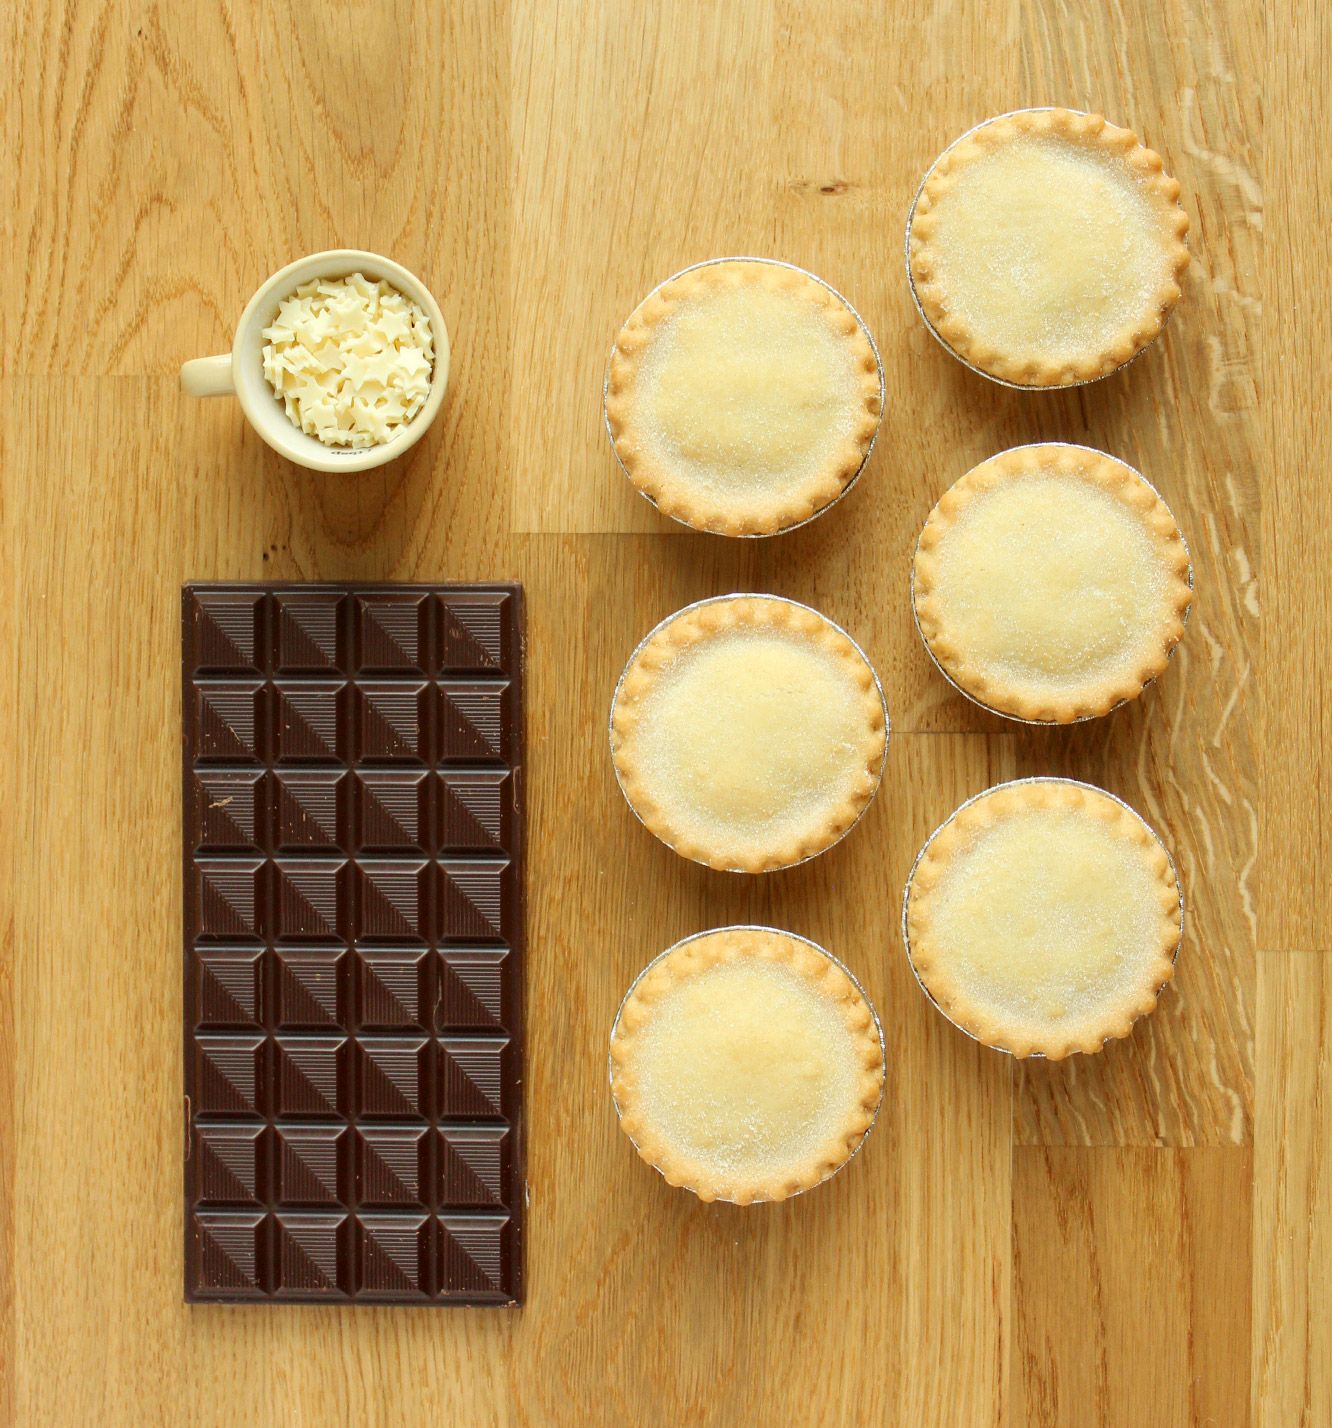
6 mince pies
300g/10.5 oz dark chocolate
Some sprinkles if you have them
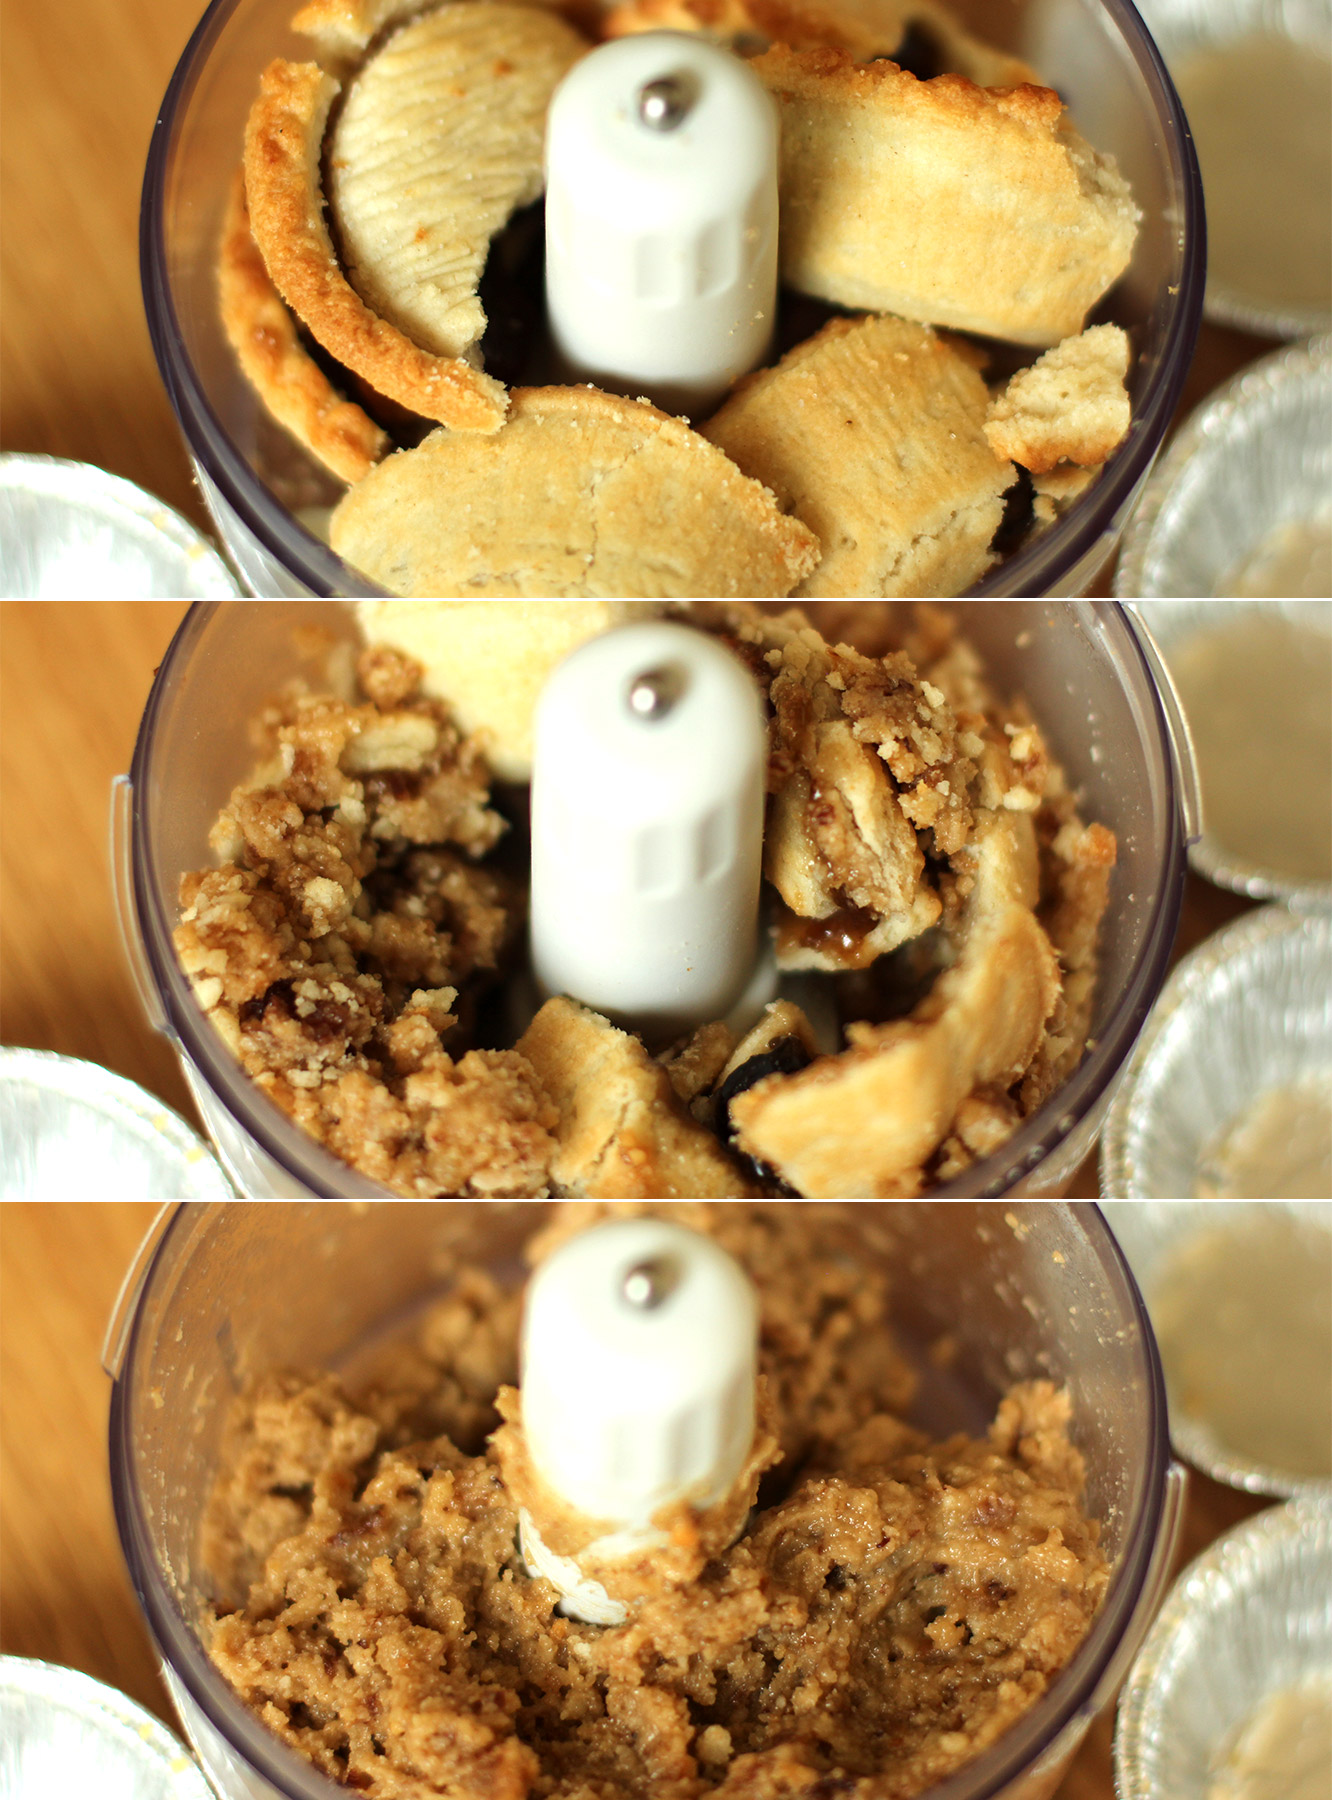
Step one
Using a food processor blitz the mince pies until they are a dough like consistency. It will be very sticky so you will probably need to put the mixture into the freezer for about 30mins to an hour.
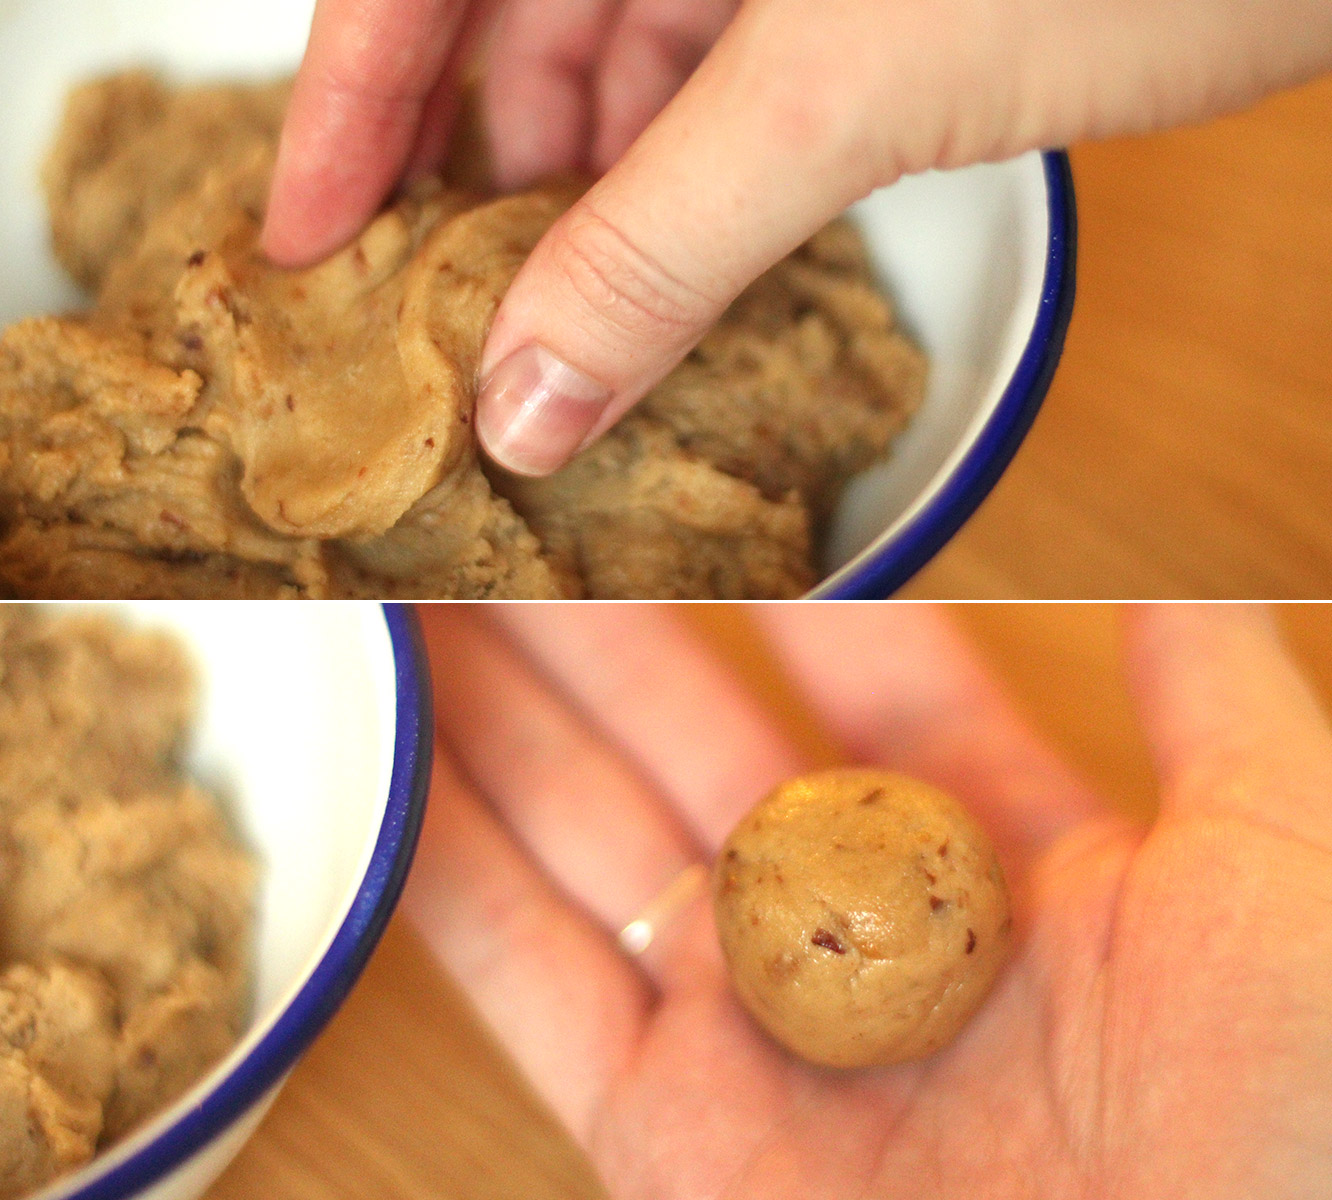
Step two
Roll the dough into evenly sized balls.
Put them back into the freezer for a while longer, until solidified.
Step three
Melt the dark chocolate and dip the truffle centres to coat them and leave them on some cellophane or greaseproof paper to dry.
If you want to see how to dip them, I cover it a little more thoroughly in this post from two weeks ago.
And there we go, early festive treats in three easy steps.
Guten Tag friends! This week’s blog post is inspired by a lovely German tradition that warmed my little heart when I was told about it.
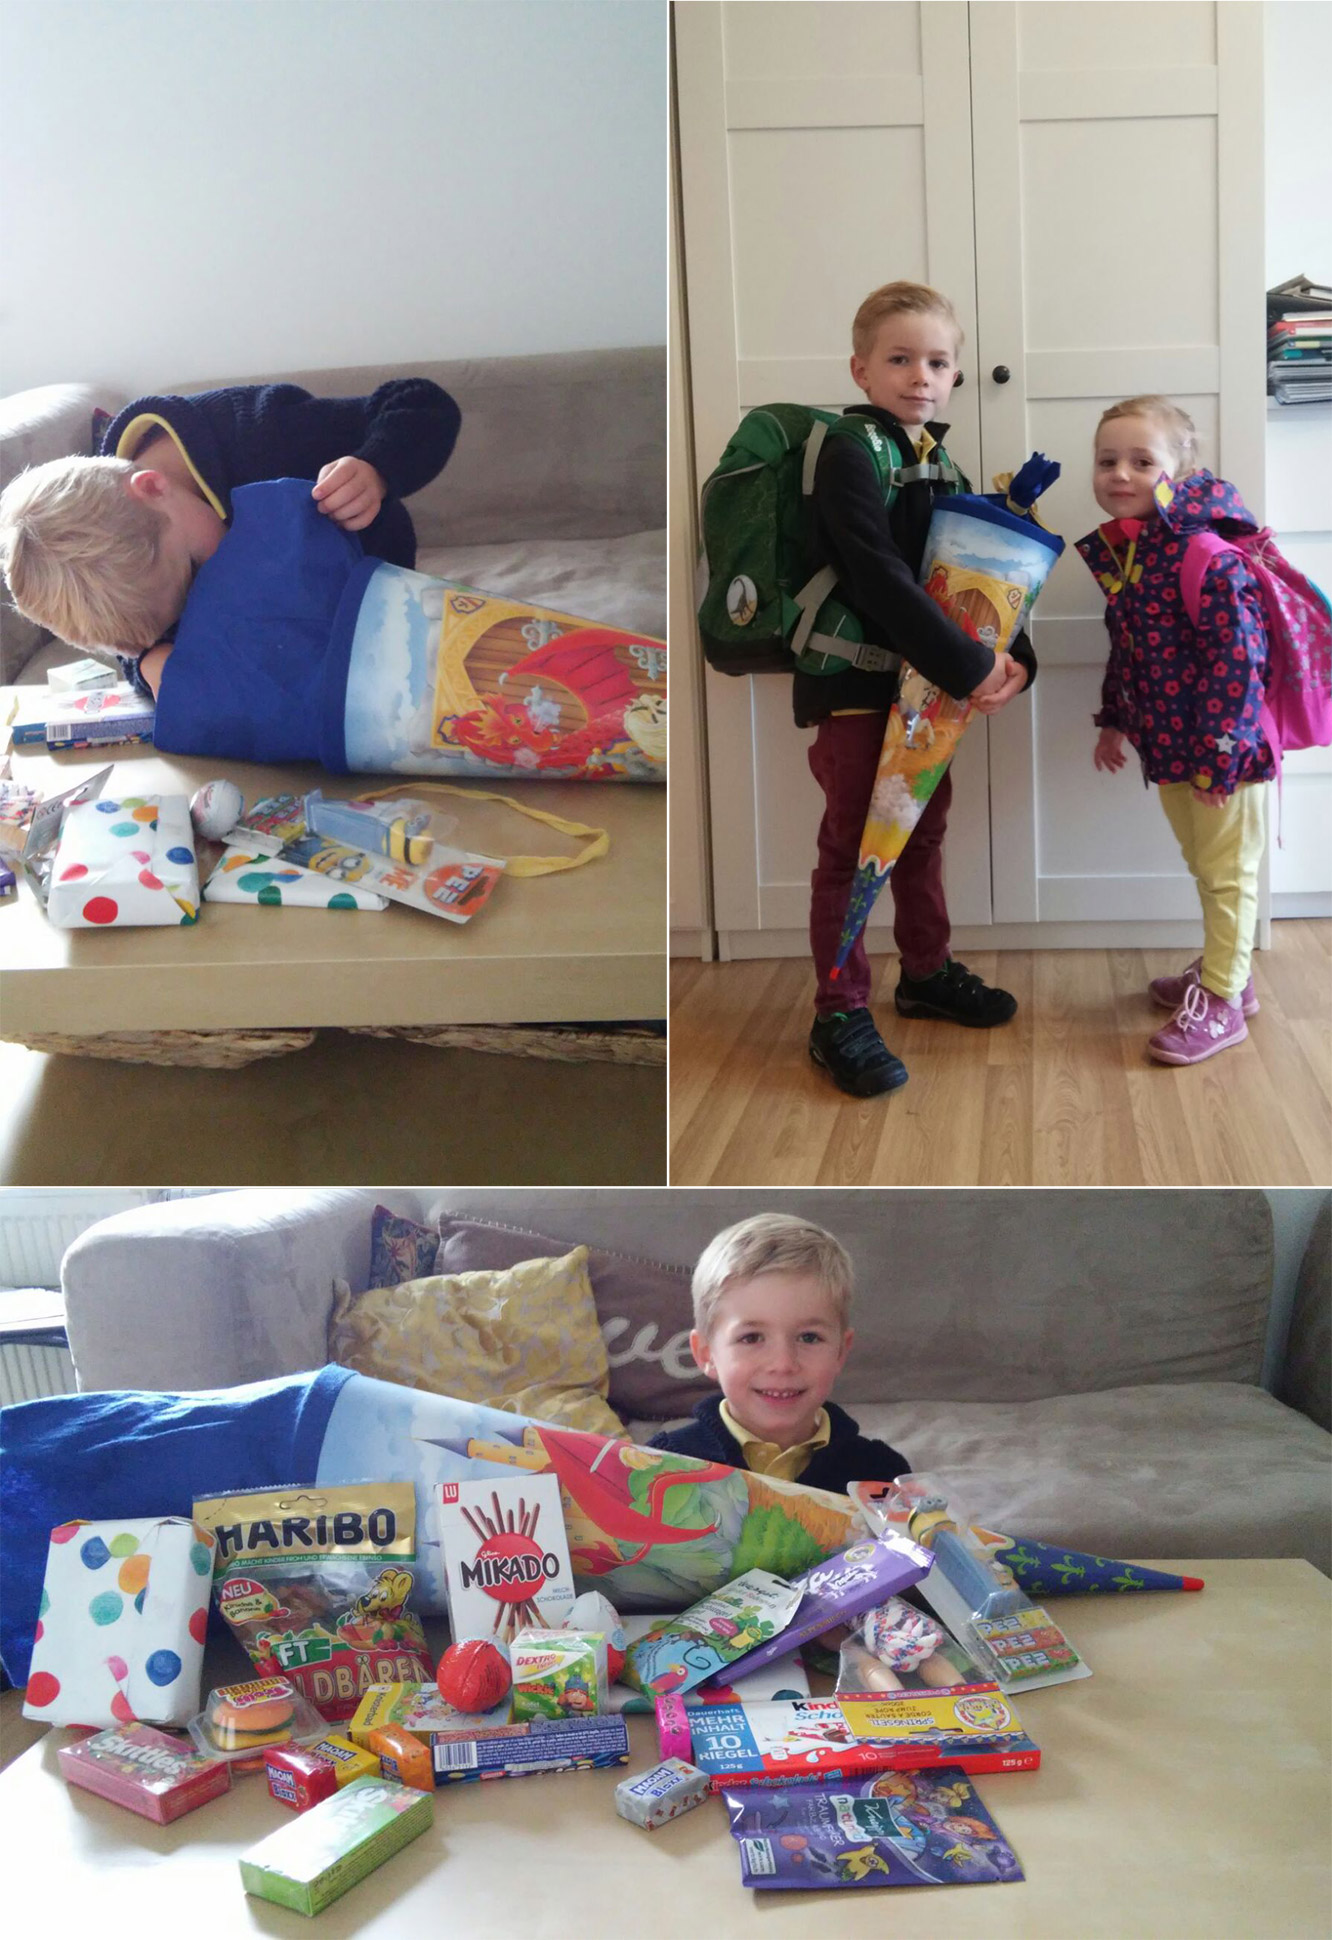
A few weeks ago I was sent these photos of a very beloved little boy; you might remember way back when we helped him make birthday party invites? Well, about 18 months later and it was the first day of school for our young sir.
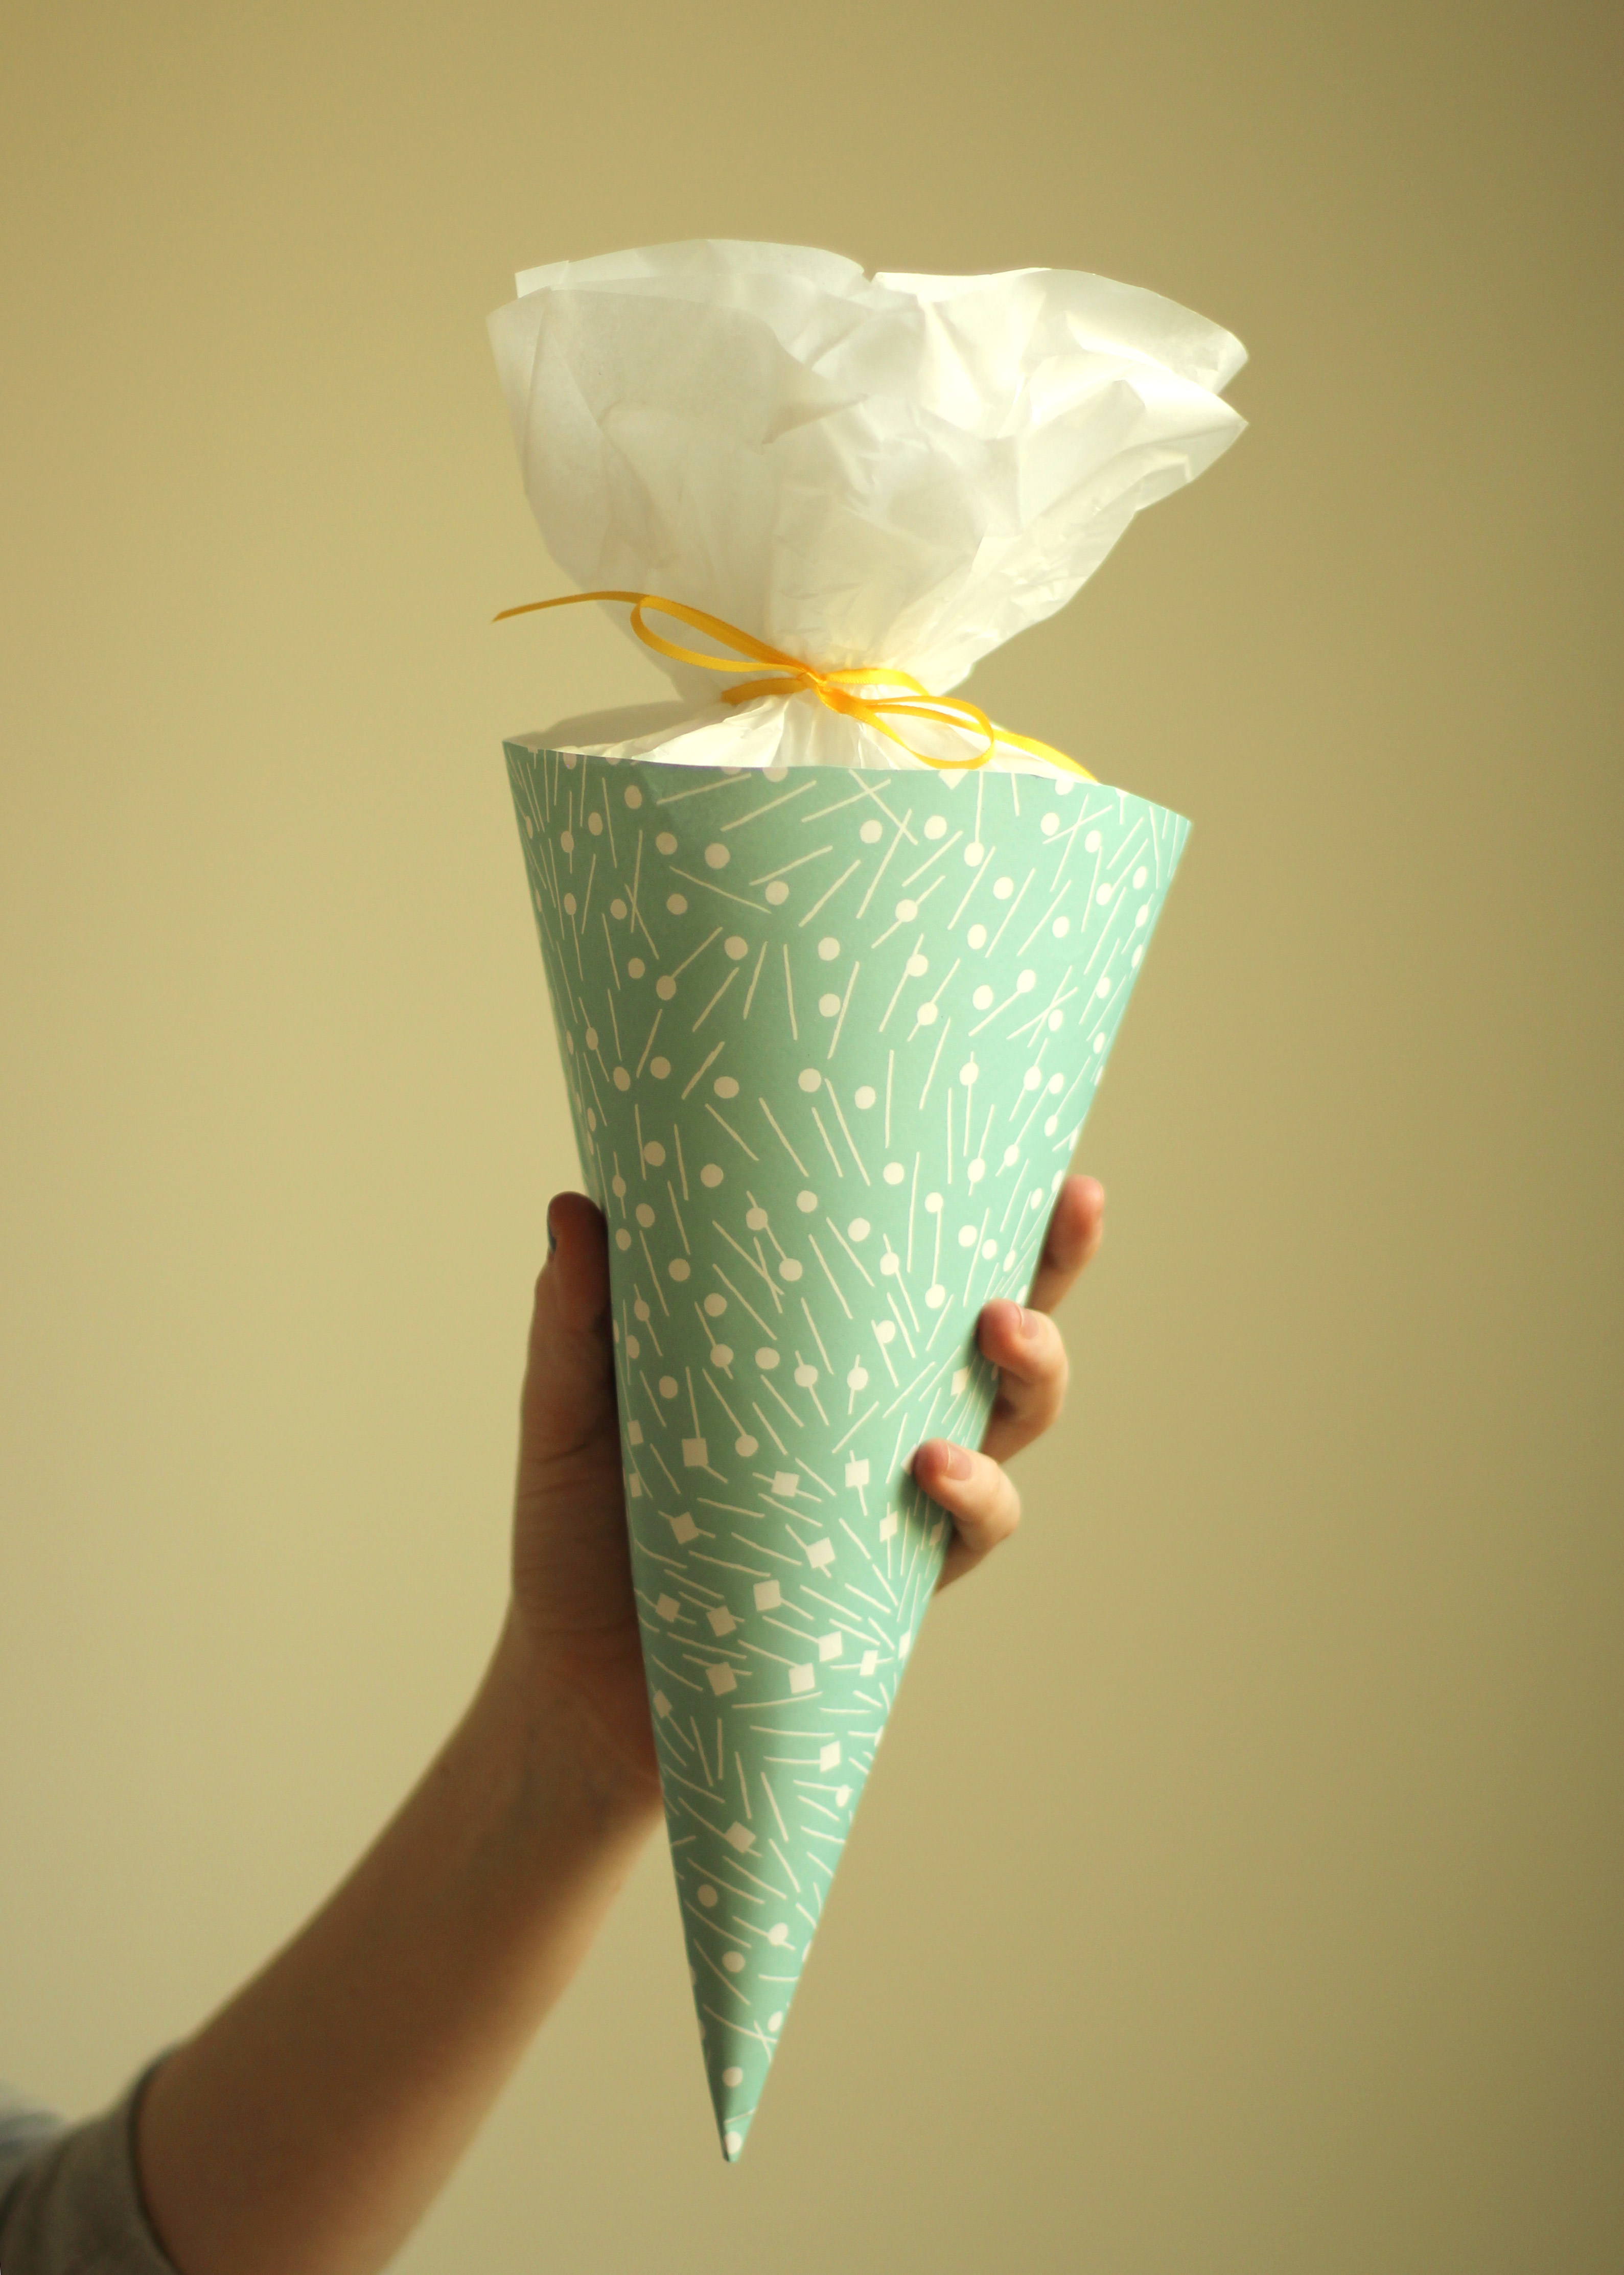
What is that thing he’s holding I hear you cry? My exact response, and I didn’t have the benefit of seeing the contents like you guys at first. Well, I’m reliably informed that in Germany children get a Schultüten on their first day of school, a cone full of lovely treats. The best part is that sometimes adults get a mini version for their first day at a new job. Cute or what?!
I considered making myself one for my new job a few weeks ago, but that is mildly tragic. Thankfully, to rescue me from celebrating myself in that slightly embarrassing way, my friend Matt (who also happens to be Vicky’s husband) managed to land himself one starting this week, yay Matt. Enter Katie and her Schultüten.
By the way, I did take some of these truffles into work myself, and to brag not to brag, but one of my new colleagues described them as “chocolates worthy of a transcontinental move”. I may have asked her to workshop her review a little until we got to that point, and in return I will probably end up making some for her to give her boyfriend to encourage such a move.
Moving on. From THE LONGEST introduction to any blog post ever, I really shouldn’t write these tired.
You will need
For the truffles:
400g/14 oz milk chocolate
400g/14 oz white chocolate
180ml/6 fl oz double cream
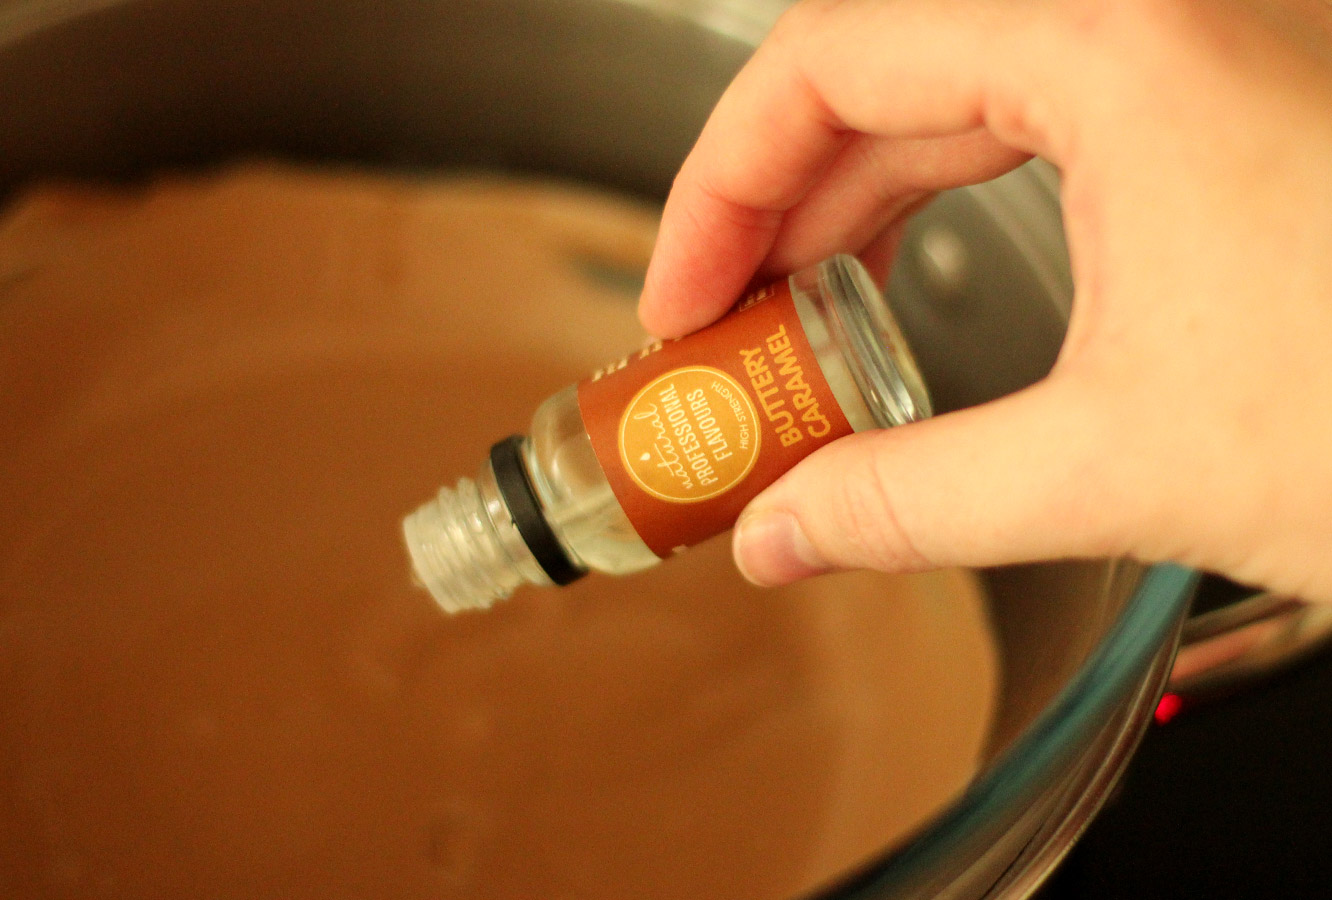
Caramel flavouring (I swear by Natural Professional Flavours – buttery caramel)
(makes up to 40 truffles)
For the cone:
Nice quality wrapping paper (I got mine from Foyles if you’re in the UK)
Tissue paper (preferably a colour that doesn’t clash with your choice of paper)
Ribbon
Double sided tape
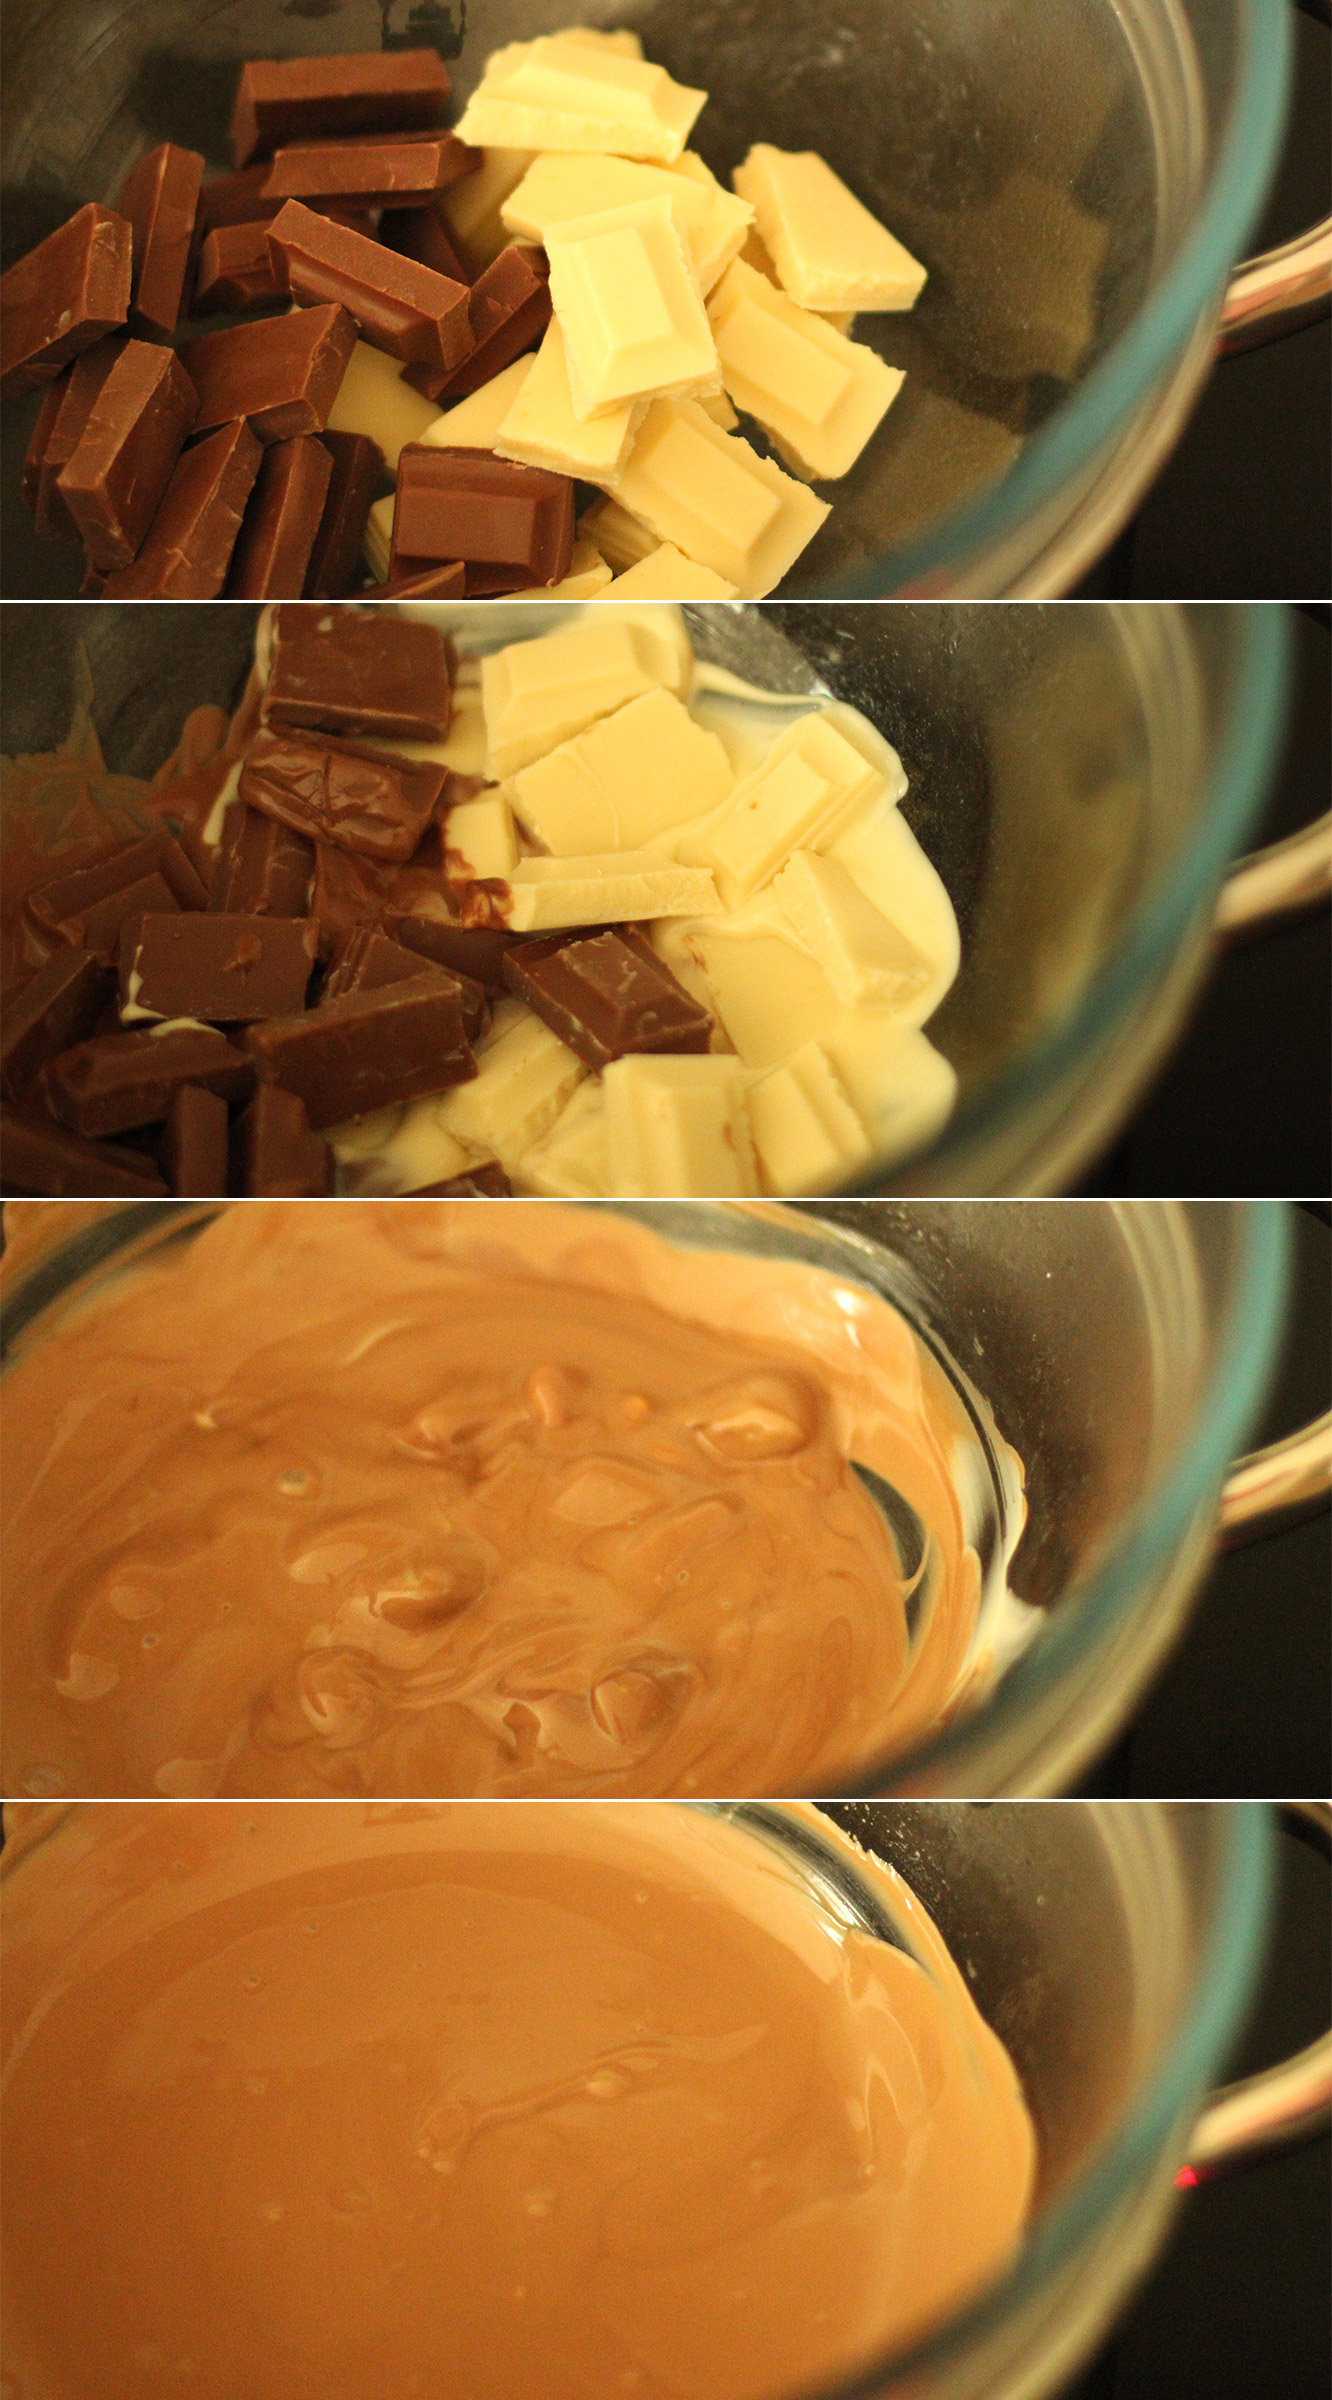
Step one
Melt 200g of each chocolate in a heatproof bowl over a pan of simmering water.
Step two
Add 1 tsp or so of the caramel flavouring (you can use other brands of flavouring by the way, a lot of supermarkets offer a caramel flavour now).
This is really just a great excuse to taste test the melted chocolate until you’re happy with it. It’s ok if this takes a few spoonfuls, being a perfectionist is a good thing.
Step three
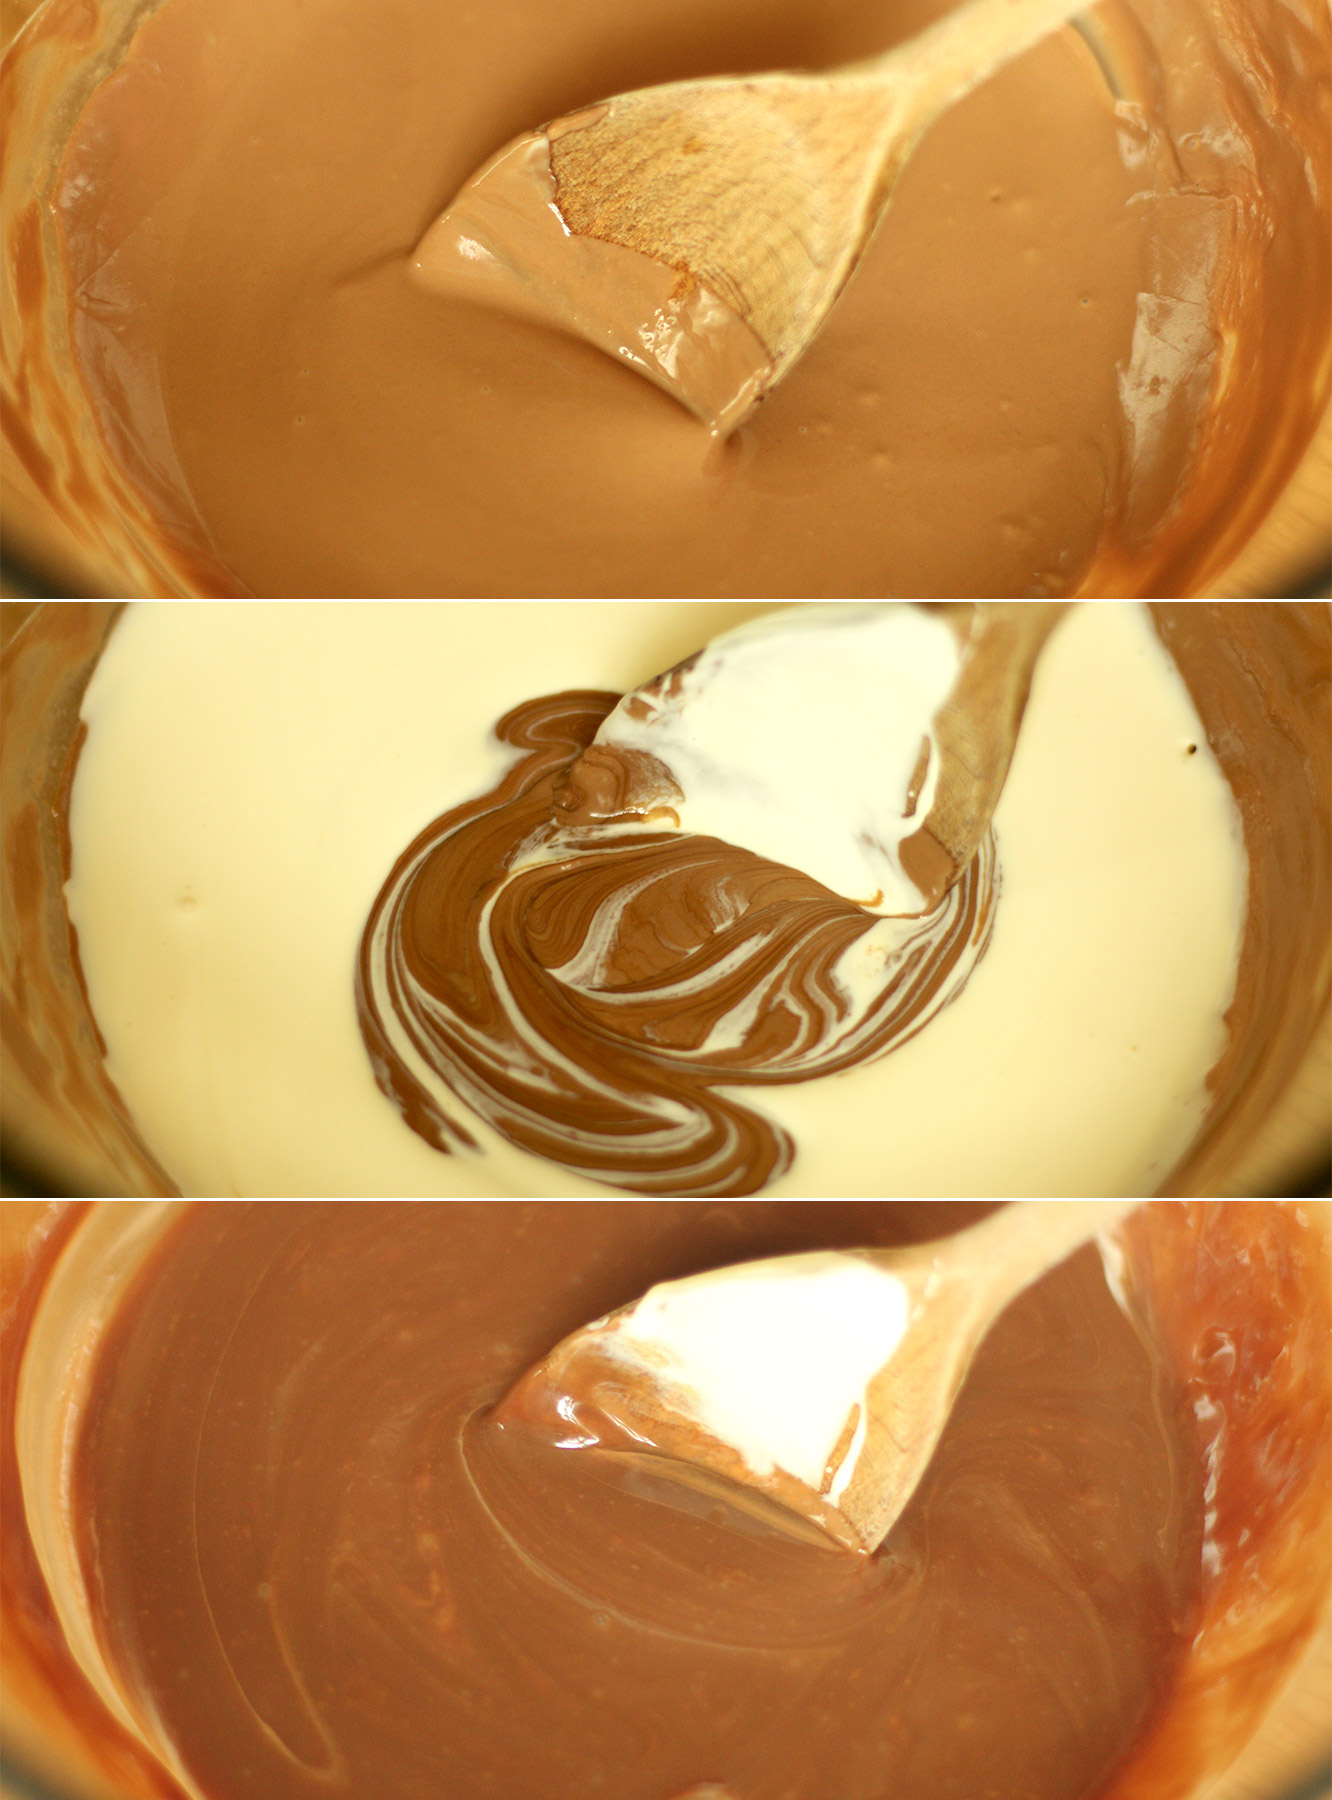
Remove the chocolate from the heat and stir in the cream until fully combined. You will probably need to leave this to set for a while.
Leave it on the side if you have time, the fridge if you’re slightly hurried, or even the freezer if you’re desperate to take photos for your blog in the fading natural light (thanks winter).
Step four
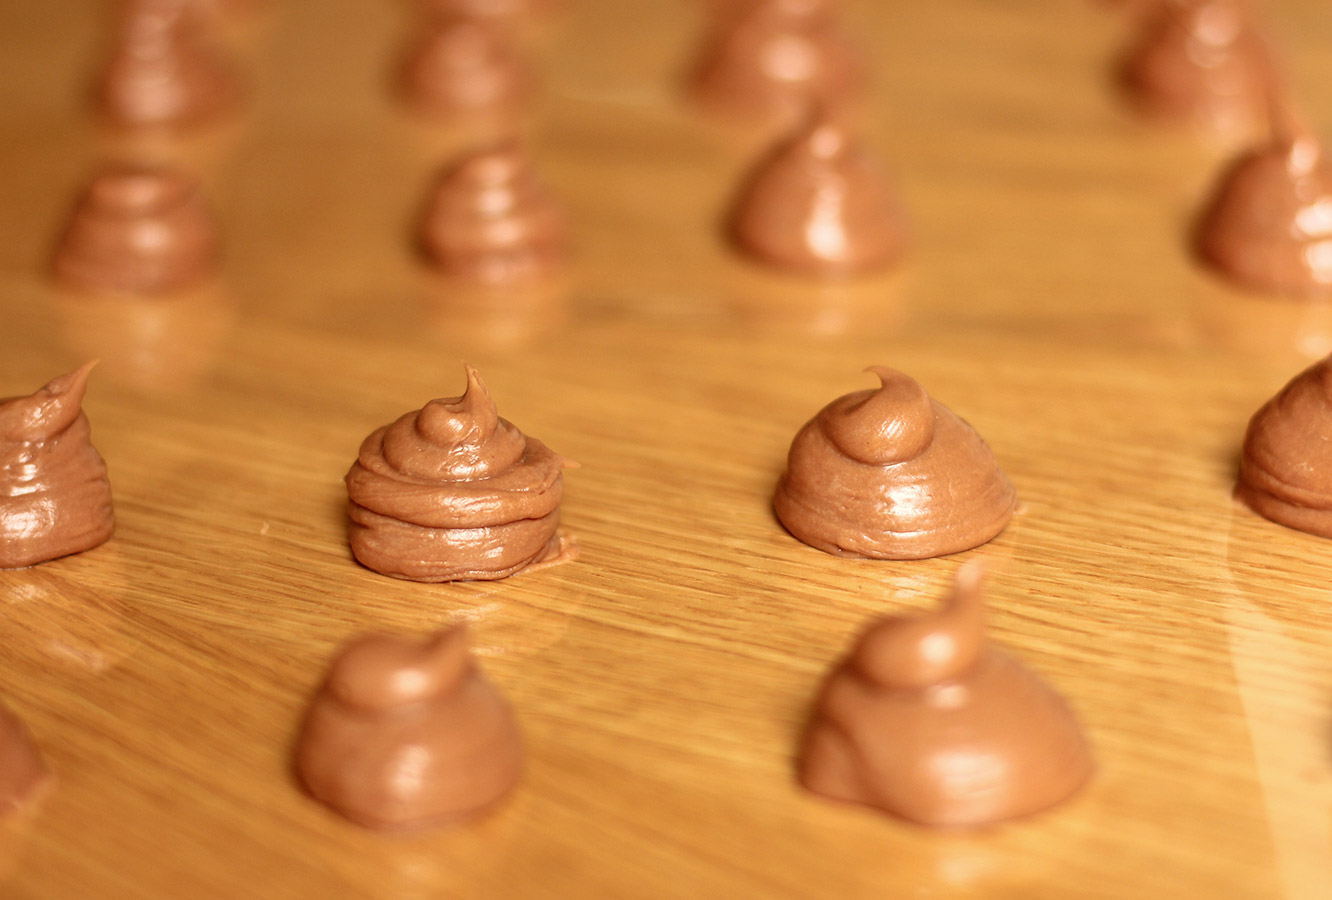
Once the mixture is pipe-able, lay out a sheet of cellophane or greaseproof paper and pipe out evenly sized blobs (yes, that’s the technical term). They need to be about, well, truffle sized, whatever that means to you pal.
Step five
Leave to set, you can put them in the fridge if you want to.
They look appetising, don’t they?
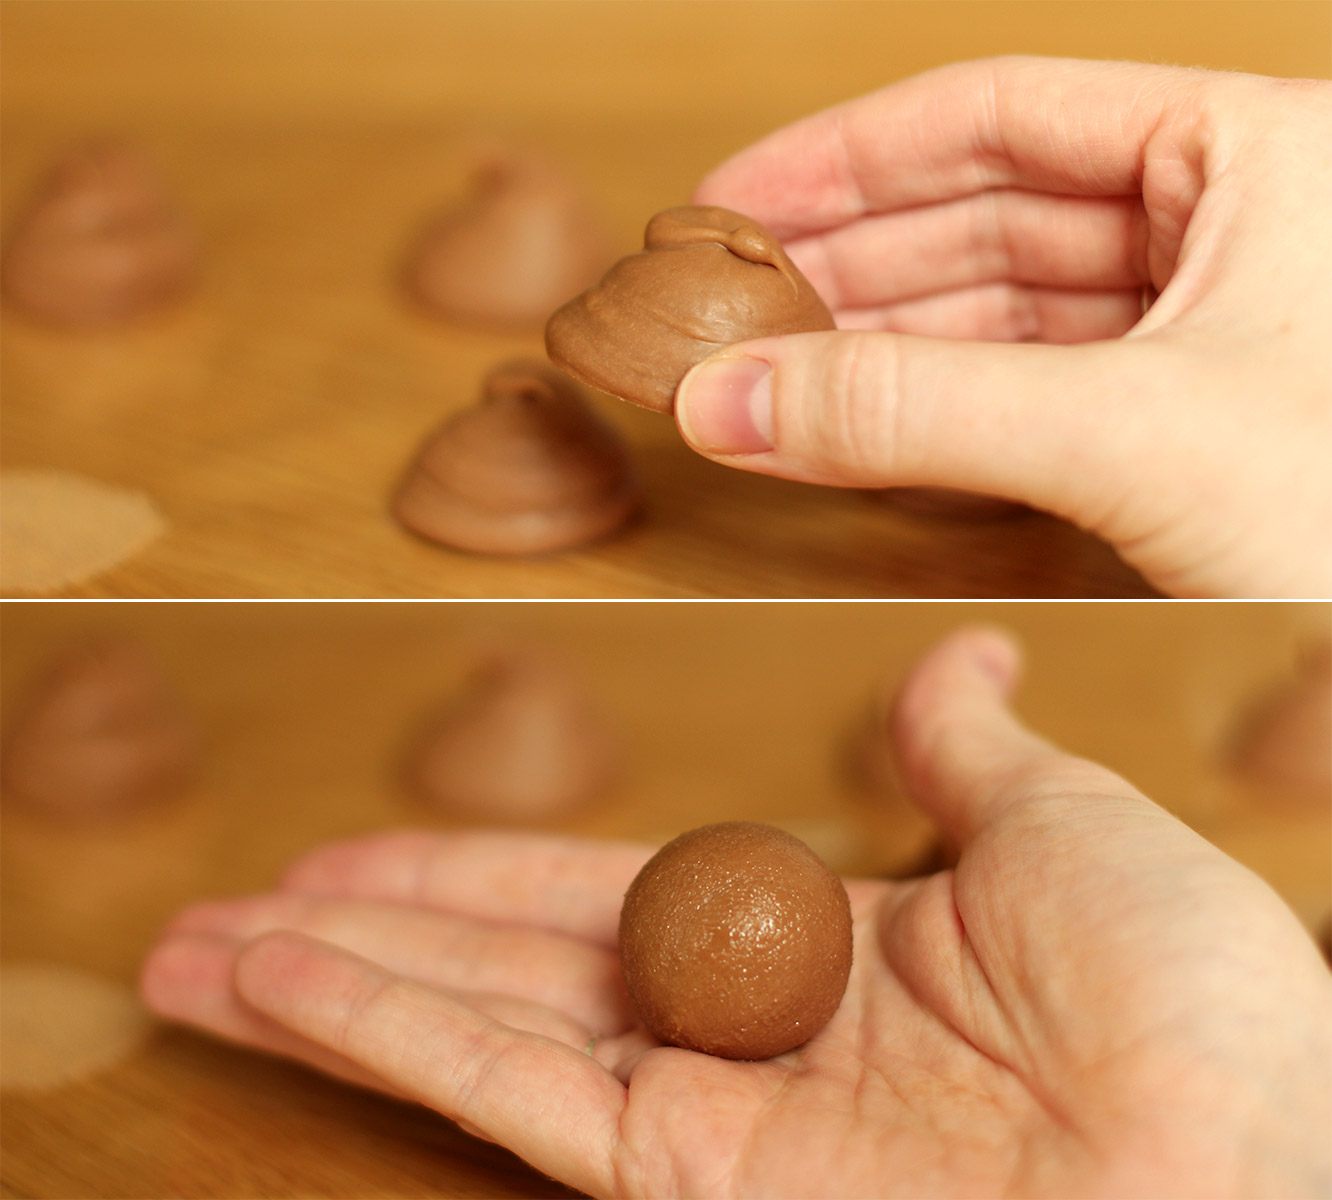
Step six
With clean and cold hands (clue: wash them under the cold tap). Squash the piped shapes a little with your fingers and roll into a ball between your palms.
You will probably need to wash your hands a few times as you go as they will start to melt as your hands warm up.
I then put mine back in the fridge while I melted the chocolate for coating.
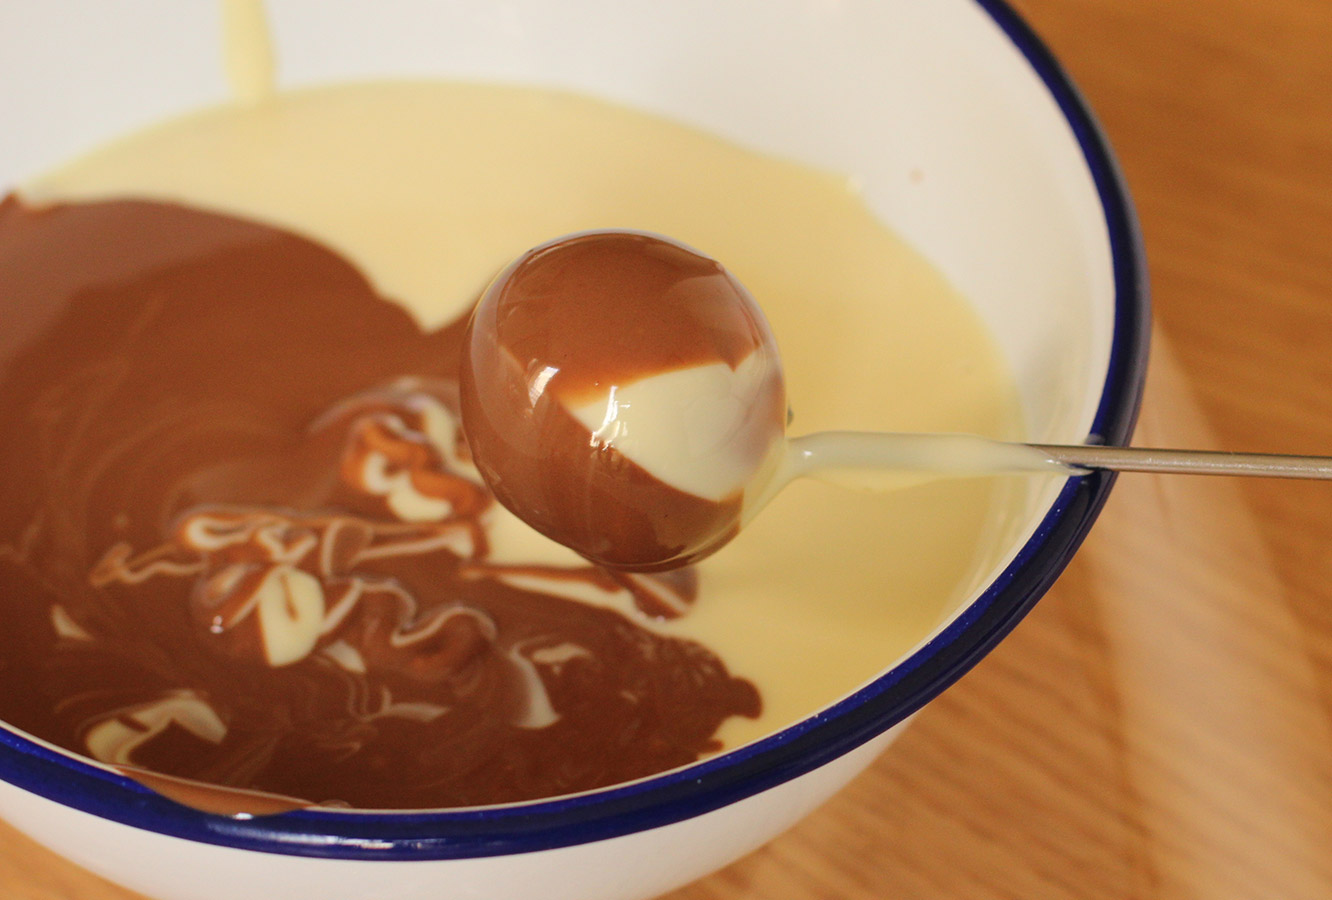
Step seven
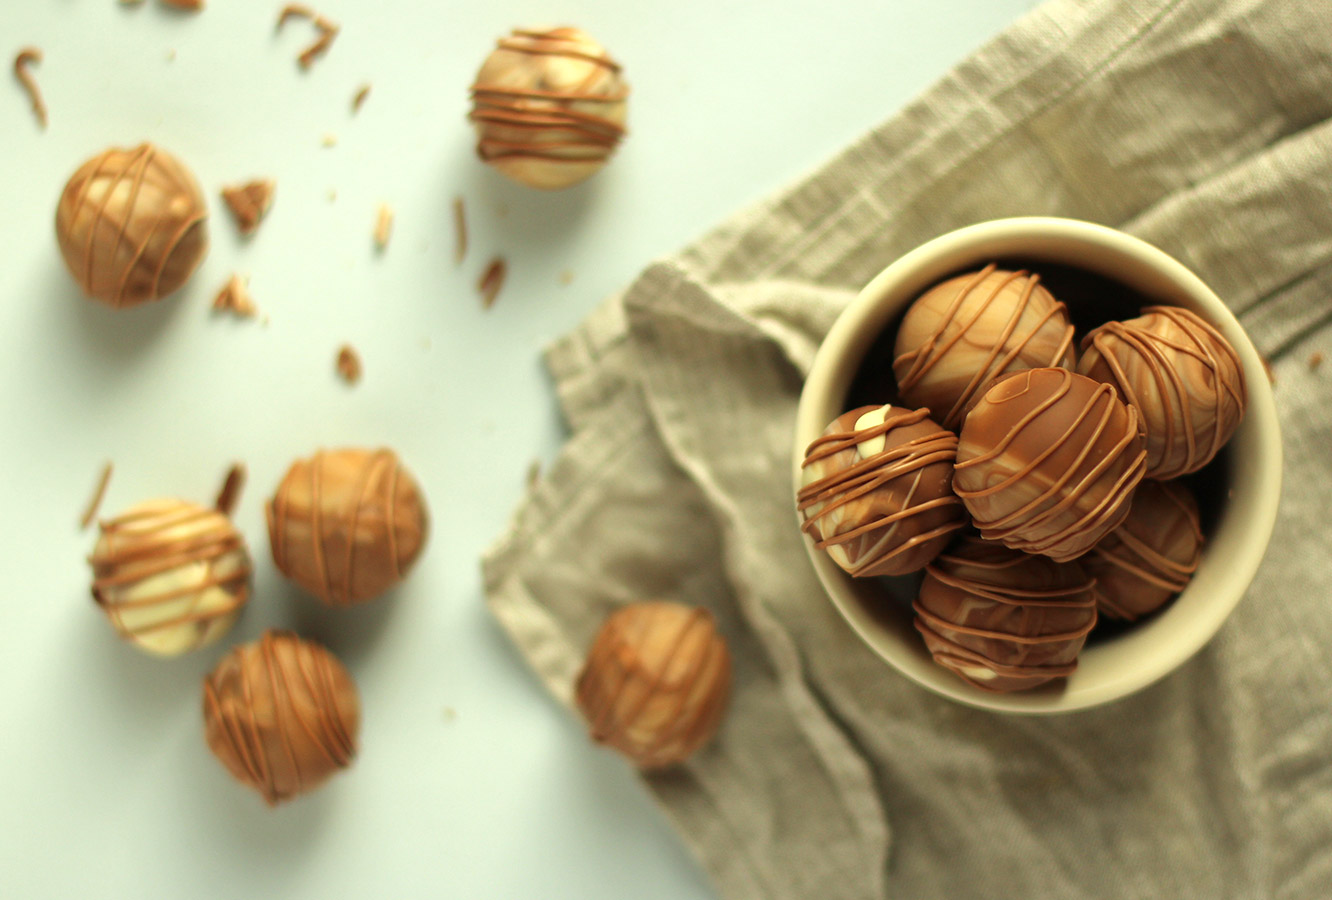
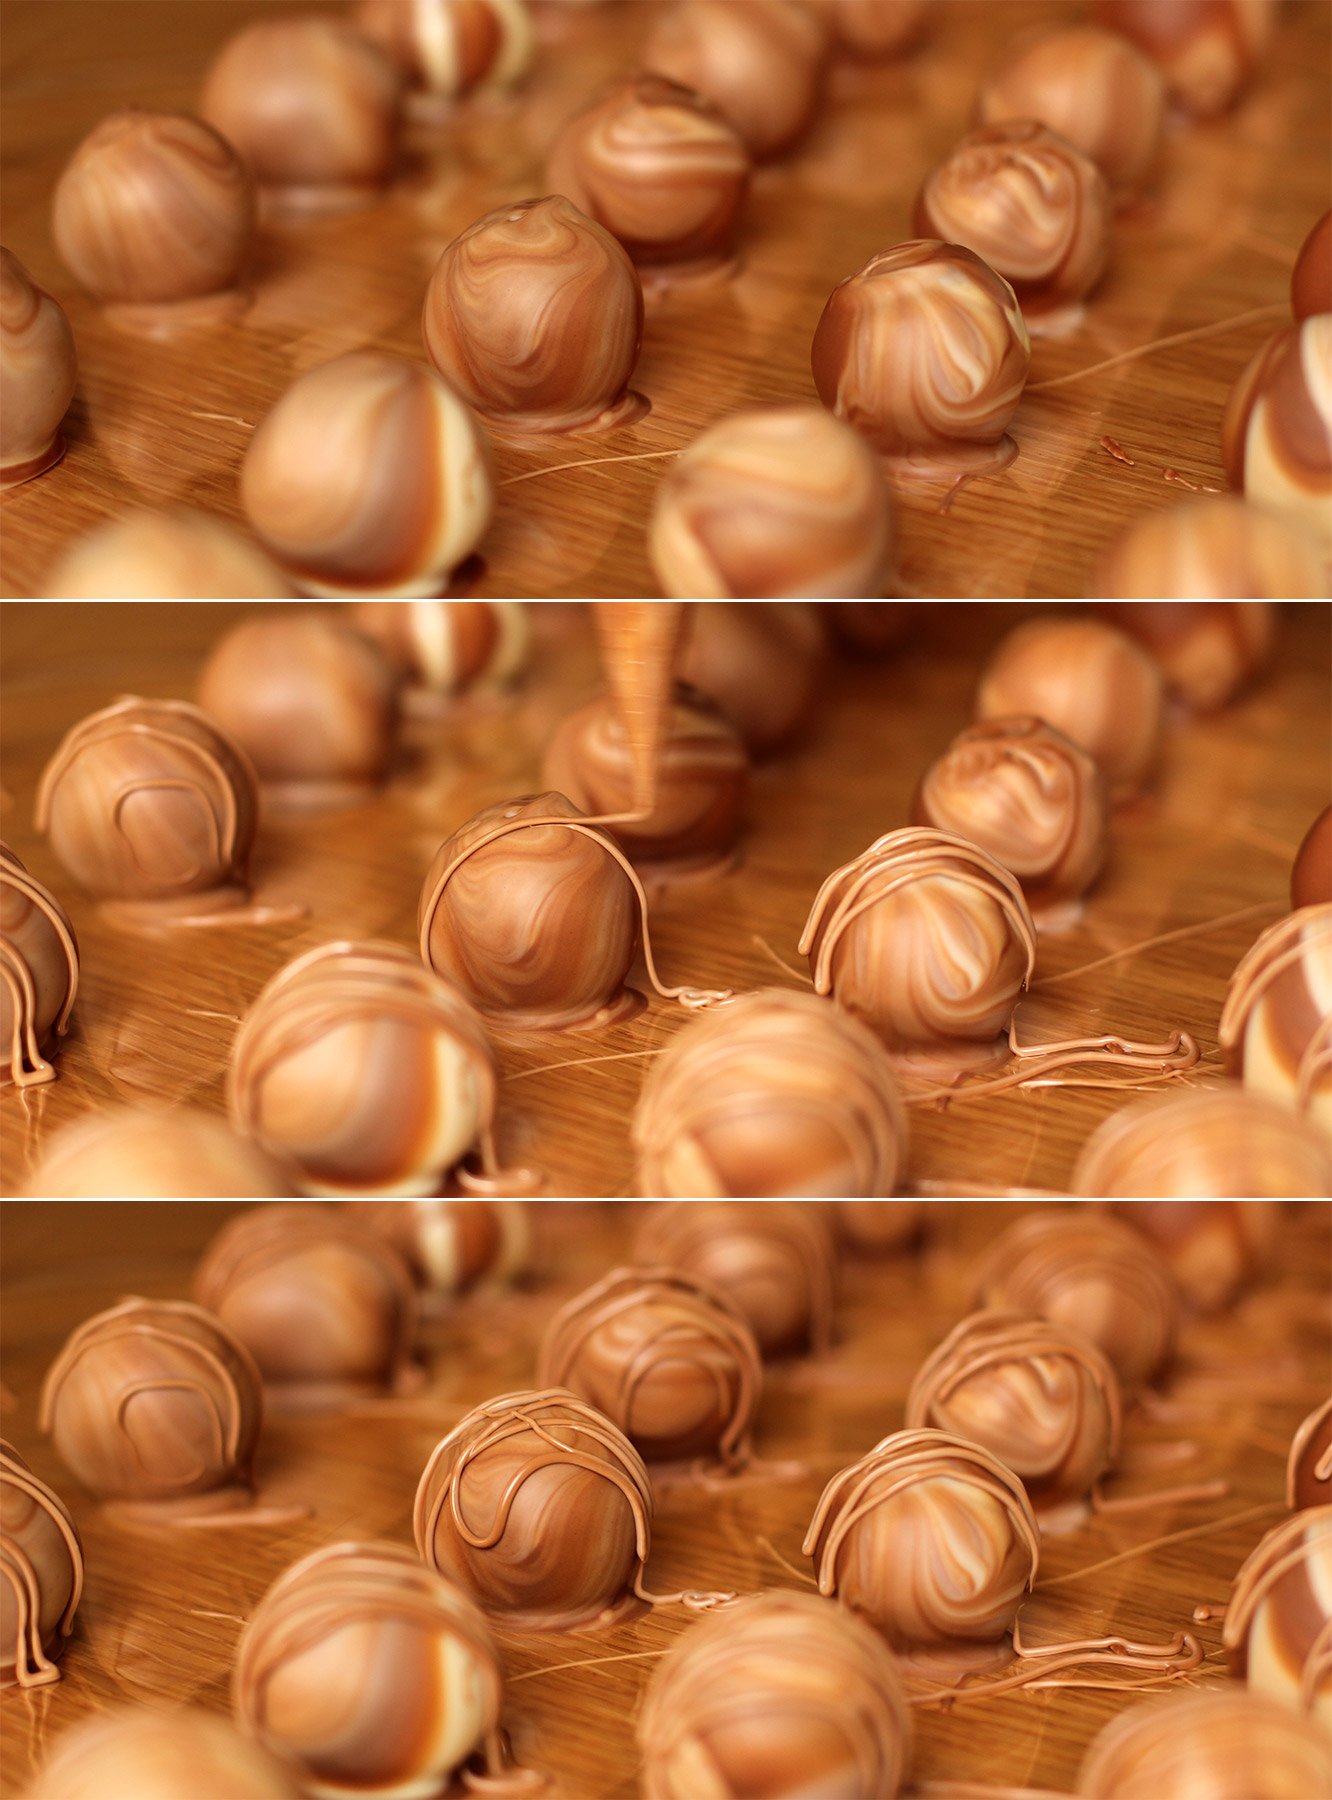
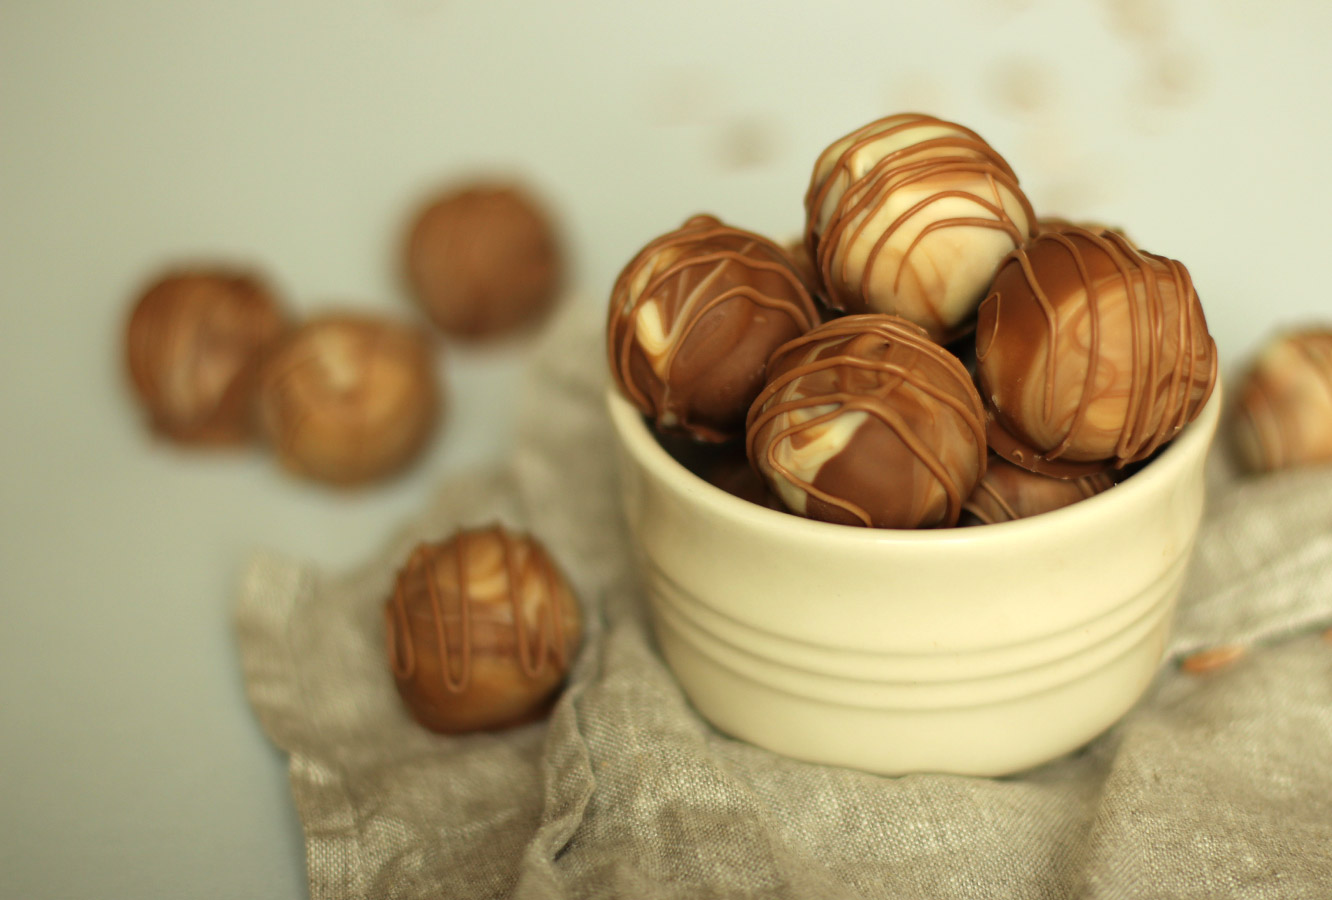
Melt the remaining white and milk chocolate separately and pour simultaneously into a small, deepish container or bowl. This is to get a marbled effect on the outside, but you could always stir them together if you don’t fancy the look of that.
Using either a plastic fork with the middle prongs taken out, or the end of a metal kebab skewer, dip the truffle centres in the chocolate.
Step eight
Repeat until you’re out of truffles. Leave to set. This time, don’t shortcut with the fridge, you want them to set at room temperature so that they don’t melt at room temperature.
Step nine
Put the leftover dipping chocolate in a piping bag and drizzle over the truffles.
Put the remaining melted chocolate in your mouth with a spoon. Or just pipe it straight in there.
Step ten
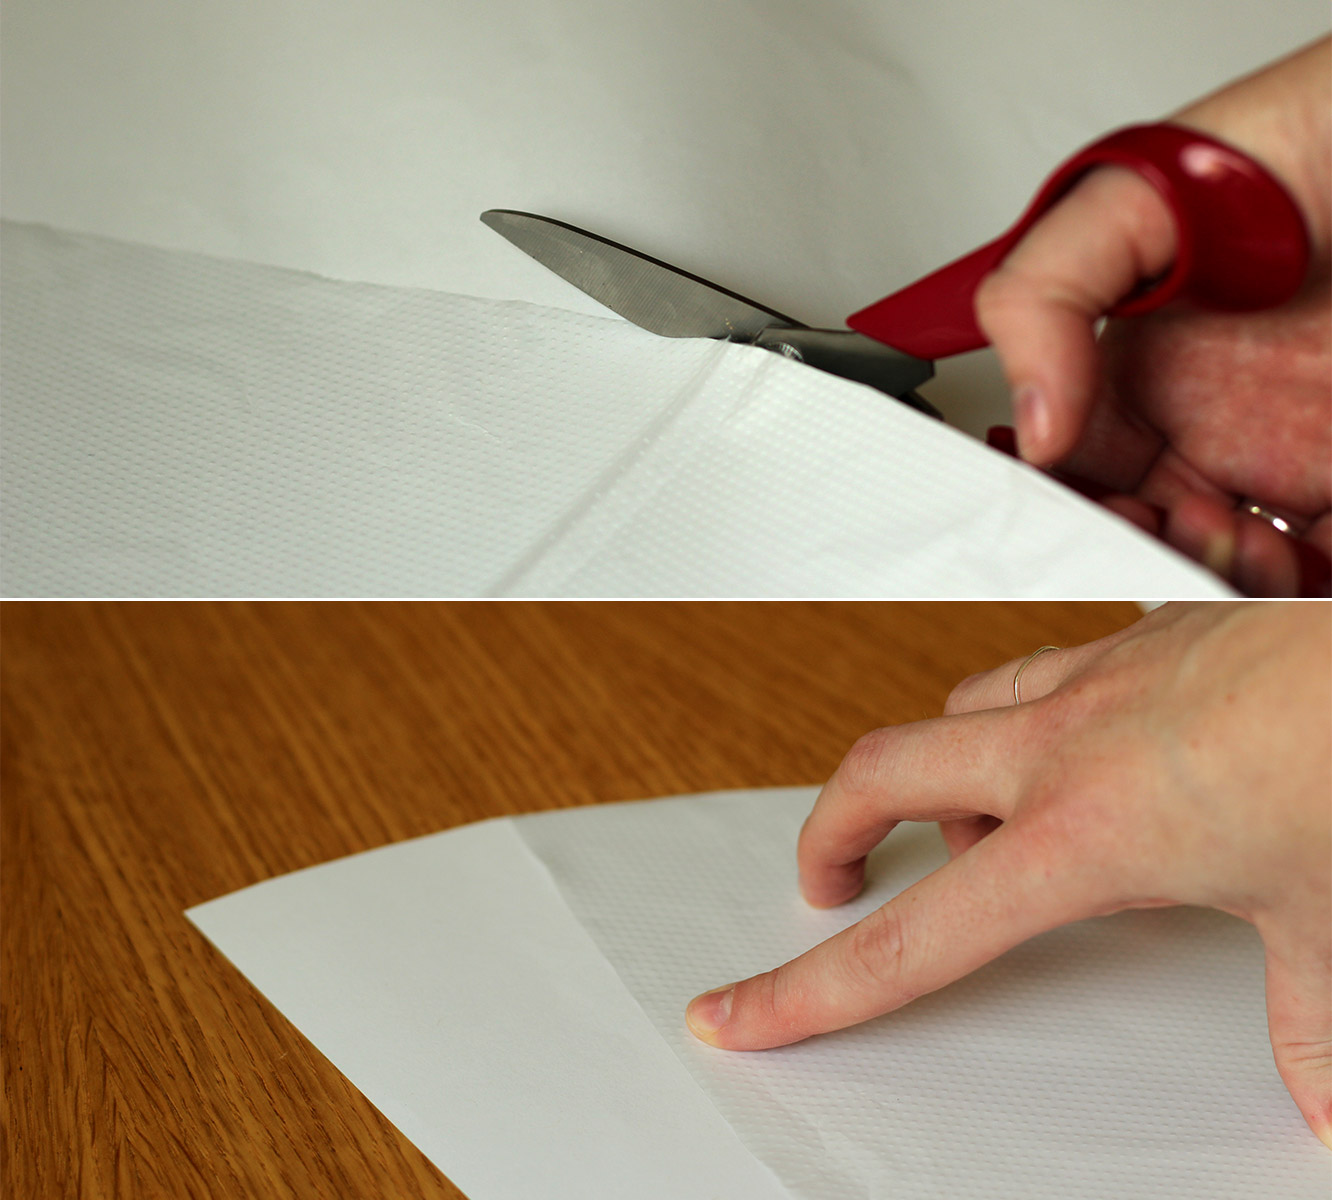
Cut open a piping bag so that it lies flat and use it as a template to cut round. Add a little extra on one side for overlap, and snip the pointy end off the bottom so it’s flat.
Step eleven
Cut three or four sheets of tissue paper to the same shape, but add another 10 cm to the top.
Tape the straight edges of the tissue to the wrong side of the wrapping paper.
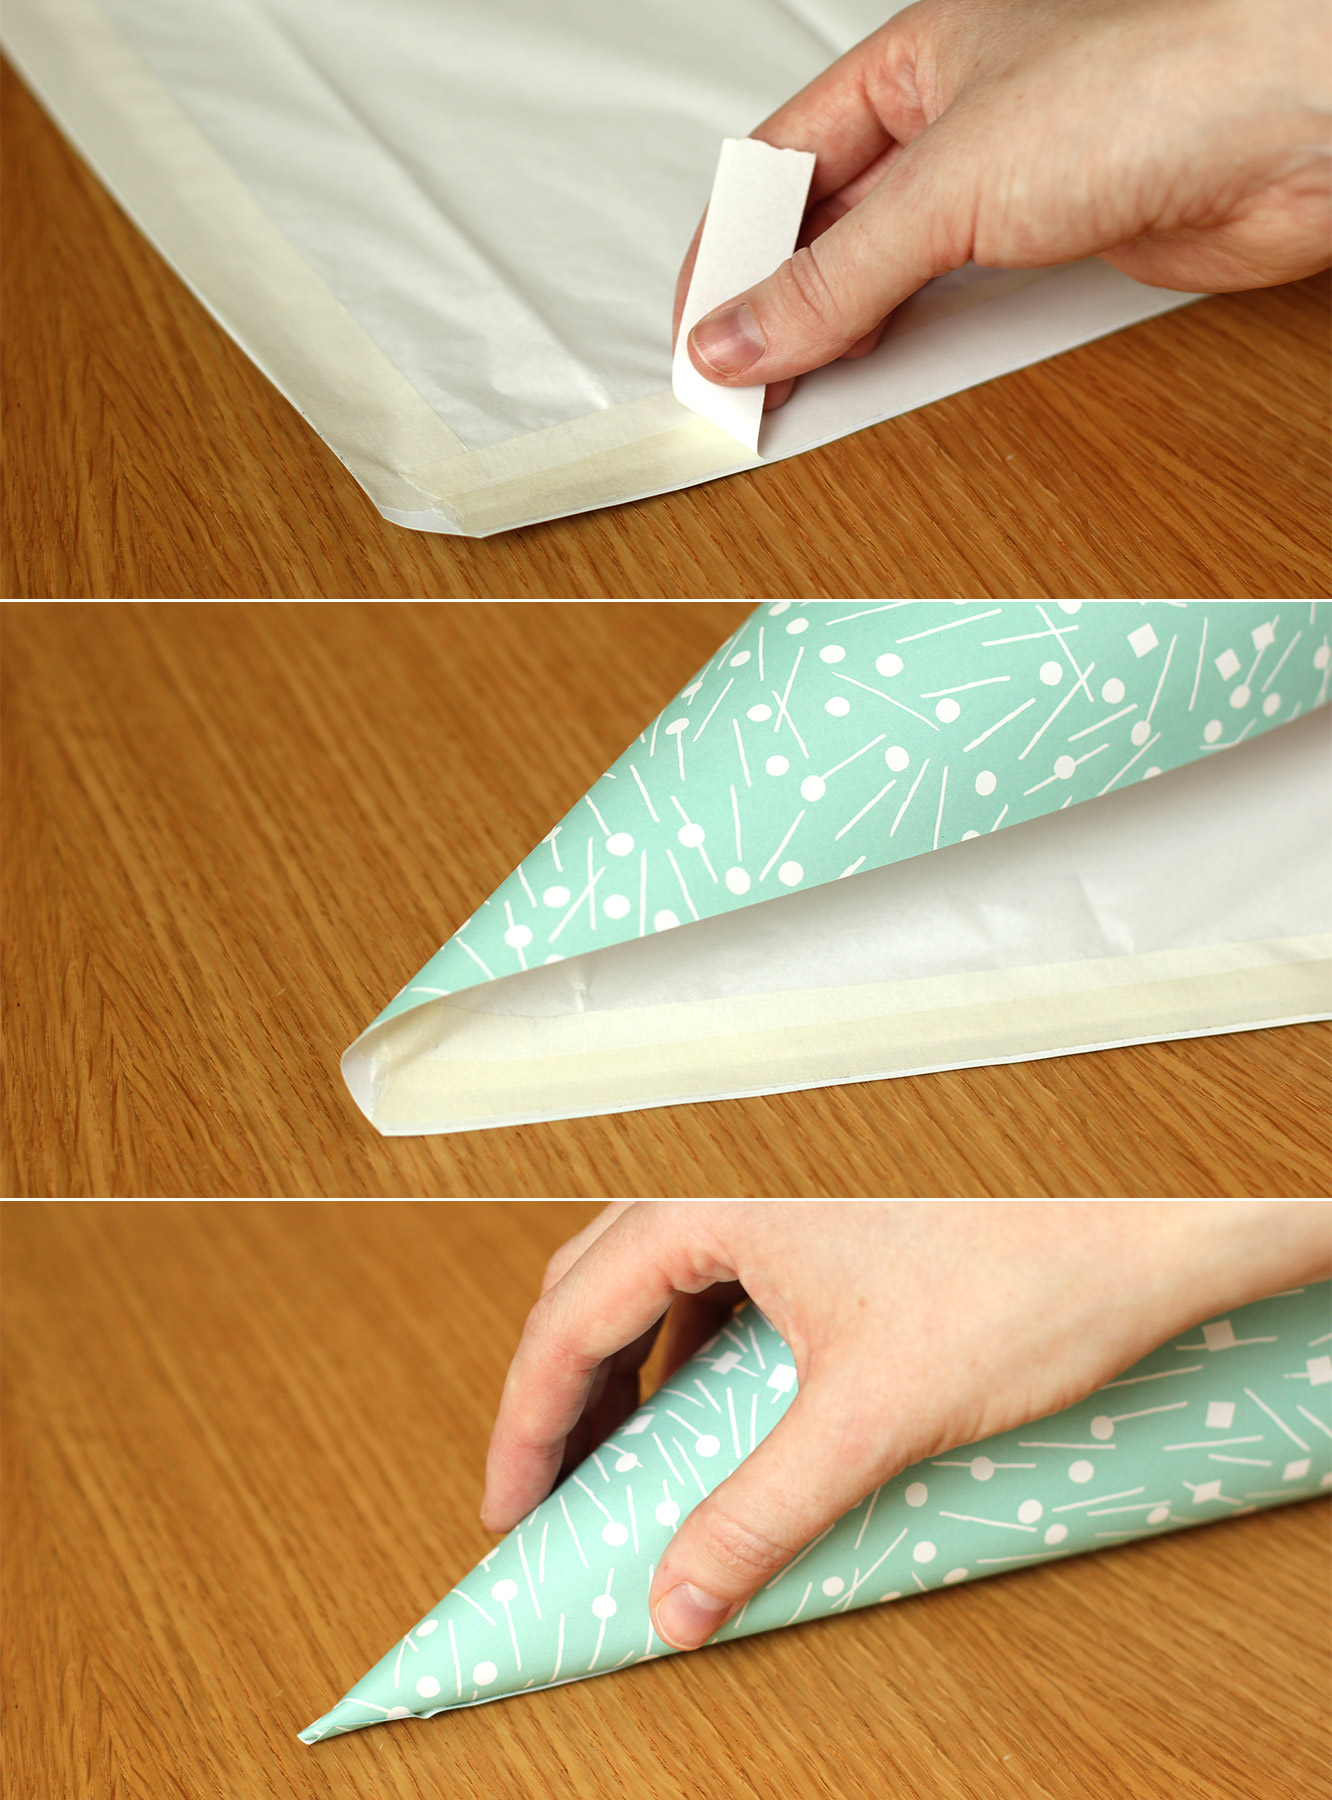
Step twelve
Fold back the top of the tissue paper on the large curved edge. Place double-sided tape around the edge and fold the tissue back over so that it is stuck the whole way round the top.
Step thirteen
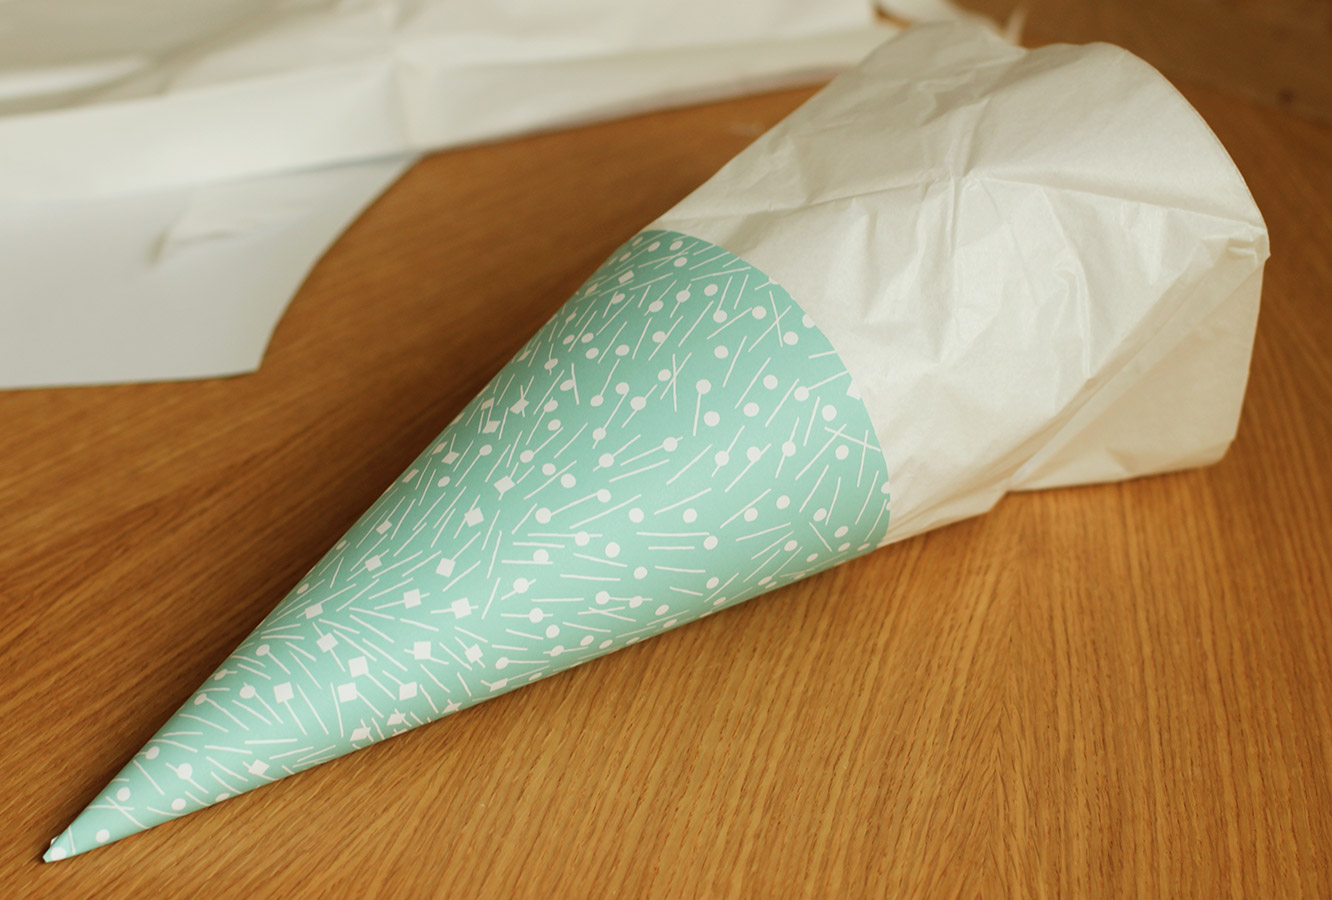
Use another strip of double-sided tape down the straight edge to roll the paper into a conical shape. You should have something like the below.
Step fourteen
Fill another piping bag with truffles and place in the cone, or Schultüten, and tie up the top with a piece of ribbon.
It has been too long without a post featuring chocolate, hasn’t it? That question was rhetorical.
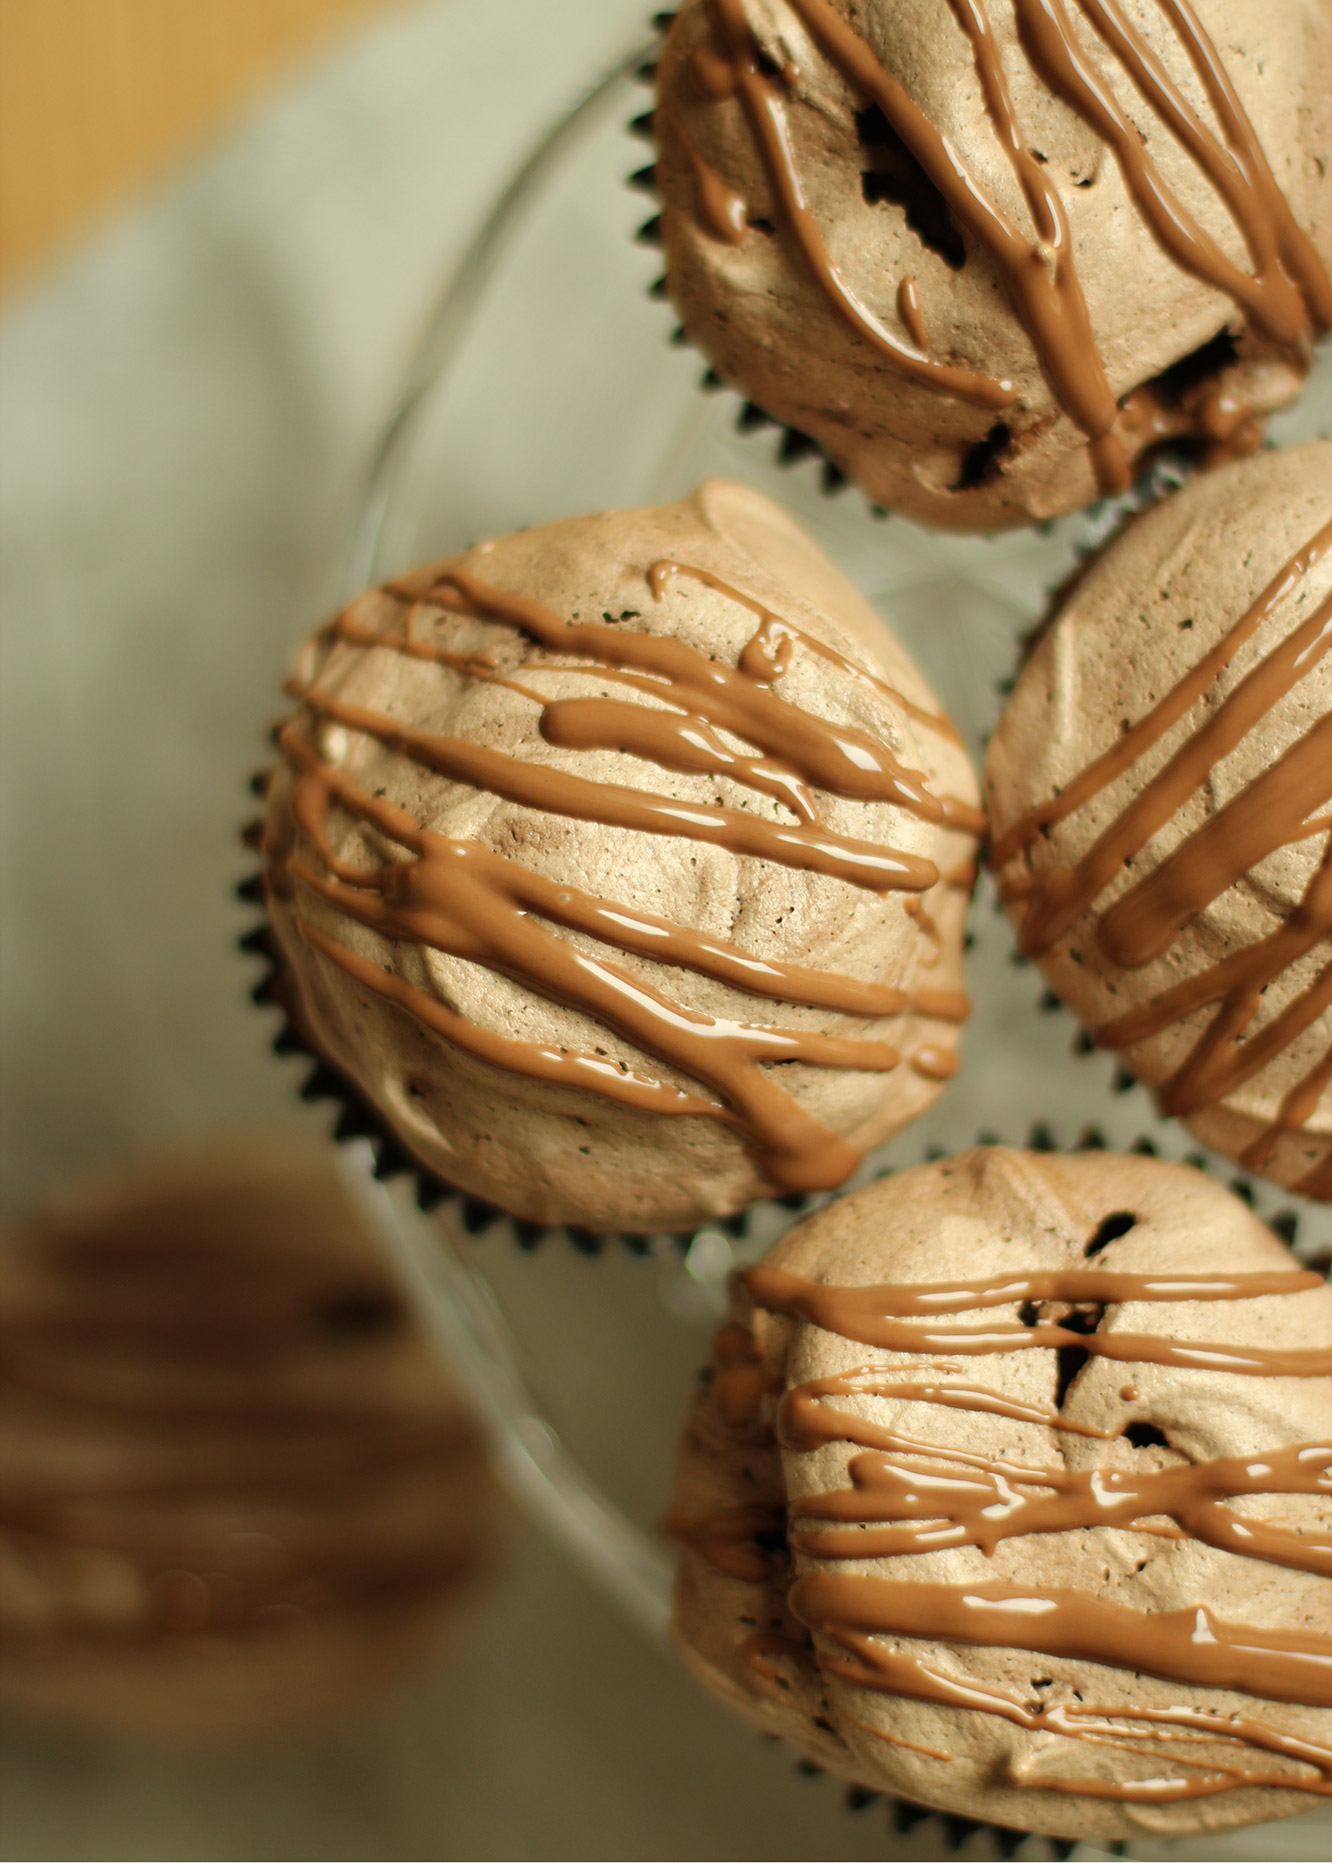
In case you hadn’t noticed from perusing this blog, I’m a pretty big fan of the stuff. If you bake these then you will be too, or a bigger fan at the end of it. They are gooey, rich and wonderful even if I do say so myself.
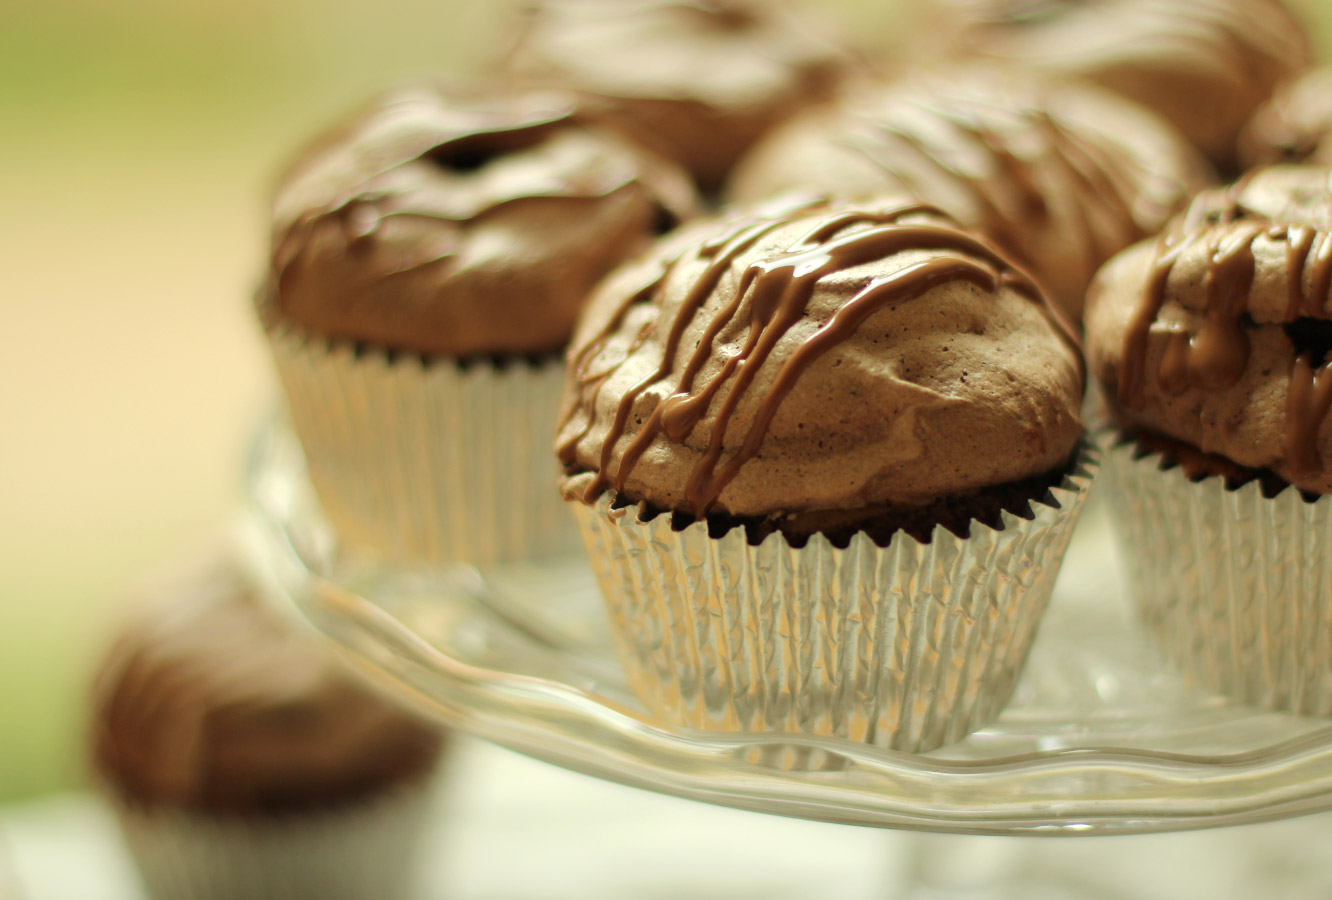
Welcome, friend, to death by chocolate brownie meringue cupcakes.
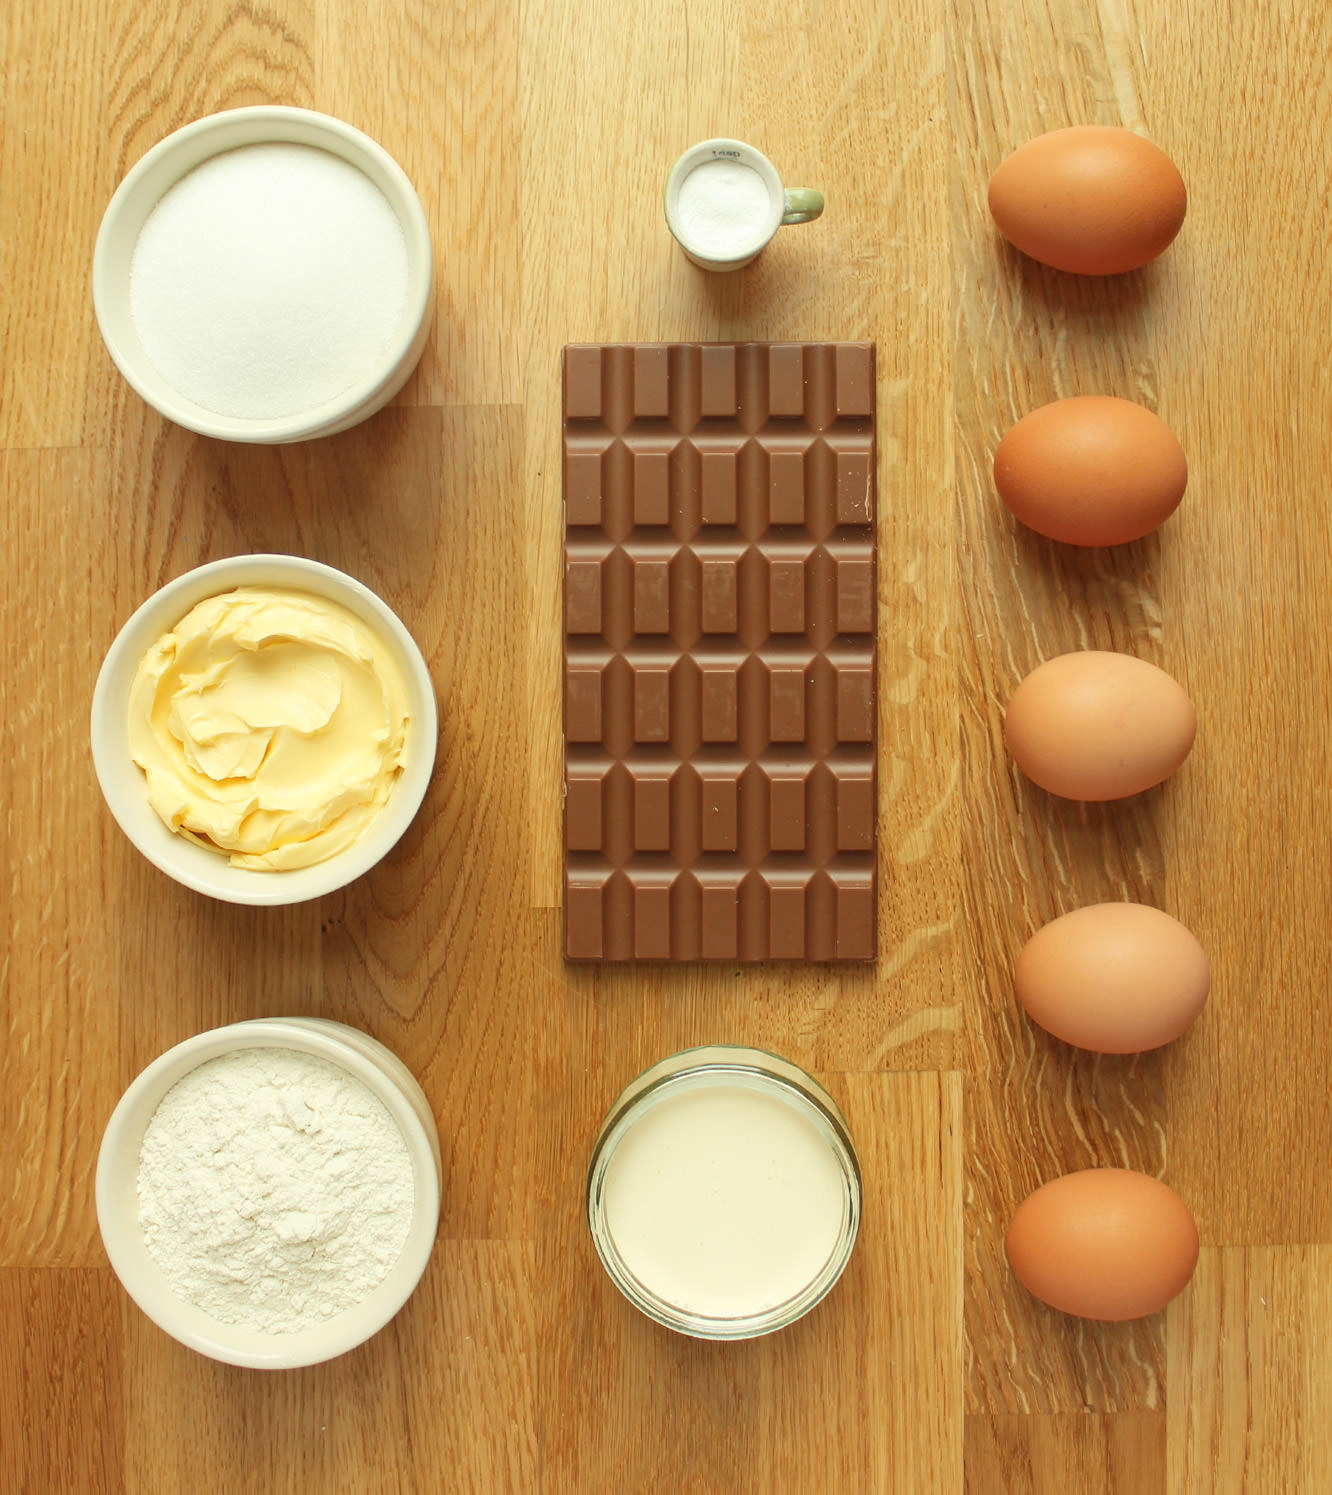
You will need
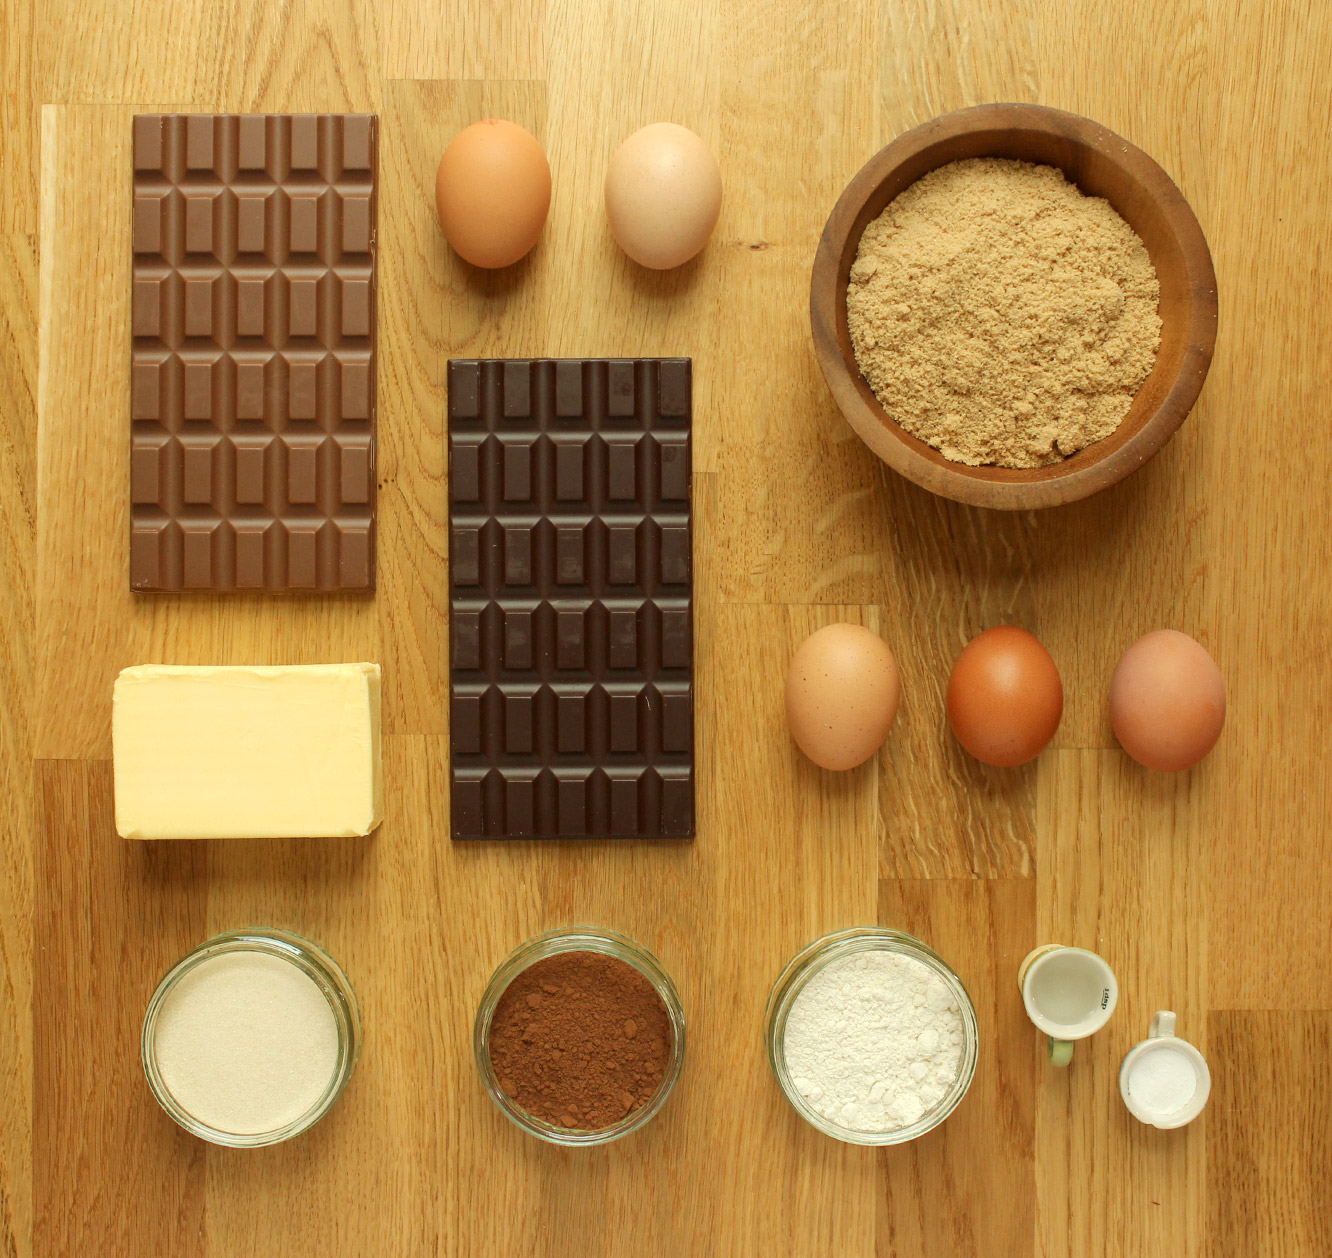
For the brownie:
250g/9 oz unsalted butter
250g/9 oz soft brown sugar (either light or dark is fine)
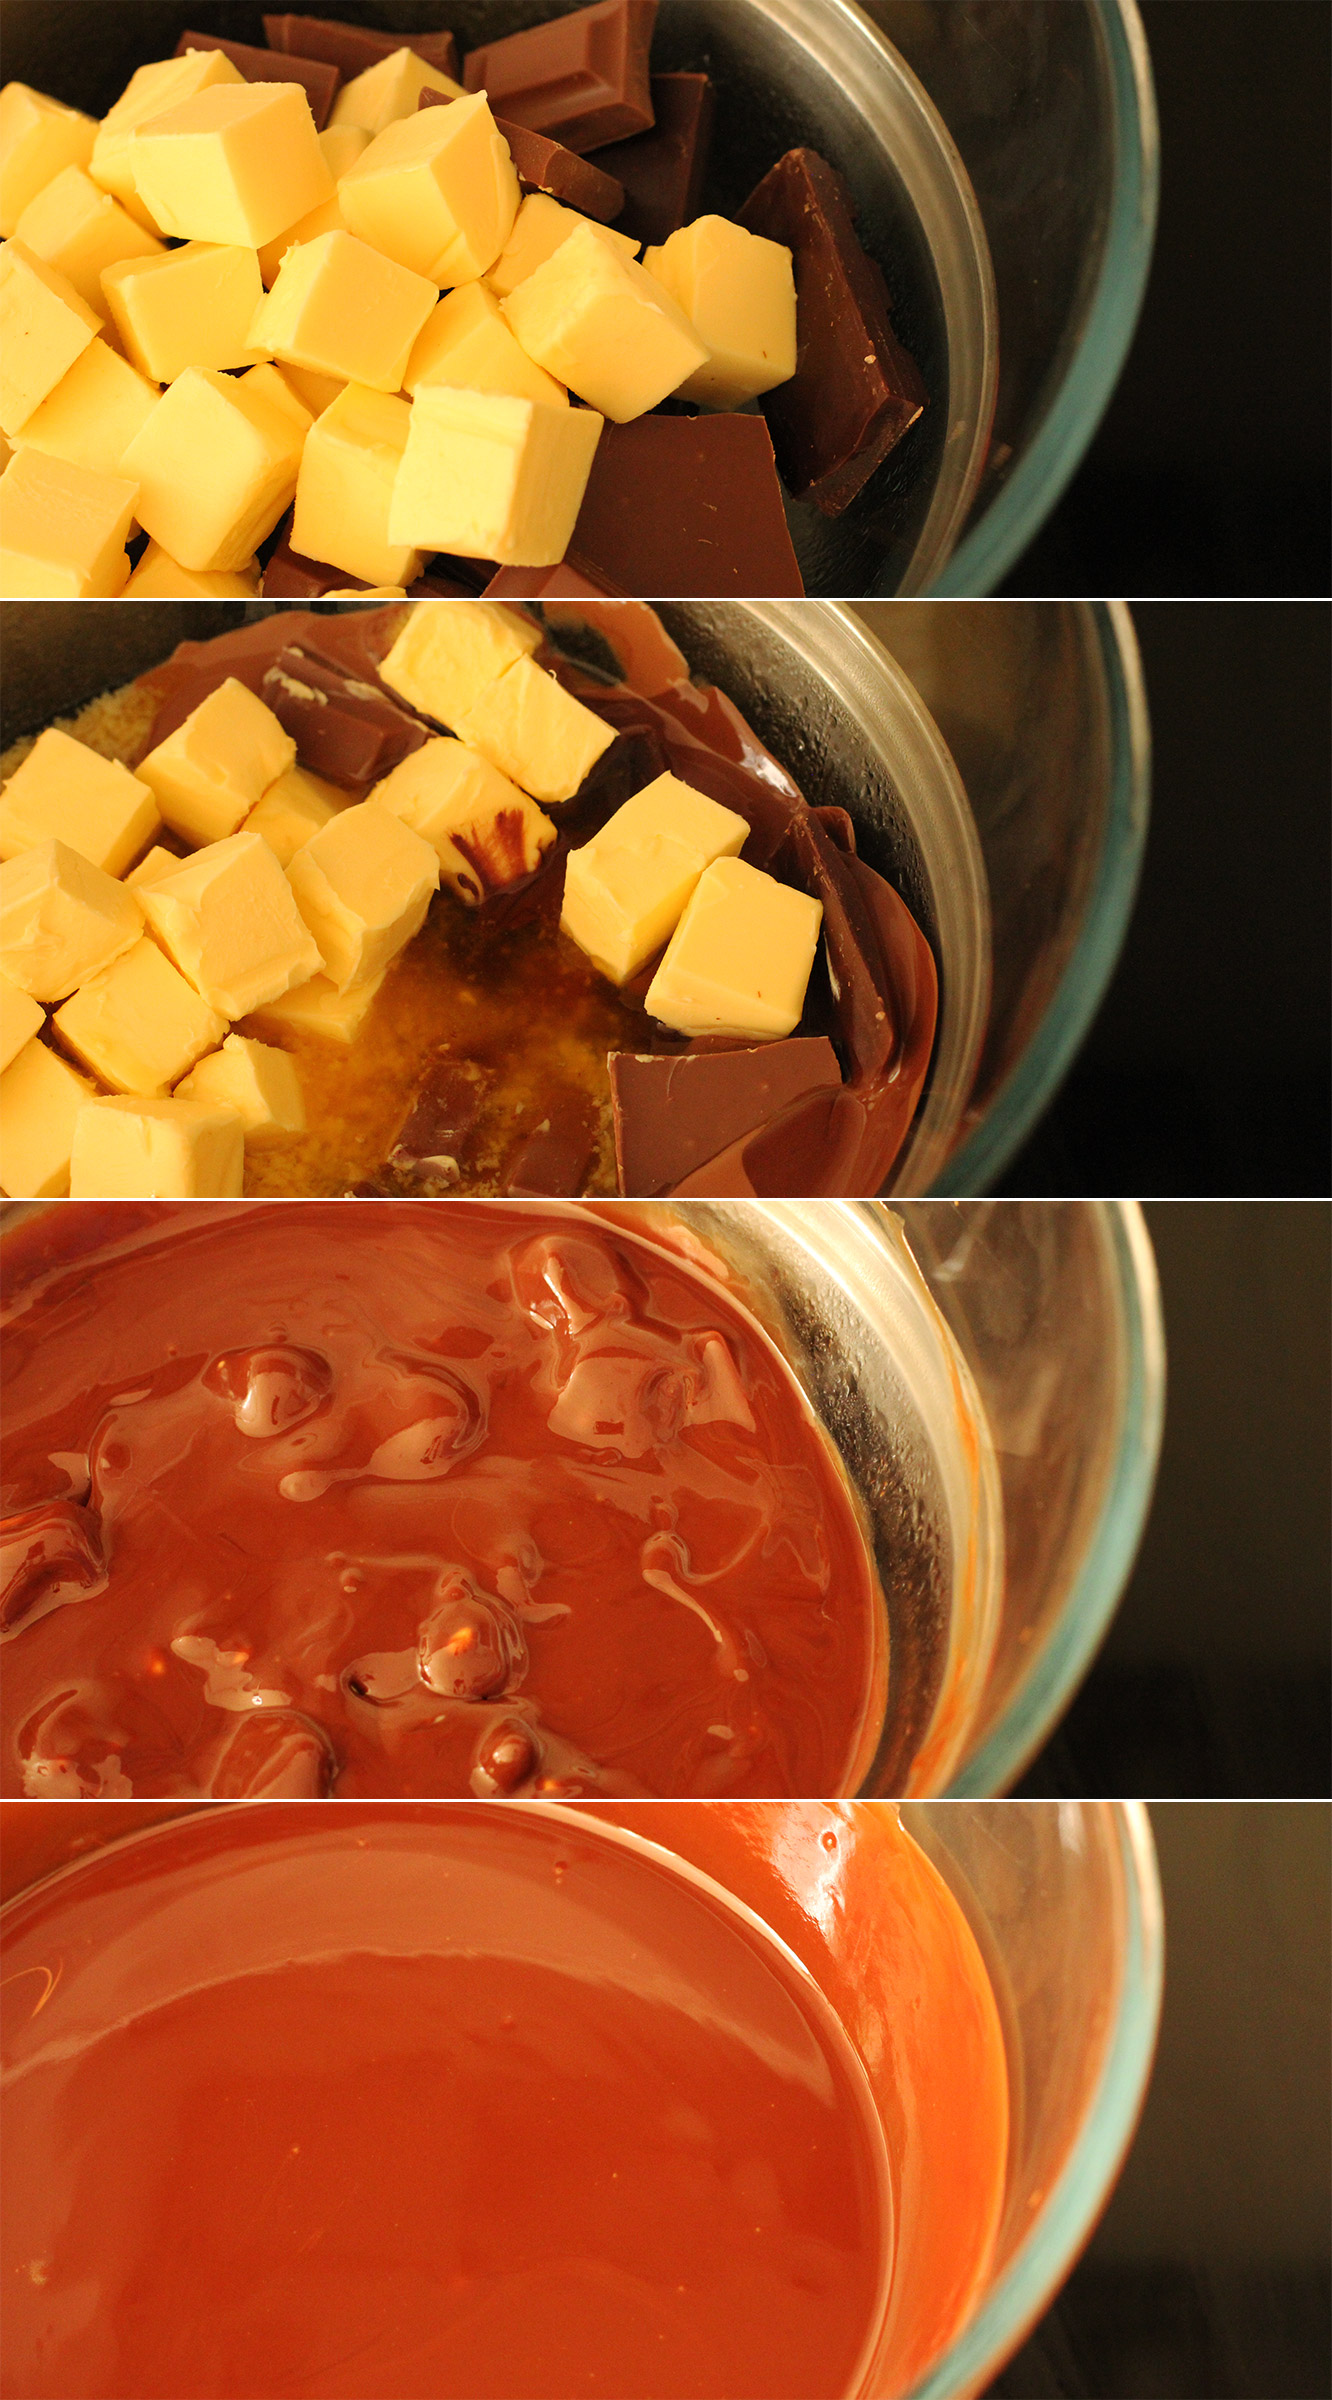
200g/7 oz dark chocolate
150g/5.5 oz milk chocolate
85g/3 oz plain flour
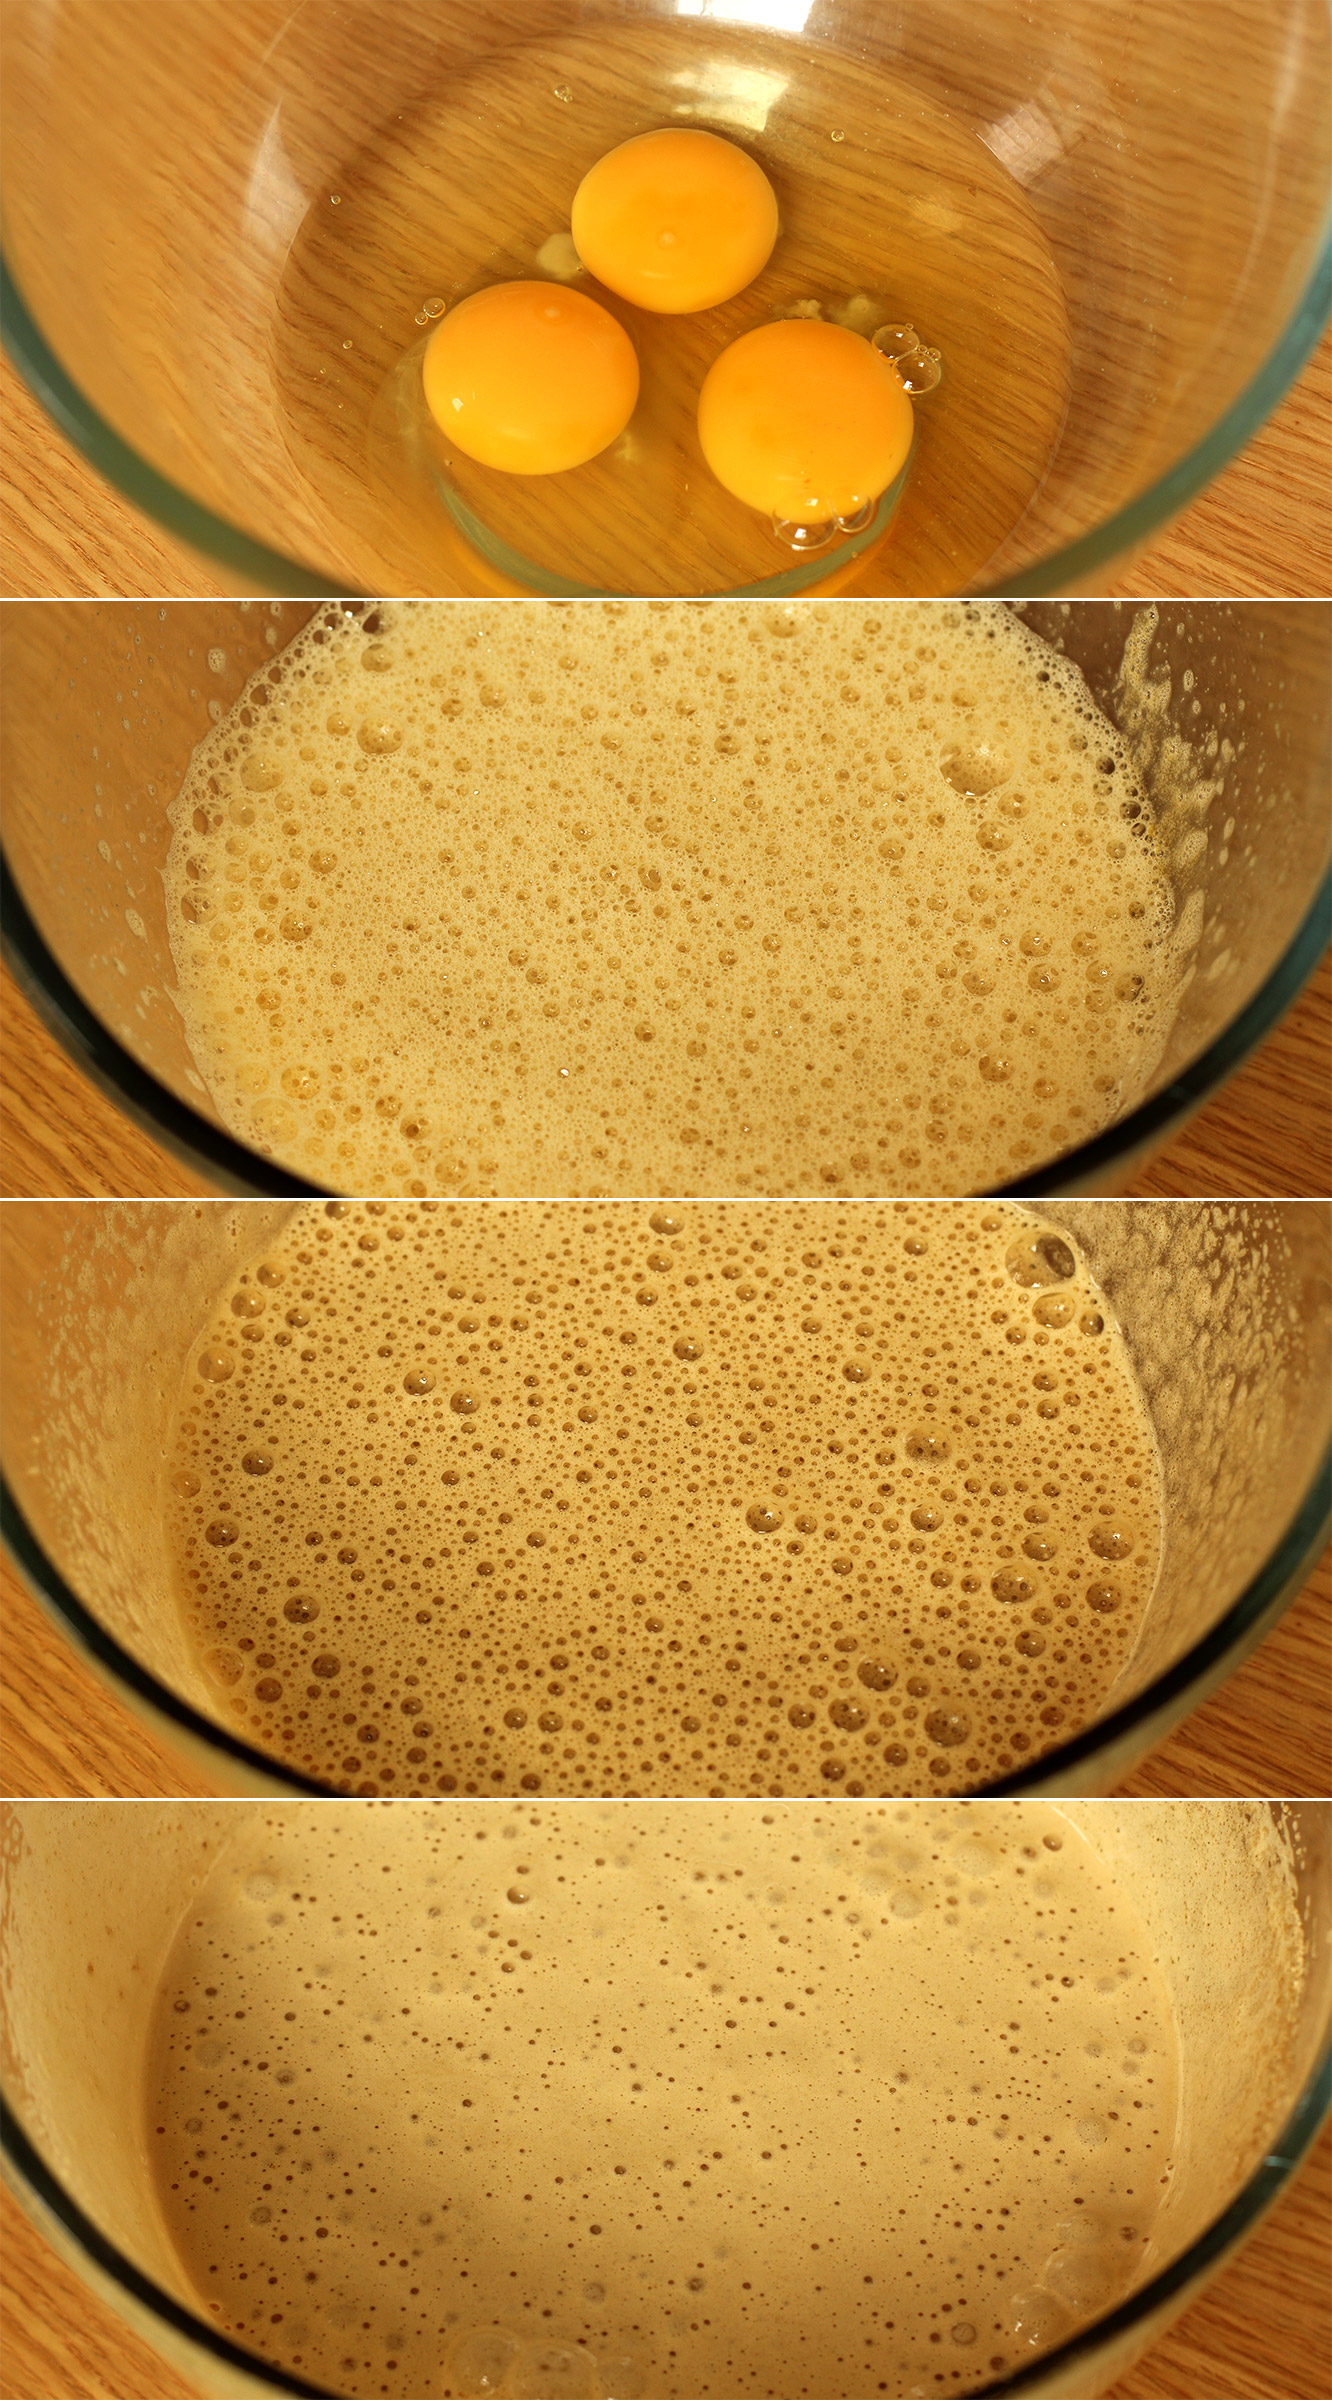
3 eggs
1 tsp baking powder
For the meringue
300g/10.5 oz golden caster sugar
100g/3.5 oz cocoa powder
6 egg whites
1-2 tsp cornflour
(makes 16-18)
Step one
Place a heatproof bowl over a pan of simmering water and add the dark and milk chocolate along with the butter. Remove from the heat once fully melted.
Step two
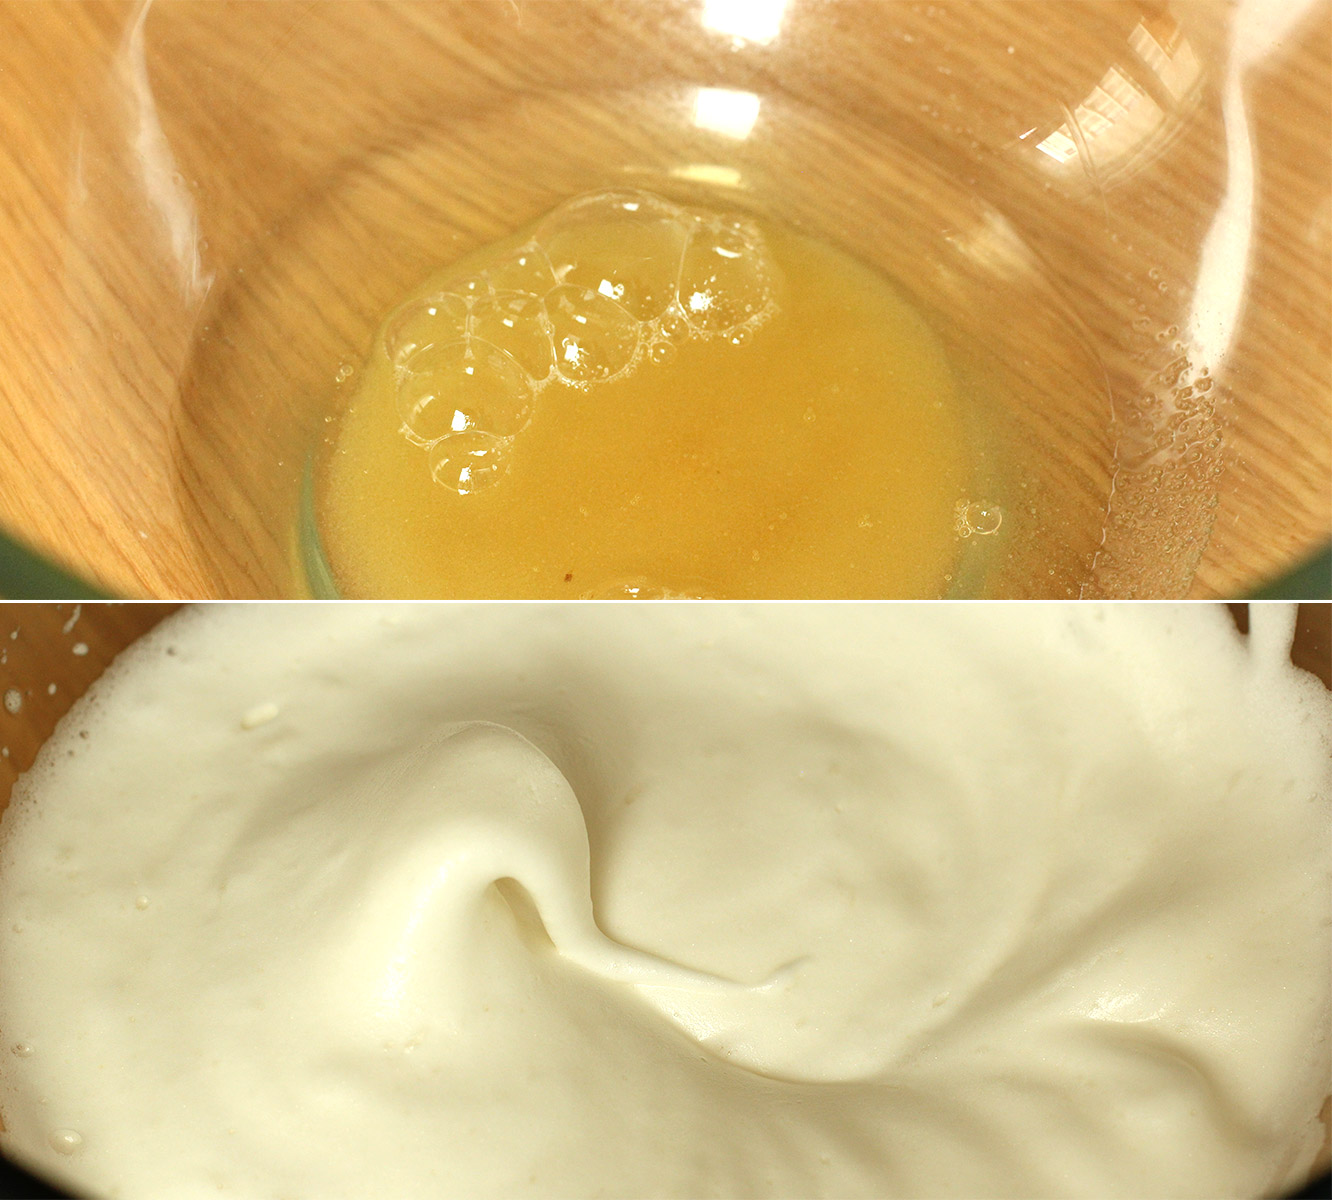
Whisk the eggs with an electric whisk, adding the sugar as you go in thirds. Keep whisking until the mix starts to thicken and goes glossy. Thin ribbons of the mixture should remain visible on the surface when you remove the beaters.
Step three
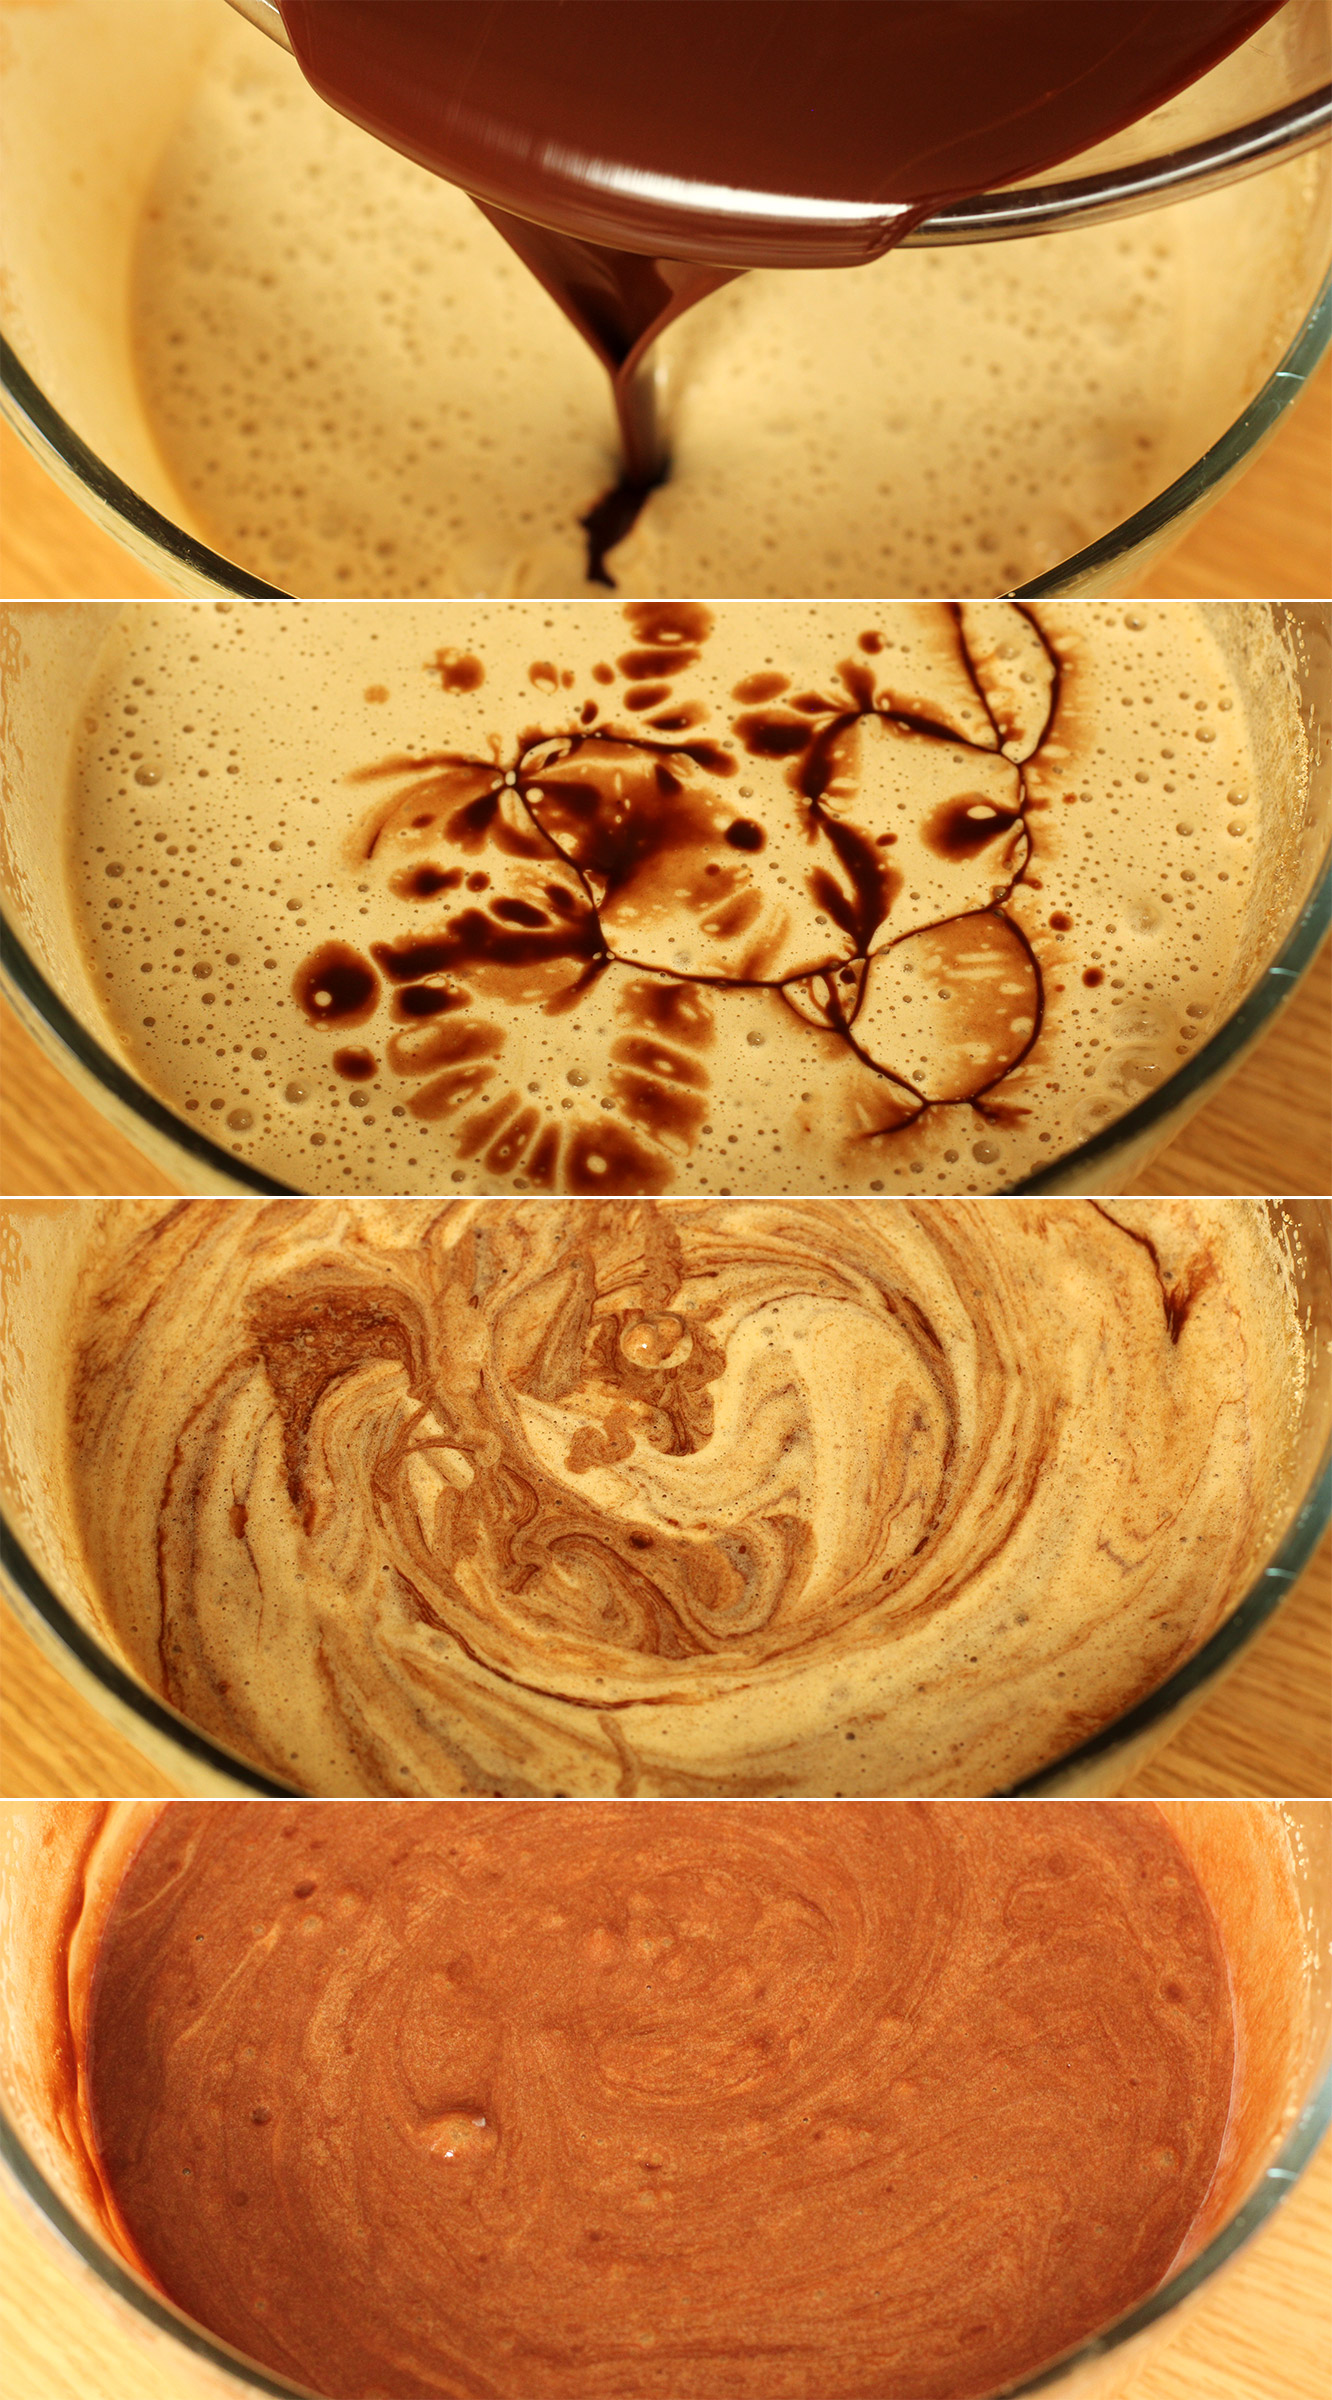
Pour the melted chocolate mixture into the eggs and stir gently with a metal spoon or a spatula until well combined.
Step three and a half
A careful reader spotted I missed out this step, thanks Gill!
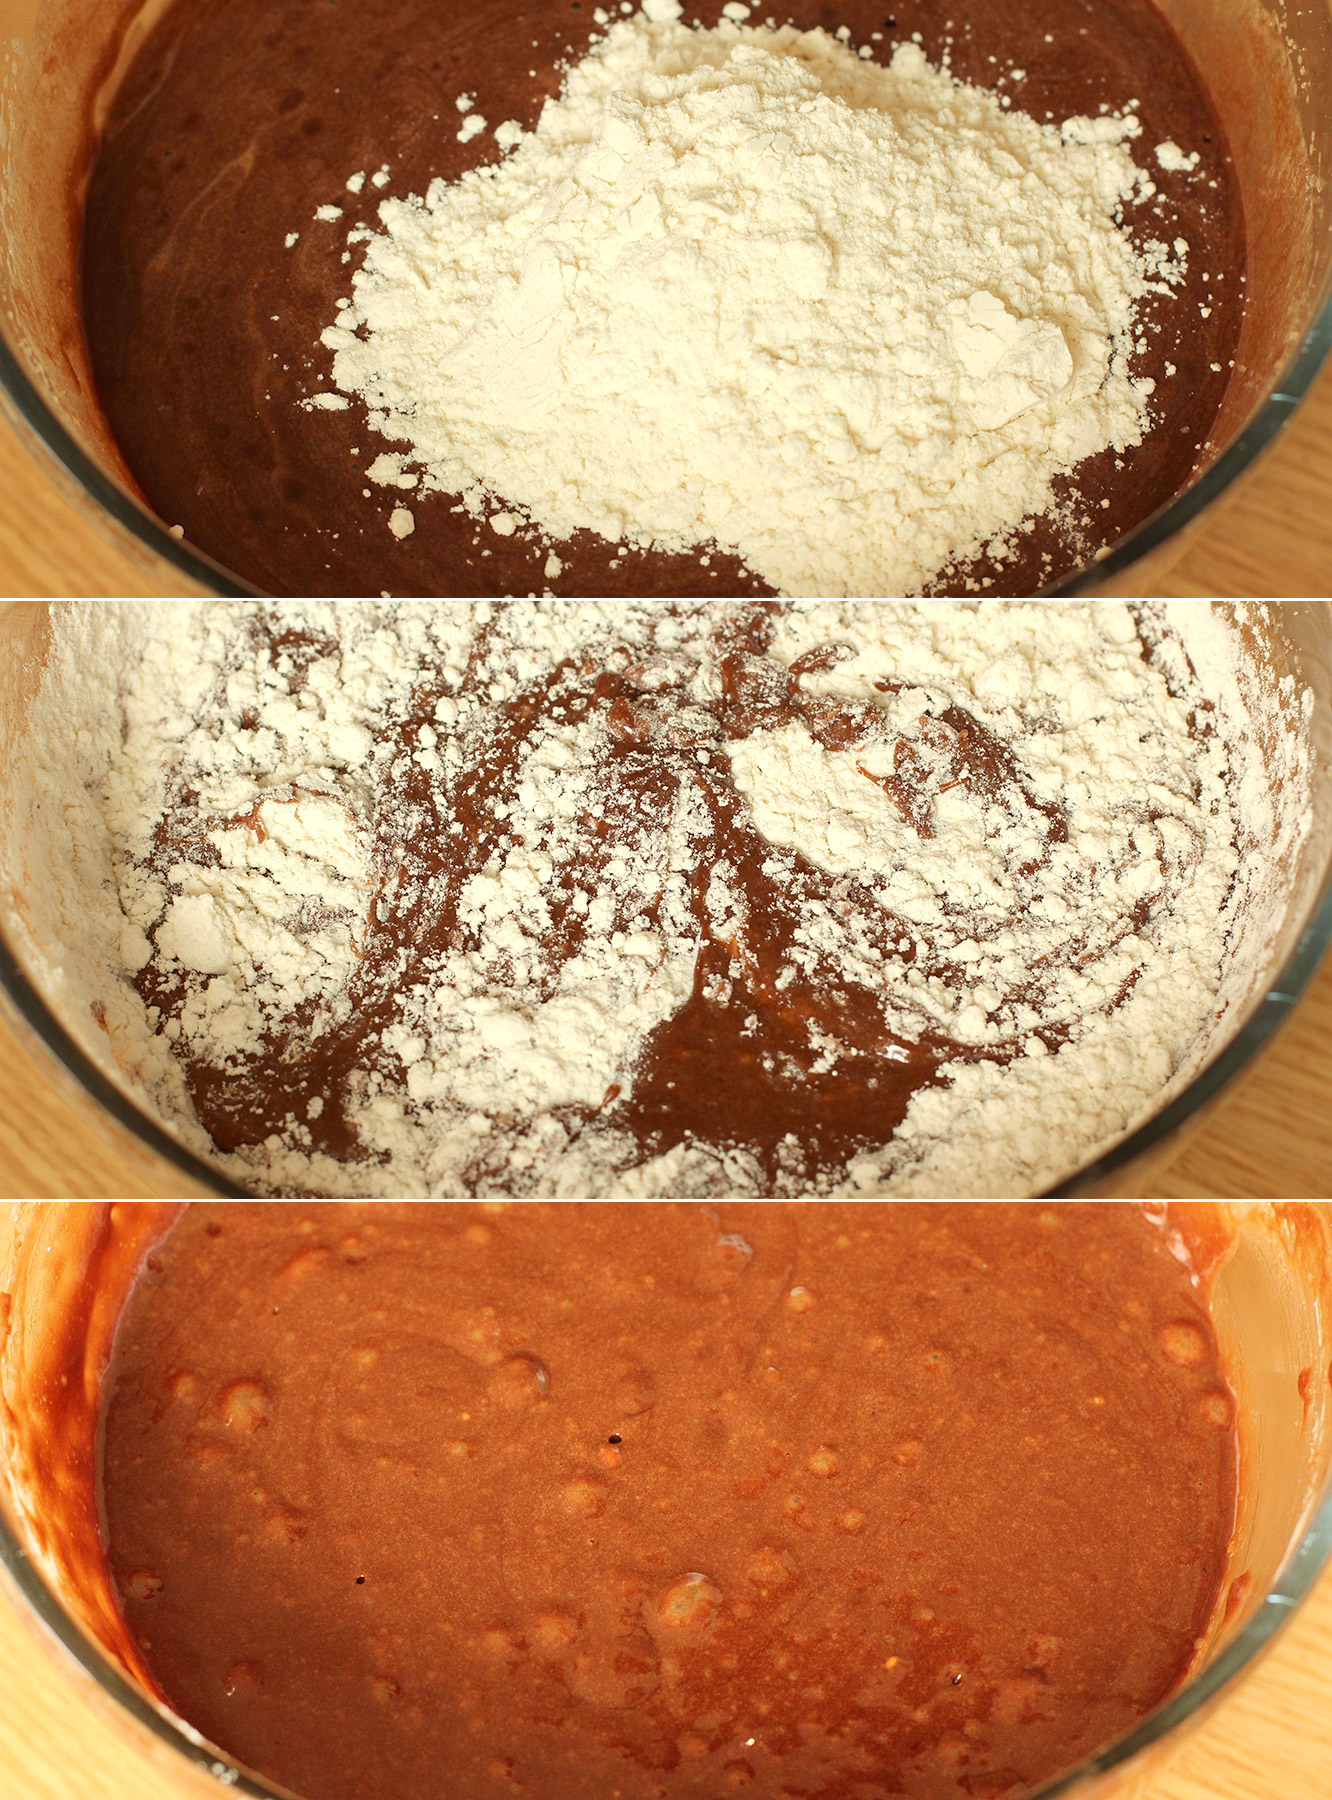
Gently fold in the flour and baking powder.
Step four
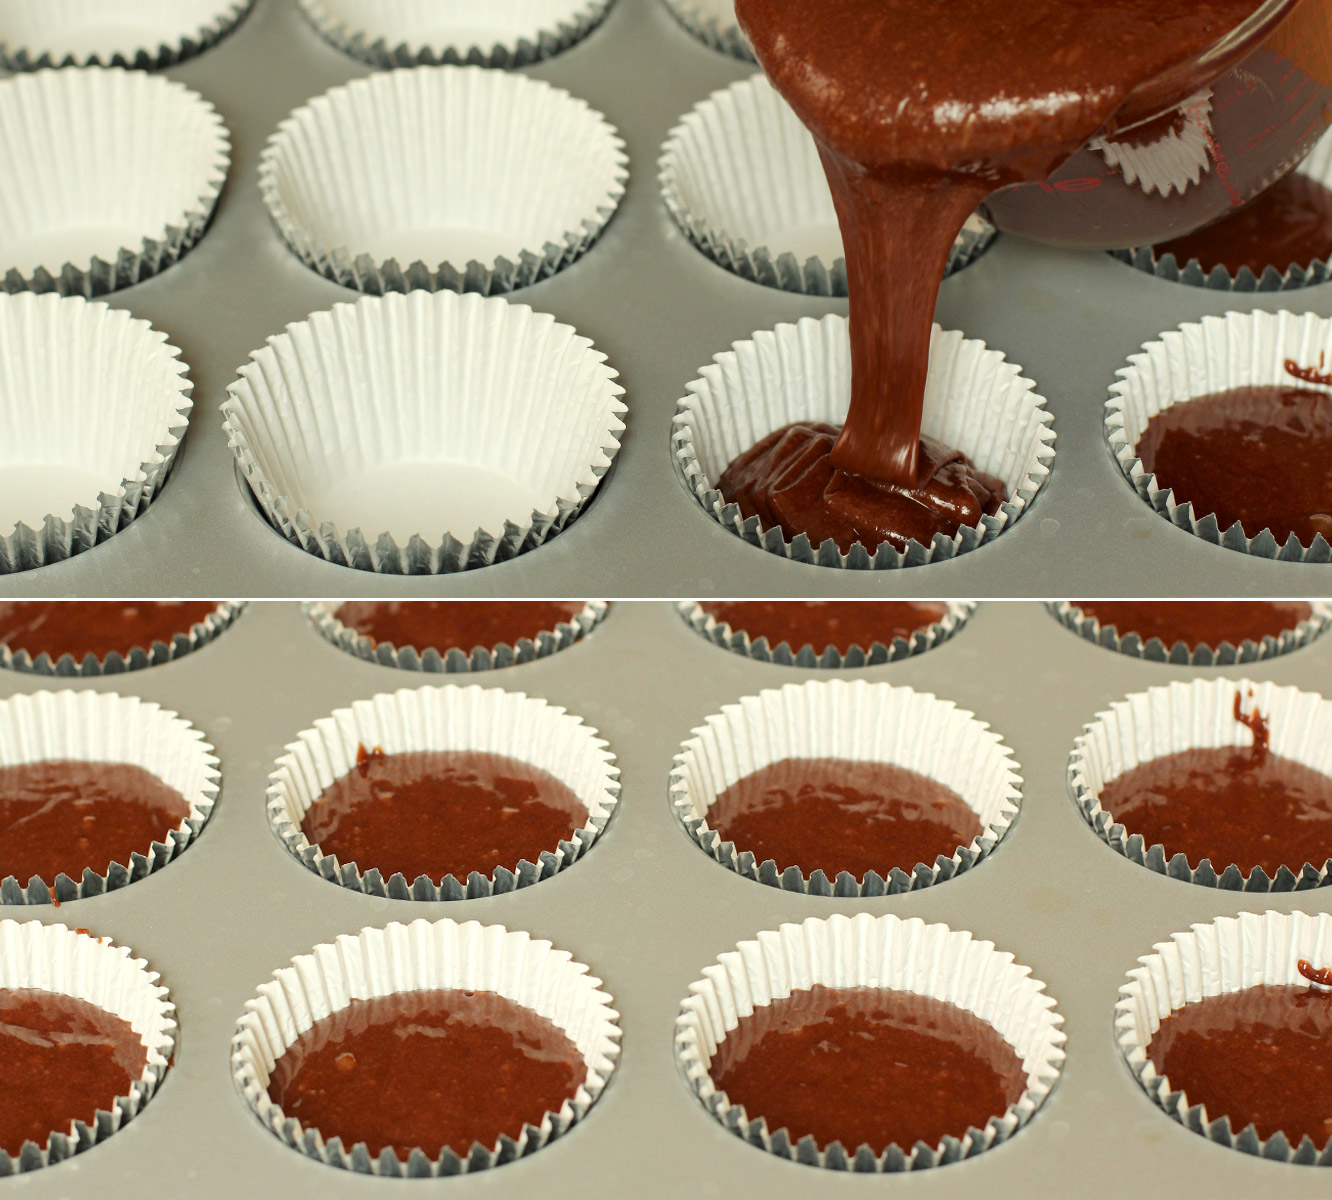
Using a jug, fill the cupcake cases between two-thirds and three quarters full.
Bake in a preheated oven on 180C/gas mark 4/350F for 25 minutes.
Step five
With about 5 minutes to go on the baking of the brownies, make the meringues.
Add a third of the golden caster sugar to the egg whites and start to whisk them until they are stiff. Basically, when you can turn the bowl upside down without anything falling out you’re good to go.
Step six
Beat in the rest of the sugar for another minute or two.
Step seven
Fold in the cocoa and cornflour. Do this as if you are stirring a bowl of kittens. Try not to hurt your meringue.
Step eight
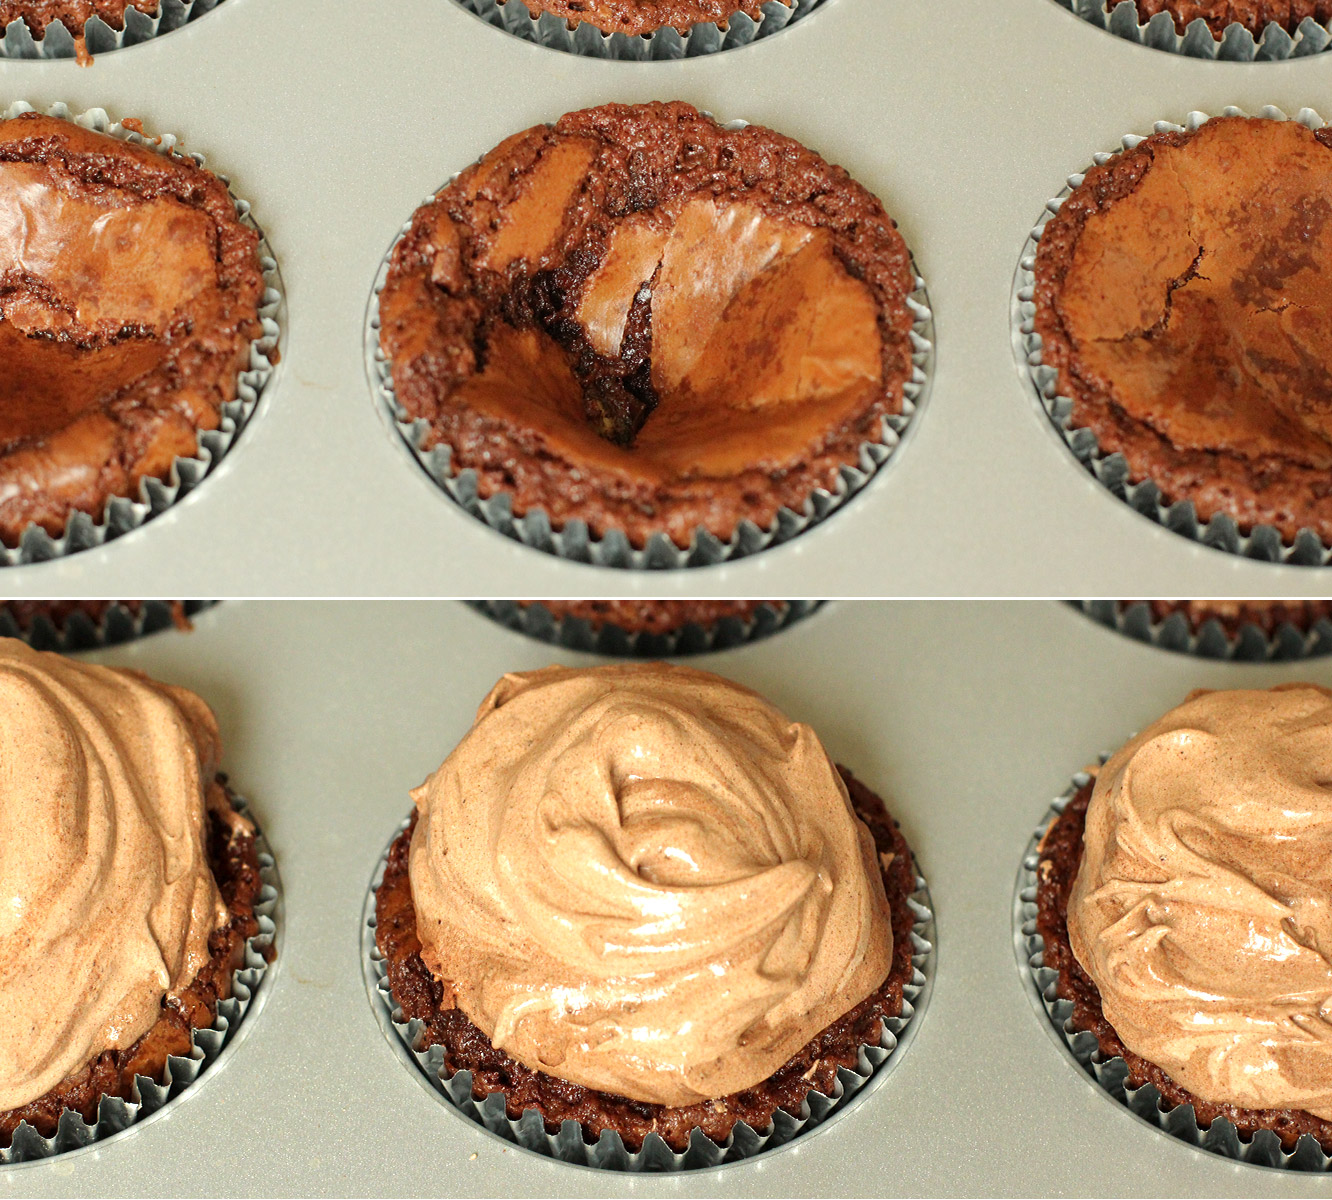
Remove the brownies from the oven. Don’t worry, they sink, one day I might bother to adjust the recipe accordingly to stop that happening but they are so tasty the way they are.
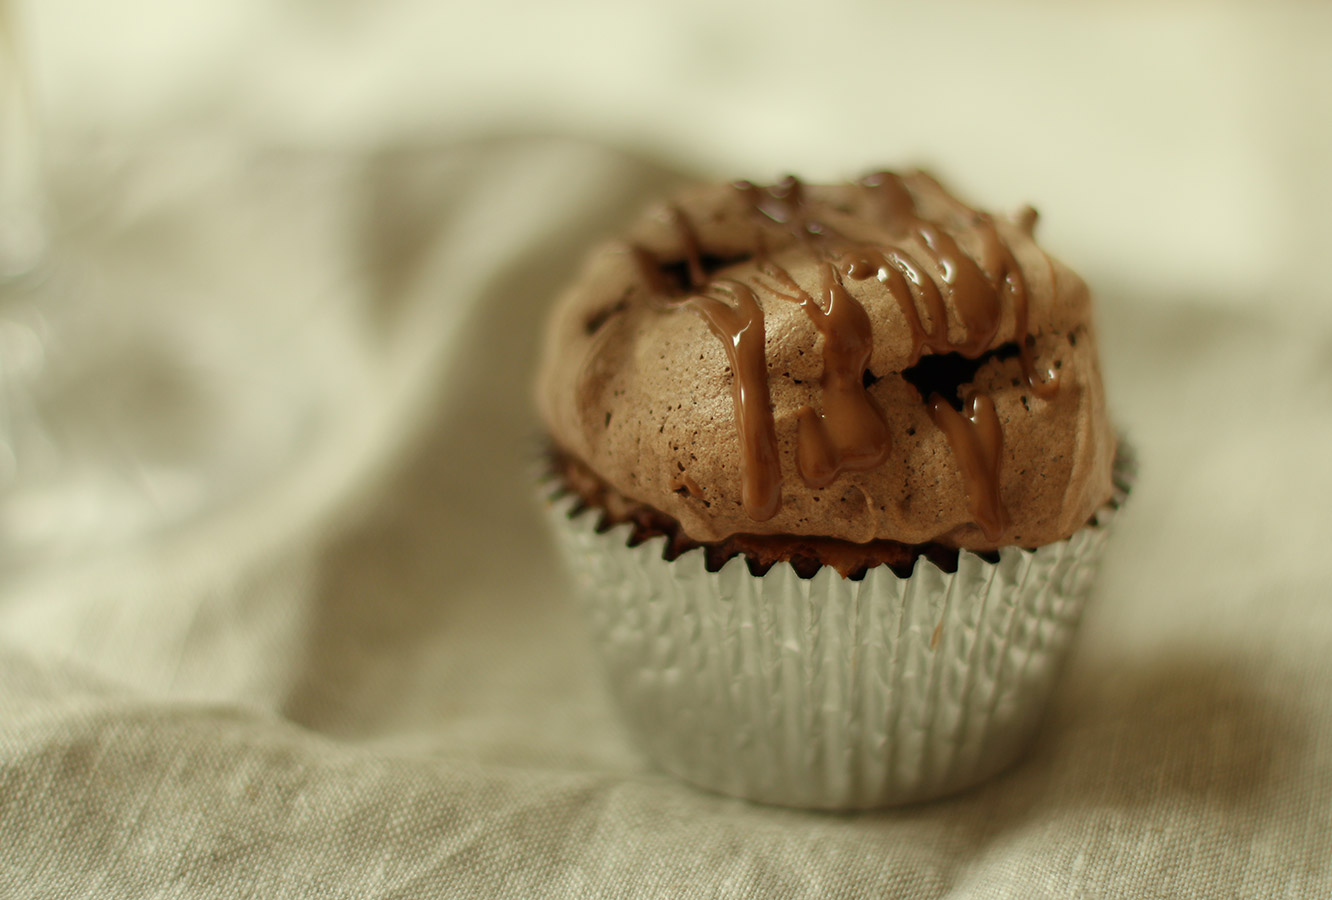
Scoop the meringue onto the cupcakes, you can pipe them if you’re feeling fancy/getting to the piping nozzles wouldn’t involve the contents of your cupboard falling on your head.
Step nine
Return to the oven and turn it down to 140C/gas mark 1/275F. Bake for a further 30 minutes. Then turn the oven off but leave the door closed and allow to cool inside the oven for as long as you can resist them.
Step ten
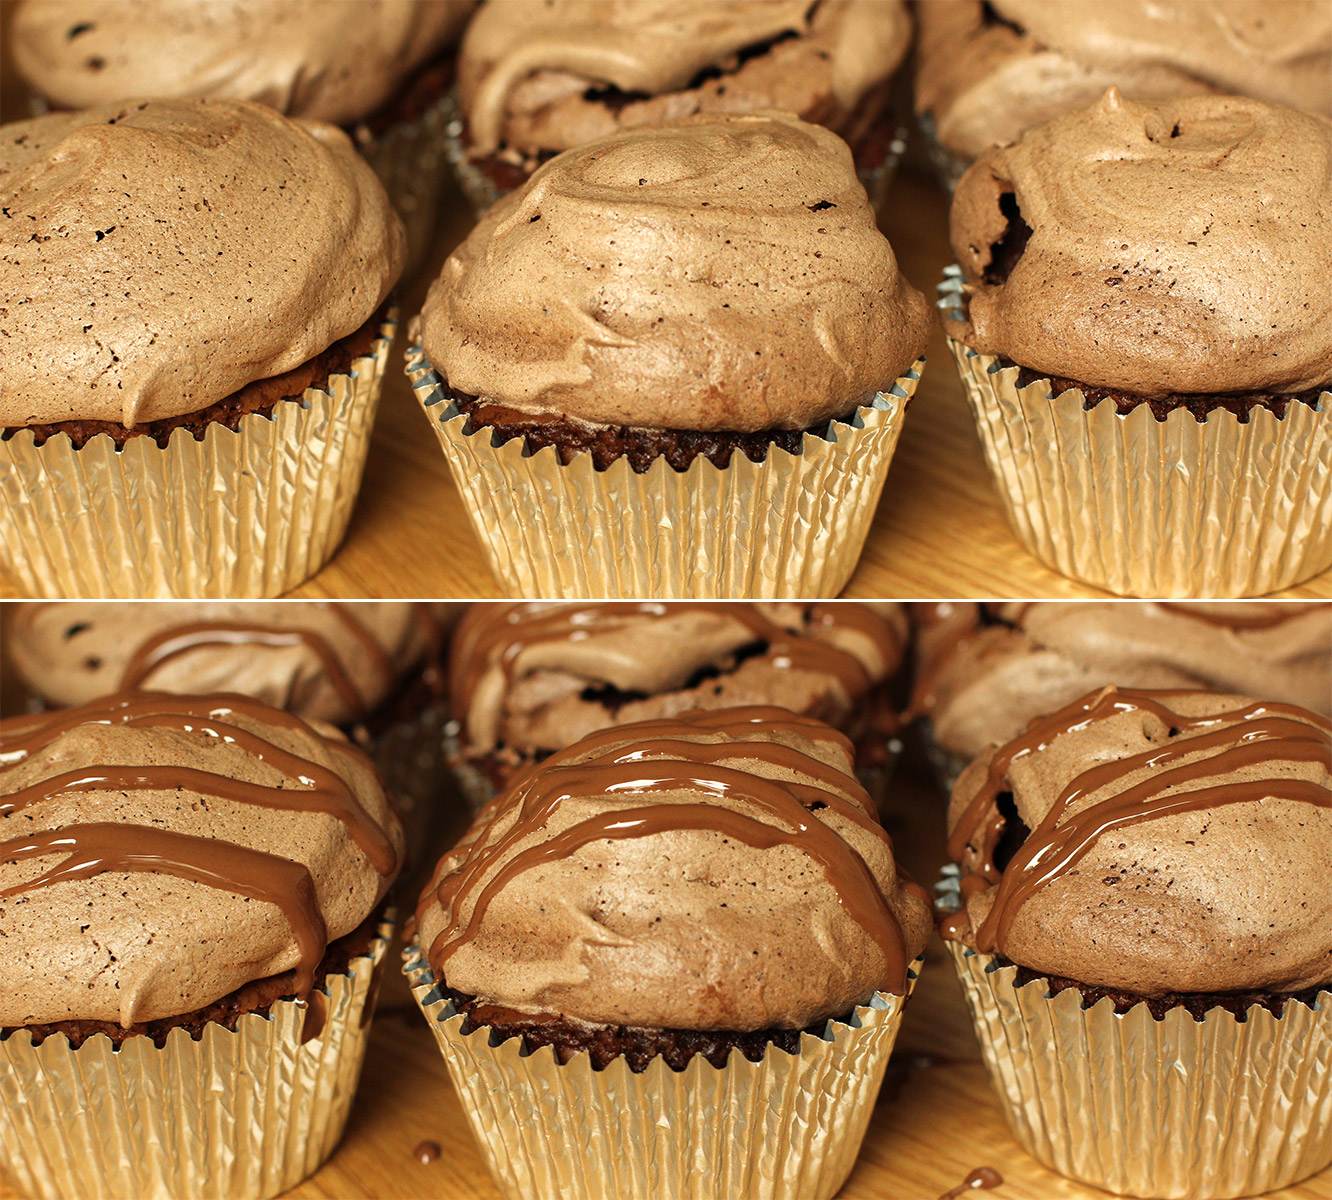
You probably bought your chocolate in 200g bars, meaning that if you haven’t scoffed it already you will have 50g milk chocolate left over. Melt this down and drizzle on top.
If you’ve eaten it already, there’s no shame in that, and your cakes will still be delicious.
I thought the gif this week should benefit me. So for the sake of the blog I just HAD to eat one.
Fanfare please! We have reached the final post of the British favourites series. This has been fun, and I hope you’ve enjoyed it, but I for one am looking forward to eating something other than cupcakes soon. Safe to say my family and friends have enjoyed themselves the past few weeks. I should probably do a detox series next.
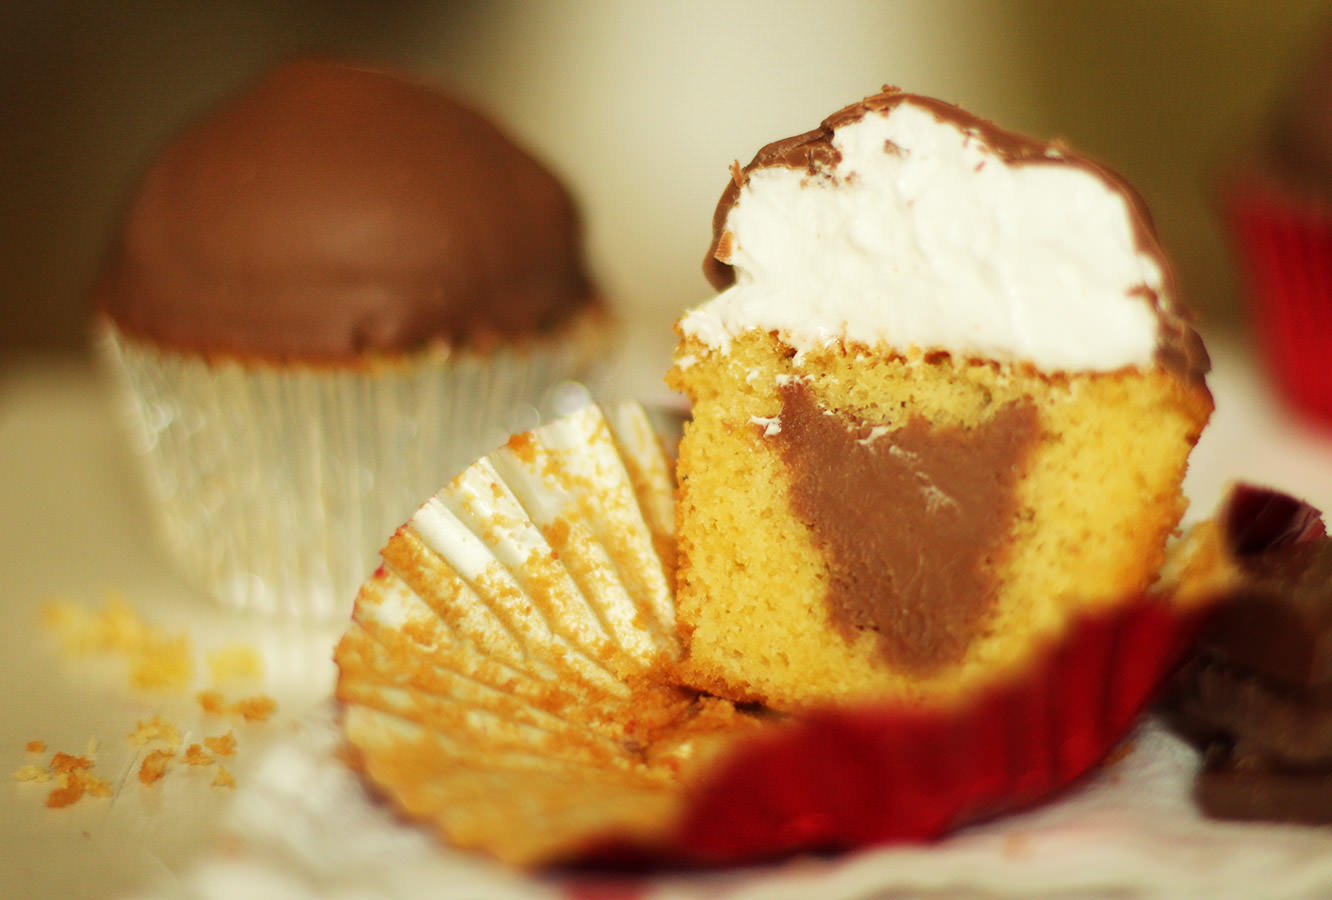
What better way to top this all off than with the Tunnock’s tea cake? The Tunnock’s bakery was founded in 1890, I’m not sure when the idea of the teacake popped into Mr Tunnock’s head but I’m sure glad it did.
You will need
For the cake:
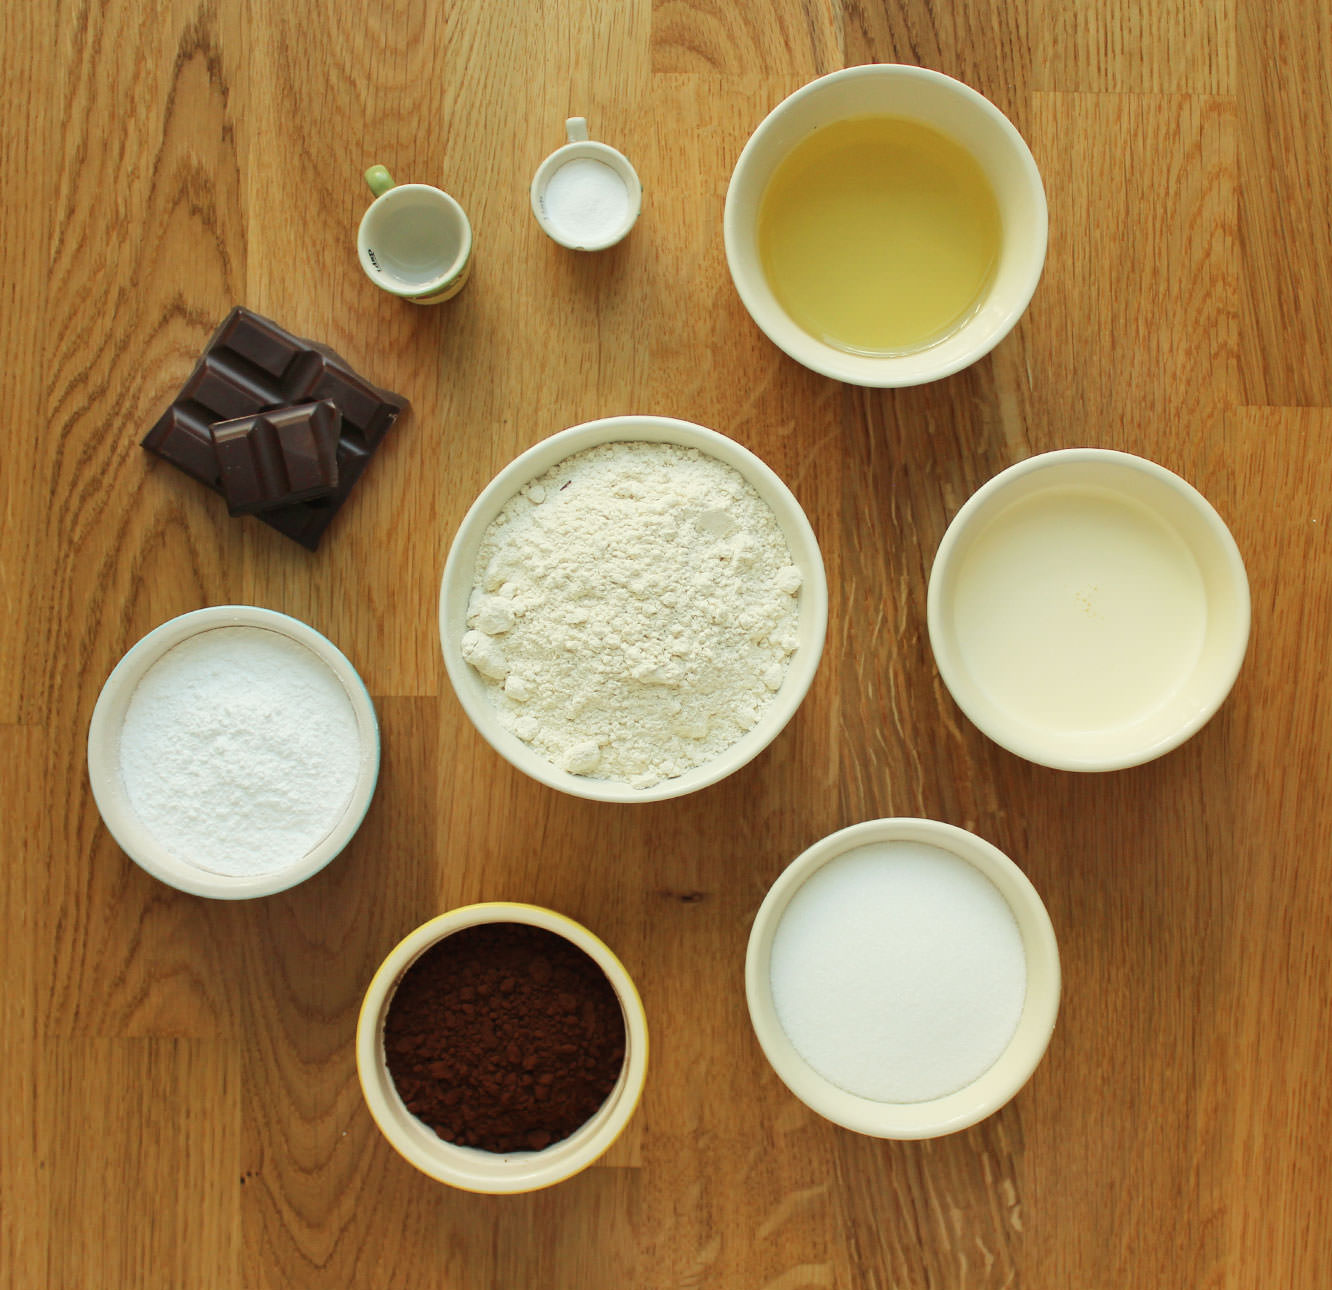
185g/6.5 oz self raising flour
185g/6.5 oz butter/margarine (I use Stork)
185g/6.5 oz caster sugar
3 eggs
1 tsp bicarbonate of soda
1 tsp vanilla extract/paste
For the filling:
200g/7 oz milk chocolate
150ml/5 fl oz double cream
For the frosting/icing:
2 egg whites
225g/8oz caster sugar
1/2 tsp cream of tartar
75ml/2.5 fl oz water
250g/9oz milk chocolate (for coating)
(makes 12)
Step one
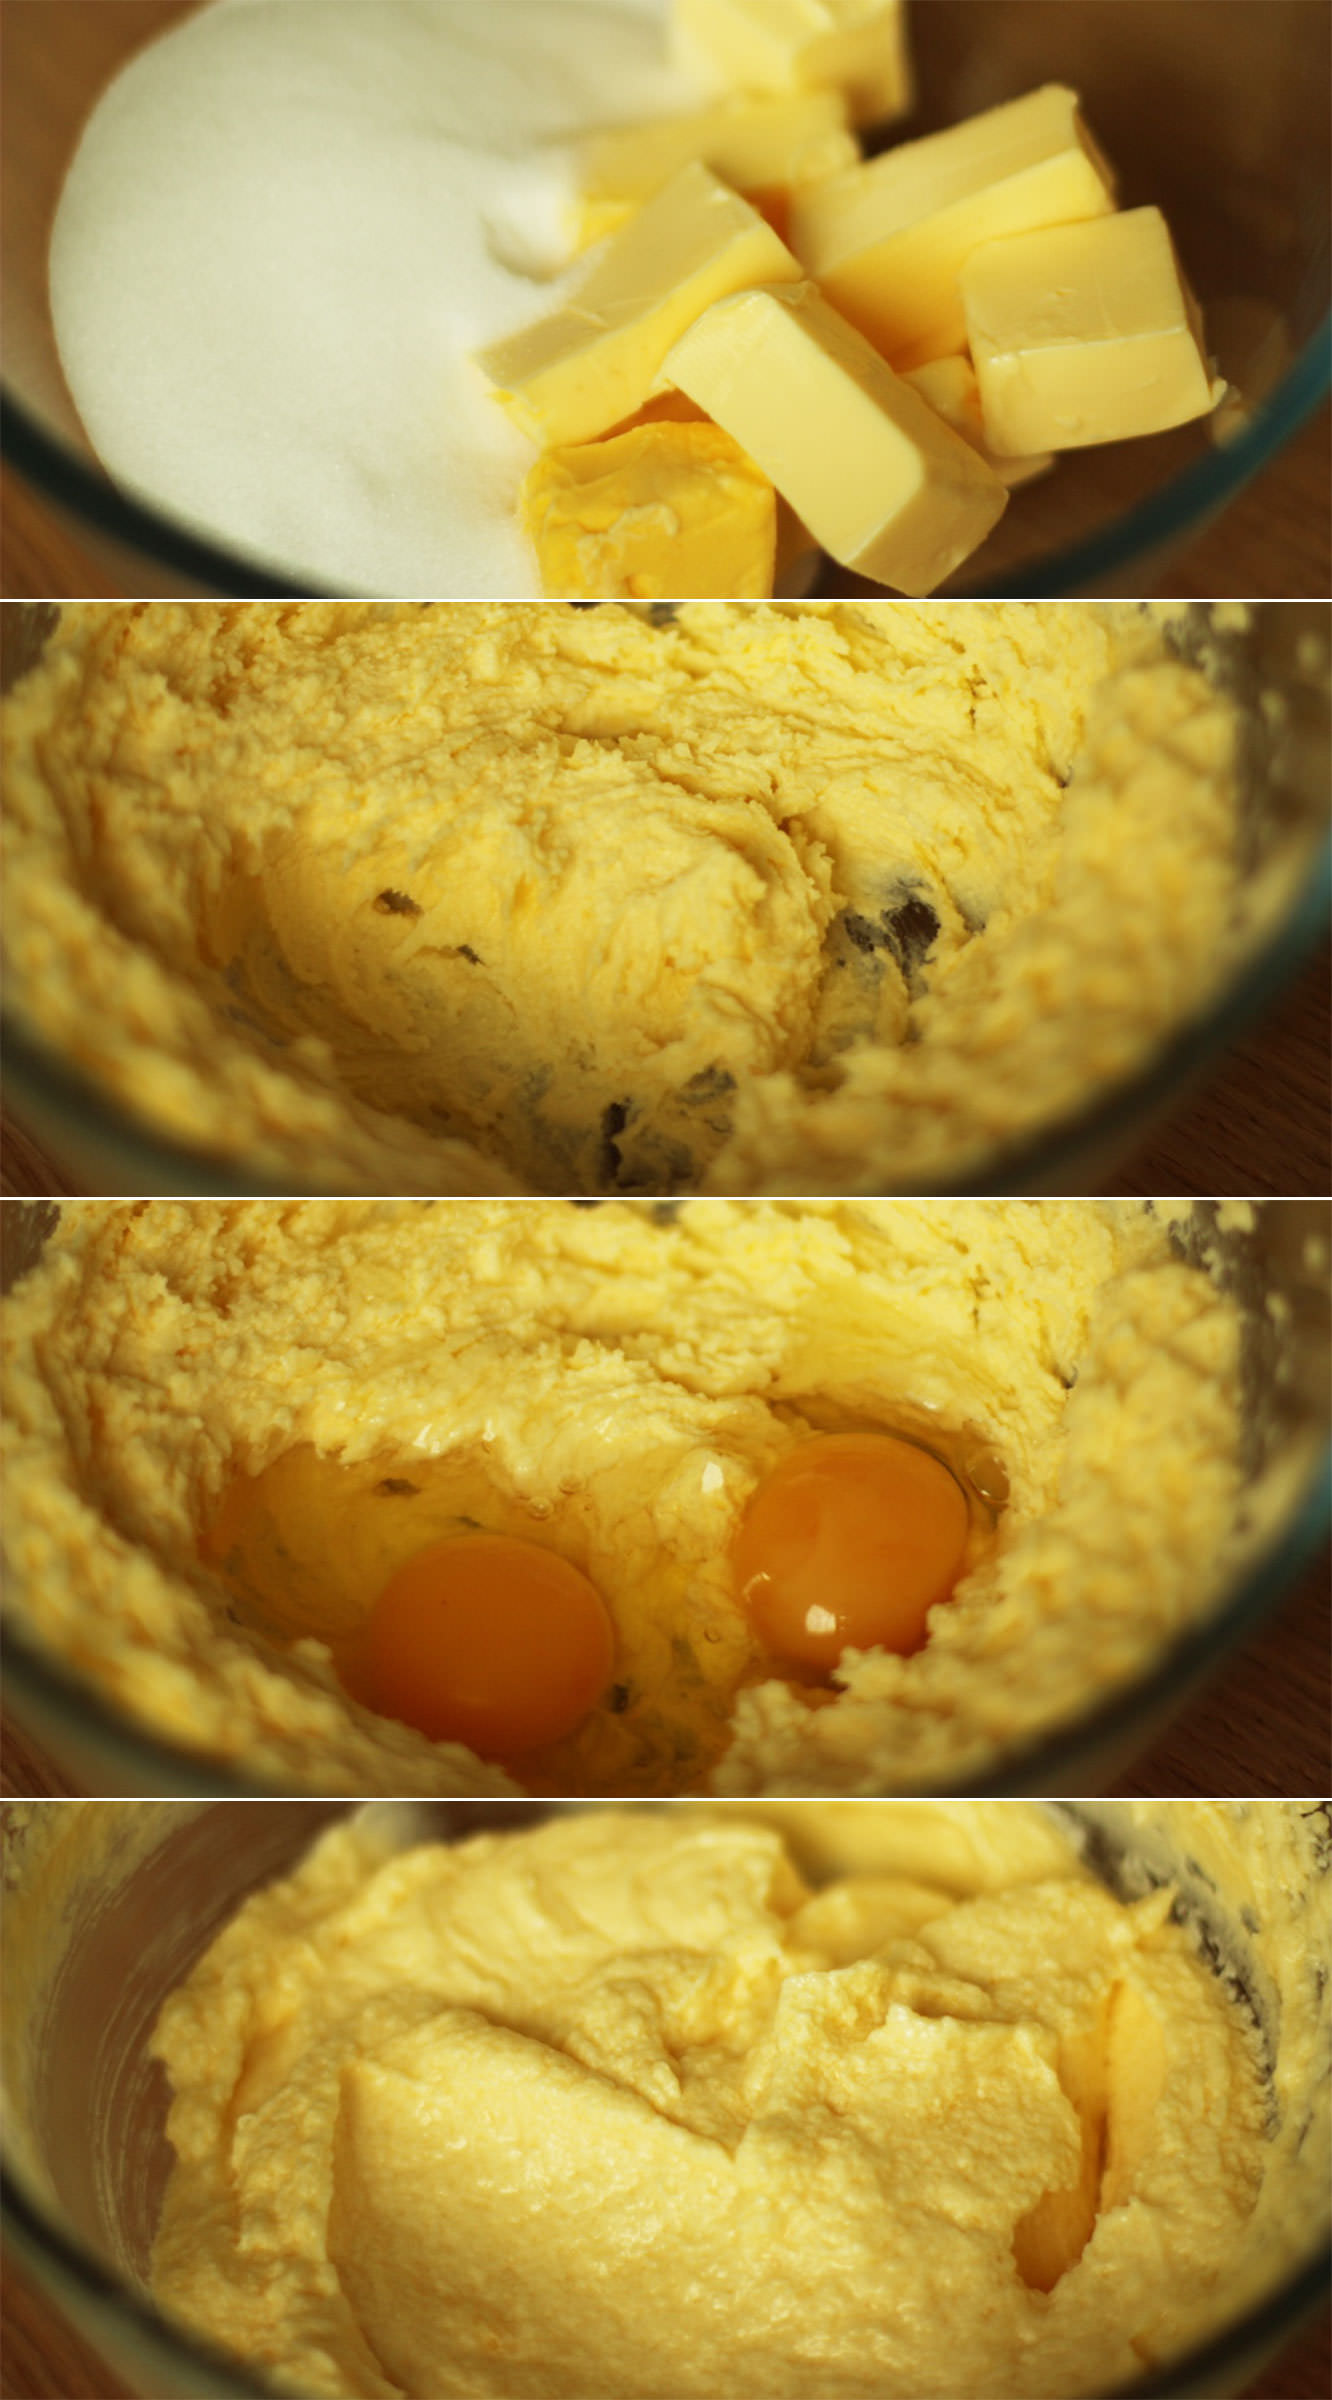
Beat together the butter and sugar until light and fluffy. If you have an electric whisk it’d be a good idea to use it.
Add the eggs and whisk again until combined.
Step two
Pop in the vanilla extract, flour and bicarbonate of soda and whisk again. You might want to pre-stir a little before turning on the whisk to avoid flour going everywhere.
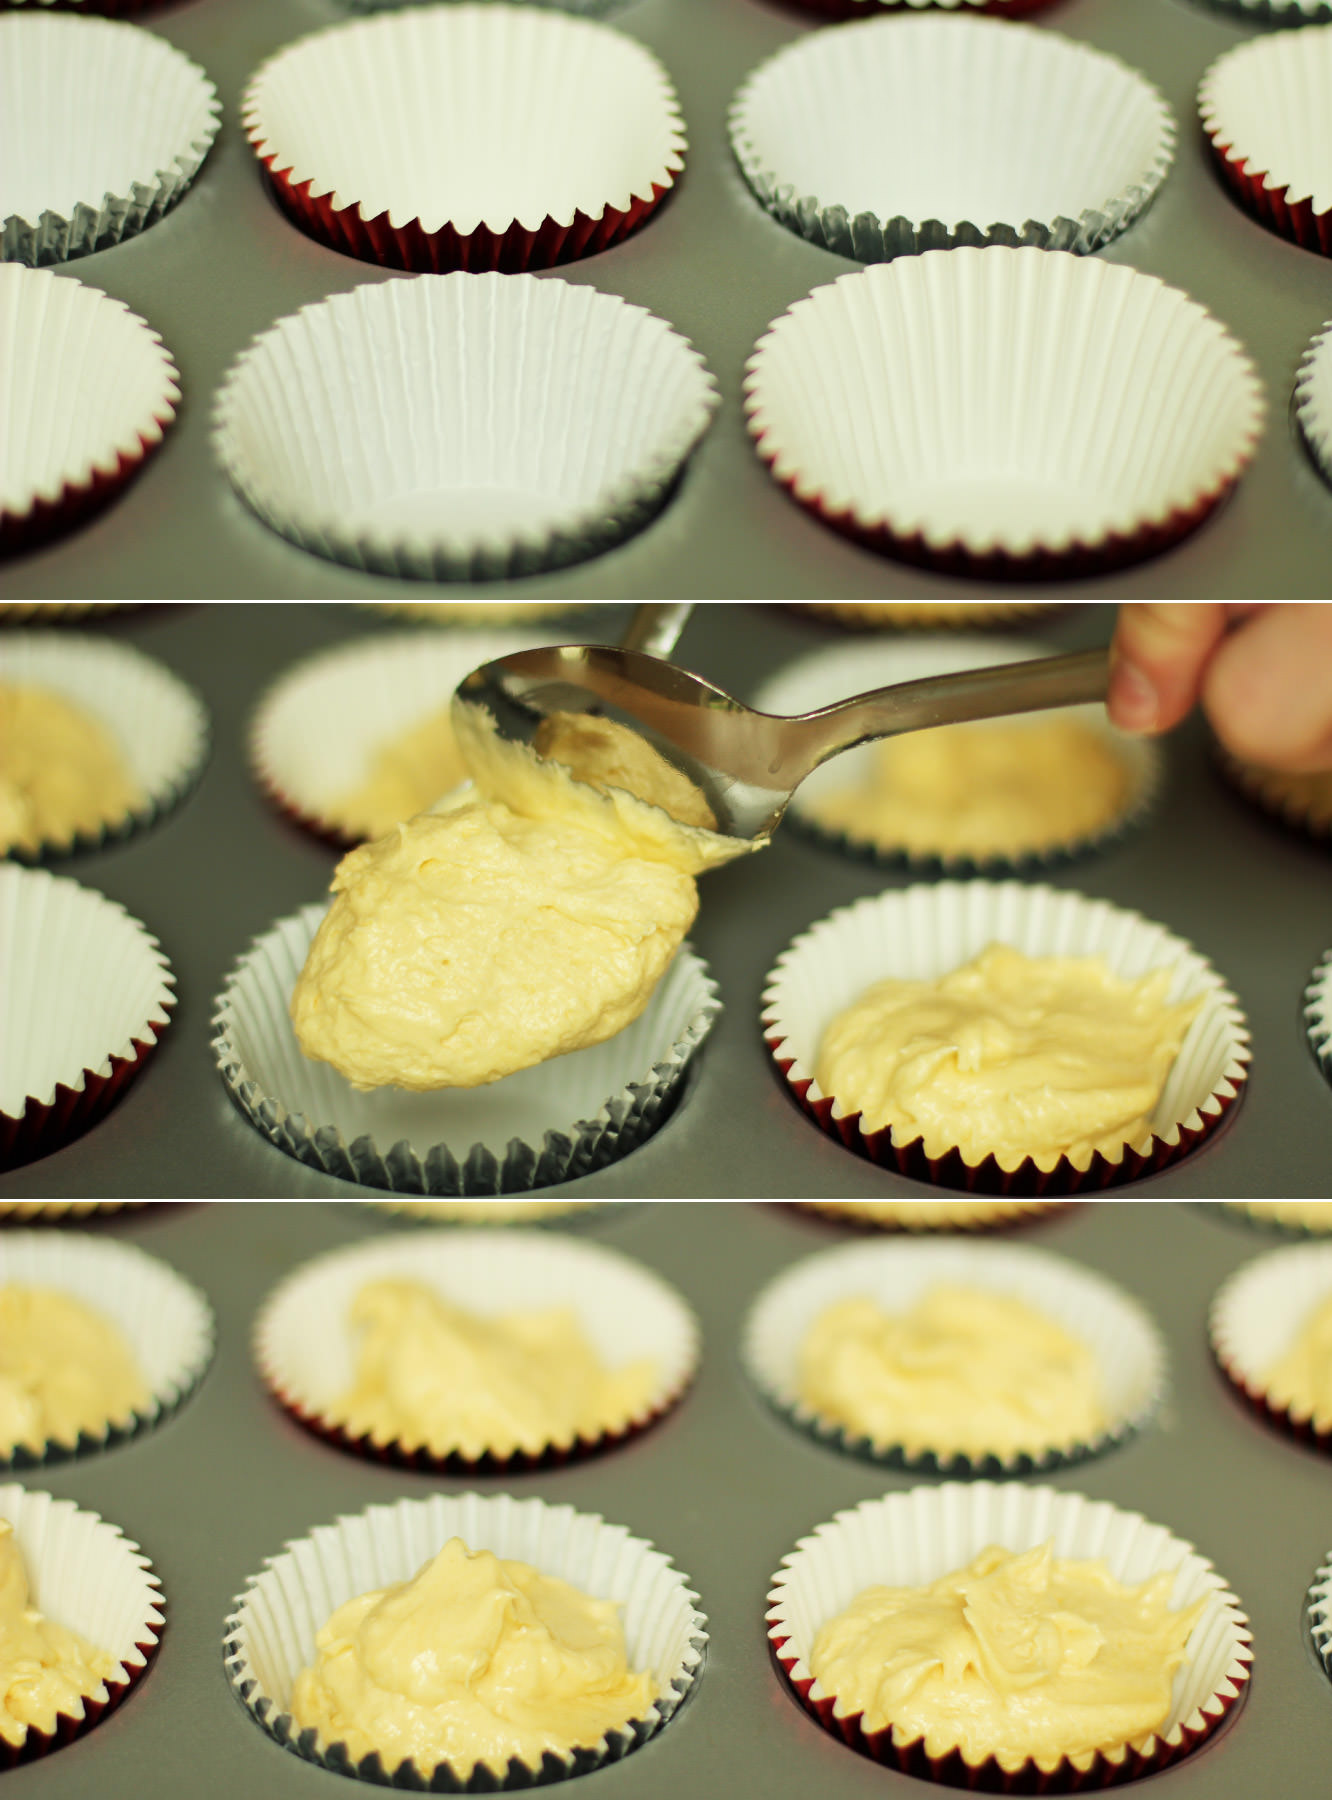
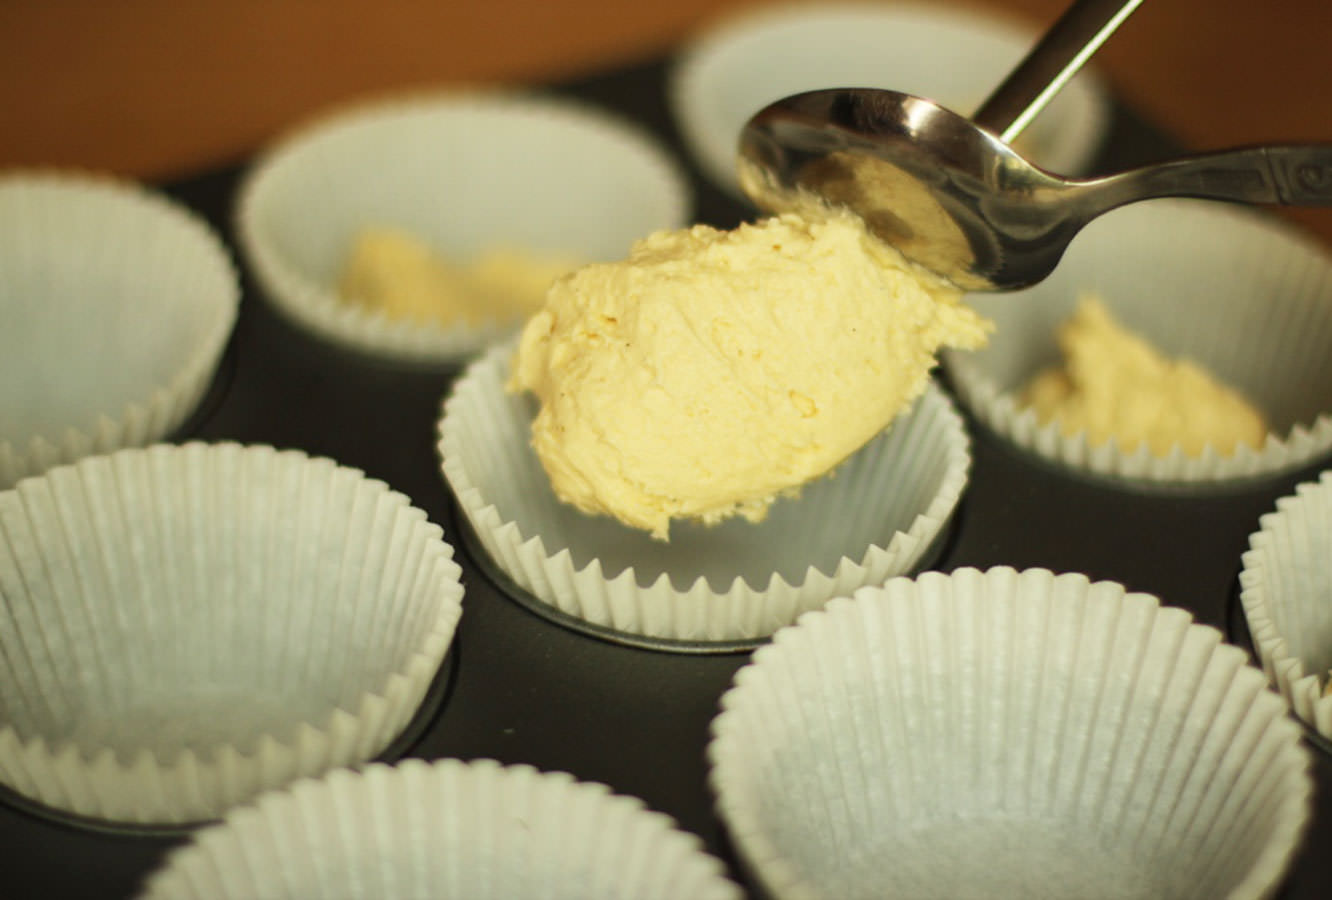
Step three
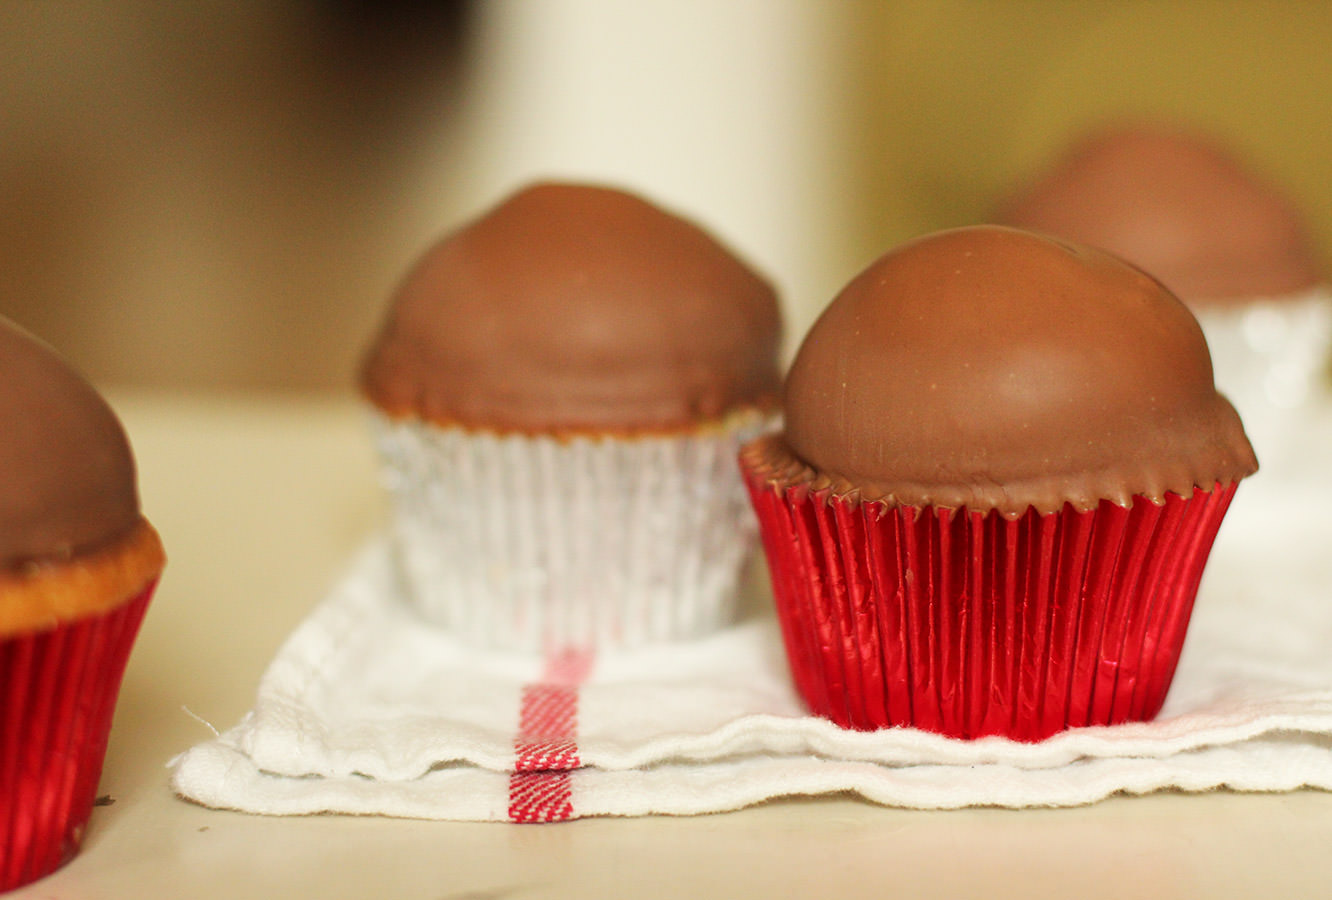
Spoon the mixture into cases (preferably silver and red foil ones to stay on brand) and bake in a preheated oven on gas mark 4/180C/350F for 20-25 minutes.
Step four
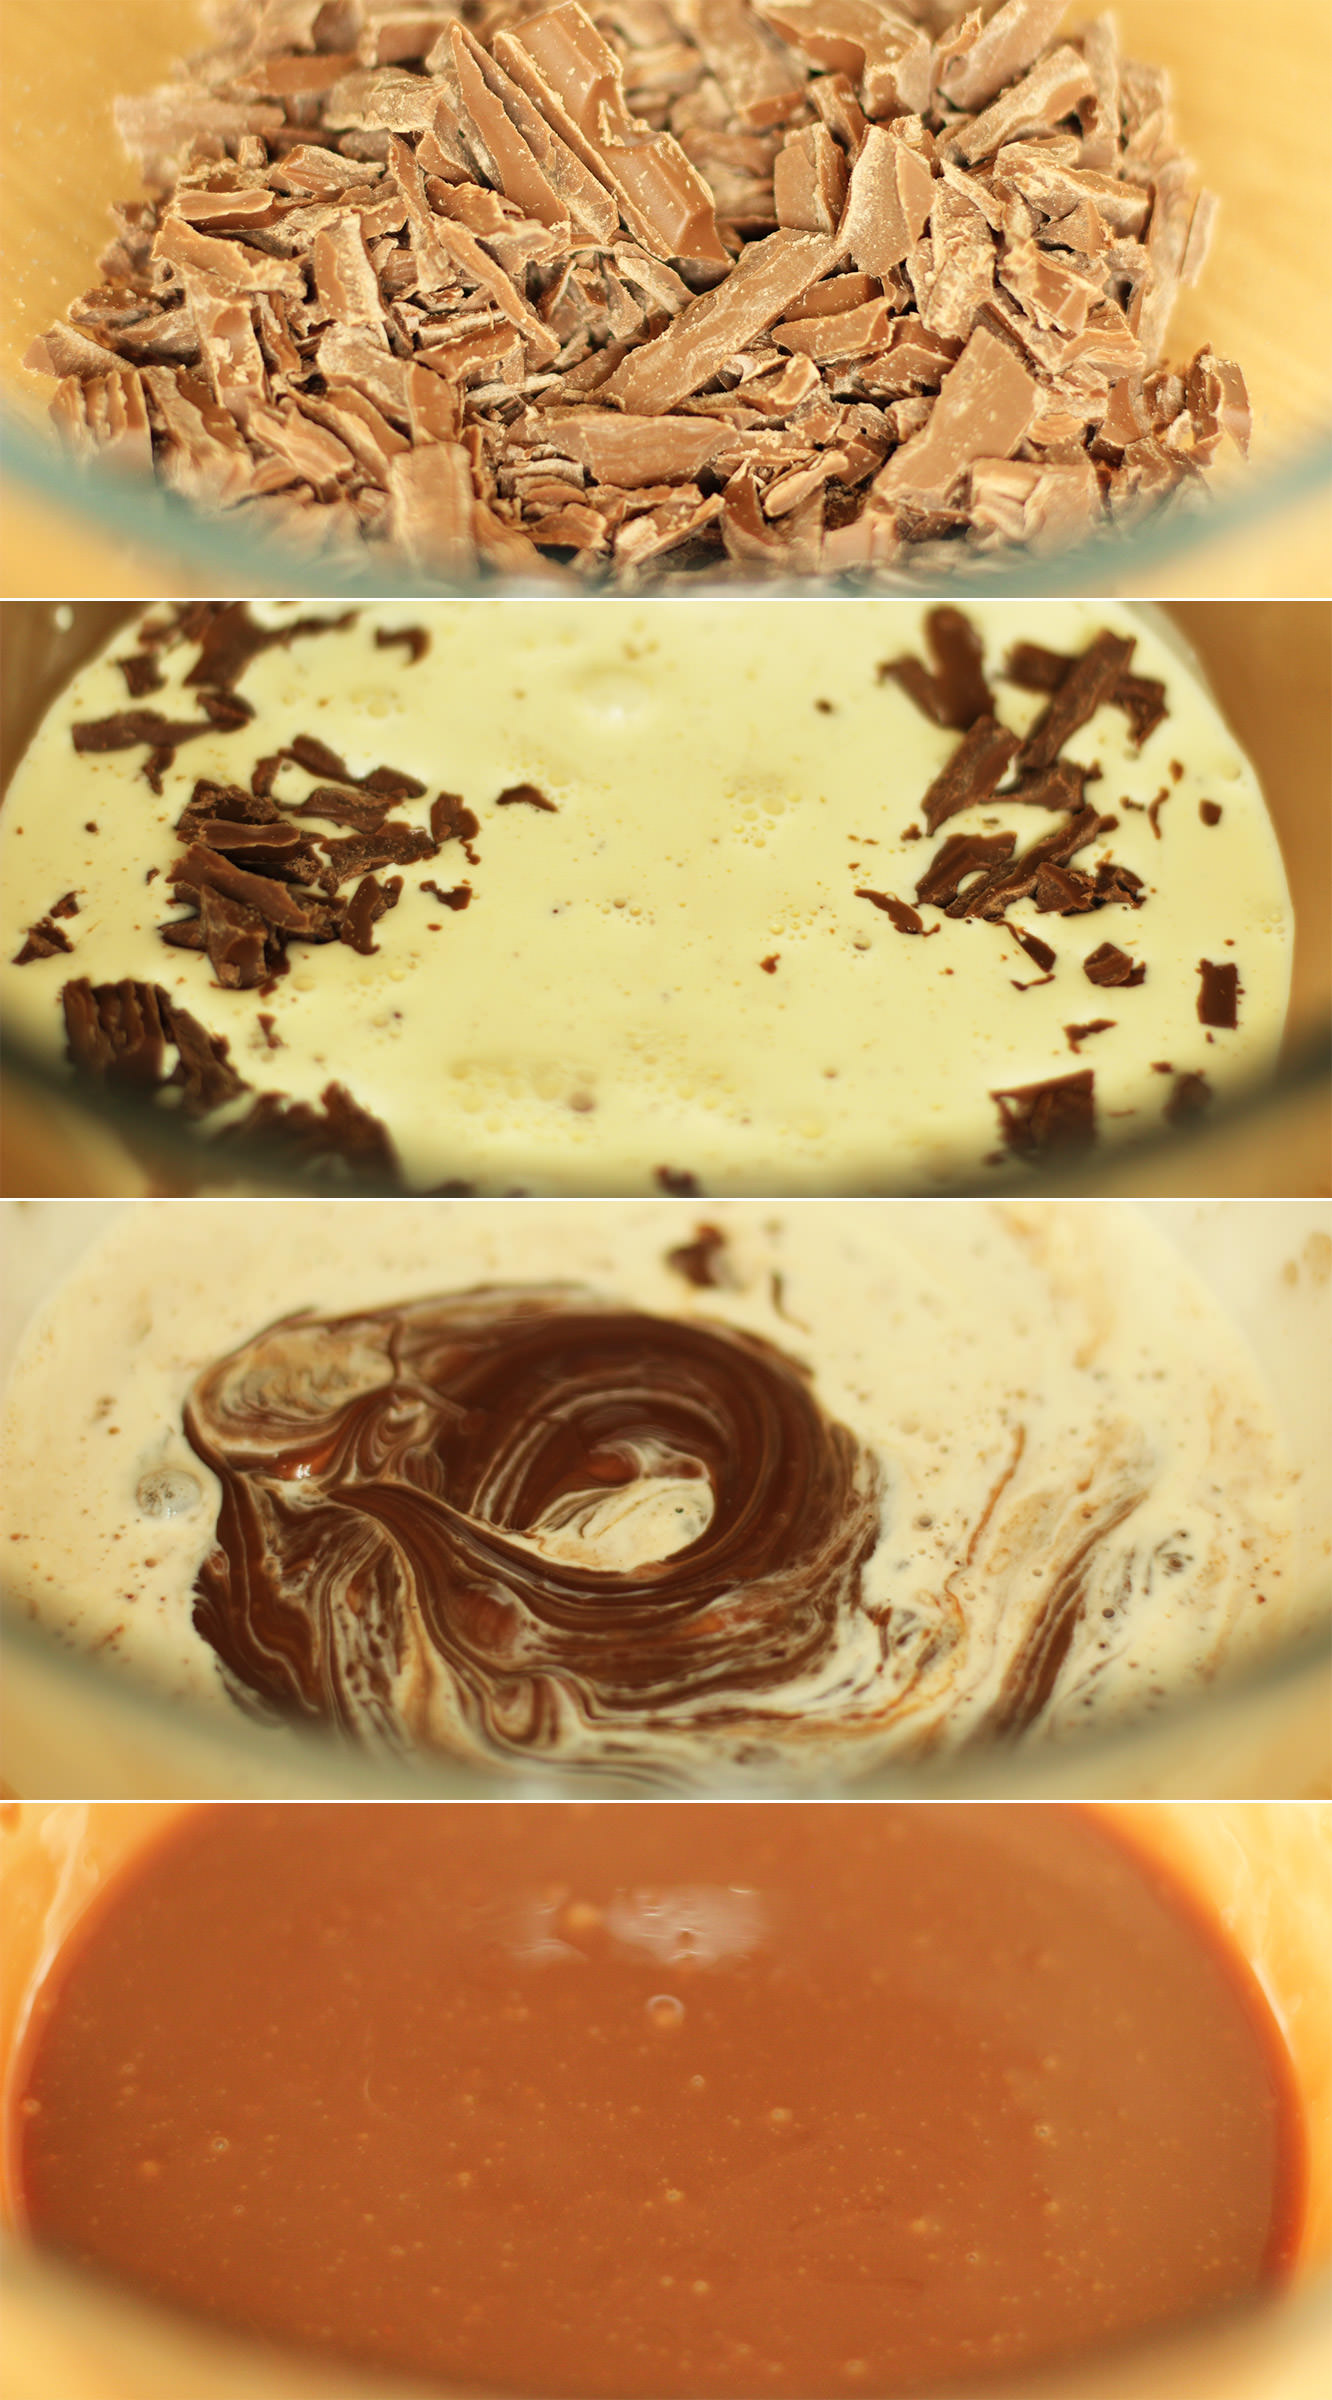
Make the ganache filling by chopping the chocolate finely and putting in a heatproof bowl. Gently heat the cream in a saucepan until you start to see little bubbles at the side and steam floating on the surface.
Pour the cream over the chocolate and use a hand whisk to melt the chocolate into the cream. Set aside to cool.
Step five
The third and final time we’re making seven minute frosting in this series, so you should be a dab hand by now. If you’ve not made this before then it’s quite straightforward, no need to be intimidated.
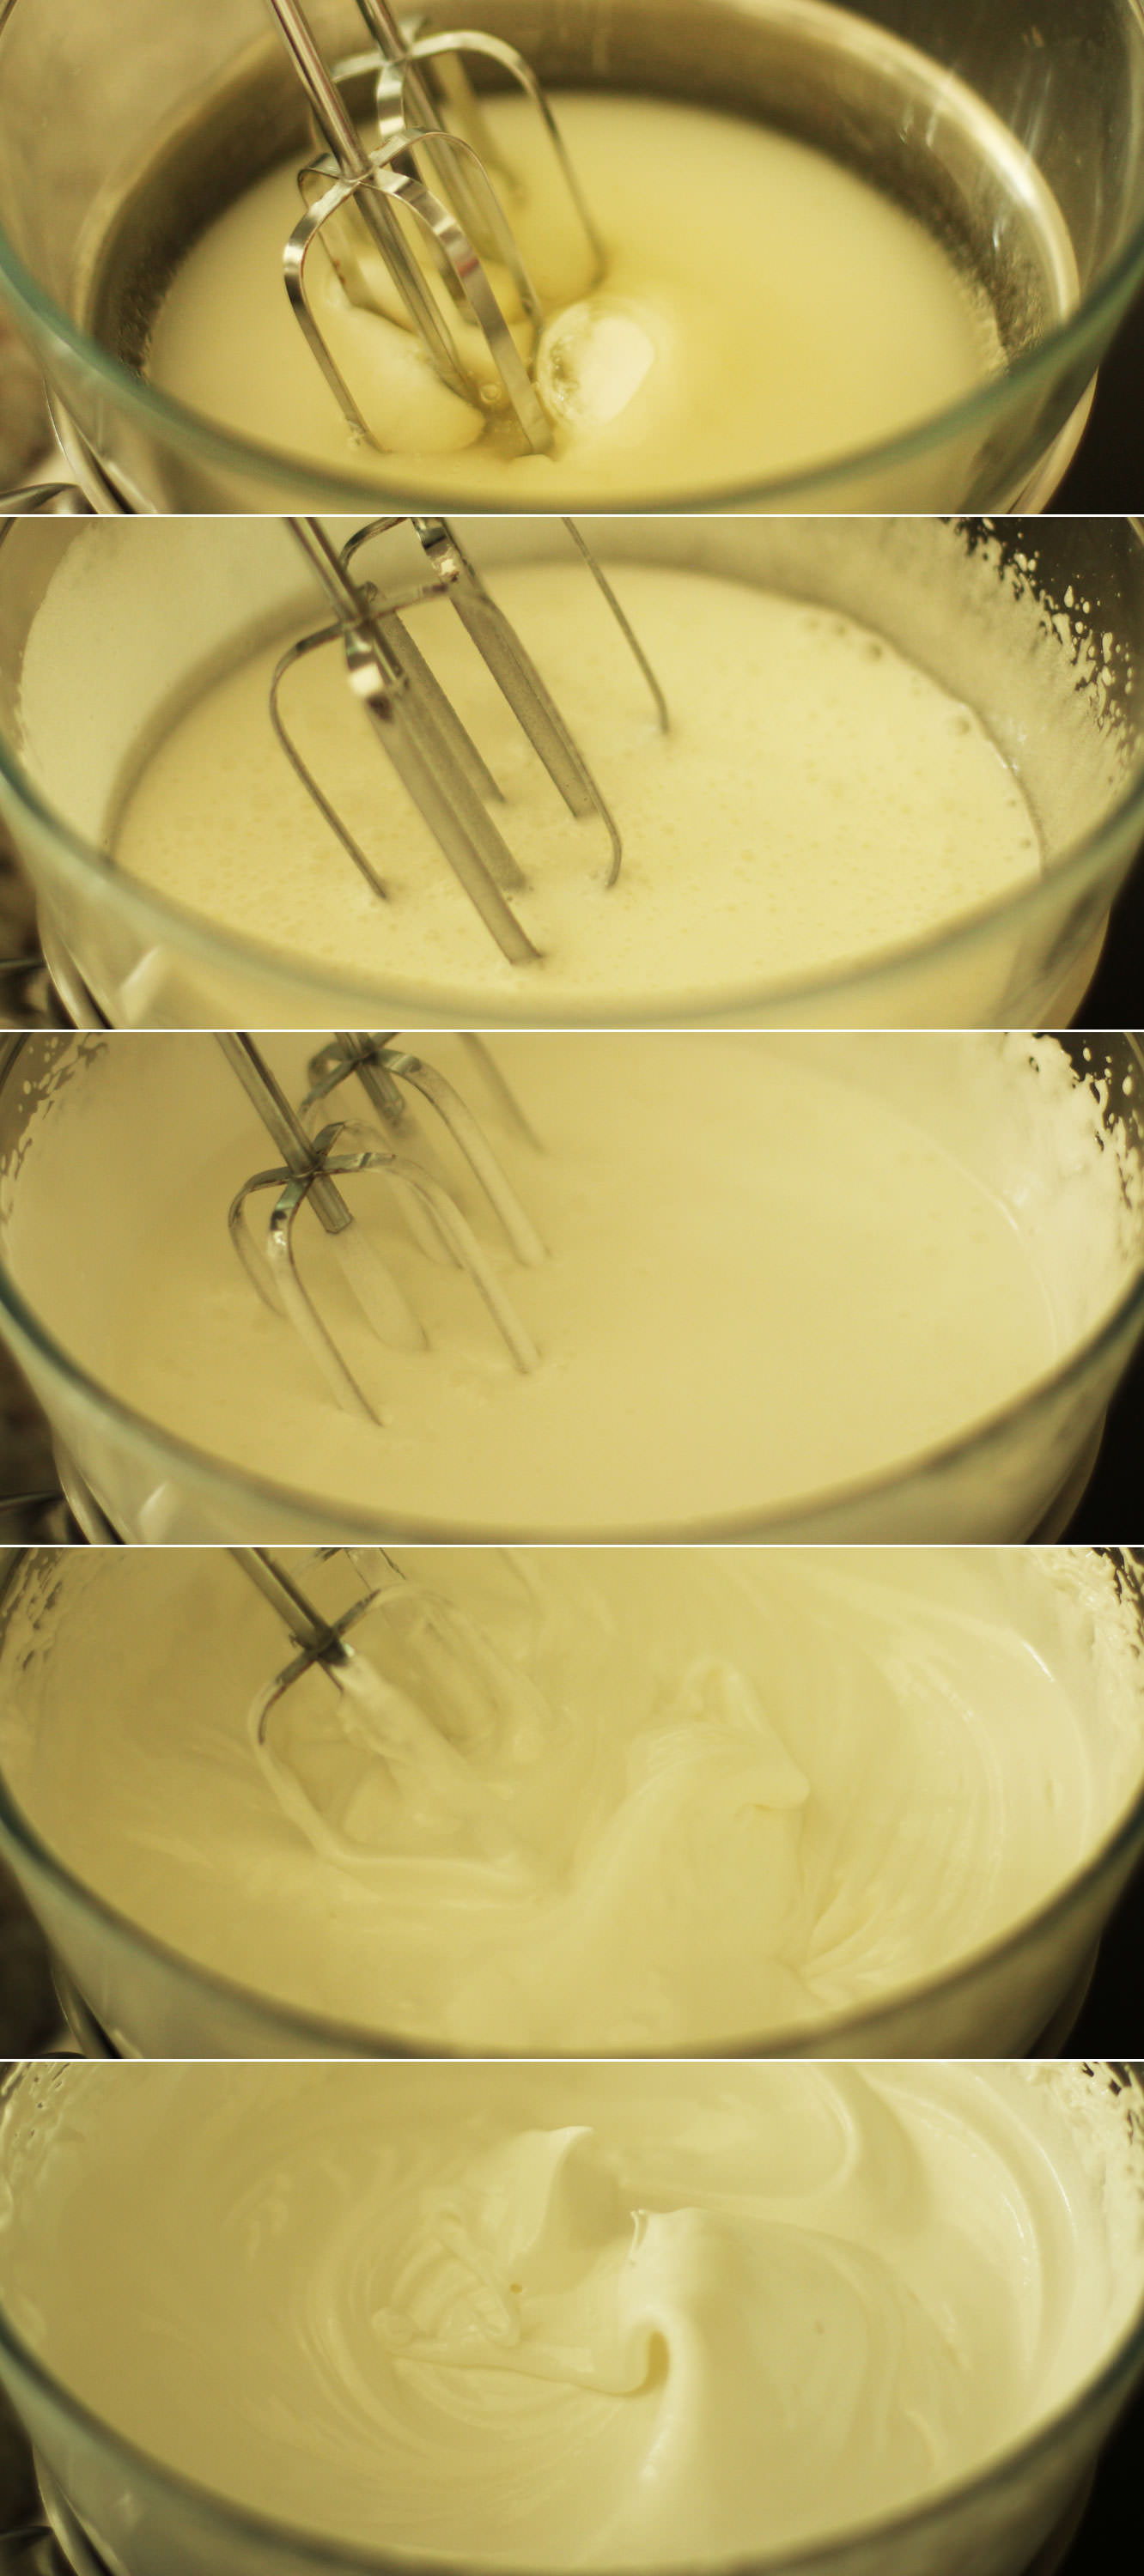
Pop a heatproof bowl over a pan of simmering water, making sure the water doesn’t touch the bottom of the bowl. Add the egg whites, sugar, water and cream of tartare and whisk for, well, seven minutes.
When you’re finished the mixture should be able to hold its shape, and not drop off a spoon when held upside down (stiff peaks).
Step six
Make a hole in the cupcakes and remove the spongey bit from the cut out. Fill with ganache and pop the ‘lid’ back on. I then spread a little of the meringue frosting over the surface to even it out a little. Pipe the frosting onto the cake using a round nozzle and holding pointed directly down at the cake (perpendicular) and squeeze.
Put in the freezer for a few hours.
Step seven
Melt the chocolate either by putting in the microwave for 20 second bursts, or in a bowl over a pan of simmering water.
You need to find a shallow but wide pot/cup to use for dipping. It needs to be wide enough for the cupcake and your fingers.
Remove the cupcakes from the freezer and dip them in the chocolate.
Week five of the British favourites cupcakes, and before we begin, I have a minor claim to fame on this one. My grandad used to engrave the embossing plates for the clock that characterises this evening treat. You know the old one with all the swirls n’ stuff.
Any guesses? The After Eight dinner mint you say? Dang straight.
Now, I know mint as a flavour polarises people, but I’m generally a fan. I can do away with a whole box of these if I’m in the right mood.
As far as the cake version goes, you don’t have to go too crazy, a little hint of mint really sets off the dark chocolate in this recipe nicely. The cake is made without eggs and butter so it’s light and fluffy allowing for a nice rich ganache icing. This is probably one of the easiest recipes in this little series, so if baking makes you nervous, start here.
As I’ve started sounding like the baking equivalent of a used car salesman we better make a start.
You will need
For the cakes:
250g/8.5 oz plain flour
250g/8.5 oz caster sugar
30g/1 oz cocoa powder
300ml/10 fl oz water
6 tbsp vegetable oil
1 tsp bicarbonate of soda
1 tsp cider vinegar
1 tsp vanilla extract
For the filling:
150g/5.5 oz icing sugar
1 1/2 tbsp water
1 tsp peppermint extract
For the ganache icing:
175ml/6 fl oz double cream
250g/8.5 oz dark chocolate
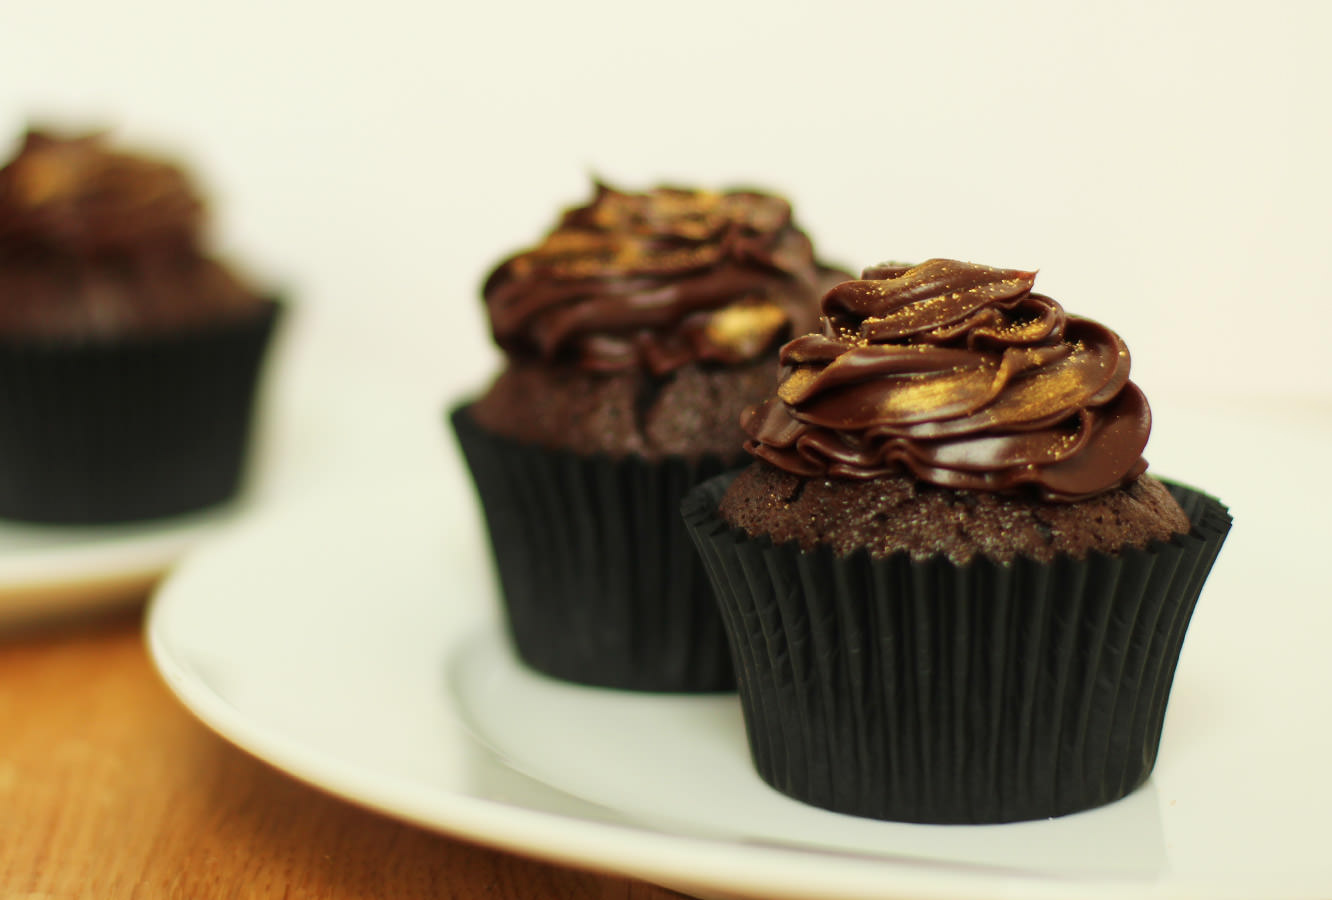
The little extras (you know, it’s polite to stay on brand):
Edible gold powder
Black muffin/cupcake cases
(makes 12)
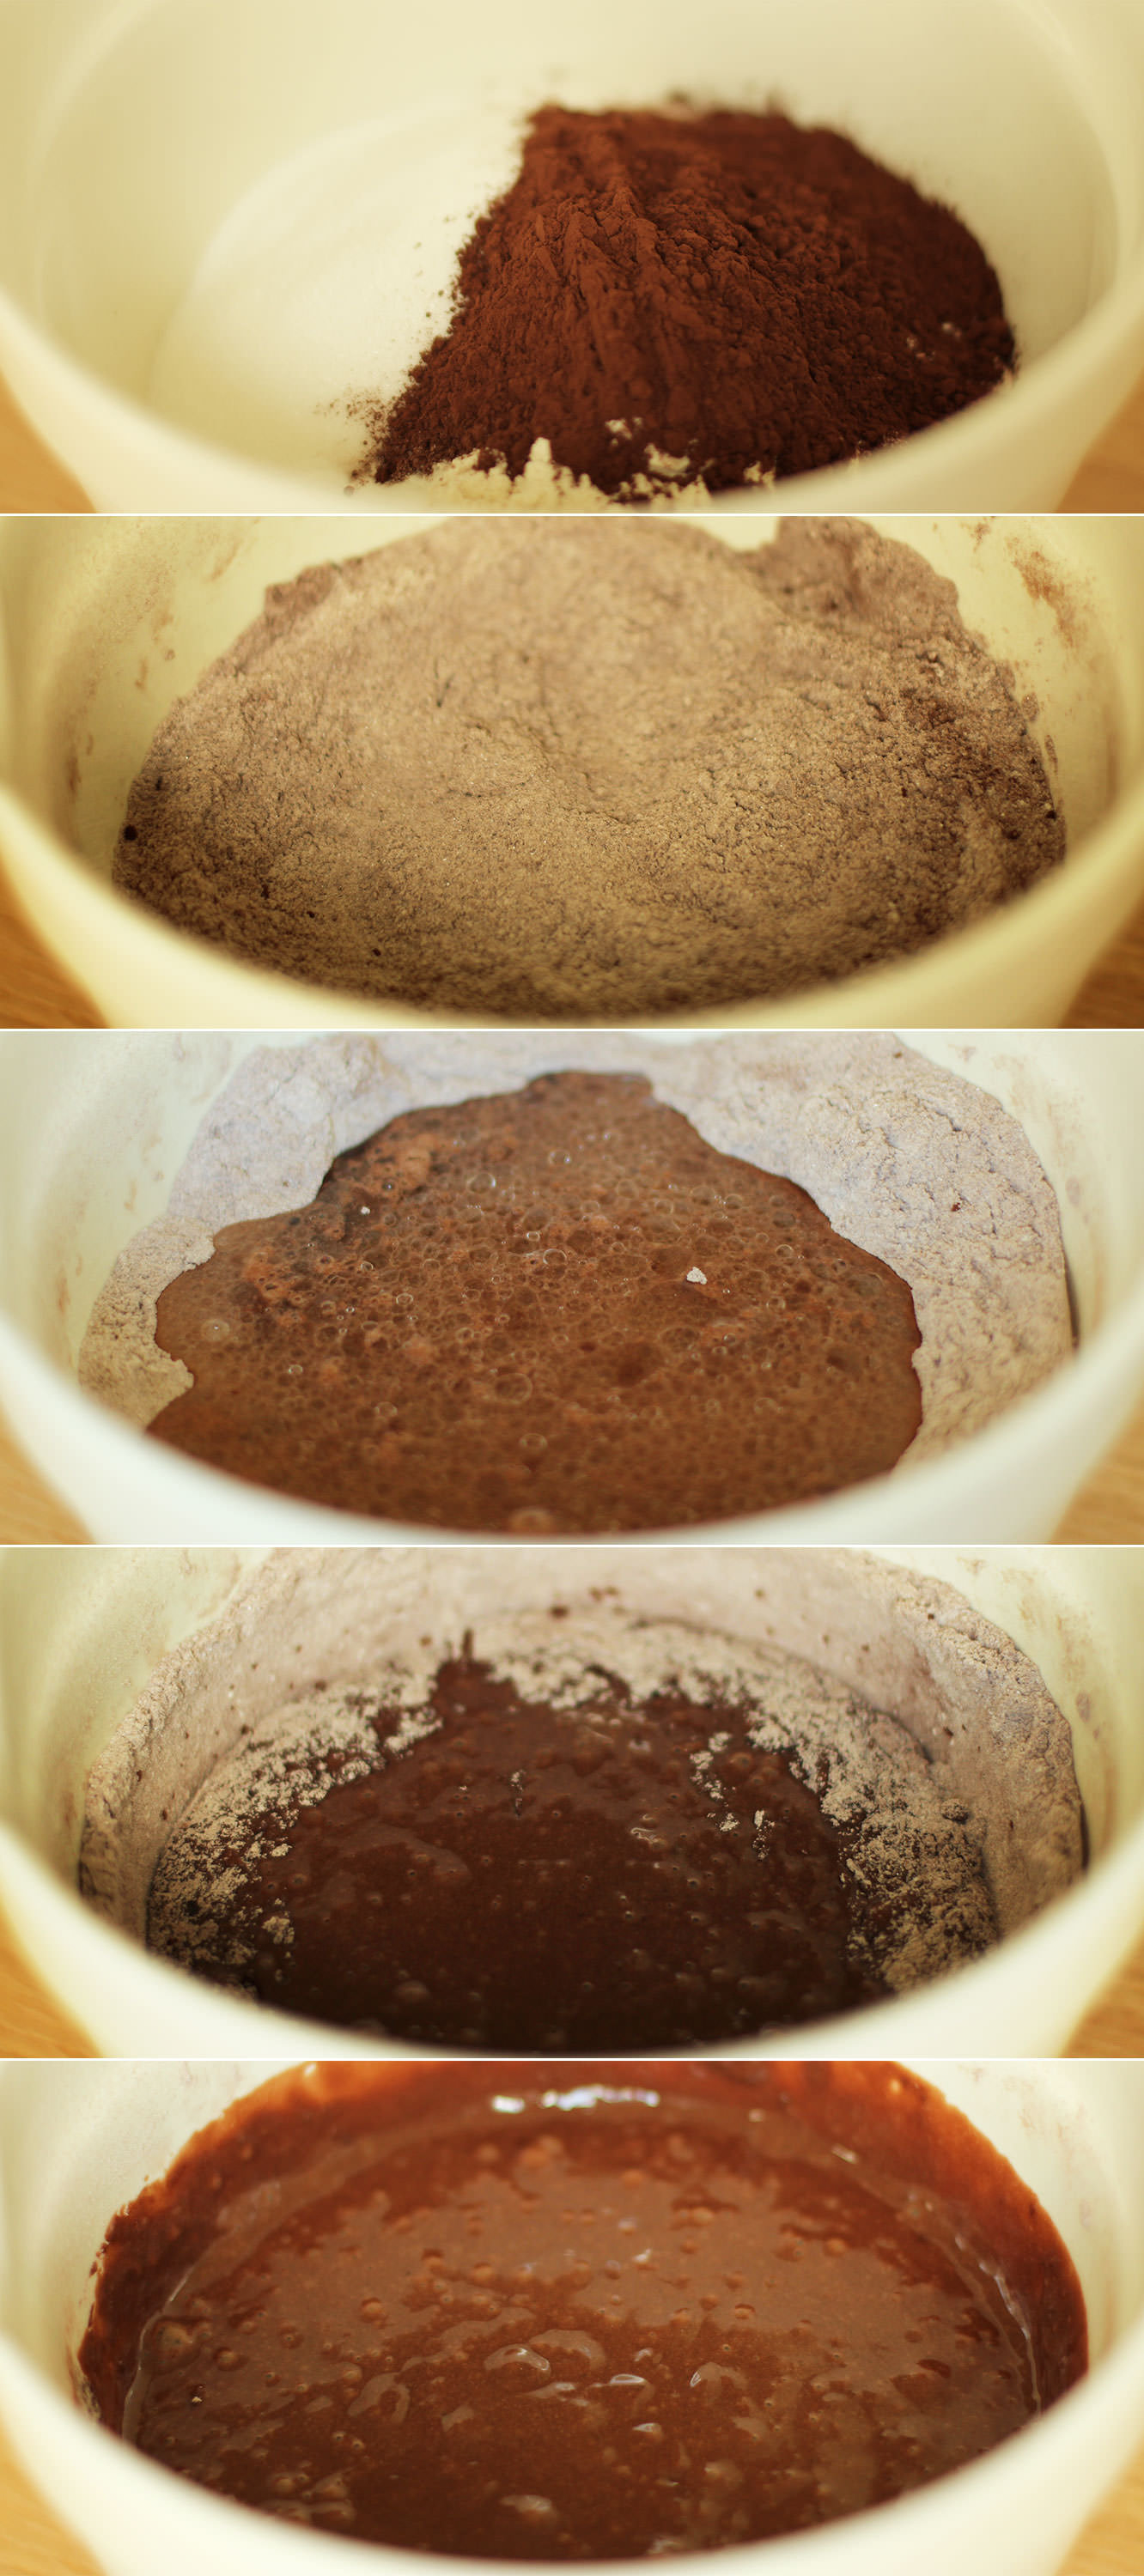
Step one
To make the cakes, mix together the caster sugar, cocoa powder, bicarbonate of soda and plain flour.
Make a well in the middle.
Step two
In a jug combine the oil, water, vanilla extract and vinegar.
Pour the wet ingredients into the middle of the dry ones. Using a hand whisk stir in small circles at the middle to gradually incorporate the dry ingredients without getting lumps.
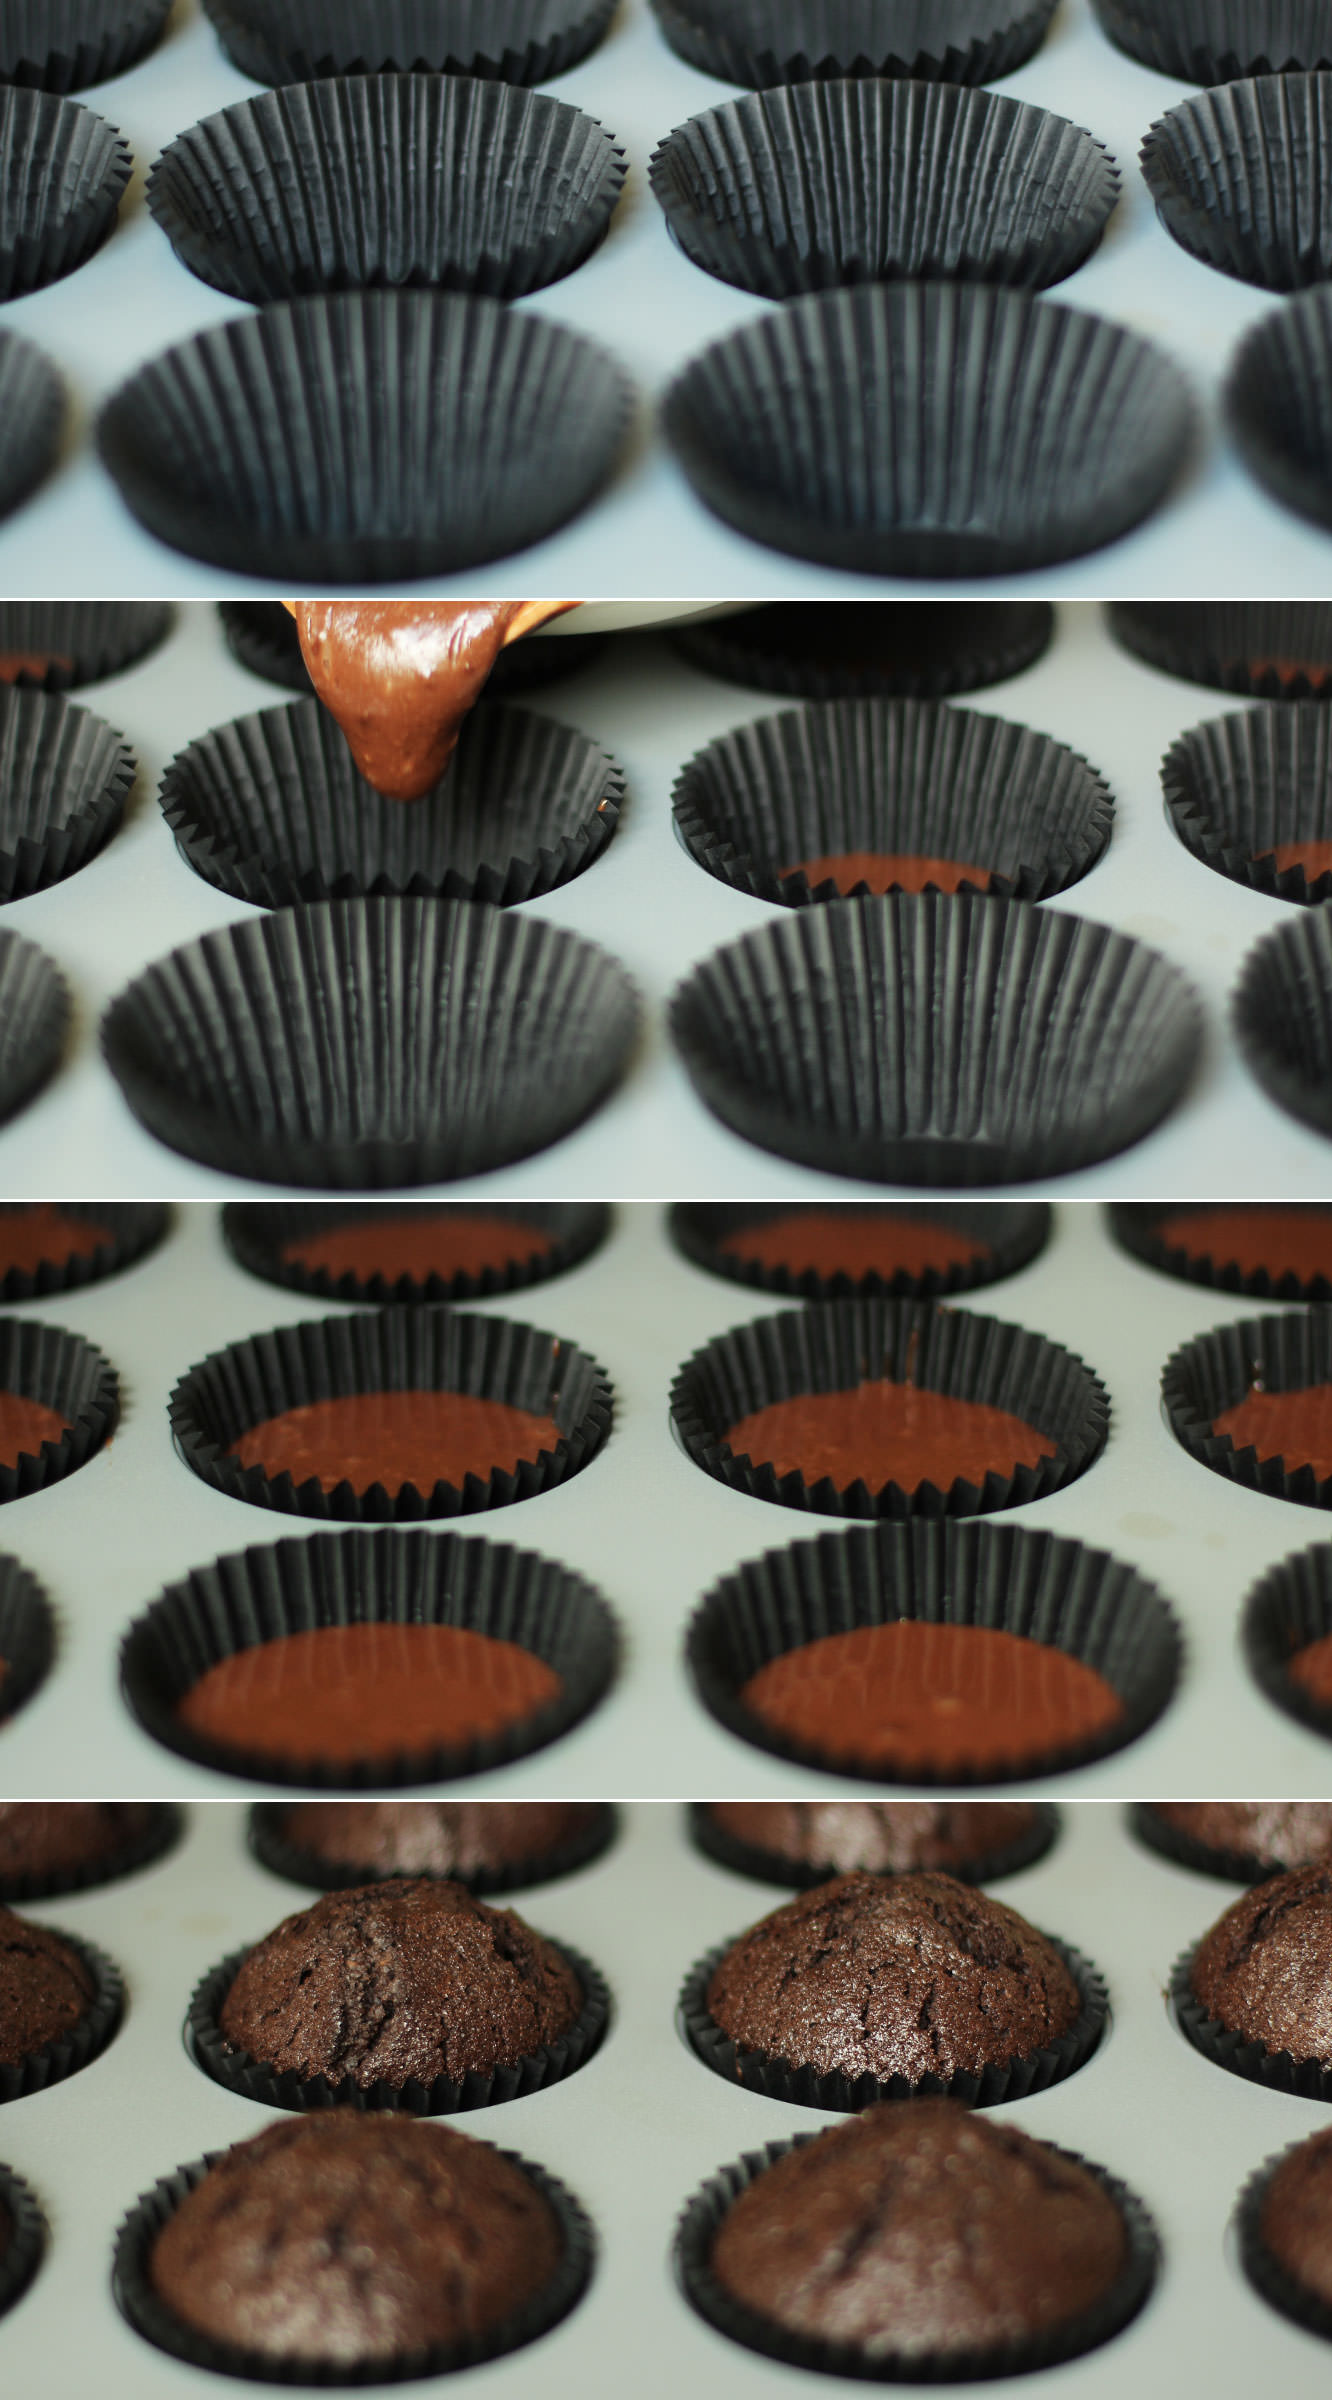
Step three
Pour the mixture into 12 cupcake cases. The mix will be fairly worryingly close to the tops of the cases but you shouldn’t have any problems, they aren’t the biggest risers.
To do this, I usually put the batter back into the jug I used for the wet ingredients in step two because it’s pretty runny.
Step four
Bake on 180C/350F/gas mark 4 for 20-25 minutes.
Step five
Finely chop the dark chocolate and place in a heatproof bowl. People who have been reading my blog for a while will be sick of hearing this, but a bread knife does a great job on chocolate. You can chop it real thin without bits flying off everywhere.
Gently heat the cream in a saucepan until it just begins to bubble. Stir constantly. It doesn’t take long for it to heat to this point so not a time to go and hang your washing out.
Once the cream has heated pour over the chocolate and stir with a whisk until fully combined.
Step six
Combine the filling ingredients. I felt it fairly unnecessary to photograph this bit. I reckon you’ll manage just fine on your own.
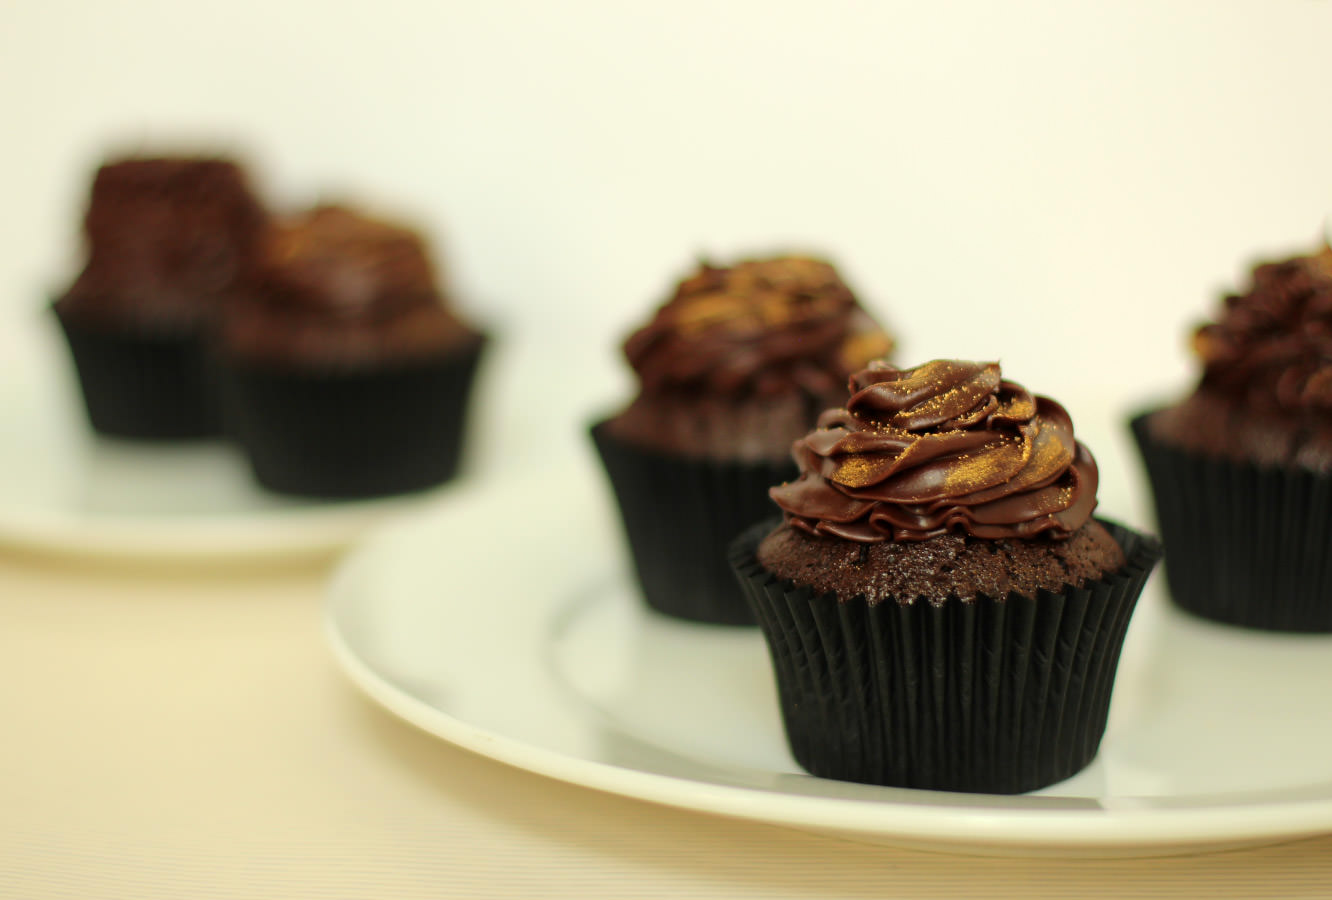
Step seven
Fill and ice the cupcakes. Remove a bit of cake from the middle by running a small knife around in a circle. Cut the pointed bit off, fill the hole and place just the lid on top.
Pipe on the ganache using your favourite nozzle. You’ll know it’s cool enough when a spoonful of mixture holds its shape when dropped back onto the rest.
Step eight
If you have it, paint on the gold powder. I’m a sucker for the details. You can get this kind of thing fairly cheaply at most UK supermarkets nowadays.
Eat them at any time in the day you like. I recommend breakfast personally, there’s an 8 in the morning too.
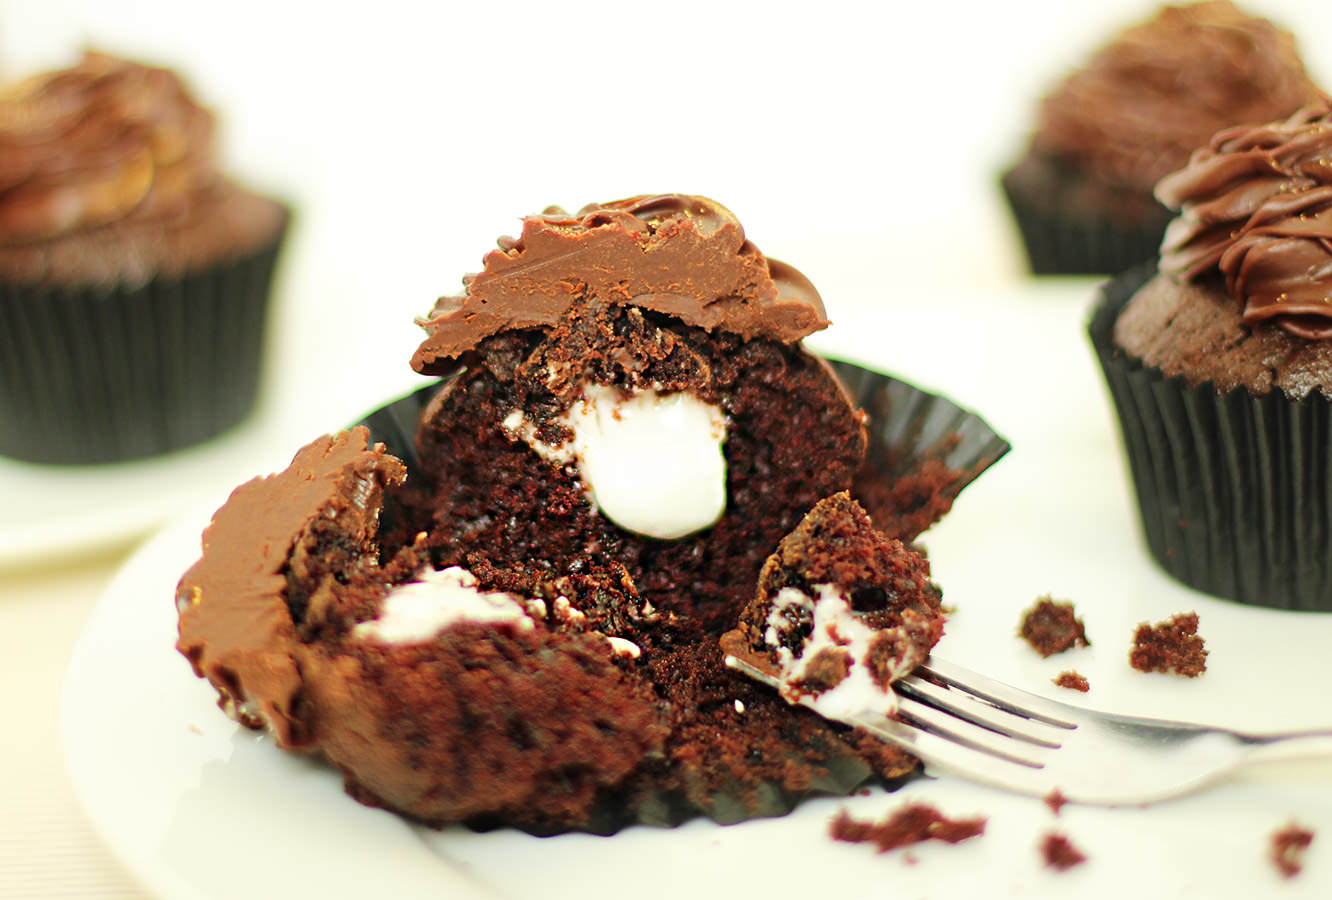
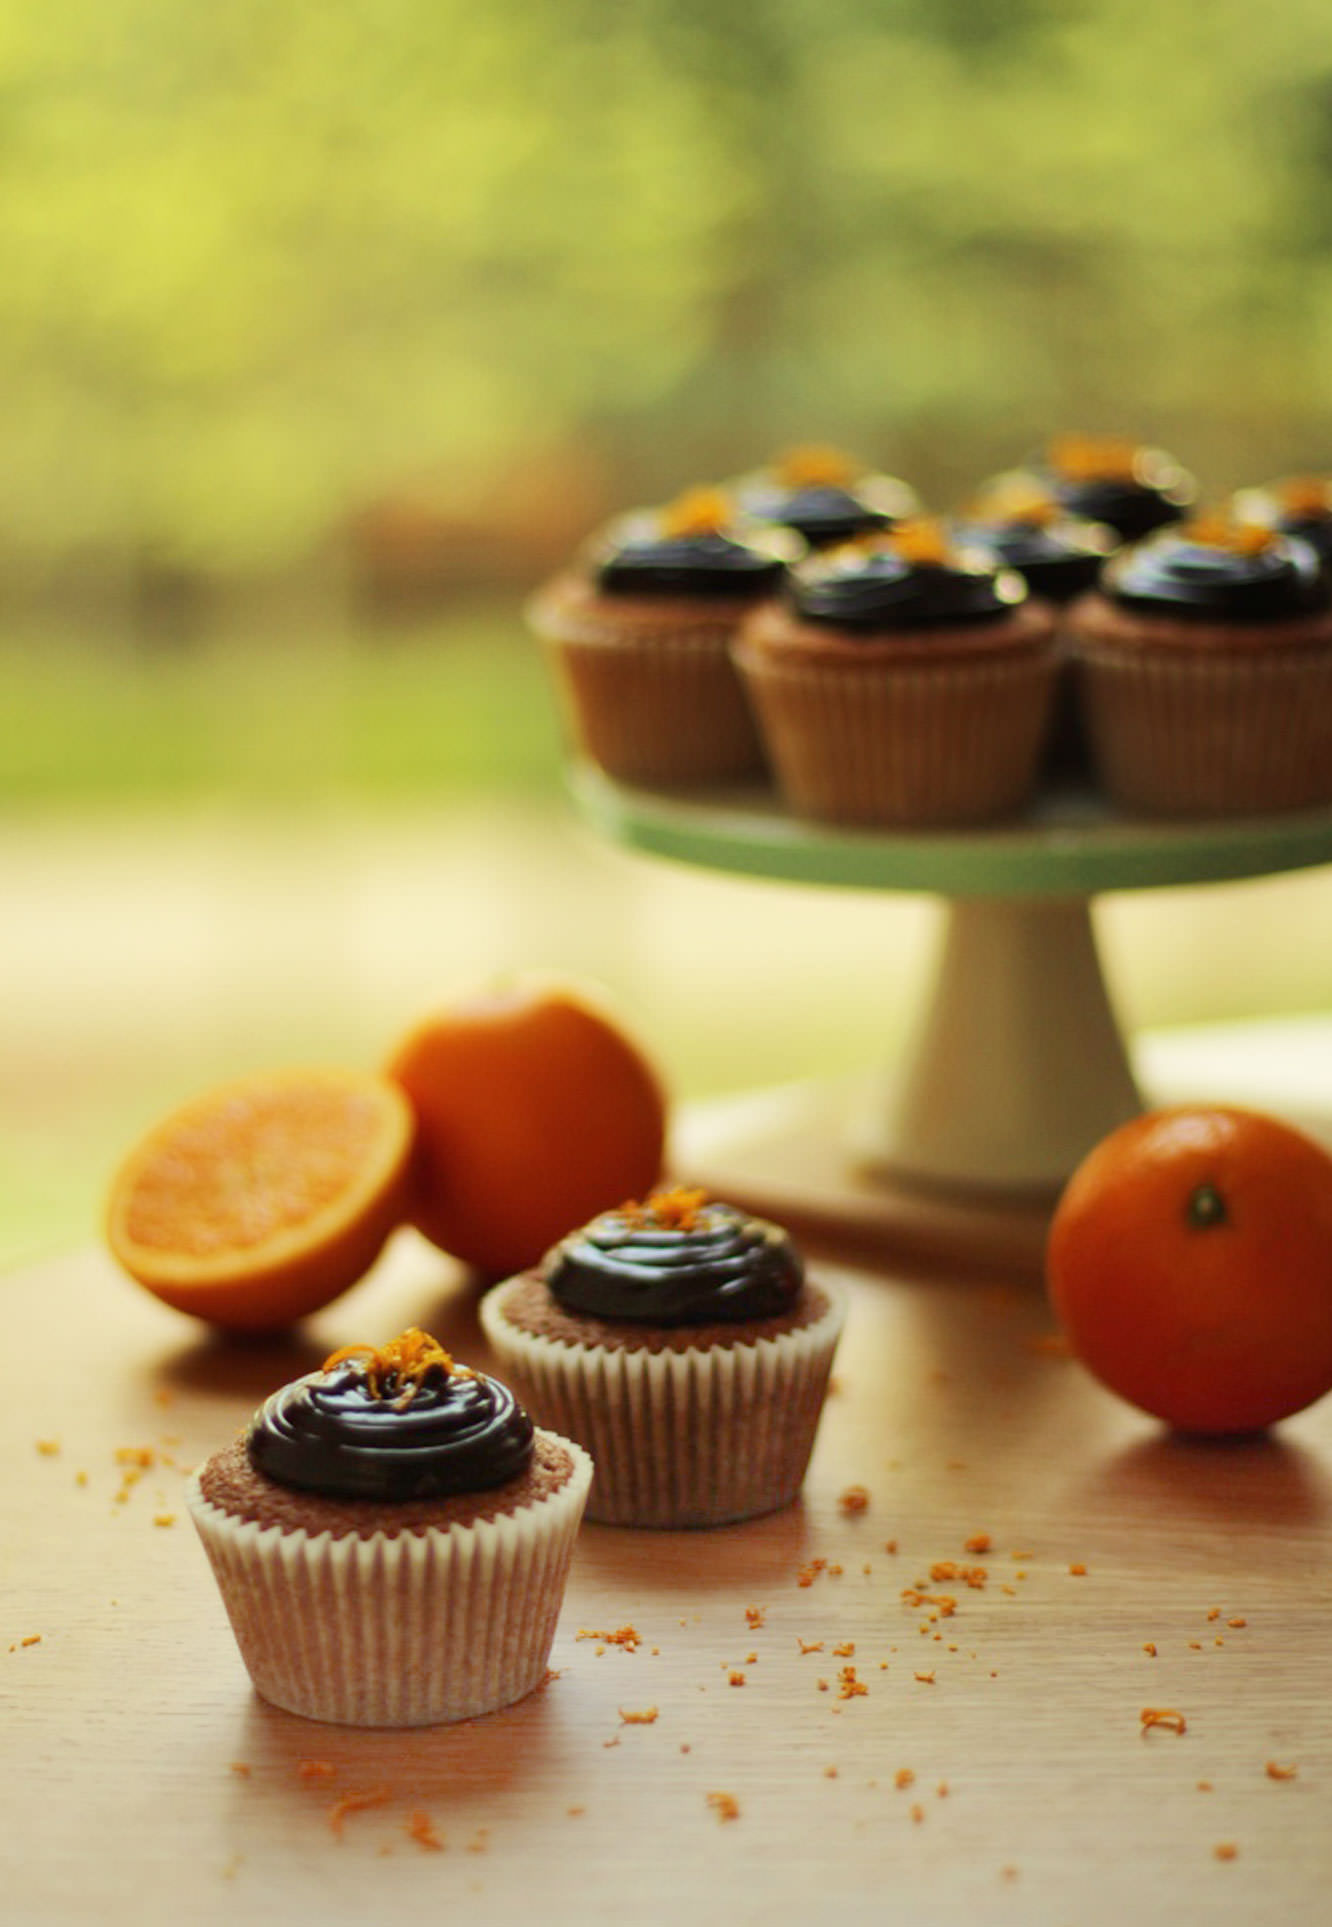
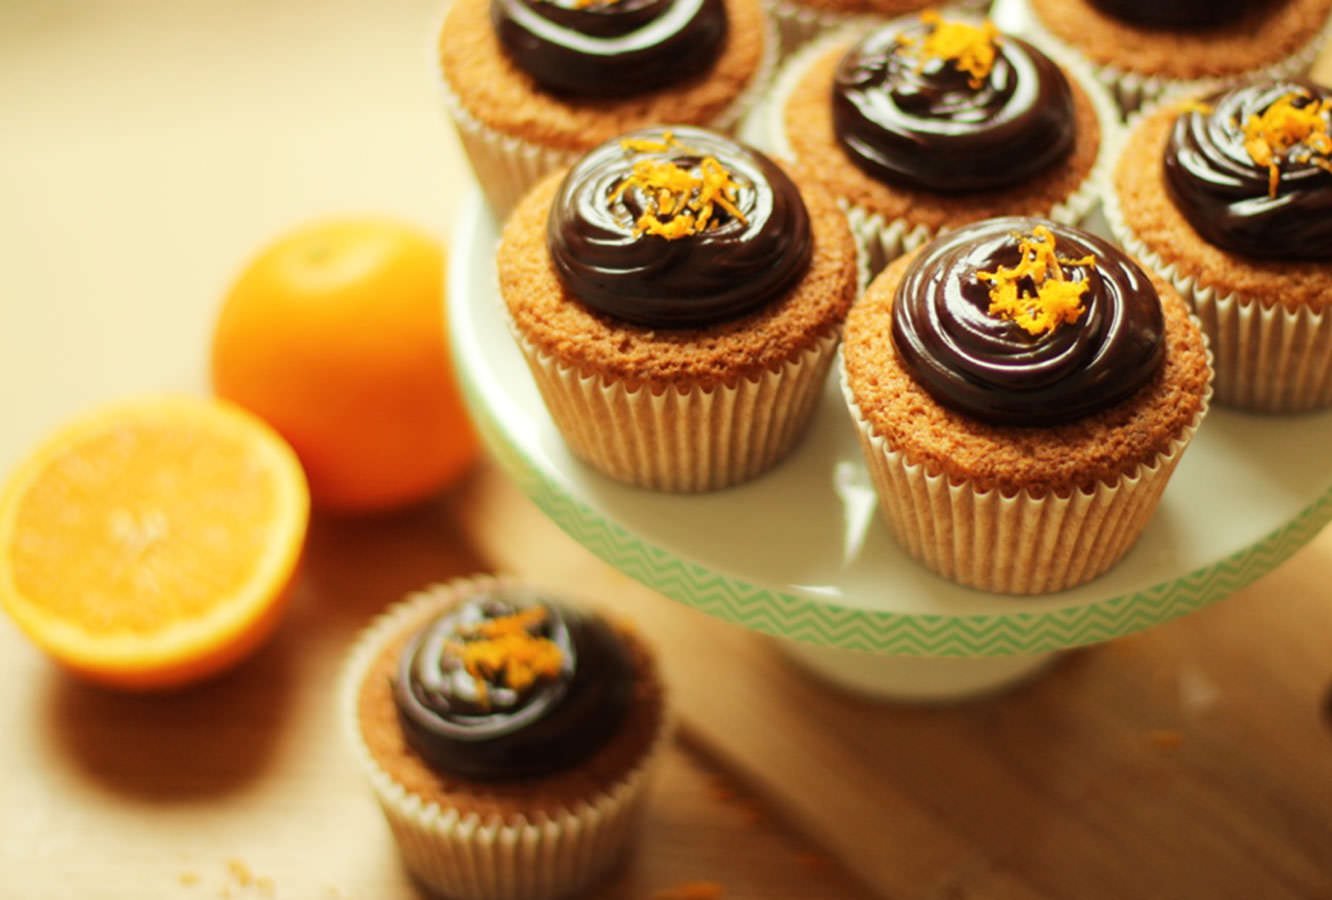
Week two of the British favourites series. One of the most heavily contested treats in GB, it had to go to court in 1991 to establish once and for all if it were a cake or a biscuit to make sure McVitie’s (its creators) were in the right tax category.
This version is 100% a cake and I dare say my favourite of this series, though there are a few still to be baked, so we’ll see.
Though this recipe contains an orange curd and a chocolate ganache it’s actually pretty easy to make, and has been met with universal approval by all who have consumed, so please don’t be put off.
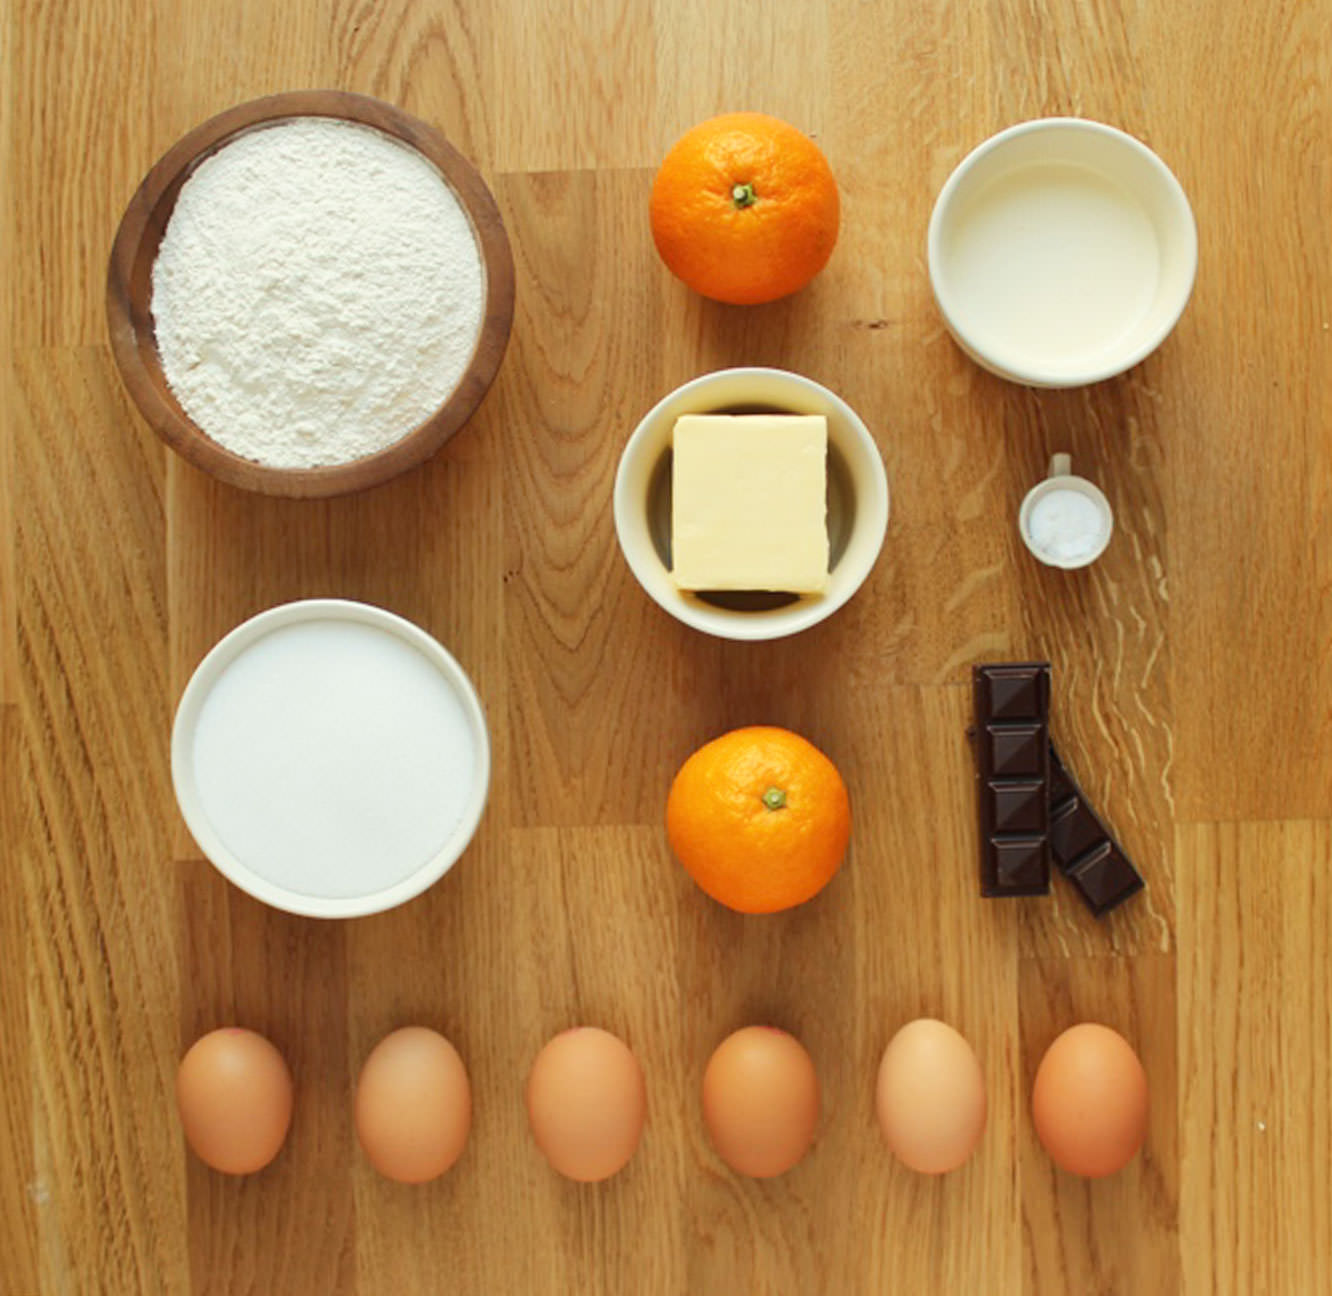
You will need
For the cake:
185g/6.5 oz self raising flour
185g/6.5 oz butter/margarine (I use Stork)
185g/6.5 oz caster sugar
3 eggs
1 tsp bicarbonate of soda
1 tsp vanilla extract/paste
For the orange curd:
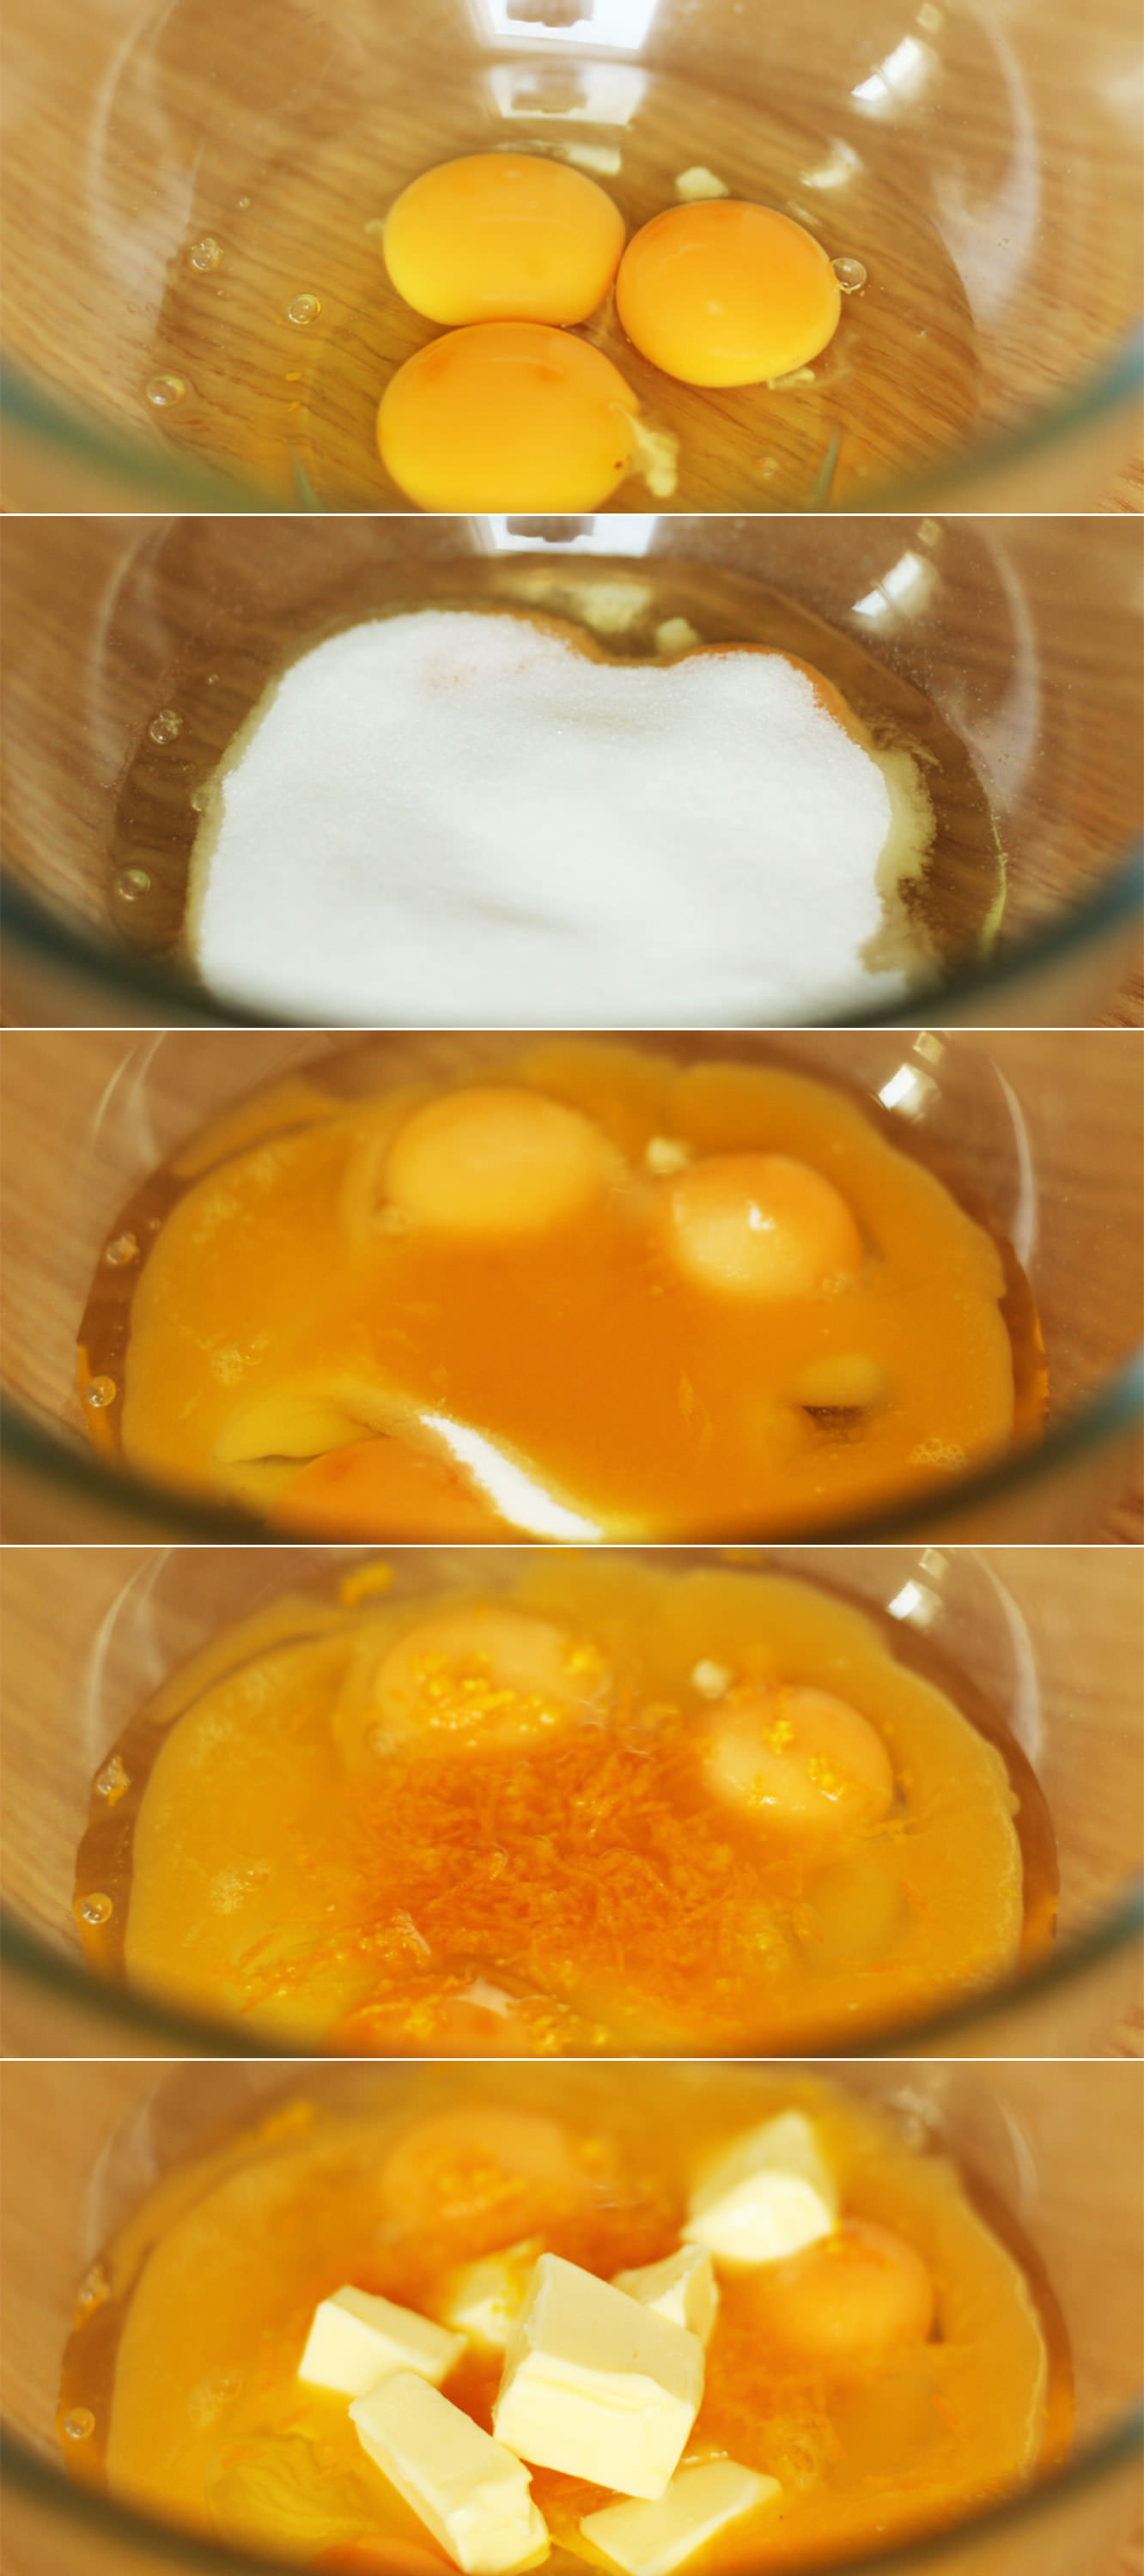
2 whole eggs
1 egg yolk
85g/3 oz caster sugar
60g/2 oz butter
90ml/3 fl oz freshly squeezed orange juice (2 oranges should do)
Zest of one orange
For the ganache:
150ml/5 fl oz double cream
200g/7 oz dark chocolate
(makes 12)
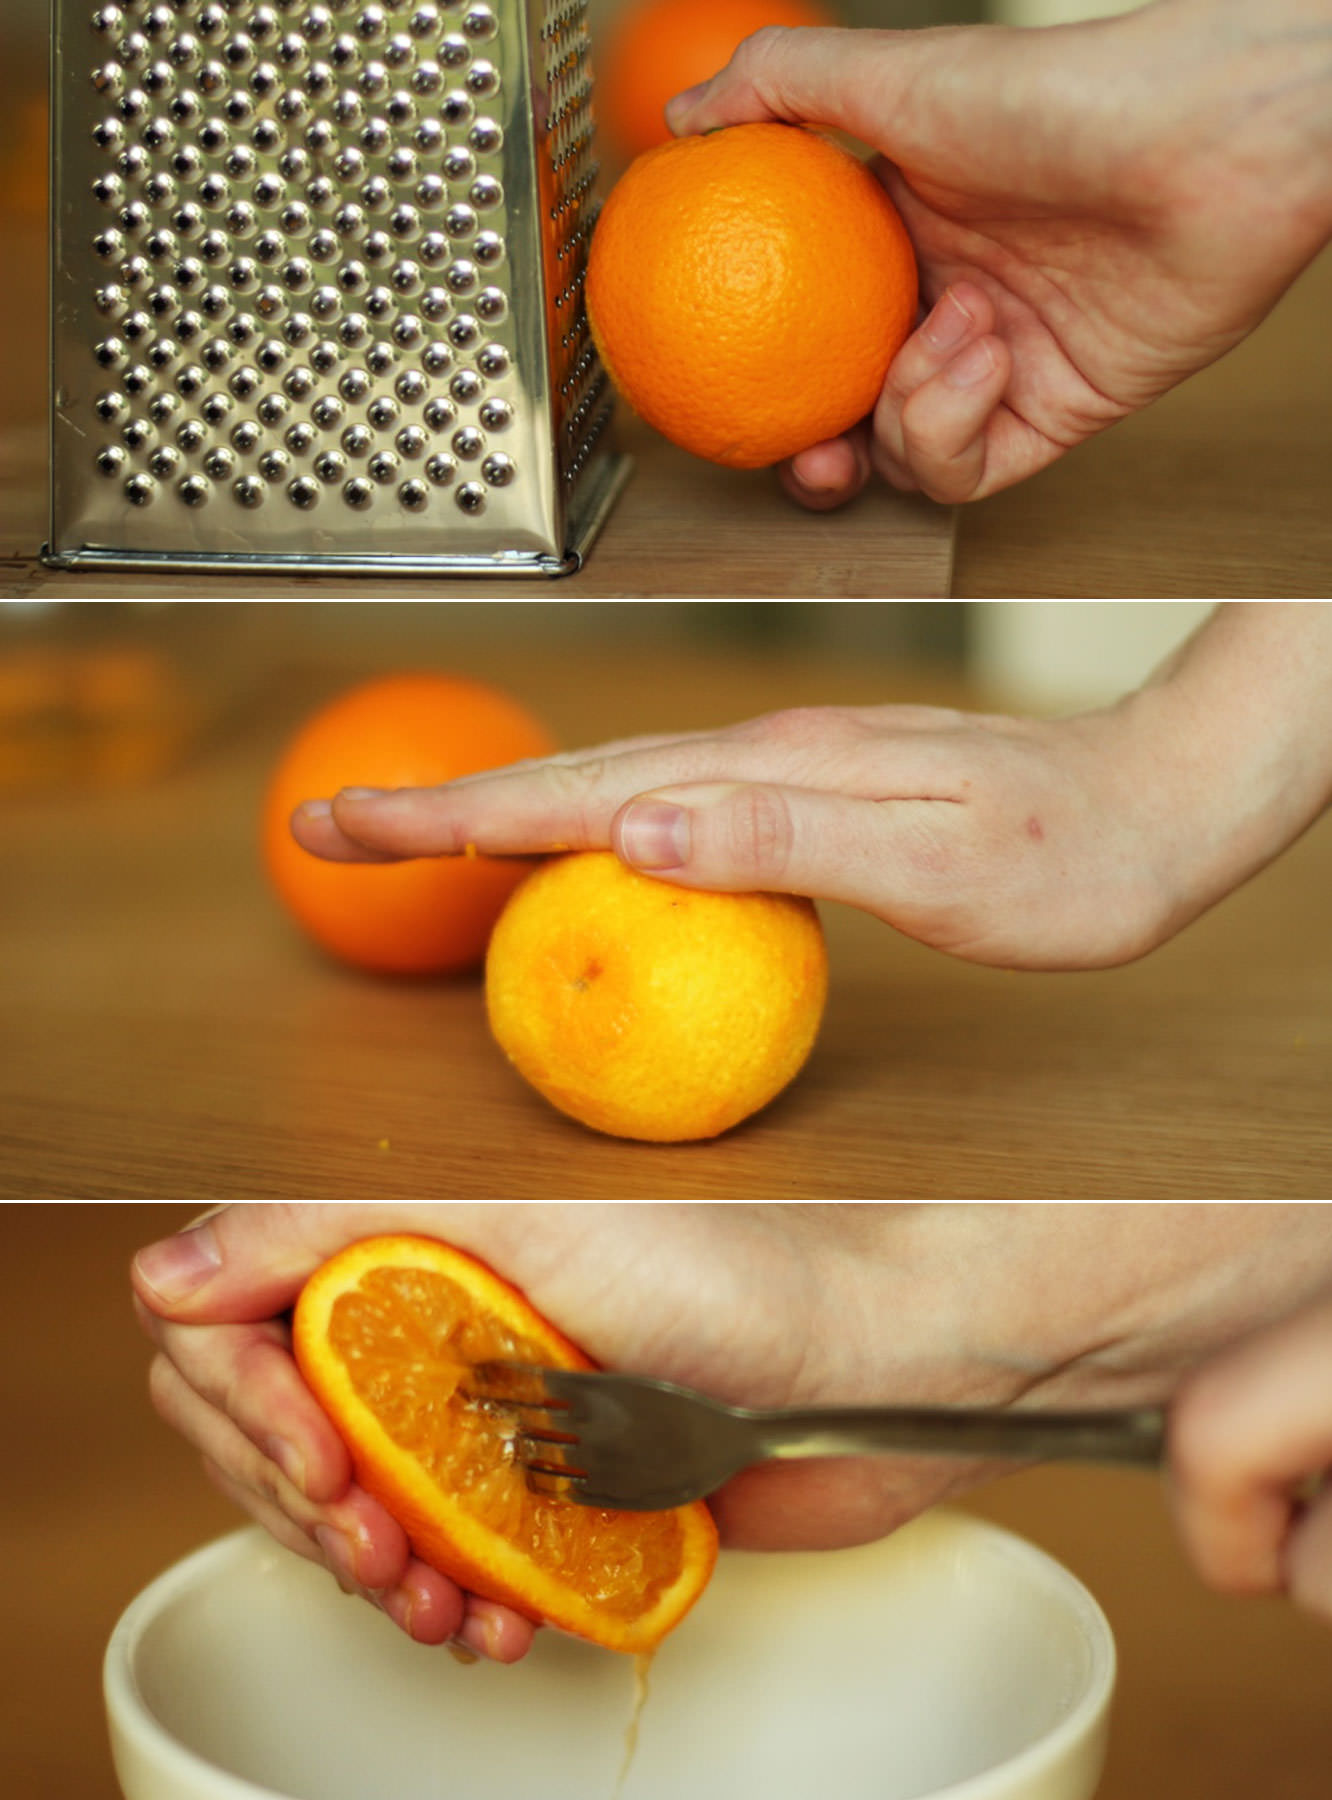
Step one
Zest one of the oranges on the smallest setting of your grater. If you don’t have a small setting don’t worry, we’re going to sieve it later. If you don’t have a small setting or a sieve then you’re stuffed, and a little odd.
Step two
Roll the oranges around to release the juices a little more. I also give them 10-20 seconds in the microwave.
Juice them using a juicer or a fork until you have the required 90ml.
Step three
Combine the eggs and yolk, sugar, butter and the orange related ingredients into a heatproof bowl.
Set aside a little bit of zest aside to decorate with later.
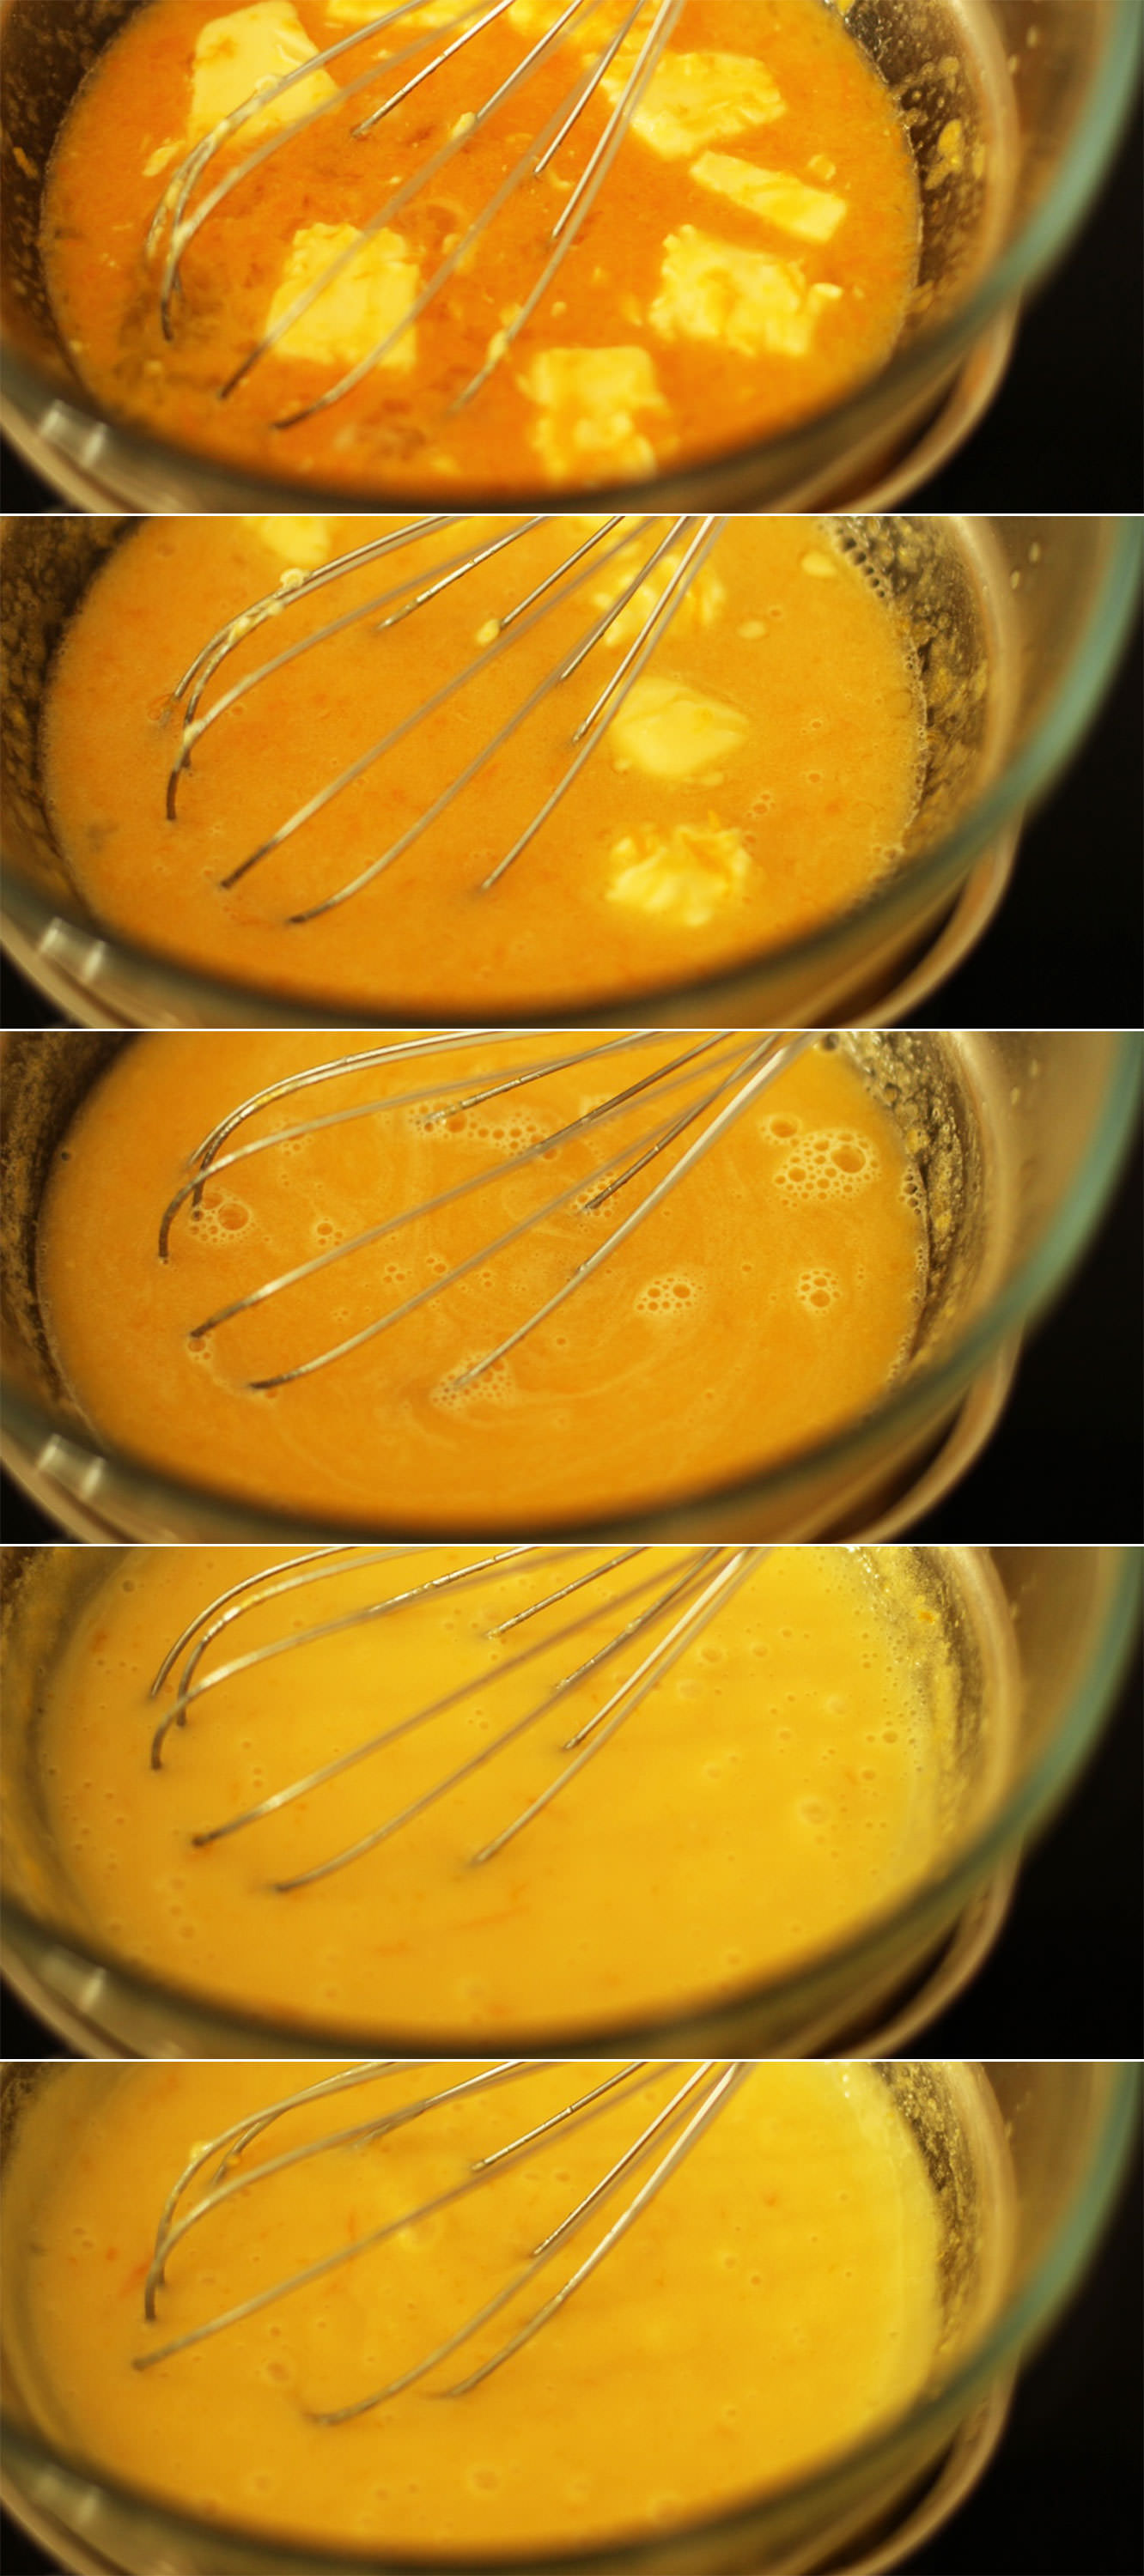
Step four
Place the bowl on top of a pan of simmering water. Stir regularly with a whisk until the mixture thickens. It should coat the back of a metal spoon without sliding off and will be fairly opaque and lighter in colour too.
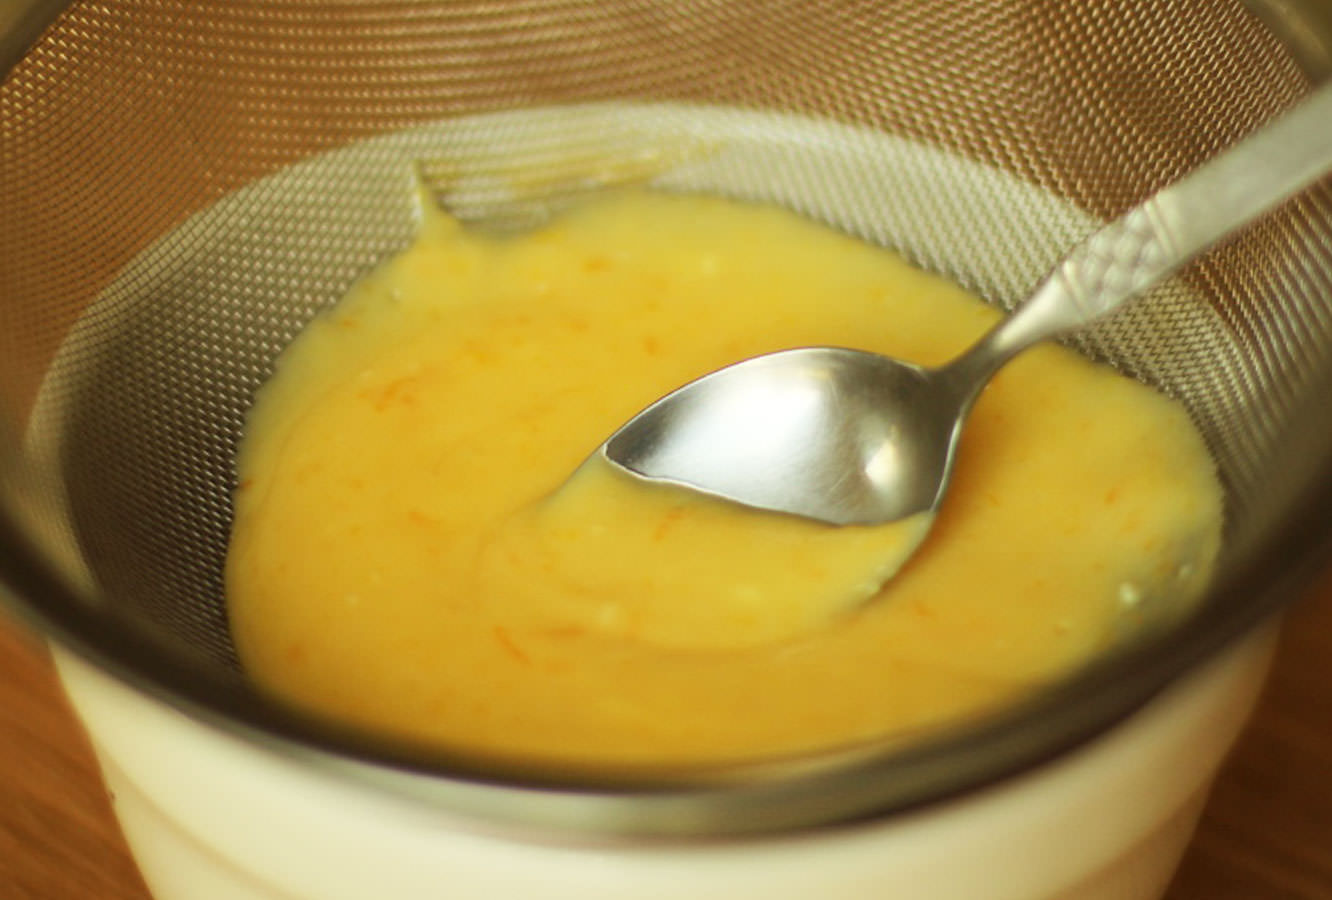
Step five
Sieve the mixture to remove the zest. Stir with a dessert spoon to get as much of the mixture through the sieve as possible.
Step six
It’s time to make the cakes! This is a basic sponge recipe as the base of a jaffa cake is not flavoured per se. If you want an extra boost of flavour you could zest the second orange and add it to the cake batter. I’ve not actually tried this (though I expect it would be nice) and they are good without so not to worry if you don’t fancy it.
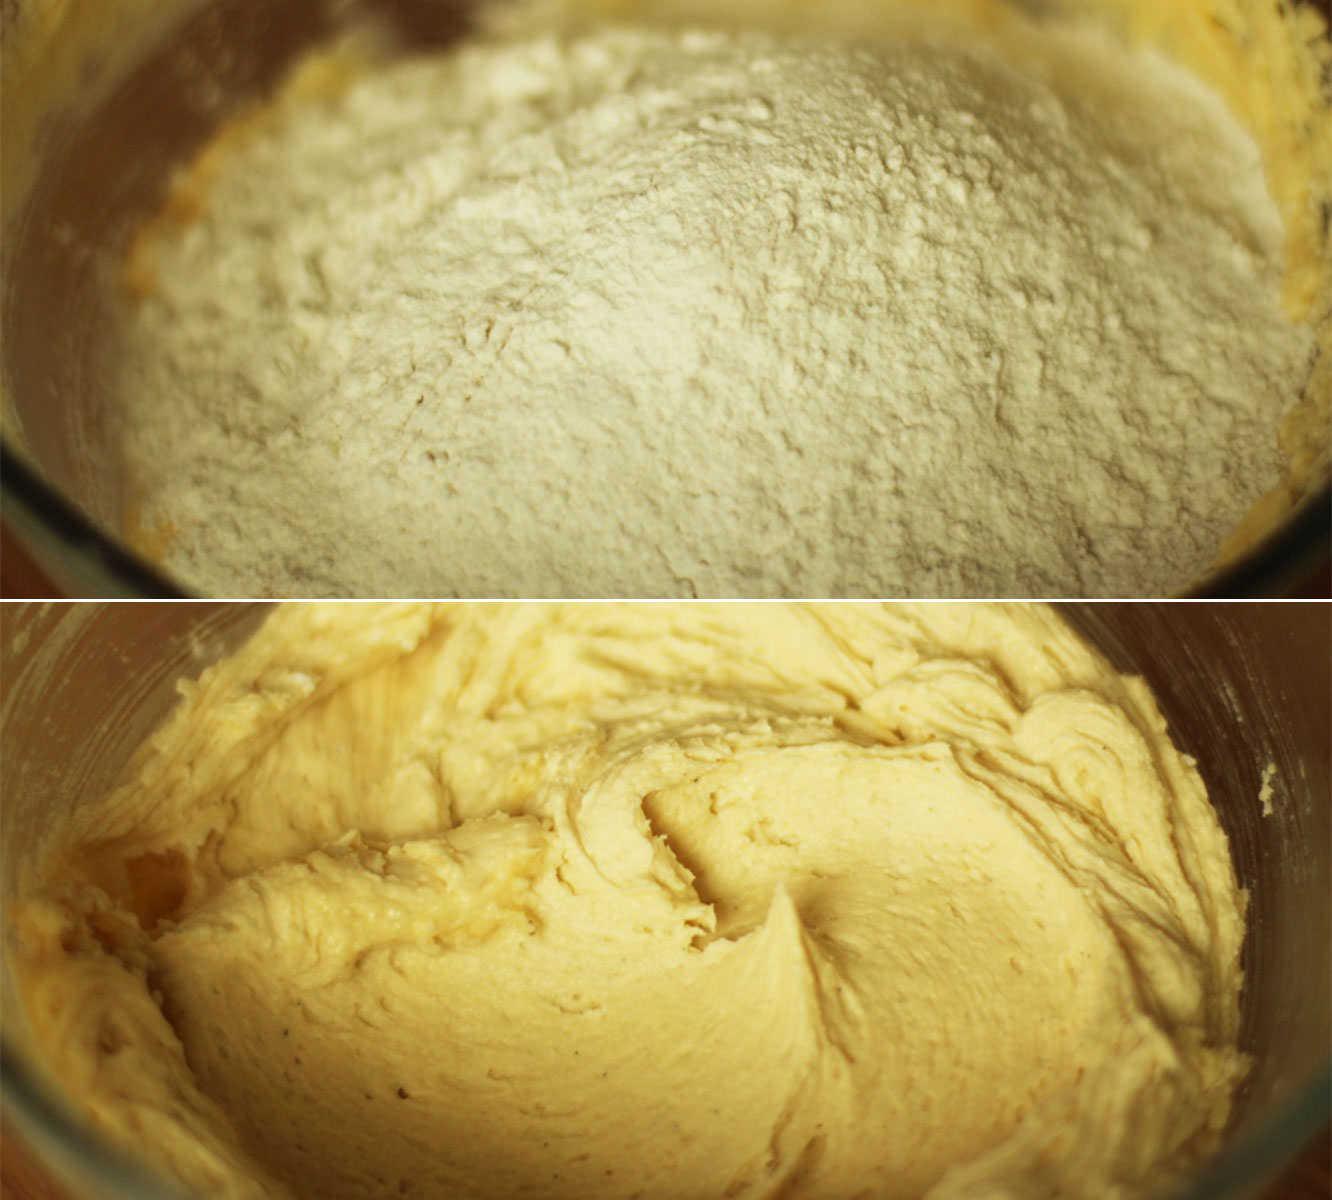
Combine the butter/margarine and the caster sugar. Using an electric whisk beat until smooth and fluffy. Add the eggs and whisk again.
Step seven
Beat in the flour, bicarbonate of soda and vanilla until fully combined.
Step eight
Spoon the mixture evenly into 12 cupcake cases. It’s about two dessert spoons per case, but just keep topping up until you run out.
Bake on gas mark 4/180C/350F for 20-25 minutes. Take care not to open the oven halfway through or your cakes will sink.
Step nine
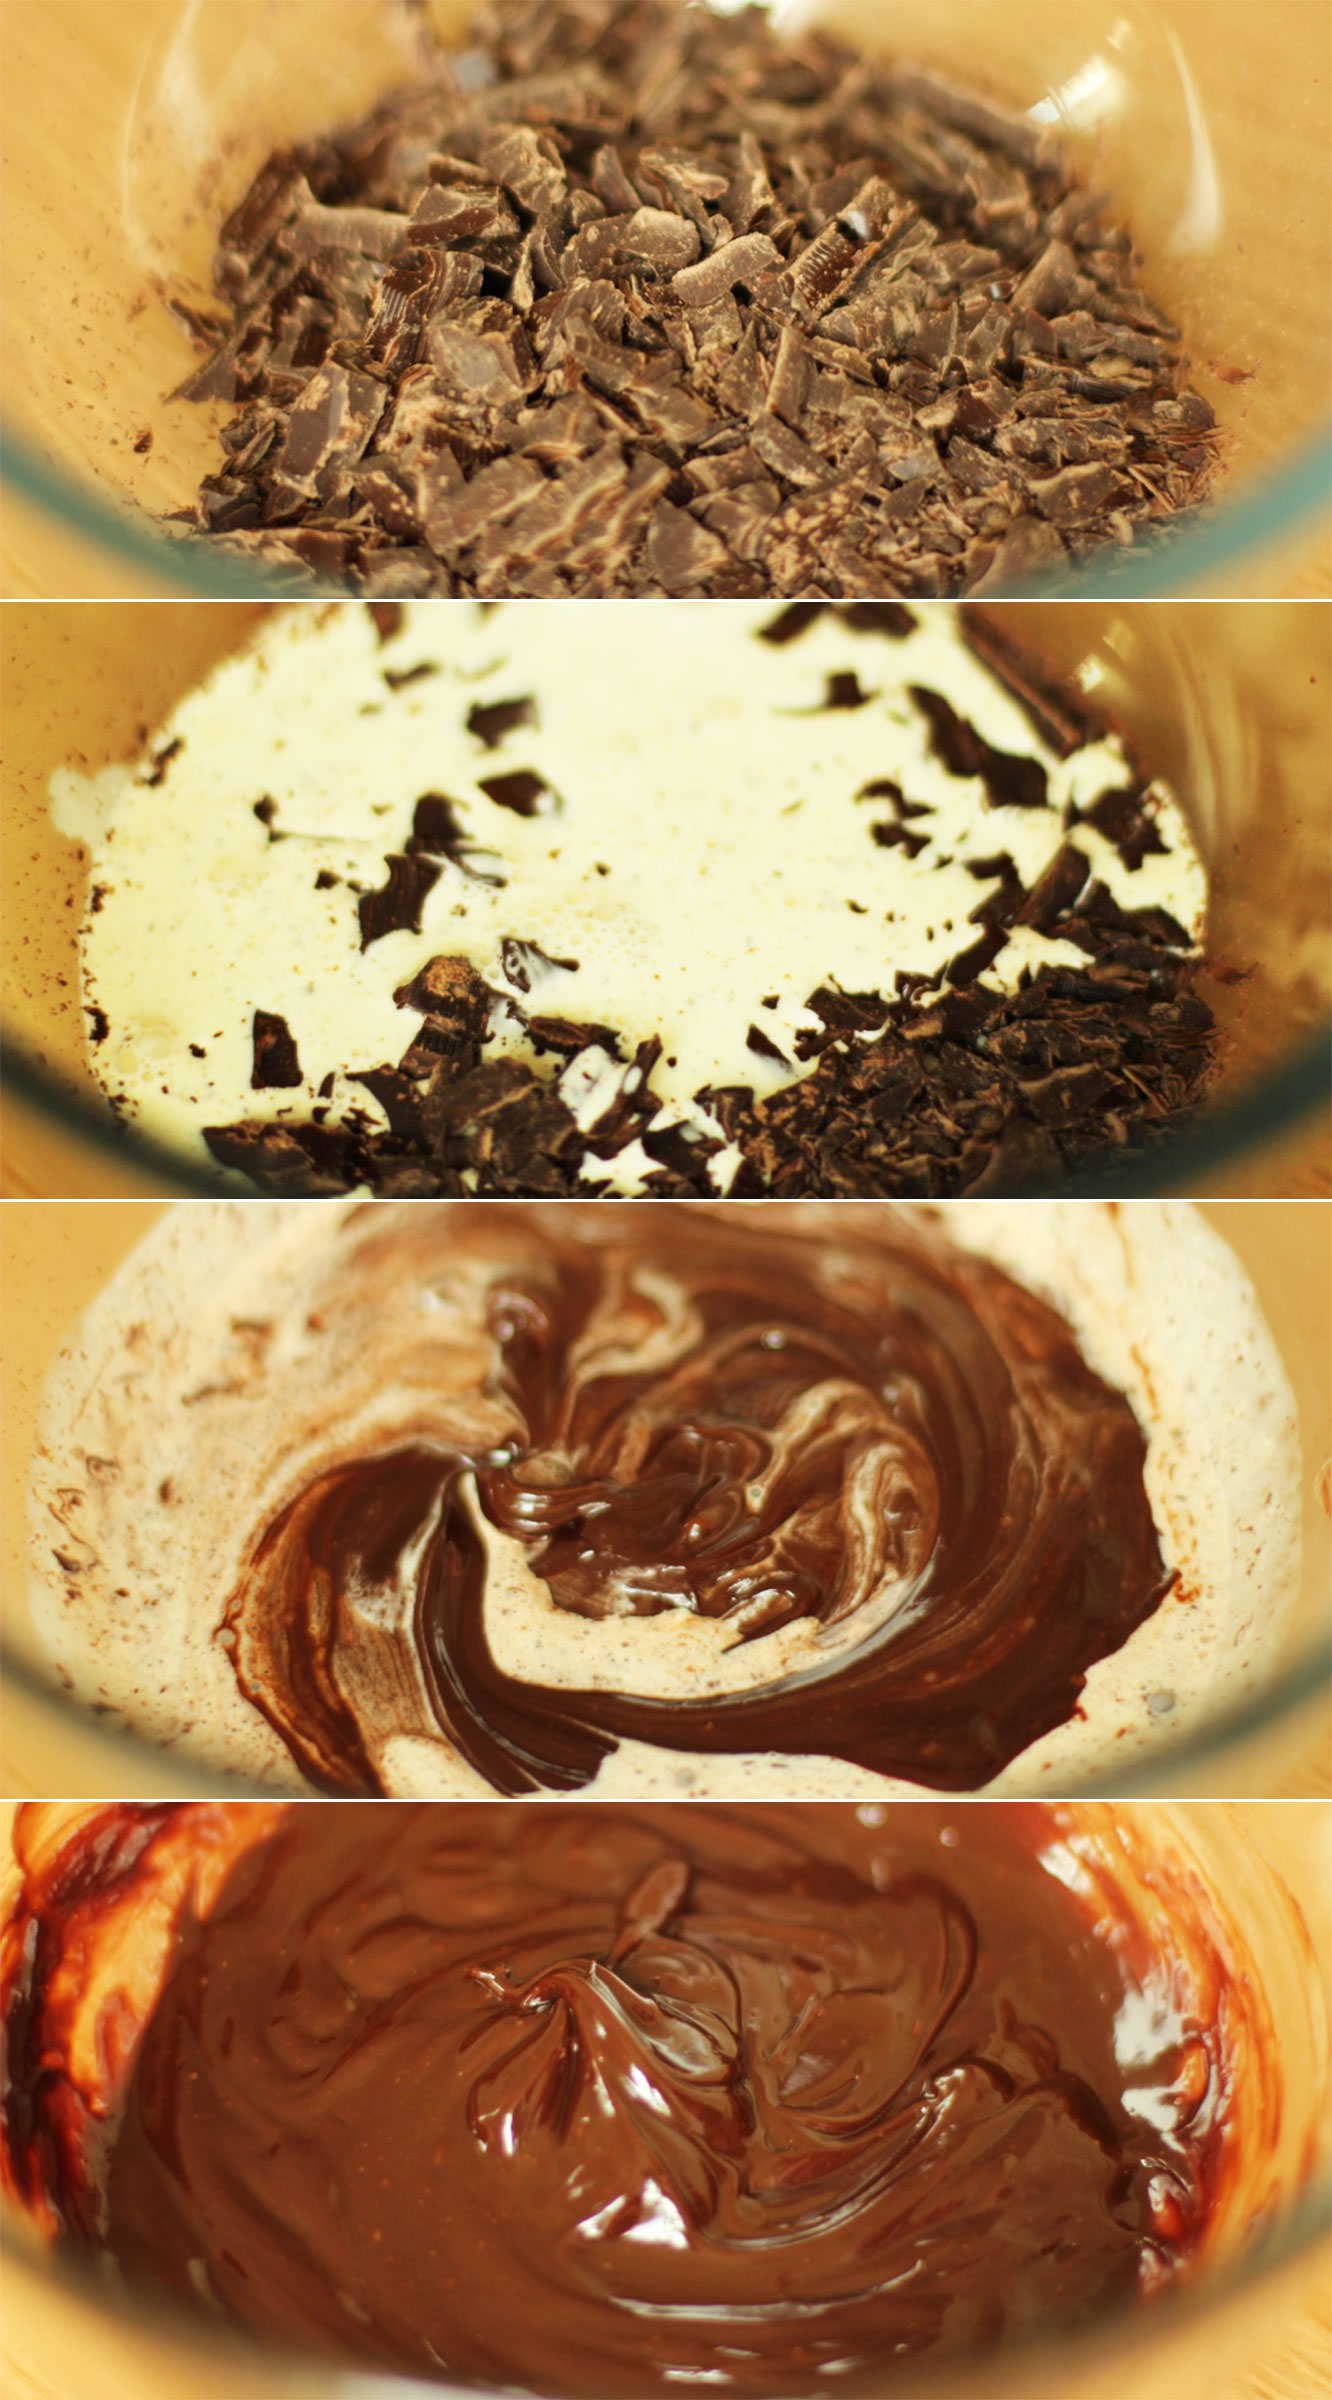
While the cakes are cooling make the ganache.
Finely chop the chocolate (or grate it if you’re super keen) and place in a clean bowl. Heat the cream in a saucepan. Do this slowly on a low heat, it burns quite easily.
The cream only needs to barely simmer before being poured over the chocolate and stirred until smooth.
The ganache won’t take long until it’s ready to pipe so only prepare it when the cakes and orange curd are nearly cooled.
You will know it’s ready when you drop a spoonful back into the bowl and it holds it’s shape.
Step ten
Cut a section of sponge out the middle with a small veg knife, and chop off the pointy bit, saving the lid.
Fill with curd and place the sponge lid back on.
Point a piping bag full of ganache straight down and squeeze. You may need to use the tip of the back to spread it out a little as you go.
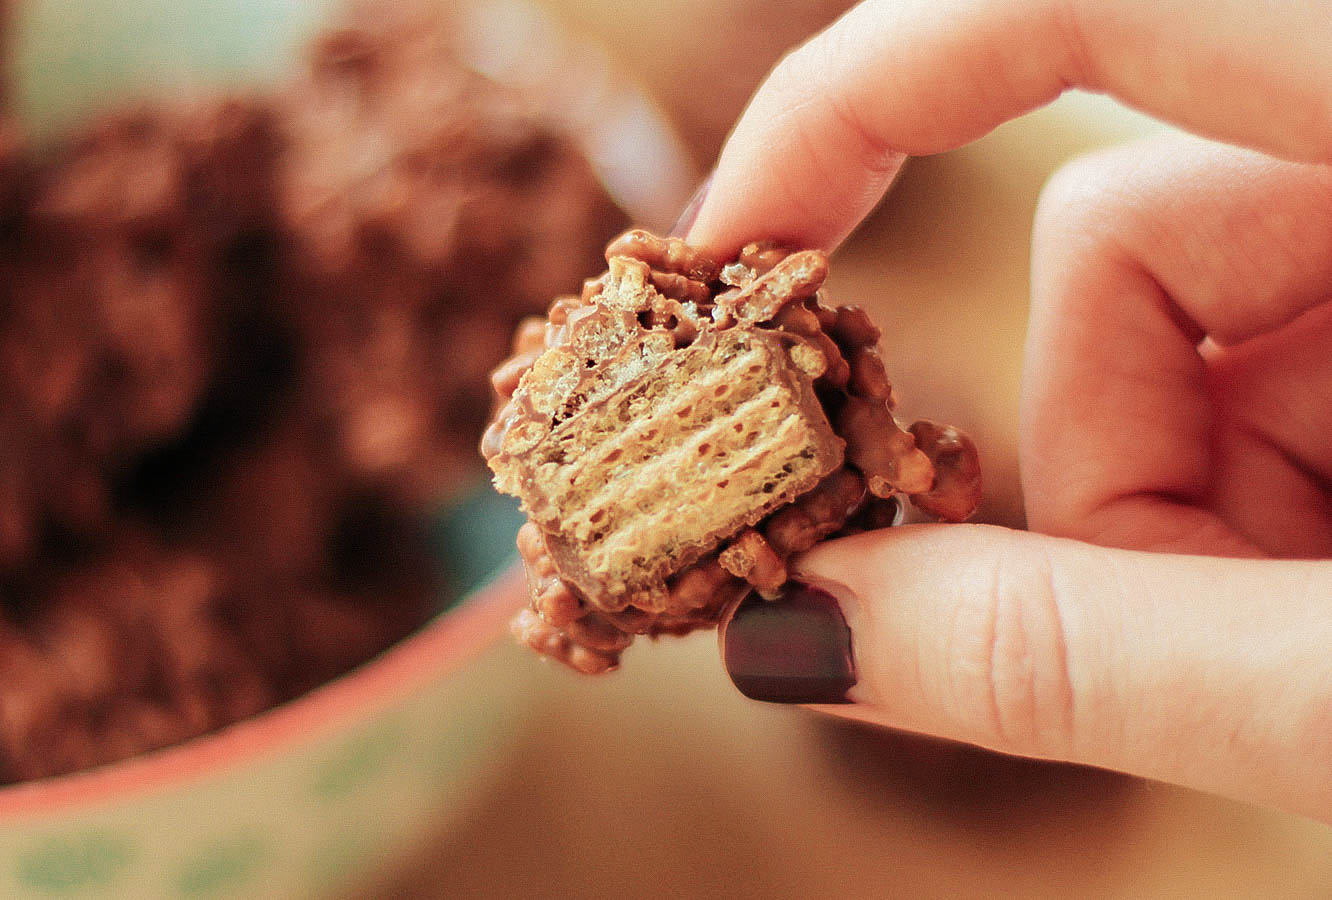
This week I went on my merry travels to visit some rather beloved friends. They’ve taken themselves off to Iceland to live for a while. Though I miss them a fair bit, it’s not such a terrible holiday destination for a person who loves photography, walking and general landscape (that’s me by the way).
We had ourselves a little road trip while I was there, naturally my stomach is my priority in all circumstances so we stocked up nicely in the snacks department. Having the luxury of doing none of the driving (Iceland is kinda wild, and my driving leaves a little to be desired), meant that I had plenty of time to consume, and became totally addicted to Hraun. Pronounced something along the lines of hhhhruin, these little guys are something I might have passed by if shopping alone, but are pretty darn yummy. I also saw a box at the airport called ‘Icelandic Mountain Bars’, which is significantly easier to say.
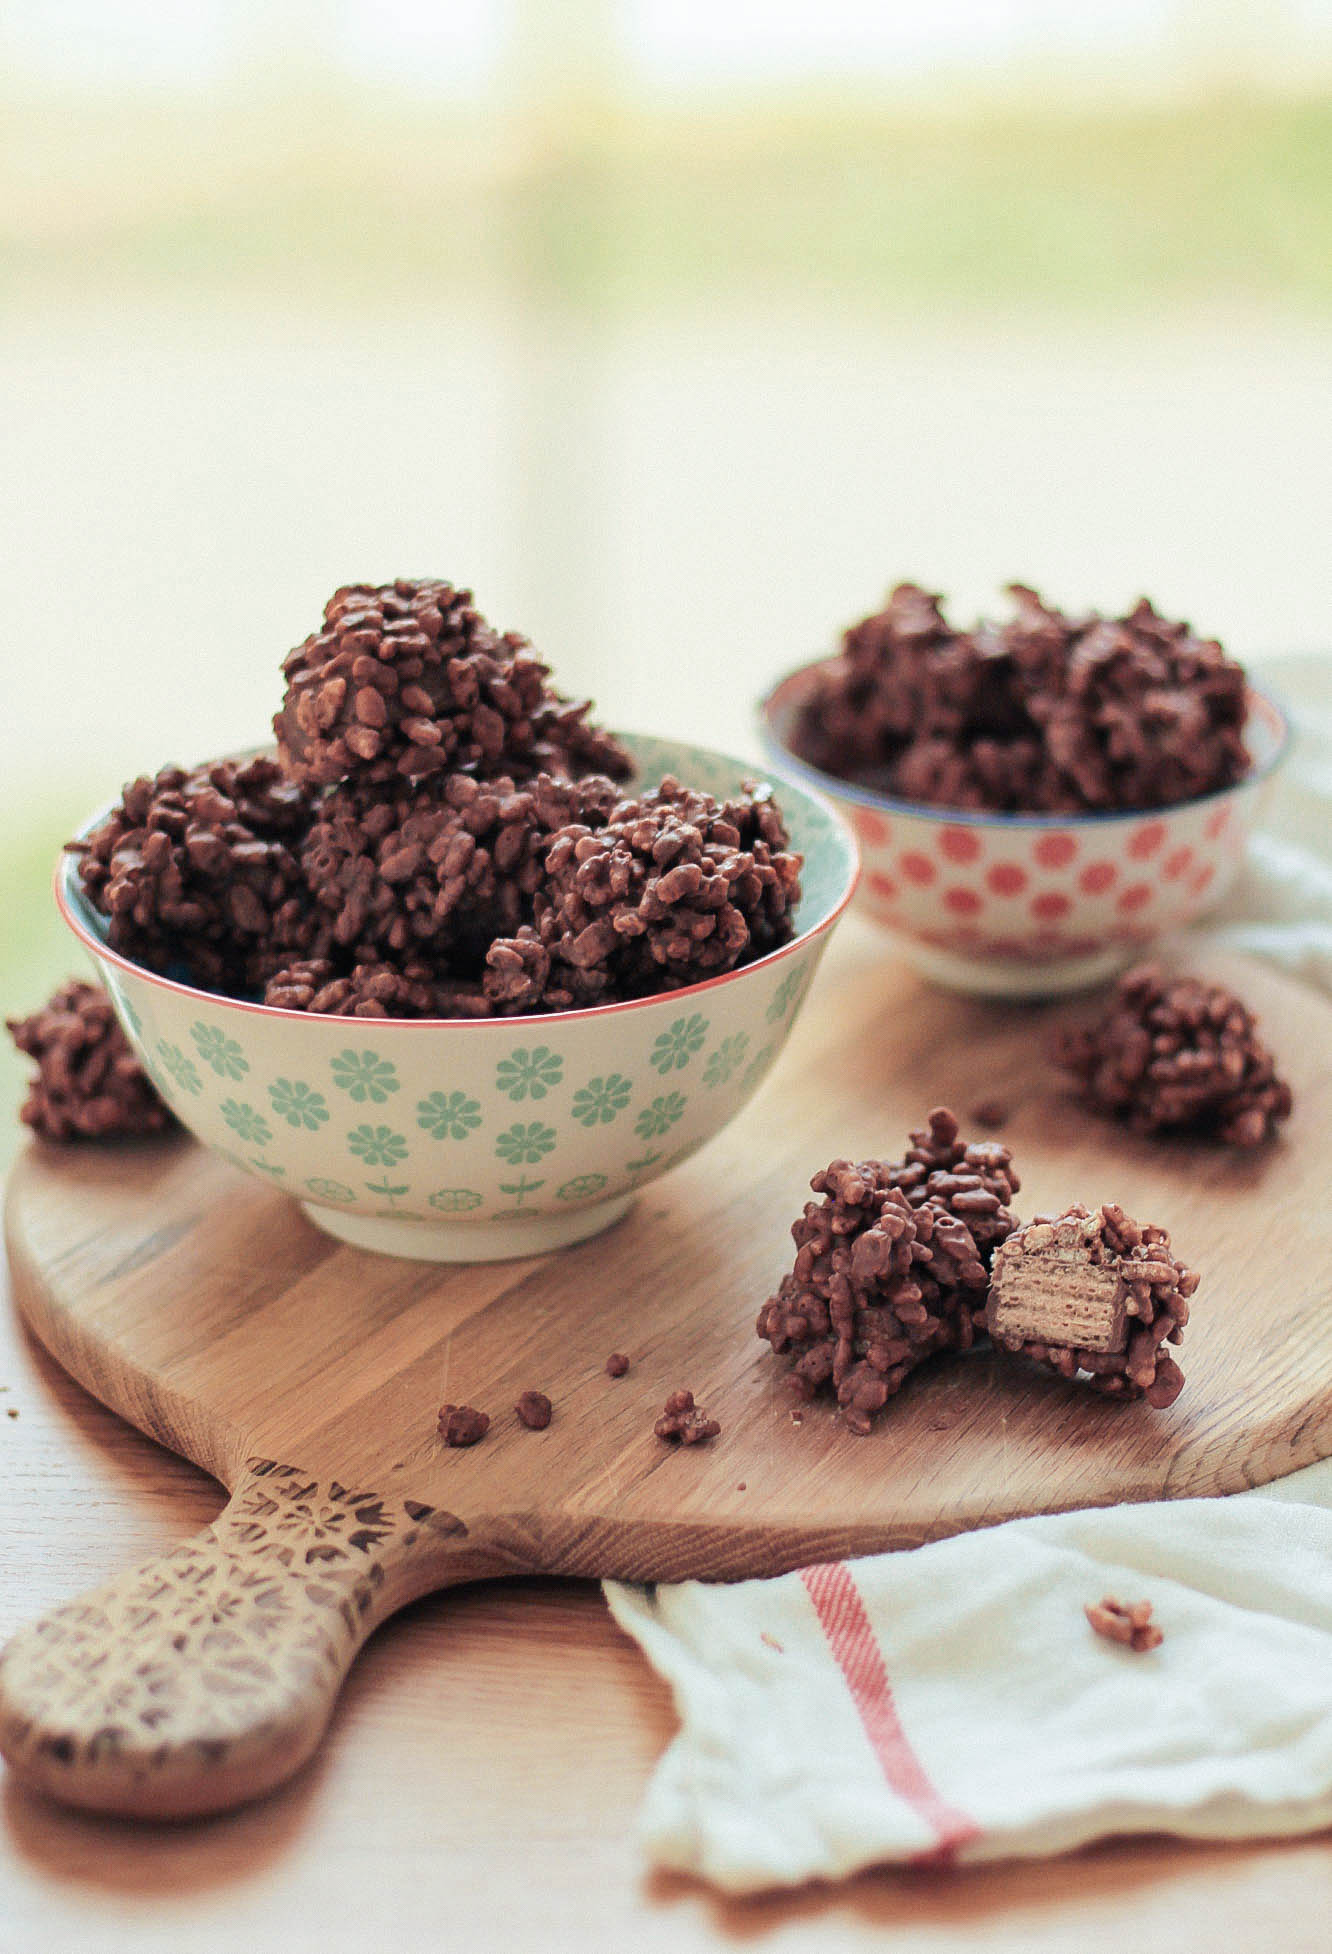
So to give you (me) a break from all that two tiered chocolate cake making you’ve (I’ve) been doing, here’s my recreation of my new favourite treat.
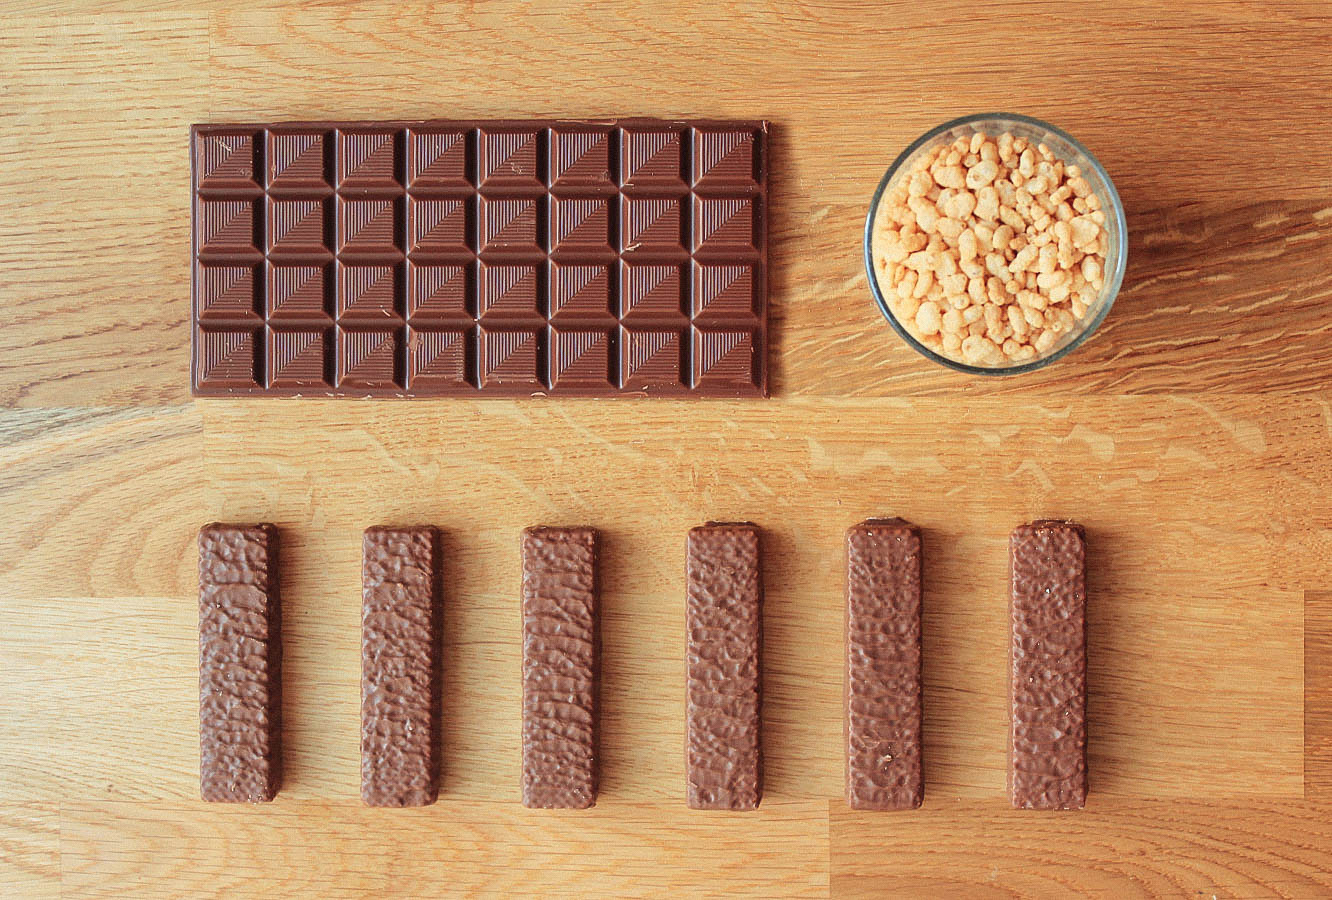
You will need
2 cups rice puff cereal
200g/7 oz milk chocolate
8 chocolate covered wafers (I used Blue Ribands)
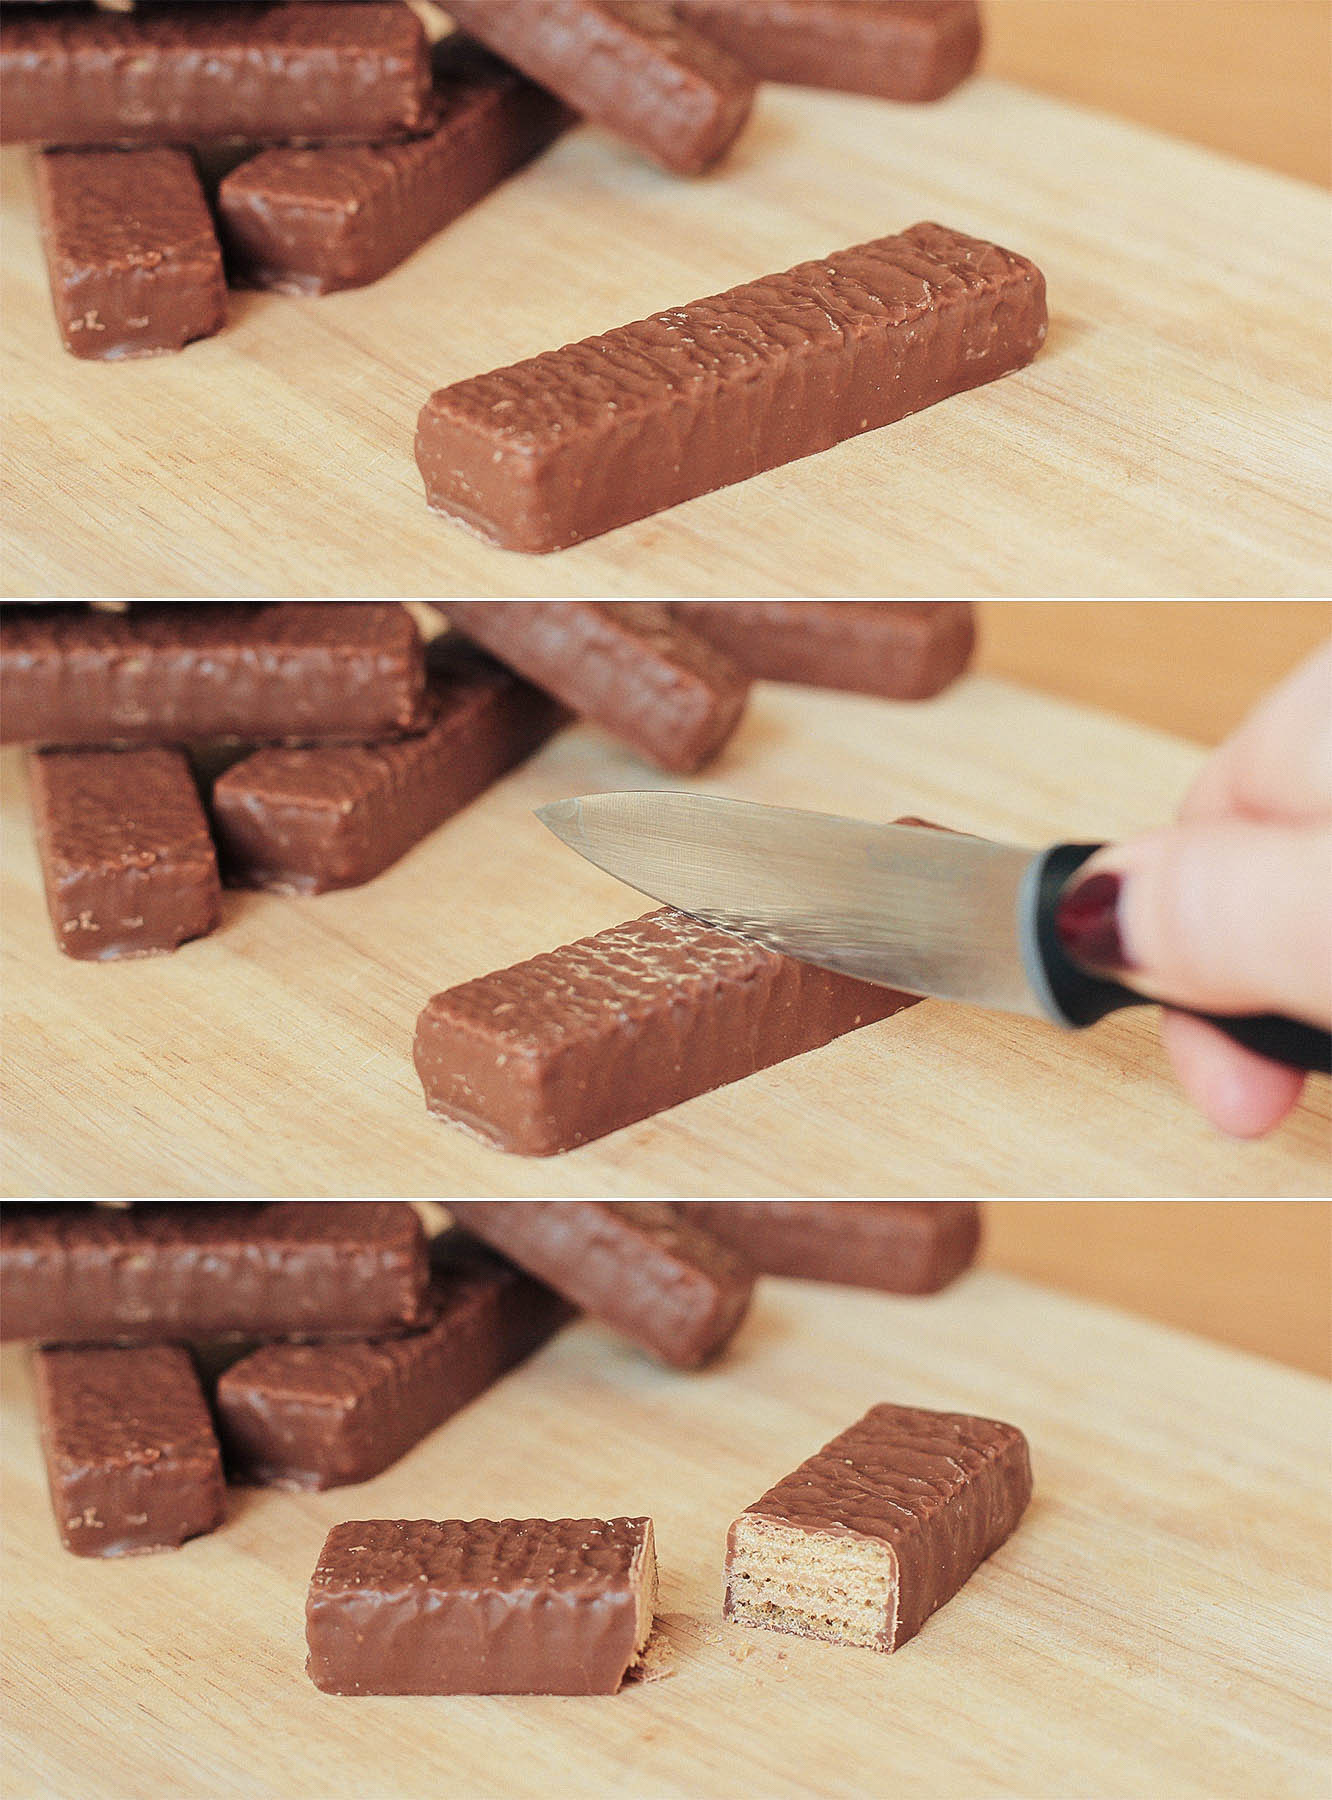
Step one
Cut the wafers in half.
Not entirely necessary, you could just make bigger ones, but this way you get to eat a higher number.
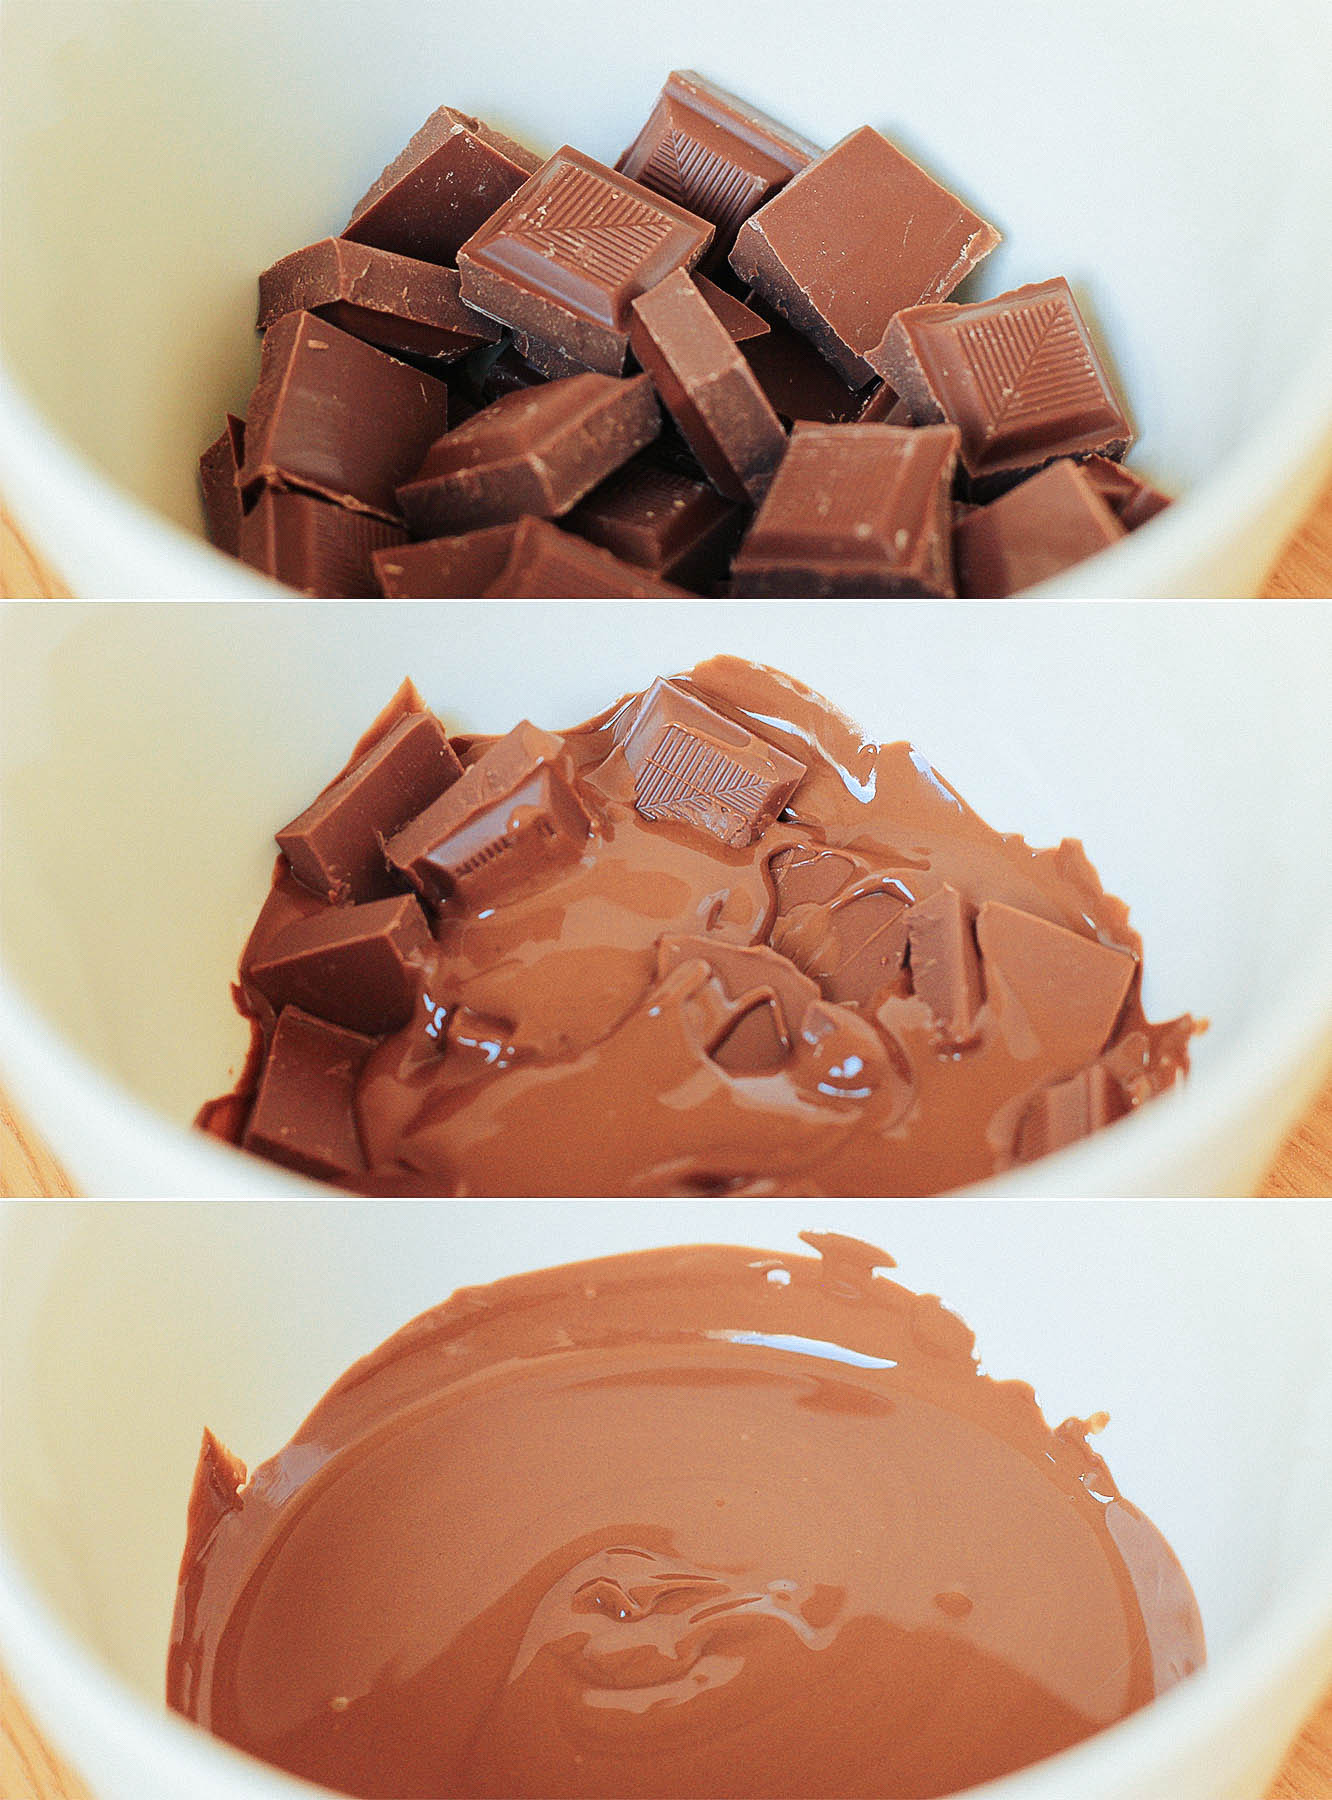
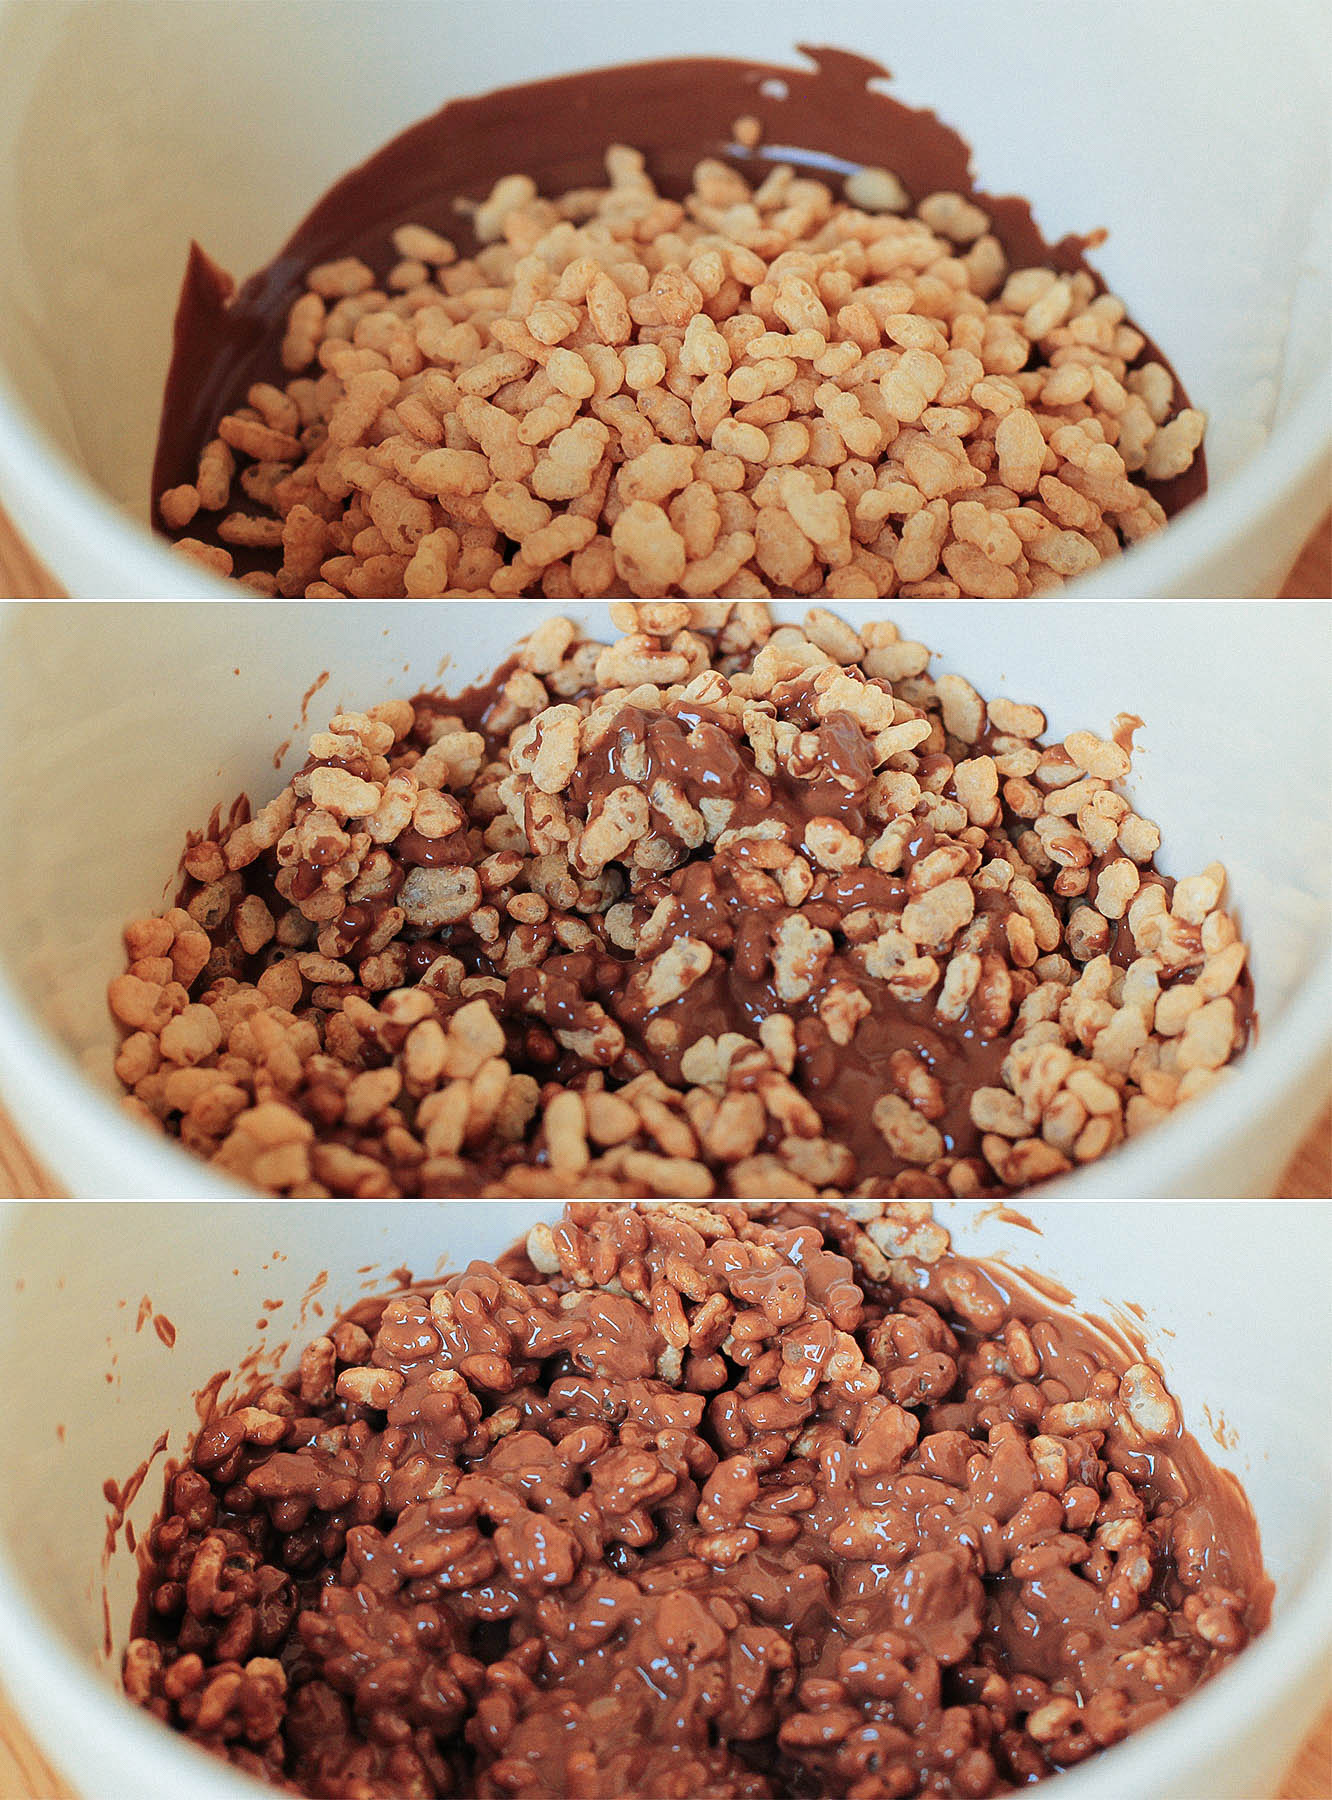
Step two
Melt the chocolate in the microwave, start off with about 40 seconds and then use 10-20 second intervals to avoid burning it.
Step three
Add the rice crispies/rice puffs to the chocolate
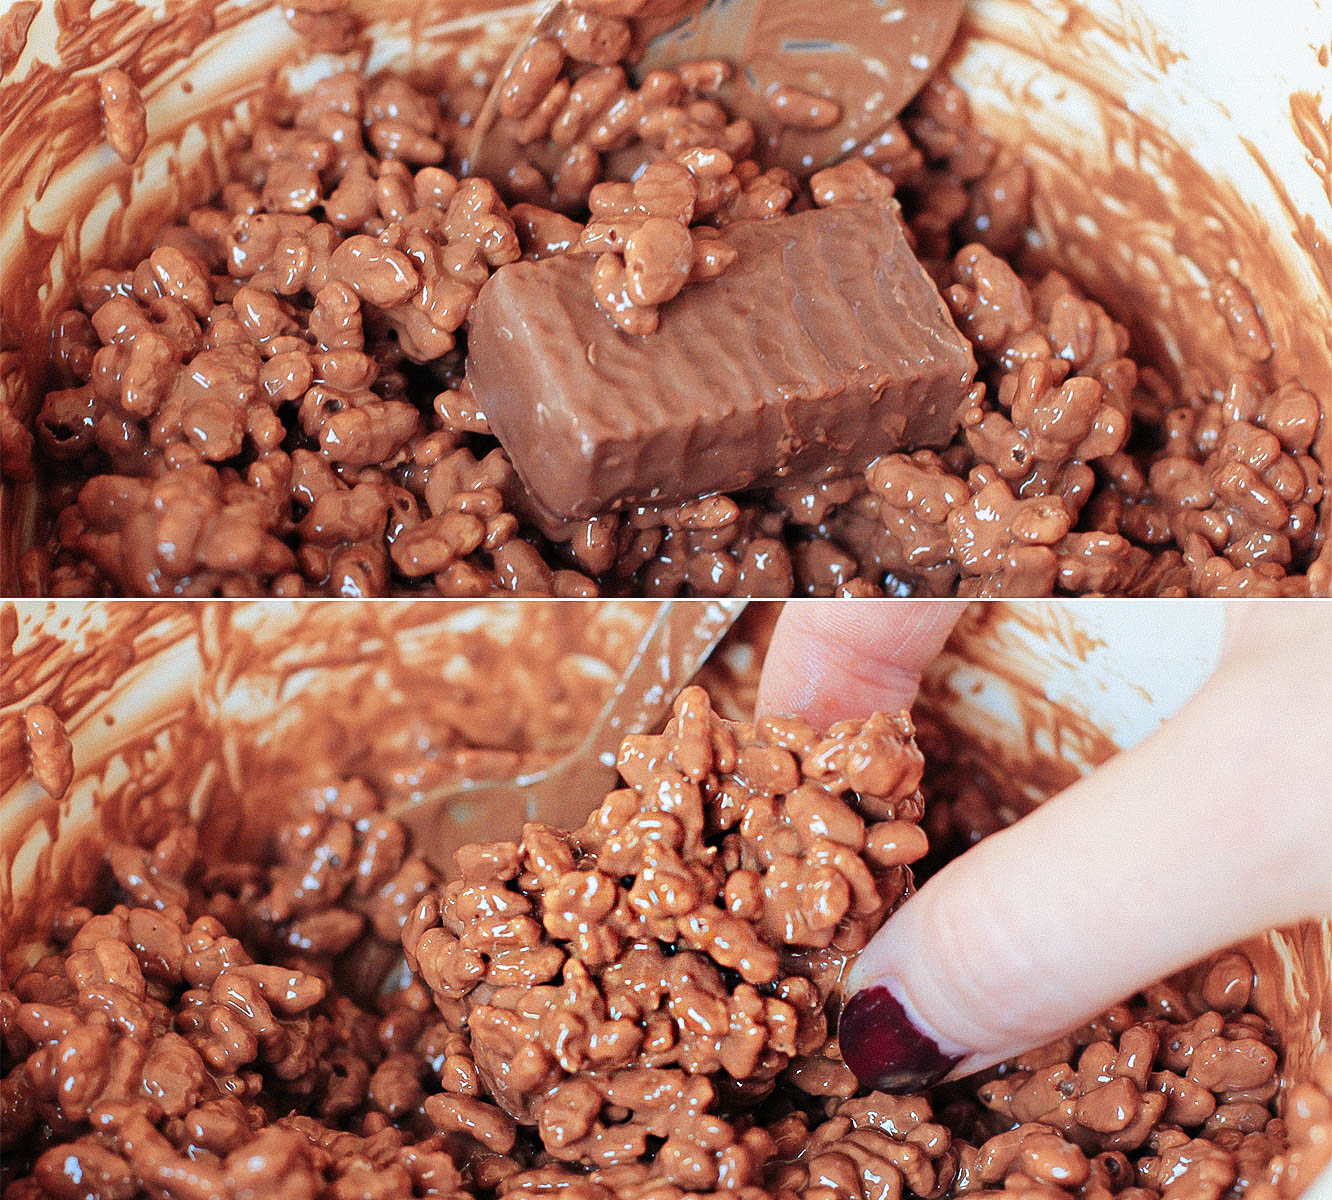
Step four
Coat the wafers in puffs. Some of them took a bit of convincing for the mixture to stick, I’d imagine laying them on greaseproof paper and spoon the rice puffs and chocolate over the top would work too.
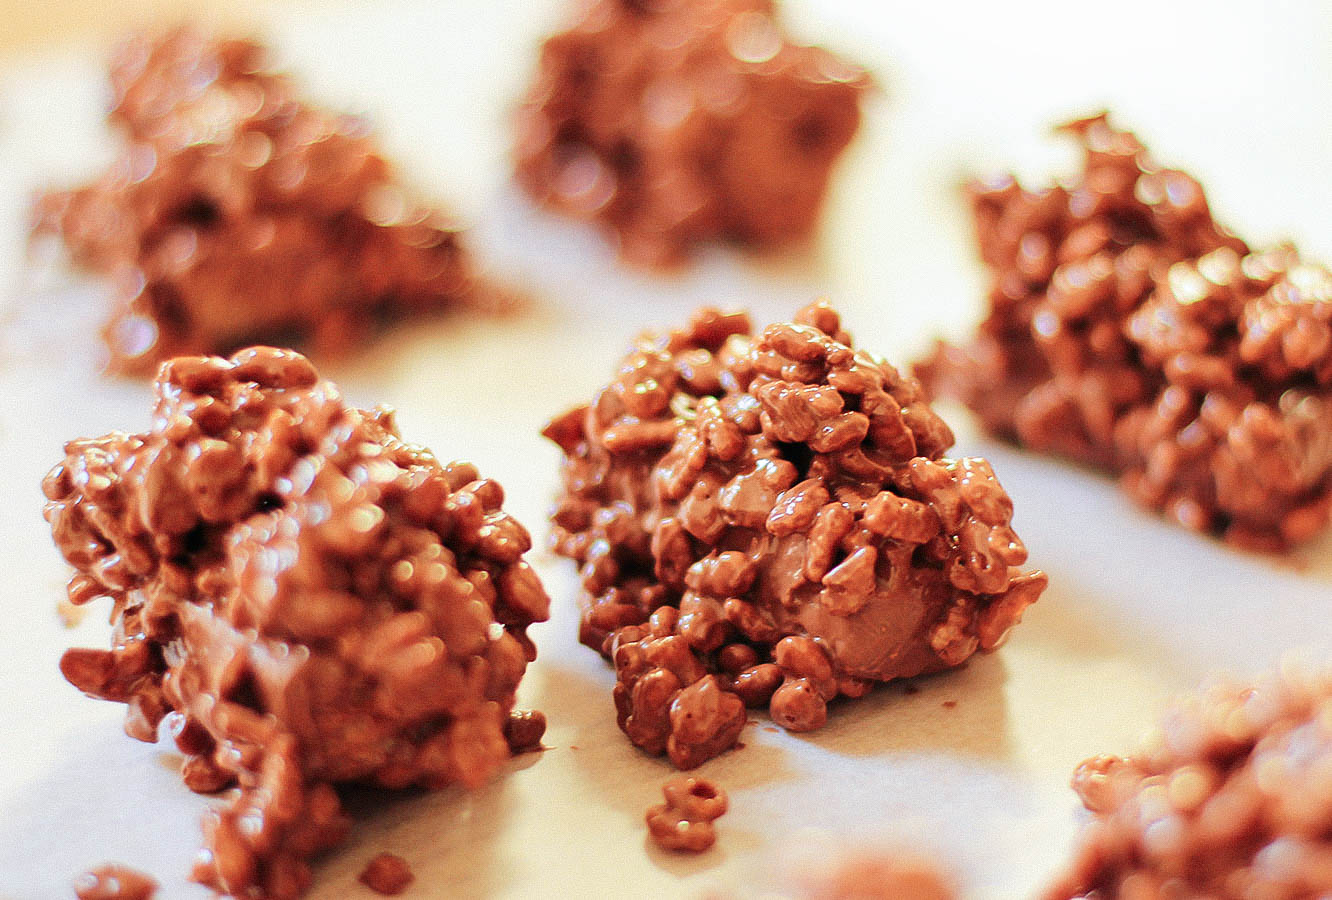
Step five
Pop onto greaseproof paper and leave to set. Place in the fridge after about 20 minutes.
A couple of weeks ago one of my favourite colleagues had a special birthday, so for a special birthday we needed a special cake.
I had only attempted one two tier cake before and had never made the chocolate collar you’ll see below. Sure this cake was a bit more effort than your average victoria sponge, but if you’ve got a few hours and a bit of patience and determination this is very much possible.
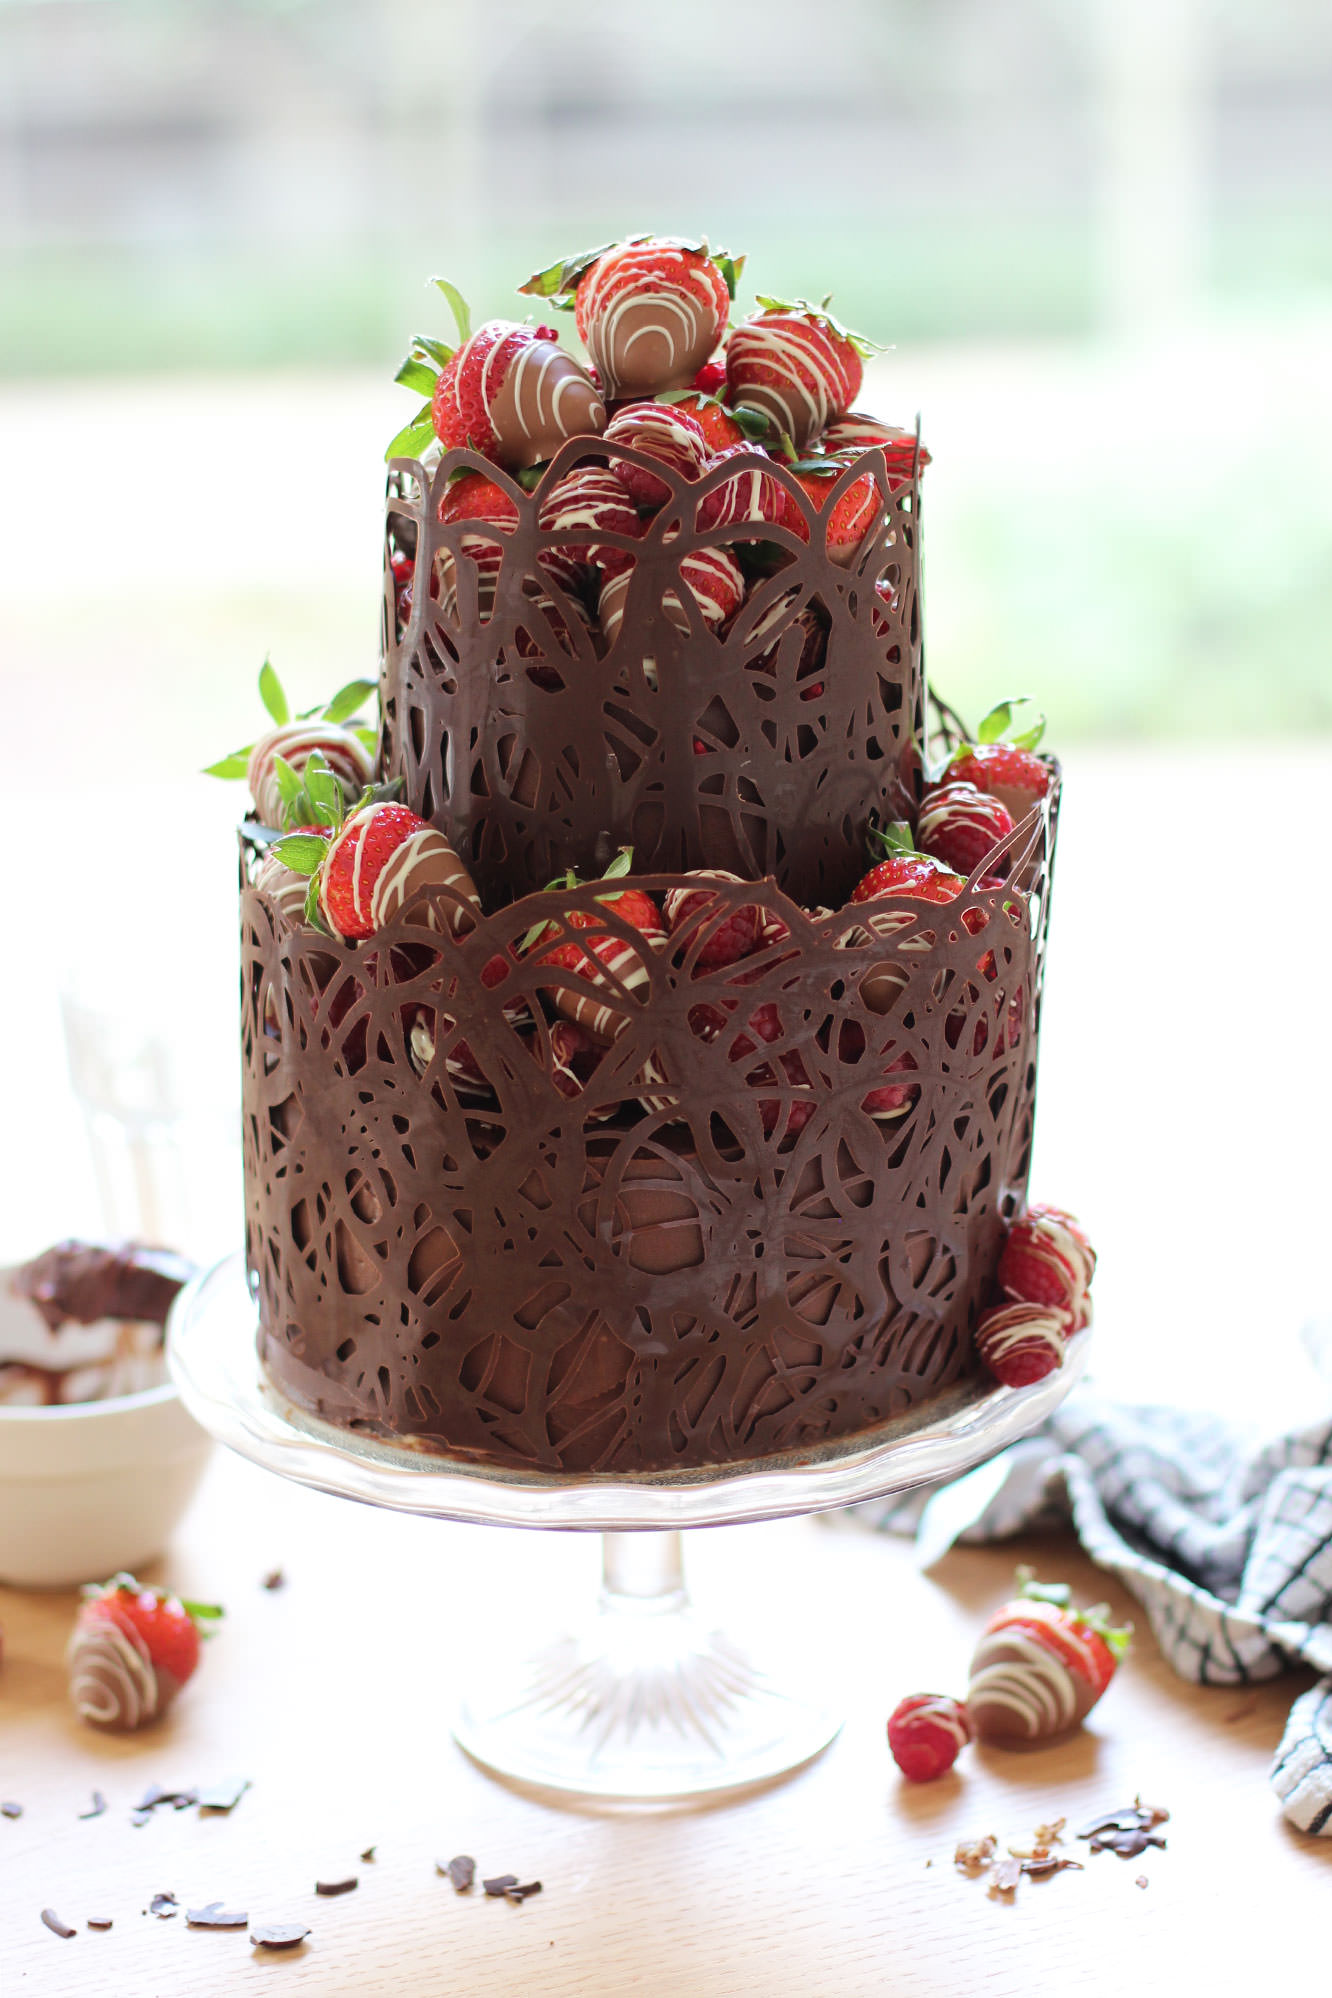
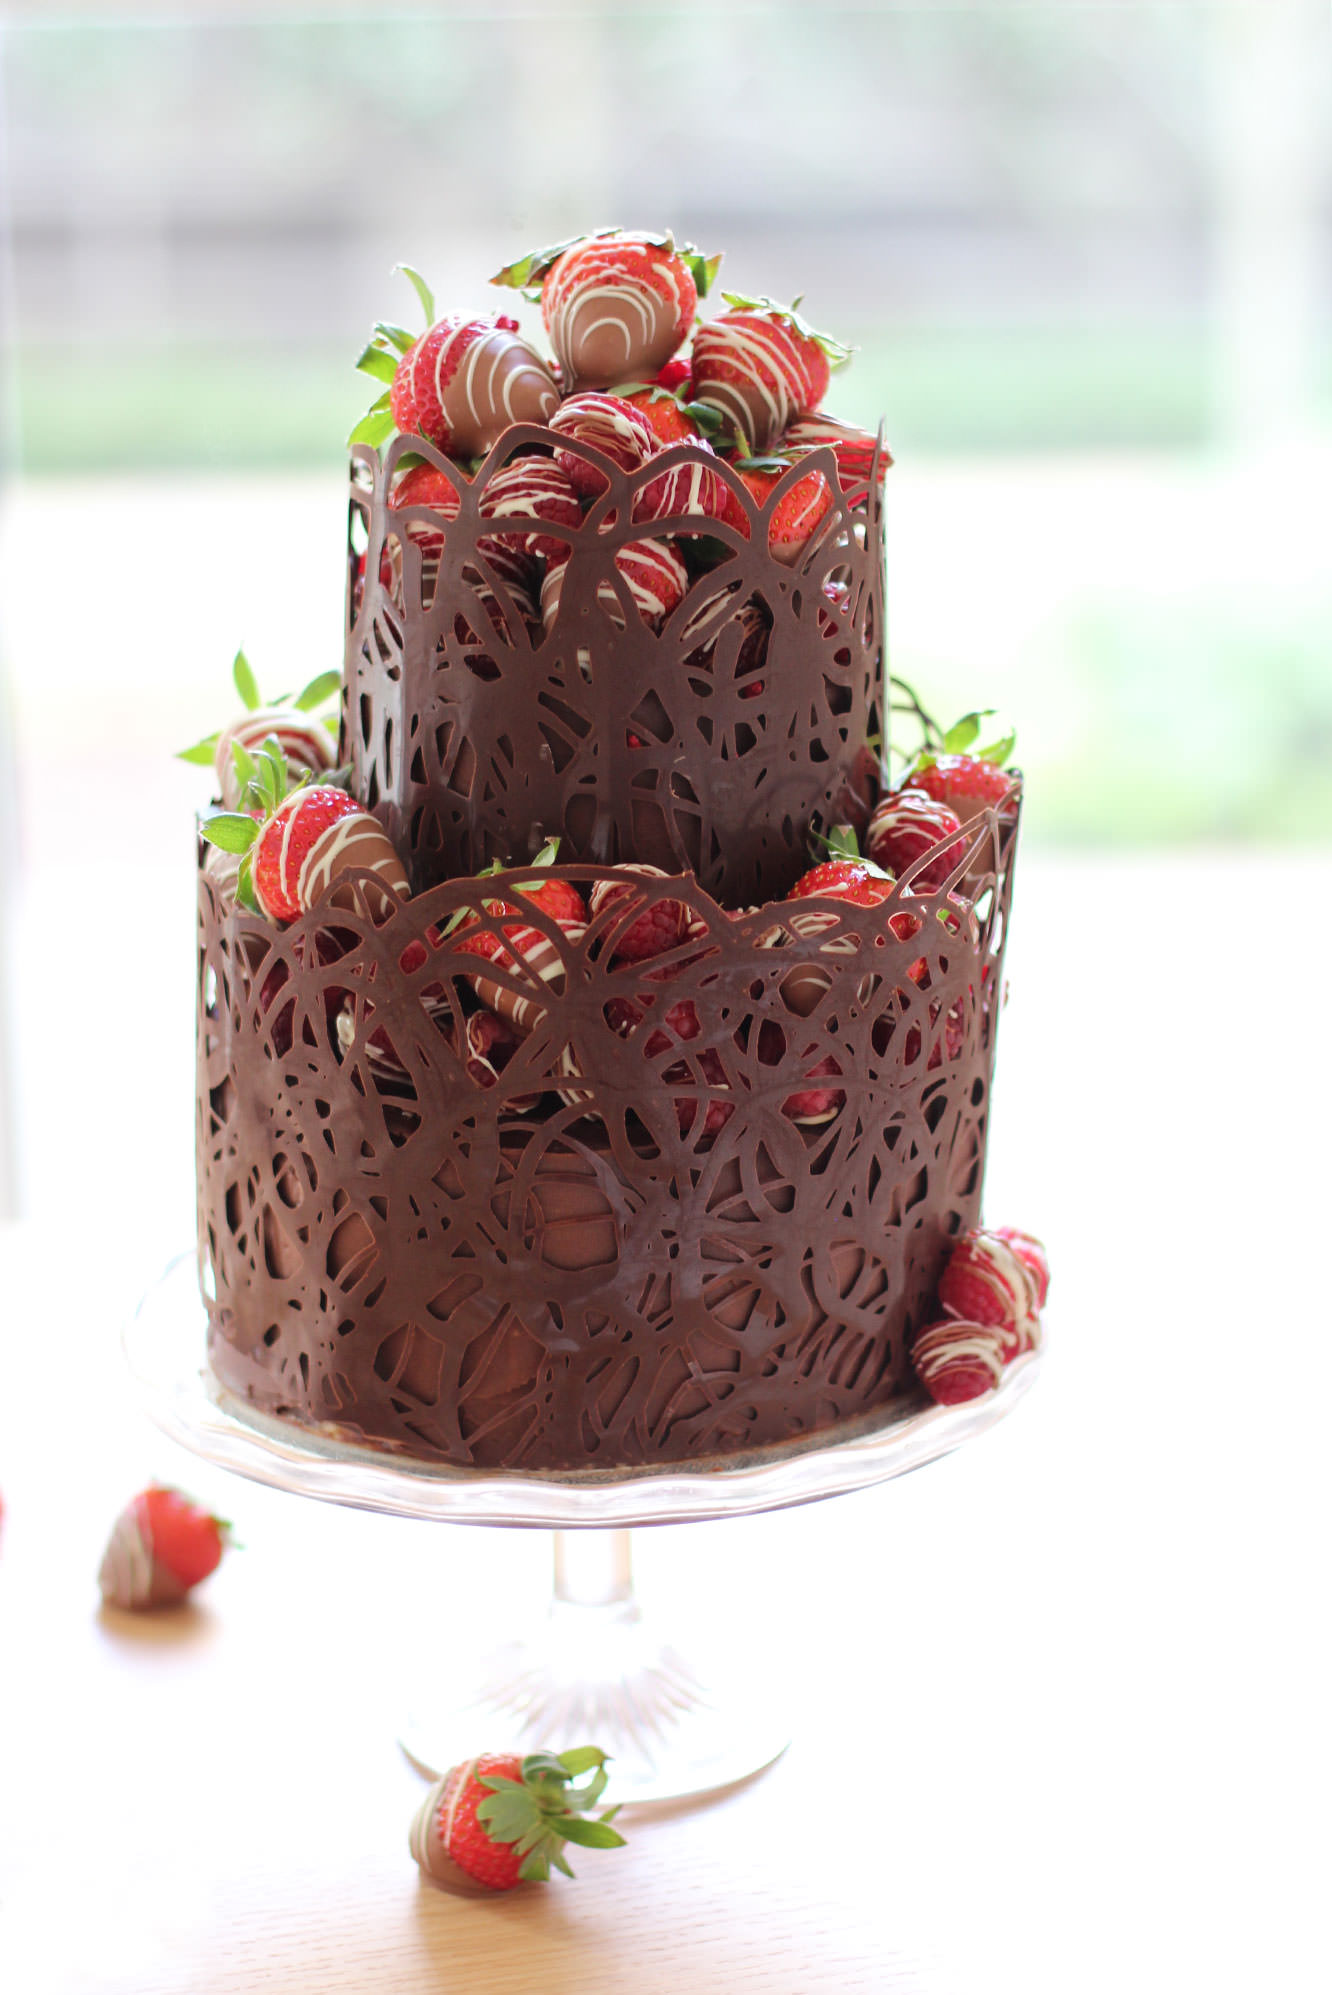
I present to you a full step-by-step recipe for a two tiered chocolate fudge cake with salted caramel buttercream, decorated with a dark chocolate collar and chocolate dipped berries. I just wanted to say that out loud. Look away if you don’t like chocolate. This won’t please you.
Happy birthday Jane!
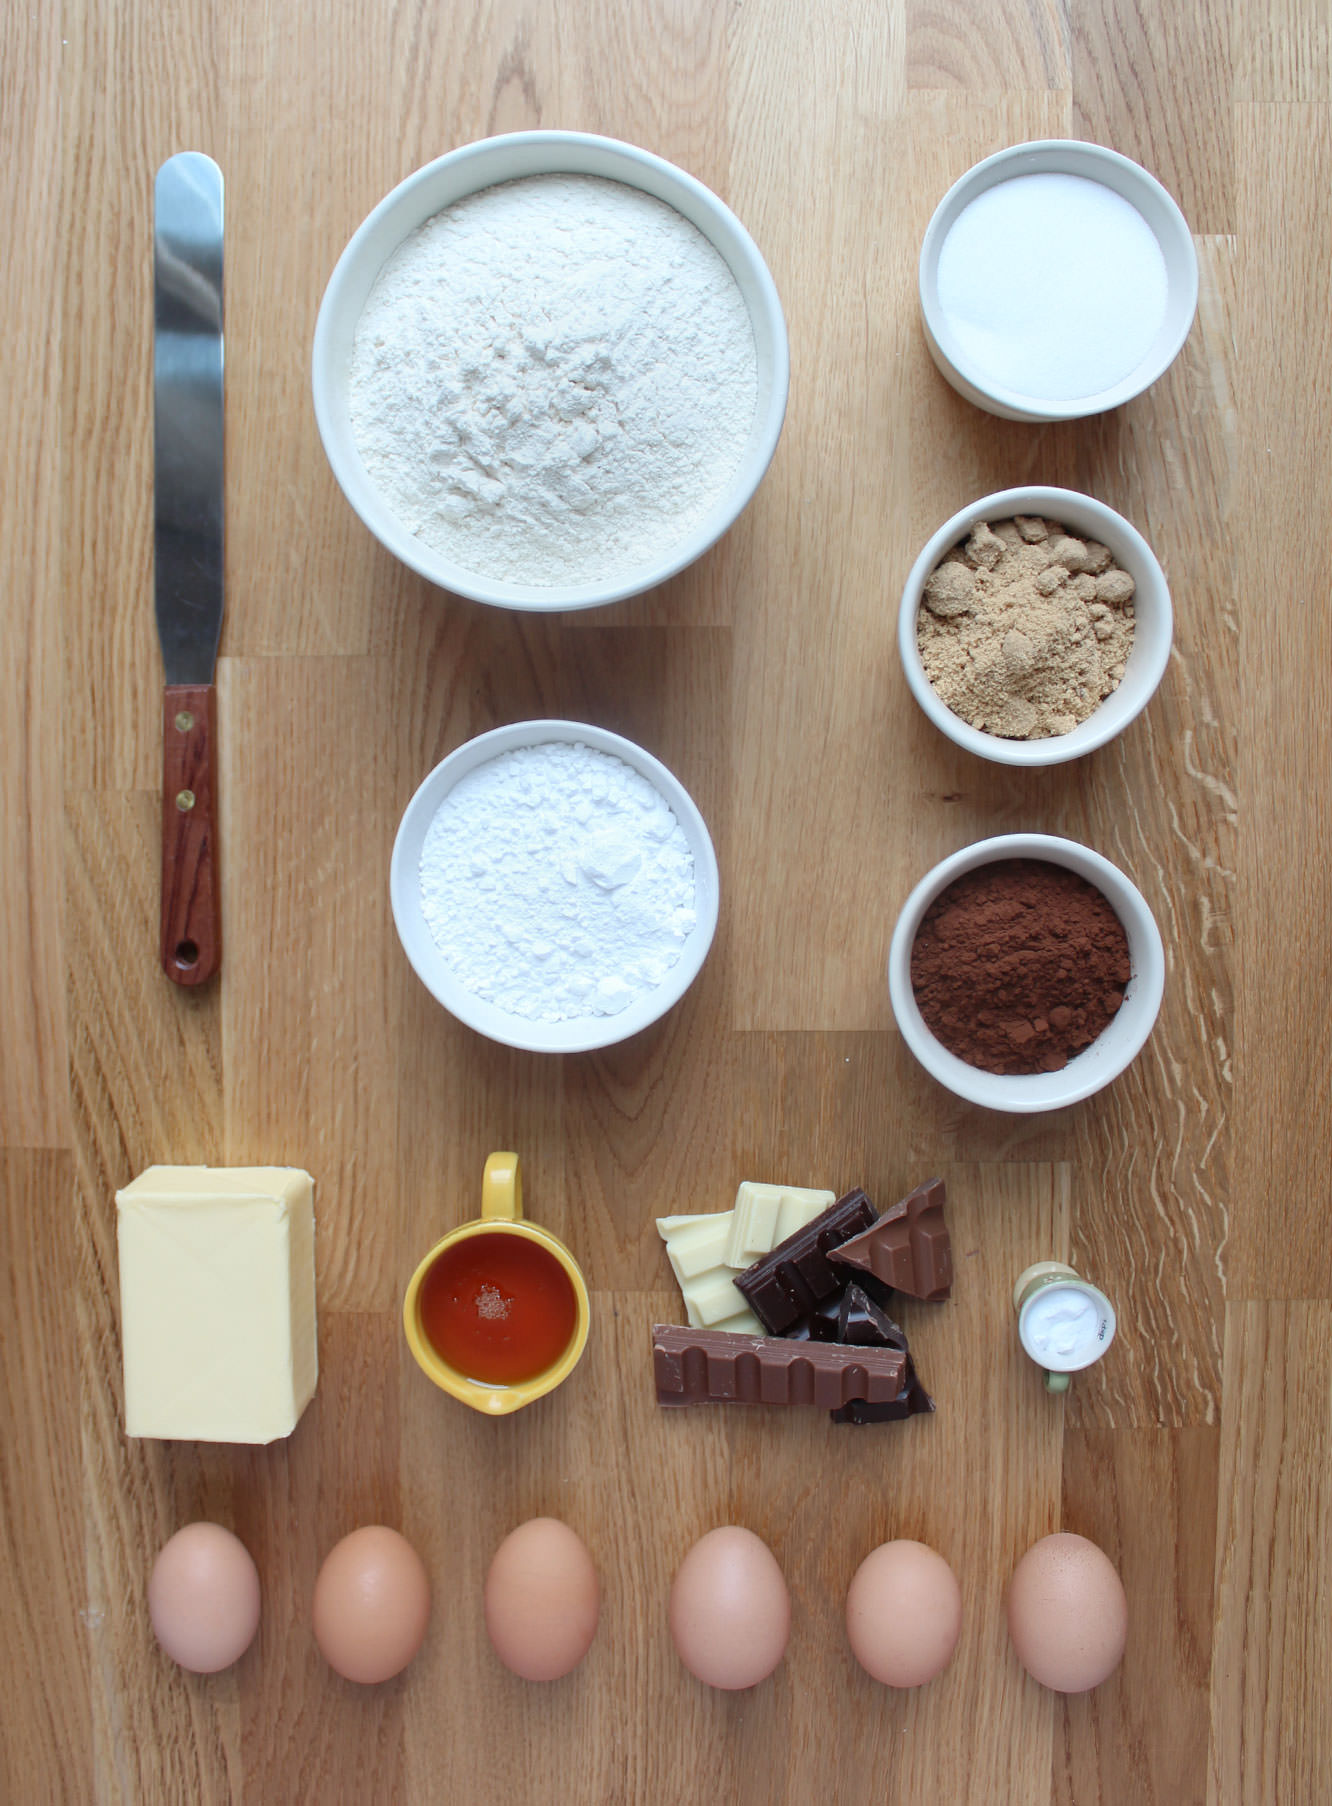
You will need
For the cake:
380g/13.5 oz caster sugar
380g/13.5 oz unsalted butter or margarine (I use stork)
325g/11.5 oz self raising flour
6 eggs
55g/2 oz cocoa powder
1 1/2 tsp bicarbonate of soda
For the salted caramel buttercream:
400g/14 oz icing sugar
250g/9 oz butter
80g/3 oz soft brown sugar
100ml/3.5 fl oz double cream
2 tbsp golden syrup
2 tsp salt
For the chocolate fudge icing:
225g/8 oz unsalted butter
200g/7 oz plain chocolate
100g/3.5 oz milk chocolate
2 tbsp golden syrup
200ml/6.5 fl oz double cream
For the decorations:
1 packet strawberries (sorry I didn’t look at weight)
2 packets of raspberries (about 500g)
200g/7 oz plain chocolate
200g/7 oz milk chocolate
100g/3.5 oz white chocolate
(for the chocolate amounts are the best approximates I can make, I bought a LOT of chocolate. I strongly recommend Sainbury’s Belgian cooking chocolate if you are in the UK, definitely do not buy that scot block stuff)
Other:
Cake tin bottom tier – 1 x 7 inch (3.5 inches deep)
Cake tin top tier – 2 x 5 inch (1.5 inches deep)
Cake boards – 1 x 8 inch, 1 x 5 inch
Sticks/straws for support. I used cake pop sticks, but wooden dowling or special cake making supports would be fine. Make sure they are at least 4 inches so you can cut them to size.
Palette knife
Sugar thermometer (not 100% essential but I recommend tempering the chocolate)
Cellophane
Piping bags
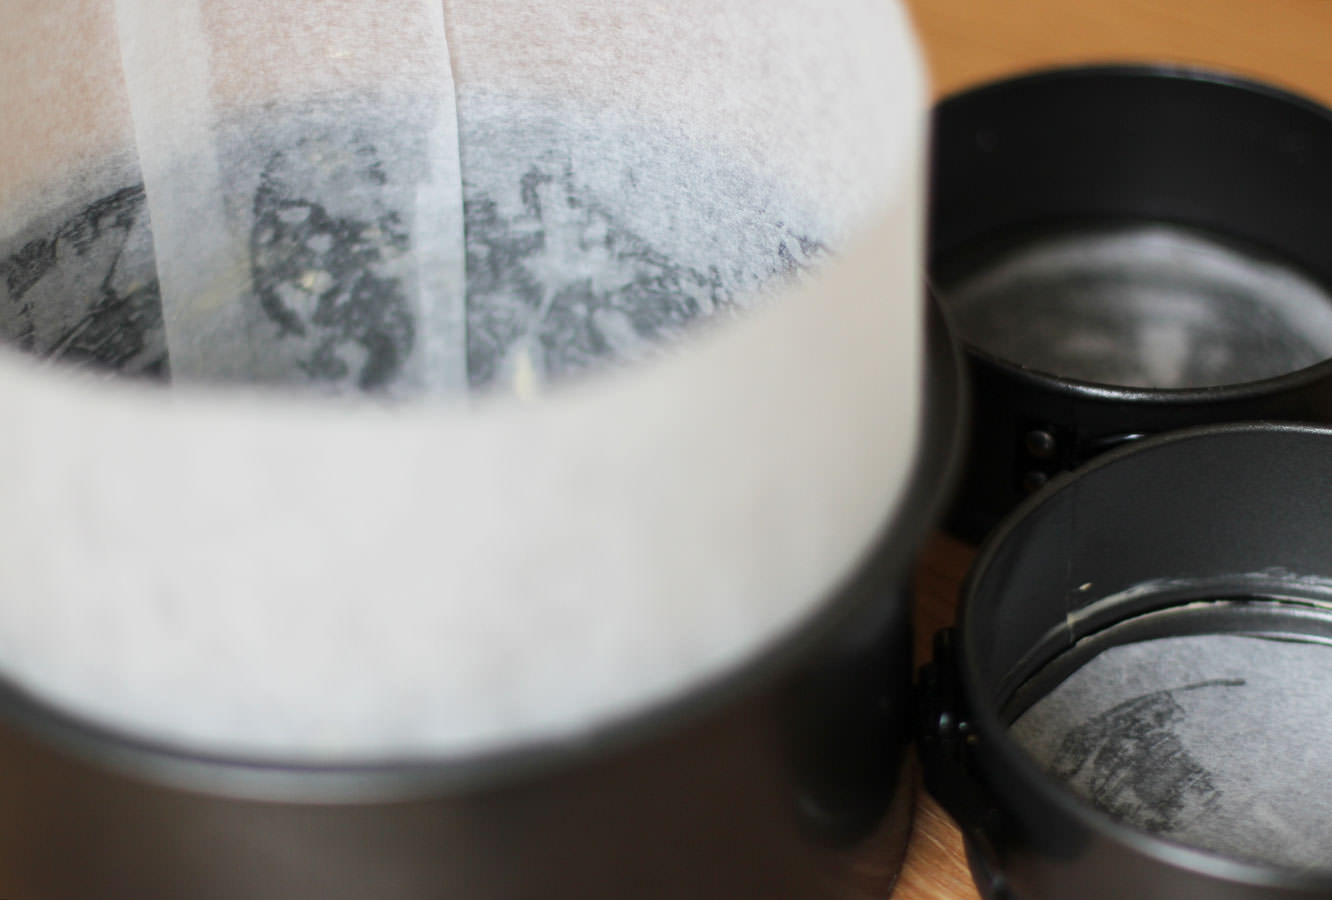
Step one
Grease and line the tins.
Note how I created a bit of a collar on the larger tin from greaseproof. This is to help stop the sides of the cake catching while the inside bakes as it’s essentially double the thickness.
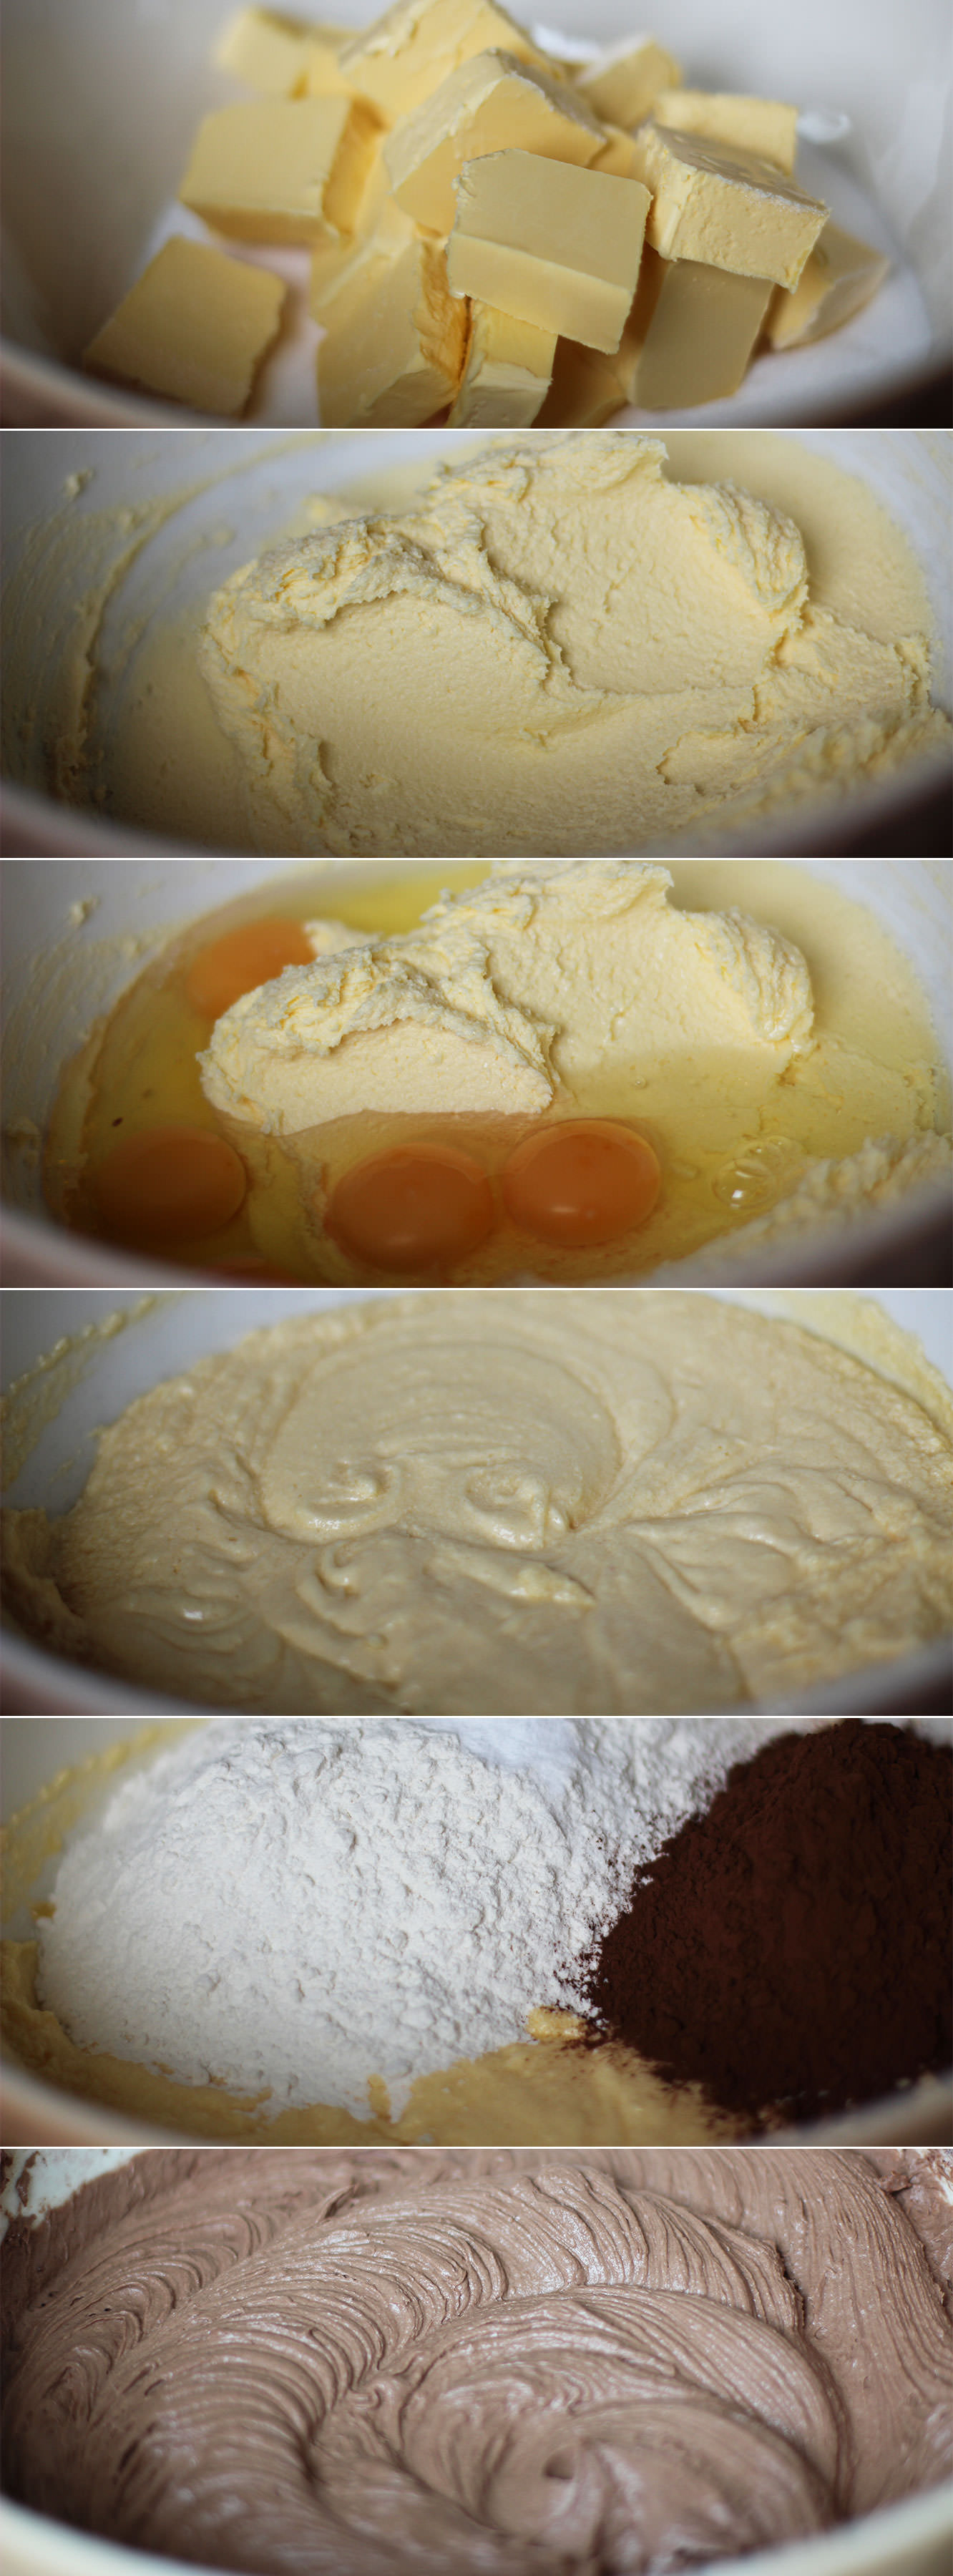
Step two
Whisk together the butter and sugar with an electric whisk, or a wooden spoon and some elbow grease, until smooth.
I used a block of stork for this, but I prefer the softer version you can get in a tub, you don’t have to wait for it to come to room temperature first that way. Margarine works just fine for cakes, I think it makes them fluffier.
You might want to use a tea towel over the bowl to avoid everything getting covered in sugar and butter.
Step three
Add all the eggs and whisk until combined.
Step four
In go the flour, bicarbonate of soda and cocoa powder.
Stir gently to start mixing the dry ingredients in first before turning the whisk on, you don’t want to choke on flour, that’s not a good way to go. It also means you will never get to eat this cake.
Step five
Divide into the tins.
Bake in the oven on 180C/350F/gas mark 4. This is where it’s a little tricky as the little cakes need a lot less time but you don’t want to open the oven much or your big cake will sink.
I say give the big cake about 30 minutes on its own, and then opening the door as little as possible add the smaller ones for the next 20 minutes. You will then need to test the cakes by sticking a sharp knife, or a cake tester if you have one. If this comes out clean (or with the odd crumb) you’re all good. If not give them another 5-10 minutes.
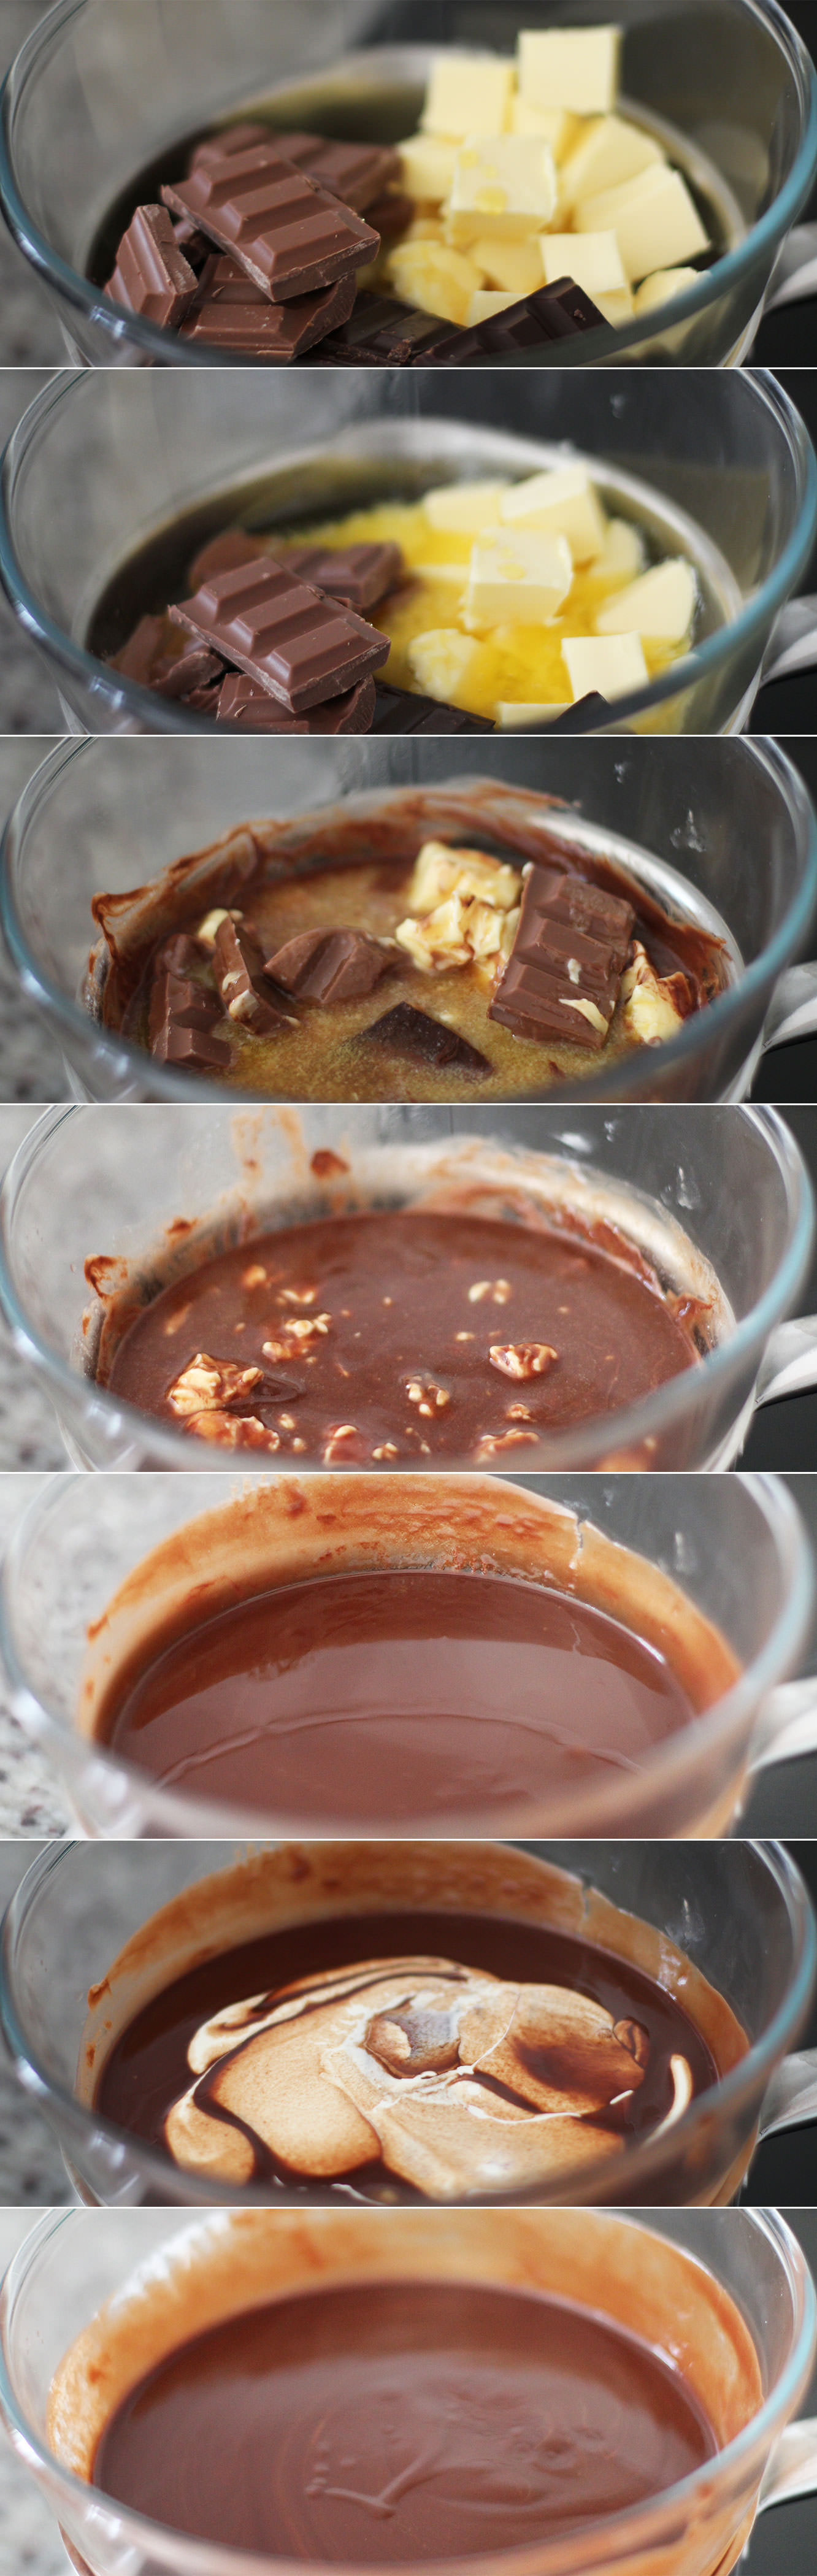
Step six
While the cakes are in the oven make the icing as both, but particularly the chocolate, need time to cool.
Place a heatproof bowl over a pan of barely simmering water. Add the butter (real butter this time), chocolate and golden syrup. Melt until smooth.
Remove from heat and stir in the cream quickly. Take the bowl off the pan and place somewhere cool and dry.
I don’t really suggest the fridge because you might forget it (like I did) and then you have to wait for it to warm up enough to spread. But that being said, the fridge is a viable option, just keep an eye on it.
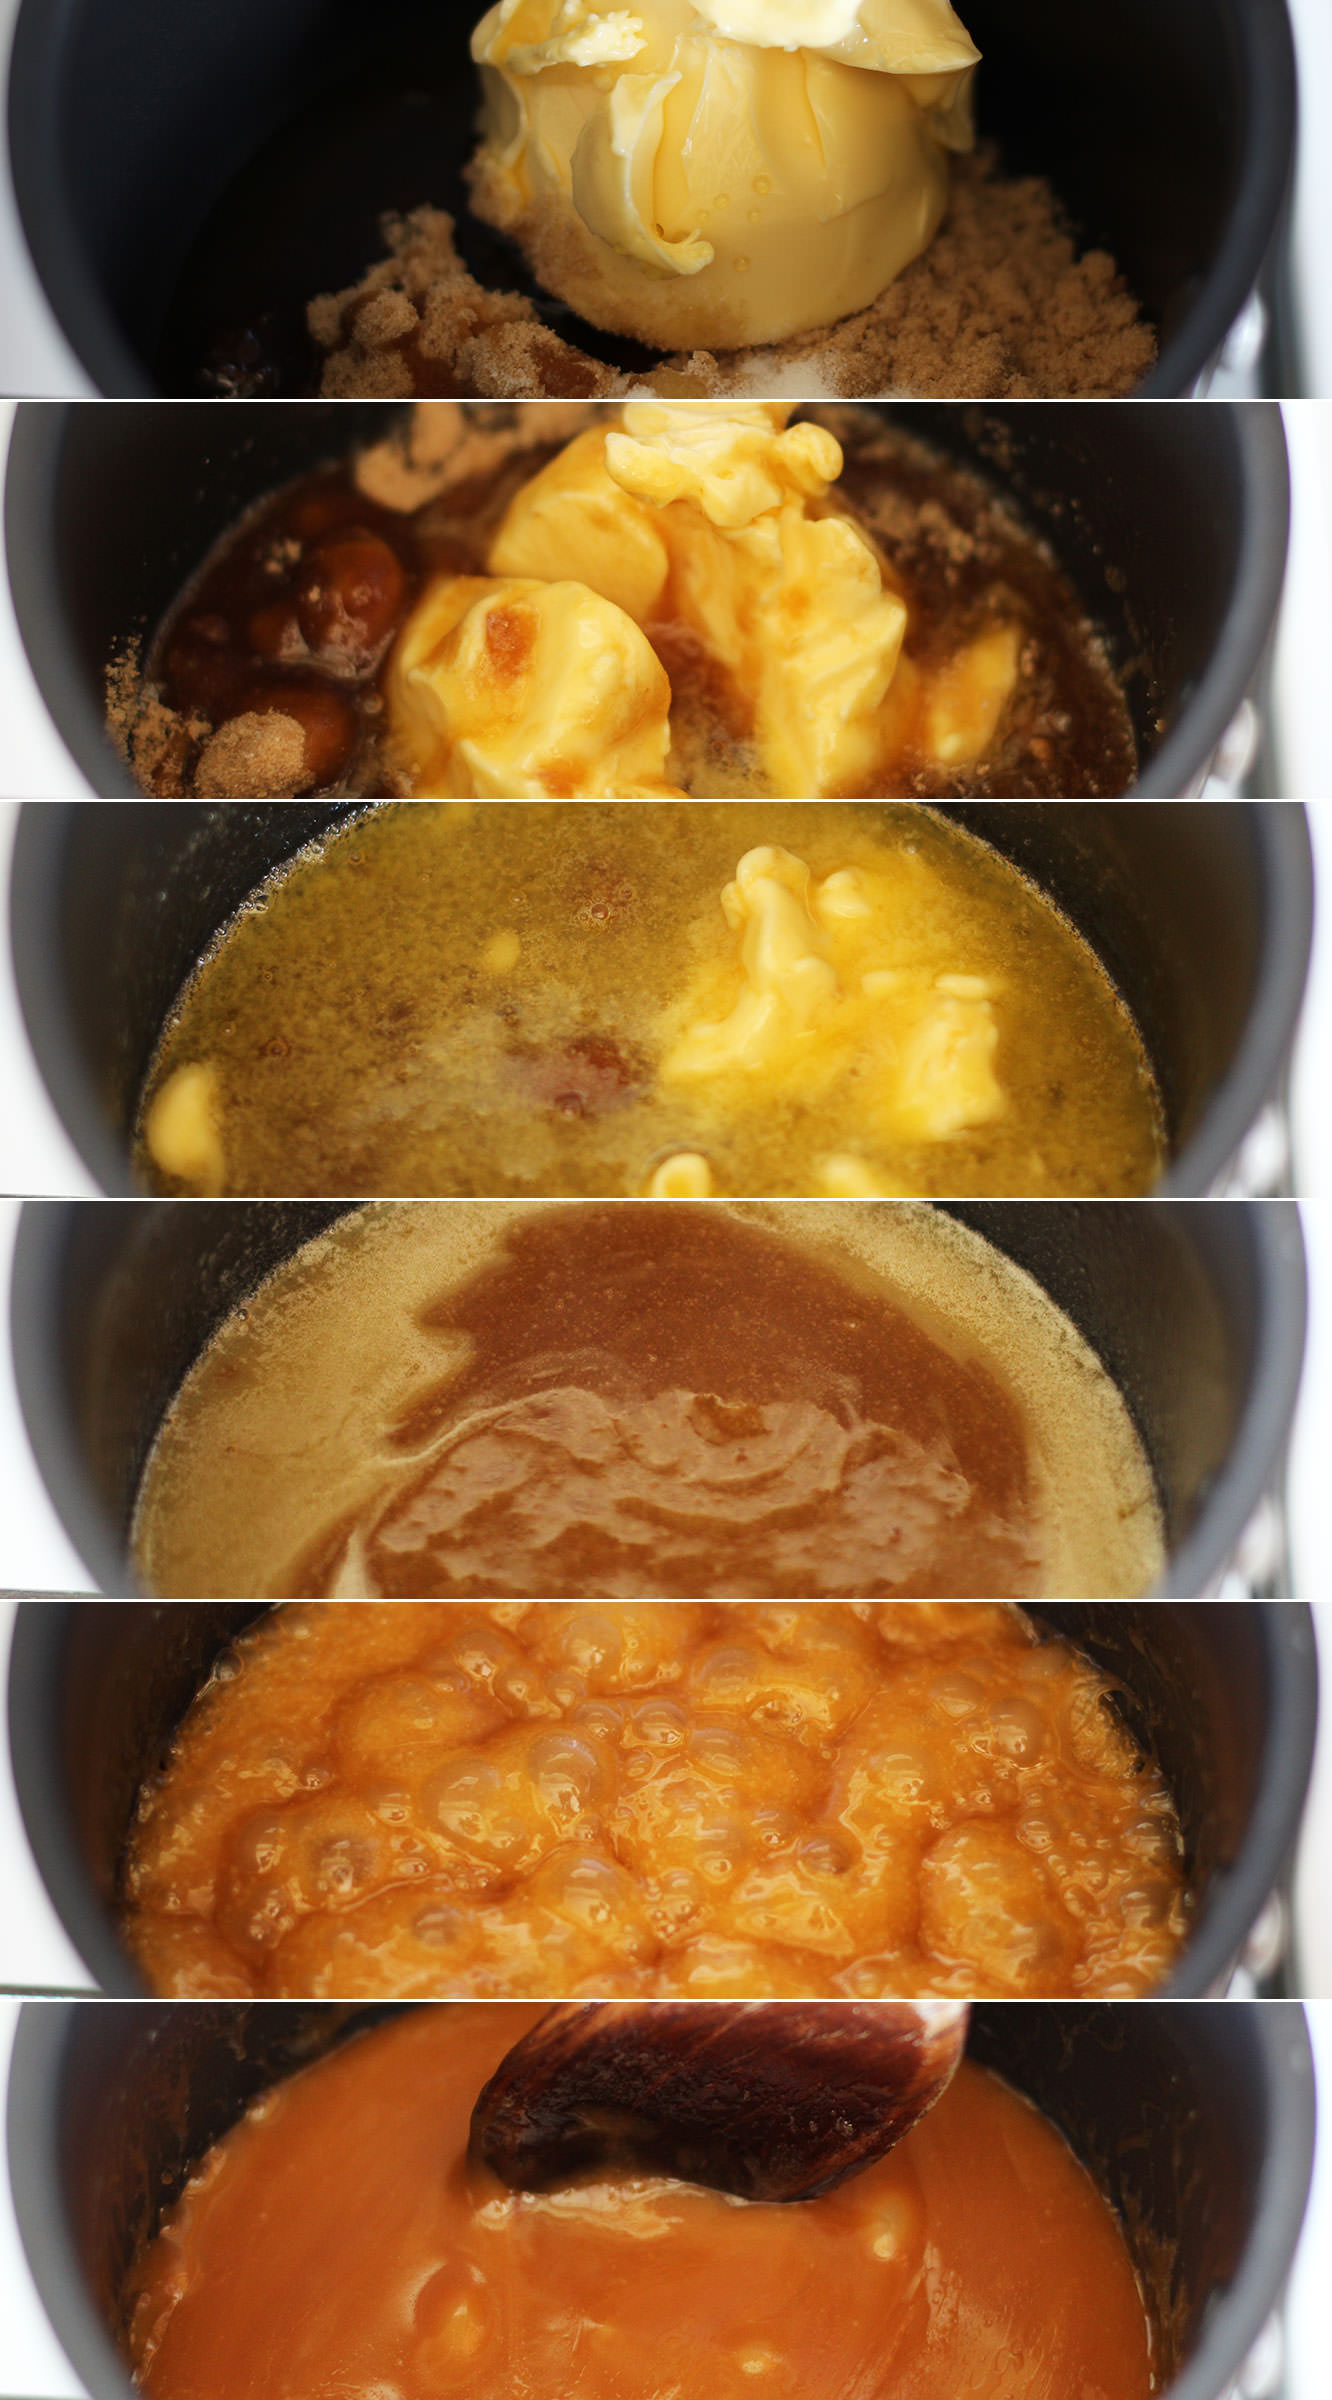
Step seven
For the salted caramel buttercream melt together 100g of the butter, the brown sugar, golden syrup and salt. Do this slowly and then bring the heat up to a simmer.
Simmer for 10 minutes. Stir regularly so that it doesn’t catch and burn. Leave to cool down for about half an hour or so.
Step eight
Stir in the 100ml cream and leave to cool further.
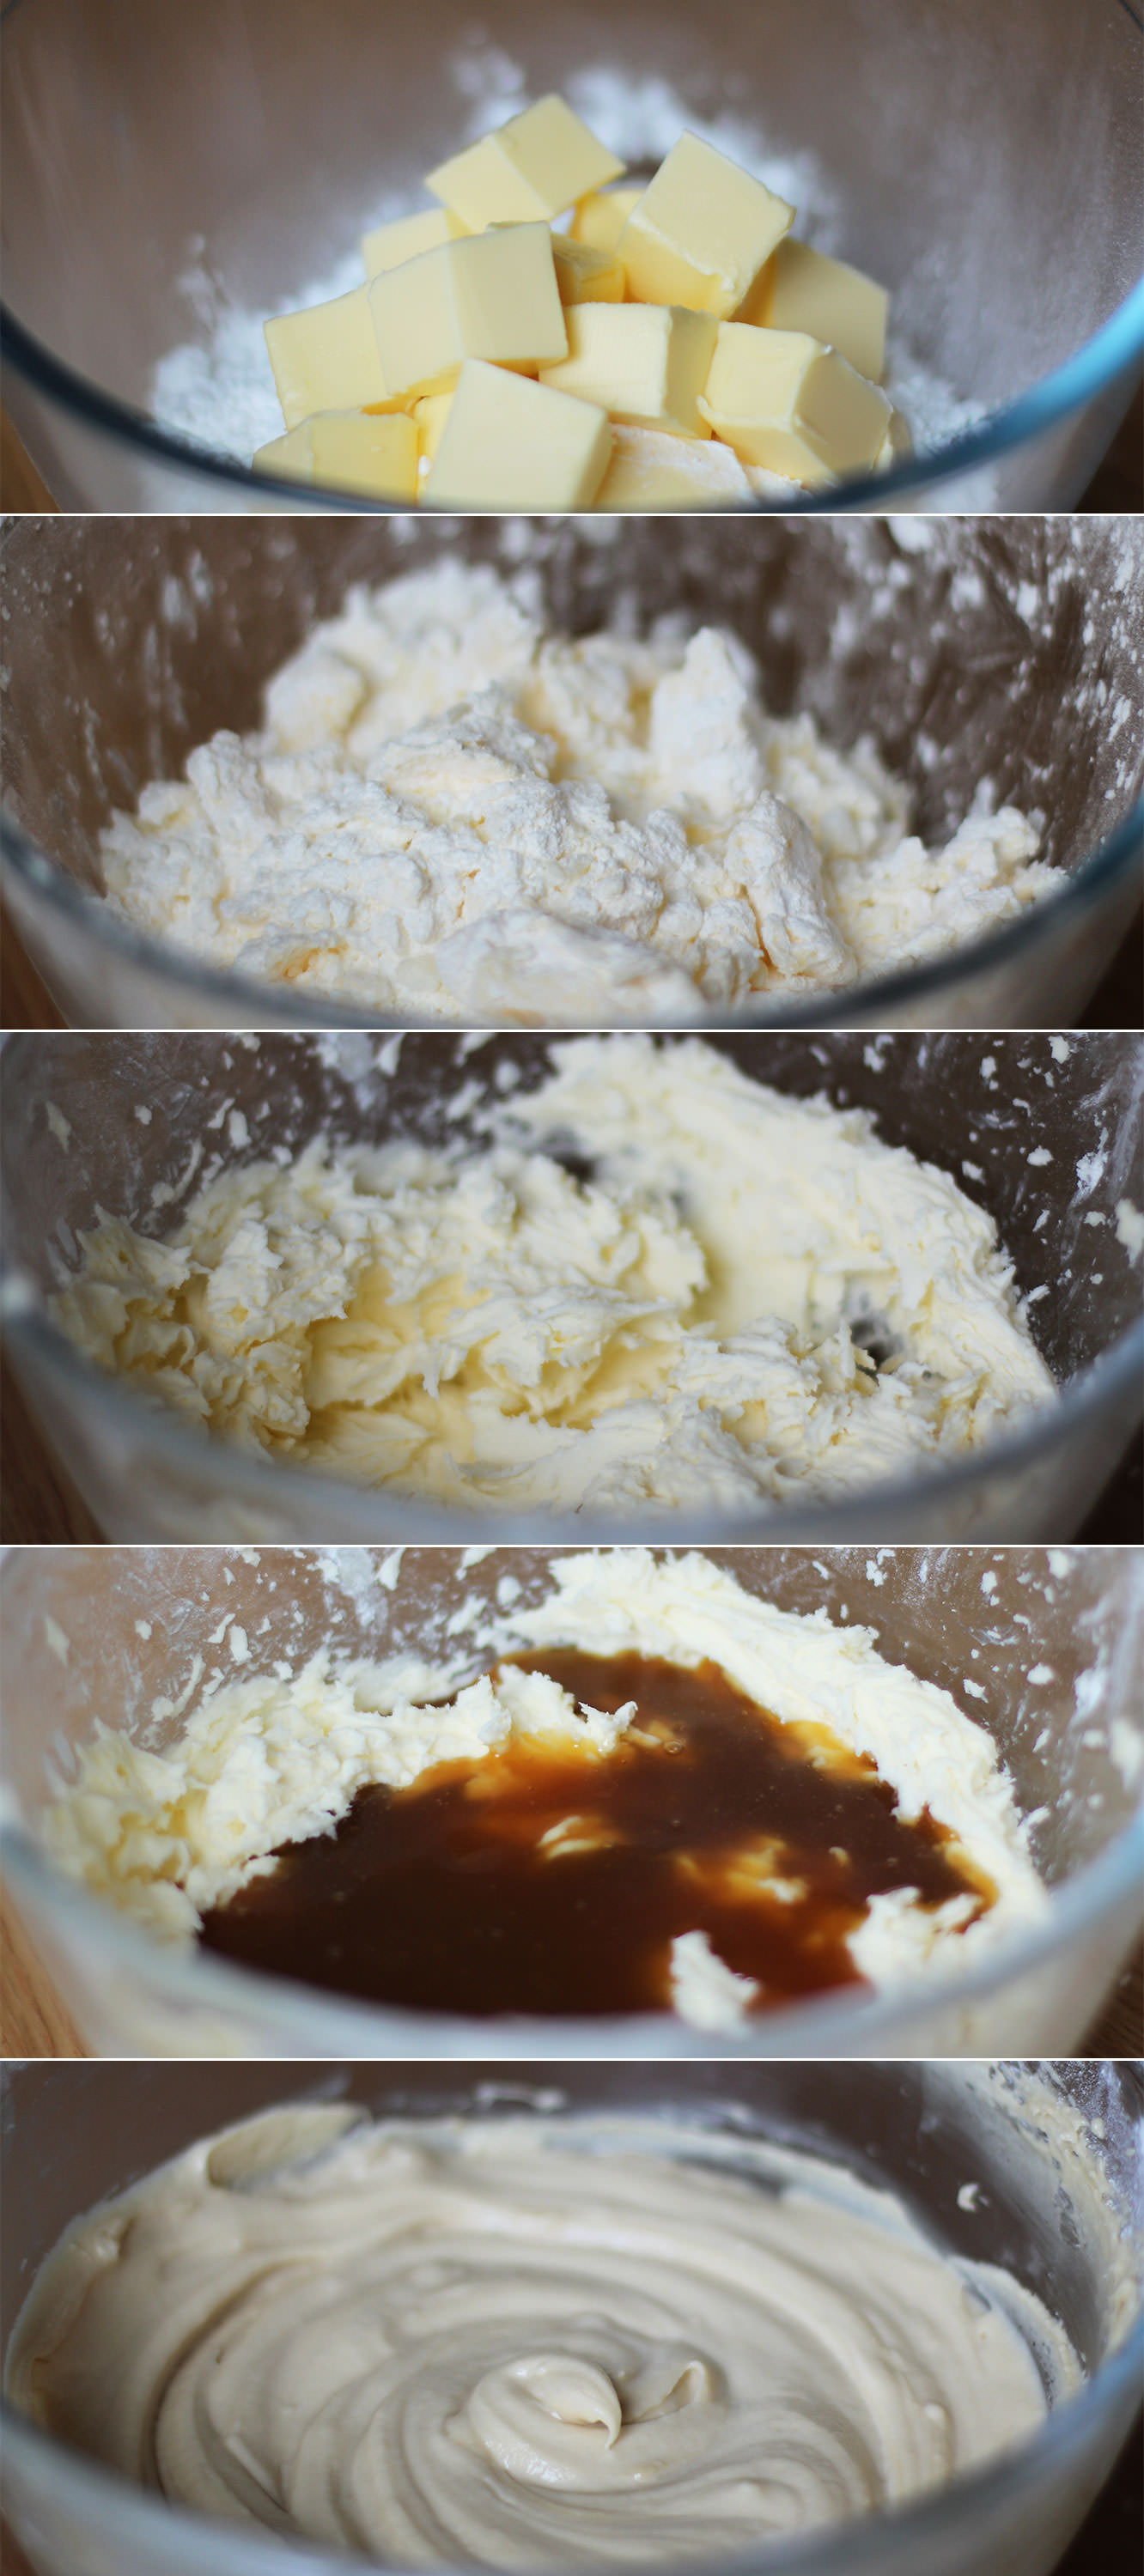
Step nine
Whisk the icing sugar and 150g of butter together with the salt. Definitely cover the bowl with the tea towel this time. I find if my butter is not quite soft enough it helps to rub it in a bit with clean hands first. There is NOwhere icing sugar won’t go when you use an electric whisk.
Step ten
Add the caramel and whisk again until smooth. Don’t worry if the caramel is still a little warm, just leave your buttercream to cool in the fridge for a bit. But again, don’t forget about it or it won’t be spreadable.
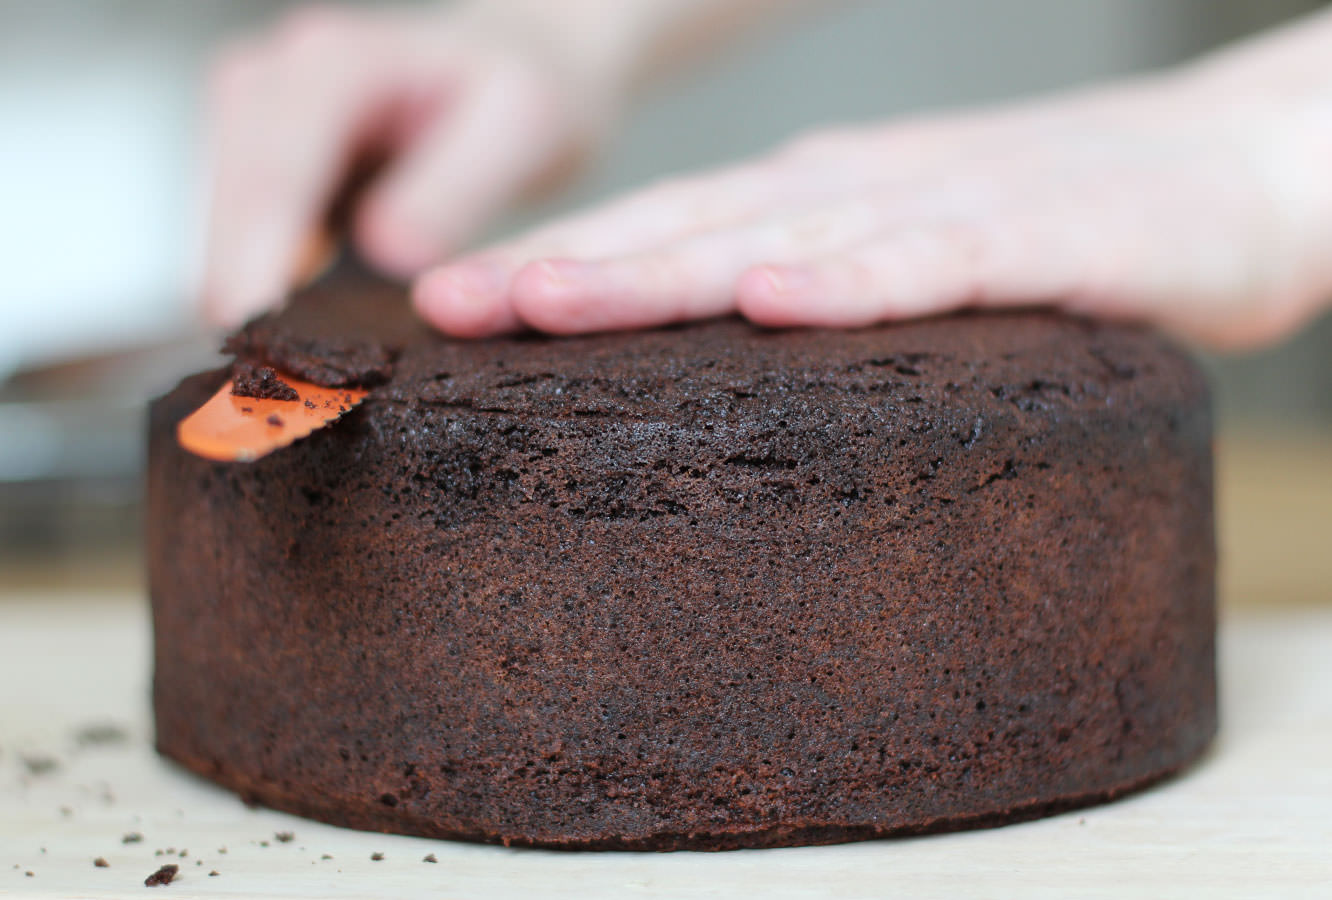
Step eleven
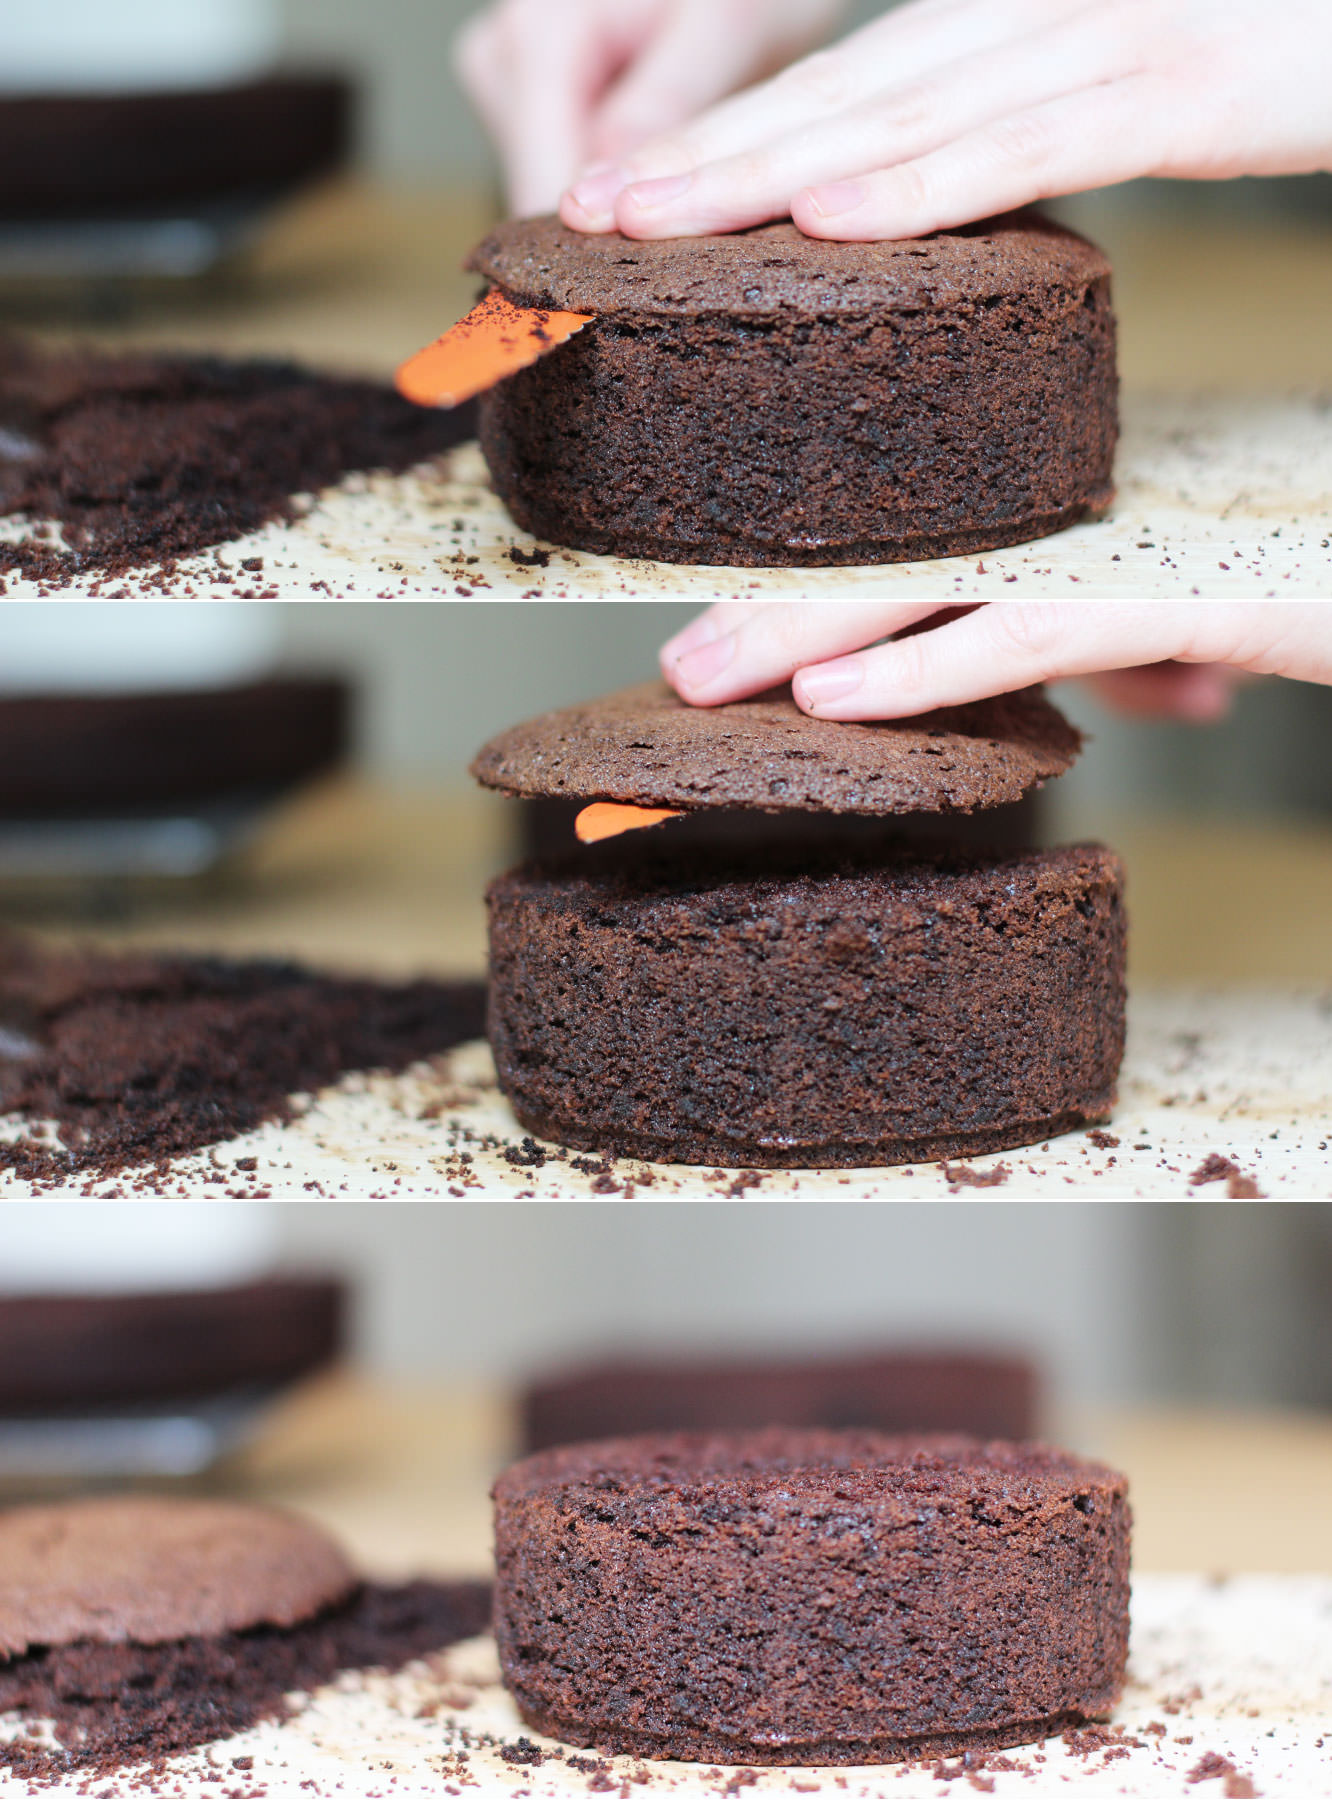
When your cakes have completely cooled prepare them for icing. You need to lop the top off the large one until it’s as flat as possible on top. So much of this cake is covered in decoration that you can get away with a little bit of wonky though so don’t panic if it’s not prefect. Having said that the flatter the better so the top tier sits straight. NO PRESSURE.
Step twelve
Cut the cake in the middle. Try to do this evenly by scoring it the whole way round first. Just keep going round in circles, getting further in each time until you’re all the way through.
Step thirteen
Level out the tops of the small cakes. I would be lying if I said I didn’t spread some icing on the offcuts and eat them.
Step fourteen
Using a palette knife ice the cakes.
First place a bit of buttercream on the cake base to stick the cake to it. Start with the caramel buttercream and ice the middle and the top. Don’t worry if bits splurge out the sides.
Smooth these out around the sides with the palette knife, gradually adding buttercream here and there to create the sharpest sides you can. Some parts will have a thicker coating than others, this layer is made to contain all the crumbs (hence the name crumb layer) and to even out the shape a bit. It’s not going to be pretty.
Place in the fridge for about an hour before starting the chocolate.
Ice the chocolate on in the same way, neatening as you go. For the most part it will be covered up, so it really doesn’t need to be too smooth.
Step fifteen
Cover the small cake in the same way.
Place both in the fridge while you prepare the decorations.
Step sixteen
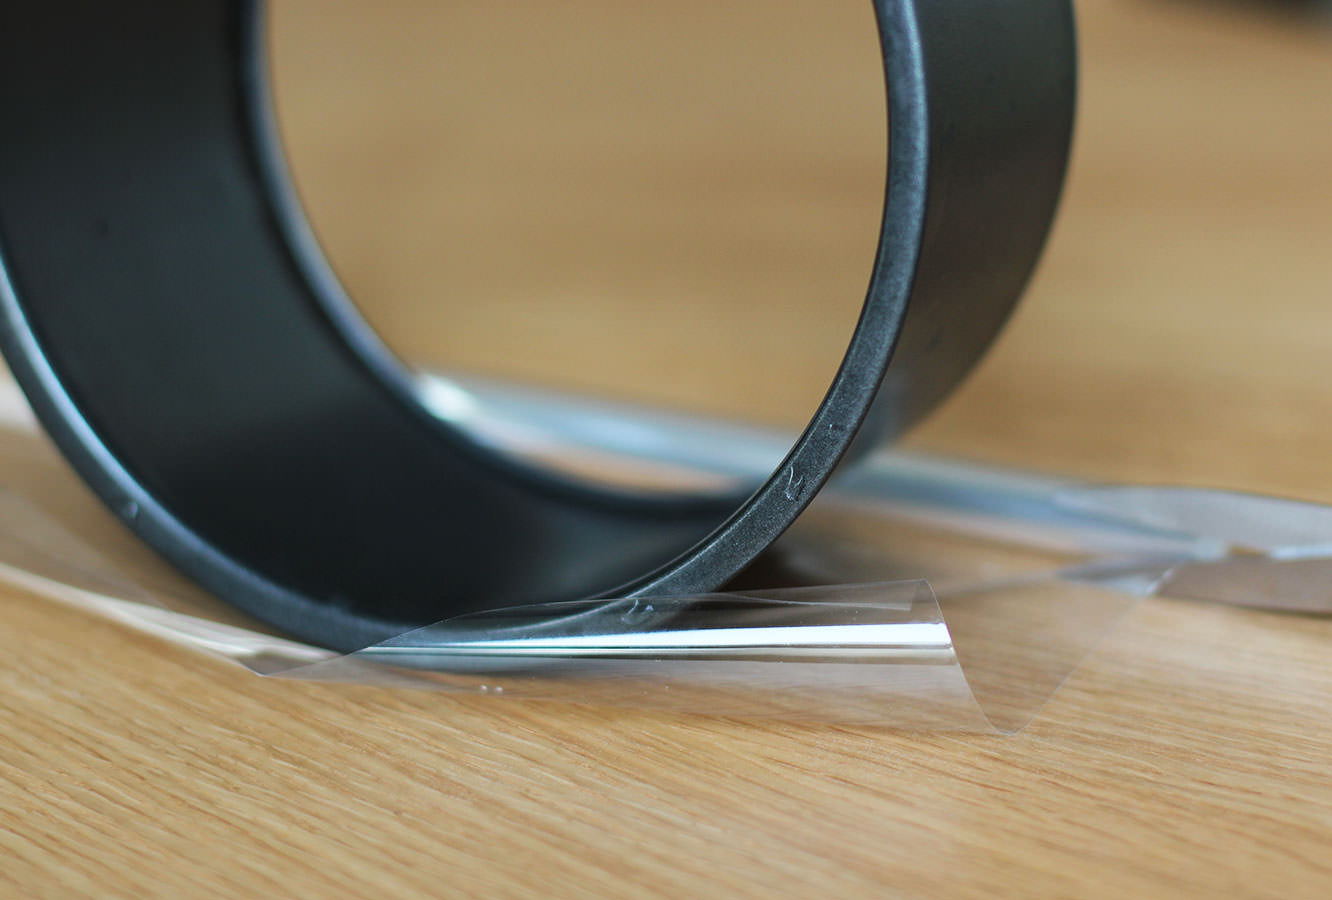
Using the tins as a guide cut a strip of the cellophane for both the top and bottom layer. You want these to be quite close to the size of the chocolate collar, so tall enough that you will have about 5cm/two inches taller than the cake, and wide enough to match the circumference. You can quickly check this against the cake to ensure it will fit.
Don’t forget to cut one for the top tier and one for the bottom, bearing in mind your top tier cake is twice as tall as the tin.
Step seventeen
Temper 200g dark chocolate. Don’t look at me like that…you are really going to want to do this so you have shiny chocolate on the collar.
First melt 125g of the chocolate in a heatproof bowl over a pan of simmering water. Let it get to 55C/131F before removing from the heat.
Chop the remaining chocolate and stir into the melted mix to aid the cool down process. Stir continually until it cools to 28C/82F. I found a good way to speed this up a bit. Put cold water in a large saucepan and the bowl on top. You’re welcome.
Place the bowl back on the heat and bring it to 31C/88F. Your chocolate is tempered.
Be warned – if you’re doing a different type of chocolate the temperatures are different:
Milk – 45C/113F original melt, 27C/81F cool down, 29C/84F
White – 45C/113F original melt, 26C/79F cool down, 28C/82F
Step eighteen
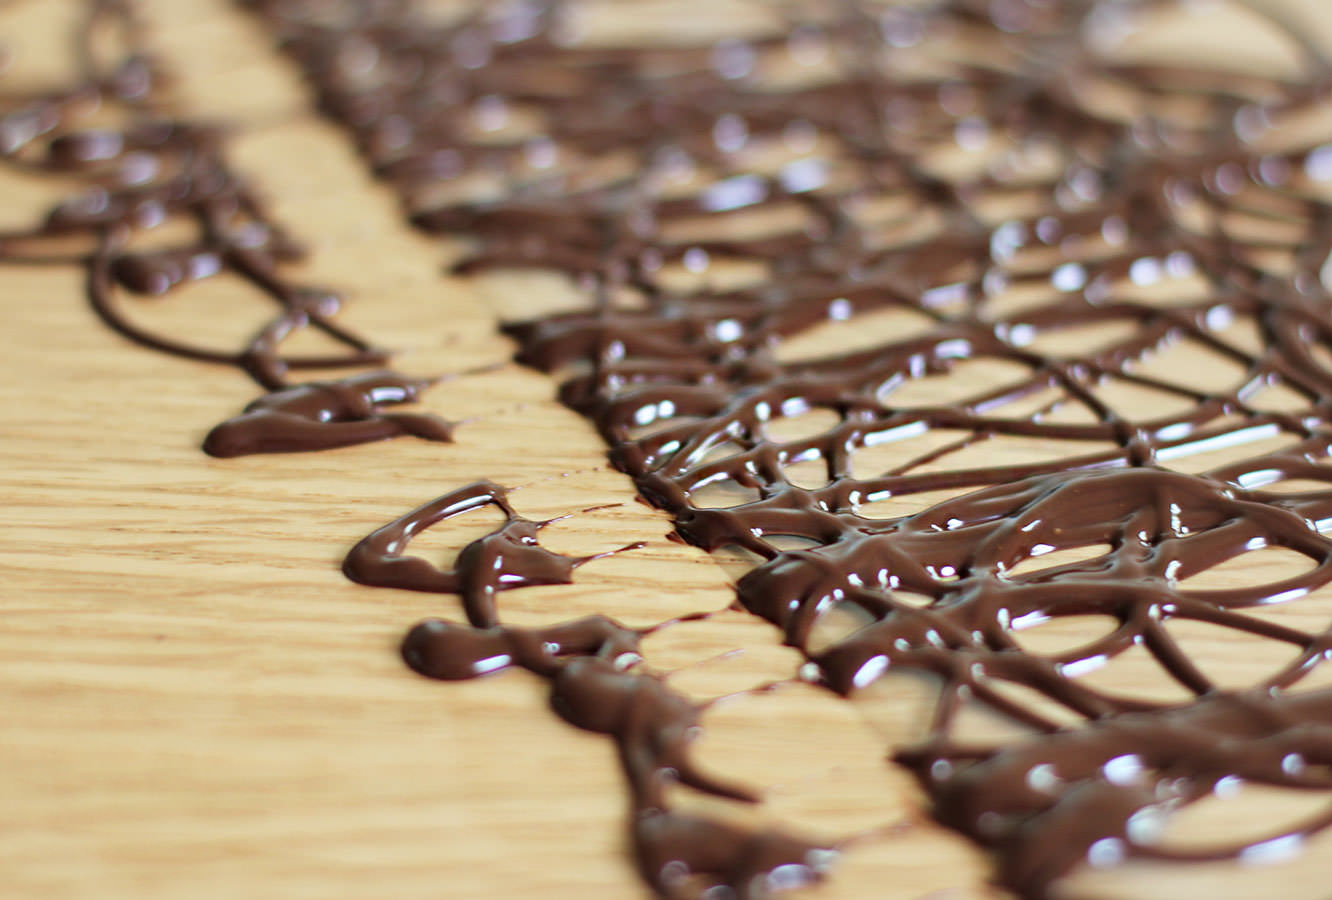
Place chocolate in a piping bag and using circular motions cover the cellophane with swirls. Go over the bottom edge onto the work surface but ensure the top stays on the cellophane so it’s ‘whirly’.
Step nineteen
When it has started to dry pull the cellophane away so the bottom is clear of the extra overlap bits.
Step twenty
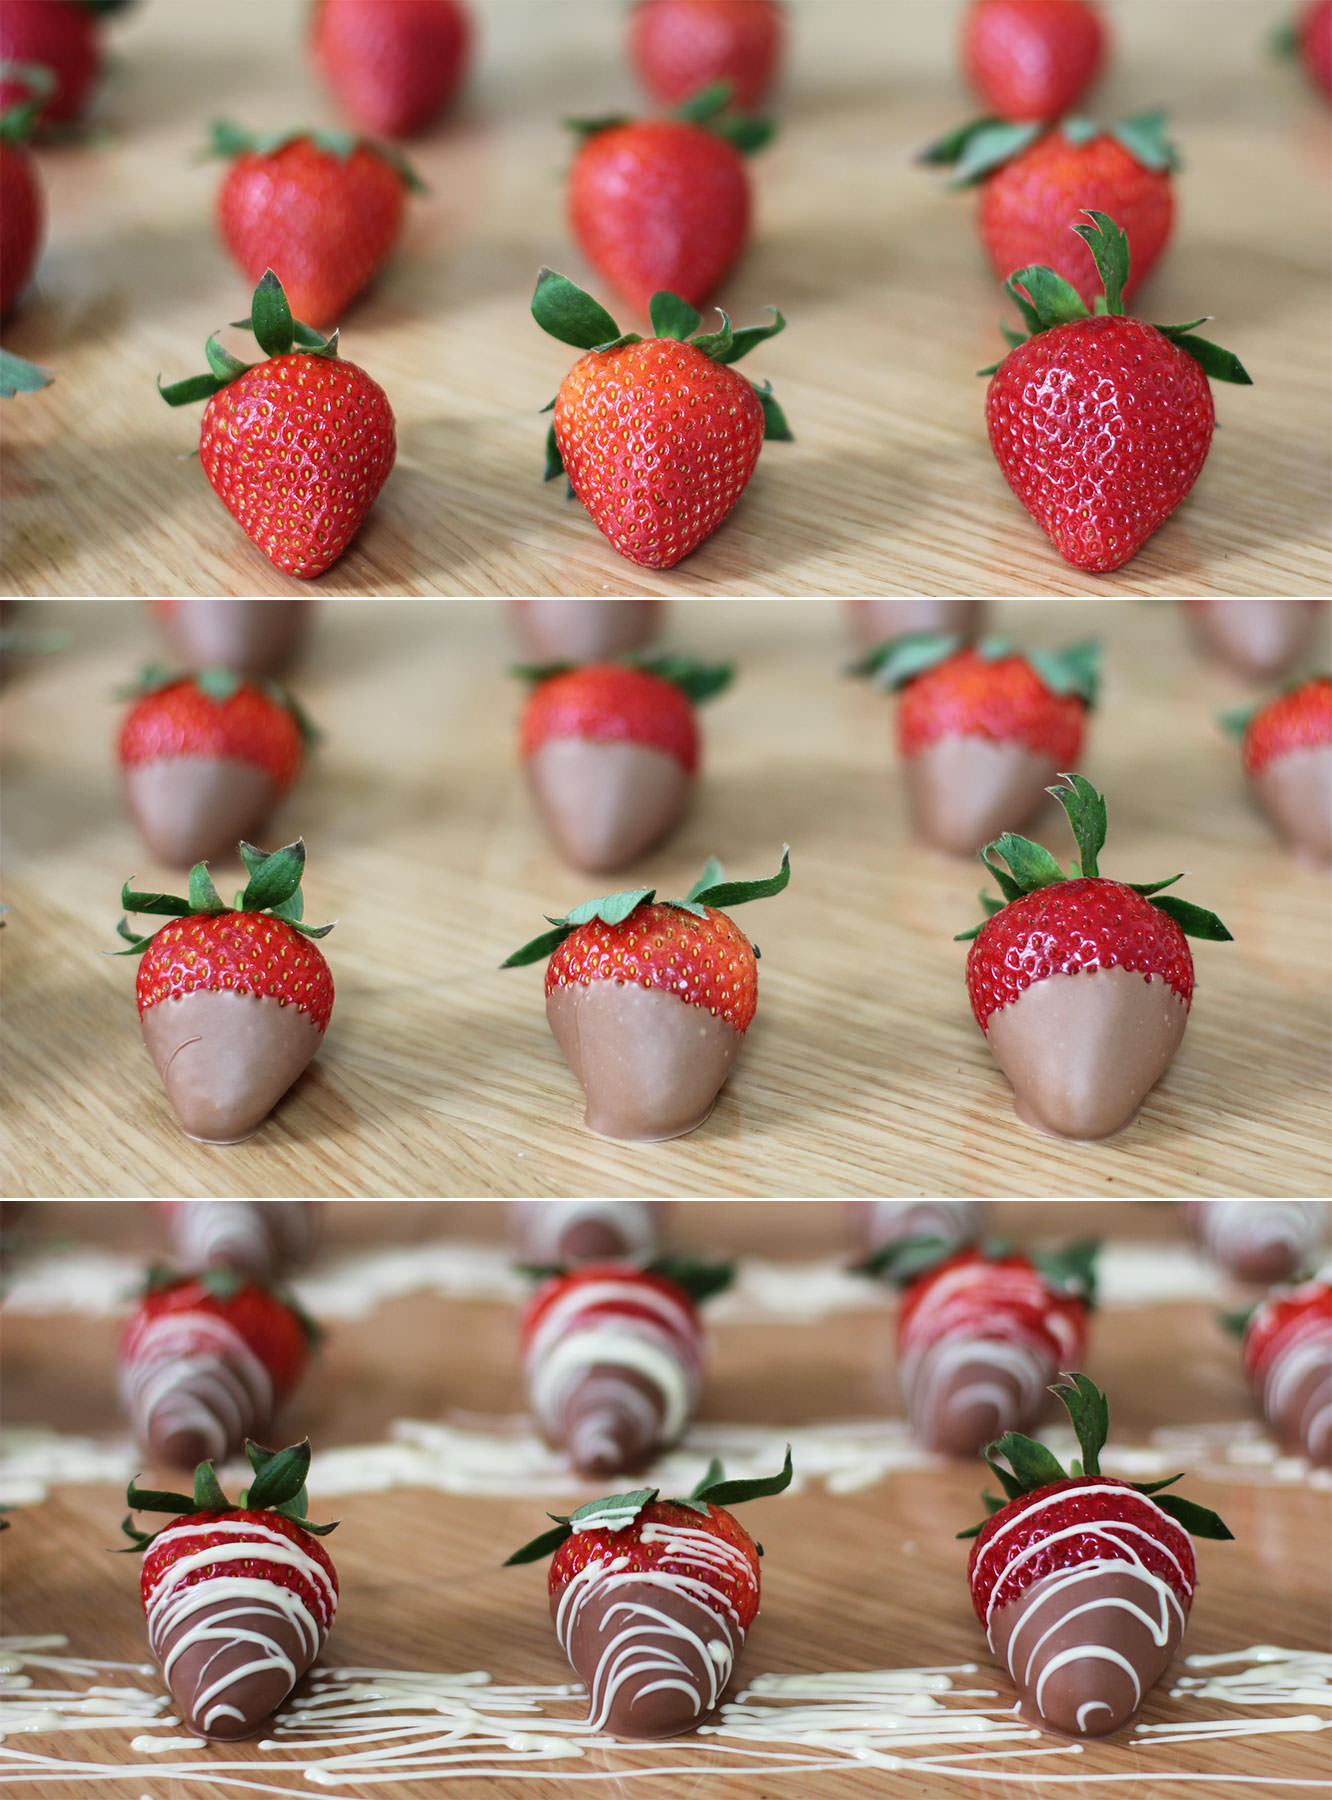
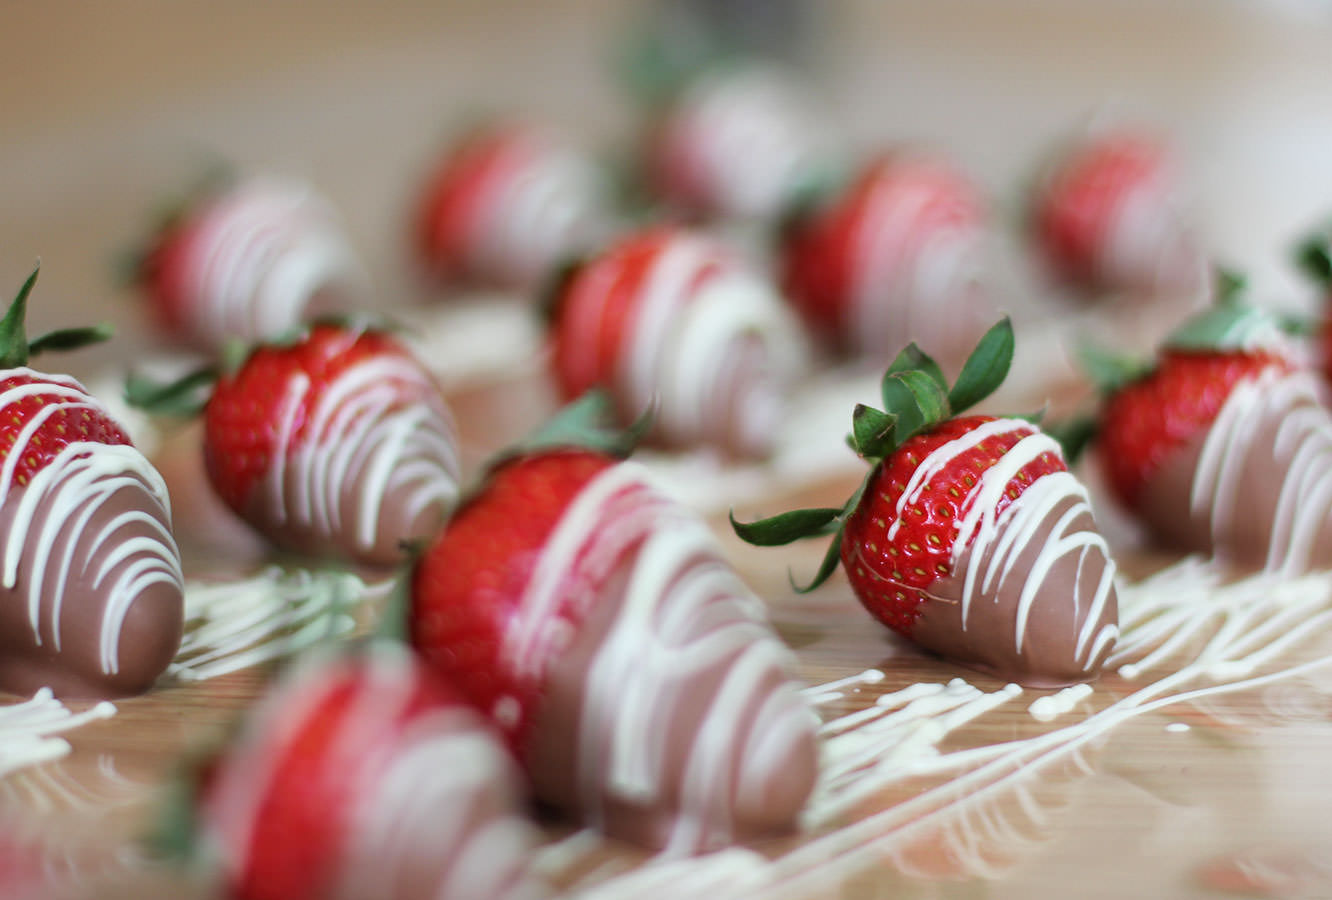
Melt (preferably temper) the milk chocolate. Dip the strawberries in half way and leave to set on some more cellophane.
Melt the white chocolate (no real need to temper this) and place in a piping bag. swing the bag back and forth to drizzle the white chocolate over the top.
Step twenty one
Drizzle the raspberries with white and milk chocolate. You can dip them if you want to, but, really? I know this is taking a while, but do you have that kind of time??
Step twenty two
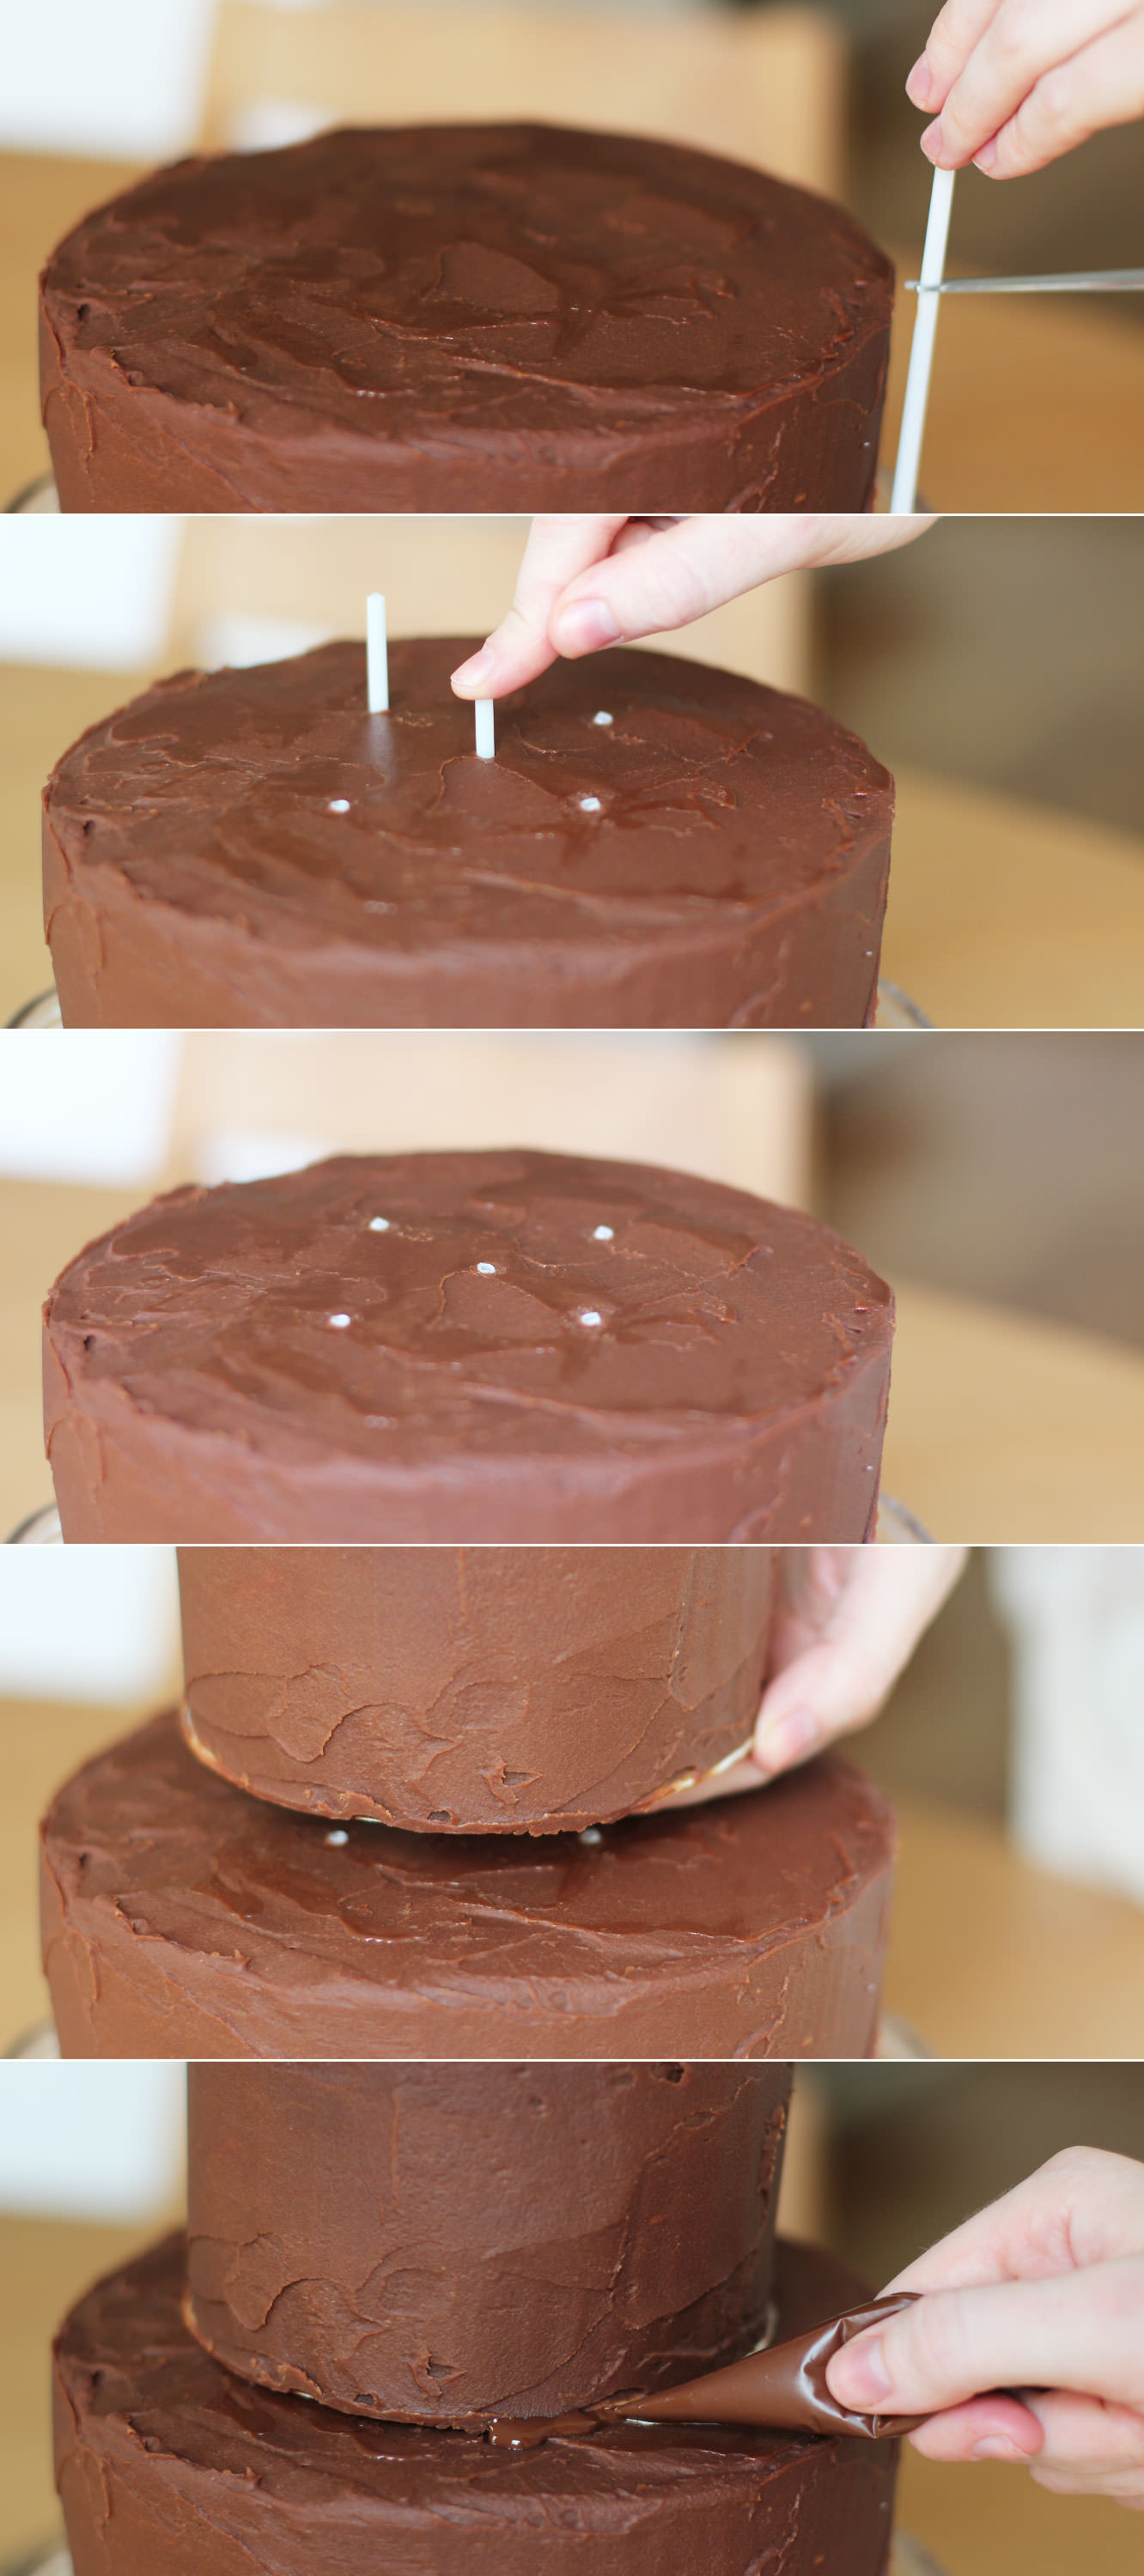
Get the cakes out of the fridge to assemble.
Cut the sticks to size and push through the bottom layer where the top tier will sit.
Place it on top.
I then secured this a bit further with the remaining dark chocolate I had. It will be covered up so no big deal if it’s messy.
Step twenty three
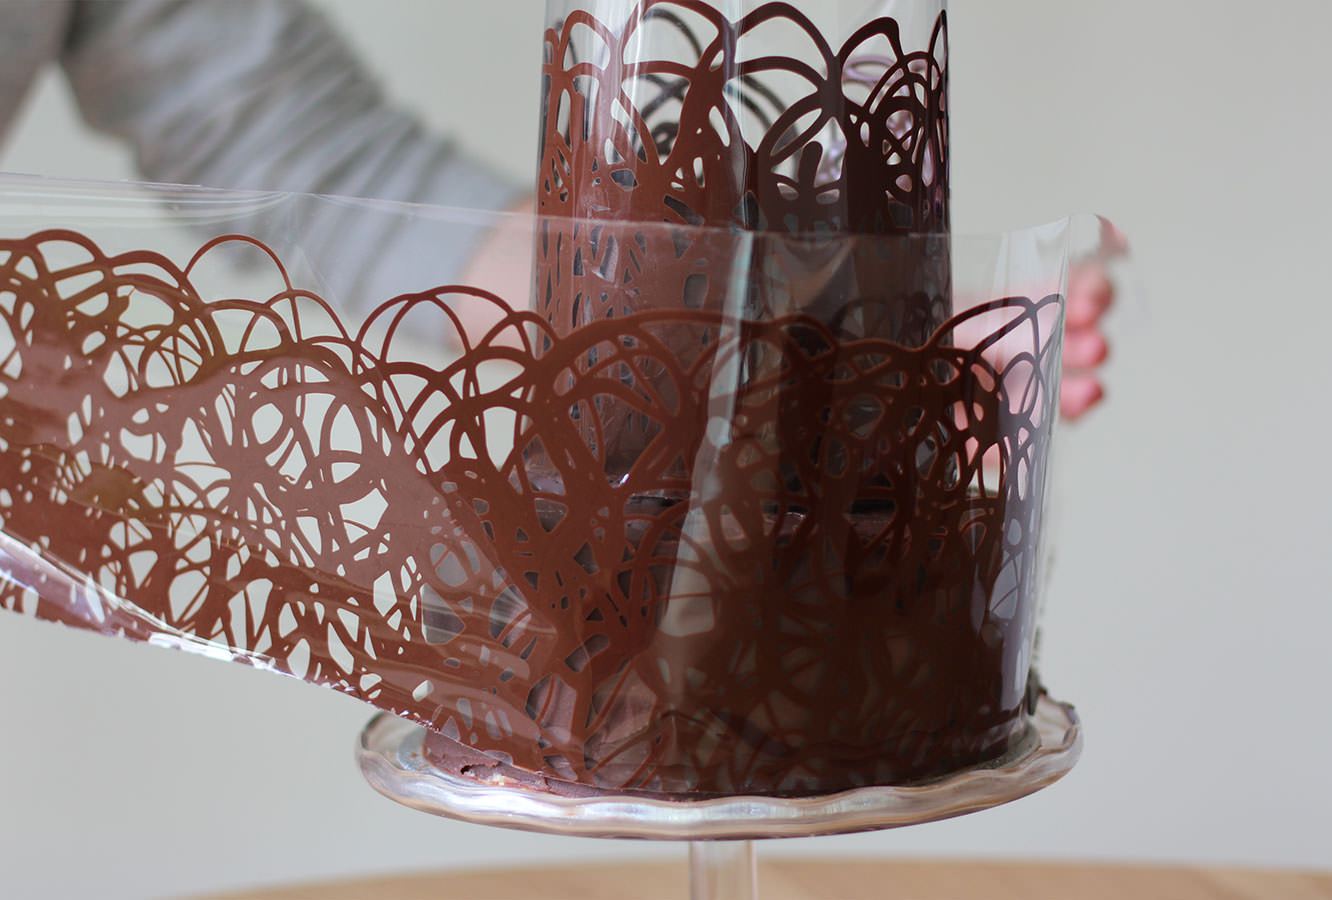
When the collars become touch dry, (meaning if you gently touch the surface you shouldn’t get chocolate on your finger, but what’s underneath is still not set) wrap them around the cake.
LEAVE THE CELLOPHANE ON. Sorry for shouting. But please. Walk away and don’t touch it for a while. Maybe leave a window open if it’s a cool day to help the process along.
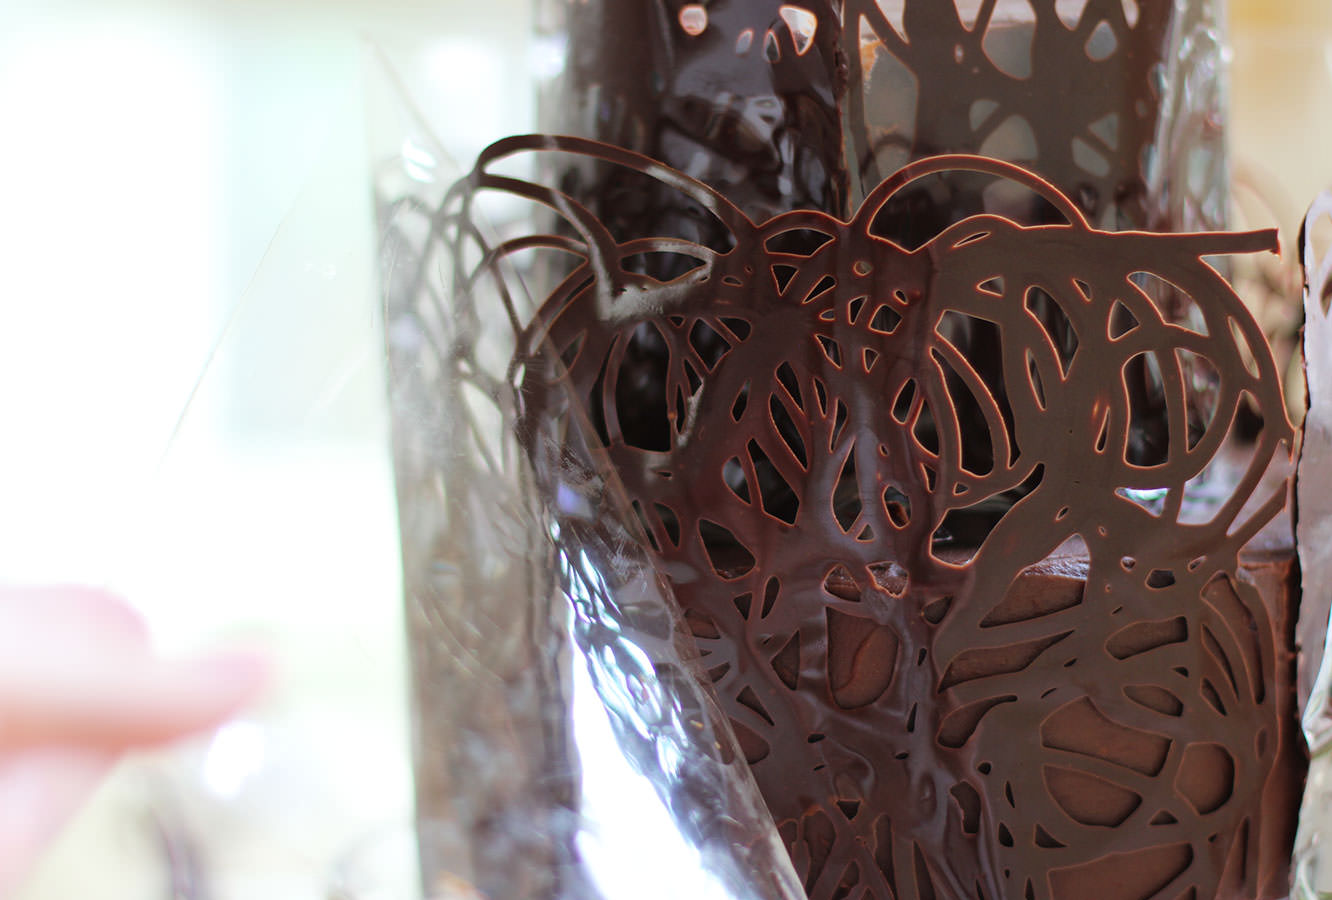
Step twenty four
When you’re feeling brave slowly peel off the cellophane to reveal your beautiful shiny chocolate collar. I was pretty excited at this point I must confess.
Step twenty five
Fill with the fruit and make someone’s occasion that bit happier.
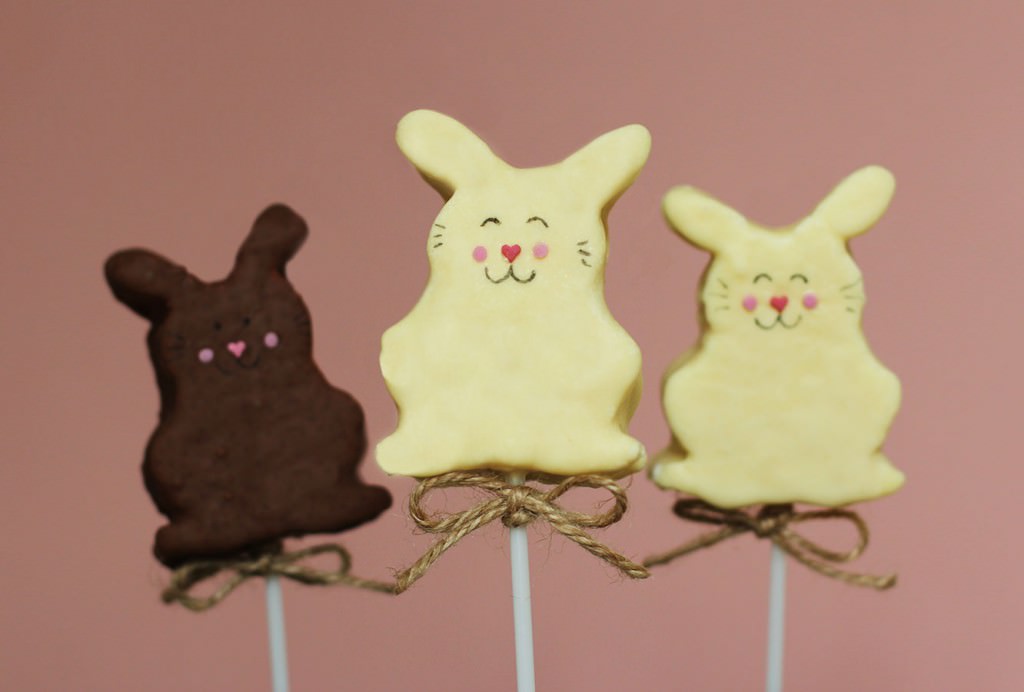
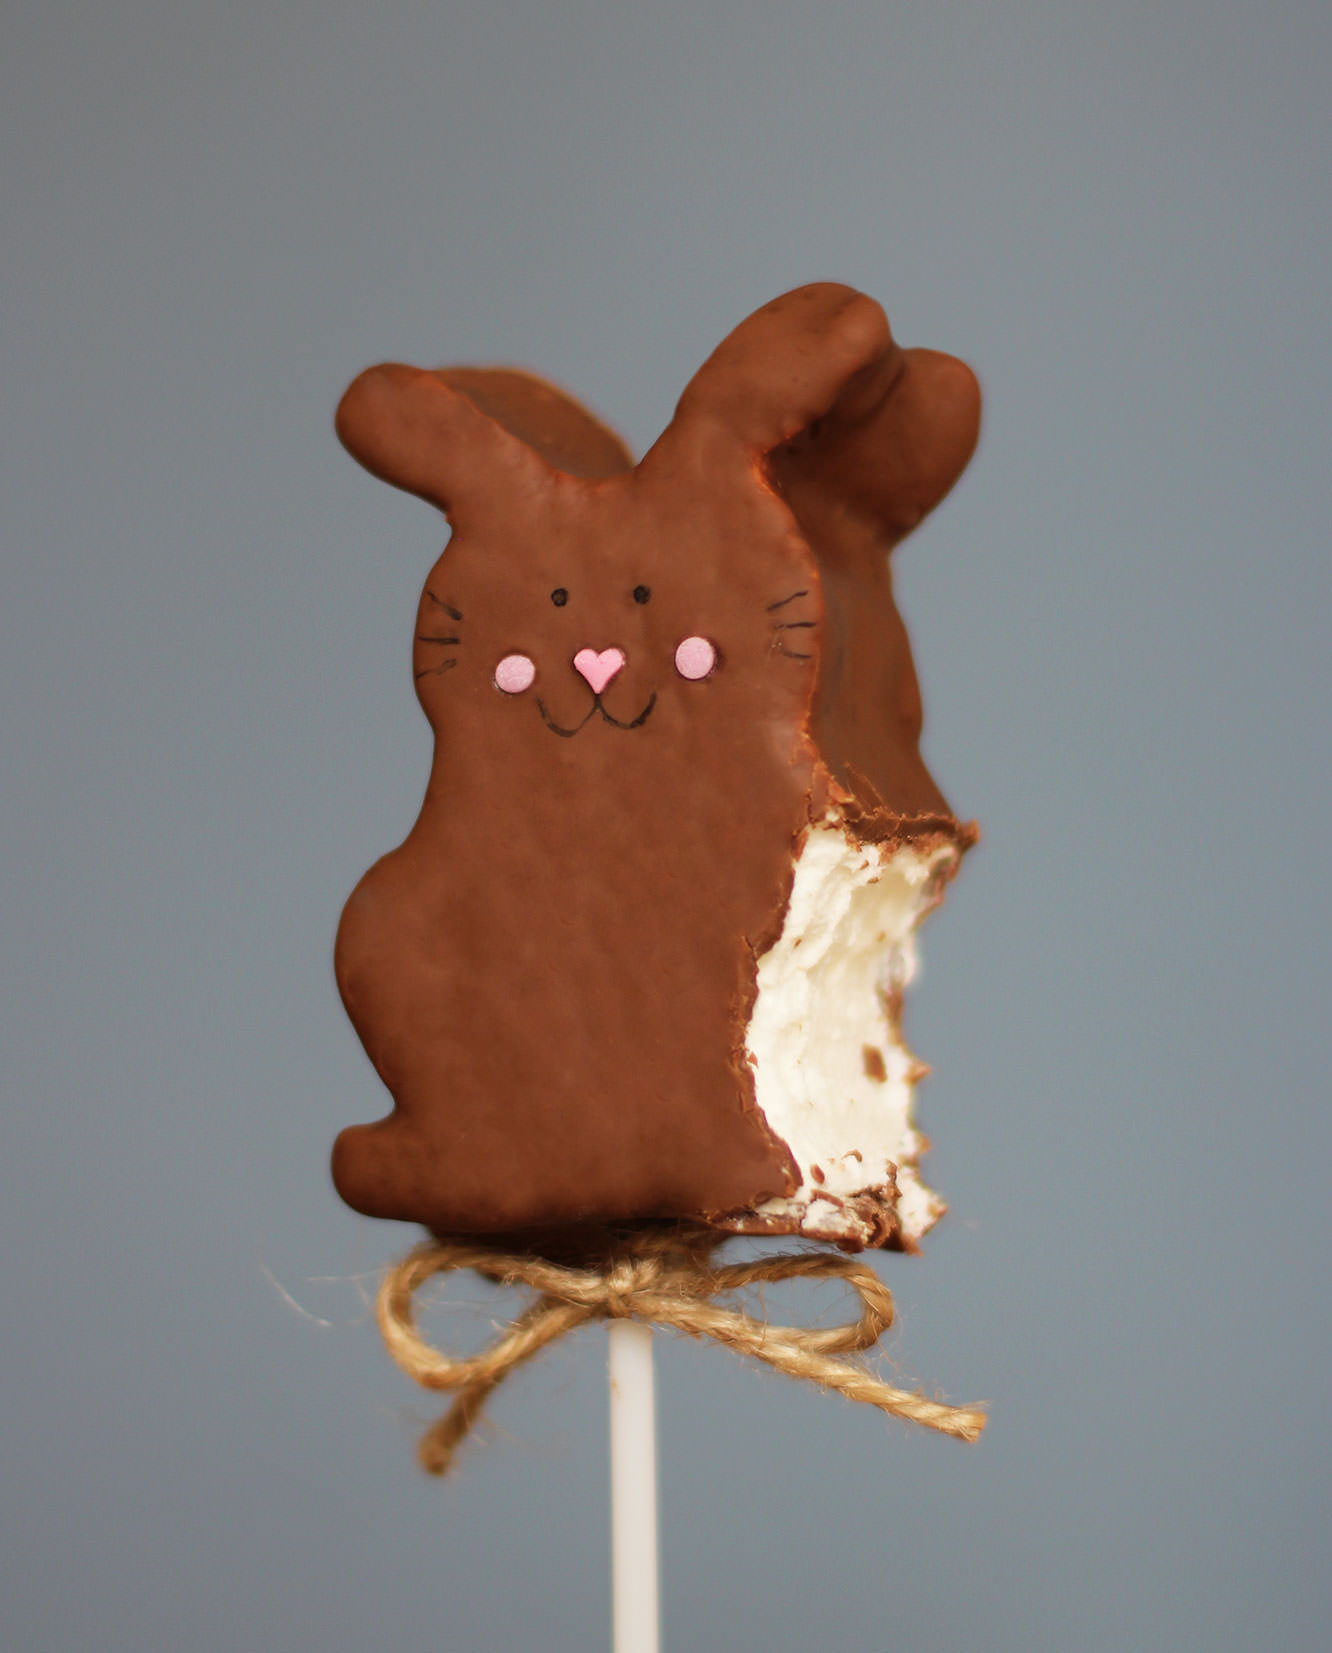
I’ve had these little bunny pops in my mind’s eye for a while now. I’ll precursor this post with saying they don’t look exactly how I imagined. Sure, they do look a bit like Pikachu, but they are scrummy, so I vote worth the time if you’ve a free afternoon and a healthy dose of patience in your arsenal.
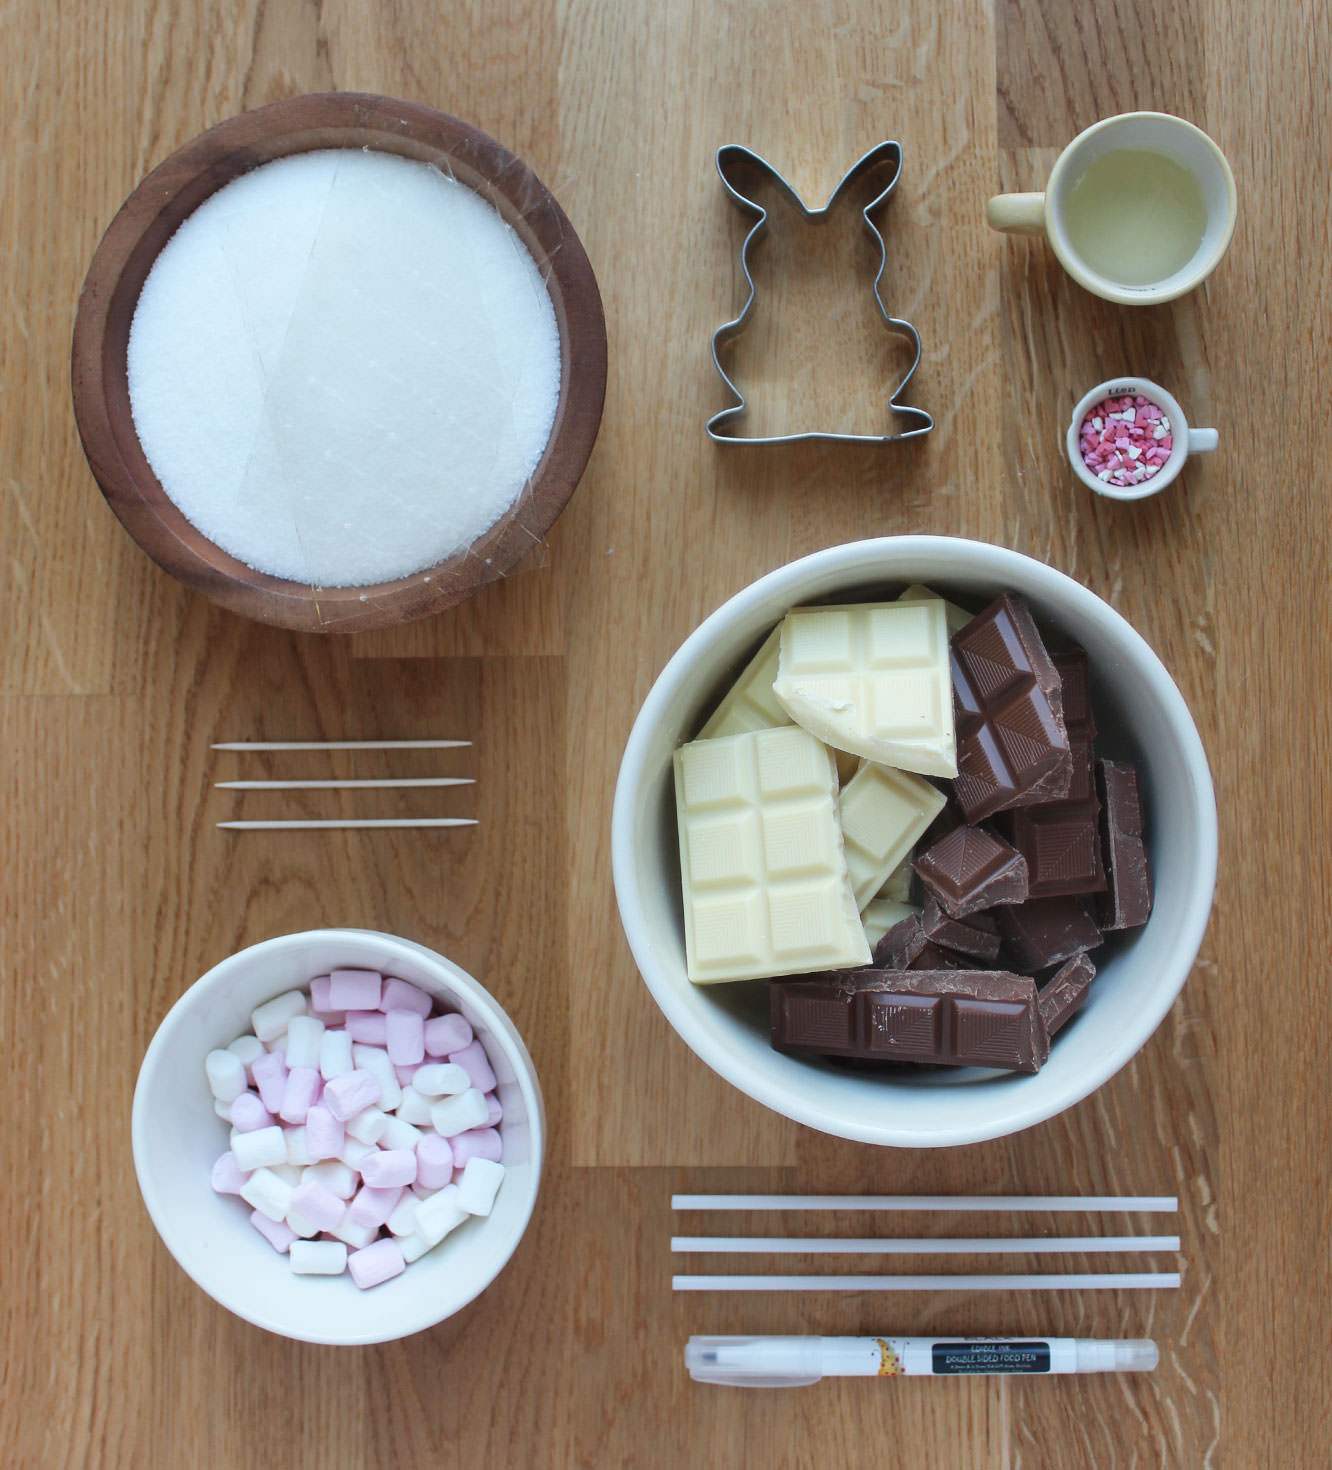
You will need
9 gelatine sheets
300g/10.5 oz granulated sugar
2 egg whites
1 tbsp liquid glucose (you can find this in a squeezy toothpaste type tube in the baking section)
2-3 tsp extract of your choice (but I HIGHLY recommend ‘buttery caramel’ from the natural professional flavours range – bought at Lakeland)
600-800g/1lb 5 oz – 1lb 12 oz chocolate for dipping (having sampled milk and white, I’d go white)
Sugar confetti for faces
Edible ink pen (or melted dark chocolate and a cocktail stick)
Icing sugar for dusting
A sugar thermometer
A bunny cutter (I got this from Amazon)
A handful of mini marshmallows (for fluffy bunny tails)
Cake pop sticks
Step one
In a cereal bowl, soak the gelatine in 150ml/5 fl oz cold water. Set aside.
Step two
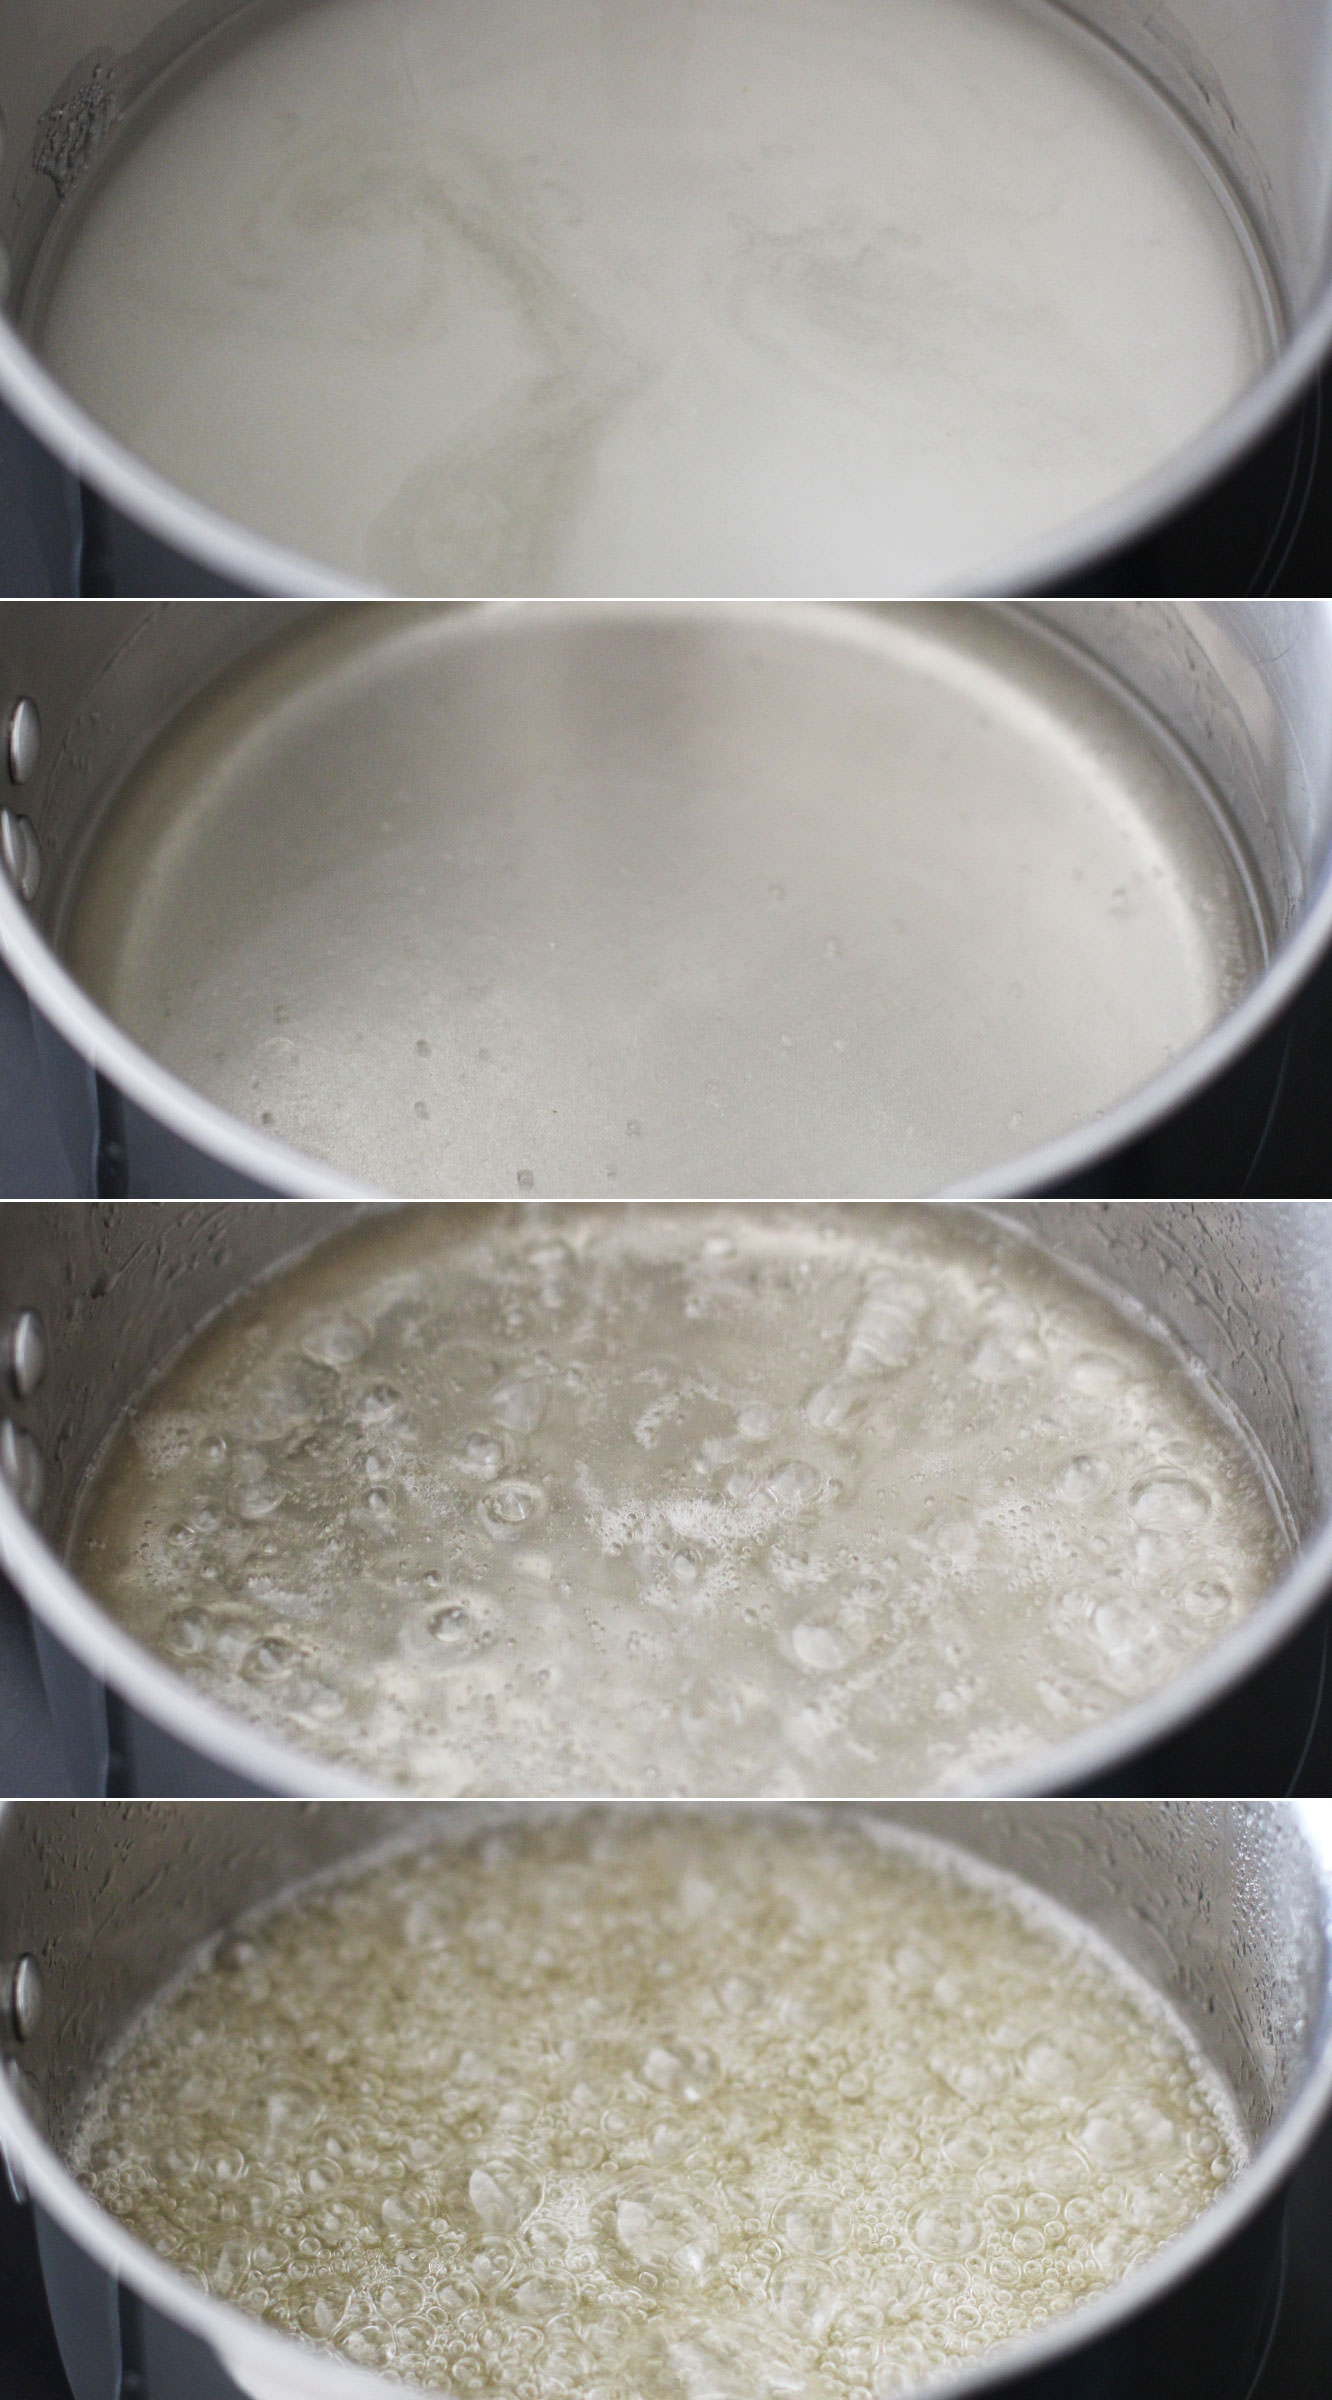
Combine the sugar, 150ml/5 fl oz water (different to the gelatine water) and the liquid glucose in a smallish saucepan. Allow the sugar to dissolve on a low heat, and then turn it up to medium-high. Be careful not to burn the sugar or any of your extremities.
The temperature you want this to get to is 118 C. It will feel like it will never get there, but stay strong.
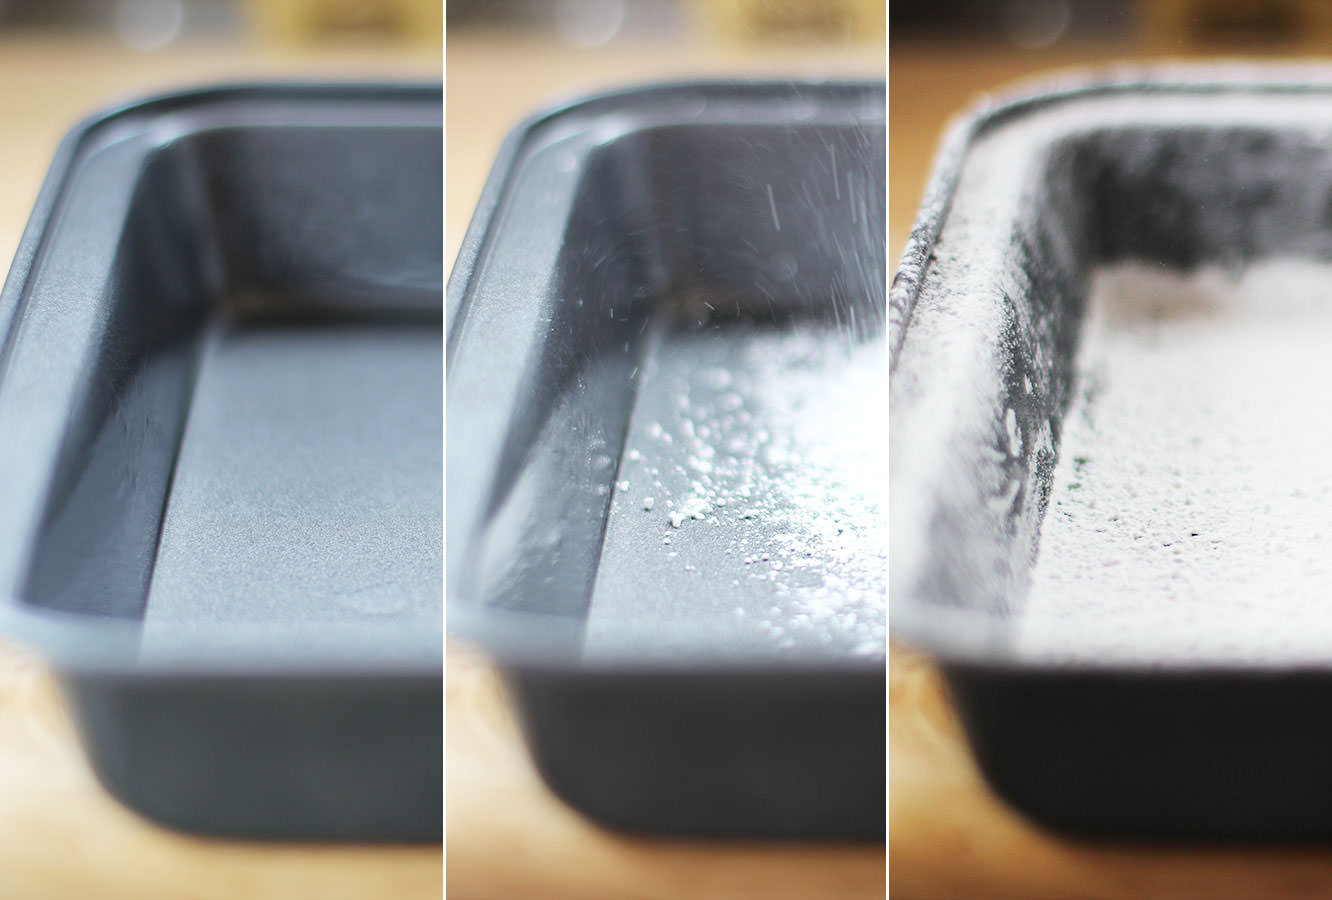
Step three
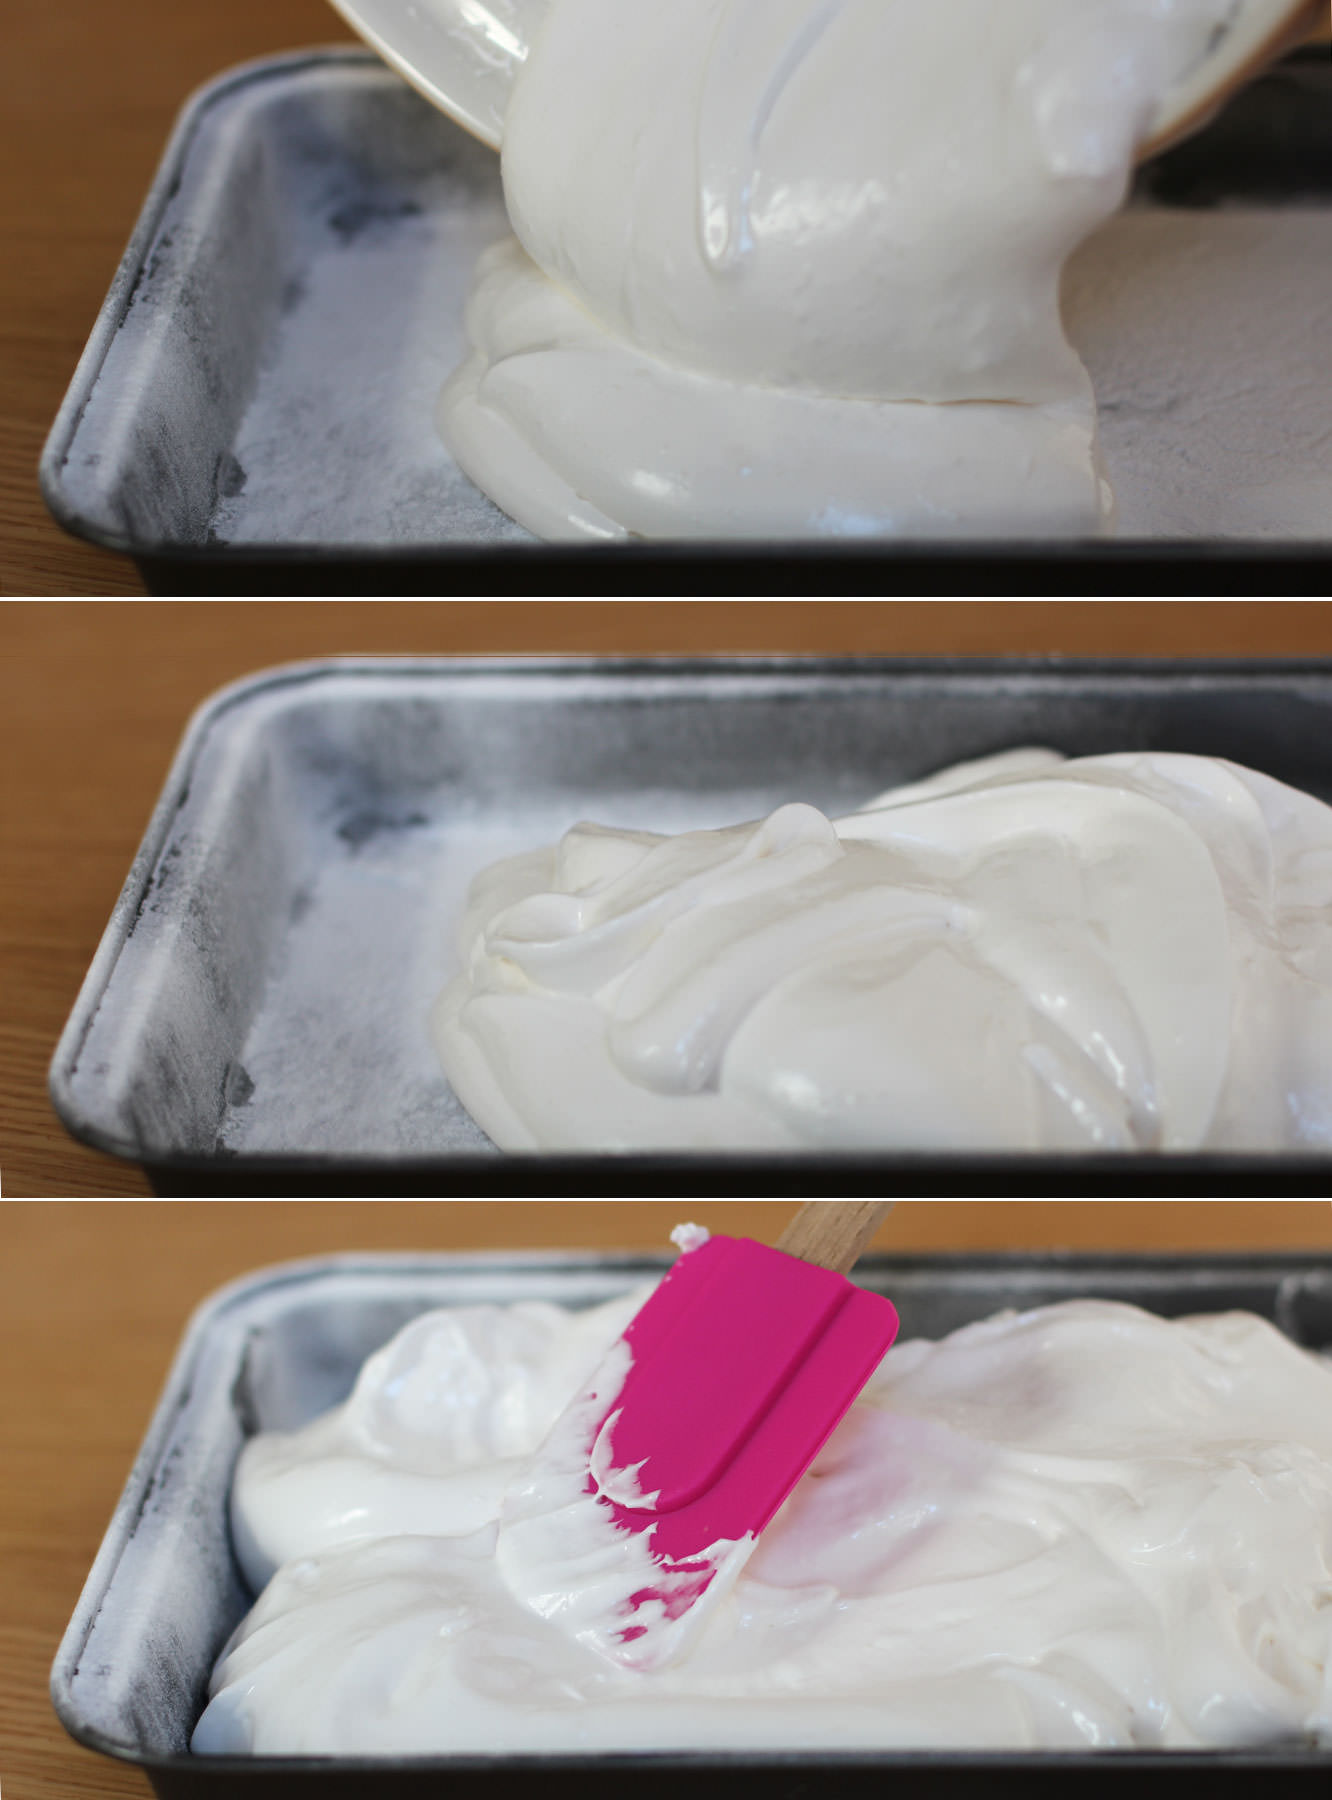
While the sugar is bubbling away take the opportunity to dust a brownie tin with icing sugar. Use a really small amount of olive oil before dusting to hold the icing sugar to the pan.
Step four
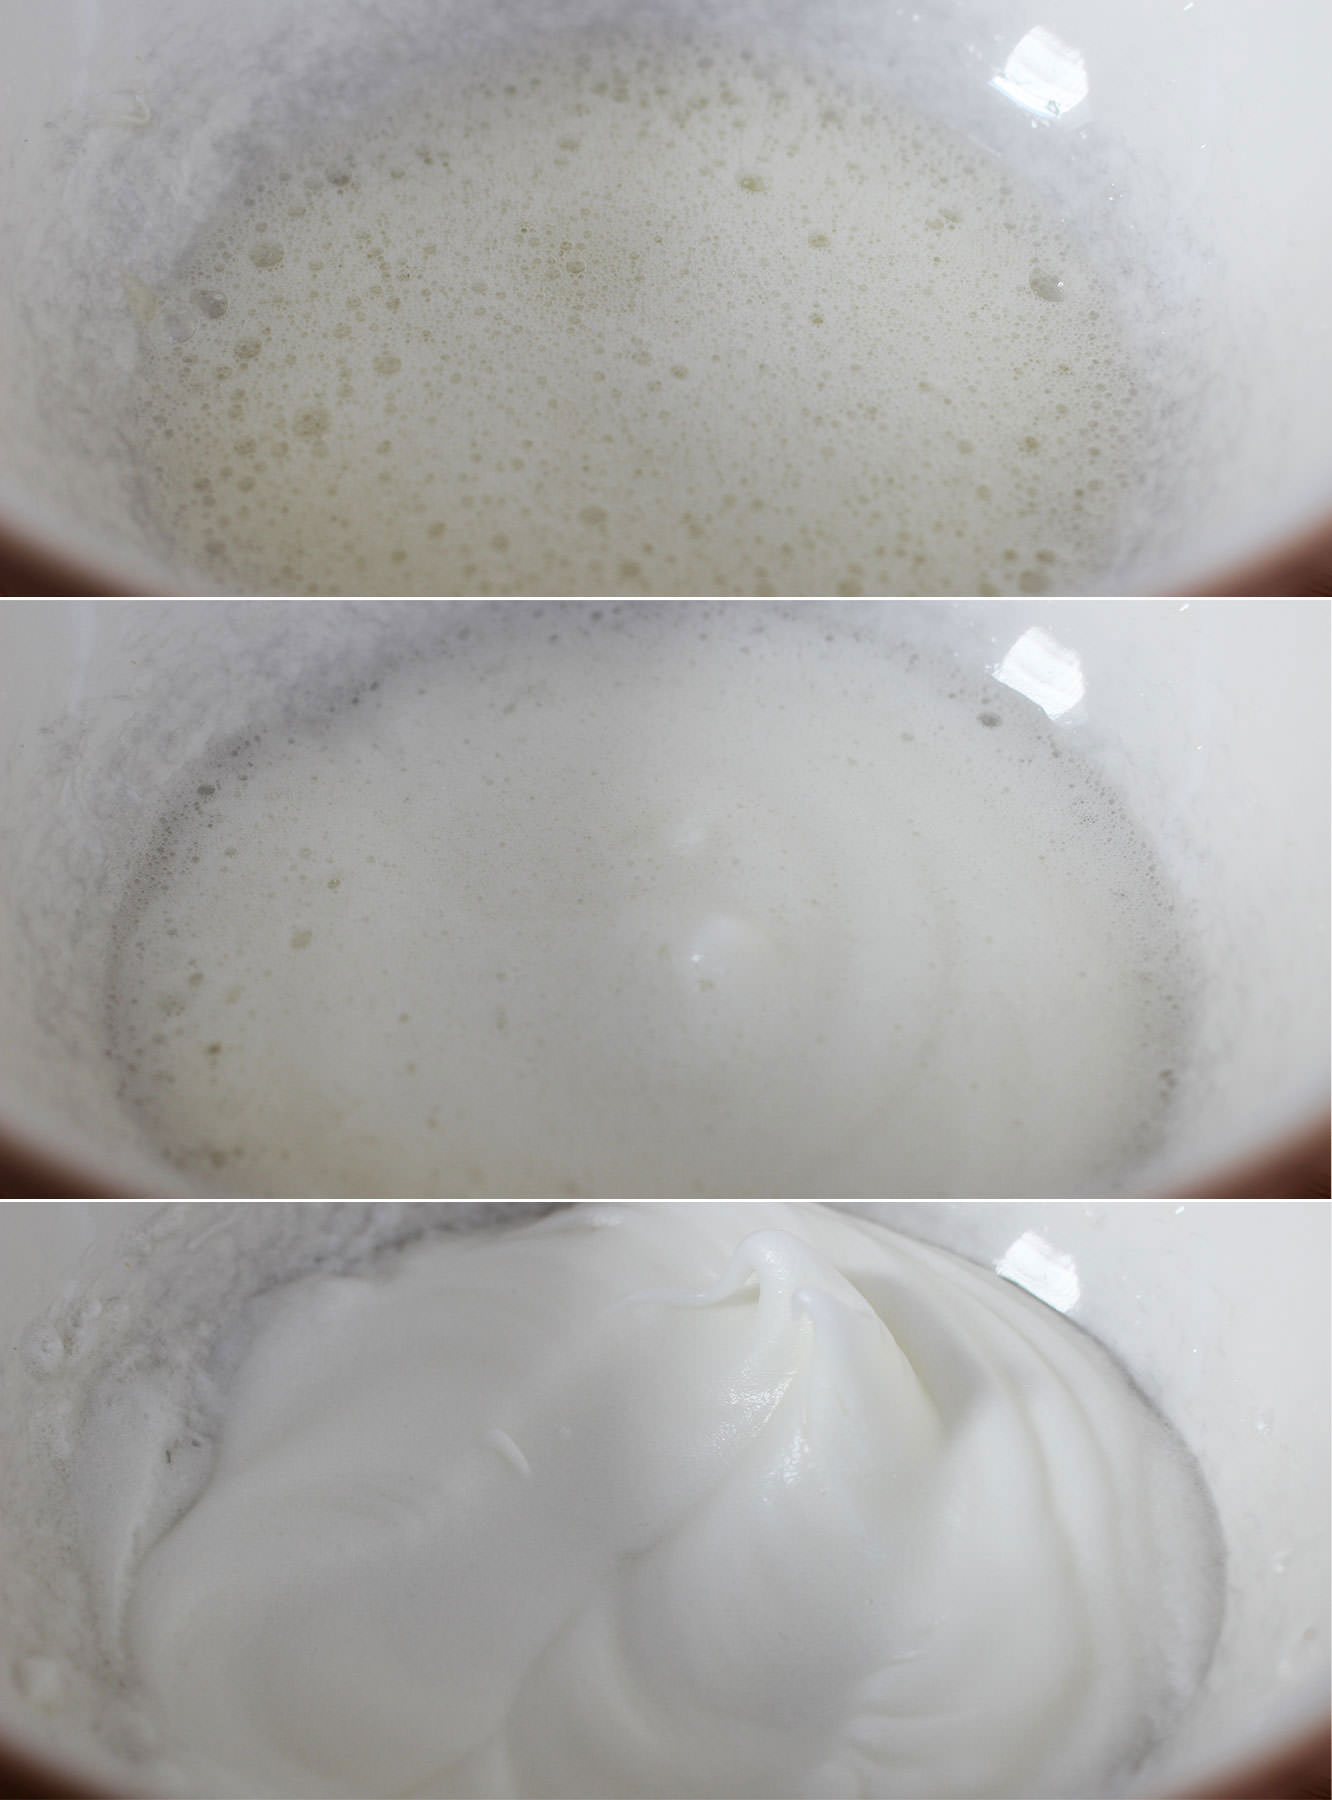
Place the egg whites in a metal or glass bowl, never plastic. Or you know, if you want to wreck your lovely Mason Cash bowl by using an electric whisk on it, by all means do. Those handsome grey marks? You could have those too.
When the sugar gets to somewhere around 112-115C whisk the egg whites into stiff peaks.
Step five
When the sugar reaches 118C take it off the heat.
Squeeze the gelatine out a bit and add it to the sugar mix. It will bubble right up so don’t panic. It should settle pretty quickly.
Step six
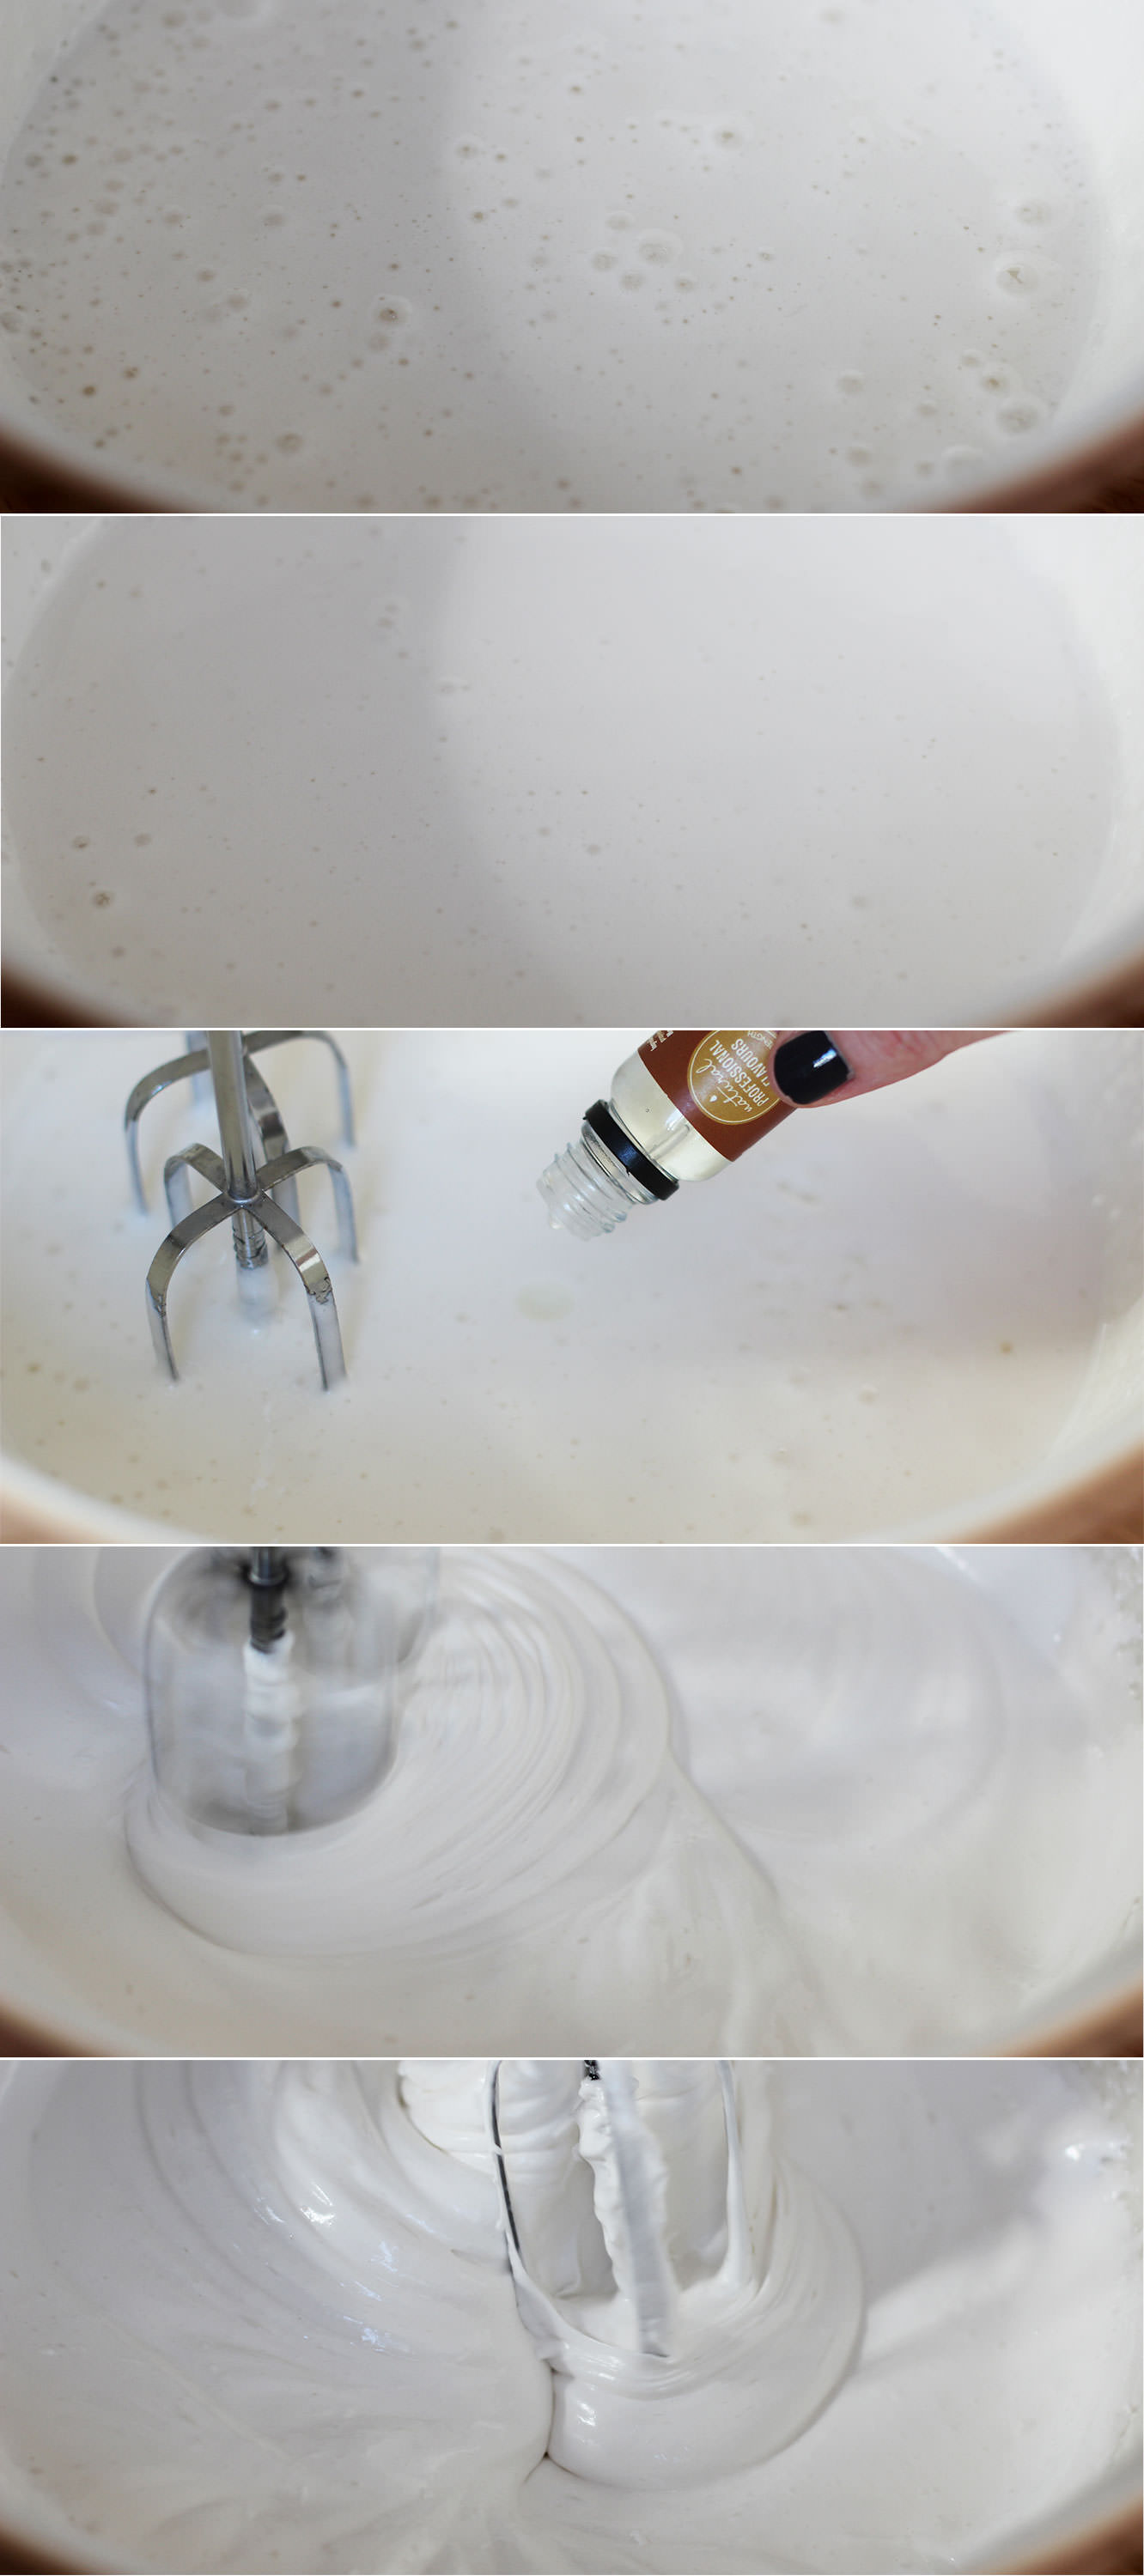
Pour the hot sugar into the eggs, but make sure you’re whisking continually to avoid a big lump of sugar at the bottom of the bowl.
Whisk until the mixture holds its shape well and is quite thick. This can take up to ten minutes.
Somewhere during the whisking (probably when you need to give your arm a rest) add the flavouring. Vanilla extract is lovely in these but they will take basically anything you fancy. Like I said in the ingredients list I really recommend ‘Buttery Caramel’ from the Natural Professional Flavours brand.
Step seven
Pour the mixture into the prepared tin and smooth out as much as possible.
Dust with icing sugar and leave to set for about an hour.
Step eight
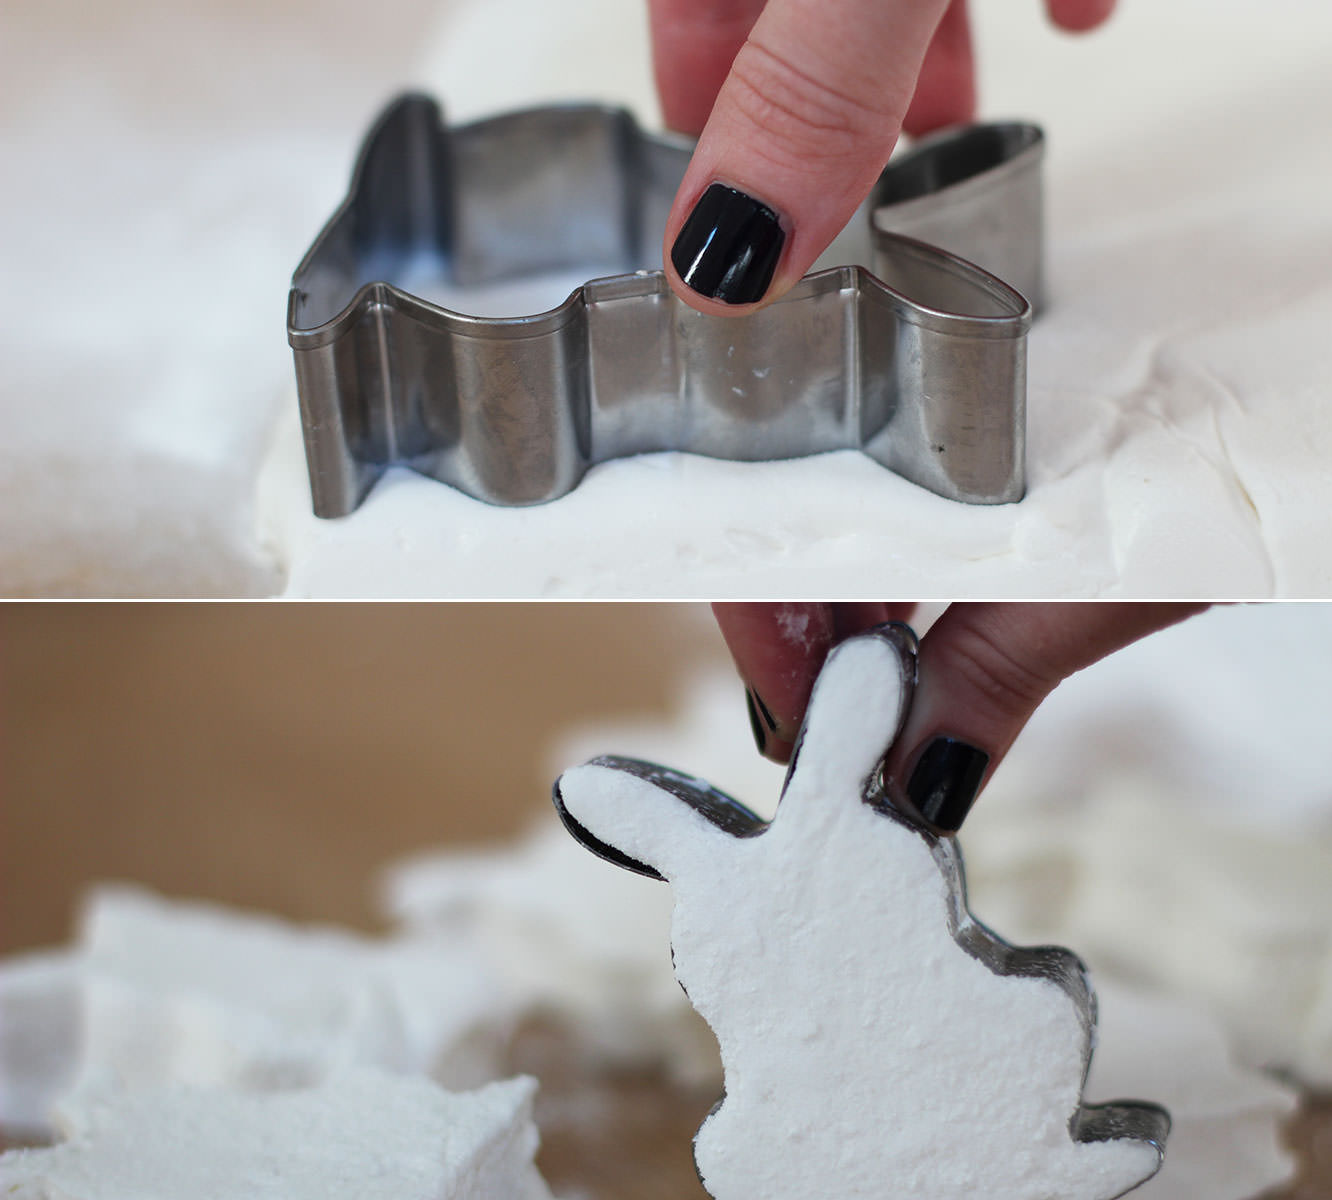
Turn the marshmallow out onto a clean surface.
Cut as many bunnies as you can out of the sheet of marshmallow. This will vary depending on your tin and cutter size. I got nine out of mine.
Step nine
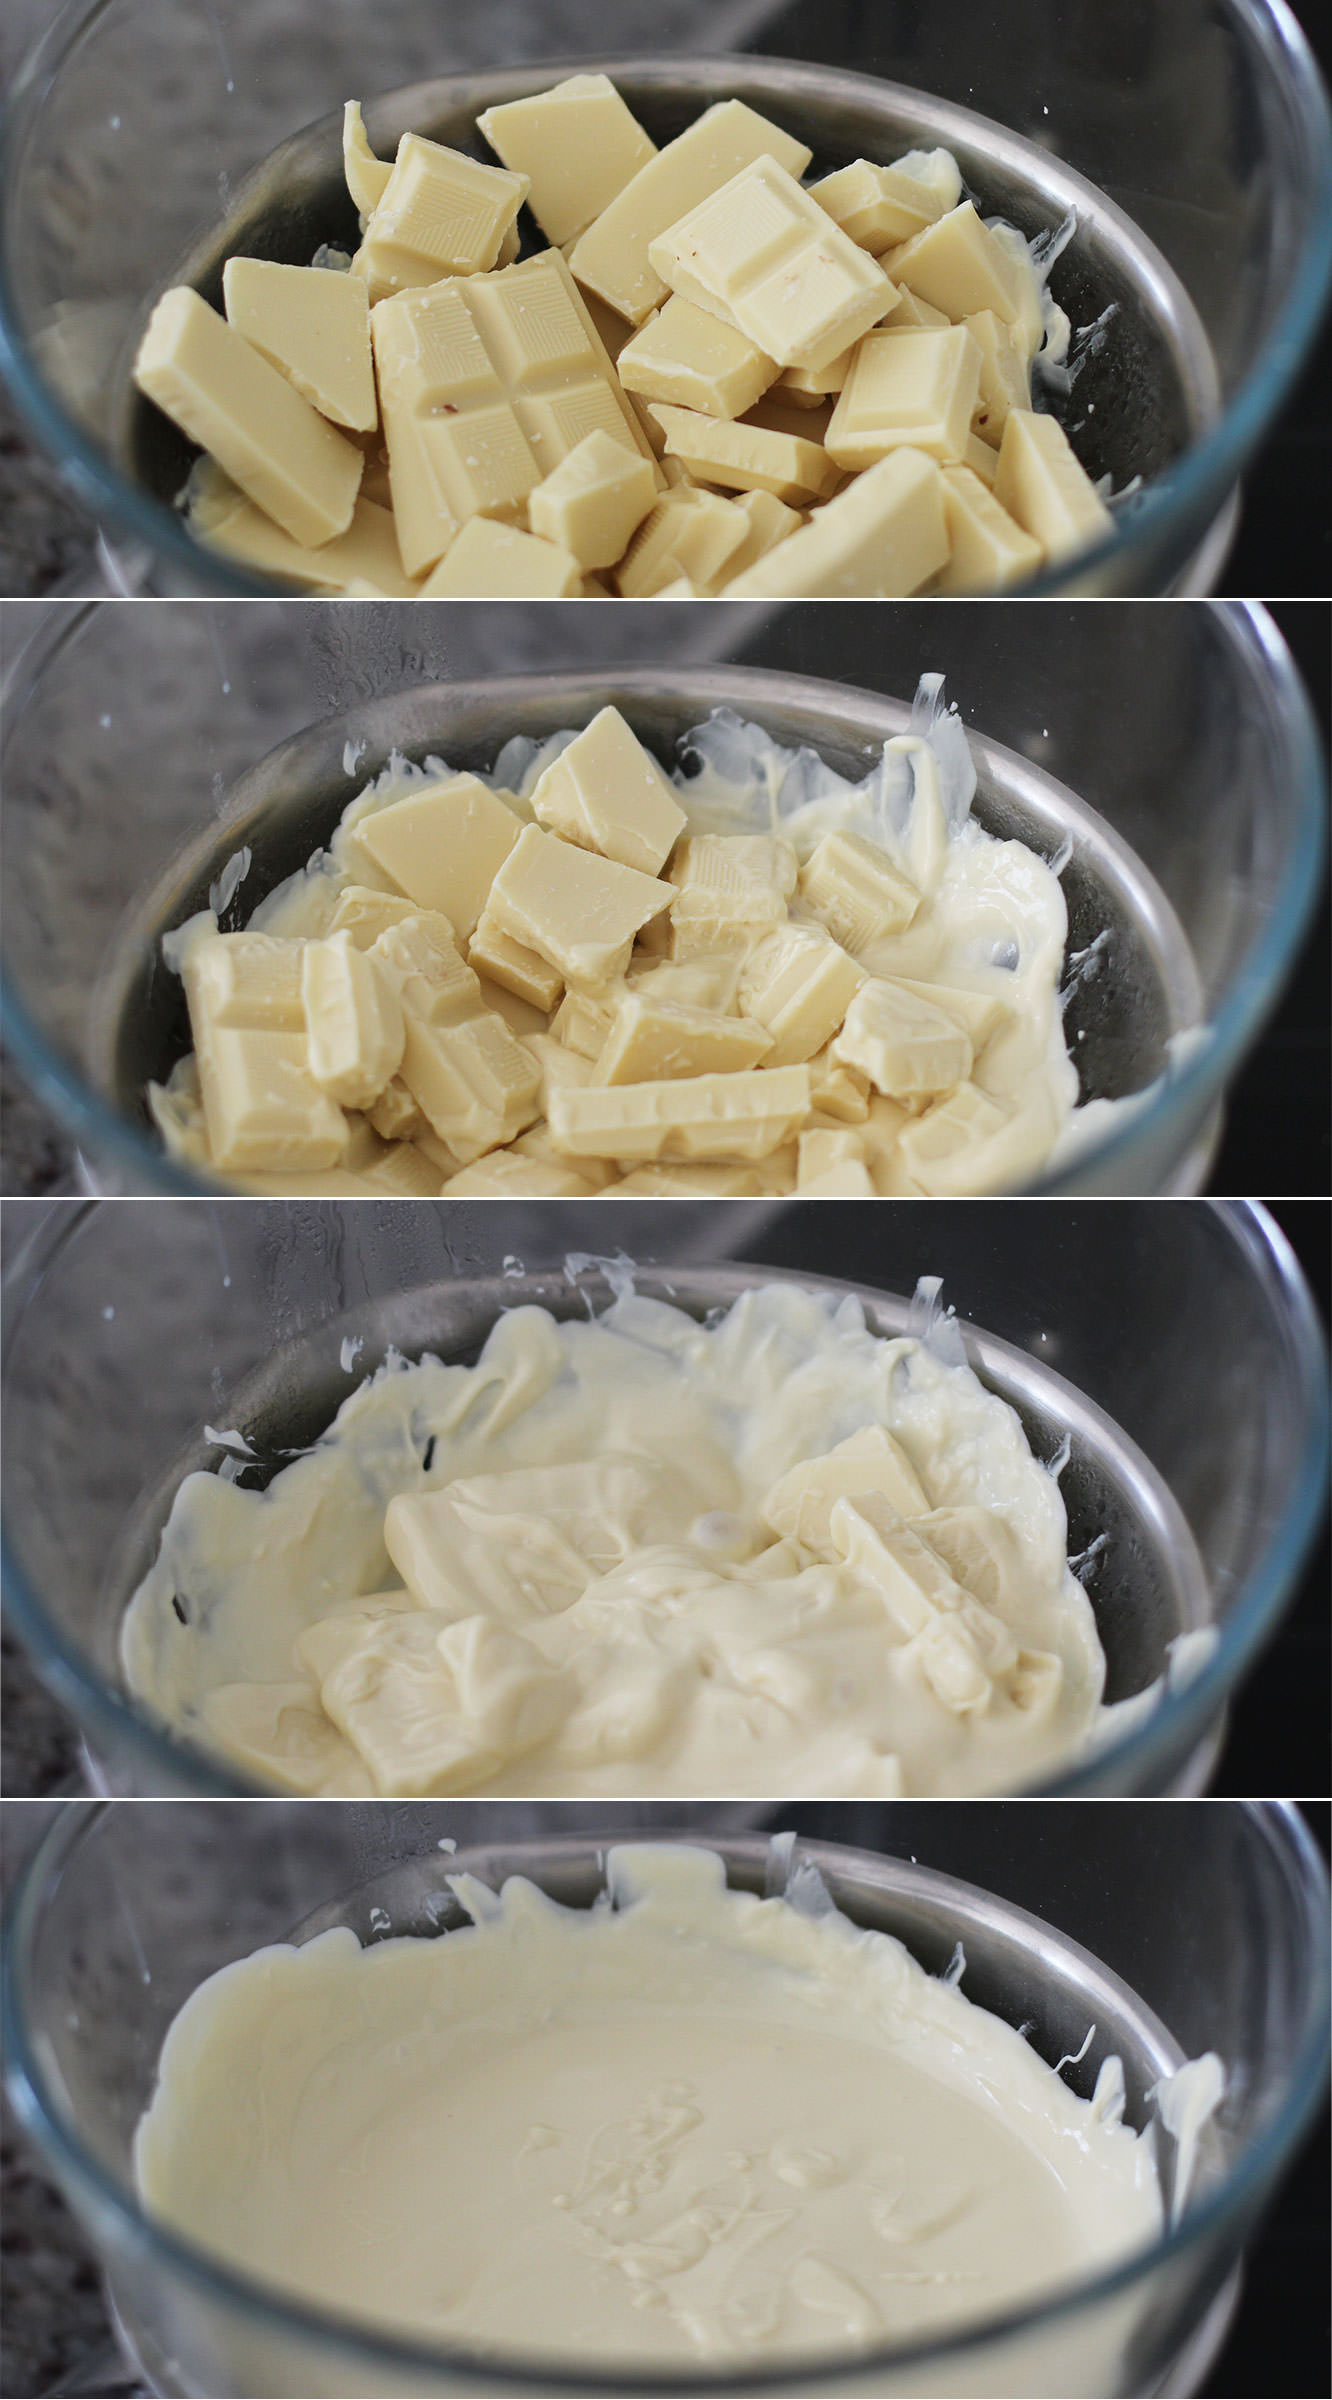
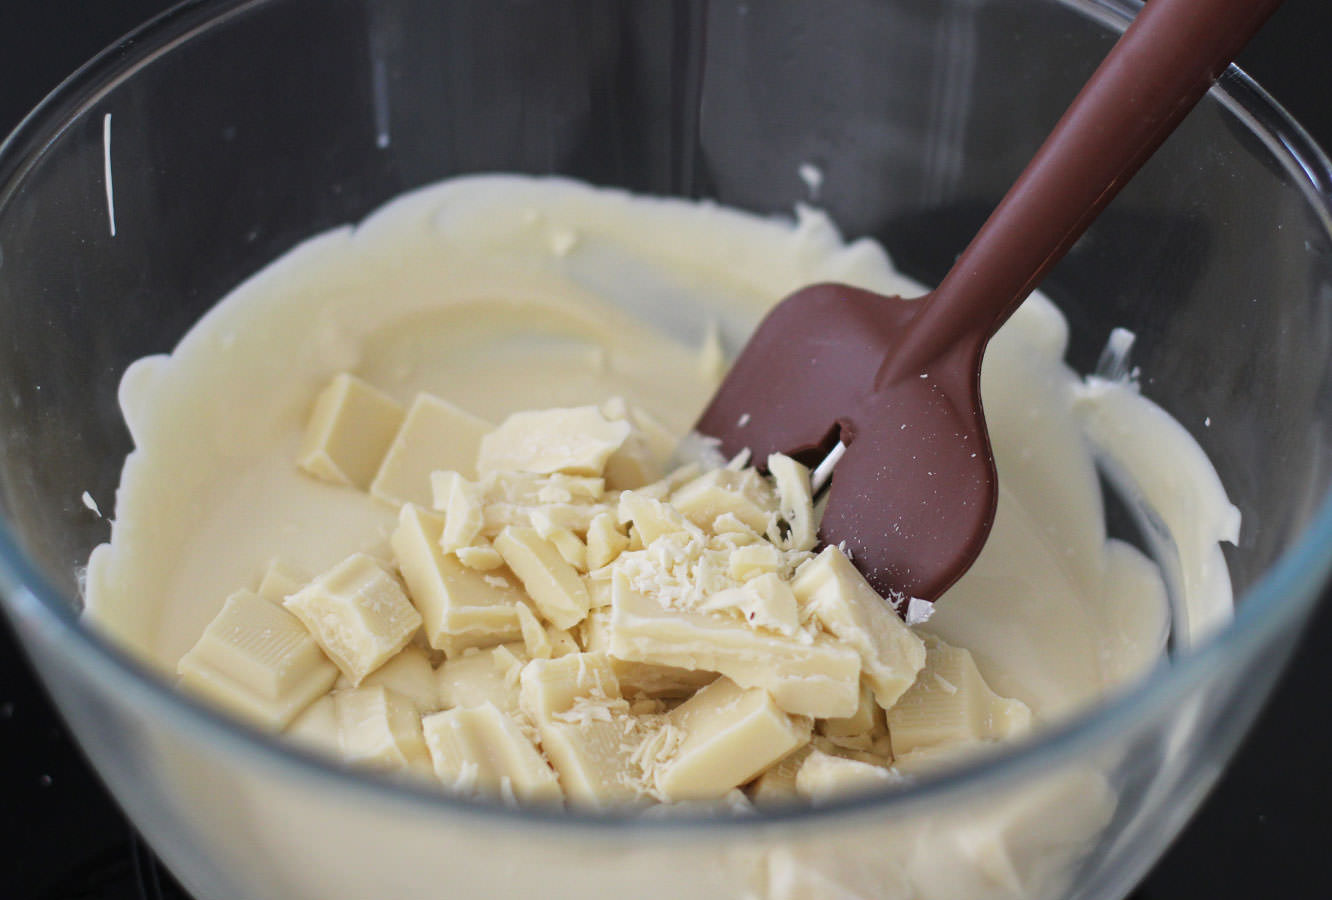
Melt a couple of pieces of chocolate in the microwave.
Dip the cake pop sticks in and push them into the bottom of the bunnies. I put mine in up to the head to increase stability. Leave to set.
Step ten
I recommend tempering the chocolate. Then you will get a nice snap when you bite into the pops and you can use the remaining chocolate to do something like this. Don’t feel you have to though, it will work without.
To temper, melt two thirds of the chocolate over a pan of boiling water and allow it to reach 45C. Remove it from the heat and add the rest of the chocolate. This should melt in and cool it down quicker. Stir it to cool down to 25C. Place it back on the heat to get it back up to 28C.
Step eleven
Place the chocolate into a small deep bowl (or I actually found with the milk chocolate that a glass works really well).
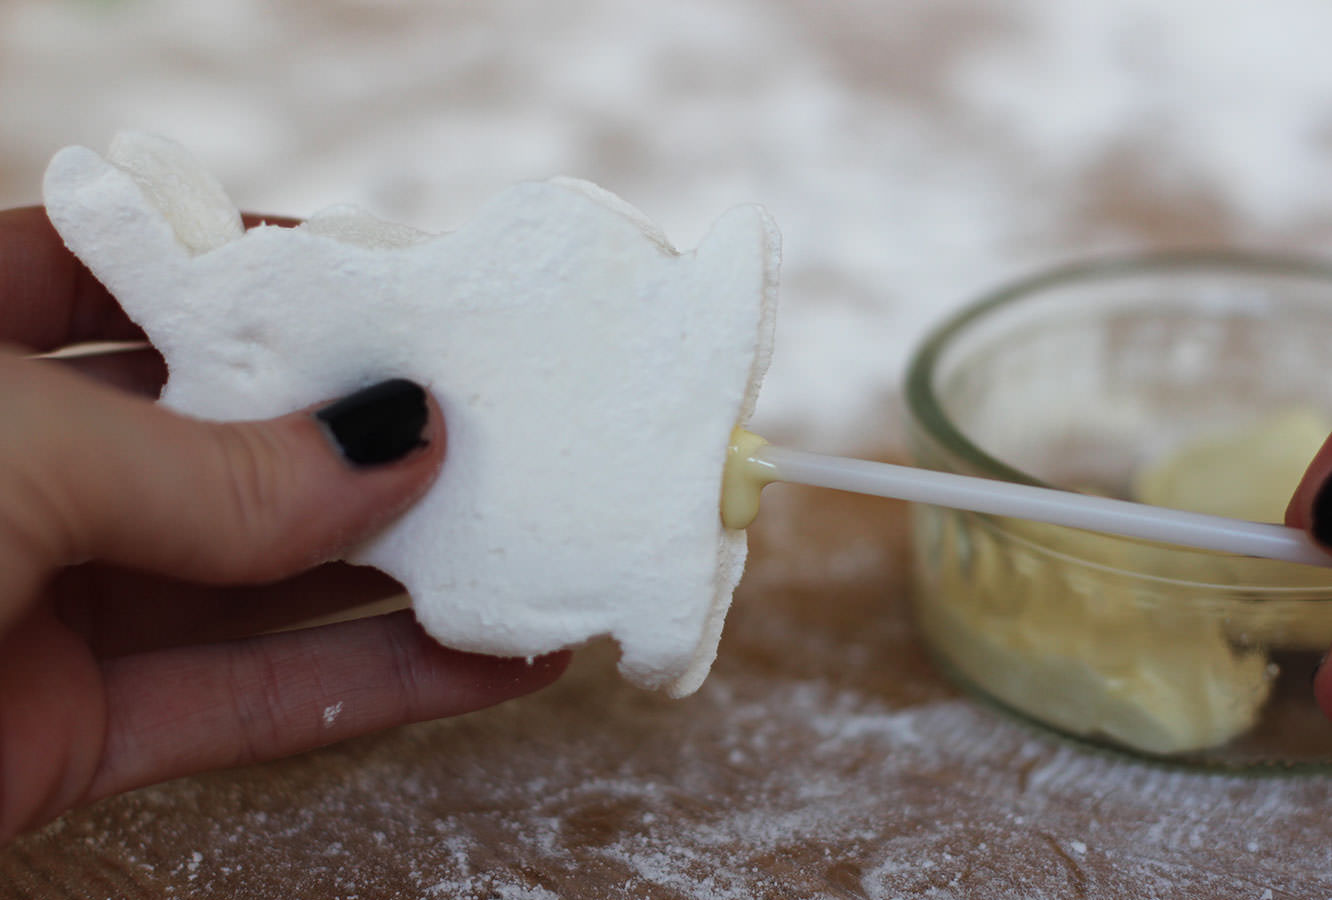
Dip the bunnies in and make sure to coat well. Allow excess chocolate to drip off, twirl it round to get an even, smooth coating.
This is where I ran into a spot of difficulty and filled my left hand with bunny pops that were covered in melted chocolate. I suggest you a) get a spare pair of willing hands, b) get a block of florist’s oasis/cake pop stand to stick them in, c) accept the back of them won’t be beautiful and lay them down on cellophane or greaseproof paper.
Step twelve
Once dry, add their little faces and tails. I used a cocktail stick with a small amount of melted chocolate to stick on sugar decorations. I got the little hearts I used for the noses from Tiger, and I can’t be sure about the circles for the cheeks.
I drew the faces on with an edible ink pen I bought online. You could use a cocktail stick and some dark chocolate if you prefer.
Step thirteen
Tie a piece of twine or ribbon around the stick and make a day a little bit happier.
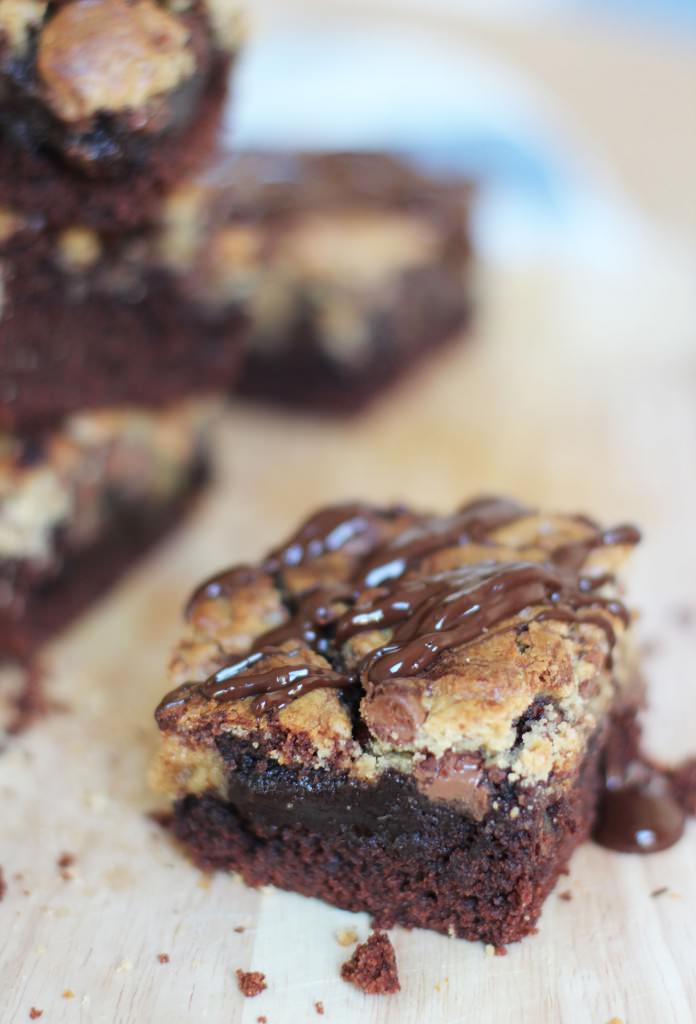
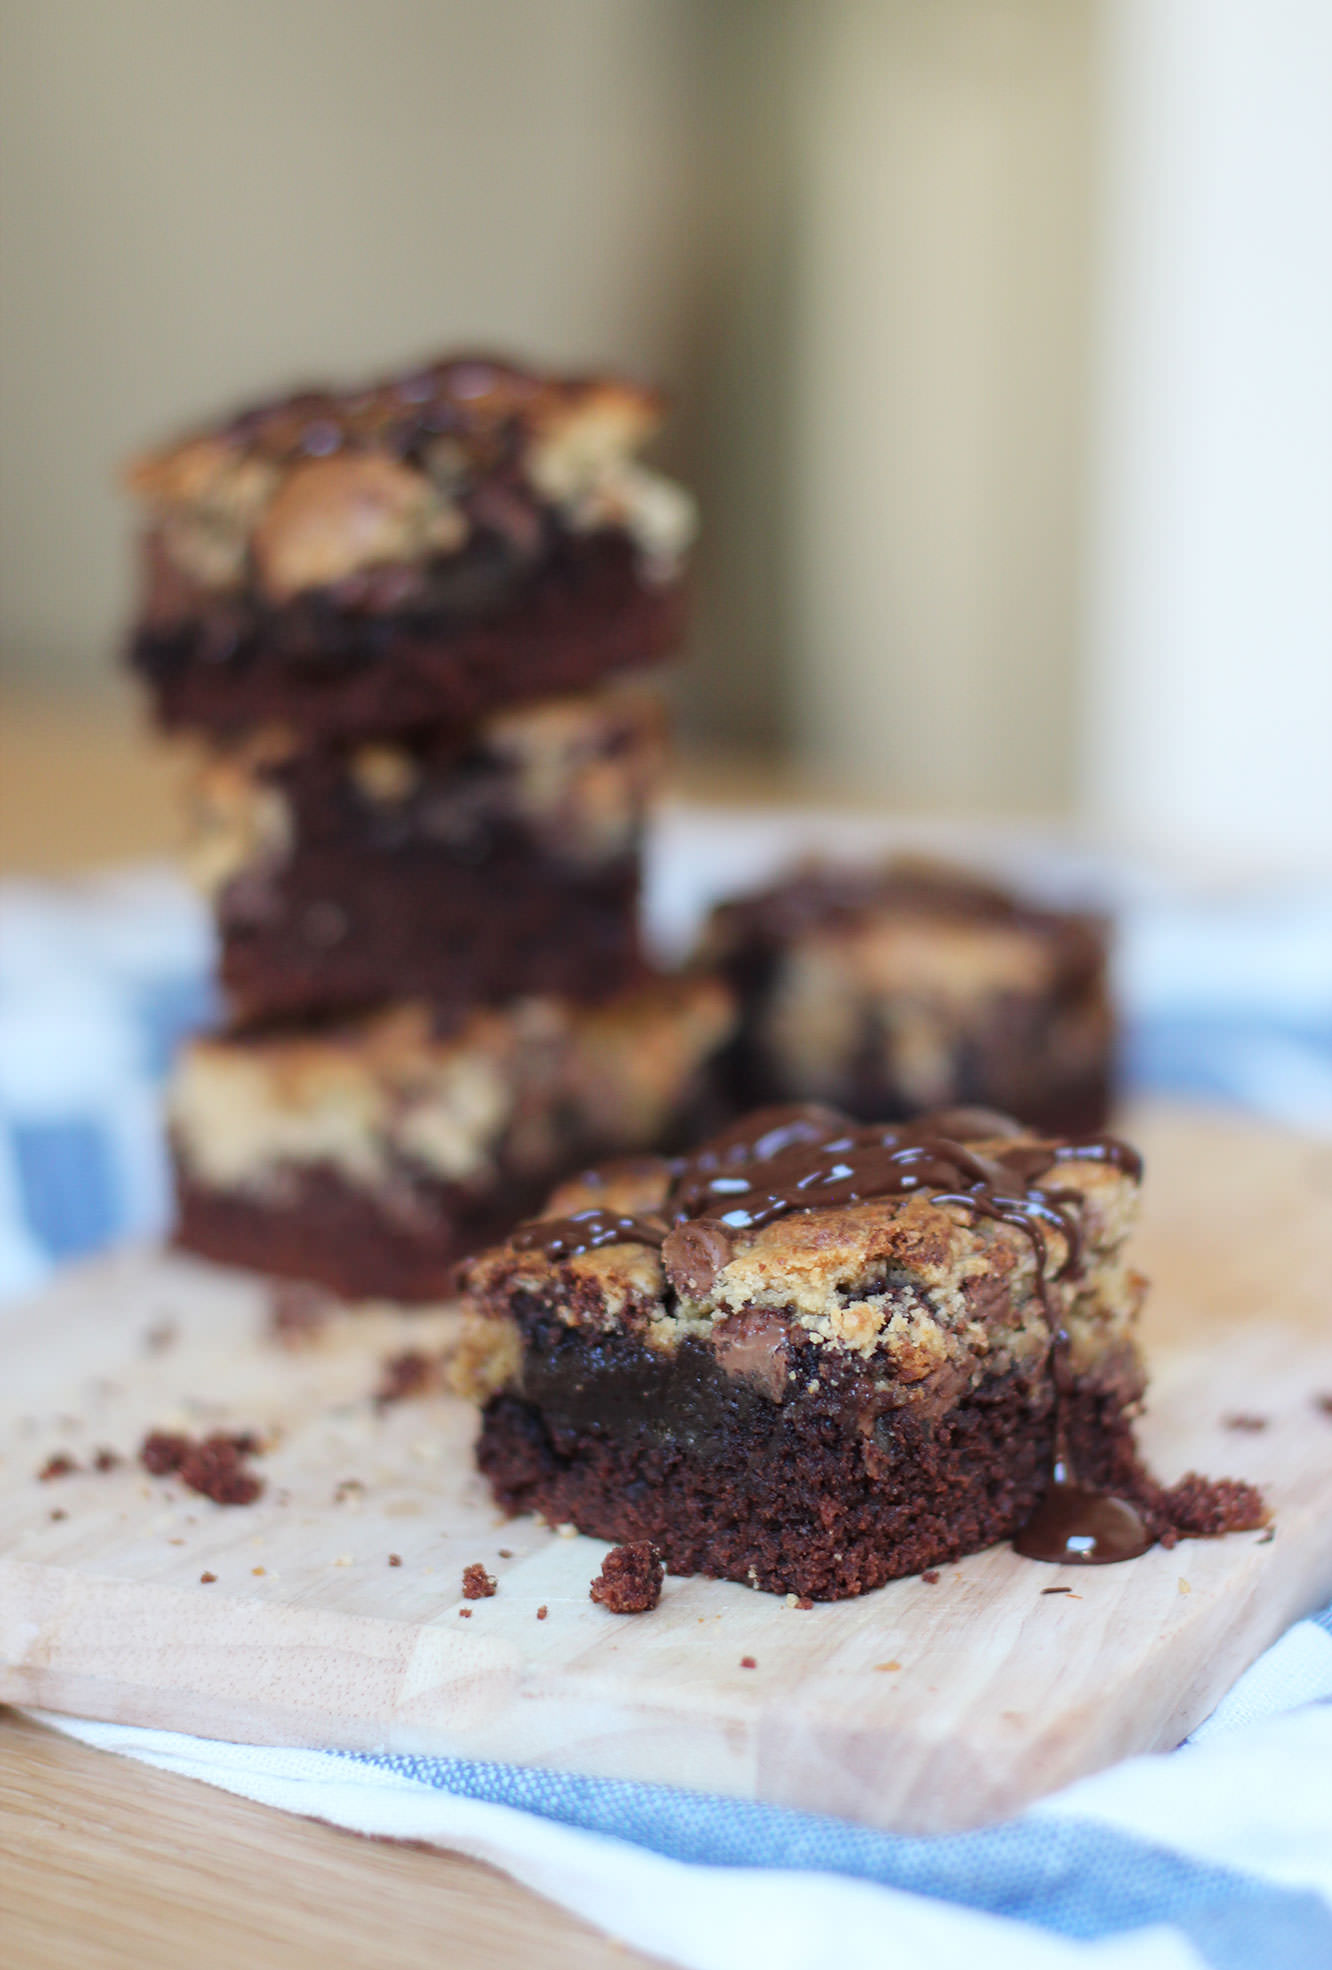
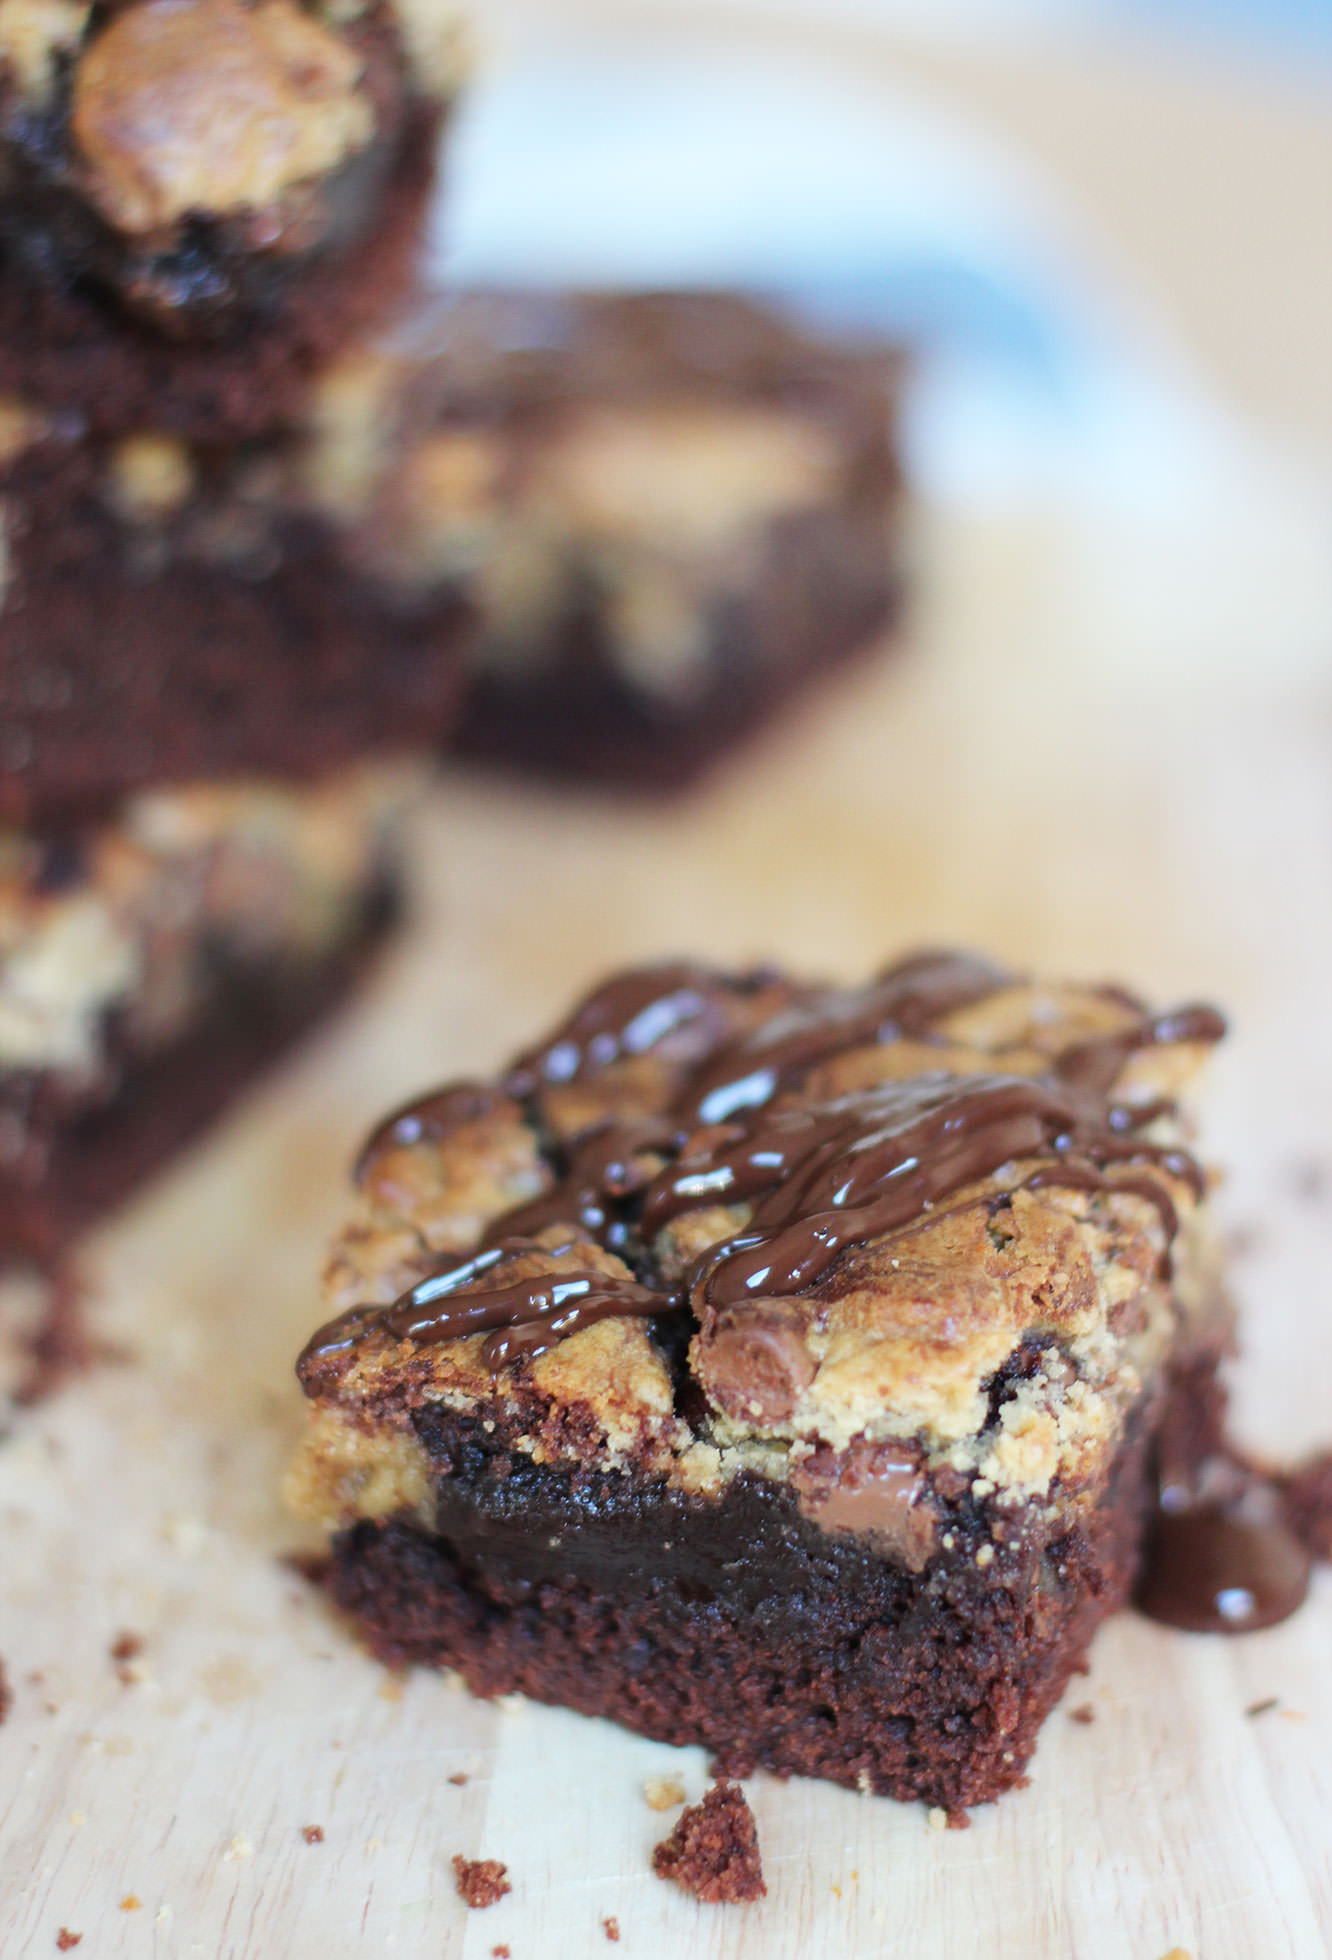
I used to make a cheat’s version of this recipe with two packet mixes, and recently I just thought to myself, ‘I wonder if this would taste better if I made the batters from scratch’. Oh boy does it.
You just have to find an excuse to make this and eat it warm from the oven with some ice cream. It’s very easy and quite a bit more impressive than regular brownies.
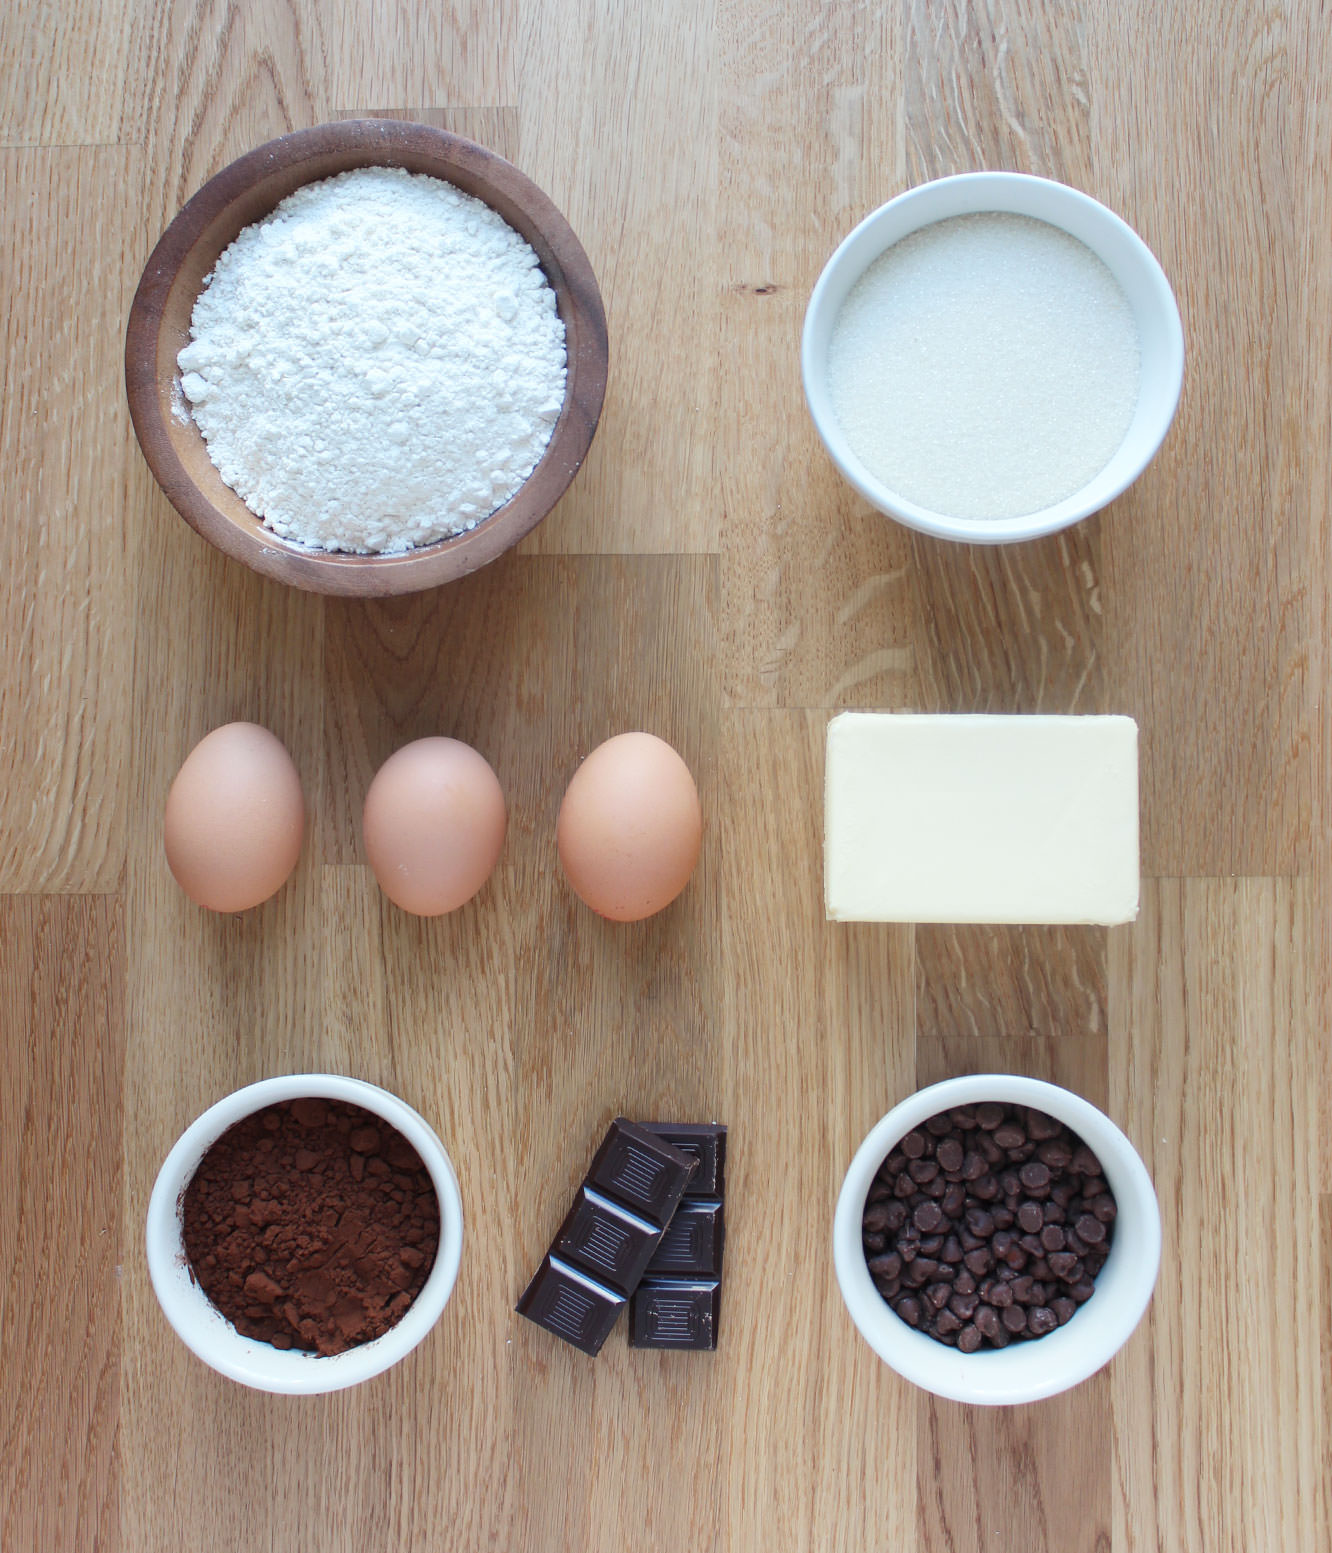
You will need
For the brownie batter:
300g/10.5 oz Caster sugar (golden if you have it)
170g/6 oz Unsalted butter
170g/6 oz Plain flour
45g/1.5 oz Cocoa powder
3 Eggs
1/2 tsp Baking powder
For the cookie dough:
170g/6 oz Plain flour
100g/3.5 oz Soft light brown sugar
100g/3.5 oz Milk chocolate chips
60g/2 oz Unsalted butter
1 Egg
1 tbsp Golden syrup
1/2 tsp Baking powder
Extra
45g/1.5 oz Dark chocolate
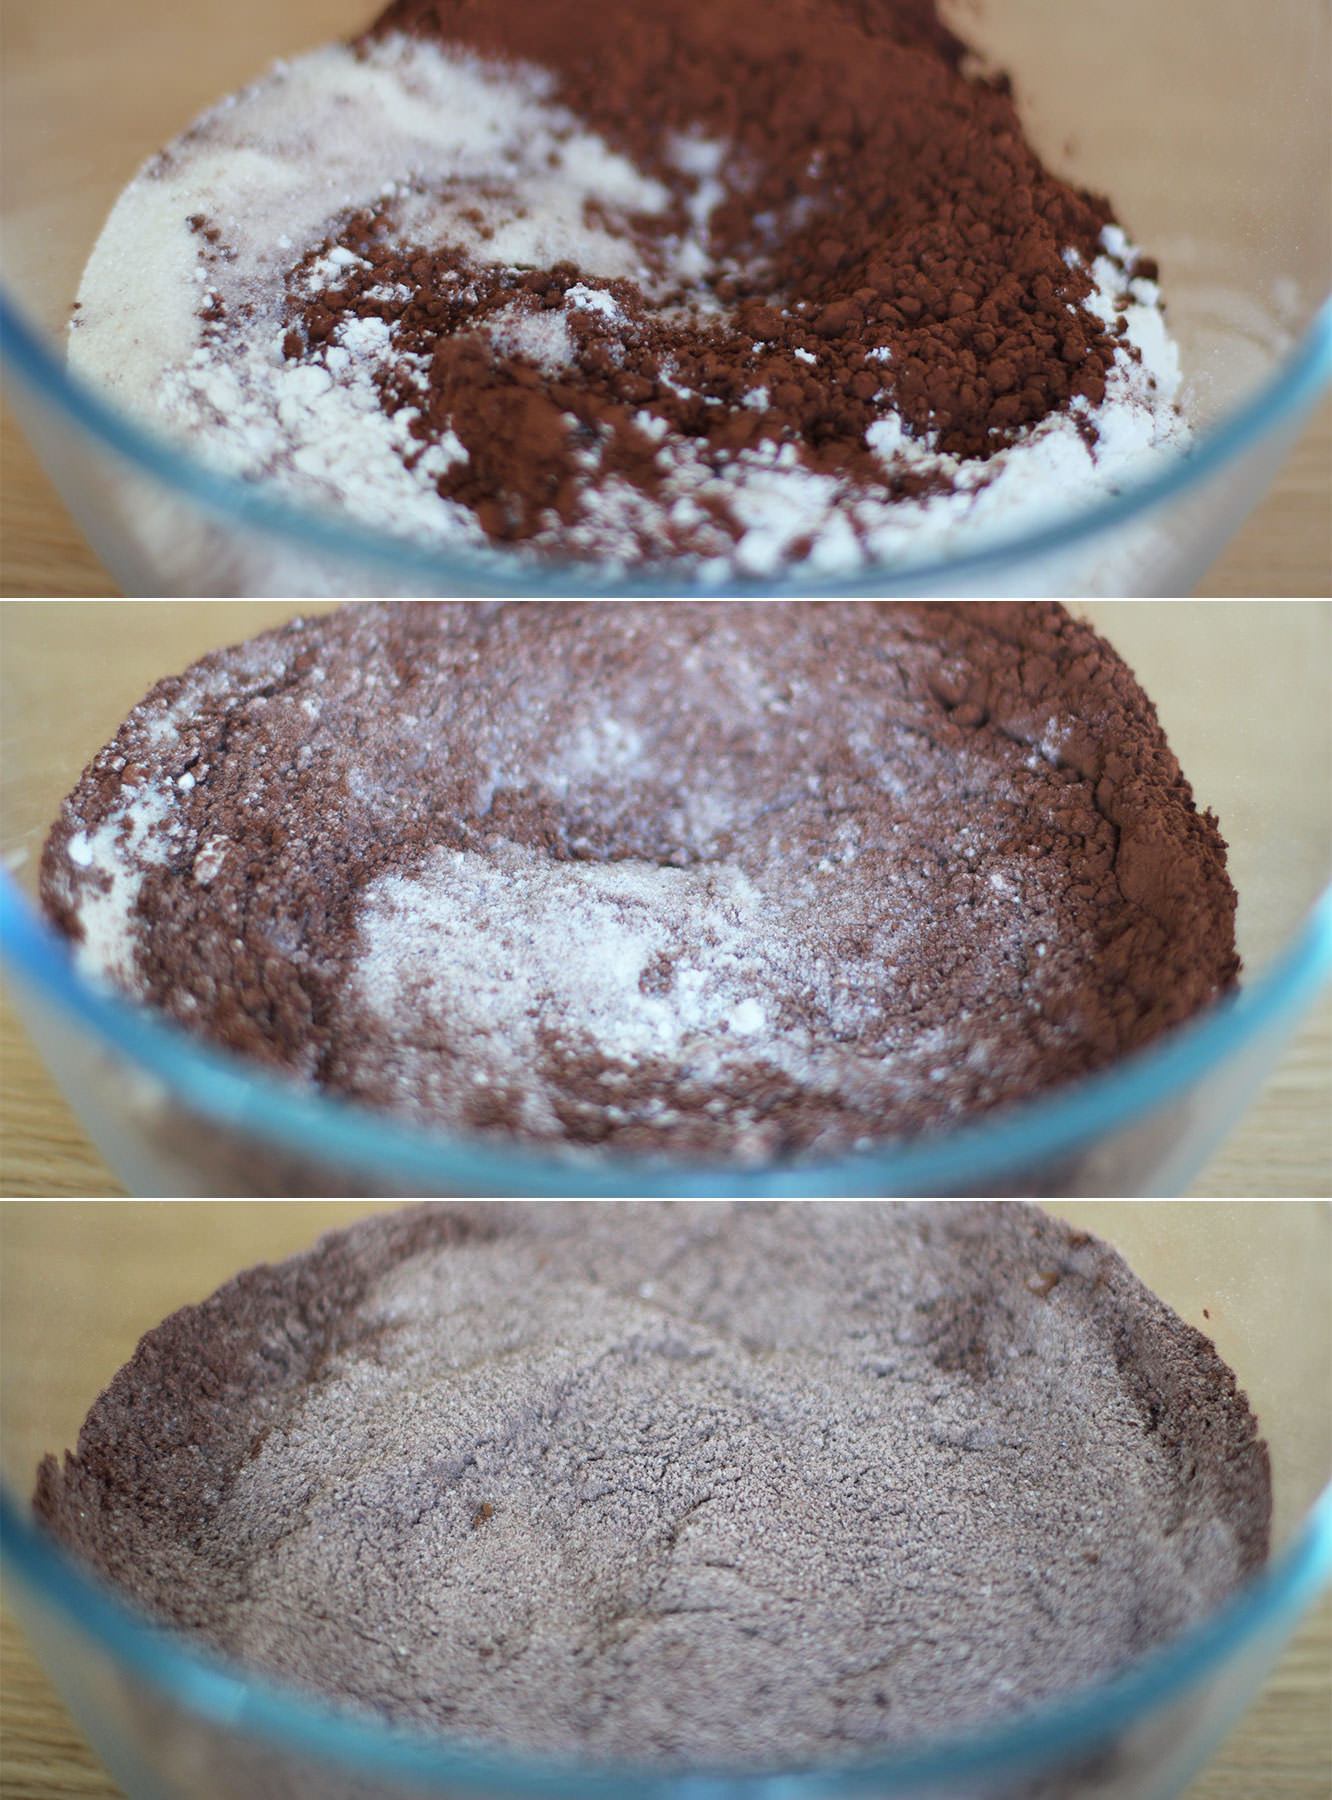
Step one
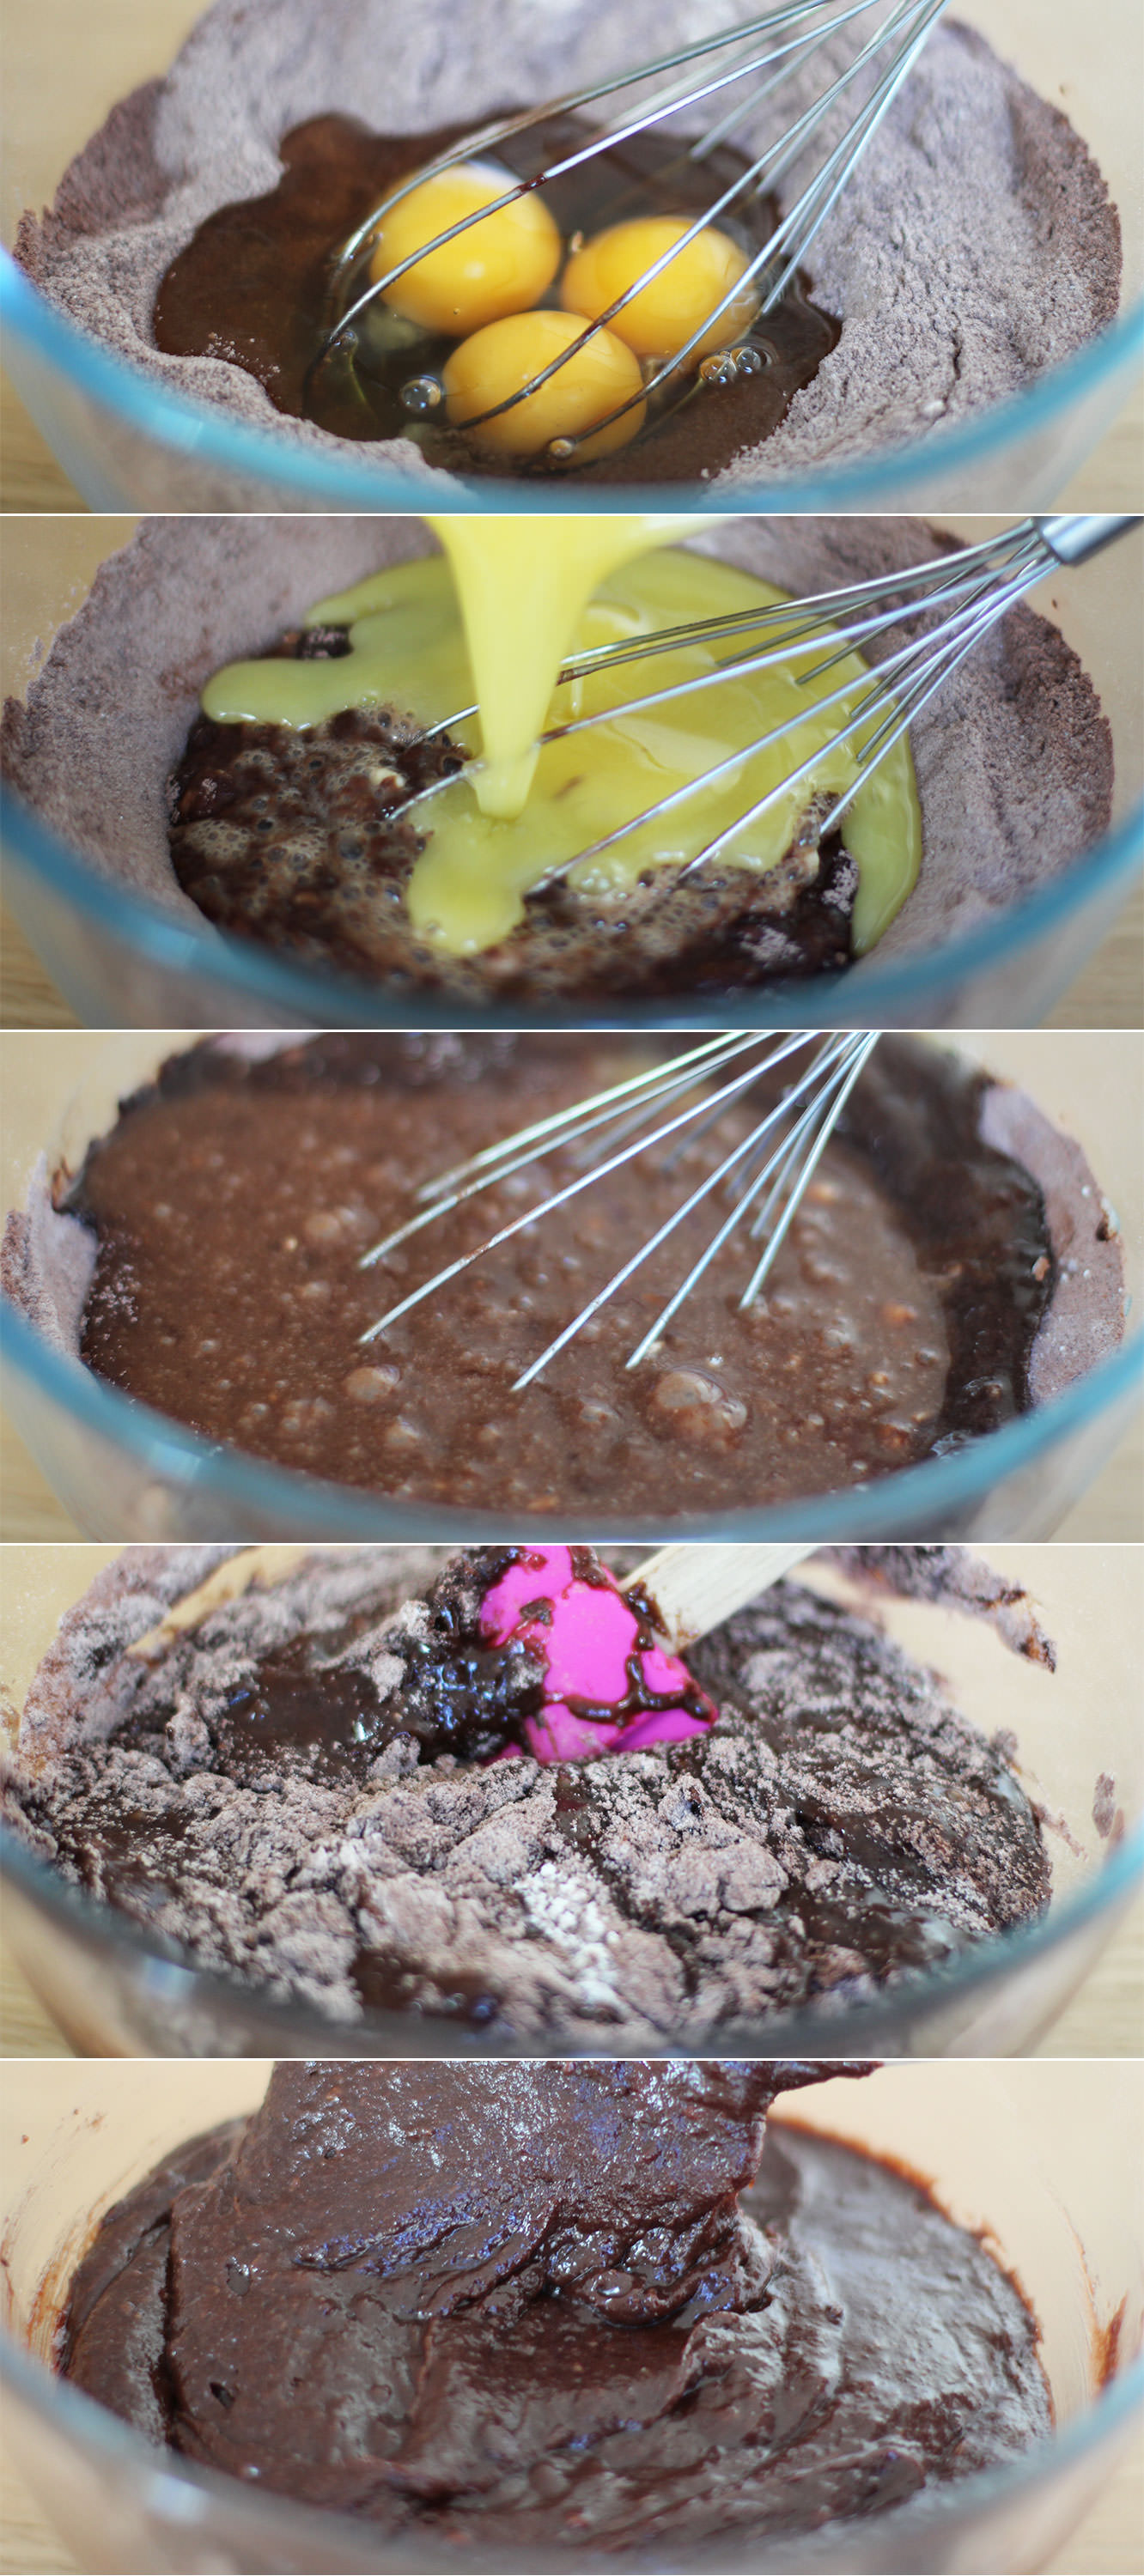
Starting with the brownie batter, mix together the baking powder, sugar, flour and cocoa powder.
Step two
Make a well in the middle of your dry ingredients and add the eggs. Using a hand whisk, combine gradually using small circles in the centre of the batter.
Step three
Melt the butter in the microwave. Only until it has just about dissolved mind, or it will cook the eggs and this is not intended to be a recipe for scrambled egg brownie.
Step four
Add the butter into the mixture and continue with your little circles until most of the flour is combined, then use a spatula or wooden spoon to fold in the rest.
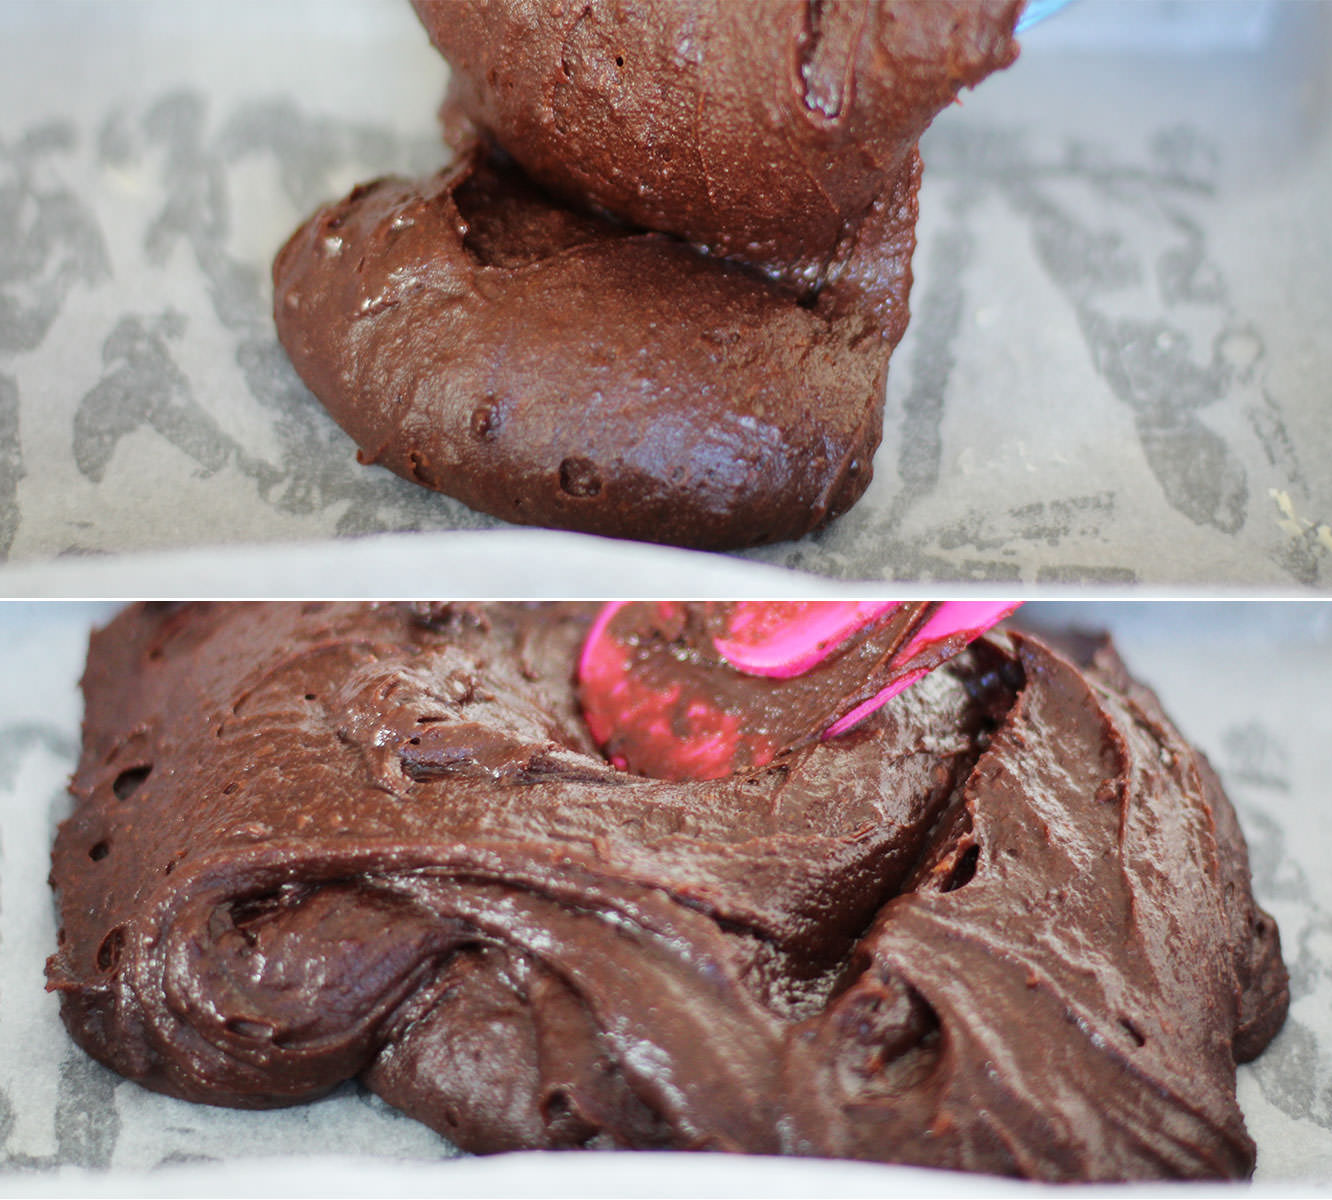
Step five
Pour into a greased and lined brownie tray and gently spread into the corners.
Get a teaspoon and eat a bit. You know you want to.
Moving on to the cookie dough…
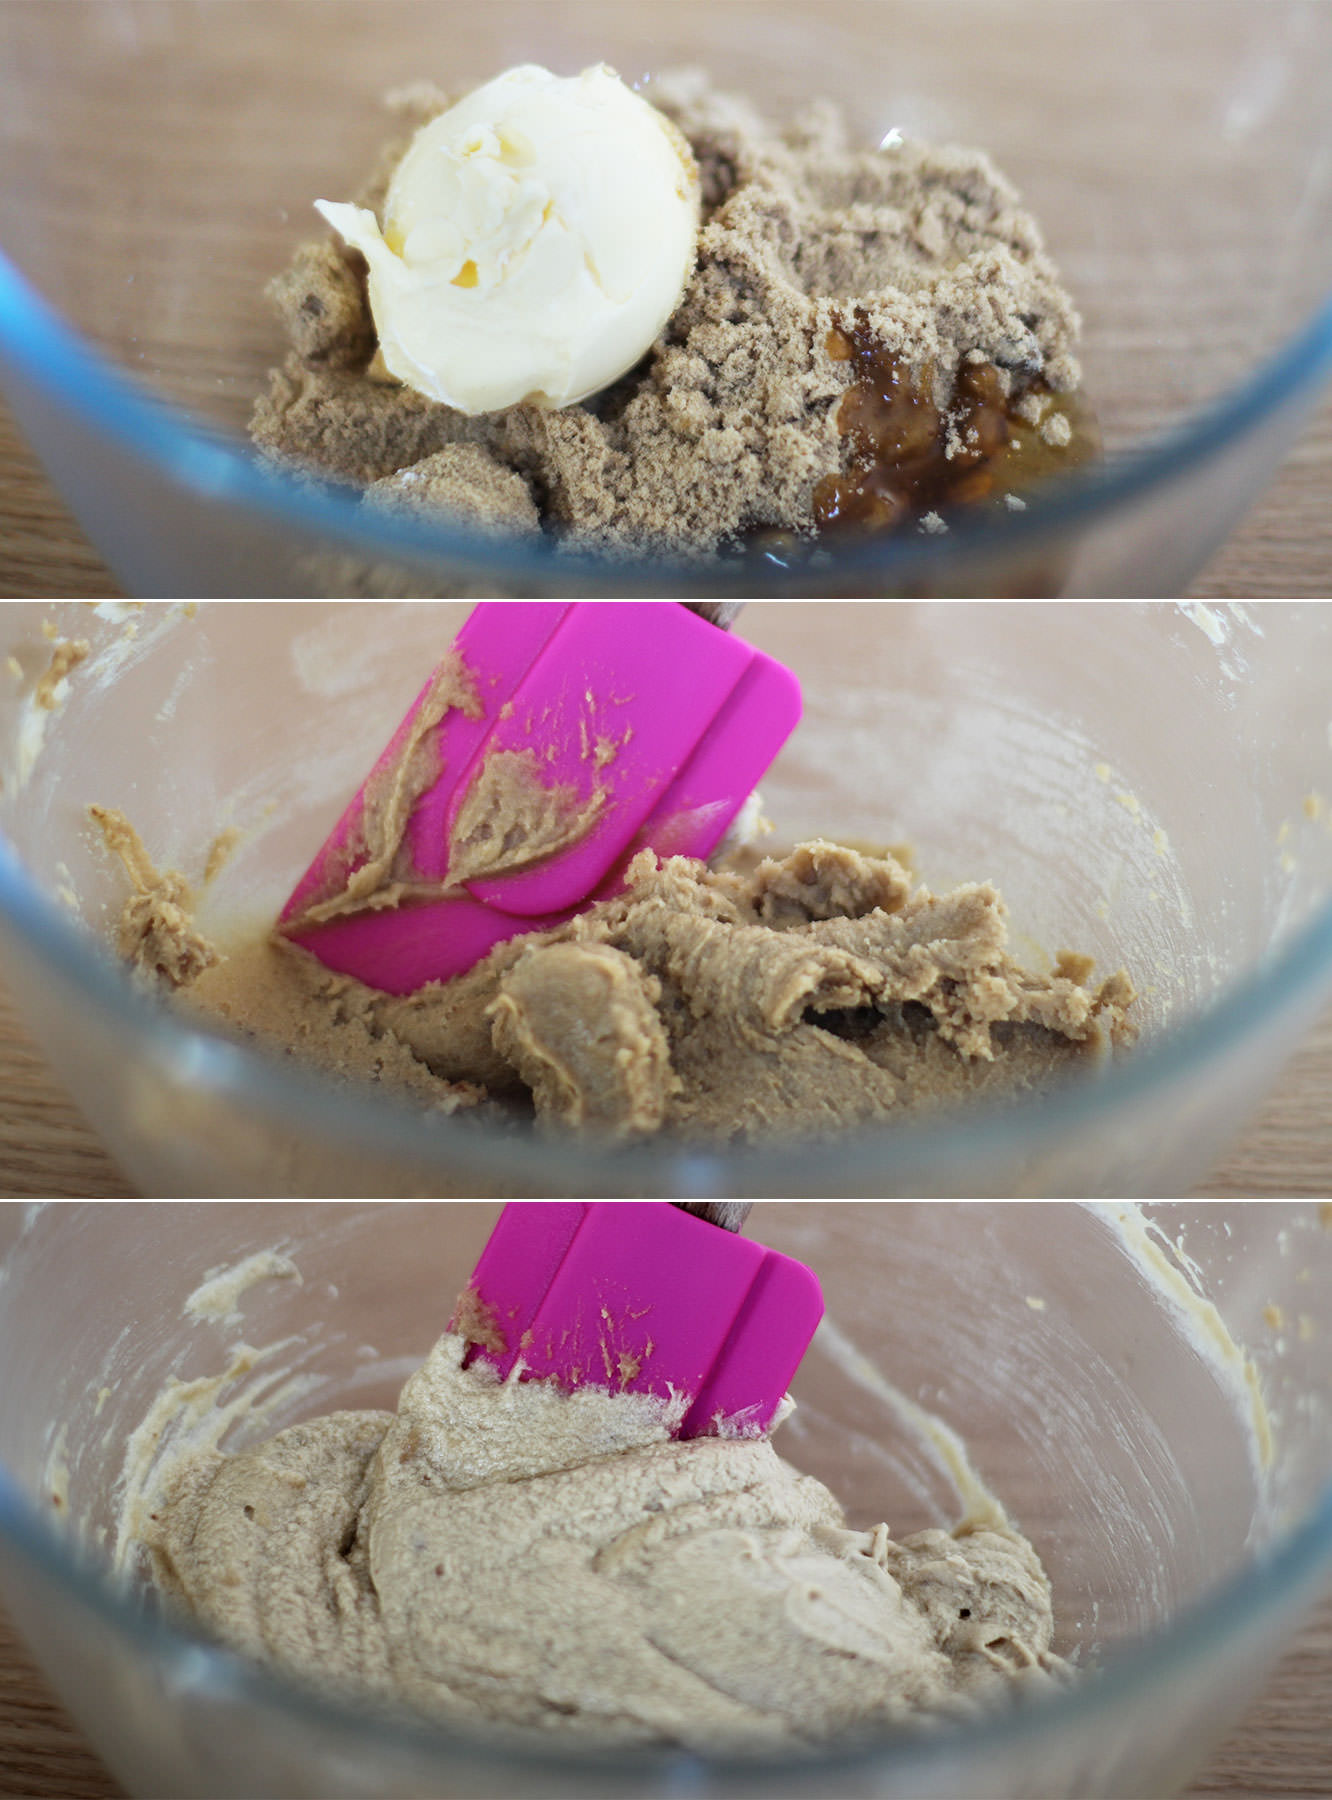
Step six
Beat together the butter, soft brown sugar and golden syrup. You might find it easier/quicker to use an electric whisk.
Step seven
Beat in the egg until pale, light and fluffy.
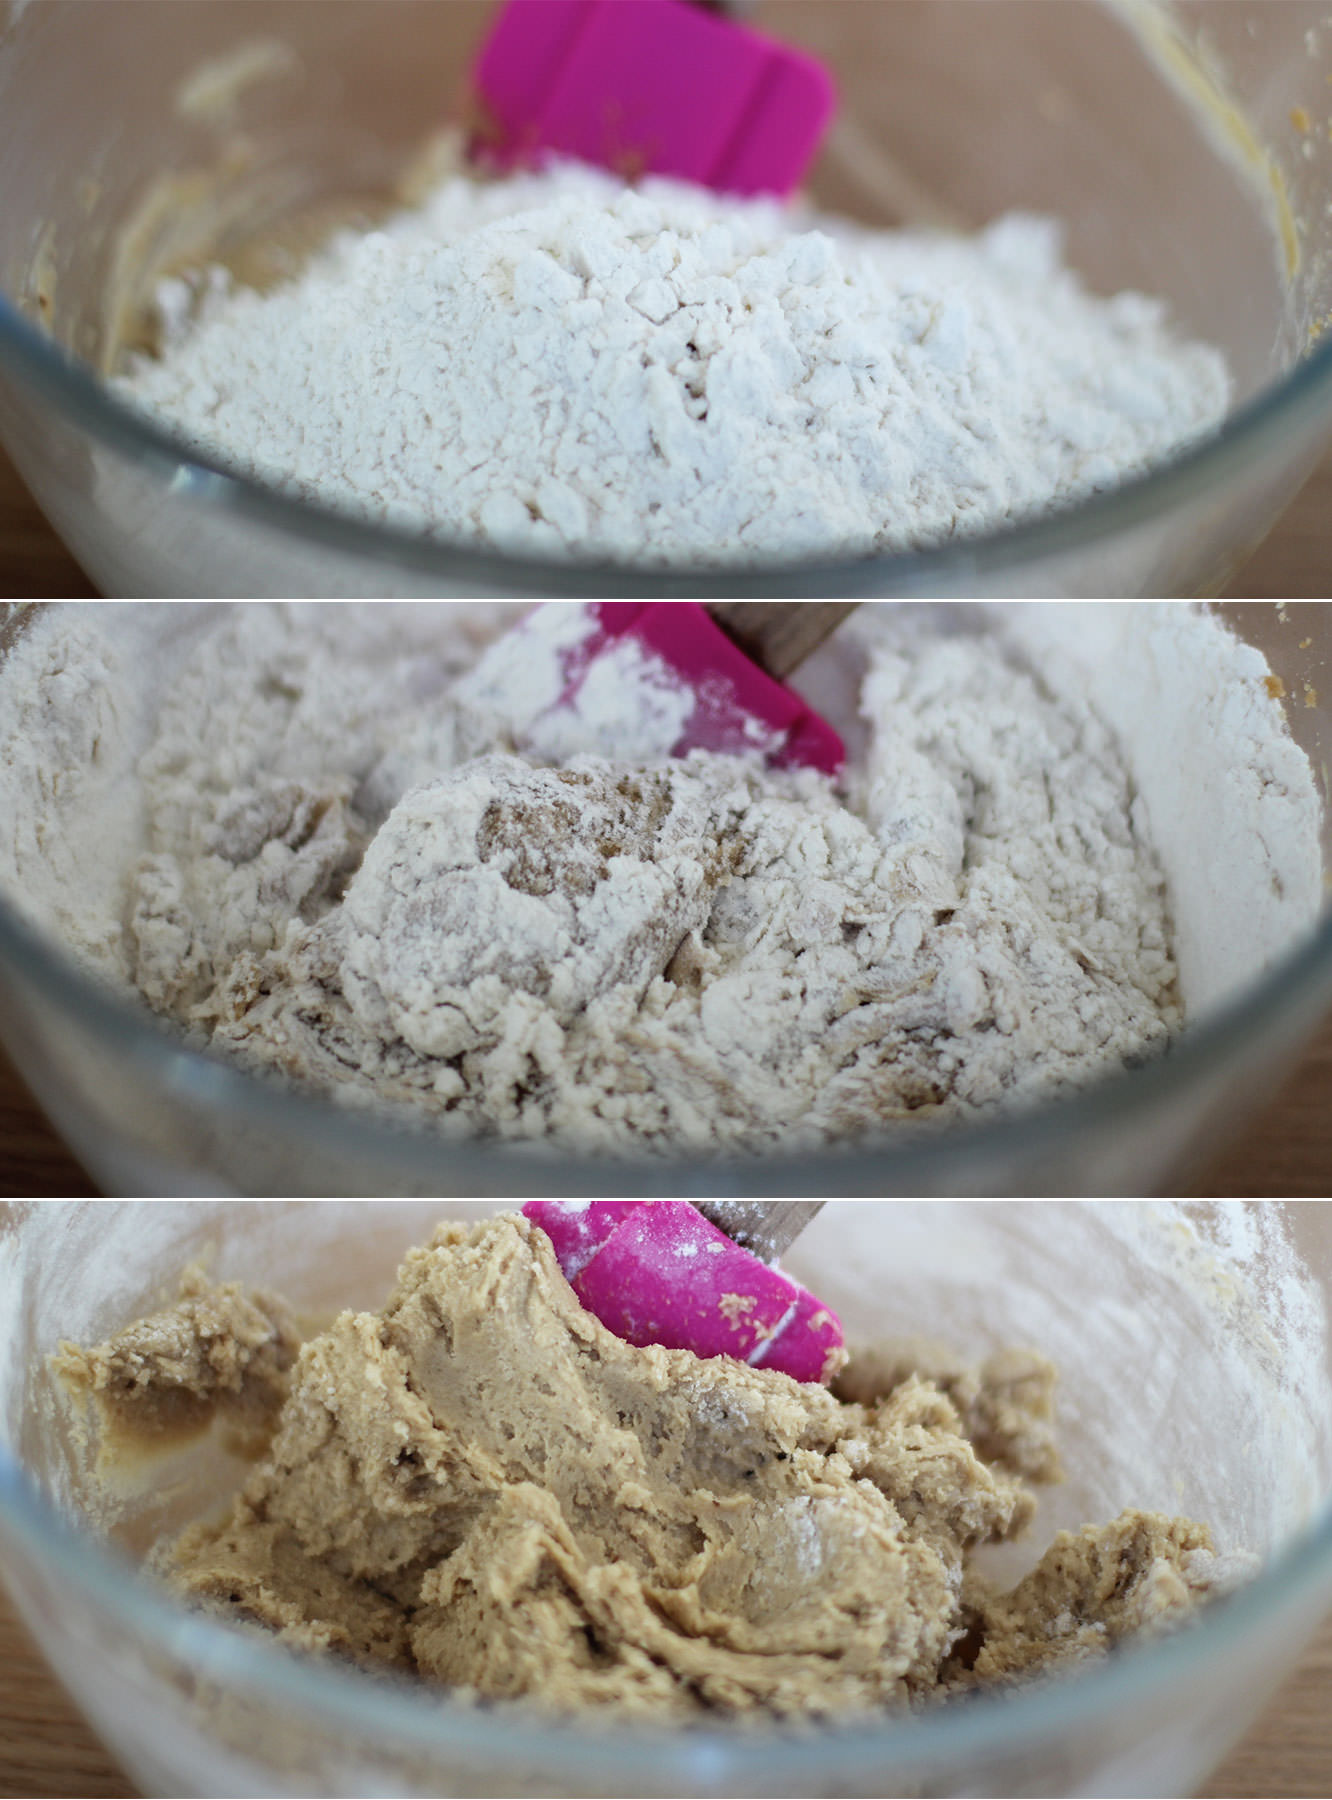
Step eight
Fold in the flour and baking powder until you have a smooth dough.
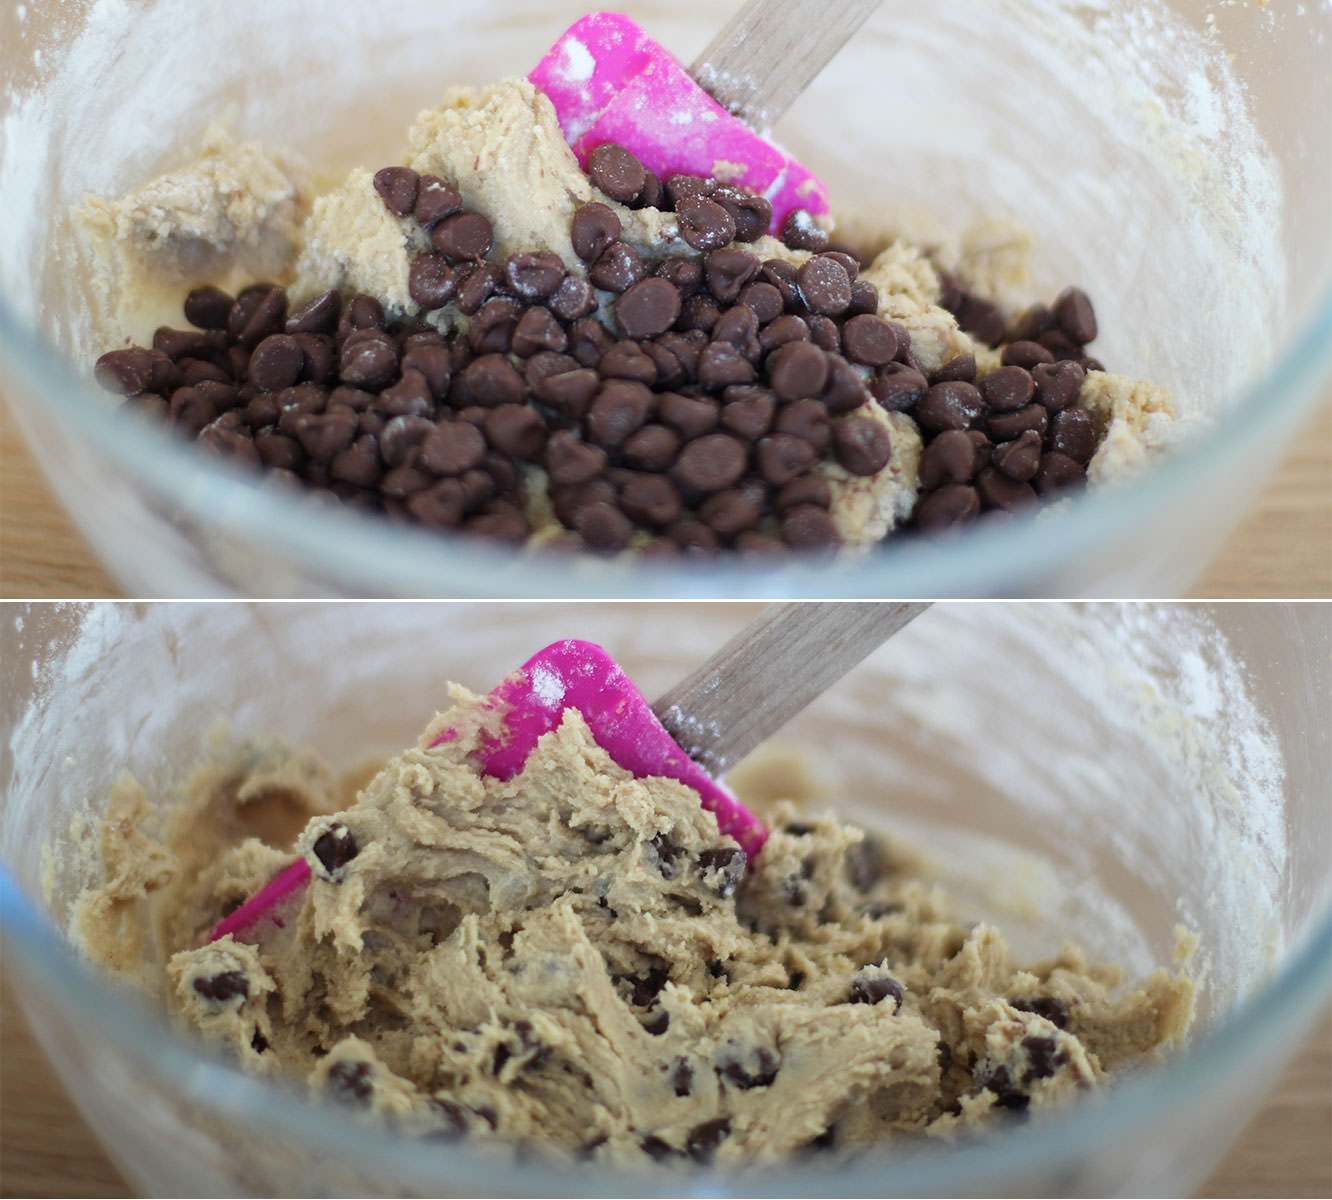
Step nine
Add the chocolate chips.
Time for another little taste.
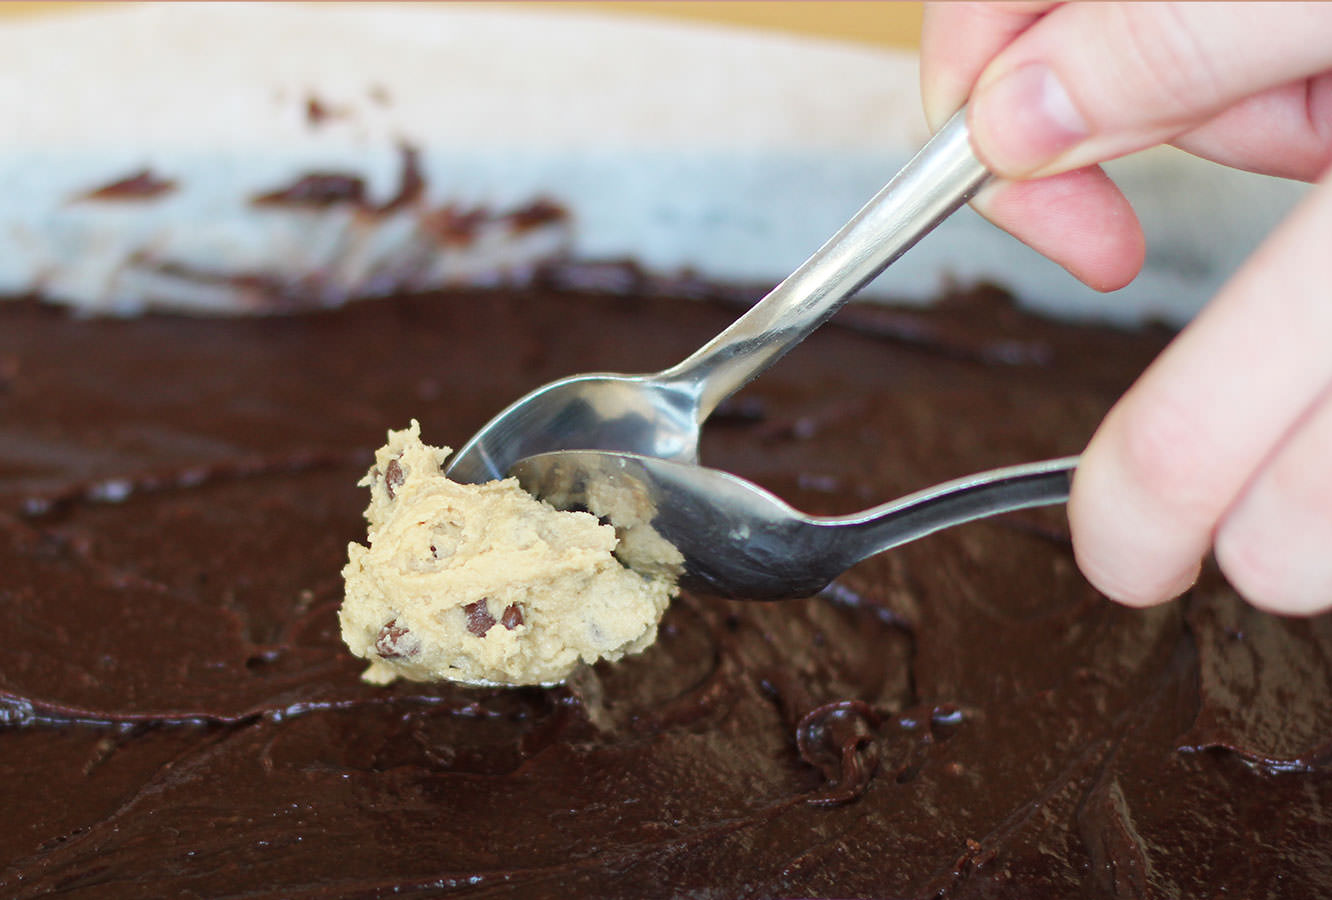
Step ten
Using a pair of teaspoons drop blobs of the batter onto the surface of the brownie mixture.
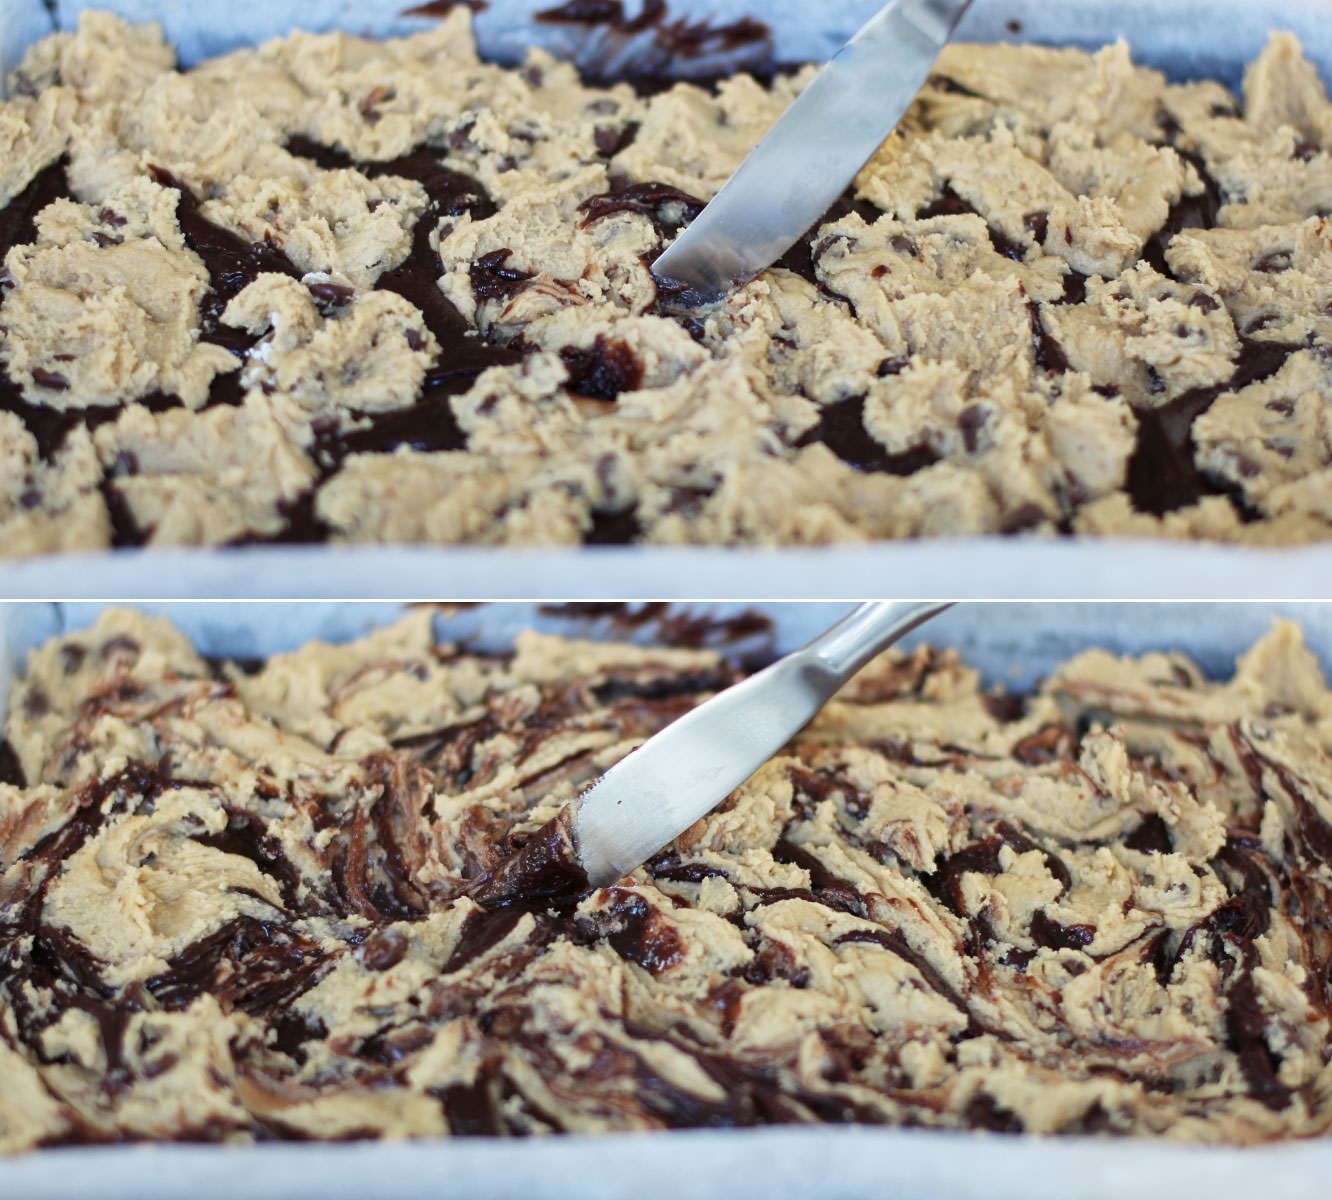
Step eleven
Push the cookie dough blobs down a bit with the back of a spoon and use a butter knife to make a marbled effect on top.
Step twelve
Bake in the oven for 30-35 minutes on 180C/350F/gas mark 4. You want there to still be a bit of fudgey chocolate between the brownie and cookie so be careful not to over do it.
Step thirteen
Melt the dark chocolate in the microwave and drizzle over with a spoon.