I promise next week will be more diet friendly. Well, actually I don’t. I really like food, and the sweeter the better as far as I’m concerned.
Last week we had some buddies round for a sleepover and I couldn’t resist making a naughty pud. This salted caramel chocolate mousse filled roulade is the perfect edition to a girls’ night in, or a dinner party, or breakfast.
Buckle up, it’s not a speedy bake, but it’s worth it.
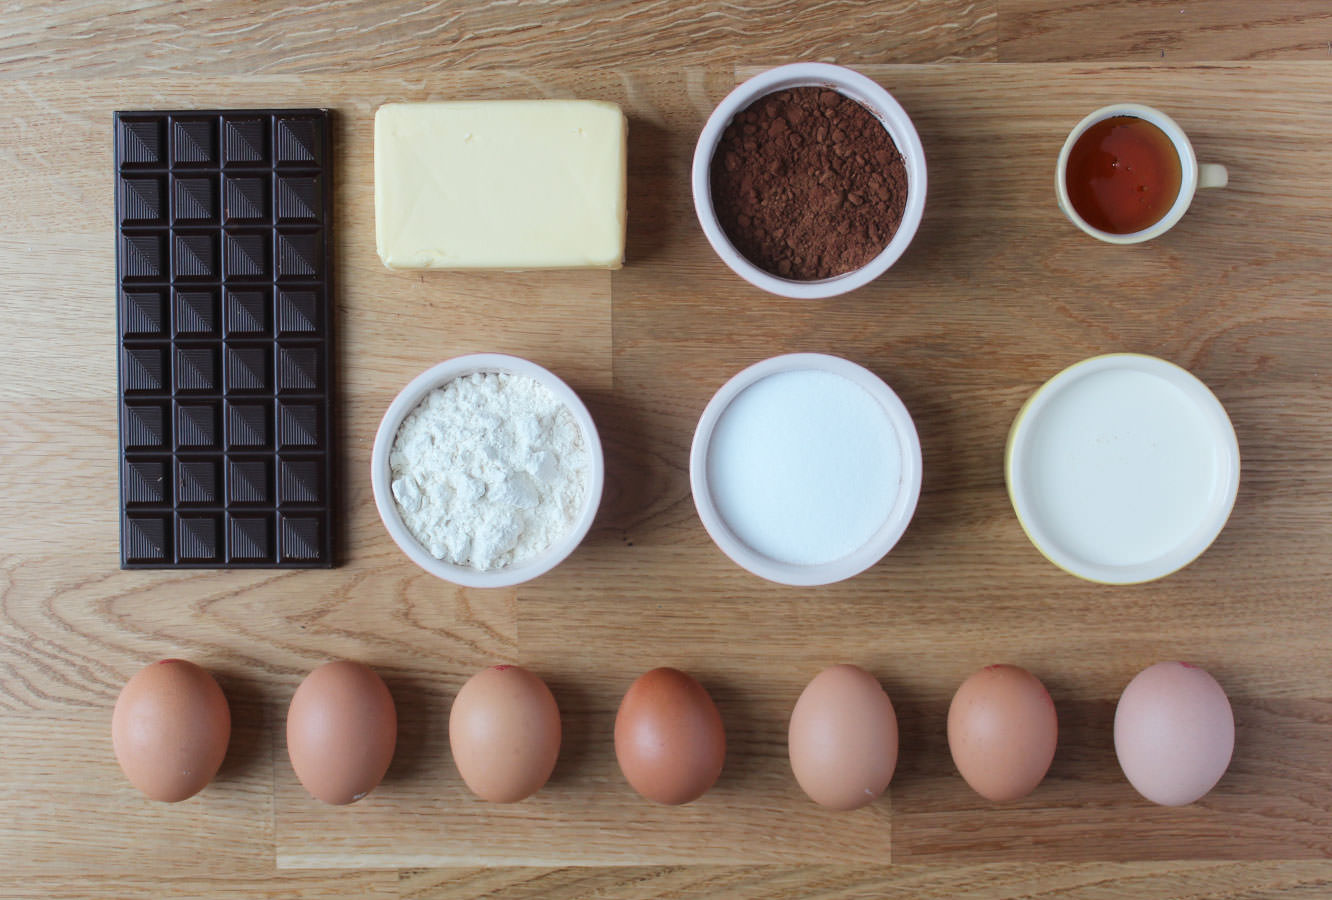
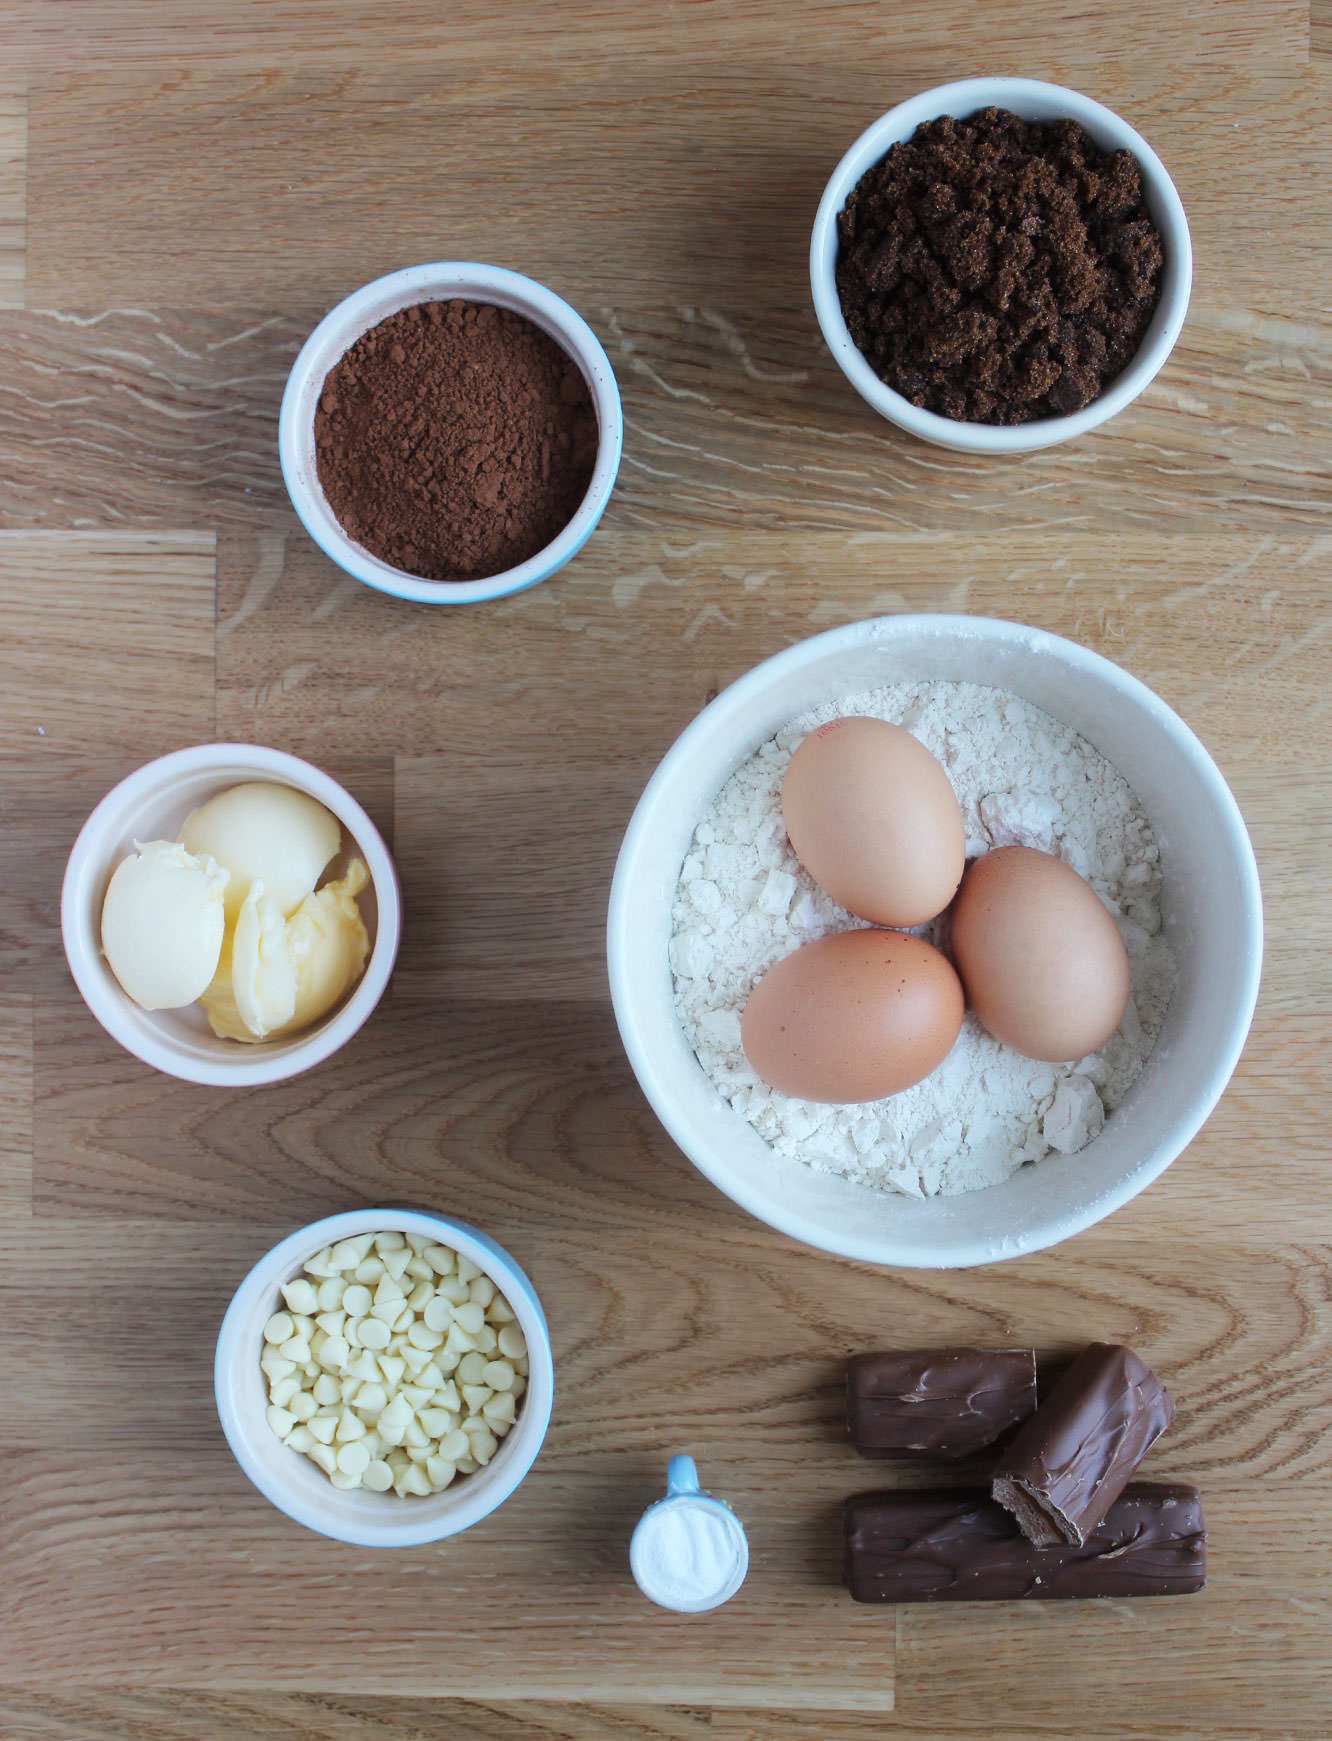
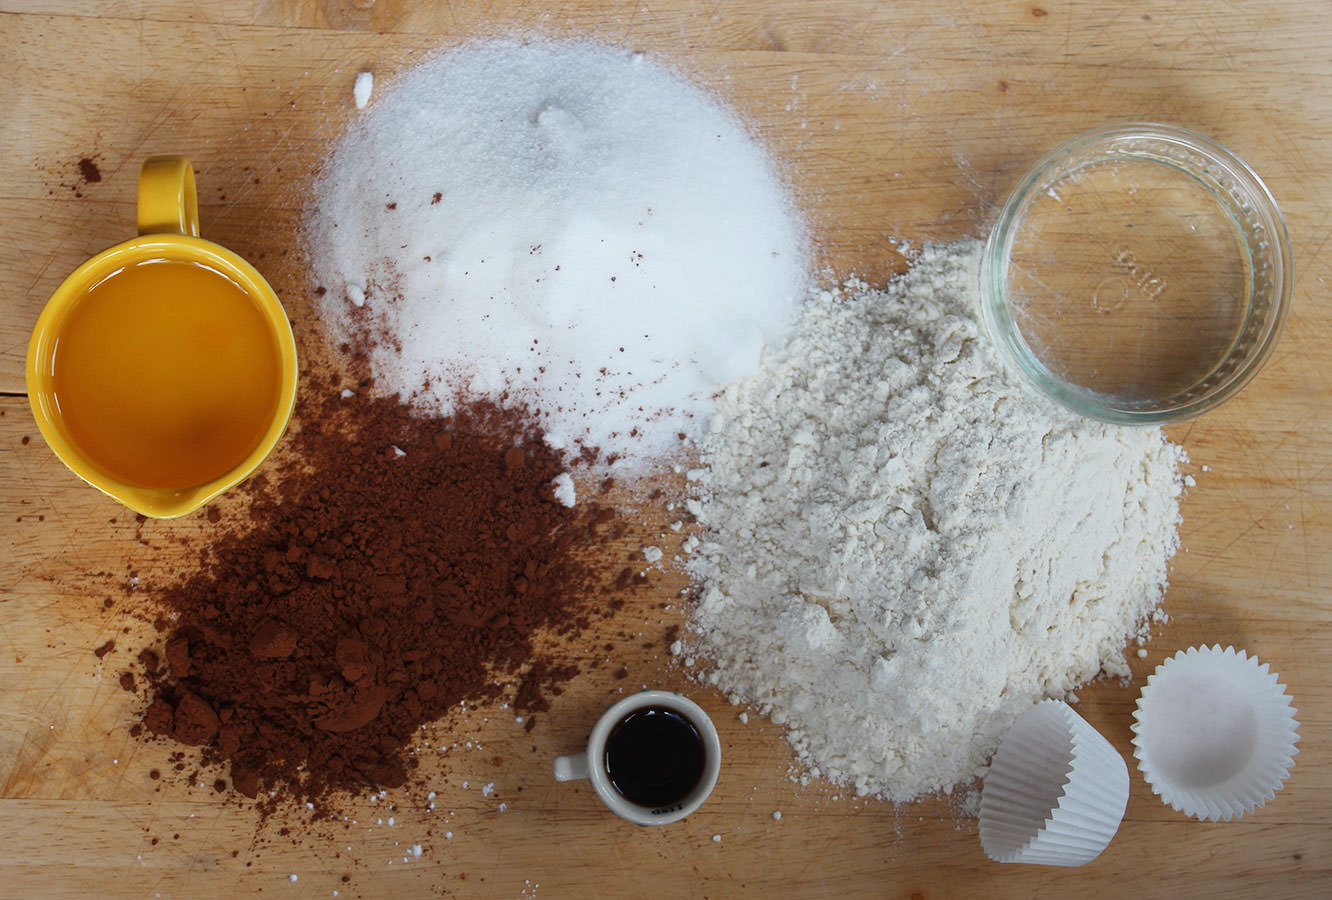
You will need
For the sponge:
130g/4.5 oz Caster sugar
100g/3.5 oz Plain flour
4 Eggs
35g/1.5 oz Cocoa powder
For the chocolate mousse:
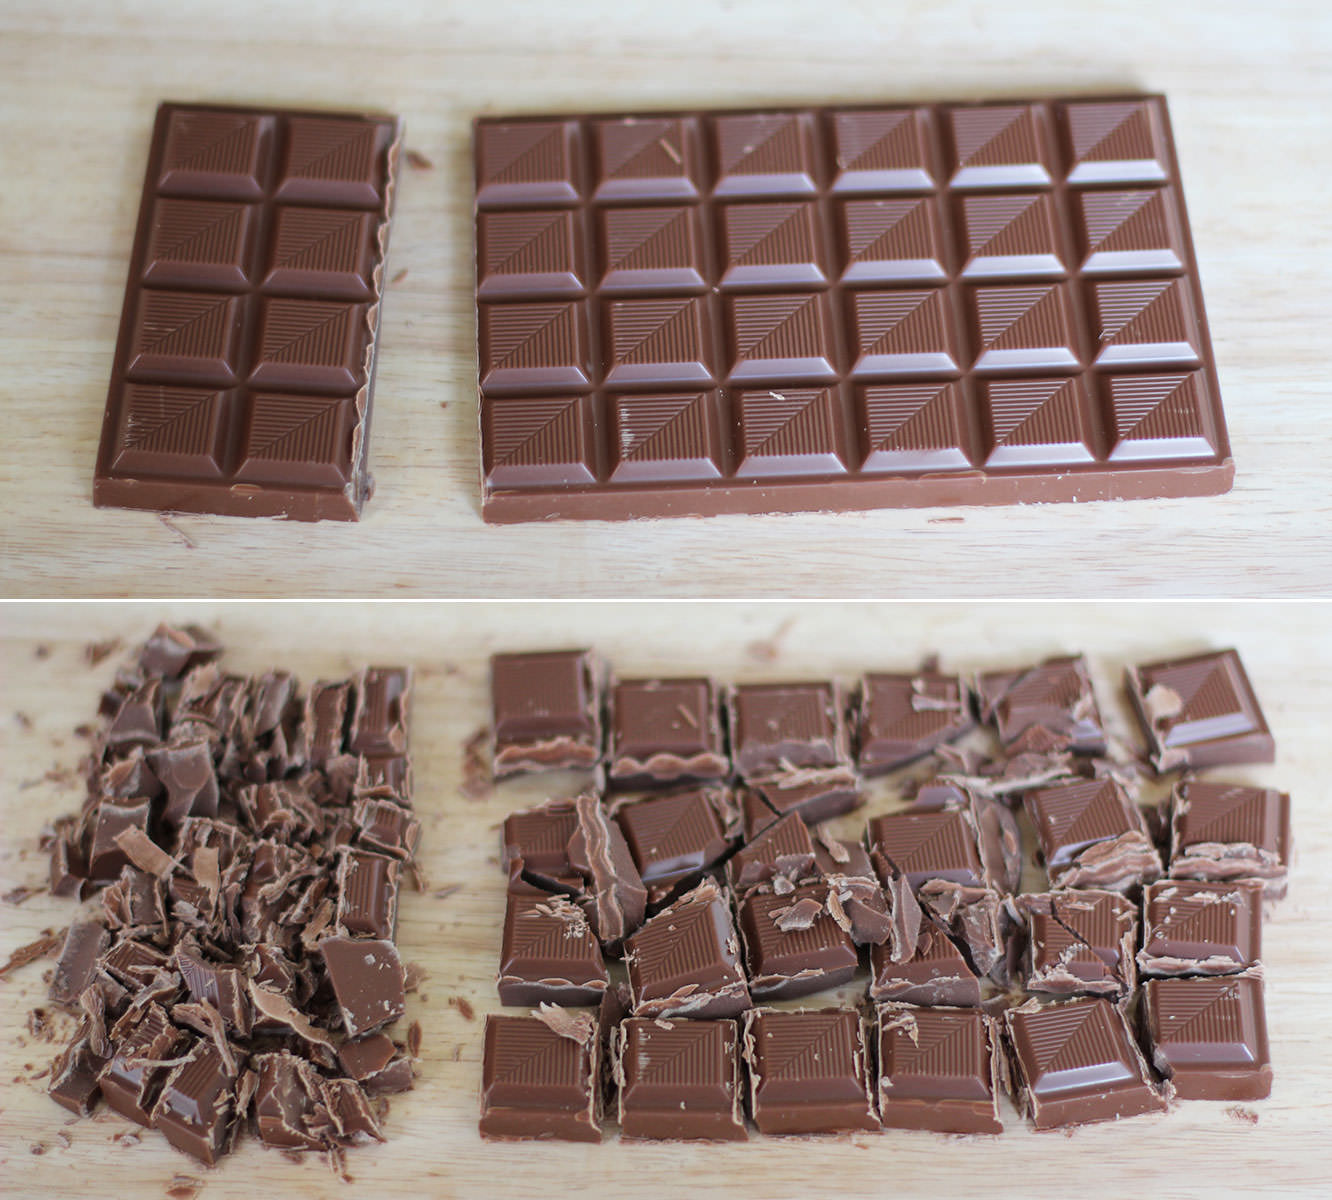
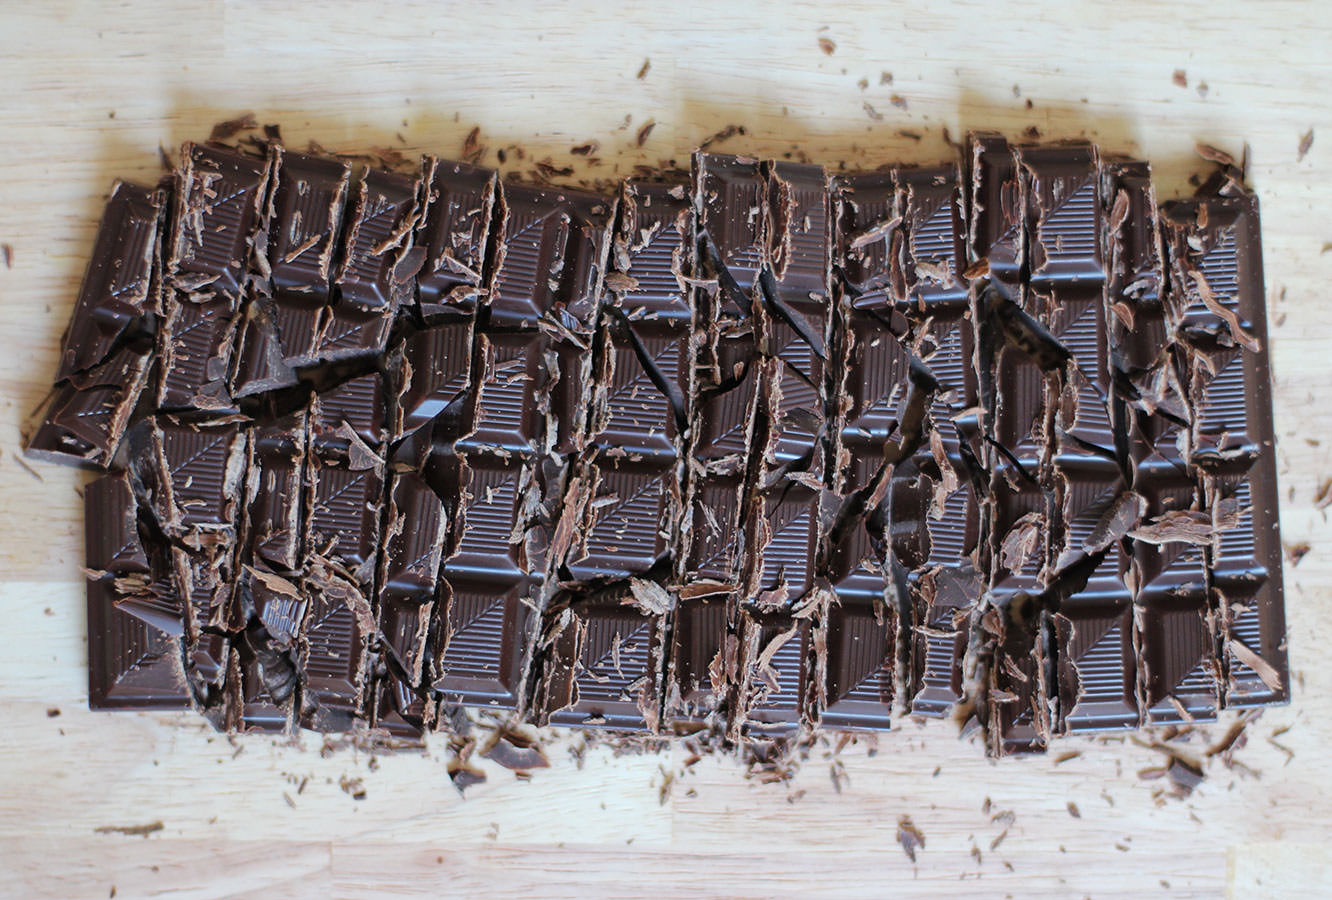
200g/7 oz Dark chocolate
3 Eggs
40g/1.5 oz Caster sugar (golden if you have it)
90ml/3 fl oz Water
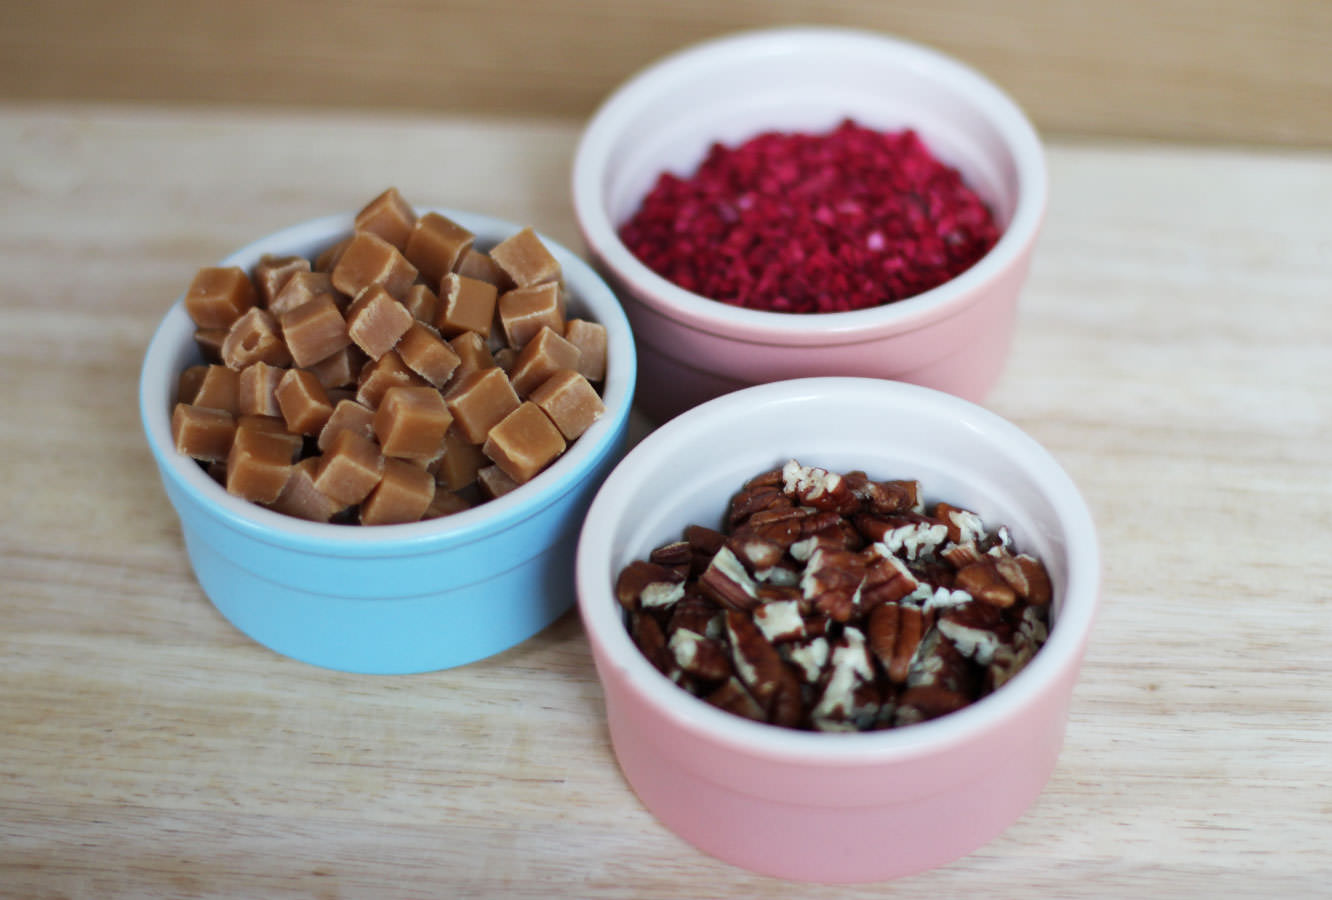
For the salted caramel frosting:
300g/10.5 oz Icing sugar
250g/9 oz Butter
80g/3 oz Soft brown sugar
100ml/3.5 fl oz Double cream
2 tbsp Golden syrup
2 tsp Salt
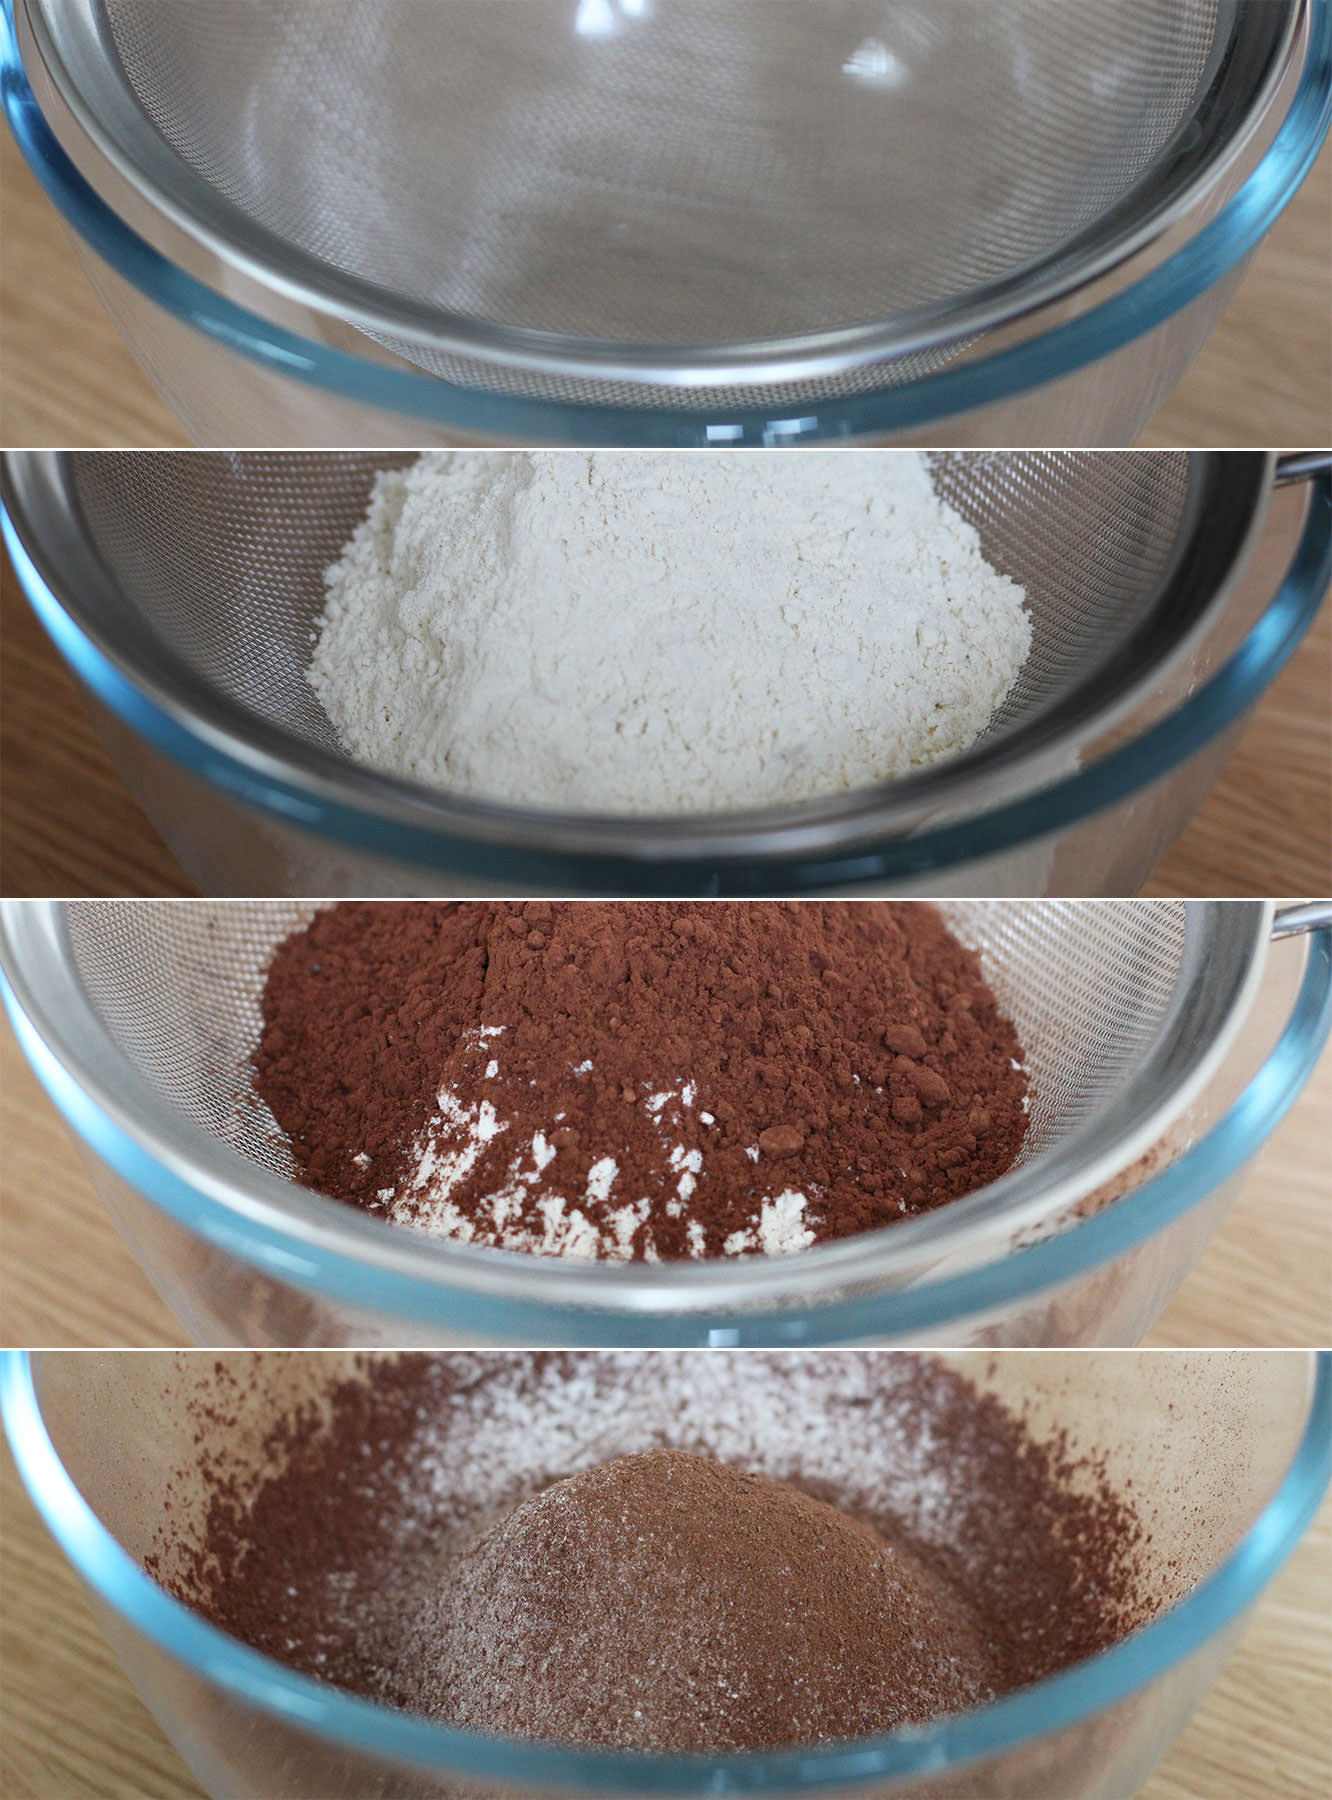
Step one
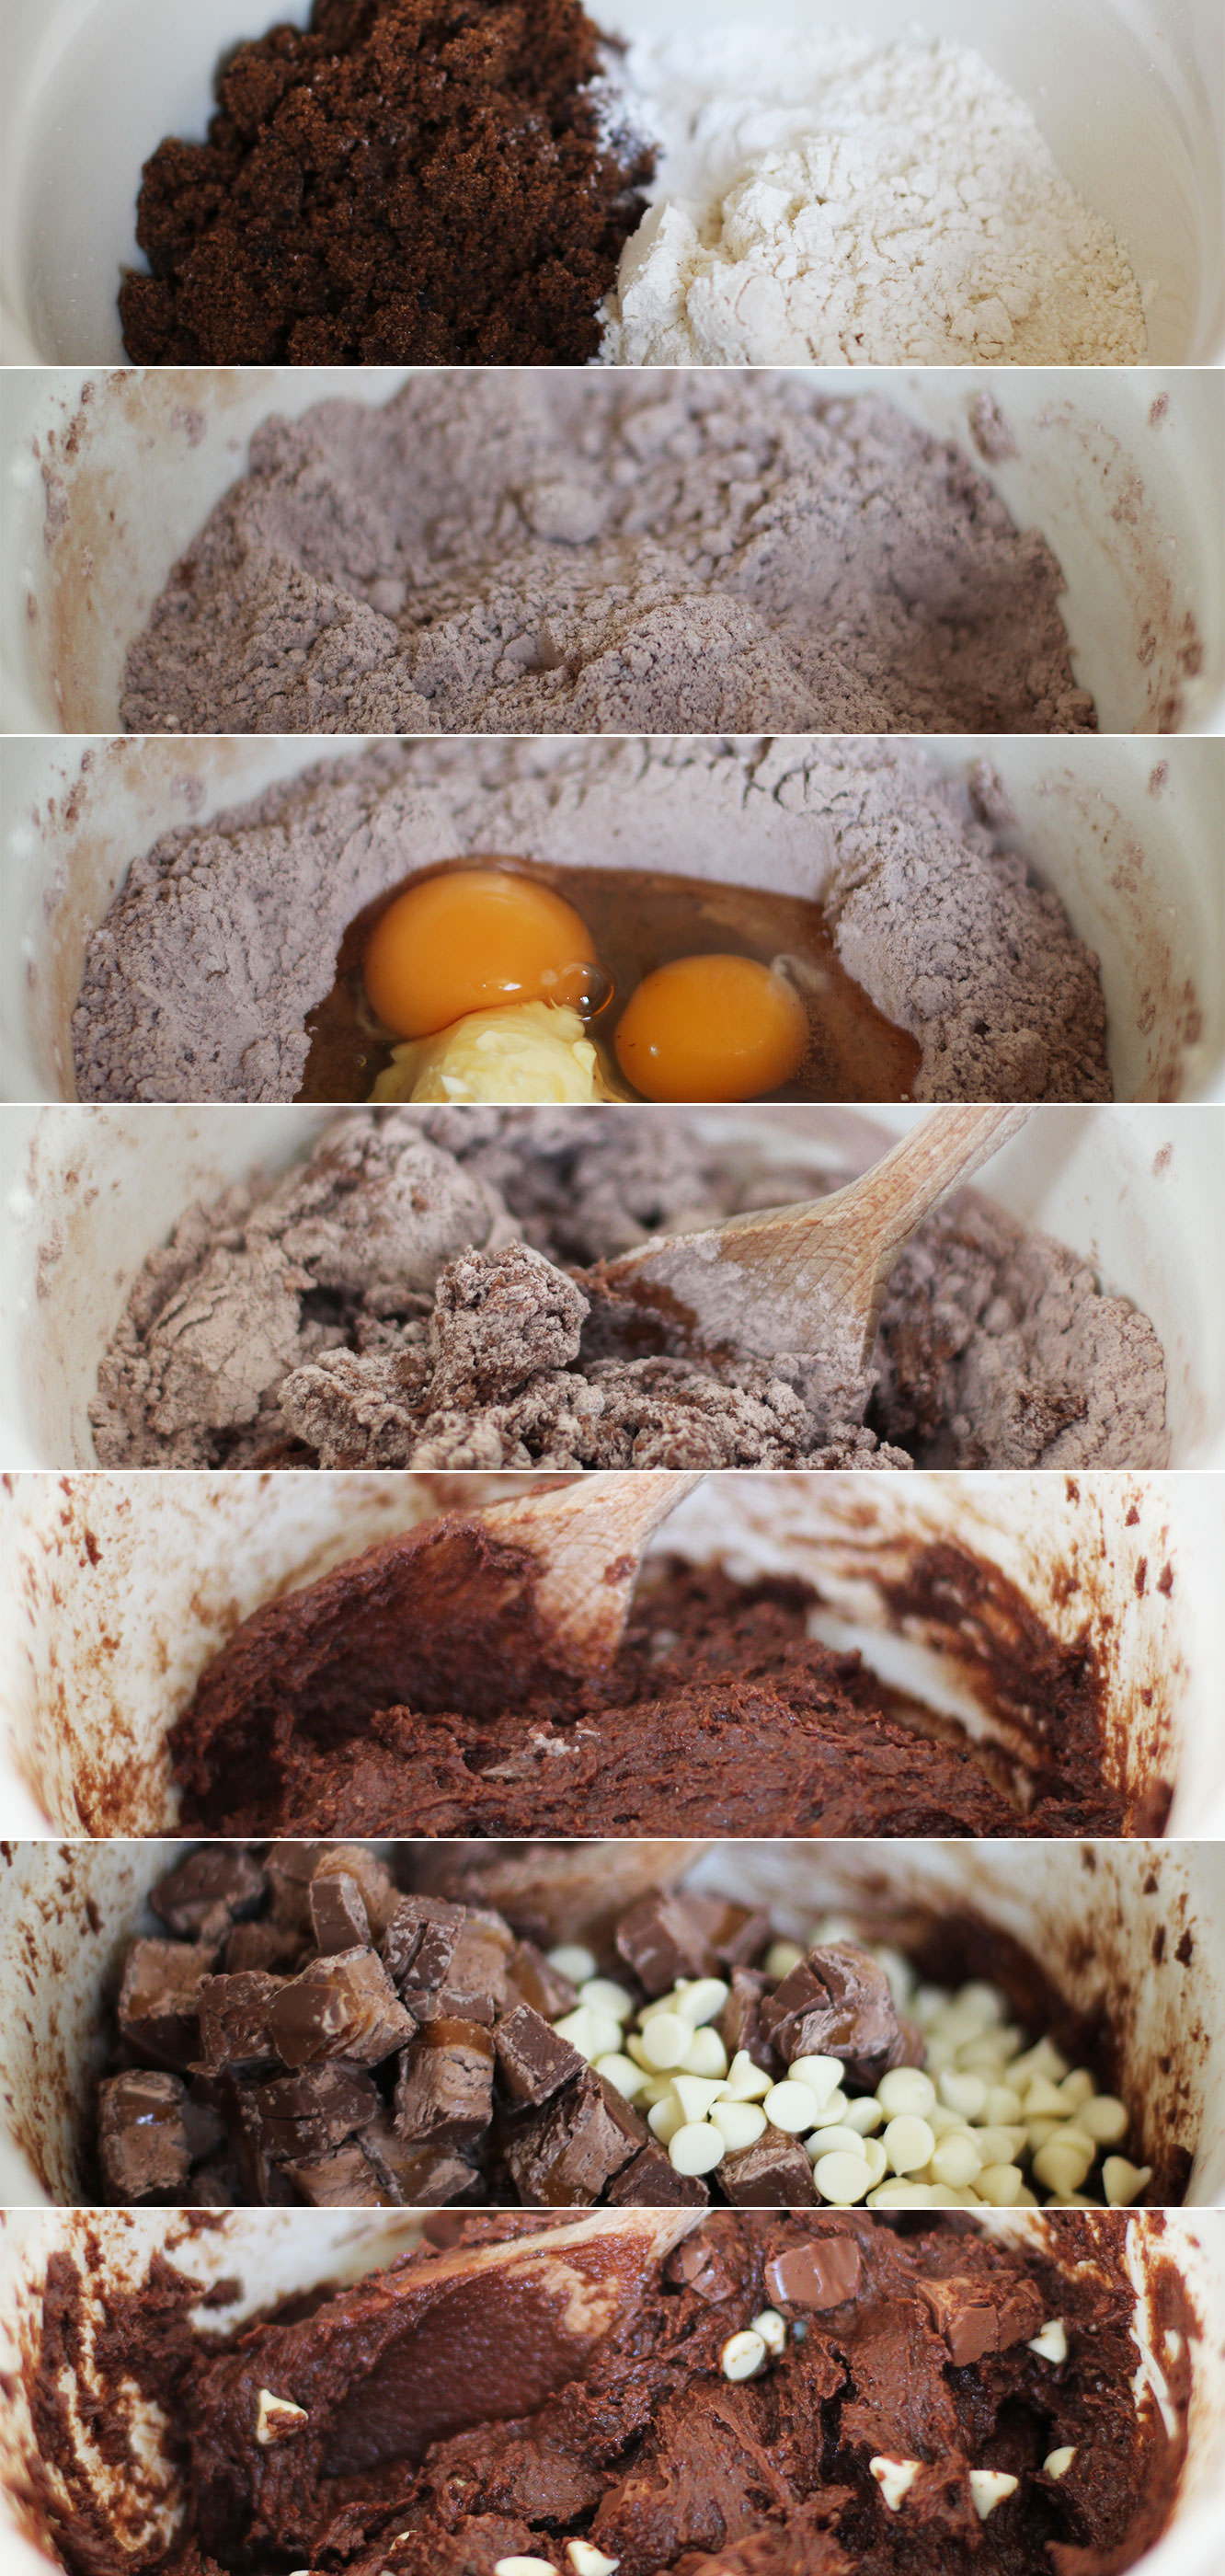
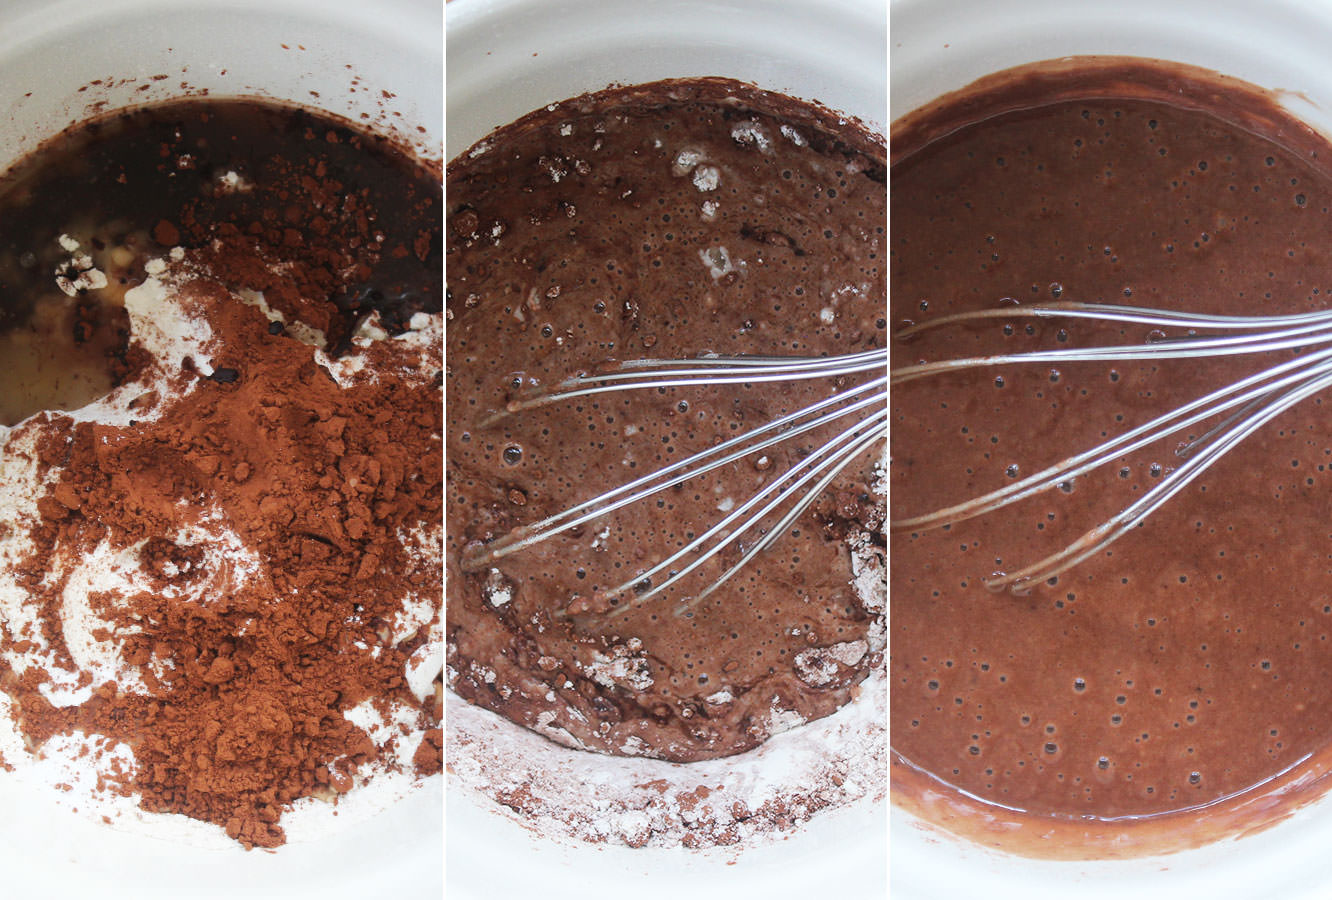
Sift together the cocoa powder and flour. Usually I’m not one of life’s sifters, but for this one you’ll want to; you don’t want to knock out all the air trying to get the lumps out of the flour.
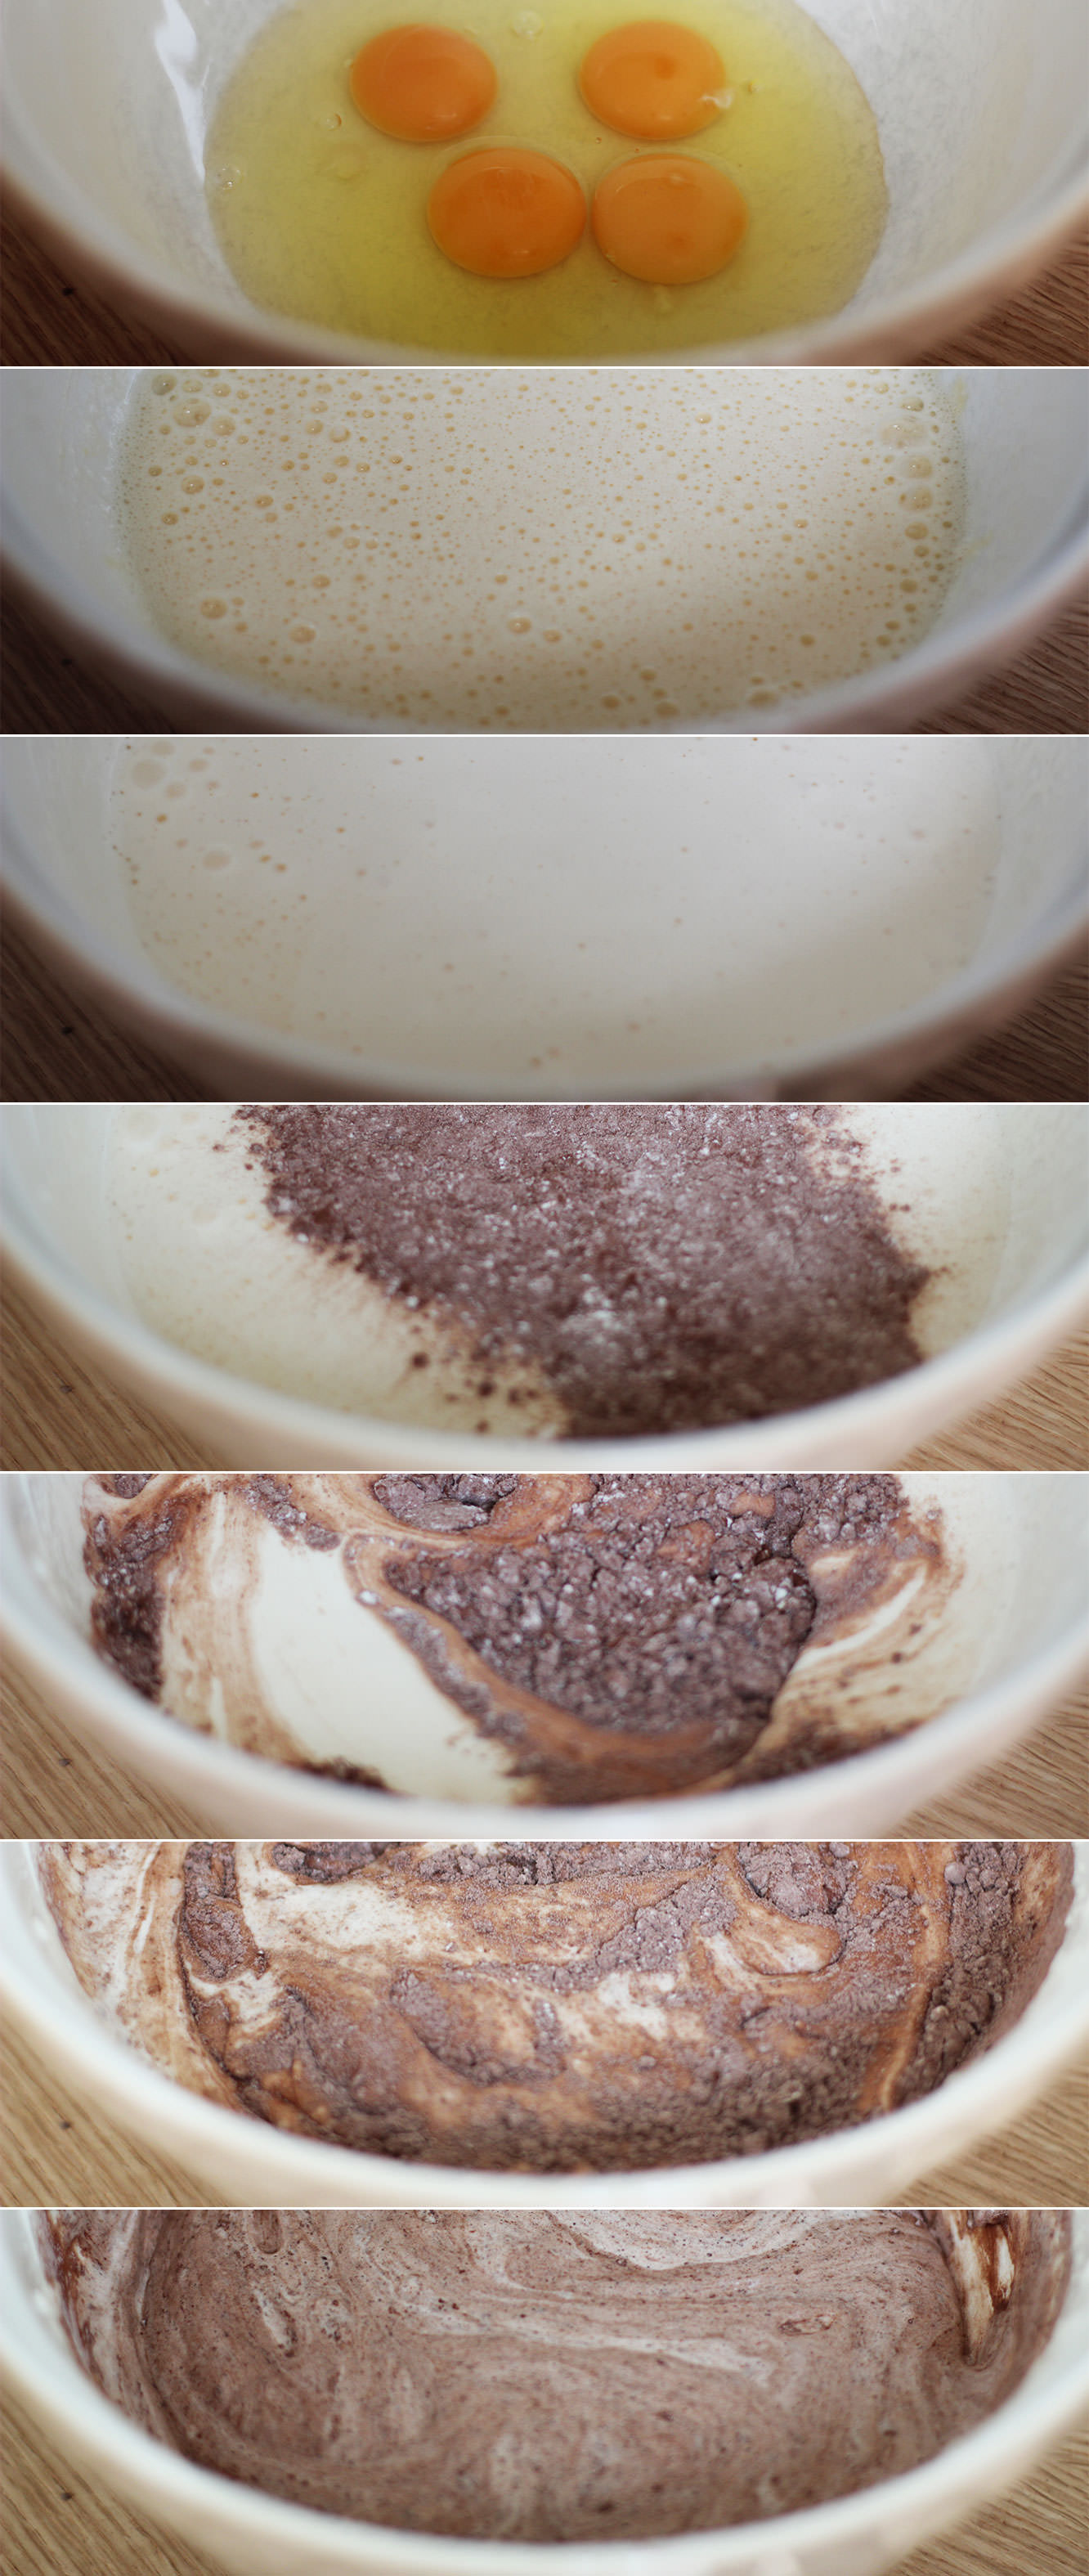
Step two
Whisk the four eggs until they are pale and shiny and so that the tracks of the whisk stay for a few seconds before sinking back into the main mixture.
Step three
Gently fold the flour and cocoa powder mix in two halves. Do this with a metal spoon and imagine you are stirring a bowl of baby kittens. Softly.
Ideally I guess it should all be one colour, but mine was still a little marbled and it didn’t seem to impact the bake.
Step four
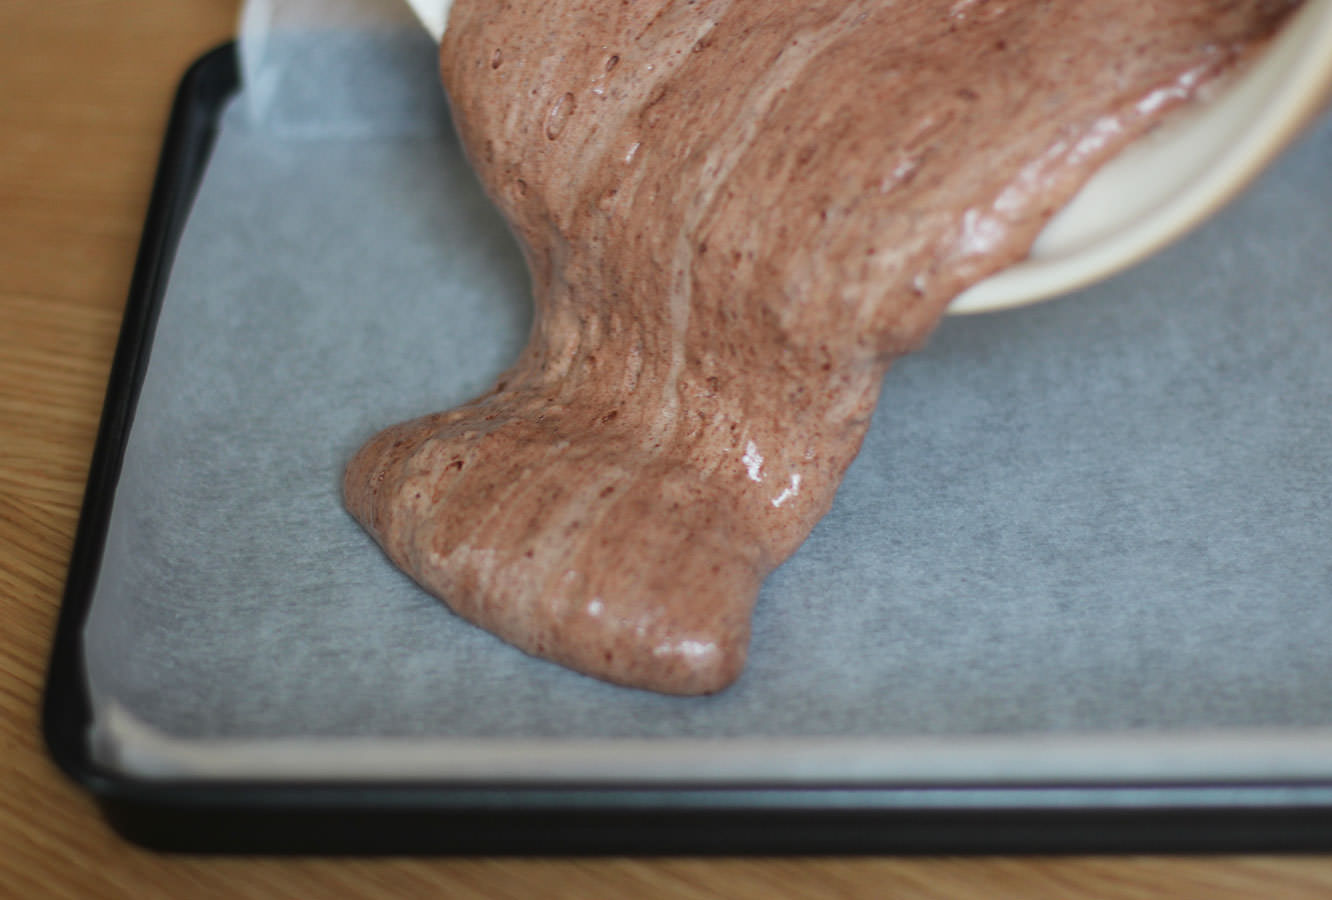
Slowly pour batter evenly across a lined tin. Mine’s not actually a swiss roll tin, it’s a bit bigger. Try not to knock any air out.
Step five
Tilt the tin to distribute the sponge mix as evenly as possible and get it right into the corners. You want to avoid spreading it with anything but you do need it to be as flat as possible on the surface. There’s no fat in this recipe to melt down and level everything off.
p.s. the GIF makes it look quicker than it is, be patient.
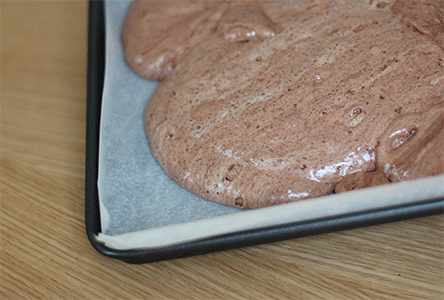
Step six
Bake in a preheated oven on 220C/ gas mark 7/ 450F for 10 minutes.
Step seven
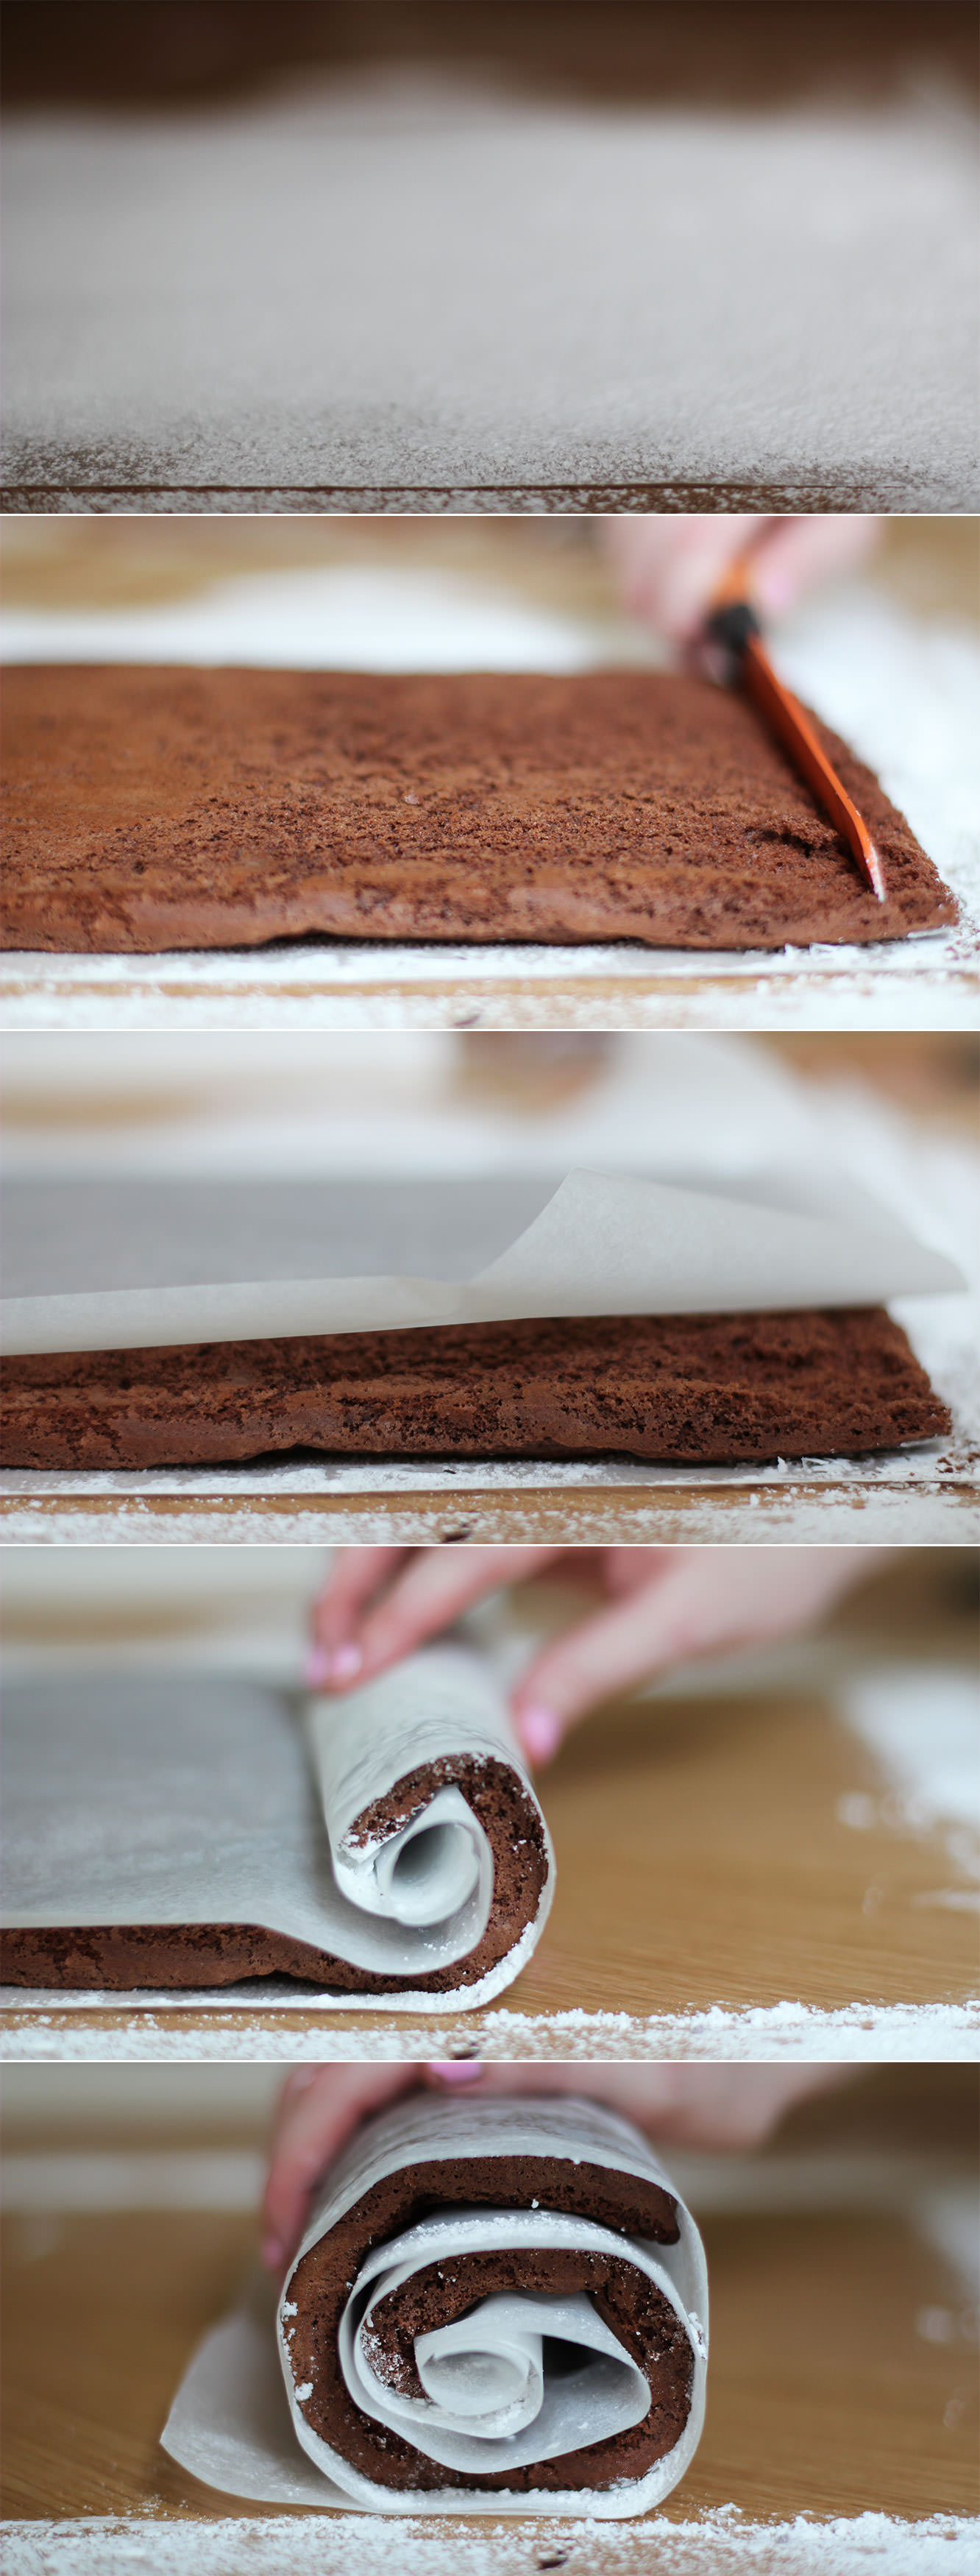
While the sponge is in the oven, dust a sheet of greaseproof paper with icing sugar.
Step eight
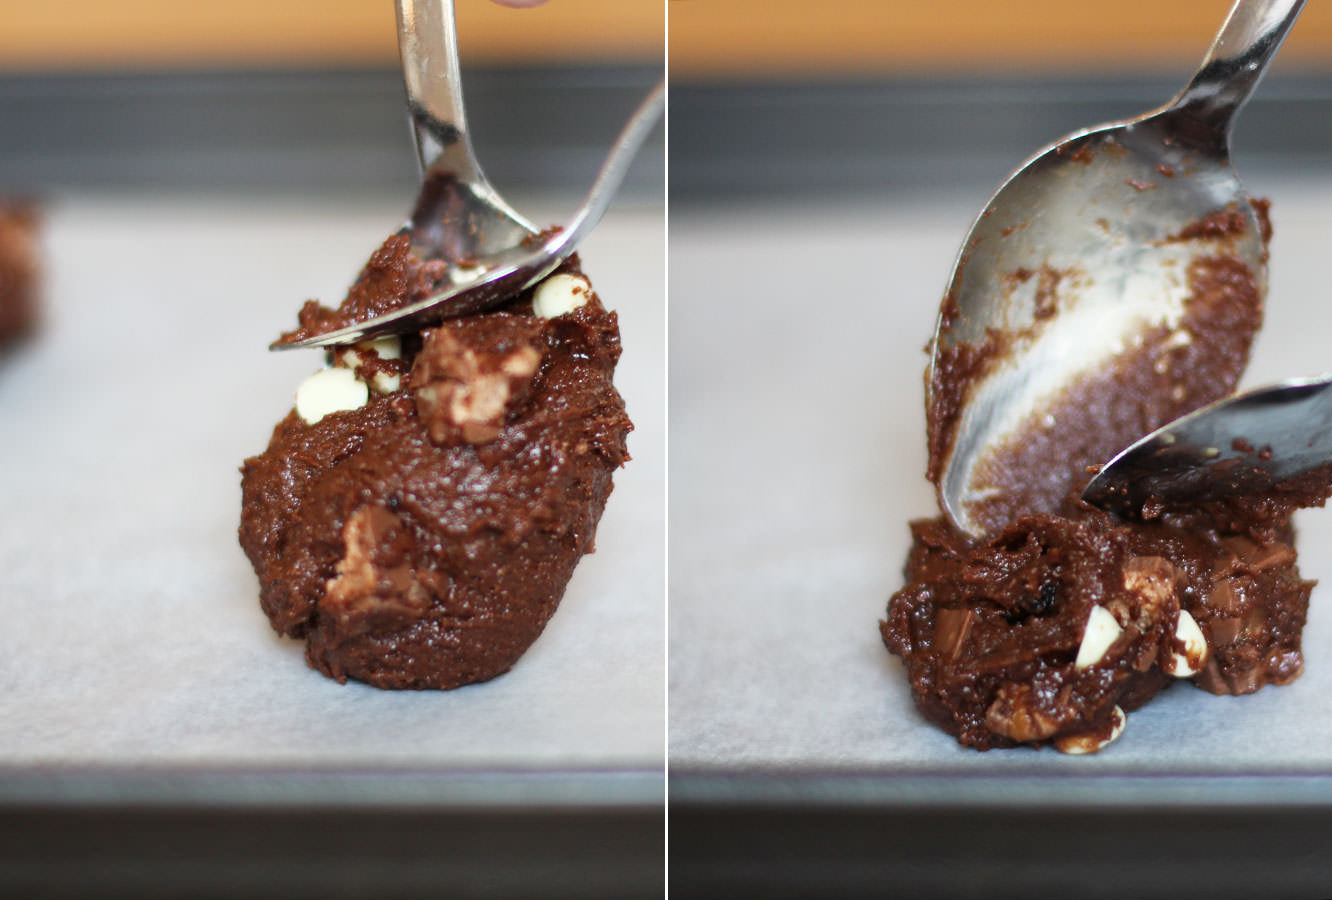
As soon as it’s finished cooking turn the sponge out onto the paper.
Cut a small groove about 1cm in from the edge to start the roll. Place another sheet of greaseproof on top and roll the cake up. Leave it to one side to cool.
Step nine
Move onto the mousse. In fact, probably do the mousse first, it needs a while to chill.
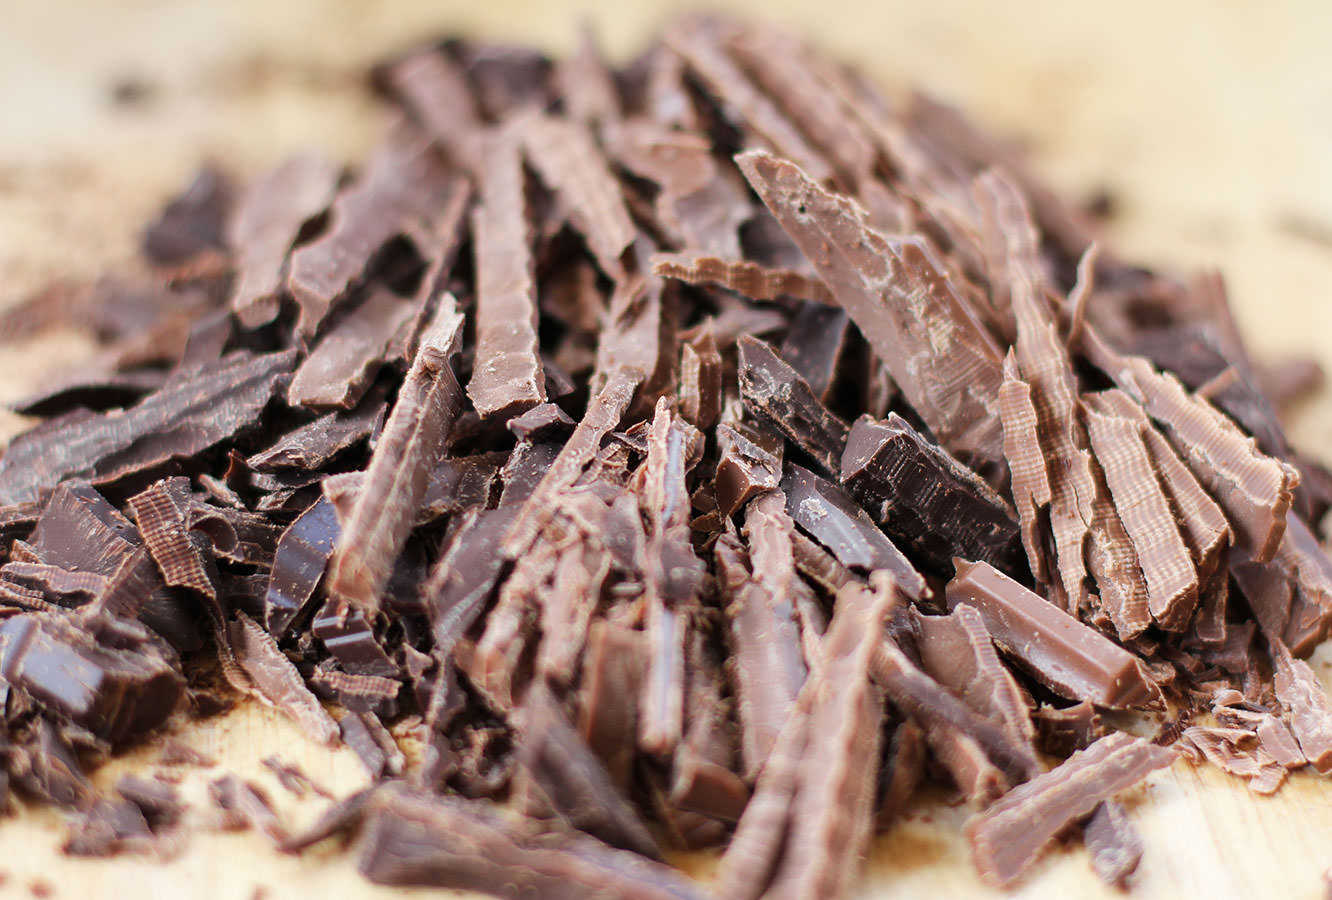
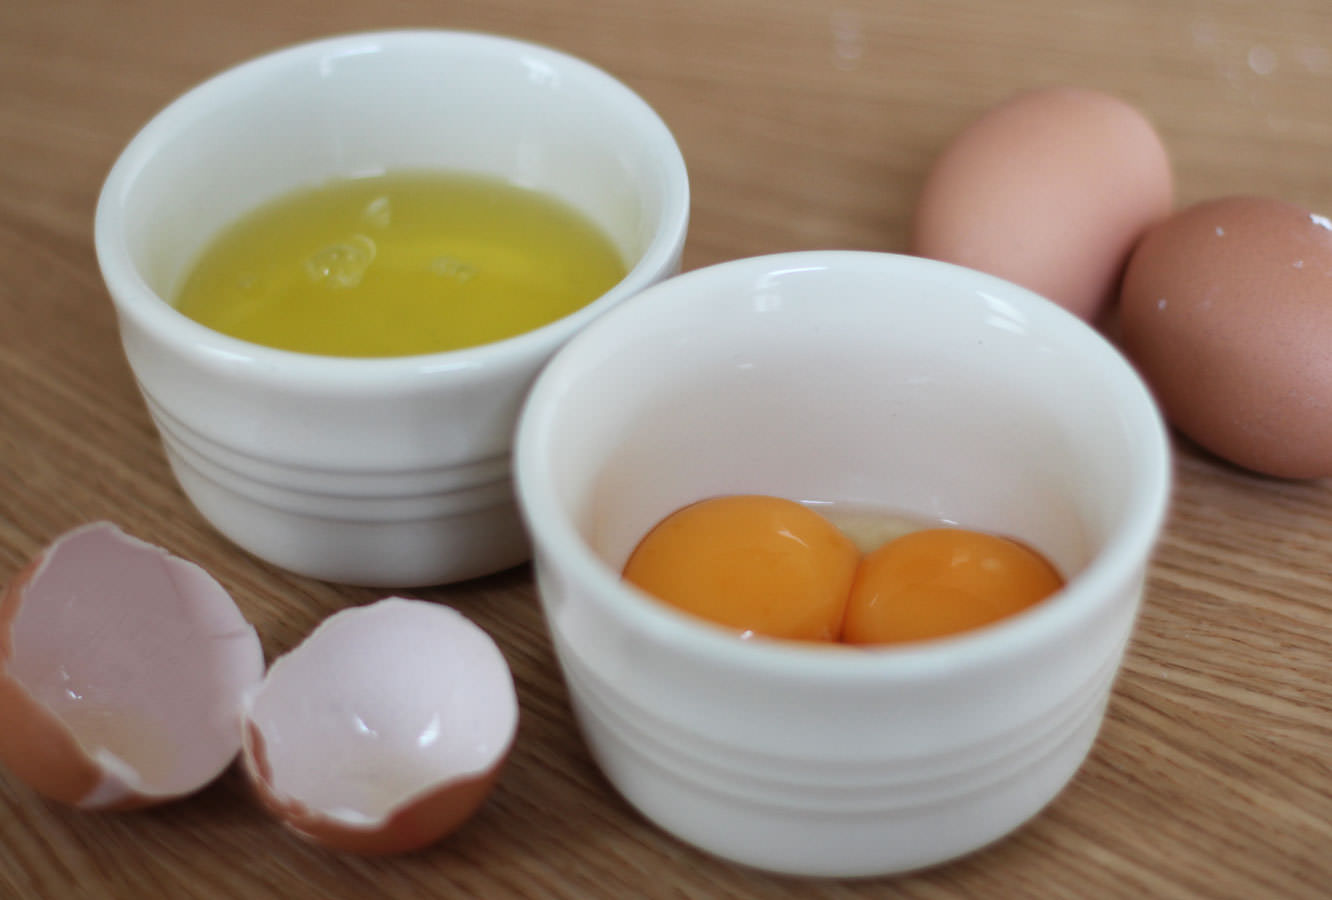
Separate the three eggs into two bowls and finely chop the chocolate.
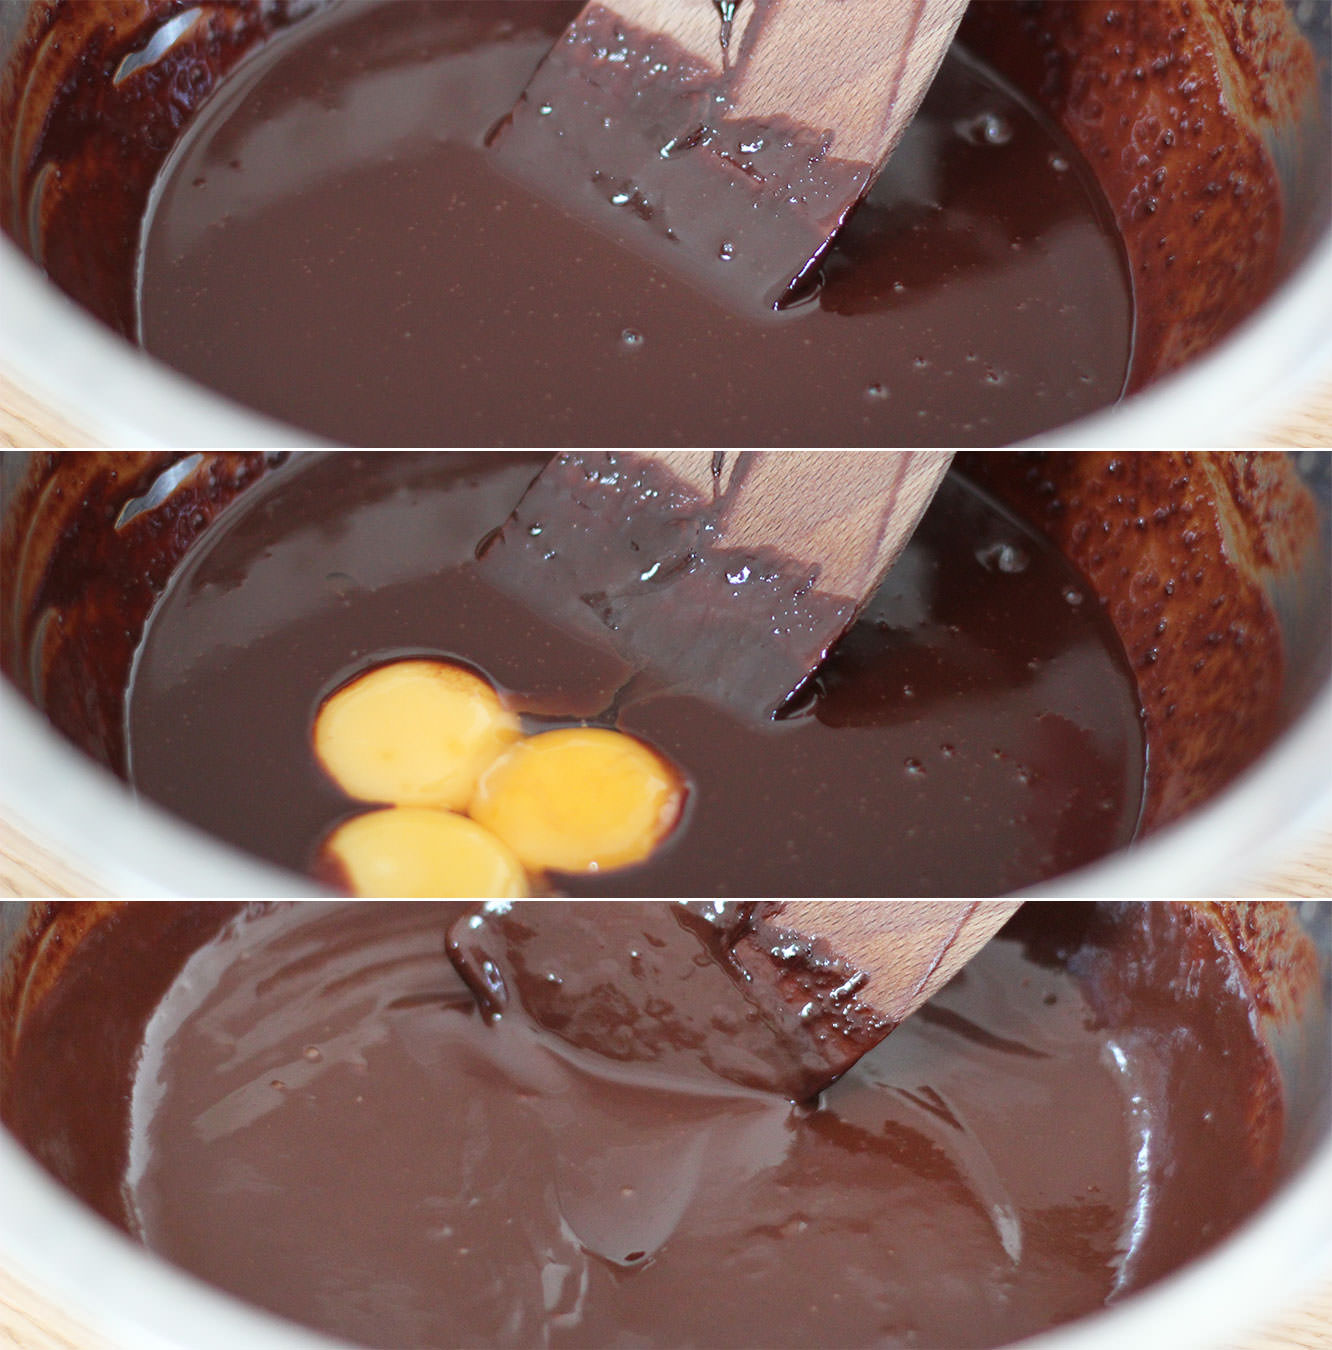
Step ten
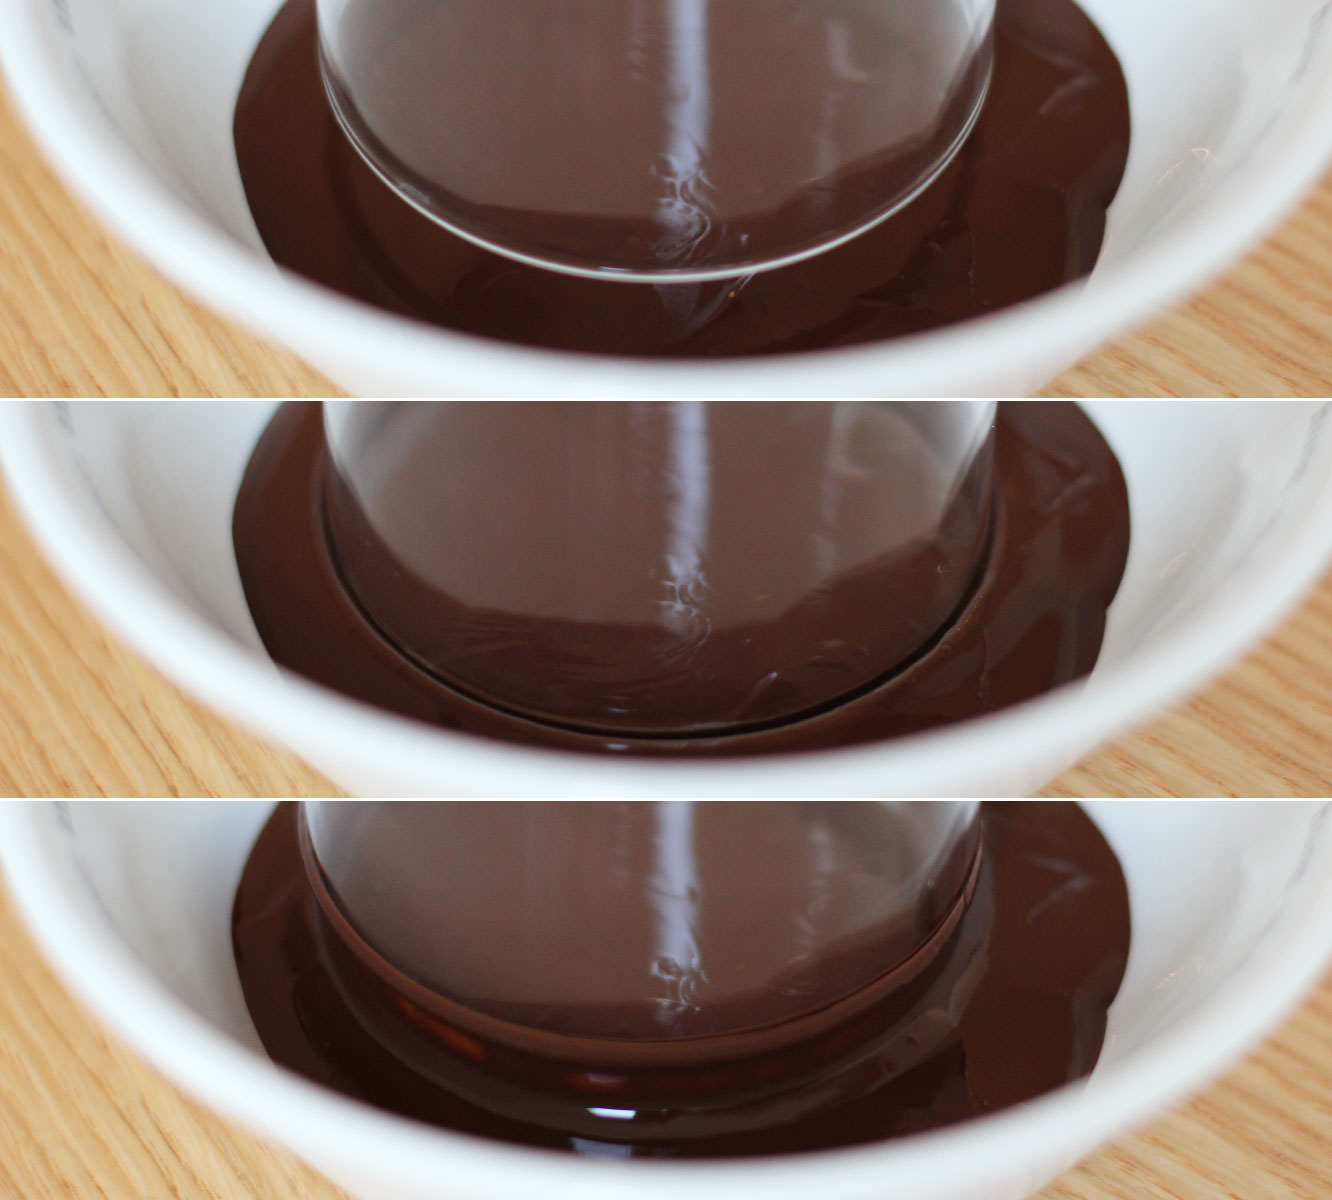
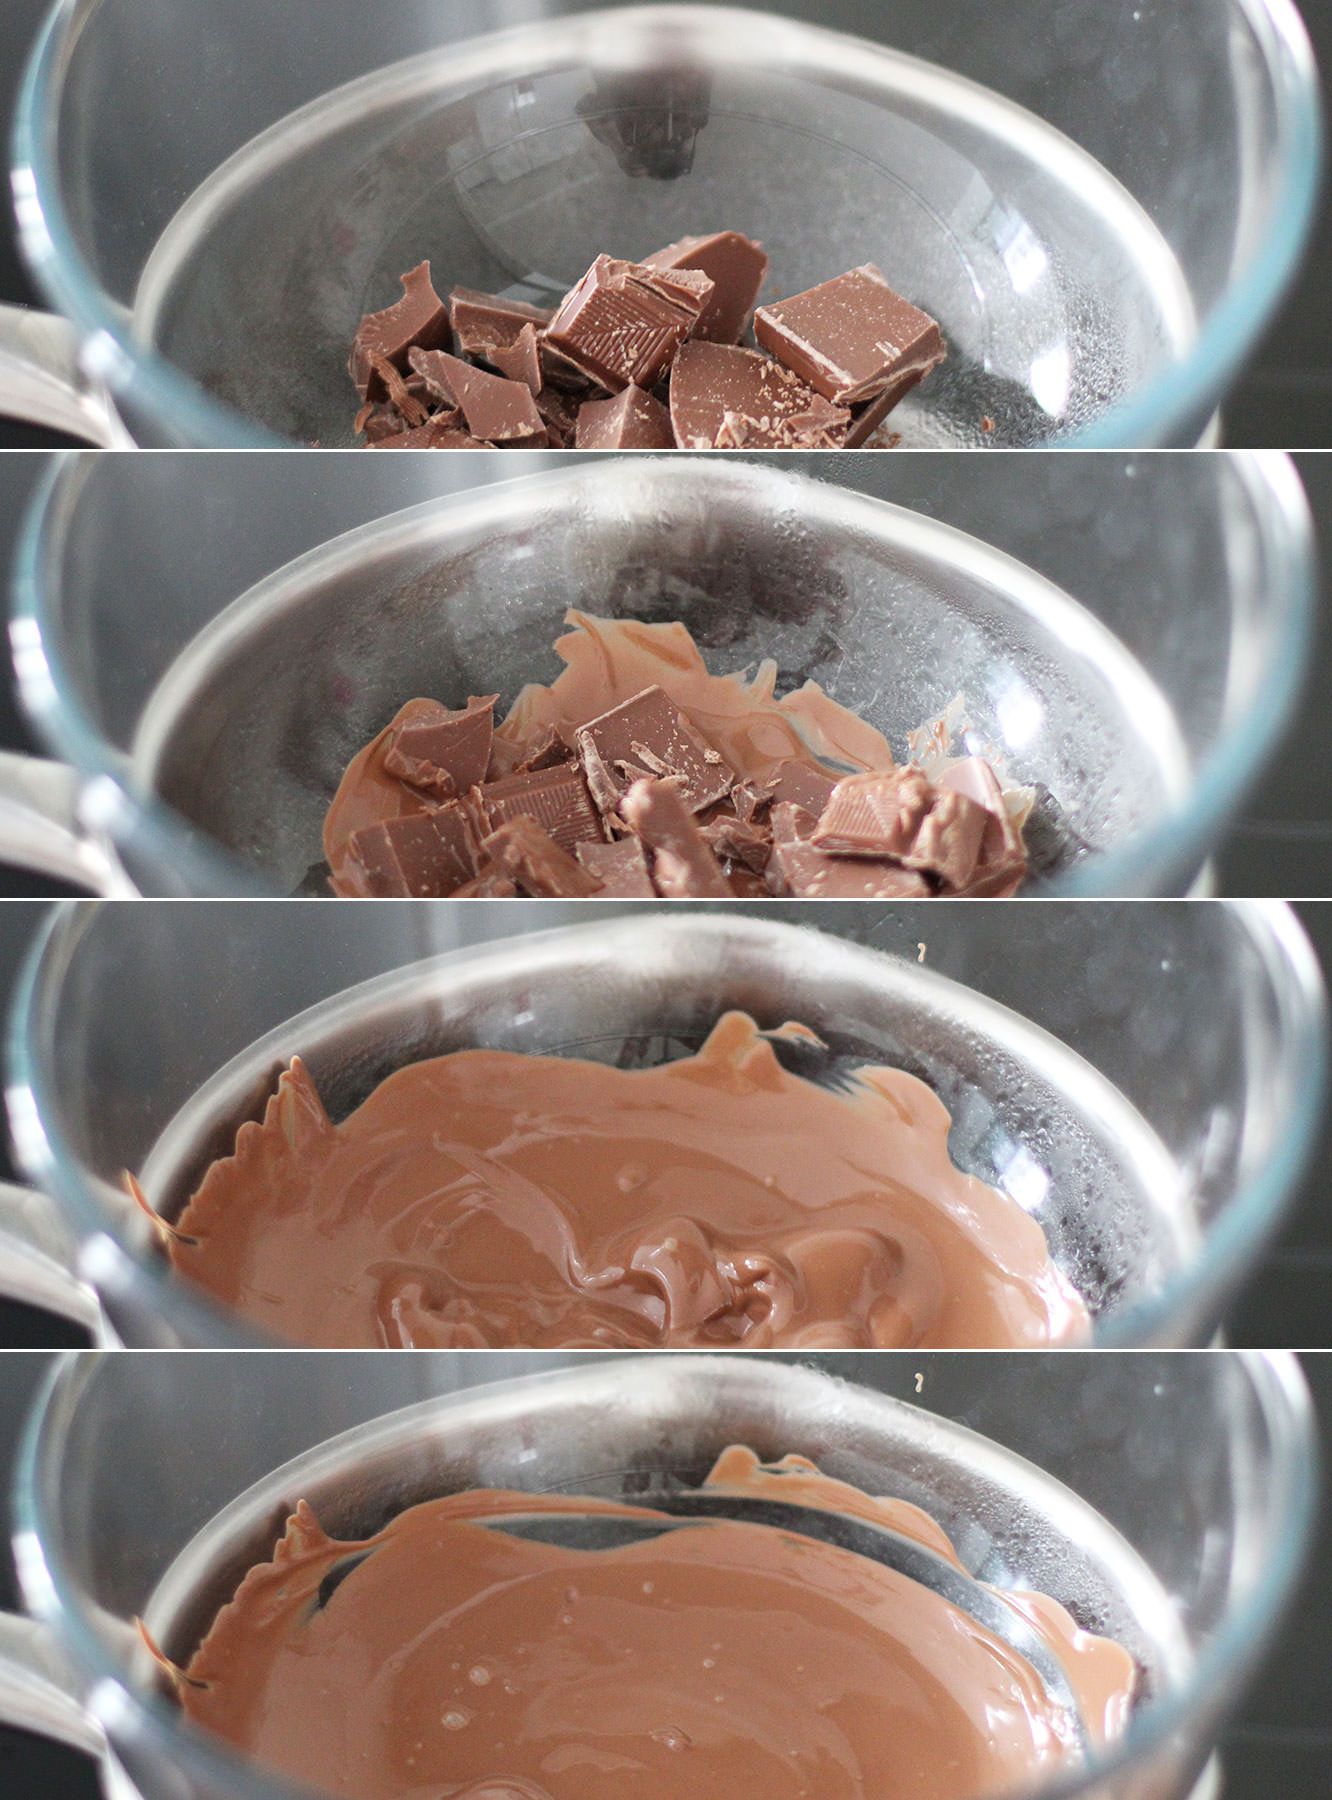
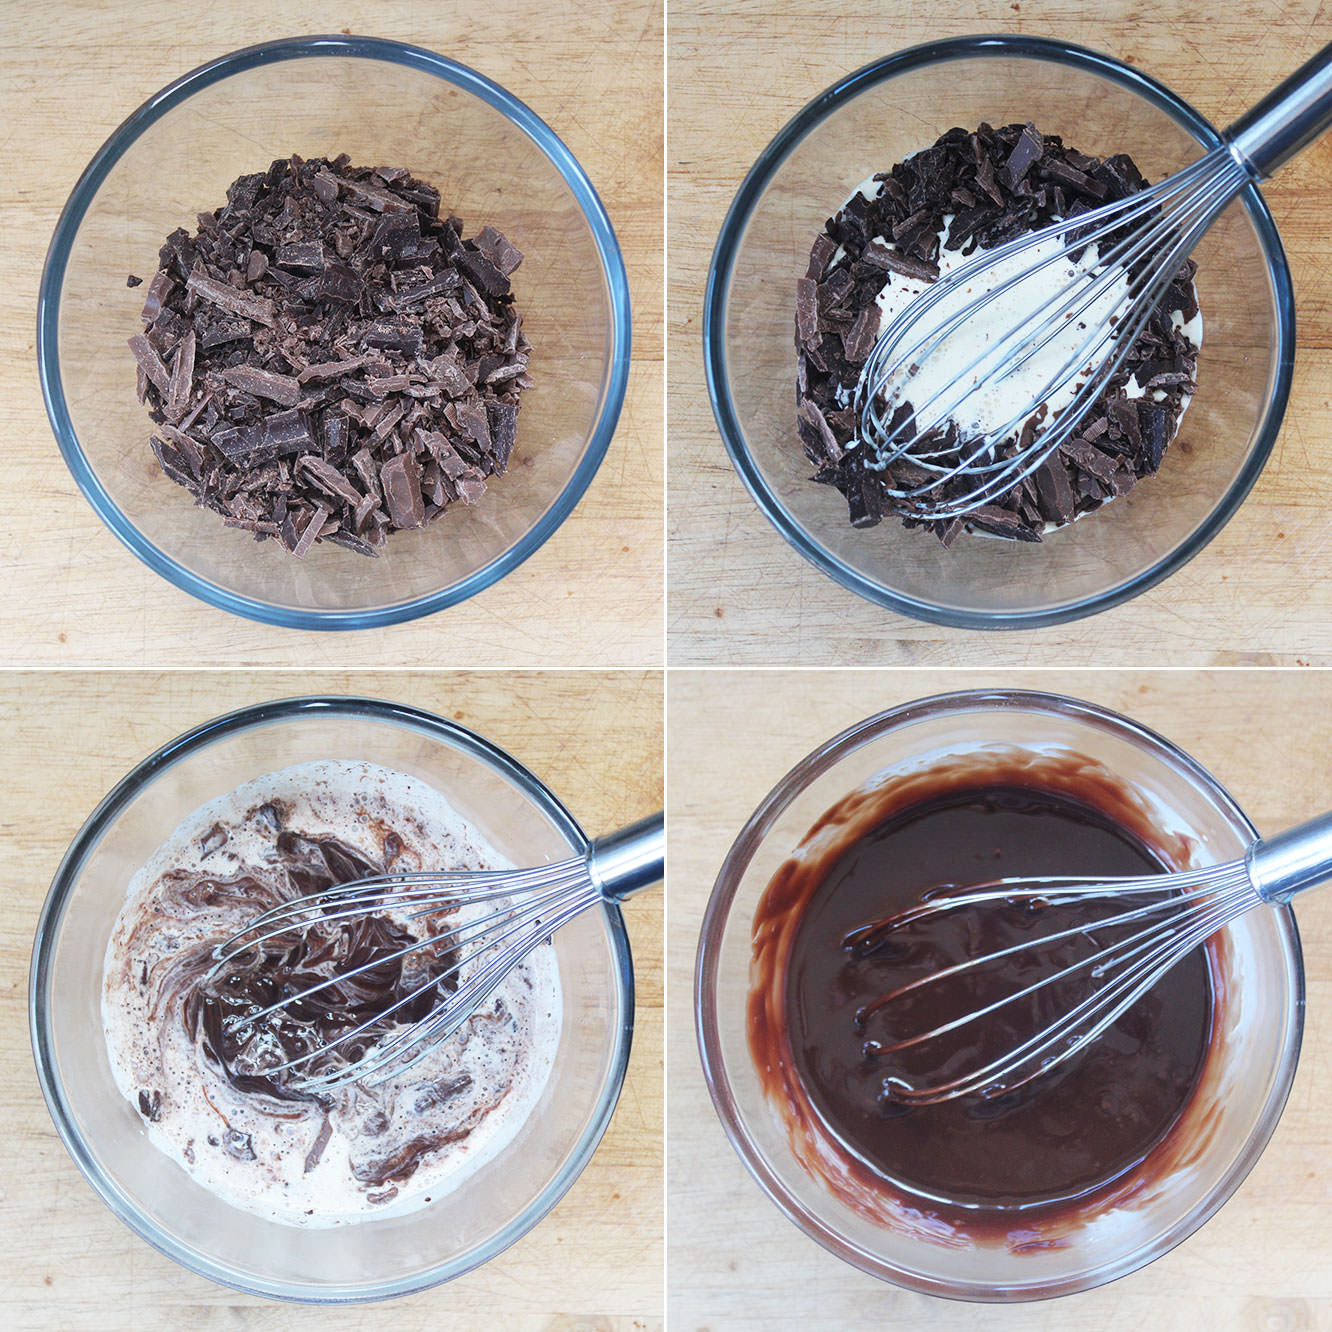
Place the chocolate and 90ml water in a heatproof bowl over a pan of simmering water until melted.
Allow to cool for 10 minutes and then stir in the egg yolks. The mixture will become thicker and should be glossy.
Step eleven
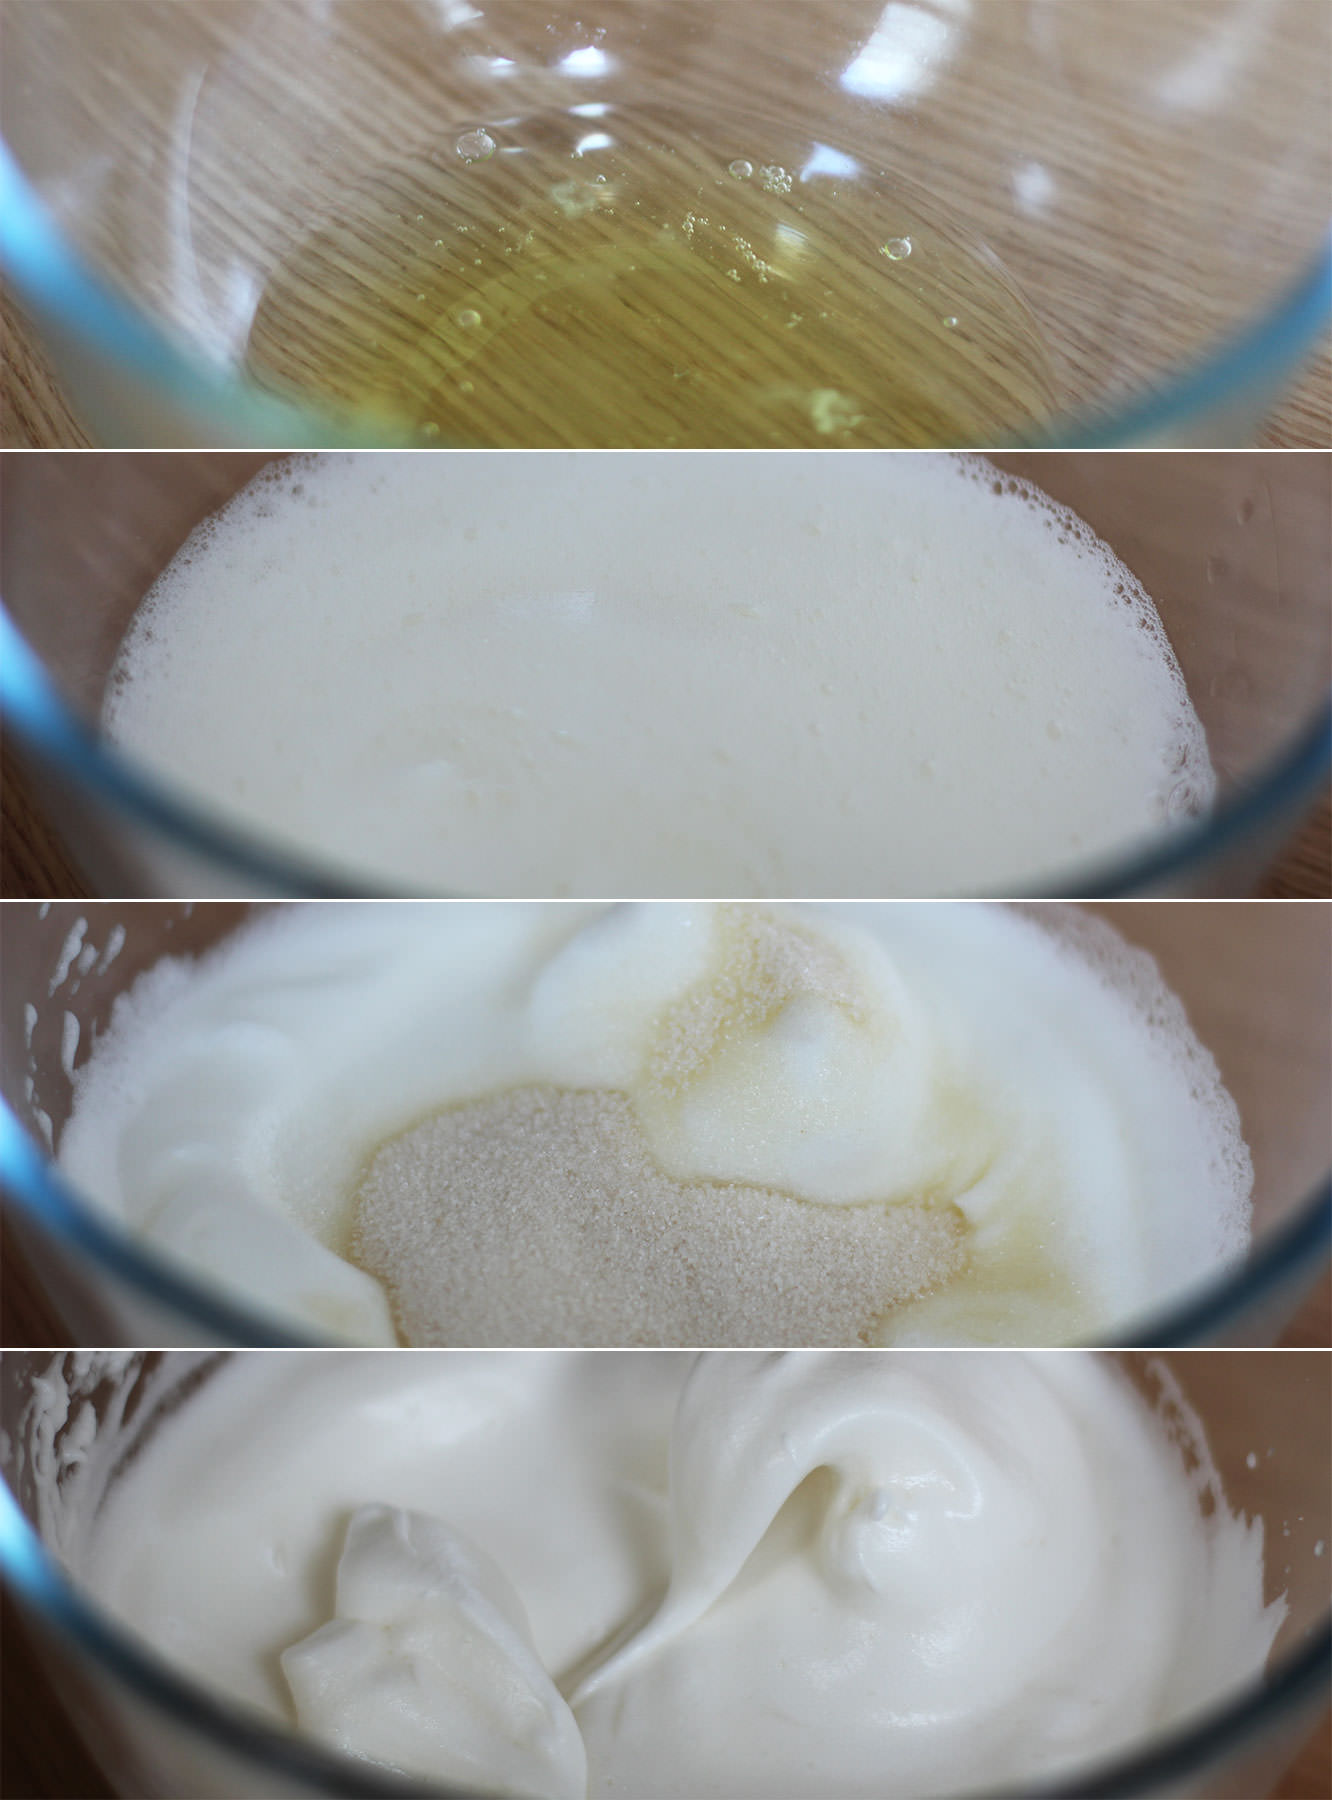
Whisk the egg whites into stiff peaks, add the caster sugar and whisk again until combined. You should be able to turn the bowl upside-down without it all falling out.
Step twelve
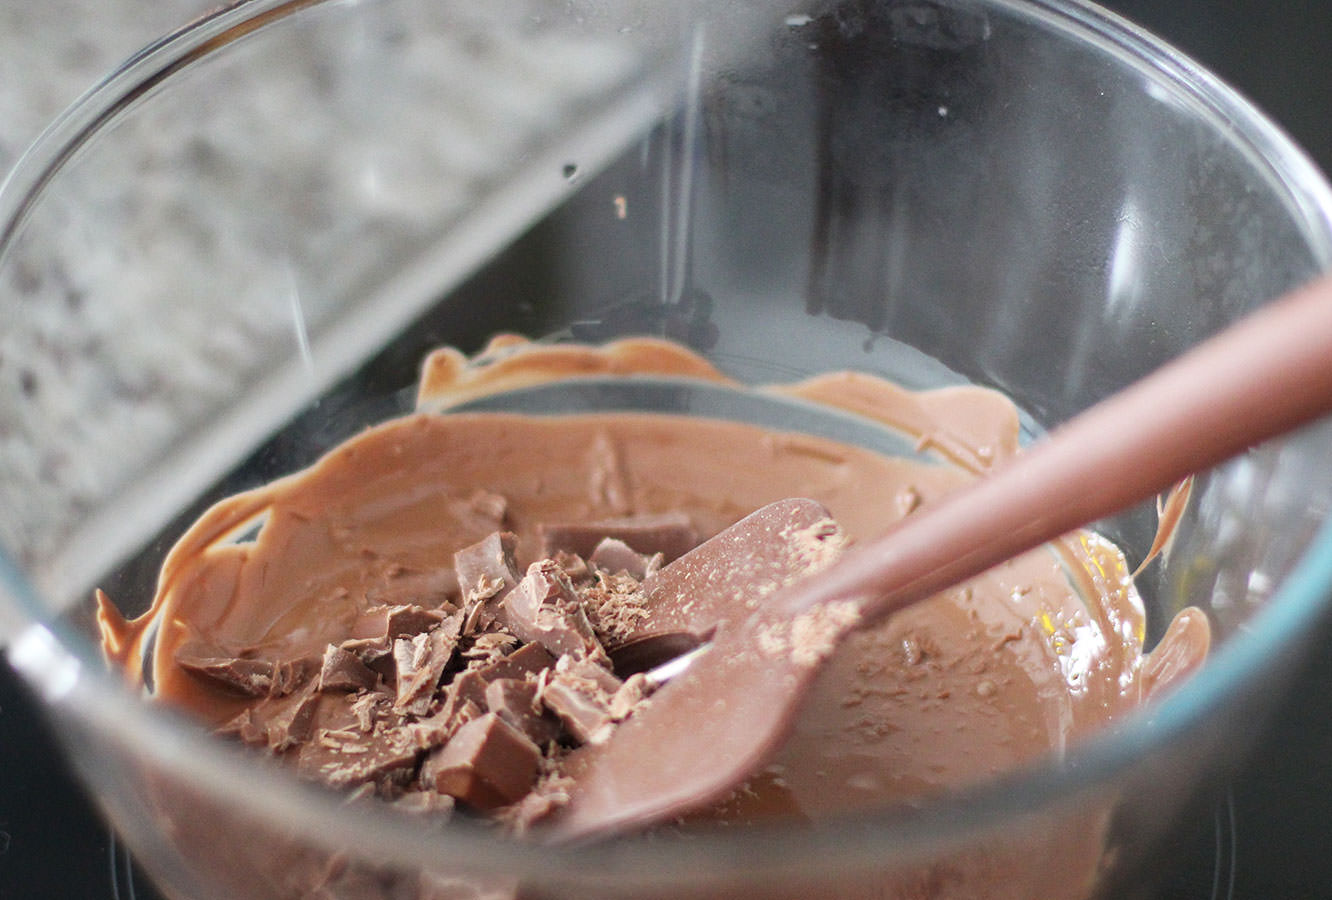
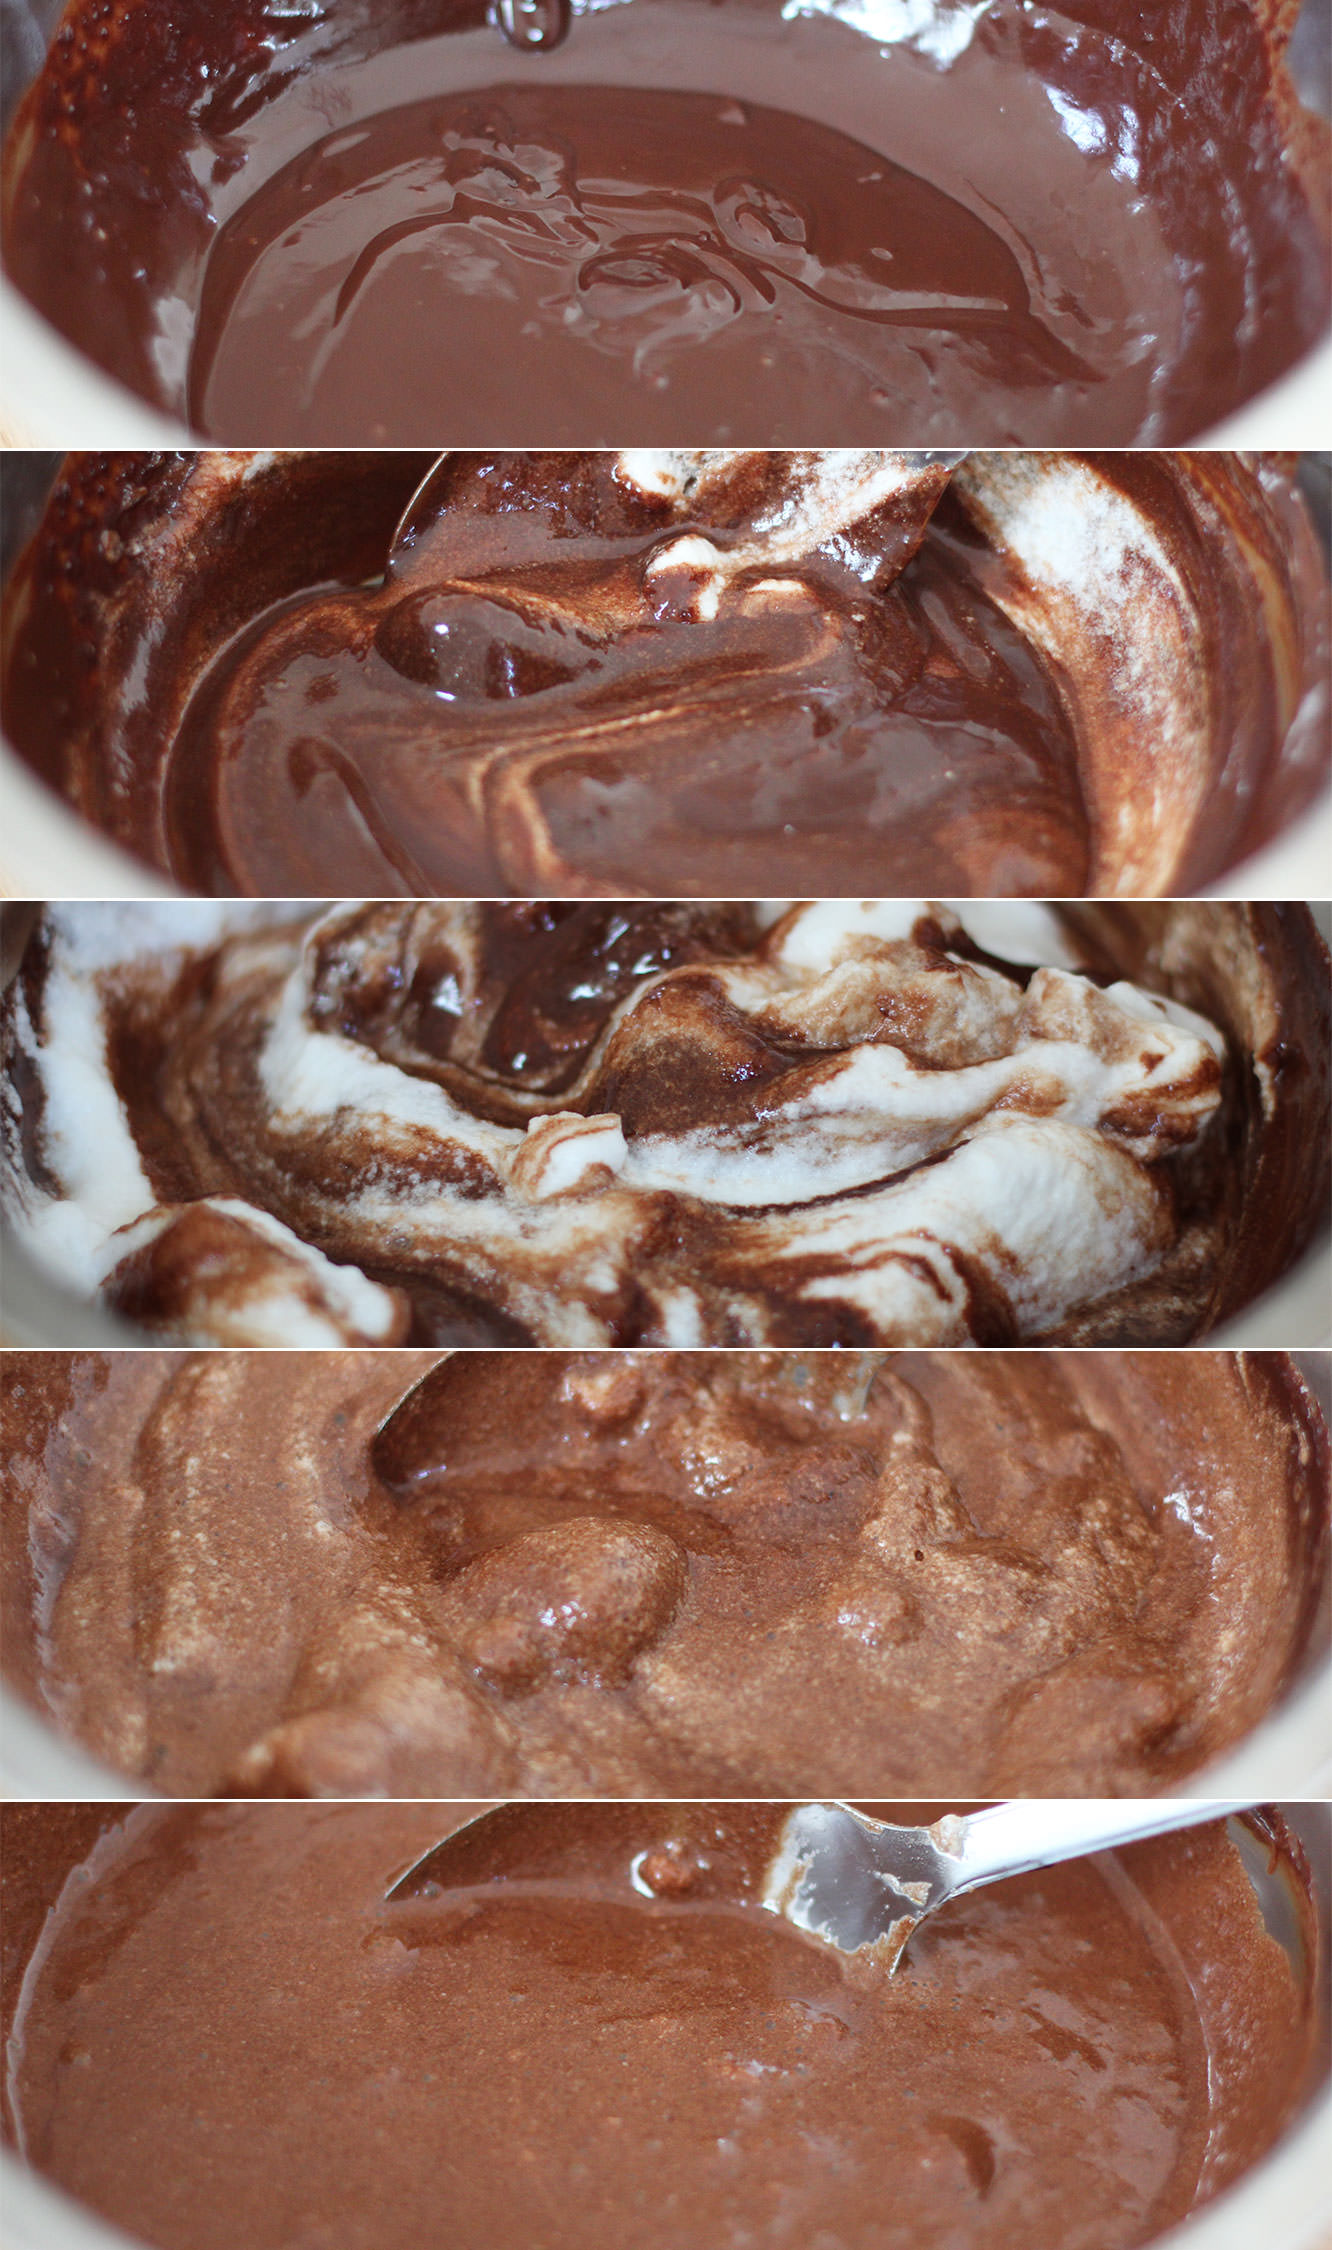
Place a spoonful of egg white into the chocolate and stir quickly to loosen the chocolate mix. Then add the rest and gently fold in with a metal spoon.
Put in the fridge for an hour or two, the longer the better really.
Step thirteen
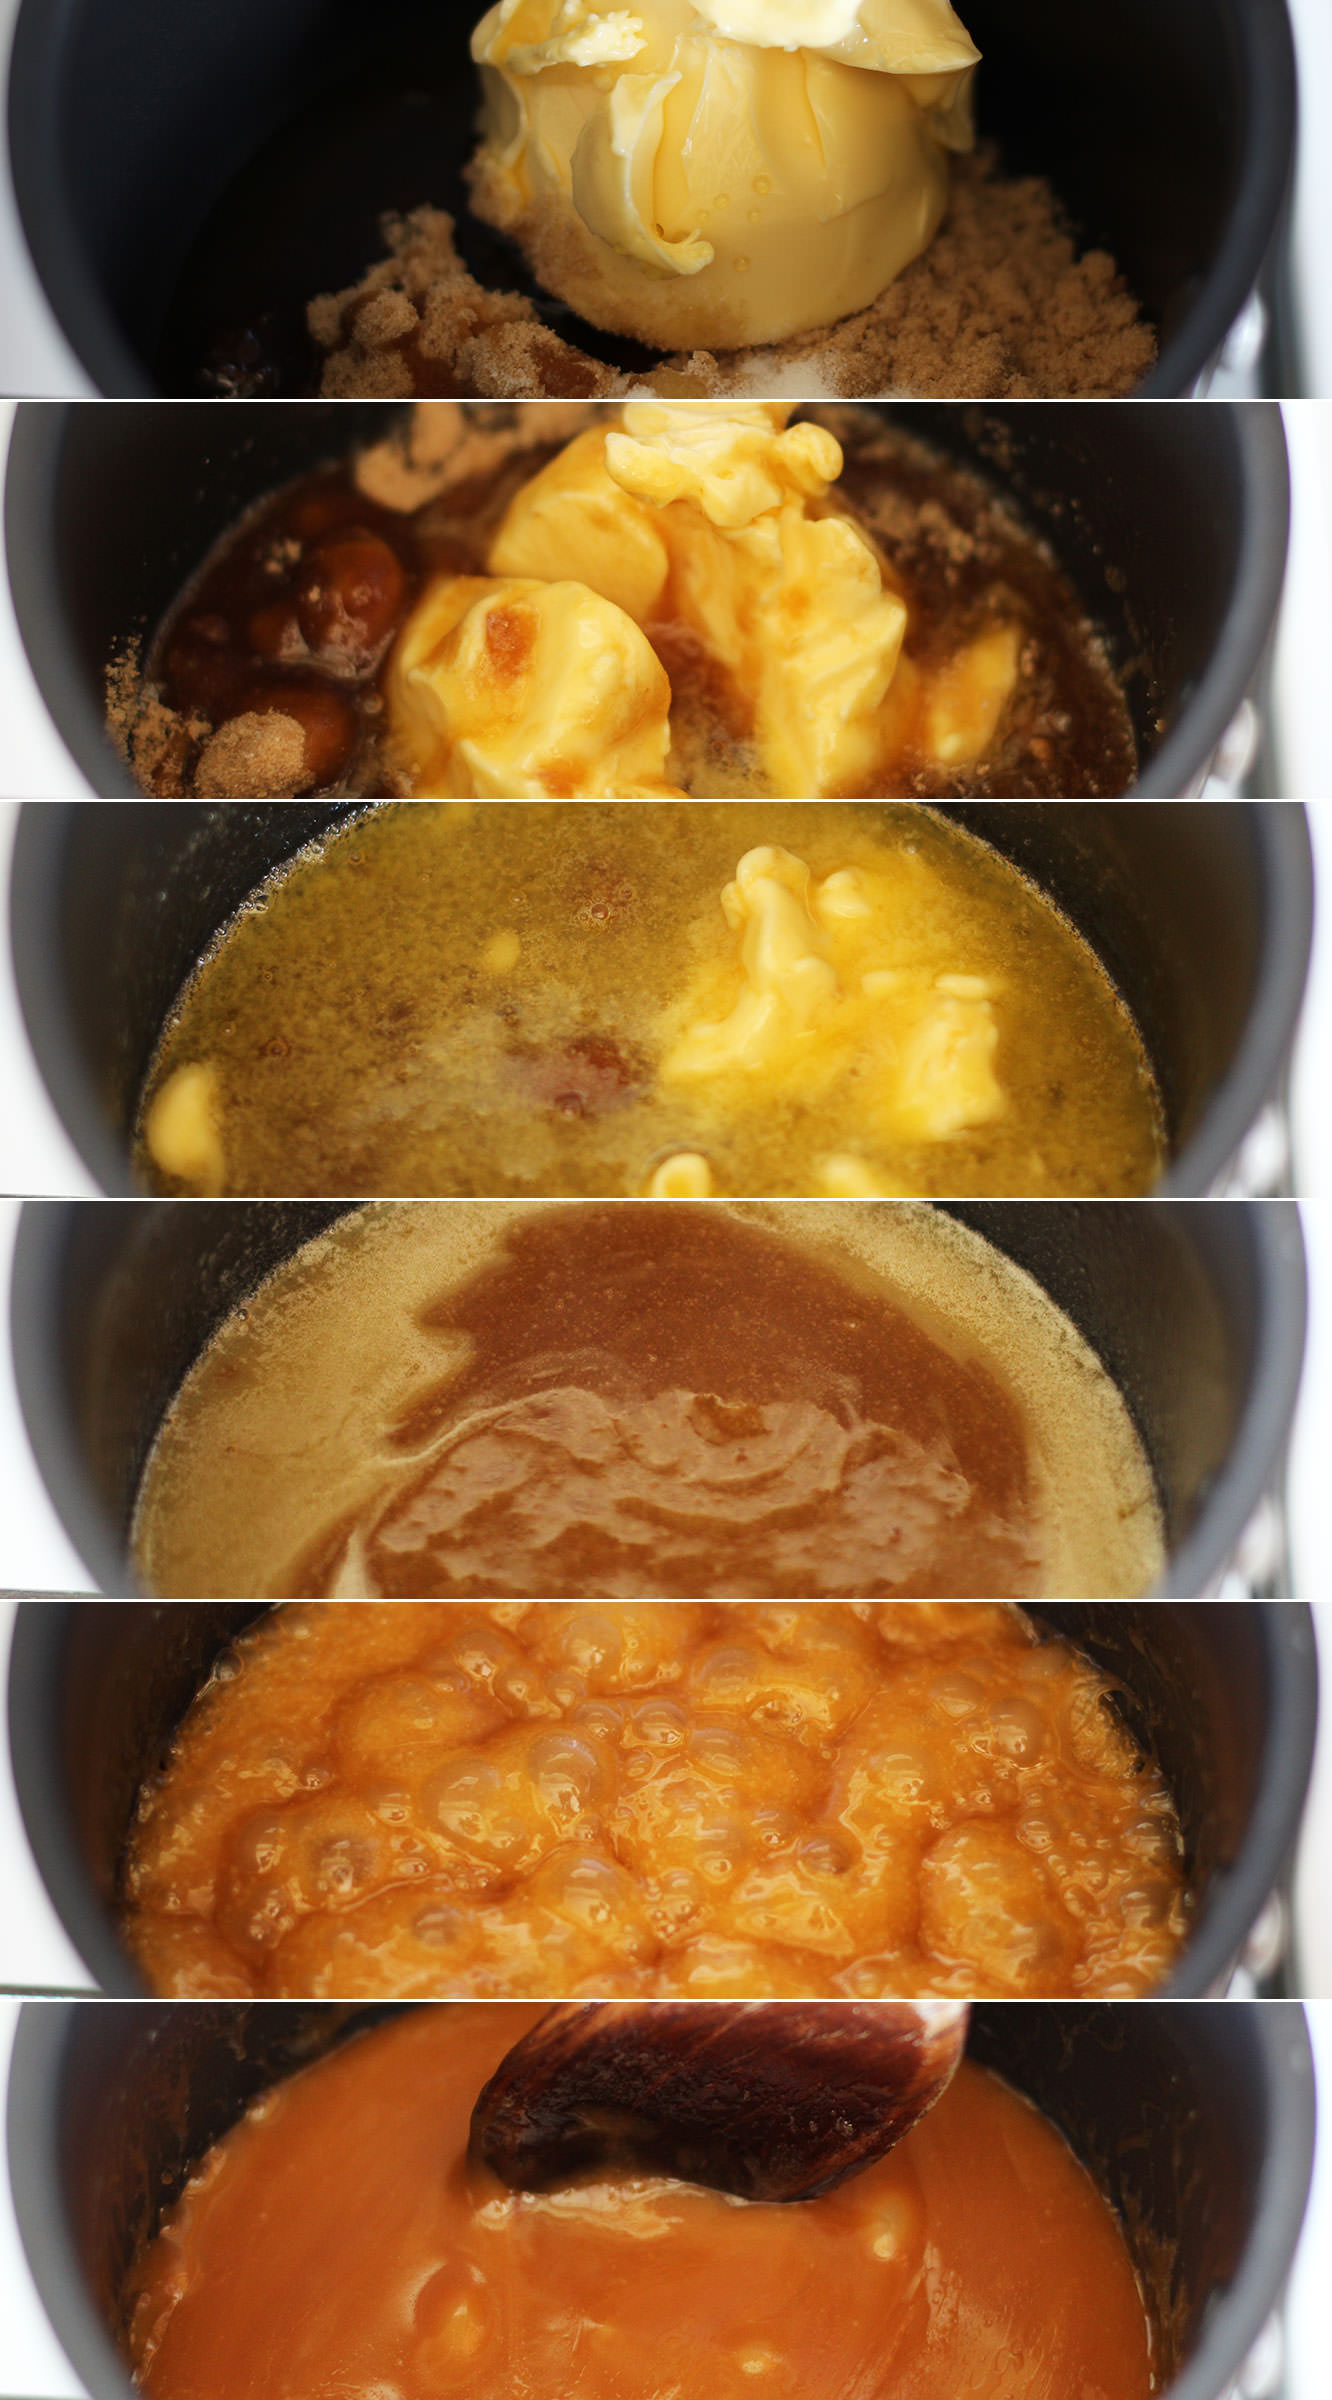
Make the salted caramel for the buttercream by melting together 100g of the butter, the brown sugar, golden syrup and salt. Do this slowly and then bring the heat up to a simmer.
Simmer for 10 minutes. Stir regularly so that it doesn’t catch and burn. Leave to cool down for about half an hour or so.
If you think you’ve seen this before, you have, this is about the 5th time I’ve used this salted caramel recipe.
Step fourteen
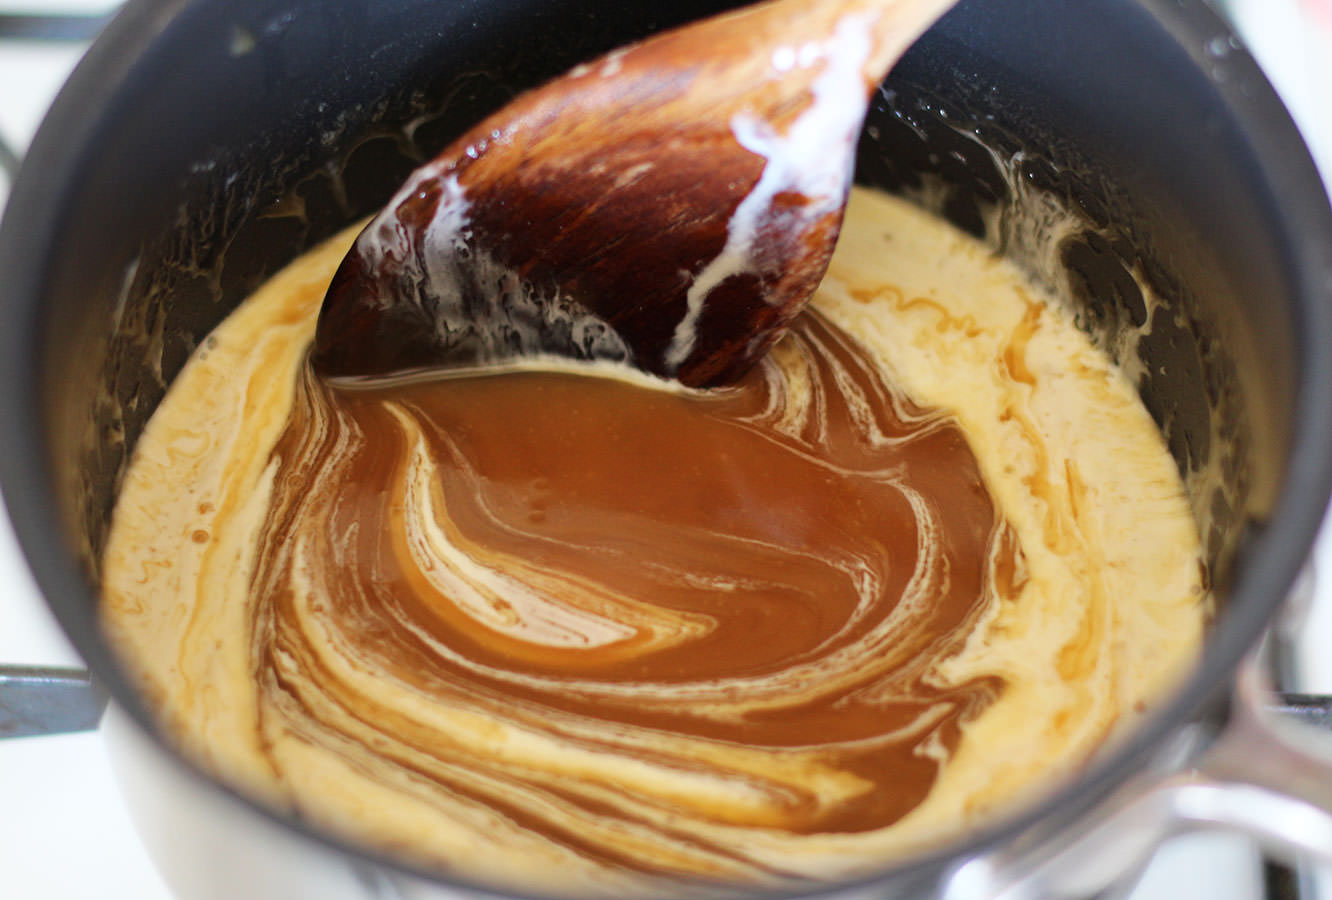
Once the caramel has cooled down a bit, stir in the 100ml of cream. Set to one side and make the buttercream.
Step fifteen
With an electric whisk beat together the rest of the butter and the icing sugar. Cover with a tea towel to begin with, or you will wind up looking like a cloud.
Step sixteen
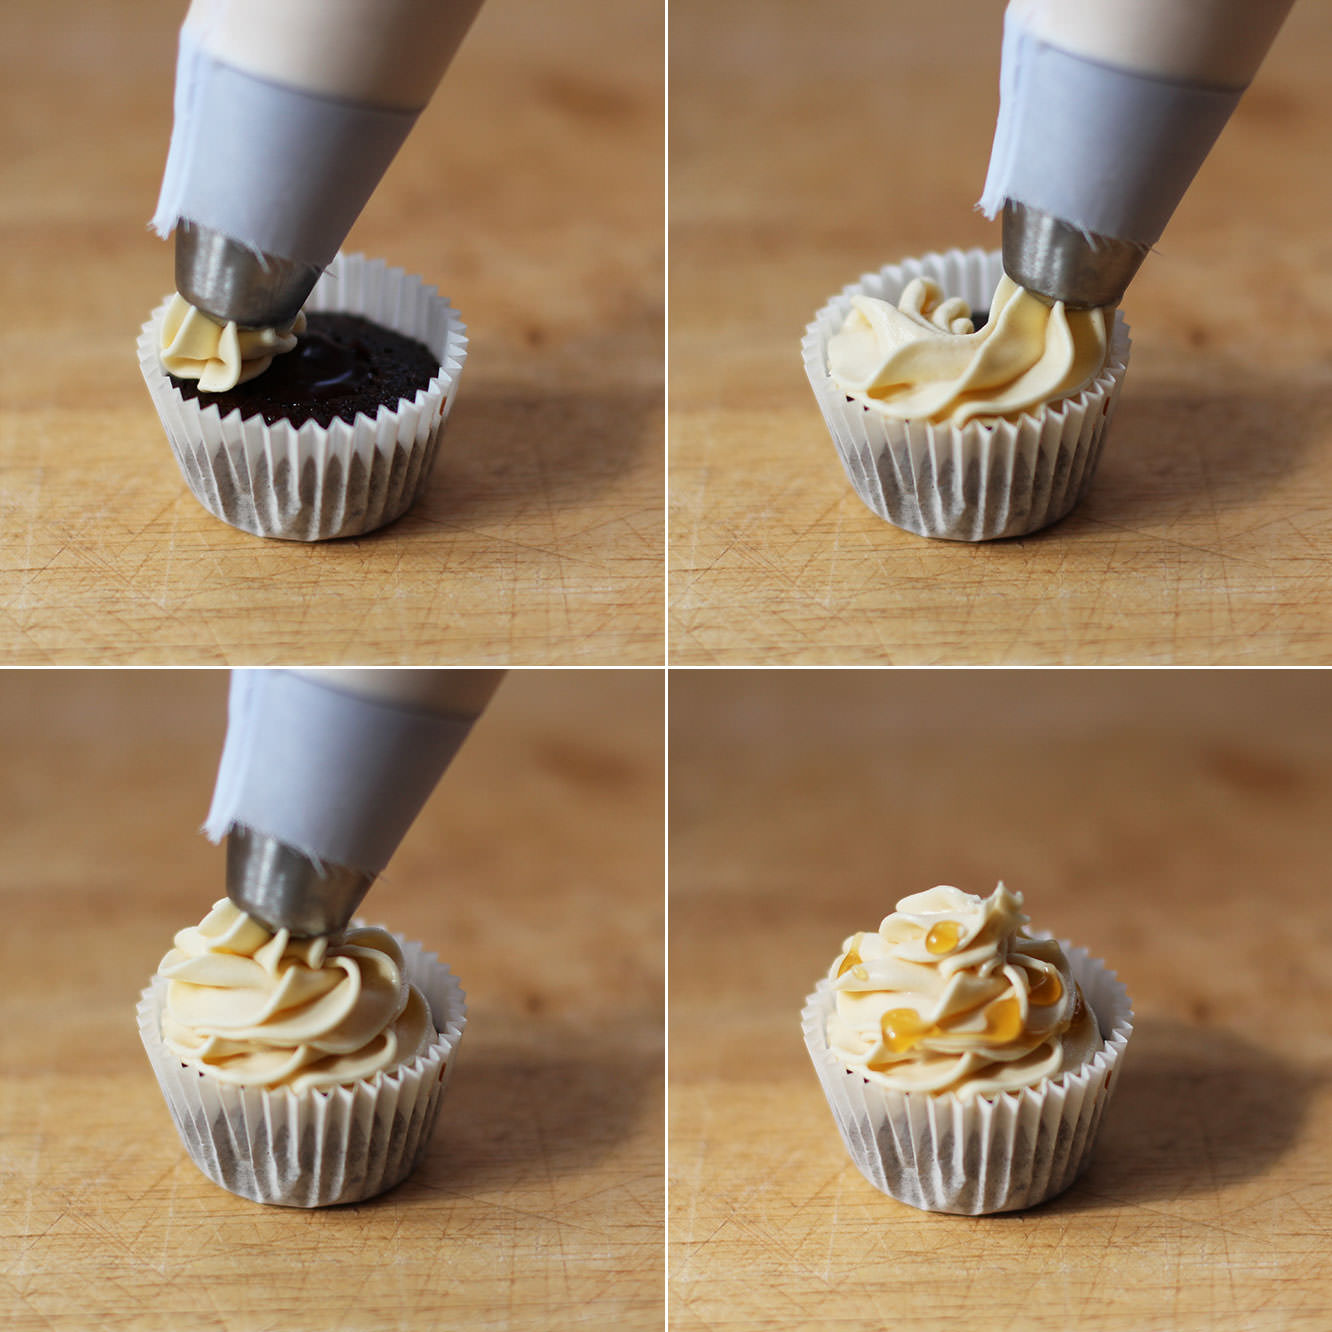
Add the salted caramel to the buttercream and whisk. Voila. Place in fridge for at least 15 minutes until cooled completely.
Step seventeen
Once the chocolate mousse is set get ready to assemble.
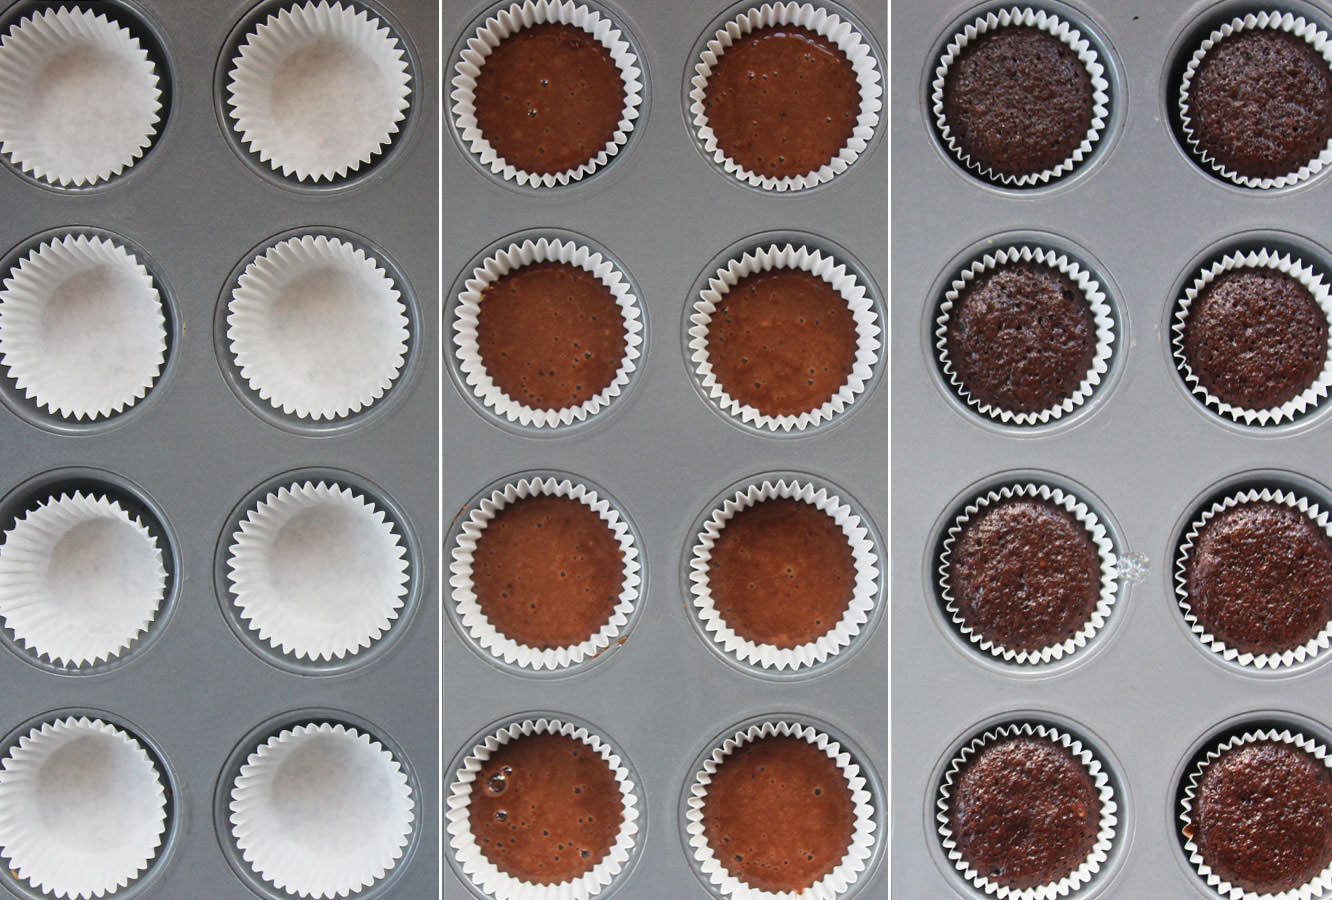
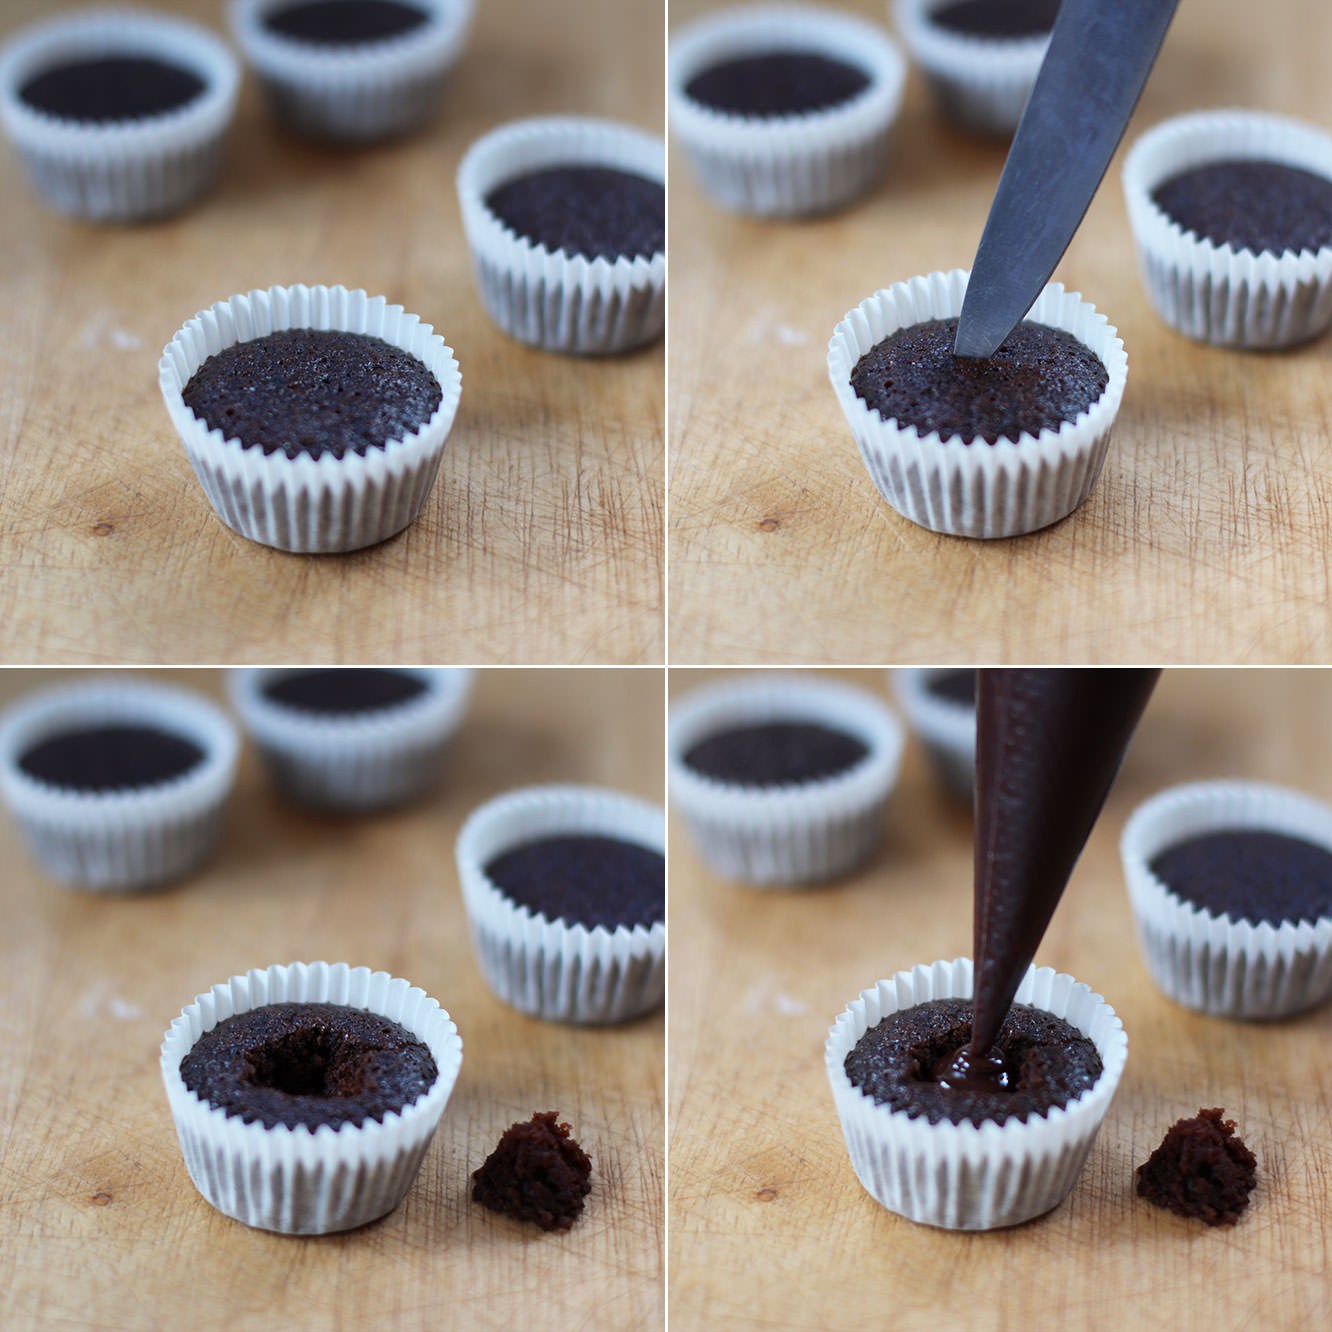
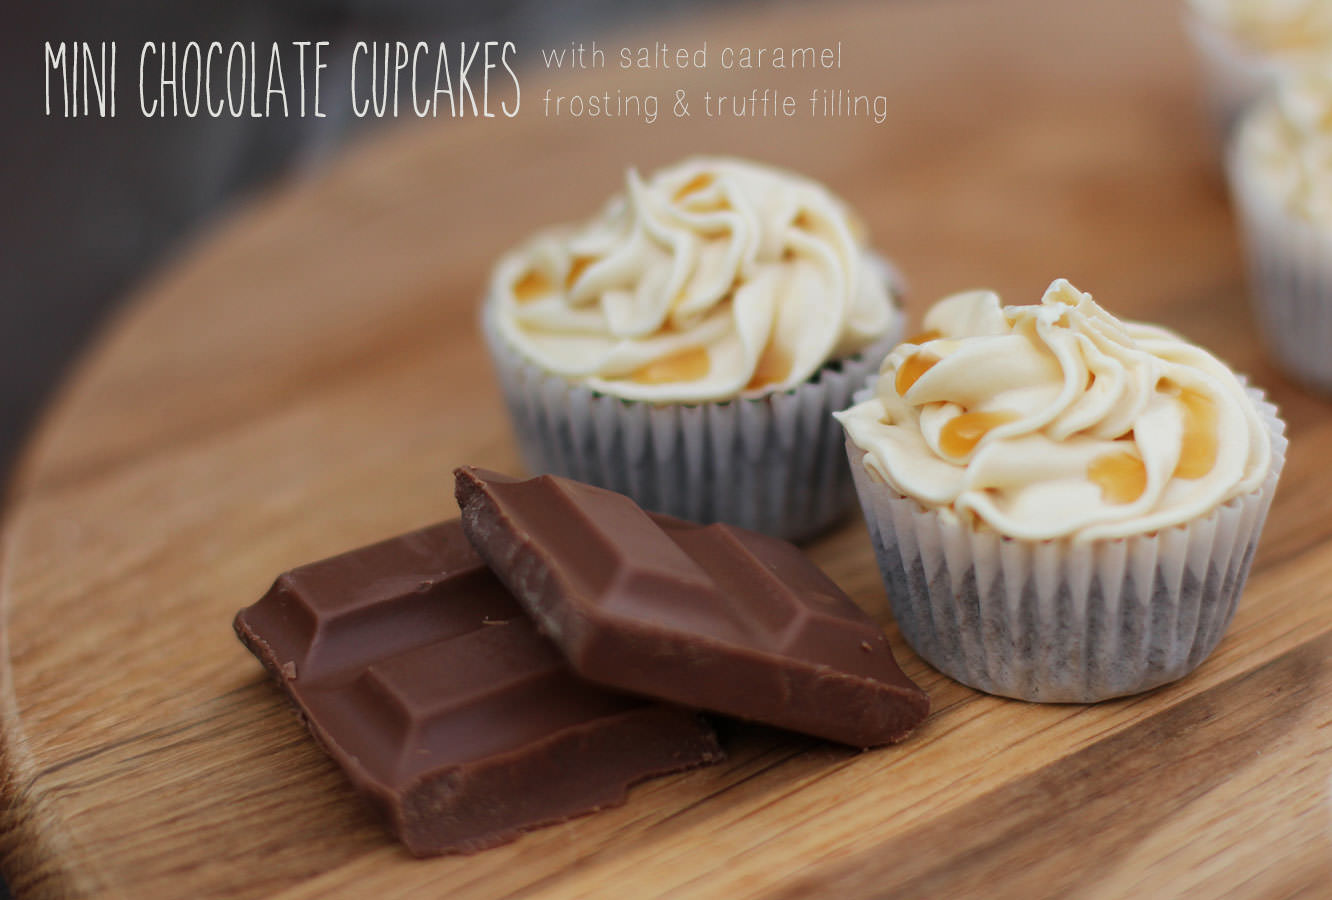
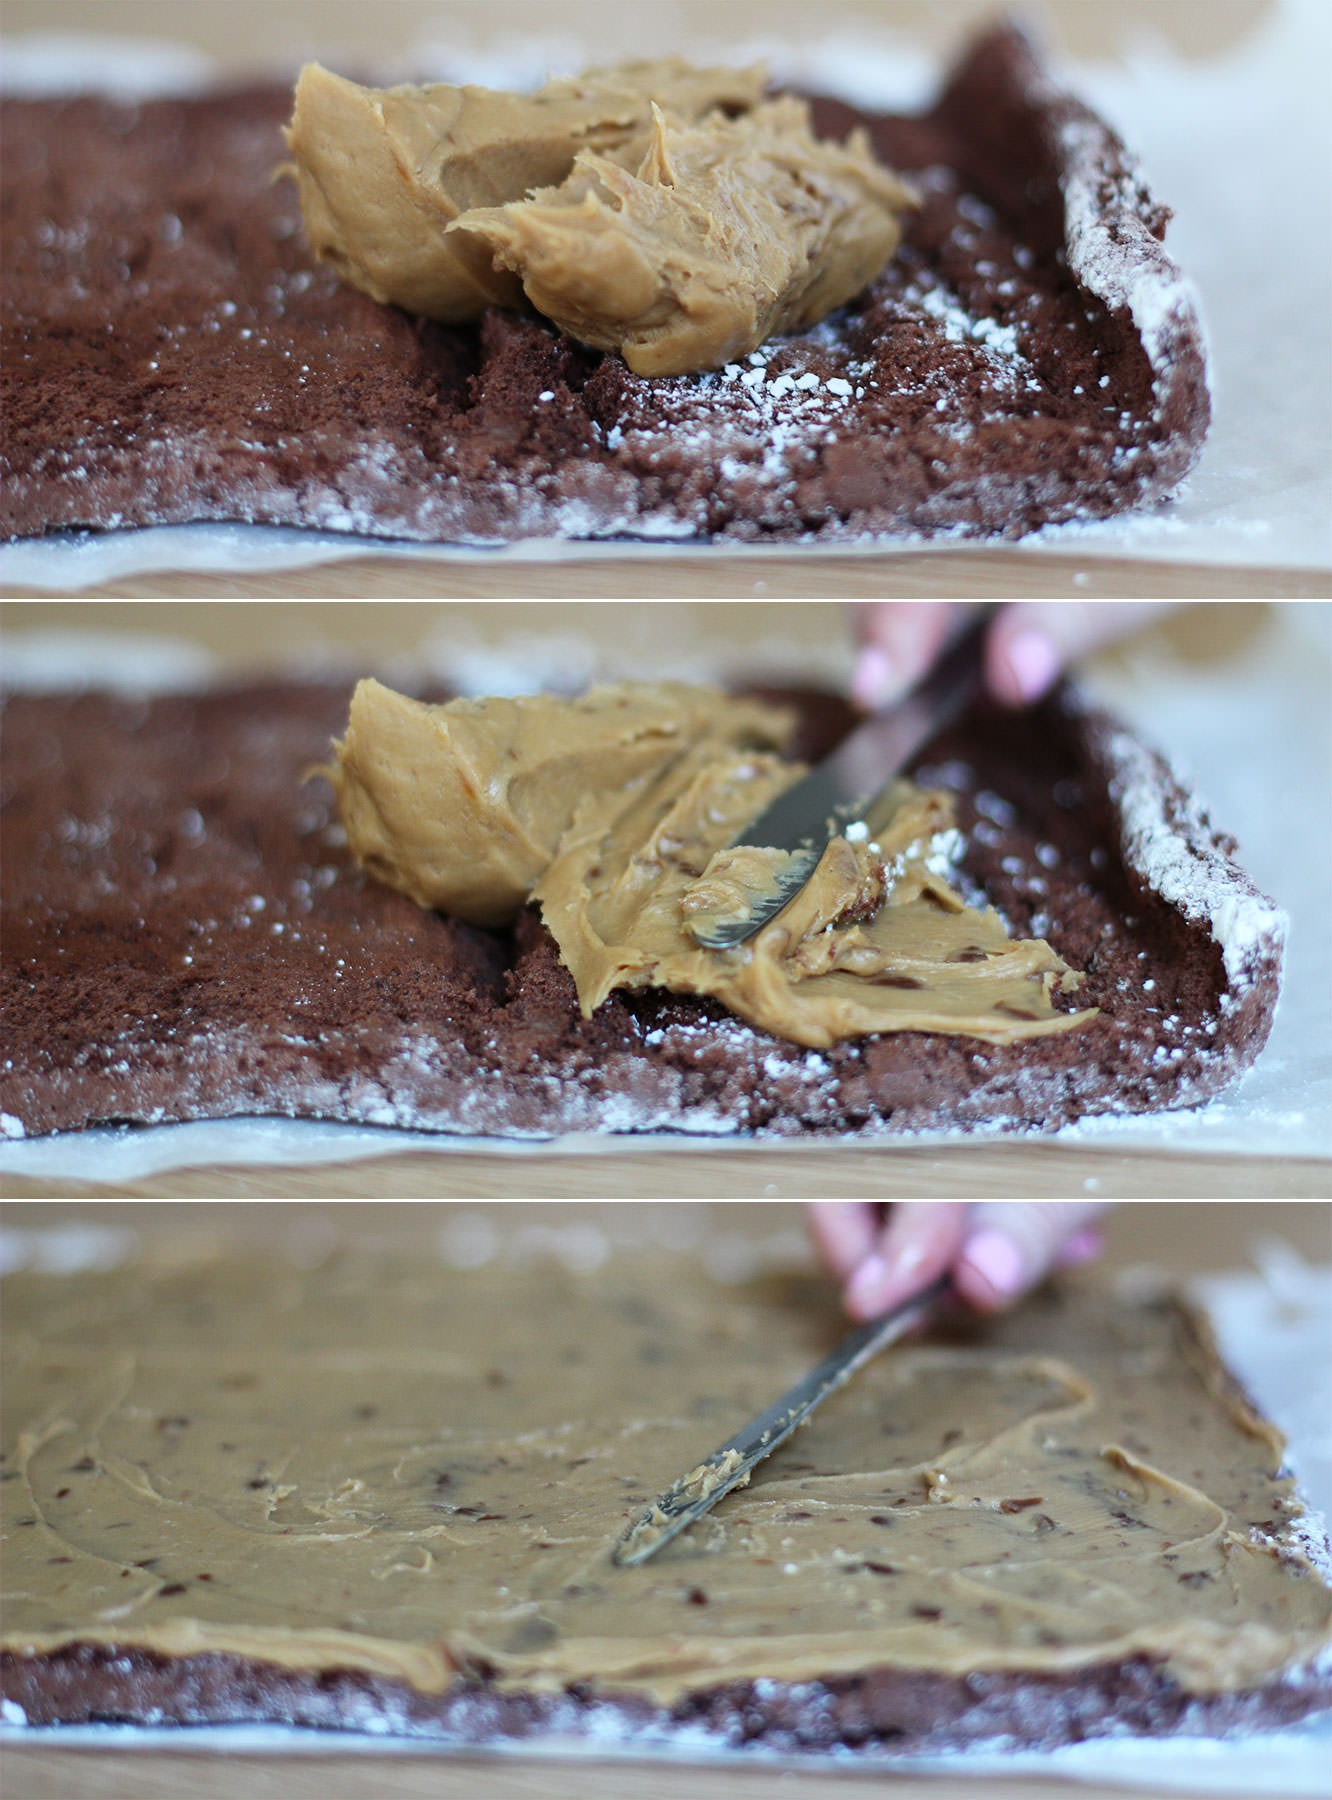
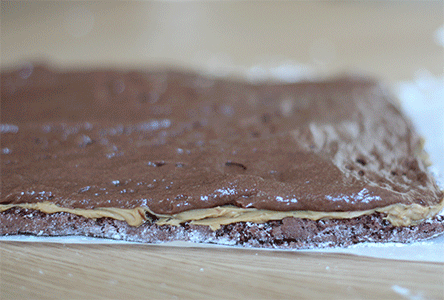
Unroll the sponge and spread a layer of caramel over the surface. I didn’t use all the buttercream so go with what feels right. I used the rest of it up on some cupcakes. Apparently I want my housemates to be obese.
If you’re wondering why mine looks darker than yours it’s because I used dark soft brown sugar and cooked it for too long.
Step eighteen
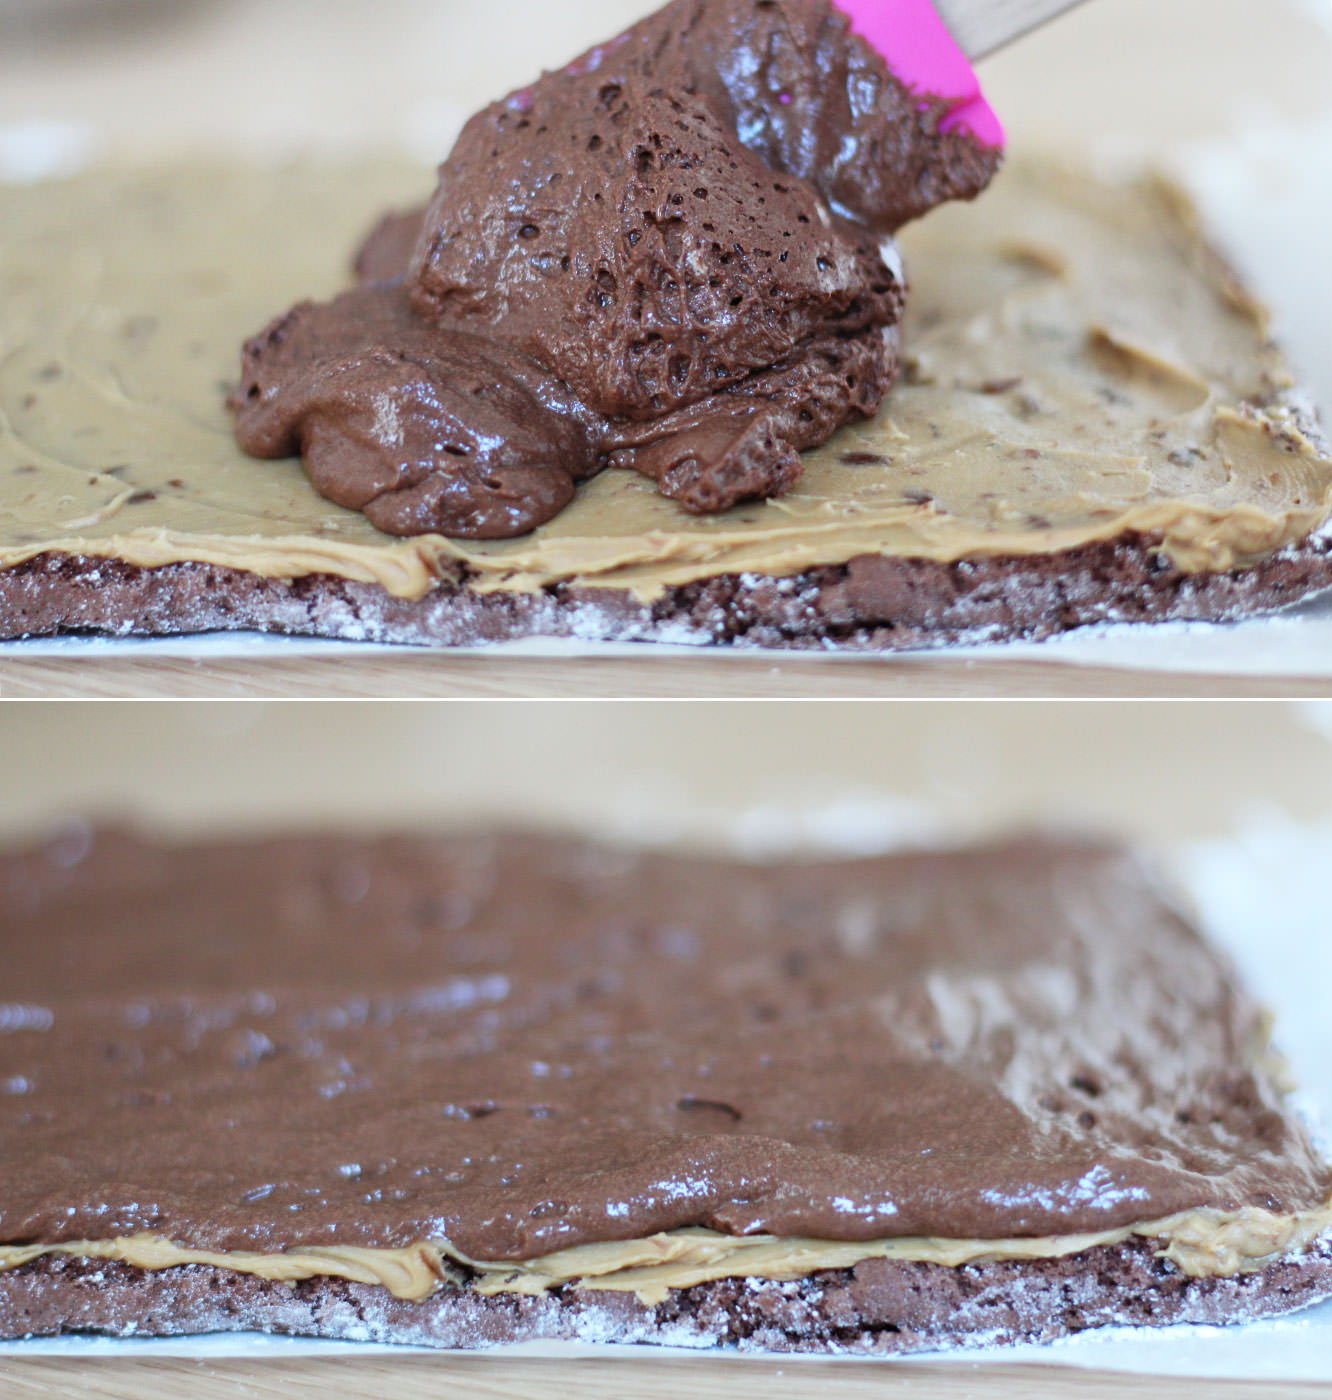
Spread the mousse over, try to keep air in it if you want, but you’ll abandon all hope fairly soon.
Step nineteen
Using the greaseproof paper roll the roulade up. Now. I probably didn’t get my first bit tight enough, but regardless, this bit ain’t pretty. Just do it, put it on a chopping board/tray put it back in the fridge and don’t think about it.
Seriously. The mousse will splurge a lot a bit. Pretend it never happened.
Step twenty
After about an hour or so in the fridge the mousse will have firmed up again. You can take it out, wipe away any excess filling and dust some more icing sugar over it.
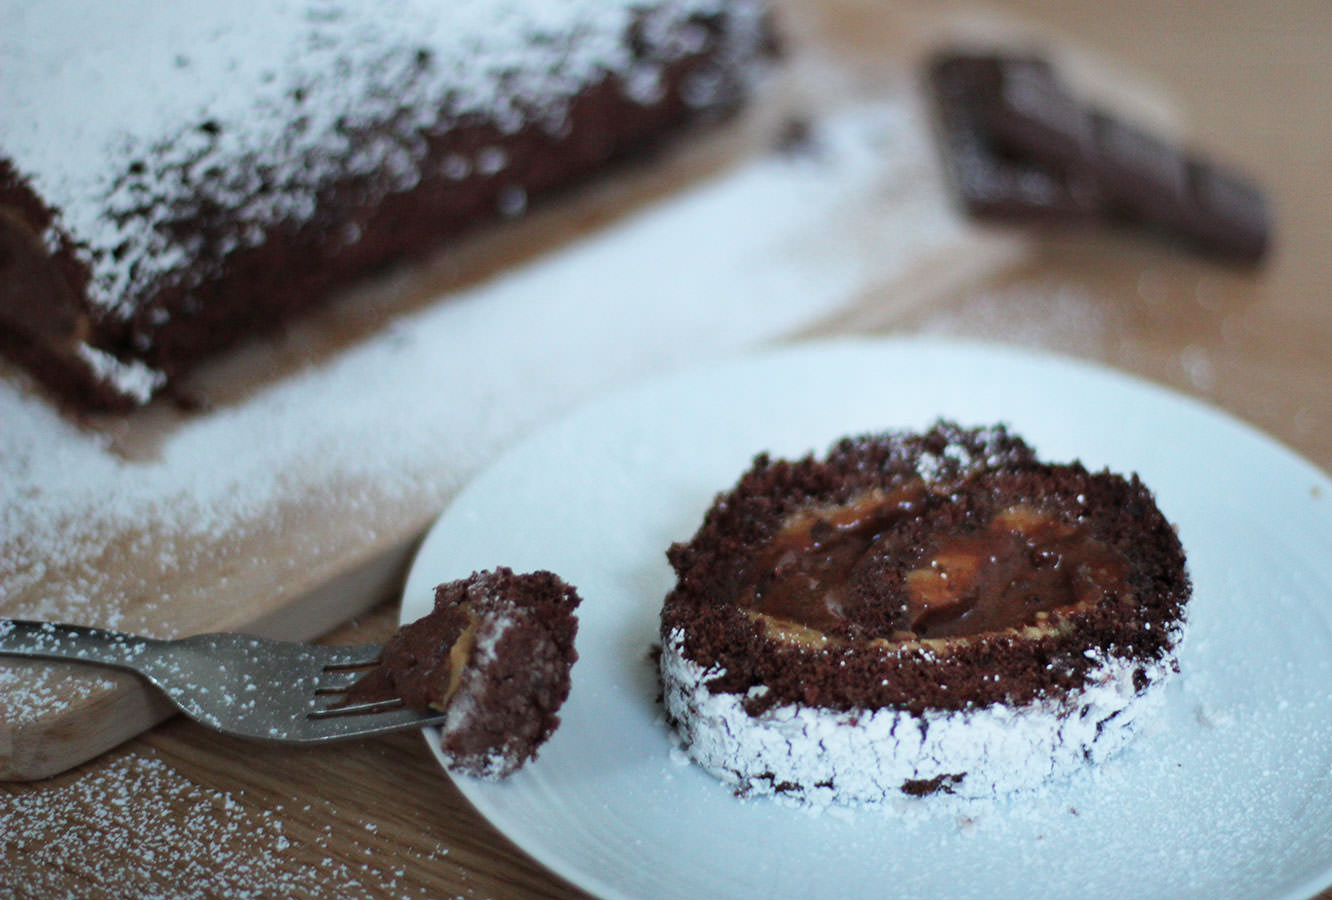
Yeah. Enjoy that my friend.