Tag: Honey

Oh hey honey

October 31st. 19C in London, beautiful sunshine.

November 1st. Fog, cold, winter has arrived.

Don’t you just love the British weather?! Its unpredictability is a constant irritation to me but I do adore the seasons. I’m very glad I don’t live somewhere that’s variations on one temperature all year round.

It’s starting to feel a little festive this week at Fabrefaction HQ. It’s bonfire night on Thursday, and we are having a housewarming party this weekend to welcome the new housies. It would be rude not to provide our guests with some treats, and even ruder not to acknowledge the approach of Mr Frost.

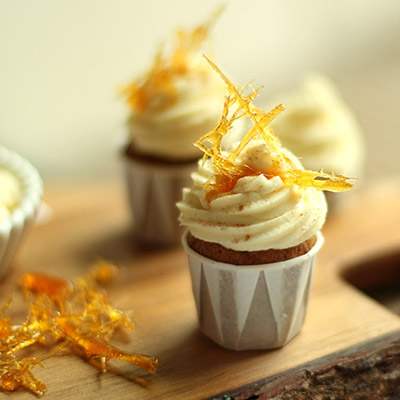
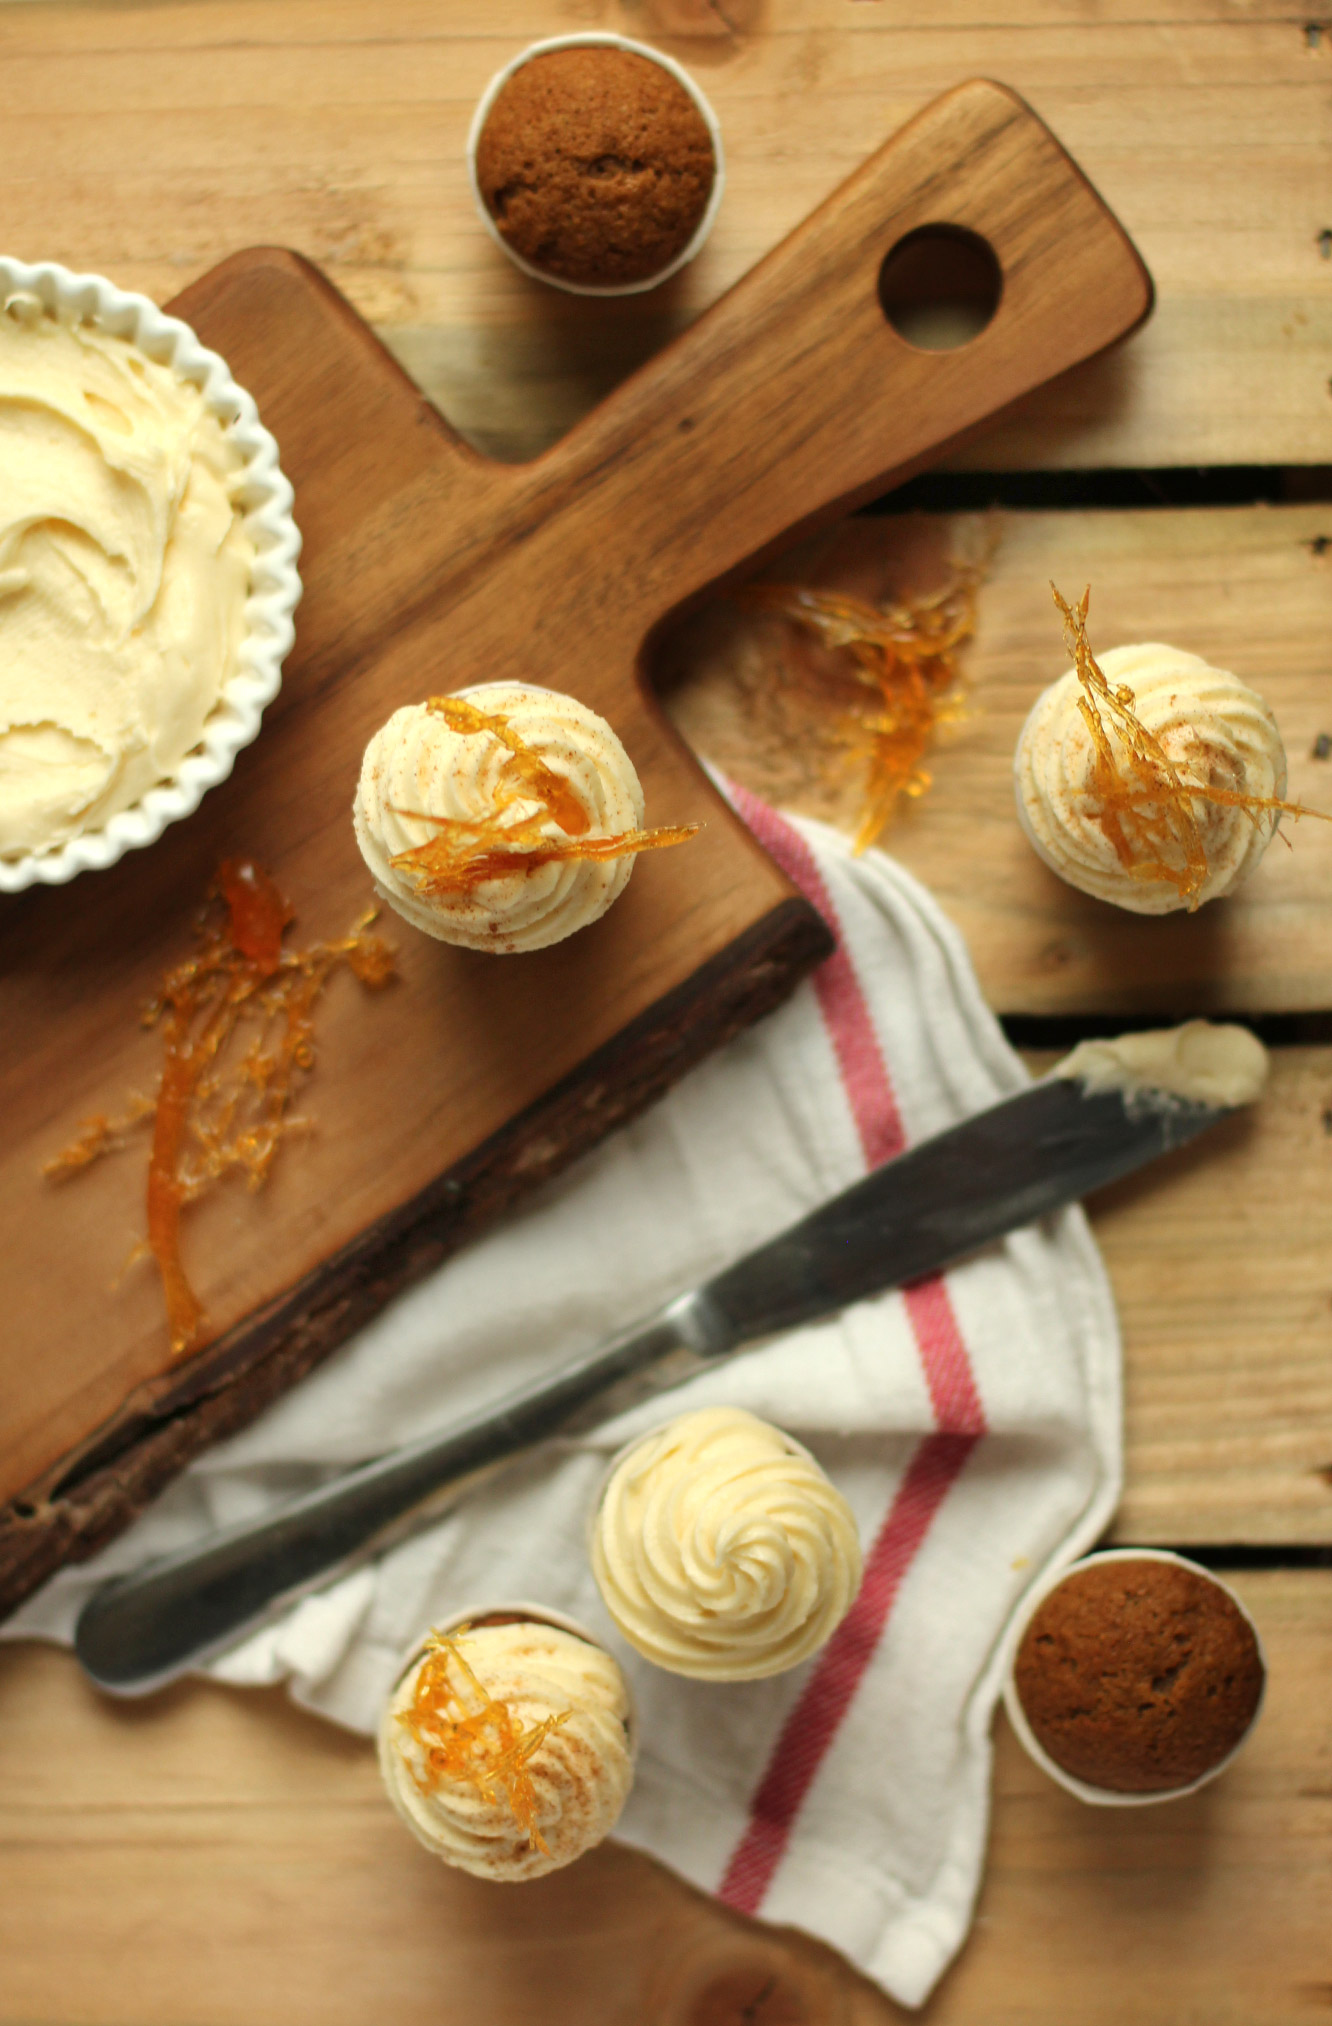
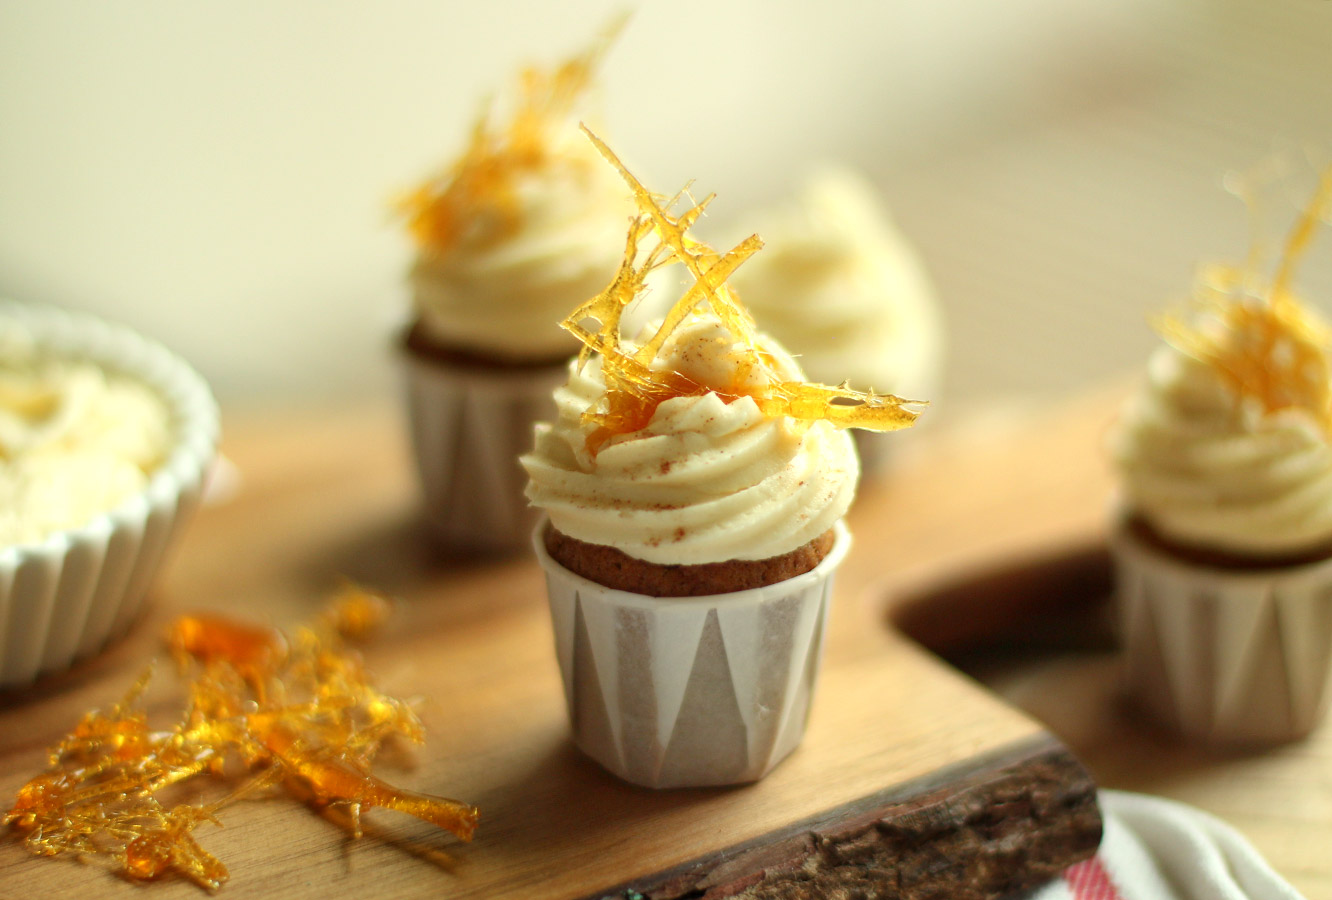
So here we are, the perfect recipe to bridge autumn and winter, mini gingerbread and honey cupcakes. If you don’t fancy the hassle you could always make this as a traybake, perhaps doubling the recipe (I halved it).
ginger-and-honey-cupcake-recipe-1

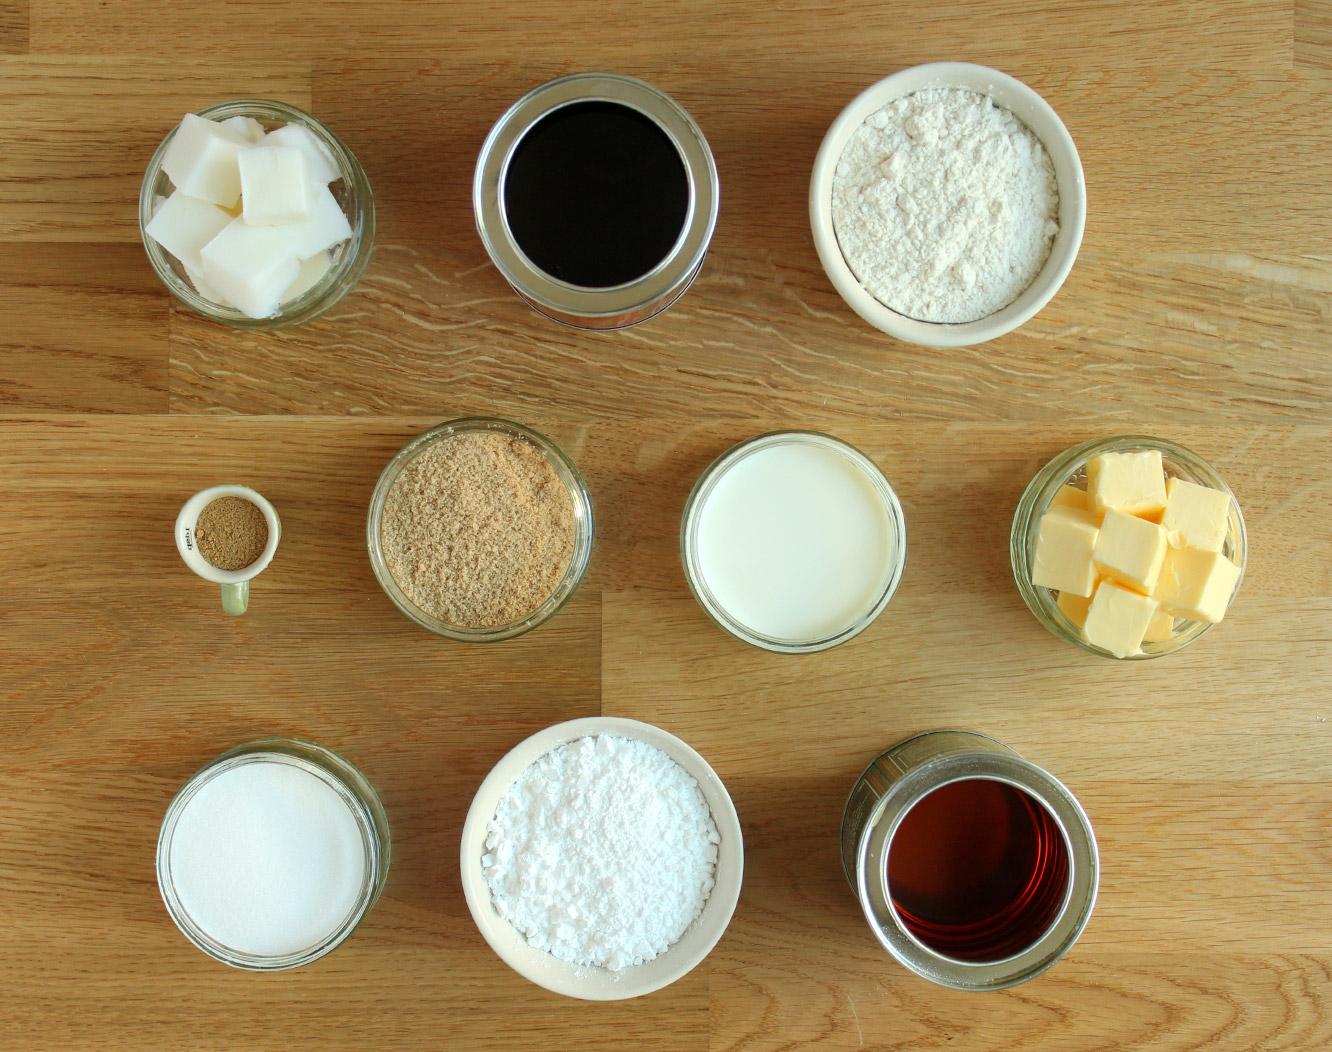
You will need

For the cake:

250g/9 oz plain flour

100g/3.5 oz golden syrup

75g/2.5 oz light soft brown sugar

75g/2.5 oz lard (yes, lard)

40g/1.5 oz treacle

140ml/4.5 fl oz milk

1 egg

1 tsp ground ginger (feel free to add more)

1 tsp bicarbonate of soda

For the icing:

300g/10.5 oz icing sugar

150g/5.25 oz unsalted butter

6 tbsp runny honey

For the sugar shards:

100g/3.5 oz caster sugar

(makes 35 mini cakes)
ginger-and-honey-cupcake-recipe-2

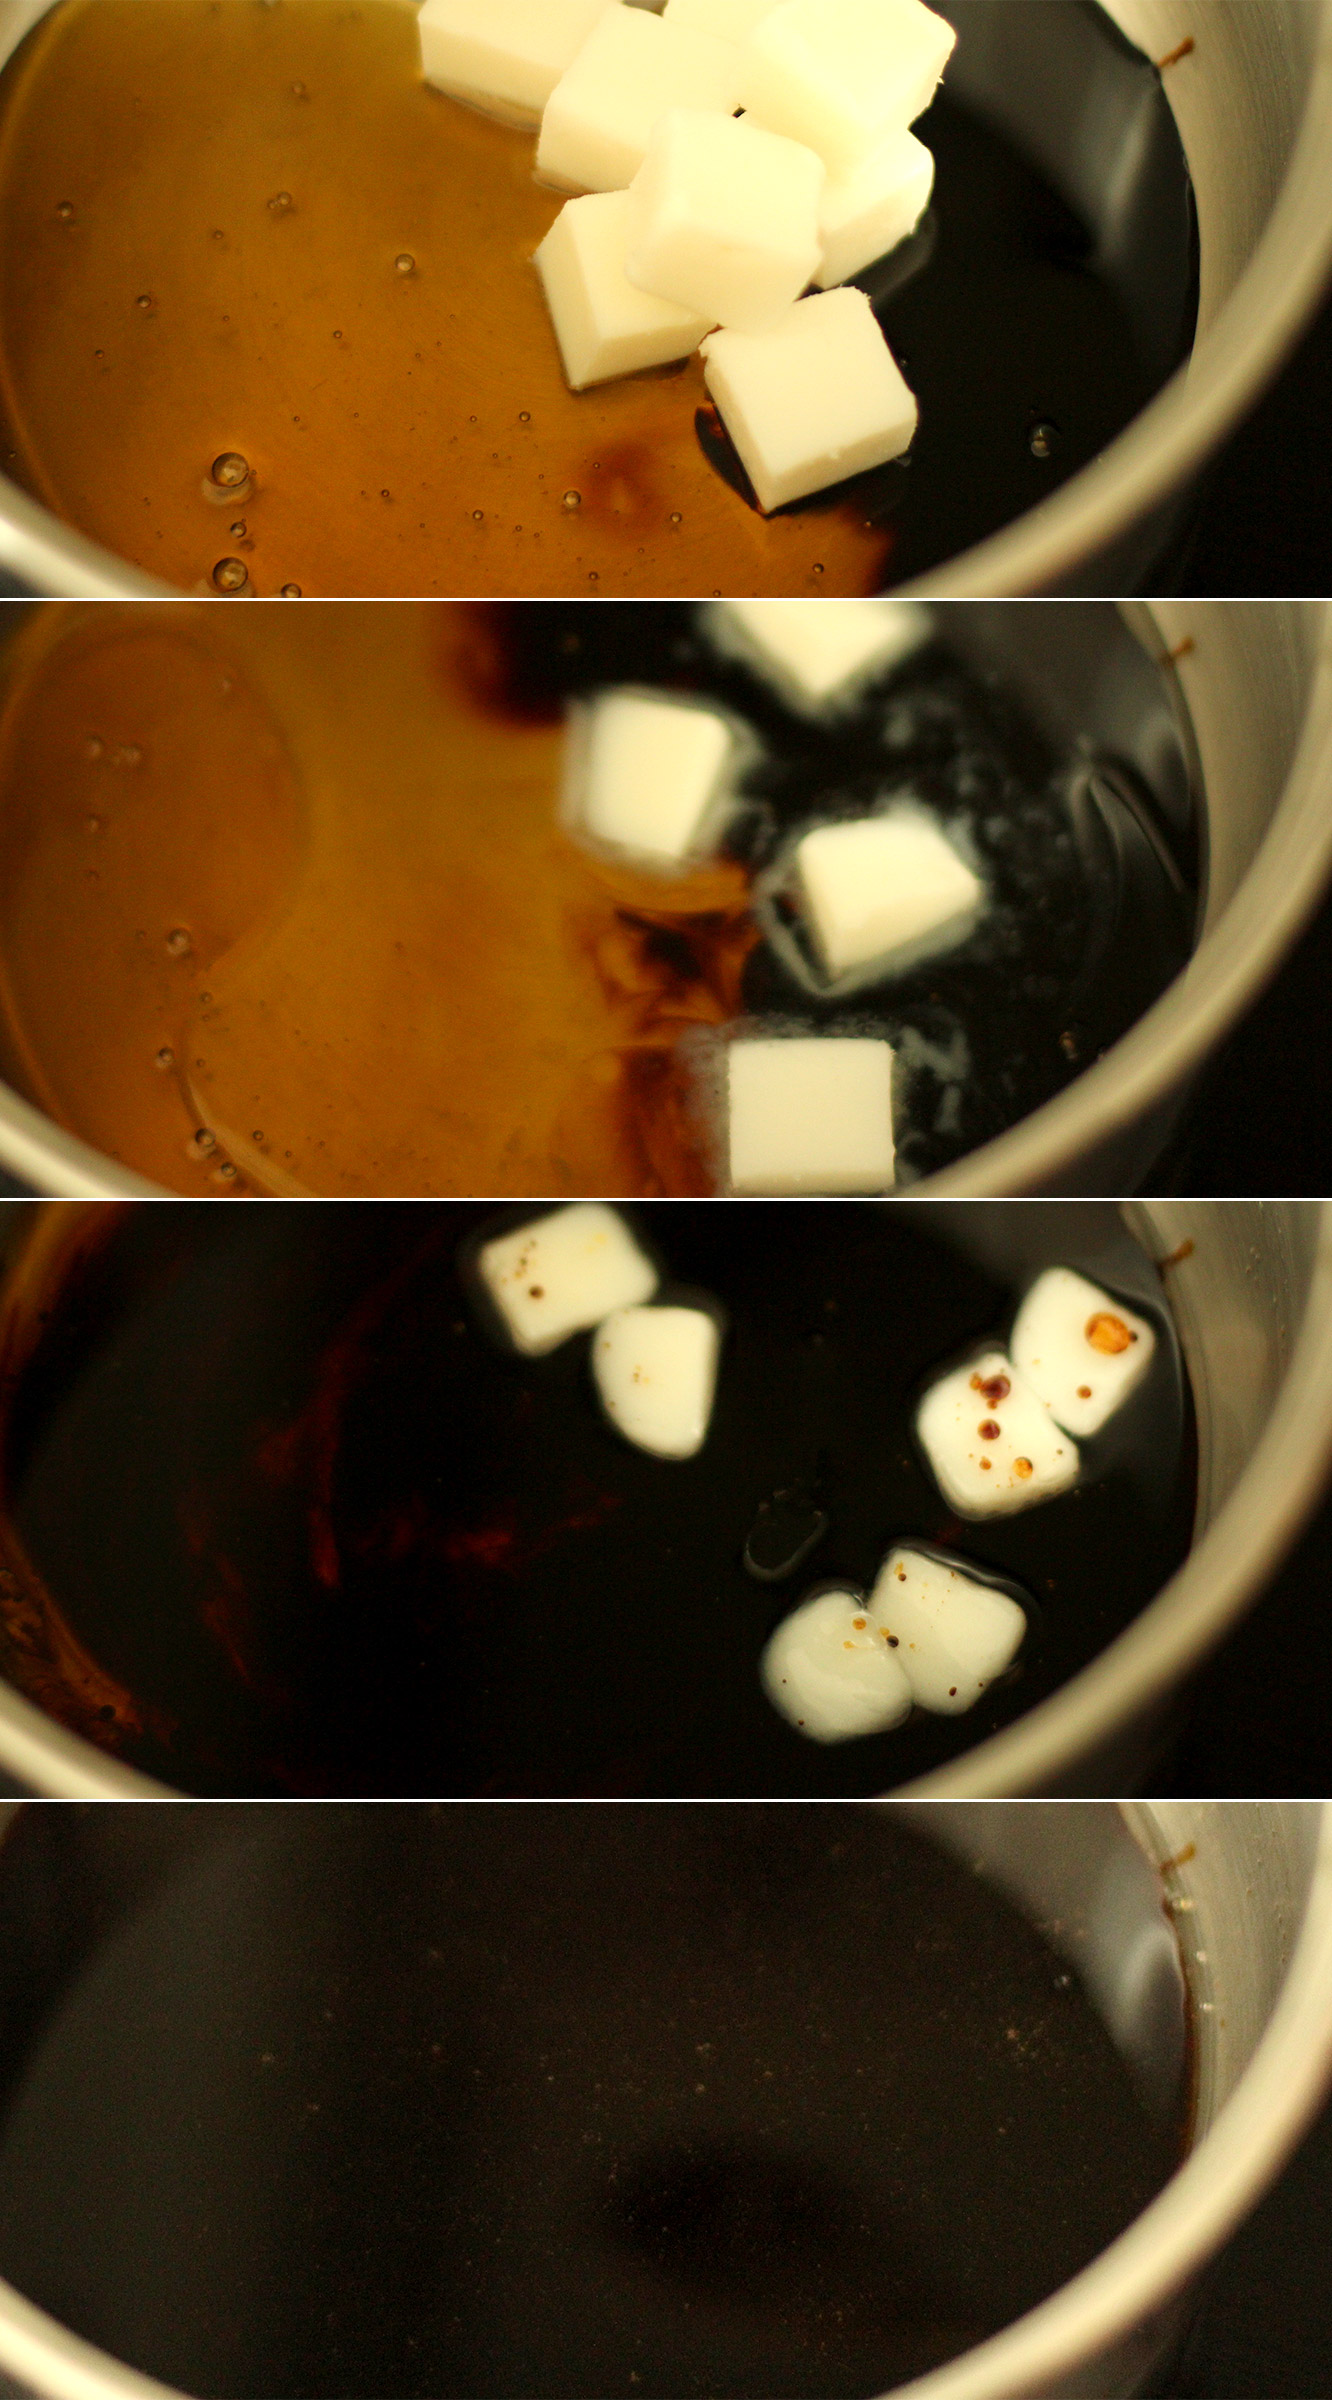
Step one

Melt the lard, golden syrup and treacle over a low heat.

Yes the lard will separate and create a glossy sheen on the surface, and yes you will think how unappetising it looks, but trust me on this one…it’s one of those recipes passed from generation to generation in my family, I’m just giving it a little facelift and daren’t replace the lard, just in case somehow Grandma is watching.
ginger-and-honey-cupcake-recipe-3

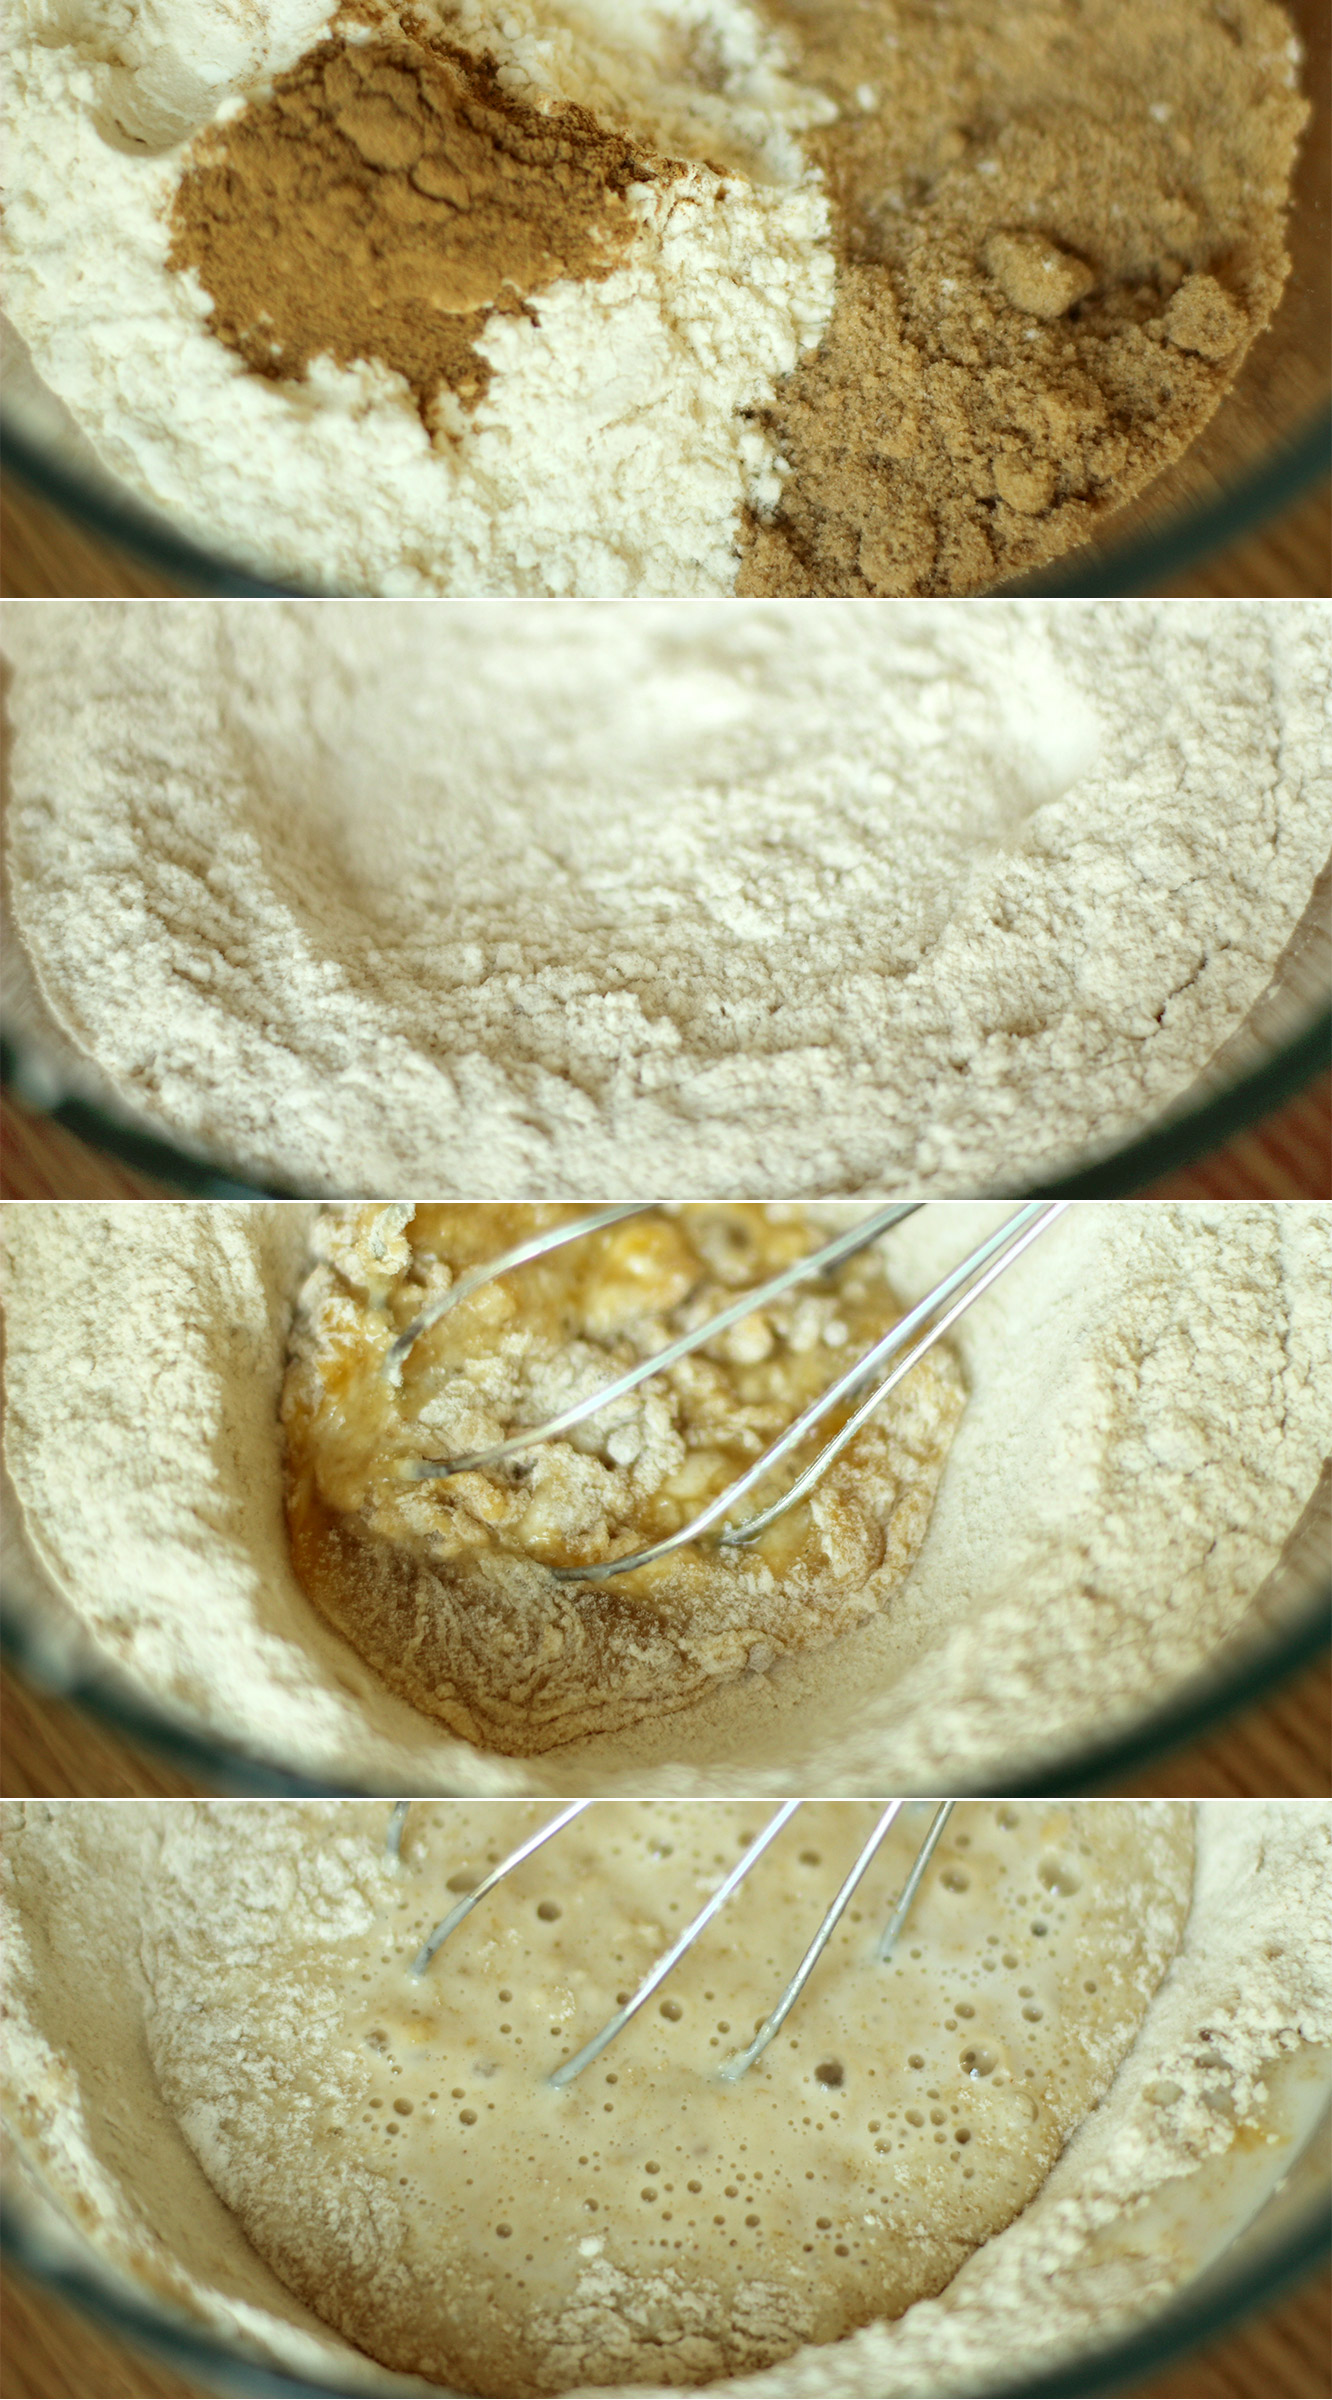
Step two

Combine the sugar, ginger, flour and bicarbonate of soda.

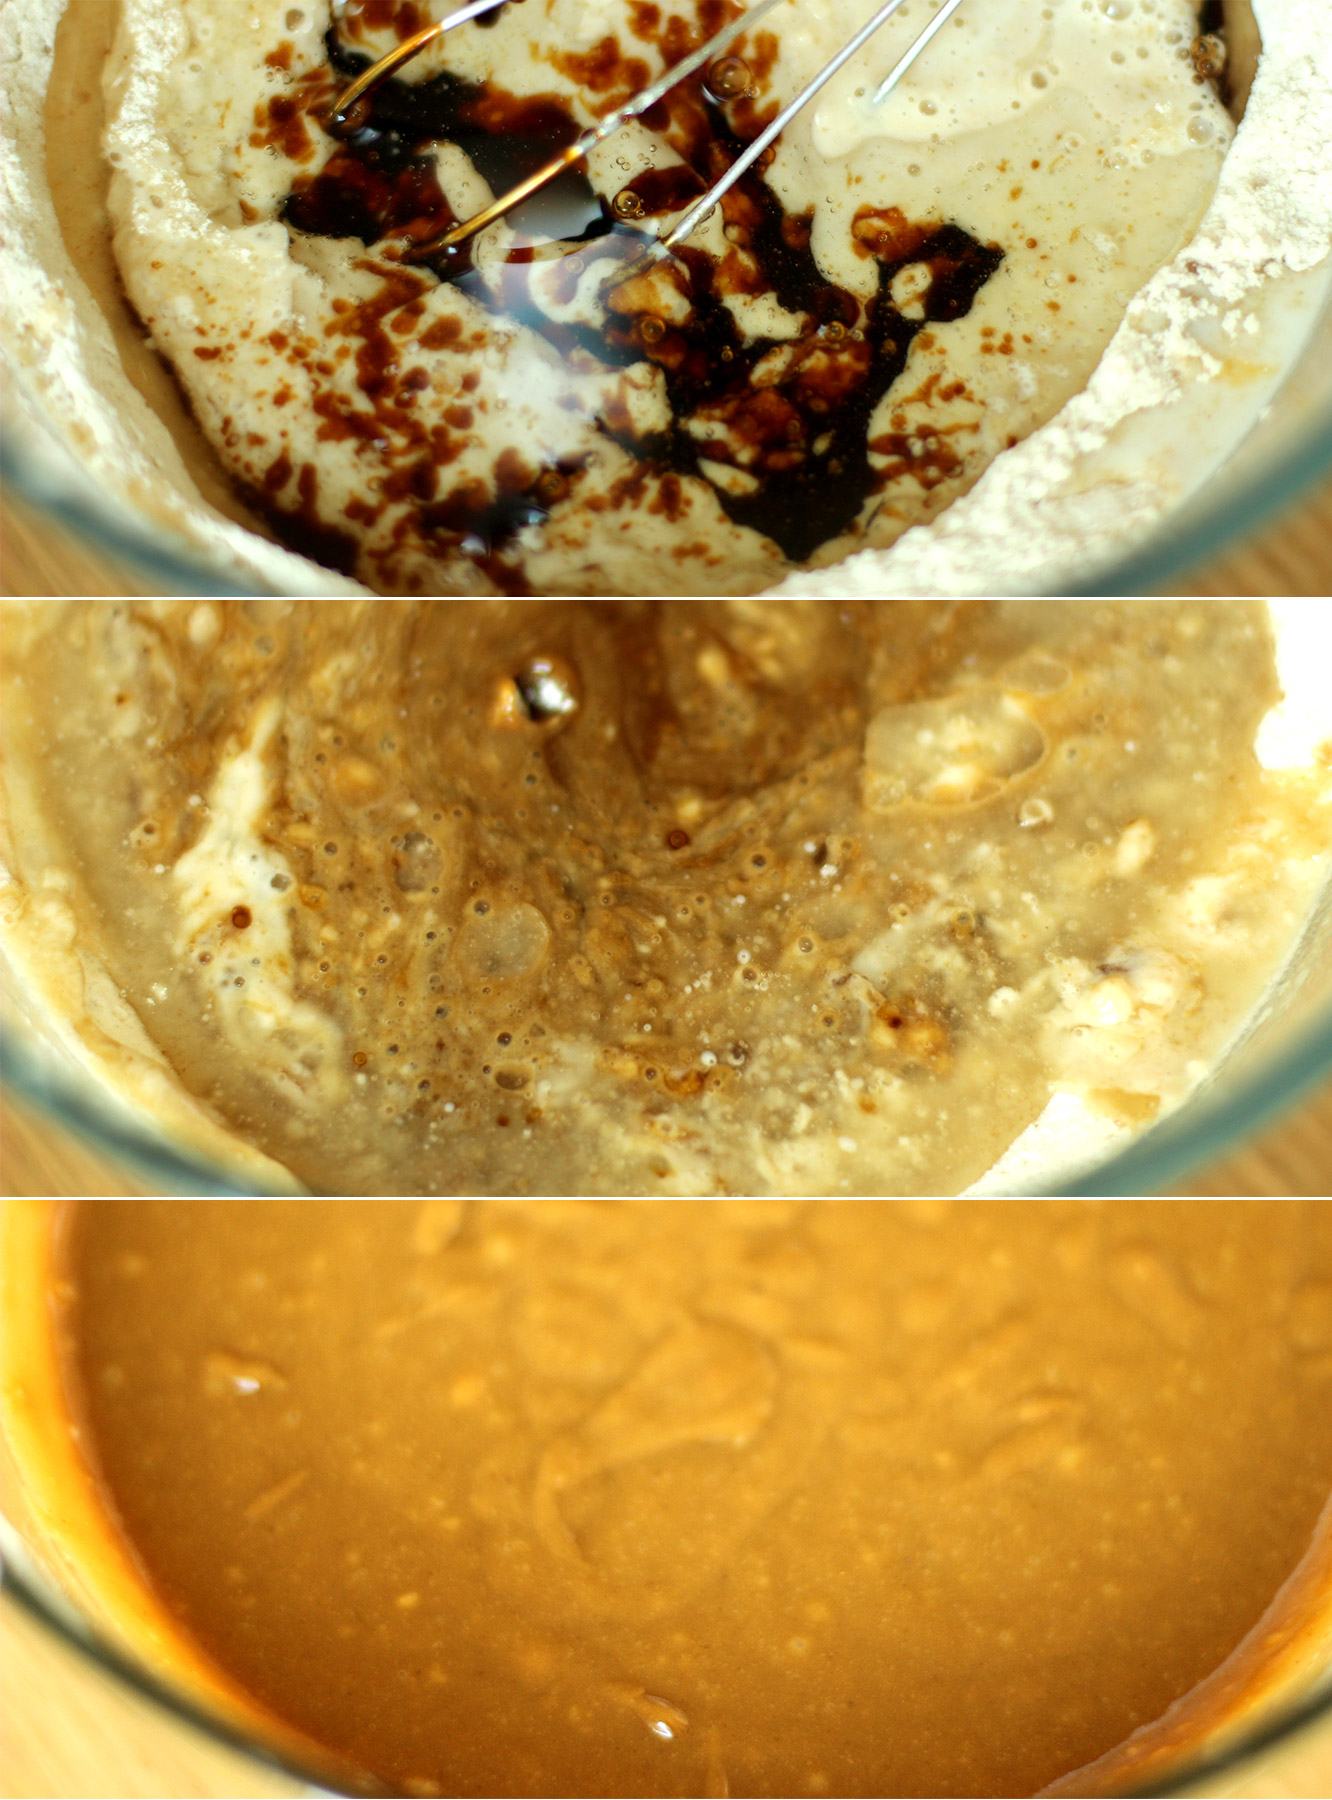
Make a well in the middle and start to whisk in the egg. Stop when you get to the consistency in the third picture down because otherwise you risk making lumps you won’t be able to get out.

Step three

Pop the milk in the microwave to heat for 30 seconds to a minute until warm. Add to the centre of the mixture and continue to whisk gently until the milk and the egg are combined, but again don’t try and mix in all the flour.
ginger-and-honey-cupcake-recipe-4

Step four

Pour in the melted treacle, golden syrup and lard mix and stir until it’s all mixed together.
ginger-and-honey-cupcake-recipe-5

Step five

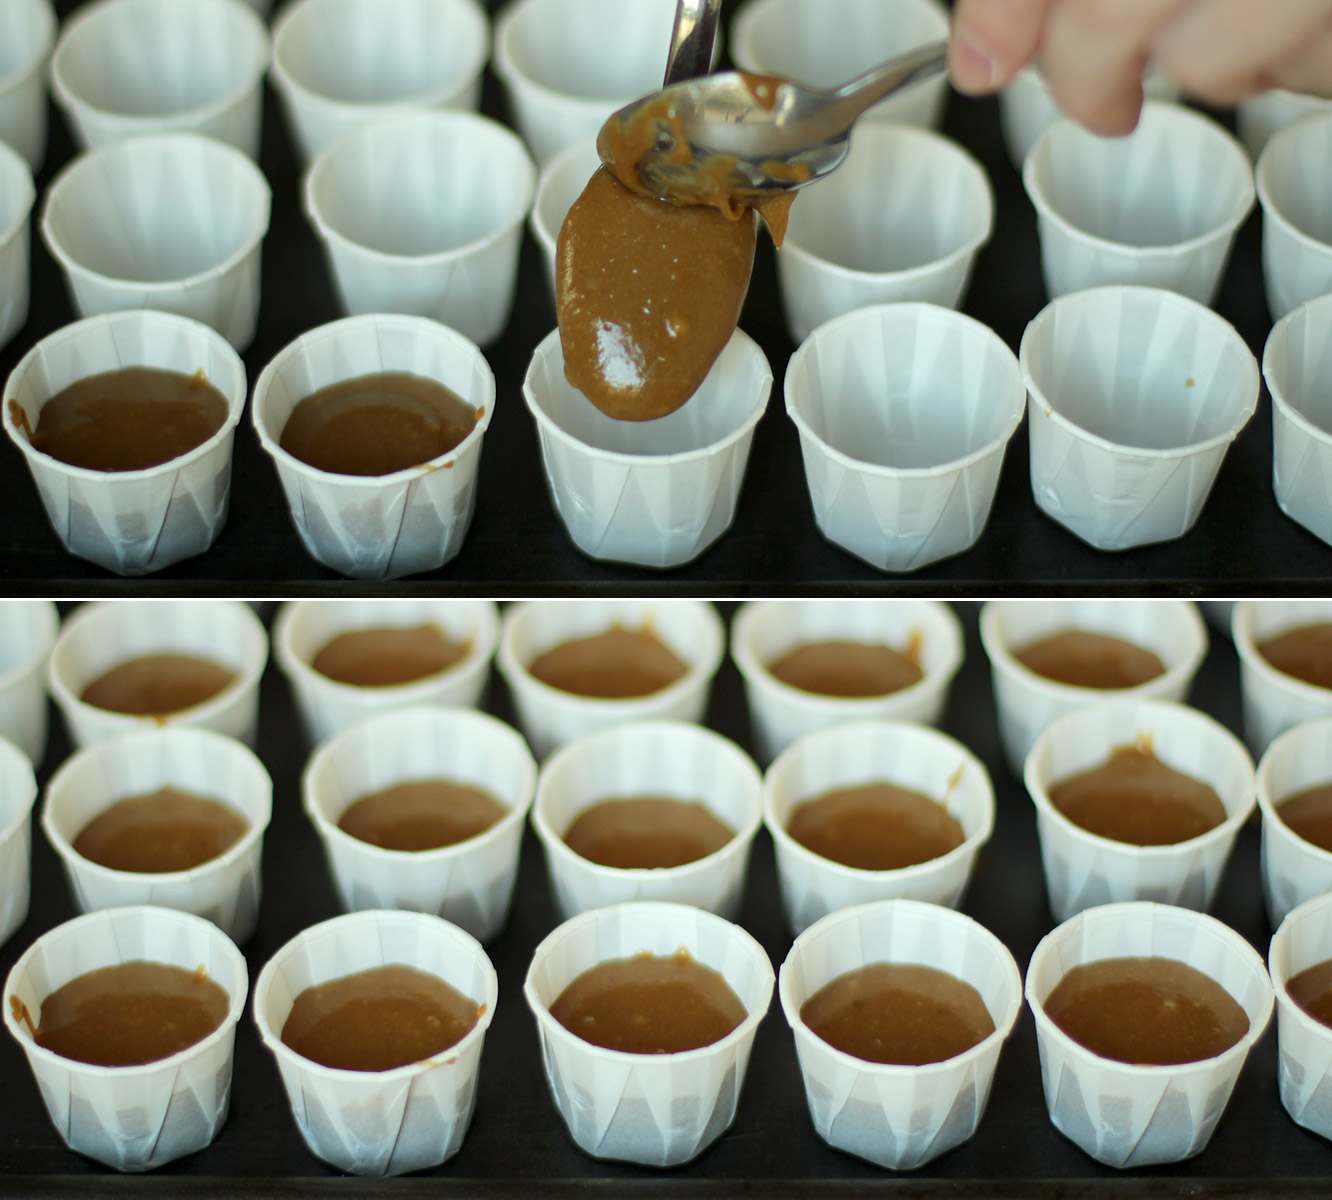
Spoon the mixture into your cases. I got a bulk order of these paper condiment cups last year for the hot chocolate stirrers I made for Christmas. I will NEVER find a way to use them all up.

If you have normal mini cupcake/muffin cases the same rules apply, about a teaspoon and a half of mixture in each. You will probably need to put them in a muffin tin though. These little cases had enough of their own structure so I put them on a baking tray.

Bake for 15 minutes on 180C/gas mark 4/350F.
ginger-and-honey-cupcake-recipe-6

Step six

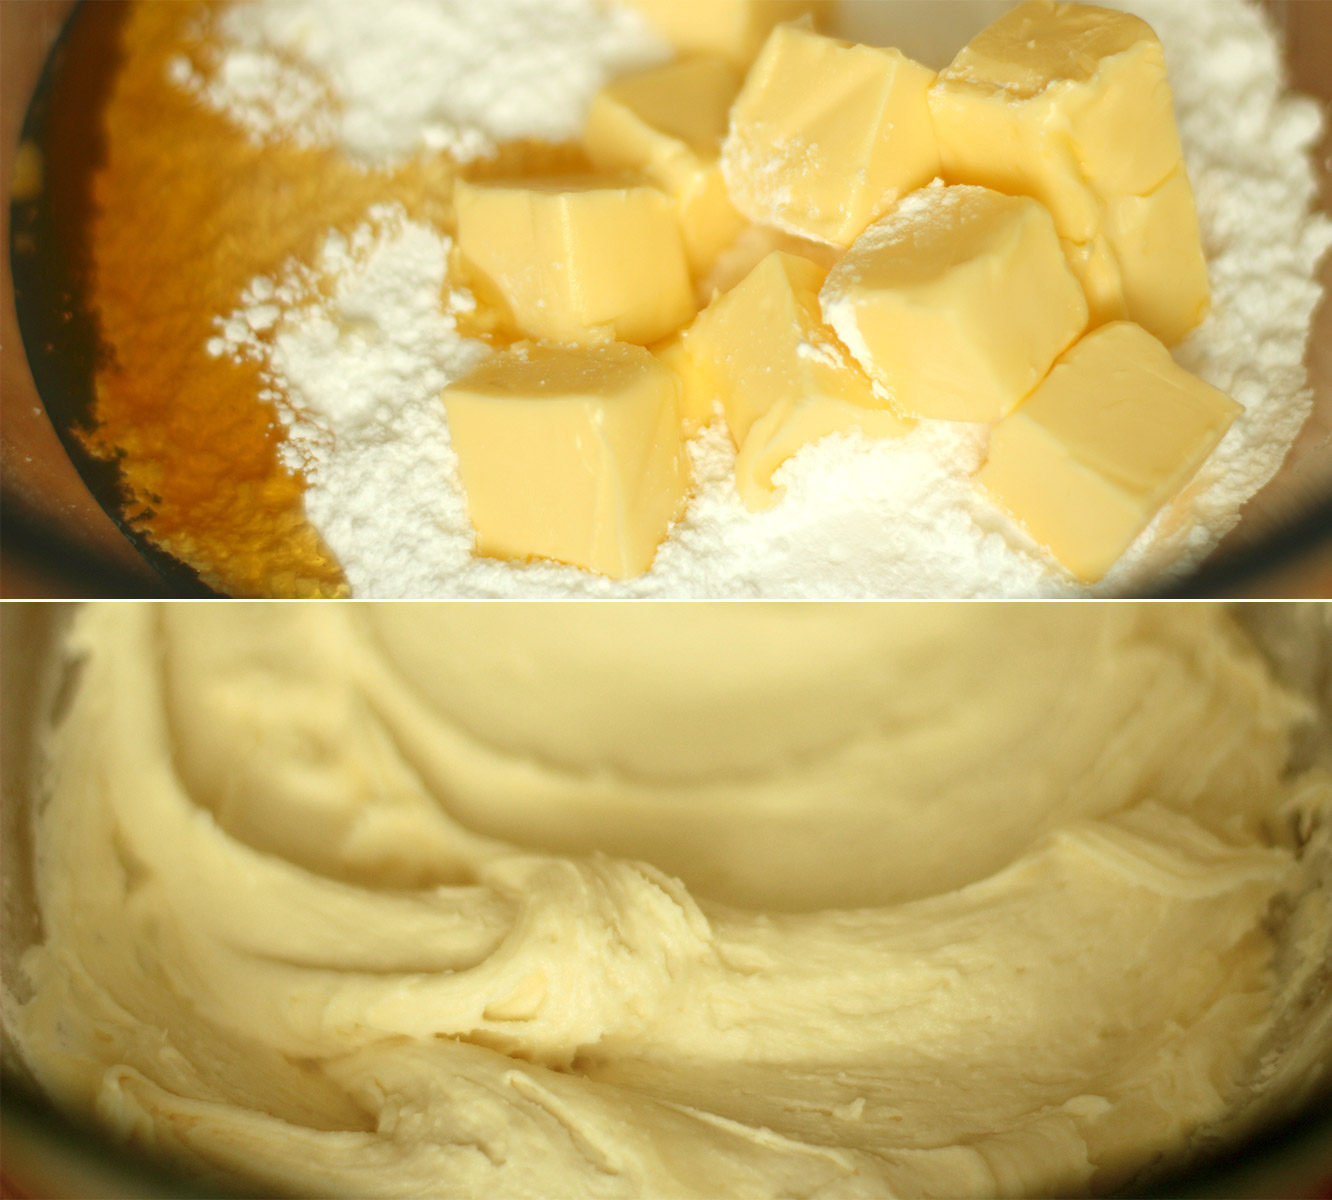
Whisk together the icing/frosting ingredients, make sure to cover your bowl with a tea towel; icing sugar will make your kitchen sticky for weeks otherwise.

Step seven

Confession time. I didn’t photograph this stage. Partly because I was a bit grumpy, partly because my camera was running out of battery and partly because my level of clumsiness, hot sugar and baking selfies are not a strong combination. Forgive me.

All you need to do to make the decorative caramel shards is gently heat the caster sugar in a saucepan until the vast majority has melted and turned caramel in colour. Don’t stir, don’t swish, just wait.

Remove from heat and lay out a sheet of greaseproof paper. With a fork trail the caramel back and forth across the paper. It will need to cool a little until it is stringy enough to do this, but it will get there. You don’t have to make individual cake toppers, just criss cross to make one massive one and break it up to get the shards.

It’s waaaaaay easier than you’d think and super effective looking.

(If you aren’t eating your cakes that day I recommend saving this step until the day of. I’m freeing most of mine bare and decorating them on party day)
ginger-and-honey-cupcake-recipe-gif

Step eight

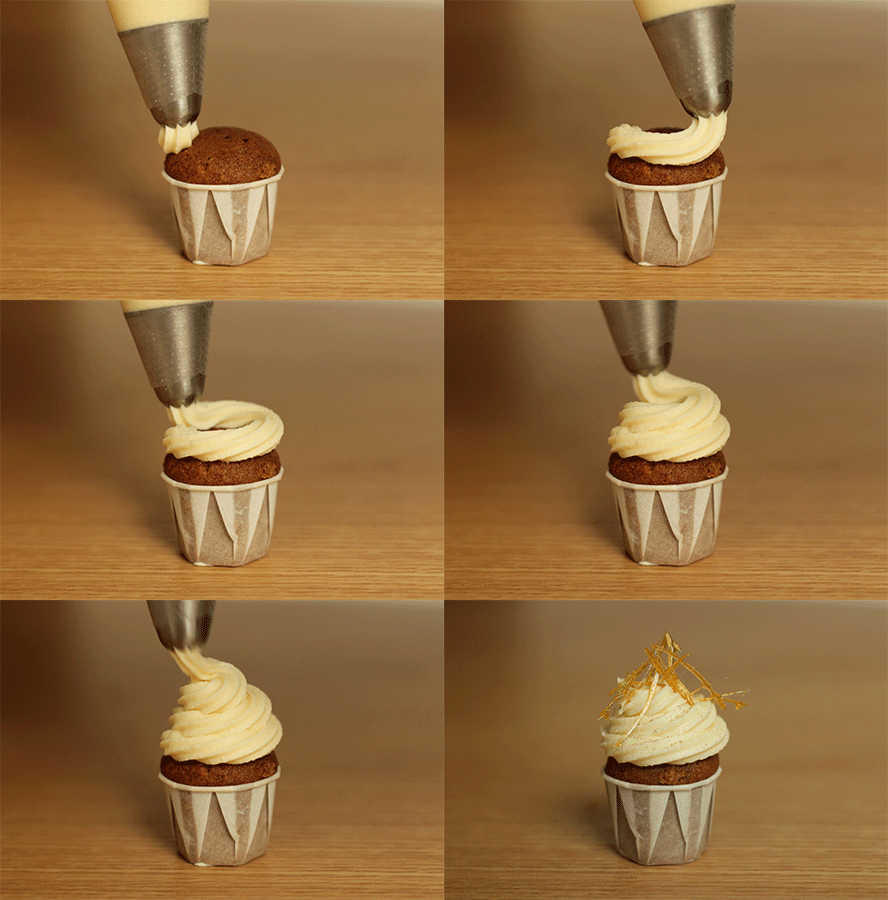
Ice your cakes however you please, I’m a diehard fan of the piping bag. I sprinkled a little bit of cinnamon on mine before adding the caramel shards.
ginger-and-honey-cupcake-recipe-8

ginger-and-honey-cupcake-recipe-7

Enjoy!
 

Crisp autumn pie

I realise it’s been a while since I did something quite fancy, and while people seem to prefer to make the easy ones, there’s definitely some love for the posts with lots of steps too.

With the return of my favourite season (I’m really fair-skinned, so shoot me if I don’t adore summer like the rest of you) and a little dinner party this weekend, I figured the only way to round off my housemate’s uh-mazing main course was with a little homage to the apple.

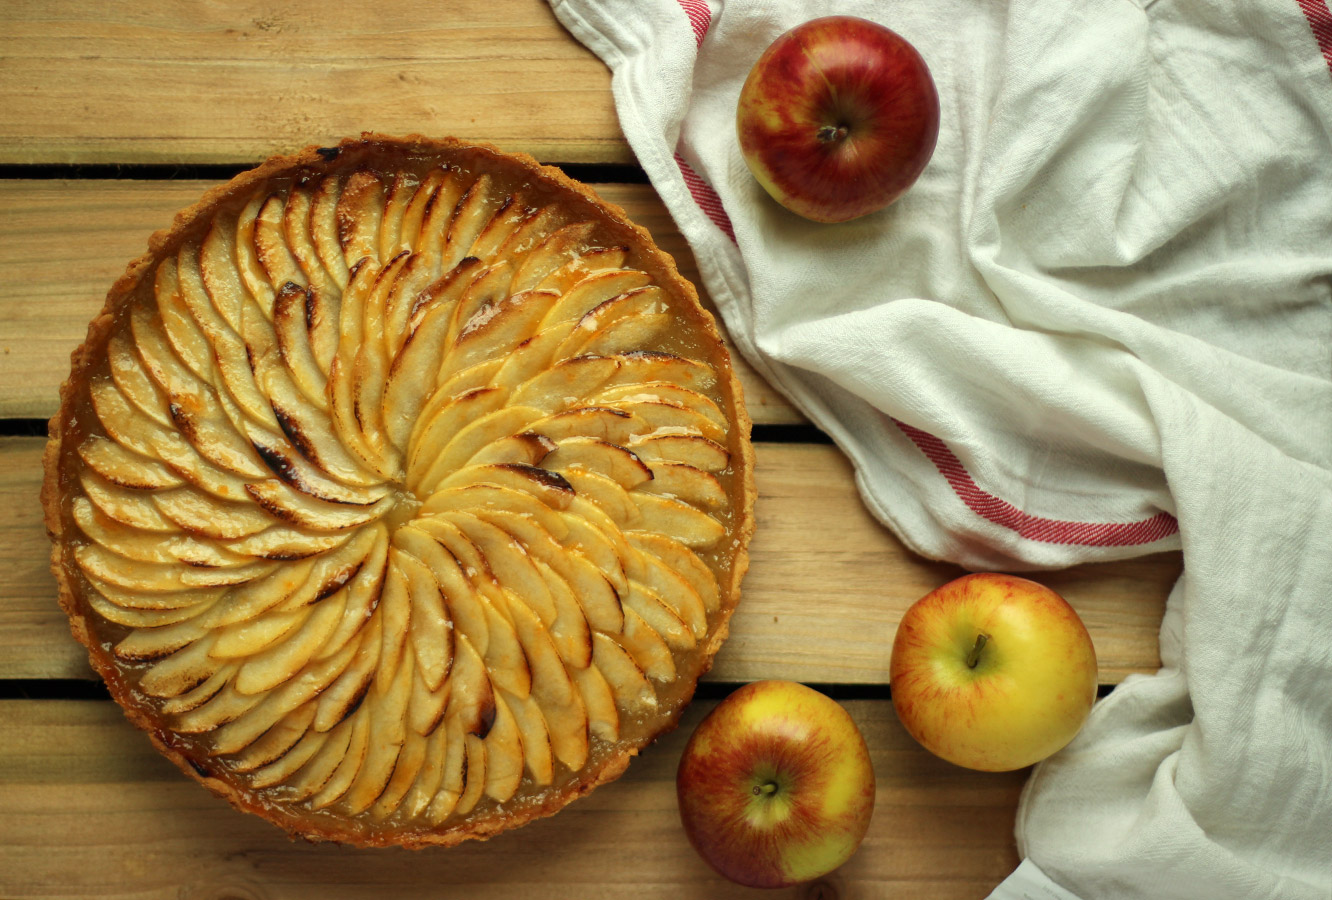
Without further ado here’s a recipe for a rather yummy apple and frangipane tart.

apple-frangipane-almond-tart-pie-1

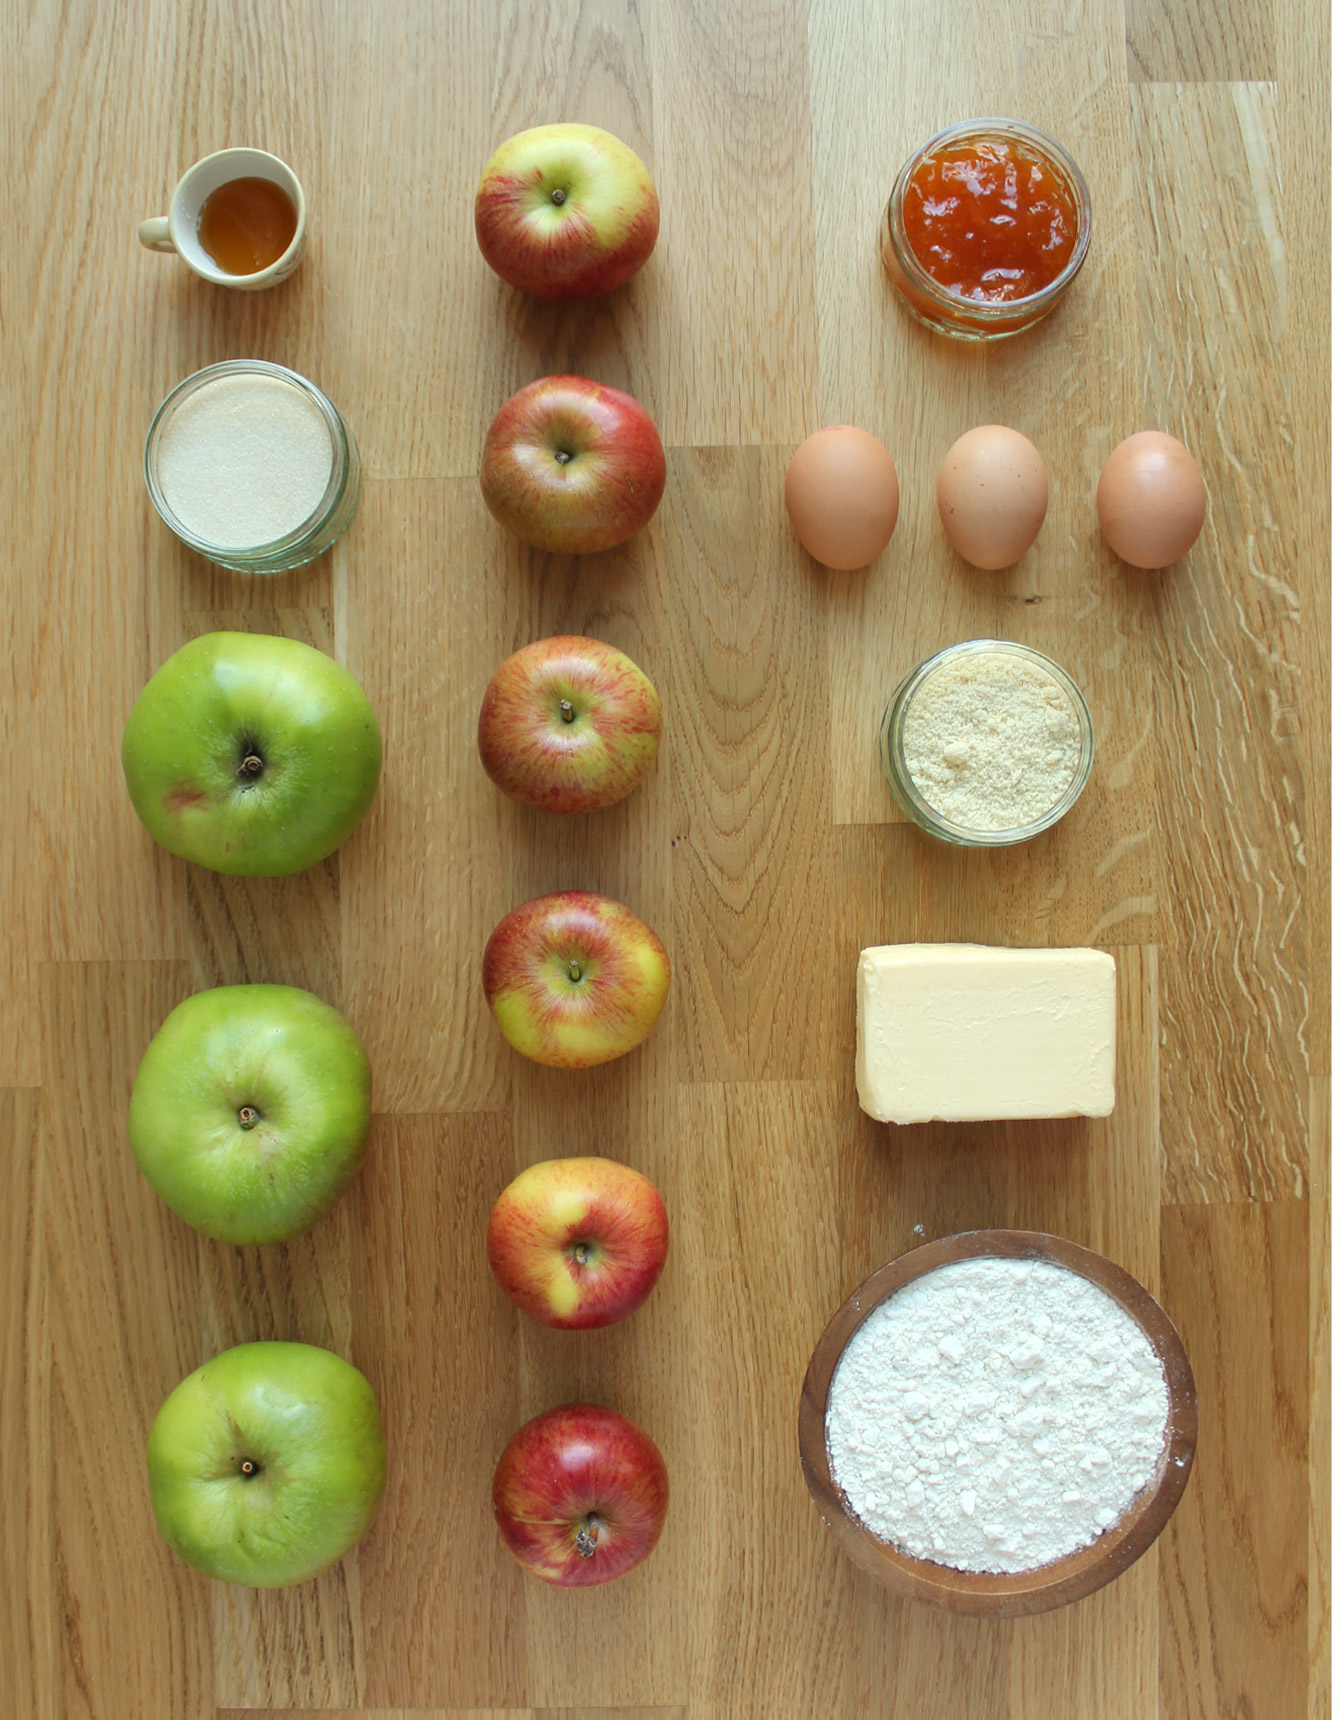
You will need

For the pastry:

300g/10.5 oz plain flour

170g/6 oz unsalted butter

30g/1 oz golden caster sugar

50ml/1.75 fl oz milk

1 egg yolk

A pinch of salt

For the frangipane:

70g/2.5 oz ground almonds

60g/2 oz unsalted butter

50g/1.75 oz golden caster sugar

40g/1.5 oz plain flour

1 egg

1-2 tsp almond extract (optional, but apple will likely overpower the almond a bit)

For the apple filling:

3 bramley cooking apples

100g/3.5 oz golden caster sugar

10g/0.5 oz unsalted butter

50ml/1.75 oz water

2-3 tbsp clear honey

For the topping:

4-5 braeburn apples (probably any eating apples would work)

2-3 tbsp apricot jam (for the glaze)

(My dish was 25cm and for quiches/pies, but there would be enough pastry and filling to do a slightly larger, shallower tart, perhaps up to 29cm or so).

apple-frangipane-almond-tart-pie-2

Step one

Start by making the sweet shortcrust pastry.

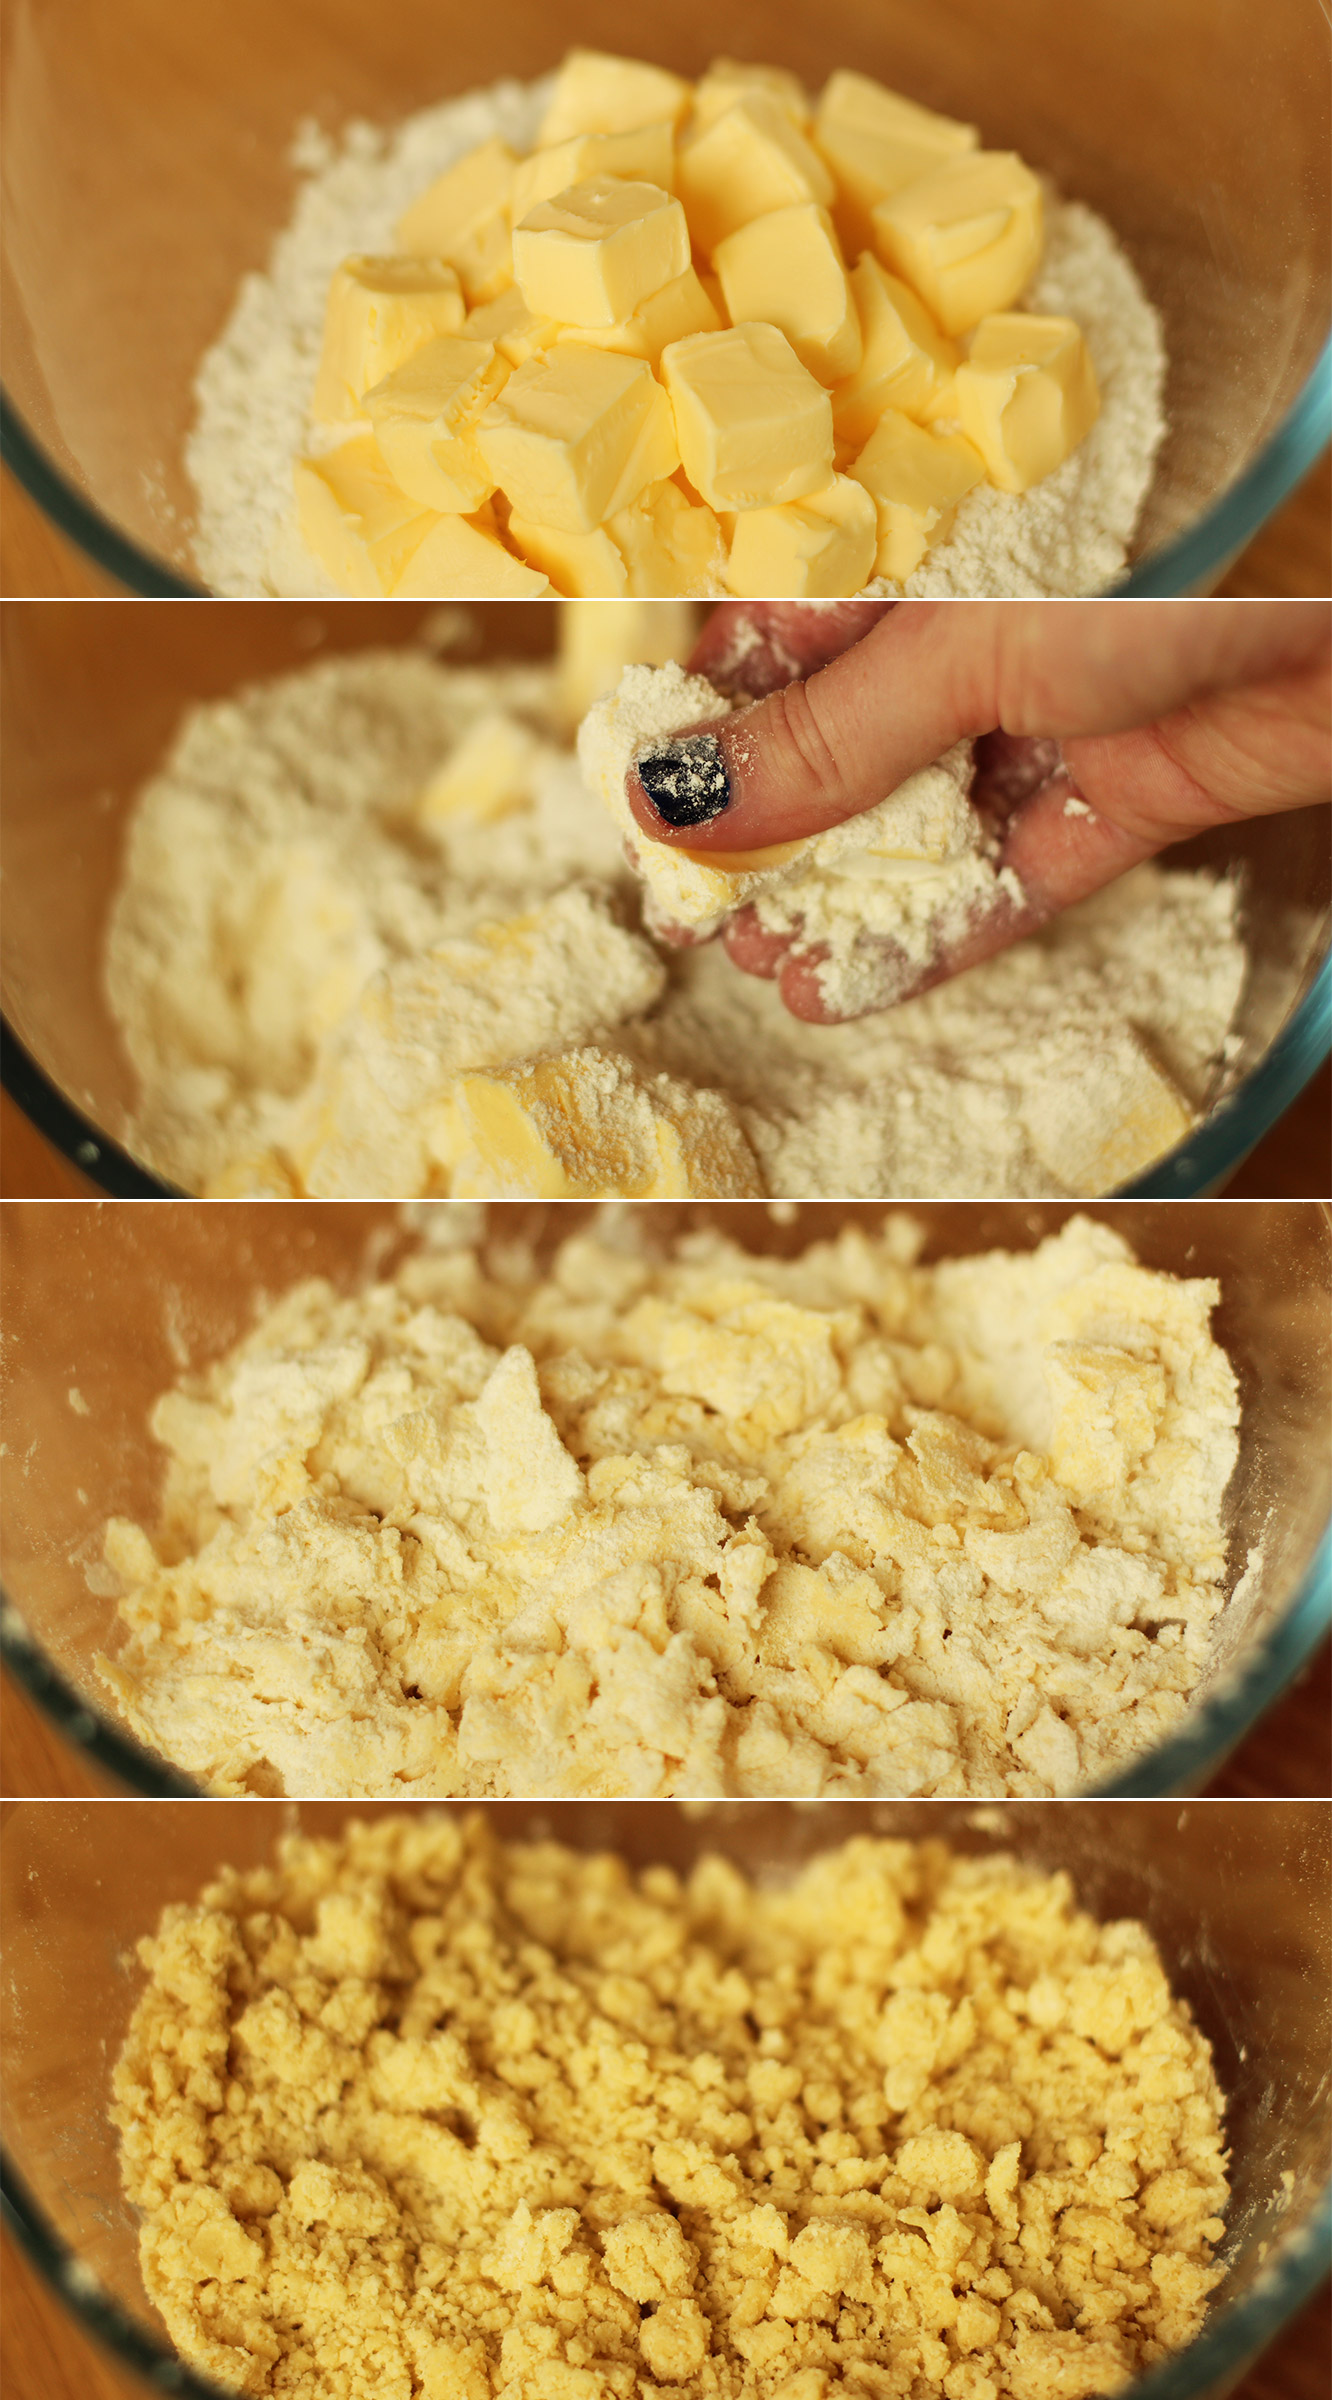
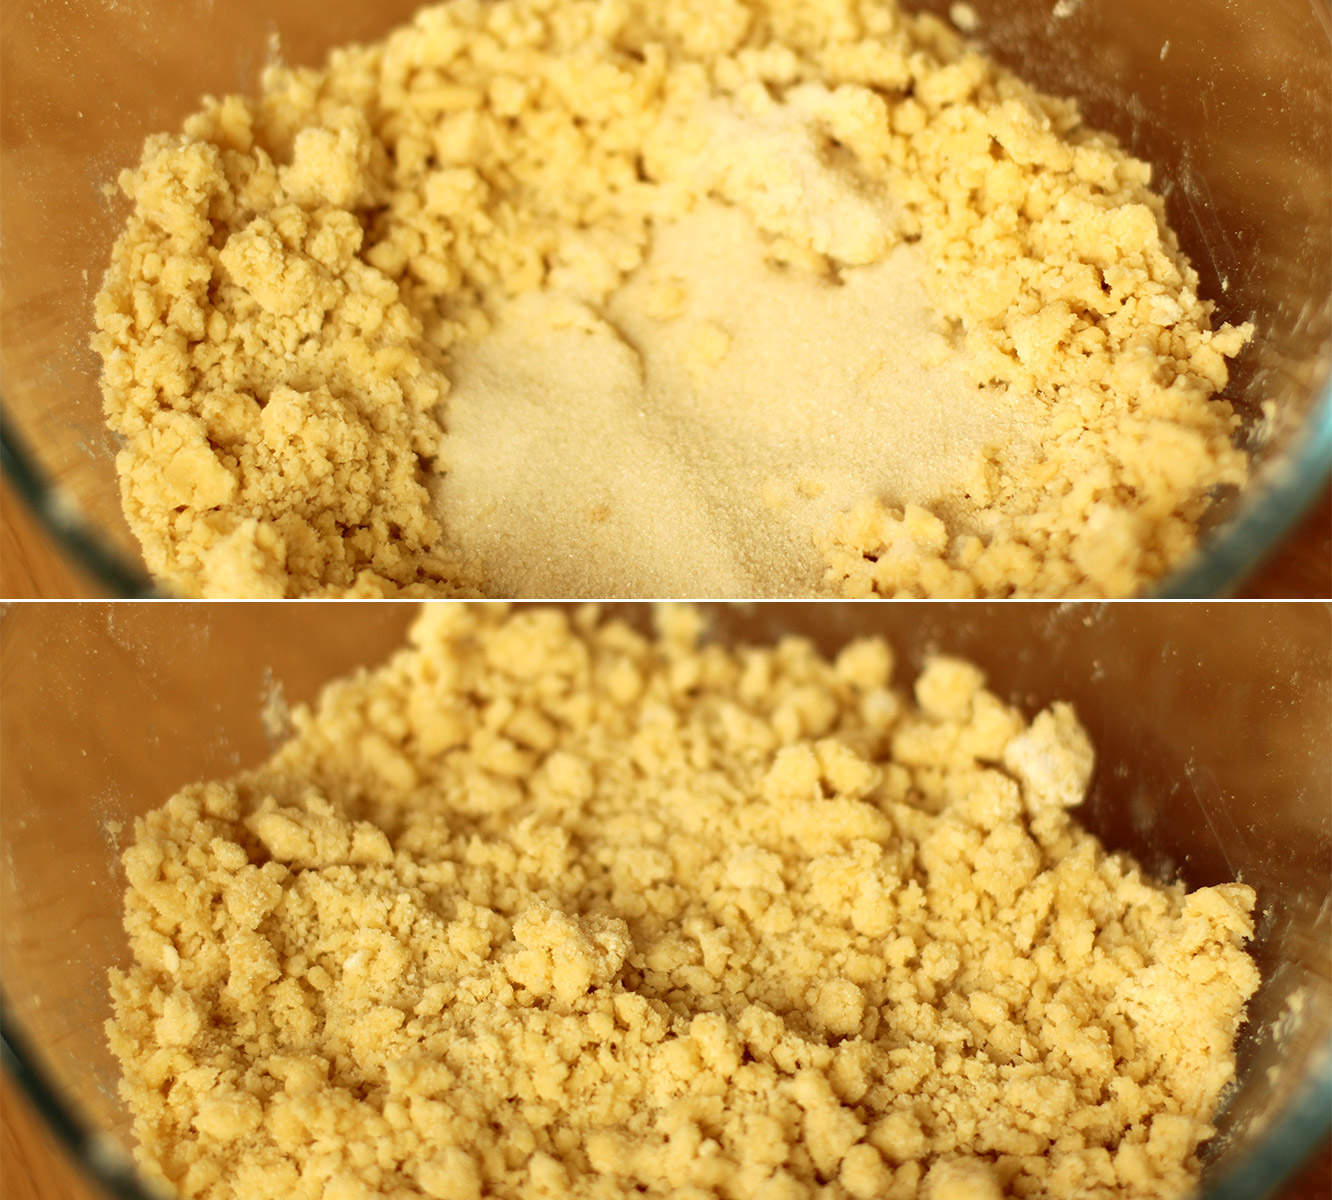
First cube the butter and pop that into the plain flour. Using your fingers, rub the butter and flour together to get a crumb-like texture.

The colder your butter the better and the smaller the crumbs you will be able to get. My house is waaaaaaarm, so as you can see, mine was a tad lumpy at this stage.

If you have a food processor I am led to believe you can do this bit in that very quickly and easily. But we can’t all be posh like you so (clean) fingers are just fine too.

apple-frangipane-almond-tart-pie-3

Step two

Stir in the caster sugar.

apple-frangipane-almond-tart-pie-4

Step three

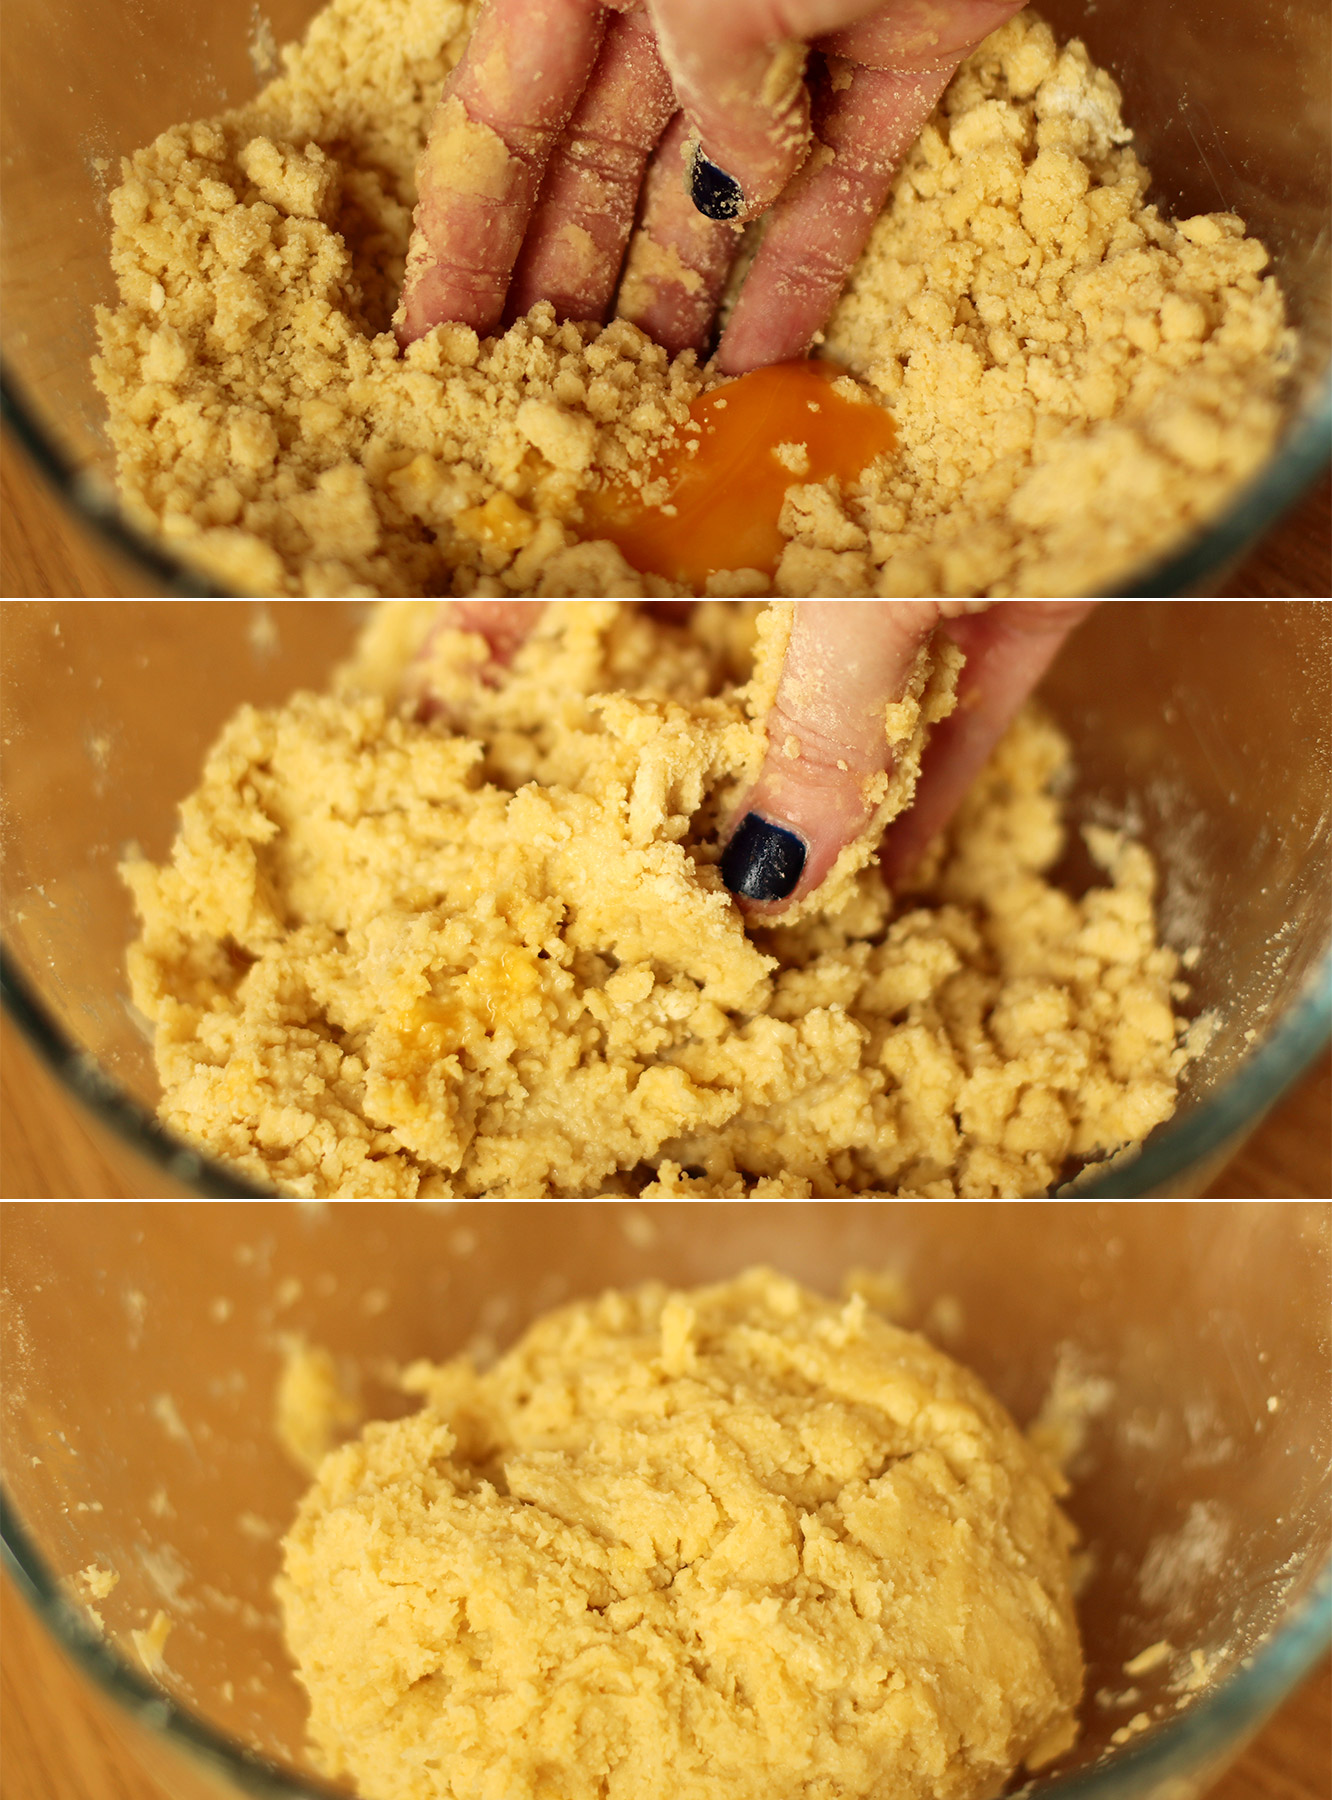
Make a well in the middle for the milk and egg yolk. Fairly sure you can guess what’s next…put yolk and milk in said well.

Bring the mixture together with your hands. It may be a bit crumbly so you can tip it onto a worktop and knead it together slightly to combine, but be careful not to over work it.

Wrap it in clingfilm and put it in the fridge for at least an hour.

apple-frangipane-almond-tart-pie-5

Step four

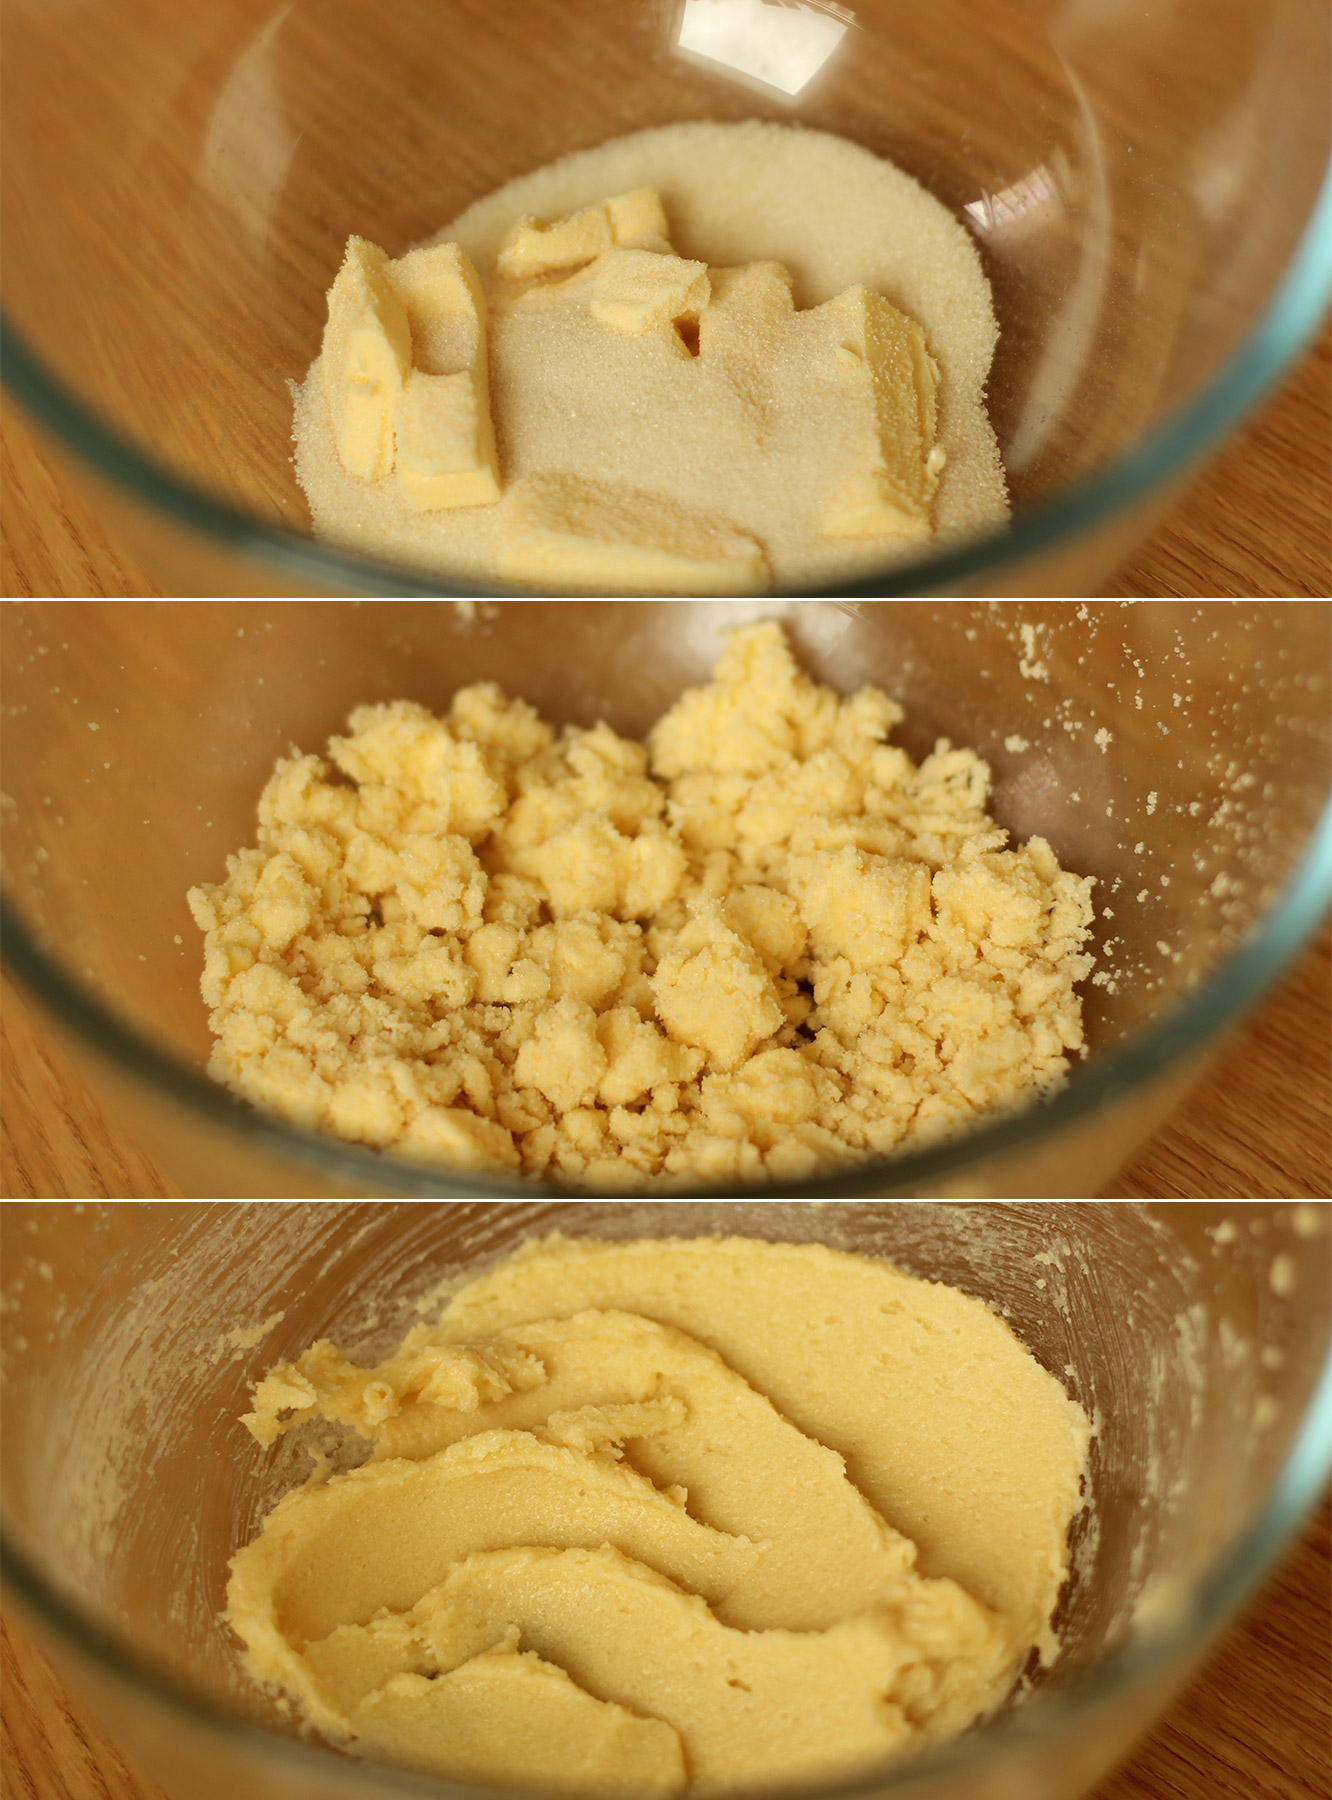
Frangipane making time. Using an electric whisk (or a wooden spoon and some strong arms) beat together the butter and sugar until smooth and fluffy.

apple-frangipane-almond-tart-pie-6

Step five

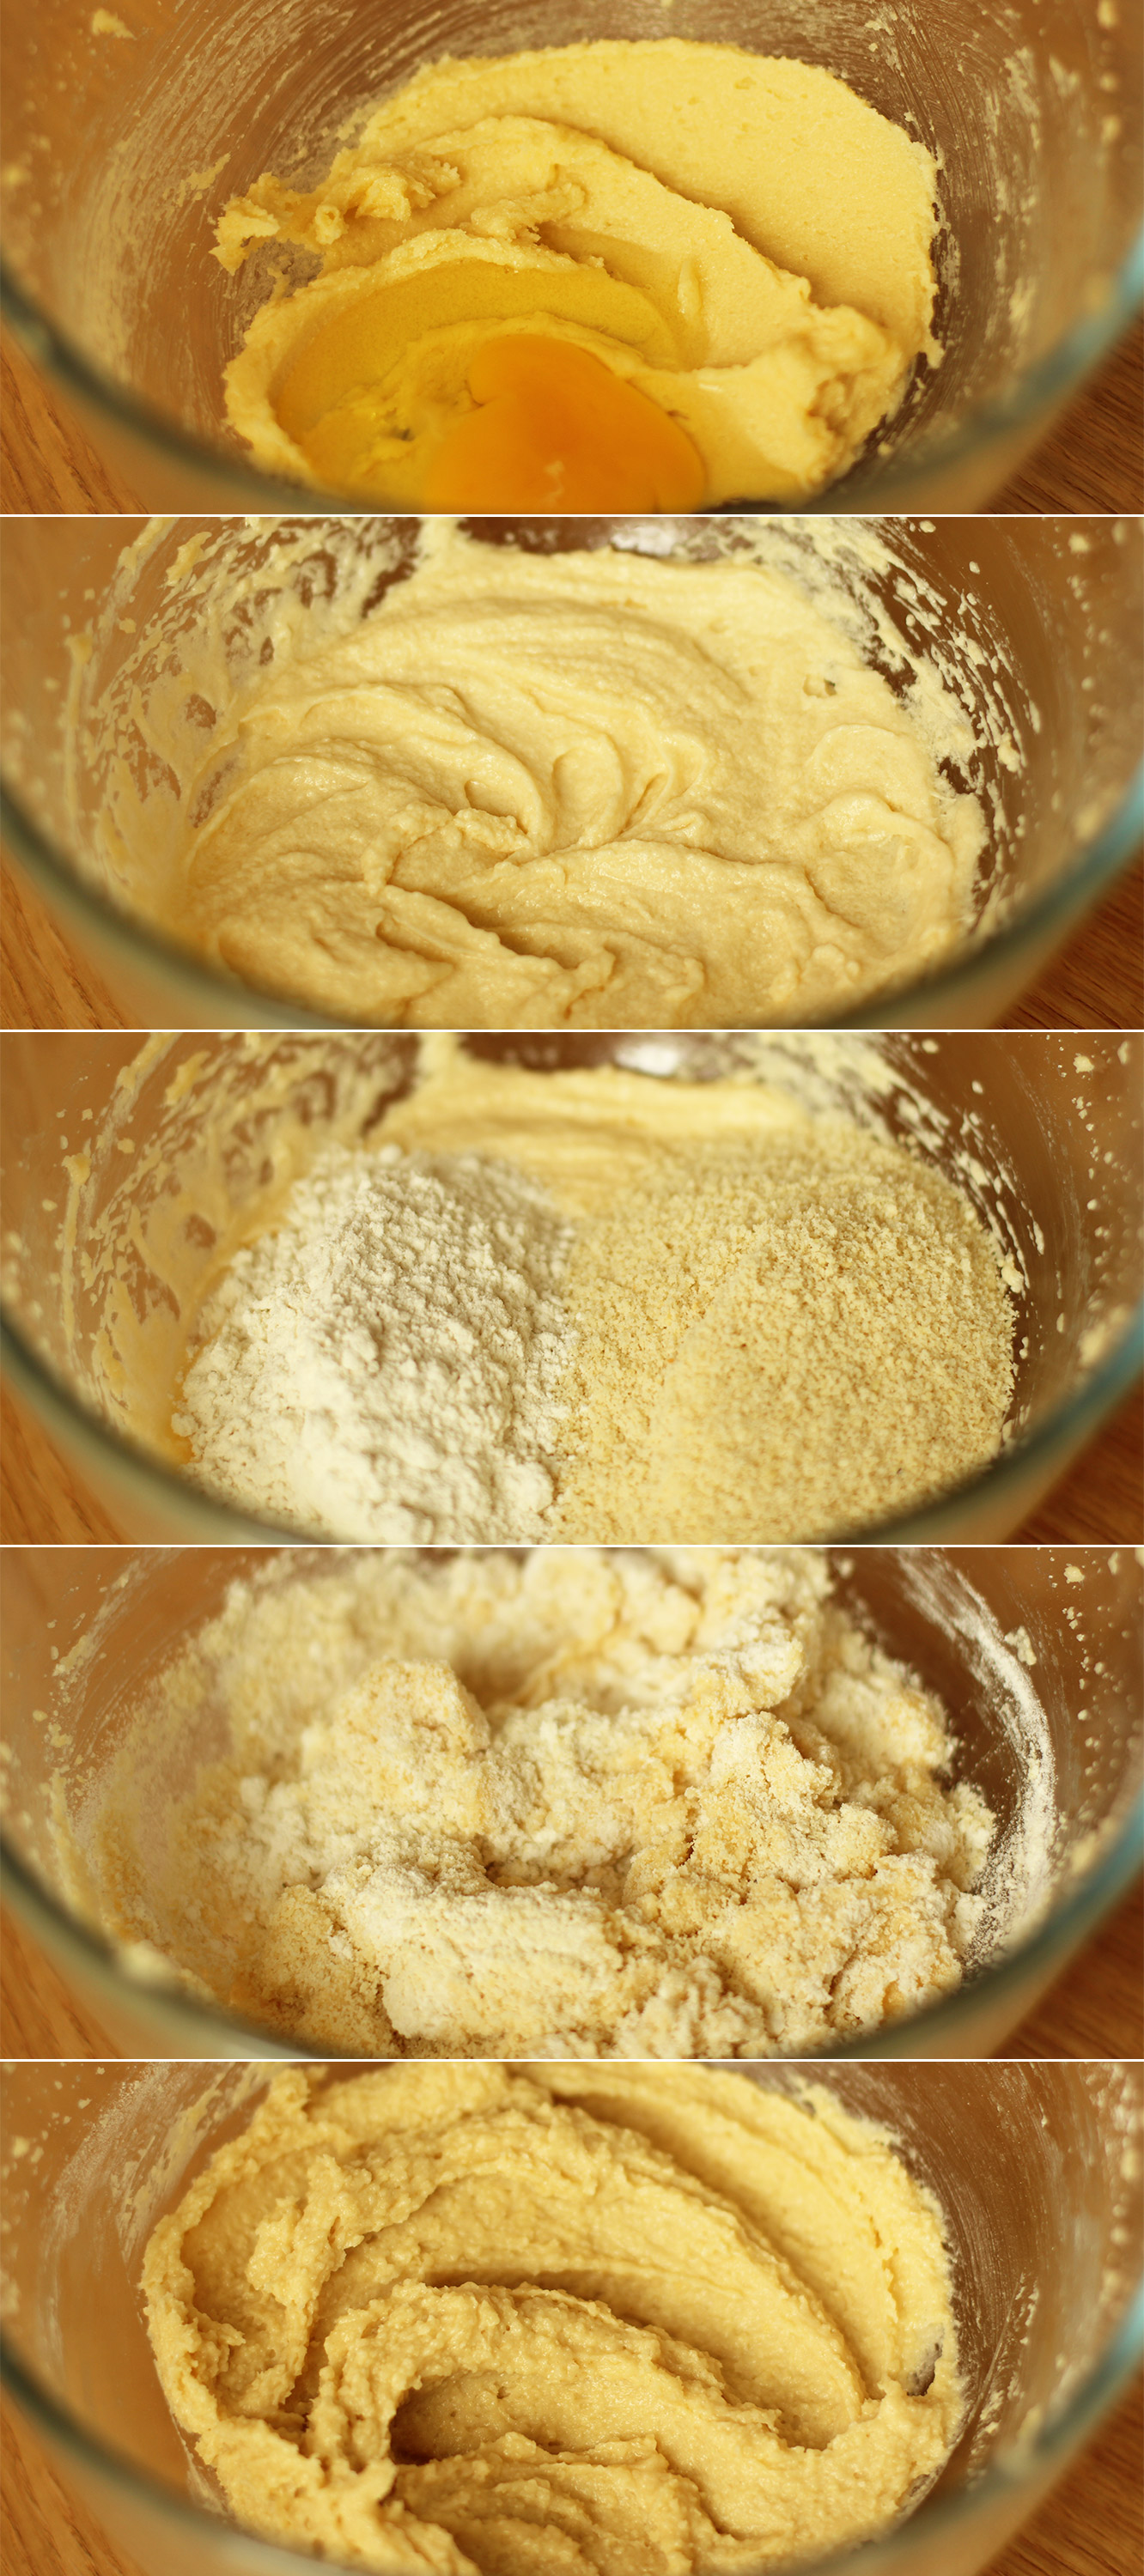
Add the egg and beat again with the whisk.

Stir in the almonds, almond extract and the flour.

Voila. Set aside.

apple-frangipane-almond-tart-pie-7

Step six

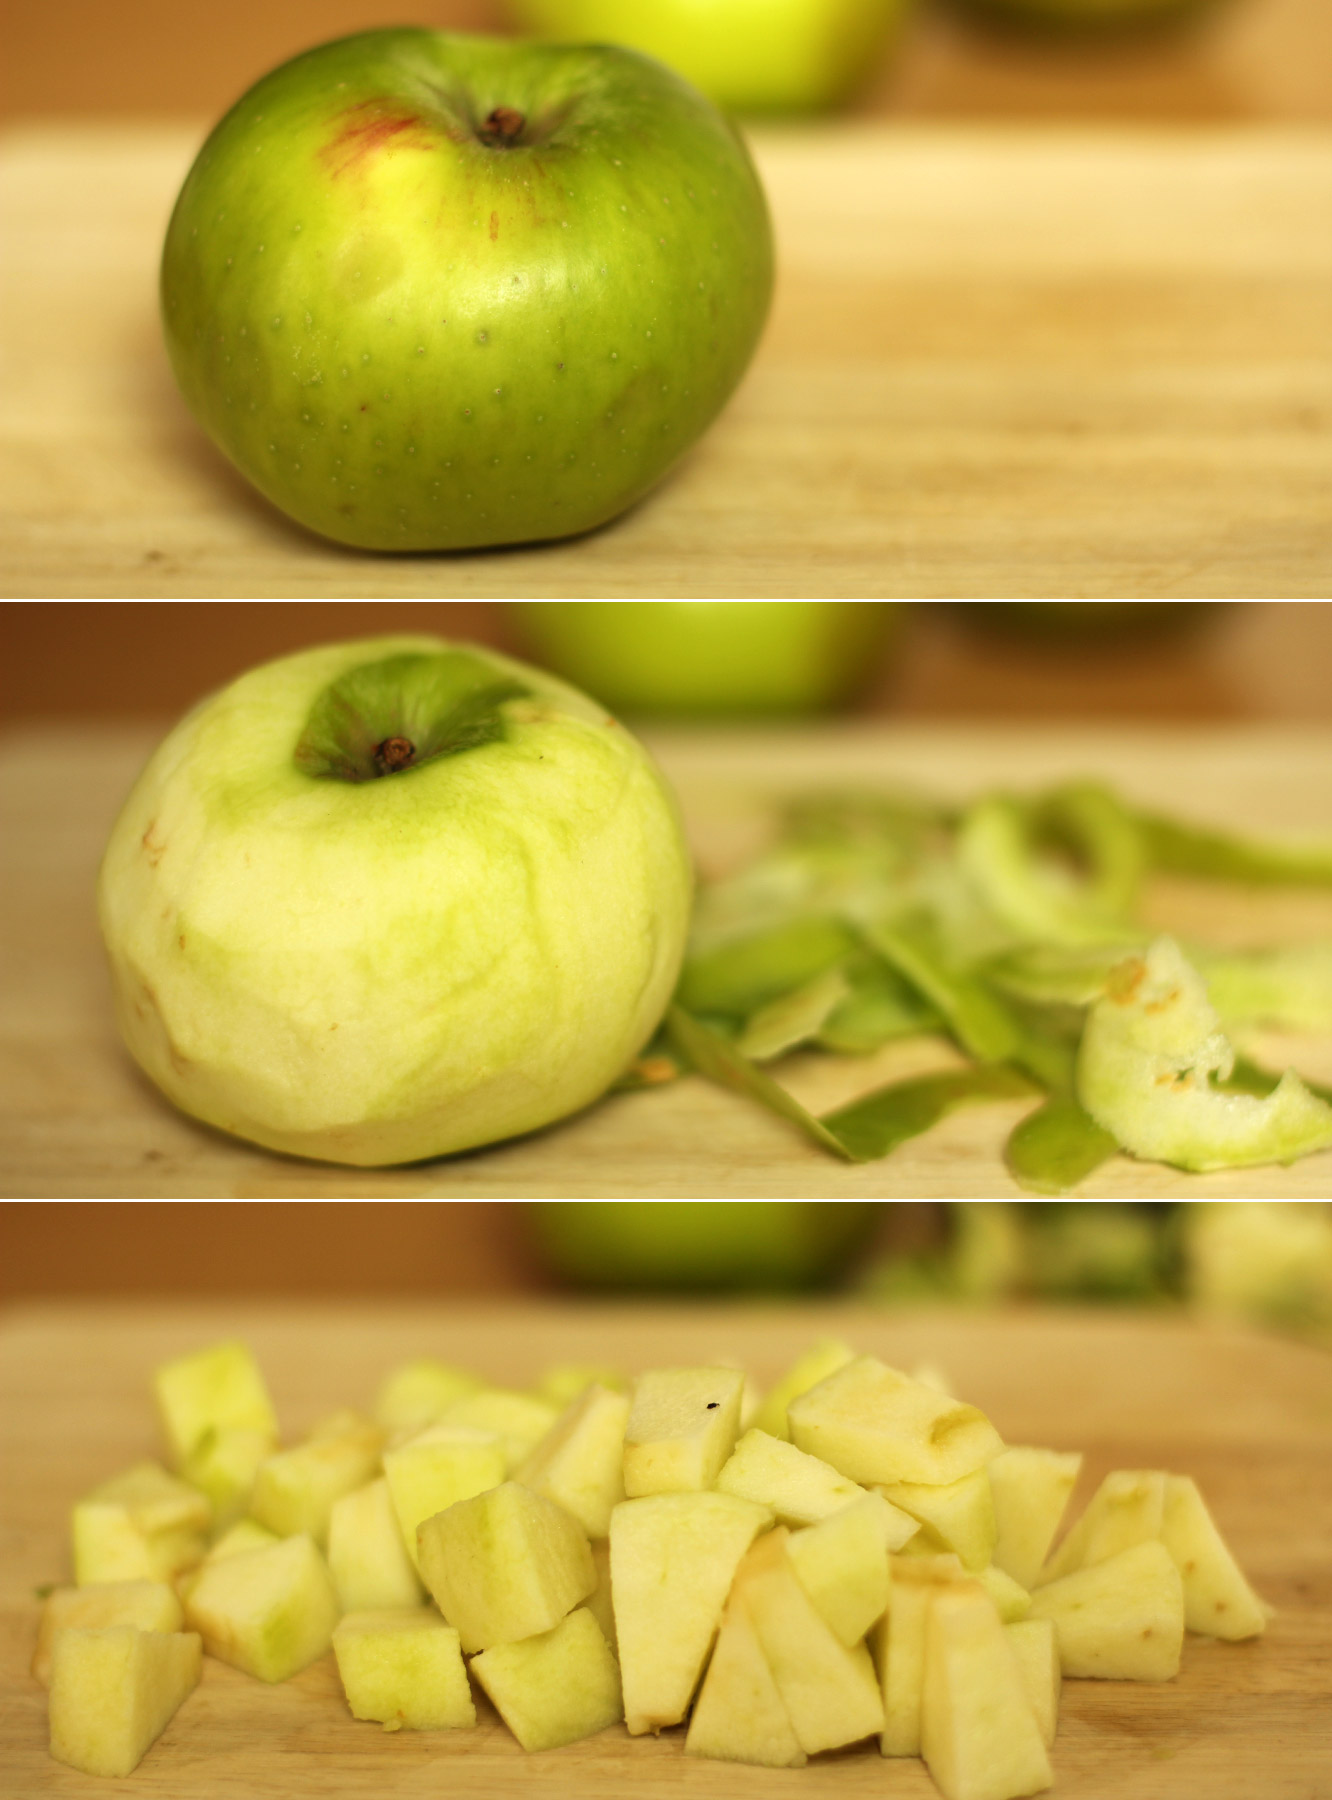
Prepare the stewed apple filling. Being by peeling and chopping the three bramley apples. If you have a bit of lemon juice handy a quick squeeze will keep the chopped ones pale while you see to the rest.

apple-frangipane-almond-tart-pie-8

Step seven

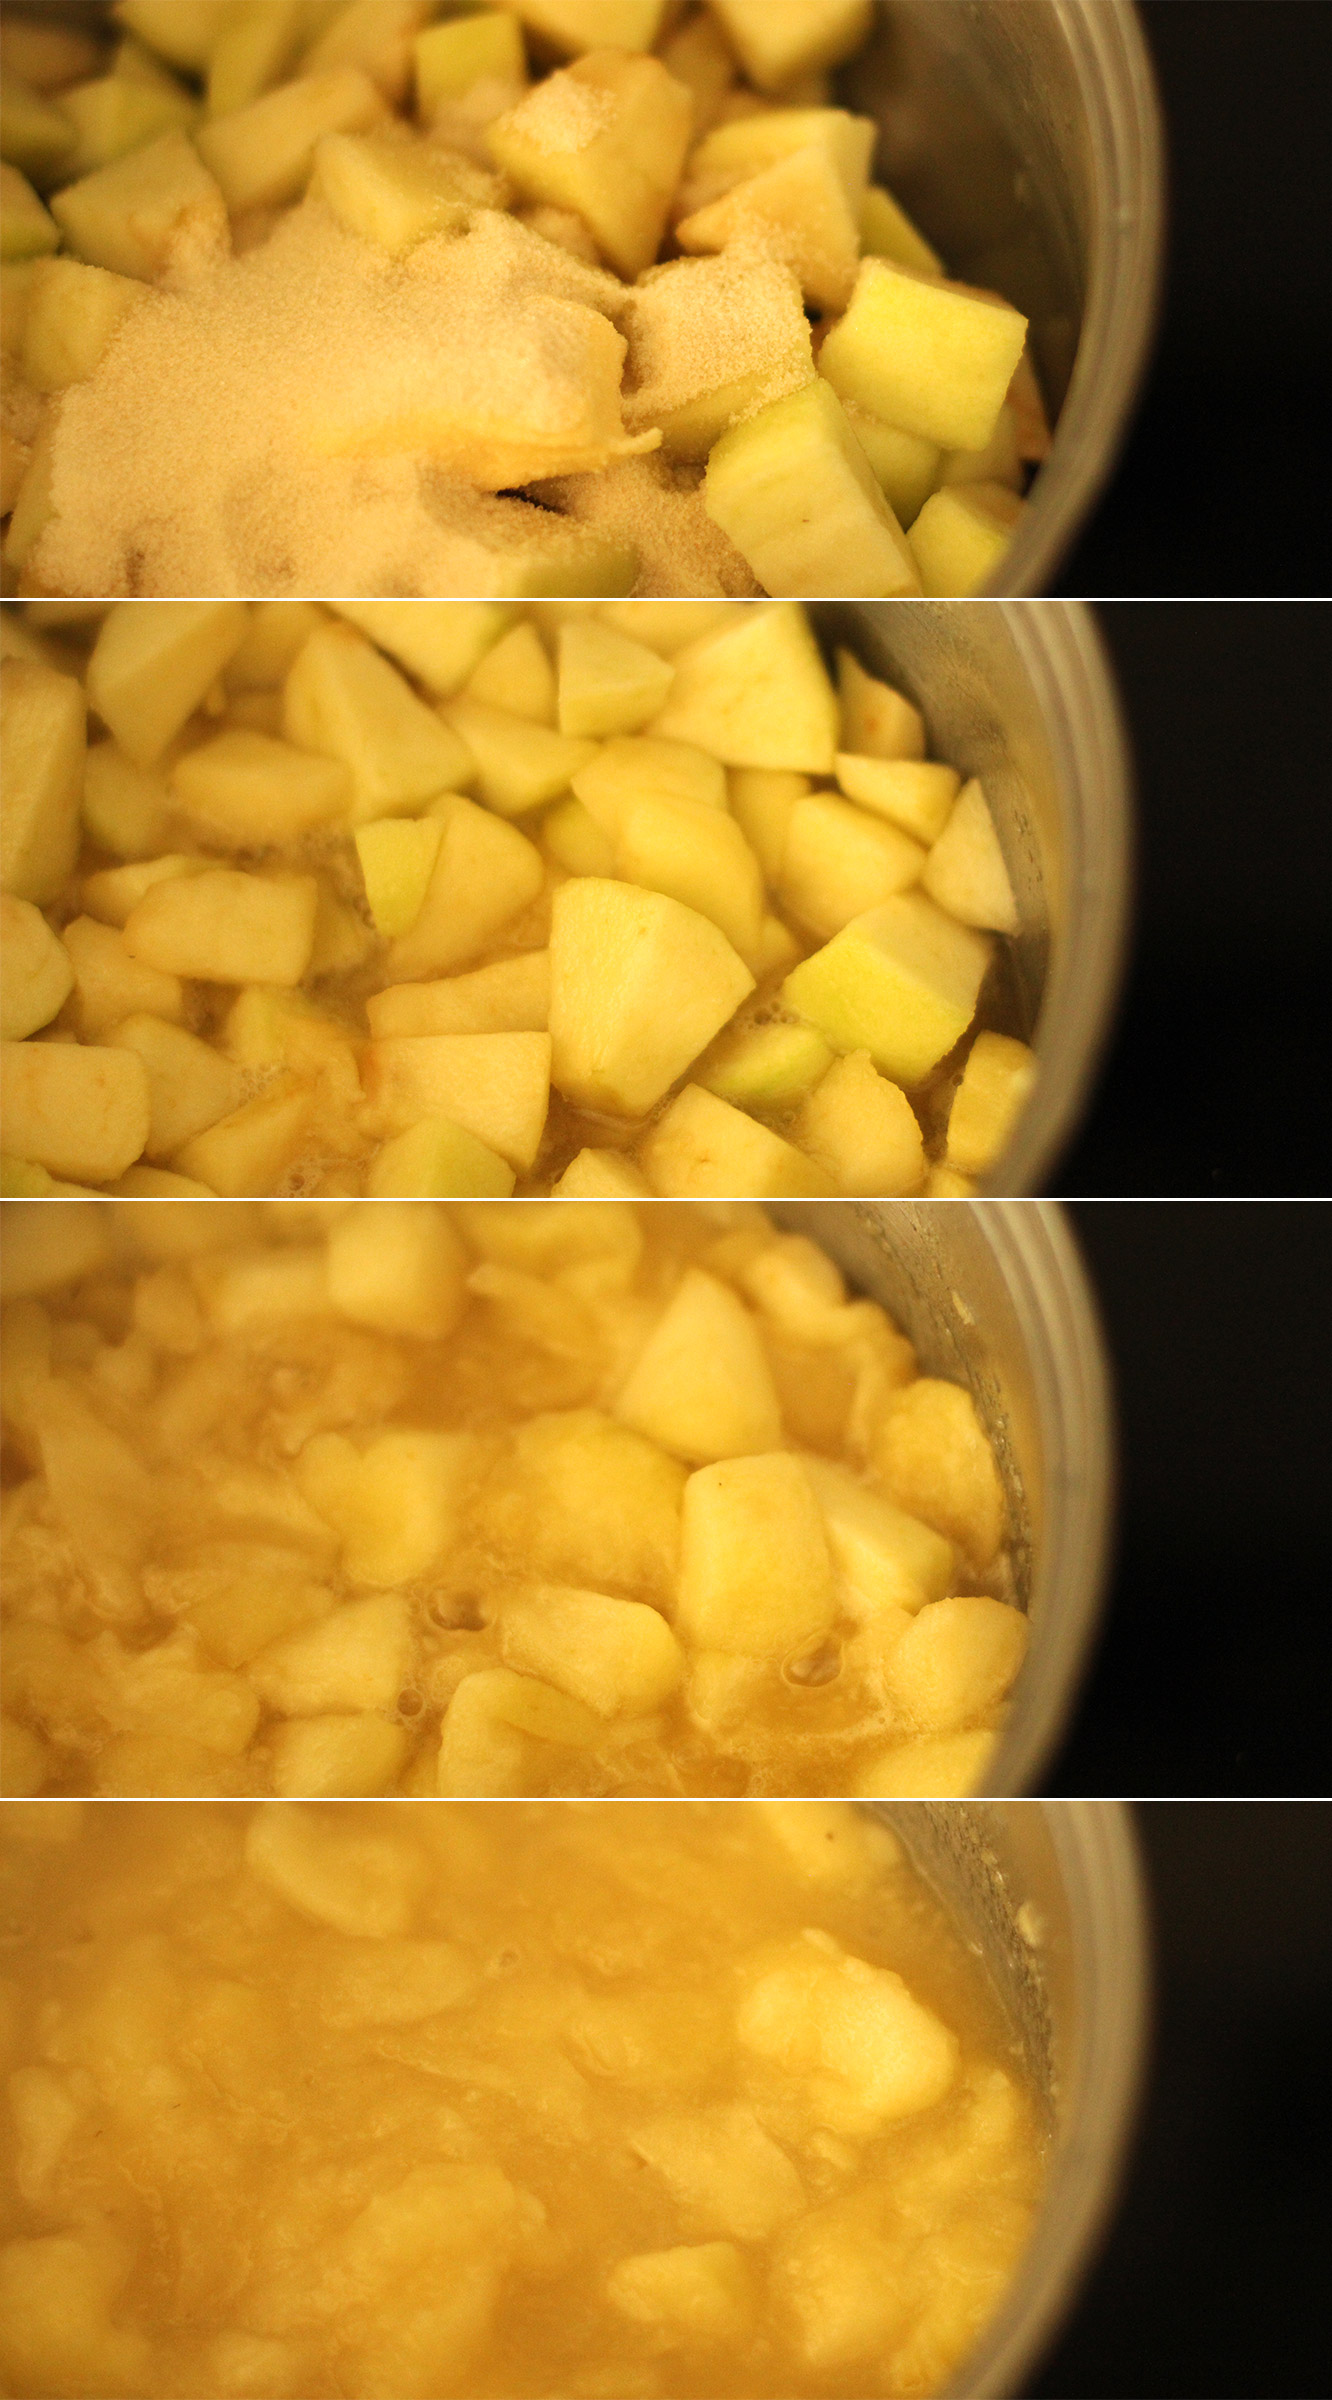
Put the chopped apples in a saucepan with the butter, honey, water and sugar. Bring to a medium-low heat and stir occasionally until the apples are mostly broken down. You want a pulp really (an appetising thought, I know).

apple-frangipane-almond-tart-pie-9

Step eight

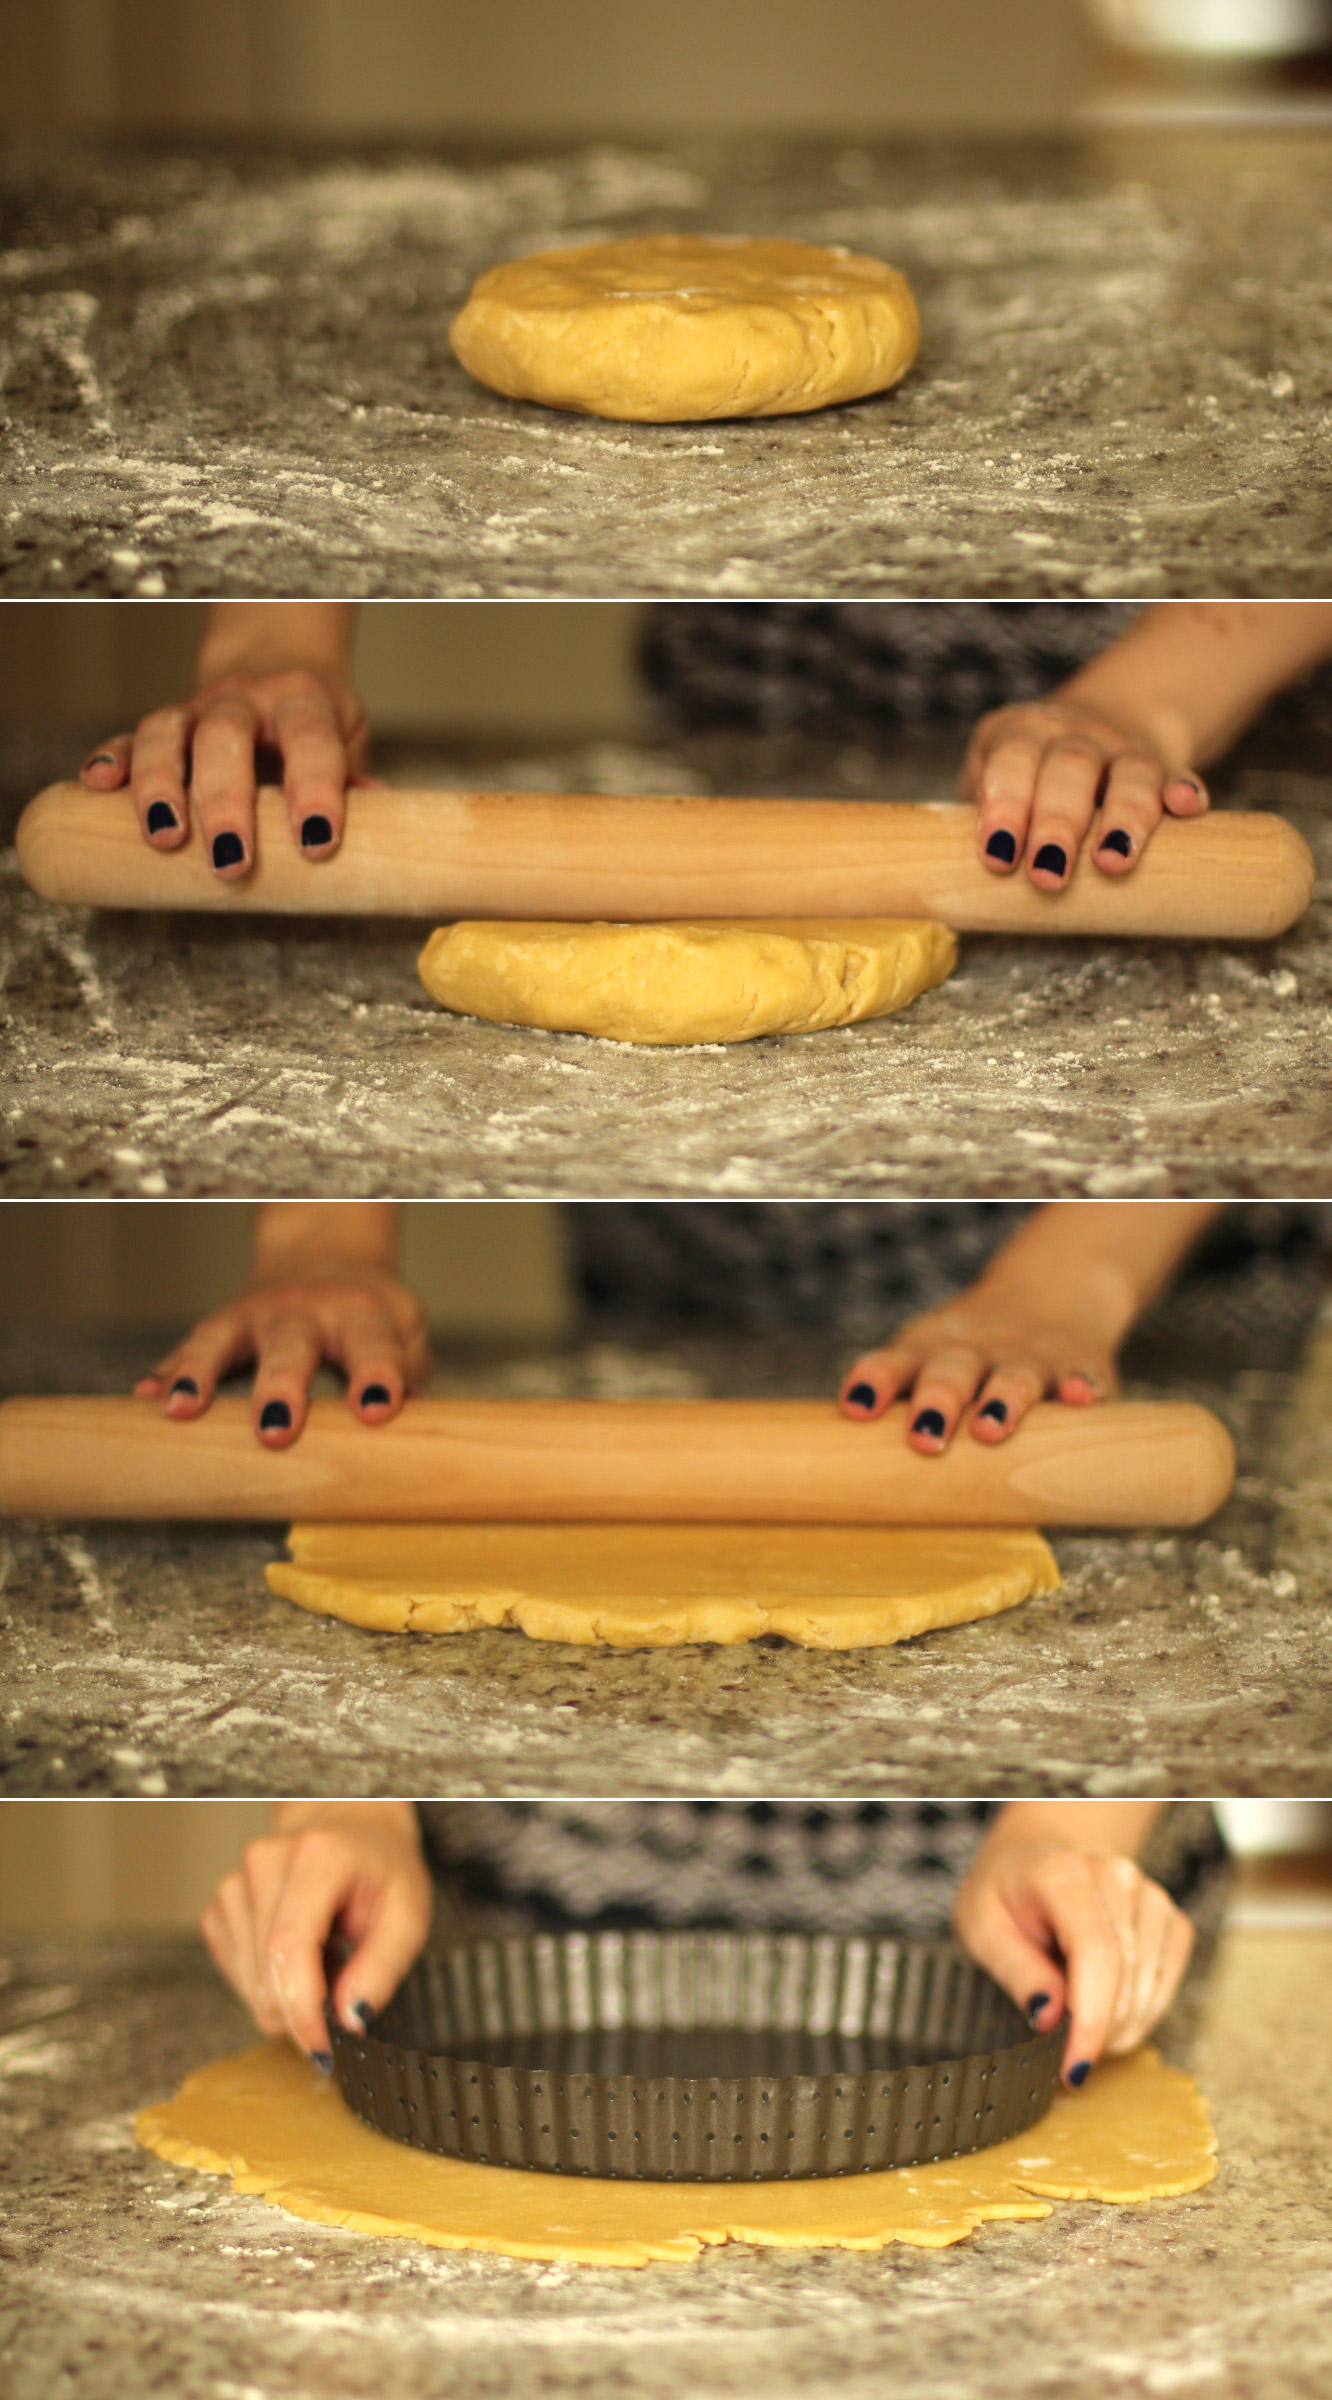
Remove the pastry from the fridge (providing an hour has passed). Place onto a lightly floured surface (you don’t want to add much more flour to the mix if you can help it).

Roll the pastry out as evenly as you can, until your chosen dish can sit in the middle with an inch or two on all sides. You don’t really want your pastry to be thicker than 5mm.

apple-frangipane-almond-tart-pie-10

Step nine

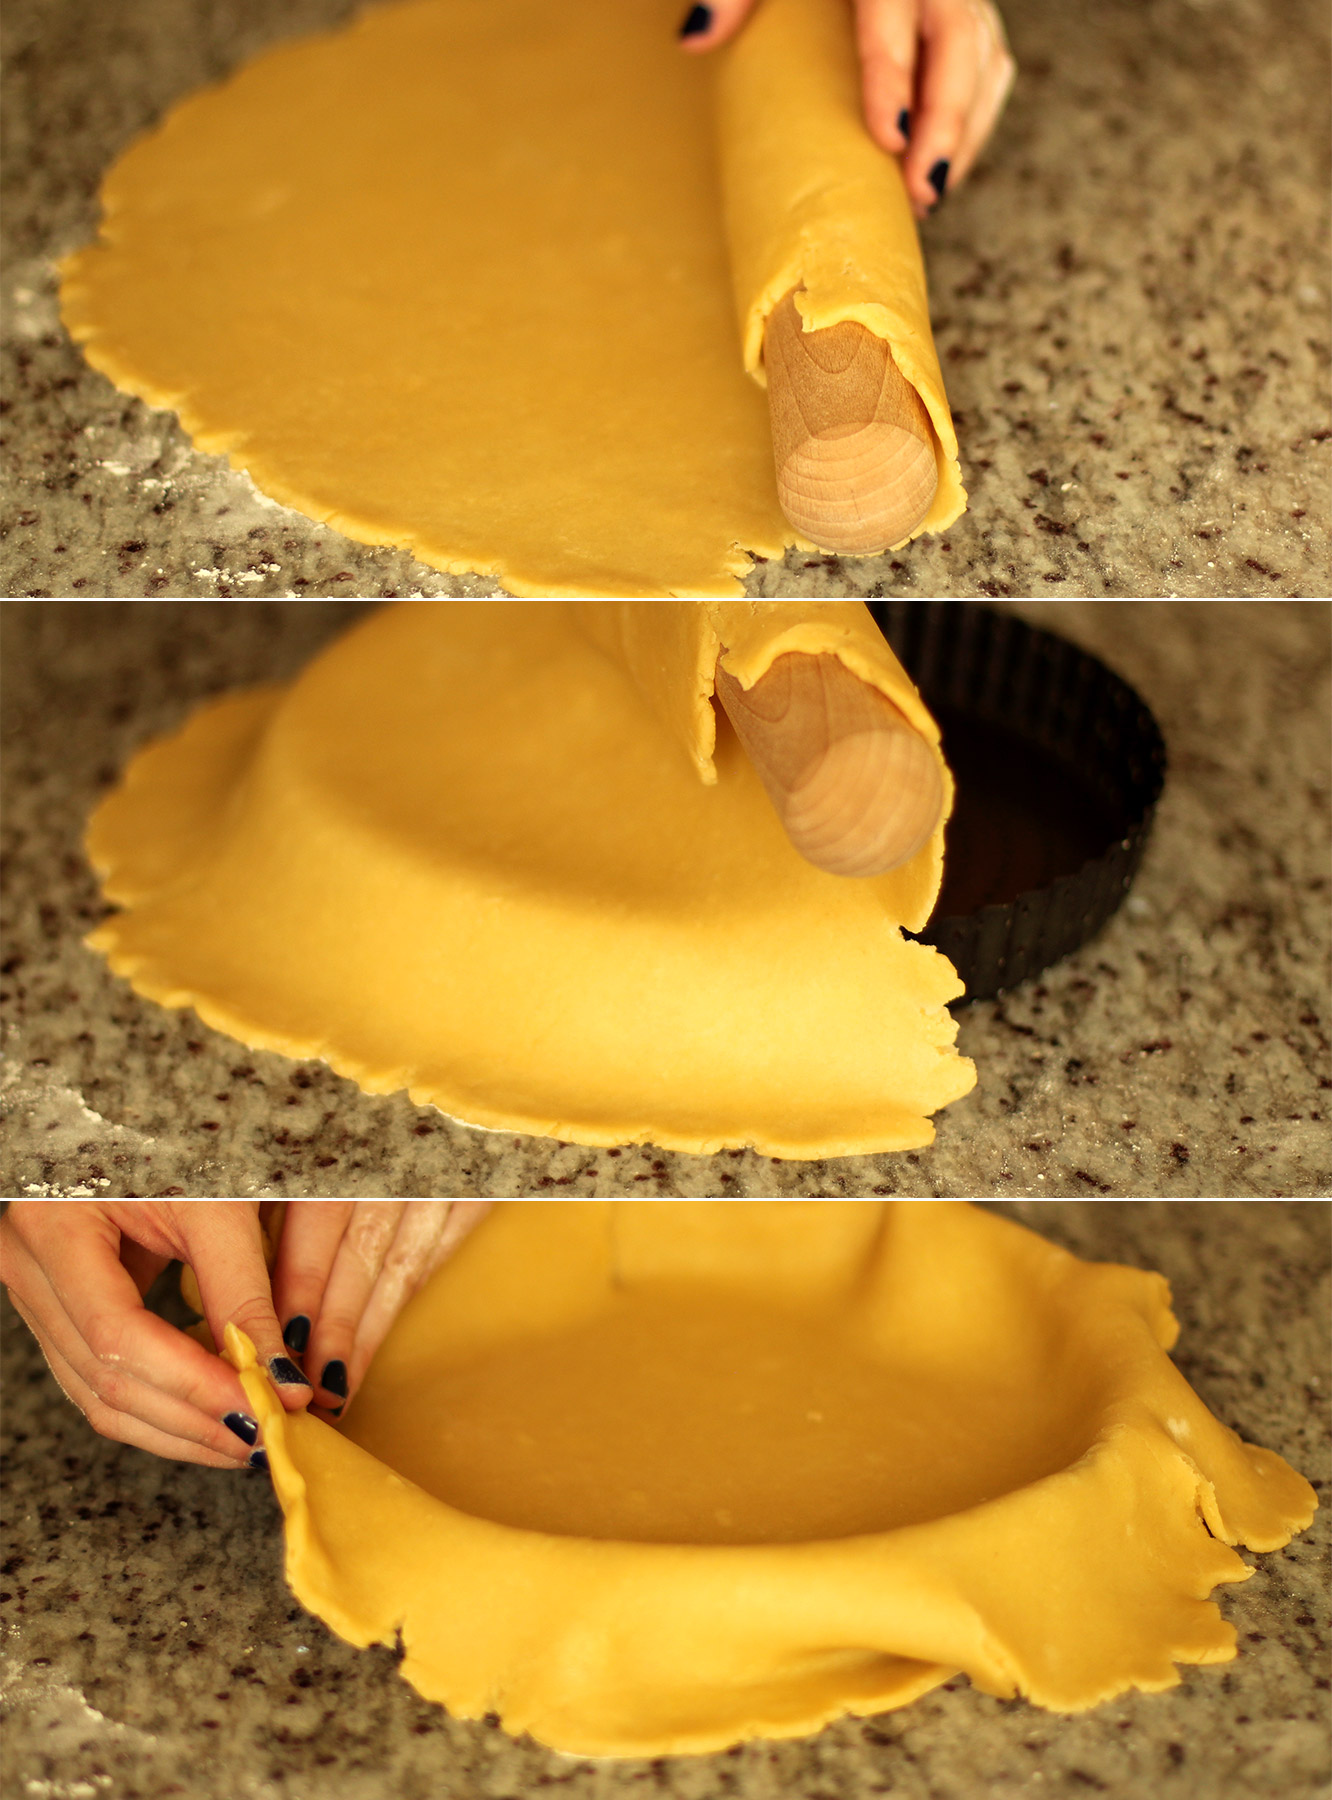
Transfer your pastry by rolling it at least half of it up onto your rolling pin and unrolling it over the top of your dish.

I then needed to lift the edges back up and place them back in to tease them better into the corners. Do this gently so as not to tear it. Having said that, I was a bit heavy handed and tears can be fixed quit easily by sticking a bit of excess pastry on top.

apple-frangipane-almond-tart-pie-11

Step ten

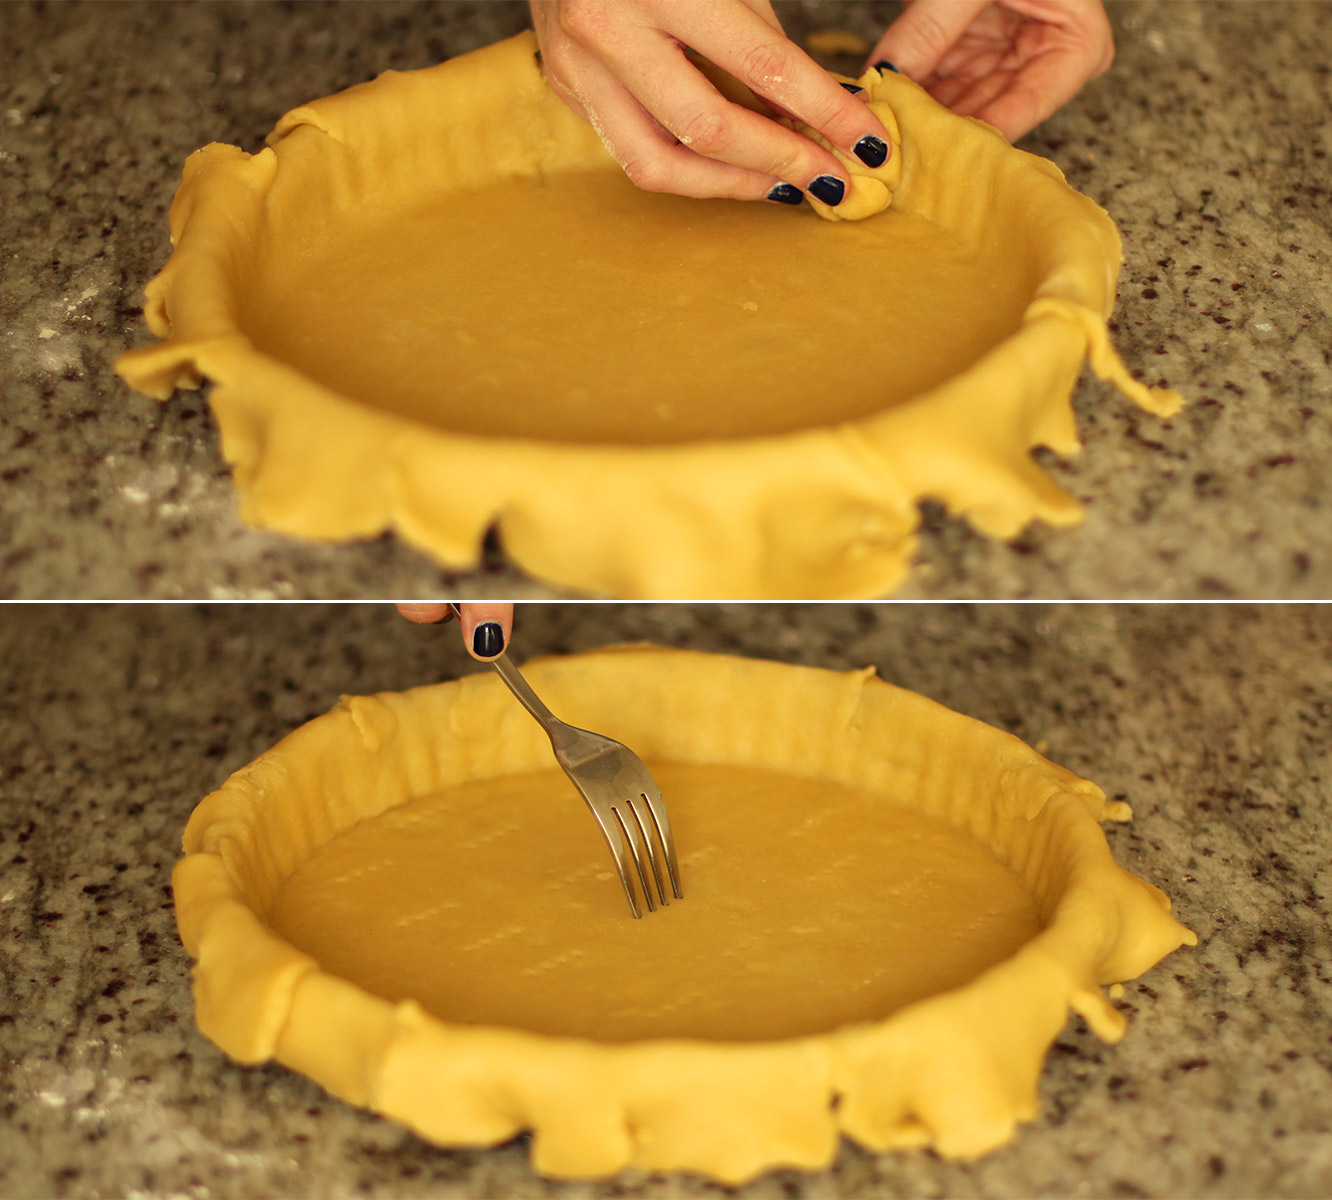
Rip a bit of pastry off the overlap and use it to press the crust further into the crevices.

Use a fork to pierce the base of the pie, this will help the pastry stay flat in the oven.

Pop him back in the fridge for another 20-30 minutes.

apple-frangipane-almond-tart-pie-12

Step eleven

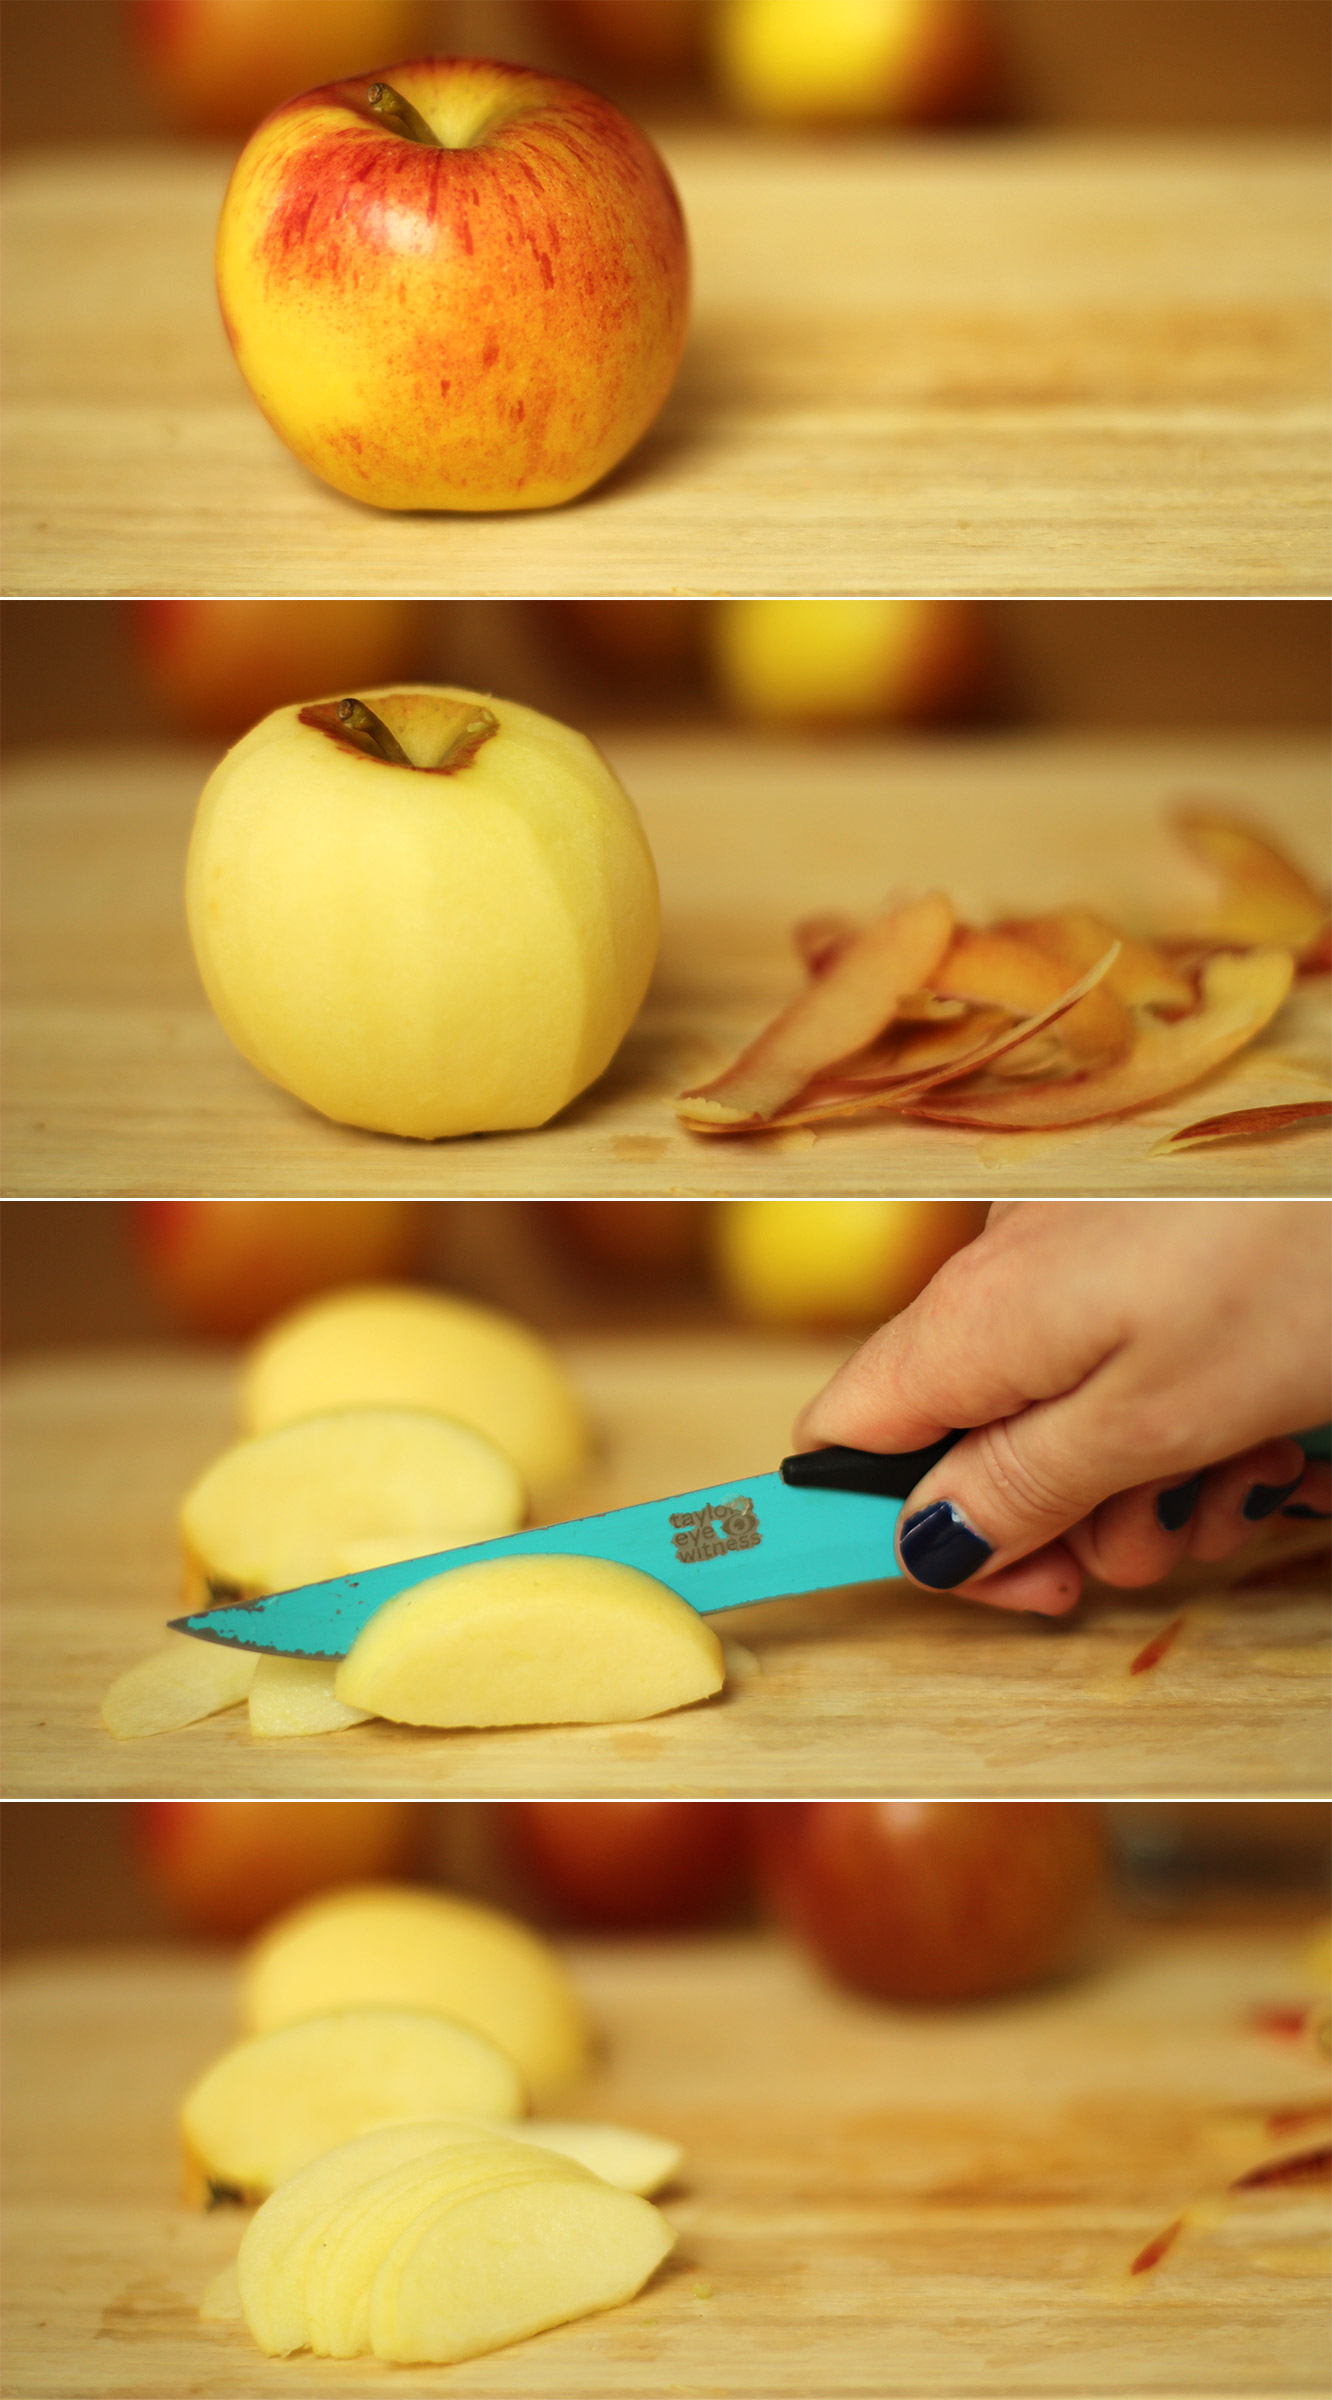
While the pastry is chilling again, peel and slice the braeburns/eating apples. You need to do this carefully as it will be the making or breaking of how your pie looks (no pressure). Try to peel nice and evenly and cut the apples as thinly as you can.

Have a large tupperware filled with cold water nearby to put your cut slices into, which will stop them from browning, again, if you have any lemon juice a few drops wouldn’t go amiss but not essential.

Pre-heat the oven to 180C/gas mark 4/350F

apple-frangipane-almond-tart-pie-13

Step eleven

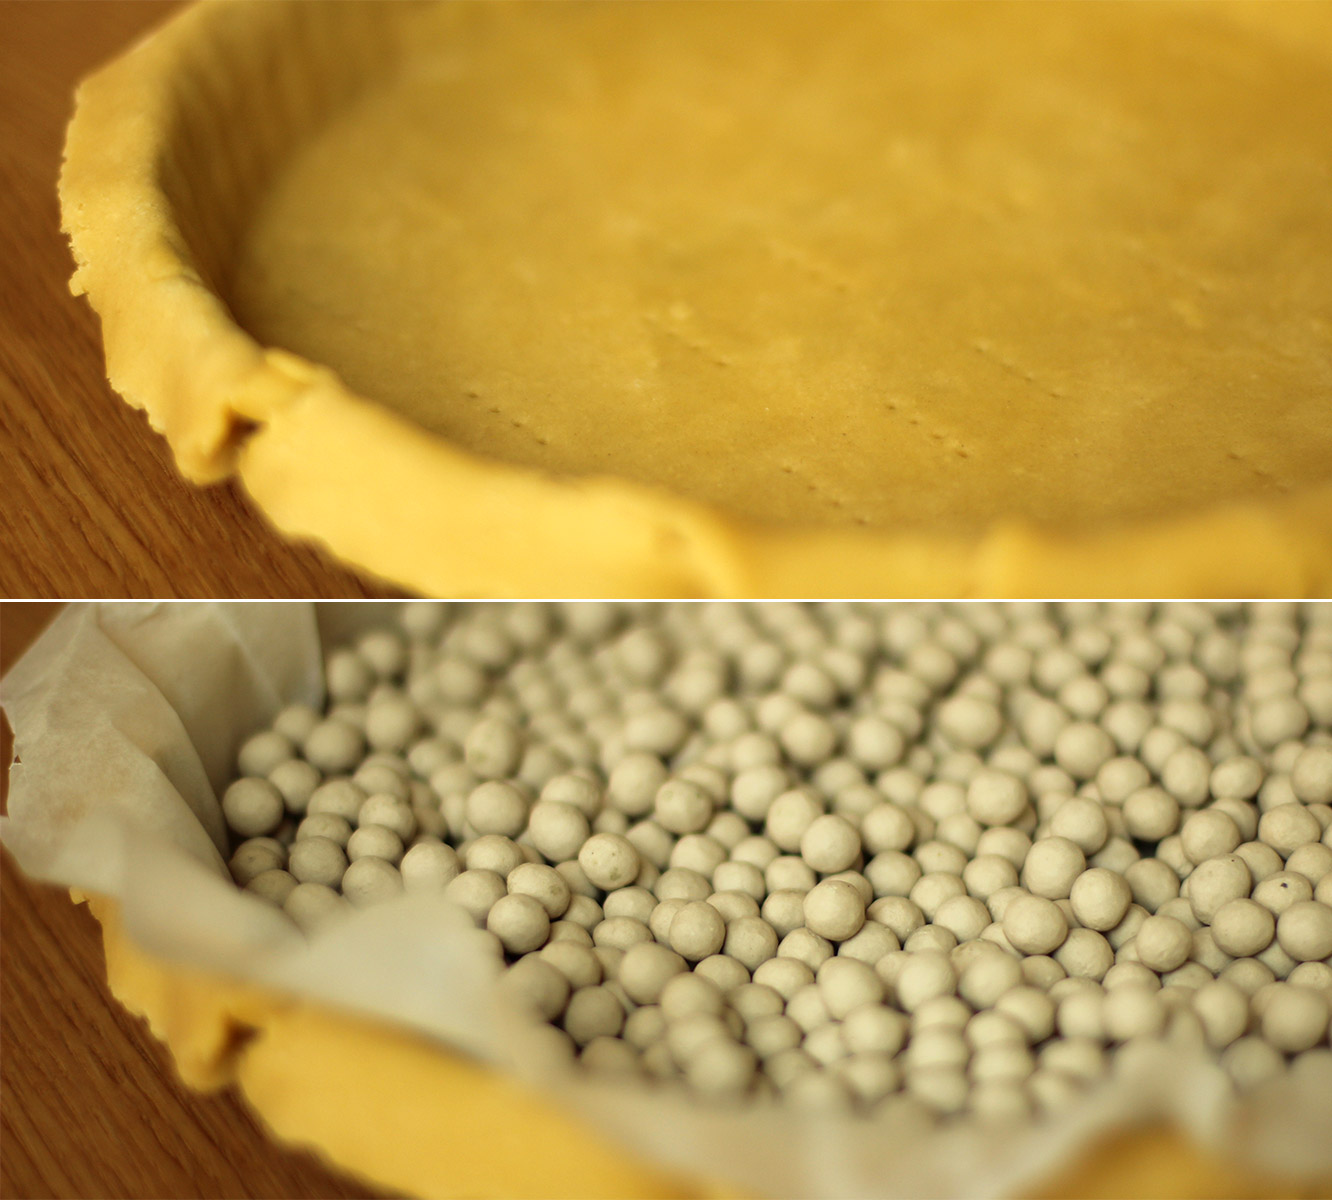
Remove the pie from the fridge and trim some of the excess pastry off the sides but still leave an overlap.

Place some baking paper in the pie and fill with baking beans. If you don’t have any then rice works too, and most dried lentils/pulses really.

Place on a baking tray and bake for 15 minutes.

apple-frangipane-almond-tart-pie-14

Step twelve

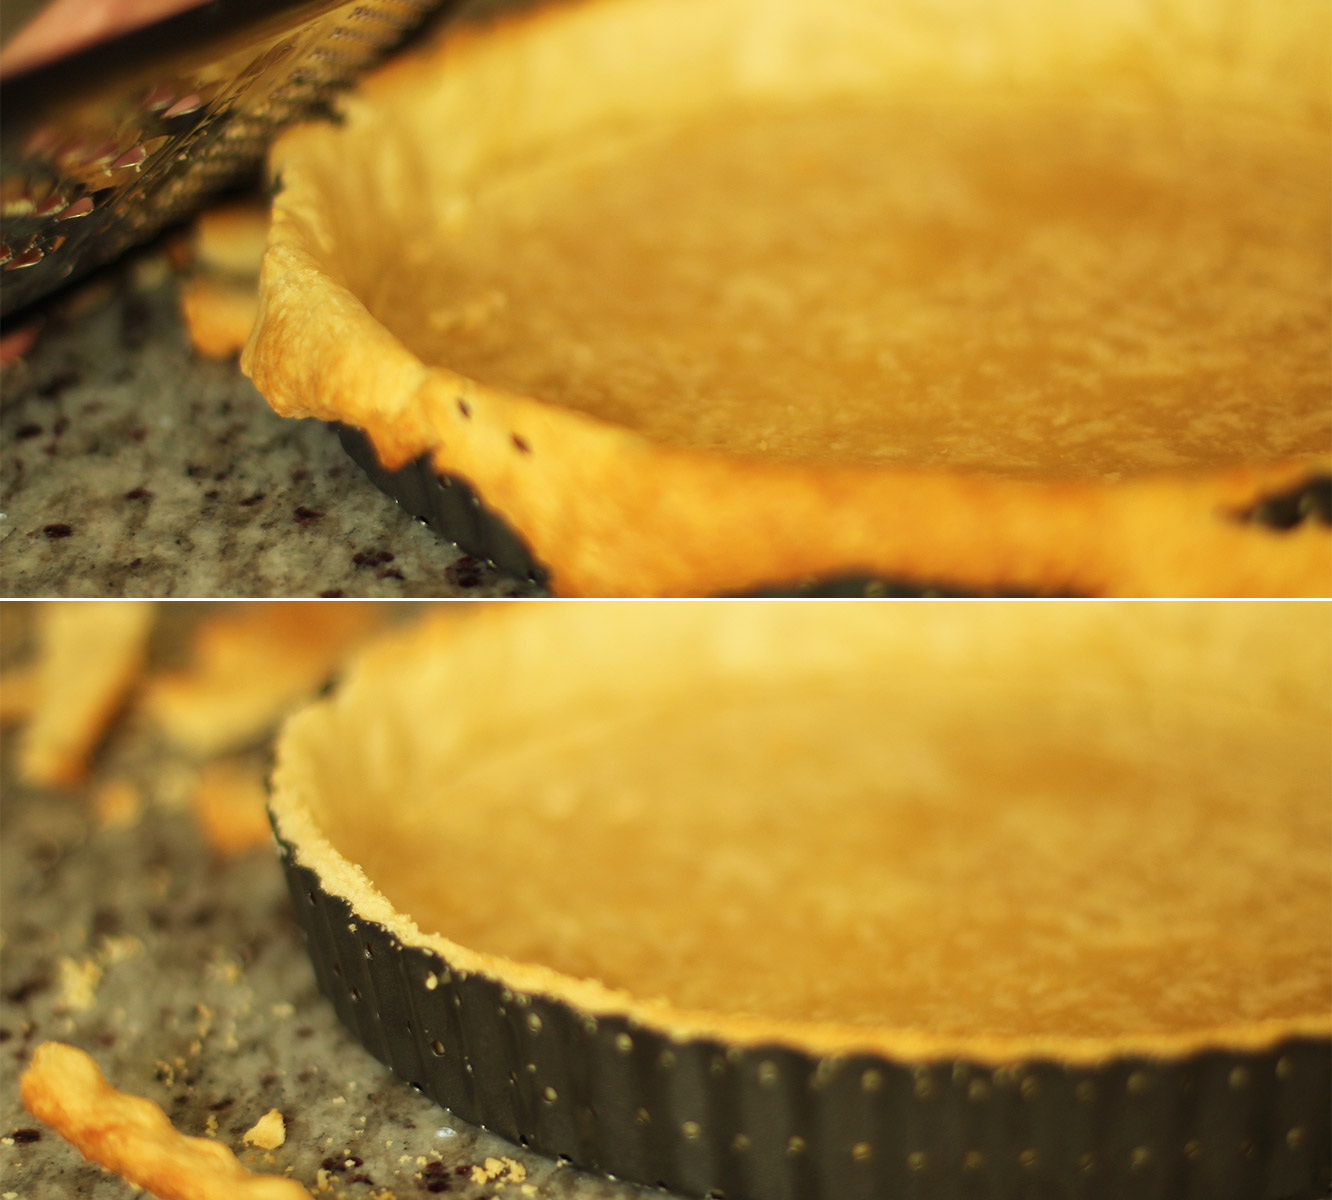
Using a grater remove the excess pastry at this stage. Doing it this way helps to avoid your pastry shrinking in the oven.

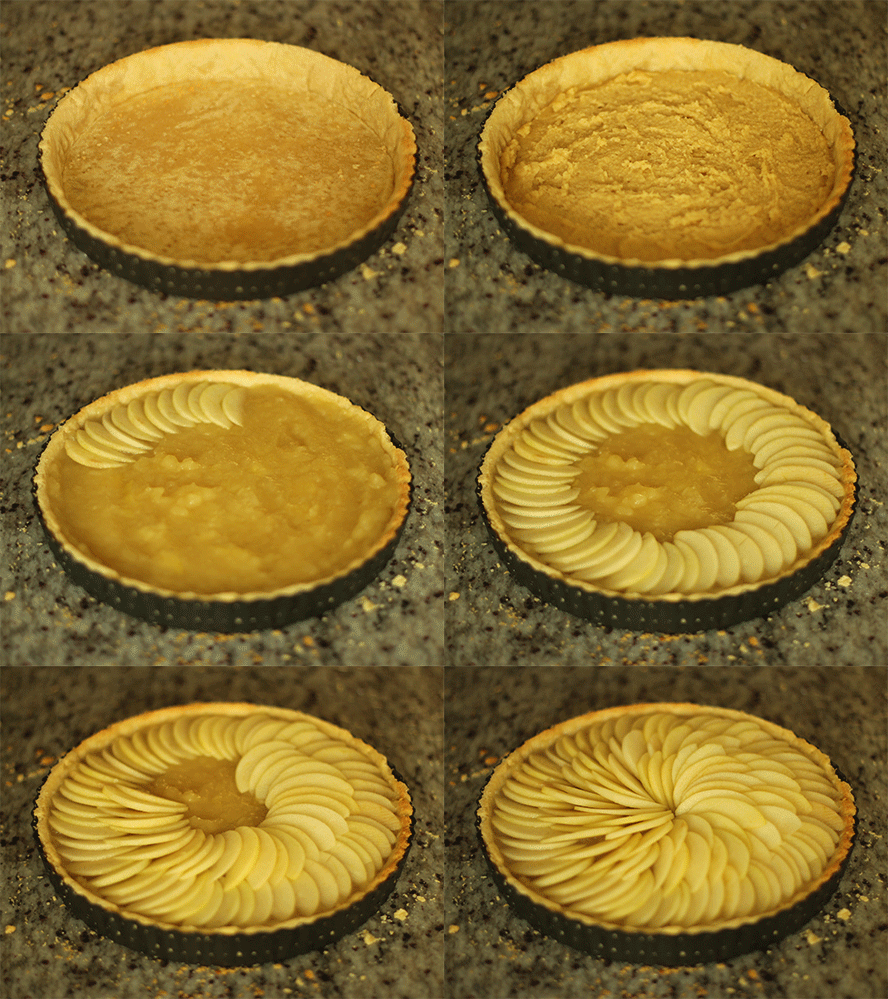
apple-frangipane-almond-tart-pie-gif

Step thirteen

FILL.

First spoon in the frangipane and spread out, followed by the stewed apple puree mixture.

Finally add your eating apples. Start with the outside and work inwards. Make sure your apples overlap each other quite a bit; the cooking process reduces the water so they will shrink and flatten out.

Bake for another hour on 180C/350F/gas mark 4. I advise checking in at regular intervals after 30 minutes as every oven is different.

apple-frangipane-almond-tart-pie-15

Step fourteen

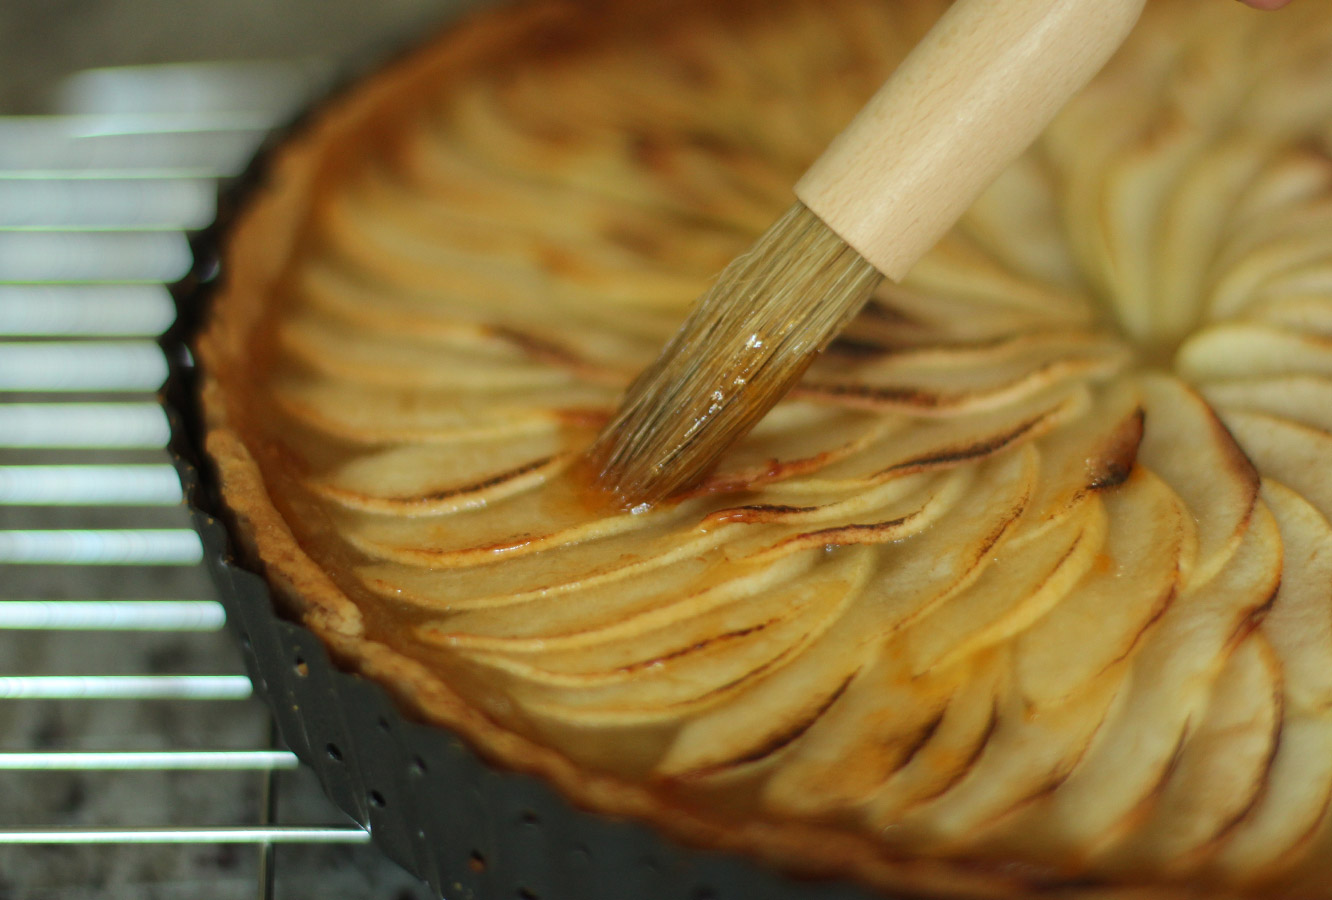
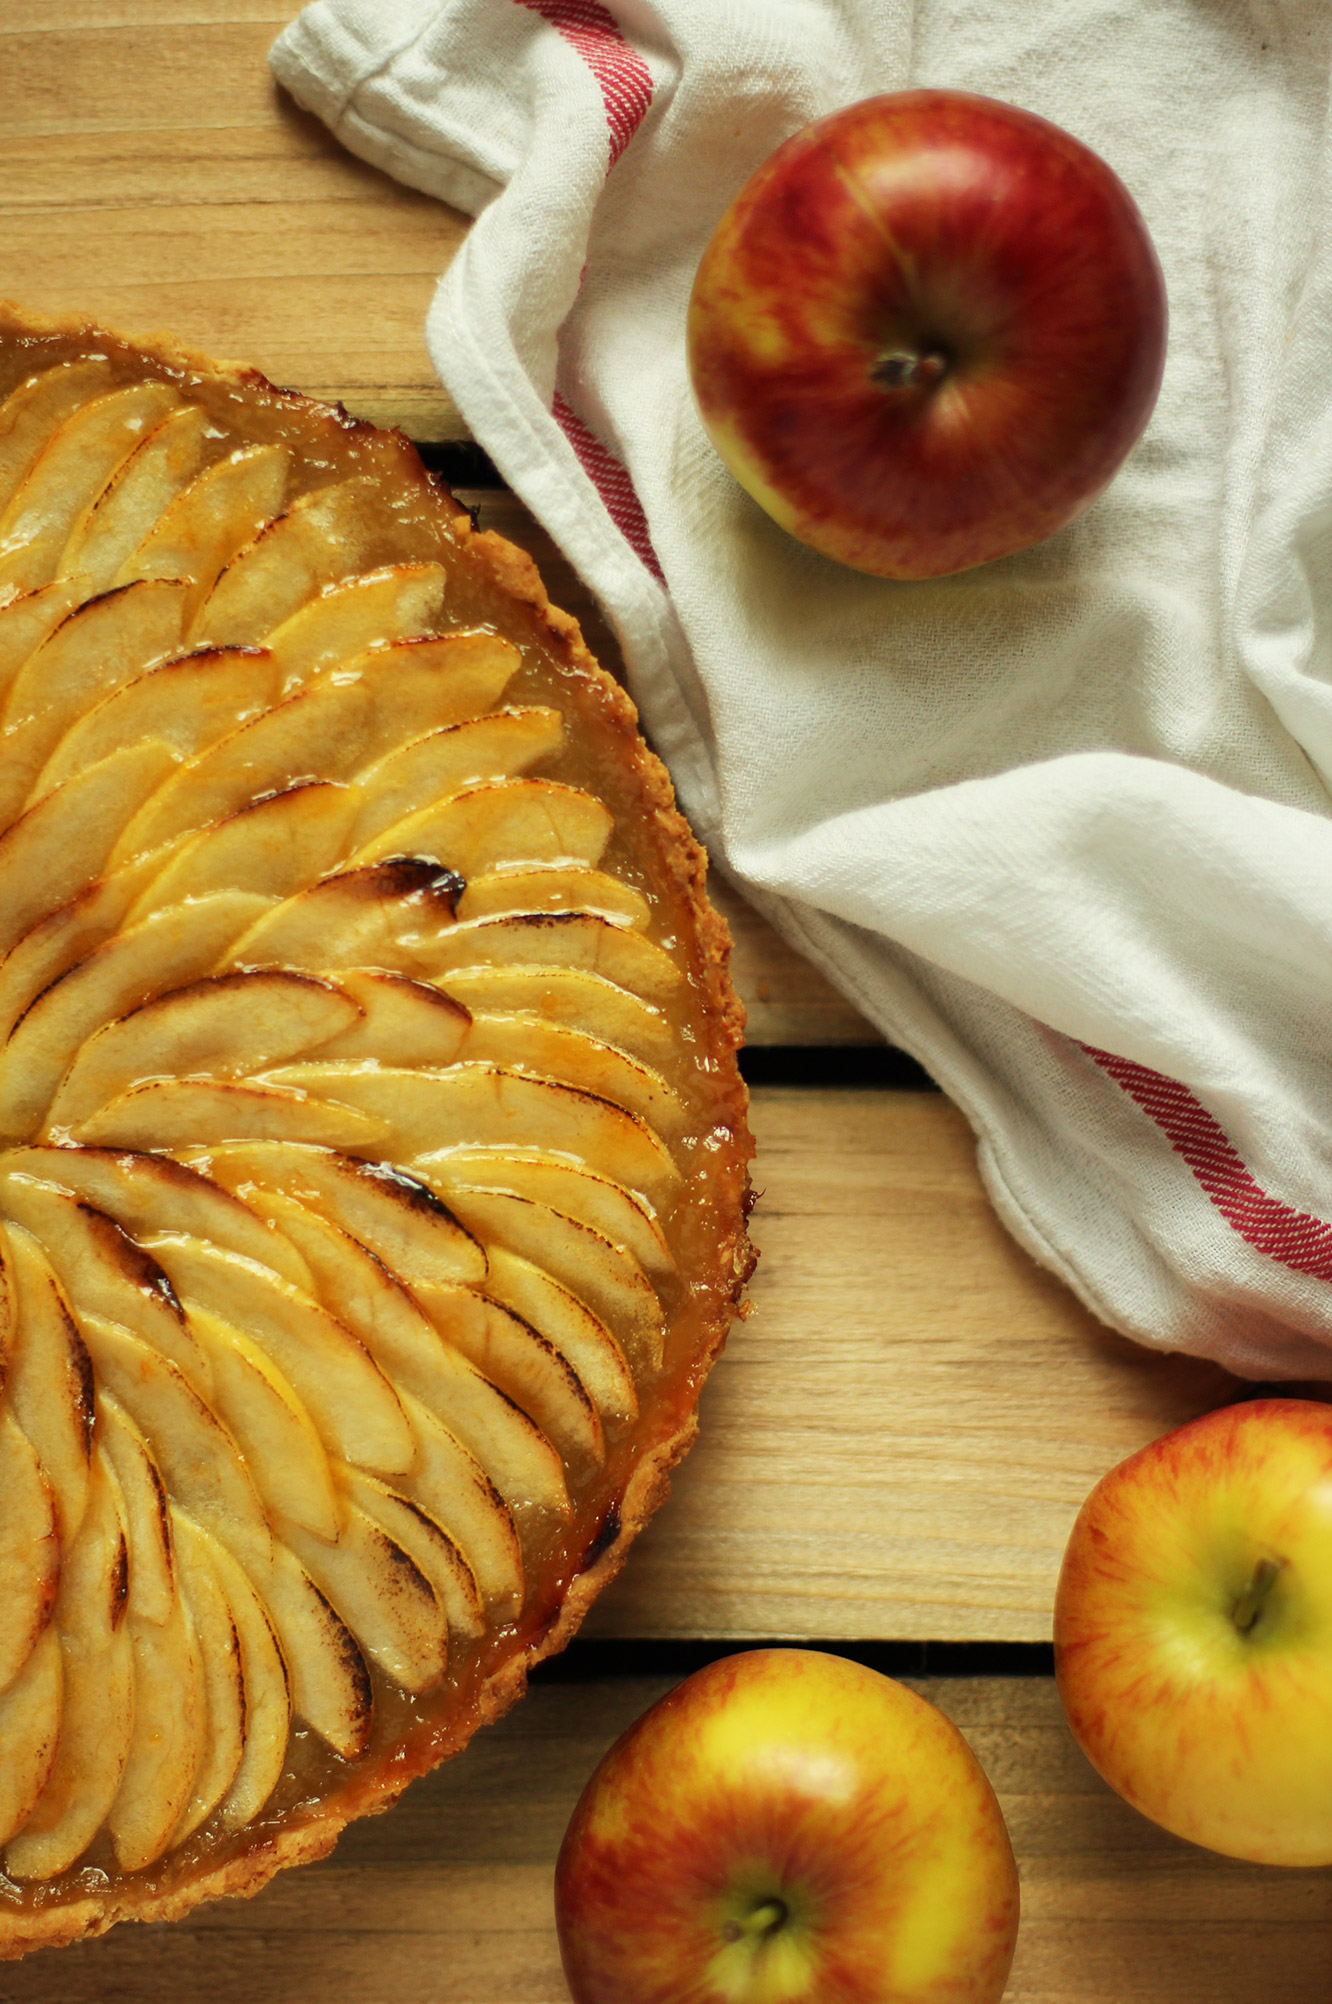
Pop a few tablespoons of apricot jam in the microwave for 10-20 seconds (keep your eye on it as it’s sugary and will heat up quickly). Brush over the surface of the tart, being careful not to move the apples around, spoiling your lovely design.

apple-frangipane-almond-tart-pie-17

apple-frangipane-almond-tart-pie-18

apple-frangipane-almond-tart-pie-16

Step fifteen

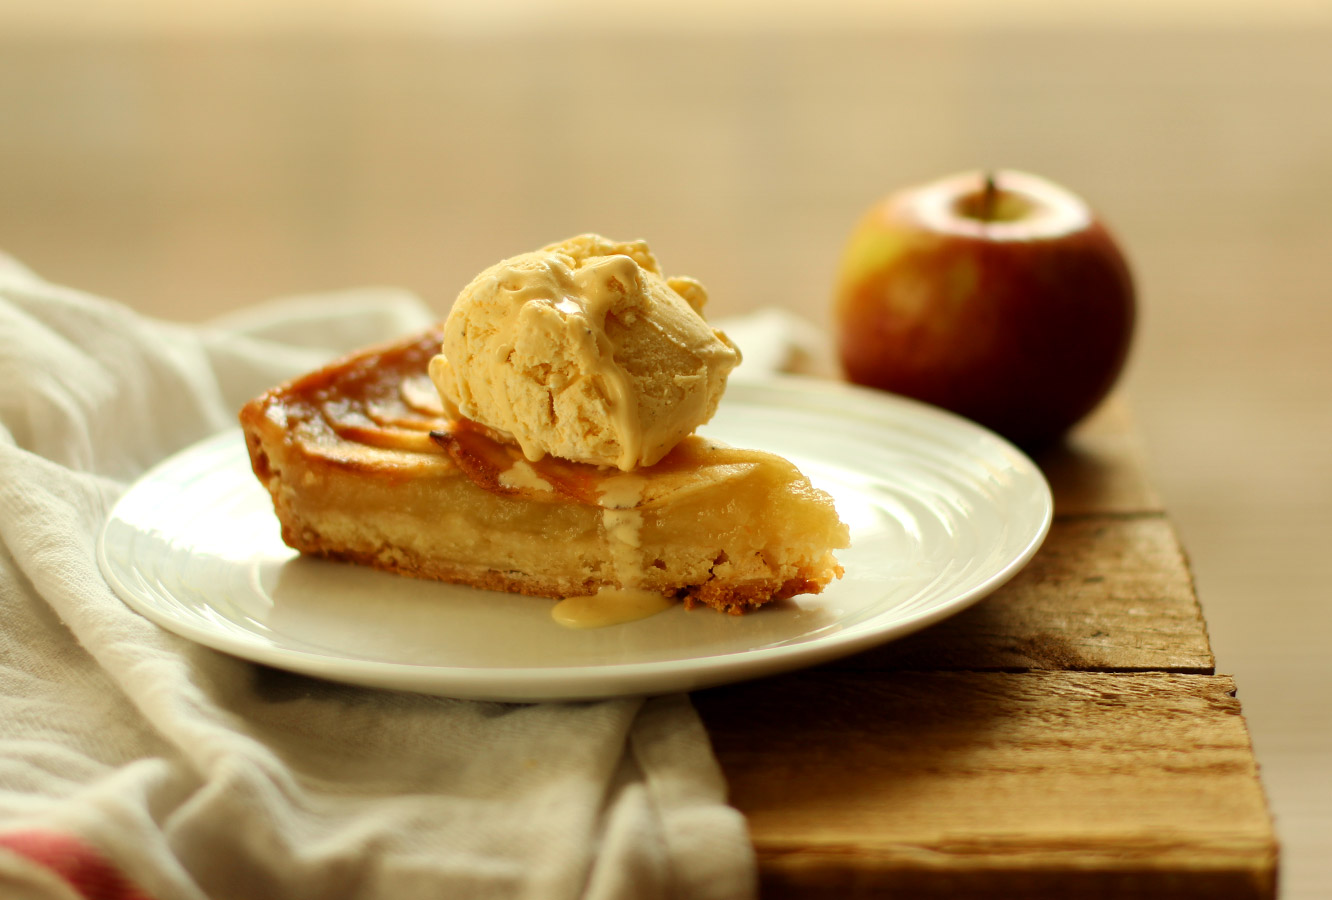
Get a scoop of vanilla ice-cream on that guy.

You can reheat your pie in the oven or individual slices in the microwave if you aren’t eating it straight away.

Until next time. x

Crabbie birthday to you

Another week another birthday. This time round it’s my lovely housemate who is bravely entering her mid-twenties; just another excuse for me to get in the kitchen.

Earlier in the week Vicky (the birthday girl in question), Matt (the fiance) and I, had sat down to watch The Princess Bride (a hilarious farce of a film), and we cracked open some Crabbie’s. It was such a lovely little evening, and I thought I would bake the experience into a cake to commemorate the little one’s birth.

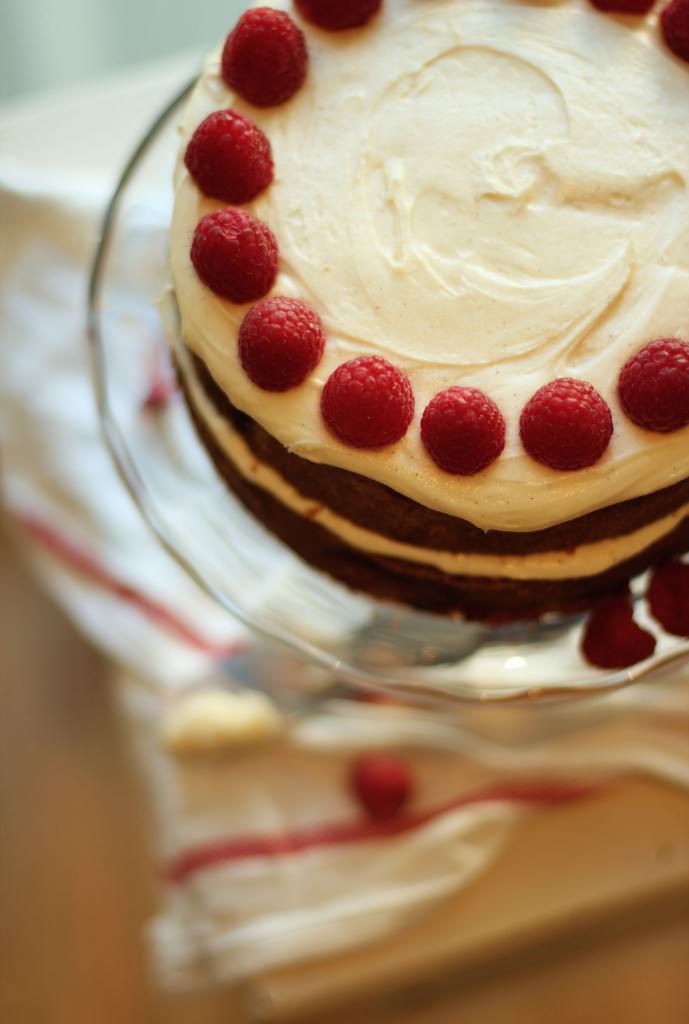
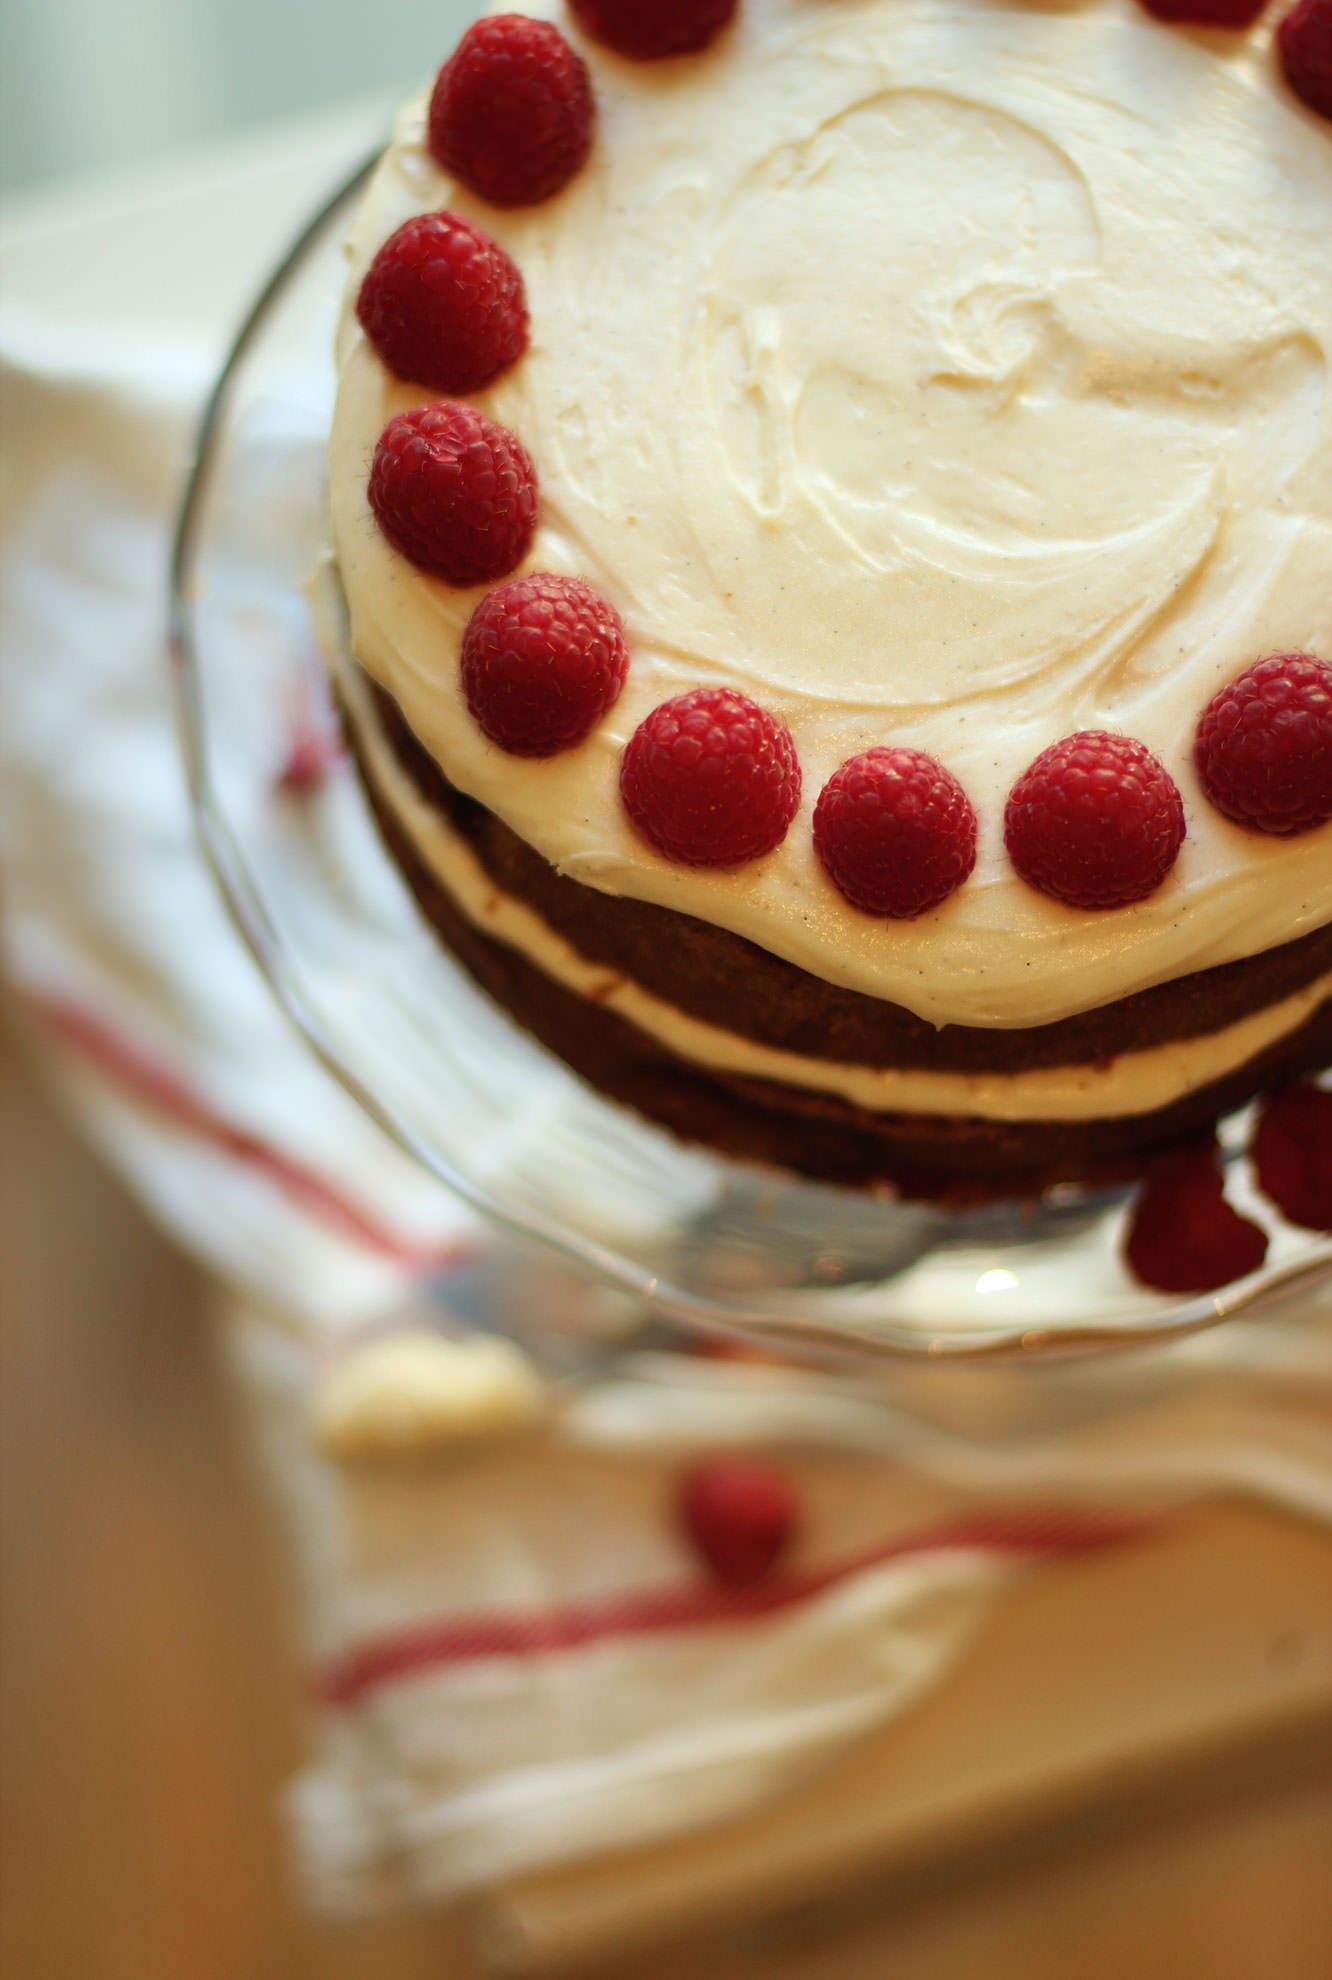
Crabbie’s, for anyone who doesn’t know (more fool you), is alcoholic ginger beer. This particular batch was raspberry flavoured, and  nobody was more surprised than me to discover how nicely ginger and raspberry complement each other. Add to that a honey and vanilla icing and you’ve got a birthday cake fit for any 24 year old.

raspberry-ginger-honey-cake-recipe-1

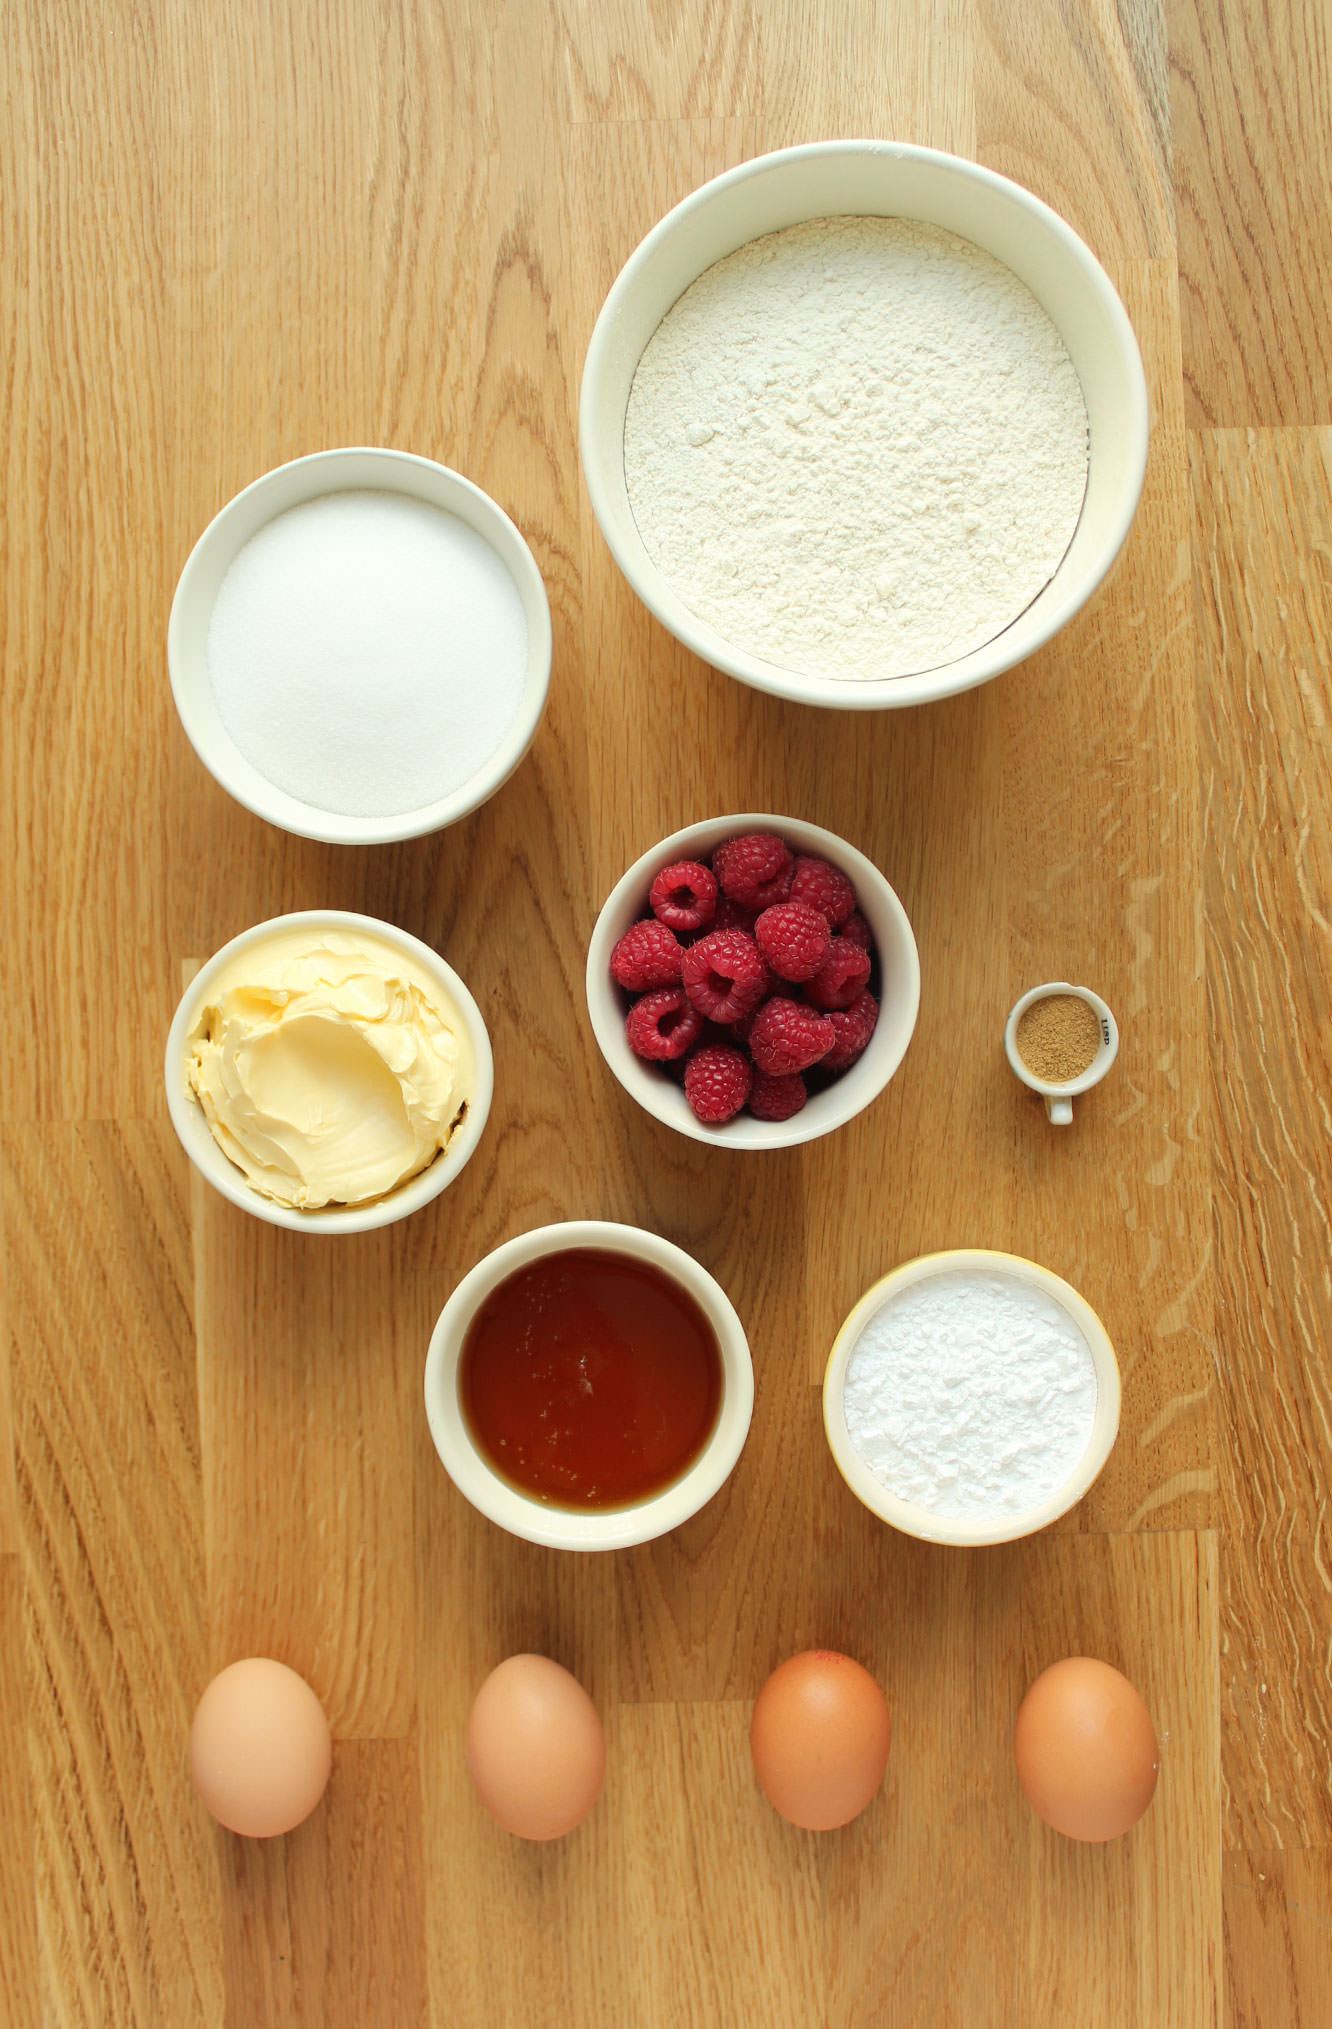
You will need

For the cake:

255g/9 oz self raising flour

255g/9 oz caster sugar

255g/9 oz margarine/butter (I use stork for cakes)

4 eggs

2 tsp ground ginger (add a bit more if you want a really strong ginger taste, 2 tsp is nice and subtle)

1 tsp vanilla extract/paste

1 tsp bicarbonate of soda

200g/7 oz raspberries

For the icing/decoration:

350g/12 oz icing sugar

150g/5 oz softened butter

170g/6 oz honey

1-2 tsp vanilla extract/paste (or even a pod if you have one so you get the lovely flecks)

100g/3.5 oz raspberries

raspberry-ginger-honey-cake-recipe-2

Step one

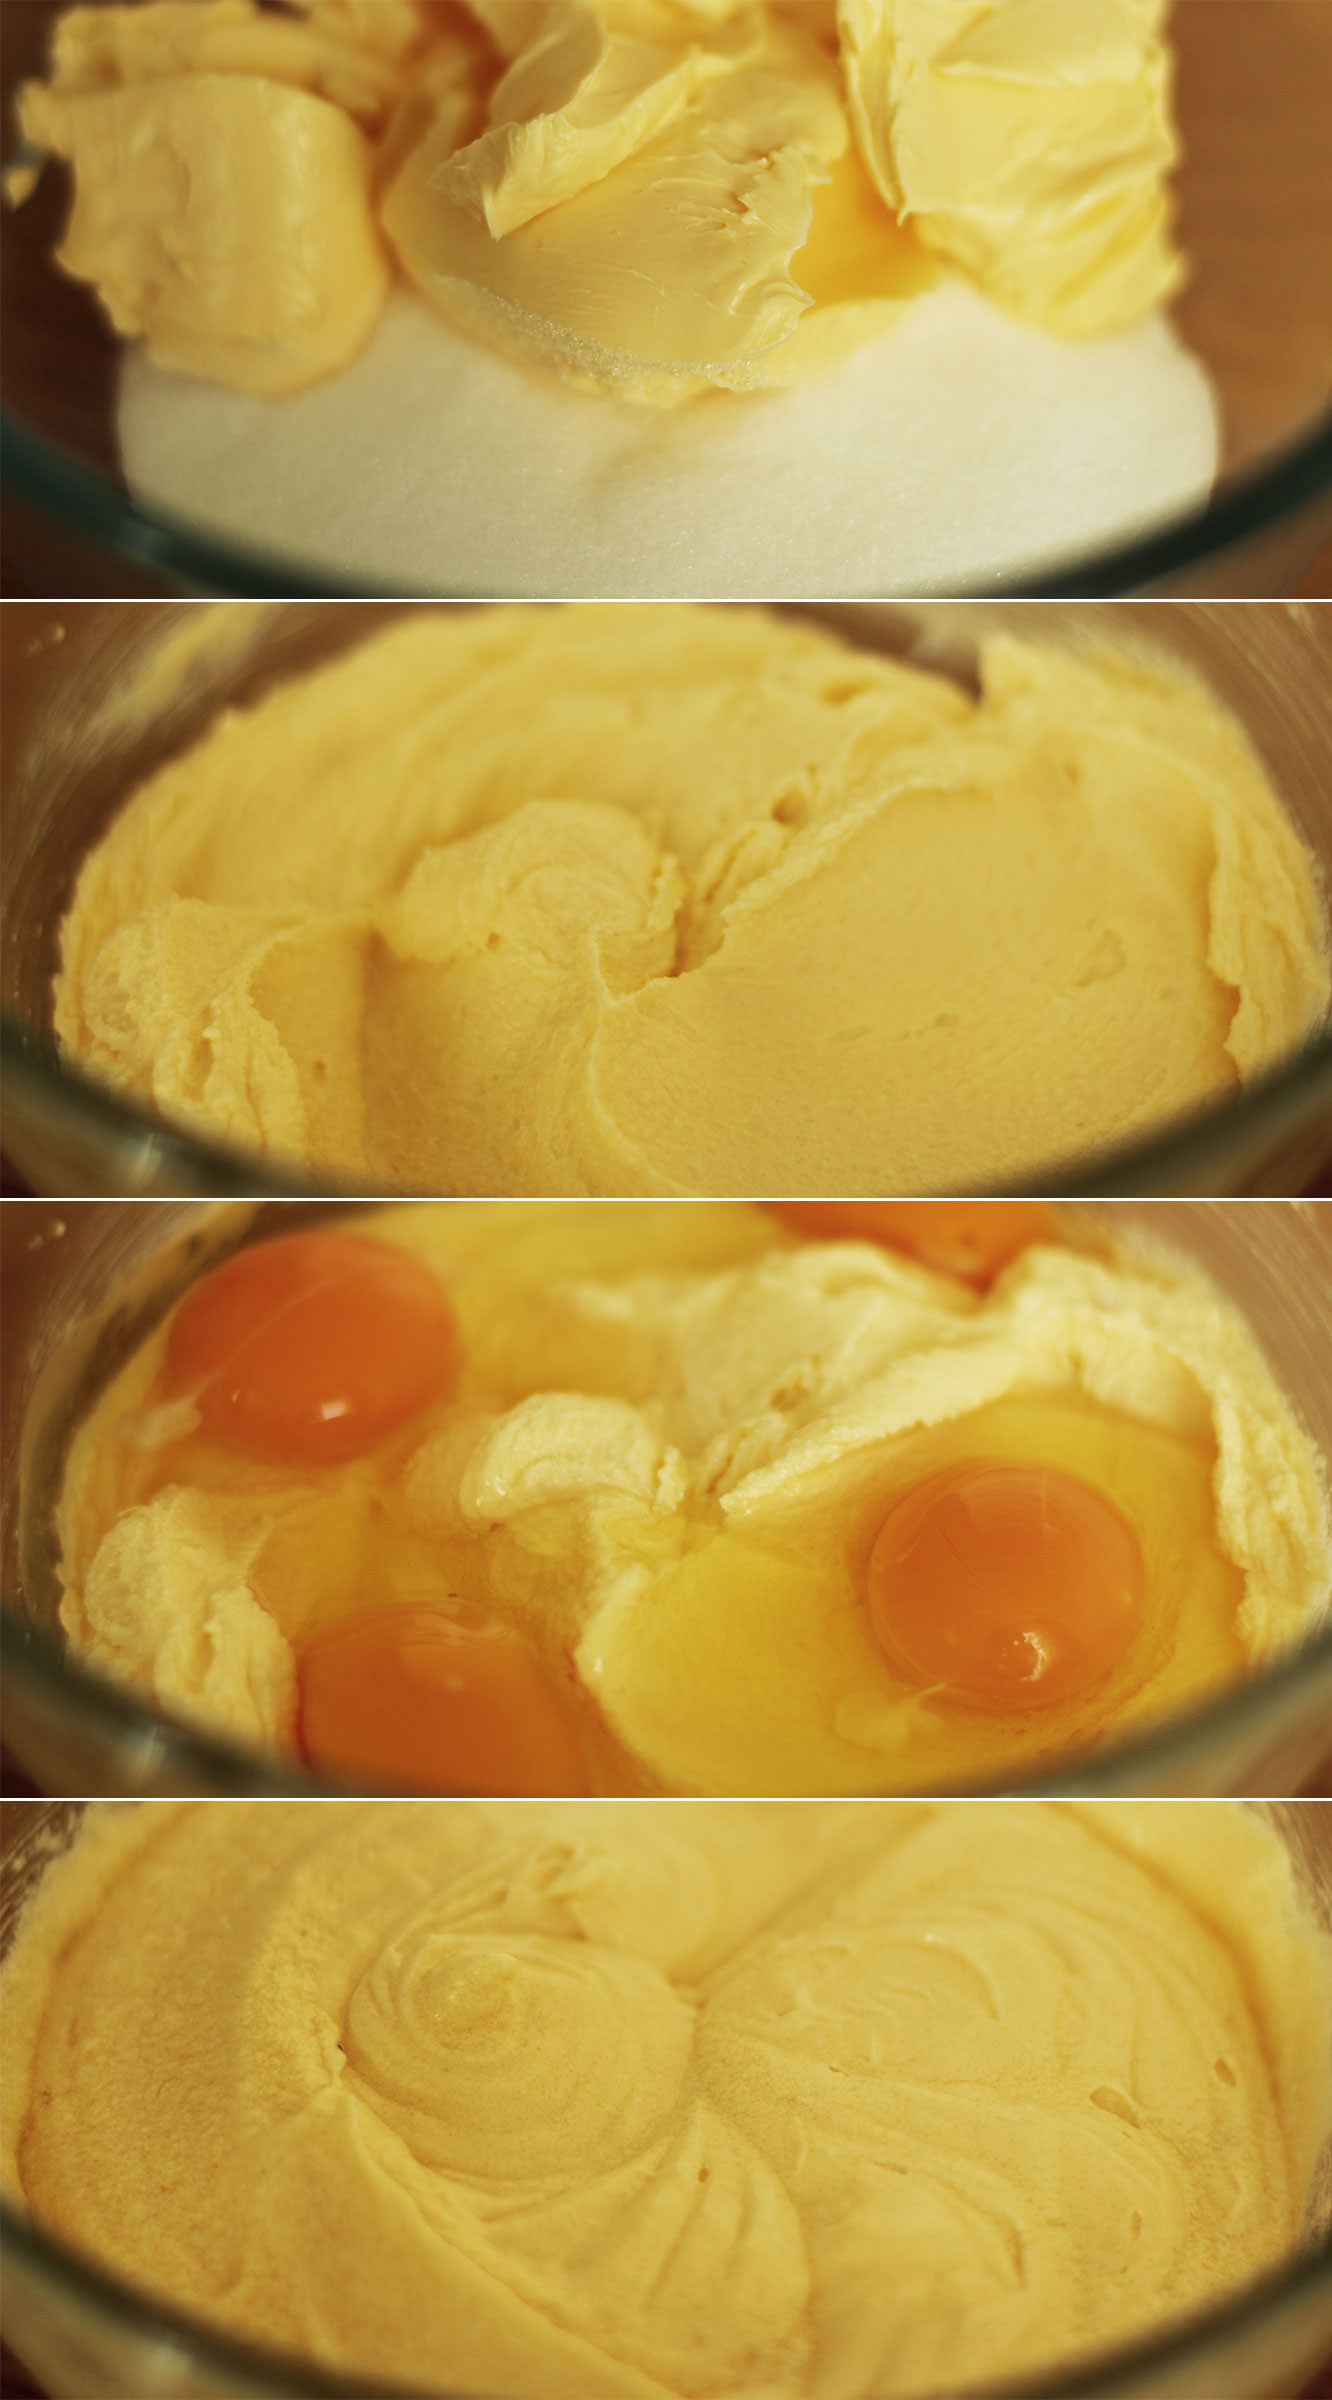
Using an electric whisk beat together the margarine and sugar until well blended and fluffy.

Step two

Add the eggs and beat again until combined. It looks a little split at this stage (see those little lumps at the sides) but you don’t need to worry, the flour never fails to sort that out.

raspberry-ginger-honey-cake-recipe-3

Step three

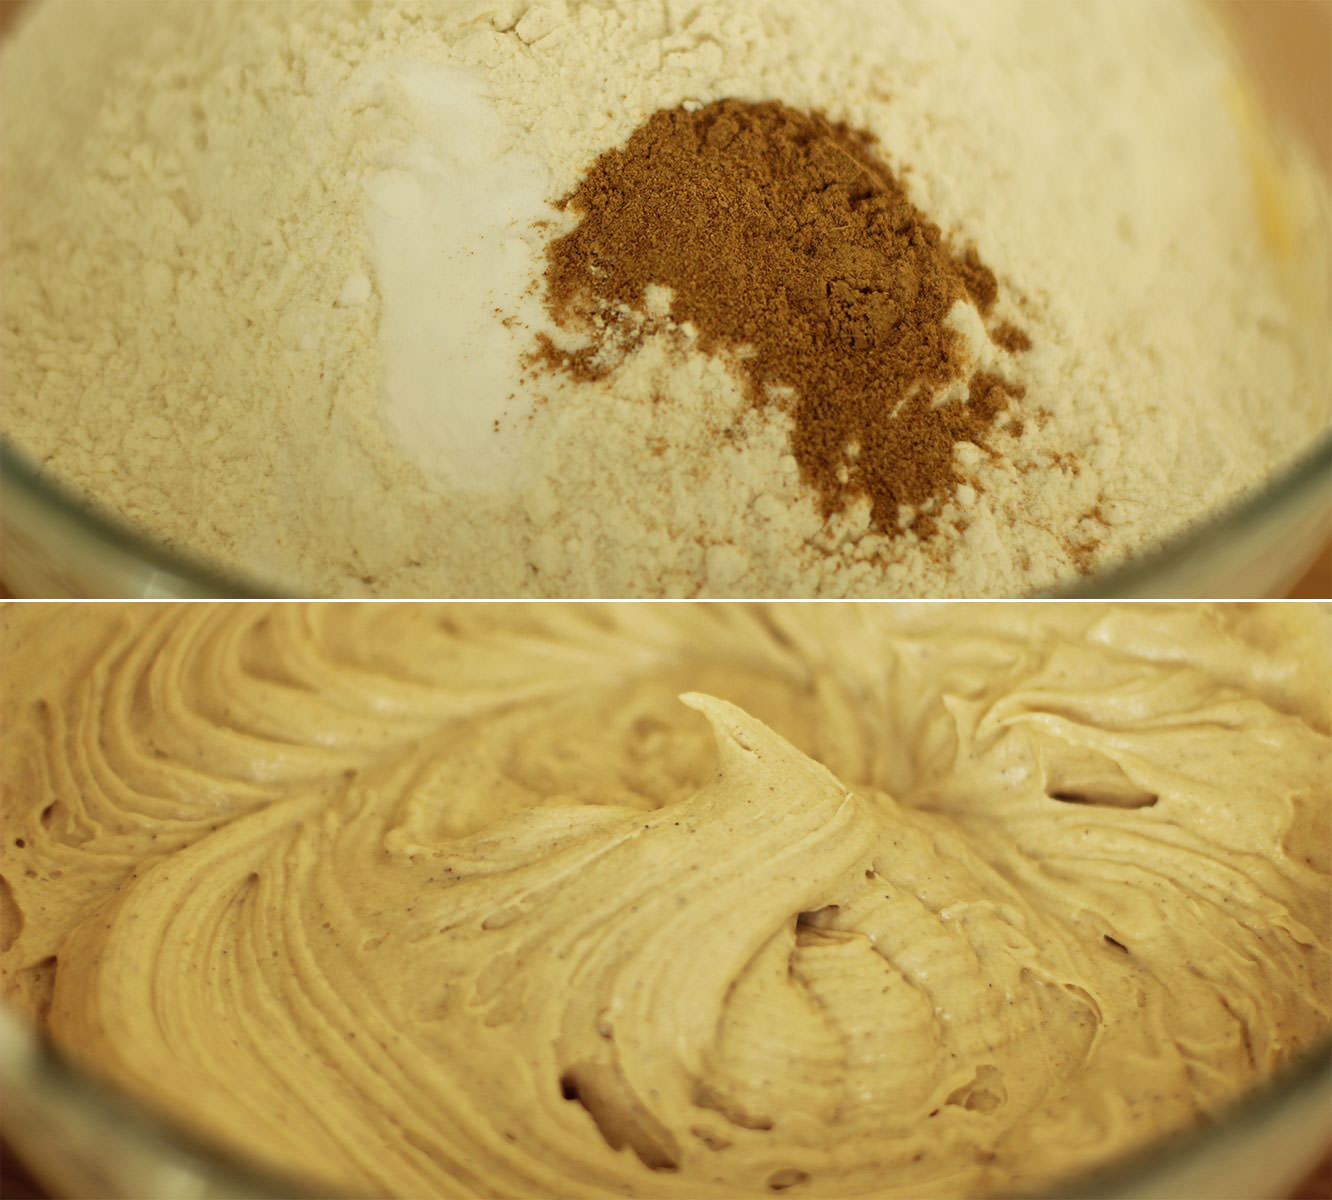
Add the flour, bicarbonate of soda and ginger and whisk again until smooth.

I also added the vanilla at this point which is in the form great paste my friend brought me back from Vanuatu, tastes delicious and has the beans in it. If you aren’t swinging by the South Pacific any time soon and don’t fancy the investment in a pod or some paste then extract will do the trick.

raspberry-ginger-honey-cake-recipe-4

Step four

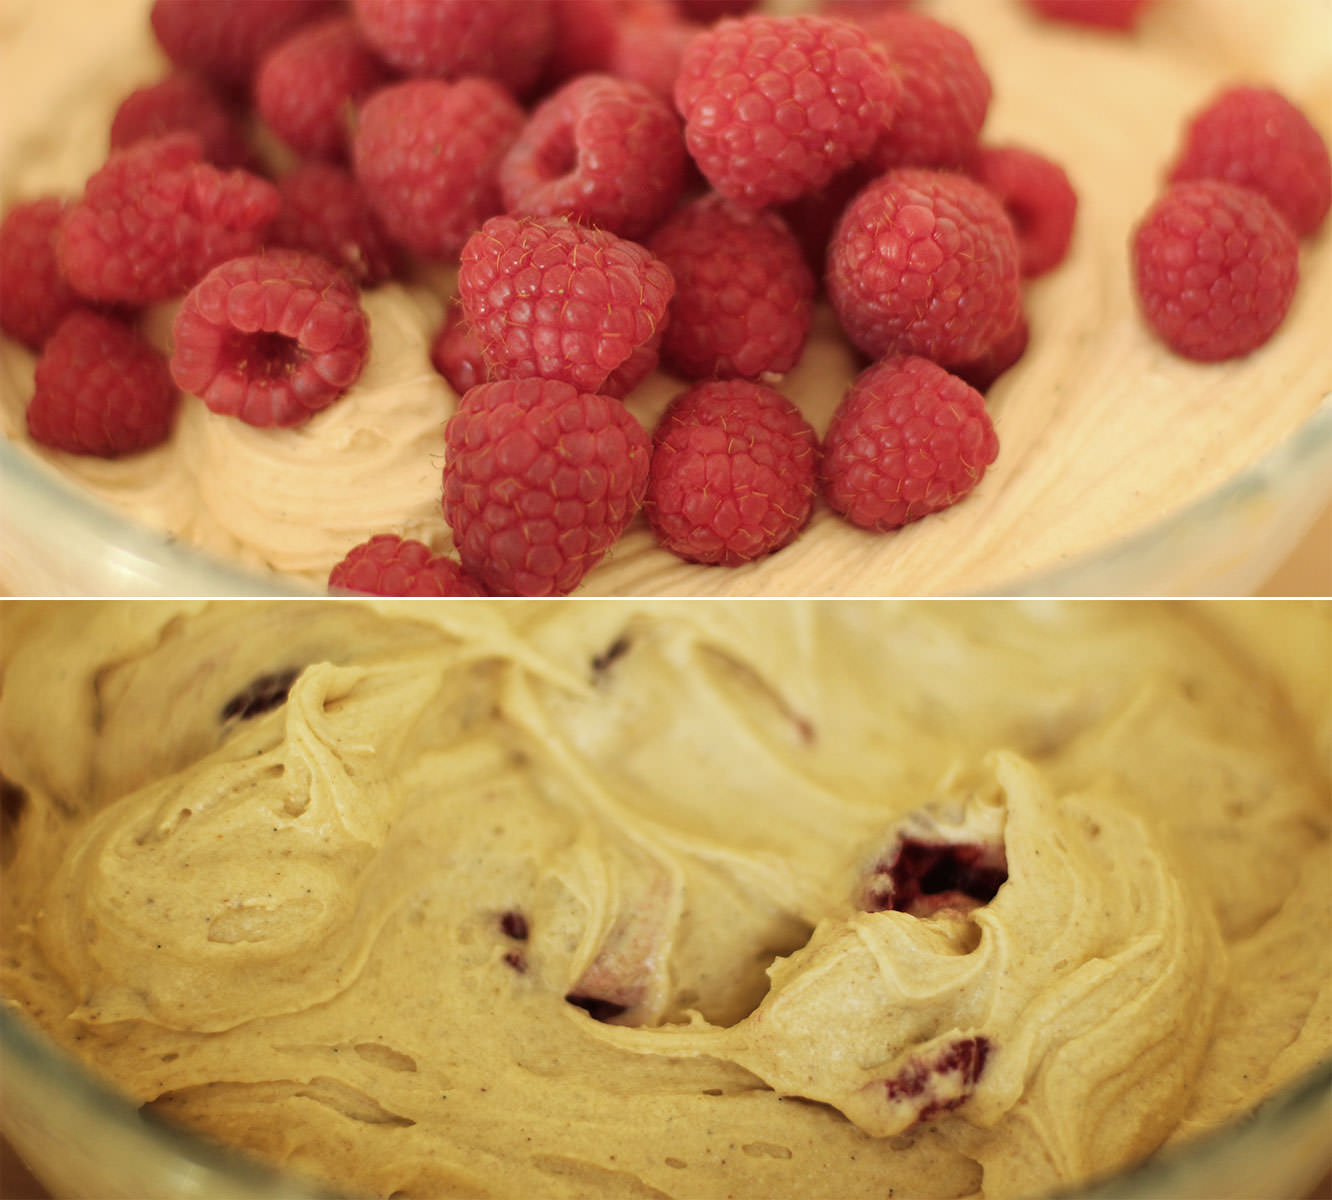
Add the raspberries and stir them in with a wooden spoon. I crushed some of them with the back of the spoon against the side of the bowl to help distribute them a little better.

raspberry-ginger-honey-cake-recipe-5

Step five

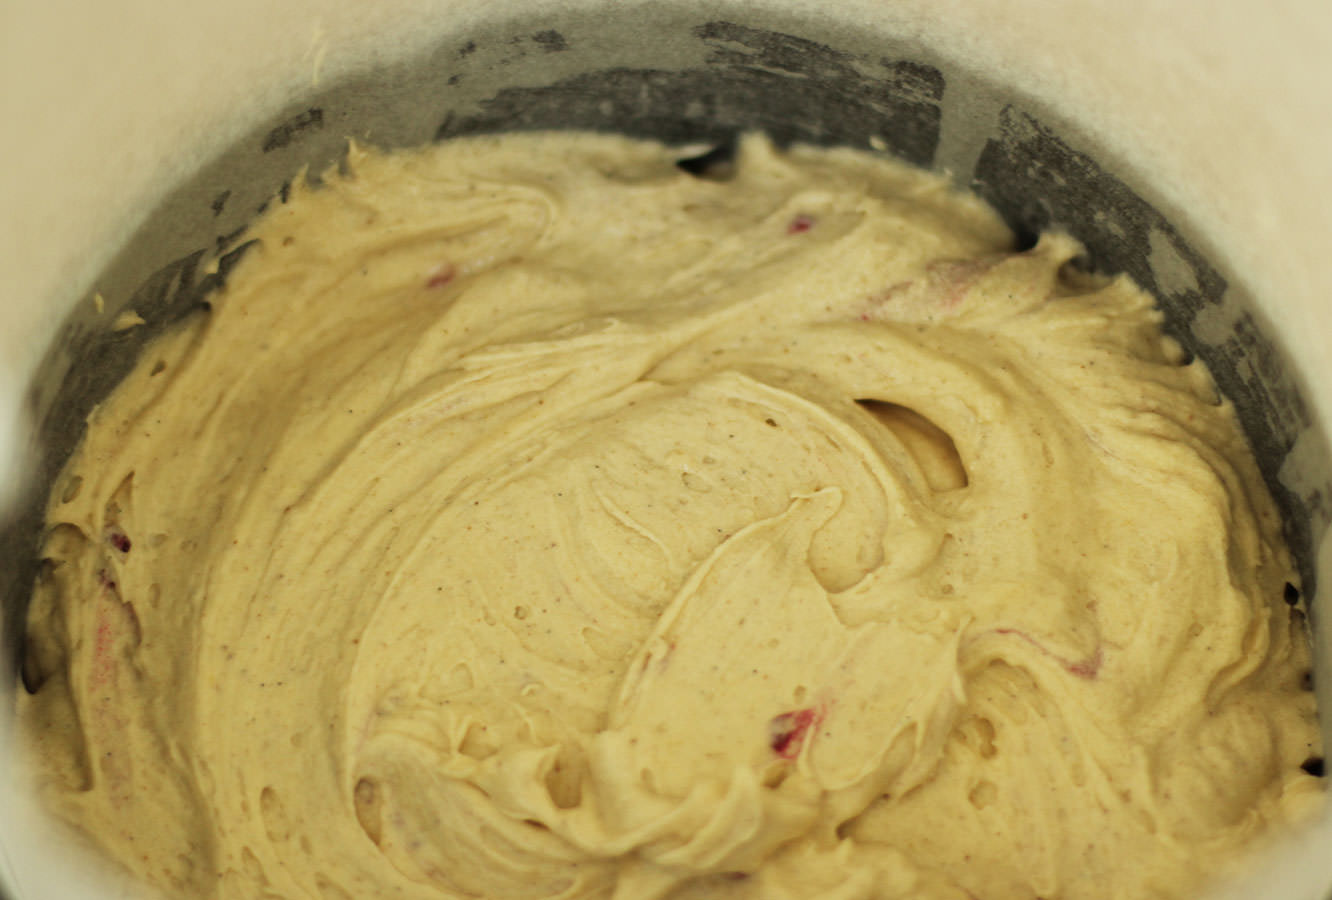
Spoon into a greased and lined tin, or two tins. Bake on 180C/350F/gas mark 4.

If you are just using a single tin you need about 45-55 minutes and make sure you line the sides so that the greaseproof protects the sides and top of the cake from burning. If you are using two separate tins 35-40 minutes should do the trick, and you only need to line the bottoms of the tins.

raspberry-ginger-honey-cake-recipe-6

Step six

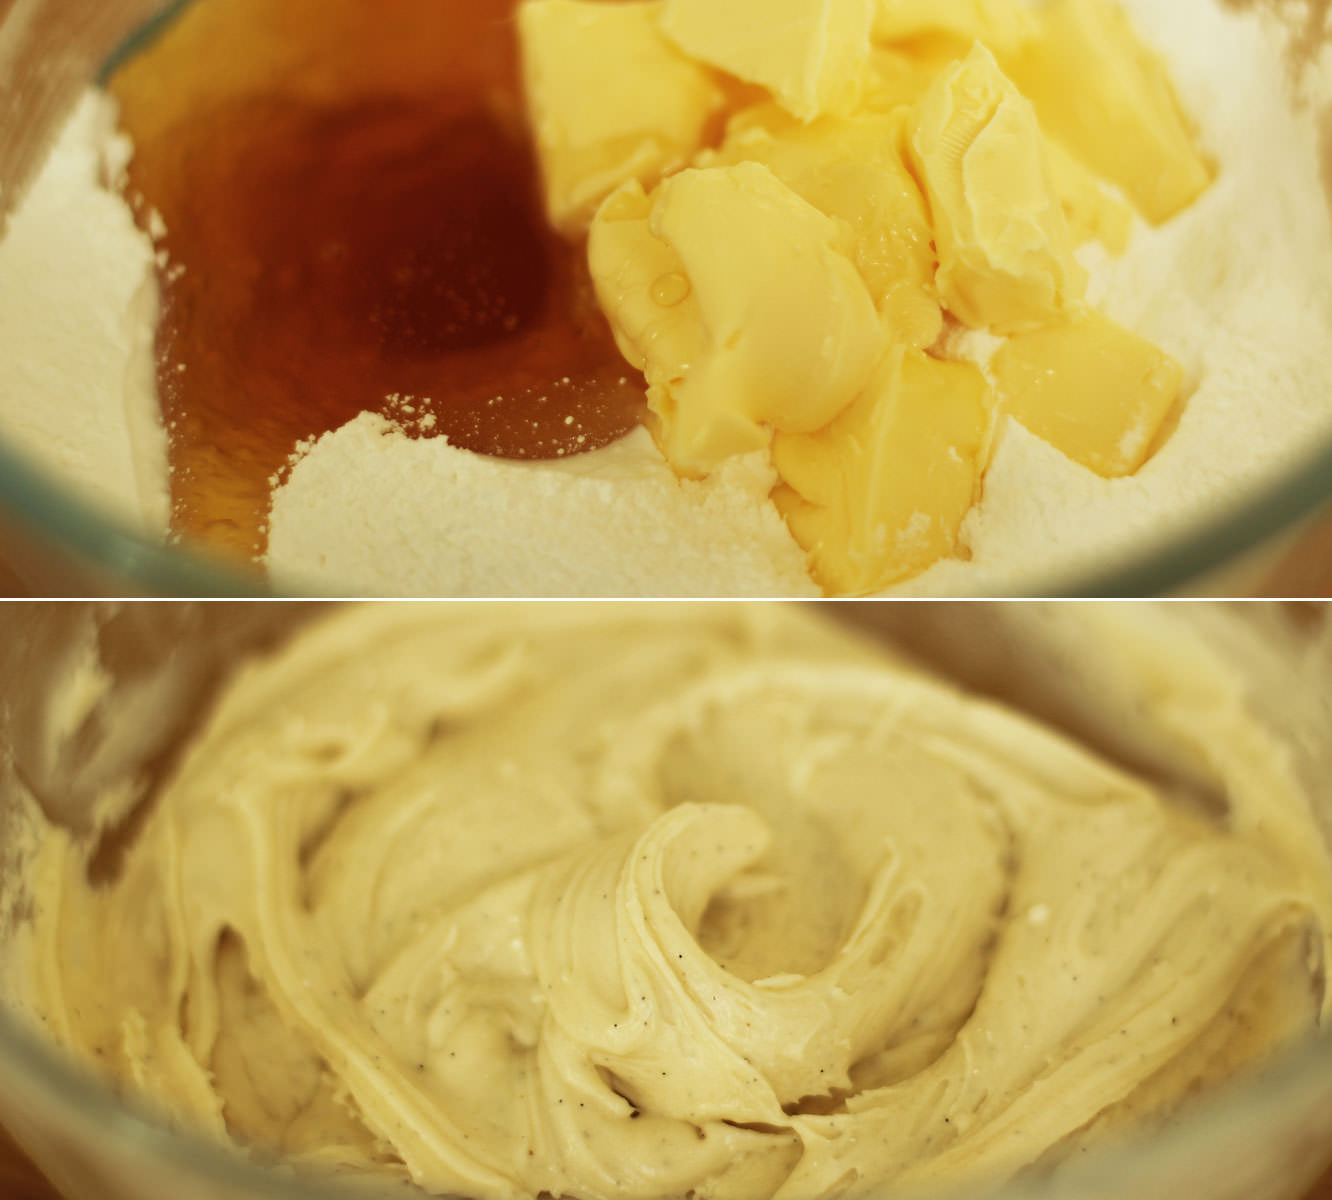
Whisk together the butter, icing sugar, vanilla and honey for the icing. Cover the bowl with a tea towel before turning on the whisk so you don’t get covered in icing sugar.

raspberry-ginger-honey-cake-recipe-gif

Step seven

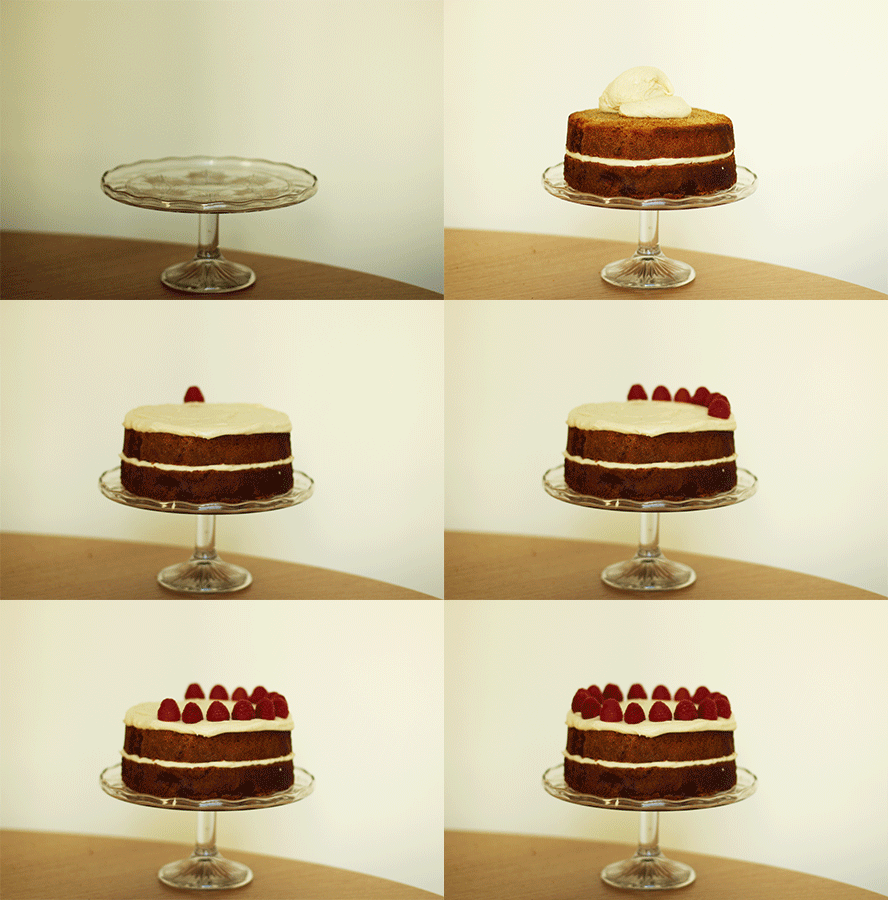
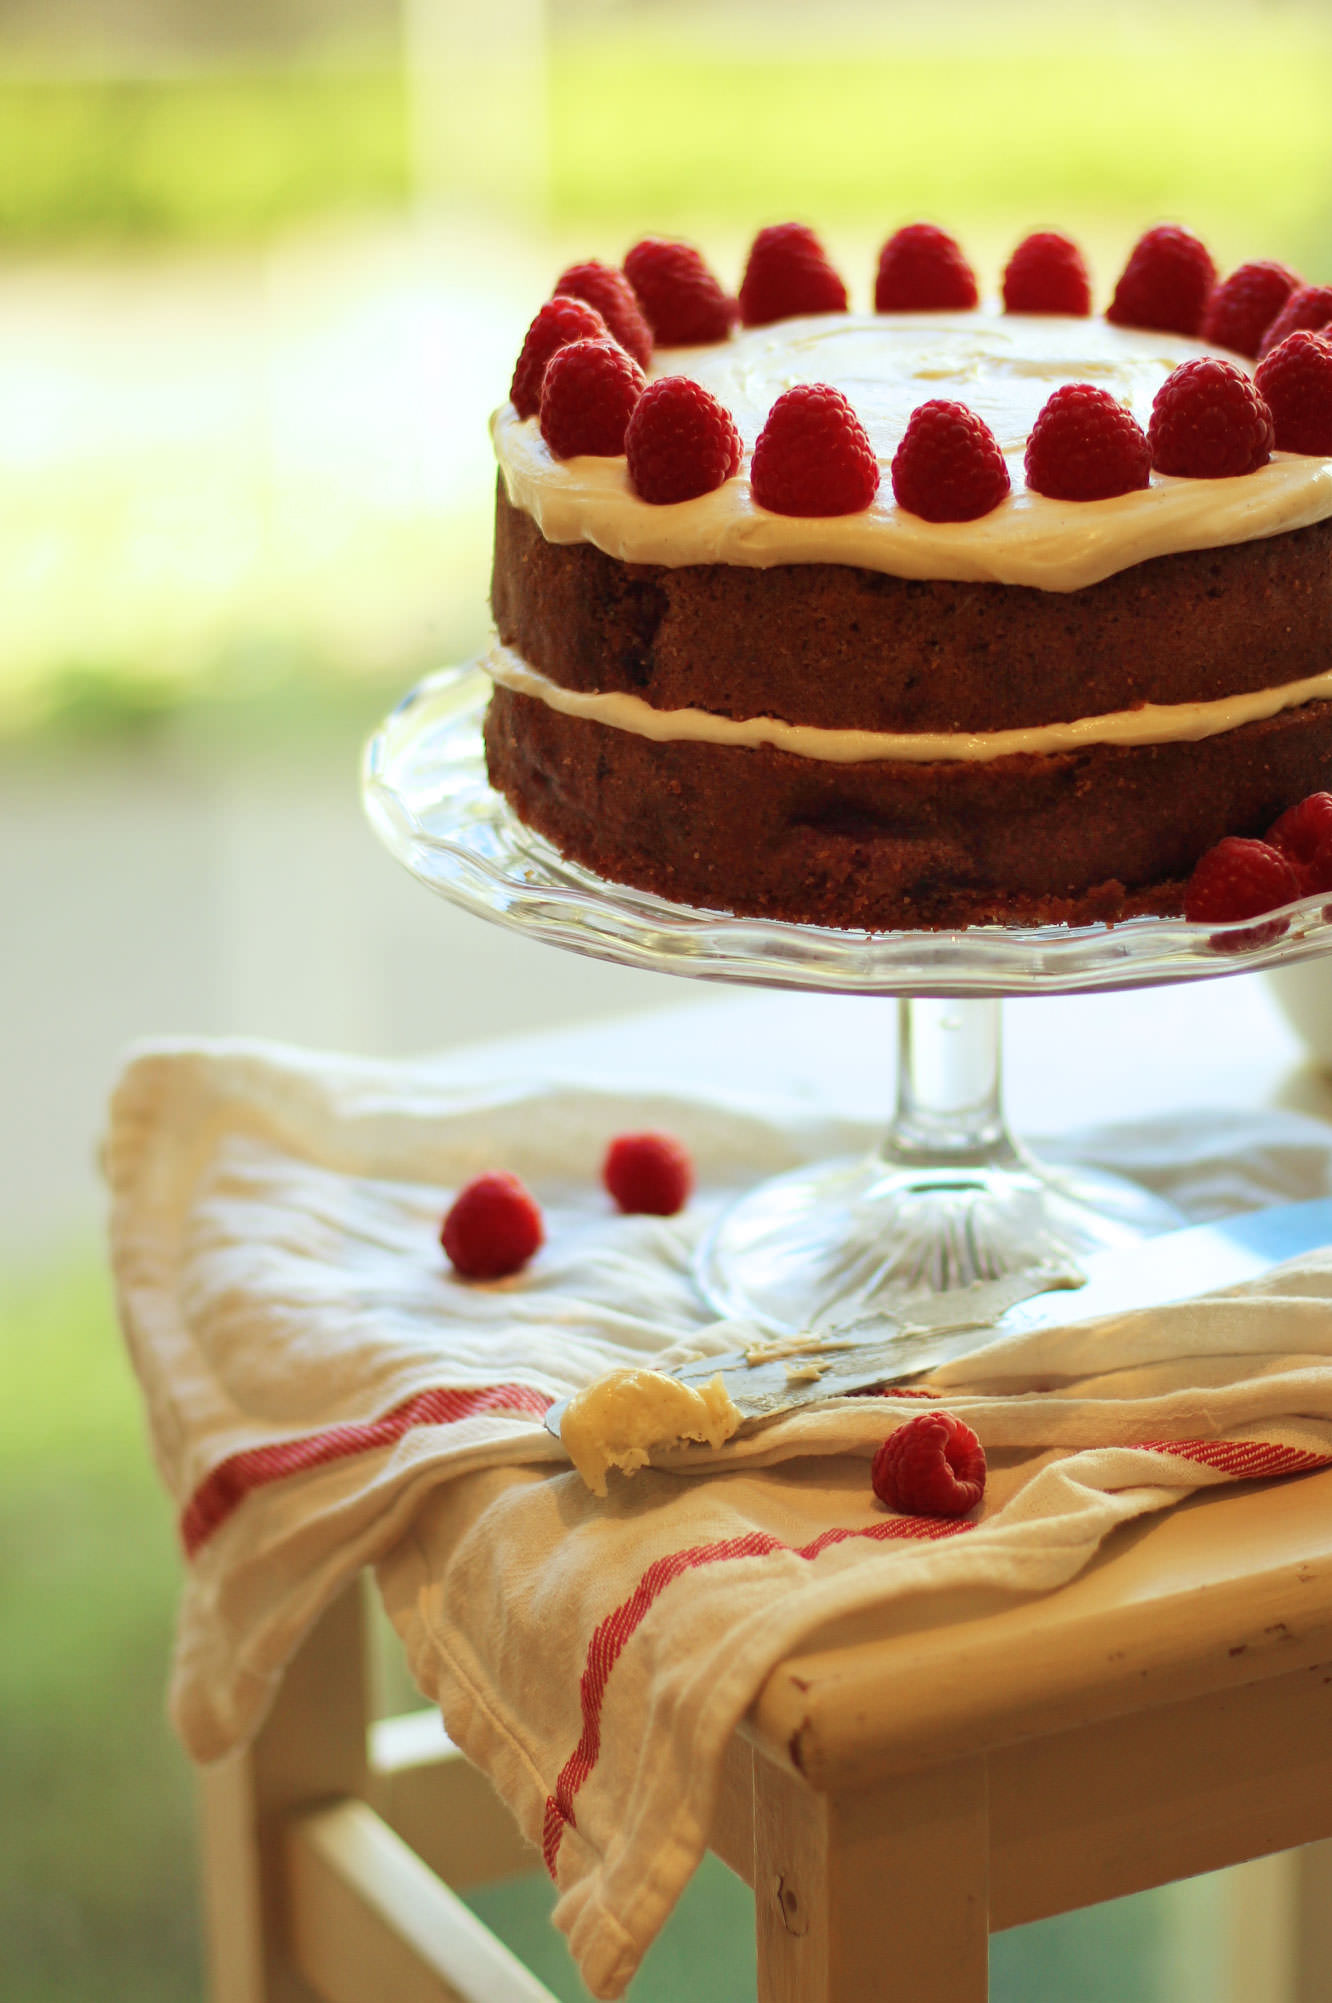
Once the cake has completely cooled assemble it. Use just under half the icing in the middle and the rest on top.

I then decorated with the remaining raspberries, but feel free to get creative!
raspberry-ginger-honey-cake-recipe-7

raspberry-ginger-honey-cake-recipe-8

Scrub-a-dub-dub

Welcome back chaps, I hope you had a lovely weekend and are now stuffed full of last week’s roulade.

This week’s post is a little more January friendly – it doesn’t involve eating and will help save a few pennies too. Since the Christmas drinks specials season came to an end I’ve been missing a certain honey and almond hot chocolate and planning to concoct something with those flavours for fabrefaction. I didn’t expect it to not be for consumption but there you go.

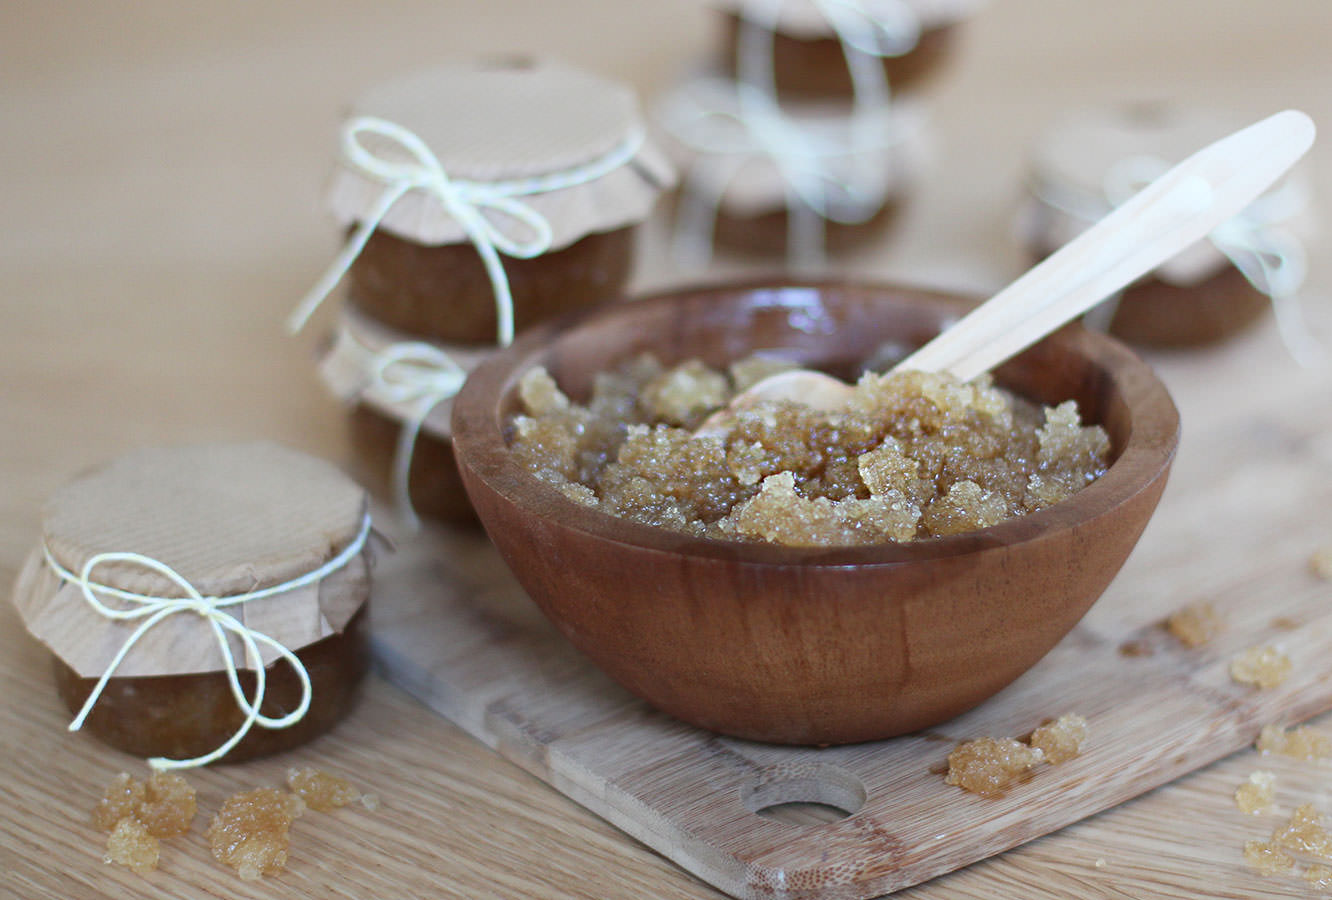
I thought it would be fun to give some favours the ladies who came to our little sleepover last week. This scrub is a great little gift on the cheap and would work well for favours for a hen party/bridal shower or similar.

honey-and-almond-homemade-sugar-scrub-1
You will need

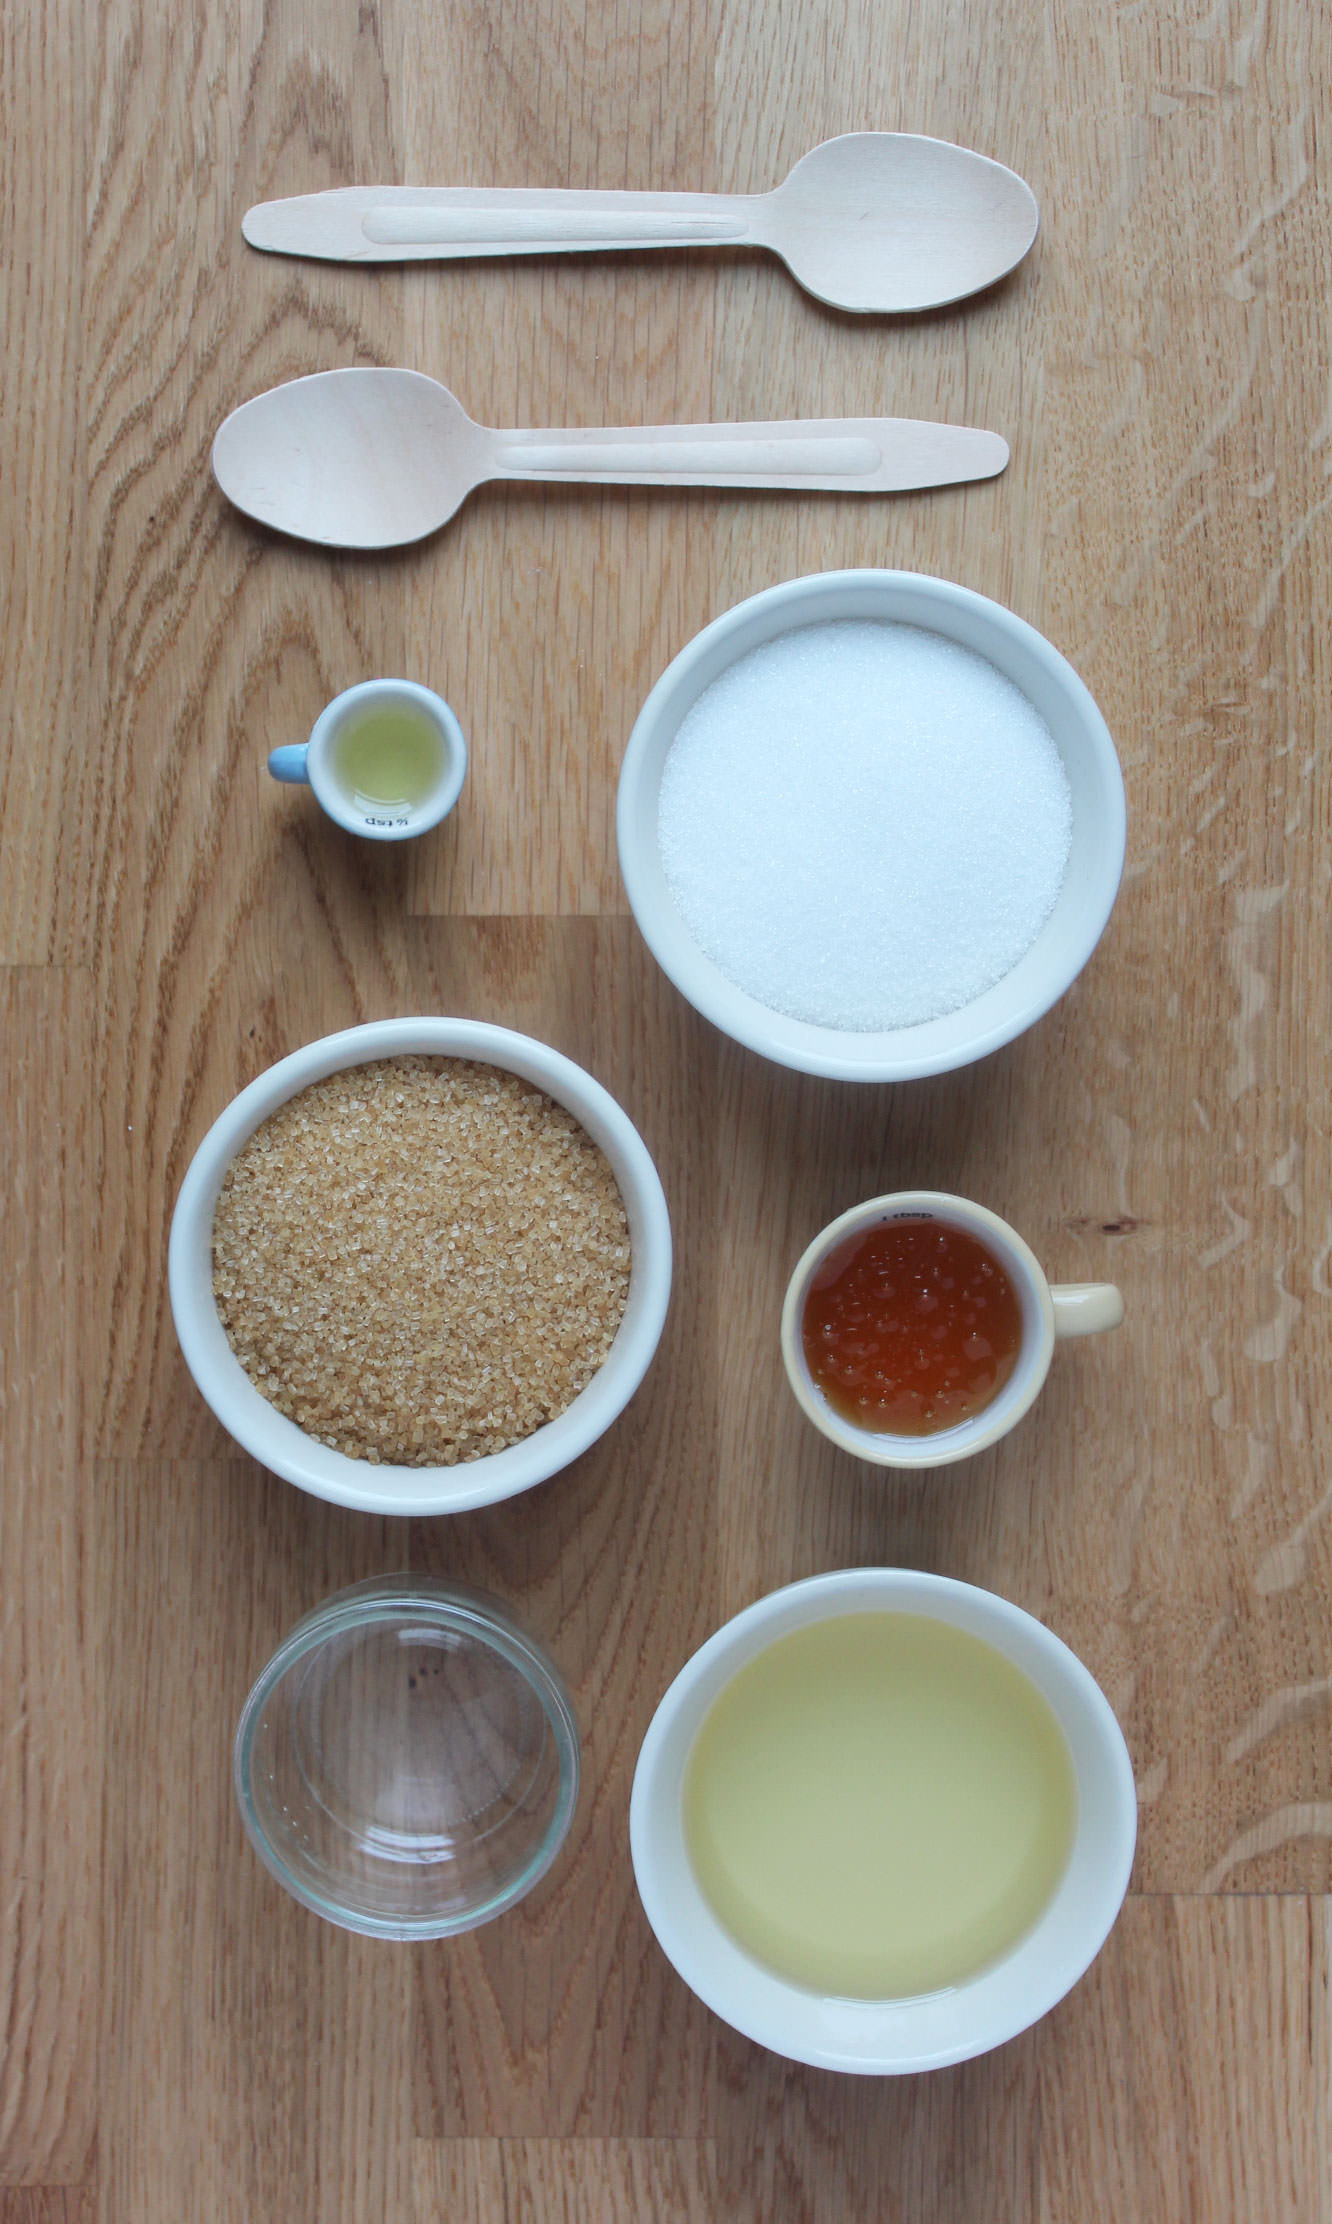
2 cups Demerara sugar

1 cup Granulated sugar

1/4 cup Walnut oil

1/2 cup Sunflower/vegetable oil

1/2 cup Clear honey

2 tsp Almond extract

(Makes six small jars)

honey-and-almond-homemade-sugar-scrub-2

Step one

There really only is one step. I couldn’t even think of a gif this week.

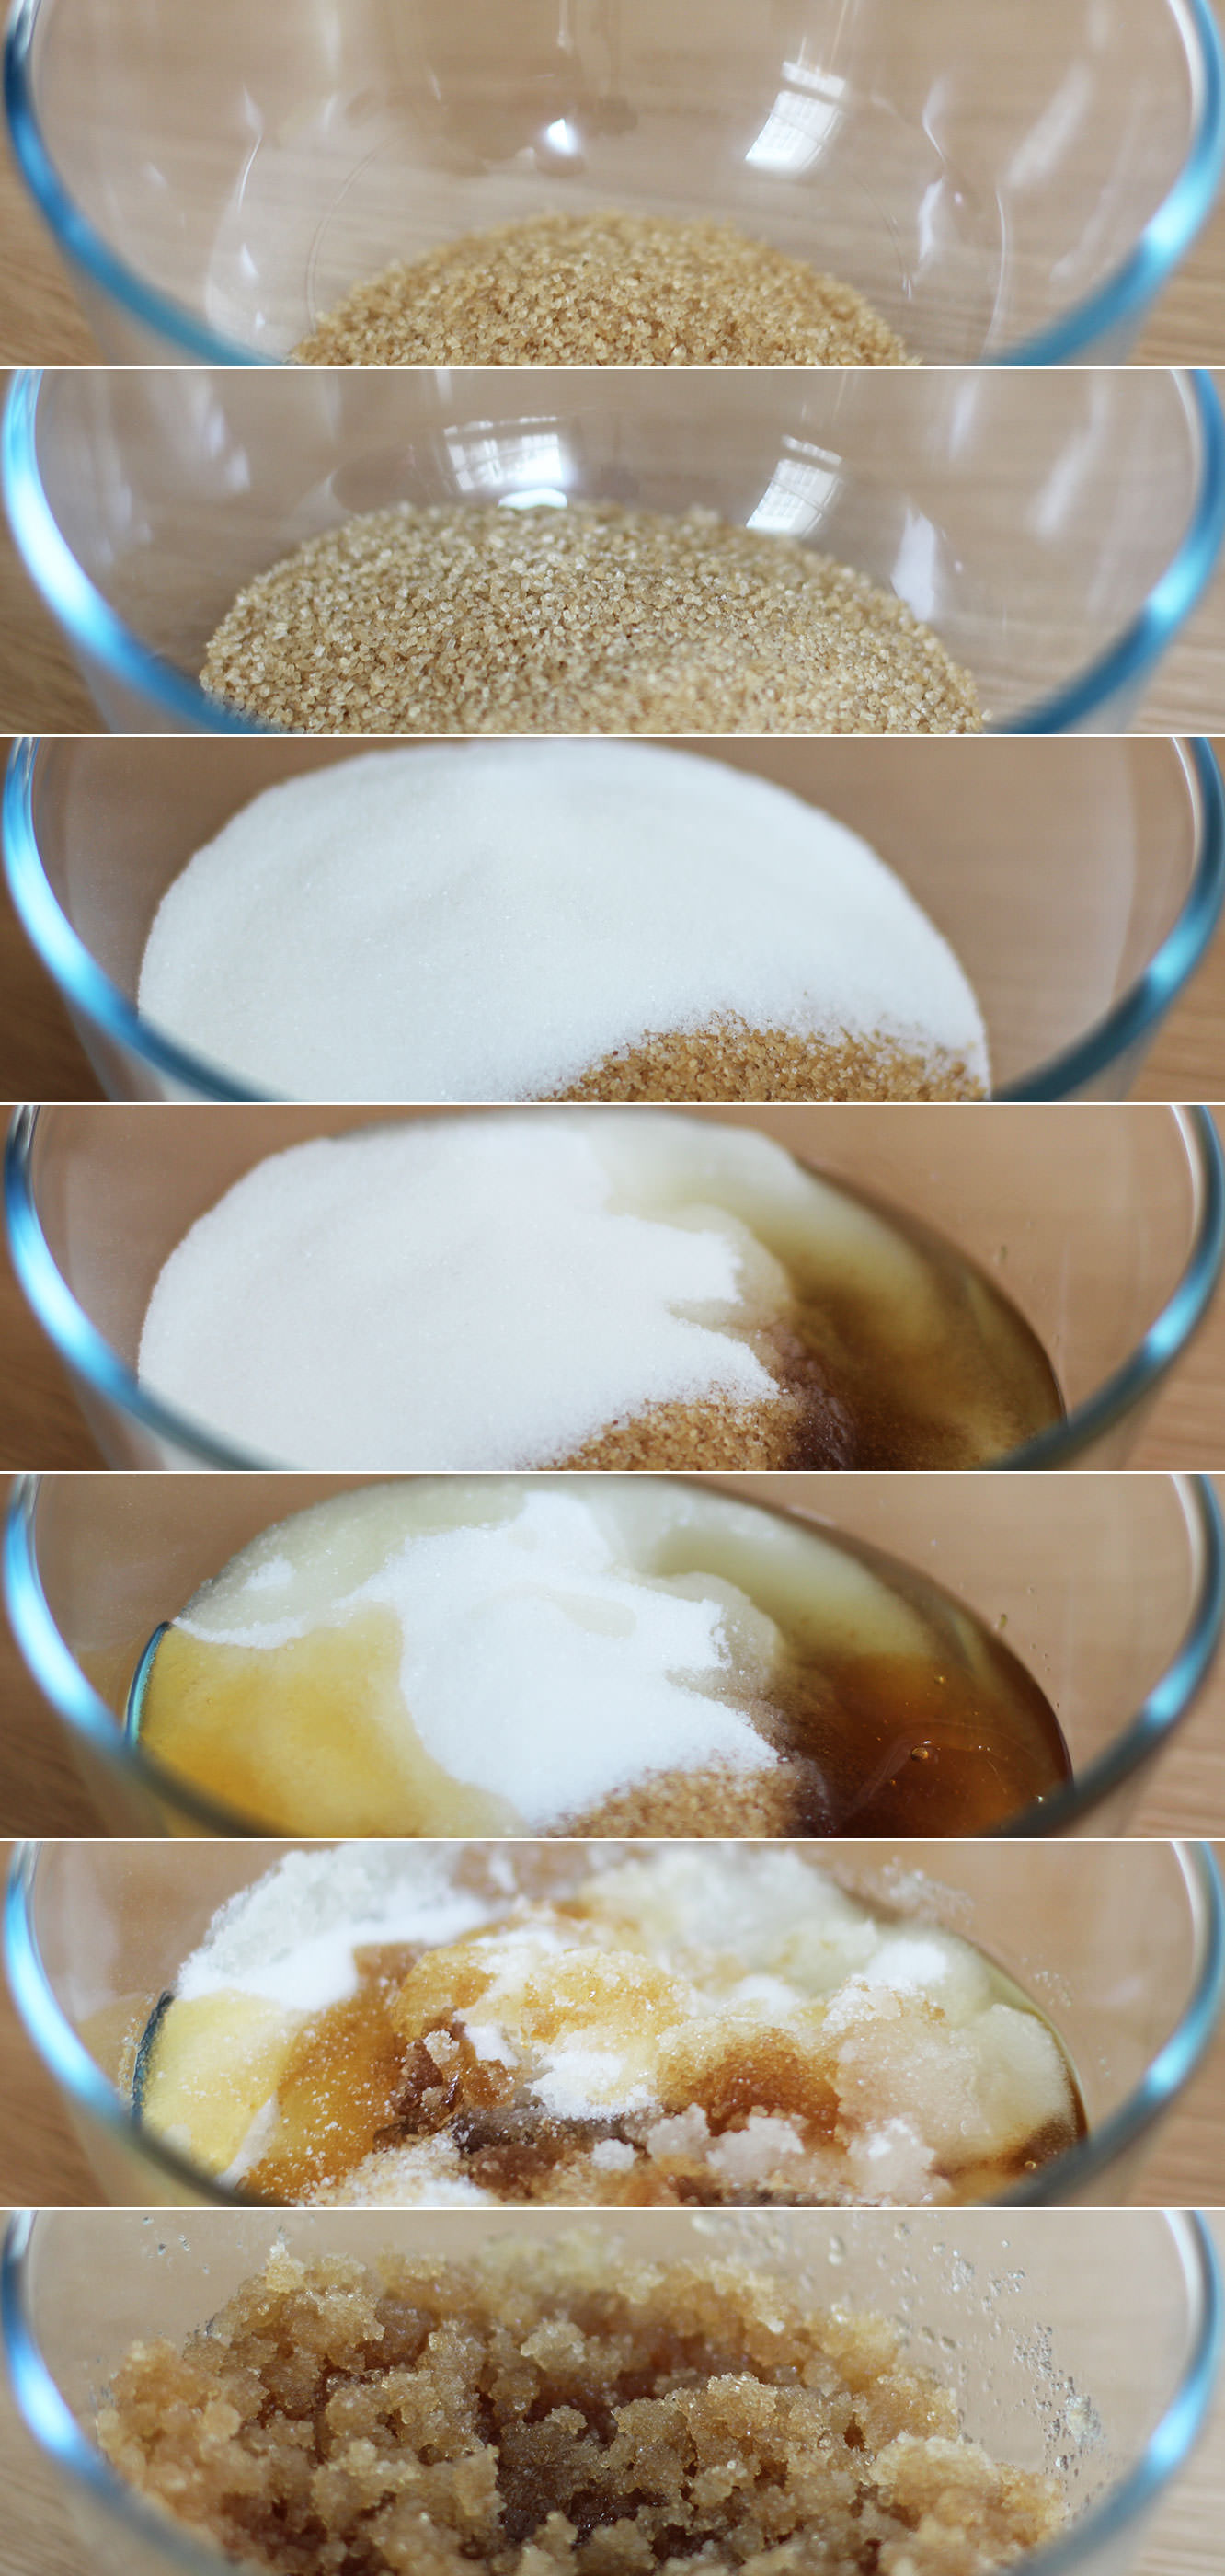
Take all the ingredients and mix them together.

honey-and-almond-homemade-sugar-scrub-3

Step two

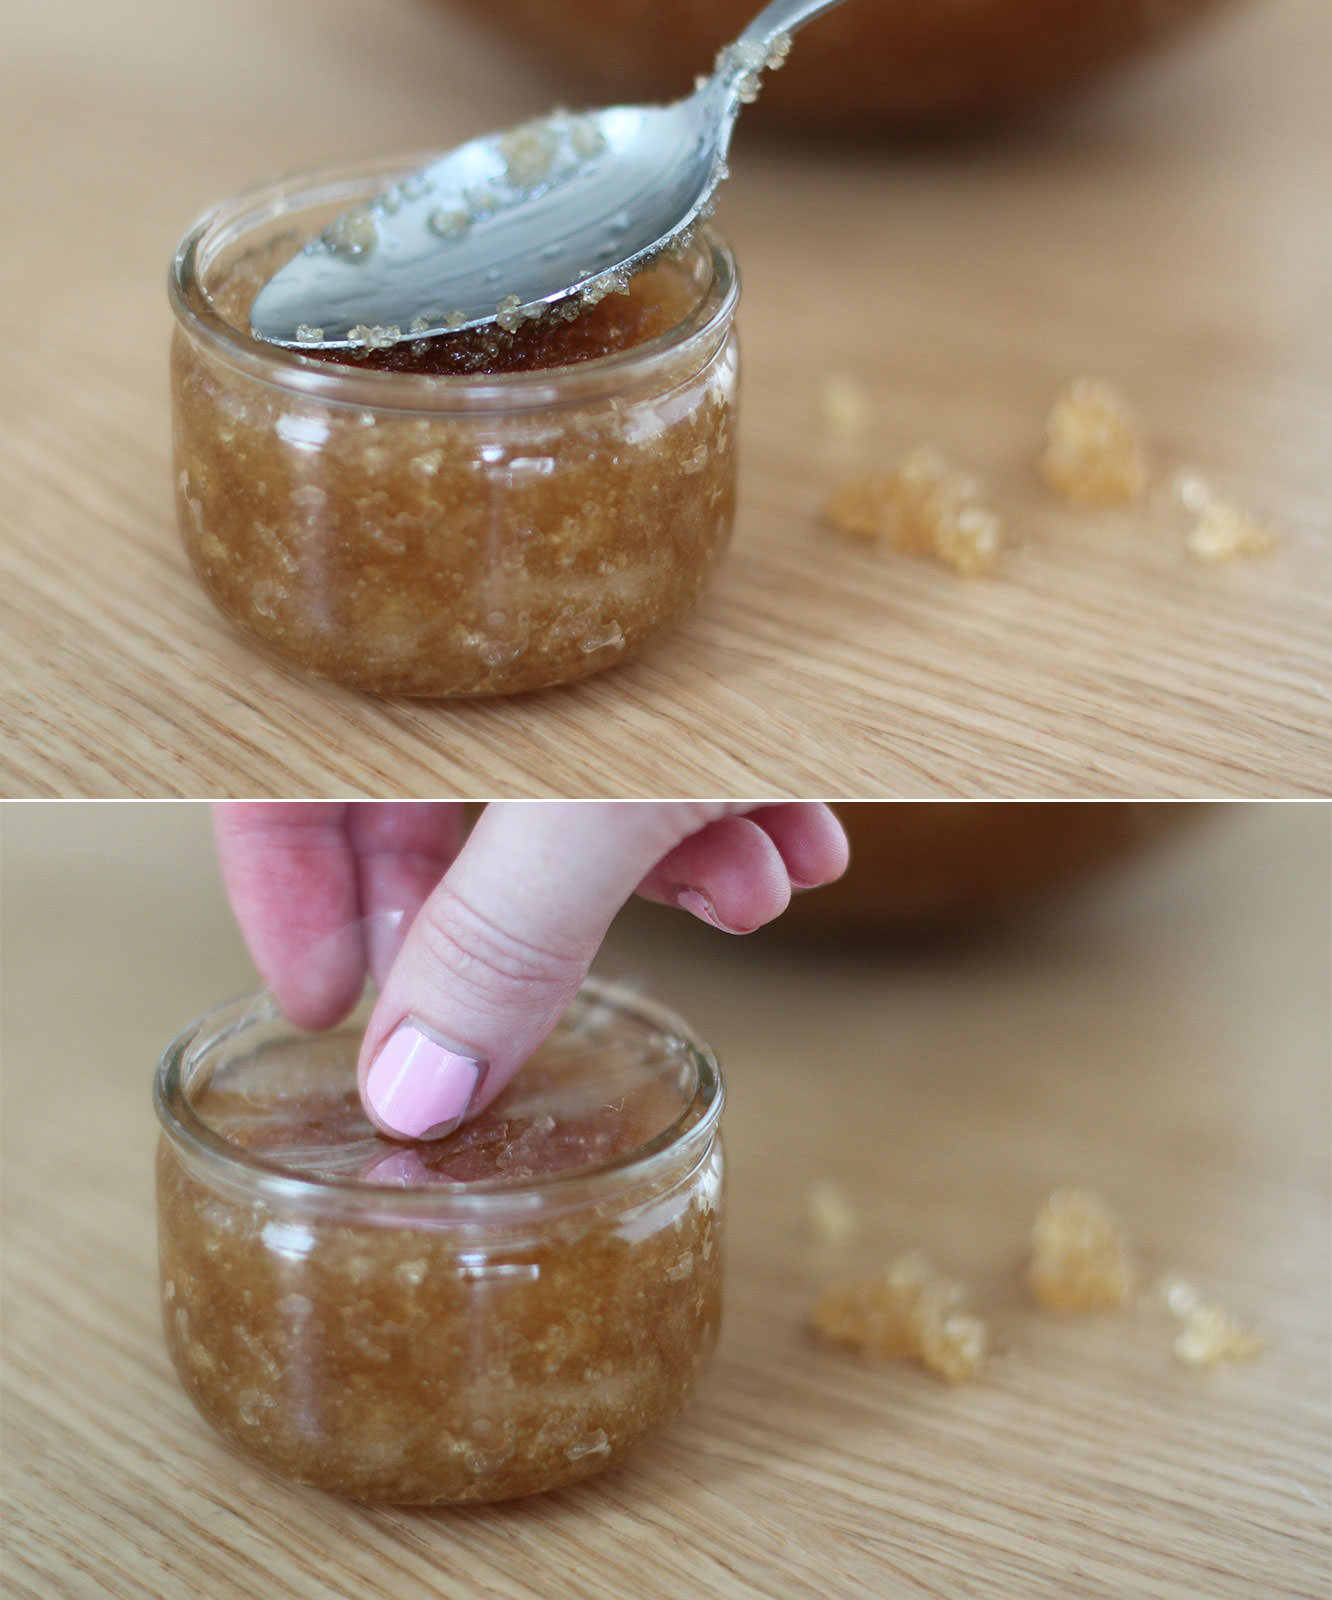
If you’re gifting these then you might want to use little ramekins or jars. I recommend something with a lid to be honest, I used cellophane to seal the scrub in. I’ll be honest, this was with mixed success – just keep them upright if you go for this option to stop the oil leaking.

honey-and-almond-homemade-sugar-scrub-4

Step three

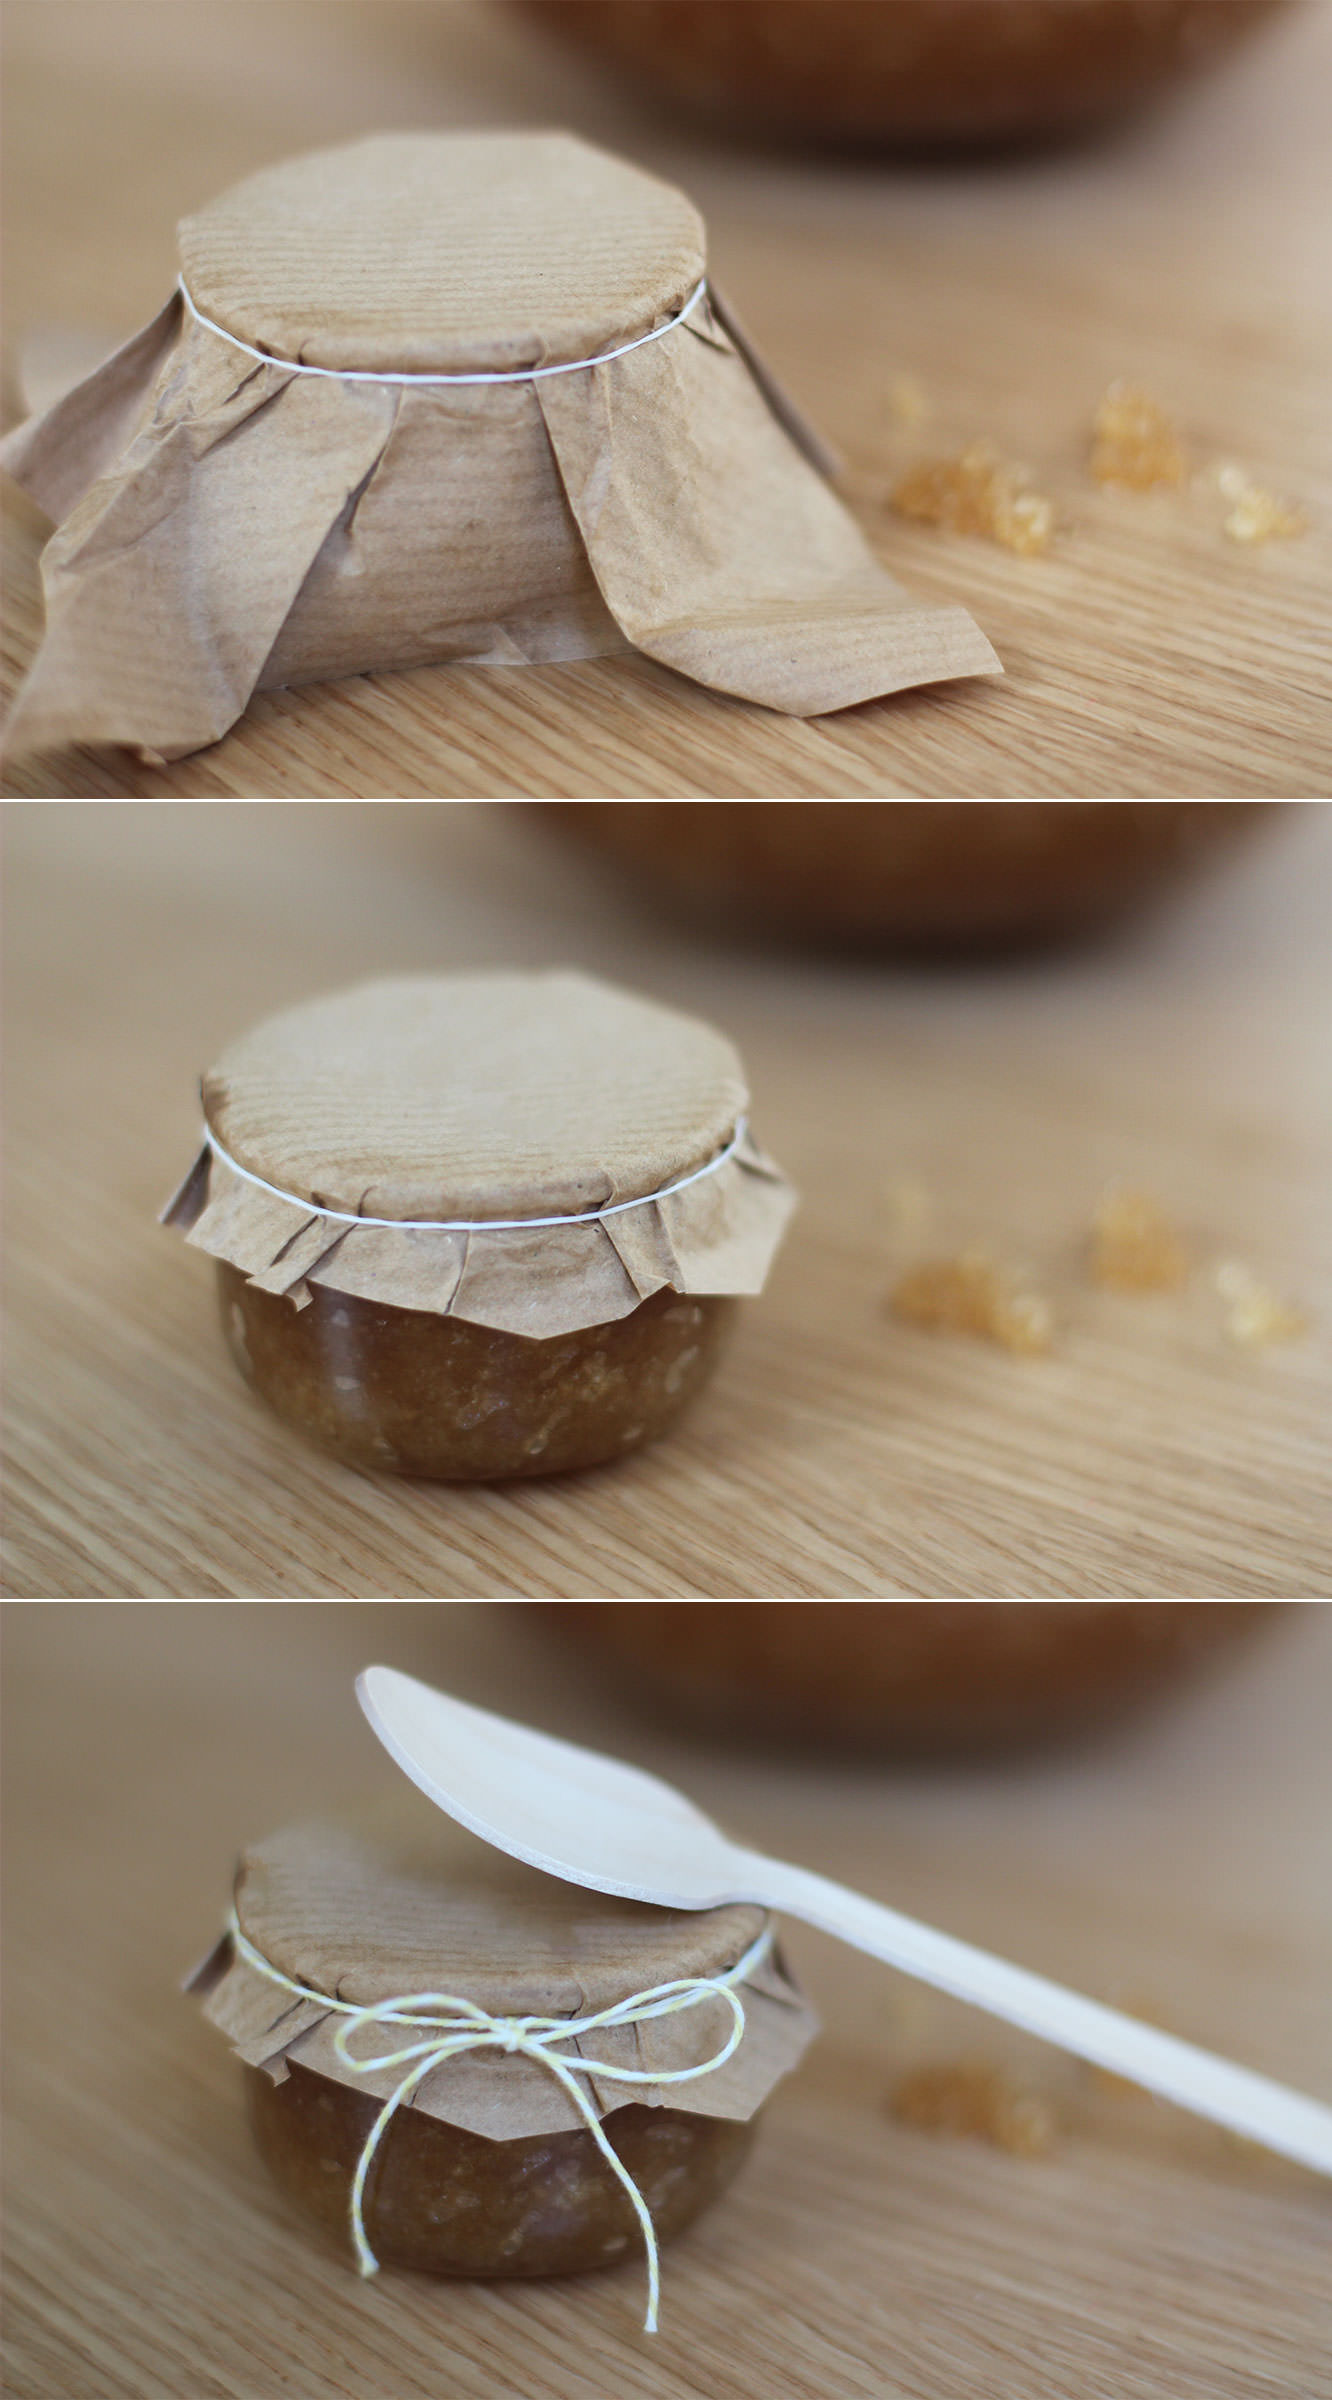
Using paper or fabric (I thought brown paper added nicely to the natural look and feel) cover the pots.

Make sure it;s a larger piece than required. Fasten with a loom band (find a small child who’s become bored of them and pinch a few).

Step four

Trim the edges of the paper or fabric. If using fabric I recommend pinking shears for the job to stop it fraying.

Step five

Tie a nice piece of string/twine/ribbon around the rim to cover the loom band. Depending on the size of the jar you might want to tie a small wooden spoon to it at this point (the scrub settles and needs a little stir before use).

I left the spoons loose because they looked novelty big in comparison to the jar. If you’re in the UK I got these from Tiger.

honey-and-almond-homemade-sugar-scrub-5

Happy scrubbing!

Rhubarb rhubarb rhubarb

Summer for many a gardener means plucking berries from their carefully loved and tended to allotments. Now, in recent years Ma has joined the grow-your-own trend with considerable zeal. To be quite honest this surprised us all immensely, as besides the single hardiest house plant you have ever known (surviving some very aggressive re-potting exercises), everything green that has entered the house since I can remember has wilted before our eyes. It’s a curse. There are no green fingers under this roof.

Fortunately, along with Mother’s rather optimistic plan to convert a section of the garden into a fruit and veg patch, came Ed; one of her colleagues complete with an allotment and a willingness to provide some plants he had given the best possible start in life.

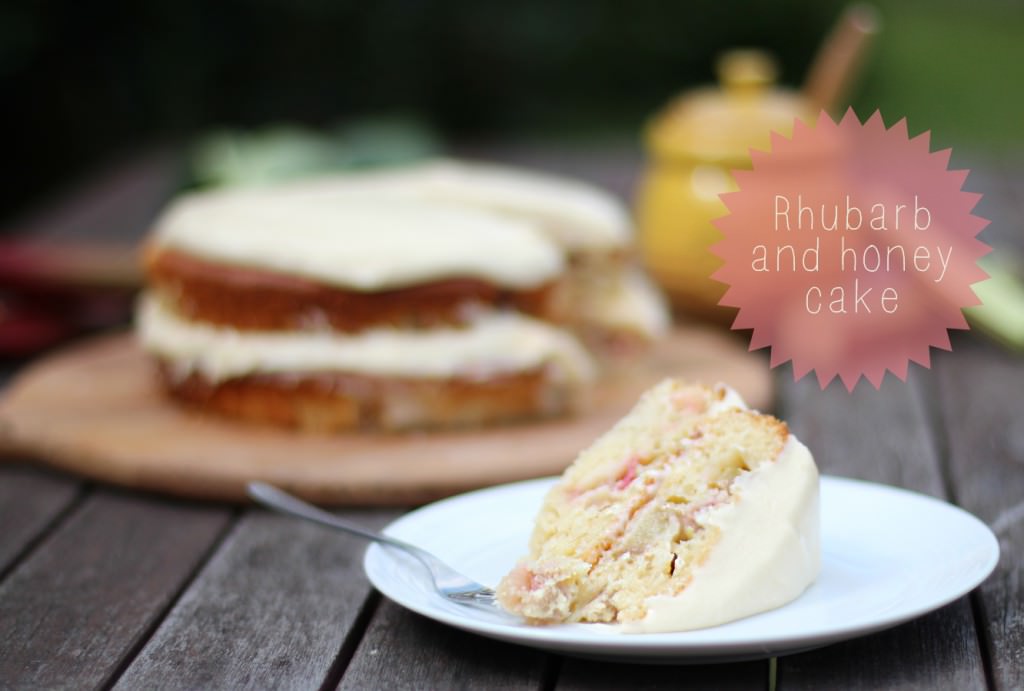
Against all the odds (and I honestly cannot overstate said odds), fruit and vegetables began to grow! This year I decided to combine my love of baking and Mum’s little crop to give you a delicious rhubarb and honey cake recipe.

Don’t turn your nose up until you’ve tried it; I’m a chocolate girl through and through but even I have been back to the kitchen for a second slice of this chap.

First though, I think it’s only fair to offer a little round of applause to the grower for these beauties. Well done Mum, I wish I could say I always believed in you, A*.

rhubarb-honey-cake-recipe-1

rhubarb-honey-cake-recipe-2

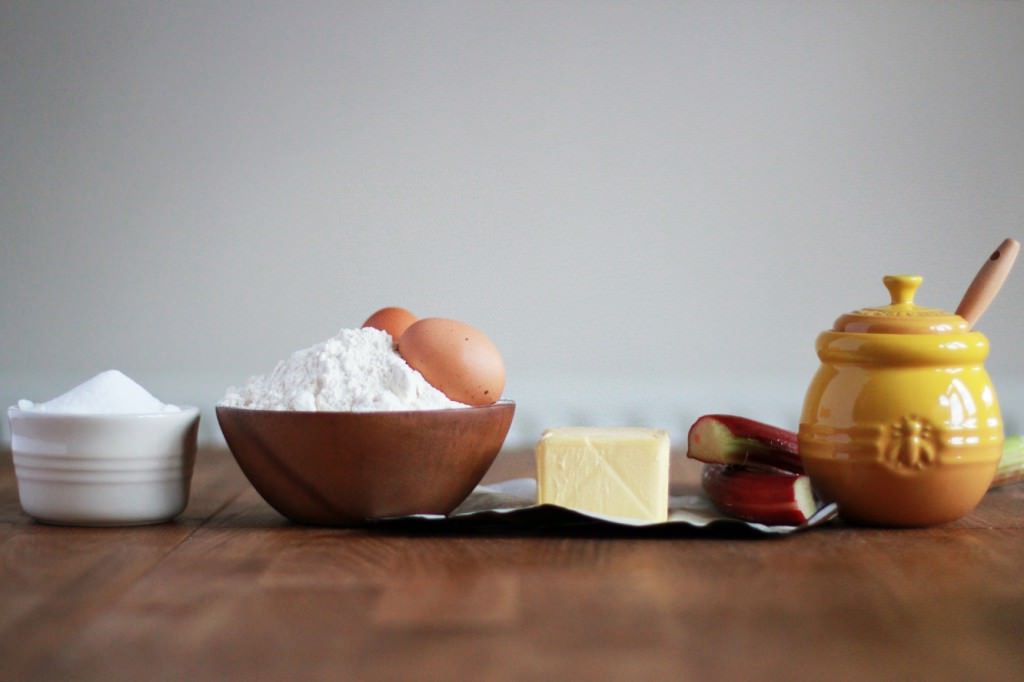
You will need

For the cake

250g/9 oz Caster sugar

250g/9oz Self raising flour

200ml Buttermilk

50g/2 oz Butter

2 Large eggs

1tsp Baking powder

350g/12 oz Rhubarb

For the icing

350g/12 oz Icing sugar

150g/5 oz Softened butter

150g/5 oz Honey

50ml Buttermilk

1-2tsp Vanilla Extract

rhubarb-honey-cake-recipe-3

Step one

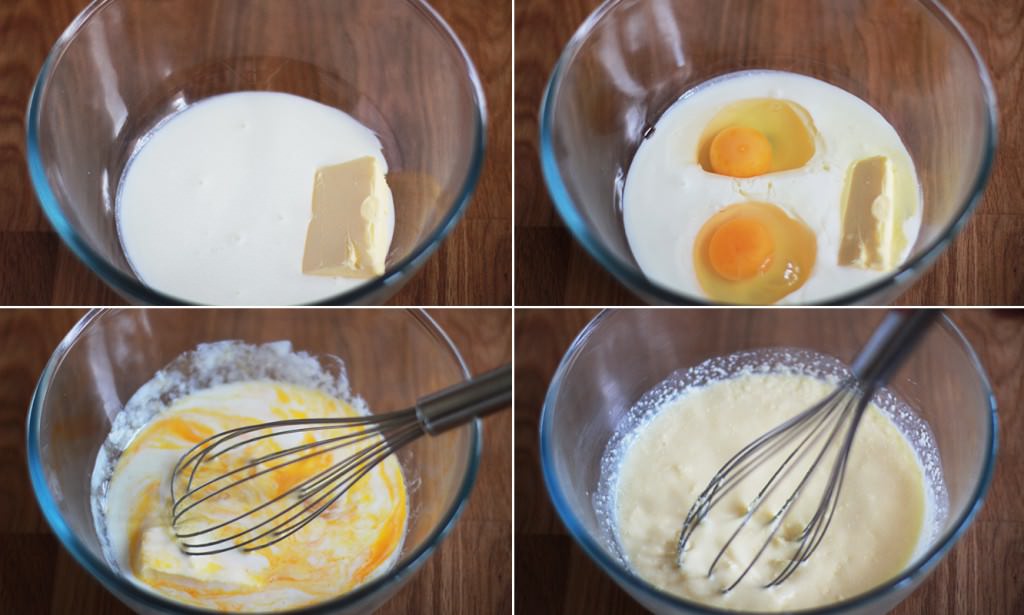
Combine the buttermilk, eggs and butter.

Don’t worry if it’s a bit ‘curdy’ at this stage, if the butter isn’t super soft that will happen, but it’s not an issue, honest!

rhubarb-honey-cake-recipe-4

Step two

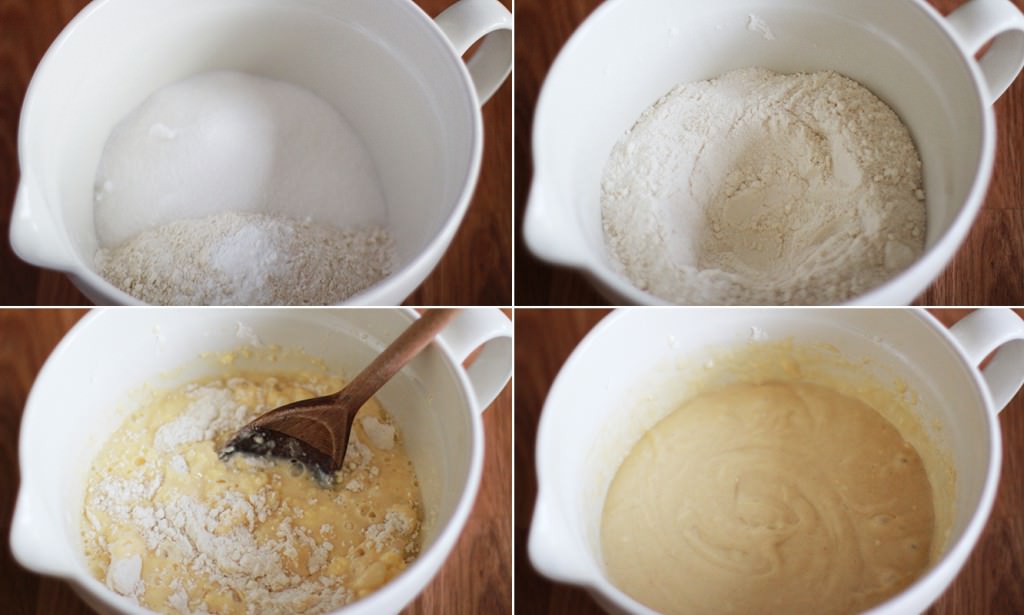
Mix together the sugar, baking powder and flour in a separate bowl. Form a well in the middle.

Step three

Pour the wet ingredients into the dry and stir until smooth. This cake mix is a little more batter-like than your average because of the buttermilk, so if you’re used to something a bit less sloppy, don’t worry.

rhubarb-honey-cake-recipe-5

Step four

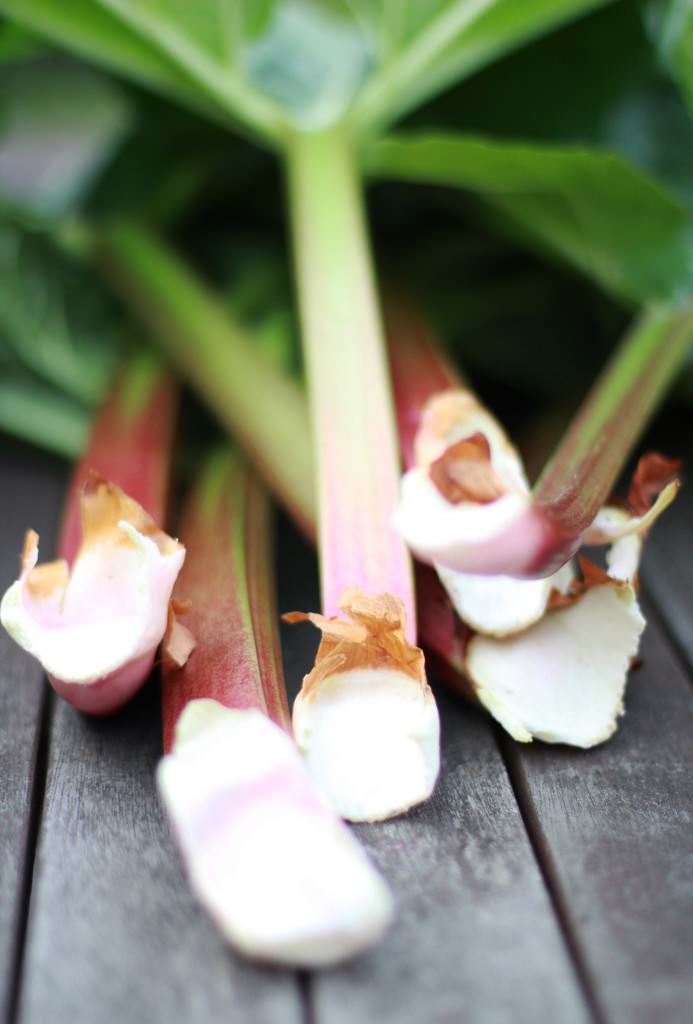
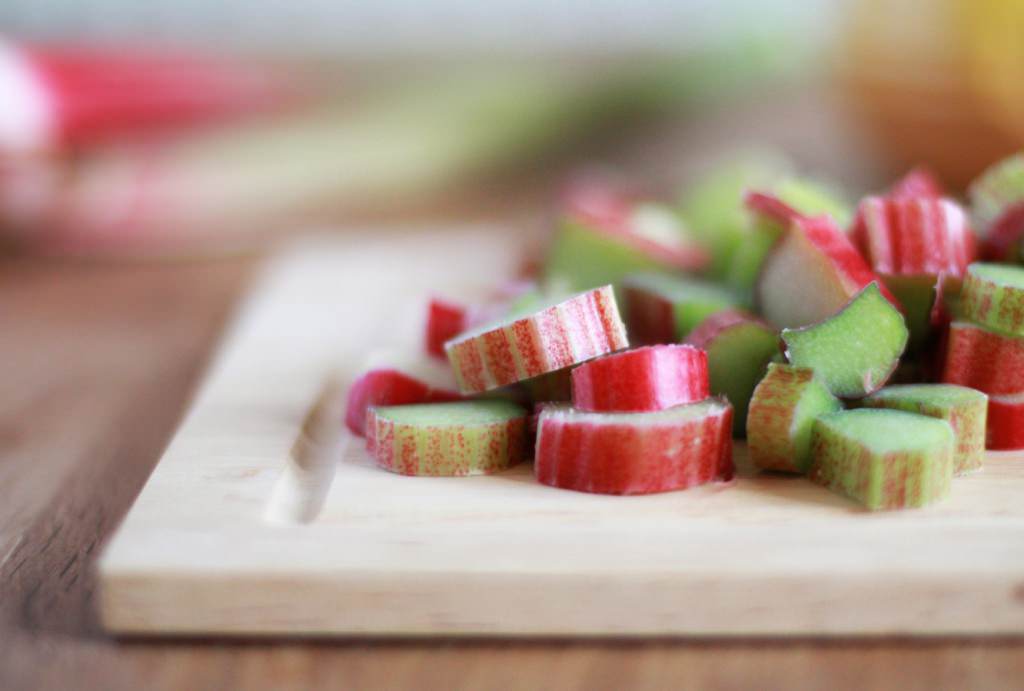
Chop up the rhubarb into slices approx 1cm thick. Get rid of any leaves and the weird husk type bits on the bottom if it’s home grown; I also got rid of a few stringy bits, but you don’t need to peel it.

Whether or not your rhubarb is forced (grown out of season) or main crop like Ma’s you don’t need to boil it or add any extra sugar when baking it into a cake like this. The sweetness of the honey and the rest of the sugar in the sponge off-sets the sharper rhubarb taste really well.

rhubarb-honey-cake-recipe-6

Step five

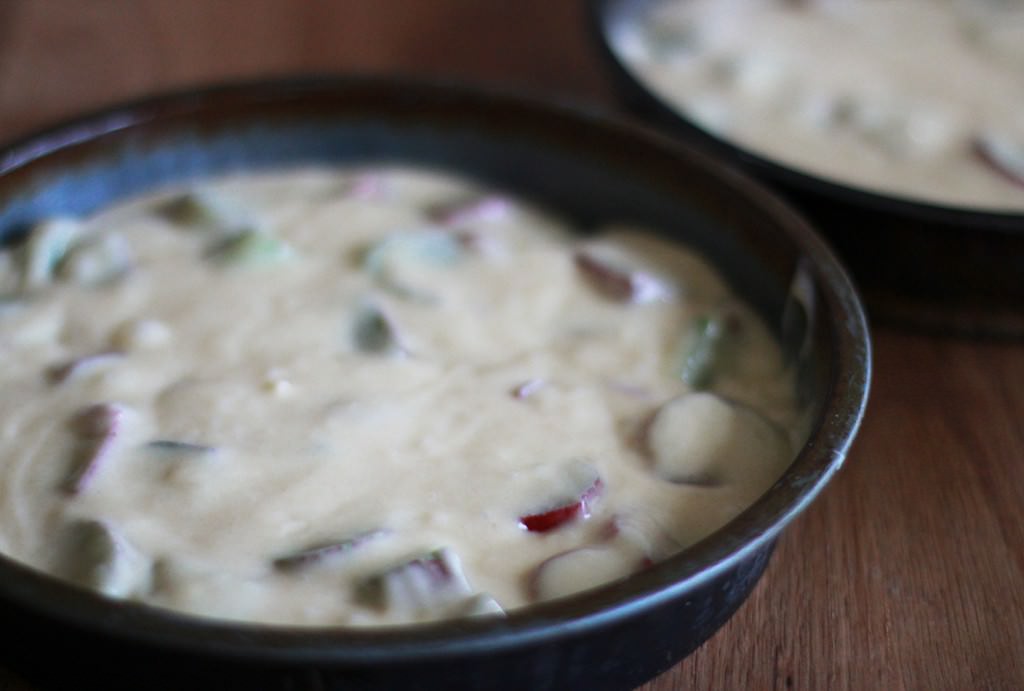
Grease and line two cake tins. Stir rhubarb into the batter and divide between the tins.

Bake on gas mark 4/ 180 C/ 350 F for 30-40 minutes until golden on top and it springs back when you touch the top.

rhubarb-honey-cake-recipe-7

Step six

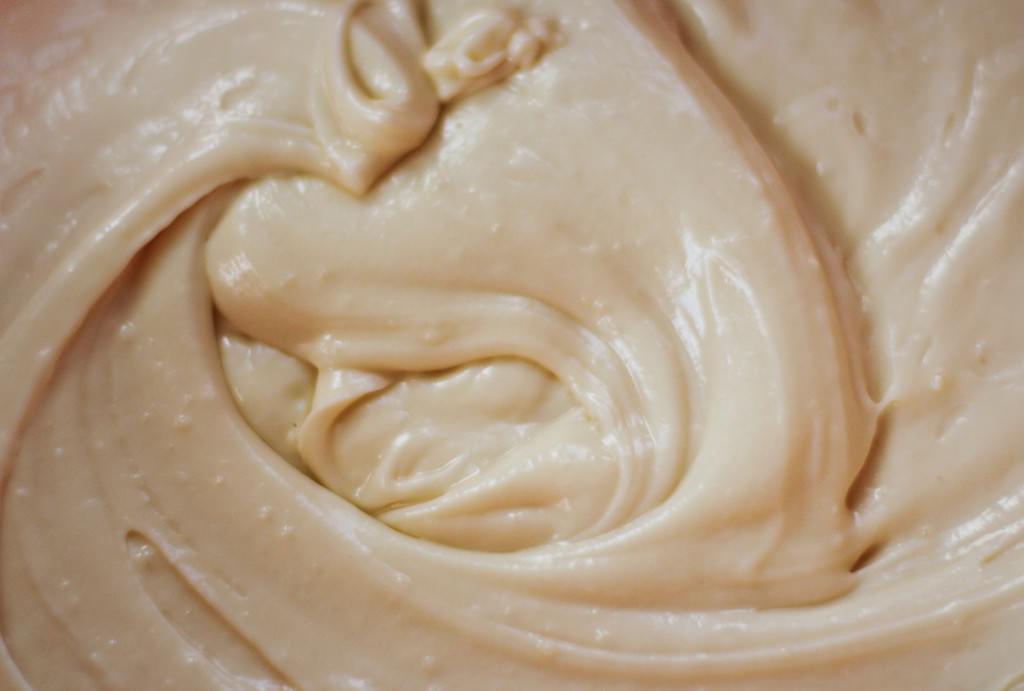
Beat together the honey, softened butter, icing sugar, buttermilk and vanilla extract to make the buttercream icing.

It’s worth popping this in the fridge for about 30 mins before using.

rhubarb-honey-cake-recipe-8

Step seven

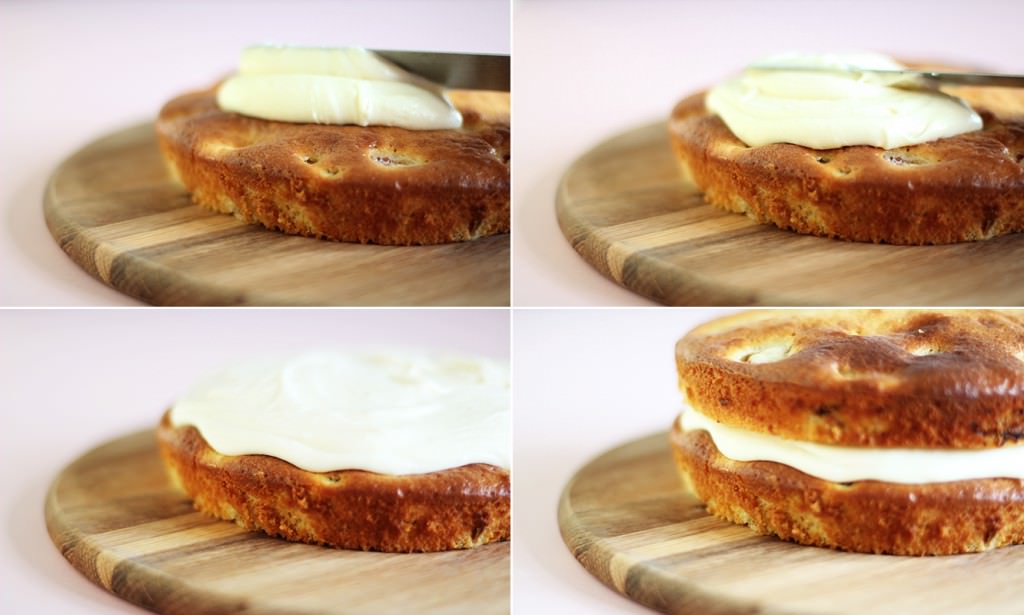
Once the cake has cooled completely, use a palette knife or the back of a spoon to spread half the icing onto the bottom cake. Don’t go right to the edge of the sponge, as the weight of the top cake will push it out a bit further and you don’t want it dribbling down the sides.

rhubarb-honey-cake-recipe-9

Step eight

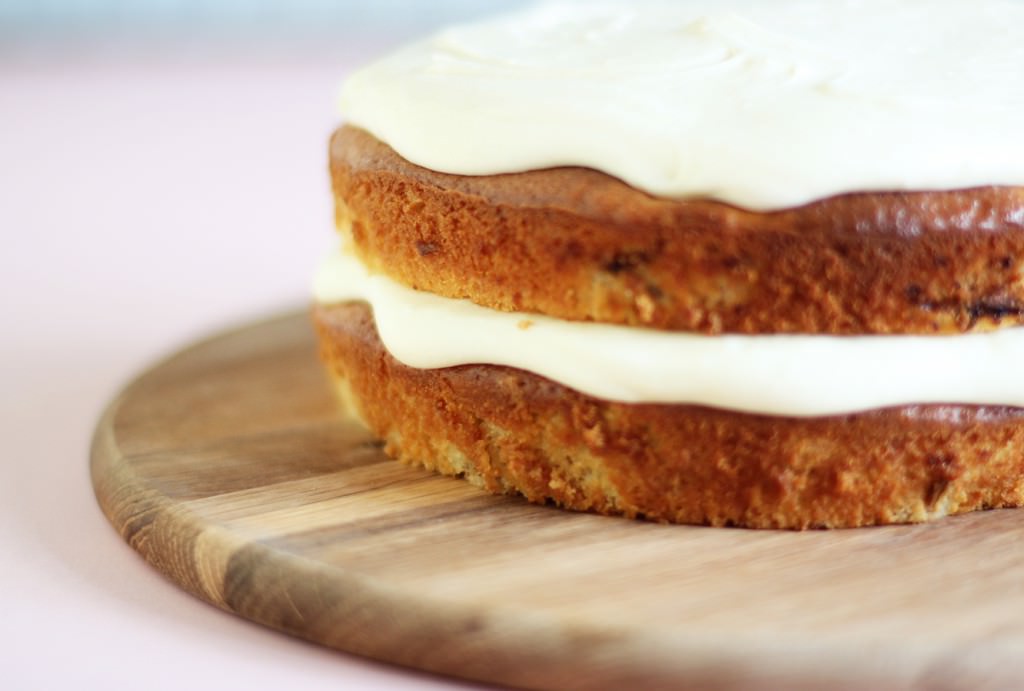
Cover the top in icing too.

I’ll be honest, I had a little left over, but I kind of made the recipe up as I went along so I’m not sure how to adjust so you have the perfect amount of icing, so you’ll just have to use the rest on some ice-cream or something.

rhubarb-honey-cake-recipe-10

Step nine

Eat until you can’t move.

Fudge for mama

Hello there, apologies for the short blogging hiatus; life happens sometimes, but I appreciate you sticking with me.

This weekend I went to stay with my friend Beth before she goes on her trip. Being as Mother’s Day is so near (this Sunday for those of you in the UK), B and I thought we would make some fudge for our mummys.

Whether or not you have Mother’s Day coming up, I urge you to have a go with making fudge. It’s a bit of a rascal but there’s lots to feel good about when you get it right, I’ve made quite a lot in my life time and so hopefully some of the below will help you avoid some of the fudging pitfalls.

Just a heads up, the batch below is fairly large, so unless you’re making it with a friend or for your Grandma too, you may want to cut the quantities in half.

how-to-make-honey-fudge-8

how-to-make-honey-fudge-1

You will need

1kg/2lb Granulated sugar

280g/10 floz Evaporated milk

120g/4 oz Clear honey

120g/4oz Salted butter

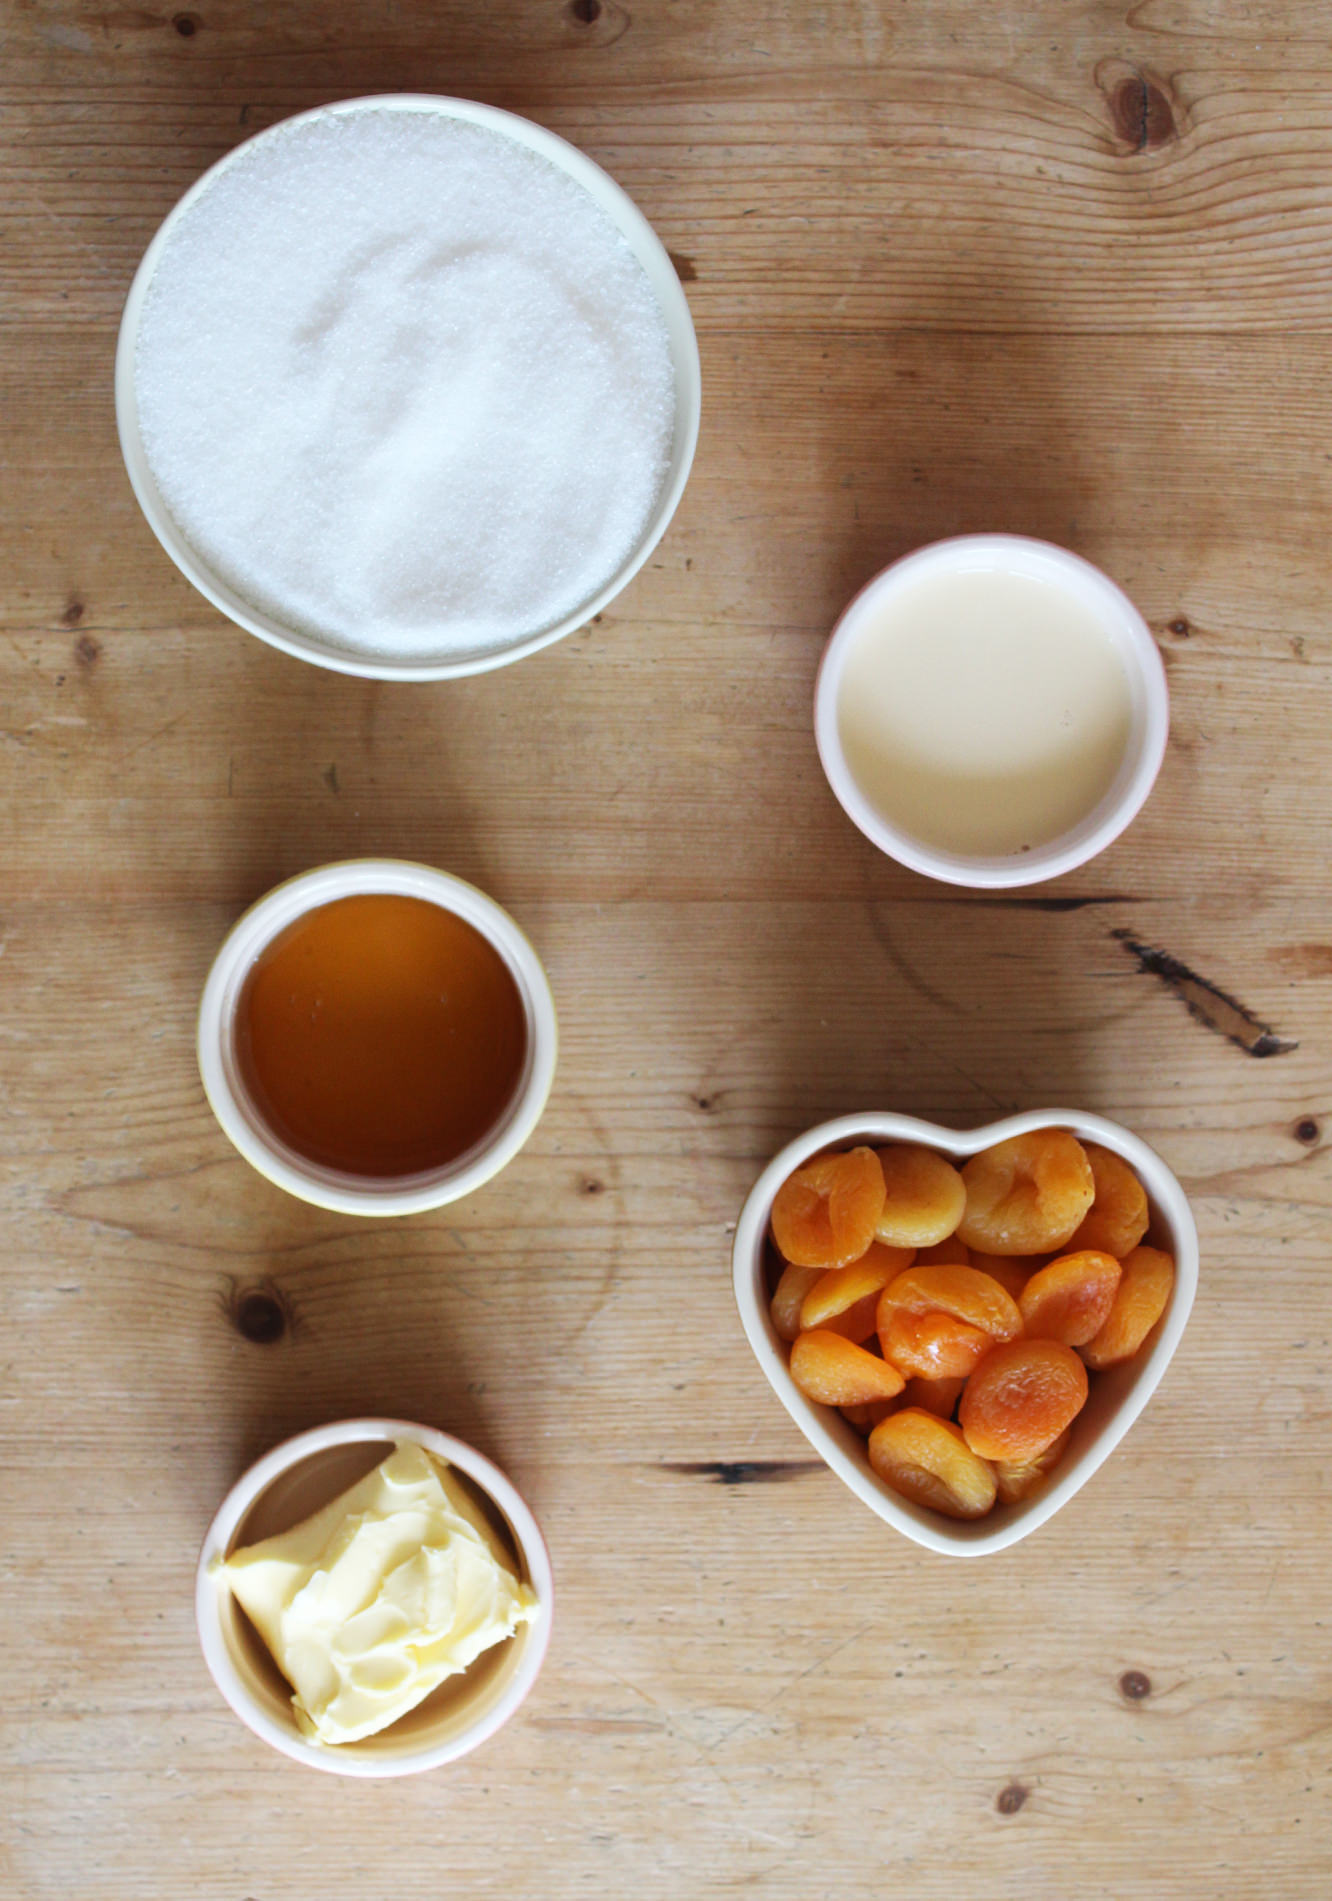
250g/9oz Dried apricots

1tsp of Liquid glucose (if you have it – not essential – but great)

Tray bake tin lined with greaseproof paper

Sugar thermometer (essential)

how-to-make-honey-fudge-2

Step one

Combine all the ingredients (minus the apricots) into a large heavy bottomed pan.

At home I use the pressure cooker, and at Beth’s we discovered this casserole dish worked pretty well. The pan should be quite large as the mixture will bubble up, and the sturdier it is the less likely your fudge is to scorch.

how-to-make-honey-fudge-3

how-to-make-honey-fudge-4

Step two

Melt ingredients on a reeeaaallly low heat.

Seriously. As low as your cooker goes. Impatience will not help you here.

This ensures all the sugar is dissolved before it boils, and should help to prevent sugar crystals forming.

You should stir gently to stop the mixture burning on the bottom of the pan. Pop your thermometer in at this point too.

This was the first outing of my rather swish thermospatula, above, so I could stir and measure the temperature at the same time. I know, I need to get out more.

how-to-make-honey-fudge-5

Step two and a half

Keep the fudge on a low heat, stirring gently.

It will begin to boil as above. Resist the urge to put your face in it, as good as it smells, that won’t end well for you.

This is where the thicker your pan the better, as this boiling stage should take around 10-15 minutes ideally. You want your fudge to reach soft ball stage on the thermometer or 115 degrees. Patience is the key here. You should the fudge thicken up and get darker evenly.

Step three (optional)

Once your fudge has reached 115 degrees pour immediately into an empty saucepan. Some fudge people will disagree with me here, as faffing about with fudge can cause crystallisation in the sugar. However, I’ve found that if I leave it in the original pan it carries on cooking and can become brittle. The trick is to do it straight away and don’t scrape the pan out or stir it once transferred.

Now, DO NOT TOUCH. Don’t allow pets, children or interfering family members near the fudge mix for at least half an hour. Preferably you want to wait until the thermometer hits about 50 degrees, but when I did this for a craft fair a few years ago I didn’t have the time to hang around, and found that half an hour was generally enough.

how-to-make-honey-fudge-6

Step four

While you wait, use scissors to chop the apricots into tiny pieces. These are an optional addition and can be substituted depending on your mum’s tastes. You may want to add a different dried fruit, some chopped nuts, or chocolate instead.

how-to-make-honey-fudge-7

Step five

Get a wooden spoon, summons all your arm power, and beat the mixture. If you have a stand mixer, you’re laughing at this stage, because it can take up to 15 mins sometimes…

About 5-7 minutes into your beating add the apricots (warning, if using chocolate chips you want to add them as late as possible so they don’t melt completely).

Keep going until the fudge becomes very thick, you still need it to be soft enough to spoon into the tin, so try not to take it too far. I didn’t have the chance to photograph this, so you will need to take your best guess. Here’s a clue though, your arm will be hurting you by now.

Step six

Spoon into your lined tin and leave to set.

how-to-make-honey-fudge-9

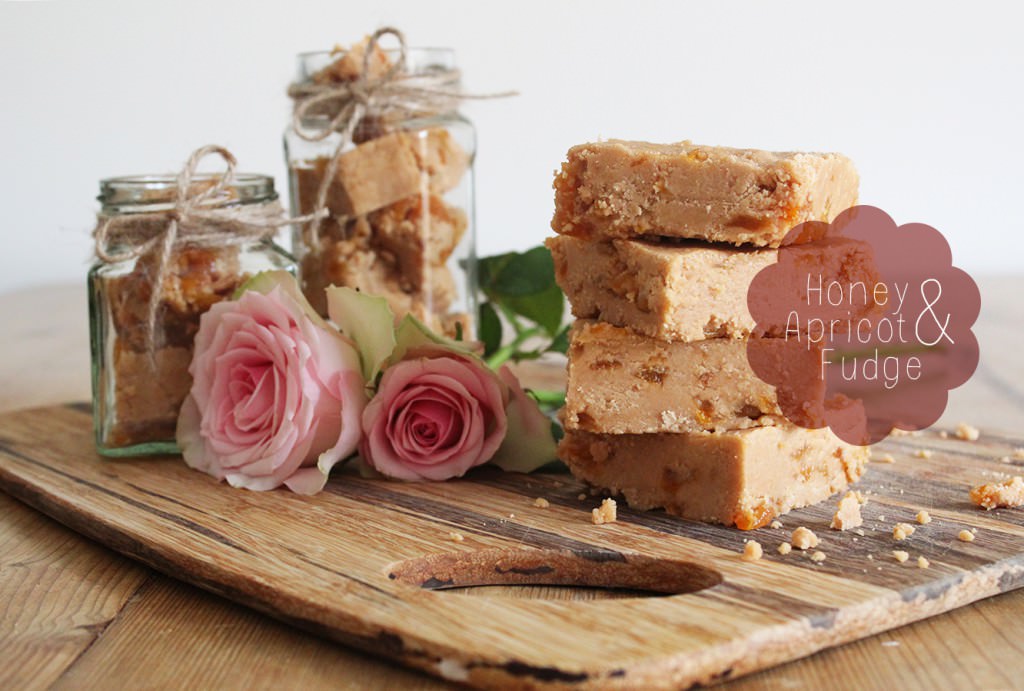
Ta da! You’ve done it!