Tag: how to

Schultüten

Guten Tag friends! This week’s blog post is inspired by a lovely German tradition that warmed my little heart when I was told about it.

A few weeks ago I was sent these photos of a very beloved little boy; you might remember way back when we helped him make birthday party invites? Well, about 18 months later and it was the first day of school for our young sir.

Schultüten

What is that thing he’s holding I hear you cry? My exact response, and I didn’t have the benefit of seeing the contents like you guys at first. Well, I’m reliably informed that in Germany children get a Schultüten on their first day of school, a cone full of lovely treats. The best part is that sometimes adults get a mini version for their first day at a new job. Cute or what?!

I considered making myself one for my new job a few weeks ago, but that is mildly tragic. Thankfully, to rescue me from celebrating myself in that slightly embarrassing way, my friend Matt (who also happens to be Vicky’s husband) managed to land himself one starting this week, yay Matt. Enter Katie and her Schultüten.

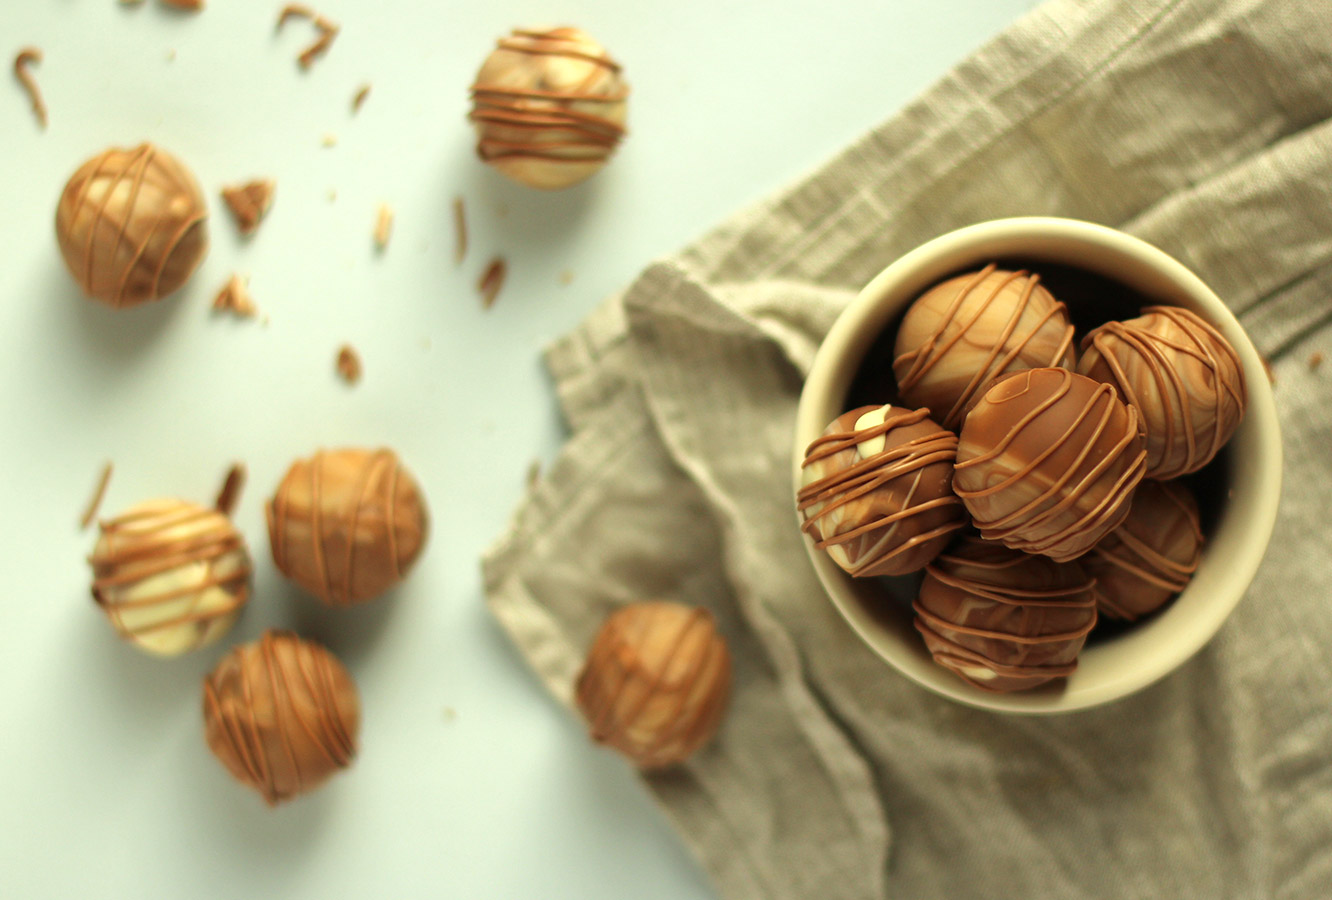
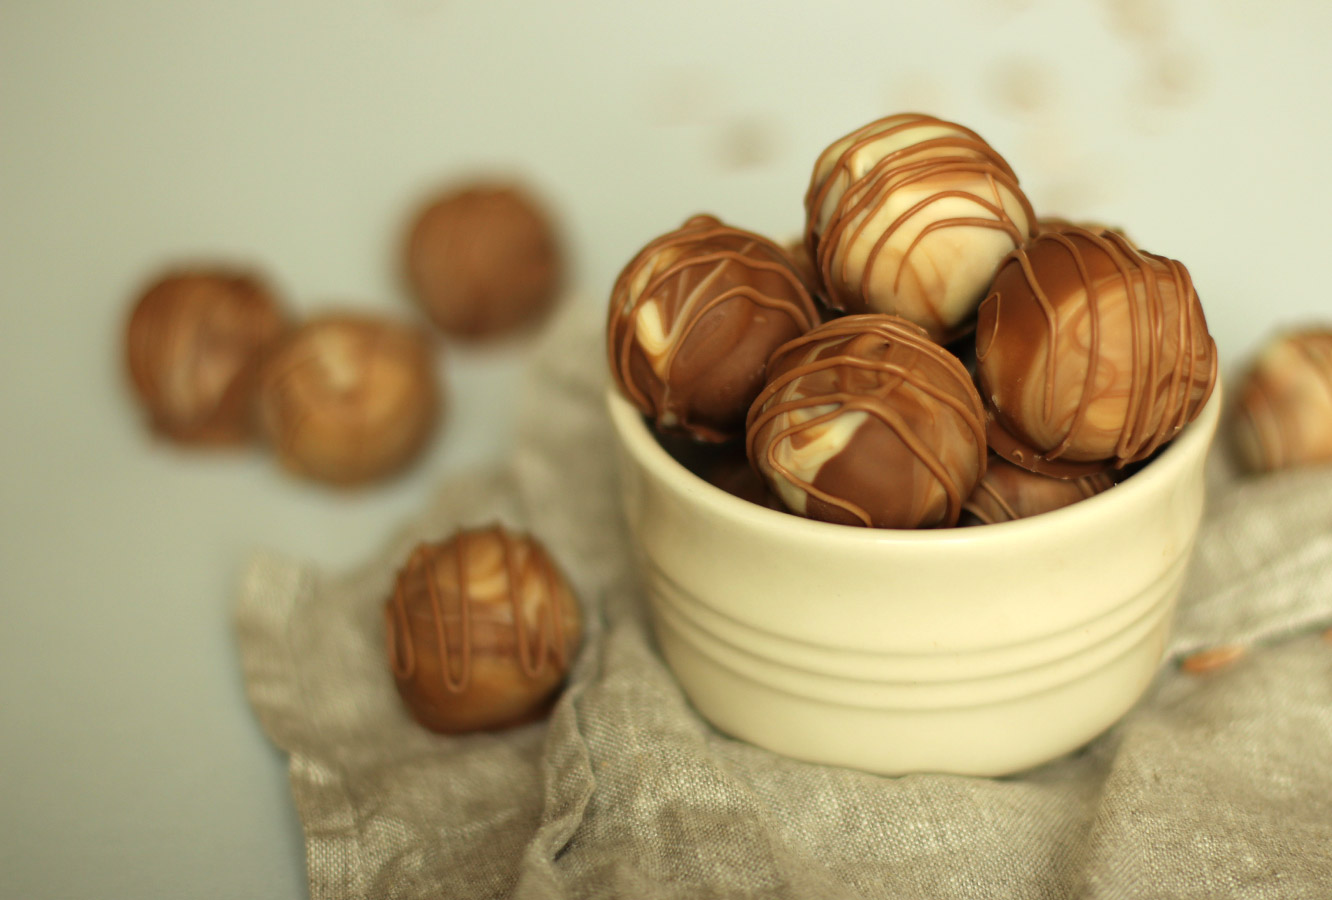
By the way, I did take some of these truffles into work myself, and to brag not to brag, but one of my new colleagues described them as “chocolates worthy of a transcontinental move”. I may have asked her to workshop her review a little until we got to that point, and in return I will probably end up making some for her to give her boyfriend to encourage such a move.

Moving on. From THE LONGEST introduction to any blog post ever, I really shouldn’t write these tired.
marbled-caramel-truffle-recipe

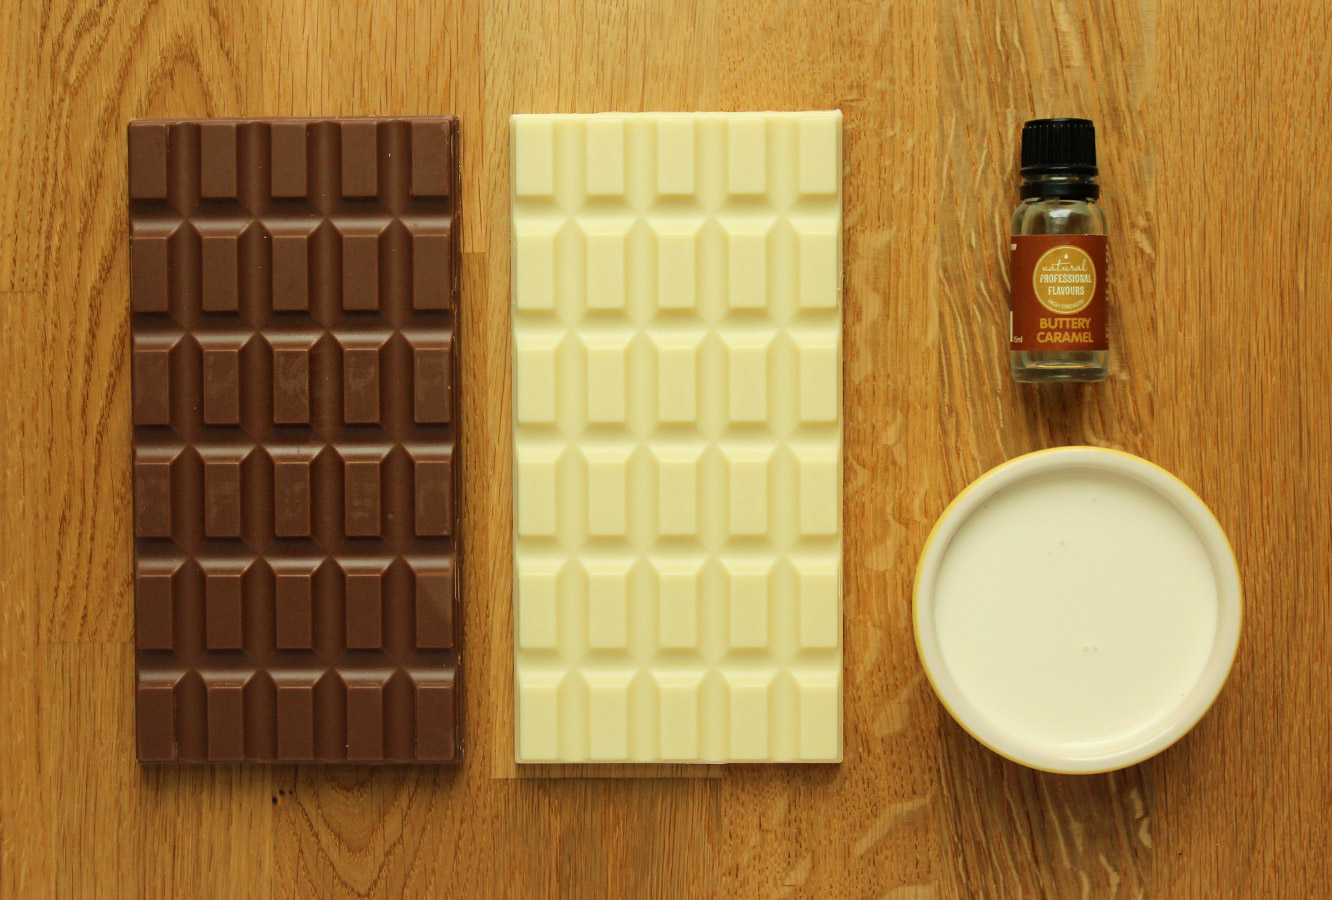
You will need

For the truffles:

400g/14 oz milk chocolate

400g/14 oz white chocolate

180ml/6 fl oz double cream

Caramel flavouring (I swear by Natural Professional Flavours – buttery caramel)

(makes up to 40 truffles)

For the cone:

Nice quality wrapping paper (I got mine from Foyles if you’re in the UK)

Tissue paper (preferably a colour that doesn’t clash with your choice of paper)

Ribbon

Double sided tape
marbled-caramel-truffle-recipe-2

Step one

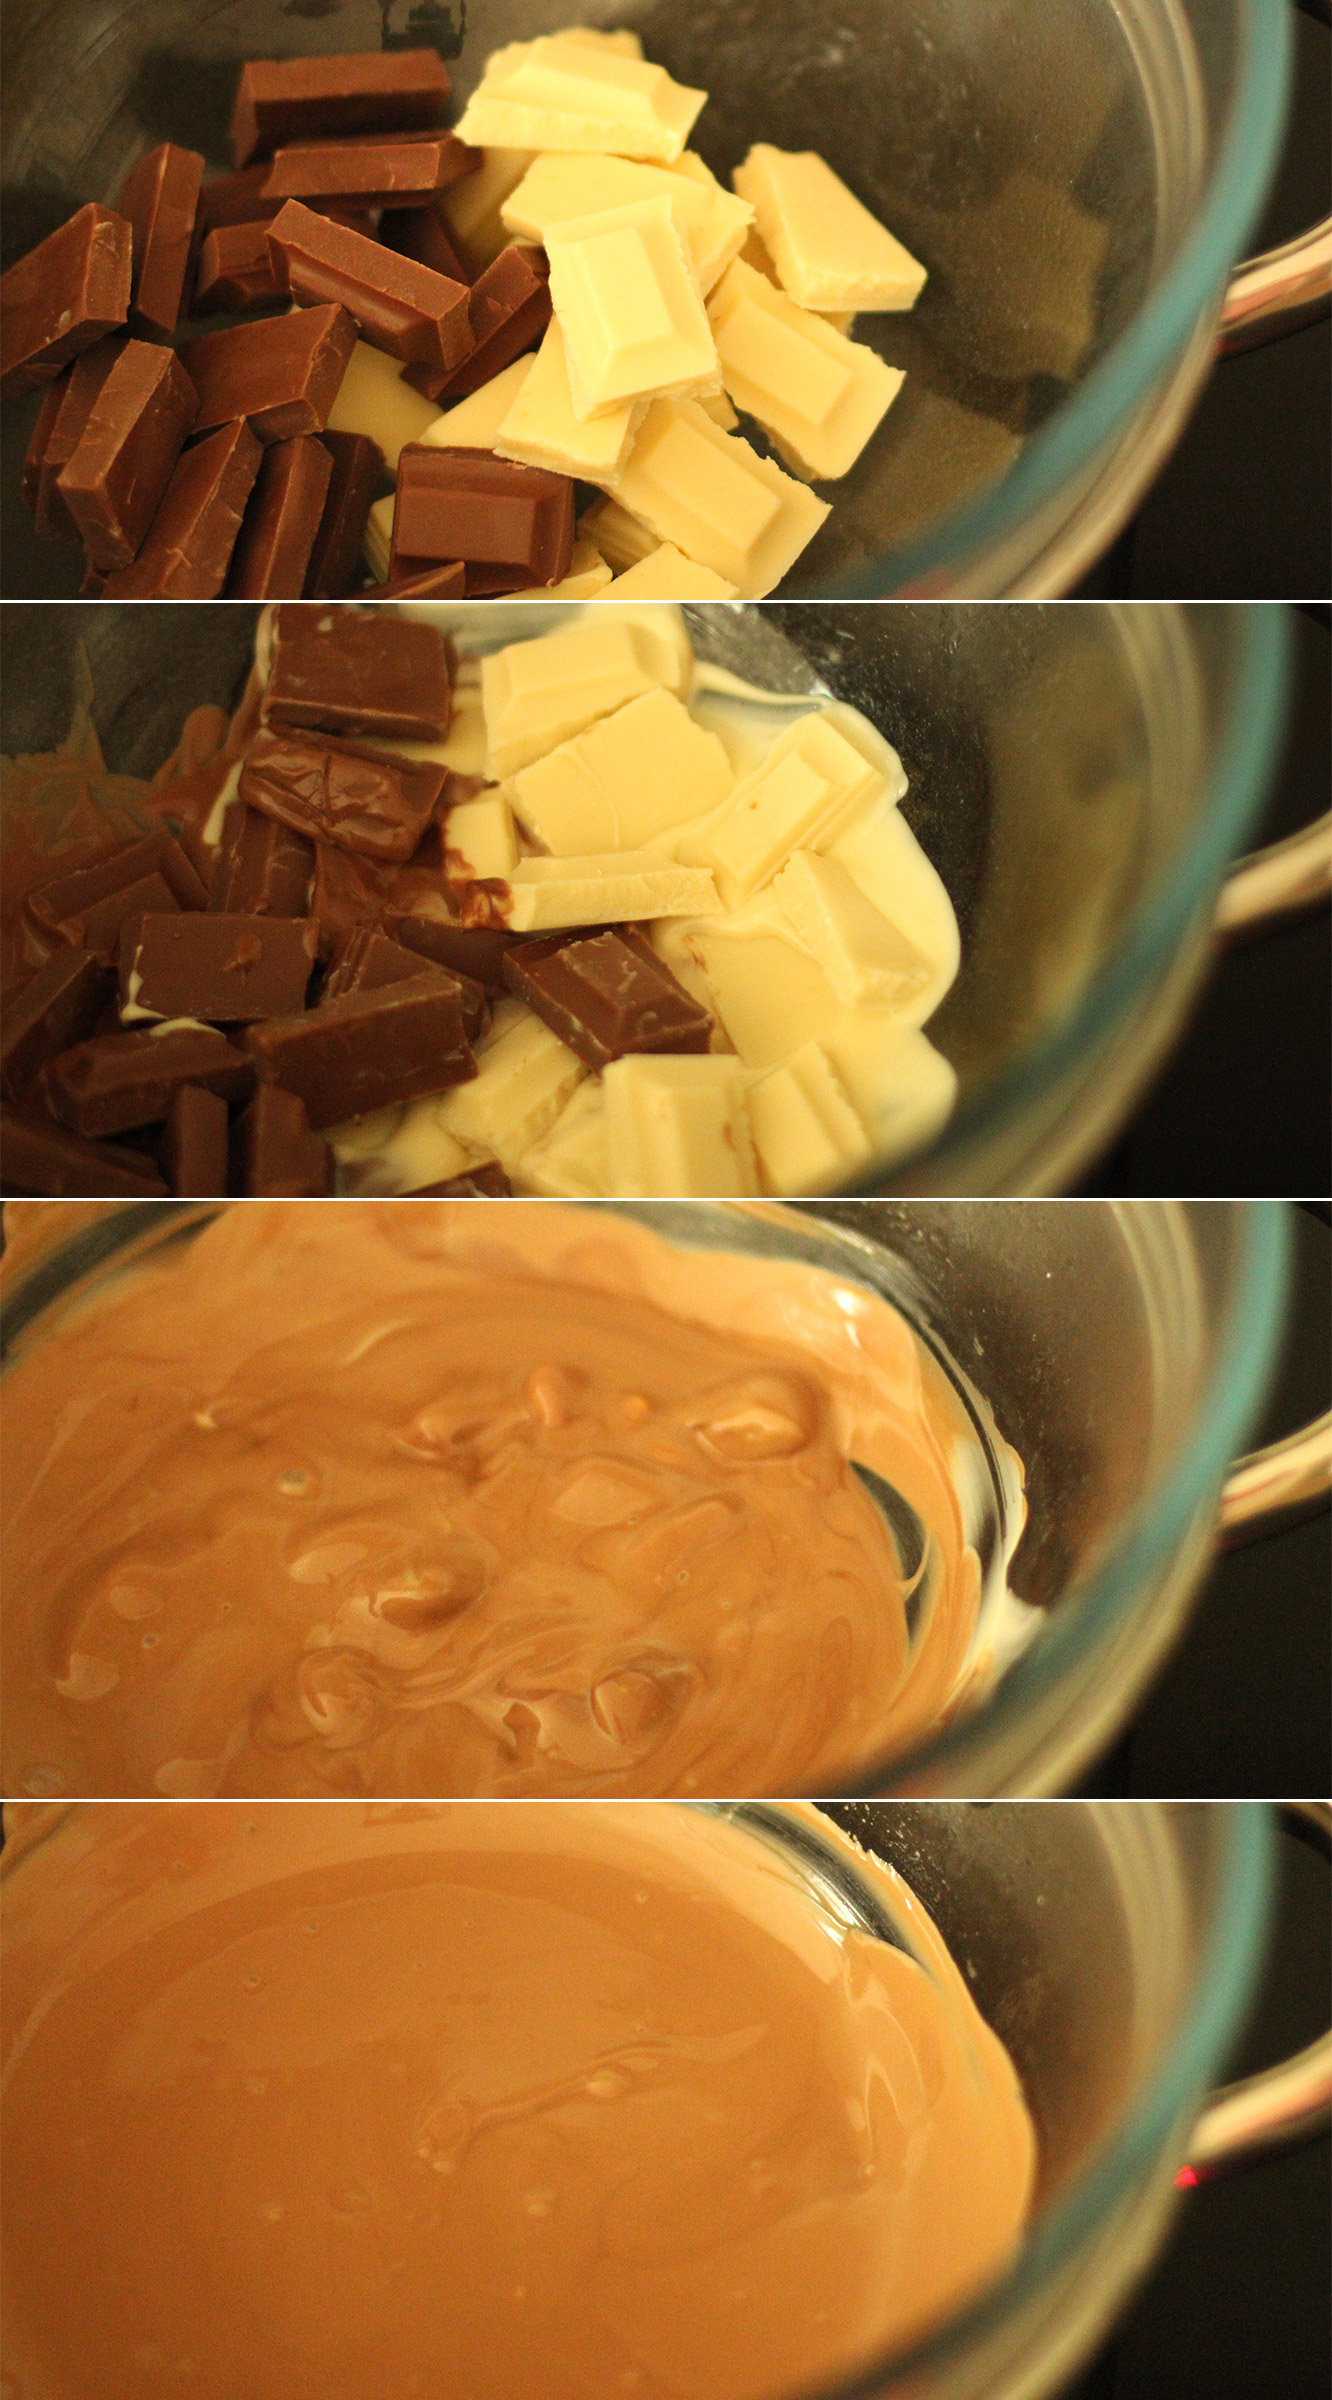
Melt 200g of each chocolate in a heatproof bowl over a pan of simmering water.
marbled-caramel-truffle-recipe-3

Step two

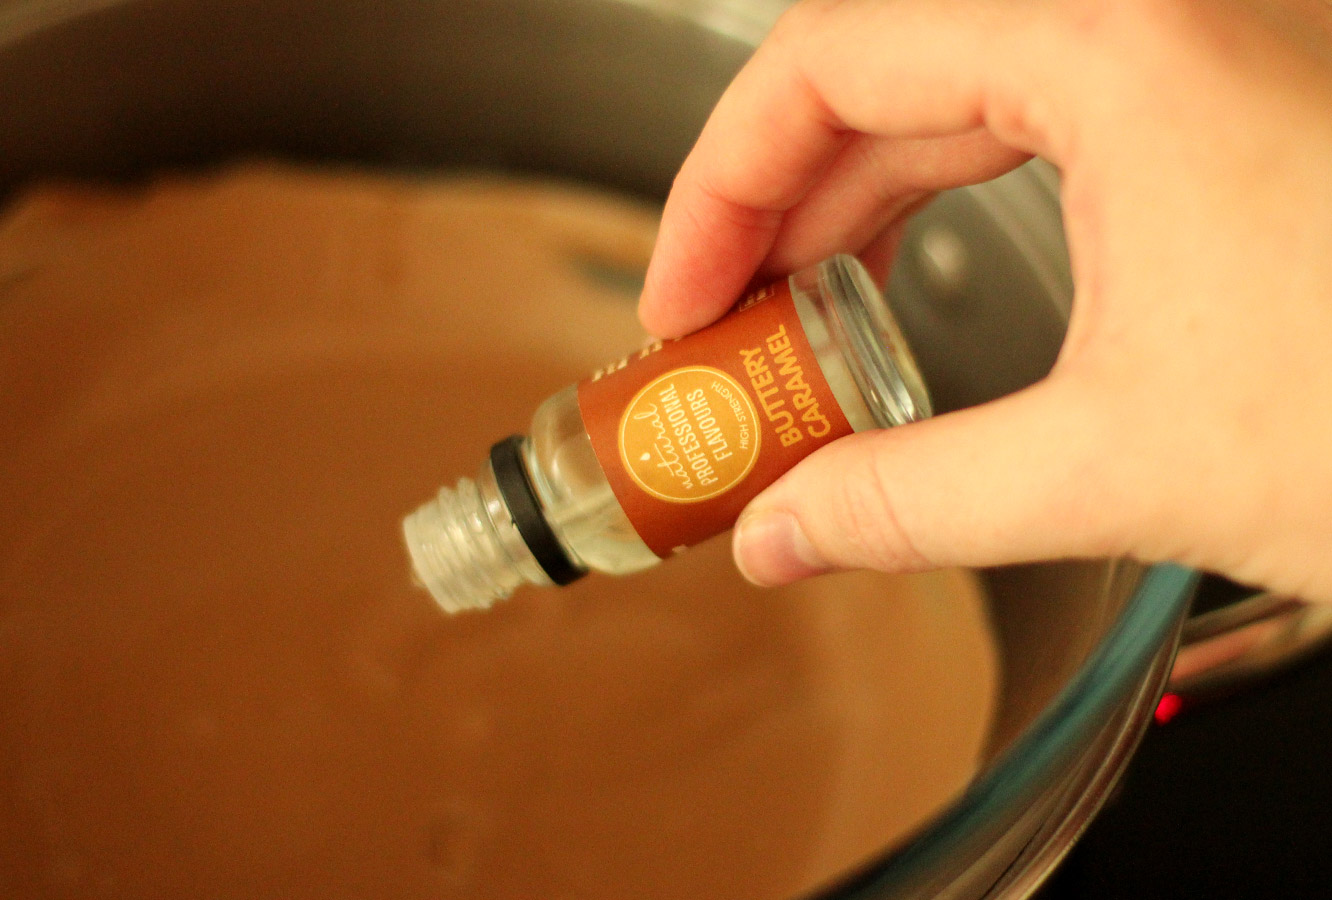
Add 1 tsp or so of the caramel flavouring (you can use other brands of flavouring by the way, a lot of supermarkets offer a caramel flavour now).

This is really just a great excuse to taste test the melted chocolate until you’re happy with it. It’s ok if this takes a few spoonfuls, being a perfectionist is a good thing.
marbled-caramel-truffle-recipe-4

Step three

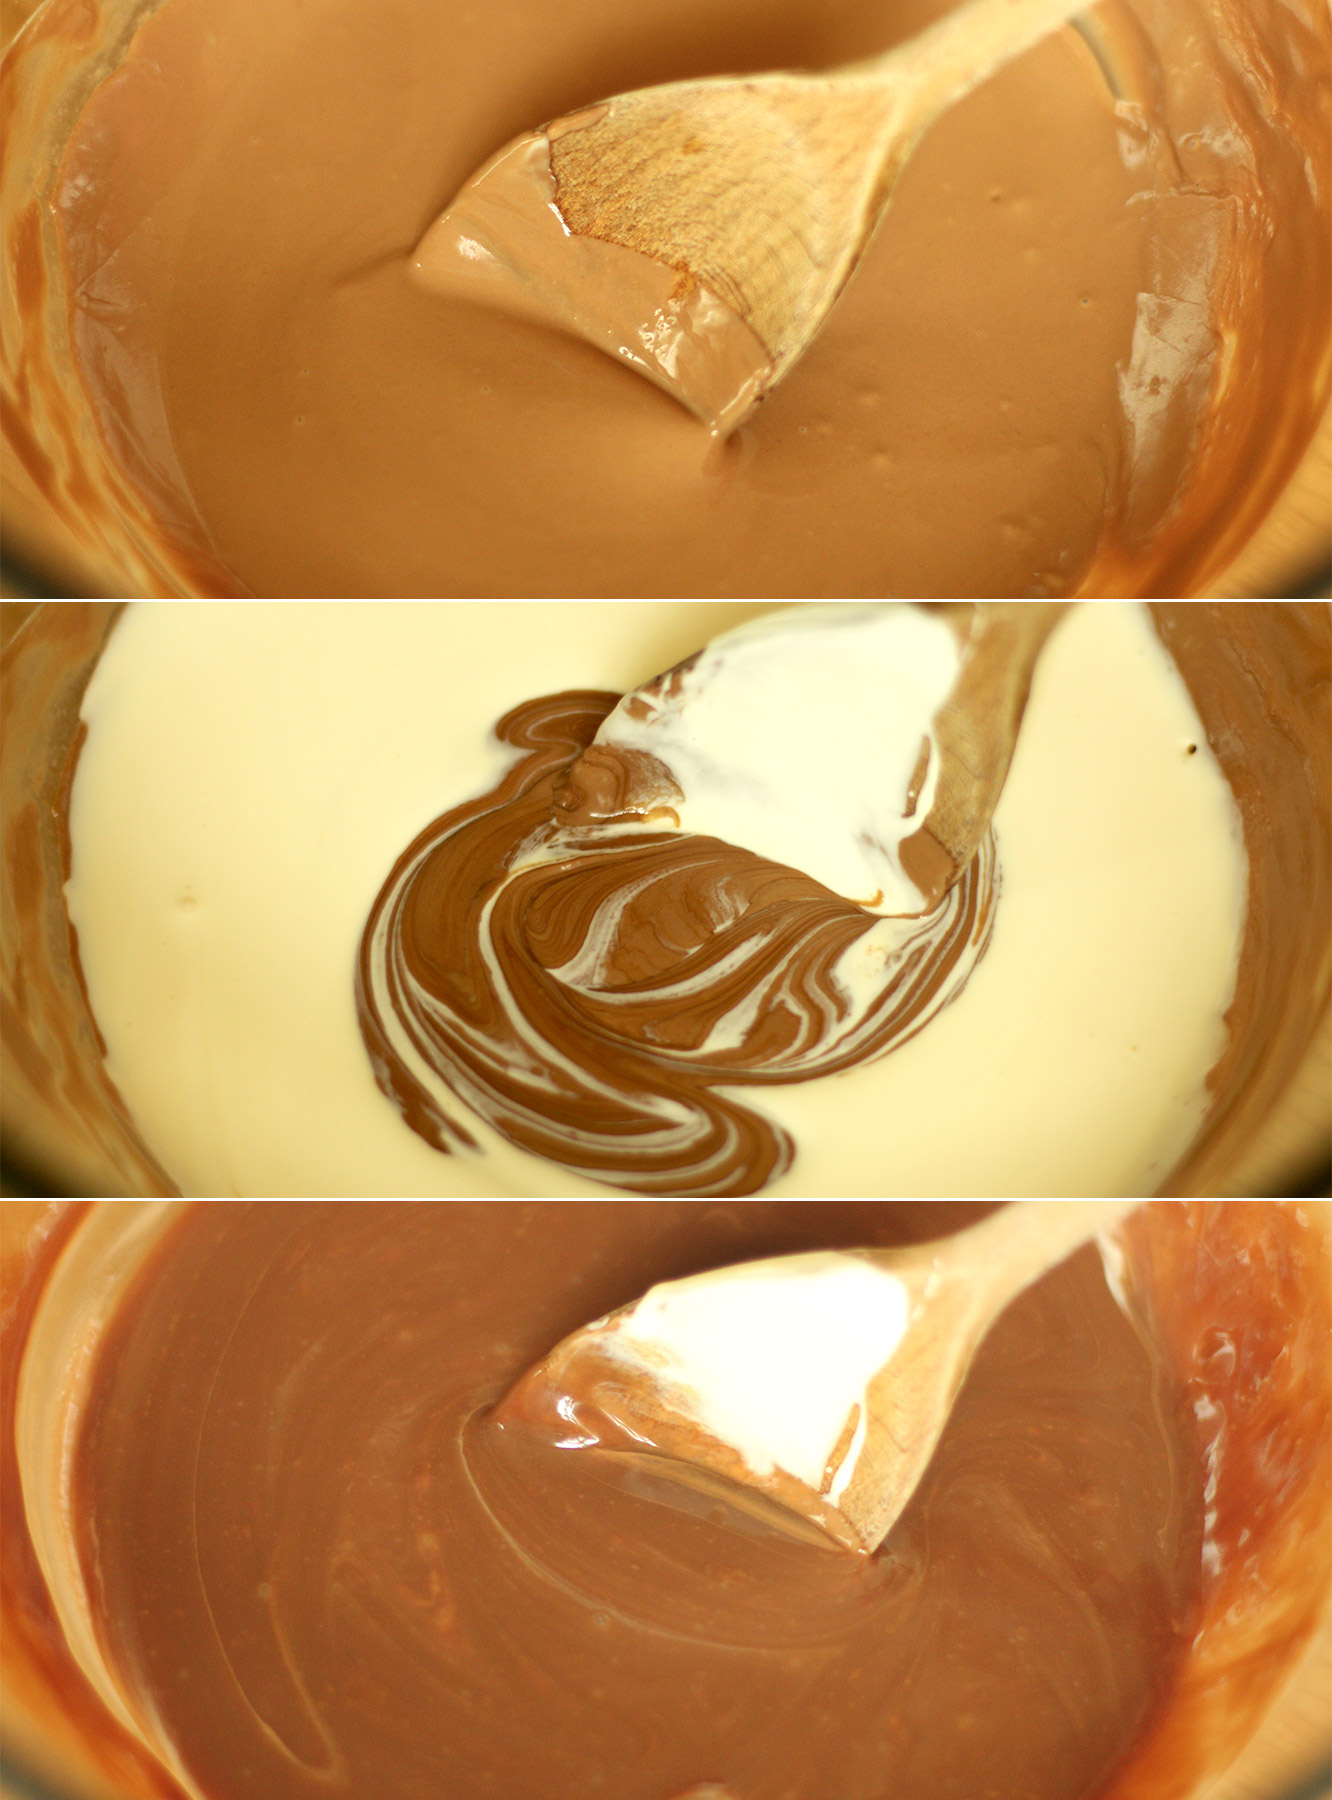
Remove the chocolate from the heat and stir in the cream until fully combined. You will probably need to leave this to set for a while.

Leave it on the side if you have time, the fridge if you’re slightly hurried, or even the freezer if you’re desperate to take photos for your blog in the fading natural light (thanks winter).
marbled-caramel-truffle-recipe-gif-1

Step four

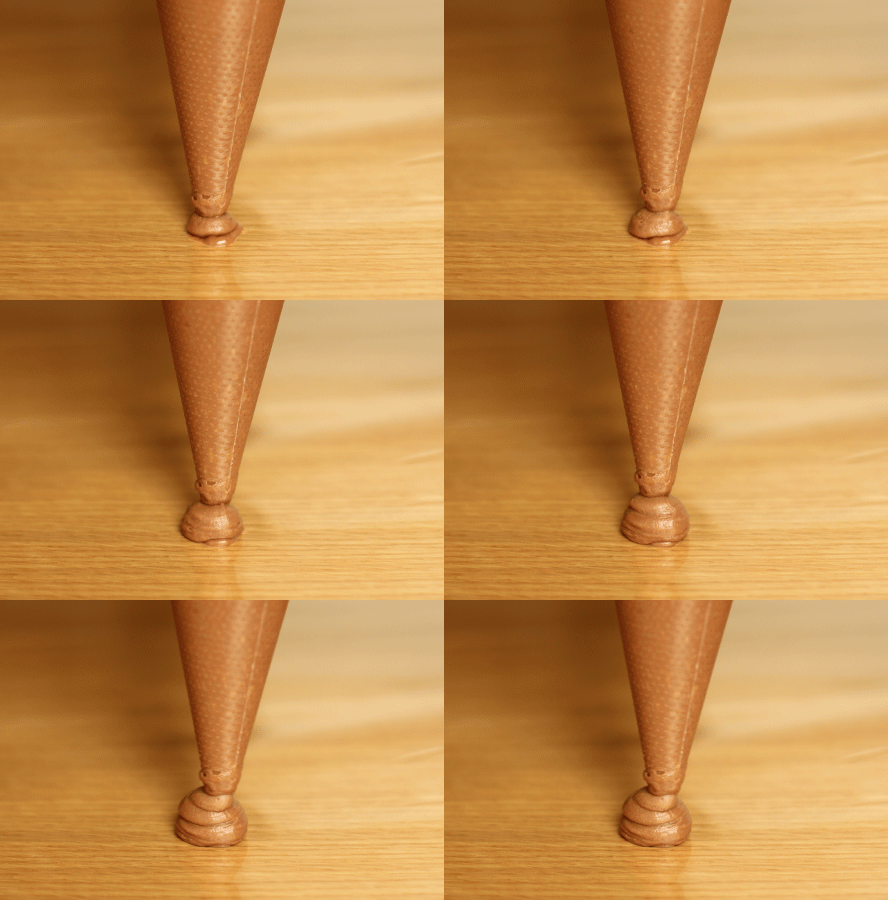
Once the mixture is pipe-able, lay out a sheet of cellophane or greaseproof paper and pipe out evenly sized blobs (yes, that’s the technical term). They need to be about, well, truffle sized, whatever that means to you pal.
marbled-caramel-truffle-recipe-5

Step five

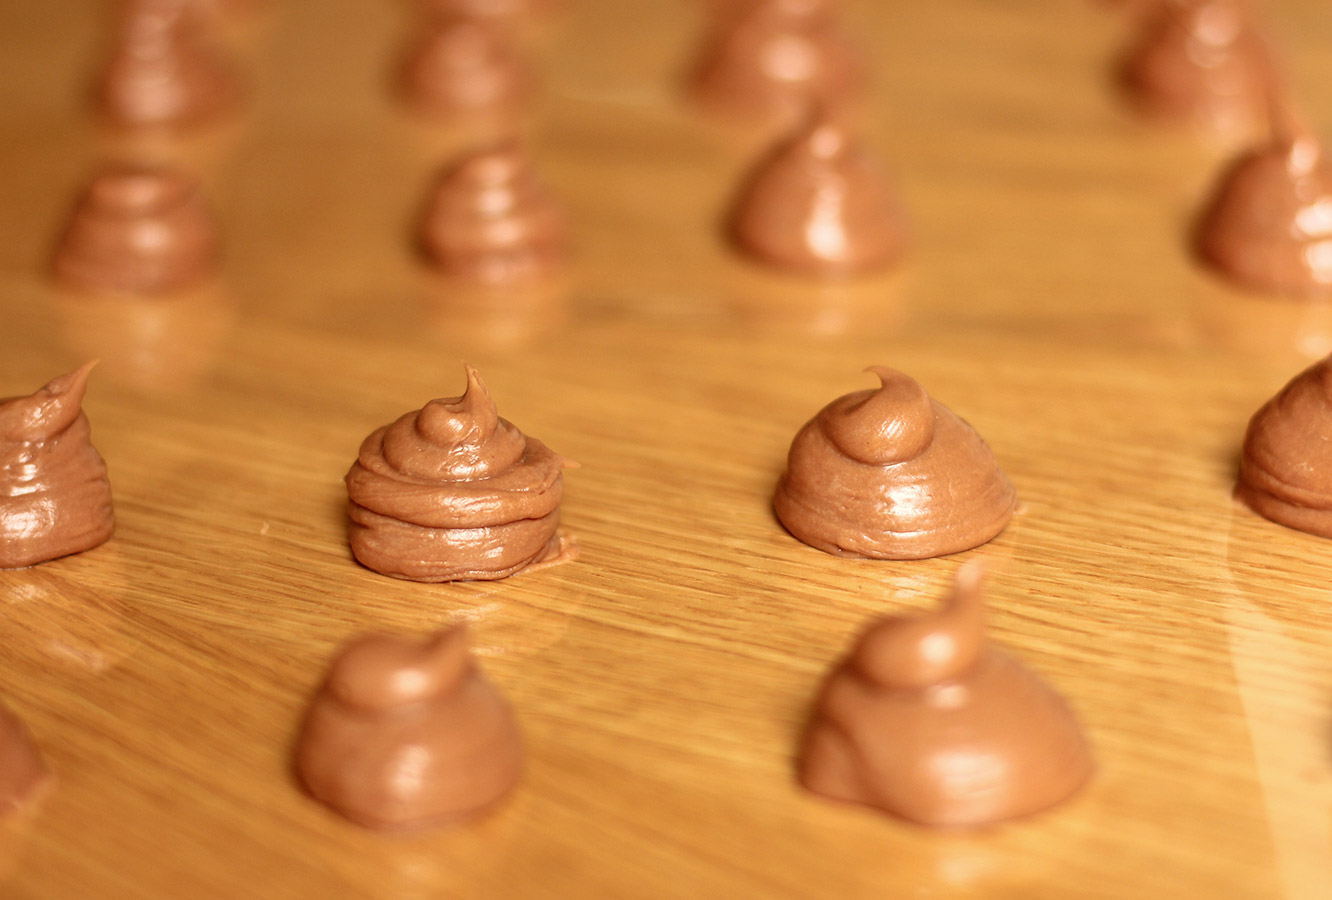
Leave to set, you can put them in the fridge if you want to.

They look appetising, don’t they?
marbled-caramel-truffle-recipe-6

Step six

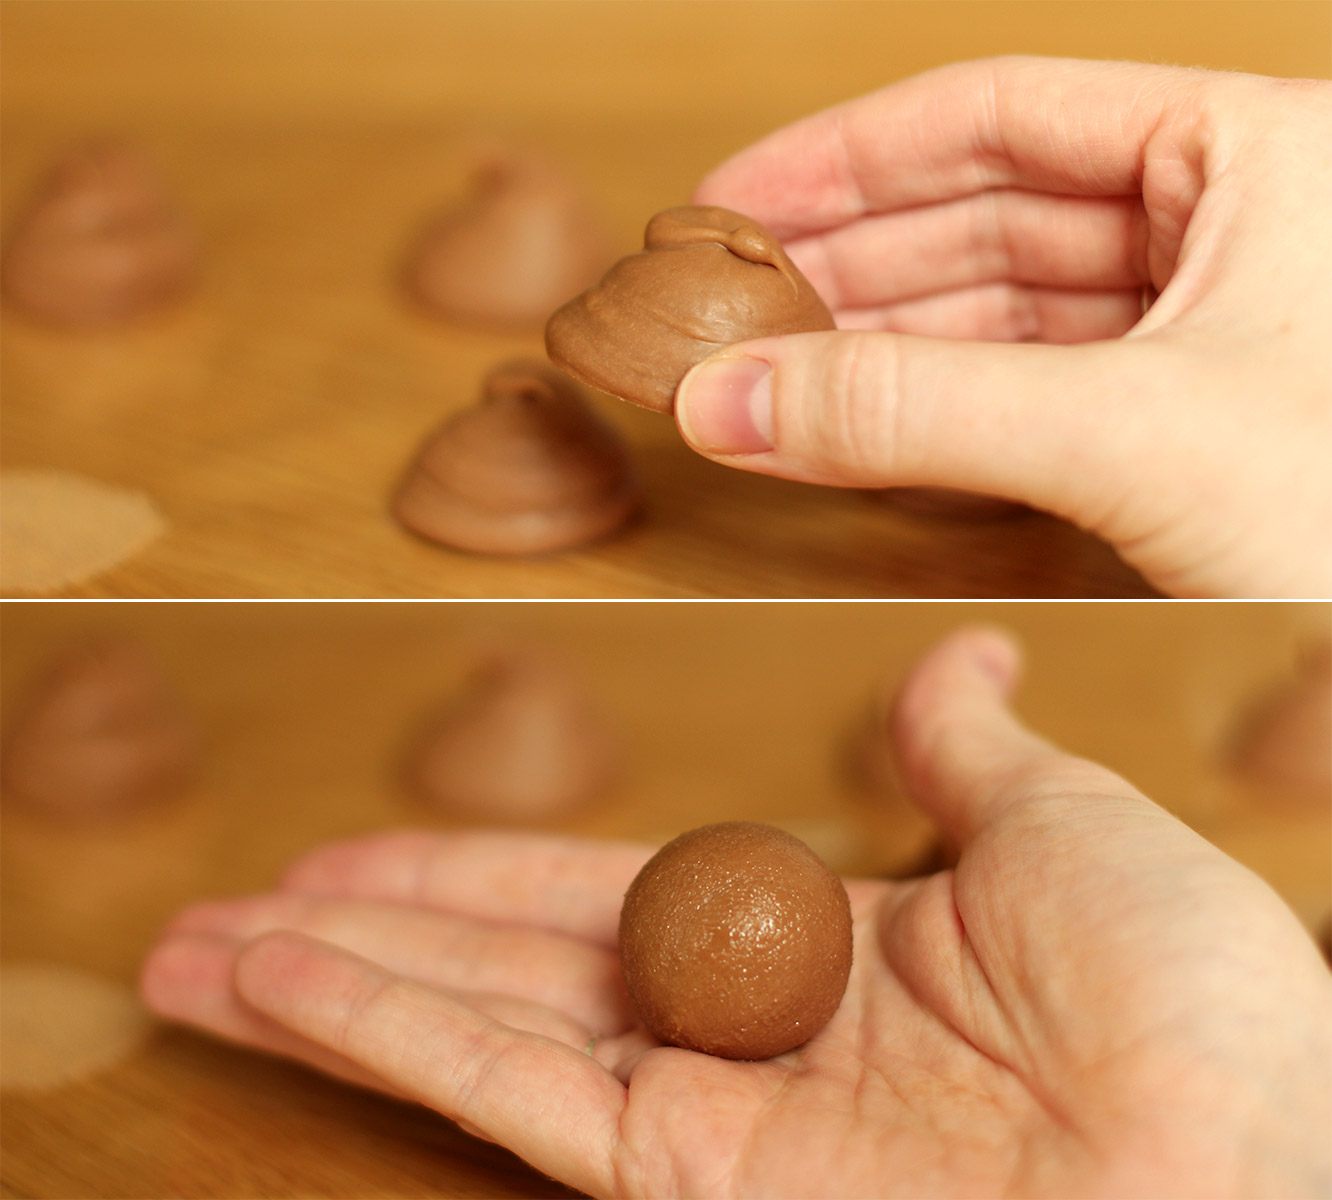
With clean and cold hands (clue: wash them under the cold tap). Squash the piped shapes a little with your fingers and roll into a ball between your palms.

You will probably need to wash your hands a few times as you go as they will start to melt as your hands warm up.

I then put mine back in the fridge while I melted the chocolate for coating.
marbled-caramel-truffle-recipe-gif-2

Step seven

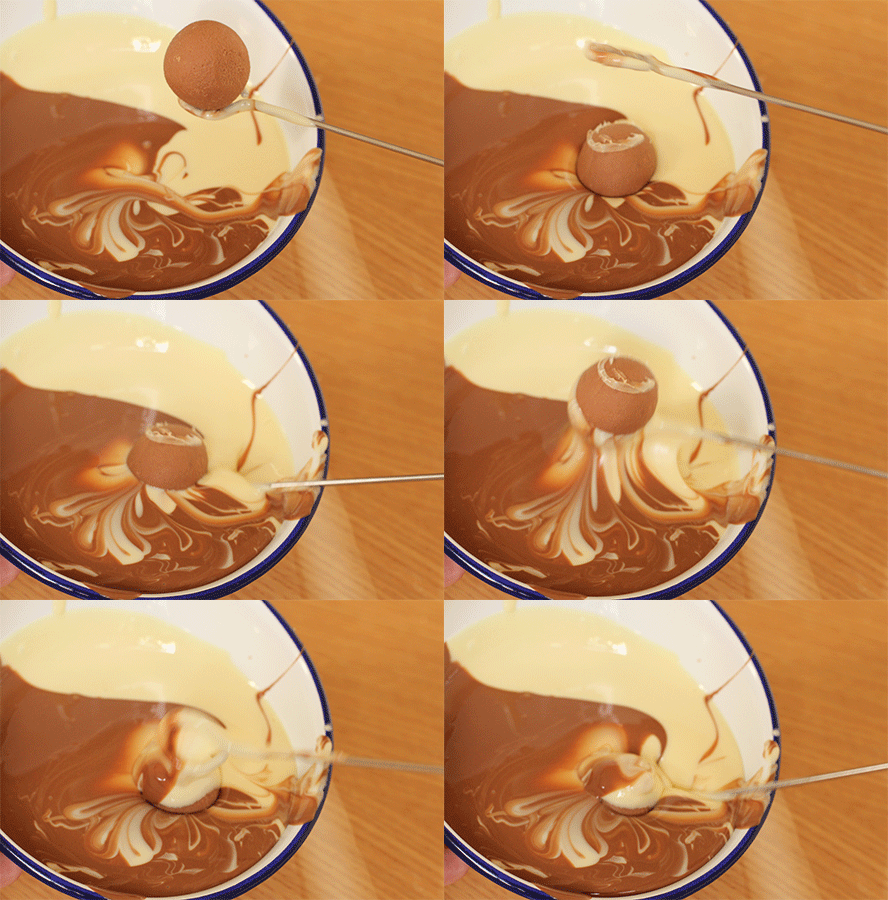
Melt the remaining white and milk chocolate separately and pour simultaneously into a small, deepish container or bowl. This is to get a marbled effect on the outside, but you could always stir them together if you don’t fancy the look of that.

Using either a plastic fork with the middle prongs taken out, or the end of a metal kebab skewer, dip the truffle centres in the chocolate.
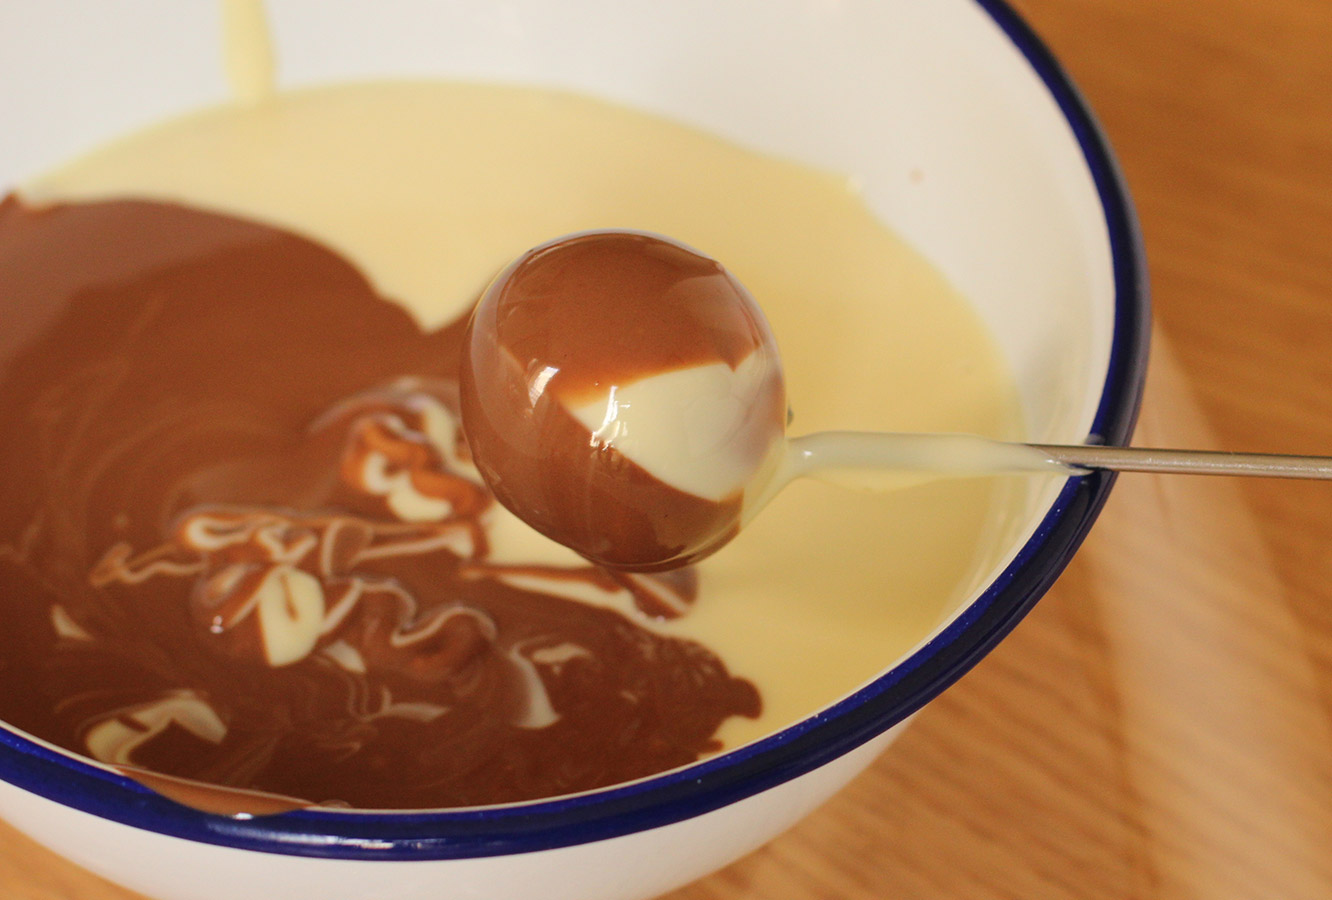
marbled-caramel-truffle-recipe-7

Step eight

Repeat until you’re out of truffles. Leave to set. This time, don’t shortcut with the fridge, you want them to set at room temperature so that they don’t melt at room temperature.
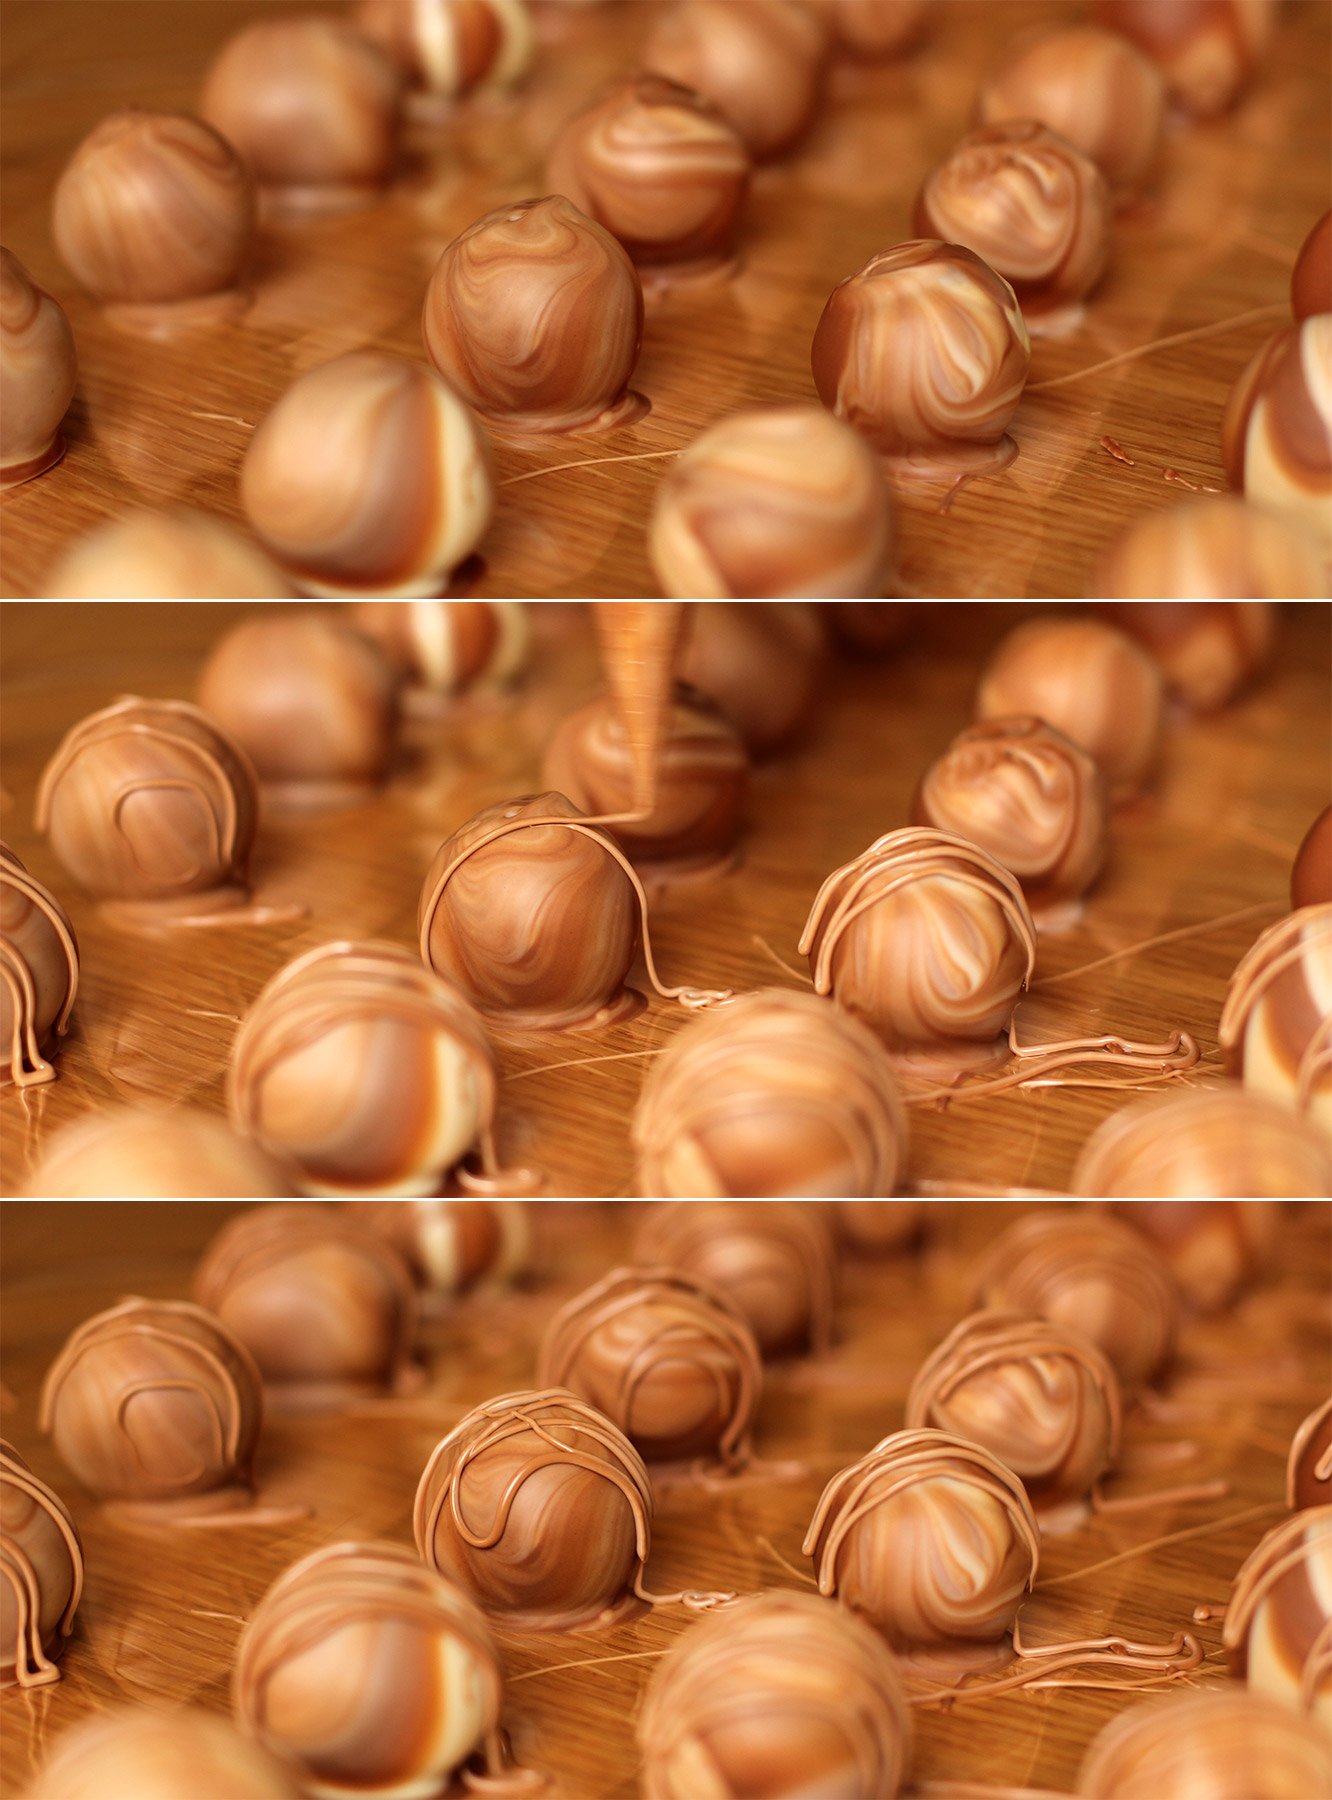
marbled-caramel-truffle-recipe-8

Step nine

Put the leftover dipping chocolate in a piping bag and drizzle over the truffles.

Put the remaining melted chocolate in your mouth with a spoon. Or just pipe it straight in there.
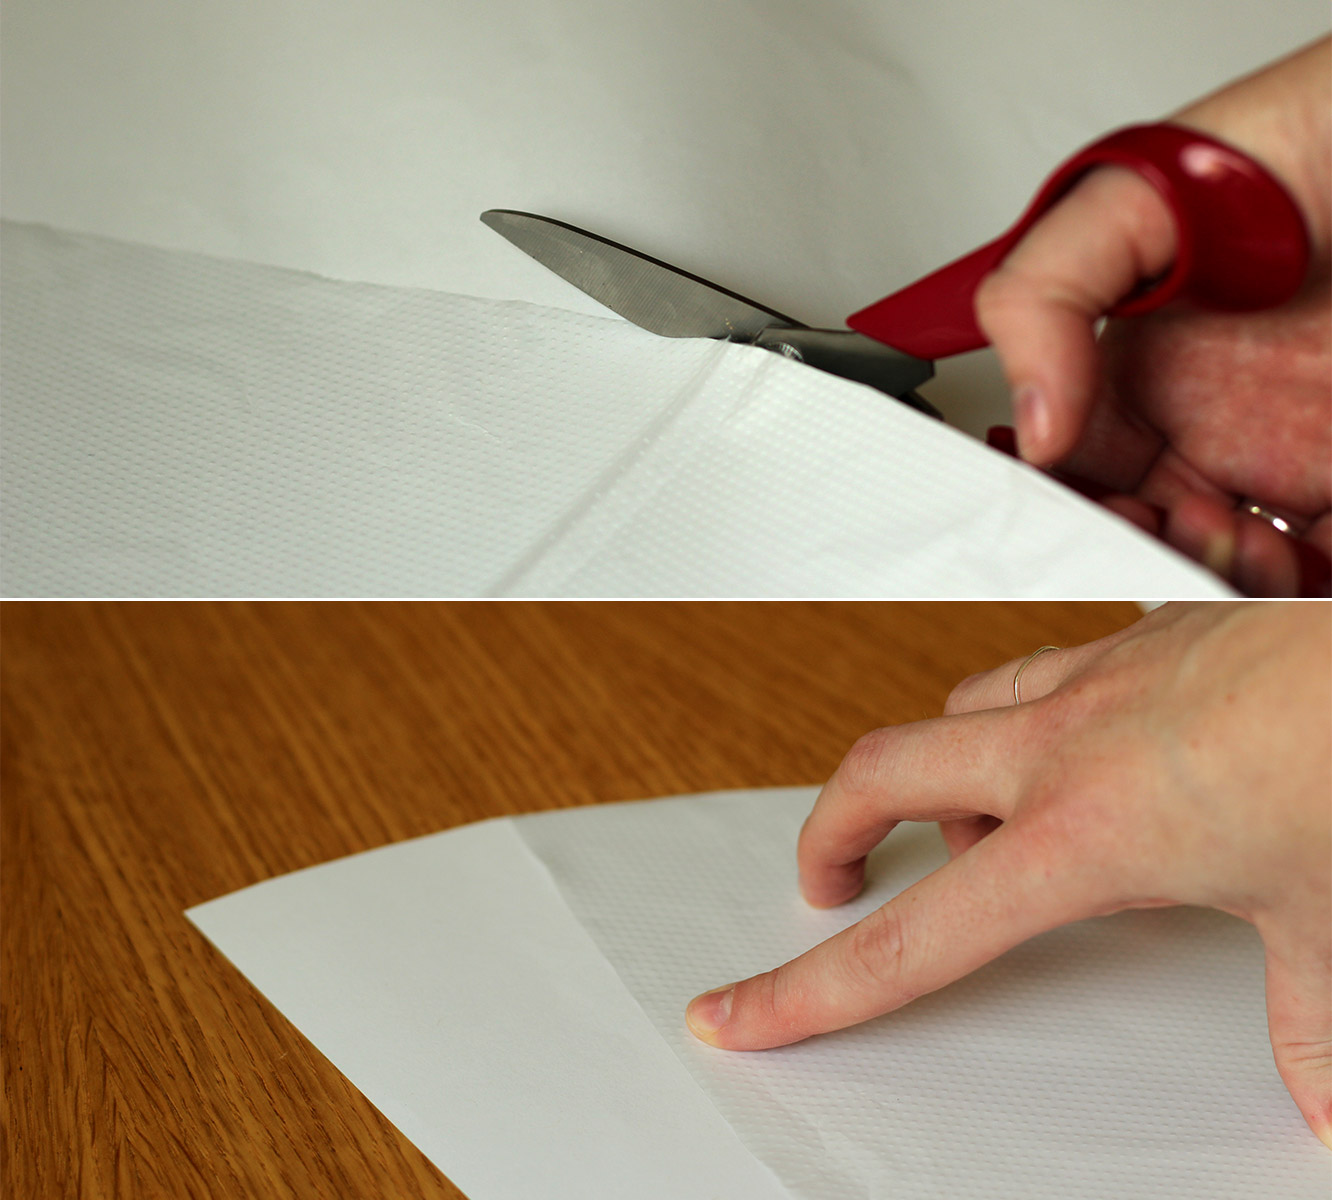
marbled-caramel-truffle-recipe-10

Step ten

Cut open a piping bag so that it lies flat and use it as a template to cut round. Add a little extra on one side for overlap, and snip the pointy end off the bottom so it’s flat.
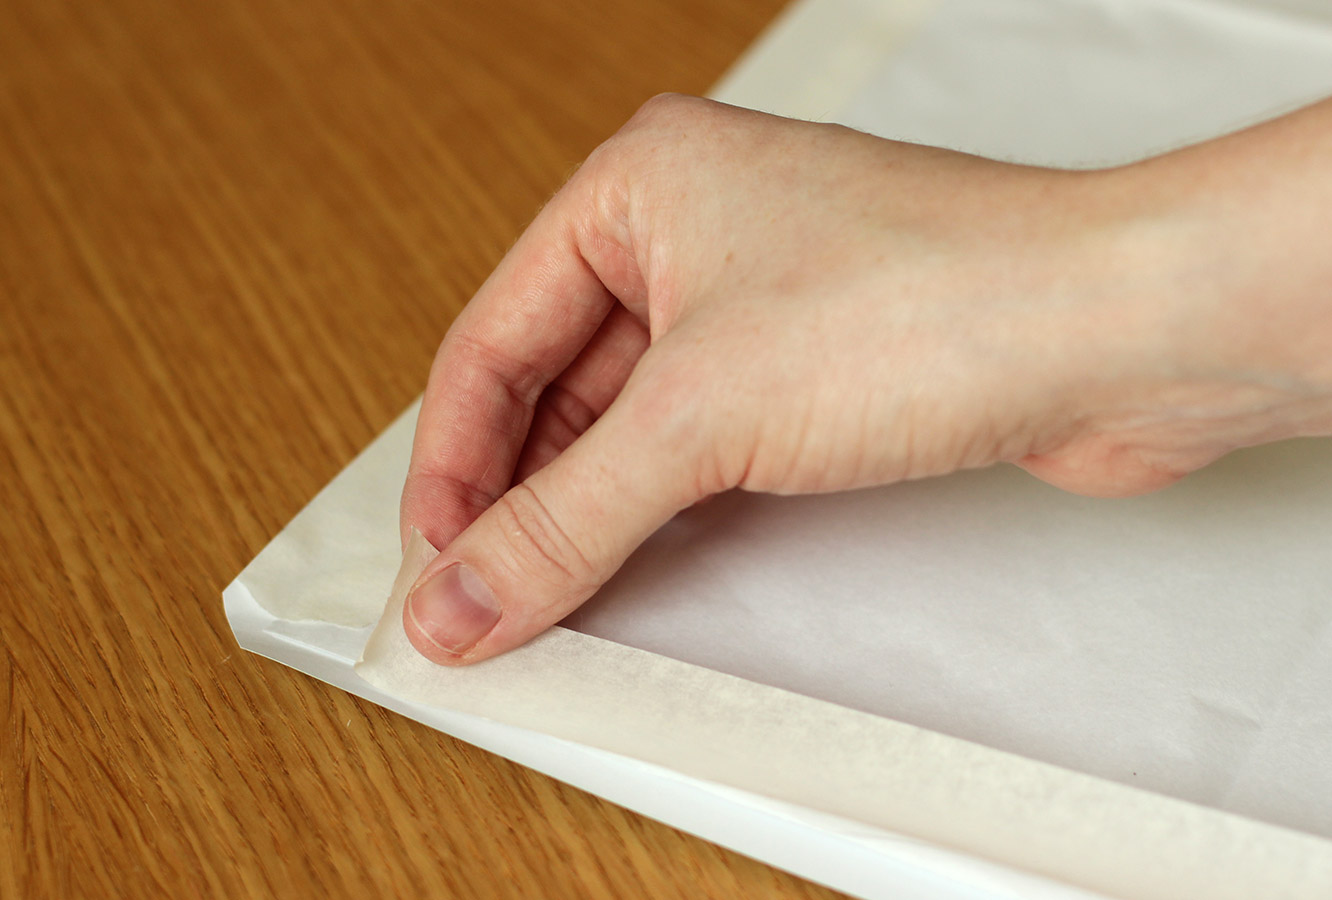
marbled-caramel-truffle-recipe-9

Step eleven

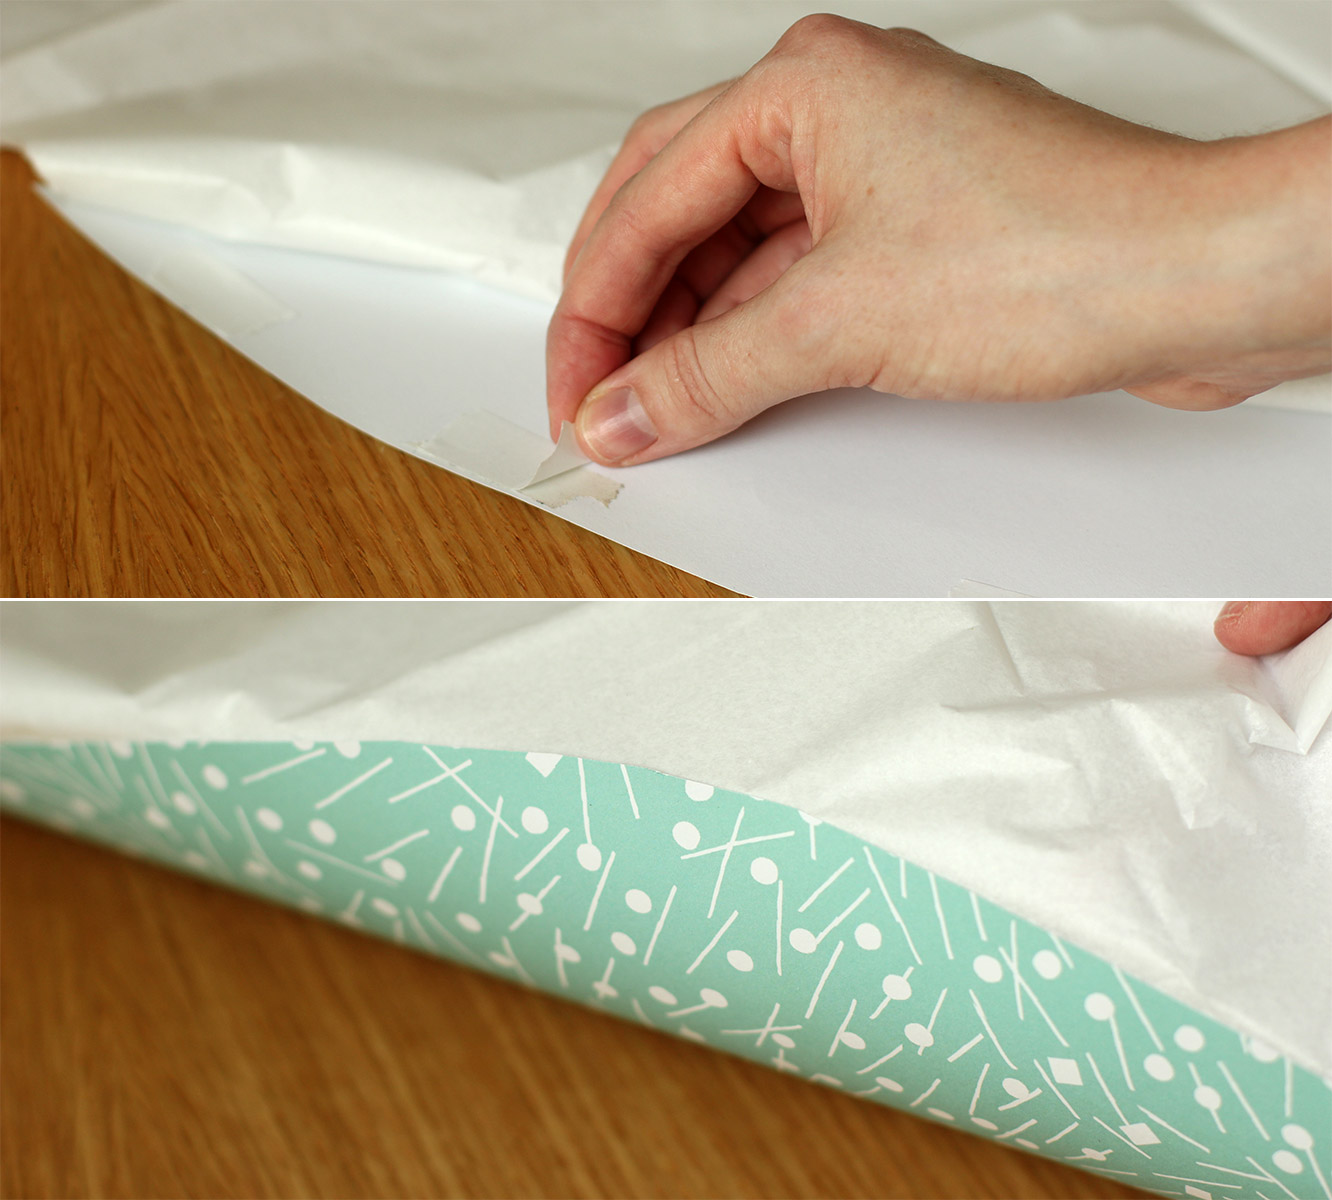
Cut three or four sheets of tissue paper to the same shape, but add another 10 cm to the top.

Tape the straight edges of the tissue to the wrong side of the wrapping paper.
marbled-caramel-truffle-recipe-12

Step twelve

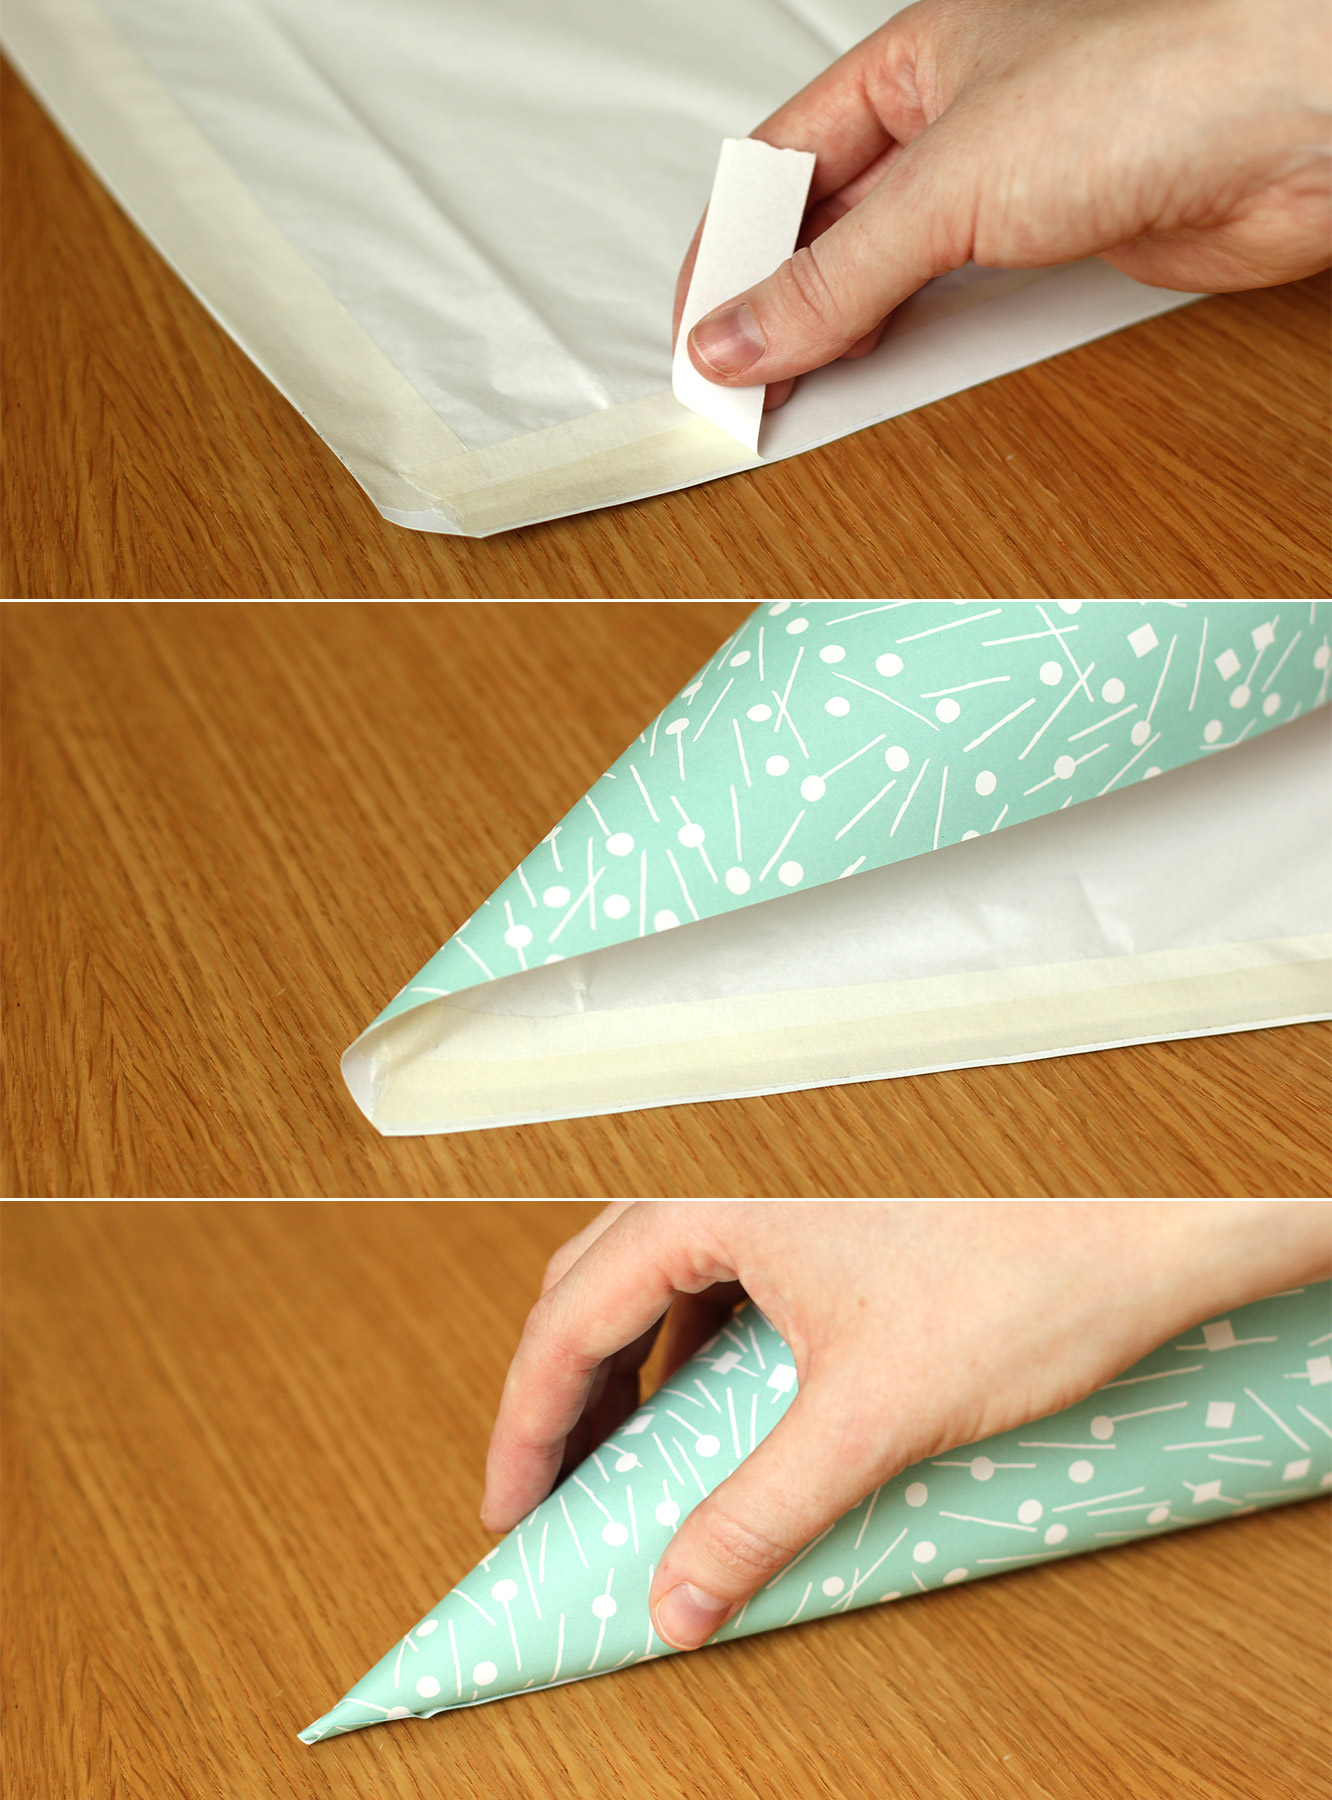
Fold back the top of the tissue paper on the large curved edge. Place double-sided tape around the edge and fold the tissue back over so that it is stuck the whole way round the top.
marbled-caramel-truffle-recipe-13

Step thirteen

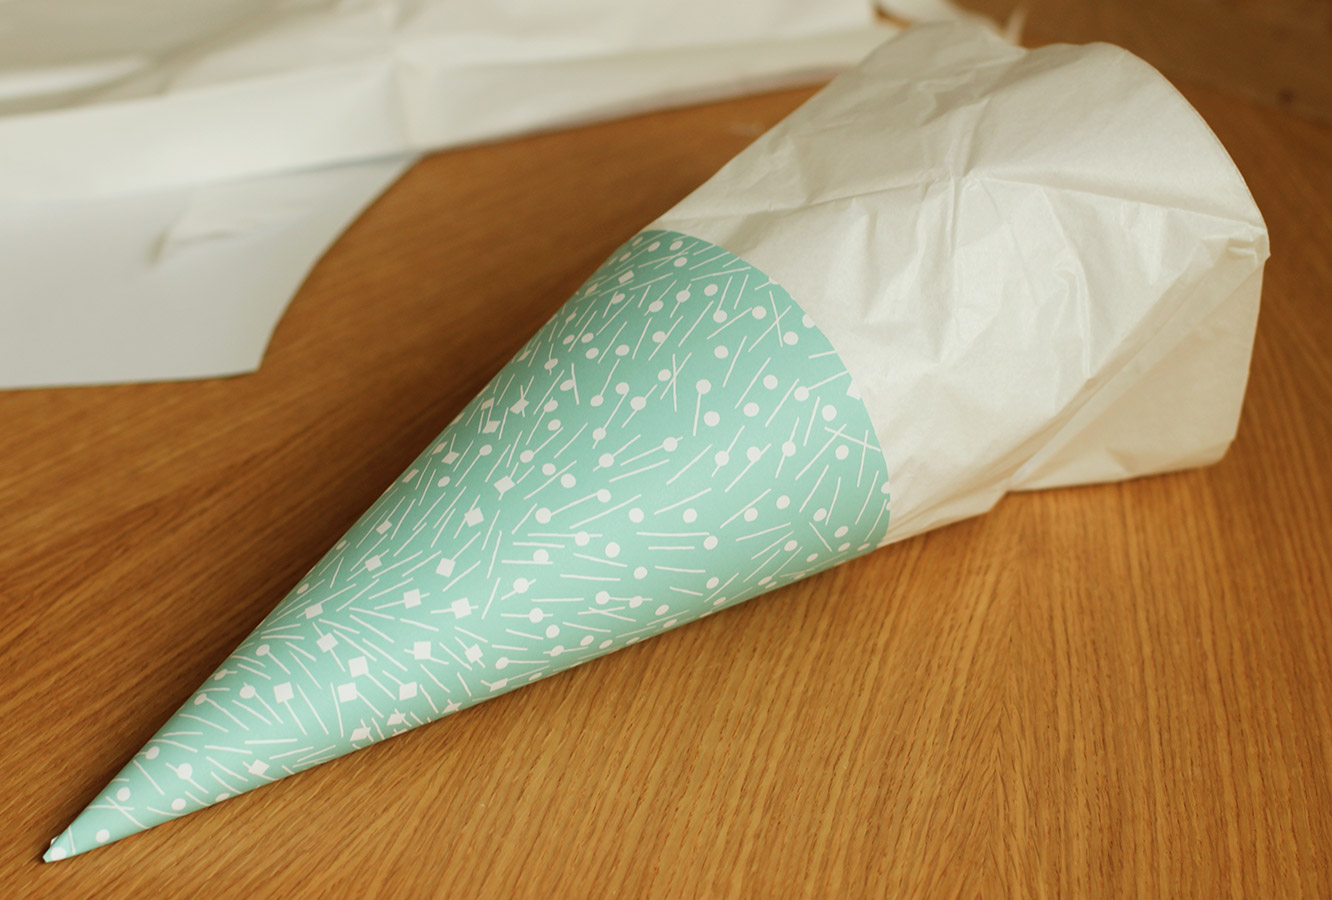
Use another strip of double-sided tape down the straight edge to roll the paper into a conical shape. You should have something like the below.
marbled-caramel-truffle-recipe-14

Step fourteen

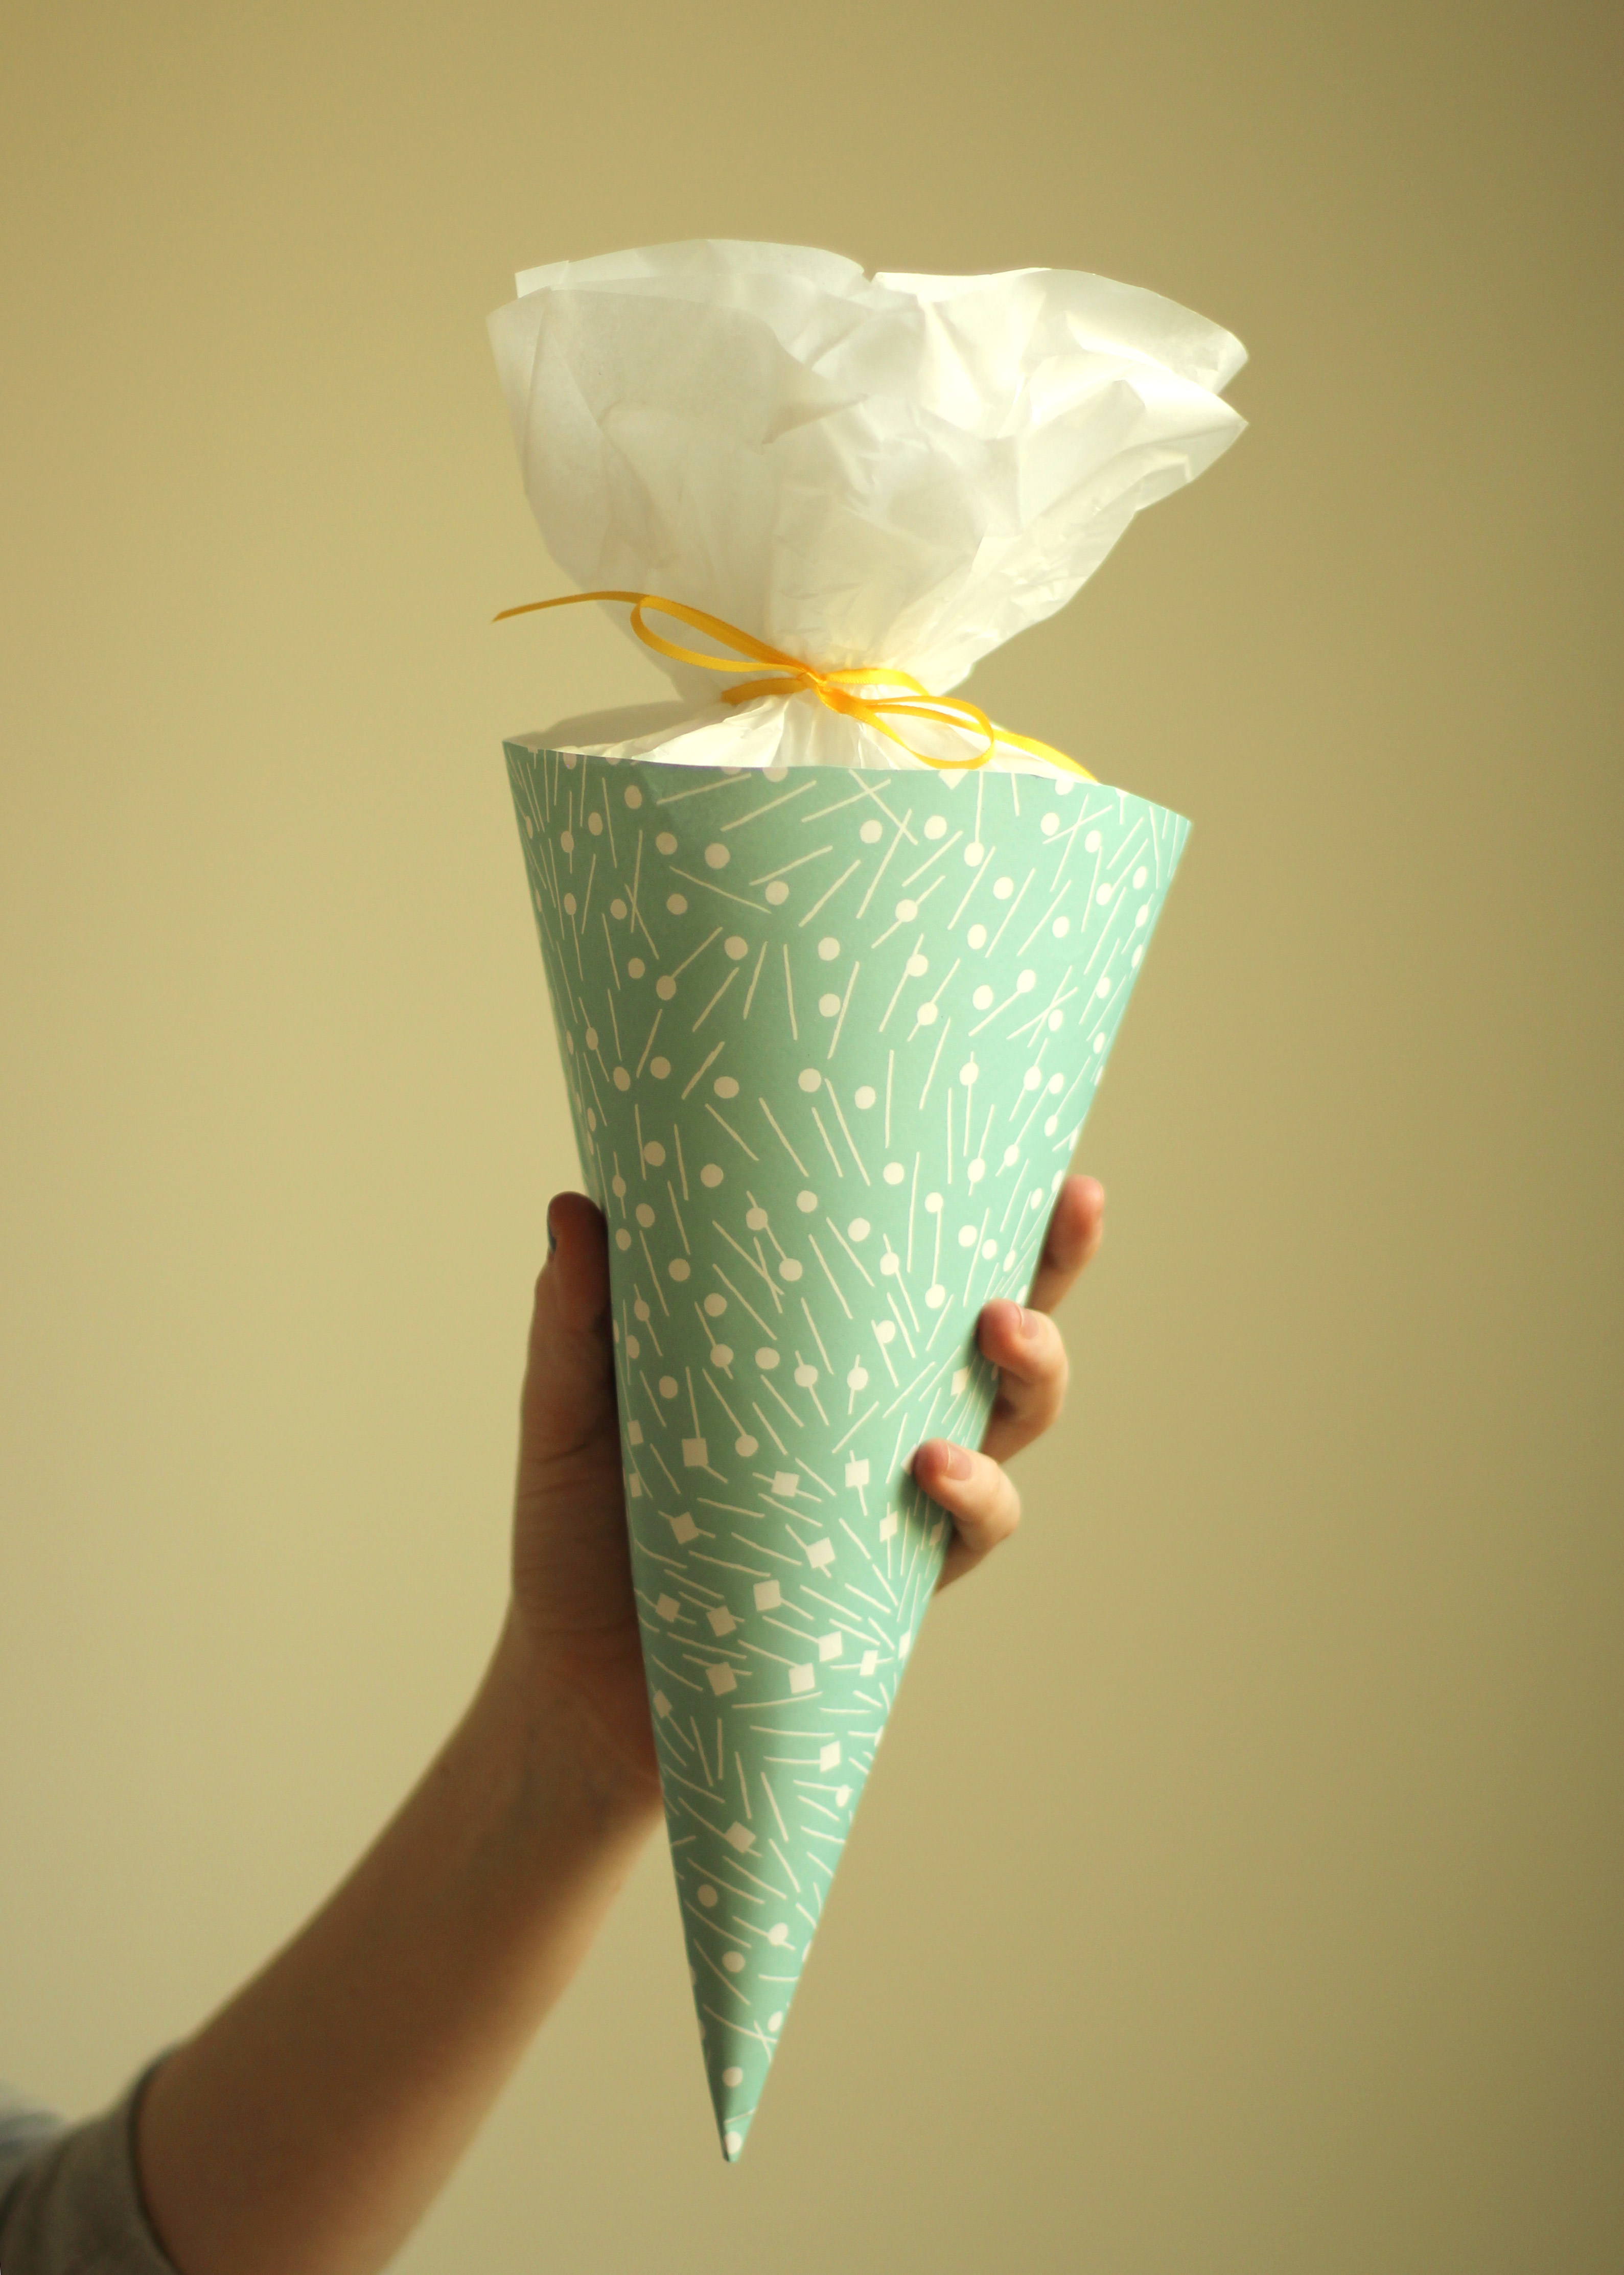
Fill another piping bag with truffles and place in the cone, or Schultüten, and tie up the top with a piece of ribbon.
marbled-caramel-truffle-recipe-17

Voila!
marbled-caramel-truffle-recipe-15

marbled-caramel-truffle-recipe-16

If you go down to the woods today…

This weekend saw the baby shower of a rather lovely lady by the name of Anna. You may (but probably won’t) remember us celebrating Anna’s hen party a while back, well now she’s about to pop a sprog would you believe?

Anna is a rather large fan of gnomes. Yeah, that was my reaction too, but you learn to embrace it after a while…she’s very endearing that way. Well, our friend Taylor (party planner extraordinaire and all round kindred spirit when it comes to carrying things out to obsessive levels of detail) decided to throw Anna a woodland themed shower. I know right? Cute. I totally took my camera and promptly forgot to take photos of all the lovely things; gingerbread fawns, woodland creature bunting, sausage roll snails and toadstool cupcakes to name just a few.

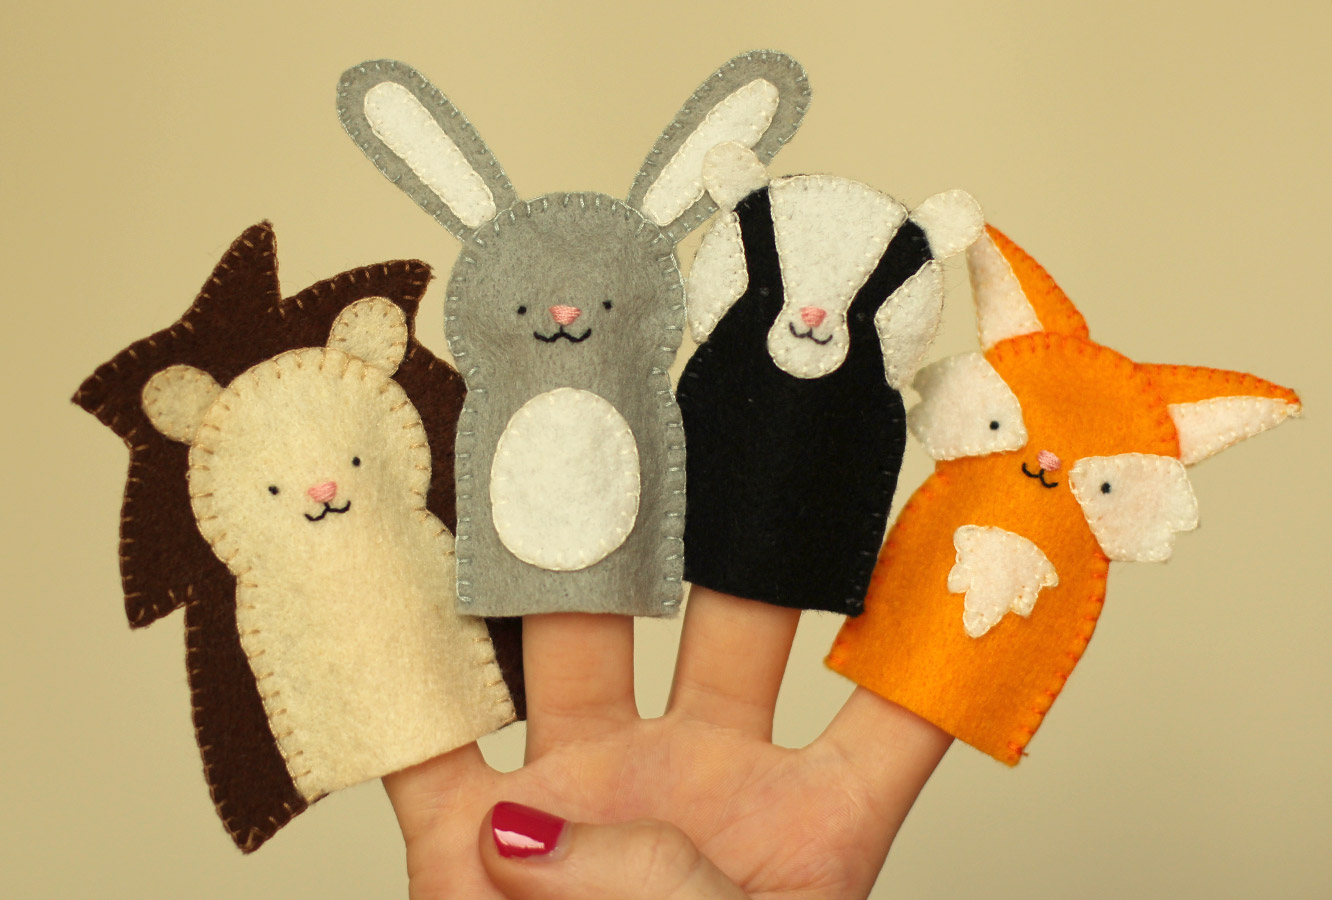
Anyway, other than baking some little flowerpot grassy gnome type cupcakes, I decided my contribution would be to carry the theme into my present and make a small selection of woodland characters to entertain baby upon her arrival into the world.

So here’s how to make your very own arsenal of woodland animal finger puppets, with a downloadable template of course.

how-to-make-finger-puppets-01

You will need

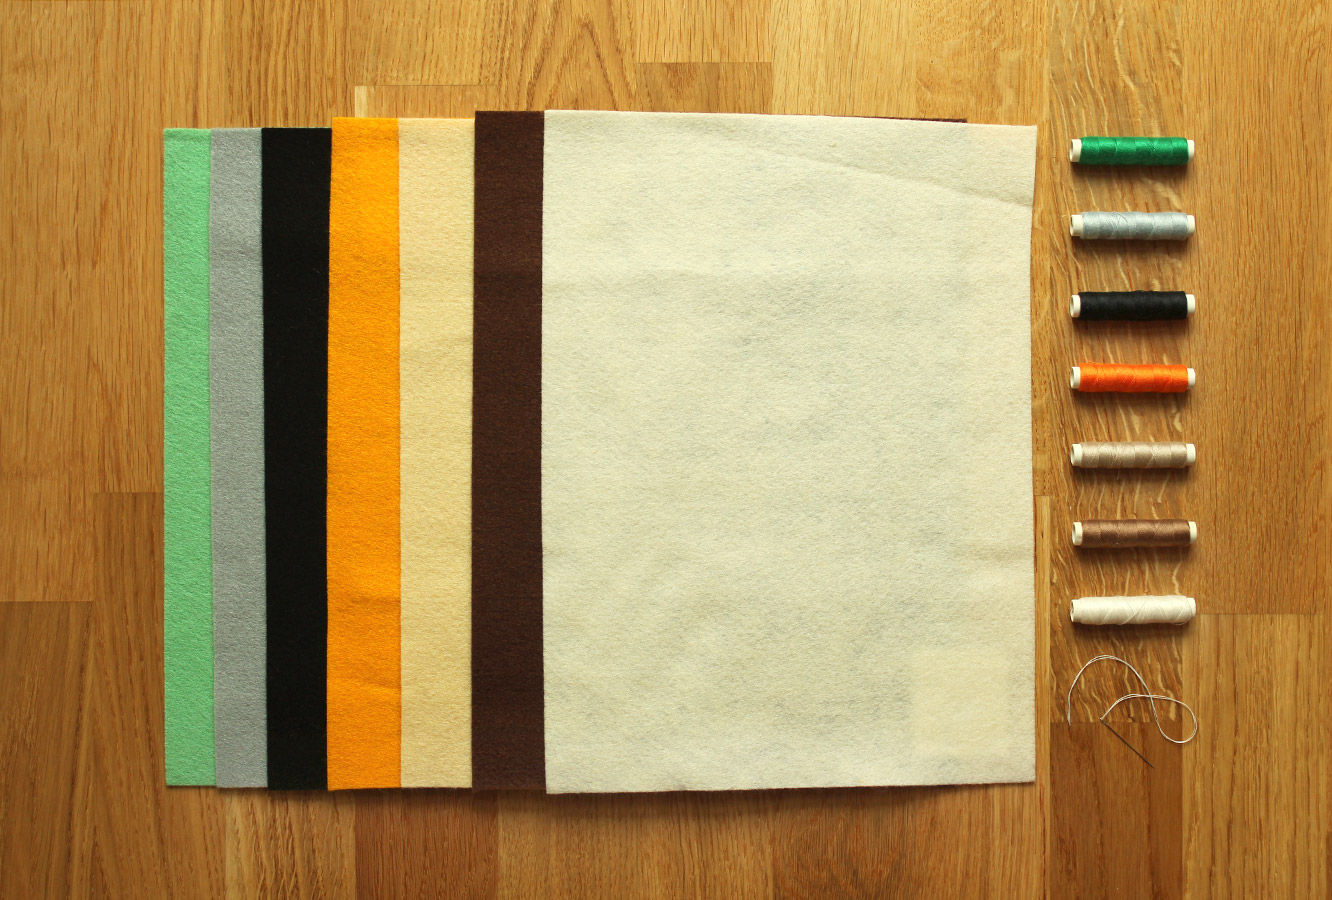
Felt (for the patterns I have provided you need brown, beige, white, black, grey and orange)

Thread in corresponding colours

A needle

This free downloadable template

how-to-make-finger-puppets-02

Step one

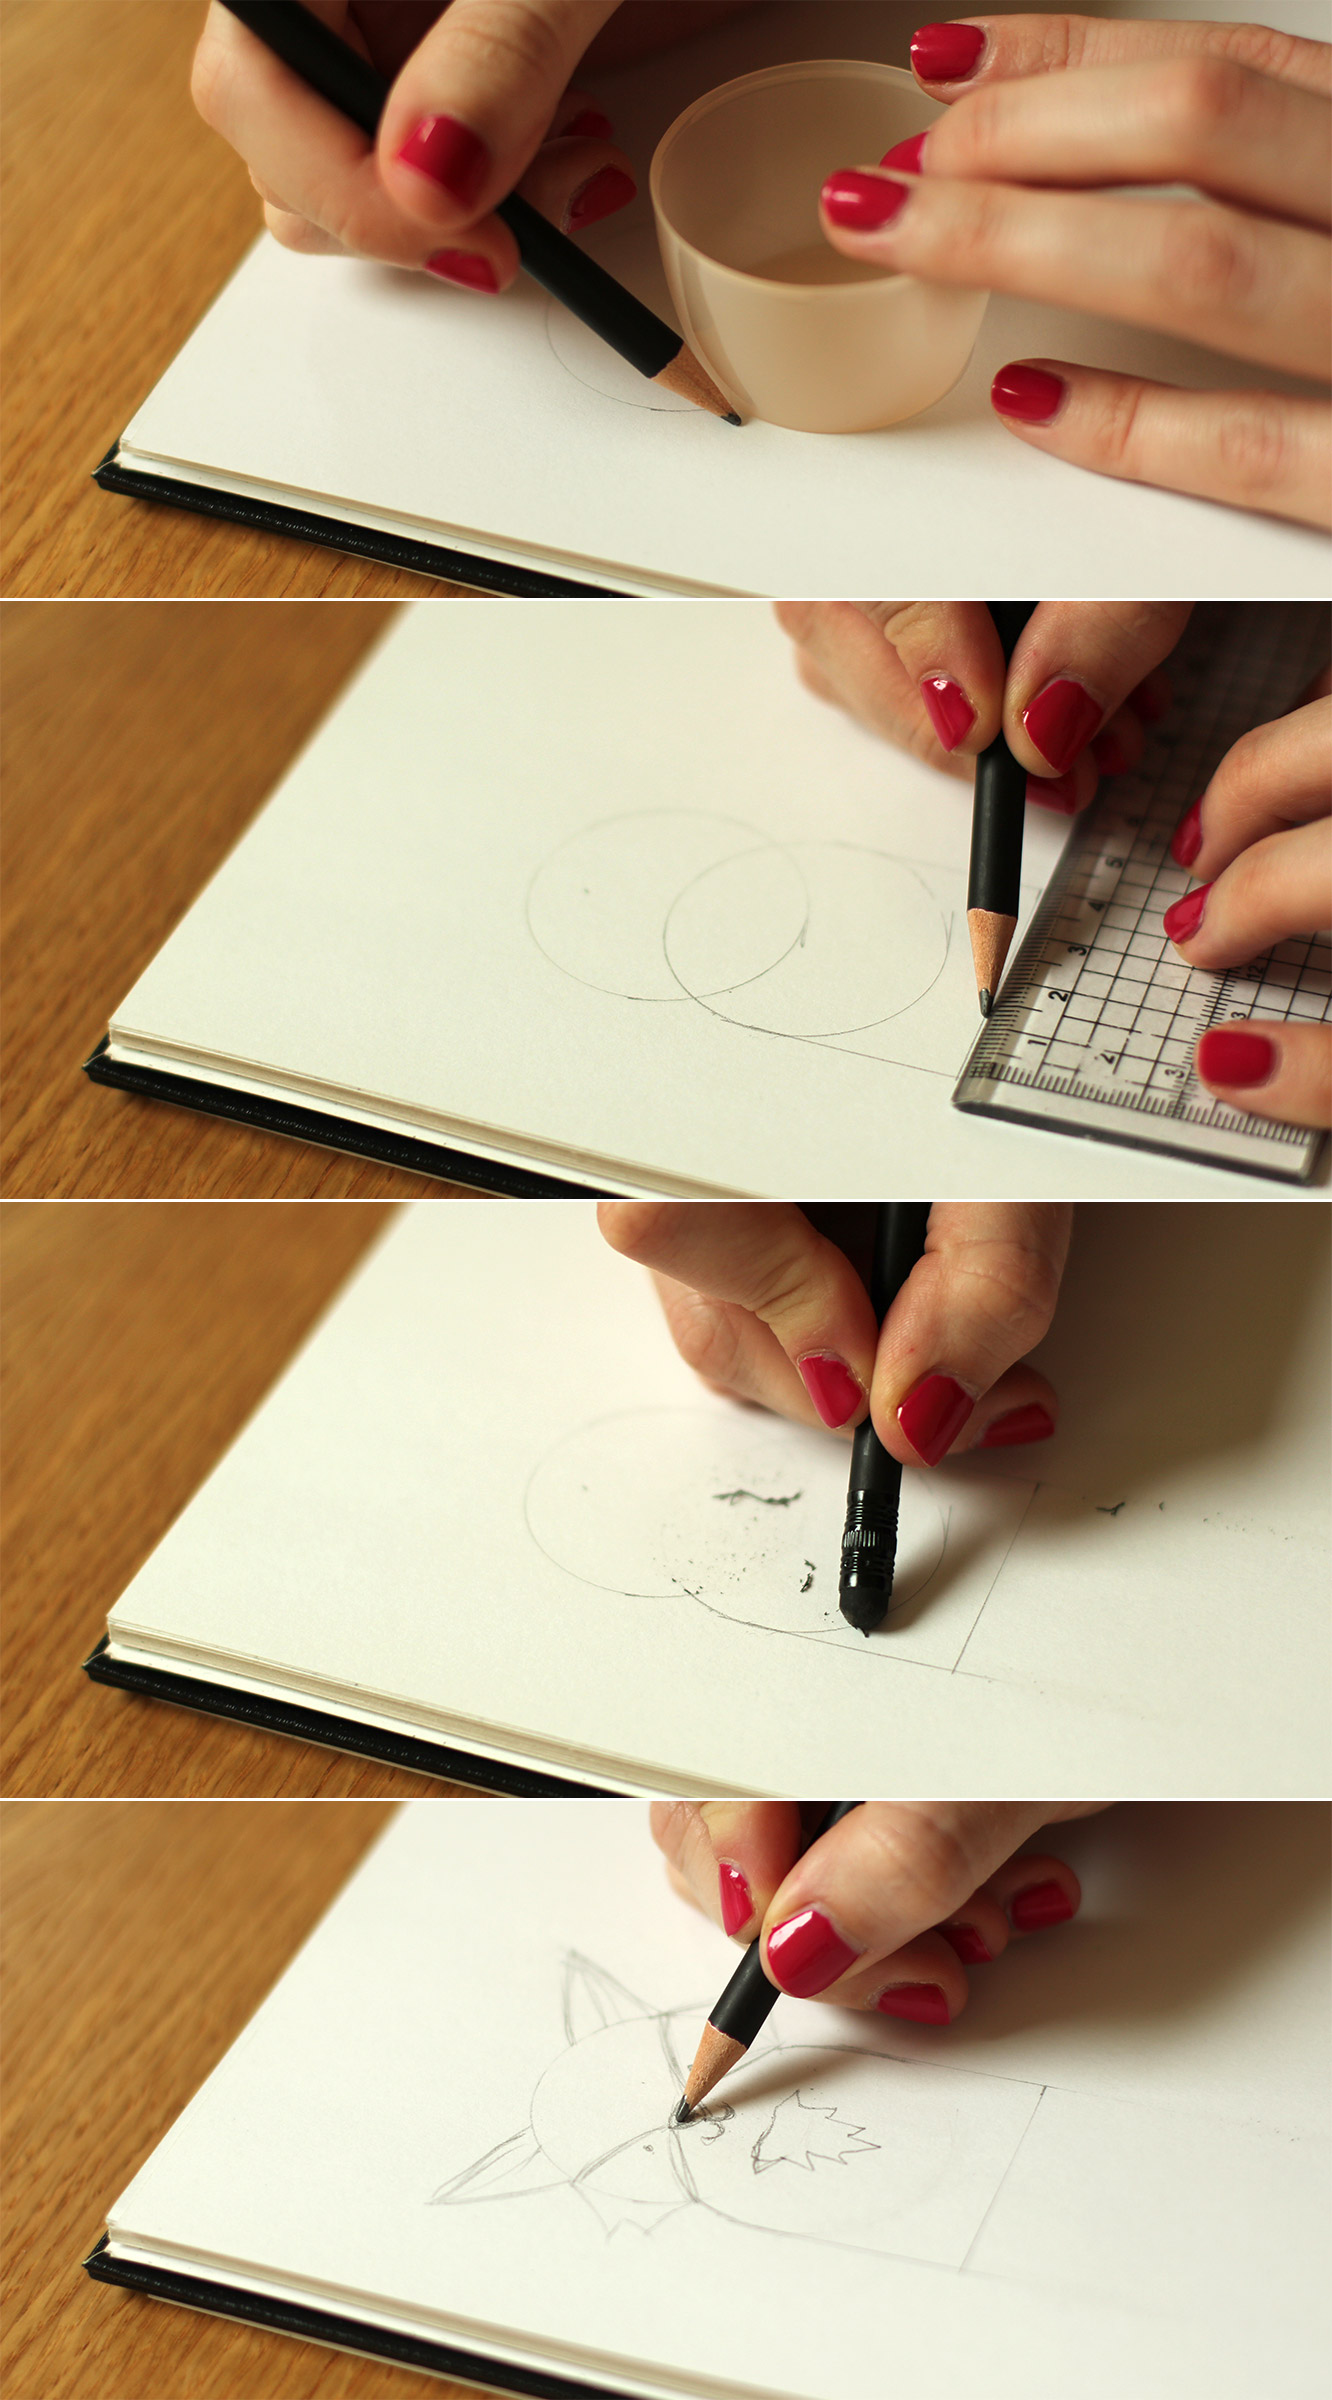
This is entirely optional. If you want to draw your own characters (or expand on the set I’ve provided) You will need to draw out a few designs. I used a deodorant can lid and a ruler to keep basic shape of my characters consistent.

If you want to cheat you could just trace the shape off the printable and add your own features to it.

how-to-make-finger-puppets-03

Step two

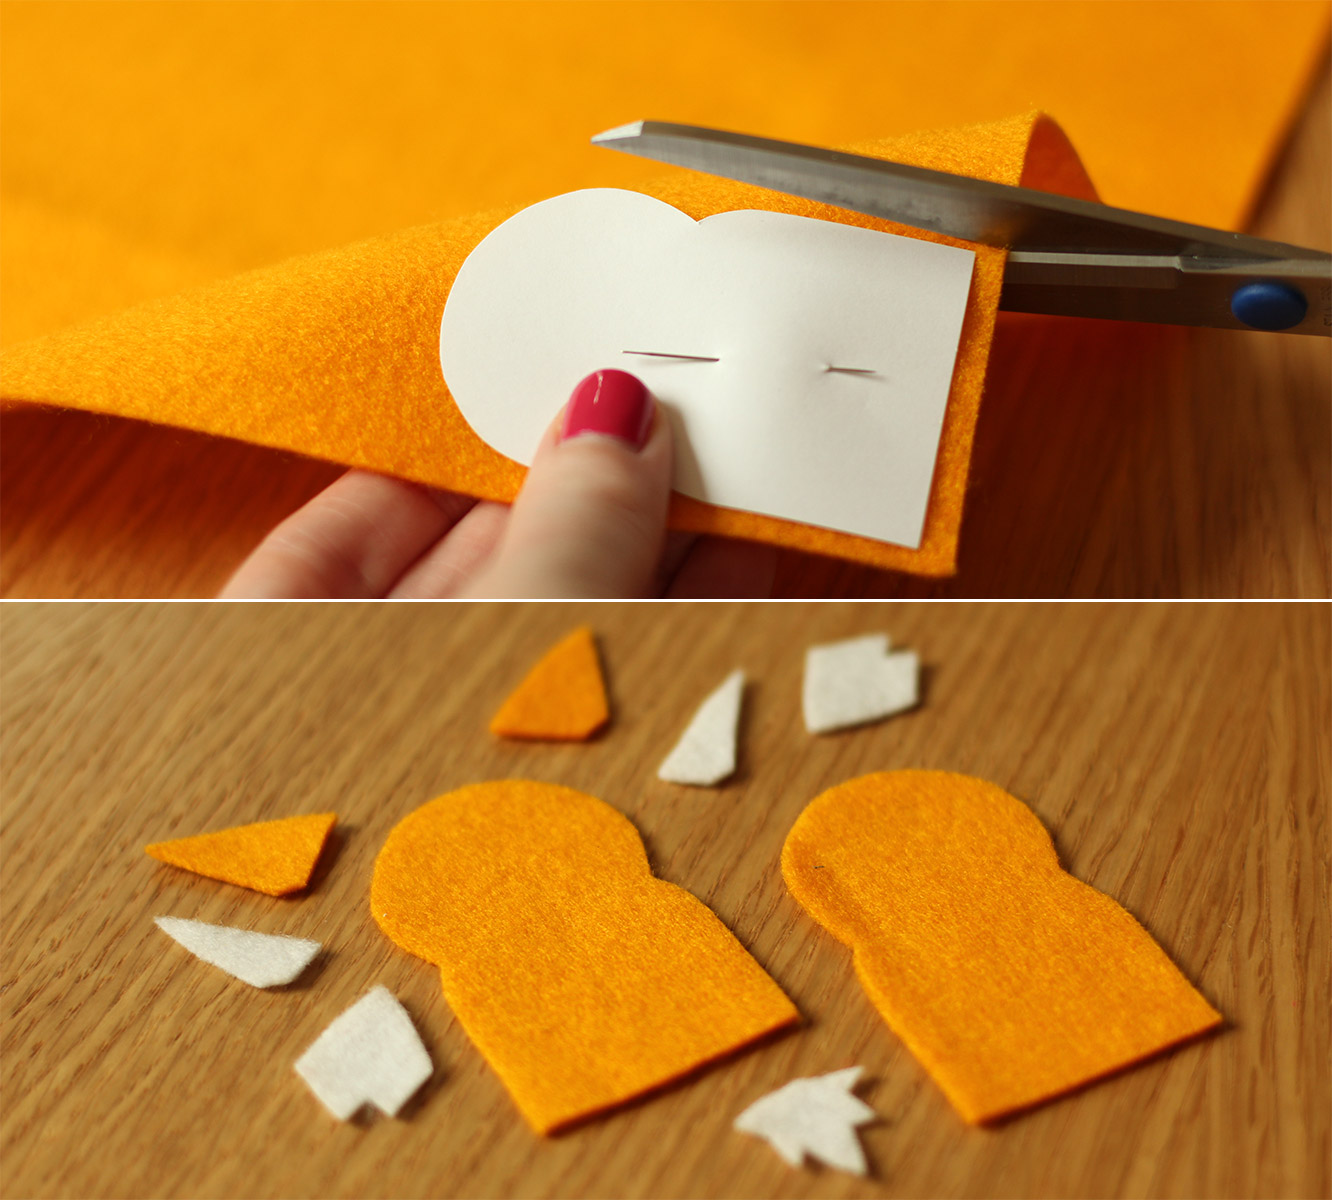
Cut out all the shapes in the relevant coloured felt.

how-to-make-finger-puppets-04

Step three

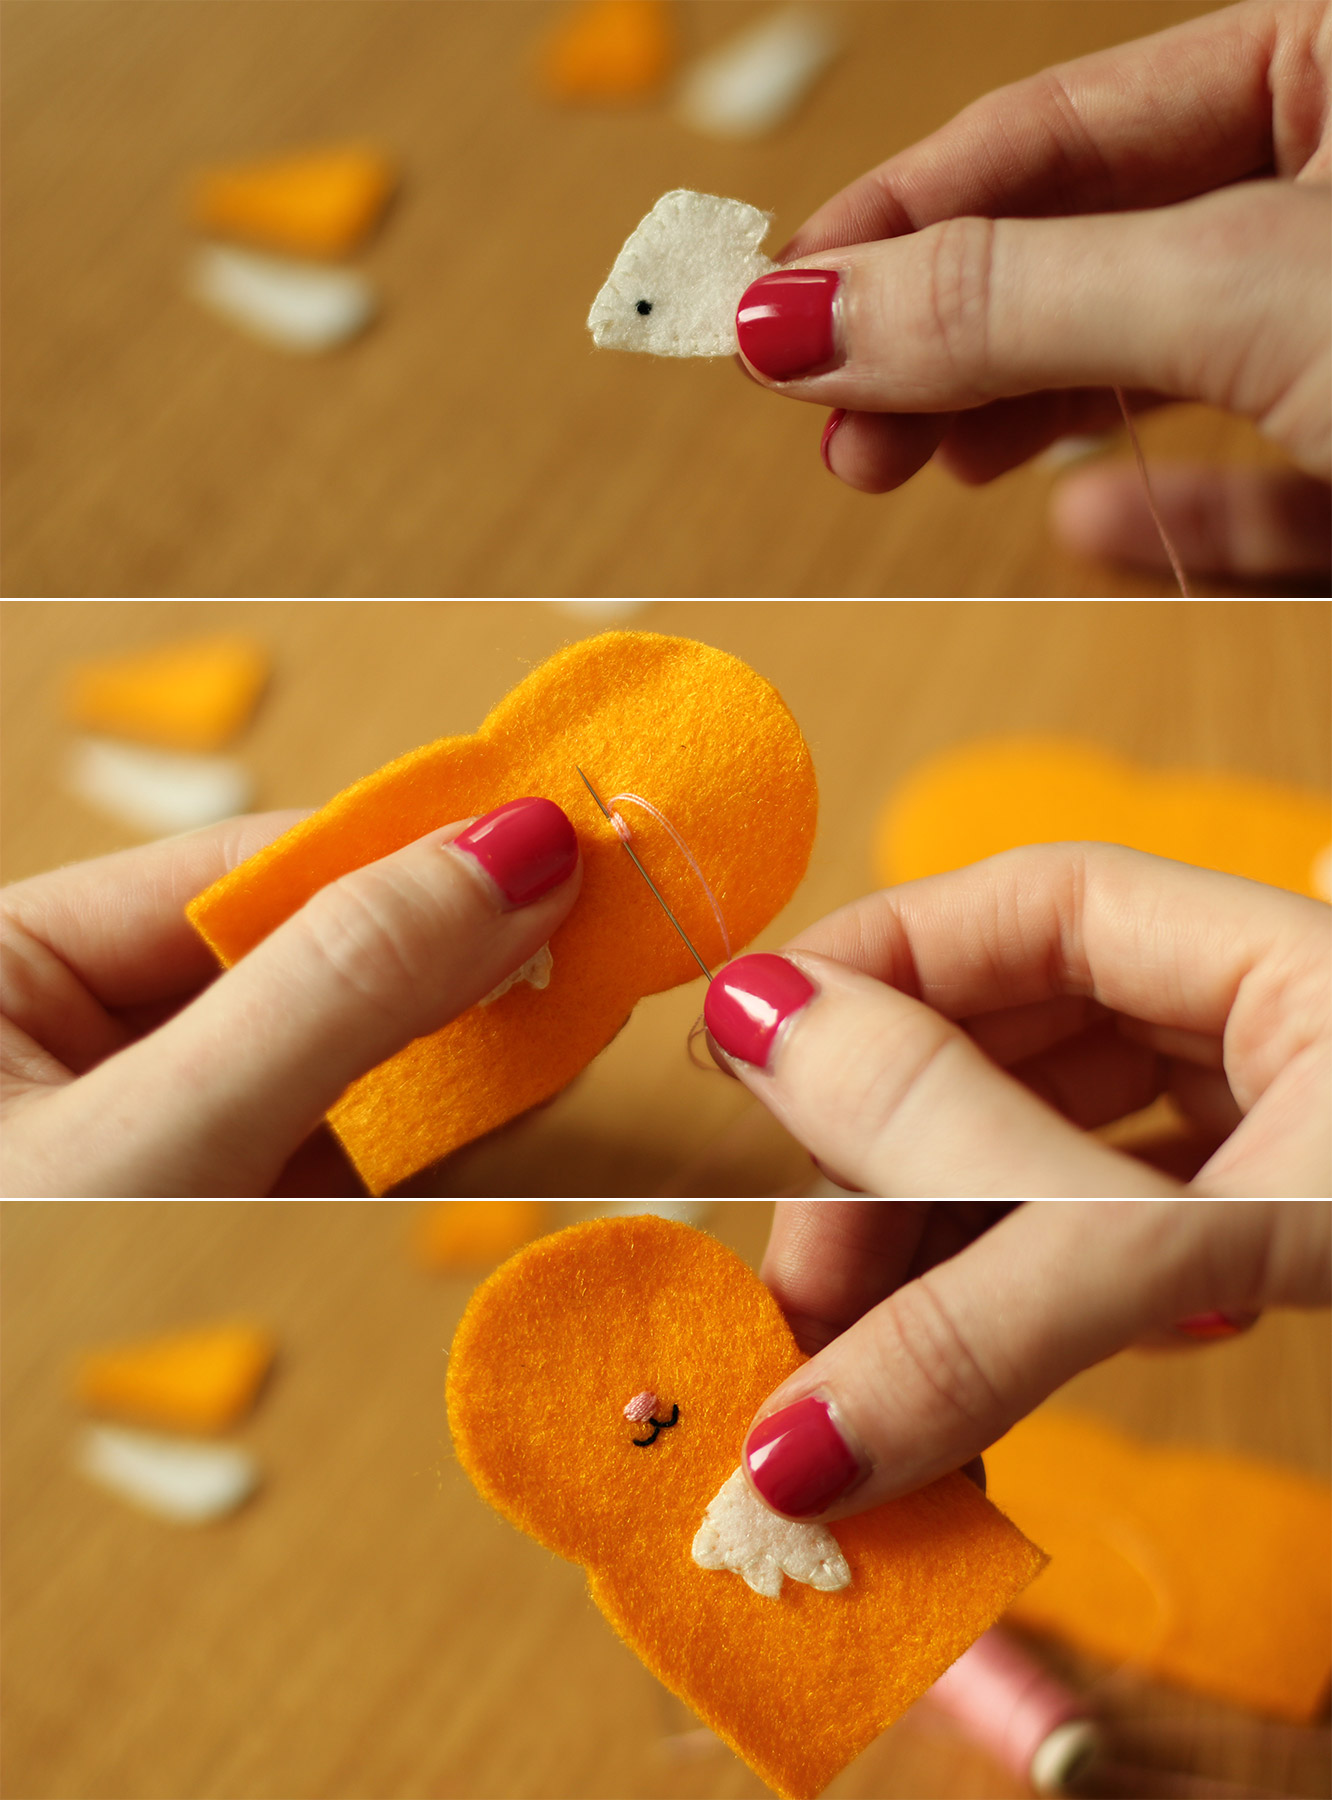
Sew on the faces, I just used simple stitches overlapping them for the noses and just a little line of backstitch for the mouths. No fancy embroidery techniques here.

how-to-make-finger-puppets-05

Step four

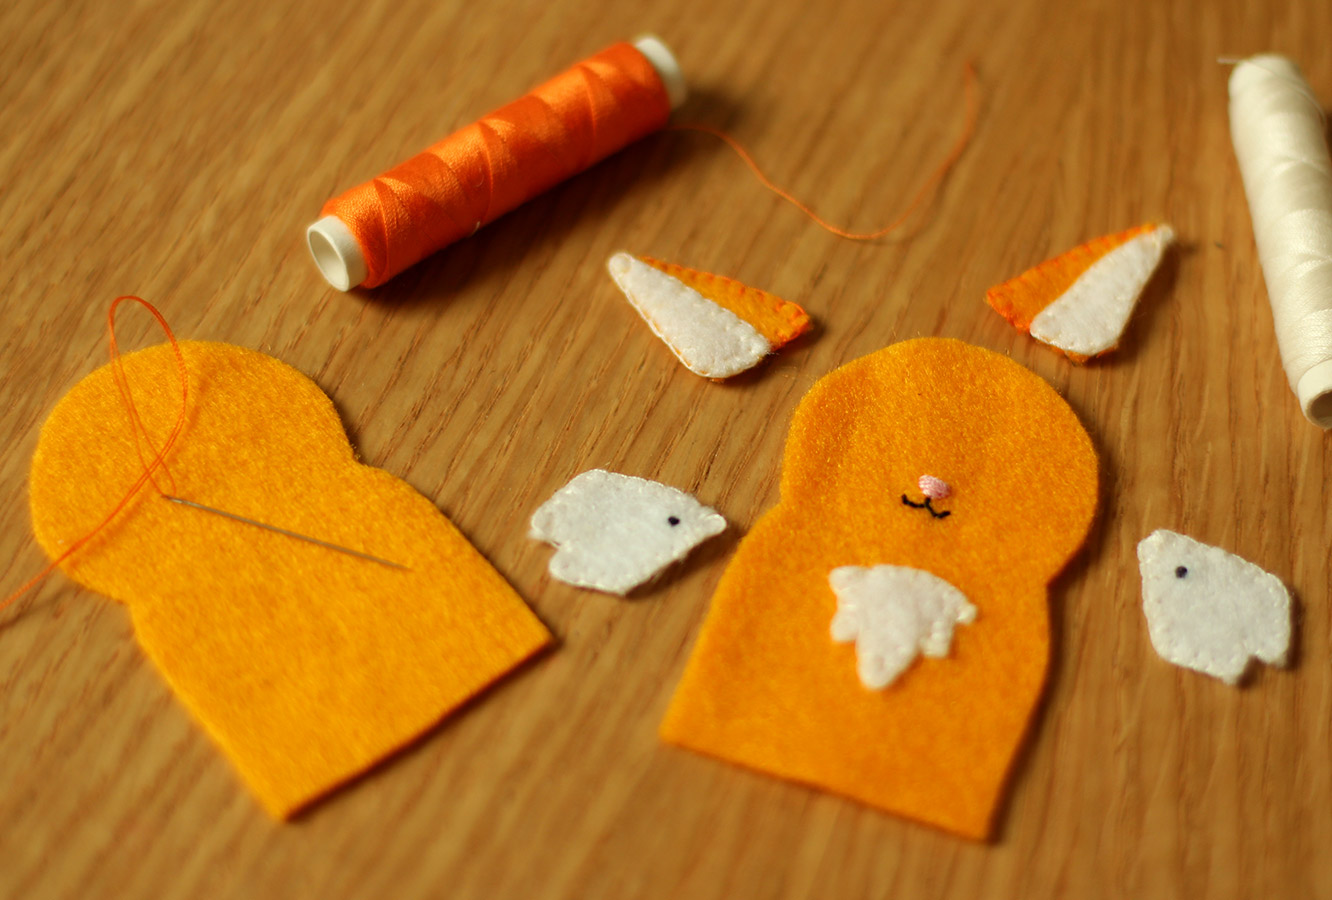
Edge all the remaining features/bits of fur with blanket stitch (see below). You will notice that for the fox I sewed the tummy fur straight onto the puppet but left the cheeks separate to glue on later. With the badger I sewed his cheeks straight on because they followed the shape of his face and I just found it less logistically challenging somehow.

how-to-make-finger-puppets-06

Step five

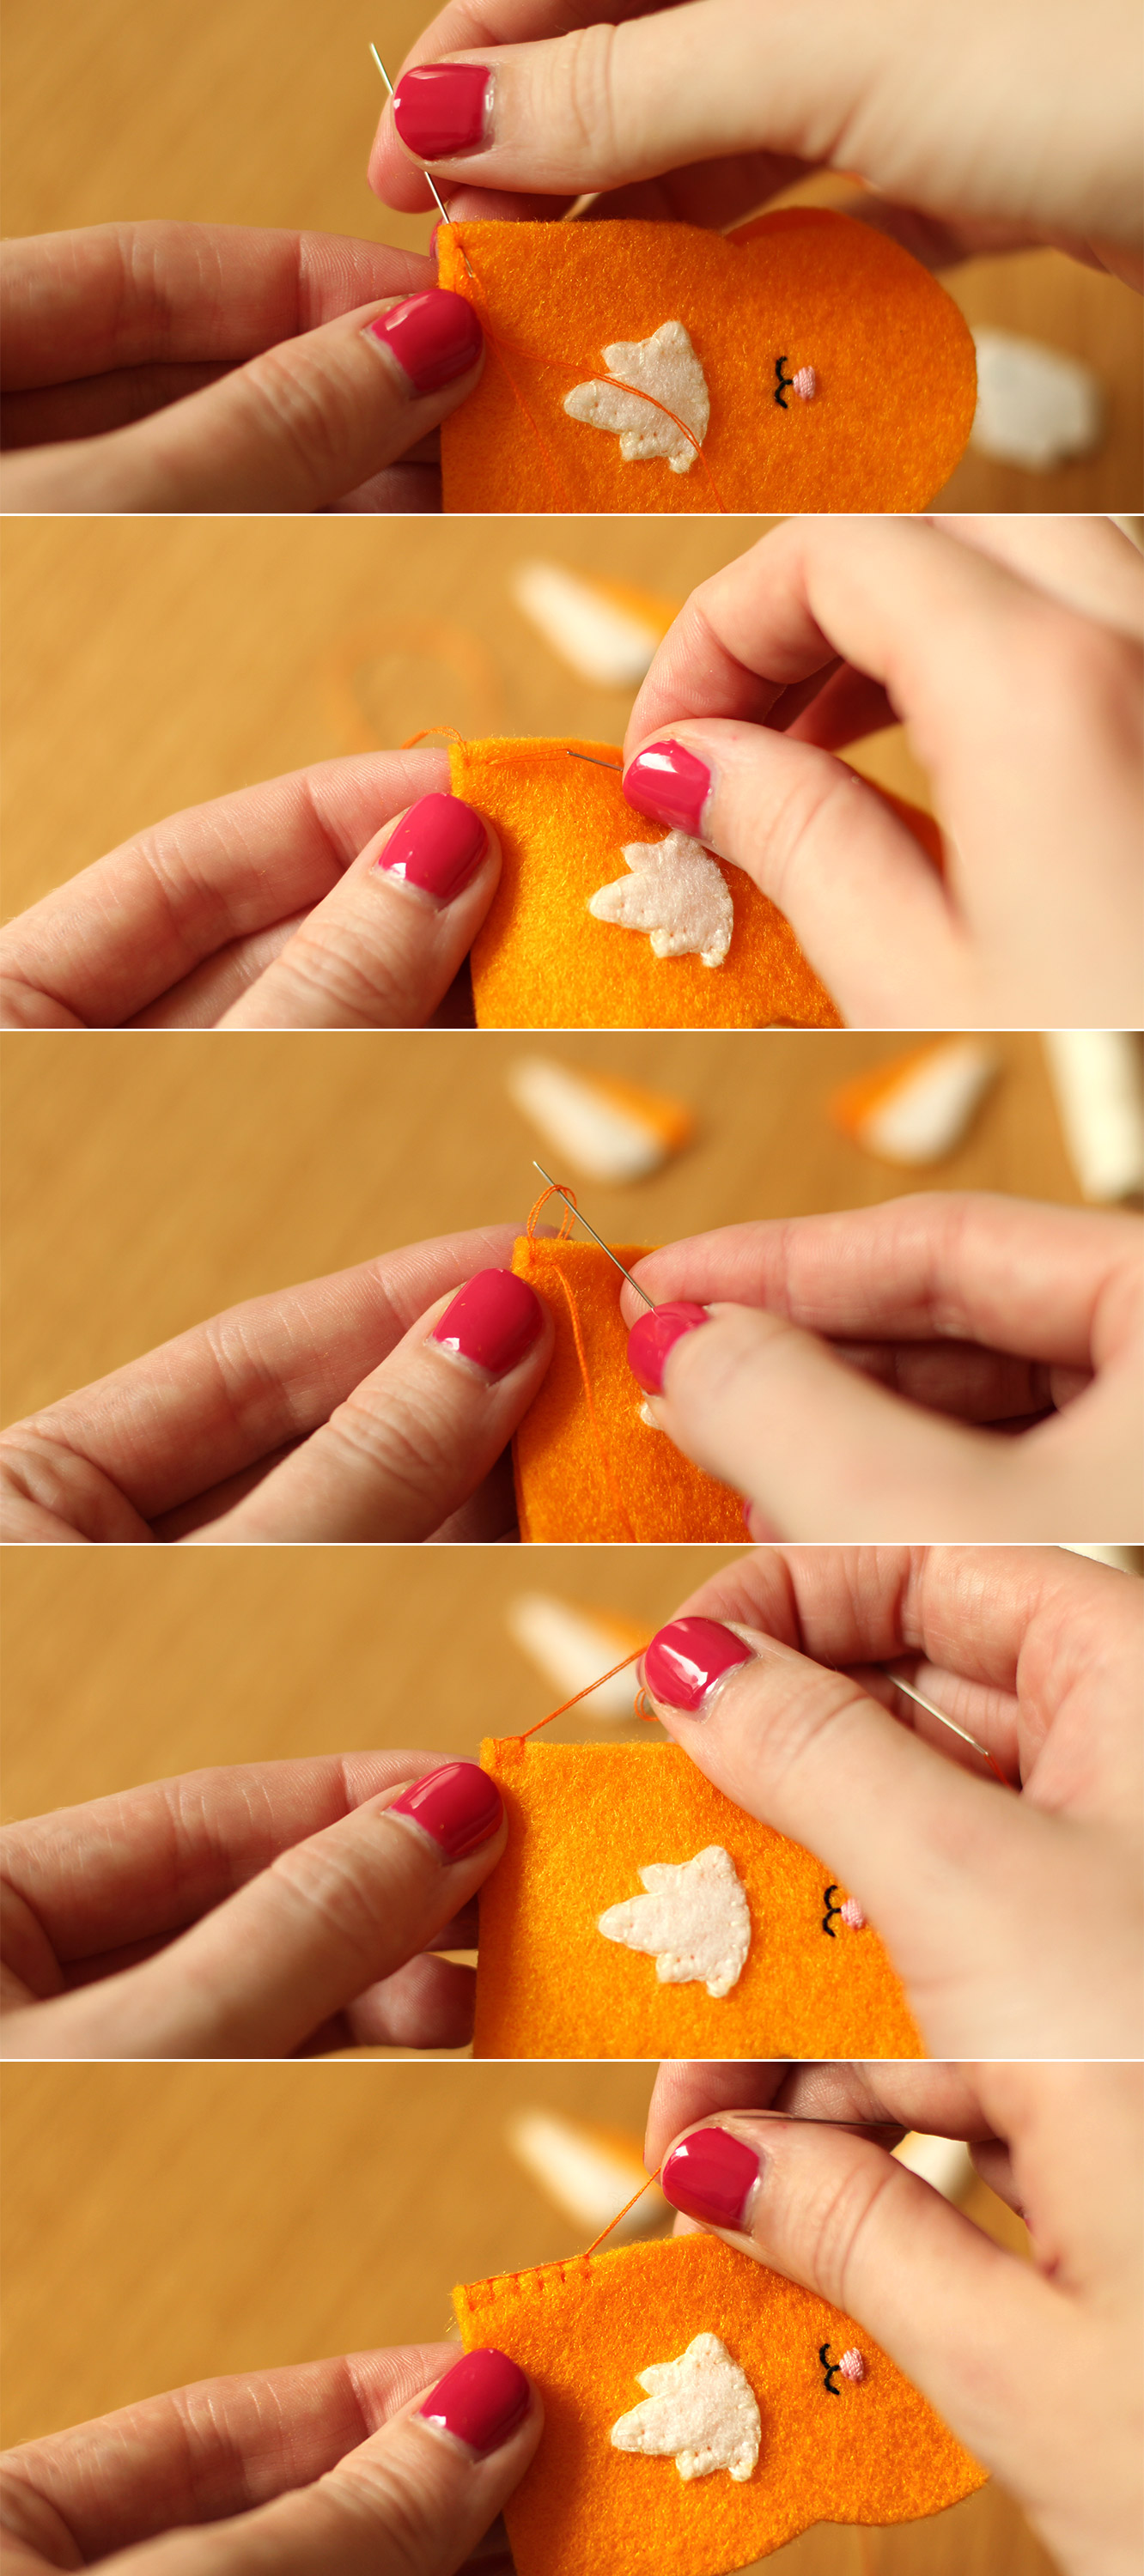
Blanket stitch the back and front of the puppet together. Utilising the memory bank of primary school sewing club for me, thanks Mrs Gothard, nailed it.

You basically need to put the needle through the felt at the height you want your stitching, and as you pull the thread through catch the loop so that it is held at the top. I’m sure the youtube can furnish you with a useful tutorial if my description and photos fail to do the job.

You need to include the ears as you go round, I just came back through at the top of the first stitch so my loop was on top of the felt to keep the effect going. I know, I wouldn’t understand that explanation either.

how-to-make-finger-puppets-07

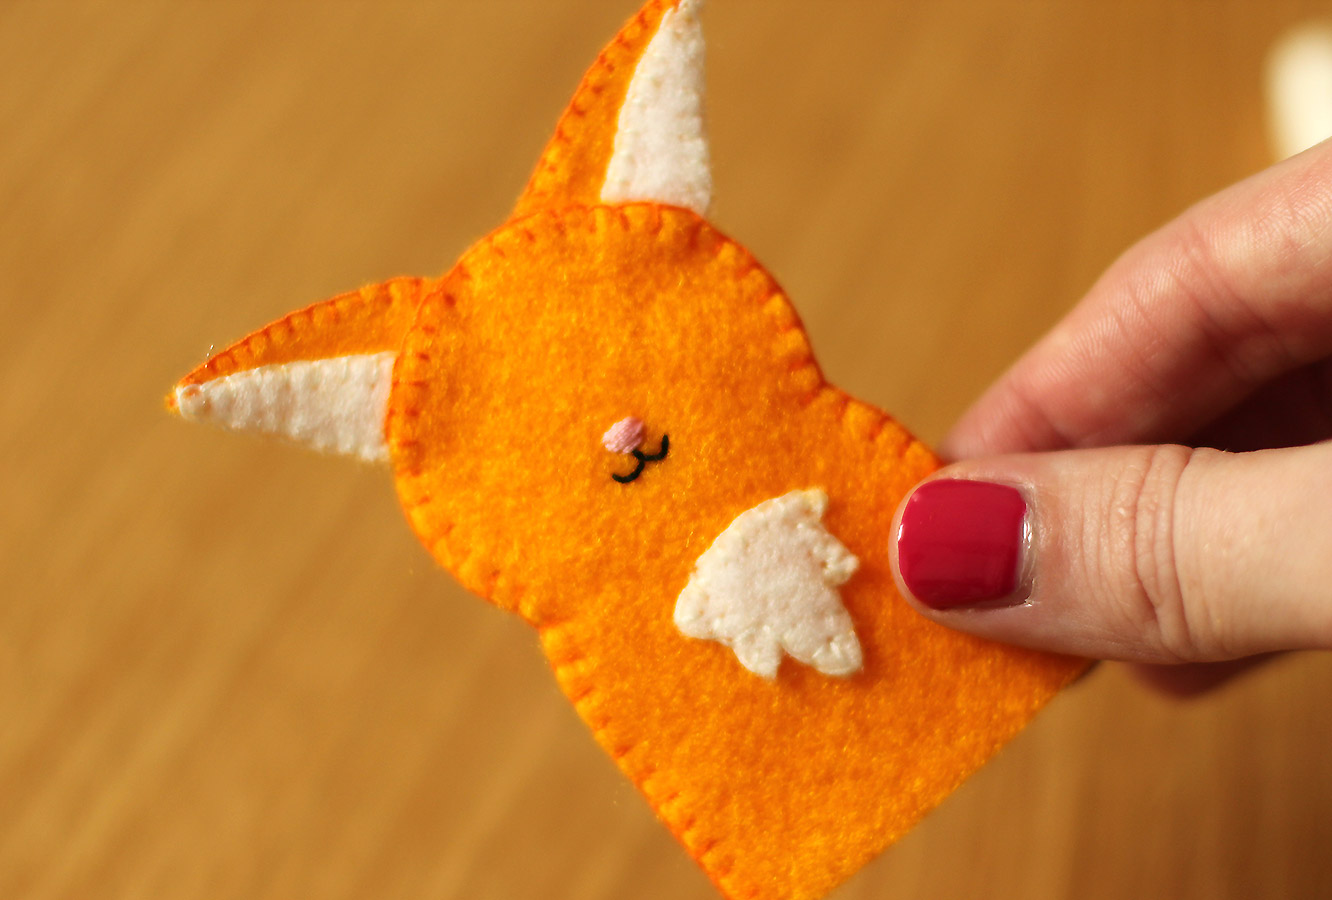
Step six

By this point if you’ve managed to follow any of my hapless instructions you will have yourself a blind little fox. On second thoughts, maybe we should have just started with the hedgehog.

how-to-make-finger-puppets-08

Step seven

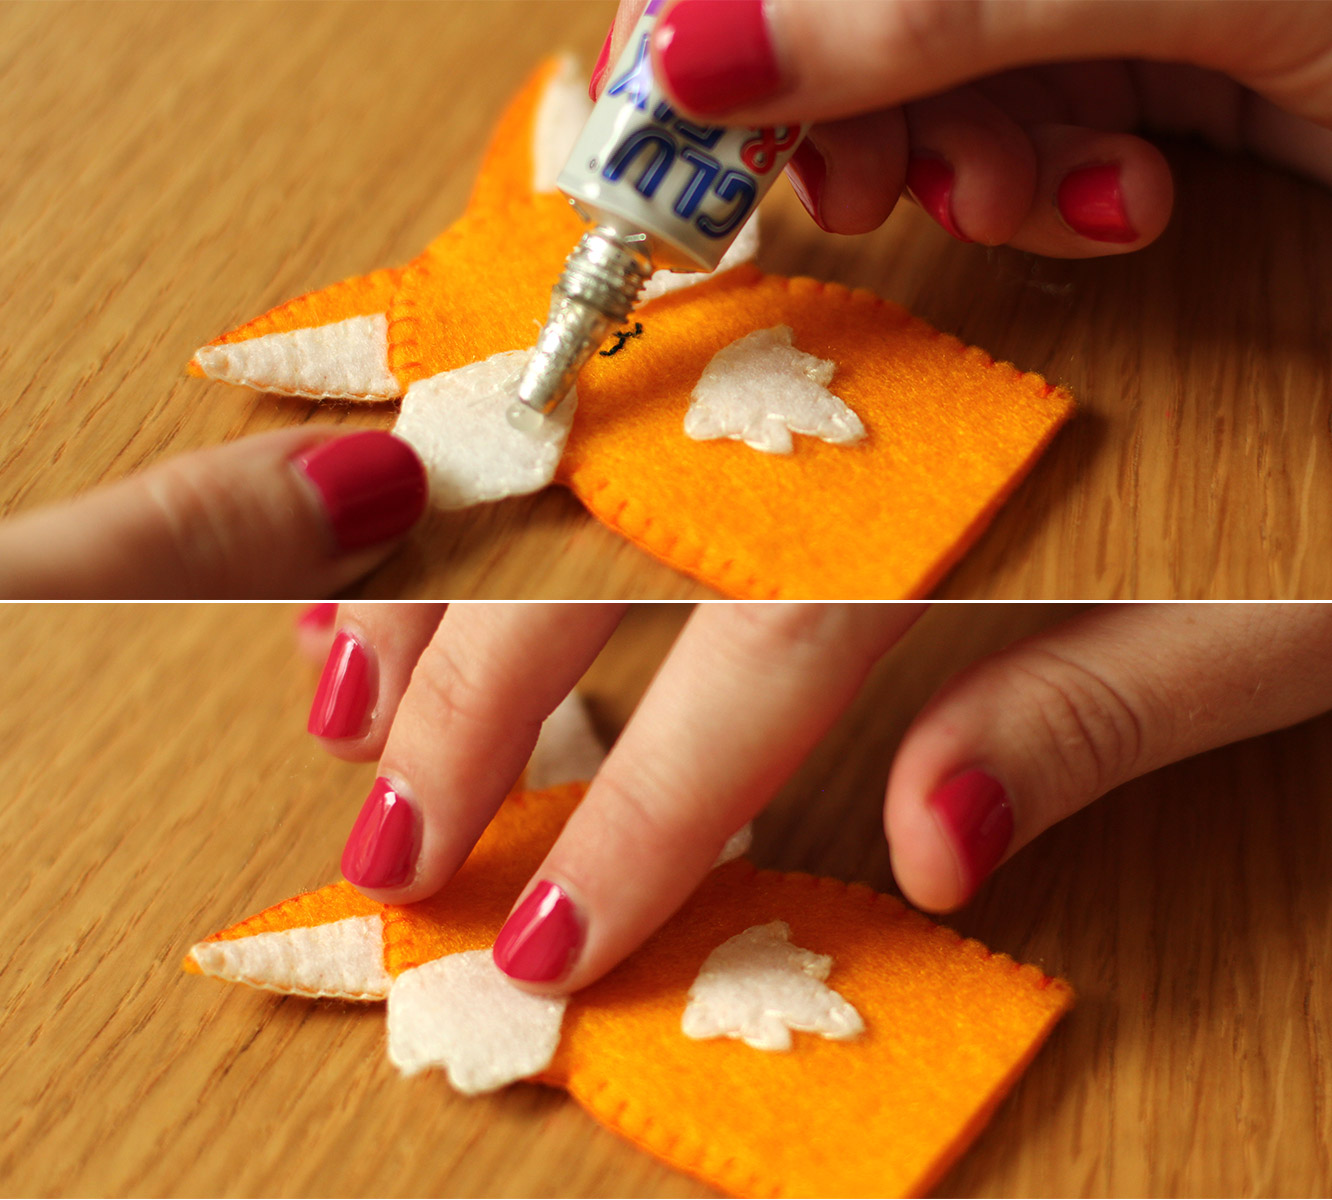
It’s ok to cheat. Just glue his eyes and fluff on, pop him over a fork or something just to make sure the glue doesn’t soak through and seal him shut.

how-to-make-finger-puppets-gif-01

Step eight

Make your fox some furry little friends.

how-to-make-finger-puppets-09

Crisp autumn pie

I realise it’s been a while since I did something quite fancy, and while people seem to prefer to make the easy ones, there’s definitely some love for the posts with lots of steps too.

With the return of my favourite season (I’m really fair-skinned, so shoot me if I don’t adore summer like the rest of you) and a little dinner party this weekend, I figured the only way to round off my housemate’s uh-mazing main course was with a little homage to the apple.

Without further ado here’s a recipe for a rather yummy apple and frangipane tart.

apple-frangipane-almond-tart-pie-1

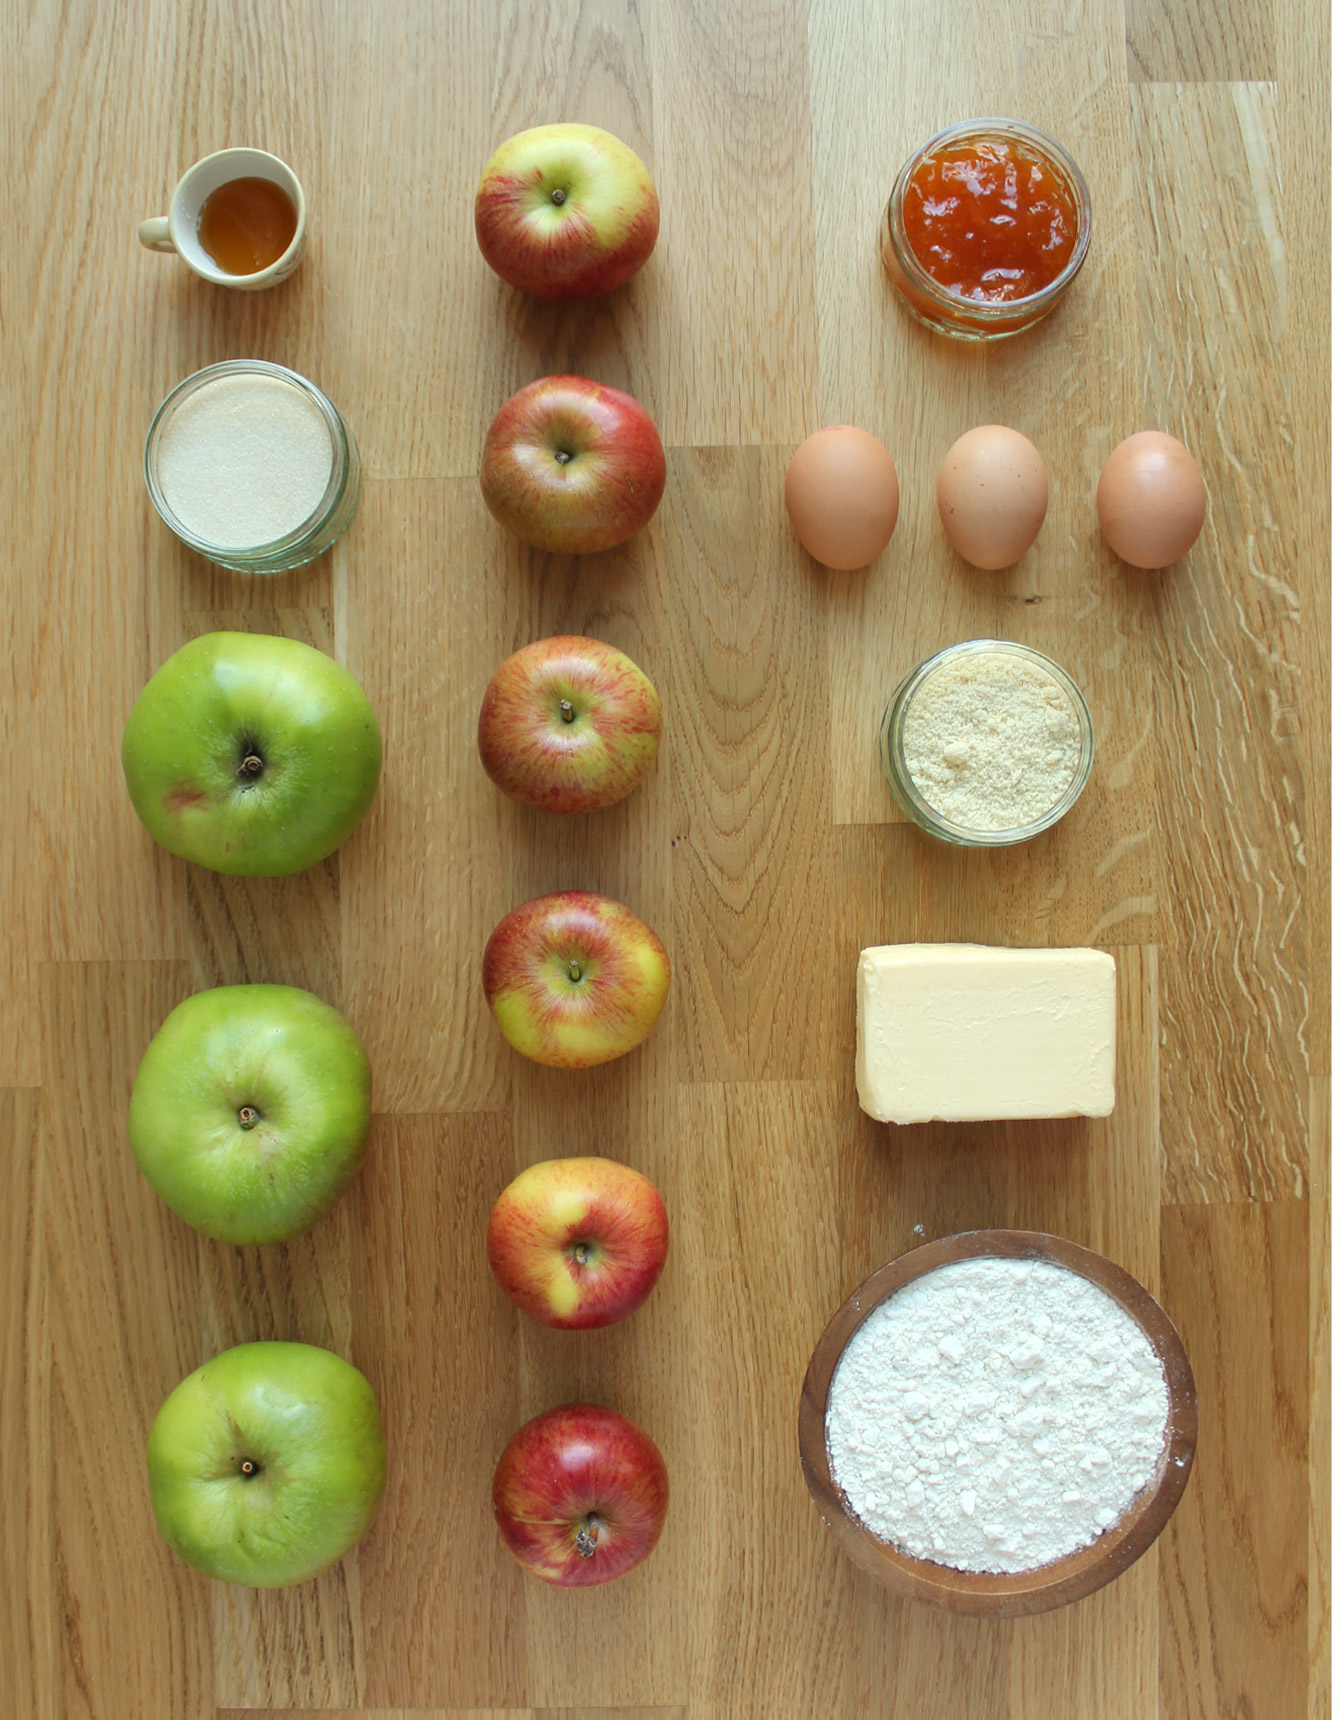
You will need

For the pastry:

300g/10.5 oz plain flour

170g/6 oz unsalted butter

30g/1 oz golden caster sugar

50ml/1.75 fl oz milk

1 egg yolk

A pinch of salt

For the frangipane:

70g/2.5 oz ground almonds

60g/2 oz unsalted butter

50g/1.75 oz golden caster sugar

40g/1.5 oz plain flour

1 egg

1-2 tsp almond extract (optional, but apple will likely overpower the almond a bit)

For the apple filling:

3 bramley cooking apples

100g/3.5 oz golden caster sugar

10g/0.5 oz unsalted butter

50ml/1.75 oz water

2-3 tbsp clear honey

For the topping:

4-5 braeburn apples (probably any eating apples would work)

2-3 tbsp apricot jam (for the glaze)

(My dish was 25cm and for quiches/pies, but there would be enough pastry and filling to do a slightly larger, shallower tart, perhaps up to 29cm or so).

apple-frangipane-almond-tart-pie-2

Step one

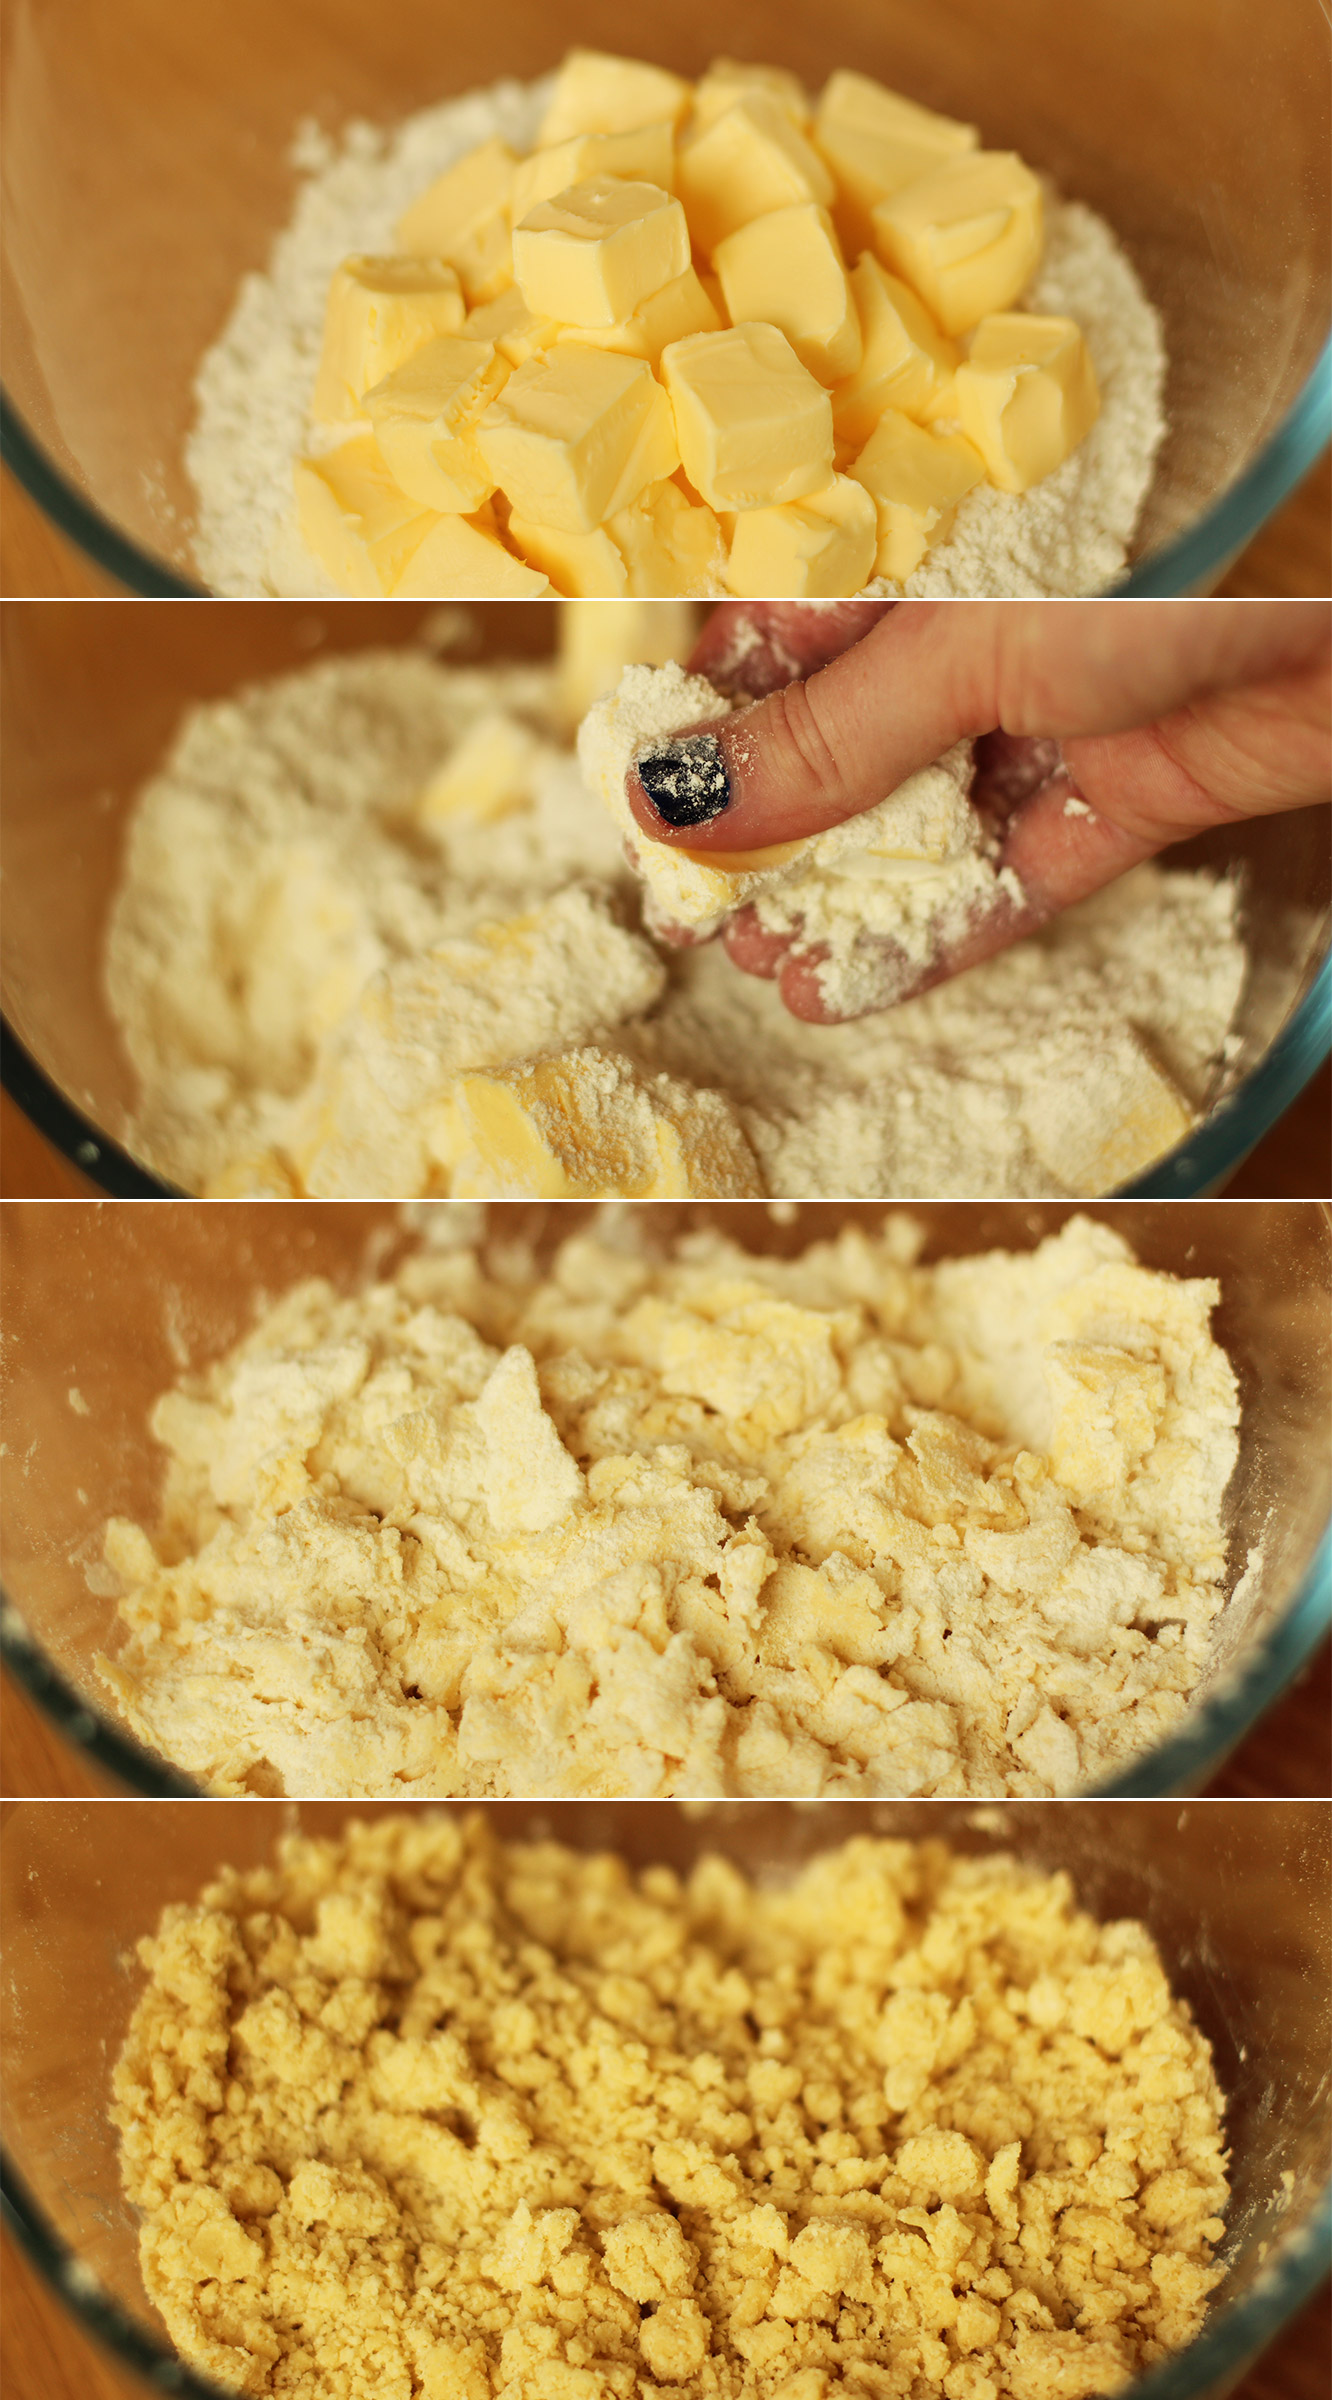
Start by making the sweet shortcrust pastry.

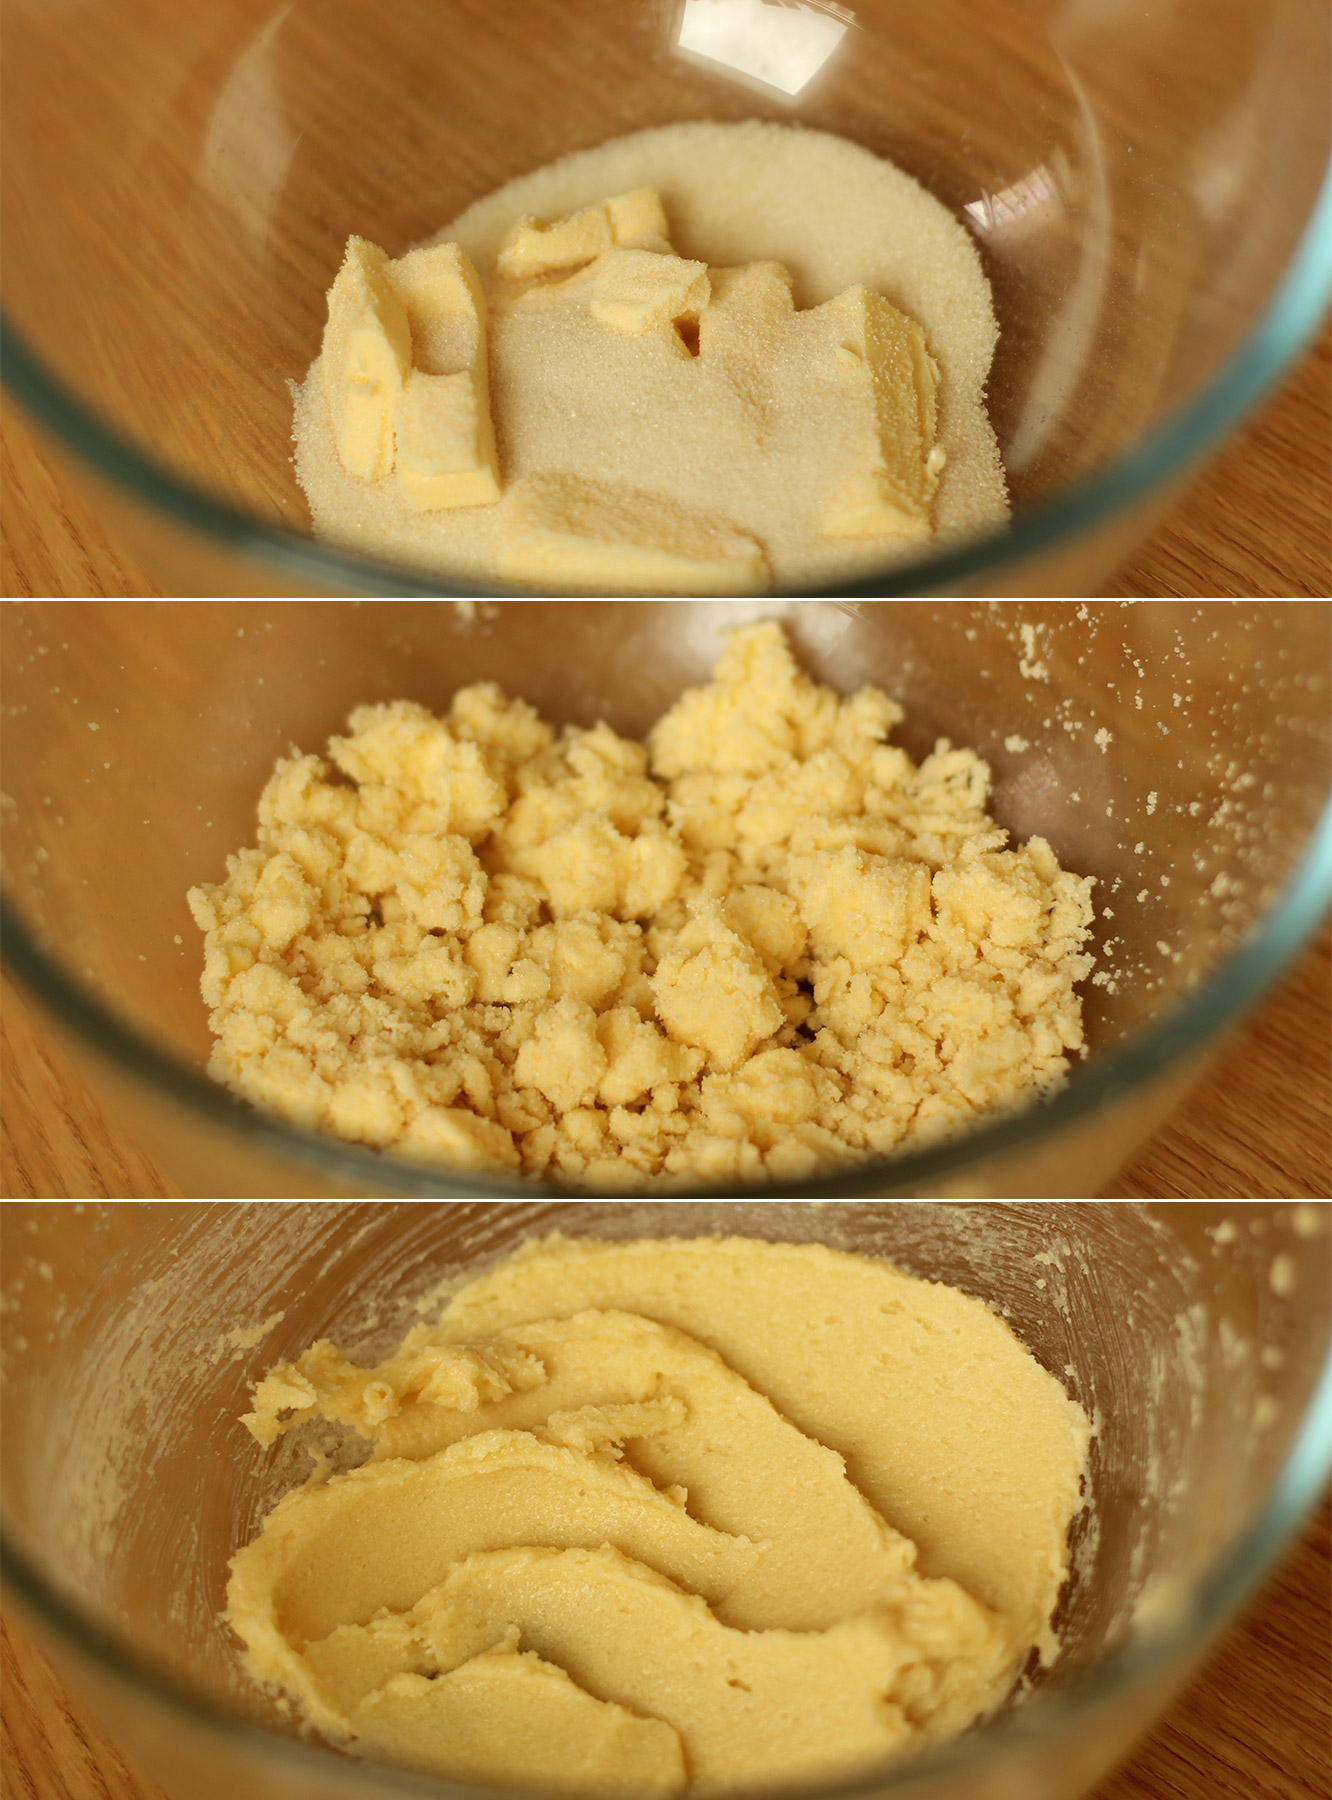
First cube the butter and pop that into the plain flour. Using your fingers, rub the butter and flour together to get a crumb-like texture.

The colder your butter the better and the smaller the crumbs you will be able to get. My house is waaaaaaarm, so as you can see, mine was a tad lumpy at this stage.

If you have a food processor I am led to believe you can do this bit in that very quickly and easily. But we can’t all be posh like you so (clean) fingers are just fine too.

apple-frangipane-almond-tart-pie-3

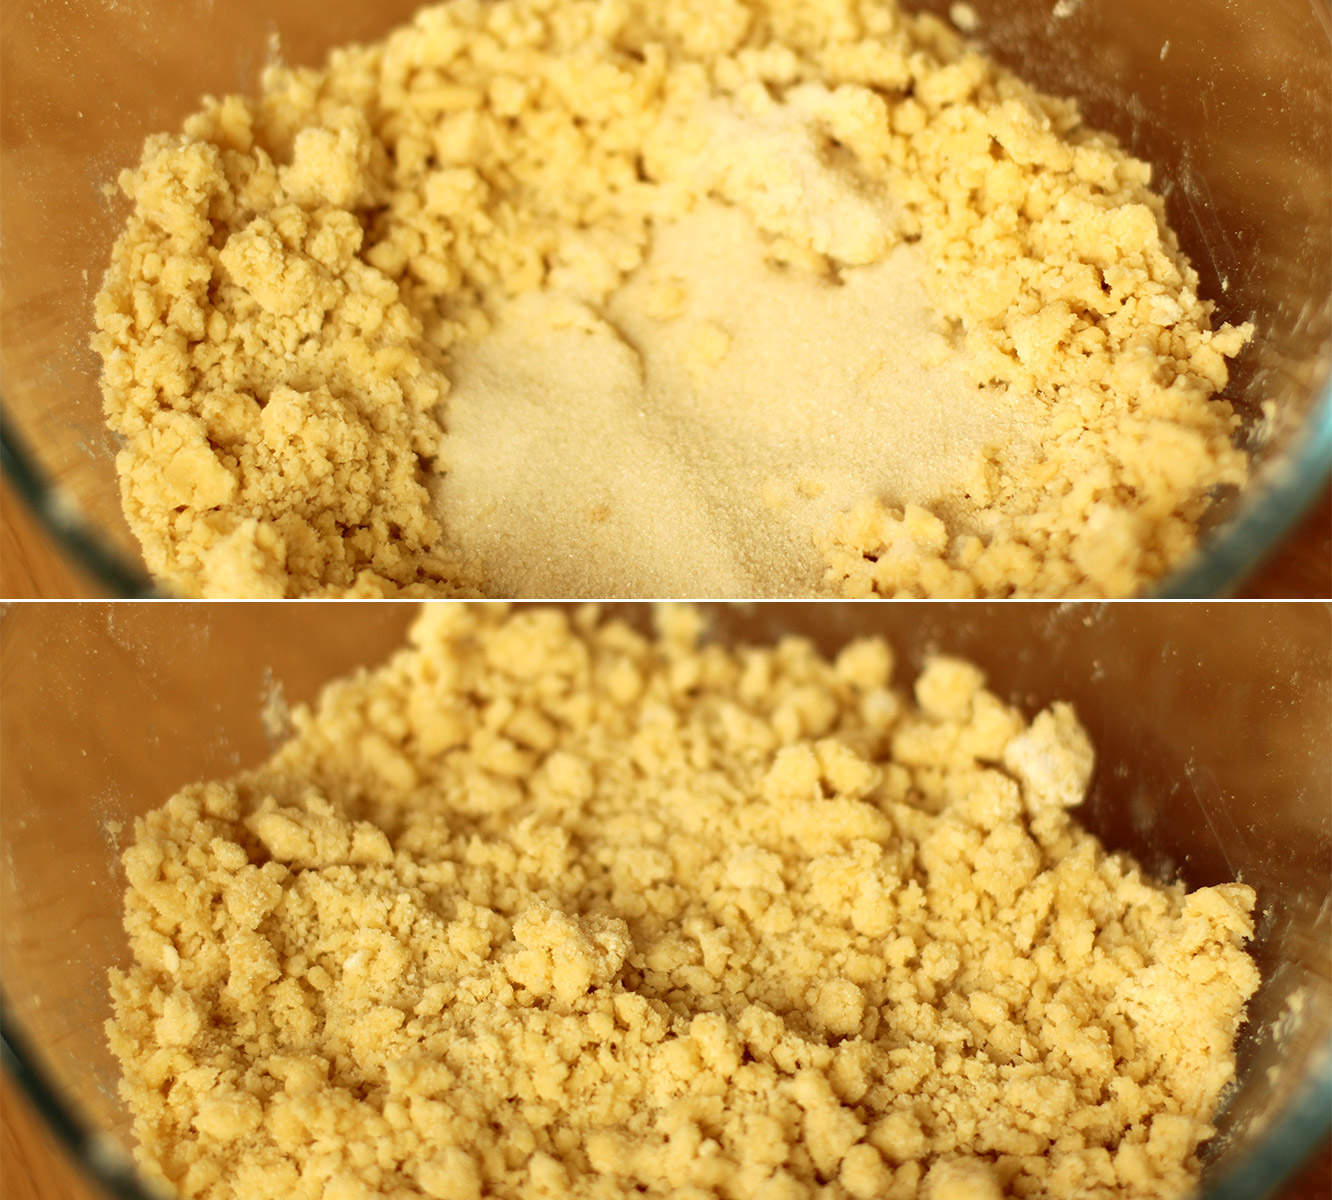
Step two

Stir in the caster sugar.

apple-frangipane-almond-tart-pie-4

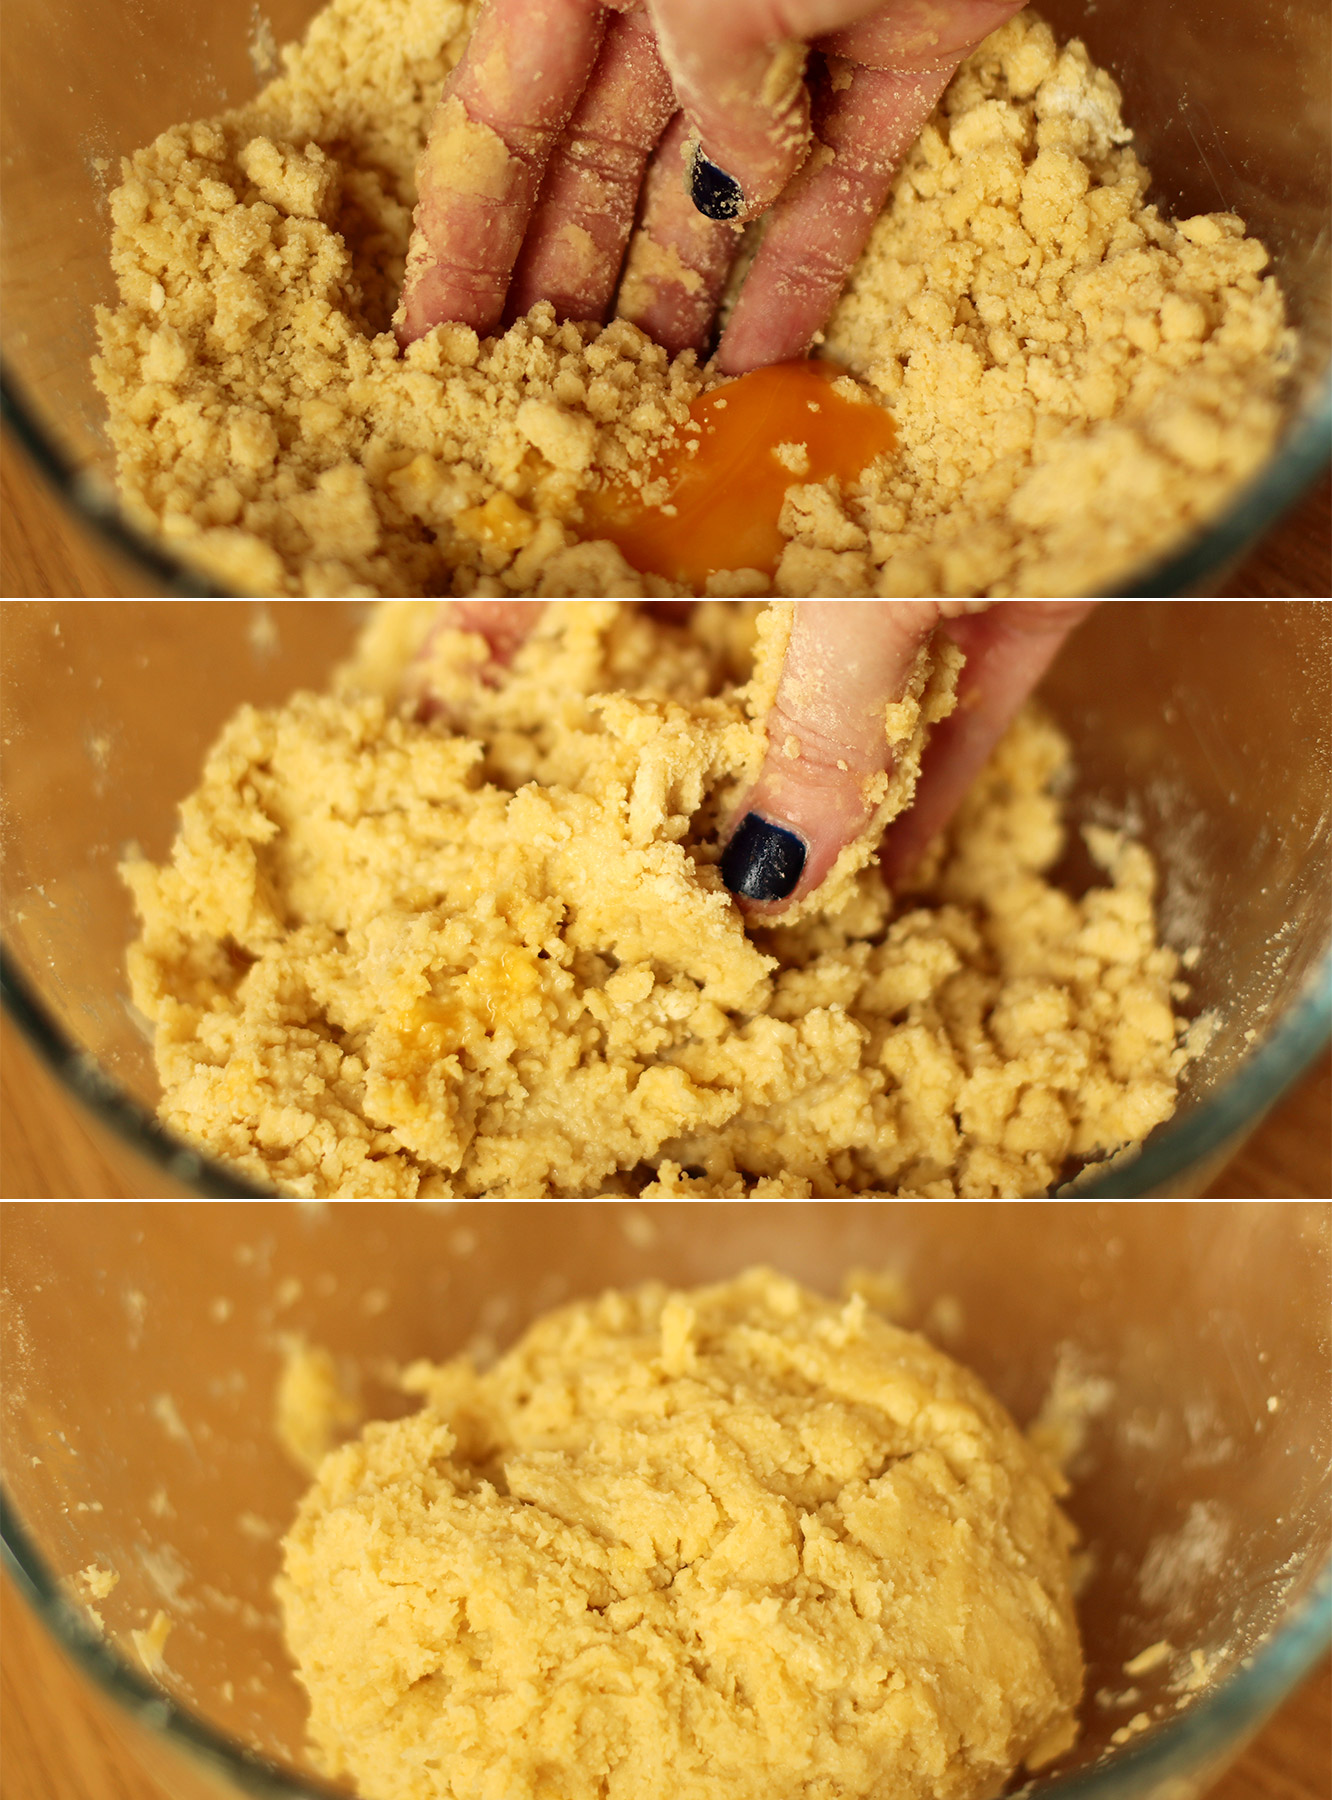
Step three

Make a well in the middle for the milk and egg yolk. Fairly sure you can guess what’s next…put yolk and milk in said well.

Bring the mixture together with your hands. It may be a bit crumbly so you can tip it onto a worktop and knead it together slightly to combine, but be careful not to over work it.

Wrap it in clingfilm and put it in the fridge for at least an hour.

apple-frangipane-almond-tart-pie-5

Step four

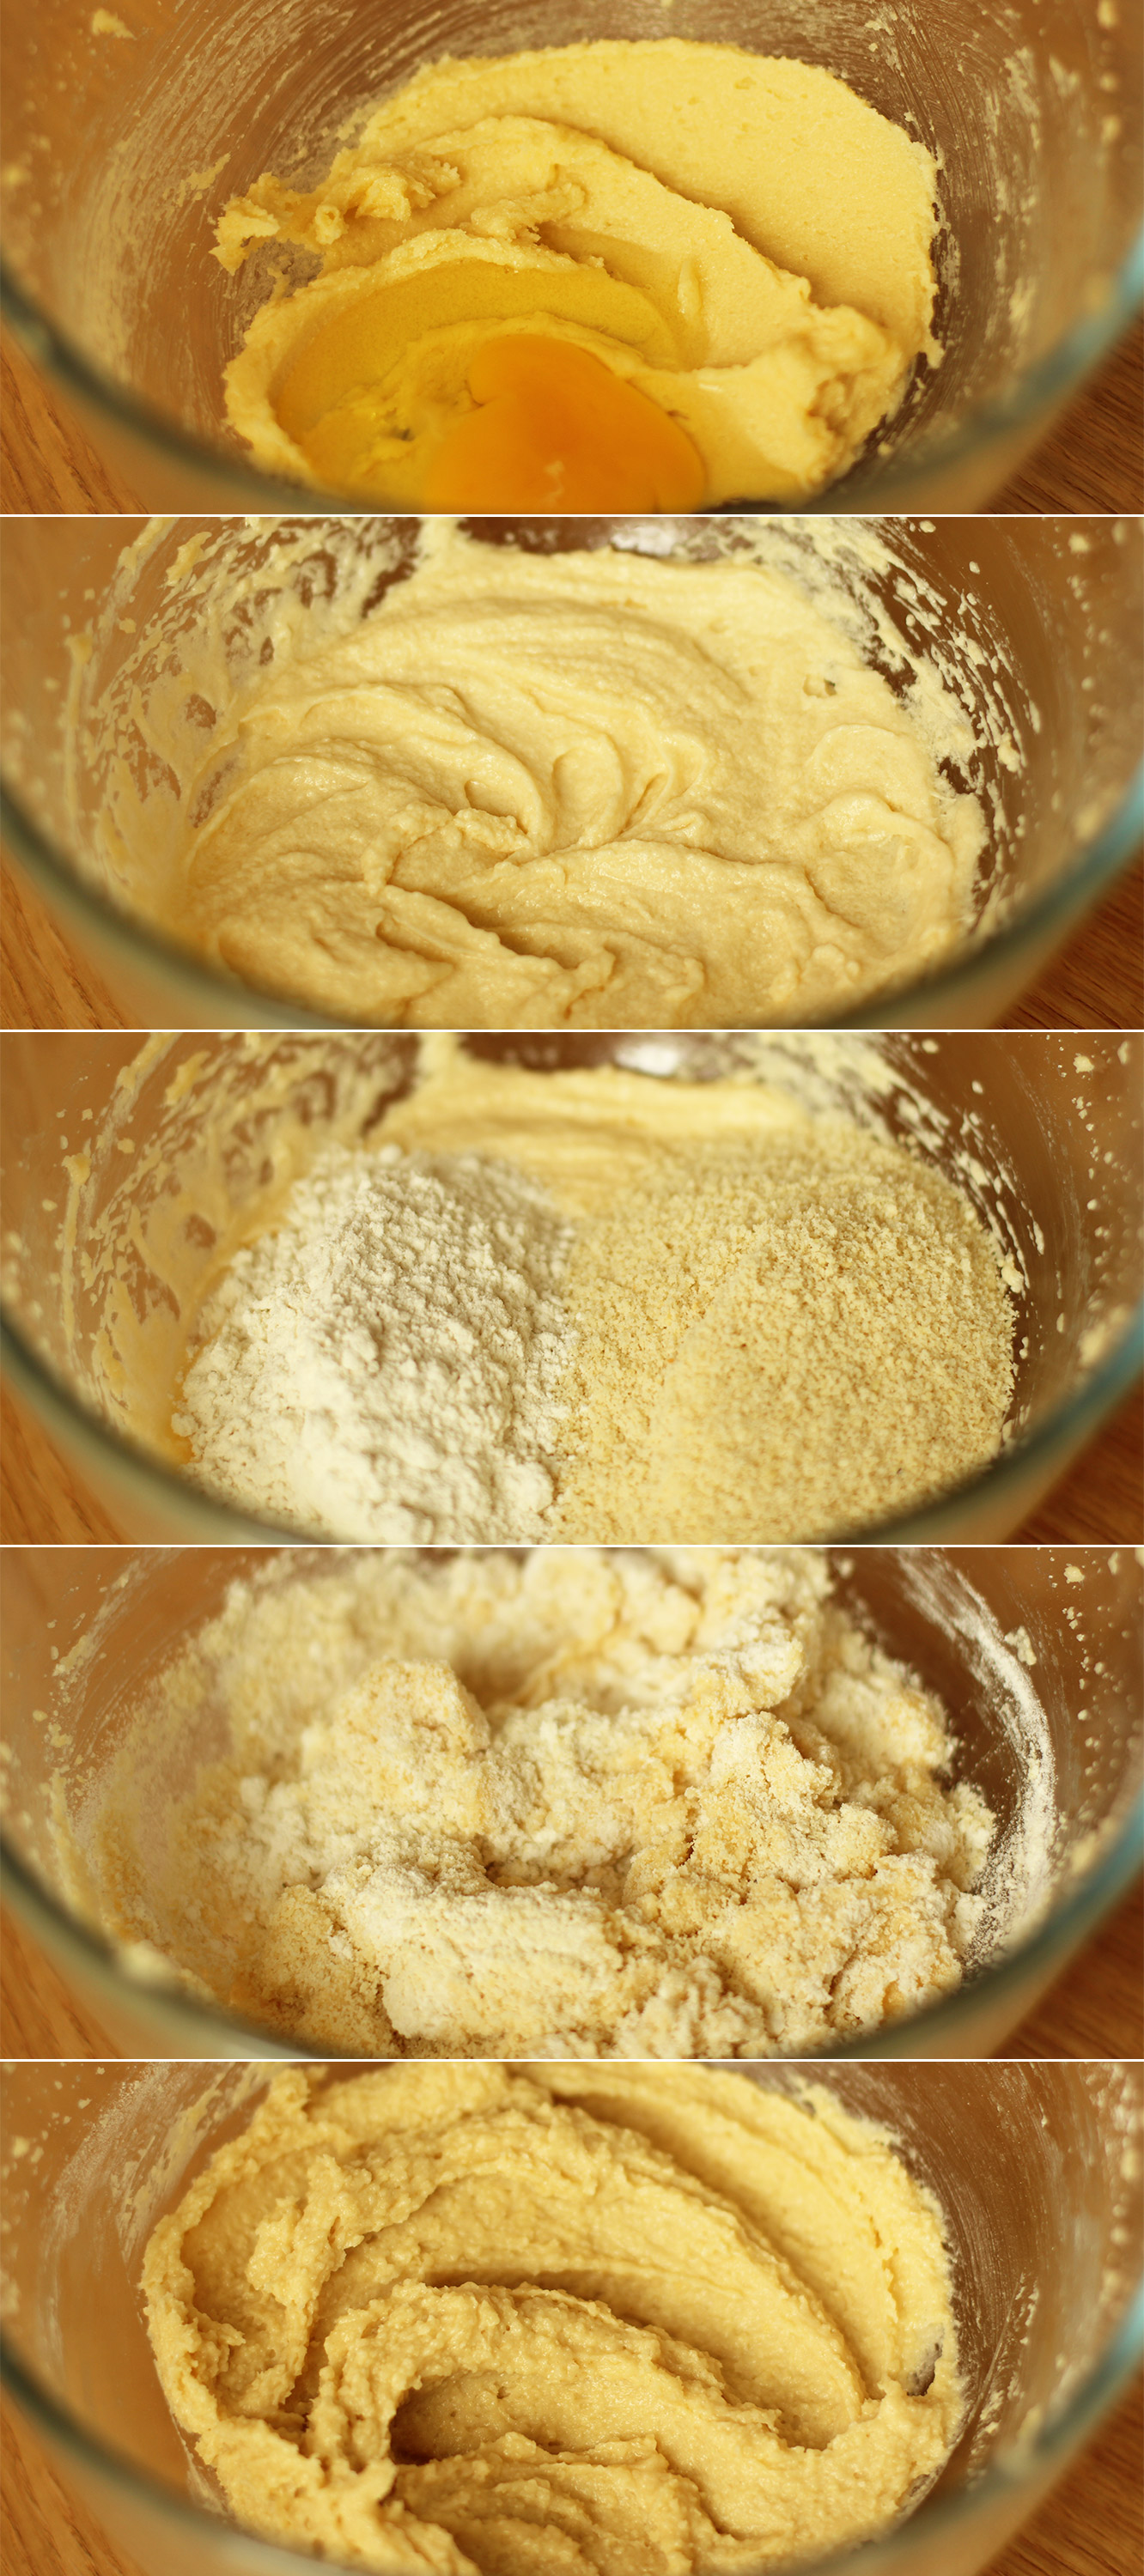
Frangipane making time. Using an electric whisk (or a wooden spoon and some strong arms) beat together the butter and sugar until smooth and fluffy.

apple-frangipane-almond-tart-pie-6

Step five

Add the egg and beat again with the whisk.

Stir in the almonds, almond extract and the flour.

Voila. Set aside.

apple-frangipane-almond-tart-pie-7

Step six

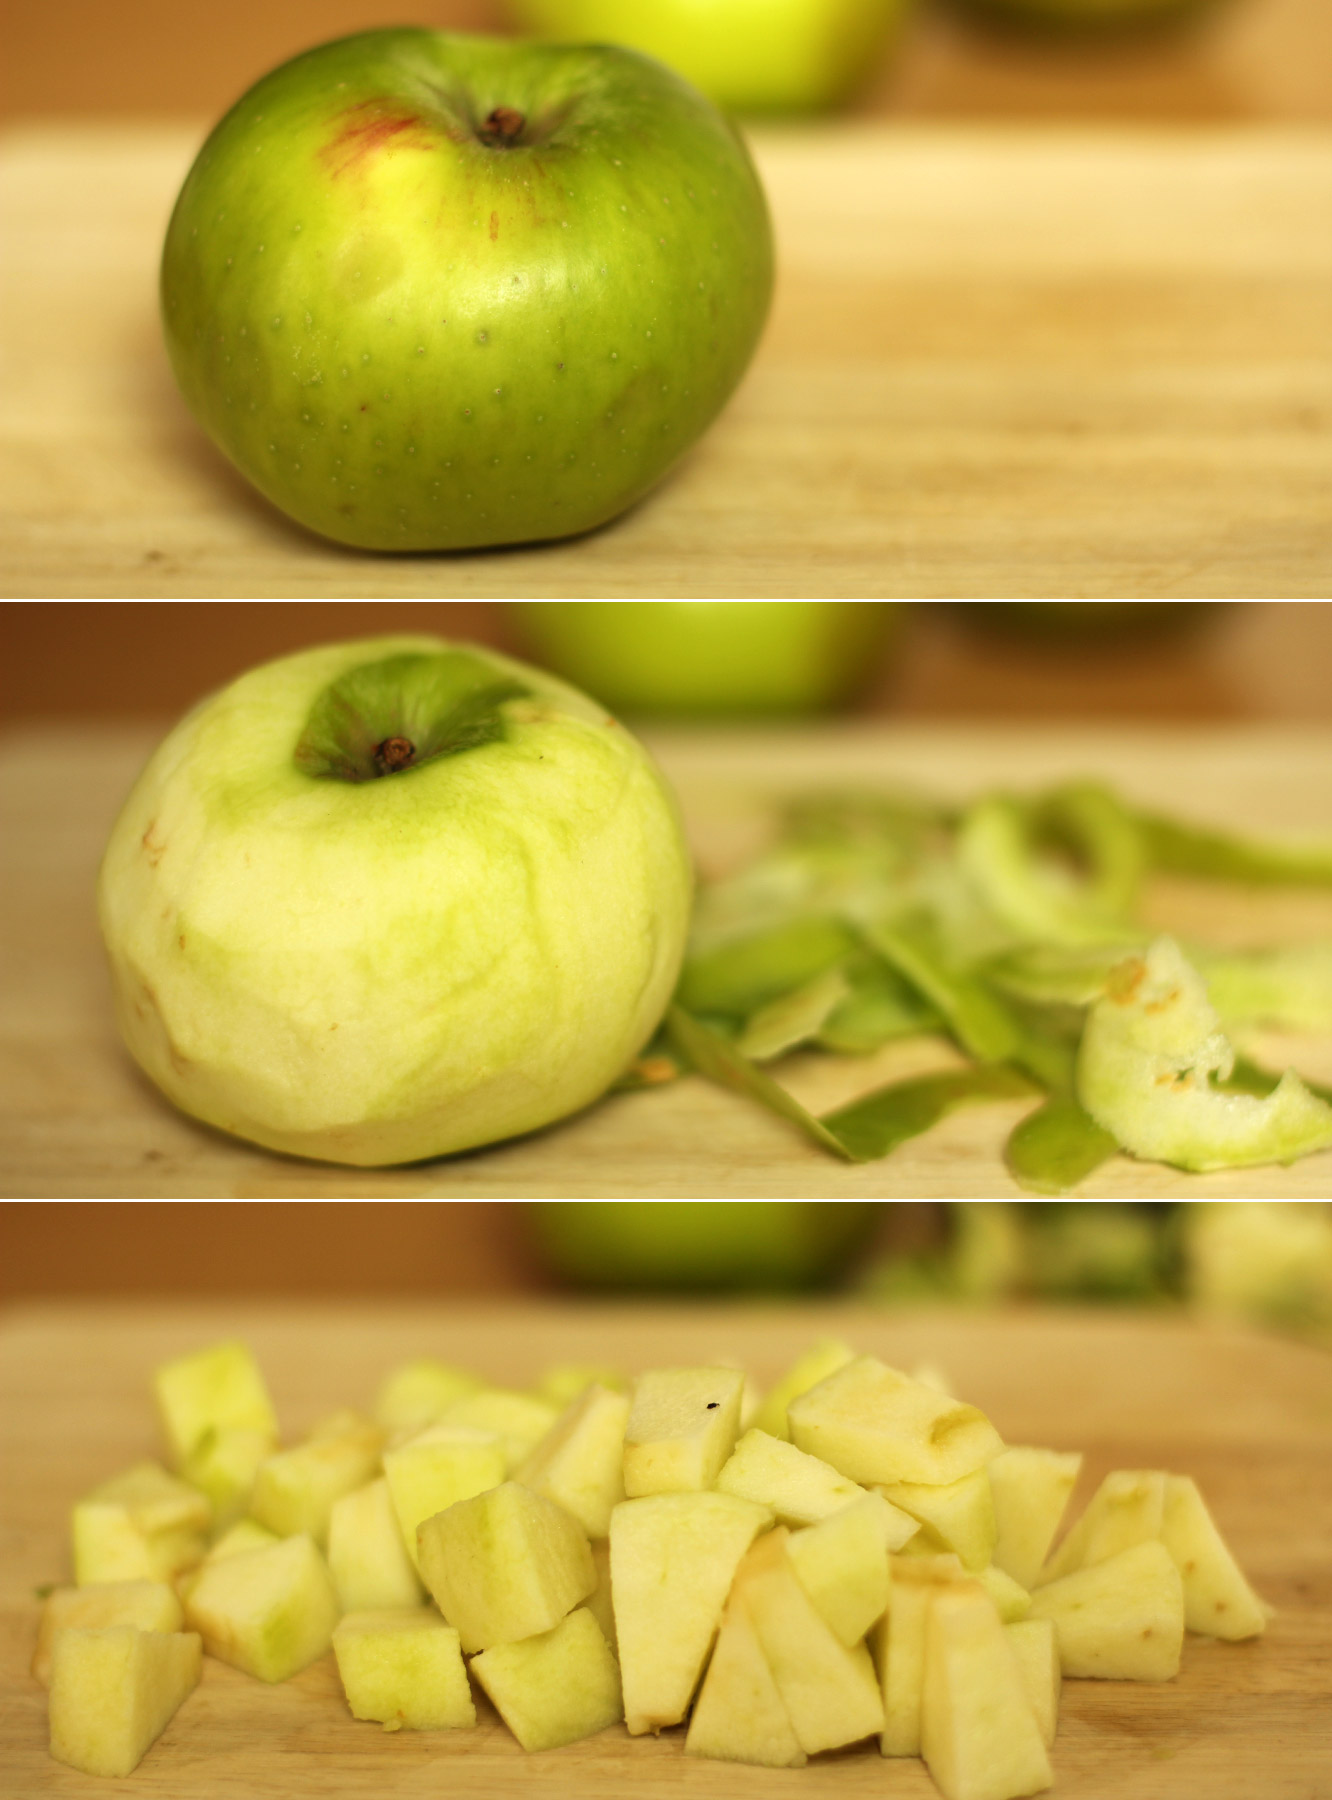
Prepare the stewed apple filling. Being by peeling and chopping the three bramley apples. If you have a bit of lemon juice handy a quick squeeze will keep the chopped ones pale while you see to the rest.

apple-frangipane-almond-tart-pie-8

Step seven

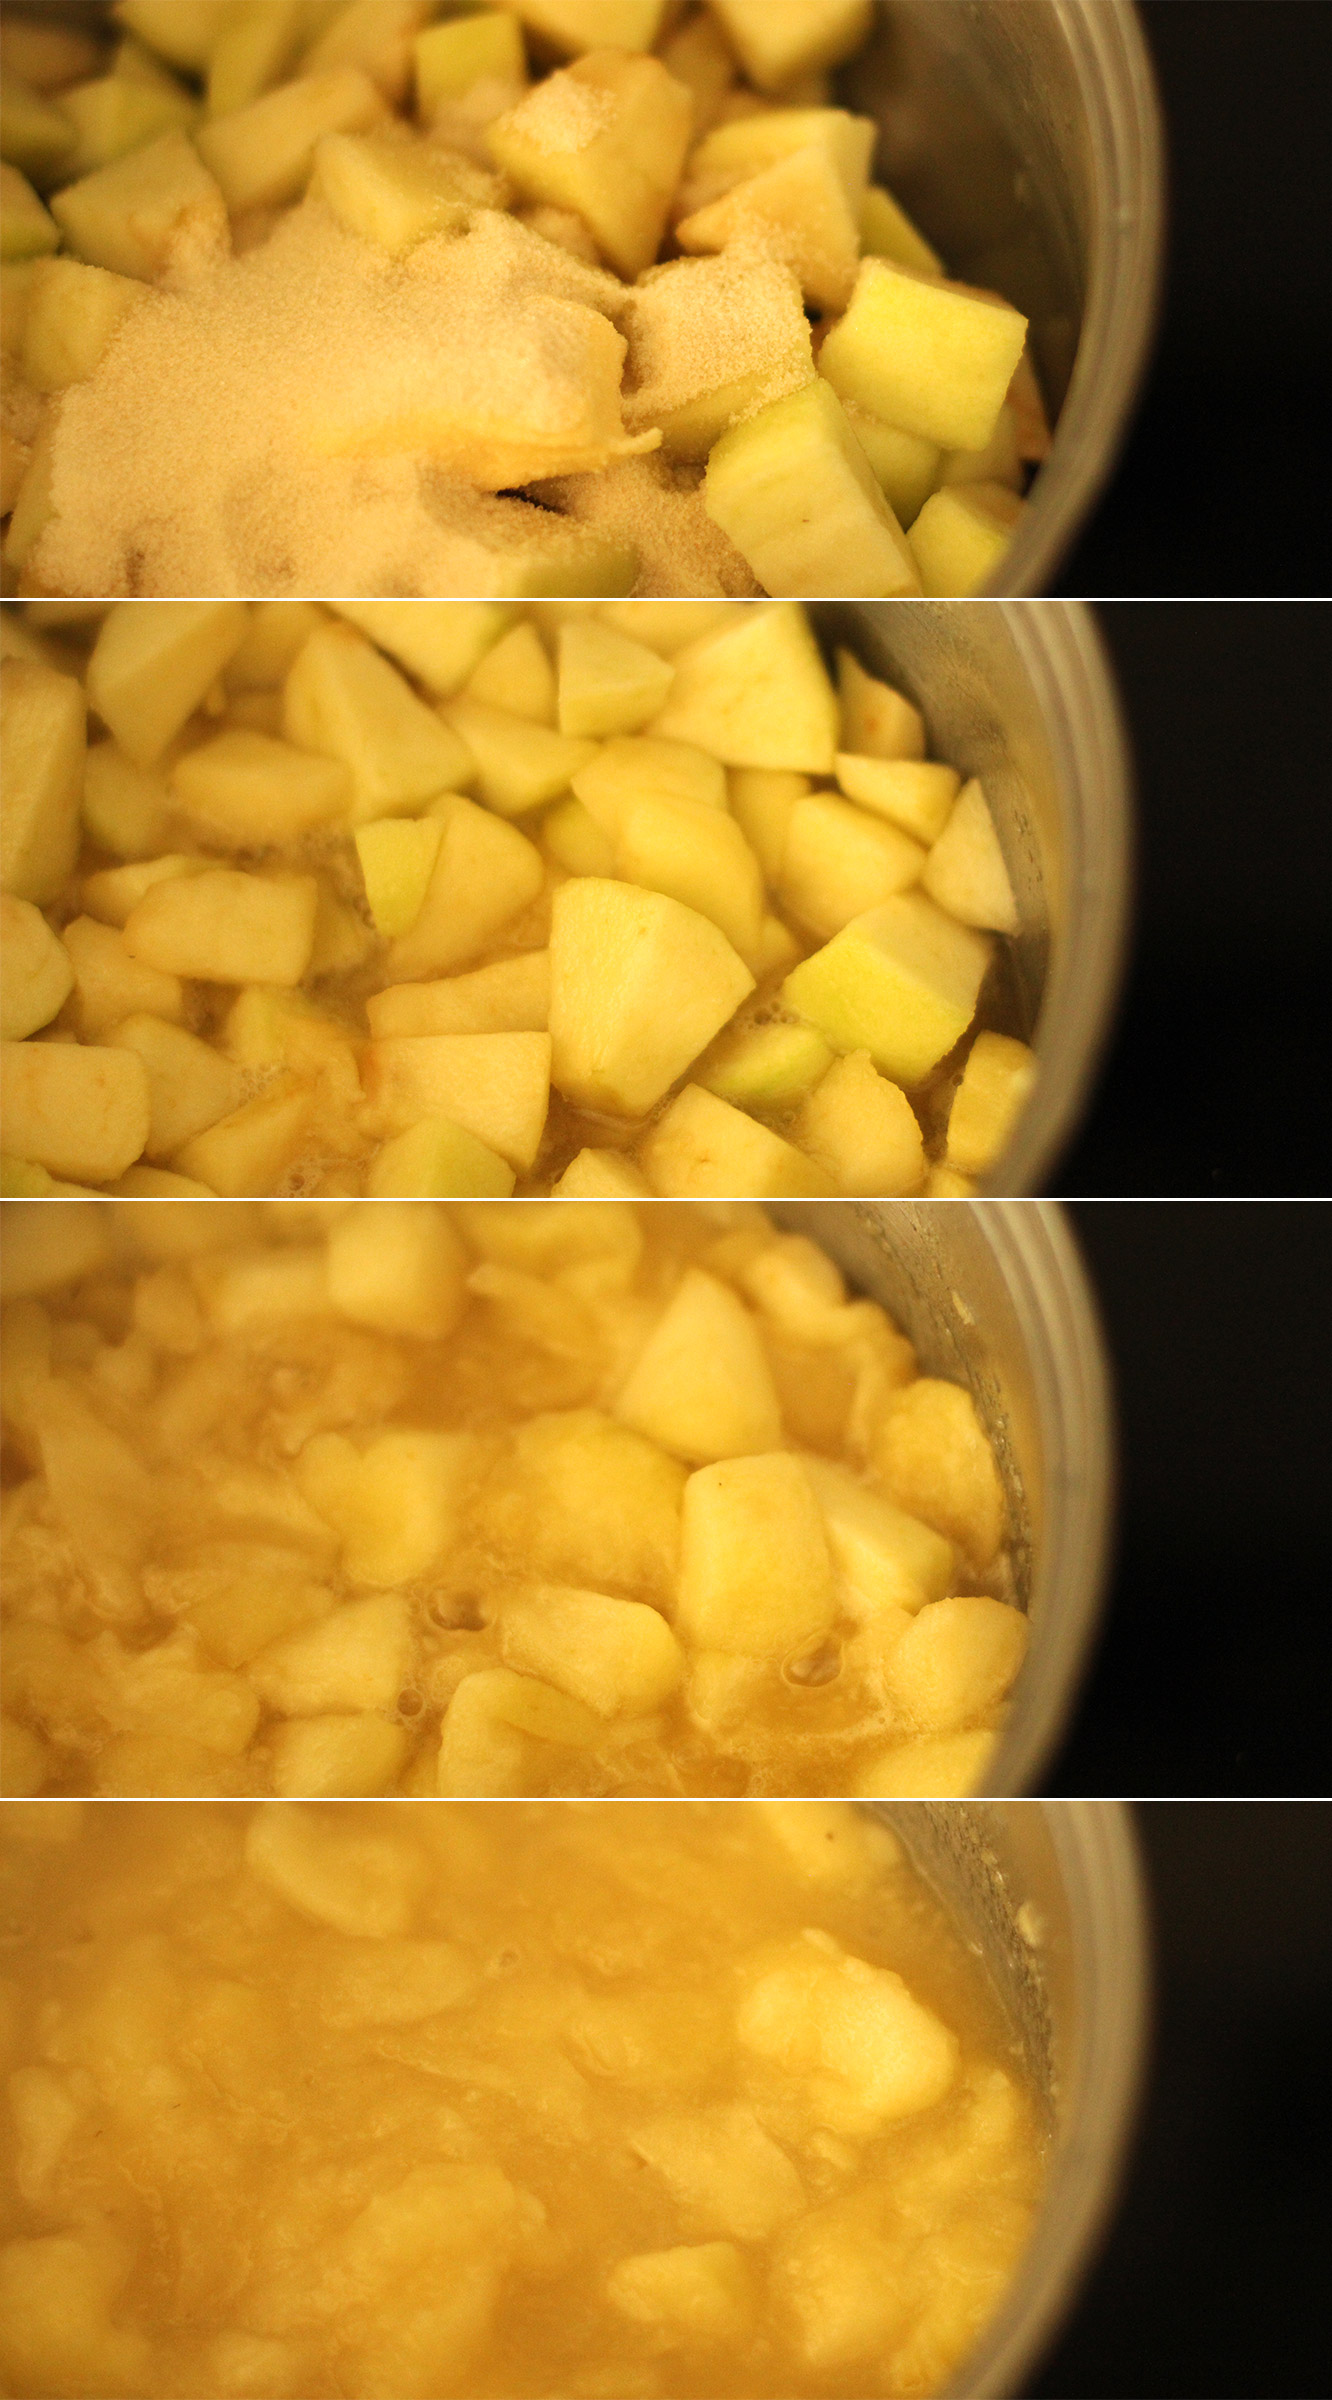
Put the chopped apples in a saucepan with the butter, honey, water and sugar. Bring to a medium-low heat and stir occasionally until the apples are mostly broken down. You want a pulp really (an appetising thought, I know).

apple-frangipane-almond-tart-pie-9

Step eight

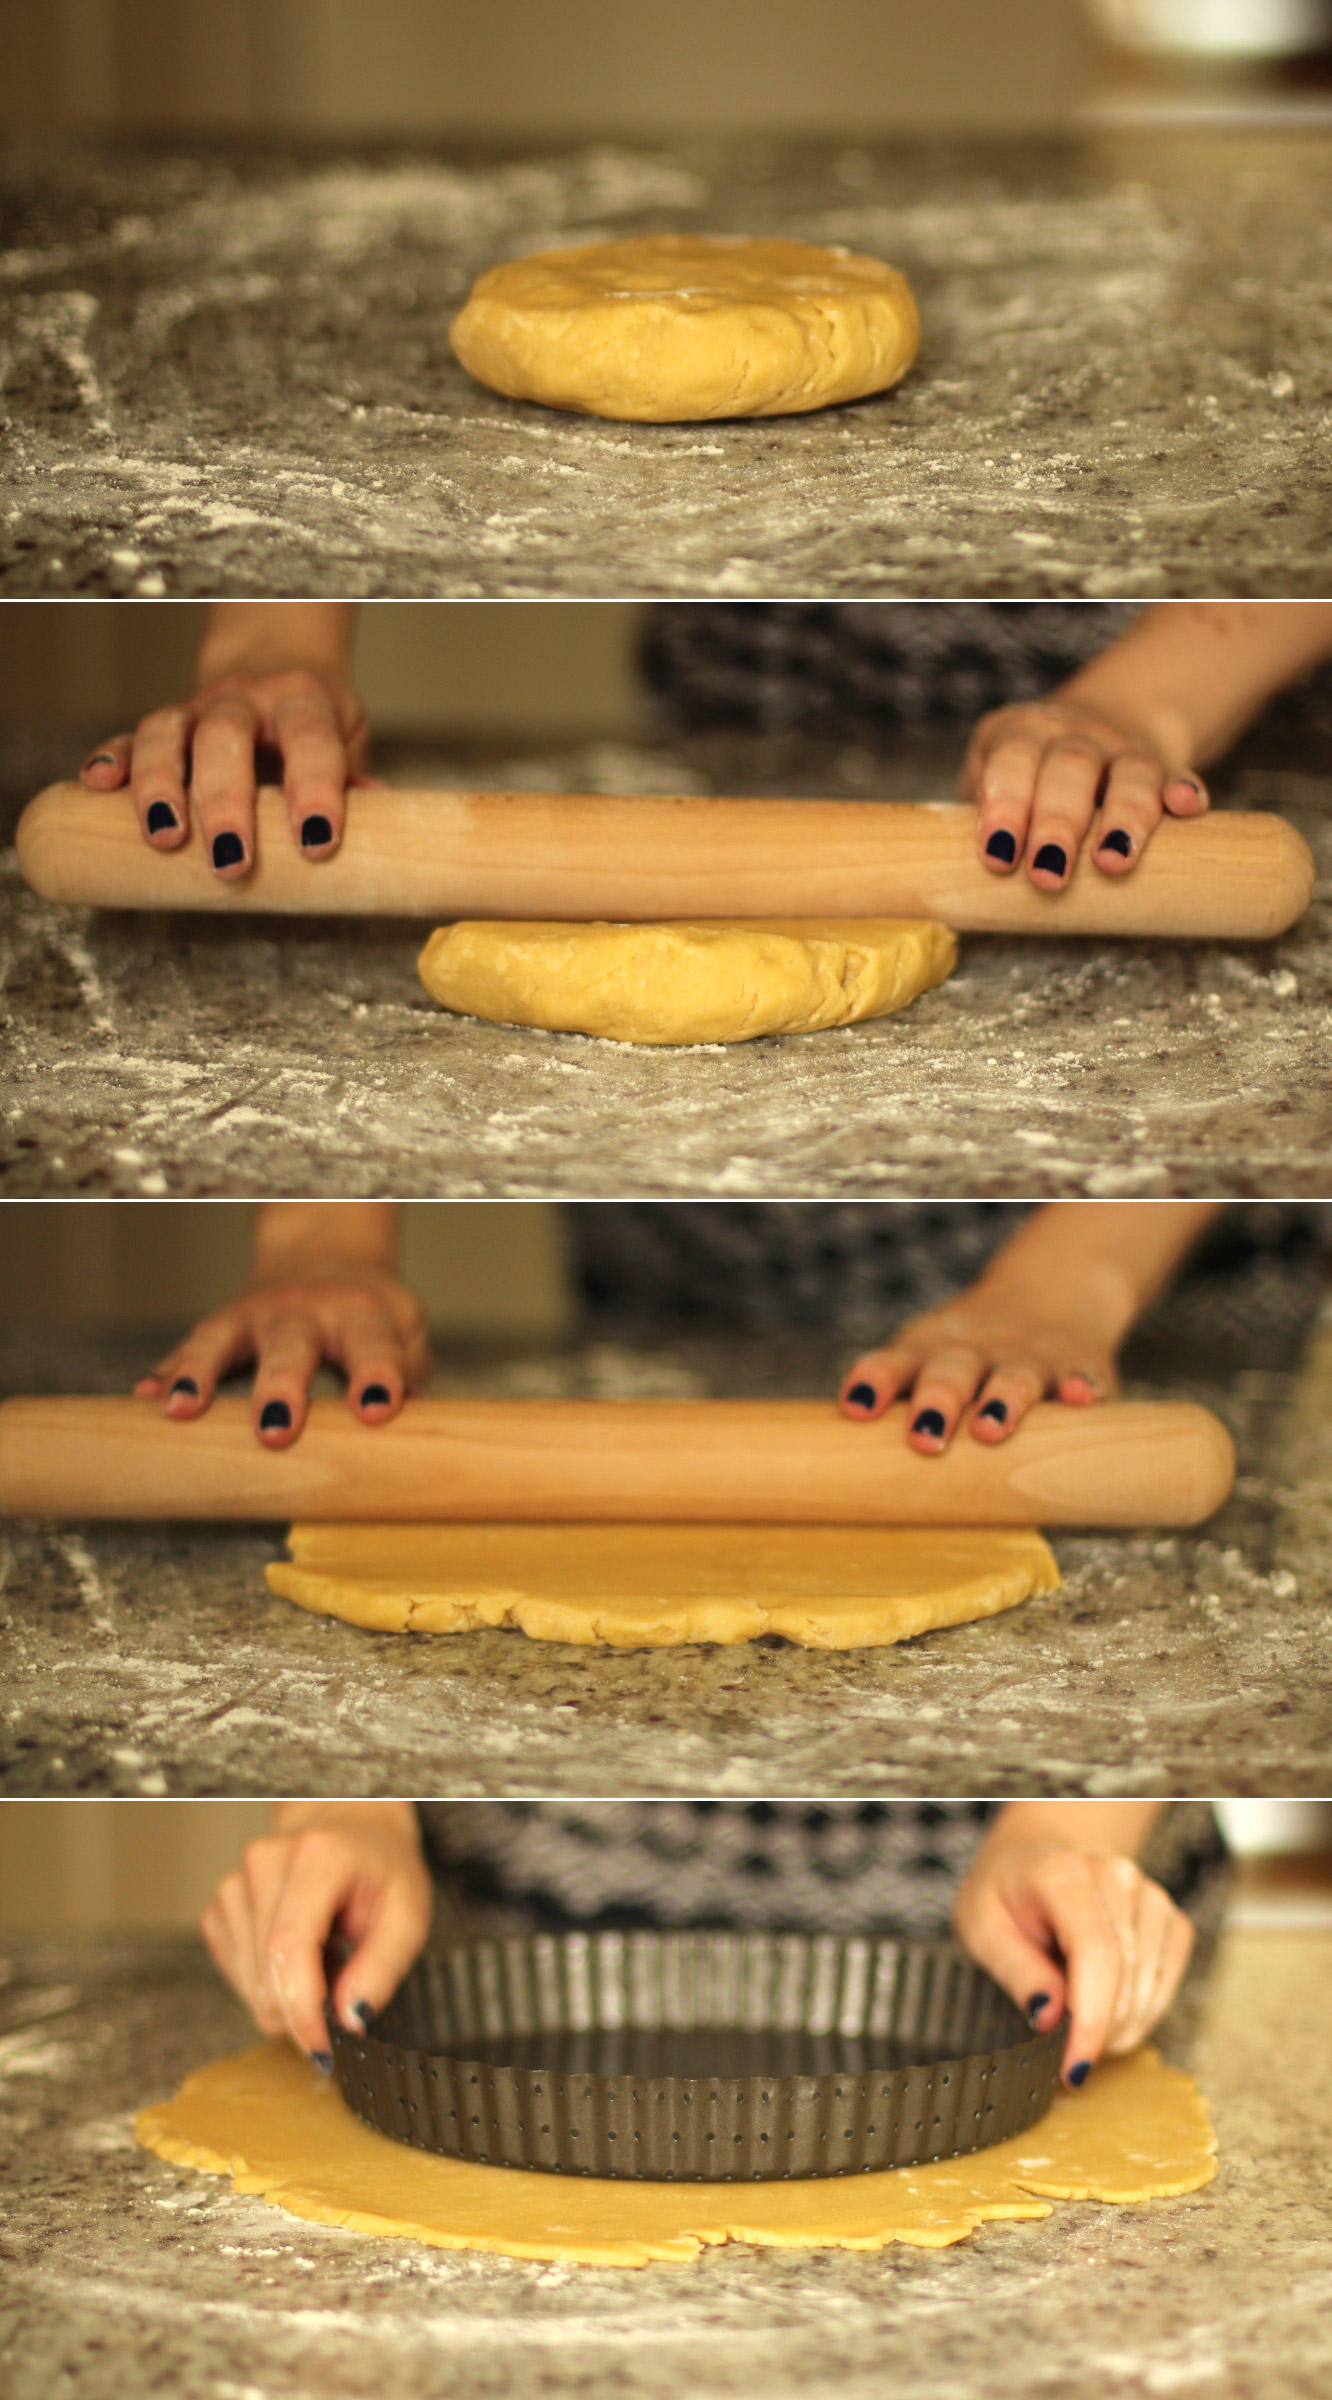
Remove the pastry from the fridge (providing an hour has passed). Place onto a lightly floured surface (you don’t want to add much more flour to the mix if you can help it).

Roll the pastry out as evenly as you can, until your chosen dish can sit in the middle with an inch or two on all sides. You don’t really want your pastry to be thicker than 5mm.

apple-frangipane-almond-tart-pie-10

Step nine

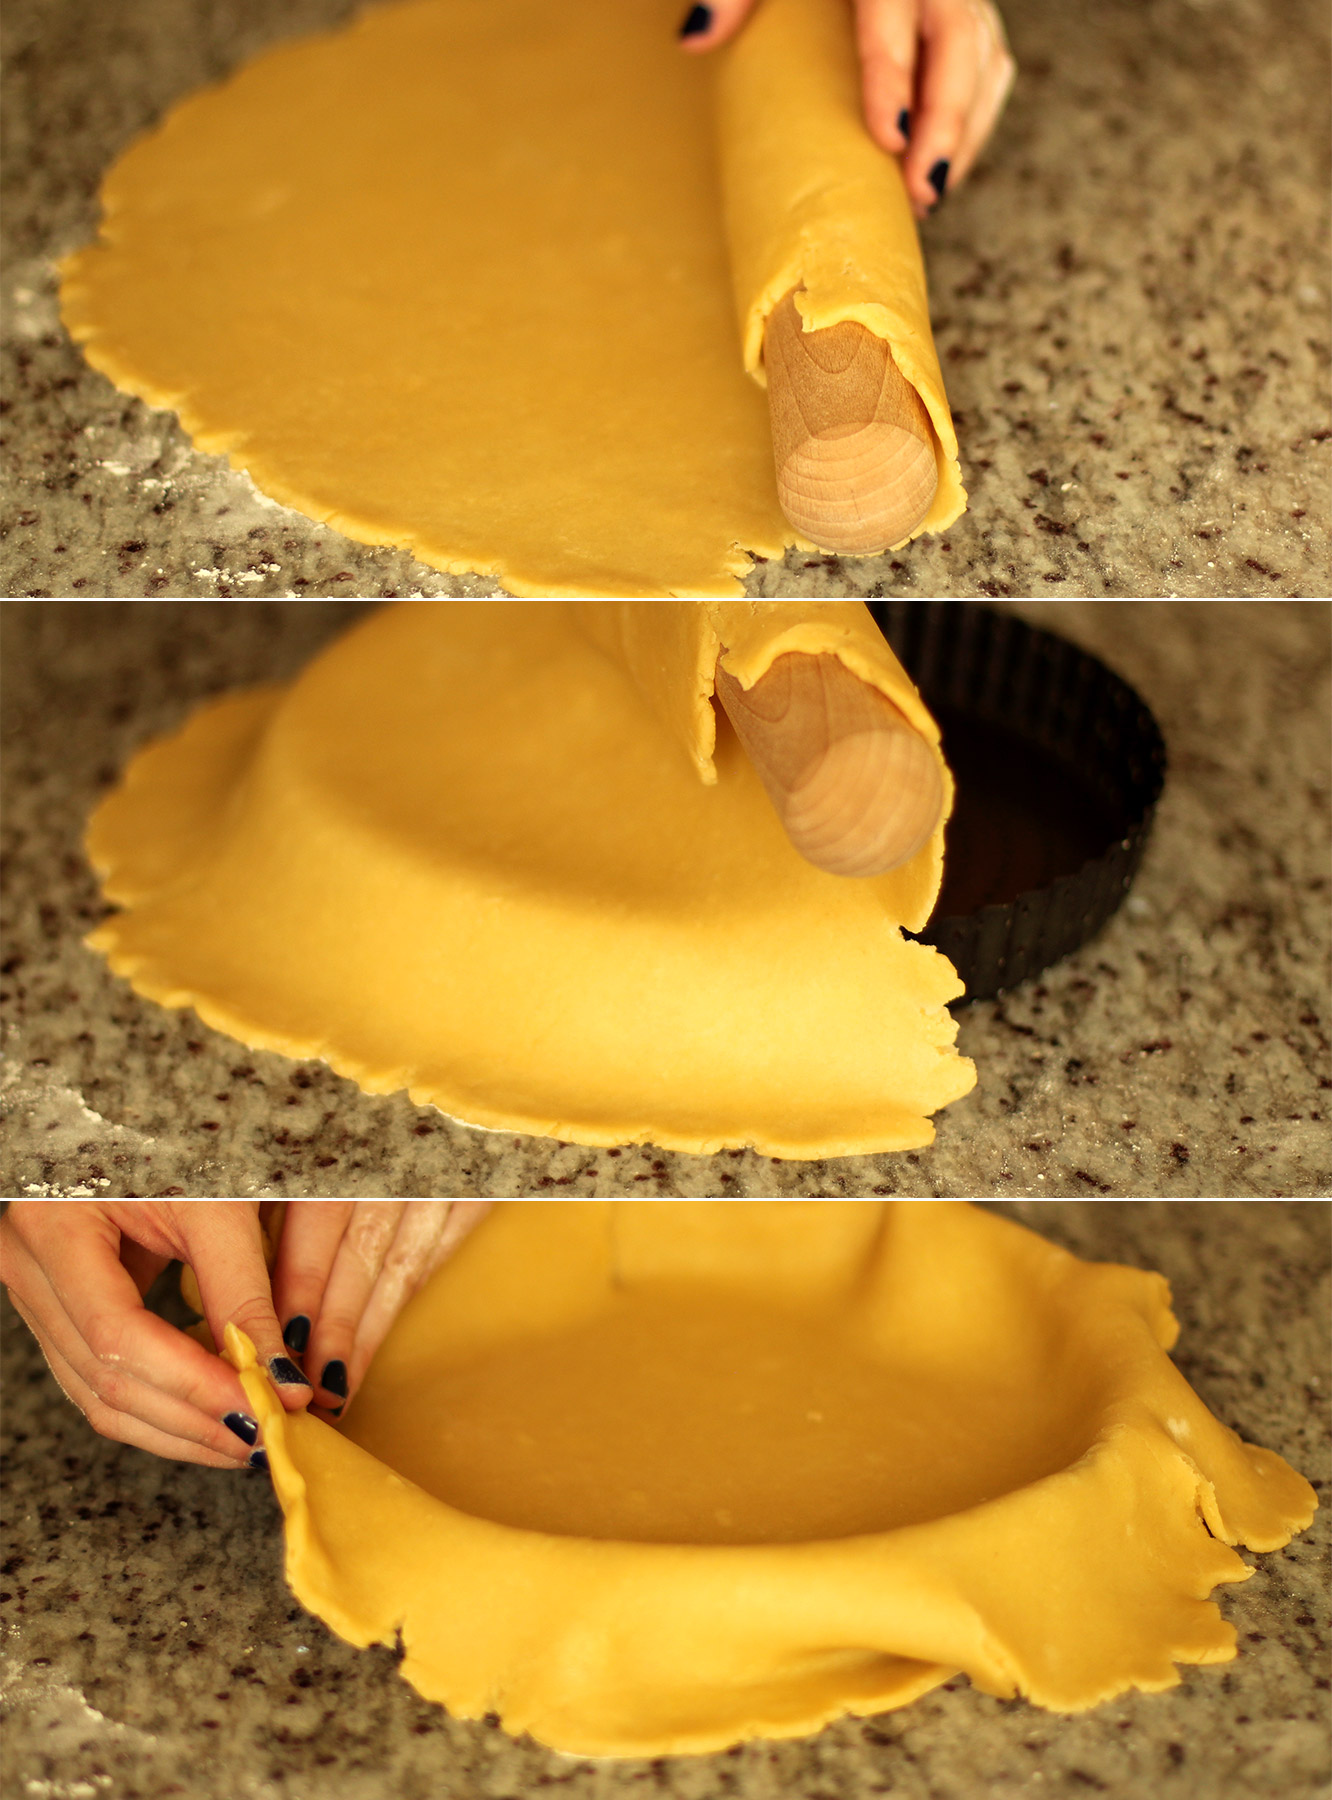
Transfer your pastry by rolling it at least half of it up onto your rolling pin and unrolling it over the top of your dish.

I then needed to lift the edges back up and place them back in to tease them better into the corners. Do this gently so as not to tear it. Having said that, I was a bit heavy handed and tears can be fixed quit easily by sticking a bit of excess pastry on top.

apple-frangipane-almond-tart-pie-11

Step ten

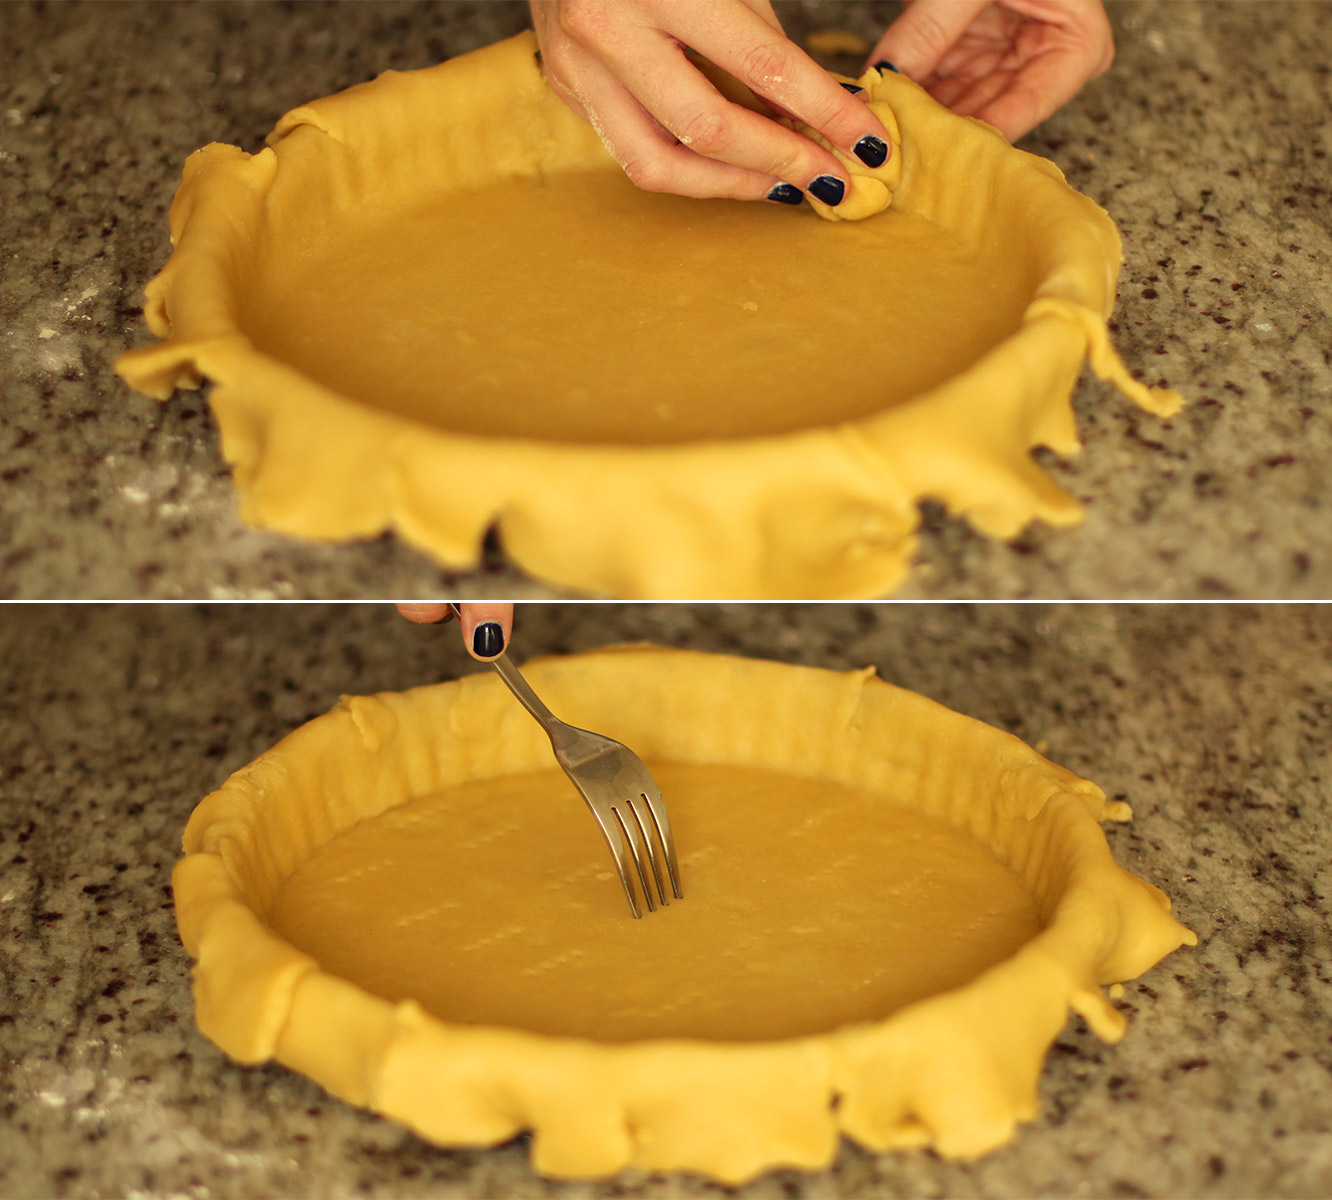
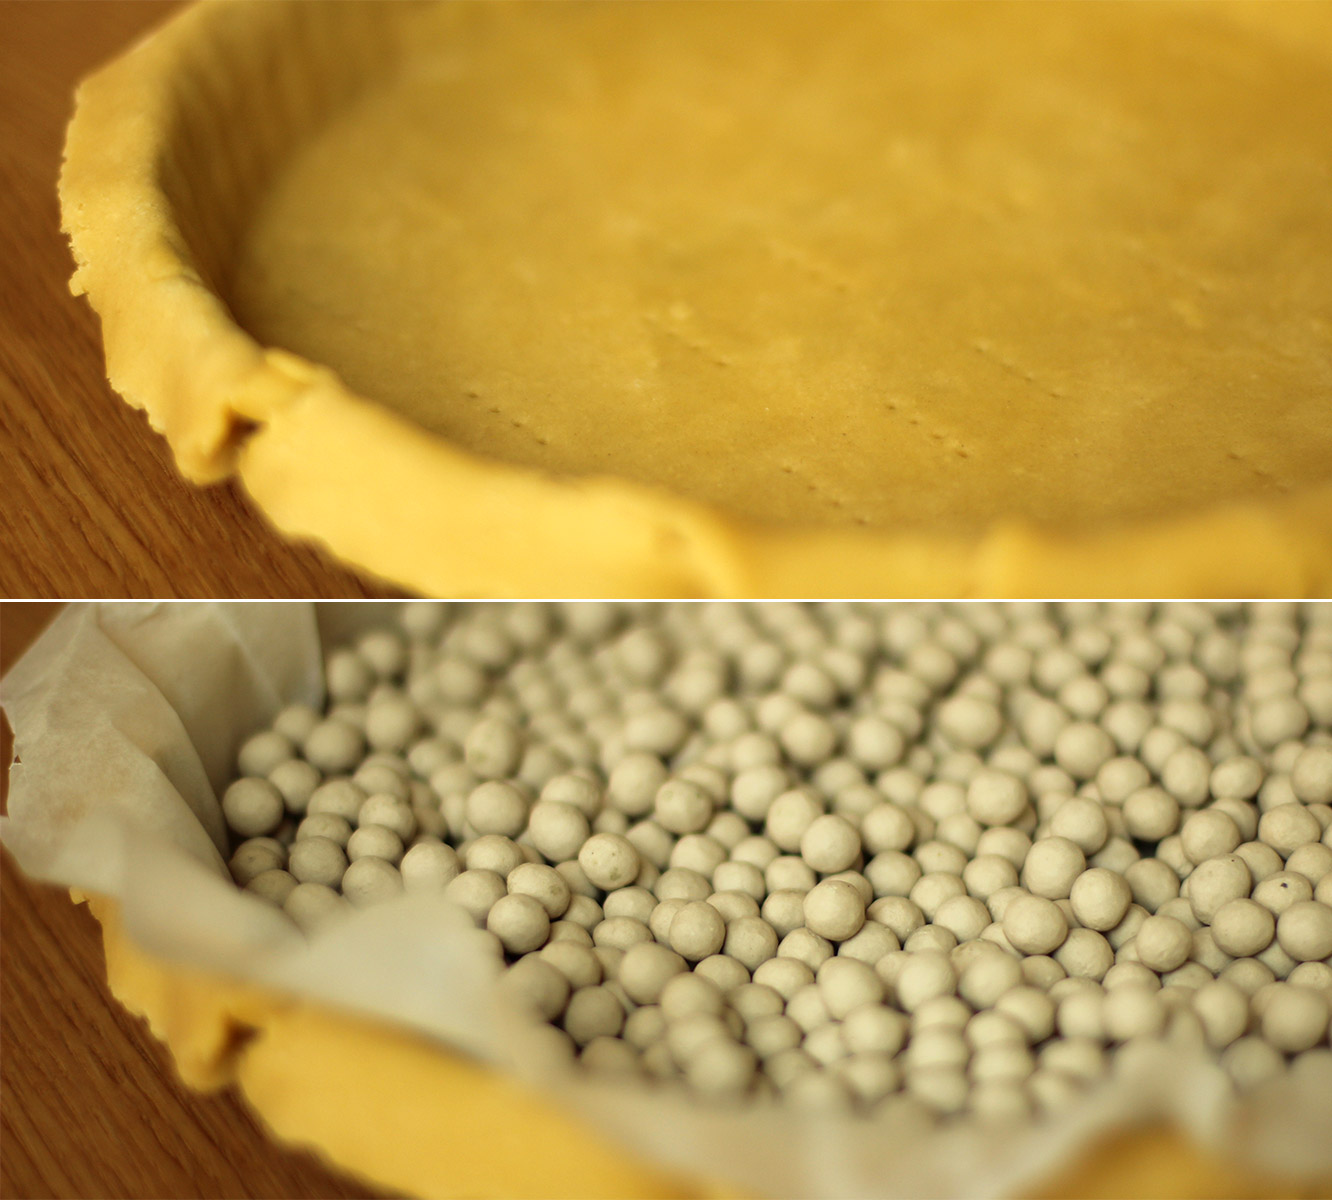
Rip a bit of pastry off the overlap and use it to press the crust further into the crevices.

Use a fork to pierce the base of the pie, this will help the pastry stay flat in the oven.

Pop him back in the fridge for another 20-30 minutes.

apple-frangipane-almond-tart-pie-12

Step eleven

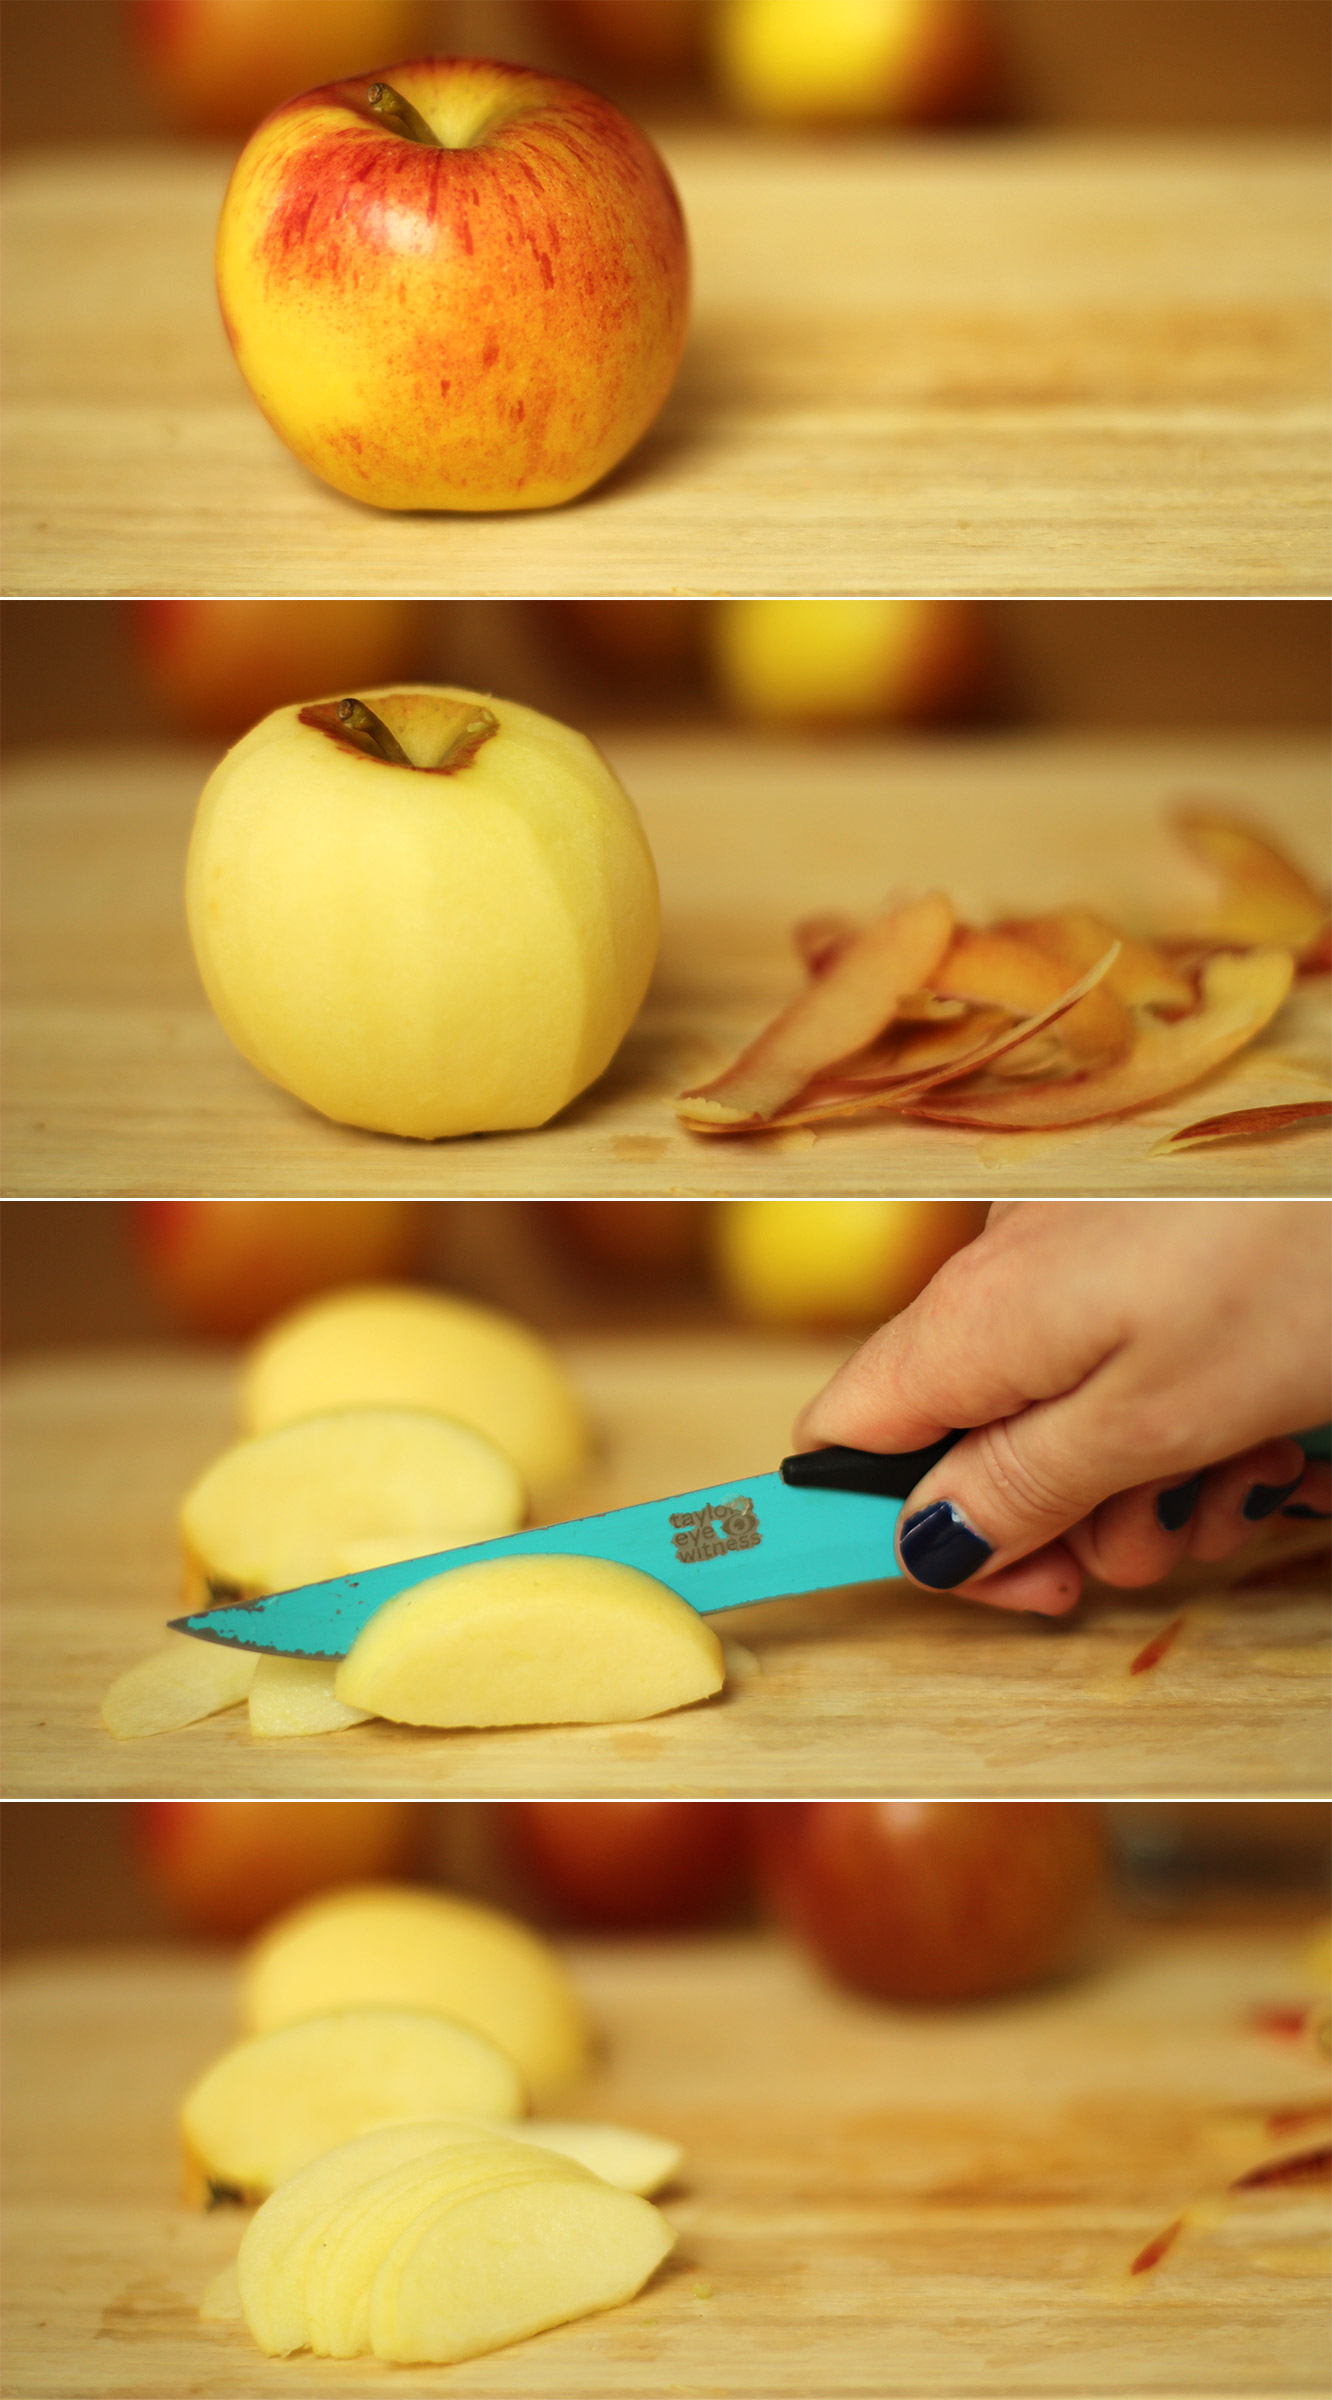
While the pastry is chilling again, peel and slice the braeburns/eating apples. You need to do this carefully as it will be the making or breaking of how your pie looks (no pressure). Try to peel nice and evenly and cut the apples as thinly as you can.

Have a large tupperware filled with cold water nearby to put your cut slices into, which will stop them from browning, again, if you have any lemon juice a few drops wouldn’t go amiss but not essential.

Pre-heat the oven to 180C/gas mark 4/350F

apple-frangipane-almond-tart-pie-13

Step eleven

Remove the pie from the fridge and trim some of the excess pastry off the sides but still leave an overlap.

Place some baking paper in the pie and fill with baking beans. If you don’t have any then rice works too, and most dried lentils/pulses really.

Place on a baking tray and bake for 15 minutes.

apple-frangipane-almond-tart-pie-14

Step twelve

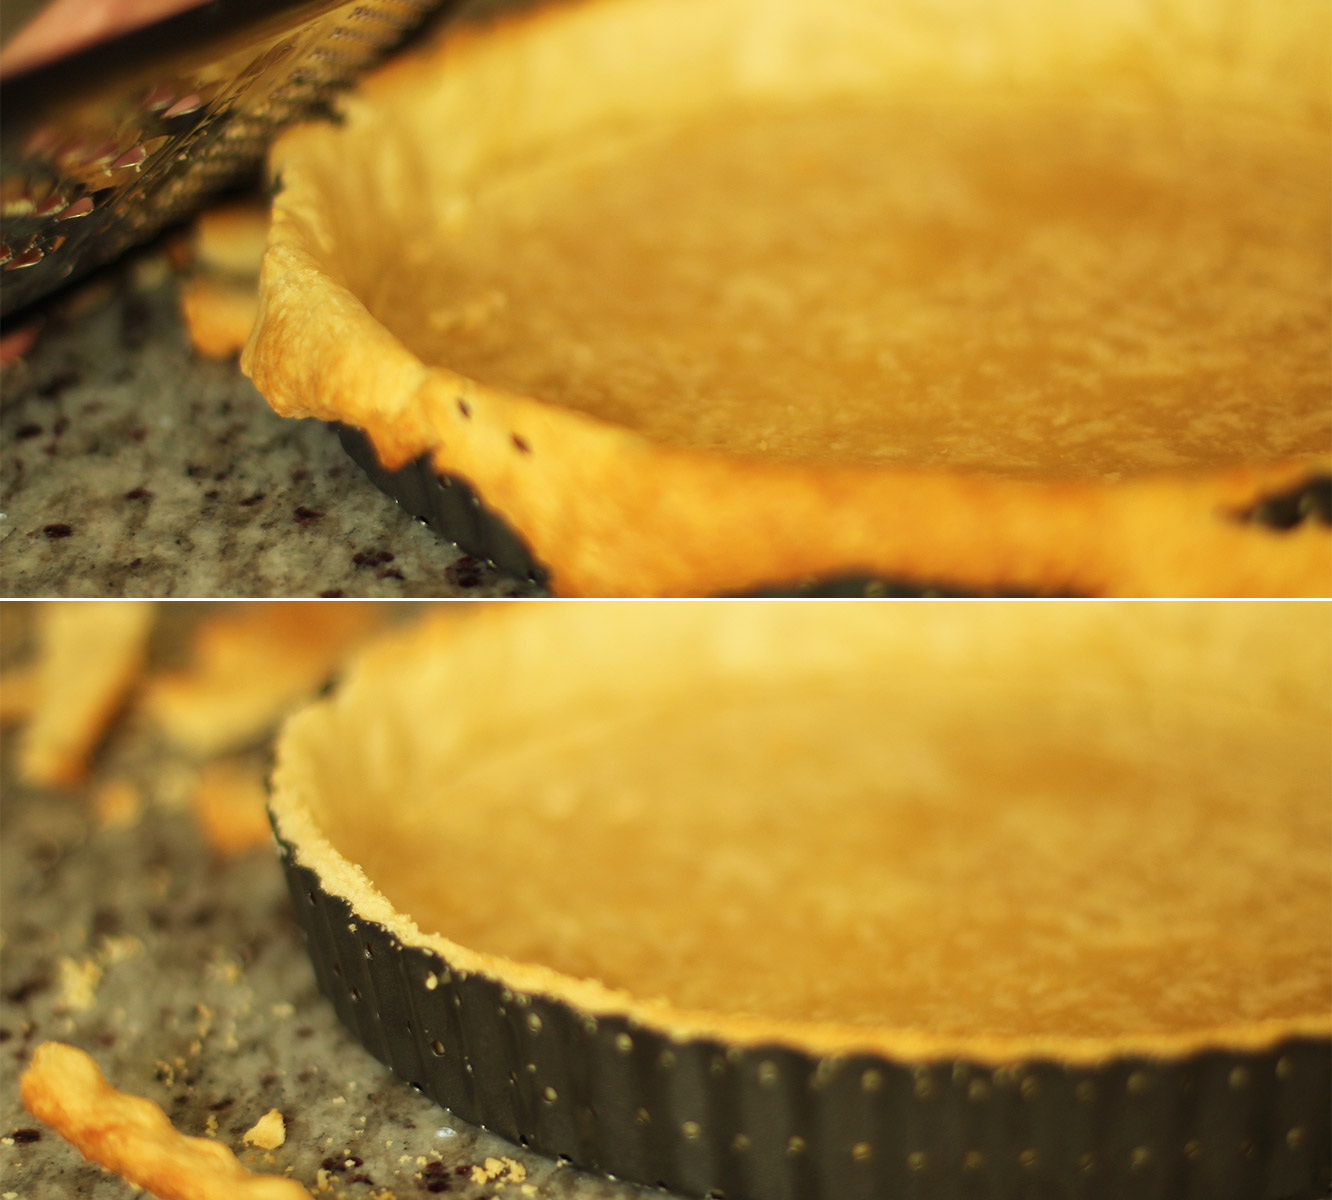
Using a grater remove the excess pastry at this stage. Doing it this way helps to avoid your pastry shrinking in the oven.

apple-frangipane-almond-tart-pie-gif

Step thirteen

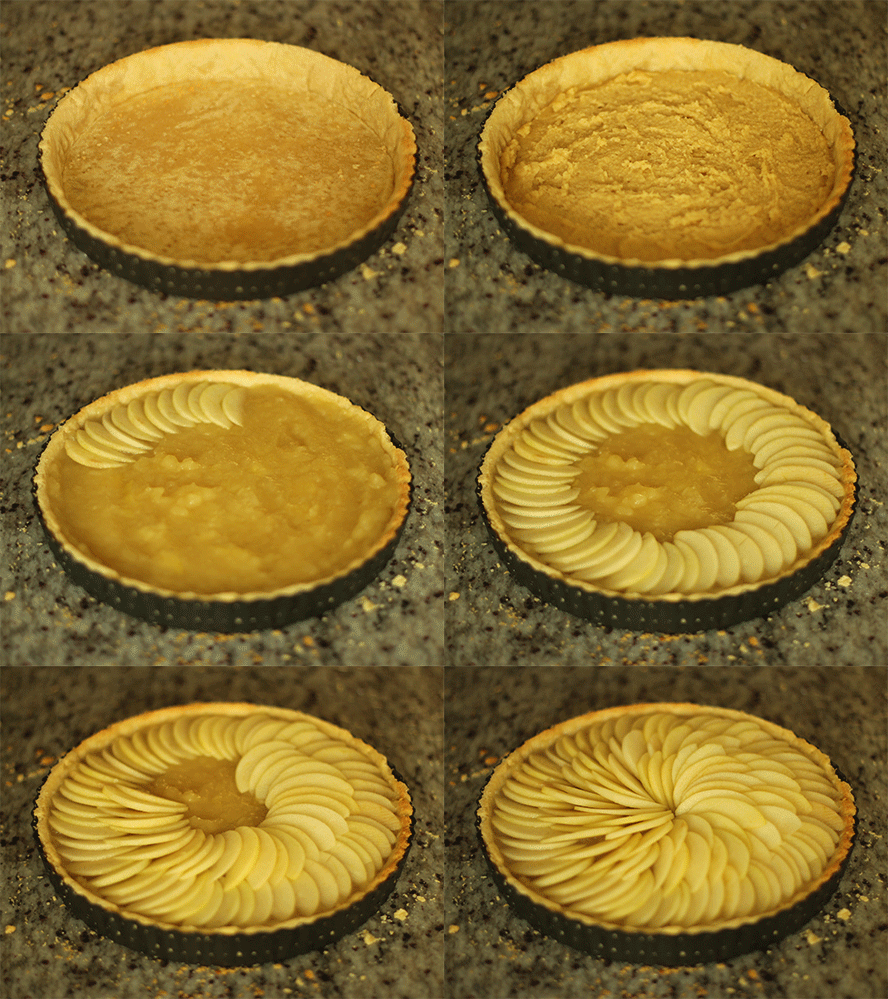
FILL.

First spoon in the frangipane and spread out, followed by the stewed apple puree mixture.

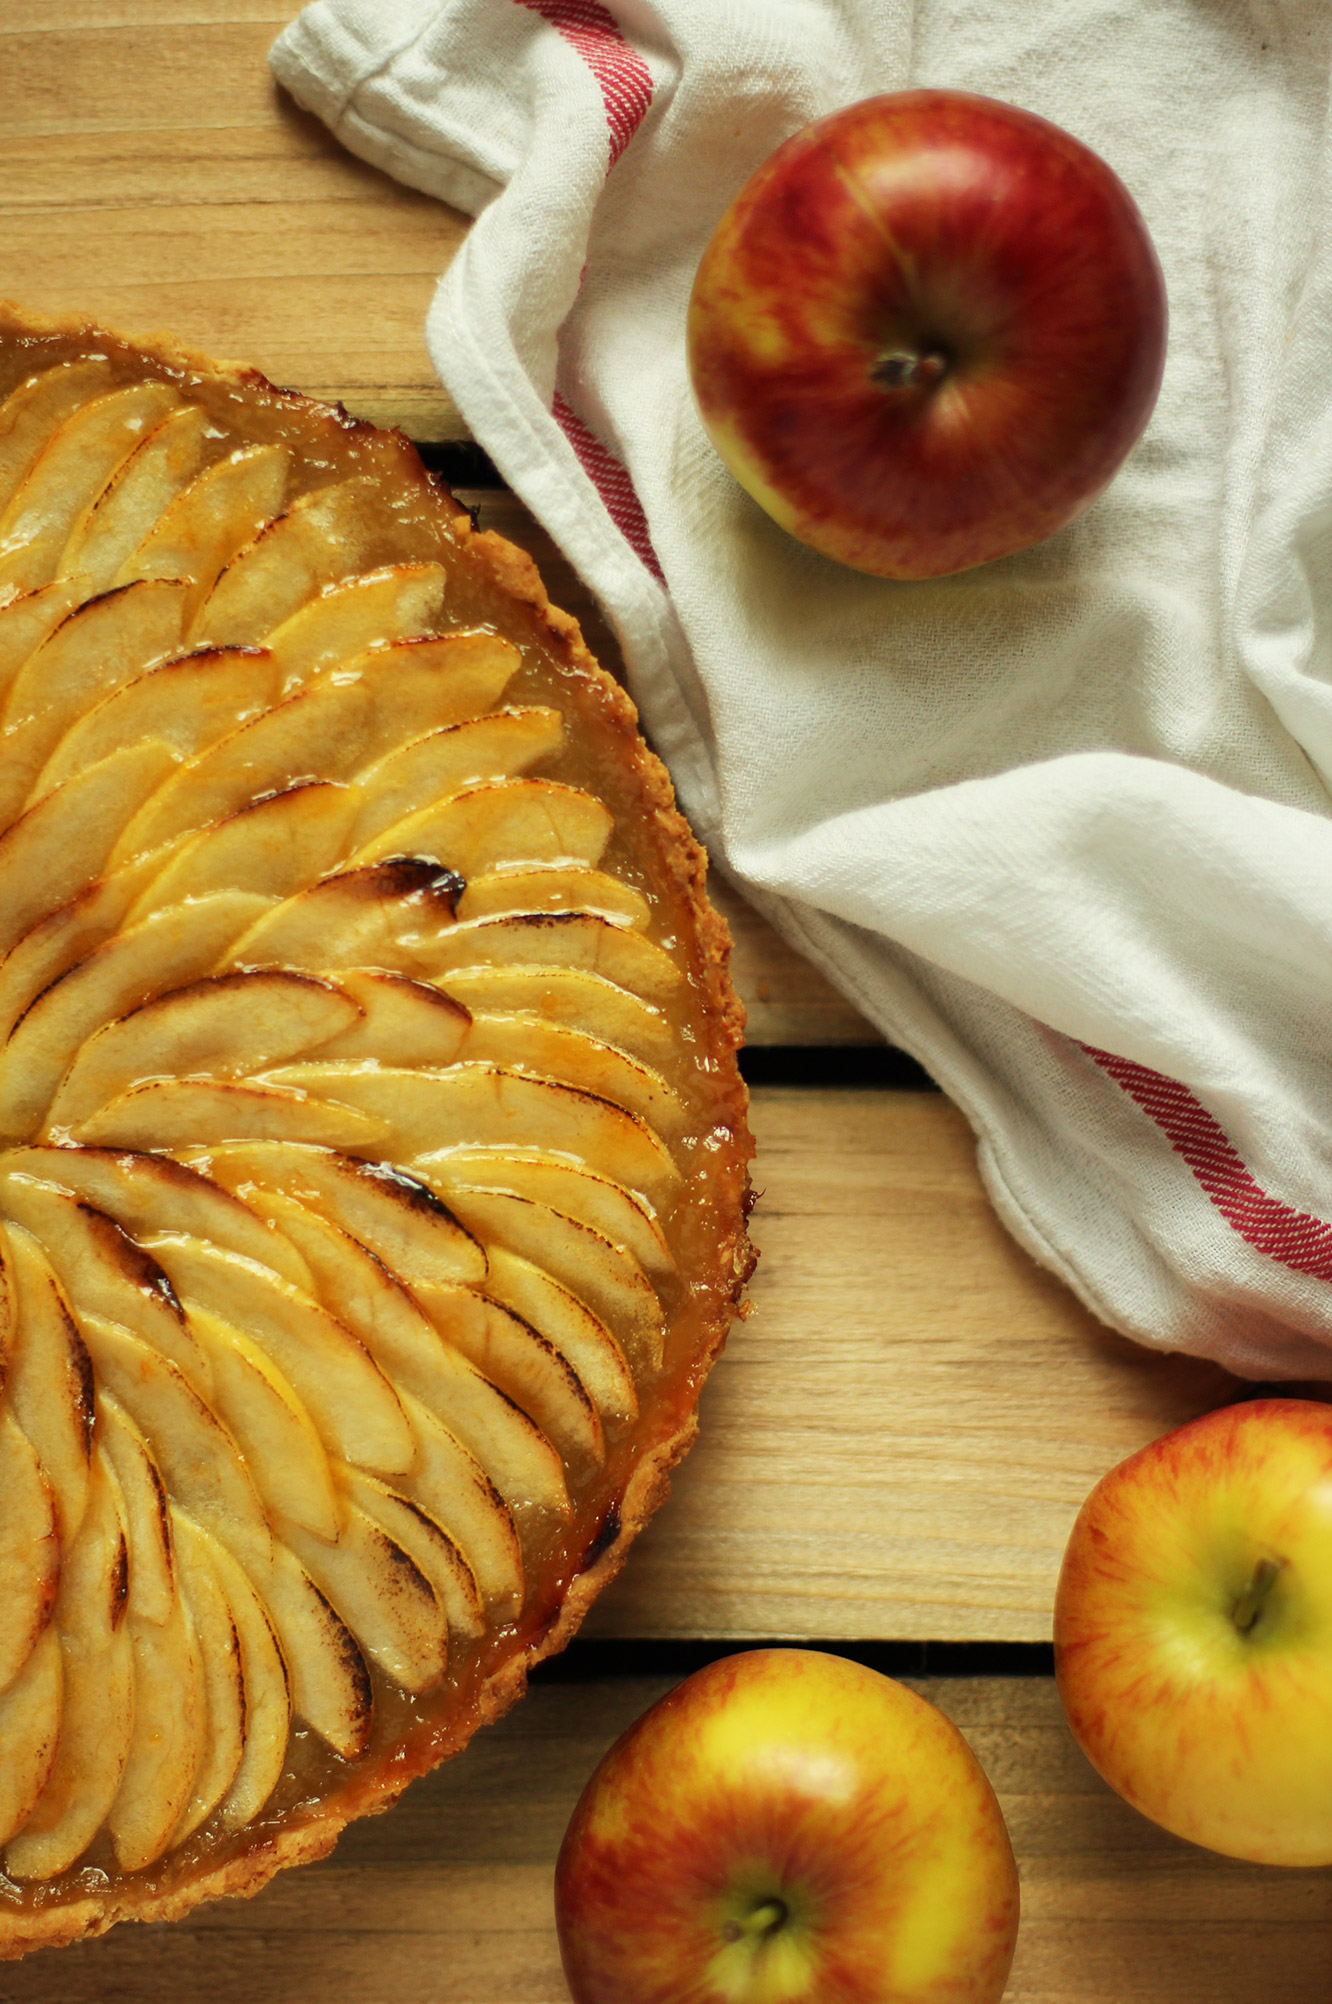
Finally add your eating apples. Start with the outside and work inwards. Make sure your apples overlap each other quite a bit; the cooking process reduces the water so they will shrink and flatten out.

Bake for another hour on 180C/350F/gas mark 4. I advise checking in at regular intervals after 30 minutes as every oven is different.

apple-frangipane-almond-tart-pie-15

Step fourteen

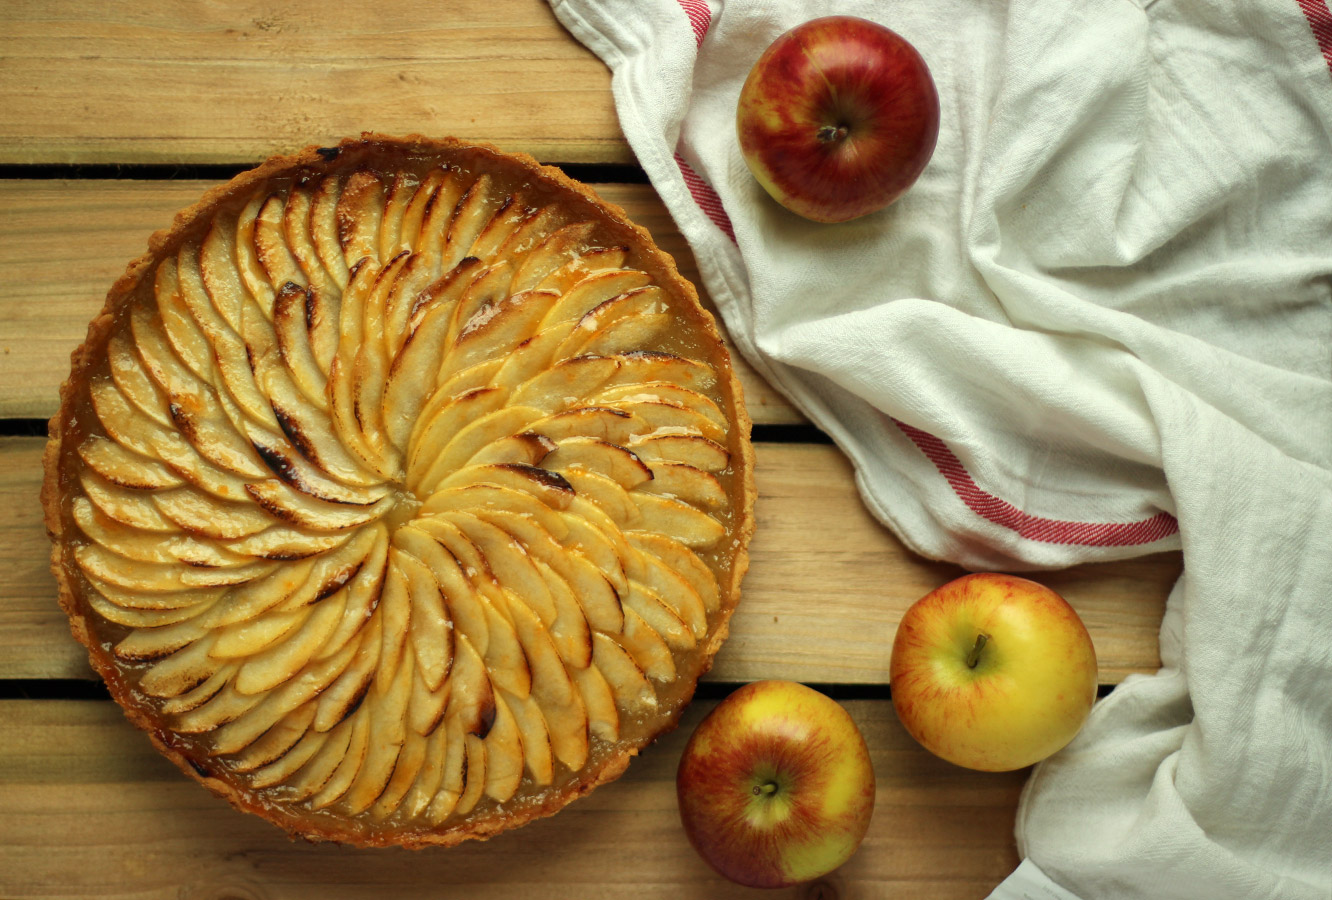
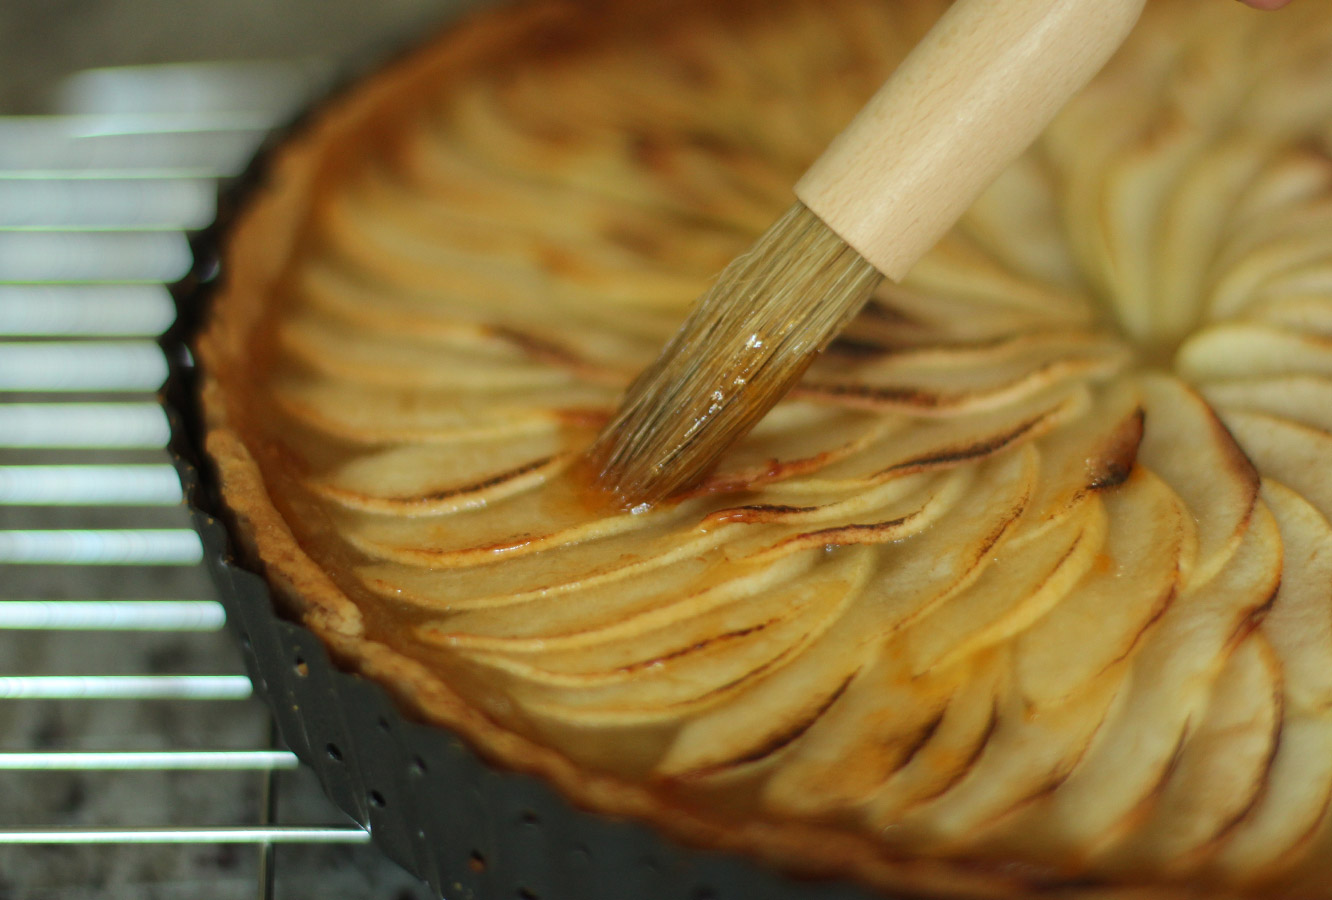
Pop a few tablespoons of apricot jam in the microwave for 10-20 seconds (keep your eye on it as it’s sugary and will heat up quickly). Brush over the surface of the tart, being careful not to move the apples around, spoiling your lovely design.

apple-frangipane-almond-tart-pie-17

apple-frangipane-almond-tart-pie-18

apple-frangipane-almond-tart-pie-16

Step fifteen

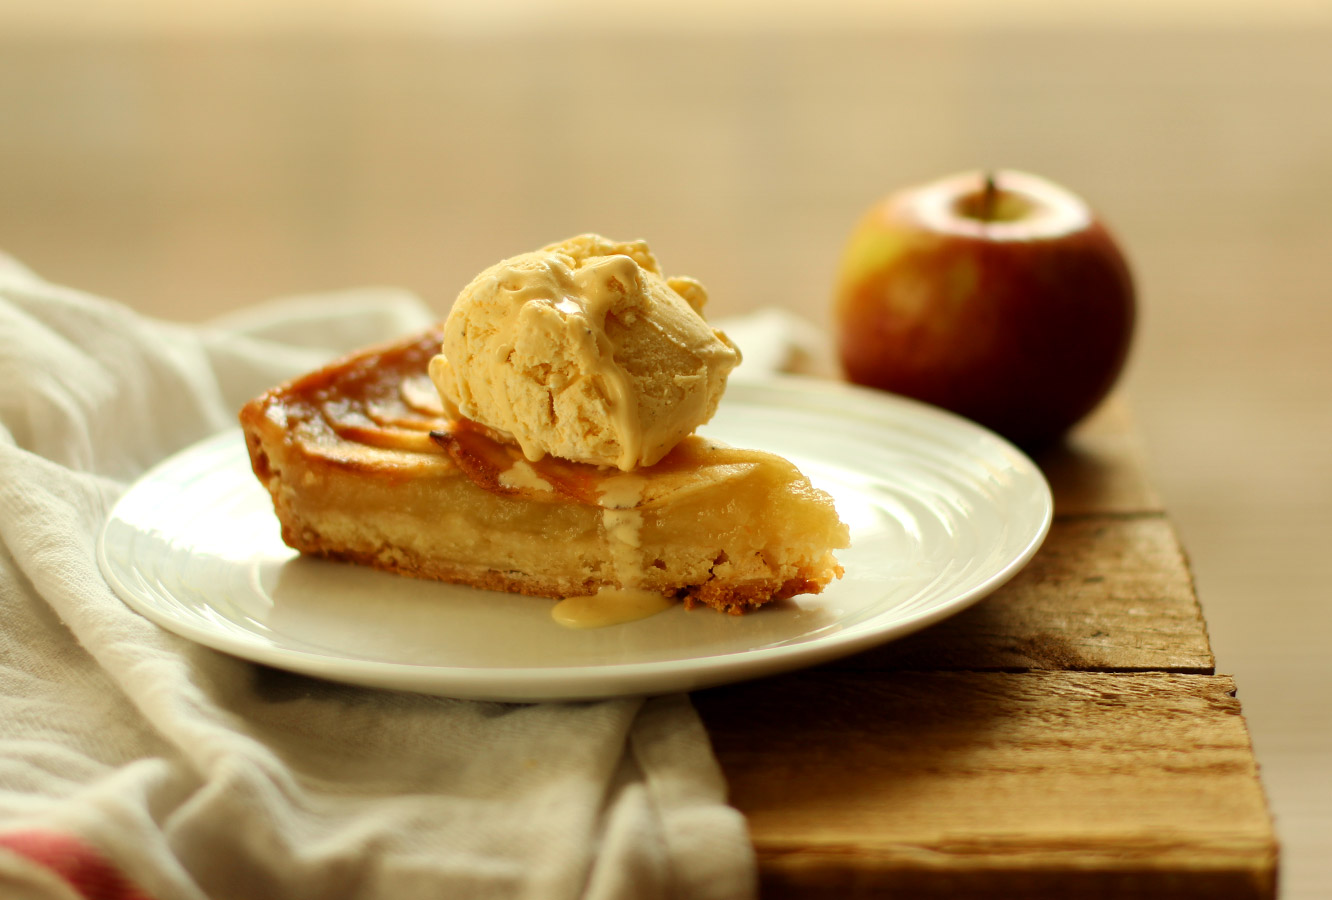
Get a scoop of vanilla ice-cream on that guy.

You can reheat your pie in the oven or individual slices in the microwave if you aren’t eating it straight away.

Until next time. x

Carved from stone

Now then, let me tell you about an ongoing battle between two of my favourite people. Beth is a responsible and considered little person who takes a great deal of care over her things. As a result, everything she owns looks brand new and nothing ever gets broken. Amy, whilst she’s not exactly going round throwing her stuff at walls, is the type to put her fingers on your computer screen and is totally incapable of keeping a case on her iPhone. It won’t surprise you to learn this drives Beth to distraction.

A few months ago, Amy, to our disbelief, actually bought a case for her phone. However, when it came to unpacking it unfortunately she found it didn’t fit. Unsurprisingly, it has not been replaced, but I felt quite sorry for her; she’d finally done what she was told and was not rewarded for her efforts.

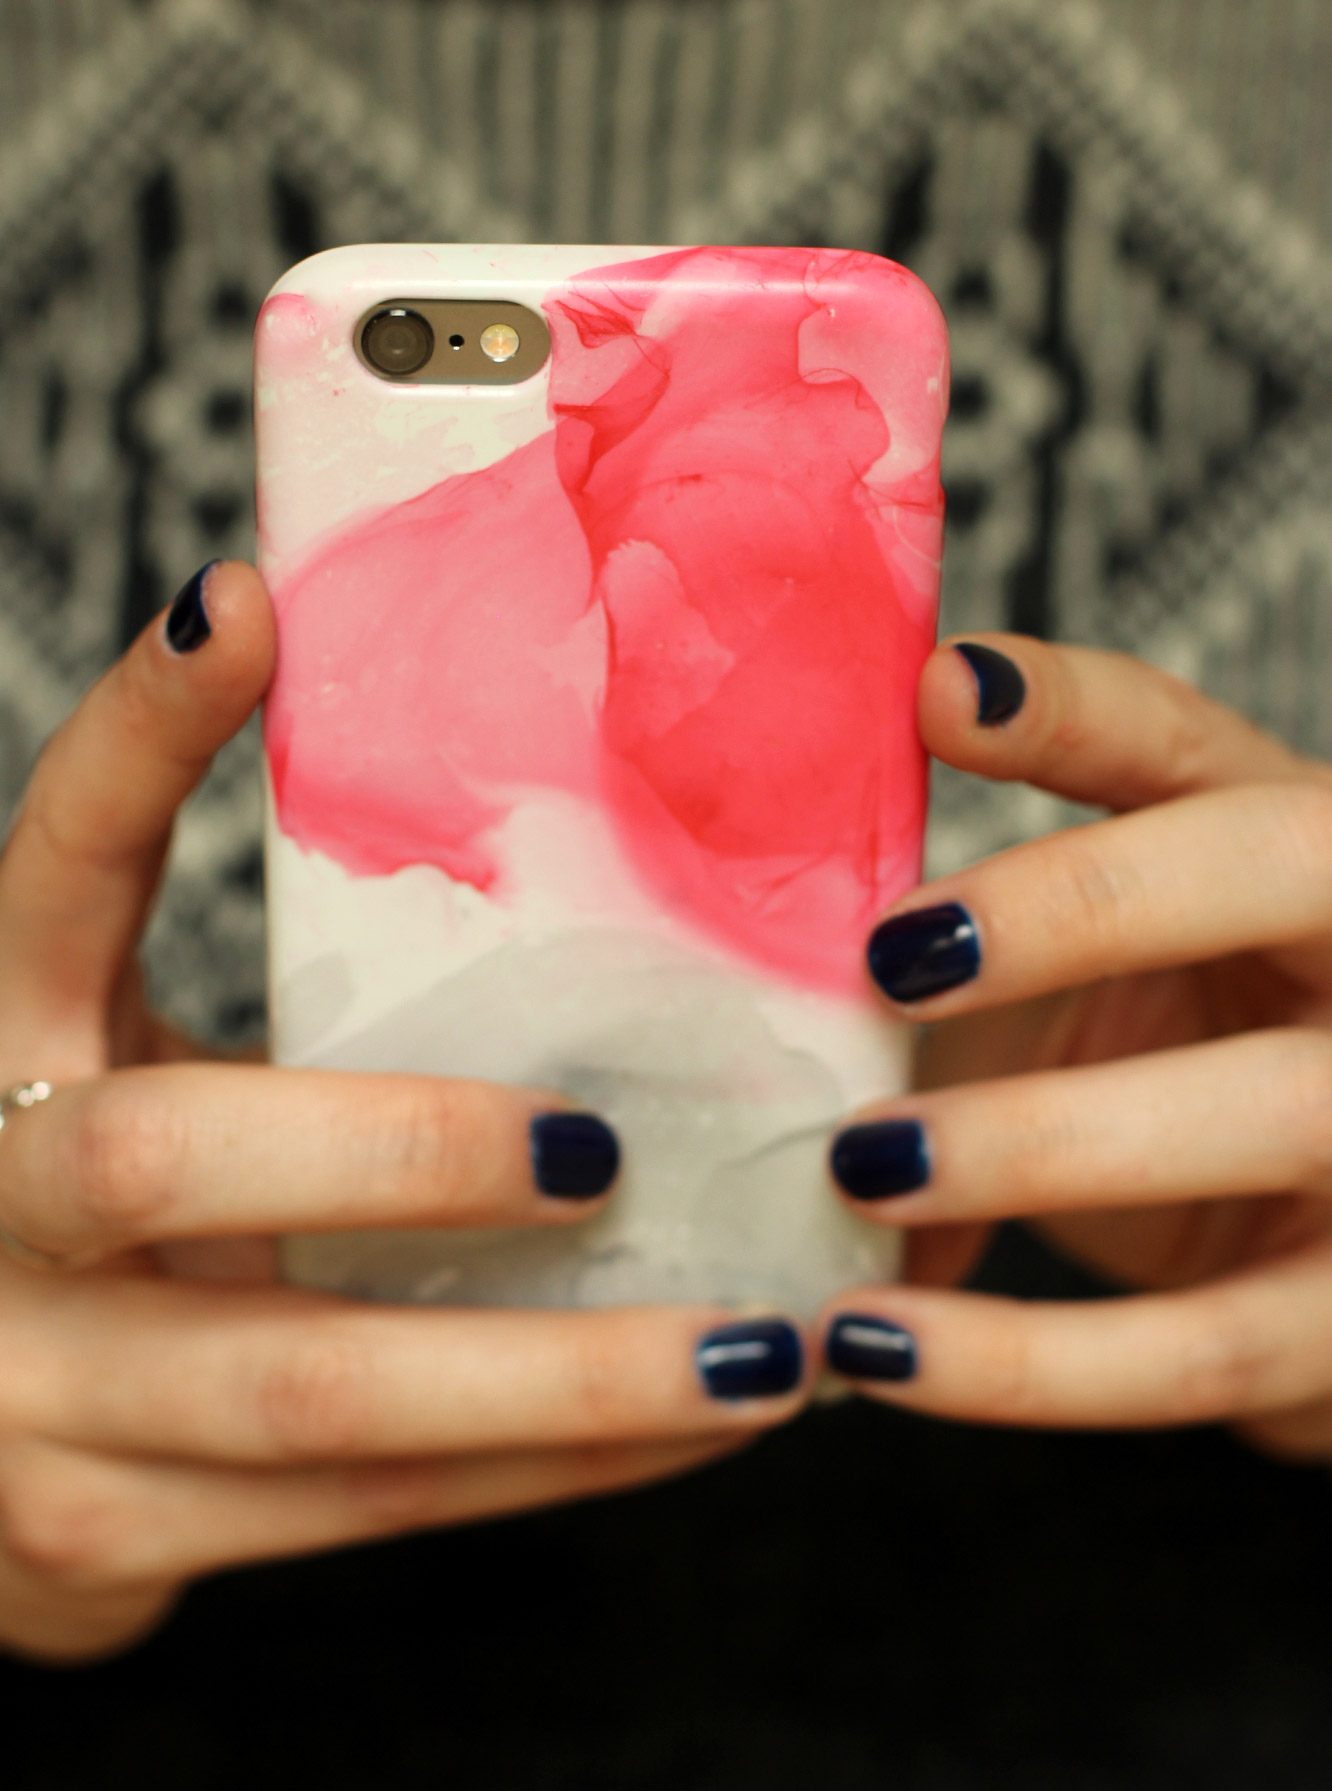
Meanwhile I was being berated by another friend (David) for choosing a practical, but admittedly rather ugly case for my own phone. I had also been admiring the various uses of the nail varnish marbling effect on Pinterest. All this to tell you that today I made myself and Amy phone cases.

nail-varnish-marbled-phone-case-diy-05

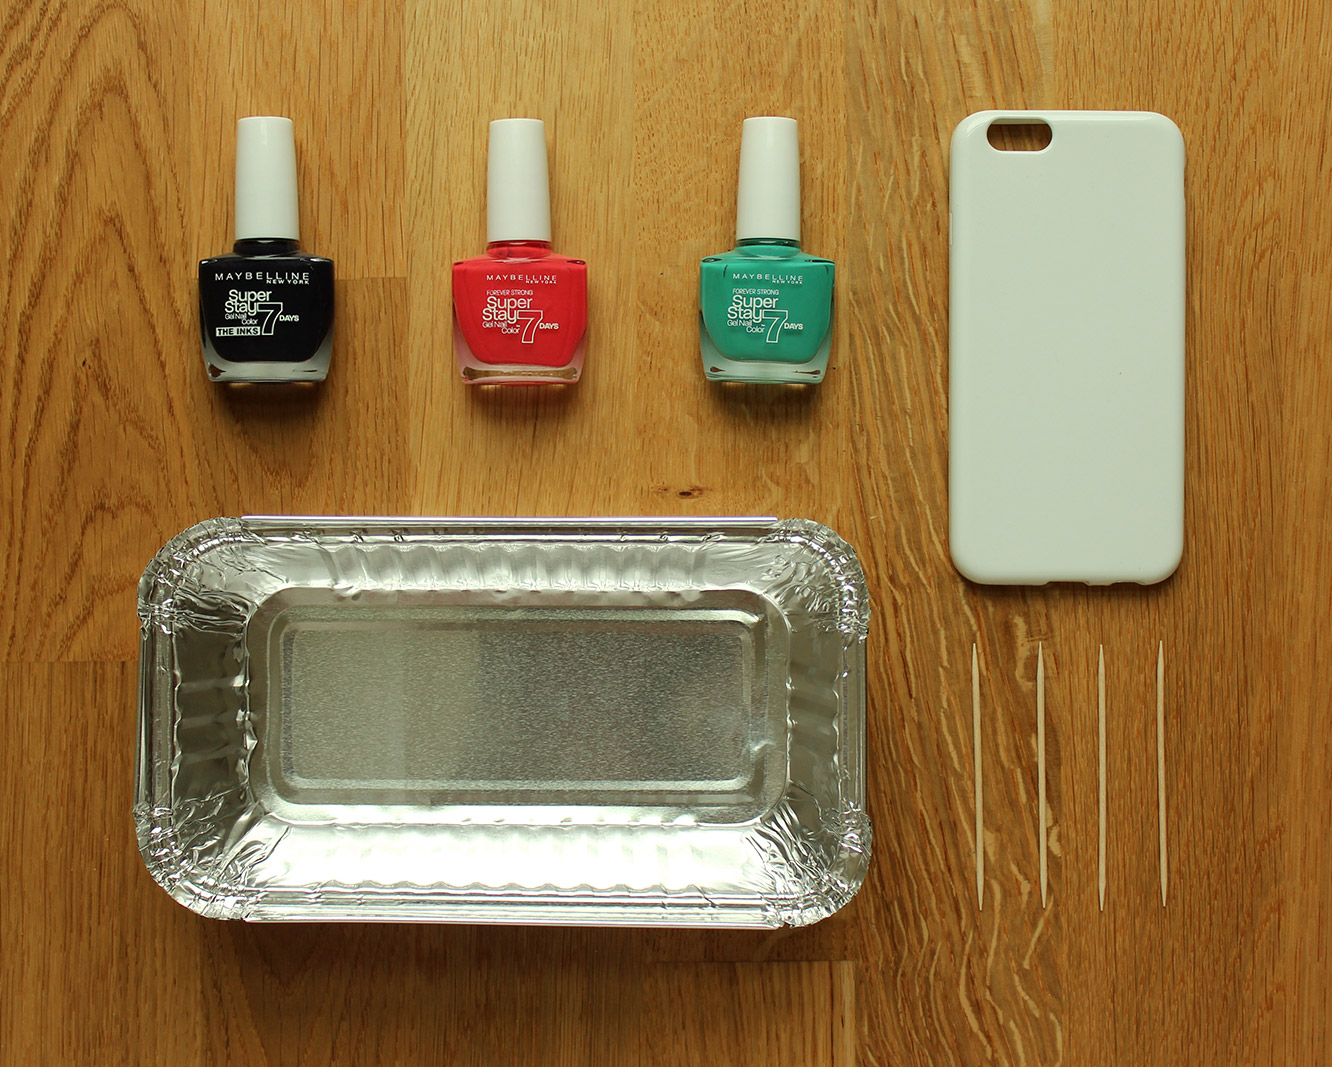
You will need

A white phone case to fit your phone (easily found on the internet for less than £5)

A tray or tub that’s disposable

Nail varnish (try to avoid quick drying brands – I only had quick drying ones so it is possible without but you have less control over the look as it sets quicker)

Cocktail sticks

Warm water

Acetone (only if you have serious perfectionism problems like me)

nail-varnish-marbled-phone-case-diy-04

Step one

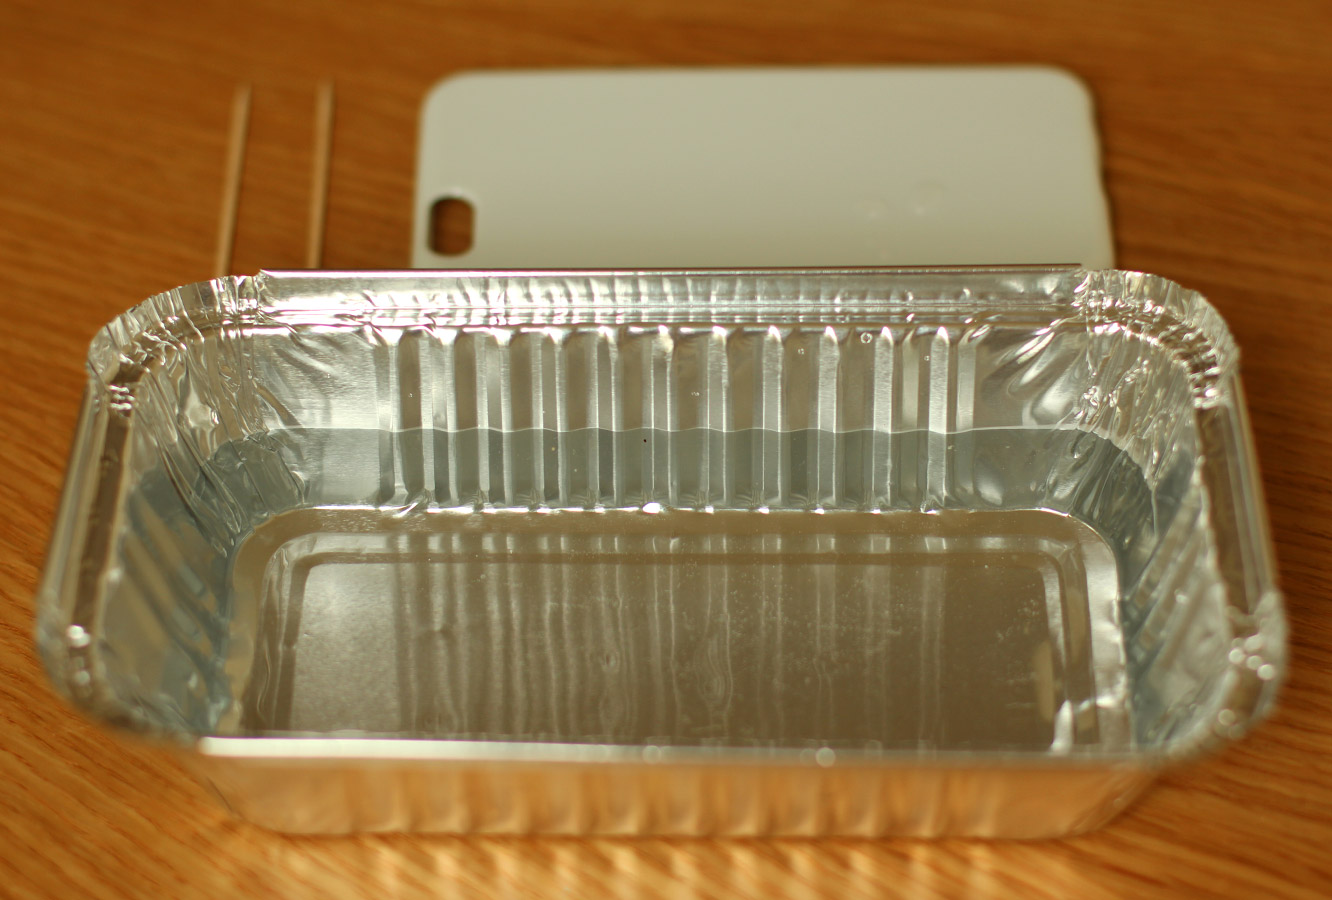
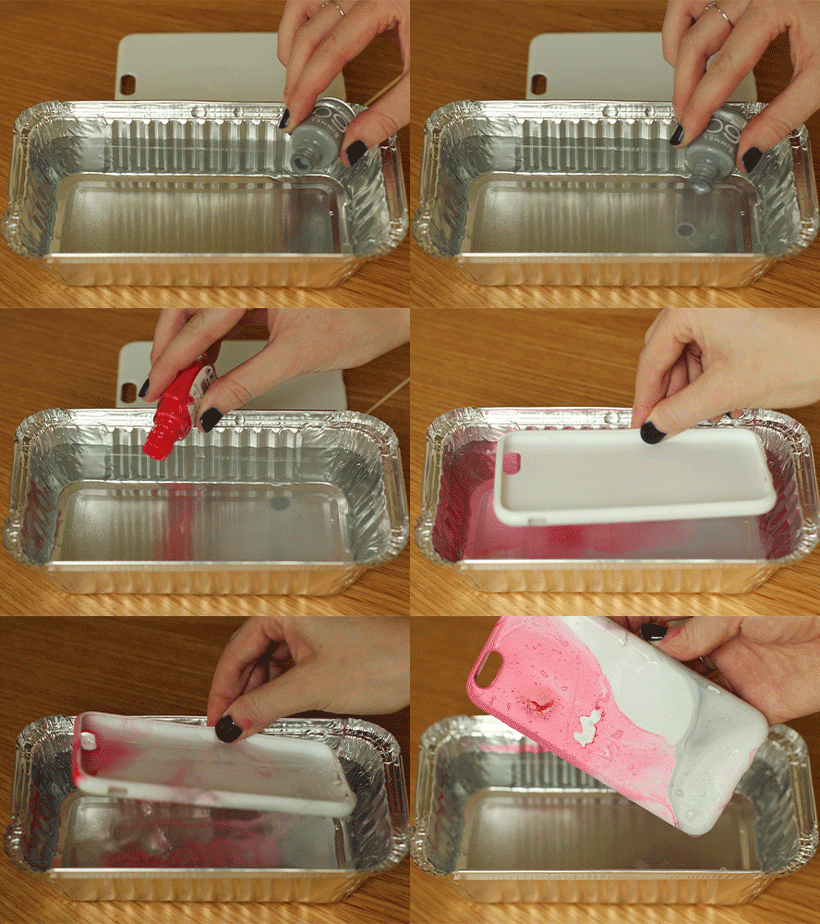
Fill your tray with warm water and de-cap your nail varnishes. You need to work quite quickly so have everything ready to go.

nail-varnish-marbled-phone-case-diy-gif

Step two

Drop a couple of drops of your chosen colours on the surface of the water. I used small quantities of nail varnish because I like the translucent effect. If you want a more opaque look and more time to play with your pattern use more varnish.

It will spread out quite nicely on its own, but I had a little swirl with a cocktail stick but it dried fairly quickly.

Step three

Dip your phone case face first into the water. be sure to completely submerge it so that the sides are coated too.

nail-varnish-marbled-phone-case-diy-03

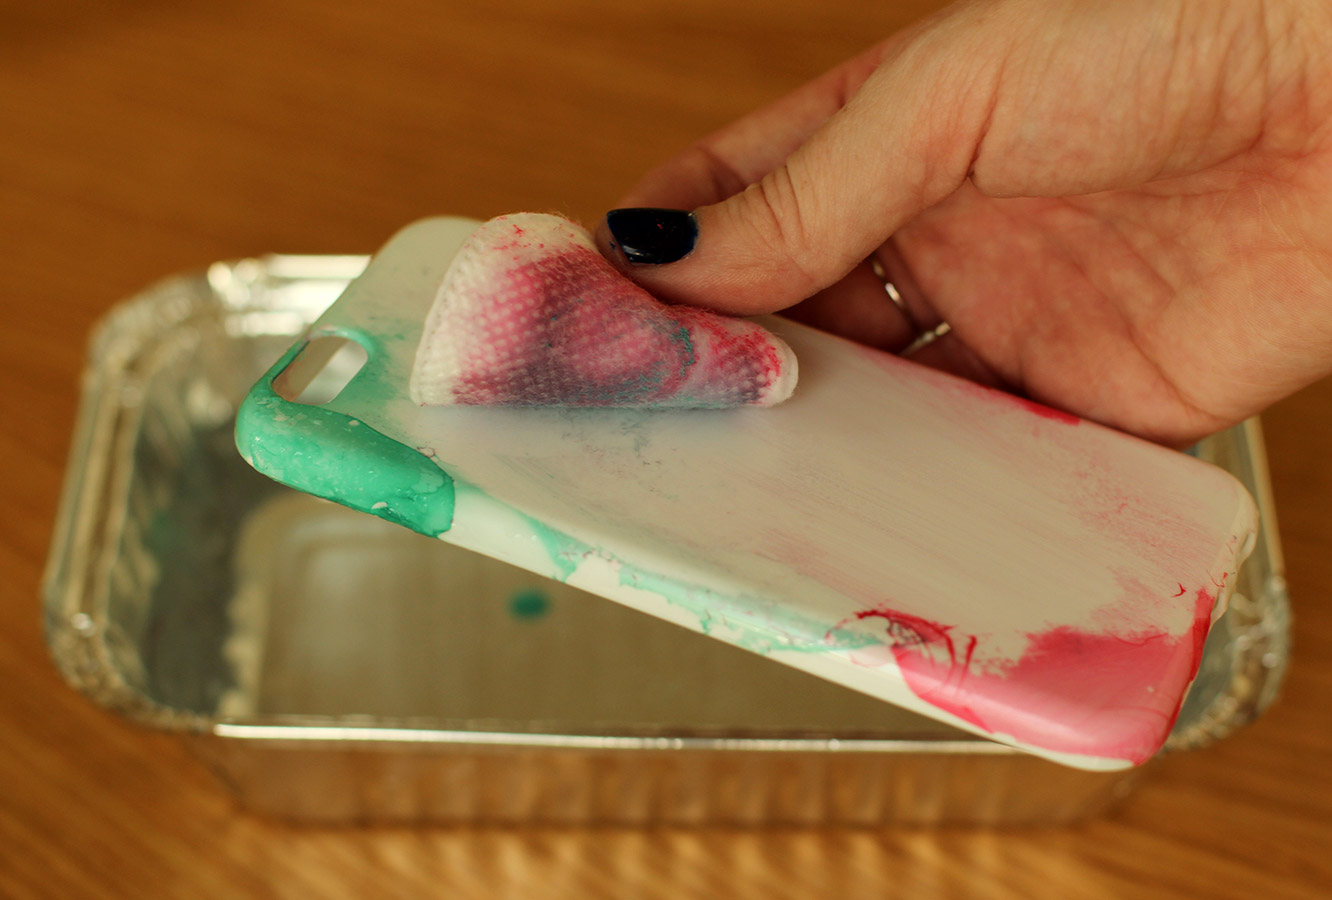
If you don’t like your design you can remove it with acetone and a make up wipe. I didn’t like the original colours I chose to put together, so I started again.

You will also notice that the one in the gif wasn’t my final design, forgive me, there was a gap in it I didn’t like. I later learned this is easy to cover with another thin layer using the same technique, making sure you line it up over the gap.

DISCLAIMER: this may only work with certain cases. The one I bought for my phone (above) was very forgiving, I am fairly sure I could do this limitlessly. However, Amy’s was a hard case (mine was flexible) and it was already coated in some white varnish, which the acetone was not kind to.

If you love your design, you might consider some mod podge or spray adhesive to seal it. I’m going to leave mine and redo it when I get bored.

nail-varnish-marbled-phone-case-diy-01

nail-varnish-marbled-phone-case-diy-02

Until next time friends. xx

Stickeh toffeh

There’s no way I could sleep at night if I didn’t include this next dessert in my British Favourites series.

I mean, I could probably sleep at night, I sleep like a baby, but sticky toffee pudding is one of the best puds Britain has produced. It wouldn’t be right not to feature it here.

So without further ado, here’s the recipe for sticky toffee cupcakes, enjoy my friends.

sticky-toffee-pudding-cupcake-recipe-1

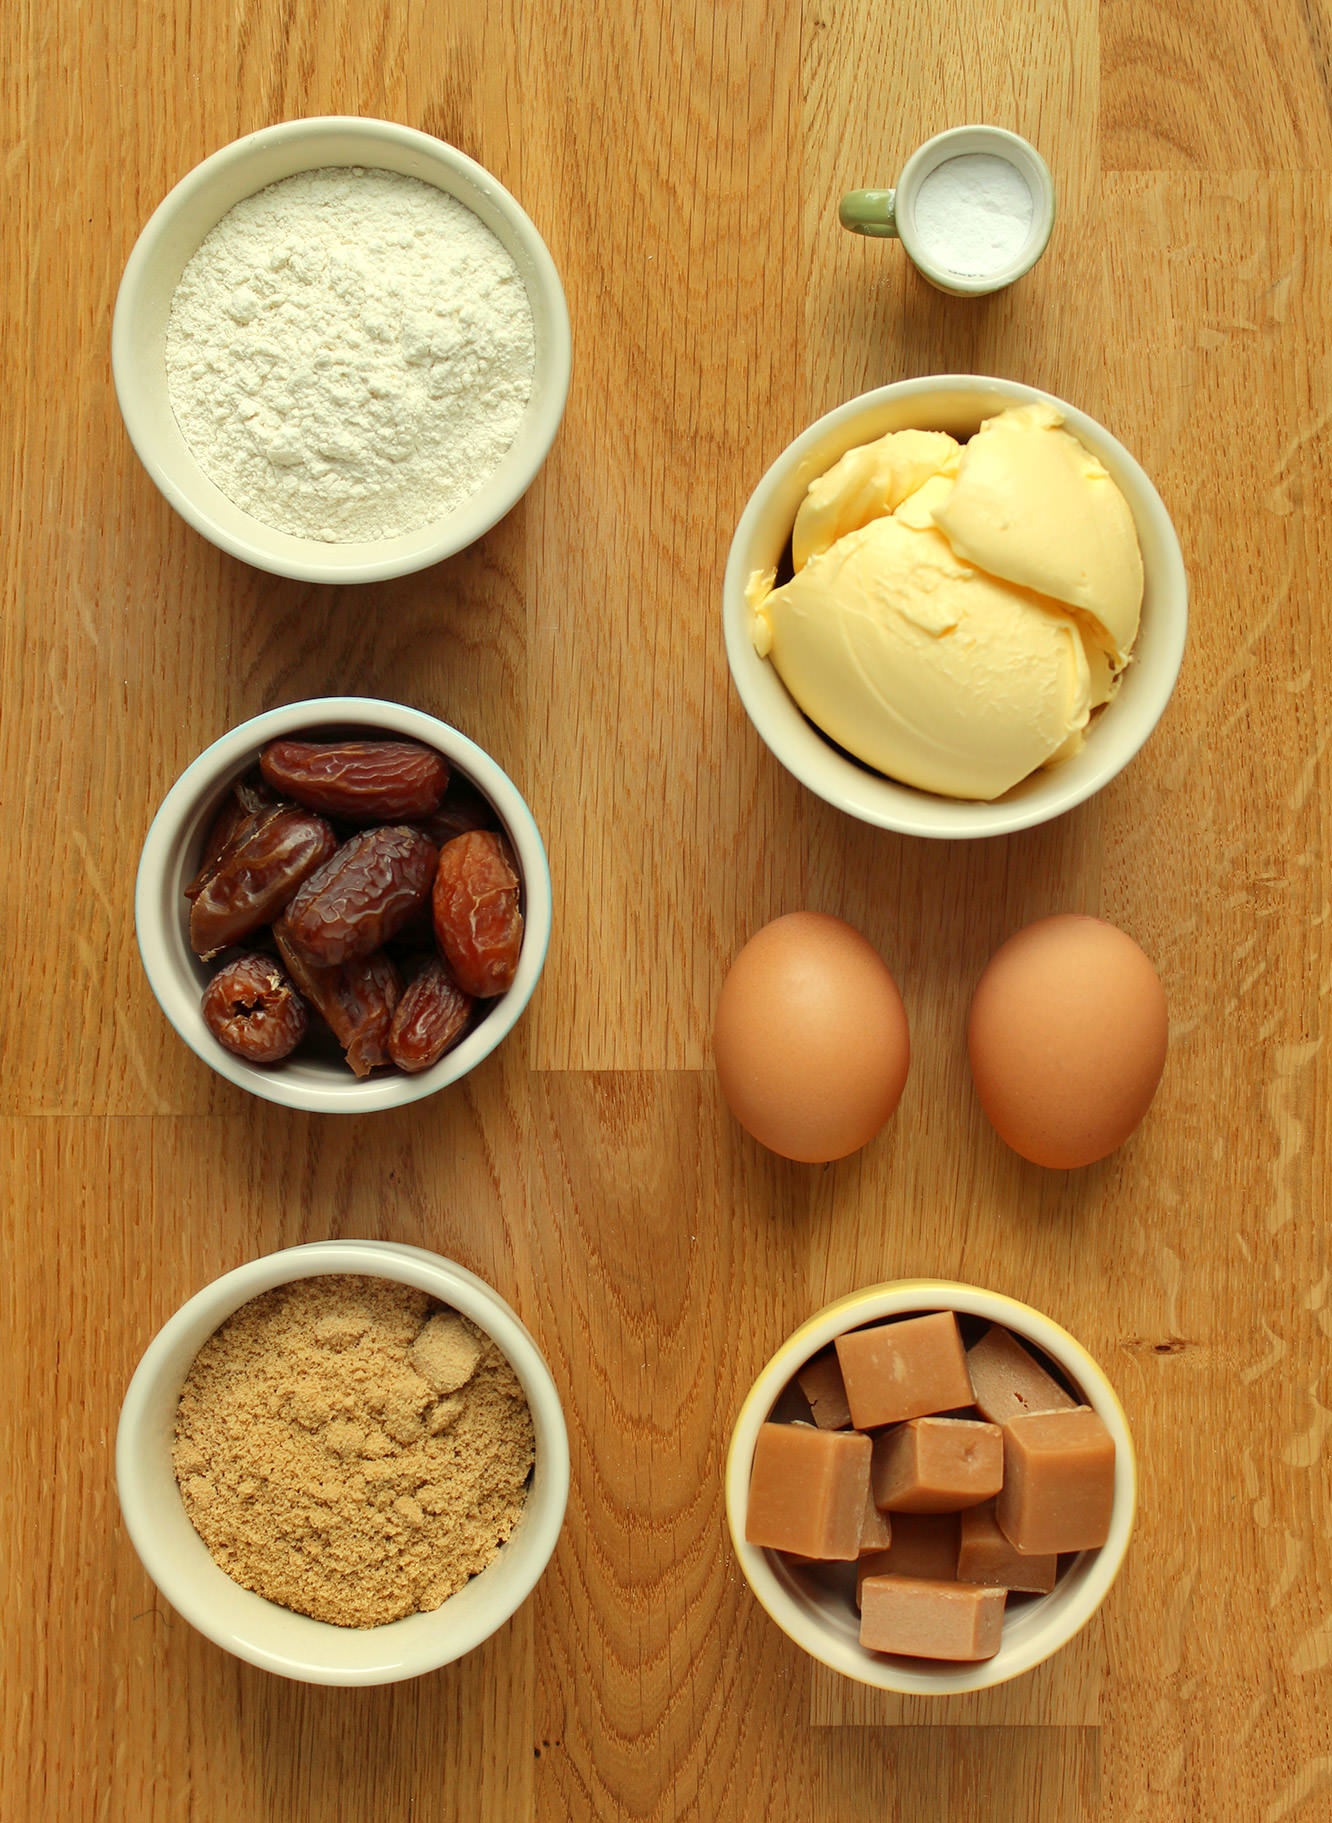
You will need

For the cakes:

200g/7 oz plain flour

160g/5.5 oz soft brown sugar

100g/3.5 oz unsalted butter/margarine (I use Stork for cakes)

150g/5 oz dates (medjool)

2 eggs

1 tsp bicarbonate of soda

For the toffee filling:

200g/7 oz sweetened condensed milk (half a tin)

100g/3.5 oz soft brown sugar

100g/3.5 oz unsalted butter (used salted if you prefer salted caramel to a more dulce de leche/toffee flavour)

50ml/1.75 fl oz double cream

For the toffee frosting/icing:

400g/14 oz of the toffee filling

100g/3.5 oz unsalted butter

100g/3.5 oz icing sugar

Dairy fudge pieces for decoration

(makes 12)

sticky-toffee-pudding-cupcake-recipe-2

Step one

Cakes first chaps.

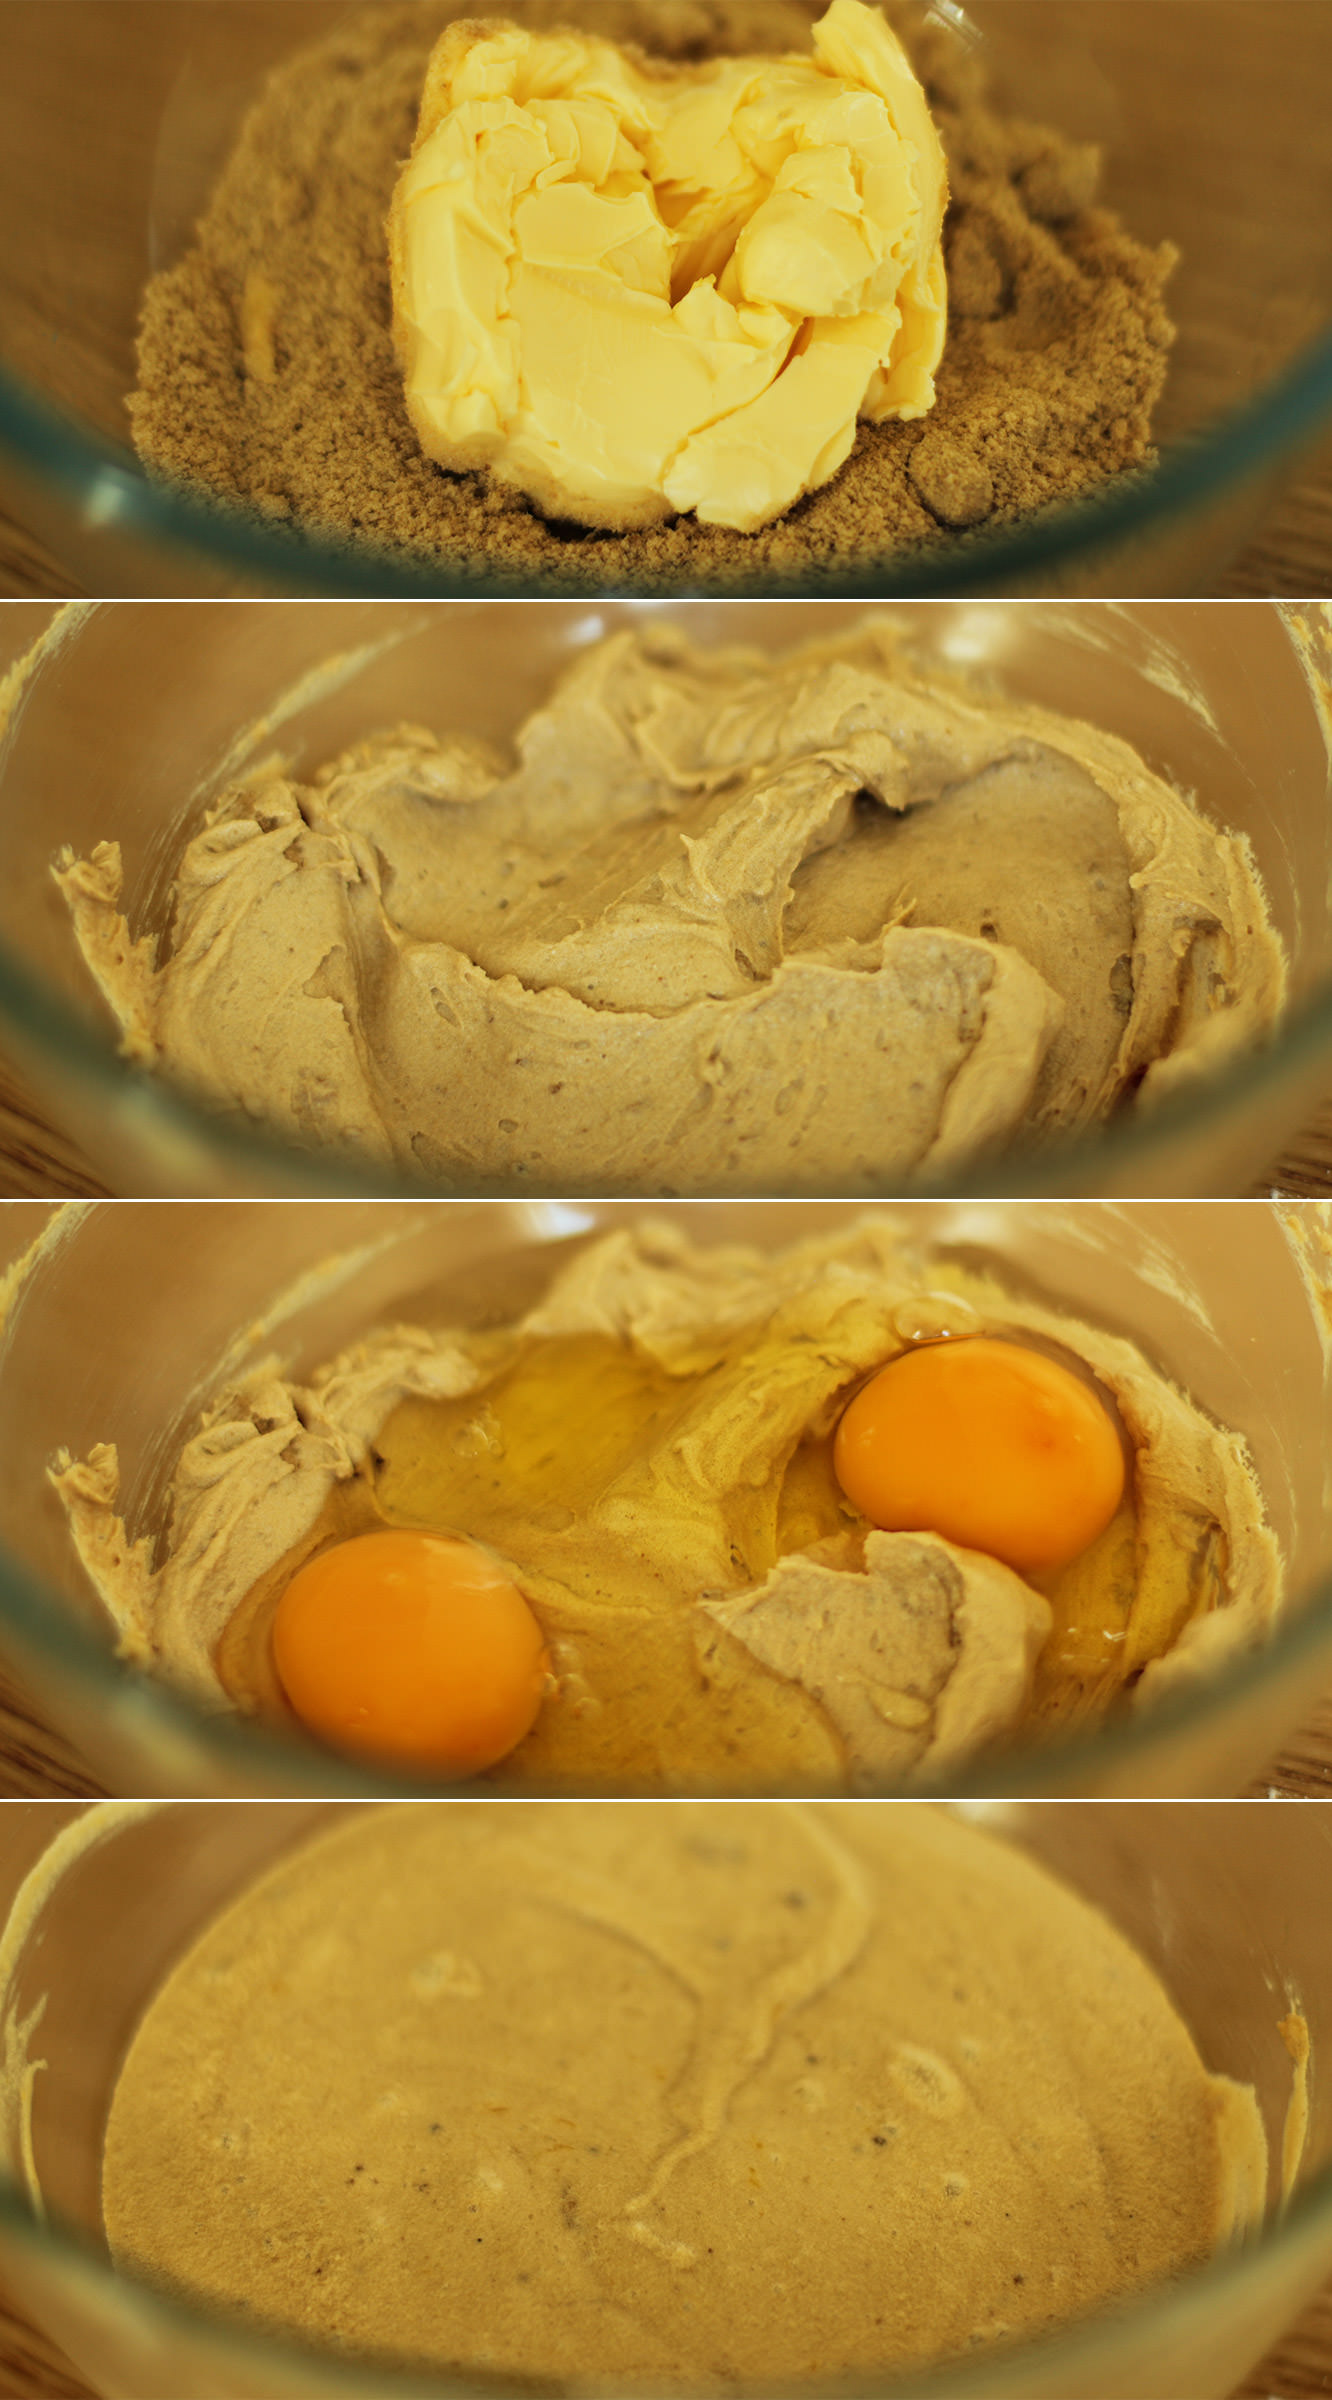
Whisk together the sugar and butter until smooth. Add the eggs and whisk again until the mix is fully combined.

sticky-toffee-pudding-cupcake-recipe-3

Step two

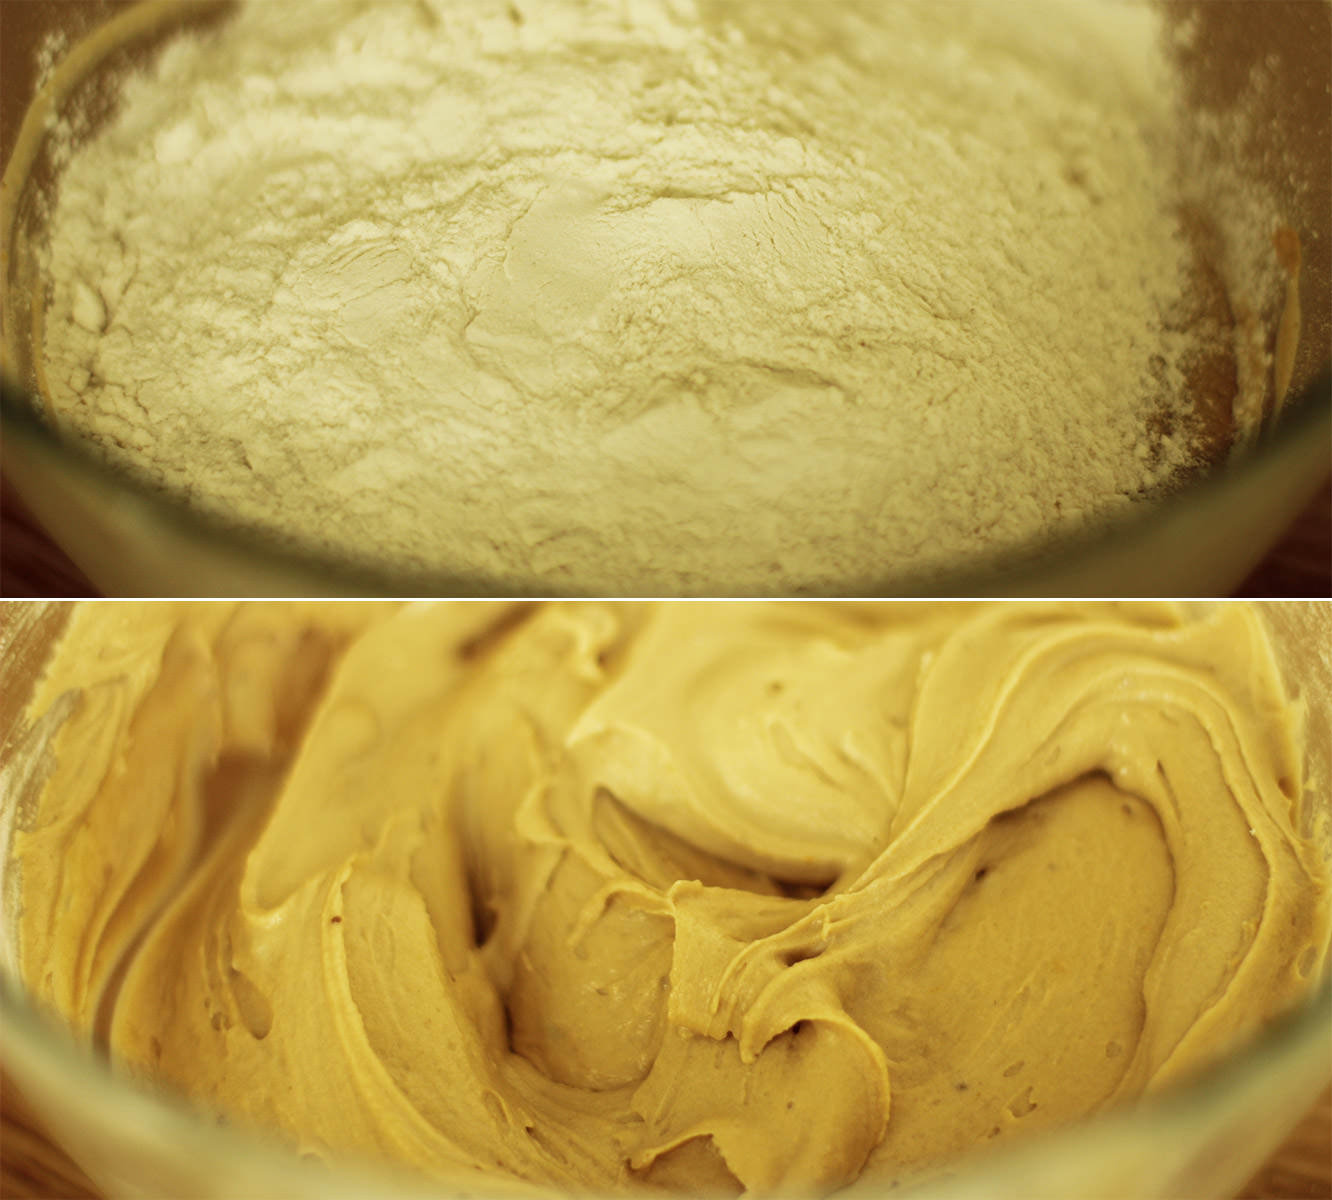
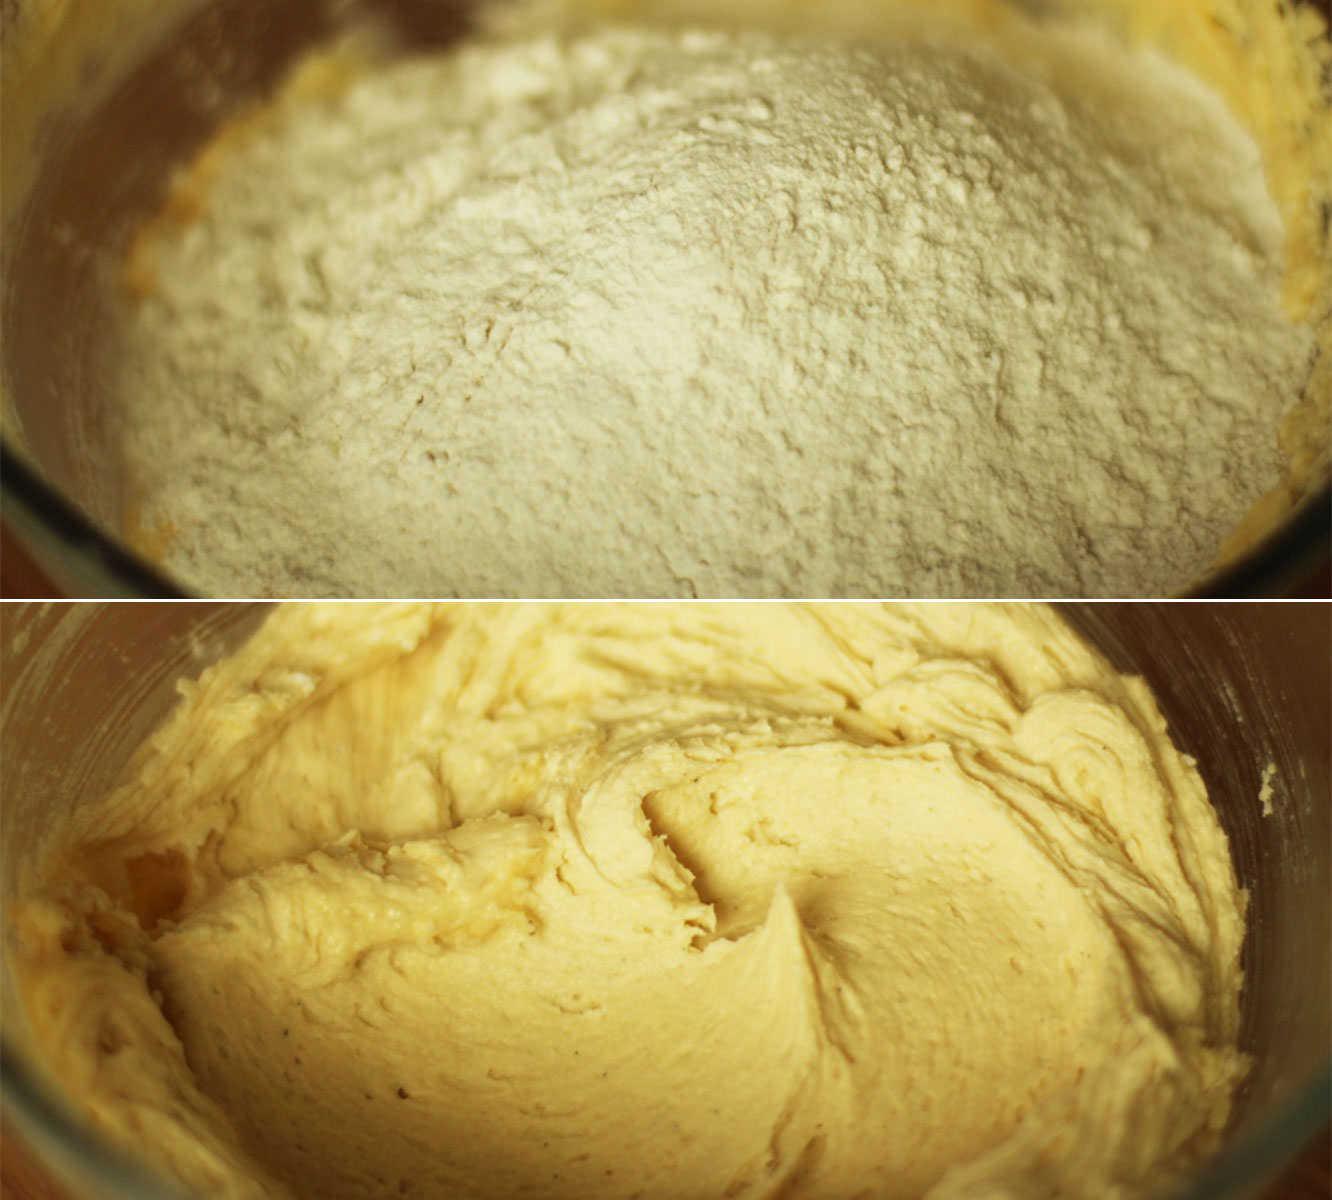
Add the flour and bicarbonate of soda and whisk again. The batter should be light and fluffy.

sticky-toffee-pudding-cupcake-recipe-4

Step three

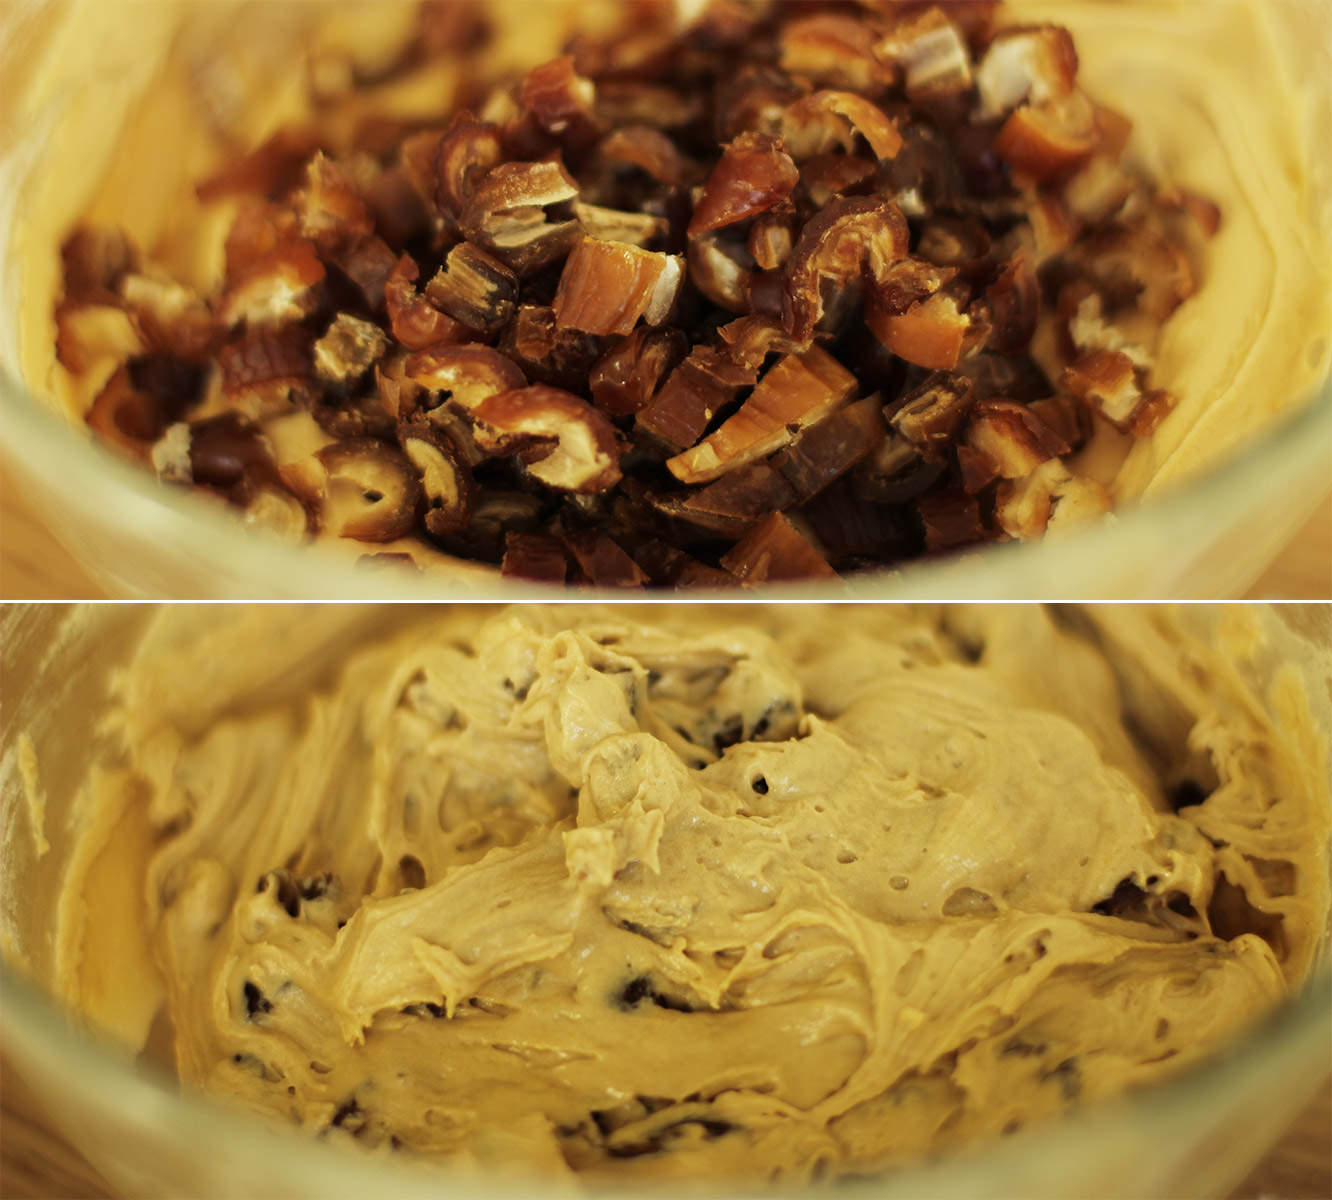
Chop the dates up into the mixture. I just used scissors for this.

Stir in so they are evenly distributed.

sticky-toffee-pudding-cupcake-recipe-7

Step four

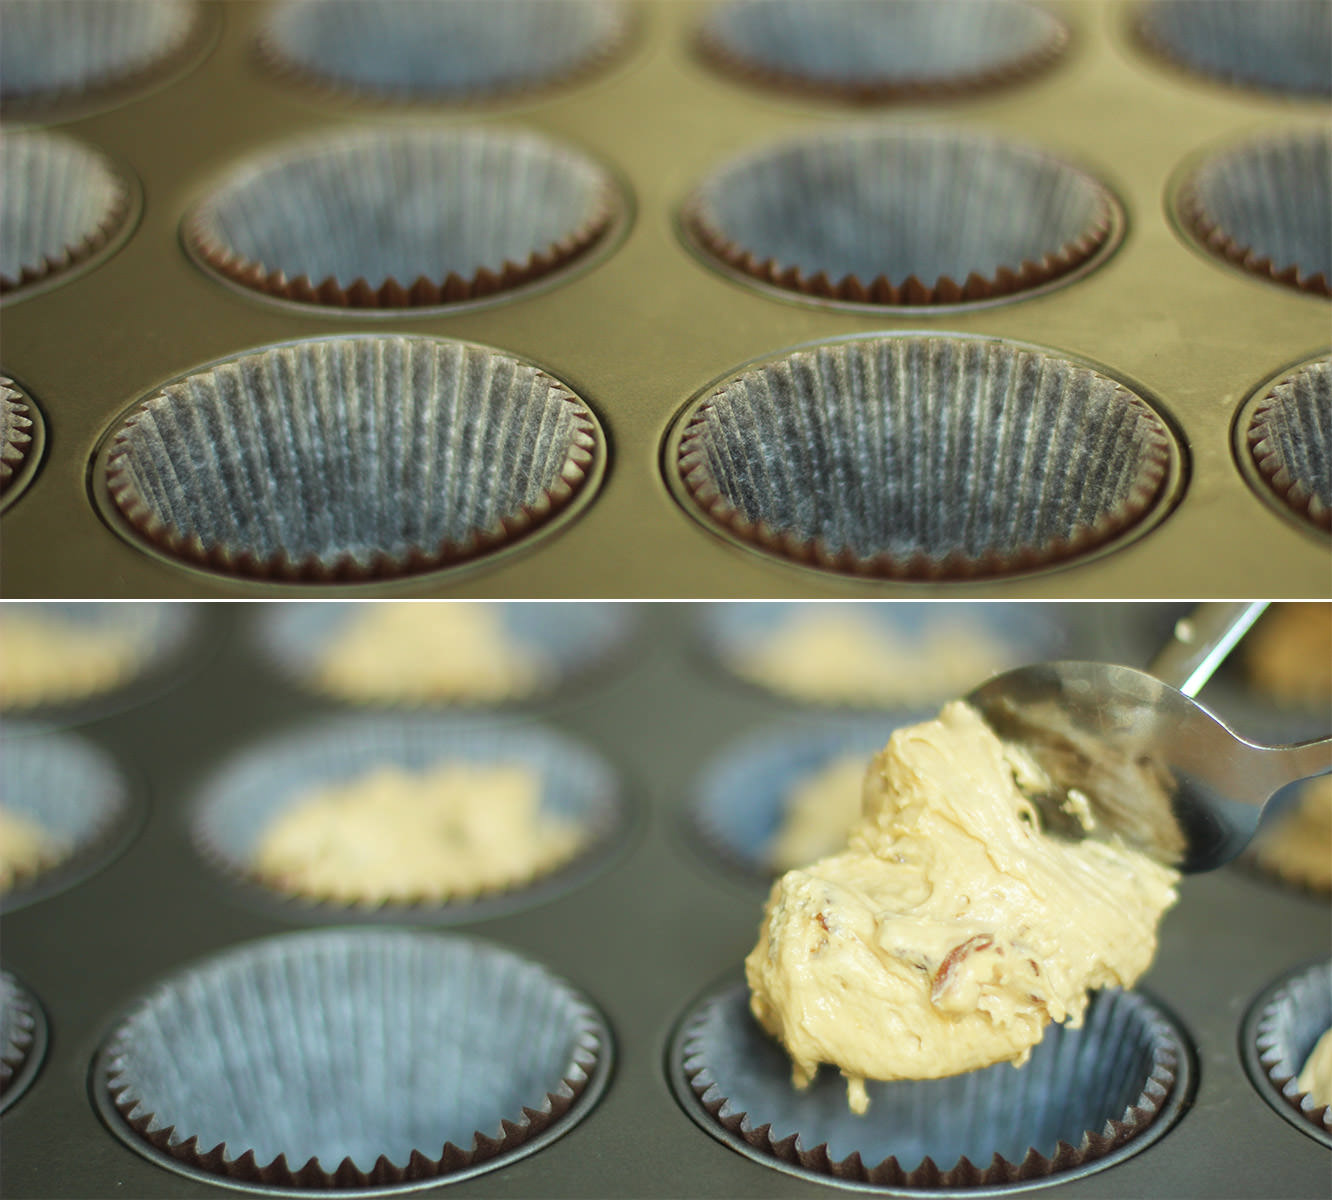
Spoon the mixture into cupcake cases. Two dessert spoons in each should do the trick.

Bake on gas mark 4/180C/350F for 20-25 minutes. I overdid mine a bit so perhaps closer to the 20 minute end is better.

sticky-toffee-pudding-cupcake-recipe-5

Step five

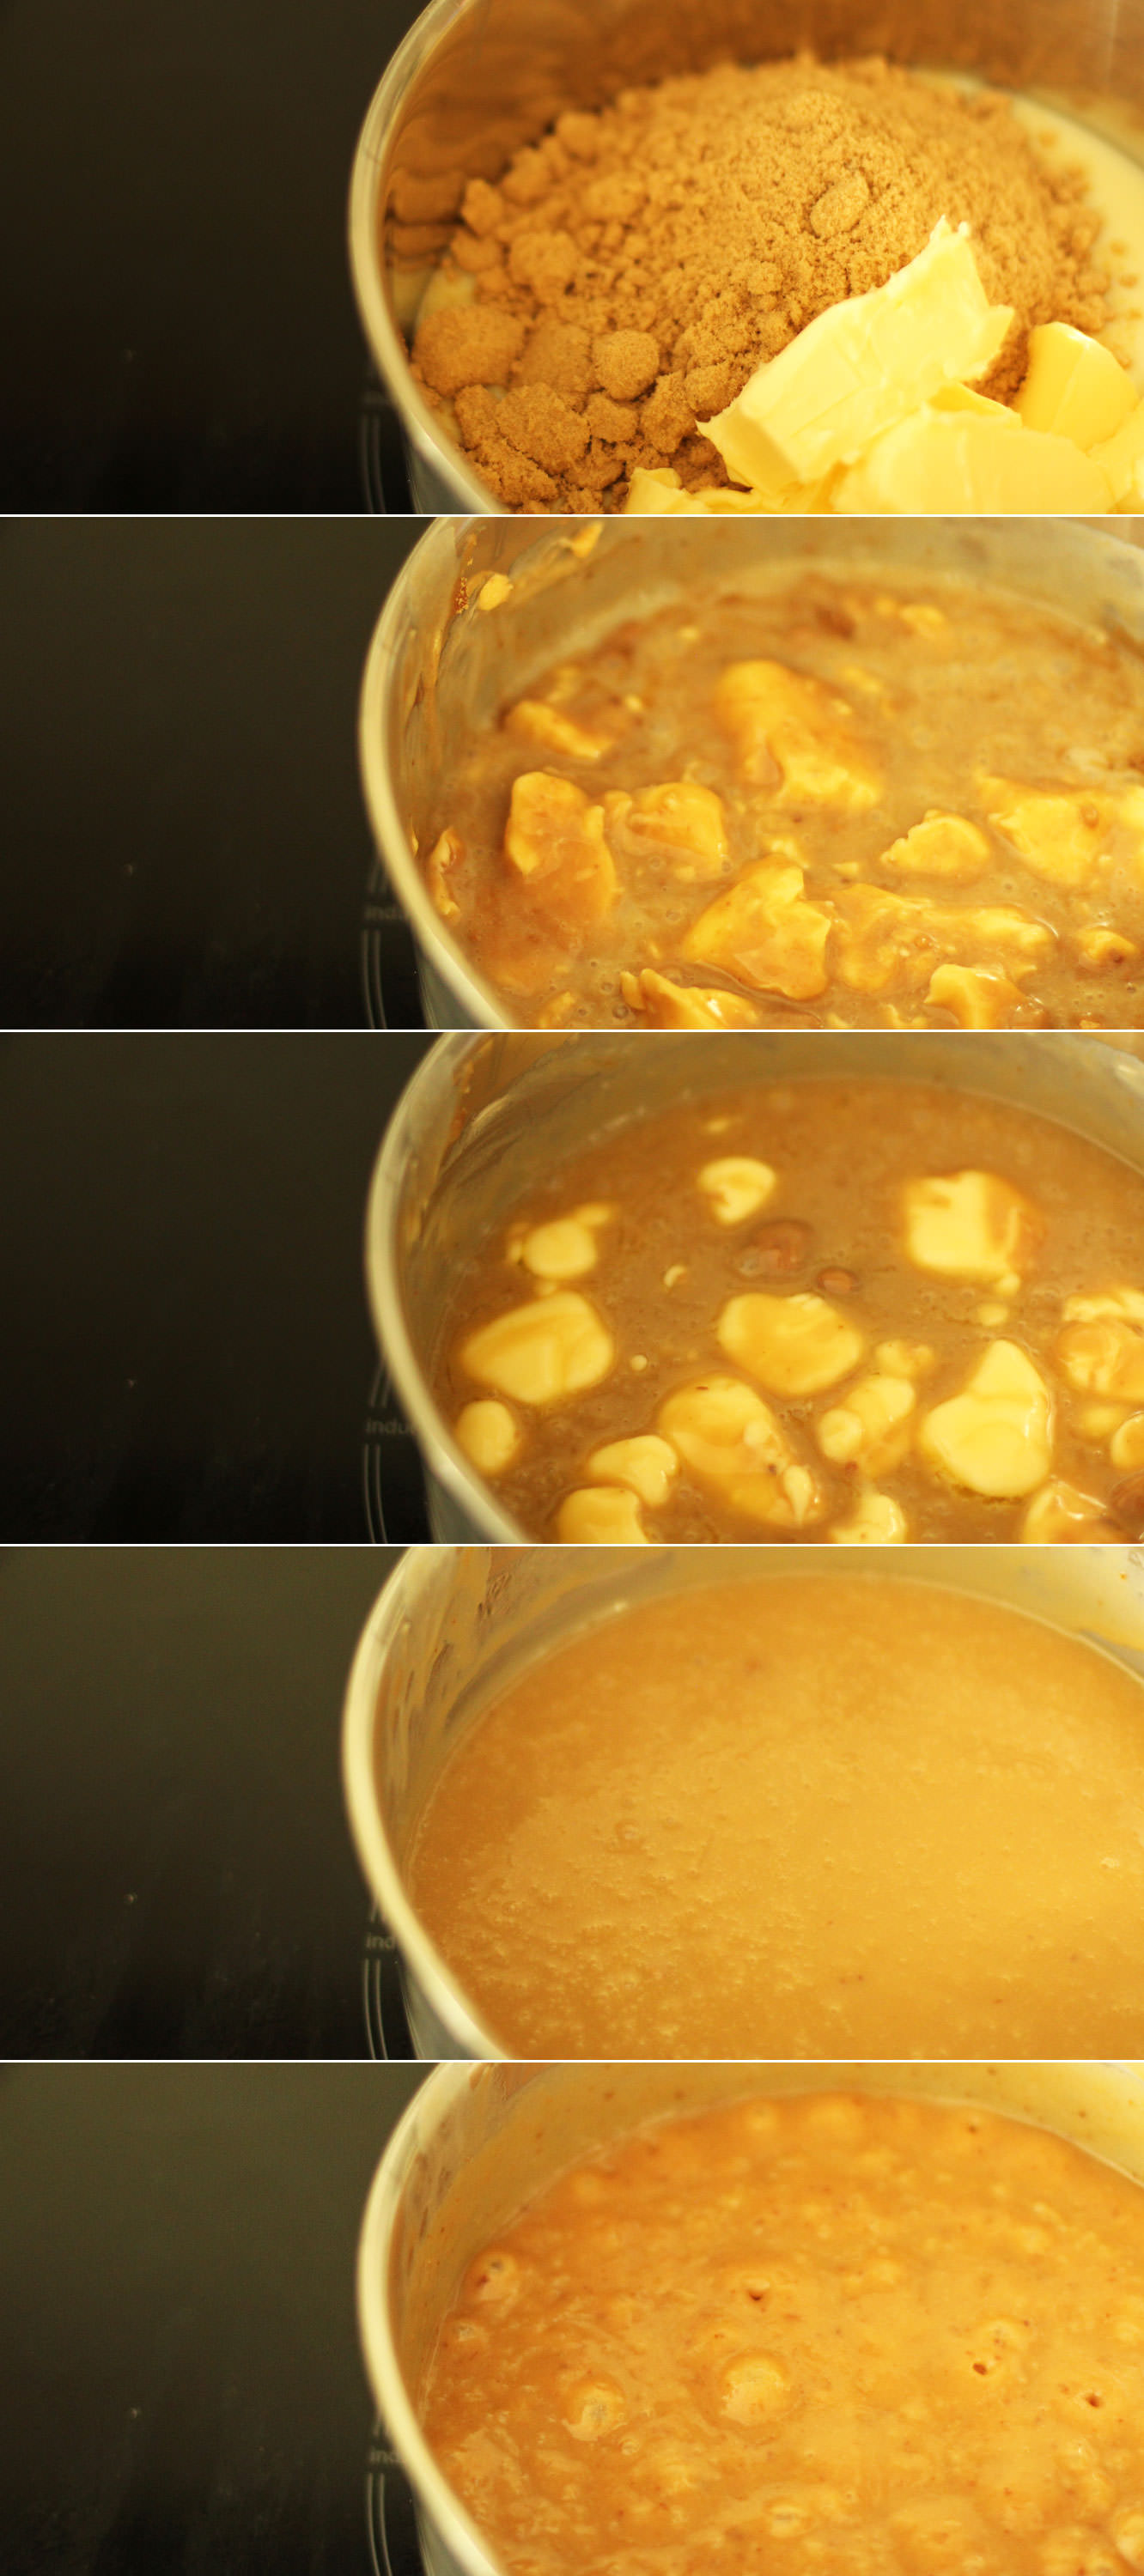
Place all of the filling ingredients into a saucepan and put on a low-medium heat until all are melted.

Turn the heat up until the mix reaches a gentle boil. Cook for 5-10 minutes, stirring constantly.

Remove from heat, pour into a heatproof bowl and leave to cool, you can pop in in the fridge after about half an hour to speed up the process.

sticky-toffee-pudding-cupcake-recipe-6

Step six

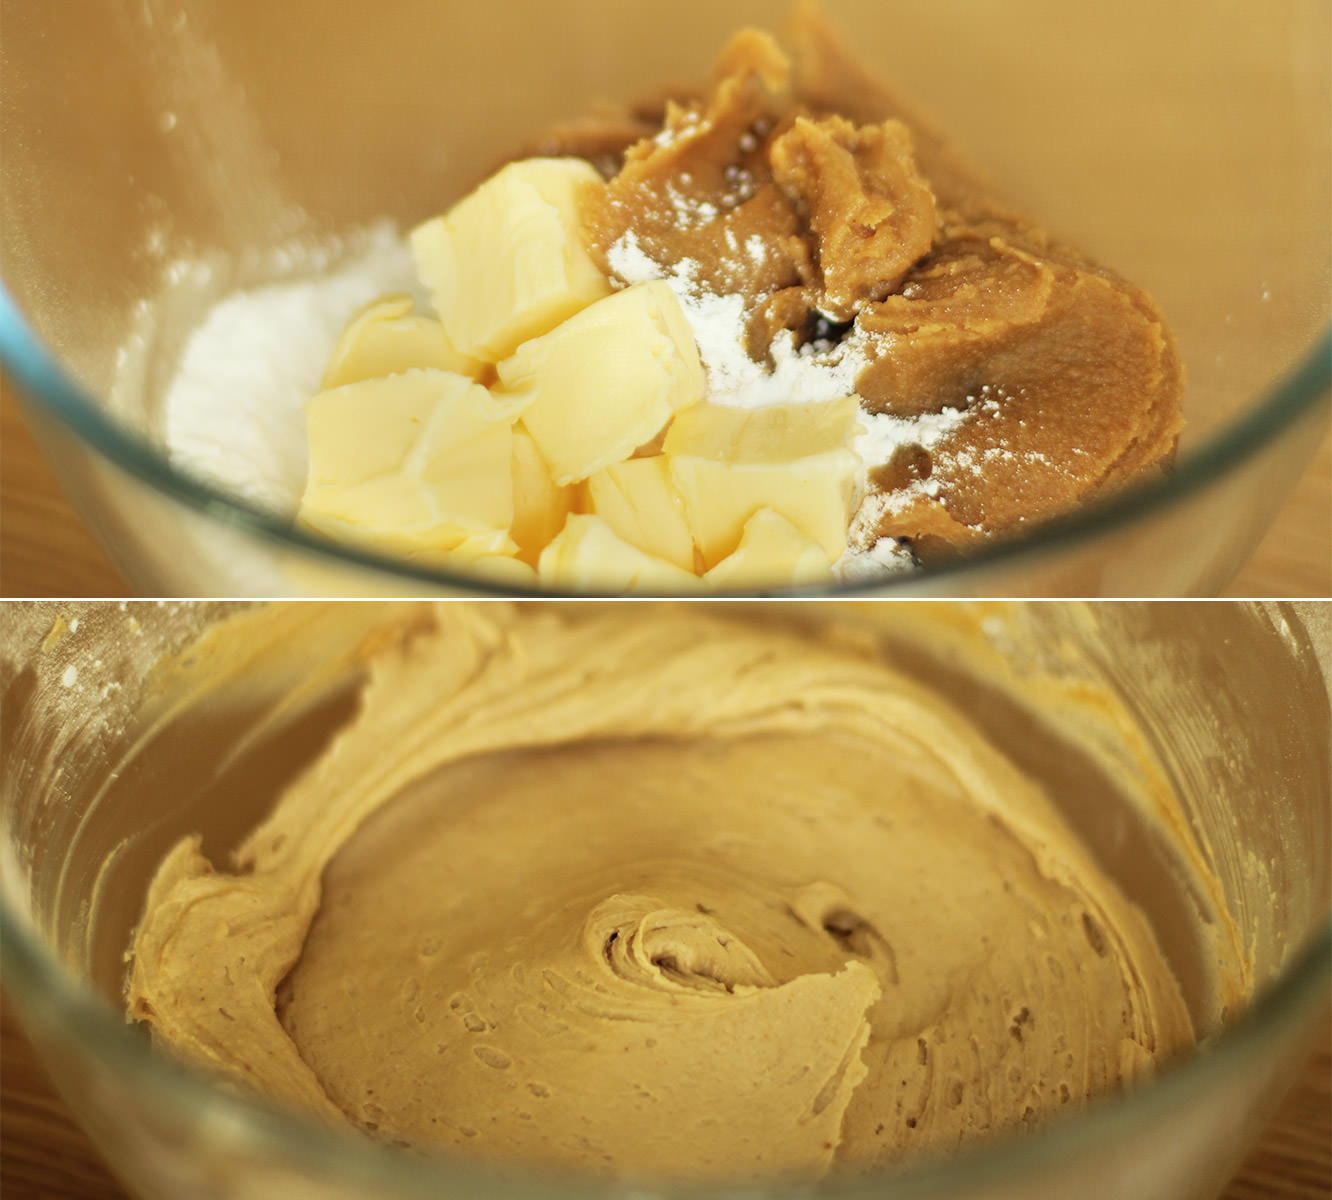
For the toffee frosting add 400g of the toffee mix to 100g of butter and 100g of icing sugar. The butter and toffee should be at room temperature.

sticky-toffee-pudding-cupcake-recipe-gif

Step seven

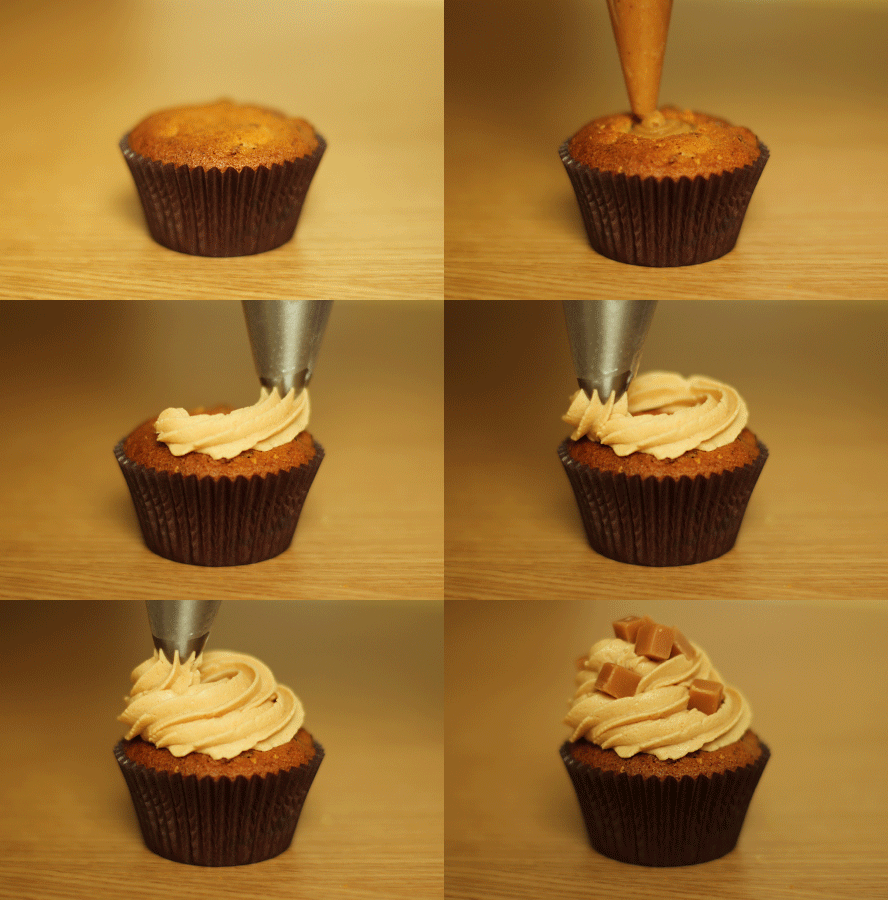
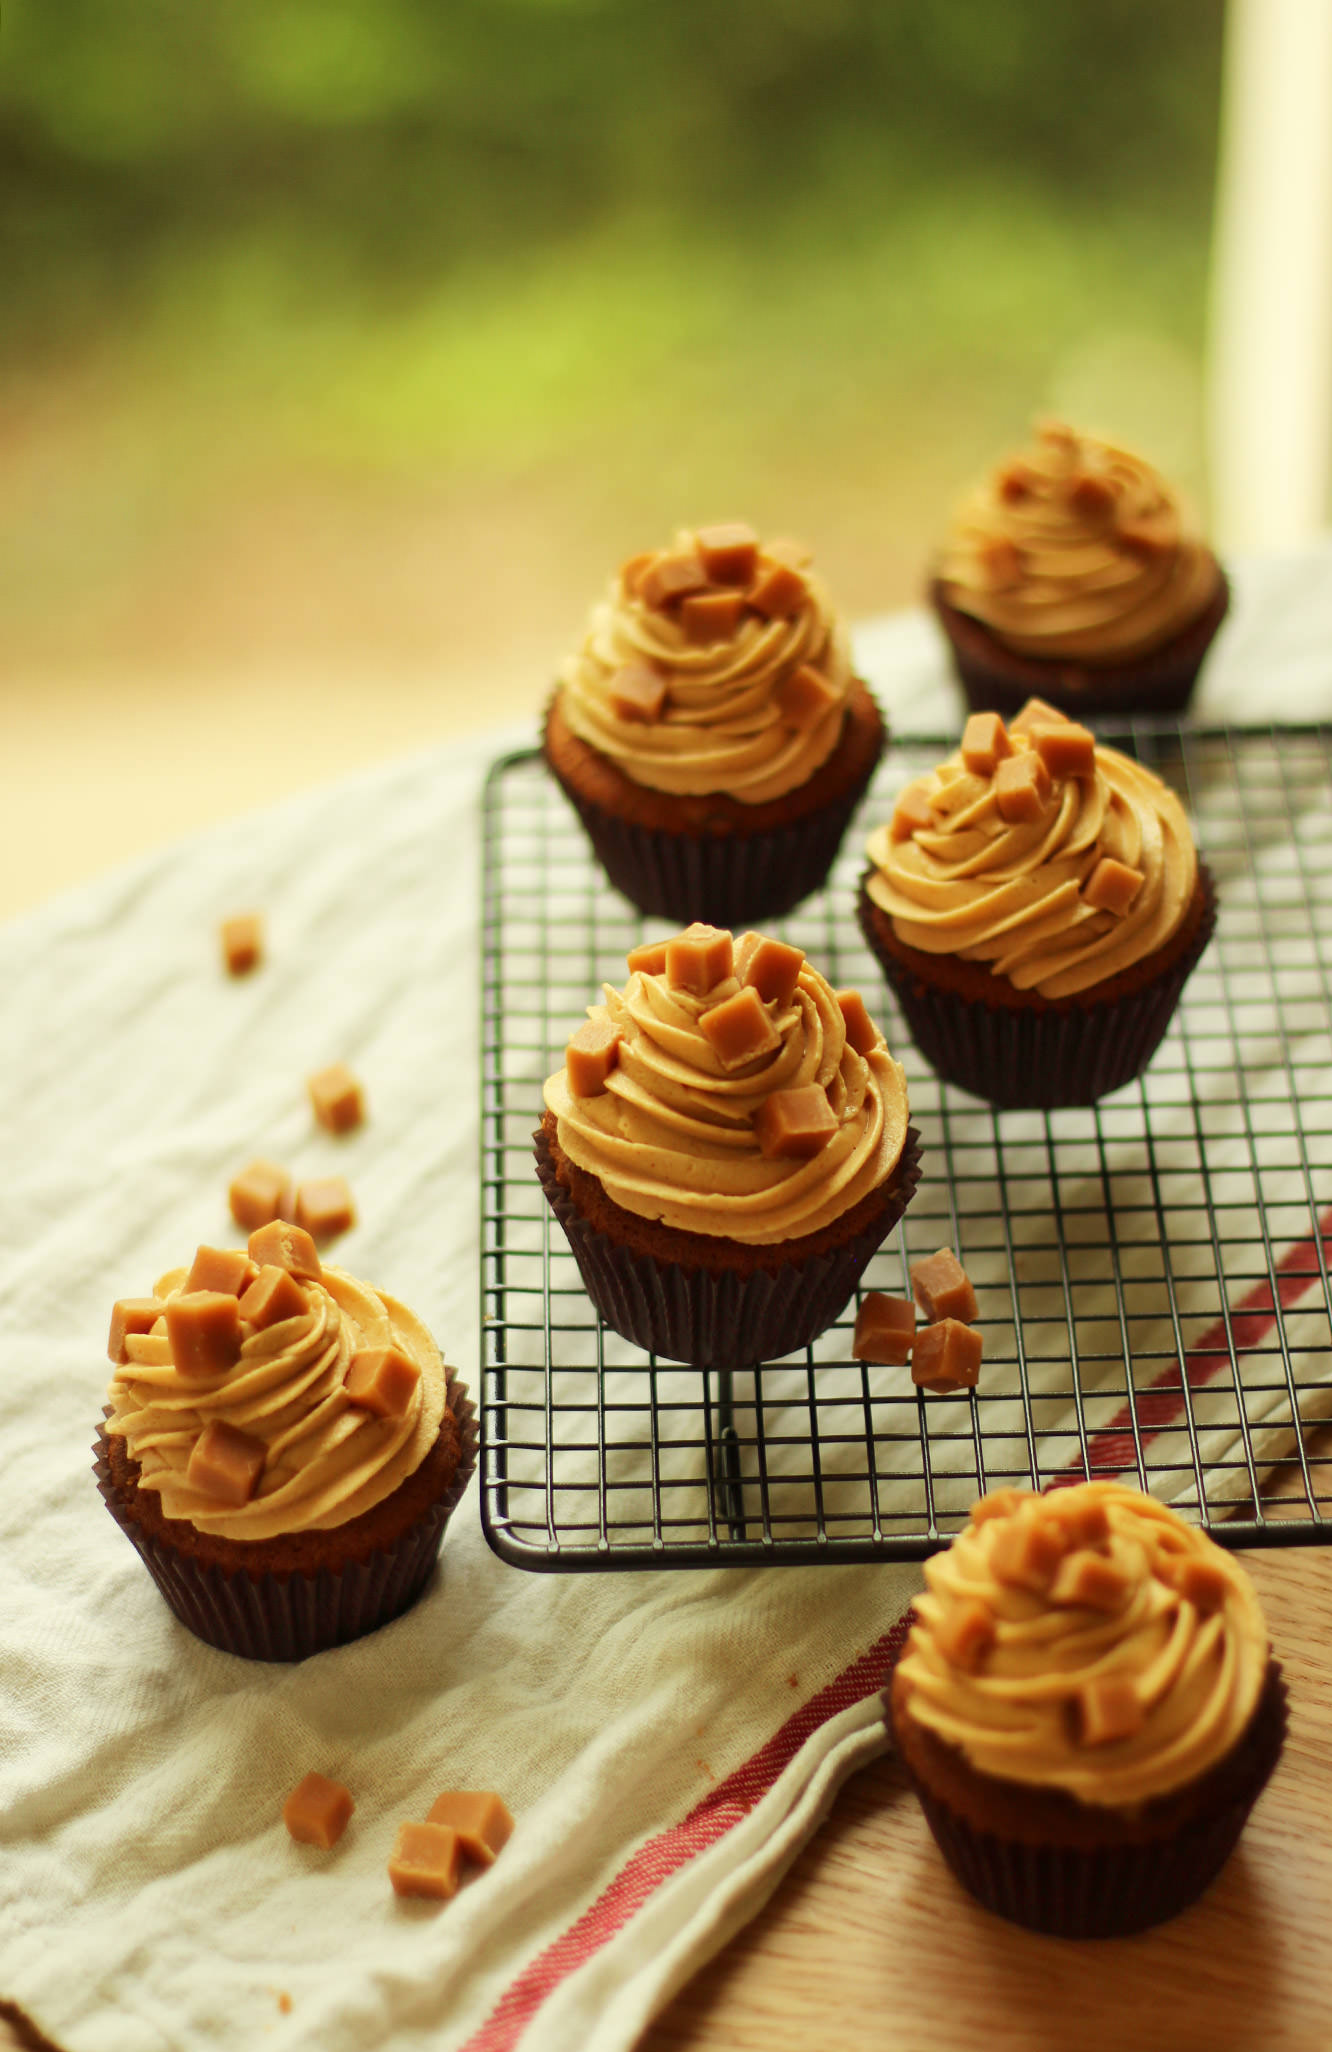
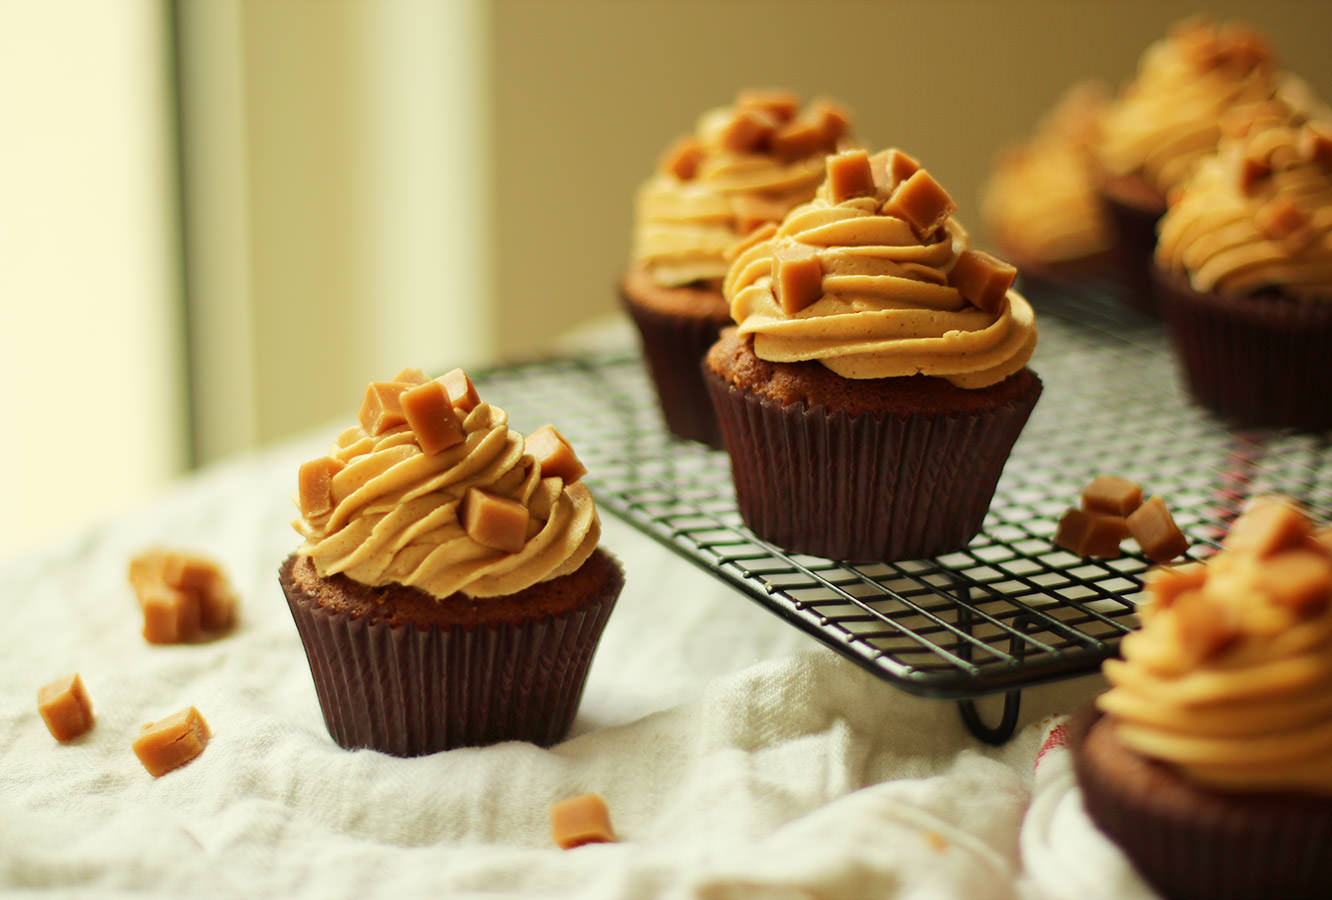
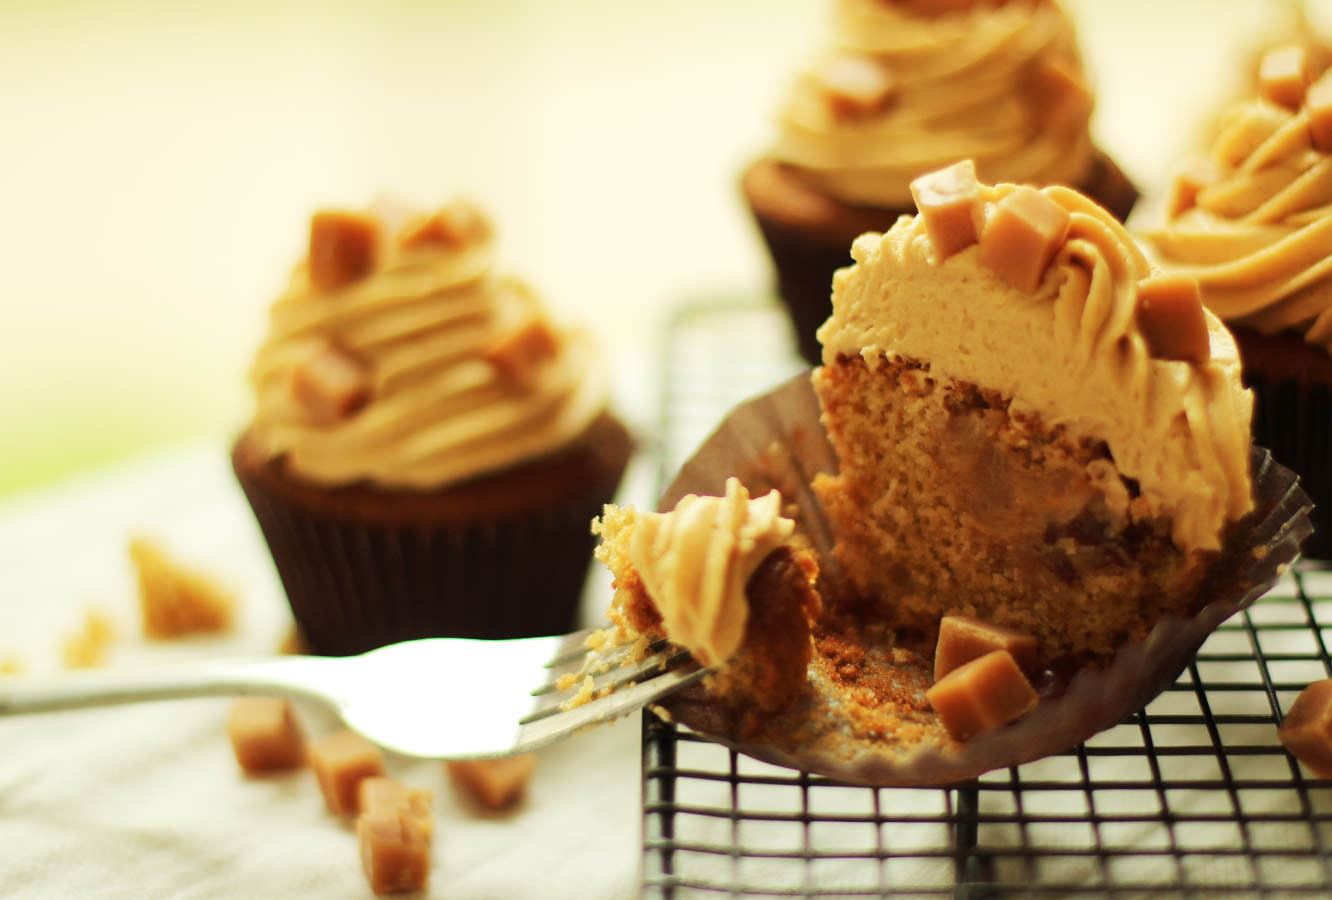
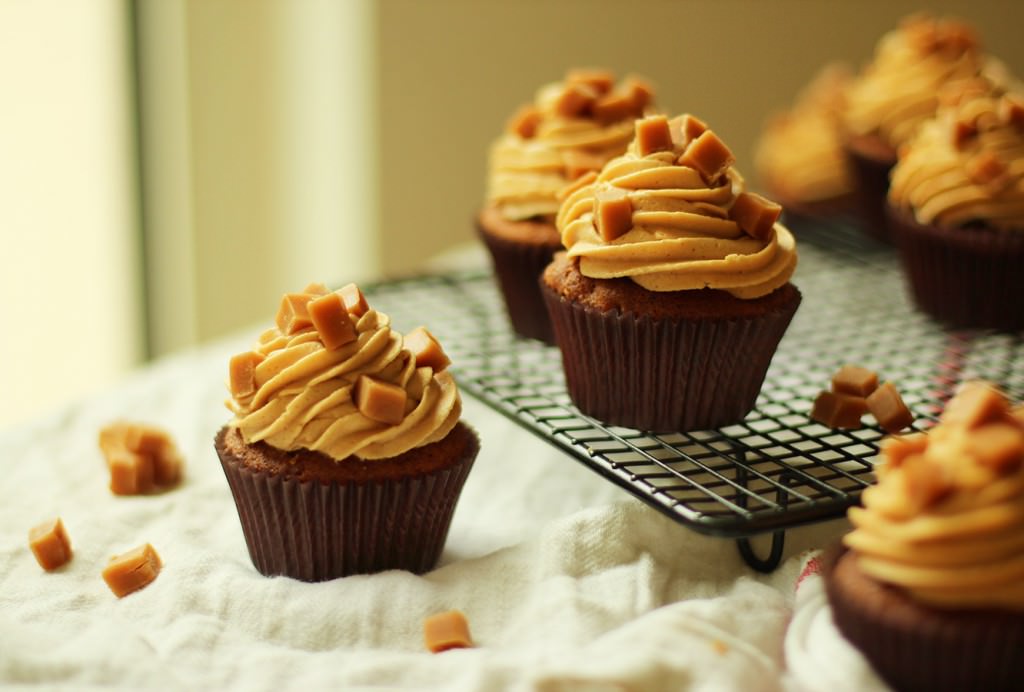
Cut a hole in the middle of the cupcakes and remove the sponge bit, keeping the top. Fill with the remaining toffee and replace the cake lid. Pipe on the frosting and sprinkle with dairy fudge pieces. You can buy these in the home baking section but I prefer to buy the big bags of individually wrapped ones and chop them into smaller pieces myself. You get WAY more for your money that way.

sticky-toffee-pudding-cupcake-recipe-10

sticky-toffee-pudding-cupcake-recipe-9

sticky-toffee-pudding-cupcake-recipe-8


Rhubarb and custard

If you’ve been following this blog for a while, you might remember my dear mother’s ventures into gardening. Last year I made a rhubarb and honey cake from one of her crops, and this year’s slotted in nicely into this cupcake series. For where would the British public be without rhubarb and custard?

Ok, let’s be honest. We’d probably be fine without rhubarb and custard. I’m not even sure people eat it that much nowadays. But it is pretty nice baked into a cupcake, they really are a great pair. Maybe we ought to resurrect it. Starting now.

Go forth and bake people of Britain (and the rest of the world too if you’re reading this).

rhubarb-and-custard-cupcake-recipe-1

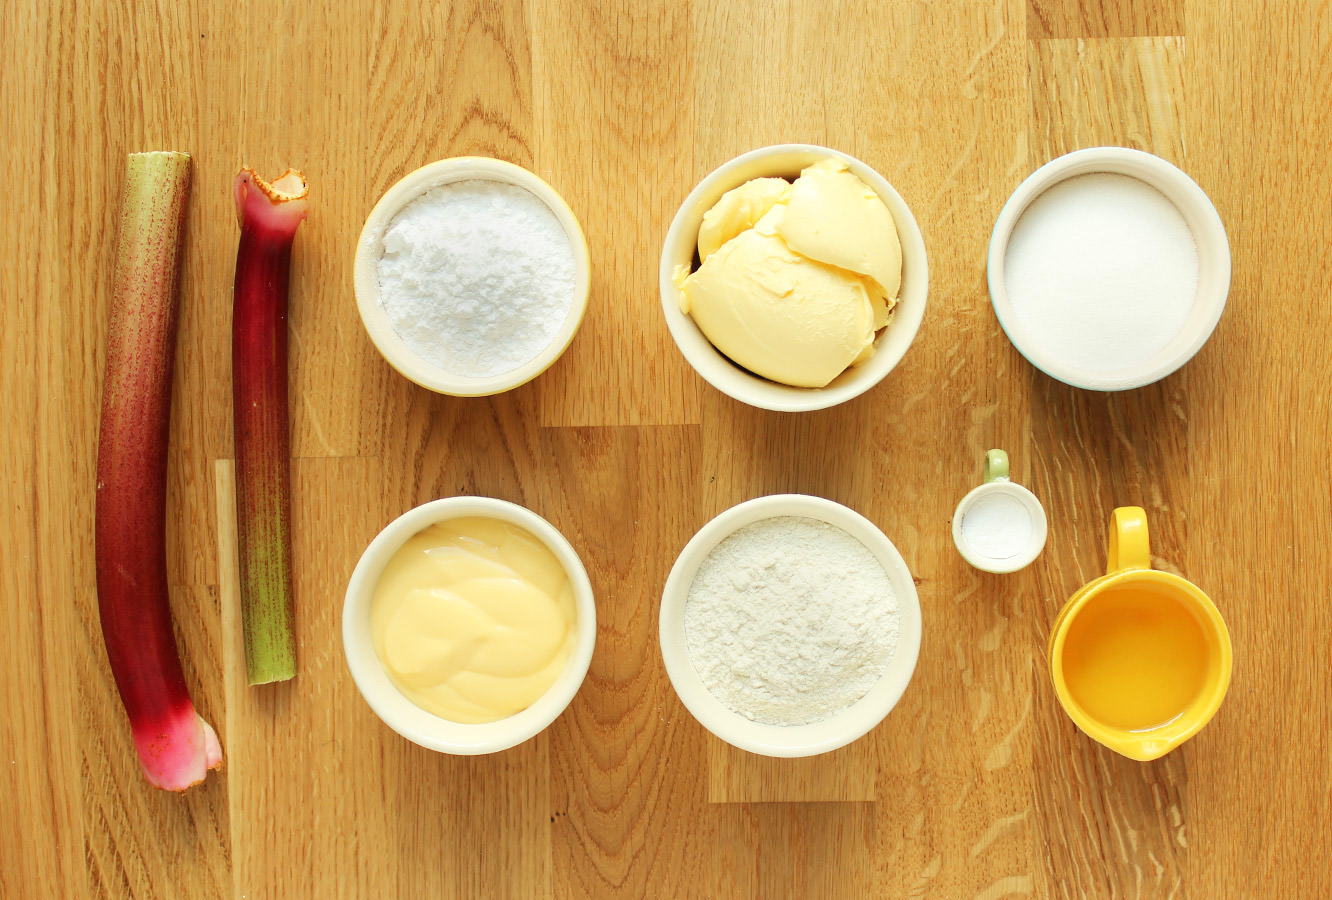
You will need

For the cakes:

250g/8.75 oz plain flour

250g/8.75 oz caster sugar

300ml/10 fl oz water

6 tbsp vegetable oil

1 tsp bicarbonate of soda

1 tsp cider vinegar

1 tsp vanilla extract

For the rhubarb filling:

200g/7 oz rhubarb

6 tbsp granulated sugar

3 tbsp water

For the custard frosting/icing:

250g/8.75 oz unsalted butter

225g/8 oz packet custard (yes, I used a carton of ambrosia, so sue me)

75g/2.5 oz icing sugar

Vanilla pod/paste (extract is fine, but I wanted the flecks)

(makes 12)

rhubarb-and-custard-cupcake-recipe-2

Step one

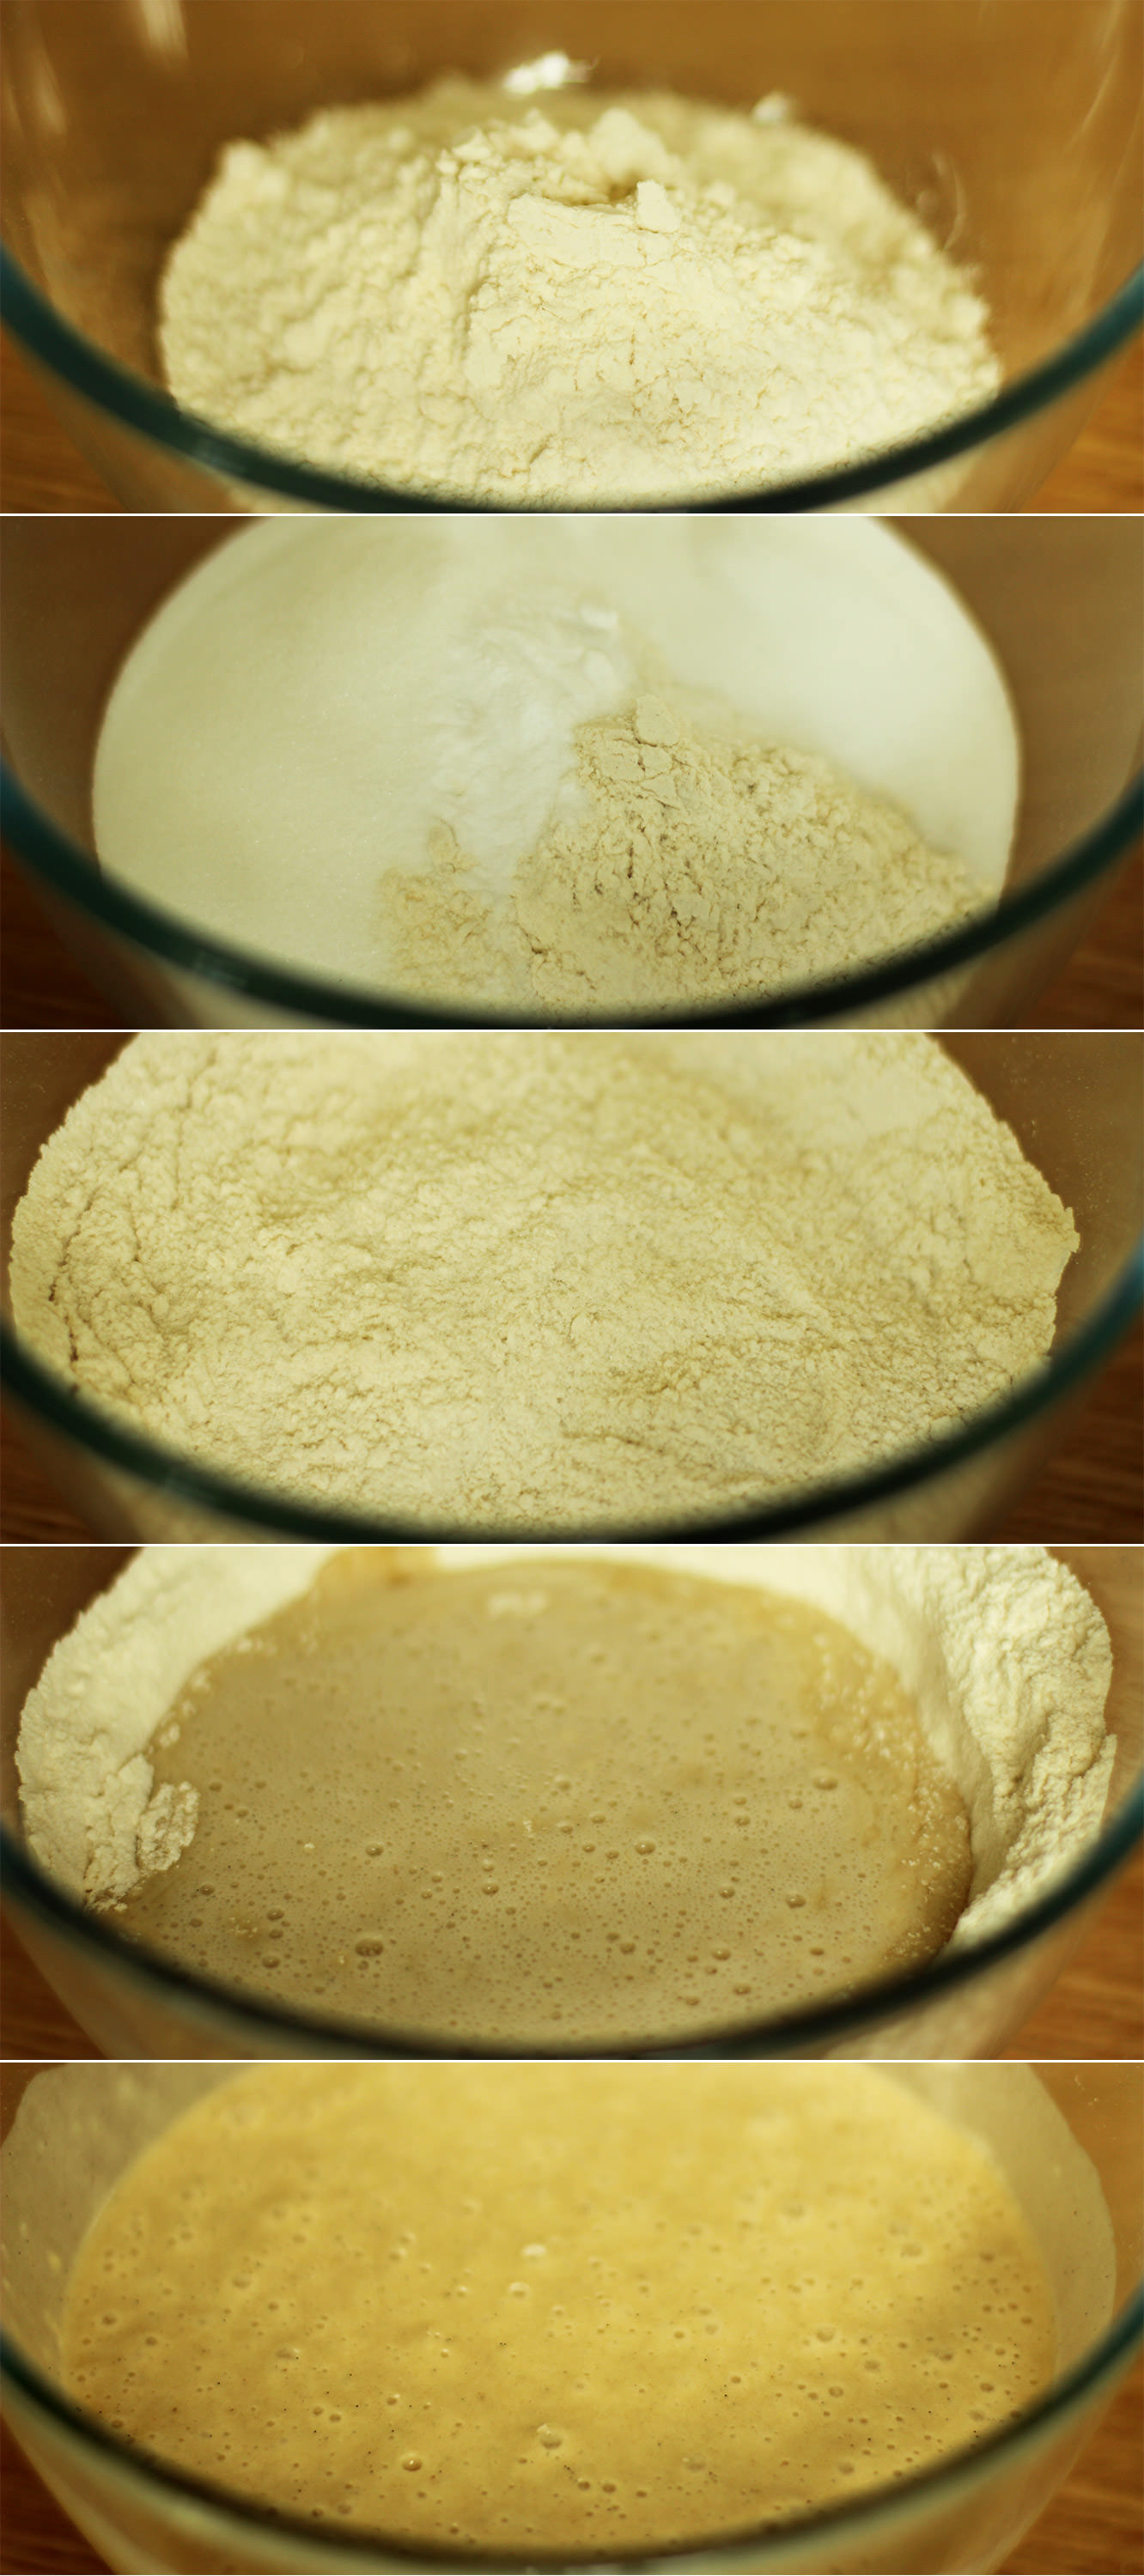
Start with the cupcakes. Combine the dry ingredients and make a well in the middle.

Pour the water, oil, extract and vinegar into the centre. Using a hand whisk, stir in small circles, gradually widening the circle until the dry ingredients are fully incorporated. Doing it gradually prevents lumps of flour in the batter.

rhubarb-and-custard-cupcake-recipe-3

Step two

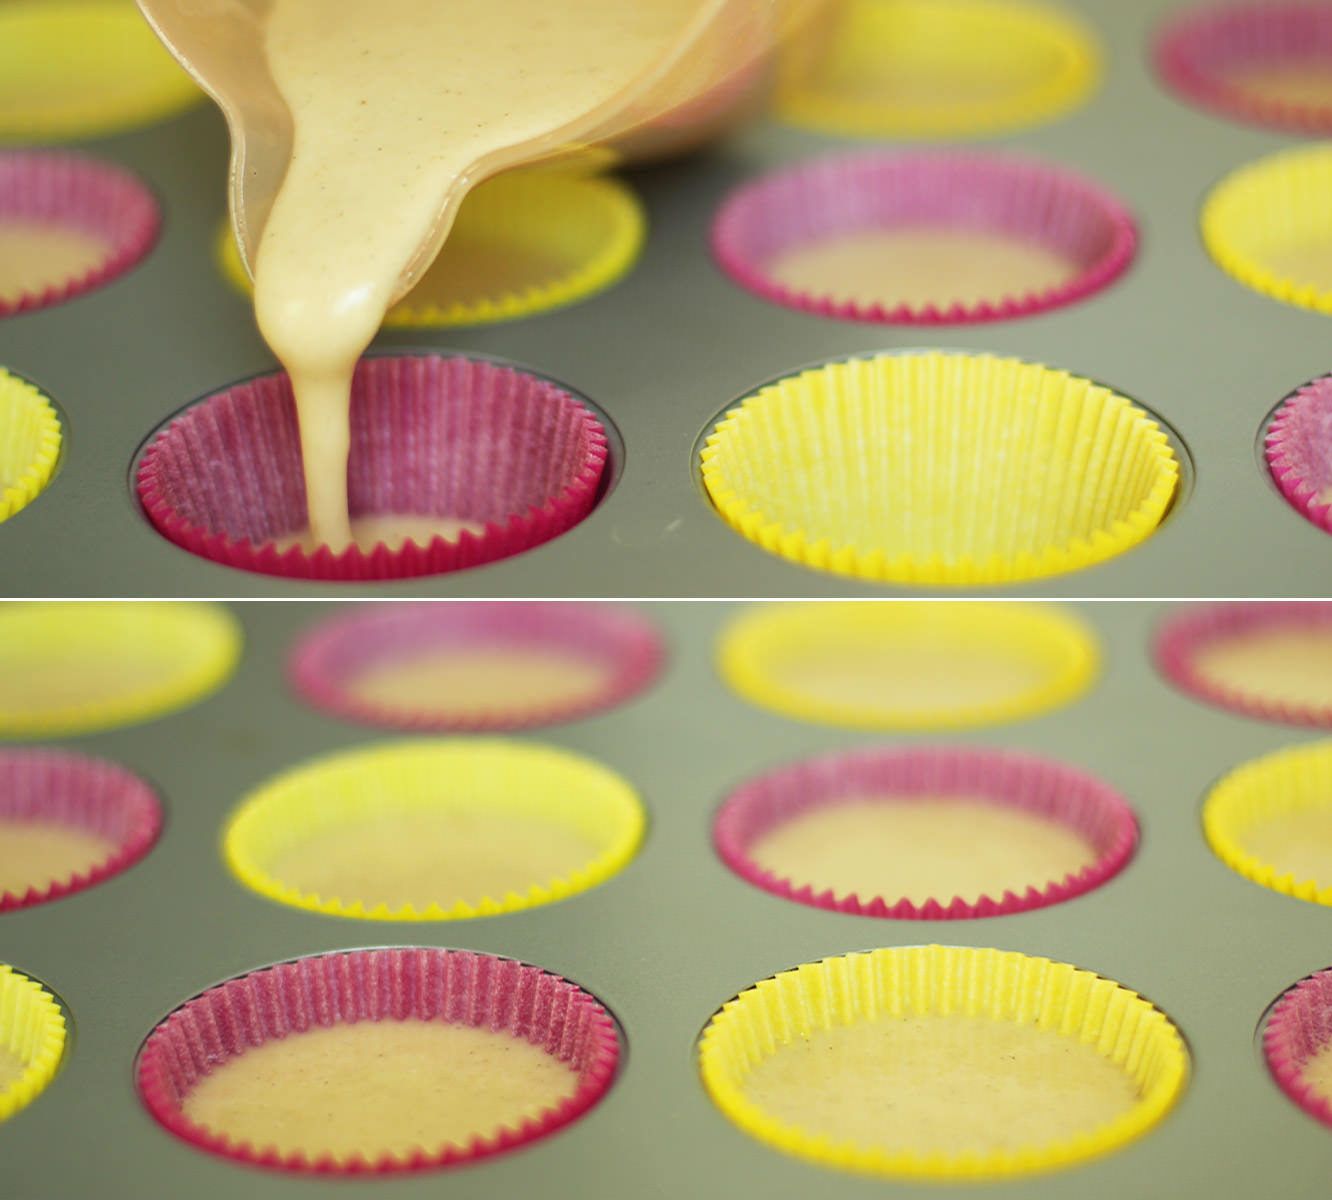
Use a jug to pour the batter into the cases. Bake on gas mark 4/350F/180C for 20-25 minutes.

rhubarb-and-custard-cupcake-recipe-4

Step three

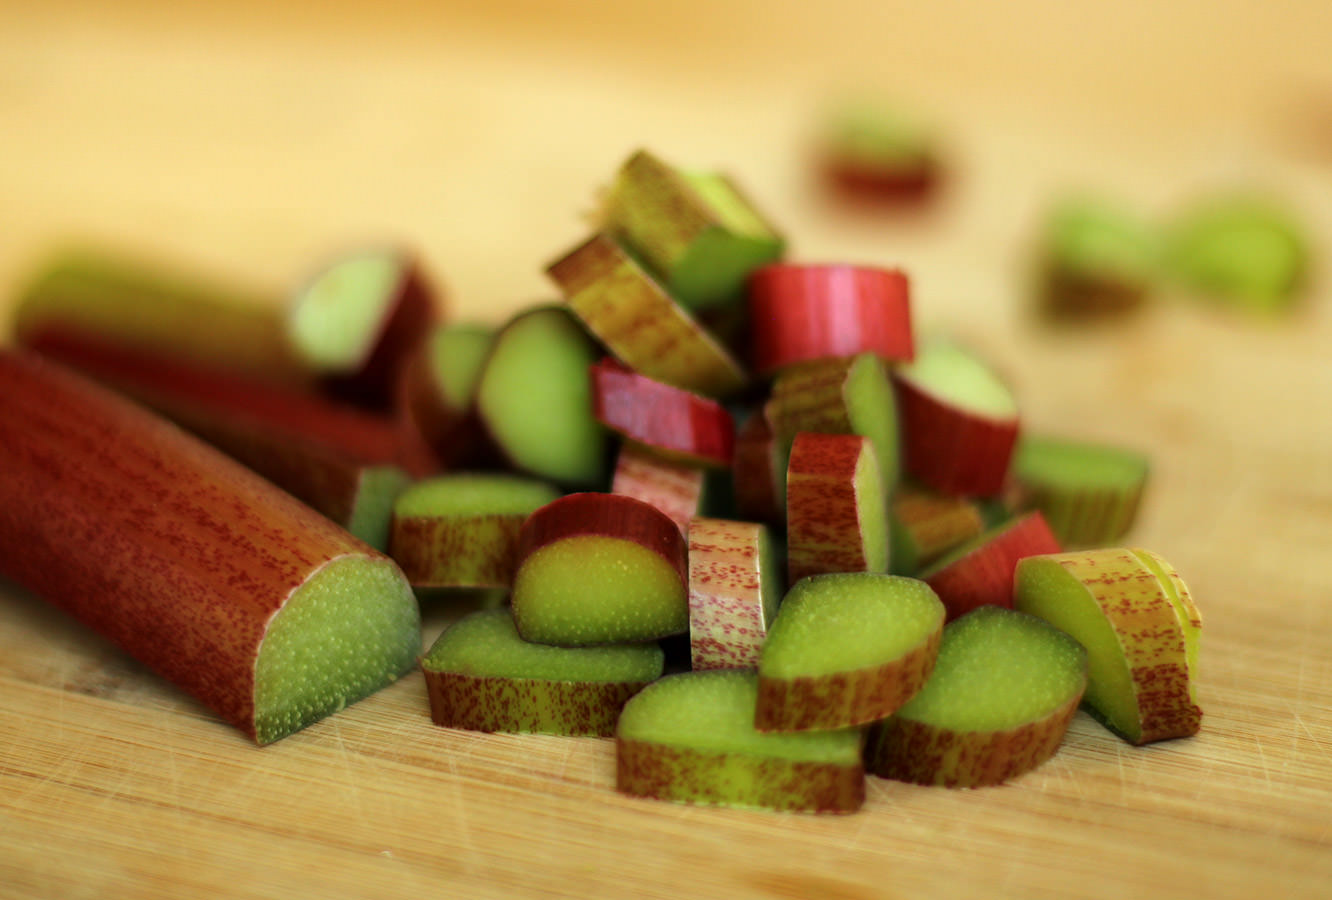
Chop the rhubarb into small slices.

rhubarb-and-custard-cupcake-recipe-5

Step four

Put the rhubarb, water and sugar into a frying pan and set to a low-medium temperature. Once the sugar has dissolved, turn the heat up and bring to a simmer.

The rhubarb will break down and the whole thing will start to resemble jam. Allow it to thicken a bit, about 10 minutes on the heat will do the trick.

If you want to you could sieve this into more of a rhubarb puree. I didn’t bother and they were still tasty. Just to reassure you, everything softens enough so there’s no weird stringy texture or anything.

Set aside to cool.

rhubarb-and-custard-cupcake-recipe-6

Step five

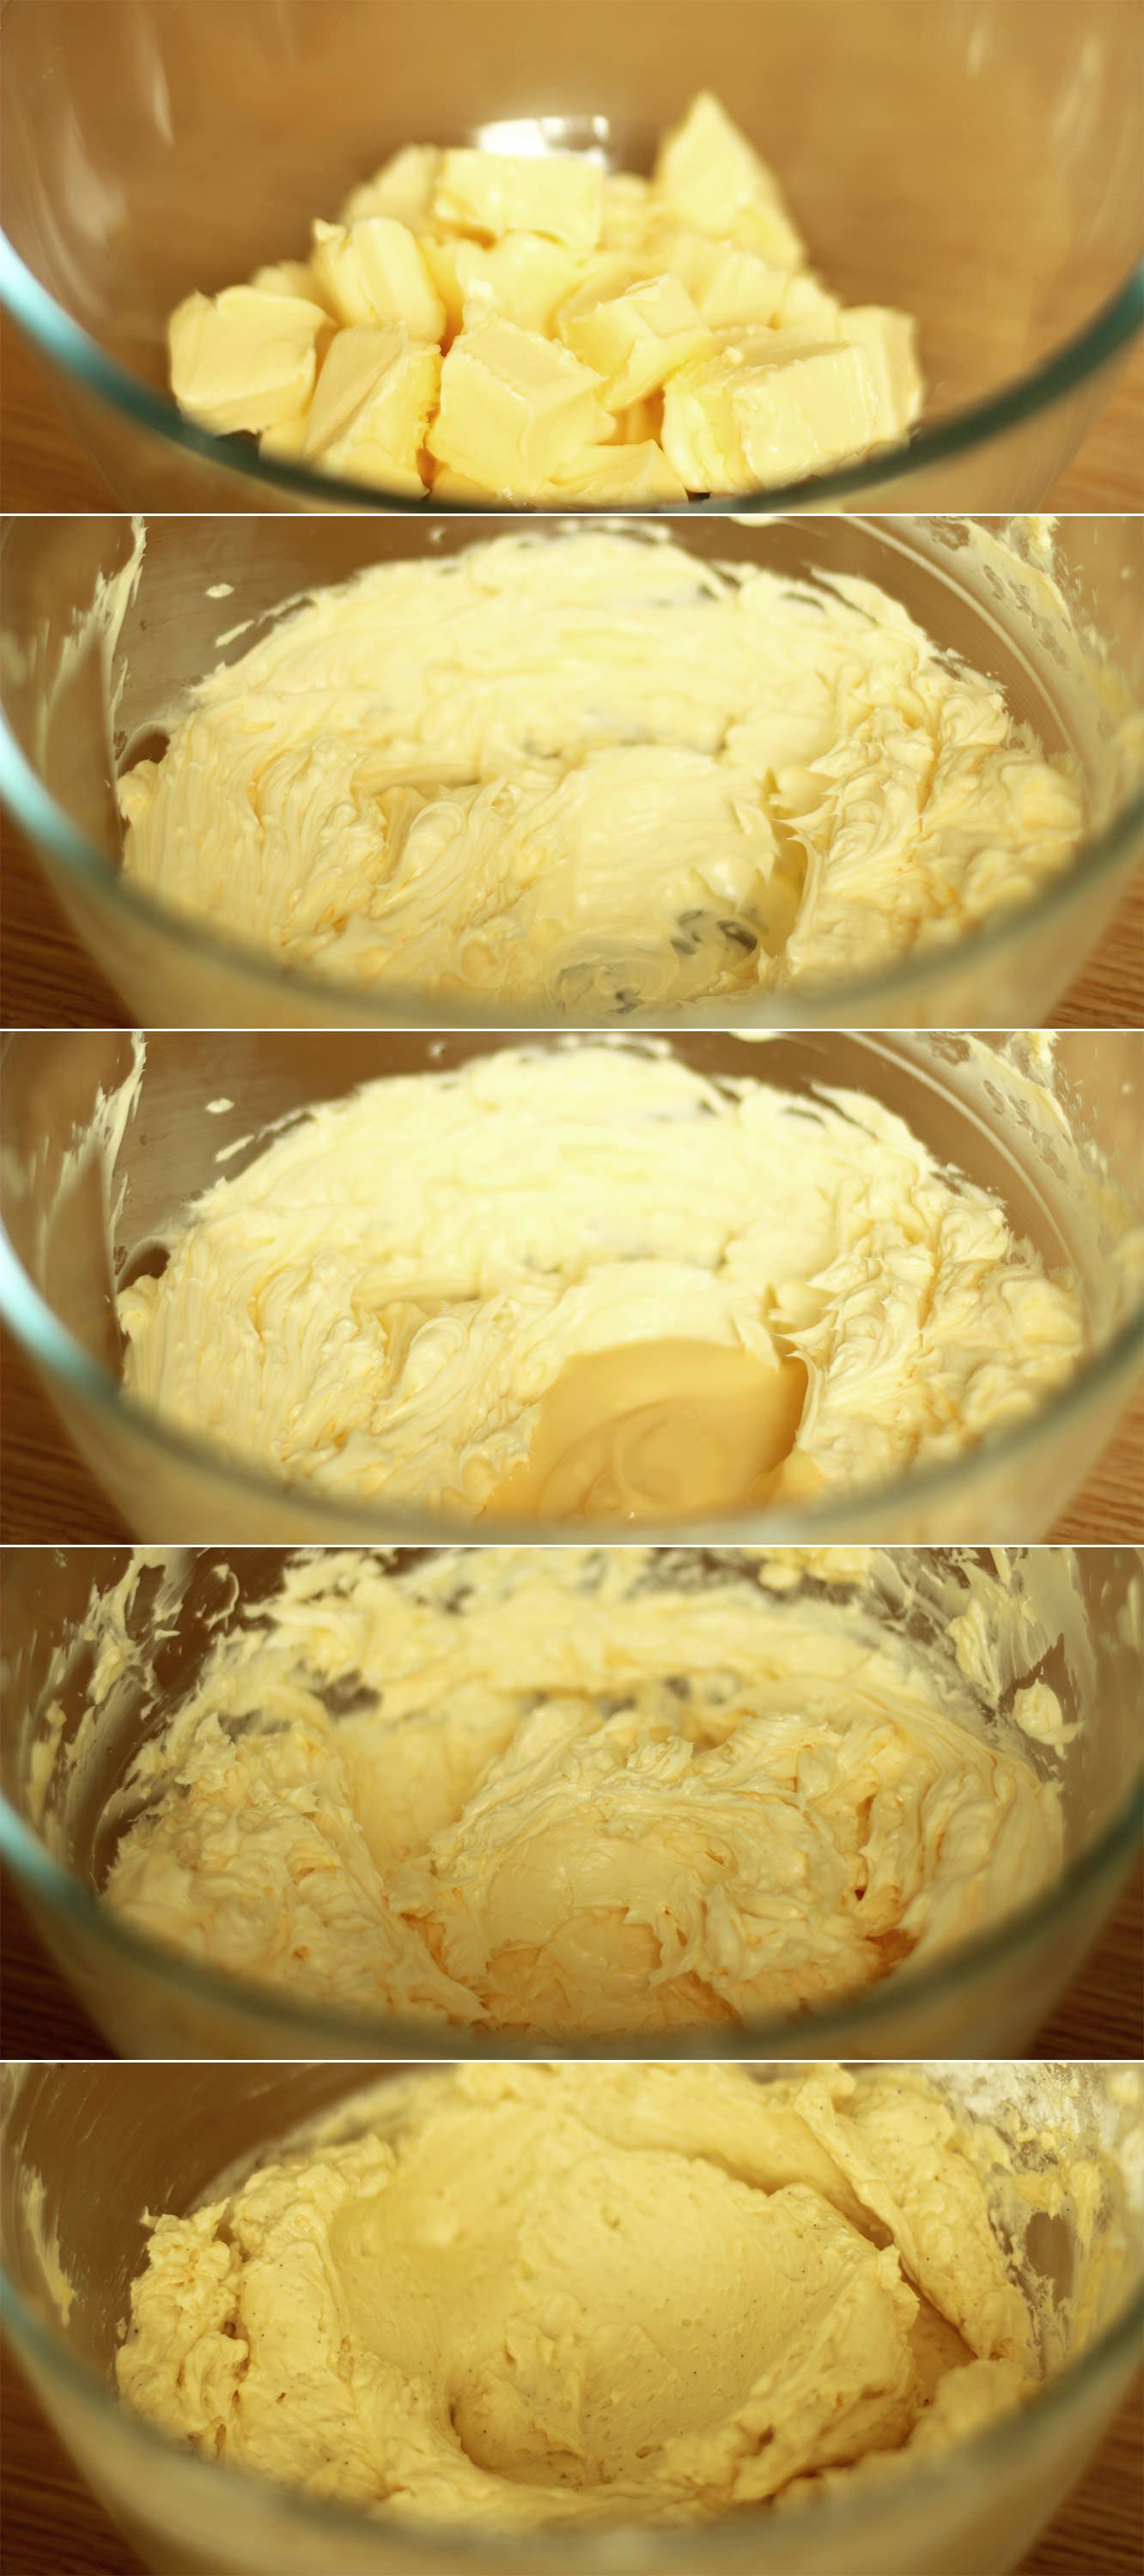
For the custard buttercream whisk the butter with an electric whisk until smooth, light and fluffy.

Add the custard a few tablespoons at a time, whisking in between. You can add the icing sugar and vanilla somewhere in the middle there.

This is a slight wandering from the German buttercream recipes that use custard and butter. I needed a little sweetener to take away a little from the butter flavour.

rhubarb-and-custard-cupcake-recipe-gif

Step six

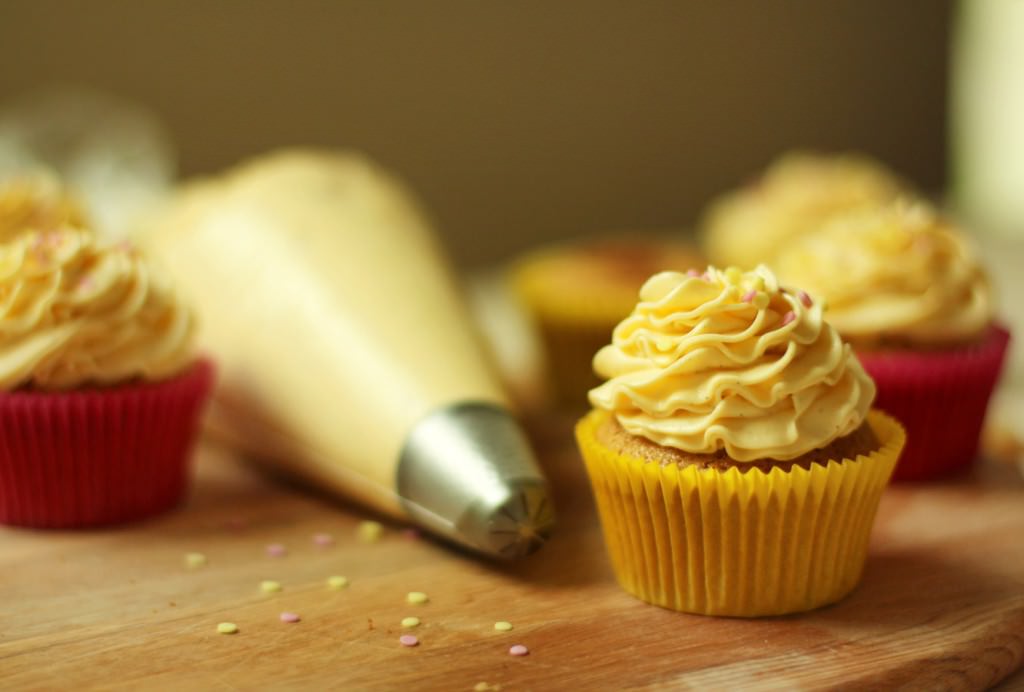
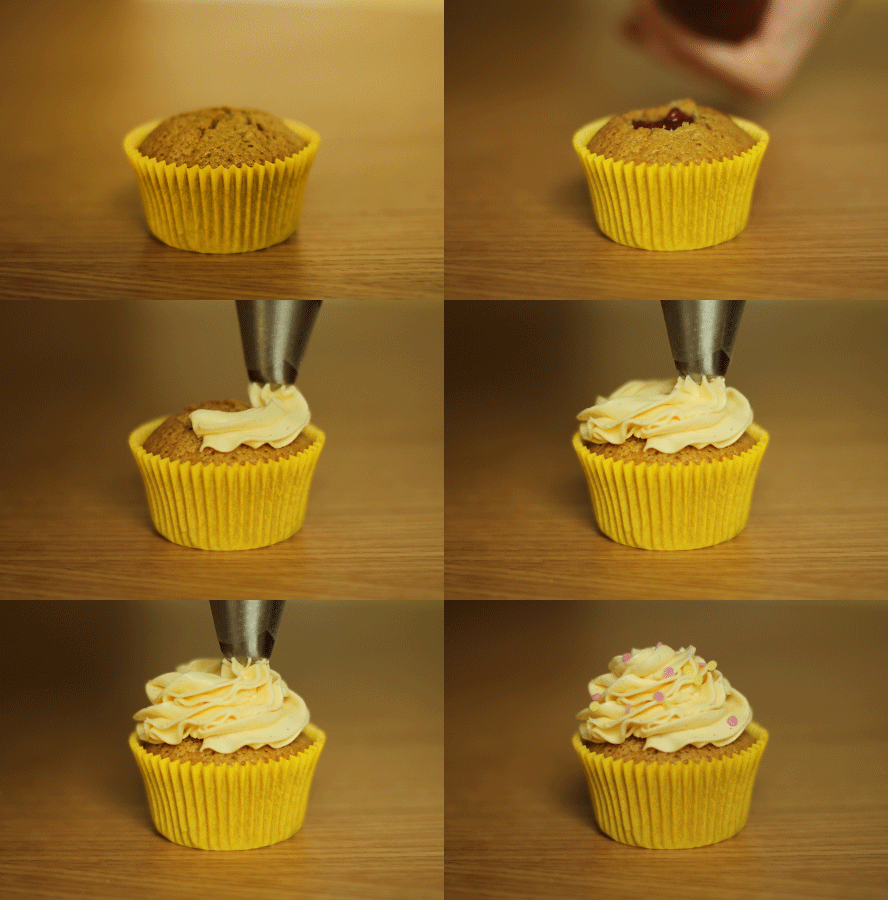
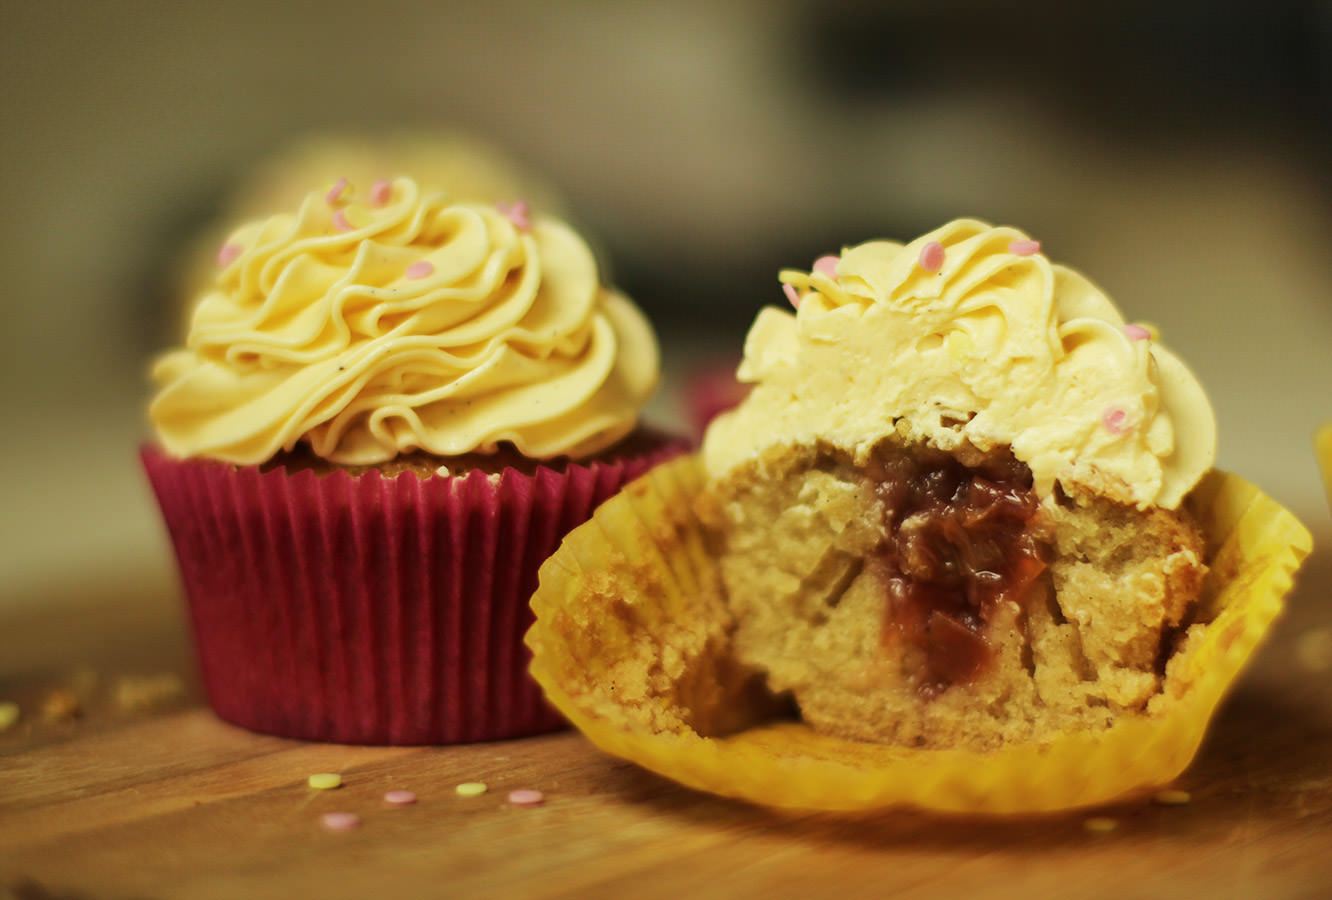
Cut a hole in the cupcake and remove the sponge bit, keeping just the top. Fill with rhubarb and replace the cake ‘lid’. Pipe on the buttercream and some sprinkles if you have them.

rhubarb-and-custard-cupcake-recipe-7

rhubarb-and-custard-cupcake-recipe-9

rhubarb-and-custard-cupcake-recipe-8

Take a big old bite of nostalgia.

When life gives you lemons

GUYS. I GOT A BLOWTORCH.

I won’t regale you with the tale of trying to fuel said blowtorch because it’s an epic tragedy to rival those of the Greeks. However, at LAST the correct butane was obtained and I held FIRE in my hands. It’s dangerous really. I’m incredibly clumsy. But hey, I’ve wanted one for years, and I was not disappointed.

You don’t actually need a blowtorch for this recipe, but I think everyone should have one so we can compare notes.

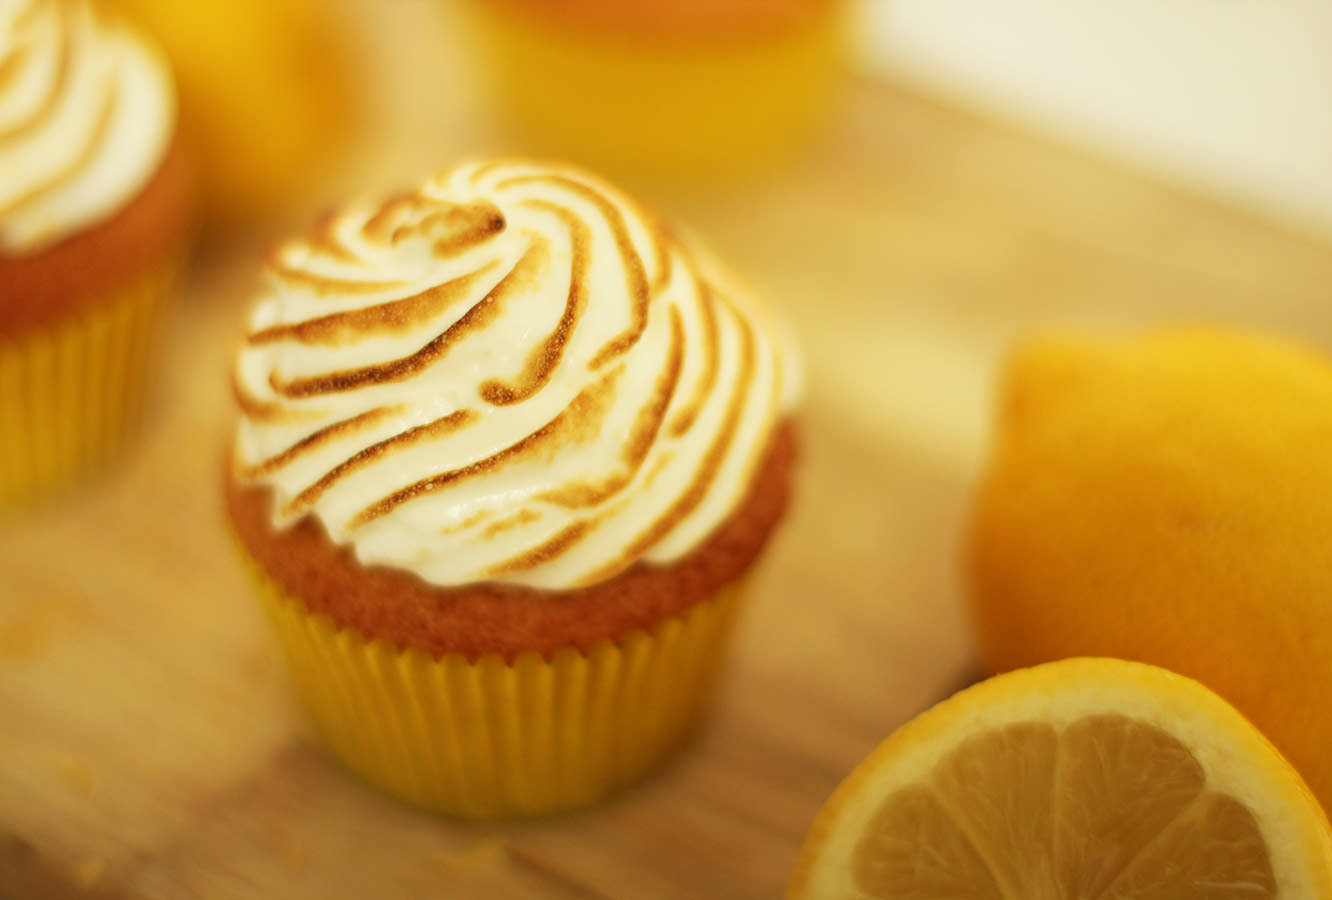
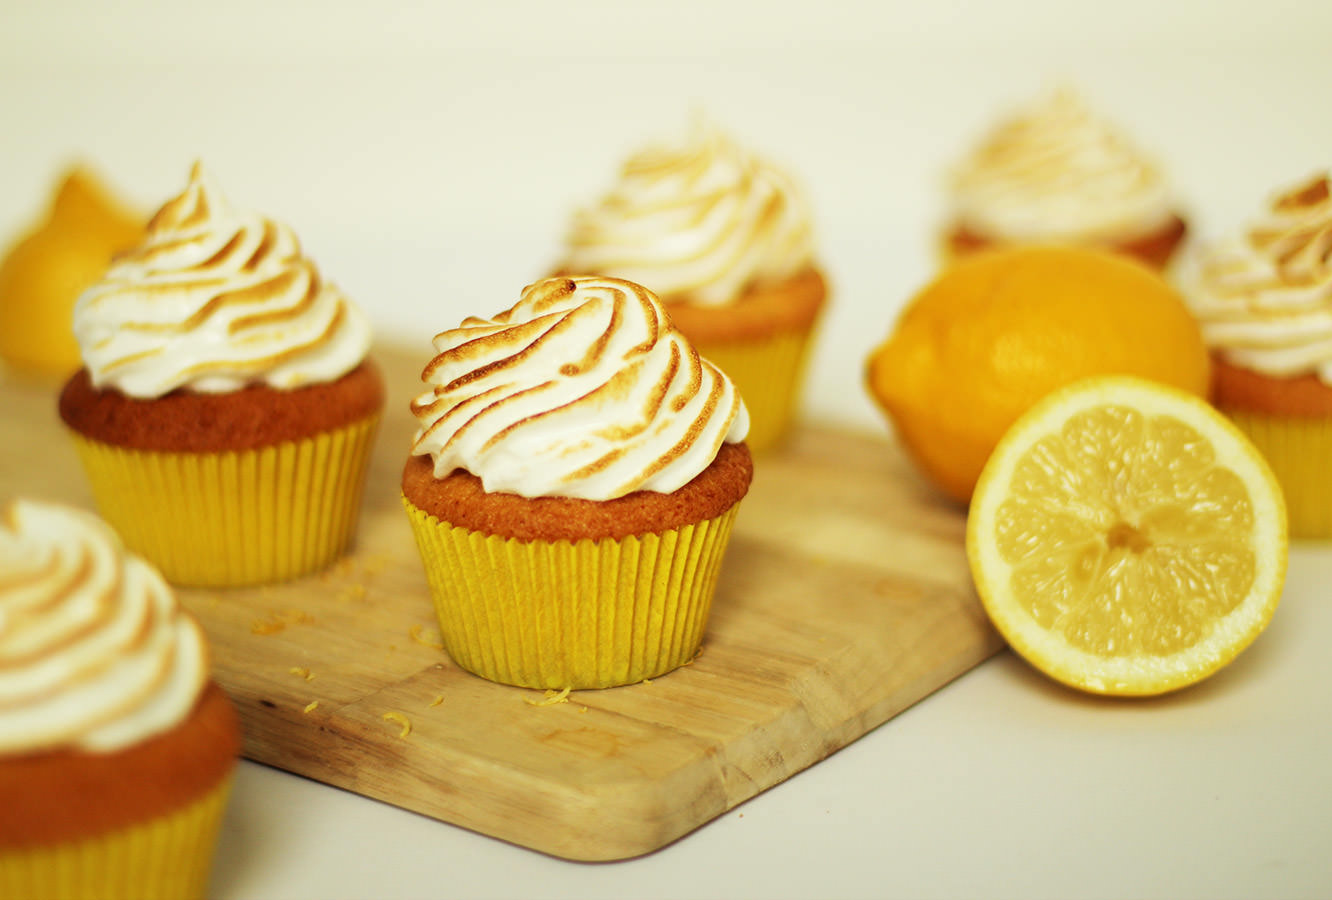
So moving on from my pyromaniac tendencies…my mum’s lemon meringue pie takes some beating. And by that, I mean, nobody has beaten it. Ever. I have a separate stomach that’s just for lemon meringue pie.

There would be no completing this British favourites series (not that we’re completing it today, buckle up friend) without lemon meringue pie. I’m actually a bit torn, because how can you convert something as delicious as lemon meringue into a cupcake recipe? Well. I tried it. They’re pretty yummy.

lemon-meringue-cupcake-recipe-1

You will need

For the cake:

185g/6.5 oz self raising flour

185g/6.5 oz butter/margarine (I use Stork)

185g/6.5 oz caster sugar

3 eggs

1 tsp bicarbonate of soda

1 tsp vanilla extract/paste

For the frosting/icing:

2 egg whites

225g/8oz caster sugar

1/2 tsp cream of tartar

75ml/2.5 fl oz water

BLOWTORCH (optional)

For the lemon curd:

2 whole eggs

1 egg yolk

85g/3 oz caster sugar

60g/2 oz butter

90ml/3 fl oz freshly squeezed lemon juice (2 lemons should do)

Zest of two lemons

(makes 12)

lemon-meringue-cupcake-recipe-2

Step one

Using an electric whisk (if you have one, otherwise a wooden spoon will do), whisk together the butter/margarine and sugar.

Add the eggs once the batter is light and fluffy and beat again until combined.

lemon-meringue-cupcake-recipe-3

Step two

Add the flour and bicarbonate of soda, vanilla essence if you have it, and whisk until you have a lovely airy consistency.

lemon-meringue-cupcake-recipe-4

Step three

Spoon the batter into 12 cupcake cases and bake for 20-25 minutes on 350F/180C/gas mark 4.

Once out of the oven leave to cool completely.

lemon-meringue-cupcake-recipe-5

Step four

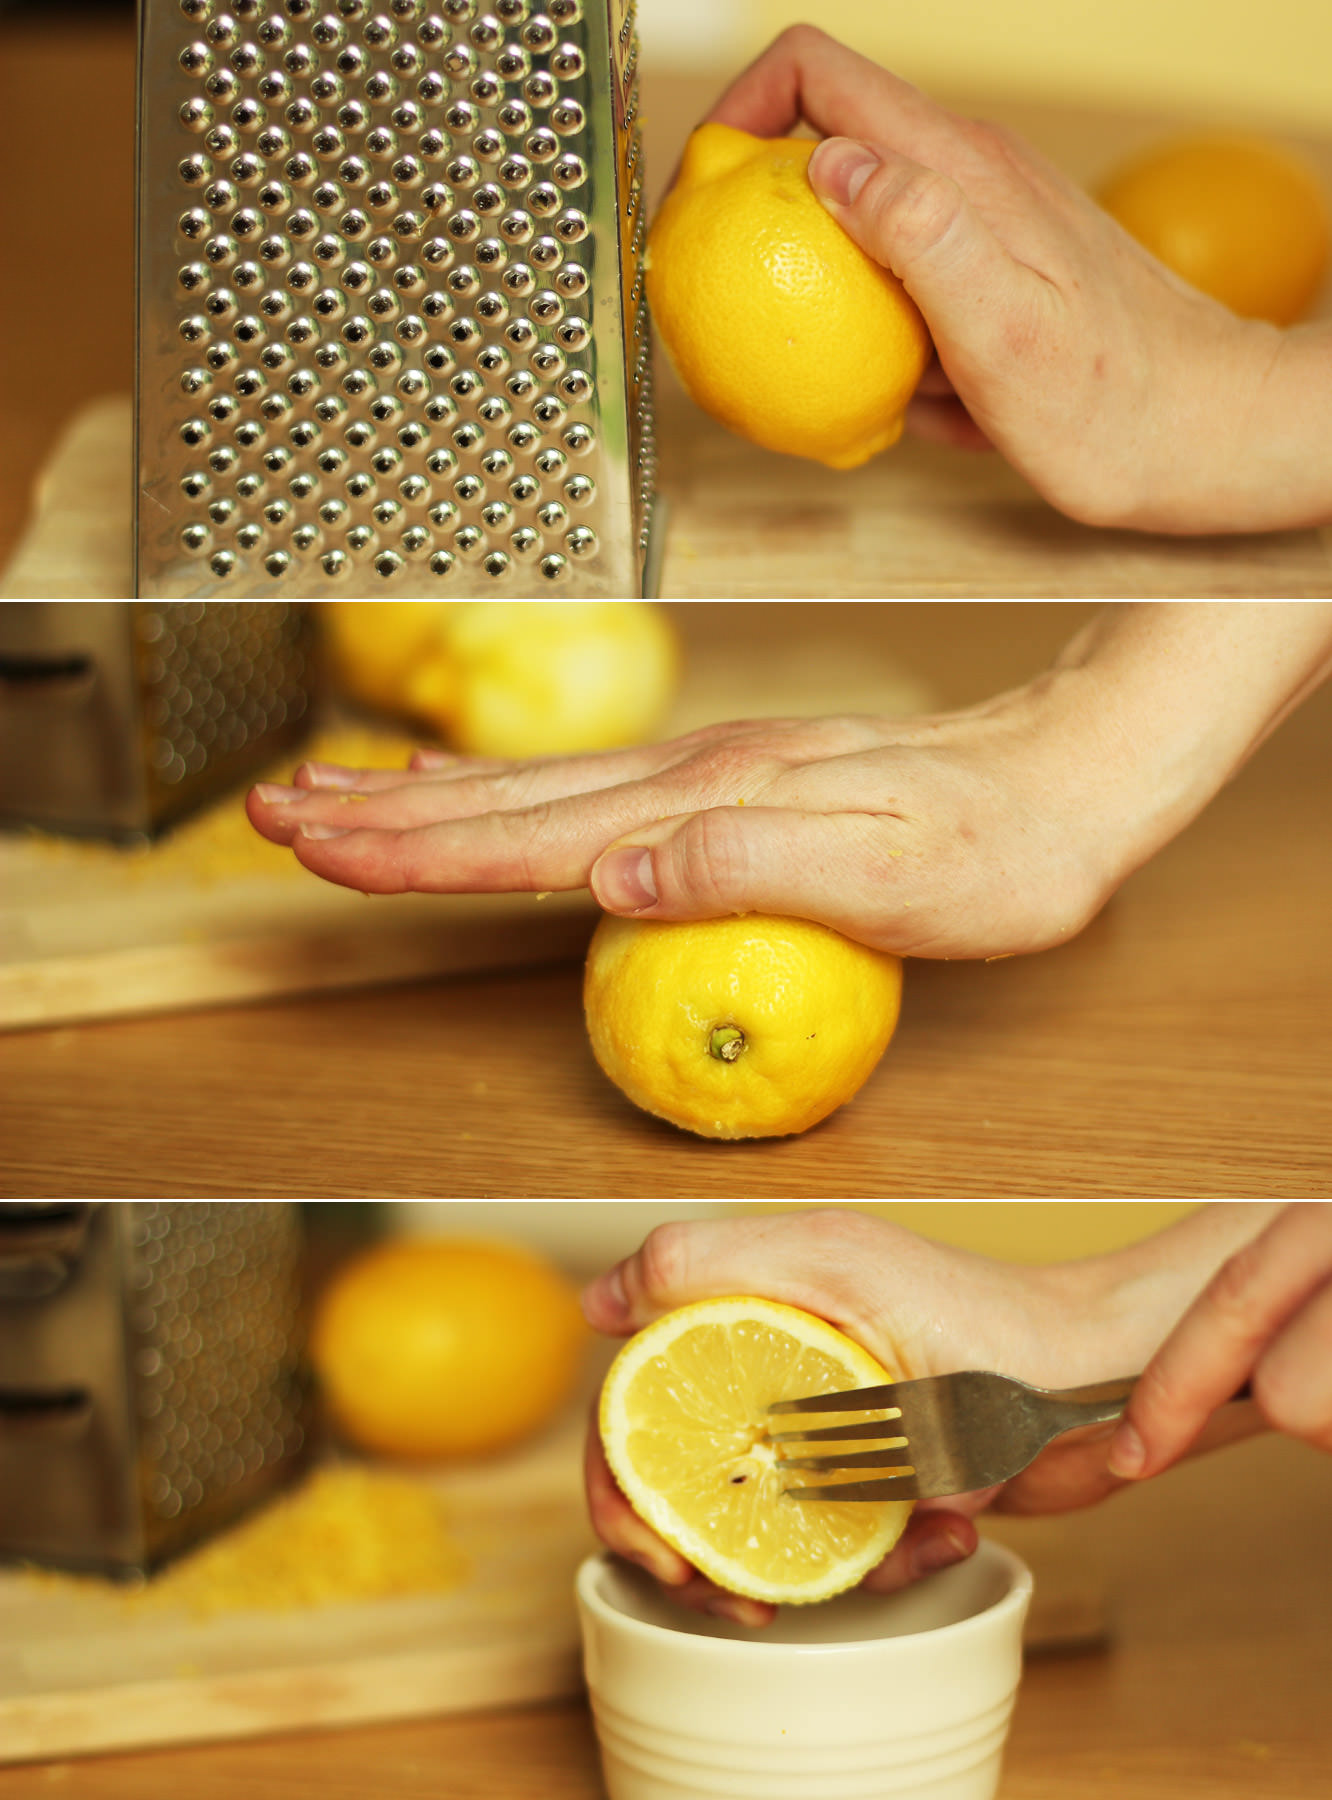
Zest the lemons.

Roll them around on a smooth, clean surface pressing down firmly. You can also pop them in the microwave for 10-20 seconds. This is all in aide of releasing the juices.

Squeeze the juice until you have 90ml, don’t worry if you’re slightly over or under.

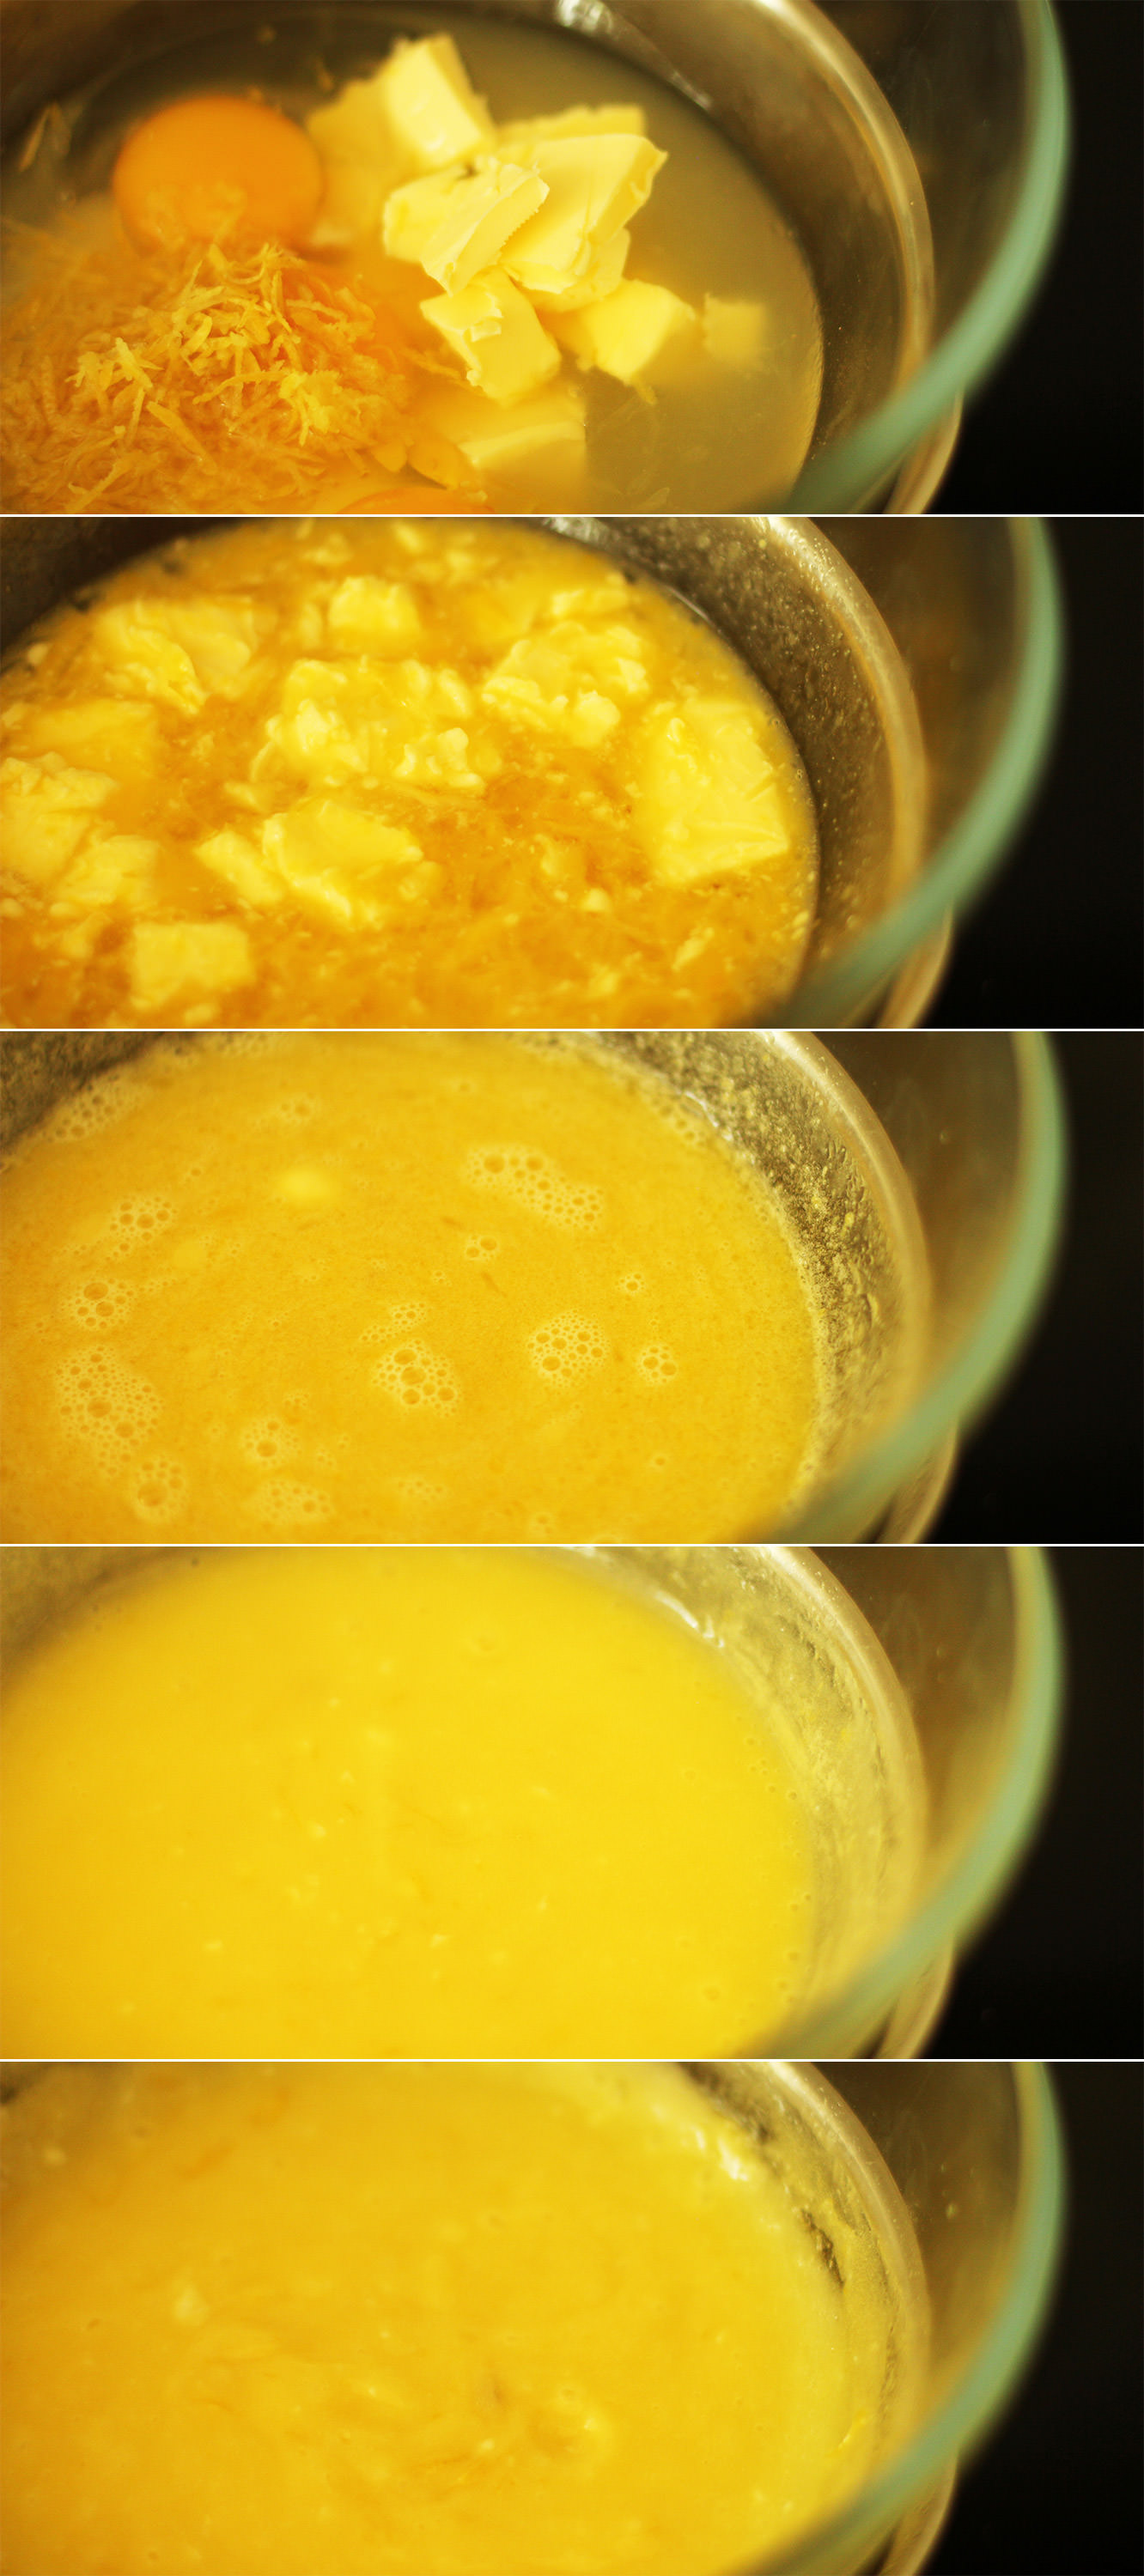
lemon-meringue-cupcake-recipe-6

Step five

Set a heatproof bowl above a pan of barely simmering water, ensuring the water isn’t touching the bottom of the bowl.

Add all the curd ingredients.

I’ve sort of been judging the readiness of this by eye. I reckon it takes around 10 minutes for the curd to thicken.

Whisk intermittently and just keep an eye on it. It will thicken more when it cools but ensure that it coats the back of a metal spoon before removing from the heat.

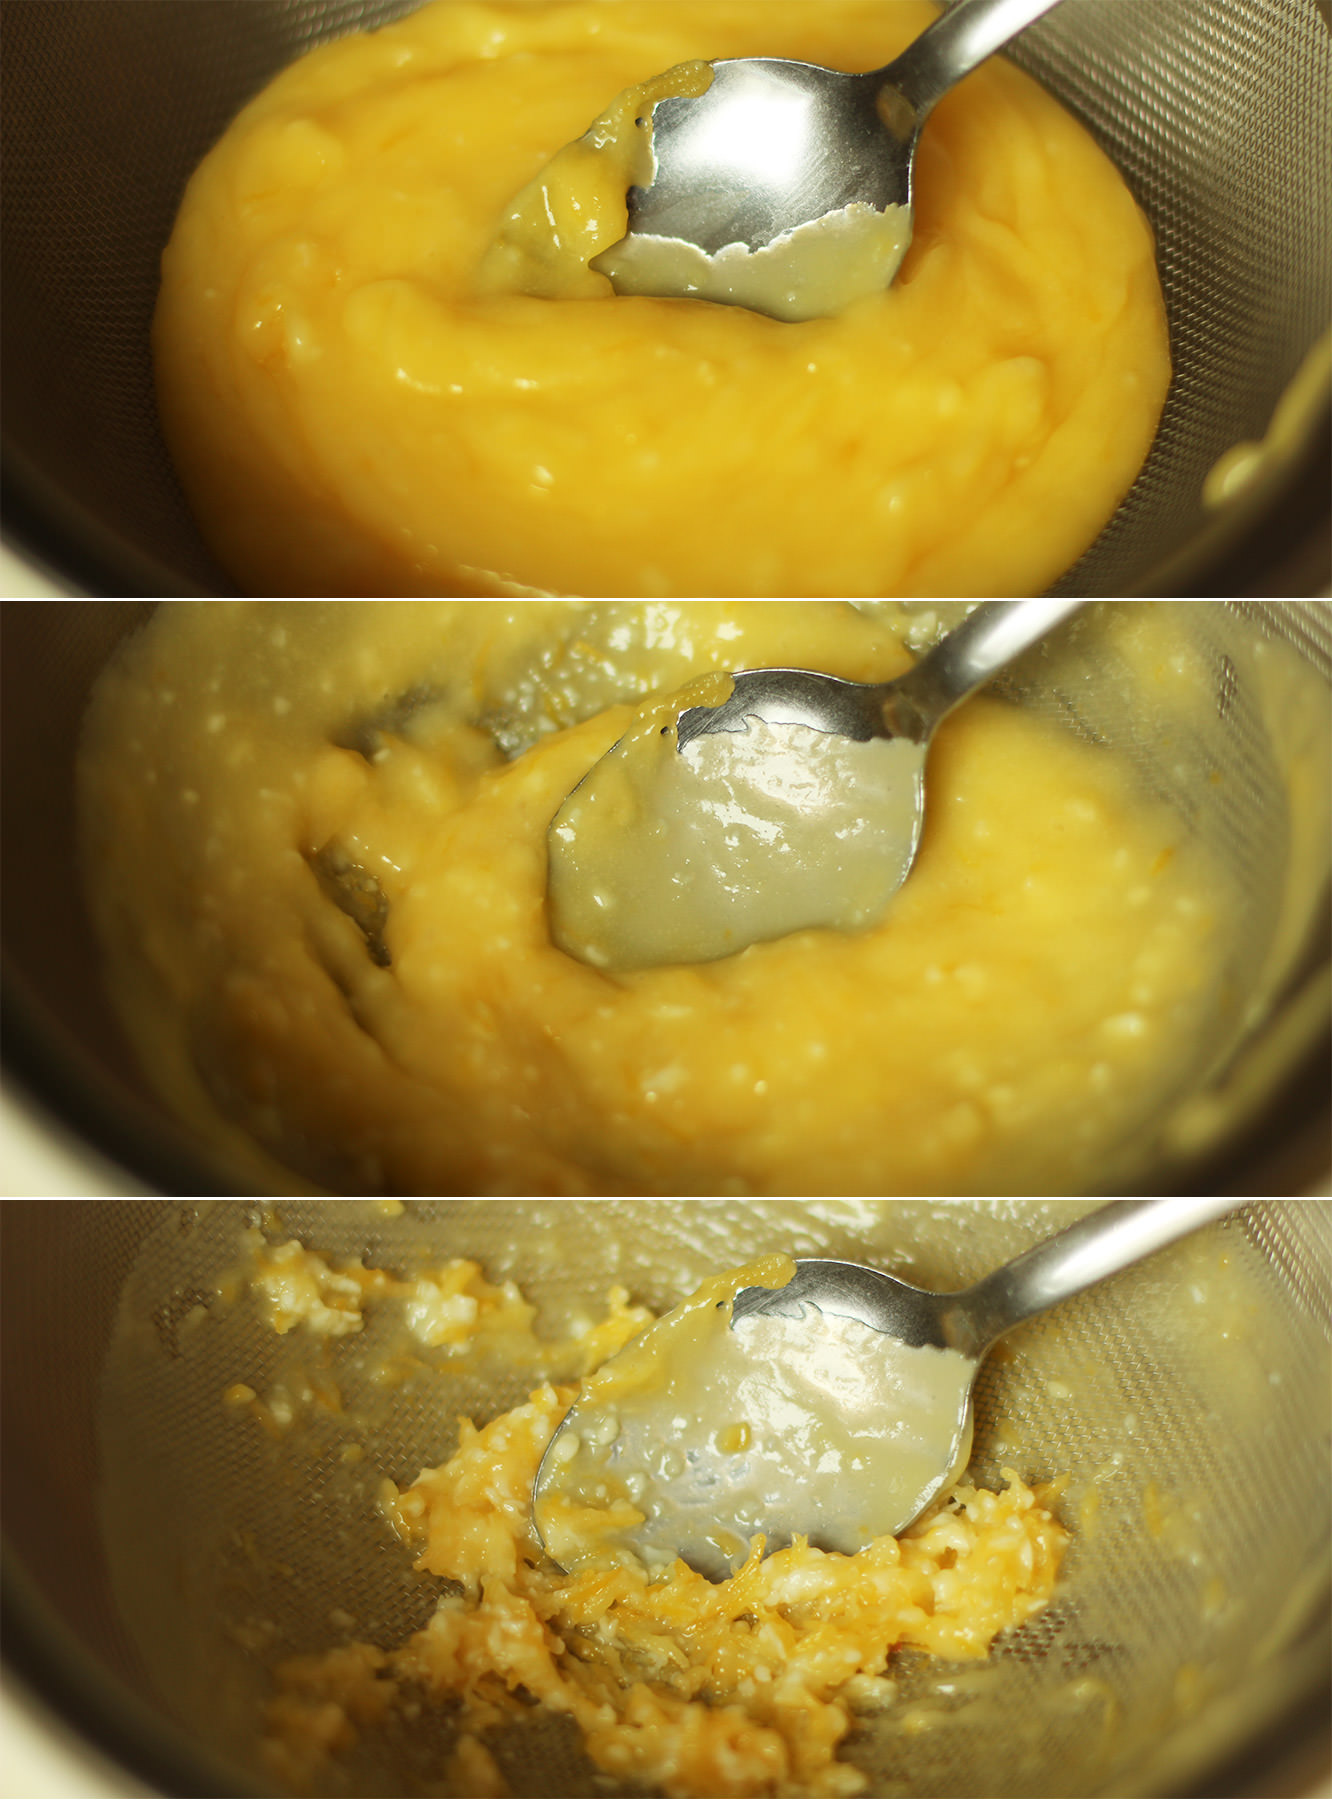
lemon-meringue-cupcake-recipe-10

Step six

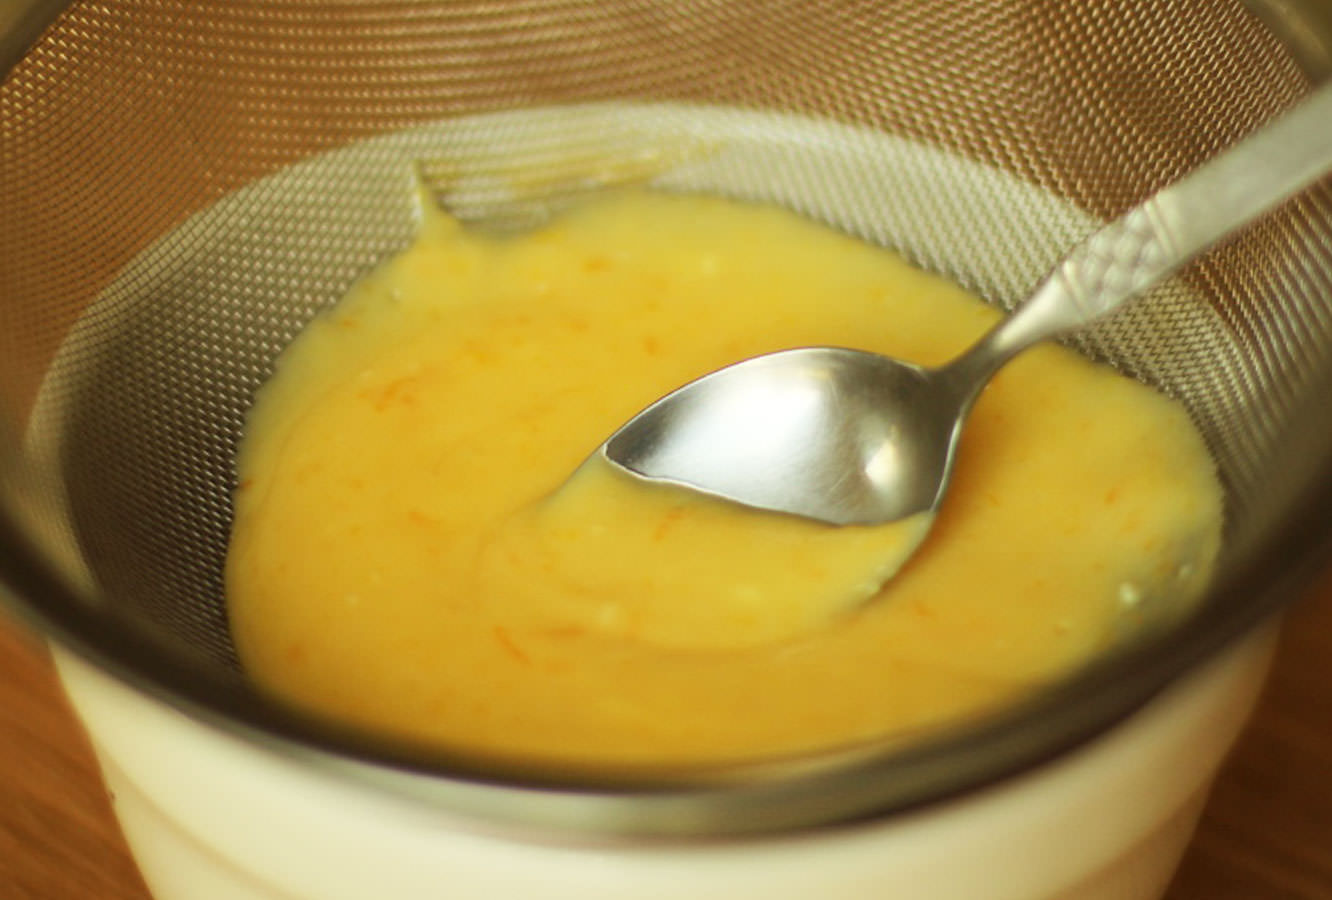
Sieve the curd by stirring it through with a metal spoon.

Pop it in the fridge to cool it down quicker if you need to.

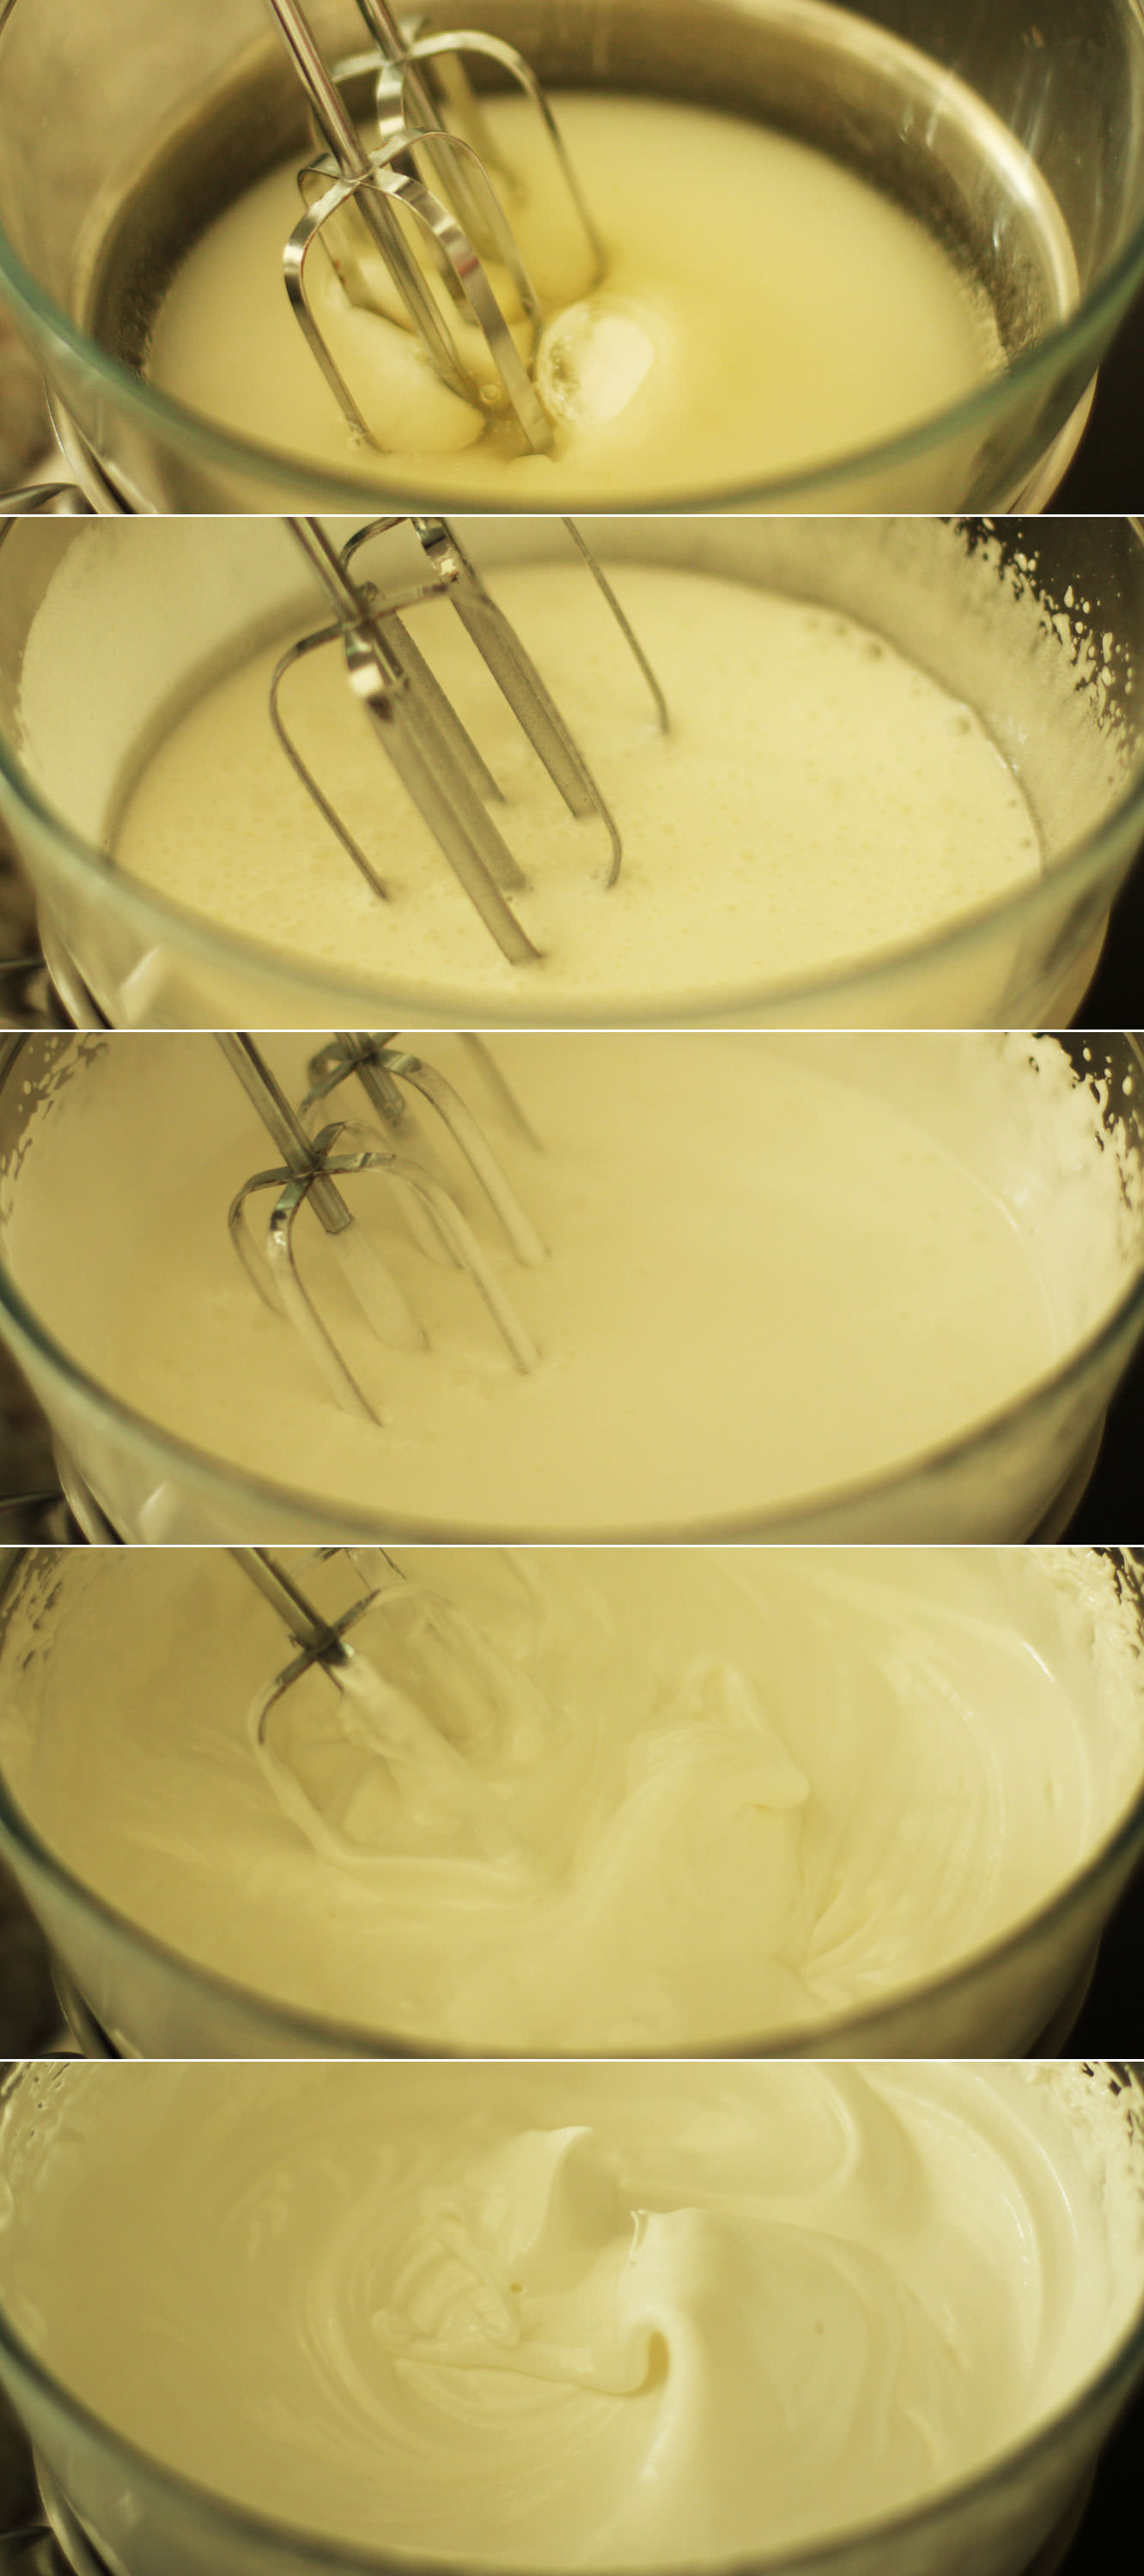
lemon-meringue-cupcake-recipe-11

Step six

This is the second time I’ve made swiss meringue/seven minute frosting in this series. It’s so much easier than you would think.

Put the water, sugar, cream of tartar and egg whites into a heatproof bowl. This should be placed over a pan of simmering water. Again, don’t let the water touch the bottom of the bowl.

Whisk it for seven minutes, don’t leave it. It should be able to hold its own shape and not fall off the whisk when you lift it. If it’s not stiff enough just keep whisking for another minute or two.

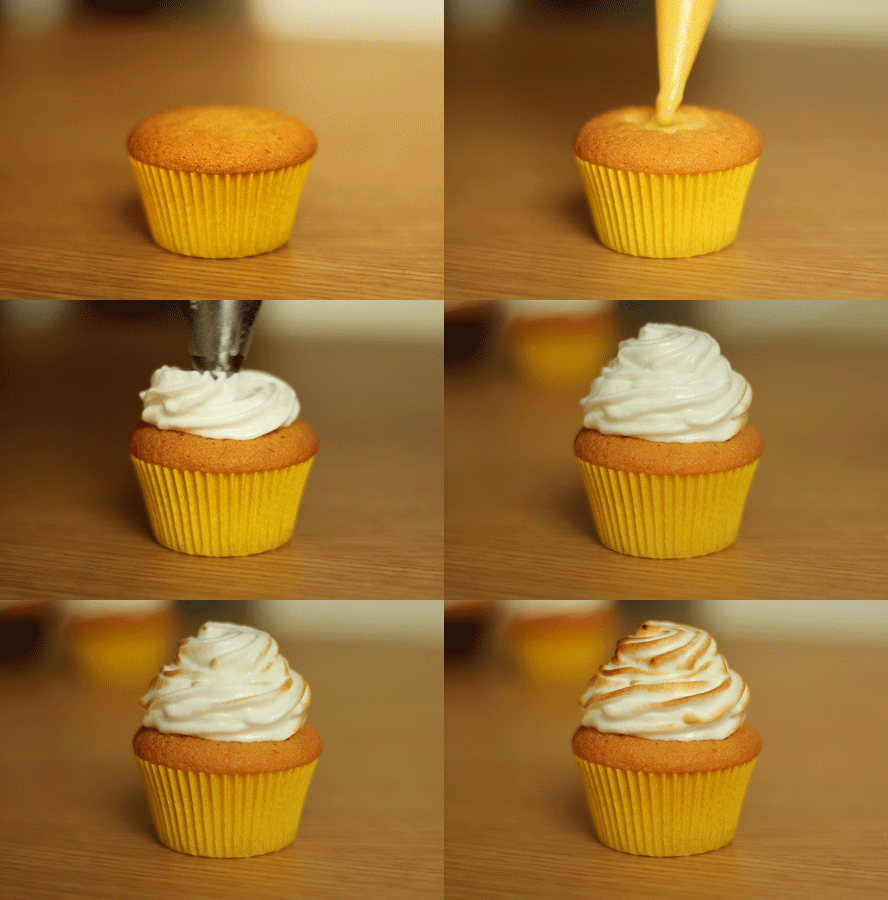
lemon-meringue-cupcake-recipe-gif

Step seven

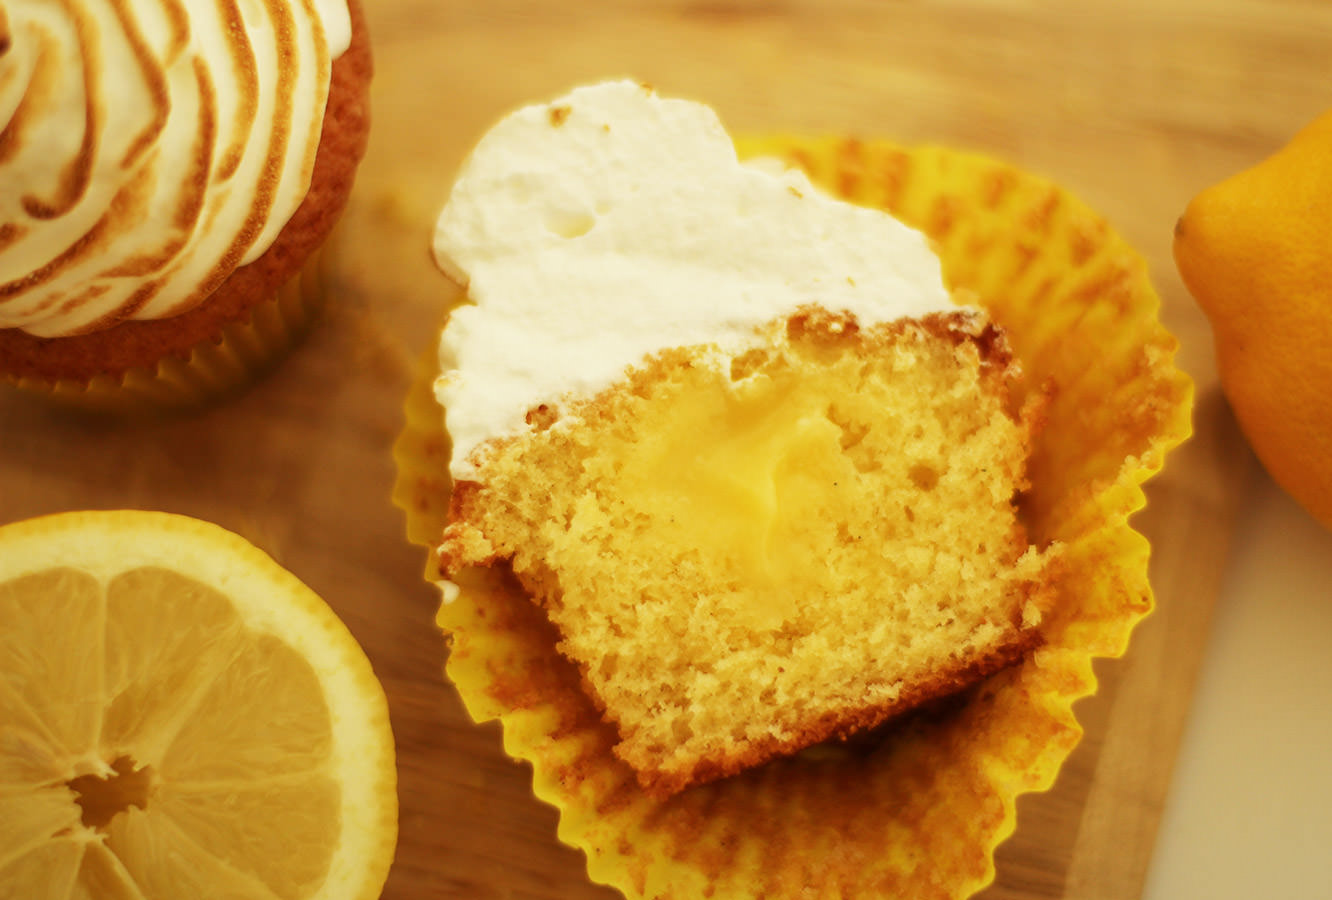
Cut a hole out out of the middle of the cupcakes and chop off the triangular bit, keeping the ‘lid’. Fill with curd and place the lid back on.

Pipe the frosting on, or even spoon on like a proper old fashioned lemon meringue pie.

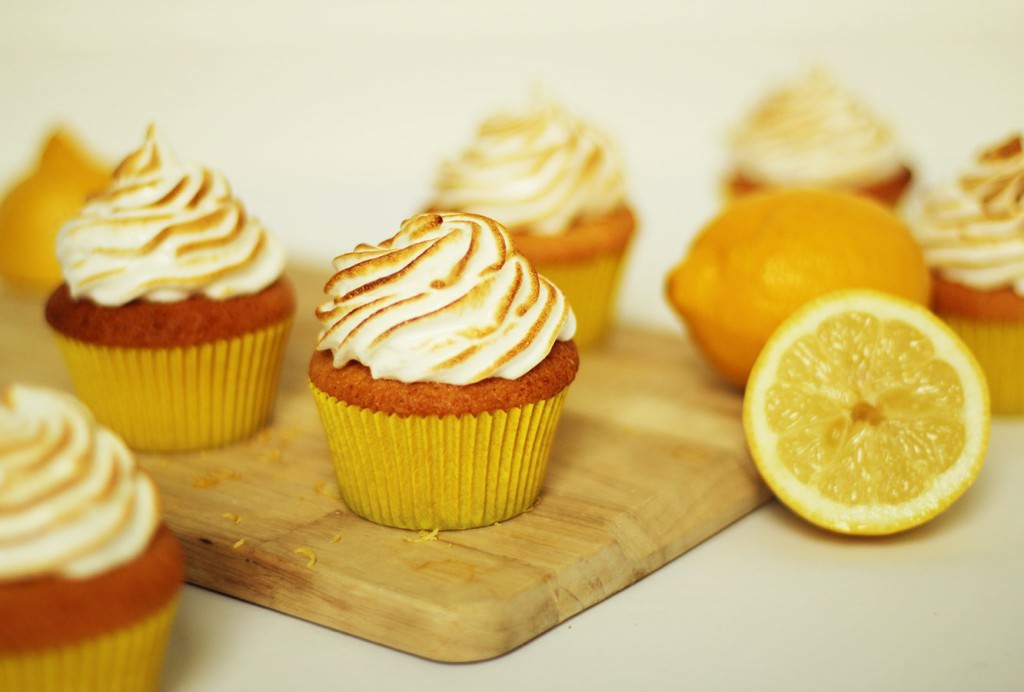
If you have a blowtorch, singe that bad boy. If you don’t, look at your feet and have a little sad moment. Don’t worry though, your cupcakes will still be delicious.

lemon-meringue-cupcake-recipe-8

lemon-meringue-cupcake-recipe-7

lemon-meringue-cupcake-recipe-9

Enjoy!
Minty fresh

Welcome back friend.

Week five of the British favourites cupcakes, and before we begin, I have a minor claim to fame on this one. My grandad used to engrave the embossing plates for the clock that characterises this evening treat. You know the old one with all the swirls n’ stuff.

Any guesses? The After Eight dinner mint you say? Dang straight.

Now, I know mint as a flavour polarises people, but I’m generally a fan. I can do away with a whole box of these if I’m in the right mood.

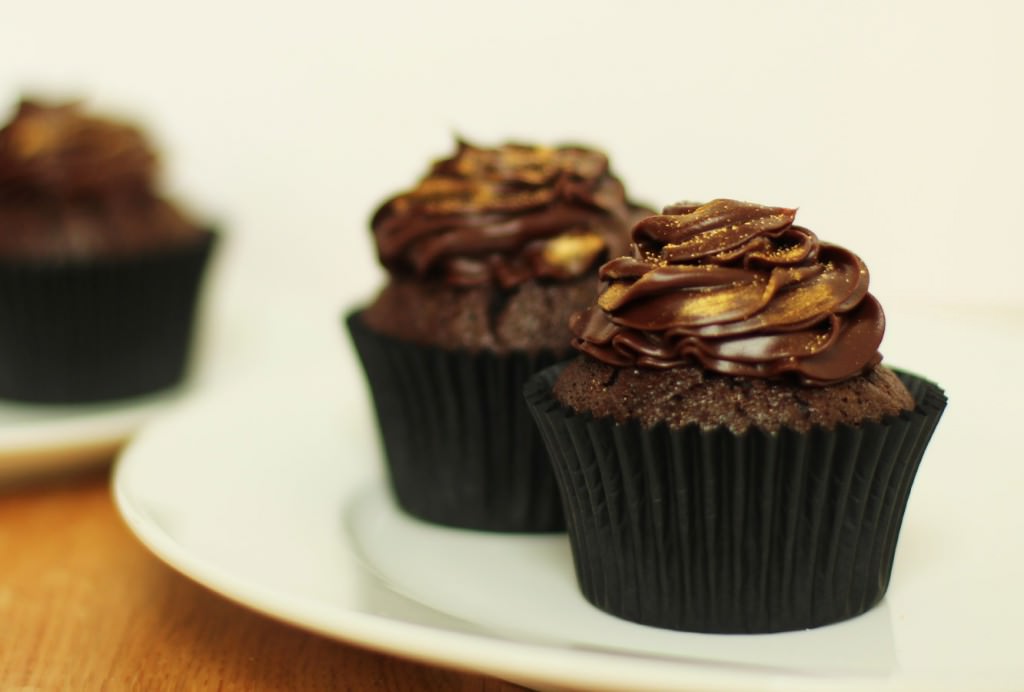
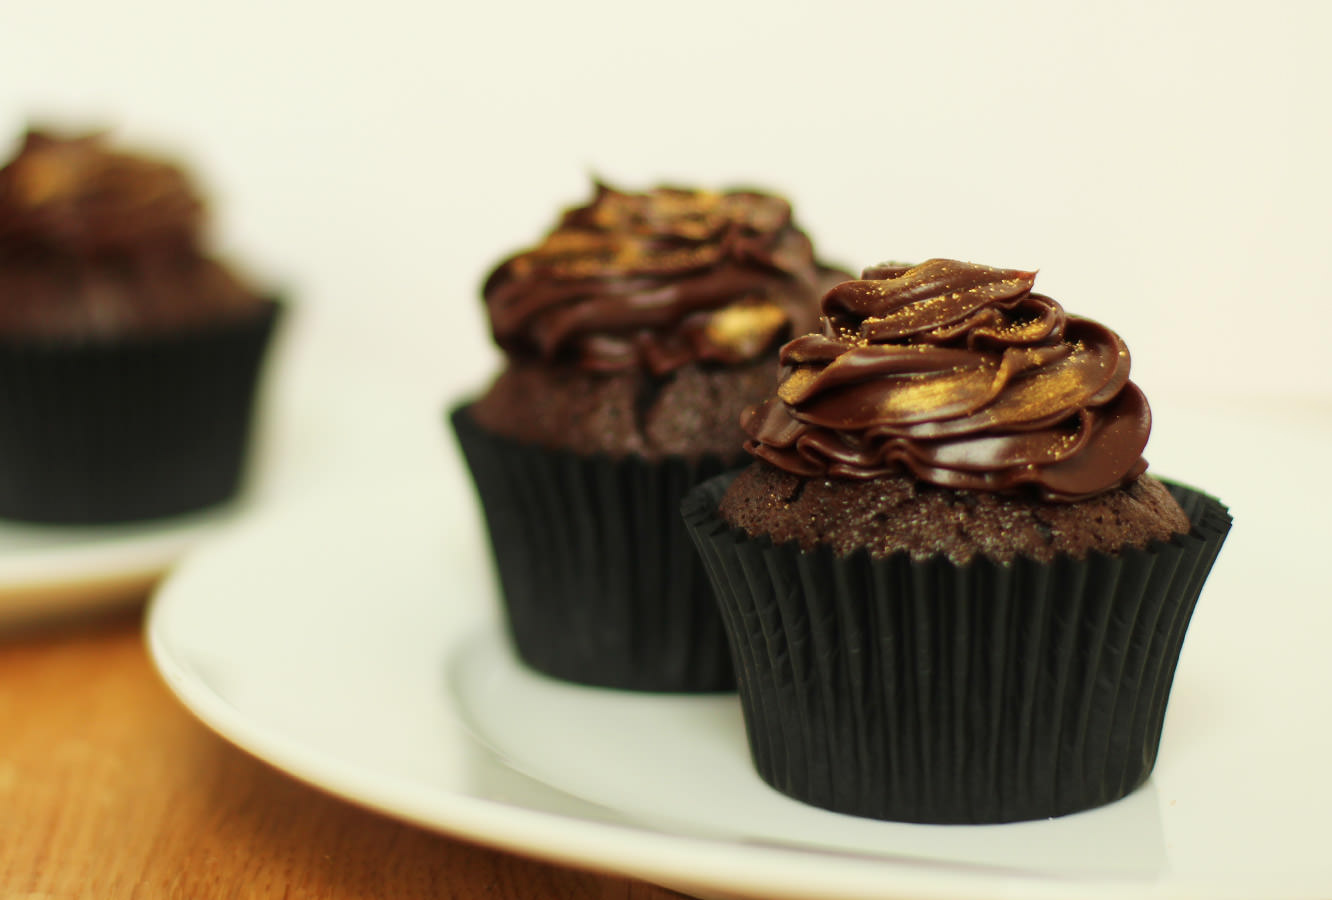
As far as the cake version goes, you don’t have to go too crazy, a little hint of mint really sets off the dark chocolate in this recipe nicely. The cake is made without eggs and butter so it’s light and fluffy allowing for a nice rich ganache icing. This is probably one of the easiest recipes in this little series, so if baking makes you nervous, start here.

As I’ve started sounding like the baking equivalent of a used car salesman we better make a start.

after-eight-cupcake-recipe-1

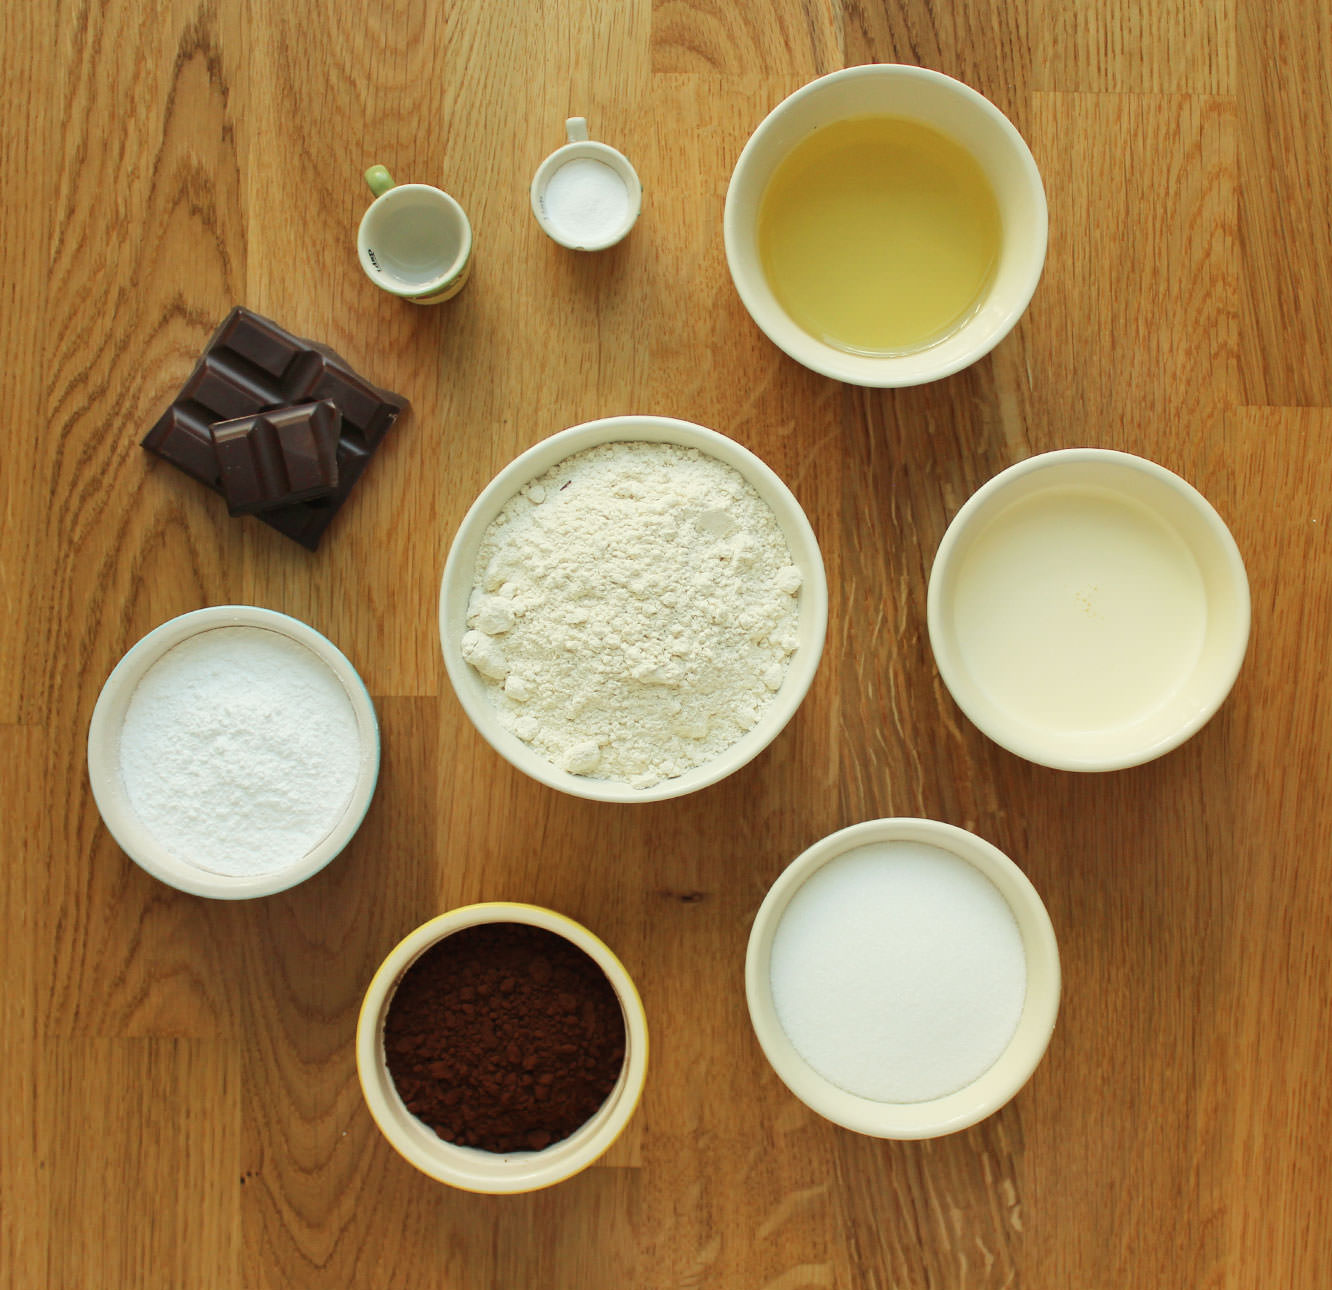
You will need

For the cakes:

250g/8.5 oz plain flour

250g/8.5 oz caster sugar

30g/1 oz cocoa powder

300ml/10 fl oz water

6 tbsp vegetable oil

1 tsp bicarbonate of soda

1 tsp cider vinegar

1 tsp vanilla extract

For the filling:

150g/5.5 oz icing sugar

1 1/2 tbsp water

1 tsp peppermint extract

For the ganache icing:

175ml/6 fl oz double cream

250g/8.5 oz dark chocolate

The little extras (you know, it’s polite to stay on brand):

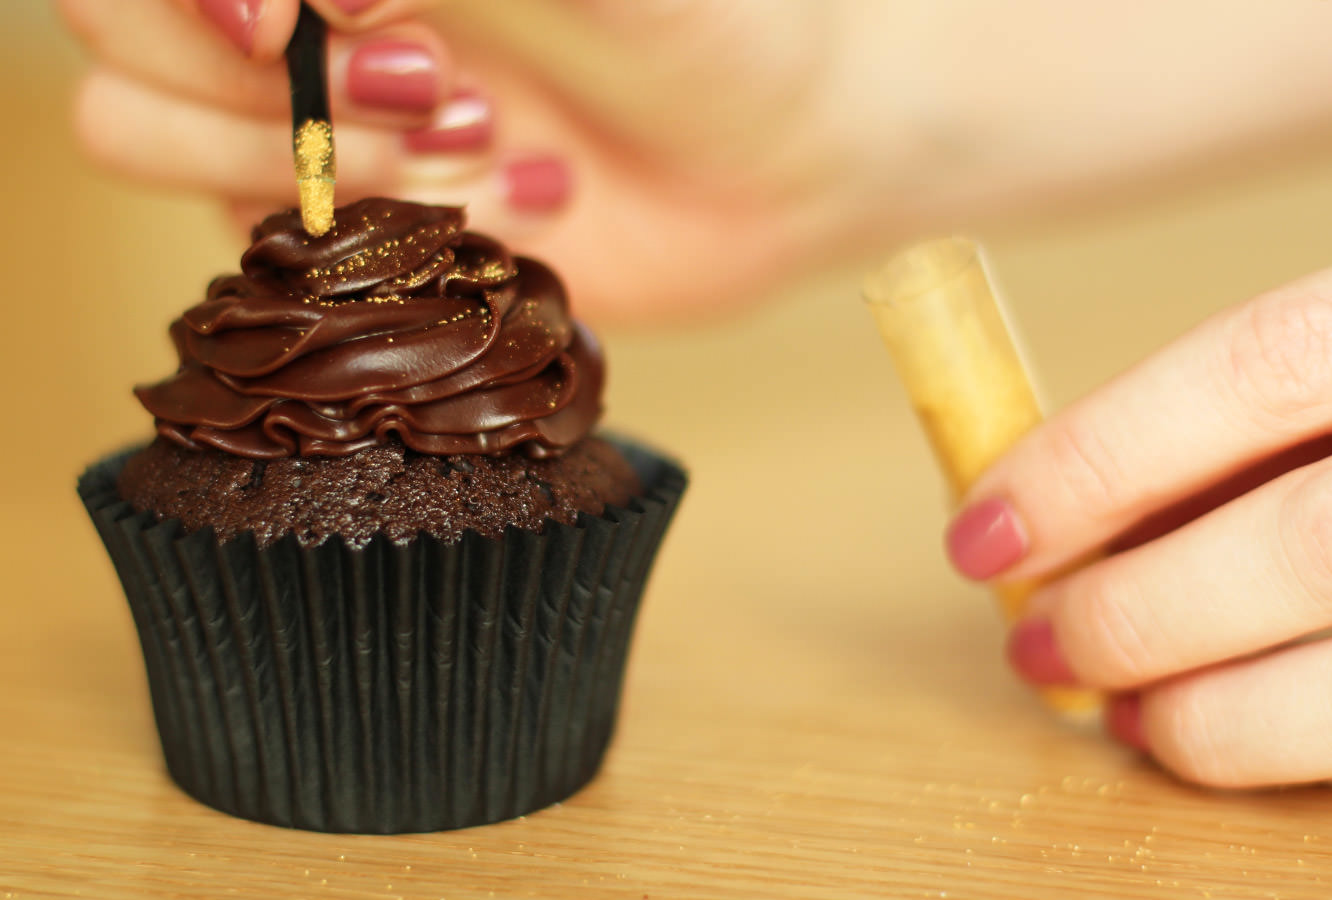
Edible gold powder

Black muffin/cupcake cases

(makes 12)

after-eight-cupcake-recipe-2

Step one

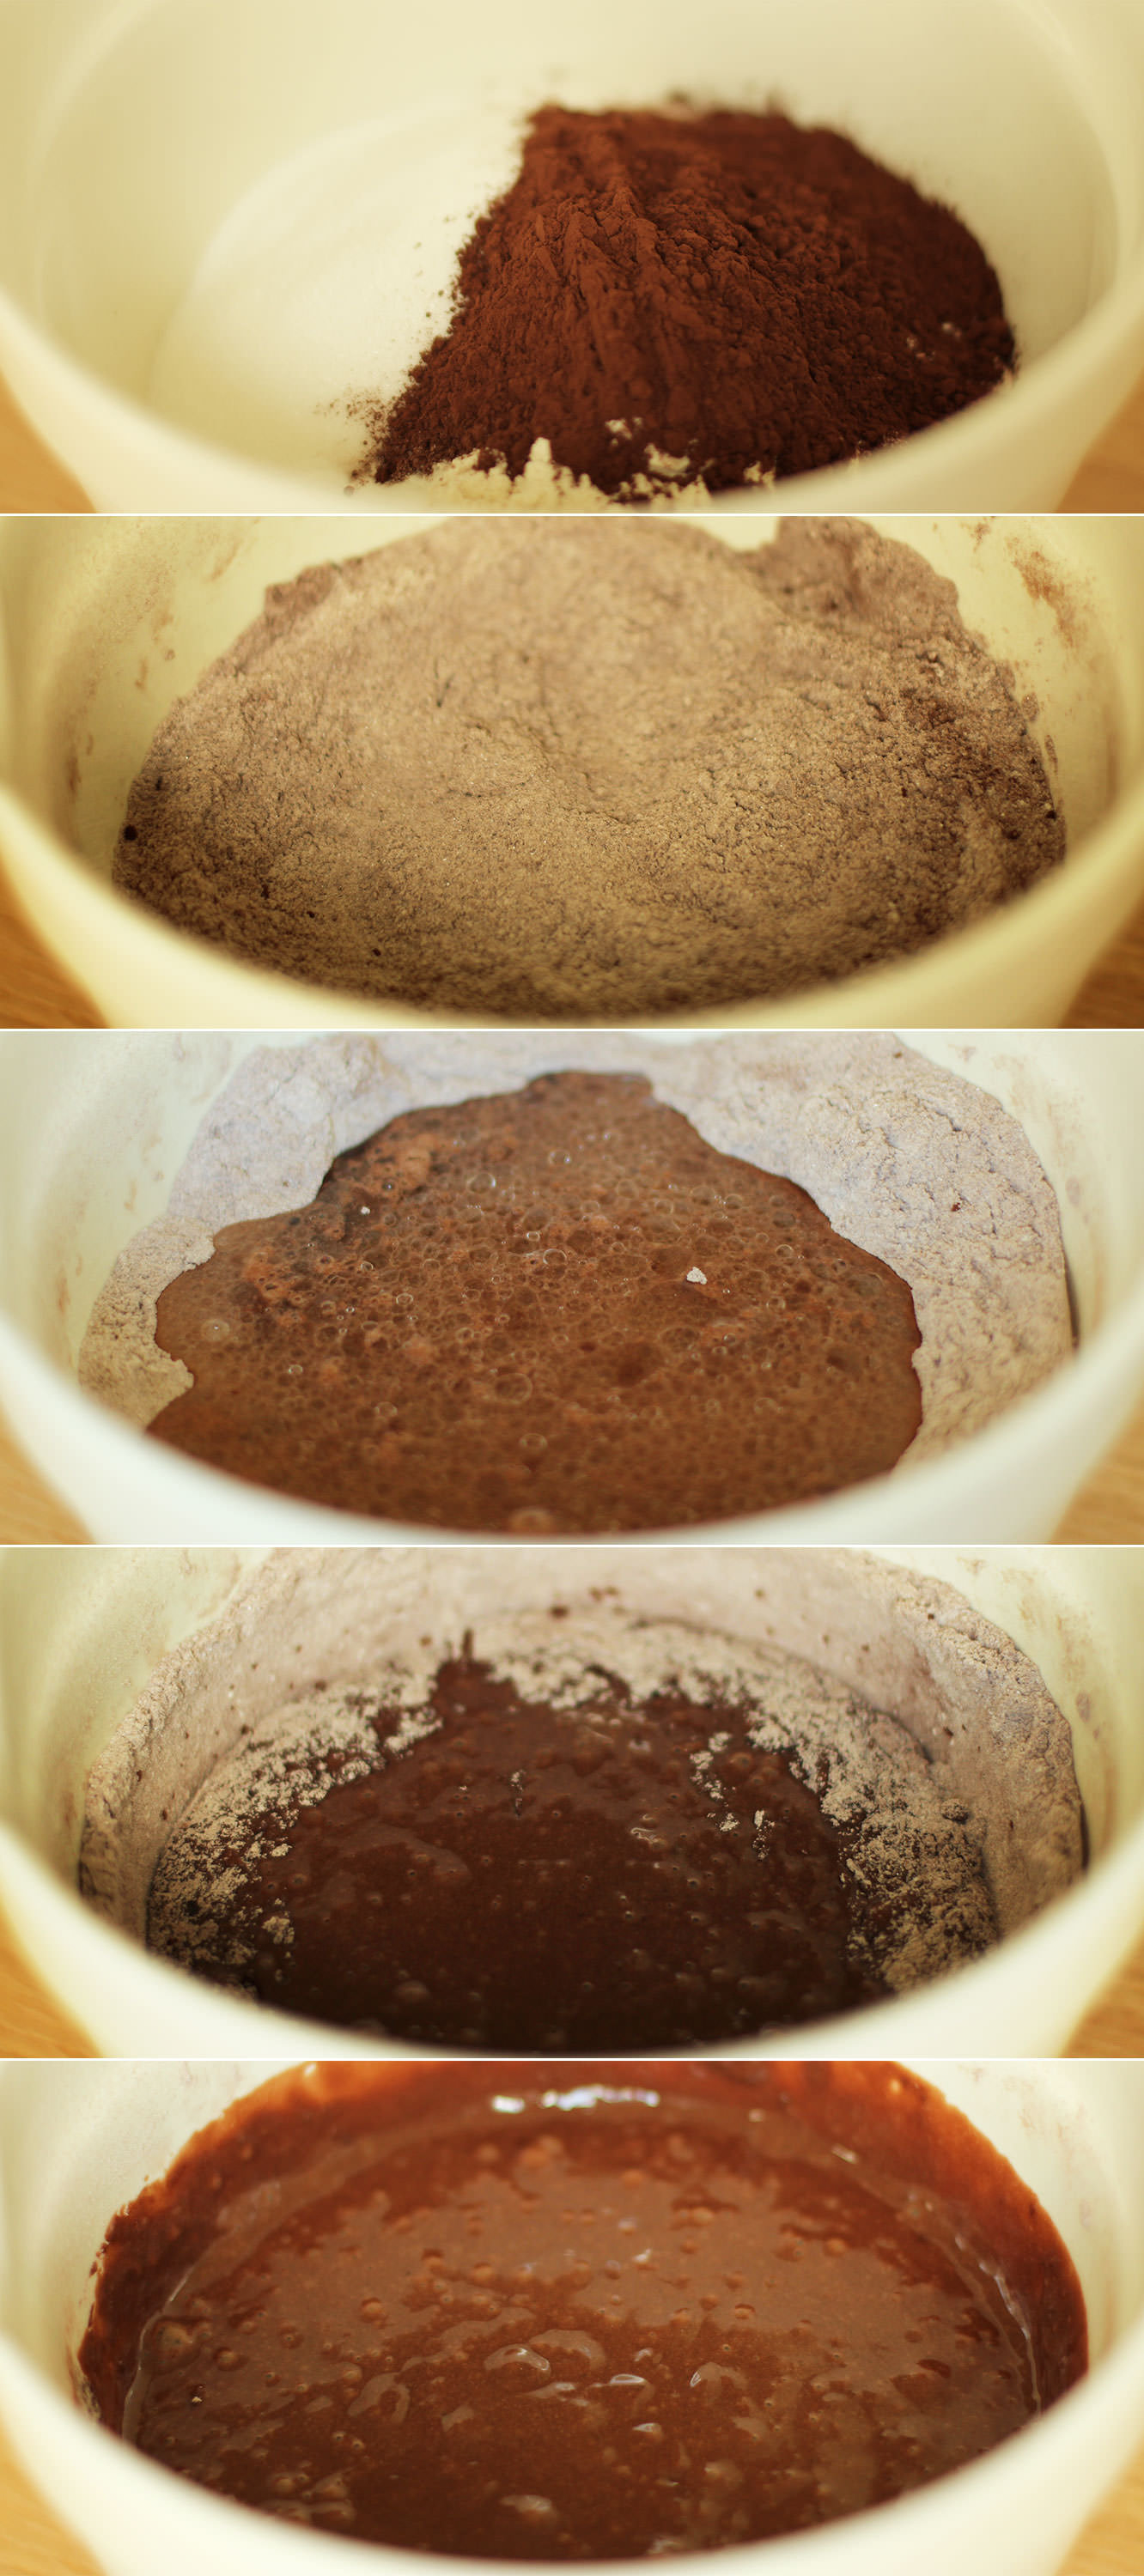
To make the cakes, mix together the caster sugar, cocoa powder, bicarbonate of soda and plain flour.

Make a well in the middle.

Step two

In a jug combine the oil, water, vanilla extract and vinegar.

Pour the wet ingredients into the middle of the dry ones. Using a hand whisk stir in small circles at the middle to gradually incorporate the dry ingredients without getting lumps.

after-eight-cupcake-recipe-3

Step three

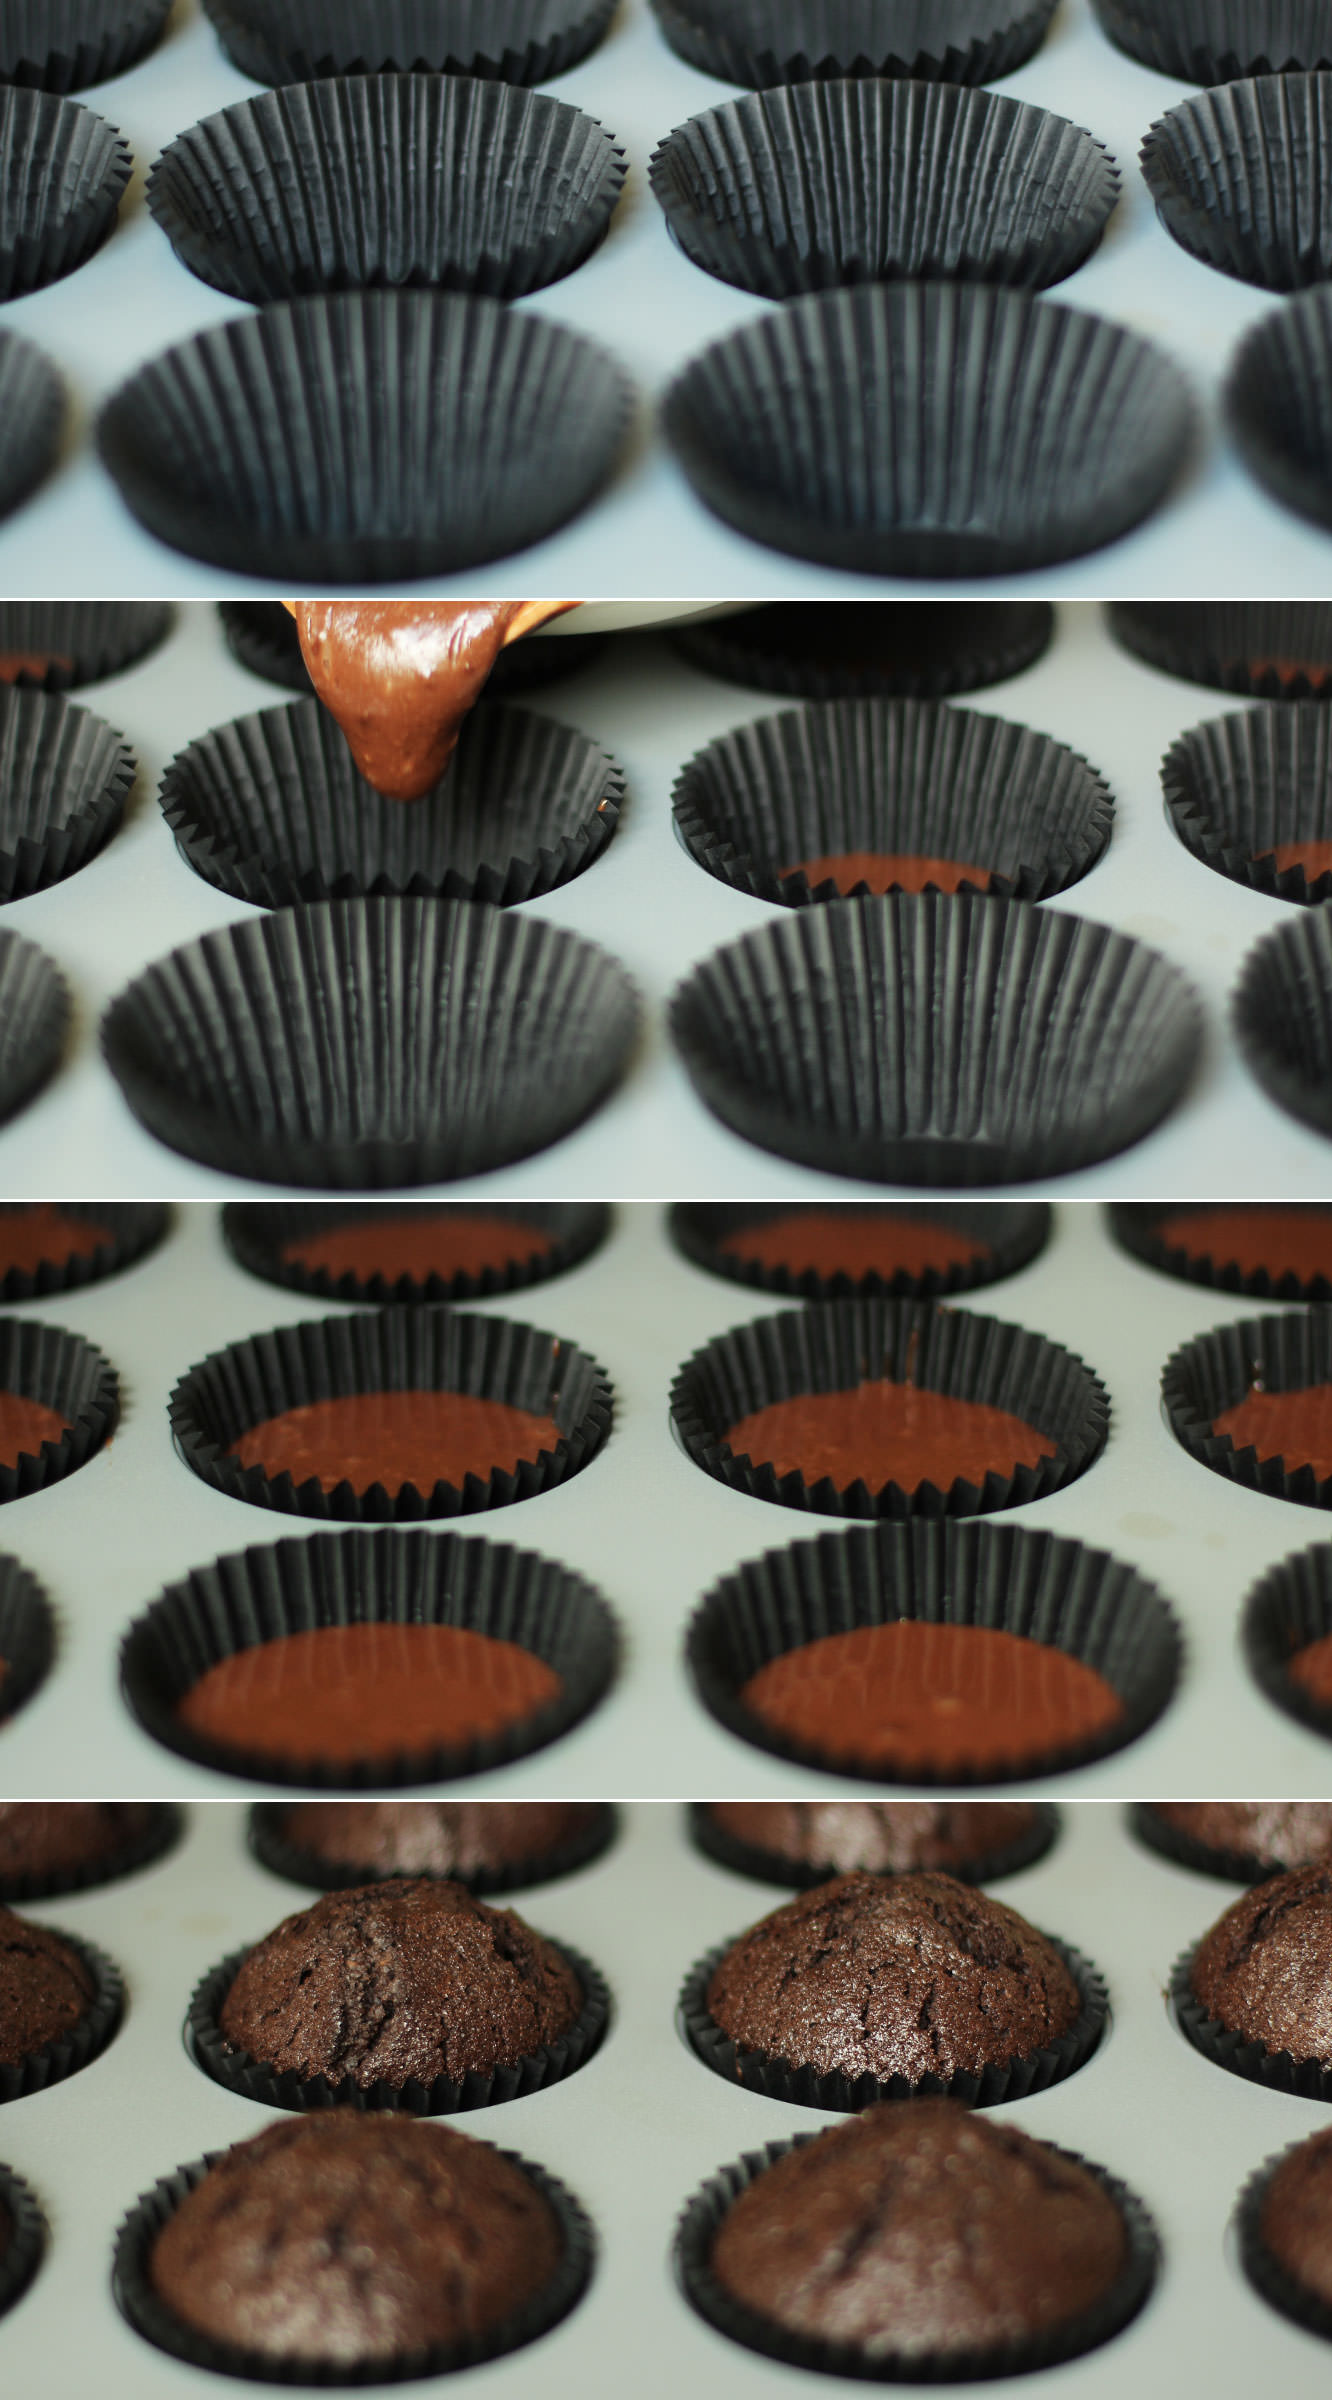
Pour the mixture into 12 cupcake cases. The mix will be fairly worryingly close to the tops of the cases but you shouldn’t have any problems, they aren’t the biggest risers.

To do this, I usually put the batter back into the jug I used for the wet ingredients in step two because it’s pretty runny.

Step four

Bake on 180C/350F/gas mark 4 for 20-25 minutes.

after-eight-cupcake-recipe-4

Step five

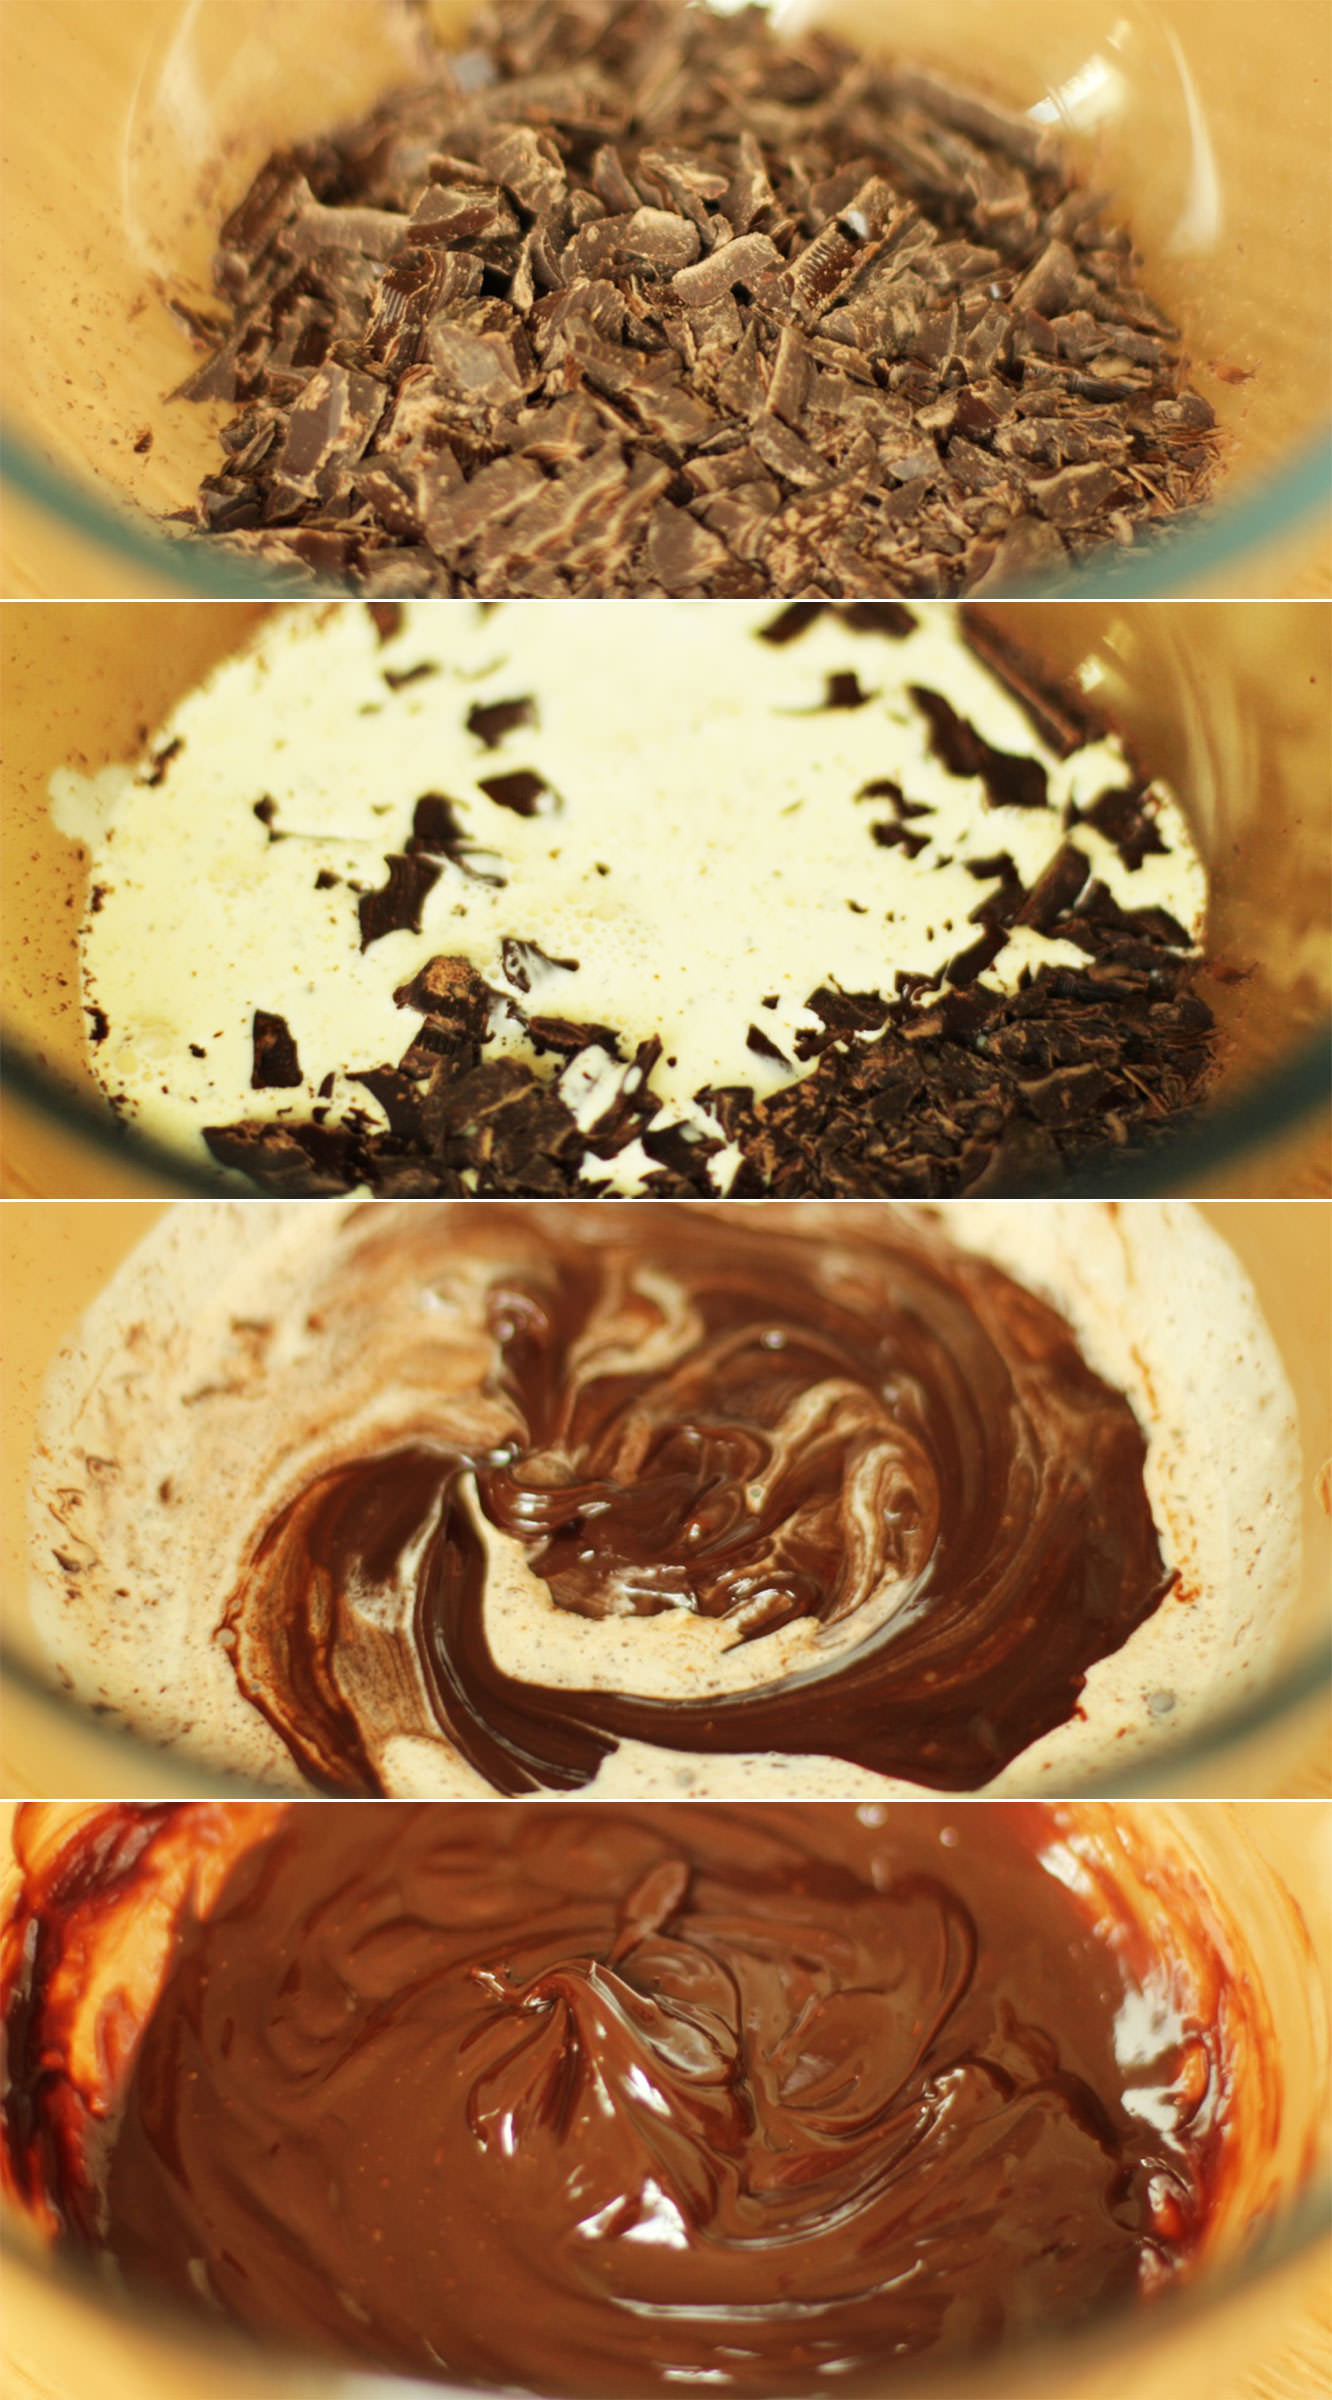
Finely chop the dark chocolate and place in a heatproof bowl. People who have been reading my blog for a while will be sick of hearing this, but a bread knife does a great job on chocolate. You can chop it real thin without bits flying off everywhere.

Gently heat the cream in a saucepan until it just begins to bubble. Stir constantly. It doesn’t take long for it to heat to this point so not a time to go and hang your washing out.

Once the cream has heated pour over the chocolate and stir with a whisk until fully combined.

Step six

Combine the filling ingredients. I felt it fairly unnecessary to photograph this bit. I reckon you’ll manage just fine on your own.

after-eight-cupcake-recipe-gif

Step seven

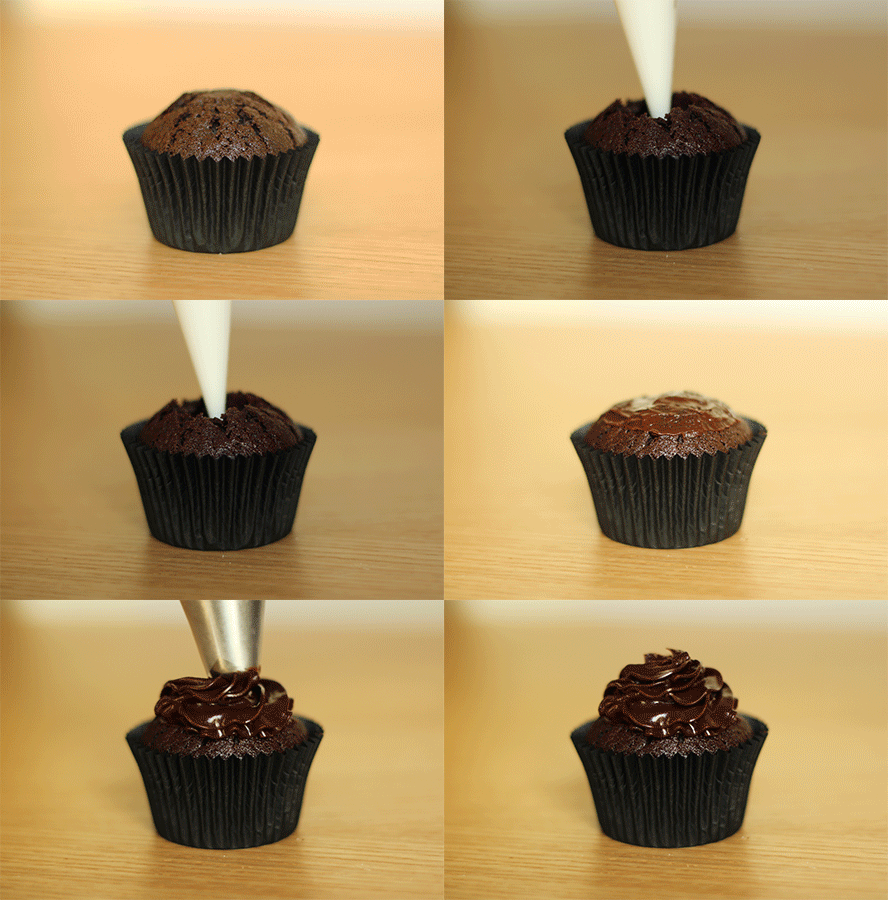
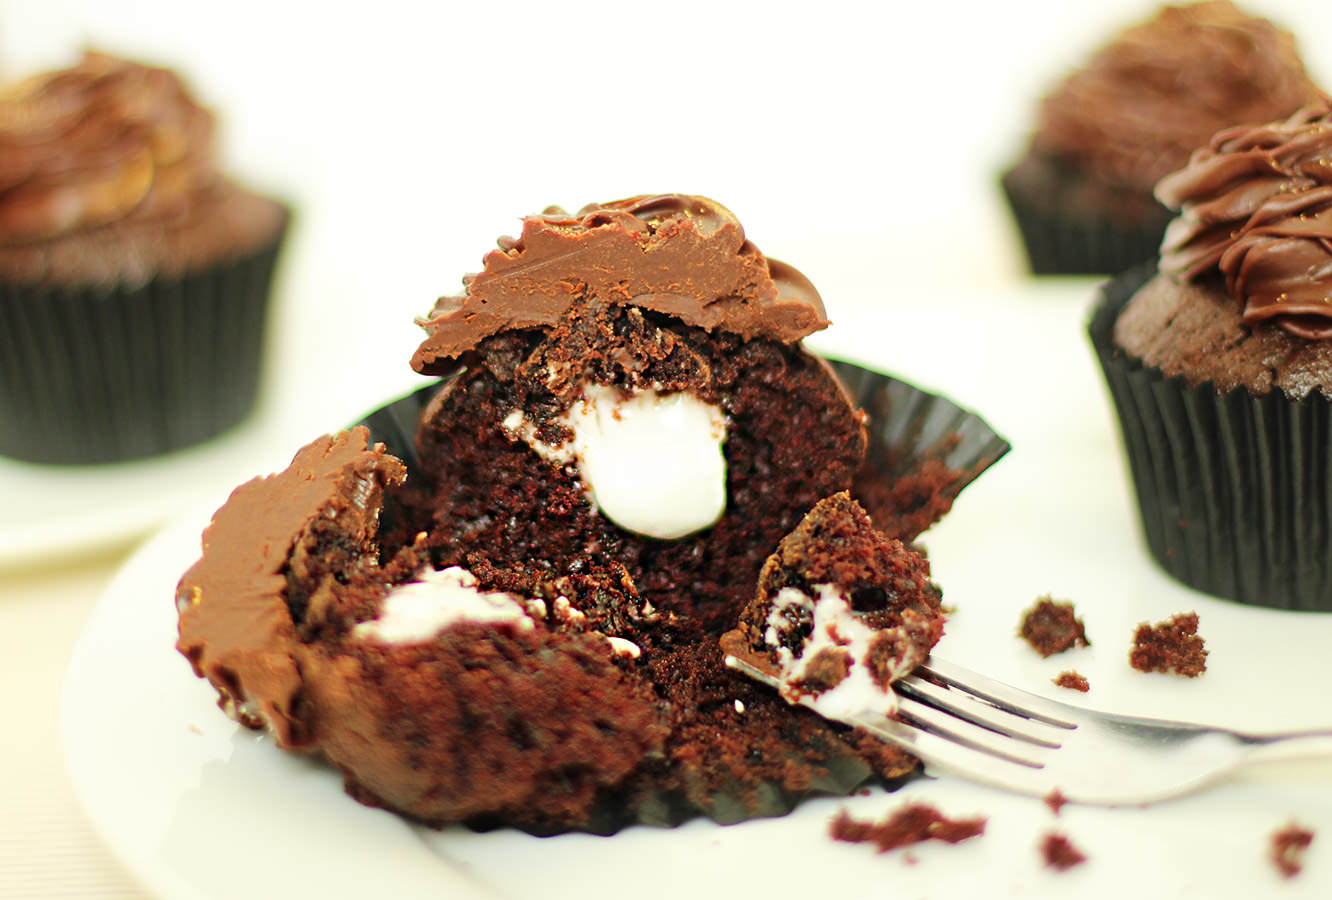
Fill and ice the cupcakes. Remove a bit of cake from the middle by running a small knife around in a circle. Cut the pointed bit off, fill the hole and place just the lid on top.

Pipe on the ganache using your favourite nozzle. You’ll know it’s cool enough when a spoonful of mixture holds its shape when dropped back onto the rest.

after-eight-cupcake-recipe-5

Step eight

If you have it, paint on the gold powder. I’m a sucker for the details. You can get this kind of thing fairly cheaply at most UK supermarkets nowadays.

after-eight-cupcake-recipe-7

after-eight-cupcake-recipe-8

after-eight-cupcake-recipe-6

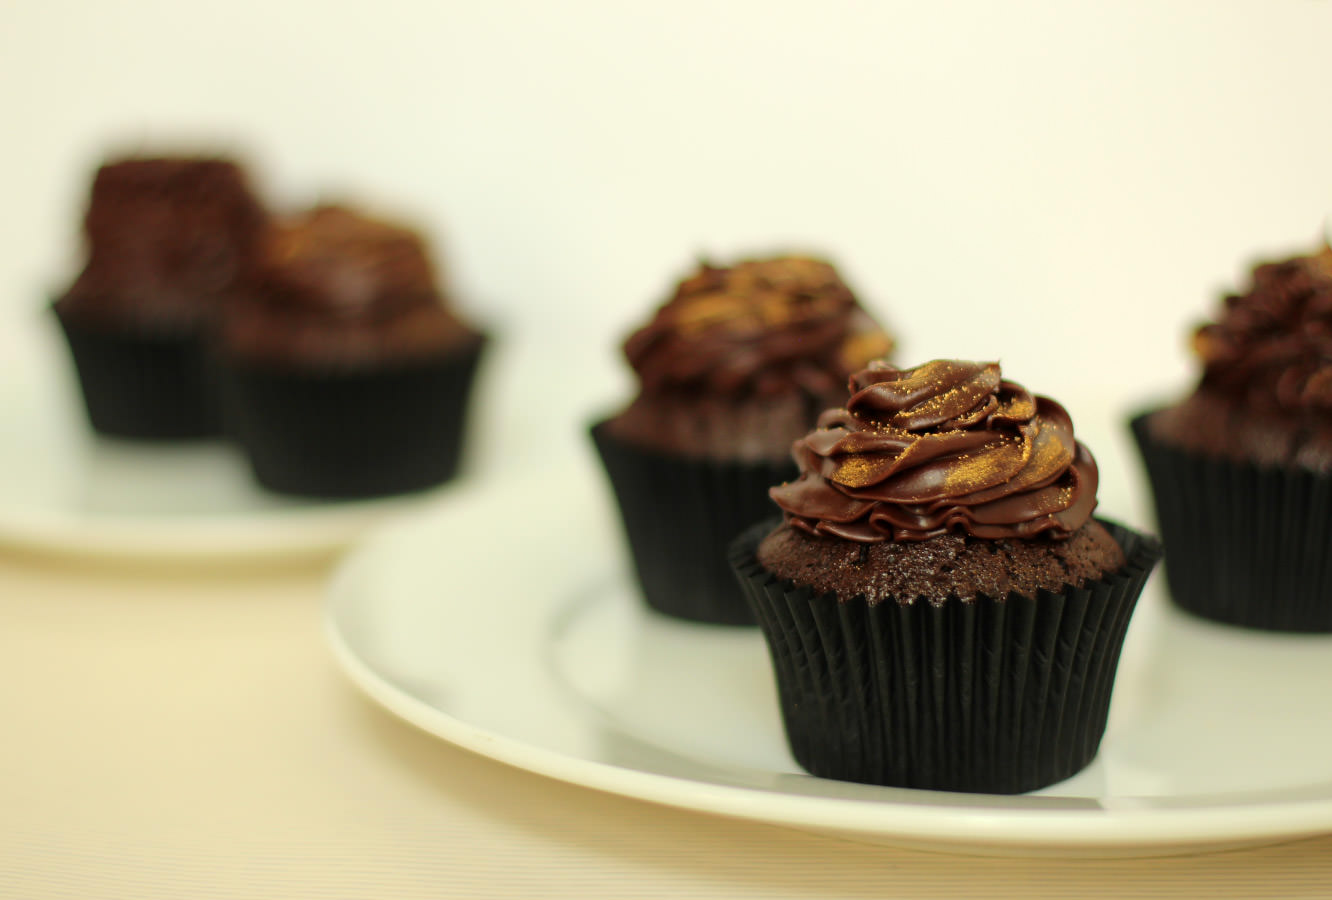
Eat them at any time in the day you like. I recommend breakfast personally, there’s an 8 in the morning too.

The only good thing to come from Eton*

Eton Mess. One of the best summer puds going. You might disagree with me, but you would be wrong. There’s nothing quite like strawberries and meringue where this person is concerned. I’ll even put down my chocolate for it. Though, most likely, if I’m at a barbecue, I’m just skipping the savoury to make way for the chocolate option and the Eton Mess.

Enough of my complete incapacity to avoid sweet things. Onto this week’s British favourites cupcake instead. Probably unsurprisingly given my rambling introduction it’s the recipe for Eton Mess cupcakes.

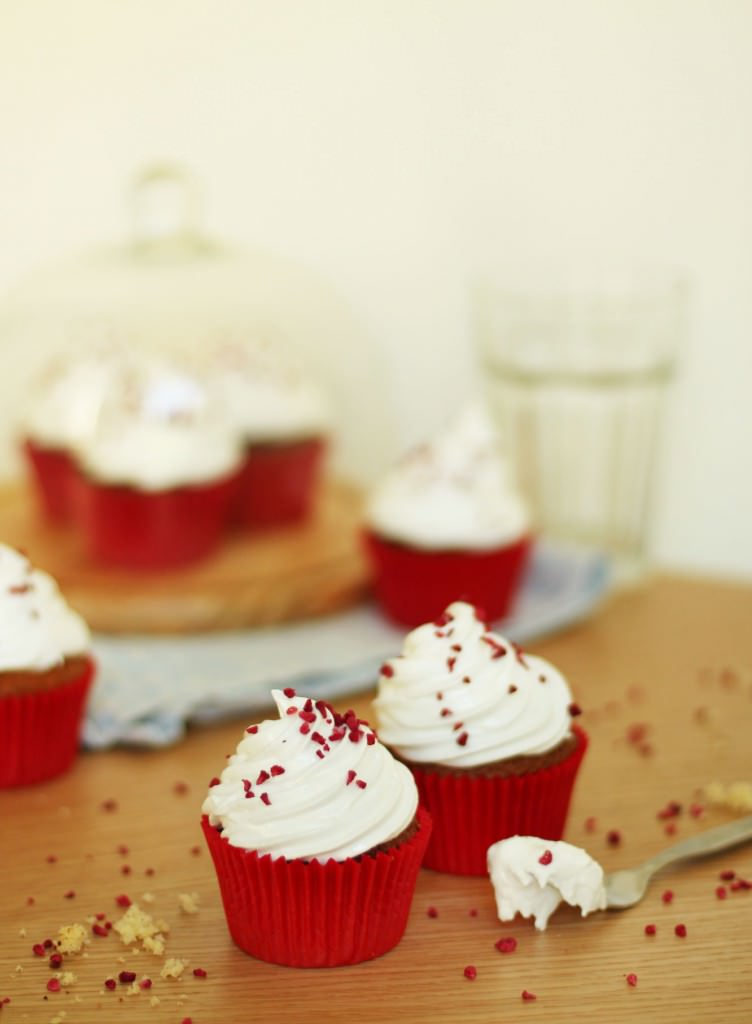
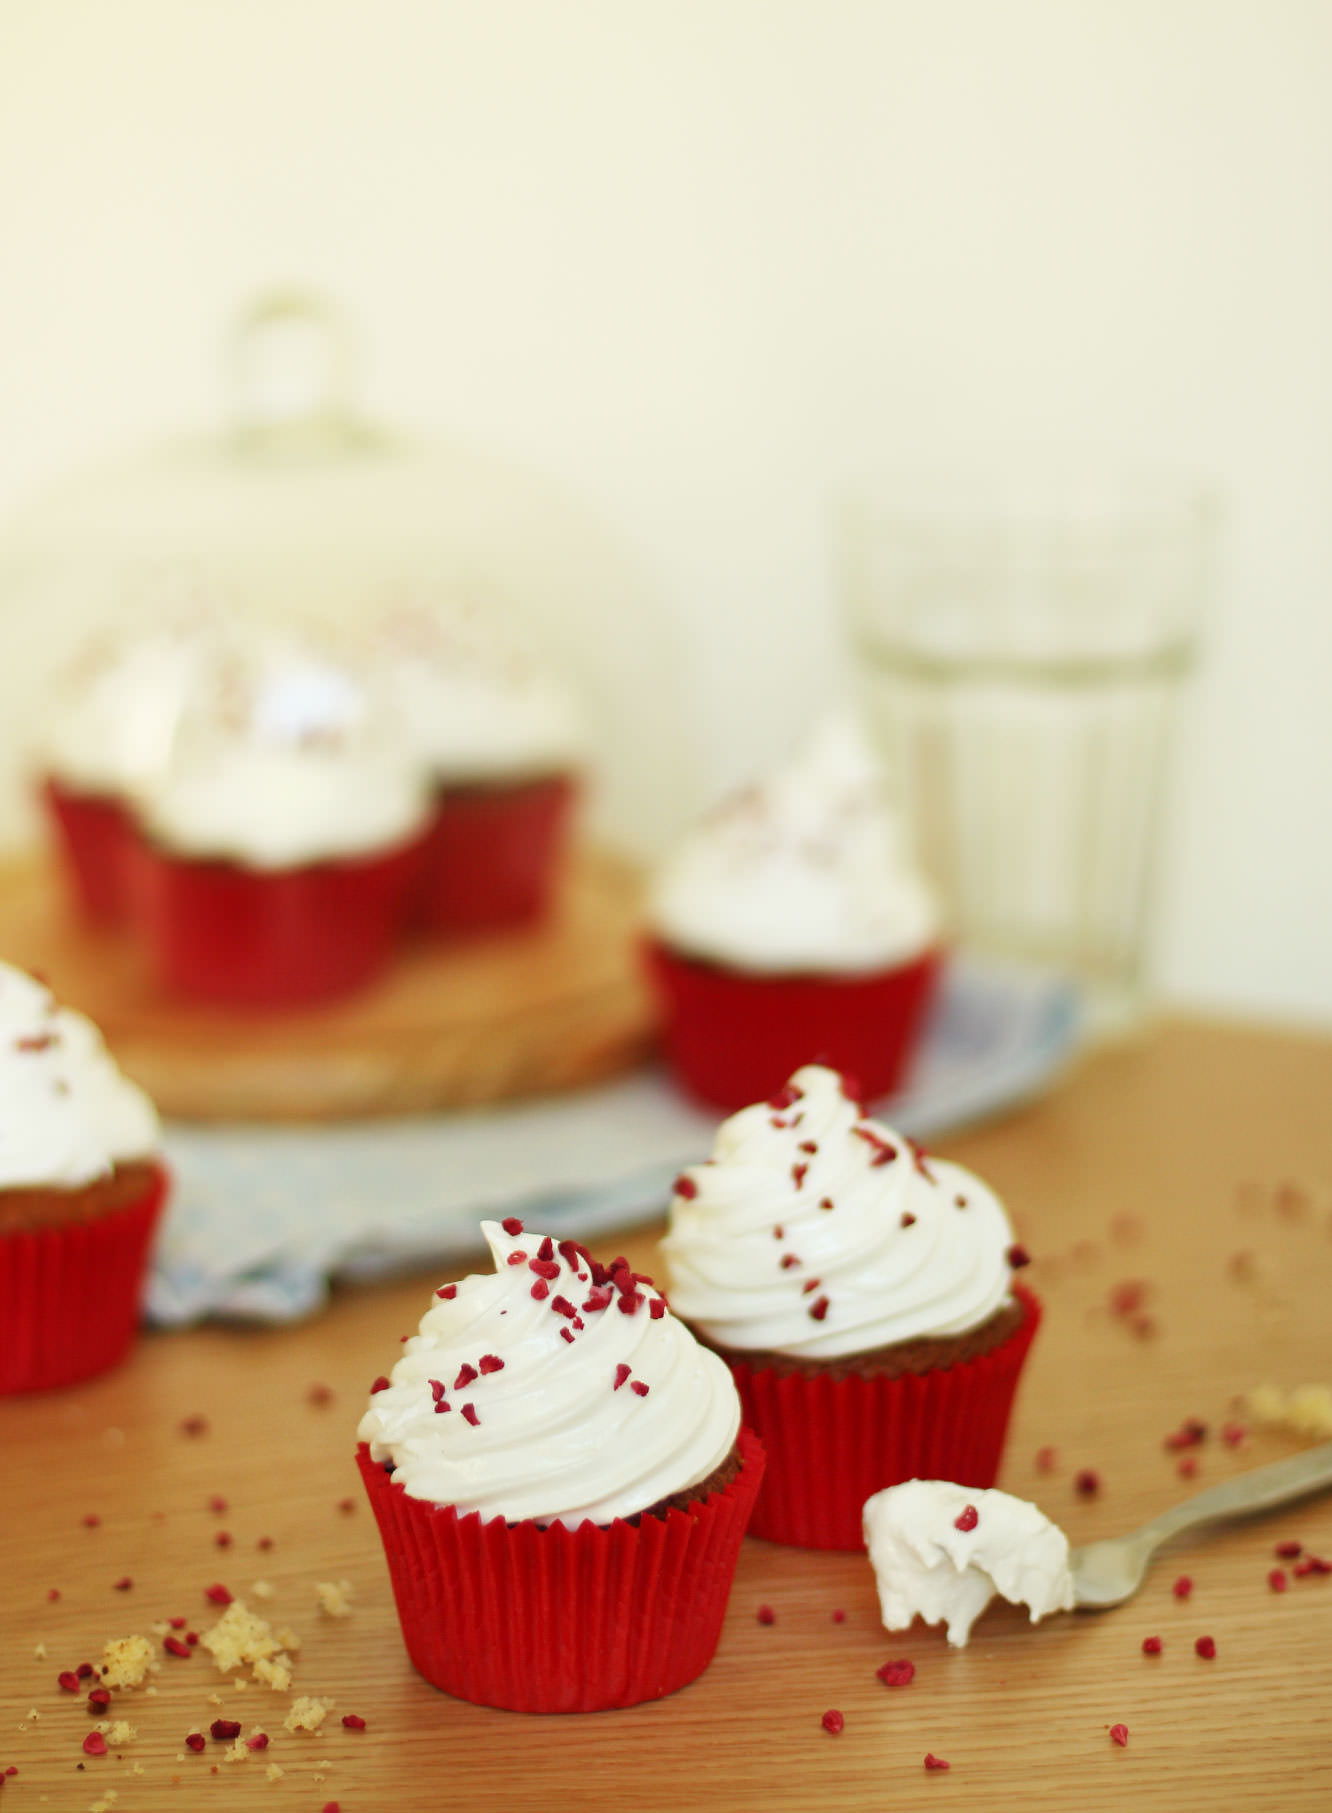
This recipe uses seven minute swiss meringue frosting. It’s the first time I’ve made it and it was pretty darn easy, so definitely give it a bash. I did notice that over a couple of days it hardens and basically becomes a meringue, and mine was a touch gritty. I think the best thing to do is make them and allow to sit out for a couple of hours so the outside hardens a little but the inside is still fluffy and smooth. A make on the day jobby if you can I reckon.

*Any association to real persons, living or dead, is purely coincidental.

eton-mess-cupcake-recipe-0

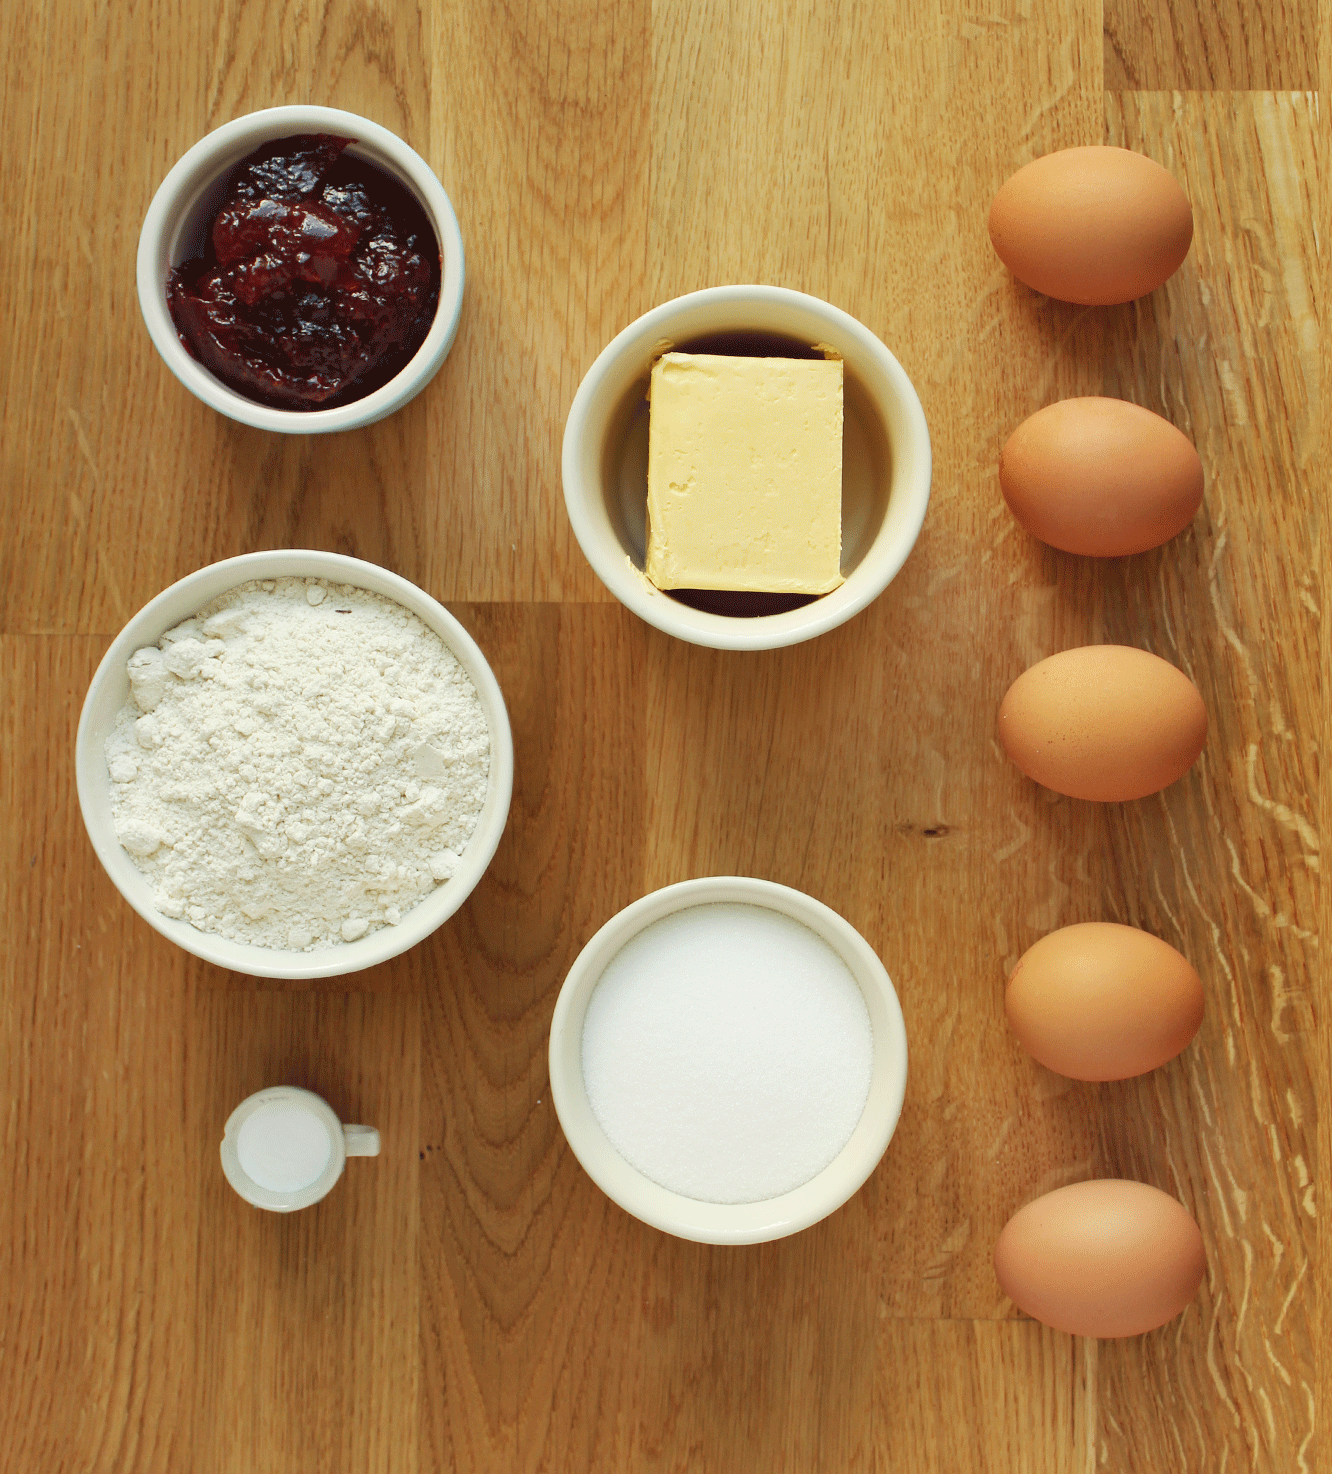
You will need

For the cake:

185g/6.5 oz self raising flour

185g/6.5 oz butter/margarine (I use Stork)

185g/6.5 oz caster sugar

3 eggs

1 tsp bicarbonate of soda

1 tsp vanilla extract/paste

For the centre:

Strawberry jam (yeah, I cheated. feel 100% free to make your own, I tip my hat to you)

For the frosting/icing:

2 egg whites

225g/8oz caster sugar

1/2 tsp cream of tartar

75ml/2.5 fl oz water

If you’re fancy like me then some freeze dried strawberries to sprinkle wouldn’t go amiss.

(makes 12)

eton-mess-cupcake-recipe-1

Step one

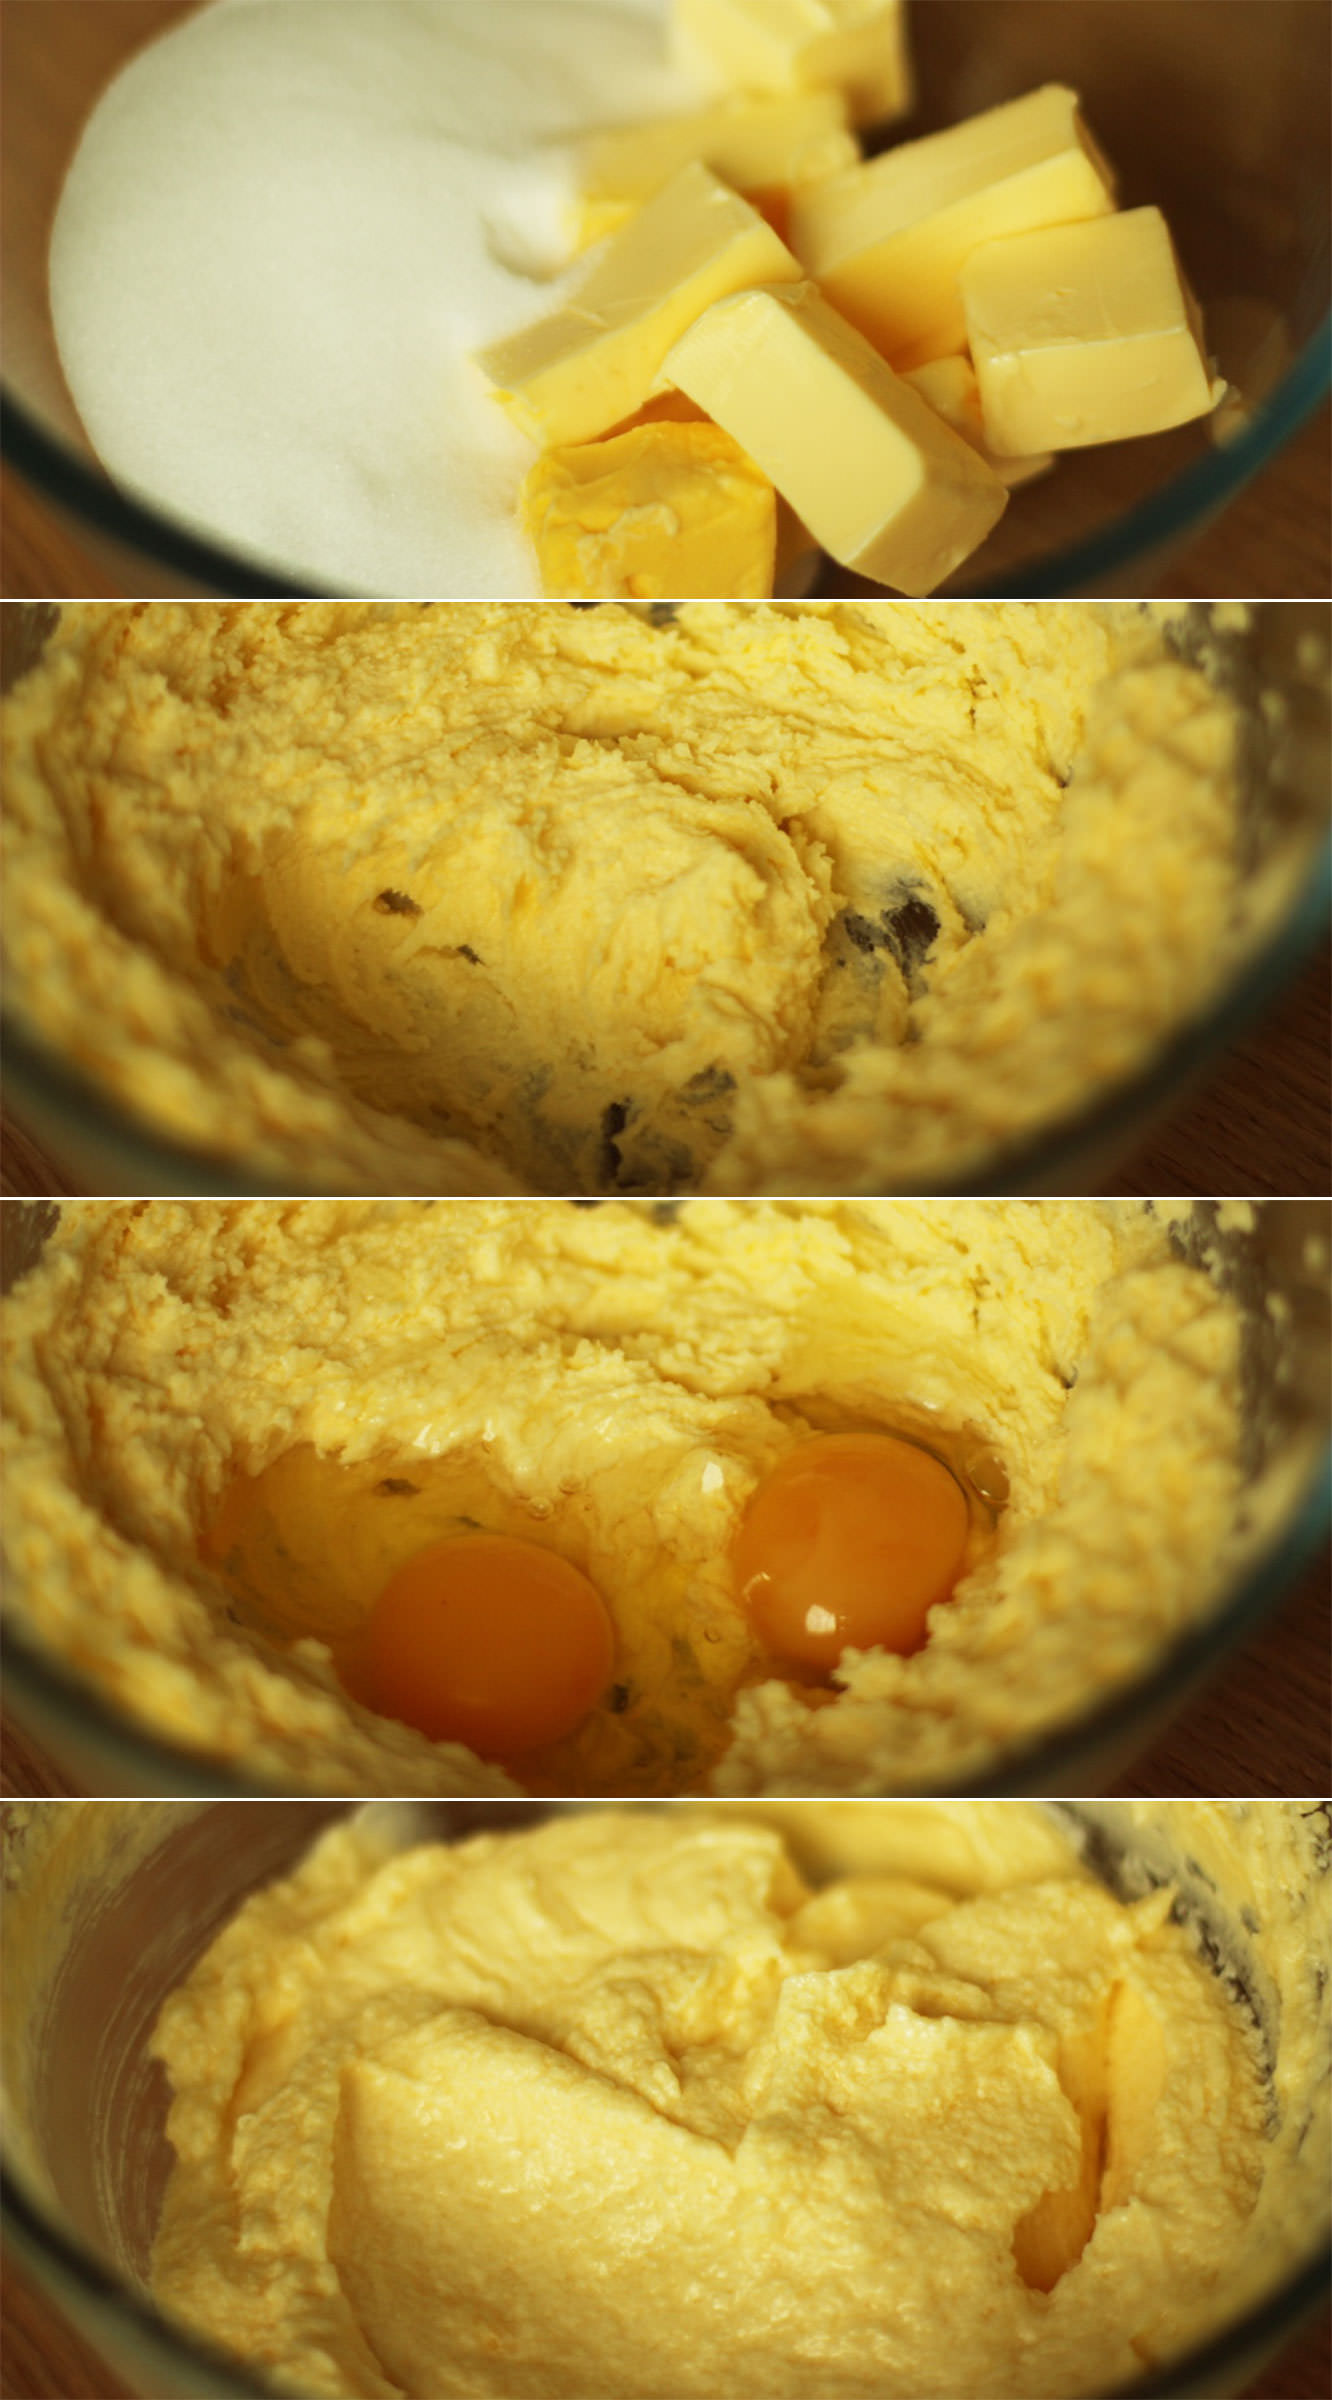
Whisk together the margarine and caster sugar until the mix is light and fluffy. If you are using butter then make sure it’s room temperature else the sugar will fly everywhere and you will just have a block of butter stuck in the middle of your whisk.

I used some strange hybrid which was Stork in a block form. Curious.

Step two

Add the eggs and whisk again until combined. Don’t worry if the mixture looks split, there’s just too much liquid at this stage. Time to add the flour.

eton-mess-cupcake-recipe-2

Step three

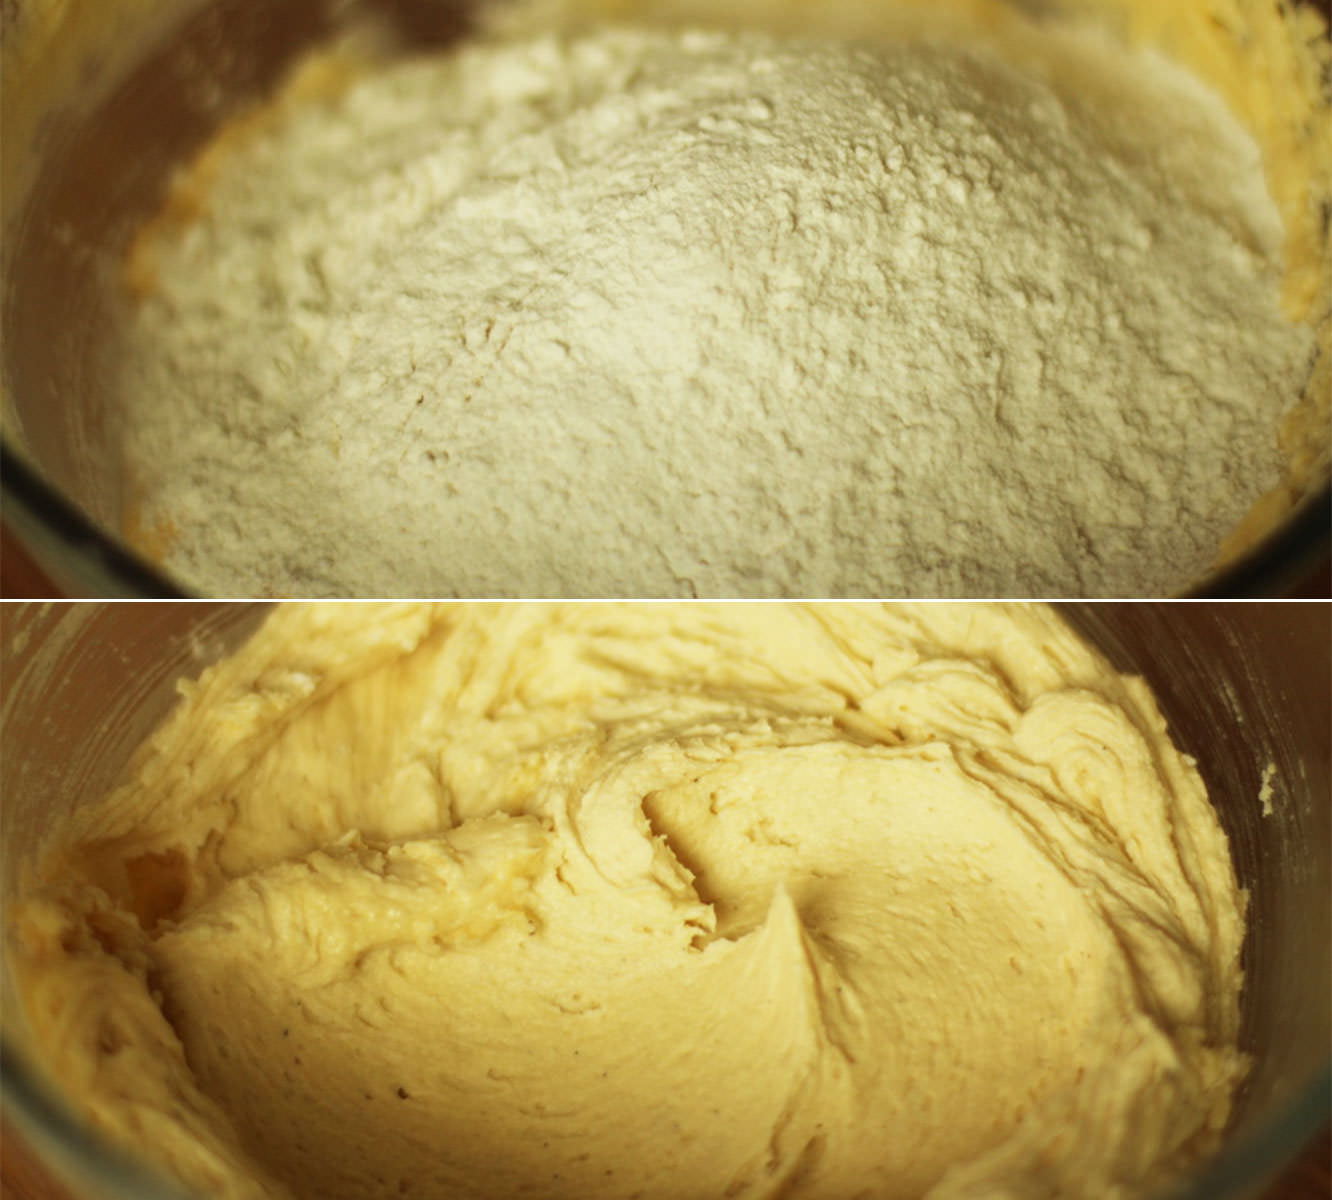
Add the vanilla, flour and bicarbonate of soda and beat with your electric whisk until smooth as above.

eton-mess-cupcake-recipe-3

Step four

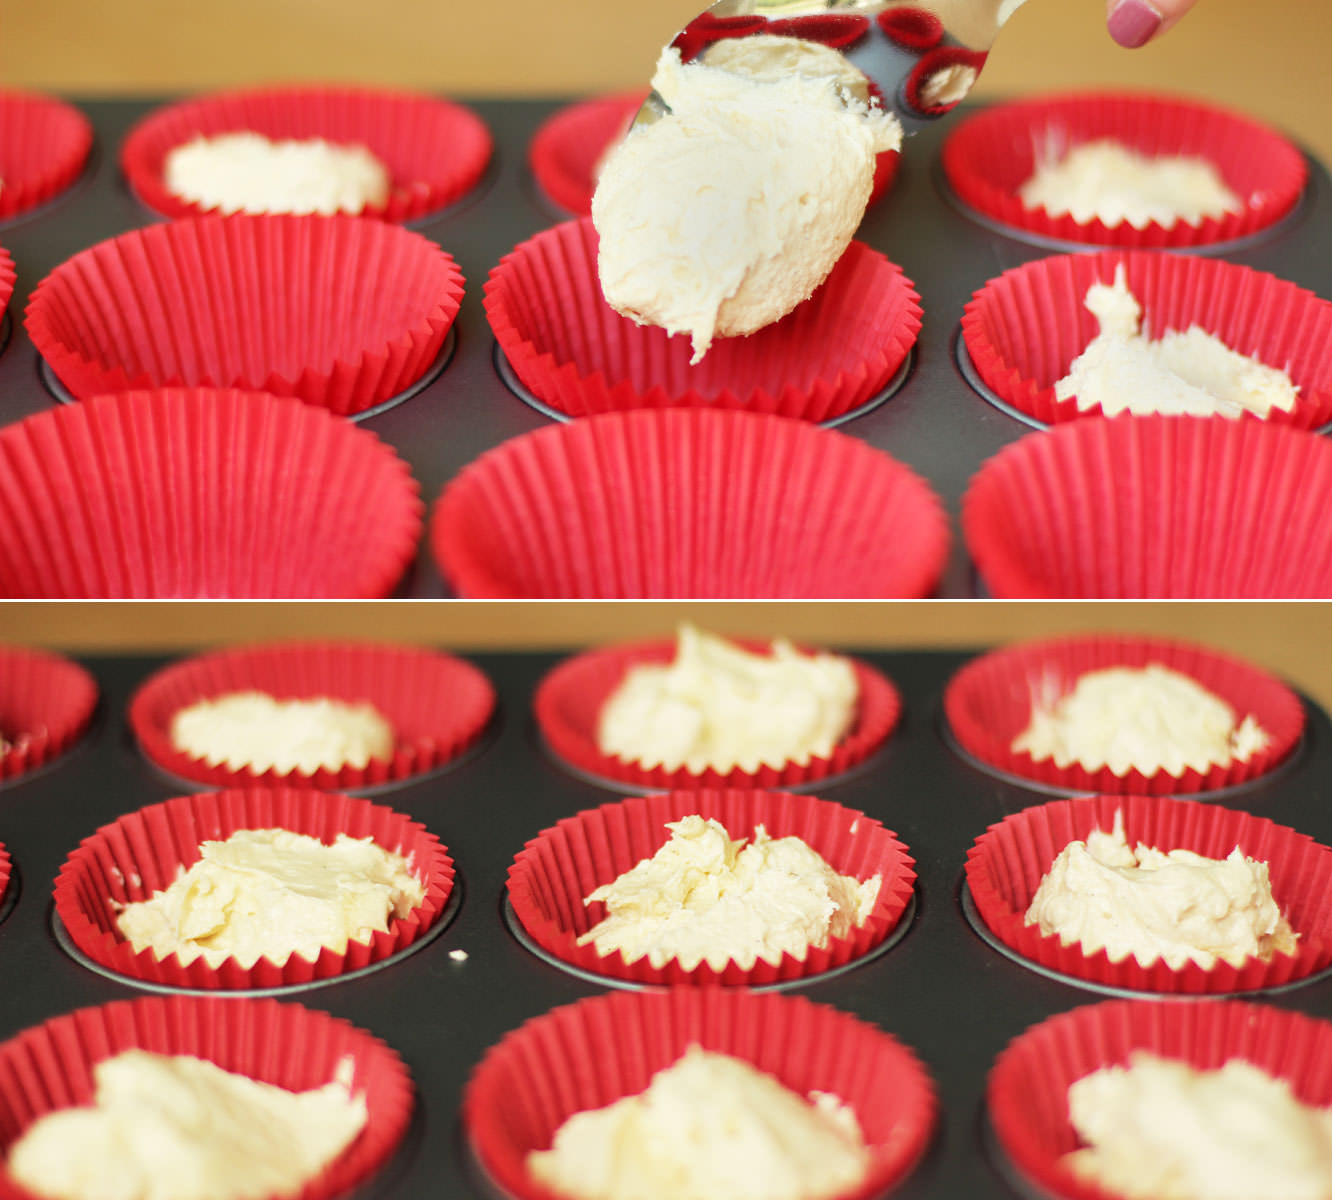
Distribute the mixture evenly between 12 cupcake cases. Usually about two rounded dessert spoons into each case does the trick.

Bake on 180C/gas mark 4/350F for 25 minutes until golden and springy to the touch.

eton-mess-cupcake-recipe-6

Step five

It’s seven minute frosting time.

Don’t get scared, I’ve been meaning to try this for ages but kept putting it off because I thought it looked like a pain. In fact, the hardest part was separating the eggs, and it’s so satisfying to pipe. I think I’m maybe a bit too into baking…

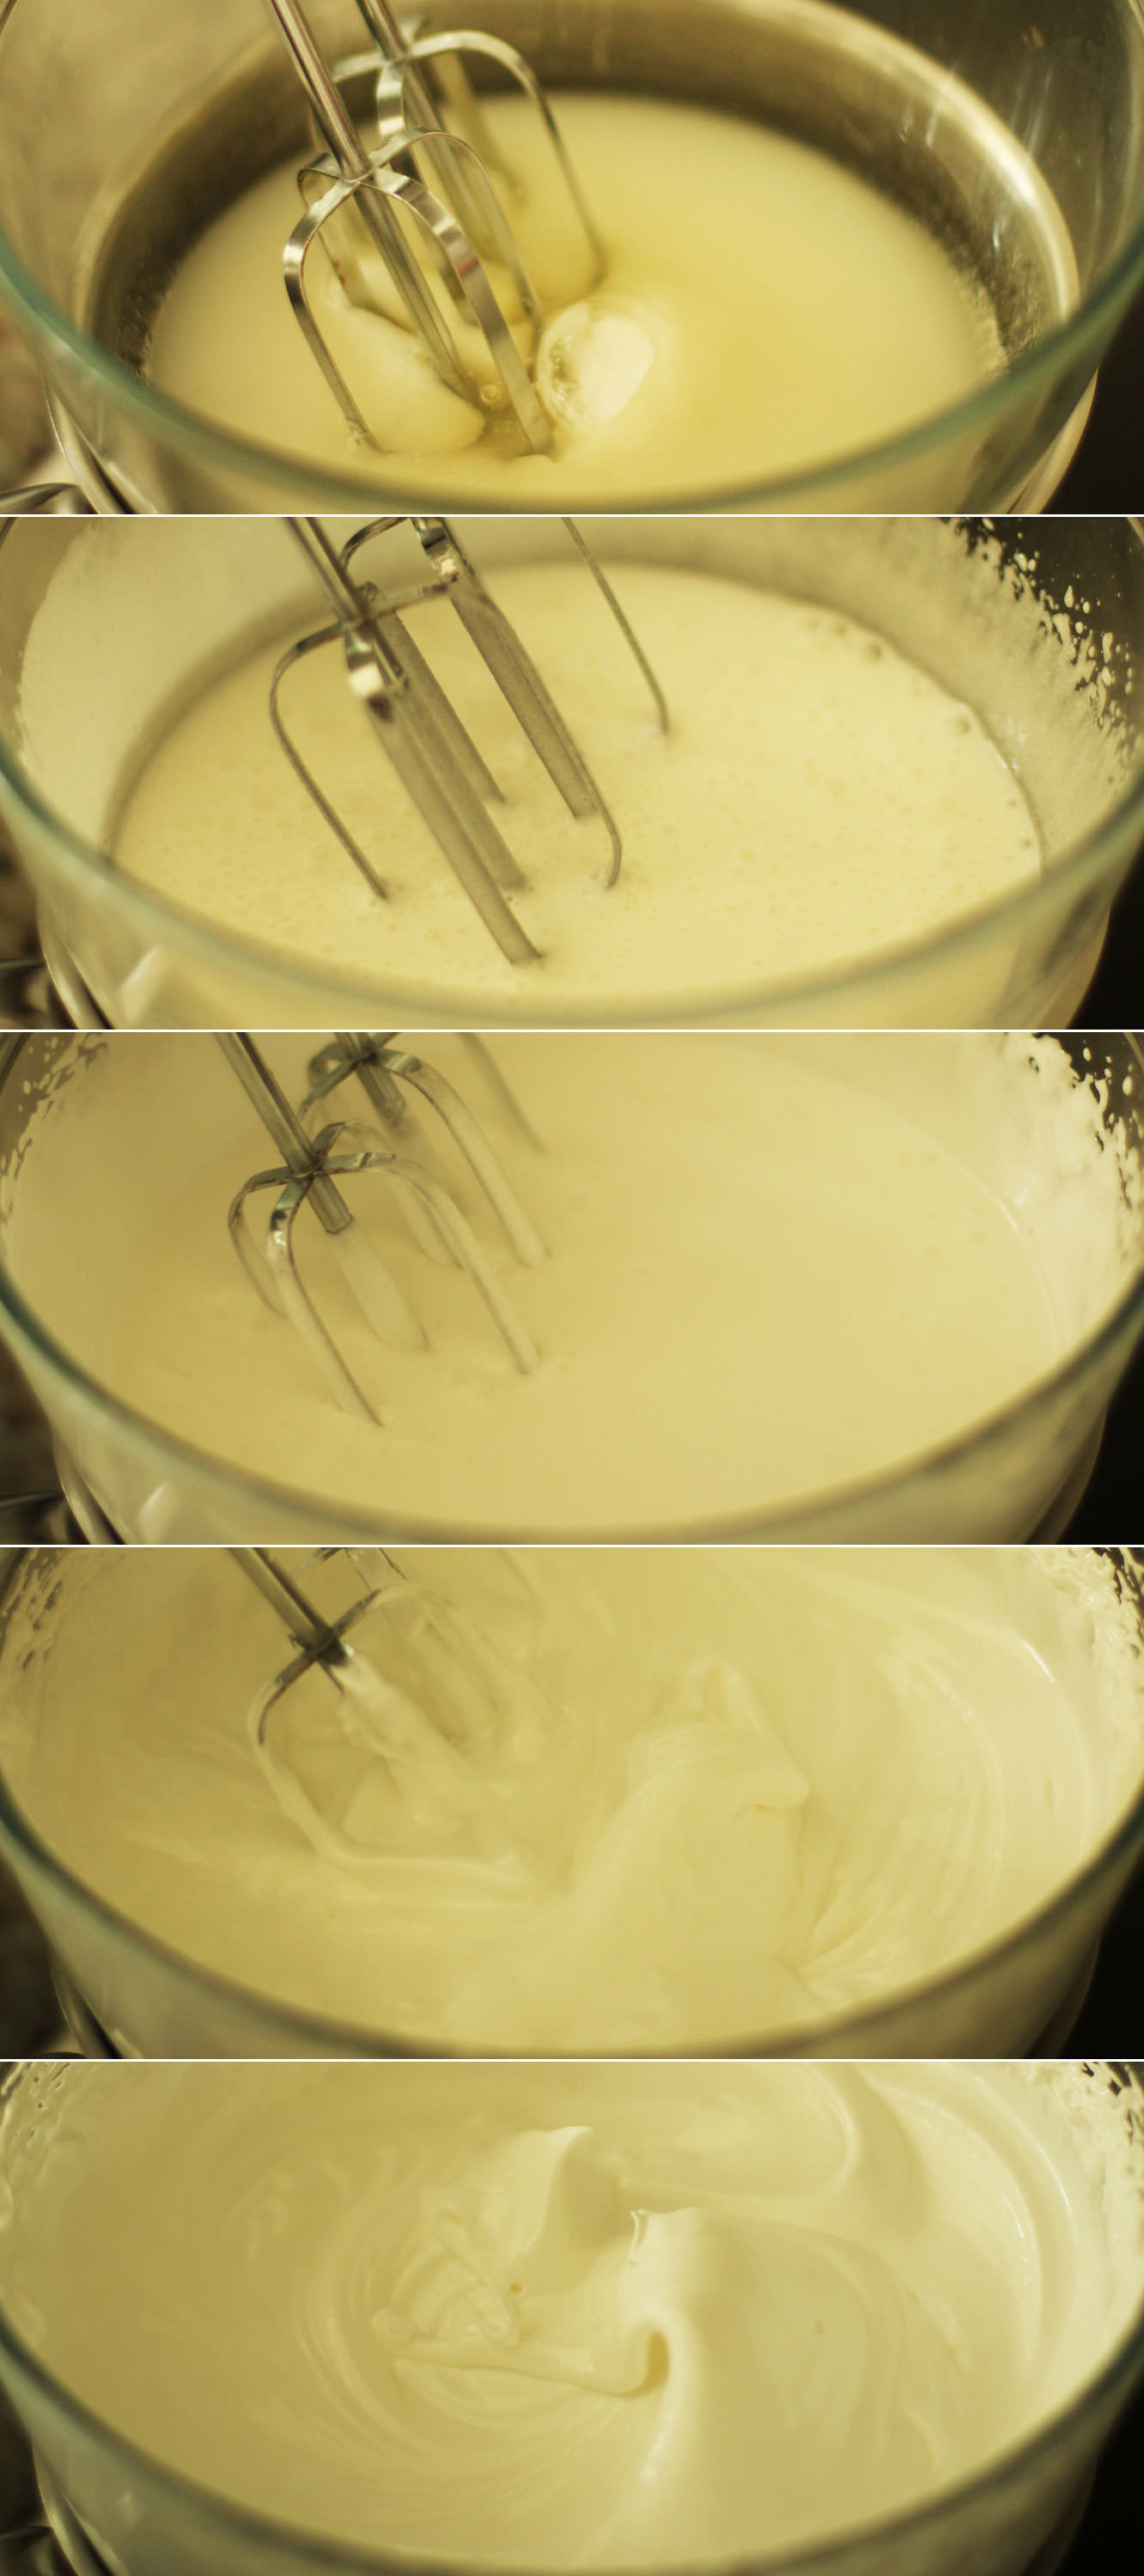
Anyway. Put the water, sugar, cream of tartar and egg whites into a heatproof bowl. This should be placed over a pan of simmering water. Don’t let the water touch the bottom of the bowl.

Whisk, for, you guessed it, seven minutes. It should be able to hold its own shape and not fall off the whisk when you lift it. If it’s not stiff enough just keep whisking for another minute or two.

I wouldn’t really recommend this if you don’t have an electric whisk.

eton-mess-cupcake-recipe-gif

Step six

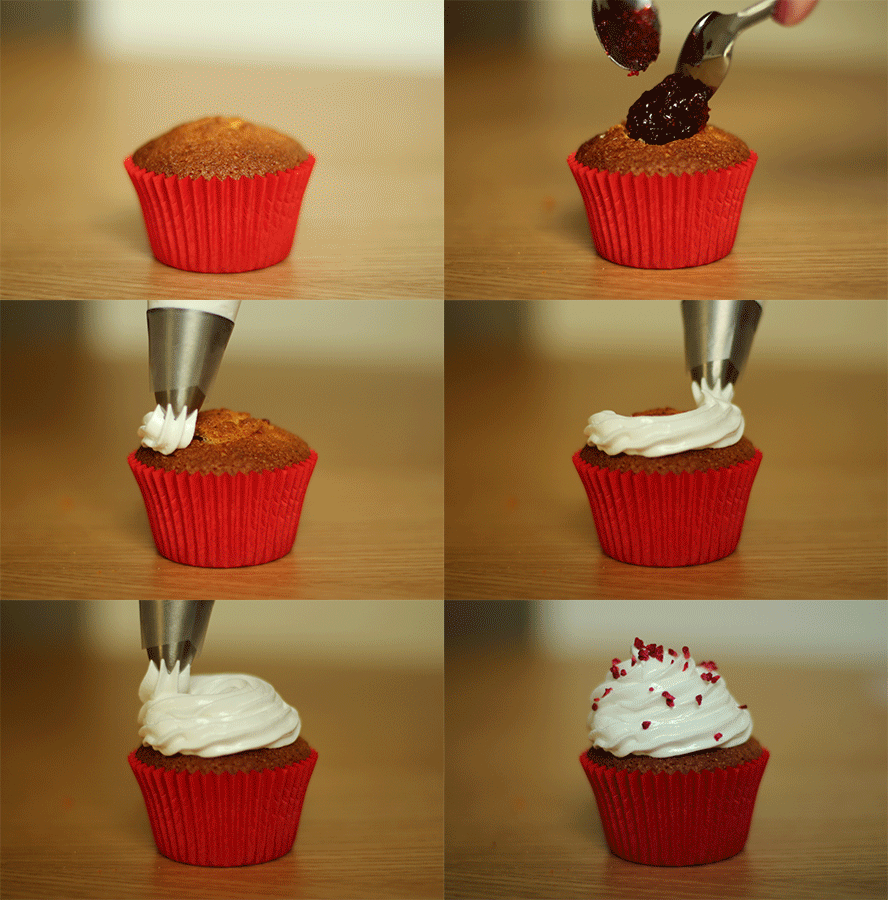
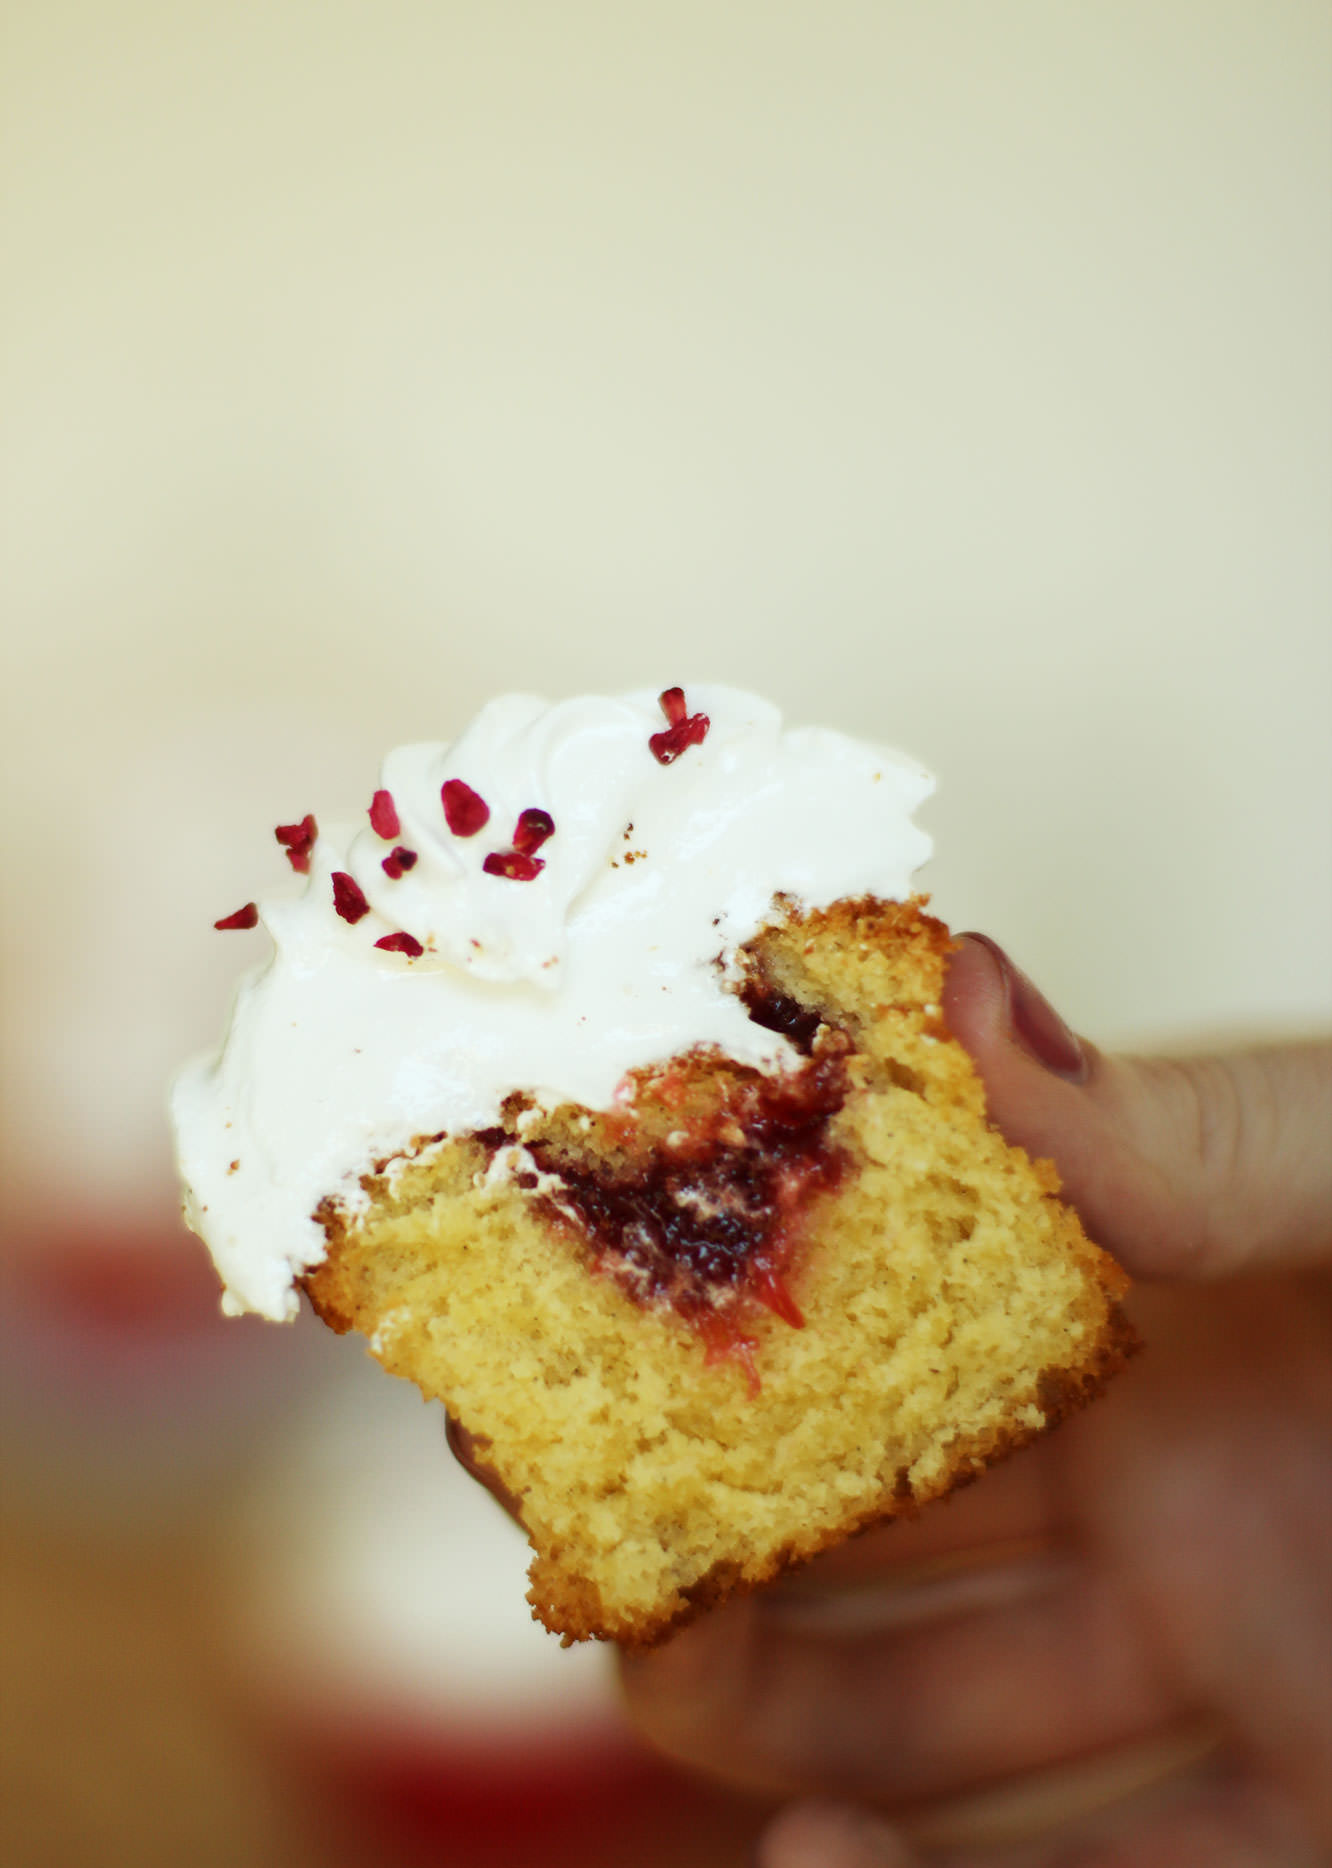
Cut a hole in the middle of your cupcakes with a small sharp knife. Remove the pointy bit, just keeping the top. Place excess cake in mouth.

Fill the hole with jam and place the lid back on.

Fill a piping bag with the swiss meringue frosting and pipe on in your preferred way. I used a fairly standard star shaped nozzle for this.

Sprinkle with freeze dried strawberries, or maybe pop a fresh one on there if you have some going.

eton-mess-cupcake-recipe-4

eton-mess-cupcake-recipe-5

Enjoy!
Jaffa-ncy a cake?

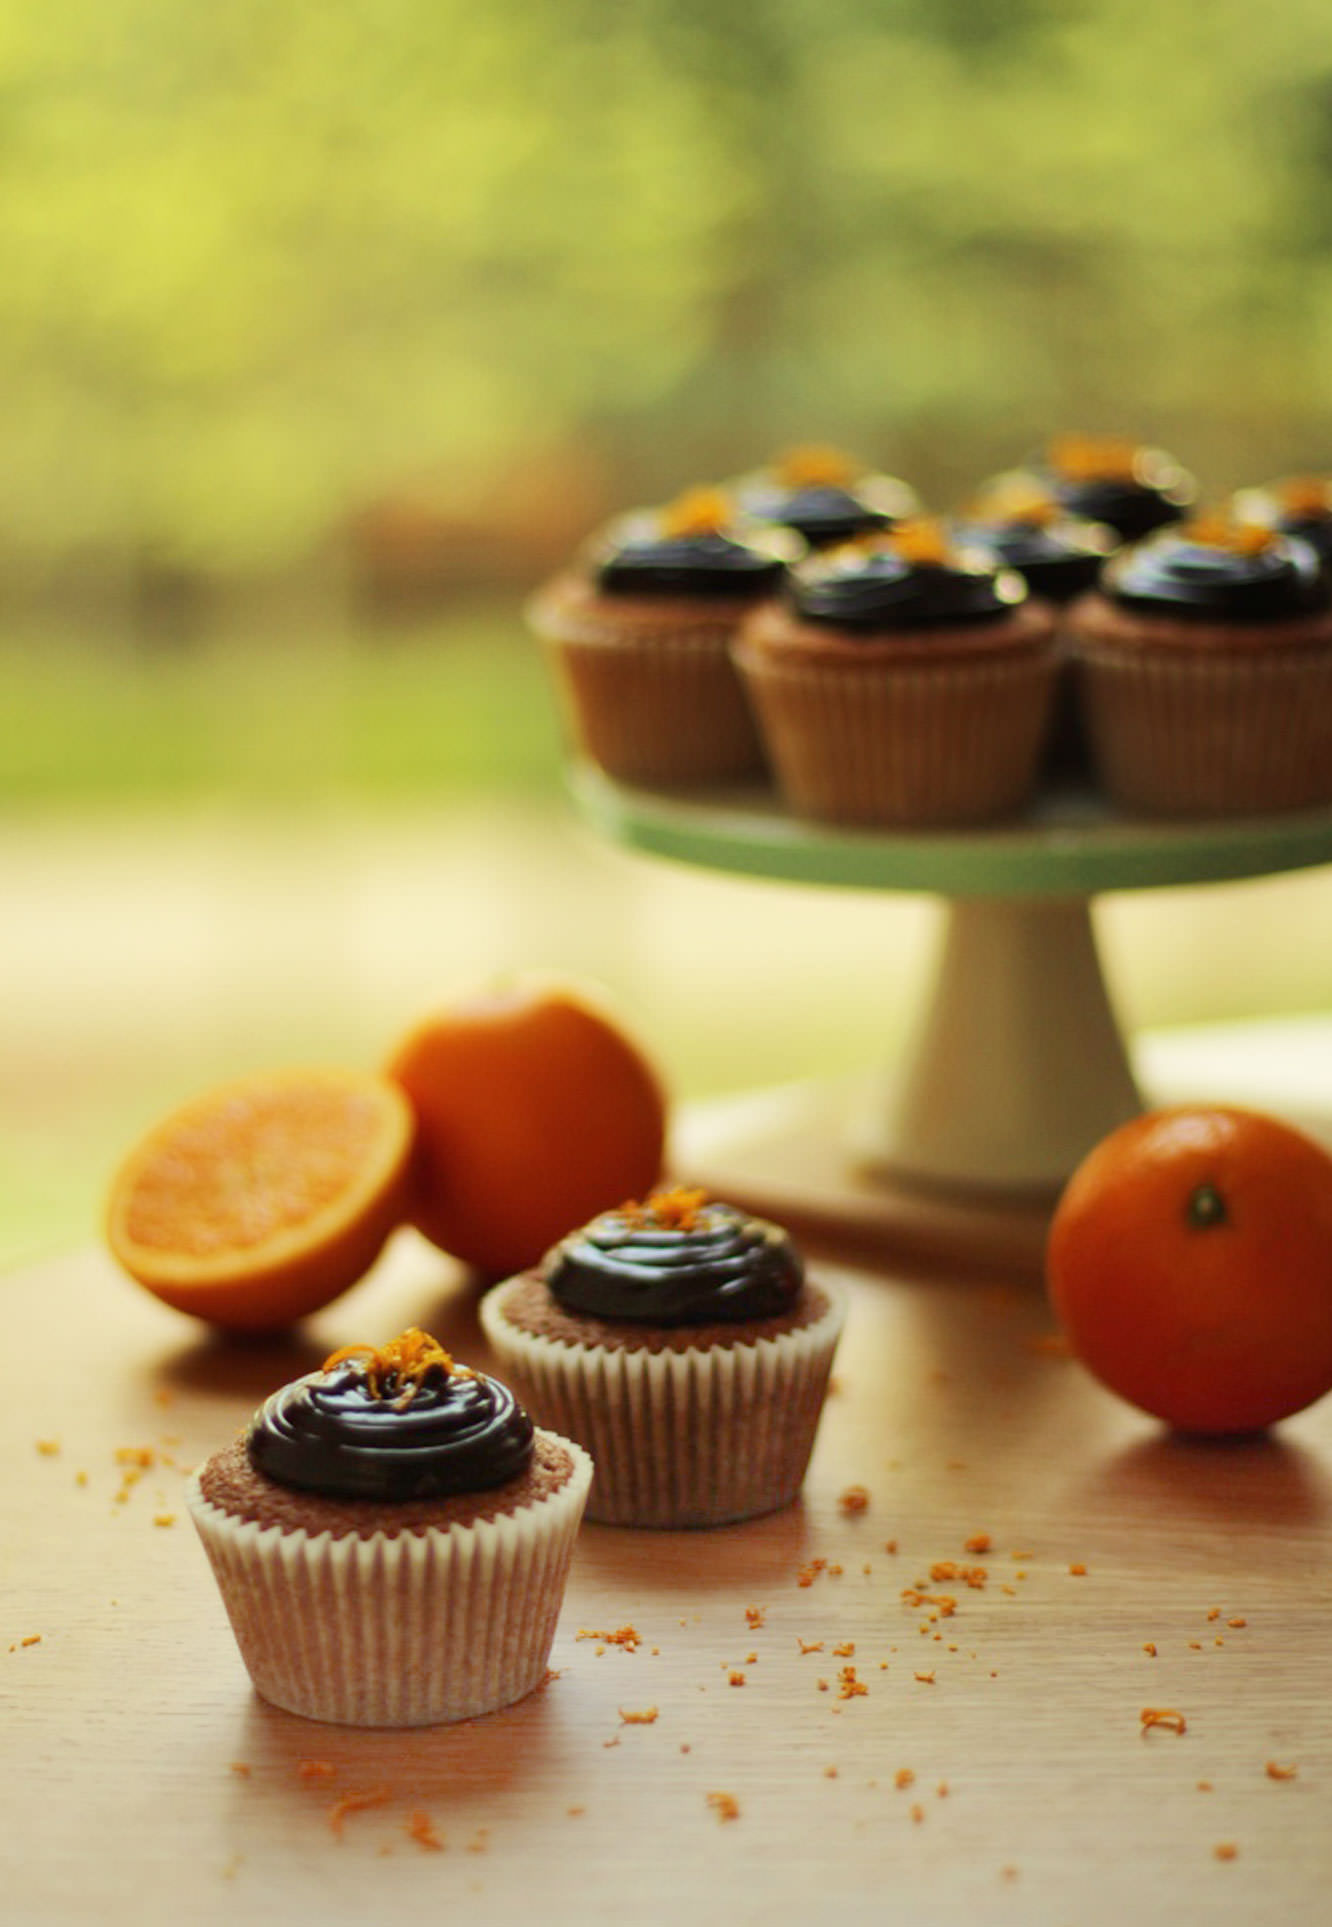
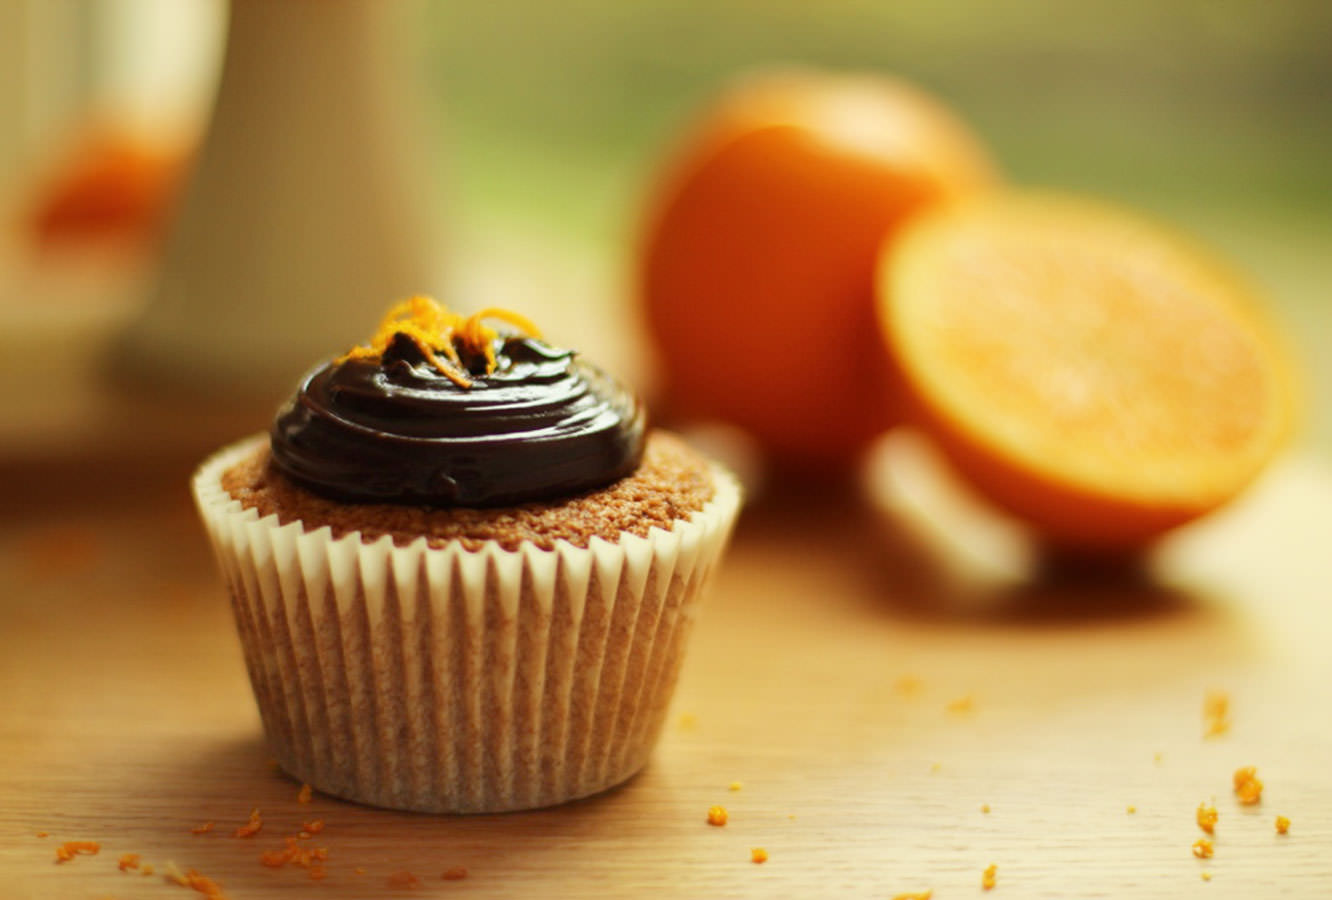
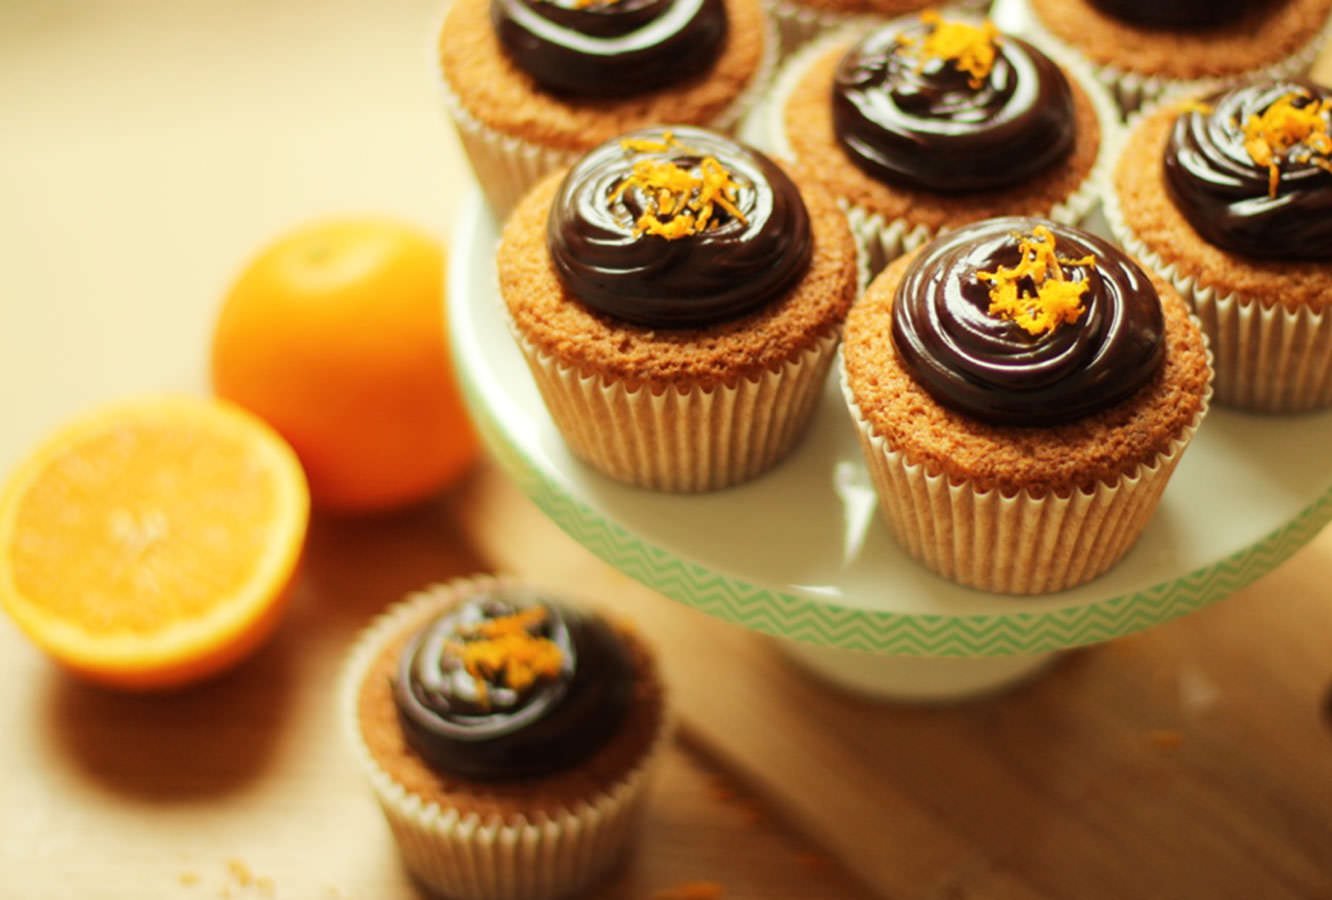
Week two of the British favourites series. One of the most heavily contested treats in GB, it had to go to court in 1991 to establish once and for all if it were a cake or a biscuit to make sure McVitie’s (its creators) were in the right tax category.

This version is 100% a cake and I dare say my favourite of this series, though there are a few still to be baked, so we’ll see.

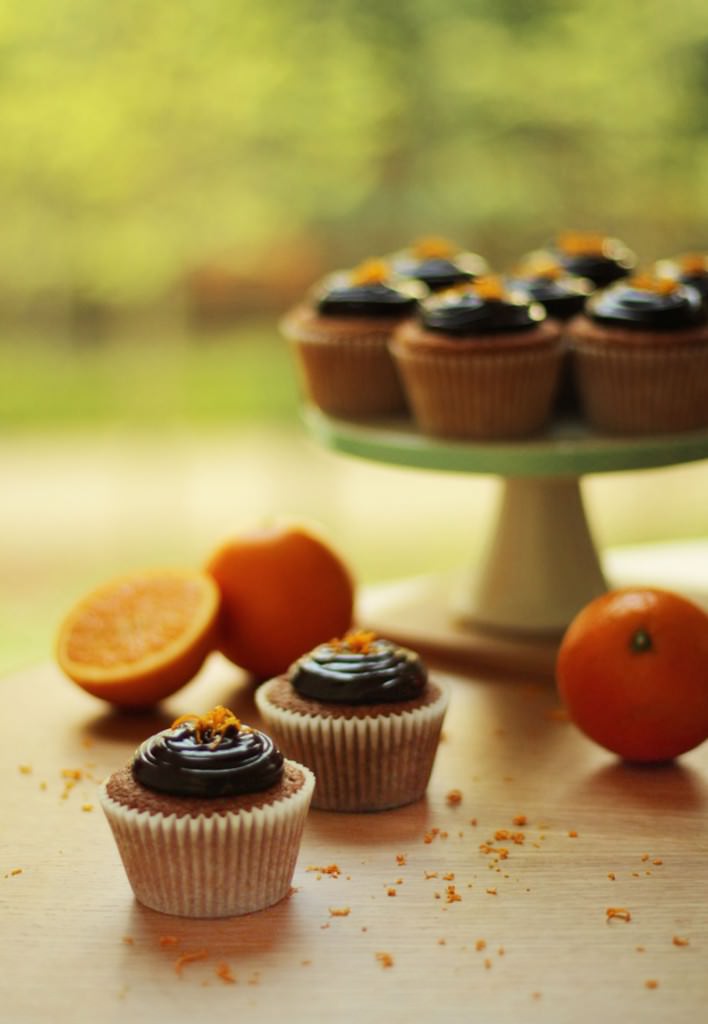
Though this recipe contains an orange curd and a chocolate ganache it’s actually pretty easy to make, and has been met with universal approval by all who have consumed, so please don’t be put off.

jaffa-cake-cupcake-recipe-0

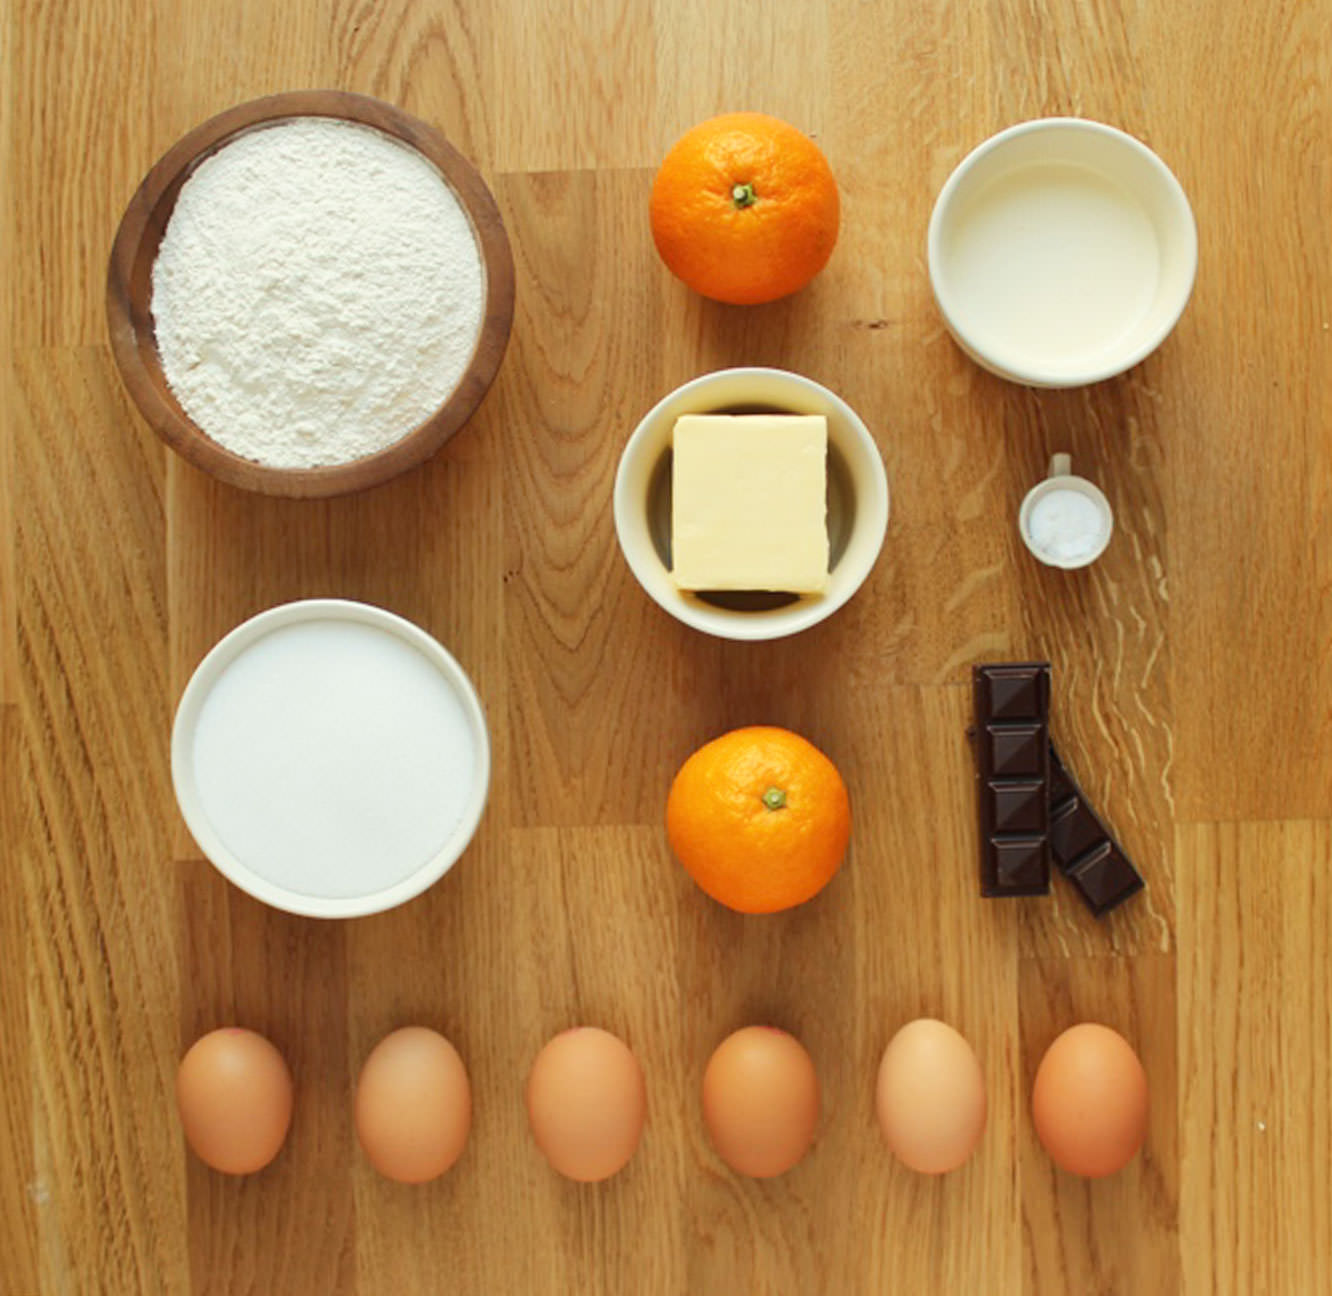
You will need

For the cake:

185g/6.5 oz self raising flour

185g/6.5 oz butter/margarine (I use Stork)

185g/6.5 oz caster sugar

3 eggs

1 tsp bicarbonate of soda

1 tsp vanilla extract/paste

For the orange curd:

2 whole eggs

1 egg yolk

85g/3 oz caster sugar

60g/2 oz butter

90ml/3 fl oz freshly squeezed orange juice (2 oranges should do)

Zest of one orange

For the ganache:

150ml/5 fl oz double cream

200g/7 oz dark chocolate

(makes 12)
jaffa-cake-cupcake-recipe

Step one

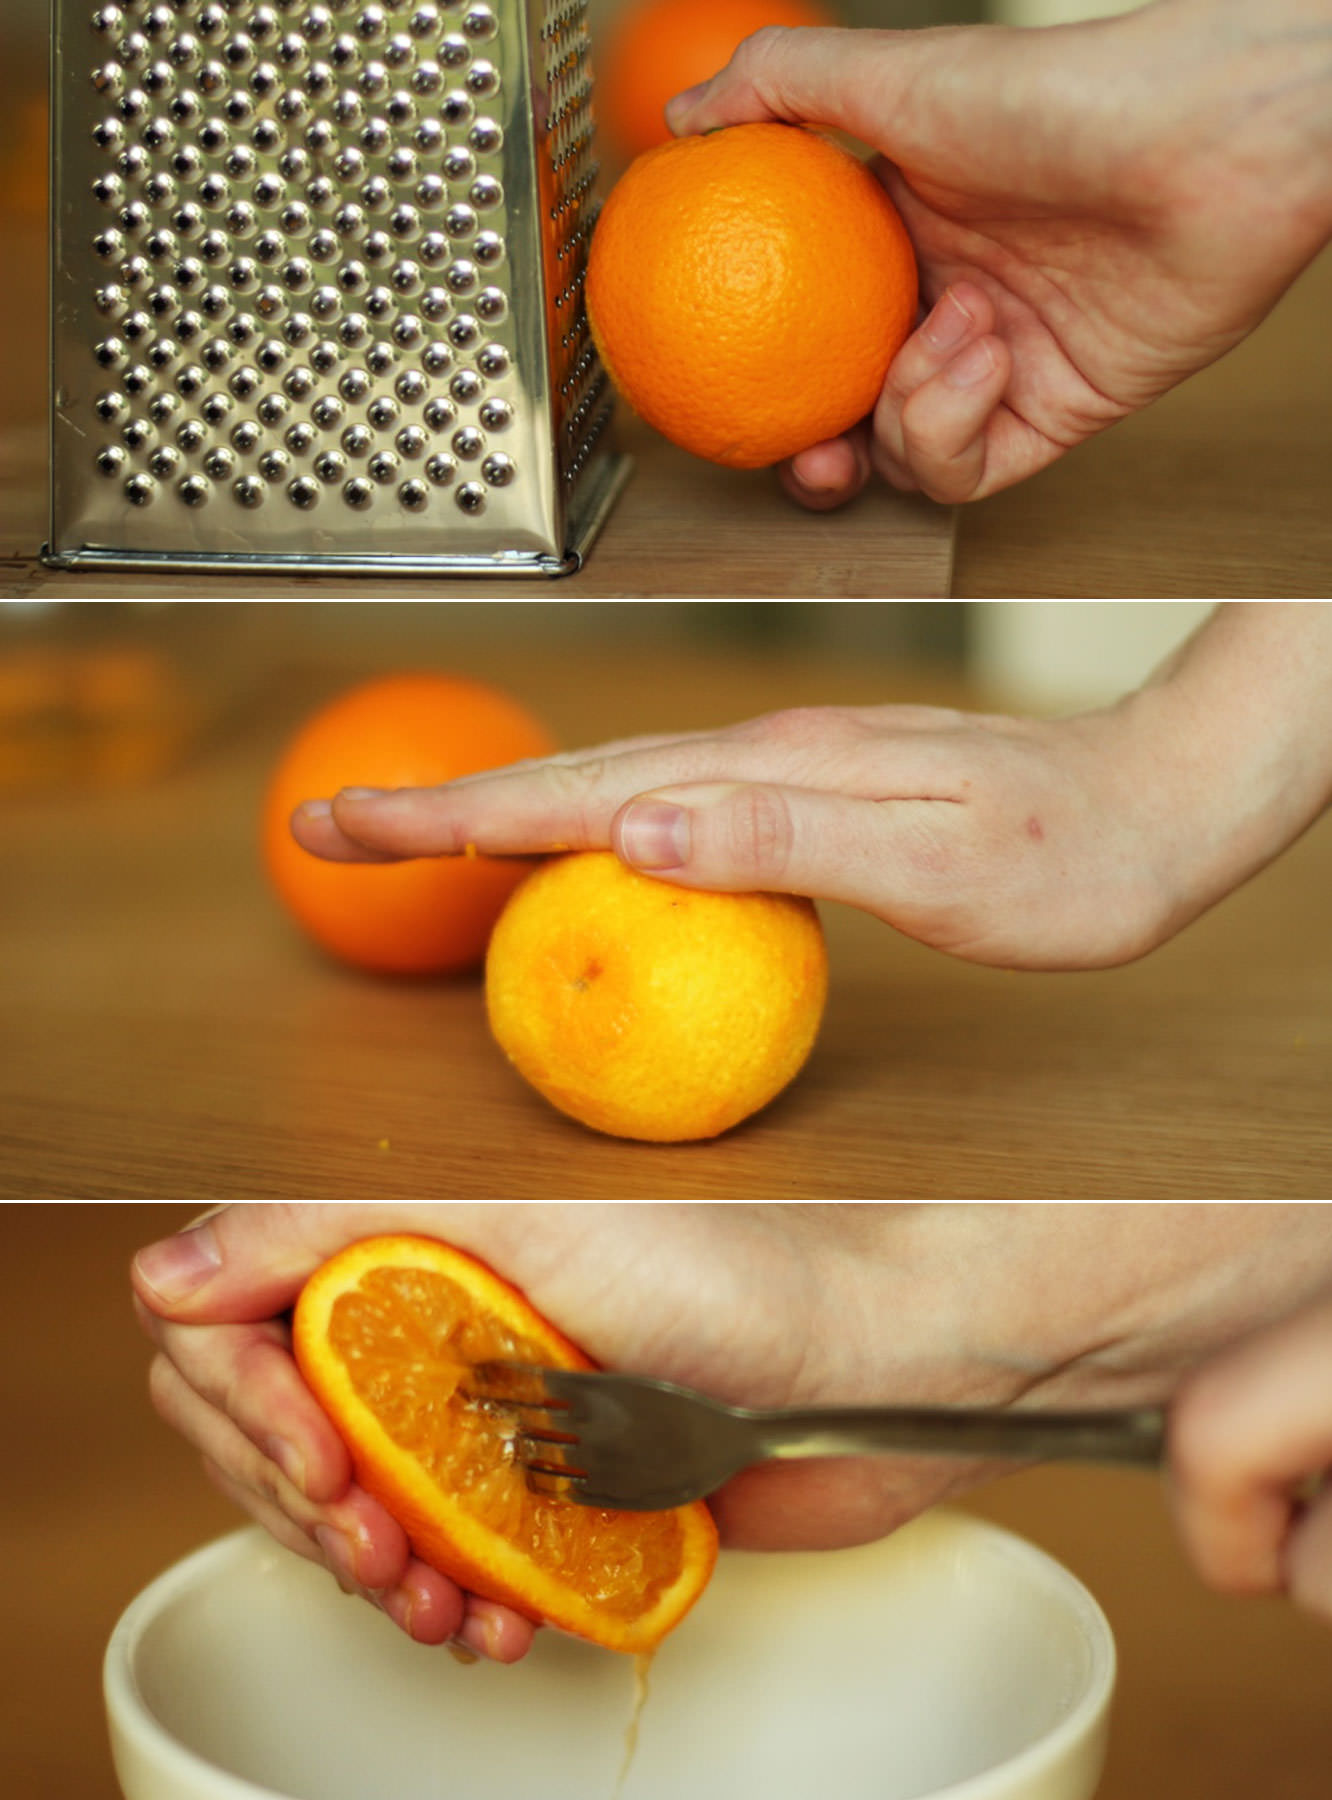
Zest one of the oranges on the smallest setting of your grater. If you don’t have a small setting don’t worry, we’re going to sieve it later. If you don’t have a small setting or a sieve then you’re stuffed, and a little odd.

Step two

Roll the oranges around to release the juices a little more. I also give them 10-20 seconds in the microwave.

Juice them using a juicer or a fork until you have the required 90ml.

jaffa-cake-cupcake-recipe-2

Step three

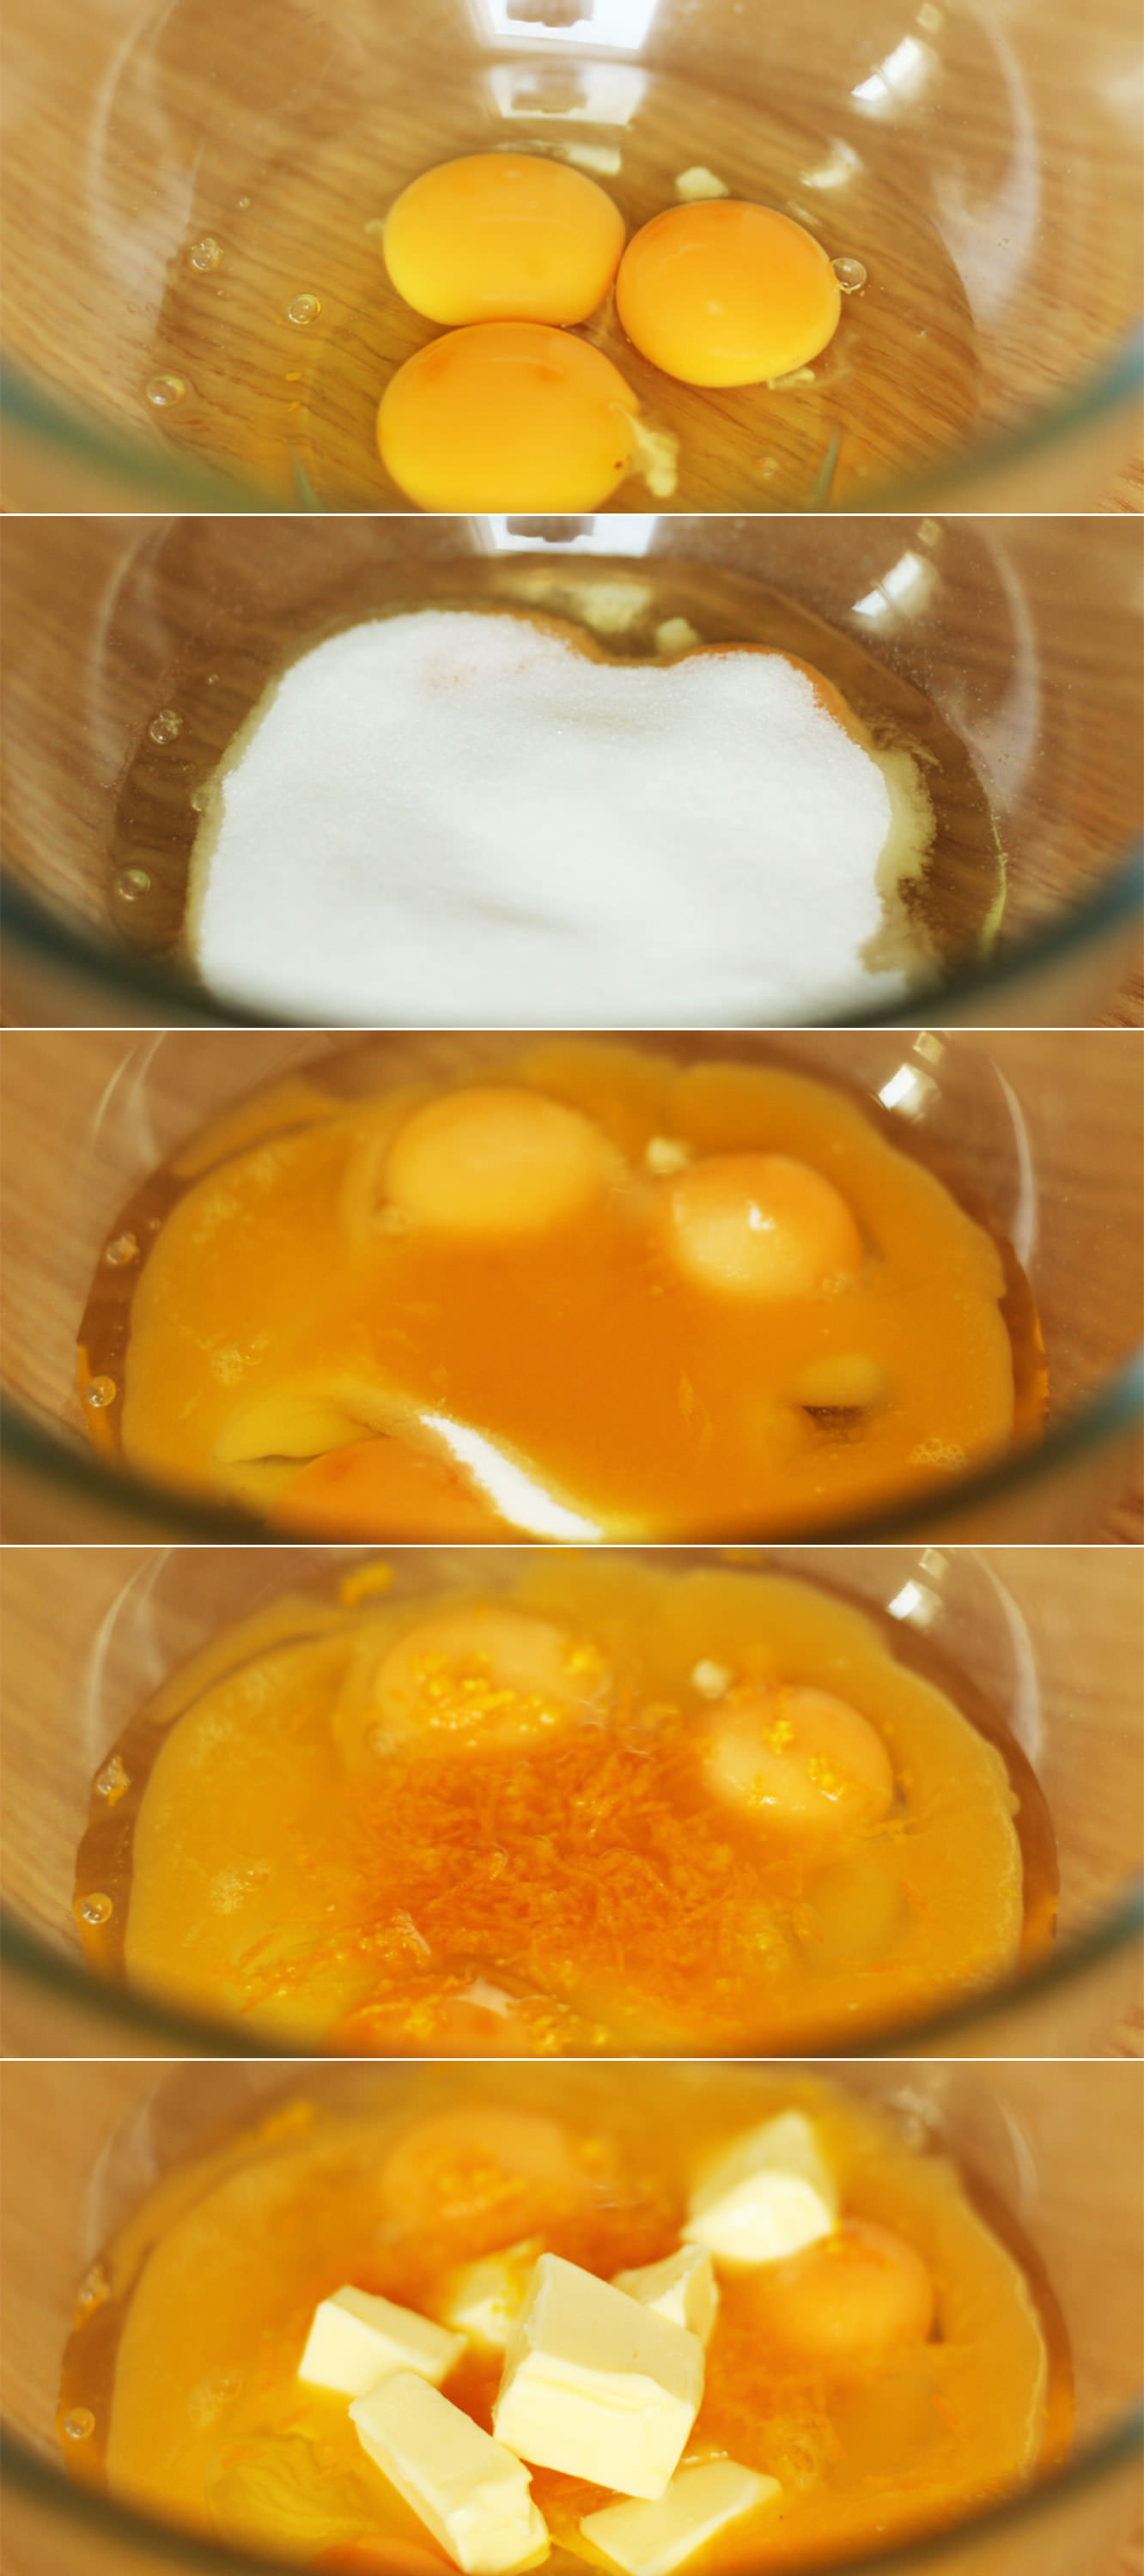
Combine the eggs and yolk, sugar, butter and the orange related ingredients into a heatproof bowl.

Set aside a little bit of zest aside to decorate with later.

jaffa-cake-cupcake-recipe-6

Step four

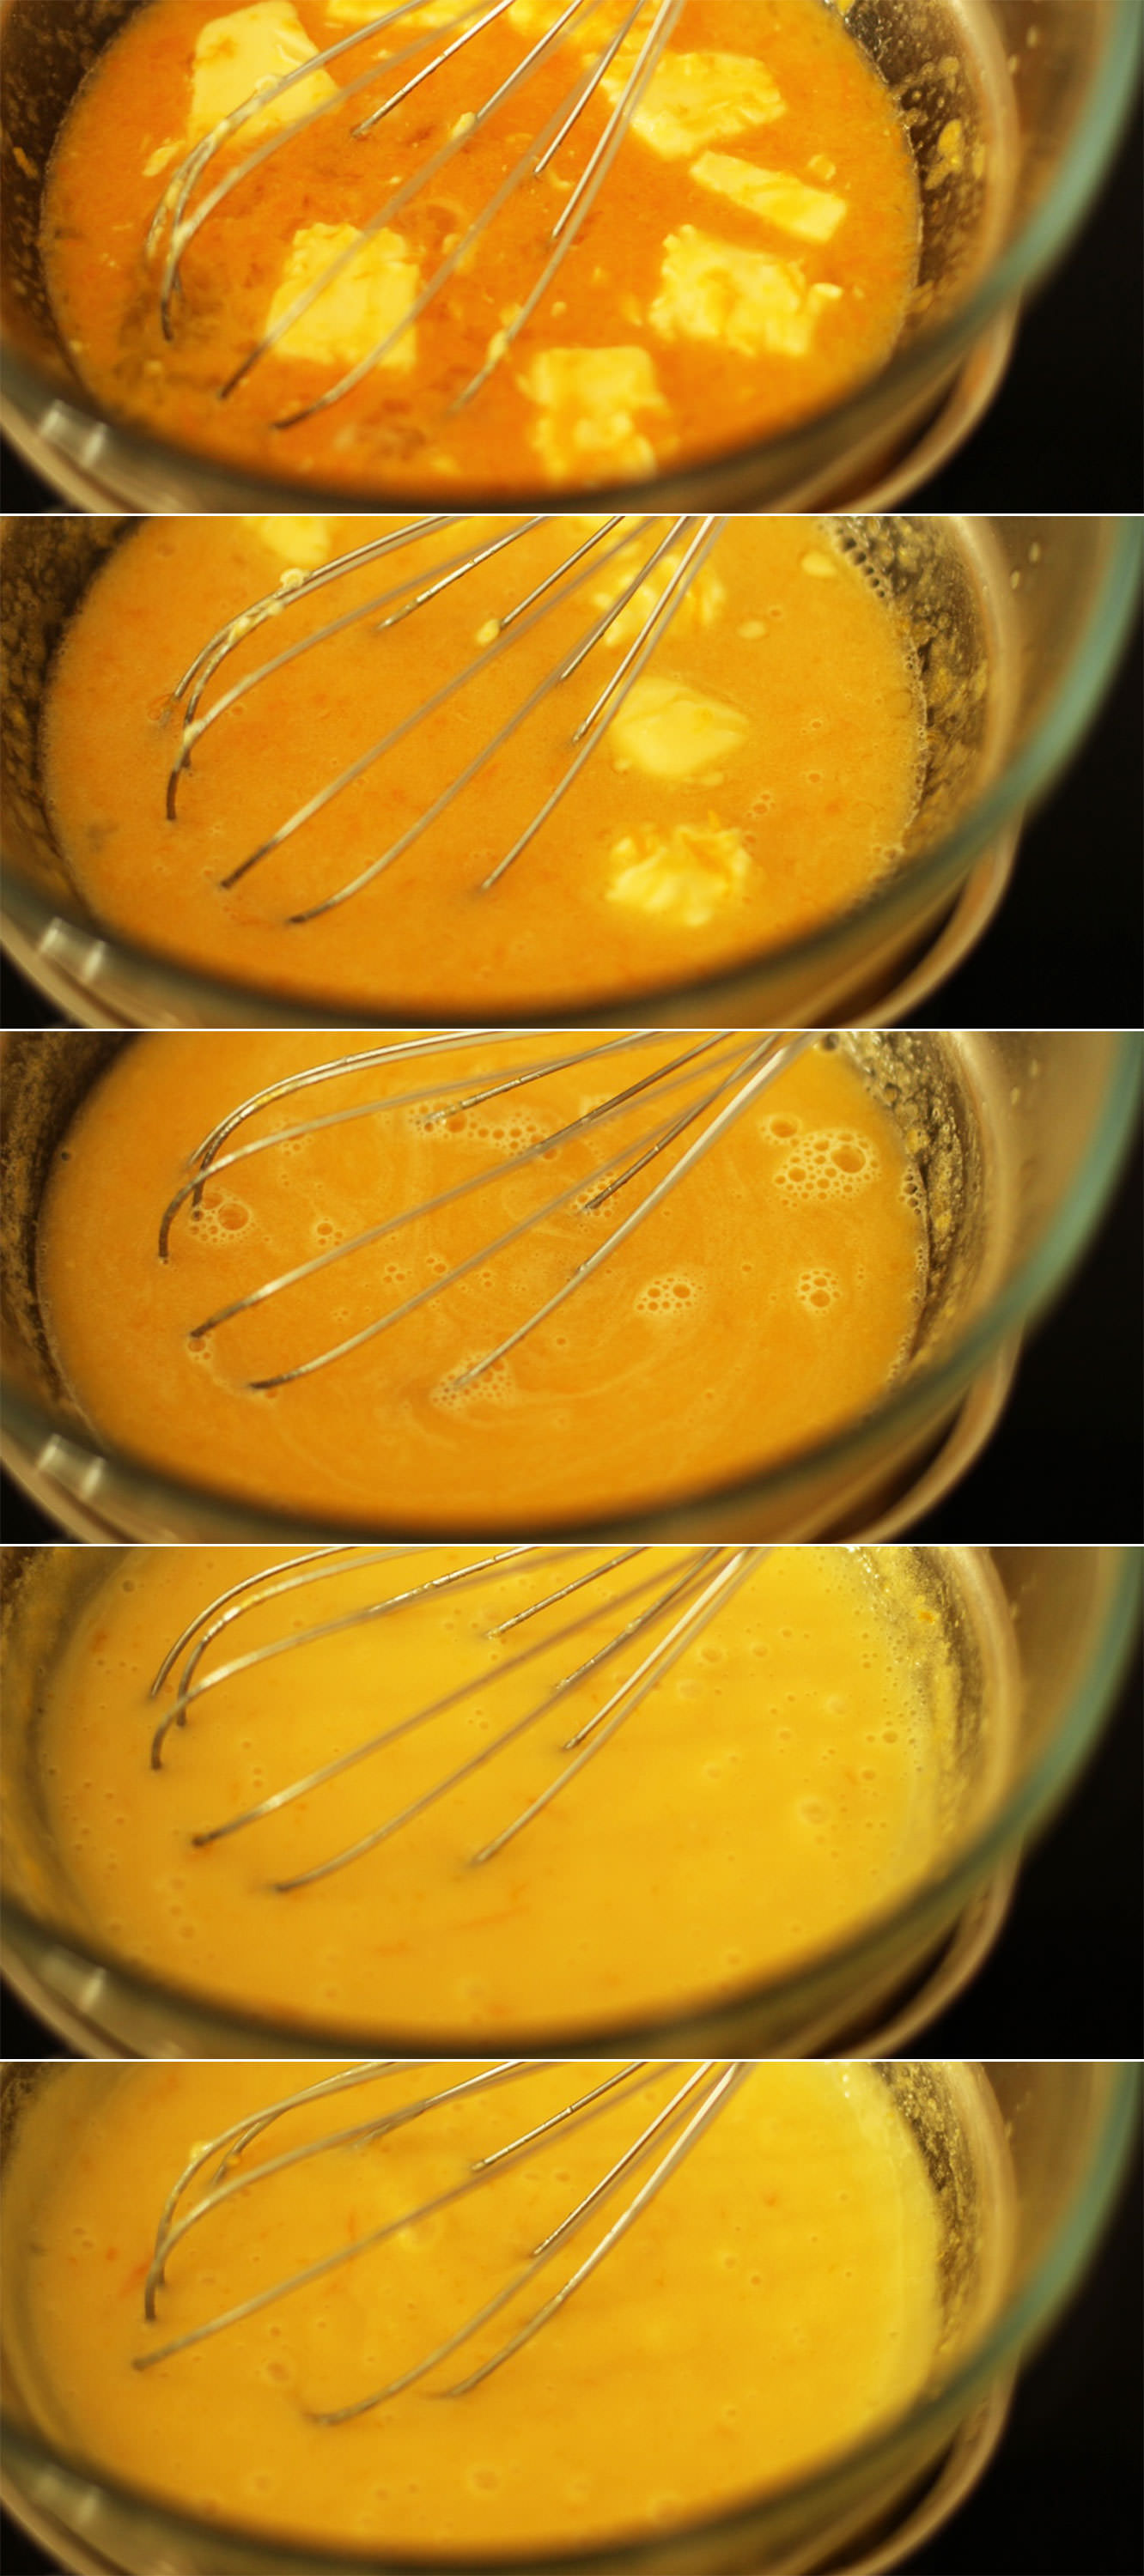
Place the bowl on top of a pan of simmering water. Stir regularly with a whisk until the mixture thickens. It should coat the back of a metal spoon without sliding off and will be fairly opaque and lighter in colour too.

jaffa-cake-cupcake-recipe-7

Step five

Sieve the mixture to remove the zest. Stir with a dessert spoon to get as much of the mixture through the sieve as possible.

jaffa-cake-cupcake-recipe-3

Step six

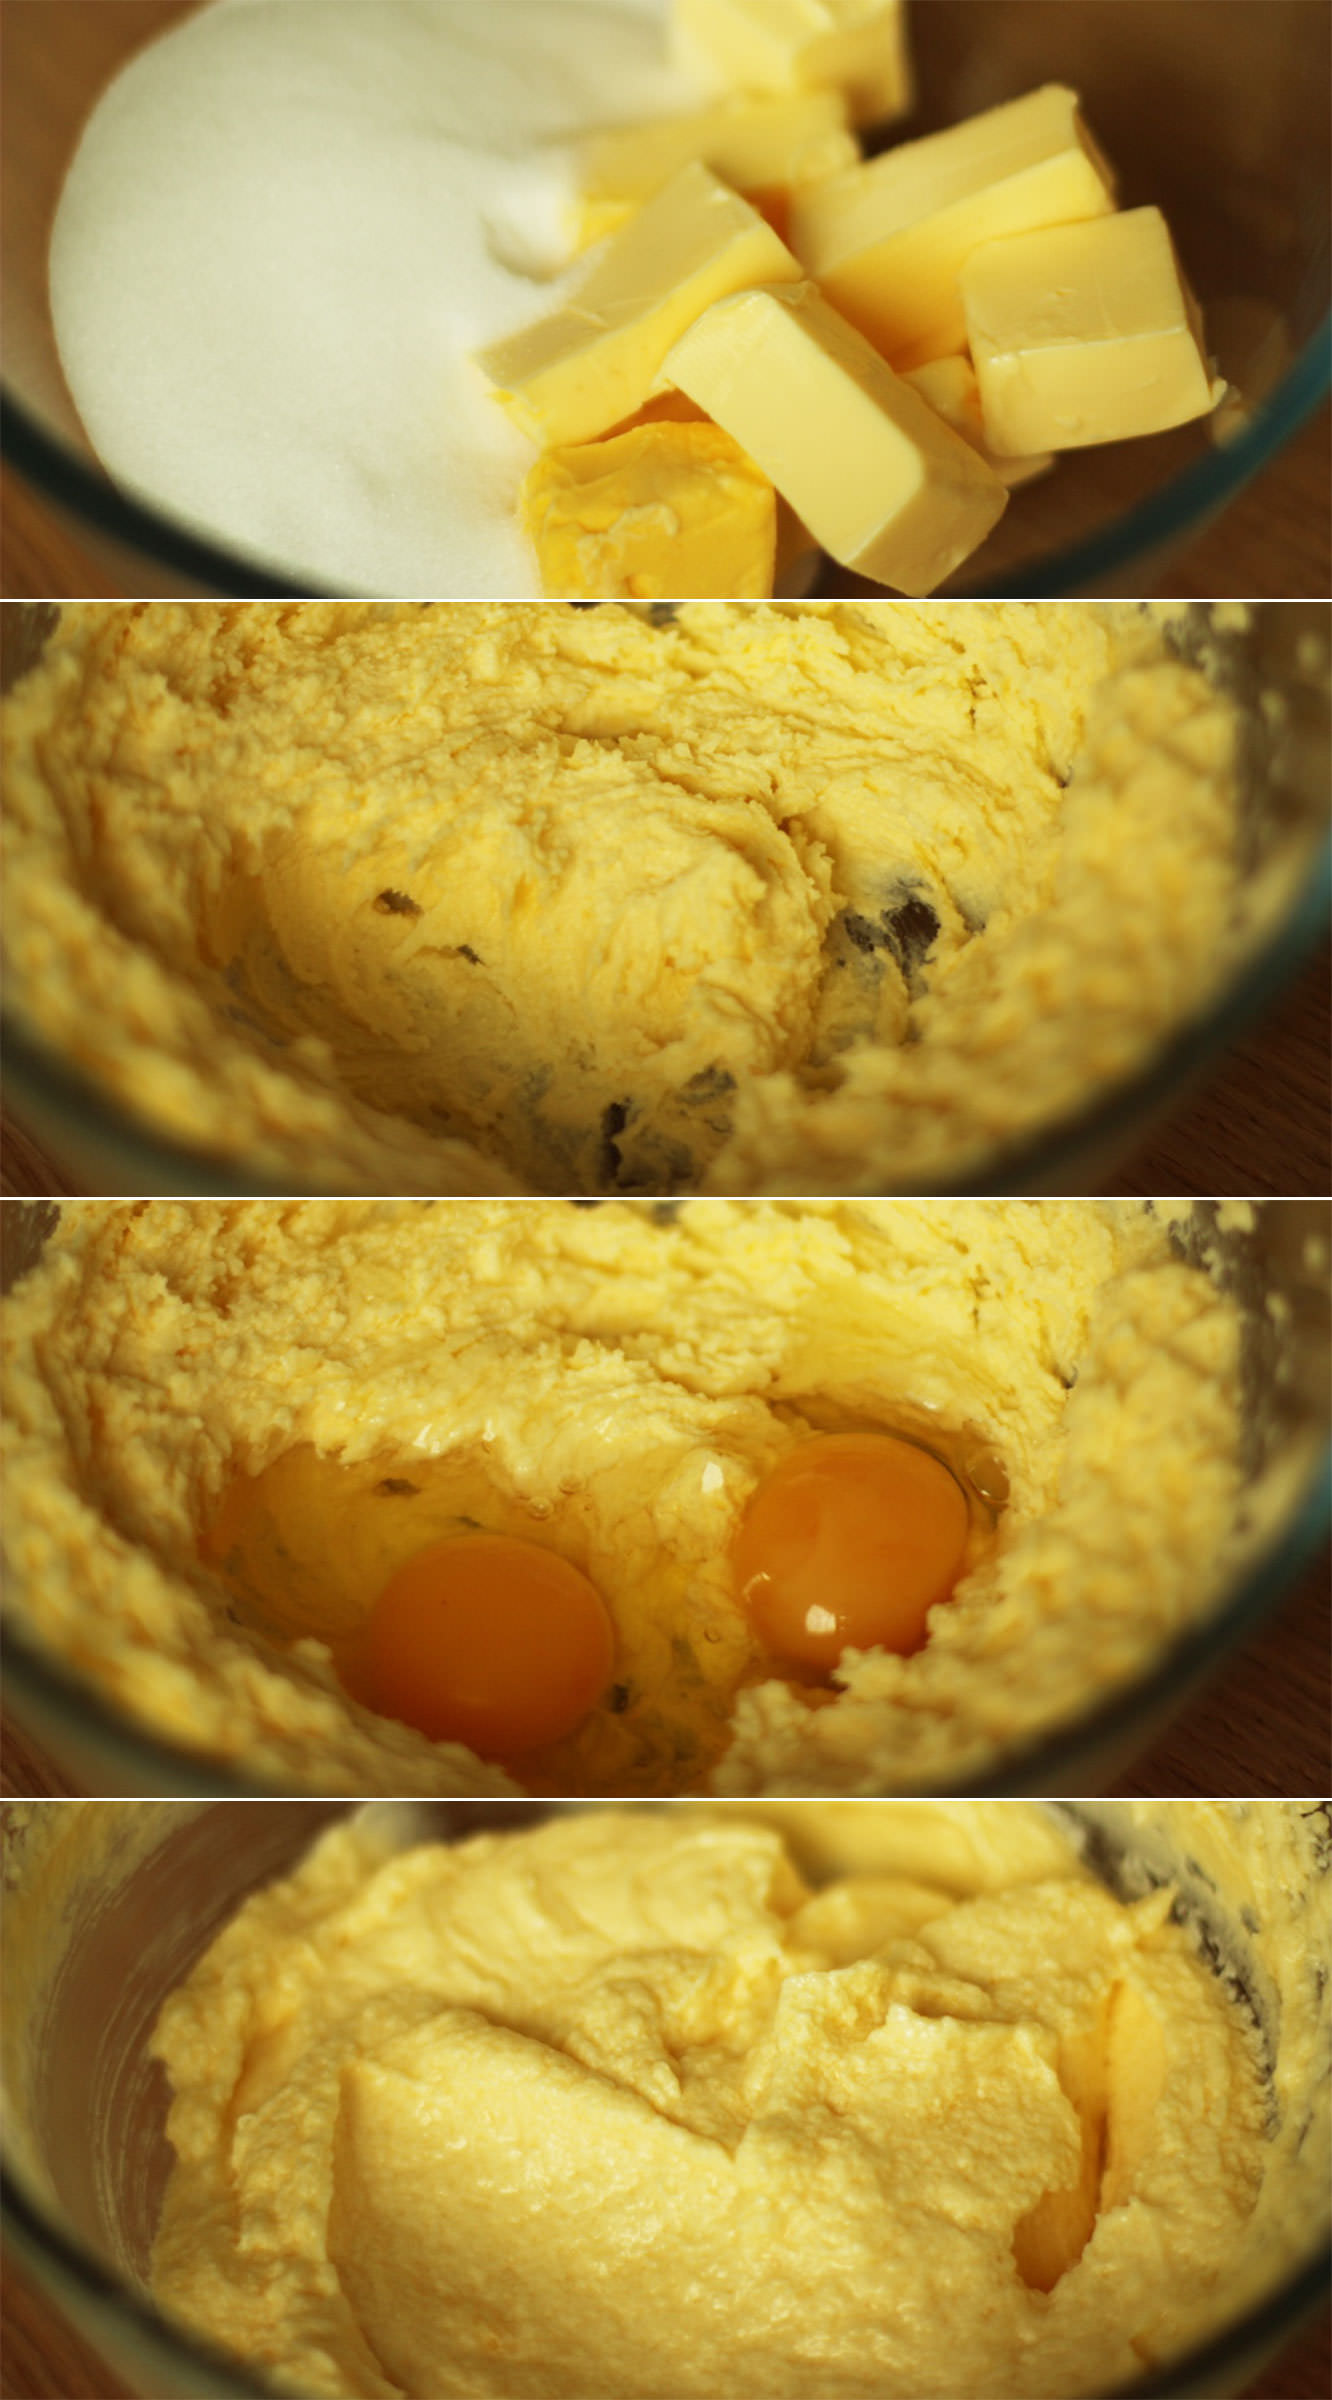
It’s time to make the cakes! This is a basic sponge recipe as the base of a jaffa cake is not flavoured per se. If you want an extra boost of flavour you could zest the second orange and add it to the cake batter. I’ve not actually tried this (though I expect it would be nice) and they are good without so not to worry if you don’t fancy it.

Combine the butter/margarine and the caster sugar. Using an electric whisk beat until smooth and fluffy. Add the eggs and whisk again.

jaffa-cake-cupcake-recipe-5

Step seven

Beat in the flour, bicarbonate of soda and vanilla until fully combined.

jaffa-cake-cupcake-recipe-8

Step eight

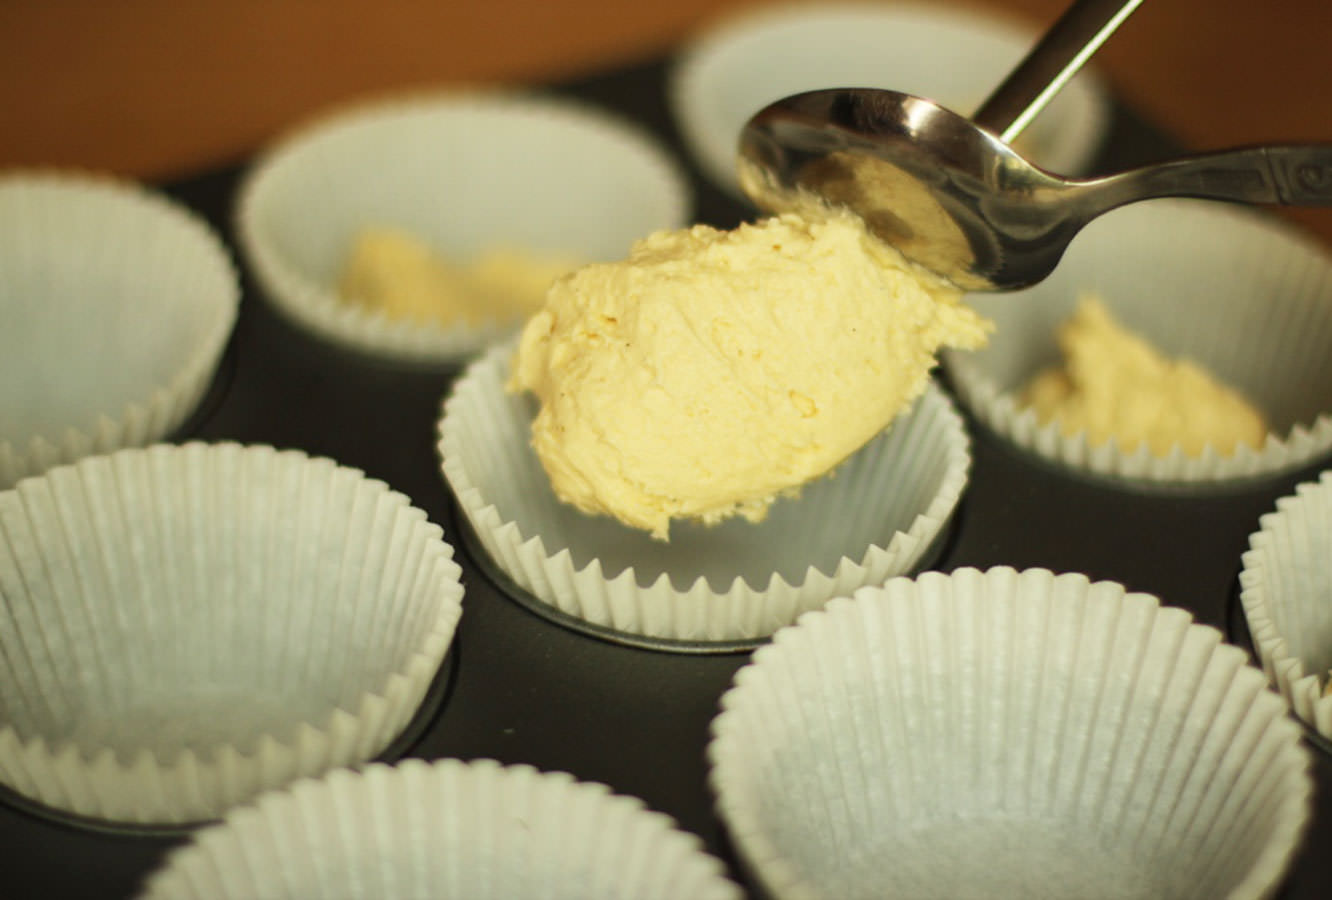
Spoon the mixture evenly into 12 cupcake cases. It’s about two dessert spoons per case, but just keep topping up until you run out.

Bake on gas mark 4/180C/350F for 20-25 minutes. Take care not to open the oven halfway through or your cakes will sink.

jaffa-cake-cupcake-recipe-4

Step nine

While the cakes are cooling make the ganache.

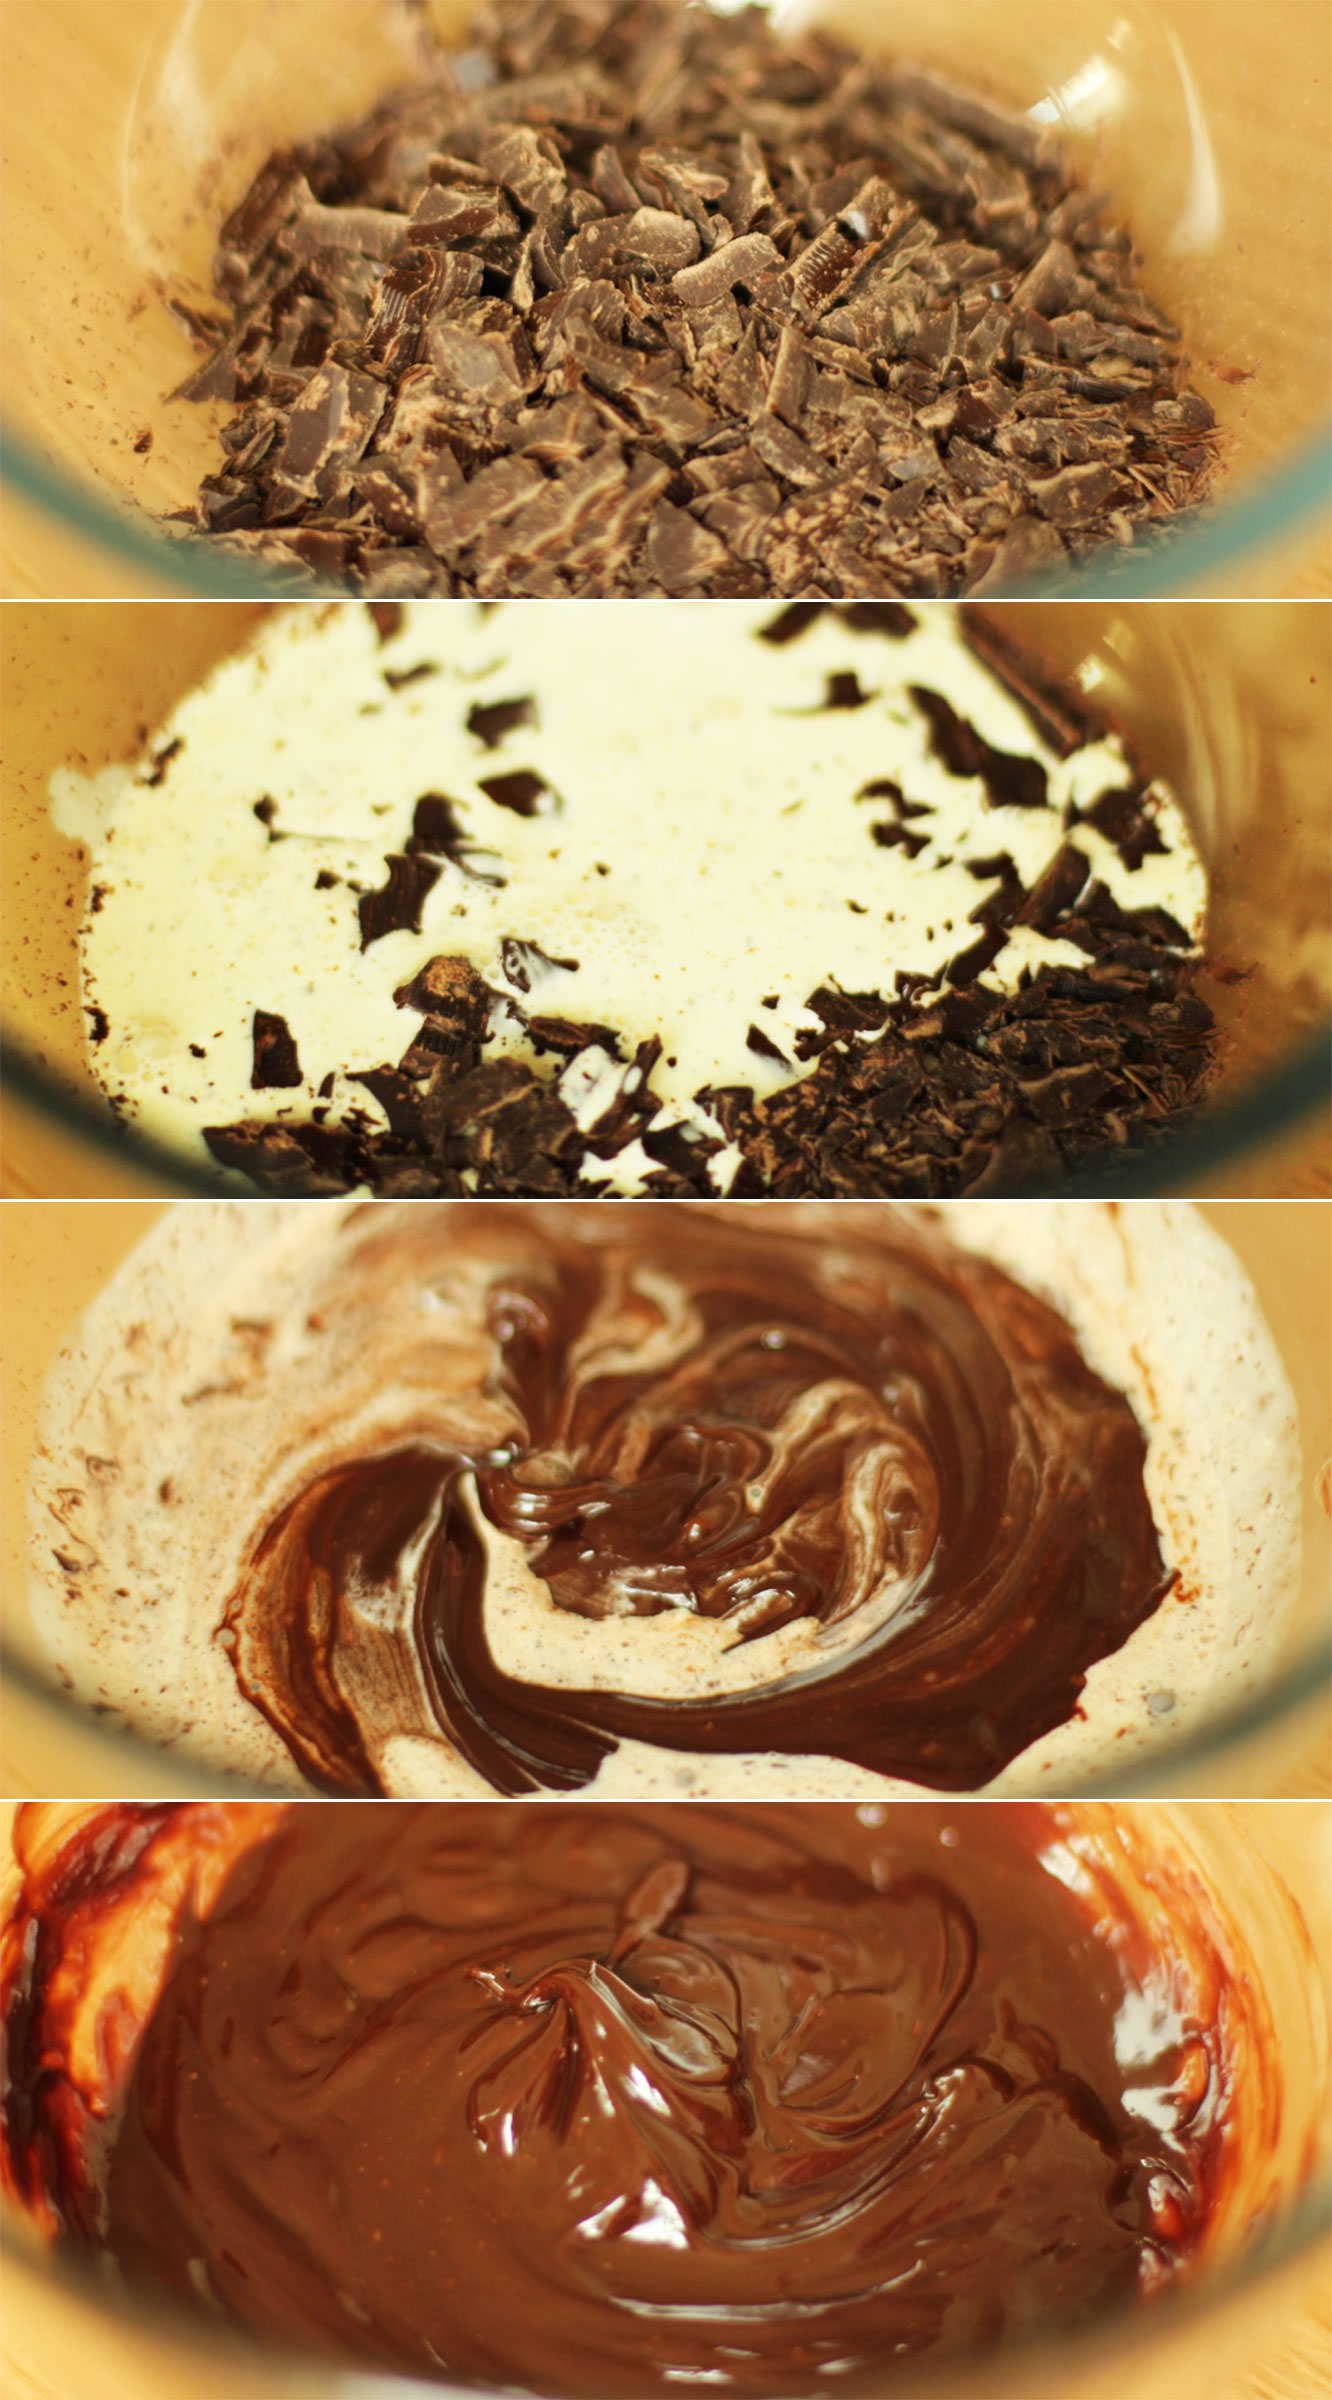
Finely chop the chocolate (or grate it if you’re super keen) and place in a clean bowl. Heat the cream in a saucepan. Do this slowly on a low heat, it burns quite easily.

The cream only needs to barely simmer before being poured over the chocolate and stirred until smooth.

The ganache won’t take long until it’s ready to pipe so only prepare it when the cakes and orange curd are nearly cooled.

You will know it’s ready when you drop a spoonful back into the bowl and it holds it’s shape.

jaffa-cake-cupcake-recipe-gif

Step ten

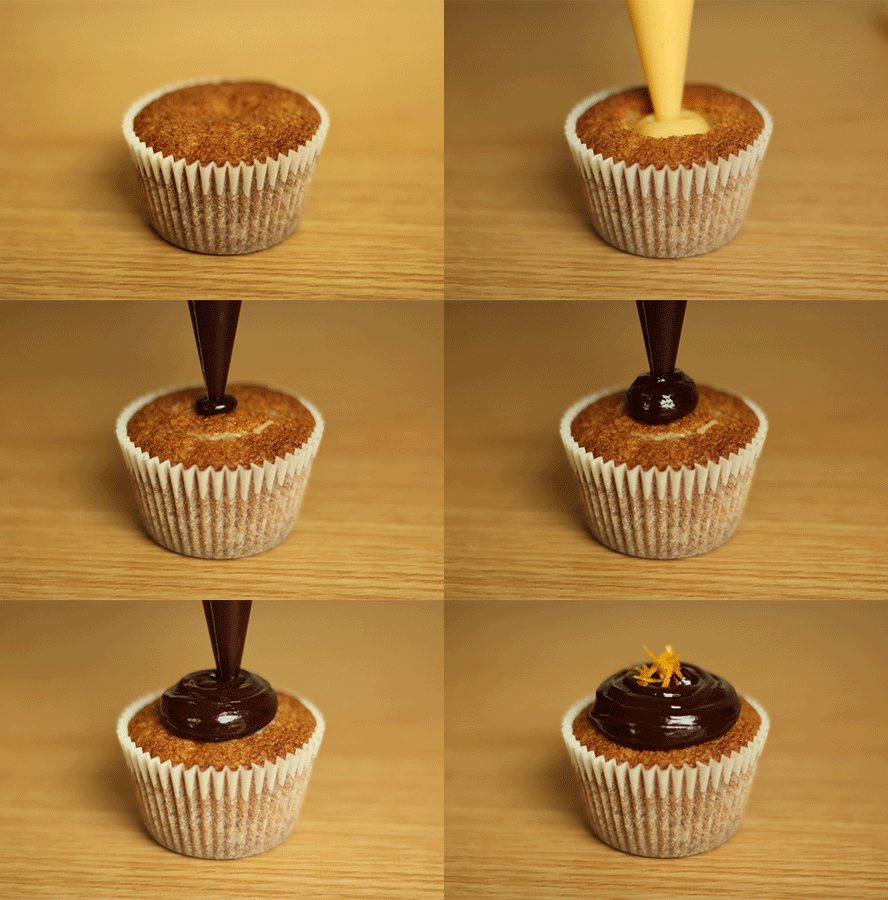
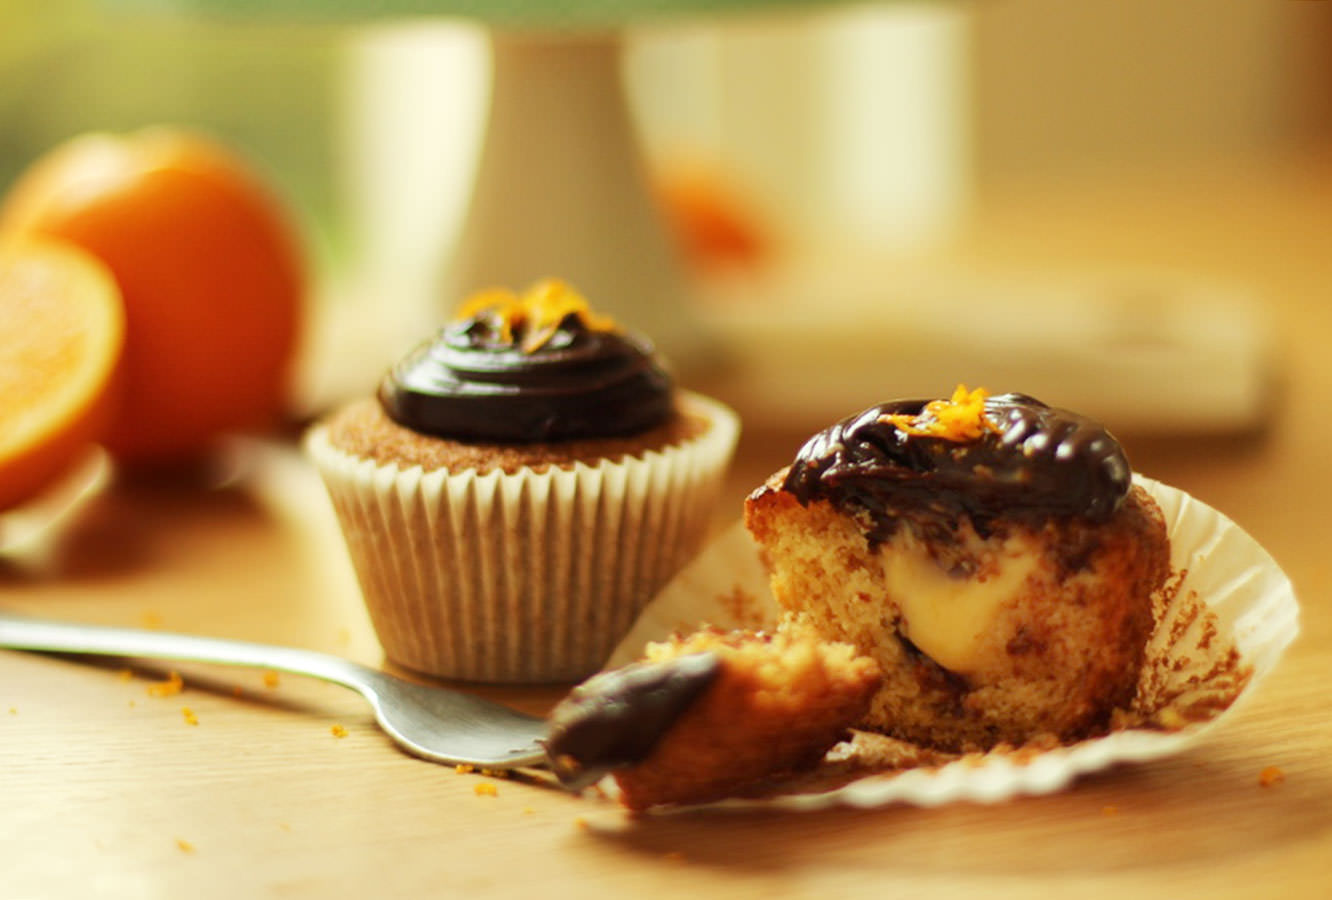
Cut a section of sponge out the middle with a small veg knife, and chop off the pointy bit, saving the lid.

Fill with curd and place the sponge lid back on.

Point a piping bag full of ganache straight down and squeeze. You may need to use the tip of the back to spread it out a little as you go.

jaffa-cake-cupcake-recipe-12


jaffa-cake-cupcake-recipe-10

jaffa-cake-cupcake-recipe-11

jaffa-cake-cupcake-recipe-9

Enjoy!!