So. Guys. 2015 happened. Happy New Year to you all!
Probably the last thing all you resolution makers need is this blog post. Just know that deep down I support your diet, but if you ever want to fall off the wagon in a carb-tacular way, I’m here for you, holding mini filled potato skins.
These bitesize chaps were more of the nibbles I made for Matt and Vicky’s party and they disappeared pretty quickly, despite being a bit of a random addition to the table. I know Vicky’s brother has been waiting on tenterhooks for this blog post. Edward, apologies for the delay.
You will need
15 New potatoes
3 Rashers of smoked bacon (or a couple of spring onions if you’re a veggie)
300ml Sour cream
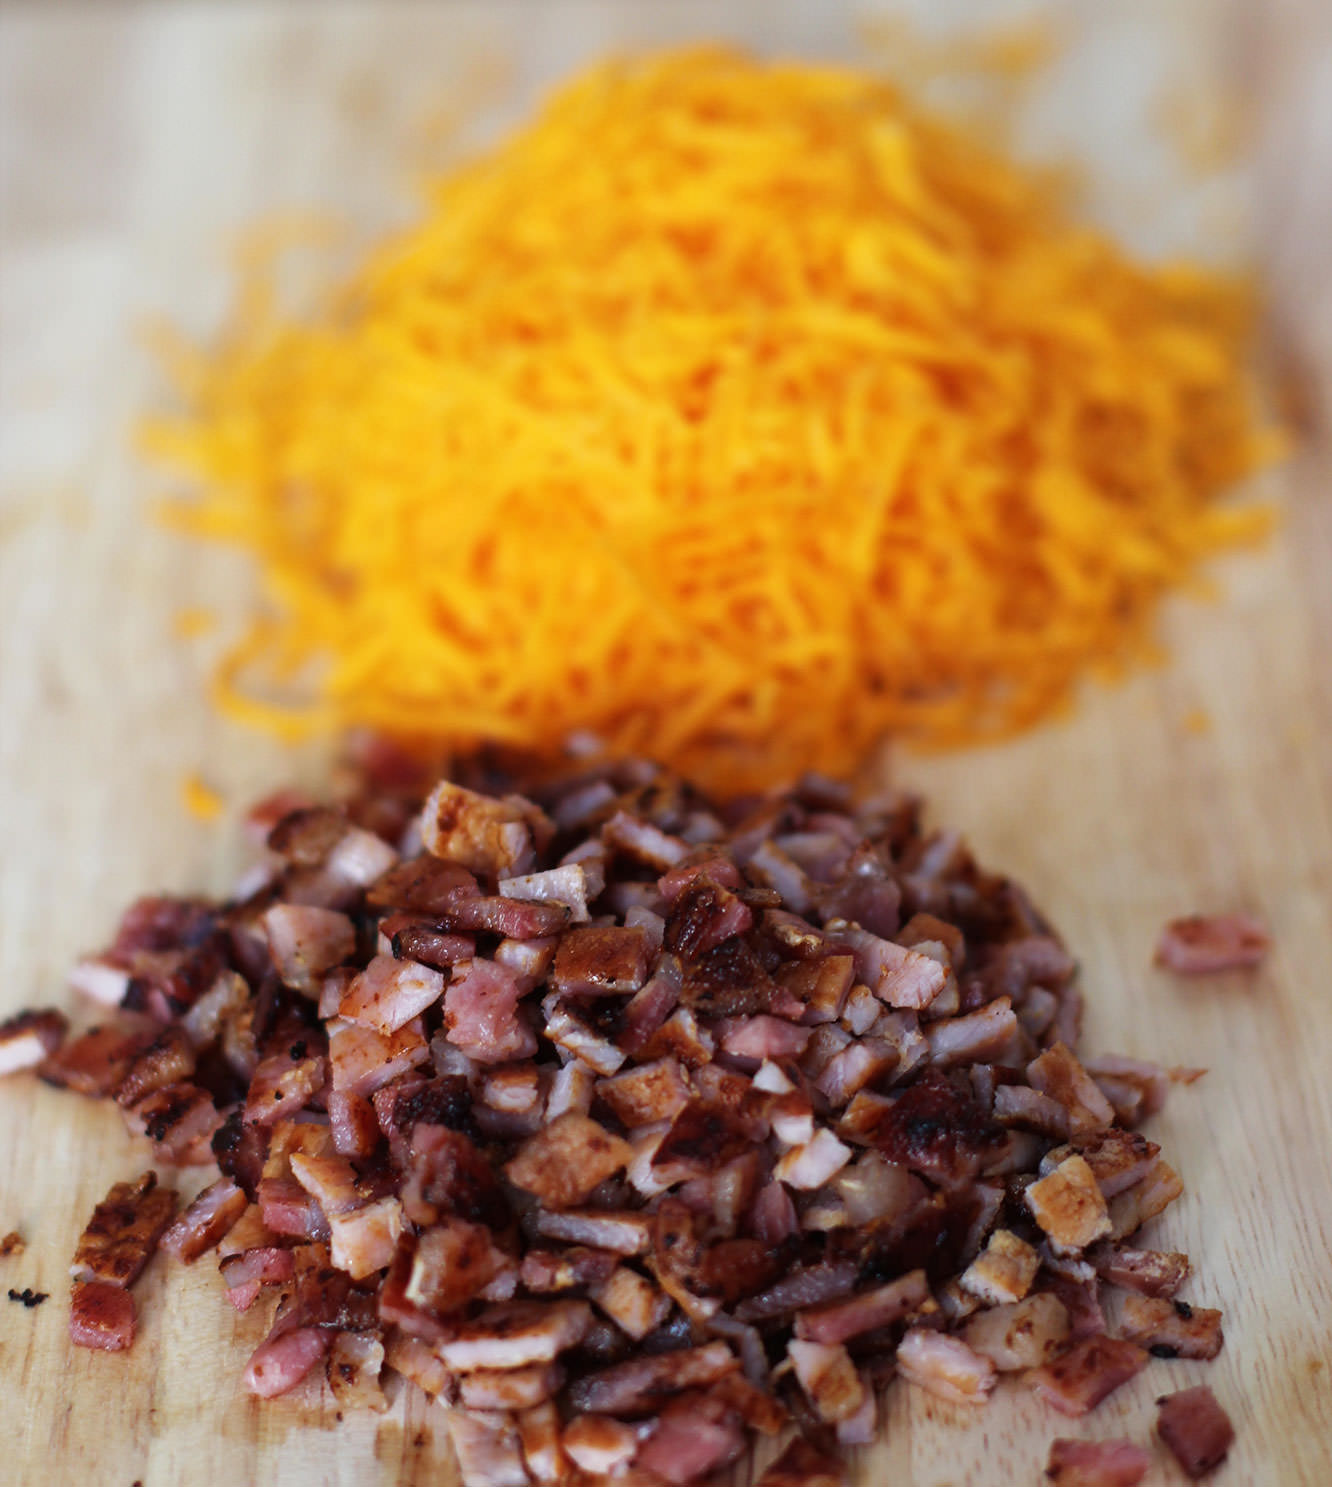
100g/5 oz Red Leicester/Double Gloucester/Cheddar cheese
Salt and pepper
Step one
Using the finest setting on your grater grate the cheese so you’re ready to go. The last thing you need is hold ups preventing you from eating these sooner.
Cook the bacon until crispy and trim into tiny tiny pieces. Scissors are key.
Step two
Put the new potatoes in a roasting tin with a blob of butter and cook on gas mark 6/200C/400F for 45 minutes. Keep an eye on them, but honestly, I’d like to meet a man who has managed to overcook a jacket potato.
Step three
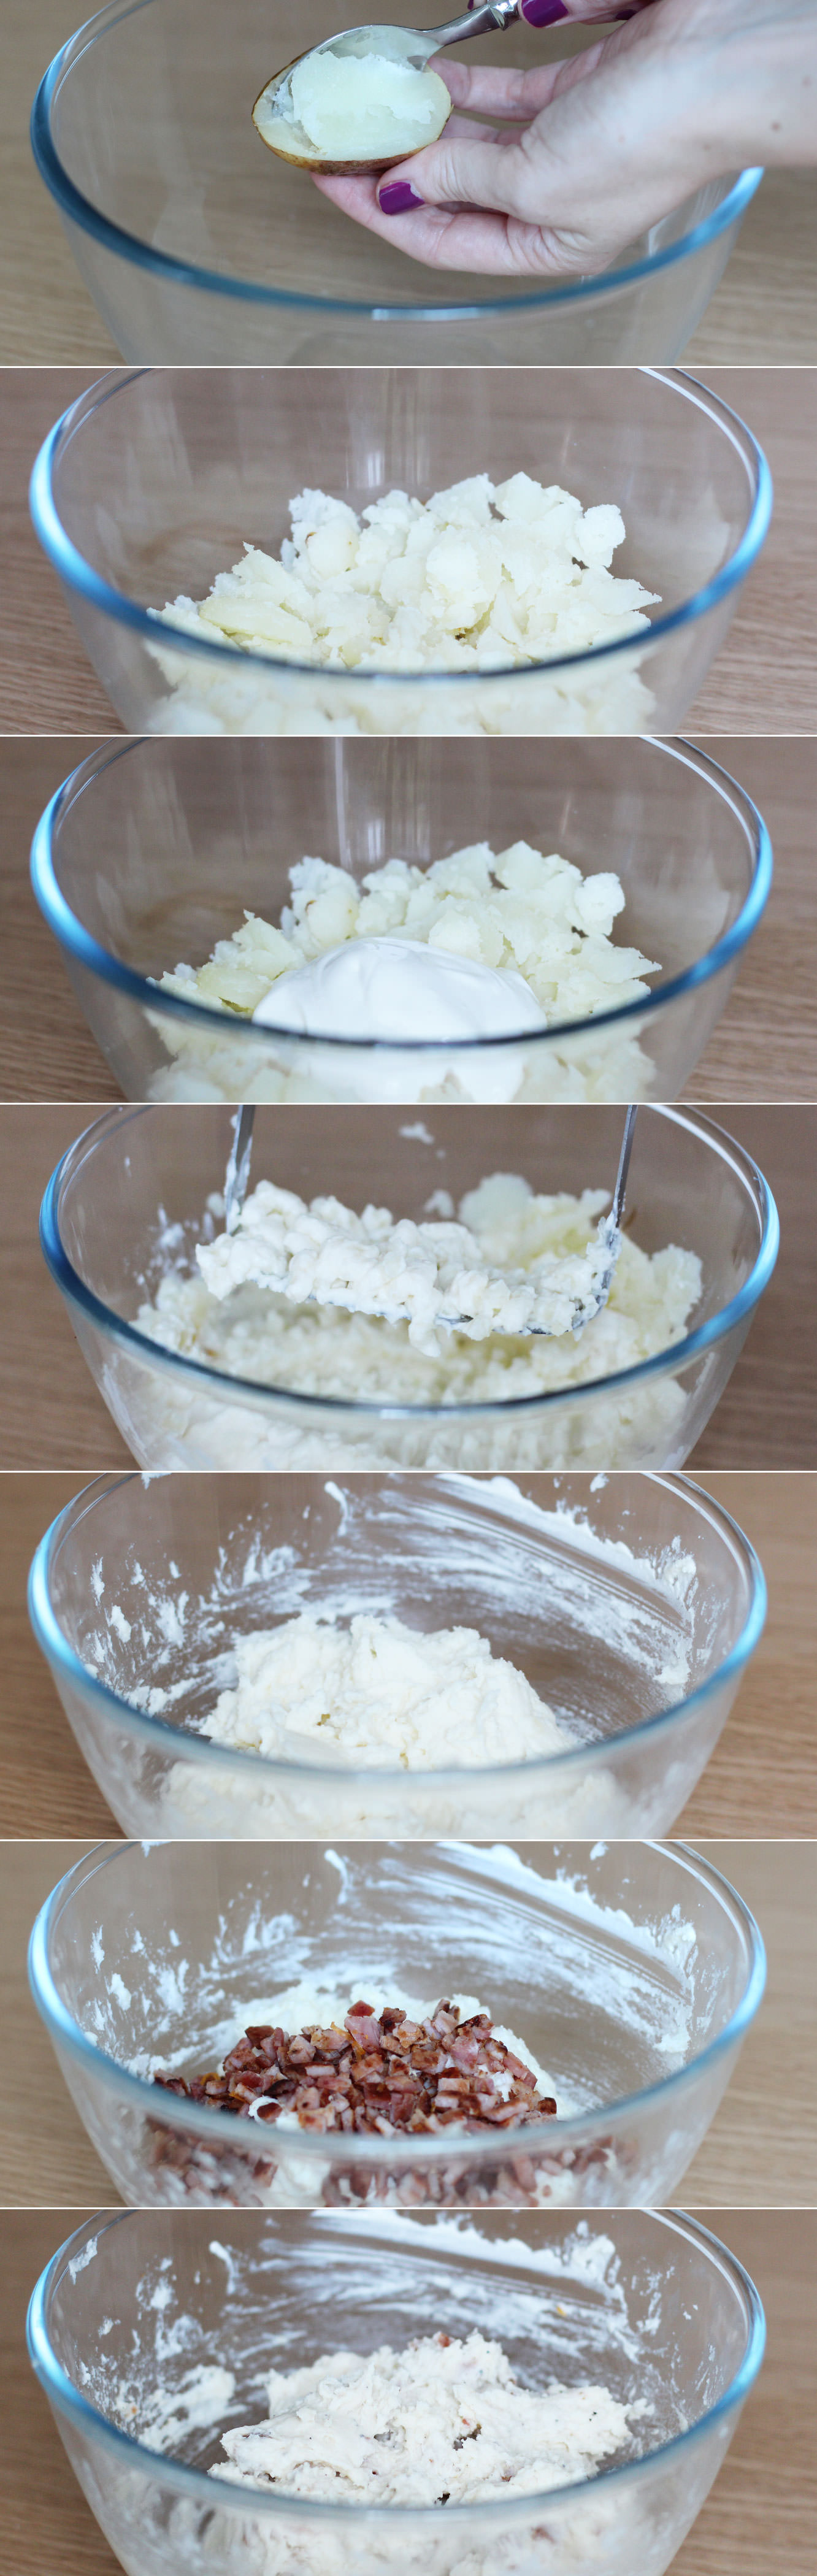
Once the potatoes are cool enough to handle cut them in half and scoop out the potato inside. Get as much out as you can without ripping the skins. Place the empty skins back into the roasting tin in a somewhat orderly fashion.
Step four
Add 150-200ml of the sour cream to the potato and season. Mash until smooth/you loose the will to make filled potato skins at all. But seriously though, don’t give up, that’s the key to smooth mash.
You might need to add a little more sour cream, but save some for dipping.
Step five
Stir in the bacon.
Step six
Avoid the urge to just eat mix with a spoon. Or does everyone else not love mashed potato as much as me?
Step seven
Refill the potato skins and sprinkle the cheese on top.
Step eight
Put back into the oven until they are fully reheated and the cheese has melted.
A while back I started a small ‘series’ courtesy of Matt and Vicky’s engagement party. I didn’t get very far, because Christmas. Sorry about that. In case you haven’t seen it, the first post is here.
So, in honour of NYE and the parties you’ll all be throwing and in need of nibbles for, here’s a couple of quick and easy last minute bites for the table: some sausage wheels and cheese puff pastry bites.
There’s a lot of cheating in this recipe. I’m not one for making my own puff pastry. Apparently I’m not even one for seasoning my own food now either.
You will need
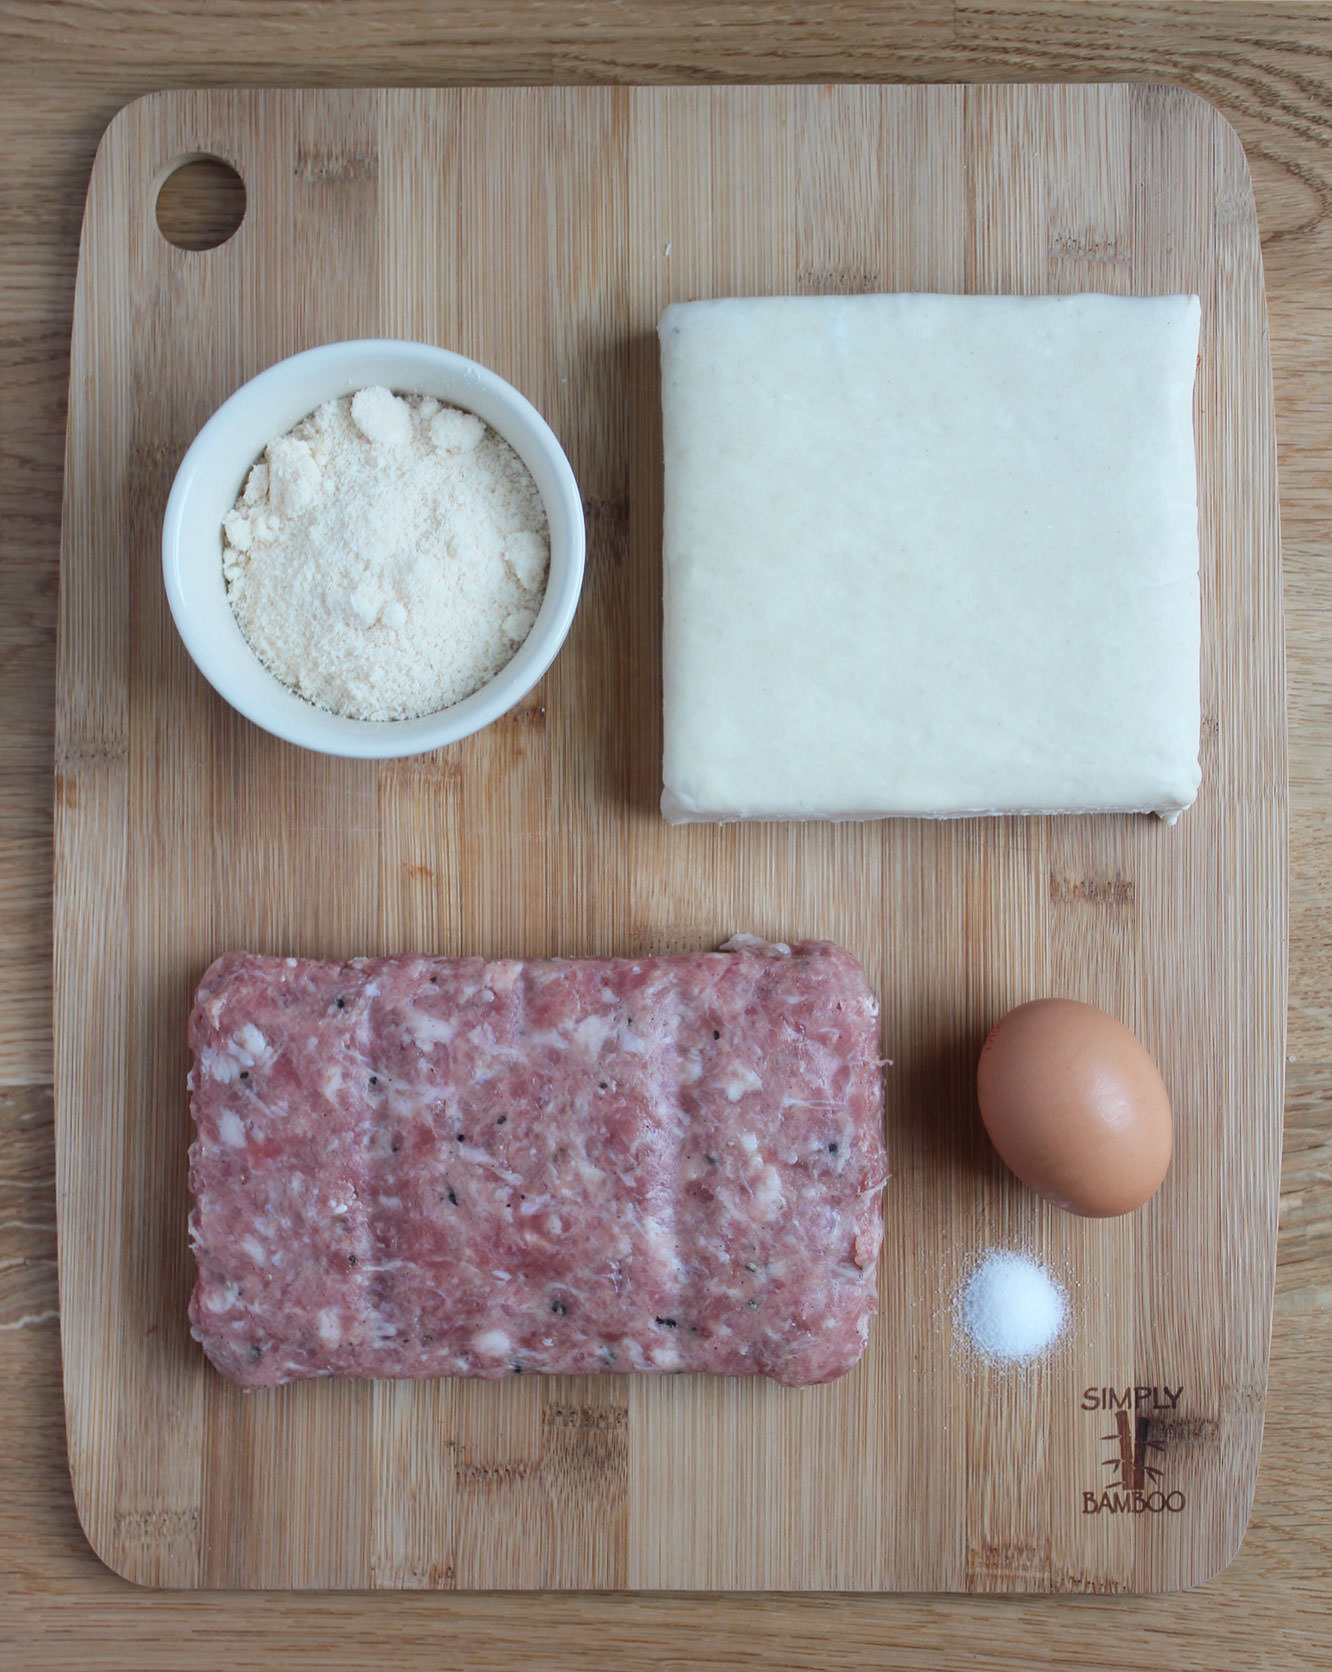
500g packet of puff pastry
400g/ 14oz of sausage meat (I bought packet of pre-seasoned/flavoured stuff from Waitrose. Zero regrets)
75g/ 2.5oz grated parmesan
1 egg
A generous pinch of salt
Step one
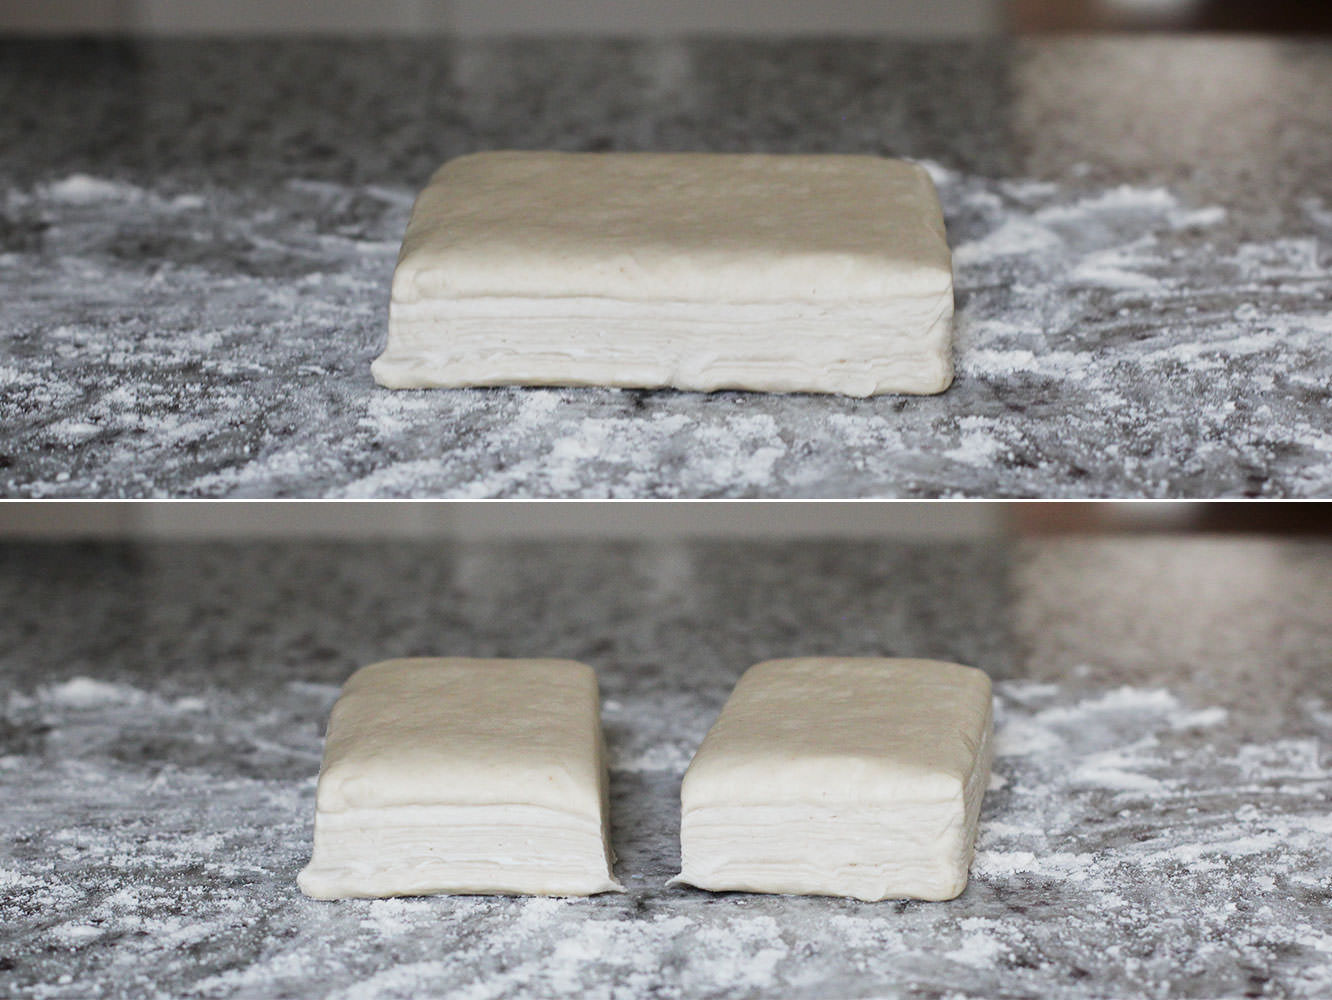
Divide pastry into halves.
Step two
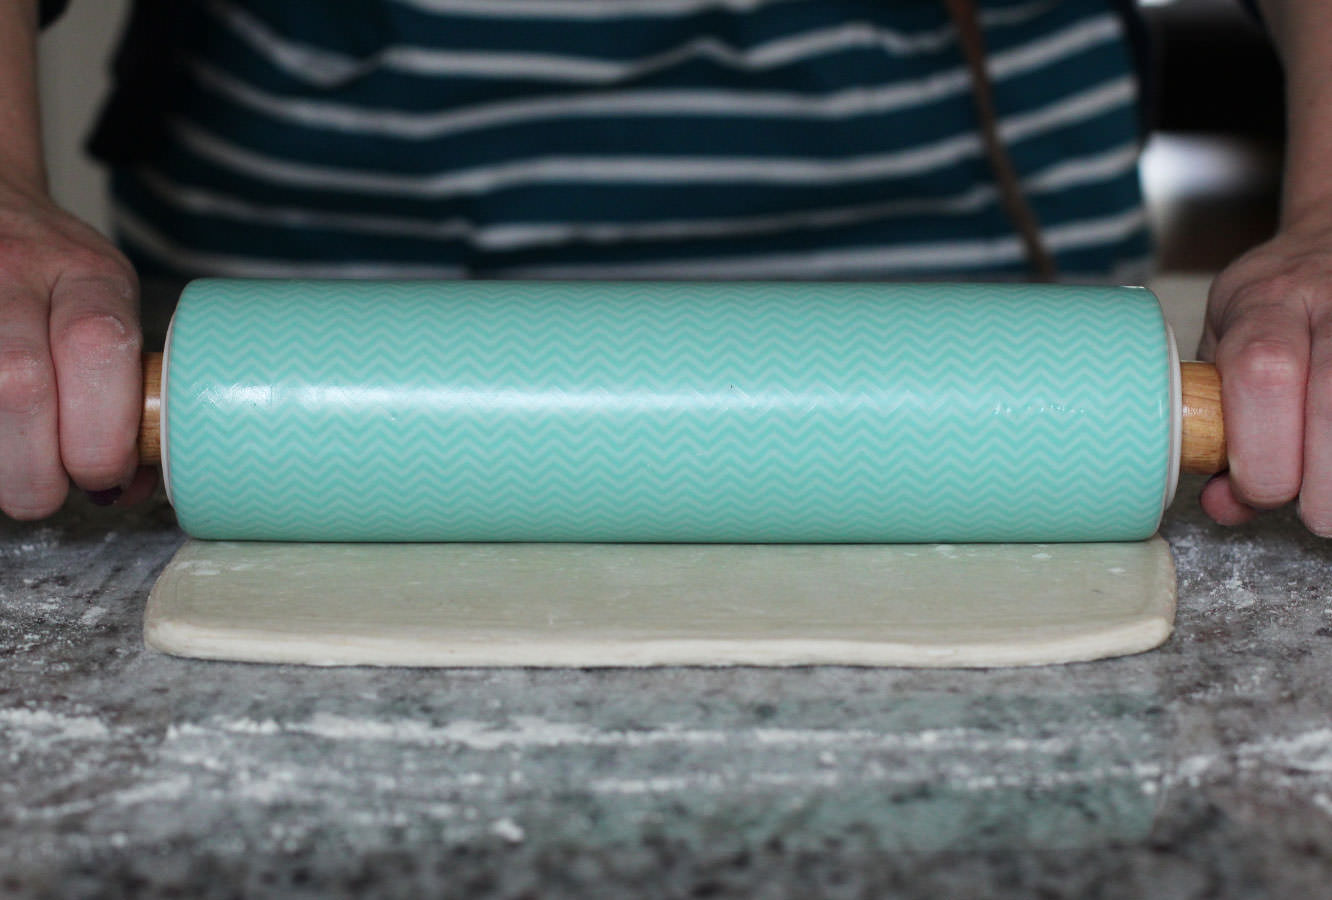
Roll out one of the halves until it’s about a centimetre thick.
Step three
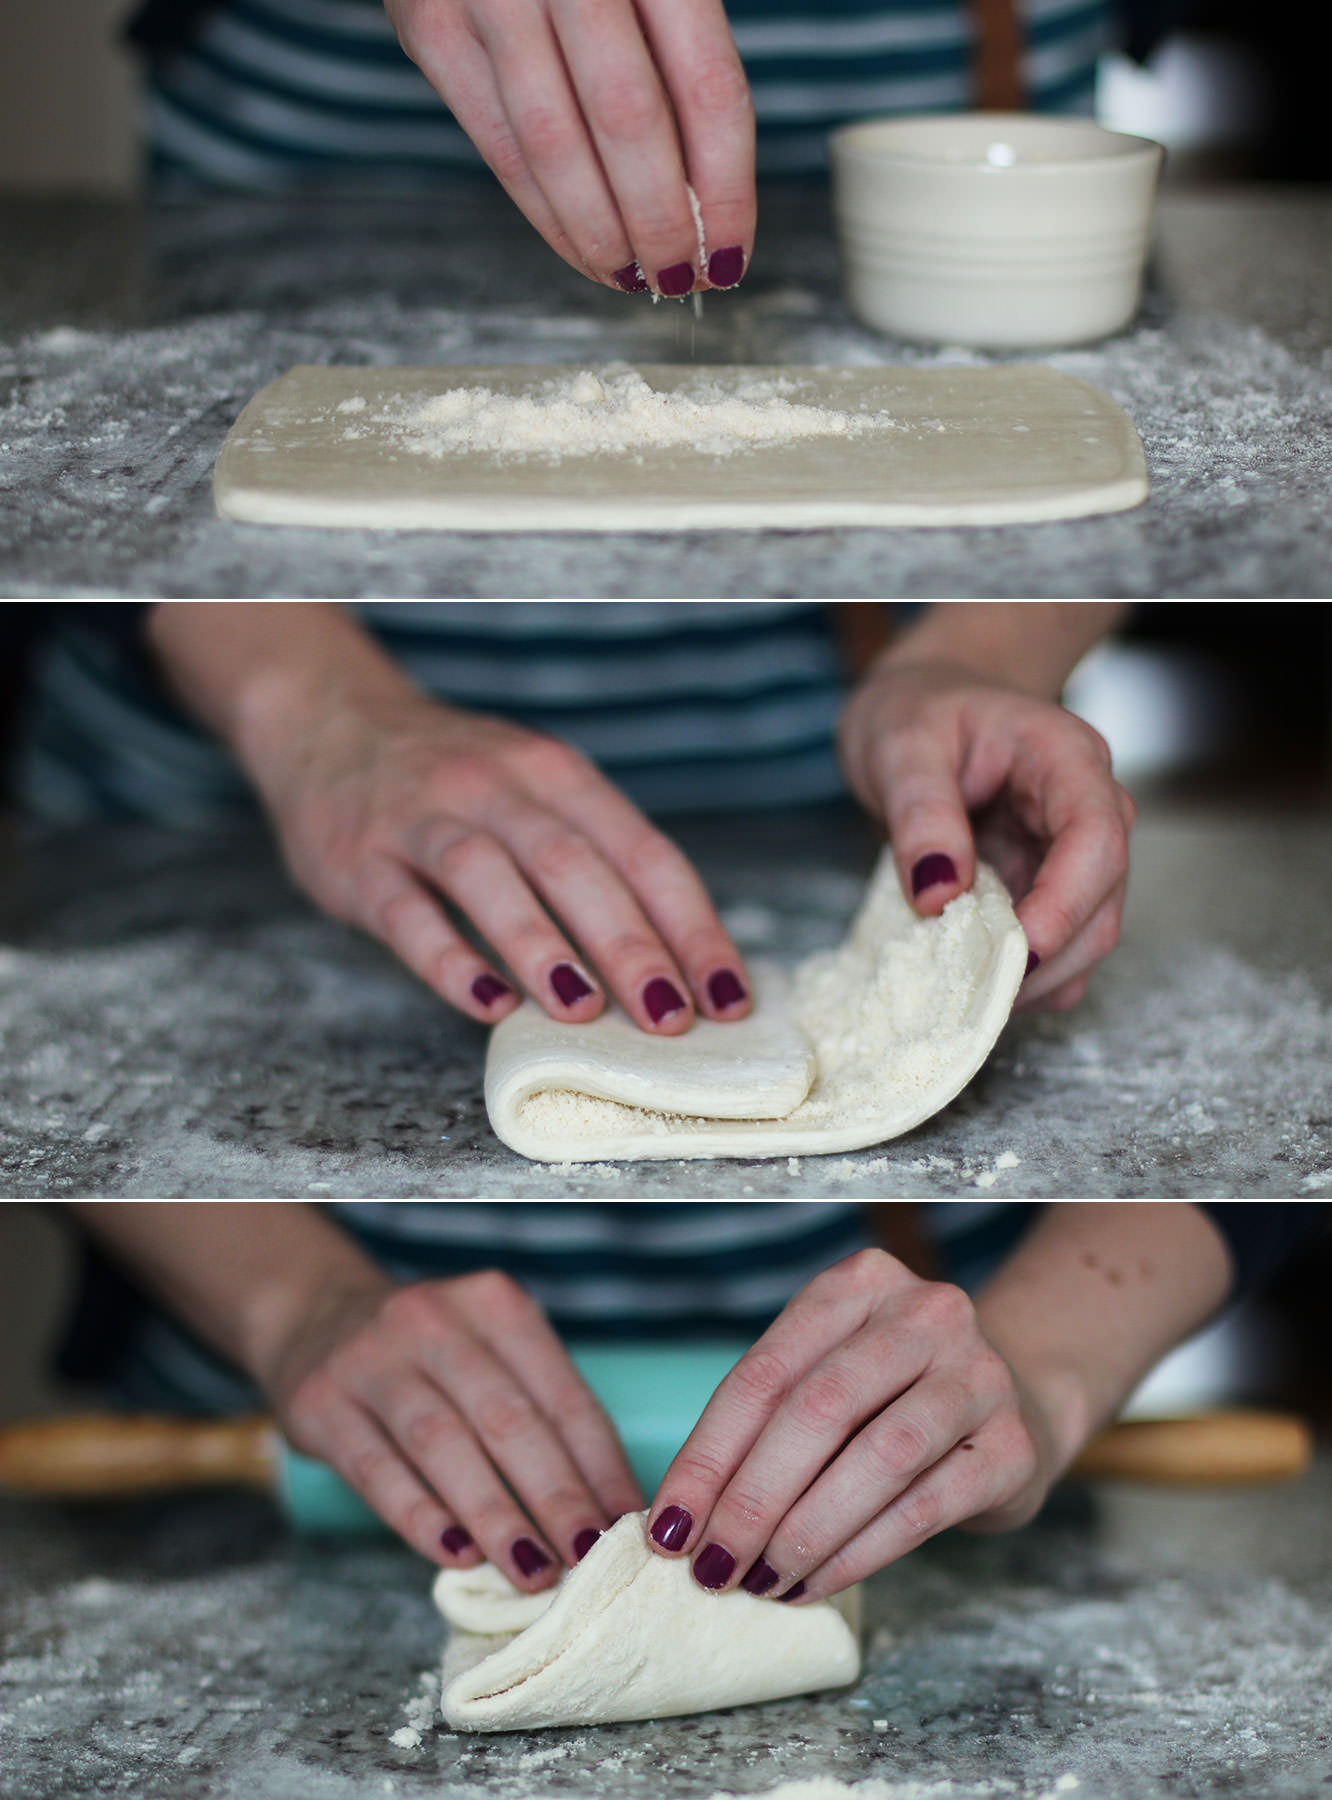
Sprinkle half the parmesan onto the pastry. Fold it into thirds and roll out a little. Fold into thirds again in the opposite direction and roll again until square.
Be careful not to over work it.
Step four
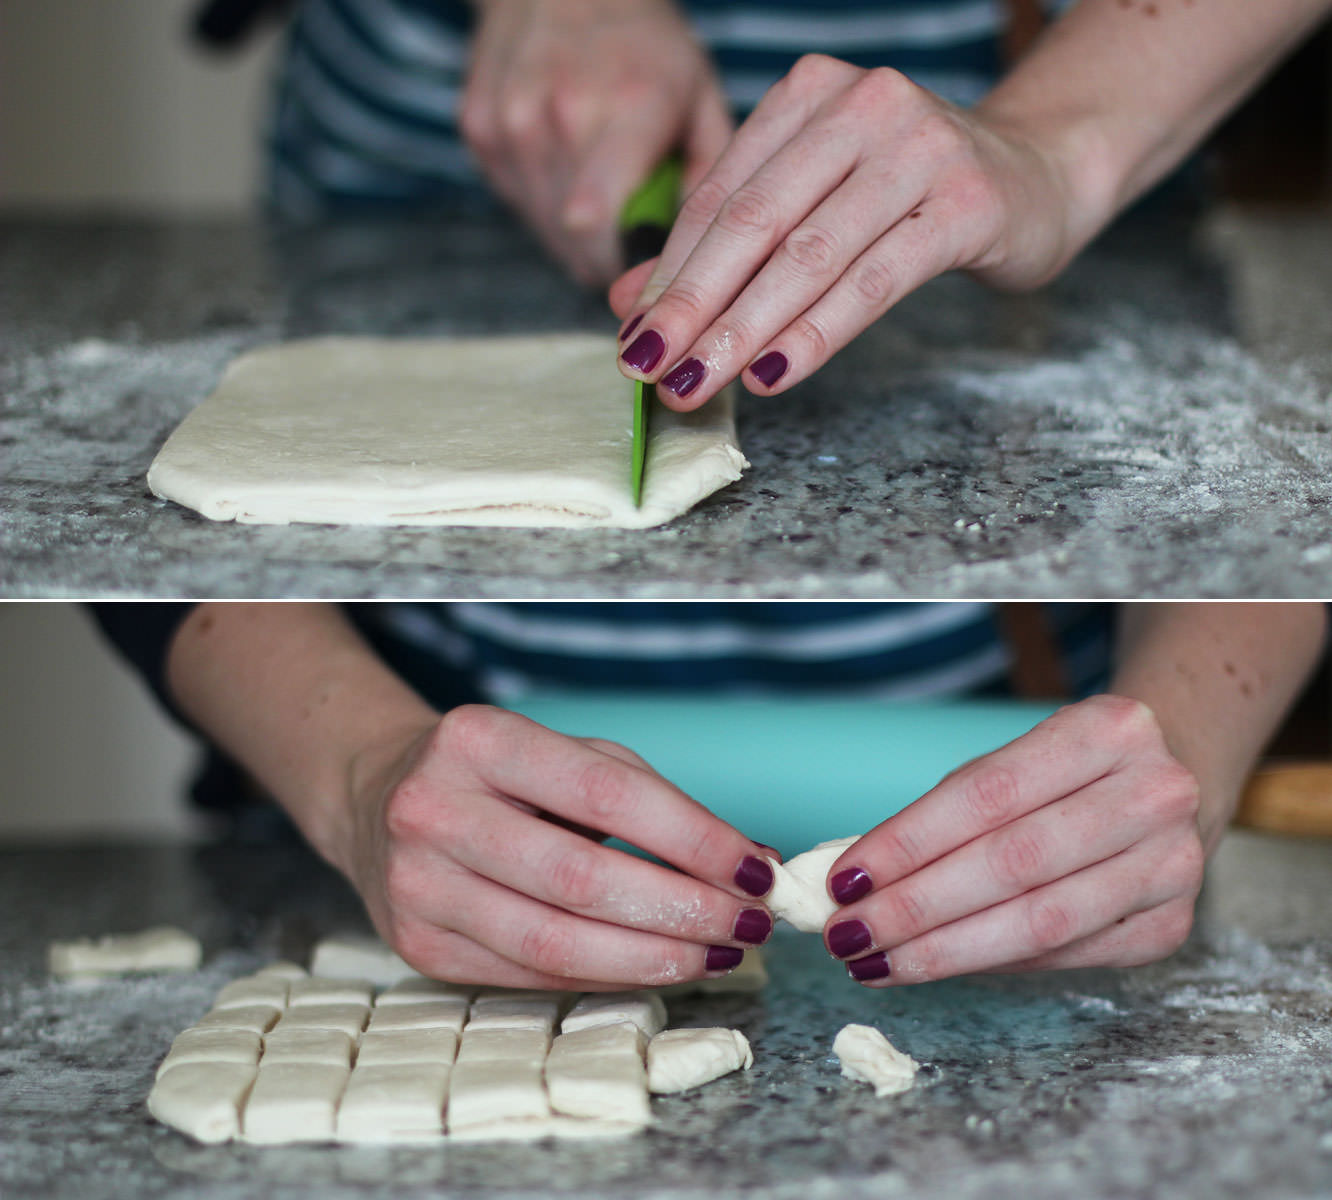
Cut into small rectangles and twist to make little bow tie looking shapes. If my ailing memory serves me correctly I believe this made around 25-30.
Step five
Place on a baking tray and sprinkle with more parmesan and some salt.
Bake on 180C/ gas mark 4/ 350F for about 45 minutes. You need to keep an eye on them as they can look done on the outside and not be cooked the whole way through.
Step six
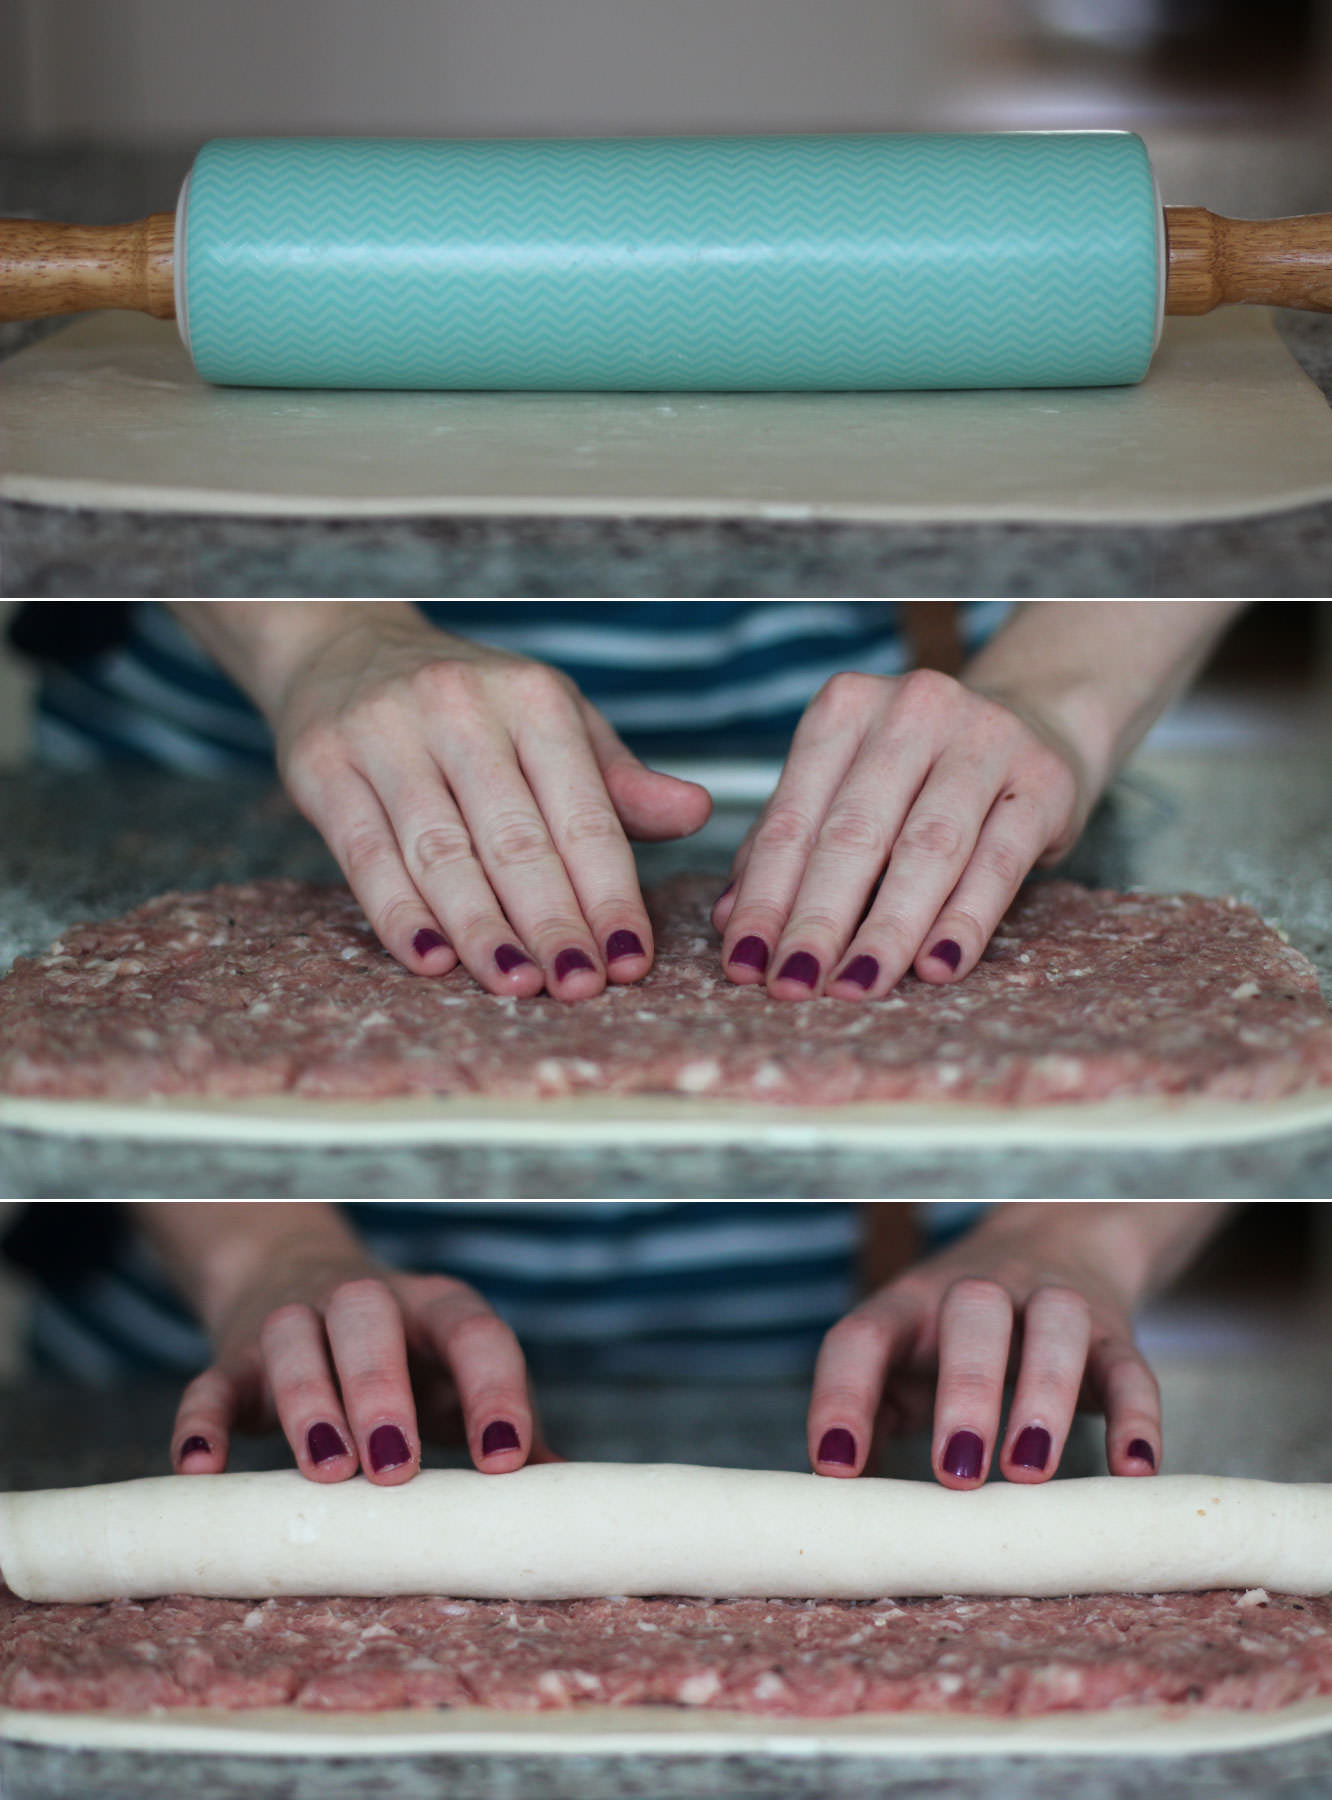
Roll out the second half of the pastry until it’s about 5mm thick.
Step seven
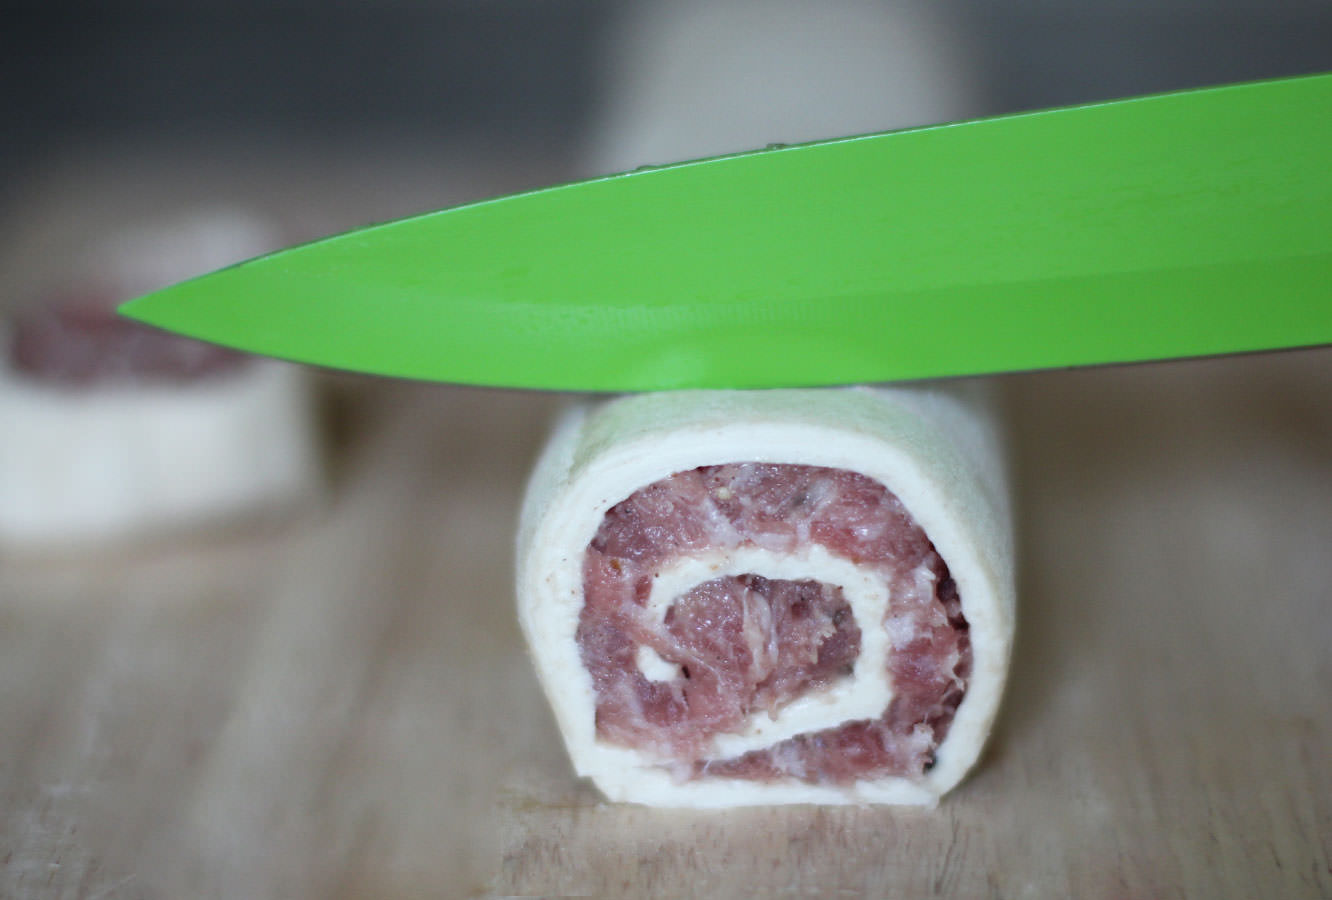
Spread the sausage meat out across the surface of the pastry. Leave a gap of 1-2cm on the long edge.
Step eight
Whisk the egg in a small bowl with a fork. Using a pastry brush (or your clean fingers) spread the egg along the gap you left in step seven.
Step nine
Roll the pastry up, the egg should help the edge to seal.
Step ten
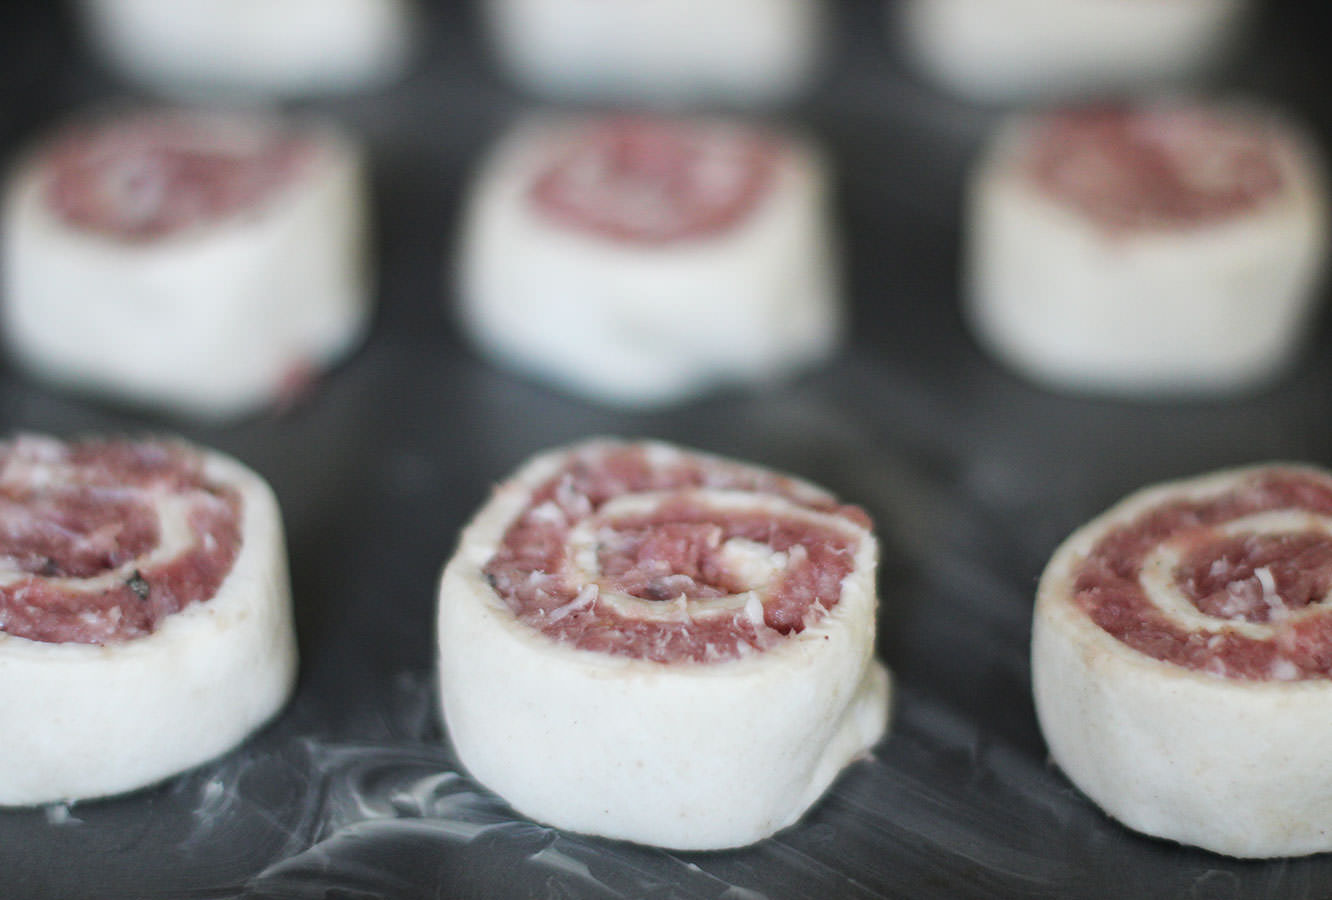
Cut slices of the sausage about 1.5cm thick.
Step eleven
Place on a greased baking tray and cook with the cheese bites.
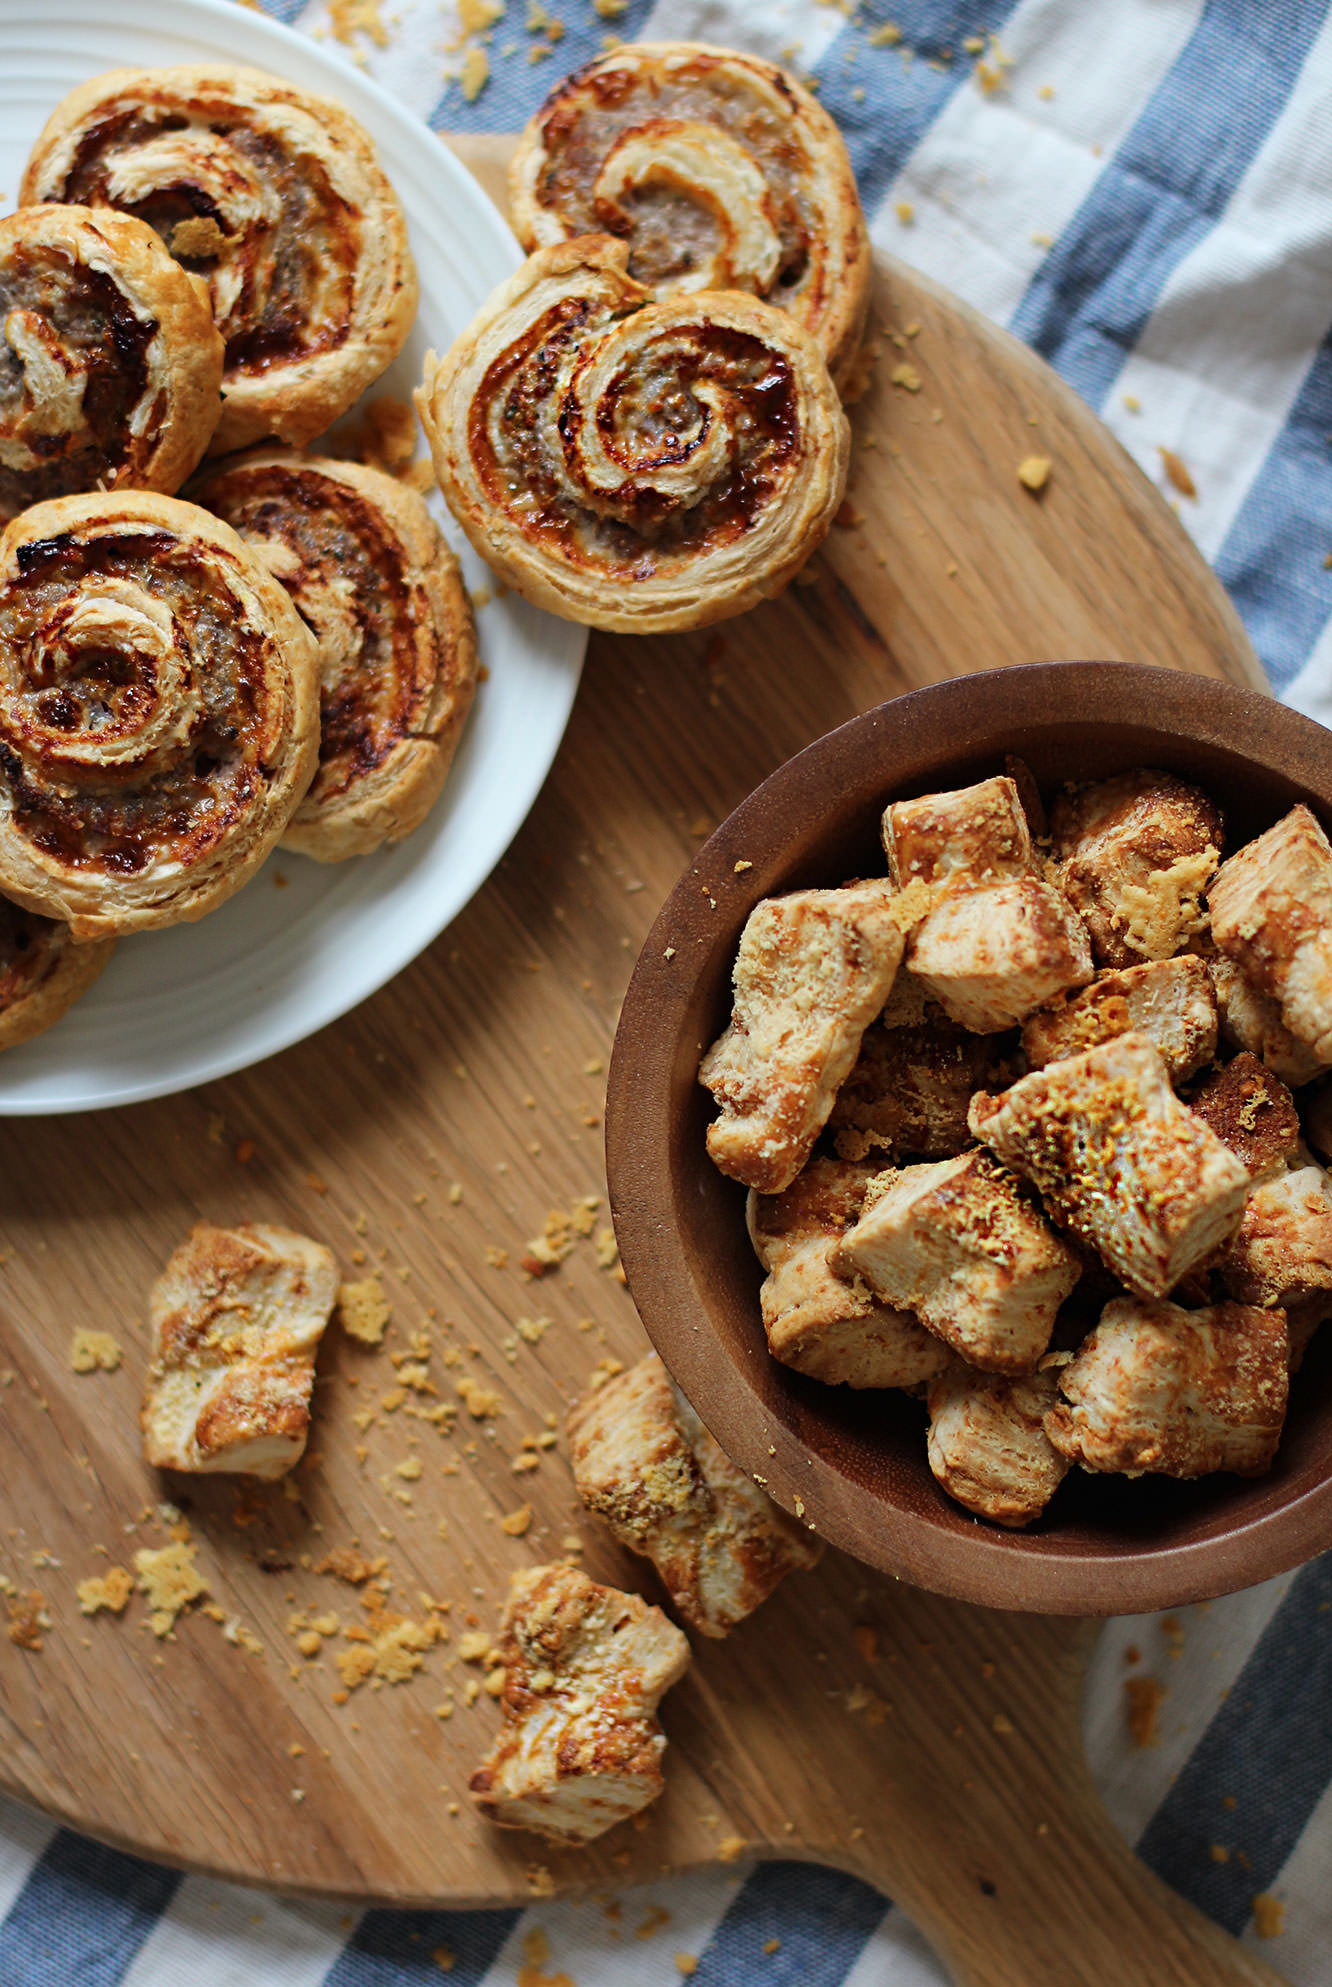
Step twelve
Serve fresh from the oven and try not to eat them all before the guests arrive.
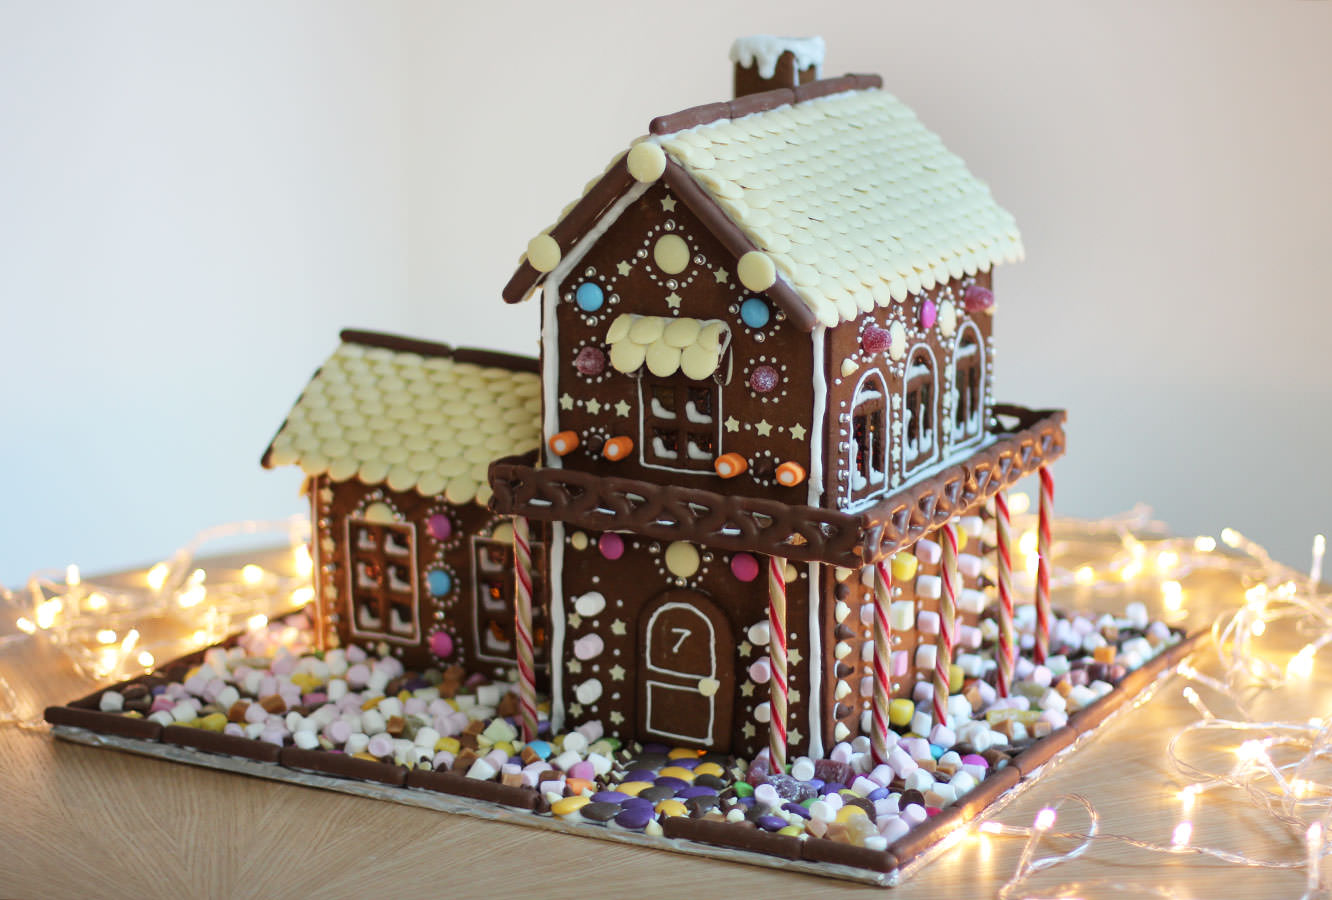
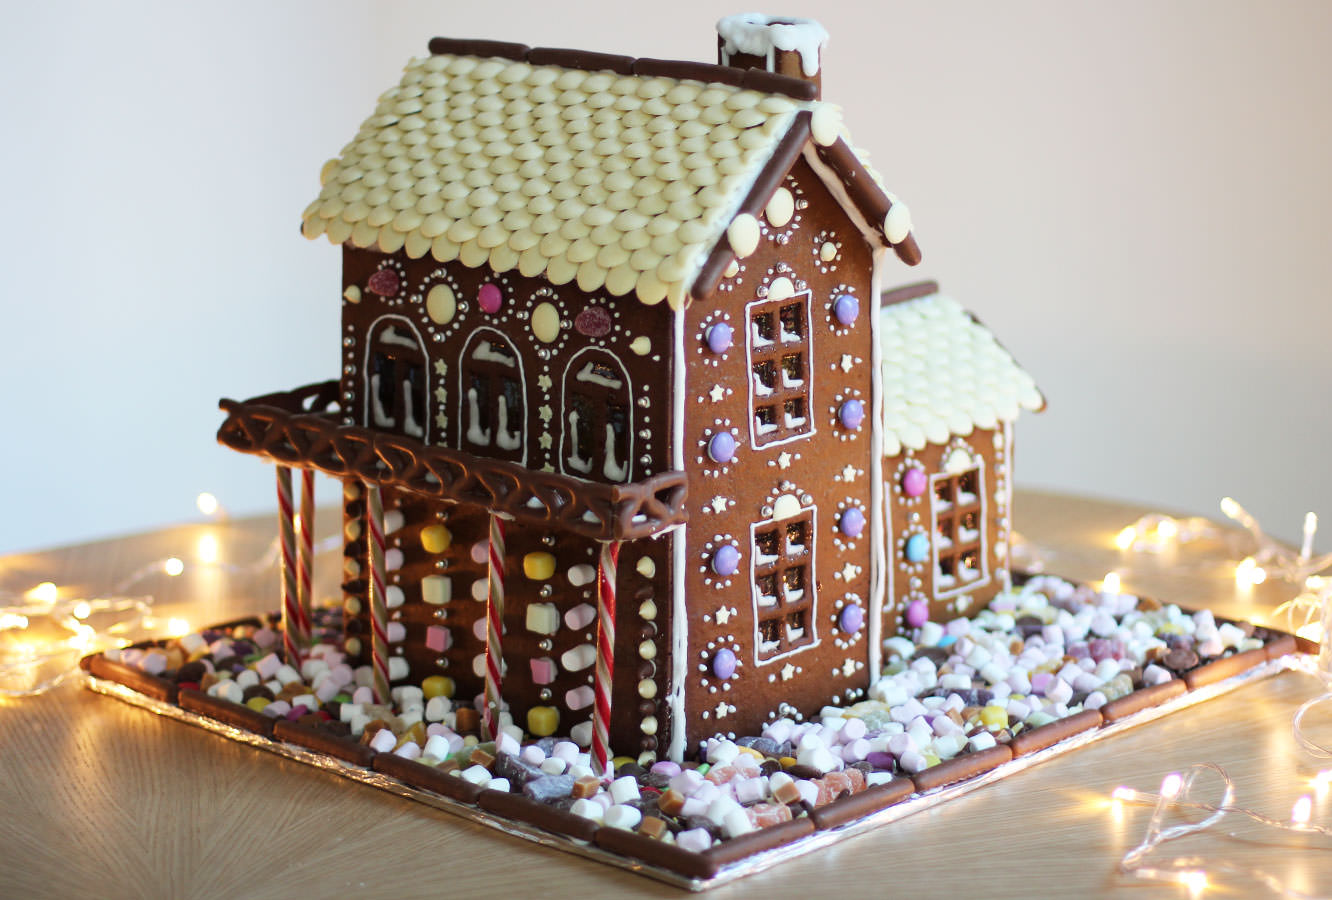
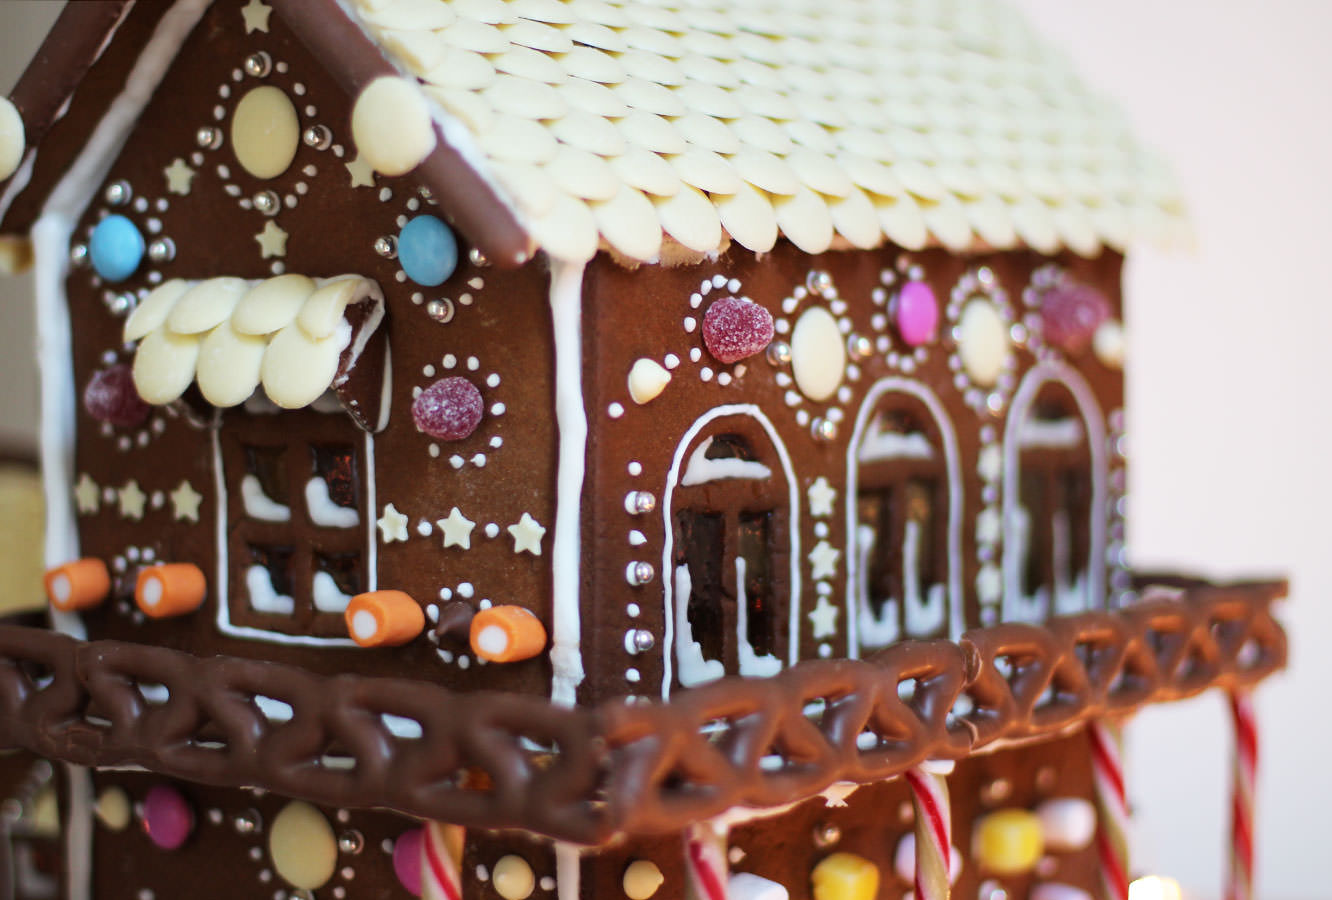
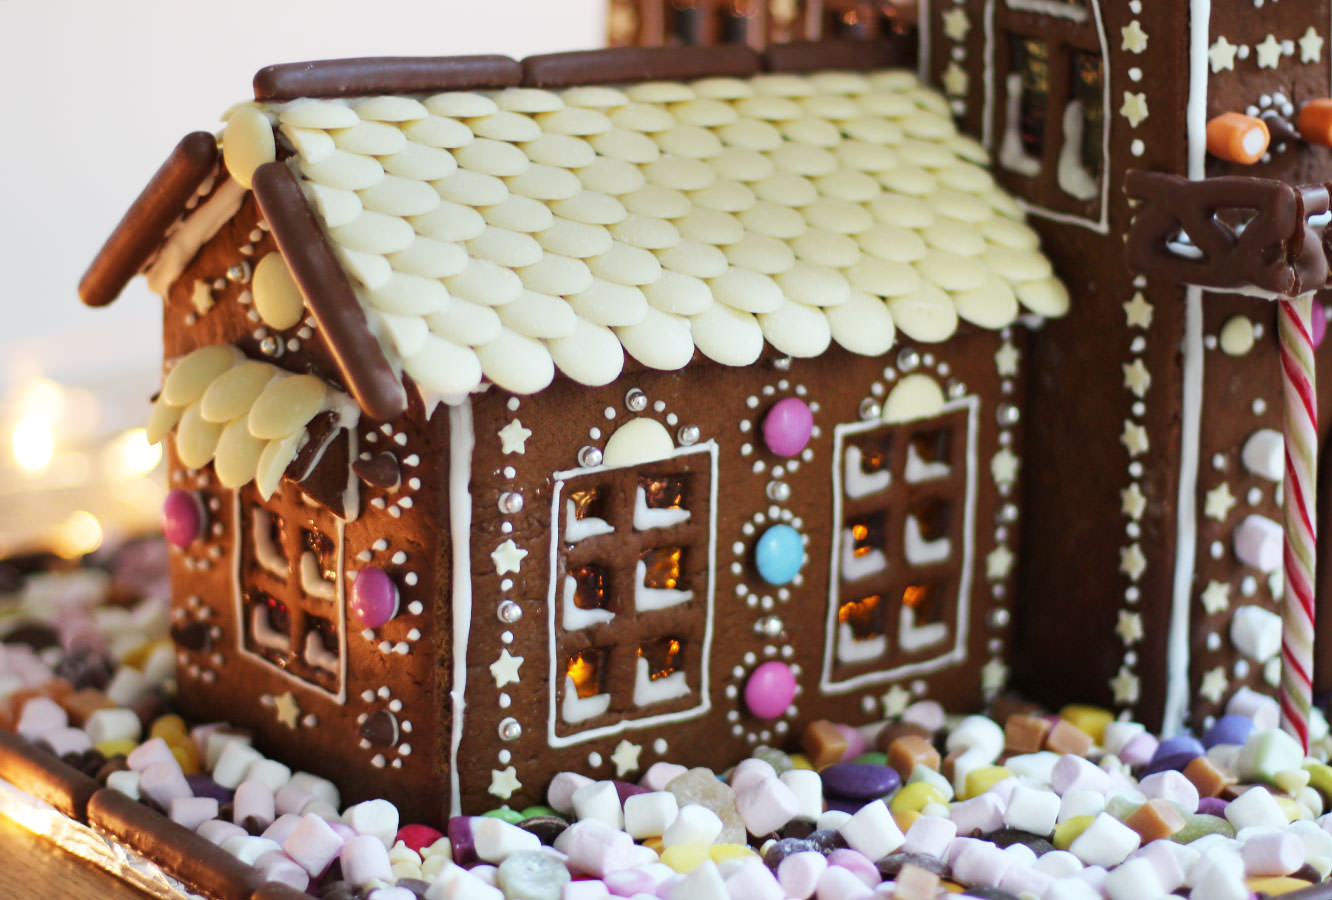
Hello again. Just a little post with some photos of this year’s gingerbread house. I said back in this post that I would start to theme them, which I’m afraid I didn’t have the inspiration for in the end, but it does have a balcony which was my engineering feat of the year.
For those of you looking to squeeze a bit of gingerbread house making into what’s left of Christmas eve, other than needing your head examining, you might find the posts I did last year useful:
Some years (every year) I have grand plans for home made gifts and decorations at Christmas. Rarely does this materialise in the lovely relaxed and whimsical way it looks in my head. Generally I end up covered in the contents of my baking cupboard feeling totally harassed by the number of hampers I’ve decided to make.
If you’re anything like me, or if you’re completely handmade/craft-phobic in the first place, this one is for you. Three super quick festive crafts to brighten up the house and fill up stockings at the last minute. You don’t need an ounce of artistic/baking ability for any of these. So no excuses.
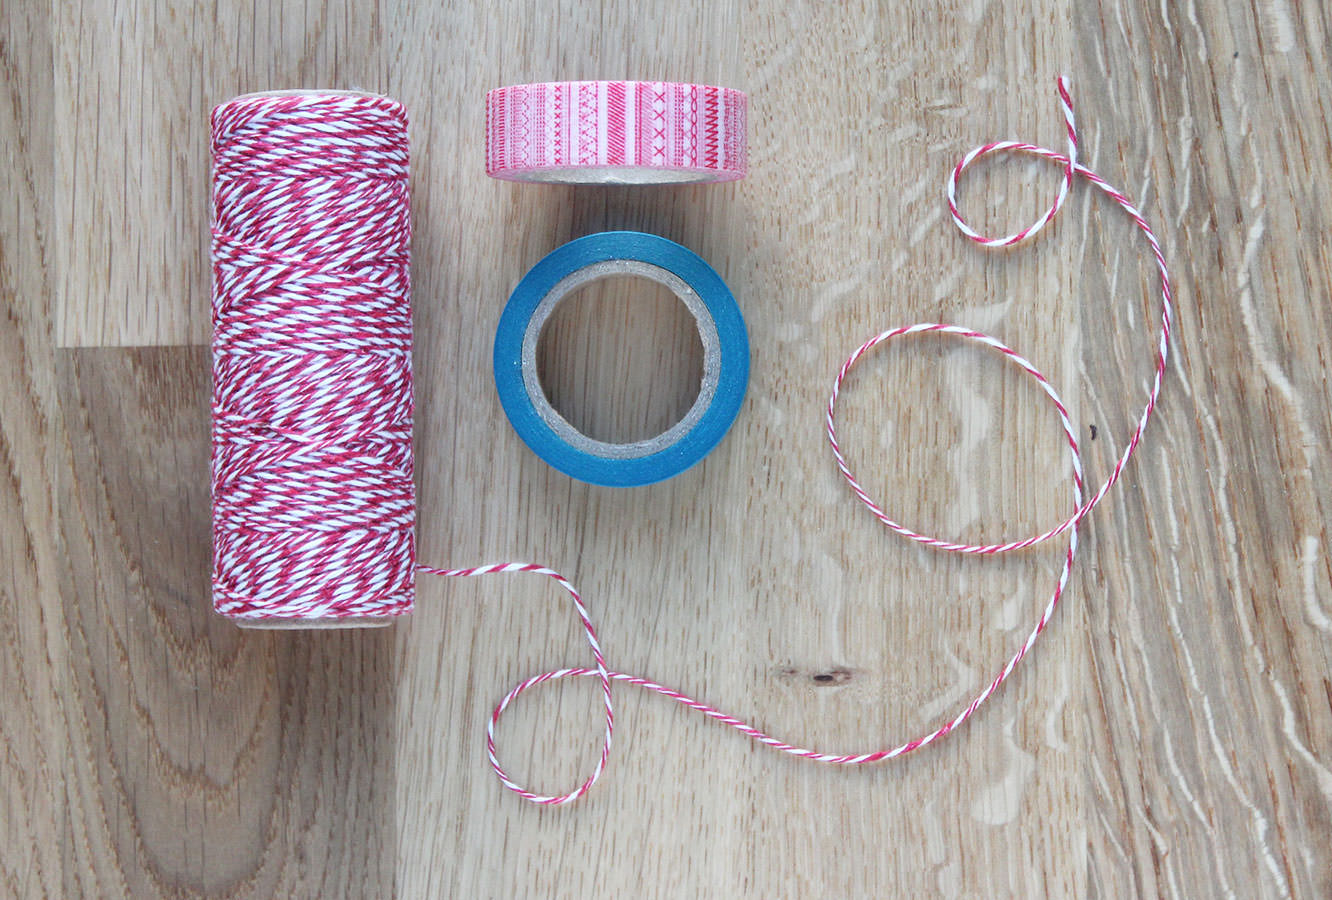
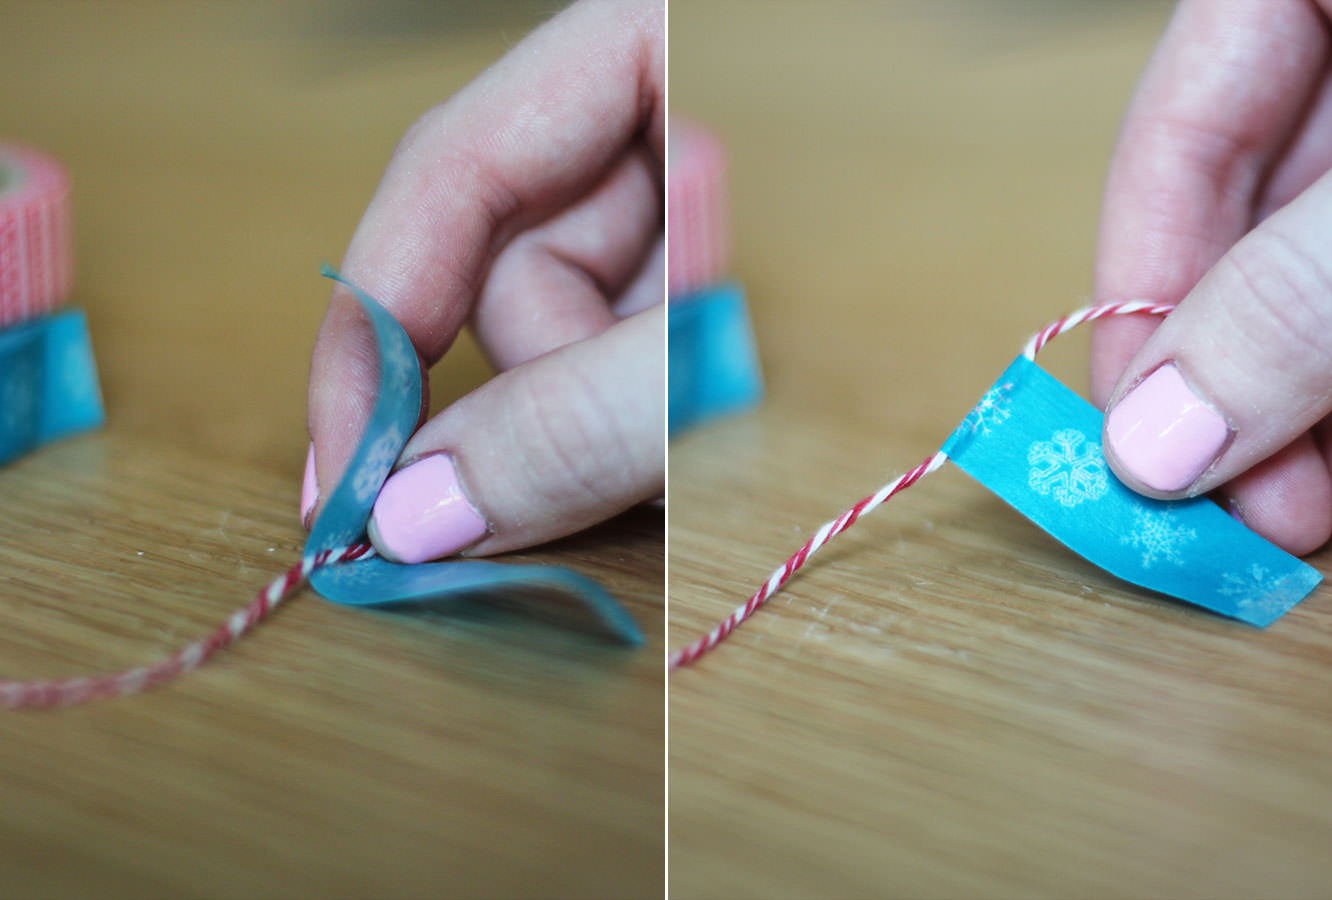
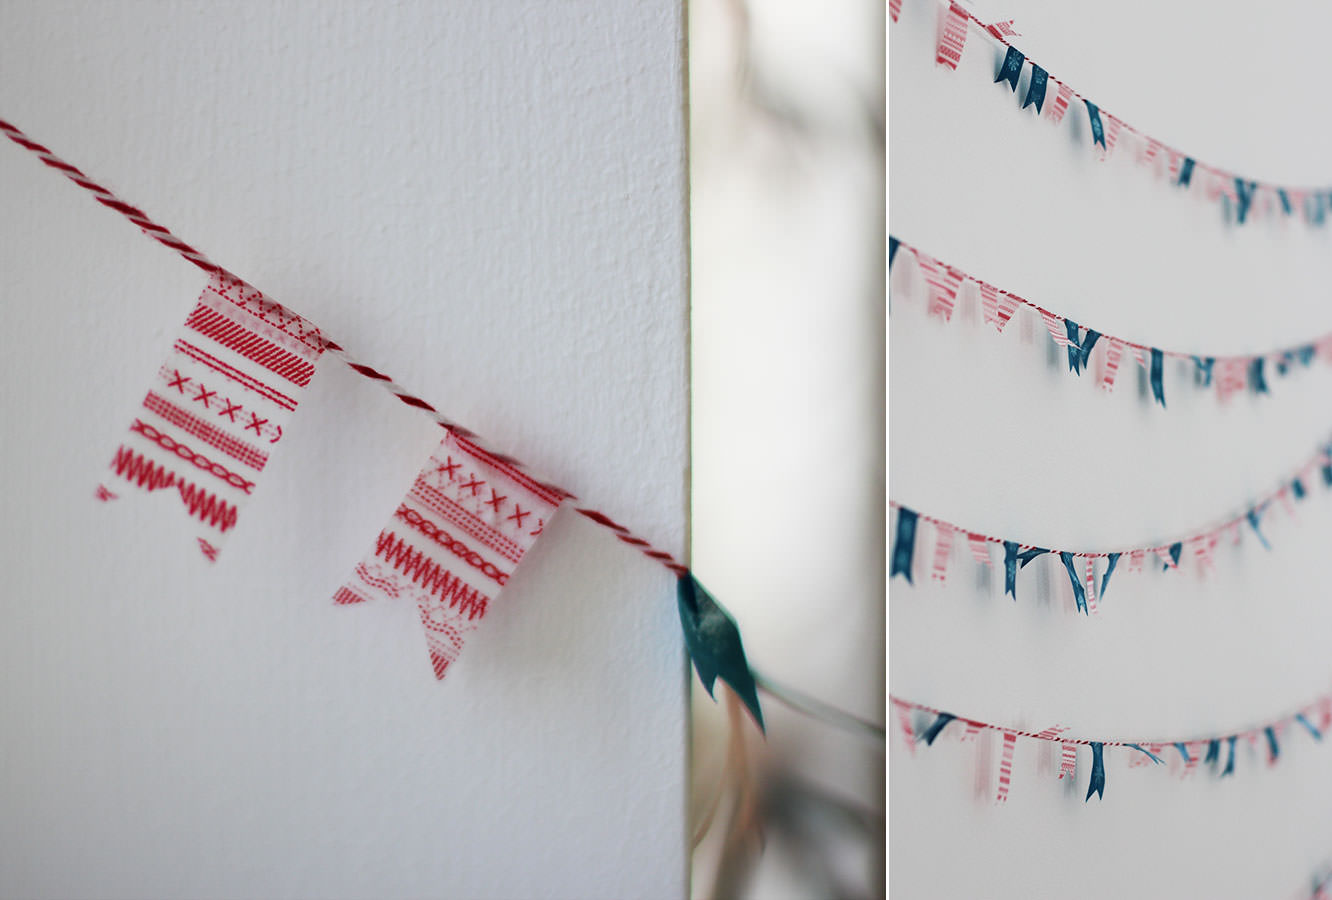
#1: Cute Christmas bunting
You will need
String (I got this two colour spool from Tiger for £1)
Christmassy washi-tape
Step one
Cut a random length of tape and place the string in the middle. If you really want to punish yourself you can try and make them all the same length, but I really like them random and it’s much easier that way too.
For this step I cut loads and stuck them on the edge of the table so I had them ready and did them in batches so I wasn’t constantly cutting one then sticking it etc etc.
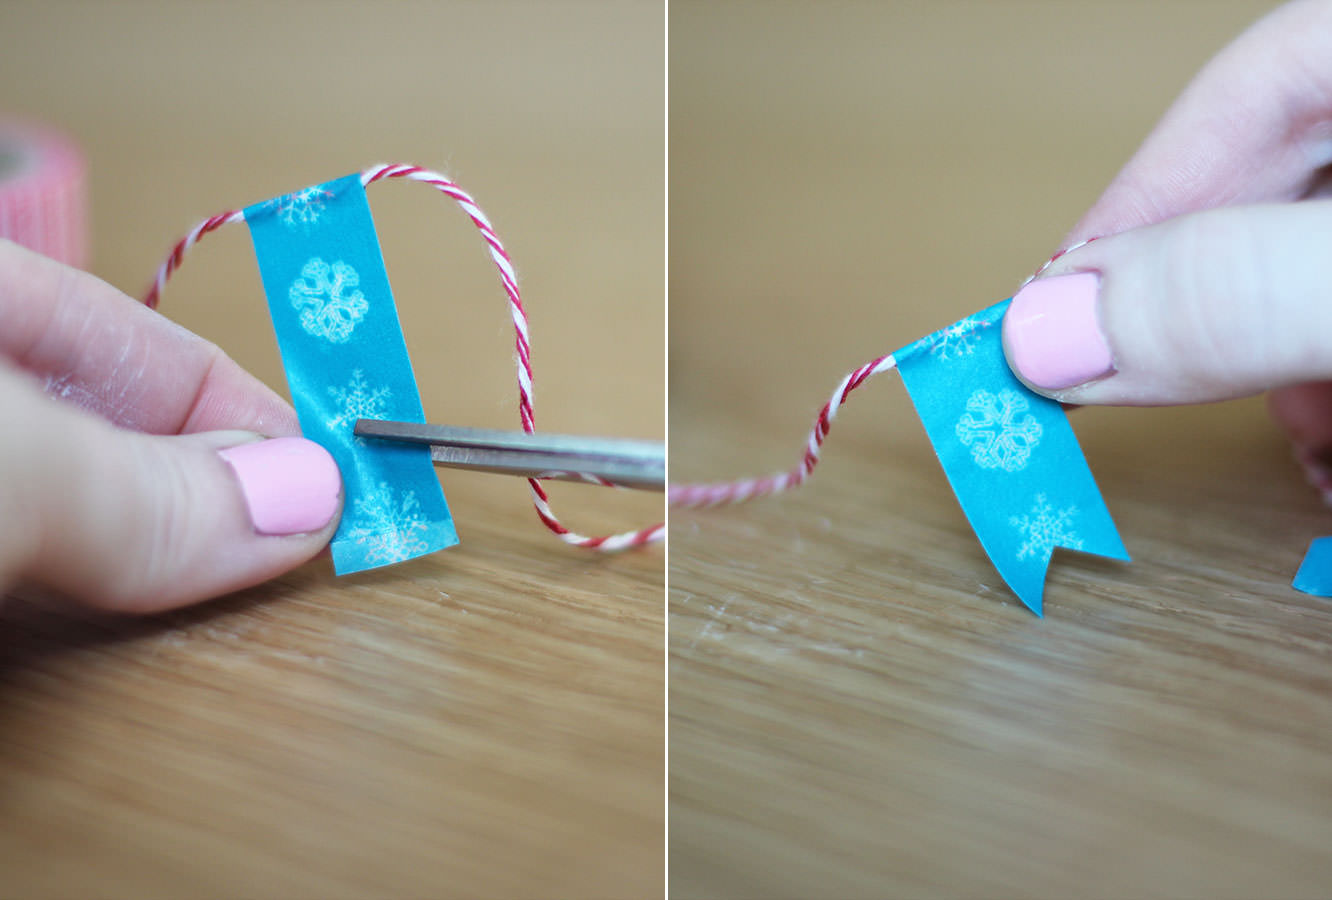
Step two
Fold over the wash tape and stick together. Again, I found it easier to do this step in bulk and then snip them in one go (see below).
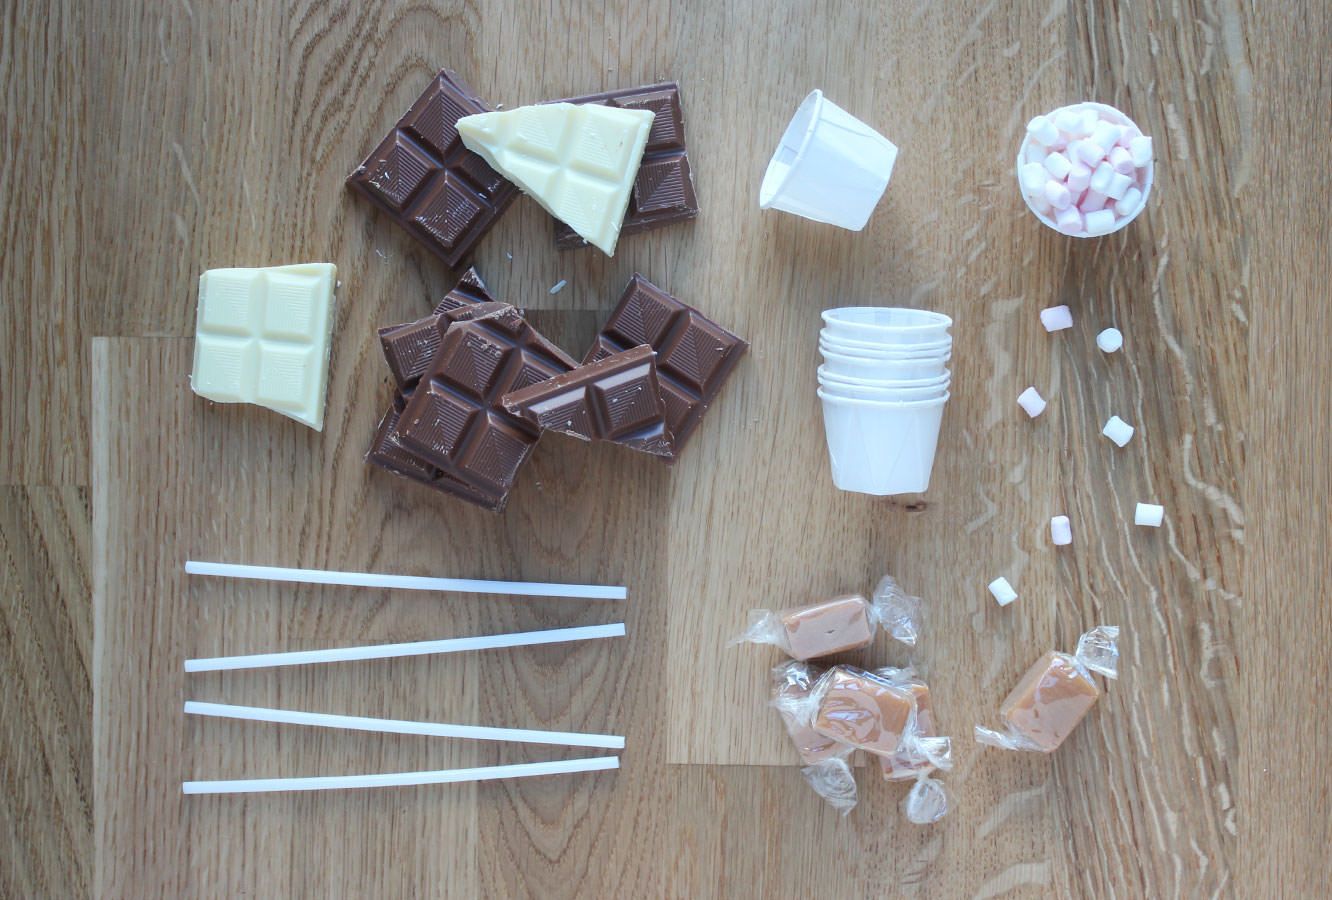
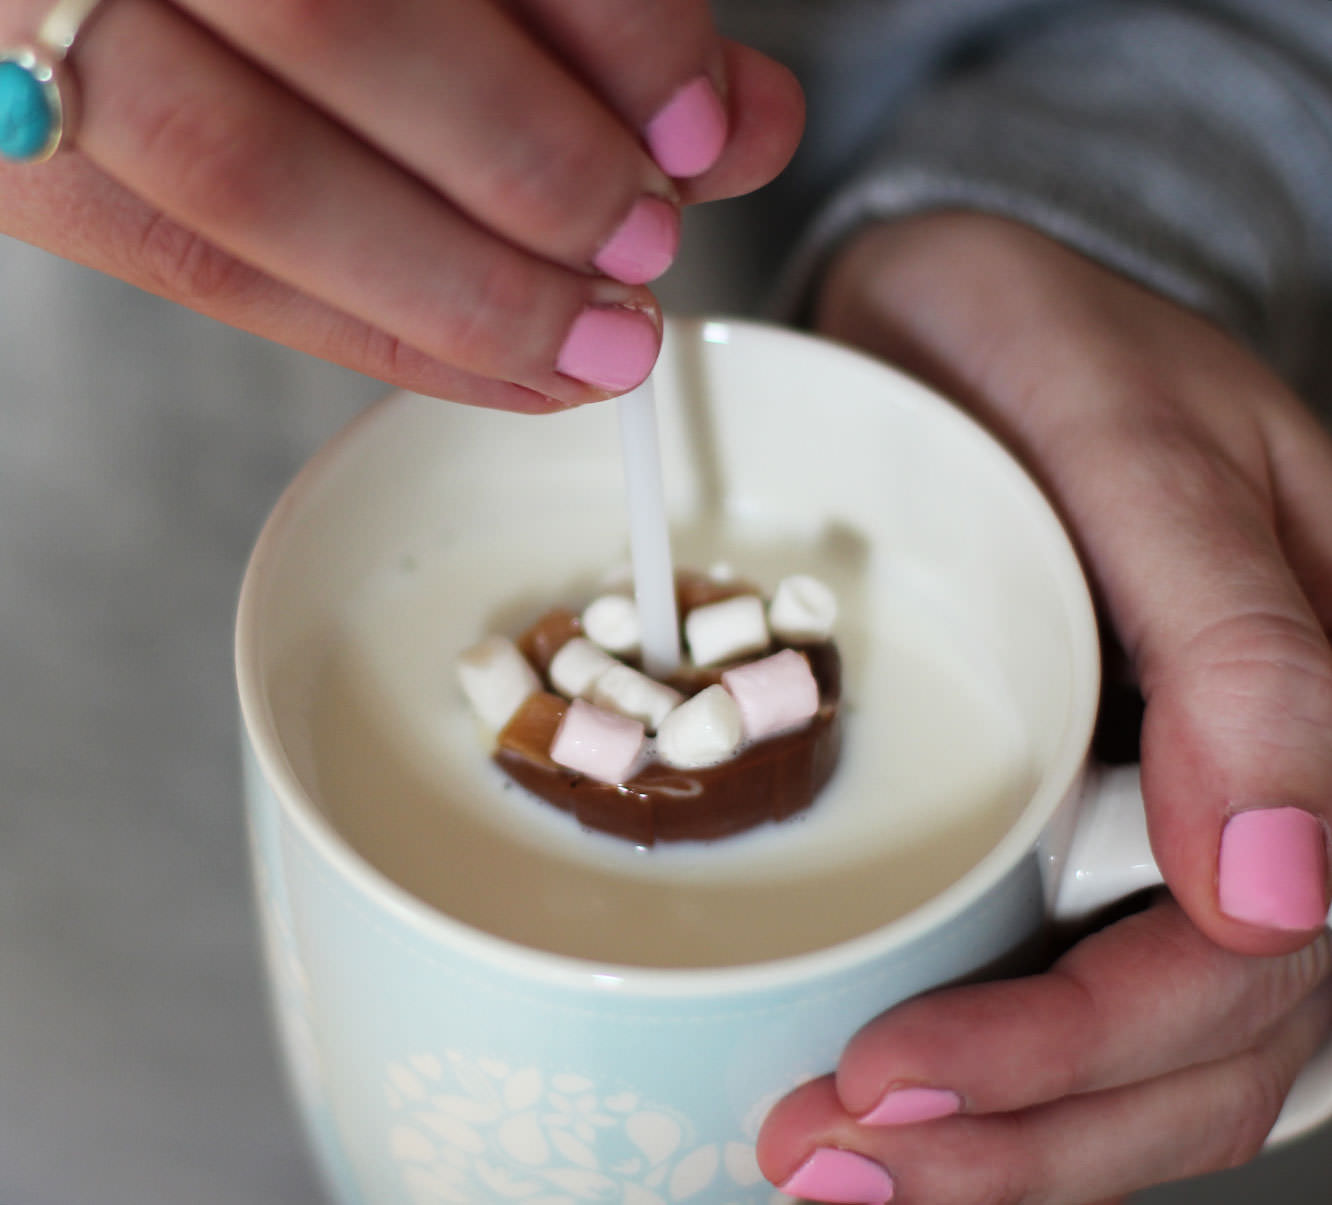
I saw one of these at the shops today, it was £3! These make a great little stocking filler, present topper-upper or gifts for the neighbours. Just swirl into hot milk for a luxury hot chocolate.
You will need
400g/ 14oz Milk chocolate
50g/ 1.5oz White chocolate
Condiment cups (if the closest McDonalds doesn’t have these you can buy them online, or use mini-muffin cases)
Mini mini marshmallows (these tiny fellows are from Waitrose)
Fudge pieces
Cake pop sticks
Edible glitter (optional)
(Makes 10-12. You need roughly 35g chocolate per cup so adjust the above to suit the number of hot chocolates you want to make).
For wrapping
Cellophane roll (available online or from craft shops)
Chrismassy ribbon or string
Step one
Chop the fudge into little chunks so that they’re roughly in proportion with the marshmallows.
Step two
Melt the chocolate slowly in the microwave and put into piping bags. You can temper it if you want, but given that you won’t see much of it, it might not be worthwhile. I go into a bit more detail as to how to temper chocolate here.
Step three
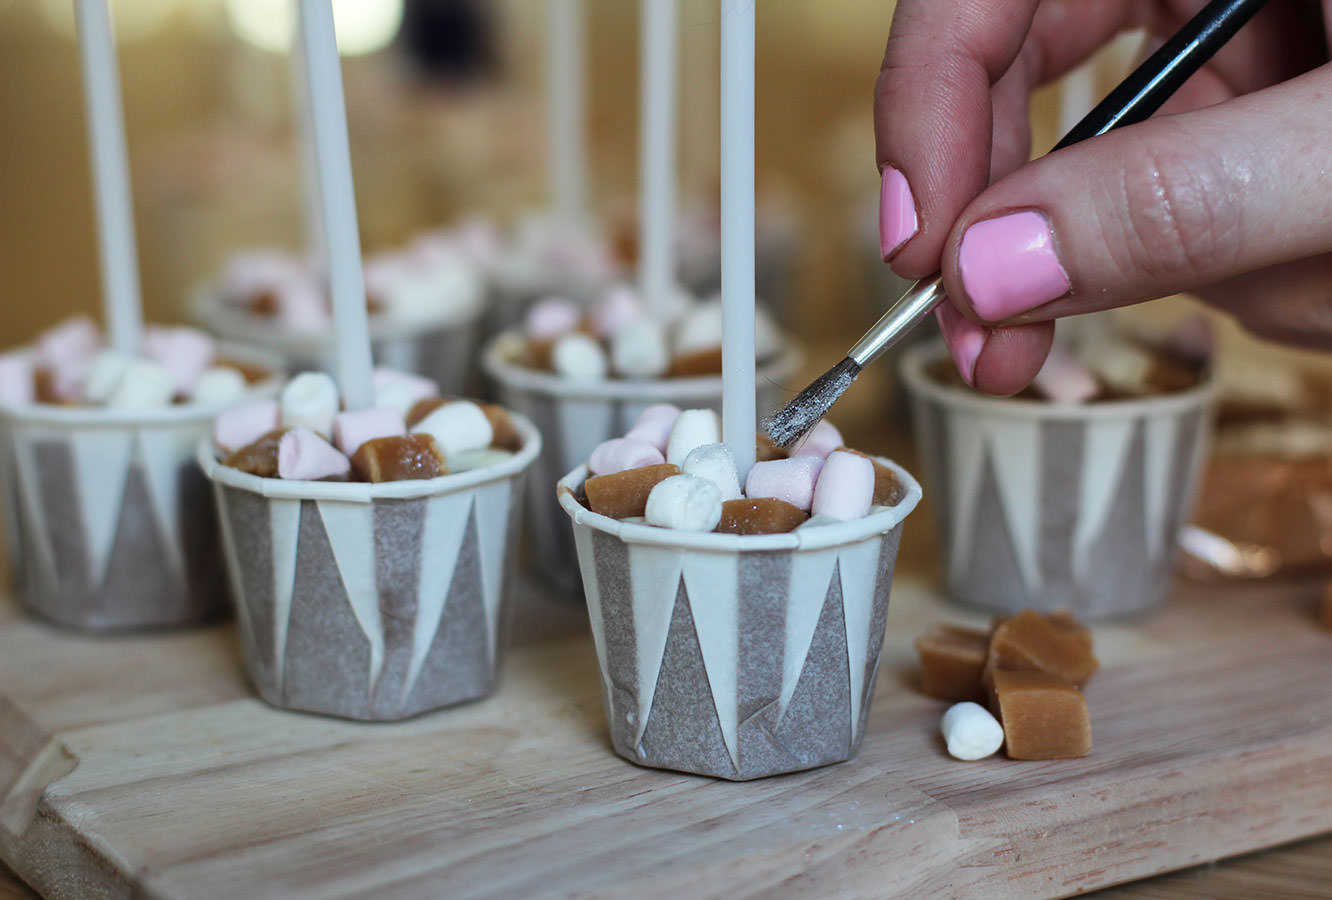
Fill cup to near the brim with milk chocolate. Add a little white and swirl in with a cocktail stick.
Place stick in and surround with fudge and marshmallows.
Leave to set.
Step four
Dust on a little glitter.
Step five
Wrap up. Cut a square of cellophane wrap and place cup in the centre, bring corners up to the middle and secure. I used a loom band to do this, you could use a small elastic band or go straight in with the ribbon/string.
Trim off the corners and ‘foof’.
Go on. There must be one spare you can treat yourself to?
In England we tend to leave Santa a sherry or a brandy and a mince pie. I’ve heard that in some Scandinavian countries he gets ‘treated’ to porridge…lucky guy. Well this post is a nod to our North American friends from whom Santa receives milk and cookies. I decided to jazz up the traditional a little, after all, you hard working parents deserve a little more than a glass of milk on the 24th.
I should start off by saying that the recipe leans more towards a sort of whoopie pie consistency than a cookie, a whookie if you’d like. Perhaps if you wanted to commit to whoopie pies you could sandwich them with the salted caramel buttercream I made a couple of months back.
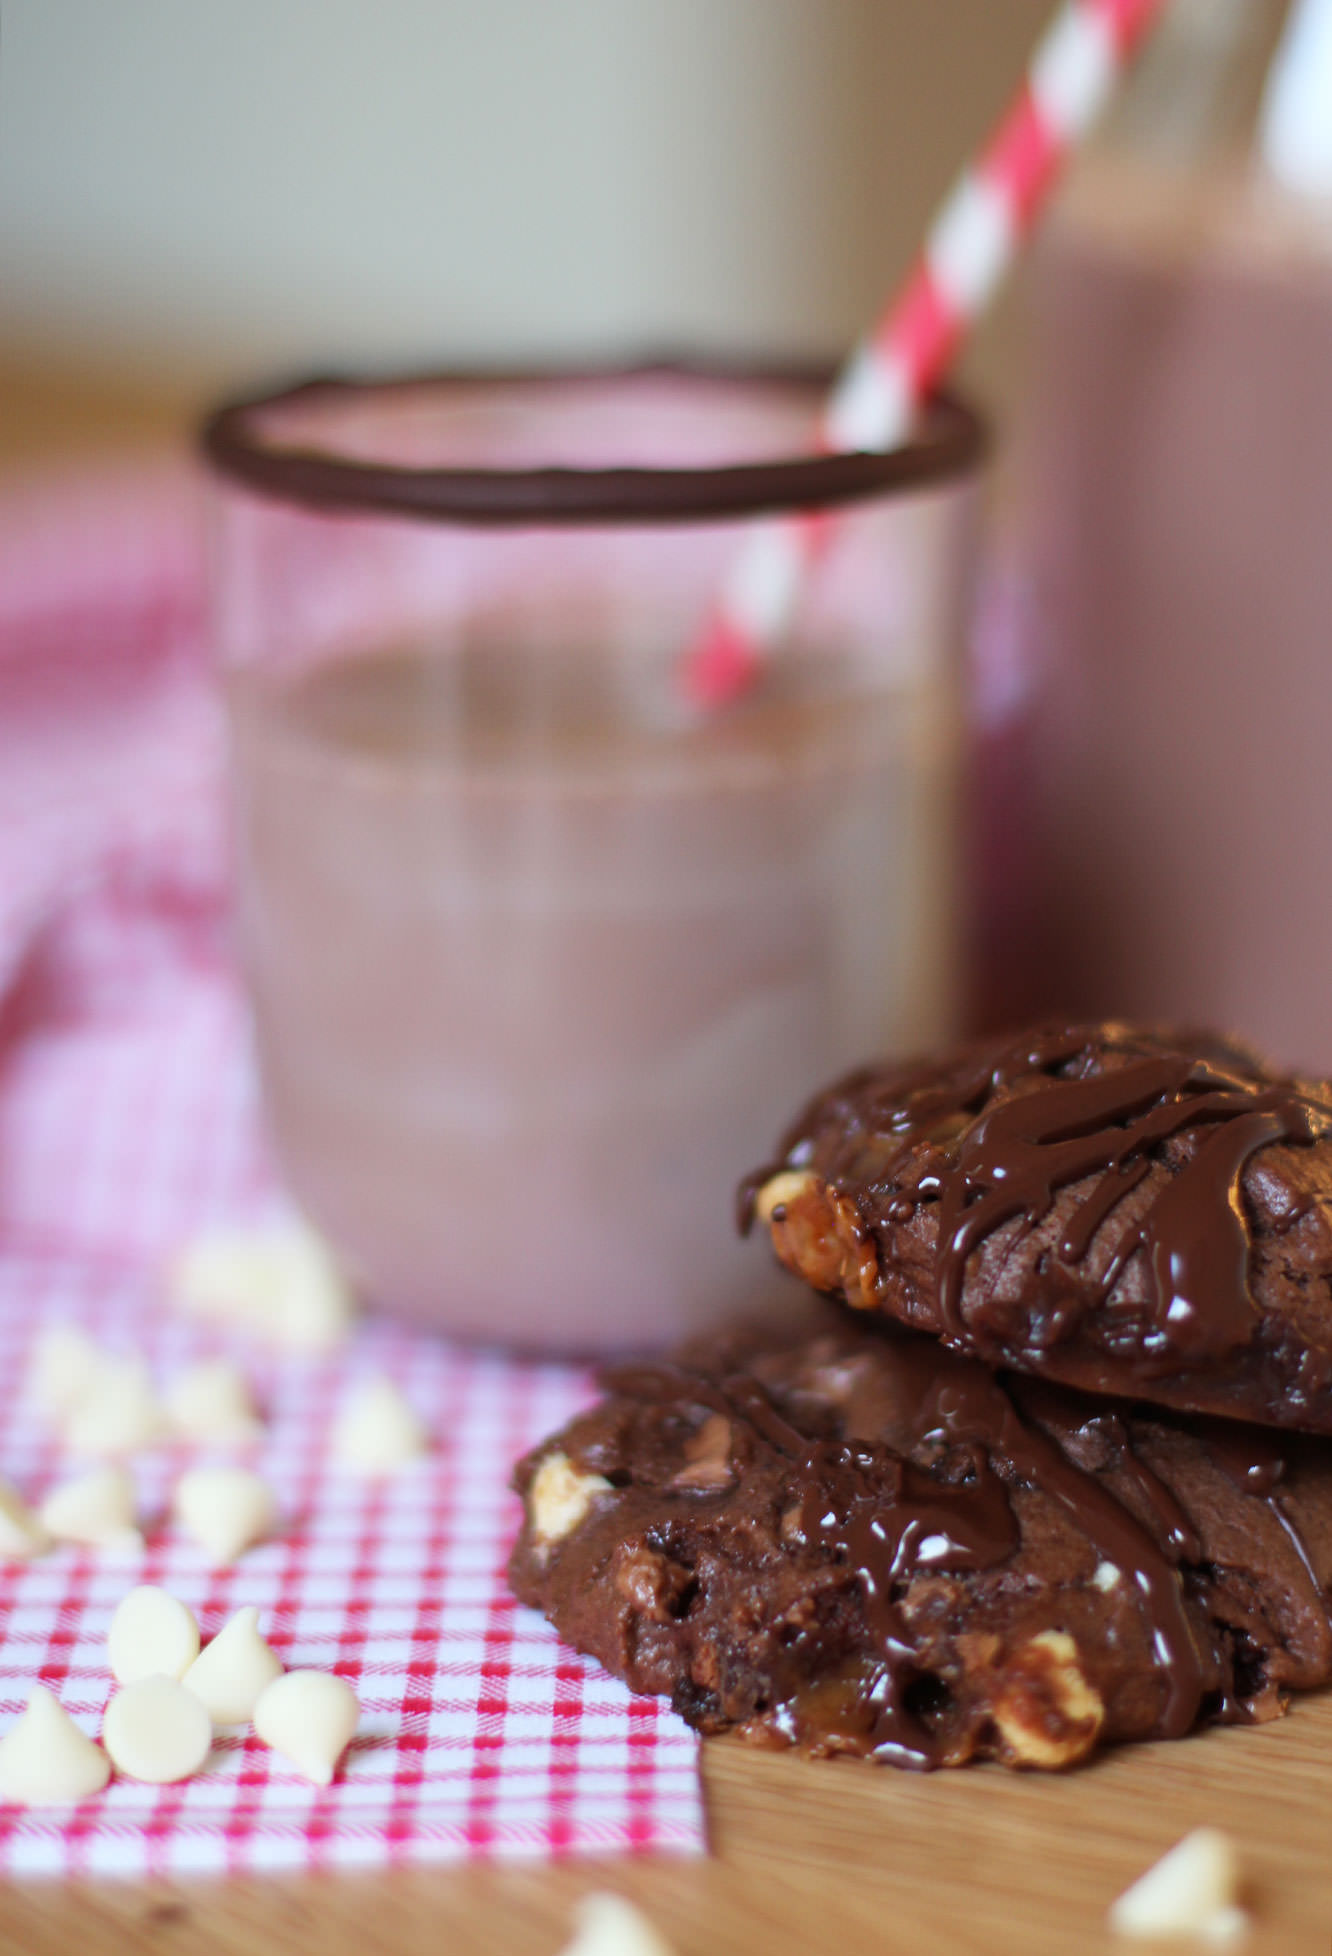
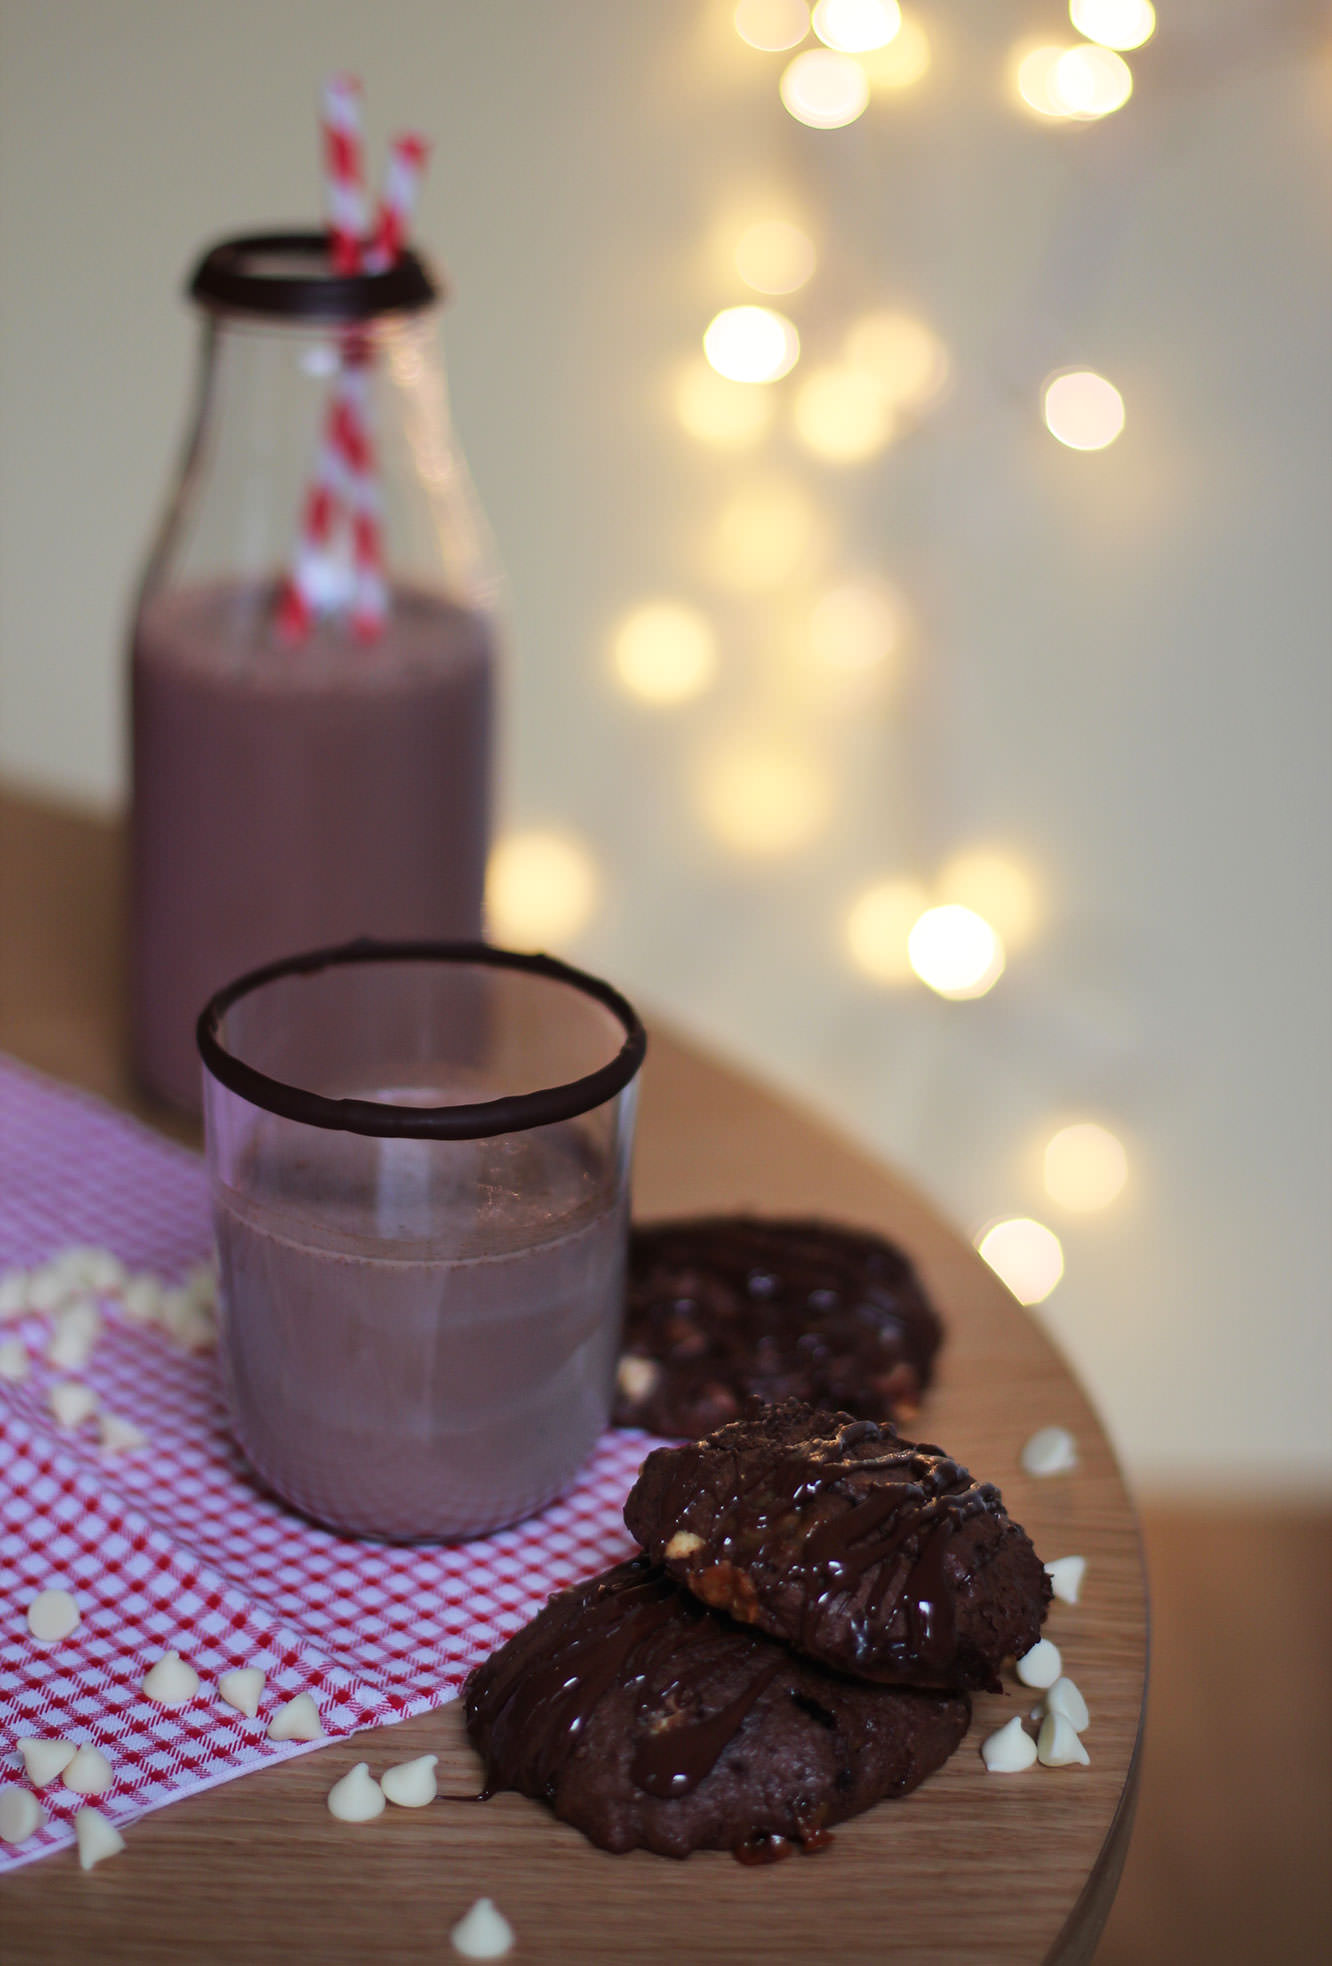
Without further ado here’s an easy Bailey’s (Irish cream) cocktail (which is more like a pudding really) and triple chocolate Mars Bar whookies.
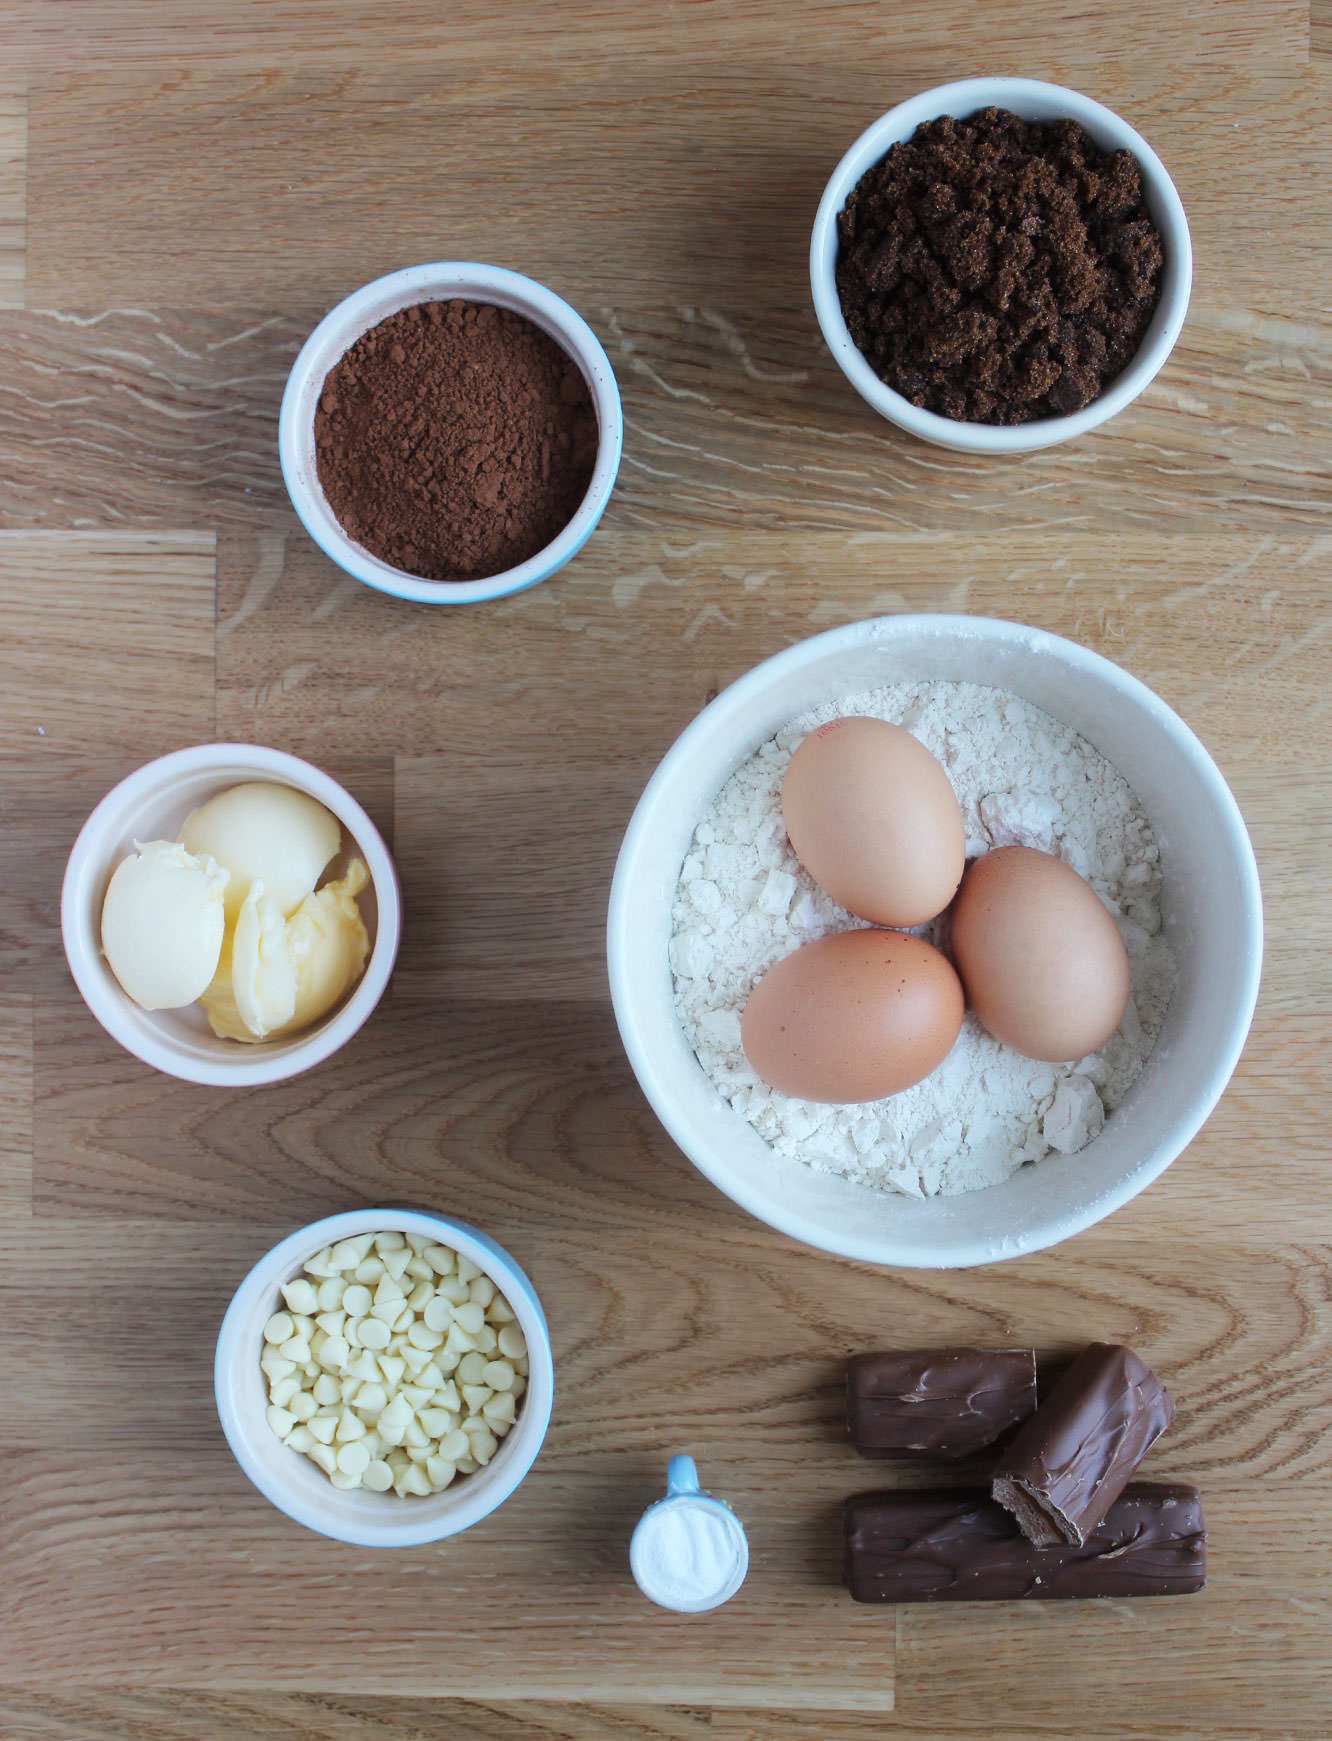
You will need
260g/9 oz Plain flour
150g/5.5 oz Soft dark brown sugar
100g/3.5 oz Unsalted butted
100g/3.5 oz White chocolate chips
40g/1.5 oz Cocoa powder
50-100g/2-3.5 oz Dark chocolate
3 Eggs
3 Mars Bars
1.5 tsp Baking powder
1 tbsp Full fat milk
For the Bailey’s cocktail
Bailey’s Irish Cream
Chocolate milk
50g/2 oz Dark chocolate
Rum/Brandy if you have some (I went without)
A sprinkle of cinnamon and nutmeg
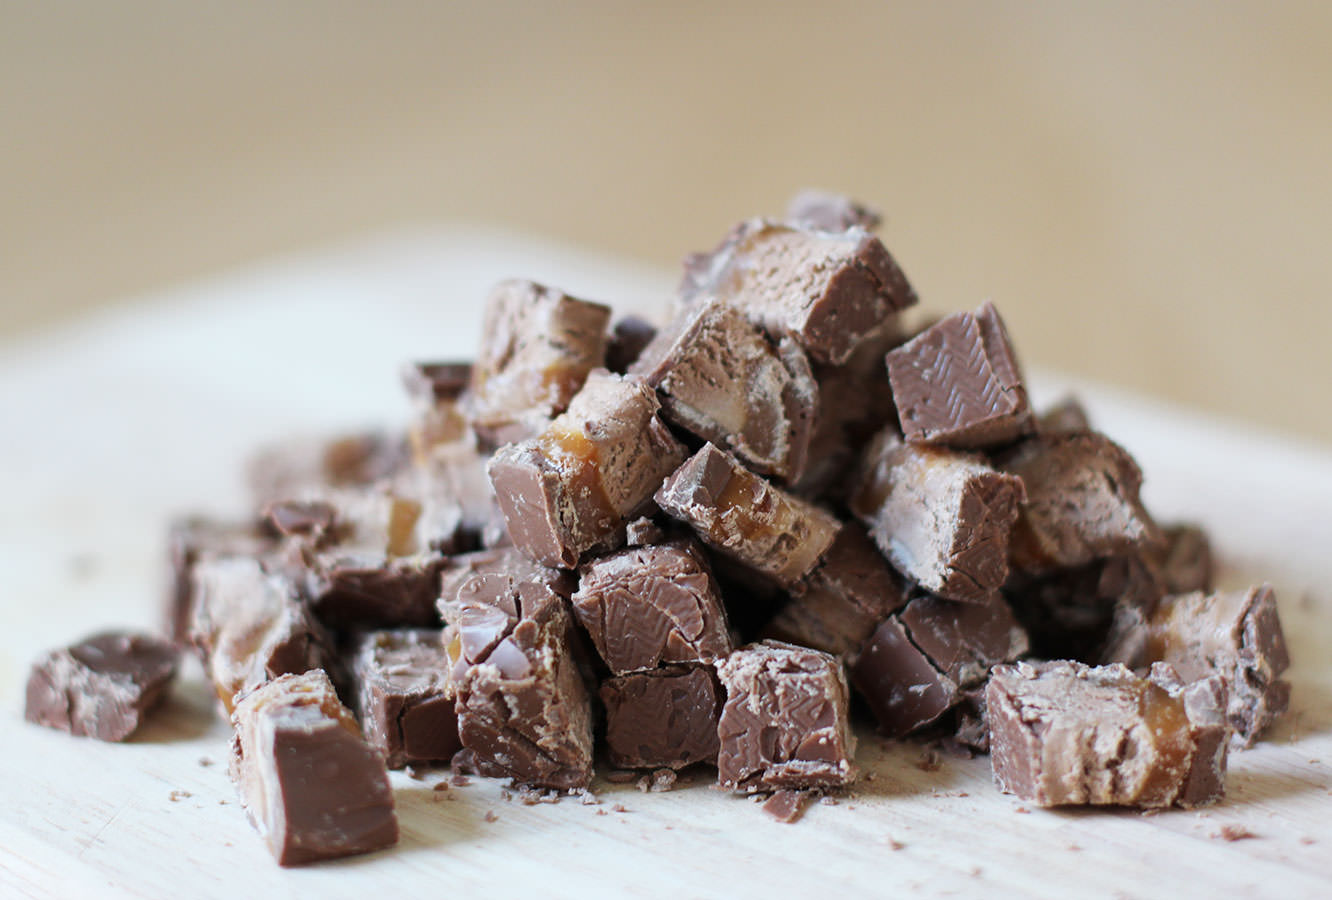
Step one
Chop the Mars bars into small chunks.
If you, like me, can’t control yourself around chocolate, you might want to add an extra one to the mix. There’s just something about chopped up Mars bar that is excessively moorish.
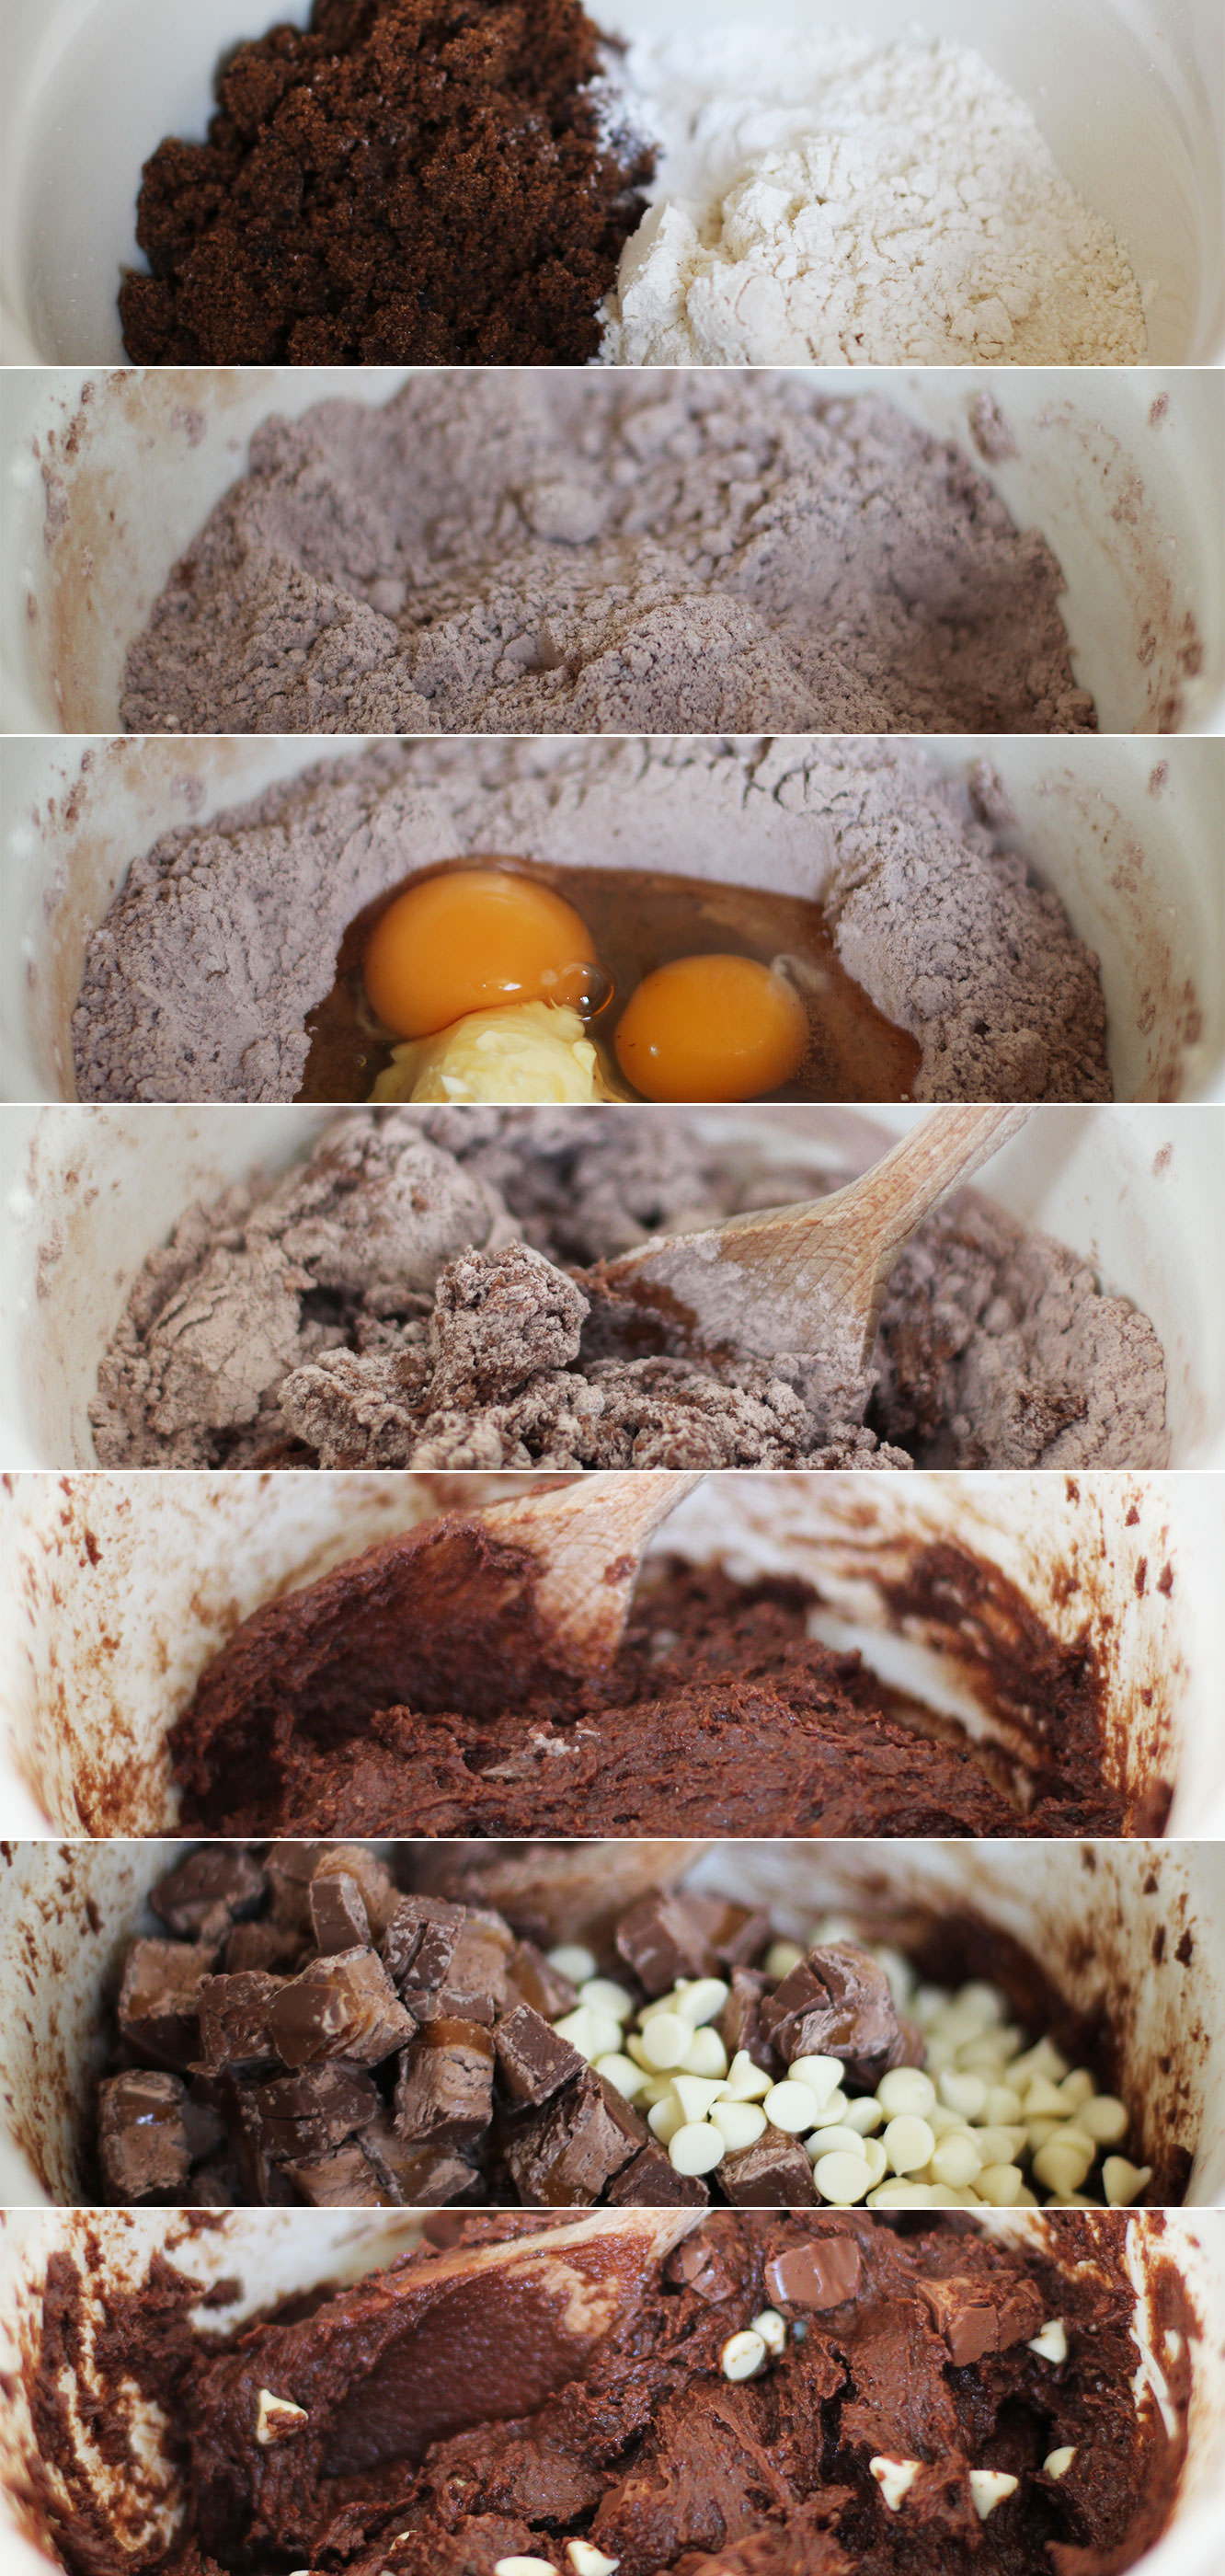
Step two
Combine all the dry ingredients (minus the chocolate) in a large bowl.
Step three
Make a well in the middle and add the eggs, milk and butter. Stir to combine. Ideally your butter will be room temperature, otherwise you’ll be mixing for a while.
Step four
Add the white chocolate and Mars bar and mix again until the chips and chunks are evenly distributed.
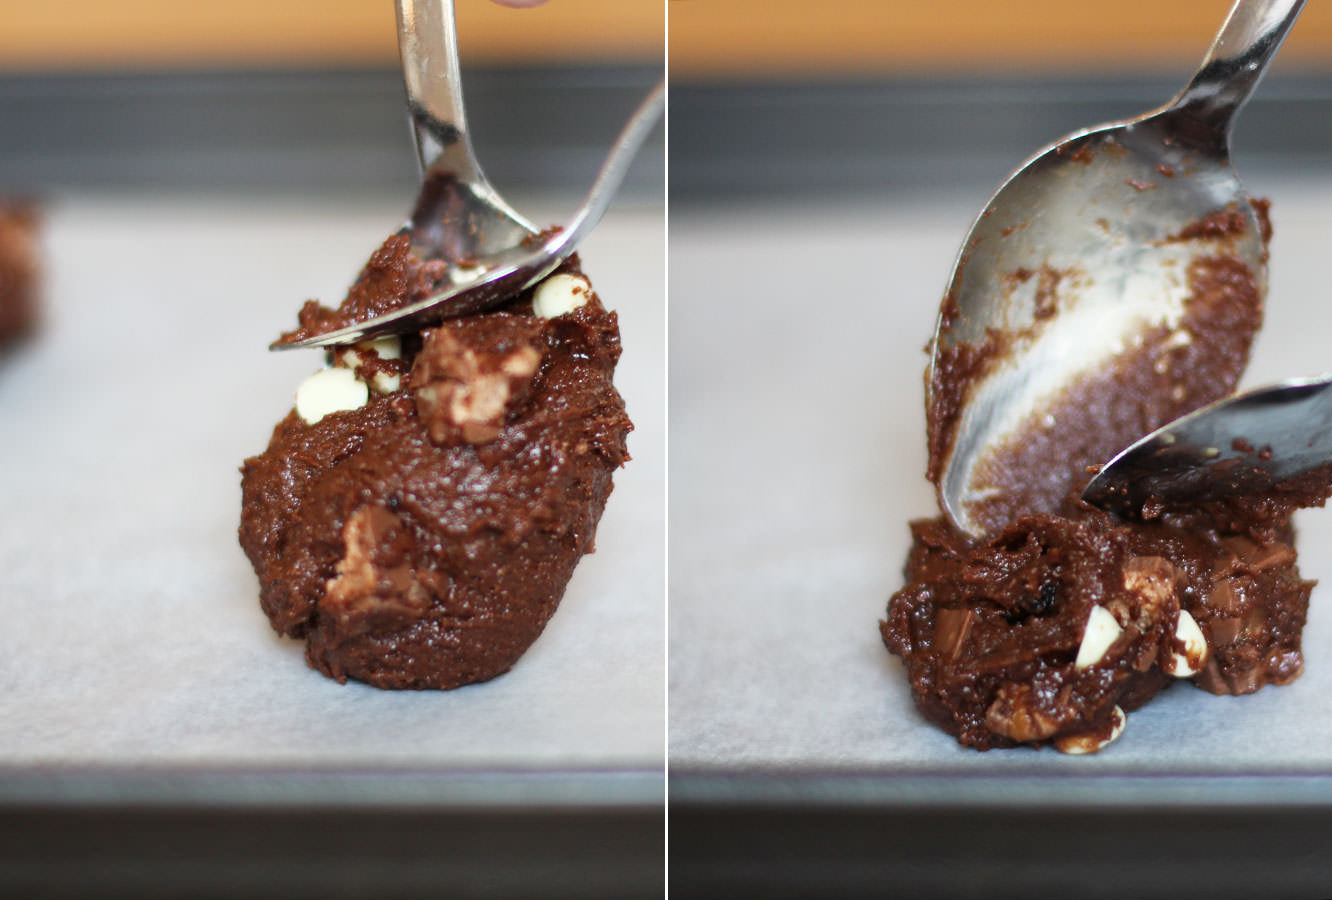
Step five
Drop dessert spoonfuls of the mixture onto baking trays lined with greaseproof paper. They won’t spread too much so flatten down a bit.
Step six
Bake on 180C/gas mark 4/350 F for about 15-20 minutes.
Step seven
Leave to cool and then melt the dark chocolate and drizzle over the top.
Step eight
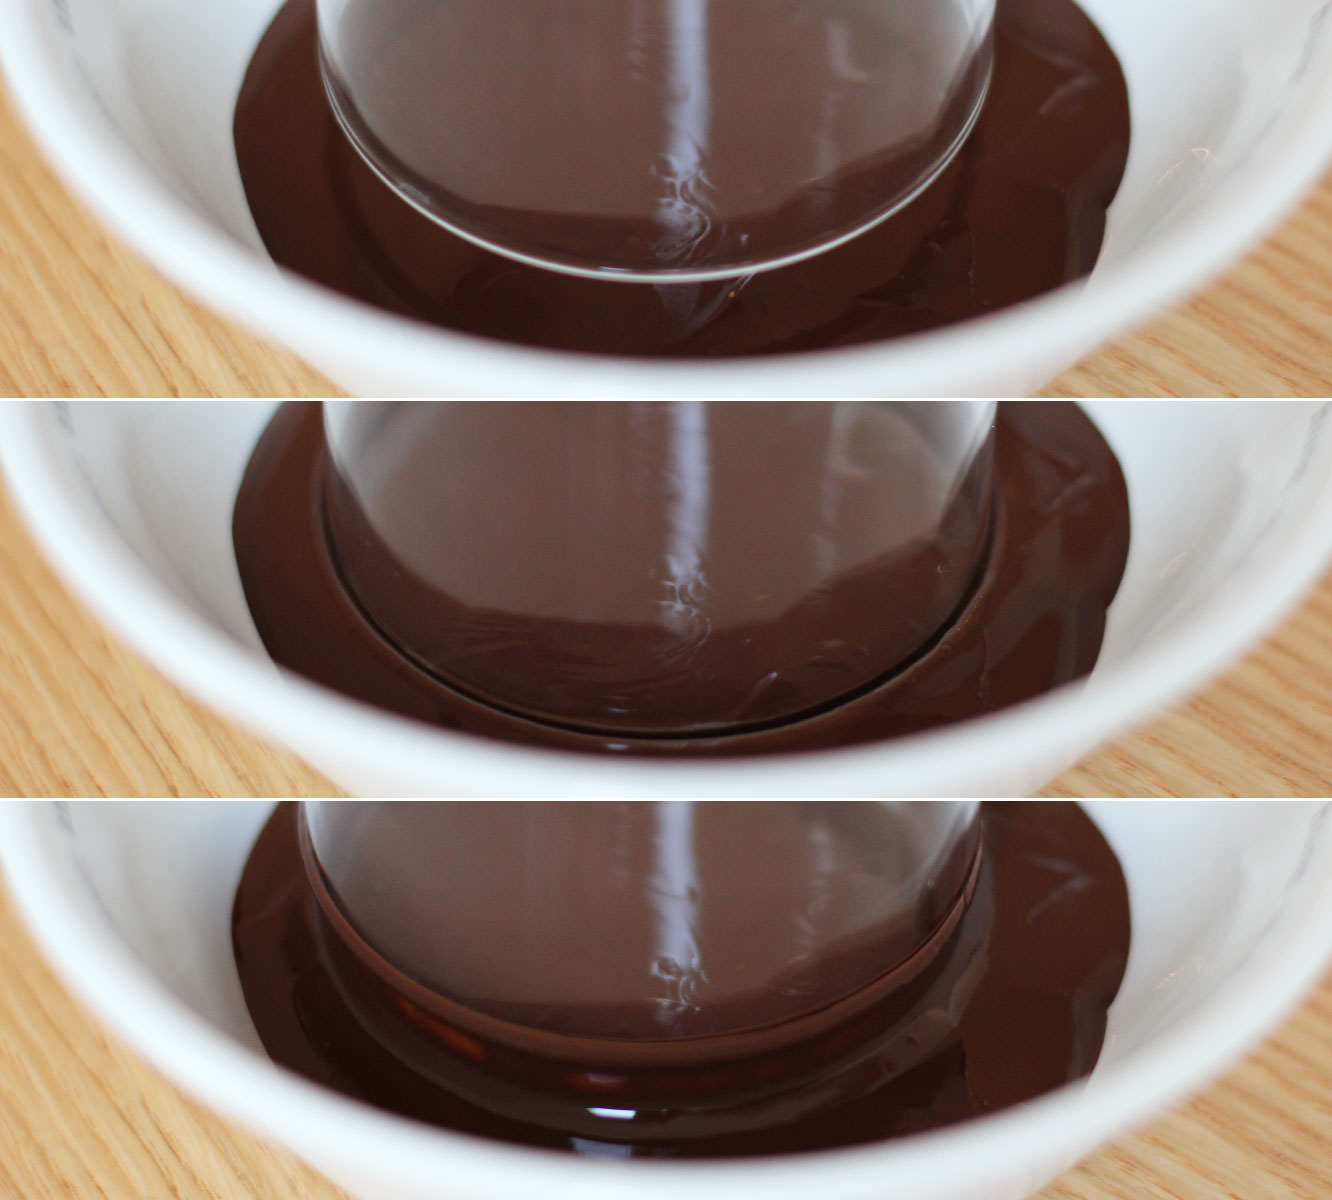
Melt the remaining dark chocolate in a small bowl and dip your glasses in to coat the rim.
Step nine
Add a shot of Baileys (and a dash of rum if you have it). A sprinkle of both cinnamon and nutmeg. Top up with approx 150ml of chocolate milk.
As you can probably tell, I didn’t exactly measure this one out, so go with your taste as a measure.
This week two celebrations collided when my lovely teacher at college had a special birthday and we crept ever closer to the 25th December. Thankfully, teach didn’t mind the seasonally confused gift – Happy Birthday Lana!
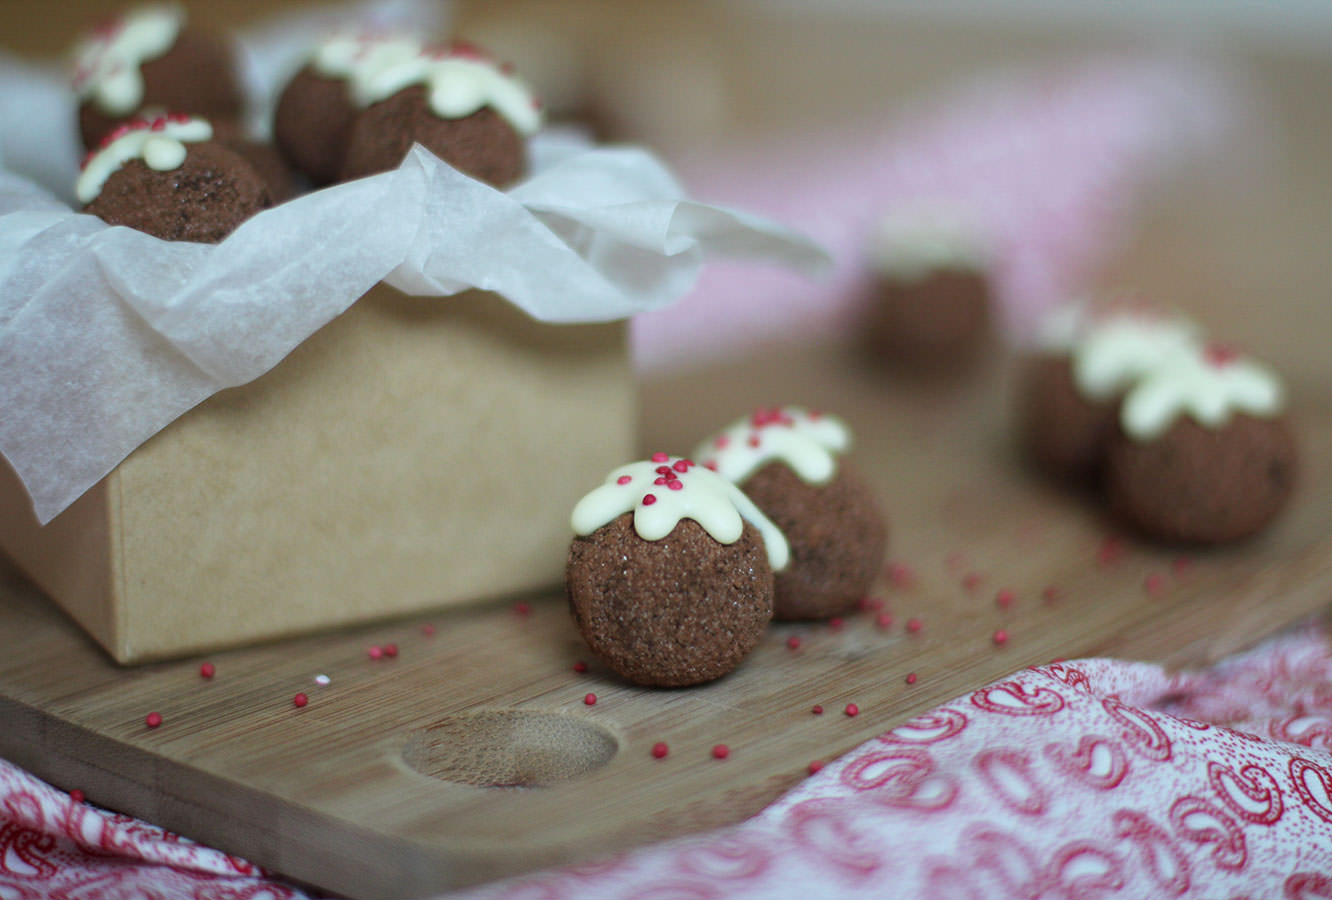
This week it’s Christmas pudding truffles, surprisingly easy to make, and with a large yield they are perfect for last minute gifts on a budget.
You will need
300g/10.5 oz Dark chocolate
100g/3.5 oz White chocolate
300ml/10.5 fl oz Double cream
30g/1 oz Unsalted butter
Red sprinkles
Cocoa and caster sugar for dusting
(Makes 60-70)
Step one
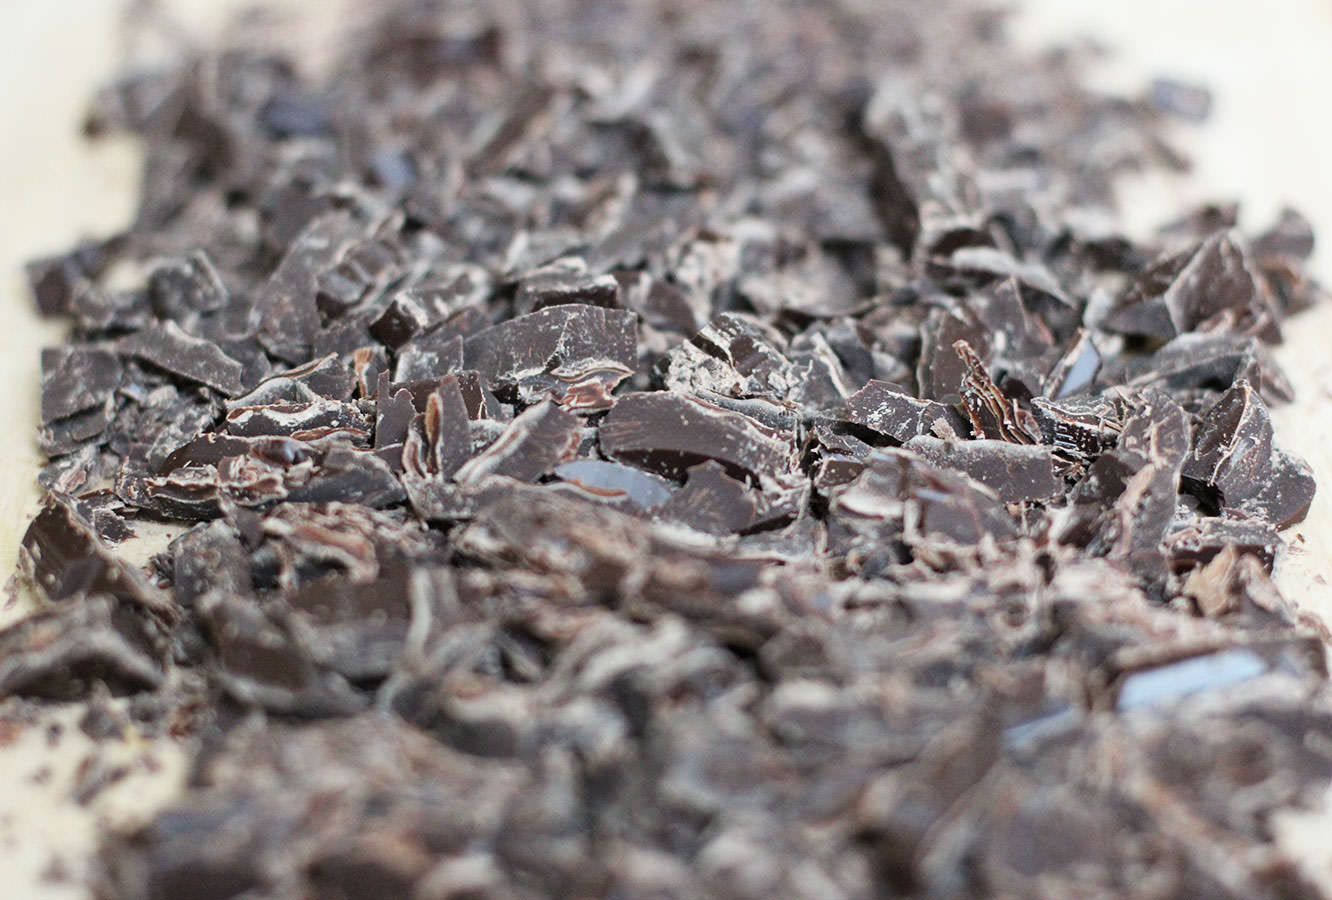
Chop the dark chocolate finely using a bread knife. Resist the urge to eat it all.
Step two
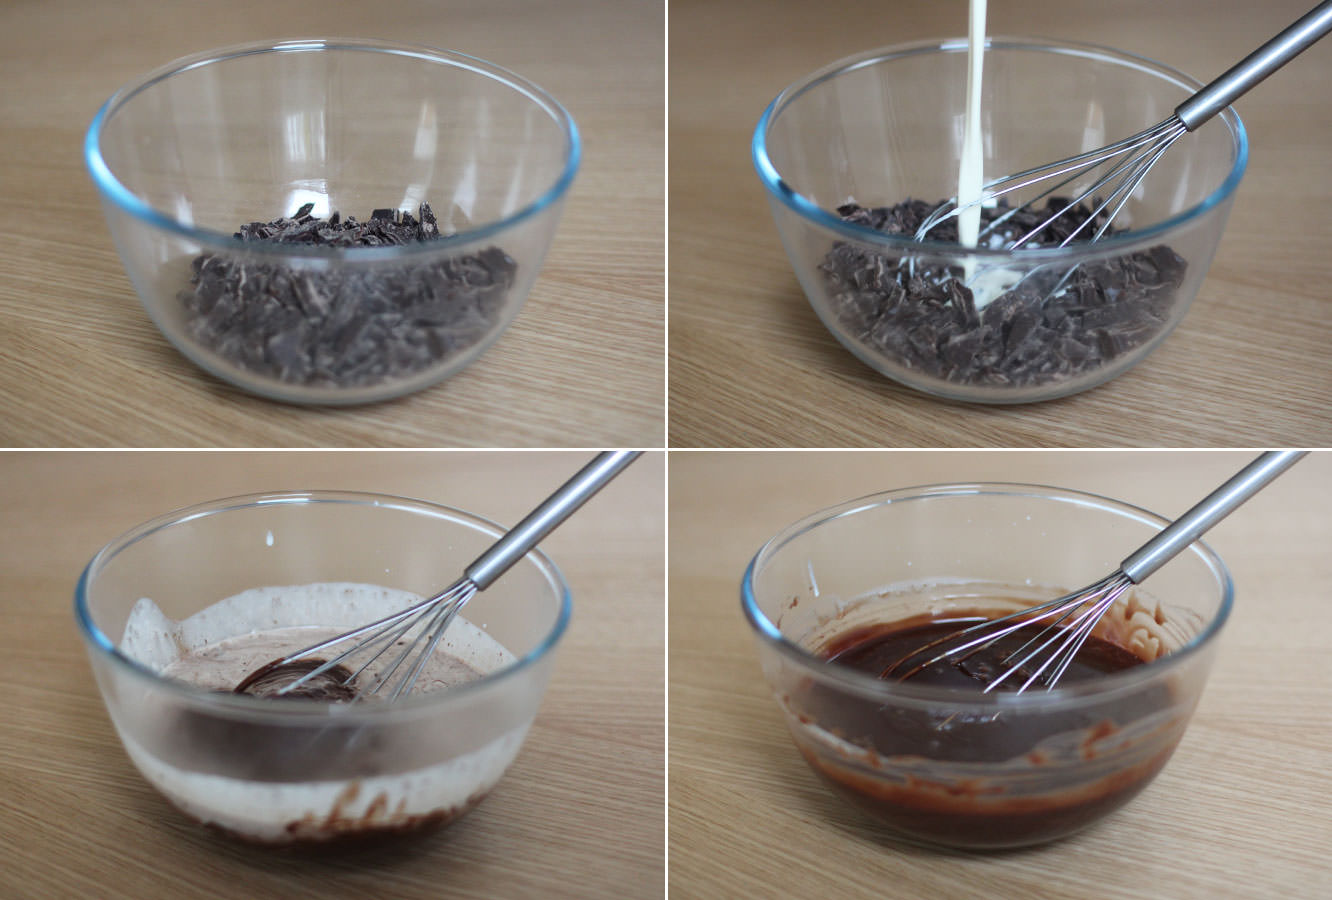
Heat the cream and butter gently in a saucepan. Wait until it starts to bubble and steam dances across the surface. There is no need to let it boil, as Mary Berry always says – chocolate melts in a child’s pocket.
Step three
Take the cream off the heat and whisk into the chocolate until fully melted. Place in the fridge to speed up the setting process.
Step four
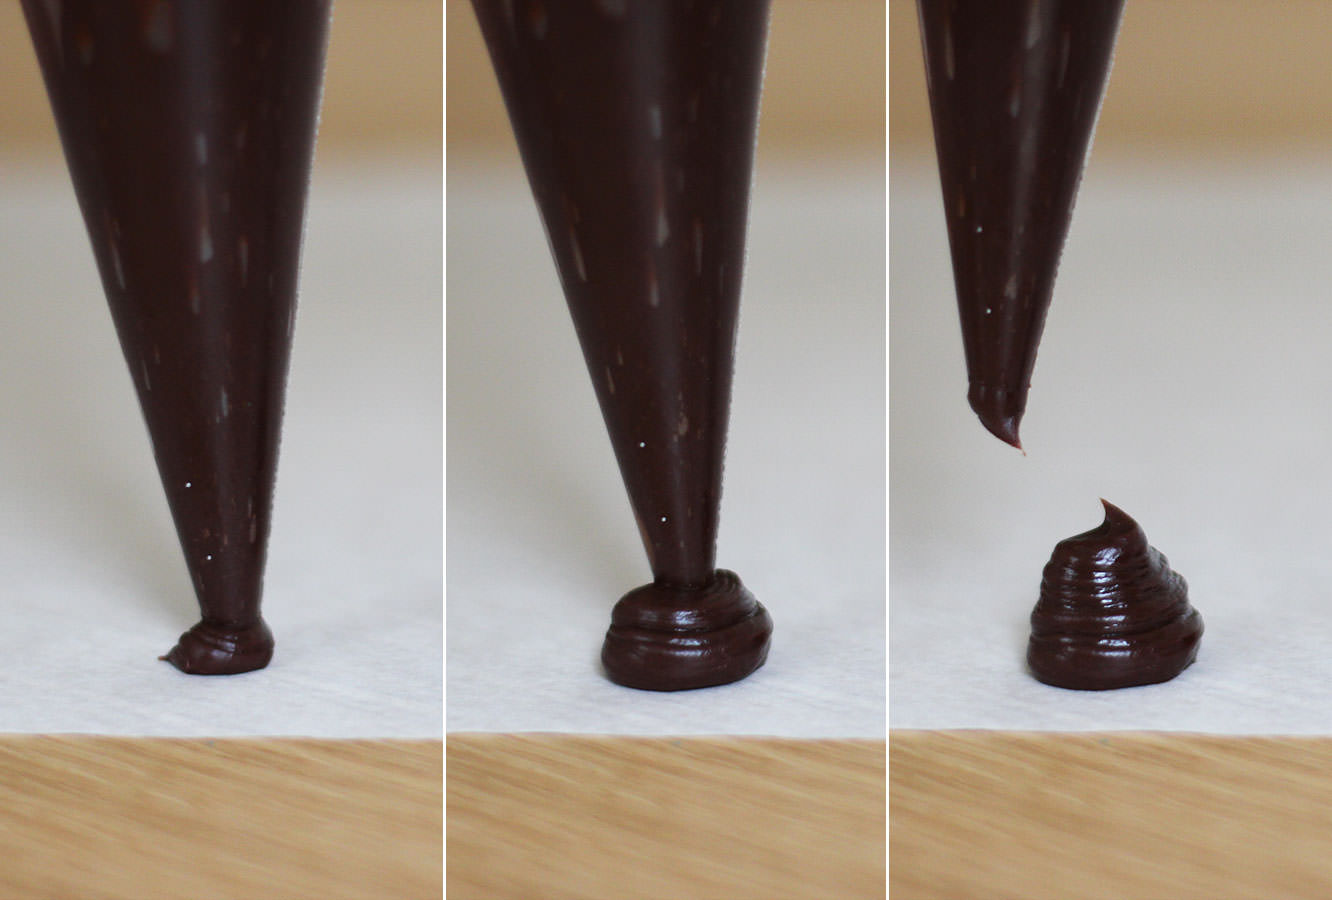
Check regularly on the truffle mix, don’t let it harden fully. Once a spoonful holds its shape when dropped onto the rest of the mixture it’s pipe-able.
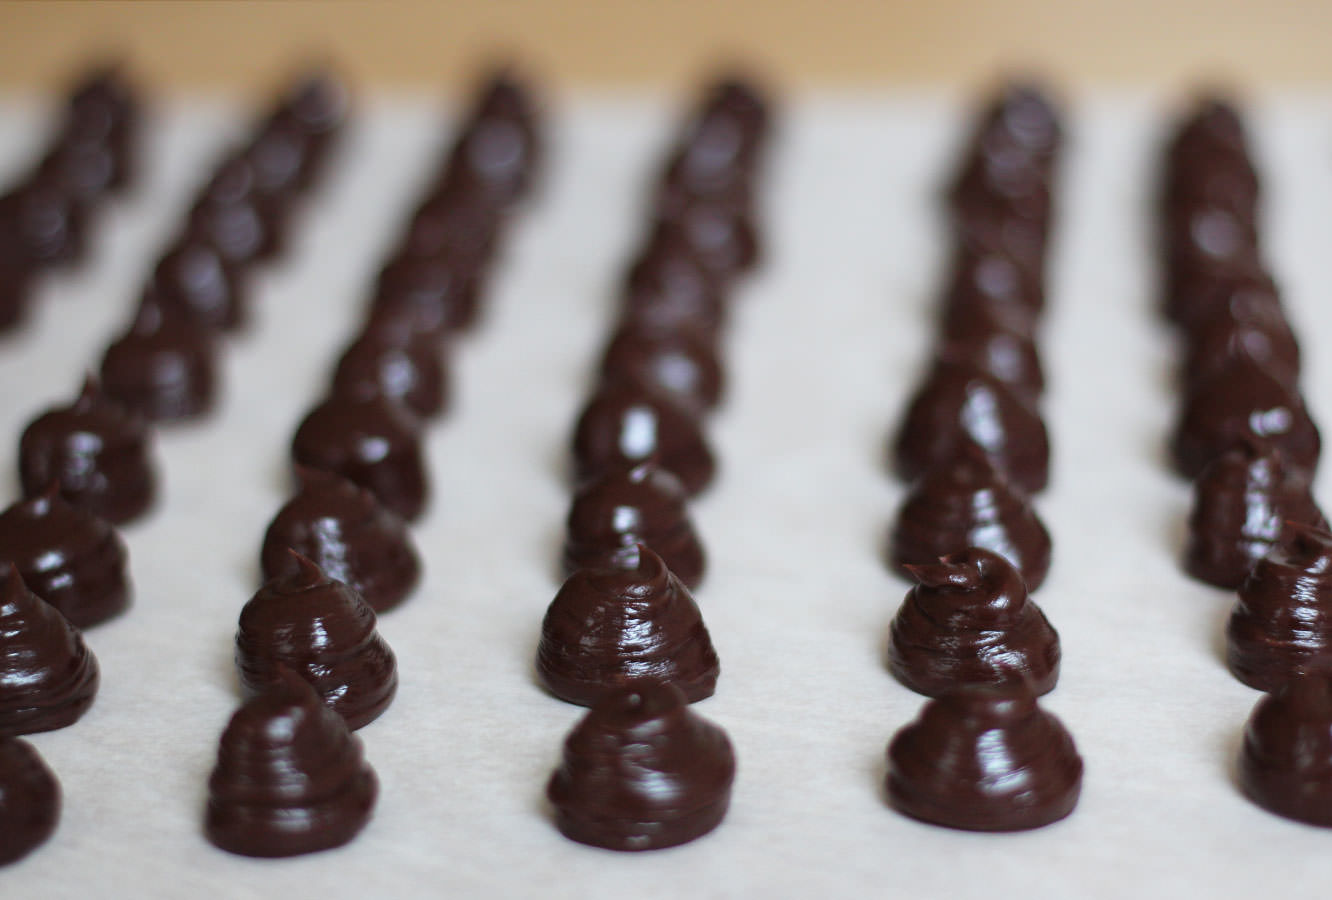
Place into a piping bag, and, holding it perpendicular to the greaseproof paper (which you have put down as instructed, um, nowhere in this post) squeeze downwards. Don’t worry if these are a bit misshapen, it’s just to make sure they’re roughly the same size.
Step five
Pipe pipe pipe.
Leave to set a bit longer, preferably with a window open to cool the truffle down quickly. The truffles won’t thank your winter central heating.
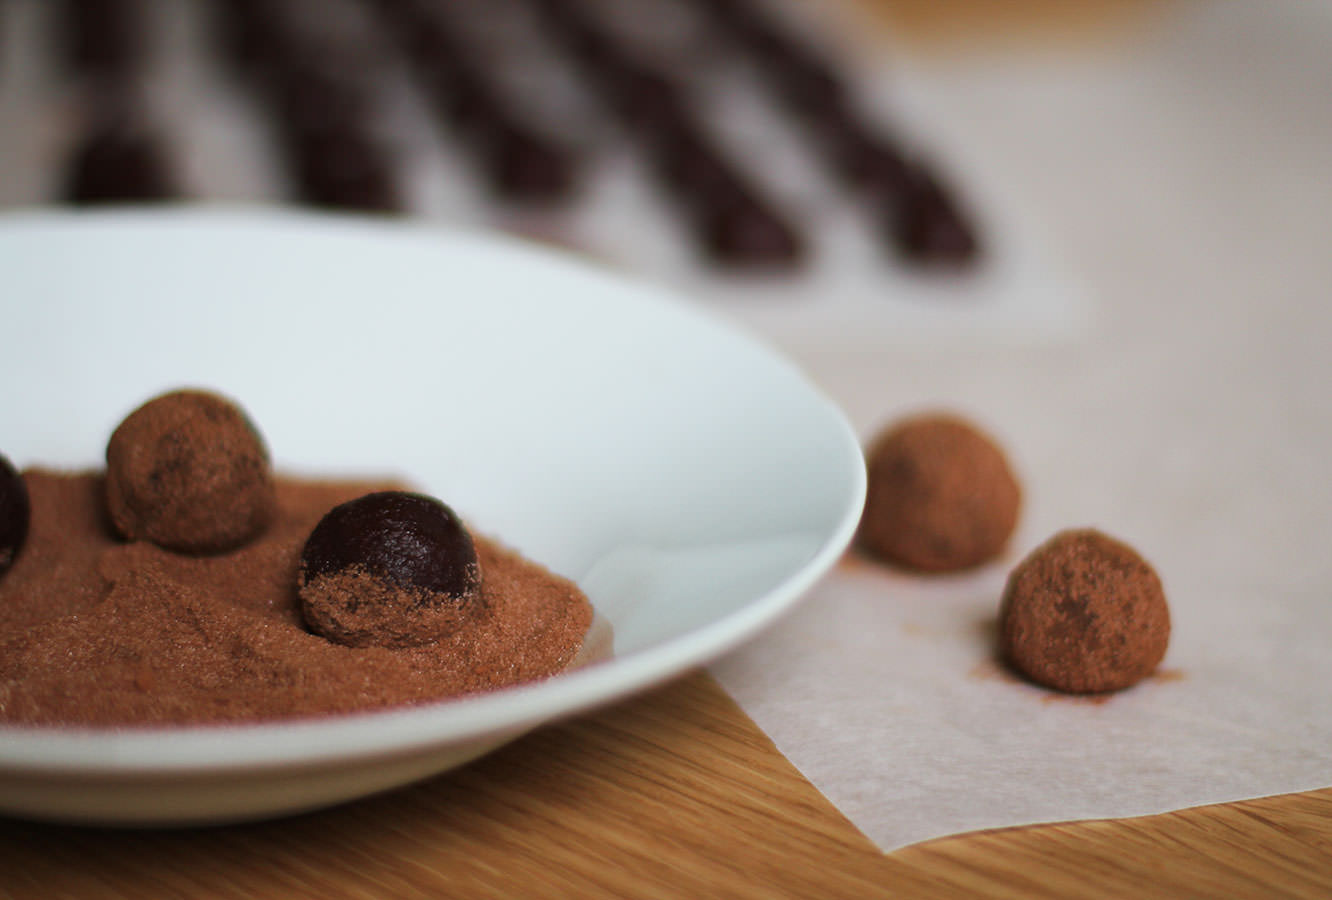
Step six
When the truffles are set roll them into balls. You will need fairly cold hands for this, so rinse them in cold water.
Step seven
Dust the truffles in cocoa and caster sugar. I mixed these at random so I’m not sure on quantities, but I used about two thirds caster sugar to a third cocoa powder.
I dusted as I rolled, as hands warm the outside of the truffles so the caster sugar will stick.
Step eight
Melt the white chocolate slowly in the microwave, pipe little splodges and drop some red sprinkles on top. I got these from Sainsbury’s, so not too hard to track down.
Leave the white chocolate to set and pack away your truffles into little bags or boxes and spread the Christmas (or Birthday) cheer!
On the first day of December it feels a little rude to not present you with a Christmas post. I’m a huge fan of the festive season, so you’re lucky I held back as long as I did.
Last year I was meandering around a craft fair and spotted a lino print stall. Now I tried lino printing at secondary school, and it made me a bit cross. I am a big fan of precision and this craft definitely comes with a dollop of ‘rustic handmade’.
This was my first bash at lino cutting and printing since the age of 14 I figure the extra years of ‘get over yourself’ and the added dexterity contributed significantly to making this a very satisfying little project.
You do need a little more ‘specialist’ equipment this time than usual, but you can set yourself up relatively cheaply with the kit. I used a combo of Amazon and Handprinted.
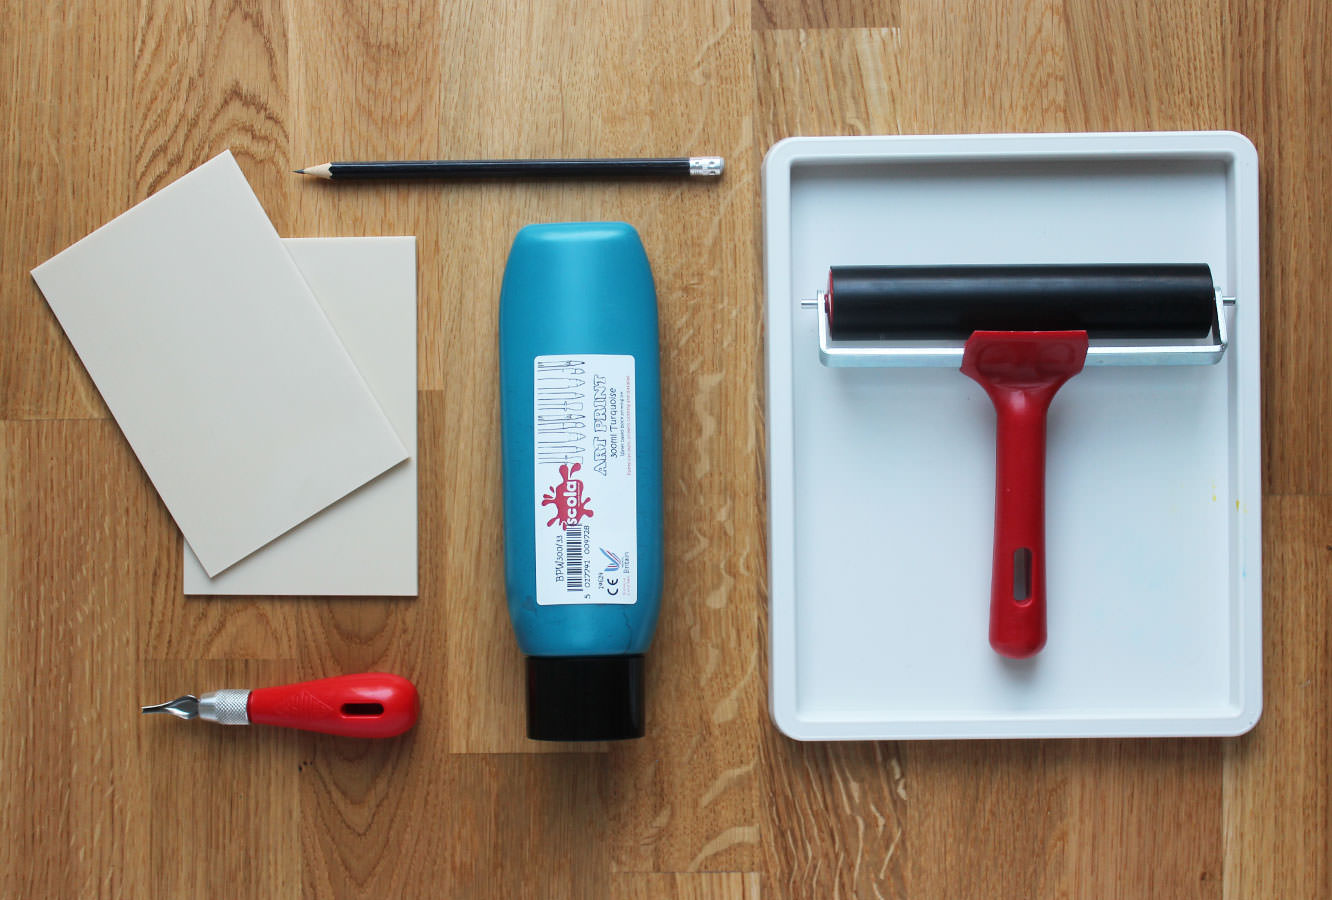
You will need
Ink tray
Ink brayer
Ink
Lino cutter (preferably with a choice of blades)
Greeting card blanks
Soft cut lino sheets (the size of your card blanks)
Tracing paper or greaseproof
Step one
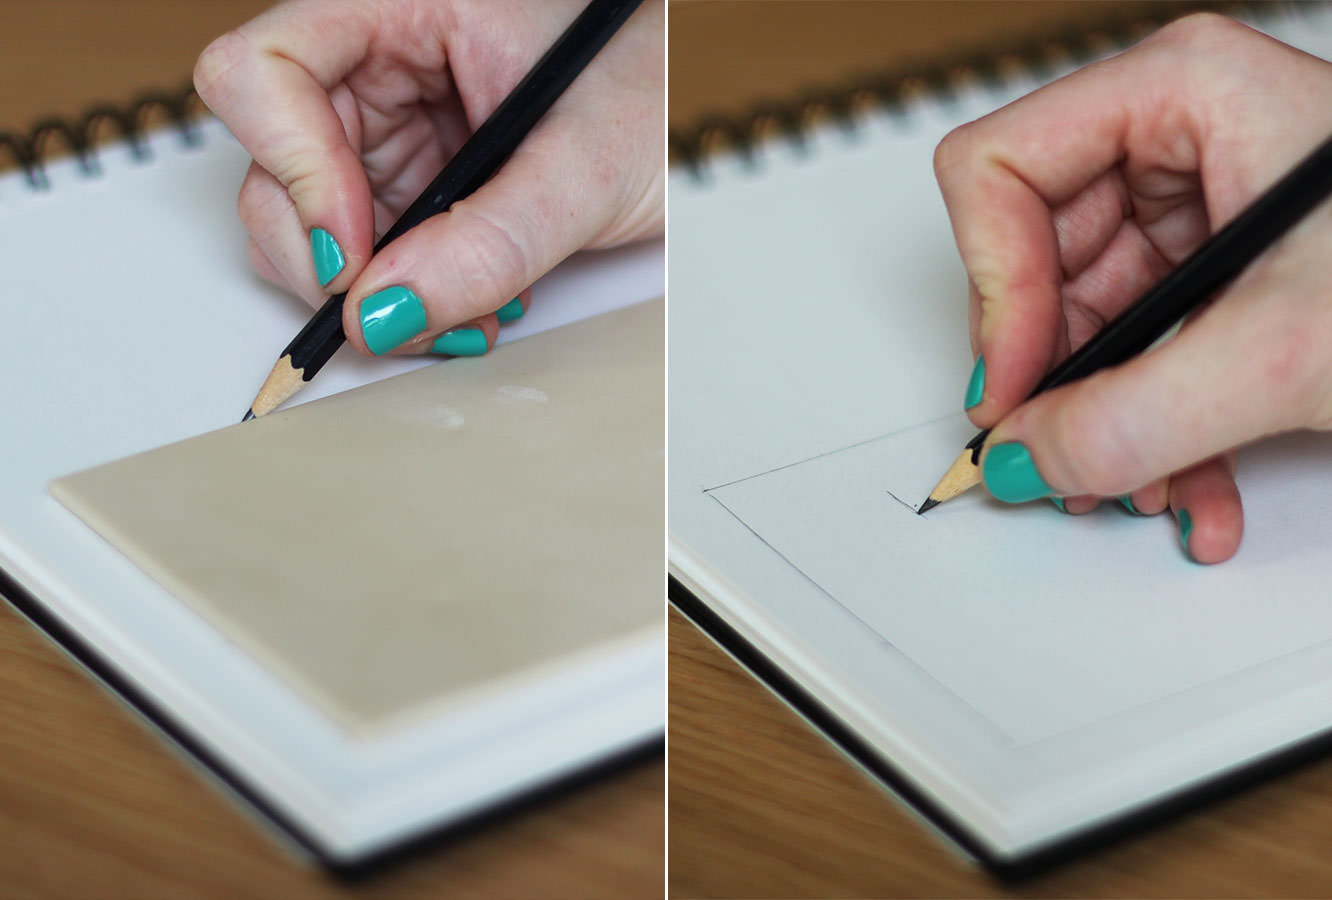
Draw around the outside of your sheet of lino so you don’t make your design too big.
Sketch out a word/picture. For your first cut I would avoid anything too intricate or with lots of corners. I went with letters in the end so I could cover up mistakes if I went wrong… I figured a lopsided squinty eyed penguin might just look a bit sad.
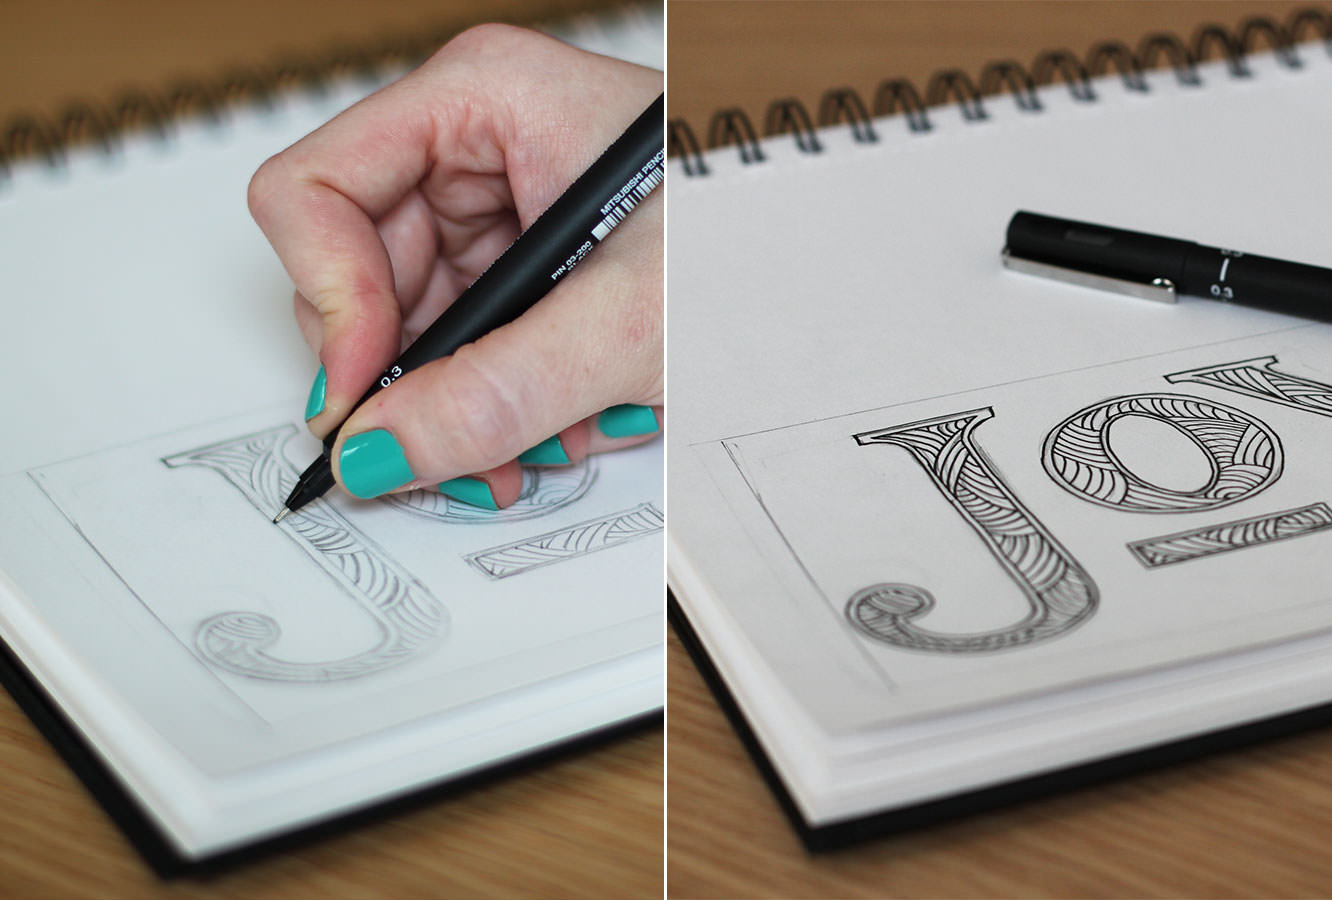
Step two
This is not essential but I outlined the design to make it easier to trace. This also helps neaten out/correct any mistakes.
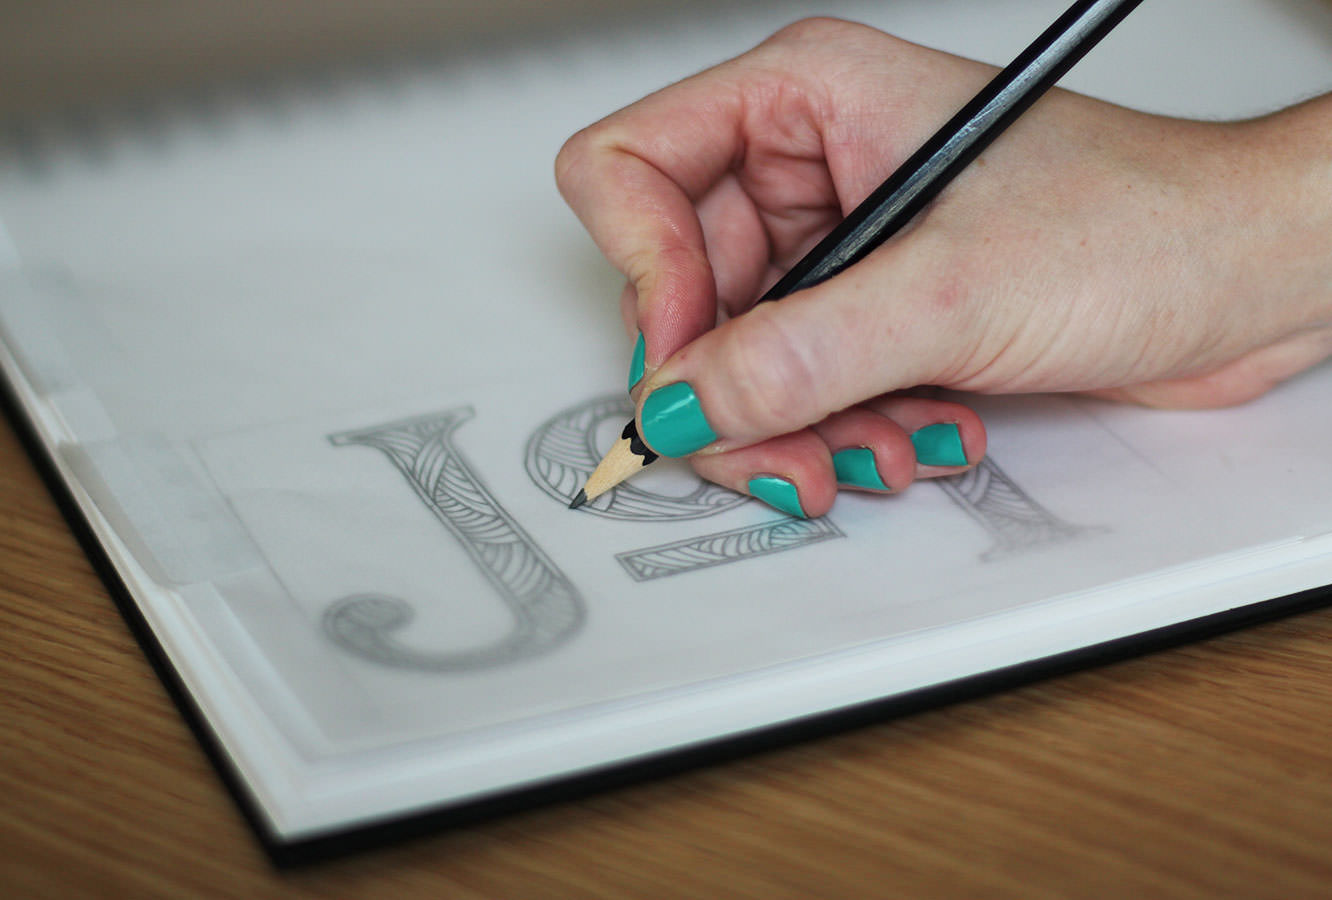
Step three
Tape a piece of tracing paper or greaseproof to your design and draw over quite firmly in pencil.
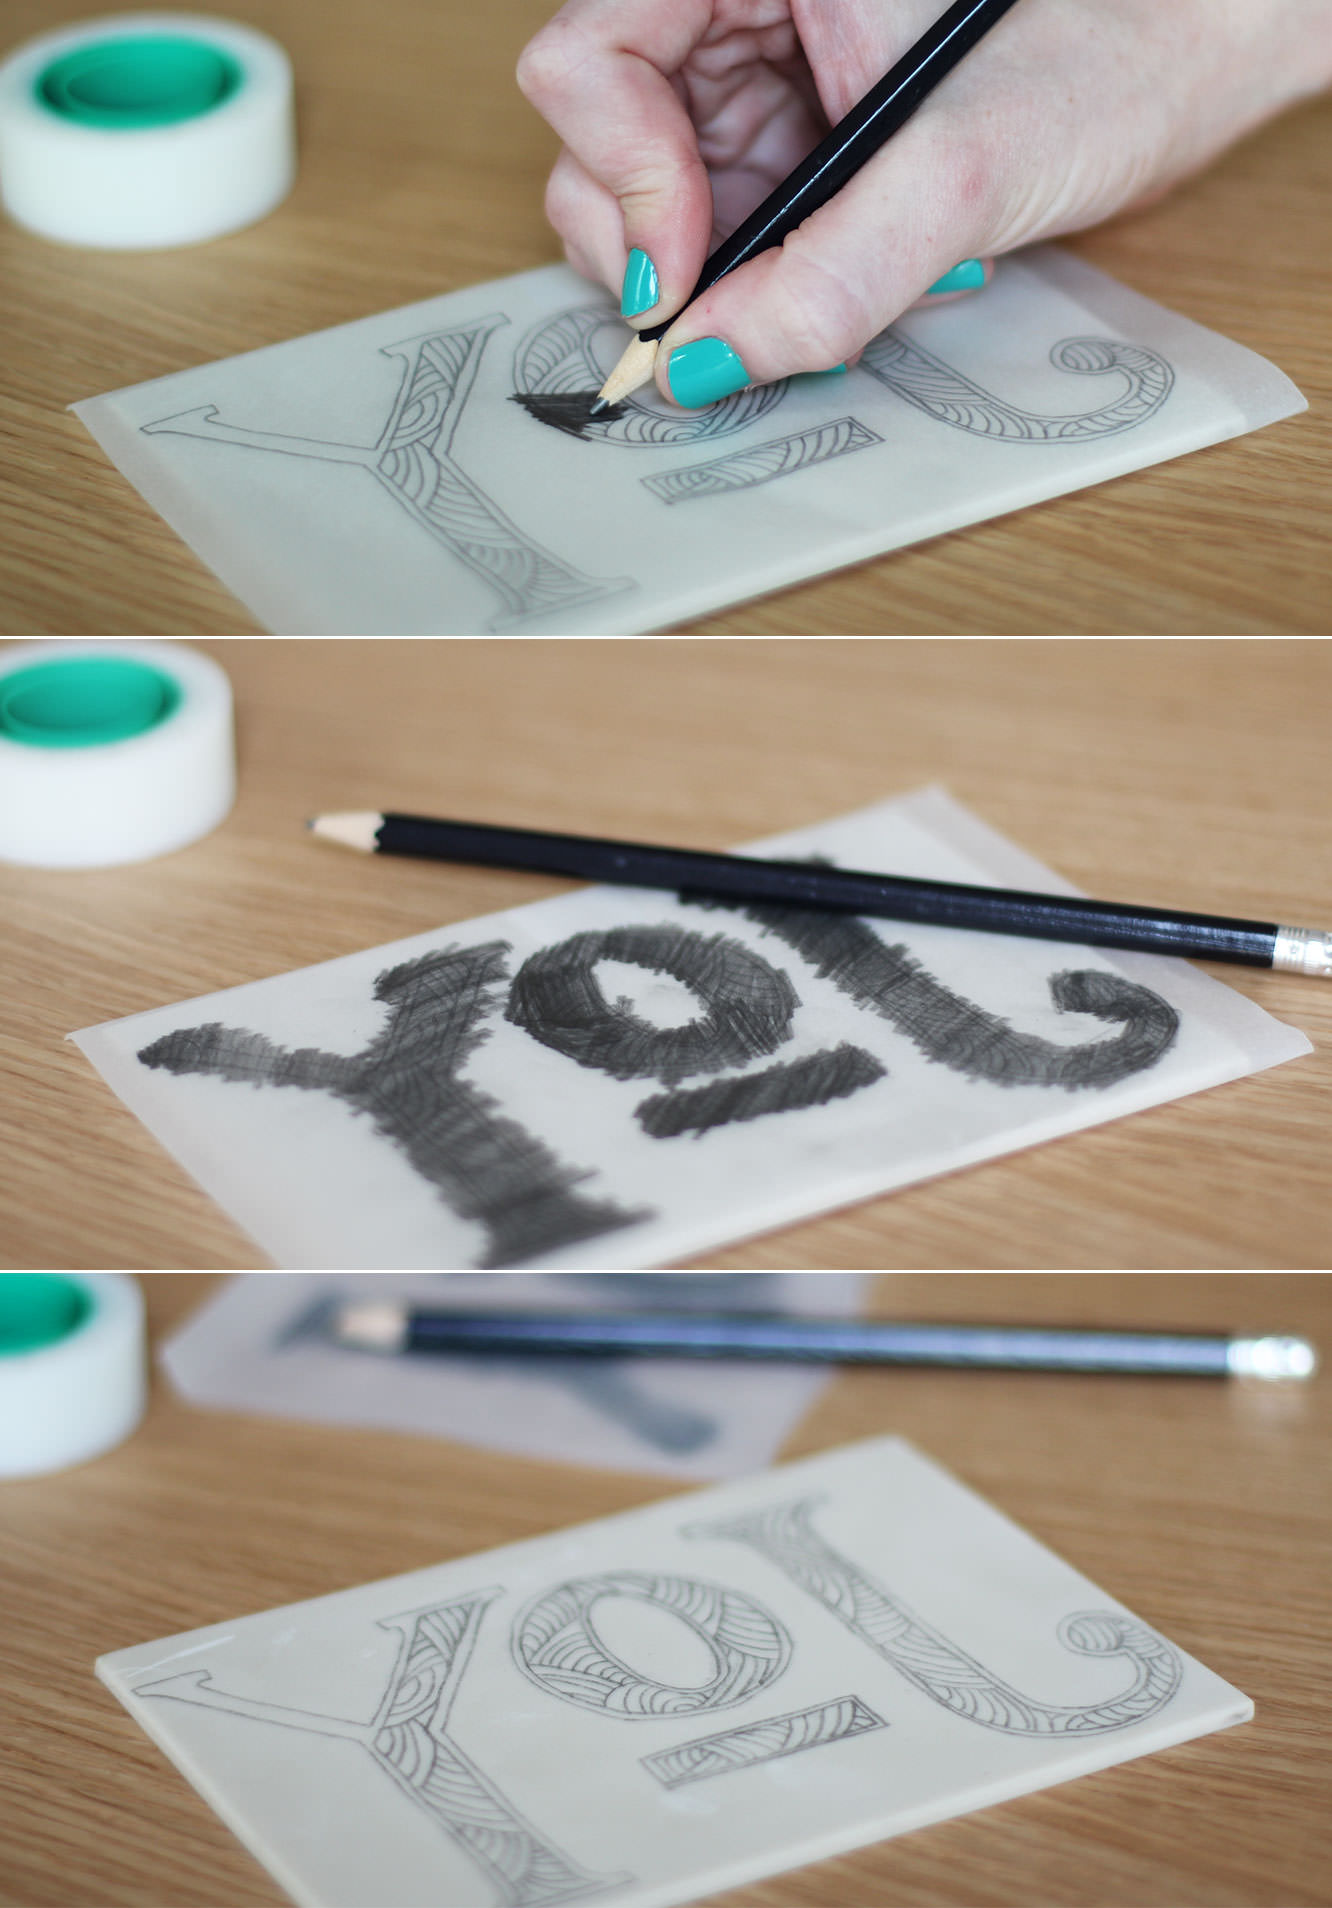
Step four
Place the traced image upside-down on your lino tile, so that the pencil marks you just made are touching the surface, not facing out.
Scribble over the top to transfer the image to the tile. Be careful to use pressure without being too forceful otherwise you might make an indent on the lino that you don’t want.
NB: As an alternative to steps 1-4 you might prefer to draw straight onto the tile. However, again, be careful not to press too hard with the pencil and remember that your design will be reversed when printed, so any lettering needs to be back to front.
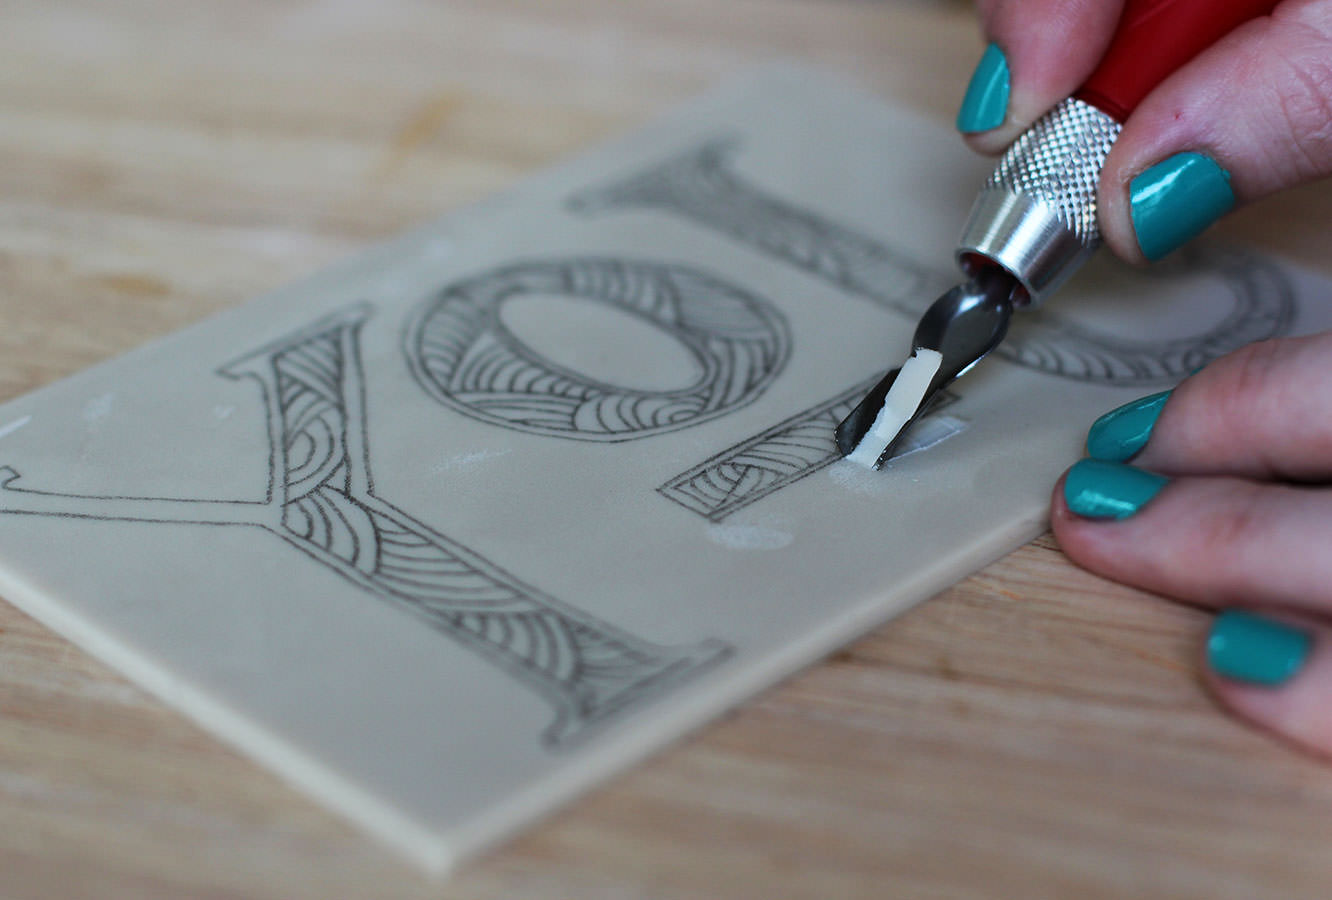
Step five
Place the lino in the middle of a chopping board. Nobody needs to go gouging any holes in their dining room table under my instruction thank you very much.
Using one of the wide cutters (labelled #10 in my pack) remove as much background space as you can. I started by making a gutter around my letters to avoid accidentally slipping into them.
My lino cutting skills leave a lot to be desired, but I’ll get better and so will you. Try not to worry too much if you accidentally cut something you’re not meant to.
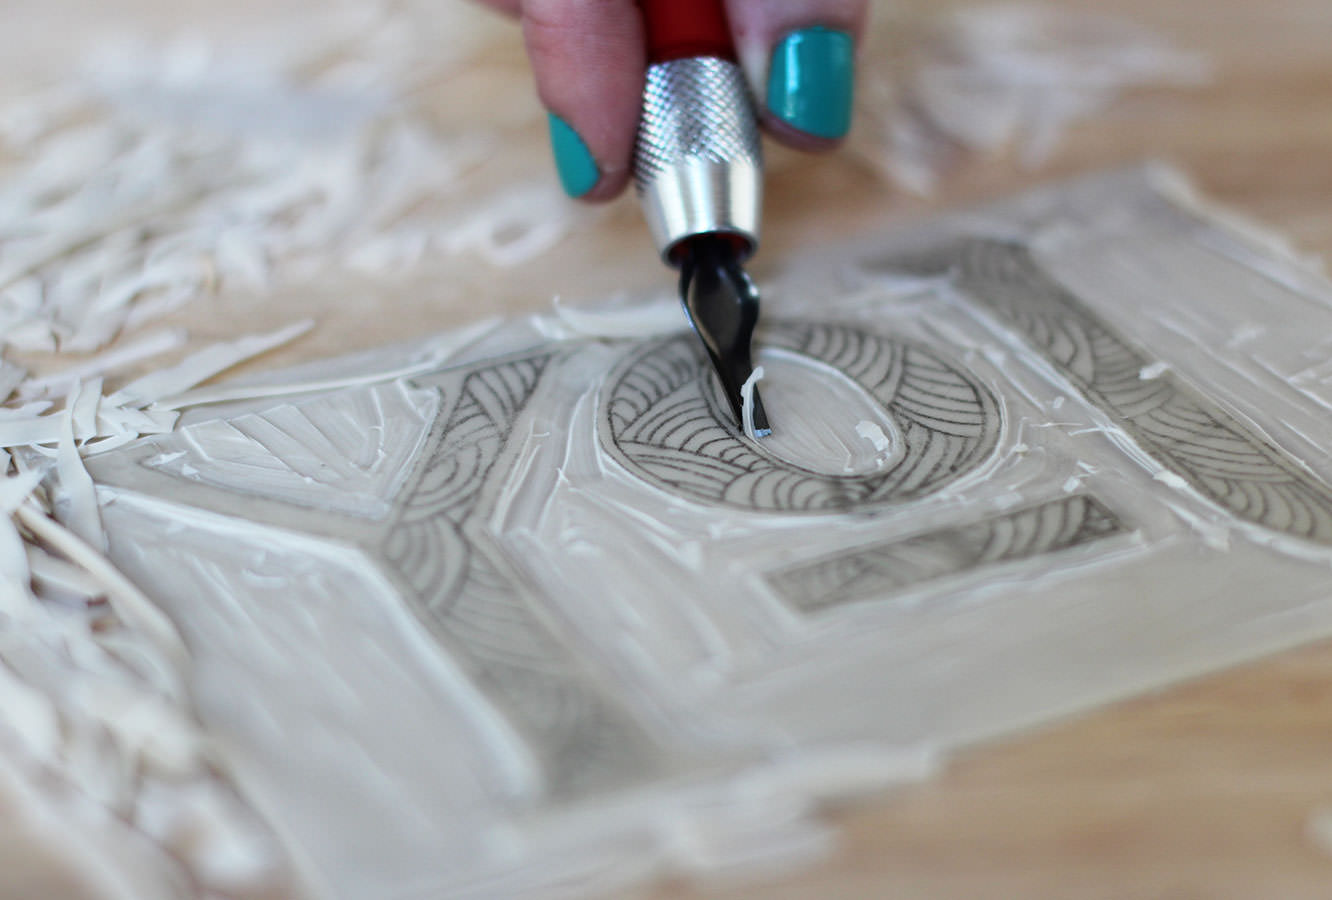
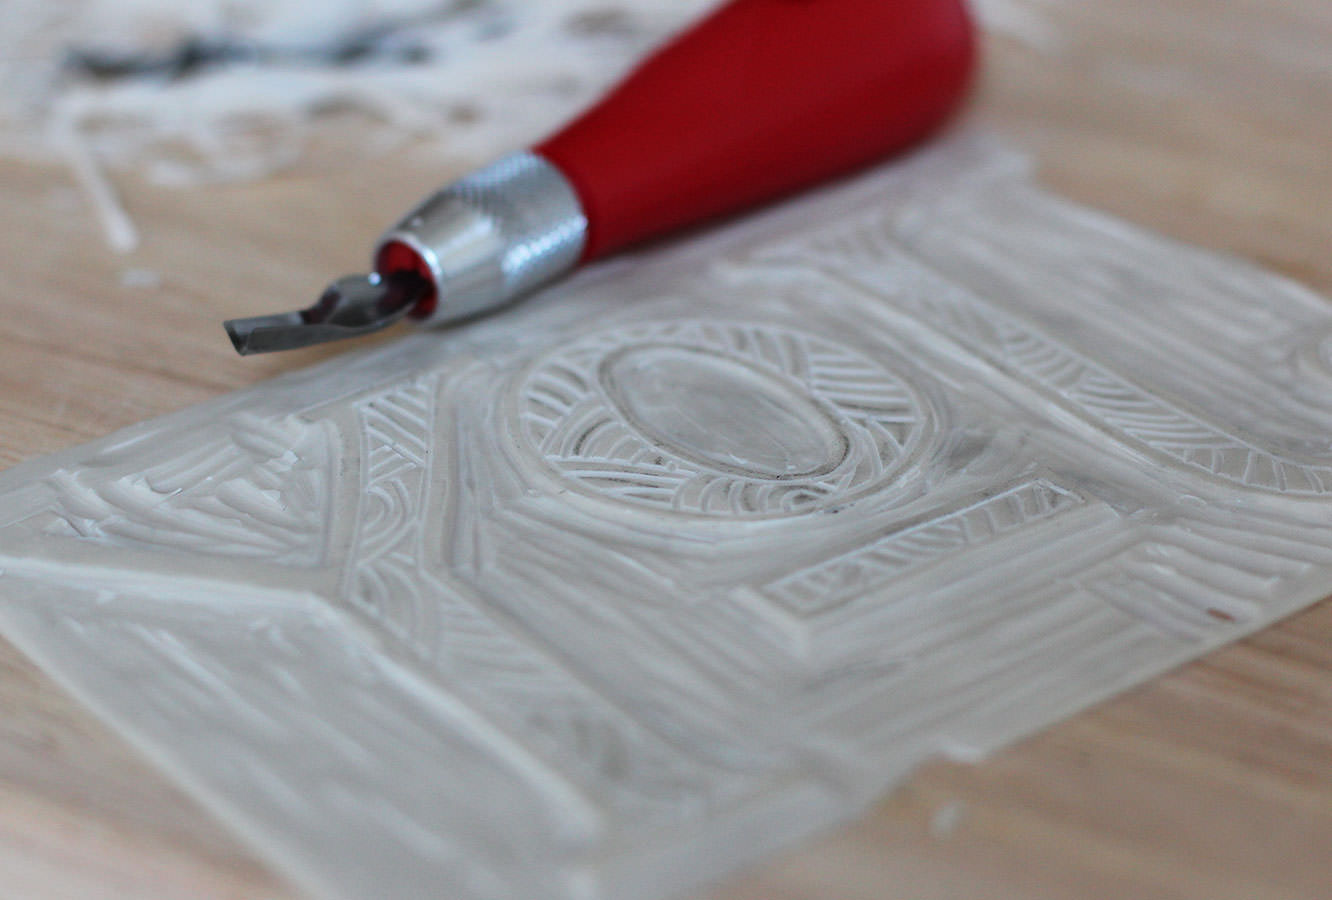
Step six
Using a blade with a deeper and narrower u shape (I think this was #9) refine the edges around your design, ensuring there’s a fair bit of depth around them.
Step seven
Using an even finer, deeper v shaped blade (#2 was my choice) cut out any details. Doing things in this order enables you to practice a bit before working on the finer aspects of your design.
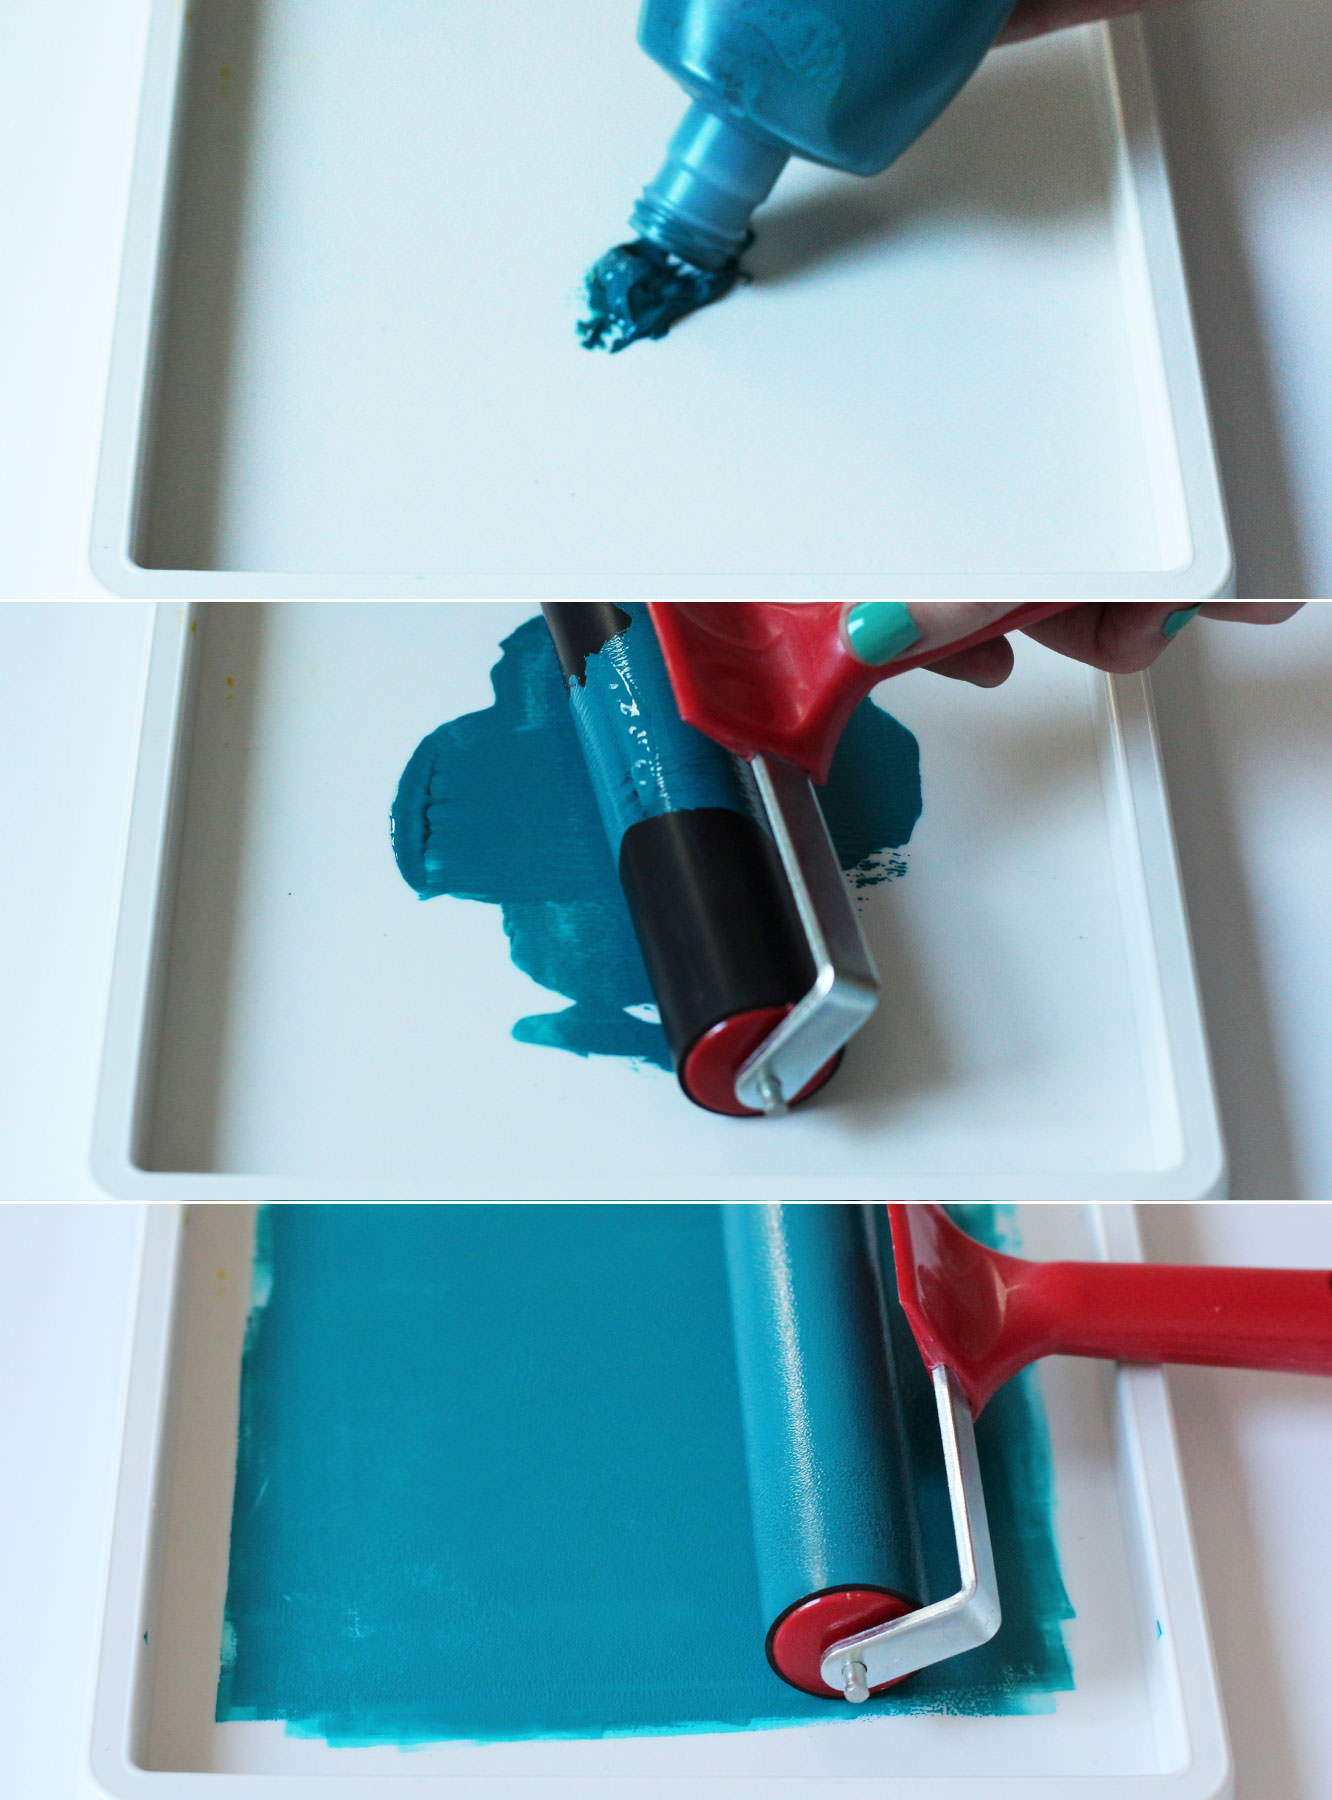
Step eight
Ink up your tray using a small splodge of ink and your brayer. You need less than you’d think so don’t over do it.
Roll the brayer back and forth until the ink looks like a smooth velvet. You’ll know it when you get there.
Step nine
Ink up your stamp by rolling the brayer back and forth. This took a bit more encouragement first time when the block was dry.
You can use the cutting tool to go back into the design where there’s ink and there’s not meant to be. I did that, and also lazily chopped a few corners off with scissors. Alternatively you can wipe excess ink with kitchen towel or even leave it there for that handmade look (which is pretty much unavoidable anyway).
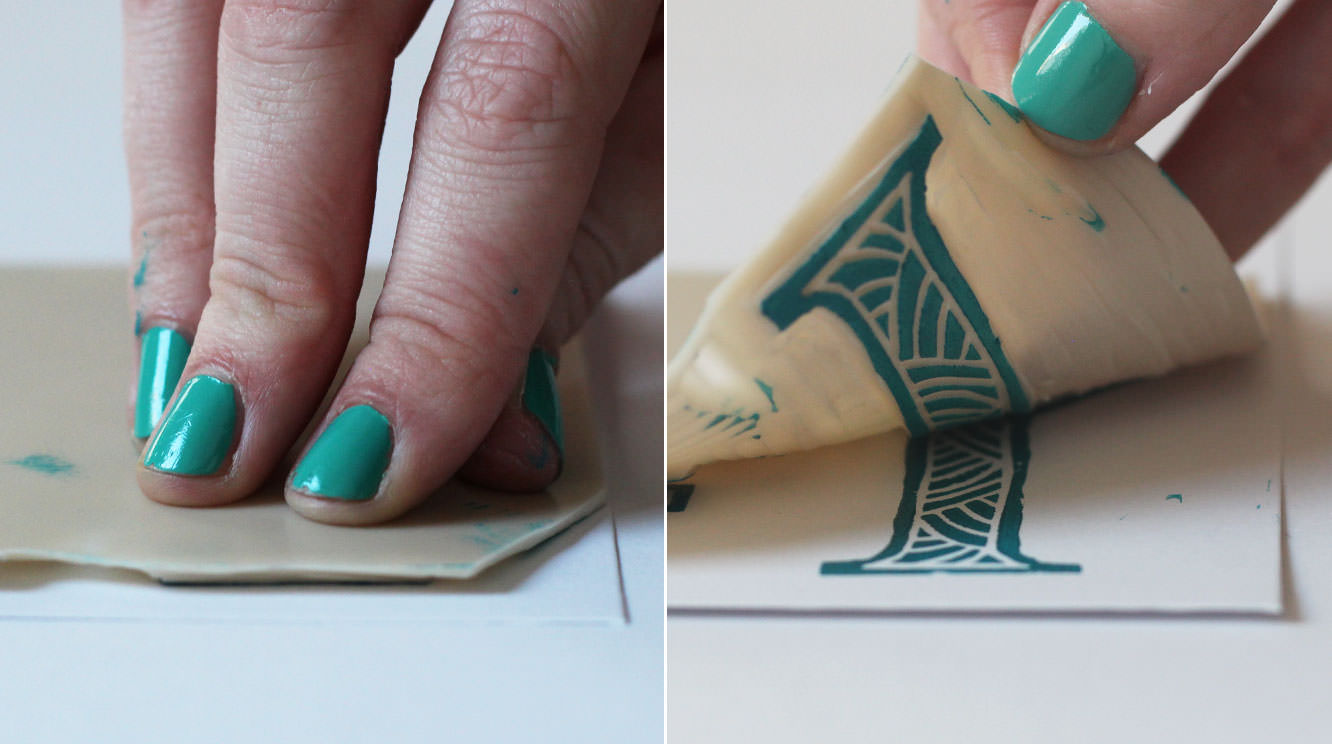
Step ten
Firmly press your stamp onto the surface of a blank greetings card or your chosen back drop. I paid particular attention to pushing down the areas I knew there was design. You can always peel it back to take a peek or put a book on top and push on that to ensure an even press.
You could do some prints and frame them as gifts if you don’t fancy cards.
Step eleven
Ink back up and print away to your heart’s content.
A couple of months ago my lovely housemate got engaged. A couple of weeks ago we celebrated that fact.
I decided I wanted to make some party food. Given that we’re fast approaching Christmas (I mean, it’s the 17th November already, what?) this little series of posts should furnish your party season with delightful nibbles and may double as last minute Christmas present/hostess gifts.
This one falls into the second category, so get online and buy yourself some cellophane bags and a roll of ribbon, your colleagues and your milk man will never have been happier. Well, I hope their lives are better than that, but either way, there won’t be any disappointment, and that’s all anyone’s looking for at Christmas.
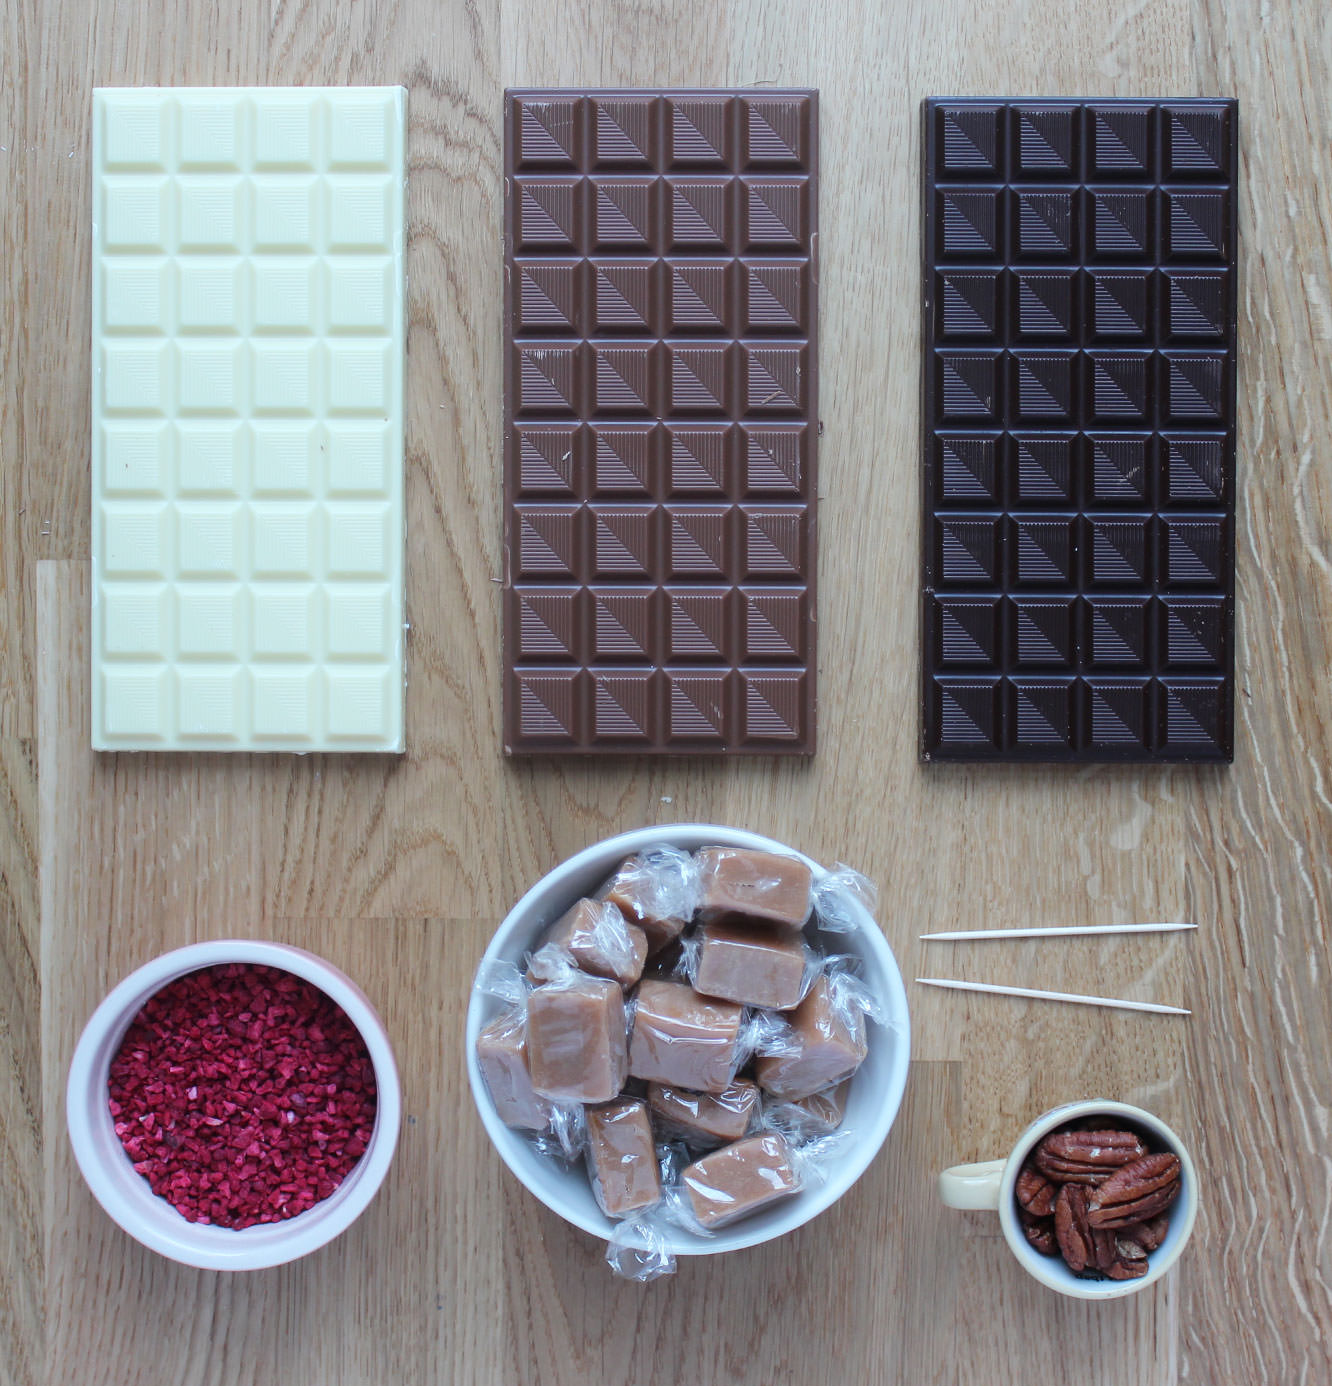
Things you need
200g/7 oz White chocolate
200g/7 oz Milk chocolate
200g/7 oz Dark chocolate
Decorations (I used freeze dried raspberries, fudge pieces and pecans)
Cocktail sticks
Piping bags or strong sandwich bags.
Cellophane (from a florist or a craft shop, or you can use greaseproof but the bottoms won’t be shiny)
Food thermometer (ideally)
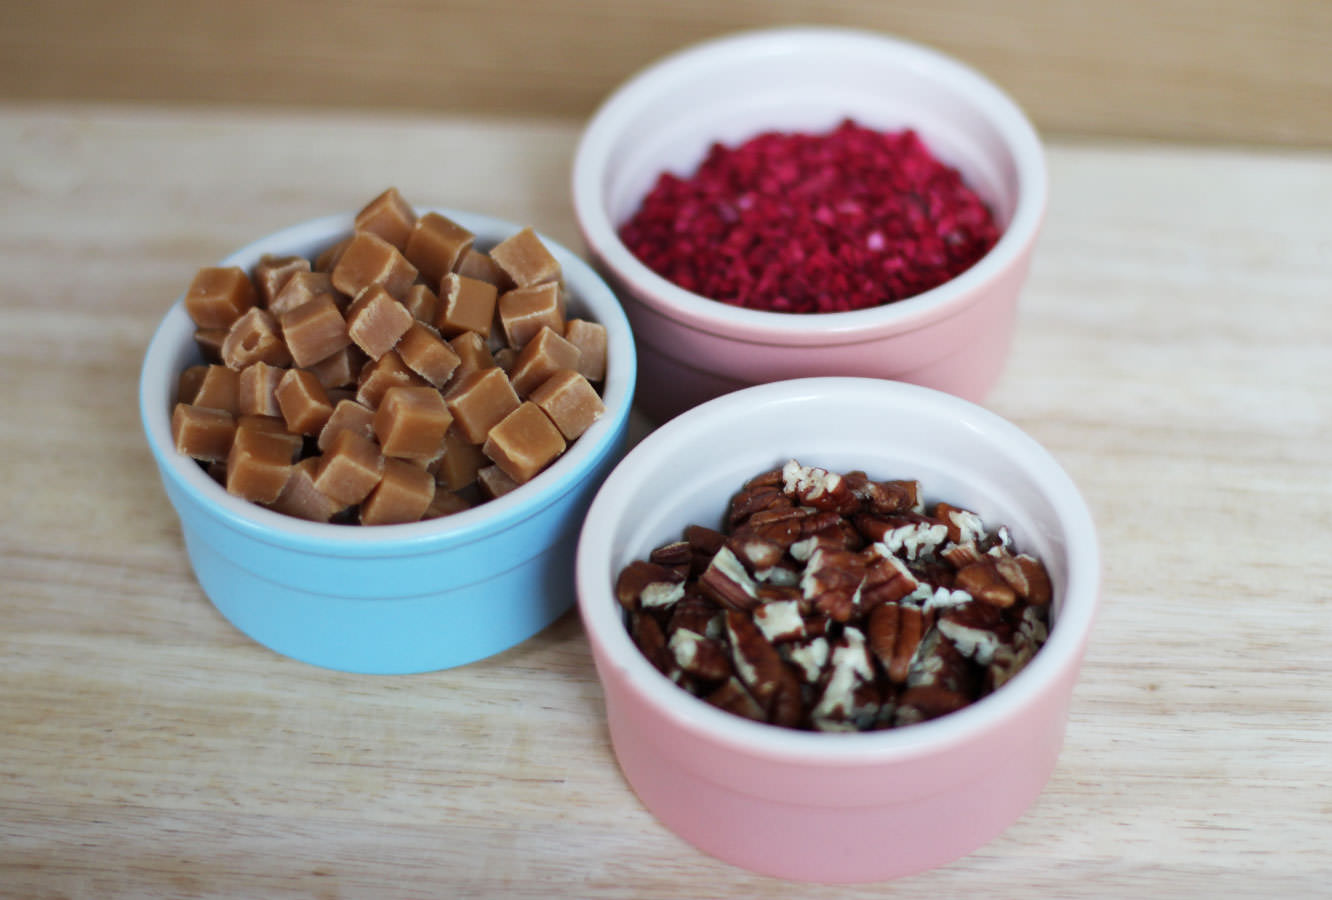
Step 0.5
Prepare your toppings if they need preparing. I wanted my drops to be quite small so I chopped up my fudge and pecans.
Step one
Now. This is the first time I have actually tempered chocolate. It was easier than I expected and well worth it for the shiny finish. I encourage it. I also encourage the purchase of a thermospatula. I’m not being paid to say that, it’s changed my life (in a small but significant way).
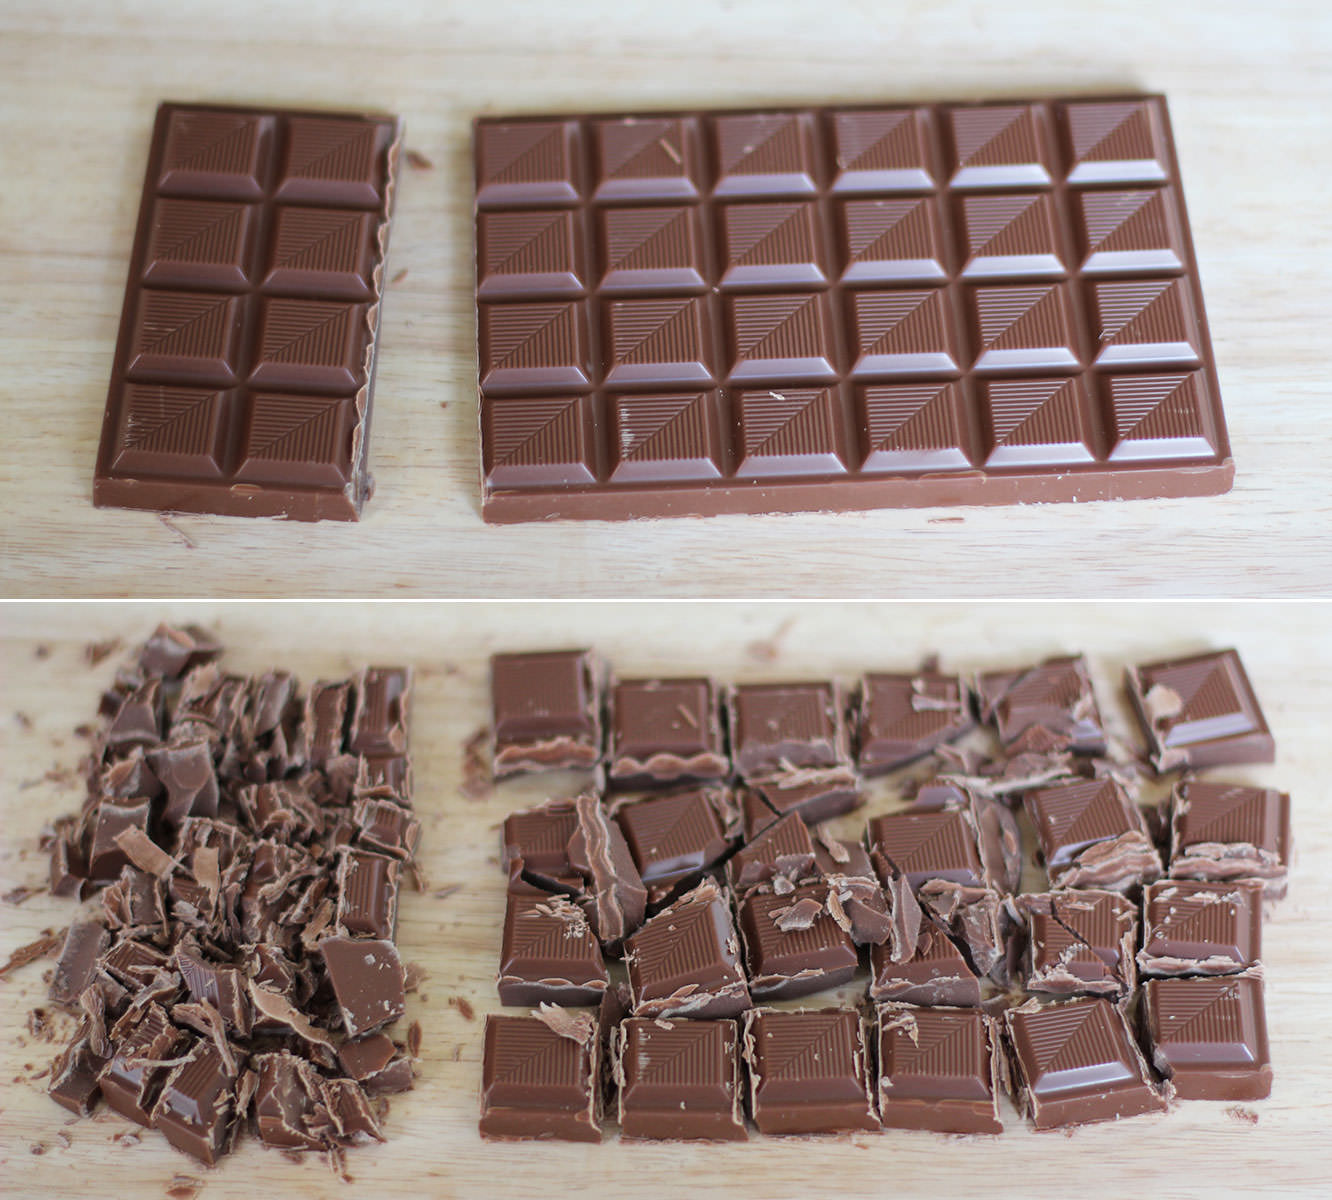
If you’re joining me on the tempering train you need to split the chocolate into a third/two thirds split. Ignore the photo above and just chop it all into big chunks. I learned as I went with this one.
Step two
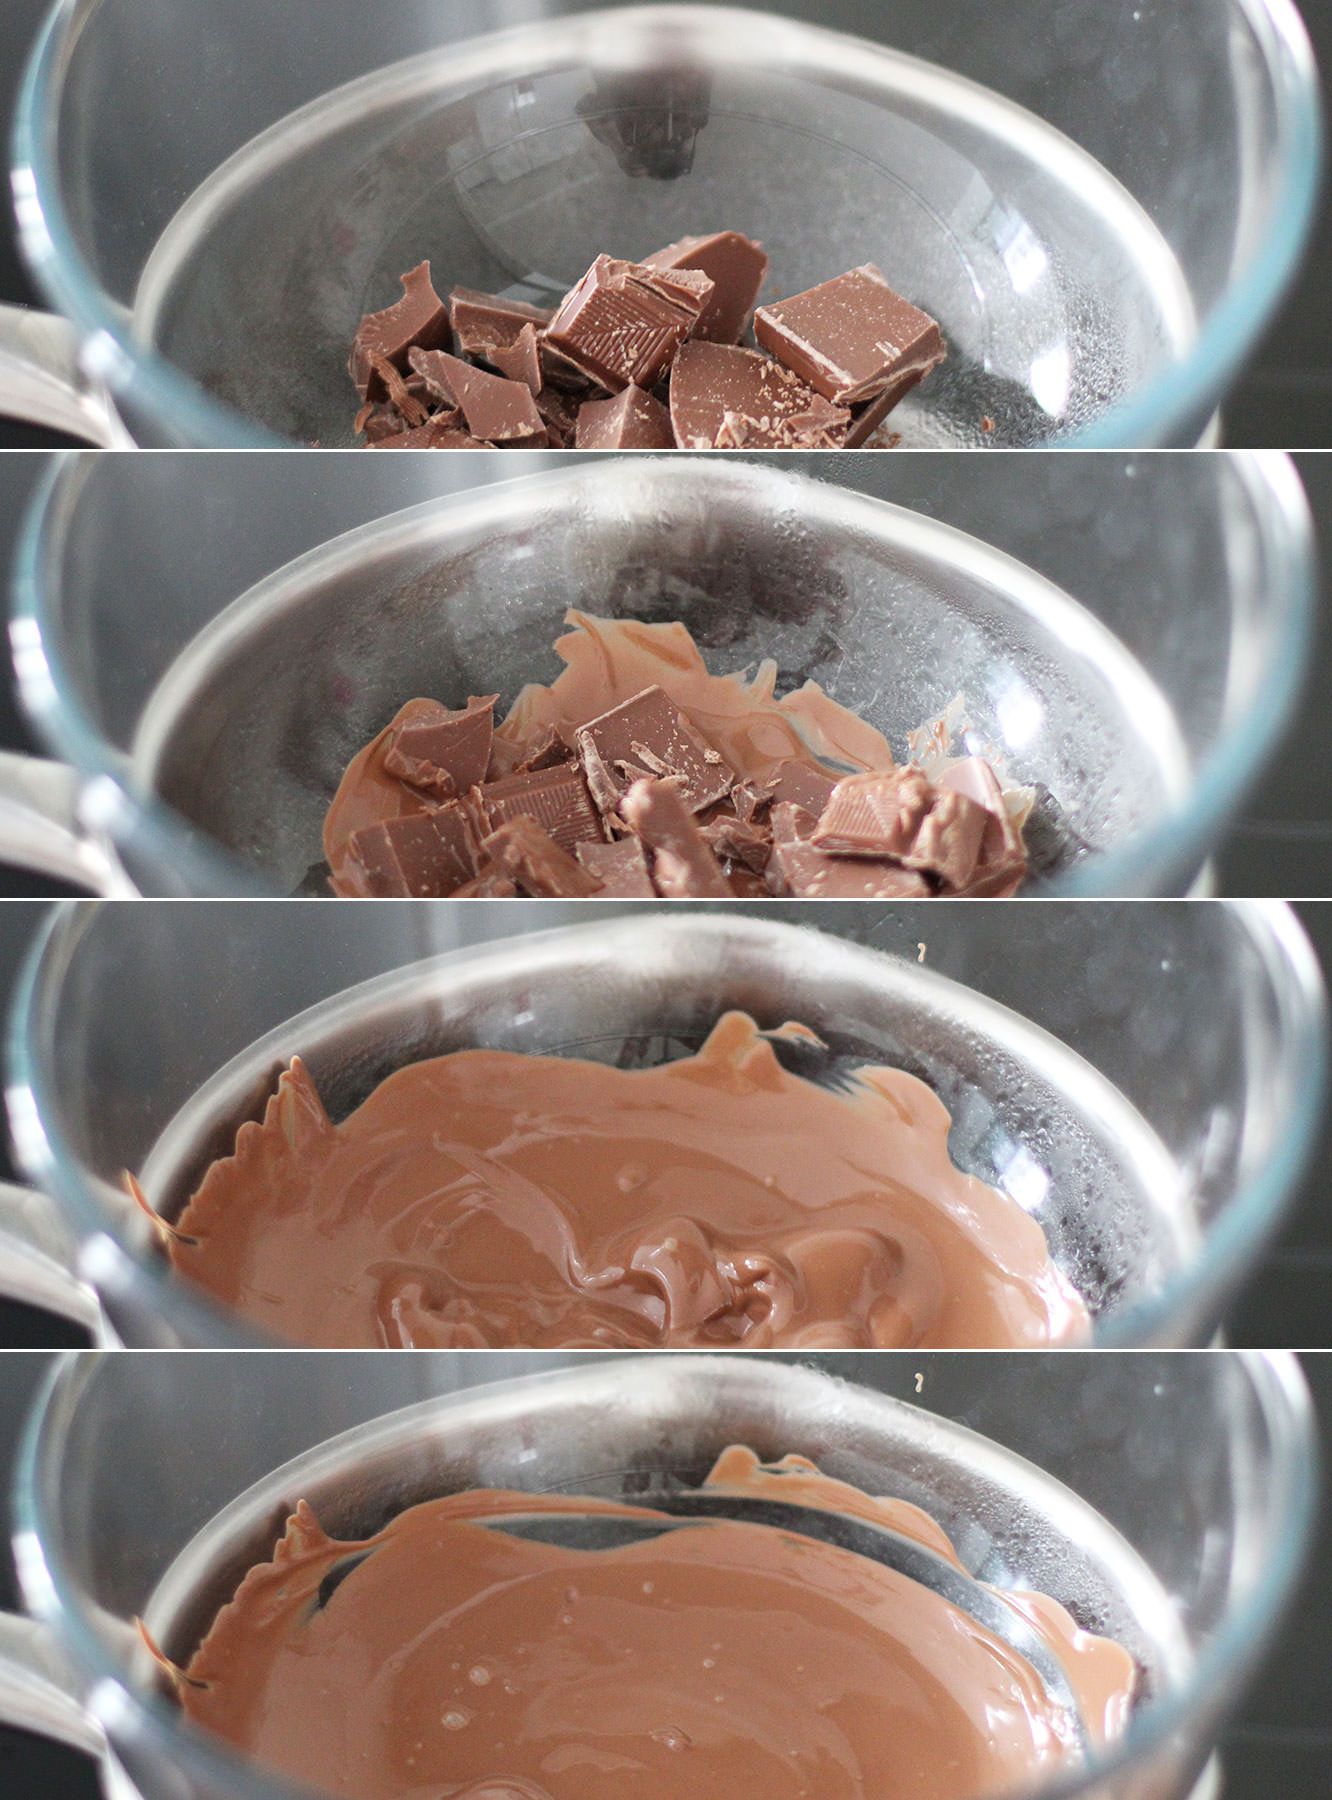
Place a heatproof bowl over a pan of simmering water; make sure the water isn’t touching the pan.
Add two thirds of the chocolate and allow to melt slowly. Stir occasionally. Mainly so you can feel like you’re doing something productive.
Bring to 45 degrees C and remove from the heat.
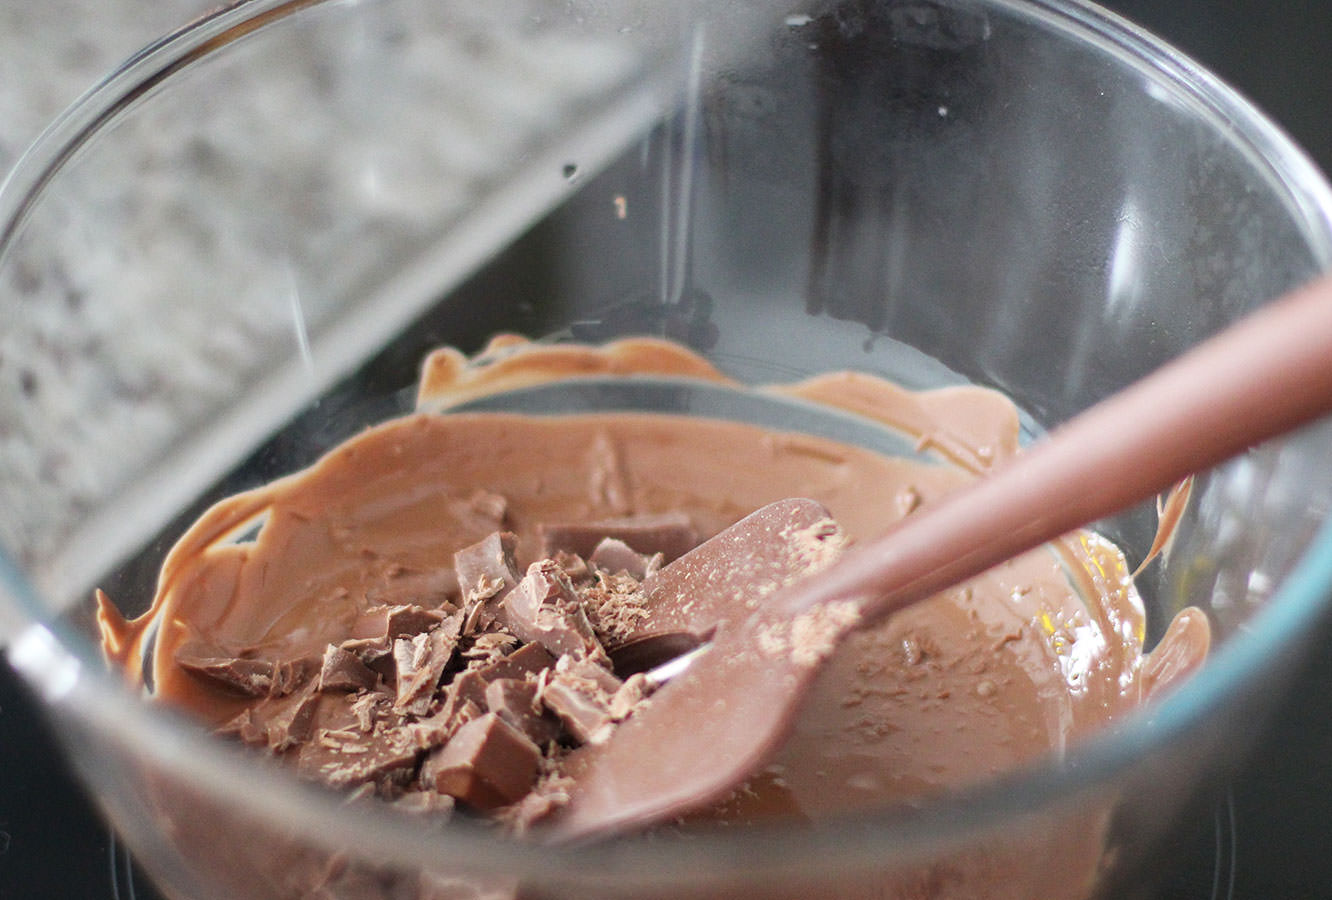
Step three
Add the rest of the chocolate and stir until its melted in. Keep stirring until the whole lot has cooled to 28 degrees C.
Step four
Place back on the heat and bring to 32 degree C.
Step five
Take back off the heat and dry the bottom of the bowl with a tea towel. Trust me, you don’t want water in your chocolate.
Step six
Pour into a piping bag.
Don’t trim the end yet. In fact, once you have twisted the opening to close it you should push any chocolate in the tip end back towards the rest, otherwise it will cool and solidify there while you’re tempering the rest.
Step seven
Repeat with the rest of the chocolate.
Step eight
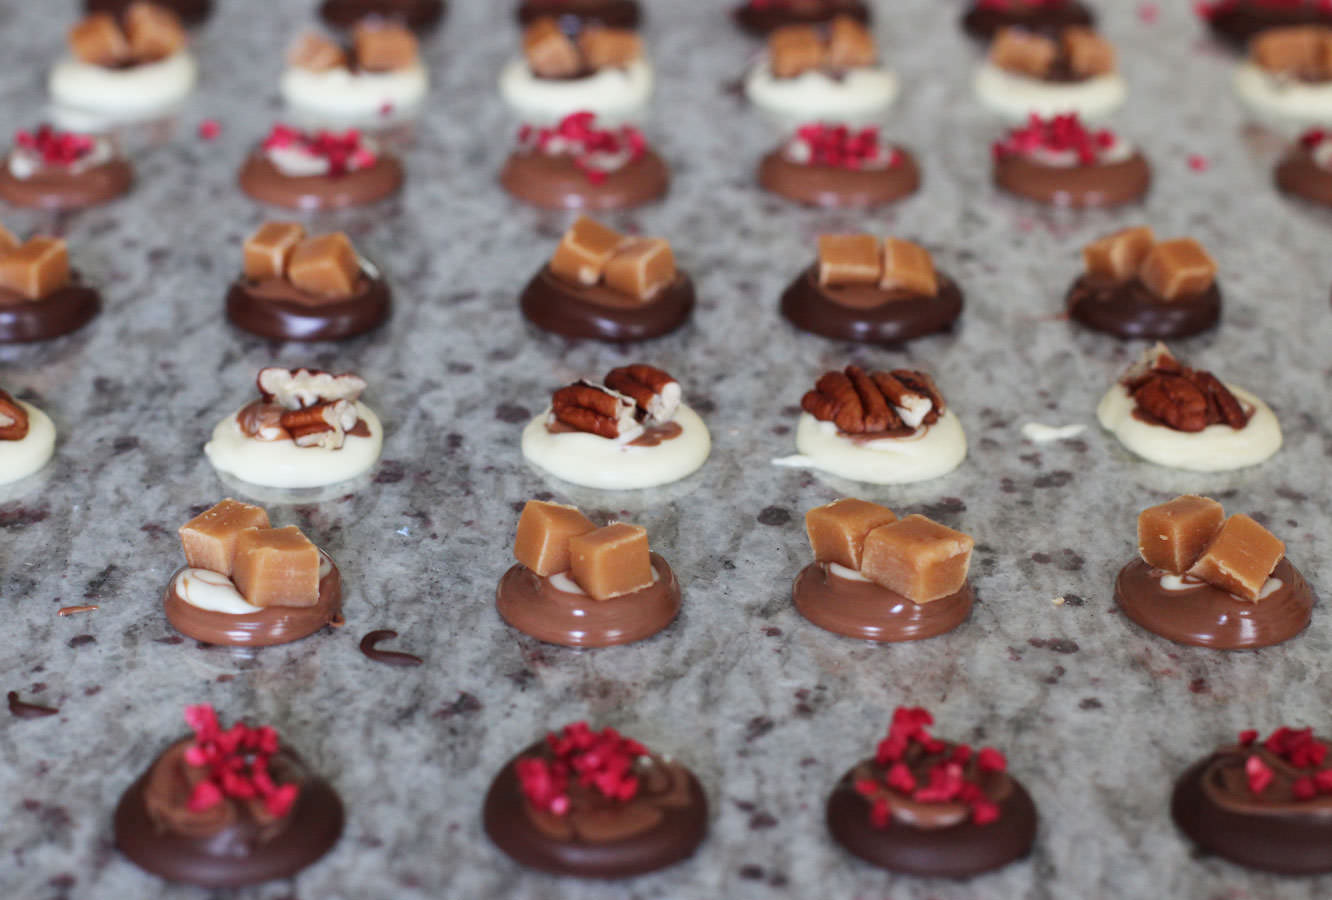
Lay down the cellophane and start piping.
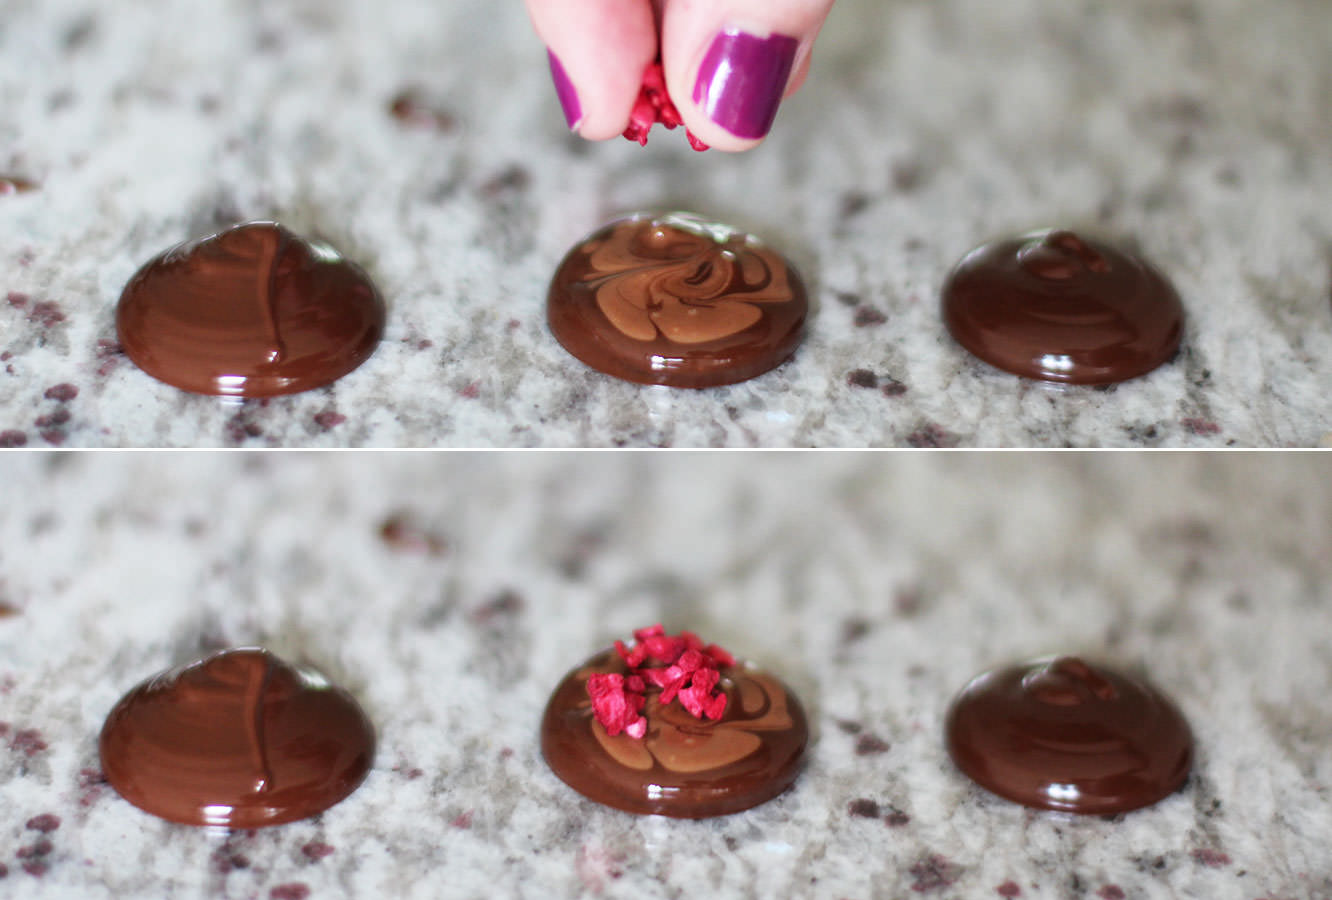
You want to hold the piping bag at a 90 degree angle to the table and squeeze. The chocolate will flood into a lovely little pool.
Add a small blob of another colour on top and swirl about with a cocktail stick to create a marbled effect.
Step nine
Sprinkle your decorations on top.
Some cranberries would go down well for christmas drops, but I was explicitly instructed not to buy any. These freeze dried raspberries looked rather pretty and tasted good too. See children? Compromise isn’t always bad.
Step ten
Keep going until you run out of chocolate/the will to live. But look…so shiny. You did well to temper it, it was worth it after all.
You might notice there’s a different pair of disembodied hands in the post this week. That’s because my lovely housemate was on half term, and ever since we watched this year’s GBBO we have wanted to make our own doughnuts (I’ve been informed donut is the wrong way to spell it). Thanks for your help Vicky and for very patiently allowing me to photograph the occasion.
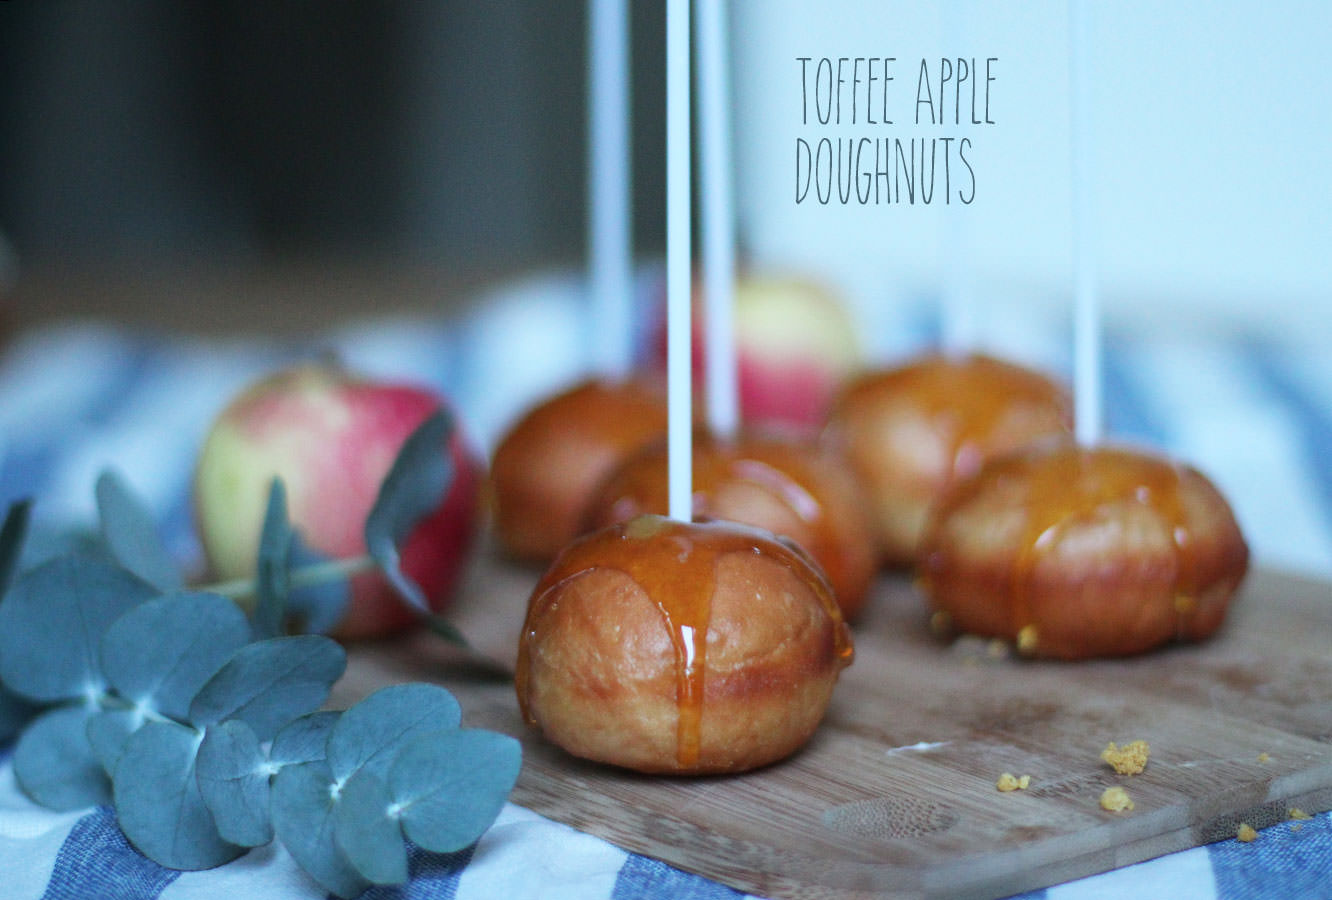
We’re having a little get together for bonfire/fireworks night on Wednesday and we thought we would make some appropriately themed treats. We bring to you a doughnut double whammy, flavoured with toffee apple and cinder toffee.
Disclaimer – these aren’t quick to make, but they are IN-credible, I was very sad to put them into the freezer, and I hope they emerge as delicious as they went in.
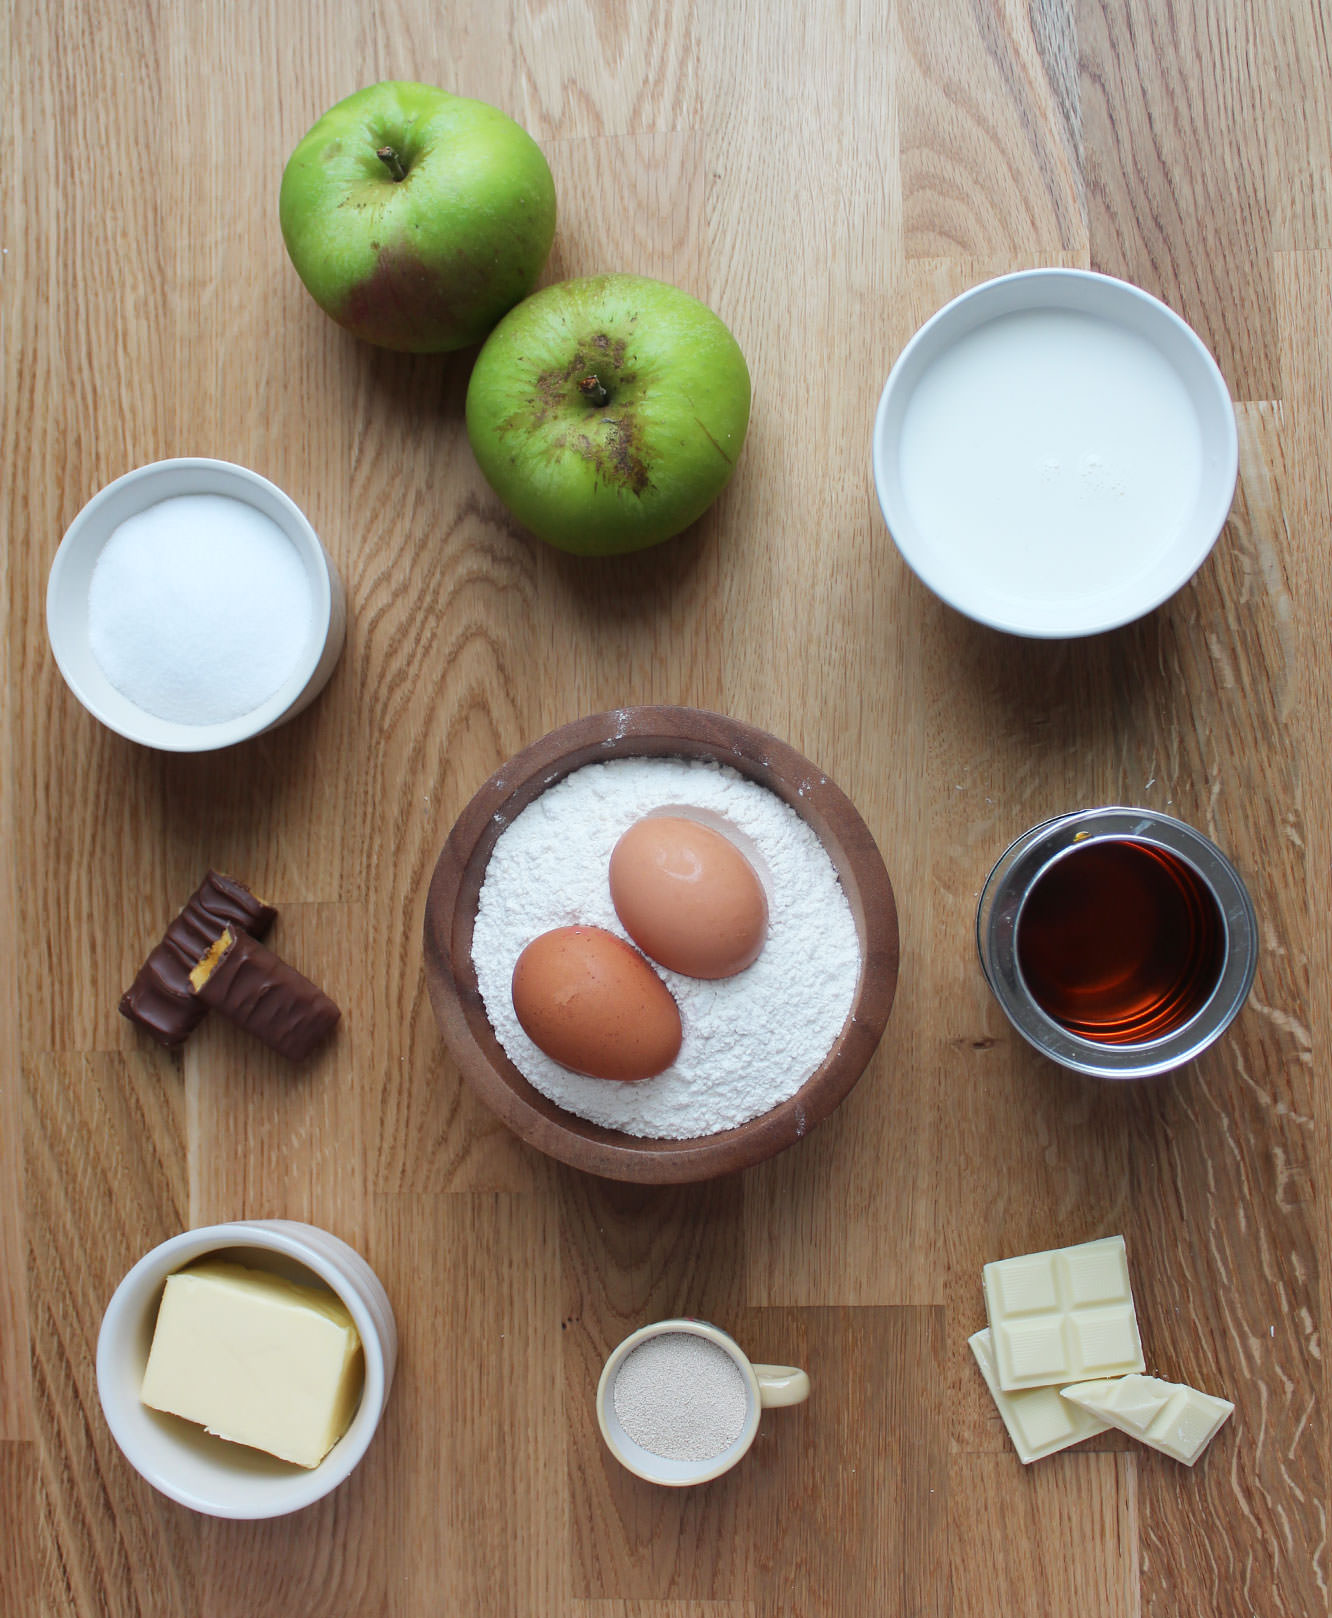
You will need
Please note: doughnut recipe makes 30, so the extra flavourings recipes are for 15 of each. If you want to make just one of the versions you will need to double the quantities of the fillings and toppings or halve the doughnut mix.
For the doughnuts:
350ml/12 fl oz Warm full fat milk
700g/1lb 8 oz Strong white bread flour
2 Eggs
70g/2.5 oz Unsalted butter
100g/3.5 oz Caster sugar
1 tsp Salt
14g/0.5 oz Dried yeast
50ml Warm water
For the toffee apple version:
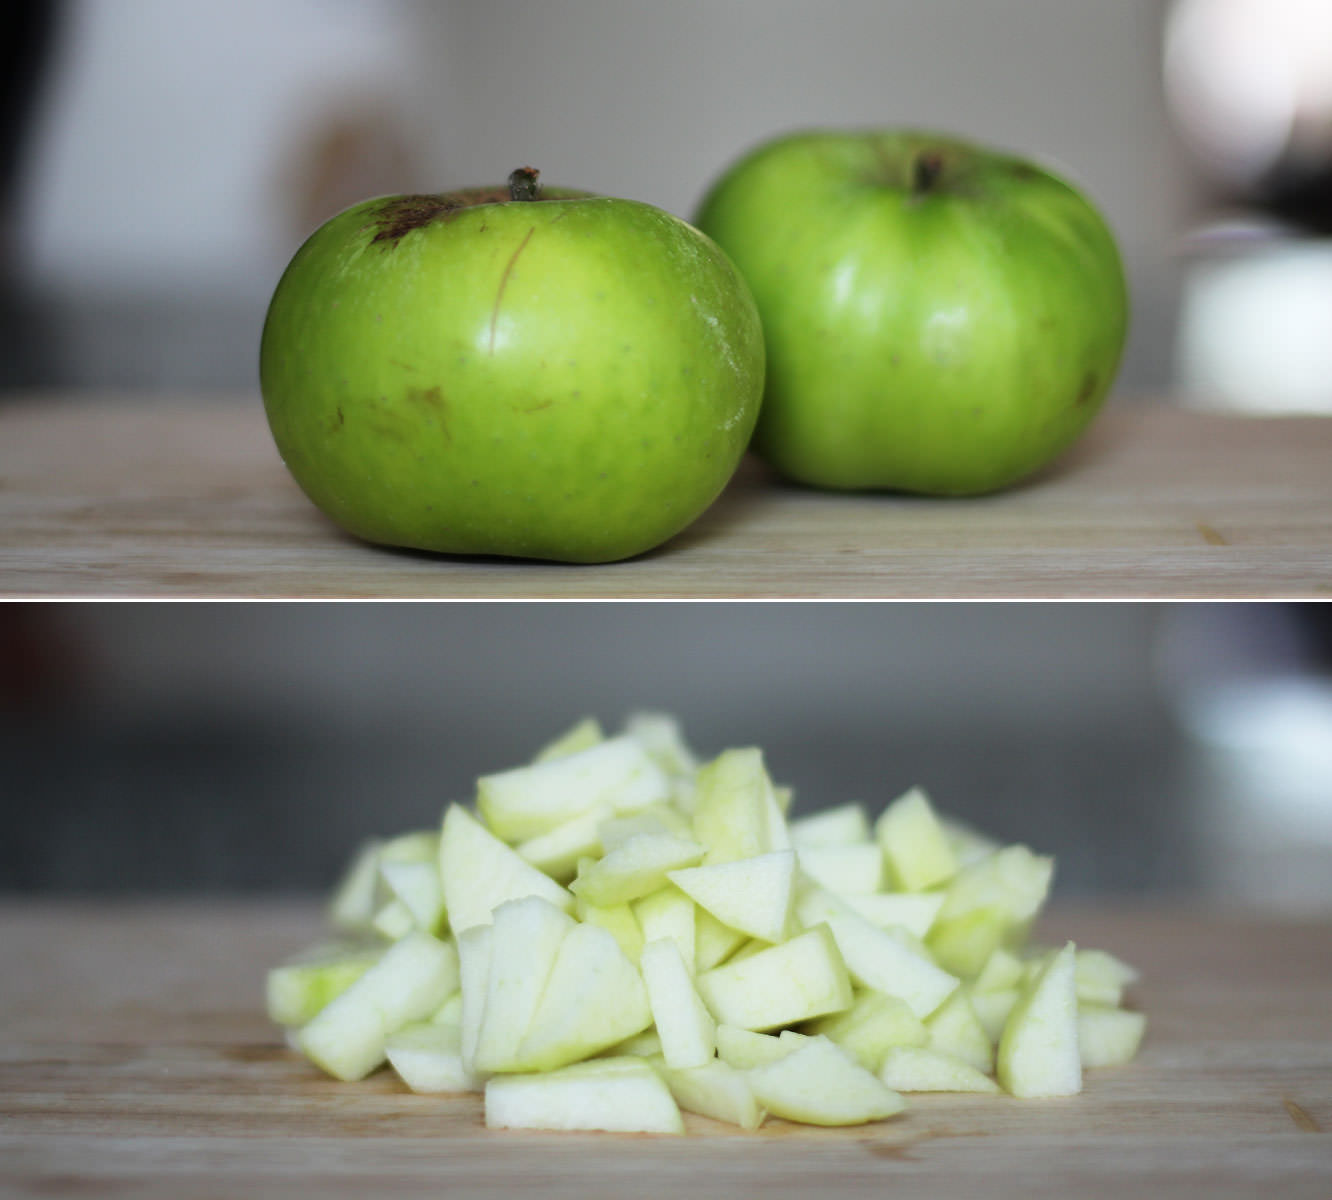
2 Bramley (cooking) apples
3 tbsp Soft light brown sugar
1 tbsp Water
300g/10.5 oz Granulated sugar
6 tbsp Water
For the cinder toffee version:
200g/7 oz White chocolate
2 Crunchie bars/some cinder toffee
1.5-2 tbsp Golden syrup
1.5-2 tbsp Full fat milk
150g/5.5 oz Icing sugar
50g/3.5 oz Unsalted butter
1 tsp Vanilla extract
Extras:
1.5 litres/50 fl oz Vegetable oil for frying
15 Cake pop sticks for the ‘toffee apples’
Flavour injector (if you don’t have one of these, a long thin piping nozzle should also work)
Step one
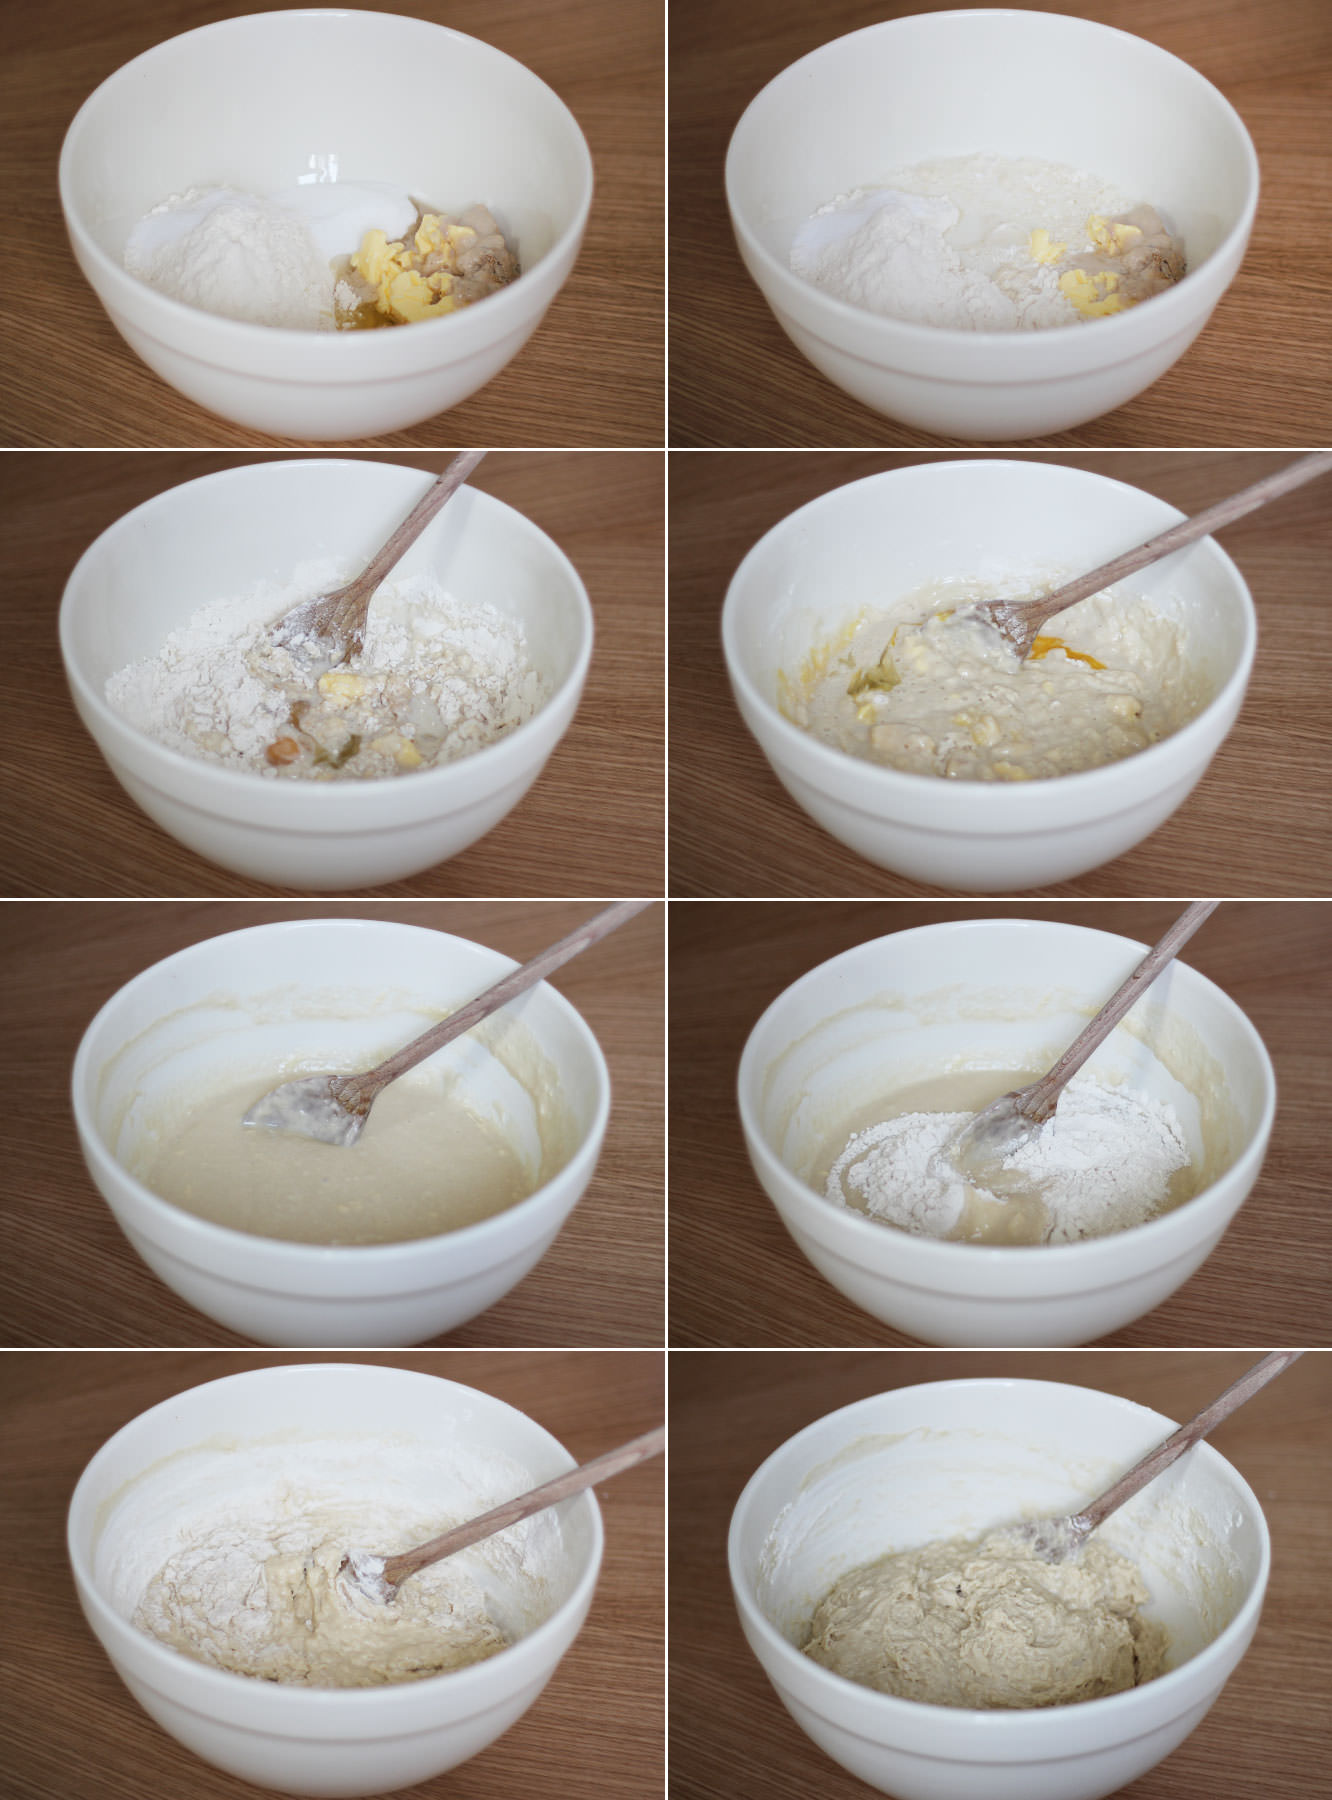
Put the yeast in the warm water and wait until frothy.
Step two
Combine half the flour with the rest of the dough ingredients (including the yeast froth). Remember to put the yeast and the salt on opposite sides of the bowl, they don’t get on.
Step three
When the batter is smooth, gradually add the rest of the flour and stir. The dough should be sticky but not impossible to work with. Vicky and I found we had to add a lot of flour in kneading so I’ve adjusted the recipe for y’all.
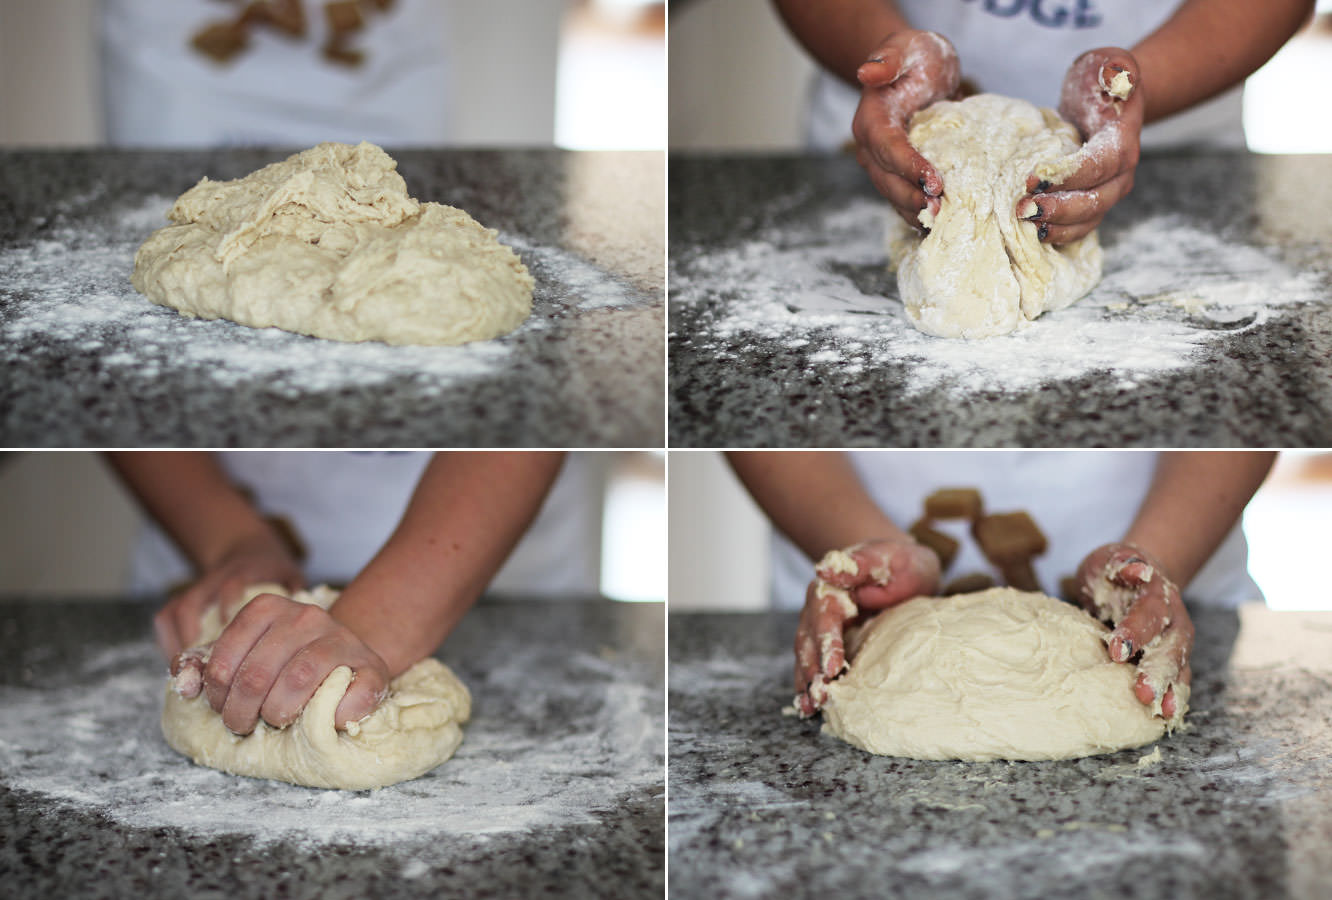
Step four
Turn the dough out onto a floured surface and knead for 5-10 minutes. It’ll still be quite sticky, don’t sweat it.
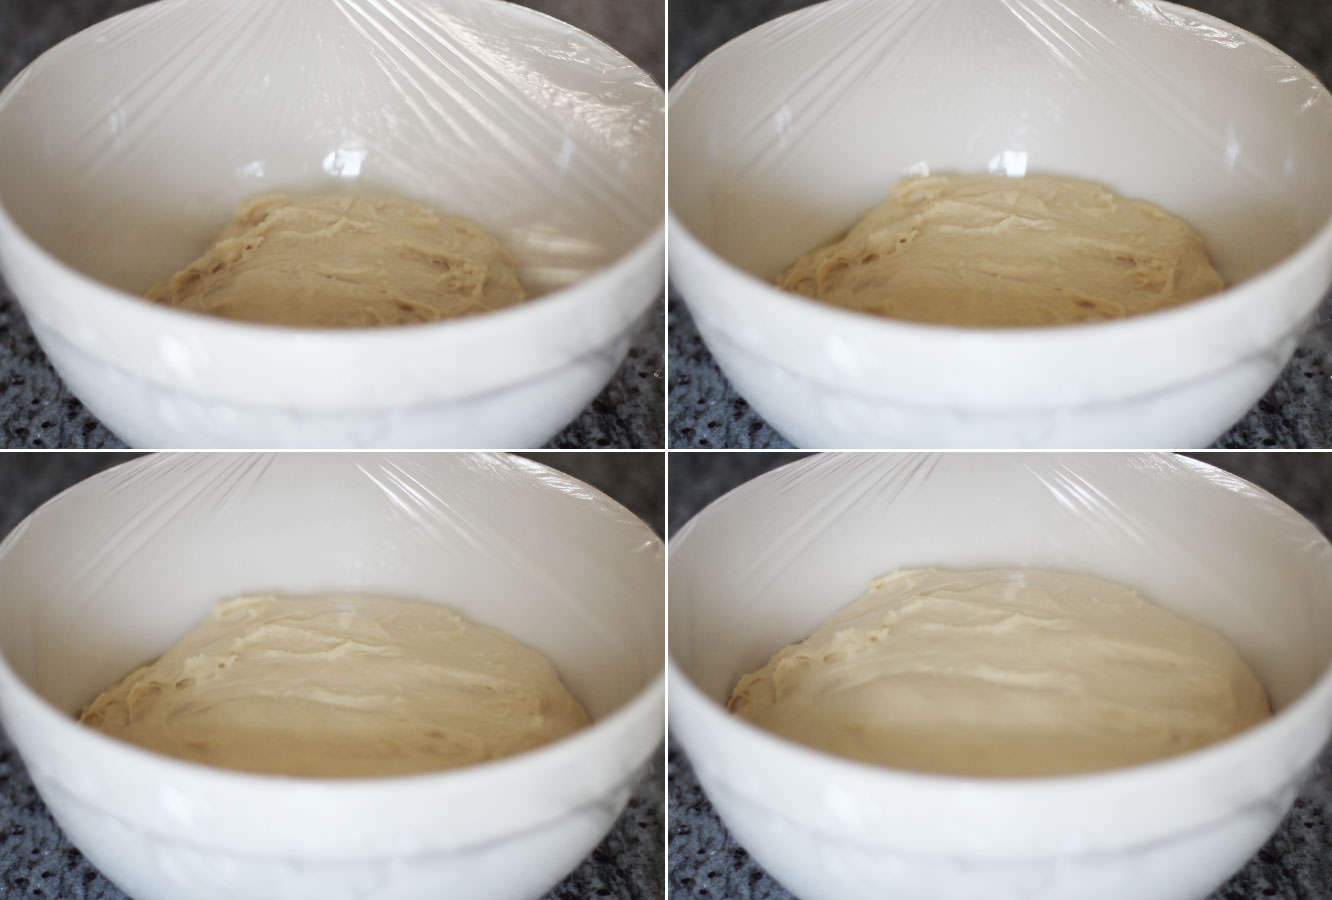
Step five
Place in a lightly oiled bowl and leave to rise for an hour or until doubled in size. While that’s going on you can prepare your toppings and fillings.
Step six
For the puree which will fill the toffee apple doughnuts, peel and chop the apples into small chunks.
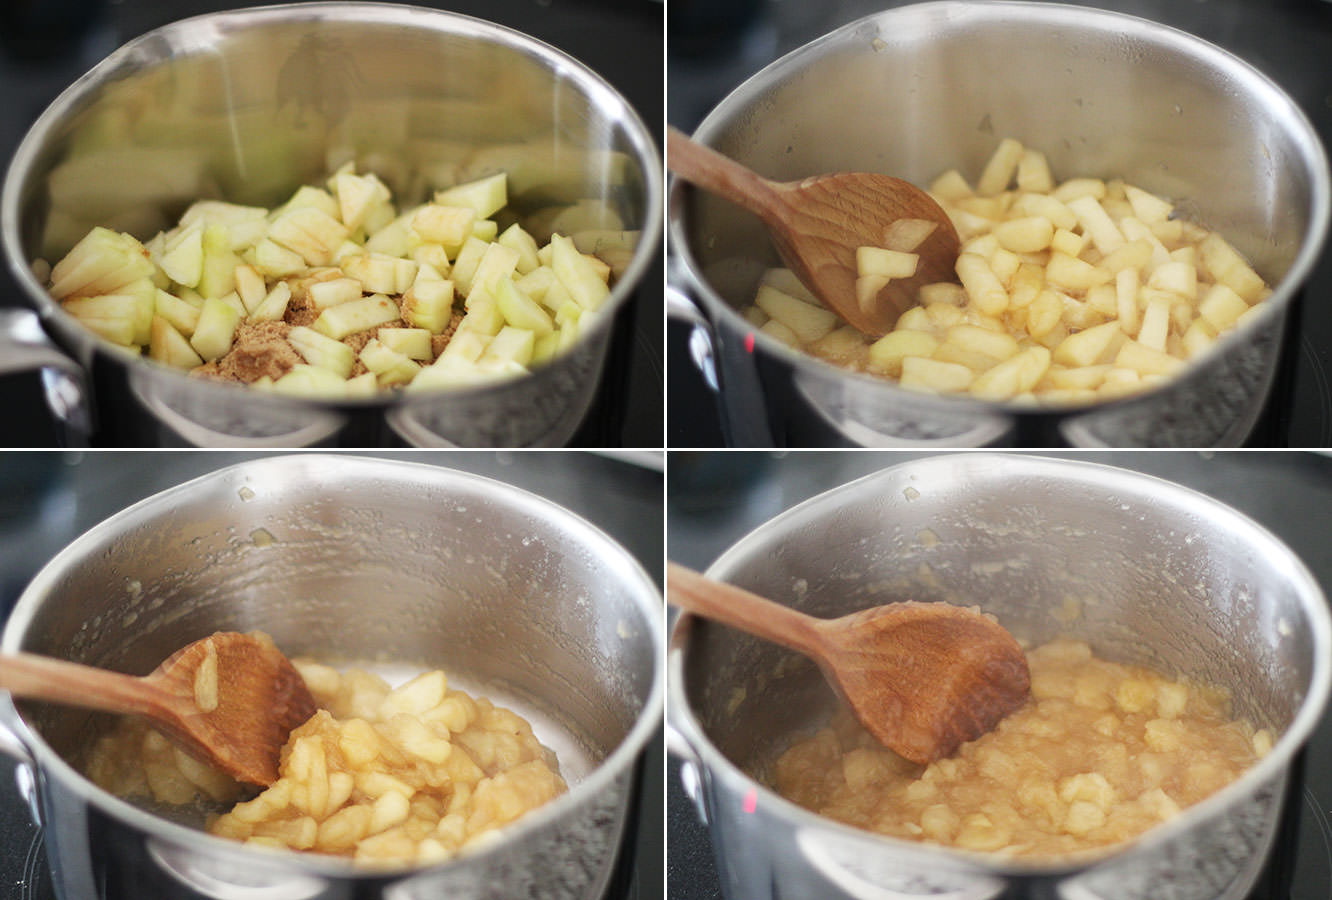
Step seven
Place the apples in a saucepan with the 3 tablespoons of soft brown sugar and 1 tablespoon of water. Heat on medium until the apples have reduced.
Step eight
If you have one, use a food processor to liquidise the apple mixture. If you don’t, do what we did and use a potato masher and then pass the mix through a sieve.
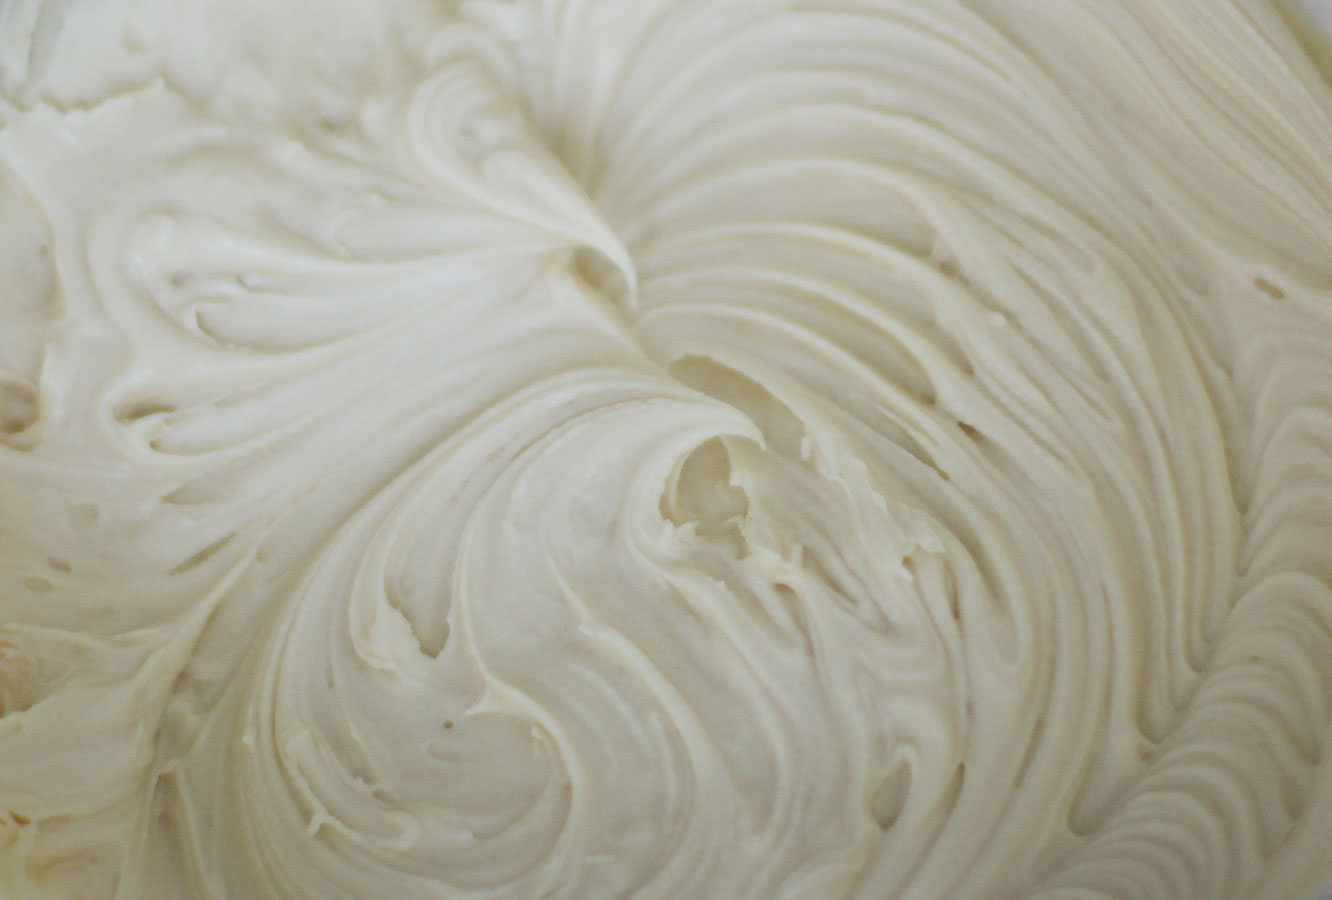
Step nine
To make the filling for the cinder toffee donuts combine the butter, icing sugar, milk, golden syrup and vanilla extract. Whisk until smooth and set aside.
Step ten
Tip the risen dough onto a floured work surface. Squeeze into a long sausage shape and chop into 30 pieces.
Step eleven
Roll into balls and leave on a tray to prove for another hour. Make sure you leave plenty of space. The picture above was before these rose, and they almost filled the tray after.
Step twelve
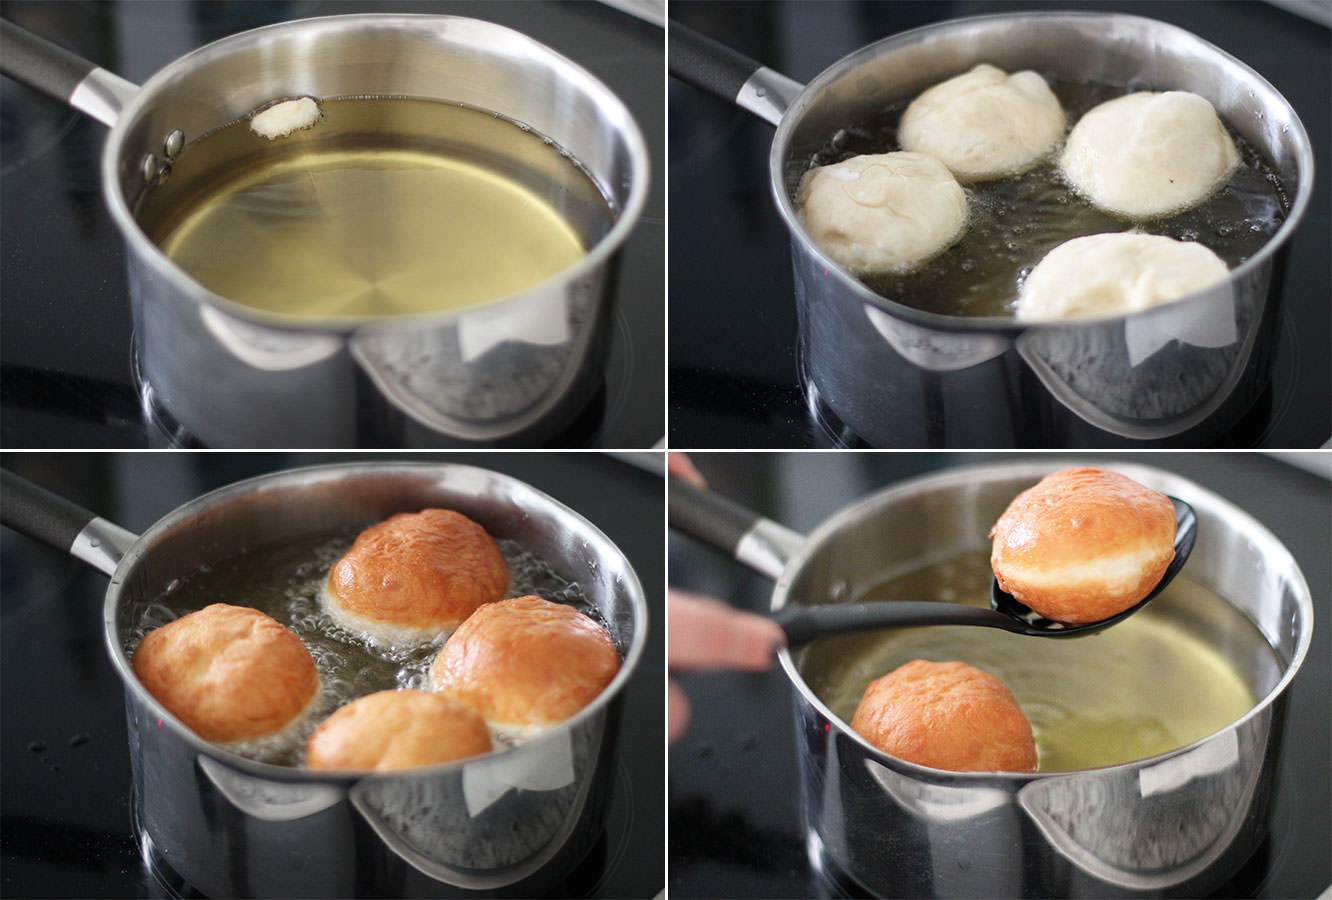
About 20 minutes before the doughnuts have finished their second rise, begin to heat the oil.
It’s beyond important that you heat the oil really slowly on a low heat to avoid risking a pan fire. There’s no reason to worry as long as you heat this gradually.
Test your oil heat with little pieces of a doughnut. When the sample floats and bubbles straight away you’re good to go.
Step thirteen
Fry the doughnuts in batches, you will get a good idea when to turn them pretty quickly, it only takes a few minutes for them to get golden.
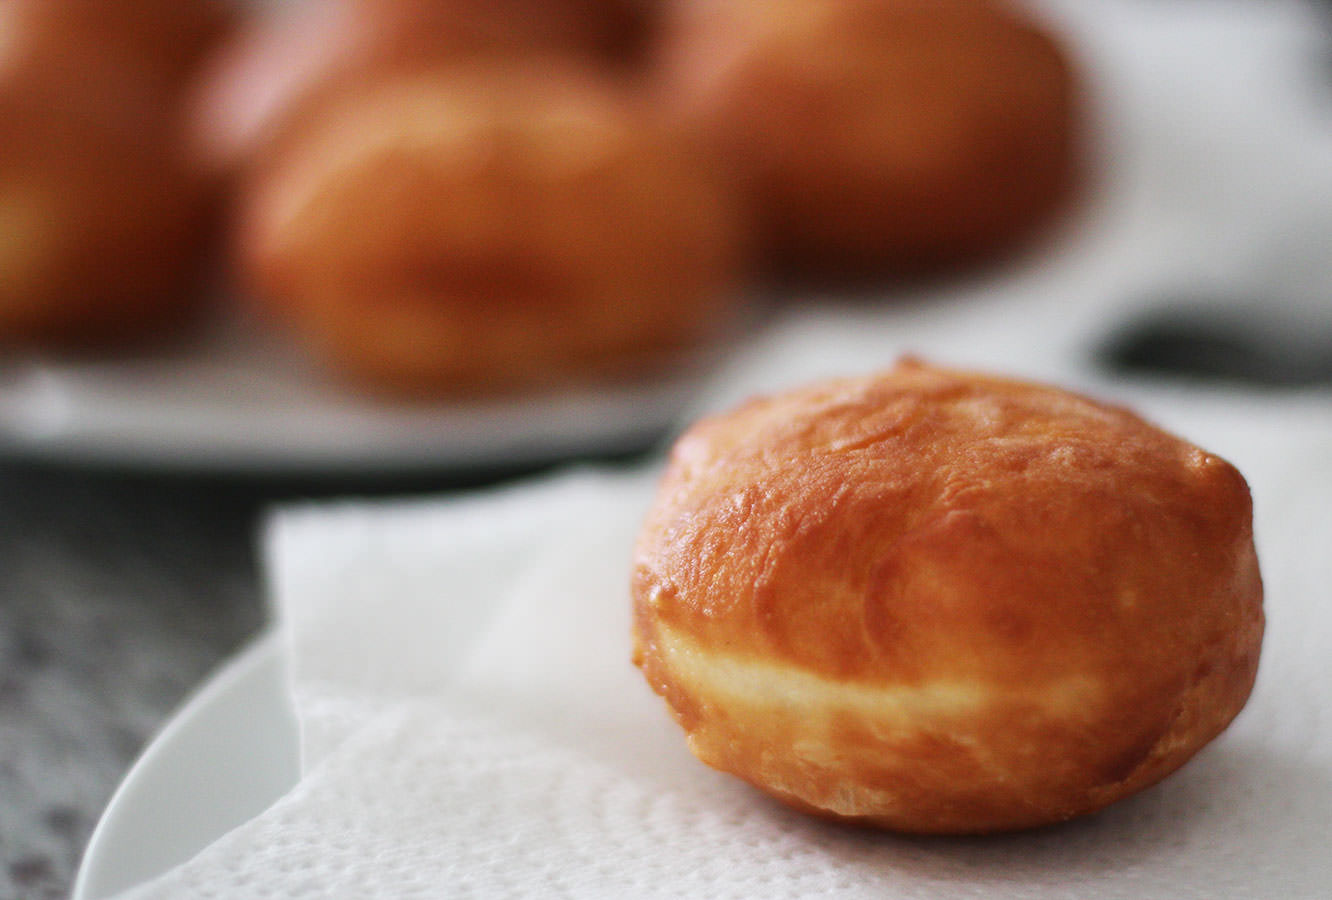
Leave your doughnuts to rest on a few sheets of kitchen roll which will soak up any excess oil.
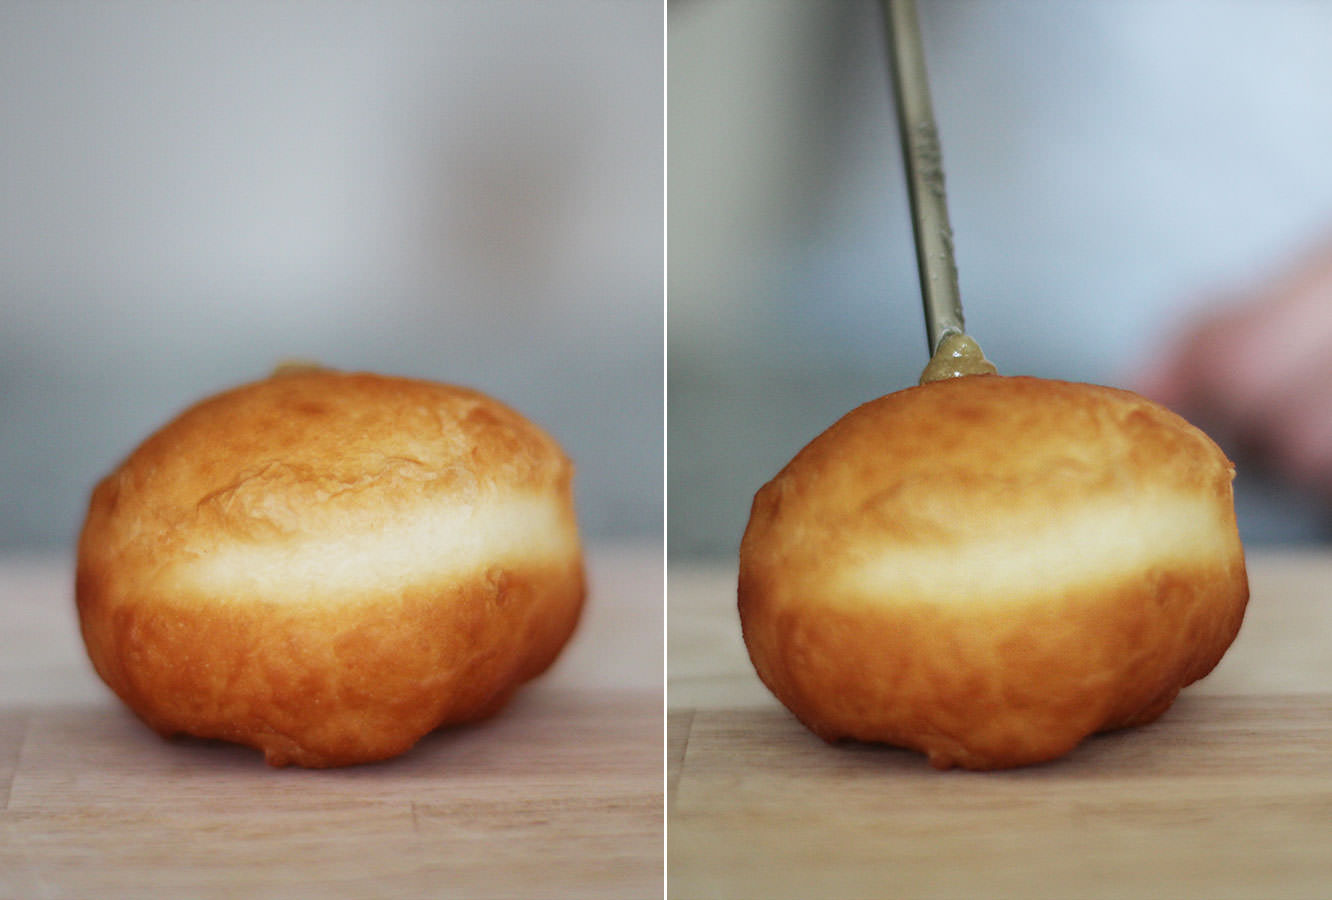
Step fourteen
When the doughnuts are completely cooled inject 15 of them with the apple puree and 15 with the cinder toffee filling.
We went in at the top because we knew we were going to cover the holes, otherwise you would use the side. For those of you with a flavour injector (and of course that will be most of you…) we did 10 ml per doughnut.
Step fifteen
For the cinder toffee doughnuts you need to crush up the crunchie bars (easily done when they’re in their wrappers) and melt the white chocolate. Do this slowly in the microwave to avoid burning it.
Dip the doughnuts in the chocolate to coat the upside down top, and sprinkle with crunchie pieces. Leave to one side for the chocolate to set.
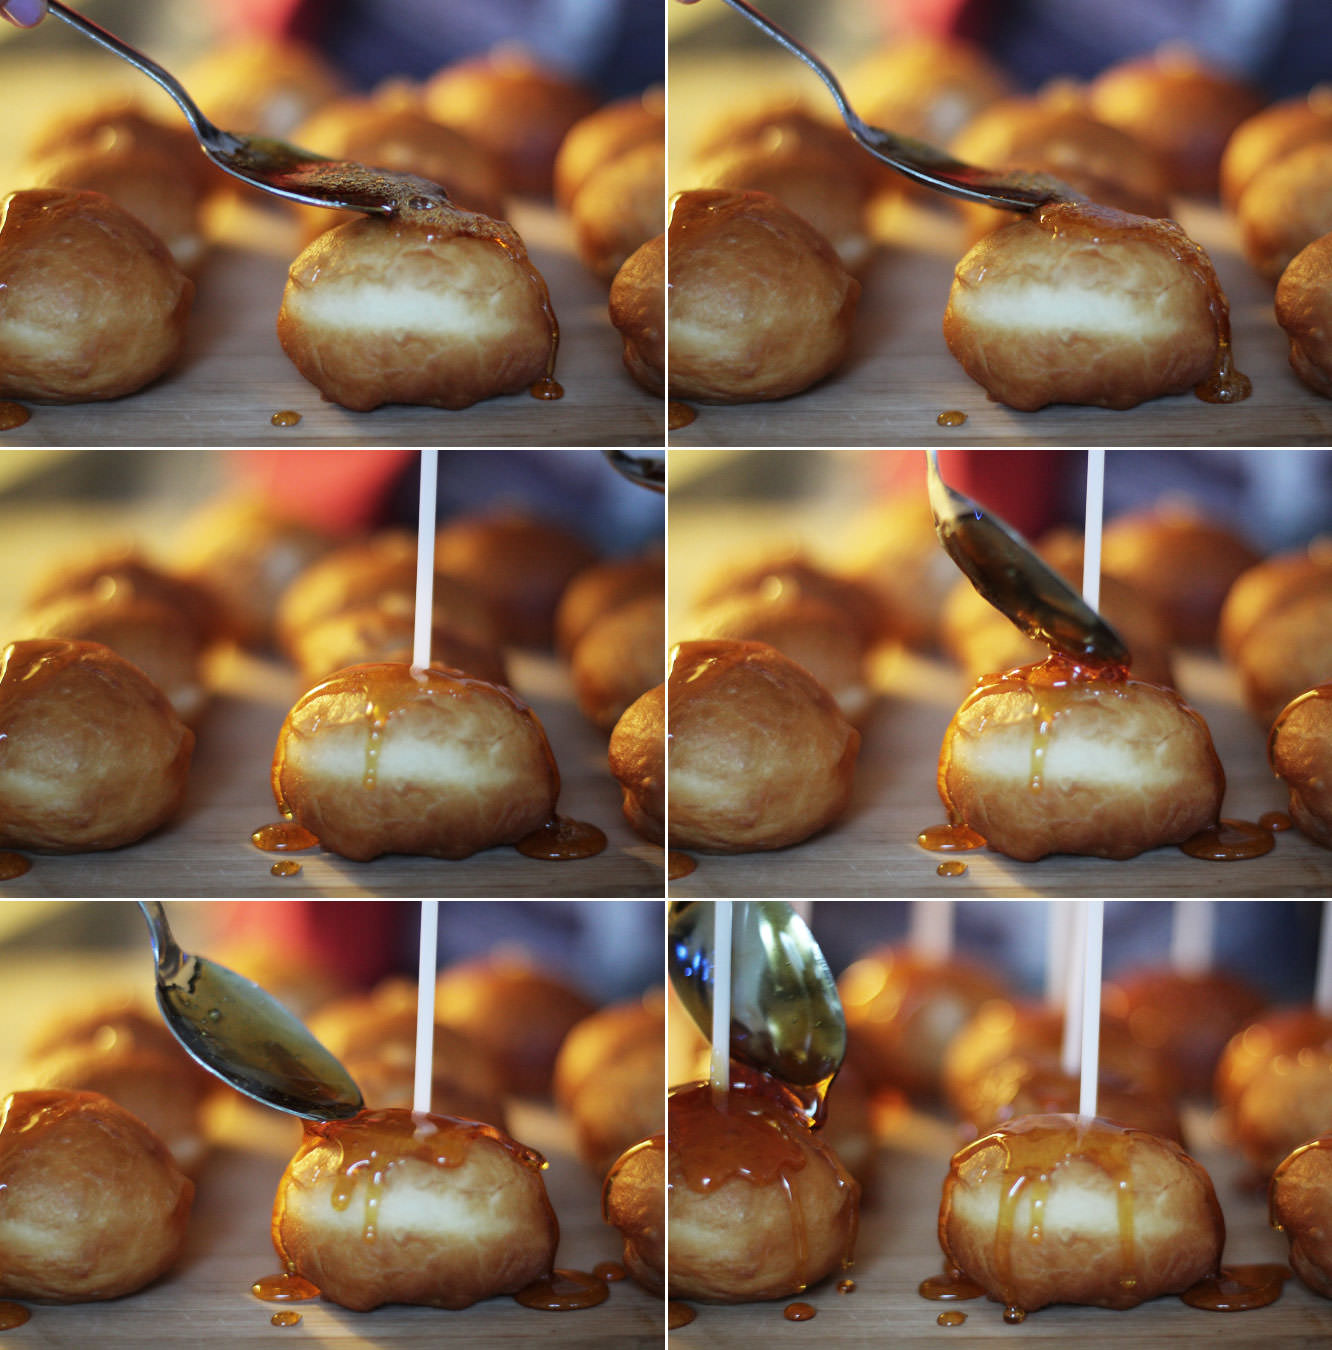
Step fifteen
Make a hard caramel by combining the 300g of granulated sugar and 6 tbsp water in a saucepan.
Heat on a low-medium heat until the mixture takes on a dark honey colour. Do not stir it as the sugar will crystallise. I’m afraid I did this by eye so I don’t have a temperature, but use the pictures above for a reference point for the colour and you’ll be fine, it’s not an exact science.
Remove from heat and cool by dipping the bottom of the saucepan in a mixing bowl full of cold water.
Spoon over the top of the doughnuts. I did one layer on each and popped the sticks in, then went back once the caramel got a little thicker (this happens as it cools) to do another and to secure the sticks in place.
This week we found ourselves in a bit of a fix. The plan was fondue, but somebody (Peter) forgot to book it. I was a bit sad when I discovered this (months of over eating to stretch my stomach for the big occasion) still, I couldn’t stay grumpy for long, as the gentleman concerned got himself to John Lewis and bought a fondue set. Sometimes it really pays off to have housemates with ridiculous boyfriends.
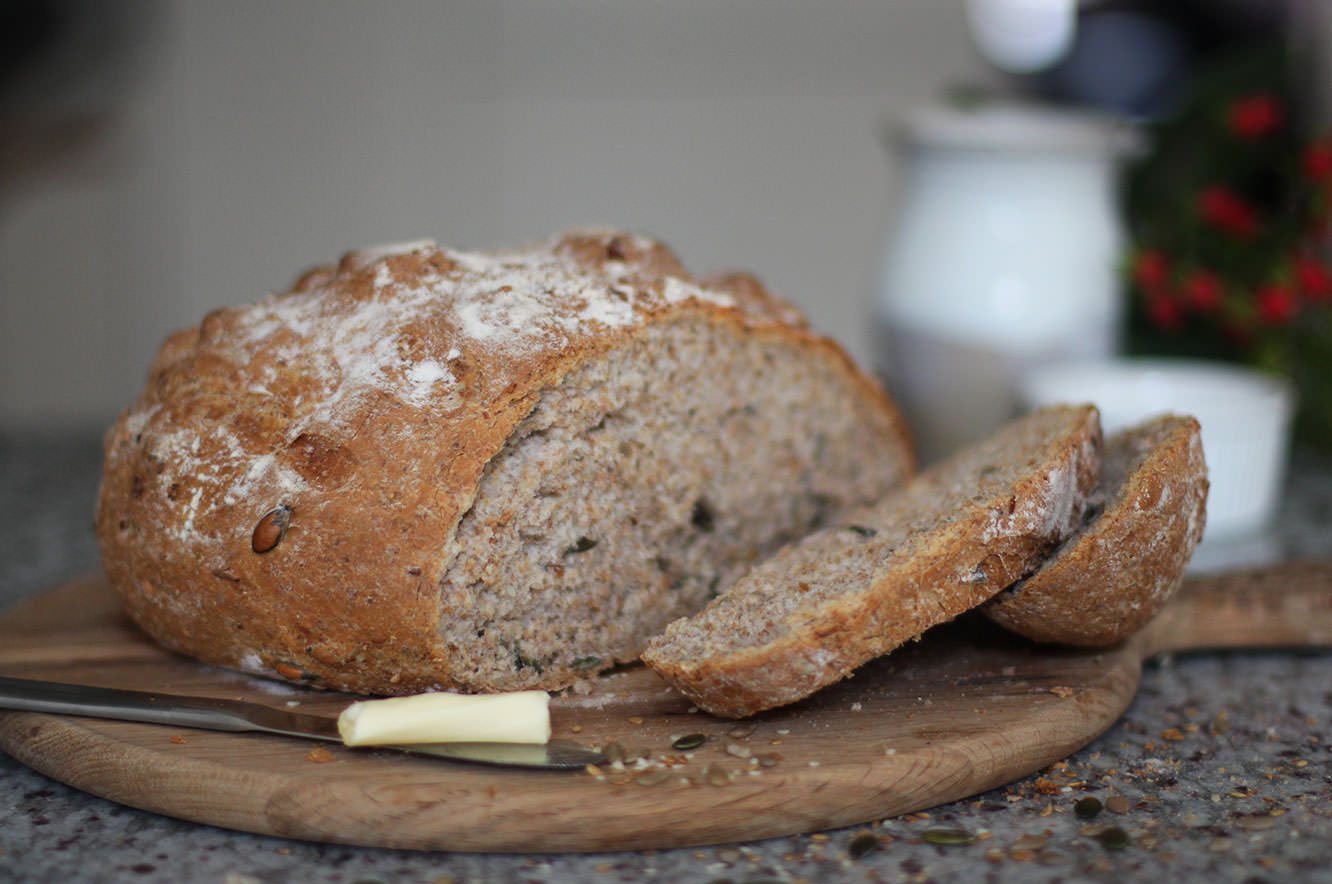
When I got word that fondue was back on, I figured I would contribute a little something to the dipping pot. So here’s a double whammy post. My seeded granary wonder bread, Pete’s (mainly Nigella’s) cheese fondue.
You will need
For the bread:
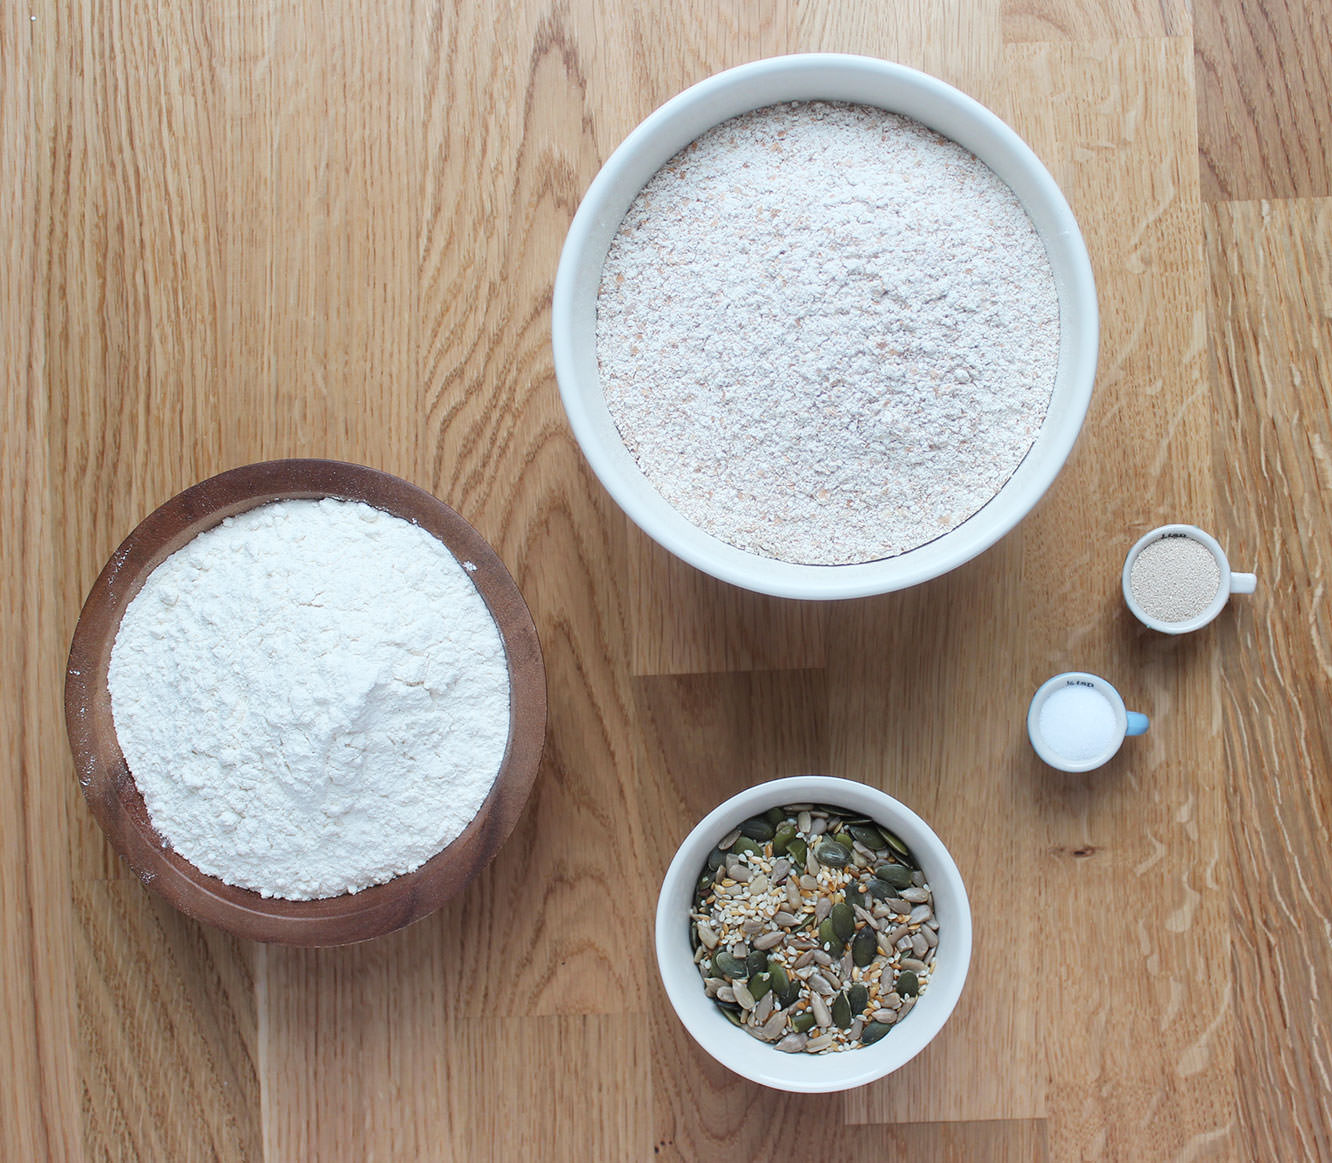
300g/10.5 oz Wholemeal bread flour
200g/7 oz Strong white bread flour
150g/5 oz Mixed seeds
300ml/10 fl oz Cold water
7g Dried yeast
7g Salt
For the fondue:
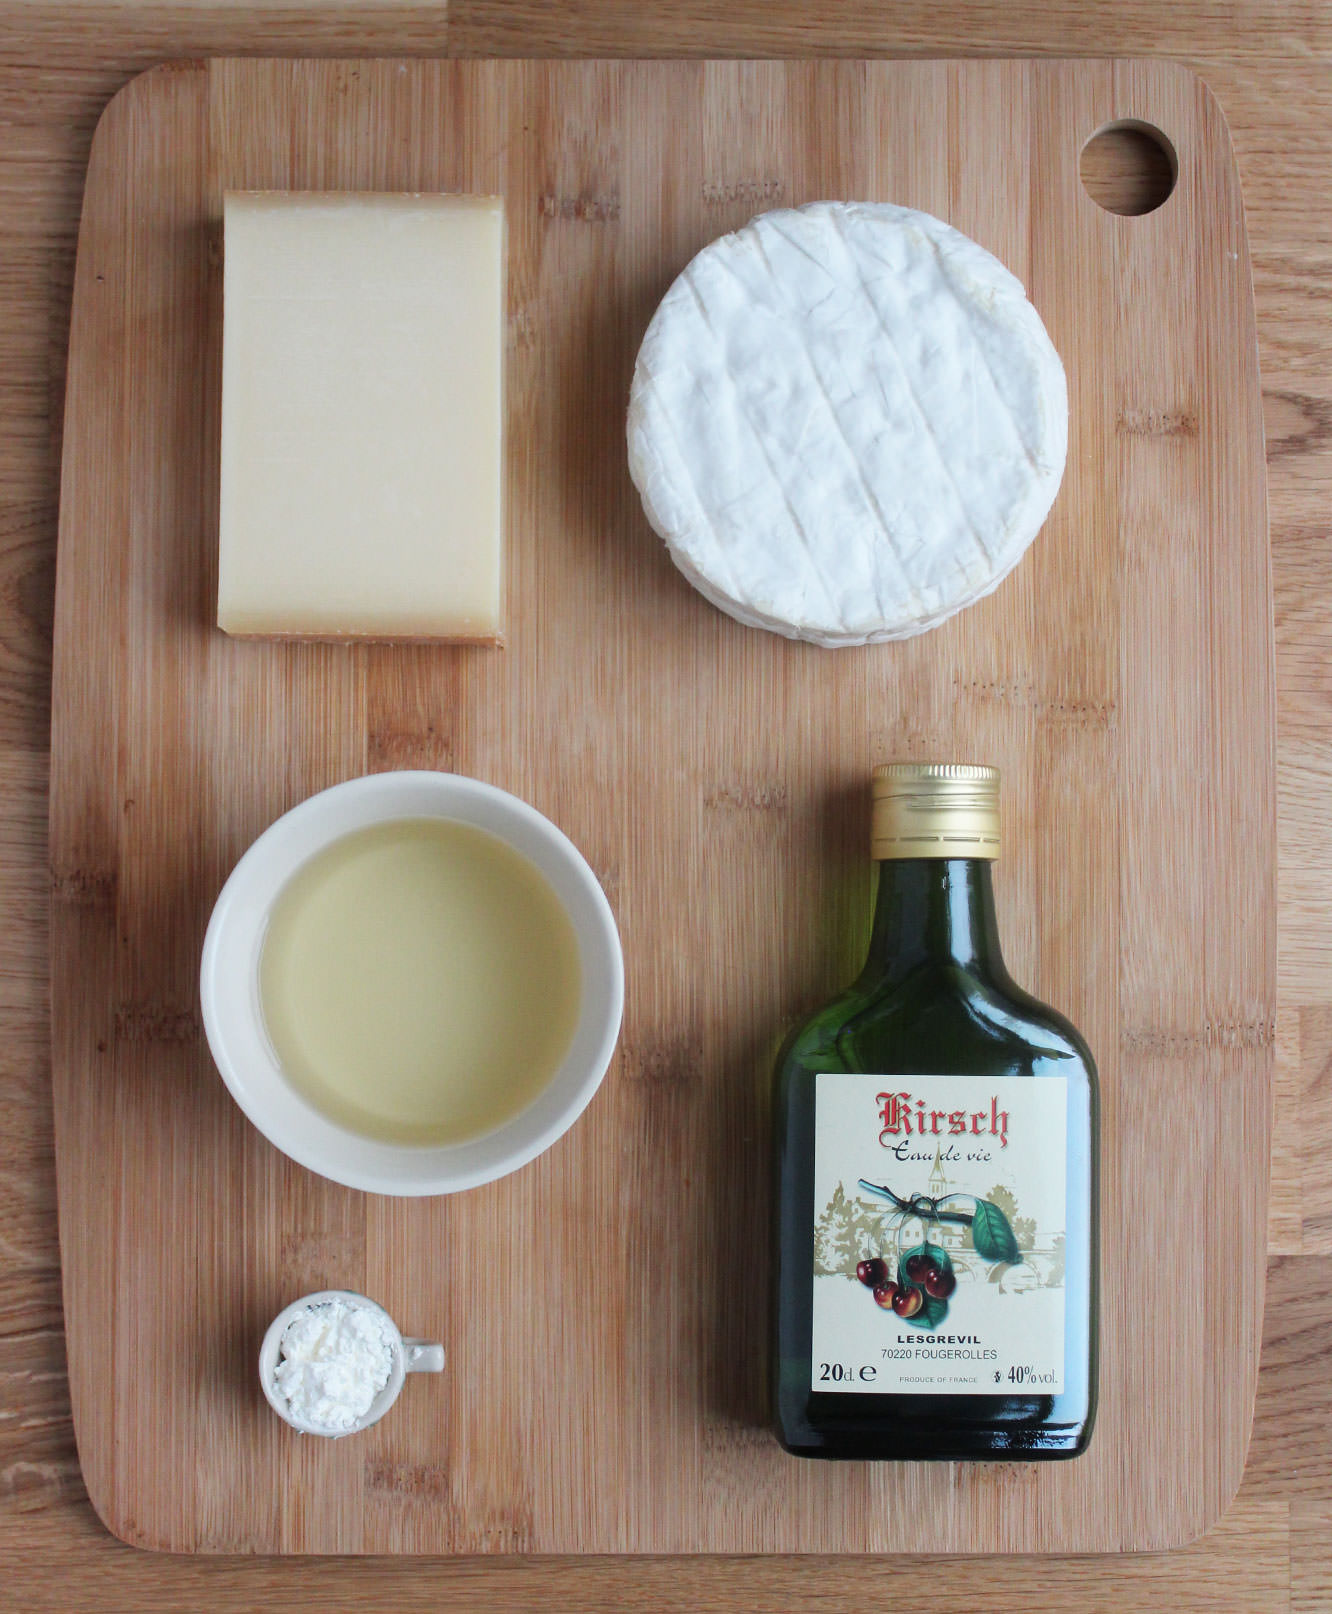
400g/14 oz Gruyere cheese
400g/14 oz Camembert (although after doing this, P and I think you’re safer with Emmental as it has a more similar melting point to Gruyere)
400ml/13.5 fl oz White wine (just buy the one that is most reduced from the highest price)
4 Tablespoons Kirsch
3 Teaspoons cornflour
Clove of garlic
Some charcuterie, just because.
(Serves 6)
Step one
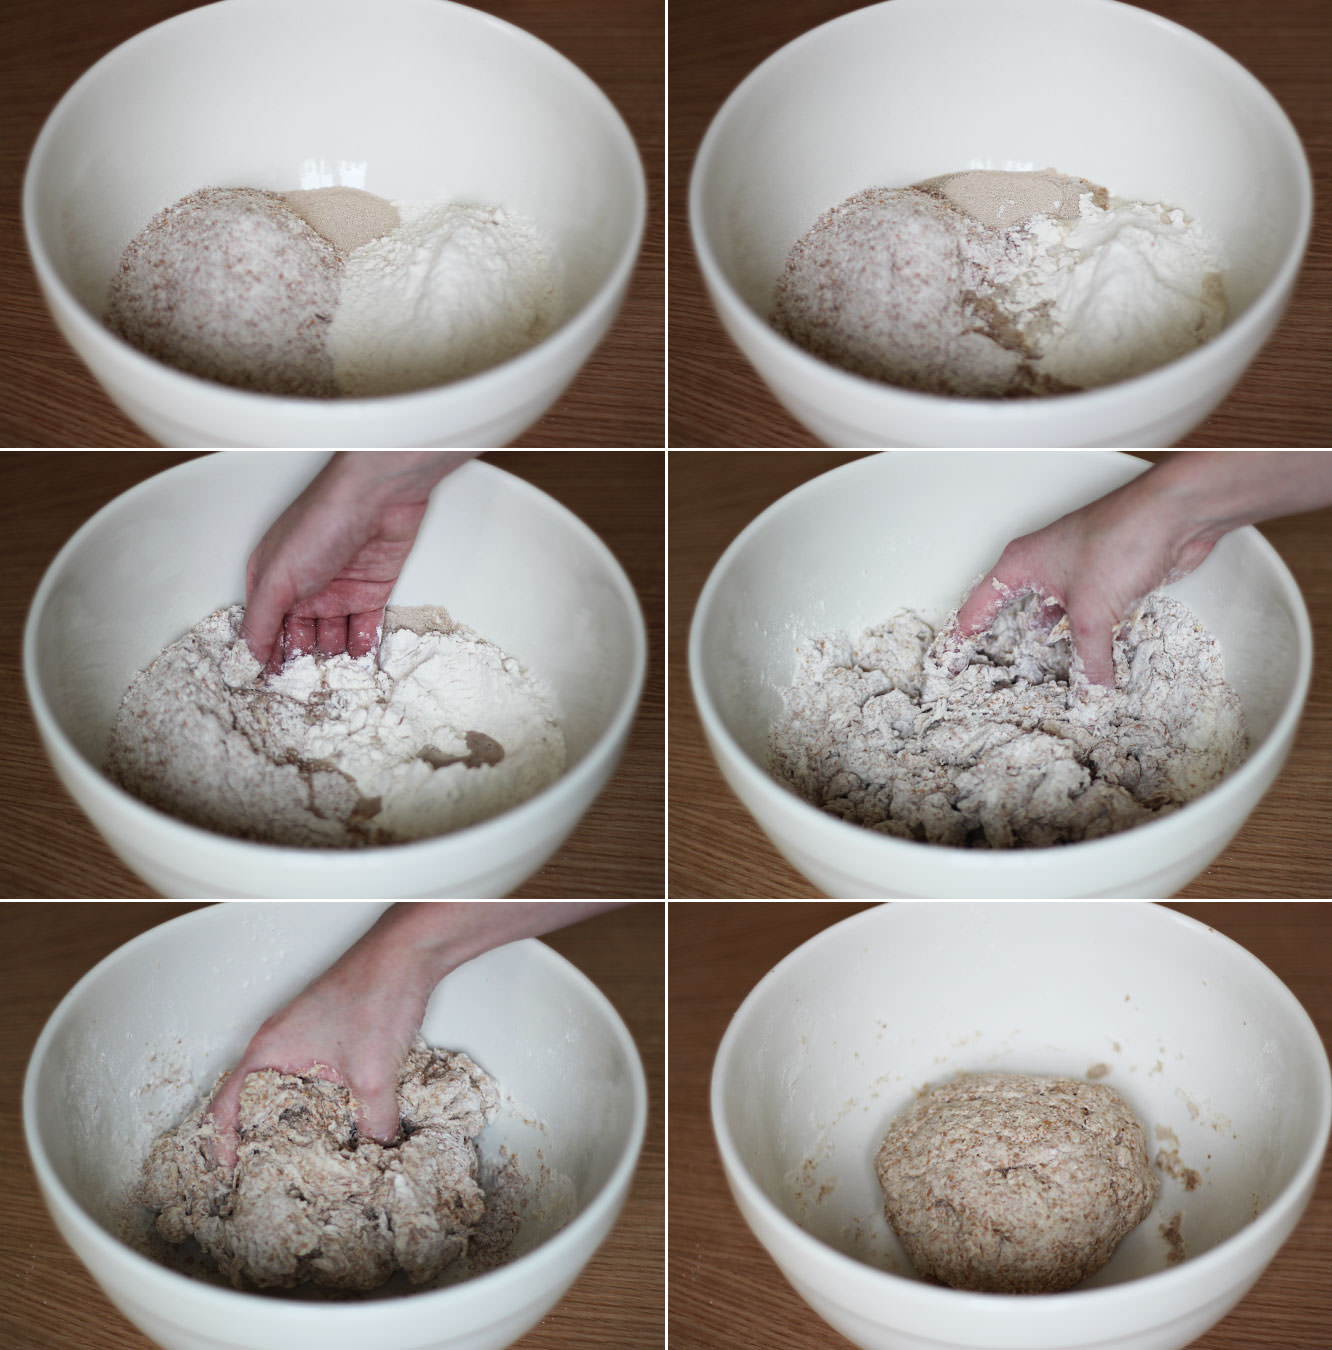
Combine the two bread flours salt and yeast in a bowl. Keep the yeast and salt as far apart as you can. The salt has a nasty track record for bullying the yeast.
Step two
Add the water and mix with your hand until combined. You don’t need the water to be warm, at least that’s what Paul Hollywood says on EVERY EPISODE OF BAKE OFF. Something about the protein structure. I’m inclined to bow to his superior knowledge.
You may need to add a tiny splash more water if your dough isn’t coming together.
Step three
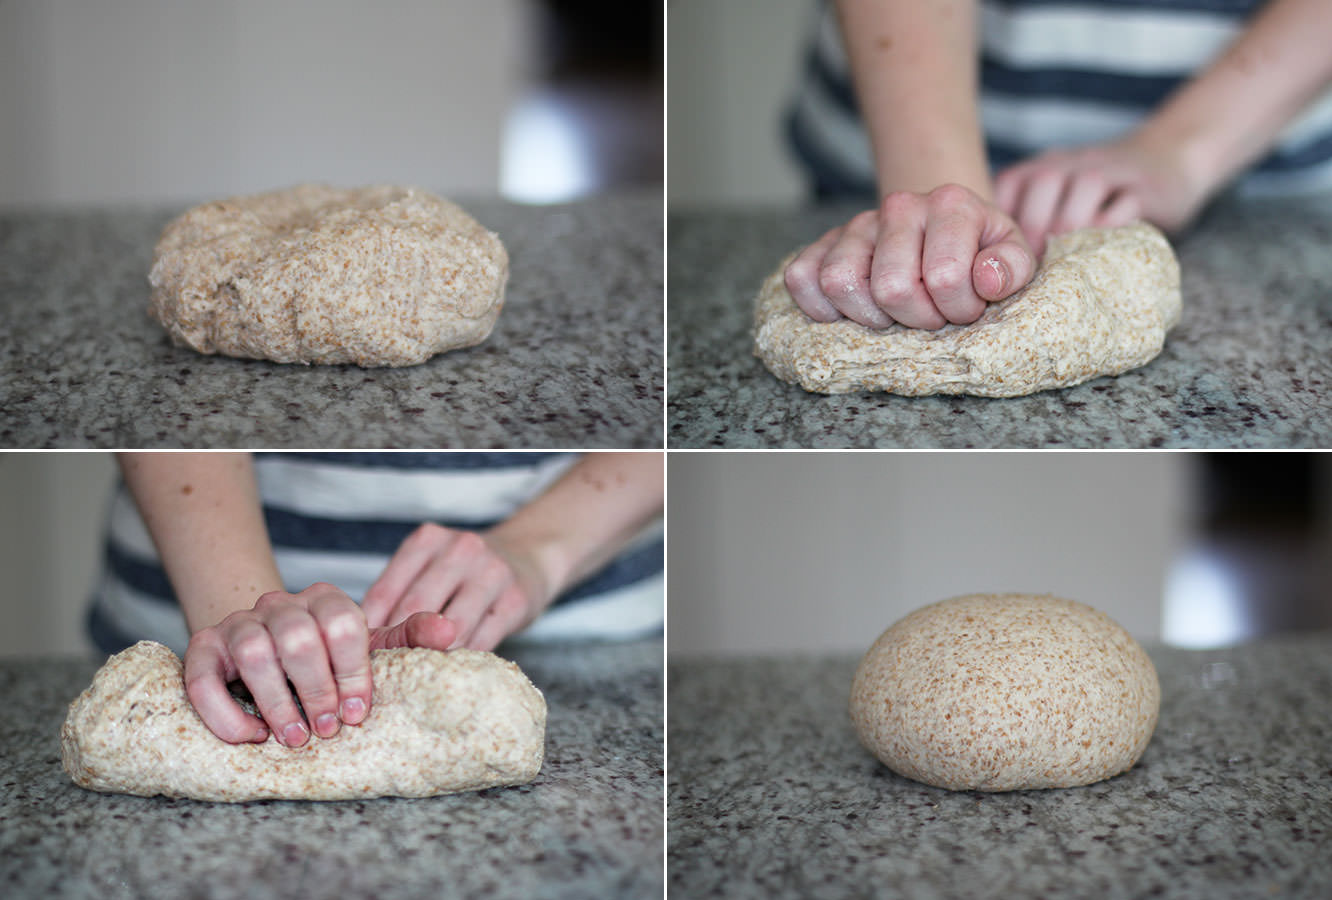
Lightly cover your work surface with olive oil so that you don’t add loads more flour to the dough as you go. Another Hollywood gem.
Knead the dough by pushing it forward as far as it will go and then folding it back. Turn and stretch again. Repeat repeat repeat.
At first the dough will be fairly brittle and will break as you do this. Don’t worry, it will get softer and more stretchy as you go. It will also merge back together more easily (you’ll know what I mean when you get there)
As it’s wholemeal flour you need to keep going on this for about 15 minutes, it should form a much smoother ball that the one you started with when you’re done.
Step four
Lightly oil a bowl and place dough in. Cover with clingfilm and leave for an hour to rise.
Step five
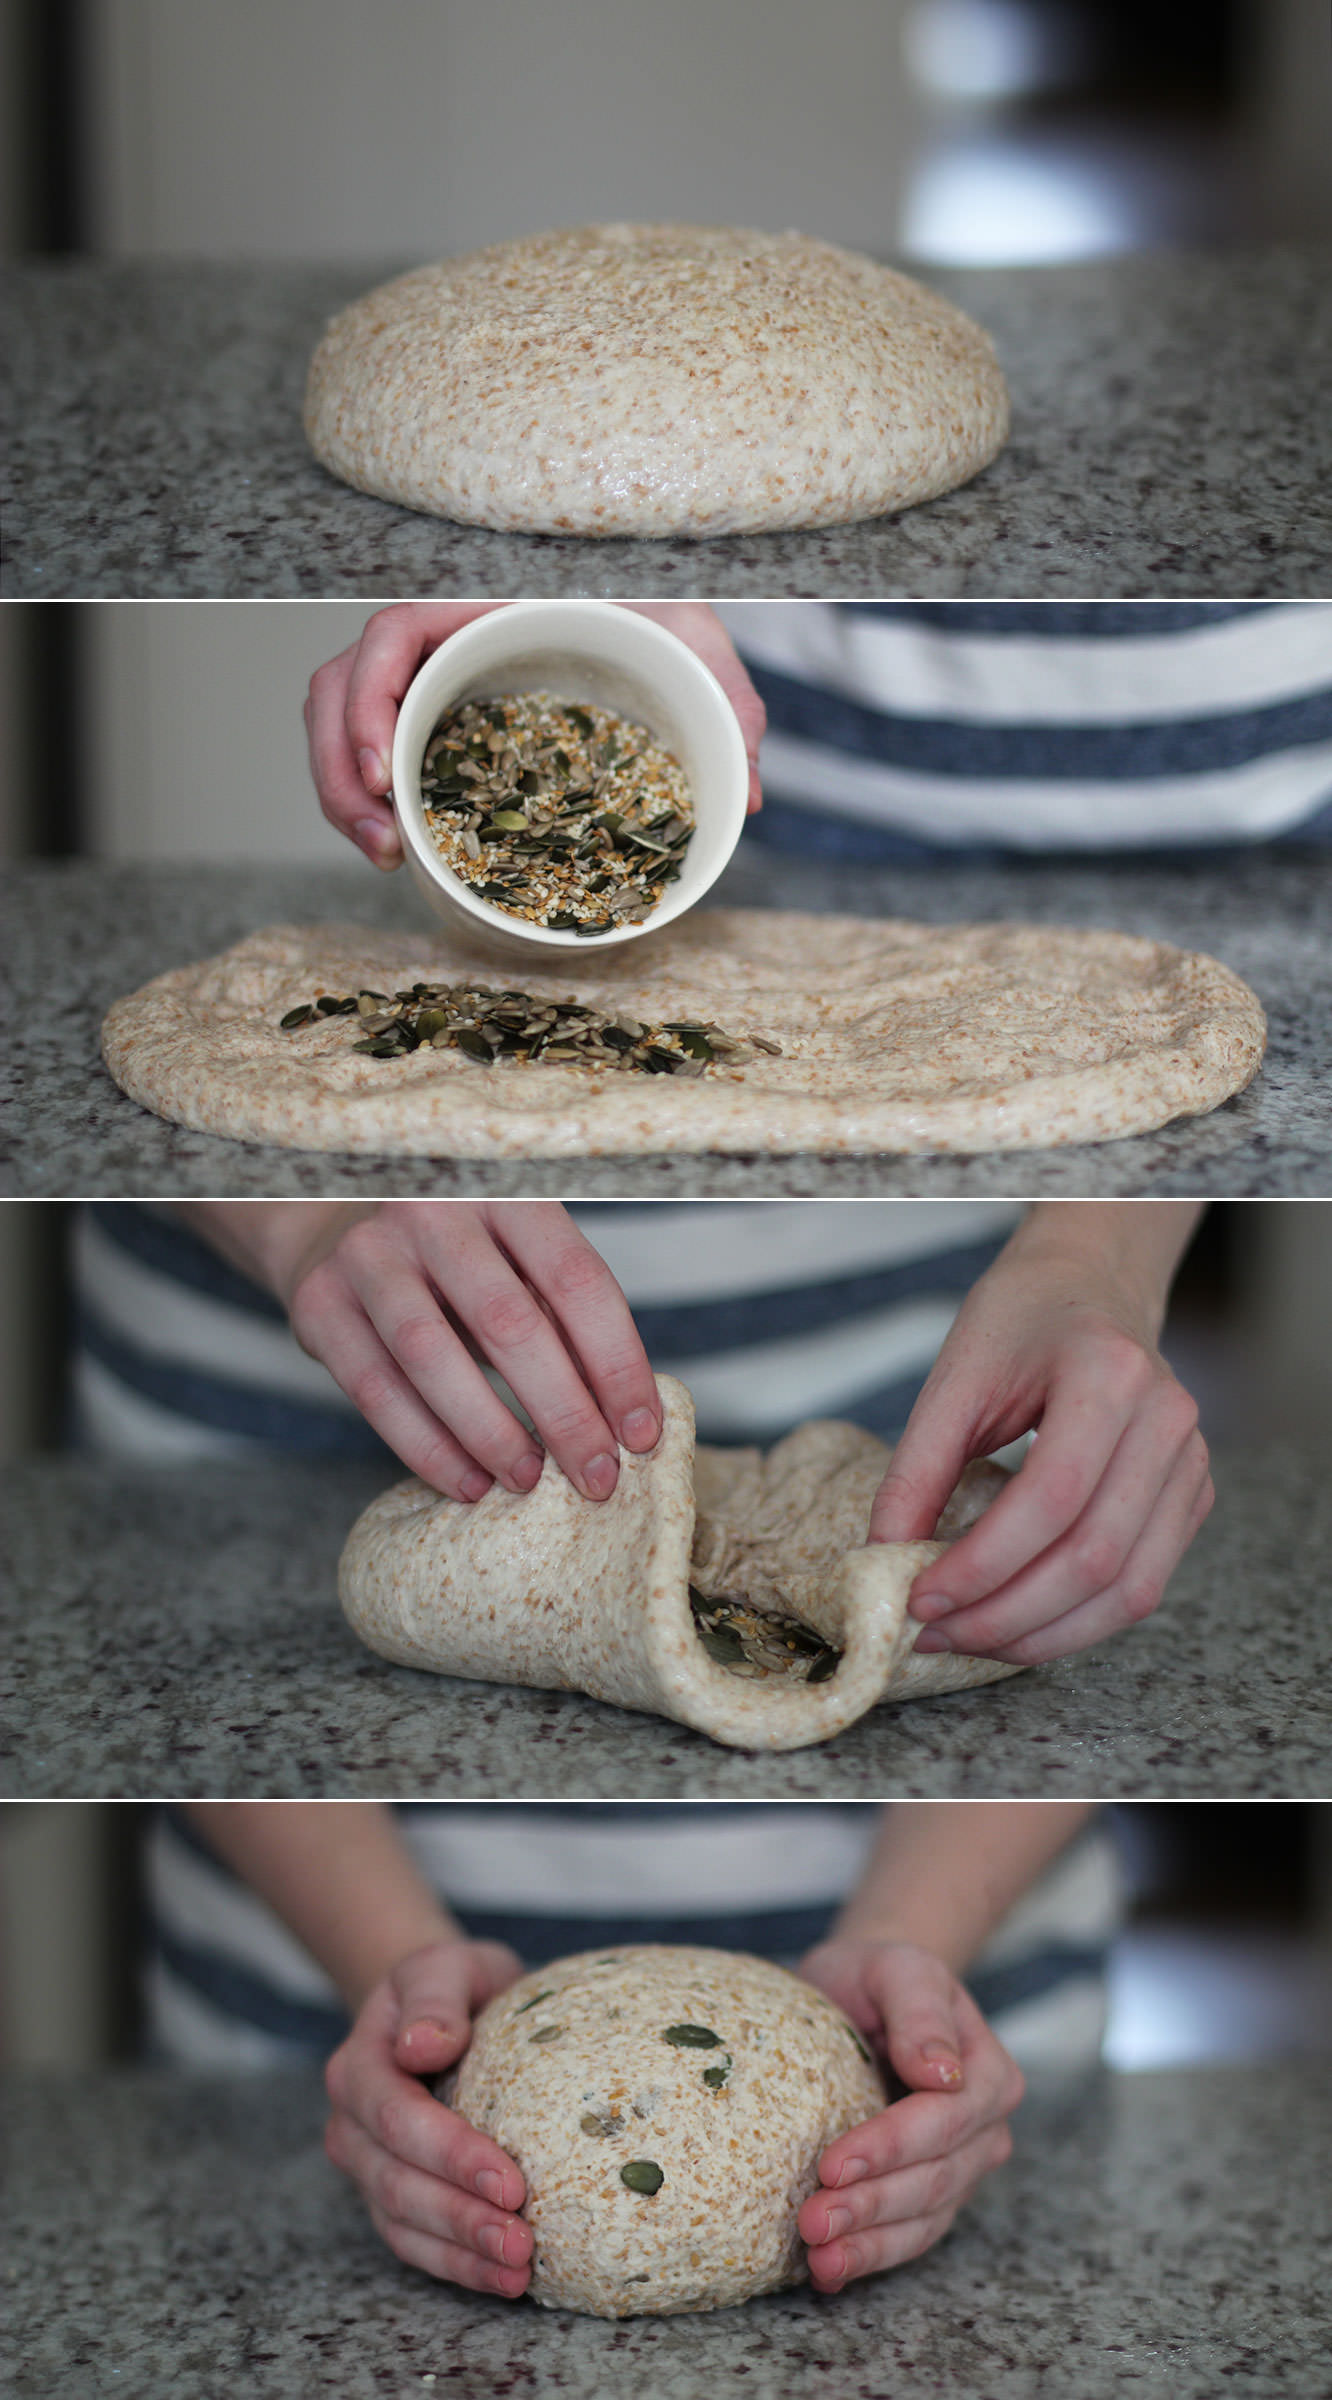
Turn dough back out onto the work surface (it’s ok if you have an overwhelming urge to put your face in it – I mean, don’t actually do it, but thinking it doesn’t make you weird).
Flatten out with your fingers (or your fist if you need a small moment of therapy). Add the mixed seeds evenly over the surface of the mix. You will feel like you have a lot, but they disappear quite quickly.
Fold the corners and sides back into the middle and knead for a minute or so until the seeds are distributed throughout.
Scoop your hands around the edges to form the dough into a ball.
Step six
Dust a large baking tray with flour and place the dough on top. Slash the top in a criss cross pattern and sprinkle the top with a bit more flour.
Leave for another hour to prove.
Step seven
Bake on 200C/gas mark 6/400F for 40-45 minutes. Keep an eye on it as it bakes incase any of the edge starts to catch.
Turn the bread over when you think it’s done and tap on the bottom. If it sounds quite hollow then you’re good.
Step eight
Try to resist biting right into the loaf. It’s time to make the fondue.
Step nine
Make sure your fondue set is ready to go and the table is set. You’re going to want to eat straight away when you see a pot of melted cheese.
Step ten
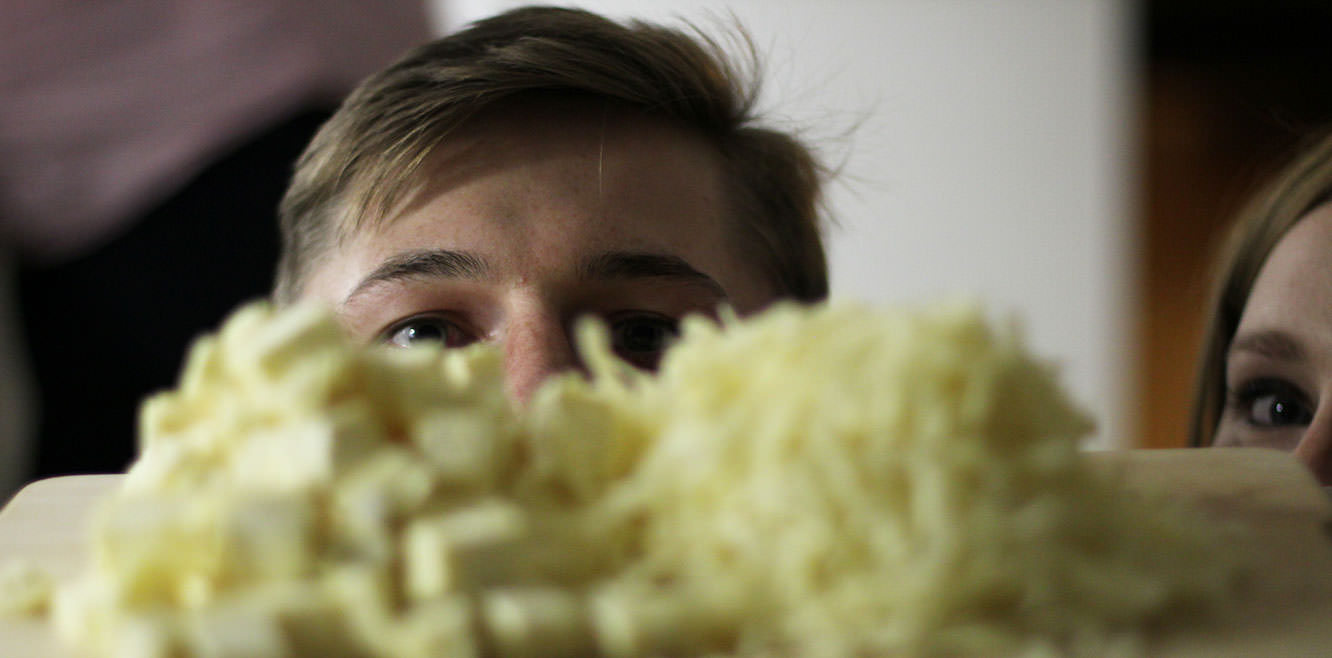
Grate the Gruyere and chop up the Camembert (although I really do recommend you use Emmental instead, the Camembert took a loooooong time to melt and was insanely rich). You will have MOUNTAINS of the stuff. Pete’s actually 6’3″…
Step eleven
Put a the wine into a saucepan on a medium heat. Bring this to a point just before it starts to simmer and start adding the cheese, stirring with a whisk and allowing it to melt in stages.
Step twelve
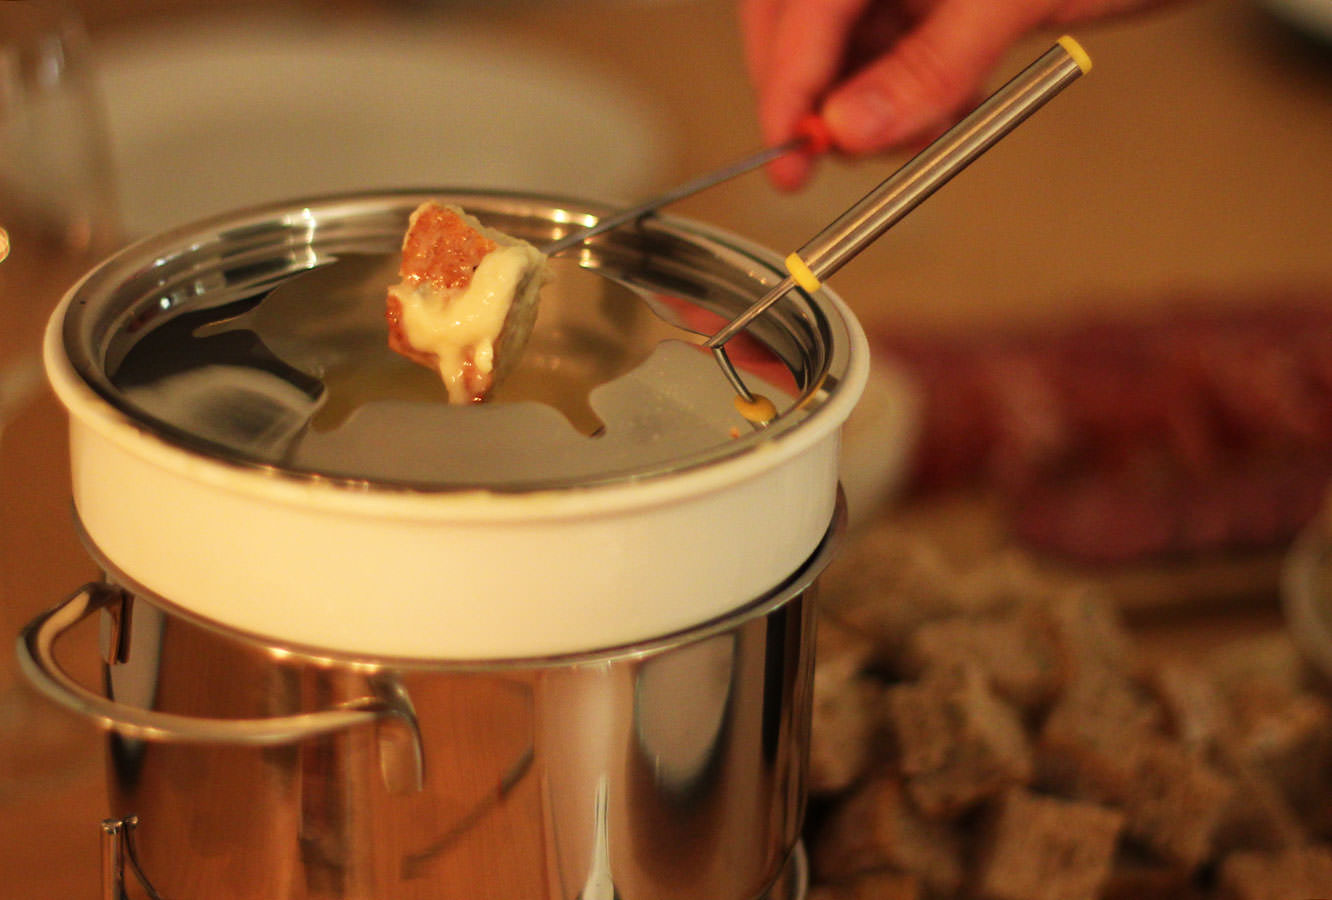
Once all the cheese has melted pop in the garlic and season to taste. Bring the heat up to a bubble and keep whisking until it is combined with the wine (though again – Camembert wasn’t co-operating fully with us on this one). Finally add the Kirsch and cornflour (probably best to mix the two beforehand so the cornflour doesn’t clump up).
Turn the heat down and allow to thicken for a few minutes before removing from the hob and pouring into the fondue pot. Light the burner/candle underneath.
Step thirteen
Sink into a very well deserved and rather disgusting cheese coma.