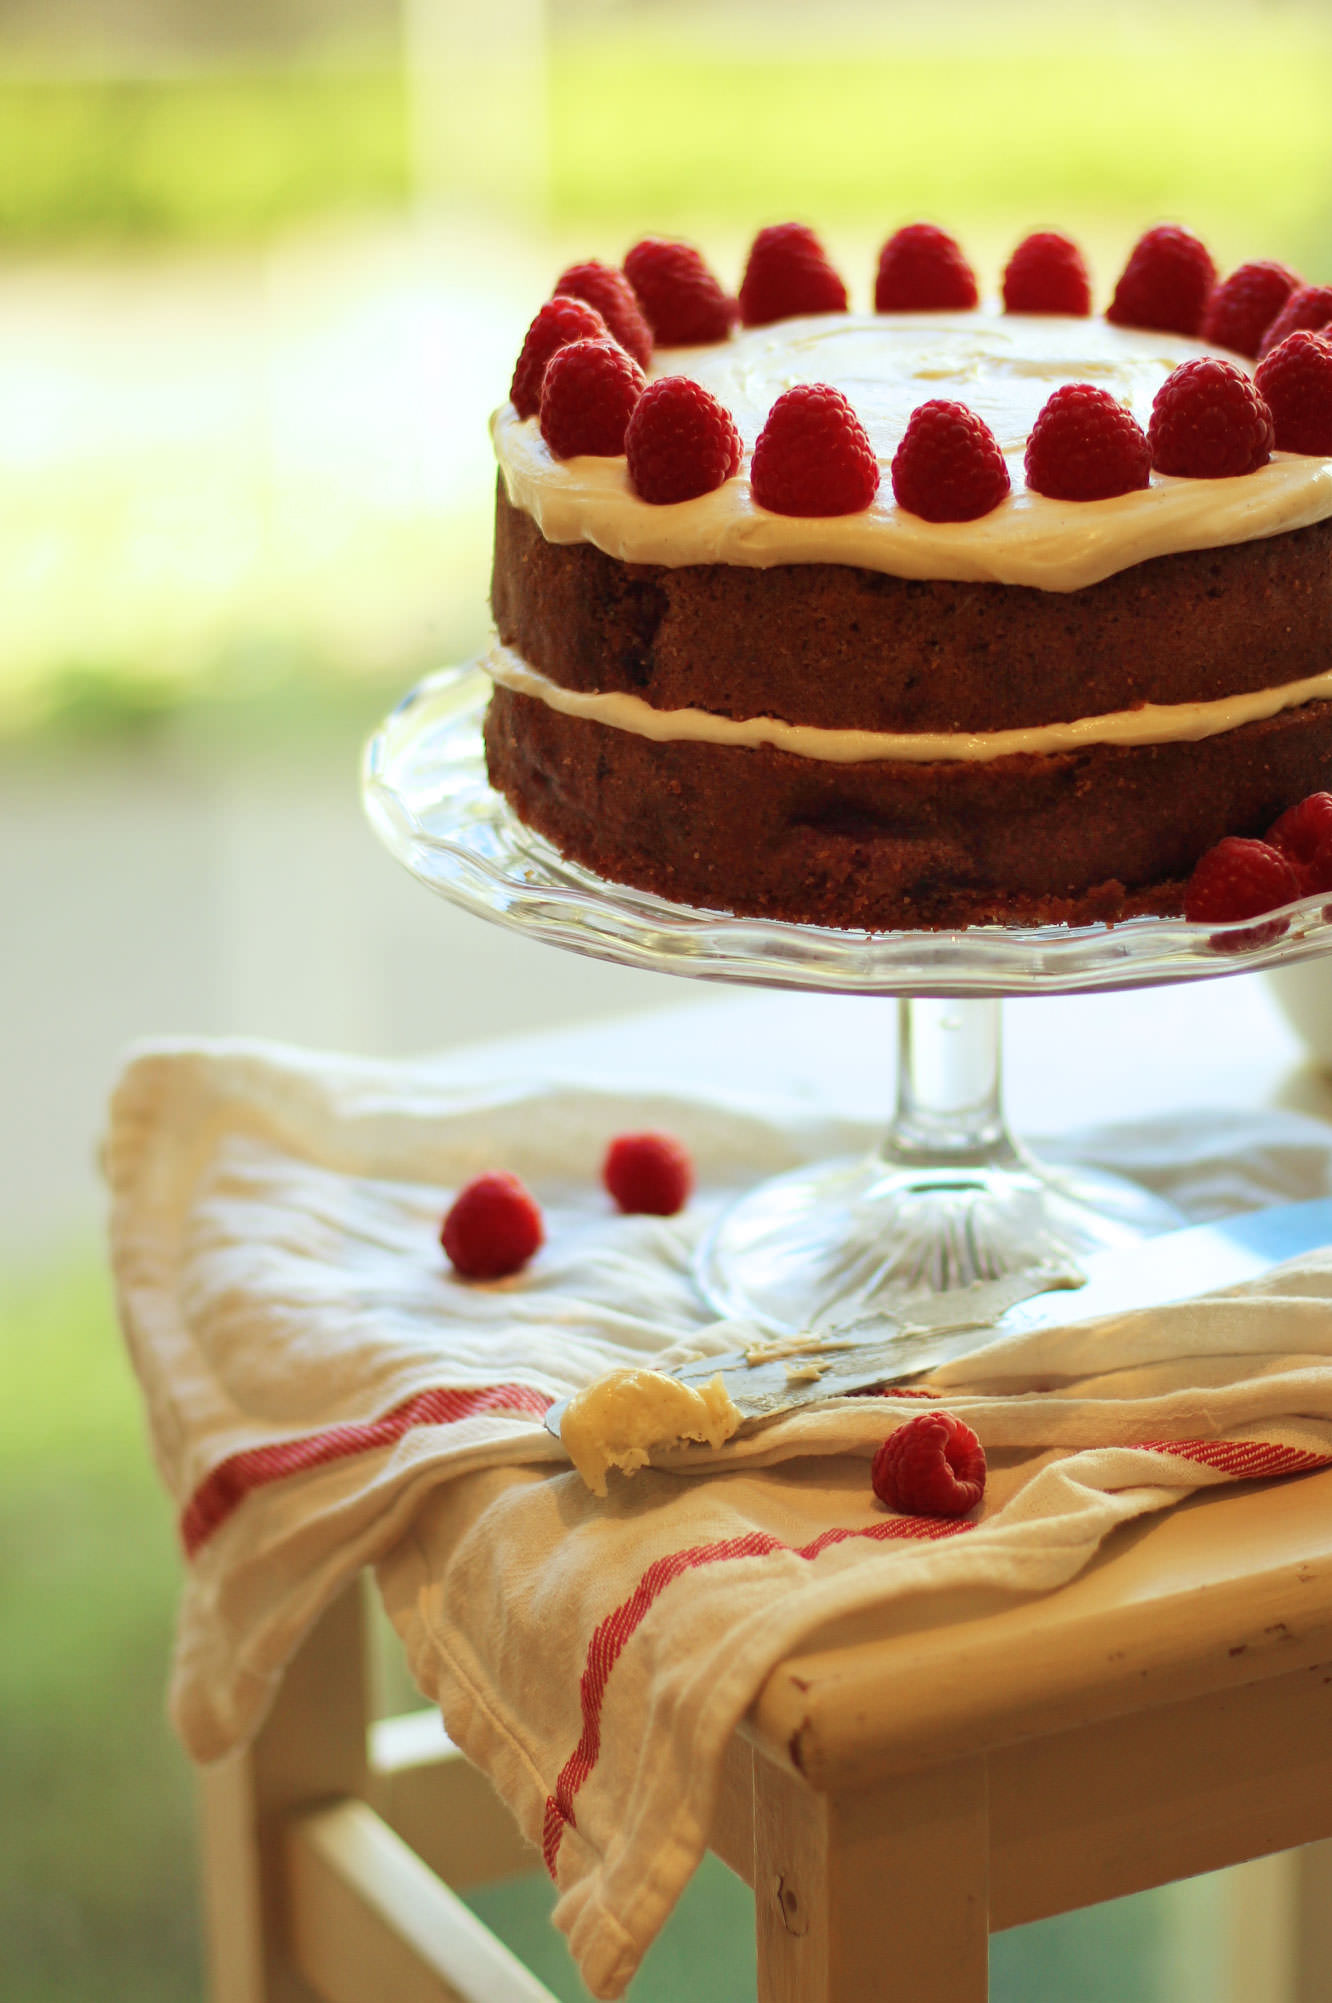
Another week another birthday. This time round it’s my lovely housemate who is bravely entering her mid-twenties; just another excuse for me to get in the kitchen.
Earlier in the week Vicky (the birthday girl in question), Matt (the fiance) and I, had sat down to watch The Princess Bride (a hilarious farce of a film), and we cracked open some Crabbie’s. It was such a lovely little evening, and I thought I would bake the experience into a cake to commemorate the little one’s birth.
Crabbie’s, for anyone who doesn’t know (more fool you), is alcoholic ginger beer. This particular batch was raspberry flavoured, and nobody was more surprised than me to discover how nicely ginger and raspberry complement each other. Add to that a honey and vanilla icing and you’ve got a birthday cake fit for any 24 year old.
You will need
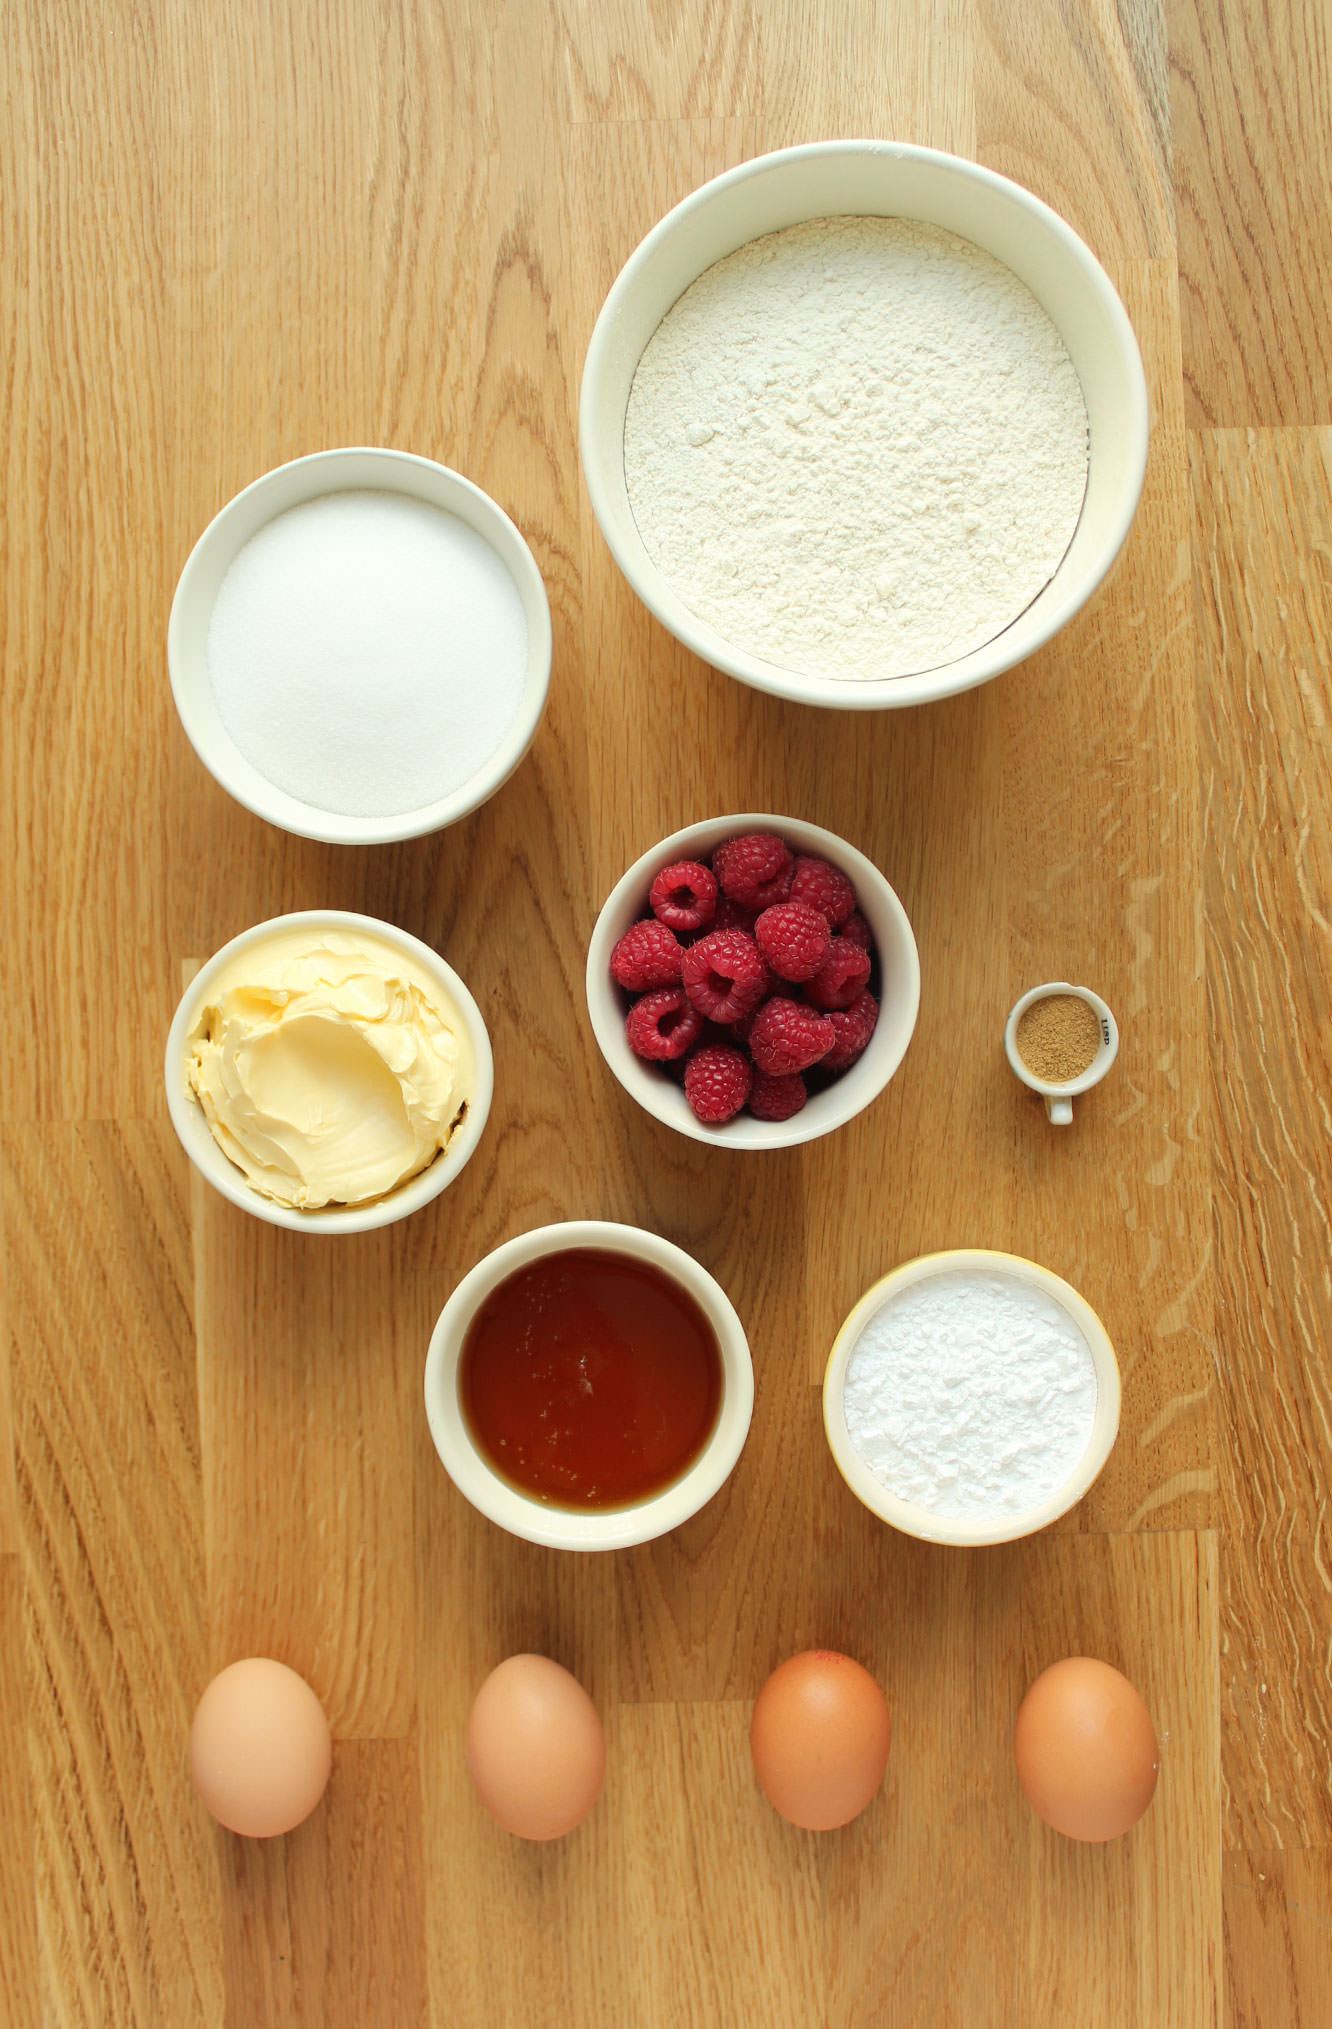
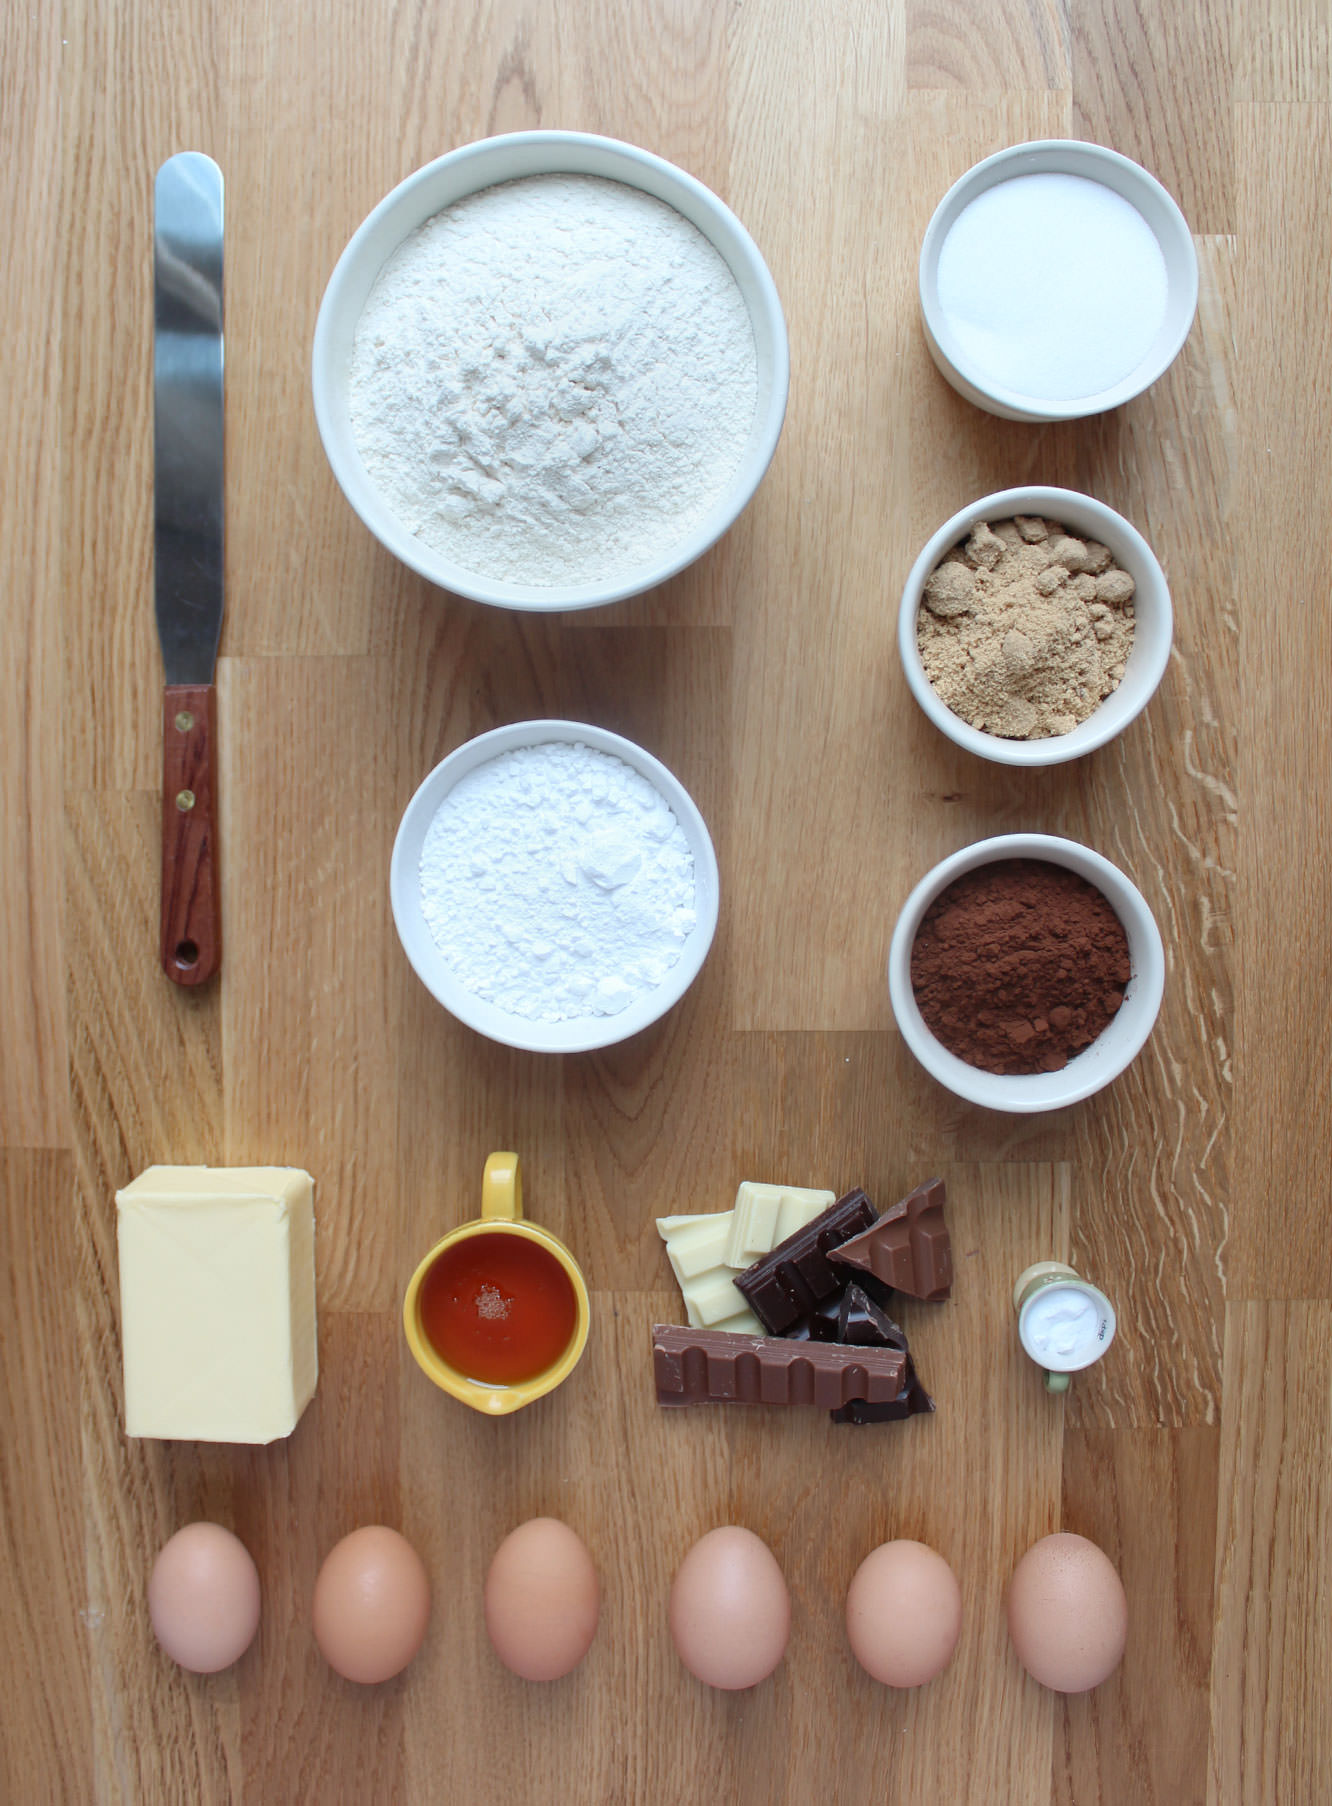
For the cake:
255g/9 oz self raising flour
255g/9 oz caster sugar
255g/9 oz margarine/butter (I use stork for cakes)
4 eggs
2 tsp ground ginger (add a bit more if you want a really strong ginger taste, 2 tsp is nice and subtle)
1 tsp vanilla extract/paste
1 tsp bicarbonate of soda
200g/7 oz raspberries
For the icing/decoration:
350g/12 oz icing sugar
150g/5 oz softened butter
170g/6 oz honey
1-2 tsp vanilla extract/paste (or even a pod if you have one so you get the lovely flecks)
100g/3.5 oz raspberries
Step one
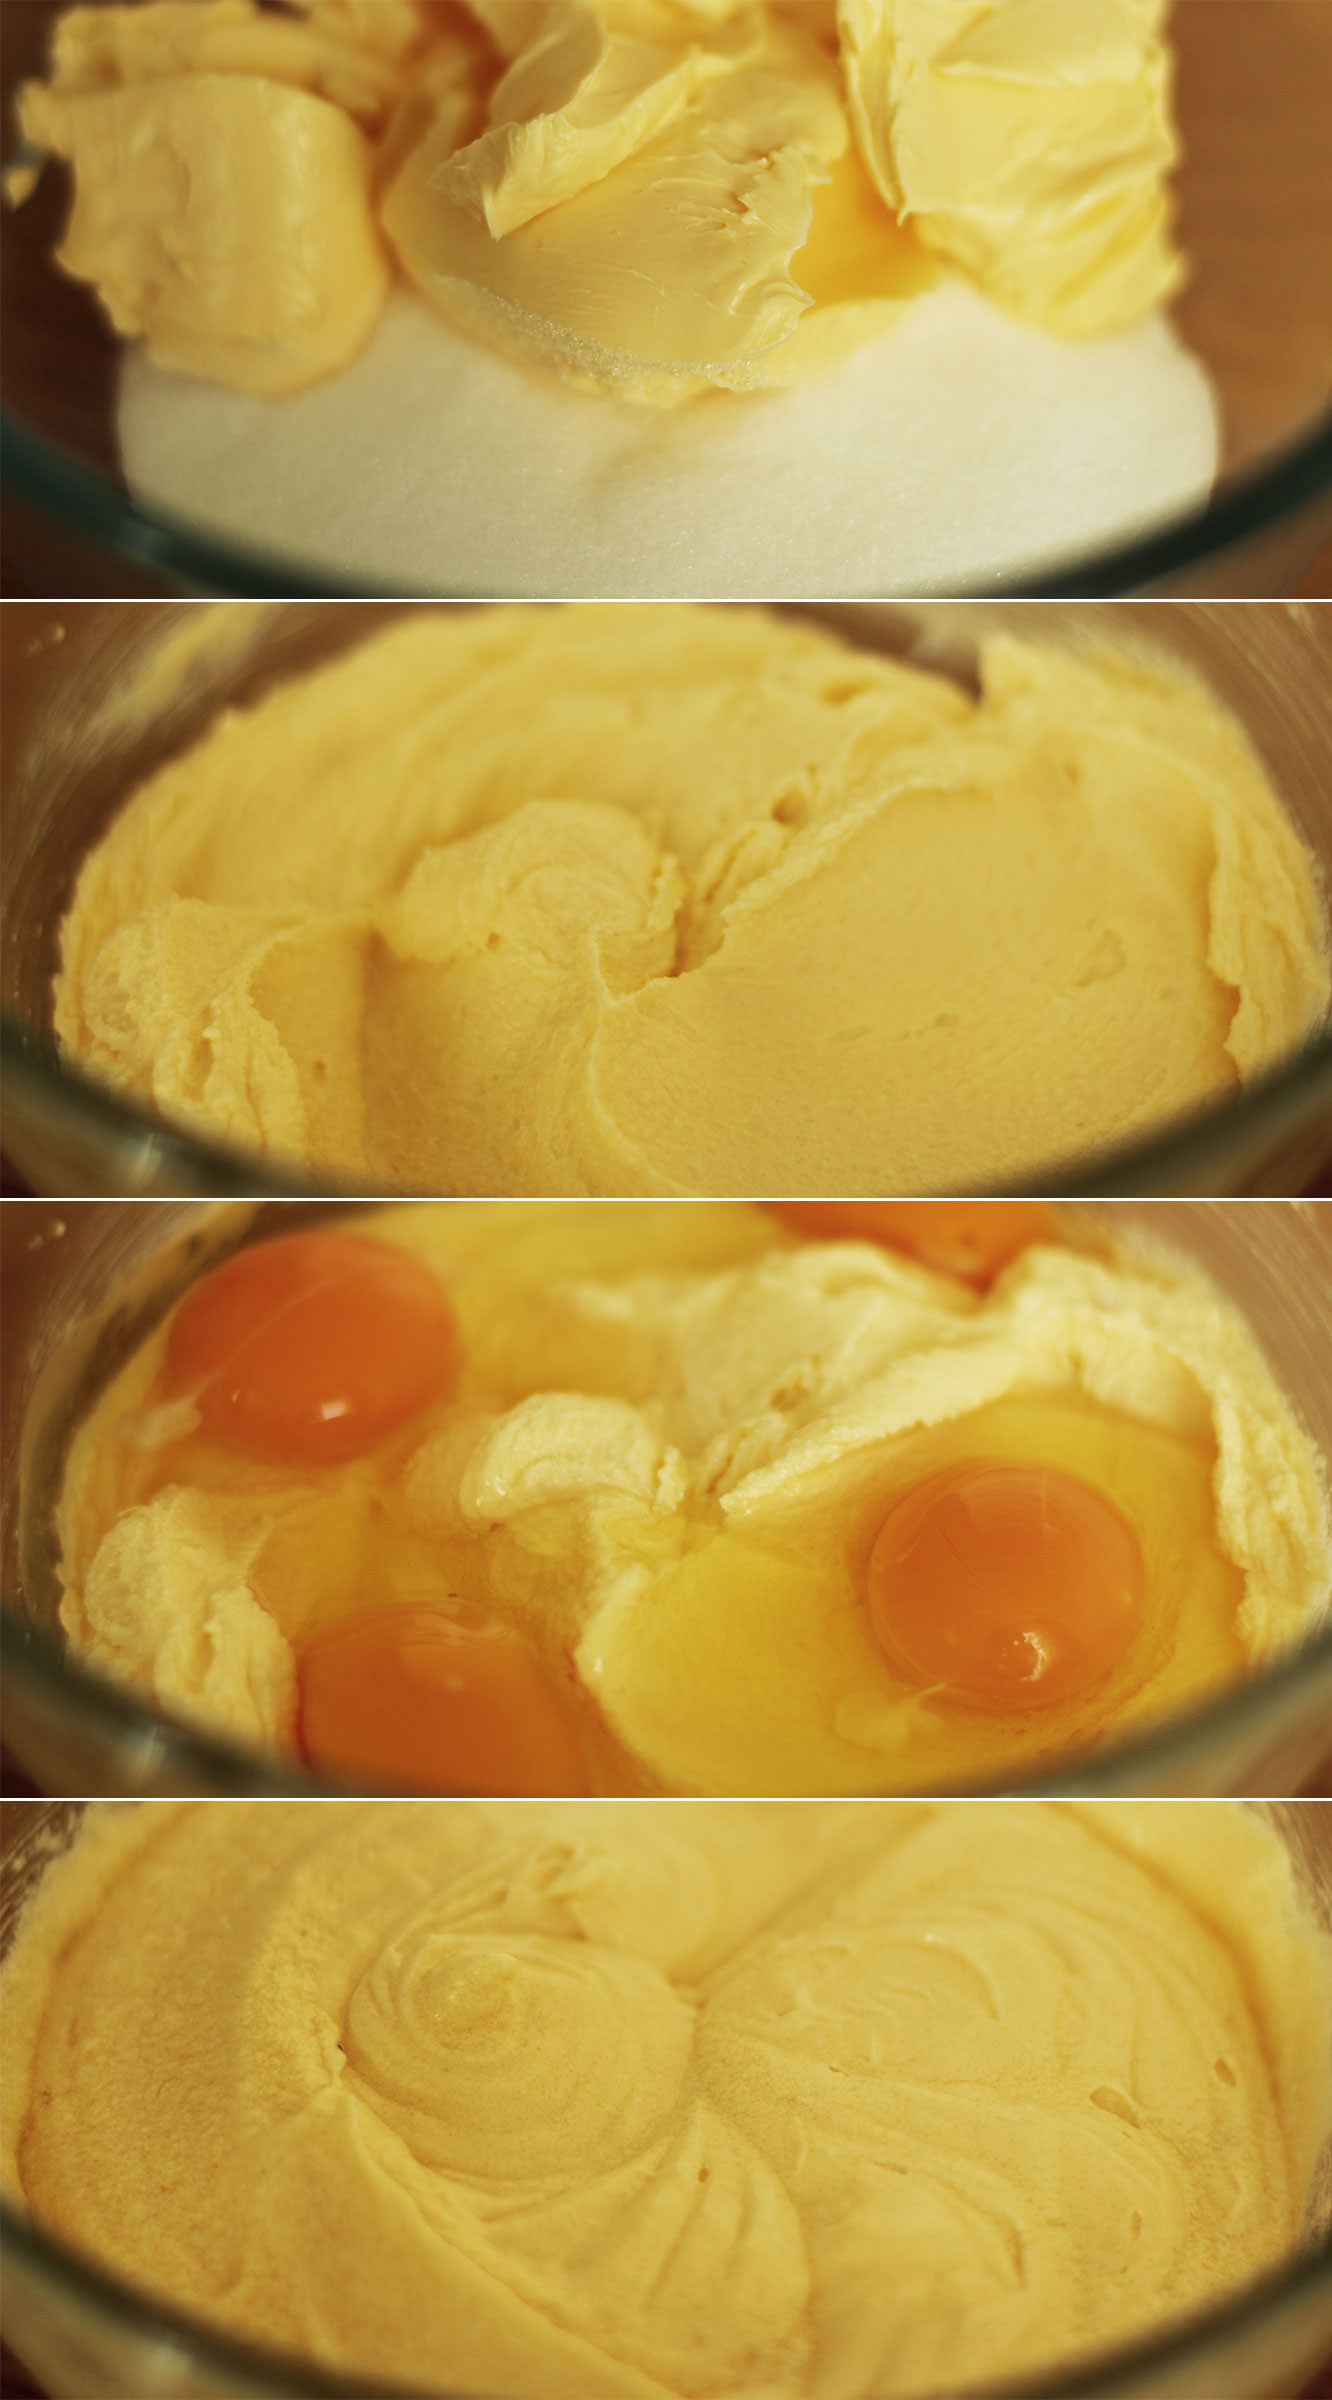
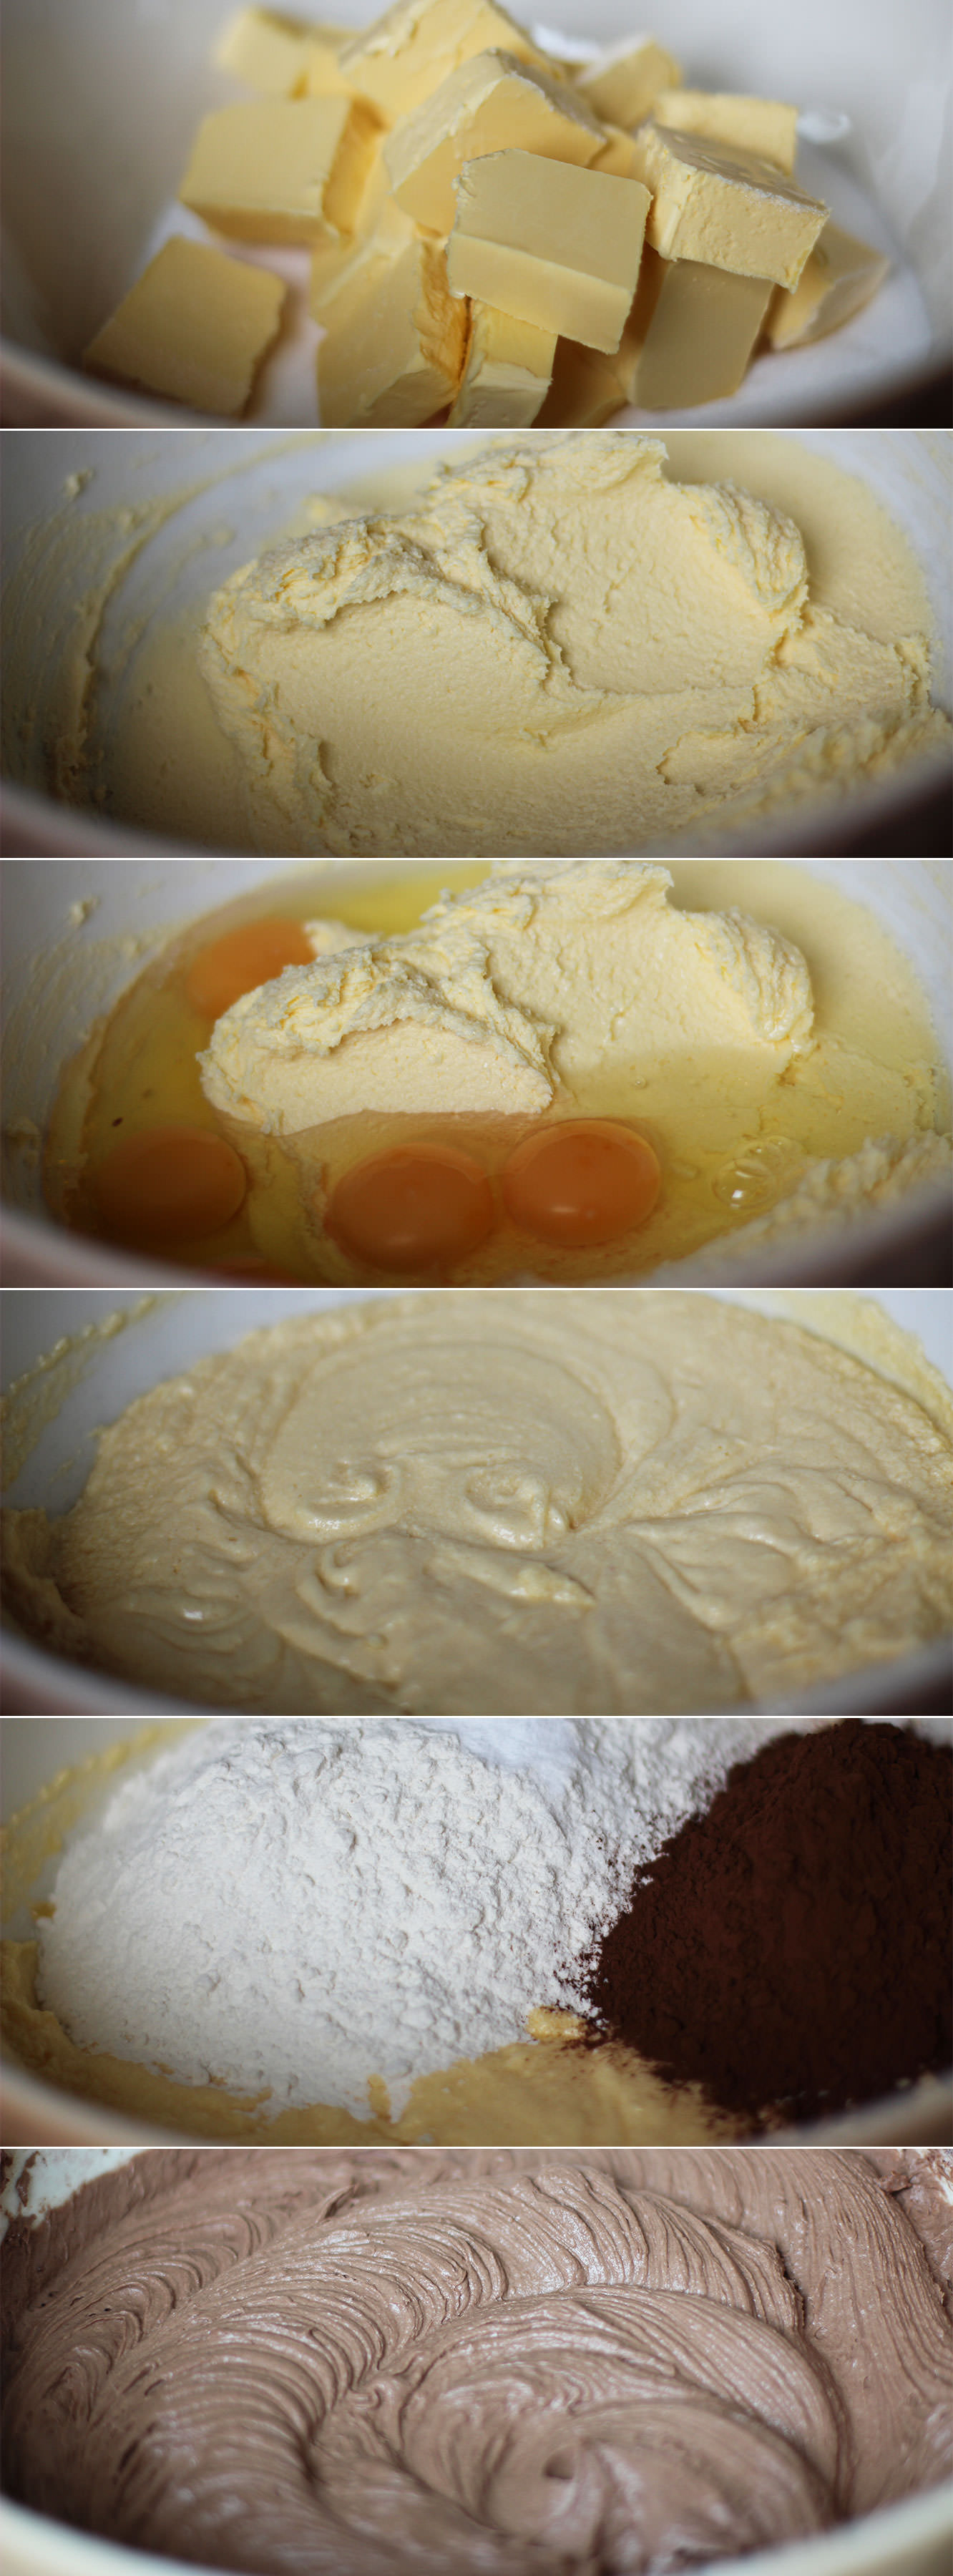
Using an electric whisk beat together the margarine and sugar until well blended and fluffy.
Step two
Add the eggs and beat again until combined. It looks a little split at this stage (see those little lumps at the sides) but you don’t need to worry, the flour never fails to sort that out.
Step three
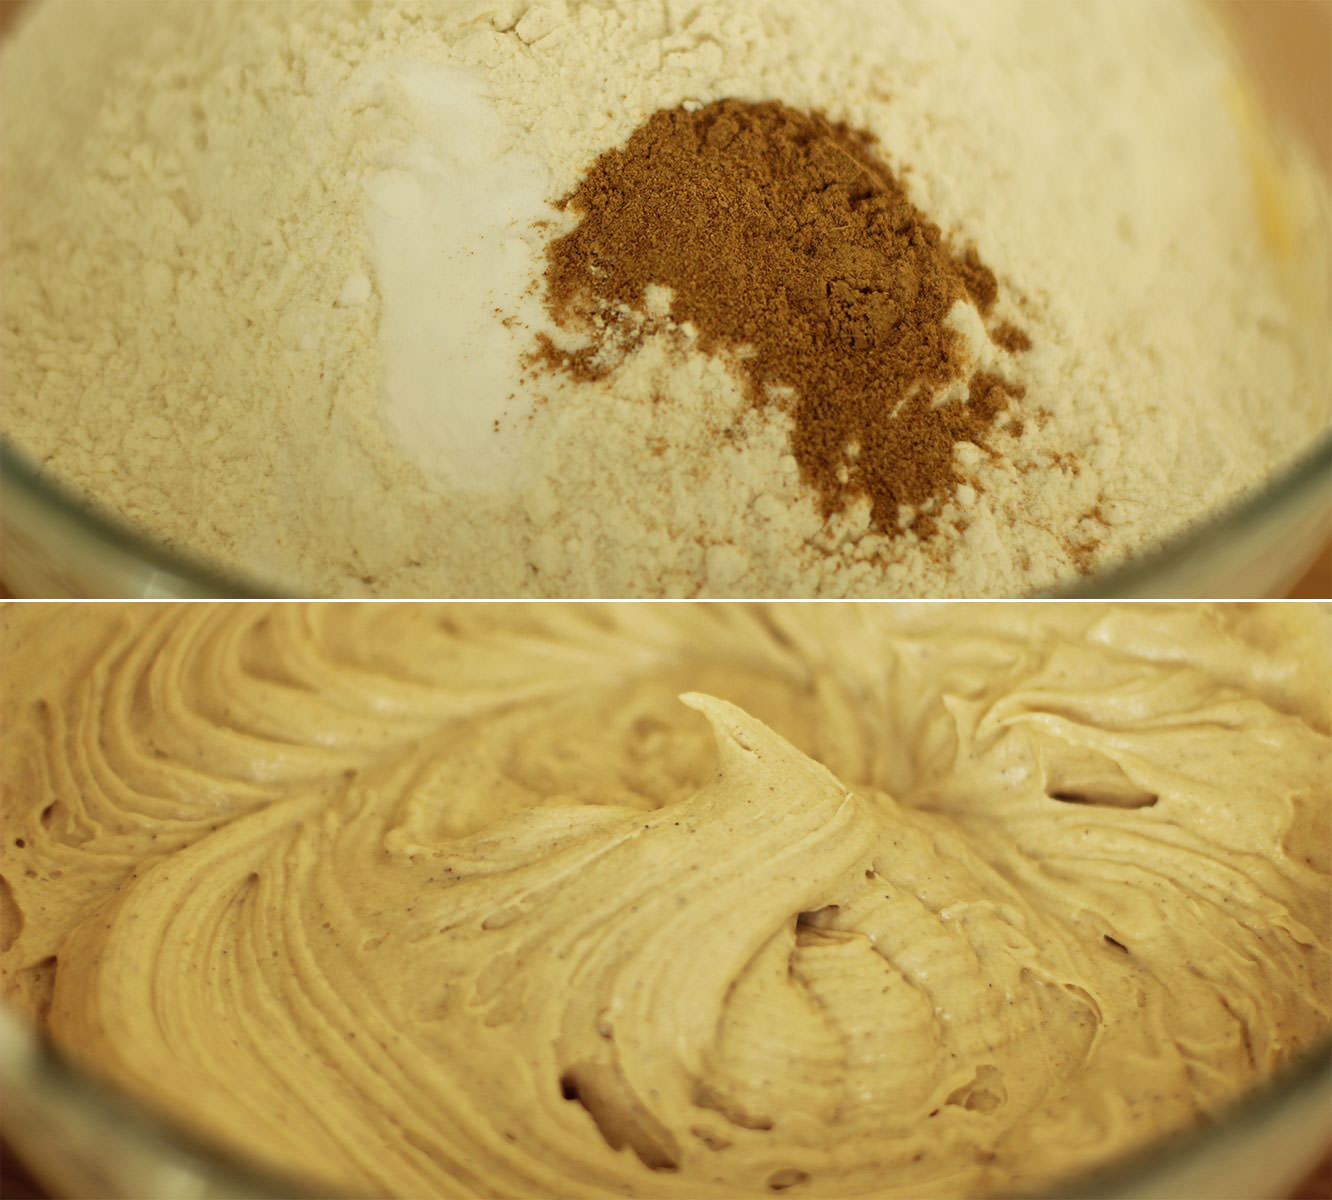
Add the flour, bicarbonate of soda and ginger and whisk again until smooth.
I also added the vanilla at this point which is in the form great paste my friend brought me back from Vanuatu, tastes delicious and has the beans in it. If you aren’t swinging by the South Pacific any time soon and don’t fancy the investment in a pod or some paste then extract will do the trick.
Step four
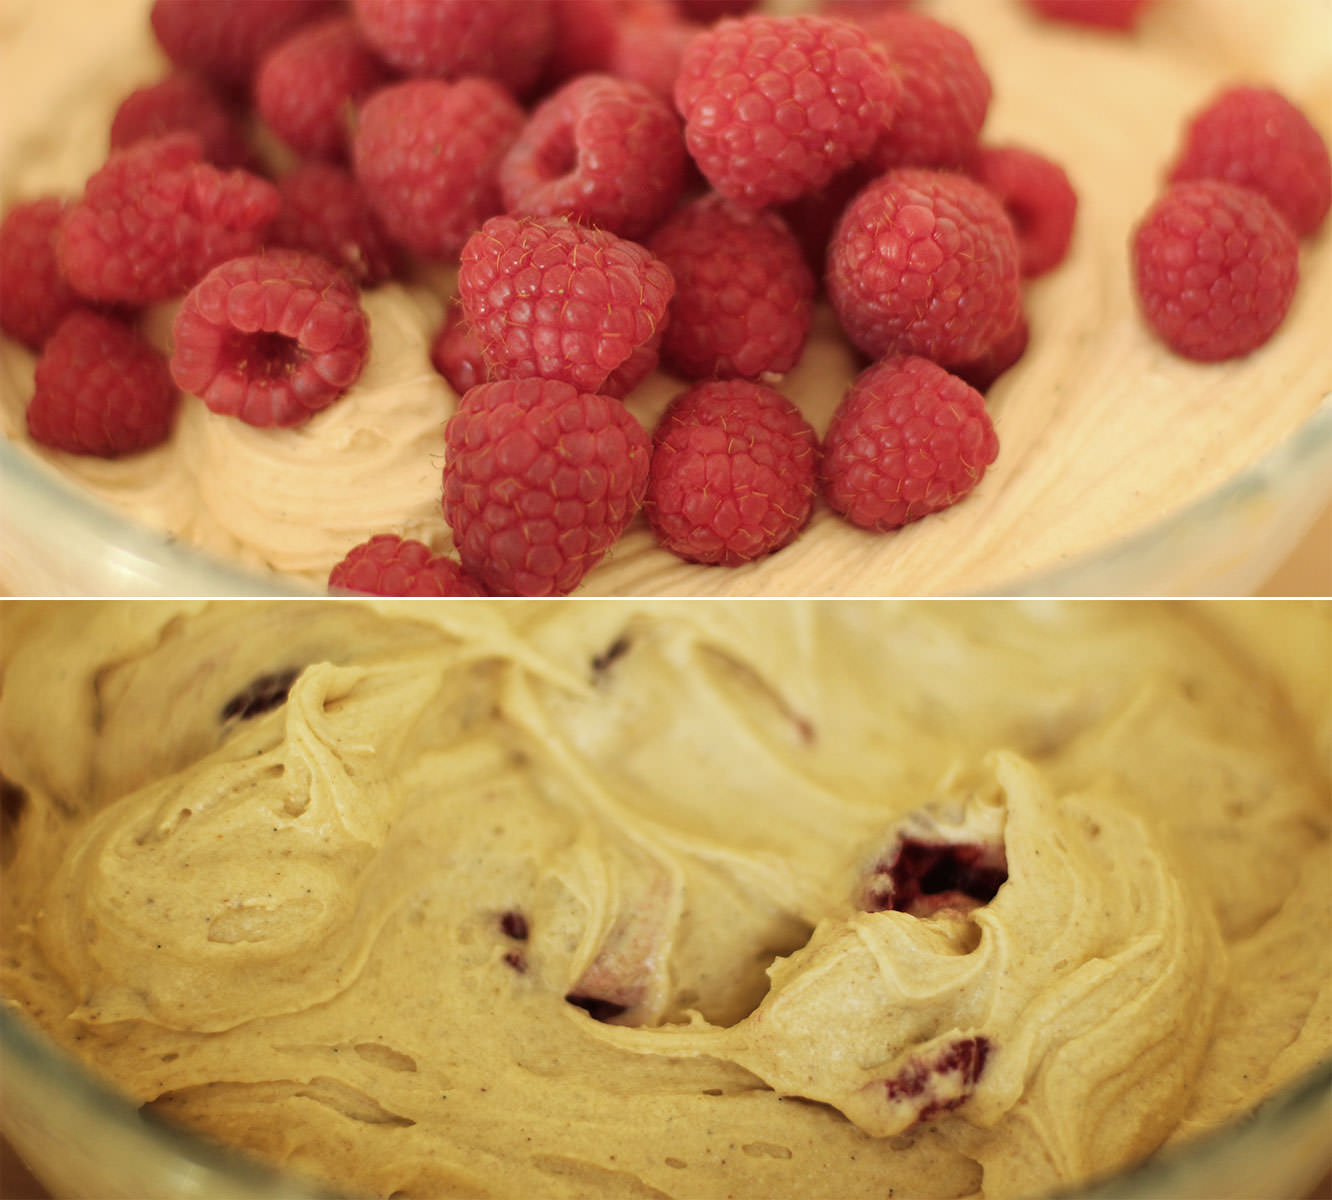
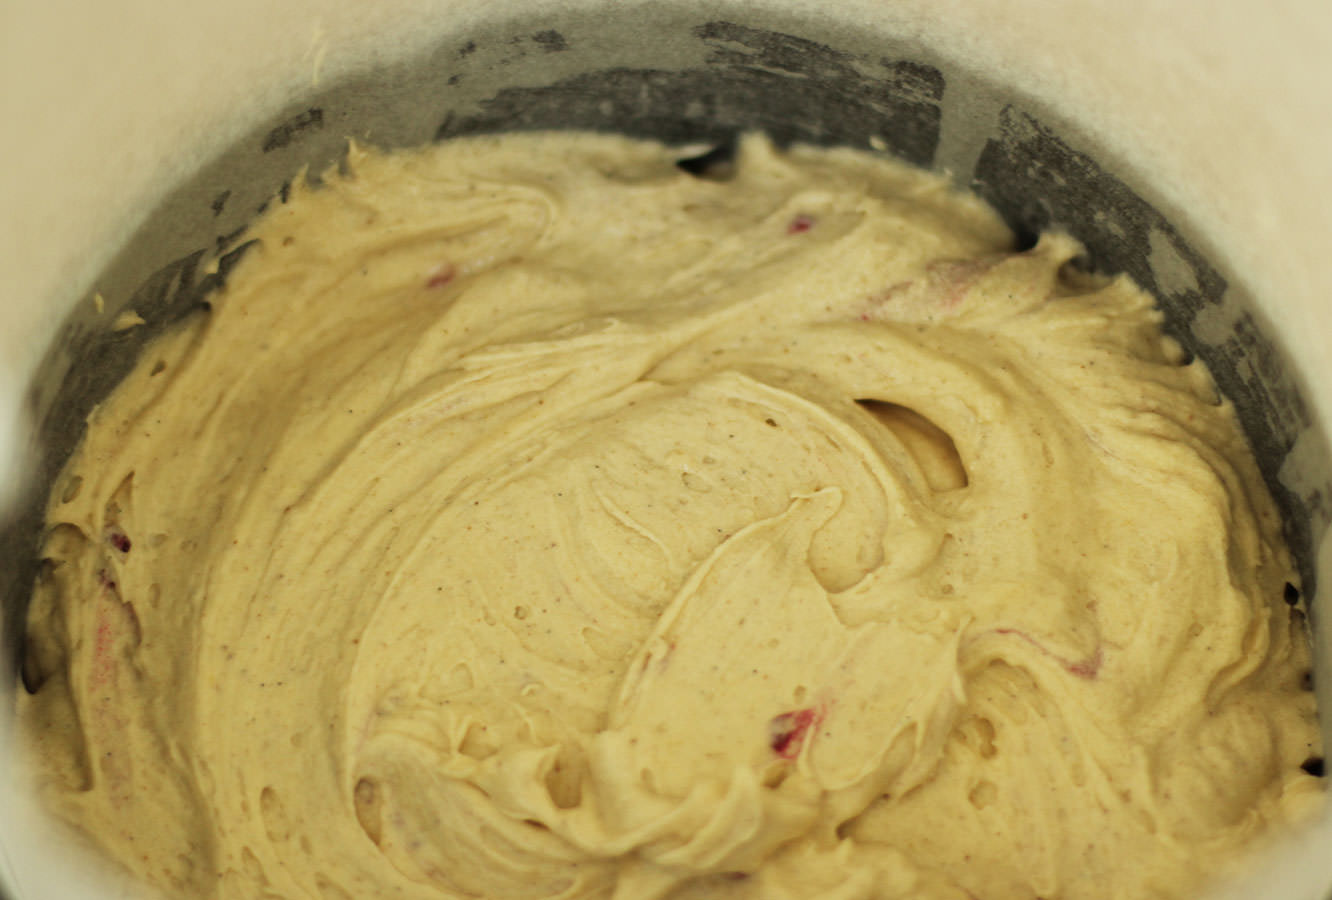
Add the raspberries and stir them in with a wooden spoon. I crushed some of them with the back of the spoon against the side of the bowl to help distribute them a little better.
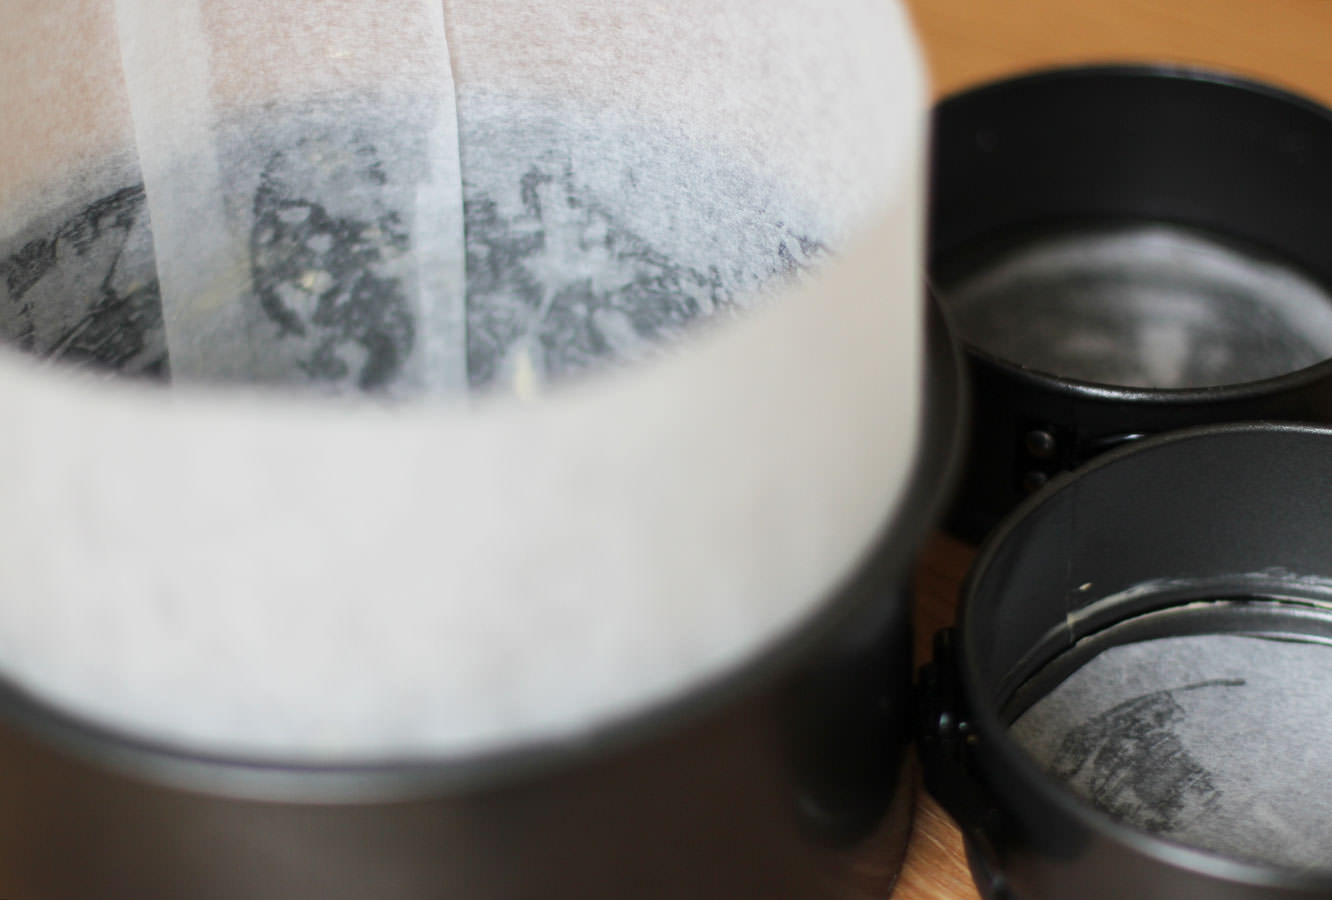
Step five
Spoon into a greased and lined tin, or two tins. Bake on 180C/350F/gas mark 4.
If you are just using a single tin you need about 45-55 minutes and make sure you line the sides so that the greaseproof protects the sides and top of the cake from burning. If you are using two separate tins 35-40 minutes should do the trick, and you only need to line the bottoms of the tins.
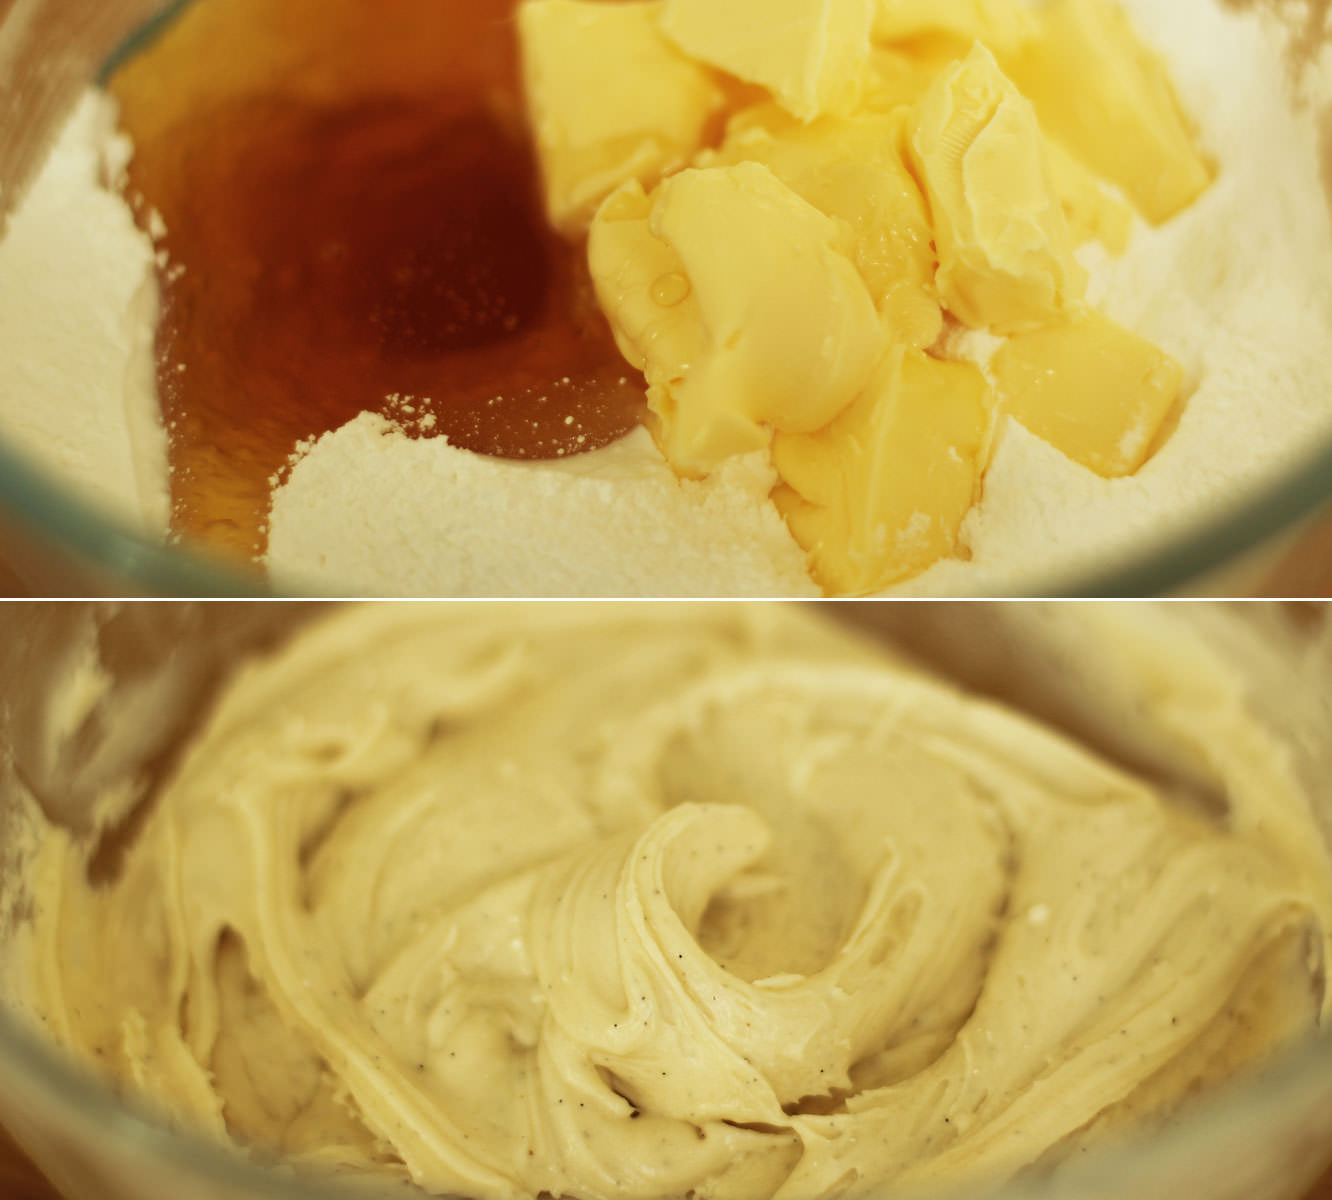
Step six
Whisk together the butter, icing sugar, vanilla and honey for the icing. Cover the bowl with a tea towel before turning on the whisk so you don’t get covered in icing sugar.
Step seven
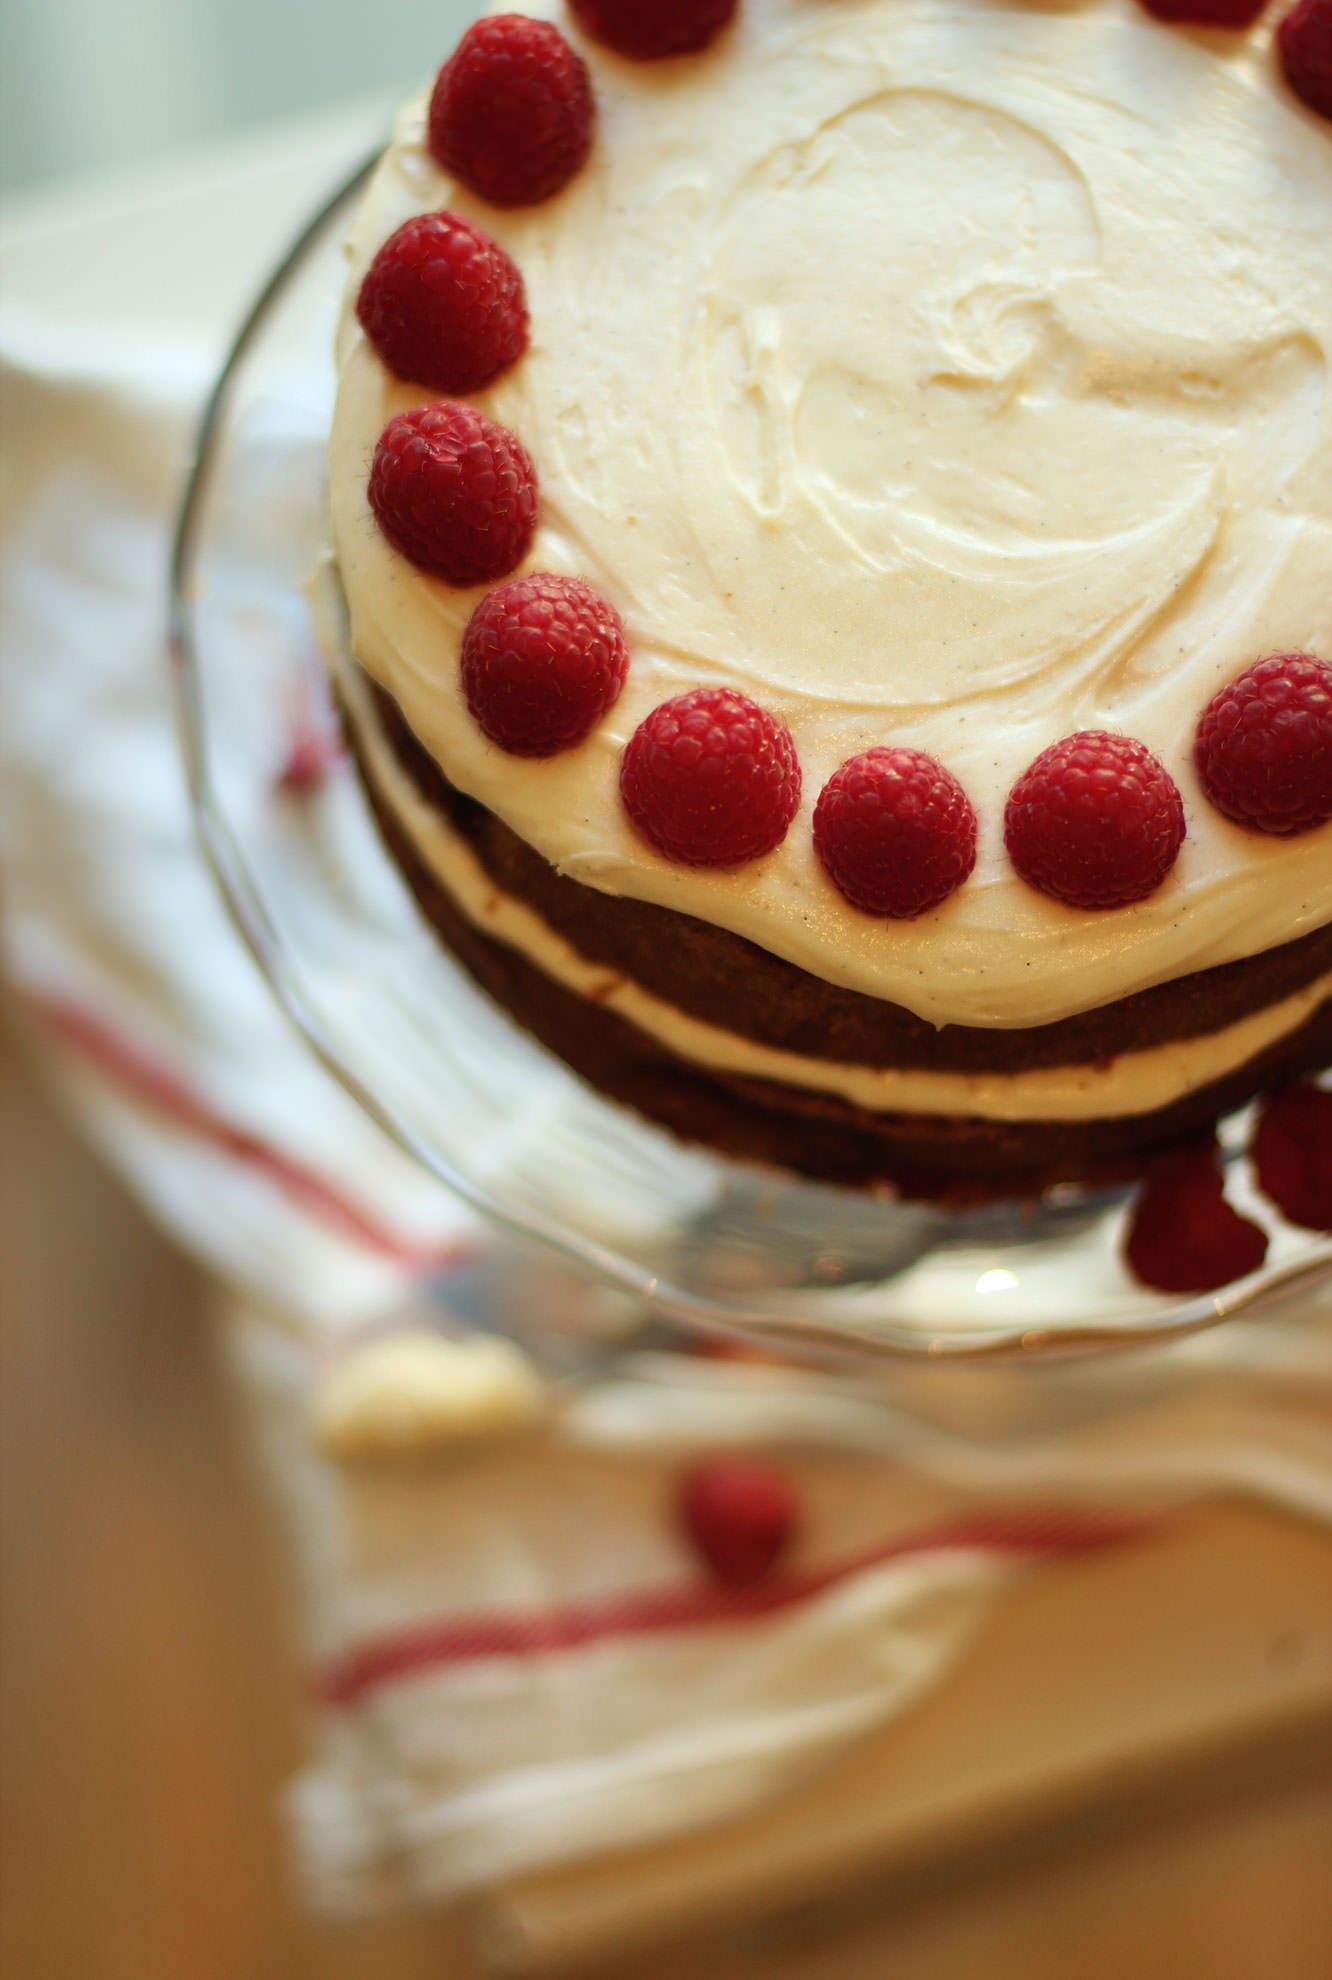
Once the cake has completely cooled assemble it. Use just under half the icing in the middle and the rest on top.
I then decorated with the remaining raspberries, but feel free to get creative!
A couple of weeks ago one of my favourite colleagues had a special birthday, so for a special birthday we needed a special cake.
I had only attempted one two tier cake before and had never made the chocolate collar you’ll see below. Sure this cake was a bit more effort than your average victoria sponge, but if you’ve got a few hours and a bit of patience and determination this is very much possible.
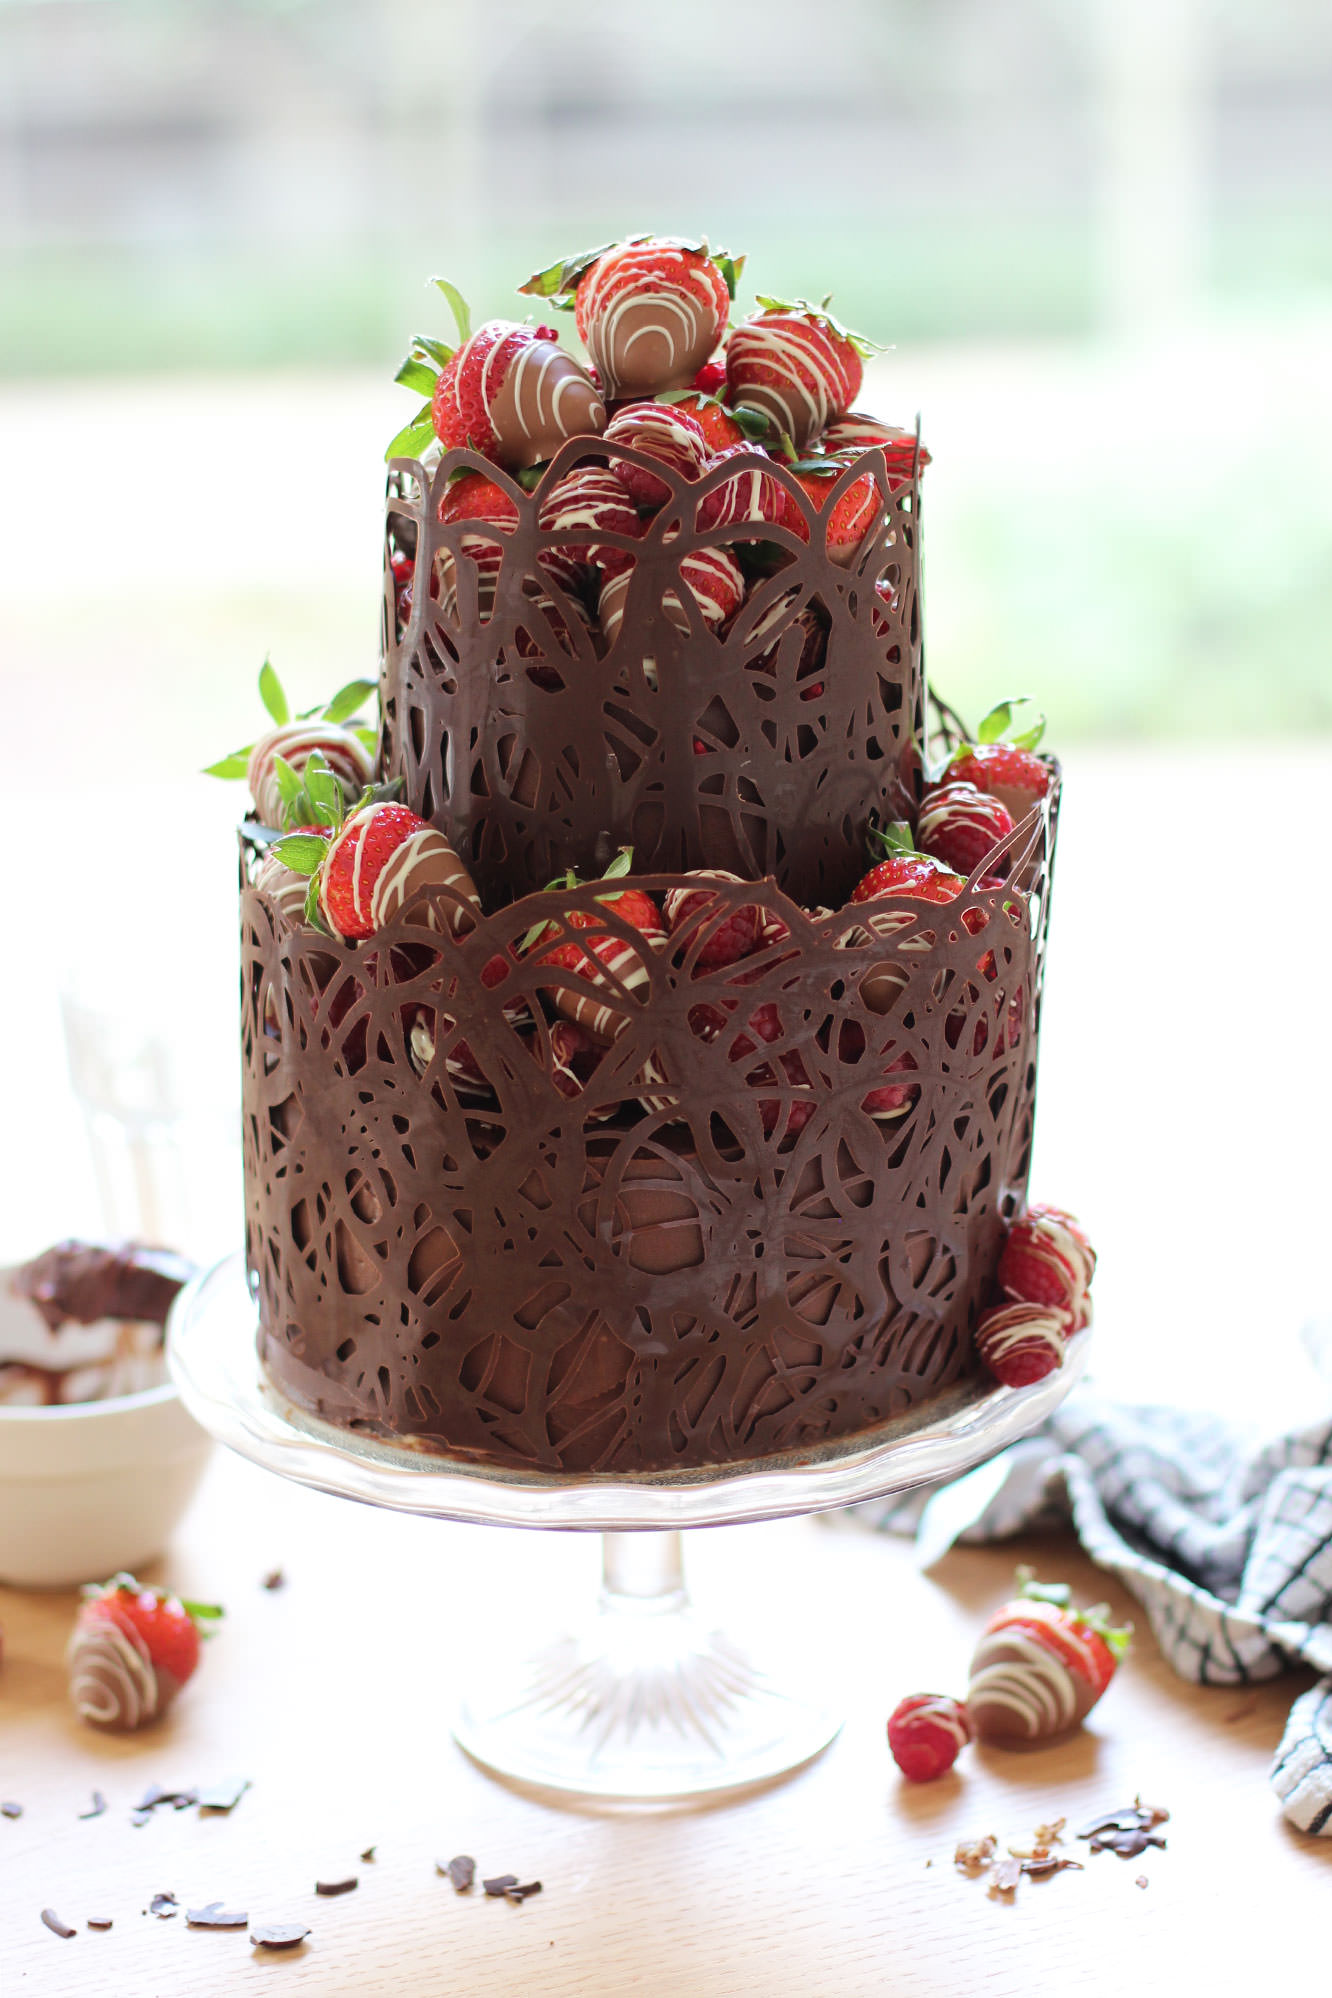
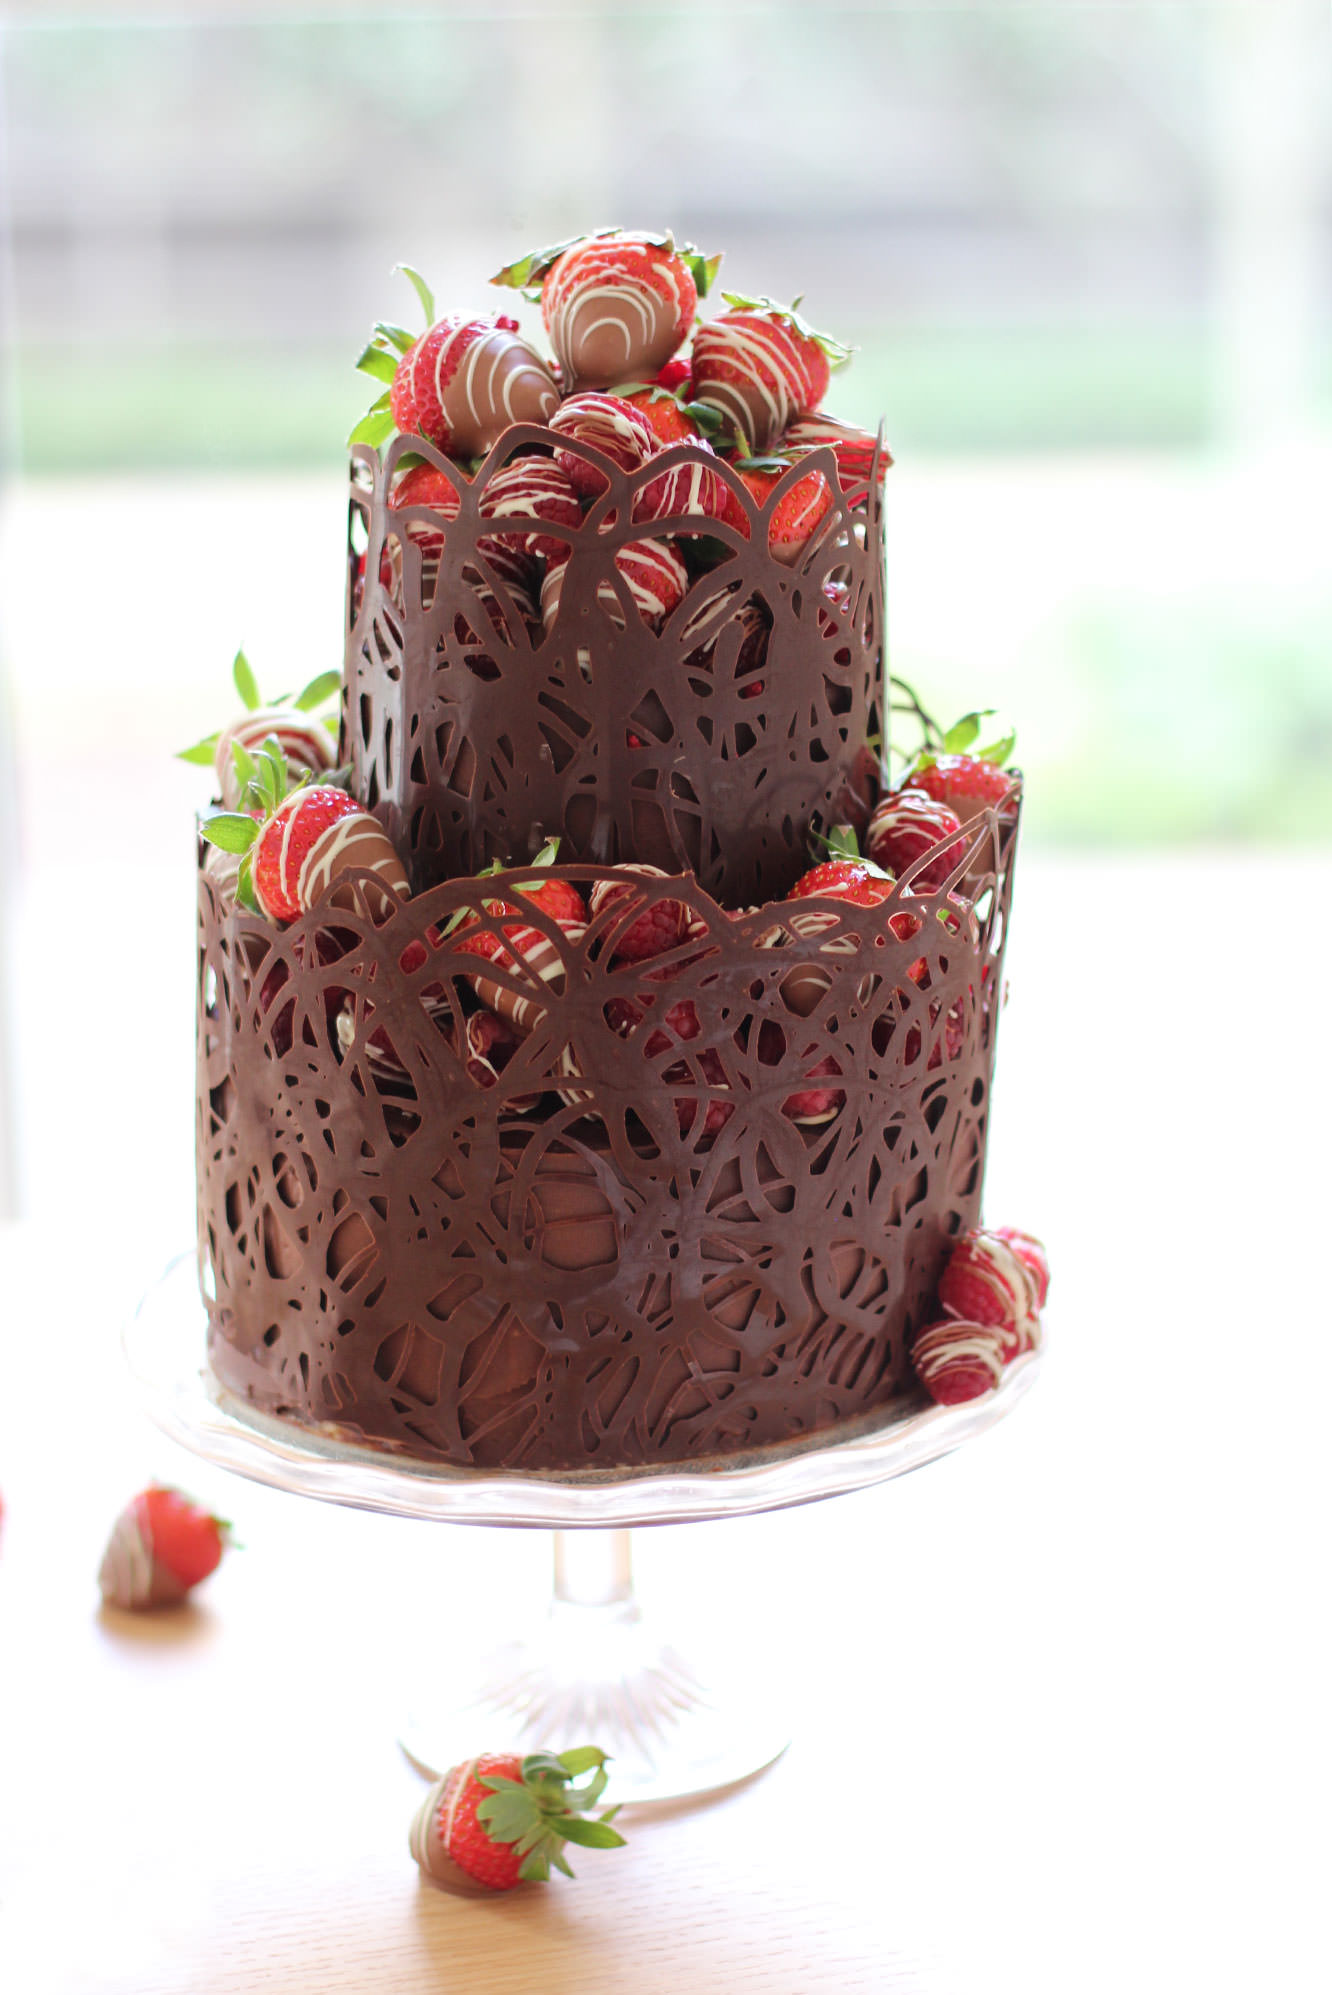
I present to you a full step-by-step recipe for a two tiered chocolate fudge cake with salted caramel buttercream, decorated with a dark chocolate collar and chocolate dipped berries. I just wanted to say that out loud. Look away if you don’t like chocolate. This won’t please you.
Happy birthday Jane!
You will need
For the cake:
380g/13.5 oz caster sugar
380g/13.5 oz unsalted butter or margarine (I use stork)
325g/11.5 oz self raising flour
6 eggs
55g/2 oz cocoa powder
1 1/2 tsp bicarbonate of soda
For the salted caramel buttercream:
400g/14 oz icing sugar
250g/9 oz butter
80g/3 oz soft brown sugar
100ml/3.5 fl oz double cream
2 tbsp golden syrup
2 tsp salt
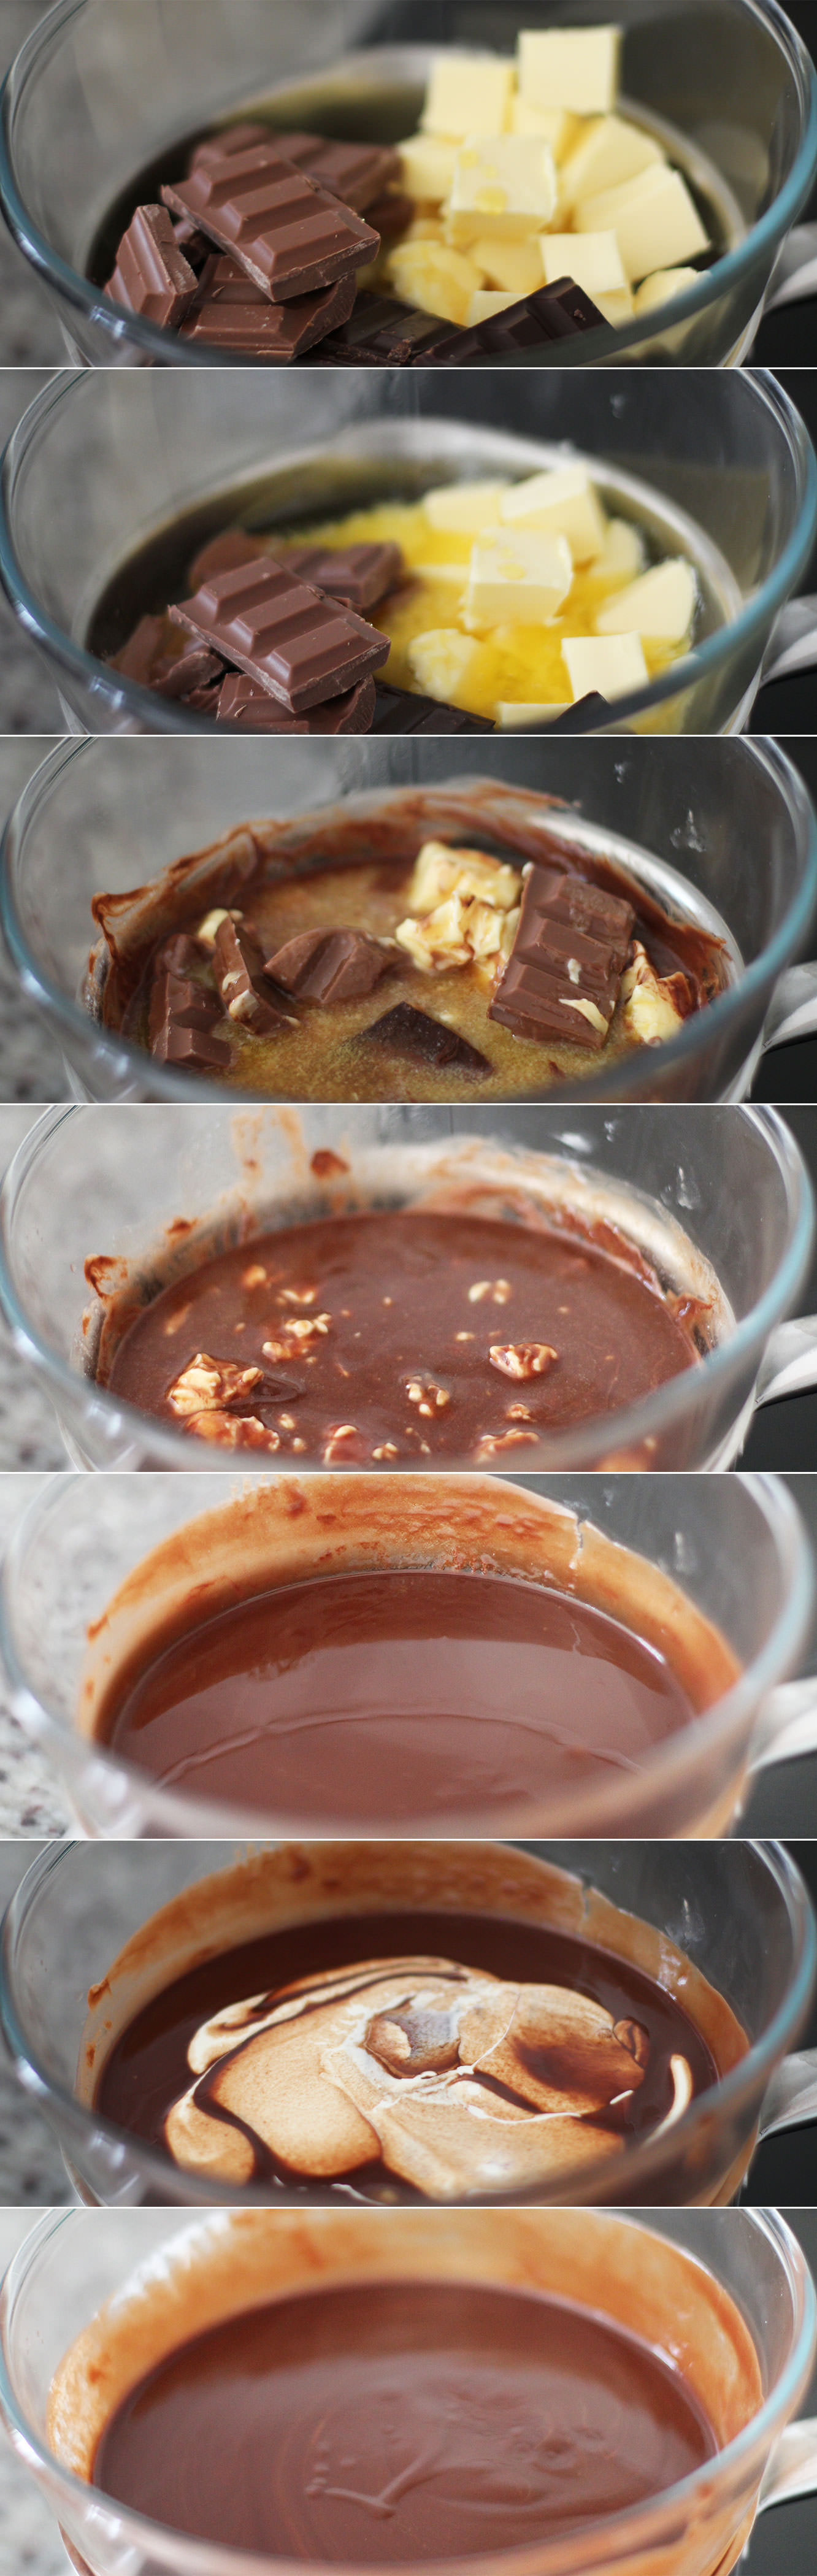
For the chocolate fudge icing:
225g/8 oz unsalted butter
200g/7 oz plain chocolate
100g/3.5 oz milk chocolate
2 tbsp golden syrup
200ml/6.5 fl oz double cream
For the decorations:
1 packet strawberries (sorry I didn’t look at weight)
2 packets of raspberries (about 500g)
200g/7 oz plain chocolate
200g/7 oz milk chocolate
100g/3.5 oz white chocolate
(for the chocolate amounts are the best approximates I can make, I bought a LOT of chocolate. I strongly recommend Sainbury’s Belgian cooking chocolate if you are in the UK, definitely do not buy that scot block stuff)
Other:
Cake tin bottom tier – 1 x 7 inch (3.5 inches deep)
Cake tin top tier – 2 x 5 inch (1.5 inches deep)
Cake boards – 1 x 8 inch, 1 x 5 inch
Sticks/straws for support. I used cake pop sticks, but wooden dowling or special cake making supports would be fine. Make sure they are at least 4 inches so you can cut them to size.
Palette knife
Sugar thermometer (not 100% essential but I recommend tempering the chocolate)
Cellophane
Piping bags
Step one
Grease and line the tins.
Note how I created a bit of a collar on the larger tin from greaseproof. This is to help stop the sides of the cake catching while the inside bakes as it’s essentially double the thickness.
Step two
Whisk together the butter and sugar with an electric whisk, or a wooden spoon and some elbow grease, until smooth.
I used a block of stork for this, but I prefer the softer version you can get in a tub, you don’t have to wait for it to come to room temperature first that way. Margarine works just fine for cakes, I think it makes them fluffier.
You might want to use a tea towel over the bowl to avoid everything getting covered in sugar and butter.
Step three
Add all the eggs and whisk until combined.
Step four
In go the flour, bicarbonate of soda and cocoa powder.
Stir gently to start mixing the dry ingredients in first before turning the whisk on, you don’t want to choke on flour, that’s not a good way to go. It also means you will never get to eat this cake.
Step five
Divide into the tins.
Bake in the oven on 180C/350F/gas mark 4. This is where it’s a little tricky as the little cakes need a lot less time but you don’t want to open the oven much or your big cake will sink.
I say give the big cake about 30 minutes on its own, and then opening the door as little as possible add the smaller ones for the next 20 minutes. You will then need to test the cakes by sticking a sharp knife, or a cake tester if you have one. If this comes out clean (or with the odd crumb) you’re all good. If not give them another 5-10 minutes.
Step six
While the cakes are in the oven make the icing as both, but particularly the chocolate, need time to cool.
Place a heatproof bowl over a pan of barely simmering water. Add the butter (real butter this time), chocolate and golden syrup. Melt until smooth.
Remove from heat and stir in the cream quickly. Take the bowl off the pan and place somewhere cool and dry.
I don’t really suggest the fridge because you might forget it (like I did) and then you have to wait for it to warm up enough to spread. But that being said, the fridge is a viable option, just keep an eye on it.
Step seven
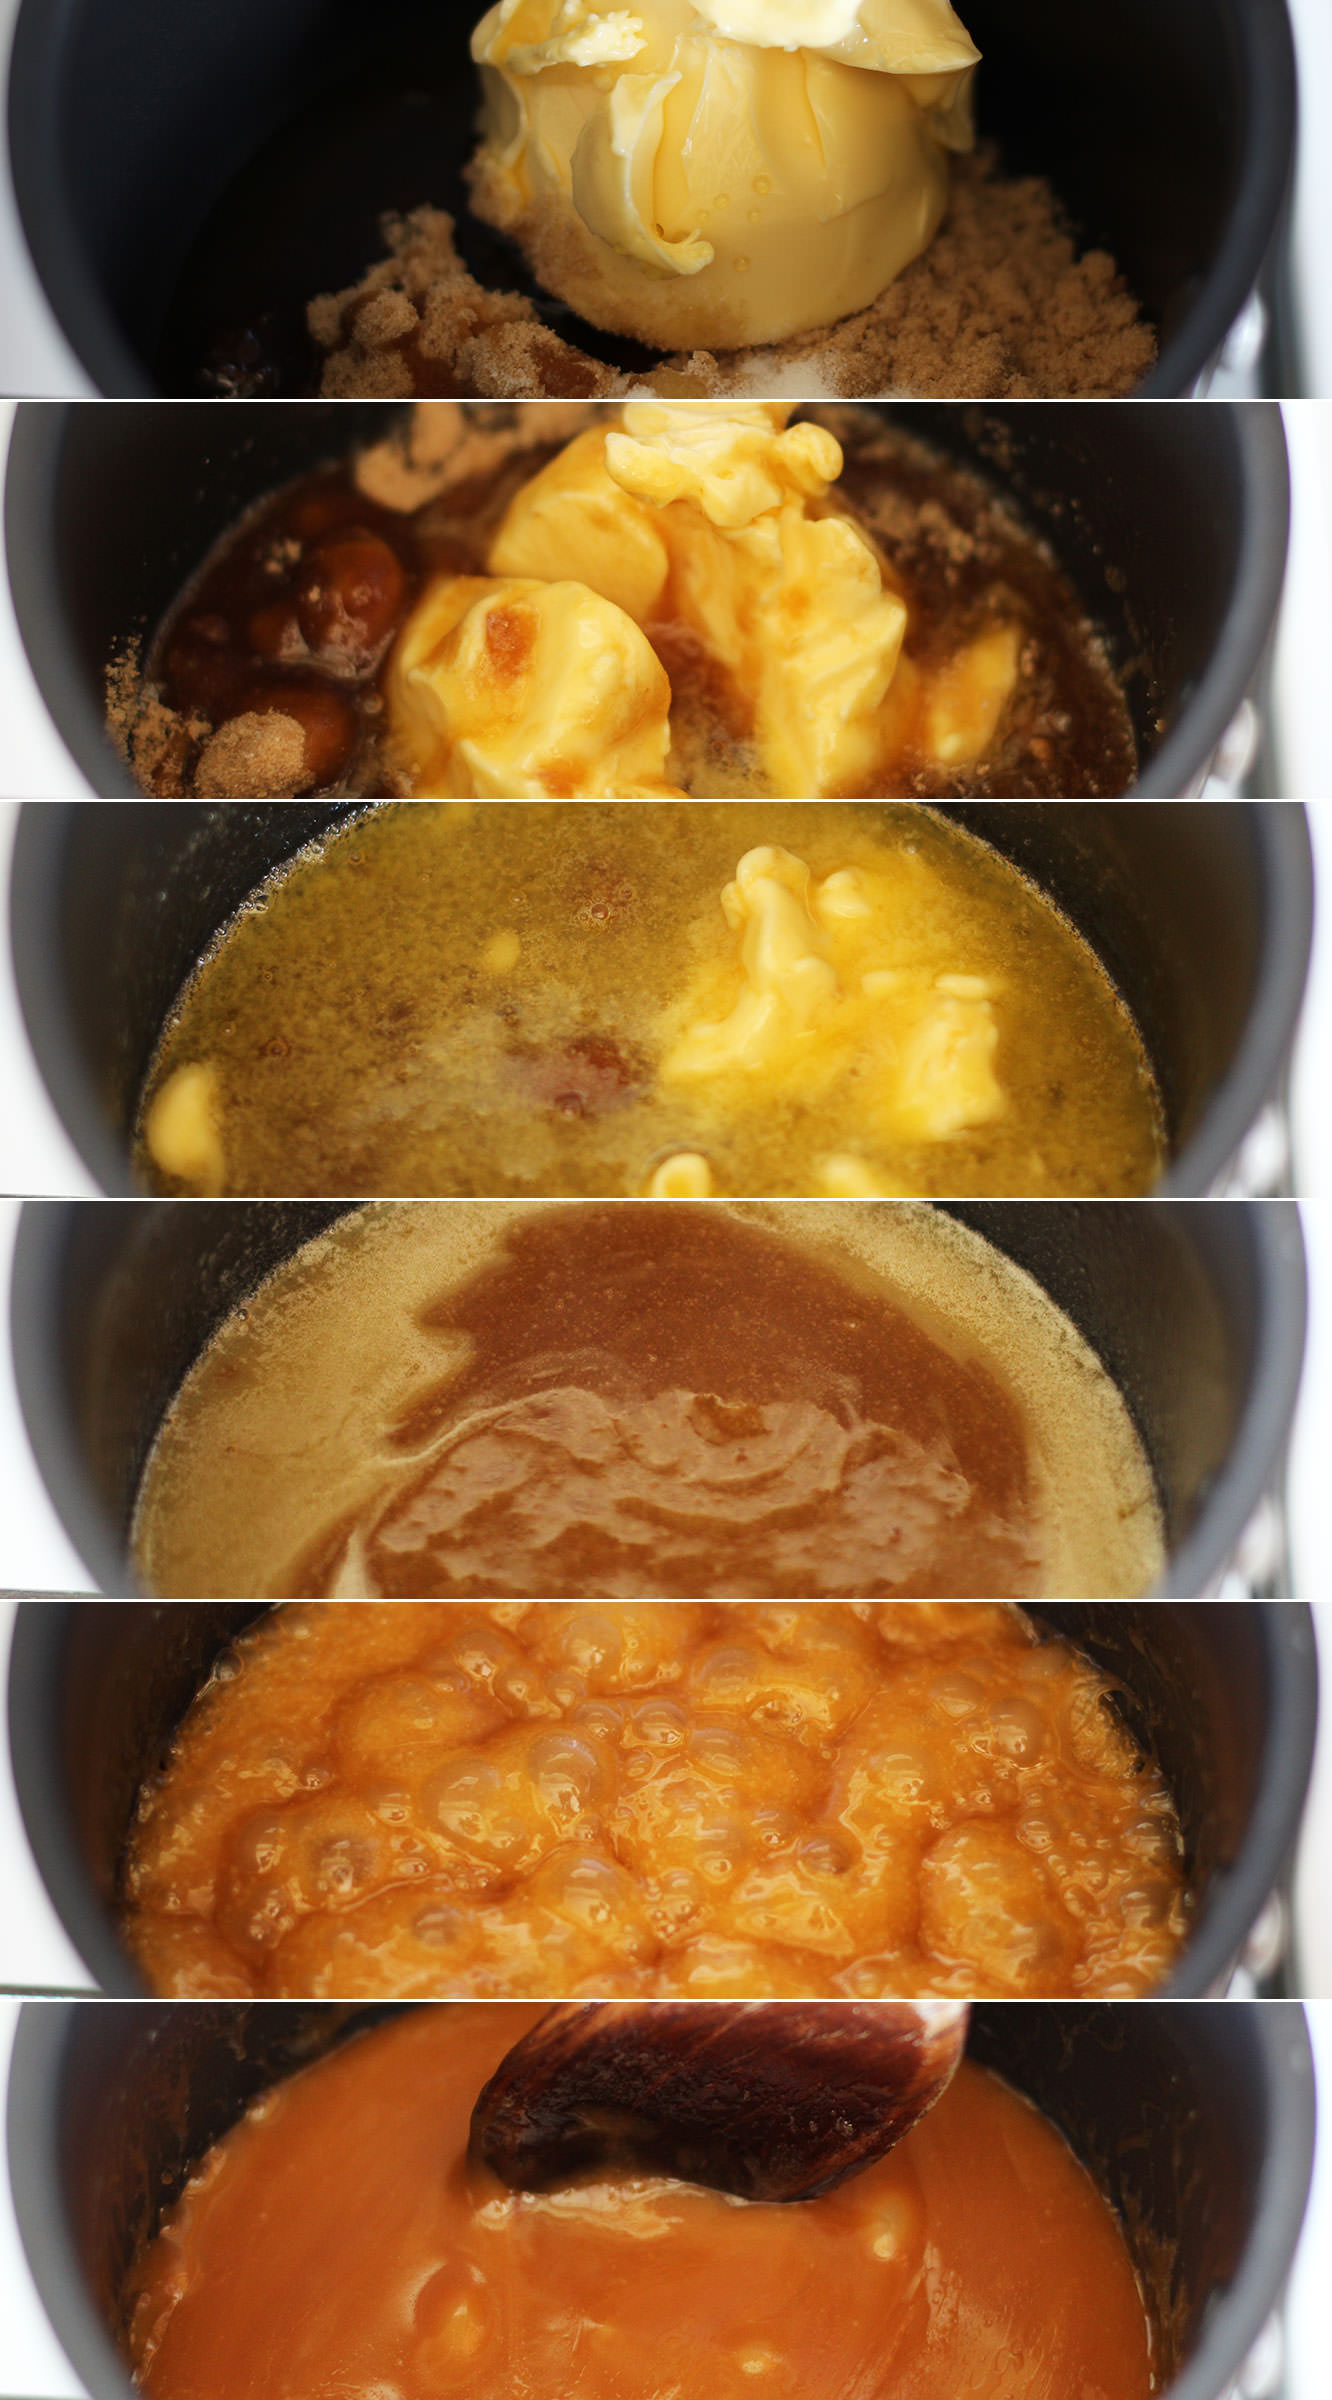
For the salted caramel buttercream melt together 100g of the butter, the brown sugar, golden syrup and salt. Do this slowly and then bring the heat up to a simmer.
Simmer for 10 minutes. Stir regularly so that it doesn’t catch and burn. Leave to cool down for about half an hour or so.
Step eight
Stir in the 100ml cream and leave to cool further.
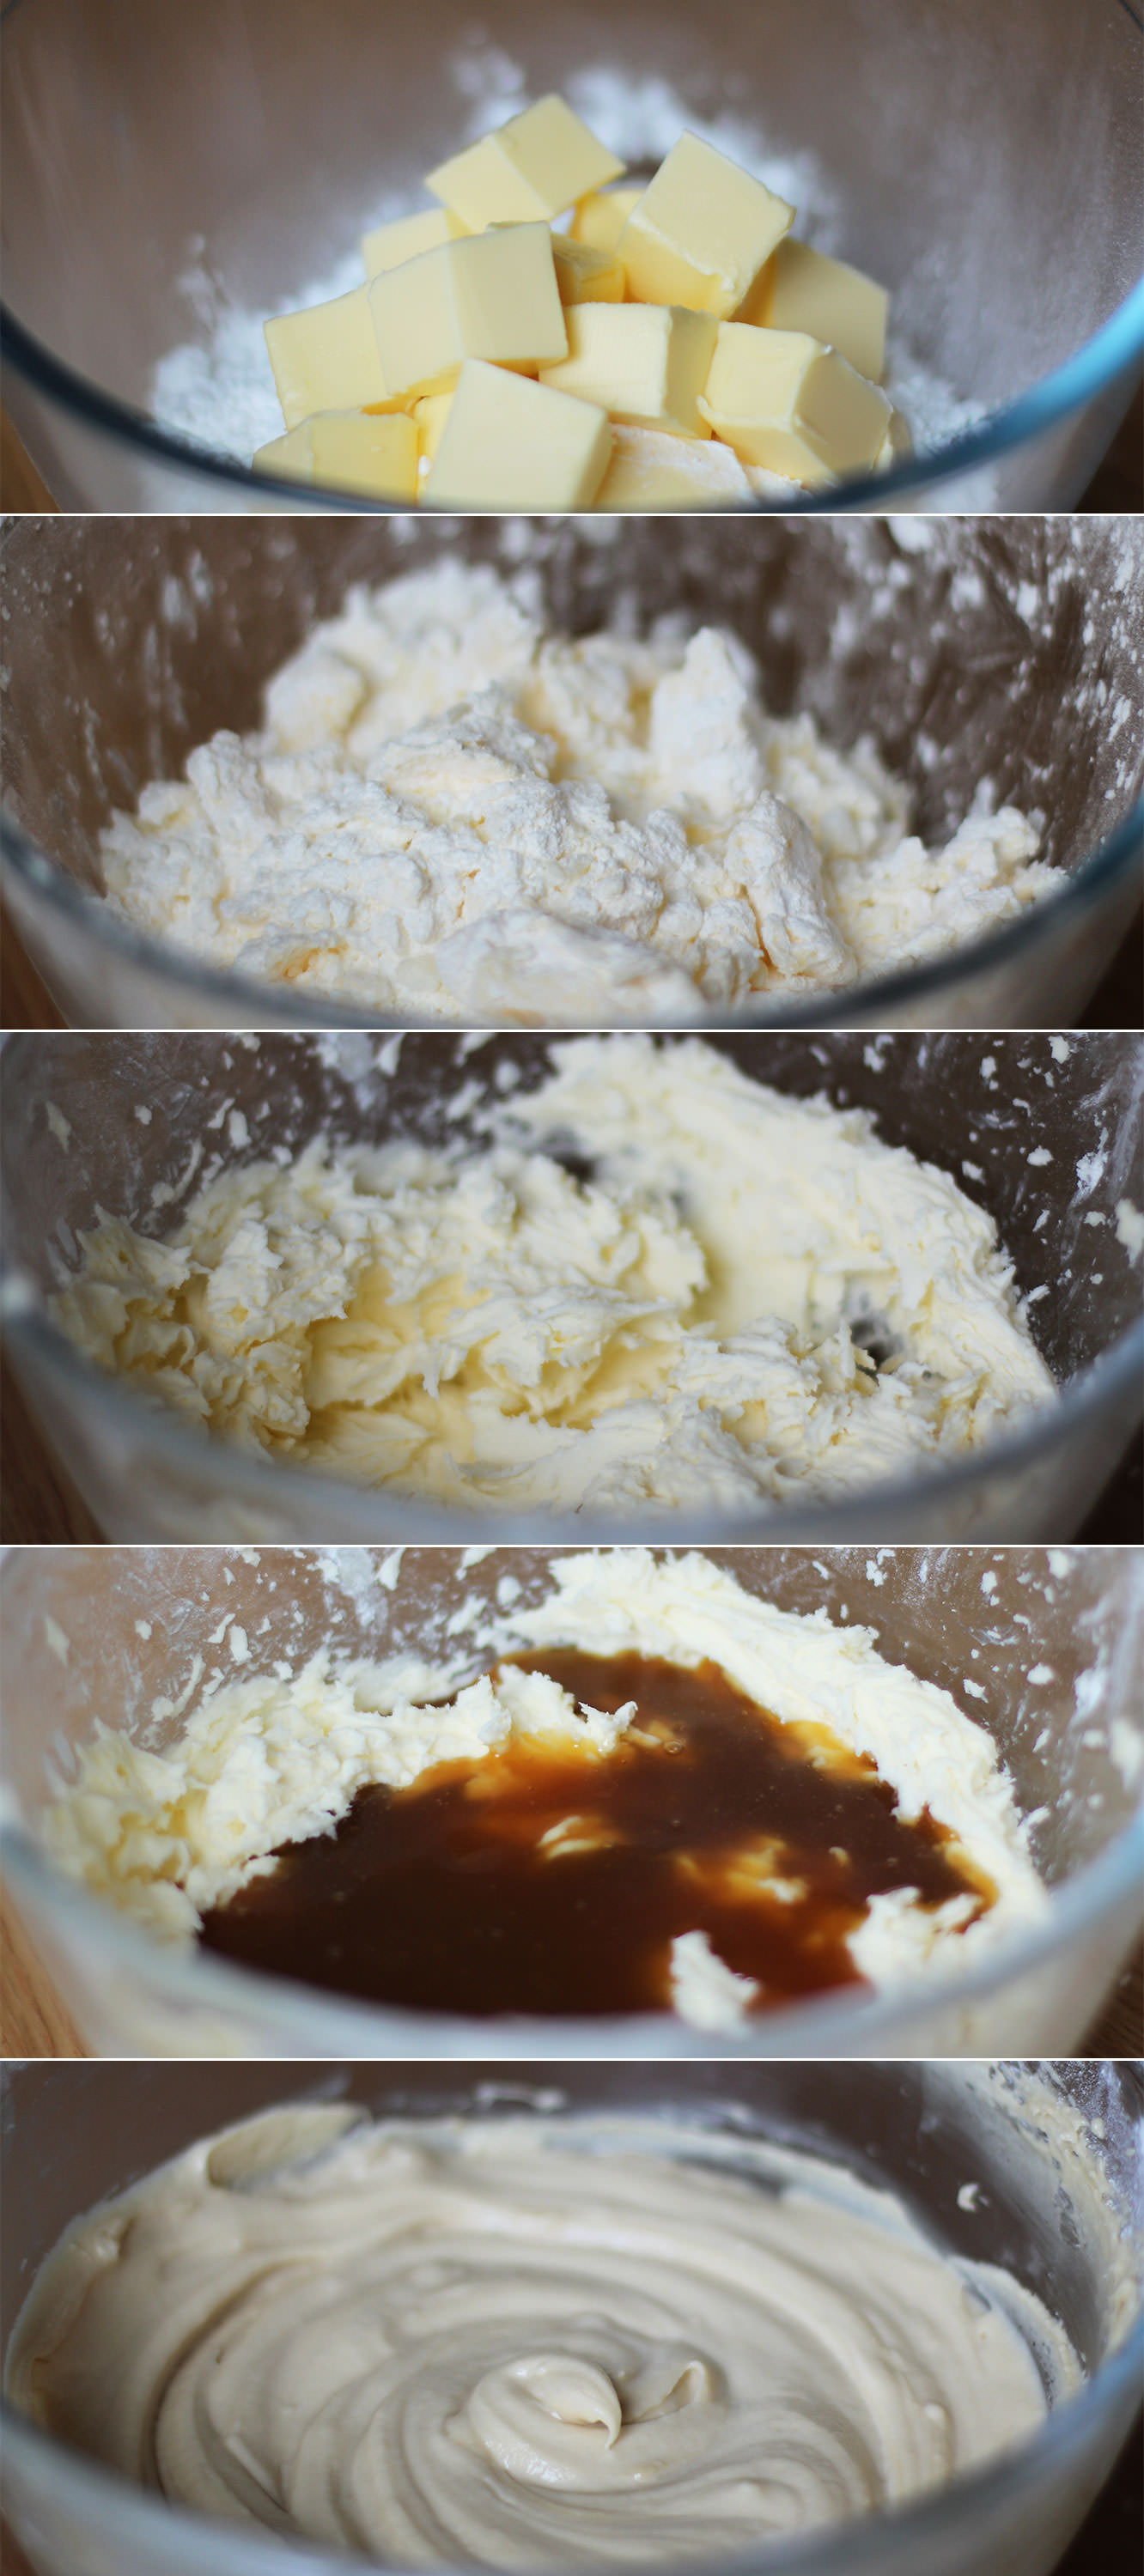
Step nine
Whisk the icing sugar and 150g of butter together with the salt. Definitely cover the bowl with the tea towel this time. I find if my butter is not quite soft enough it helps to rub it in a bit with clean hands first. There is NOwhere icing sugar won’t go when you use an electric whisk.
Step ten
Add the caramel and whisk again until smooth. Don’t worry if the caramel is still a little warm, just leave your buttercream to cool in the fridge for a bit. But again, don’t forget about it or it won’t be spreadable.
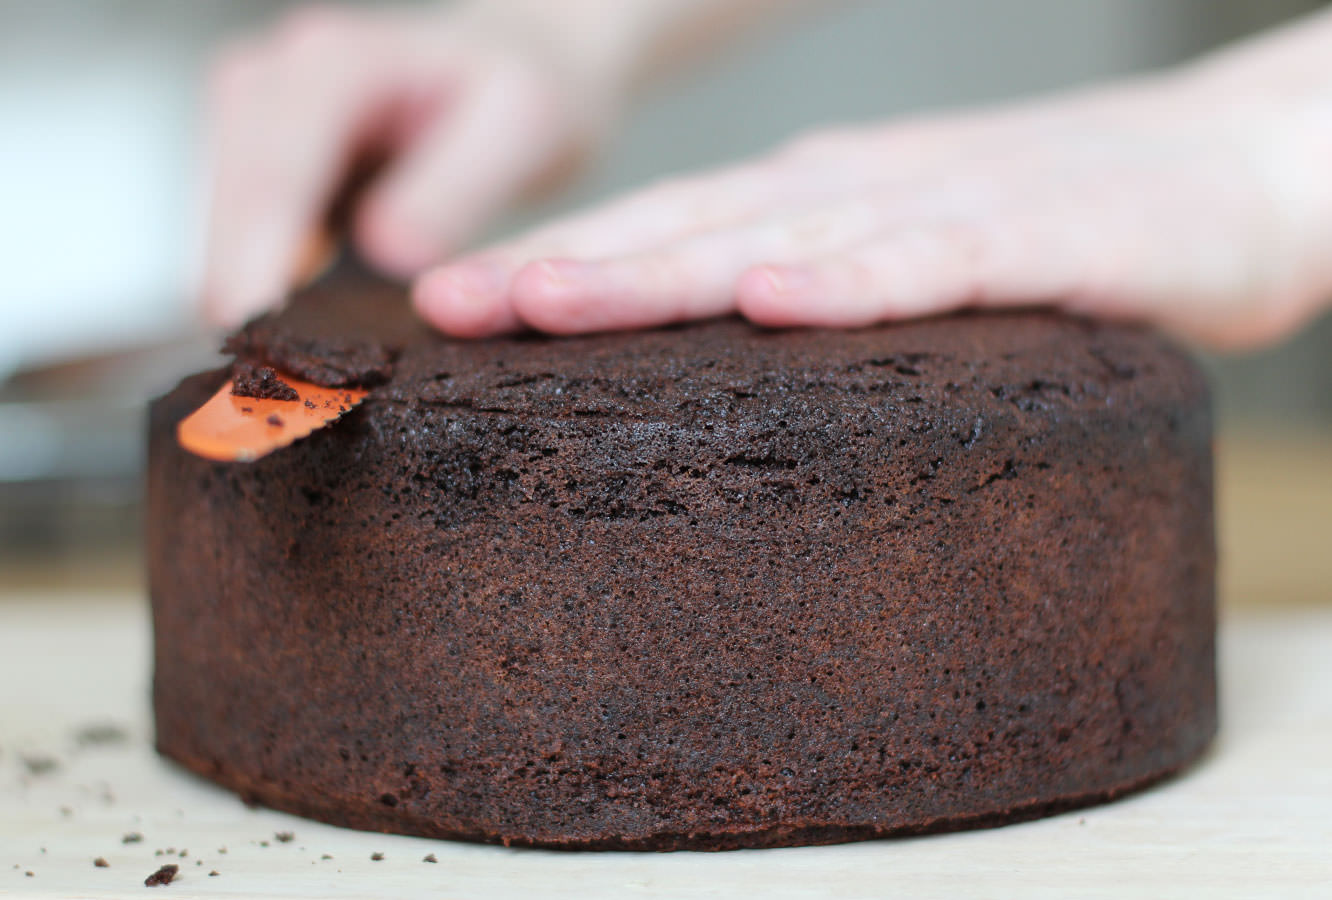
Step eleven
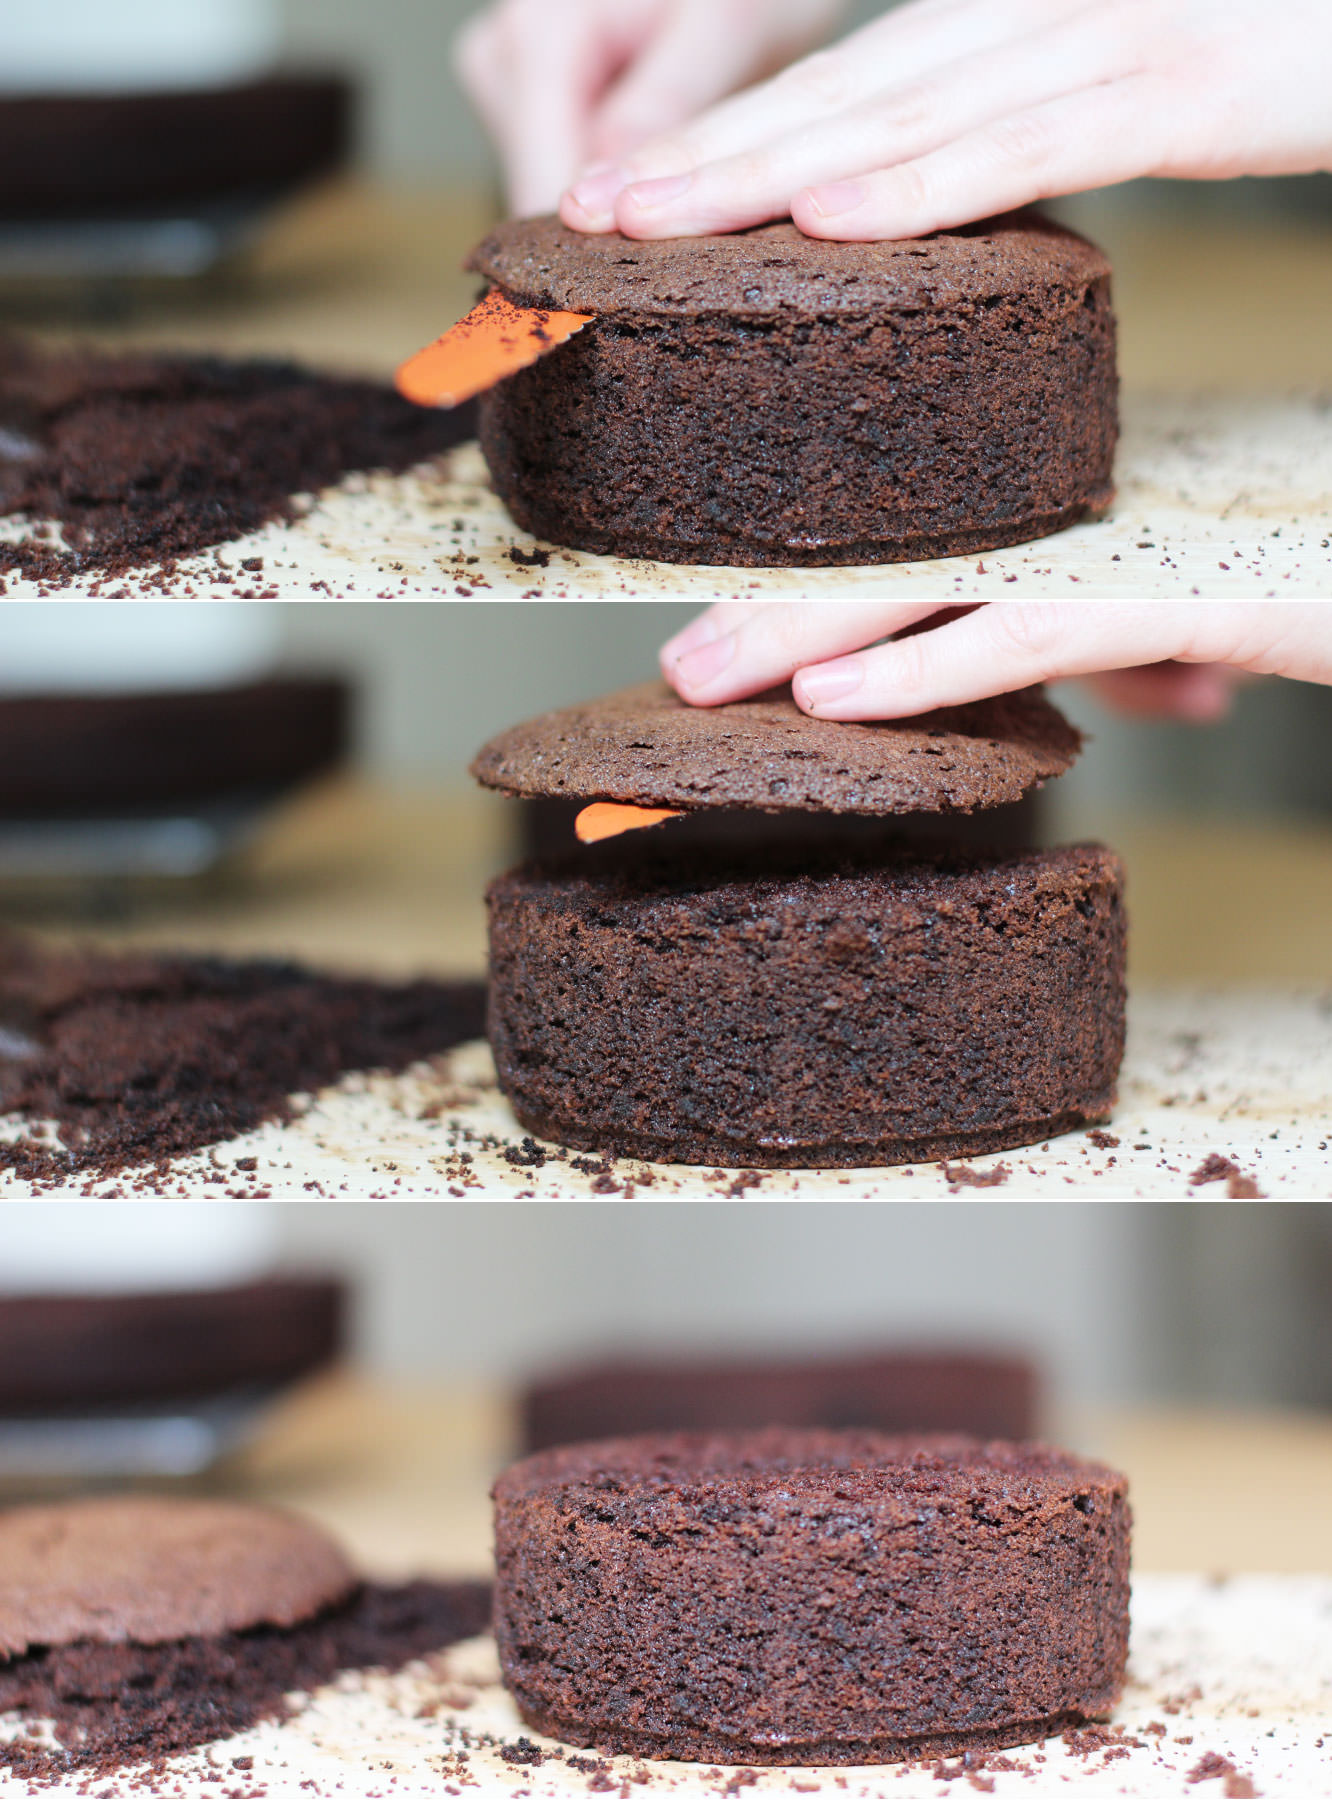
When your cakes have completely cooled prepare them for icing. You need to lop the top off the large one until it’s as flat as possible on top. So much of this cake is covered in decoration that you can get away with a little bit of wonky though so don’t panic if it’s not prefect. Having said that the flatter the better so the top tier sits straight. NO PRESSURE.
Step twelve
Cut the cake in the middle. Try to do this evenly by scoring it the whole way round first. Just keep going round in circles, getting further in each time until you’re all the way through.
Step thirteen
Level out the tops of the small cakes. I would be lying if I said I didn’t spread some icing on the offcuts and eat them.
Step fourteen
Using a palette knife ice the cakes.
First place a bit of buttercream on the cake base to stick the cake to it. Start with the caramel buttercream and ice the middle and the top. Don’t worry if bits splurge out the sides.
Smooth these out around the sides with the palette knife, gradually adding buttercream here and there to create the sharpest sides you can. Some parts will have a thicker coating than others, this layer is made to contain all the crumbs (hence the name crumb layer) and to even out the shape a bit. It’s not going to be pretty.
Place in the fridge for about an hour before starting the chocolate.
Ice the chocolate on in the same way, neatening as you go. For the most part it will be covered up, so it really doesn’t need to be too smooth.
Step fifteen
Cover the small cake in the same way.
Place both in the fridge while you prepare the decorations.
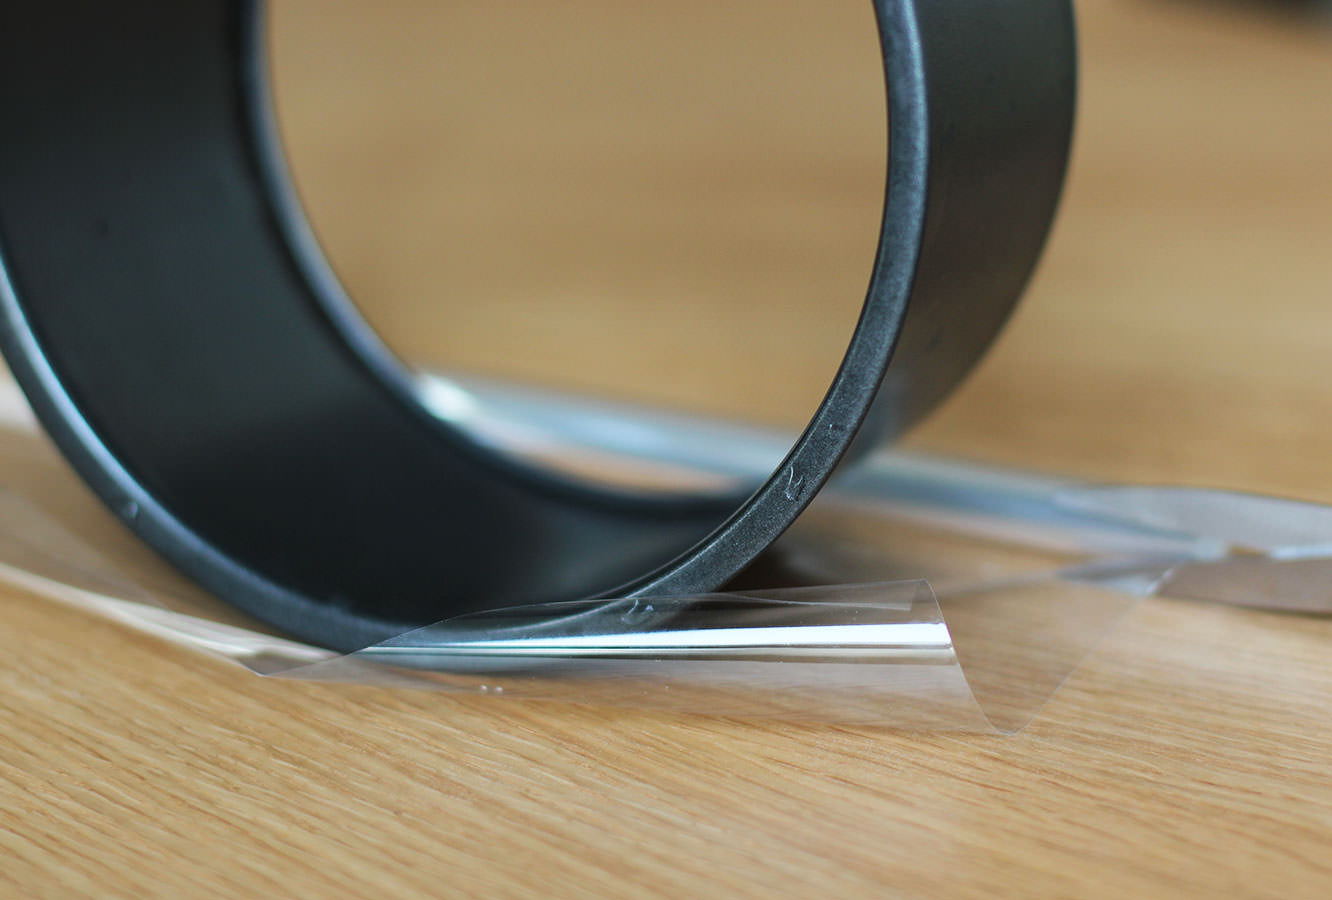
Step sixteen
Using the tins as a guide cut a strip of the cellophane for both the top and bottom layer. You want these to be quite close to the size of the chocolate collar, so tall enough that you will have about 5cm/two inches taller than the cake, and wide enough to match the circumference. You can quickly check this against the cake to ensure it will fit.
Don’t forget to cut one for the top tier and one for the bottom, bearing in mind your top tier cake is twice as tall as the tin.
Step seventeen
Temper 200g dark chocolate. Don’t look at me like that…you are really going to want to do this so you have shiny chocolate on the collar.
First melt 125g of the chocolate in a heatproof bowl over a pan of simmering water. Let it get to 55C/131F before removing from the heat.
Chop the remaining chocolate and stir into the melted mix to aid the cool down process. Stir continually until it cools to 28C/82F. I found a good way to speed this up a bit. Put cold water in a large saucepan and the bowl on top. You’re welcome.
Place the bowl back on the heat and bring it to 31C/88F. Your chocolate is tempered.
Be warned – if you’re doing a different type of chocolate the temperatures are different:
Milk – 45C/113F original melt, 27C/81F cool down, 29C/84F
White – 45C/113F original melt, 26C/79F cool down, 28C/82F
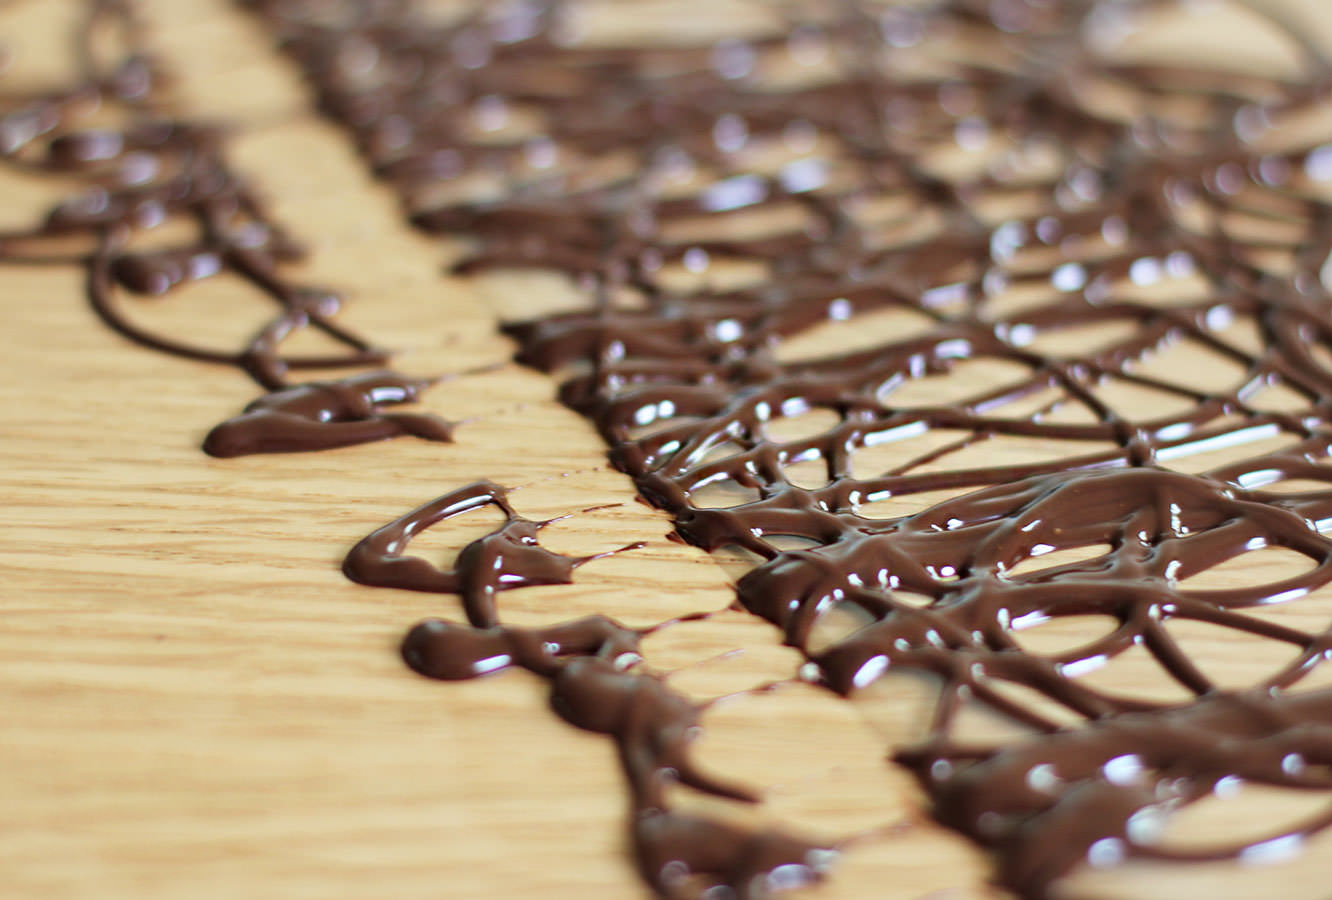
Step eighteen
Place chocolate in a piping bag and using circular motions cover the cellophane with swirls. Go over the bottom edge onto the work surface but ensure the top stays on the cellophane so it’s ‘whirly’.
Step nineteen
When it has started to dry pull the cellophane away so the bottom is clear of the extra overlap bits.
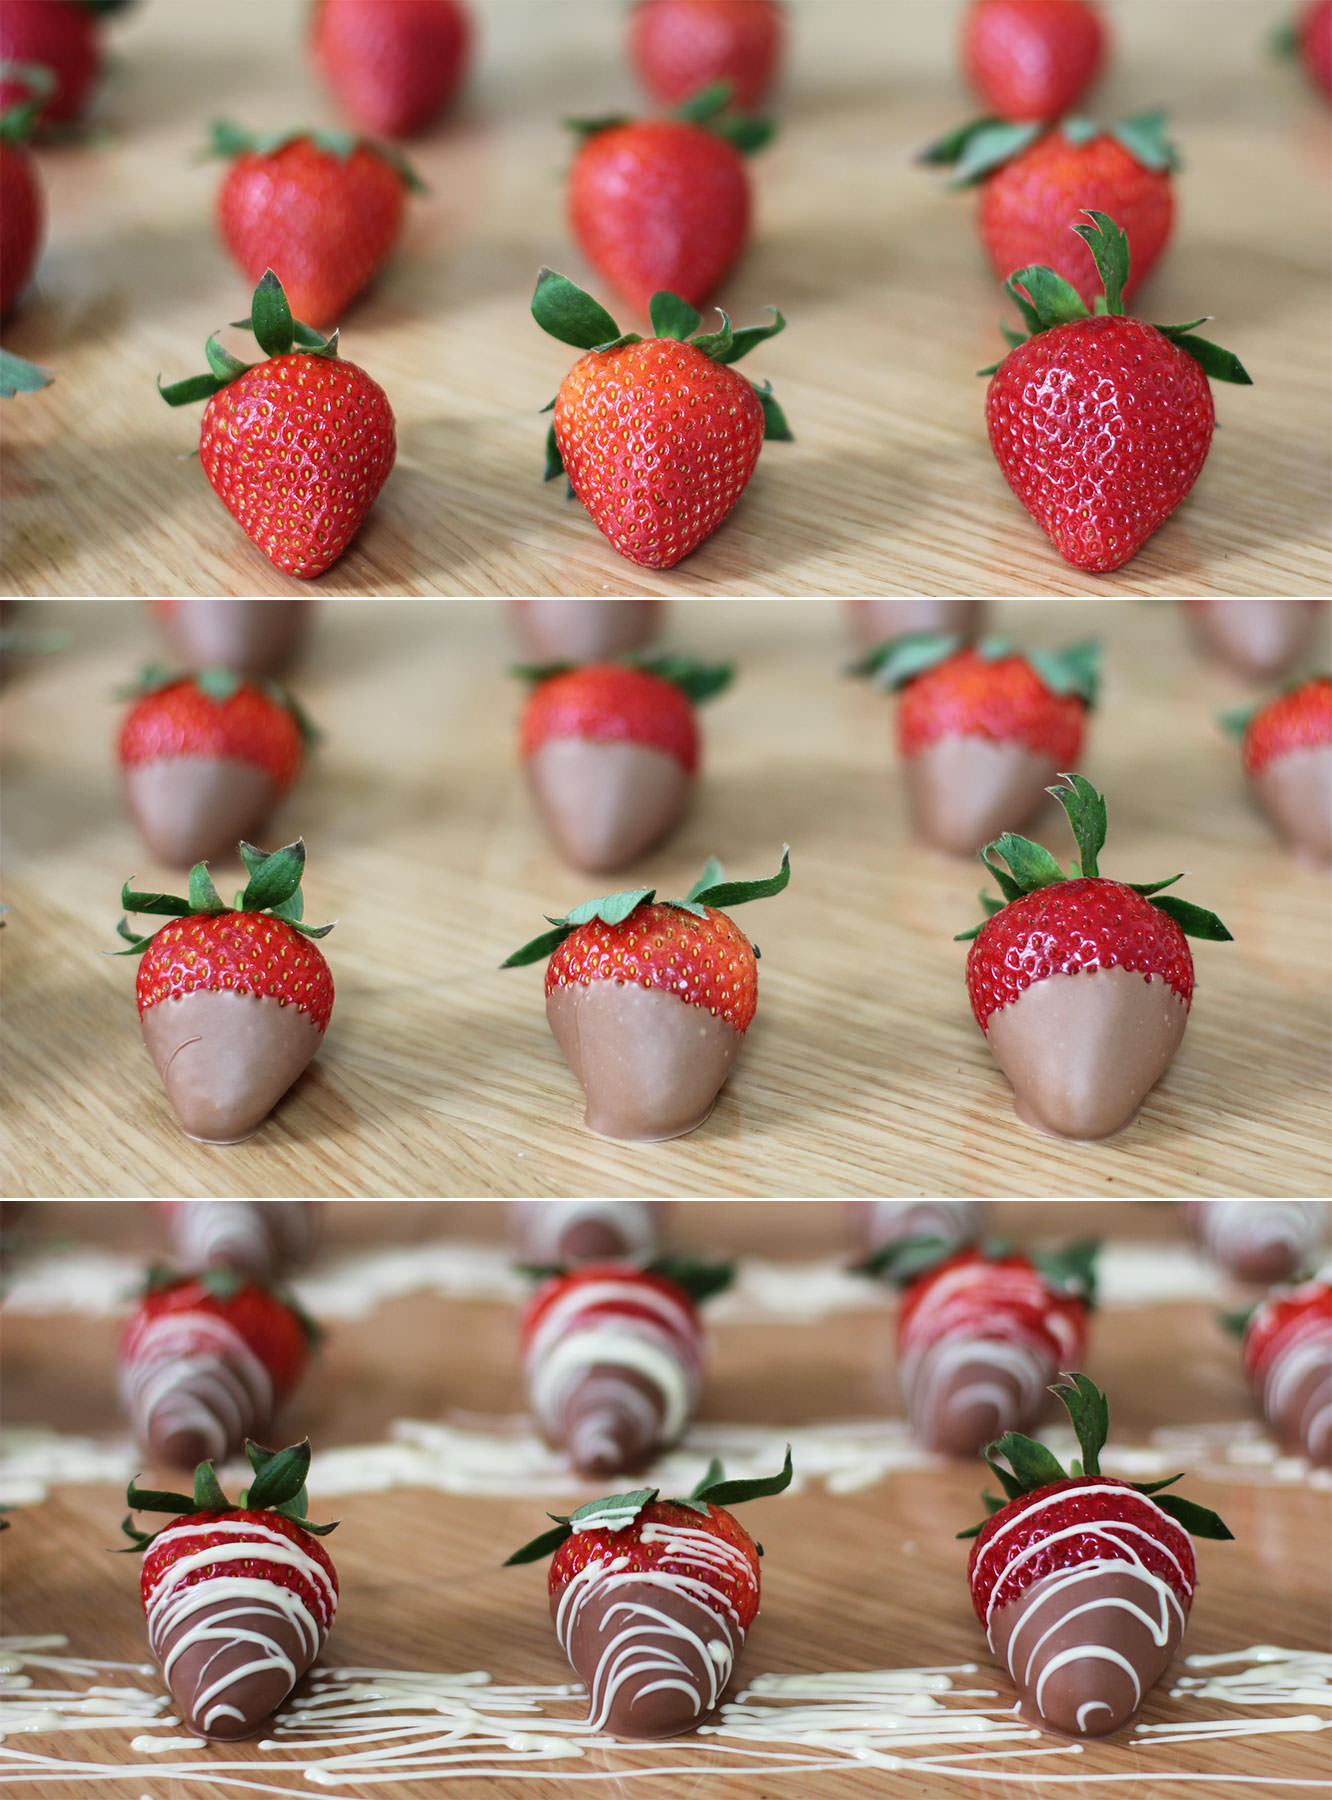
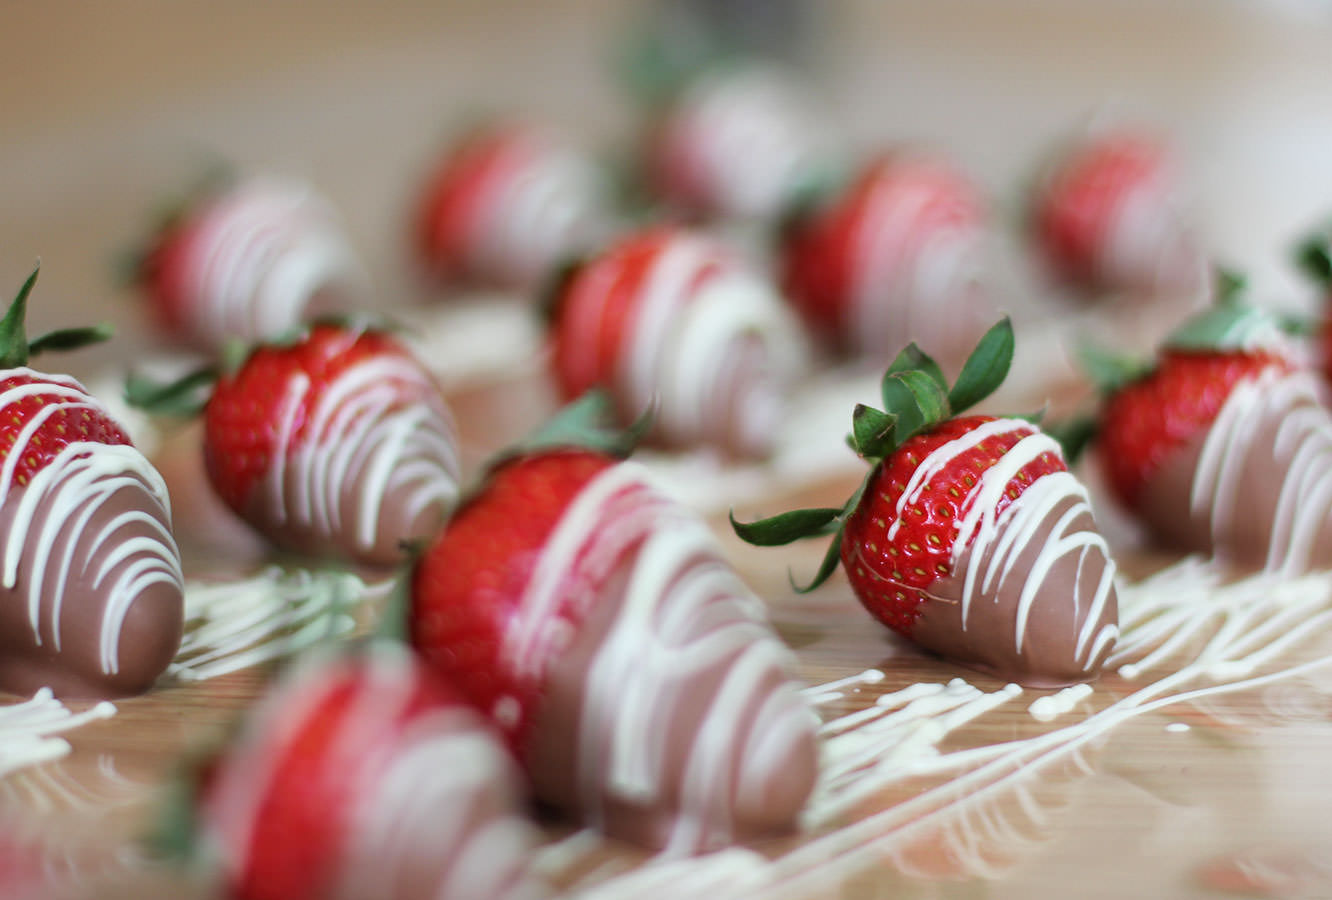
Step twenty
Melt (preferably temper) the milk chocolate. Dip the strawberries in half way and leave to set on some more cellophane.
Melt the white chocolate (no real need to temper this) and place in a piping bag. swing the bag back and forth to drizzle the white chocolate over the top.
Step twenty one
Drizzle the raspberries with white and milk chocolate. You can dip them if you want to, but, really? I know this is taking a while, but do you have that kind of time??
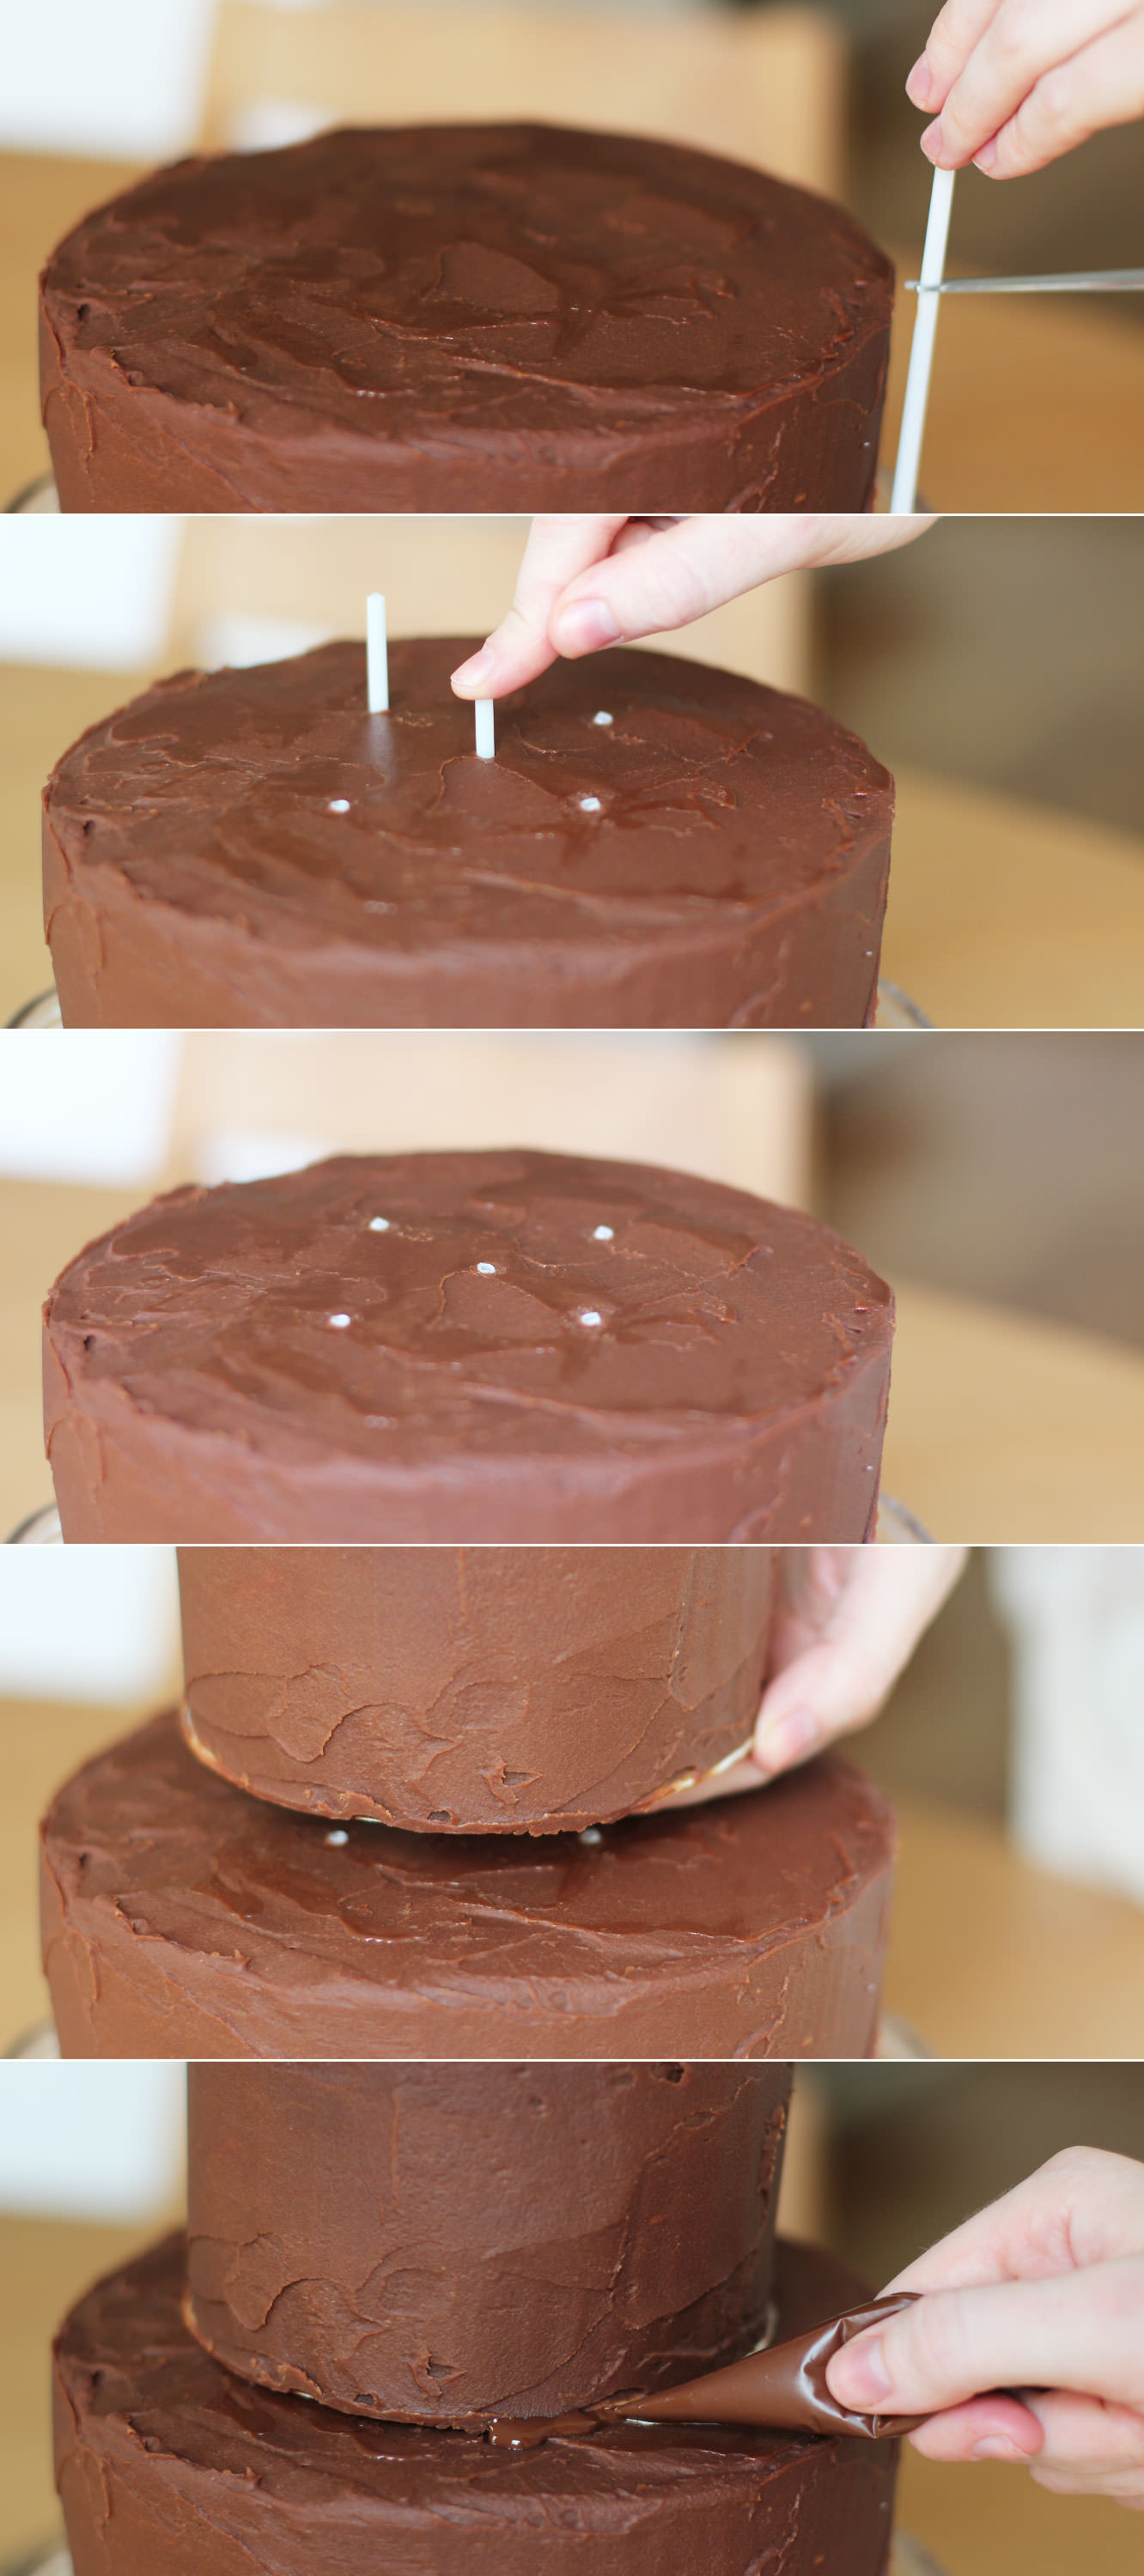
Step twenty two
Get the cakes out of the fridge to assemble.
Cut the sticks to size and push through the bottom layer where the top tier will sit.
Place it on top.
I then secured this a bit further with the remaining dark chocolate I had. It will be covered up so no big deal if it’s messy.
Step twenty three
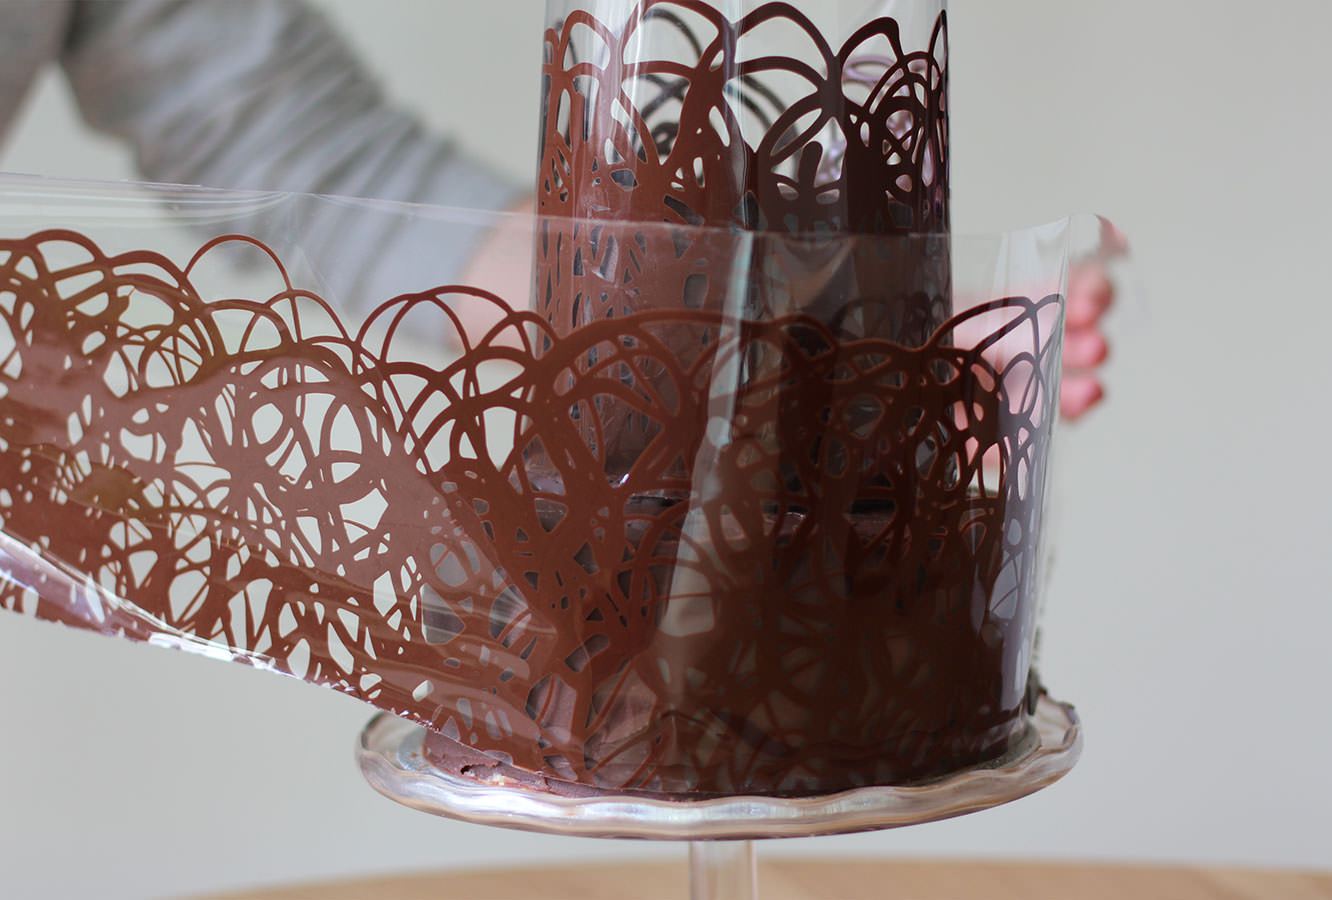
When the collars become touch dry, (meaning if you gently touch the surface you shouldn’t get chocolate on your finger, but what’s underneath is still not set) wrap them around the cake.
LEAVE THE CELLOPHANE ON. Sorry for shouting. But please. Walk away and don’t touch it for a while. Maybe leave a window open if it’s a cool day to help the process along.
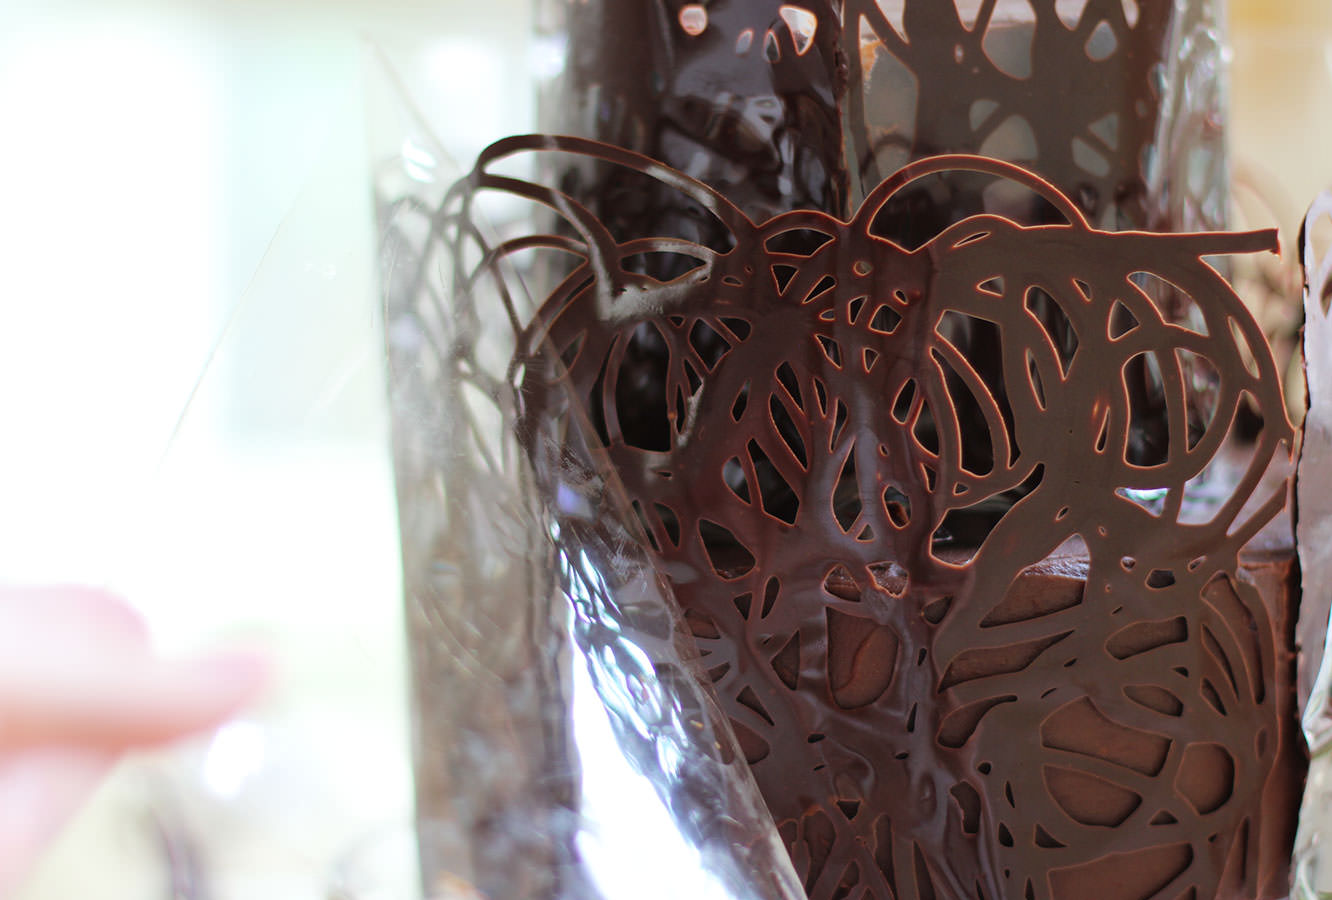
Step twenty four
When you’re feeling brave slowly peel off the cellophane to reveal your beautiful shiny chocolate collar. I was pretty excited at this point I must confess.
Step twenty five
Fill with the fruit and make someone’s occasion that bit happier.
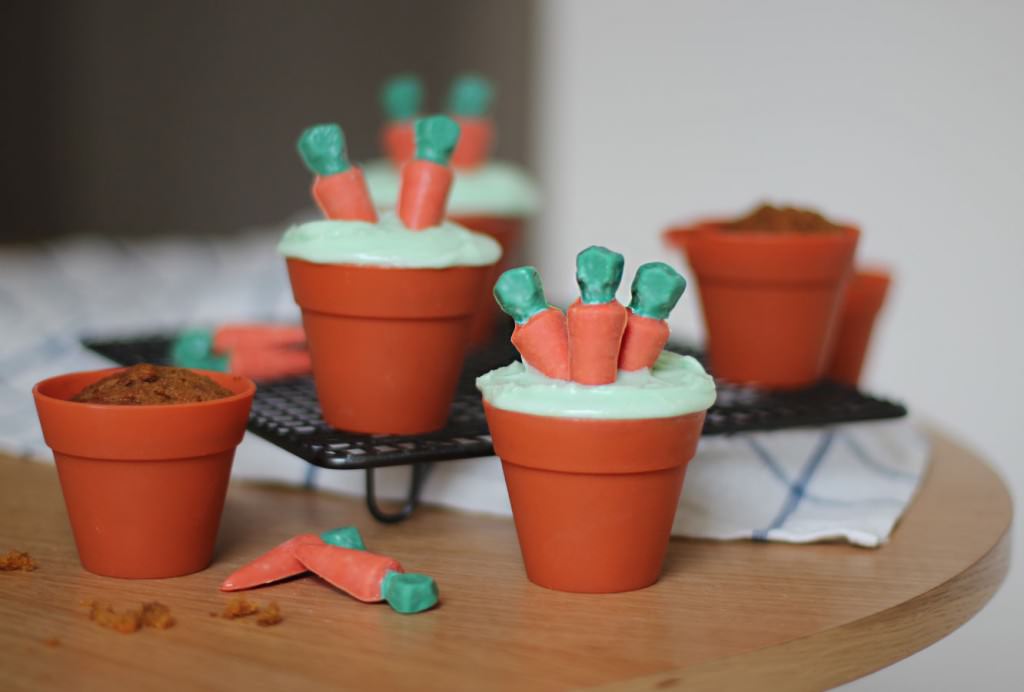
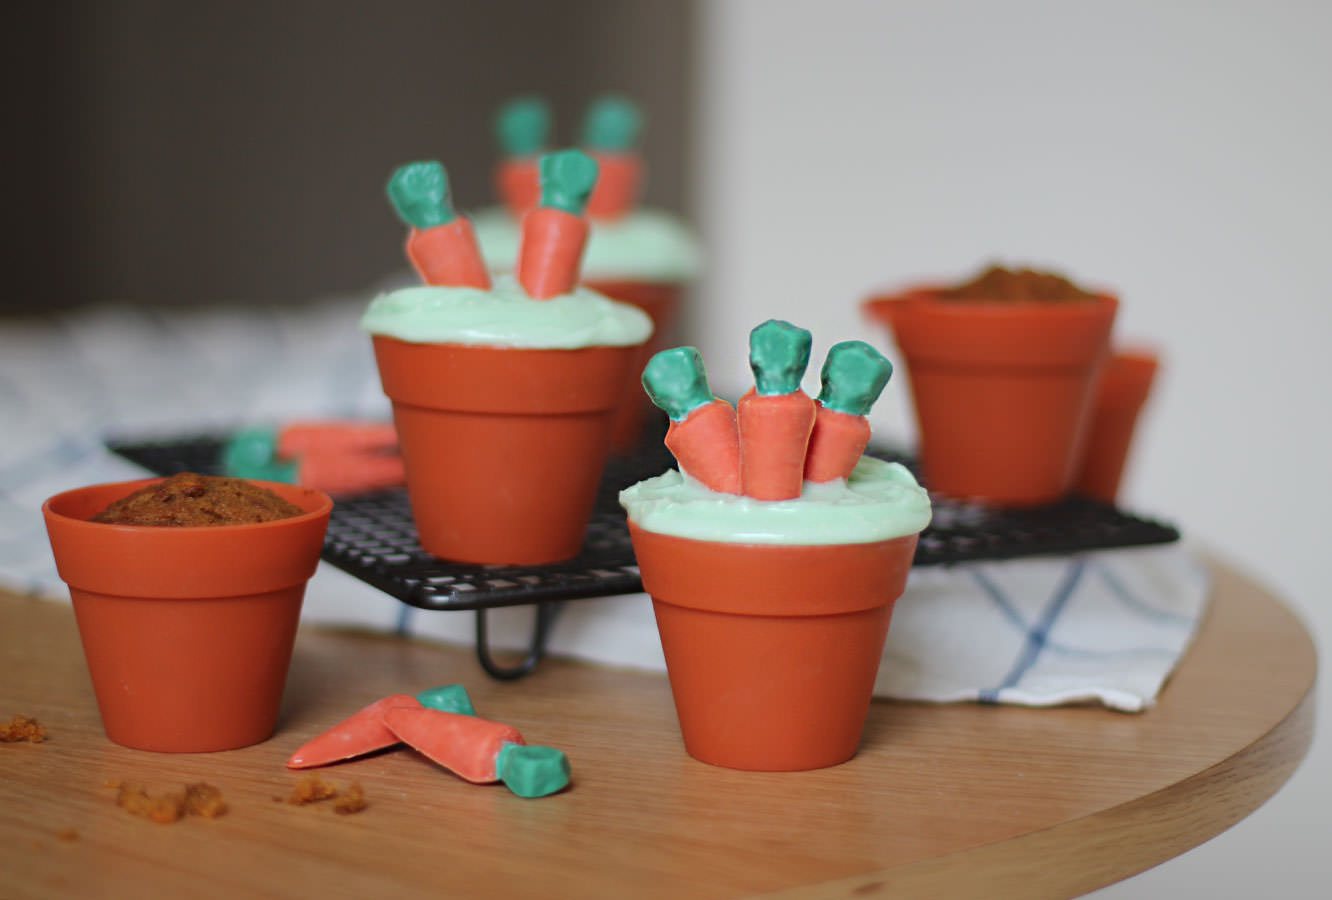
Hullo again, with Easter well and truly around the corner, here’s another cute bunny-themed bake for you.
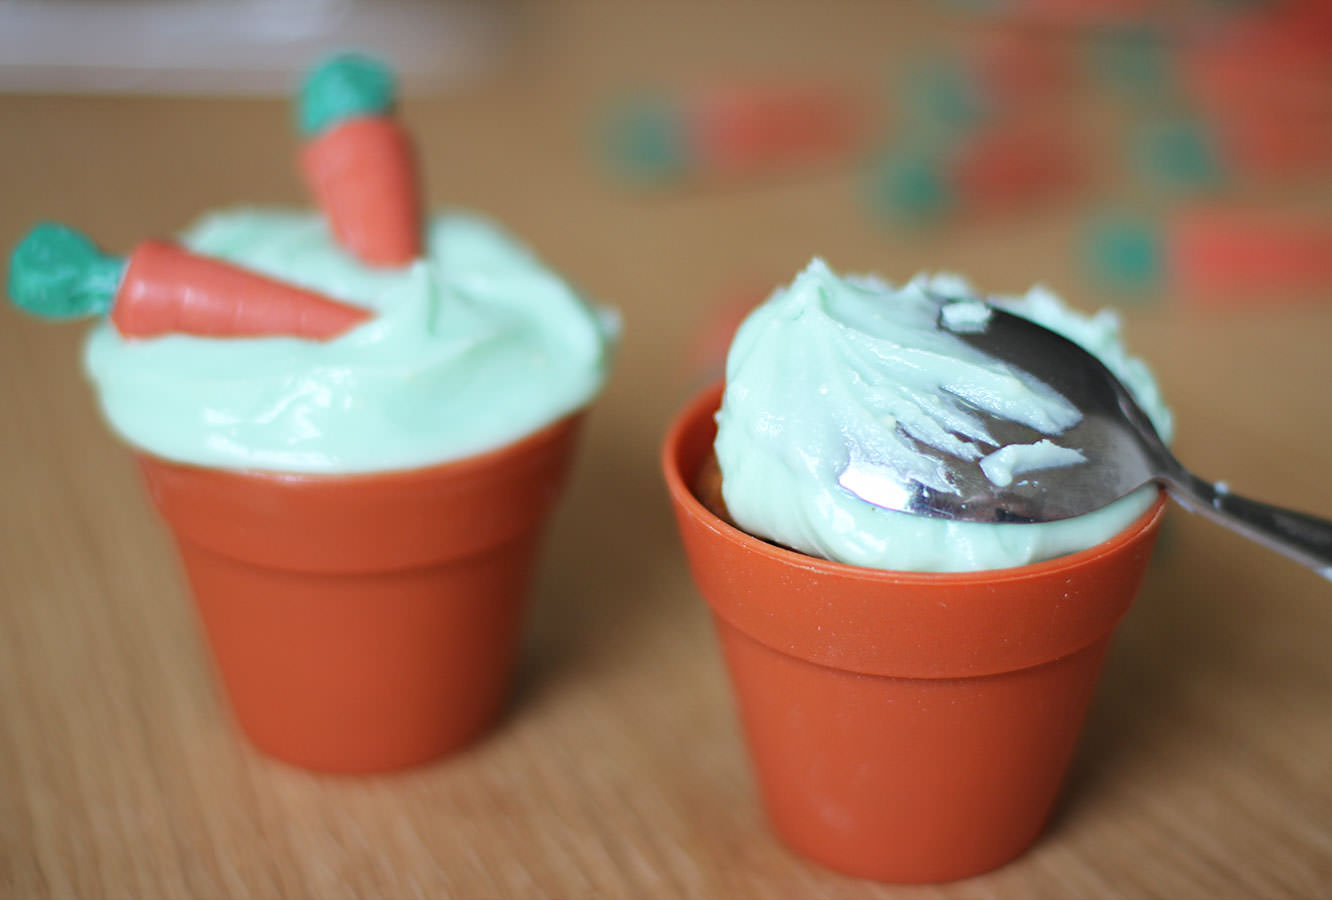
I found an adorable mould for tiny carrots online when browsing for chocolate moulds, as you do on payday…right? I couldn’t resist pairing them with the gorgeous little flowerpot shaped cupcake cases my lovely pal Taylor bought me for my birthday a couple of years back.
Anyhoo, there was an obvious flavour choice for these and I pried myself away from my usual chocolate bakes to bring you carrot muffins/cupcakes with cream cheese frosting.
This makes 6 cupcakes, so you will want to double it for more or for a single cake.
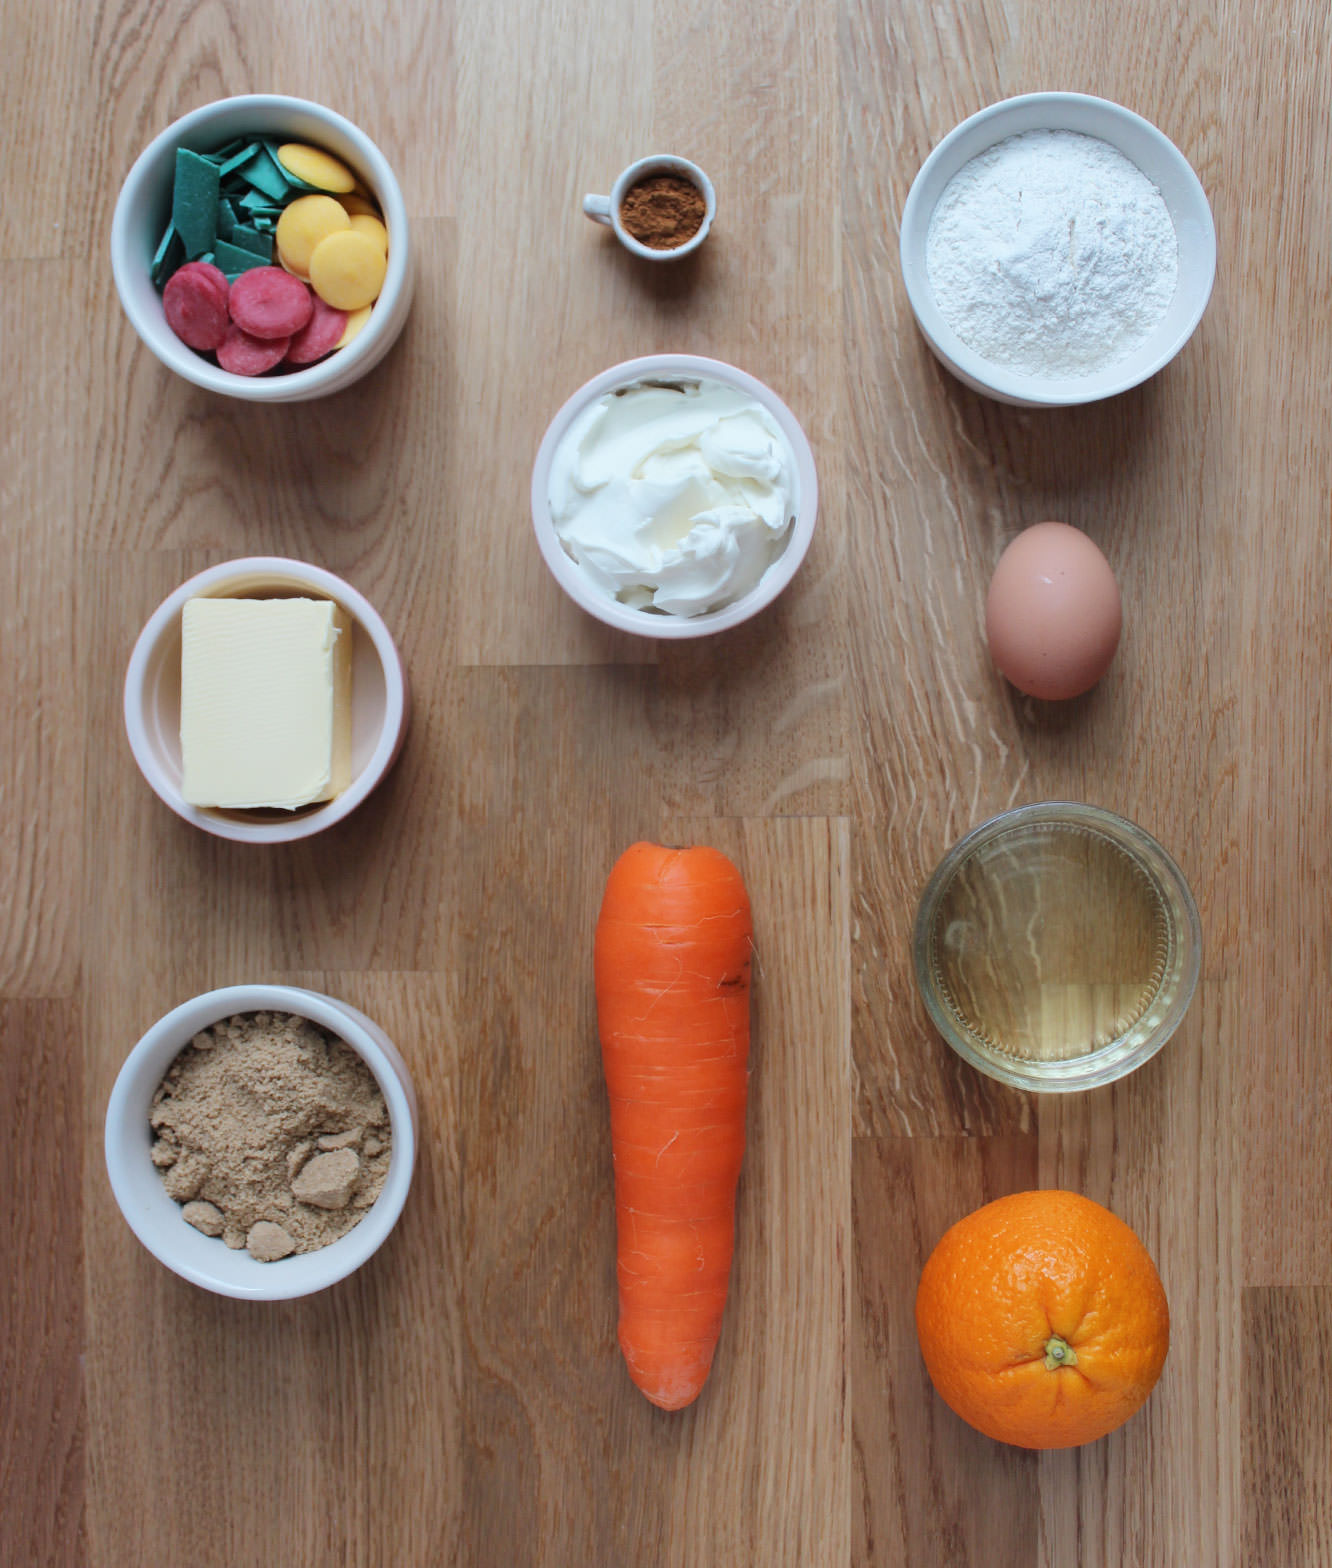
You will need
100g/3.5 oz self-raising flour
100g/3.5 oz carrot
80g/2.5 oz soft light brown sugar
75ml/2.5 fl oz sunflower/vegetable oil
1 egg
1/2 tsp bicarbonate of soda
1 tsp ground cinnamon
1/2 tsp ground nutmeg
Zest of an orange
For the icing:
75g/2.5 oz soft cream cheese (full fat)
25g/1 oz unsalted butter
100g/3.5 oz icing sugar
1 tsp vanilla extract
Green food colouring
Other:
Candy coating chips in orange (or yellow and red like me) and green
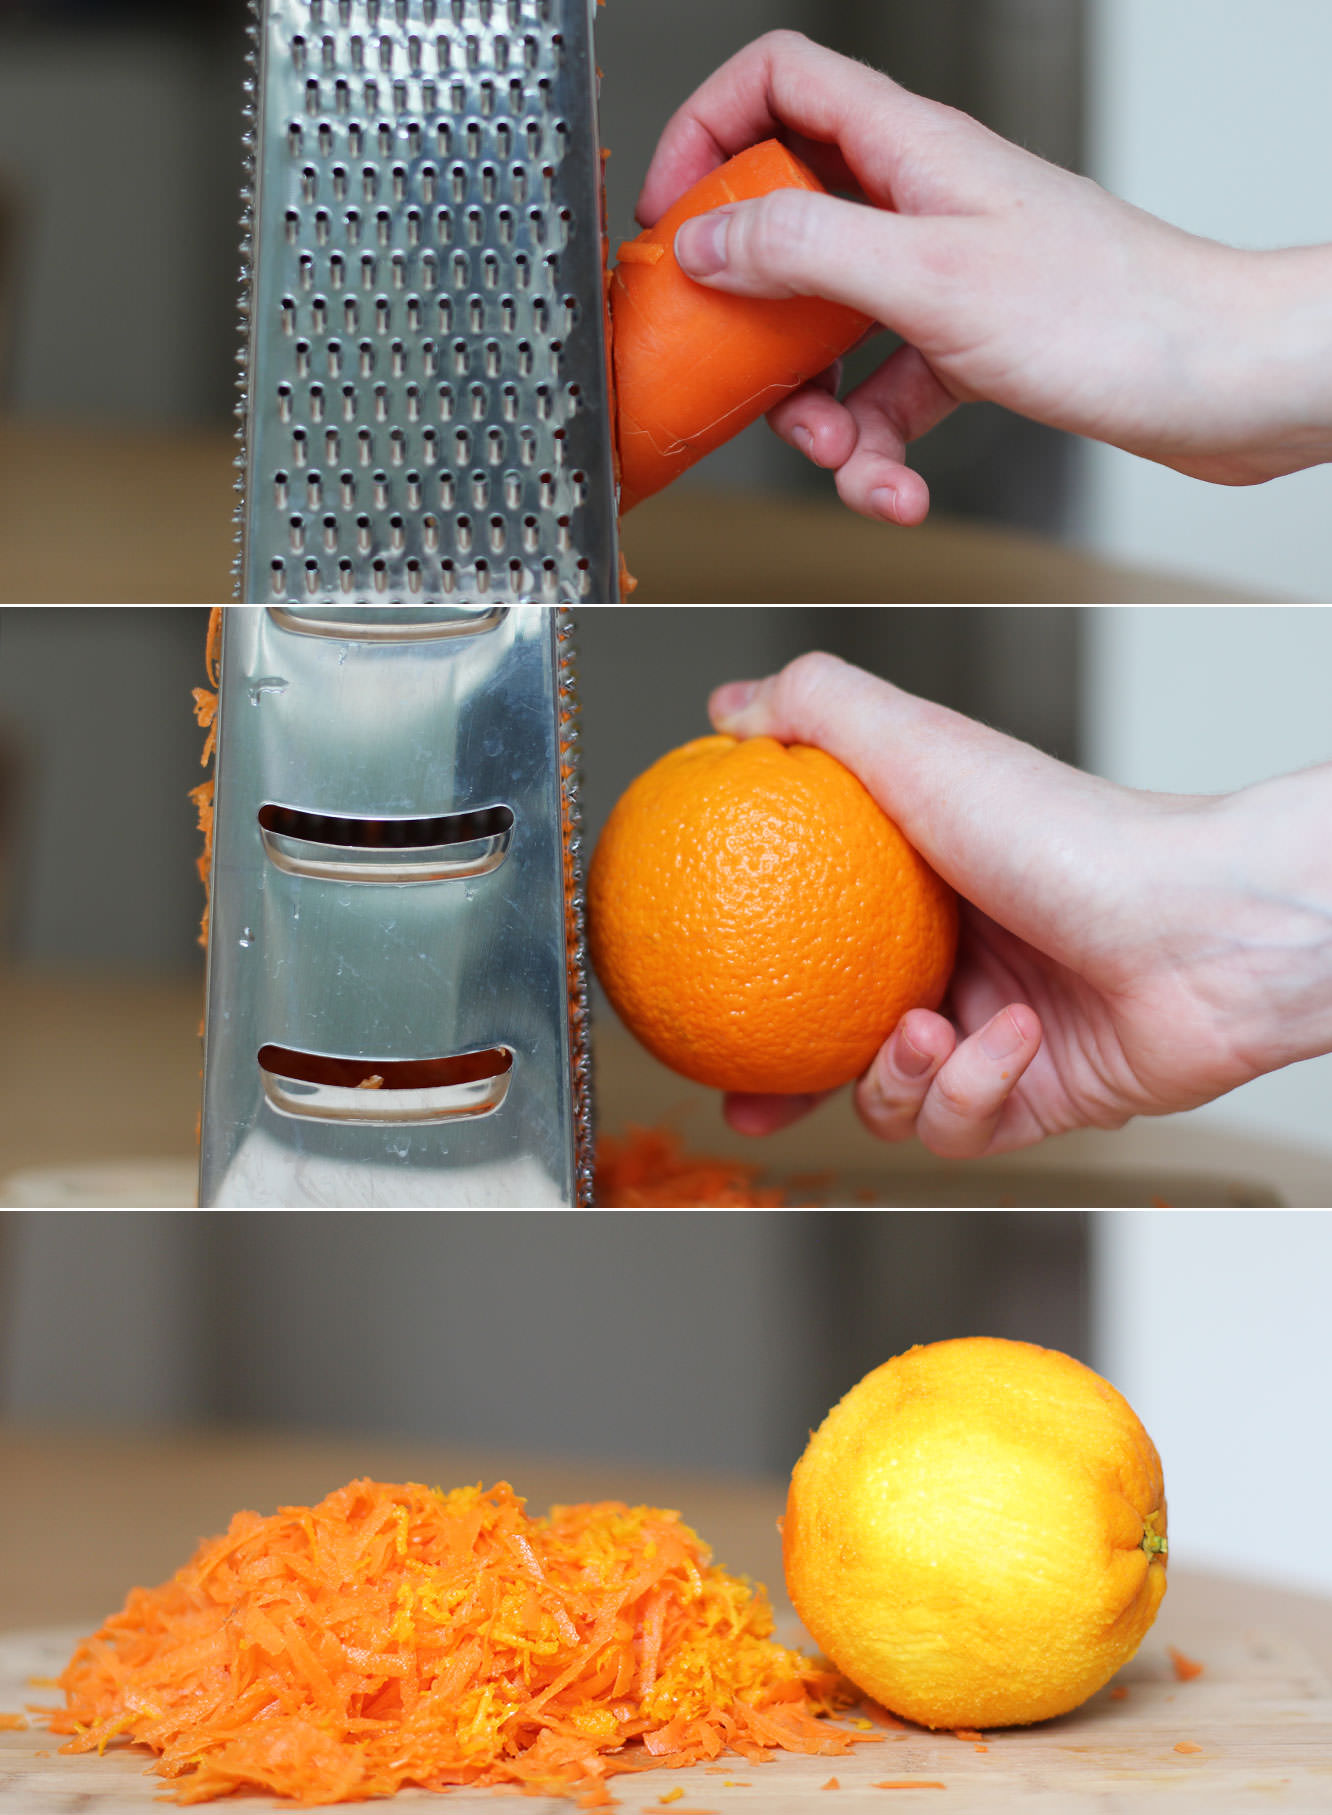
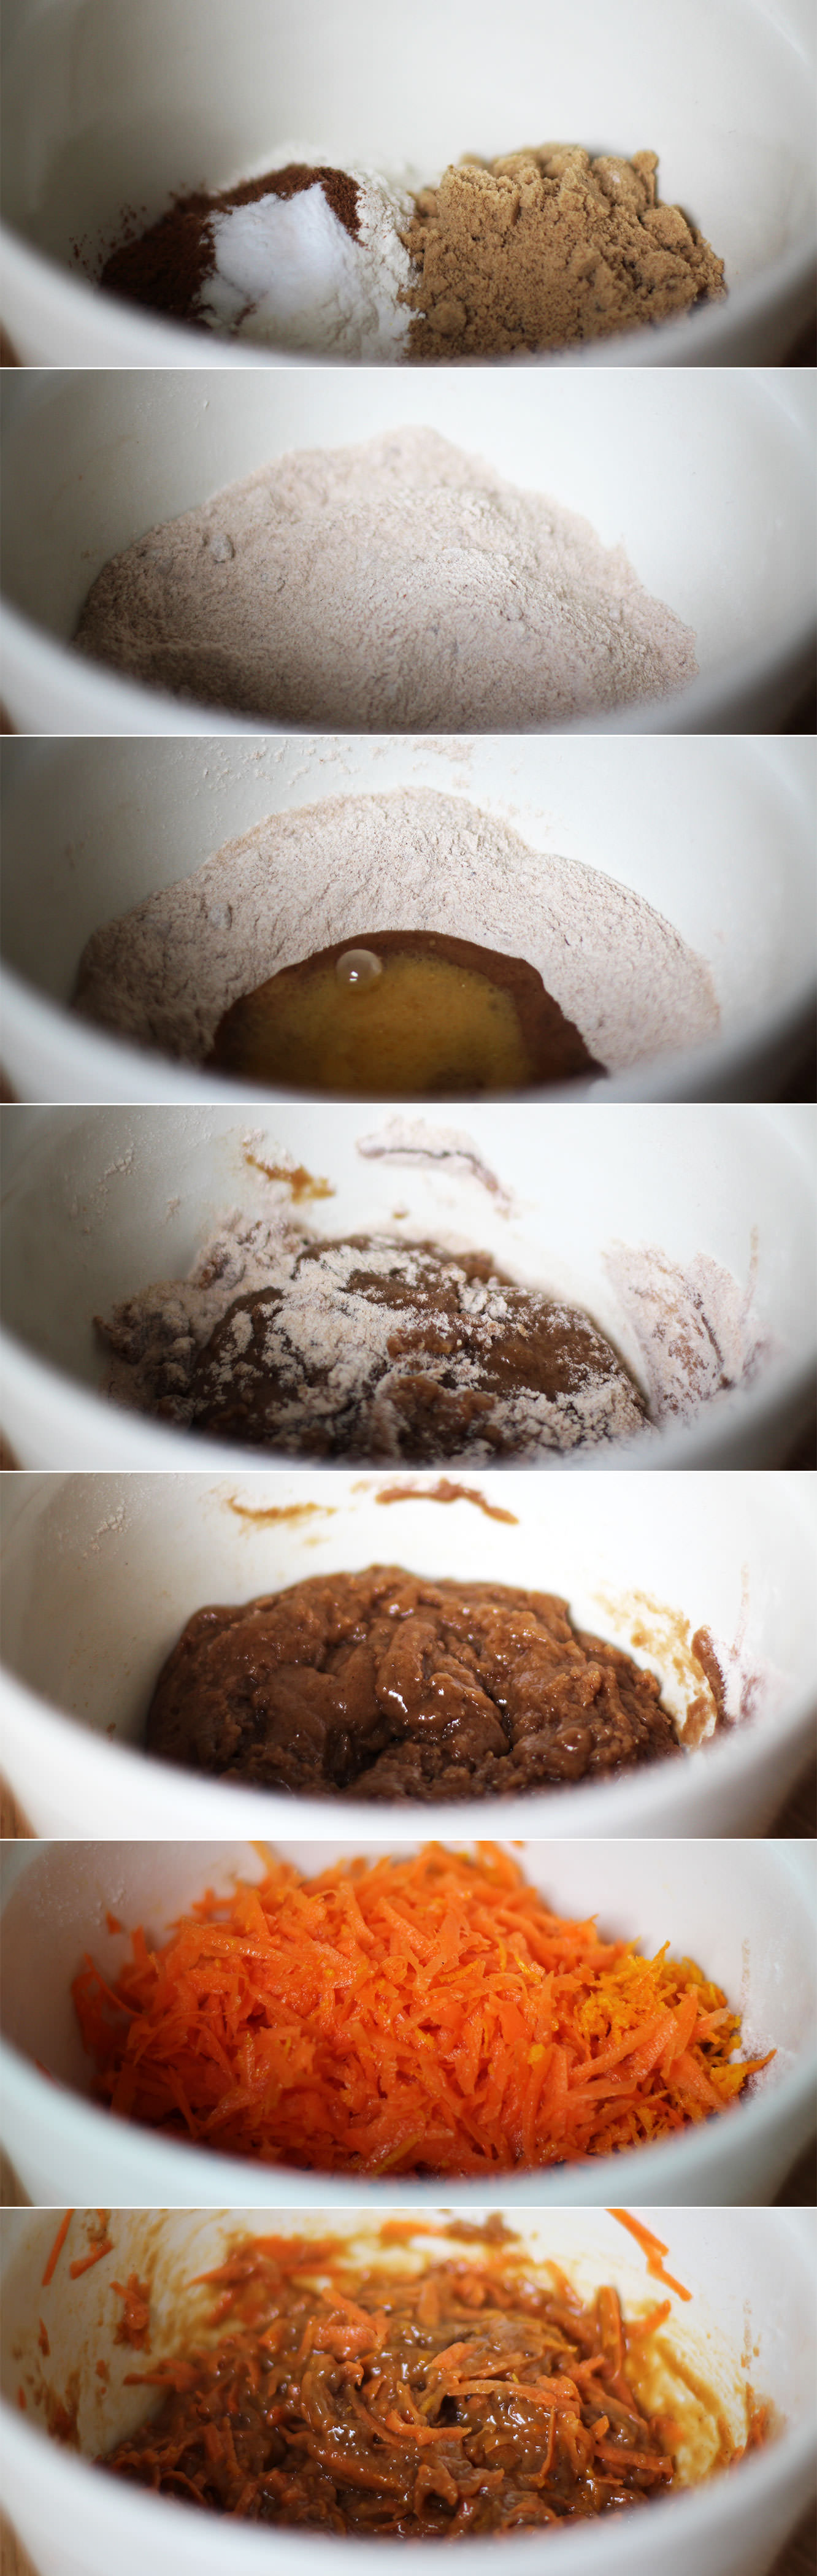
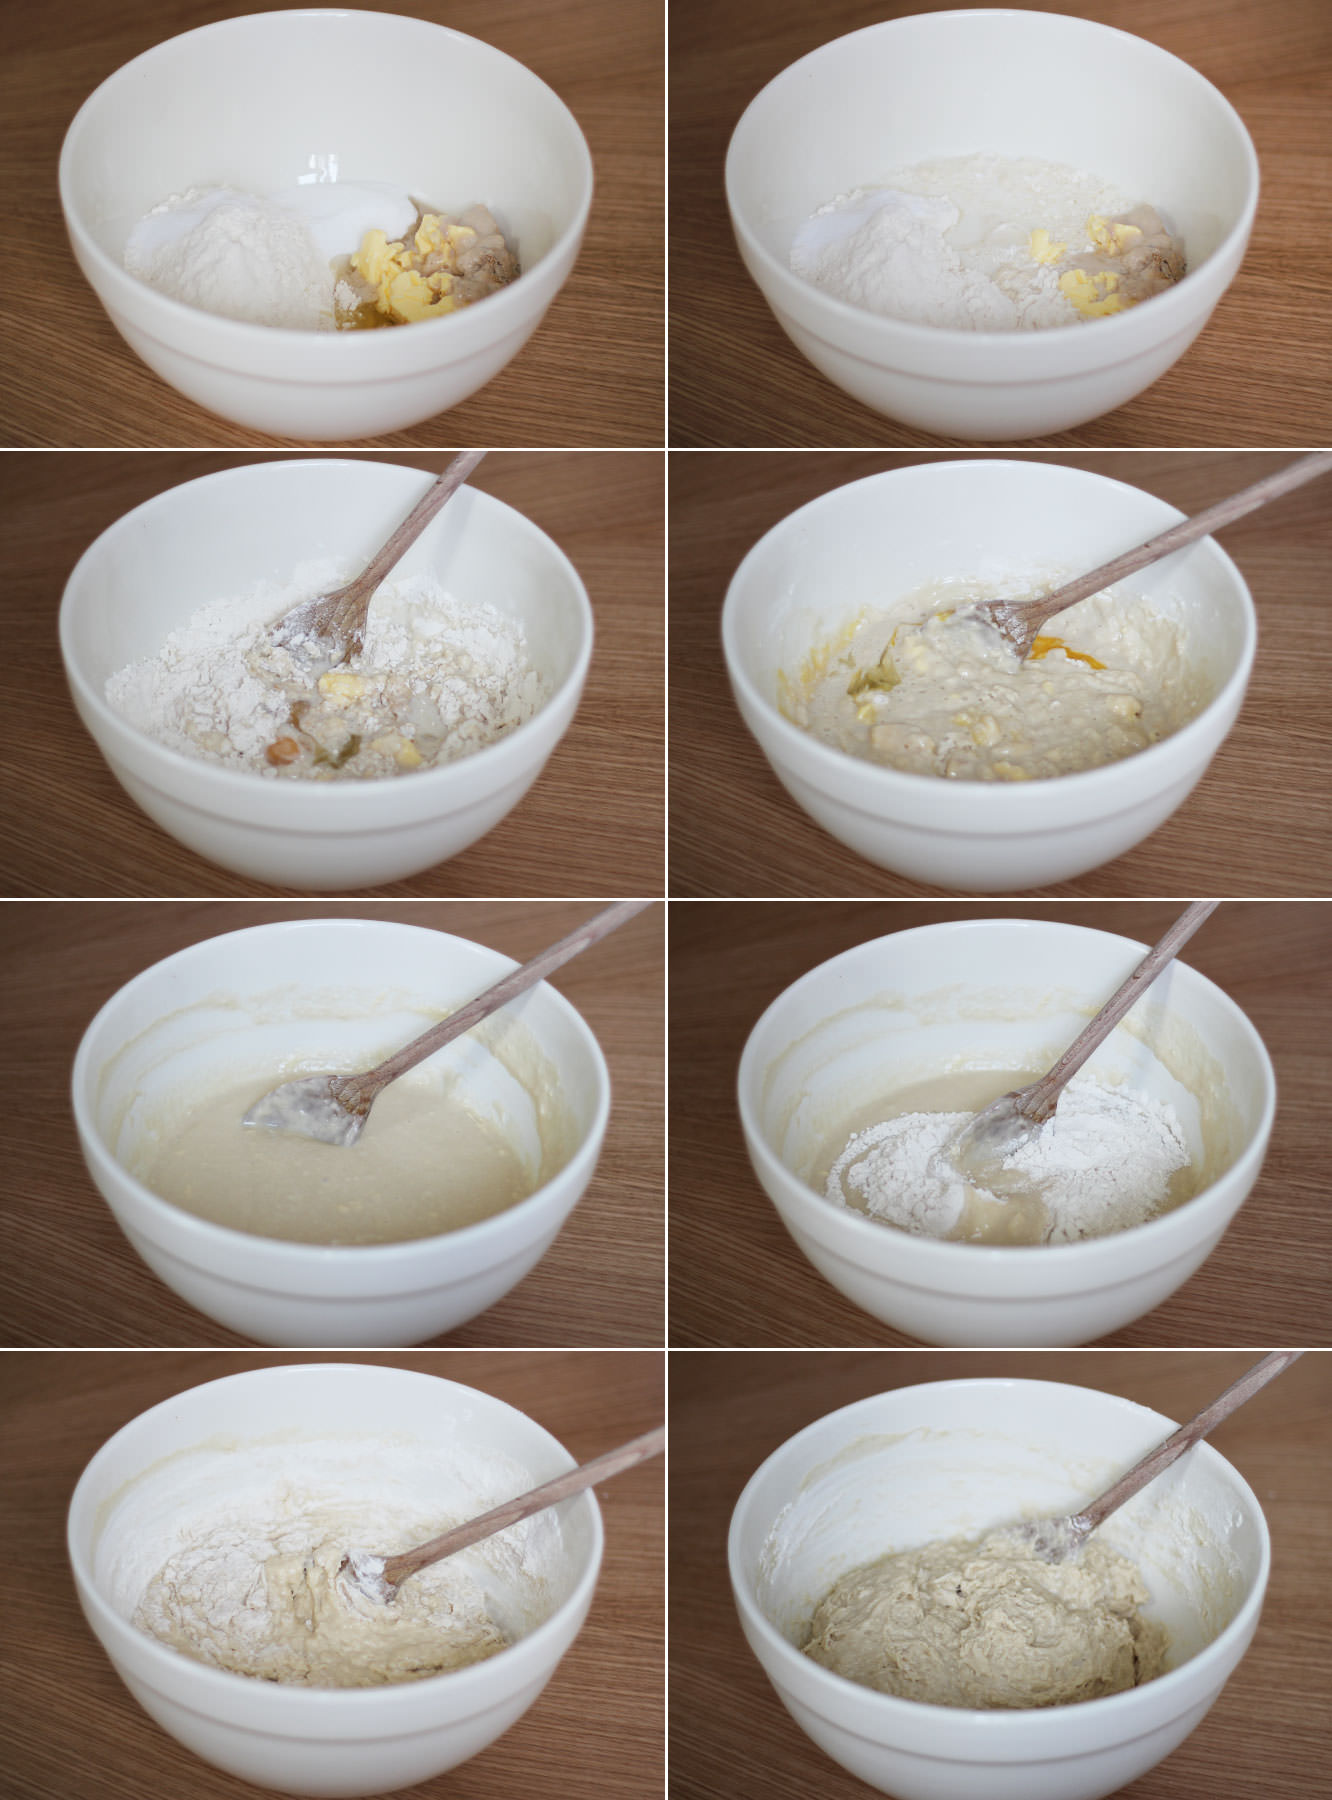
Grate the carrot on the largest setting and the skin of the orange on the smallest setting on your grater.
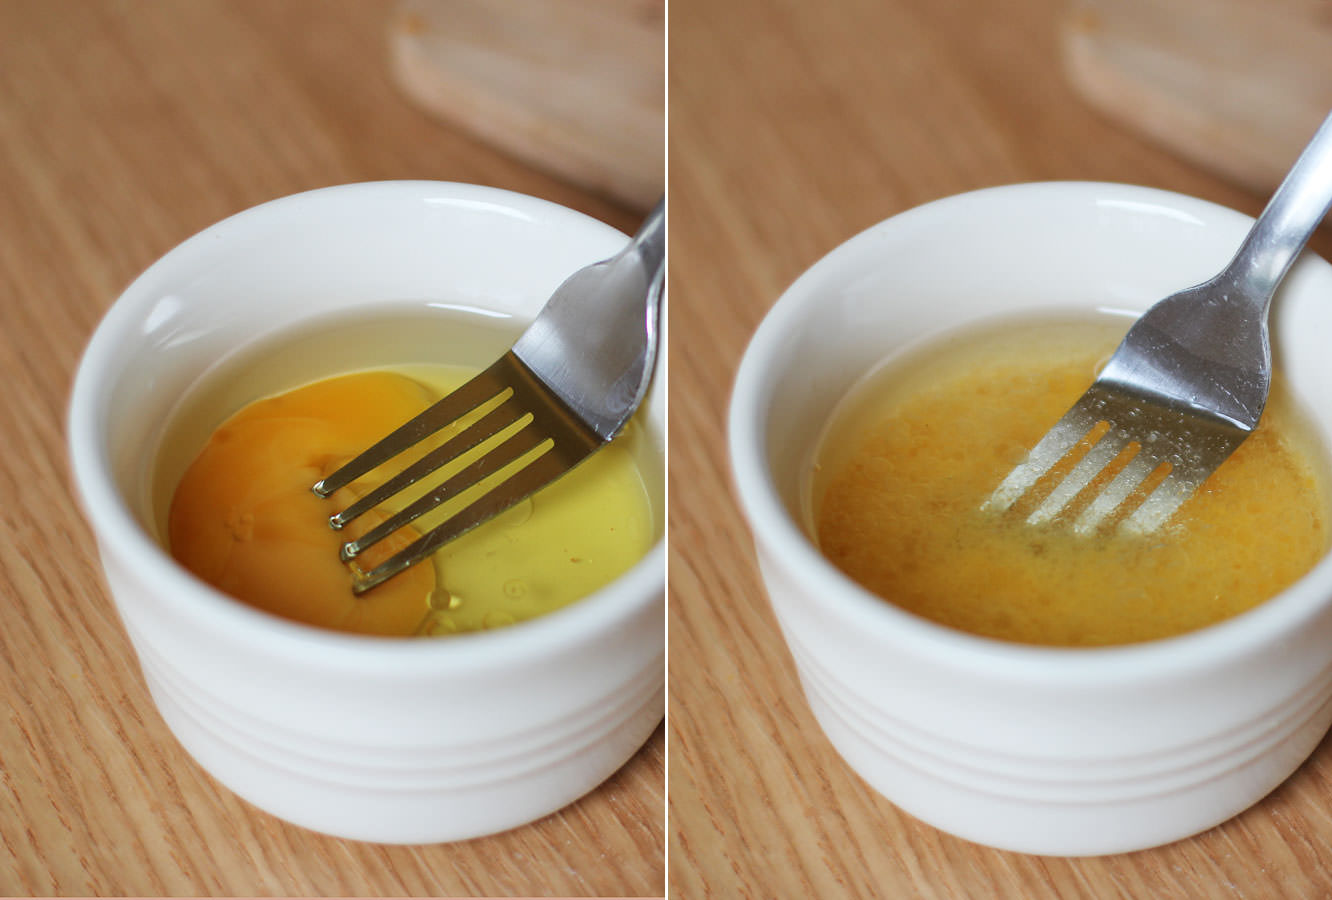
Step two
Using a fork combine the oil and the egg in a small dish.
Step three
Combine the flour, sugar, spices and bicarb in a mixing bowl. Make a well in the middle and stir in the egg and oil mix. Do this in small circles to avoid lumps.
Add the carrot and orange zest (some raisins wouldn’t go amiss if you have some).
Let’s be honest. Not the most appetising looking mixture.
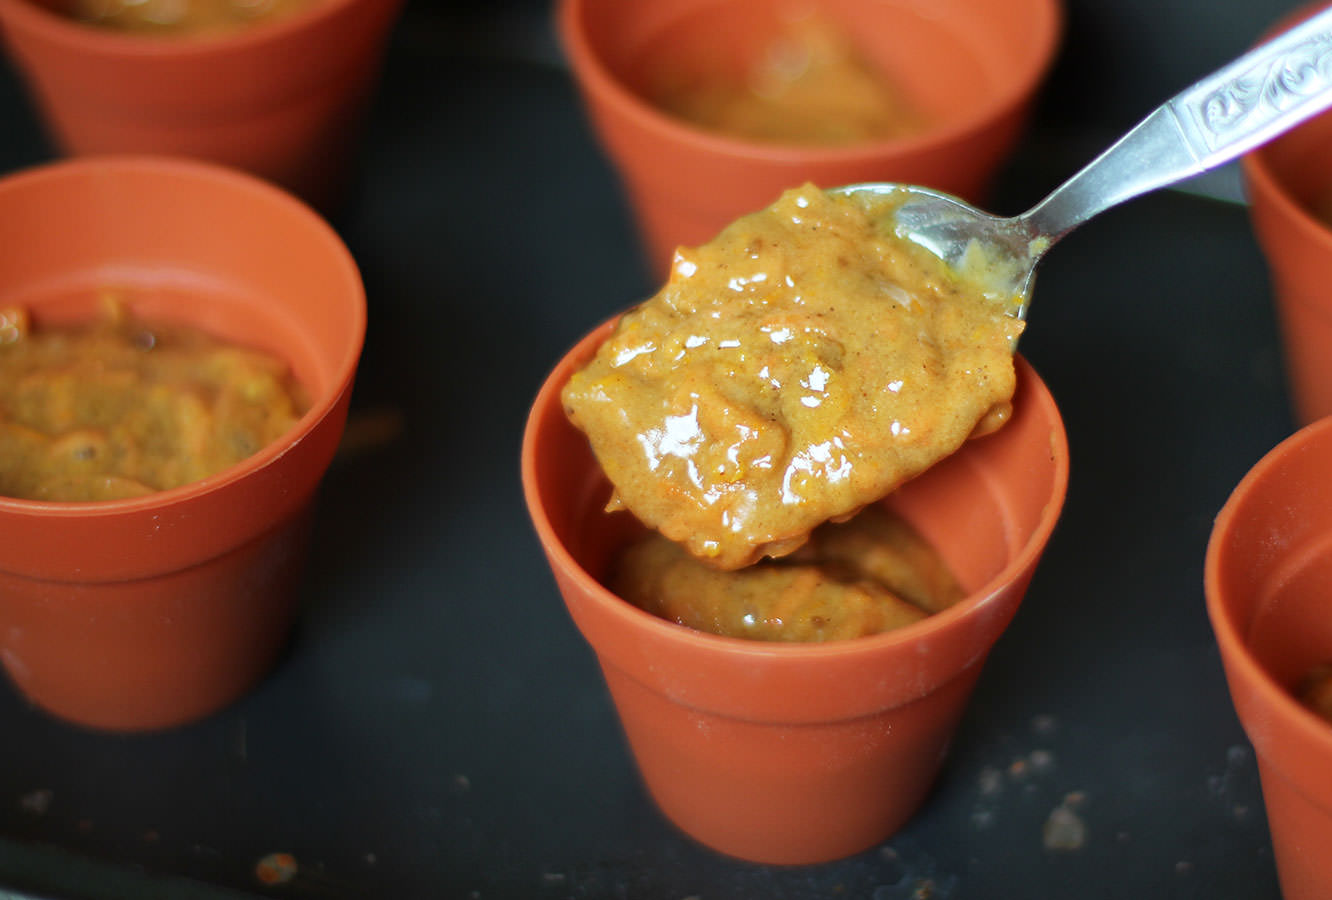
Step four
Distribute the mixture evenly between the pots.
Bake on gas mark 4/180C/350F for 20-25 minutes.
Step five
While the cakes are in the oven melt your candy chips in the microwave and fill the moulds using a piping bag. Make sure to look underneath your mould to check there’s no bubbles.
If mixing the orange from red and yellow like me I advise you to start with yellow and gradually add red to get the colour you want rather than the other way round.
Step six
Make the icing by combining the cream cheese, icing sugar, butter and food colouring. Now, I won’t lie, you may need to add a little more icing sugar to the recipe, I’ve adjusted the quantities based on a slightly runny mix that I had, but they might not be totally perfect. My apologies chaps.
Add food colouring until you have a colour you like, I didn’t want to overdo it and overshadow the carrots.
Step seven
When the cakes are completely cool ice them just using a spoon. You can get more fancy if you want but personally I didn’t see the need to faff about.
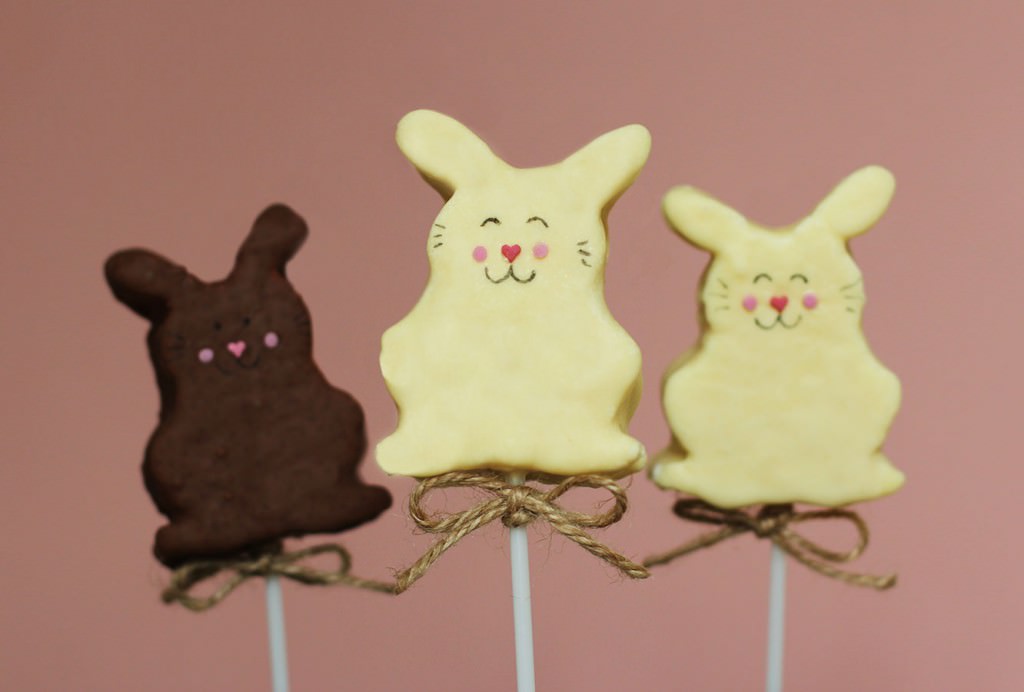
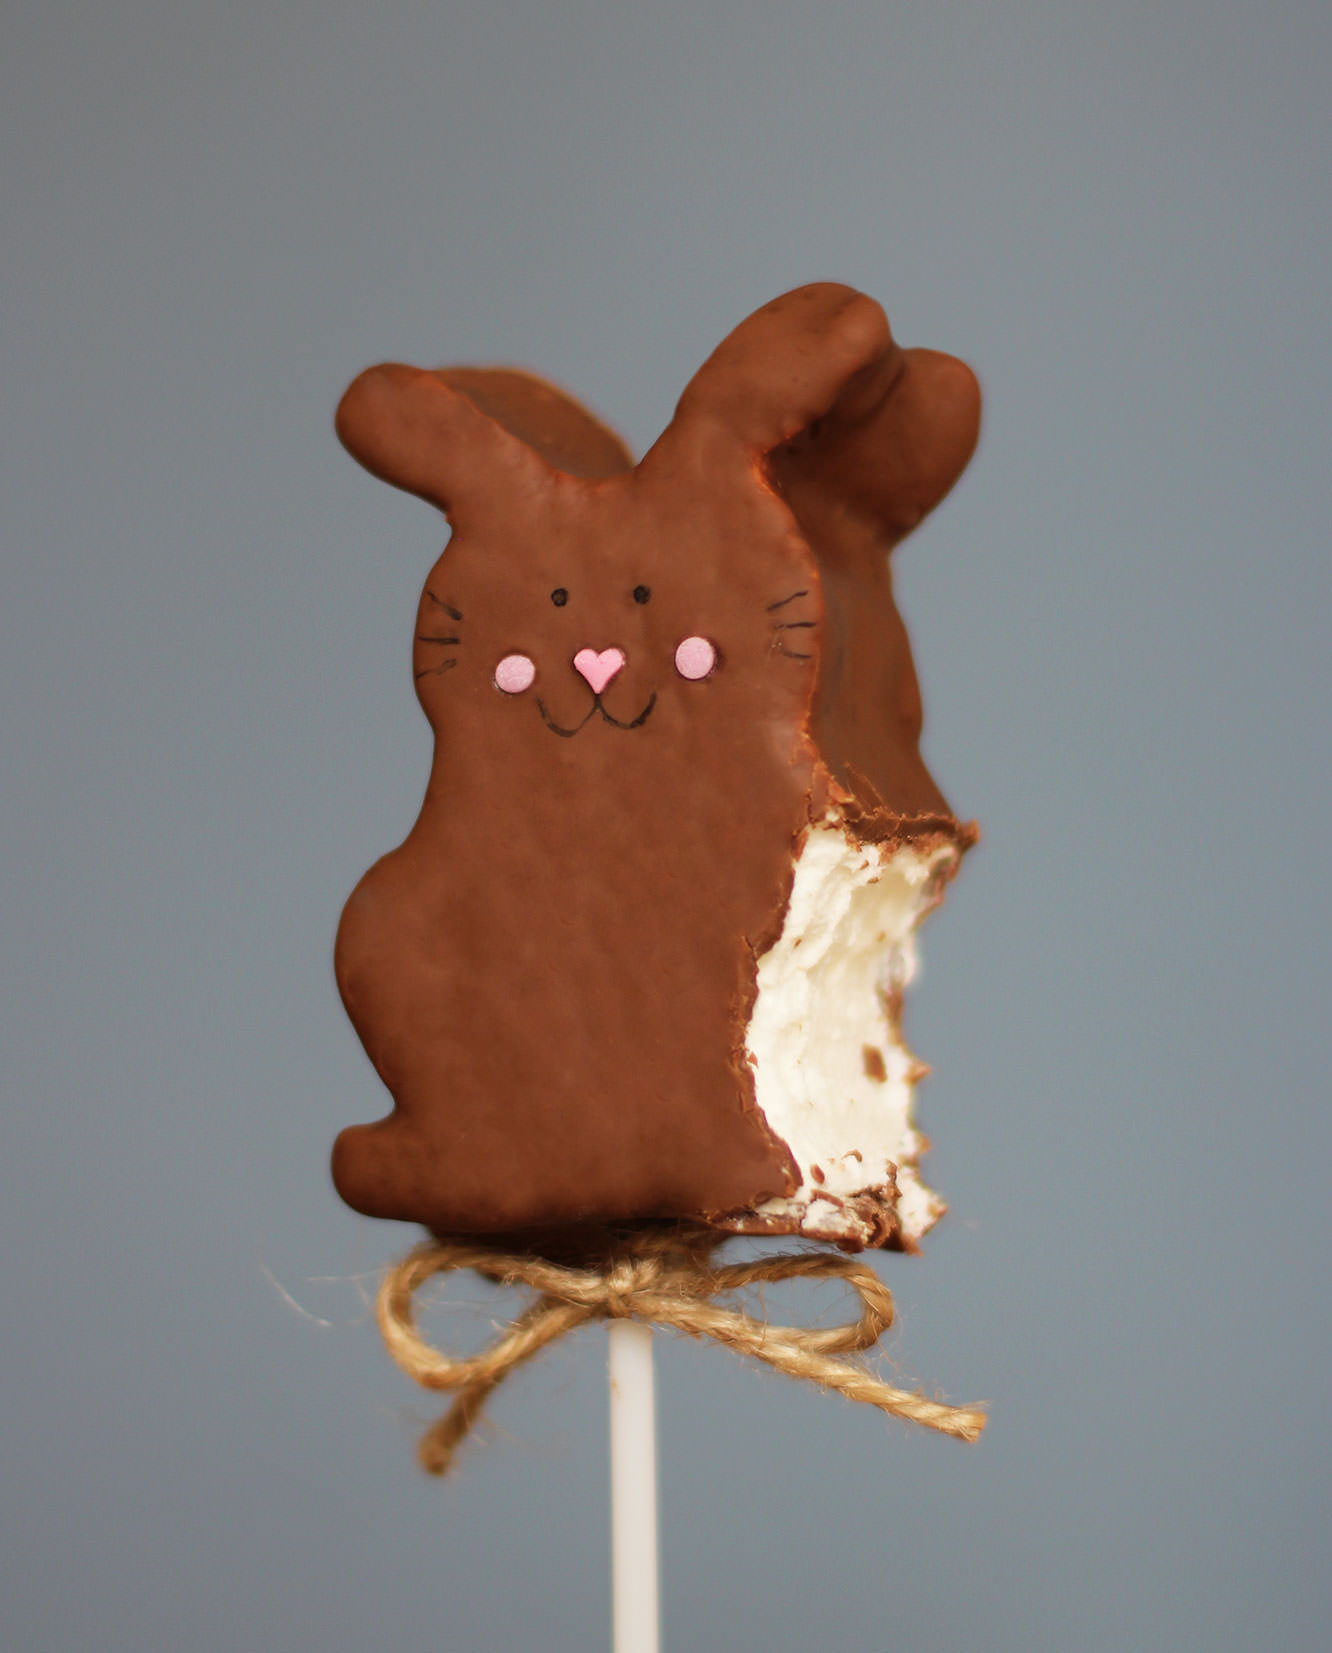
I’ve had these little bunny pops in my mind’s eye for a while now. I’ll precursor this post with saying they don’t look exactly how I imagined. Sure, they do look a bit like Pikachu, but they are scrummy, so I vote worth the time if you’ve a free afternoon and a healthy dose of patience in your arsenal.
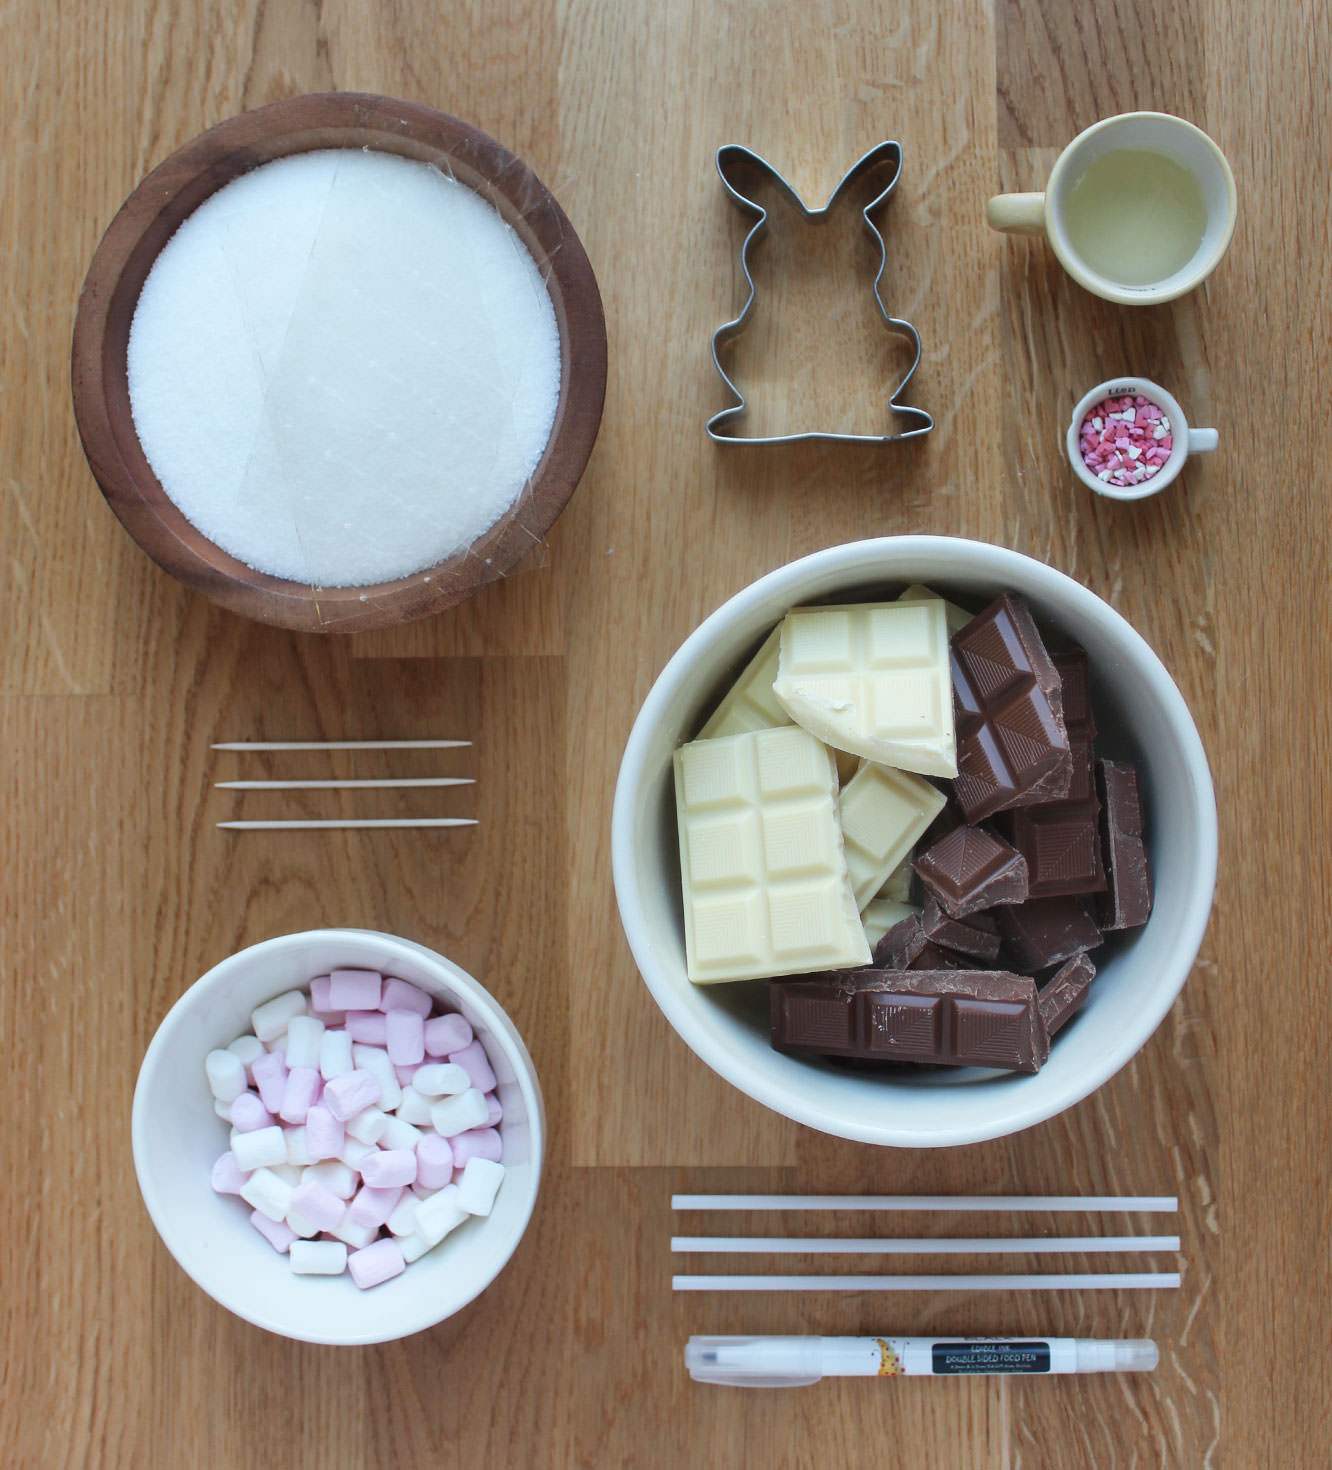
You will need
9 gelatine sheets
300g/10.5 oz granulated sugar
2 egg whites
1 tbsp liquid glucose (you can find this in a squeezy toothpaste type tube in the baking section)
2-3 tsp extract of your choice (but I HIGHLY recommend ‘buttery caramel’ from the natural professional flavours range – bought at Lakeland)
600-800g/1lb 5 oz – 1lb 12 oz chocolate for dipping (having sampled milk and white, I’d go white)
Sugar confetti for faces
Edible ink pen (or melted dark chocolate and a cocktail stick)
Icing sugar for dusting
A sugar thermometer
A bunny cutter (I got this from Amazon)
A handful of mini marshmallows (for fluffy bunny tails)
Cake pop sticks
Step one
In a cereal bowl, soak the gelatine in 150ml/5 fl oz cold water. Set aside.
Step two
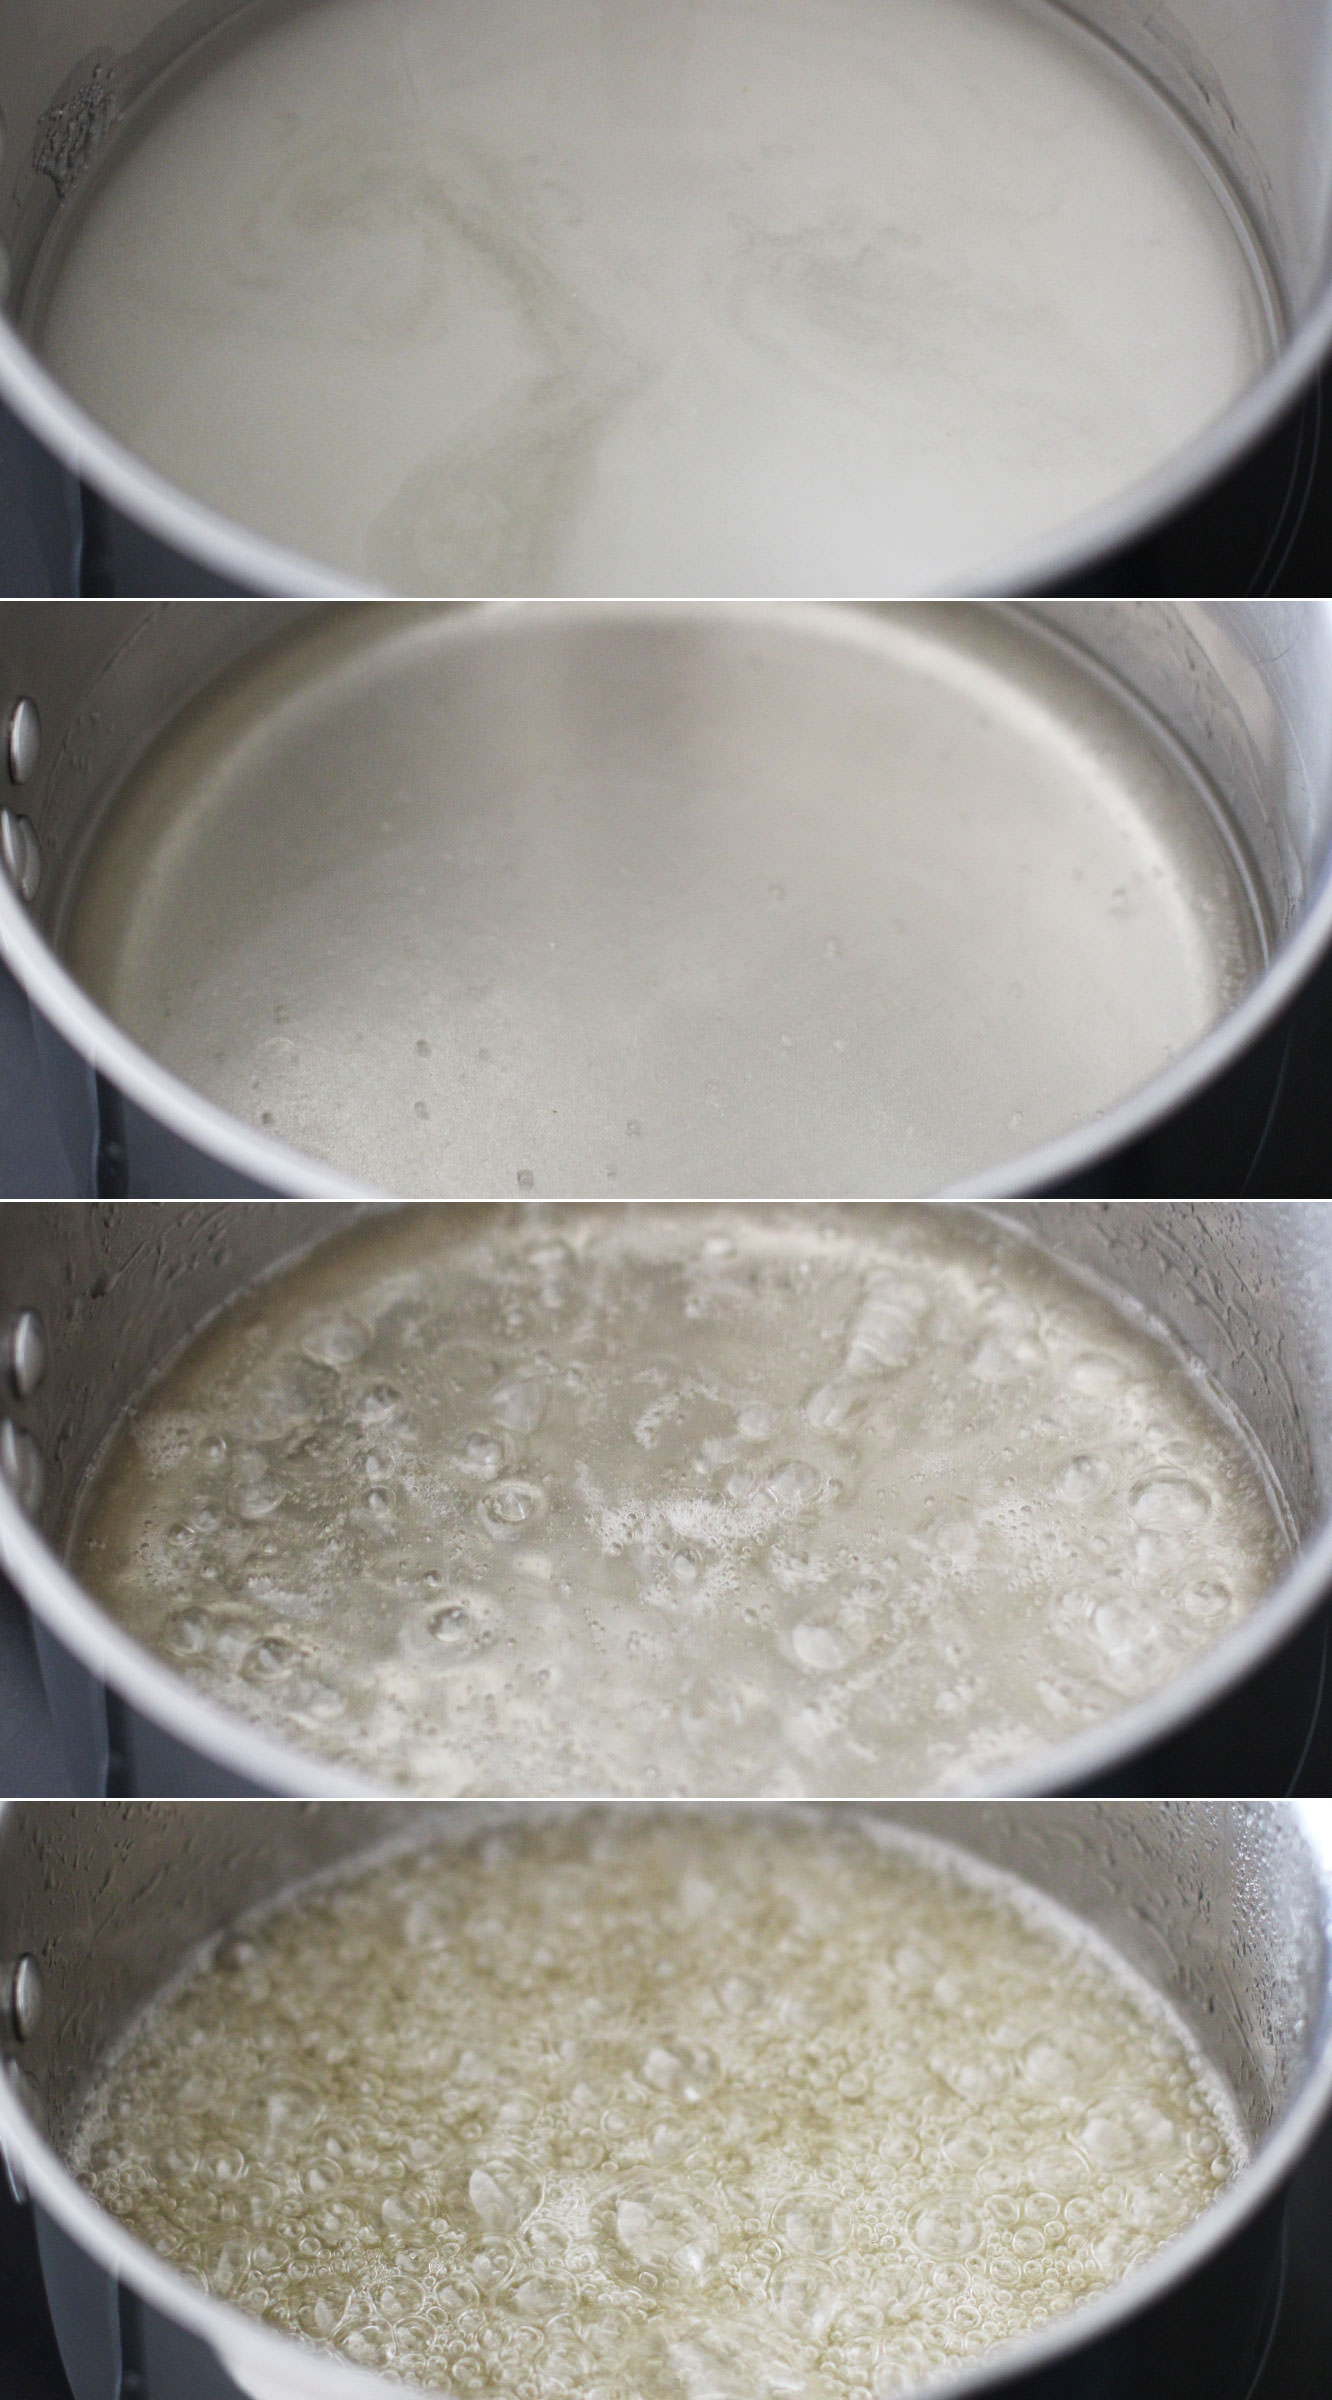
Combine the sugar, 150ml/5 fl oz water (different to the gelatine water) and the liquid glucose in a smallish saucepan. Allow the sugar to dissolve on a low heat, and then turn it up to medium-high. Be careful not to burn the sugar or any of your extremities.
The temperature you want this to get to is 118 C. It will feel like it will never get there, but stay strong.
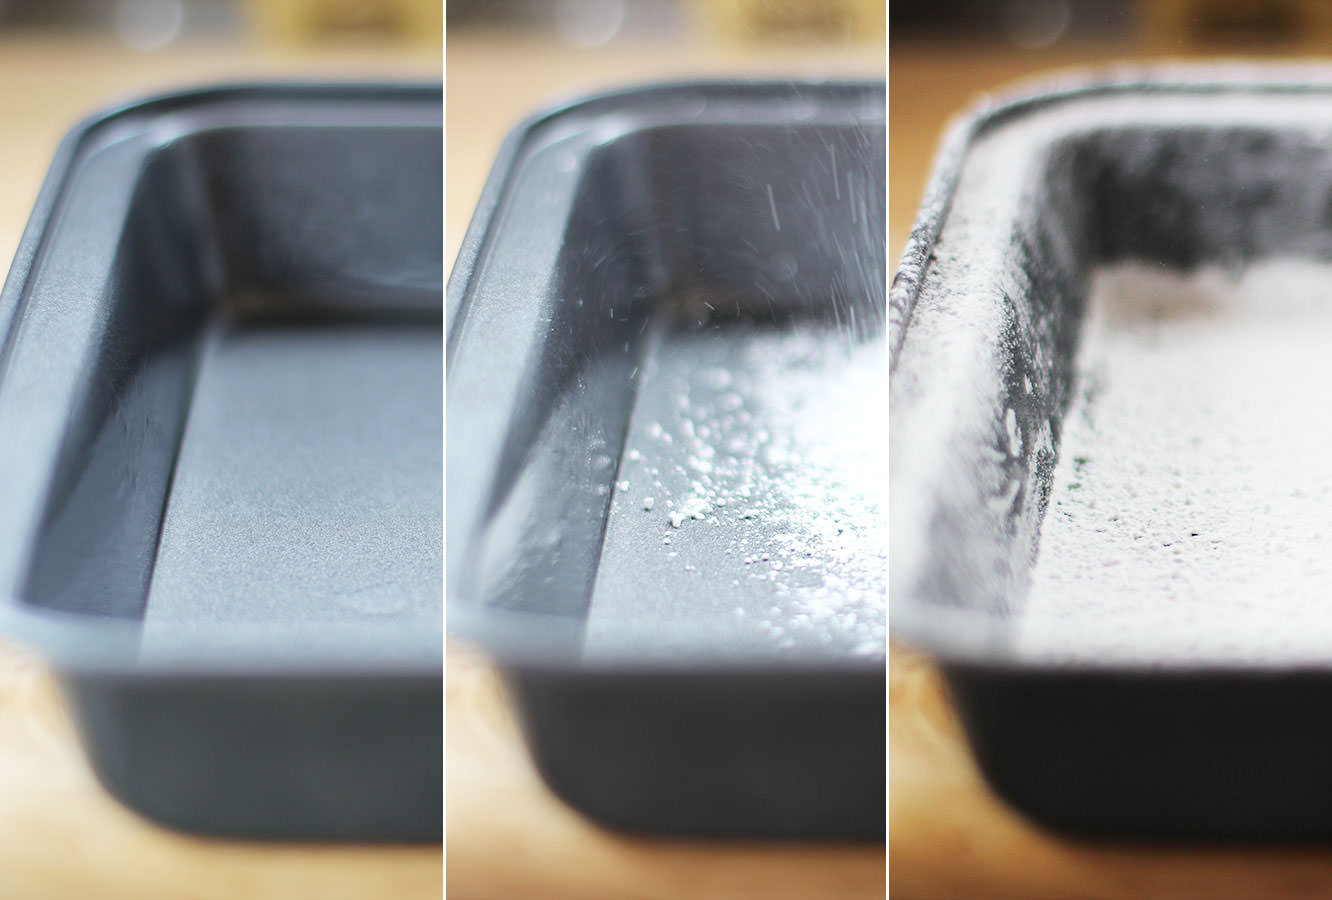
Step three
While the sugar is bubbling away take the opportunity to dust a brownie tin with icing sugar. Use a really small amount of olive oil before dusting to hold the icing sugar to the pan.
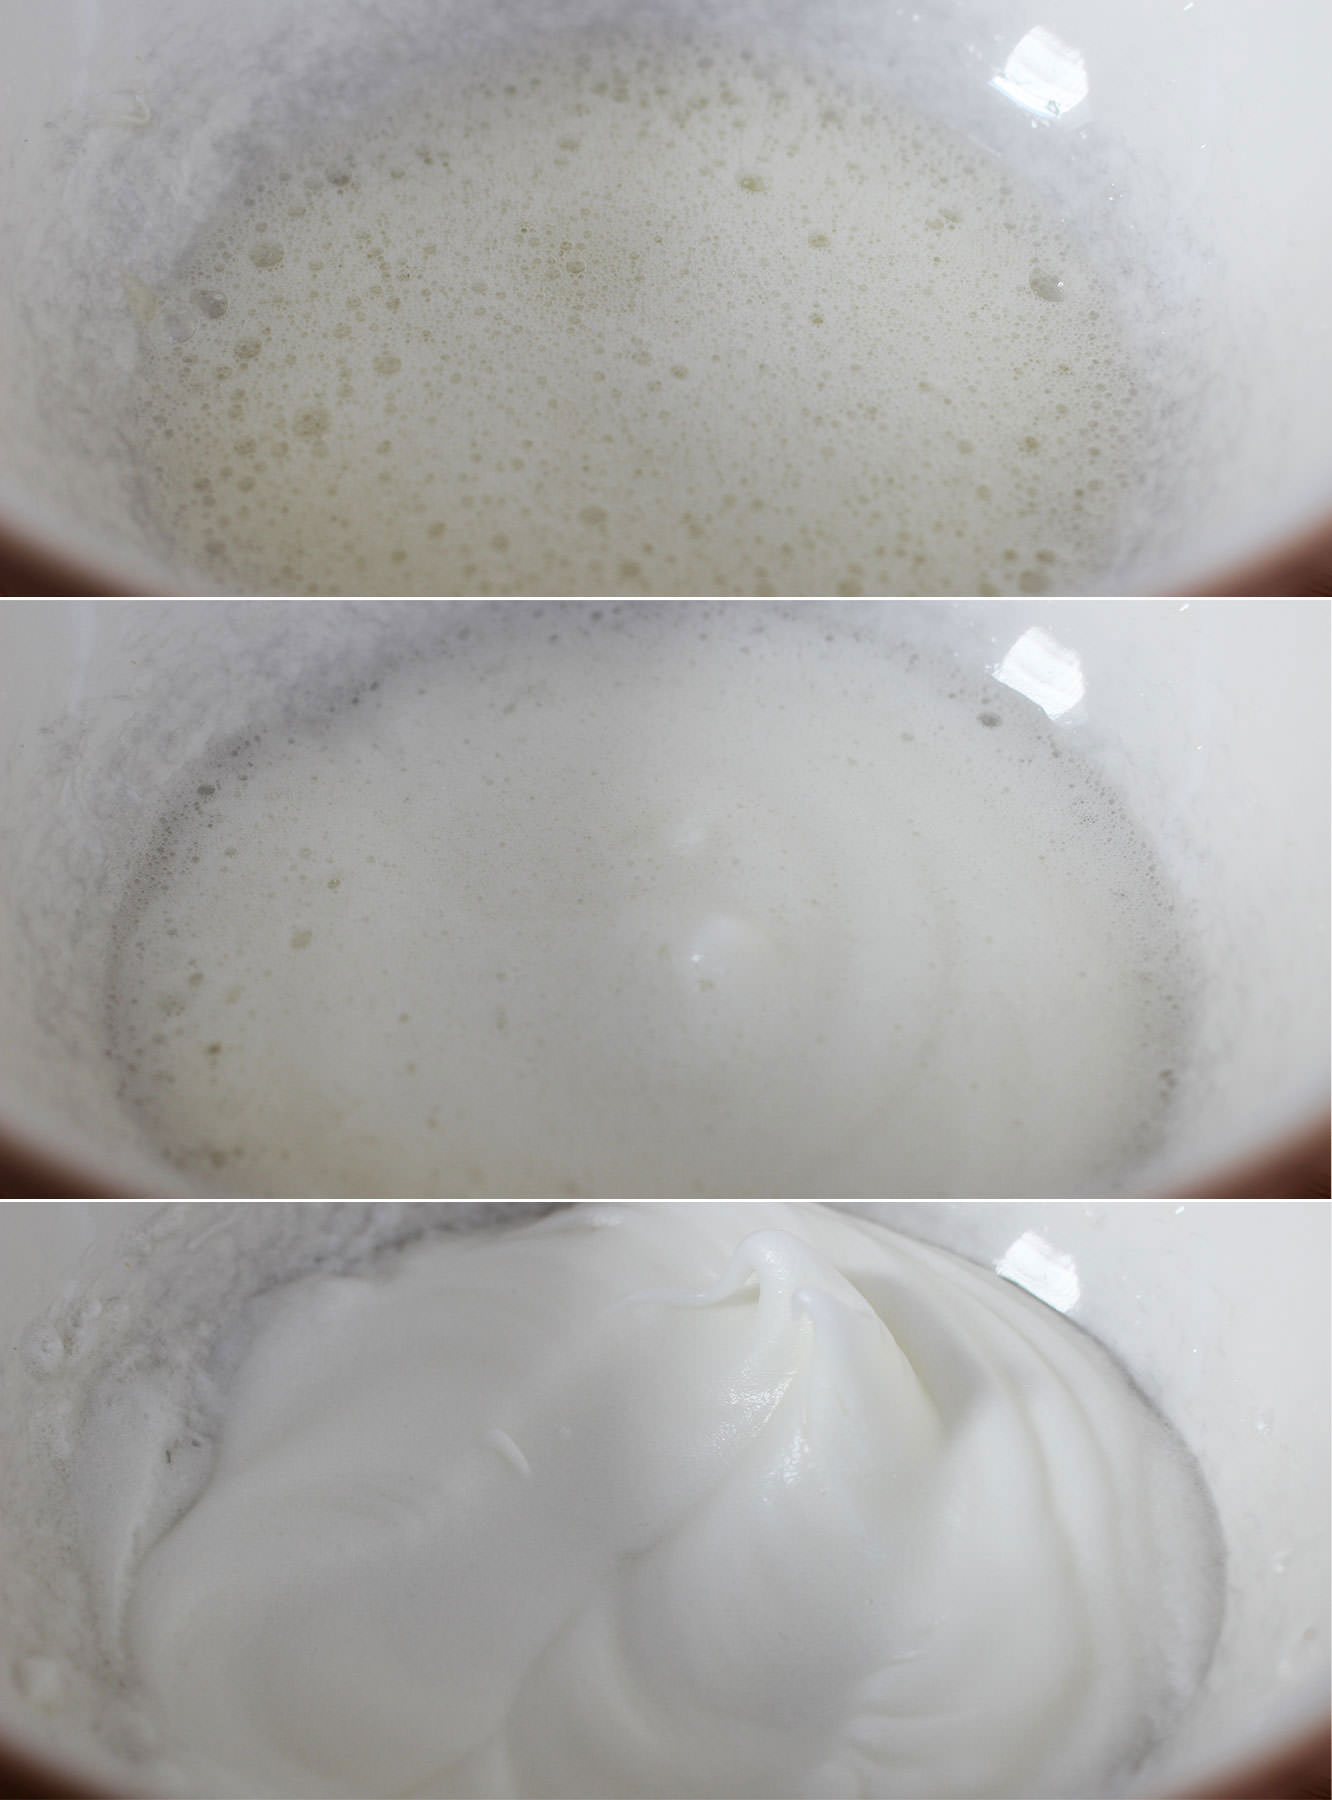
Step four
Place the egg whites in a metal or glass bowl, never plastic. Or you know, if you want to wreck your lovely Mason Cash bowl by using an electric whisk on it, by all means do. Those handsome grey marks? You could have those too.
When the sugar gets to somewhere around 112-115C whisk the egg whites into stiff peaks.
Step five
When the sugar reaches 118C take it off the heat.
Squeeze the gelatine out a bit and add it to the sugar mix. It will bubble right up so don’t panic. It should settle pretty quickly.
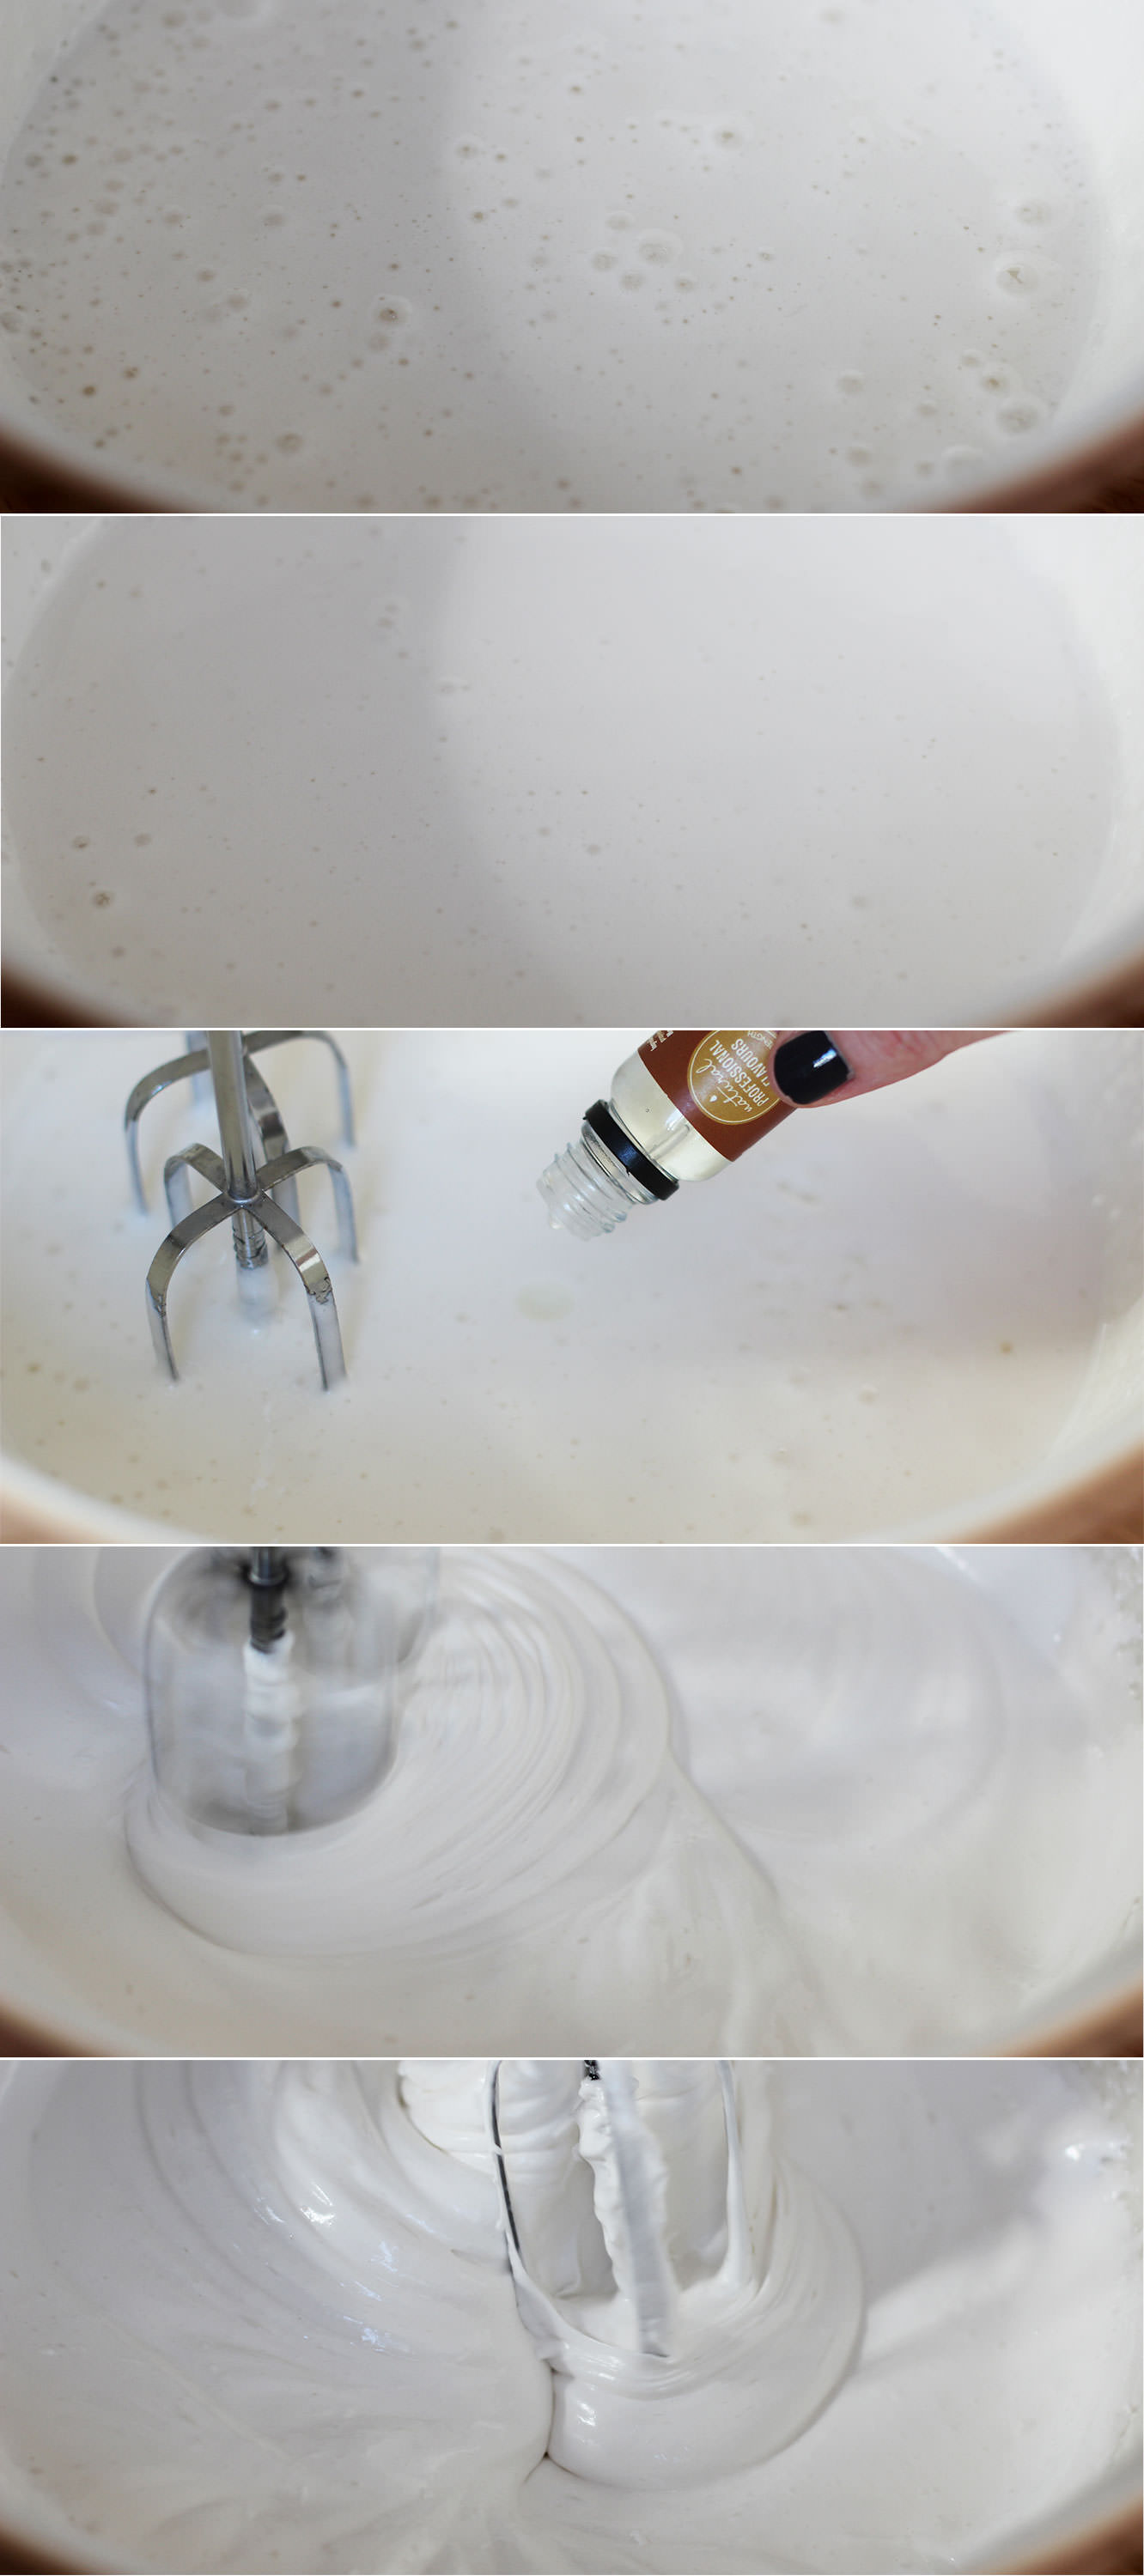
Step six
Pour the hot sugar into the eggs, but make sure you’re whisking continually to avoid a big lump of sugar at the bottom of the bowl.
Whisk until the mixture holds its shape well and is quite thick. This can take up to ten minutes.
Somewhere during the whisking (probably when you need to give your arm a rest) add the flavouring. Vanilla extract is lovely in these but they will take basically anything you fancy. Like I said in the ingredients list I really recommend ‘Buttery Caramel’ from the Natural Professional Flavours brand.
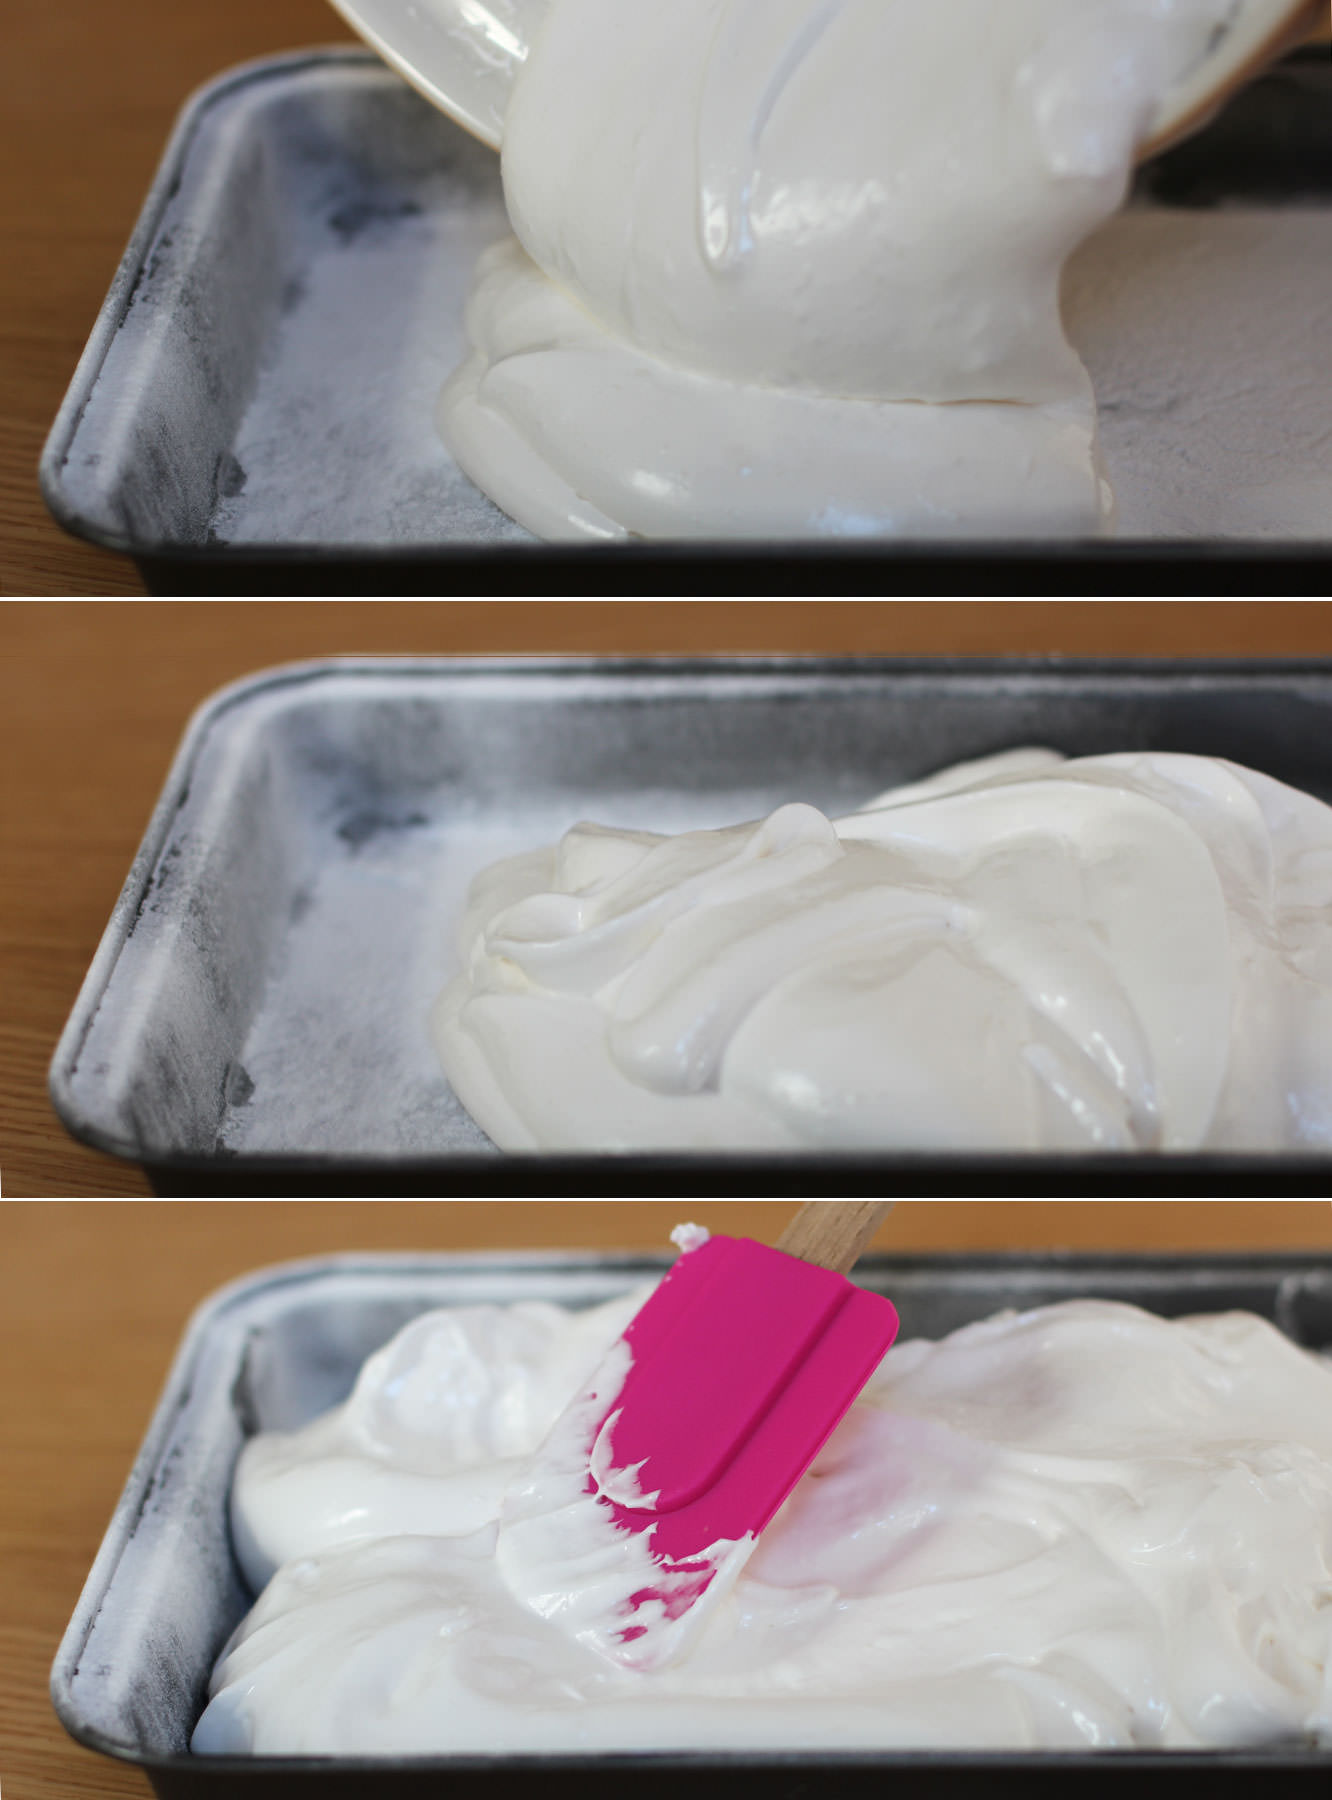
Step seven
Pour the mixture into the prepared tin and smooth out as much as possible.
Dust with icing sugar and leave to set for about an hour.
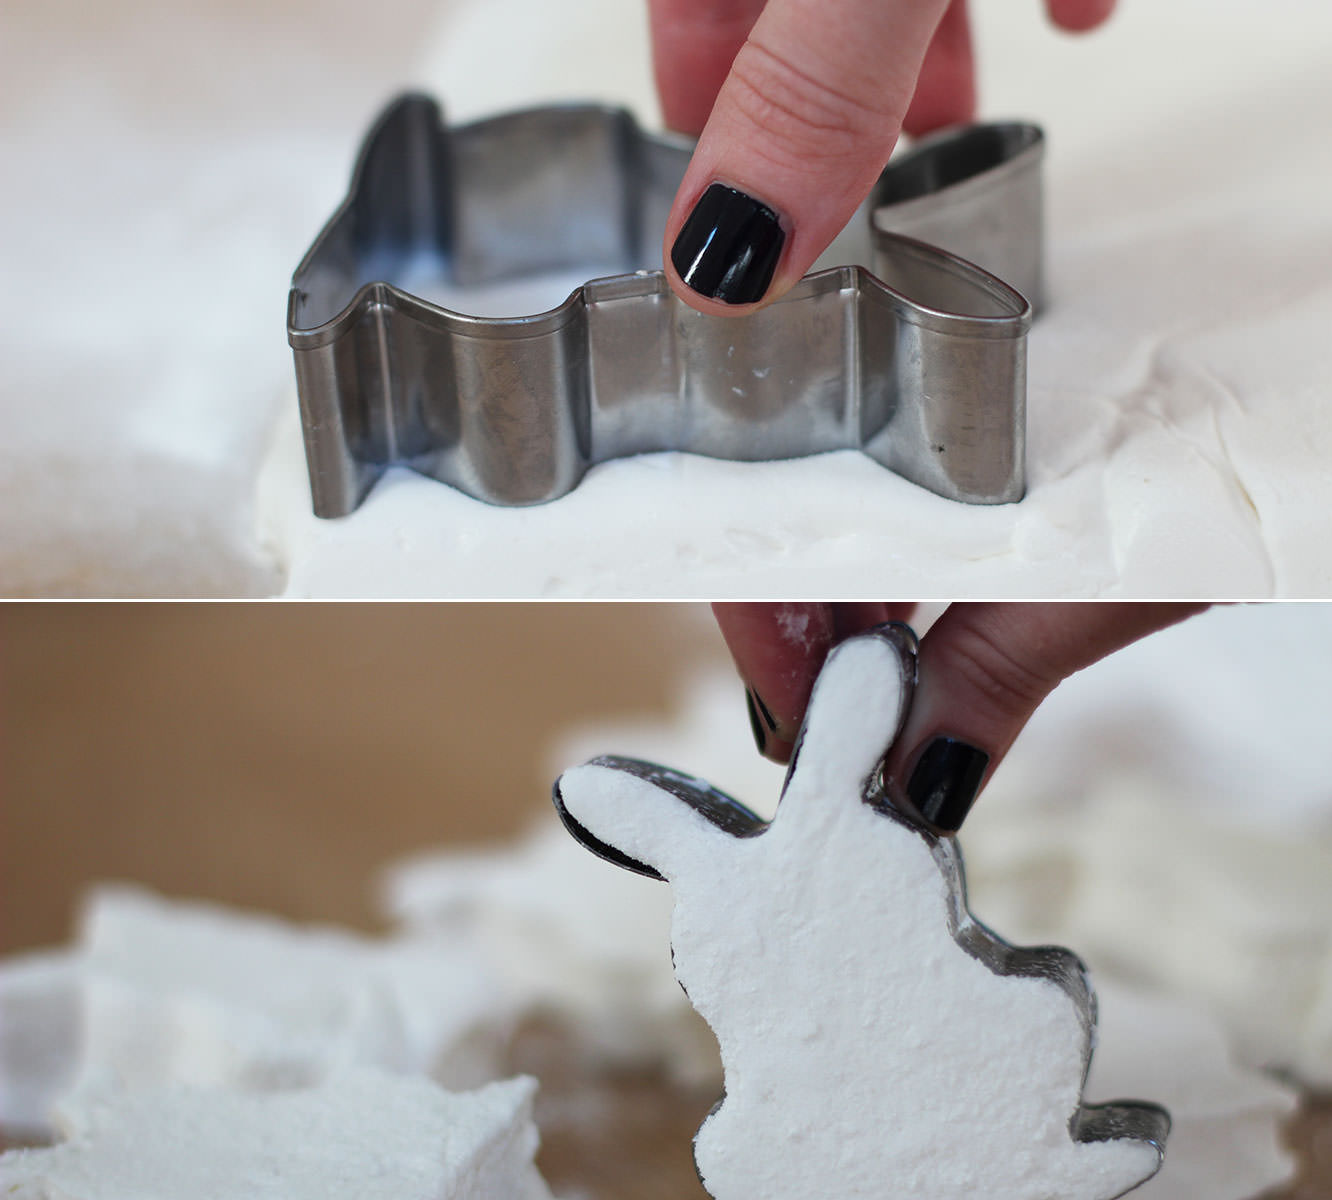
Step eight
Turn the marshmallow out onto a clean surface.
Cut as many bunnies as you can out of the sheet of marshmallow. This will vary depending on your tin and cutter size. I got nine out of mine.
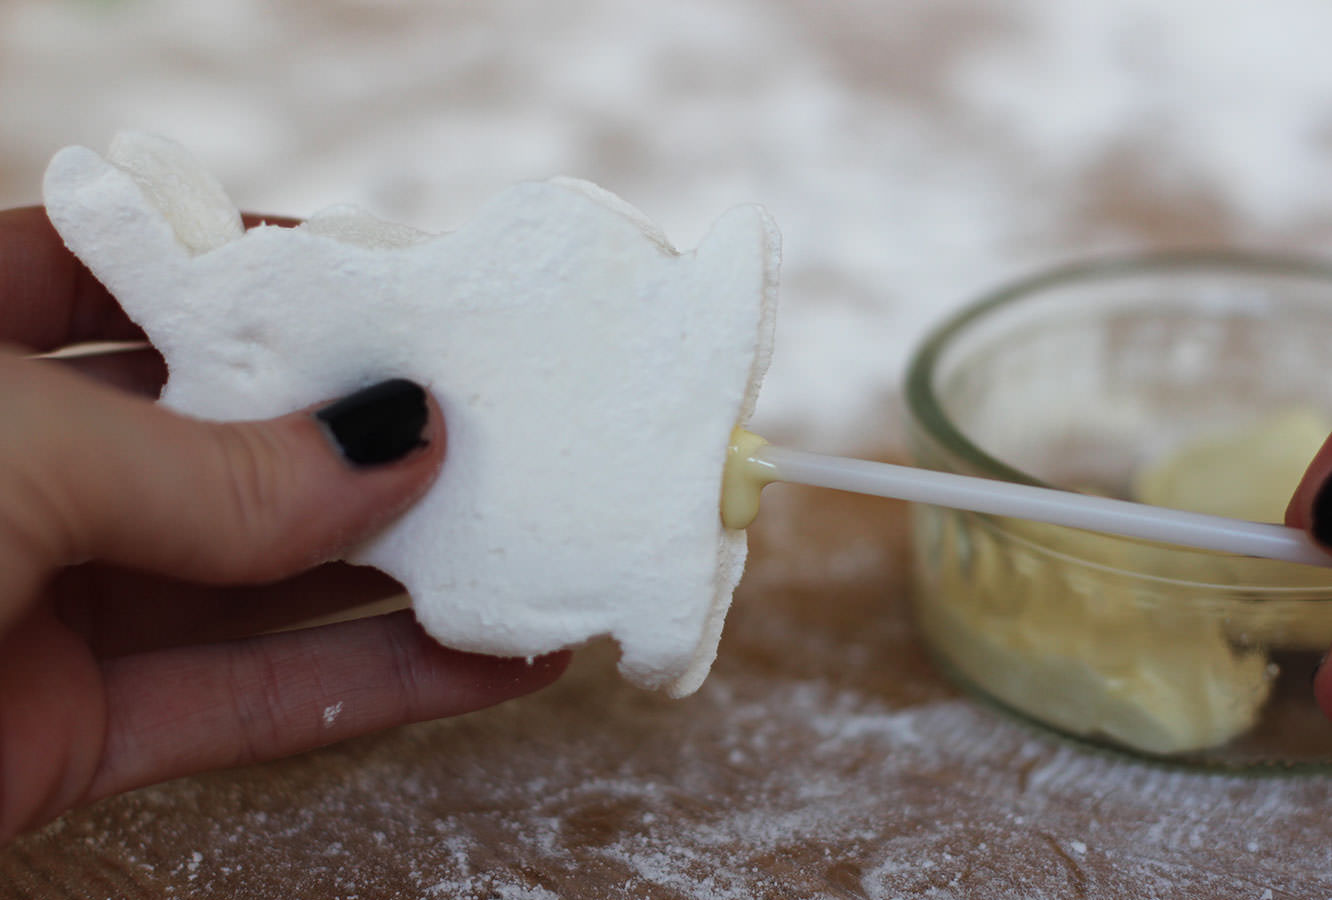
Step nine
Melt a couple of pieces of chocolate in the microwave.
Dip the cake pop sticks in and push them into the bottom of the bunnies. I put mine in up to the head to increase stability. Leave to set.
Step ten
I recommend tempering the chocolate. Then you will get a nice snap when you bite into the pops and you can use the remaining chocolate to do something like this. Don’t feel you have to though, it will work without.
To temper, melt two thirds of the chocolate over a pan of boiling water and allow it to reach 45C. Remove it from the heat and add the rest of the chocolate. This should melt in and cool it down quicker. Stir it to cool down to 25C. Place it back on the heat to get it back up to 28C.
Step eleven
Place the chocolate into a small deep bowl (or I actually found with the milk chocolate that a glass works really well).
Dip the bunnies in and make sure to coat well. Allow excess chocolate to drip off, twirl it round to get an even, smooth coating.
This is where I ran into a spot of difficulty and filled my left hand with bunny pops that were covered in melted chocolate. I suggest you a) get a spare pair of willing hands, b) get a block of florist’s oasis/cake pop stand to stick them in, c) accept the back of them won’t be beautiful and lay them down on cellophane or greaseproof paper.
Step twelve
Once dry, add their little faces and tails. I used a cocktail stick with a small amount of melted chocolate to stick on sugar decorations. I got the little hearts I used for the noses from Tiger, and I can’t be sure about the circles for the cheeks.
I drew the faces on with an edible ink pen I bought online. You could use a cocktail stick and some dark chocolate if you prefer.
Step thirteen
Tie a piece of twine or ribbon around the stick and make a day a little bit happier.
Apparently when I think Mother’s Day blogging I think fudge. It’s a good thing my mum likes fudge. What’s that? You didn’t realise Mother’s day was so soon? I know, right? Me neither. It’s this Sunday for those of you in GB, the rest of you should check your calendars, this is the sneakiest holiday of the year.
This is a super super easy way to make a treat for your Ma. It’s not like the last fudge recipe I posted, which while being totally delicious I’d wager none of you actually made. Well there’s no boiling sugar or a thermometer required for this one, and barely any cooking at all.
You might need to cut this recipe by half or even more, it makes quite a large batch for just one mummy to eat. It can be frozen.
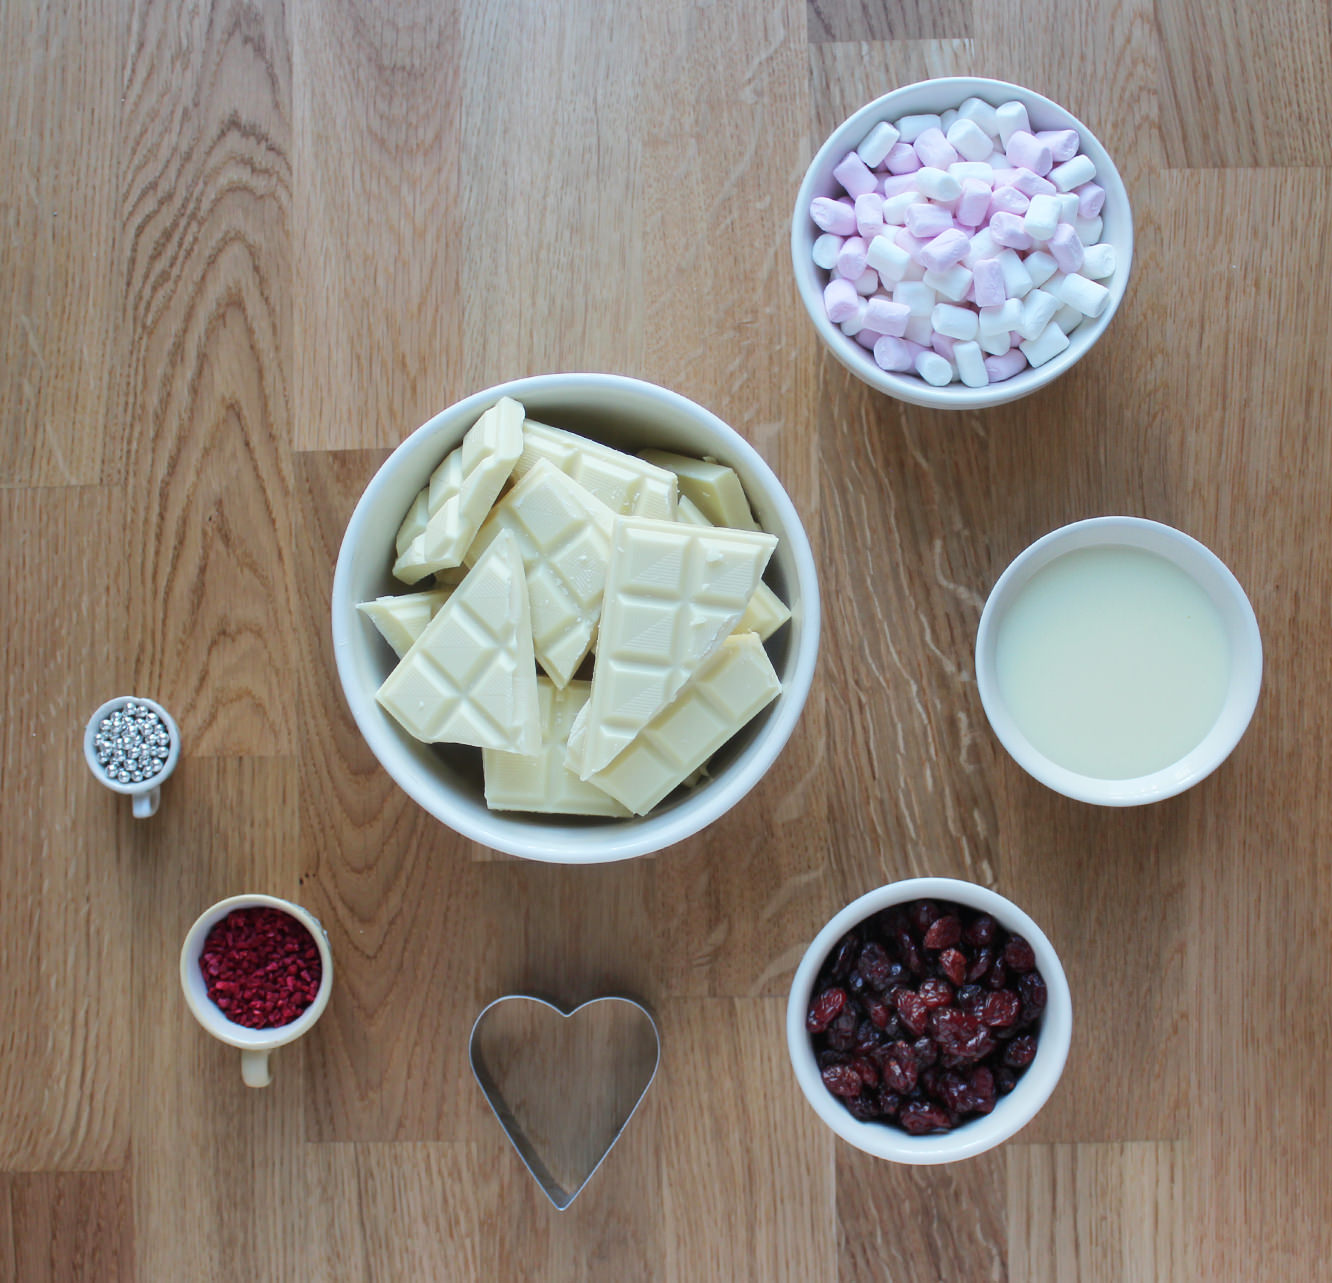
You will need
600g/1 lb 3 oz White chocolate (yeah, this is serious stuff)
397g Condensed milk (1 can basically)
125g/4.5 oz Cranberries
85g/3 oz Mini marshmallows
25g/1 oz Dark chocolate
Other decorations (I used silver balls and freeze dried raspberries because that’s what I had, but any manner of nuts and dried fruits would be acceptable, even as a substitute for the marshmallows and cranberries)
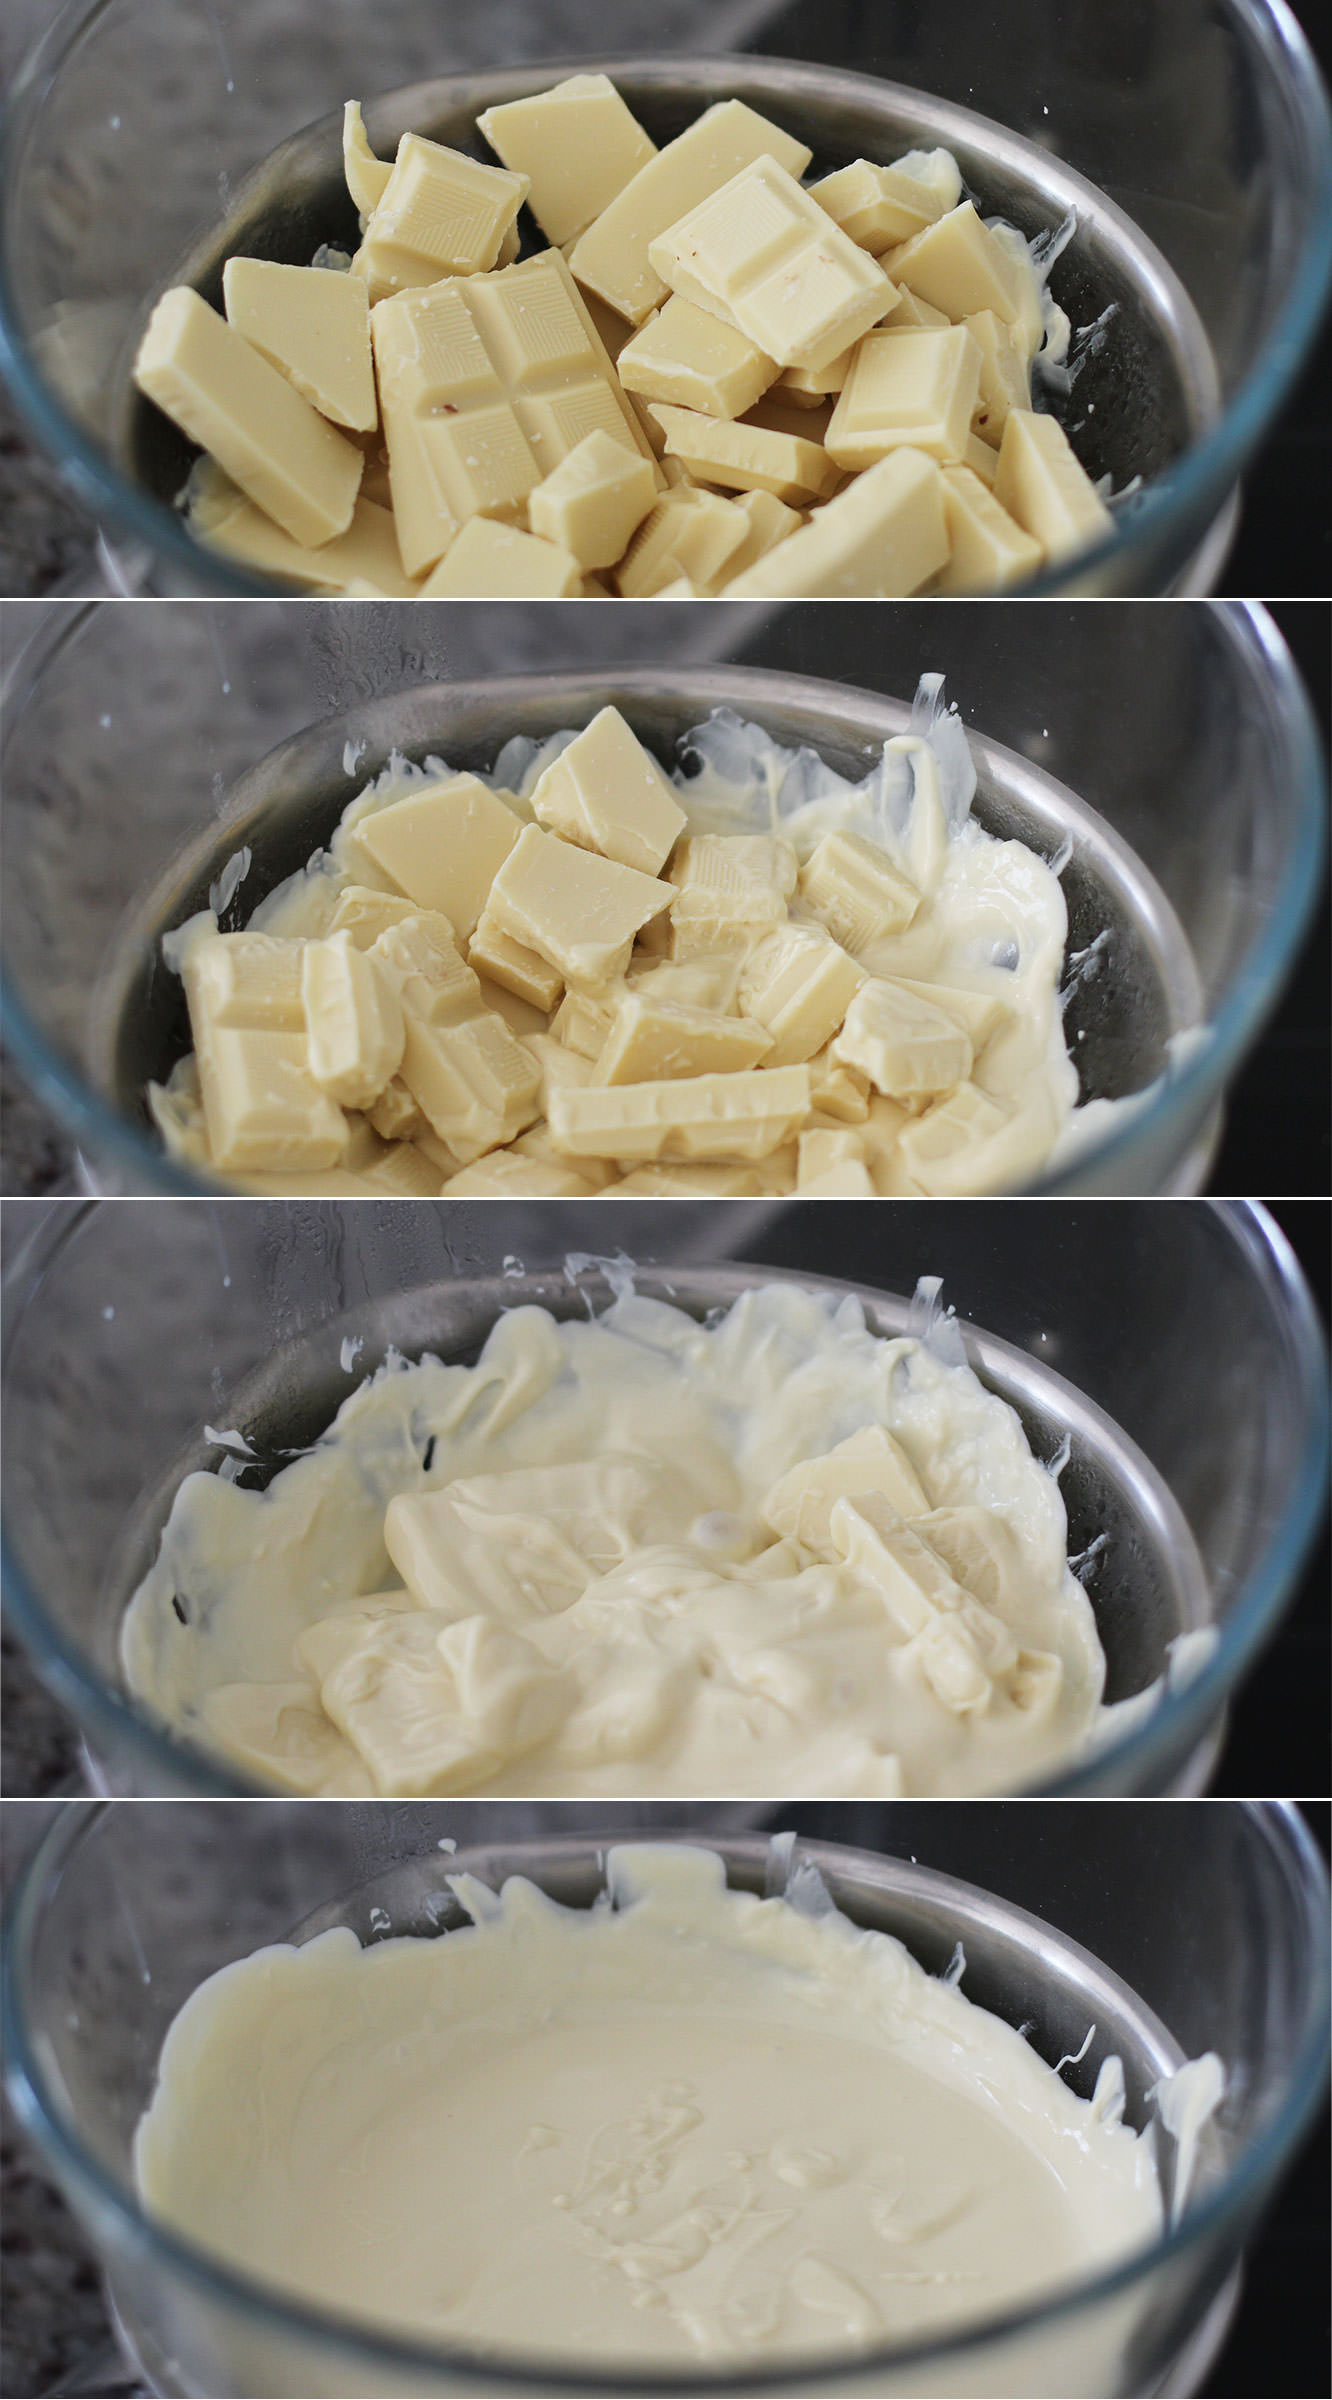
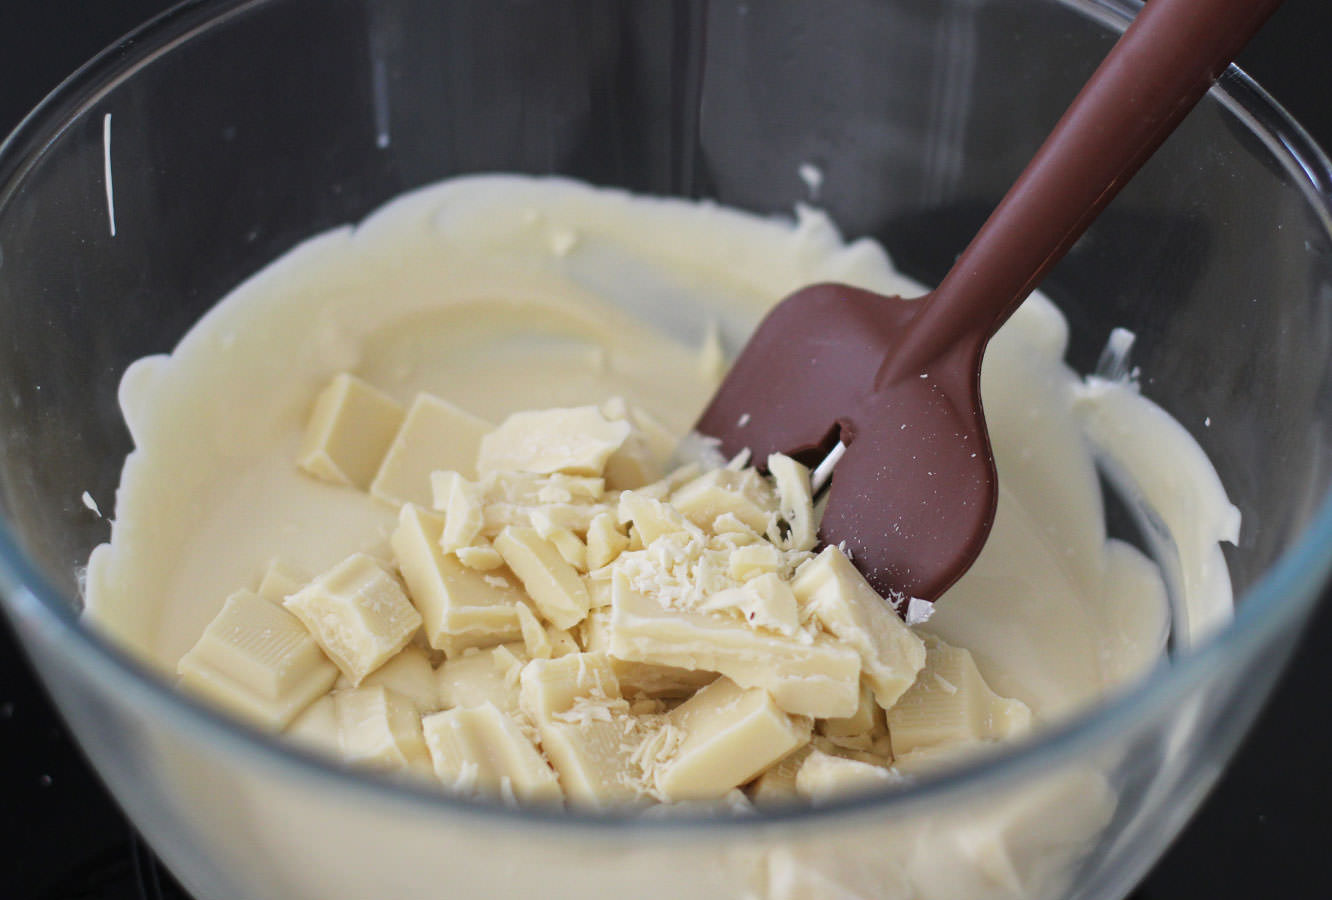
Step one
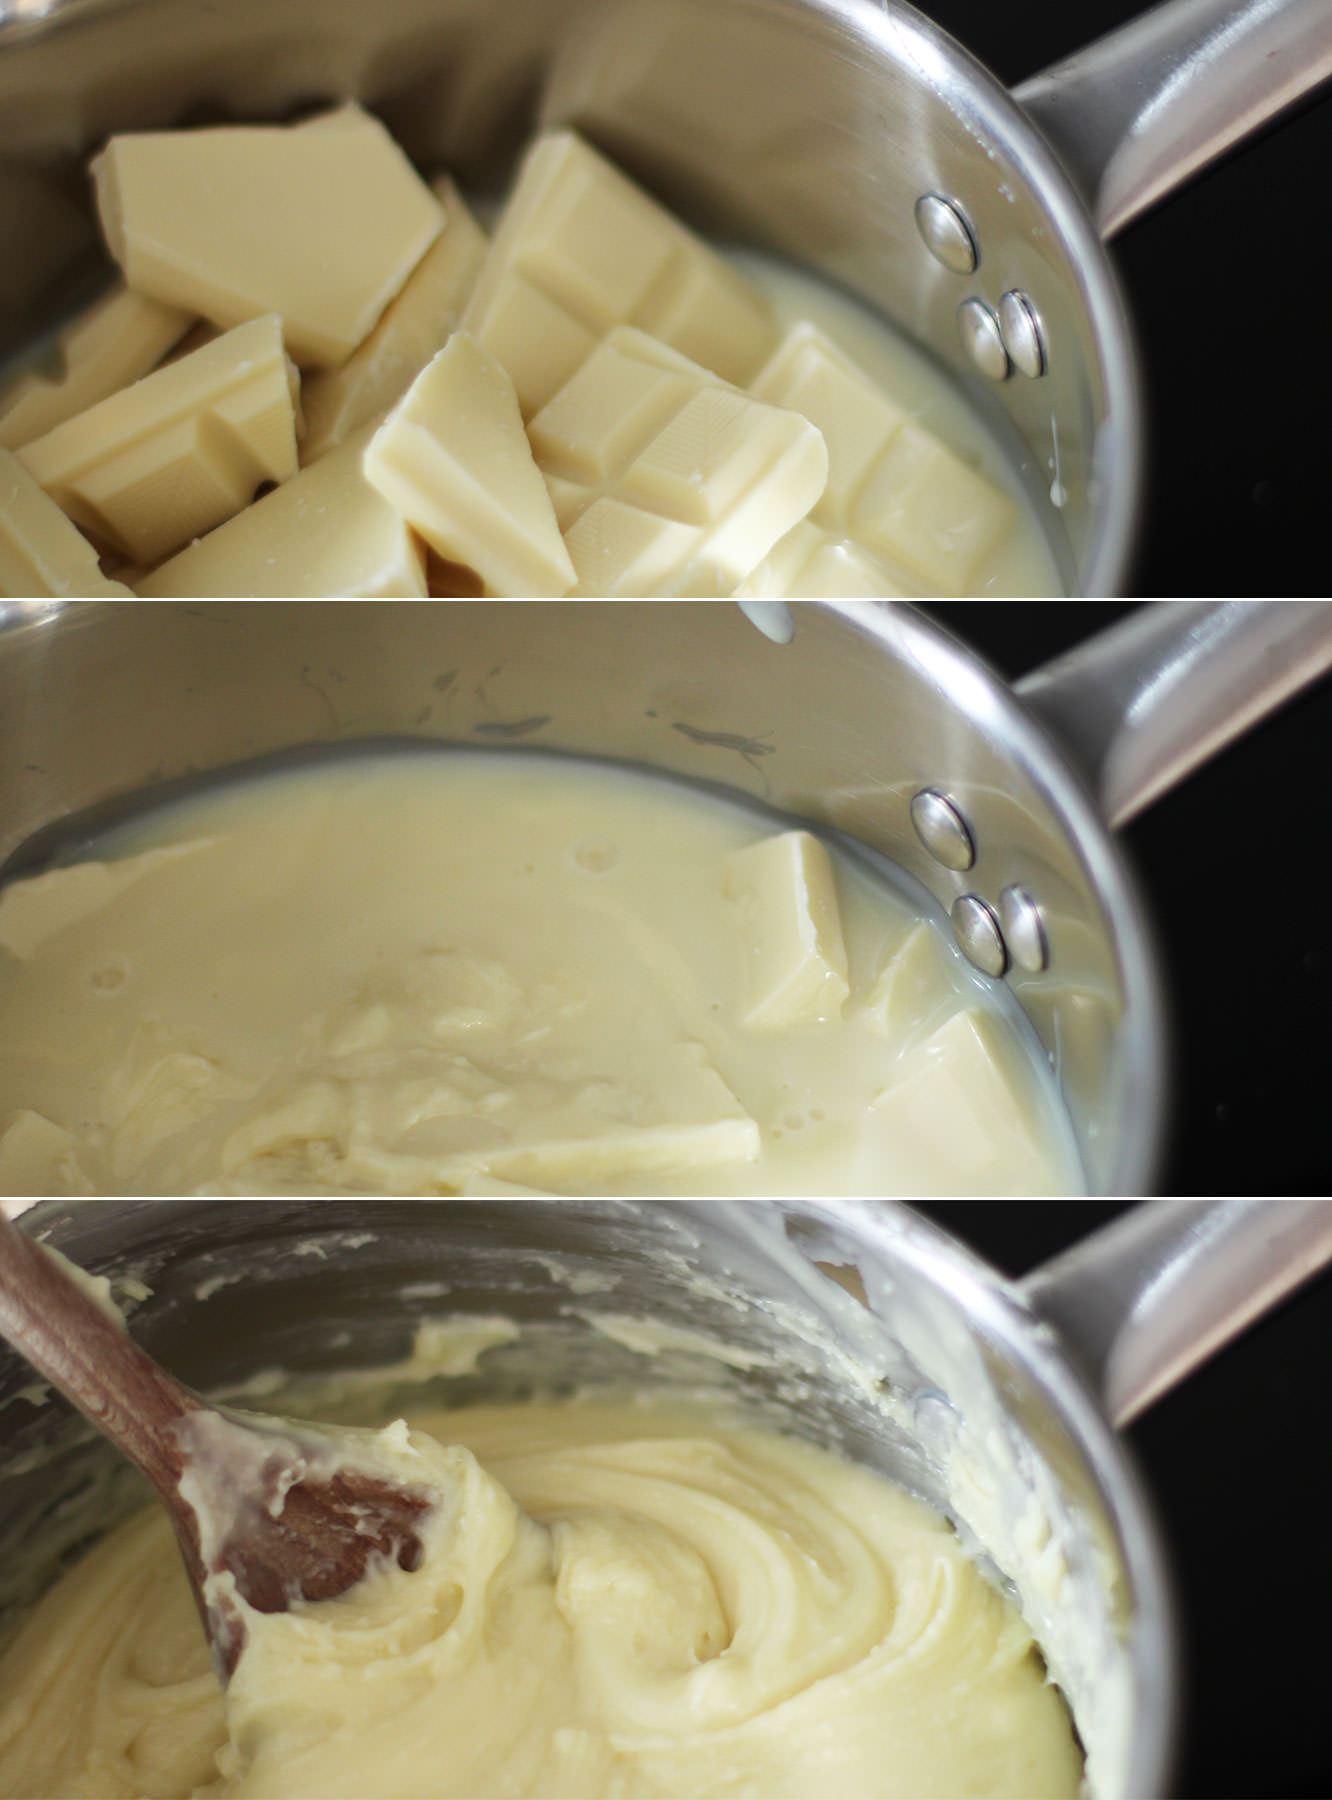
Break the white chocolate into chunks and place in a pan with the tin of condensed milk.
Melt together on a low heat. Once you have a smooth fudge-like mixture, remove from the hob.
Step two
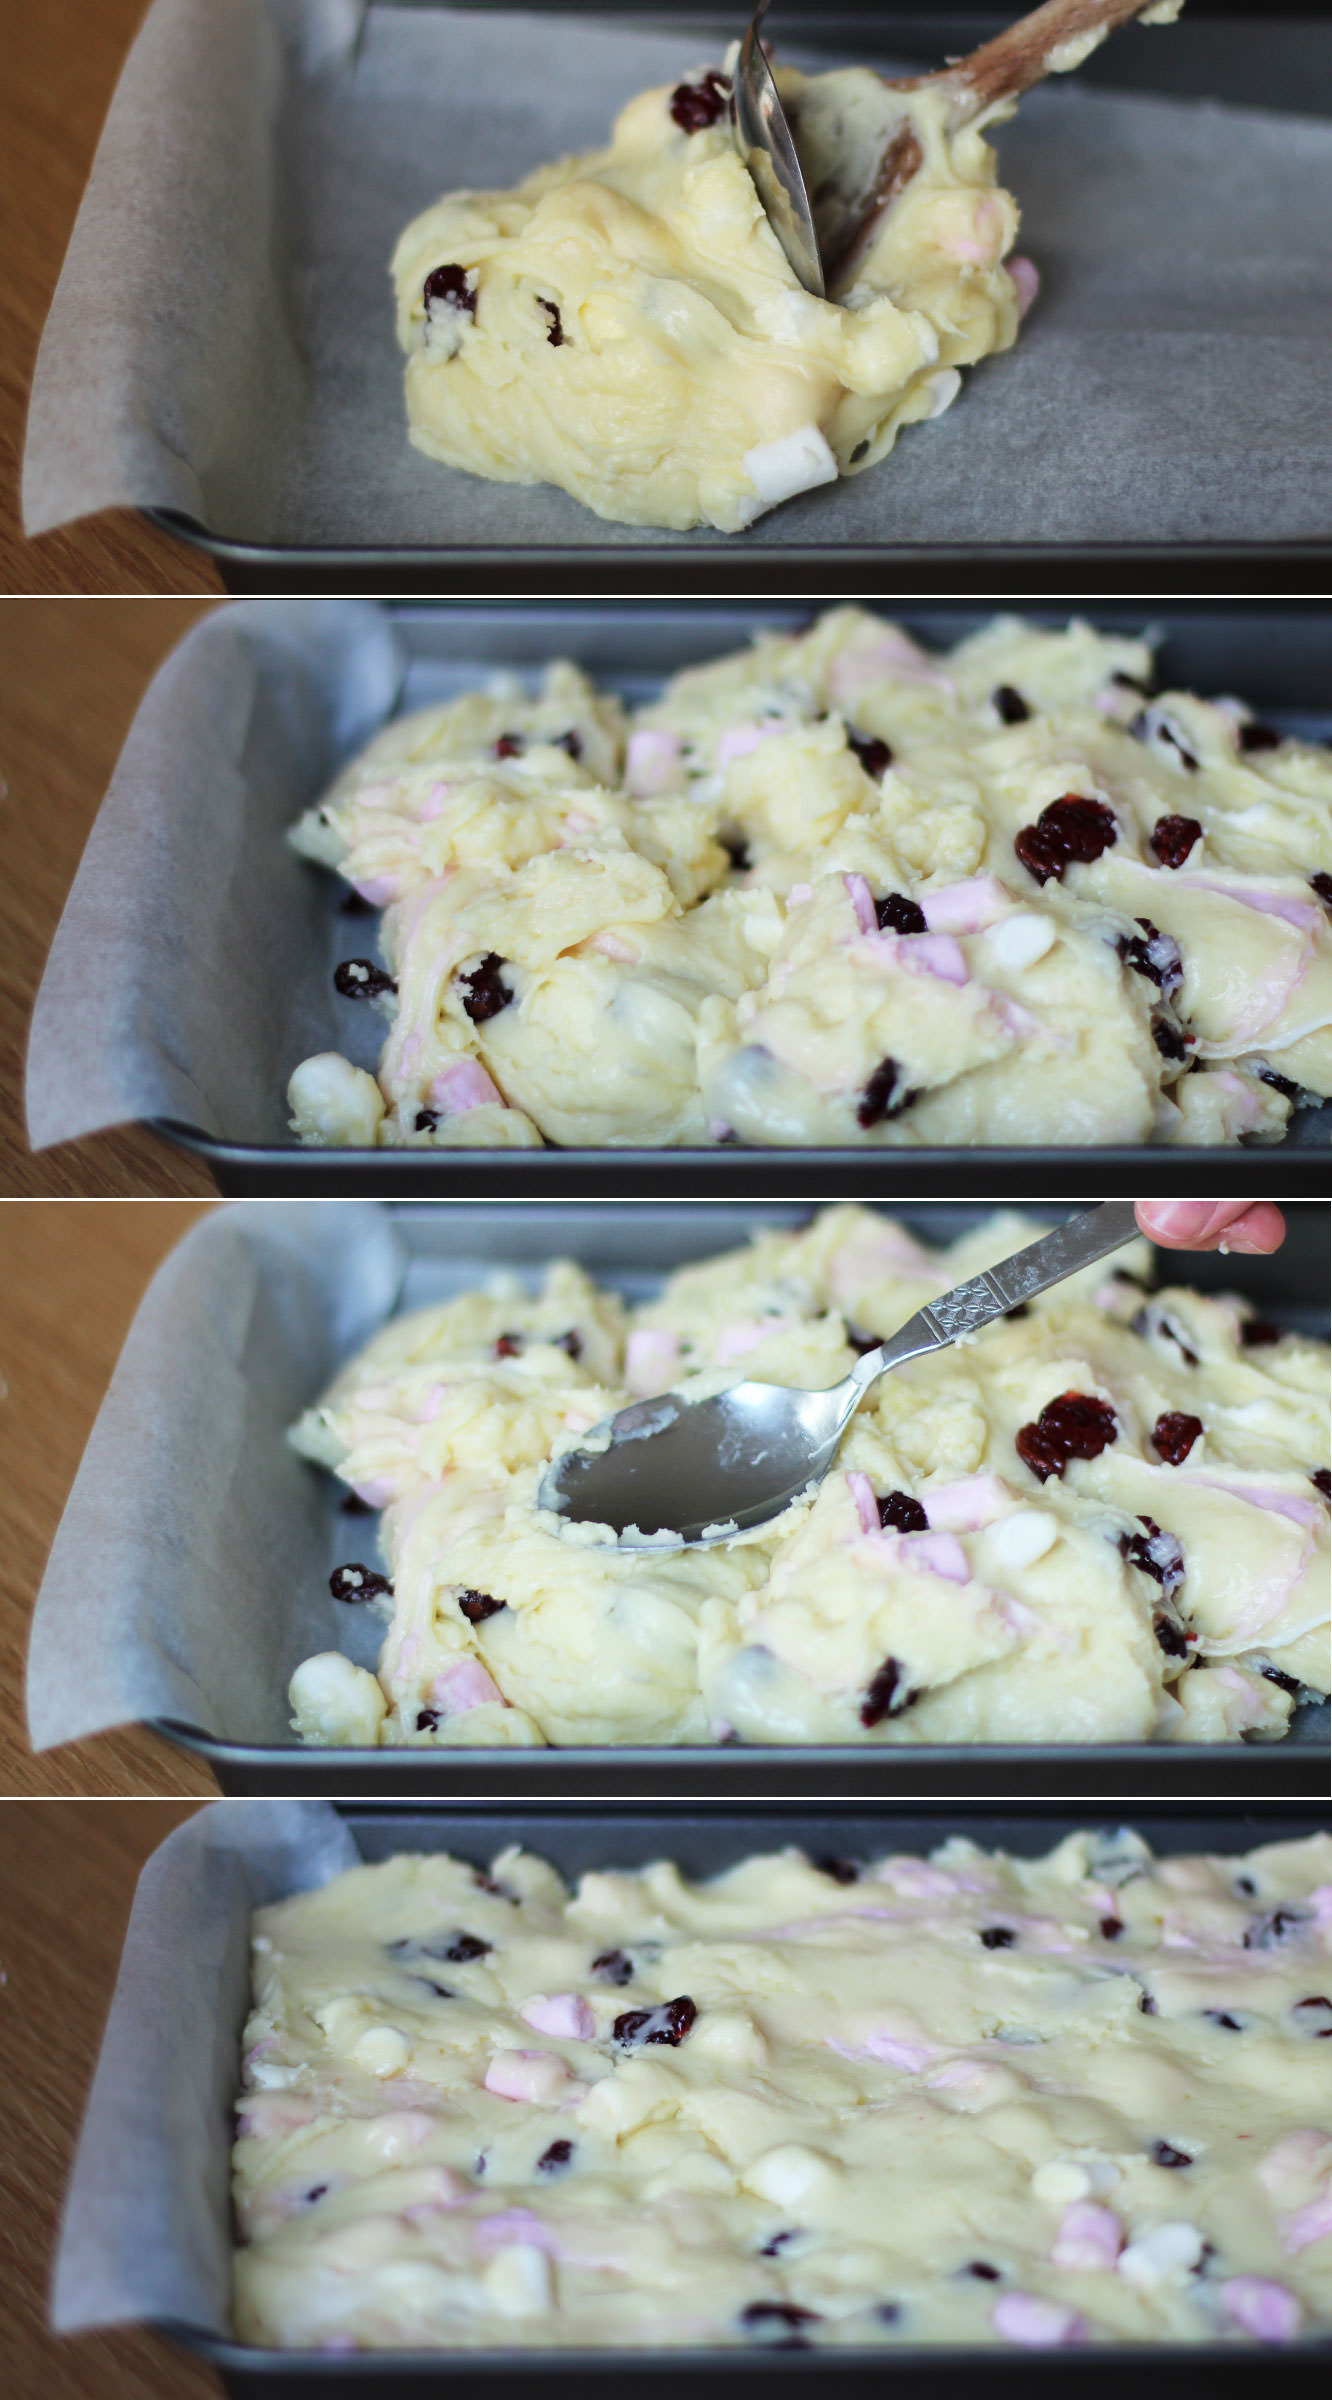
Add two thirds of the cranberries and marshmallows, stir to combine.
Step three
Drop the mixture into a brownie tin lined with greaseproof paper. Push into the corners with the back of a spoon and even the top out a bit.
Step four
Sprinkle the remaining cranberries, the silver balls and freeze-dried raspberries on top and push down slightly so they stick.
The alternative would be to swap this step with the next one so they stick to the chocolate (this would probably also look nicer because you would actually be able to see them rather than hiding them with a load of dark chocolate…). I make the mistakes so you don’t have to.
Step five
Melt the dark chocolate in the microwave and drizzle over the fudge. Sprinkle the remaining marshmallows on top. I had a bit of dark chocolate left so did another layer on top of the marshmallows.
Place in the fridge to allow the whole thing to set.
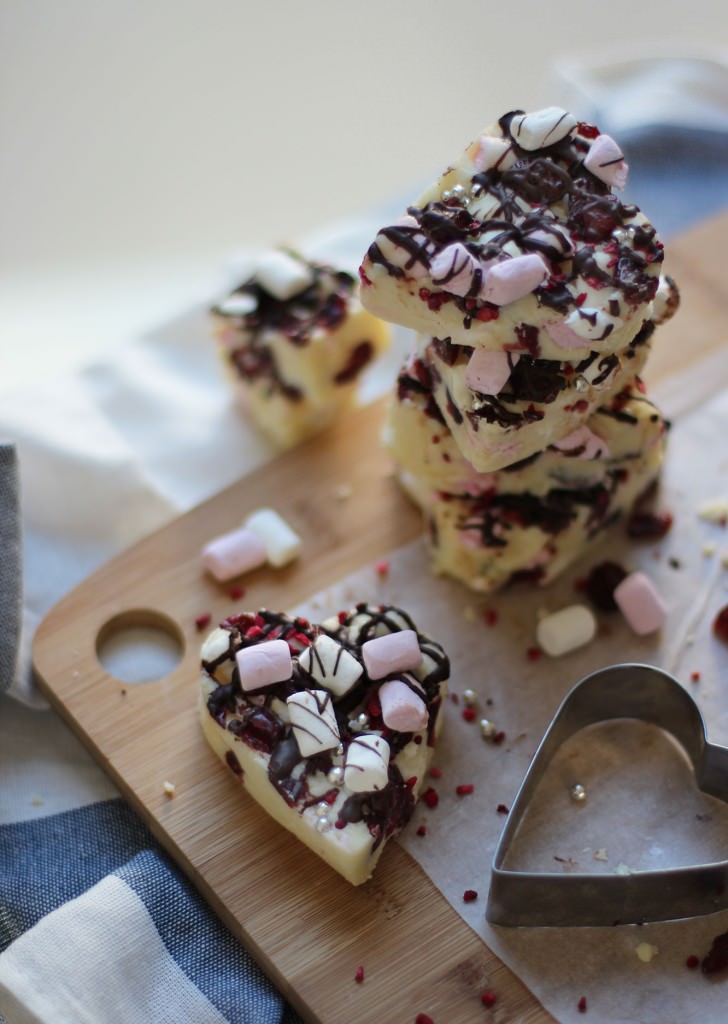
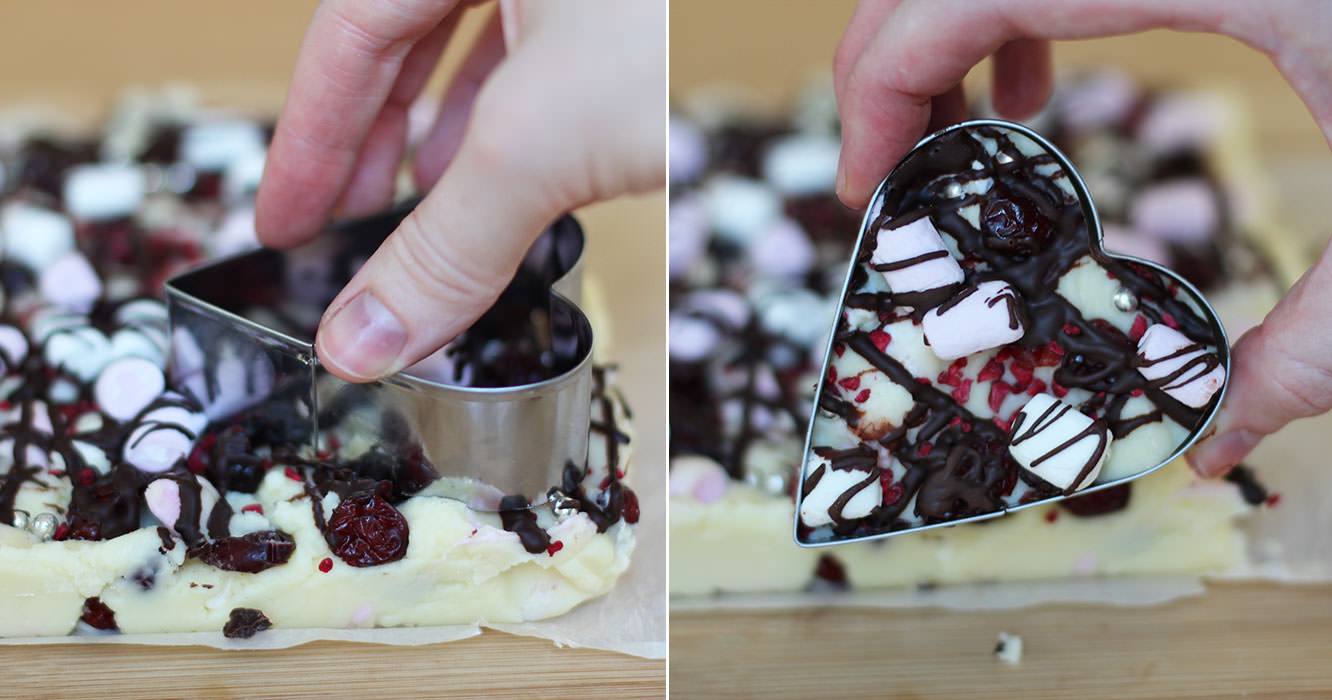
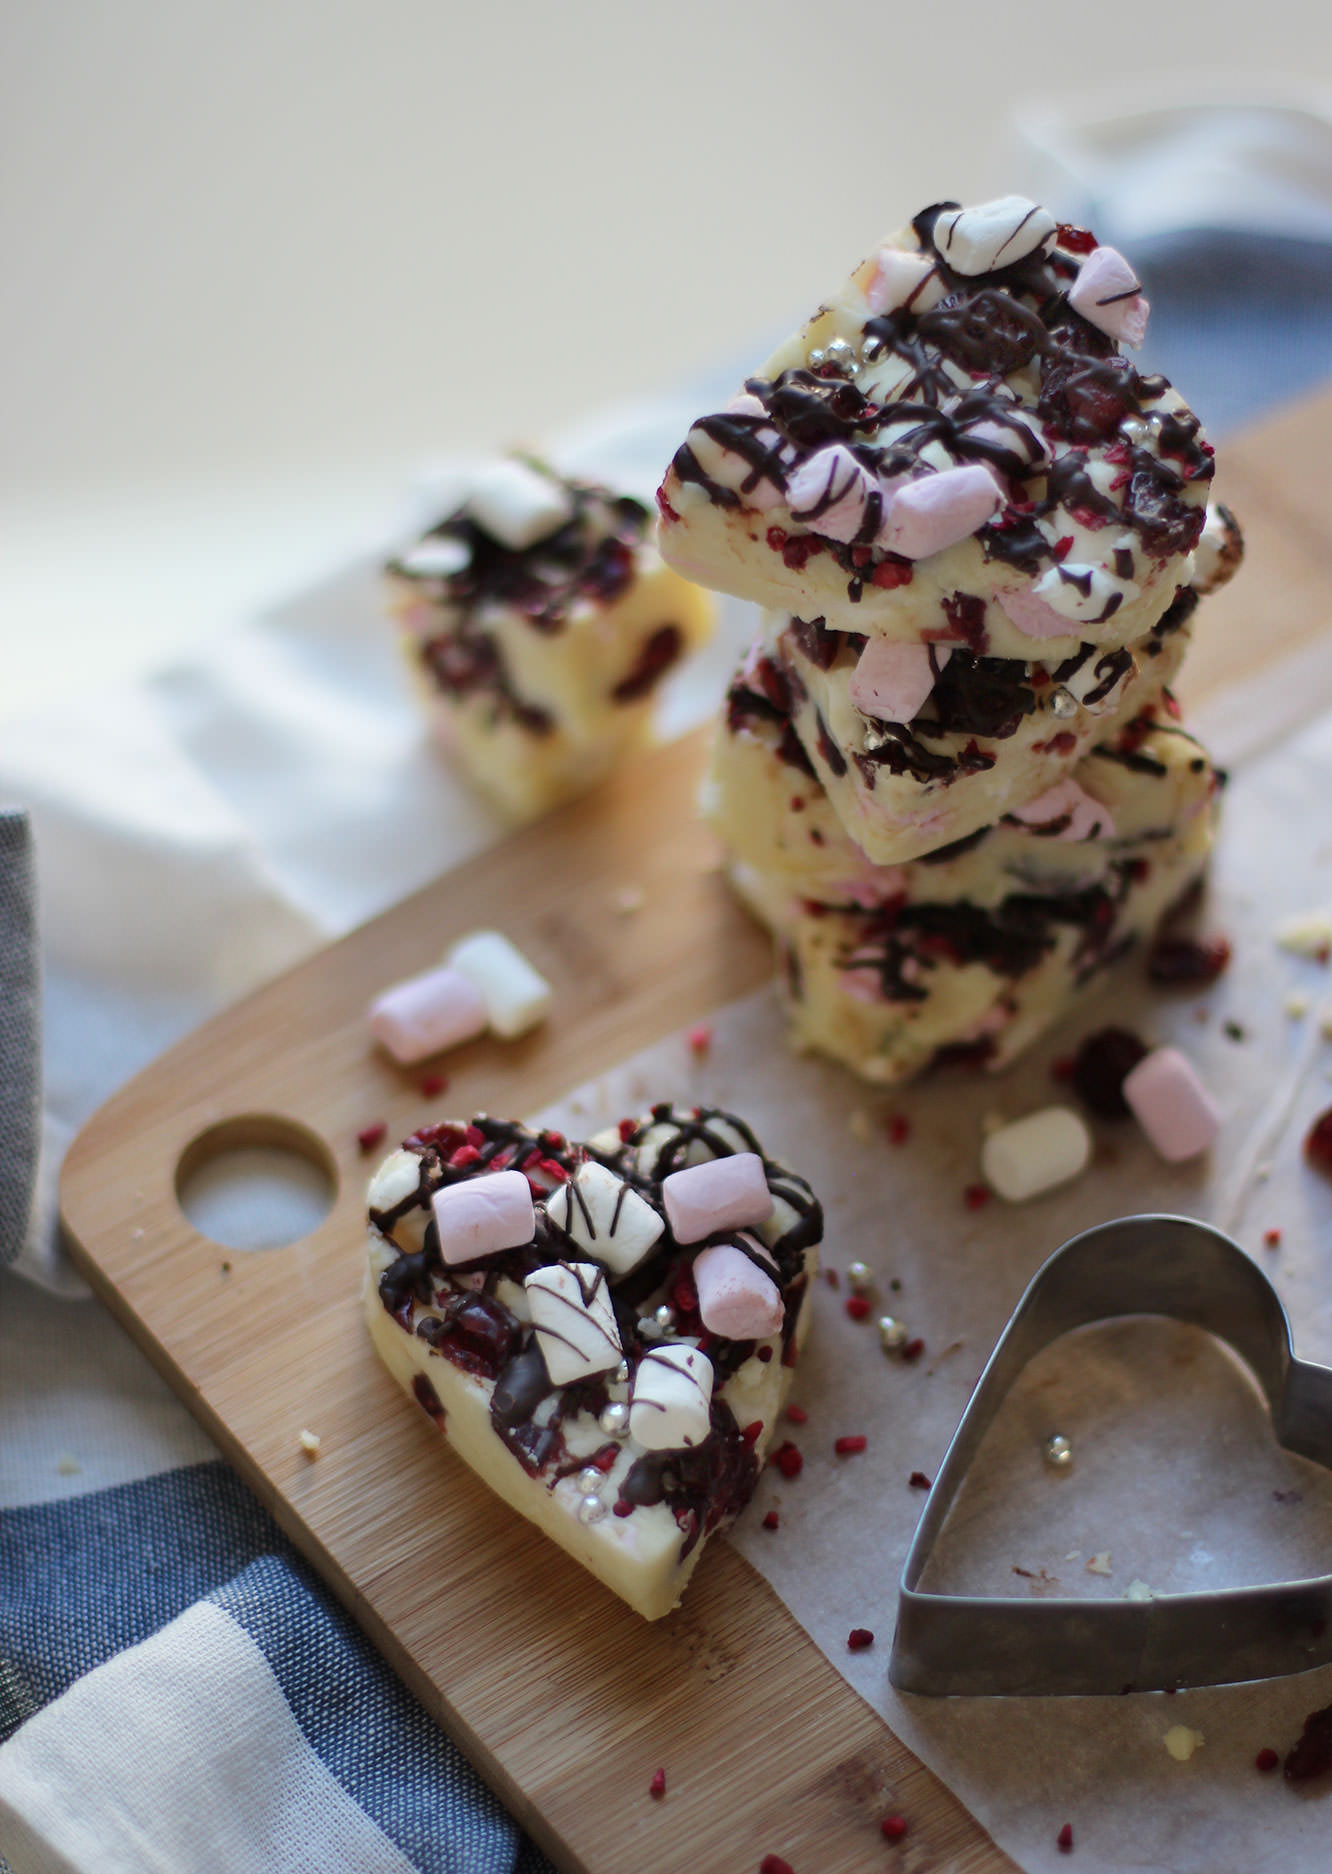
Step six
Using a cutter of your choice (this heart-shaped one was from Lakeland), cut the fudge into pieces. If you don’t have a cutter, then bars or chunks would look nice too.
February. For me, the pits of the calendar. Nobody really needs February. It just extends winter for too long, and personally, by the time we’re a week into it I’m ready to bid farewell to the chilly winds and rains and usher in March and April.
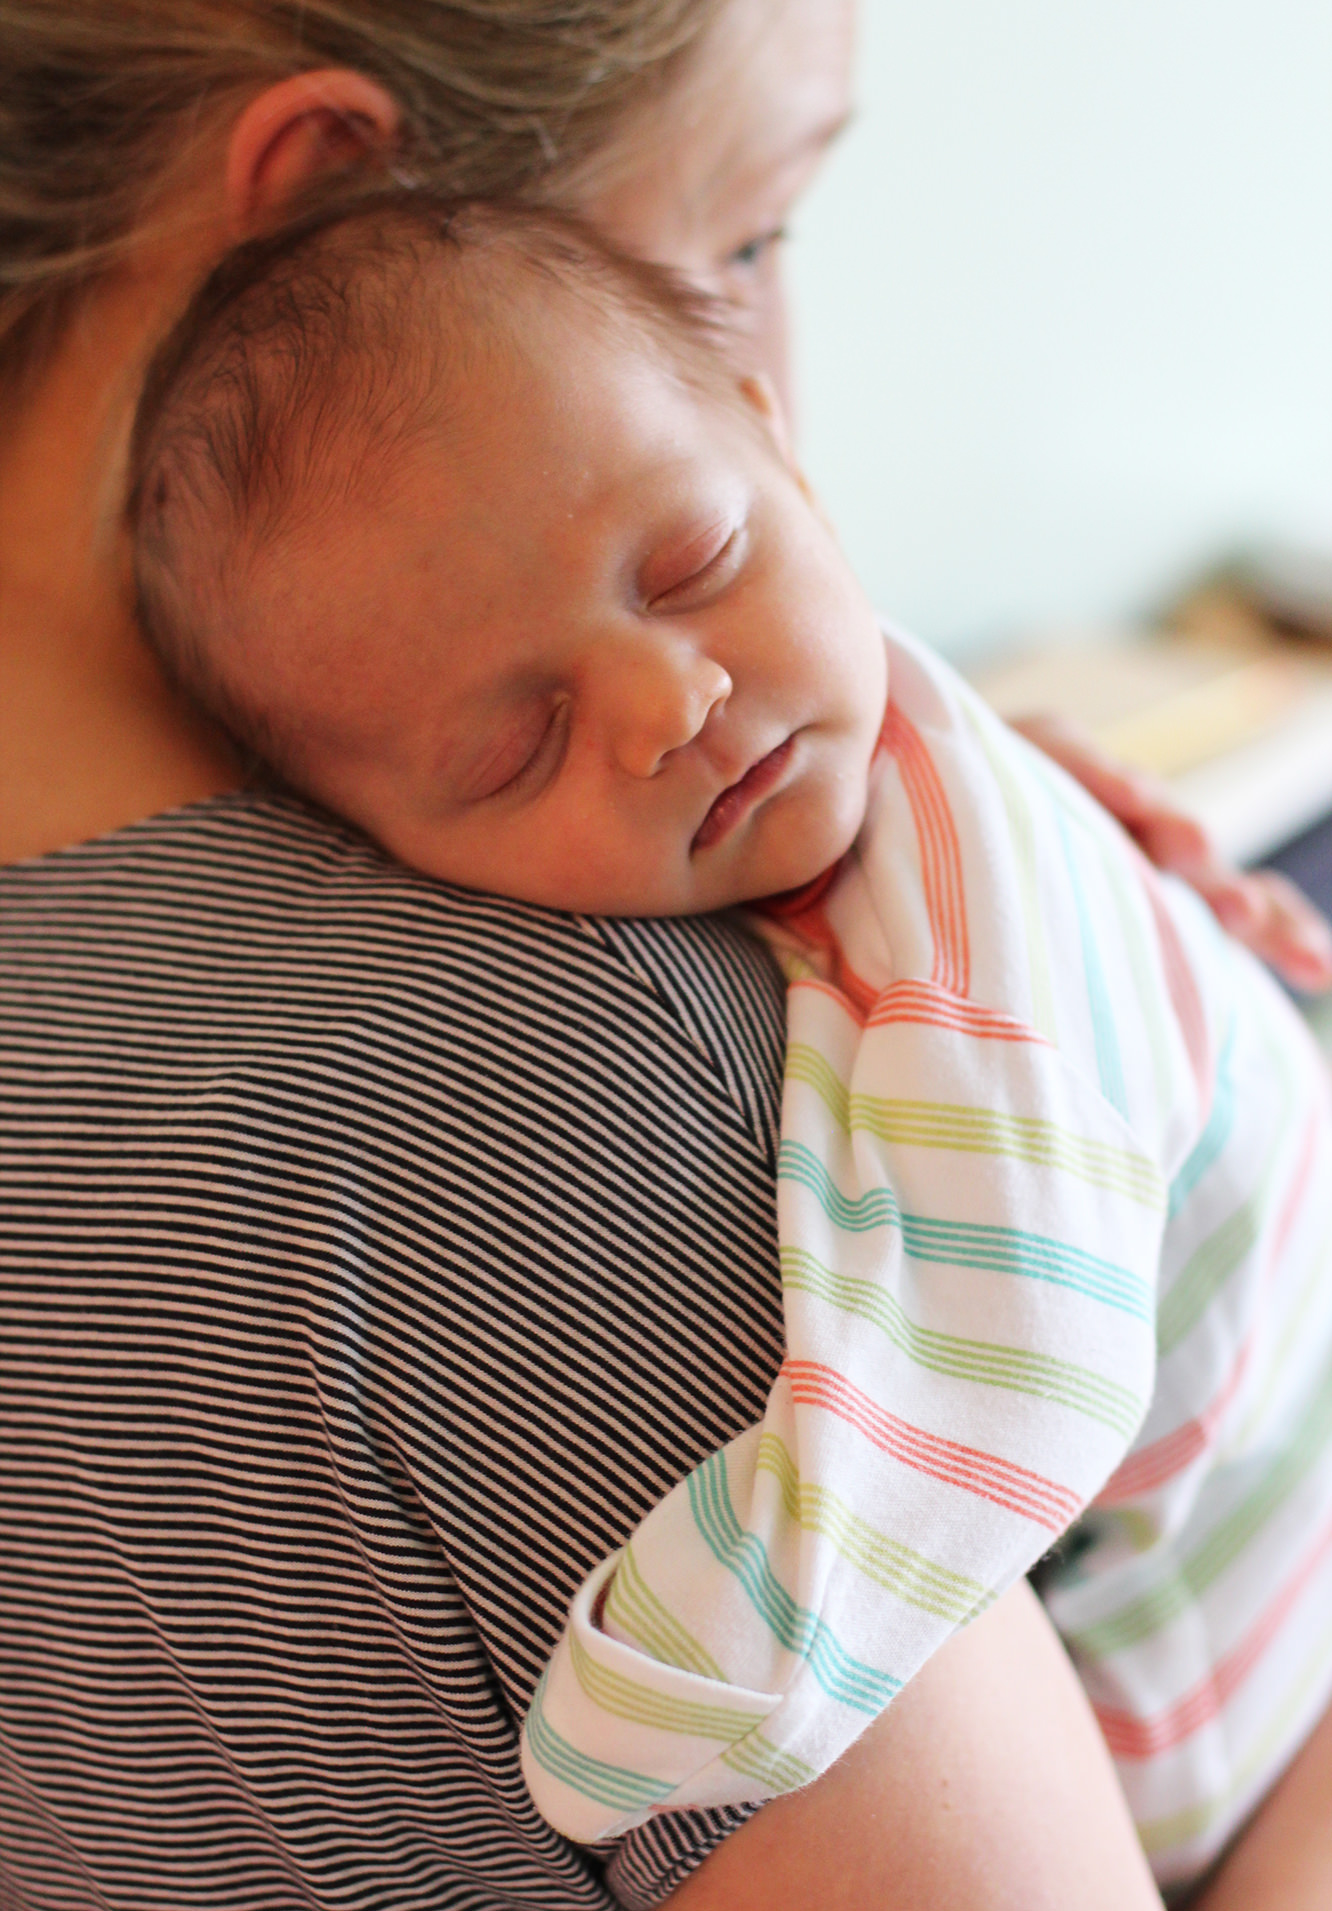
This time round however, Spring came early to a very special household. My wonderful friends Hannah and David had a BEAUTIFUL baby boy earlier this month, shaking off the winter blues. I’m head over heels for the little bundle already and can’t wait to see him grow.
As if I needed an excuse to craft eh?
This is a great little project if you already have kiddies and are expecting another, as the older siblings can definitely lend a hand.
For the impatient ones, yes, there is a picture of bubba at the bottom.
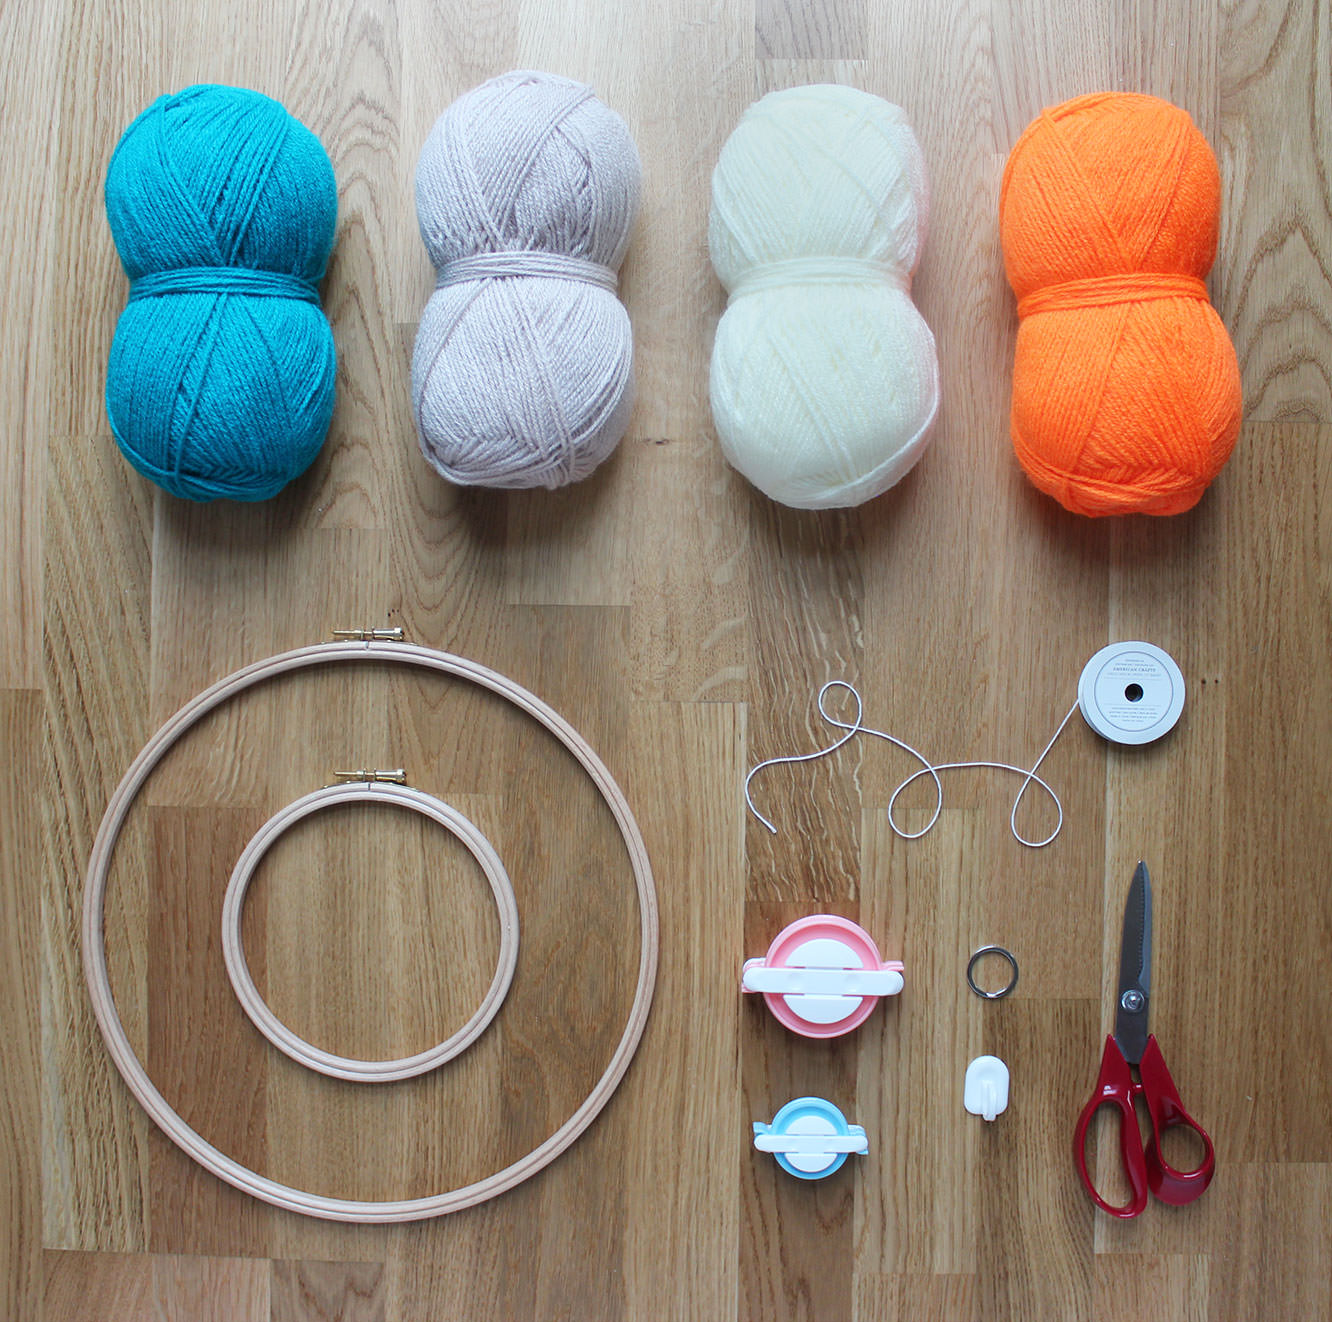
Things you need
12″ Embroidery hoop
9″ Embroidery hoop
Wool in a variety of colours (perfect for using up offcuts)
Pom pom makers in a variety of sizes (or cardboard, see below)
Double sided tape
Needle and thread
A sticky hook
A keyring
2-3m String
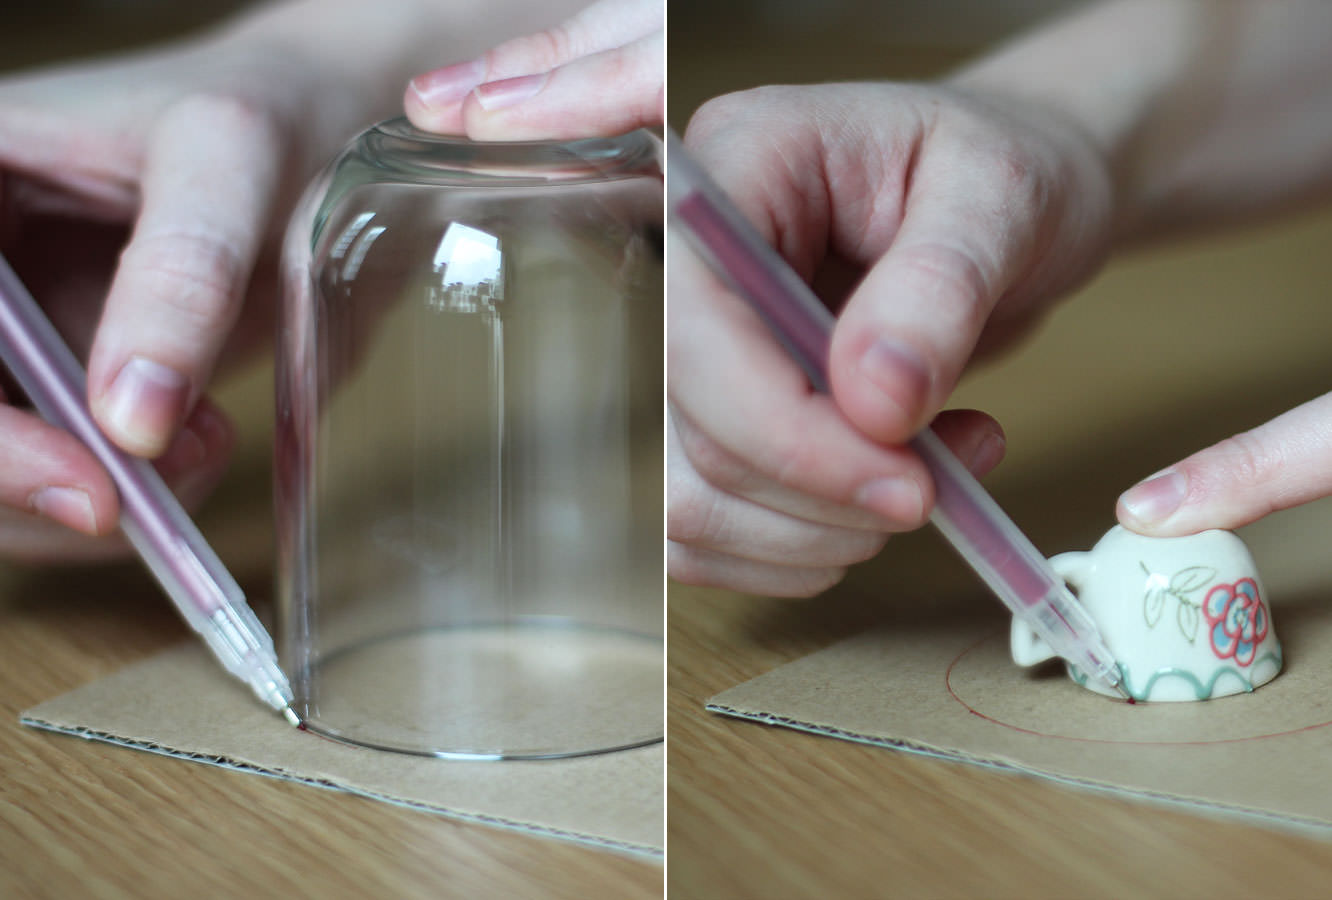
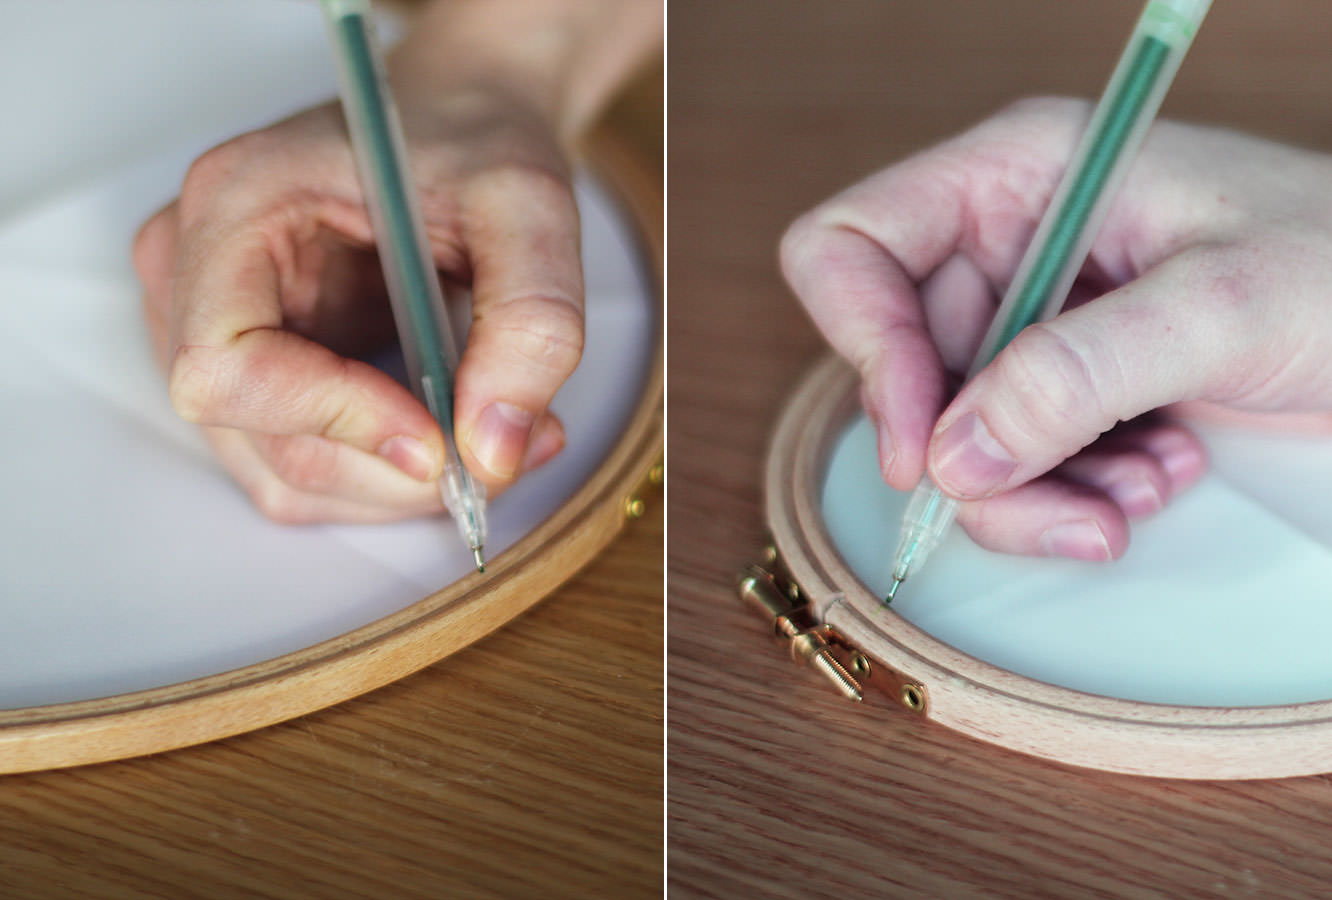
Step one
For those of you without pom pom makers (for goodness sake buy some) draw round a variety of circular objects to make differently sized cardboard hoops for your pom poms. You will need to make two hoops per size.
If you have pom pom makers, none of this is for you, skip to step 8 and relish in the fact you loved yourself enough to shell out £4 to save your sanity. All you guys need to do is follow the, in all likelihood hilariously translated, instructions on the back of your packet of pom pom makers. I bought mine on eBay from China, I strongly suggest you do the same.
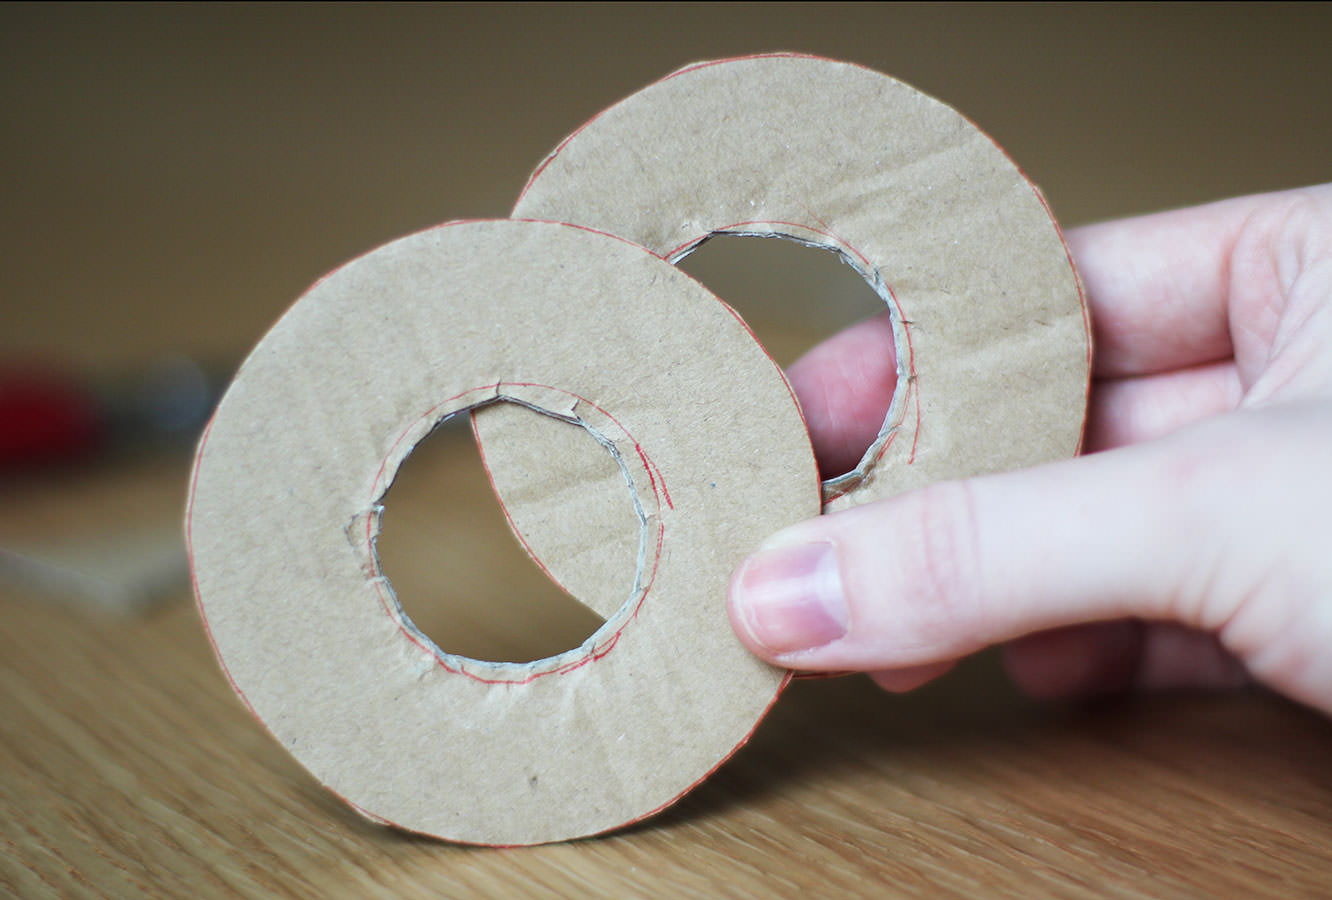
Step two
Cut out the hoops so that you have a hole in the centre. Don’t worry if they’re messy, it won’t impact your poms.
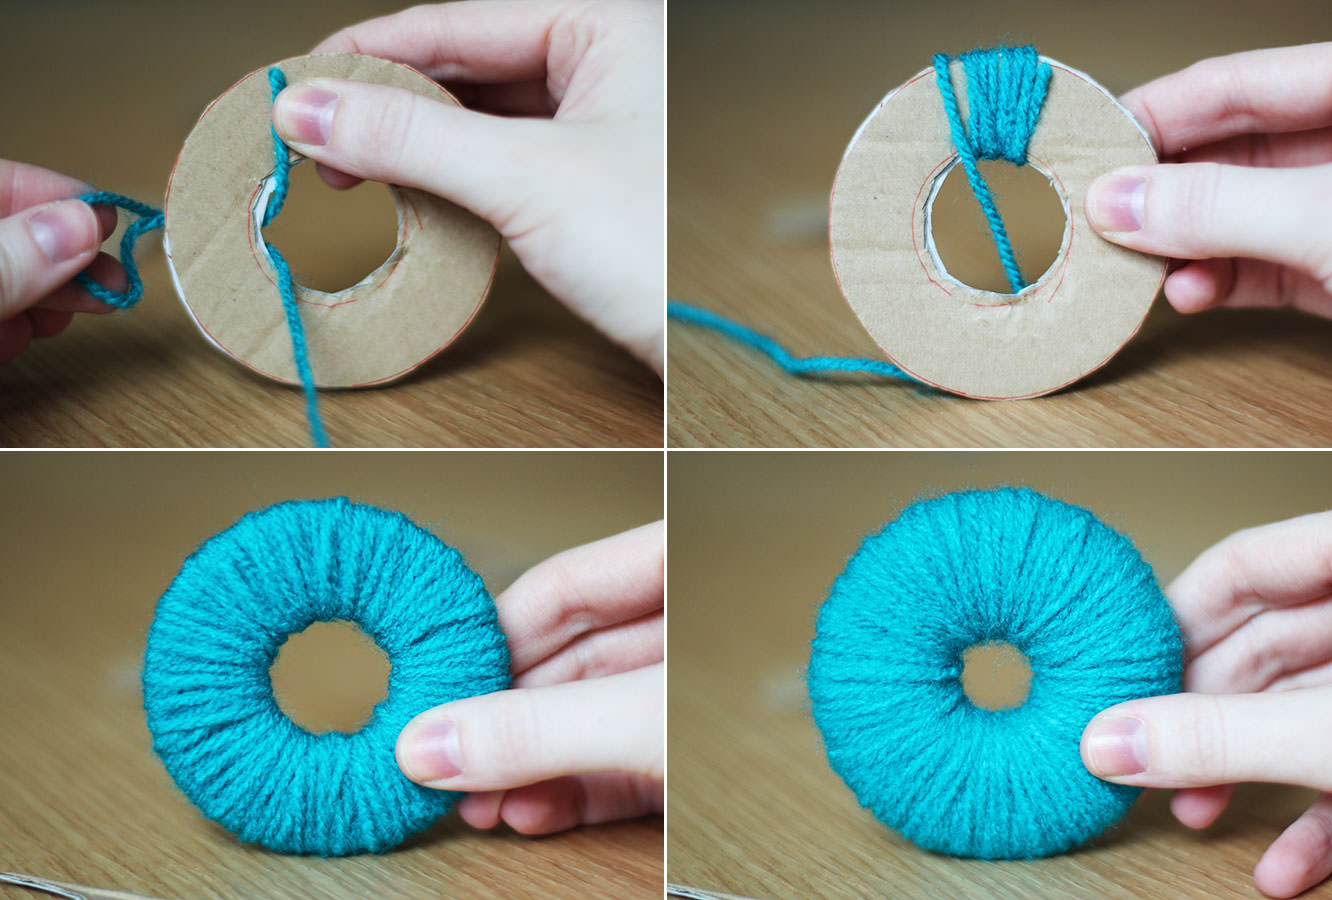
Step three
Sandwich the two pieces of cardboard together and wrap lengths of wool around and around.
You do this by pulling the end of the wool through the centre of the disk and back over the edge.
Keep going as long as you can, but essentially the fuller the hole in the middle the plusher your pom pom will be.
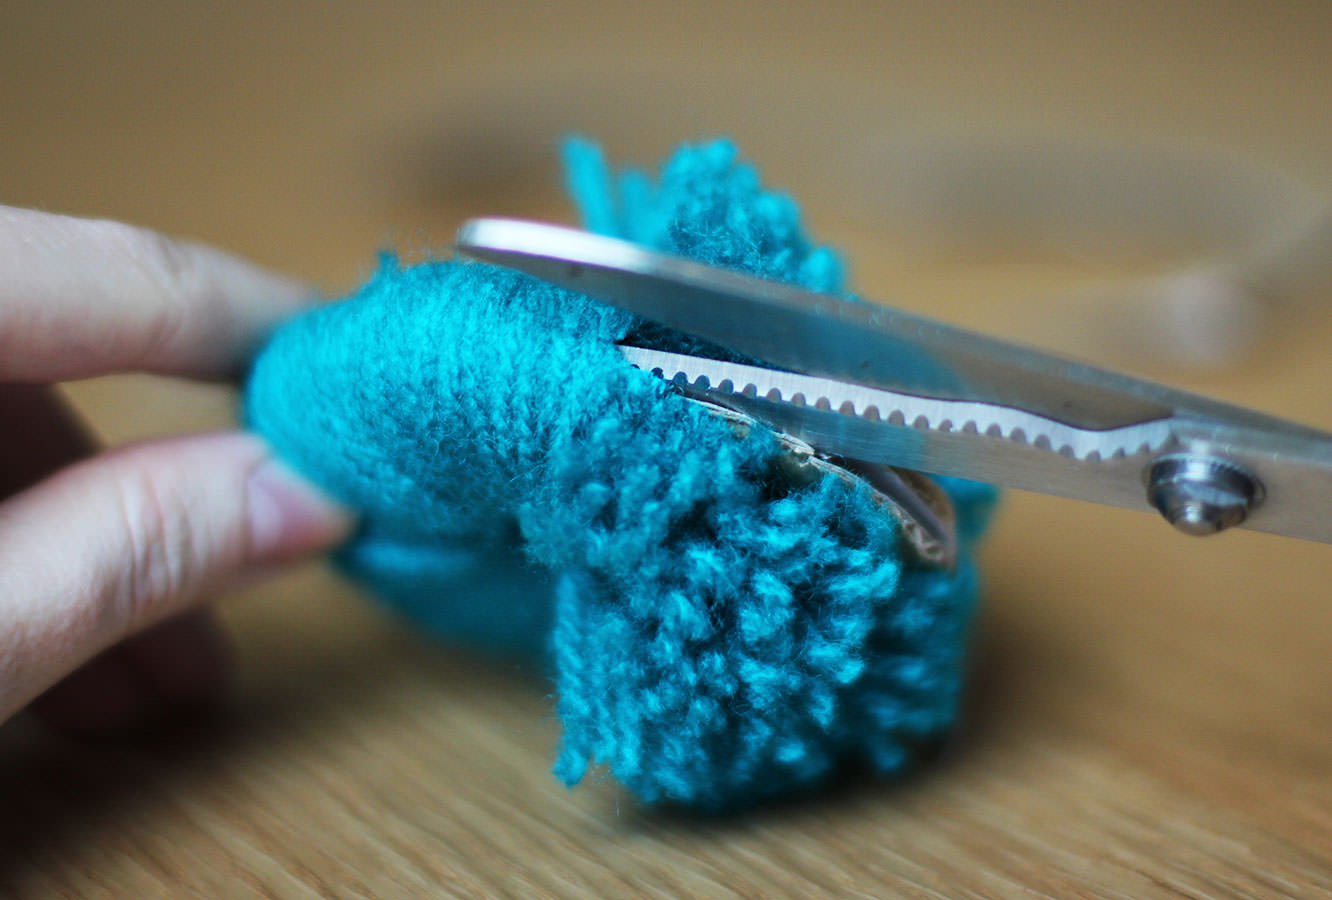
Step four
Using scissors cut round the circumference of the ring.
Once you’ve made a few snips you should be able to get the scissors between the two layers of card which then makes this very quick.
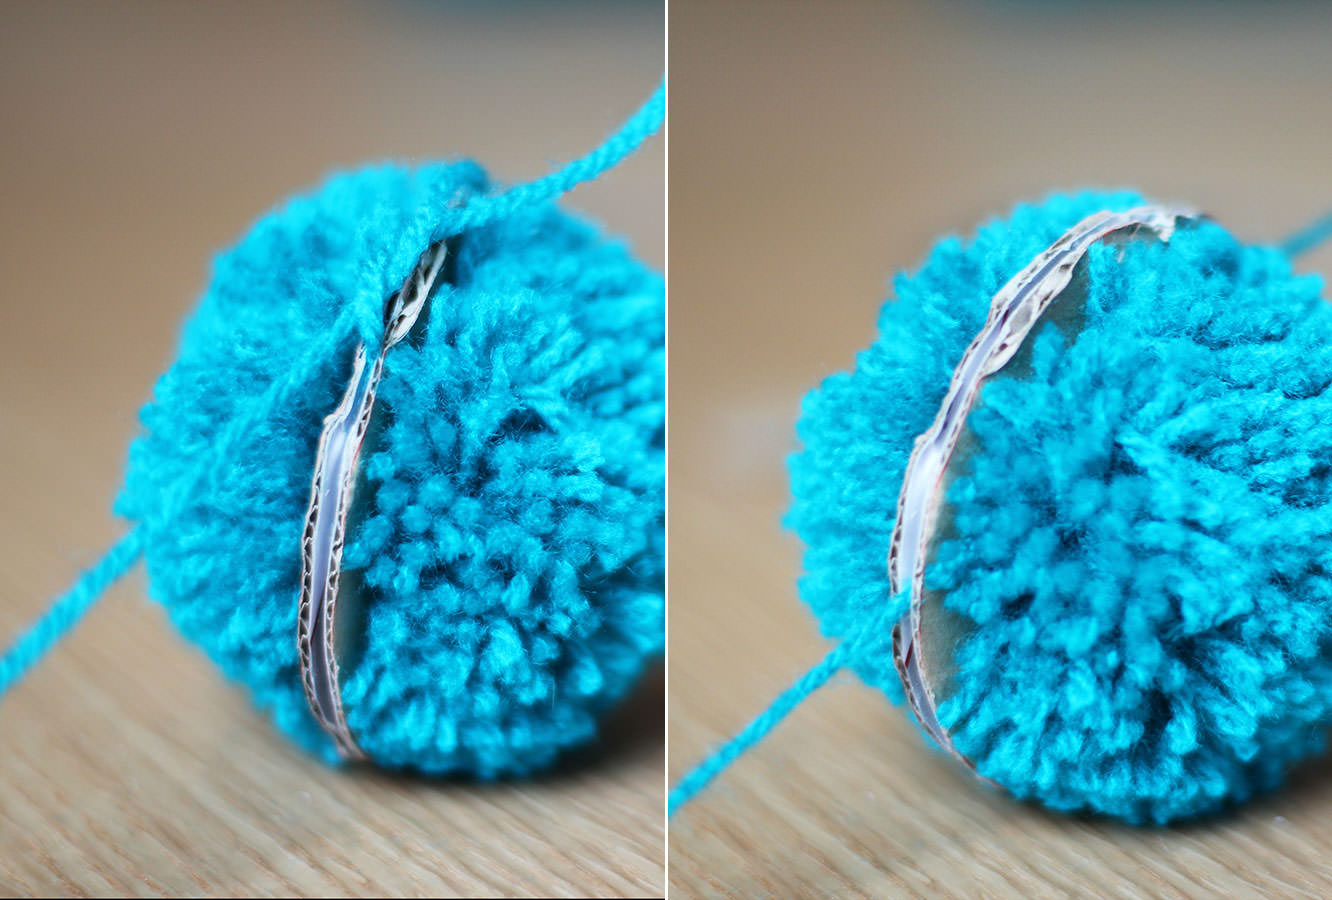
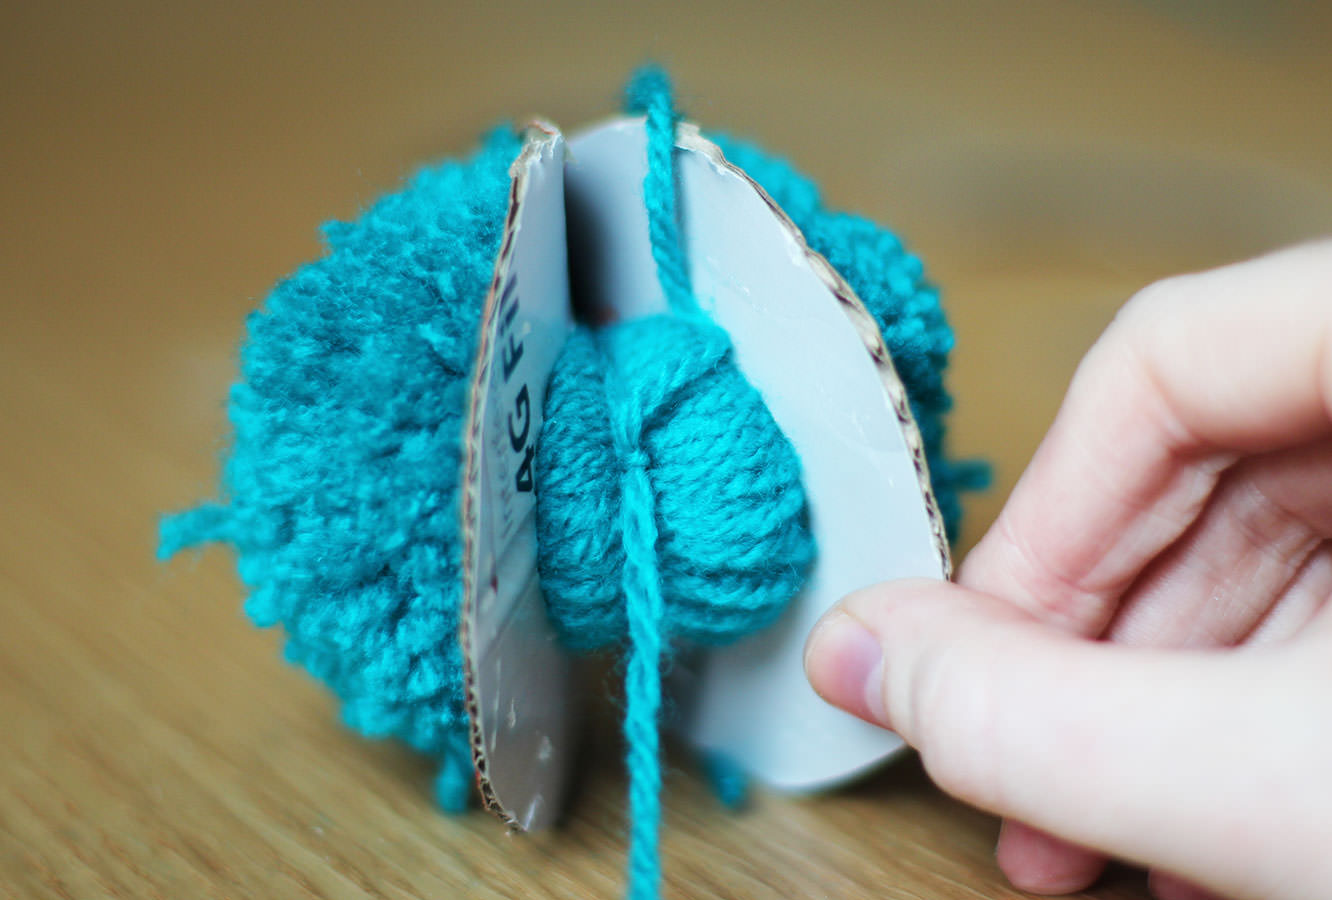
Step five
Wrap a length of wool around the edge and tie a knot in between the cardboard layers. I always do a few for good measure.
Step six
Pull the cardboard rings off to release your pom pom.
Step seven
Trim any straggly bits to neaten it all up.
Step eight
Repeat until you have at least 24 pom poms of different sizes and colours.
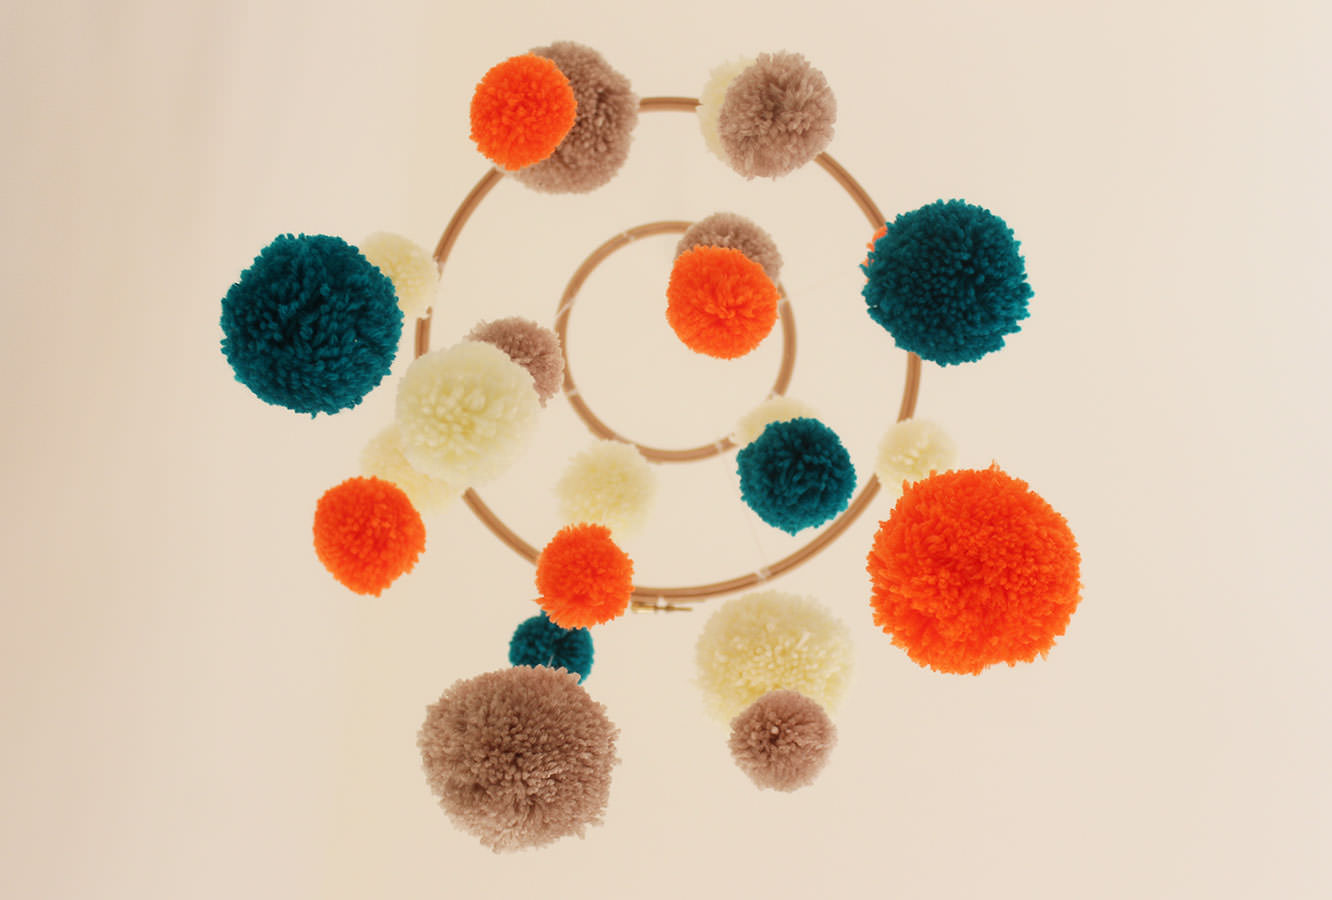
Step nine
Sew the pom poms to varying lengths of cotton thread in twos (or if you’ve made more, then keep adding them!)
I went back and forth through each pom pom a few times so they didn’t slip down/fall off the end.
I recommend doing this randomly, or you’ll drive yourself crazy! Plus it looks better for baby if they are dotted about as the different levels of perspective means you can see more.
Step ten
Cut a paper/newspaper circle that fits inside the embroidery hoops. Fold each in half three times so you get 8 equal segments.
Placing the paper circles into the hoops mark out the eighths.
Step eleven
Remove the outer hoops and stick a small strip of double sided tape by each marker.
Step twelve
Attach two pieces of string to hang the mobile by. They need to wrap around both the outer and inner hoops and be as even as possible.
Try to make it so that the string comes out from under the hoop at all points. Otherwise you’ll do what I did and put the outer hoop on top, one will be over and the whole thing will hang a bit wonky. Distressed isn’t the word.
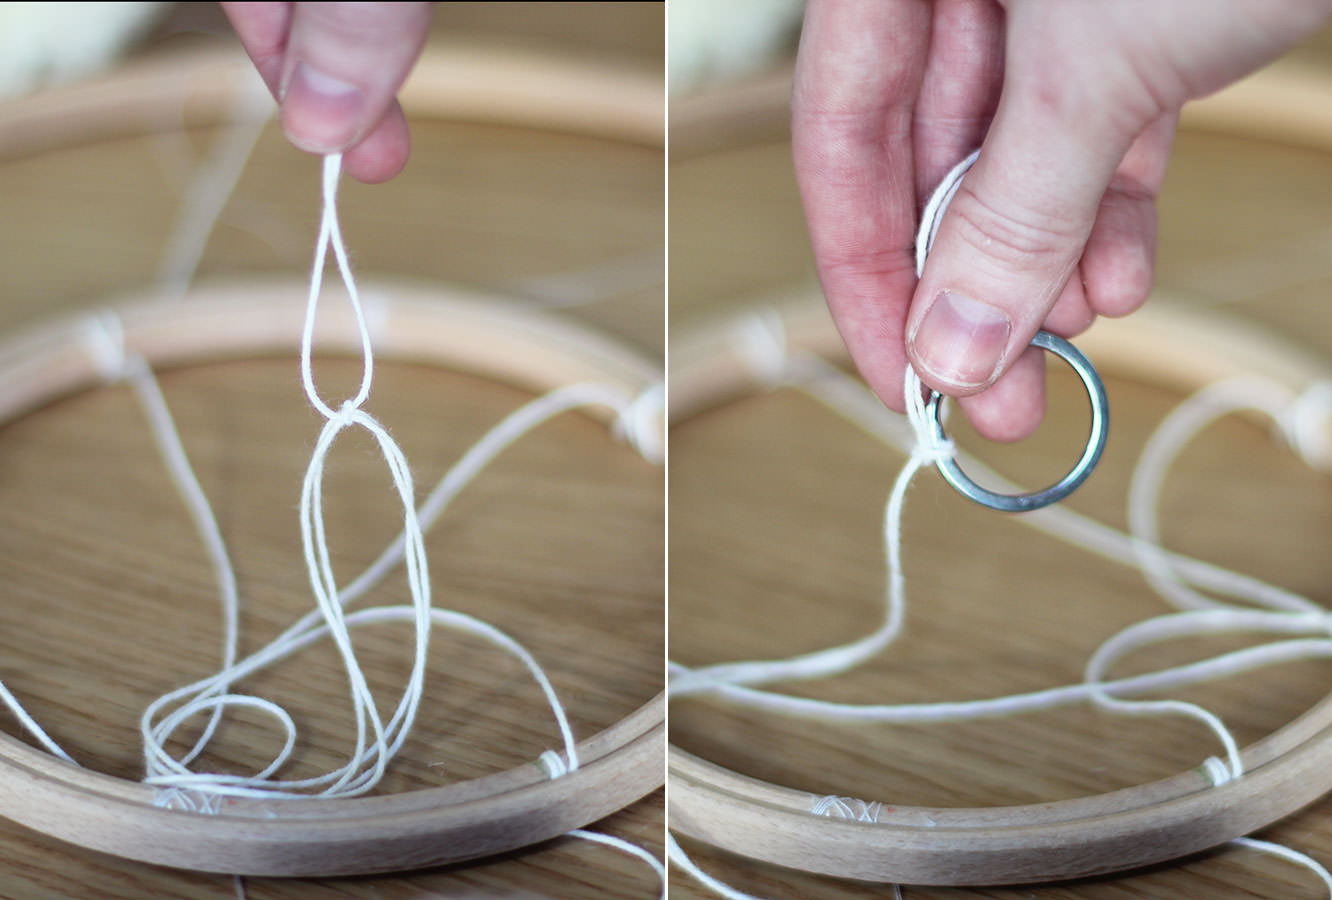
Step thirteen
Tie a longish piece of string (this will totally depend on your ceiling to cot distance) to connect the crossed over pieces you just attached to the hoops. Still with me?!
At the other end of that length of string tie a keyring. This is the bit that will enable your mobile to spin round.
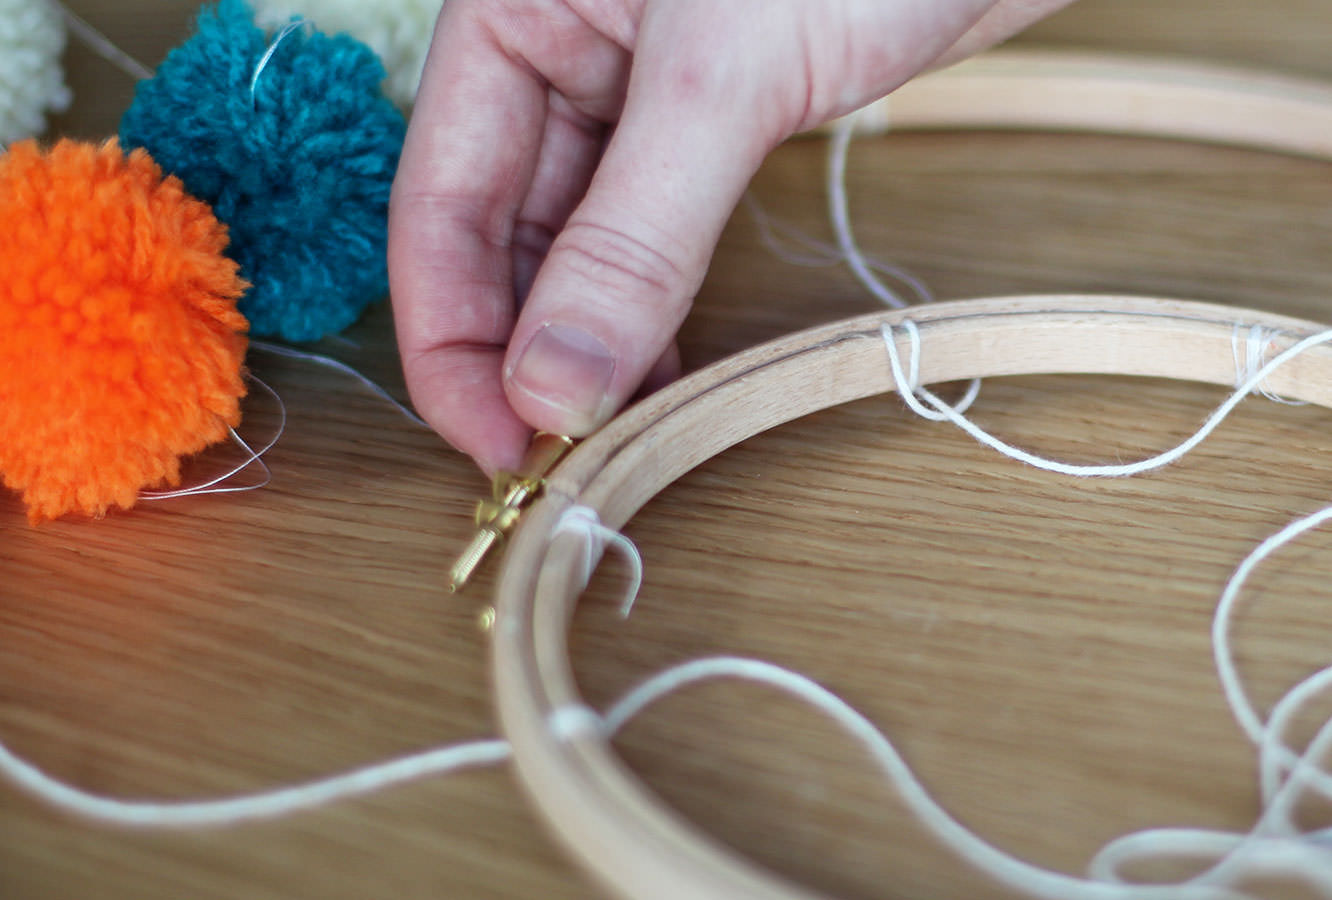
Step fourteen
Attach your pom pom lengths, 8 around the outside, 4 around the inside by wrapping the thread round the hoop a few times. The tape should hold them in place quite well.
Step fifteen
Reattach the outer hoops and tighten.
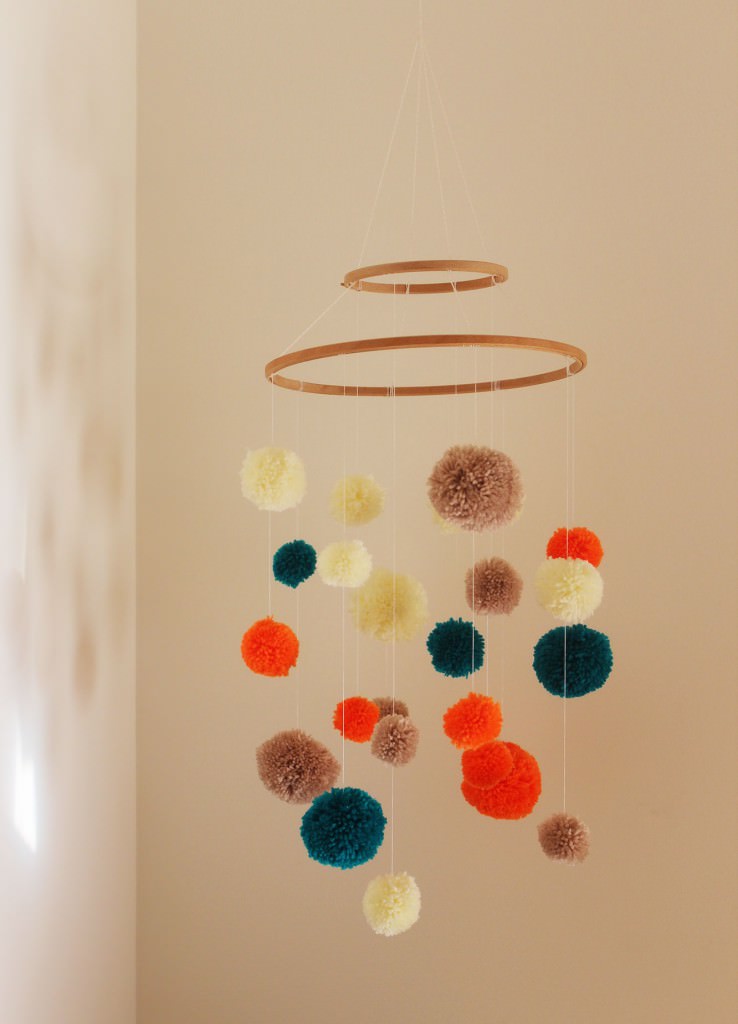
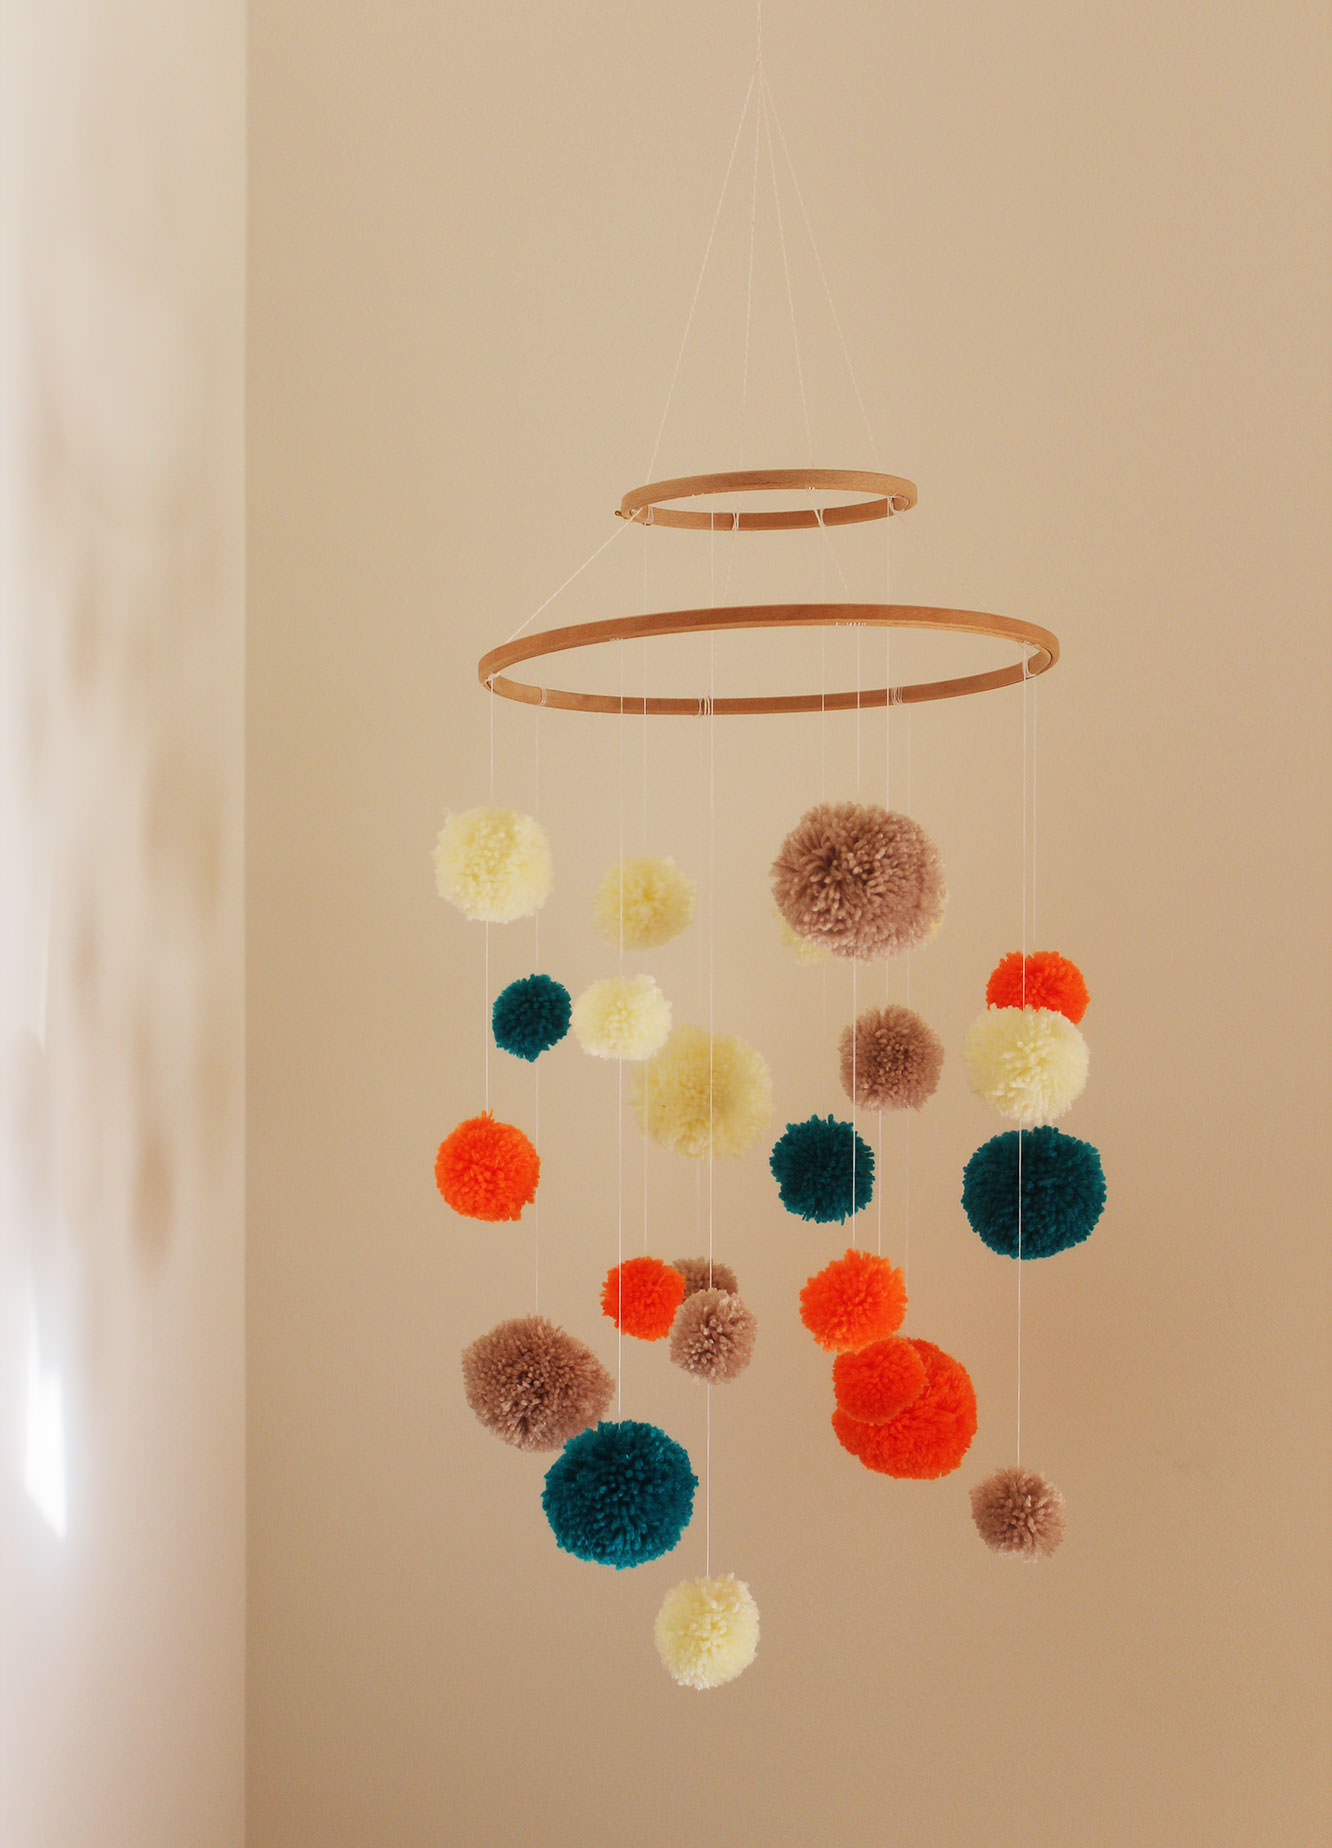
Step sixteen
Using the sticky hook hang from the ceiling.
Step seventeen
Lie under it for a little while. It’s relaxing being a baby.
Wait, that’s not all.
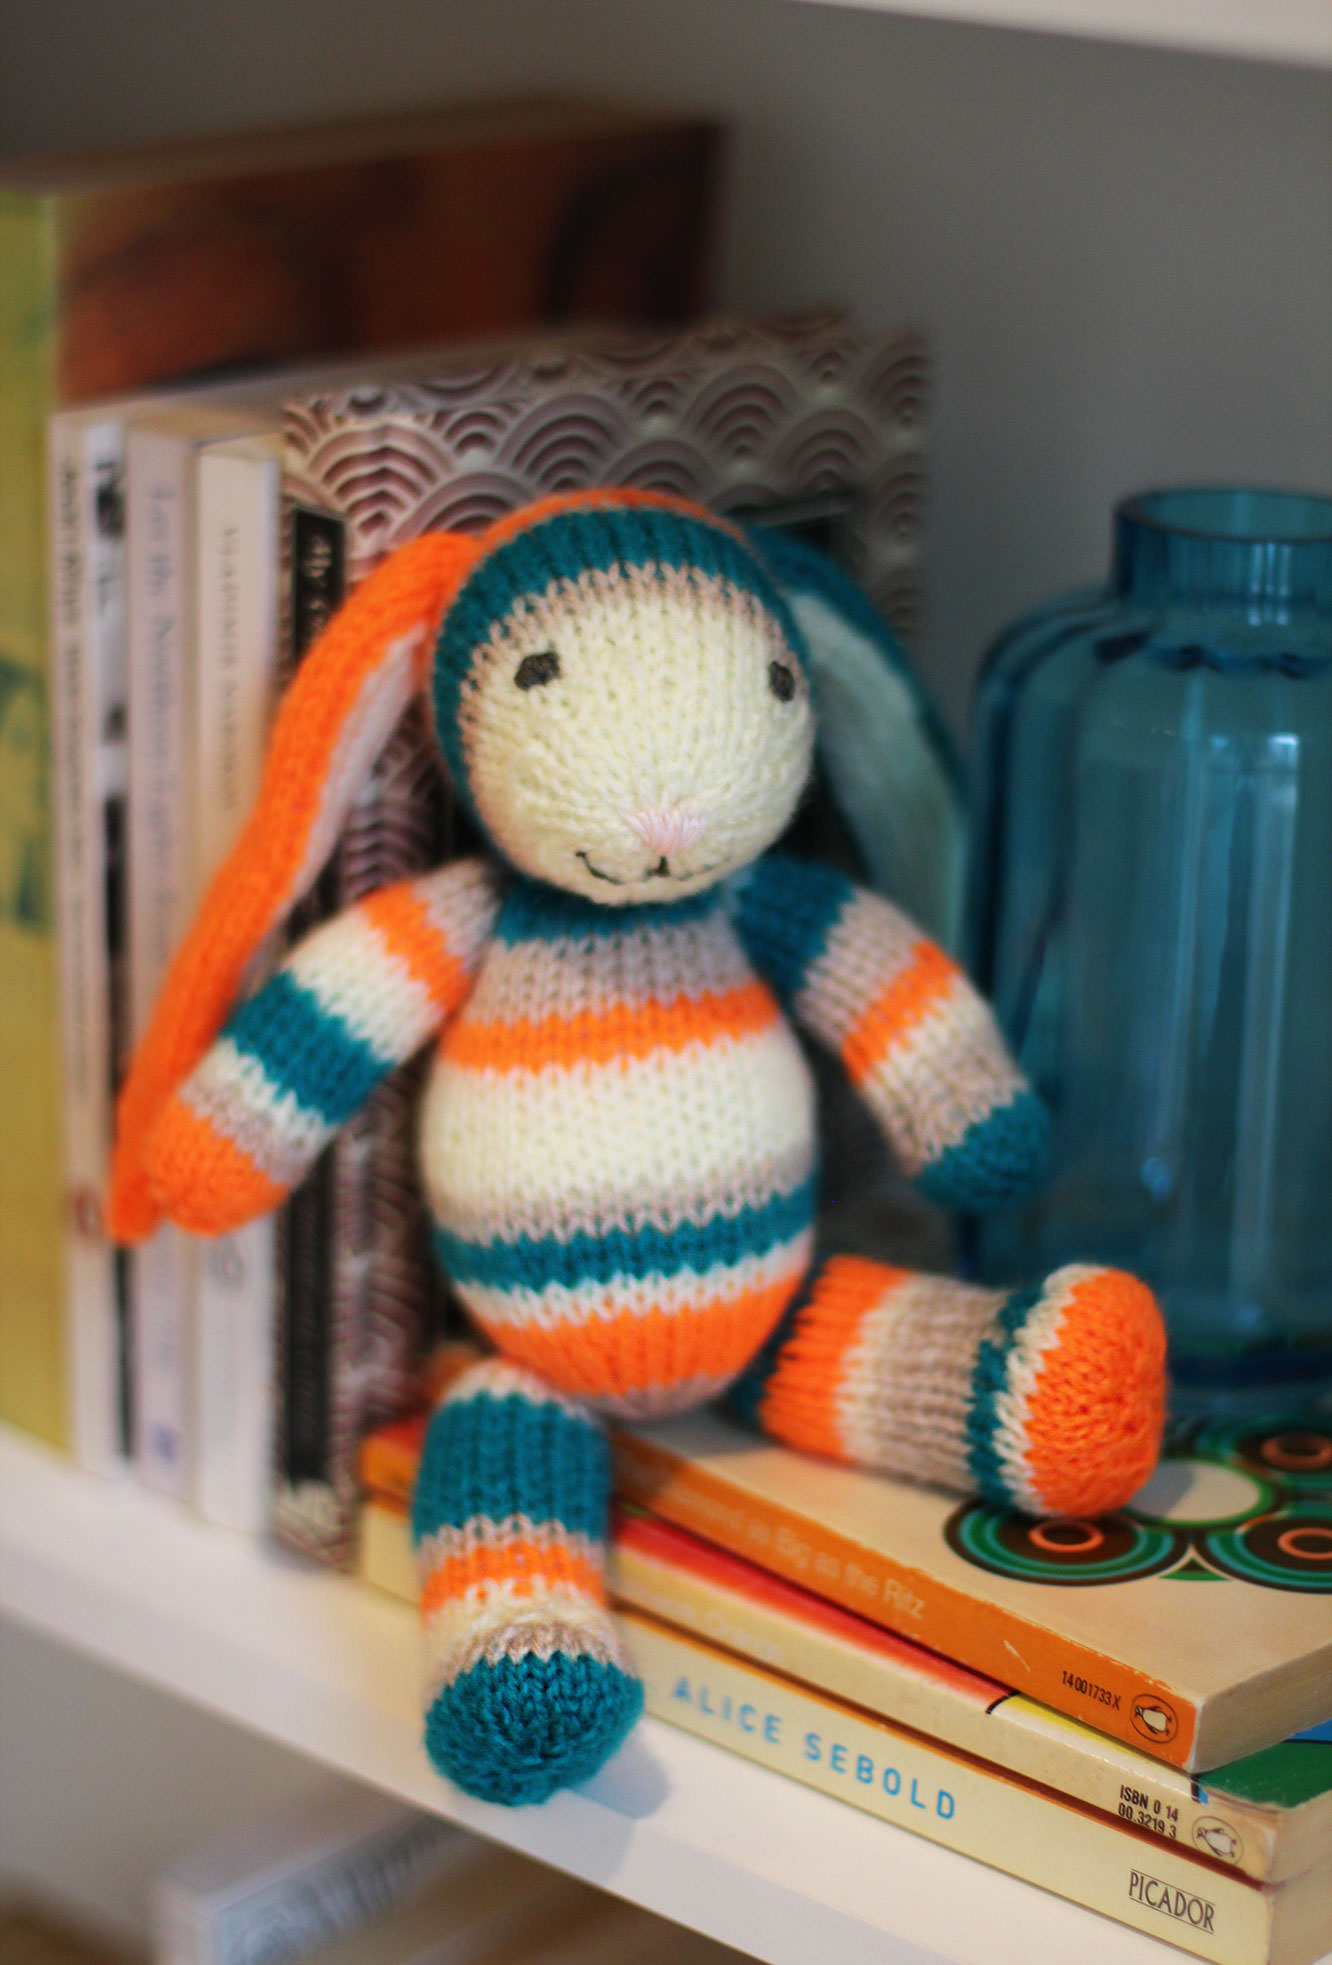
I also couldn’t resist making baby a little friend to match his mobile. Introducing Bernard the bunny.
I haven’t included a step-by-step for Bernard because he’s not my pattern. In fact, this was the first time I’ve ever knitted a ‘creature’ before. He’s not quite the masterpiece I envisaged when I started but full of character and a great beginner knit.
Bernard was knitted from the free fuzzy lamb pattern by Barbara Prime (I just added longer ears). I urge you to visit fuzzymitten.com where you can buy all kinds of super cheap cute and quirky patterns including a bikini clad alpaca and a sloth in a poncho. Barbara’s patterns are adorable and easy to follow.
Another plug goes out to Hannah Melin whose ‘Hello World’ print I couldn’t resist at a craft fair just before Christmas. I think it would look lovely on the wall of any nursery.
I should probably make it clear that I’m not being sponsored for either of the above, I just think it’s good to support one’s fellow craftspeople from time to time.
Without further ado, here’s the man of the hour LOOKHOWCUTE.
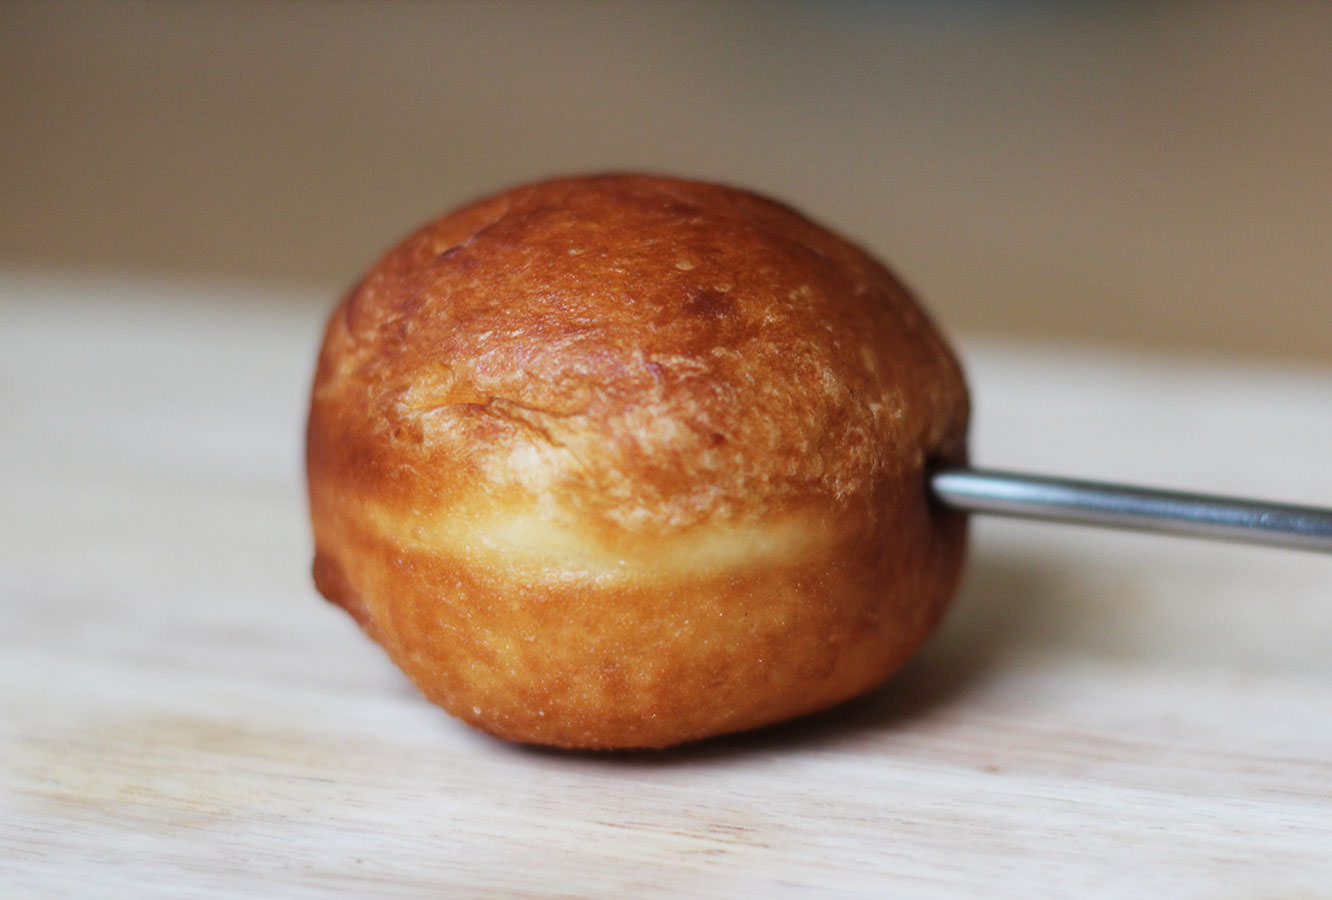
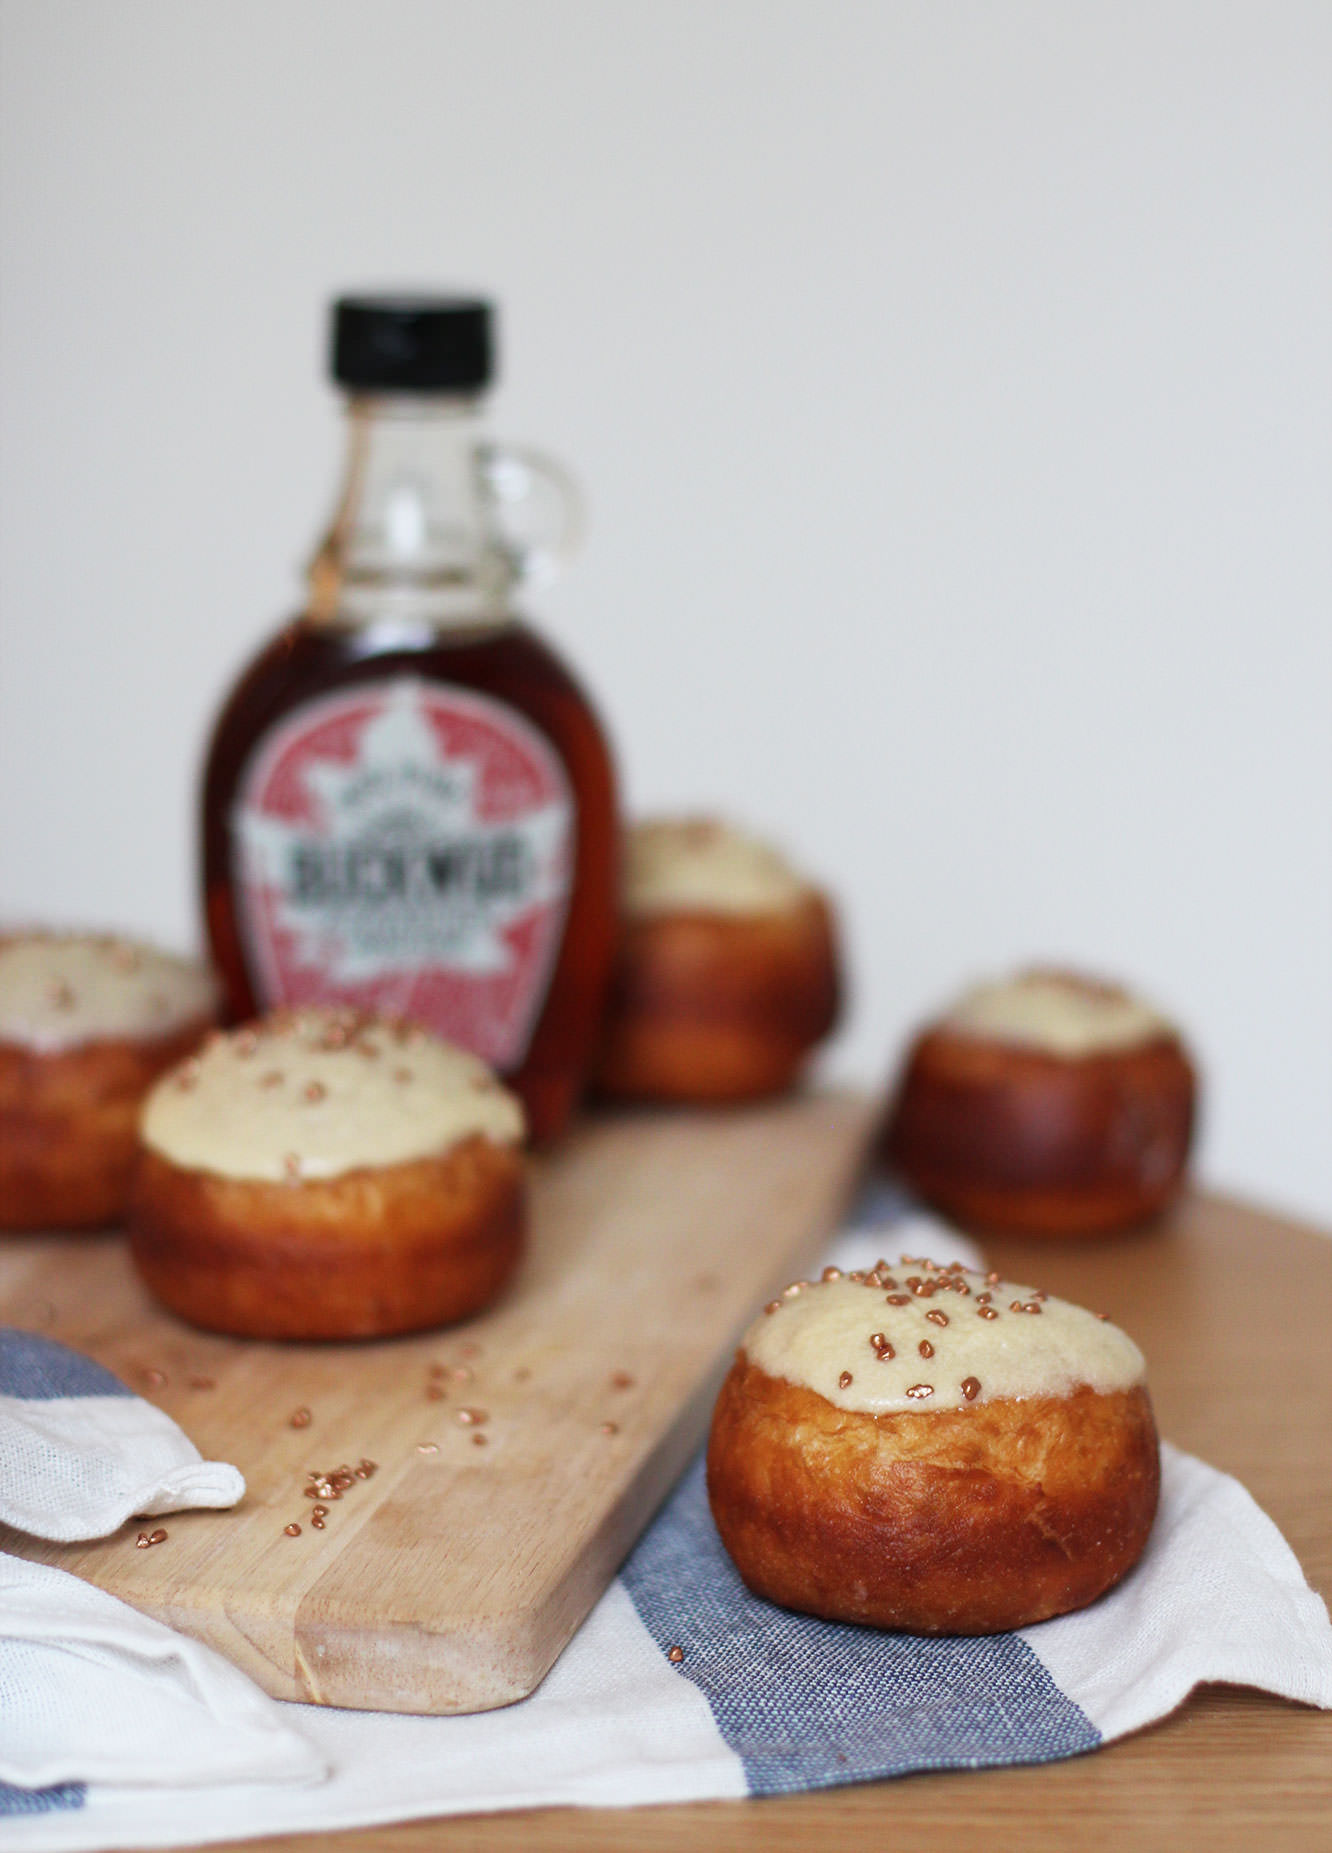
I’m going to call it before you do. I am a tiny bit cheating in this post. Back in November my housemate Vicky and I made Bonfire Night doughnuts. It was an epic feat of baking, one I vowed not to repeat for a very long time. That is, until my teacher at college had a birthday last week and I took to the kitchen again to make a maple themed bun in honour of his Canadian homeland.
So I confess. Given that doughnuts are a touch on the complex side, I’ve repeated many of the photos from November. It’s a lot easier to get snap happy when there’s a spare set of eyes to watch the pan of hot oil, so don’t judge me too harshly friends.
I urge you to give doughnuts a try some day.
You will need
For the doughnuts:
350ml/12 fl oz Warm full fat milk
700g/1lb 8 oz Strong white bread flour
2 Eggs
70g/2.5 oz Unsalted butter
100g/3.5 oz Caster sugar
1 tsp Salt
14g/0.5 oz Dried yeast
50ml Warm water
For the filling:
300g/10.5 oz Icing sugar
125g/4.5 oz Unsalted butter
175ml/6 fl oz Maple syrup (as good as you can afford)
1 tsp Maple extract (don’t panic if you don’t have this or can’t find it, I lumped for a caramel extract in the end, and you could leave it out altogether)
For the glaze:
100ml/3 fl oz Maple syrup
100g/3.5 oz Icing sugar
25g/1 oz Unsalted butter
Extras
1.5 litres/50 fl oz Vegetable oil for frying
Sprinkles (these bronze ones are from Waitrose)
A flavour injector or piping bag with long thin nozzle
(Makes 25-30)
Step one
Put the yeast in the warm water and wait until frothy.
Step two
Combine half the flour with the rest of the dough ingredients (including the yeast froth).
Put the yeast and the salt on opposite sides of the bowl so the salt doesn’t prevent the yeast from doing its thang.
Step three
When the batter is smooth, gradually add the rest of the flour and stir.
The dough will be sticky but not impossible to work with. Having said that I still gave the work top a significant dusting of flour.
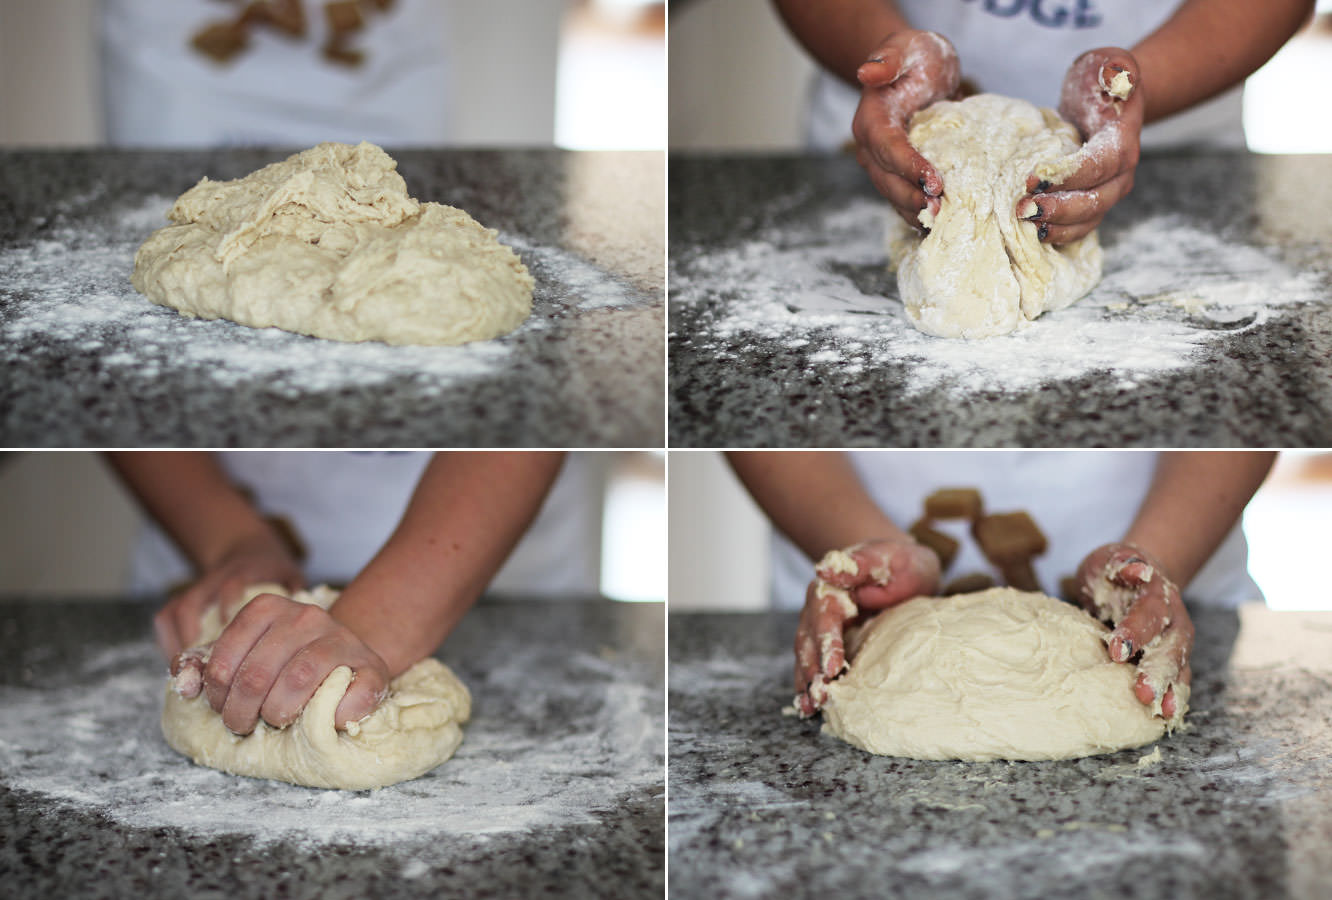
Step four
Turn the dough out onto a floured surface.
Knead for about 10 minutes, don’t worry if you have to add more flour to stop it sticking but don’t add loads and loads.
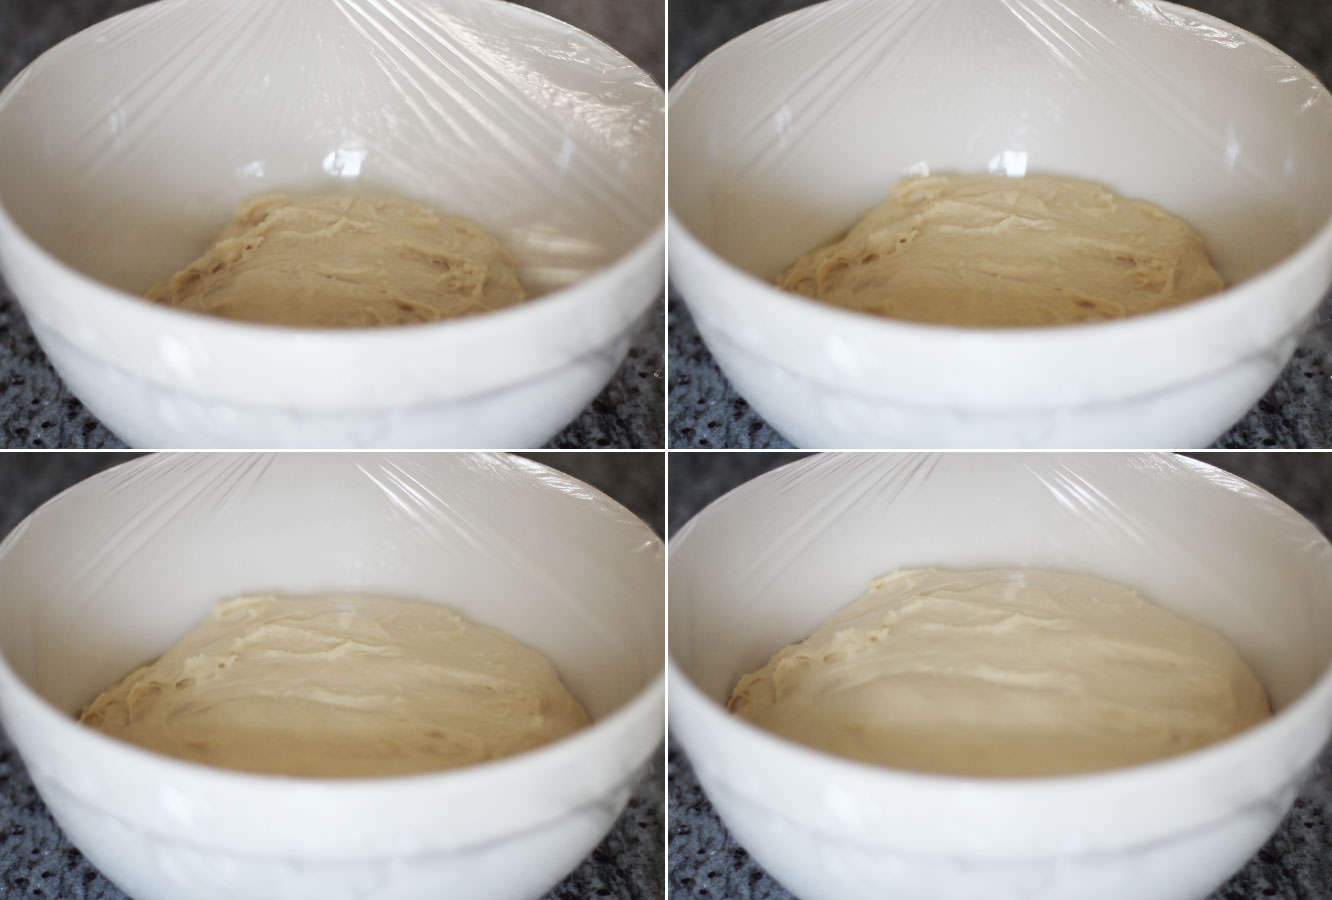
Step five
Pop it back in the bowl and cover with clingfilm. Leave in a warm dry place for 60-90 minutes or until doubled in size.
Step six
Once the dough has finished rising turn it back out of the bowl and roll out into two long strips. Cut into 30 equal pieces.
Step seven
Roll the pieces into balls and leave on a lightly dusted (with flour just in case that wasn’t obvious) surface or tray to prove.
Step eight
You’ve probably got time here to make the filling and the glaze.
Essentially for both you just need to whisk all the ingredients together in a bowl. I can’t even make that sound remotely more complicated.
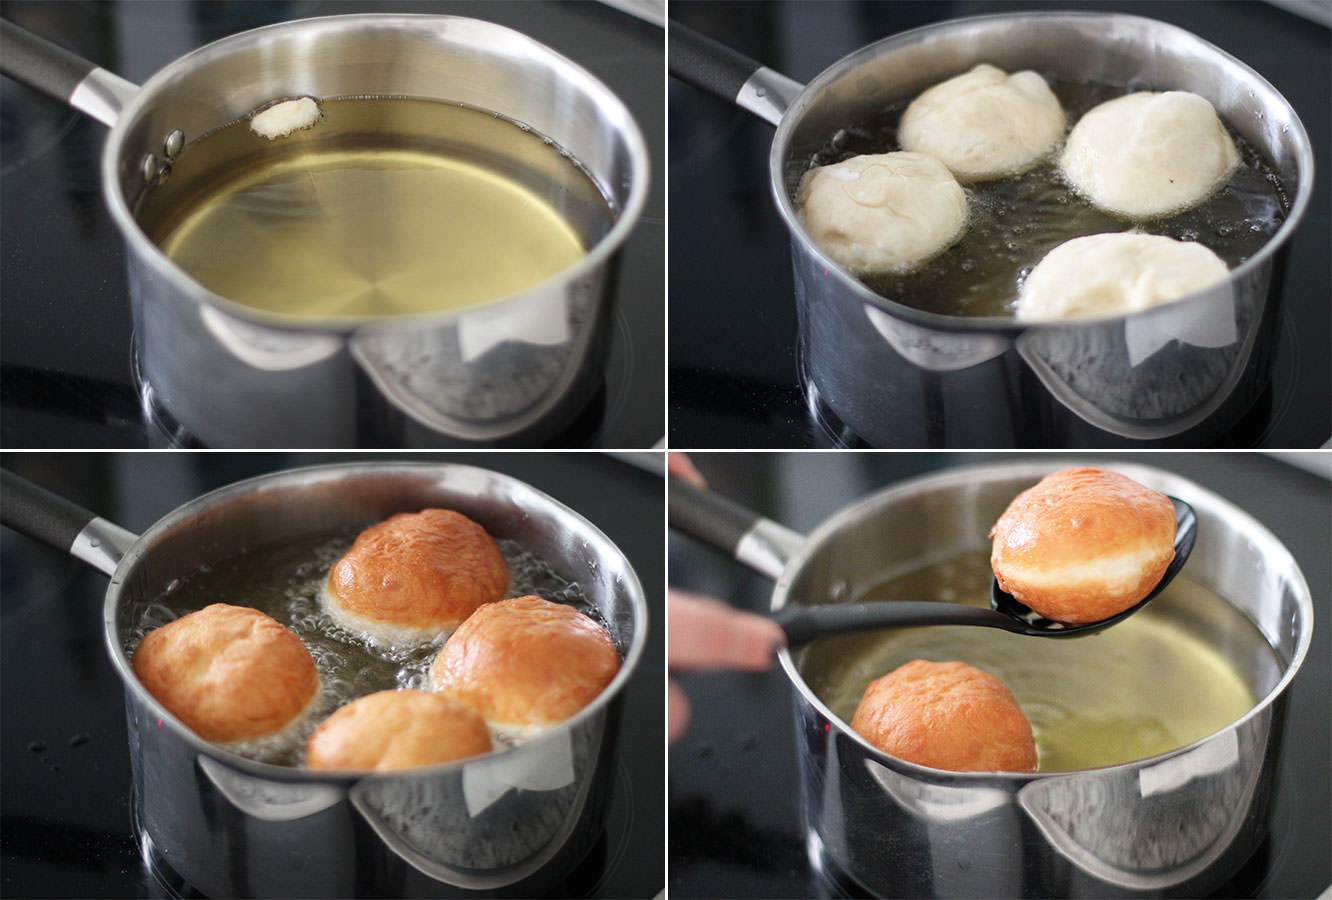
Step nine
About 20 minutes after the proving has started put the oil in the pan on a low-medium heat. Definitely don’t rush this stage, it will take a long time for the oil to come to the right temperature but patience is key.
Test your oil heat with little pieces of a dough. When this tester floats and bubbles straight away you’re good to go.
Step ten
Cook your doughnuts. I did this by eye, but I reckon it only takes about 30 seconds to a minute on each side.
Leave your doughnuts to rest on a few sheets of kitchen roll which will soak up any excess oil.
Step eleven
Once the doughnuts are completely cool, fill them with the maple buttercream.
My flavour injector has measurements on the side, so I went for about 10 ml in each. If you don’t have that luxury, practice piping an adequate amount of filling out so you know how much pressure to add and for how long to fill them properly.
Step twelve
Place the glaze in a deep cereal bowl.
Turn the doughnuts upside down and dip them in the mixture. Sprinkle some, well, sprinkles, on top.
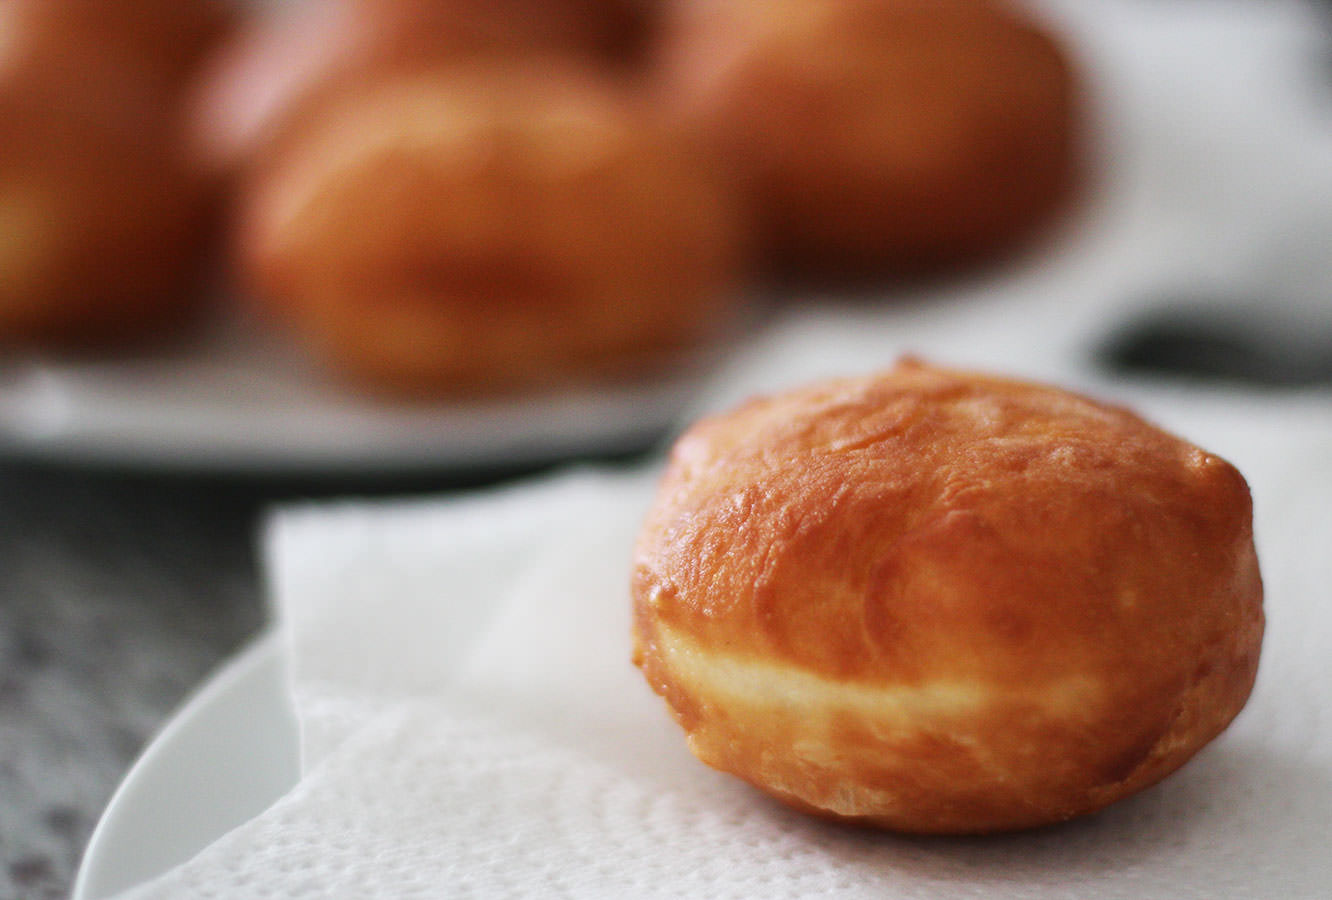
Step thirteen
Stand back and survey. You just made doughnuts my friend.
Sorry, what’s that? IT’S PANCAKE DAY TOMORROW? Or maybe if you read this on a Tuesday it’s pancake day today. Or maybe if you’re reading this in a few months time pancake day is nowhere nearby, and if that’s the case there’s nothing stopping you from making pancakes anyway. Especially when they taste THIS good.
I don’t think there can ever be enough pancakes, so I bring you not one, not two, but three recipes this week. And with three recipes comes three gifs. I know, I spoil you.
My fellow Europeans will have to excuse me for edging towards the North American style of pancake (you can add more flavours this way, but I assure you I’m still a die hard fan of our traditional flat friends). Those of you across the pond will also have to excuse me for not adding sugar and melted butter and all that nonsense to the mix.
These are a hybrid, somewhere half way between. Maybe this is what happens in Iceland or Greenland, who knows?
Enough ramble. LET’S. GET. FLIPPING.
Who am I kidding? I’m far too anxious to flip them.
You will need
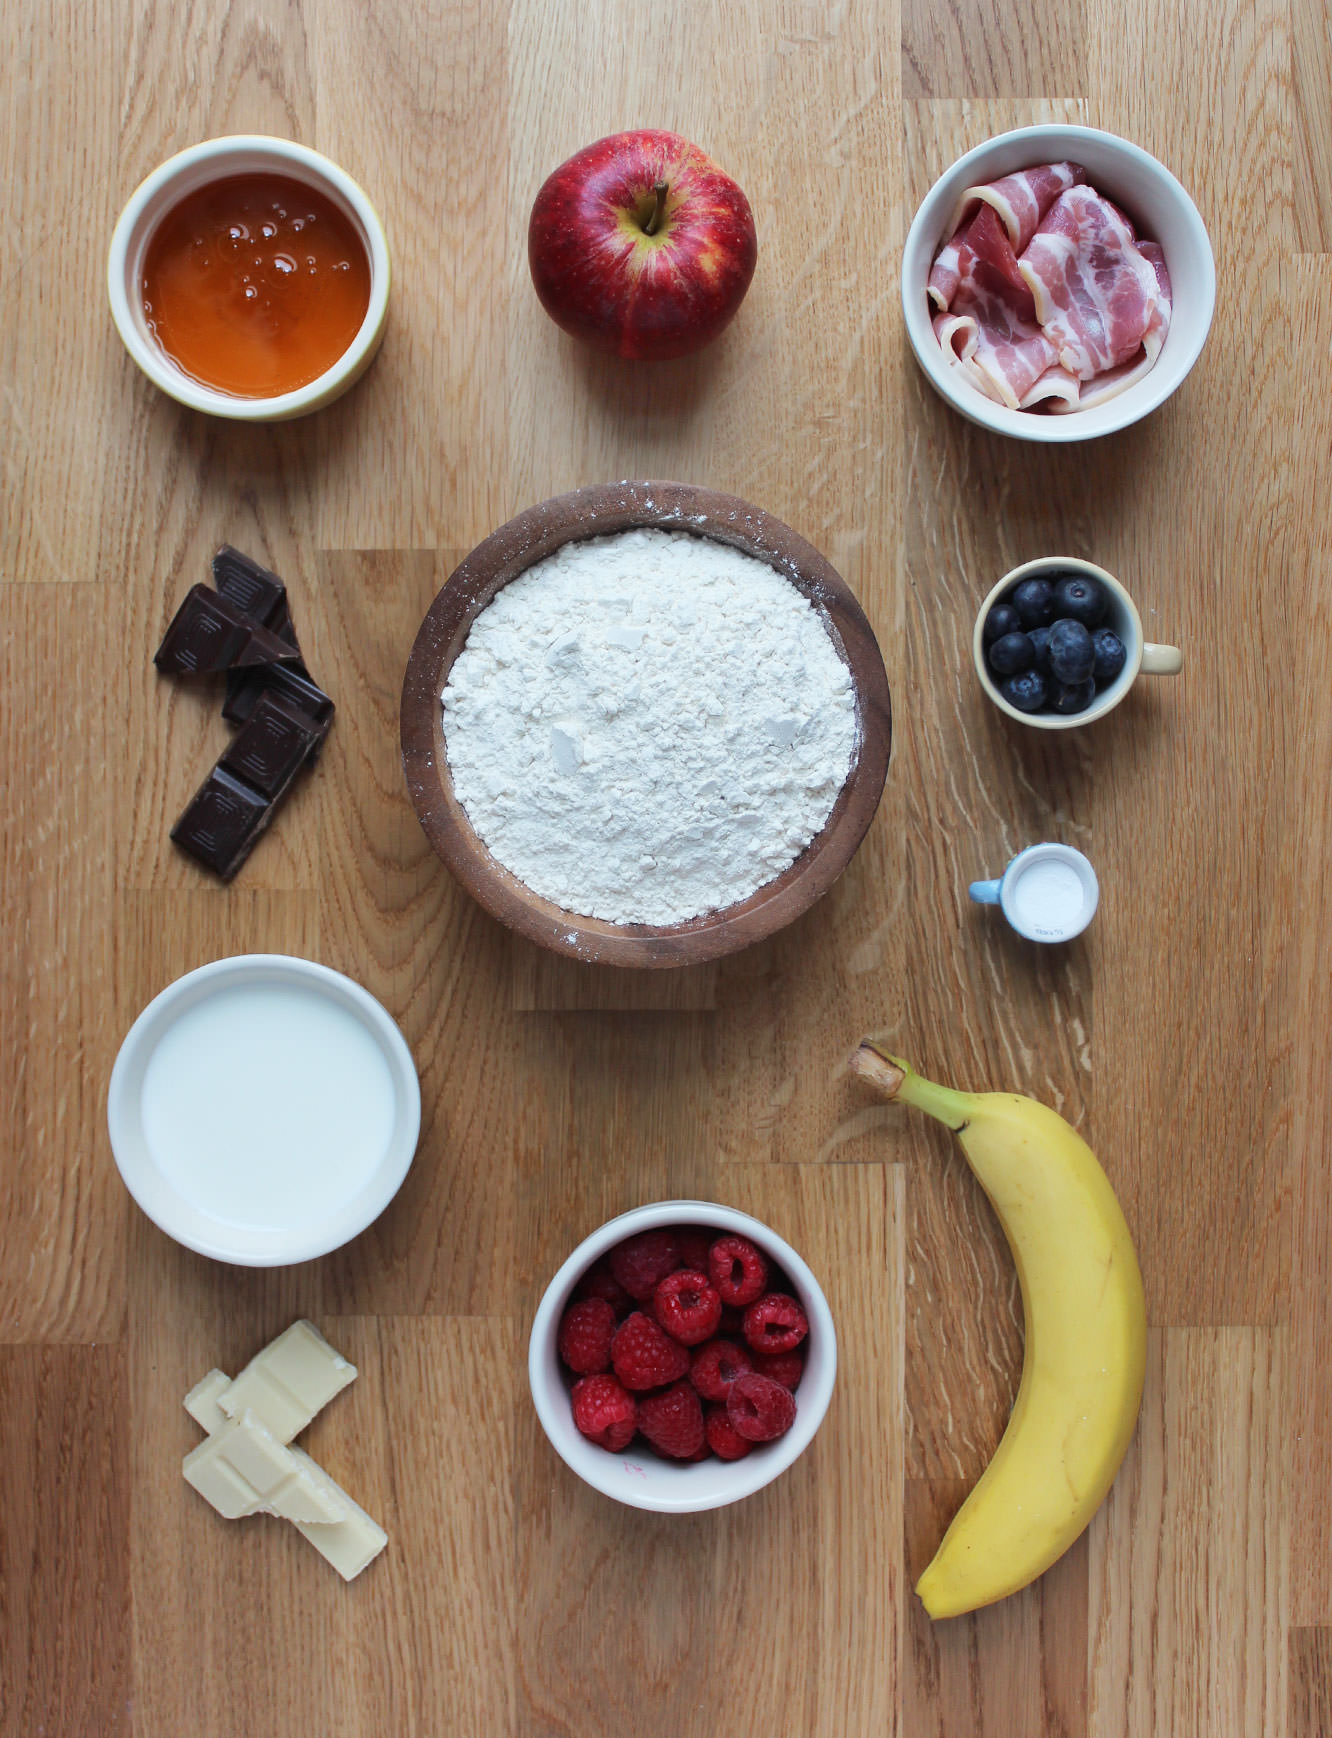
Apple, maple and bacon pancakes
1 cup Plain flour
1 cup Full fat milk
1 Apple
1 Egg
1 tsp Baking powder
Bacon and maple syrup to serve (adjust to your own preference)
White chocolate and raspberry pancakes
1 cup Plain flour
1 cup Full fat milk
1 cup Raspberries
1 Egg
1 tsp Baking powder
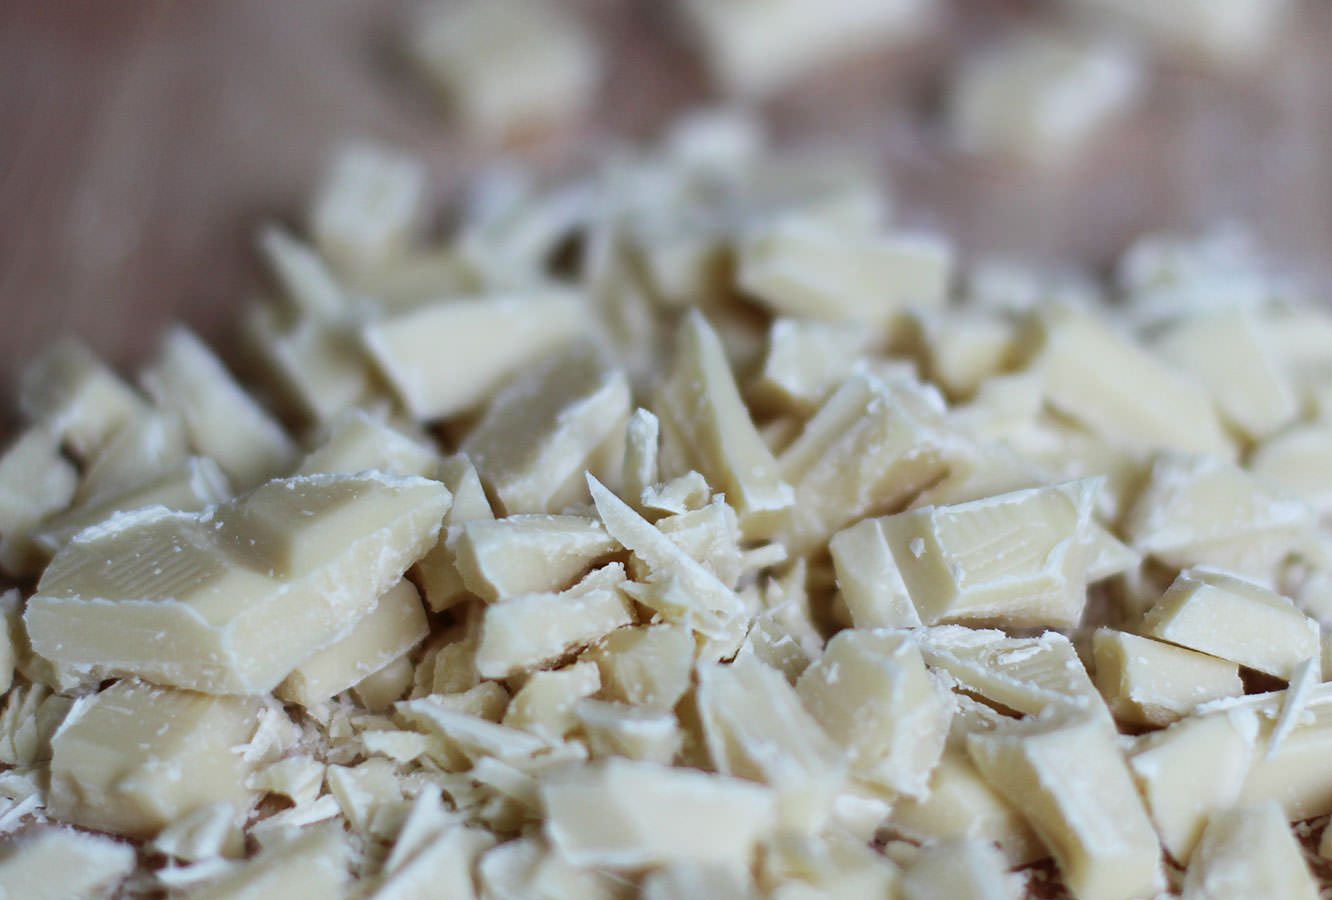
100g/3.5 oz White chocolate
50g/1.5 oz Dark chocolate to serve
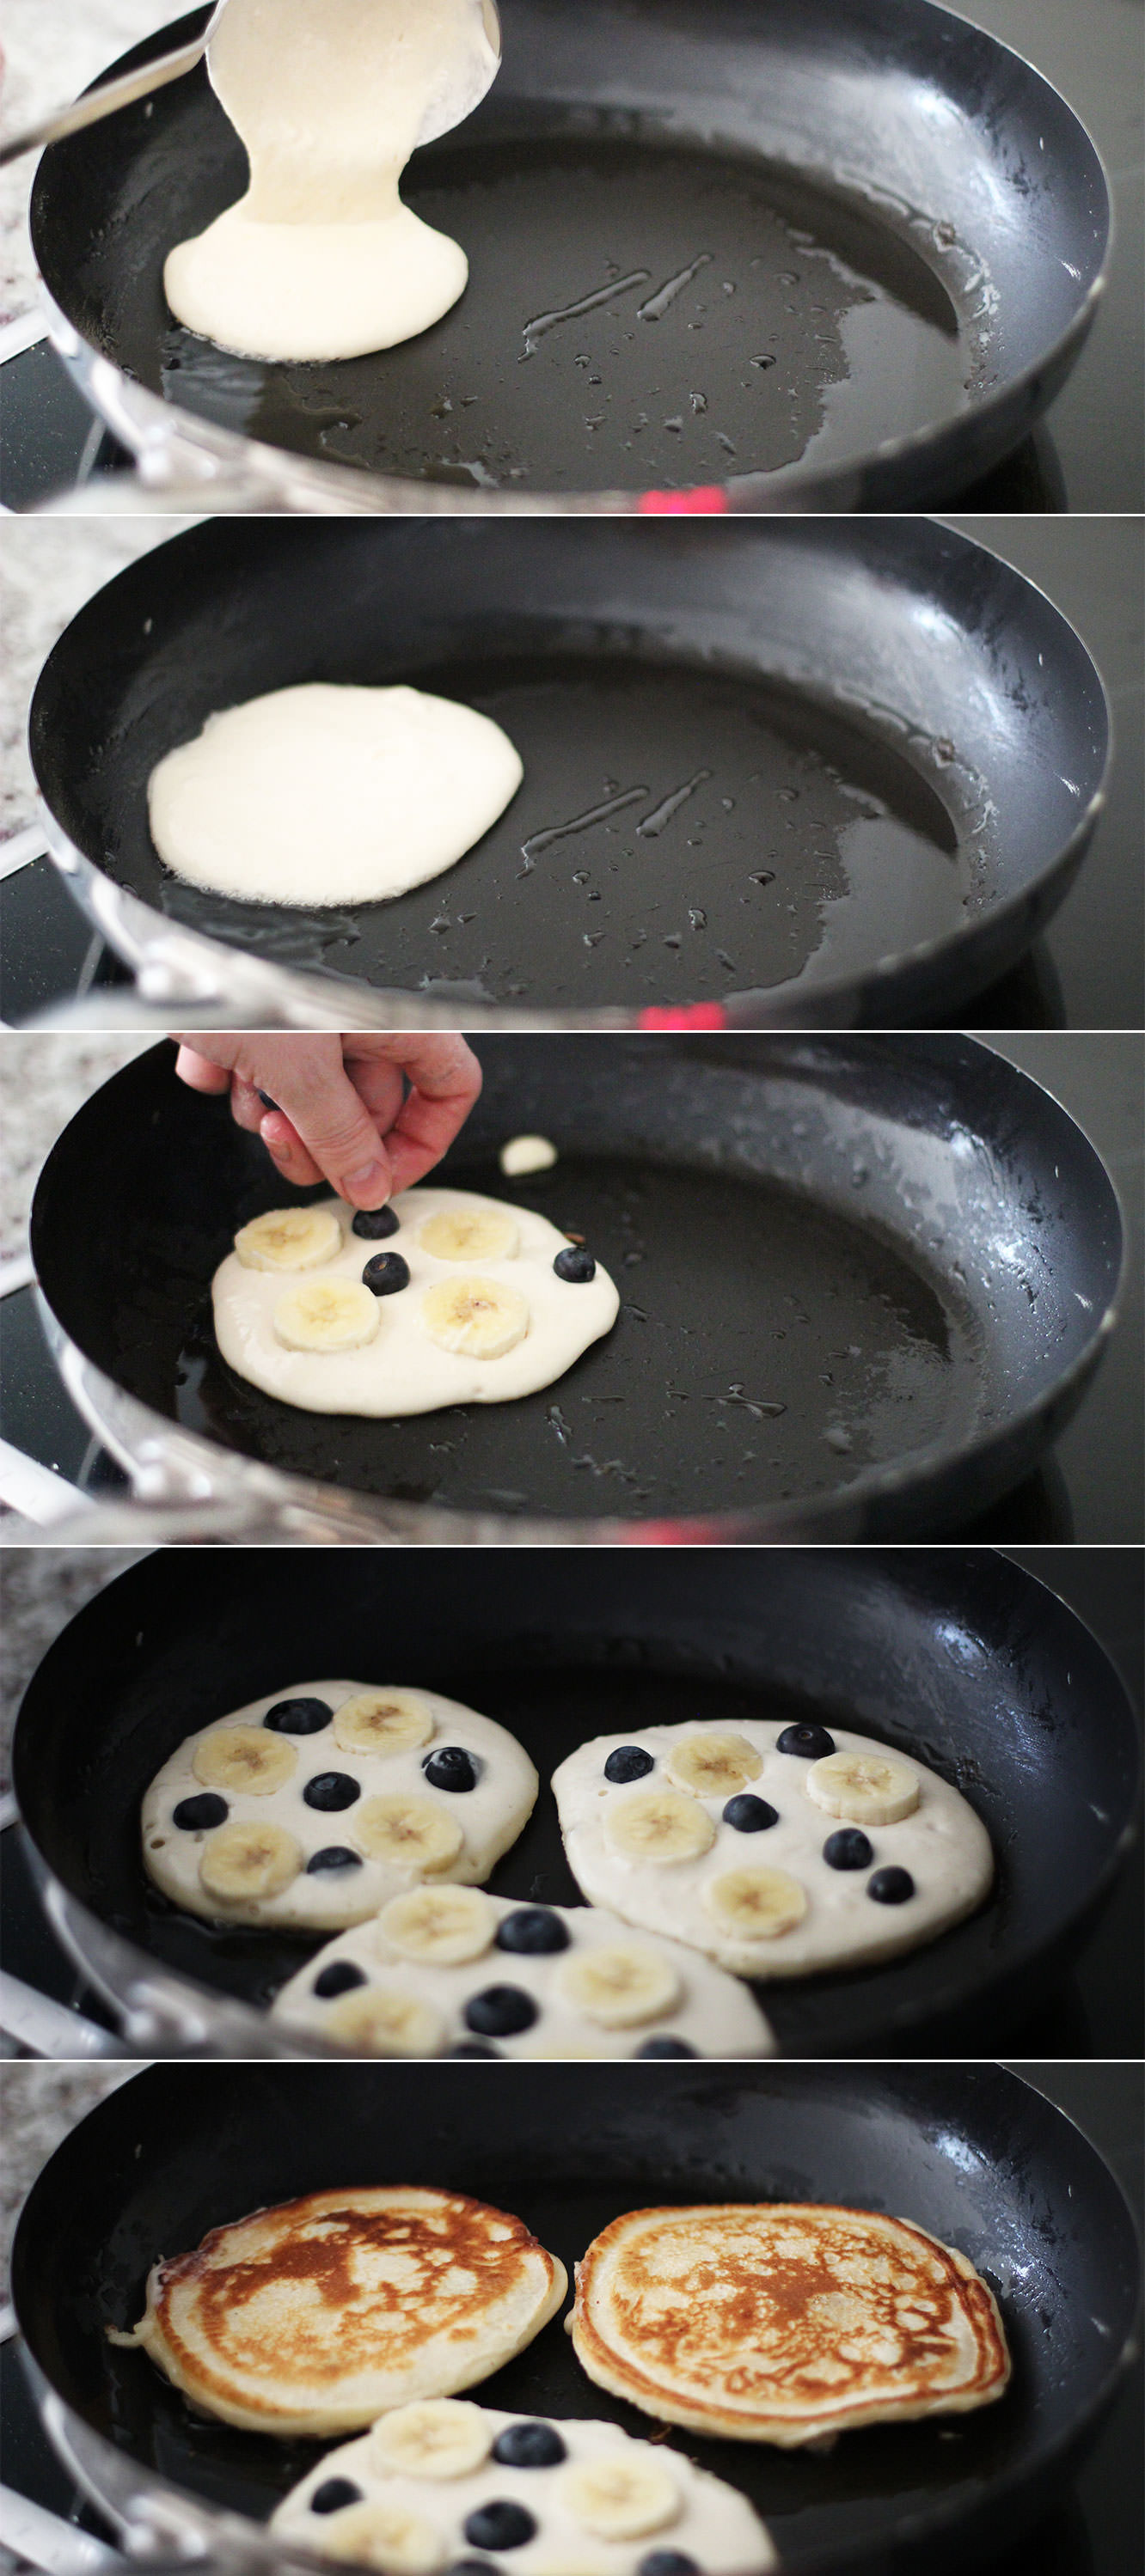
Banana and blueberry buttermilk almond pancakes
1 cup Plain flour
1 tub Buttermilk (284ml)
1 Egg
1 tsp Baking powder
1/2 tsp Almond extract
2 Bananas
1/2 cup Blueberries
More blueberries, some natural yoghurt and honey to serve
NB: The process is the same for all three recipes, however, the banana ones use buttermilk instead of regular milk. This makes a much thicker, goopier mixture.
All the recipes make 6-8 pancakes depending on their size.
Apple, maple and bacon pancakes
Step one
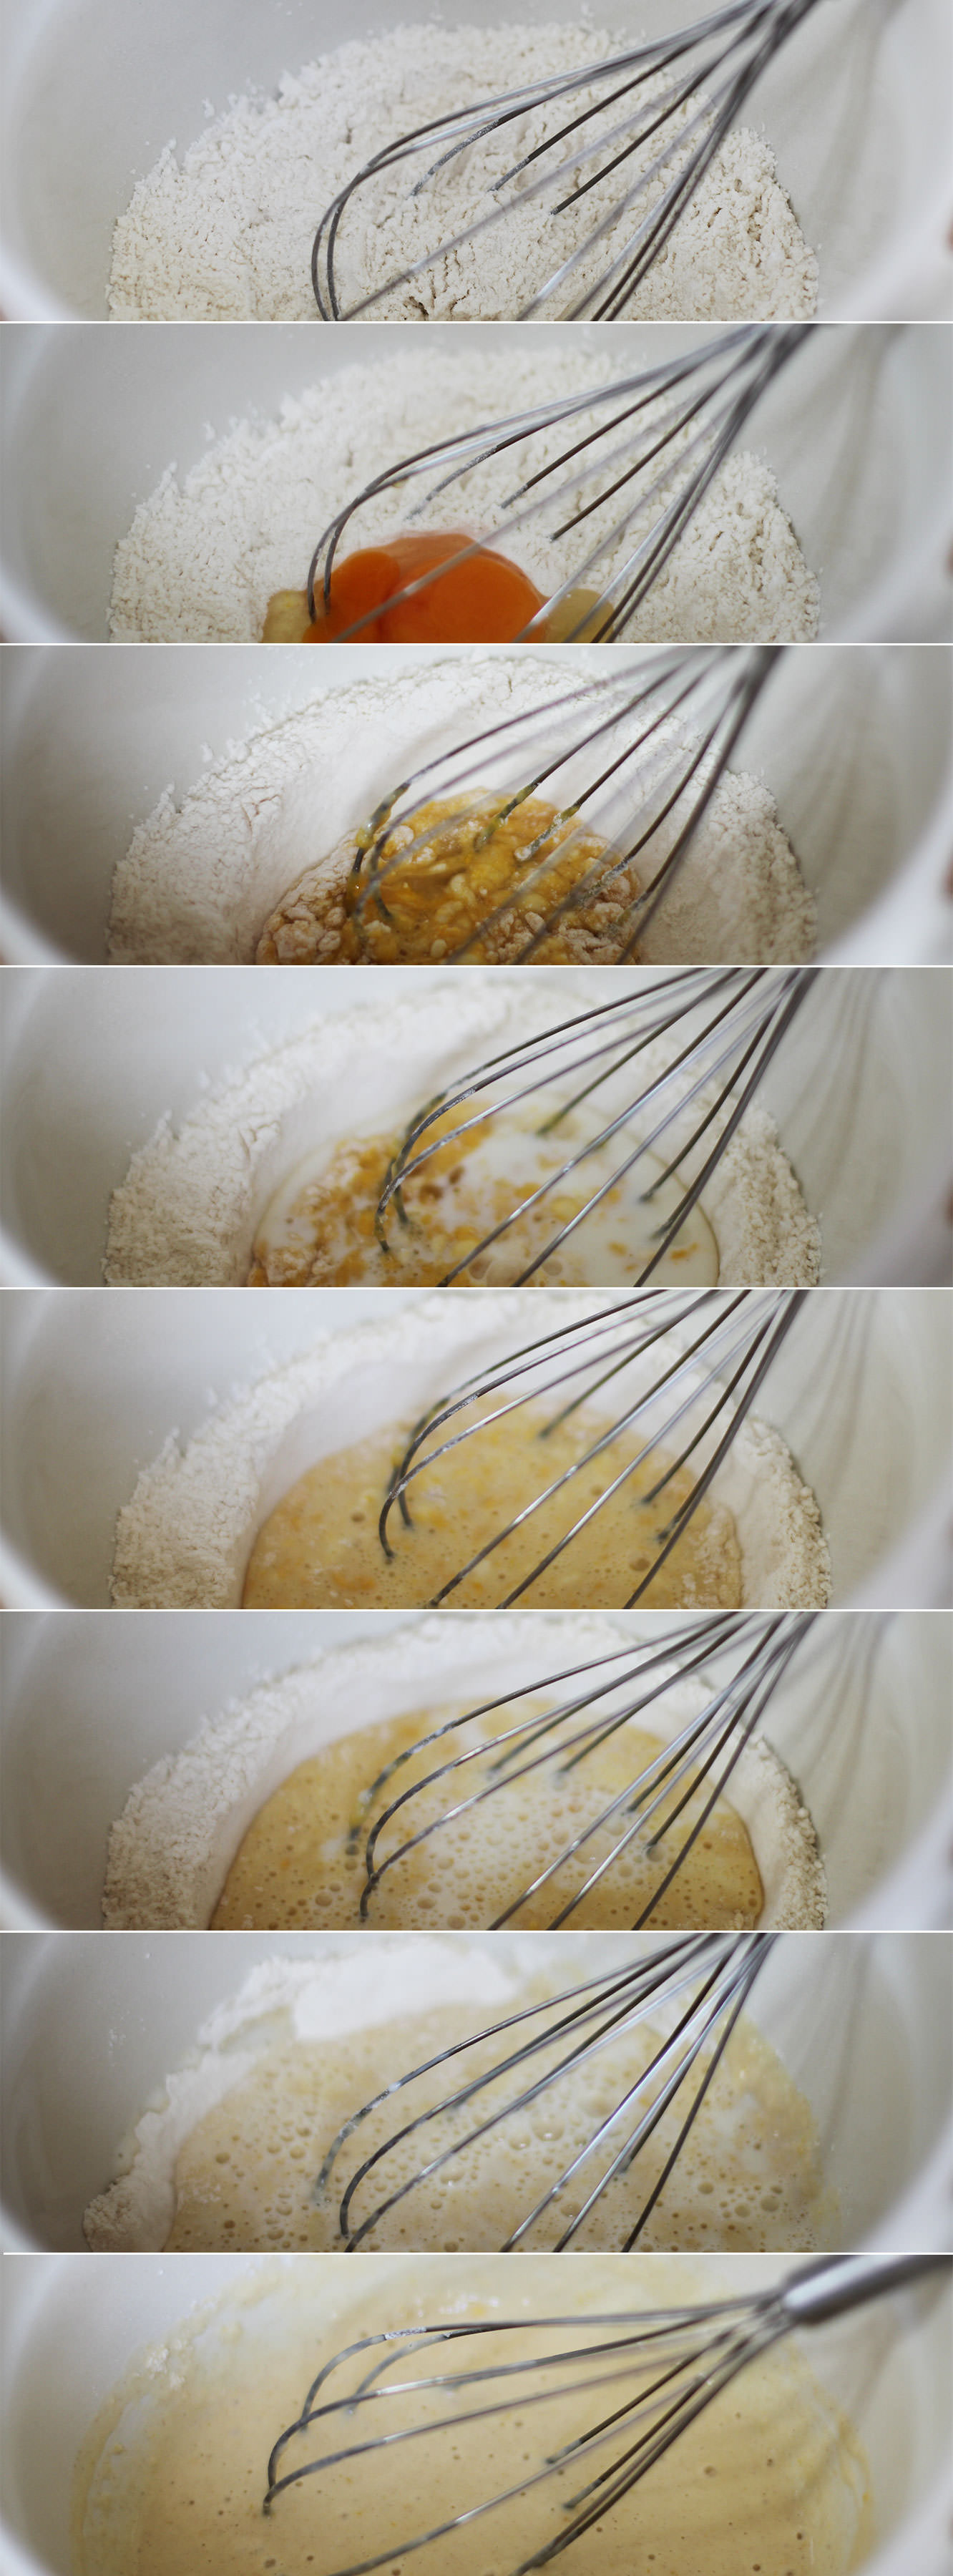
Whisk together the flour and baking powder and make a well in the middle for the egg.
The way to make smooth pancakes is to whisk little circles to gradually include the flour. Slowly add the milk a third at a time and continue making circles until all the flour is mixed in.
Step two
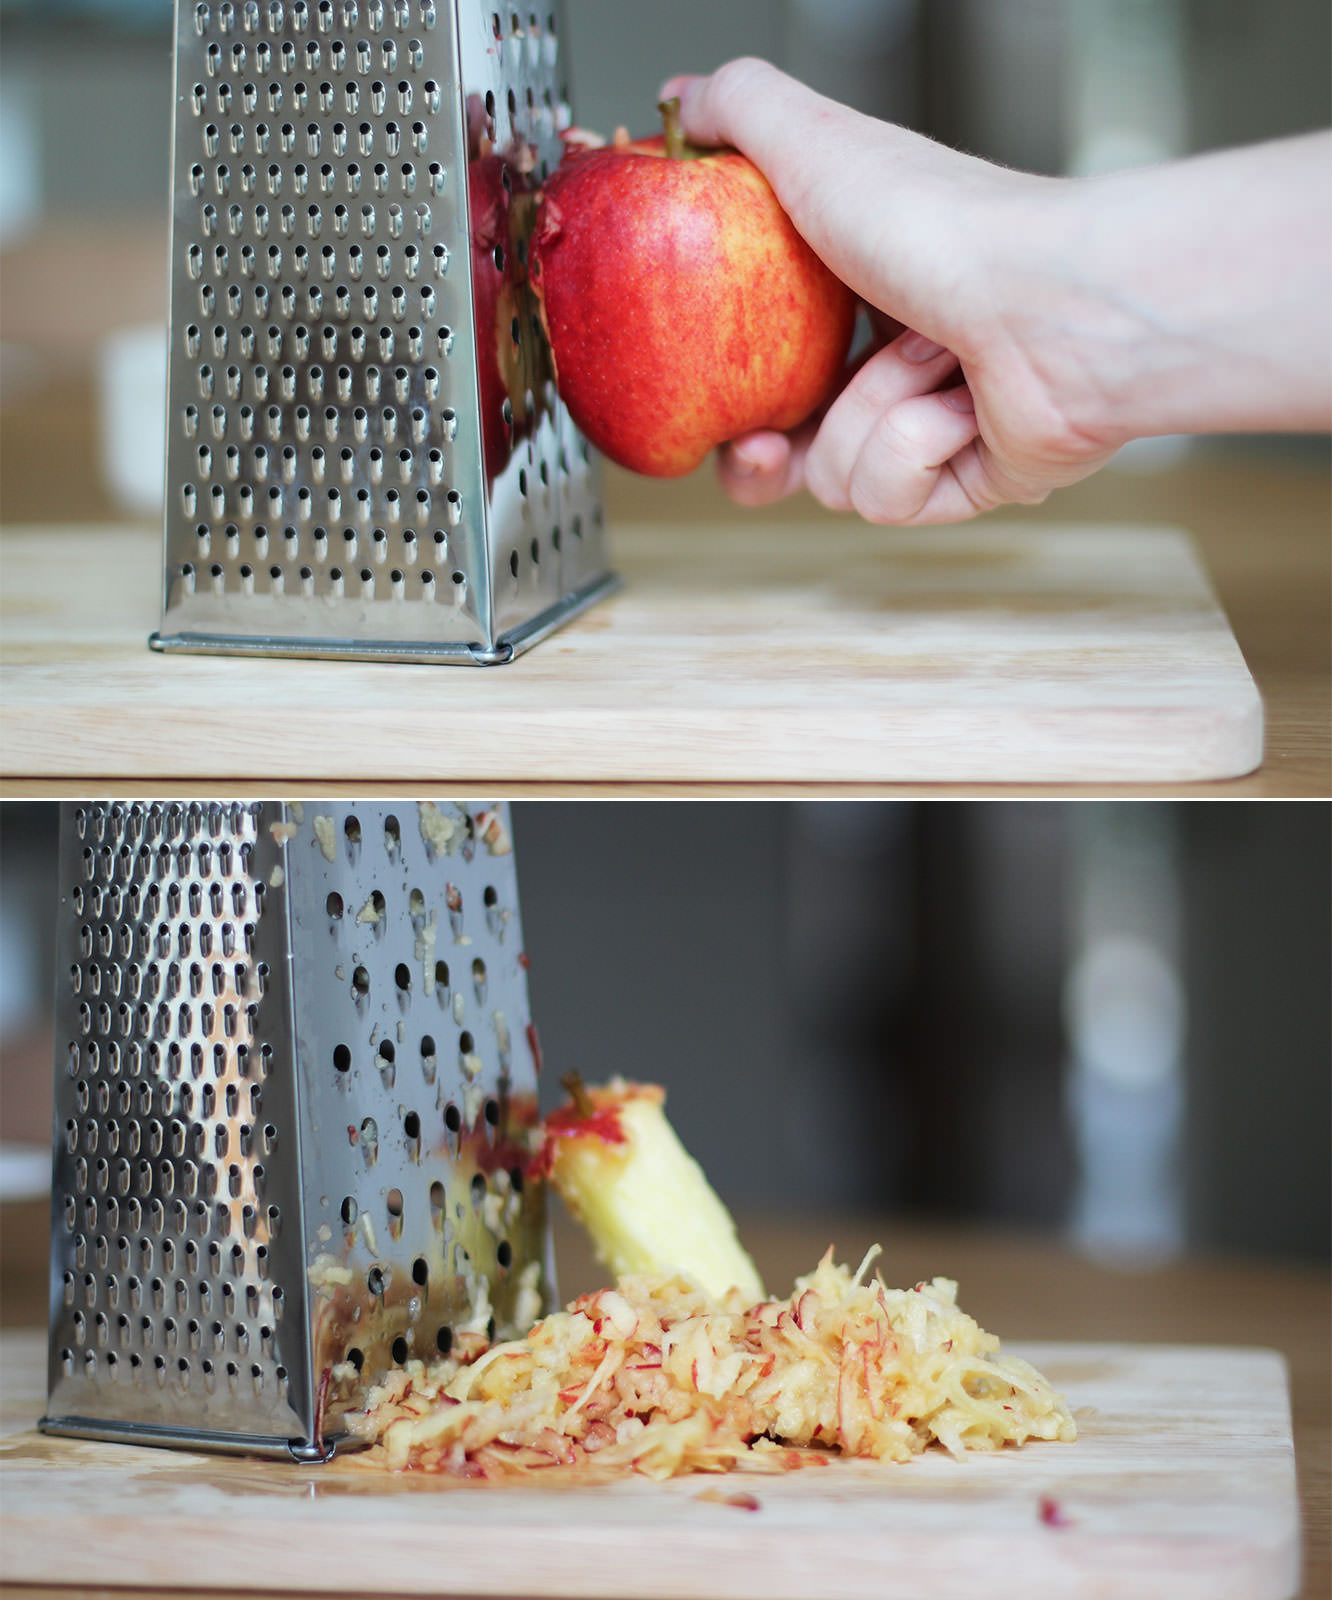
Grate the apple until you get to the core and add to the pancake batter.
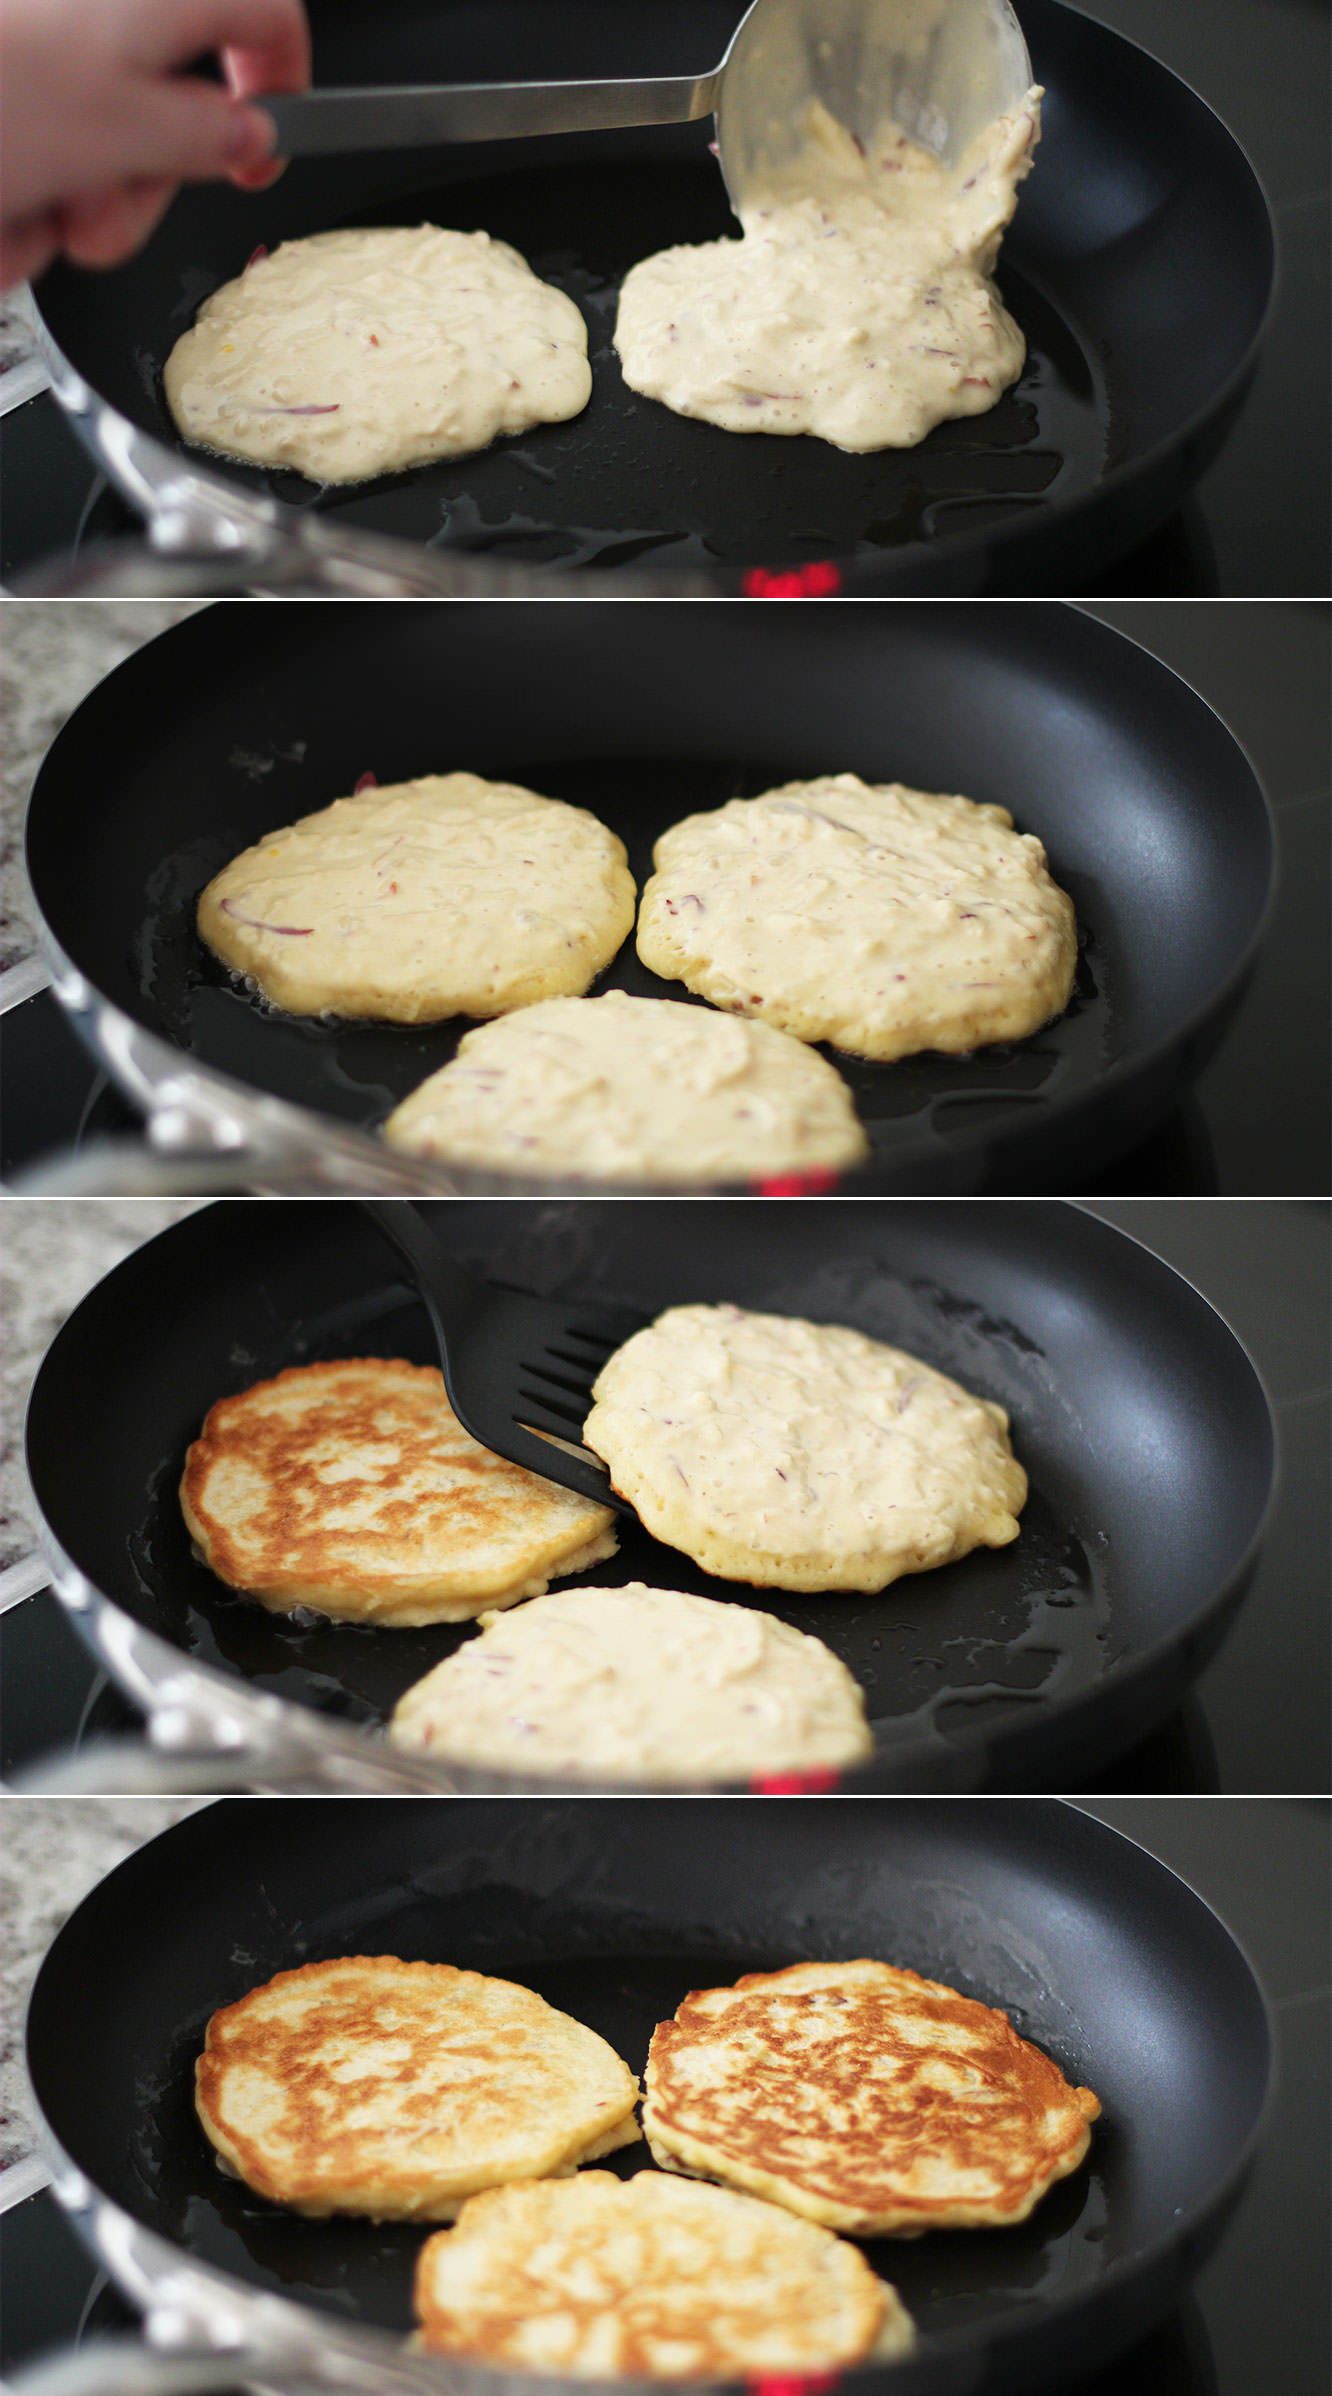
Step three
Using a tablespoon or so of vegetable oil, fry the pancakes until you start to see lots of little bubbles on the surface.
FLIP FLIP FLIP.
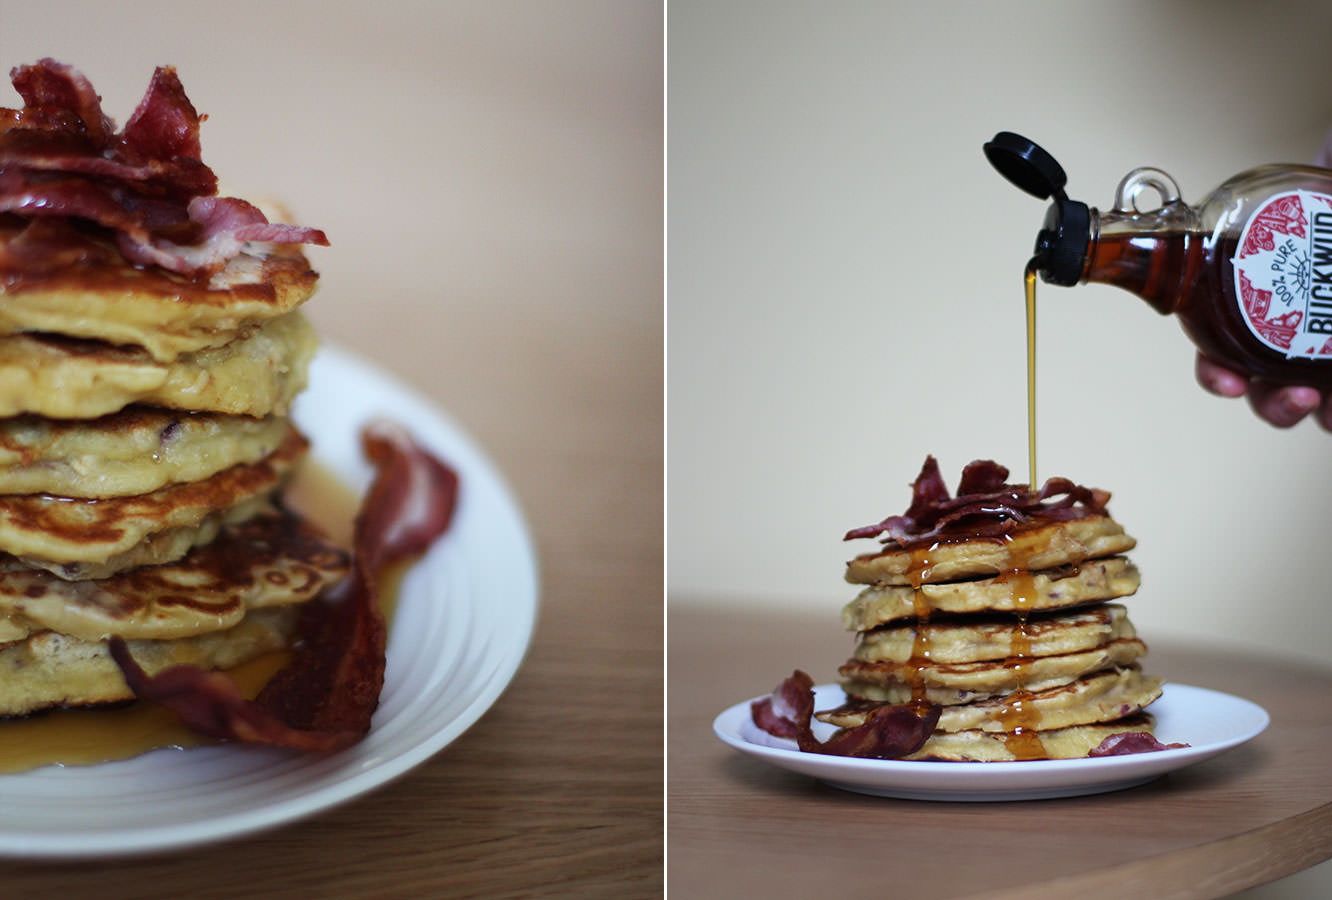
Step four
If you’re wanting bacon with this (and unless you’re a vegetarian, you are wanting bacon) then you’ll want to have that grilling or frying off at the same time.
Right. One down, two to go.
White chocolate and raspberry pancakes
Step one
Refer to step one of apple, maple and bacon recipe.
Step two
Chop the white chocolate into smallish chunks.
Step three
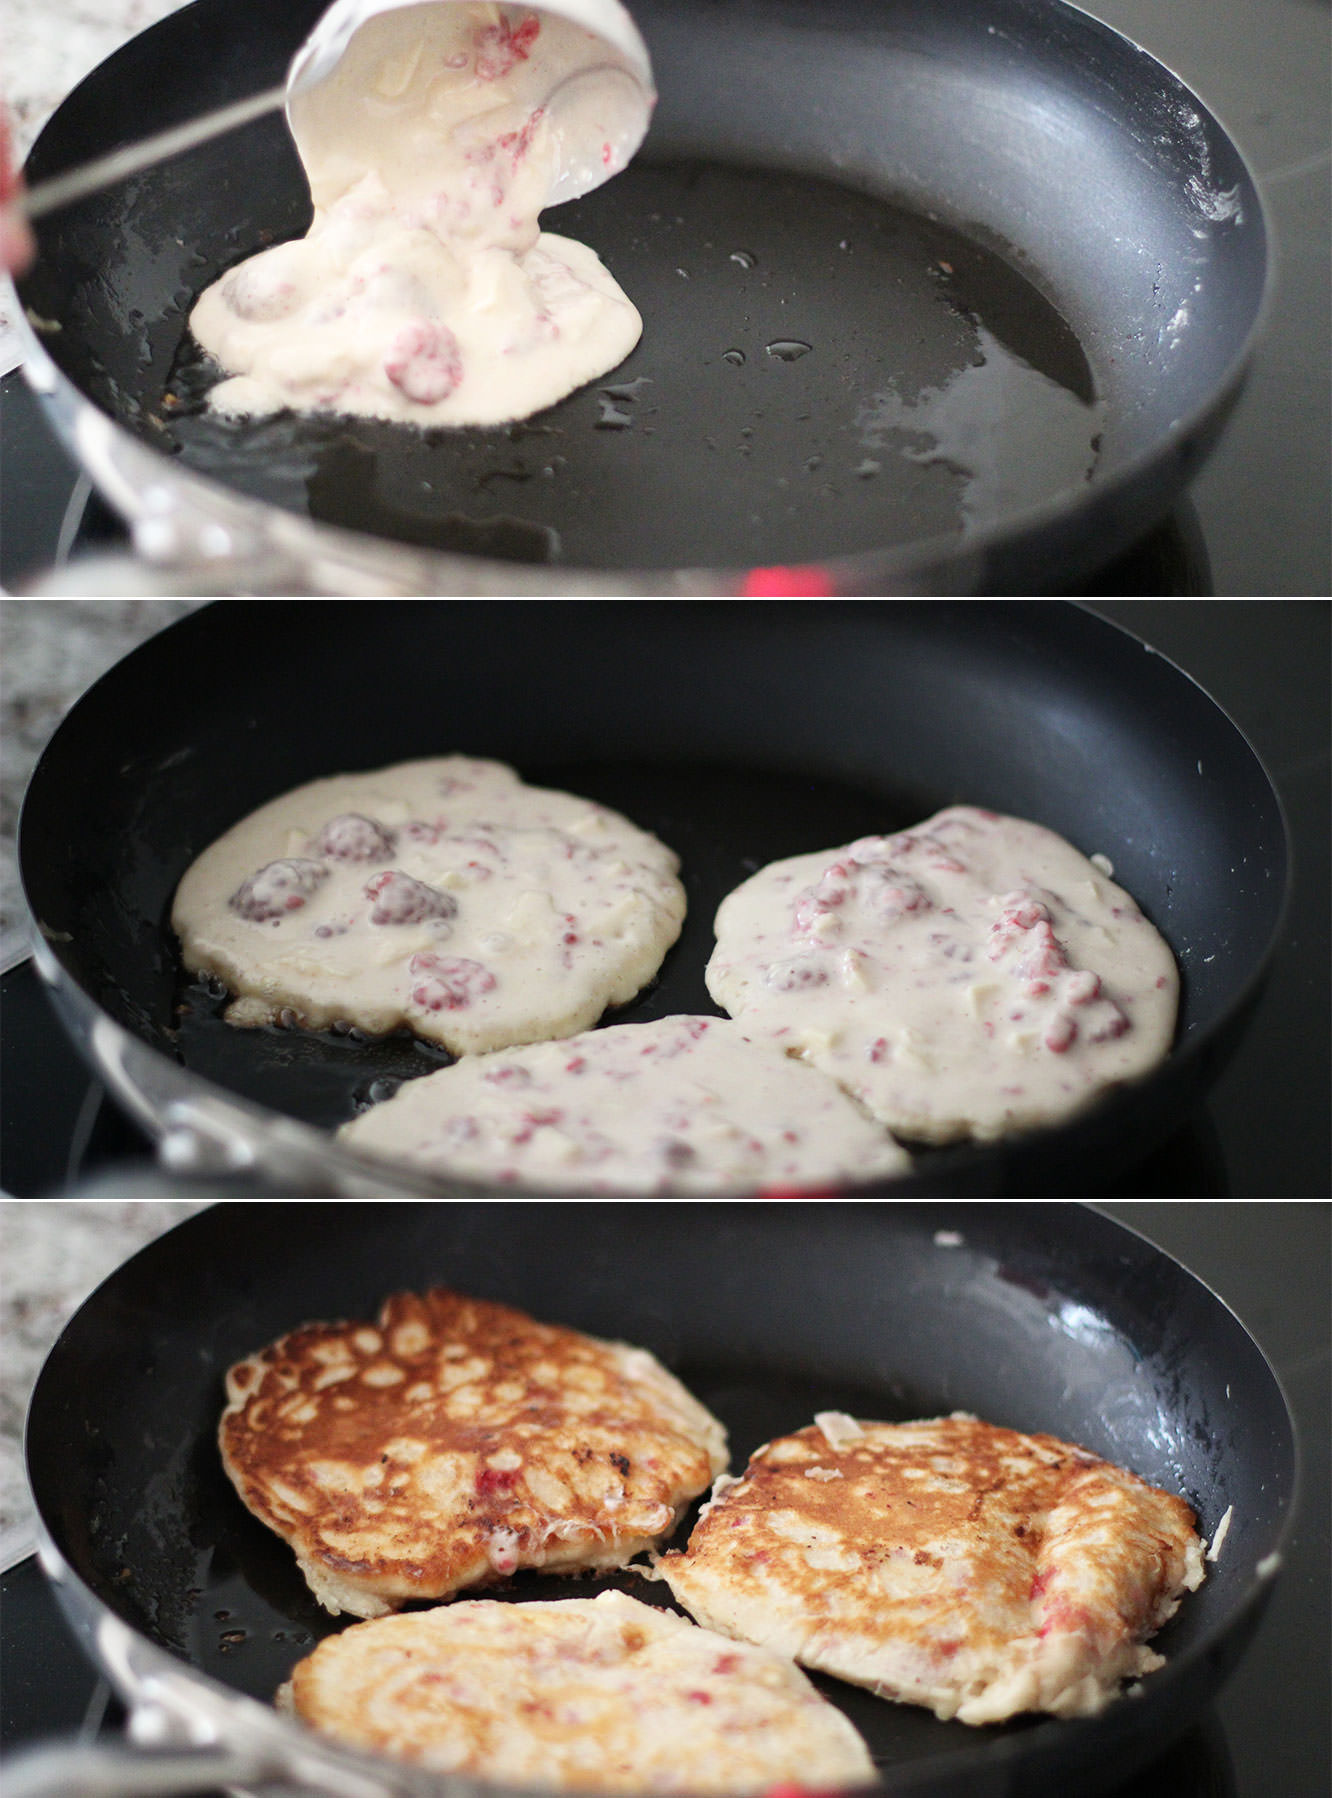
Stir the raspberries and chocolate into the batter. I squashed a few of them with the back of the spoon.
Step four
Cook em off.
You will find this mix a little runnier than the last one from a combo of the raspberry juice and the melting white chocolate.
Step five
Put the dark chocolate in a small bowl in the microwave and melt gradually, 20-30 seconds at a time.
Step six
Stack them, cover in dark chocolate, enjoy.
Banana and blueberry buttermilk almond pancakes
Step one
Repeat the usual step one, you’re a pro by now. This time the buttermilk rather than the milk will make a thicker texture. Don’t forget to include the almond extract.
Step two
Spoon a pancake into the pan and place slices of banana and some blueberries onto the surface. Push them down a little so they don’t fall out when you flip them.
Welcome back chaps, I hope you had a lovely weekend and are now stuffed full of last week’s roulade.
This week’s post is a little more January friendly – it doesn’t involve eating and will help save a few pennies too. Since the Christmas drinks specials season came to an end I’ve been missing a certain honey and almond hot chocolate and planning to concoct something with those flavours for fabrefaction. I didn’t expect it to not be for consumption but there you go.
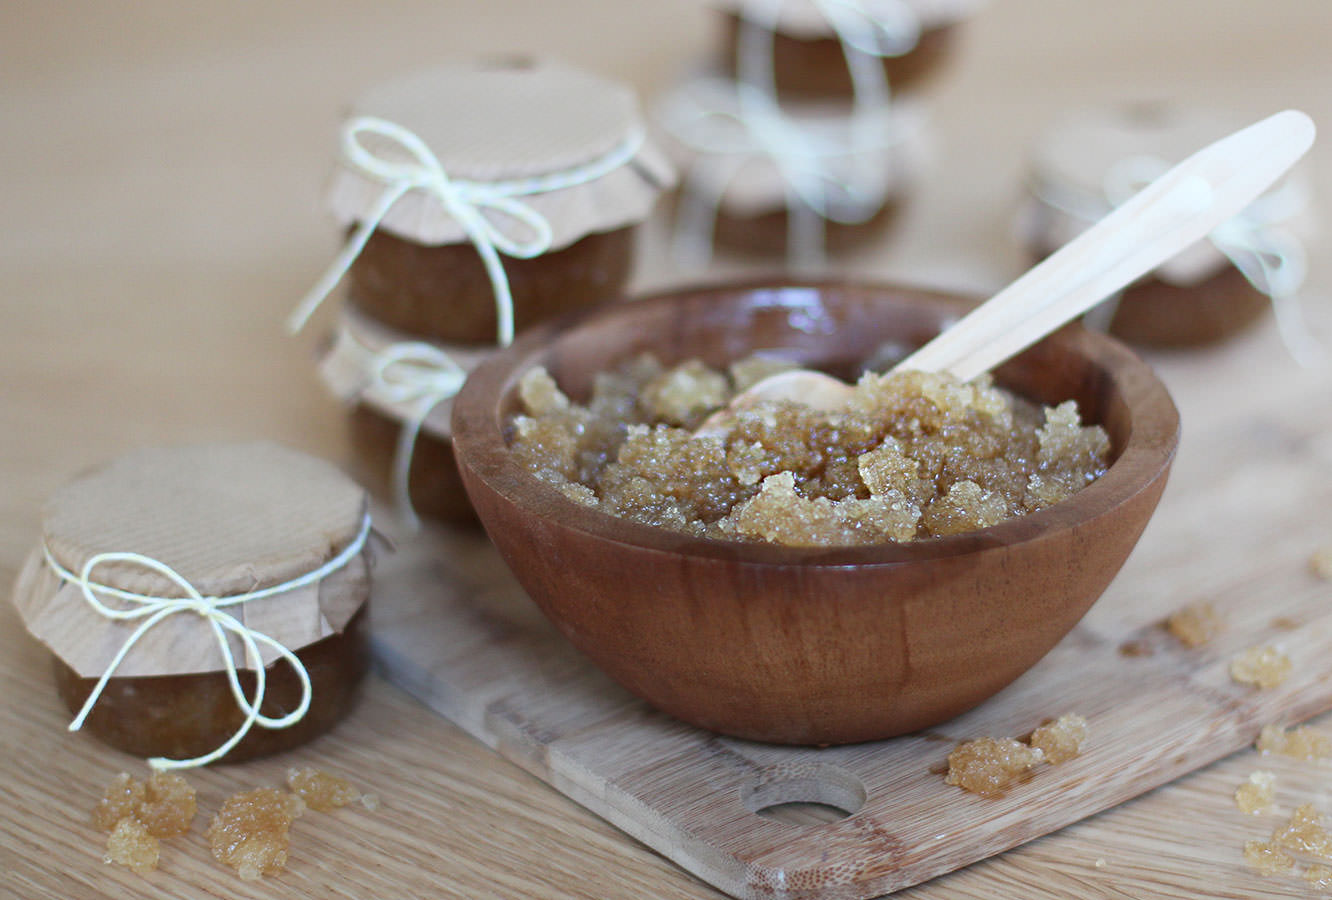
I thought it would be fun to give some favours the ladies who came to our little sleepover last week. This scrub is a great little gift on the cheap and would work well for favours for a hen party/bridal shower or similar.
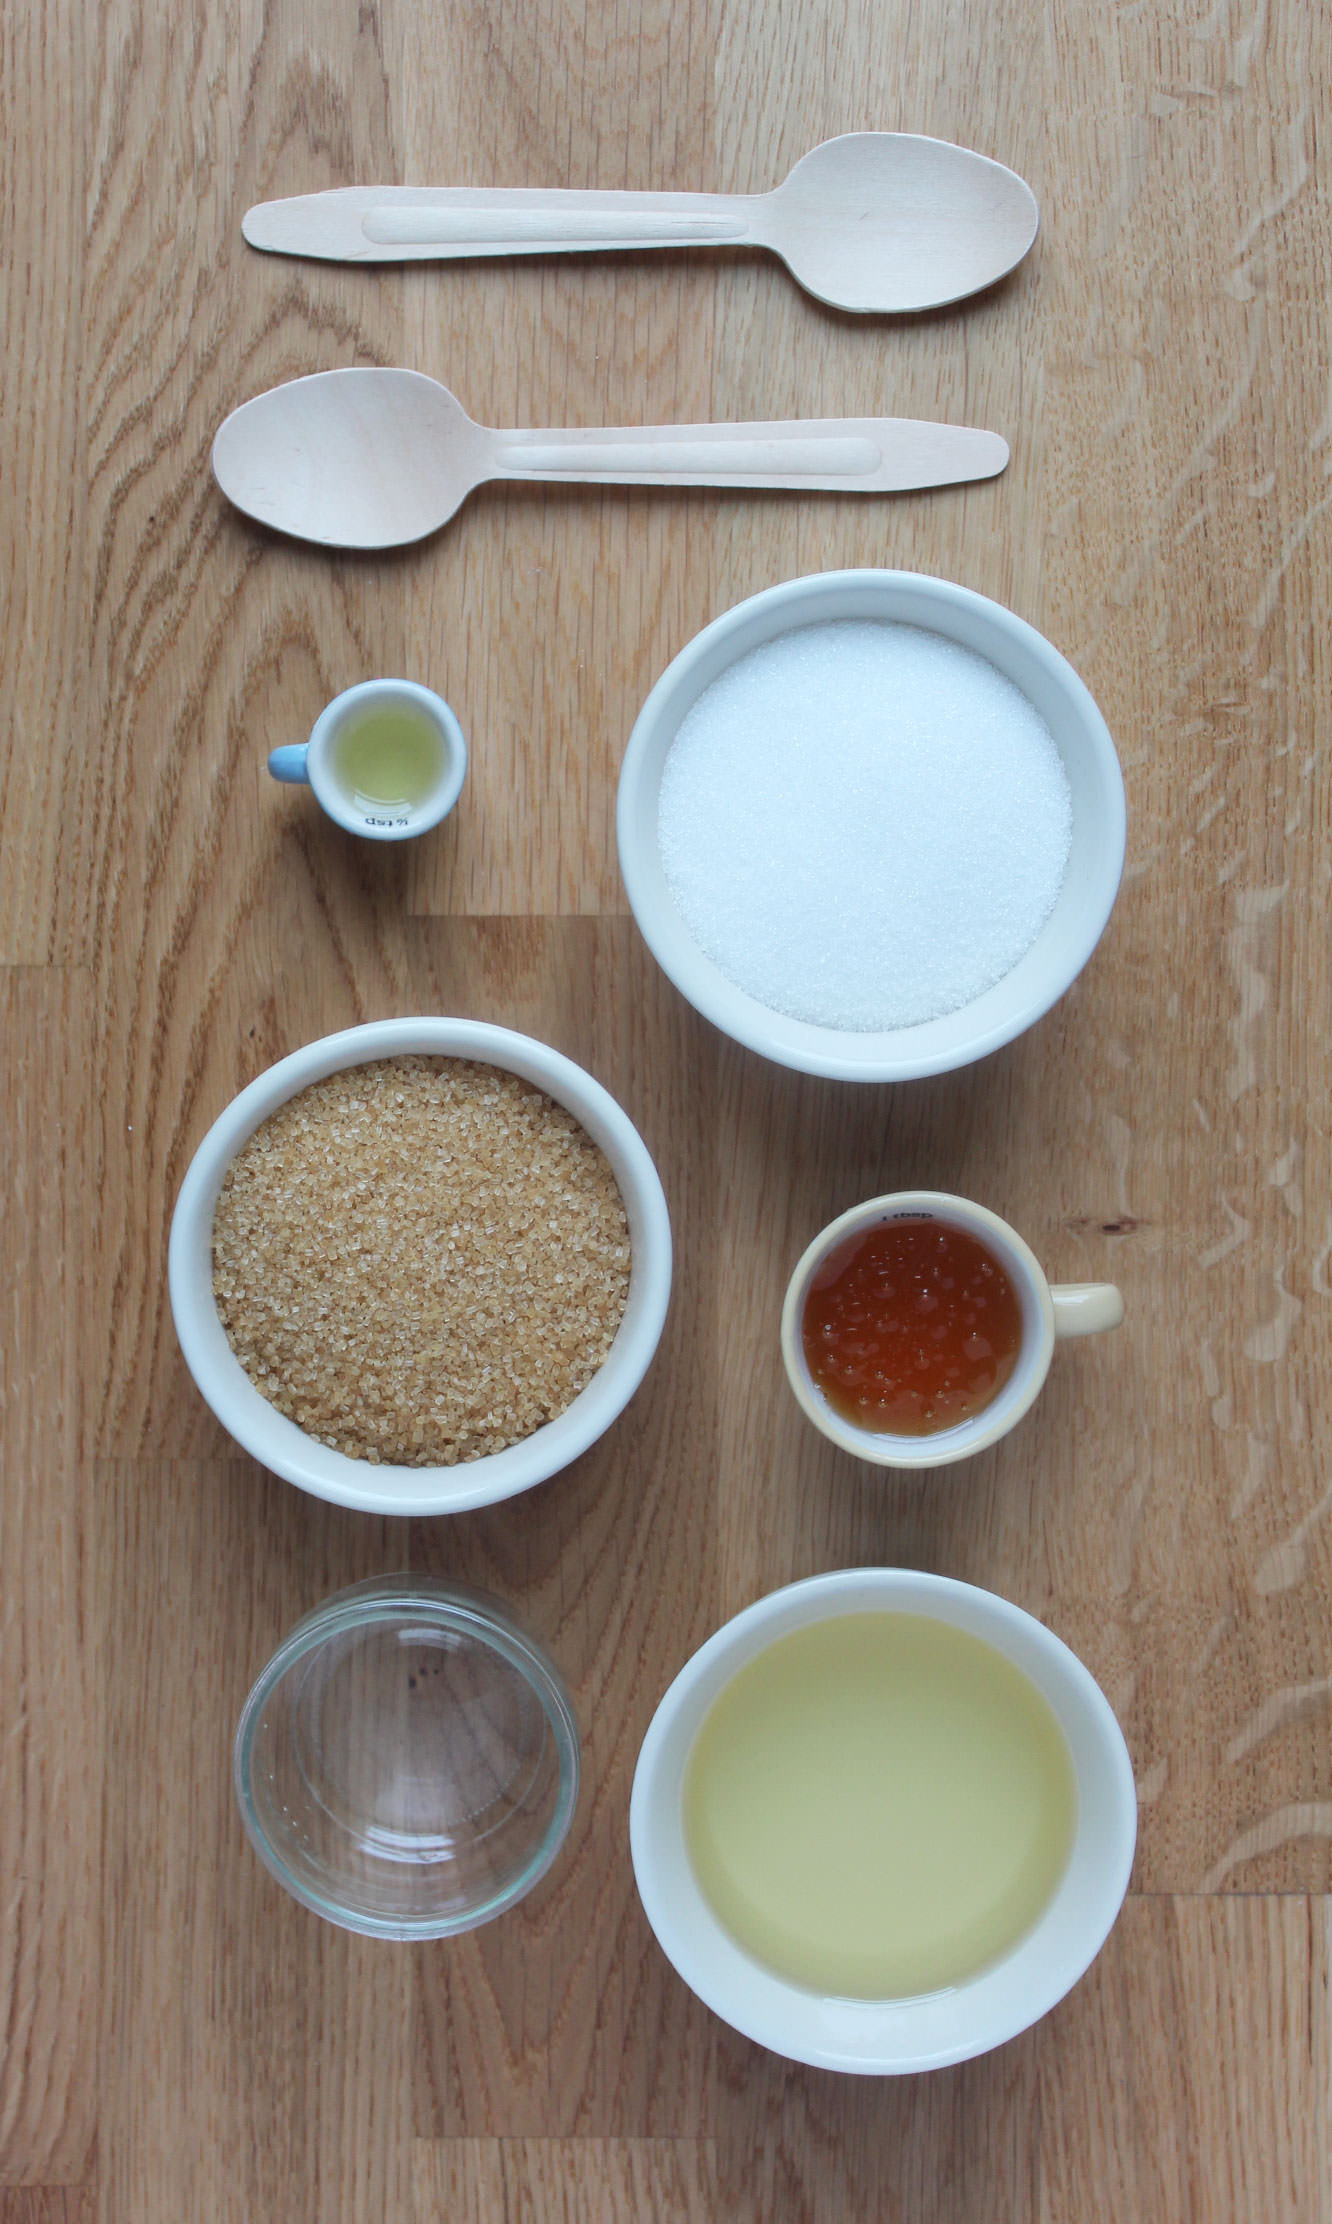
You will need
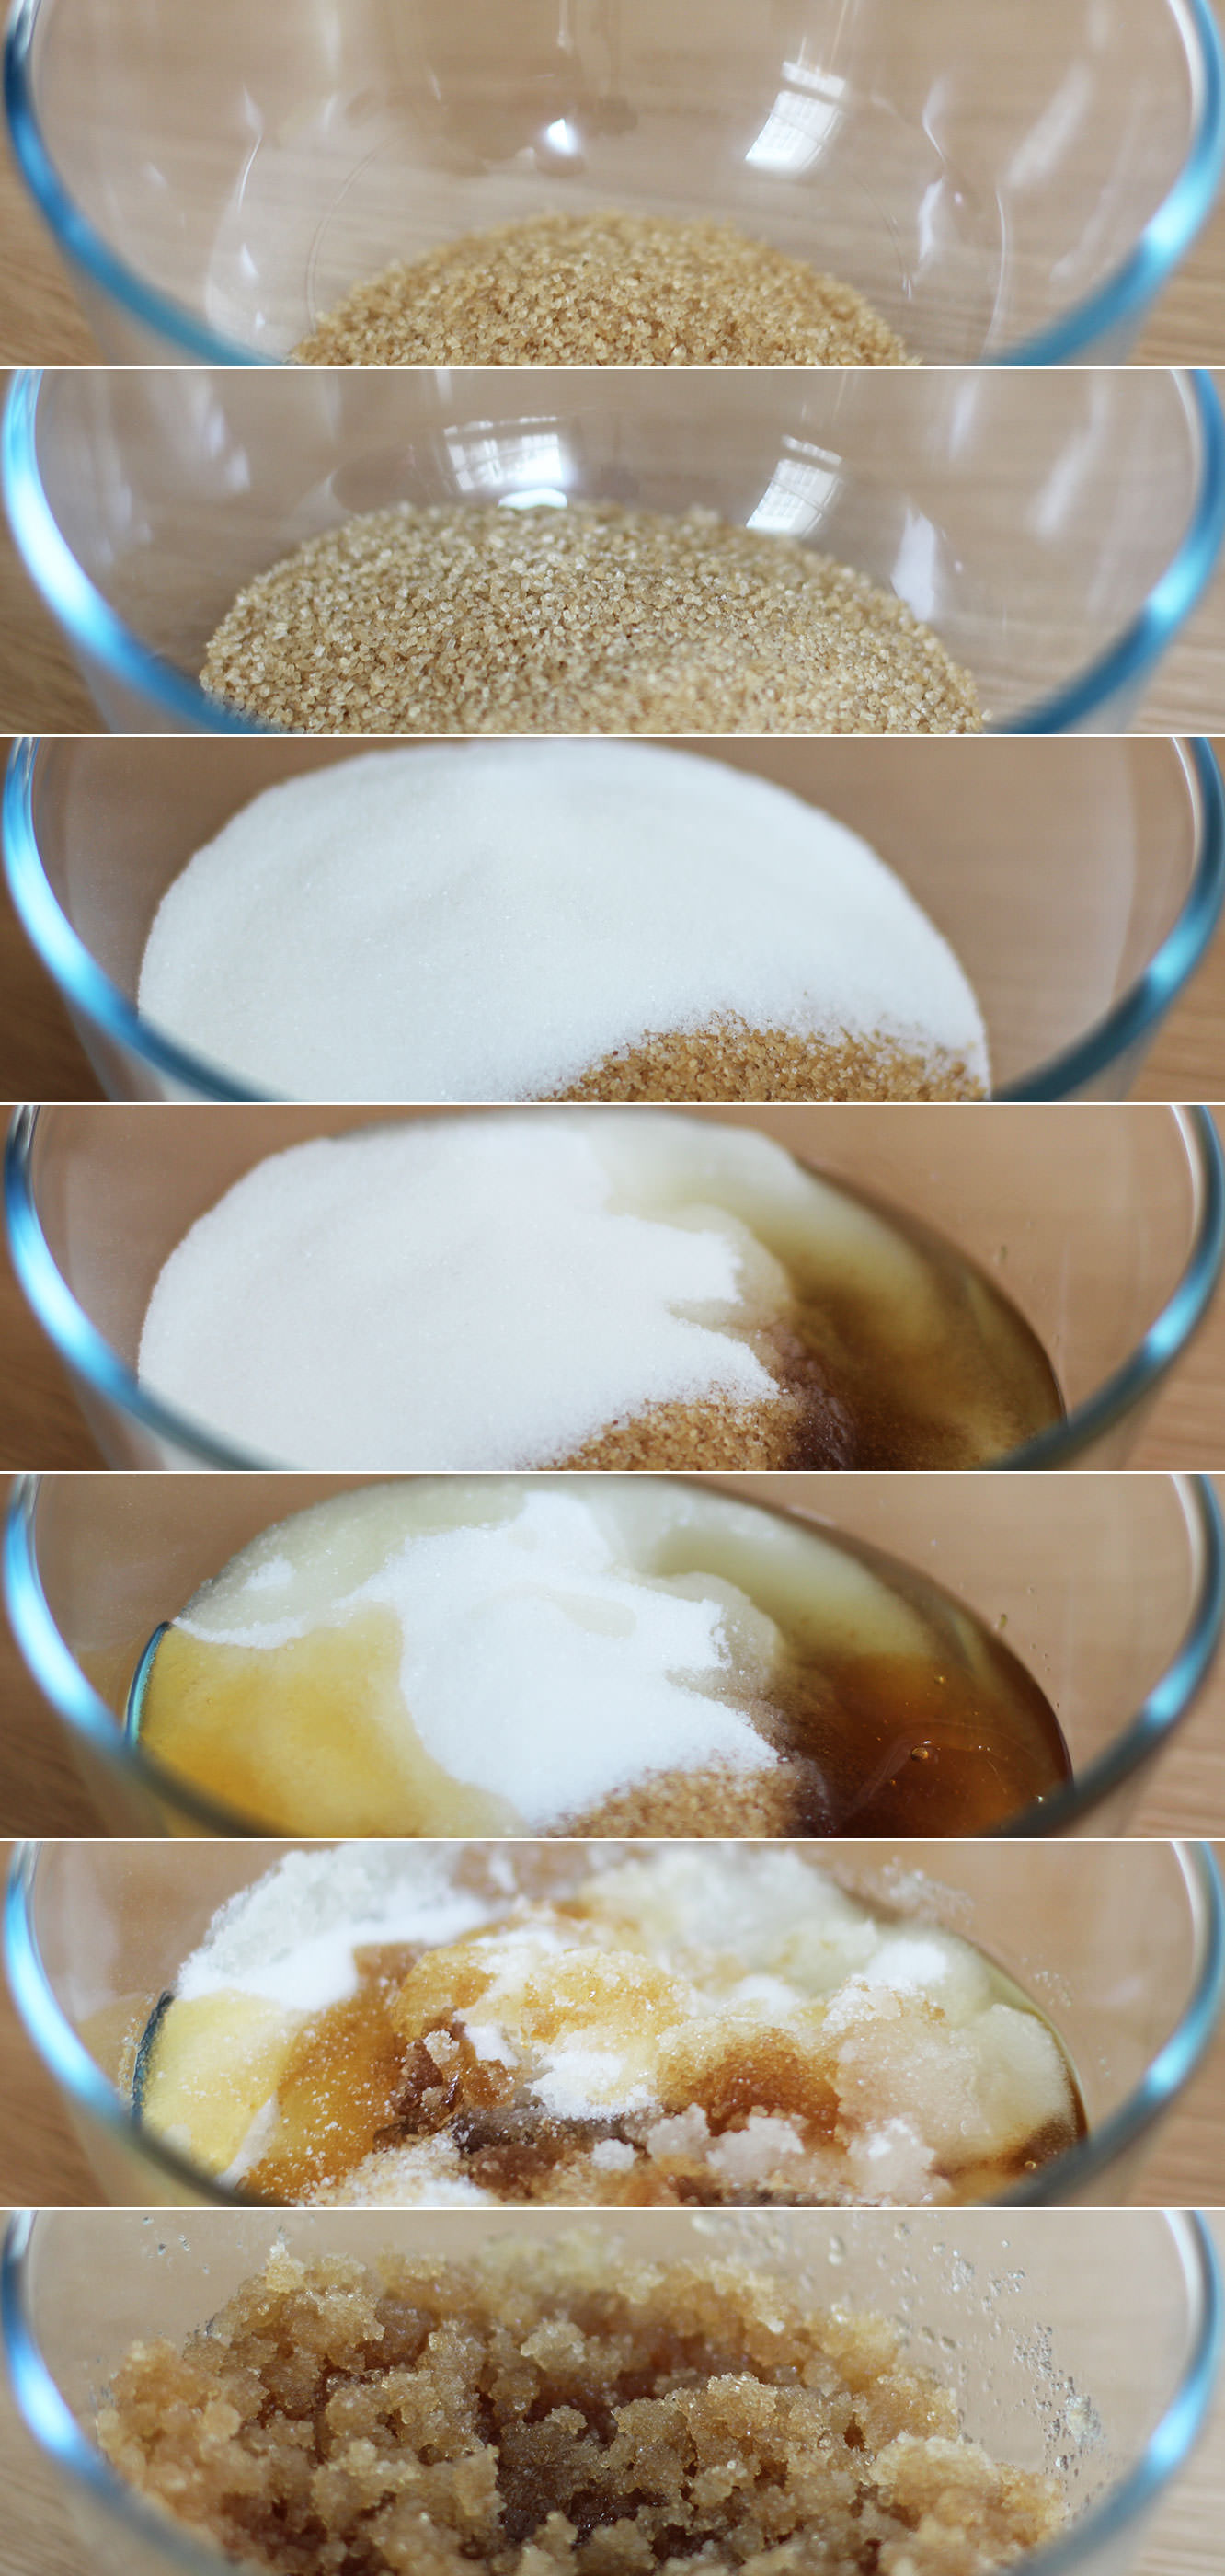
2 cups Demerara sugar
1 cup Granulated sugar
1/4 cup Walnut oil
1/2 cup Sunflower/vegetable oil
1/2 cup Clear honey
2 tsp Almond extract
(Makes six small jars)
Step one
There really only is one step. I couldn’t even think of a gif this week.
Take all the ingredients and mix them together.
Step two
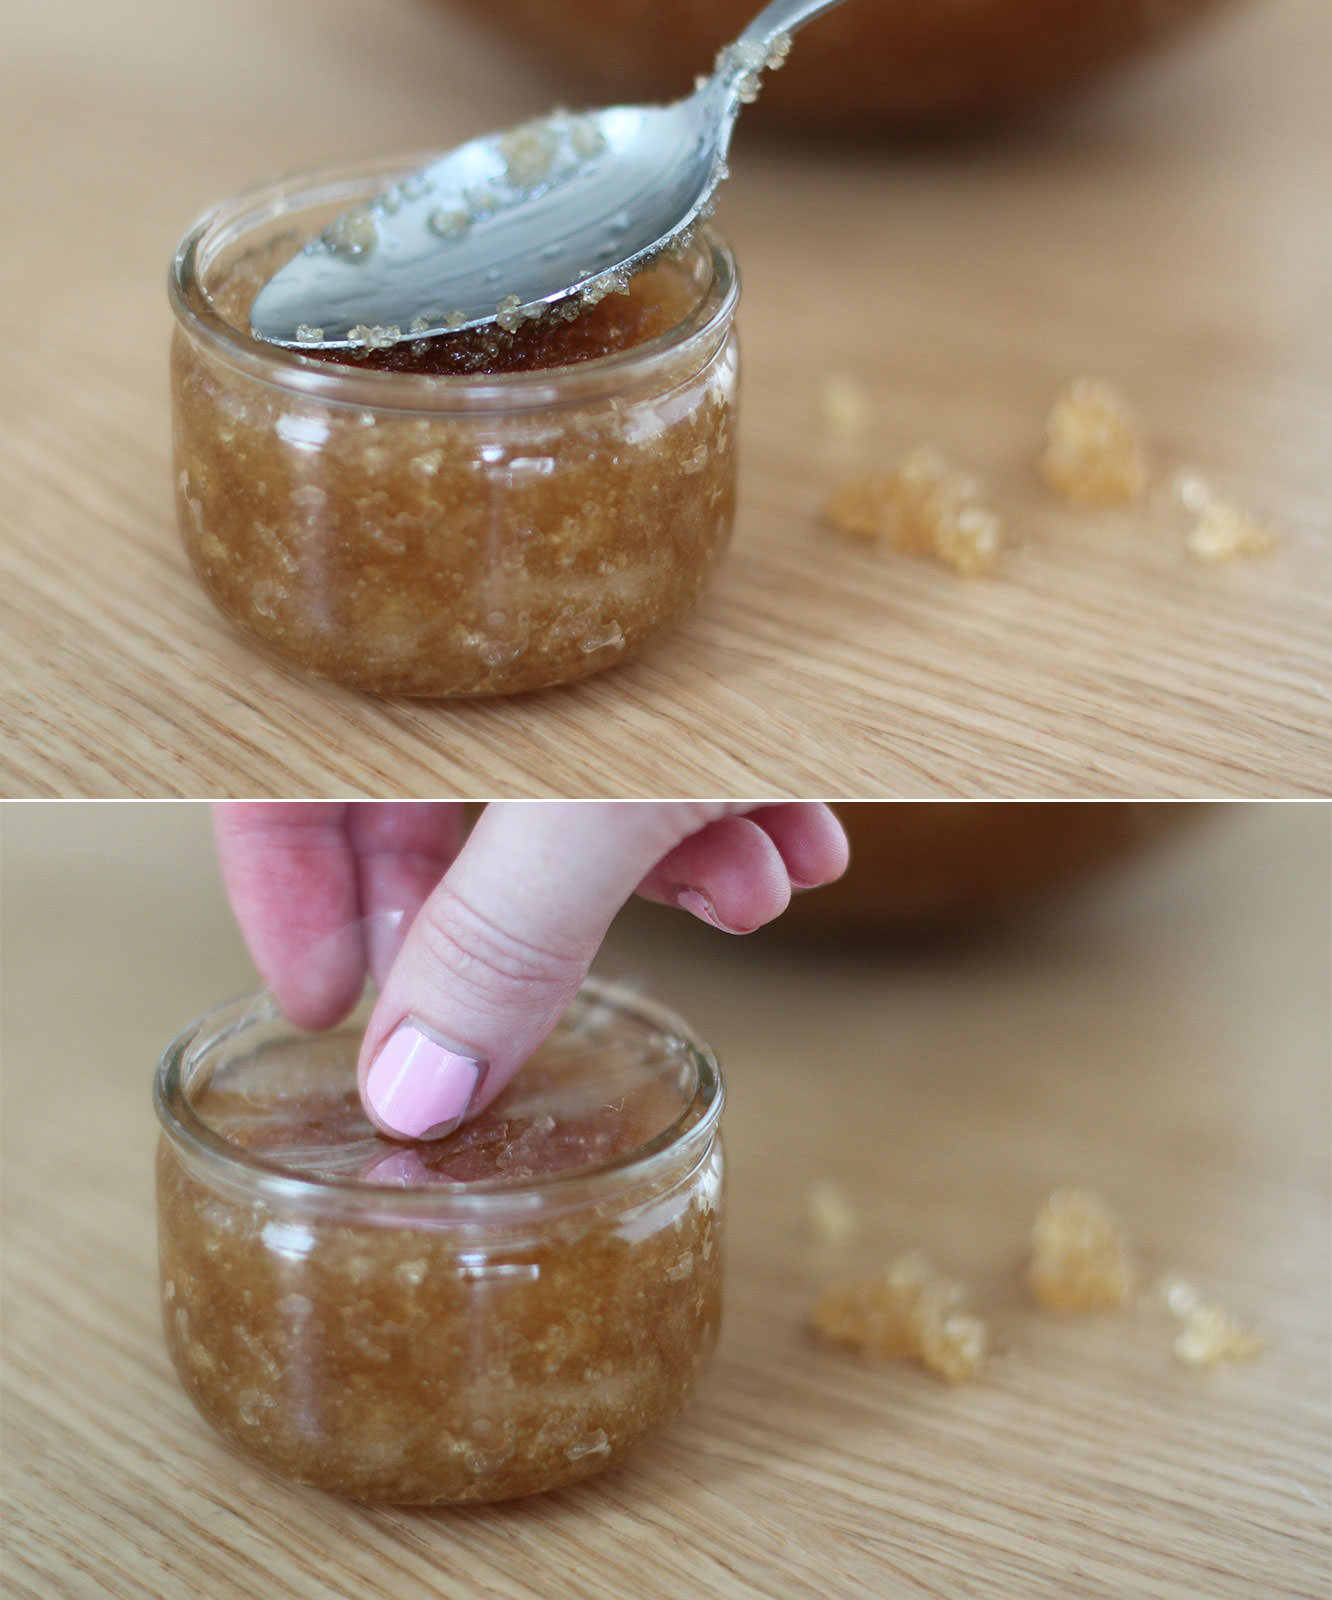
If you’re gifting these then you might want to use little ramekins or jars. I recommend something with a lid to be honest, I used cellophane to seal the scrub in. I’ll be honest, this was with mixed success – just keep them upright if you go for this option to stop the oil leaking.
Step three
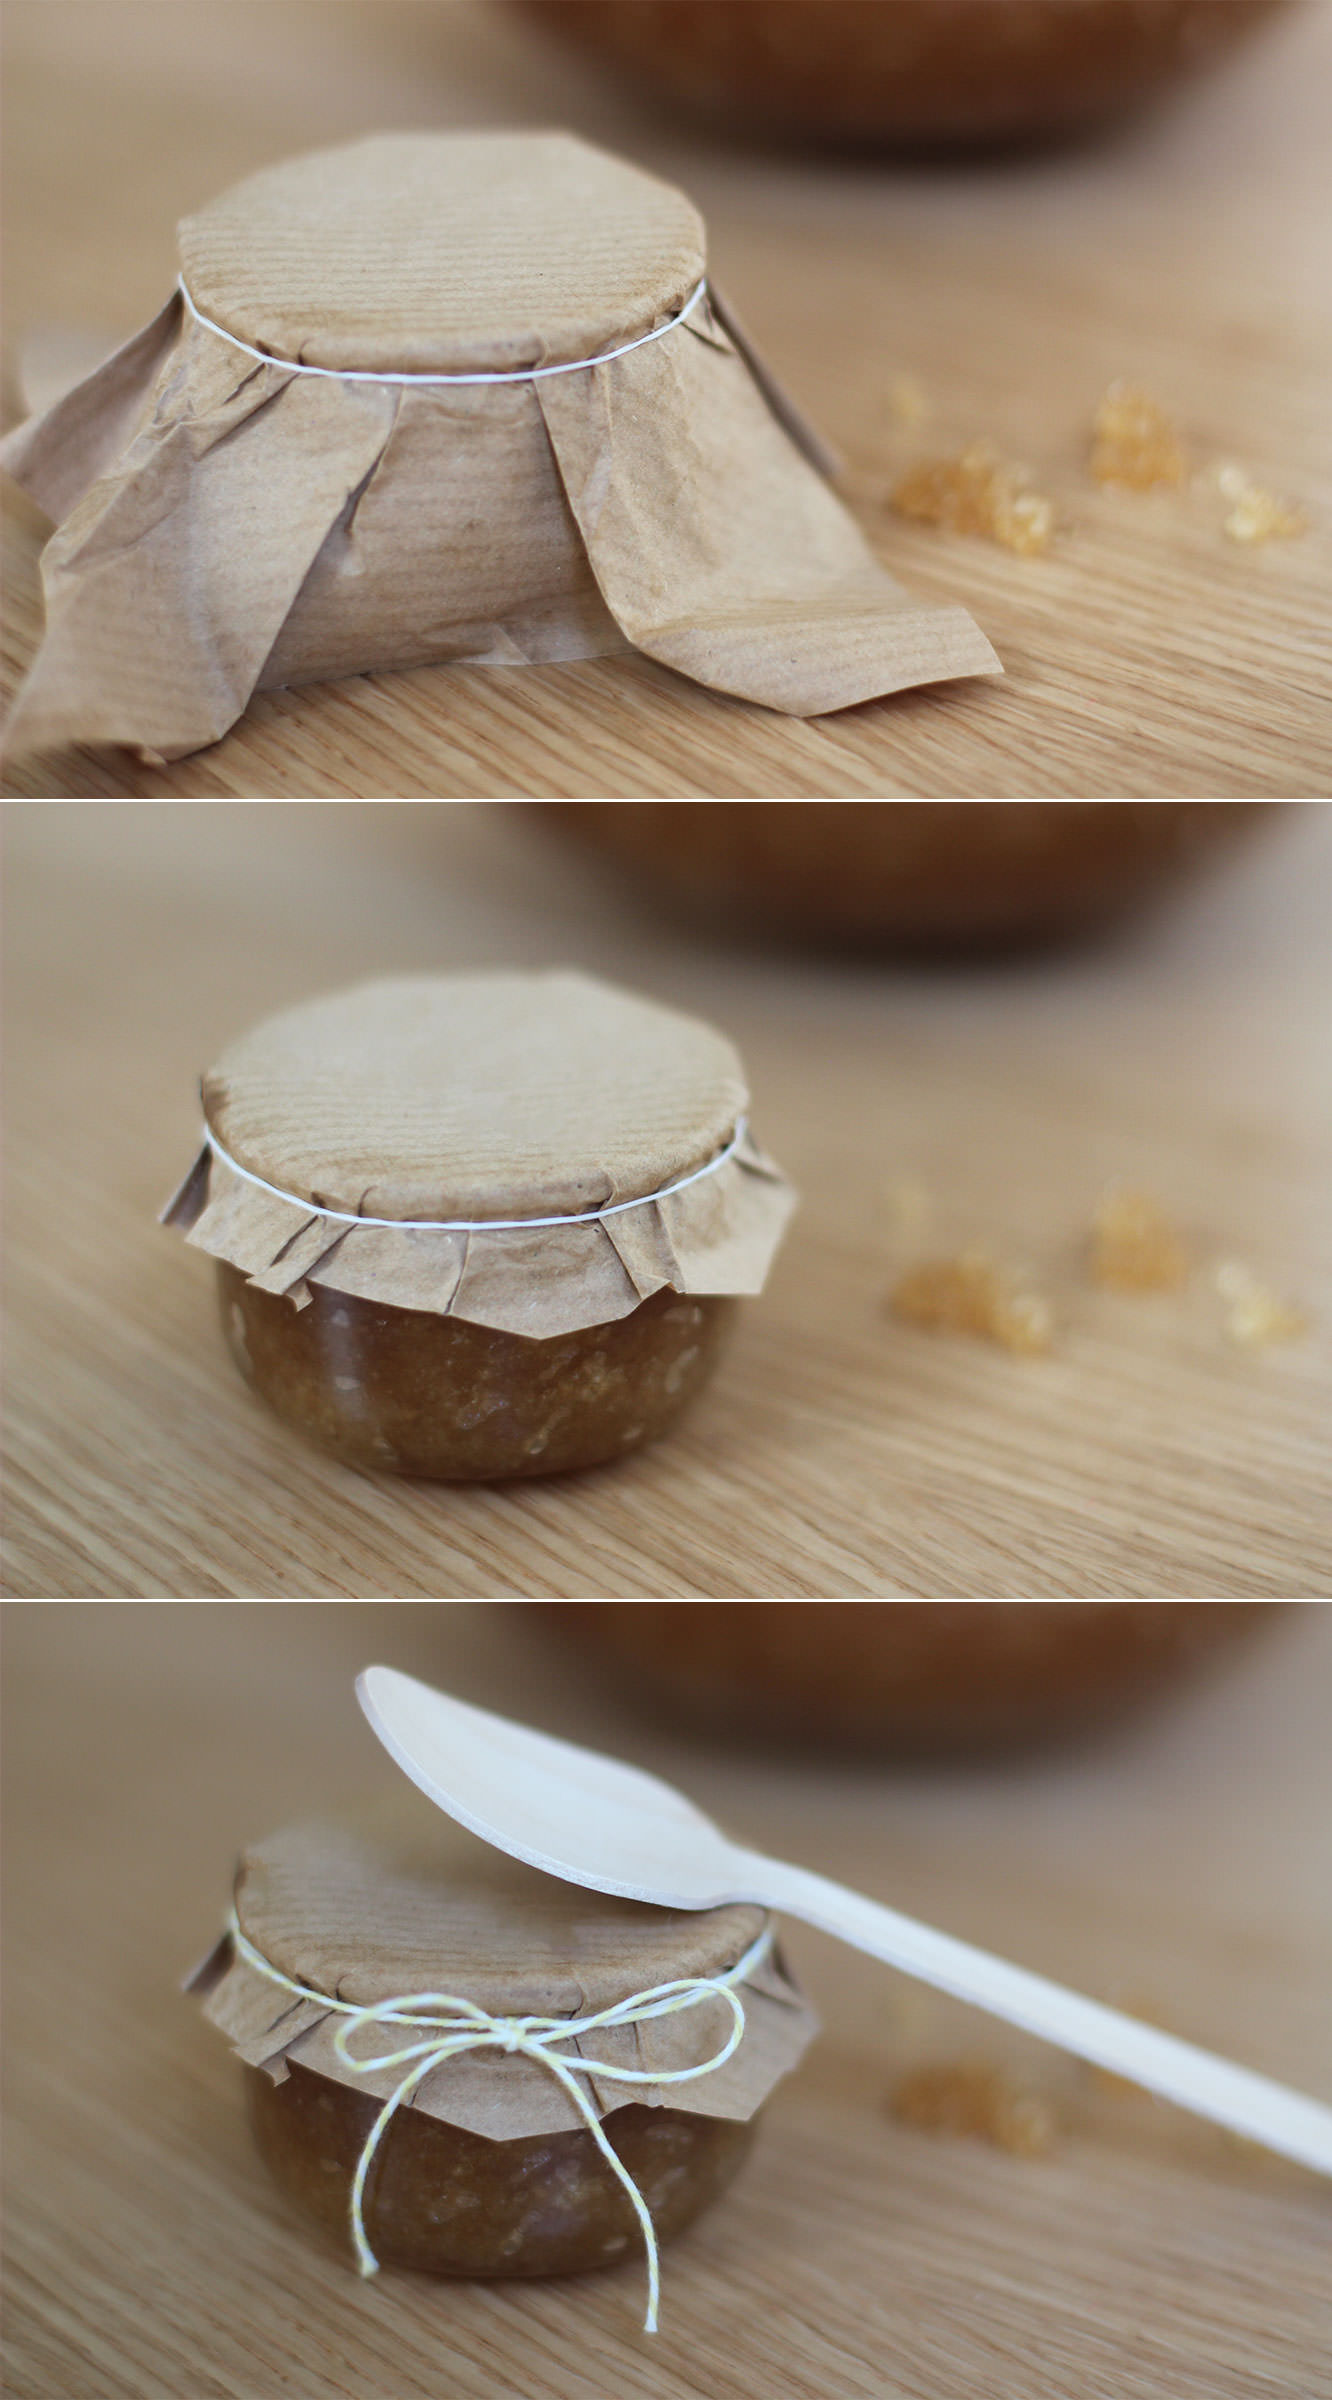
Using paper or fabric (I thought brown paper added nicely to the natural look and feel) cover the pots.
Make sure it;s a larger piece than required. Fasten with a loom band (find a small child who’s become bored of them and pinch a few).
Step four
Trim the edges of the paper or fabric. If using fabric I recommend pinking shears for the job to stop it fraying.
Step five
Tie a nice piece of string/twine/ribbon around the rim to cover the loom band. Depending on the size of the jar you might want to tie a small wooden spoon to it at this point (the scrub settles and needs a little stir before use).
I left the spoons loose because they looked novelty big in comparison to the jar. If you’re in the UK I got these from Tiger.
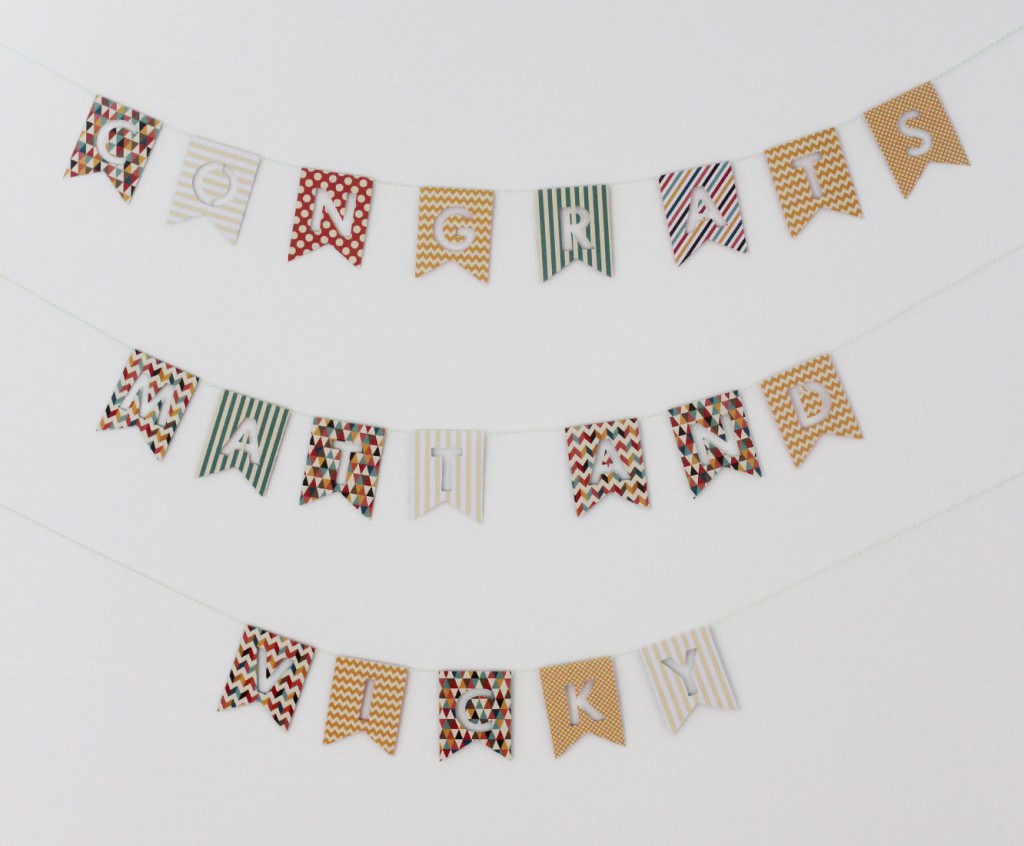
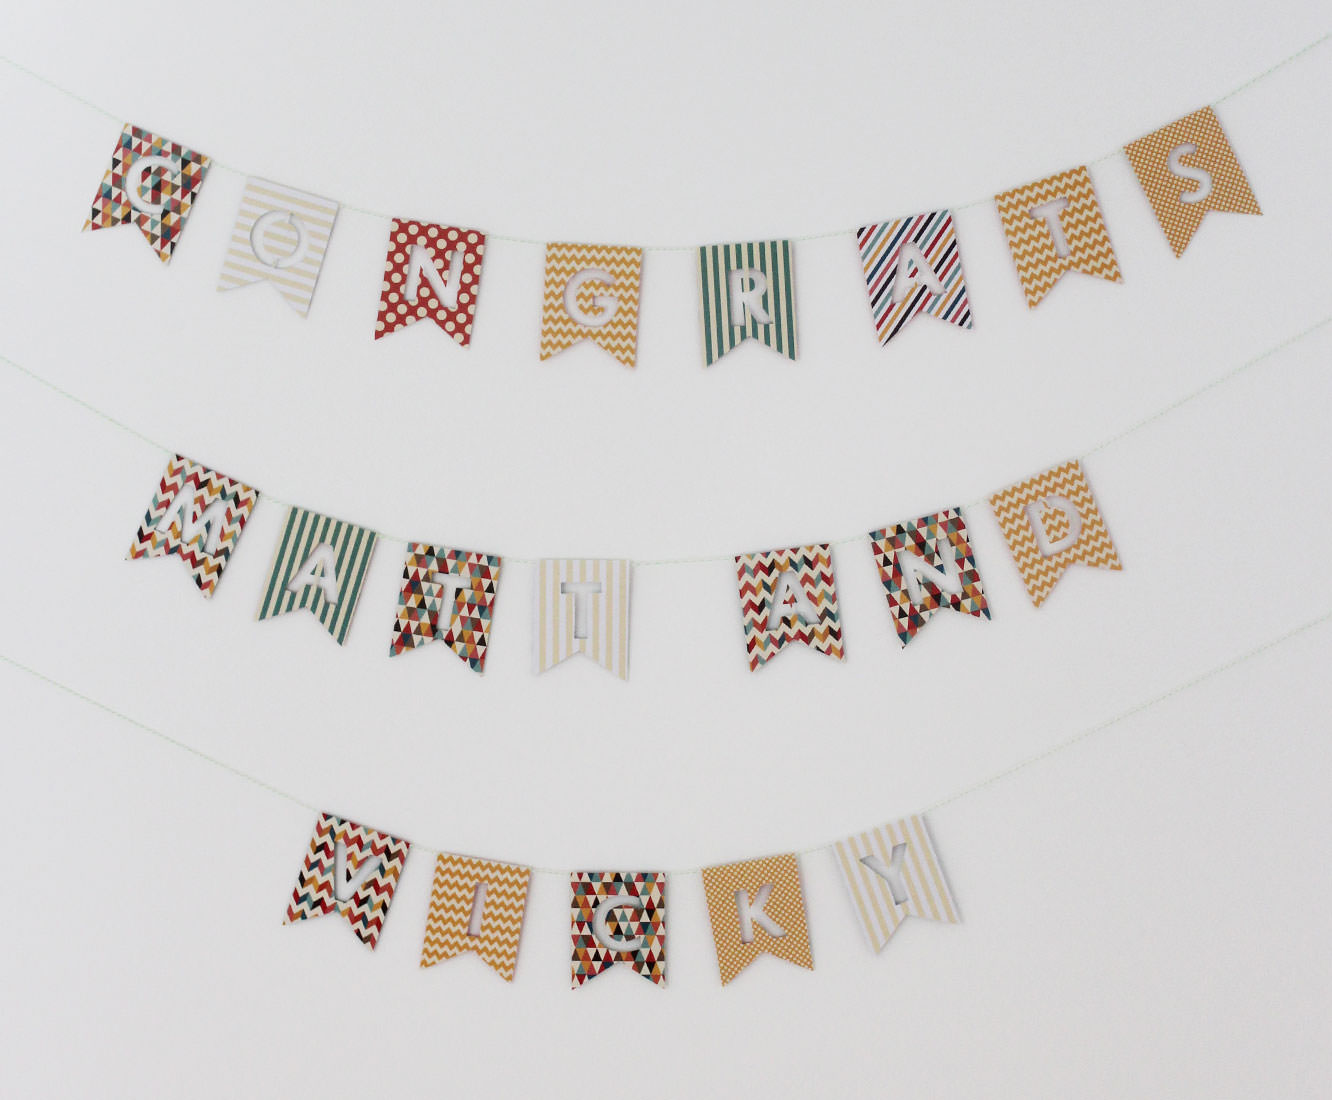
I’m finally going to wrap up my little series of posts from Matt and Vicky’s engagement party this week. I know, you didn’t think there could possibly be more right? Well, no party is complete without a banner.
Just in case their guests forgot, I made a little congratulations banner. A congrats banner, let’s be honest, congratulations is a long word.
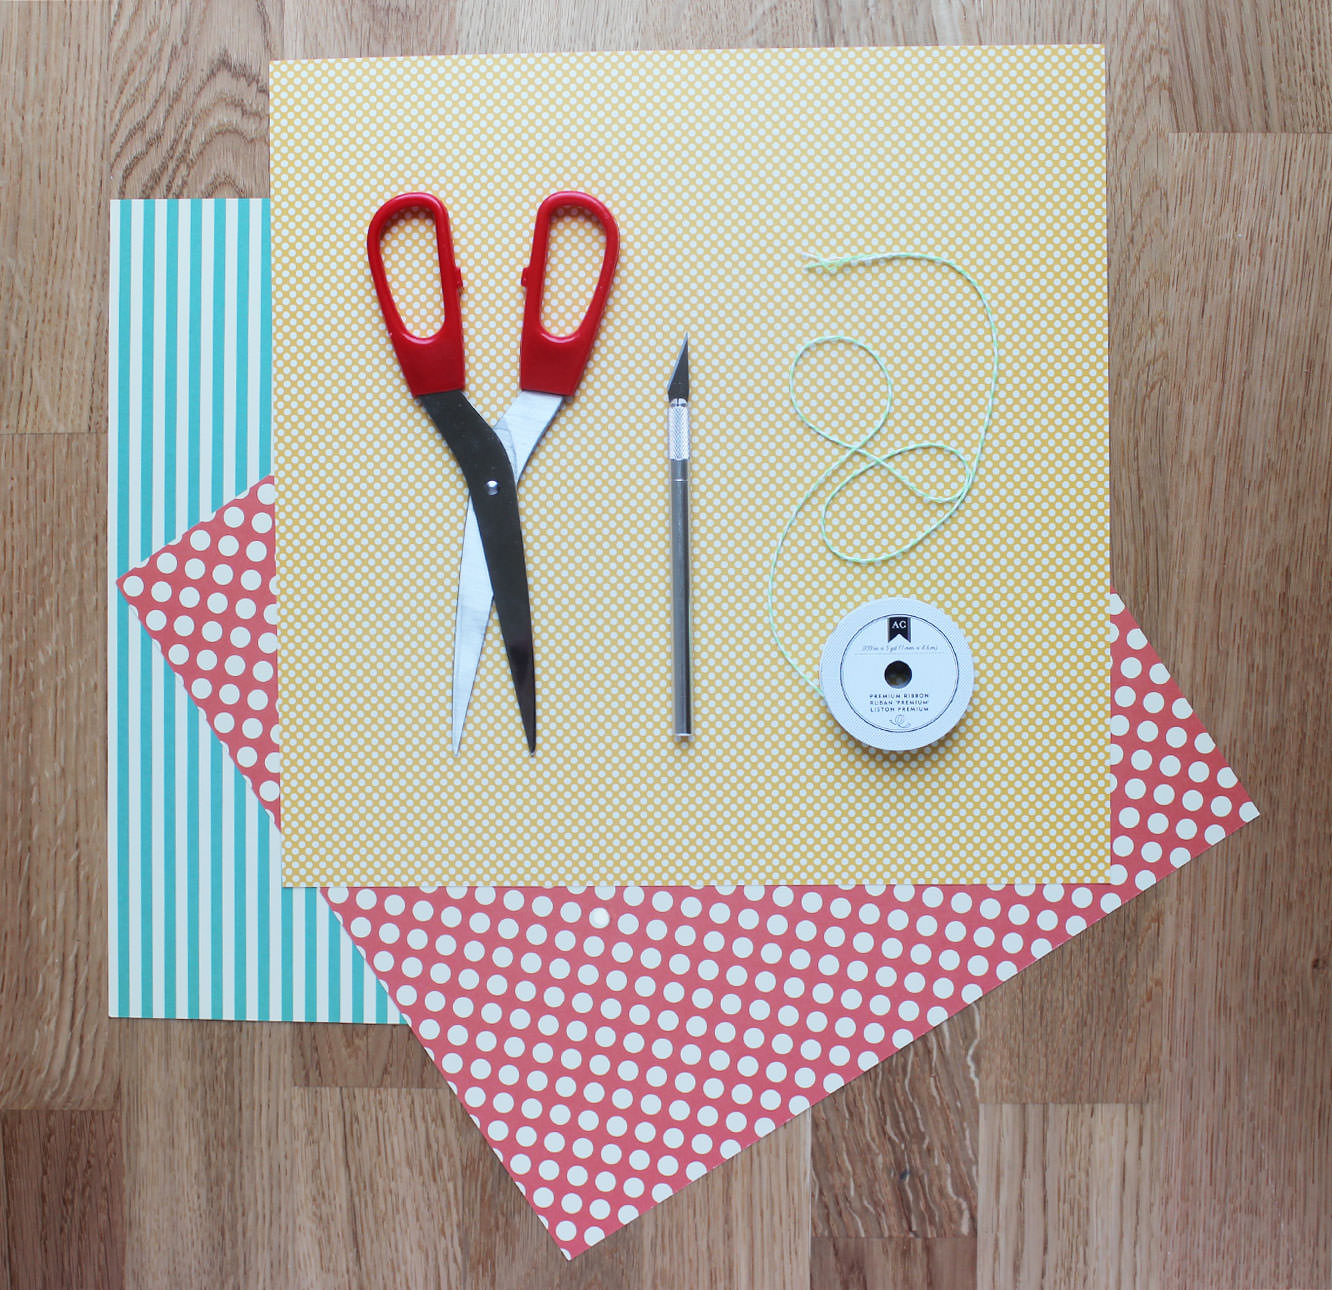
You will need
Some pretty paper or card
A craft knife and a cutting mat (or chopping board)
Double-sided tape
String
Step one
Using a chunky font, type out the message for your banner. I think this was Futura in case you want to copy exactly (but then you would also need to find a Matt and a Vicky to congratulate).
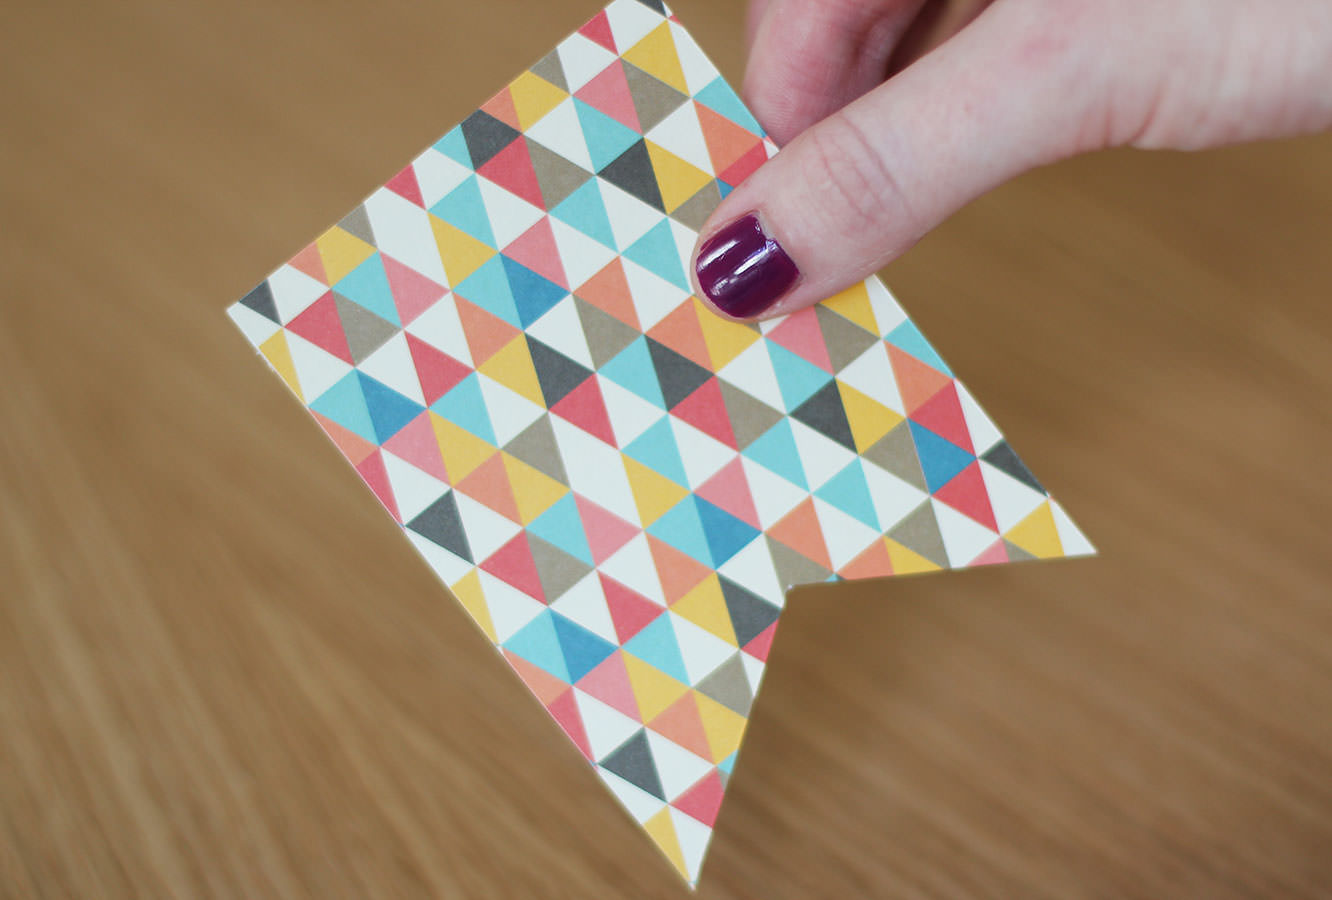
Step two
Cut out little flag shapes big enough to house your letters, remember to leave at least half a centimetre at the top to fold over.
These are super simple to get even, just draw a rectangle with a line down the centre and then draw two diagonals from the corner to the same point on the central line. Use the first one as a template.
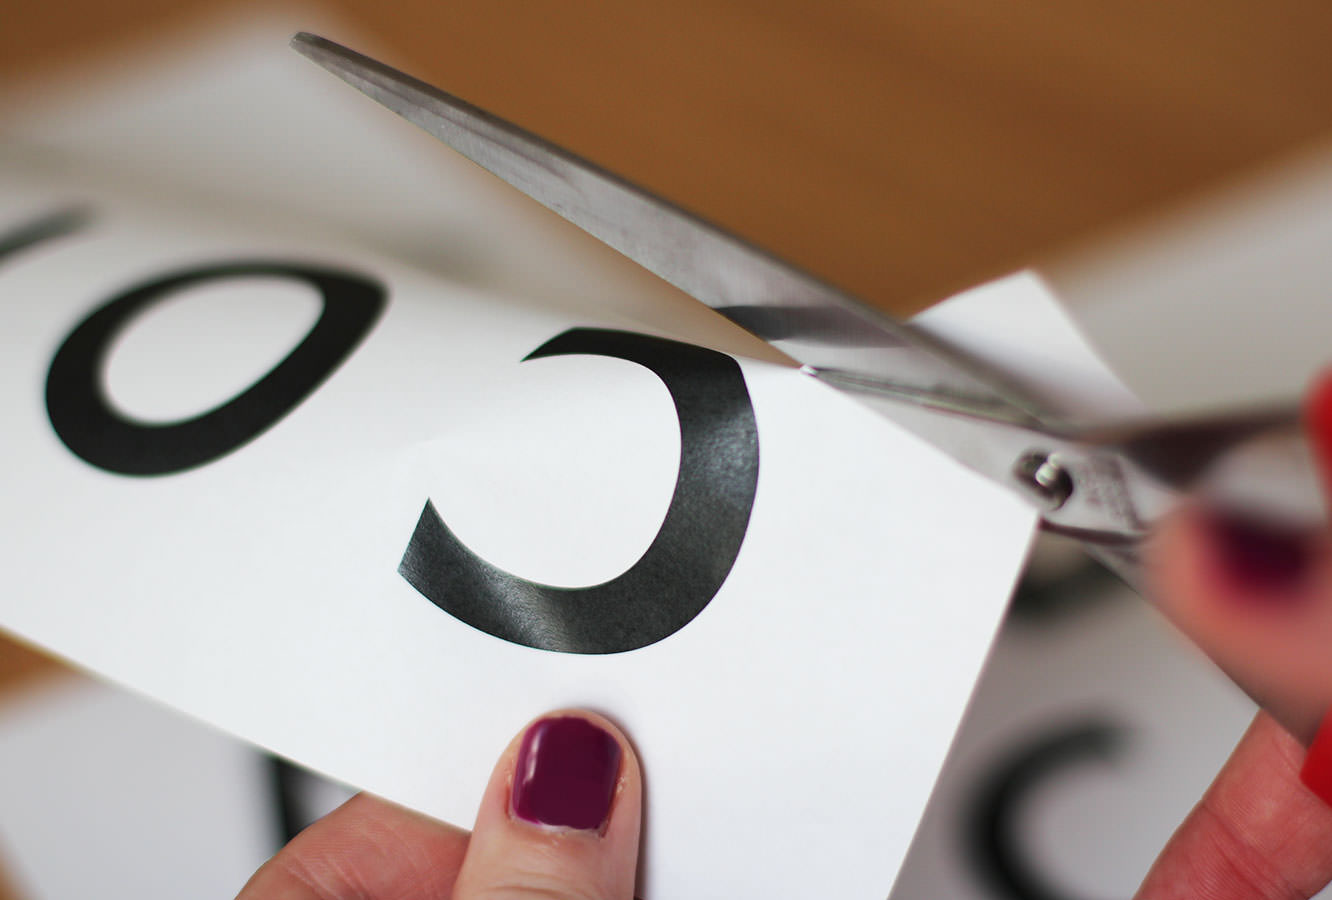
Step three
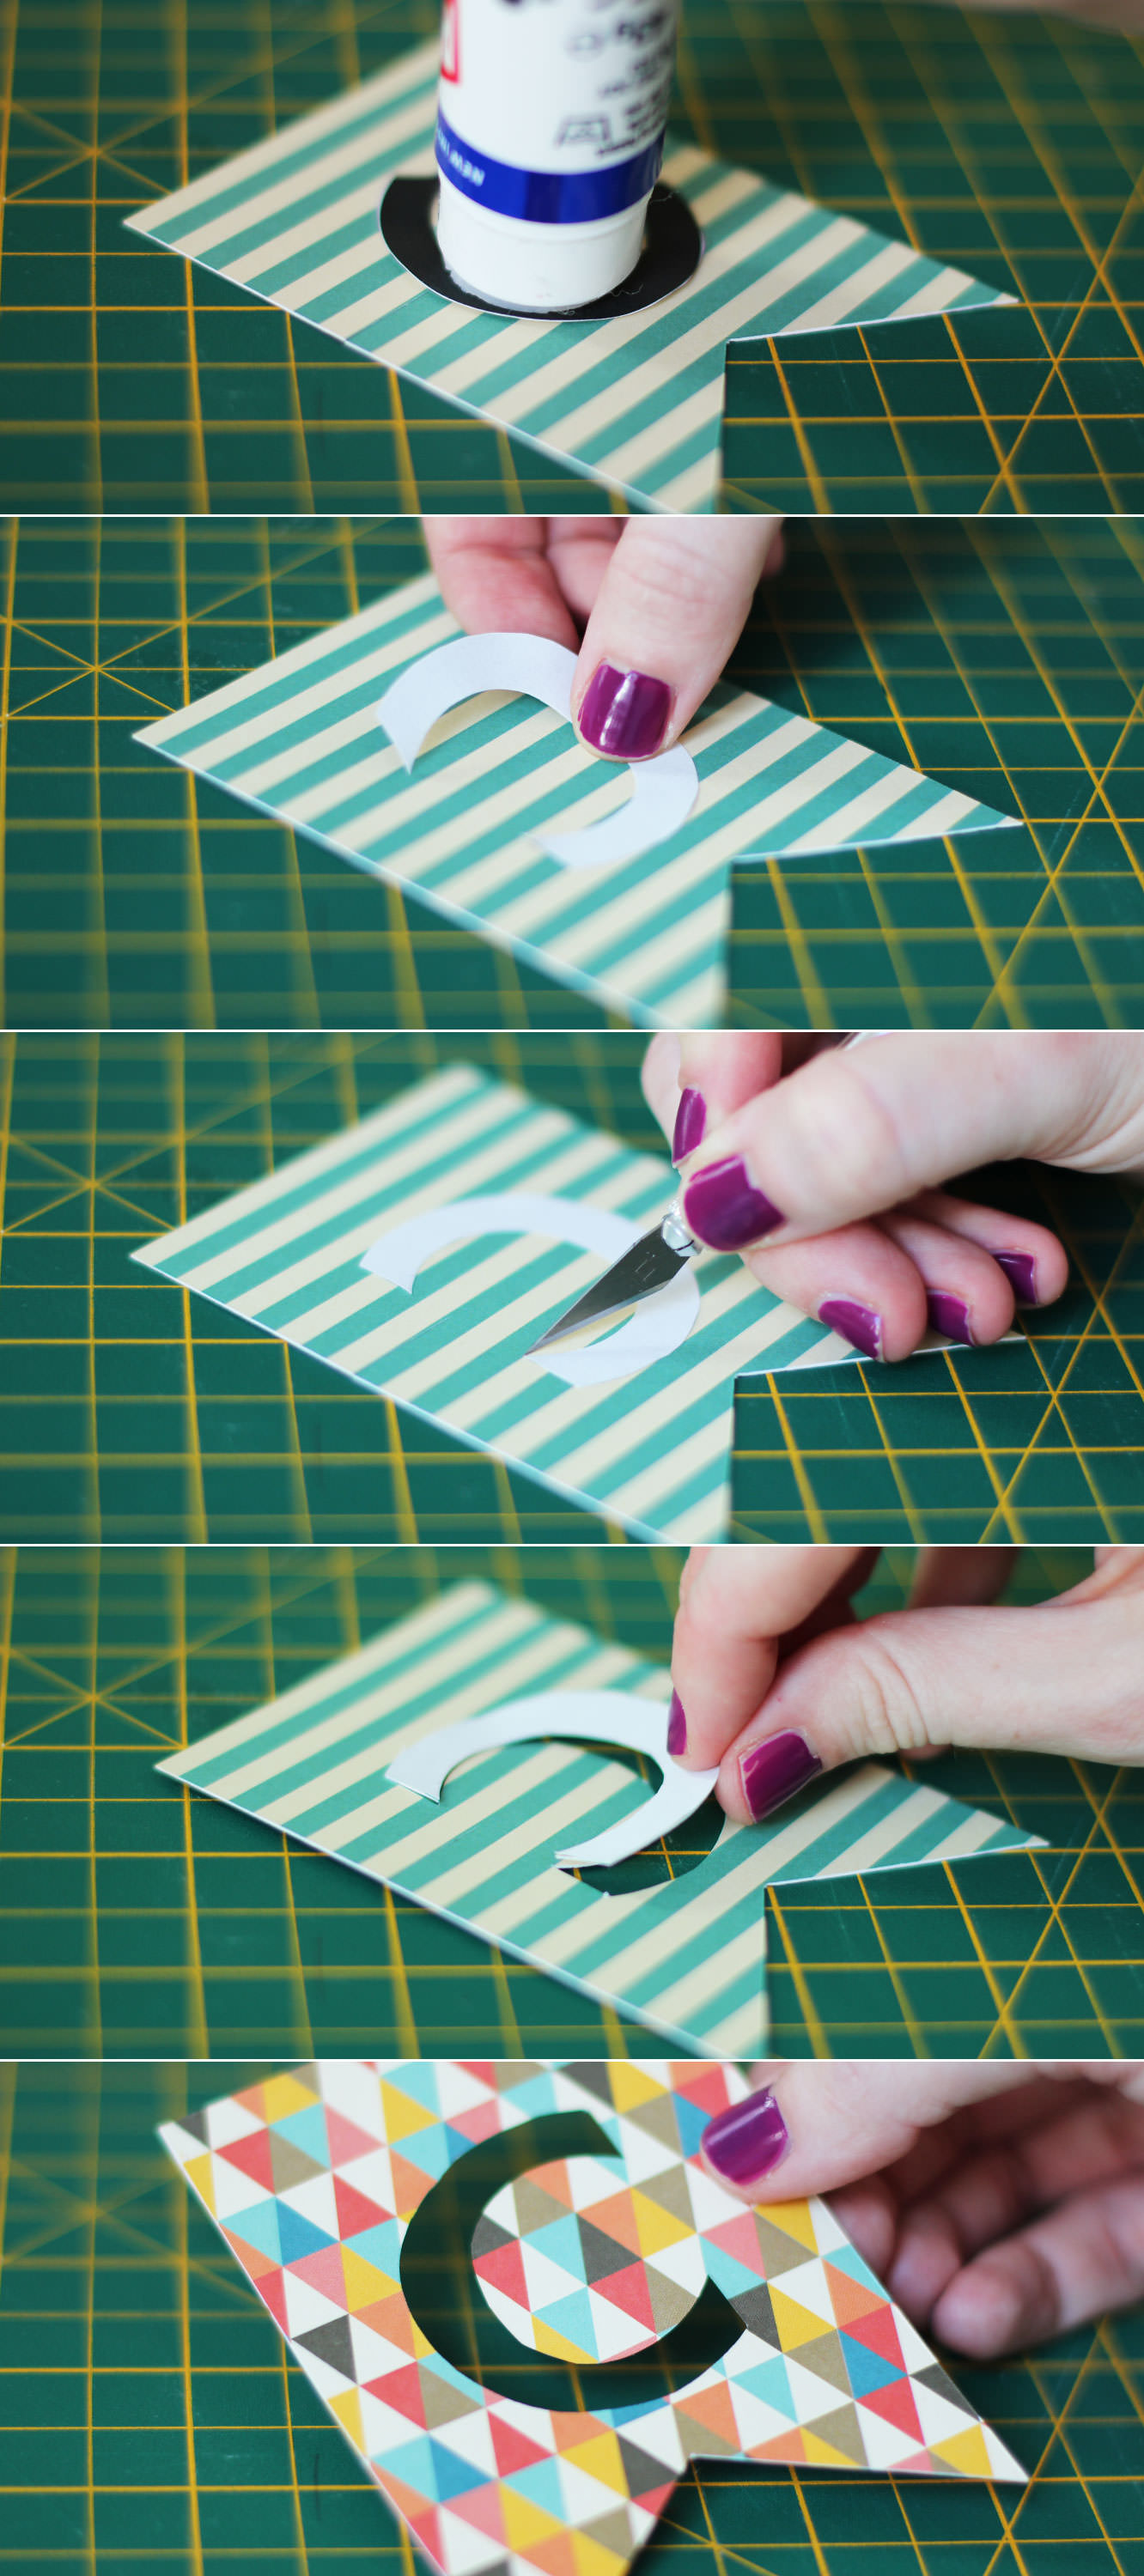
Glue the front of the letters and stick them face down on the back of each flag.
Use a craft knife to cut around the edge of the letter. The child in me was bizarrely satisfied by punching these out.
When cutting out letters like A and O which have a counter in them remember to keep a small stem so you don’t totally hollow them out.
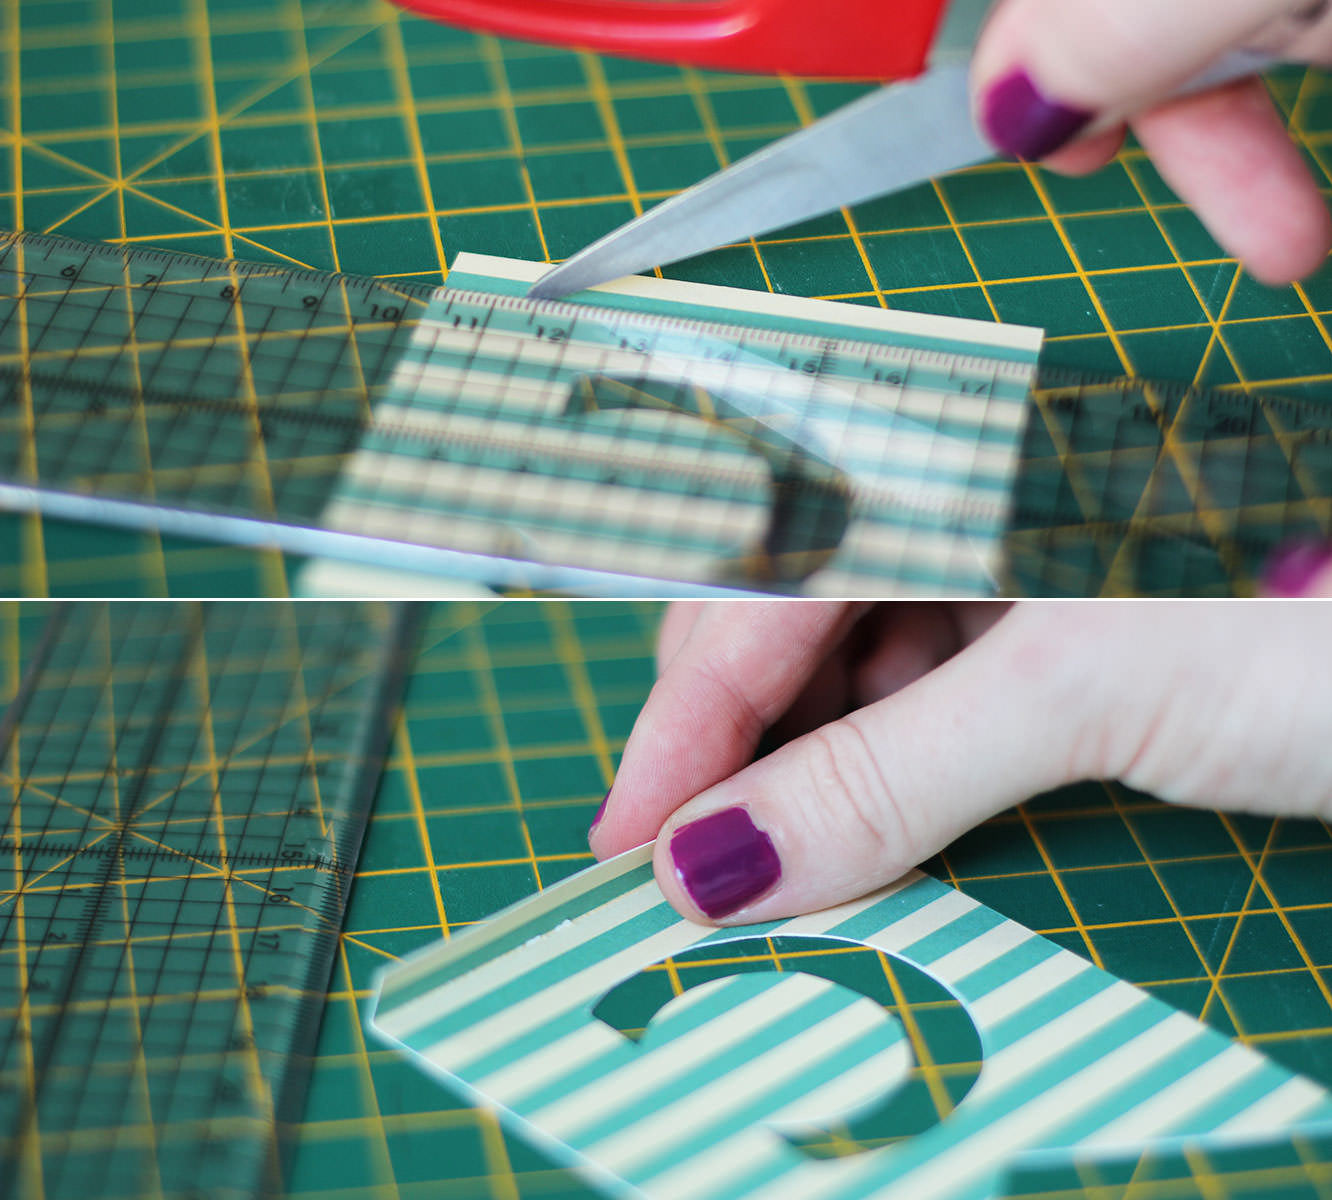
Step four
Using open scissors score the top of the flag (on the back) to create a fold.
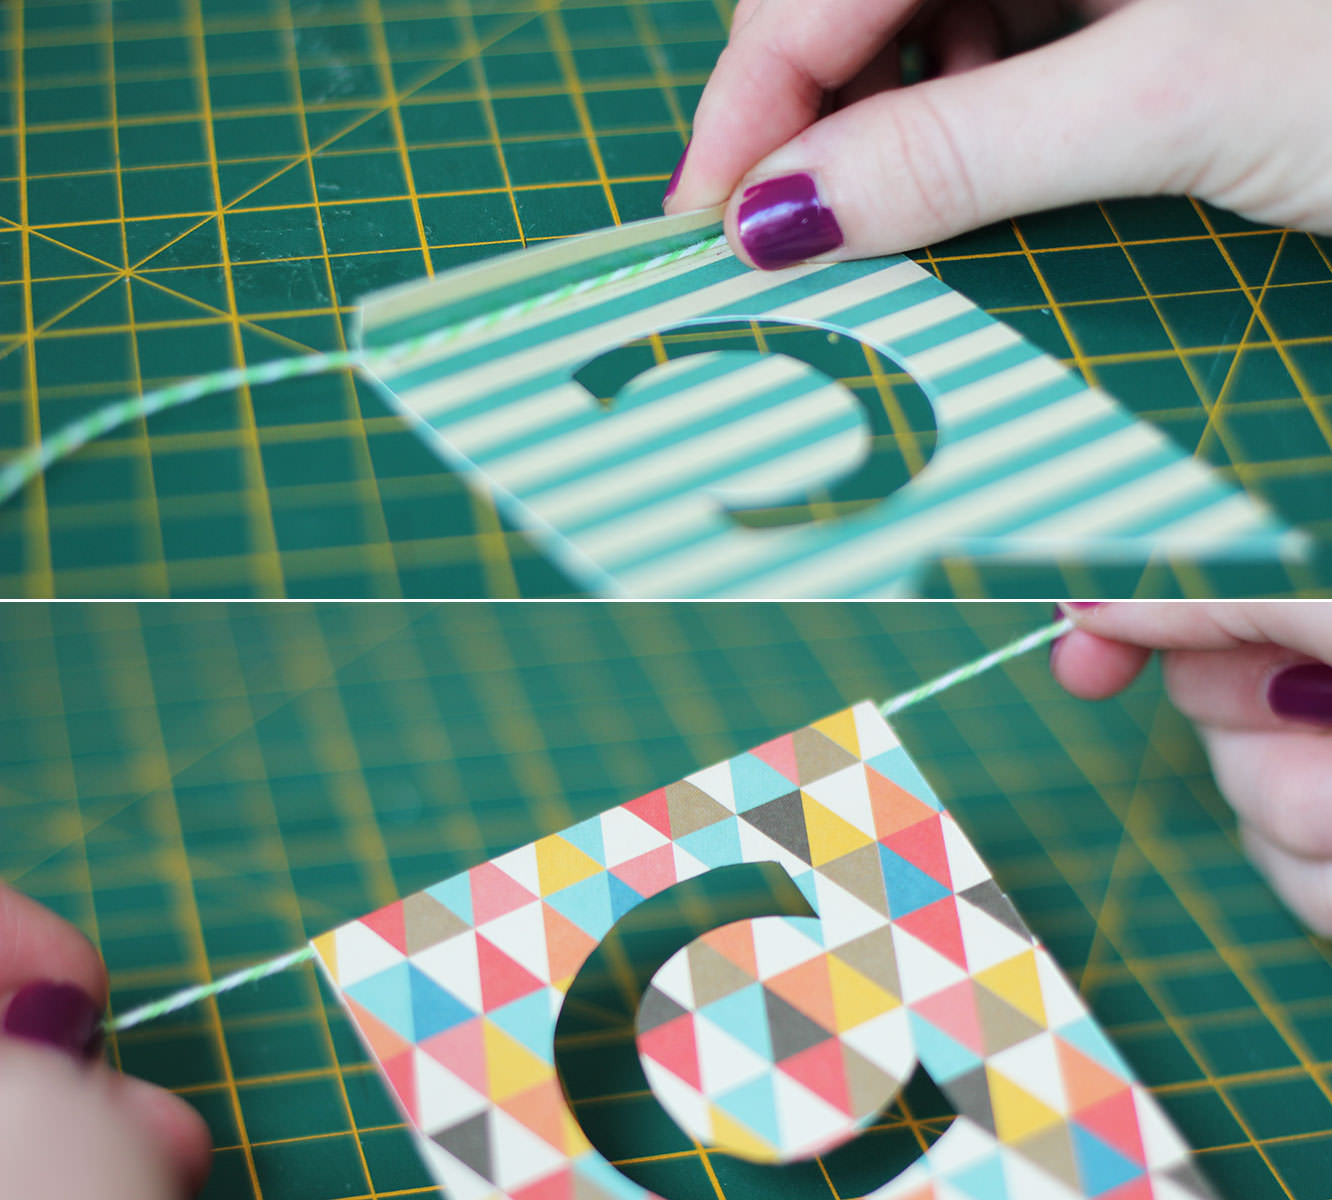
Step five
Stick double sided tape inside the fold, making sure it’s right to the top edge. Place the string in the fold and stick down.