Tag: how to

Hippity-poppity

It’s almost EASTER.

I’ve had these little bunny pops in my mind’s eye for a while now. I’ll precursor this post with saying they don’t look exactly how I imagined. Sure, they do look a bit like Pikachu, but they are scrummy, so I vote worth the time if you’ve a free afternoon and a healthy dose of patience in your arsenal.
caramel-chocolate-marshmallow-bunny-pops-recipe

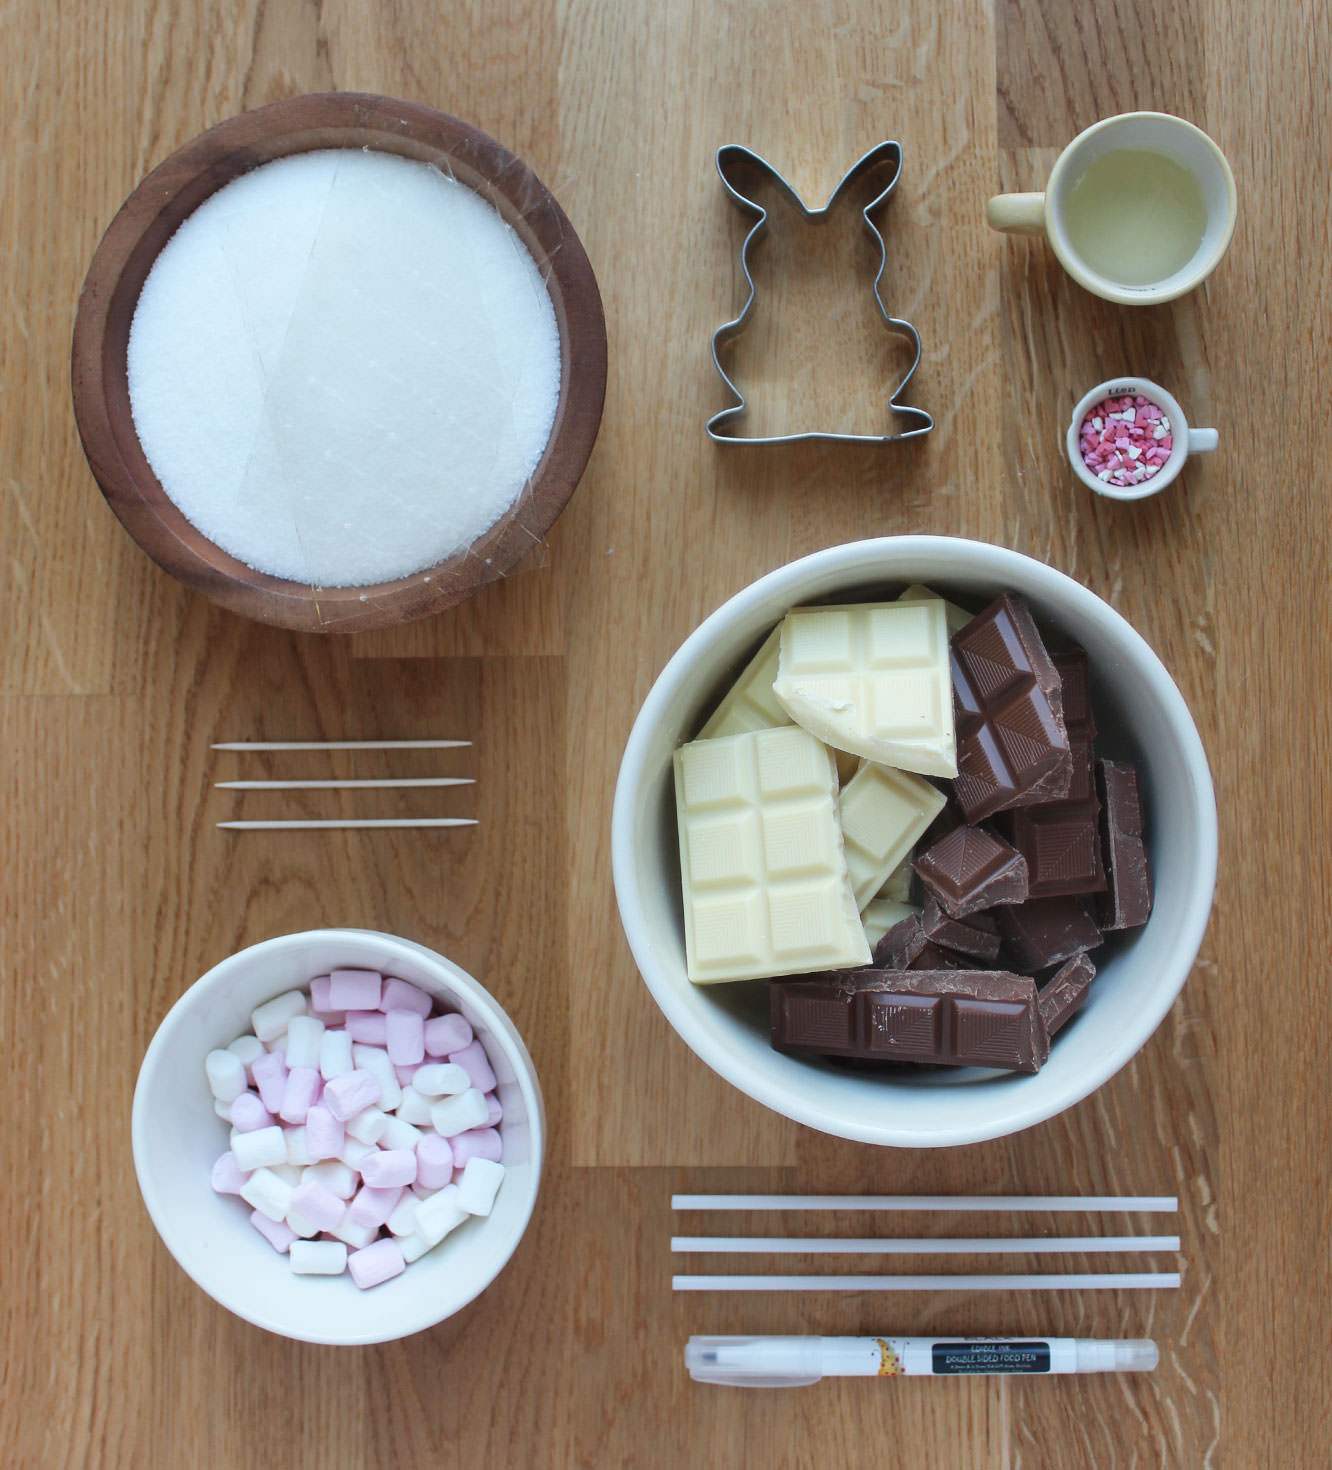
You will need

9 gelatine sheets

300g/10.5 oz granulated sugar

2 egg whites

1 tbsp liquid glucose (you can find this in a squeezy toothpaste type tube in the baking section)

2-3 tsp extract of your choice (but I HIGHLY recommend ‘buttery caramel’ from the natural professional flavours range – bought at Lakeland)

600-800g/1lb 5 oz – 1lb 12 oz chocolate for dipping (having sampled milk and white, I’d go white)

Sugar confetti for faces

Edible ink pen (or melted dark chocolate and a cocktail stick)

Icing sugar for dusting

A sugar thermometer

A bunny cutter (I got this from Amazon)

A handful of mini marshmallows (for fluffy bunny tails)

Cake pop sticks
caramel-chocolate-marshmallow-bunny-pops-recipe-2

Step one

In a cereal bowl, soak the gelatine in 150ml/5 fl oz cold water. Set aside.

Step two

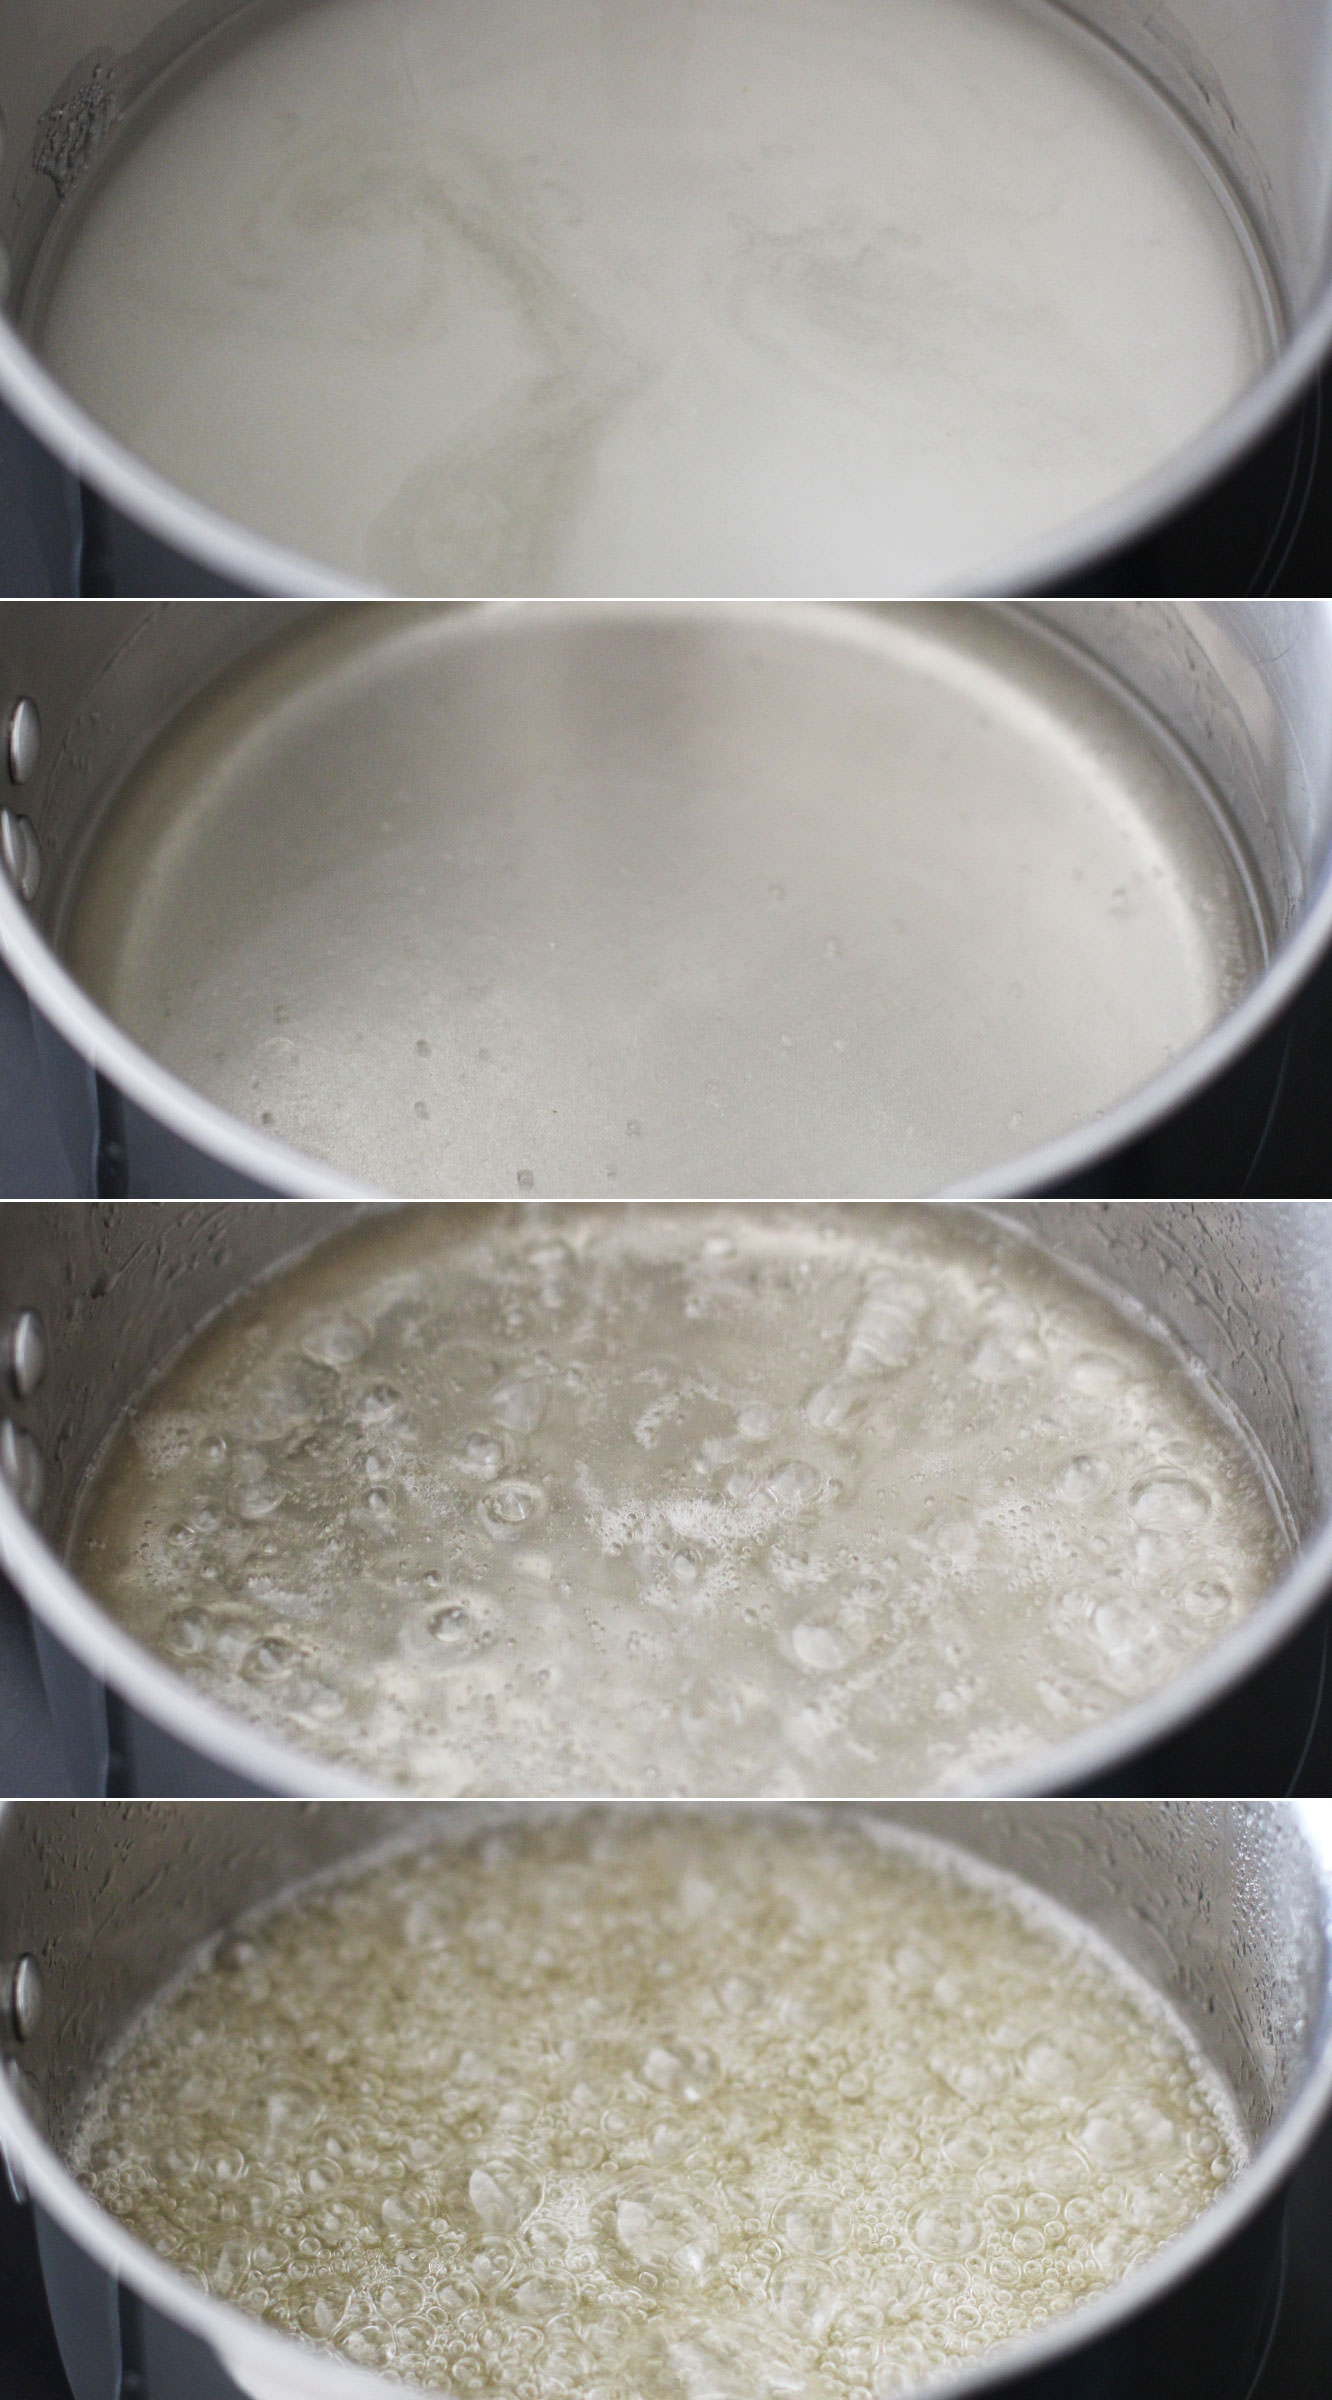
Combine the sugar, 150ml/5 fl oz water (different to the gelatine water) and the liquid glucose in a smallish saucepan. Allow the sugar to dissolve on a low heat, and then turn it up to medium-high. Be careful not to burn the sugar or any of your extremities.

The temperature you want this to get to is 118 C. It will feel like it will never get there, but stay strong.
maple-marshmallow-recipe-1

Step three

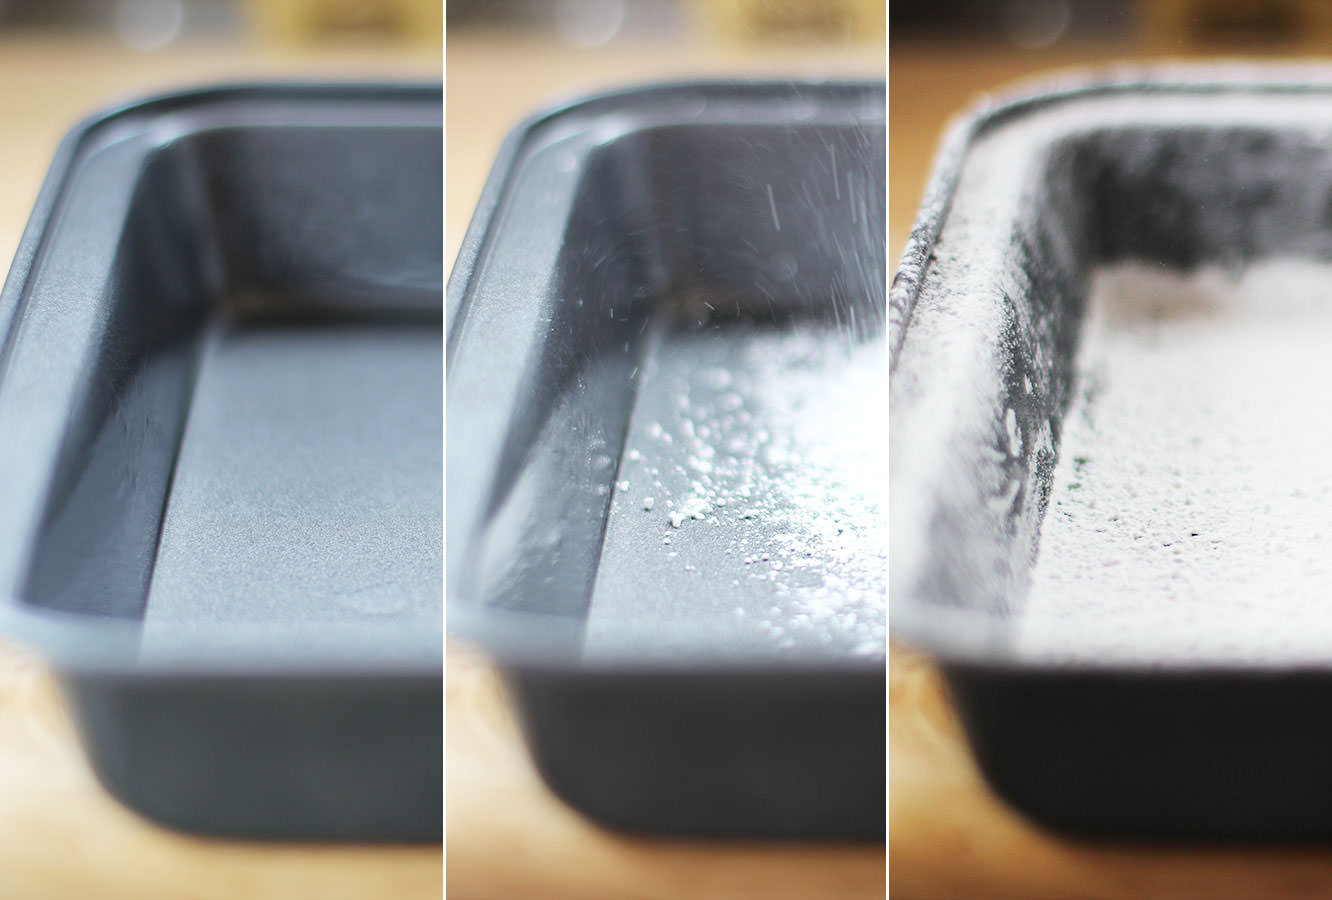
While the sugar is bubbling away take the opportunity to dust a brownie tin with icing sugar. Use a really small amount of olive oil before dusting to hold the icing sugar to the pan.
caramel-chocolate-marshmallow-bunny-pops-recipe-1

Step four

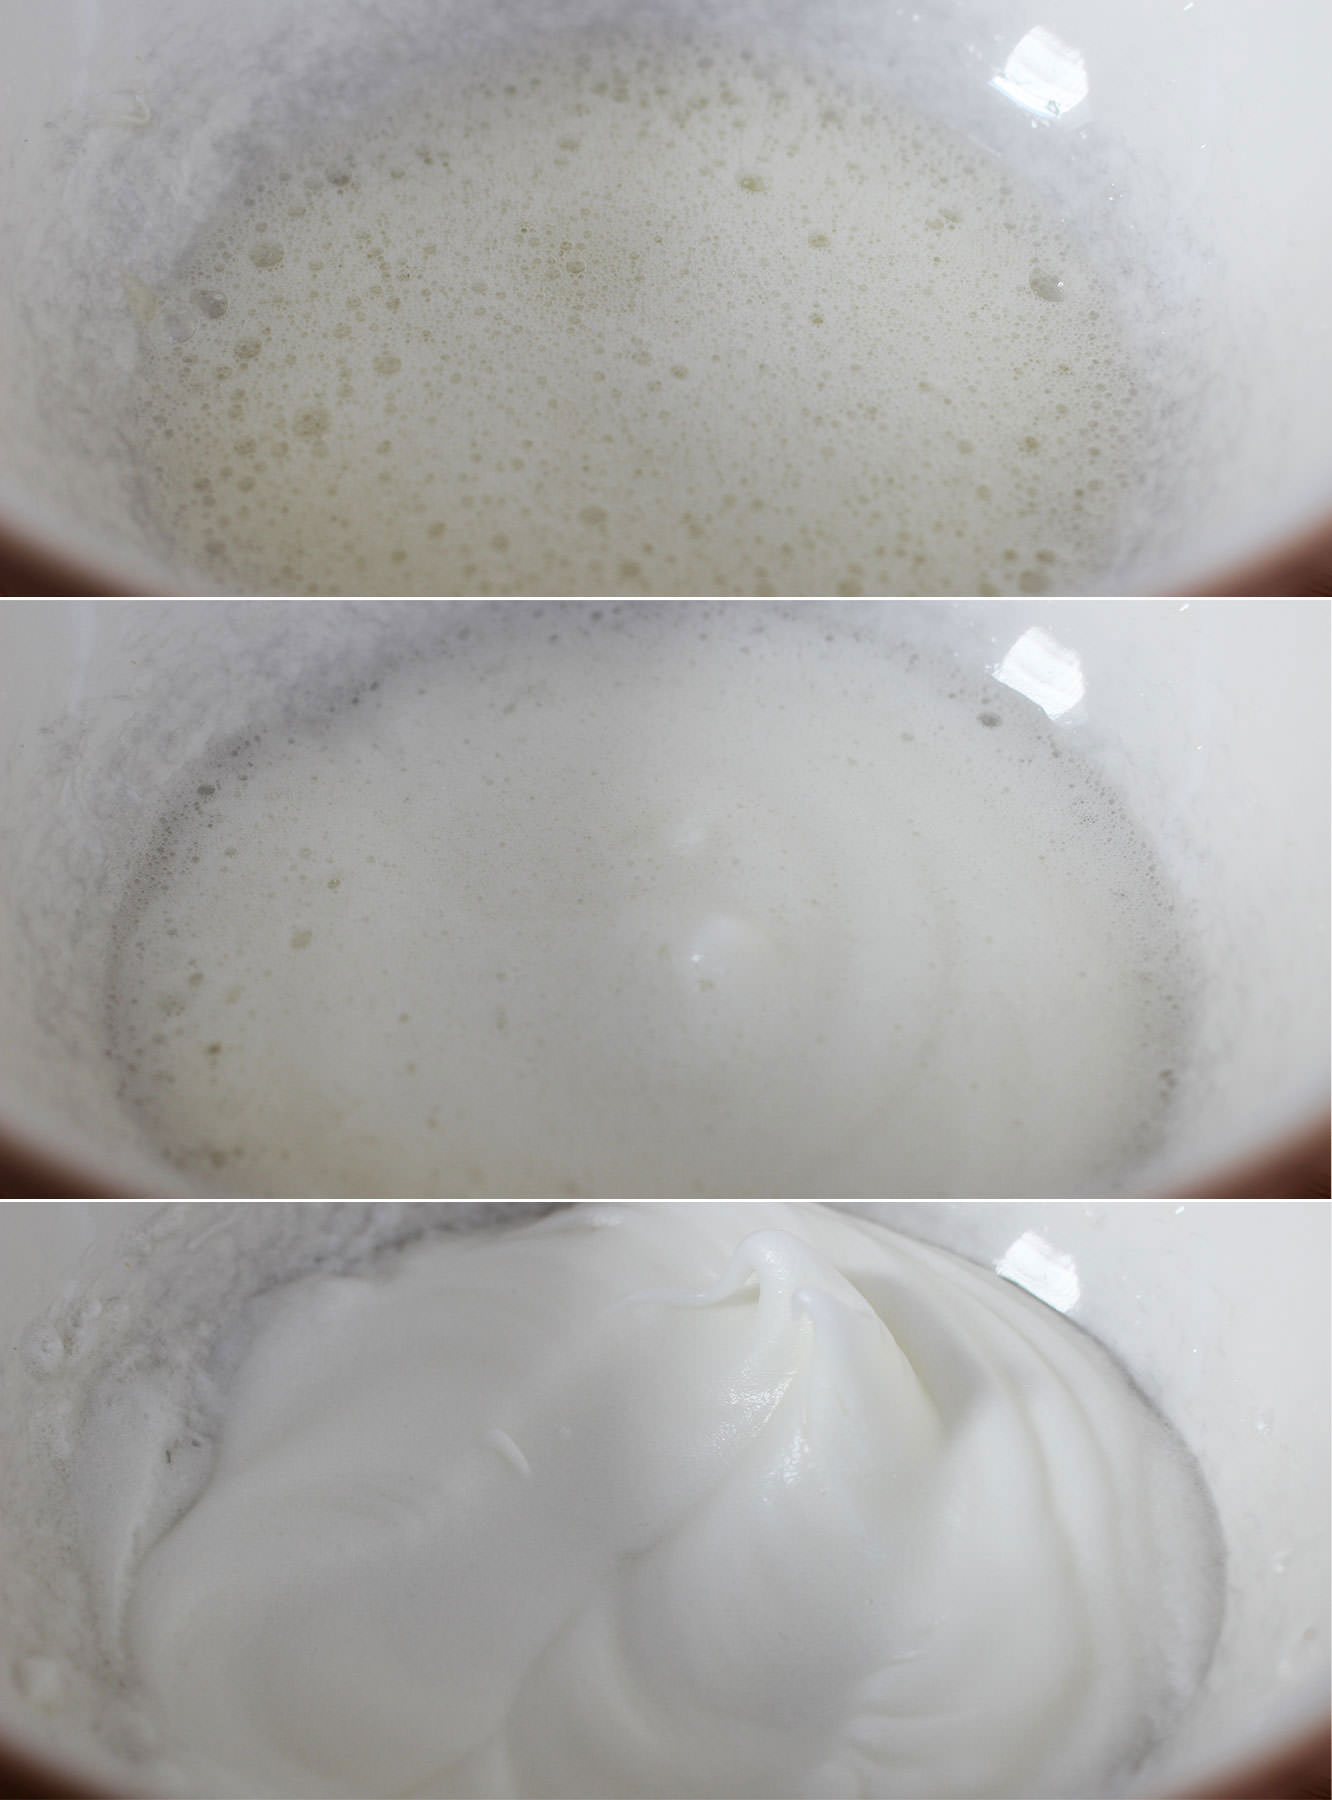
Place the egg whites in a metal or glass bowl, never plastic. Or you know, if you want to wreck your lovely Mason Cash bowl by using an electric whisk on it, by all means do. Those handsome grey marks? You could have those too.

When the sugar gets to somewhere around 112-115C whisk the egg whites into stiff peaks.

Step five

When the sugar reaches 118C take it off the heat.

Squeeze the gelatine out a bit and add it to the sugar mix. It will bubble right up so don’t panic. It should settle pretty quickly.
caramel-chocolate-marshmallow-bunny-pops-recipe-3

Step six

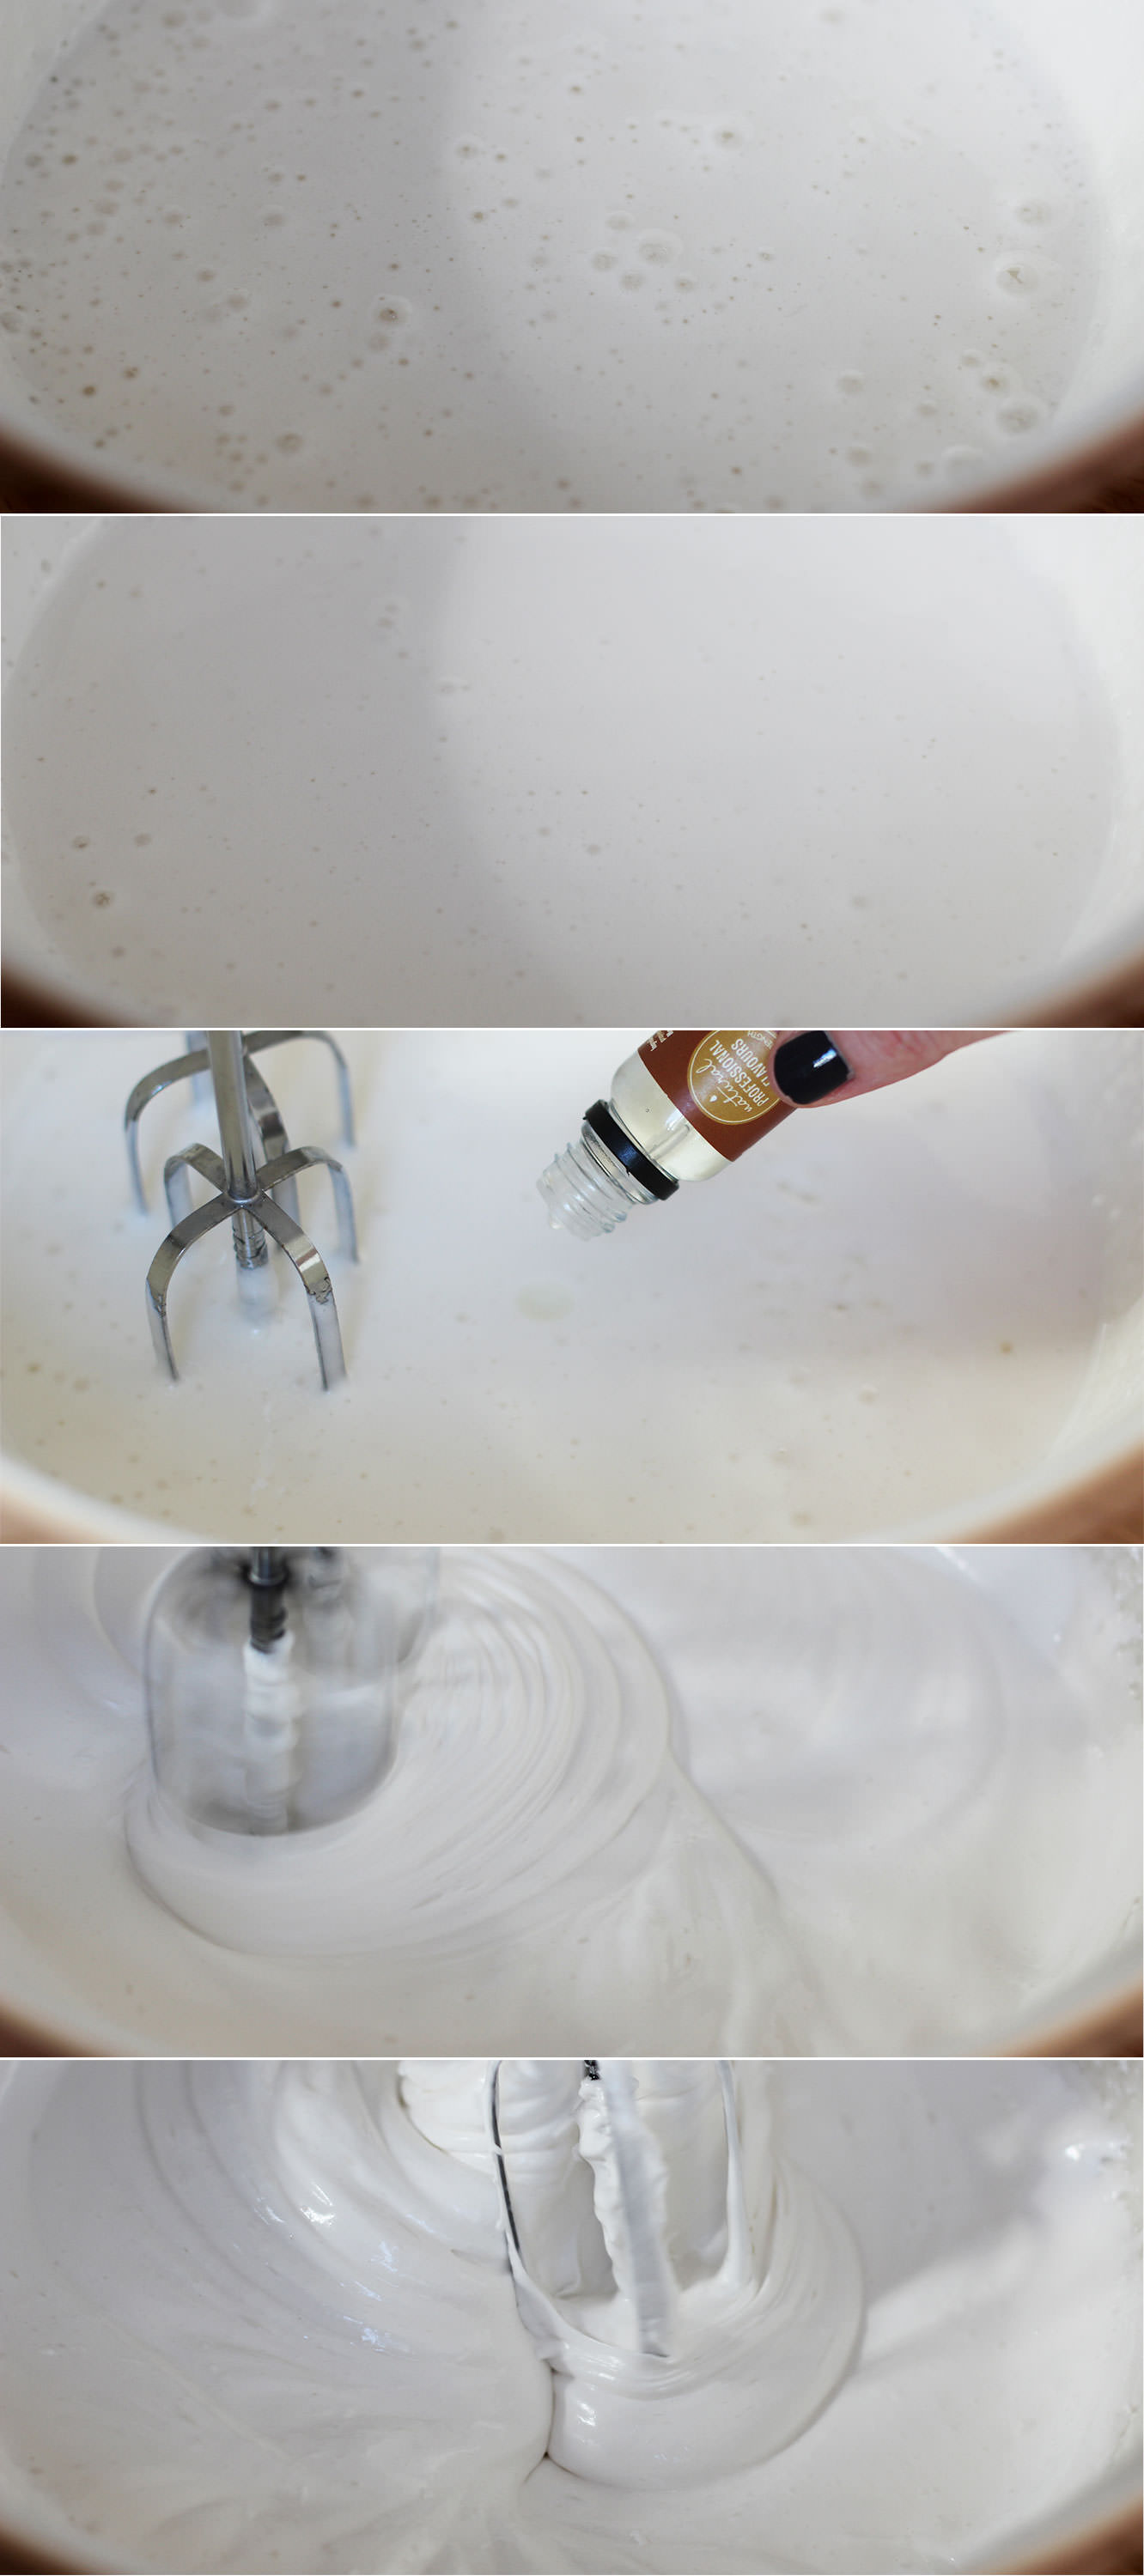
Pour the hot sugar into the eggs, but make sure you’re whisking continually to avoid a big lump of sugar at the bottom of the bowl.

Whisk until the mixture holds its shape well and is quite thick. This can take up to ten minutes.

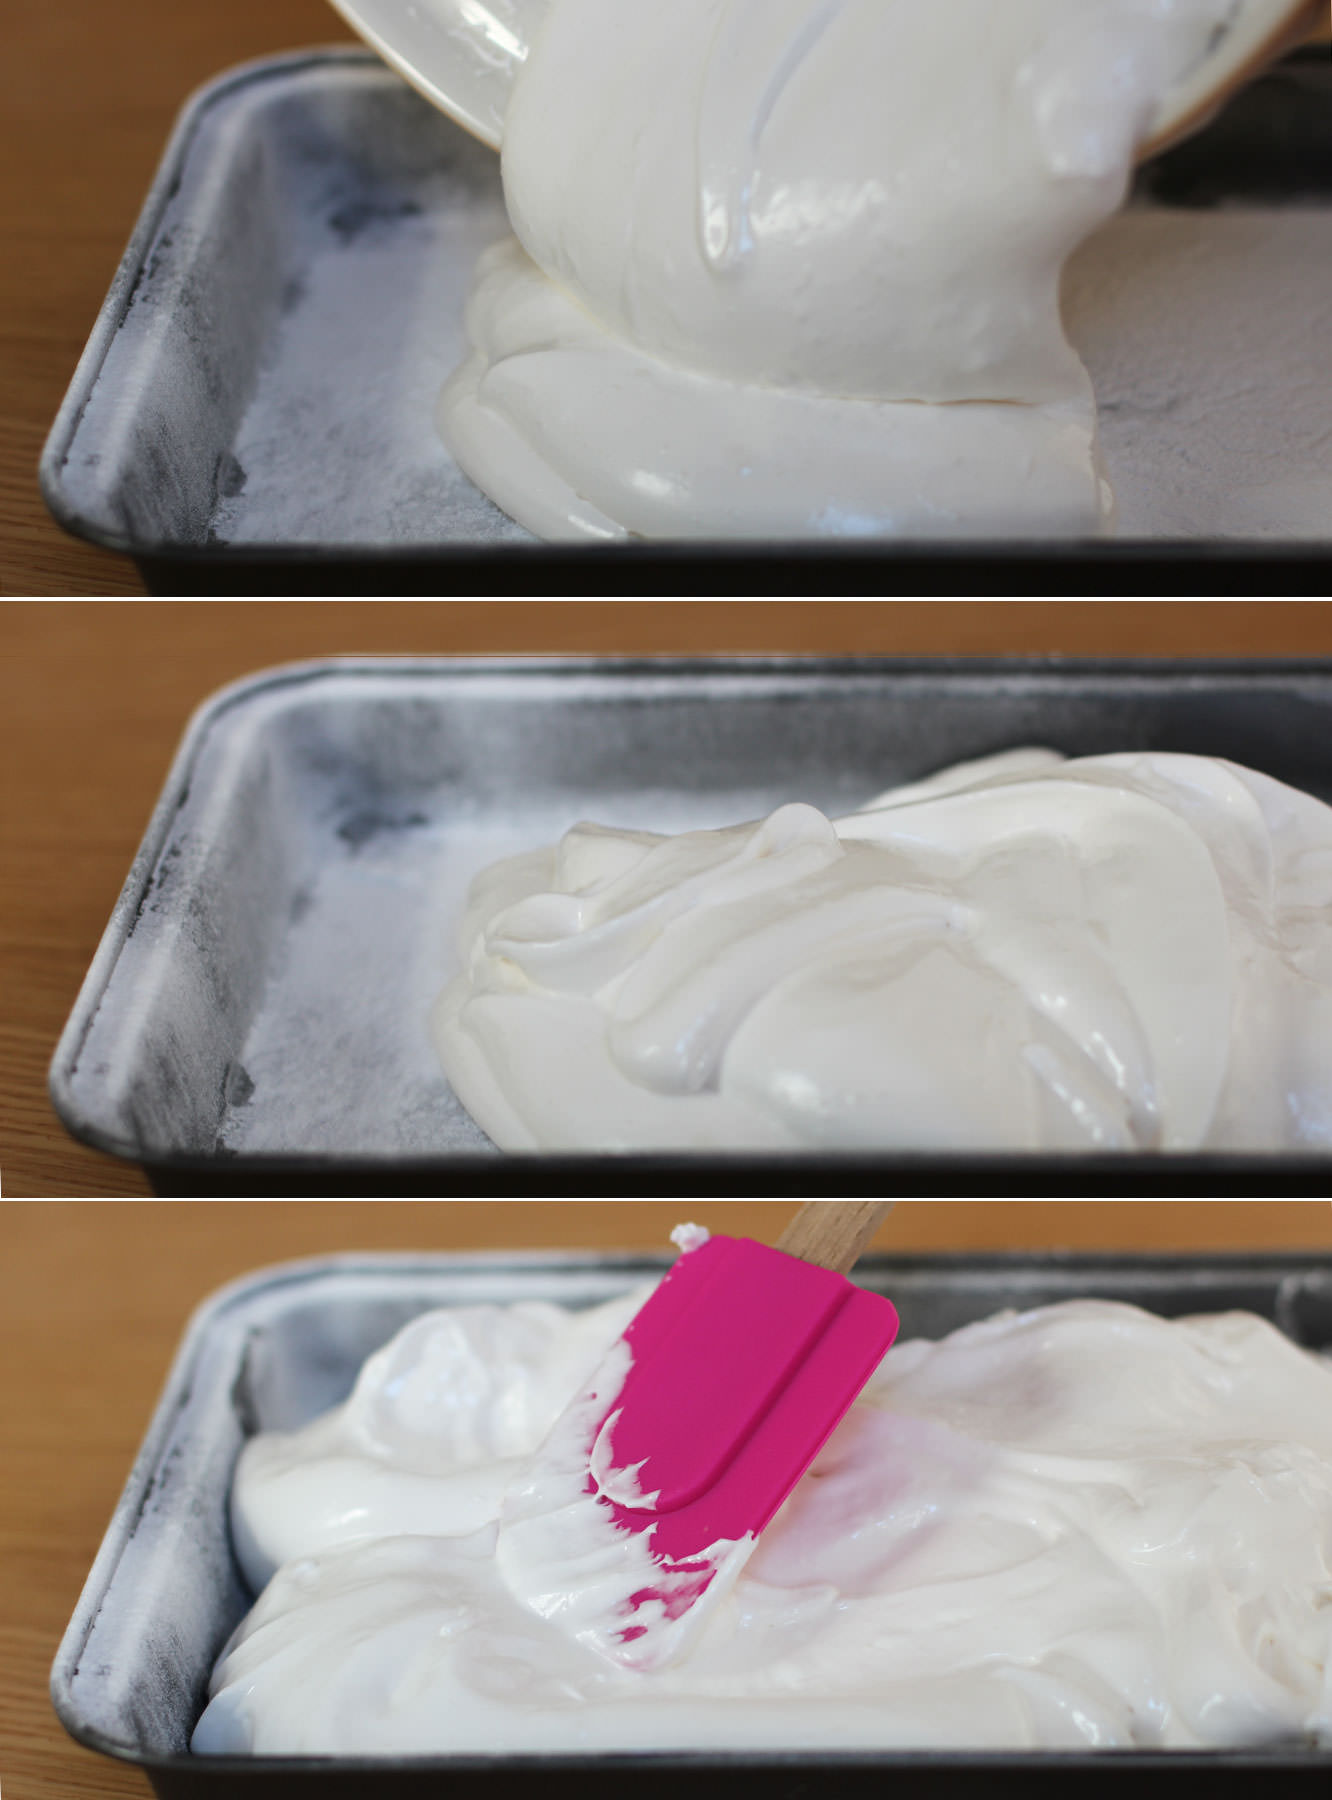
Somewhere during the whisking (probably when you need to give your arm a rest) add the flavouring. Vanilla extract is lovely in these but they will take basically anything you fancy. Like I said in the ingredients list I really recommend ‘Buttery Caramel’ from the Natural Professional Flavours brand.
caramel-chocolate-marshmallow-bunny-pops-recipe-4

Step seven

Pour the mixture into the prepared tin and smooth out as much as possible.

Dust with icing sugar and leave to set for about an hour.
caramel-chocolate-marshmallow-bunny-pops-recipe-5

Step eight

Turn the marshmallow out onto a clean surface.

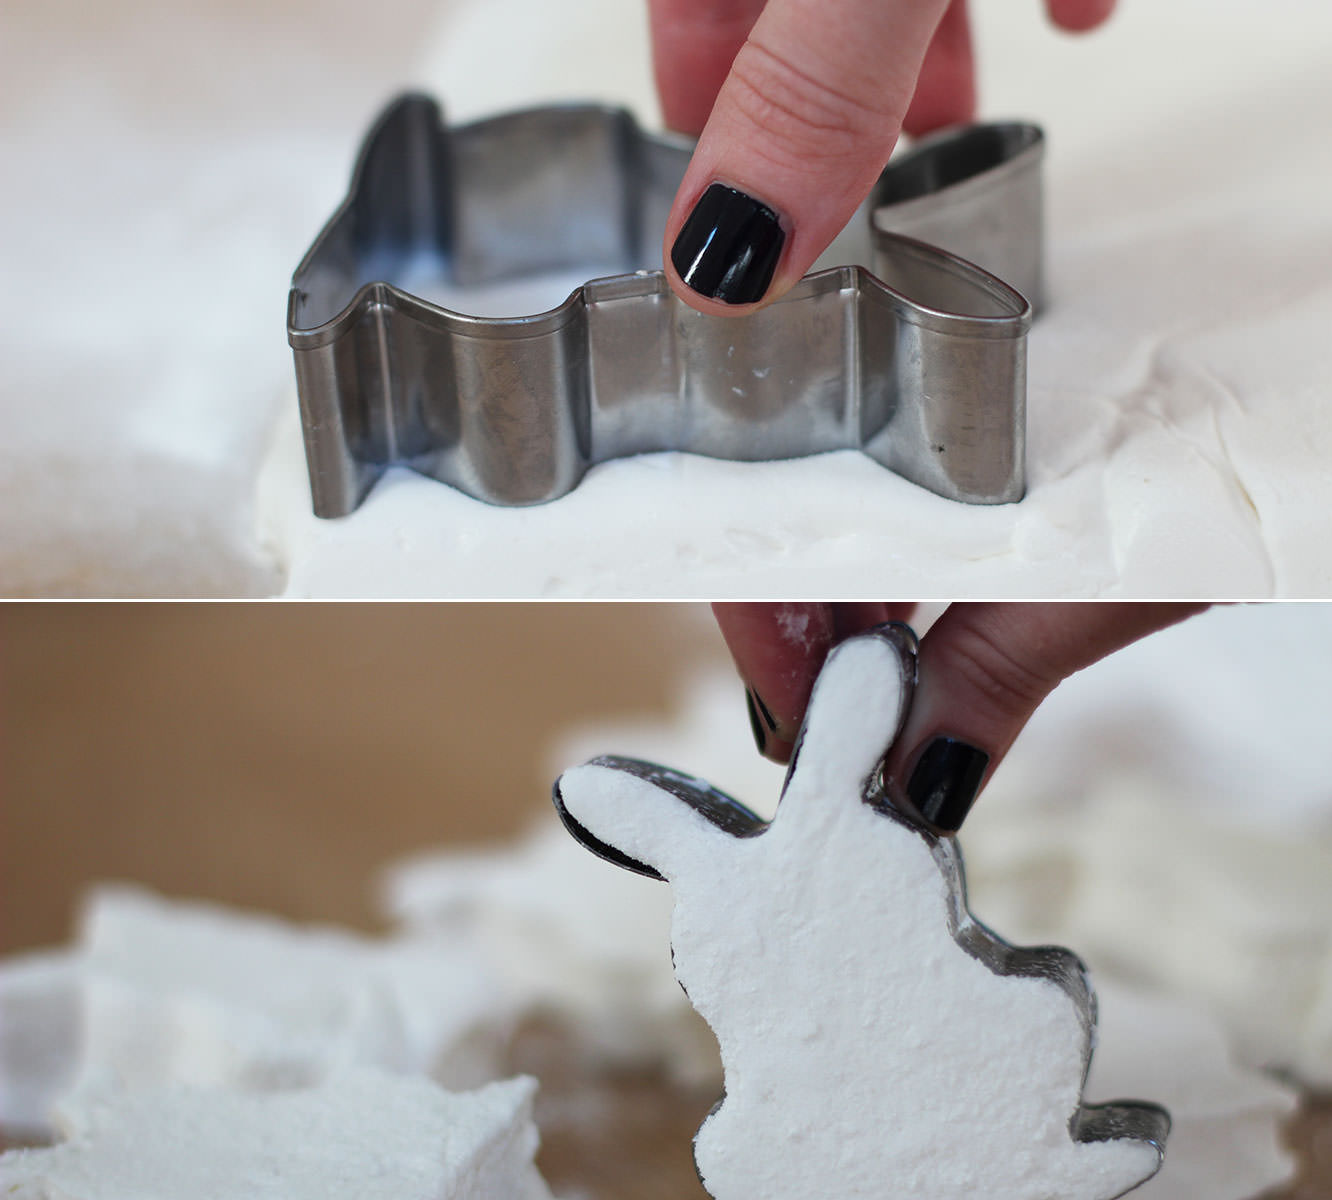
Cut as many bunnies as you can out of the sheet of marshmallow. This will vary depending on your tin and cutter size. I got nine out of mine.
caramel-chocolate-marshmallow-bunny-pops-recipe-6

Step nine

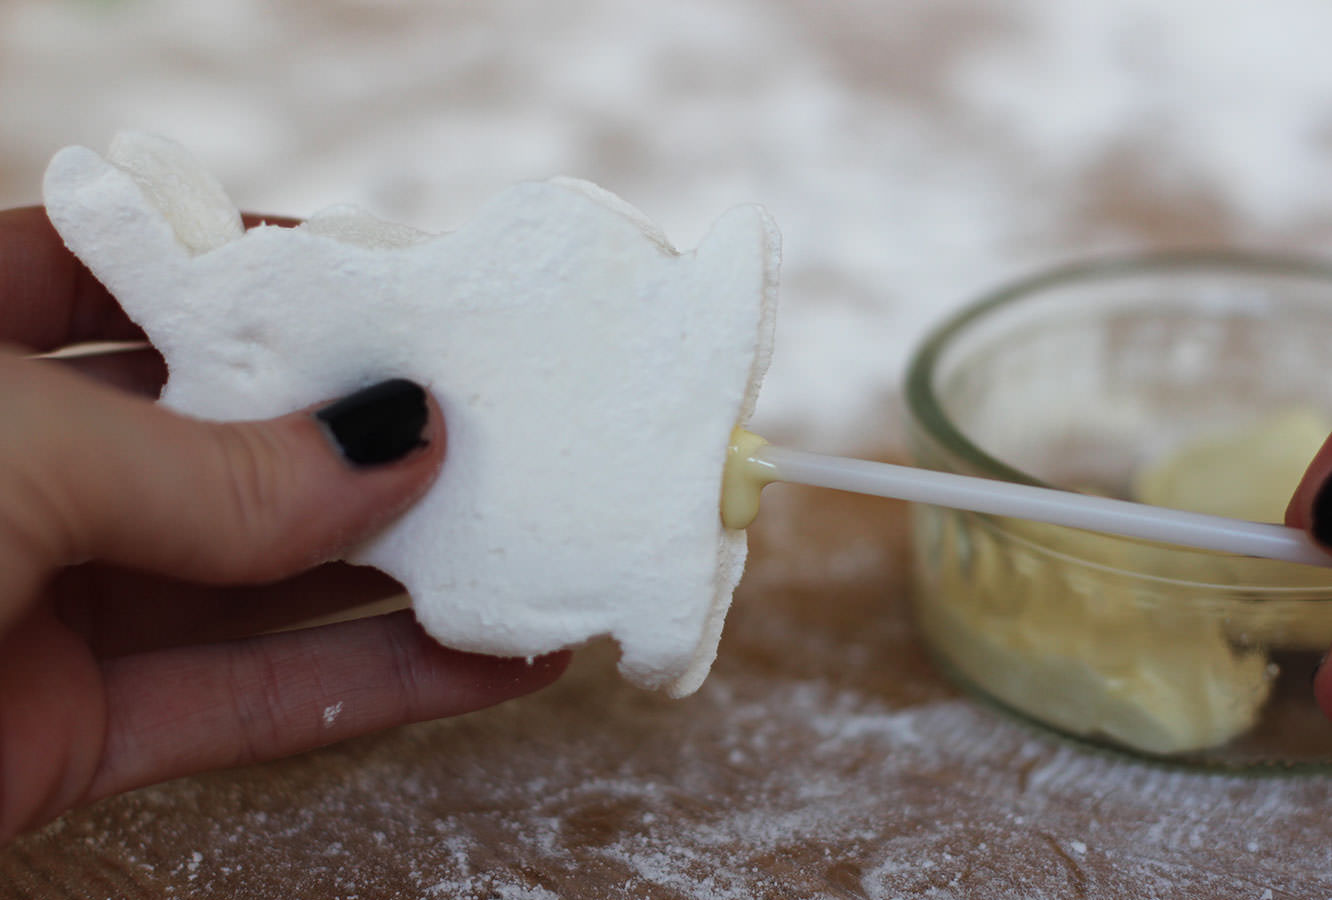
Melt a couple of pieces of chocolate in the microwave.

Dip the cake pop sticks in and push them into the bottom of the bunnies. I put mine in up to the head to increase stability. Leave to set.
caramel-chocolate-marshmallow-bunny-pops-recipe-7

Step ten

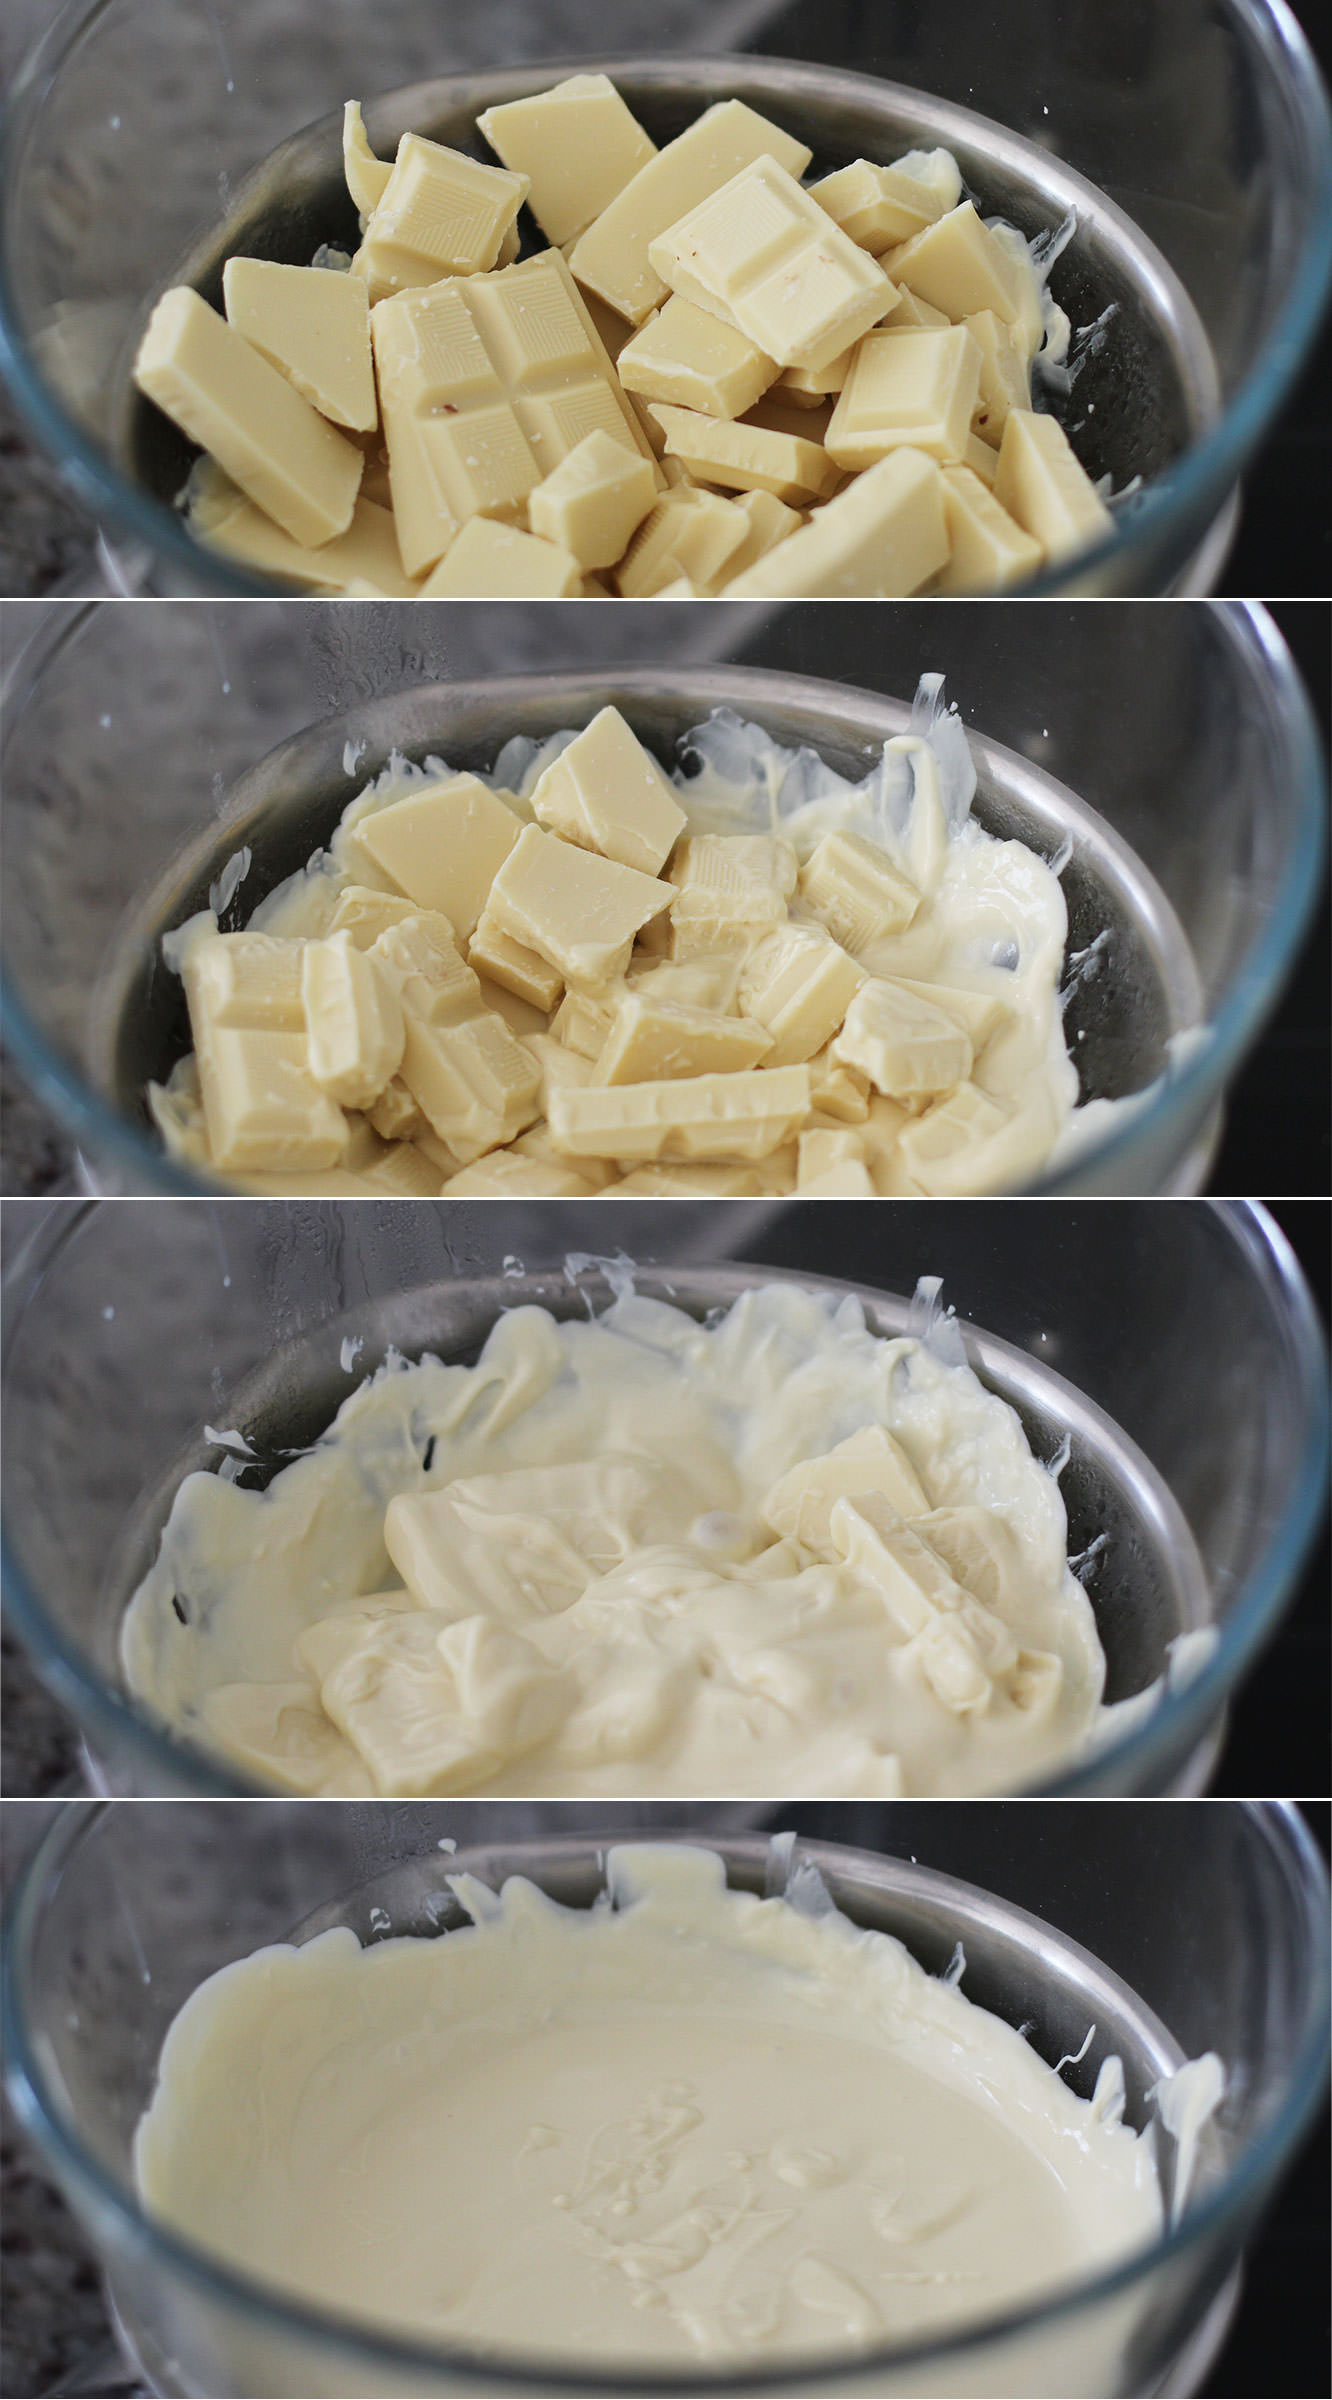
I recommend tempering the chocolate. Then you will get a nice snap when you bite into the pops and you can use the remaining chocolate to do something like this. Don’t feel you have to though, it will work without.
caramel-chocolate-marshmallow-bunny-pops-recipe-8

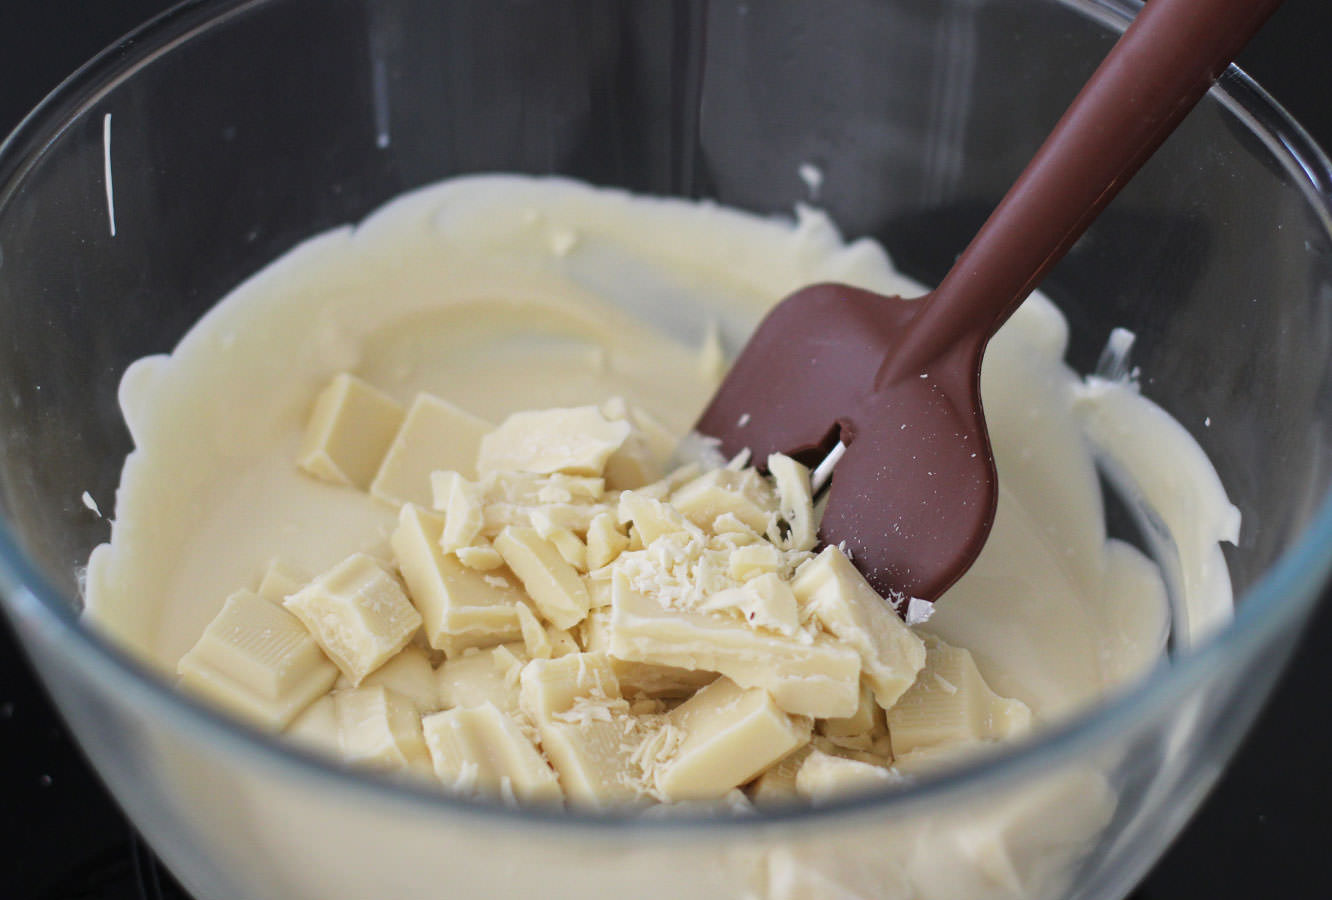
To temper, melt two thirds of the chocolate over a pan of boiling water and allow it to reach 45C. Remove it from the heat and add the rest of the chocolate. This should melt in and cool it down quicker. Stir it to cool down to 25C. Place it back on the heat to get it back up to 28C.
caramel-chocolate-marshmallow-bunny-pops-recipe-gif

Step eleven

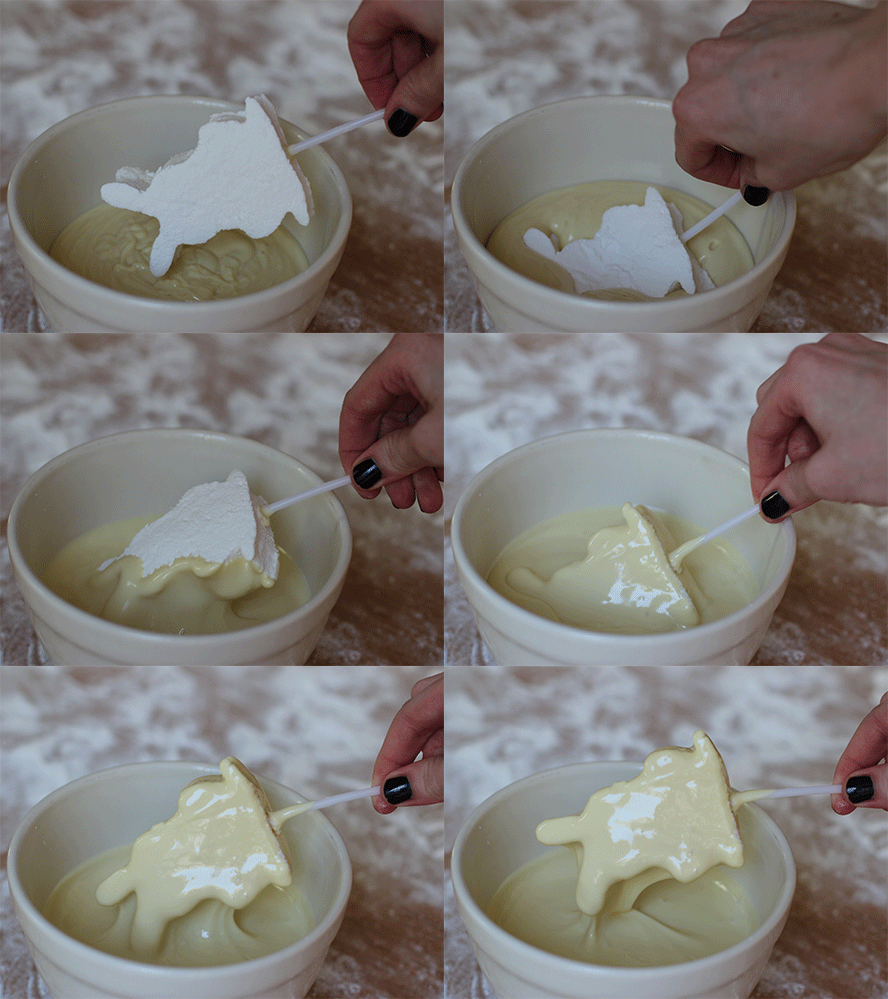
Place the chocolate into a small deep bowl (or I actually found with the milk chocolate that a glass works really well).

Dip the bunnies in and make sure to coat well. Allow excess chocolate to drip off, twirl it round to get an even, smooth coating.

This is where I ran into a spot of difficulty and filled my left hand with bunny pops that were covered in melted chocolate. I suggest you a) get a spare pair of willing hands, b) get a block of florist’s oasis/cake pop stand to stick them in, c) accept the back of them won’t be beautiful and lay them down on cellophane or greaseproof paper.

Step twelve

Once dry, add their little faces and tails. I used a cocktail stick with a small amount of melted chocolate to stick on sugar decorations. I got the little hearts I used for the noses from Tiger, and I can’t be sure about the circles for the cheeks.

I drew the faces on with an edible ink pen I bought online. You could use a cocktail stick and some dark chocolate if you prefer.

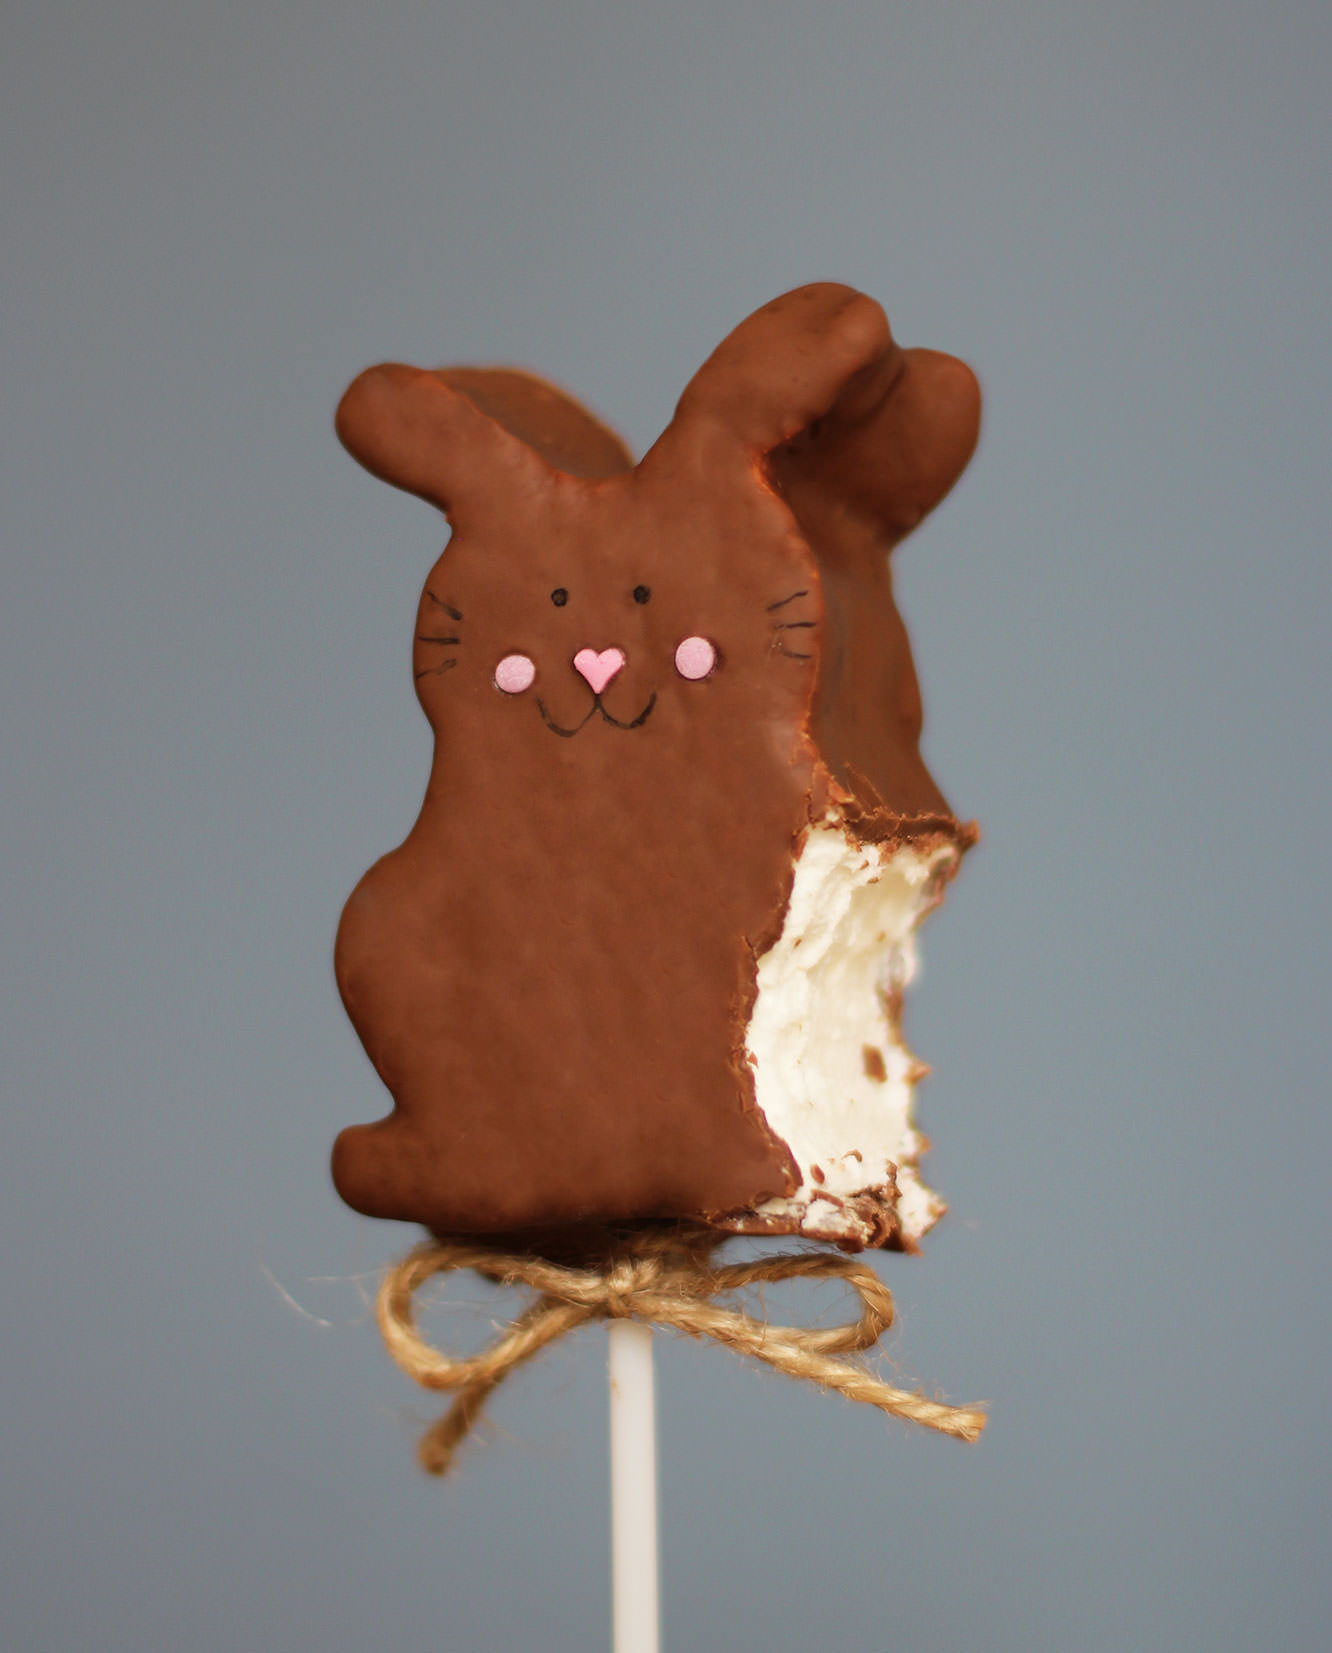
caramel-chocolate-marshmallow-bunny-pops-recipe-9

caramel-chocolate-marshmallow-bunny-pops-recipe-10

Step thirteen

Tie a piece of twine or ribbon around the stick and make a day a little bit happier.

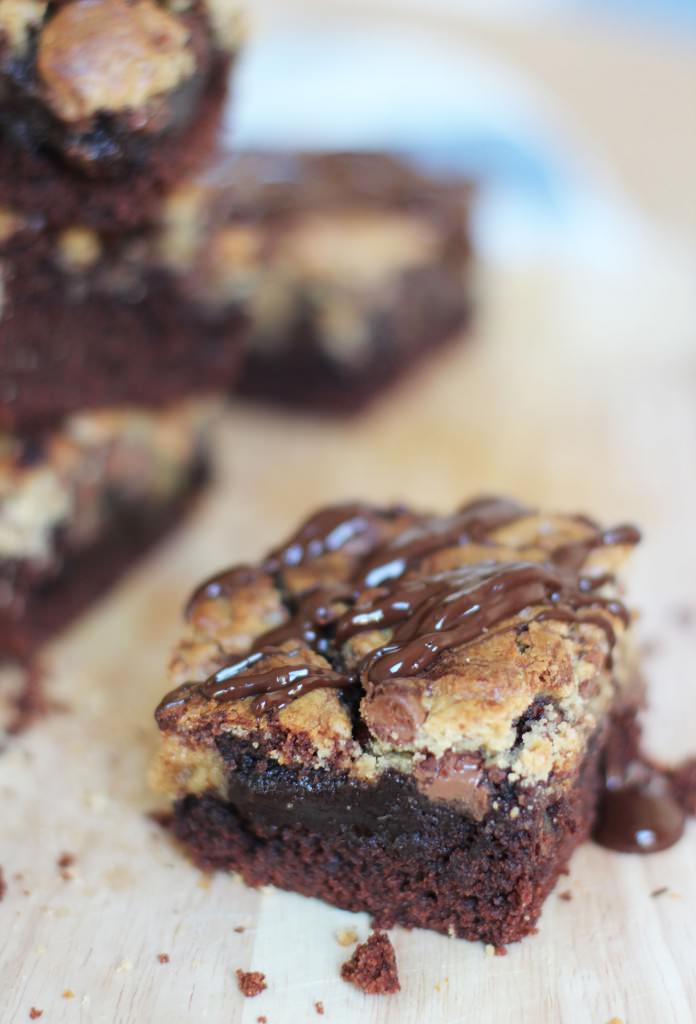
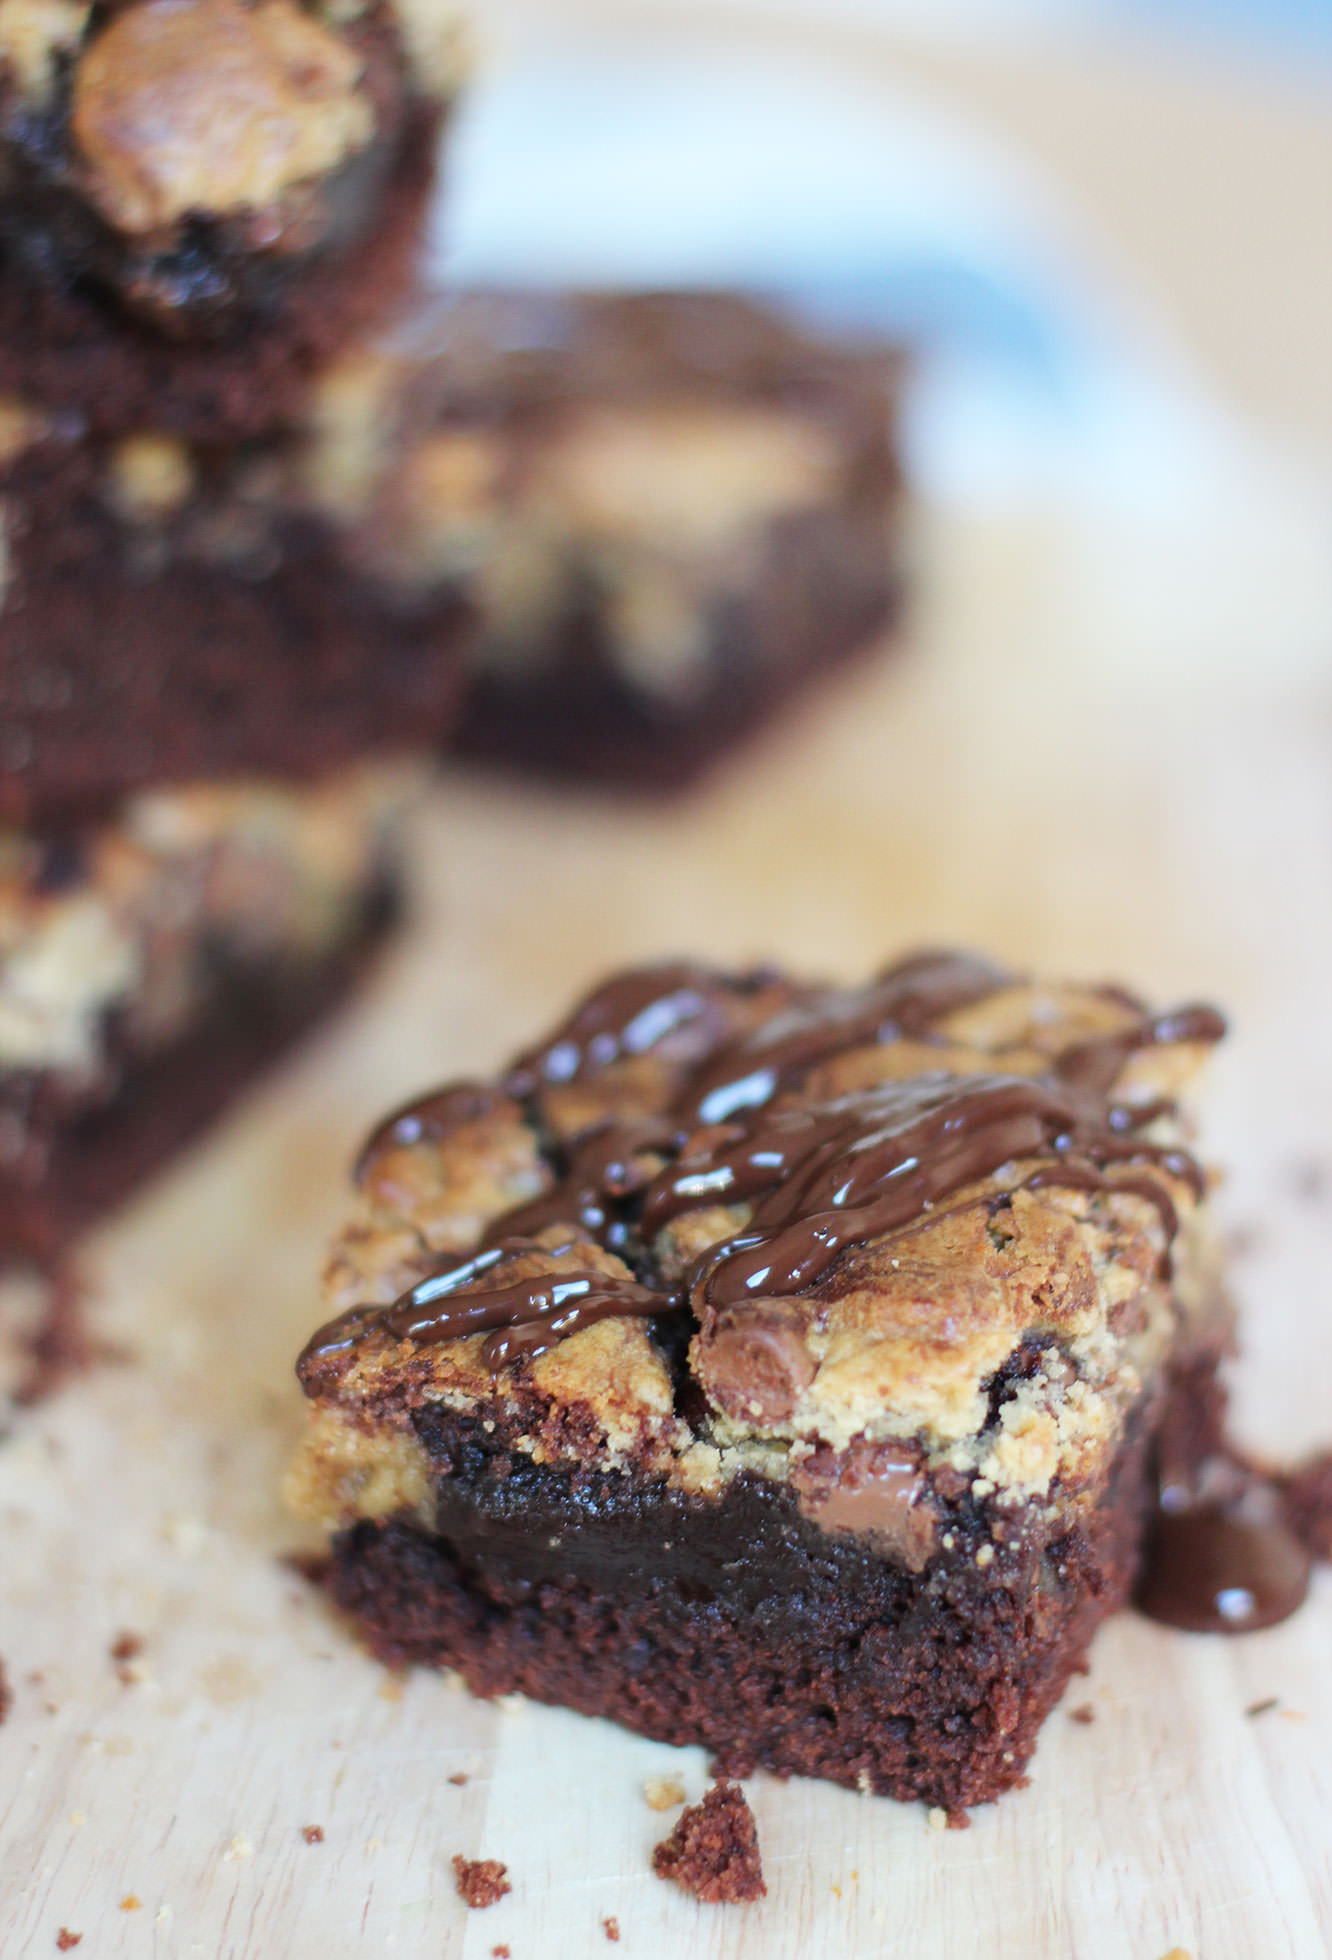
cookie dough + chocolate brownie = yum

I used to make a cheat’s version of this recipe with two packet mixes, and recently I just thought to myself, ‘I wonder if this would taste better if I made the batters from scratch’. Oh boy does it.

You just have to find an excuse to make this and eat it warm from the oven with some ice cream. It’s very easy and quite a bit more impressive than regular brownies.

cookie-dough-brownie-recipe-0

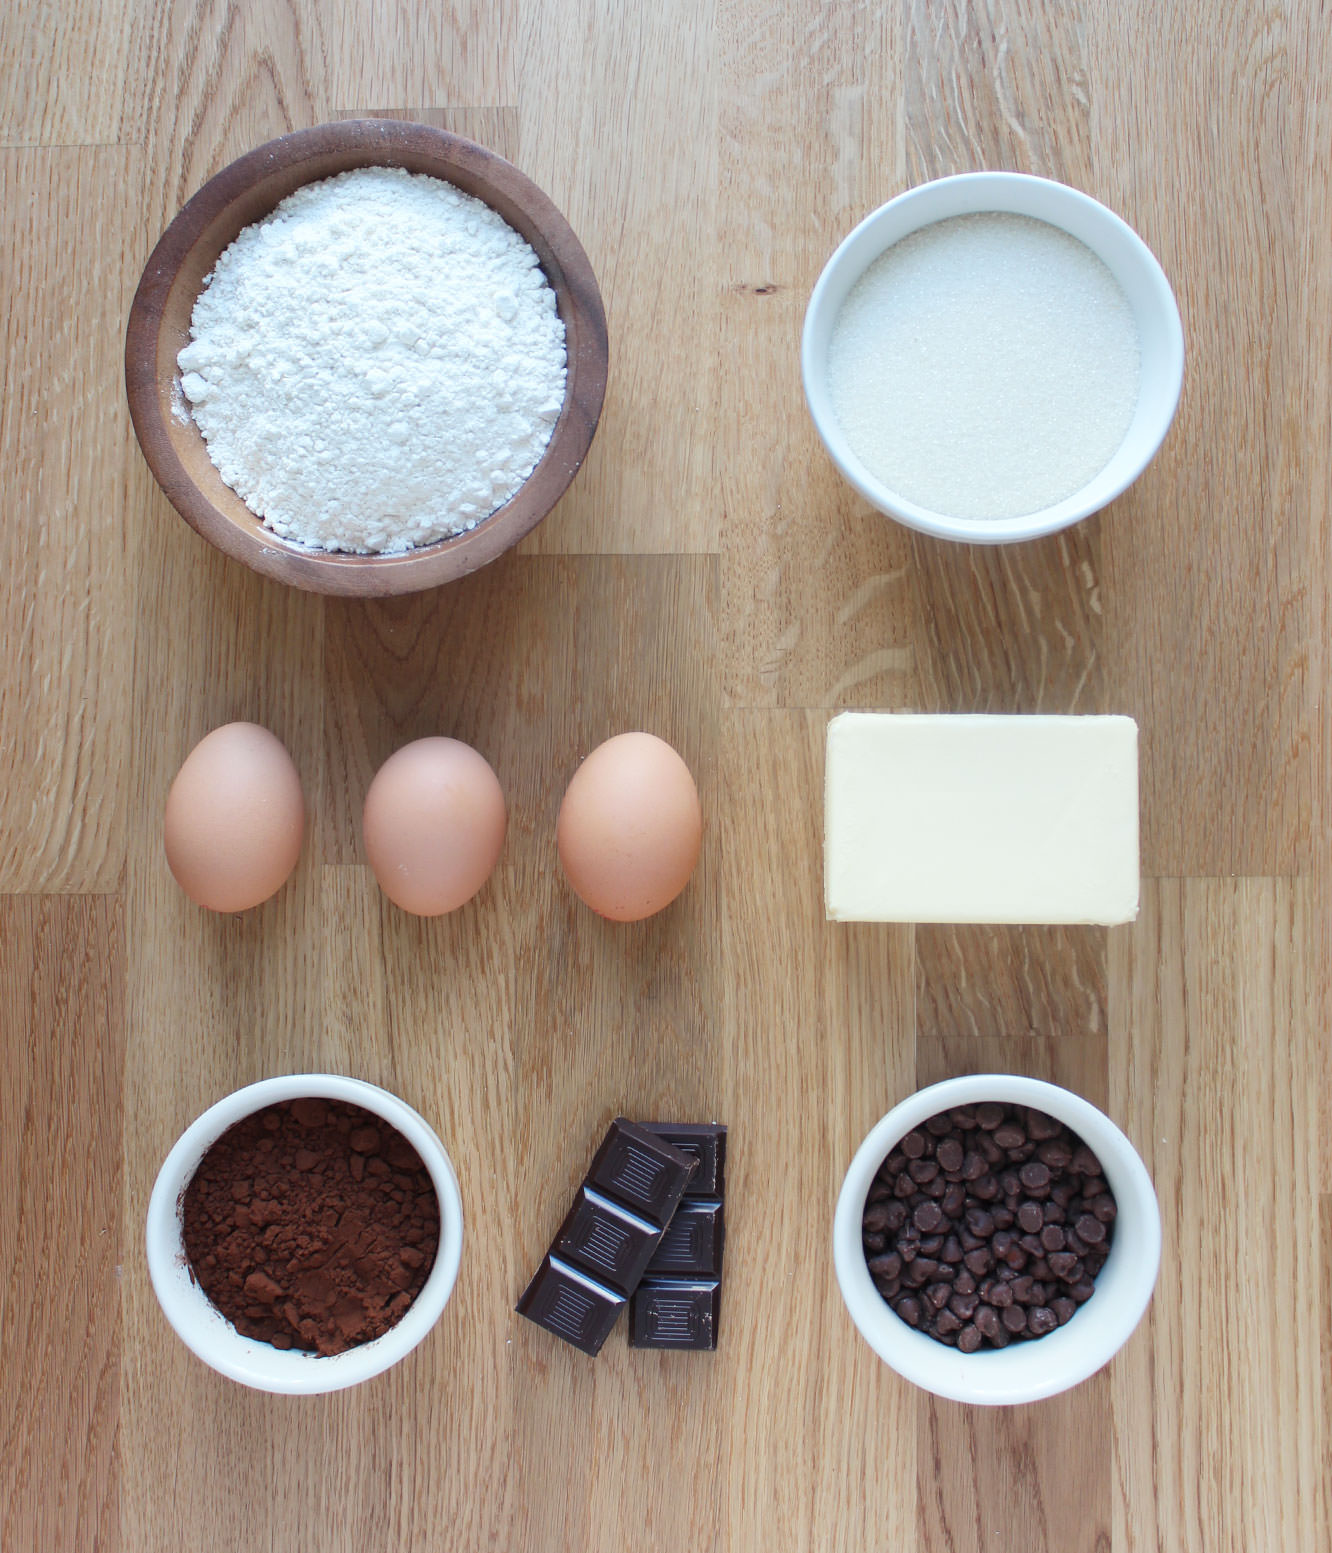
You will need

For the brownie batter:

300g/10.5 oz Caster sugar (golden if you have it)

170g/6 oz Unsalted butter

170g/6 oz Plain flour

45g/1.5 oz Cocoa powder

3 Eggs

1/2 tsp Baking powder

For the cookie dough:

170g/6 oz Plain flour

100g/3.5 oz Soft light brown sugar

100g/3.5 oz Milk chocolate chips

60g/2 oz Unsalted butter

1 Egg

1 tbsp Golden syrup

1/2 tsp Baking powder

Extra

45g/1.5 oz Dark chocolate

cookie-dough-brownie-recipe

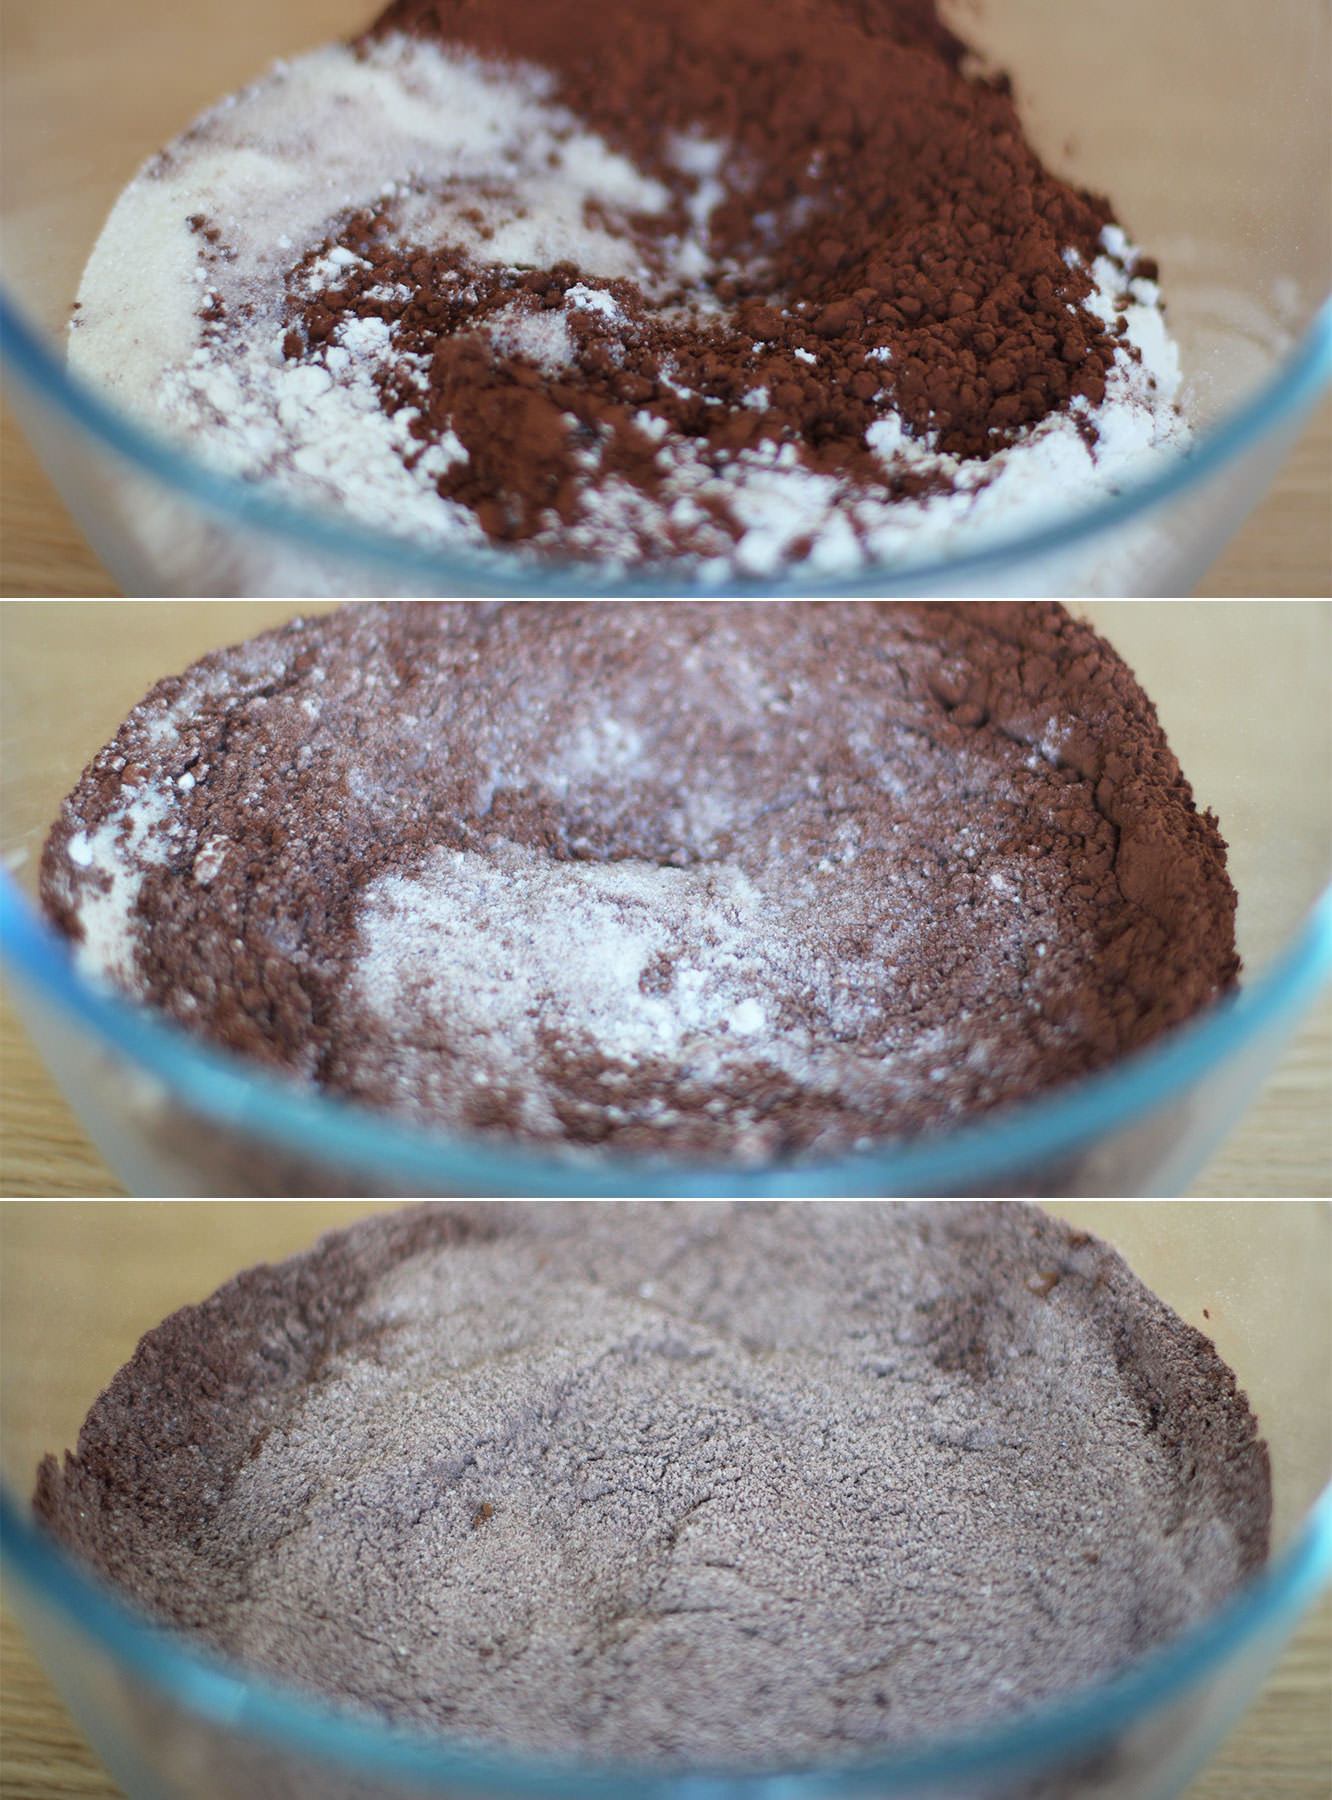
Step one

Starting with the brownie batter, mix together the baking powder, sugar, flour and cocoa powder.

cookie-dough-brownie-recipe-1

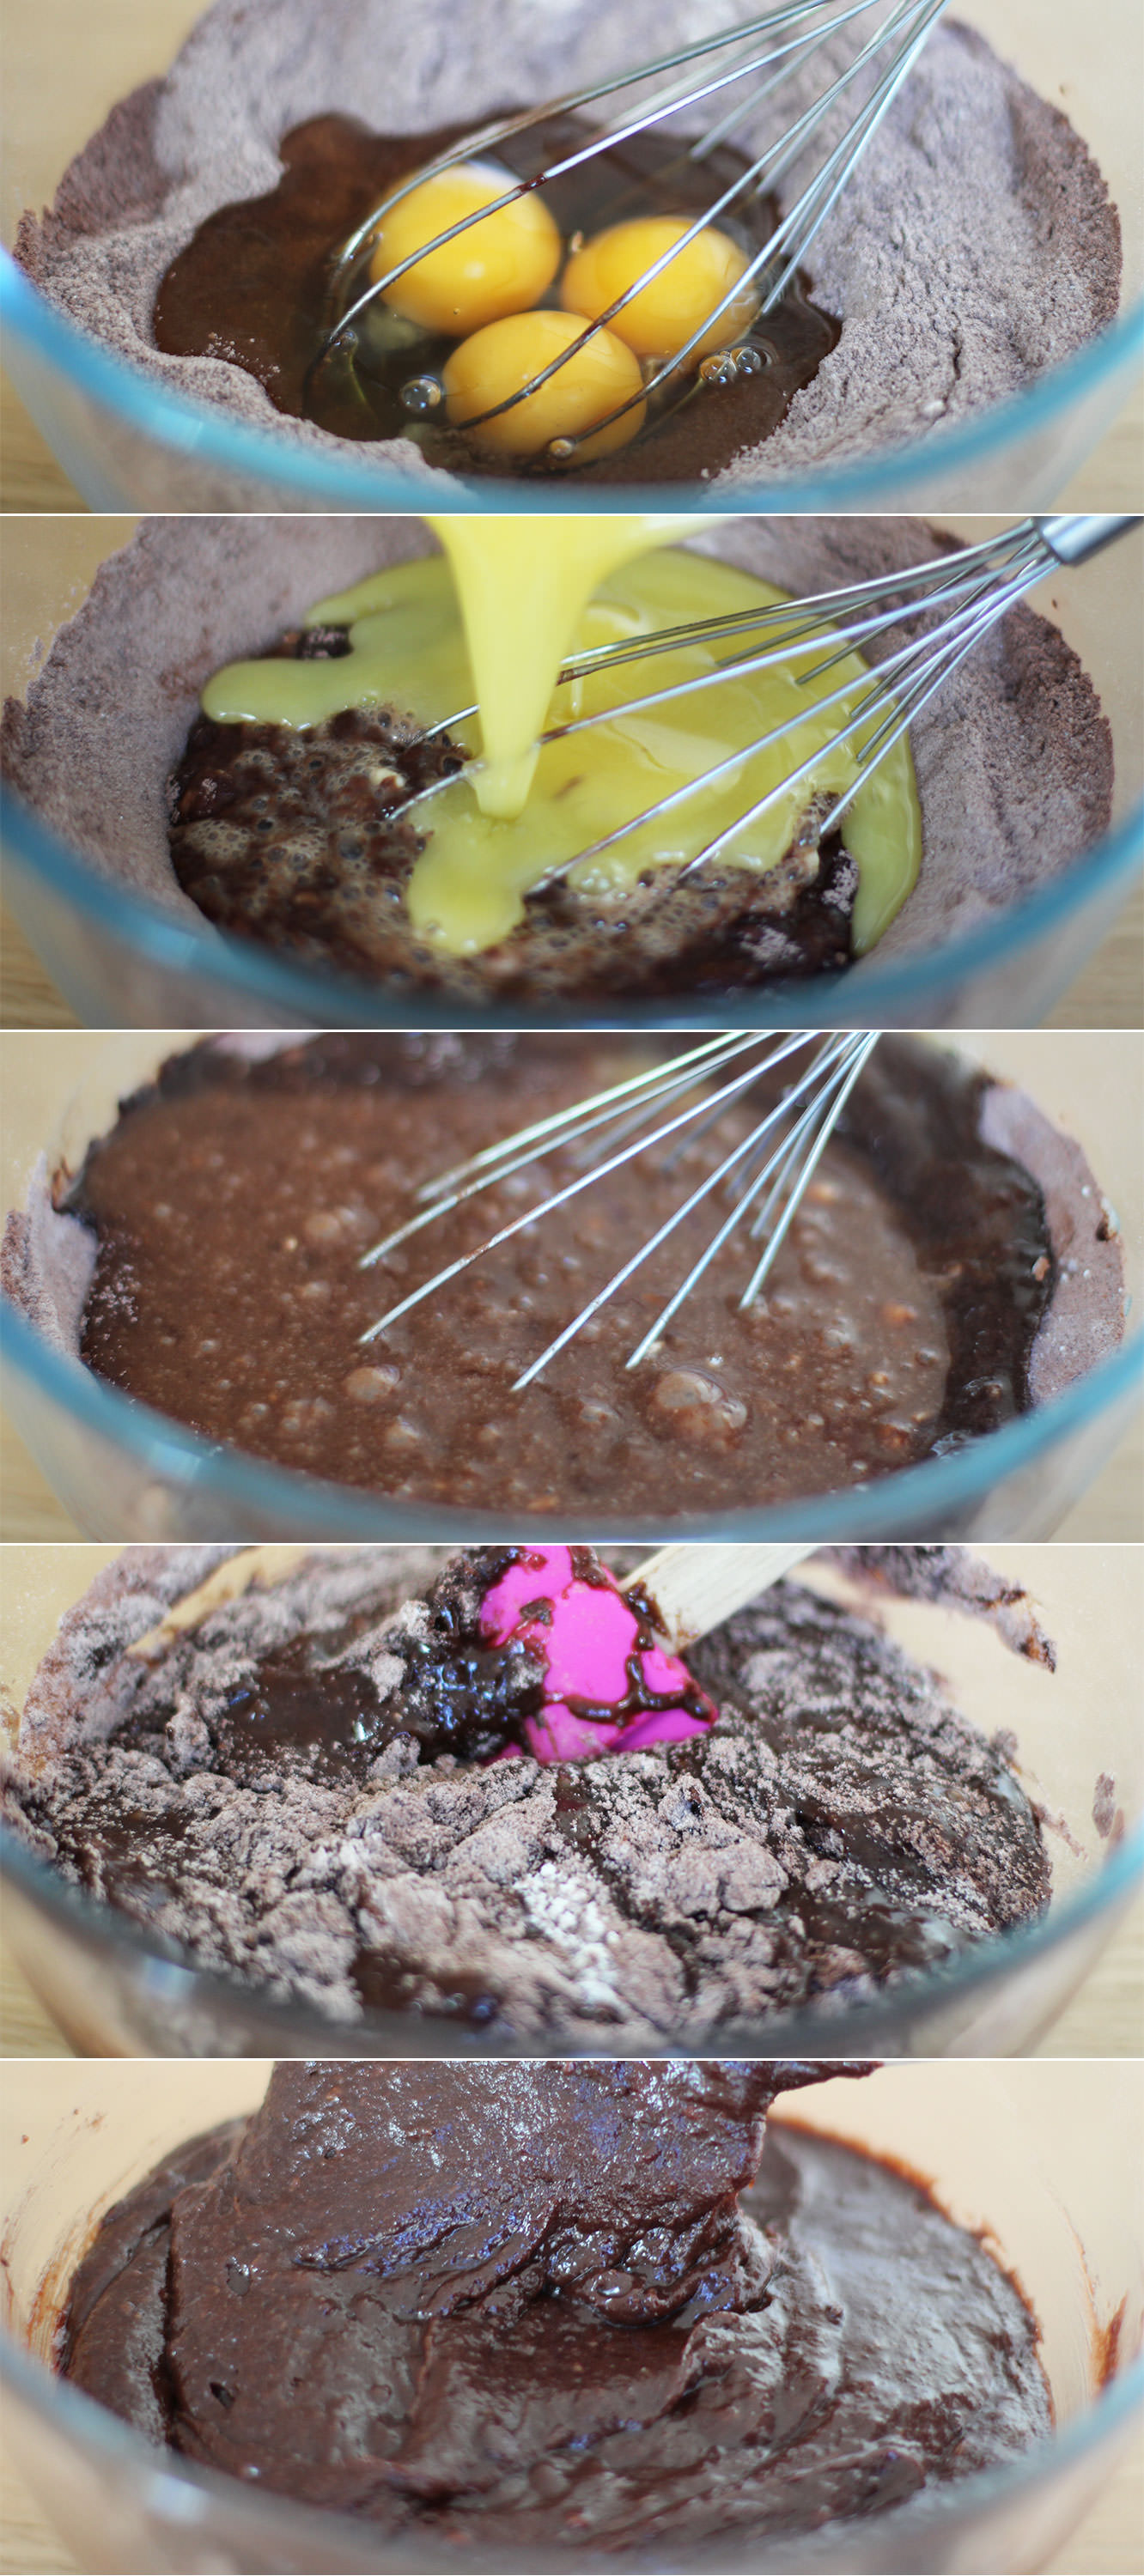
Step two

Make a well in the middle of your dry ingredients and add the eggs. Using a hand whisk, combine gradually using small circles in the centre of the batter.

Step three

Melt the butter in the microwave. Only until it has just about dissolved mind, or it will cook the eggs and this is not intended to be a recipe for scrambled egg brownie.

Step four

Add the butter into the mixture and continue with your little circles until most of the flour is combined, then use a spatula or wooden spoon to fold in the rest.

cookie-dough-brownie-recipe-2

Step five

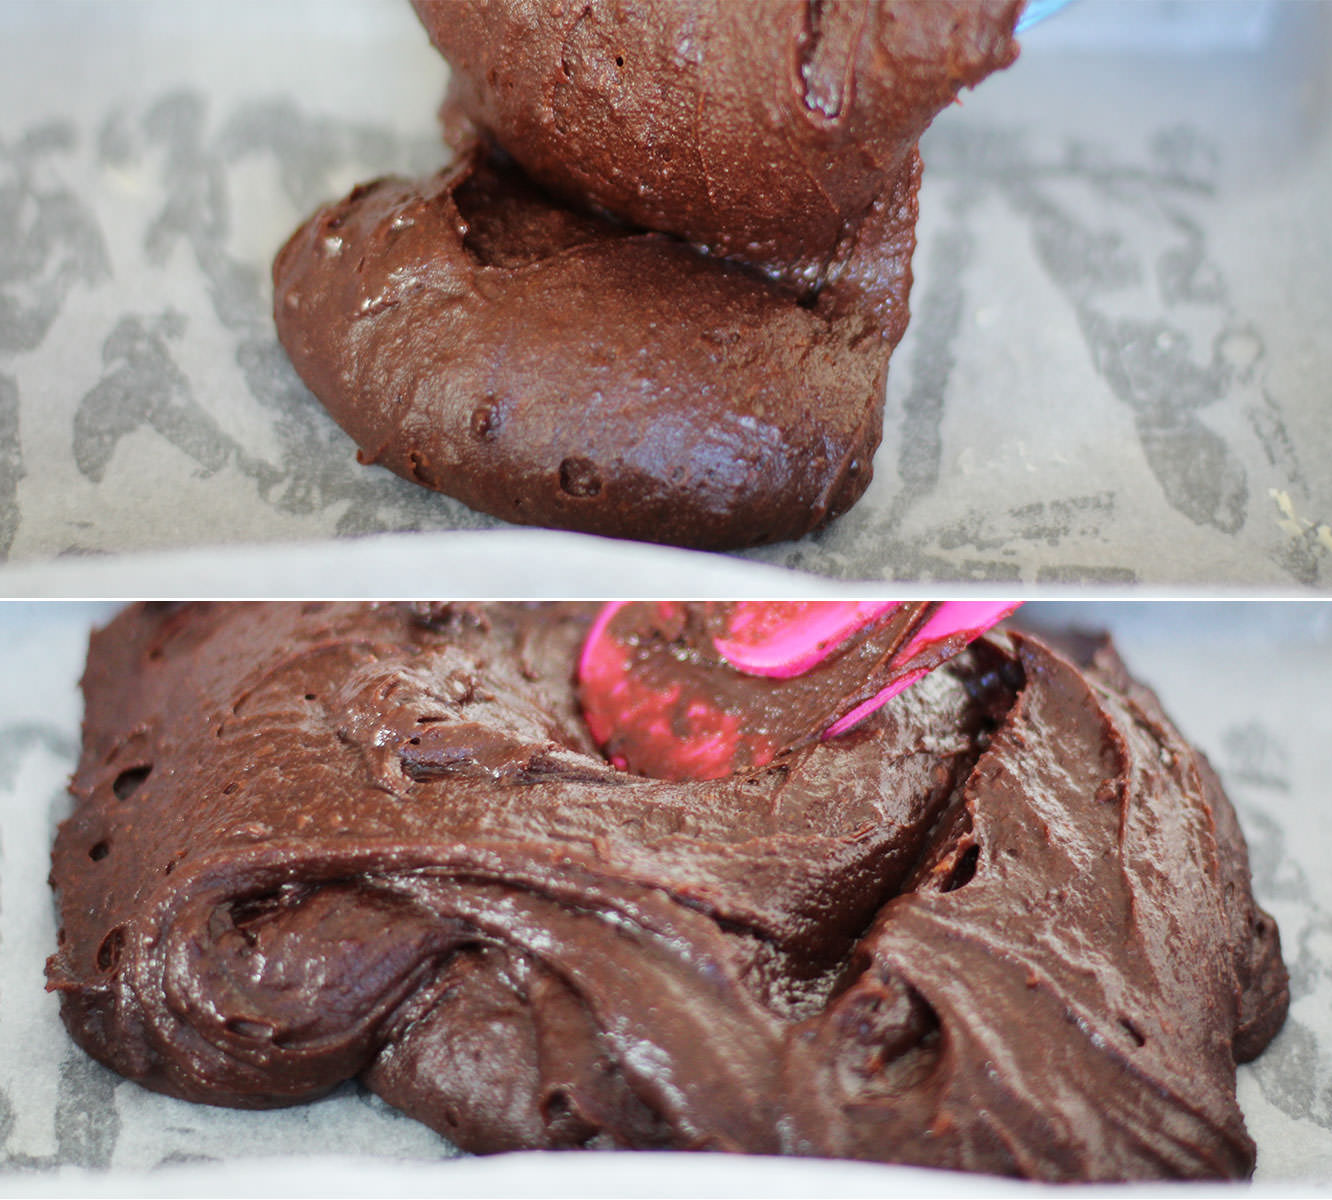
Pour into a greased and lined brownie tray and gently spread into the corners.

Get a teaspoon and eat a bit. You know you want to.

Moving on to the cookie dough…

cookie-dough-brownie-recipe-3

Step six

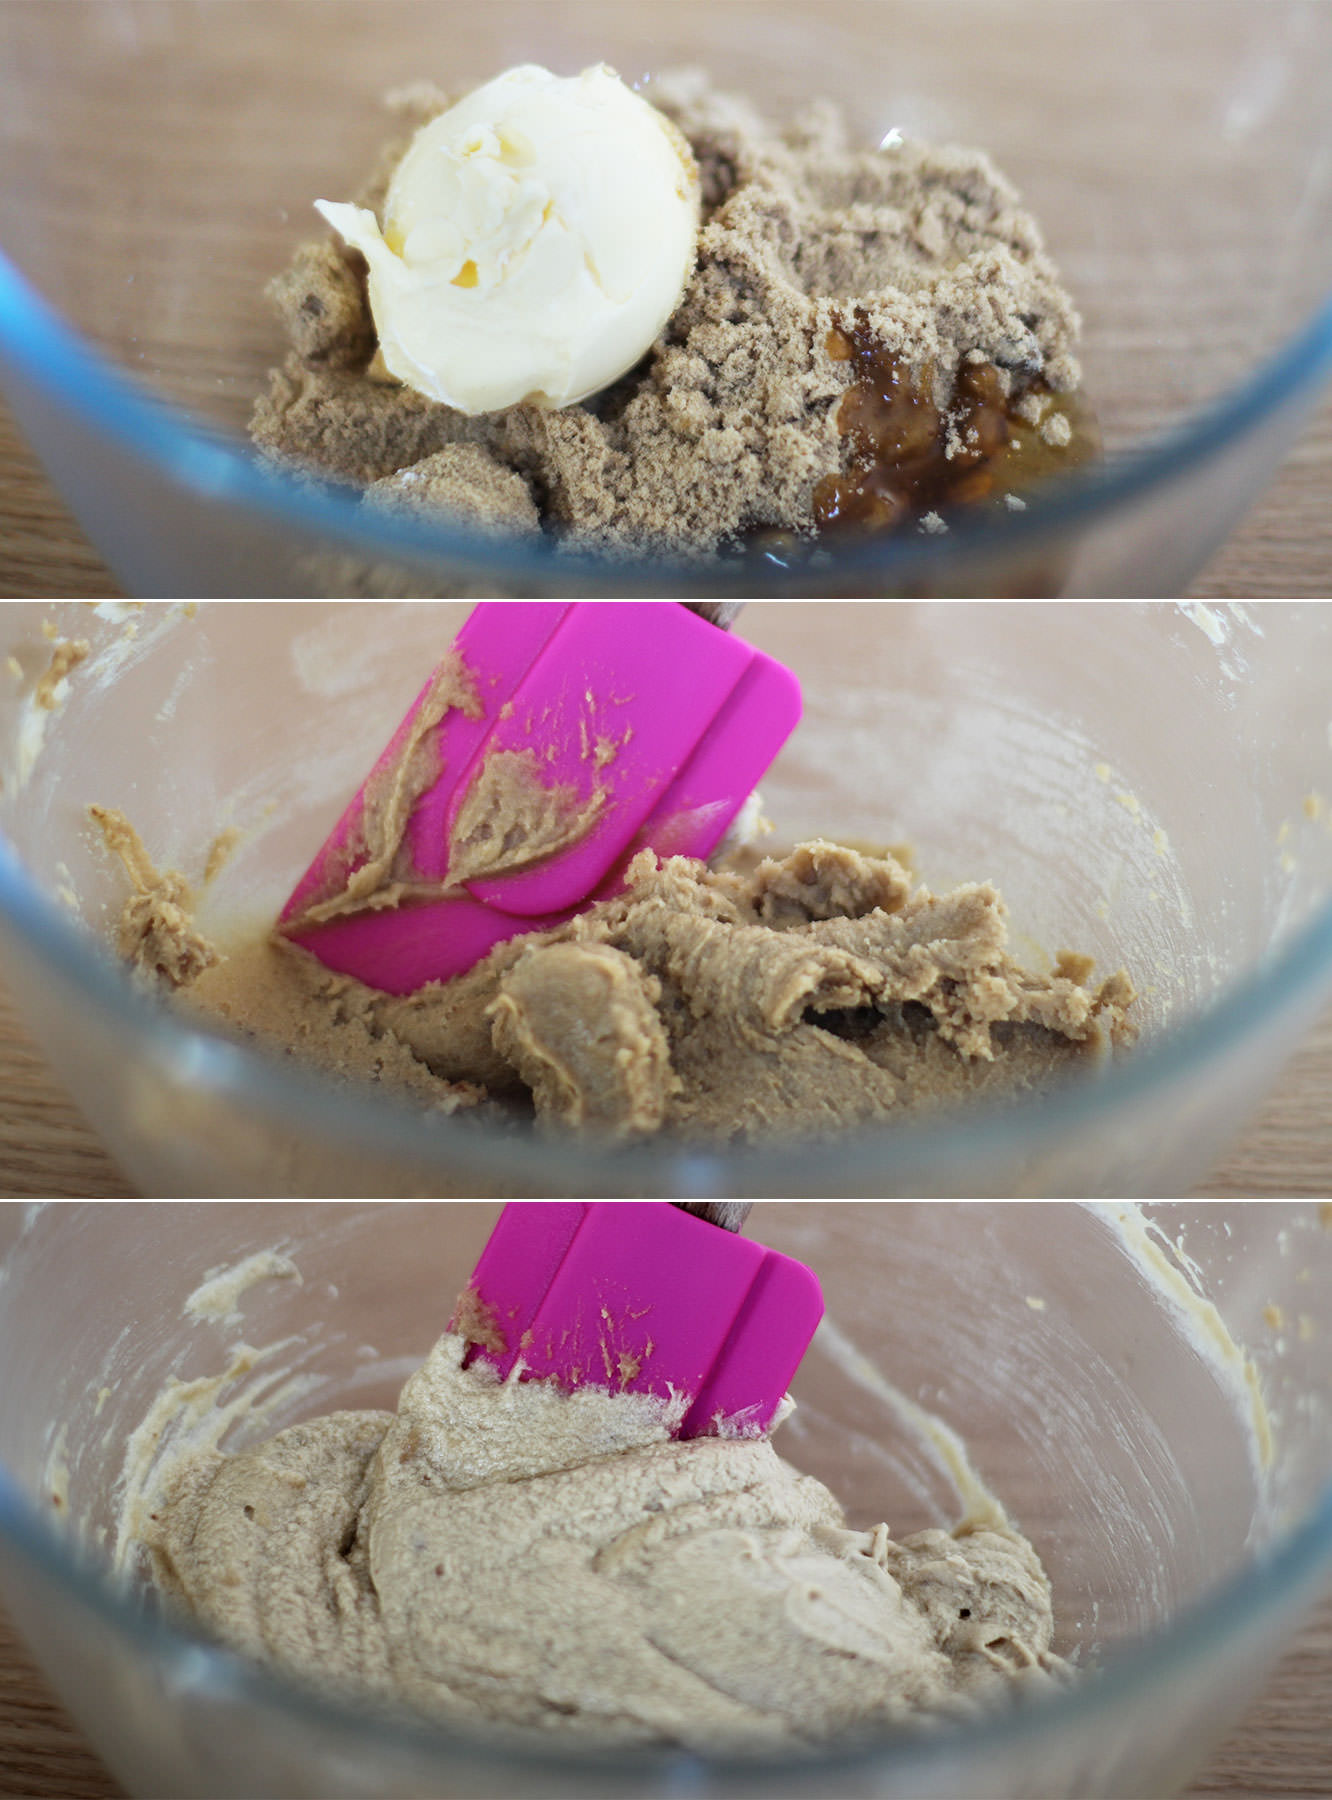
Beat together the butter, soft brown sugar and golden syrup. You might find it easier/quicker to use an electric whisk.

Step seven

Beat in the egg until pale, light and fluffy.

cookie-dough-brownie-recipe-4

Step eight

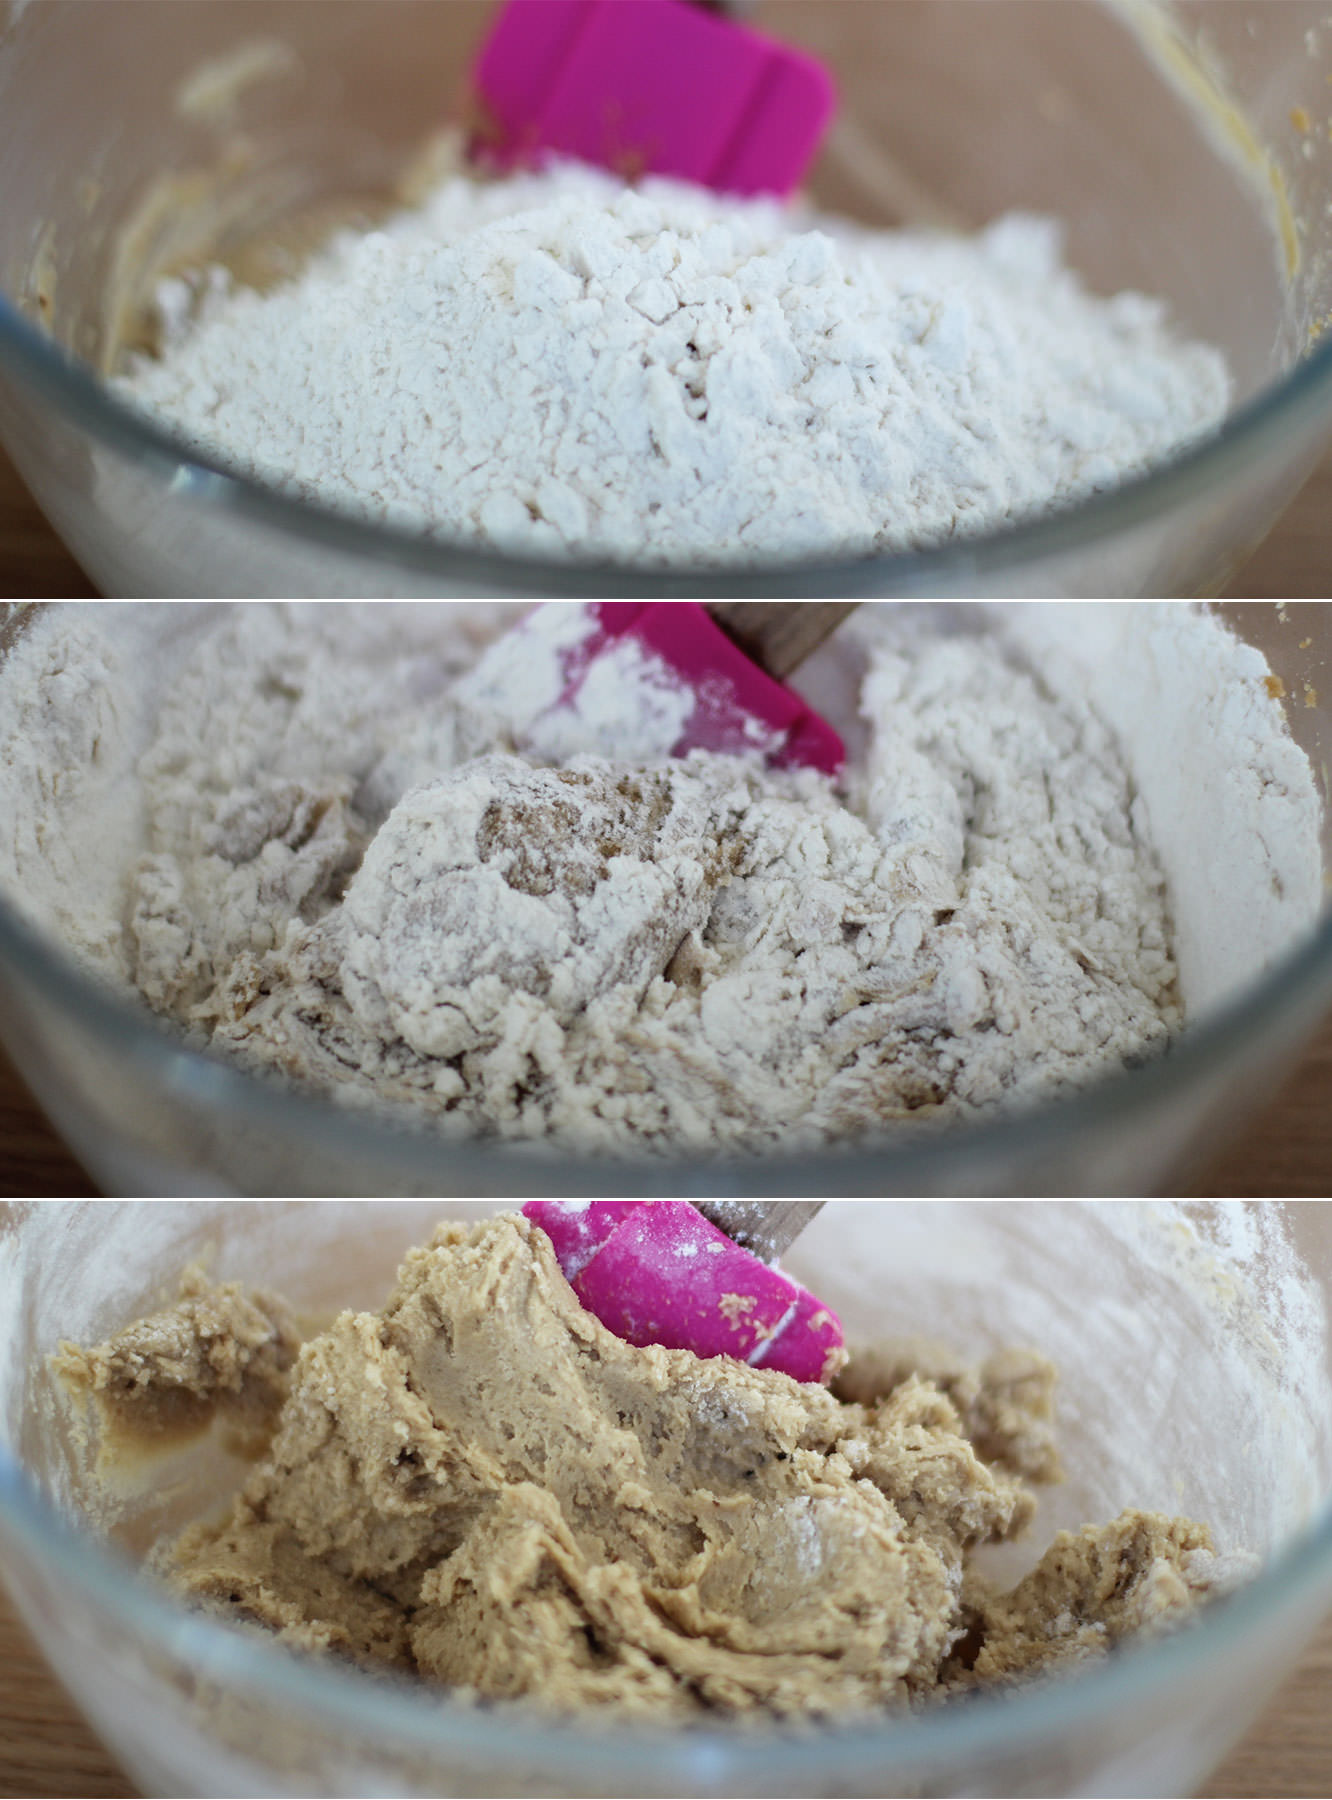
Fold in the flour and baking powder until you have a smooth dough.

cookie-dough-brownie-recipe-5

Step nine

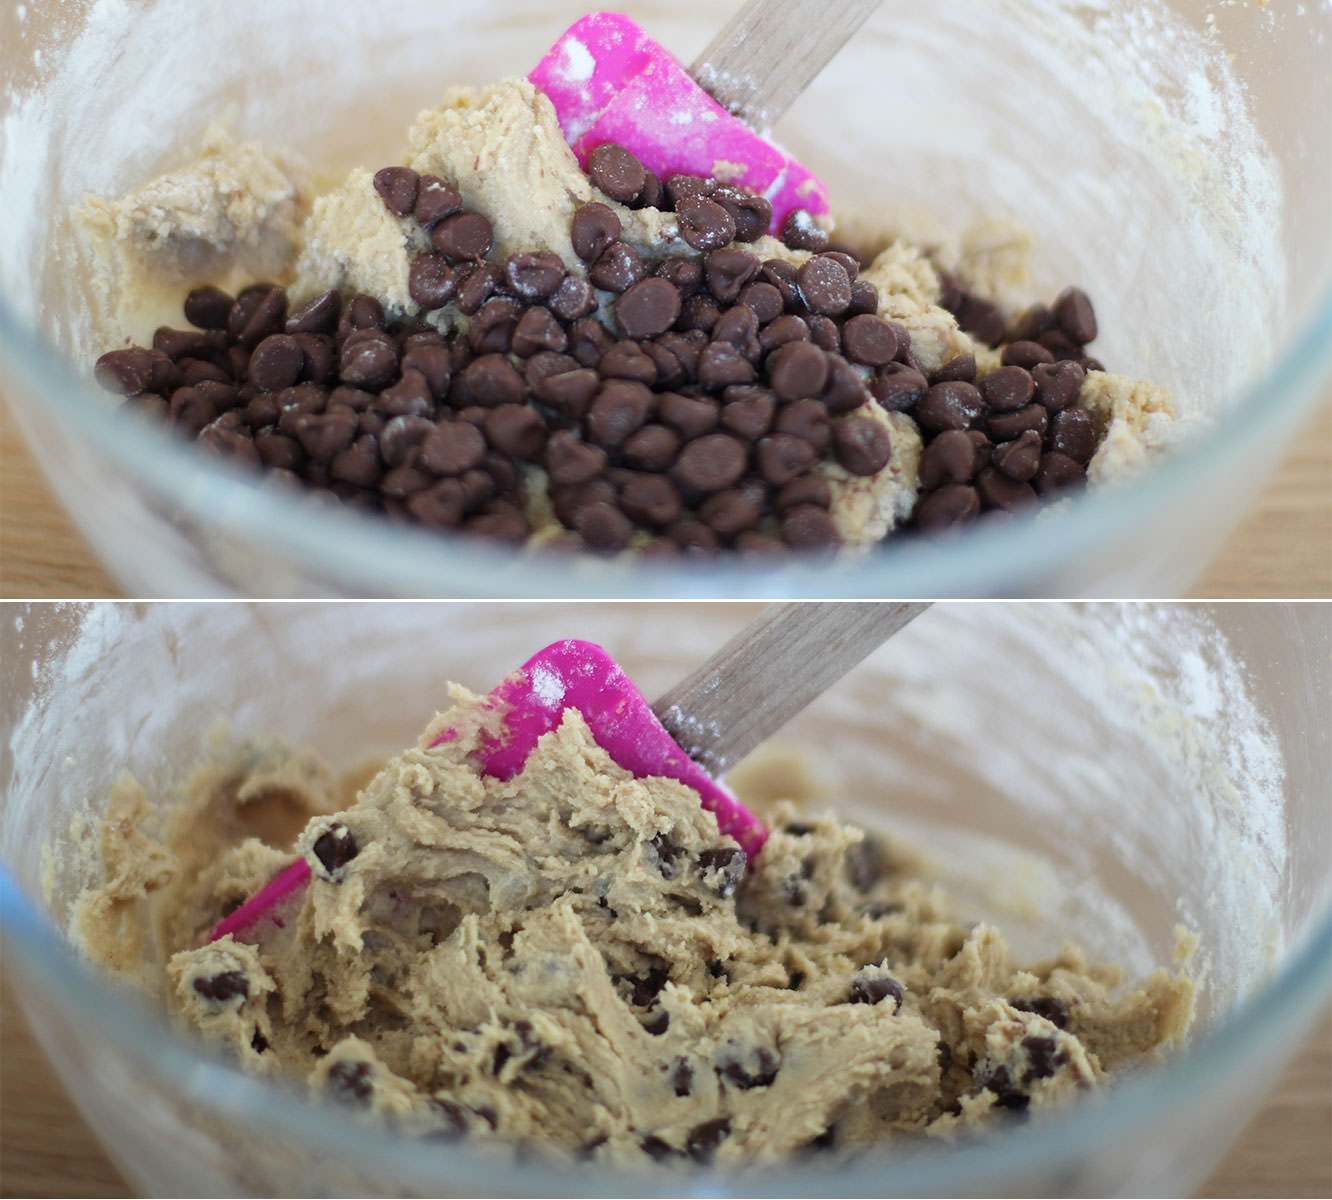
Add the chocolate chips.

Time for another little taste.

cookie-dough-brownie-recipe-7

Step ten

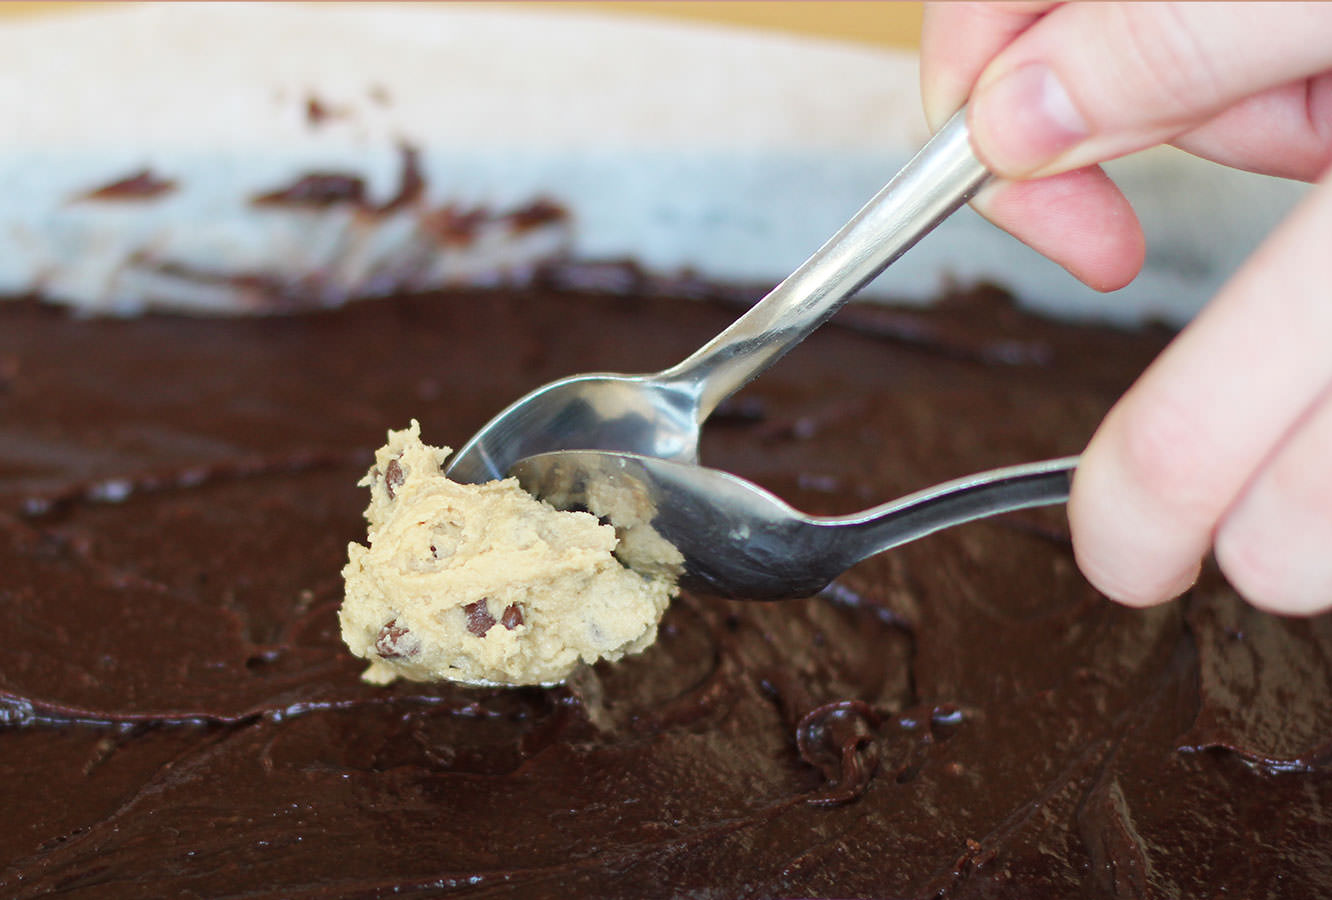
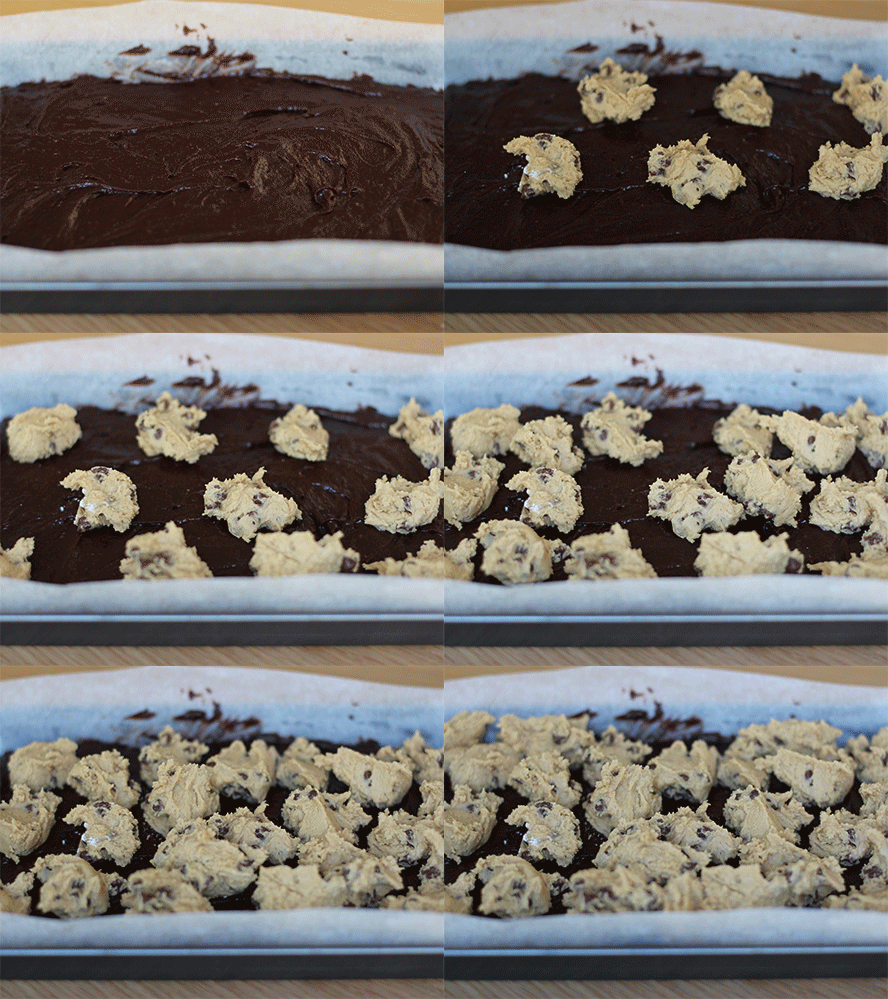
Using a pair of teaspoons drop blobs of the batter onto the surface of the brownie mixture.

cookie-dough-brownie-recipe-gif

cookie-dough-brownie-recipe-6

Step eleven

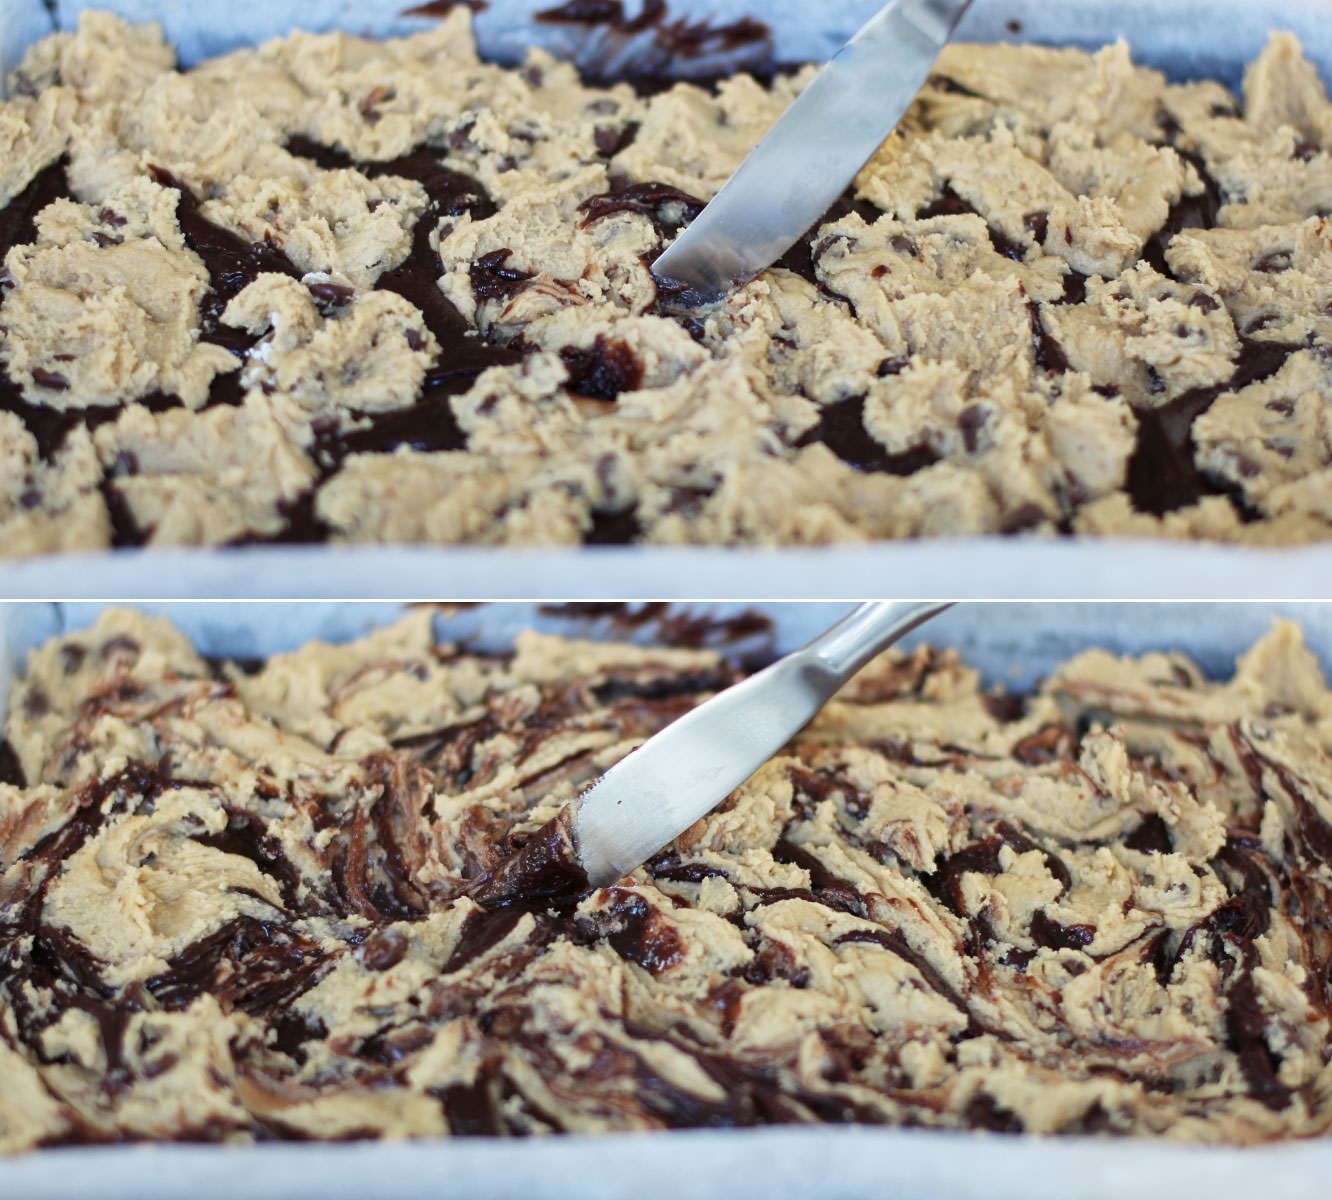
Push the cookie dough blobs down a bit with the back of a spoon and use a butter knife to make a marbled effect on top.

Step twelve

Bake in the oven for 30-35 minutes on 180C/350F/gas mark 4. You want there to still be a bit of fudgey chocolate between the brownie and cookie so be careful not to over do it.

Step thirteen

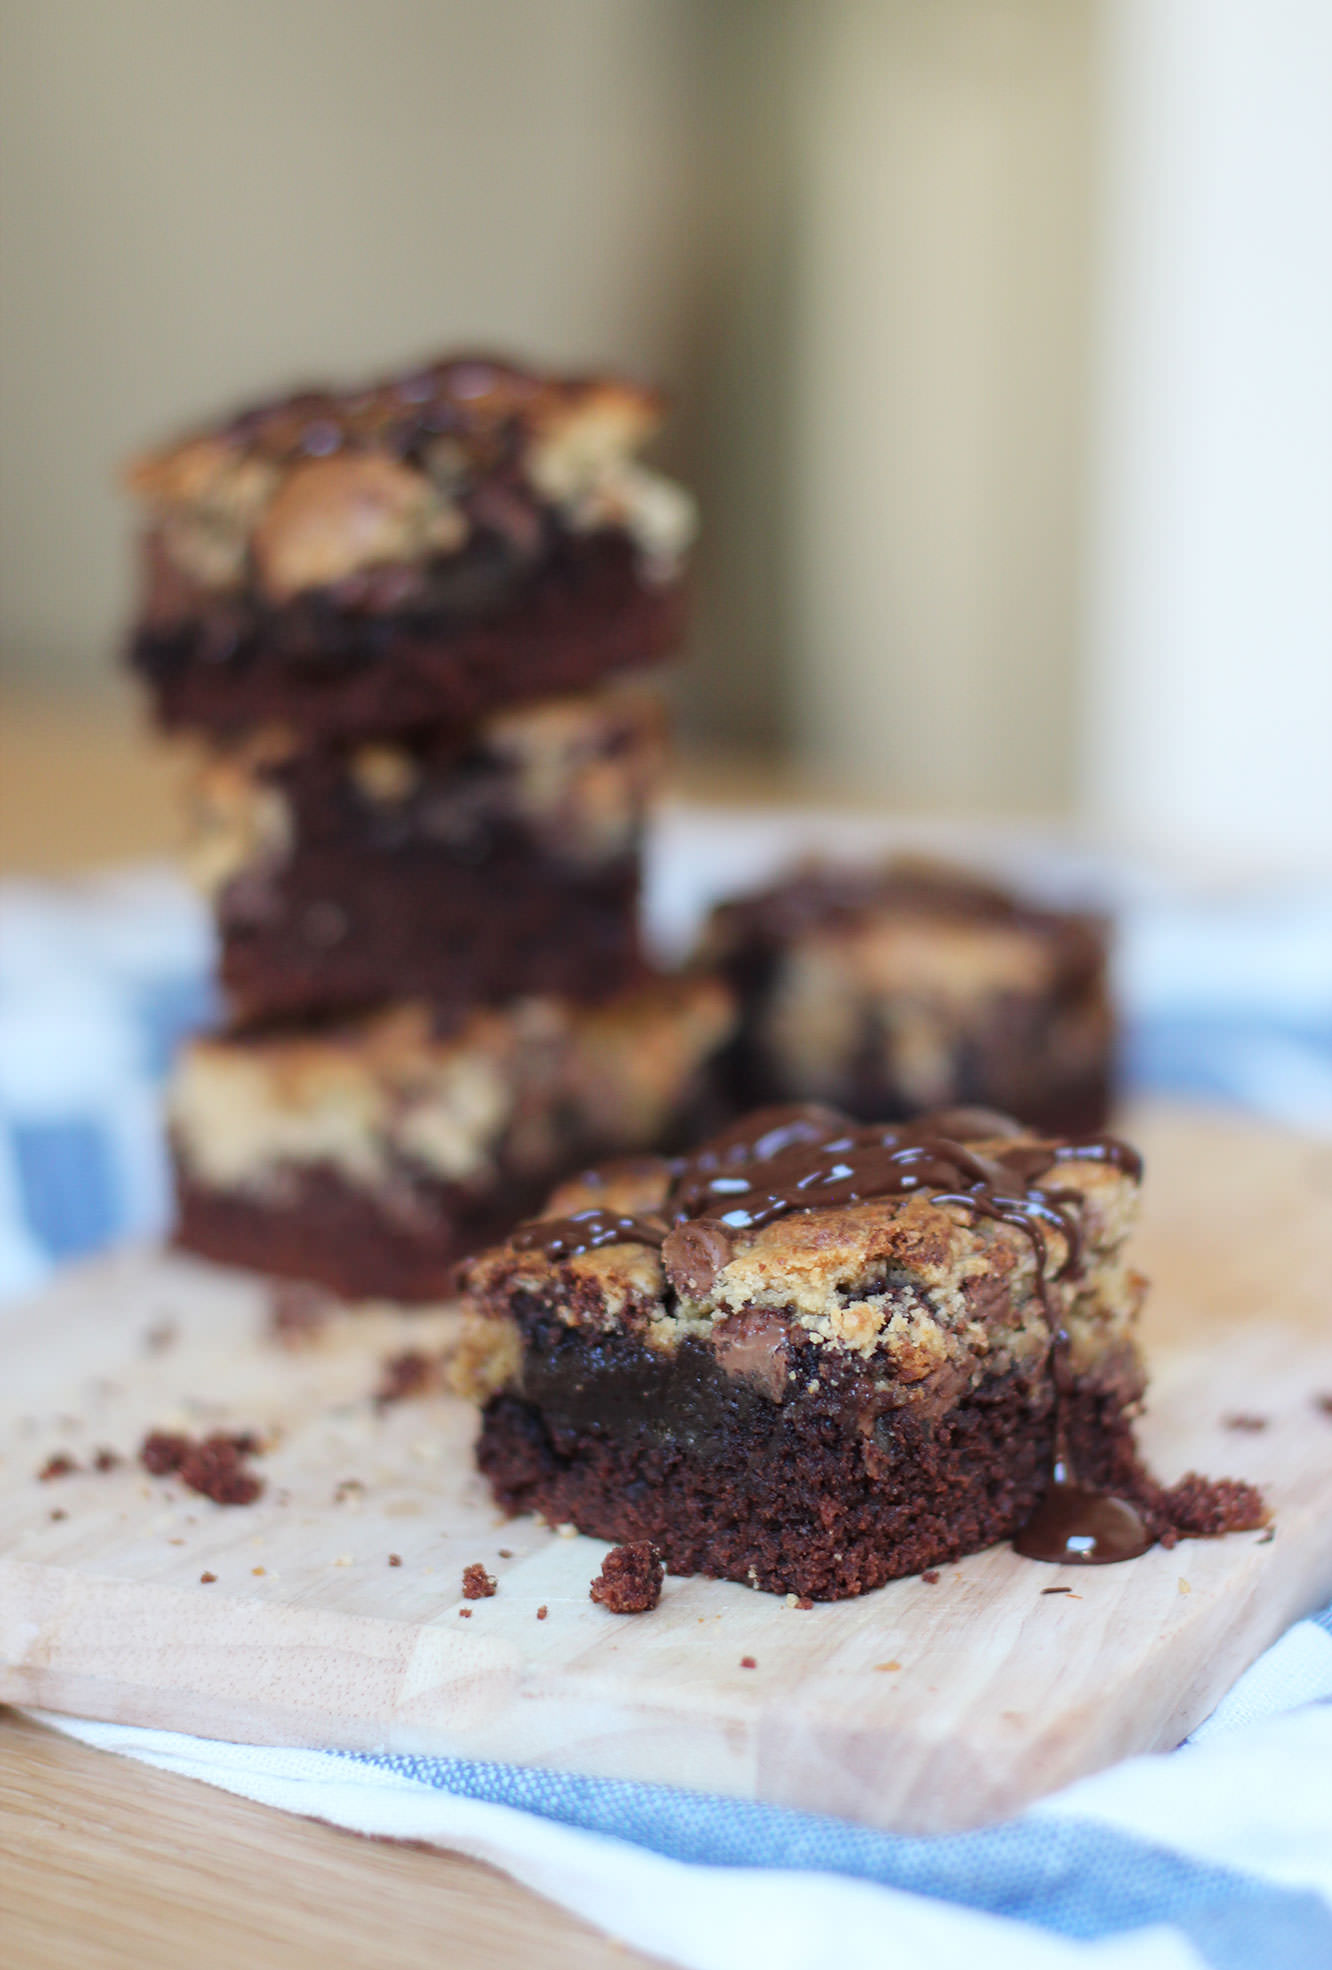
Melt the dark chocolate in the microwave and drizzle over with a spoon.

cookie-dough-brownie-recipe-8

cookie-dough-brownie-recipe-9

Yeah. You are so welcome.

Look out for Mr Stork

February. For me, the pits of the calendar. Nobody really needs February. It just extends winter for too long, and personally, by the time we’re a week into it I’m ready to bid farewell to the chilly winds and rains and usher in March and April.

This time round however, Spring came early to a very special household. My wonderful friends Hannah and David had a BEAUTIFUL baby boy earlier this month, shaking off the winter blues. I’m head over heels for the little bundle already and can’t wait to see him grow.

As if I needed an excuse to craft eh?

This is a great little project if you already have kiddies and are expecting another, as the older siblings can definitely lend a hand.

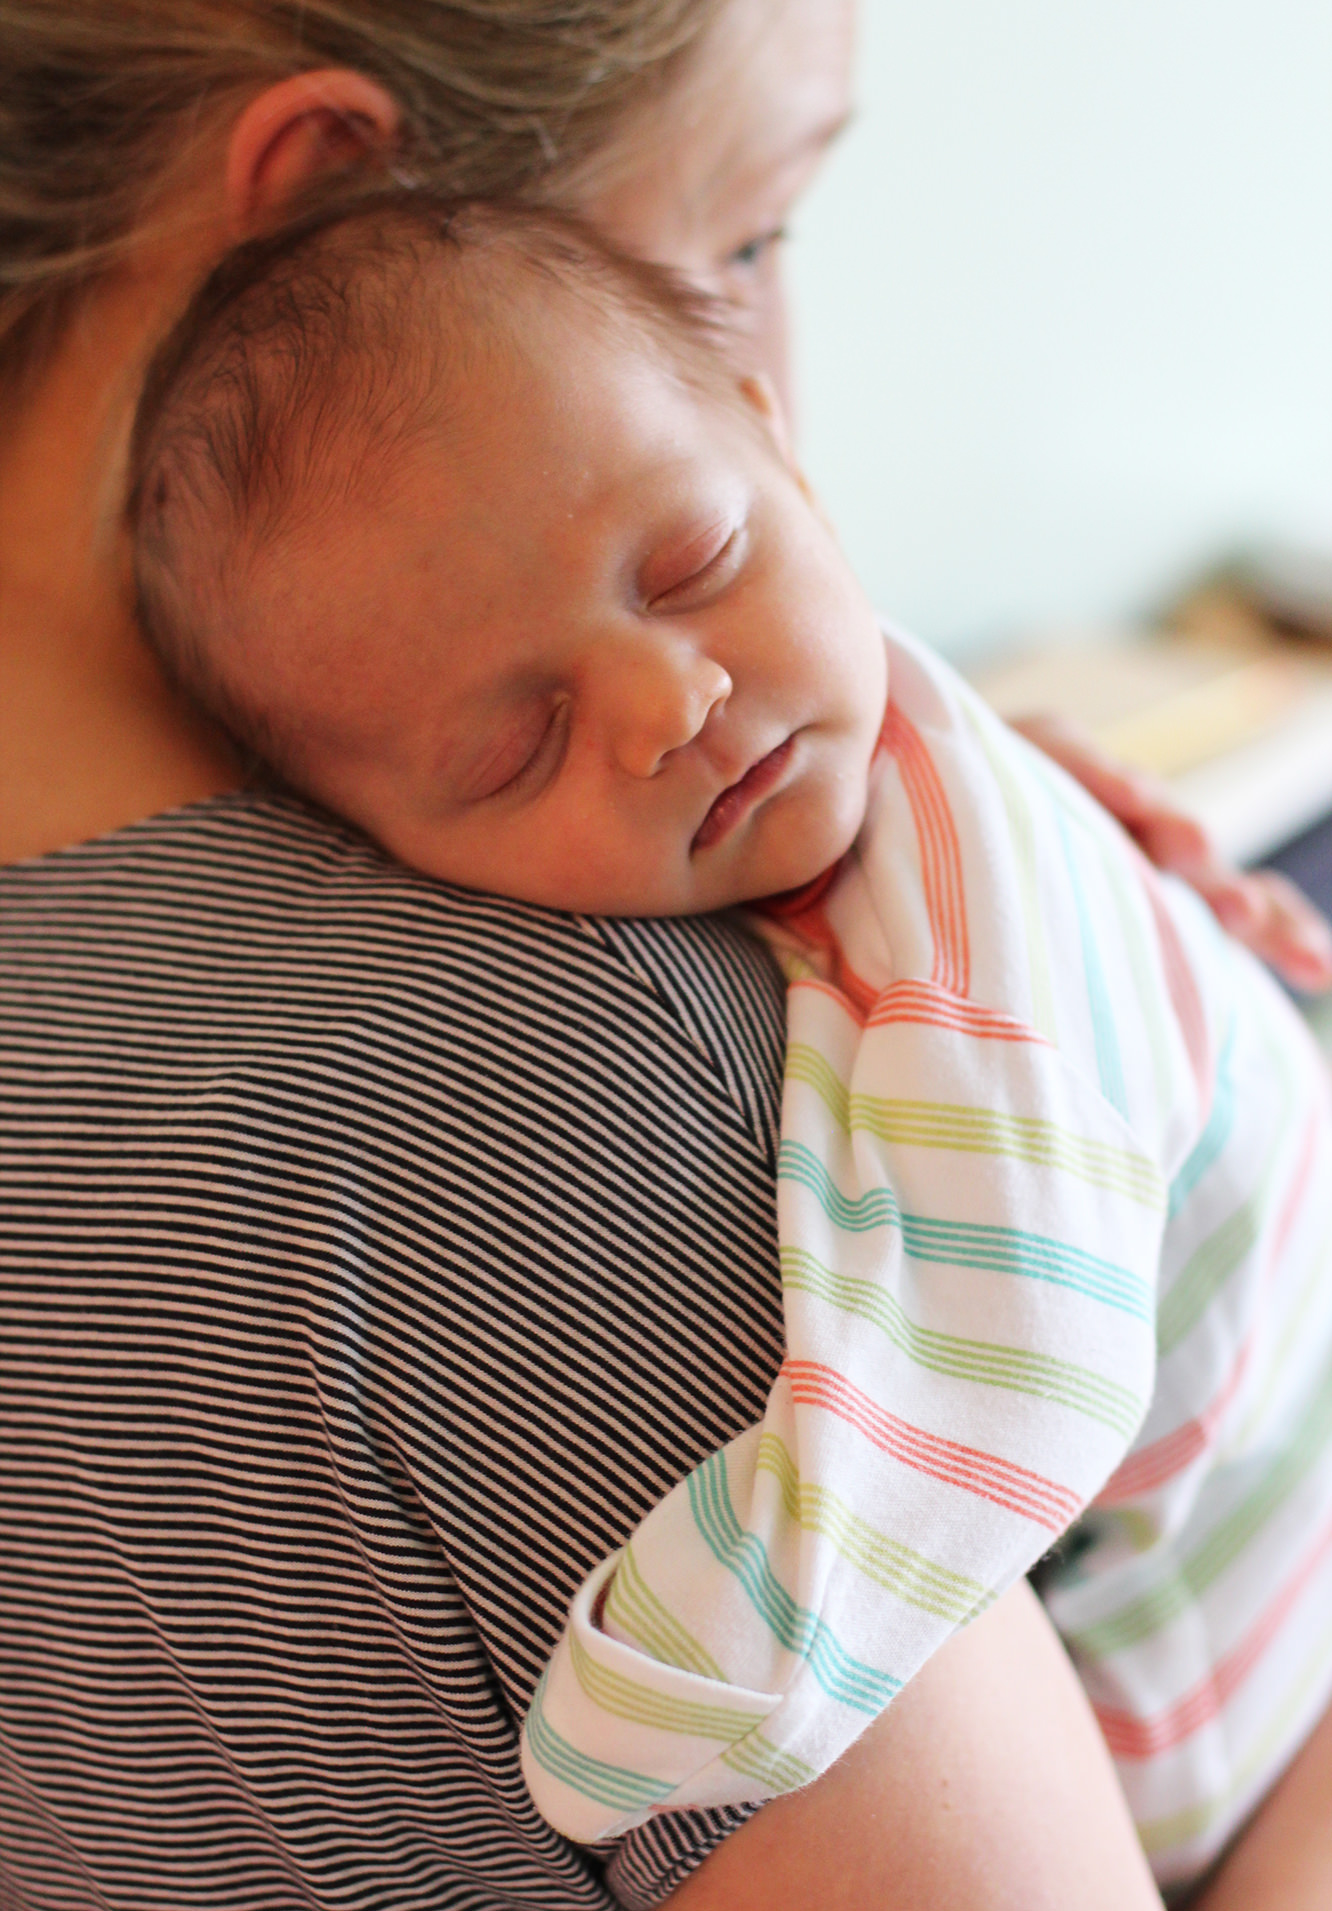
For the impatient ones, yes, there is a picture of bubba at the bottom.

how-to-make-baby-mobile

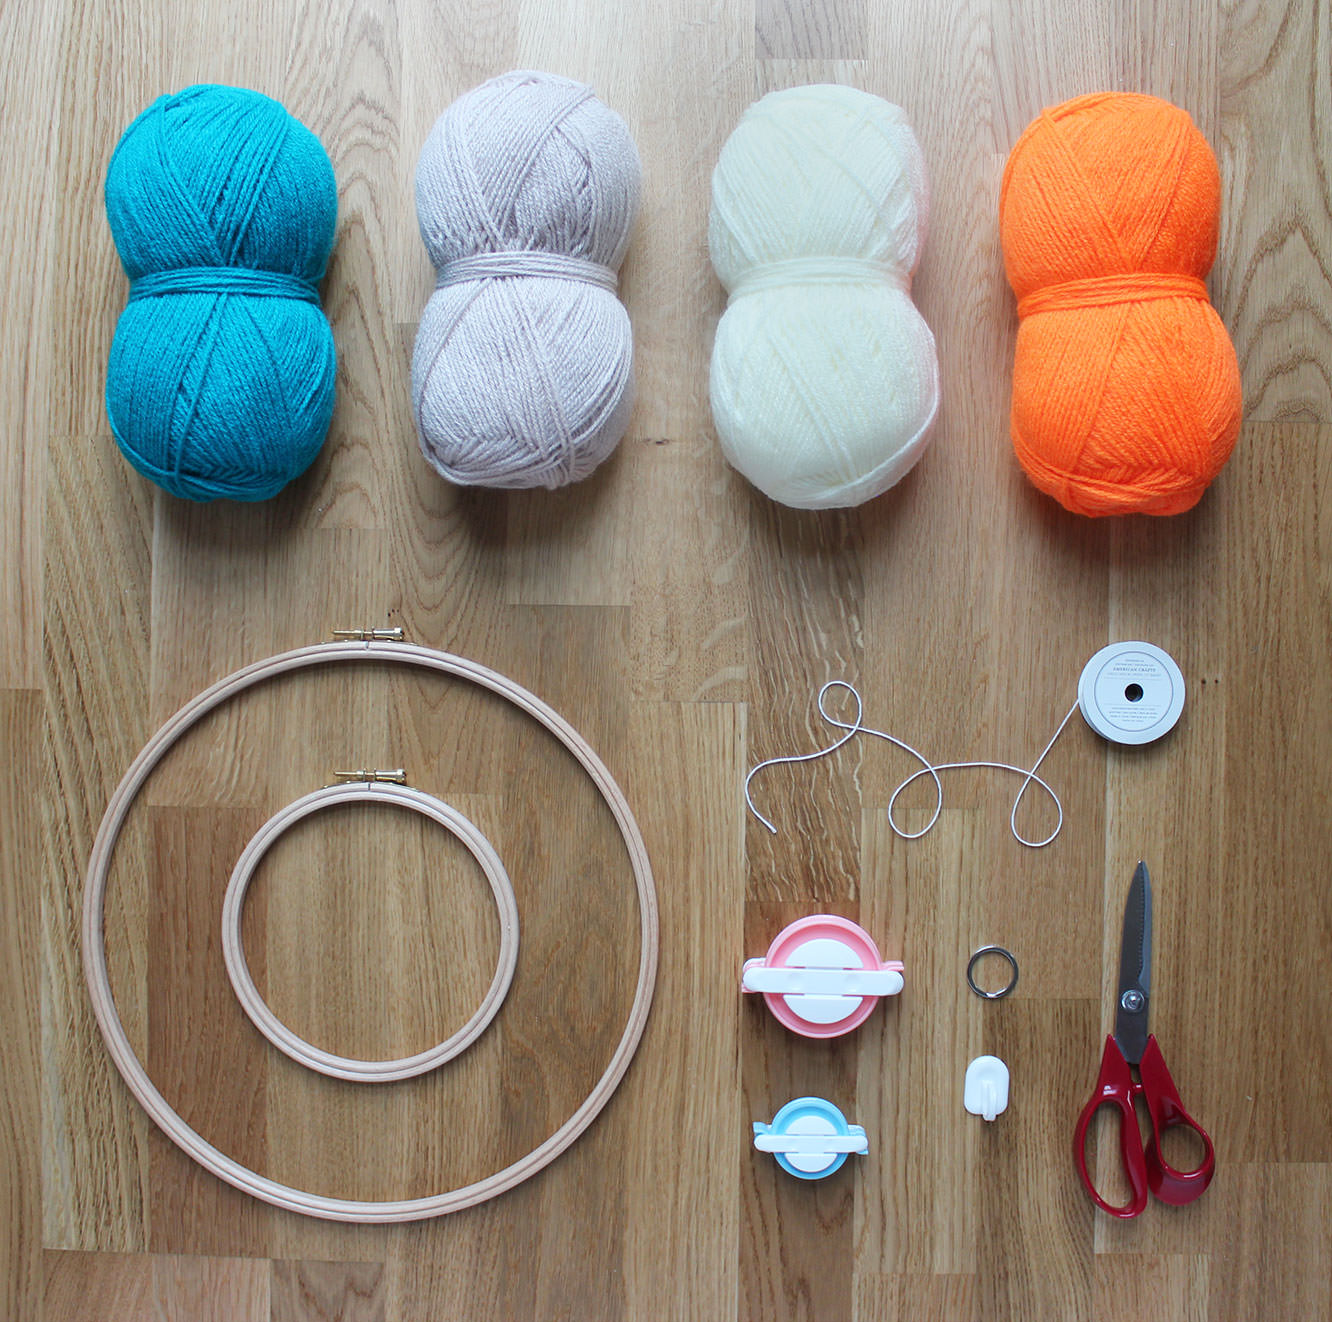
Things you need

12″ Embroidery hoop

9″ Embroidery hoop

Wool in a variety of colours (perfect for using up offcuts)

Pom pom makers in a variety of sizes (or cardboard, see below)

Double sided tape

Needle and thread

A sticky hook

A keyring

2-3m String

how-to-make-baby-mobile-1

Step one

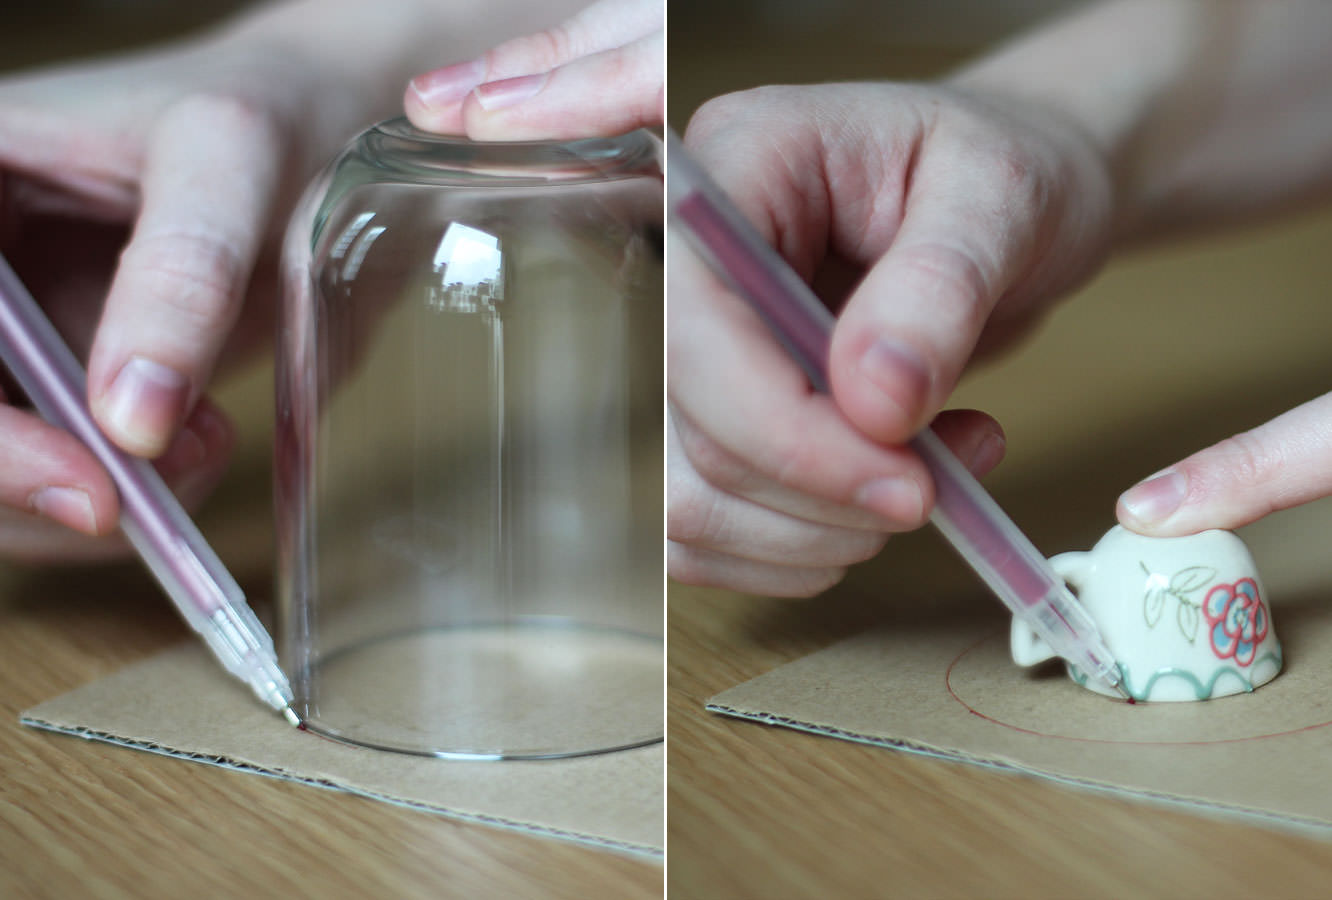
For those of you without pom pom makers (for goodness sake buy some) draw round a variety of circular objects to make differently sized cardboard hoops for your pom poms. You will need to make two hoops per size.

If you have pom pom makers, none of this is for you, skip to step 8 and relish in the fact you loved yourself enough to shell out £4 to save your sanity. All you guys need to do is follow the, in all likelihood hilariously translated, instructions on the back of your packet of pom pom makers. I bought mine on eBay from China, I strongly suggest you do the same.

how-to-make-baby-mobile-2

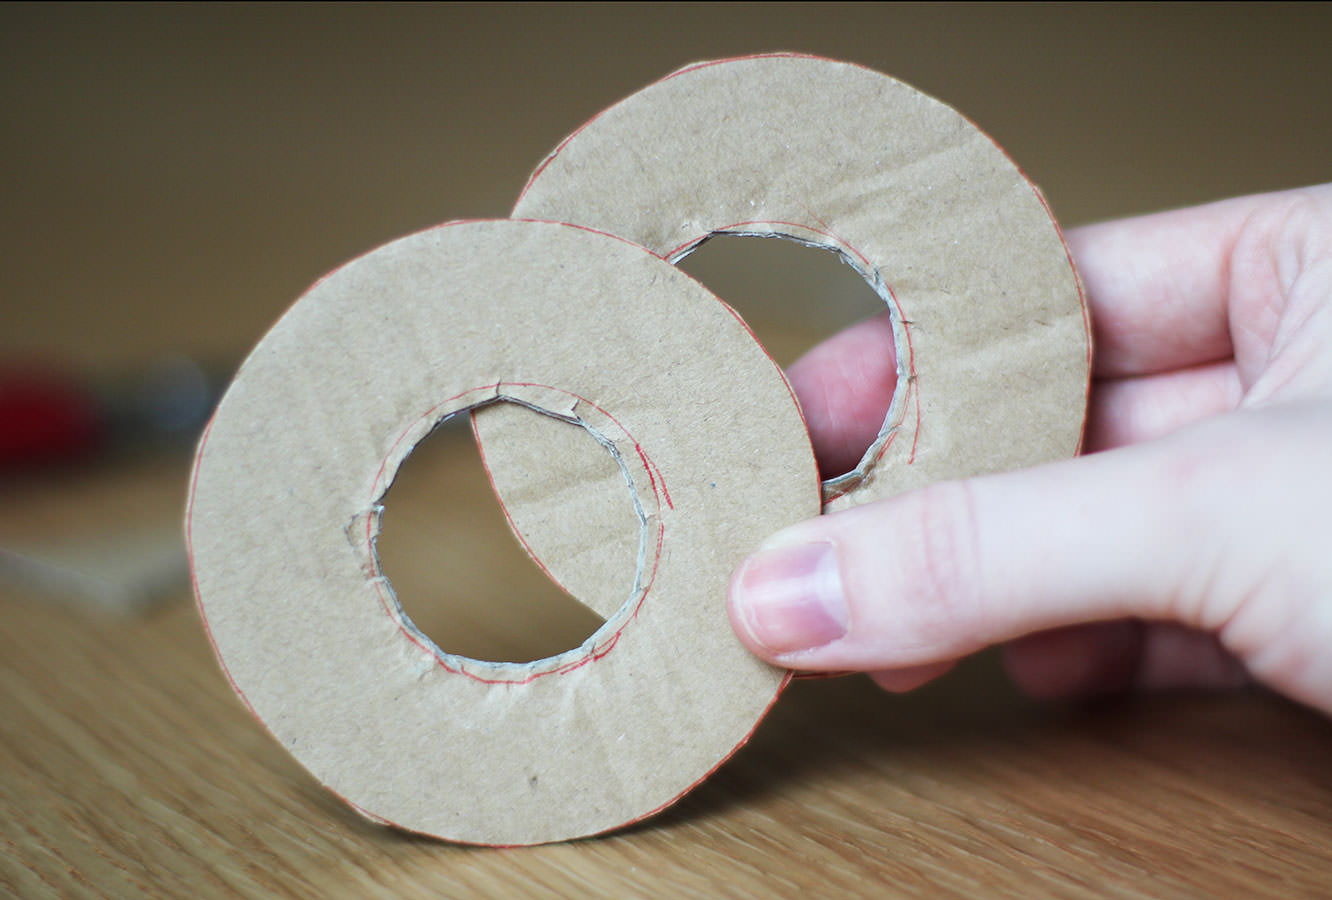
Step two

Cut out the hoops so that you have a hole in the centre. Don’t worry if they’re messy, it won’t impact your poms.

how-to-make-baby-mobile-3

Step three

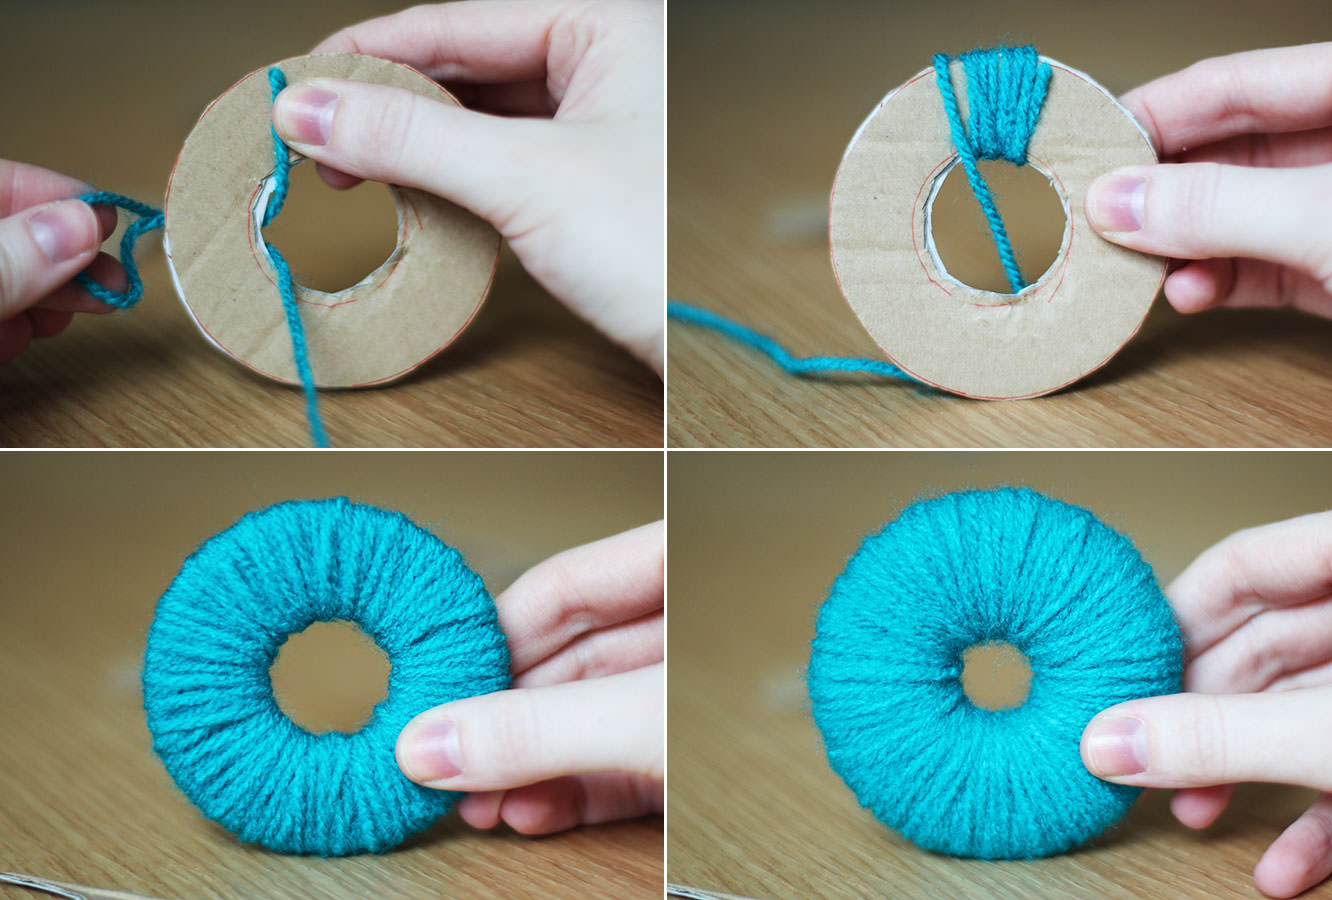
Sandwich the two pieces of cardboard together and wrap lengths of wool around and around.

You do this by pulling the end of the wool through the centre of the disk and back over the edge.

Keep going as long as you can, but essentially the fuller the hole in the middle the plusher your pom pom will be.

how-to-make-baby-mobile-4

Step four

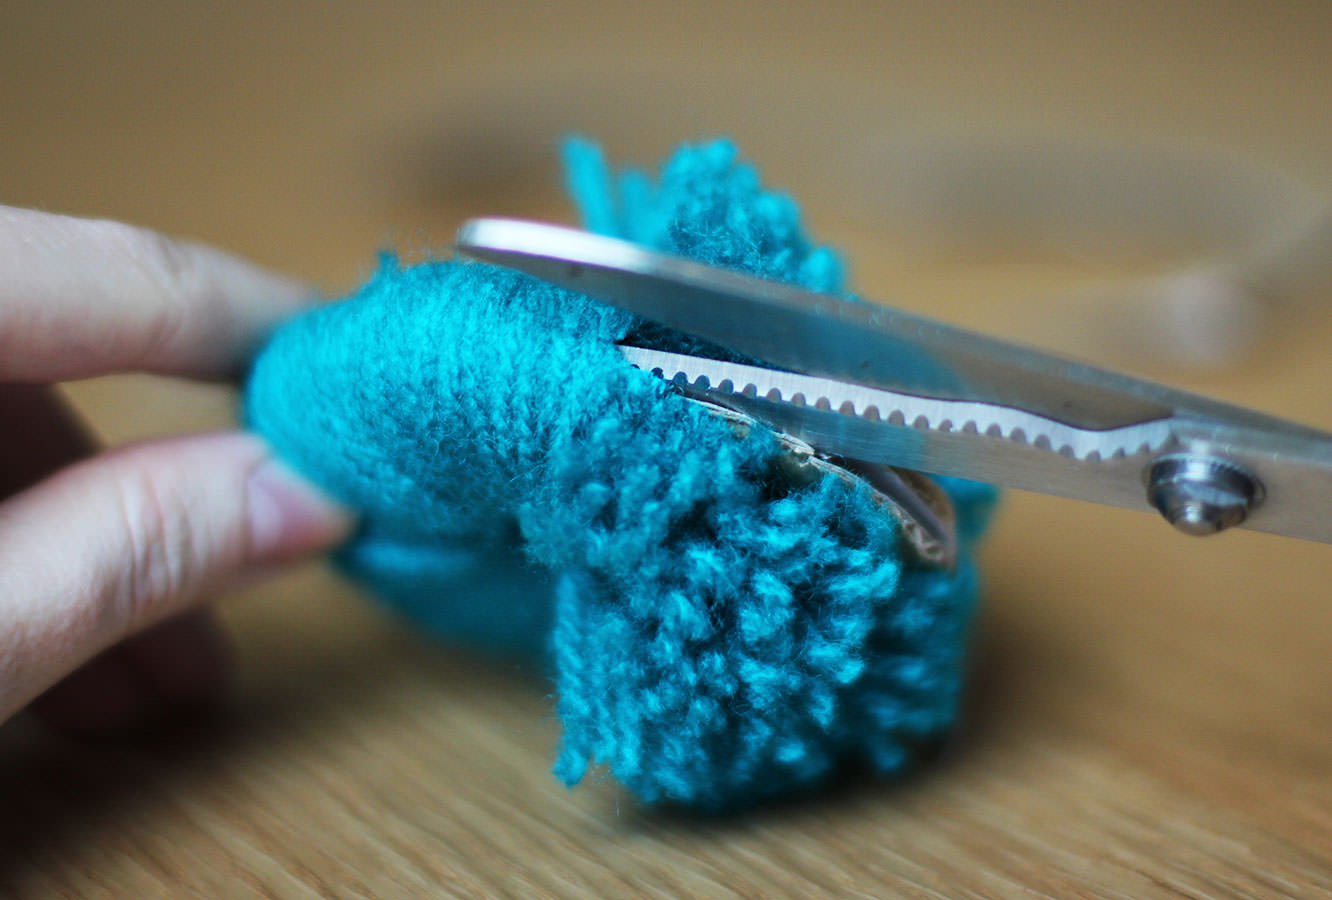
Using scissors cut round the circumference of the ring.

Once you’ve made a few snips you should be able to get the scissors between the two layers of card which then makes this very quick.

how-to-make-baby-mobile-5

Step five

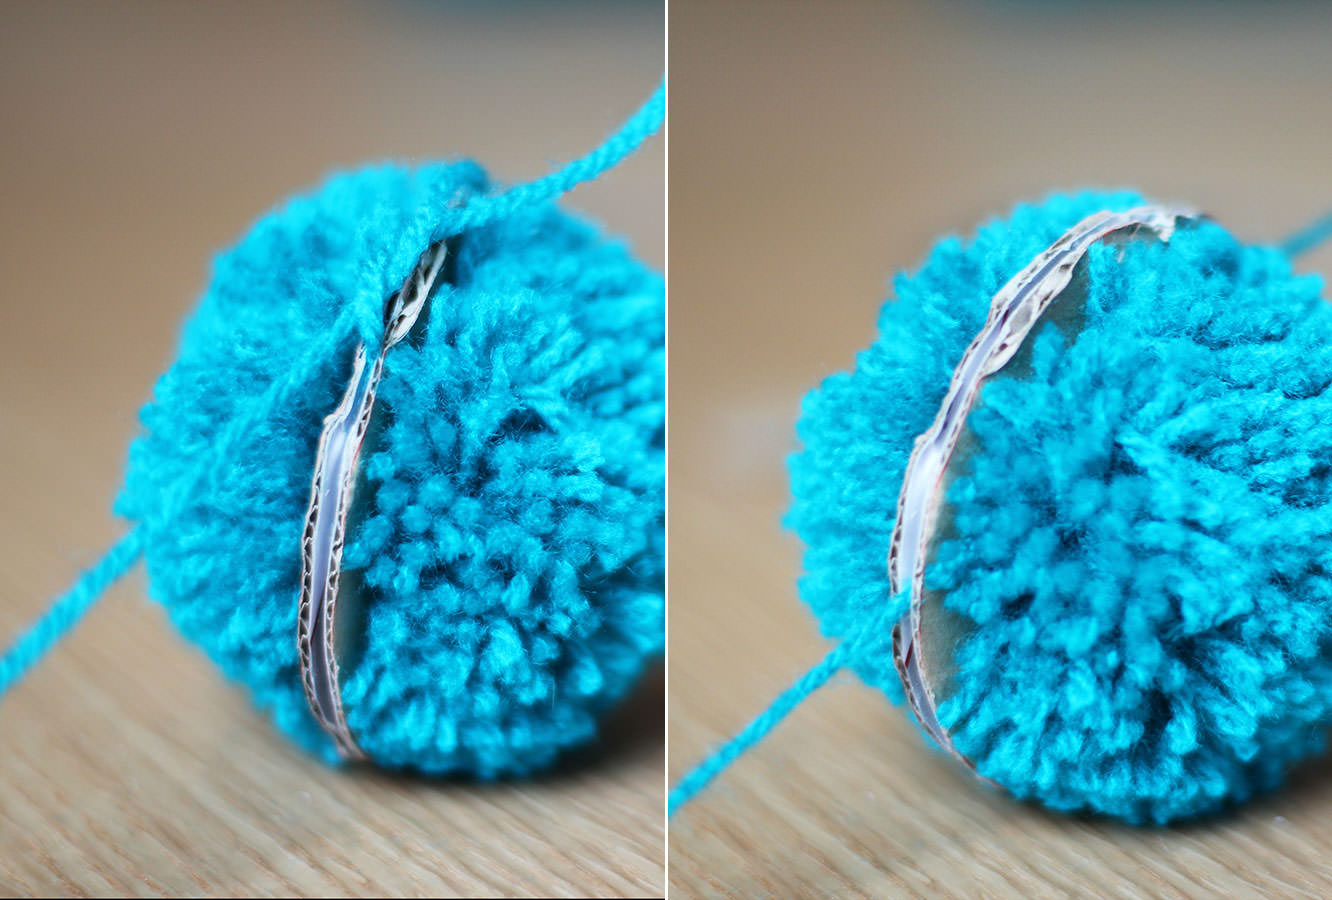
Wrap a length of wool around the edge and tie a knot in between the cardboard layers. I always do a few for good measure.

how-to-make-baby-mobile-6

Step six

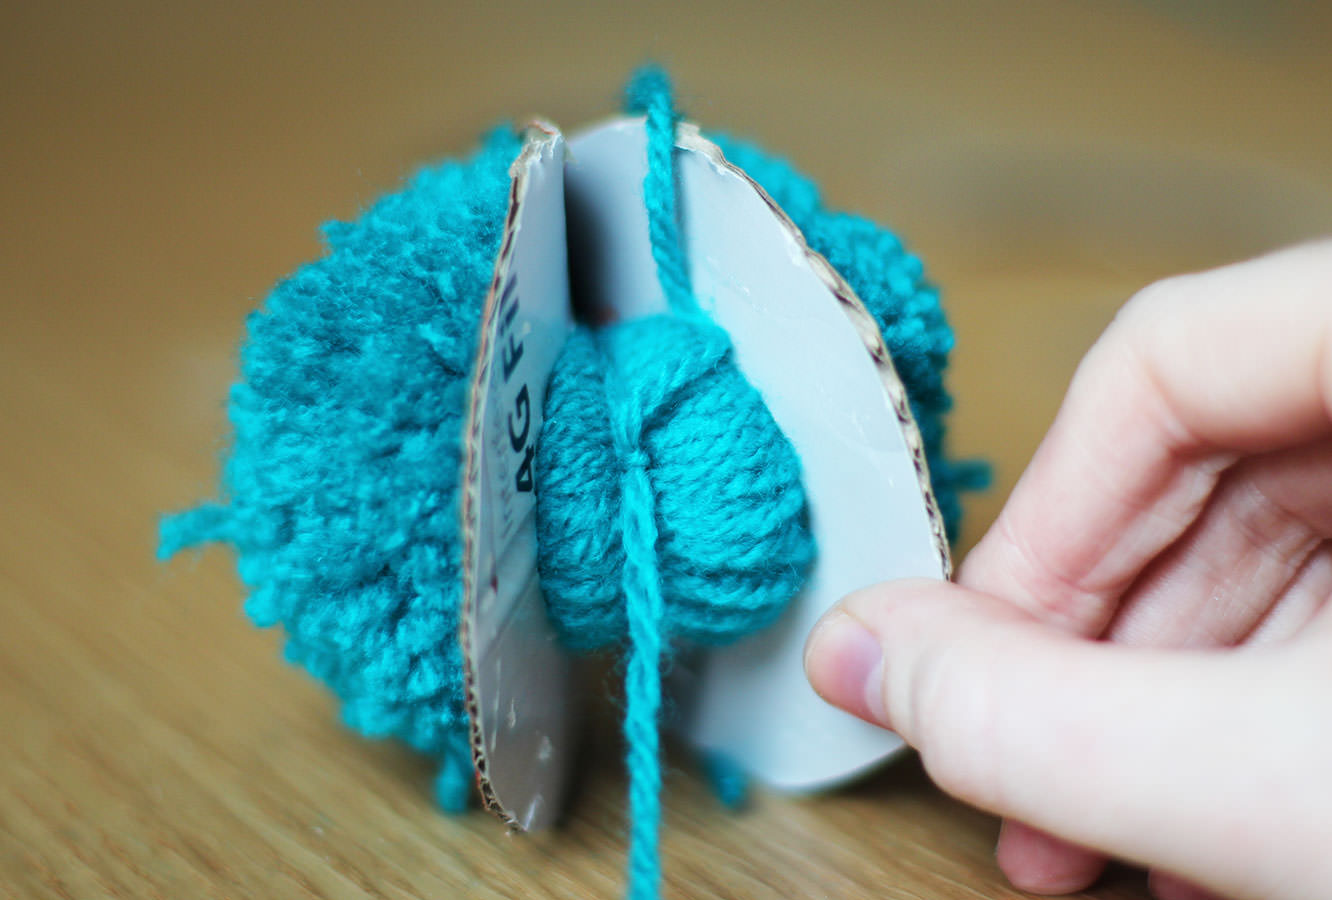
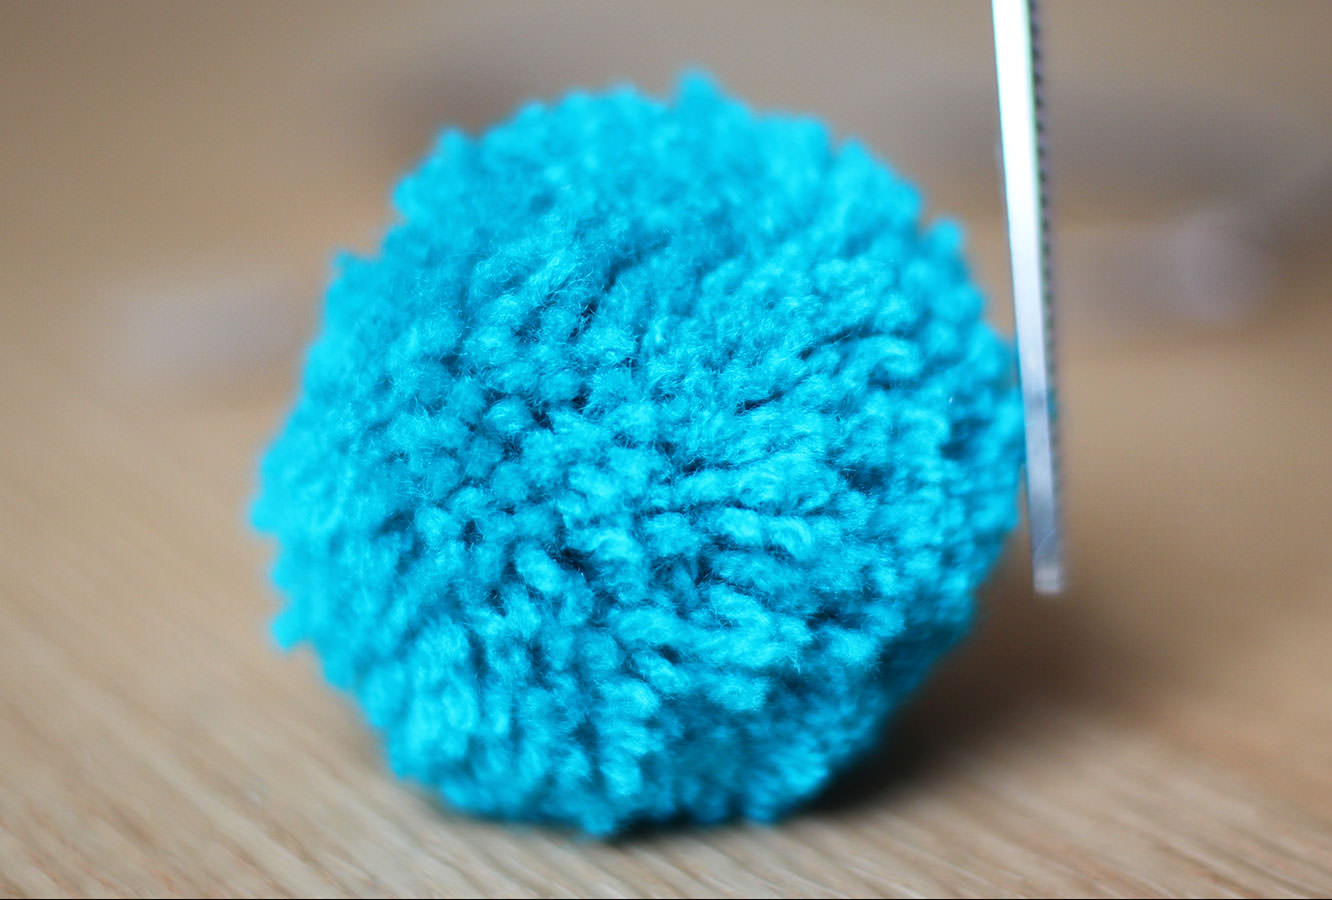
Pull the cardboard rings off to release your pom pom.

how-to-make-baby-mobile-7

Step seven

Trim any straggly bits to neaten it all up.

how-to-make-baby-mobile-gif

Step eight

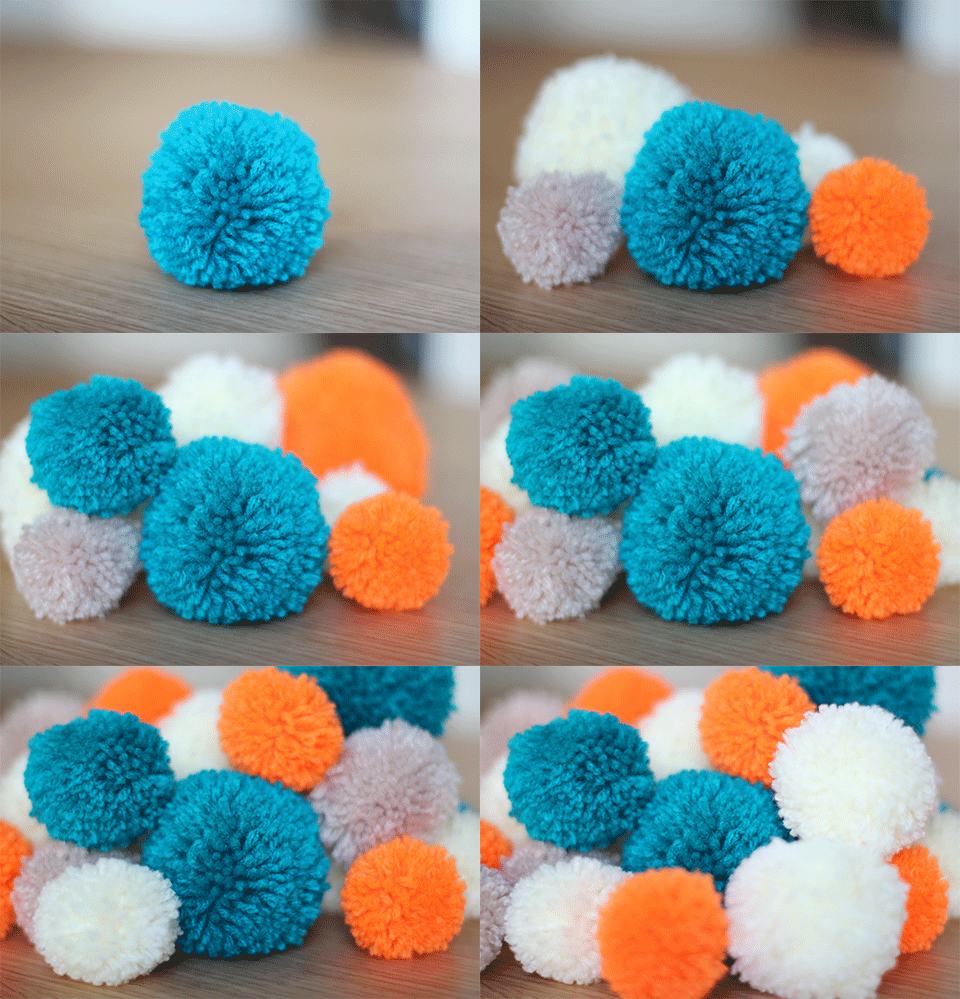
Repeat until you have at least 24 pom poms of different sizes and colours.

how-to-make-baby-mobile-10

Step nine

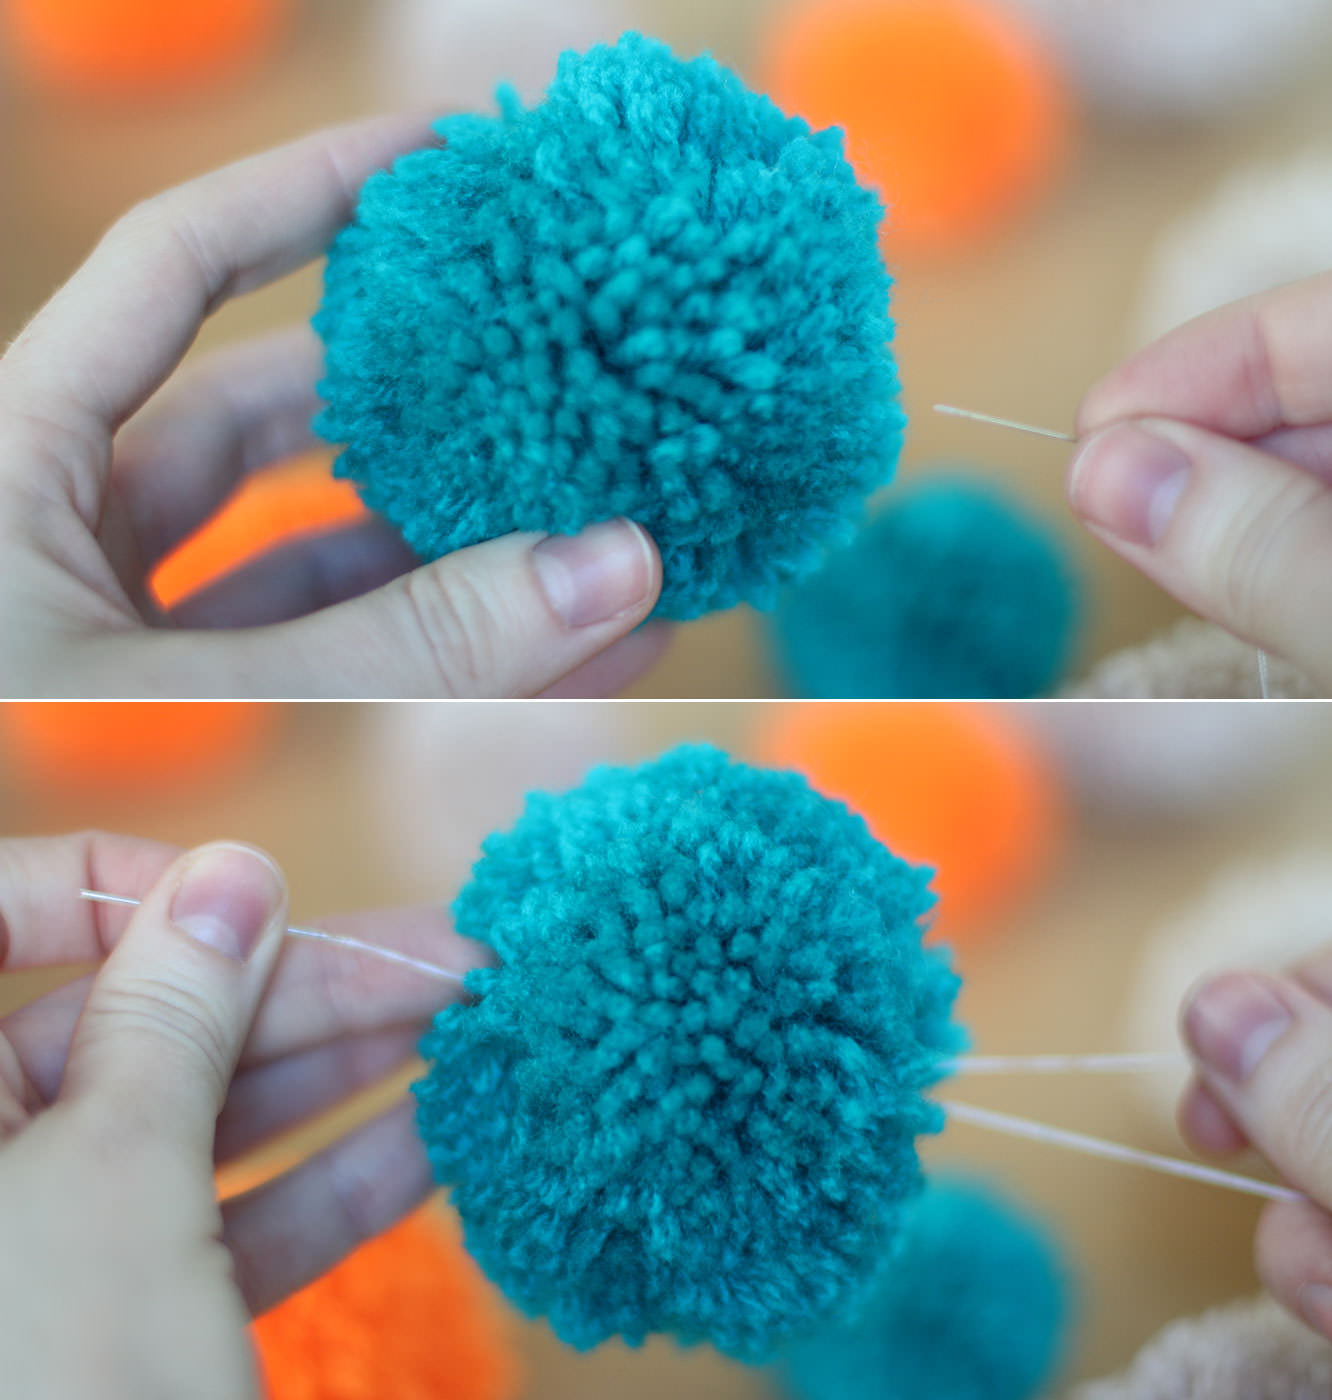
Sew the pom poms to varying lengths of cotton thread in twos (or if you’ve made more, then keep adding them!)

I went back and forth through each pom pom a few times so they didn’t slip down/fall off the end.

I recommend doing this randomly, or you’ll drive yourself crazy! Plus it looks better for baby if they are dotted about as the different levels of perspective means you can see more.

how-to-make-baby-mobile-8

Step ten

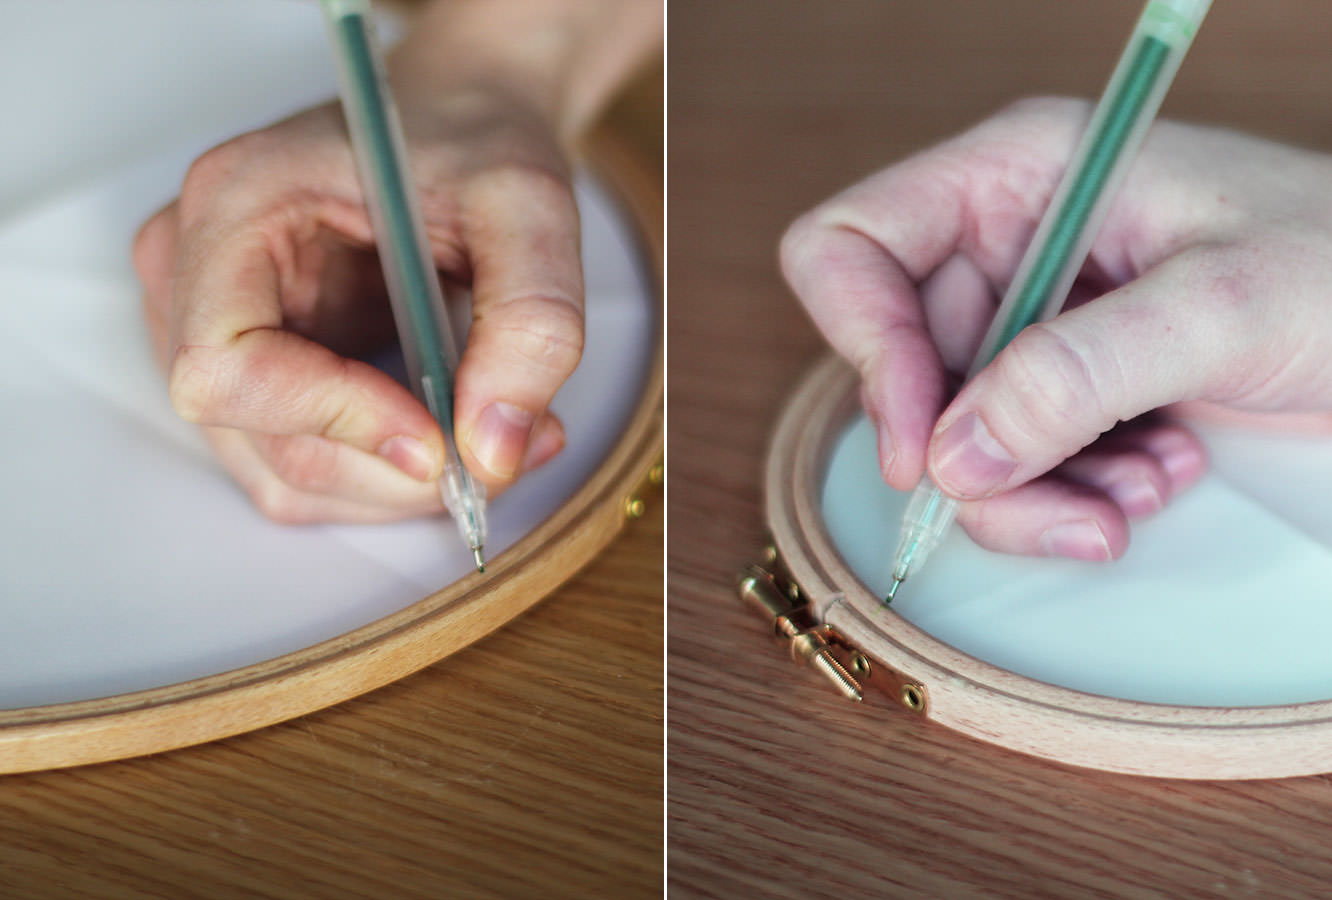
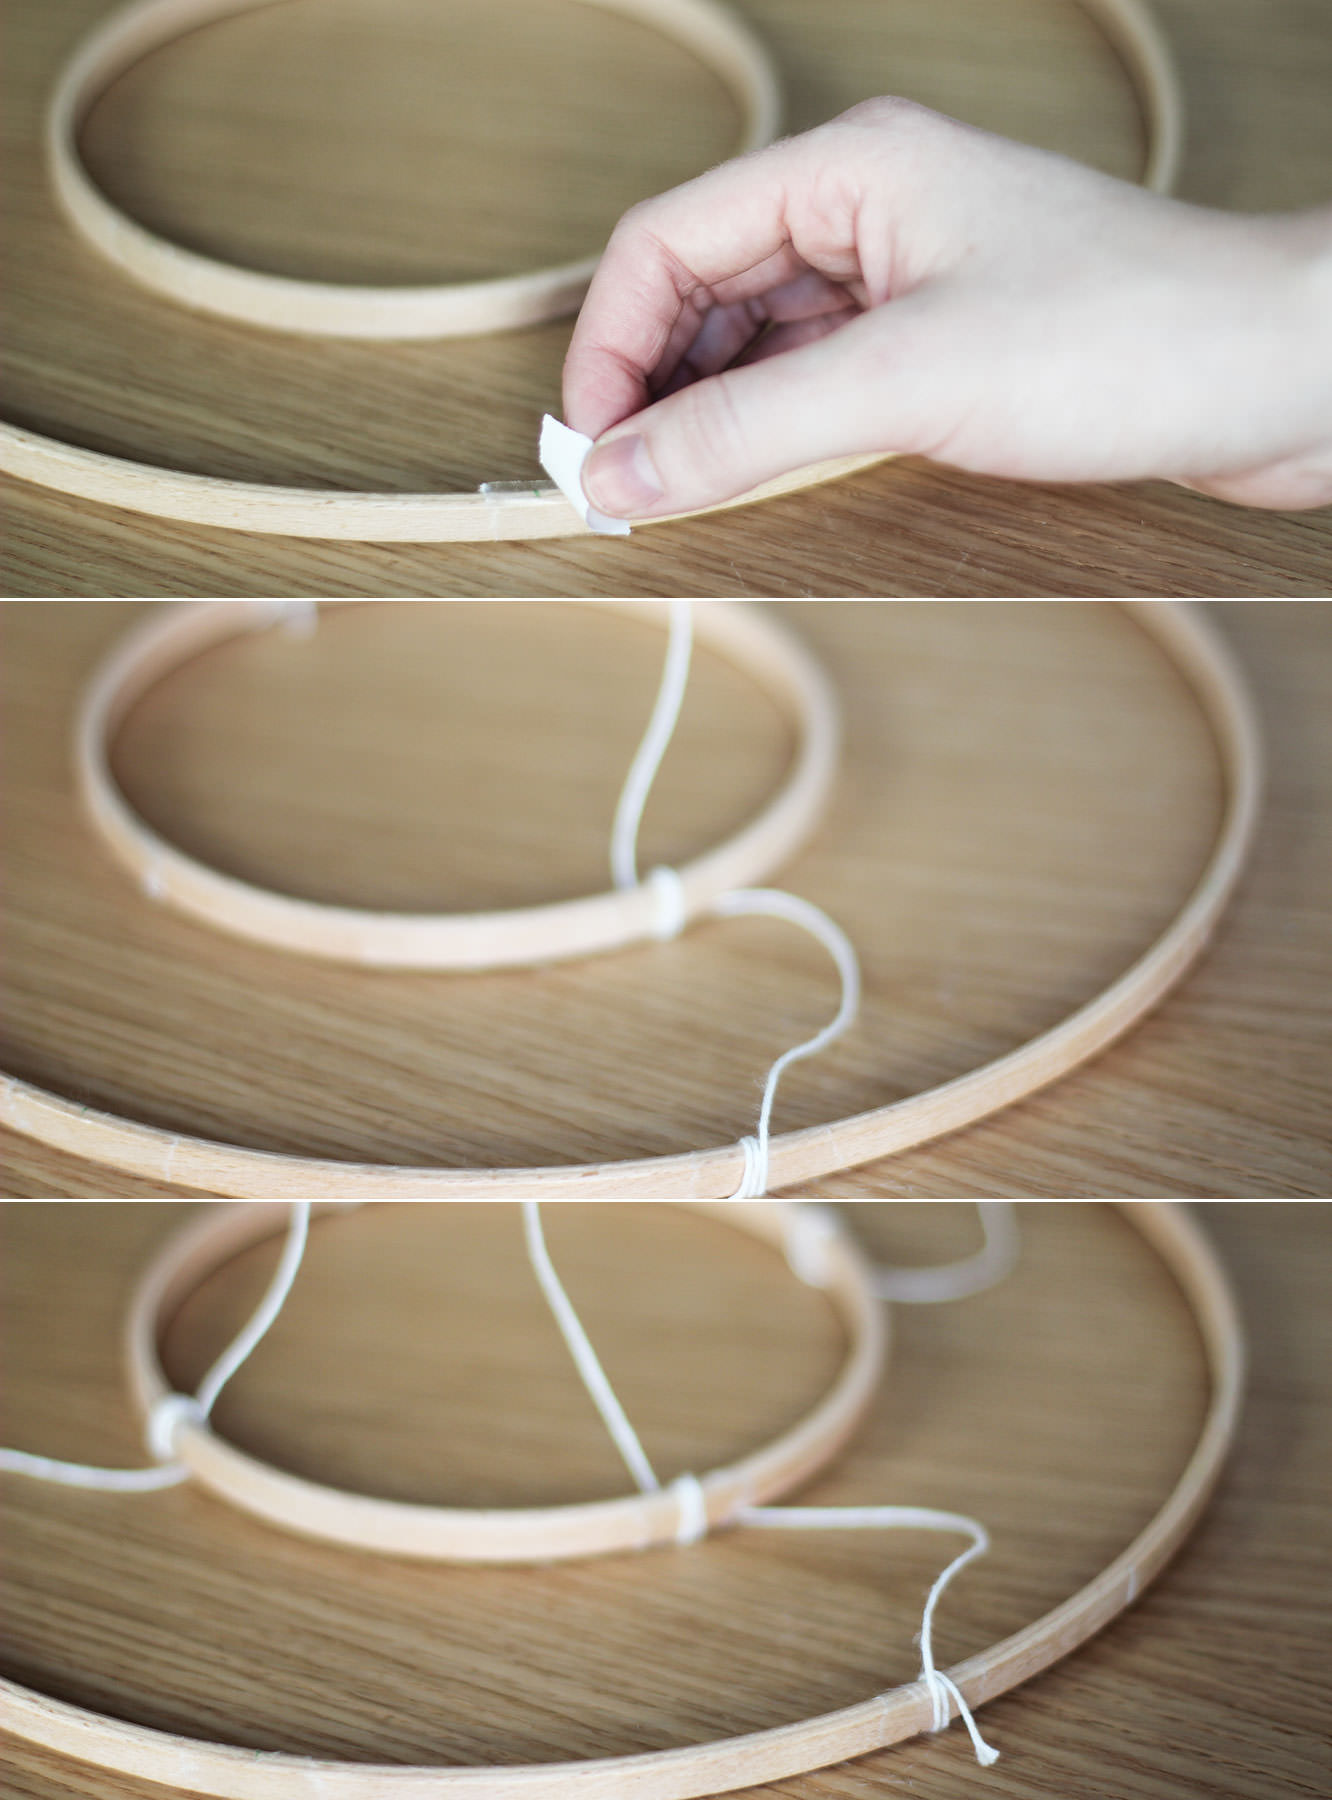
Cut a paper/newspaper circle that fits inside the embroidery hoops. Fold each in half three times so you get 8 equal segments.

Placing the paper circles into the hoops mark out the eighths.

how-to-make-baby-mobile-9

Step eleven

Remove the outer hoops and stick a small strip of double sided tape by each marker.

Step twelve

Attach two pieces of string to hang the mobile by. They need to wrap around both the outer and inner hoops and be as even as possible.

Try to make it so that the string comes out from under the hoop at all points. Otherwise you’ll do what I did and put the outer hoop on top, one will be over and the whole thing will hang a bit wonky. Distressed isn’t the word.

how-to-make-baby-mobile-12

Step thirteen

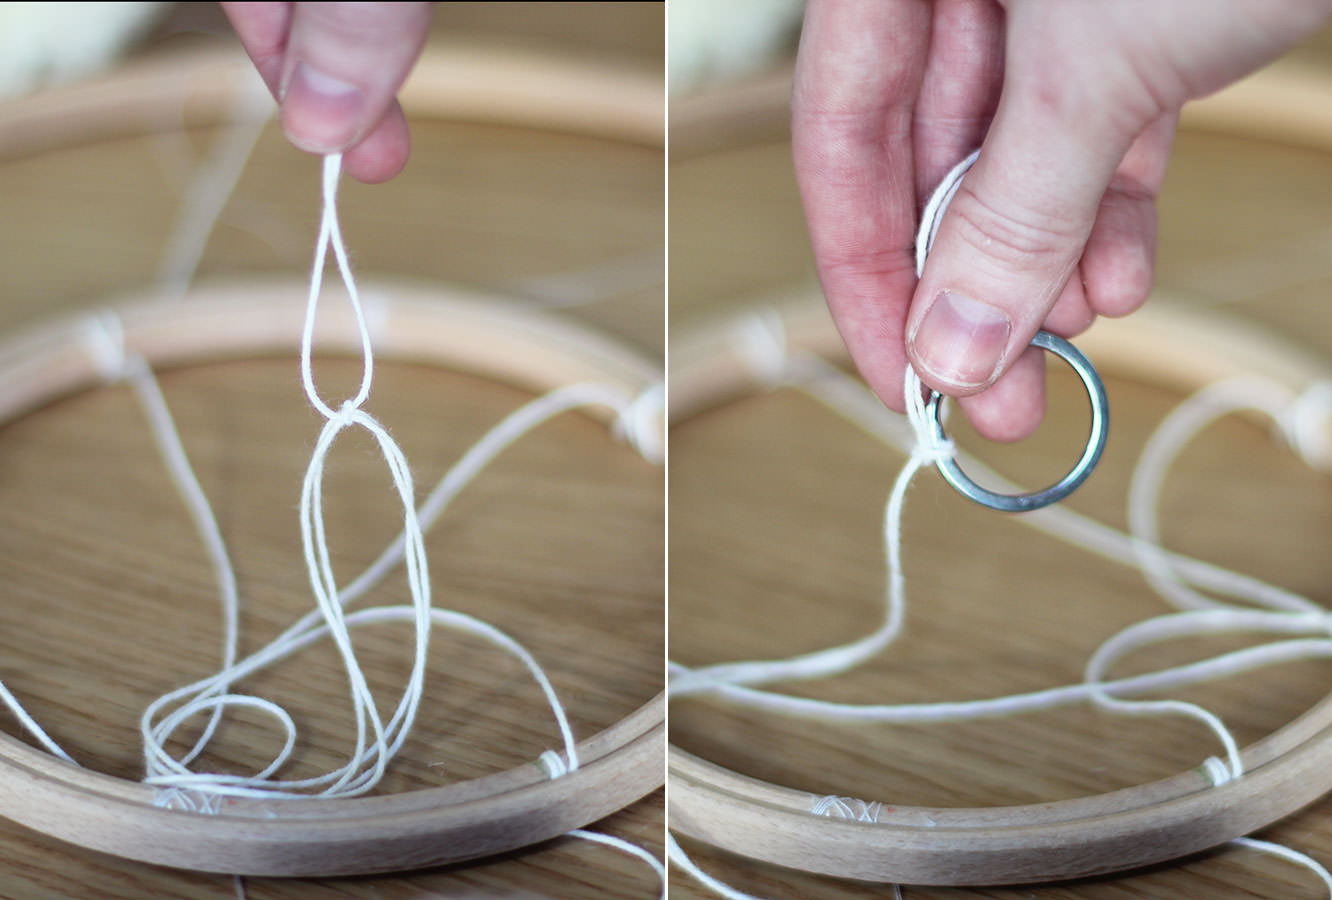
Tie a longish piece of string (this will totally depend on your ceiling to cot distance) to connect the crossed over pieces you just attached to the hoops. Still with me?!

At the other end of that length of string tie a keyring. This is the bit that will enable your mobile to spin round.

Step fourteen

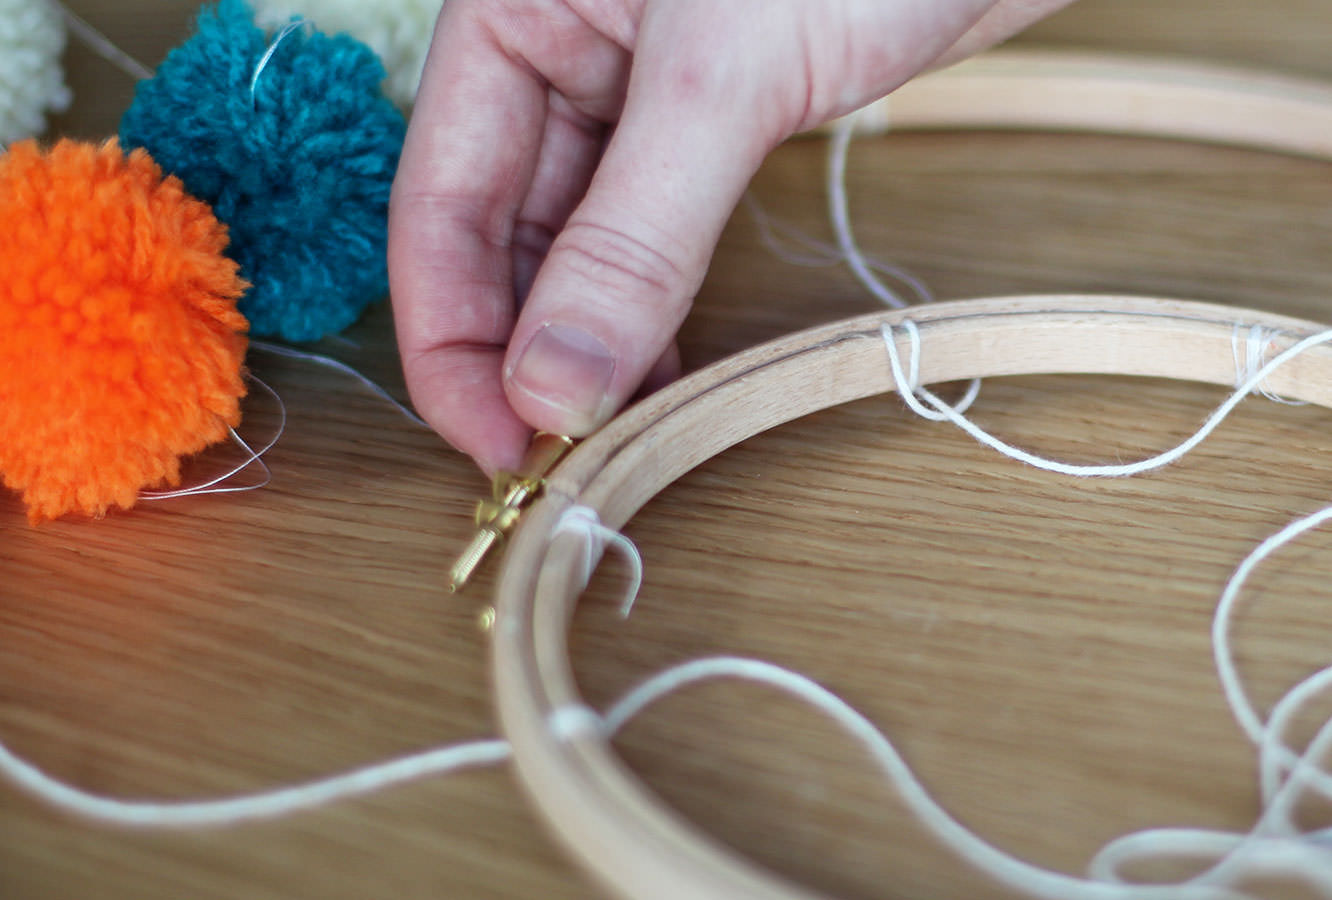
Attach your pom pom lengths, 8 around the outside, 4 around the inside by wrapping the thread round the hoop a few times. The tape should hold them in place quite well.

how-to-make-baby-mobile-11

Step fifteen

Reattach the outer hoops and tighten.

how-to-make-baby-mobile-13

Step sixteen

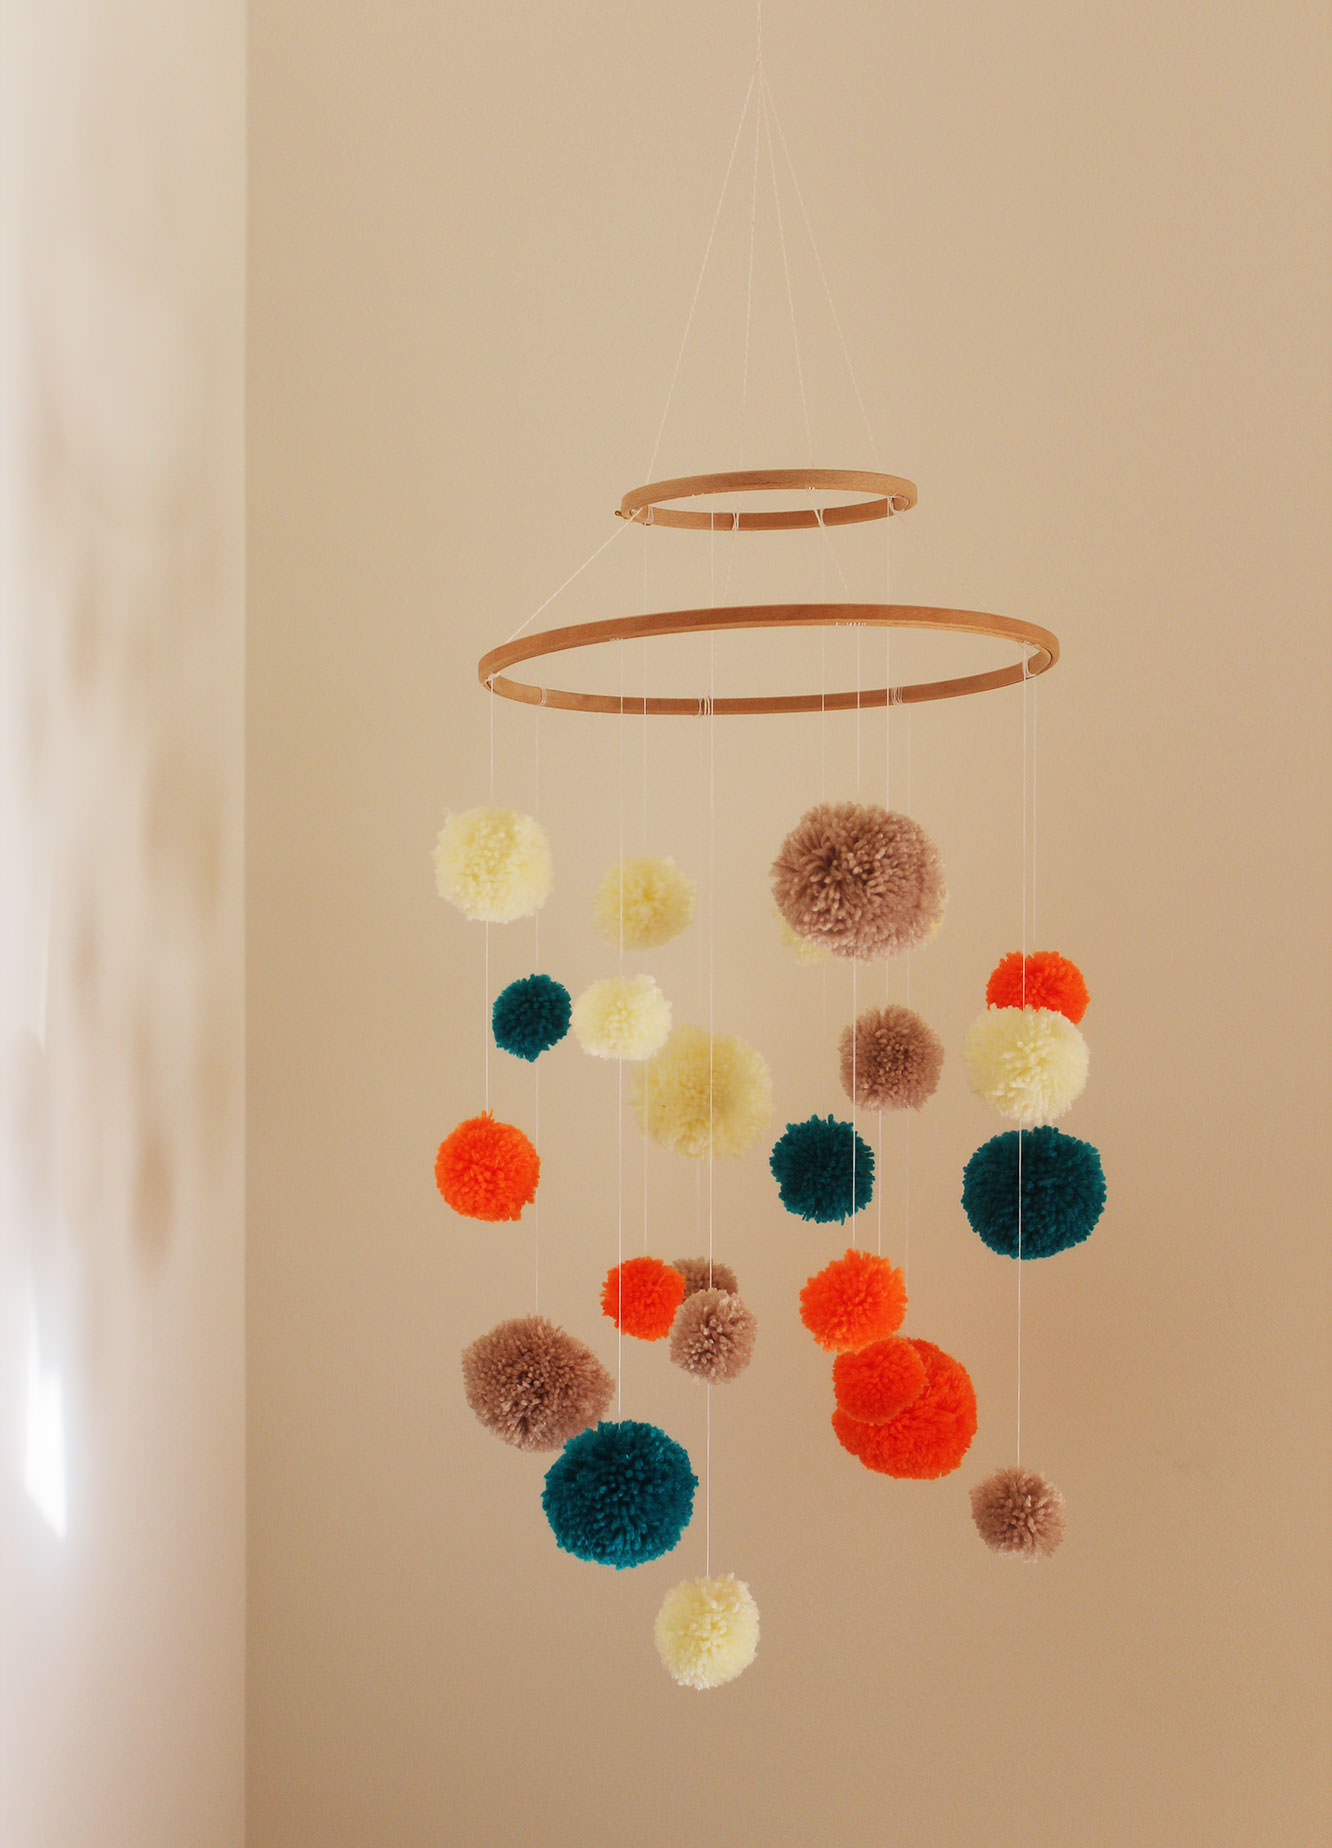
Using the sticky hook hang from the ceiling.

how-to-make-baby-mobile-14

Step seventeen

Lie under it for a little while. It’s relaxing being a baby.

Wait, that’s not all.

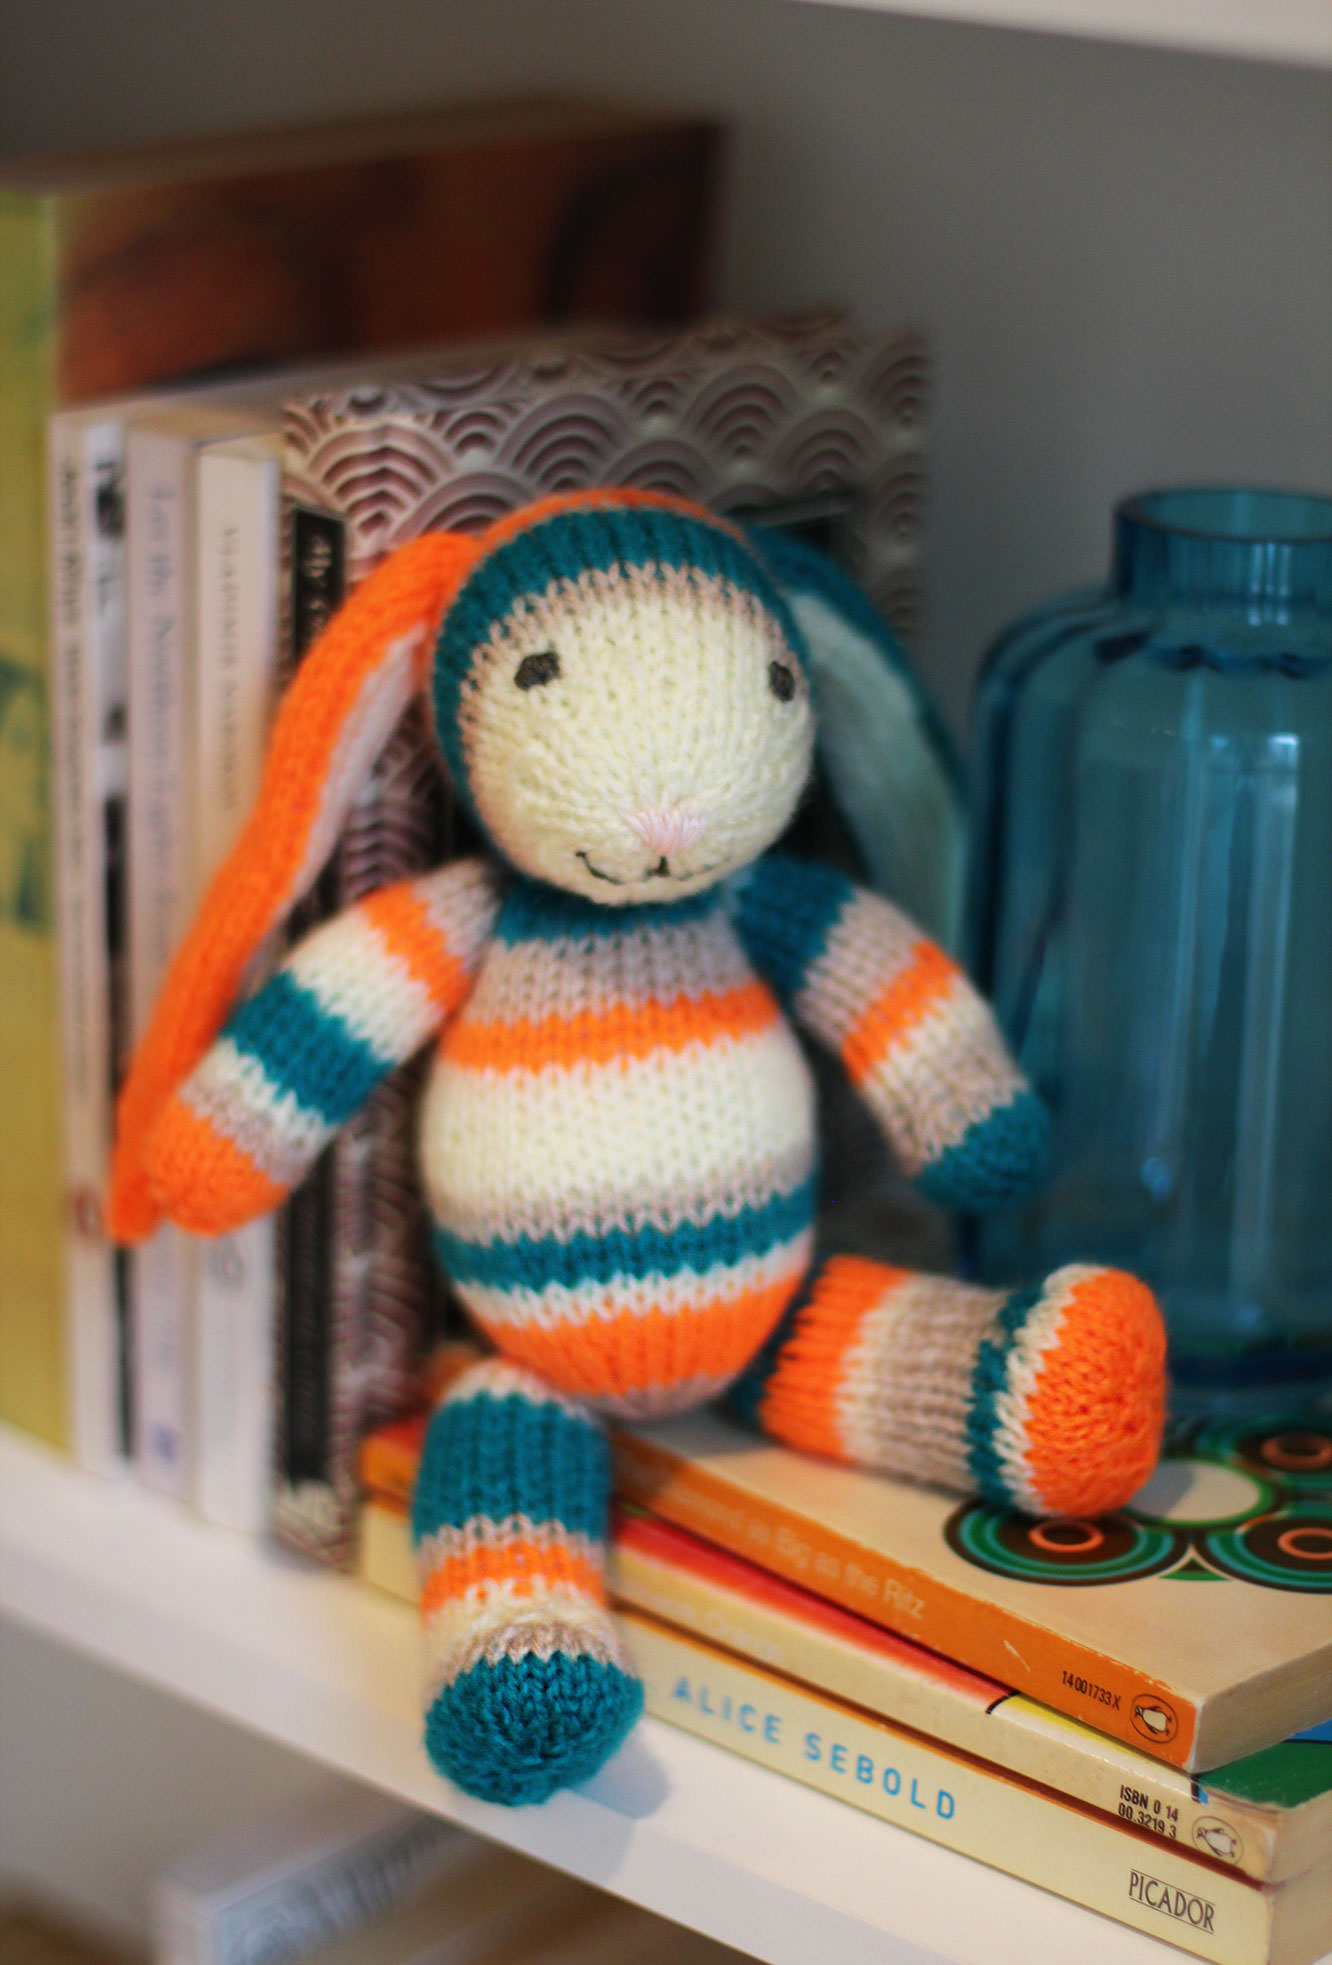
I also couldn’t resist making baby a little friend to match his mobile. Introducing Bernard the bunny.

how-to-make-baby-mobile-15

I haven’t included a step-by-step for Bernard because he’s not my pattern. In fact, this was the first time I’ve ever knitted a ‘creature’ before. He’s not quite the masterpiece I envisaged when I started but full of character and a great beginner knit.

Bernard was knitted from the free fuzzy lamb pattern by Barbara Prime (I just added longer ears). I urge you to visit fuzzymitten.com where you can buy all kinds of super cheap cute and quirky patterns including a bikini clad alpaca and a sloth in a poncho. Barbara’s patterns are adorable and easy to follow.

how-to-make-baby-mobile-17

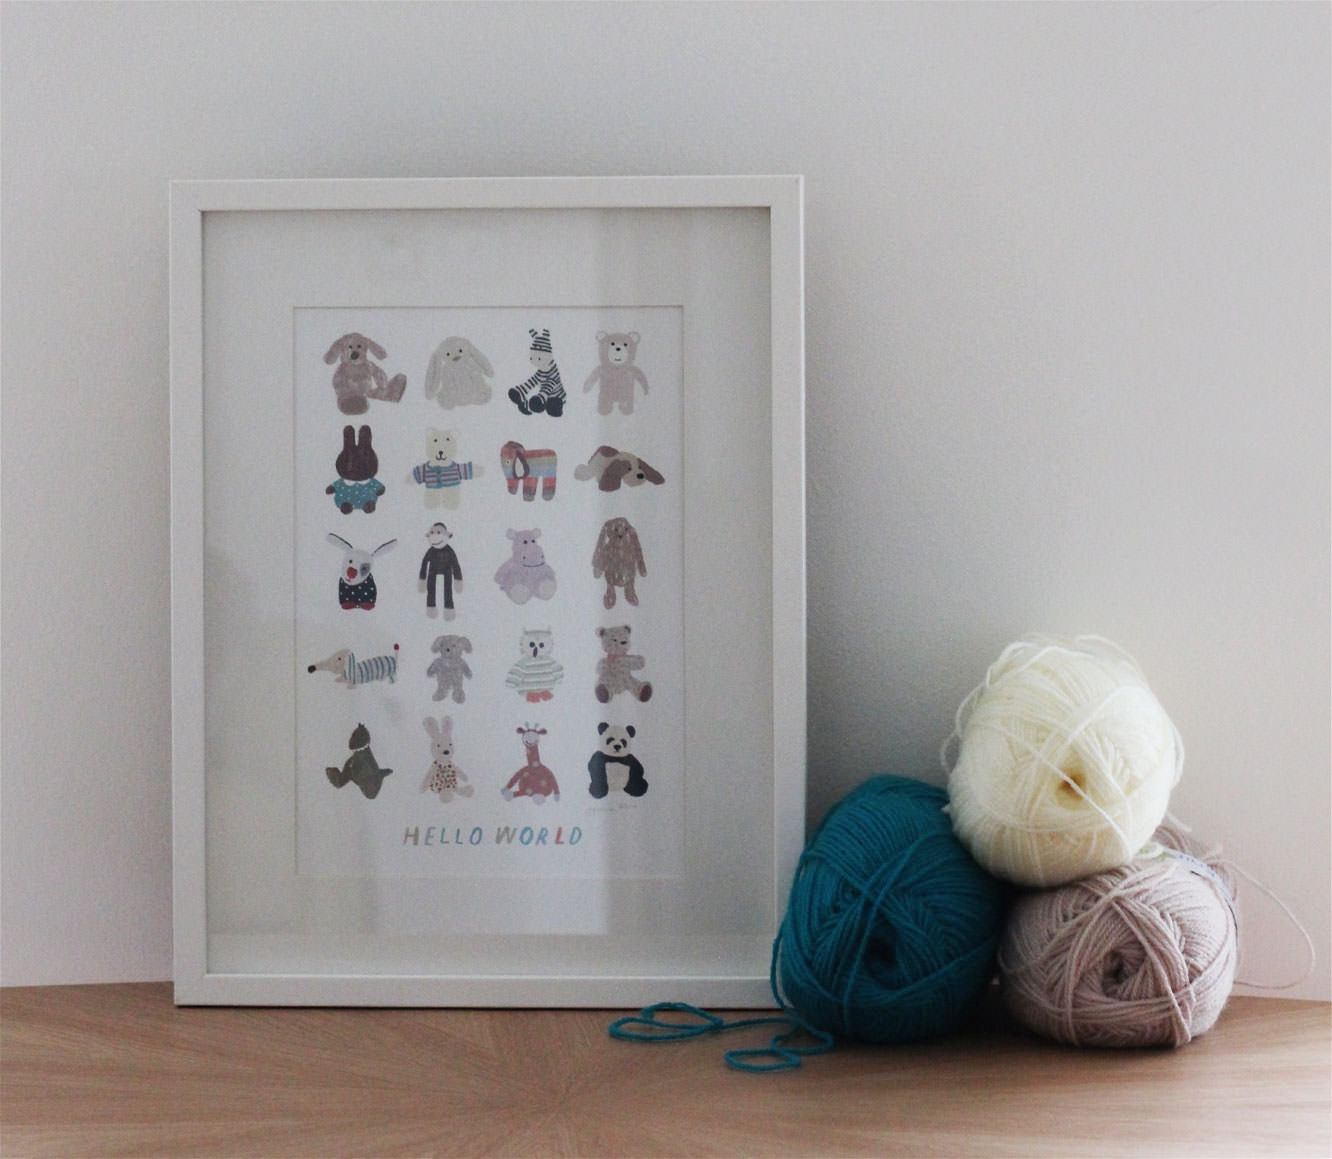
Another plug goes out to Hannah Melin whose ‘Hello World’ print I couldn’t resist at a craft fair just before Christmas. I think it would look lovely on the wall of any nursery.

I should probably make it clear that I’m not being sponsored for either of the above, I just think it’s good to support one’s fellow craftspeople from time to time.

Without further ado, here’s the man of the hour LOOKHOWCUTE.

how-to-make-baby-mobile-16

Snug as a bug

Spring is in the air! Well, not really. It’s actually been so cold that I’ve cracked out the woollens for the first time this winter. BUT, if you get knitting now, you will have a perfect little snood to make the transition from winter to spring a cosy one.

I don’t want any excuses that you don’t know how to knit. I didn’t know how to knit a few years ago. This is a really easy and quick project to get you started. Plus I set up a youtube account to facilitate teaching you, so really, you owe me a try.

free-knitting-pattern-chunky-snood-how-to-10

You will need

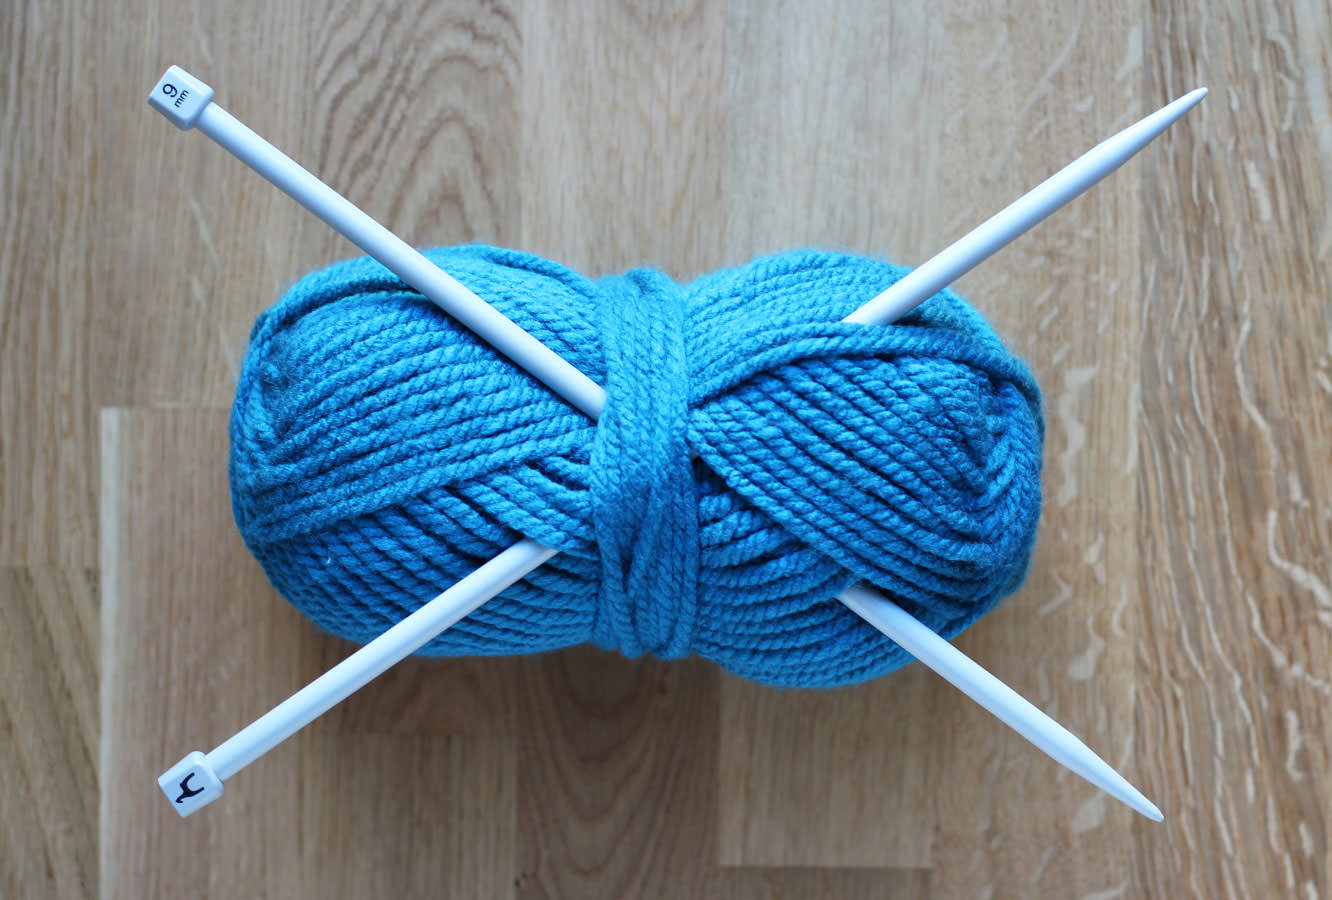
9mm knitting needles

200g of bulky (or extra chunky) wool, my ball was by Patons. If you want a longer/bigger snood, just double up and get 400g.

Pattern

For those of you who know what you’re doing:

co 22 st.

k1, p1 to end of row.

Repeat k1, p1 until close to the end, cast off keeping enough yarn to sew ends together.

free-knitting-pattern-chunky-snood-how-to

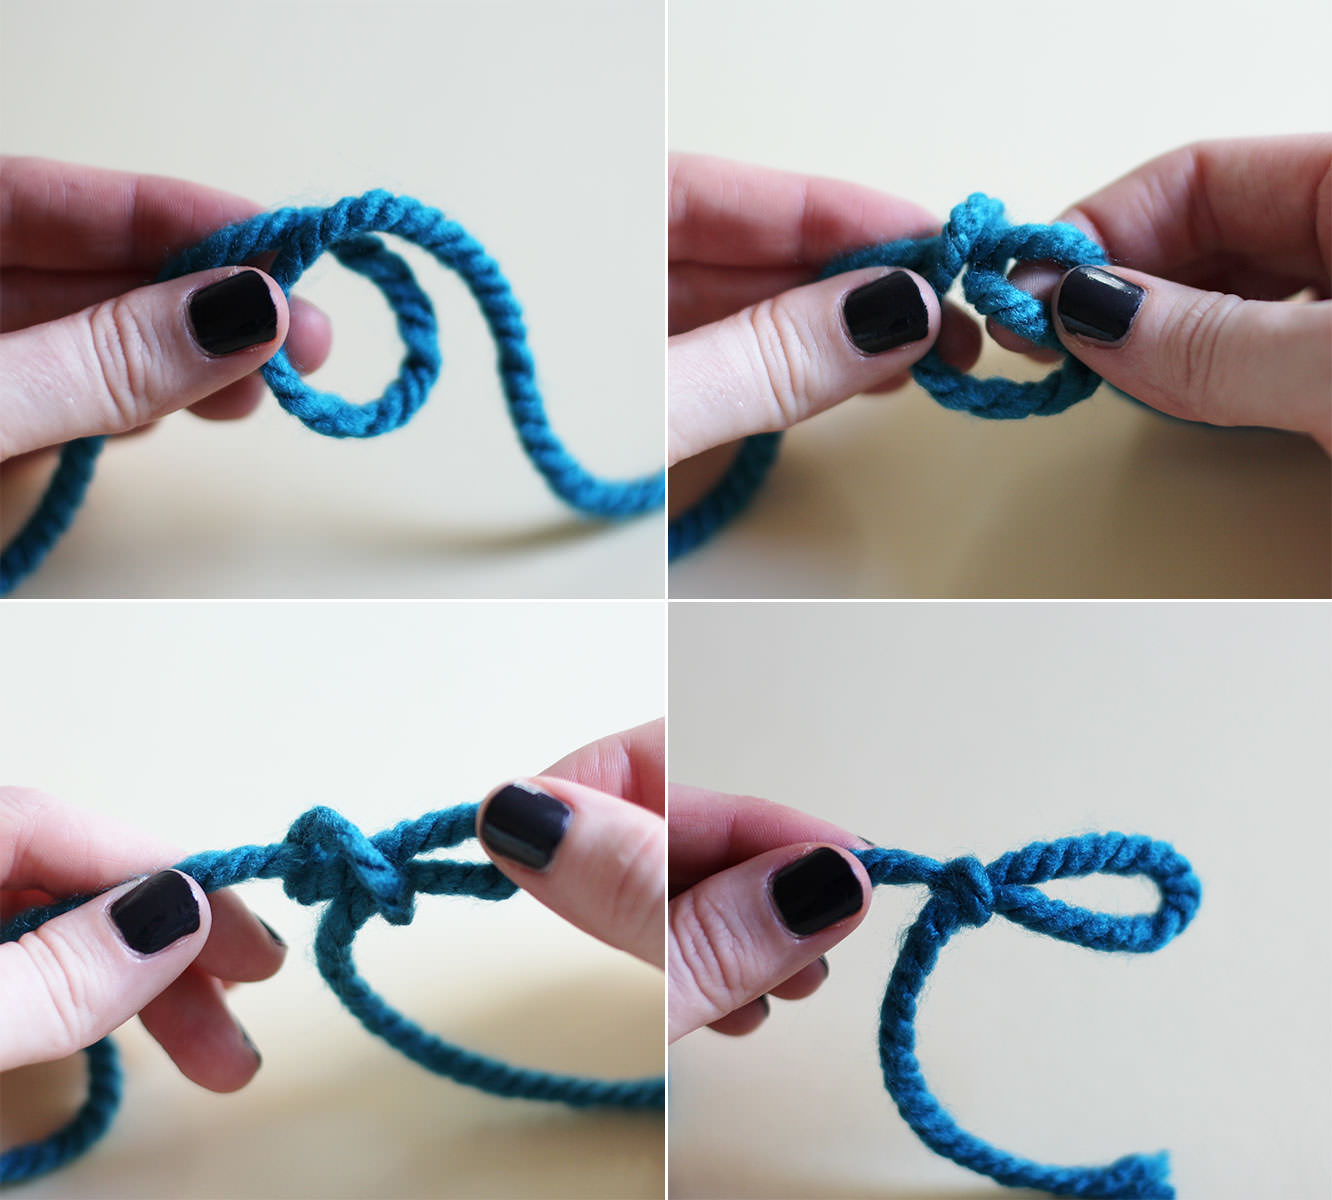
Step one

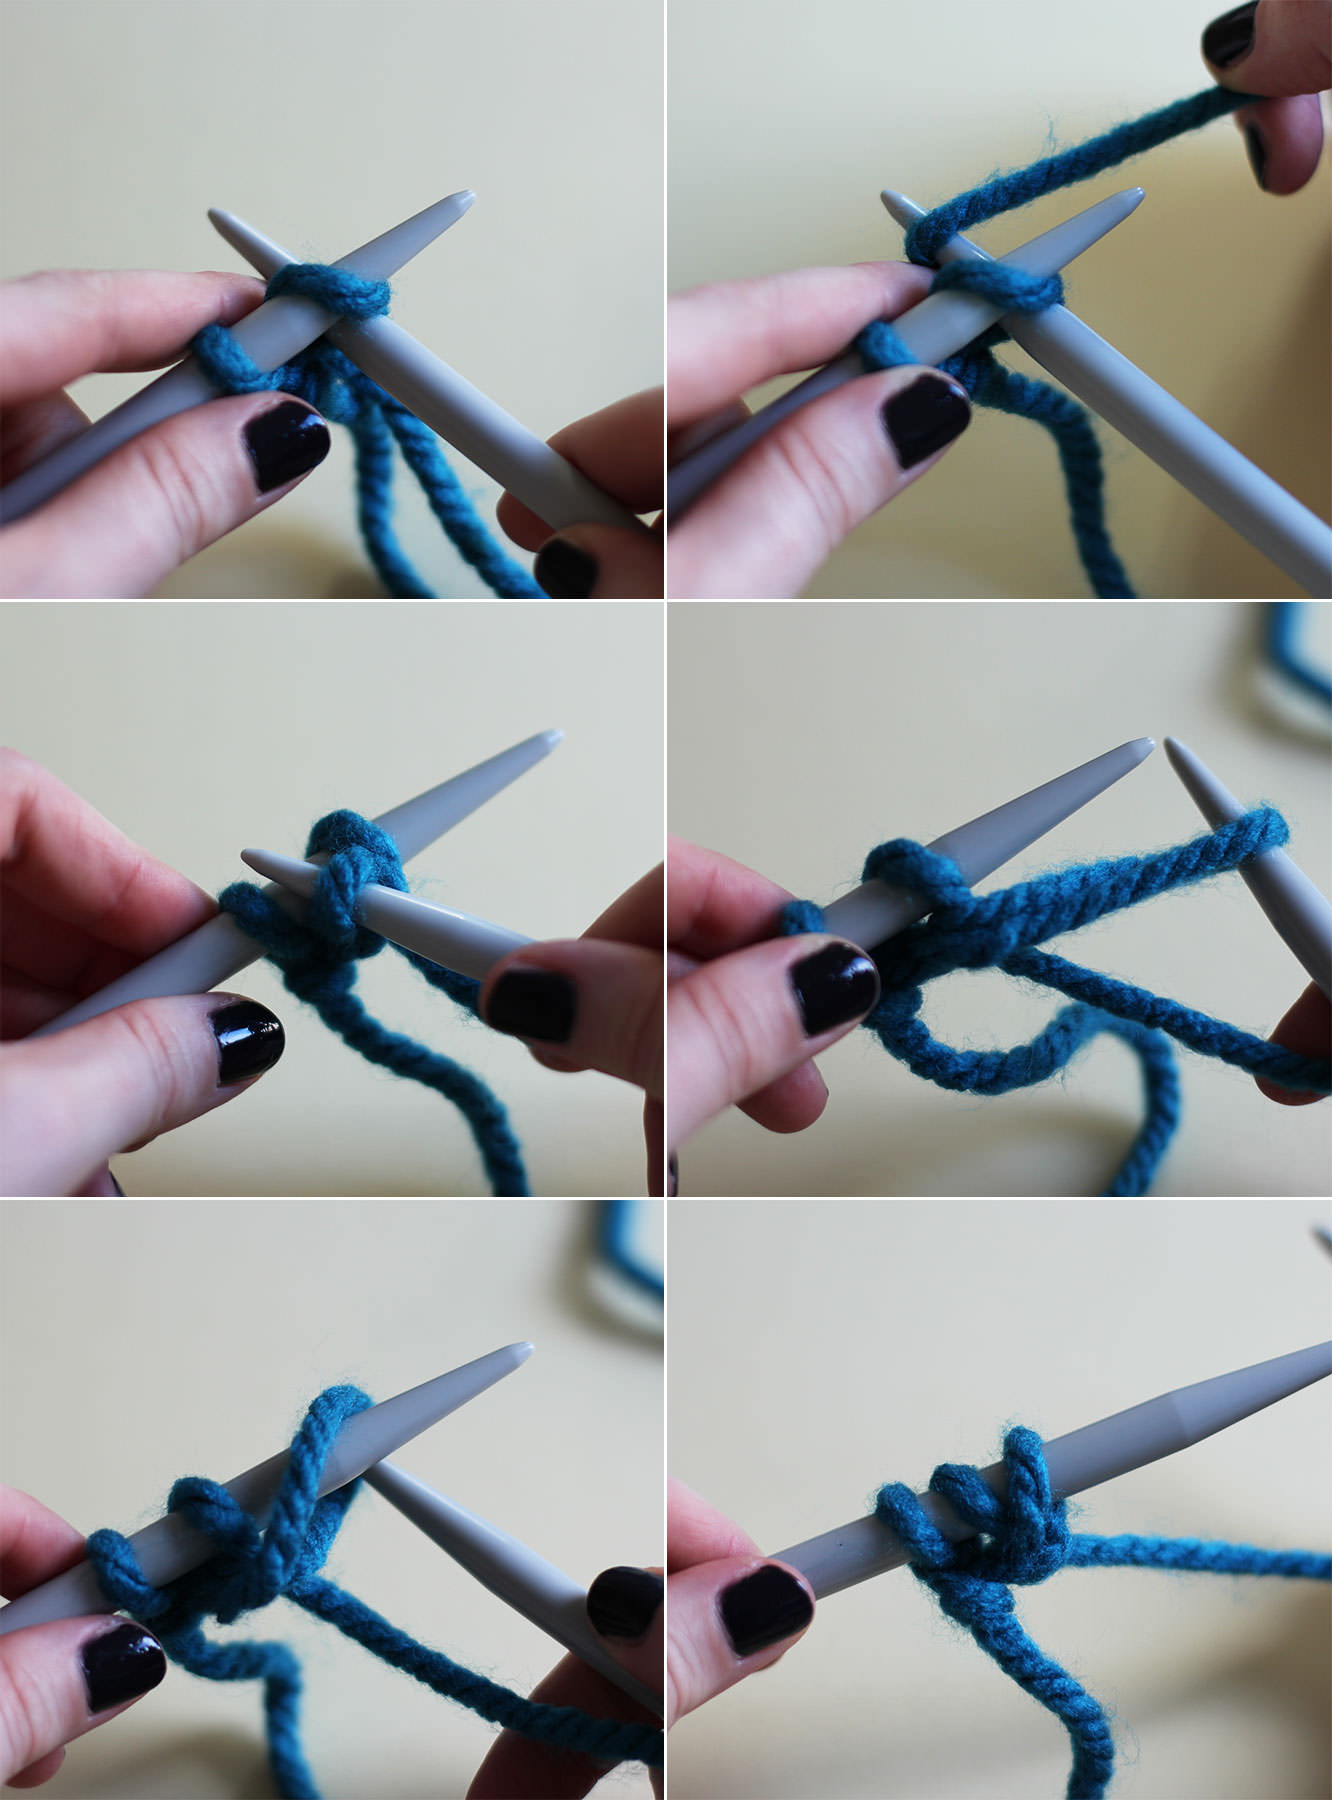
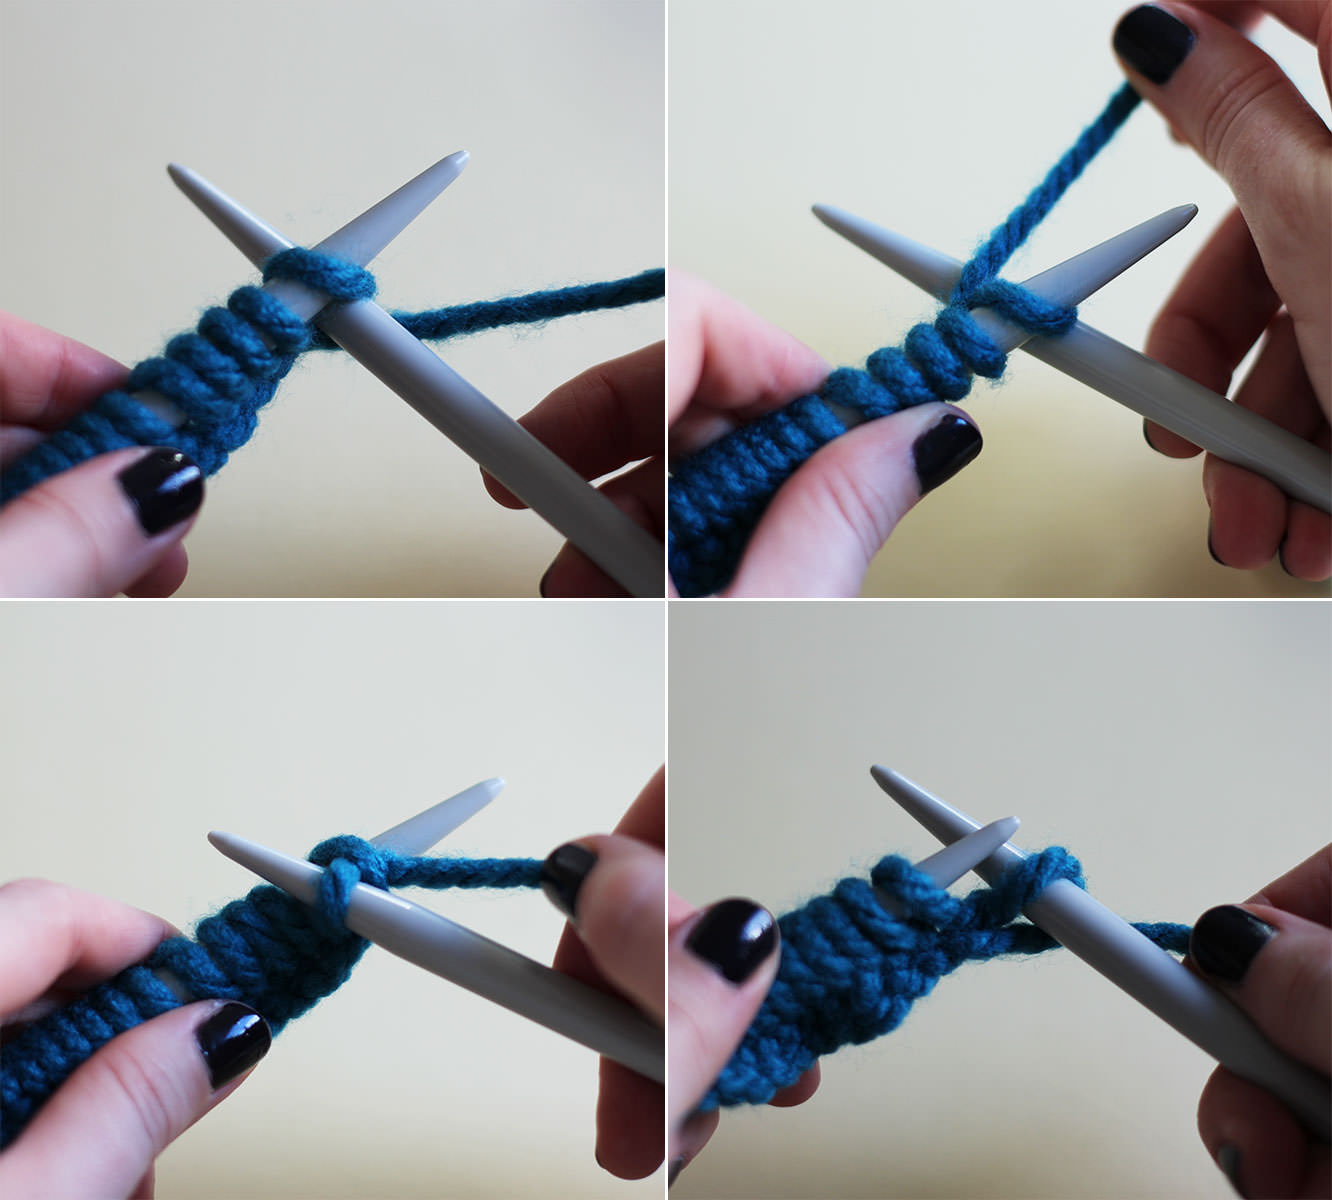
Make a slip knot by overlapping the end of the wool to make a circle and looping it back through.

free-knitting-pattern-chunky-snood-how-to-5

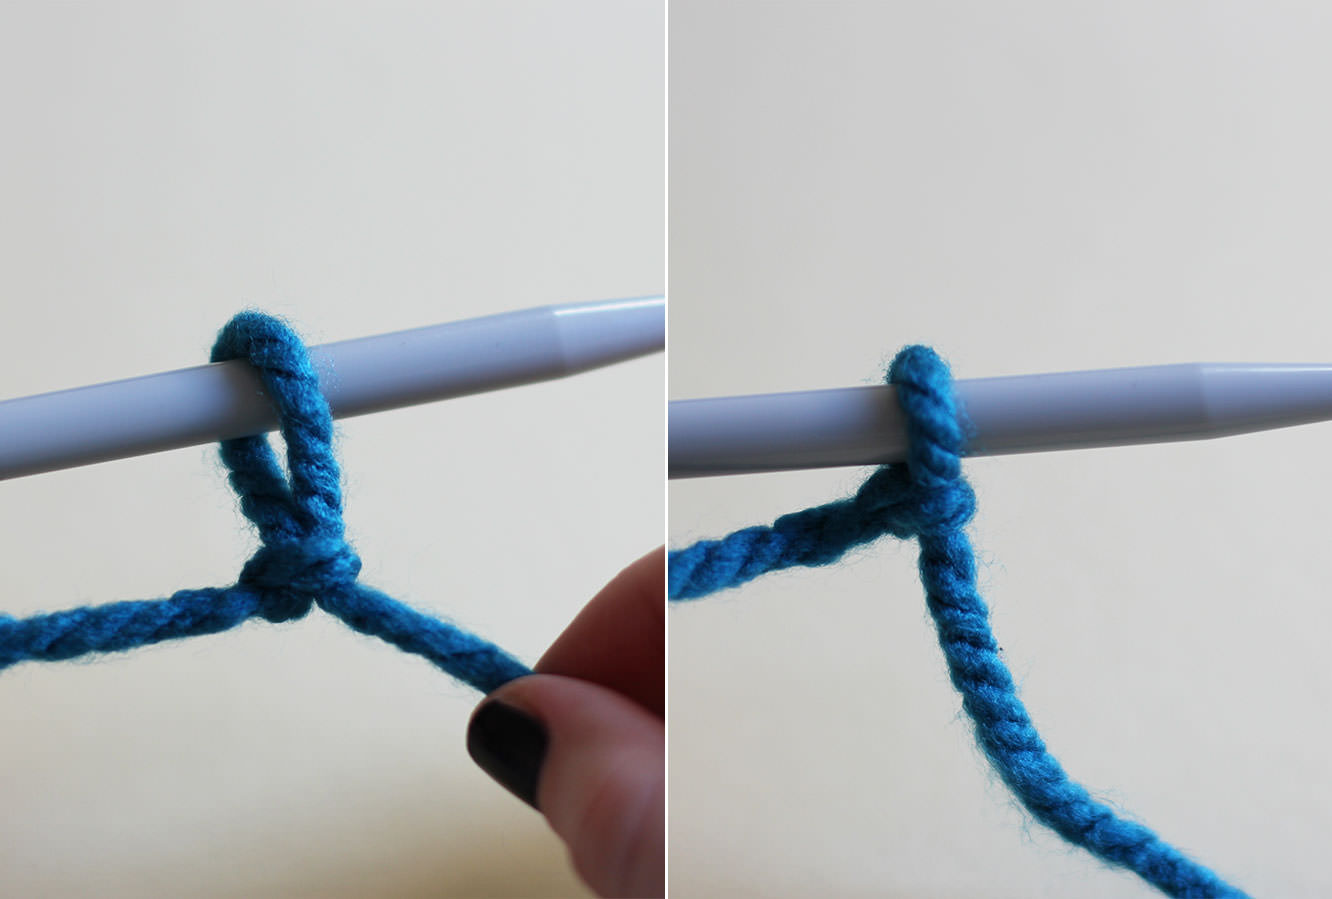
Step two

Place the loop over the end of the knitting needle and pull to tighten.

free-knitting-pattern-chunky-snood-how-to-1

Step three

Time to cast on.

Push the right needle through the loop behind the left one. Wrap the long end of the wool (the bit that leads to the ball) around it so that the wool sits between the two needles.

Pull the right needle under the left, taking the wool with you and through the loop. Tug it through until you can loop it over the end of the left needle and tighten.

Do this 22 times.

free-knitting-pattern-chunky-snood-how-to-2

Step four

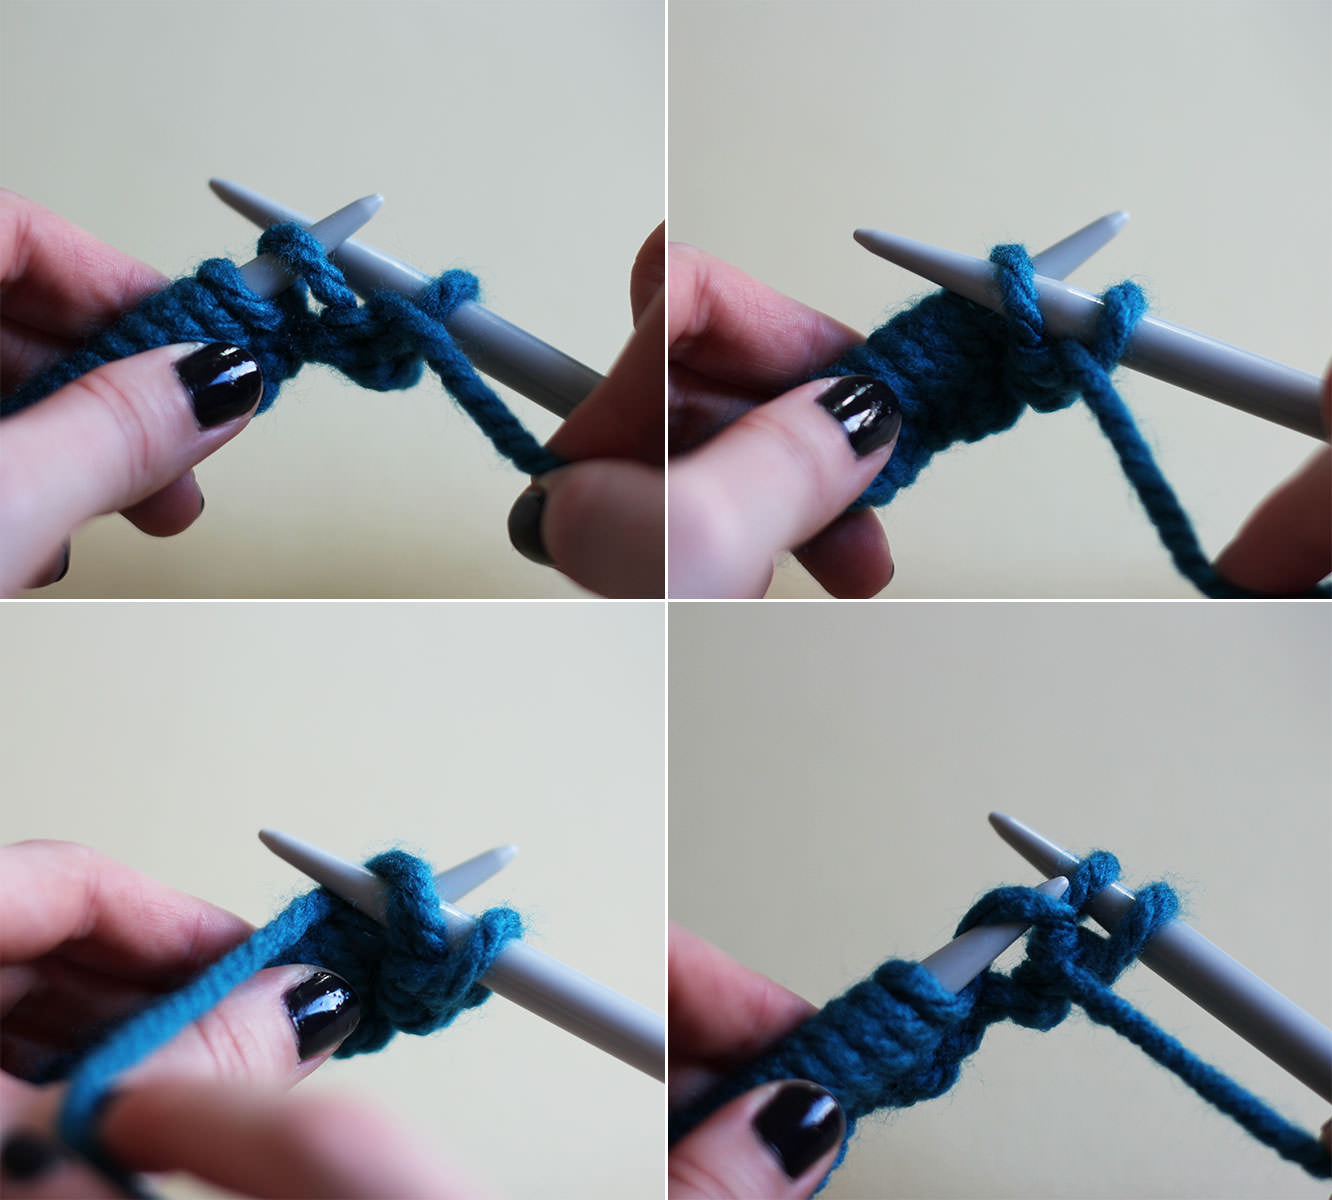
The pattern is just knit one, purl one, they are the two basic stitches.

You knit a stitch basically in the same way as casting on, but instead of hooking it back onto the left needle leave it on the right one.

free-knitting-pattern-chunky-snood-how-to-3

Step five

The second stitch is a purl. For this one place the wool in front of the knitting and push the right needle through the loop in front of the left. Wrap the wool around it and take it through to the back and pull the stitch off.

HAVEN’T GOT A CLUE WHAT I MEAN AND CAN’T UNDERSTAND FROM THE PHOTOS?? That’s ok. I have the youtube.

The video shows a knit, purl, knit, purl sequence. Yeah. I’ll work on my videography skills, but you get the gist.

Step six

Repeat the knit, purl, knit, purl until you get to the end of the row. Turn the knitting round and k1 (knit one), p1 (purl one) until the end. Keep going.

free-knitting-pattern-chunky-snood-how-to-7

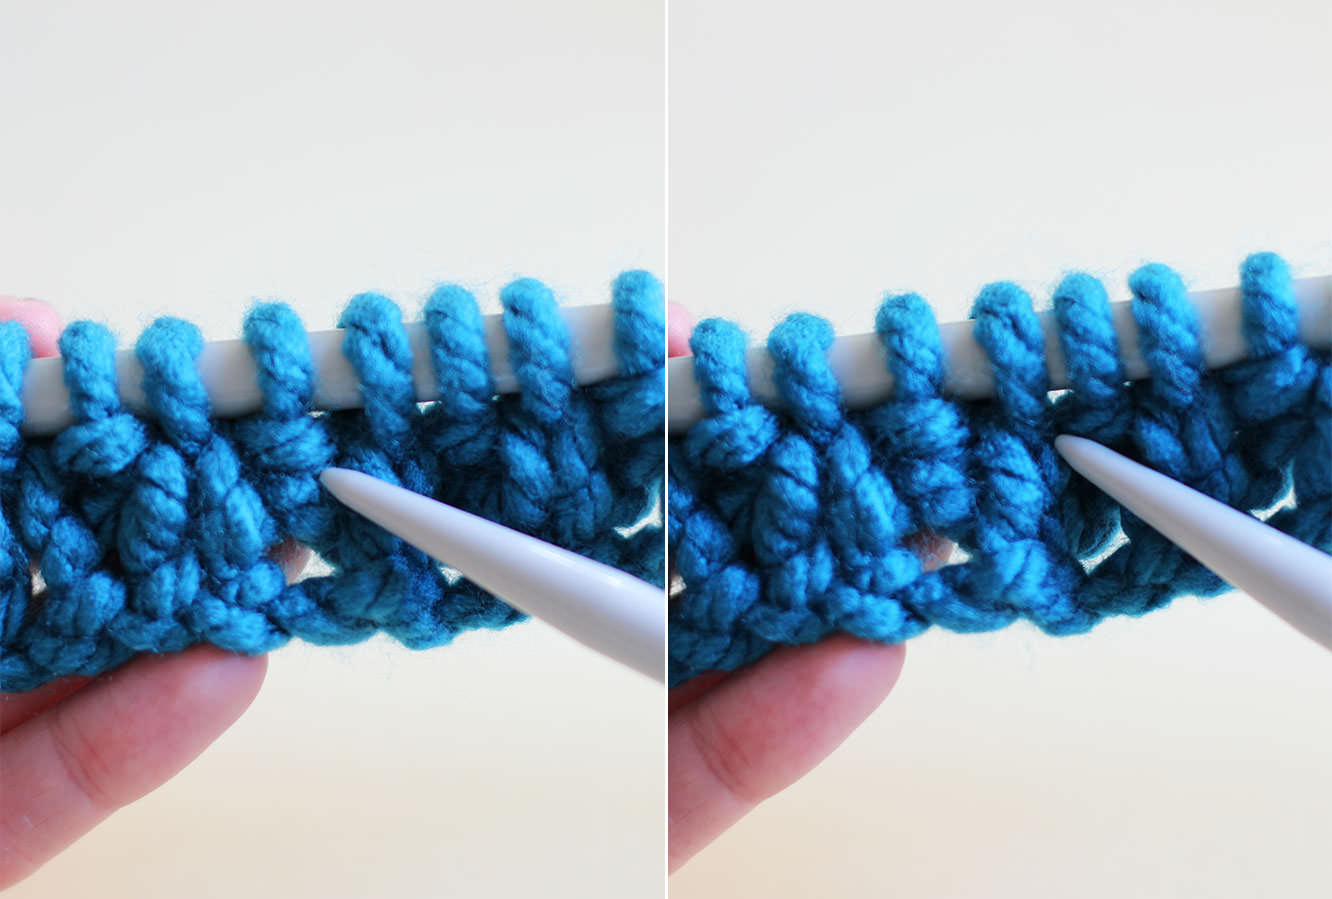
The picture above shows the difference between a knit and a purl just in case you get lost at any point. On the left is a purl, you can see a little bump (sort of like a pearl, geddit?) and on the right is a knit. They are basically the same stitch but in opposite directions.

This is where I got a bit carried away with my new youtube account…

Don’t worry, I know I’m super cool.

free-knitting-pattern-chunky-snood-how-to-4

Step seven

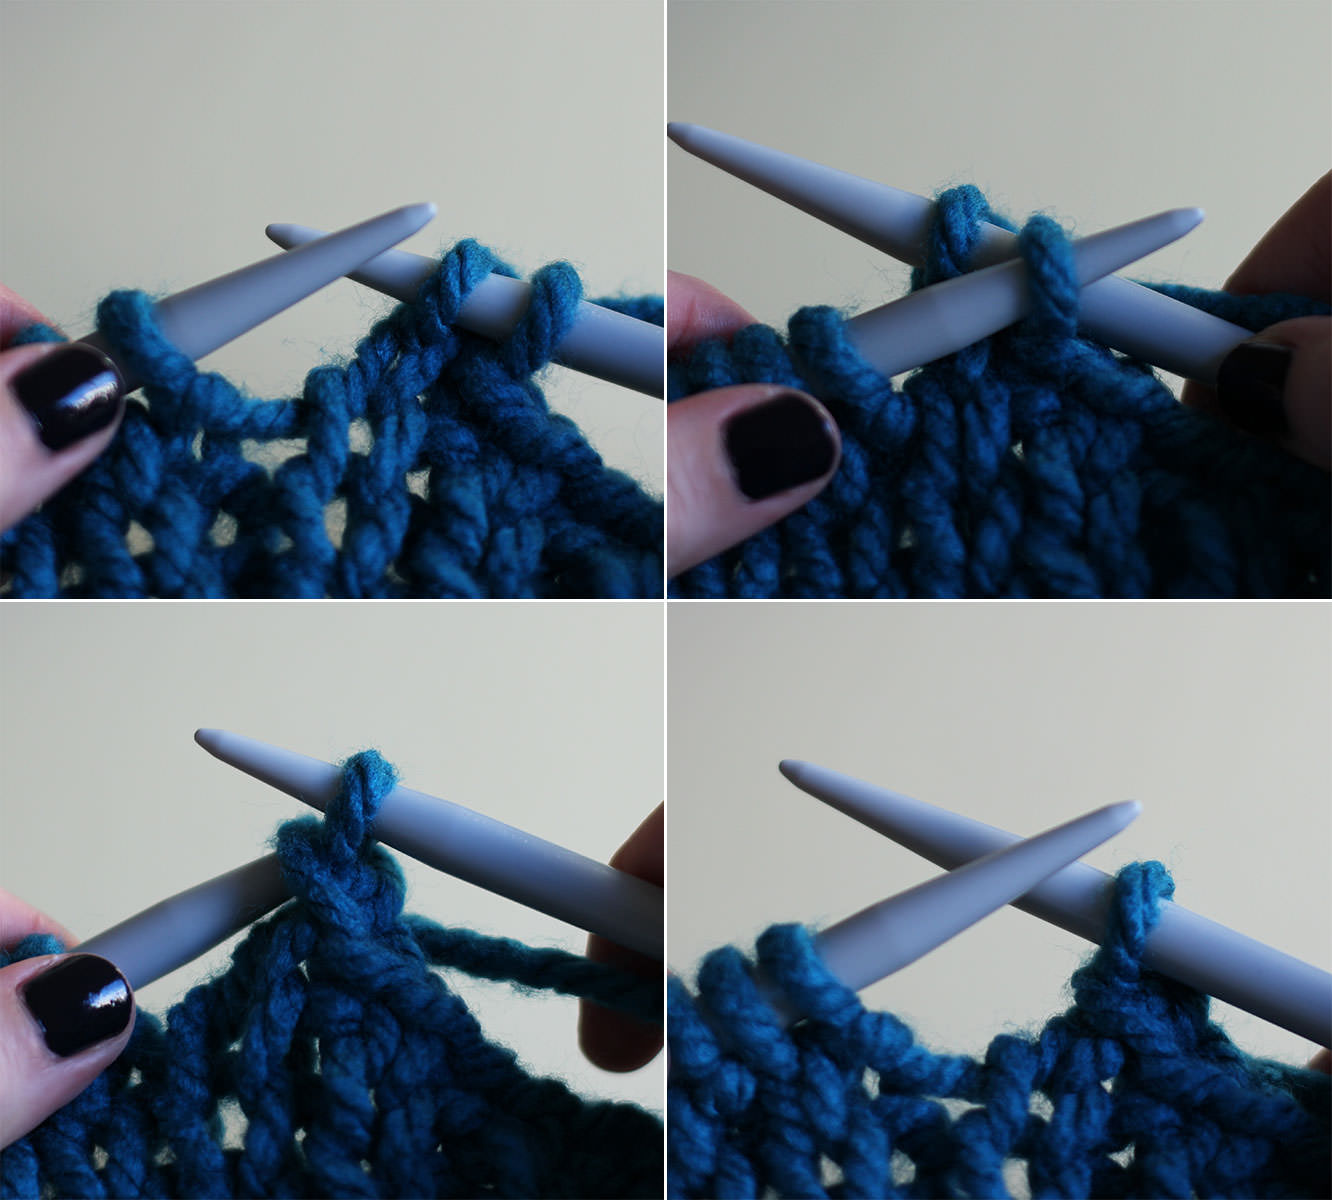
As you get close to the end of the wool you need to make sure you’re keeping enough to cast off and sew your snood together. Once the ball has basically unravelled so you can grab the end without getting in a mess, measure five times the width of the knitting from the end and tie a slip knot to remind you to stop as close as possible to that point.

To cast off, knit two, then loop the first over the second. Knit another one and repeat.

Sorry, what’s that? You could really do with another youtube video? Of course.

free-knitting-pattern-chunky-snood-how-to-8

Step eight

Once you get to the last stitch remove the needle and pull the end of the thread through the loop and pull to tighten.

free-knitting-pattern-chunky-snood-how-to-9

Step nine

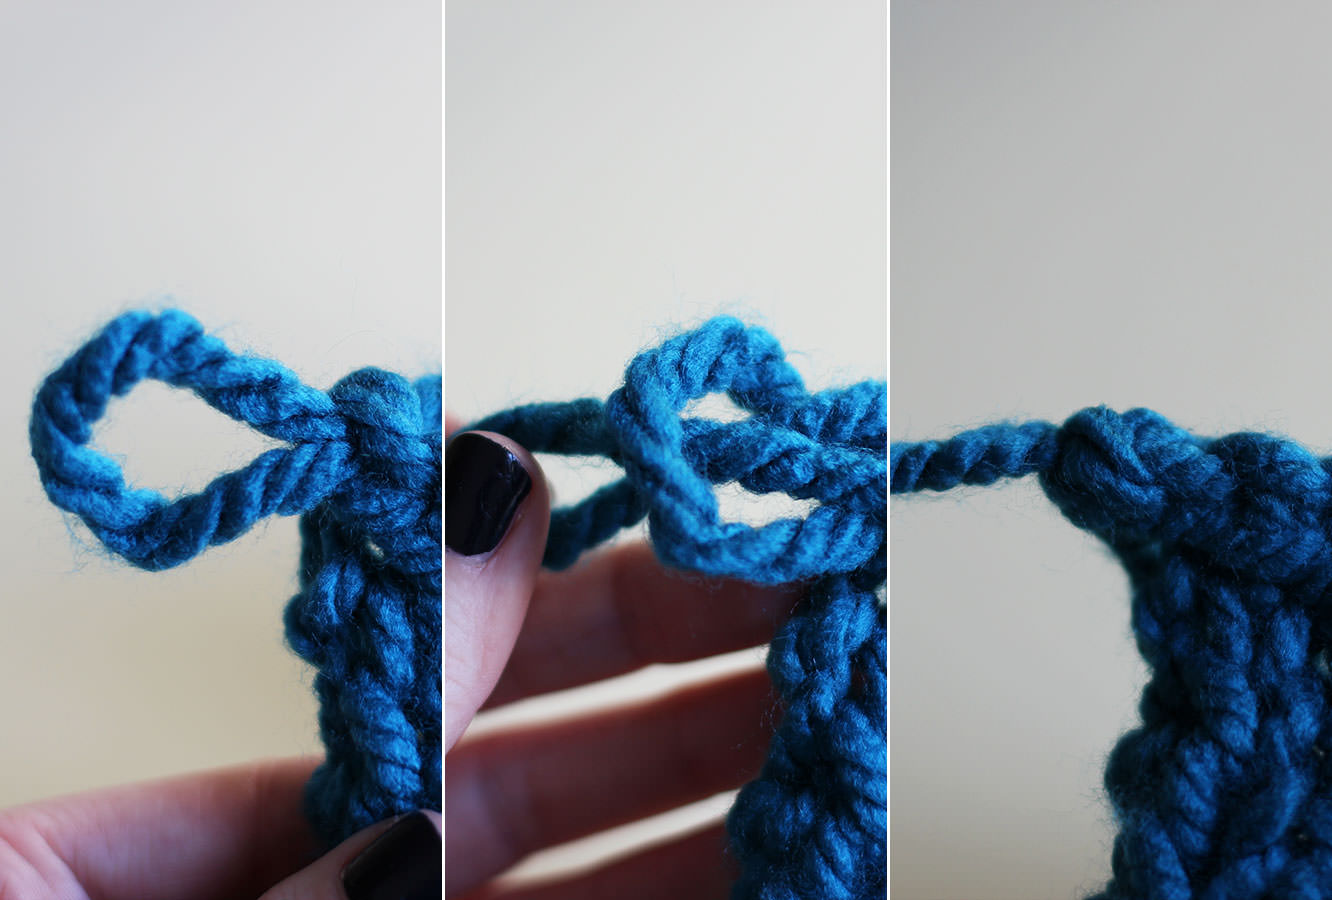
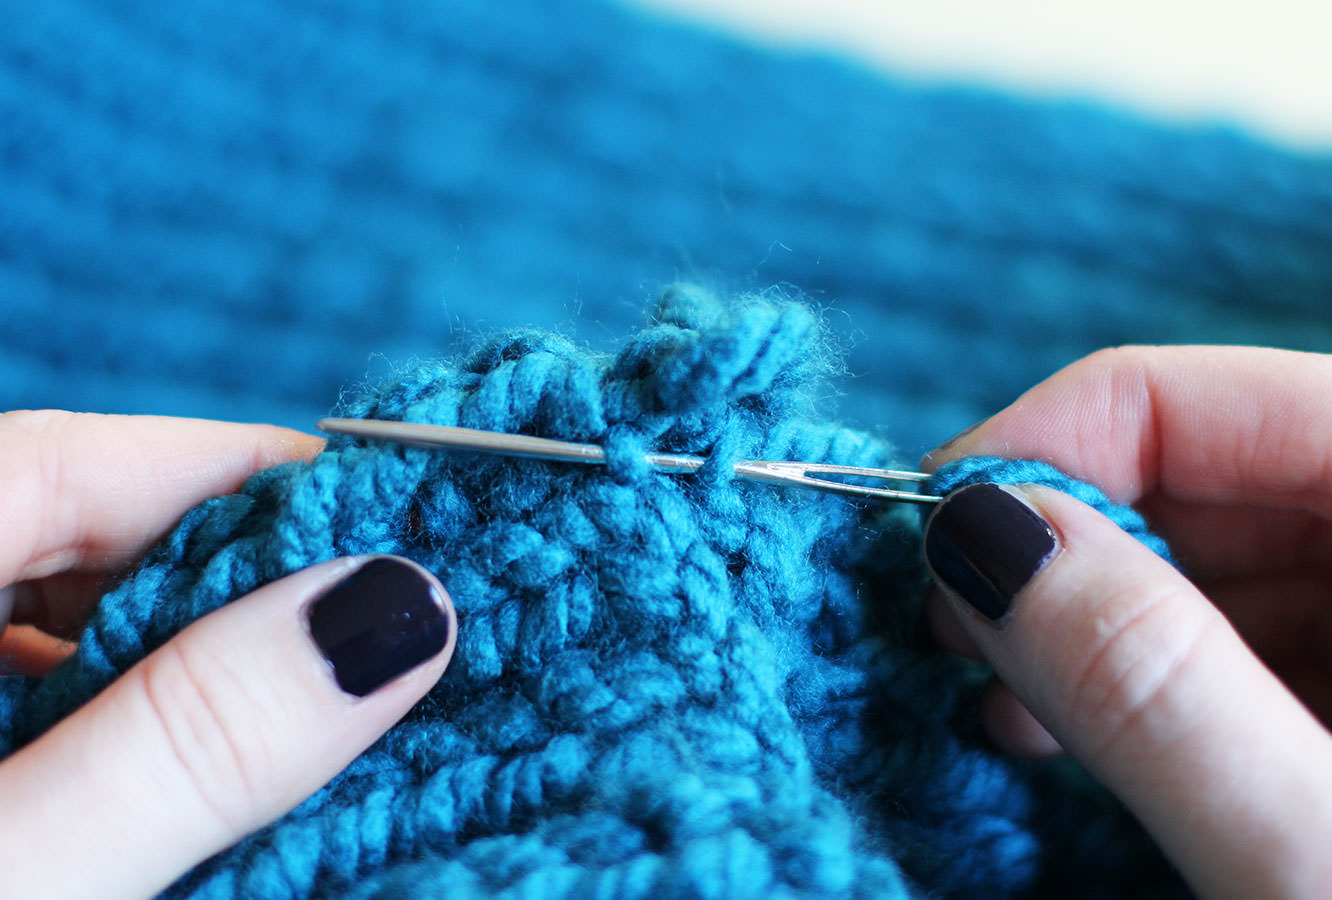
Place the two ends together use a wool needle or a crochet hook to sew together. I find it best to go side to side like this.

After I did this I stretched it using the backs of two chairs, I tend to knit a little tight, you might not need to do that. The other way would be to dampen it and pin it out on the carpet but the chair method just seemed a bit easier.

free-knitting-pattern-chunky-snood-how-to-11

free-knitting-pattern-chunky-snood-how-to-12

Step ten

Put it on your beautiful friend.

Ginger breading fun 2014

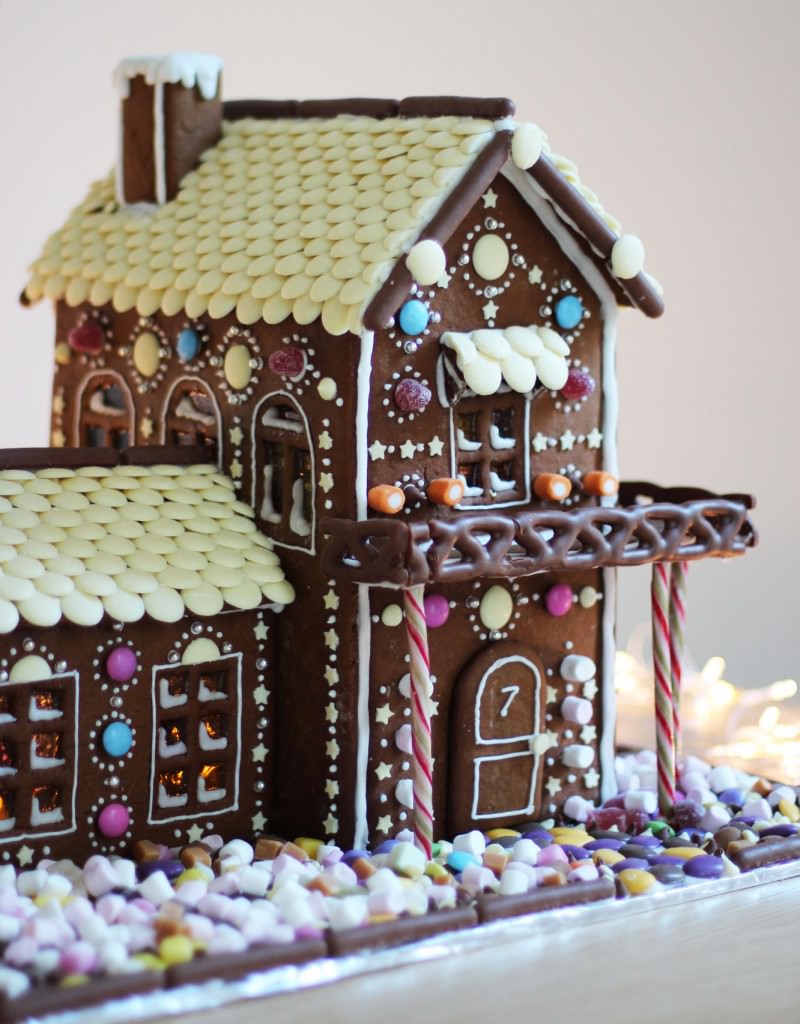
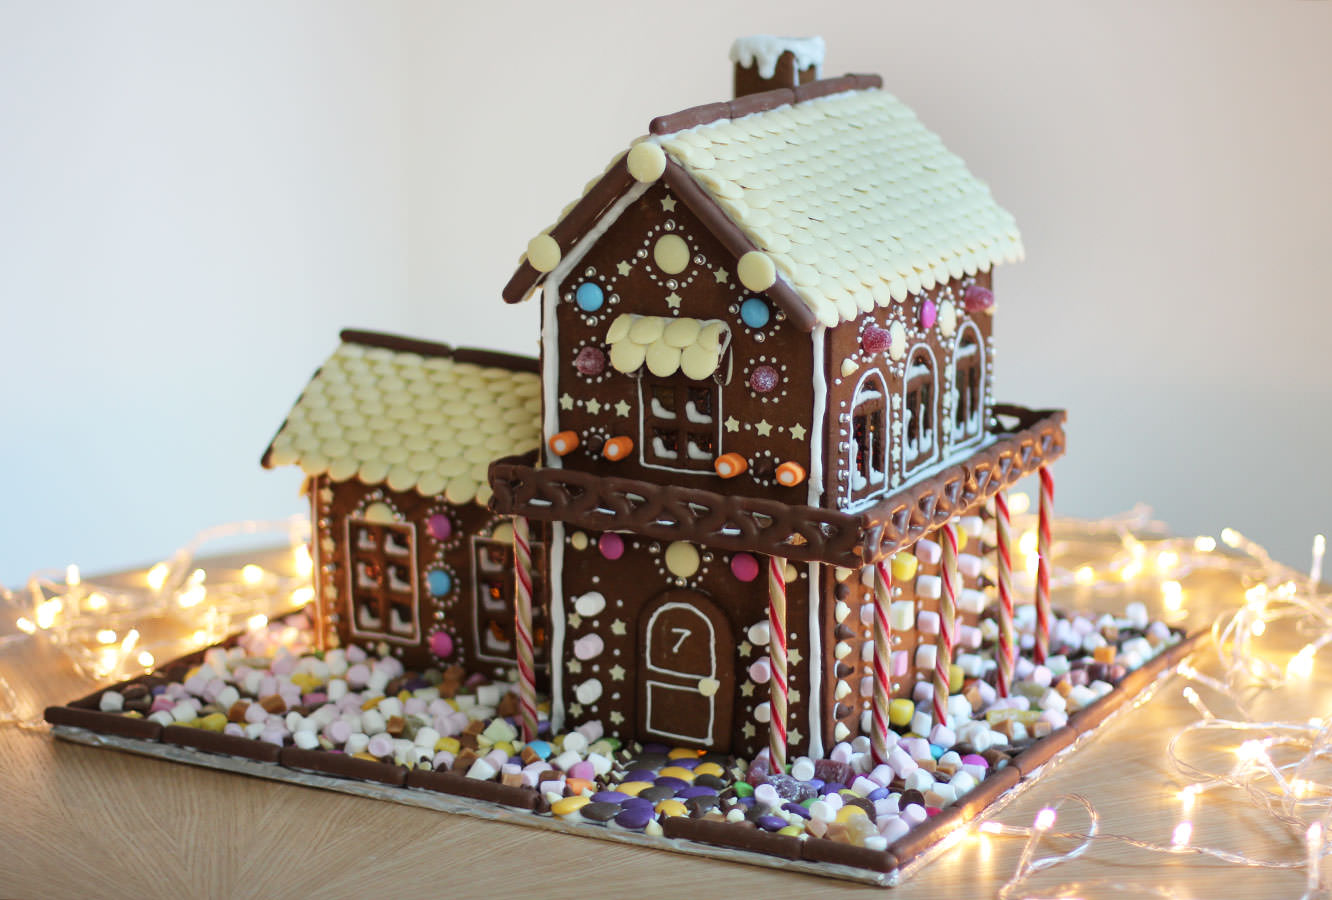
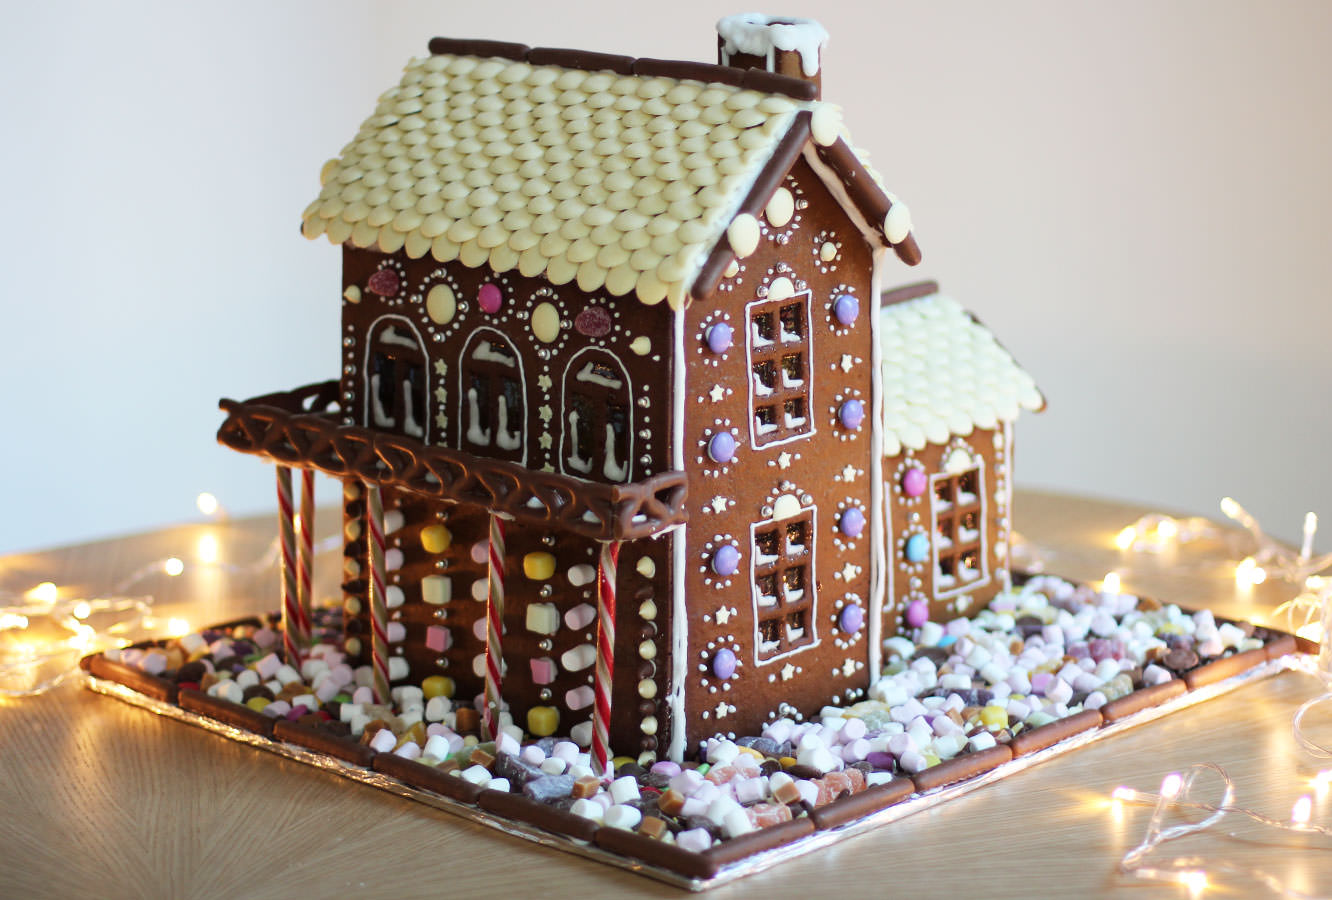
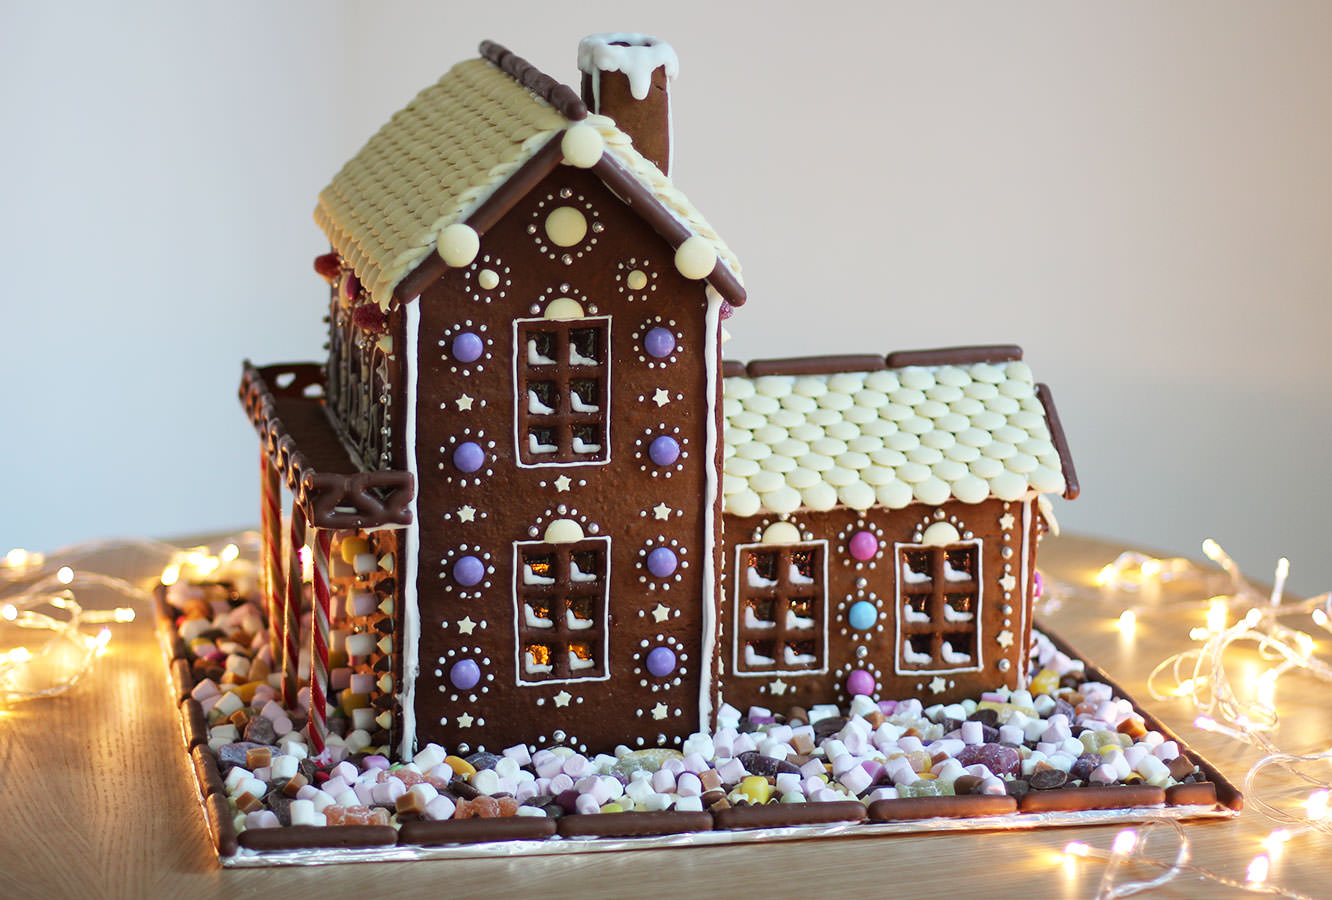
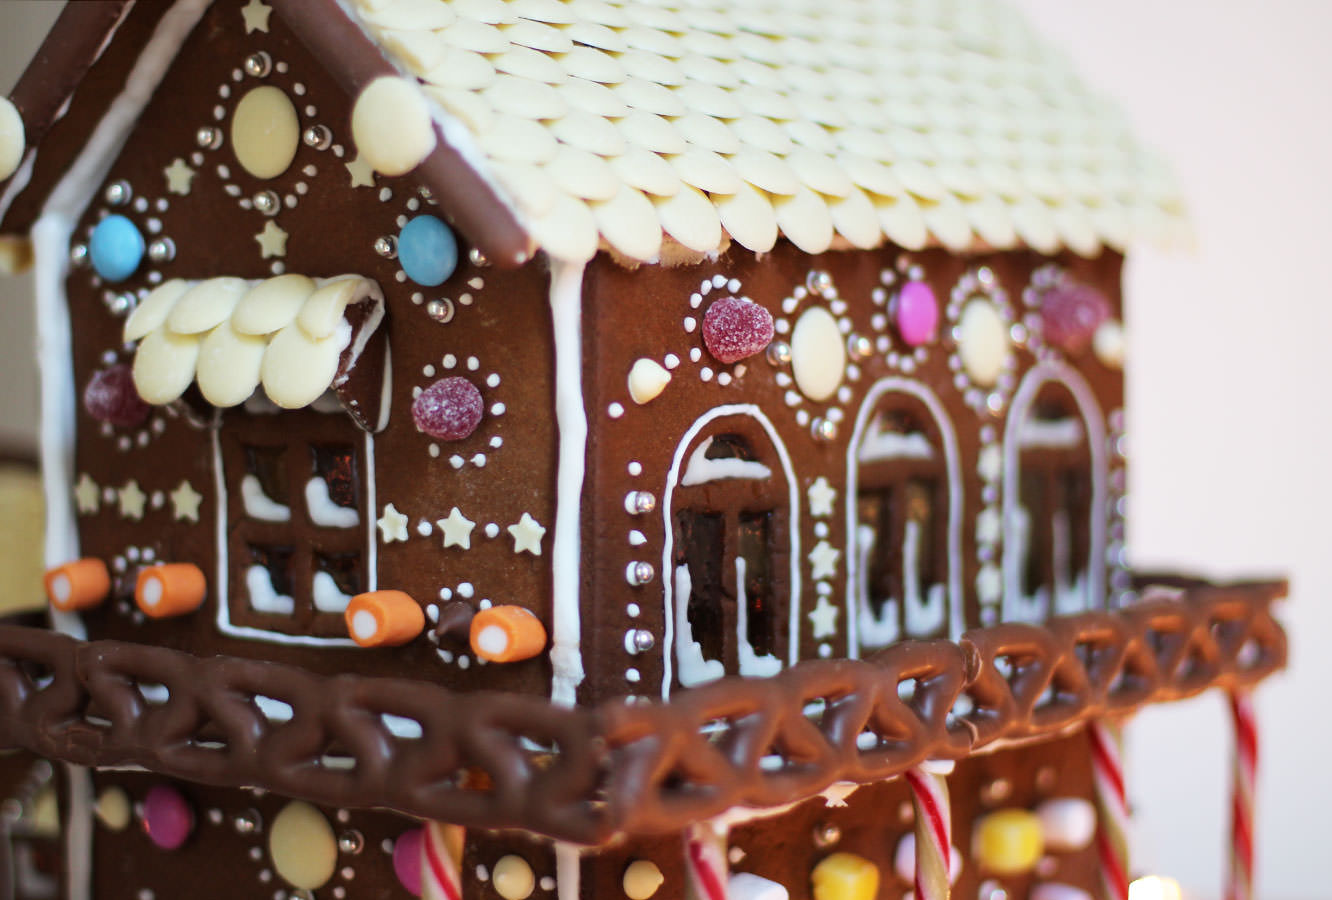
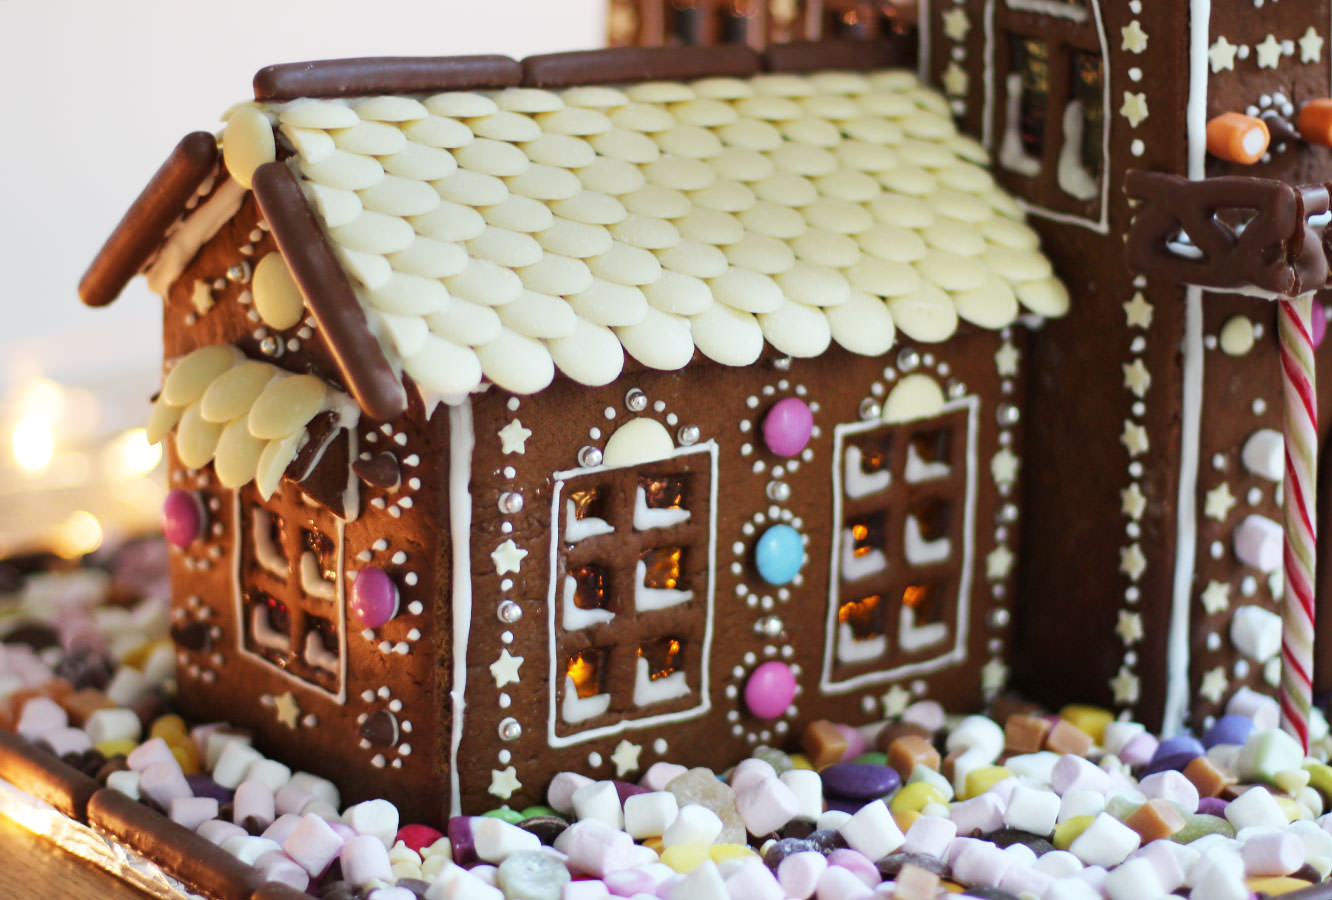
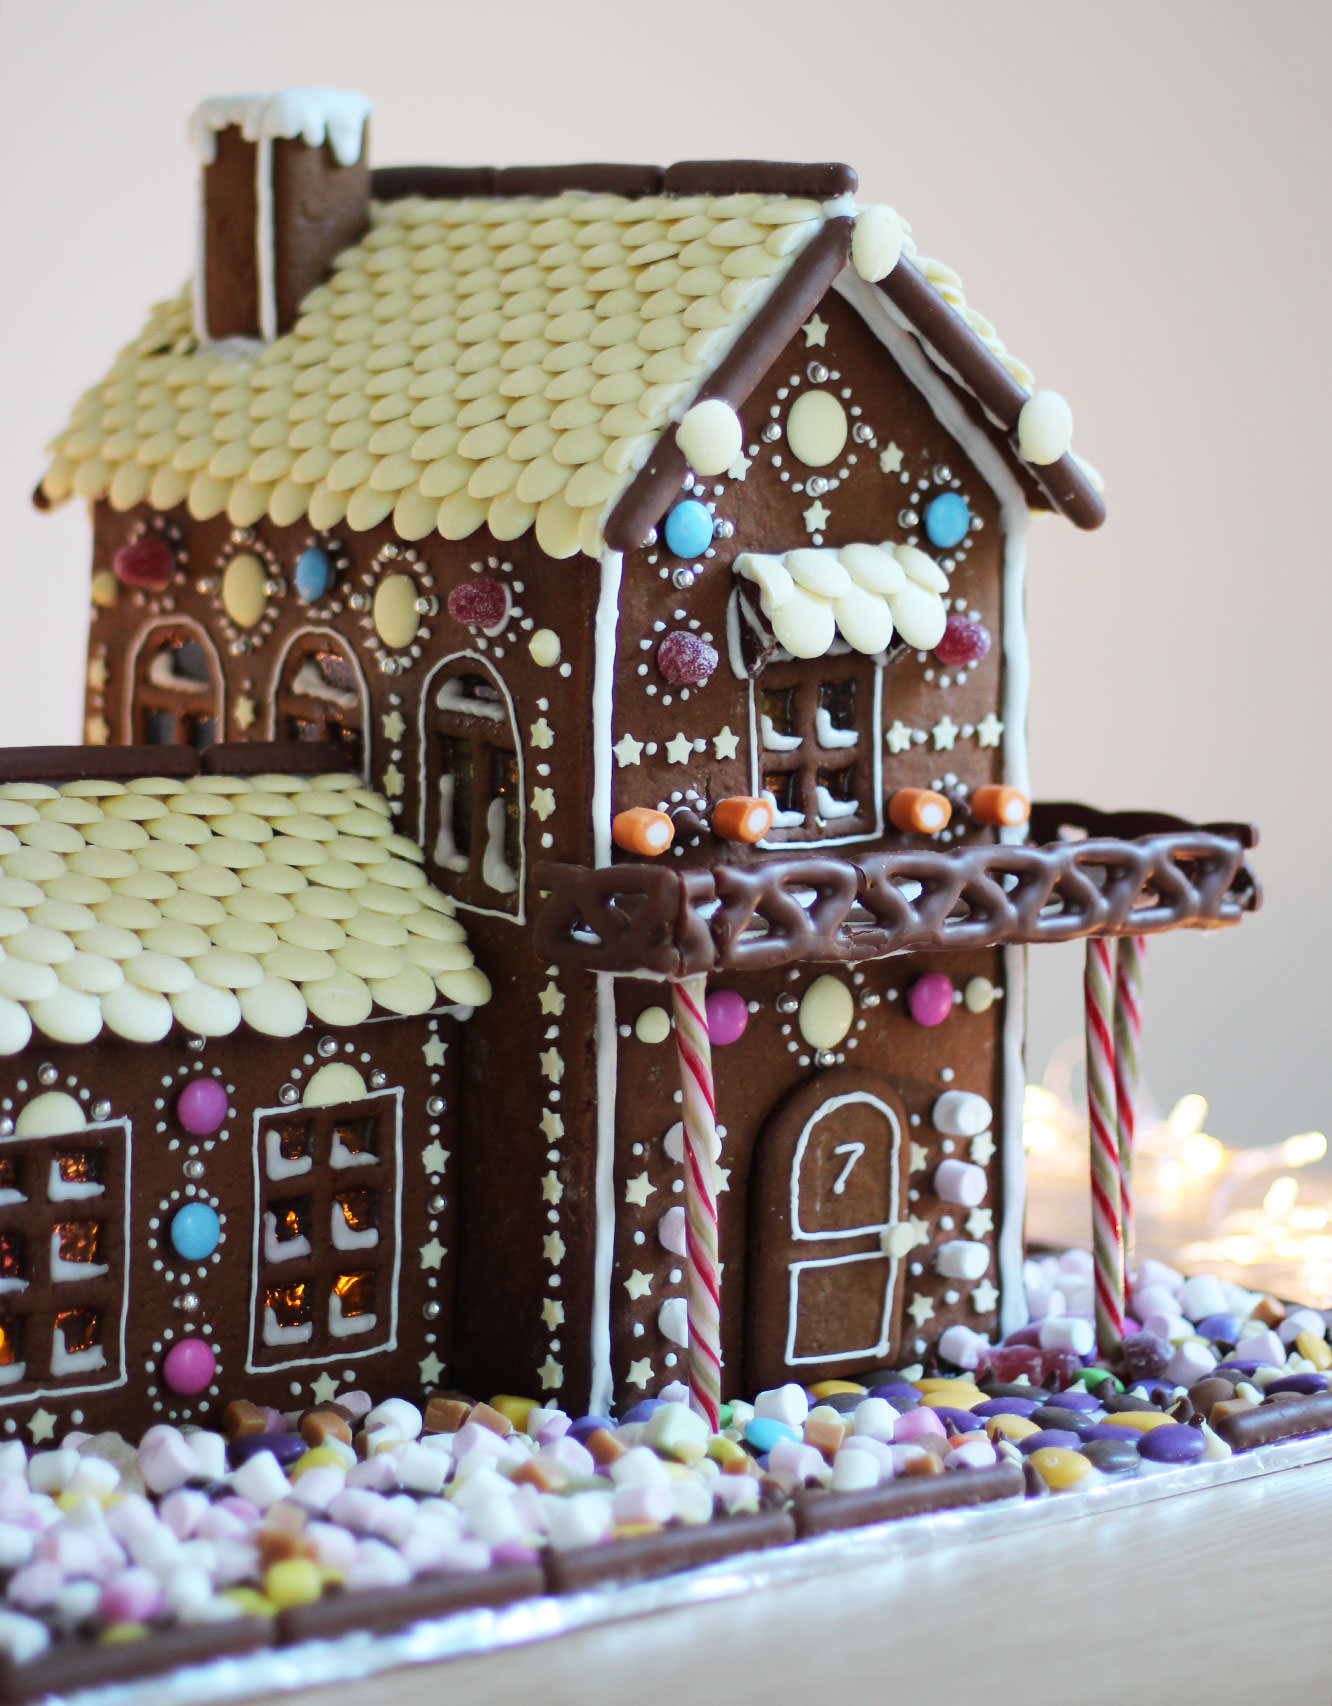
Hello again. Just a little post with some photos of this year’s gingerbread house. I said back in this post that I would start to theme them, which I’m afraid I didn’t have the inspiration for in the end, but it does have a balcony which was my engineering feat of the year.

For those of you looking to squeeze a bit of gingerbread house making into what’s left of Christmas eve, other than needing your head examining, you might find the posts I did last year useful:

#1: Gingerbread house recipe

#2: How to assemble a gingerbread house

#3: Tips for decorating a gingerbread house

Now for the good bit…

Gingerbread house 2014

gingerbread-house-2014-recipe

gingerbread-house-2014-recipe-2

gingerbread-house-2014-recipe-1

gingerbread-house-2014-recipe-5

gingerbread-house-2014-recipe-3

gingerbread-house-2014-recipe-4

Have a wonderful Christmas all 

Get a load of THAT crumb structure

I have been remiss. Apologies, in all my gallivanting around the country and generally doing life I’ve not updated the blog in a few weeks.

Some of this gallivanting found me in Cambridge with my buddies Rachel and David recently. Last time I saw them they were making focaccia and traversing numerous counties; prepping in one, letting it rise on the car journey and baking in another.
This time round Dave and I kept all stages in one location, and photographed it for your viewing pleasure.

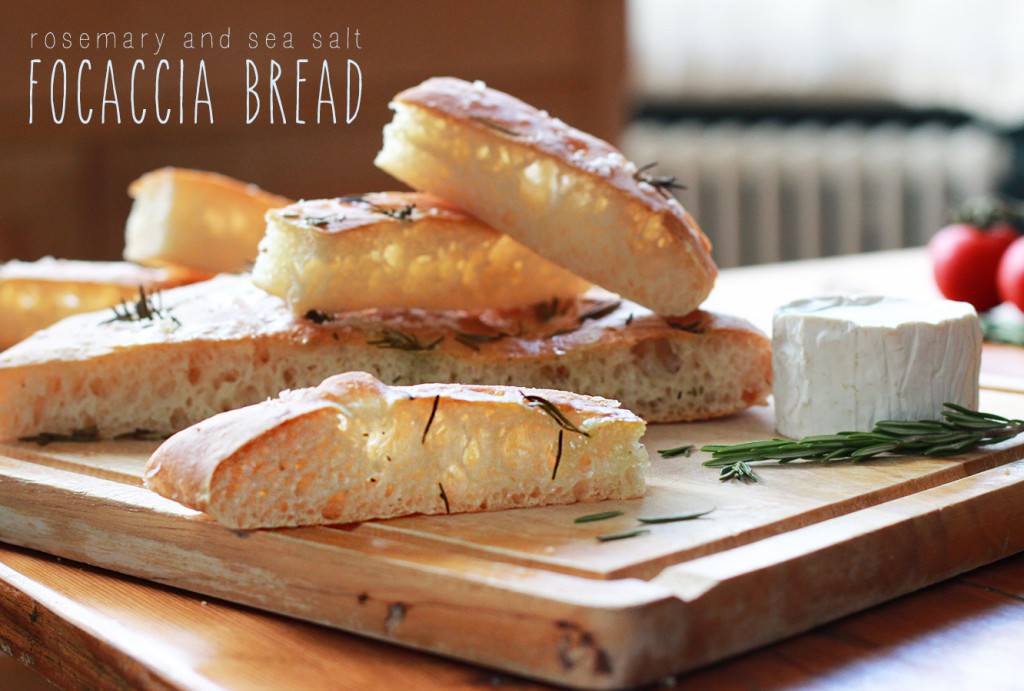
Focaccia is kind of nuts, so don’t be surprised that it looks wrong basically right up until it’s baked, those of you who watch the Great British Bake Off will know that it’s all in the name of getting an uneven crumb structure.

focaccia-recipe-1

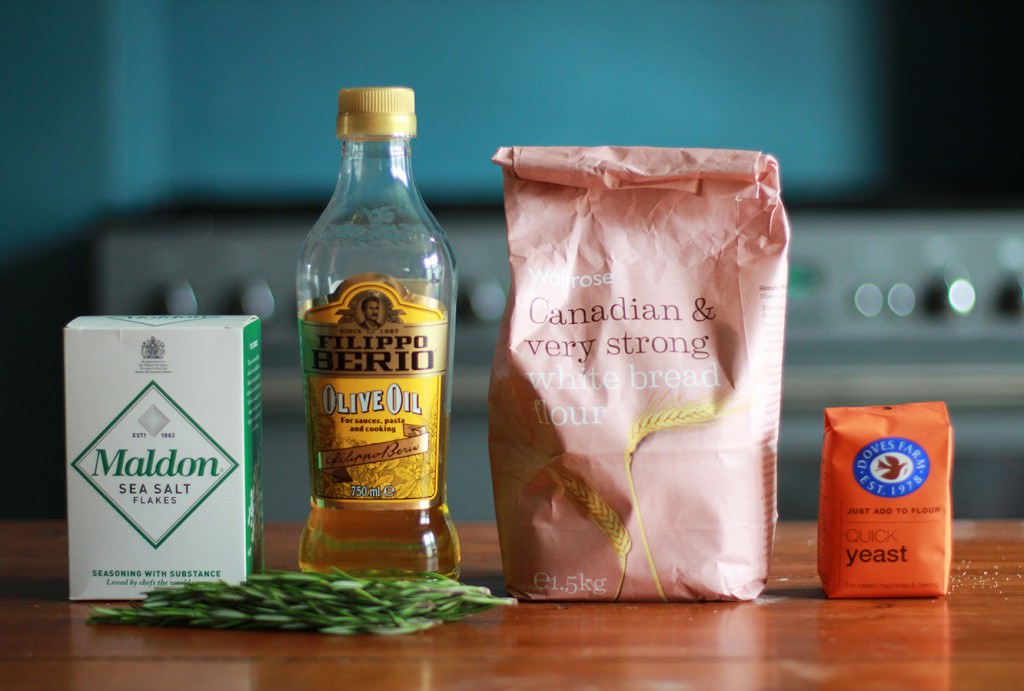
You will need

500g/1lb 2oz strong white bread flour

2 tsp salt

2 sachets dried yeast (14g)

2 tbsp olive oil

400ml/14fl oz cold water

More olive oil

Sea salt

Fresh rosemary

Original recipe source here

focaccia-recipe-2

Step one

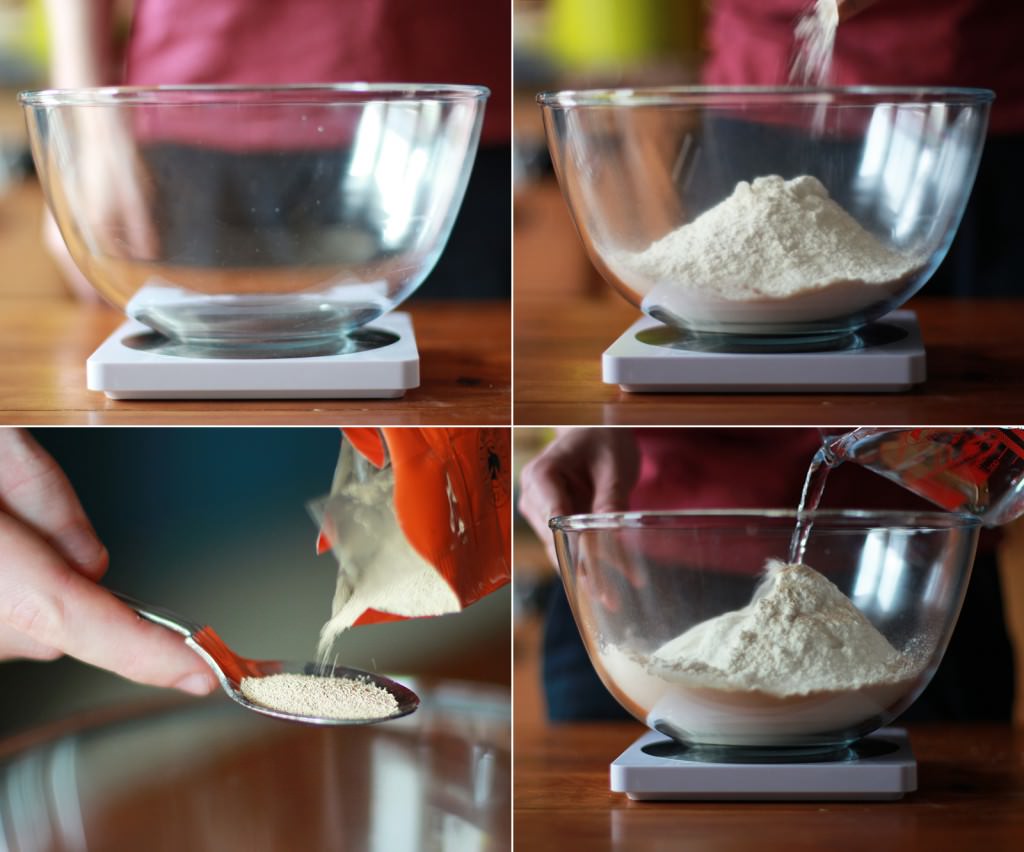
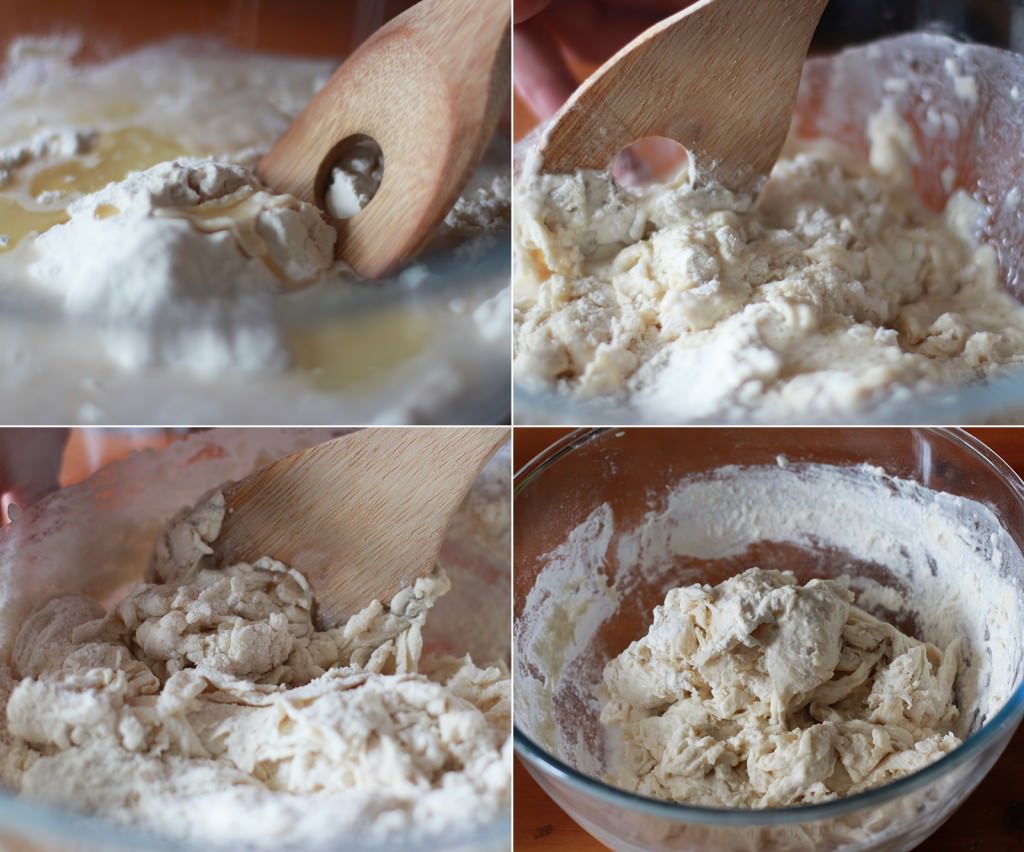
Combine flour and yeast in a bowl with 300mls of the water and two tbsp of olive oil.

focaccia-recipe-3

Step two

Stir with a wooden spoon to combine. This is the first of many ‘don’t worry’ assurances I will give, because at this stage it really doesn’t look too hot.

focaccia-recipe-4

Step three

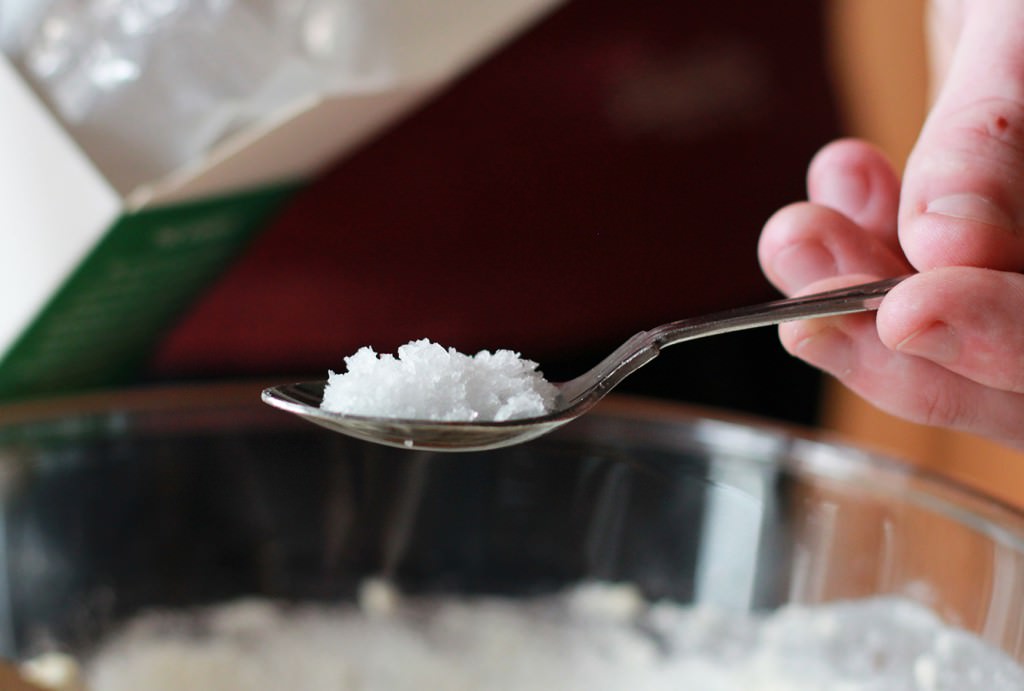
Add the salt.

Top tip from Davey-boy here: don’t add it any earlier like some recipes will tell you, because yeast hates salt and will go on strike if you do. Those weren’t Dave’s exact words, but essentially, it’s better to mix them in separately.

focaccia-recipe-5

Step four

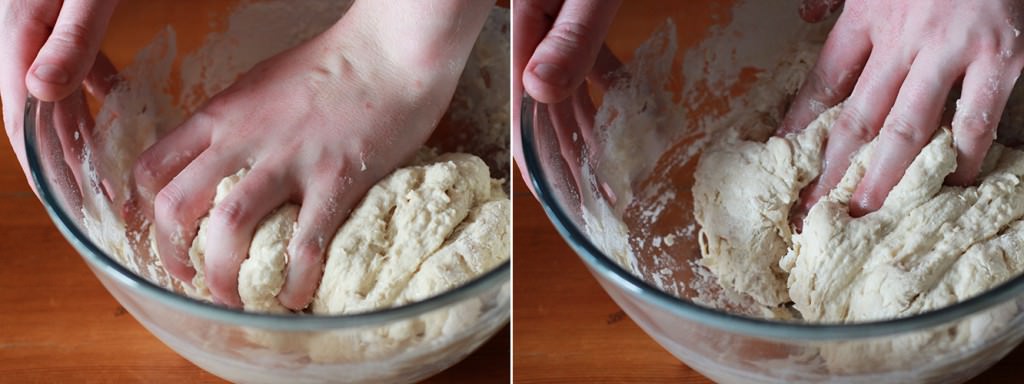
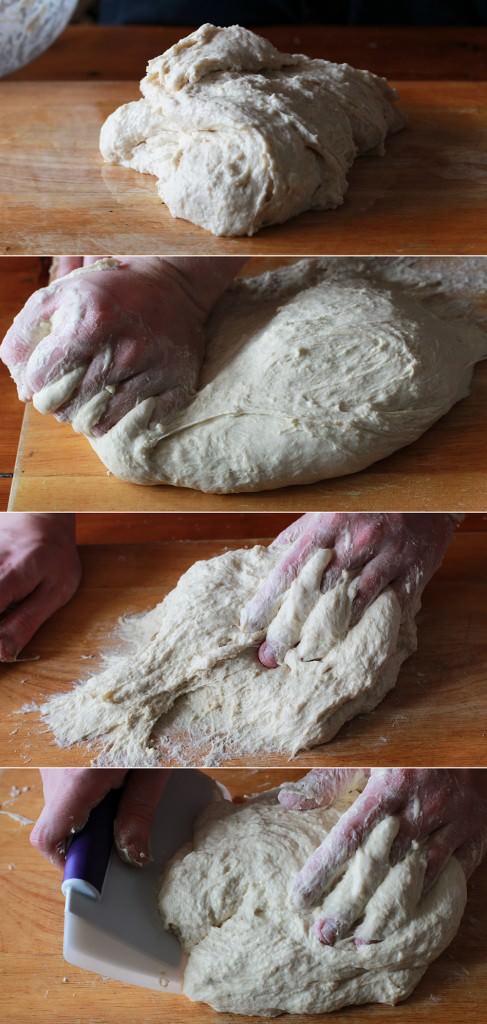
Bring together the dough by kneading in the bowl.

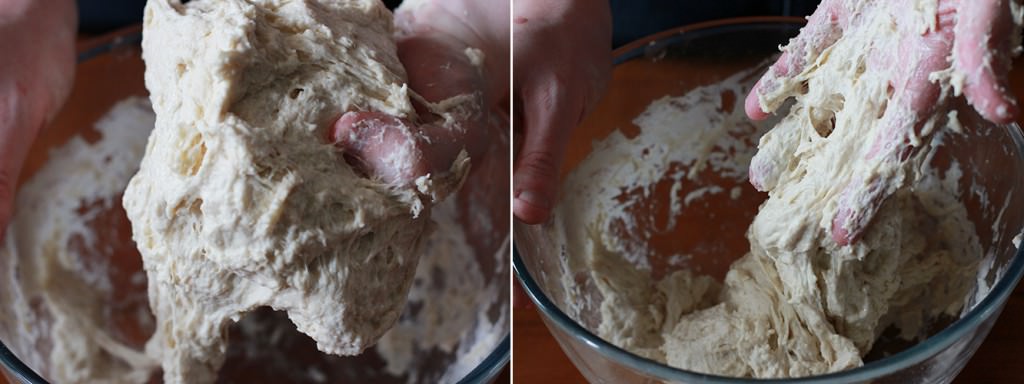
Gradually add the remaining 100mls of water as you do this. Keep pulling and stretching for 5 minutes, it will get disgusting, but don’t be tempted to leave any out. Remember, it’s all about those uneven crumbs.

focaccia-recipe-6

See?! Ew. But it’s ok. Honest.

focaccia-recipe-7

Step five

Cover your work surface in olive oil and slop that mess out onto it.

Carry on kneading for another 5 to 10 minutes until the dough begins to smooth out a bit, a dough scraper really helps here if you have one handy, as the mix is quite stringy and prone to sticking.

Resist the urge to add any flour to your surface; while it would make it a bit easier and would help it to look more like something that you’d want to eat, it won’t do that crumb structure any favours.

focaccia-recipe-8

Step six

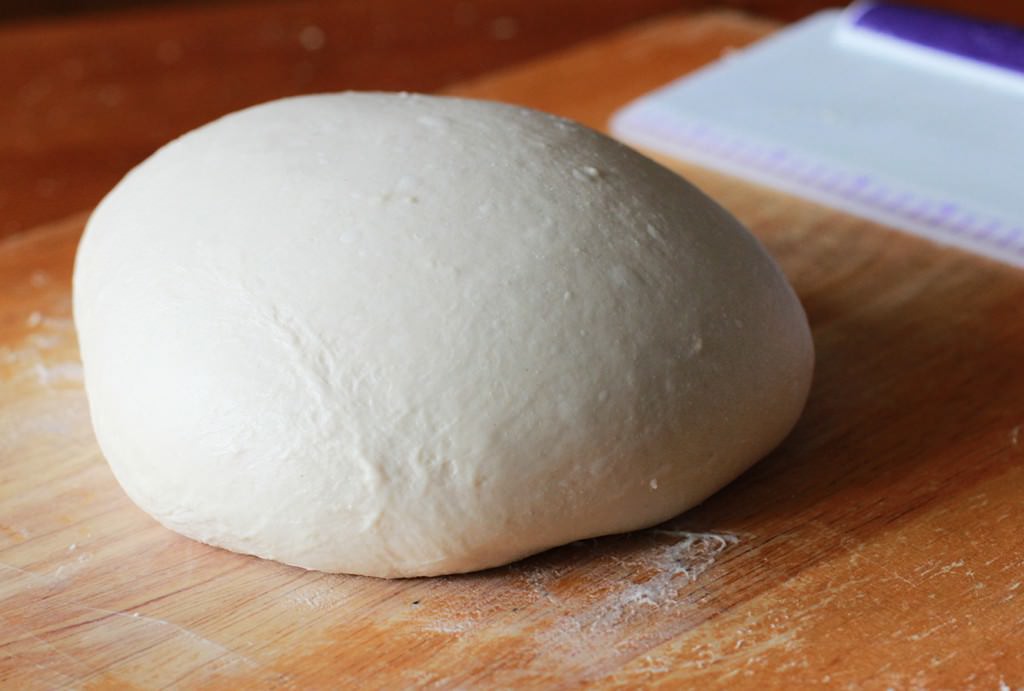
If yours looks as good as Dave’s take a bow.

focaccia-recipe-9

Step seven

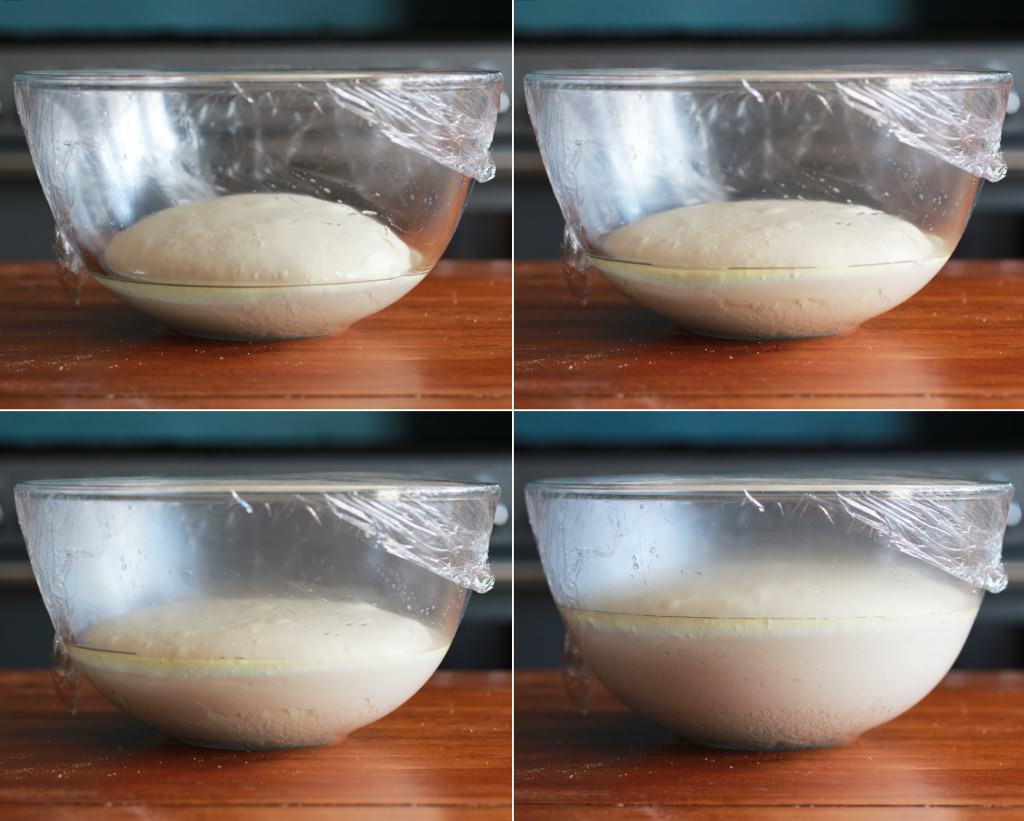
Transfer dough back into the mixing bowl and cover in cling film.

Wait for it to double in size, usually it takes about an hour, but this might vary depending on the temperature of the day/your house.

p.s. It’s still pretty sloppy and weird at this stage, so don’t panic.

focaccia-recipe-10

Step eight

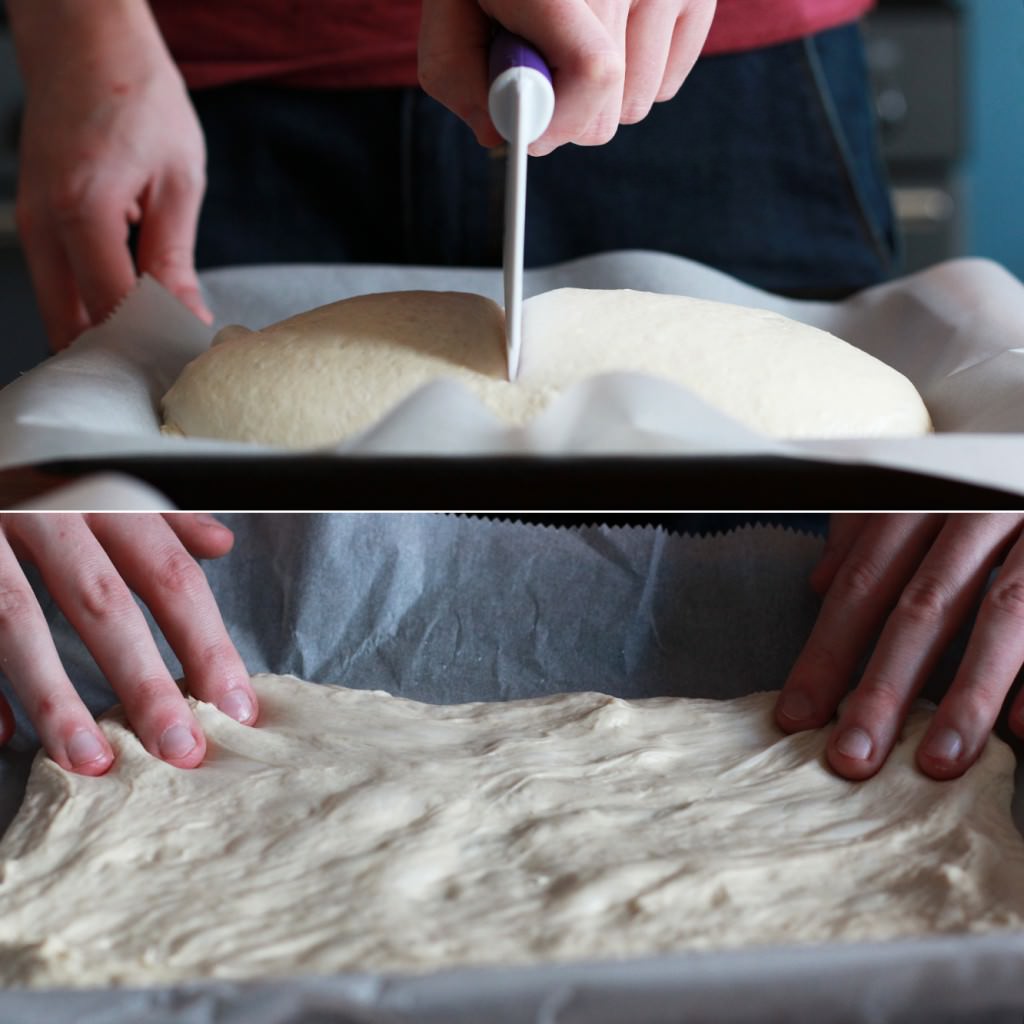
Divide the mix in half and place on two baking trays covered in greaseproof paper/baking parchment.

You will have to adopt a weird stretching-stroking technique to get the dough to fill the space; it’s quite elasticy. The loaves should be about 2-3cm/1″ thick once you’re done. Persevere.

focaccia-recipe-11

Step eight

Leave to prove for another hour.
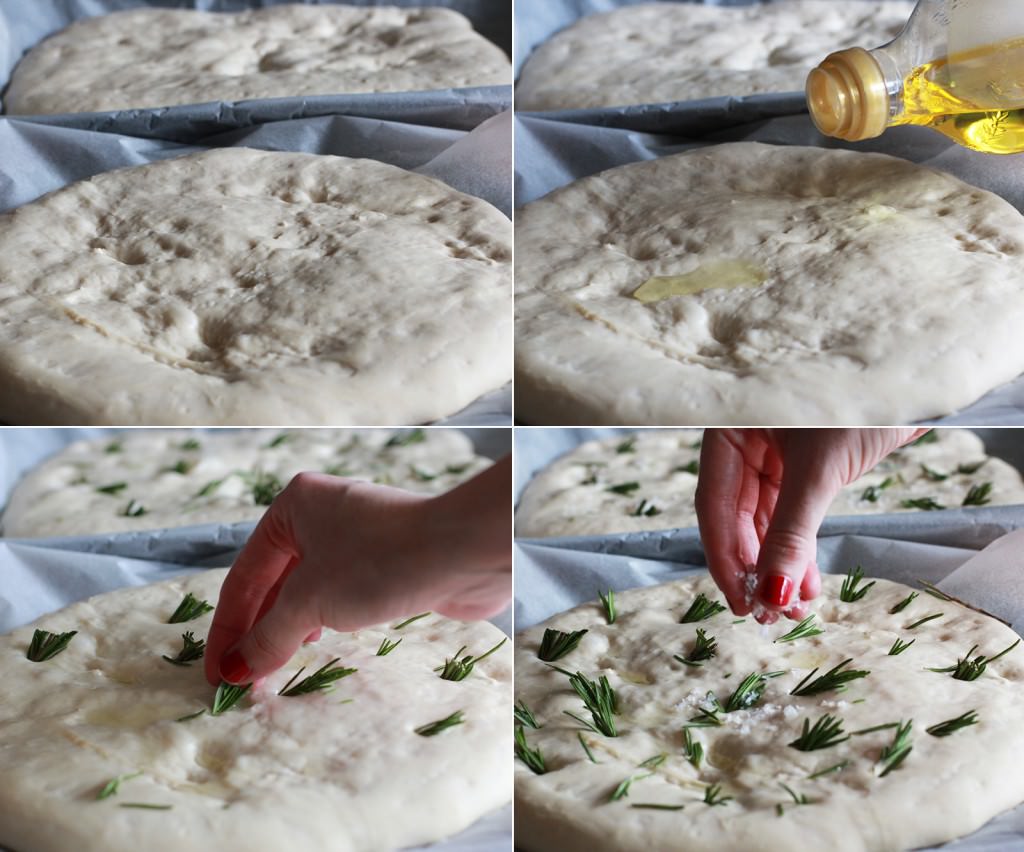
Drizzle in olive oil, push in some sprigs of rosemary and sprinkle with sea salt.
Step nine

Bake in the oven on Gas mark 7/220 C/425 F for about 20-30 minutes until golden on top.

focaccia-recipe-12

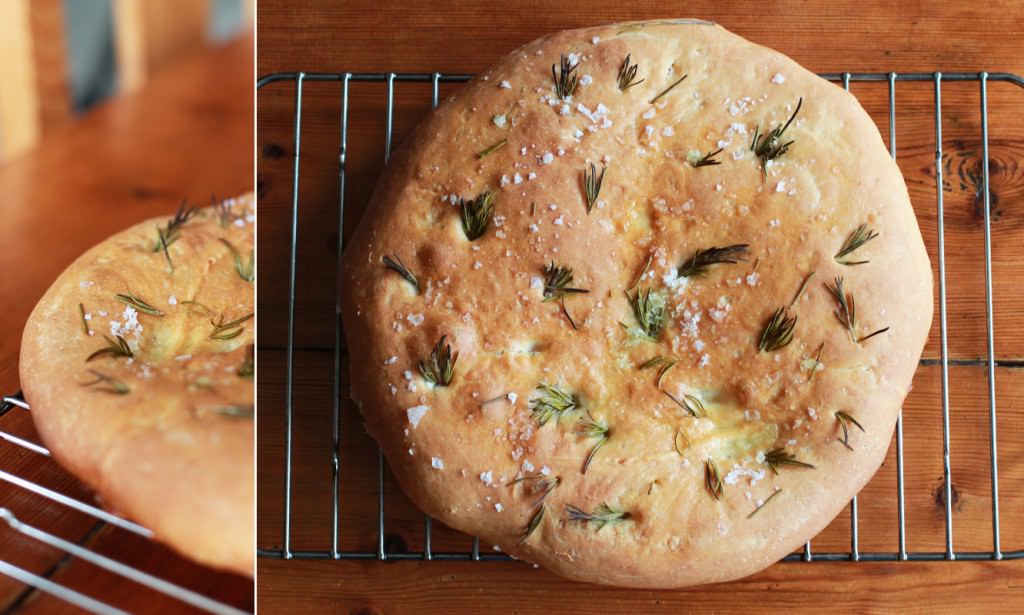
See. I told you it would come good in the end.

focaccia-recipe-14

Step ten

Show off that crumb structure.

focaccia-recipe-13

Step eleven

Consume.

Nesting

It’s such a lovely time of year, the sun is shining and the shops are full of mini eggs. What’s not to love?

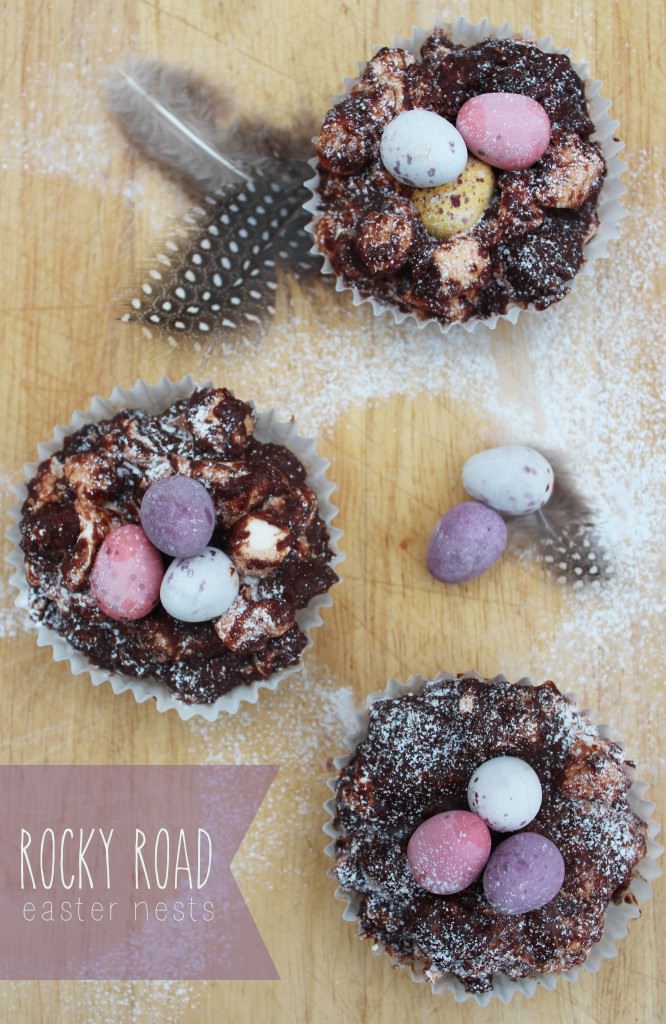
This little idea popped into my head when I was putting out the snacks for an open day (I sort of swing by a university law school and do admissions in my spare time/to get paid). Anyway, after opening the rice crispy bites, and popping one in my mouth (it’s good manners to make sure everything is in order for the guests) I moved on to unpacking the rocky road. BINGO. Rocky road Easter nests were born!

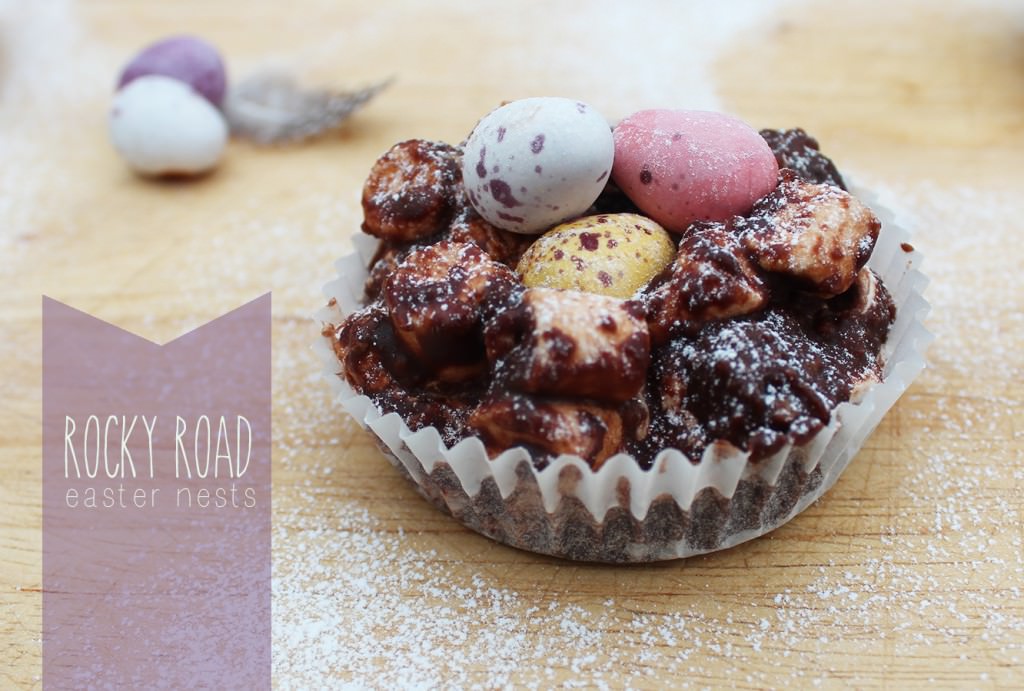
As if that hasn’t sold it well enough to you, these look far more realistic than your regular festive treat, and you will never touch a box of shredded wheat again once you’ve tried them. Just as easy to make with kiddies and more ingredients so more fun to be had.

Rocky-Road-Easter-Nests

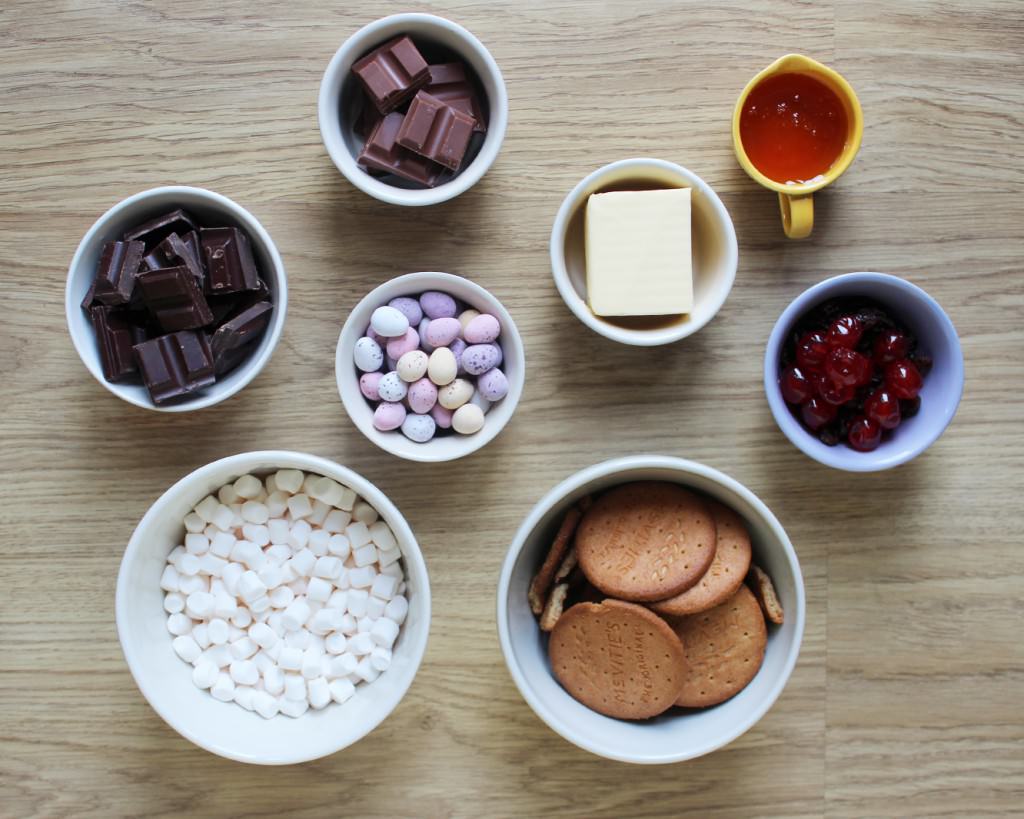
You will need

200g/7 oz Dark chocolate

100g/3.5 oz Milk chocolate

125g/4.5 oz Unsalted butter

3 tbsp Golden syrup

200g/7 0z Digestive biscuits

100g/3.5 oz Mini marshmallows

Generous handful of seedless raisins

 15 Glace cherries (cut into quarters)

Bag of mini eggs

Fairy cake cases

Icing sugar to dust

Makes 15

Rocky-Road-Easter-Nests-2

Step one

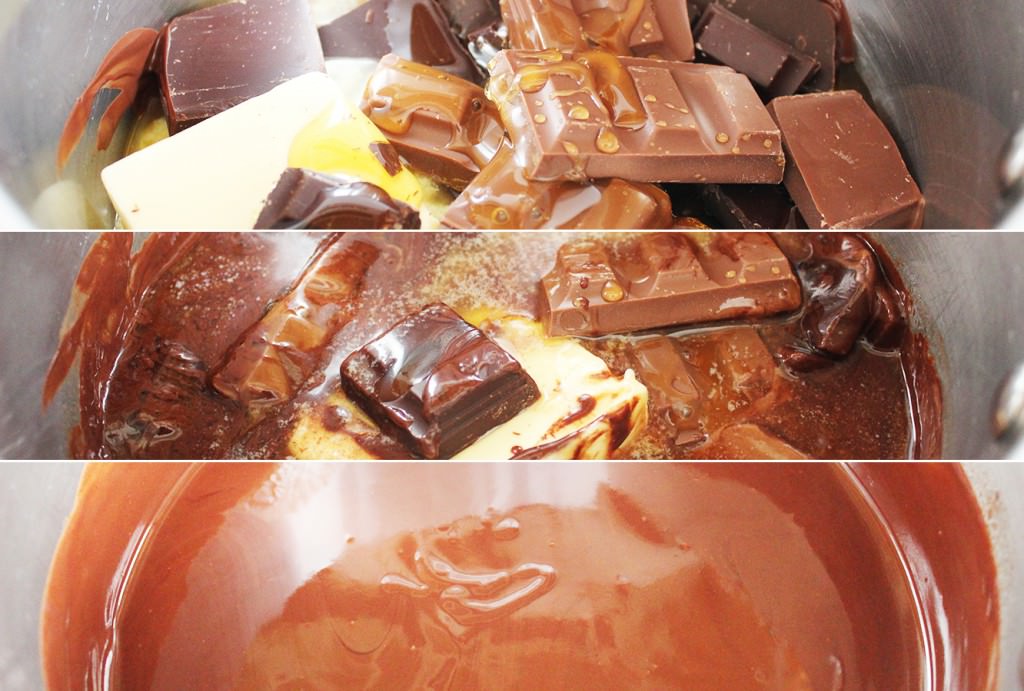
Melt the dark chocolate, milk chocolate, butter and golden syrup in a sauce pan.

Go slowly, burning chocolate is one of life’s saddest occurrences.

Rocky-Road-Easter-Nests-3

Step two

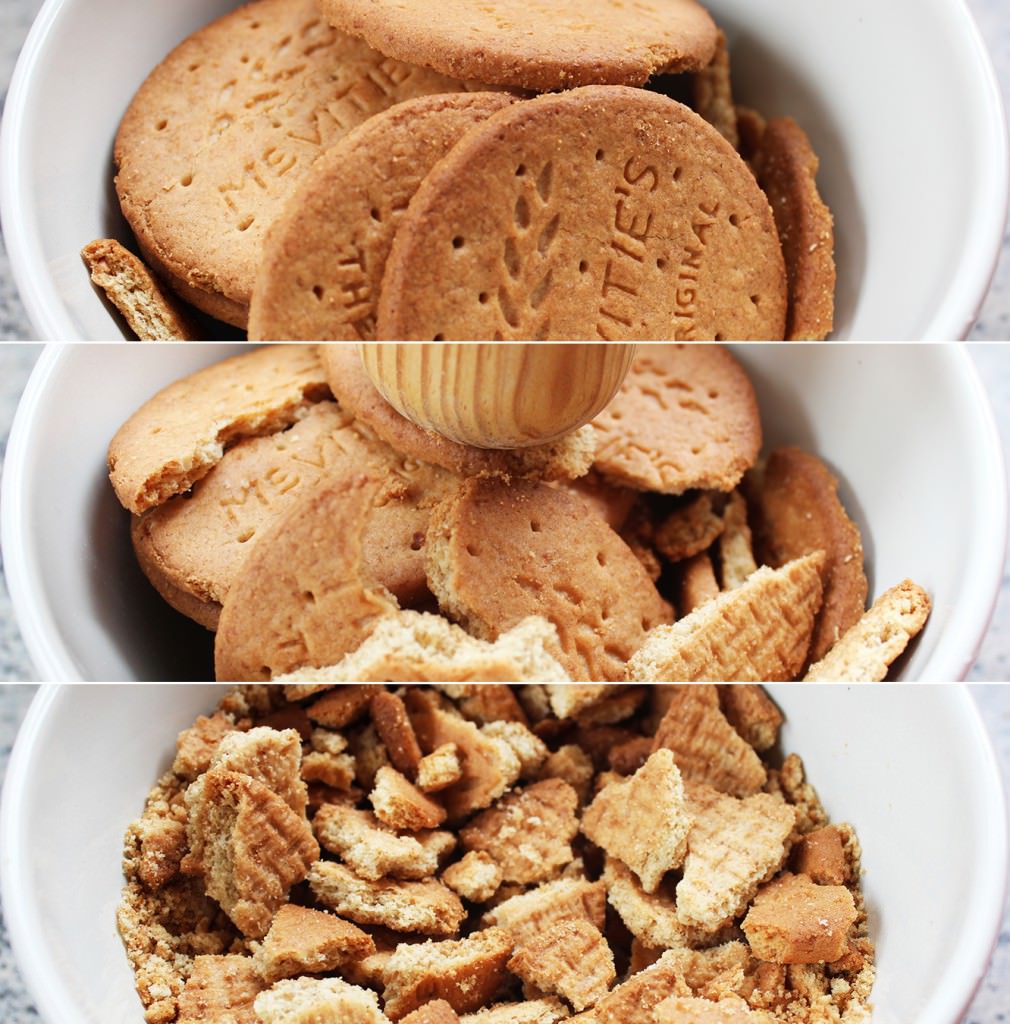
While the chocolate is melting, but without getting too distracted, crush up the digestive biscuits with the end of a rolling pin.

Or your fist if you’re having a particularly bad day.

Rocky-Road-Easter-Nests-4

Step three

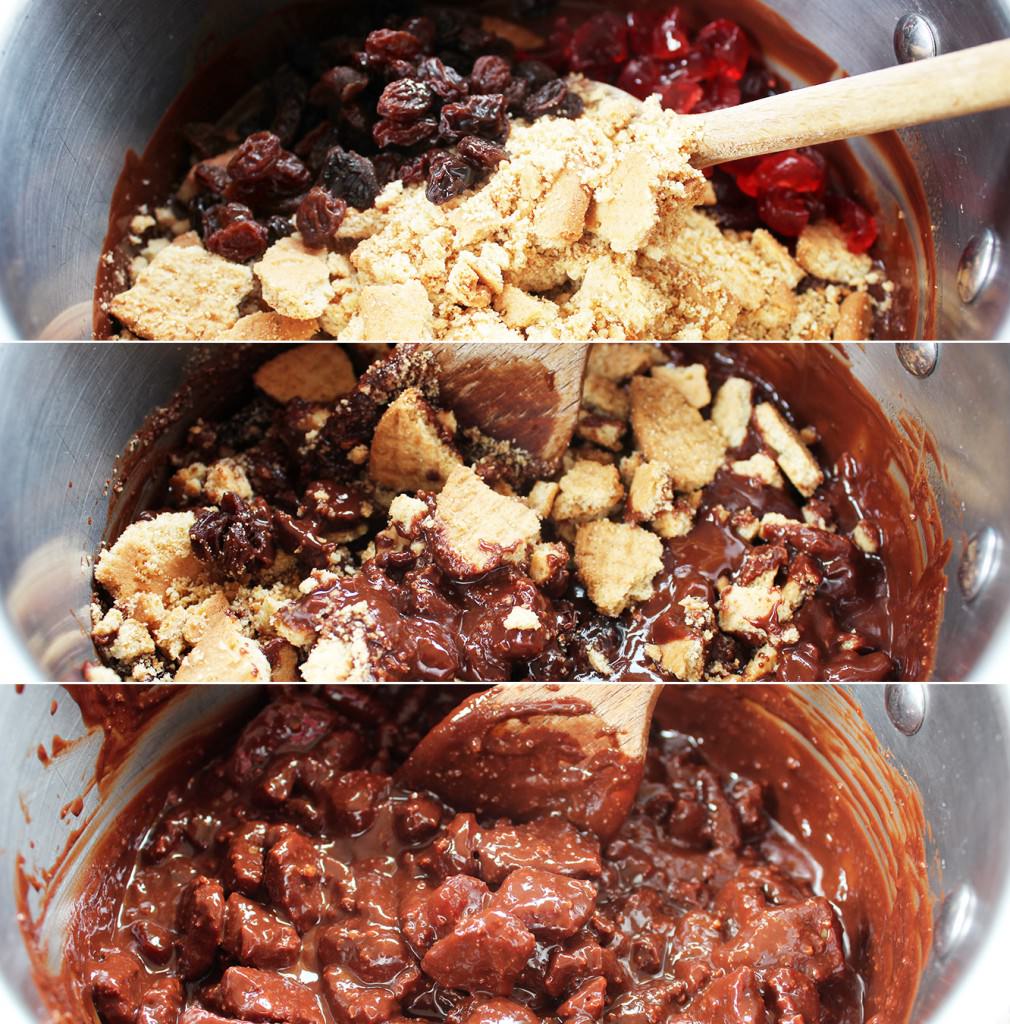
Stir the biscuit, cherries and raisins into the chocolate. Leave the marshmallows alone for the moment.

In case you weren’t gifted with common sense, this should be off the heat by now.

Set to one side.

Rocky-Road-Easter-Nests-5

Step four

This is the clever bit, or at least I like to think so.

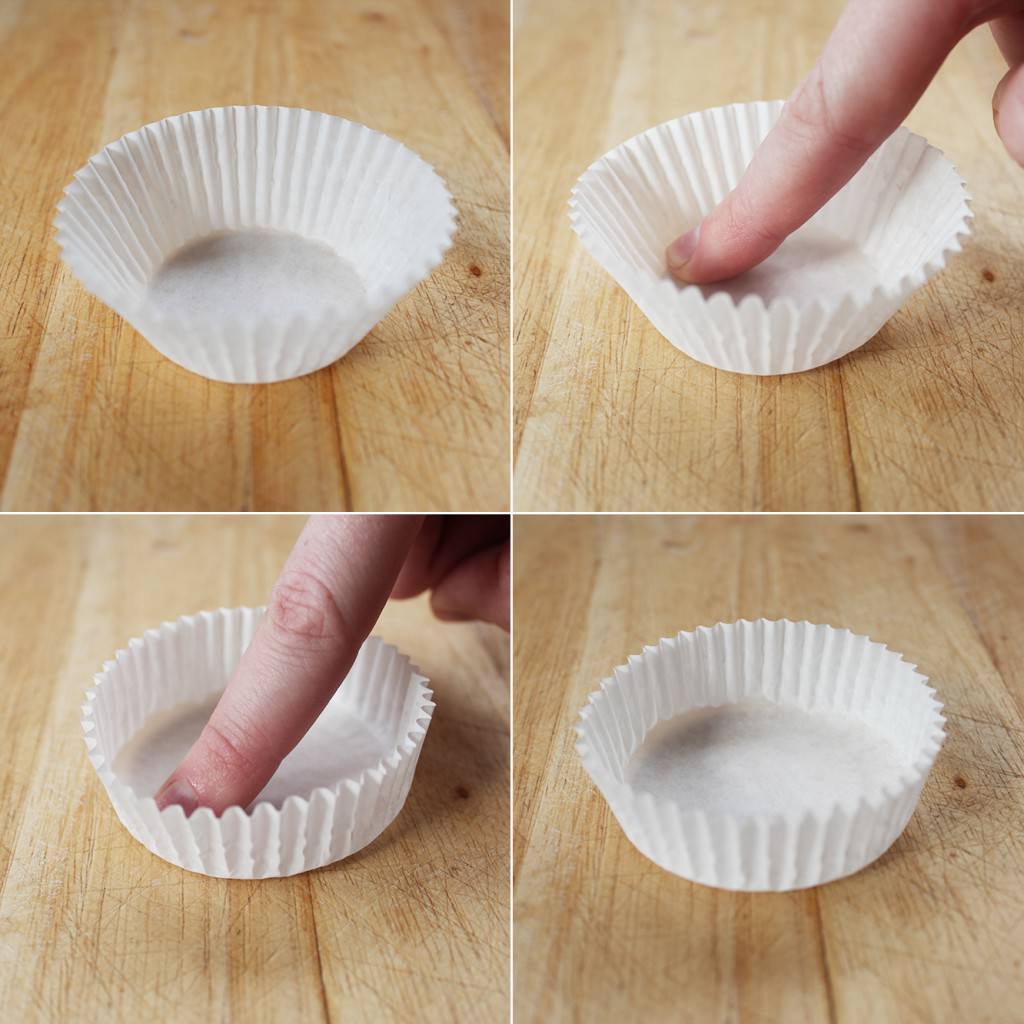
I figured nests aren’t the strange conical shape of cupcake cases, and I didn’t want to end up mail ordering some weird and wonderful baking cases that met my specifications, so I just adapted the regular ones.

I say regular, but I’m not convinced these are actually universal. Before America convinced us that muffin-sized cakes covered in mountains of buttercream (the cupcake we know and love) were the way forward, us Brits had a more modest little bun – the fairy cake. Do other countries have these too? Answers on a post card please.

Anyway, my dear ma has been chastising me about using up the many a fairy cake case we have gathering dust in the cupboard while I burn through the muffin cases to make my cupcakes. They just aren’t cool anymore mum.

Until now.

The fairy cake cases are the perfect size for this, although, of course, whatever size you have should work the same way (you will just have a slightly different number of nests at the end).

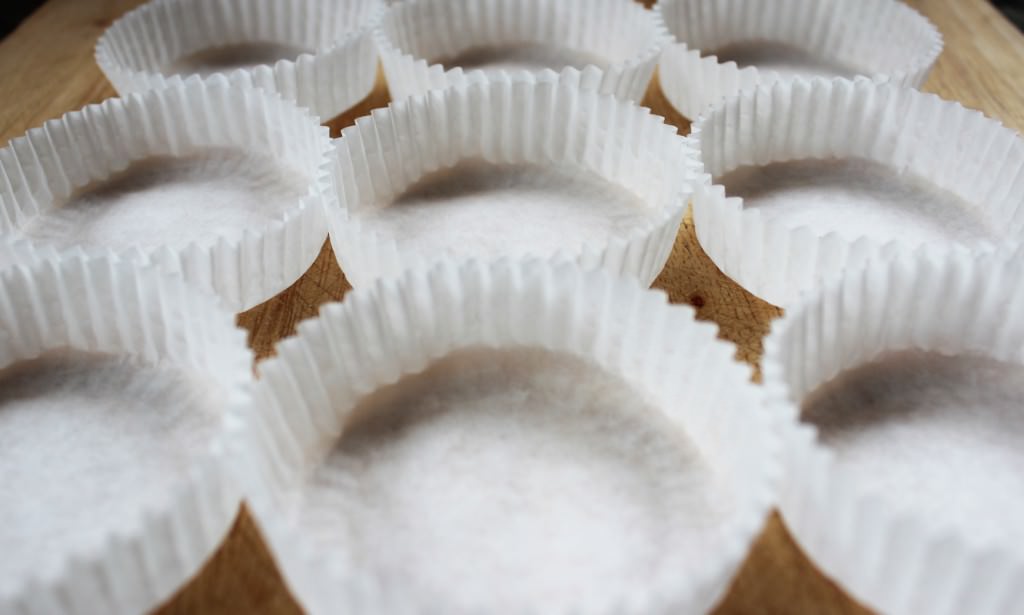
Basically you just run your finger around the inside edge of the case in circles until it opens out and has short straight walls as pictured.

Rocky-Road-Easter-Nests-6

Step four

Repeat x 15

Rocky-Road-Easter-Nests-7

Step five

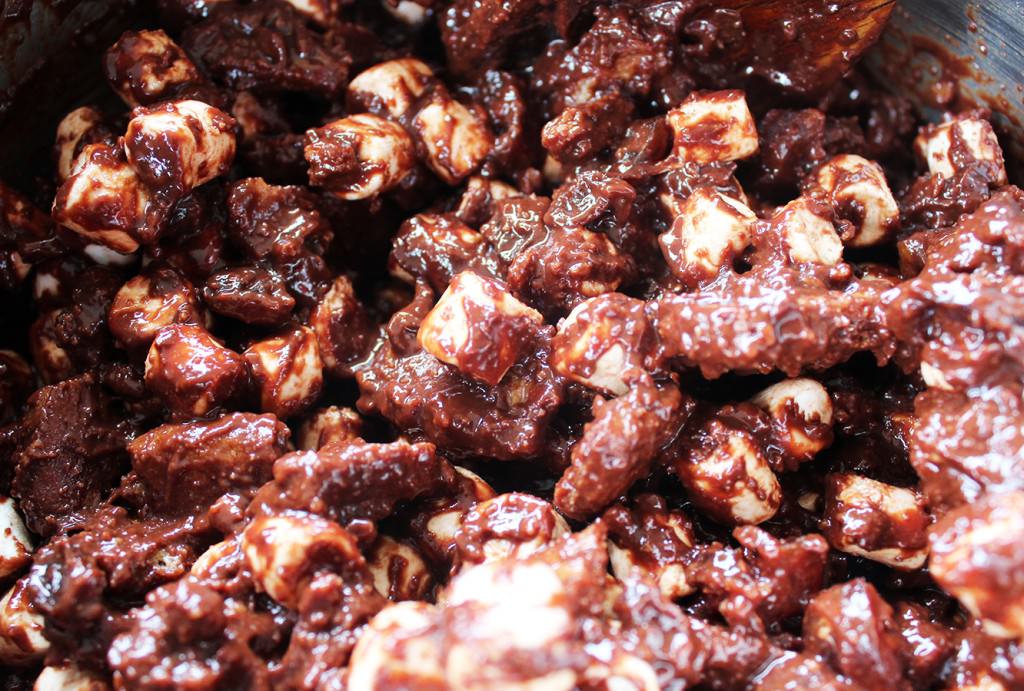
The chocolate mix should now have cooled sufficiently to not melt your marshmallows to mush.

Stir them in…you will still have to work fairly quickly.

Rocky-Road-Easter-Nests-8

Step six

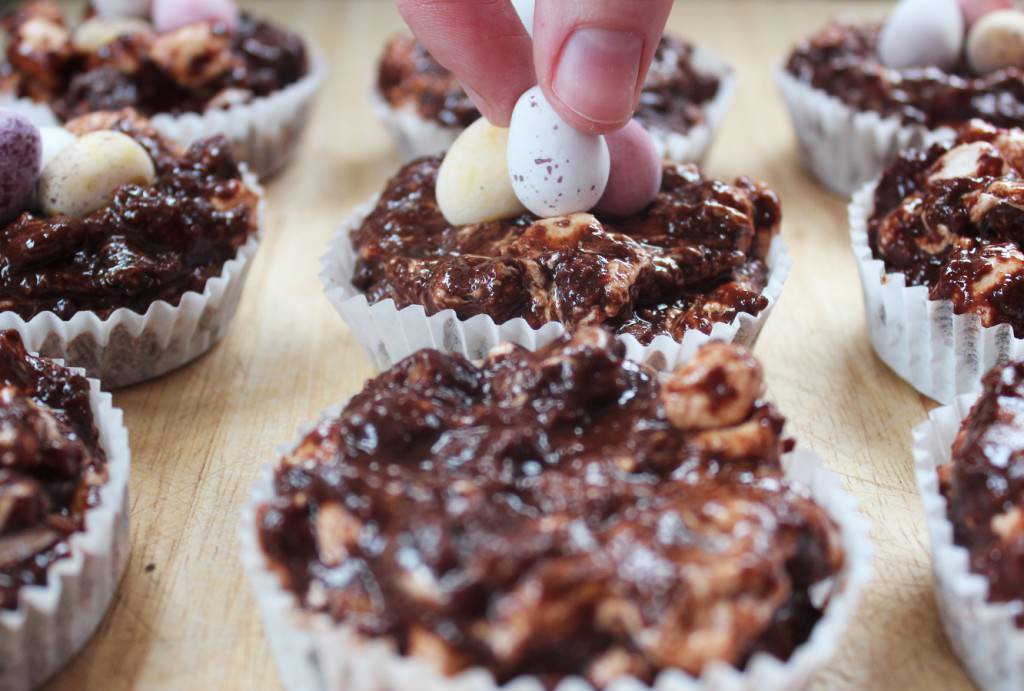
Spoon mixture into cases and stick eggs in the nests. Don’t be tight, give at least three to each one.

Step seven

Put in the fridge to set.

Dust in icing sugar before serving, you can afford to be a bit more liberal than I was. After I’d taken the pictures I dropped the spoon on one and it actually looked a lot better with a heavier dusting.

Rocky-Road-Easter-Nests-10

Rocky-Road-Easter-Nests-9

Step eight

Get chubby.

Have a great week guys!

Oh, and you may have noticed I’ve moved my site – I’m trying to figure out what impact that has on the people who were already following me, I’ll keep you posted!

A little box of joy

In case you hadn’t noticed, Easter is fast approaching. I’m a big fan of Easter, and Spring in general. This year I’m heading to Germany to see some very wonderful people and I can’t wait.

In the meantime though, I’m busy covering everything in mini eggs and thinking up yummy Easter treats for you to get chubby eating. You’re welcome.

This one is great for kids and would make a lovely little present for the relatives or anyone else you might be seeing over the next few weeks.

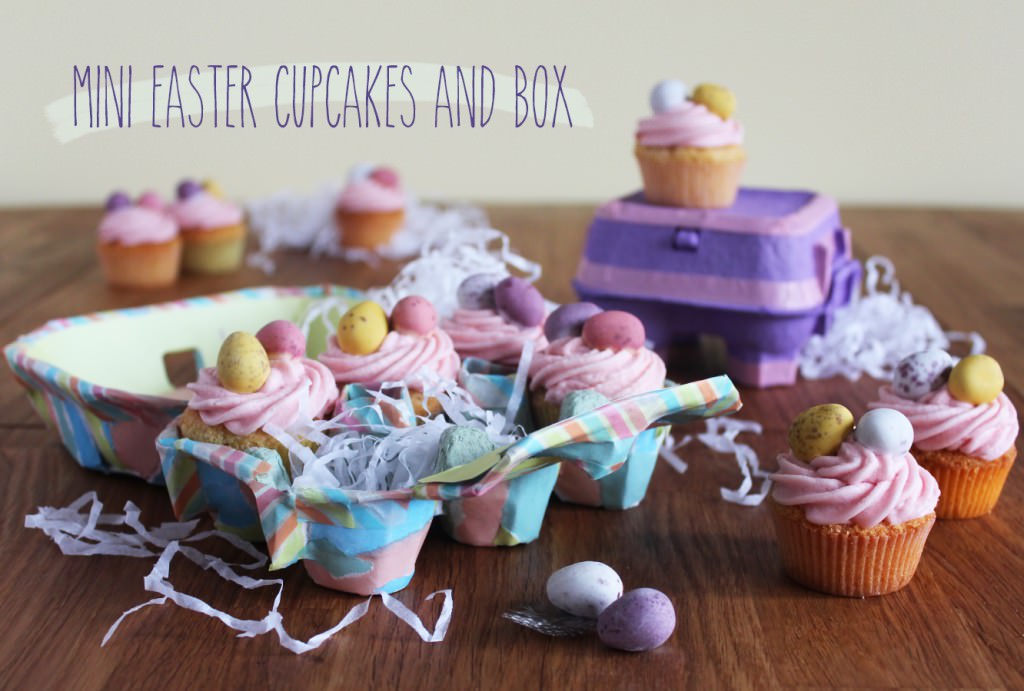
Mini-Easter-Cupcakes-Recipe-1


You will need

An egg box

Coloured paper/paints

PVA glue

For the cakes

4.5 oz/125g Self raising flour

4.5 oz/125g Butter/margarine (I use stork for most cakes)

4.5 oz/125g Caster sugar

2 eggs

1tsp Vanilla extract

For the decoration

4.5 oz/125g Unsalted butter (room temperature)

2 tbsp Full fat milk

12 oz/350g Icing sugar

Food colouring

1 tsp Vanilla extract

Mini eggs

Mini cupcake/muffin cases

Makes 24

Mini-Easter-Cupcakes-Recipe-2

Step one

Decorate your egg box. This post is just a suggestion, you can paint it, or cover it in glitter, or stick cotton wool balls all over to make it look like a sheep. Your only limit is your imagination, and the fact it’s an egg box…

Rip paper into strips. The thinner the paper the better with this really, as egg boxes, I discovered, are rather lumpy, so thicker papers don’t mould around them so well.

Mix PVA and water together in a bowl that you don’t mind getting temporarily covered in glue. You want about 3 parts PVA to 1 part water (otherwise the egg box will get soggy).

Paint the glue mix onto the surface of the box and stick paper on top. Cover each strip of paper with more glue mix as you go. This is where it all gets very Art Attack. Neil Buchanan made it look so easy…

Keep going until the whole outside is covered and leave somewhere to dry. Make sure you do the box bit a good few hours in advance of using it, ideally the day before.

Mini-Easter-Cupcakes-Recipe-3

At this stage mine looked like the above, and I still thought it was a bit messy.

Mini-Easter-Cupcakes-Recipe-4

Step two

Line the edges with washi tape. I did this to neaten mine up mainly, you possibly won’t have the same issue.

You might notice the purple box in the background…thought I would include a cheats option. That’s the box from those Cadbury’s Egg n’ Spoon things. They are amazing in case you were wondering, and now you have an excuse to buy a pack.

Cut the central doo-dahs so they are level with the rest of the sides.

Line the lid either using the same technique as before, or with cut paper and double sided tape.

Mini-Easter-Cupcakes-Recipe-5

Step three

Time to start on the cakes. I use an electric whisk to make cakes but a wooden spoon and some elbow grease is just as good.

Cream together the margarine and caster sugar. If you’re using butter bring it to room temperature before doing this. You want it to be fluffy and light like the image on the right. Honestly, Stork is the way forward for this. Cheaper too.

Mini-Easter-Cupcakes-Recipe-6

Step four

Quickly whisk/beat in the eggs and vanilla extract and then add the flour.

Stir until you have a smooth thick batter.

Heat oven to gas mark 4/180 C/350 F

Mini-Easter-Cupcakes-Recipe-7

Step five

Fill cake cases with mixture. You want them to be about two thirds full, a few of mine were too full, so if in doubt look at the above and go for a bit less!

Step six

Bake for  about 30 mins on gas mark 4/180 C/350 F. My oven is a touch special so keep an eye on yours, timings may vary.

Leave to cool completely before icing.

Step seven

Whisk together the unsalted butter, icing sugar, milk, and vanilla extract. Add food colouring of your choice.

Now, I don’t usually use a recipe for this so don’t shy away from adding a bit more icing sugar if your icing is too wet or a splash more milk if too dry.

Mini-Easter-Cupcakes-Recipe-8

Step eight

Ice your cakes and pop two mini eggs on top.

I won’t give too many piping tips as I’m still getting the hang of things myself. The general rule though is to keep the piping bag at quite an upright angle and apply even pressure.

Mini-Easter-Cupcakes-Recipe-9

Step nine

Put them in the egg box and make someone’s day that little bit more joyful.

Mini-Easter-Cupcakes-Recipe-10

Fudge for mama

Hello there, apologies for the short blogging hiatus; life happens sometimes, but I appreciate you sticking with me.

This weekend I went to stay with my friend Beth before she goes on her trip. Being as Mother’s Day is so near (this Sunday for those of you in the UK), B and I thought we would make some fudge for our mummys.

Whether or not you have Mother’s Day coming up, I urge you to have a go with making fudge. It’s a bit of a rascal but there’s lots to feel good about when you get it right, I’ve made quite a lot in my life time and so hopefully some of the below will help you avoid some of the fudging pitfalls.

Just a heads up, the batch below is fairly large, so unless you’re making it with a friend or for your Grandma too, you may want to cut the quantities in half.

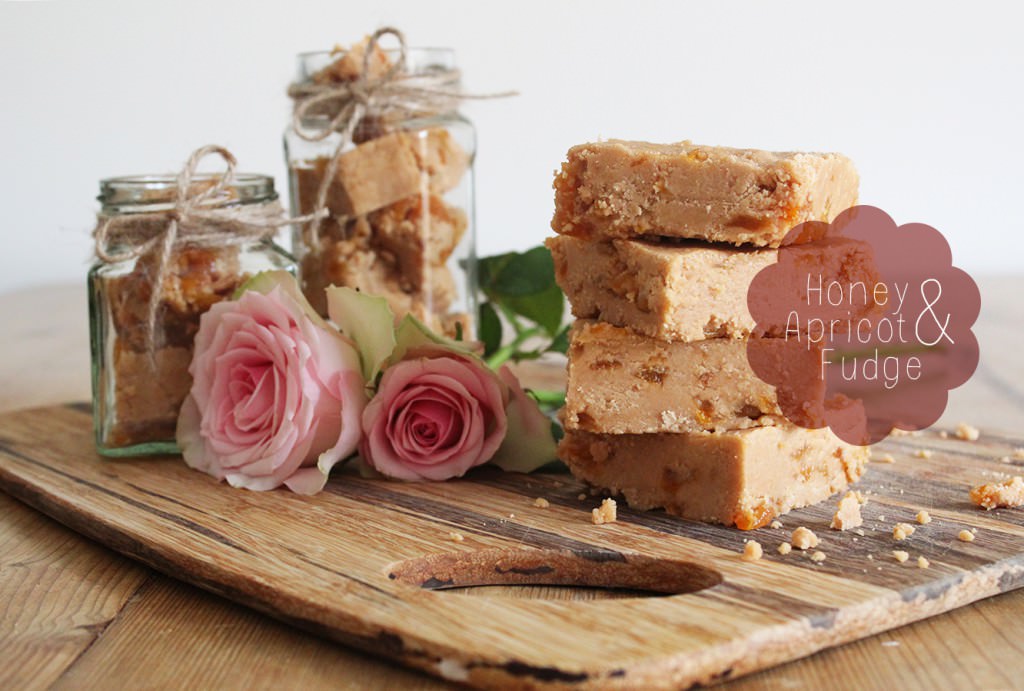
how-to-make-honey-fudge-8

how-to-make-honey-fudge-1

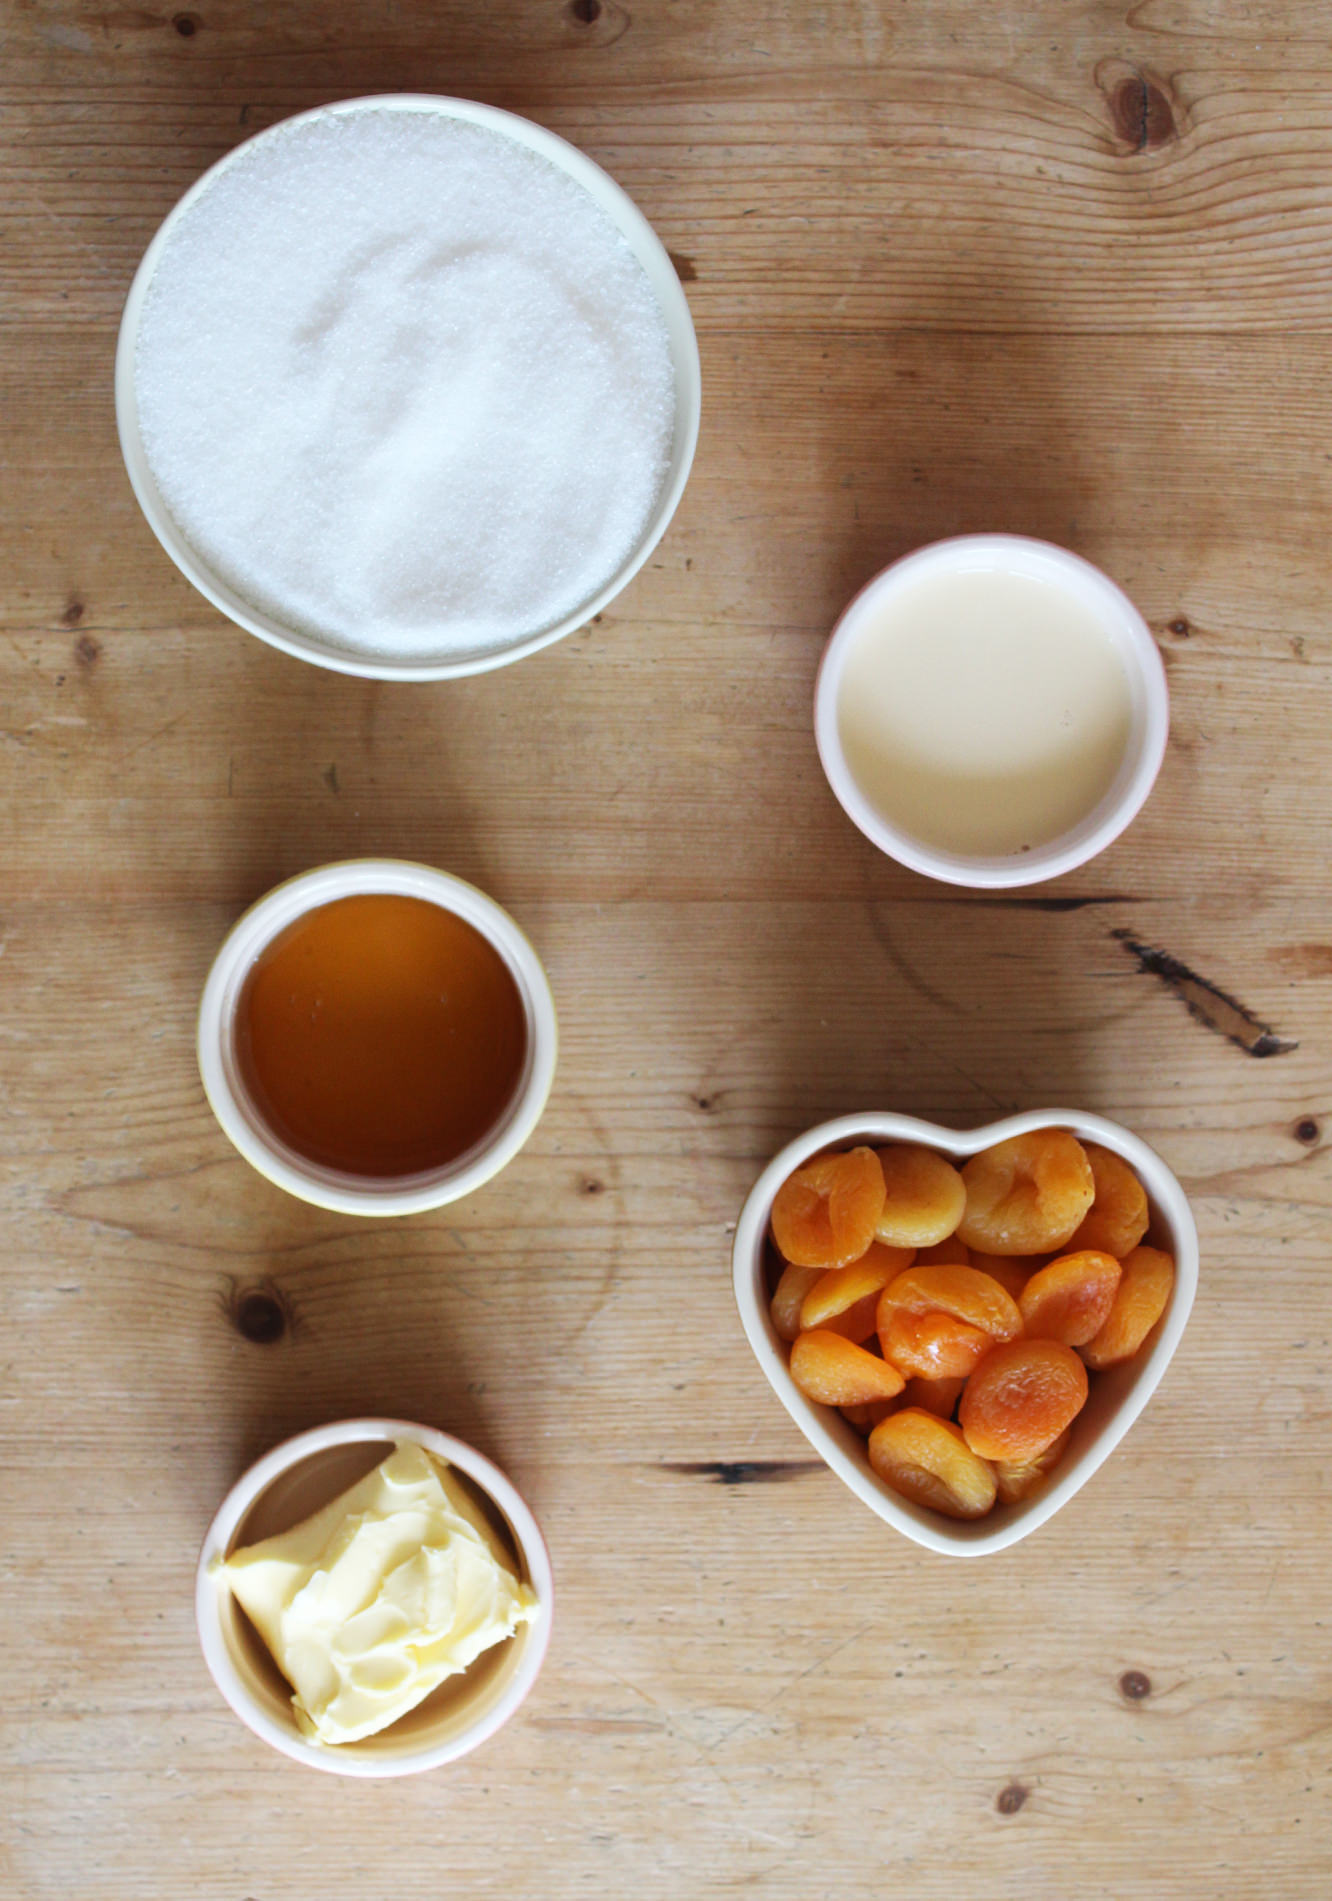
You will need

1kg/2lb Granulated sugar

280g/10 floz Evaporated milk

120g/4 oz Clear honey

120g/4oz Salted butter

250g/9oz Dried apricots

1tsp of Liquid glucose (if you have it – not essential – but great)

Tray bake tin lined with greaseproof paper

Sugar thermometer (essential)

how-to-make-honey-fudge-2

Step one

Combine all the ingredients (minus the apricots) into a large heavy bottomed pan.

At home I use the pressure cooker, and at Beth’s we discovered this casserole dish worked pretty well. The pan should be quite large as the mixture will bubble up, and the sturdier it is the less likely your fudge is to scorch.

how-to-make-honey-fudge-3

how-to-make-honey-fudge-4

Step two

Melt ingredients on a reeeaaallly low heat.

Seriously. As low as your cooker goes. Impatience will not help you here.

This ensures all the sugar is dissolved before it boils, and should help to prevent sugar crystals forming.

You should stir gently to stop the mixture burning on the bottom of the pan. Pop your thermometer in at this point too.

This was the first outing of my rather swish thermospatula, above, so I could stir and measure the temperature at the same time. I know, I need to get out more.

how-to-make-honey-fudge-5

Step two and a half

Keep the fudge on a low heat, stirring gently.

It will begin to boil as above. Resist the urge to put your face in it, as good as it smells, that won’t end well for you.

This is where the thicker your pan the better, as this boiling stage should take around 10-15 minutes ideally. You want your fudge to reach soft ball stage on the thermometer or 115 degrees. Patience is the key here. You should the fudge thicken up and get darker evenly.

Step three (optional)

Once your fudge has reached 115 degrees pour immediately into an empty saucepan. Some fudge people will disagree with me here, as faffing about with fudge can cause crystallisation in the sugar. However, I’ve found that if I leave it in the original pan it carries on cooking and can become brittle. The trick is to do it straight away and don’t scrape the pan out or stir it once transferred.

Now, DO NOT TOUCH. Don’t allow pets, children or interfering family members near the fudge mix for at least half an hour. Preferably you want to wait until the thermometer hits about 50 degrees, but when I did this for a craft fair a few years ago I didn’t have the time to hang around, and found that half an hour was generally enough.

how-to-make-honey-fudge-6

Step four

While you wait, use scissors to chop the apricots into tiny pieces. These are an optional addition and can be substituted depending on your mum’s tastes. You may want to add a different dried fruit, some chopped nuts, or chocolate instead.

how-to-make-honey-fudge-7

Step five

Get a wooden spoon, summons all your arm power, and beat the mixture. If you have a stand mixer, you’re laughing at this stage, because it can take up to 15 mins sometimes…

About 5-7 minutes into your beating add the apricots (warning, if using chocolate chips you want to add them as late as possible so they don’t melt completely).

Keep going until the fudge becomes very thick, you still need it to be soft enough to spoon into the tin, so try not to take it too far. I didn’t have the chance to photograph this, so you will need to take your best guess. Here’s a clue though, your arm will be hurting you by now.

Step six

Spoon into your lined tin and leave to set.

how-to-make-honey-fudge-9

Ta da! You’ve done it!

Churronimoooo

Hmm, blogging Monday seems to gradually becoming blogging Tuesday, apologies chaps.

I’ve been on my travels up and down the country recently (well, mainly side to side actually). So not a huge amount of crafting has been a-happening.

One such weekend was spent with some of my bests in NW London, and at brunch time I took my camera out and started snapping. We decided that churros bites  were the order of the day (if you don’t know what churros are, then you’ve not really lived yet, fact).

None of us had made them before and at least one of us was terrified by the prospect of a pan fire (no deep fat fryer for us). It was actually gob-smackingly easy and very fun, so go on, have a go.

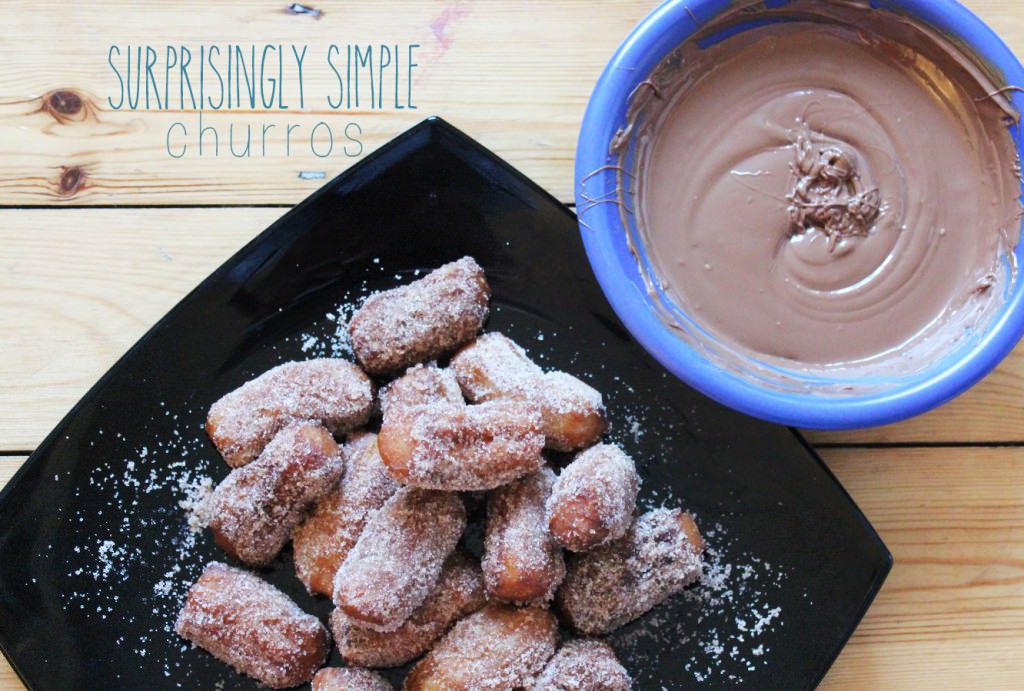
how-to-make-churros-1

You will need

1 cup Water

2 and 1/2 tbsp Caster sugar (plus some for coating)

1/2 tsp Salt

1 cup Plain flour

1L Vegetable oil

Ground cinnamon (for coating)

100-200g Chocolate (for dipping)

Serves 4 (recipe sourced at allrecipes.com)

how-to-make-churros-2

Step one

In a saucepan combine the cup of water, 2 and 1/2 tablespoons of sugar, salt, and 2 tbsp vegetable oil.

Heat over a medium heat until sugar has dissolved and mixture comes to the boil.

how-to-make-churros-4

Step two

Take water off the heat and pour in a cup of plain flour.

how-to-make-churros-5

Step two and a half

Stir stir stir.

The mix will a) get too heavy for a whisk very quickly b) get very lumpy very quickly c) look plain wrong.

Persevere though, if you keep mixing you will manage to smooth it out considerably in a matter of minutes. I promise.

how-to-make-churros-6

Step three

Heat the rest of the oil in a sizeable pan. SLOWLY.

You want it to be on no more than a medium heat the whole time, and this will take a while. You know the oil is at the right temperature when you drop a little mixture in and it bubbles and floats rather than sinking to the bottom.

how-to-make-churros-7

Step four

Fill a large piping bag with the mix and squeeze to the end.

A star shaped nozzle will give you the most authentic looking churros, but I would advise a fairly small one. Ours was the biggest in the pack, and the chunkiness turned our churros into churros bites fairly early on…we didn’t want to end up with only 4 massive ones…less space for the chocolate that way.

how-to-make-churros-8

Step five

Pipe into the pan. We had one person piping and another using a pair of scissors to snip the mixture in at a desired length. Manageable with one person though I suspect – if you don’t have a helper.

This is where you need to keep an eye on the heat because if you’re not careful you risk cooking/burning the outside and then having uncooked dough within. We learned by doing on this one!

So keep the pan on a low-medium heat and just cook them by eye. Even the most novice chef can see when one of these is ready.

how-to-make-churros-9

Step six

Lift the churros out of the pan and drain on a plate covered with a few sheets of kitchen roll.

A slotted spoon would be ideal for this if you have one.

how-to-make-churros-10

Step seven

Cover another plate in caster sugar and cinnamon (adjust quantities to taste), and roll drained churros around until coated in the mix.

how-to-make-churros-11

Step eight

Stack em high!

how-to-make-churros-12

Step nine

While the churros are cooking, draining, and being coated, task somebody with melting the chocolate.

Do this in the microwave and don’t get impatient. A 30 second blast followed by some 10 seconds with stirring in between will do the trick.

how-to-make-churros-14

Step ten

Eat until you can’t move.