In England we tend to leave Santa a sherry or a brandy and a mince pie. I’ve heard that in some Scandinavian countries he gets ‘treated’ to porridge…lucky guy. Well this post is a nod to our North American friends from whom Santa receives milk and cookies. I decided to jazz up the traditional a little, after all, you hard working parents deserve a little more than a glass of milk on the 24th.
I should start off by saying that the recipe leans more towards a sort of whoopie pie consistency than a cookie, a whookie if you’d like. Perhaps if you wanted to commit to whoopie pies you could sandwich them with the salted caramel buttercream I made a couple of months back.
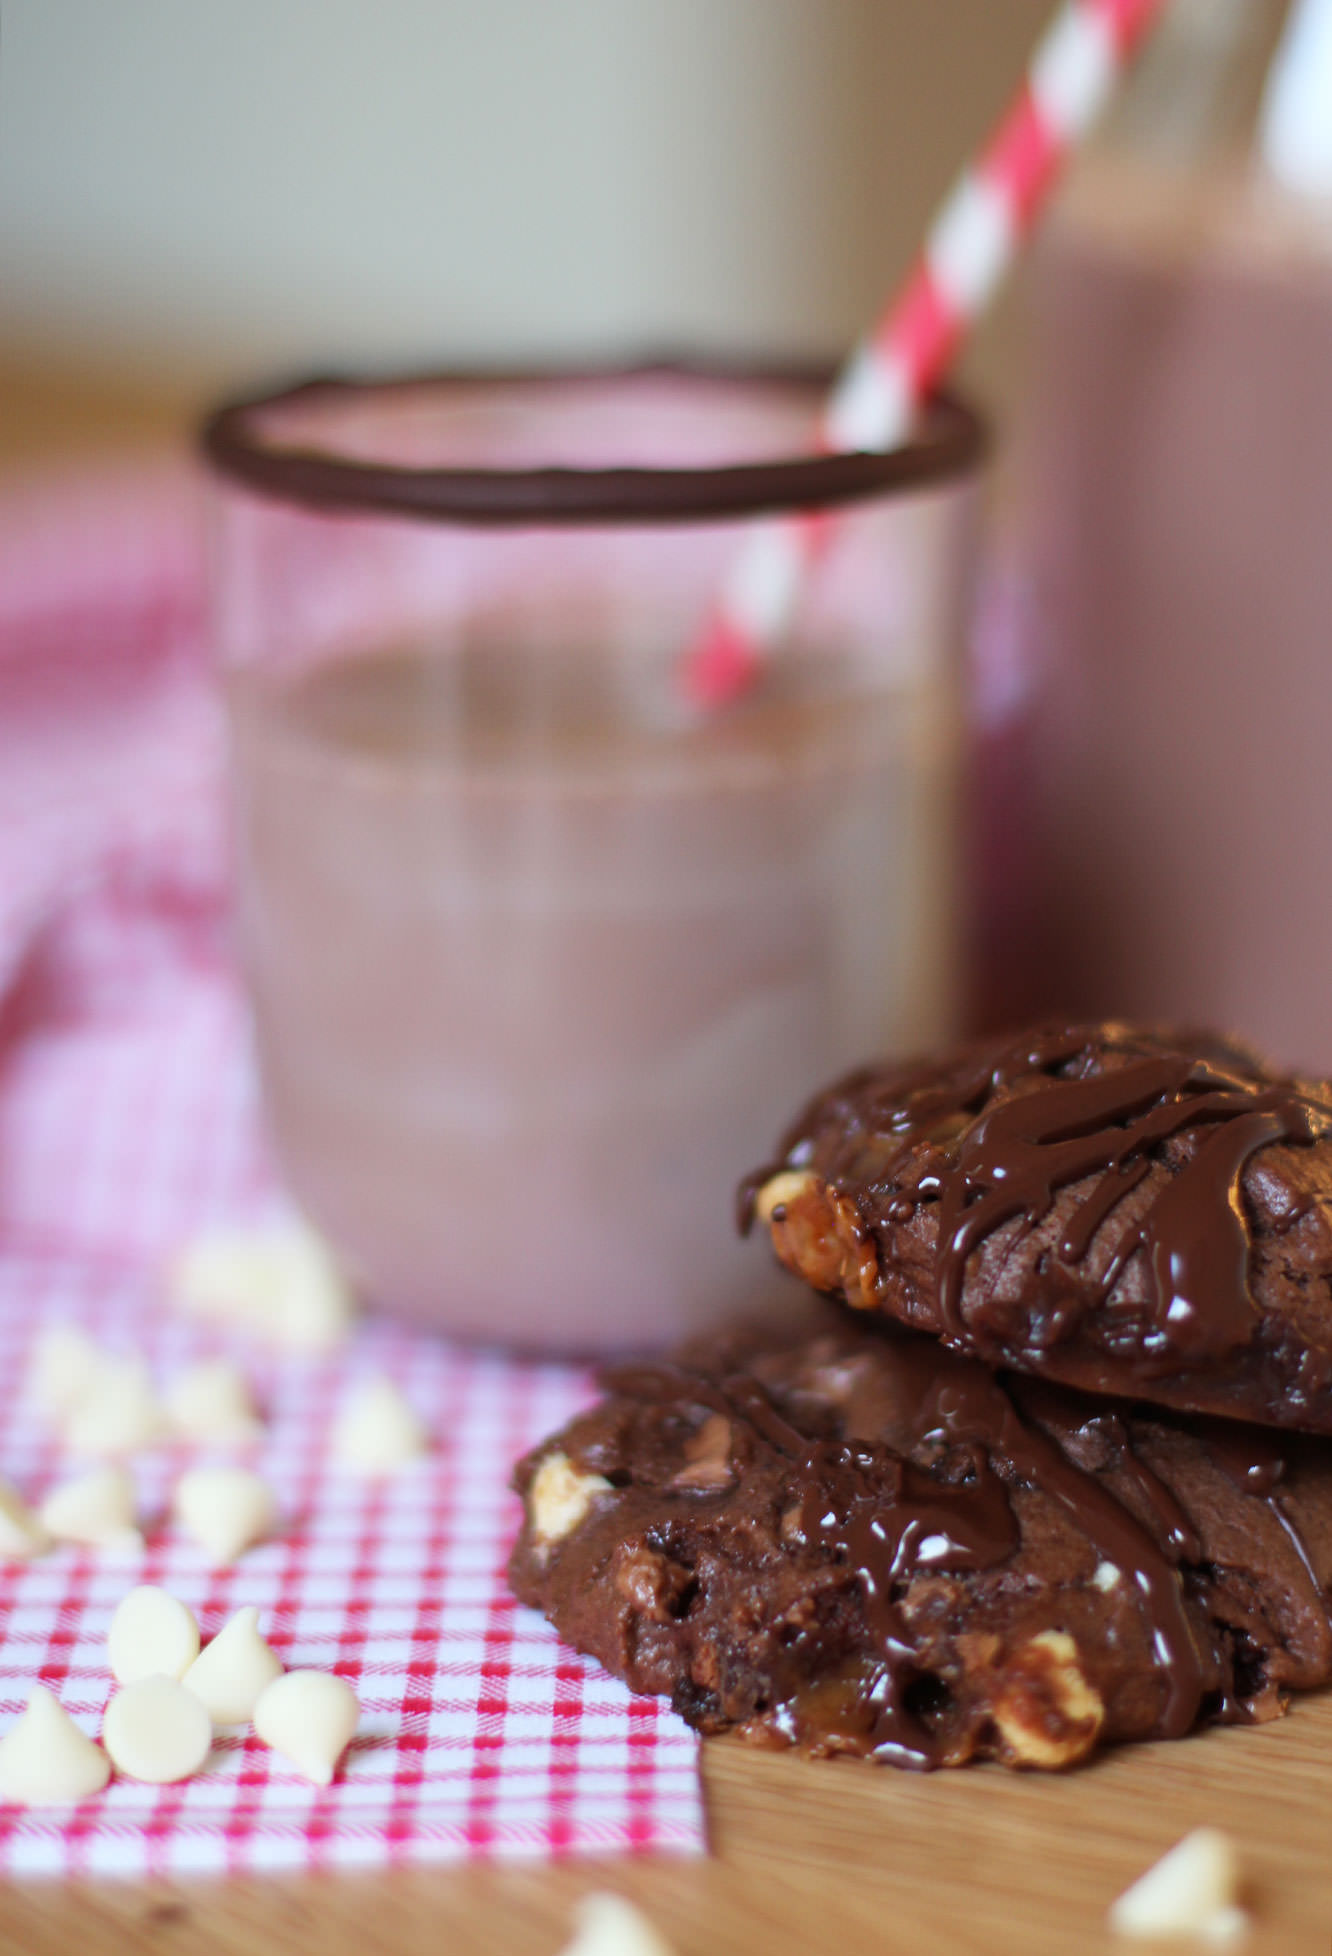
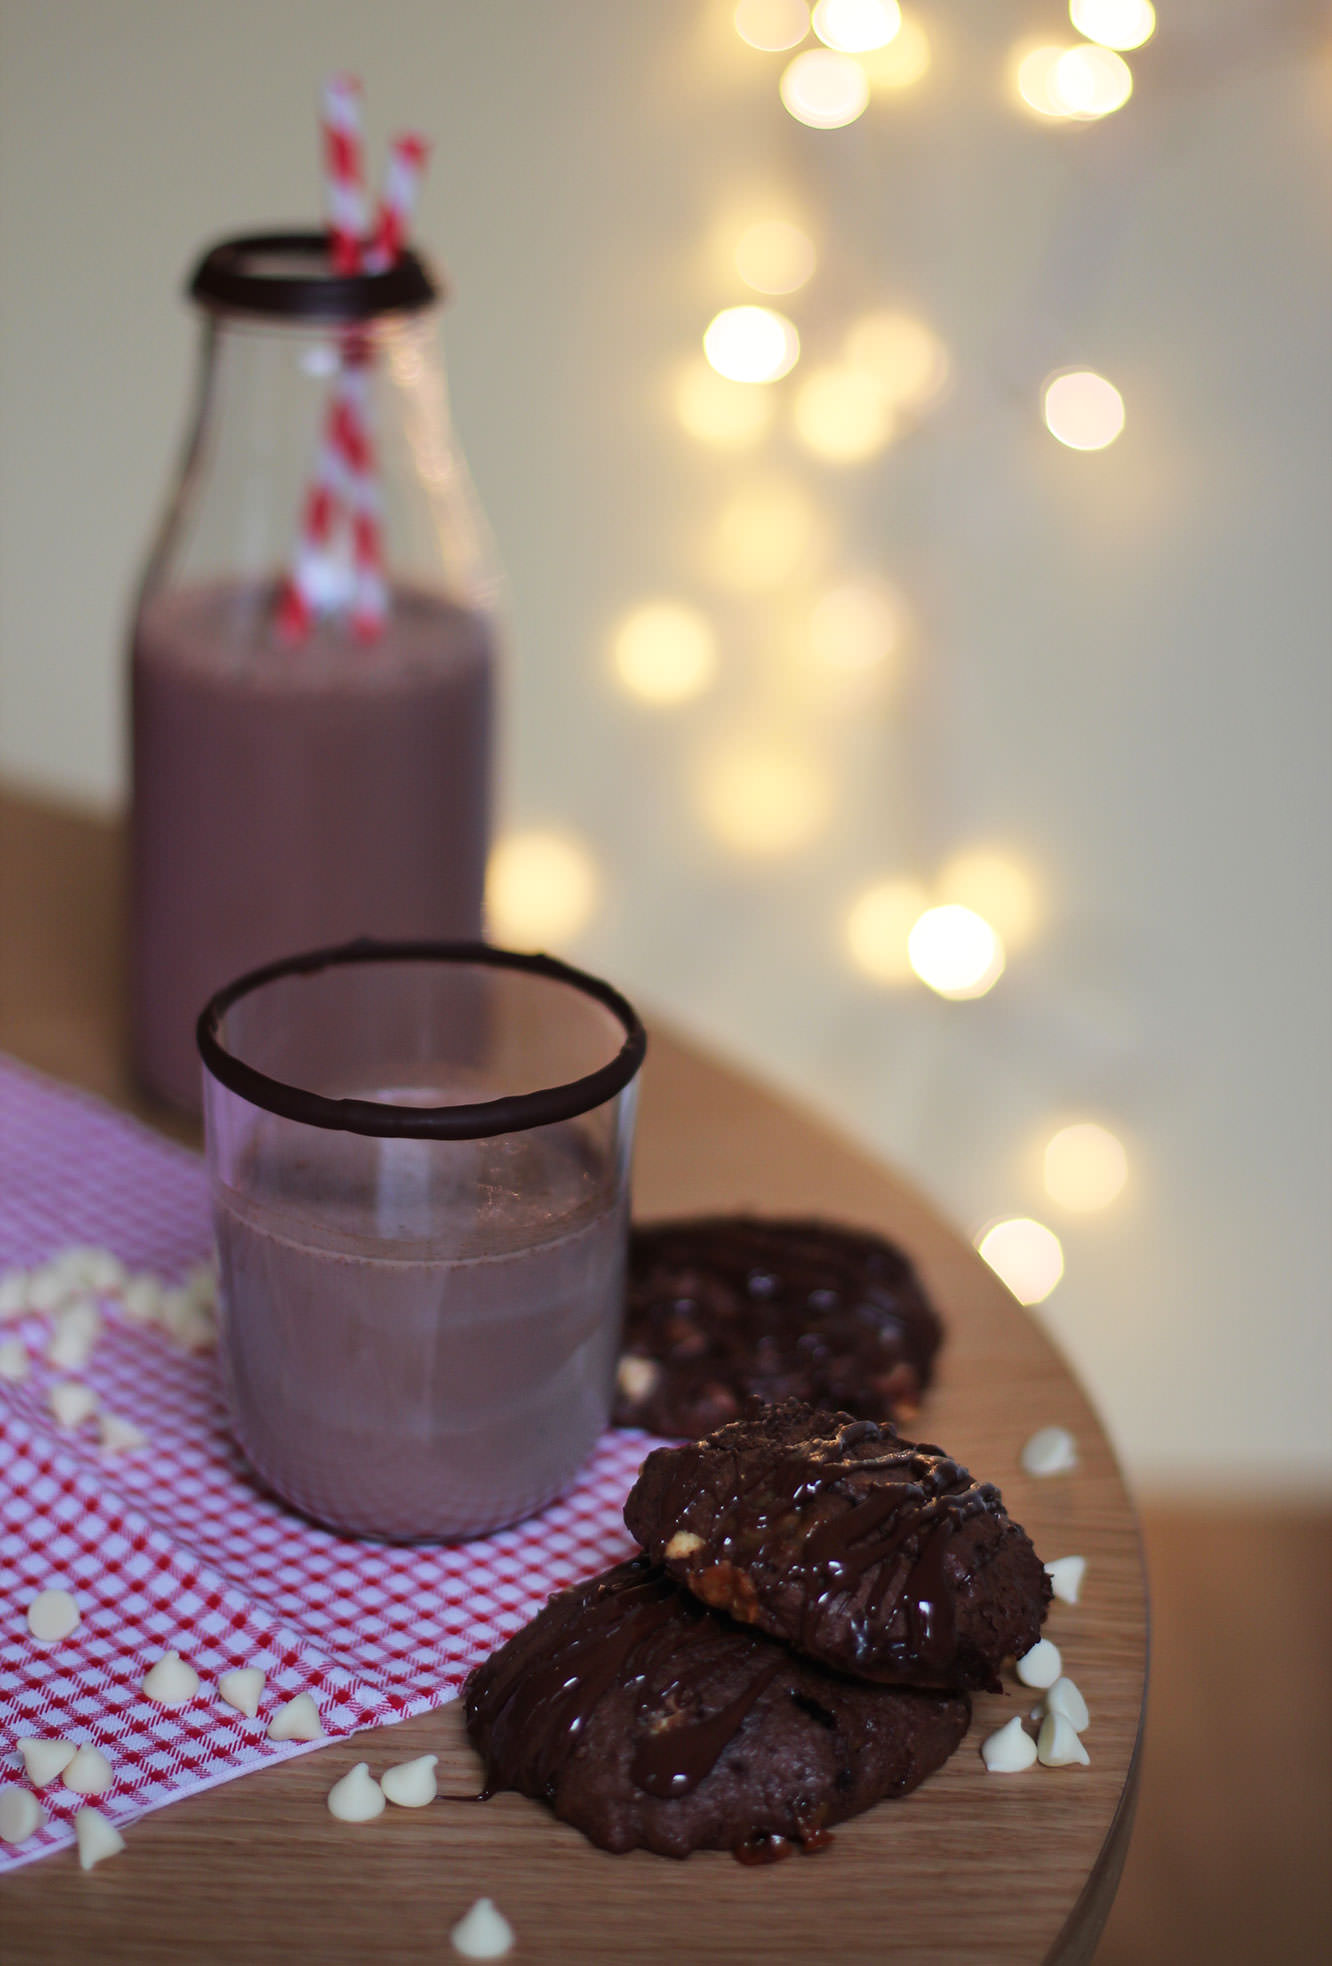
Without further ado here’s an easy Bailey’s (Irish cream) cocktail (which is more like a pudding really) and triple chocolate Mars Bar whookies.
You will need
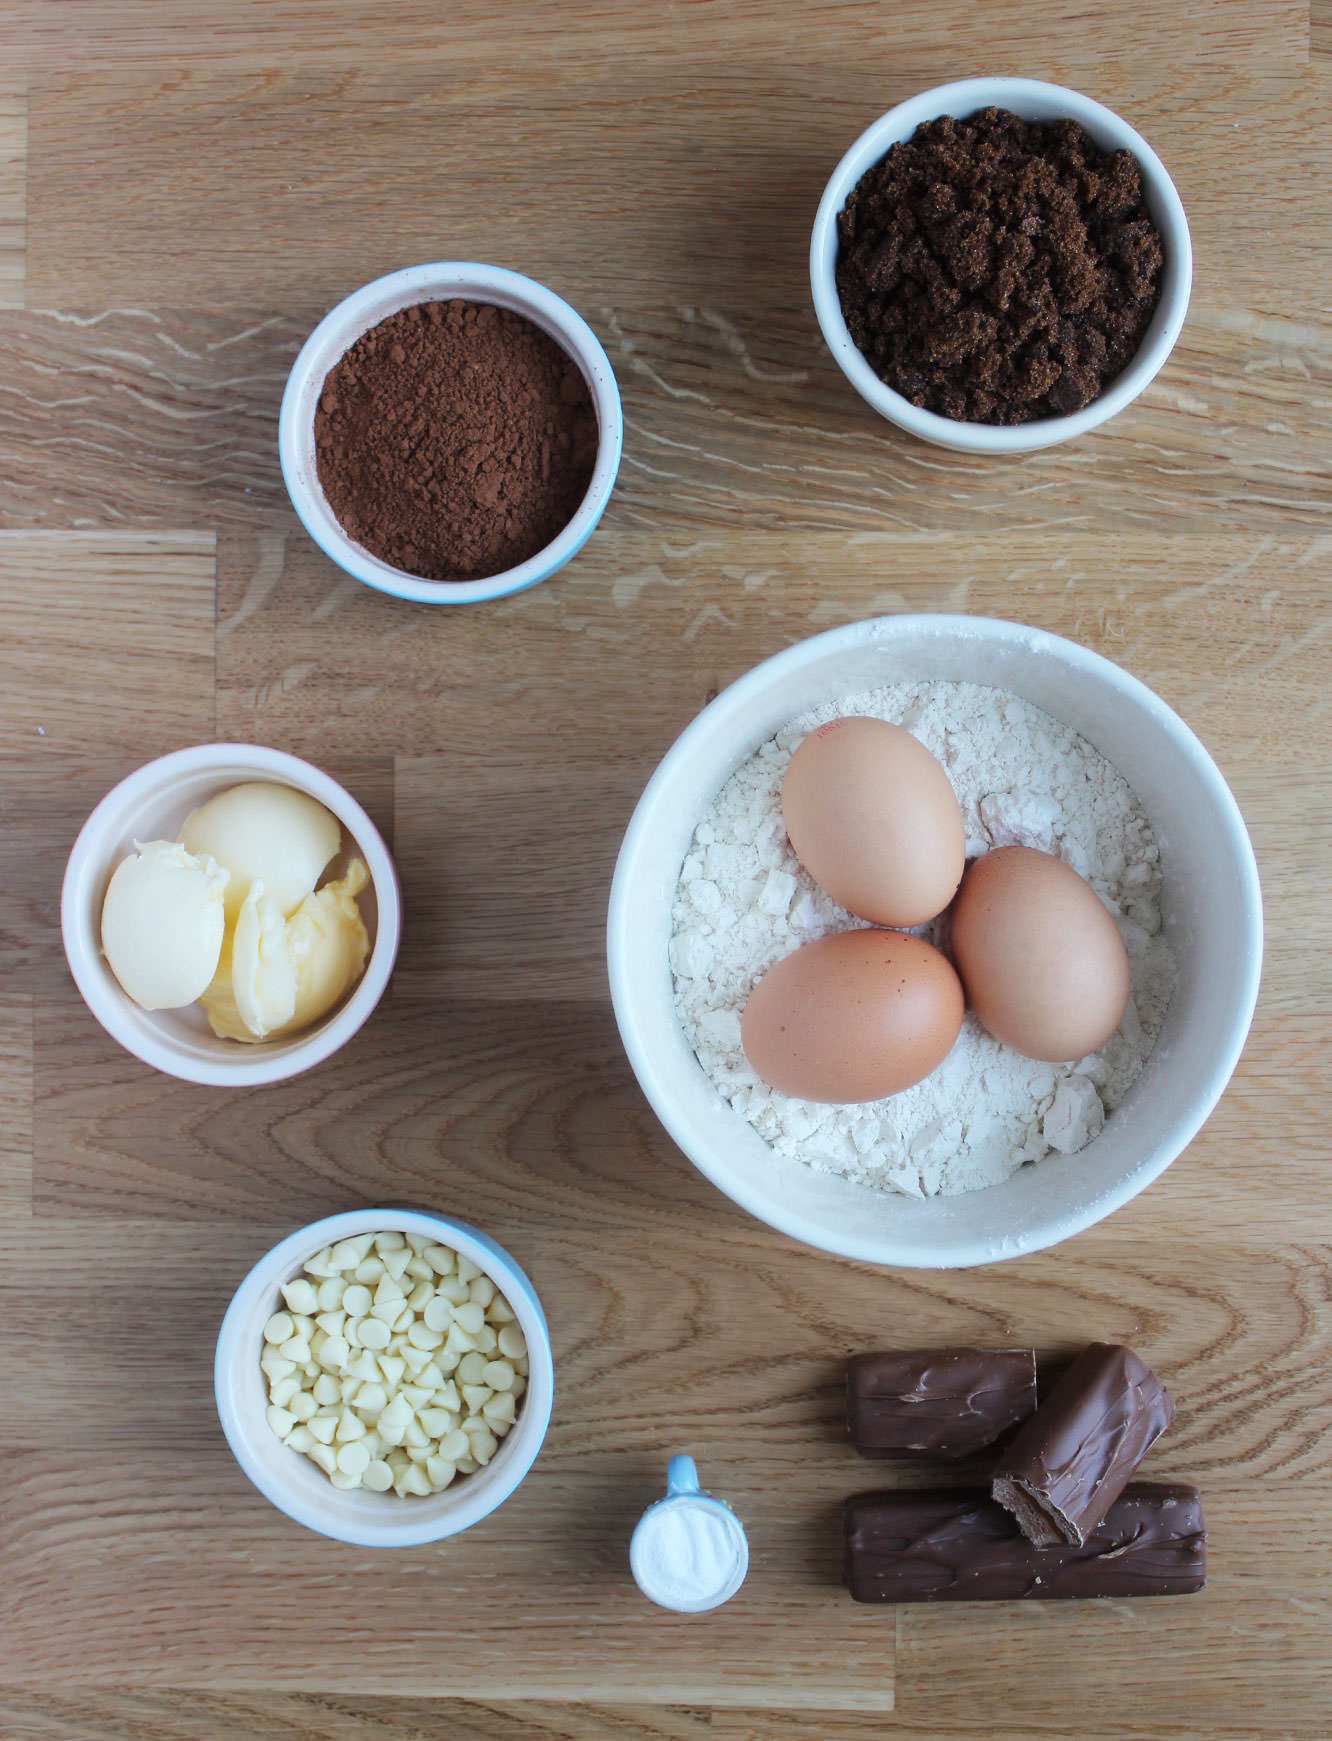
260g/9 oz Plain flour
150g/5.5 oz Soft dark brown sugar
100g/3.5 oz Unsalted butted
100g/3.5 oz White chocolate chips
40g/1.5 oz Cocoa powder
50-100g/2-3.5 oz Dark chocolate
3 Eggs
3 Mars Bars
1.5 tsp Baking powder
1 tbsp Full fat milk
For the Bailey’s cocktail
Bailey’s Irish Cream
Chocolate milk
50g/2 oz Dark chocolate
Rum/Brandy if you have some (I went without)
A sprinkle of cinnamon and nutmeg
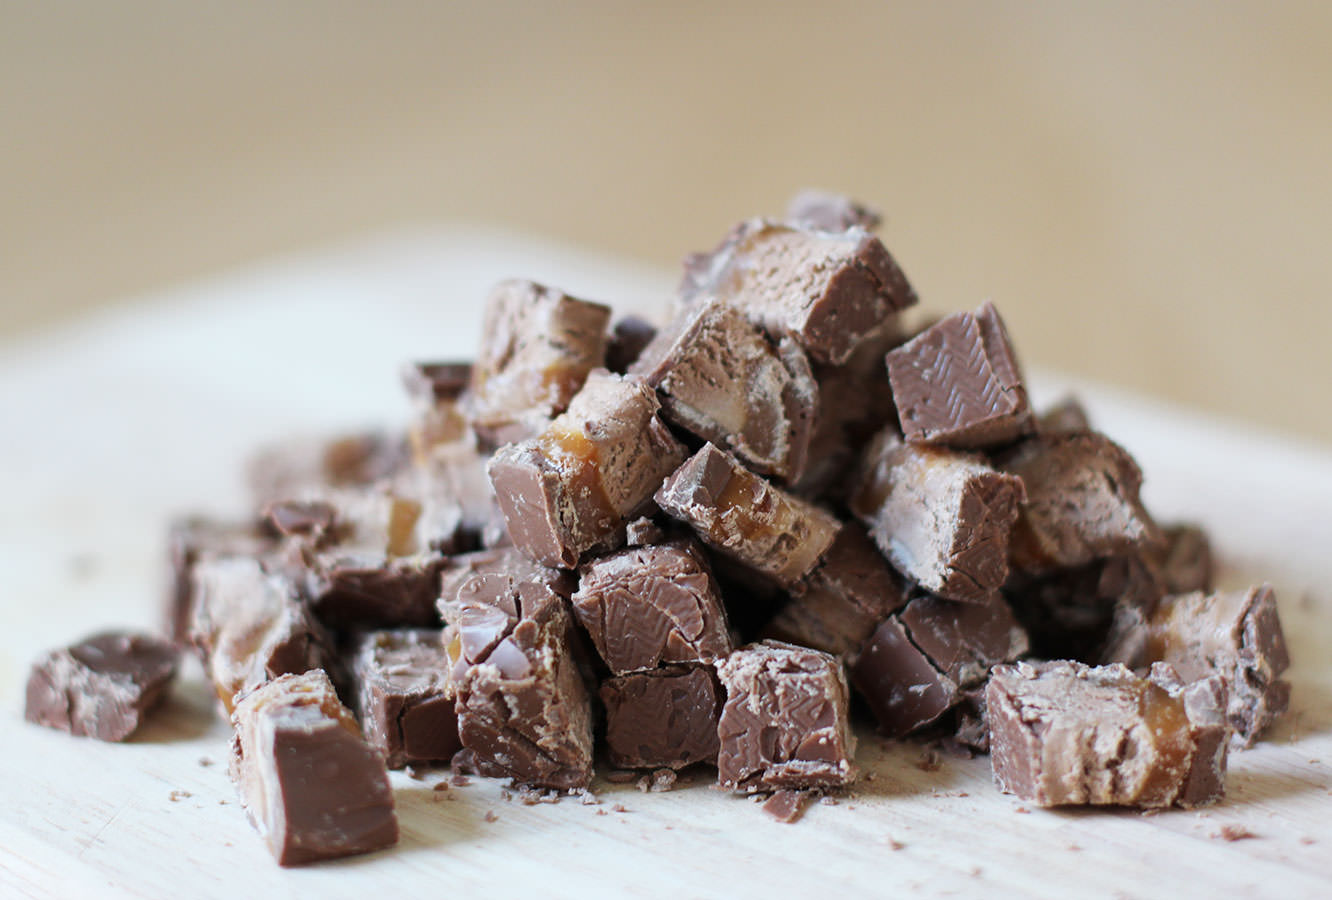
Step one
Chop the Mars bars into small chunks.
If you, like me, can’t control yourself around chocolate, you might want to add an extra one to the mix. There’s just something about chopped up Mars bar that is excessively moorish.
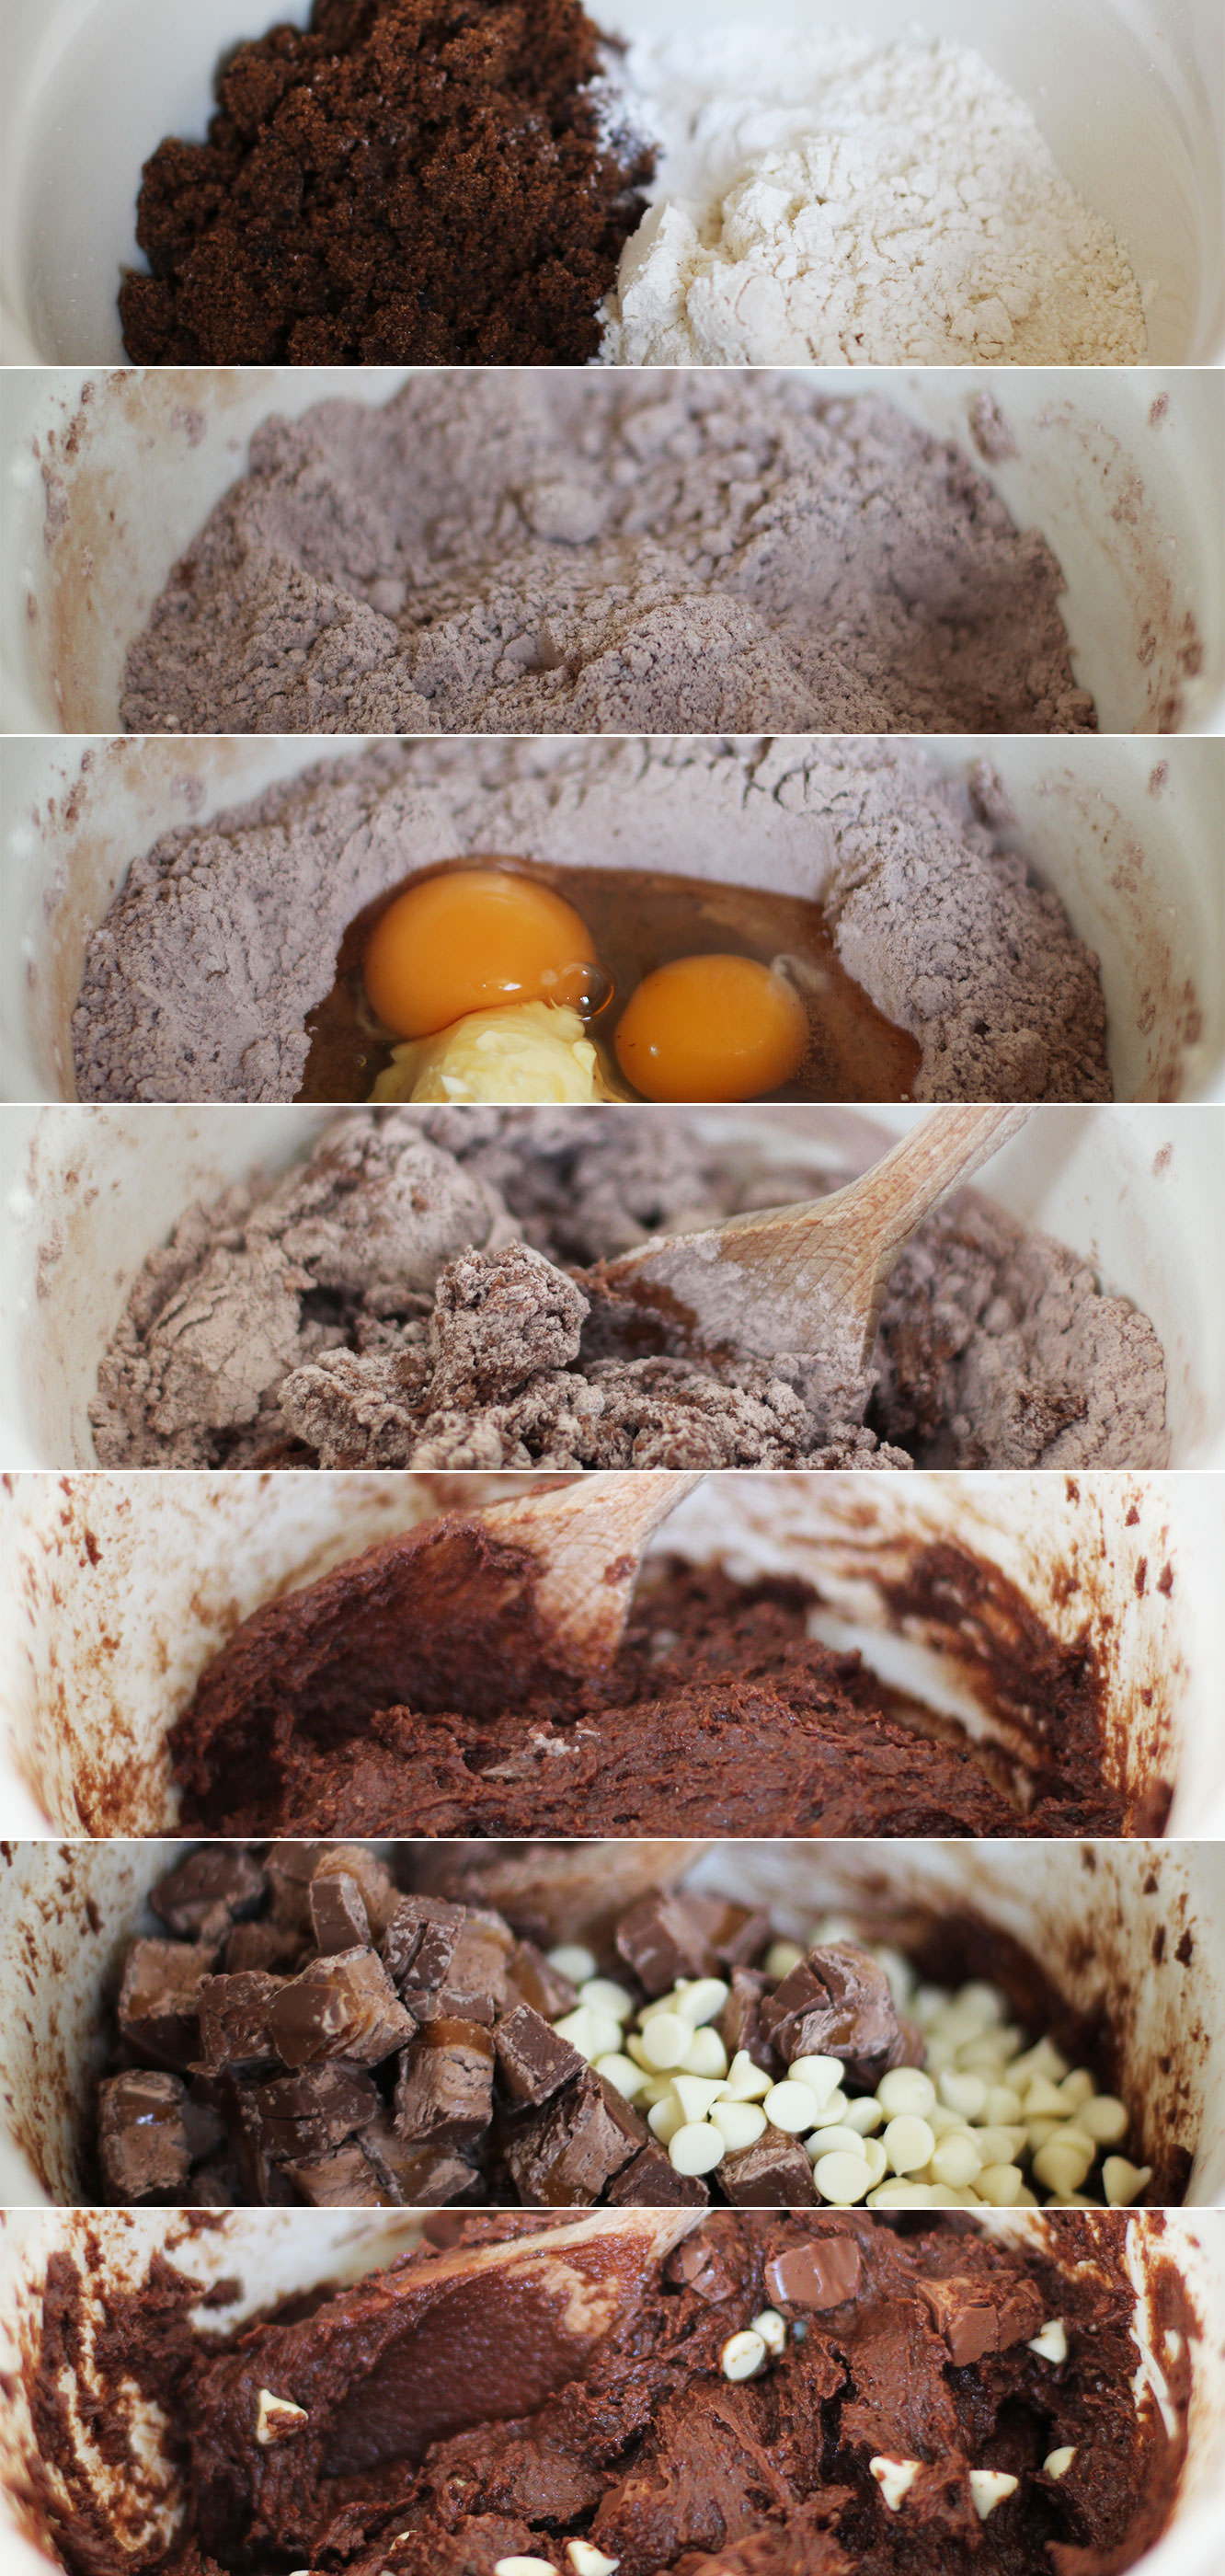
Step two
Combine all the dry ingredients (minus the chocolate) in a large bowl.
Step three
Make a well in the middle and add the eggs, milk and butter. Stir to combine. Ideally your butter will be room temperature, otherwise you’ll be mixing for a while.
Step four
Add the white chocolate and Mars bar and mix again until the chips and chunks are evenly distributed.
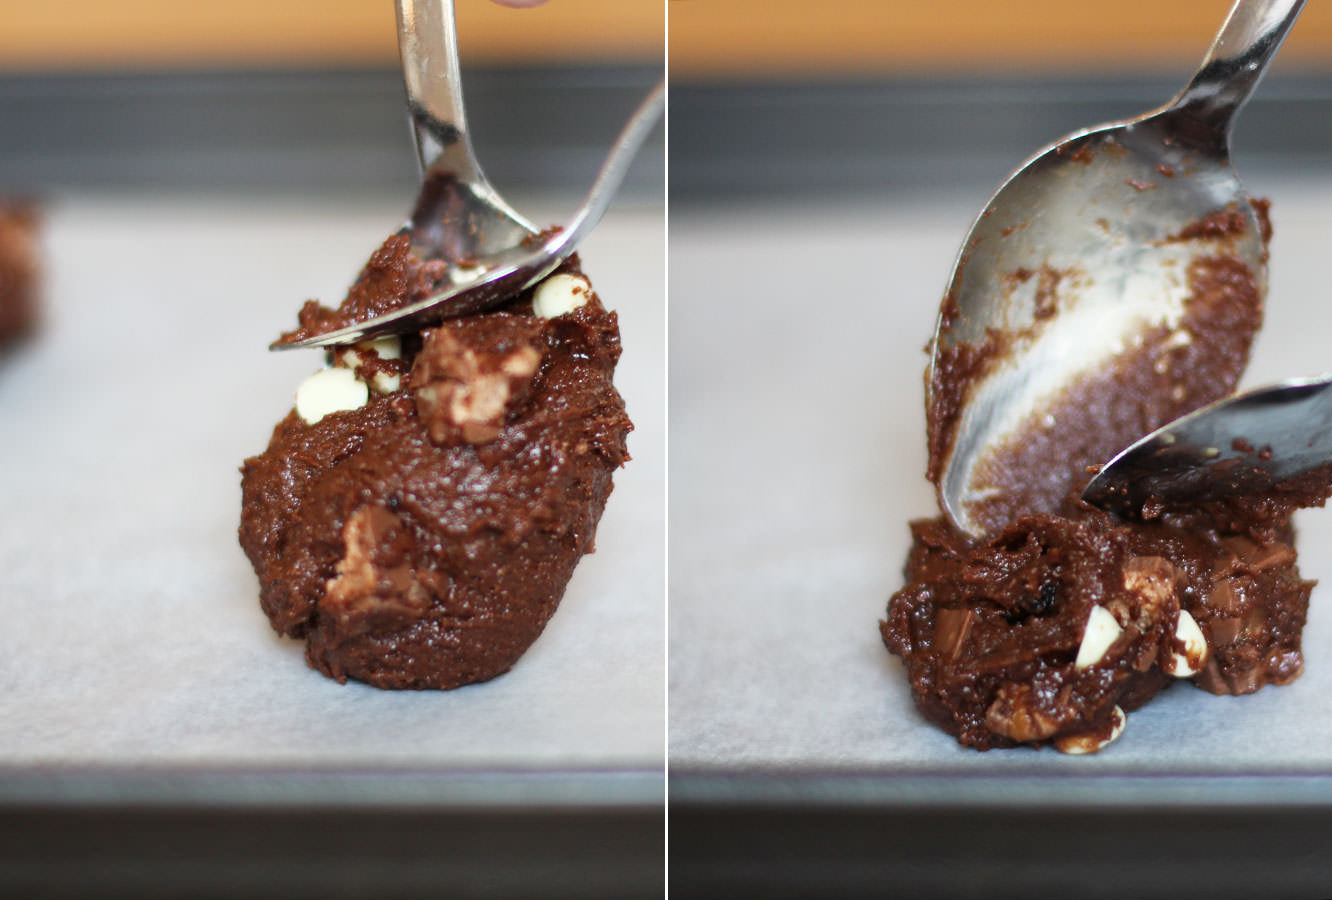
Step five
Drop dessert spoonfuls of the mixture onto baking trays lined with greaseproof paper. They won’t spread too much so flatten down a bit.
Step six
Bake on 180C/gas mark 4/350 F for about 15-20 minutes.
Step seven
Leave to cool and then melt the dark chocolate and drizzle over the top.
Step eight
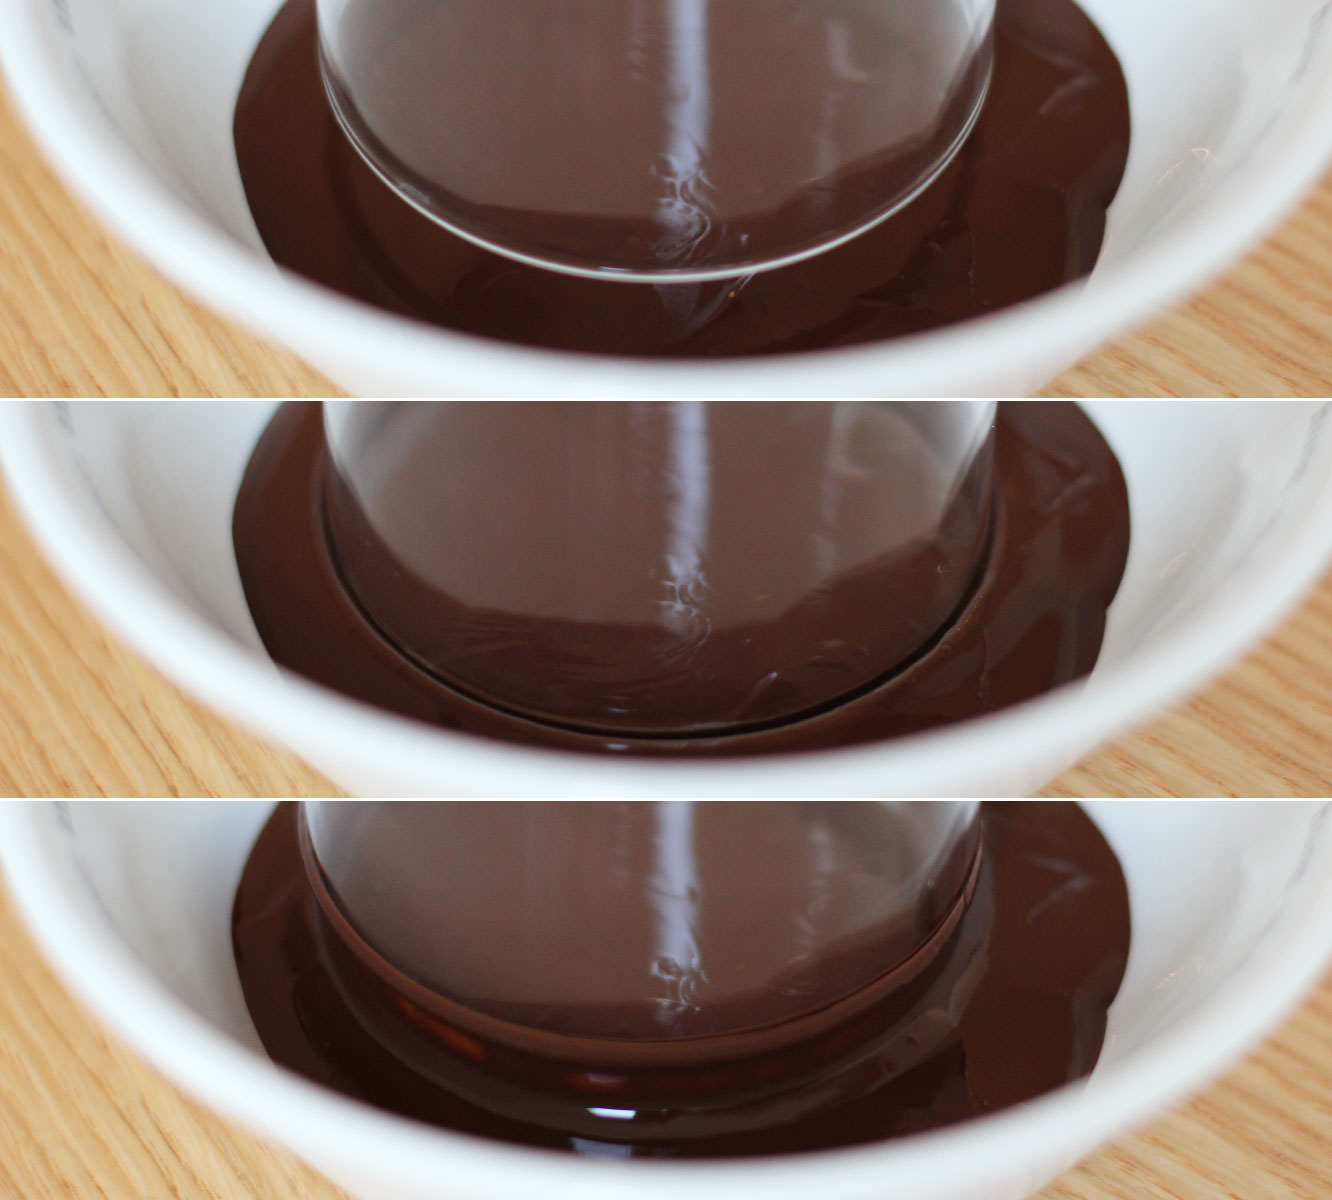
Melt the remaining dark chocolate in a small bowl and dip your glasses in to coat the rim.
Step nine
Add a shot of Baileys (and a dash of rum if you have it). A sprinkle of both cinnamon and nutmeg. Top up with approx 150ml of chocolate milk.
As you can probably tell, I didn’t exactly measure this one out, so go with your taste as a measure.
This week two celebrations collided when my lovely teacher at college had a special birthday and we crept ever closer to the 25th December. Thankfully, teach didn’t mind the seasonally confused gift – Happy Birthday Lana!
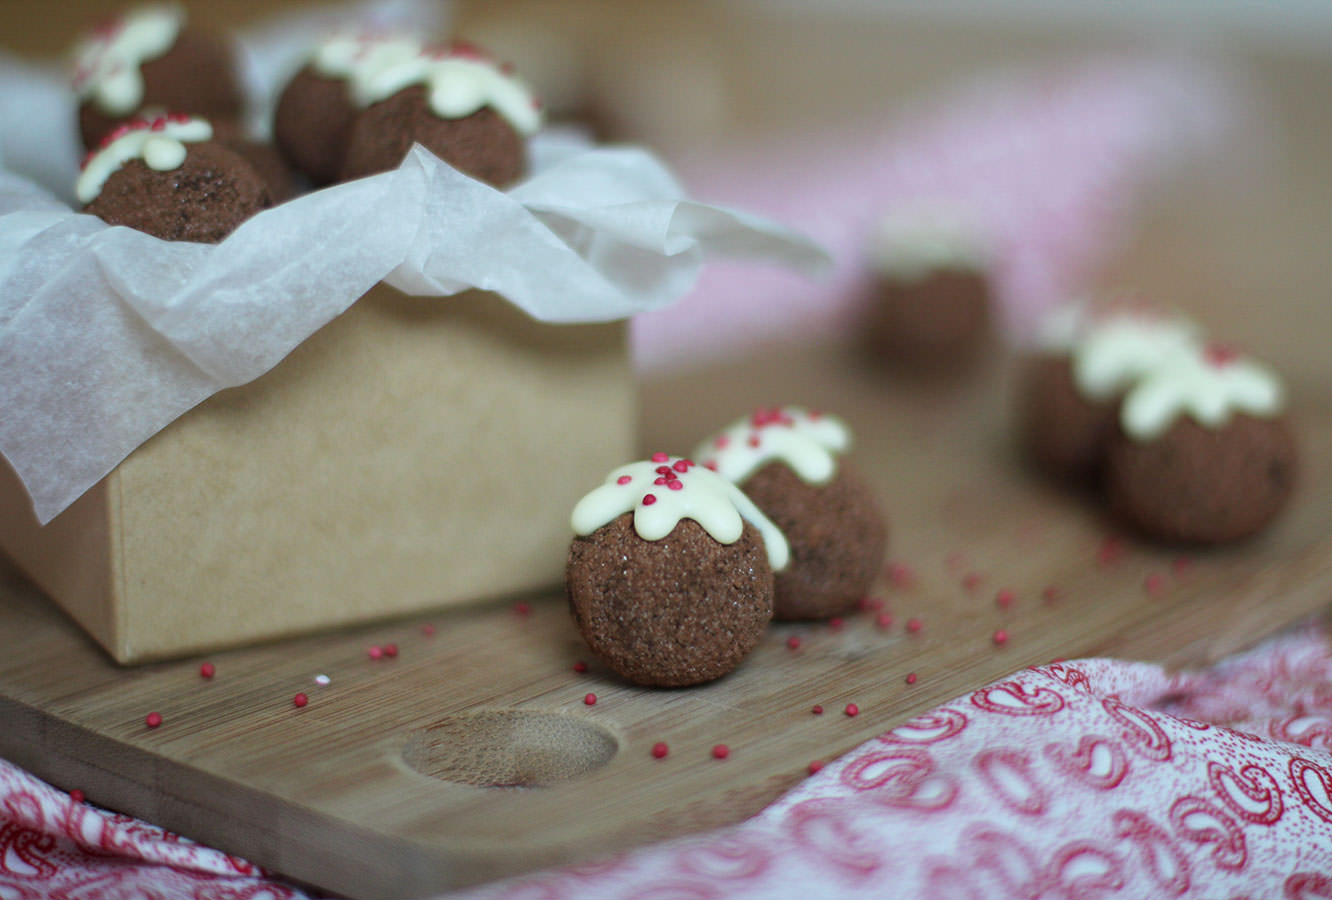
This week it’s Christmas pudding truffles, surprisingly easy to make, and with a large yield they are perfect for last minute gifts on a budget.
You will need
300g/10.5 oz Dark chocolate
100g/3.5 oz White chocolate
300ml/10.5 fl oz Double cream
30g/1 oz Unsalted butter
Red sprinkles
Cocoa and caster sugar for dusting
(Makes 60-70)
Step one
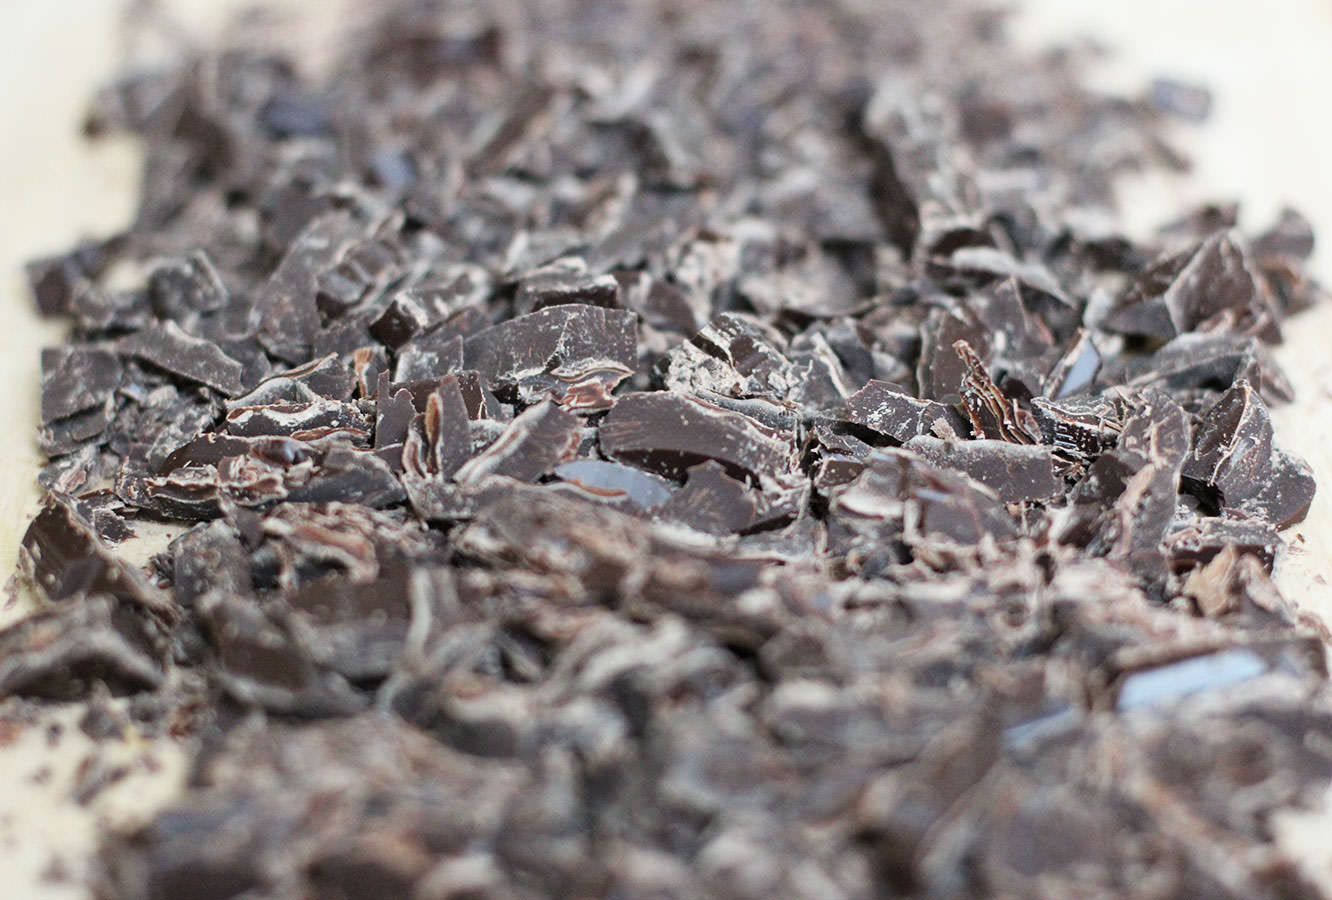
Chop the dark chocolate finely using a bread knife. Resist the urge to eat it all.
Step two
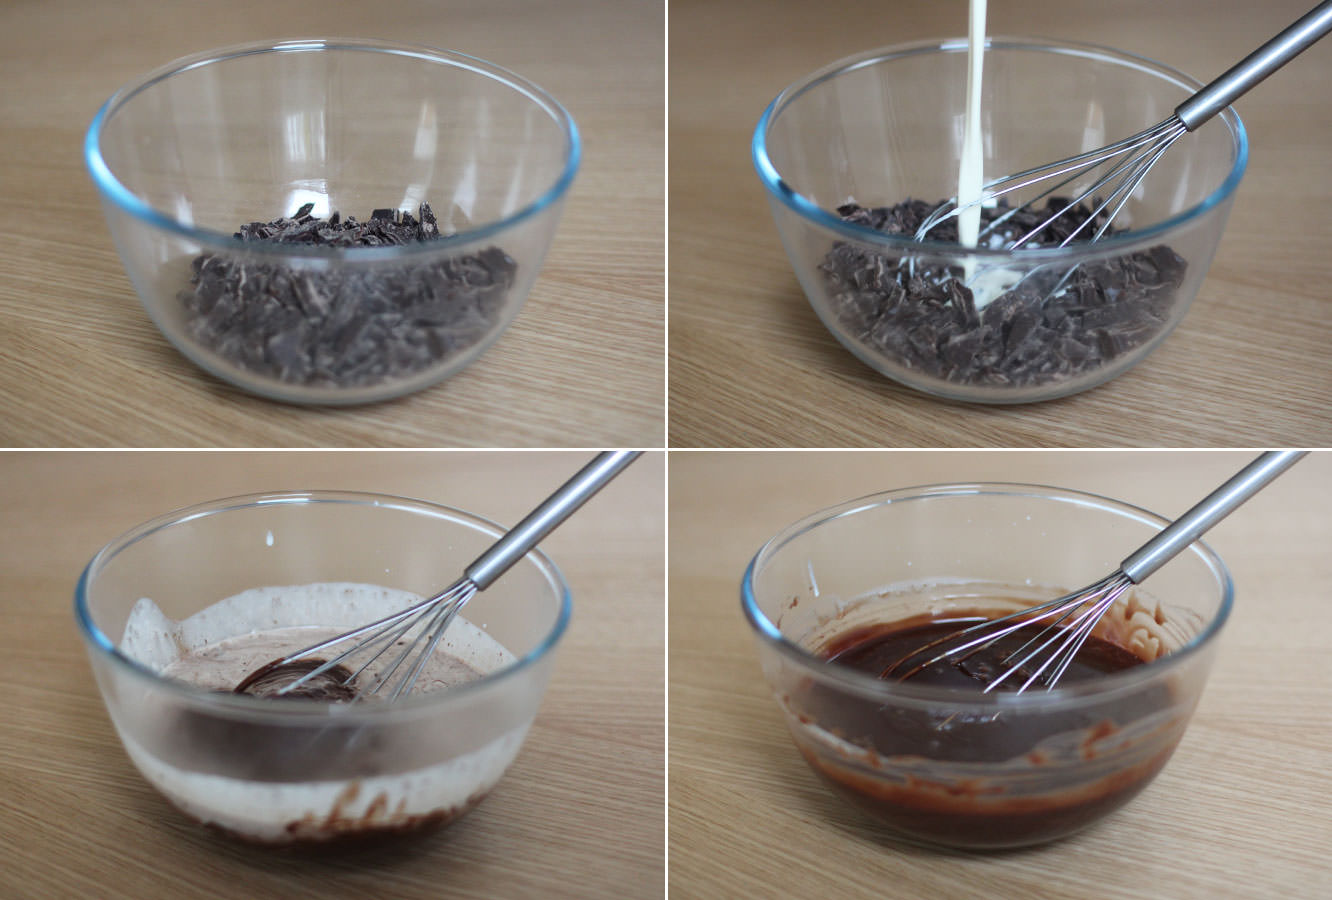
Heat the cream and butter gently in a saucepan. Wait until it starts to bubble and steam dances across the surface. There is no need to let it boil, as Mary Berry always says – chocolate melts in a child’s pocket.
Step three
Take the cream off the heat and whisk into the chocolate until fully melted. Place in the fridge to speed up the setting process.
Step four
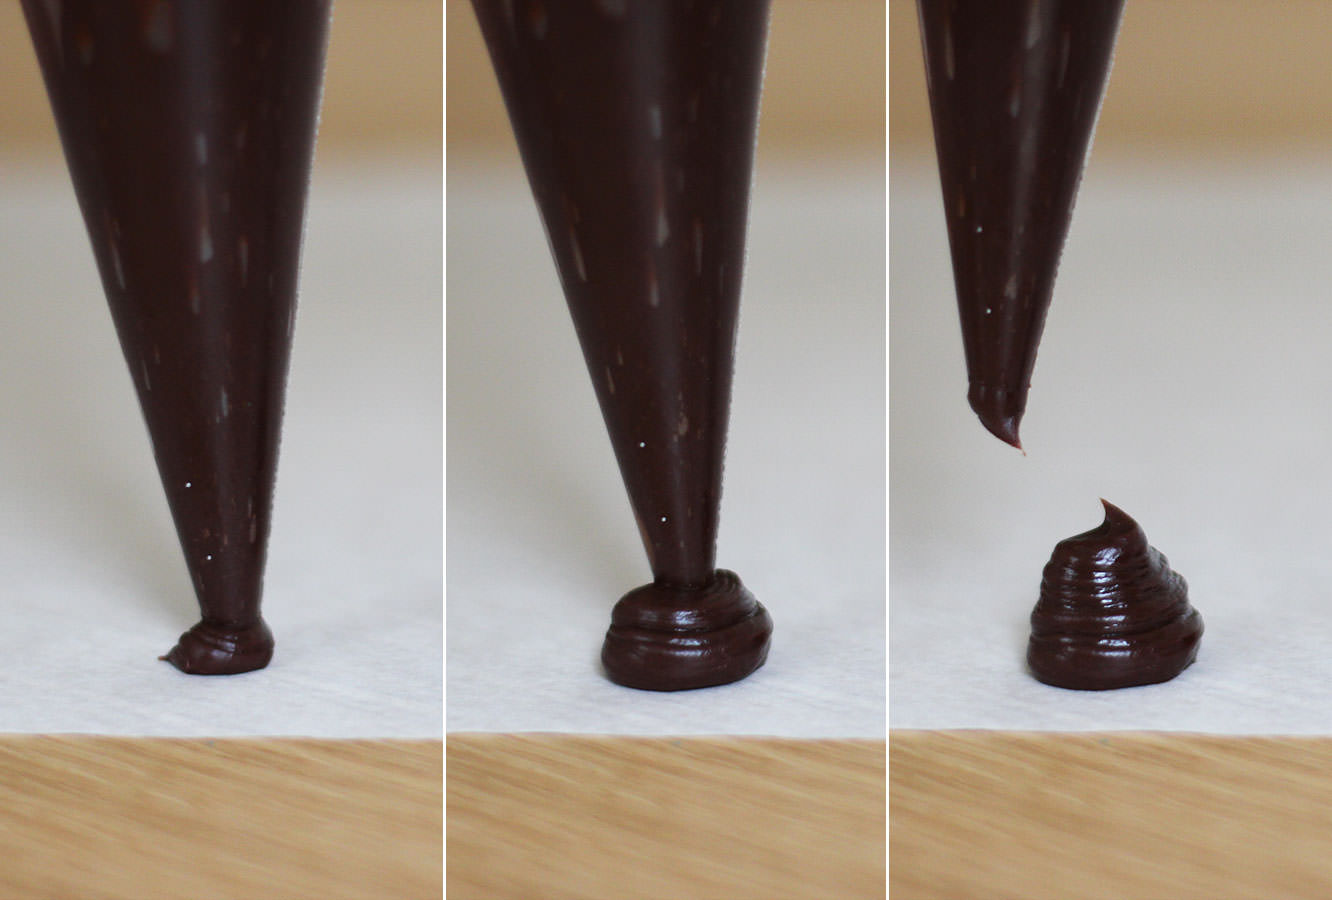
Check regularly on the truffle mix, don’t let it harden fully. Once a spoonful holds its shape when dropped onto the rest of the mixture it’s pipe-able.
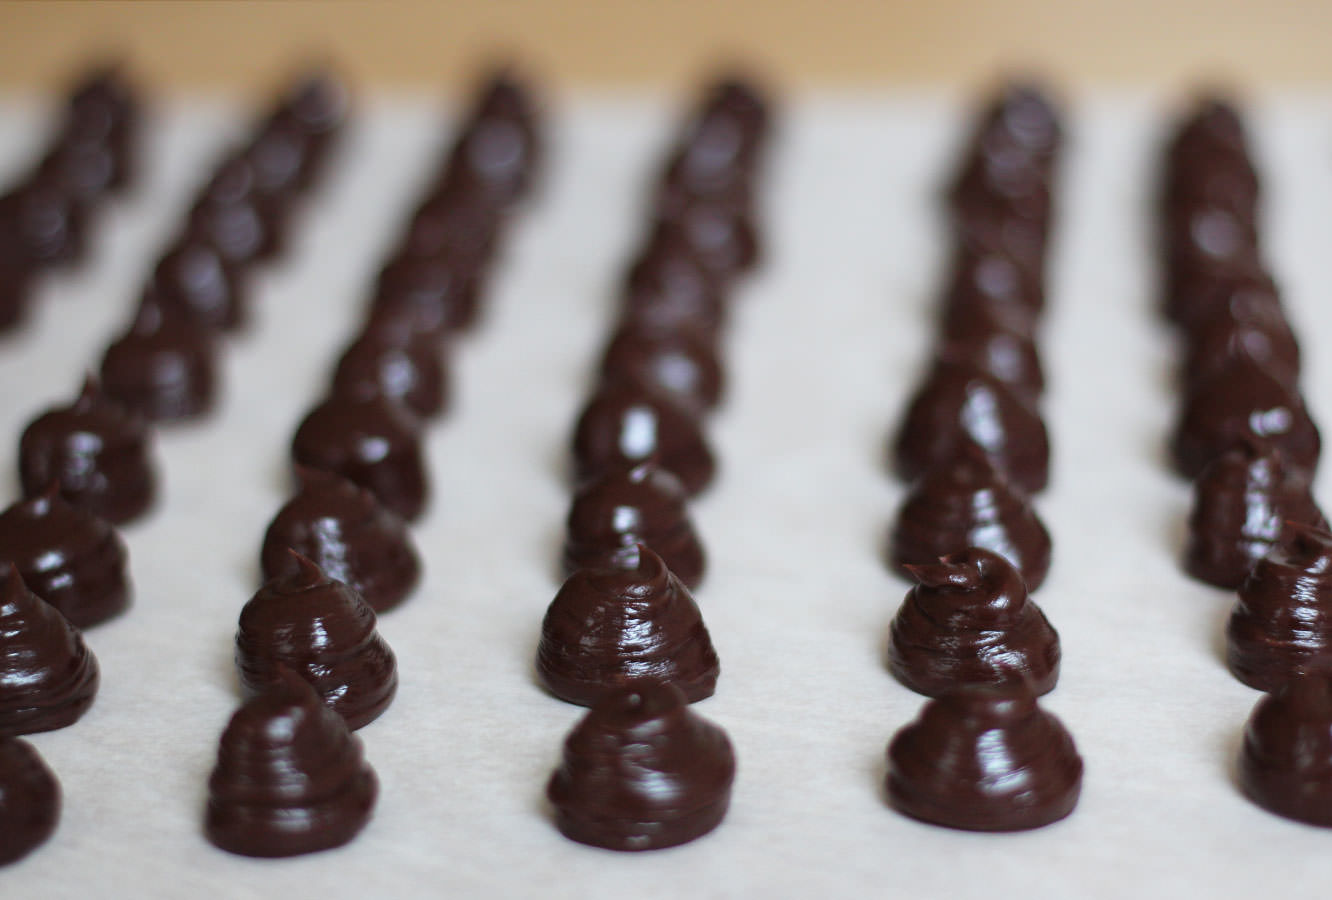
Place into a piping bag, and, holding it perpendicular to the greaseproof paper (which you have put down as instructed, um, nowhere in this post) squeeze downwards. Don’t worry if these are a bit misshapen, it’s just to make sure they’re roughly the same size.
Step five
Pipe pipe pipe.
Leave to set a bit longer, preferably with a window open to cool the truffle down quickly. The truffles won’t thank your winter central heating.
Step six
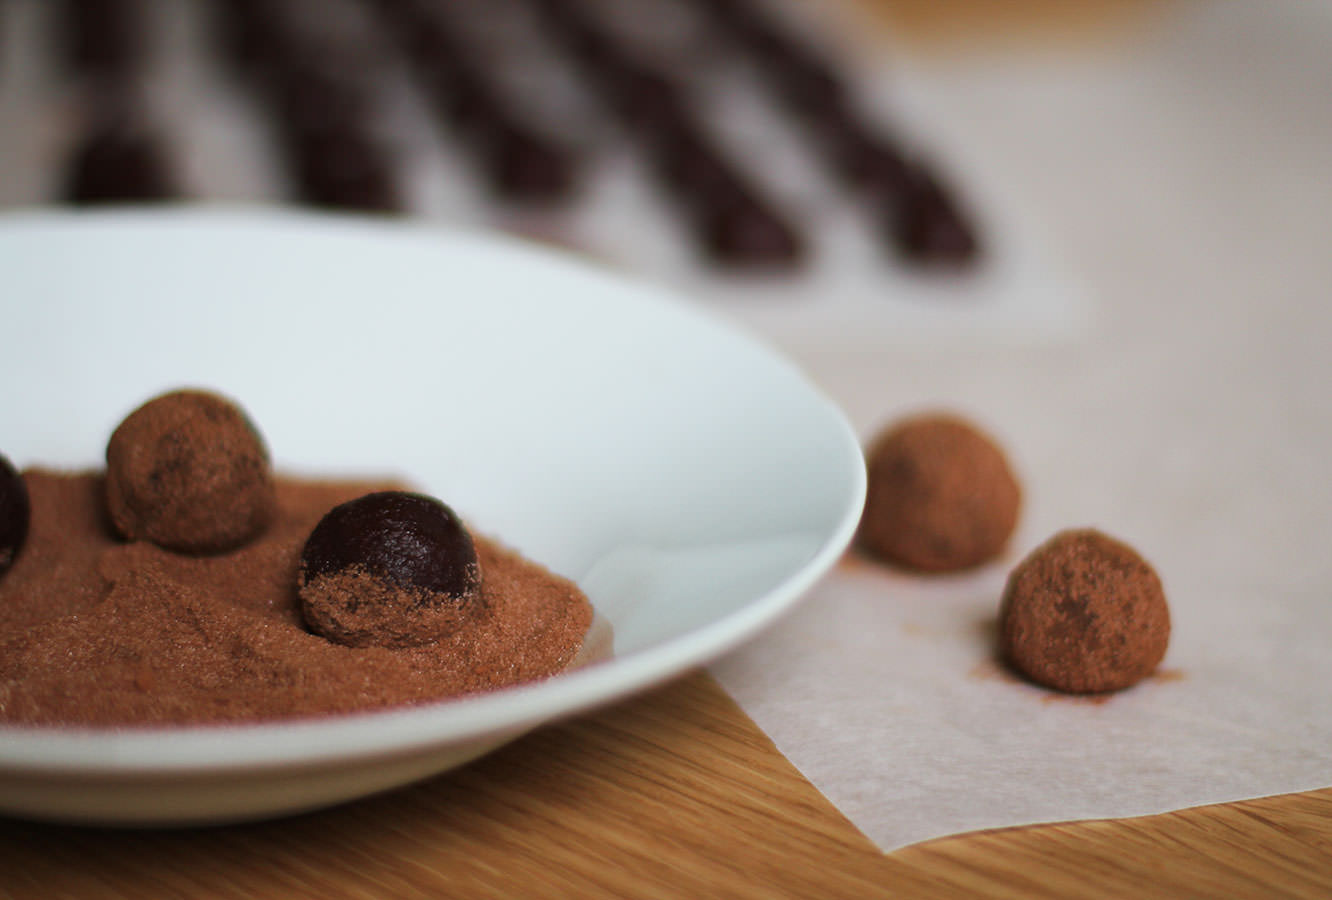
When the truffles are set roll them into balls. You will need fairly cold hands for this, so rinse them in cold water.
Step seven
Dust the truffles in cocoa and caster sugar. I mixed these at random so I’m not sure on quantities, but I used about two thirds caster sugar to a third cocoa powder.
I dusted as I rolled, as hands warm the outside of the truffles so the caster sugar will stick.
Step eight
Melt the white chocolate slowly in the microwave, pipe little splodges and drop some red sprinkles on top. I got these from Sainsbury’s, so not too hard to track down.
Leave the white chocolate to set and pack away your truffles into little bags or boxes and spread the Christmas (or Birthday) cheer!
A couple of months ago my lovely housemate got engaged. A couple of weeks ago we celebrated that fact.
I decided I wanted to make some party food. Given that we’re fast approaching Christmas (I mean, it’s the 17th November already, what?) this little series of posts should furnish your party season with delightful nibbles and may double as last minute Christmas present/hostess gifts.
This one falls into the second category, so get online and buy yourself some cellophane bags and a roll of ribbon, your colleagues and your milk man will never have been happier. Well, I hope their lives are better than that, but either way, there won’t be any disappointment, and that’s all anyone’s looking for at Christmas.
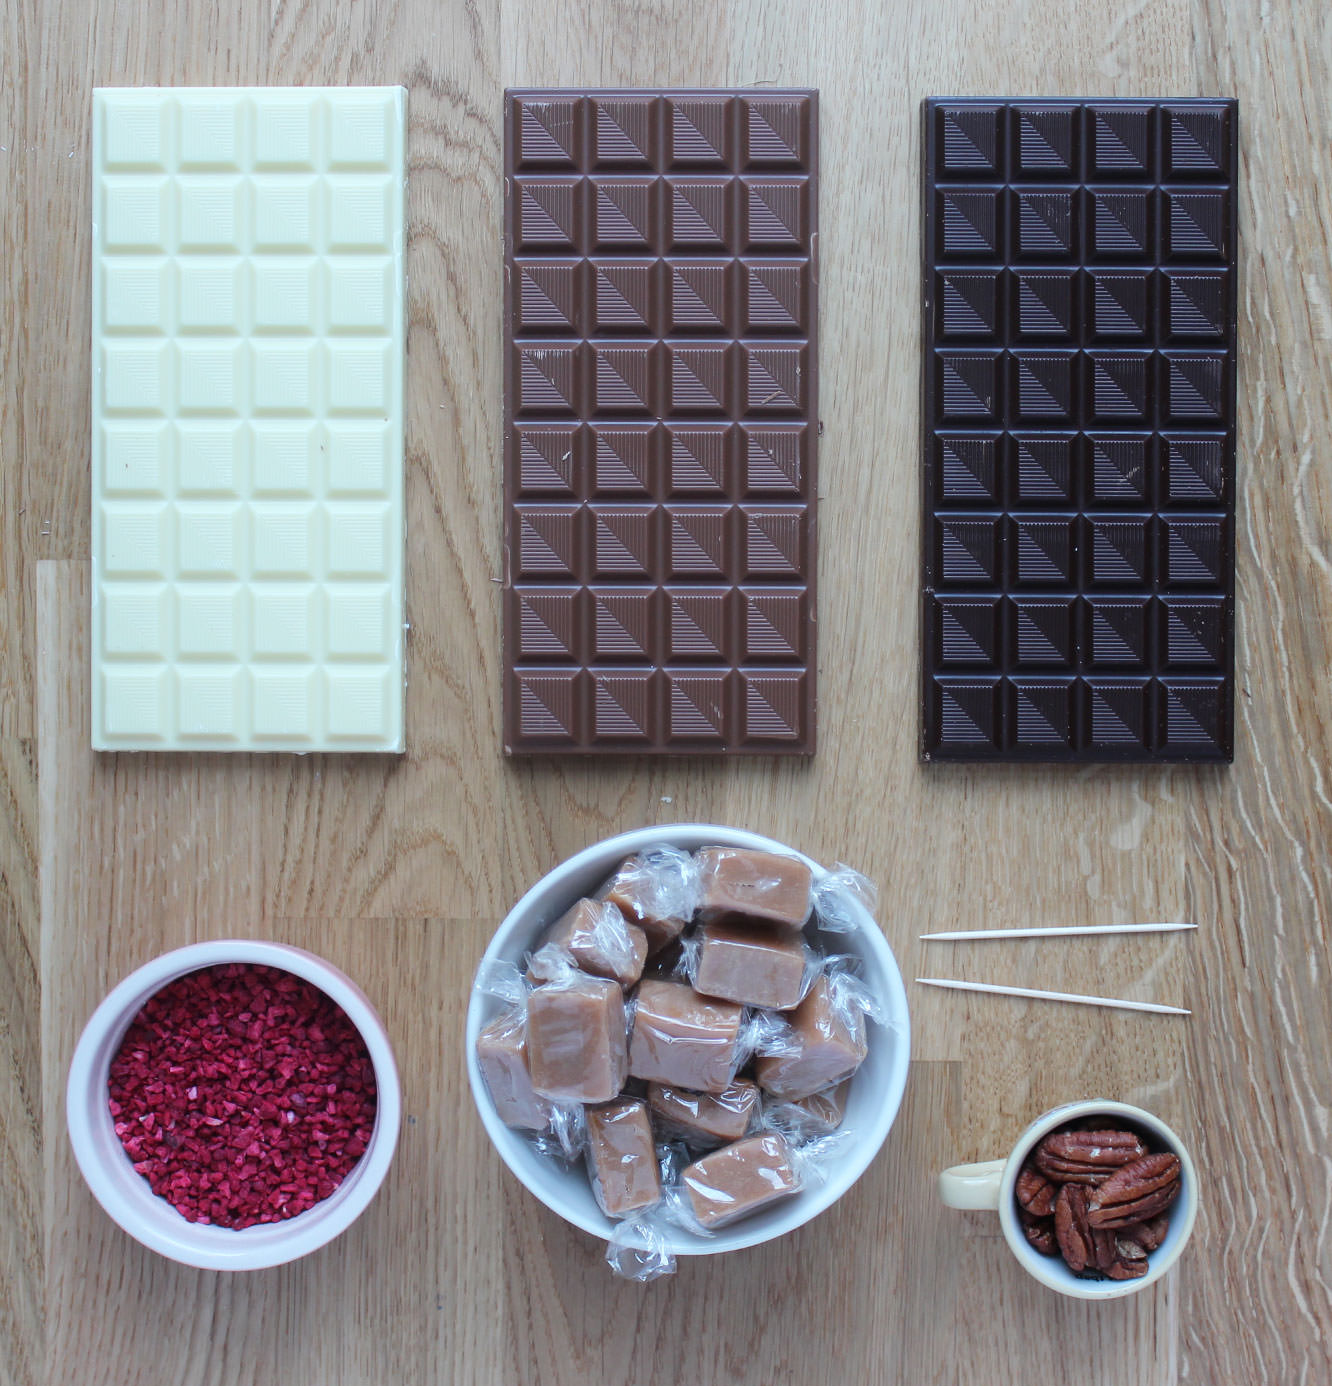
Things you need
200g/7 oz White chocolate
200g/7 oz Milk chocolate
200g/7 oz Dark chocolate
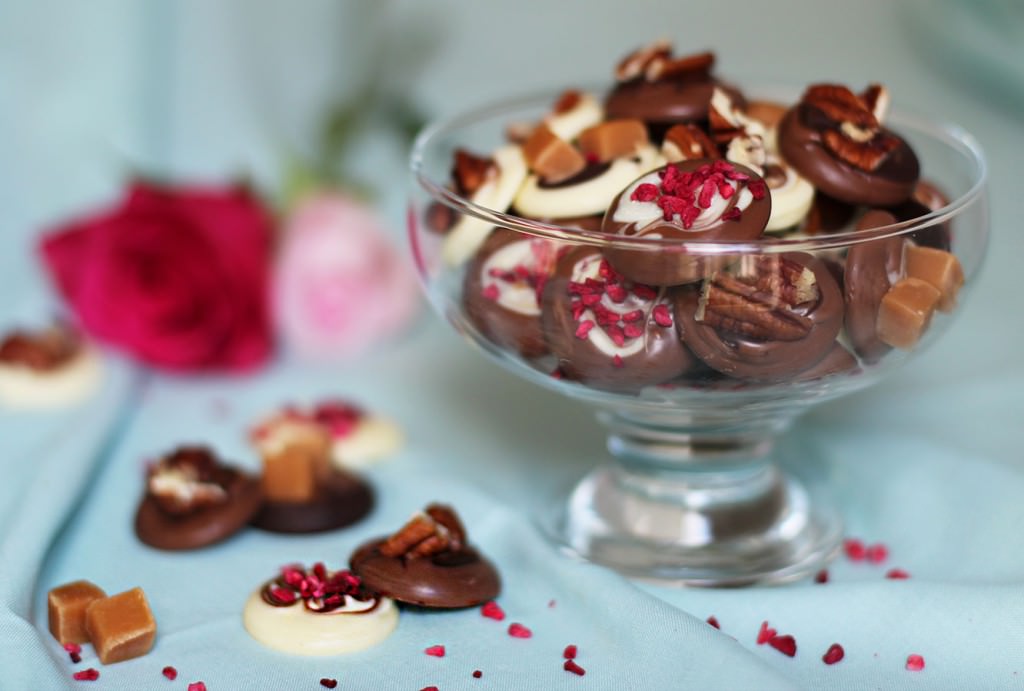
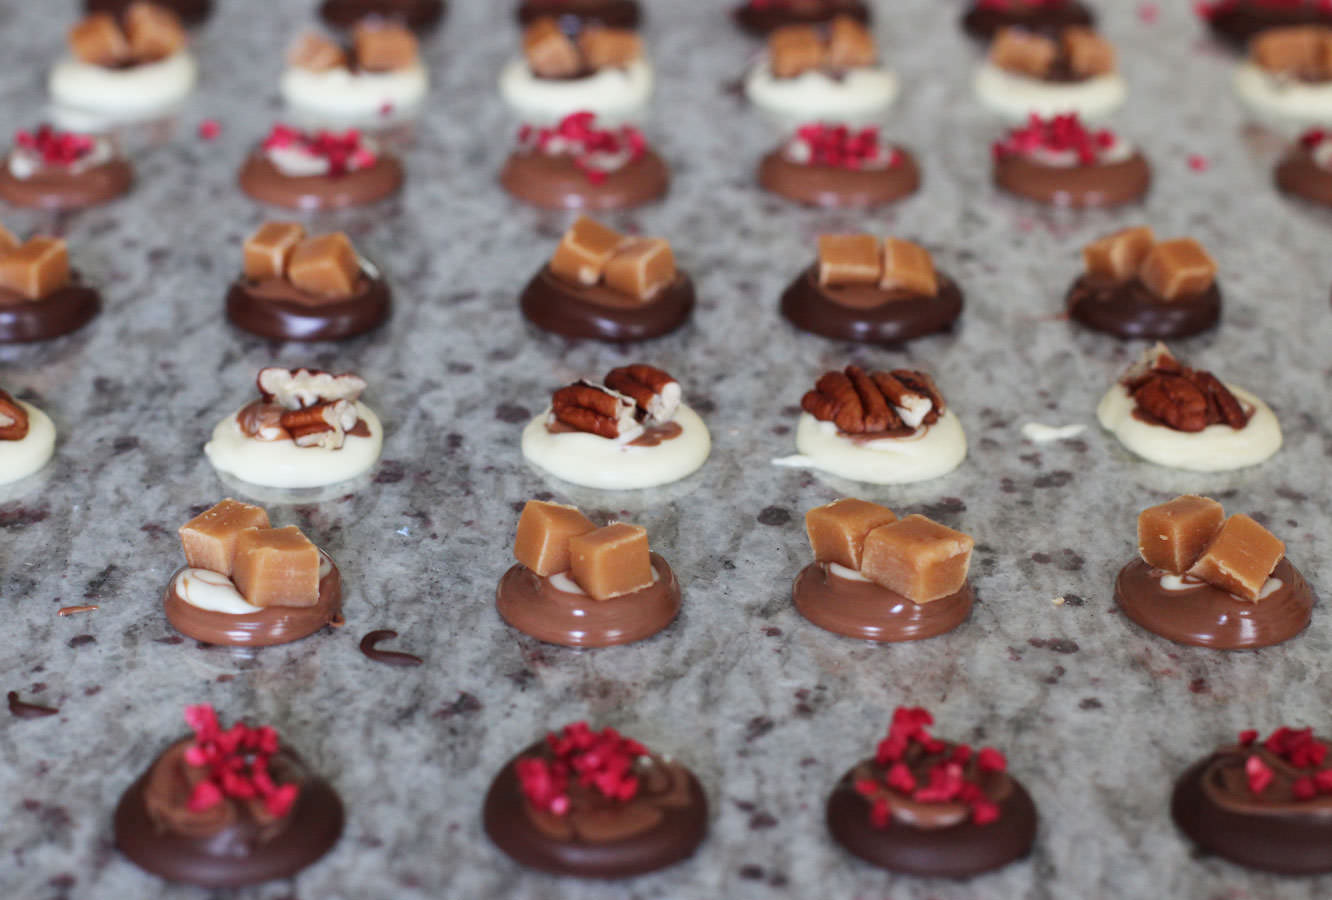
Decorations (I used freeze dried raspberries, fudge pieces and pecans)
Cocktail sticks
Piping bags or strong sandwich bags.
Cellophane (from a florist or a craft shop, or you can use greaseproof but the bottoms won’t be shiny)
Food thermometer (ideally)
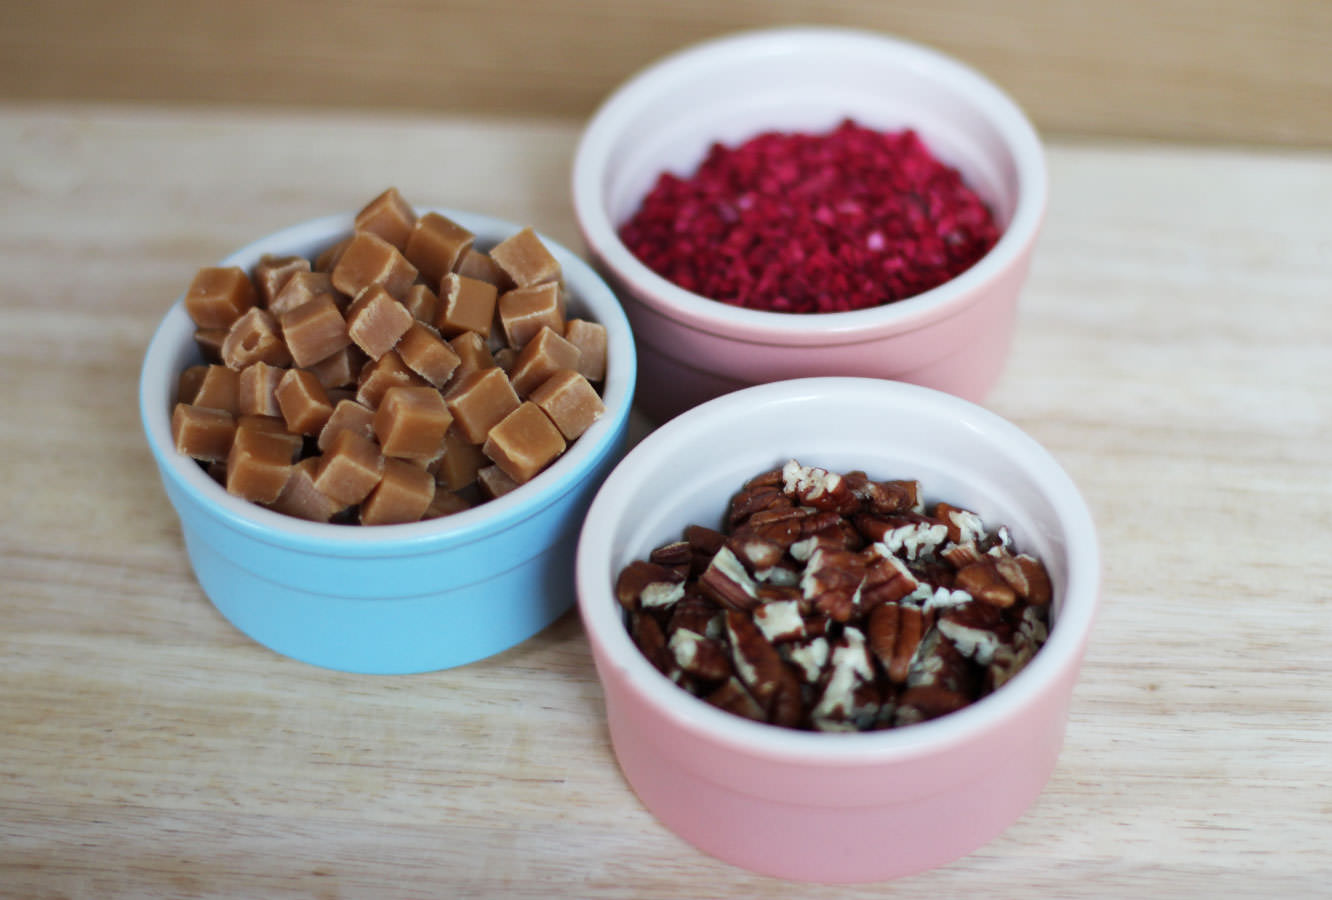
Step 0.5
Prepare your toppings if they need preparing. I wanted my drops to be quite small so I chopped up my fudge and pecans.
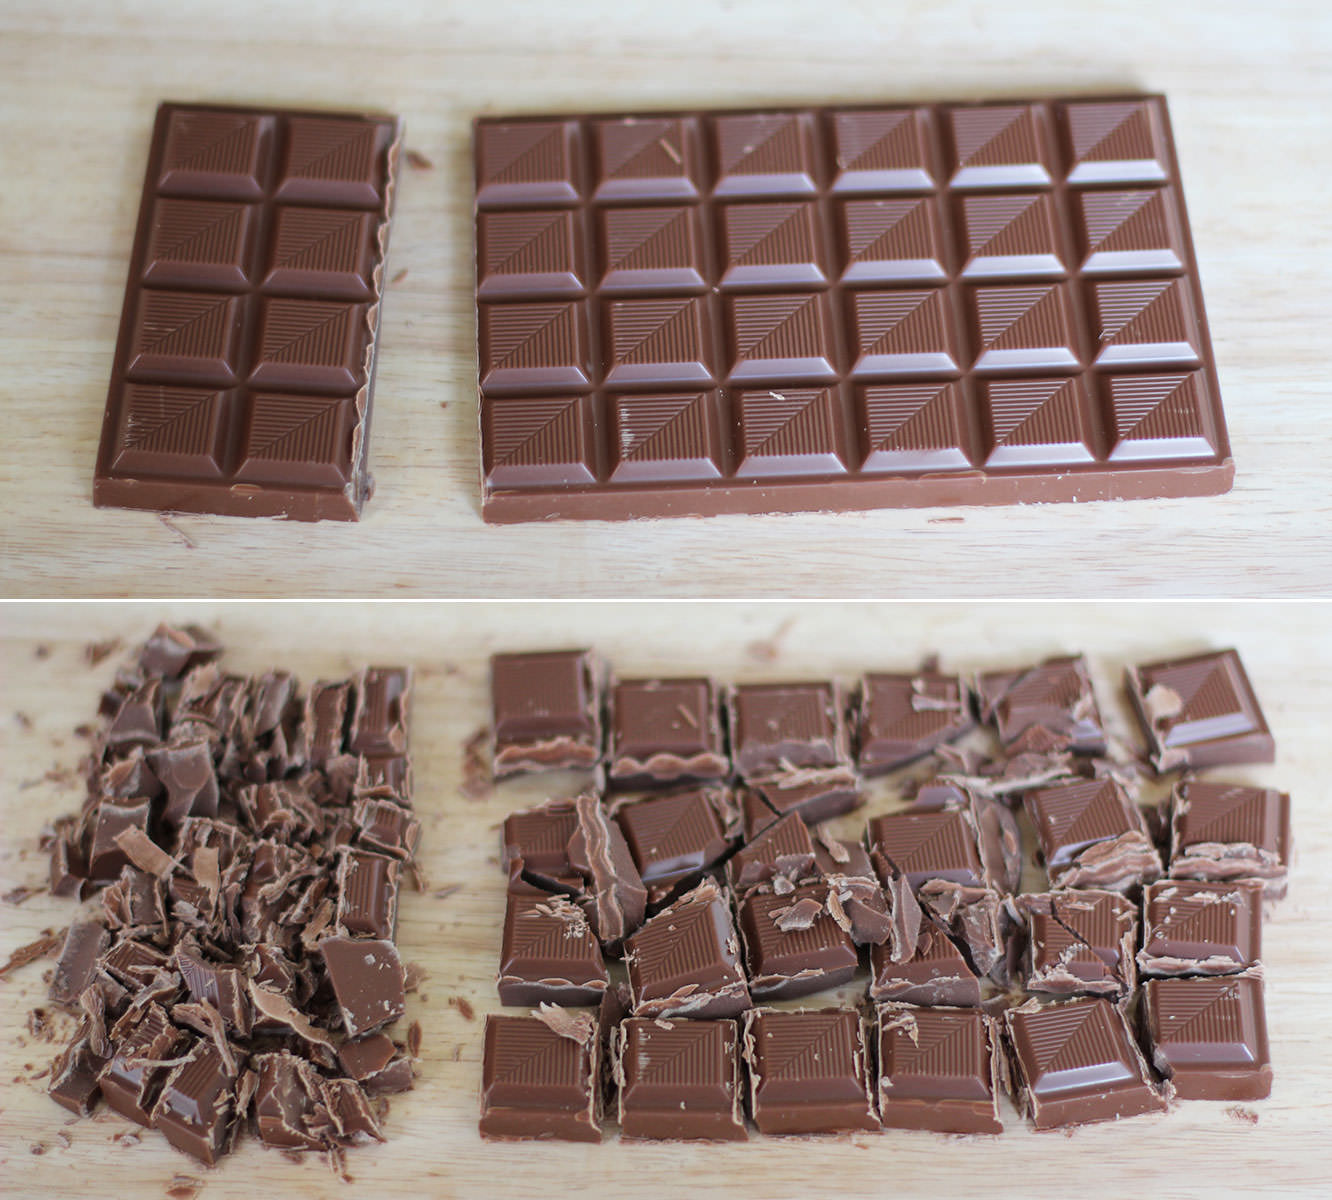
Step one
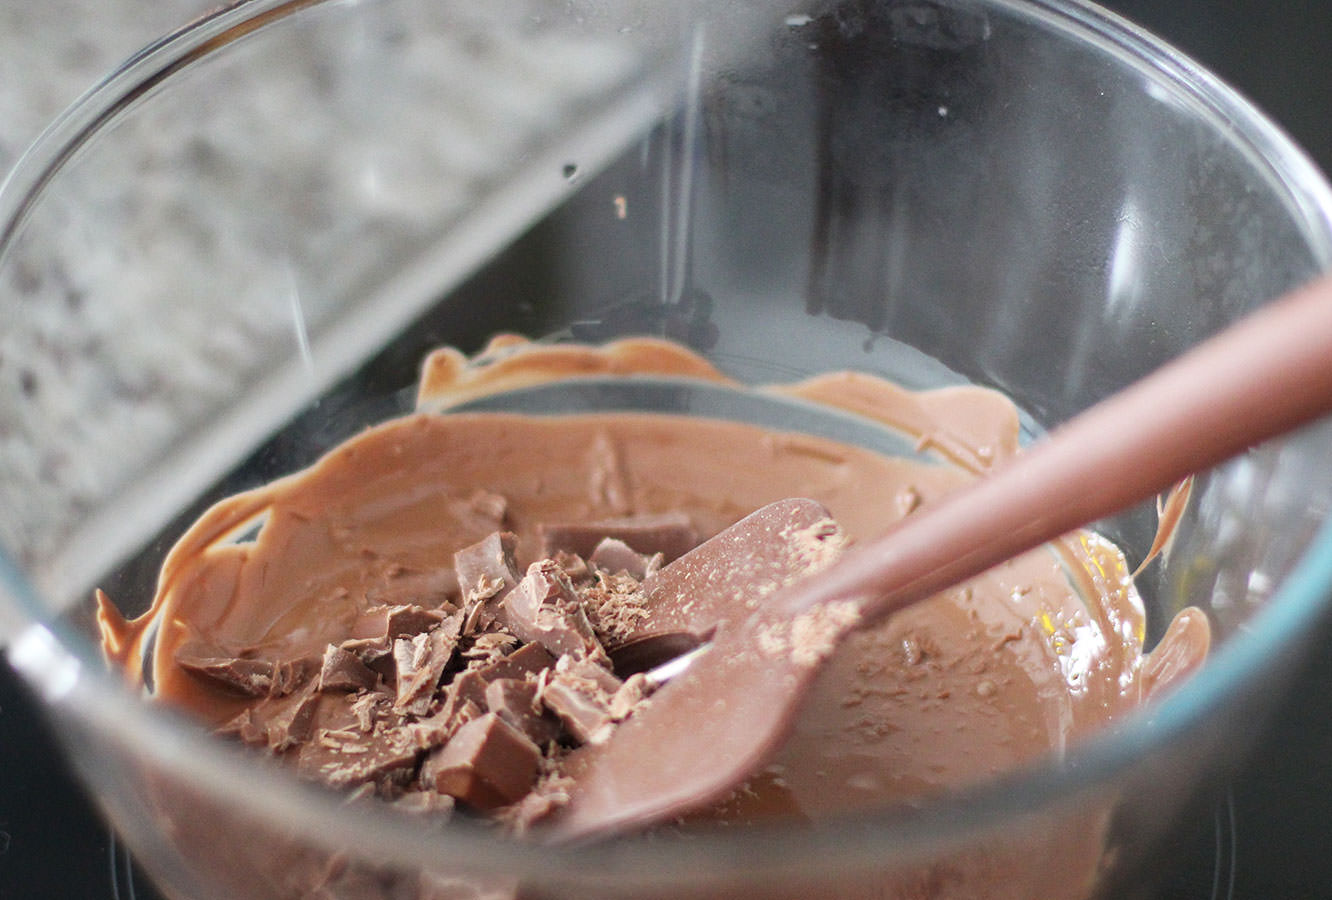
Now. This is the first time I have actually tempered chocolate. It was easier than I expected and well worth it for the shiny finish. I encourage it. I also encourage the purchase of a thermospatula. I’m not being paid to say that, it’s changed my life (in a small but significant way).
If you’re joining me on the tempering train you need to split the chocolate into a third/two thirds split. Ignore the photo above and just chop it all into big chunks. I learned as I went with this one.
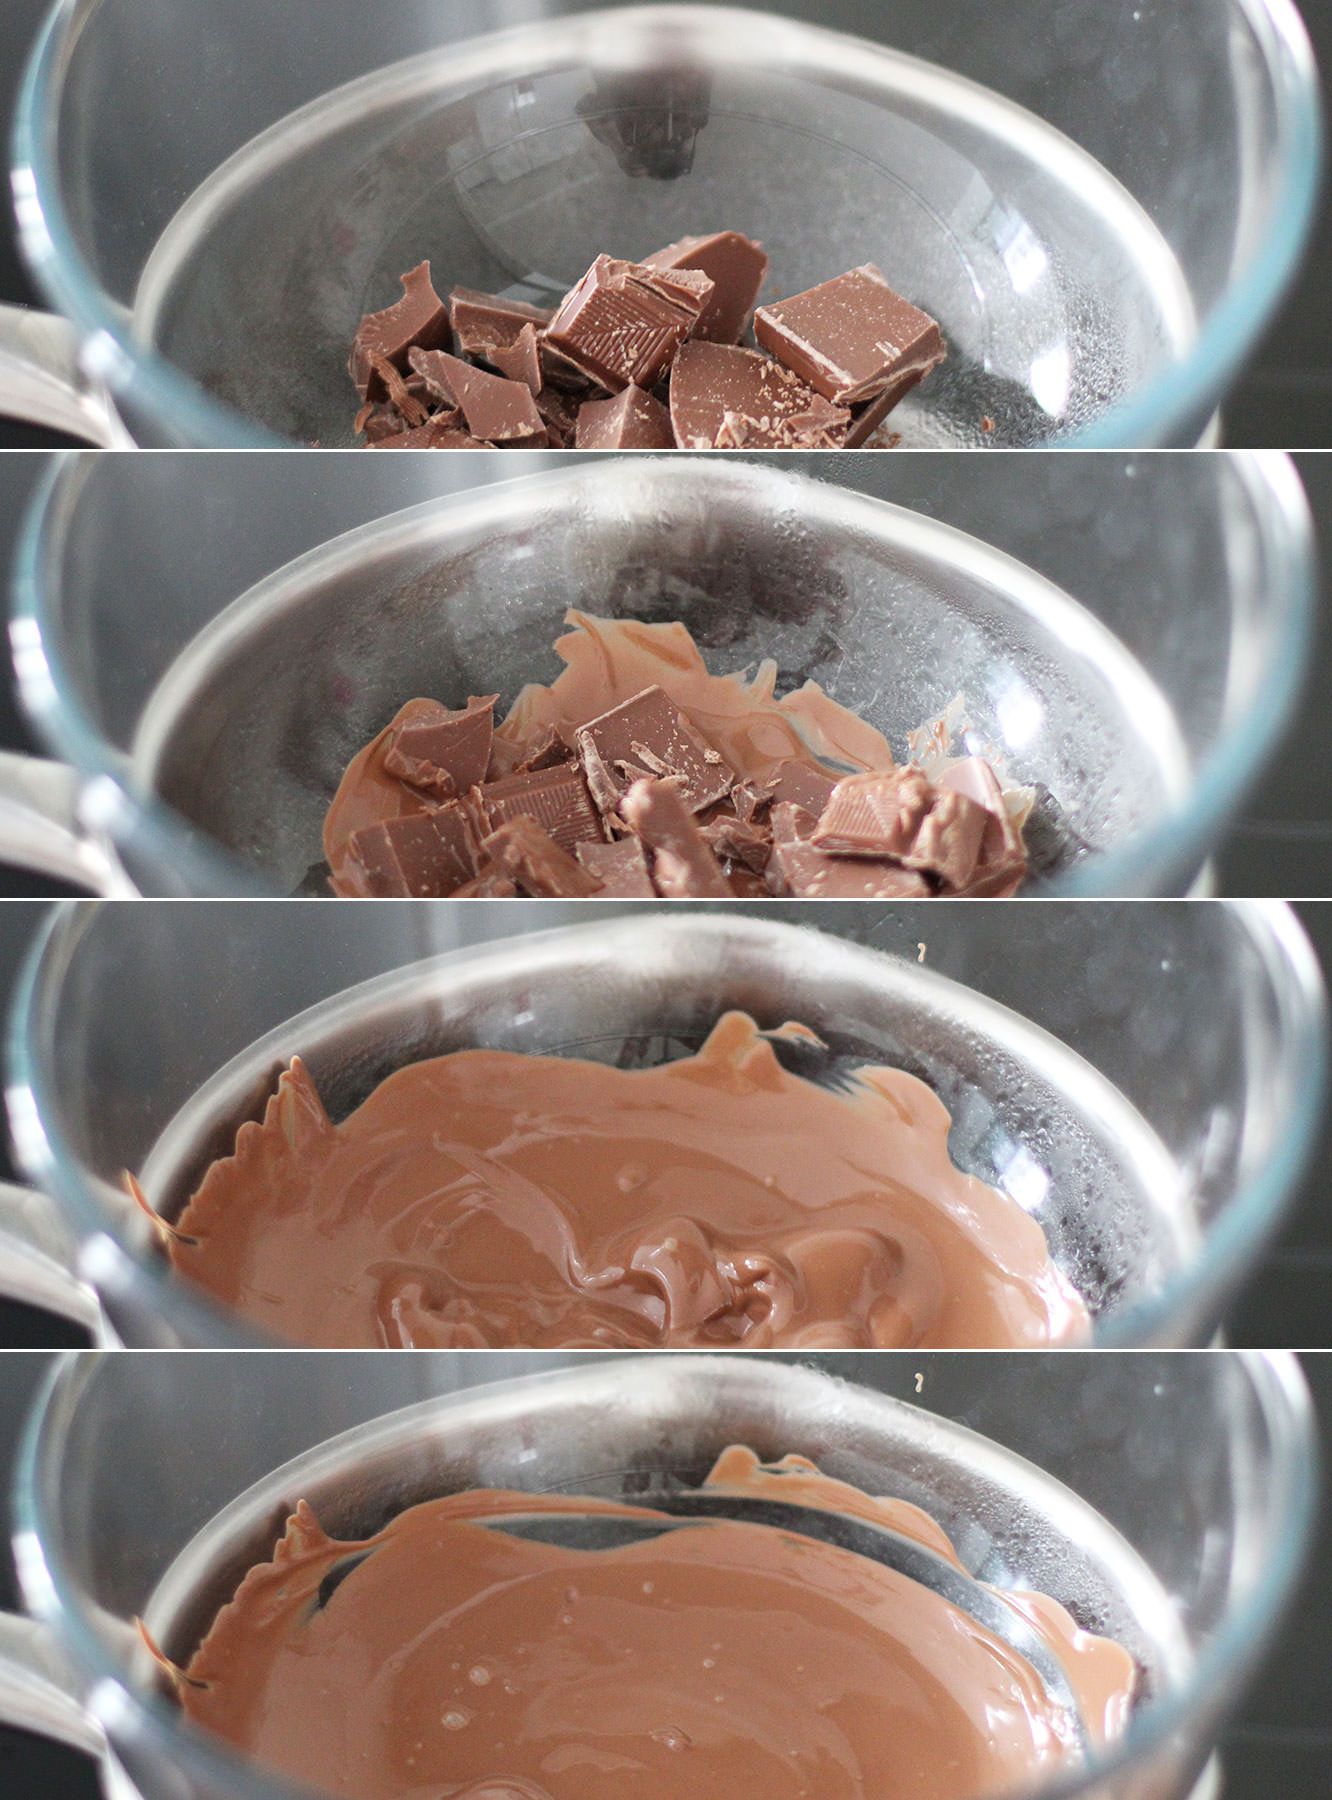
Step two
Place a heatproof bowl over a pan of simmering water; make sure the water isn’t touching the pan.
Add two thirds of the chocolate and allow to melt slowly. Stir occasionally. Mainly so you can feel like you’re doing something productive.
Bring to 45 degrees C and remove from the heat.
Step three
Add the rest of the chocolate and stir until its melted in. Keep stirring until the whole lot has cooled to 28 degrees C.
Step four
Place back on the heat and bring to 32 degree C.
Step five
Take back off the heat and dry the bottom of the bowl with a tea towel. Trust me, you don’t want water in your chocolate.
Step six
Pour into a piping bag.
Don’t trim the end yet. In fact, once you have twisted the opening to close it you should push any chocolate in the tip end back towards the rest, otherwise it will cool and solidify there while you’re tempering the rest.
Step seven
Repeat with the rest of the chocolate.
Step eight
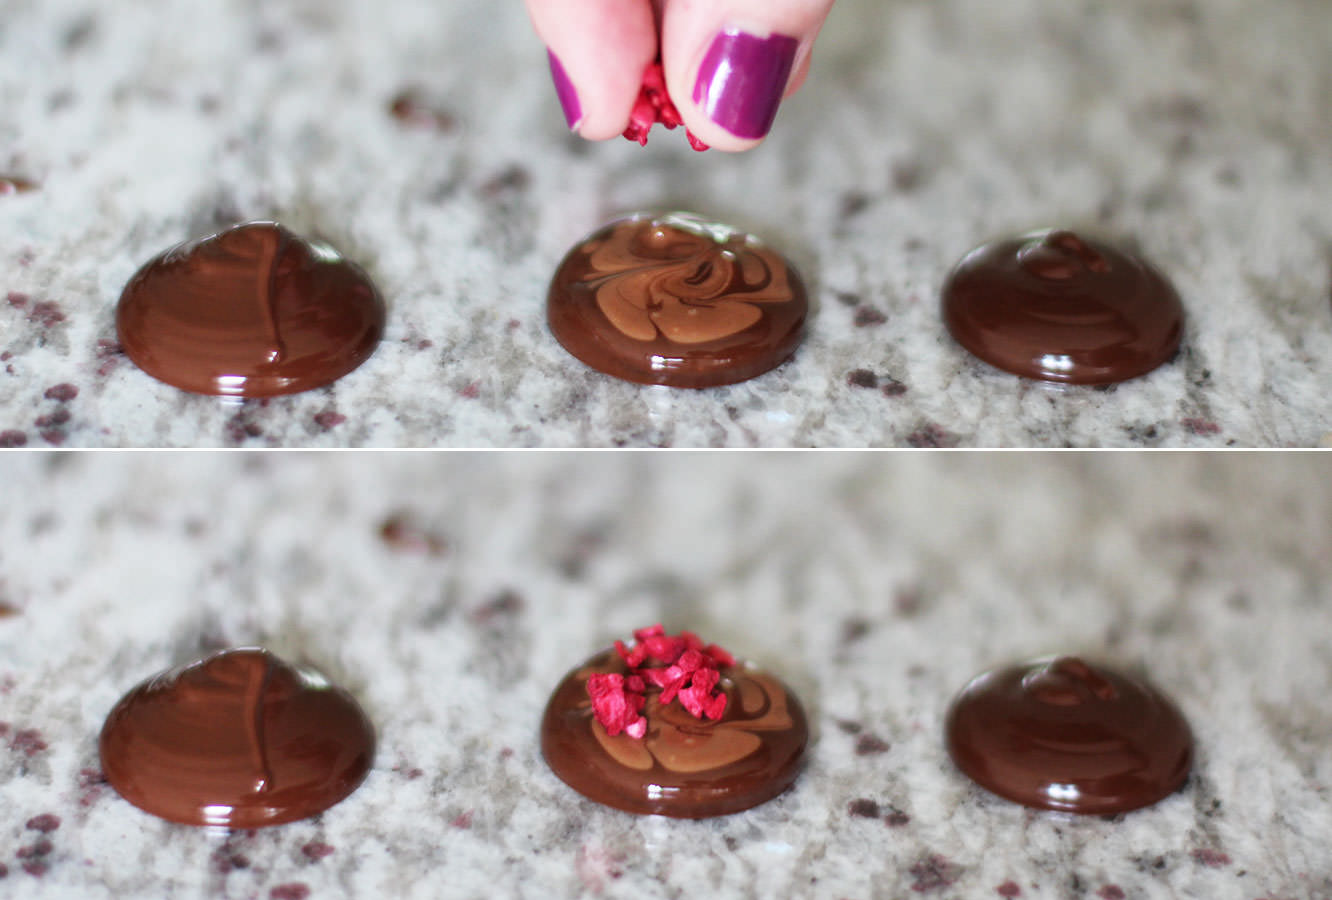
Lay down the cellophane and start piping.
You want to hold the piping bag at a 90 degree angle to the table and squeeze. The chocolate will flood into a lovely little pool.
Add a small blob of another colour on top and swirl about with a cocktail stick to create a marbled effect.
Step nine
Sprinkle your decorations on top.
Some cranberries would go down well for christmas drops, but I was explicitly instructed not to buy any. These freeze dried raspberries looked rather pretty and tasted good too. See children? Compromise isn’t always bad.
Step ten
Keep going until you run out of chocolate/the will to live. But look…so shiny. You did well to temper it, it was worth it after all.
Hullo chums. Just a little heads up that this is my last post for a couple of weeks as I’m heading off on holiday and didn’t quite have the organisational skill to do enough to tide you over until I’m back. Something my new design guru seanwes would not be impressed with.
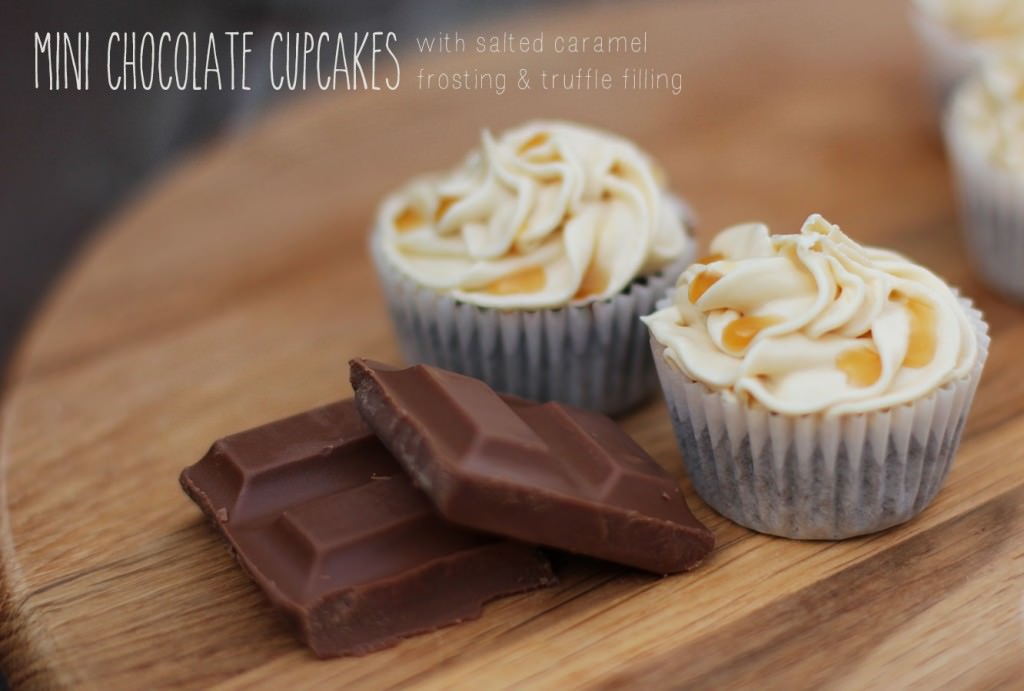
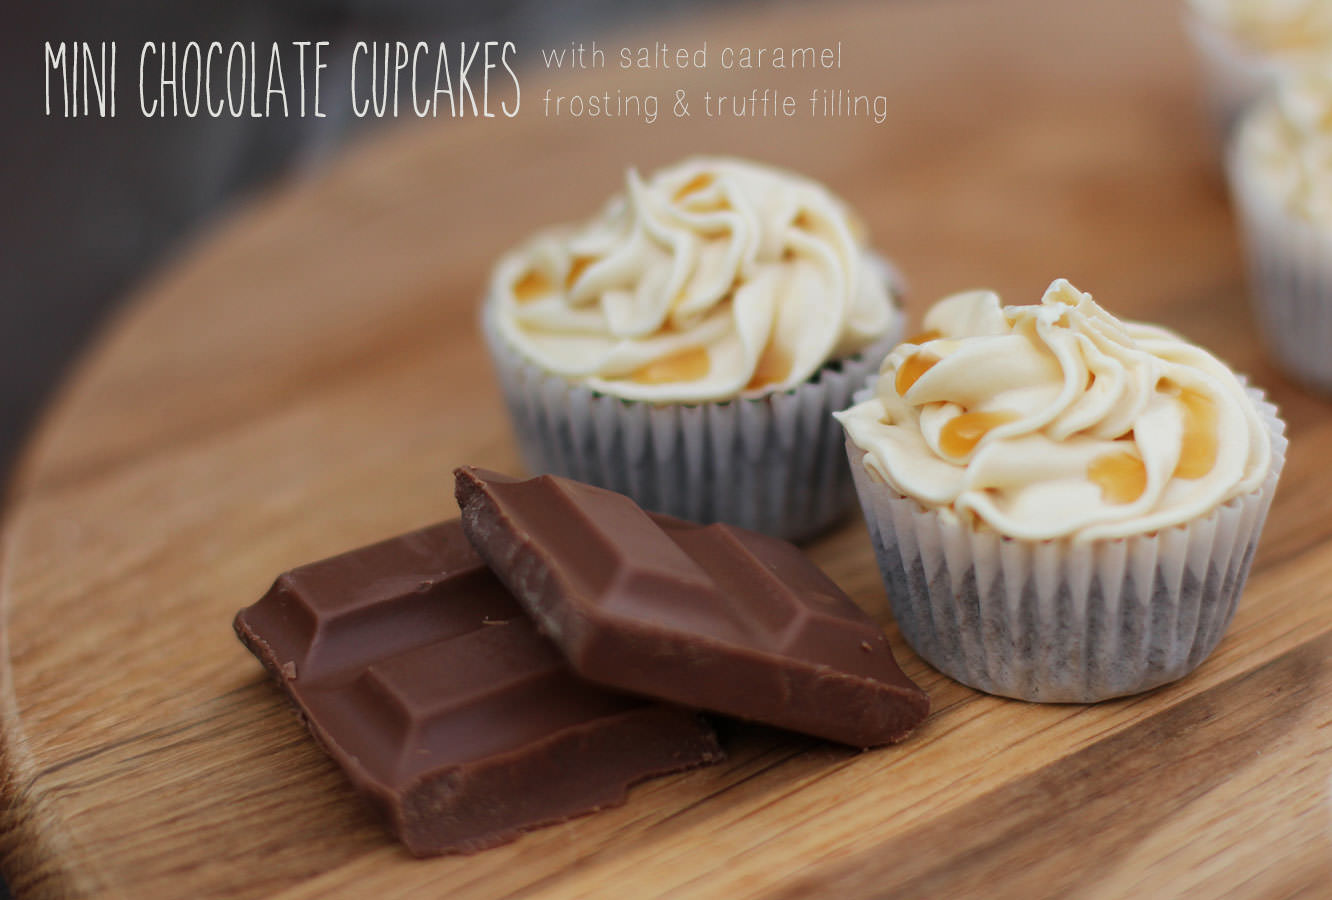
But anyway. This is a real good’un I’m leaving you with, there’s not much point making any of the rest of the afternoon tea series after you’ve done these. Your guests won’t look back. Partly because they will be bouncing around the room on a sugar high.
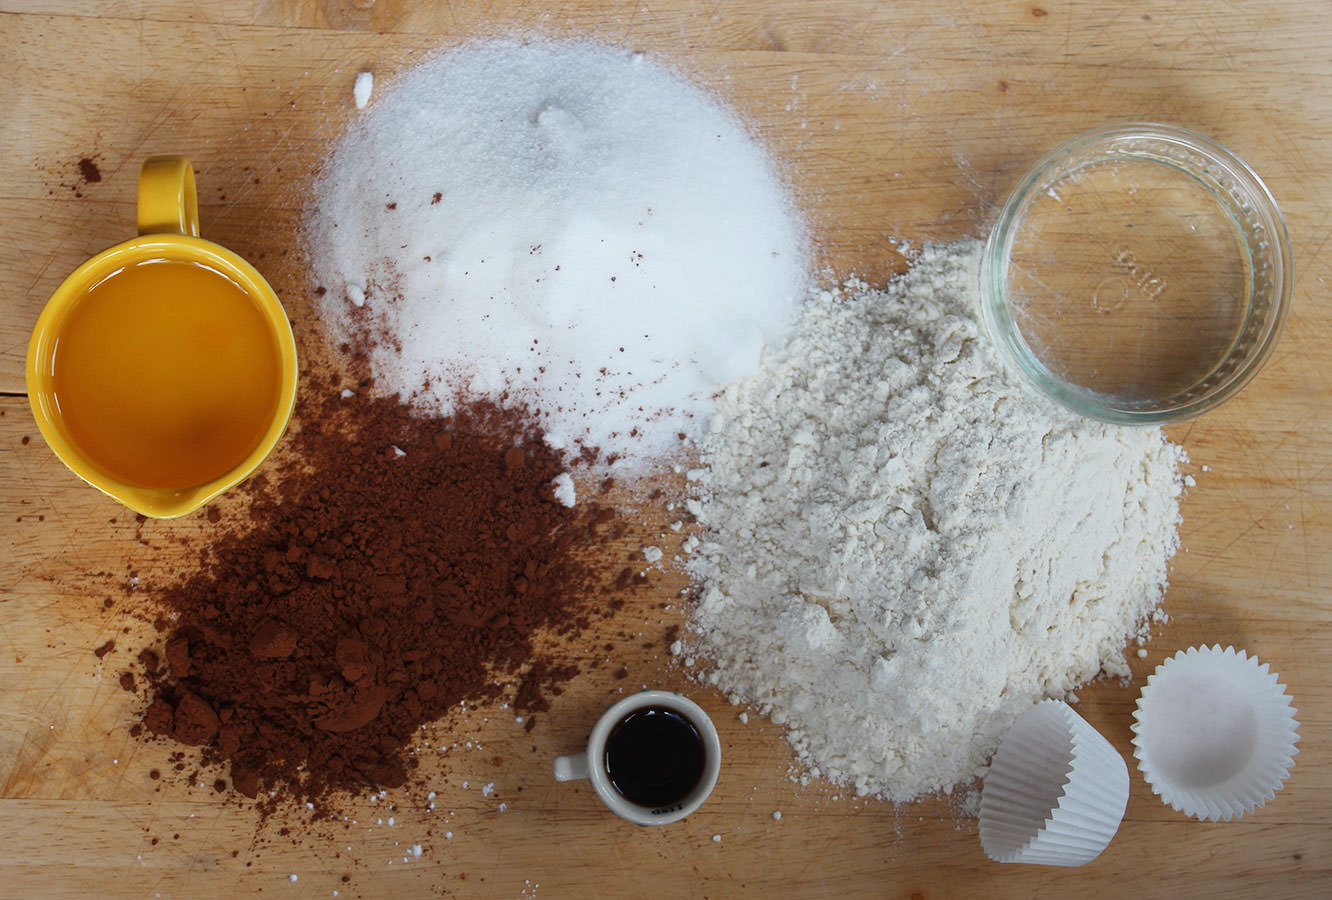
You will need
For the cakes:
200g/7 oz Plain flour
200g/7 oz Caster sugar
30g/1 oz Cocoa powder
250ml/8.5 fl oz Water
5 tbsp Vegetable oil
1 tsp Bicarbonate of soda
1 tsp Cider vinegar
1 tsp Vanilla extract
For the ganache filling:
100g/3.5 oz Dark chocolate
100g/3.5 oz Milk chocolate
200ml/6.5 fl oz Double cream
For the salted caramel frosting:
300g/10.5 oz Icing sugar
250g/9 oz Butter
80g/3 oz Soft brown sugar
100ml/3.5 fl oz Double cream
2 tbsp Golden syrup
2 tsp Salt
(Makes 48)
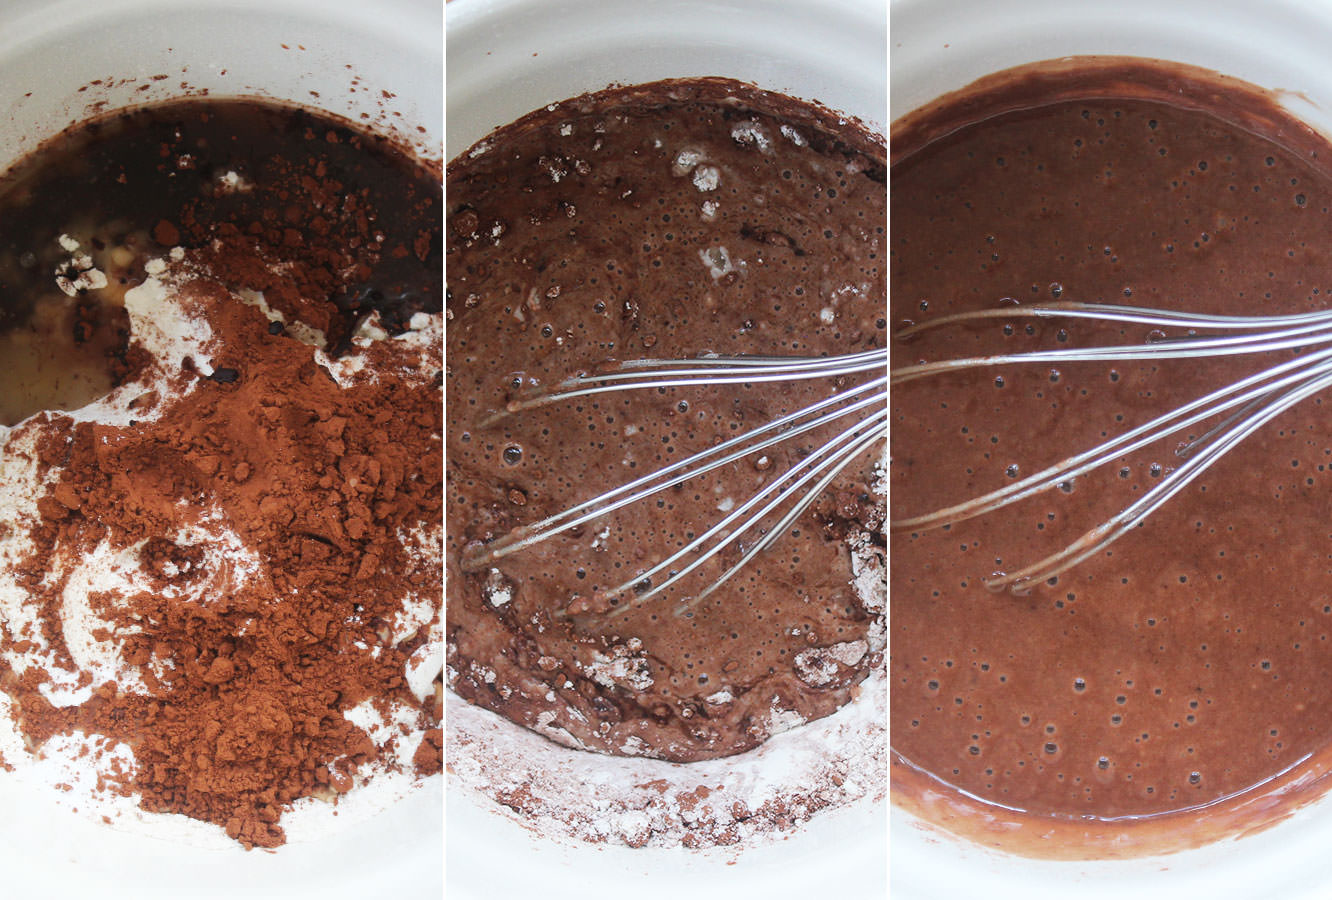
Step one
Combine all the cake ingredients into one bowl and whisk until there are no lumps. This makes quite a thin batter that you will find a bit disturbing if you are used to putting egg and butter in cakes.
This recipe is great for vegans (as long as you don’t add the icing or filling – use substitutes instead perhaps). It’s my favourite recipe for chocolate cupcakes now, I originally found it when baking for a lactose intolerant friend.
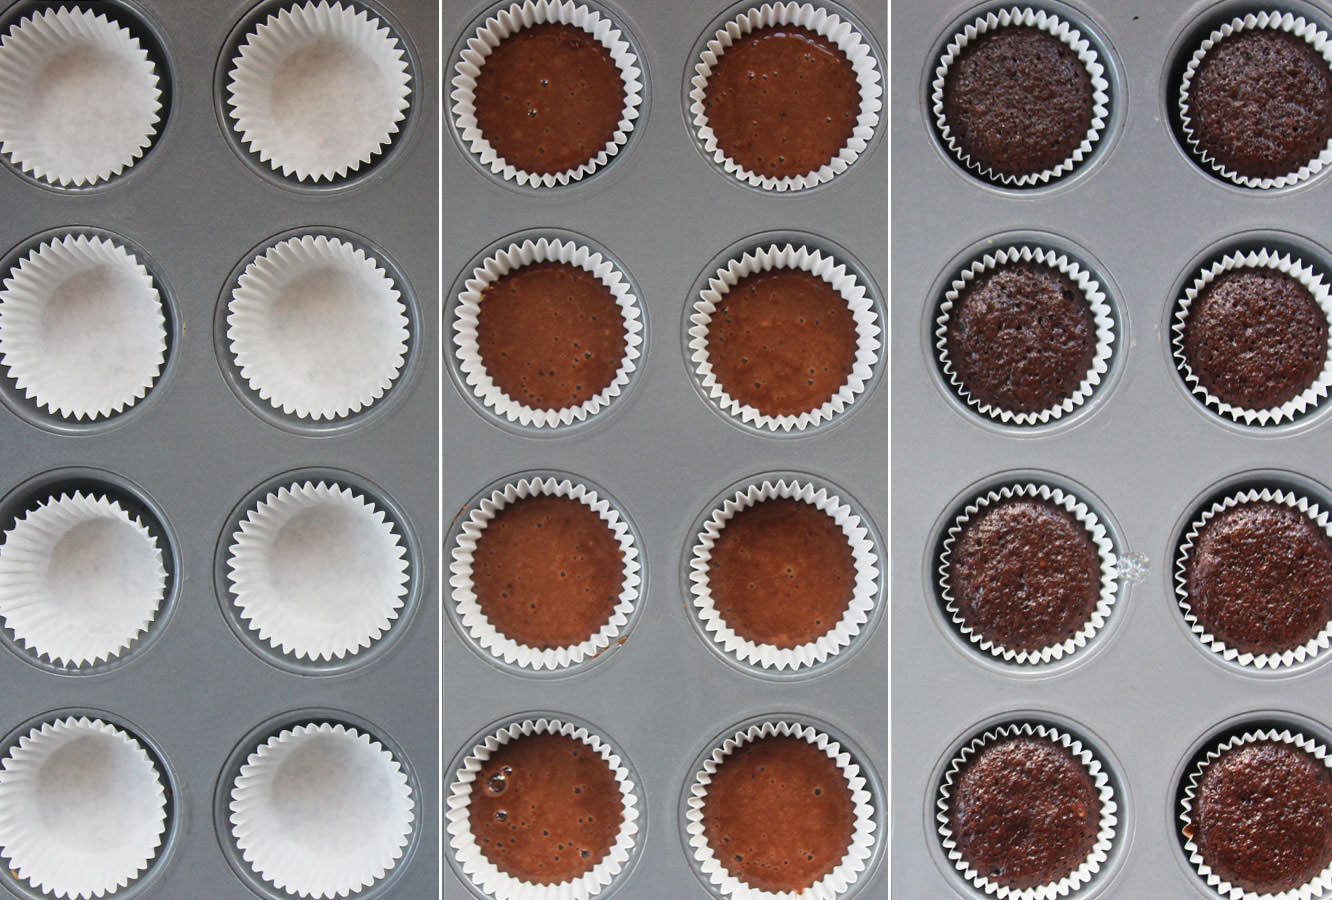
Step two
Spoon into mini cupcake/muffin cases. I filled mine about halfway and could have gone to two thirds. There’s not a huge amount of rise in this mixture, perfect for cupcakes because they are nice and flat for icing onto.
Step three
Bake in the oven at gas mark 4/180C/350F for around 40 minutes or until springy to the touch.
Step three
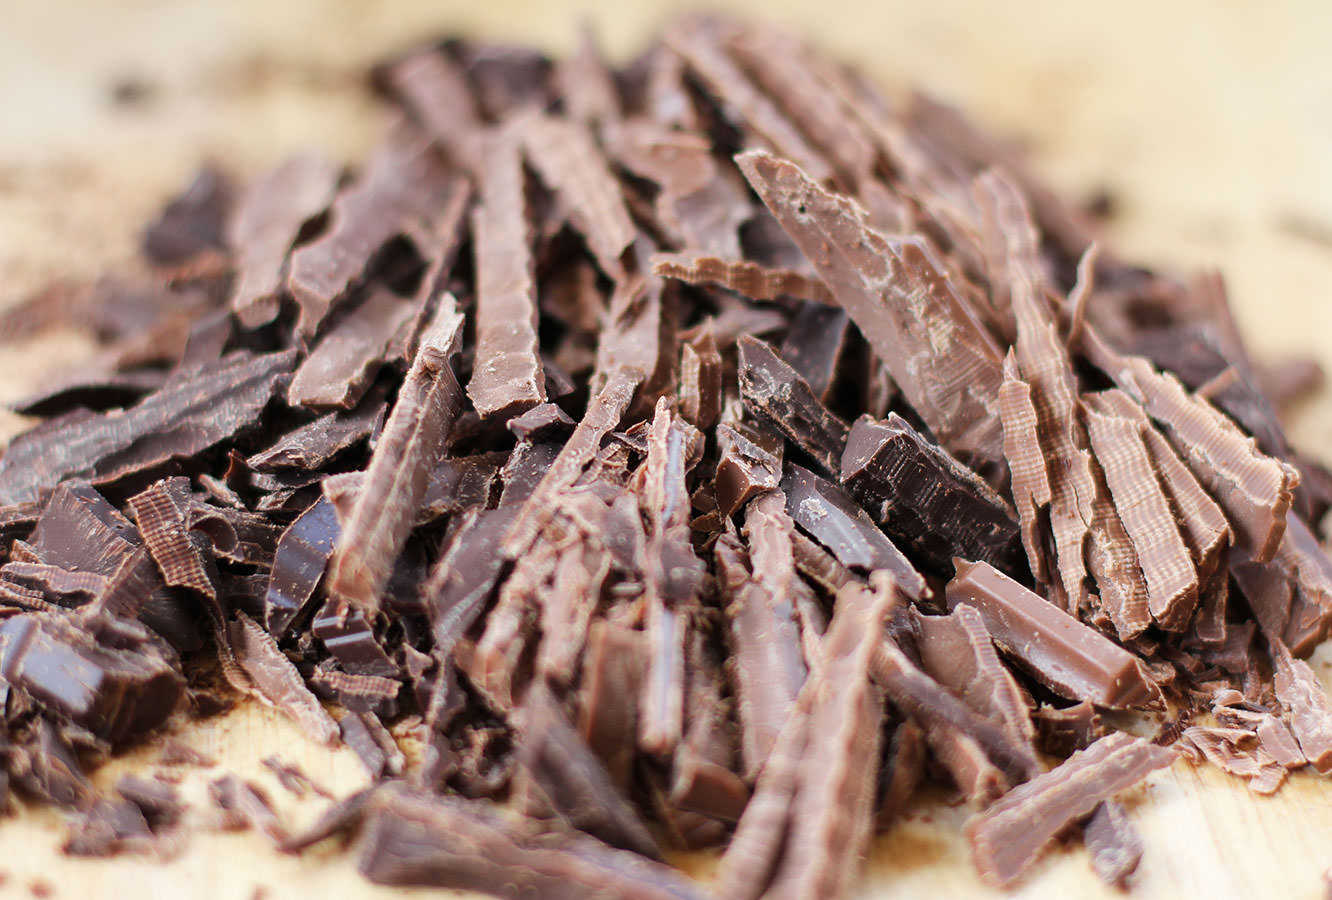
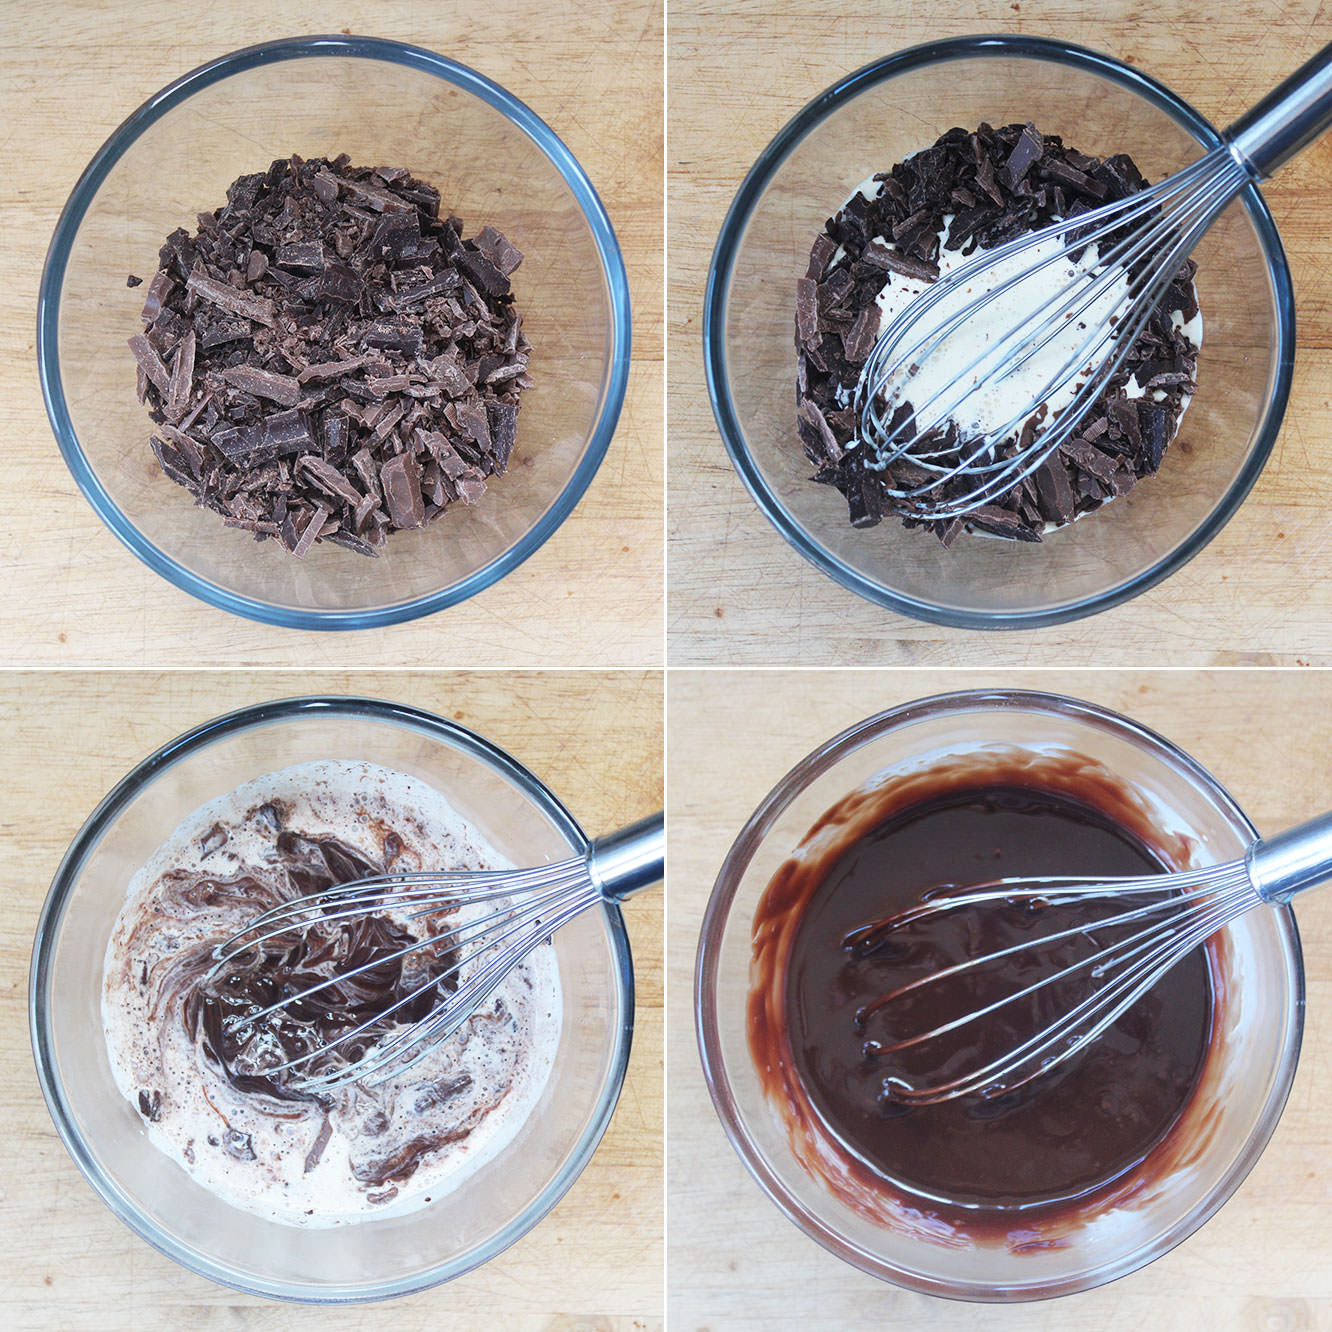
Whilst the cakes are in the oven, make the ganache. Chop the chocolate finely; I always use a bread knife for this and recommend you do too, you’ll never go back.
Place chocolate pieces in a small mixing bowl.
Step five
Gently heat 200ml double cream in a small saucepan. Let it get to the point where there is steam sort of dancing across the top and it’s beginning to simmer/bubble at the edges. You don’t need to wait longer than this, it doesn’t need to be piping hot – as Mary Berry always says in her wonderfully whimsical way – chocolate can melt in a child’s pocket.
Pour the cream over the chocolate and whisk until smooth. Set to one side.
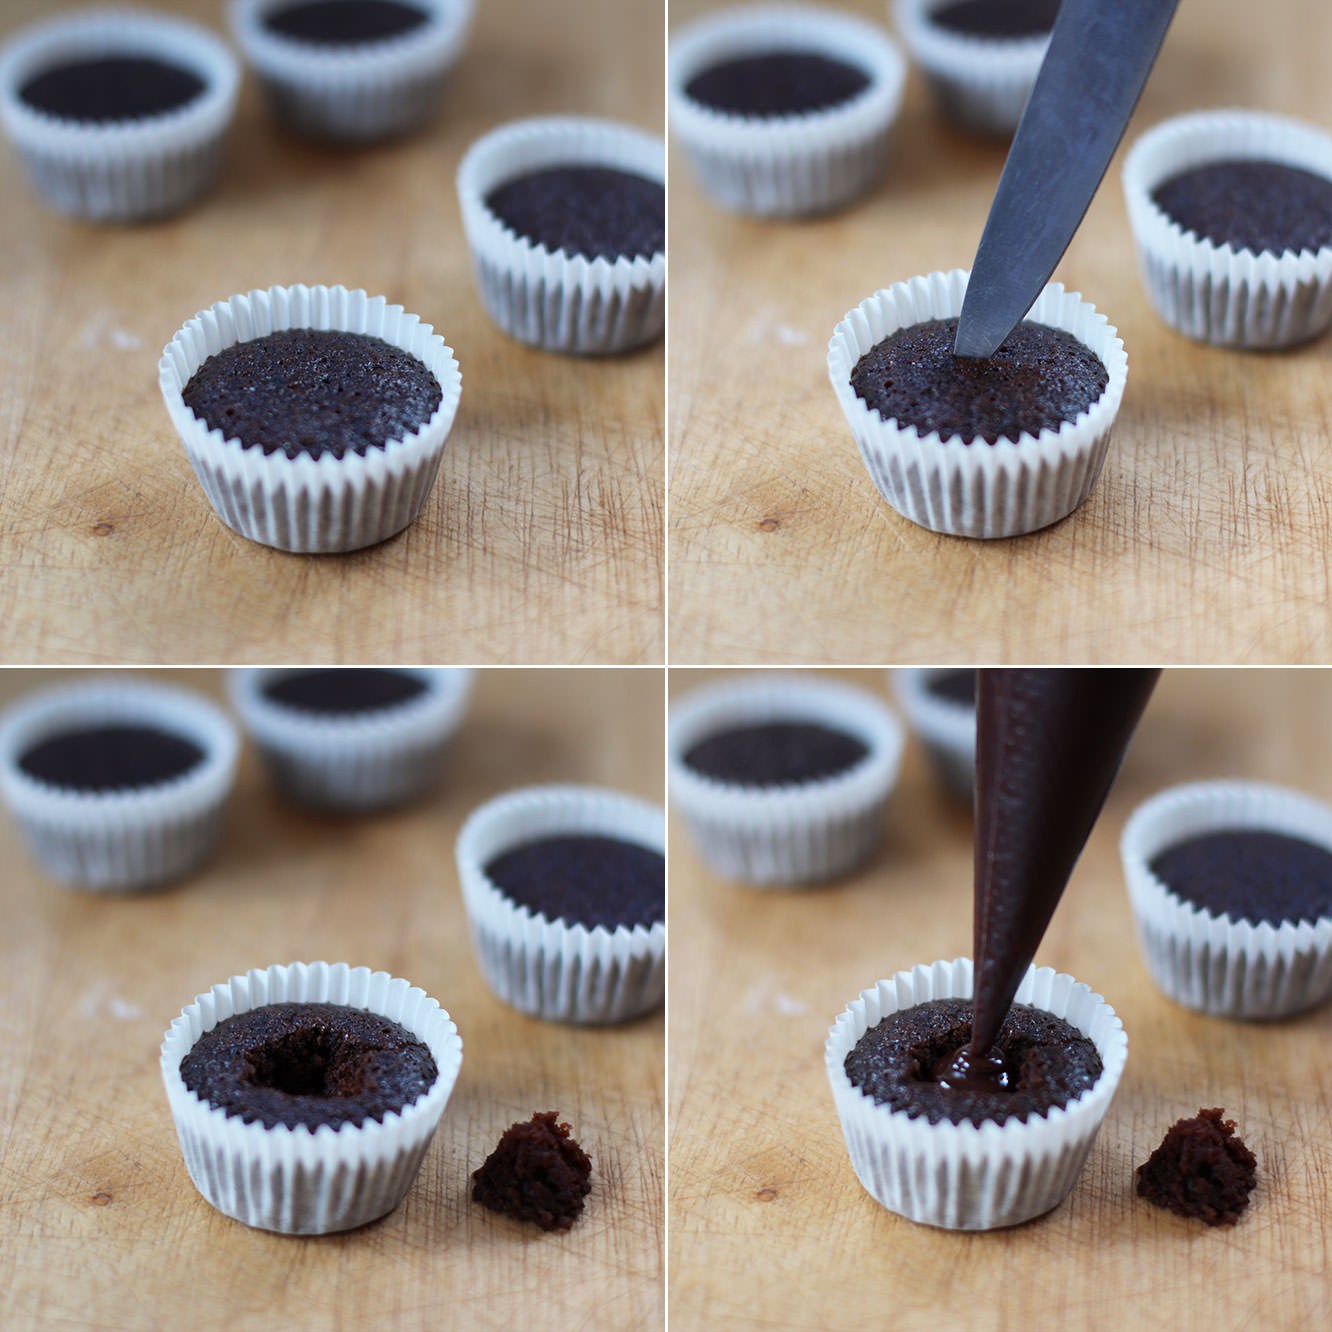
Step six
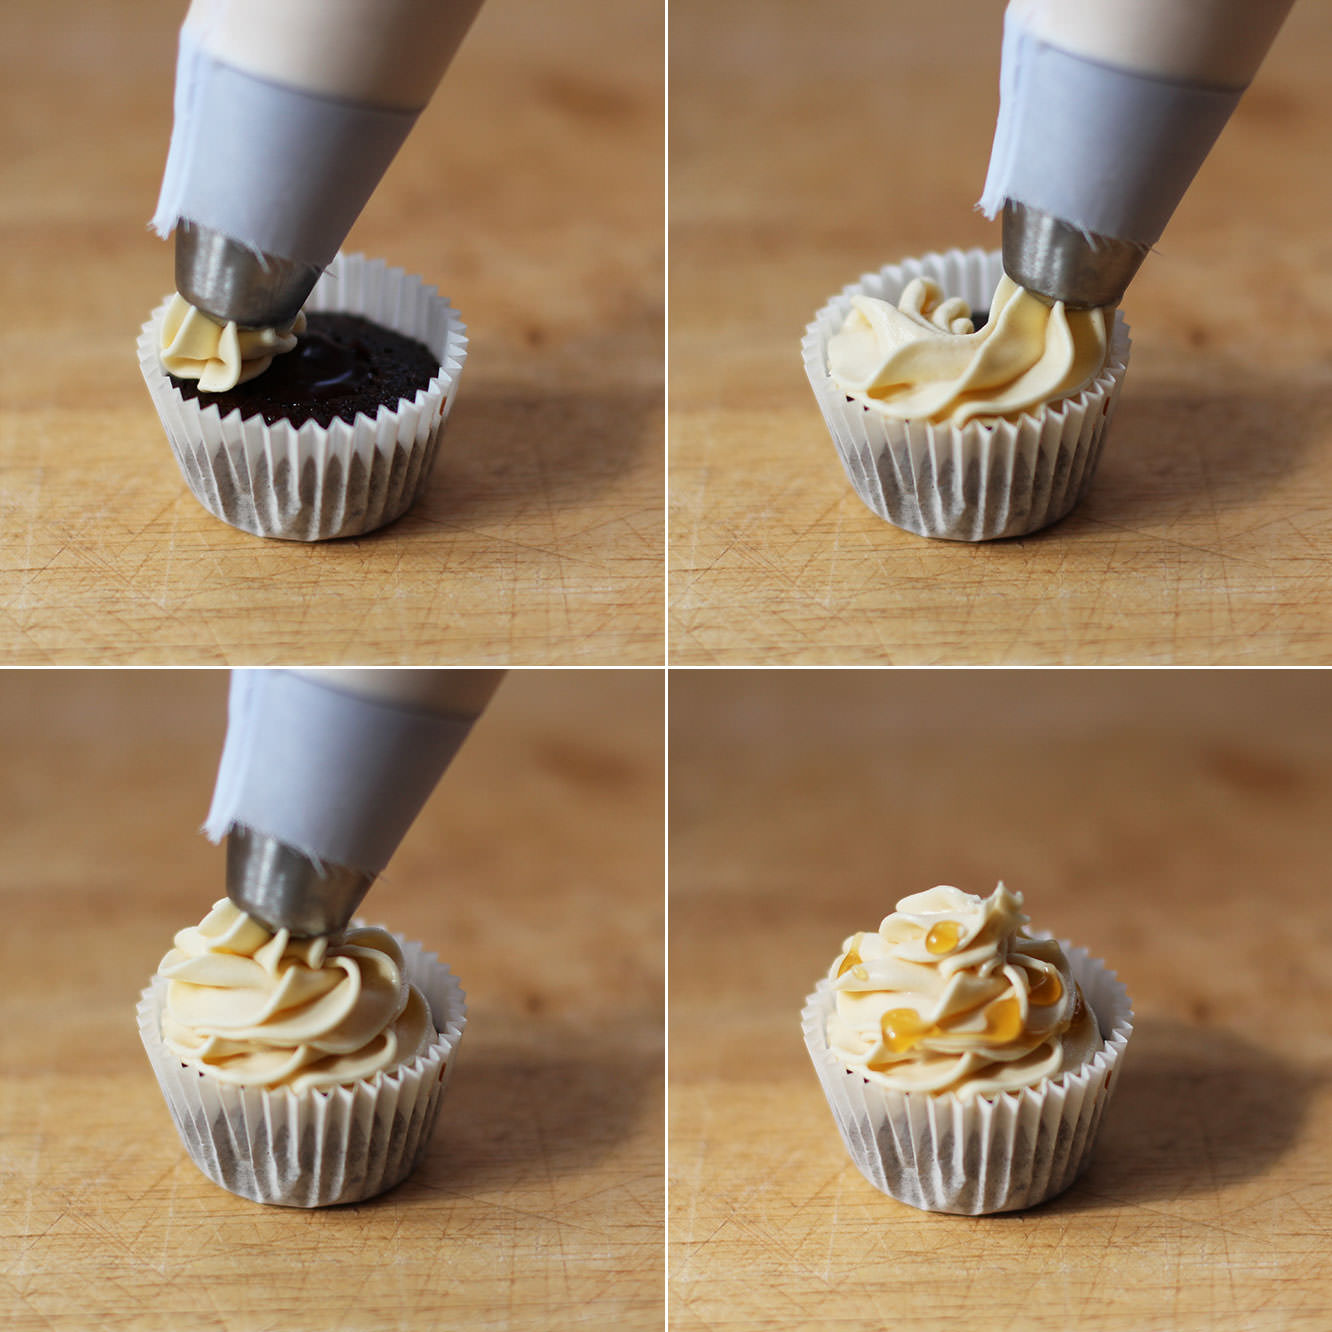
Once the cakes have completely cooled use a small vegetable knife to cut a hole in the centre. Yes you can eat the bit that pops out.
I found it was easiest to put the ganache into a piping bag as the cakes are quite small. Fill the gap entirely until the ganache is level with the top of the cake.
Step seven
Just keep filling, filling, filling, what do we do? We fill.
Leave them to set.
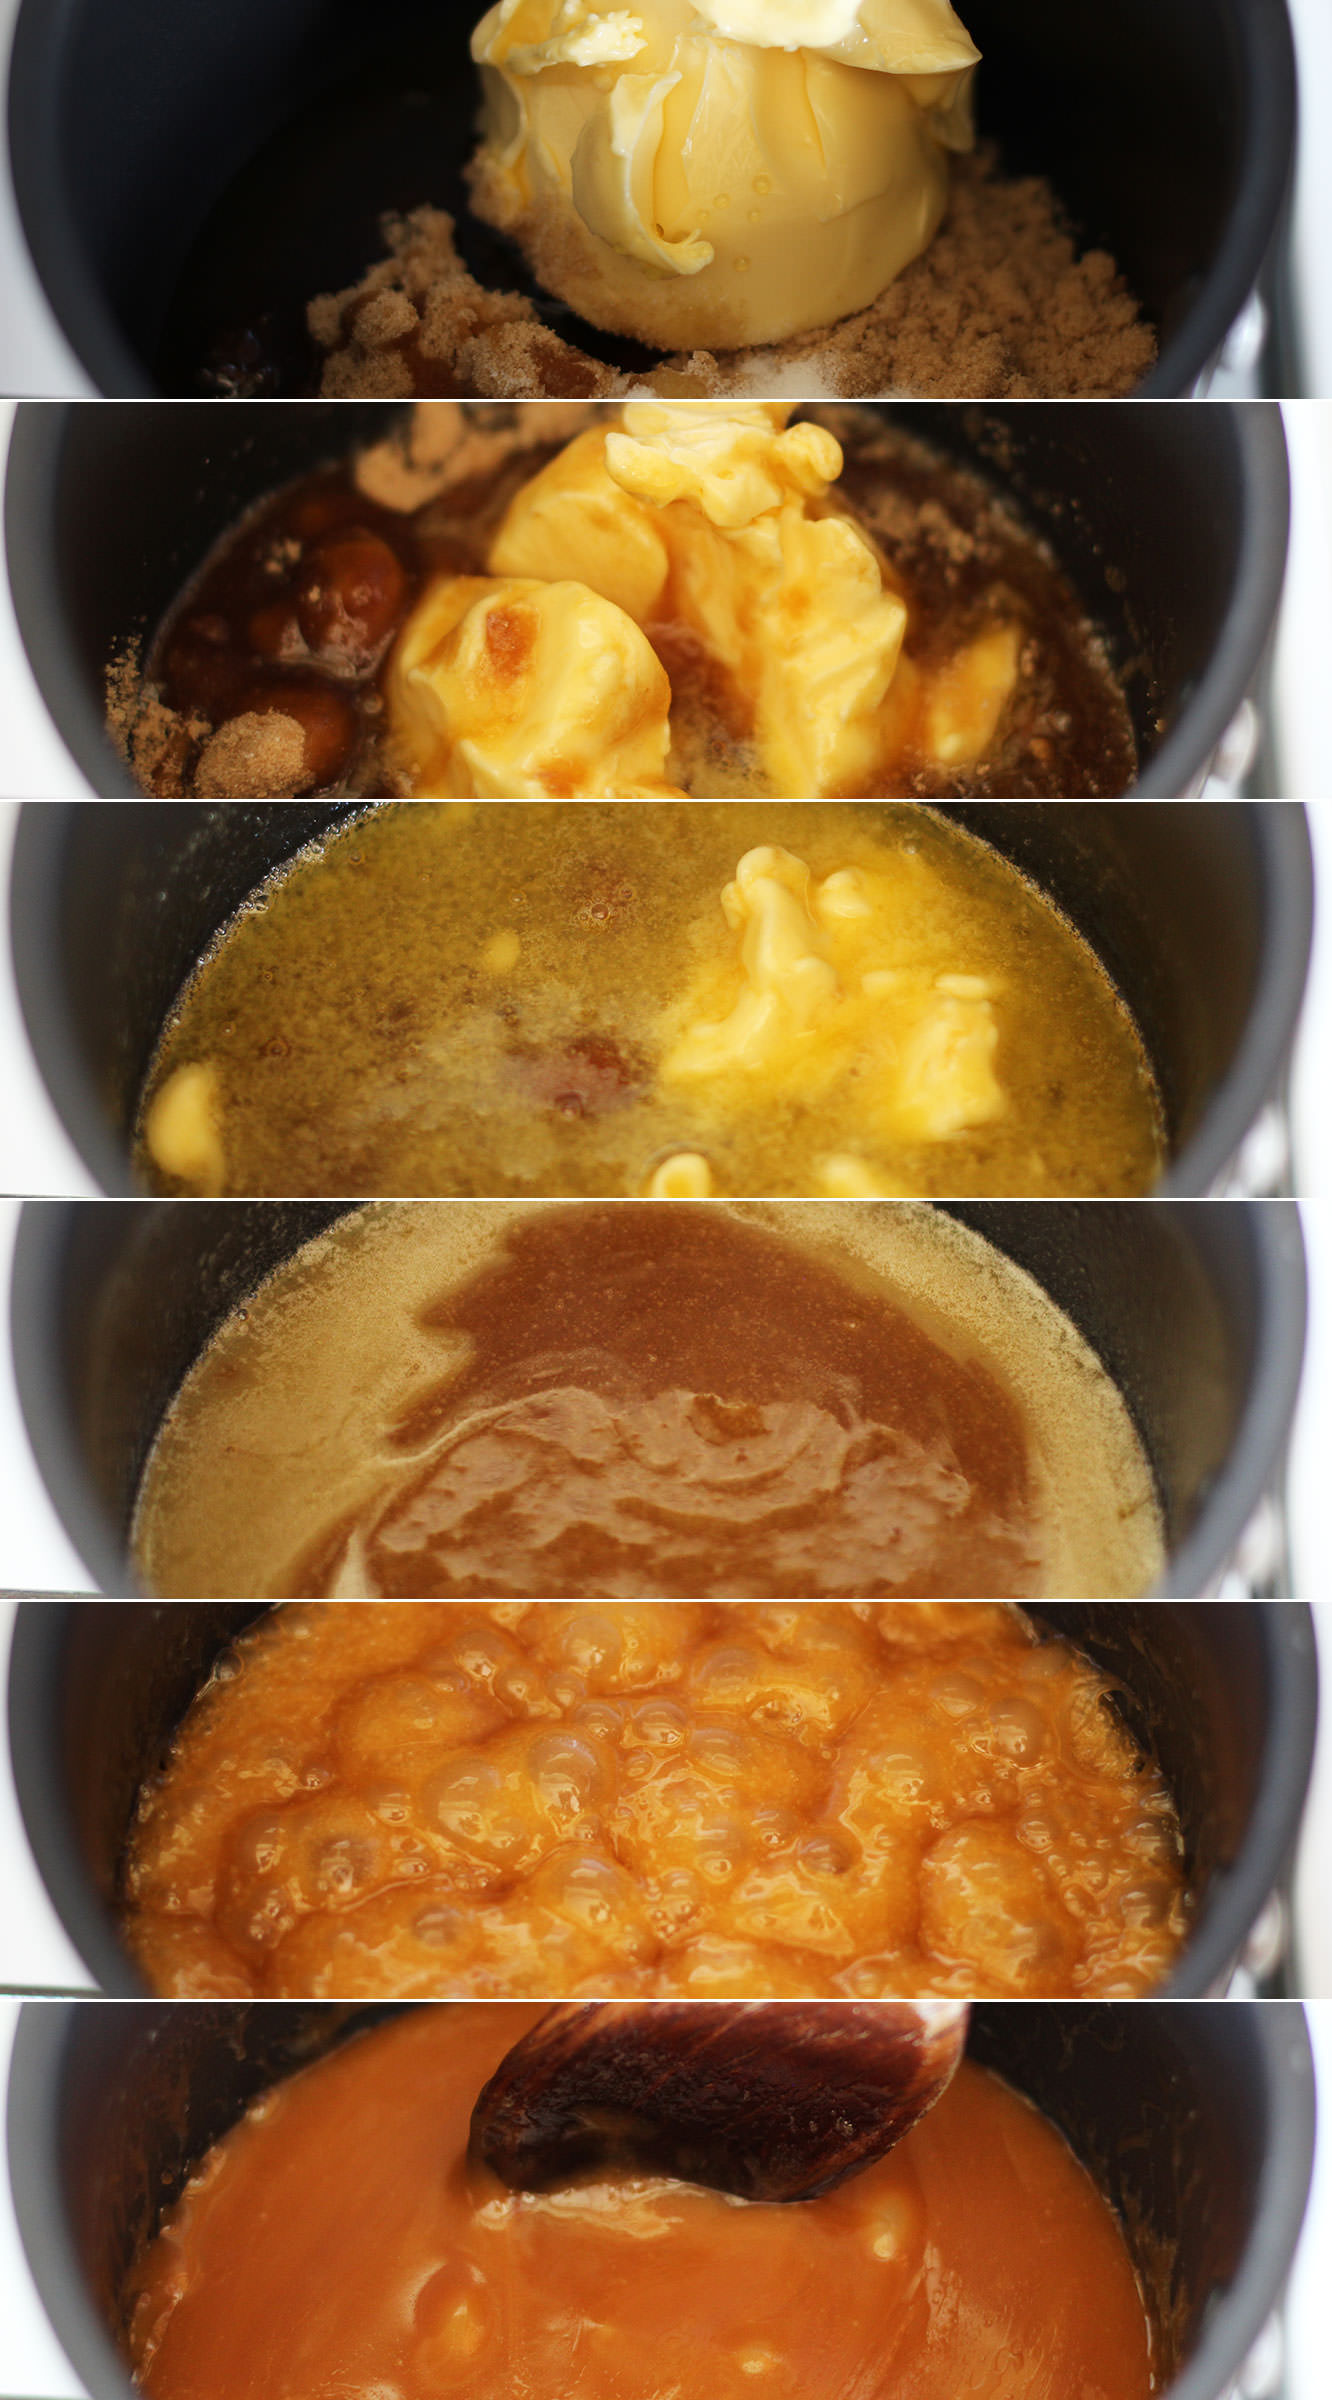
Step eight
Melt together 100g of the butter, the brown sugar, golden syrup and salt. Do this slowly and then bring the heat up to a simmer.
Simmer for 10 minutes. Stir regularly so that it doesn’t catch and burn. Leave to cool down for about half an hour or so.
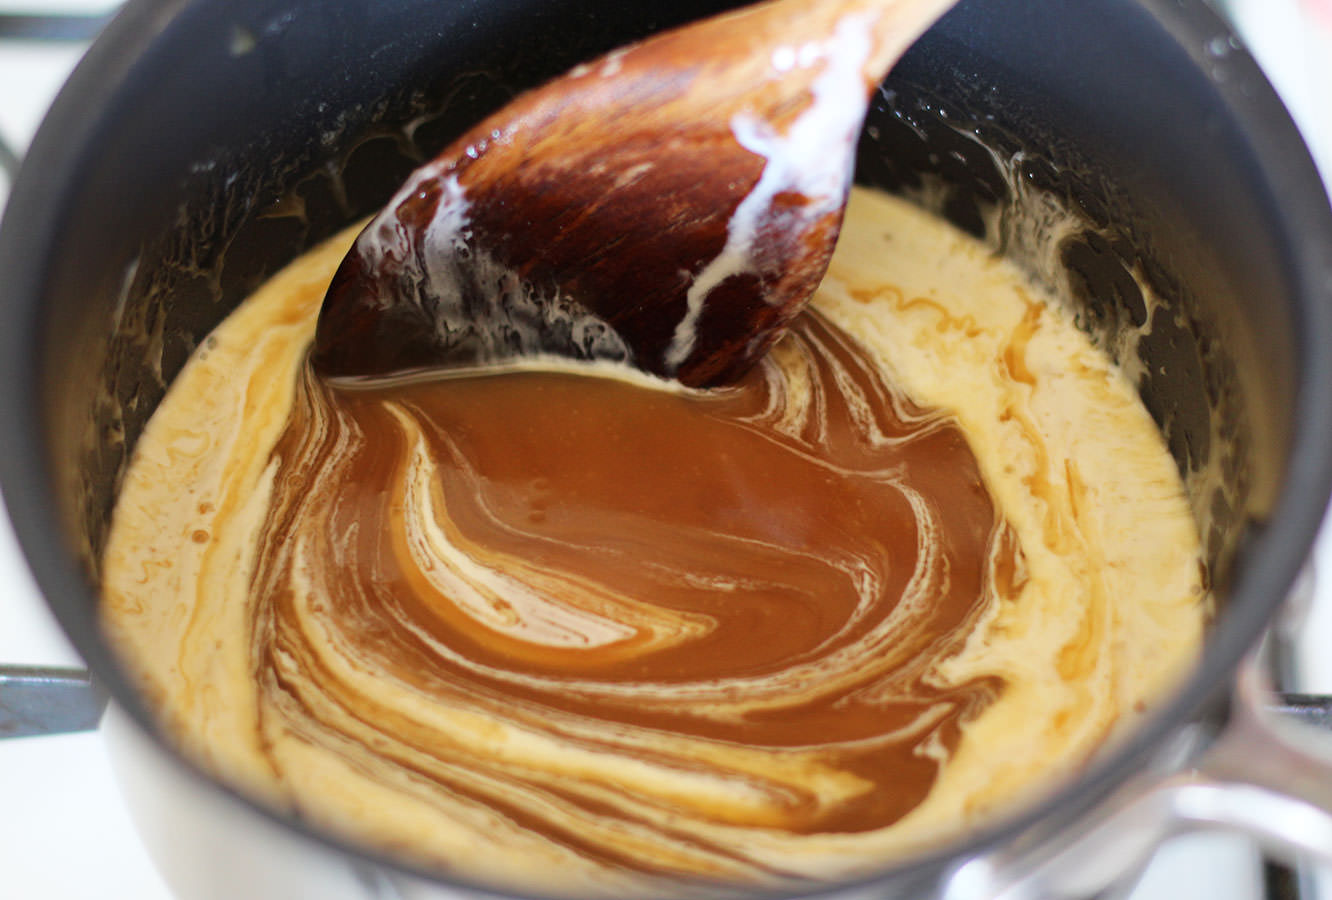
Step nine
Once the caramel has cooled down a bit, stir in the 100ml of cream. This will bizarrely make the caramel darker. Maybe a scientist can tell me why? Answers on a postcard please.
It will also get much runnier, I understand that bit.
Allow to cool to room temperature.
Step ten
With an electric whisk beat together the rest of the butter and the icing sugar. Cover with a tea towel to begin with so you don’t choke on the clouds of icing sugar…
Once the mixture is well combined gradually mix in the caramel you made earlier. Set a bit of this aside (about 50-100ml or so) to decorate later on.
Step eleven
Pop the frosting into a piping bag and top off your little cakes with a drizzle of caramel once iced. I used a different nozzle than I usually do just because. Forgive me that some of them look a little wonky.
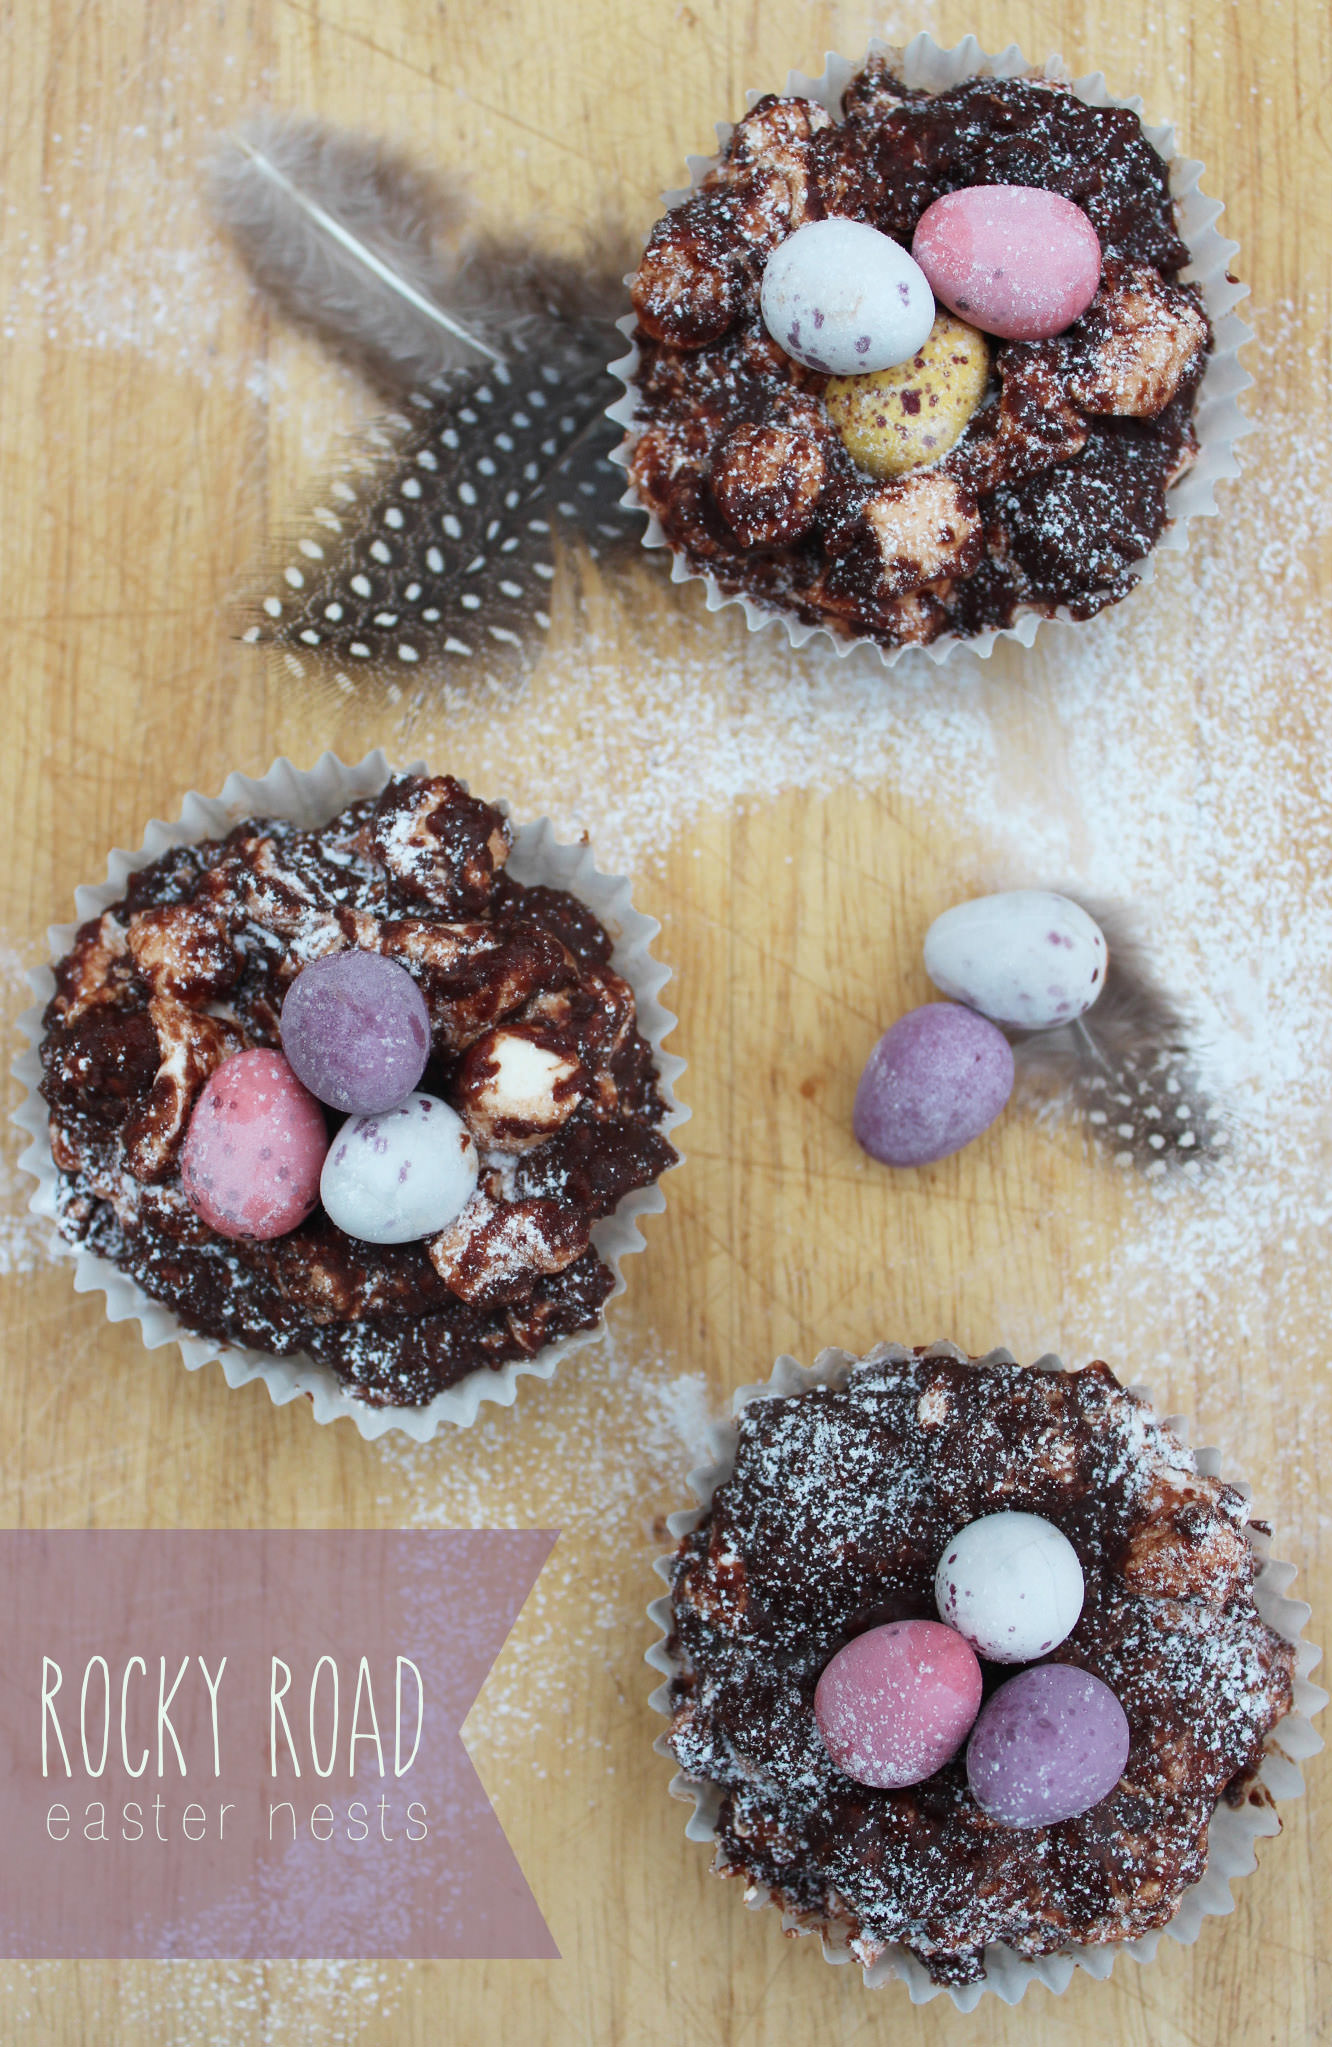
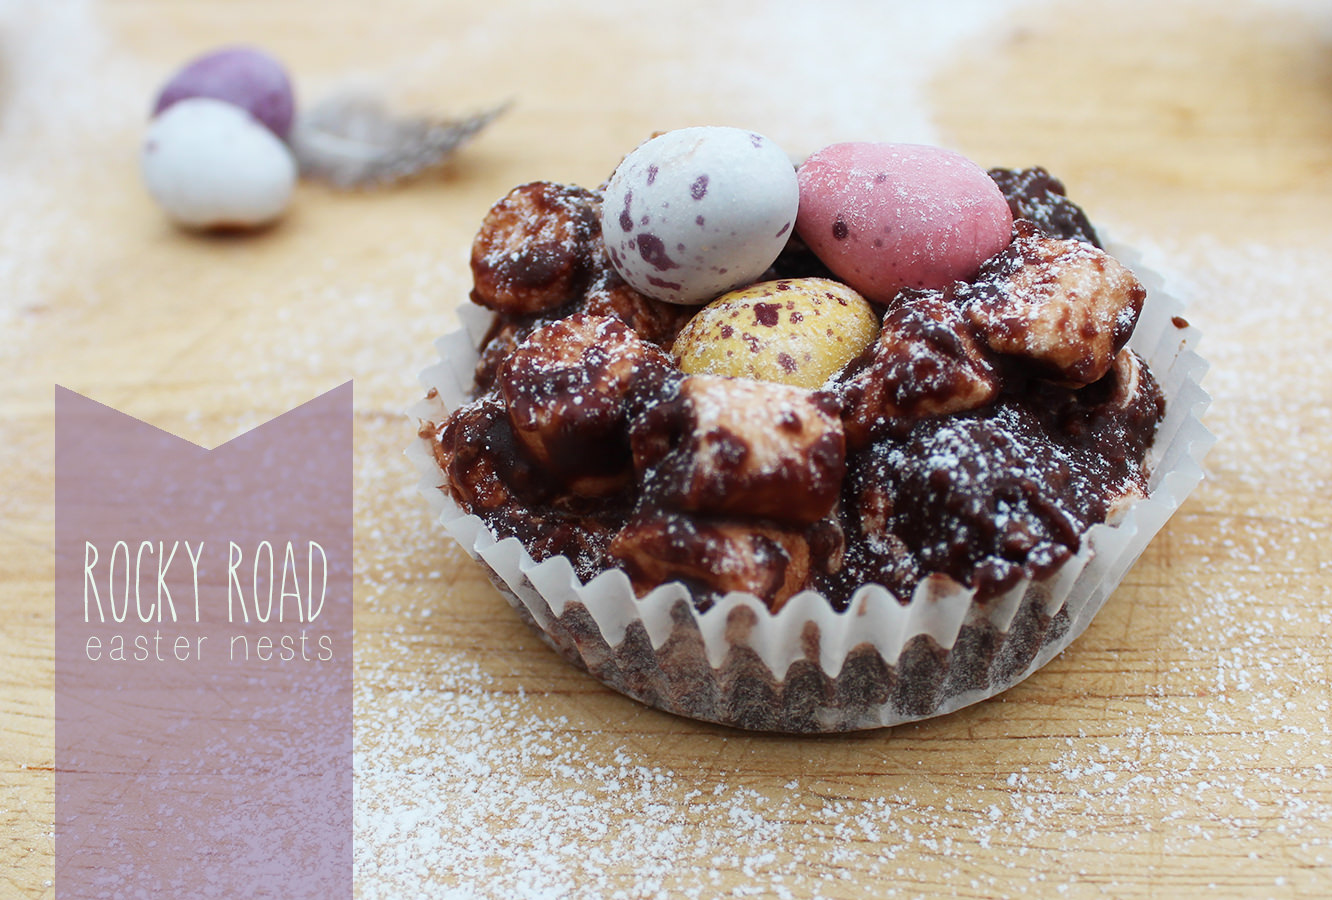
It’s such a lovely time of year, the sun is shining and the shops are full of mini eggs. What’s not to love?
This little idea popped into my head when I was putting out the snacks for an open day (I sort of swing by a university law school and do admissions in my spare time/to get paid). Anyway, after opening the rice crispy bites, and popping one in my mouth (it’s good manners to make sure everything is in order for the guests) I moved on to unpacking the rocky road. BINGO. Rocky road Easter nests were born!
As if that hasn’t sold it well enough to you, these look far more realistic than your regular festive treat, and you will never touch a box of shredded wheat again once you’ve tried them. Just as easy to make with kiddies and more ingredients so more fun to be had.
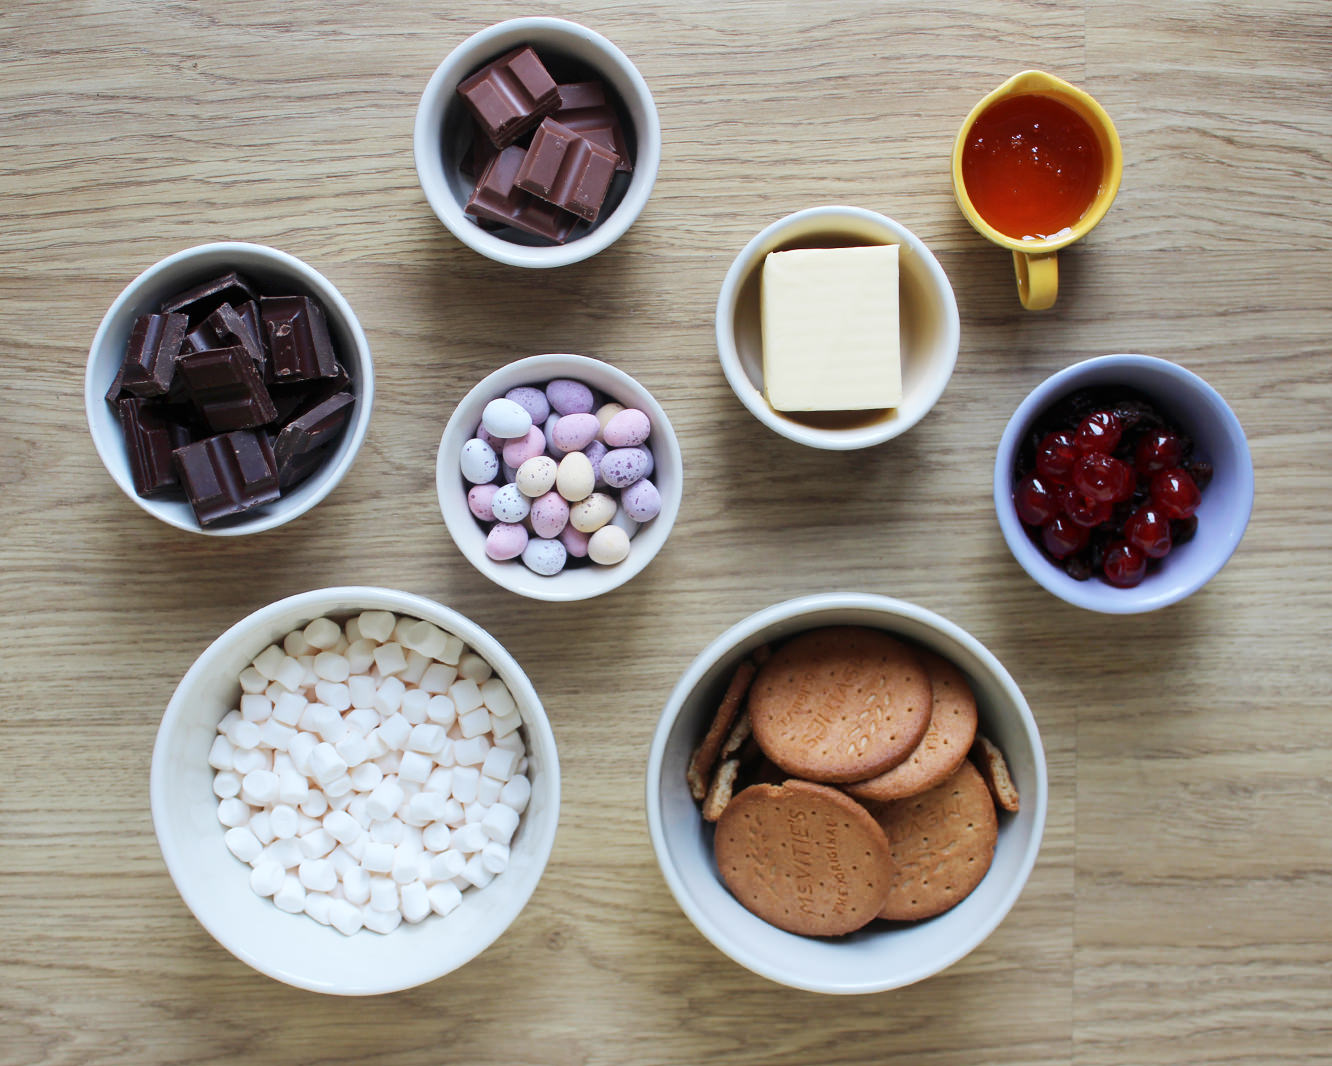
You will need
200g/7 oz Dark chocolate
100g/3.5 oz Milk chocolate
125g/4.5 oz Unsalted butter
3 tbsp Golden syrup
200g/7 0z Digestive biscuits
100g/3.5 oz Mini marshmallows
Generous handful of seedless raisins
15 Glace cherries (cut into quarters)
Bag of mini eggs
Fairy cake cases
Icing sugar to dust
Makes 15
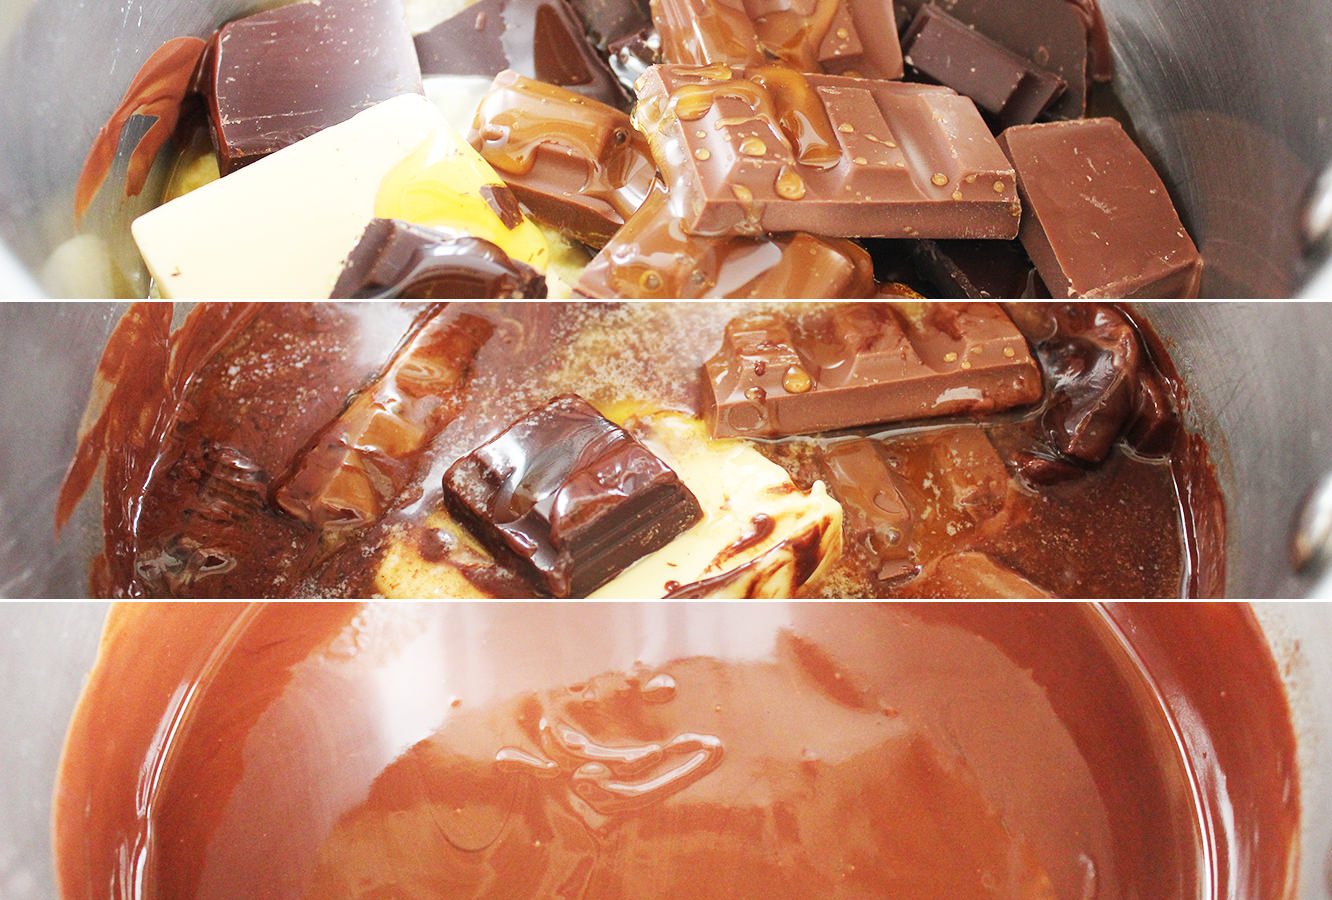
Step one
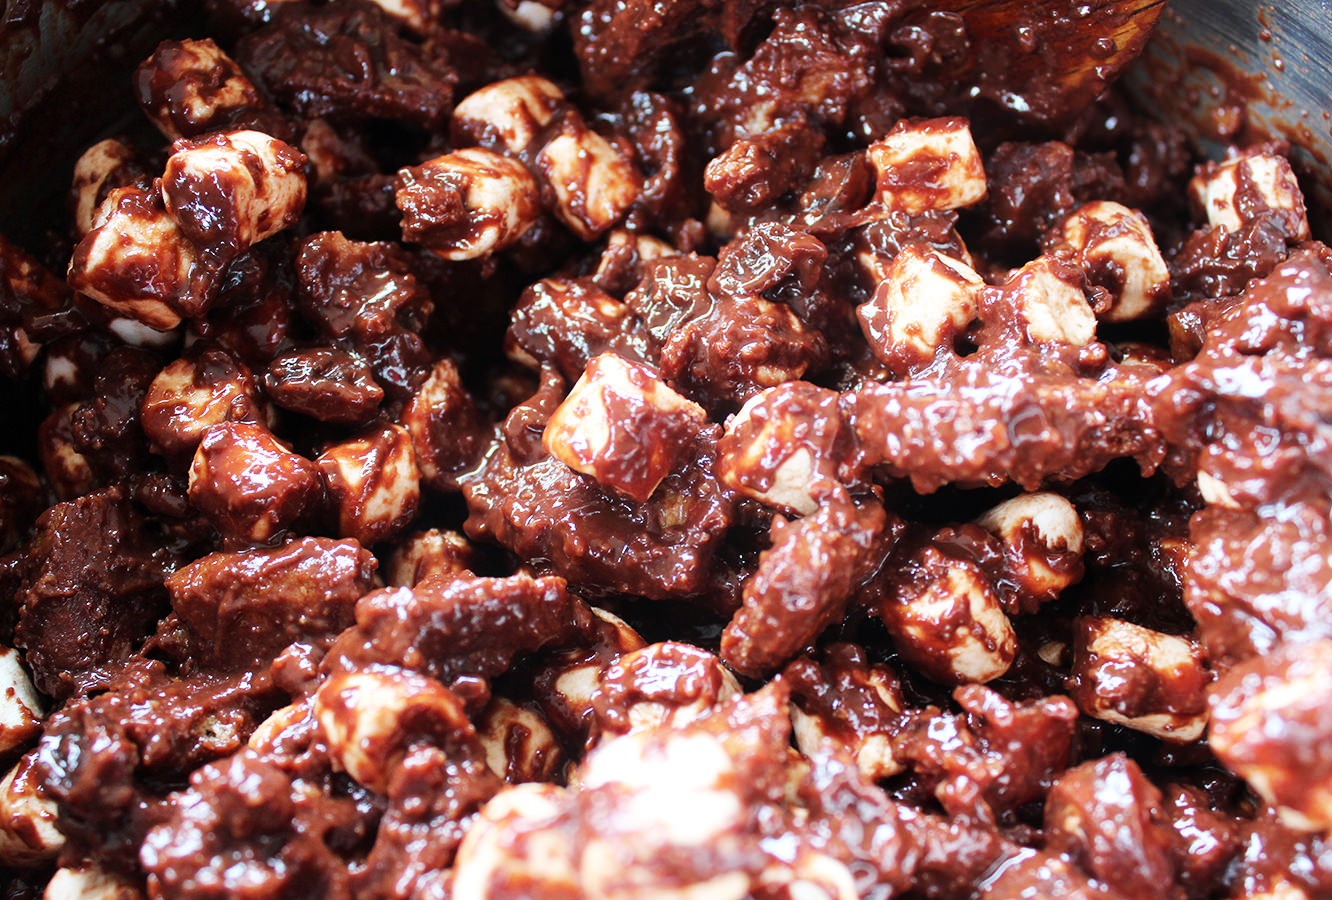
Melt the dark chocolate, milk chocolate, butter and golden syrup in a sauce pan.
Go slowly, burning chocolate is one of life’s saddest occurrences.
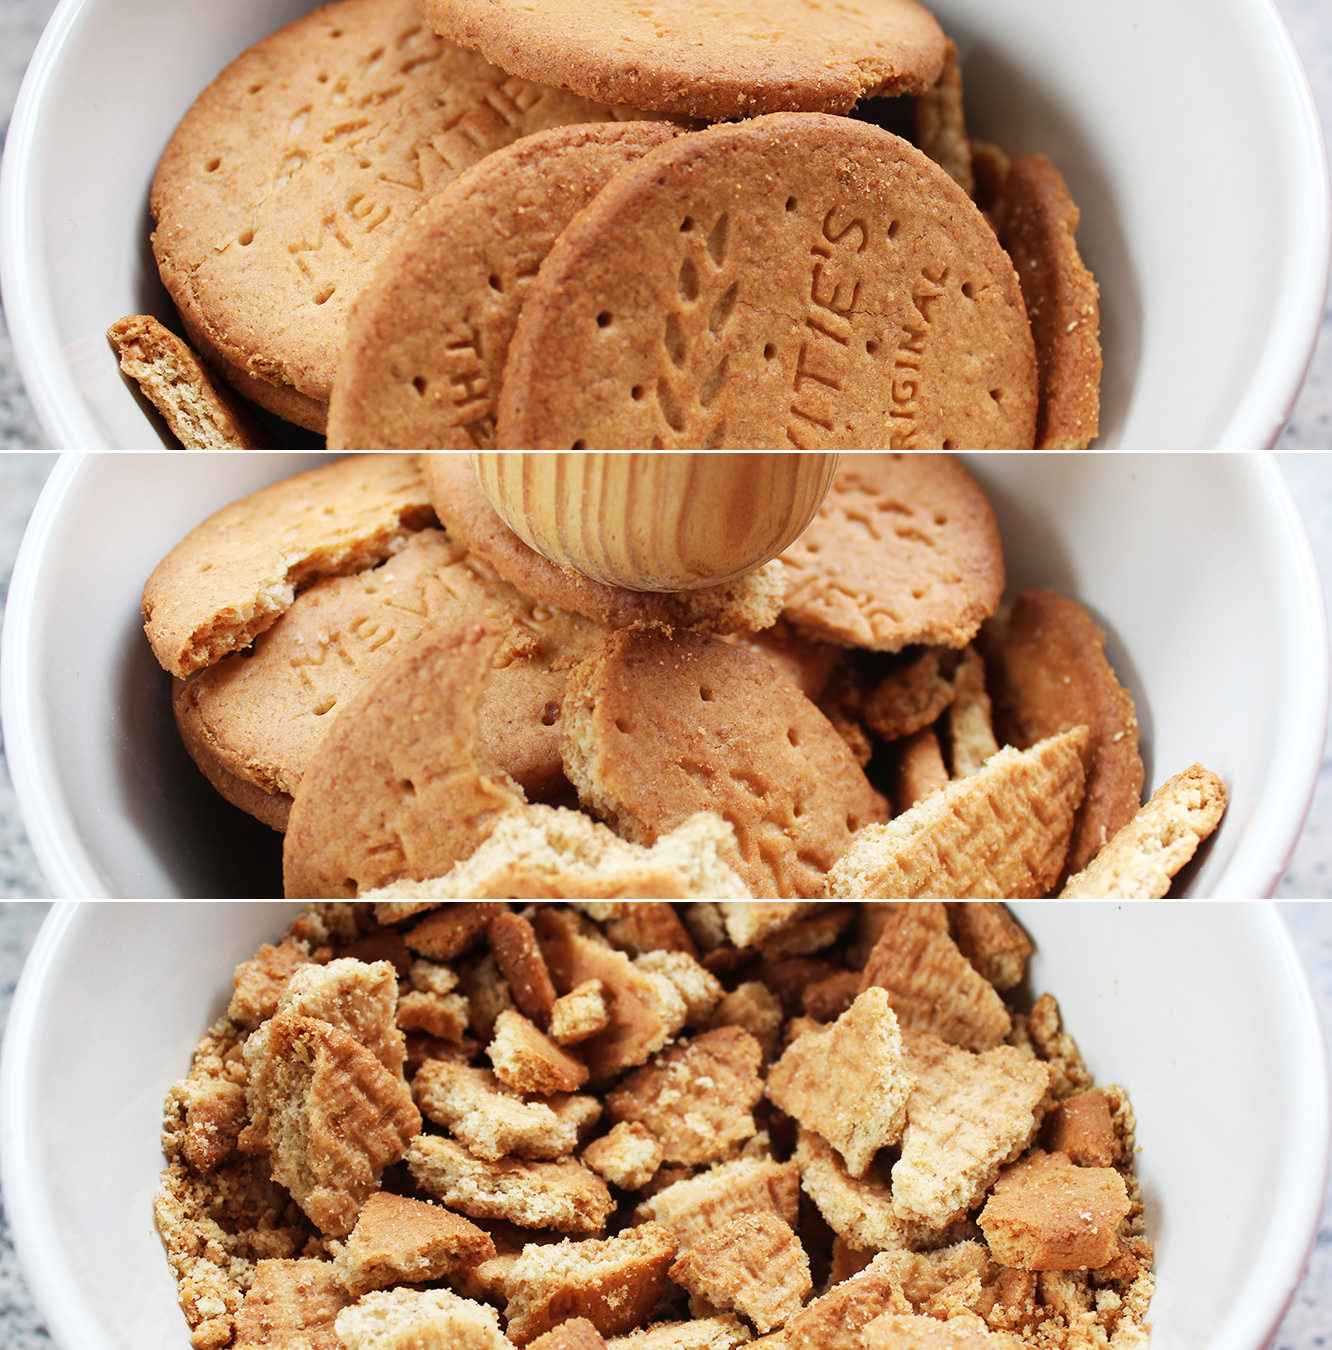
Step two
While the chocolate is melting, but without getting too distracted, crush up the digestive biscuits with the end of a rolling pin.
Or your fist if you’re having a particularly bad day.
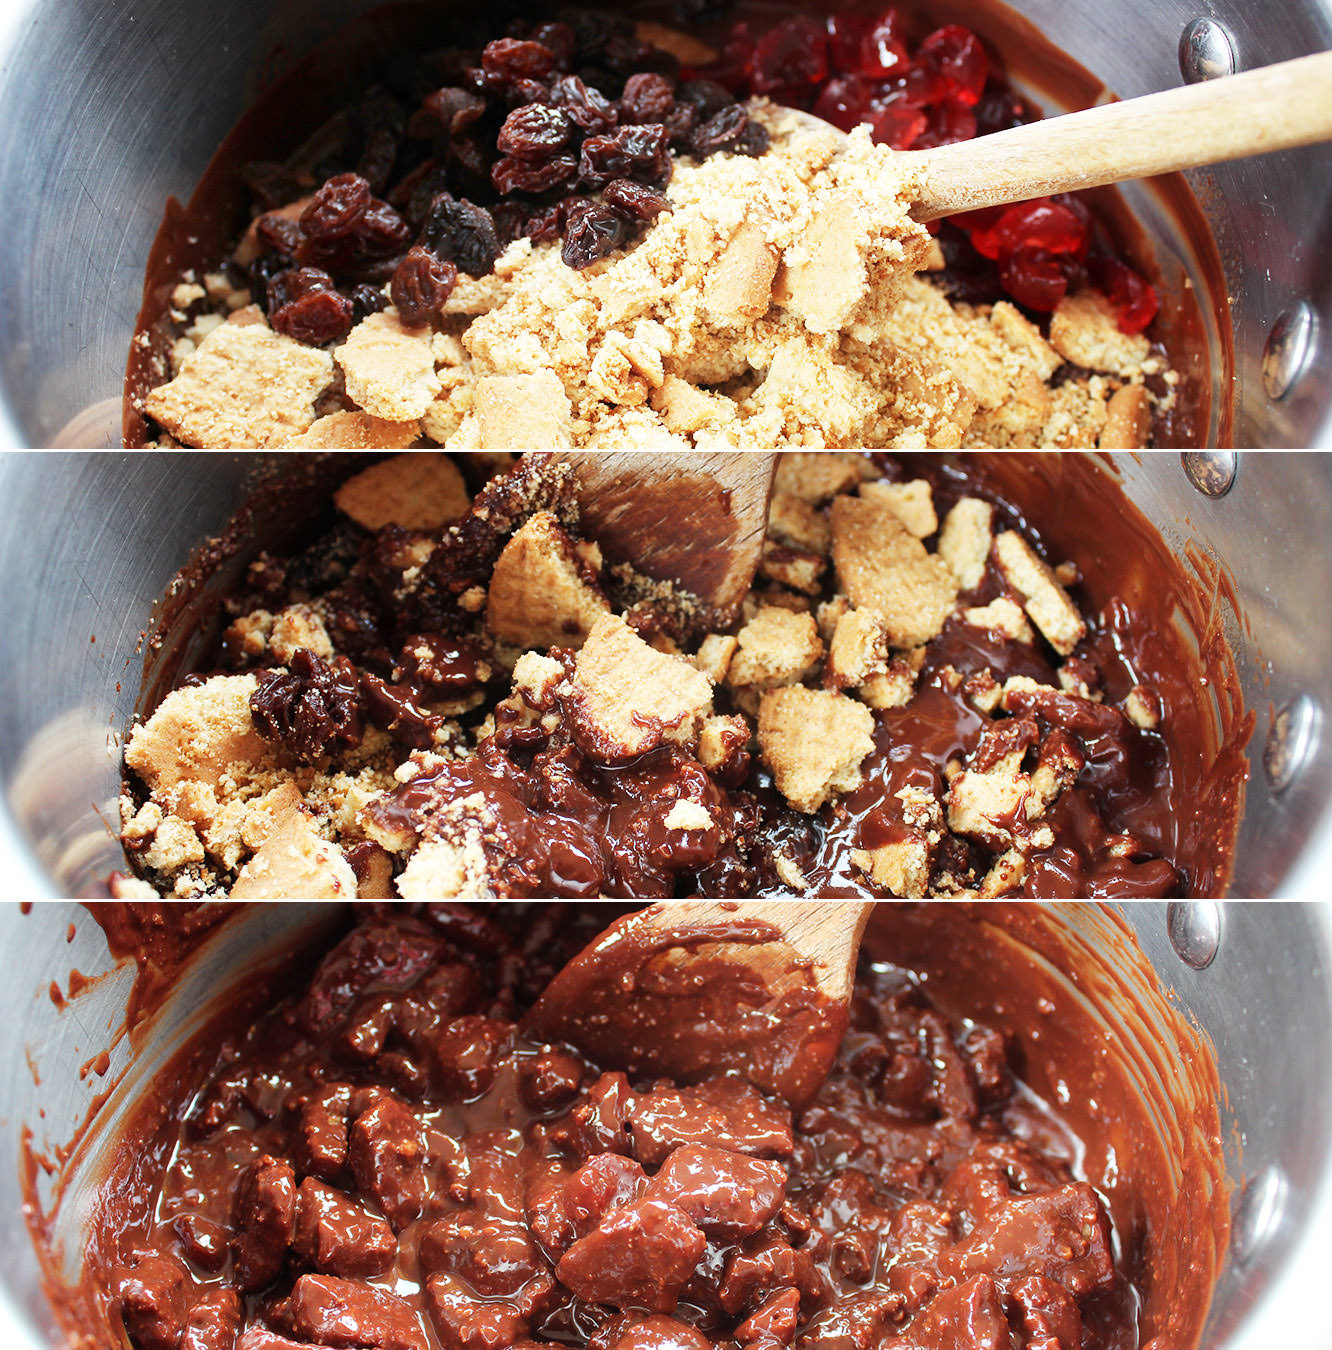
Step three
Stir the biscuit, cherries and raisins into the chocolate. Leave the marshmallows alone for the moment.
In case you weren’t gifted with common sense, this should be off the heat by now.
Set to one side.
Step four
This is the clever bit, or at least I like to think so.
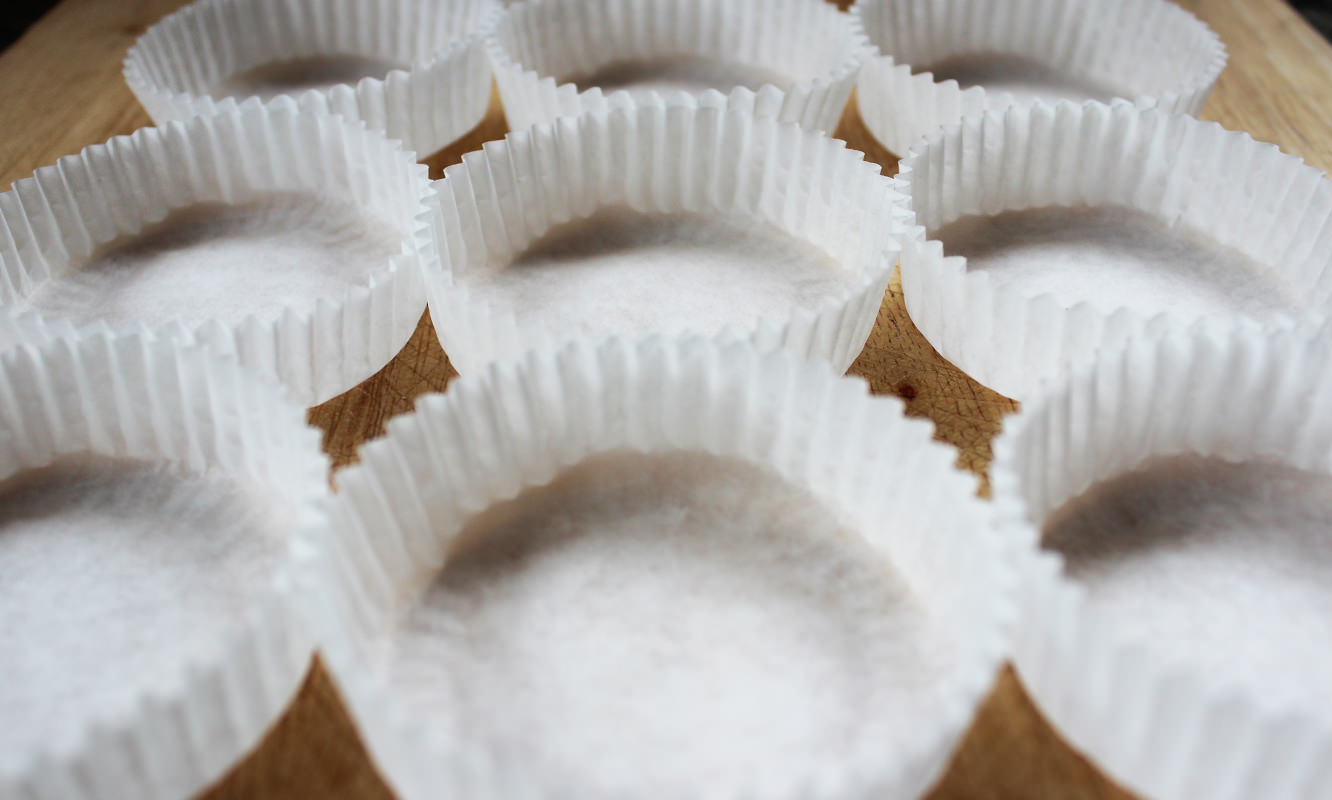
I figured nests aren’t the strange conical shape of cupcake cases, and I didn’t want to end up mail ordering some weird and wonderful baking cases that met my specifications, so I just adapted the regular ones.
I say regular, but I’m not convinced these are actually universal. Before America convinced us that muffin-sized cakes covered in mountains of buttercream (the cupcake we know and love) were the way forward, us Brits had a more modest little bun – the fairy cake. Do other countries have these too? Answers on a post card please.
Anyway, my dear ma has been chastising me about using up the many a fairy cake case we have gathering dust in the cupboard while I burn through the muffin cases to make my cupcakes. They just aren’t cool anymore mum.
Until now.
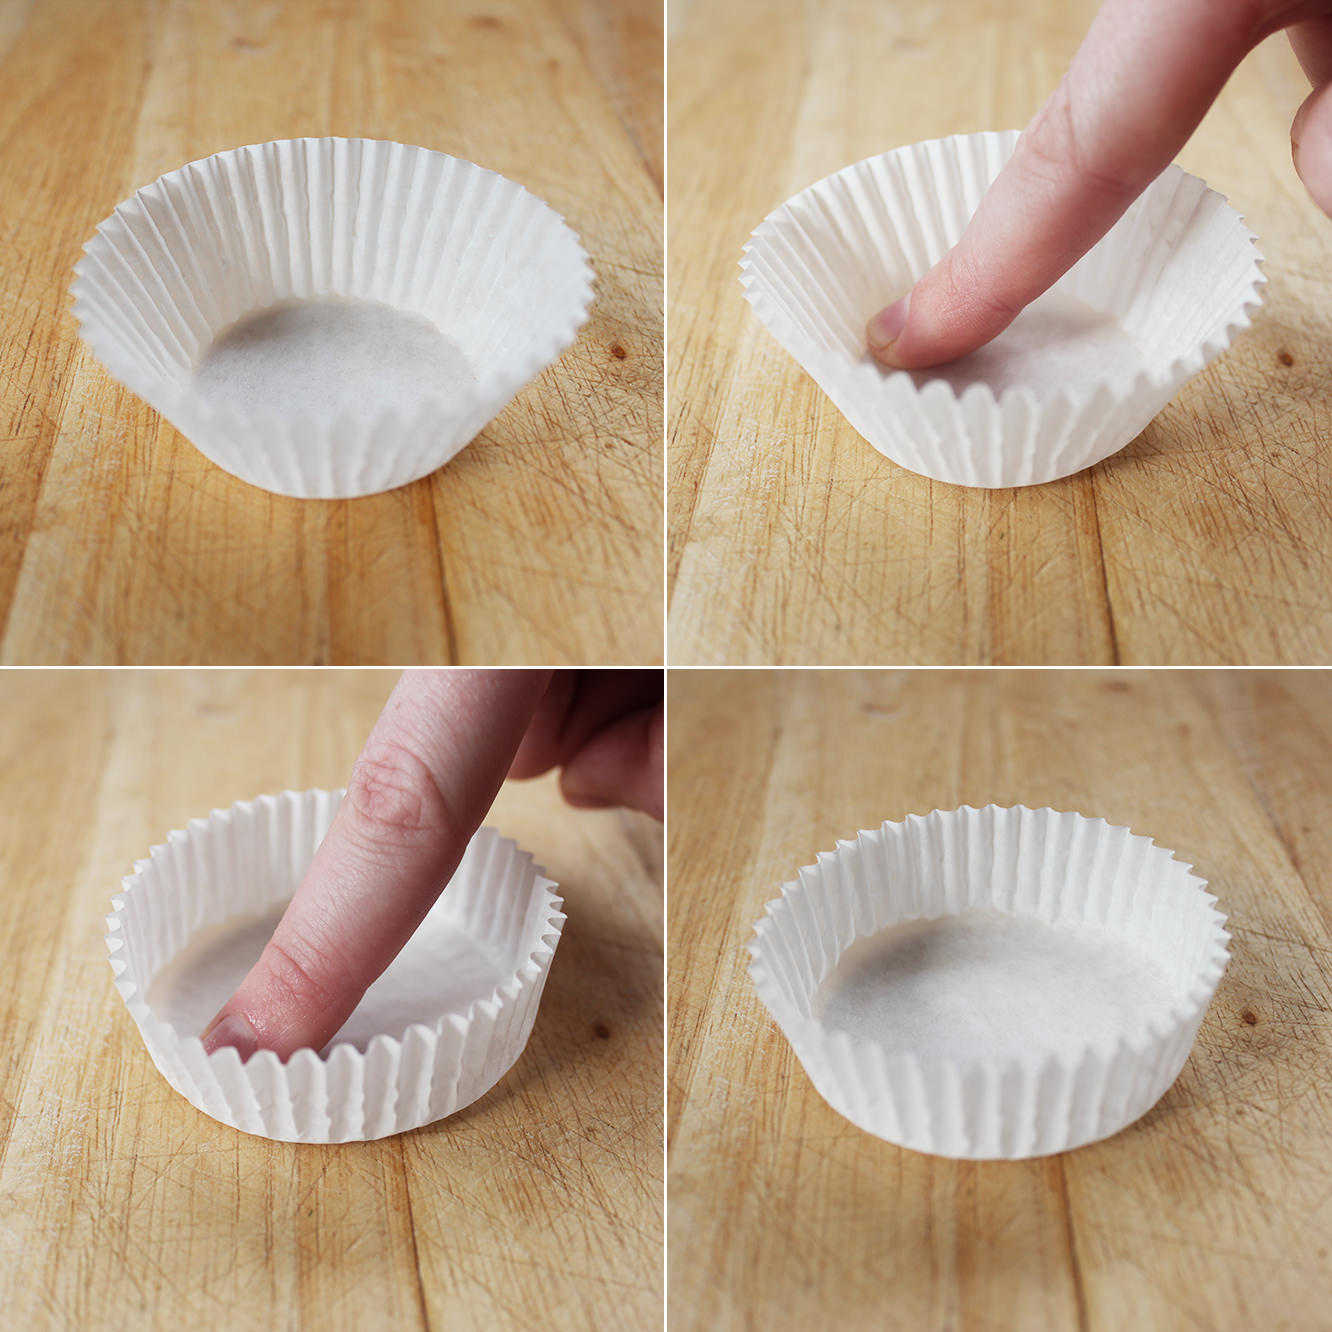
The fairy cake cases are the perfect size for this, although, of course, whatever size you have should work the same way (you will just have a slightly different number of nests at the end).
Basically you just run your finger around the inside edge of the case in circles until it opens out and has short straight walls as pictured.
Step four
Repeat x 15
Step five
The chocolate mix should now have cooled sufficiently to not melt your marshmallows to mush.
Stir them in…you will still have to work fairly quickly.
Step six
Spoon mixture into cases and stick eggs in the nests. Don’t be tight, give at least three to each one.
Step seven
Put in the fridge to set.
Dust in icing sugar before serving, you can afford to be a bit more liberal than I was. After I’d taken the pictures I dropped the spoon on one and it actually looked a lot better with a heavier dusting.
Step eight
Get chubby.
Have a great week guys!
Oh, and you may have noticed I’ve moved my site – I’m trying to figure out what impact that has on the people who were already following me, I’ll keep you posted!
If your country doesn’t stock Mars bars then I am truly sorry…for these are delicious, and you will probably never experience the joy of tasting one. If you live in the UK then get down to your local newsagent, there’s no time to be wasting.
A little disclaimer before I begin: the combination of the fact that a) I was making these for a charity bake sale and b) I couldn’t find a regular 4 pack of Mars bars means that the recipe below is rather substantial. Divide in half or into thirds if you are baking these for home and don’t fancy obesity as a life choice (you won’t be able to stop eating them).
You will need
6 Mars bars
3 tbsp Golden syrup
250g Unsalted butter
9 cups of Rice crispies
(this is basically a whole box – I used the cheap Tesco knock off kind, no need to break the bank)
400g Milk chocolate
An appointment with your GP to test your blood sugar levels.
Makes 24 (at least)
Step one
Chop up the Mars bar.
Oh go on then, there’s at least one piece going spare…
Step two
Put Mars, butter, and golden syrup in a pan on a medium heat to melt.
Those fluffy bits in the middle of the Mars bars take what feels like forever to melt, but they do get there, just keep stirring, and maybe stick a bit of Dragon’s Den on or something.
Step three
Put most of the rice puffs in a big bowl. I always hold a few cups back to add later, as this isn’t an exact Science so you won’t always need them all.
Pour the melted mixture over the puffs. You probably deserve another little taste at this point.
Step four
Stir together until rice crispies are evenly covered. It’s up to you whether to add the rest that you kept to one side or not, I added the whole lot to mine.
Step five
Line a couple of tray bake tins with foil and distribute your mixture accordingly. Again, it’s up to you how deep/shallow you want your crispy cakes to be, so choose your tins with that in mind.
Step six
Squash the mixture down with the back of a spoon until it fills the various crevices (or with your hands when you get tired of doing it the PC way – wash them first though, there are some standards to be upheld).
Make sure the mixture is squashed down firmly or it will all fall apart later. Literally.
Step seven
Melt the milk chocolate and cover the top of the crispy cakes evenly. Again this will sort of depend on what tin you use and what consistency you want as to how much you need, as you want enough to cover it all. If you chose a shallower tin then you’ll need a bit more chocolate and so on.
Step eight
Cut the crispy cakes into slices now before it all sets up, it’s just all a bit easier that way.
I’ve been on my travels up and down the country recently (well, mainly side to side actually). So not a huge amount of crafting has been a-happening.
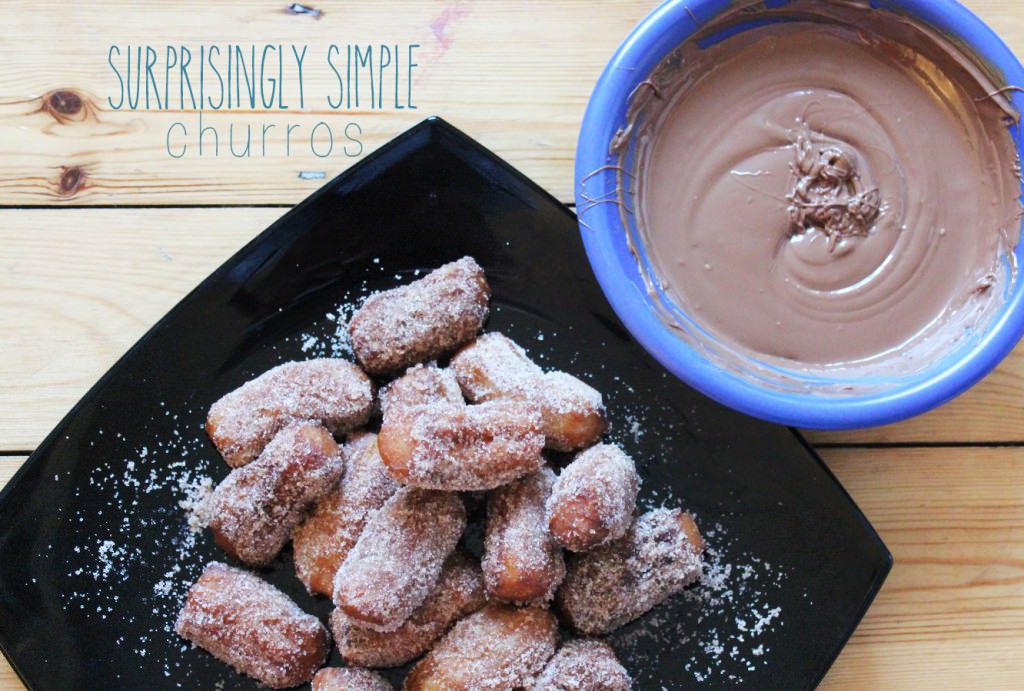
One such weekend was spent with some of my bests in NW London, and at brunch time I took my camera out and started snapping. We decided that churros bites were the order of the day (if you don’t know what churros are, then you’ve not really lived yet, fact).
None of us had made them before and at least one of us was terrified by the prospect of a pan fire (no deep fat fryer for us). It was actually gob-smackingly easy and very fun, so go on, have a go.
You will need
1 cup Water
2 and 1/2 tbsp Caster sugar (plus some for coating)
In a saucepan combine the cup of water, 2 and 1/2 tablespoons of sugar, salt, and 2 tbsp vegetable oil.
Heat over a medium heat until sugar has dissolved and mixture comes to the boil.
Step two
Take water off the heat and pour in a cup of plain flour.
Step two and a half
Stir stir stir.
The mix will a) get too heavy for a whisk very quickly b) get very lumpy very quickly c) look plain wrong.
Persevere though, if you keep mixing you will manage to smooth it out considerably in a matter of minutes. I promise.
Step three
Heat the rest of the oil in a sizeable pan. SLOWLY.
You want it to be on no more than a medium heat the whole time, and this will take a while. You know the oil is at the right temperature when you drop a little mixture in and it bubbles and floats rather than sinking to the bottom.
Step four
Fill a large piping bag with the mix and squeeze to the end.
A star shaped nozzle will give you the most authentic looking churros, but I would advise a fairly small one. Ours was the biggest in the pack, and the chunkiness turned our churros into churros bites fairly early on…we didn’t want to end up with only 4 massive ones…less space for the chocolate that way.
Step five
Pipe into the pan. We had one person piping and another using a pair of scissors to snip the mixture in at a desired length. Manageable with one person though I suspect – if you don’t have a helper.
This is where you need to keep an eye on the heat because if you’re not careful you risk cooking/burning the outside and then having uncooked dough within. We learned by doing on this one!
So keep the pan on a low-medium heat and just cook them by eye. Even the most novice chef can see when one of these is ready.
Step six
Lift the churros out of the pan and drain on a plate covered with a few sheets of kitchen roll.
A slotted spoon would be ideal for this if you have one.
Step seven
Cover another plate in caster sugar and cinnamon (adjust quantities to taste), and roll drained churros around until coated in the mix.
Step eight
Stack em high!
Step nine
While the churros are cooking, draining, and being coated, task somebody with melting the chocolate.
Do this in the microwave and don’t get impatient. A 30 second blast followed by some 10 seconds with stirring in between will do the trick.
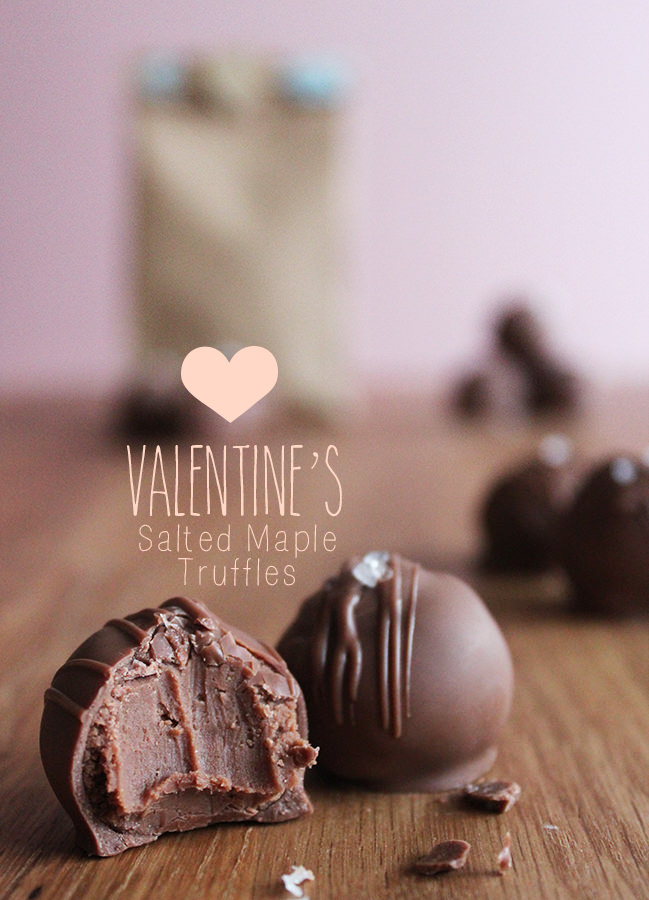
When making themaple truffles I ended up with a decent amount of left over chocolate from the dipping stage. So I decided to create another little Valentine’s treat. There’s still time to dash to the shop and whip one up tomorrow evening for a yummy treat that’s more heartfelt than hallmark.
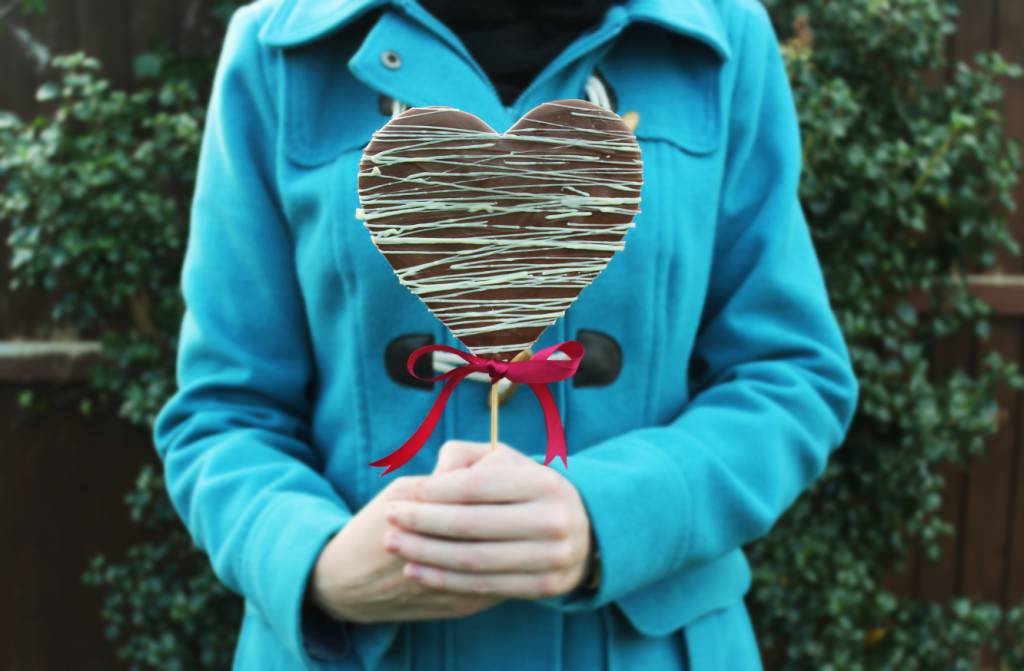
This is a little bit of a cheat post (hence the mid-weekness of it all). I’m afraid there are no photographs of the stages, just the final product. But all is not lost…I do go through making homemade chocolate lollies here.
To create the heart shape you just need to create two circles next to each other and then sort of pipe down and drag to make the point. More info can be found on the Christmas Lollies post (link above). Once the outside is touch dry you can melt a couple of squares of white chocolate and drizzle over the top. Feel free to experiment with different decorations, types of chocolate, or just chuck a load of sweets on top while it’s still drying. You might even want to try piping a message to your beloved?
Wishing you a wonderful rest of the week, see you on Monday!
Valentine’s Day is the marmite of all the celebrations; people seem to either love it or hate it (I’m actually fairly in the middle on the whole thing, much like my relationship to marmite). The US tends to go mad for Valentine’s*…but let’s be fair, they’re a lot more chipper about everything than the rest of the world anyway. We Brits stay true to form, far more cynical, but with the inherent sense of obligation that both forces us to celebrate something, and then resent the enjoyment we get from it.
Chocolates are a typical Val Day gift, but they tend to lack the personal touch that well, let’s face it, is the fault of the whole shebang. I figure if you’re going to do it, do it right, make your own.
Whatever continent you live on, and whatever occasion you’re celebrating this February, here’s another recipe fresh from my kitchen. Great for gifting or gorging on, I present milk chocolate truffles with a hint of salty maple goodness.
* source: Pinterest…which is a completely accurate representation of American life.
You will need:
500g Milk chocolate
75ml Evaporated milk
50ml Double cream
1 to 1 and a half tbsp Maple syrup
2 tsp Salted butter
Pinch of table salt
Rock salt to decorate
Makes 20-30 truffles
Step one
Chop 250g of the chocolate finely, and place in a bowl. The more you chop the easier the cream will melt it. Use a bread/serrated knife for this…you can thank me later…I just changed your life.
Step two
Put the cream, evaporated milk, maple syrup, a pinch of salt, and the 2 tsp of butter in a small pan.
Don’t put more than a tablespoon and a half of maple syrup in your truffle filling – whilst tasting delicious it won’t set up, ergo it won’t be easy to cover in chocolate (yes, I did find out the hard way, but I’m kind enough to give you recipe 2.0).
Place on a low heat and bring to the boil, stir regularly. Leave that heat on low, I mean it! Patience is the way to go with cream, it’s the hormonal teenager of the baking world (volatile and breaks down easily).
Step three
Once the cream starts to bubble, take off the heat and pour it over the chocolate. Stir quickly with a hand whisk until all the chocolate is melted and it’s thick and glossy.
Step four
Wait.
Step five
Once your truffle mix is holding its shape (pull the whisk out and dribble it around, if it’s not merging back into one clump then it’s good to go) put into a piping bag/good quality sandwich bag. If you’re impatient then stick it in the fridge or freezer to help it along (but don’t forget about it – you don’t want it to be un pipe-able)
Snip off the corner and pipe into evenly sized blobs. Don’t worry if they are a bit misshapen, this is just to ensure evenly sized truffles more than anything. My mix wasn’t quite solid enough when I did it above (this is partly because it was the too-much-maple batch) so wait a while longer than that.
Leave for another 15-20 minutes.
Step six
Roll truffles into balls. You will need cold hands for this, I found washing them in cold water a few times throughout helped. You might need to give them a little squash first so that they roll (you’ll understand when you get there).
Step seven
Melt the remaining chocolate (keep about 50g back for a moment). You want to put it in a fairly small bowl so it’s nice and deep for dunking.
Do this in a microwave, but watch it closely, it turns in seconds. Pop it in for 30 seconds to start it off and then 10 second intervals, stirring in between.
Once it’s fully melted put the remaining 50g in and allow the heat from the rest of the chocolate to melt that too. This will help to temper it making the texture and shine better in the end product.
Step eight
Find something to dip with. You can buy fancy tools for this but I happened to have a metal kebab skewer with a whirly bit on the end. If you don’t, then snap the middle two prongs off a plastic fork.
Step nine
Dip.
I’ve tried to show the stages above, but essentially: 1. Tilt bowl and put truffle on dipper 2. Drop into melted chocolate 3. Lift out using dipper 4. Flip over and drop back in to coat the other side 5. Lift out and allow excess chocolate to drip off.
Don’t tap dipper on the side of the bowl, or your truffle will get stuck onto it. If you are overwhelmed by the urge to tap, then sort of thwack it on the melted chocolate, sounds counter productive but it does work.
Step ten
Dip all the truffles and rest on greaseproof paper in rows, leave to set for 10 minutes or so before decorating.
Step eleven
Put excess melted chocolate into a piping/sandwich bag and snip a small opening in the bottom. Allow the chocolate to start pouring from the bag and move your hand back and forth over the rows of chocolate. This creates the stripey bits on the top. There’s no need to squeeze really, it will pour out of the bag at the right speed.
Don’t worry about the bits that fall down the middle, you can put them on top of your ice cream. Nothing wasted when it comes to chocolate.
Step twelve
Put a little bit of rock salt on the top of each truffle. Don’t overdo this or it will be unpleasant, but a little salt is actually really nice with sweet or caramelly things like maple syrup and chocolate.
Step thirteen
Leave them to set. Have a little taste. Go on. You’ve got a few to spare. They’ll never know. Unless of course you write a blog about it, and then never actually produce any of the chocolates (sorry boyfriend).
Oh, and I made a little baggy…
Step fourteen
Stay tuned to fabrefaction for the making of the bag, and the using up of the left over dipping chocolate.
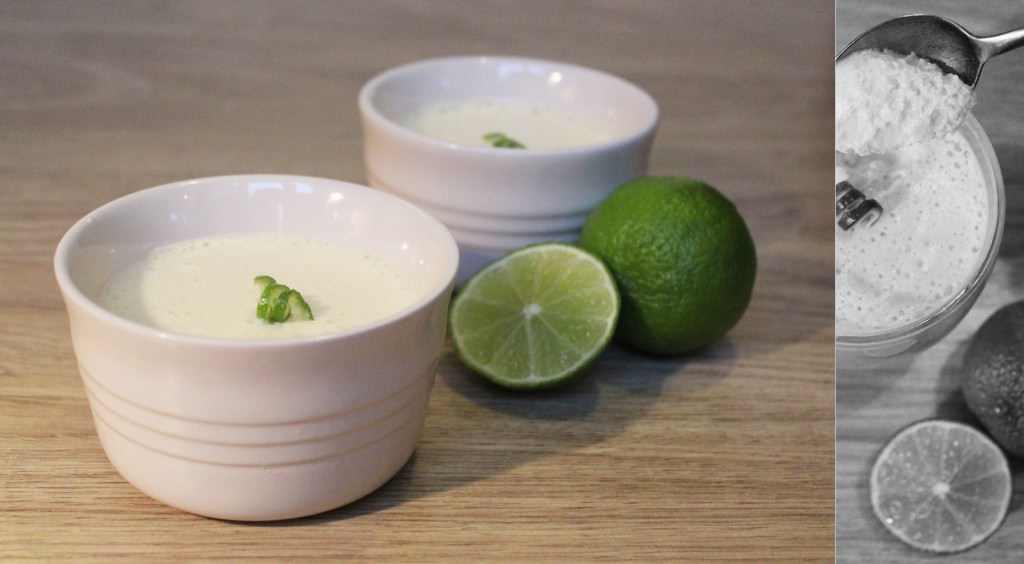
Riding on the success of a chocolate orange mousse I made for Ma’s birthday I thought this weekend would be a perfect time to flex my culinary muscles and invent a new recipe of my very own. It didn’t quite have as many bubbles as the other one I made (you know, from a recipe book by a French pastry chef…) but it was much lighter and fluffier than any syllabub I’ve ever seen. Hence the White Chocolate and Lime Moussabub was born.
A word of caution – make the day before your soiree, or early morning, as it needs a good few hours to set. Also, if you’re thinking to invite the kind of people who choose a cheeseboard rather than dessert then, a) you probably want to save this one for the sweet tooths instead, and b) de-friend them – there are better people in the world.
You will need:
200g White chocolate
110ml Double cream
40ml Full fat milk
3 eggs (or 2 if on the large side)
55g/2 oz Caster sugar
A lime
(Serves 4-6 depending on the size of your pots and tummies)
Step one
Chop chocolate finely. You will hear this time and again if you decide to follow this blog but it really is easiest to use a bread knife/one with a serrated edge for this. The smaller you can chop the better, as you will be using the cream mix to melt it. Place in a large bowl.
Step two
Place milk, cream and lime zest in a small saucepan and heat gently on a low heat. If you want to use a strip of the zest for decoration then put to one side now rather than covering in cream… nobody wants that on their pudding.
Once the mixture has started to boil, pour it through a sieve over the white chocolate and stir until fully melted. If the mix cools down before it fully melts the chocolate then you can place the bowl over a pan of boiling water to melt any stubborn bits.
Taste.
I added some lime juice at this stage – just under half the lime. It depends how much of a citrus taste you want, but I found that to be just right. Stir through thoroughly (and now say that out loud ten times as quickly as you can).
Step three
Separate the egg whites into another bowl. Glass or ceramic is best for this, as plastic bowls can tend to retain some grease, and that will scupper your efforts to whip up your whites.
I tend to crack the egg on the side of the bowl and pass the yolk from shell to shell until all the white has drained away, but whatever works for you.
Keep yolks to one side.
Step four
Whisk! If you don’t have a hand held whisk or a fancy stand mixer then hopefully the Lord blessed you with strong arms.
When the eggs start to fluff up, add the sugar and keep whisking until they are stiff and glossy. People are a bit precious about egg whites but generally I don’t think there’s anything to freak out about, just slow down a bit when they start to stiffen up – the sugar will help stabilise them and it’s unlikely you’ll go over if you’re looking at what you’re doing.
Step five
Whisk the egg yolks in. Your mixture should yellow a bit, and will loose a little of its structure – don’t panic!
Step six
Put a scoop of your eggs (up to a third) into the chocolate mix and fold in to loosen it up (middle photo). This will help you to not knock out all the air from your moussabub, if you do it all at once you’ll lose your bubbles.
Add the rest of the eggs and gently fold the mixture together. Turn the bowl as you do so it to help you get everything together without flattening it. Patience is a must here.
Step seven
Spoon into serving dishes and put in the fridge (allow at least 4 hours I’d say). Try not to disturb them too much, and no poking, those bubbles are precious!
Step eight
Remember that bit of lime peel you put aside? Well, it makes lovely whirly bits for the tops. If you have one of those fancy zester tools then you won’t need my hillbilly method, but this is the best thing I could think of!! If you know how the professionals do it then answers on a postcard please.
At least 20 mins before serving make thin strips from your piece of peel. Curl them up and put them in the handle of a peg as shown above. Leave them to sit until you are ready to rock and roll. Place on top of each dessert.
NB: If you make your mousse the night before then either keep your peel in a bit of water and take out to dry an hour before serving, or wrap in tinfoil and put in the fridge. Don’t cut up and coil until just before you want to use it as they will dry out and shrink.
You might also try breaking up a biscuit (ginger would work well) or grating some chocolate on top for a bit of a different texture.