Tag: Gift

If you go down to the woods today…

This weekend saw the baby shower of a rather lovely lady by the name of Anna. You may (but probably won’t) remember us celebrating Anna’s hen party a while back, well now she’s about to pop a sprog would you believe?

Anna is a rather large fan of gnomes. Yeah, that was my reaction too, but you learn to embrace it after a while…she’s very endearing that way. Well, our friend Taylor (party planner extraordinaire and all round kindred spirit when it comes to carrying things out to obsessive levels of detail) decided to throw Anna a woodland themed shower. I know right? Cute. I totally took my camera and promptly forgot to take photos of all the lovely things; gingerbread fawns, woodland creature bunting, sausage roll snails and toadstool cupcakes to name just a few.

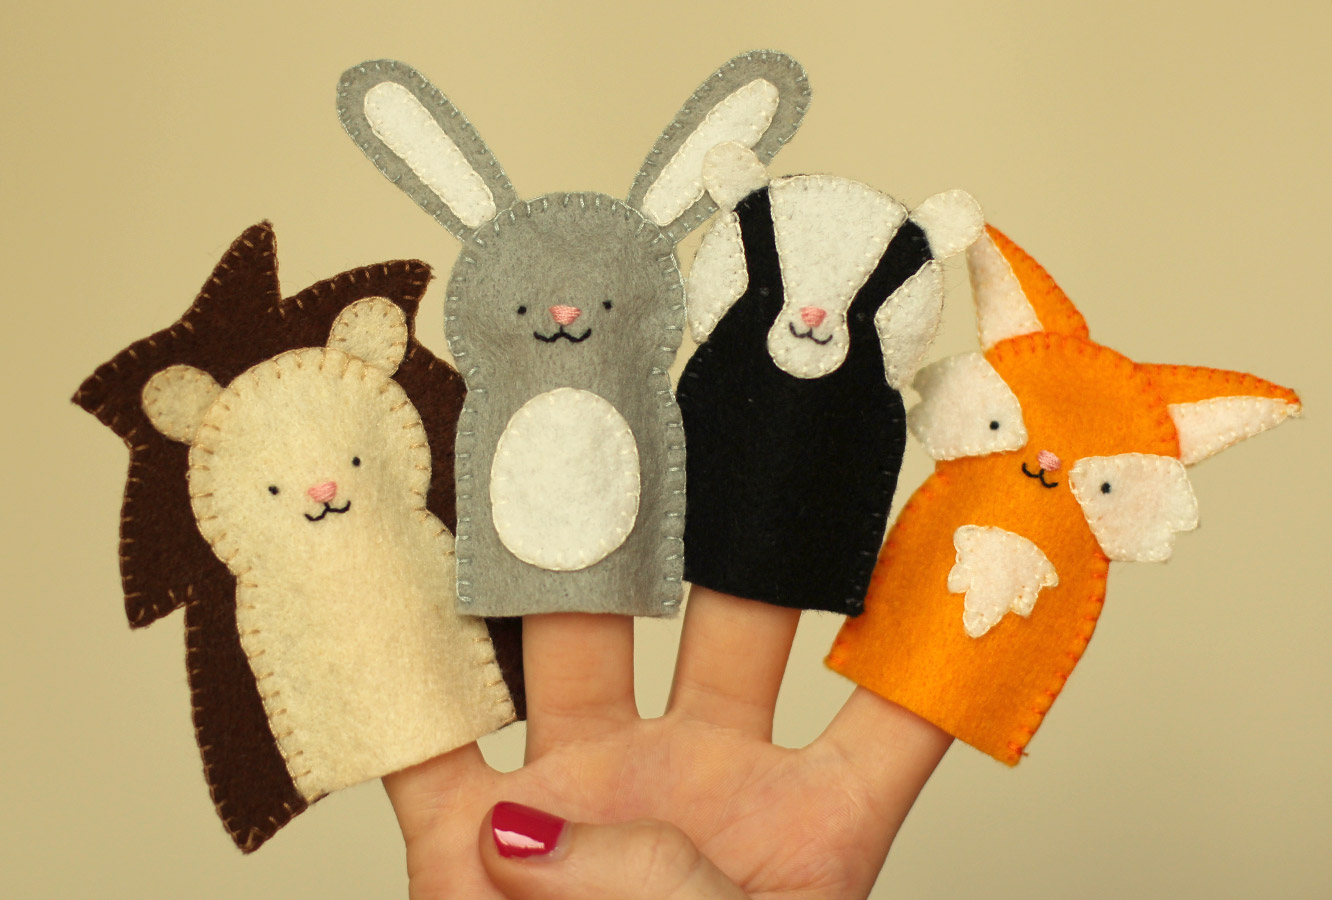
Anyway, other than baking some little flowerpot grassy gnome type cupcakes, I decided my contribution would be to carry the theme into my present and make a small selection of woodland characters to entertain baby upon her arrival into the world.

So here’s how to make your very own arsenal of woodland animal finger puppets, with a downloadable template of course.
how-to-make-finger-puppets-01

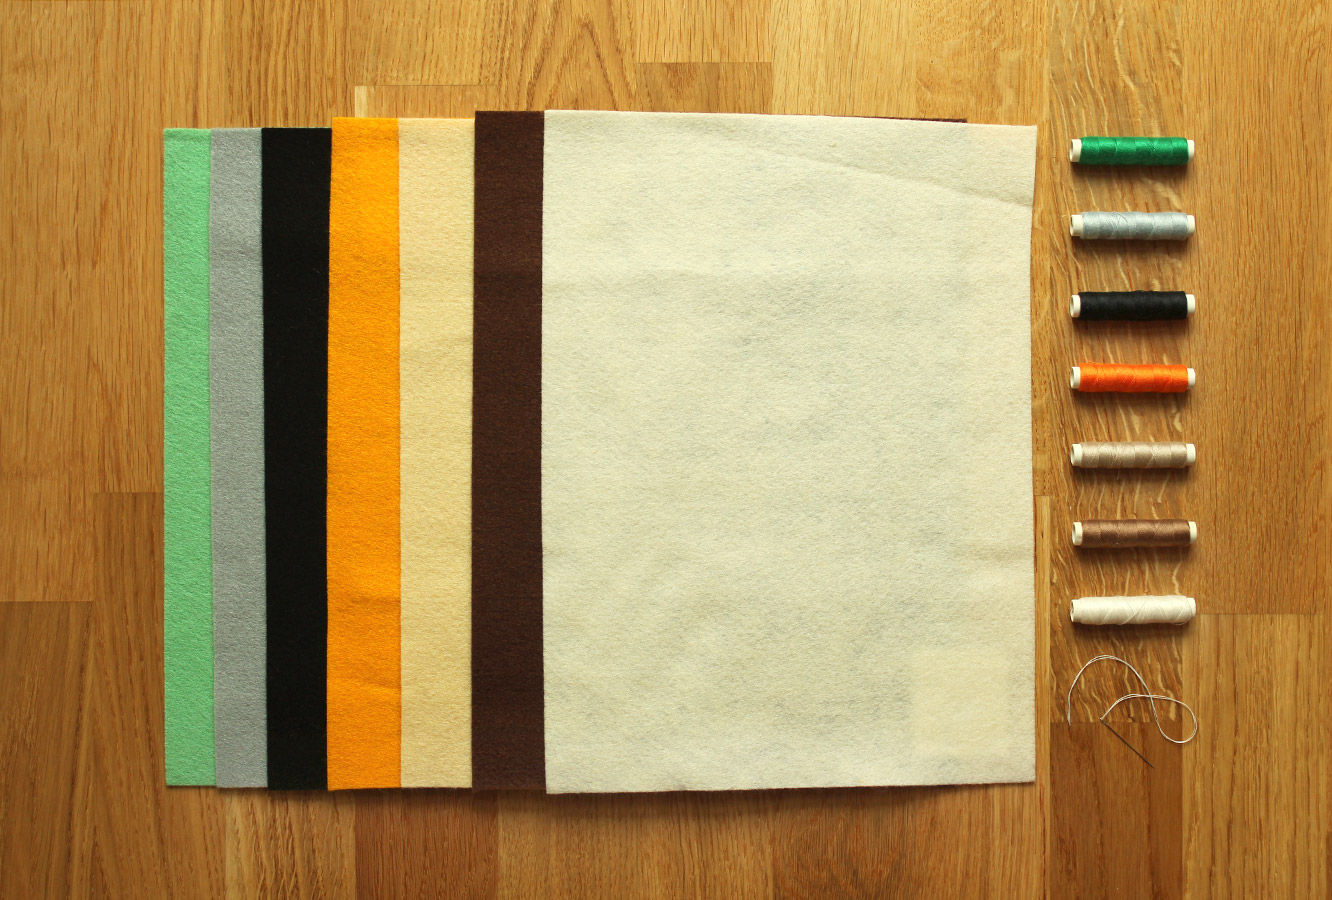
You will need

Felt (for the patterns I have provided you need brown, beige, white, black, grey and orange)

Thread in corresponding colours

A needle

This free downloadable template
how-to-make-finger-puppets-02

Step one

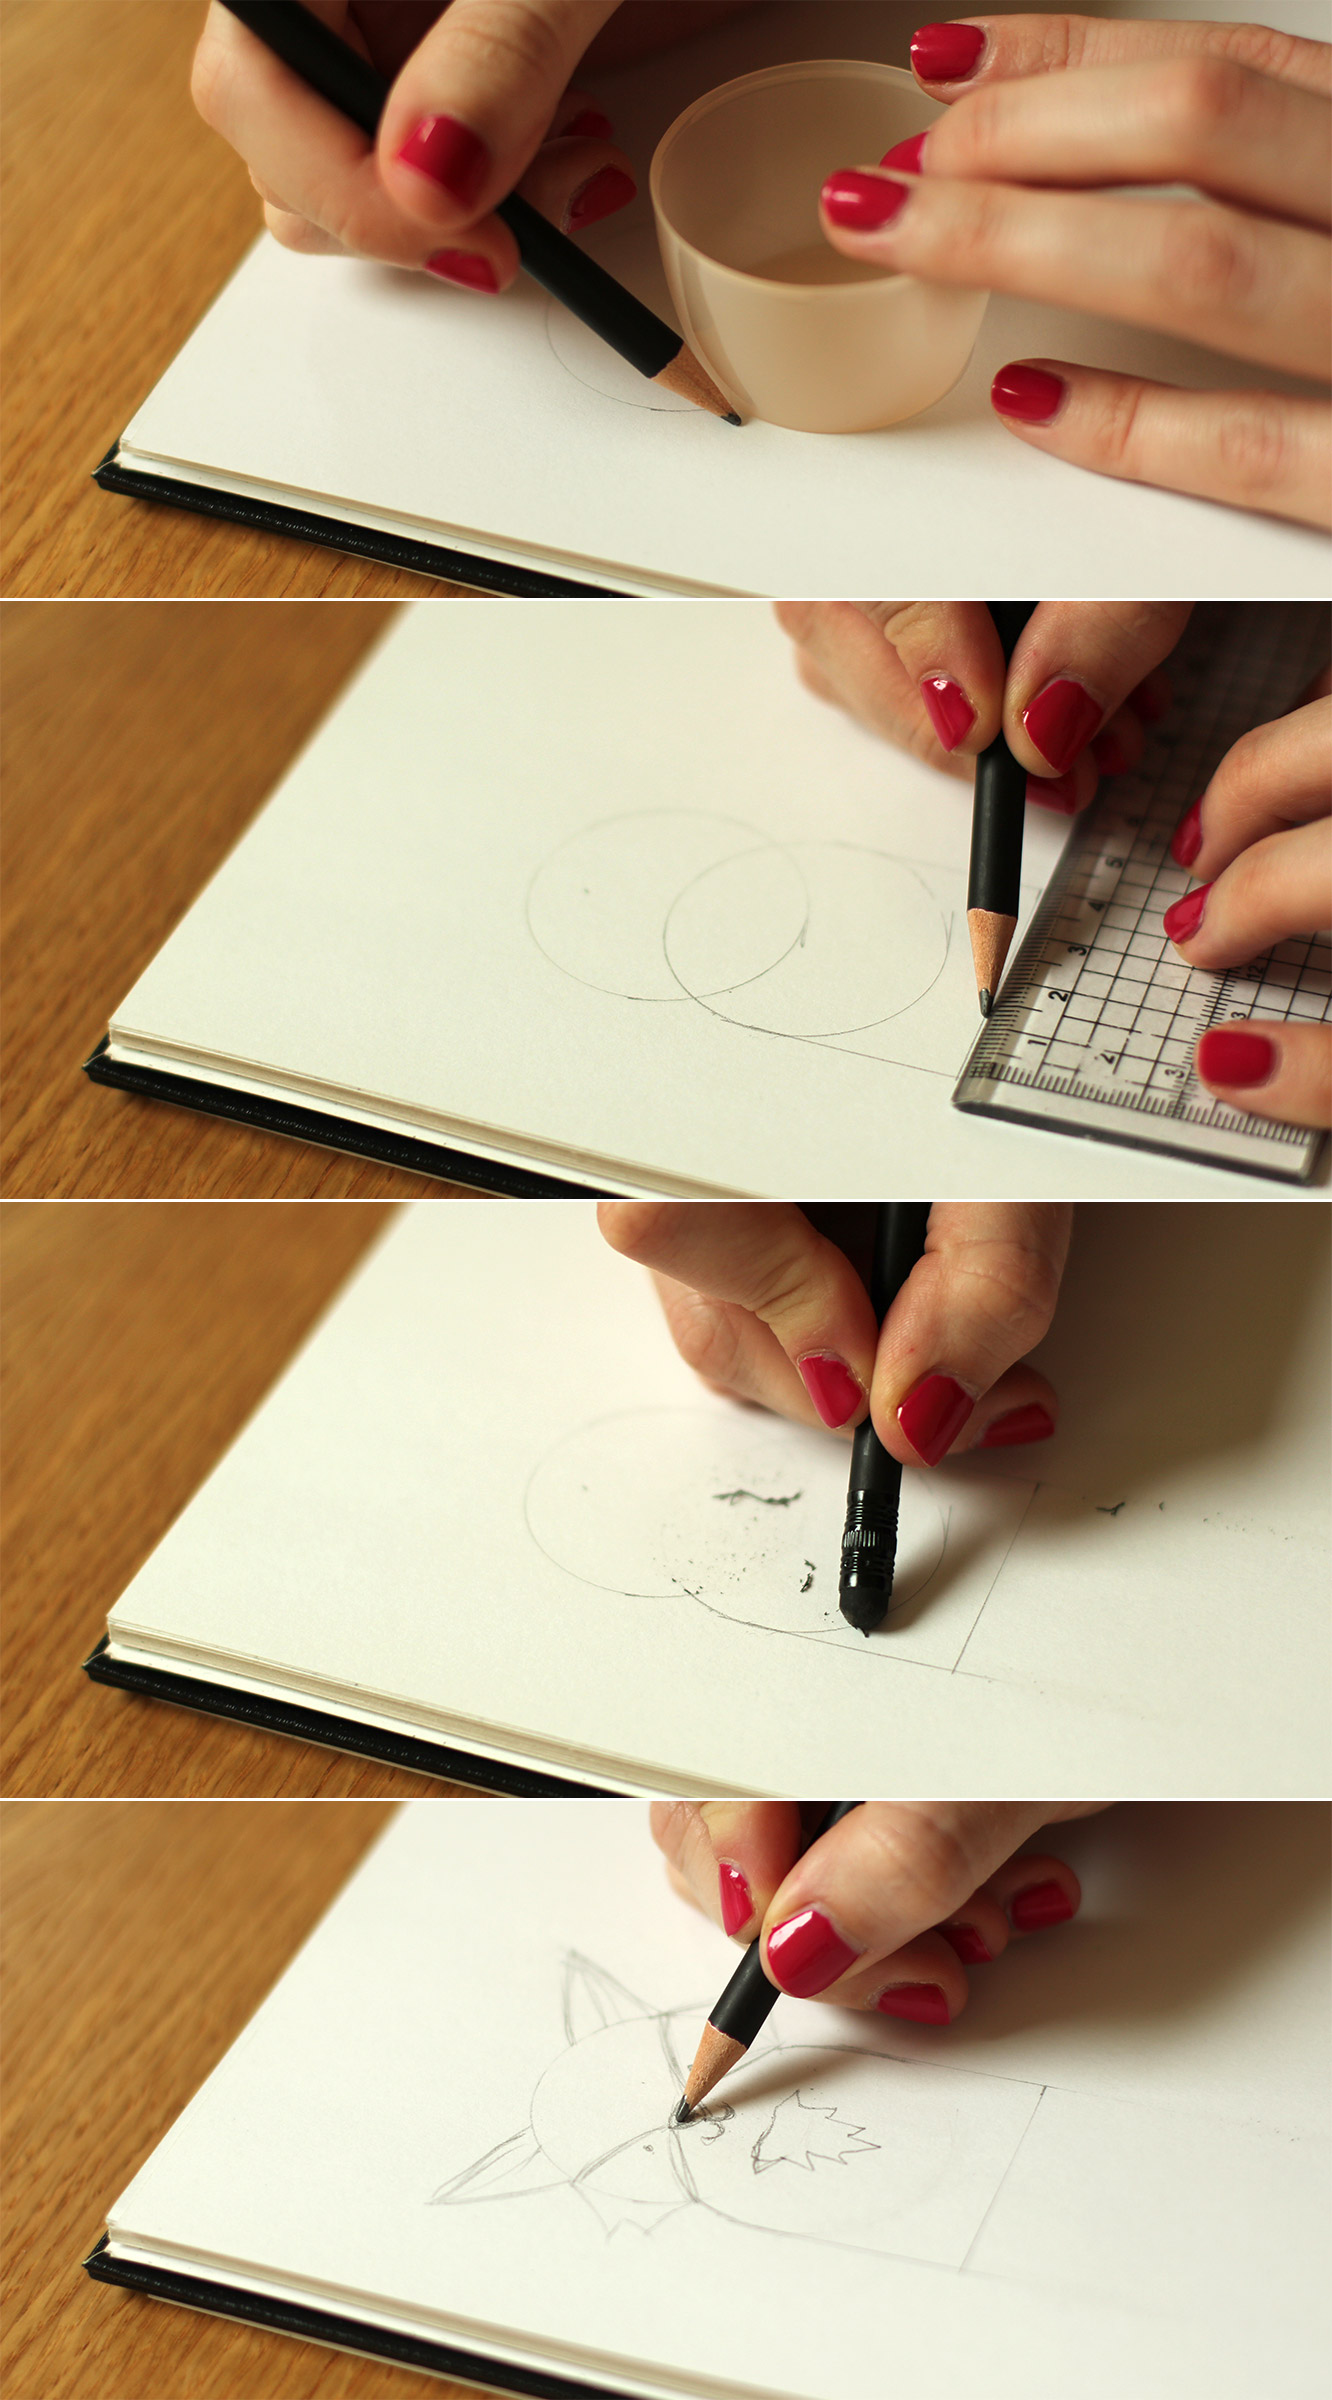
This is entirely optional. If you want to draw your own characters (or expand on the set I’ve provided) You will need to draw out a few designs. I used a deodorant can lid and a ruler to keep basic shape of my characters consistent.

If you want to cheat you could just trace the shape off the printable and add your own features to it.
how-to-make-finger-puppets-03

Step two

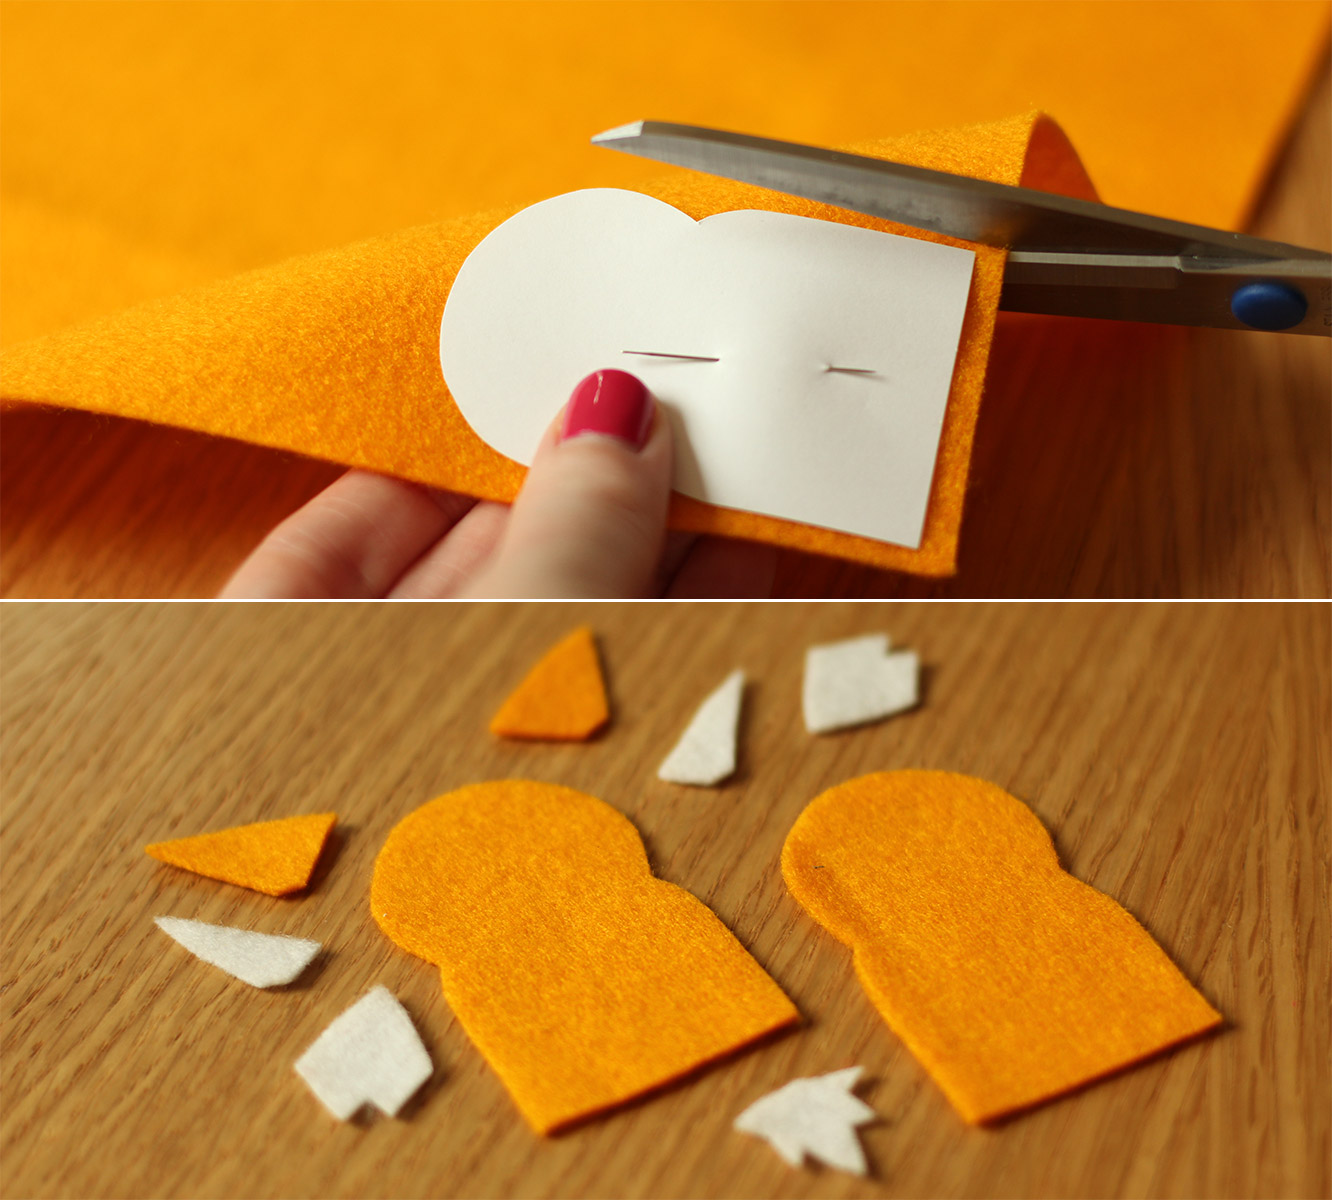
Cut out all the shapes in the relevant coloured felt.
how-to-make-finger-puppets-04

Step three

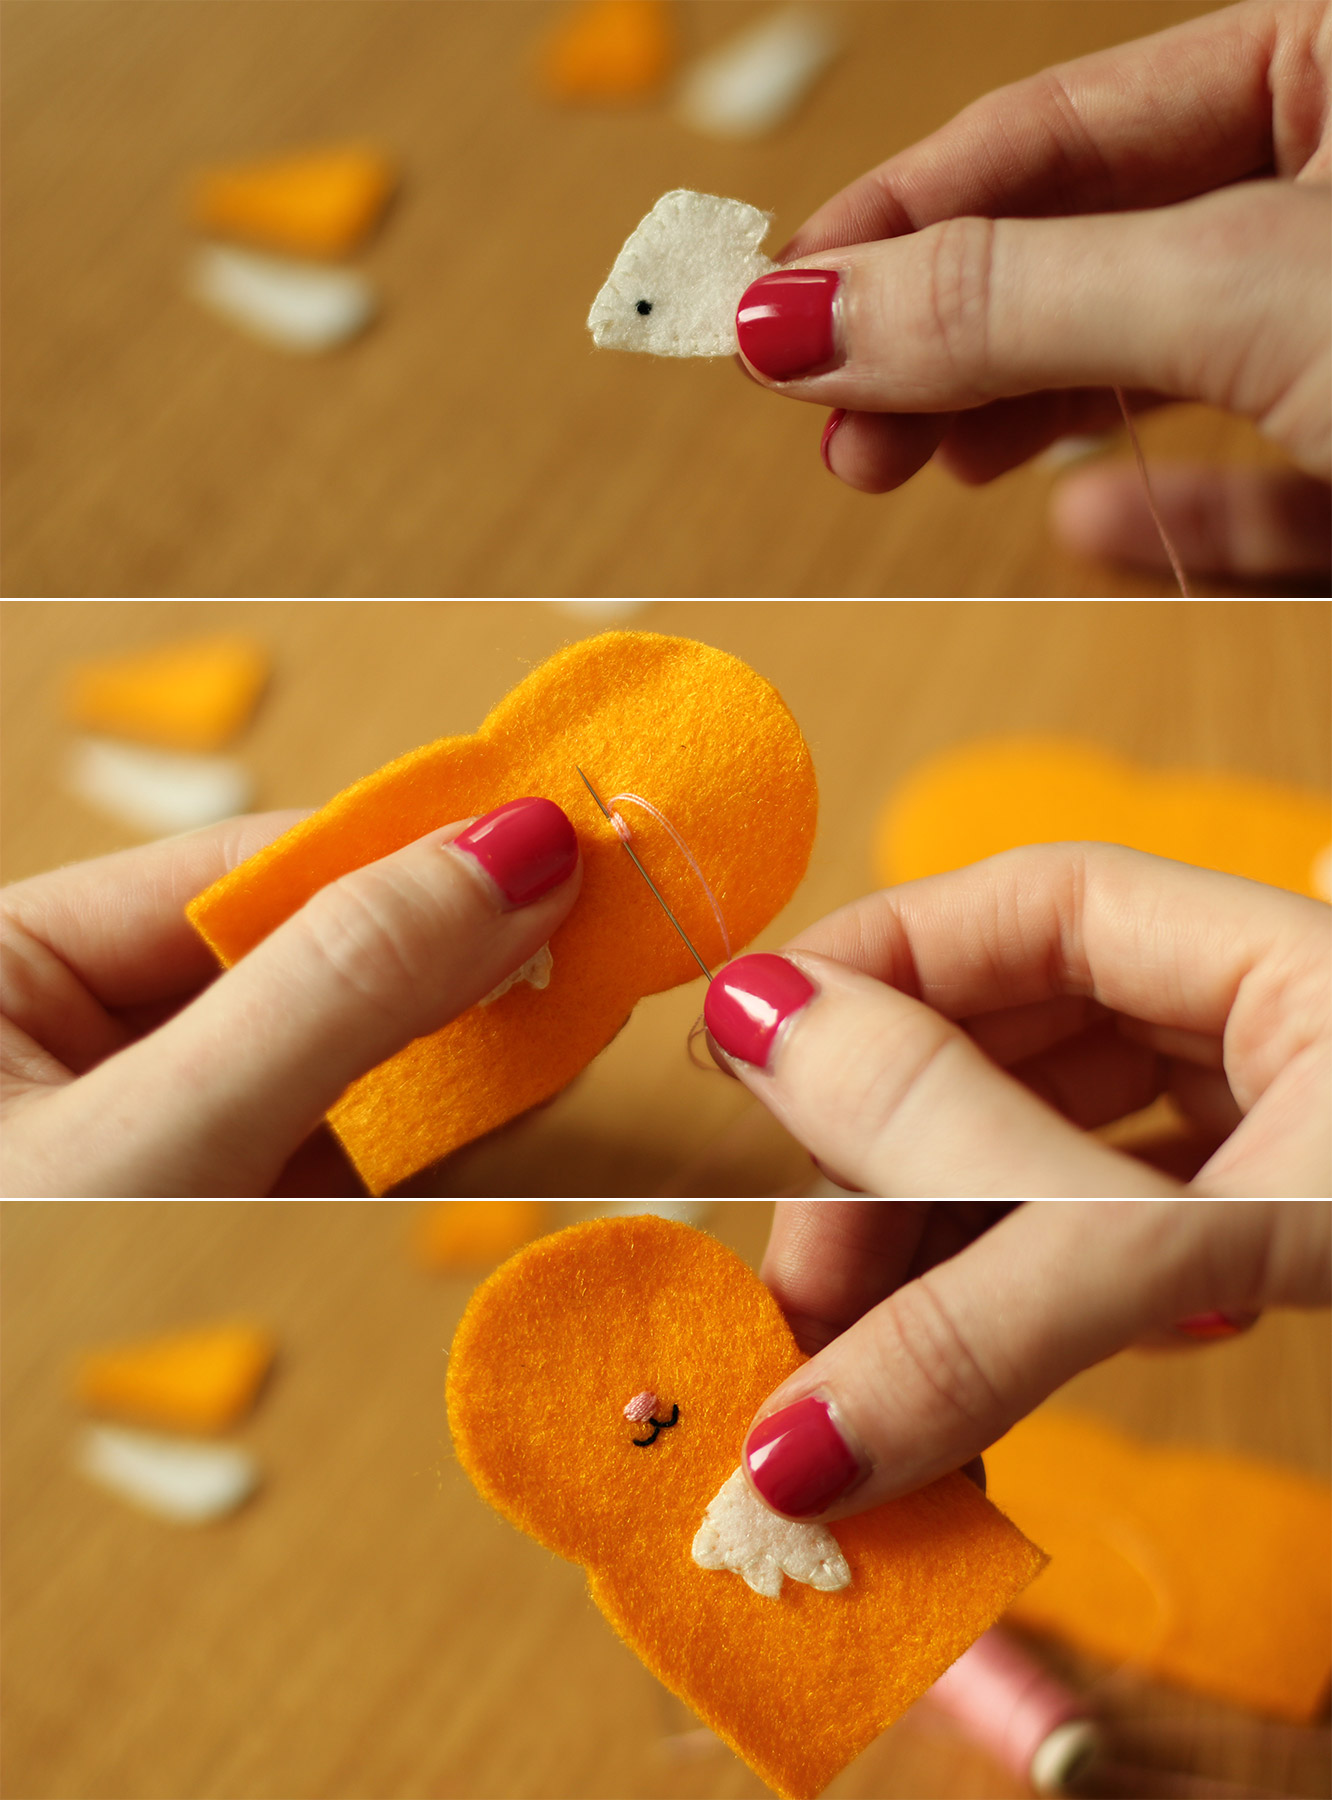
Sew on the faces, I just used simple stitches overlapping them for the noses and just a little line of backstitch for the mouths. No fancy embroidery techniques here.
how-to-make-finger-puppets-05

Step four

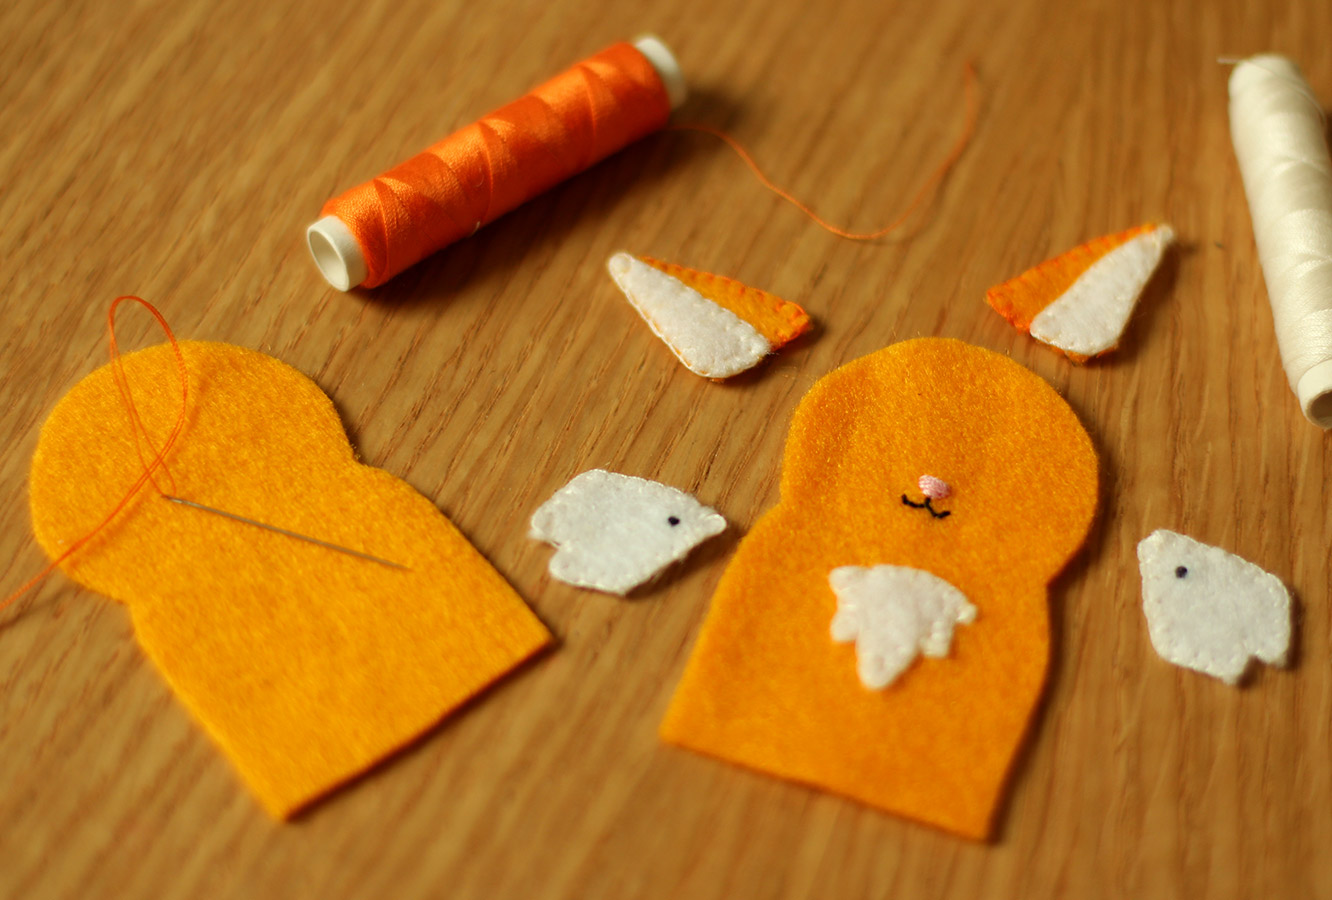
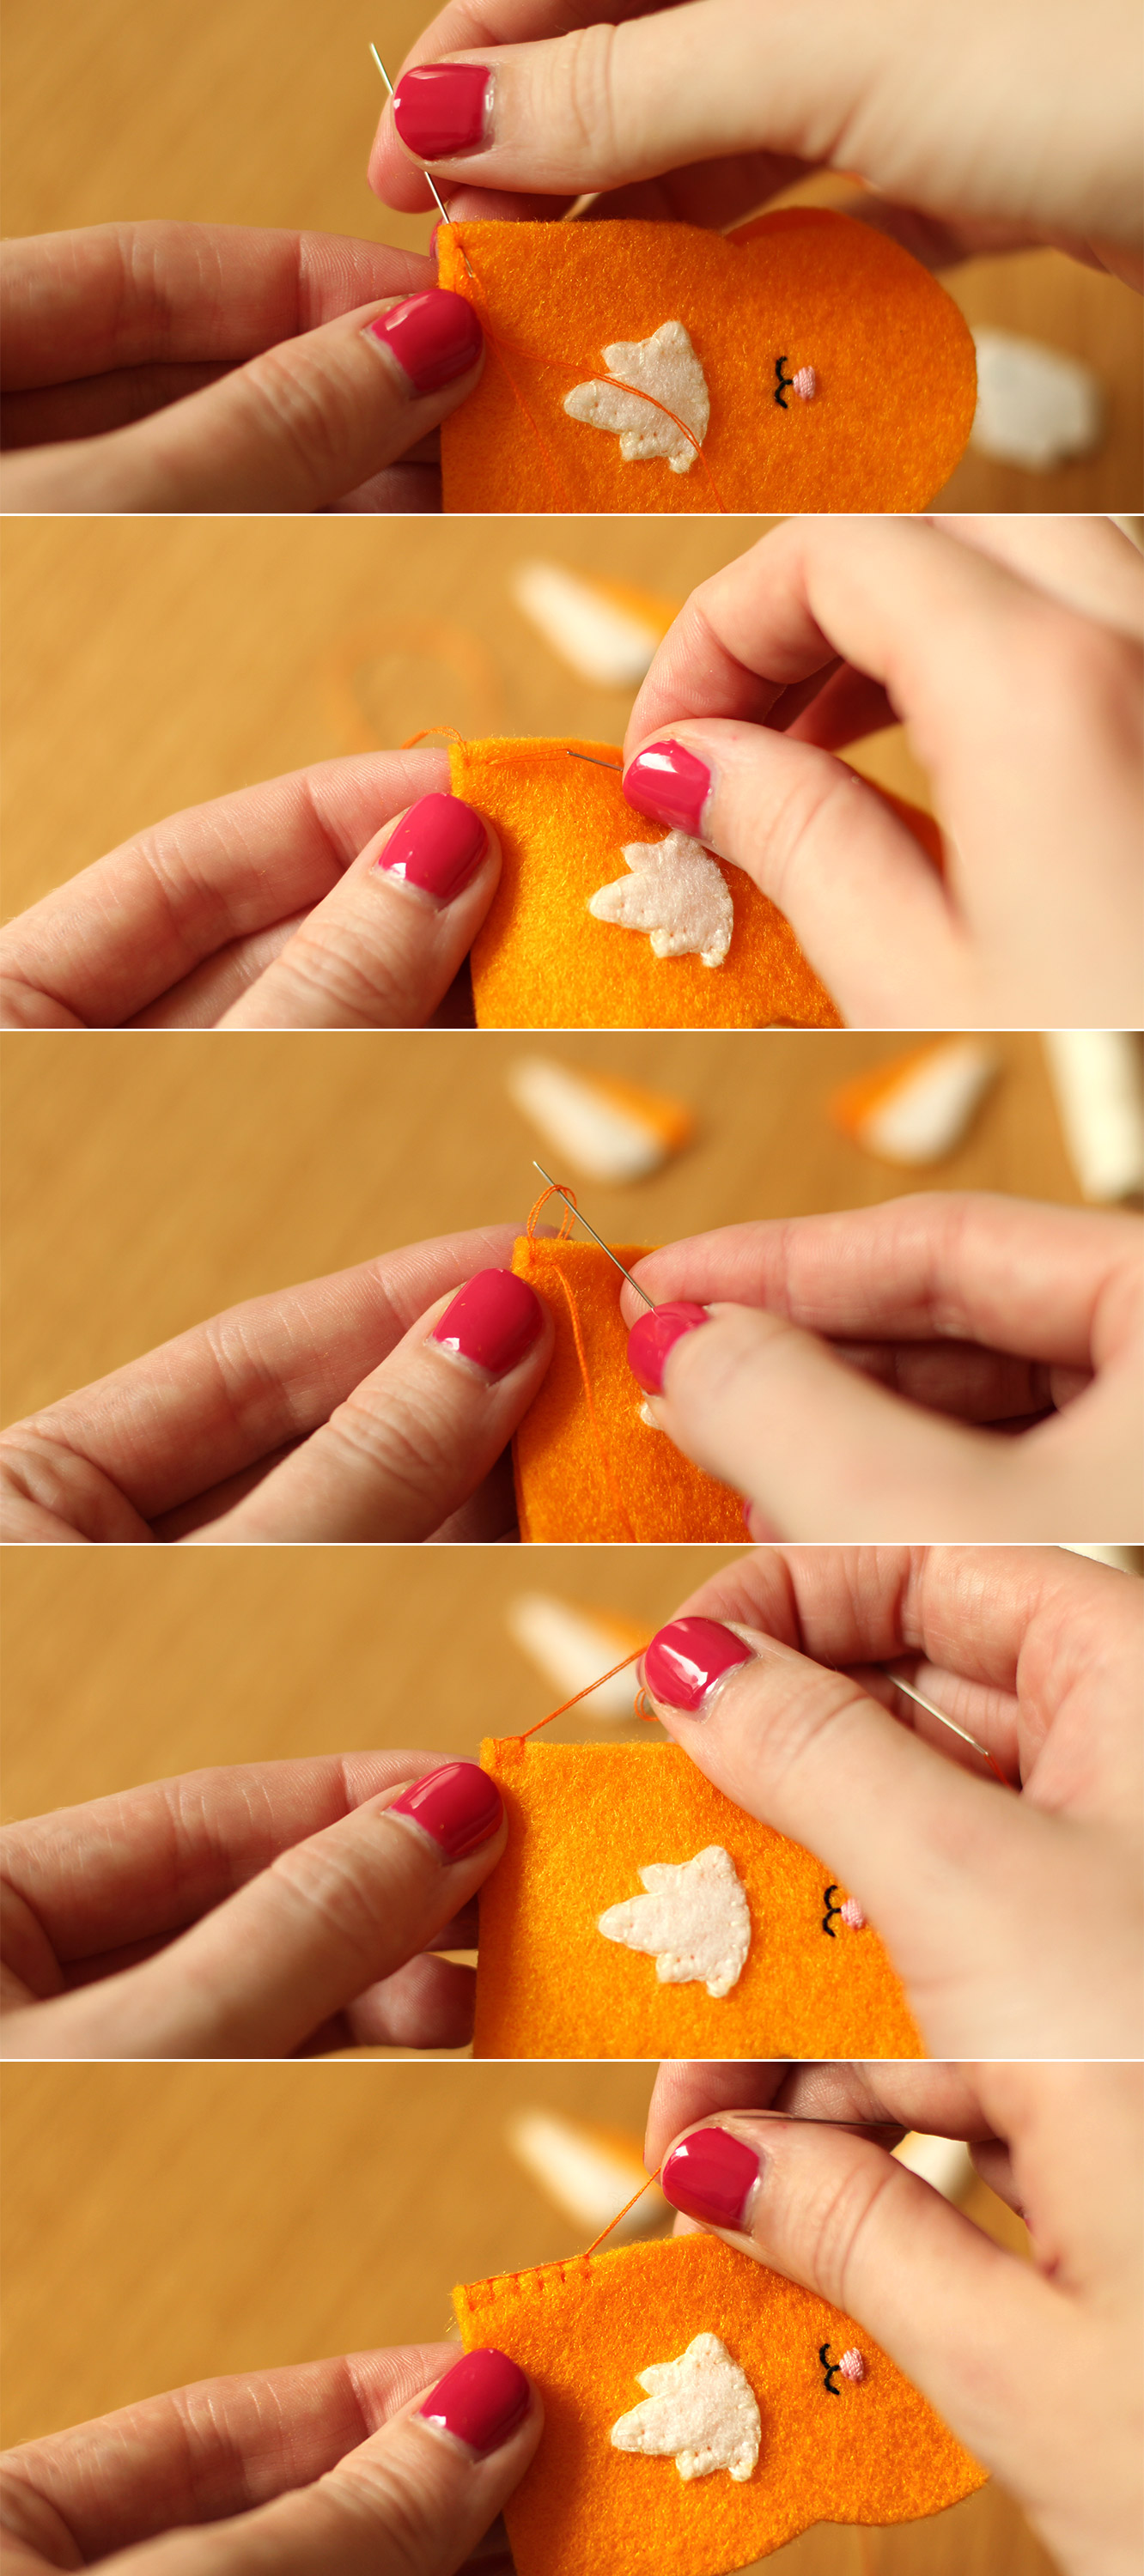
Edge all the remaining features/bits of fur with blanket stitch (see below). You will notice that for the fox I sewed the tummy fur straight onto the puppet but left the cheeks separate to glue on later. With the badger I sewed his cheeks straight on because they followed the shape of his face and I just found it less logistically challenging somehow.
how-to-make-finger-puppets-06

Step five

Blanket stitch the back and front of the puppet together. Utilising the memory bank of primary school sewing club for me, thanks Mrs Gothard, nailed it.

You basically need to put the needle through the felt at the height you want your stitching, and as you pull the thread through catch the loop so that it is held at the top. I’m sure the youtube can furnish you with a useful tutorial if my description and photos fail to do the job.

You need to include the ears as you go round, I just came back through at the top of the first stitch so my loop was on top of the felt to keep the effect going. I know, I wouldn’t understand that explanation either.
how-to-make-finger-puppets-07

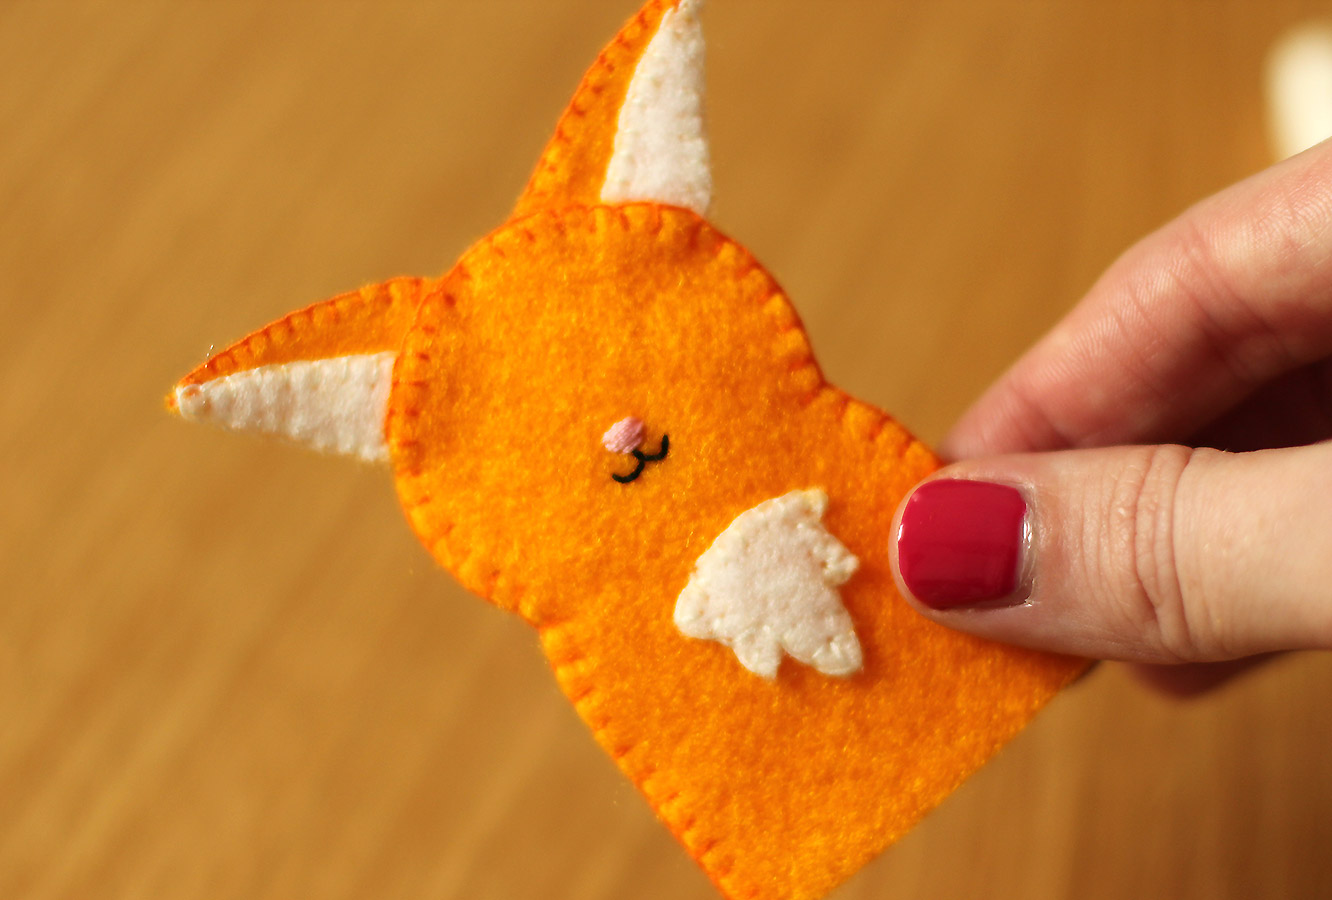
Step six

By this point if you’ve managed to follow any of my hapless instructions you will have yourself a blind little fox. On second thoughts, maybe we should have just started with the hedgehog.
how-to-make-finger-puppets-08

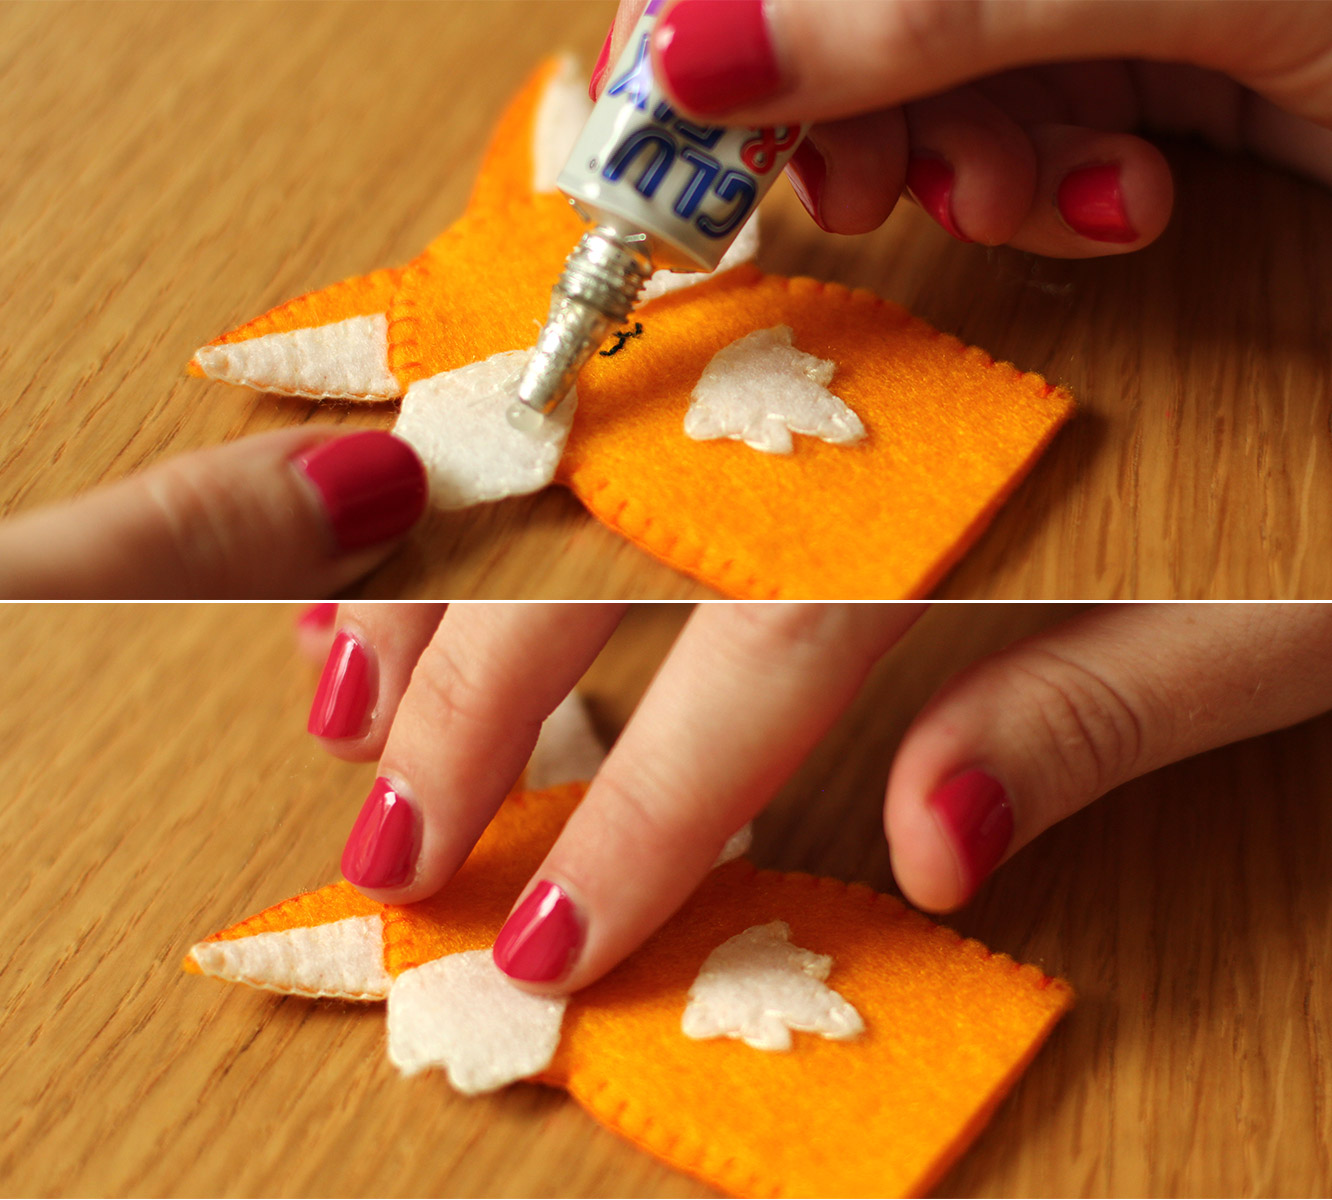
Step seven

It’s ok to cheat. Just glue his eyes and fluff on, pop him over a fork or something just to make sure the glue doesn’t soak through and seal him shut.
how-to-make-finger-puppets-gif-01

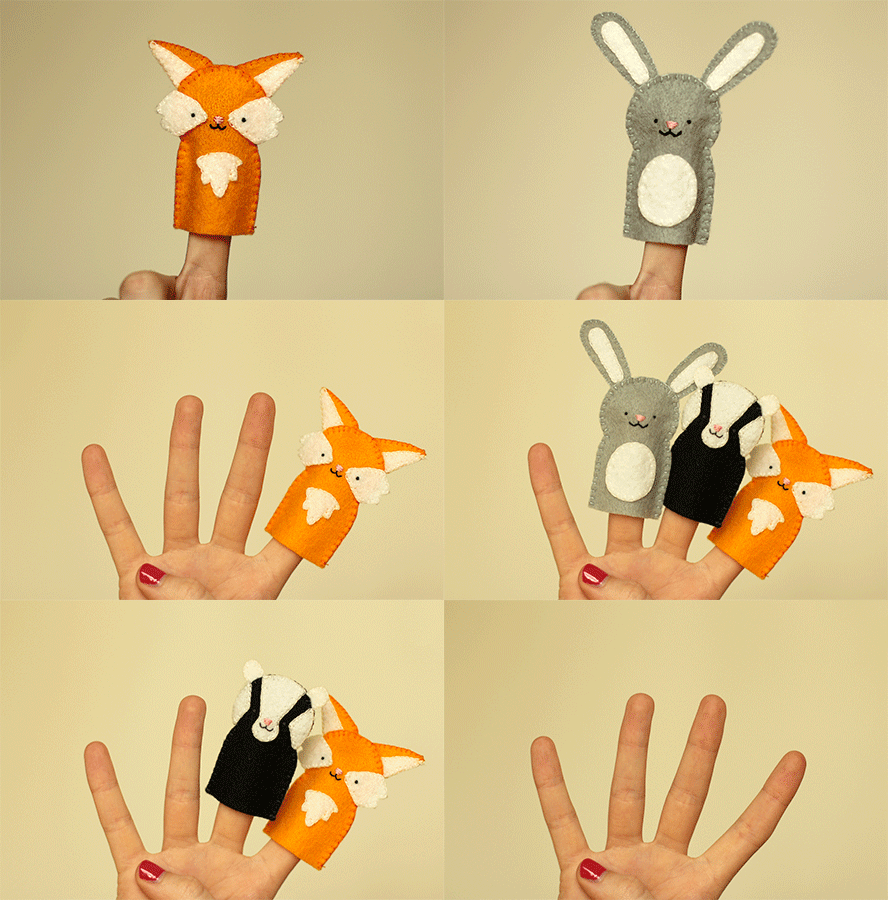
Step eight

Make your fox some furry little friends.
how-to-make-finger-puppets-09

Carved from stone

Now then, let me tell you about an ongoing battle between two of my favourite people. Beth is a responsible and considered little person who takes a great deal of care over her things. As a result, everything she owns looks brand new and nothing ever gets broken. Amy, whilst she’s not exactly going round throwing her stuff at walls, is the type to put her fingers on your computer screen and is totally incapable of keeping a case on her iPhone. It won’t surprise you to learn this drives Beth to distraction.

A few months ago, Amy, to our disbelief, actually bought a case for her phone. However, when it came to unpacking it unfortunately she found it didn’t fit. Unsurprisingly, it has not been replaced, but I felt quite sorry for her; she’d finally done what she was told and was not rewarded for her efforts.

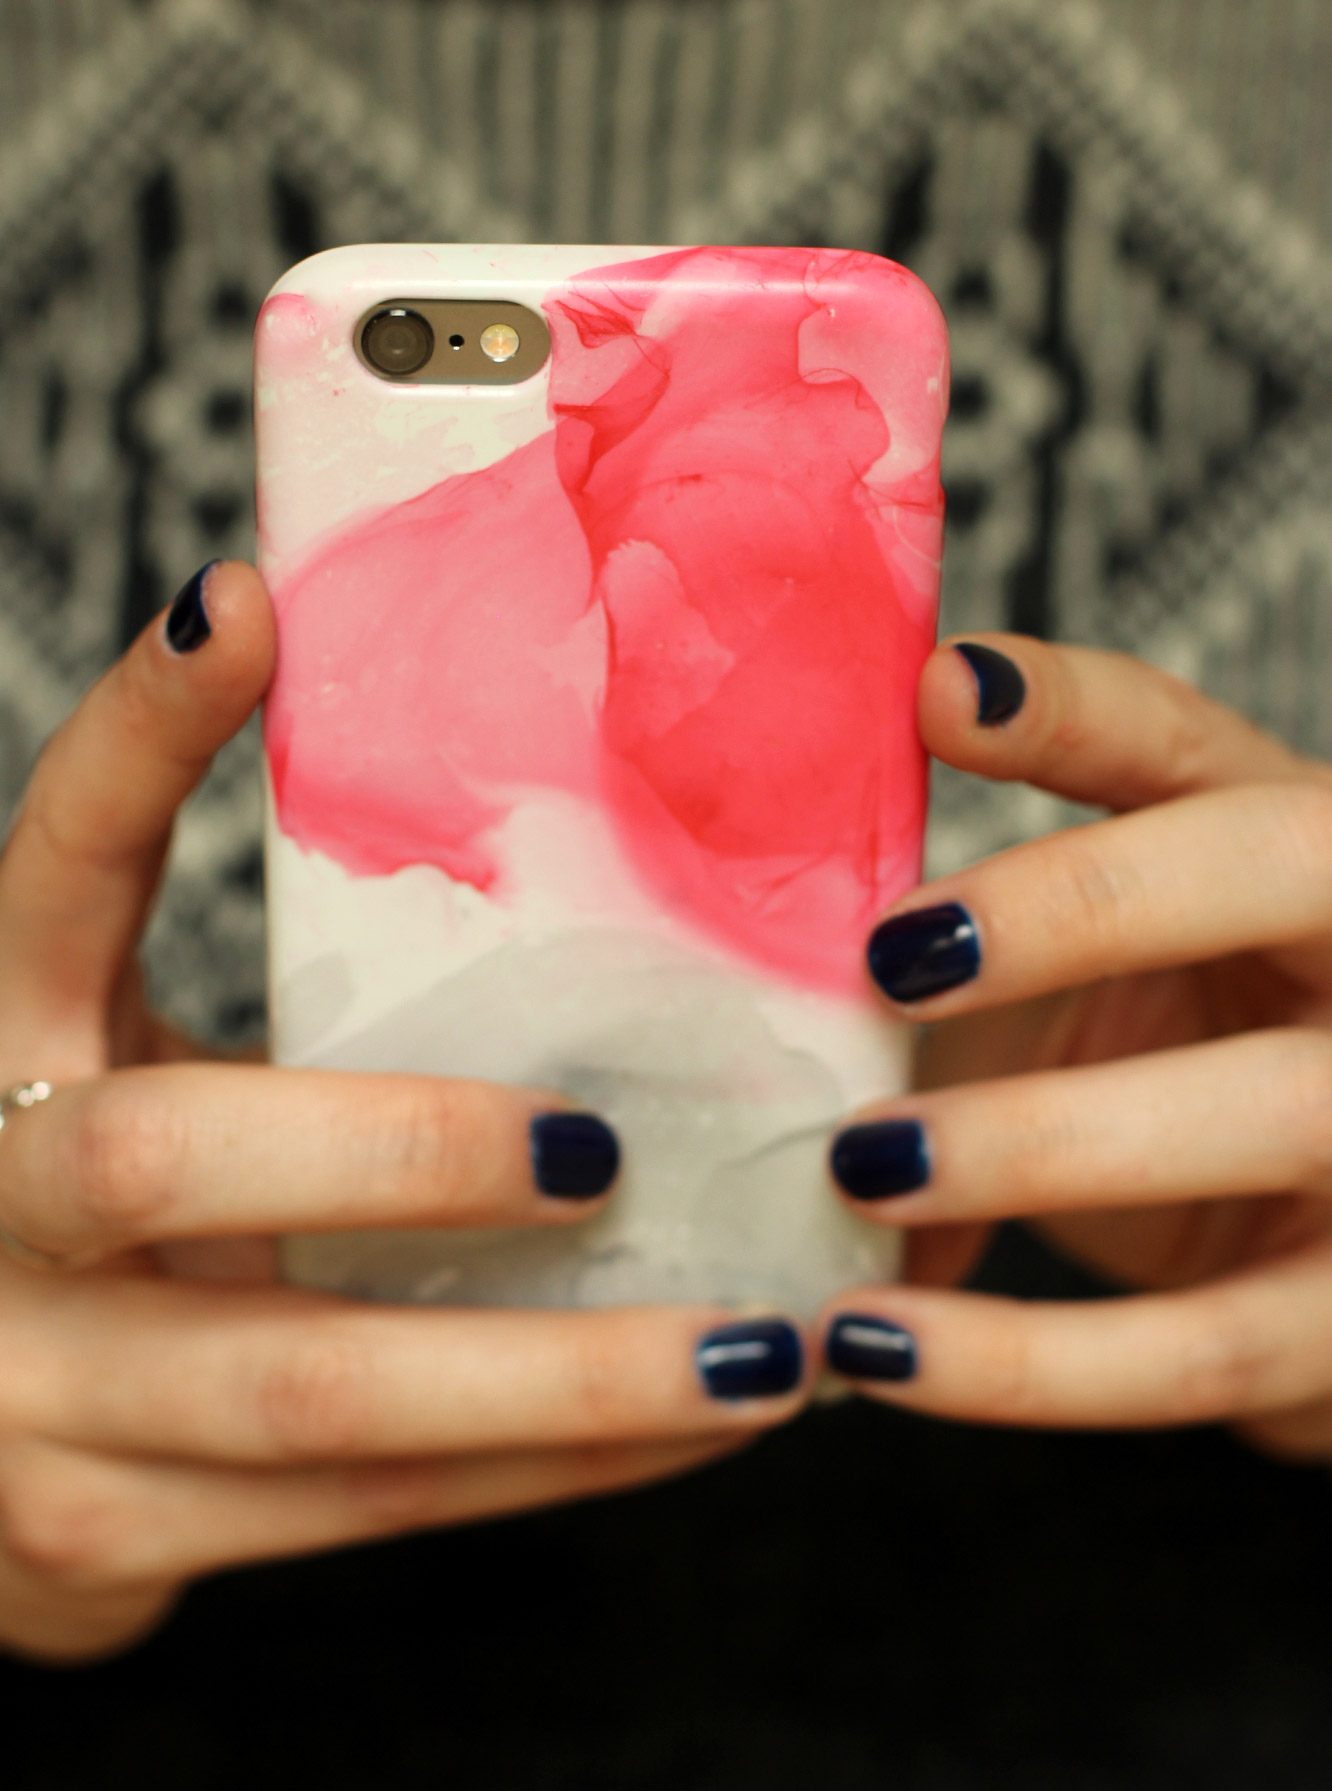
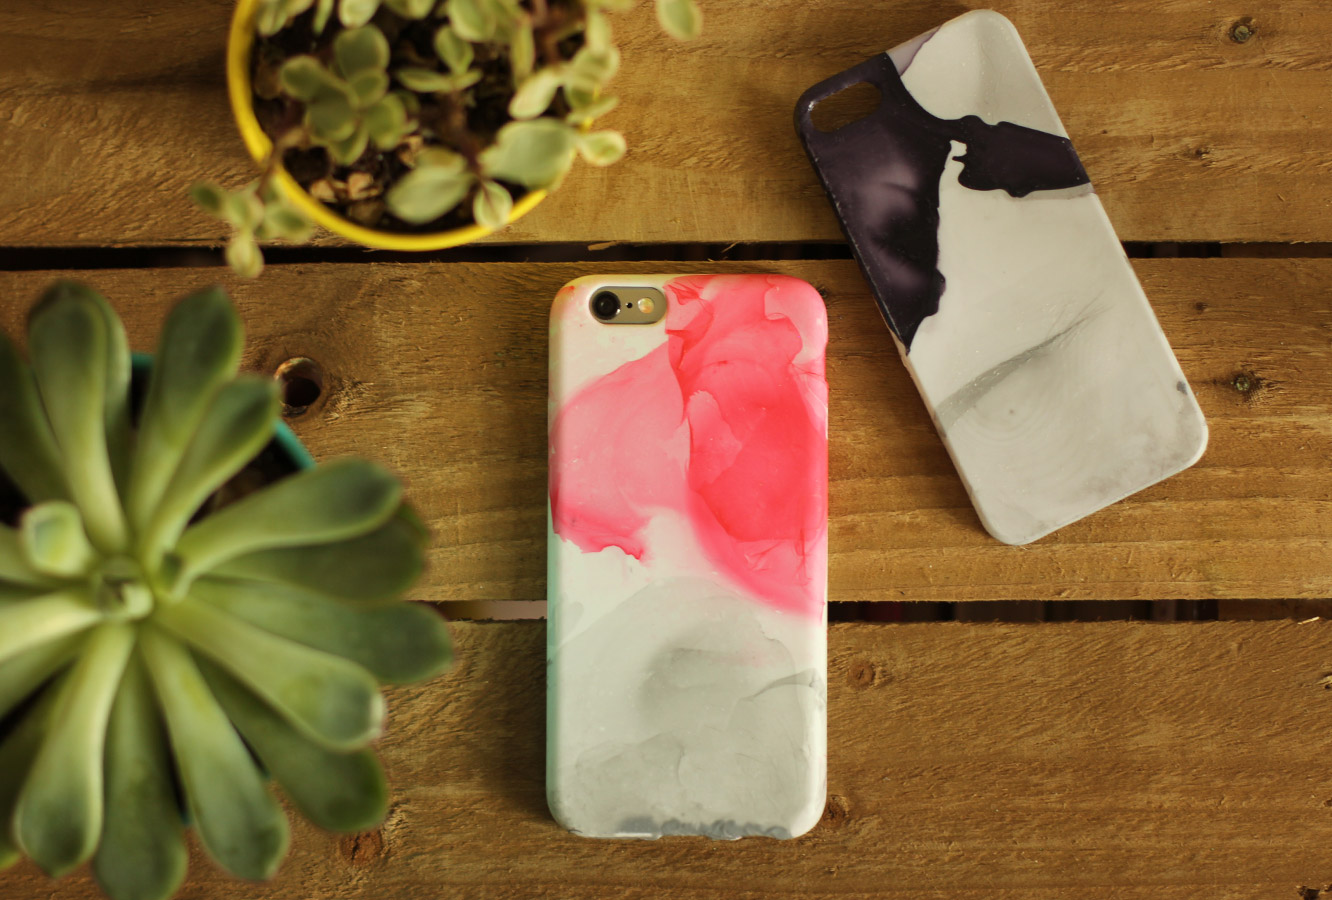
Meanwhile I was being berated by another friend (David) for choosing a practical, but admittedly rather ugly case for my own phone. I had also been admiring the various uses of the nail varnish marbling effect on Pinterest. All this to tell you that today I made myself and Amy phone cases.

nail-varnish-marbled-phone-case-diy-05

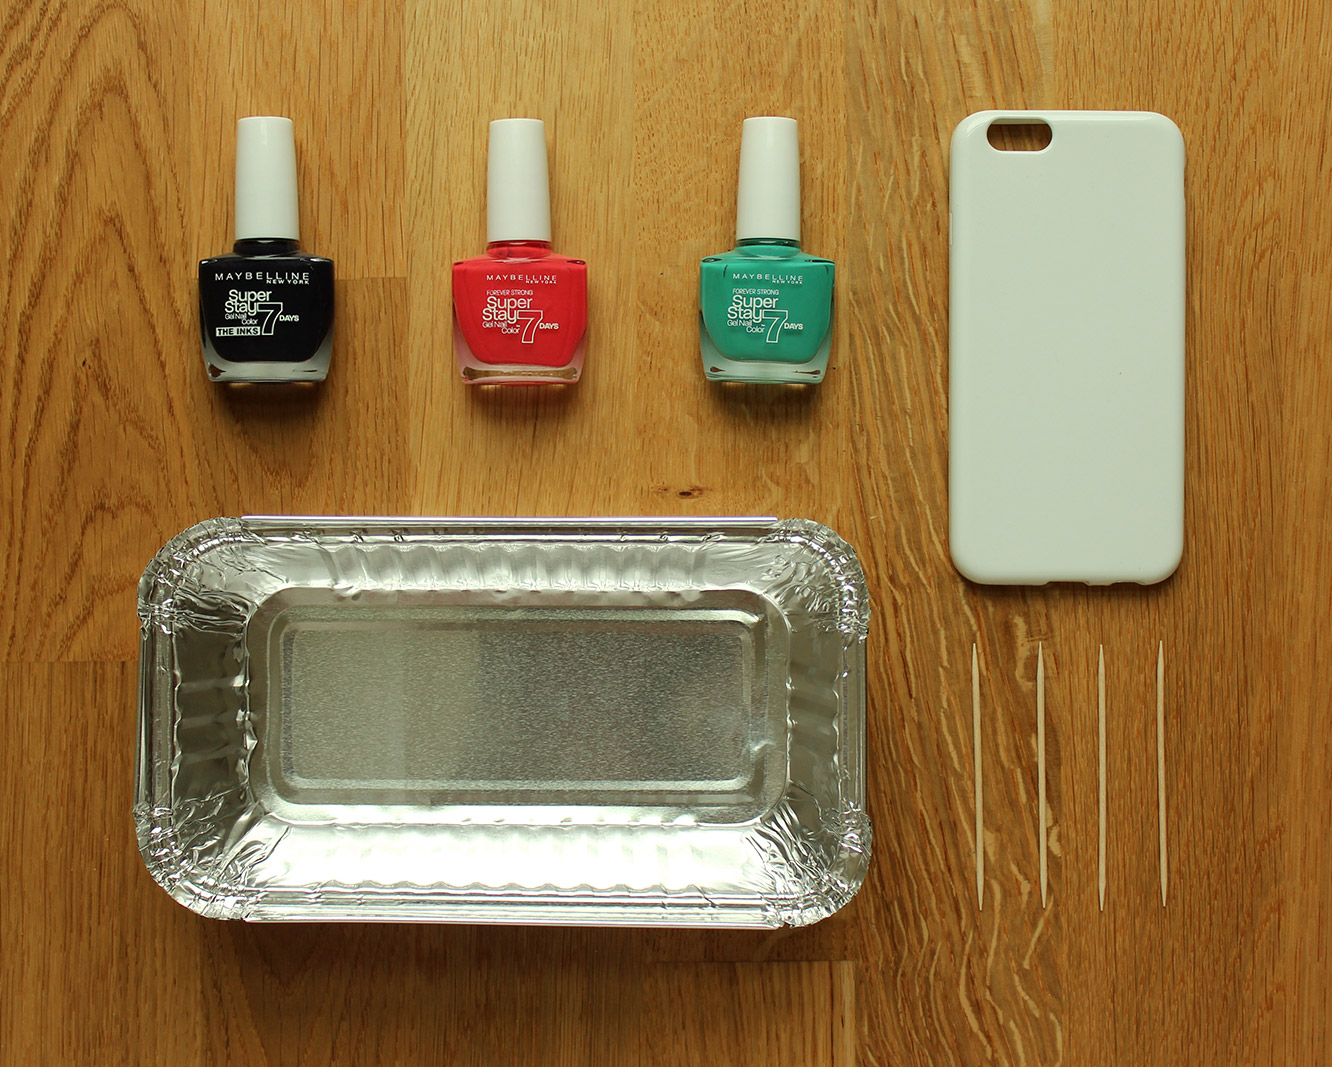
You will need

A white phone case to fit your phone (easily found on the internet for less than £5)

A tray or tub that’s disposable

Nail varnish (try to avoid quick drying brands – I only had quick drying ones so it is possible without but you have less control over the look as it sets quicker)

Cocktail sticks

Warm water

Acetone (only if you have serious perfectionism problems like me)

nail-varnish-marbled-phone-case-diy-04

Step one

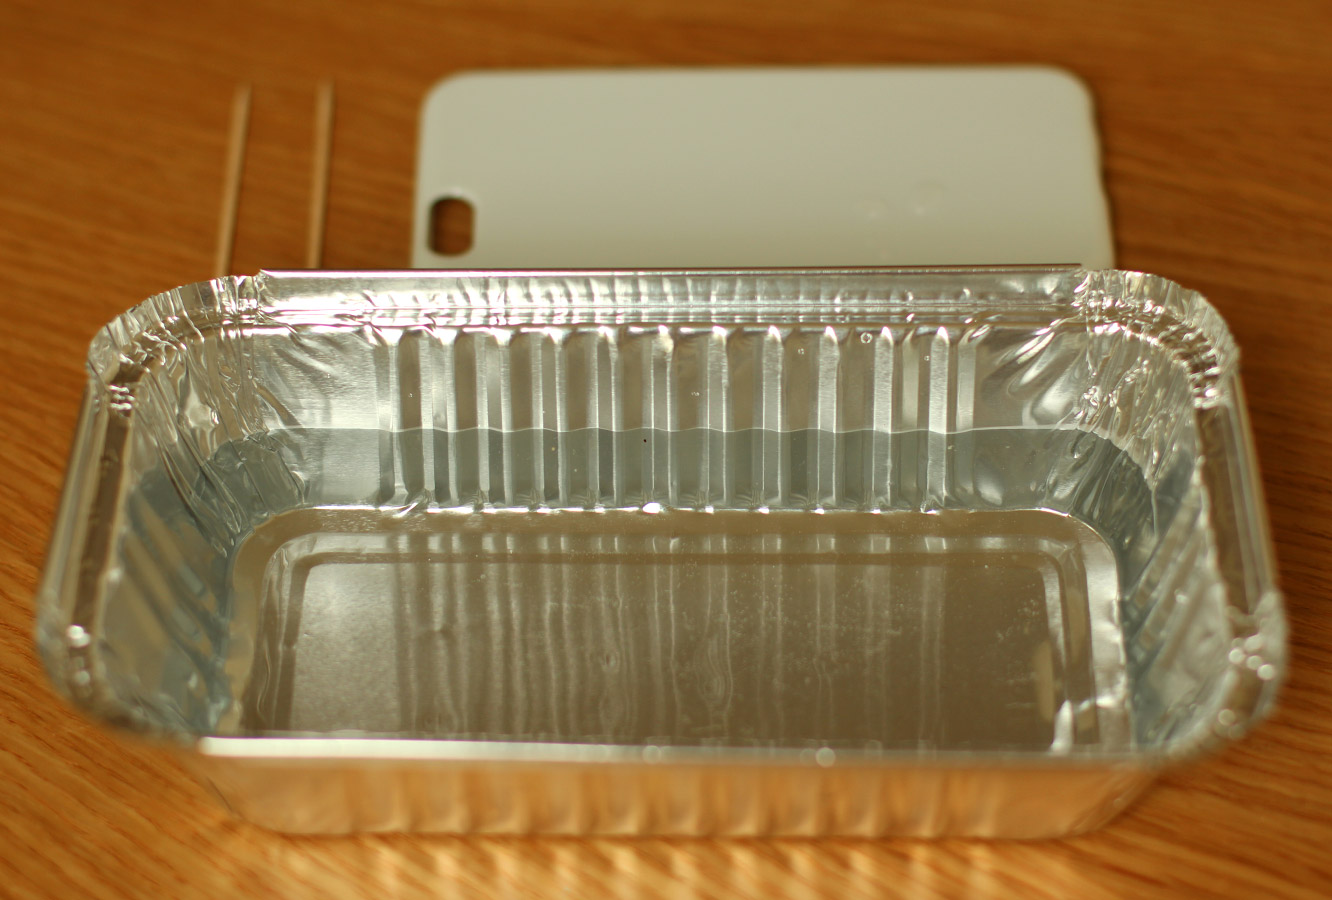
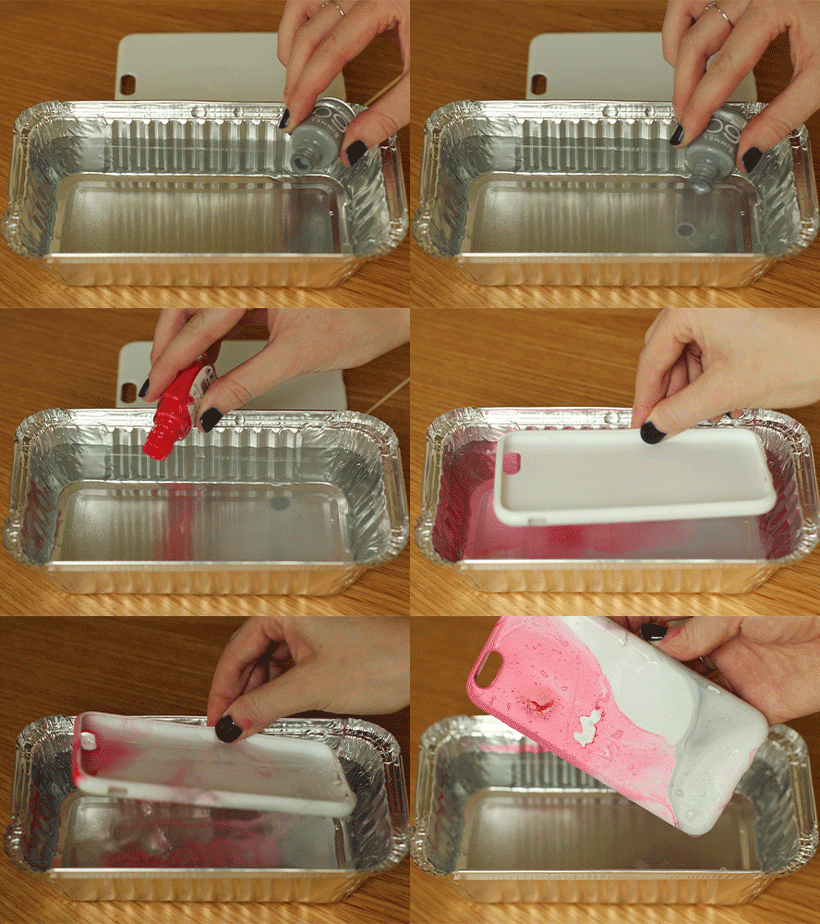
Fill your tray with warm water and de-cap your nail varnishes. You need to work quite quickly so have everything ready to go.

nail-varnish-marbled-phone-case-diy-gif

Step two

Drop a couple of drops of your chosen colours on the surface of the water. I used small quantities of nail varnish because I like the translucent effect. If you want a more opaque look and more time to play with your pattern use more varnish.

It will spread out quite nicely on its own, but I had a little swirl with a cocktail stick but it dried fairly quickly.

Step three

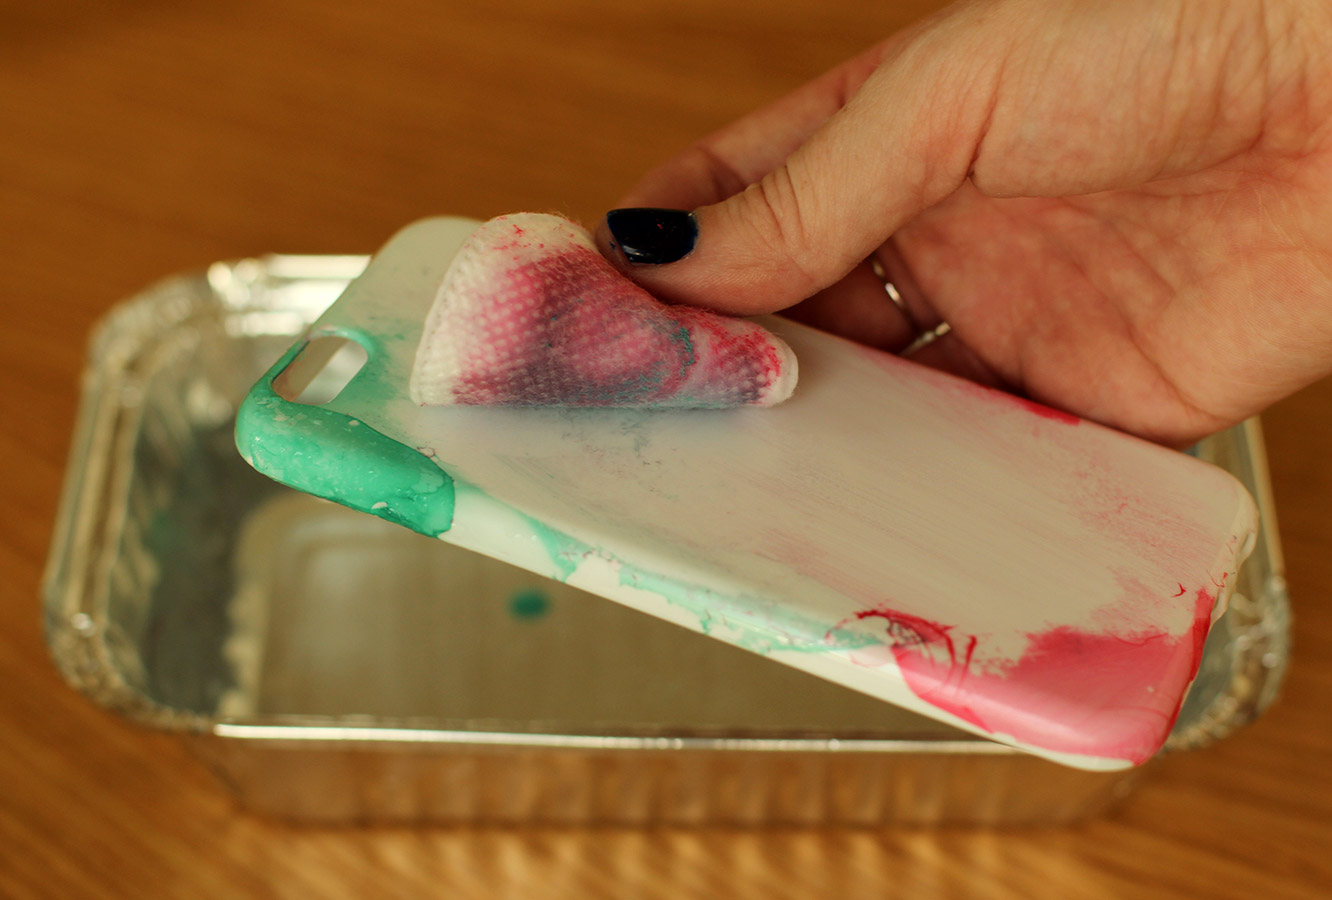
Dip your phone case face first into the water. be sure to completely submerge it so that the sides are coated too.

nail-varnish-marbled-phone-case-diy-03

If you don’t like your design you can remove it with acetone and a make up wipe. I didn’t like the original colours I chose to put together, so I started again.

You will also notice that the one in the gif wasn’t my final design, forgive me, there was a gap in it I didn’t like. I later learned this is easy to cover with another thin layer using the same technique, making sure you line it up over the gap.

DISCLAIMER: this may only work with certain cases. The one I bought for my phone (above) was very forgiving, I am fairly sure I could do this limitlessly. However, Amy’s was a hard case (mine was flexible) and it was already coated in some white varnish, which the acetone was not kind to.

If you love your design, you might consider some mod podge or spray adhesive to seal it. I’m going to leave mine and redo it when I get bored.

nail-varnish-marbled-phone-case-diy-01

nail-varnish-marbled-phone-case-diy-02

Until next time friends. xx
Smelling of roses

Friends, I am sorry. I have definitely become a little lax on the blogging front. Too busy having fun recovering from the craziness of the last few weeks and, of course, the joys of job hunting.

So back to business as usual on fabrefaction this week, no more cupcakes for a while, and as far as I know, no more hen parties. I’m sure I will find something else to do a little series on soon though.

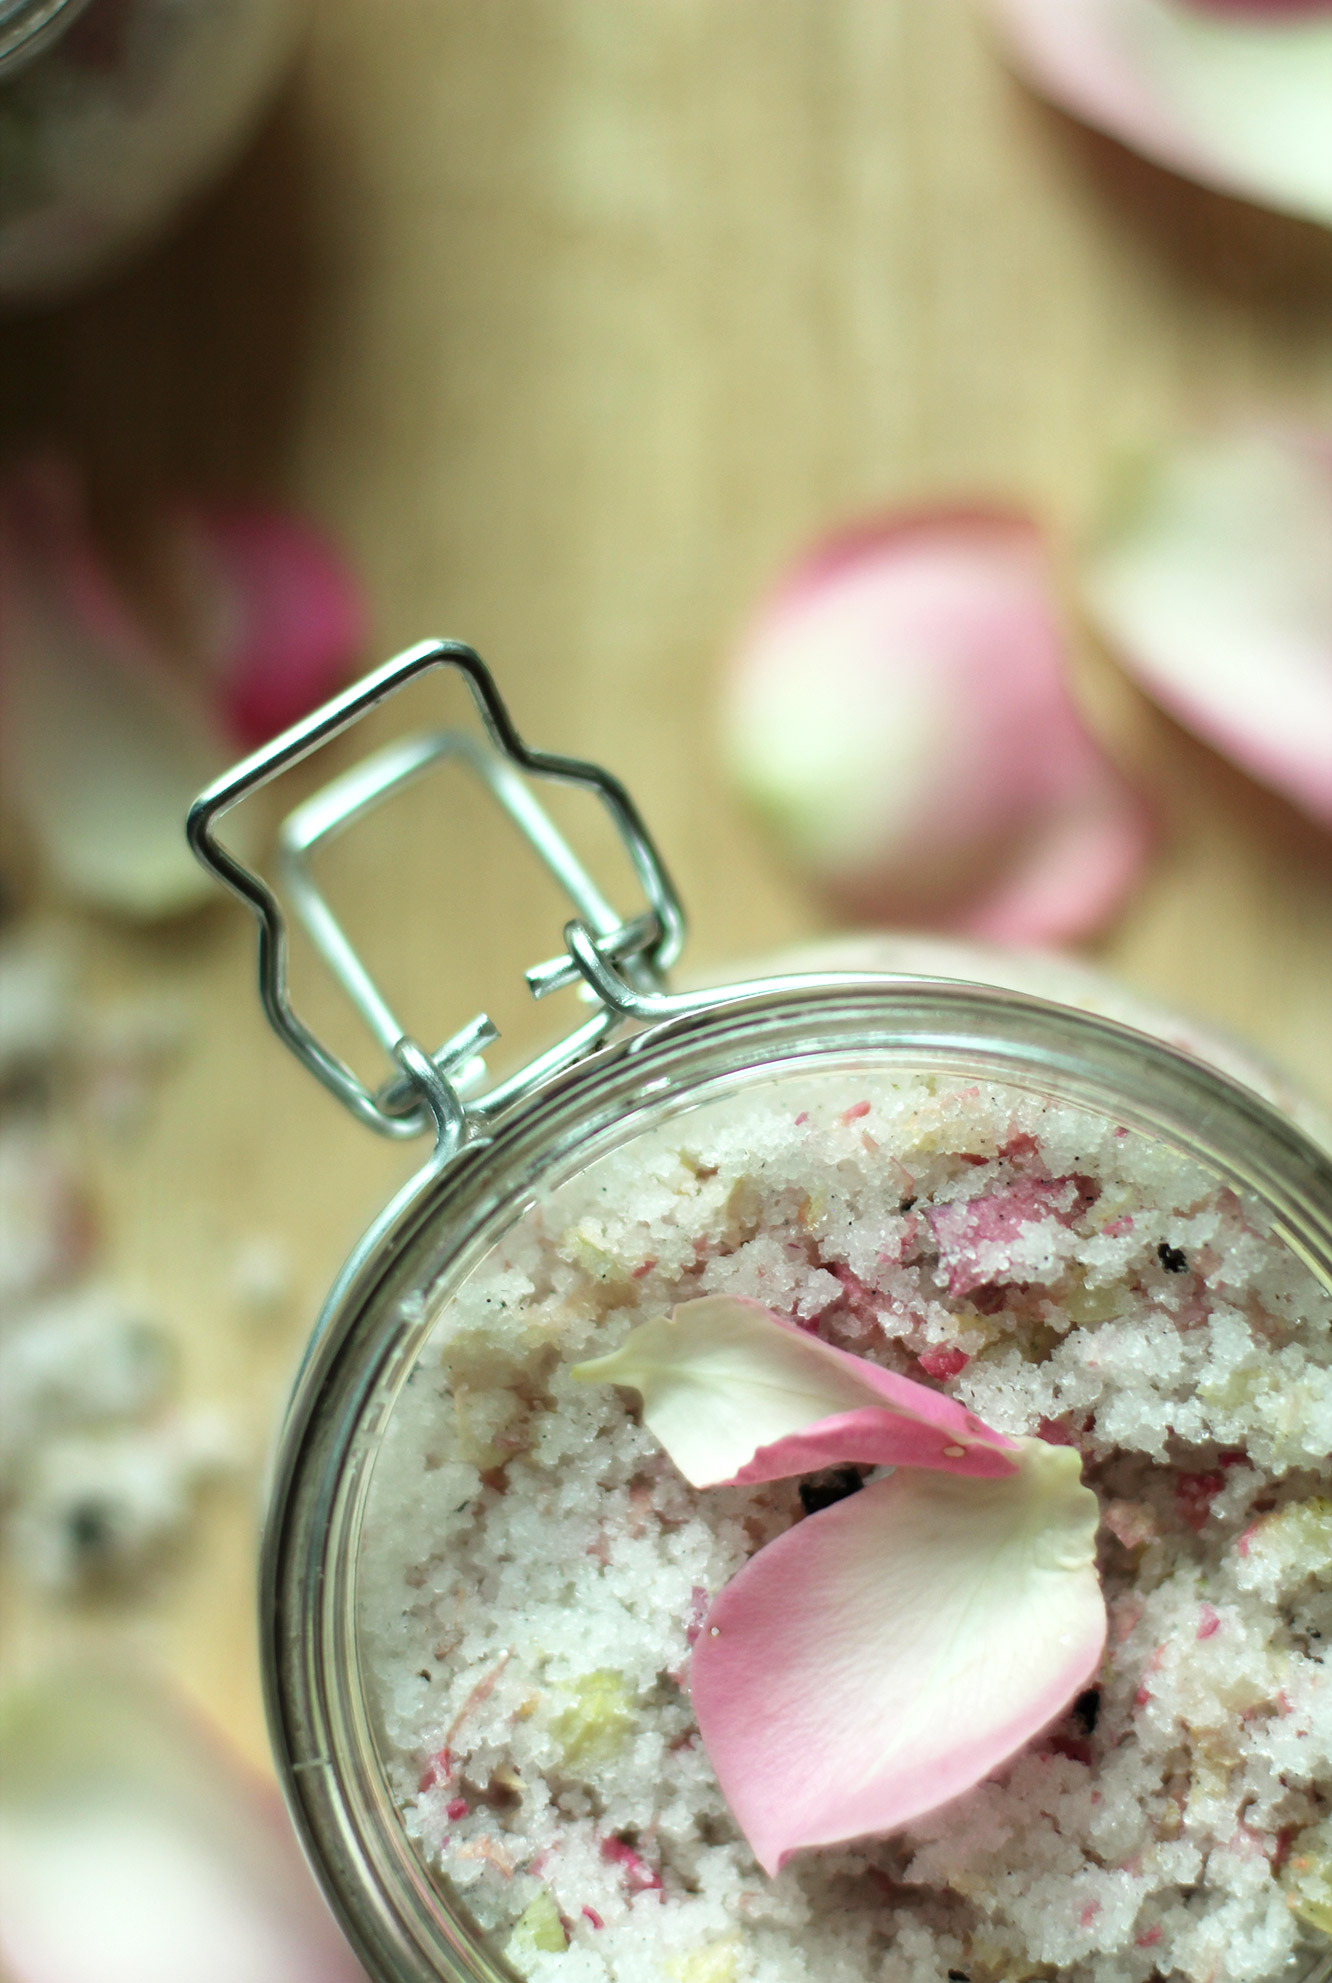
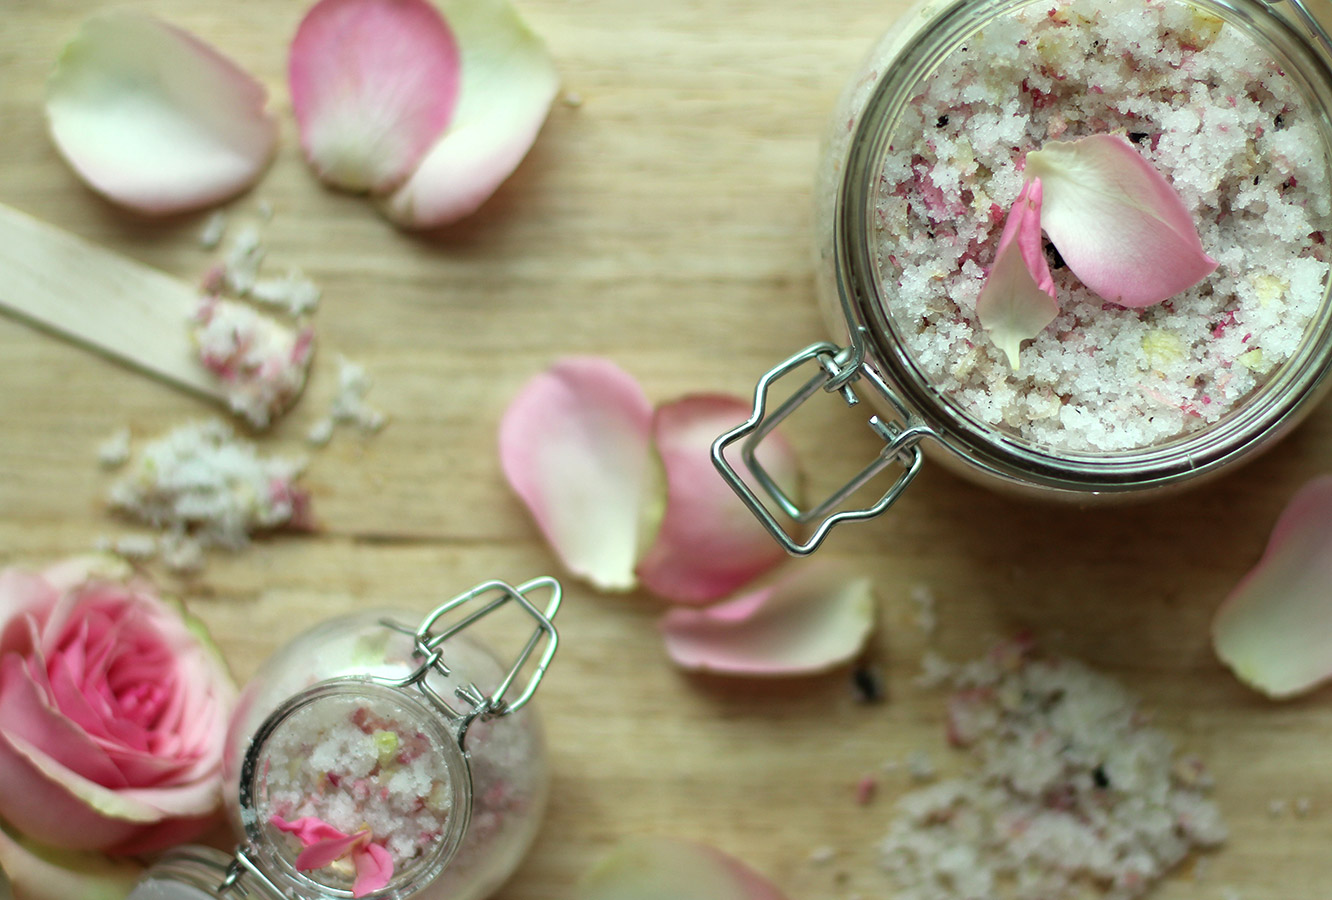
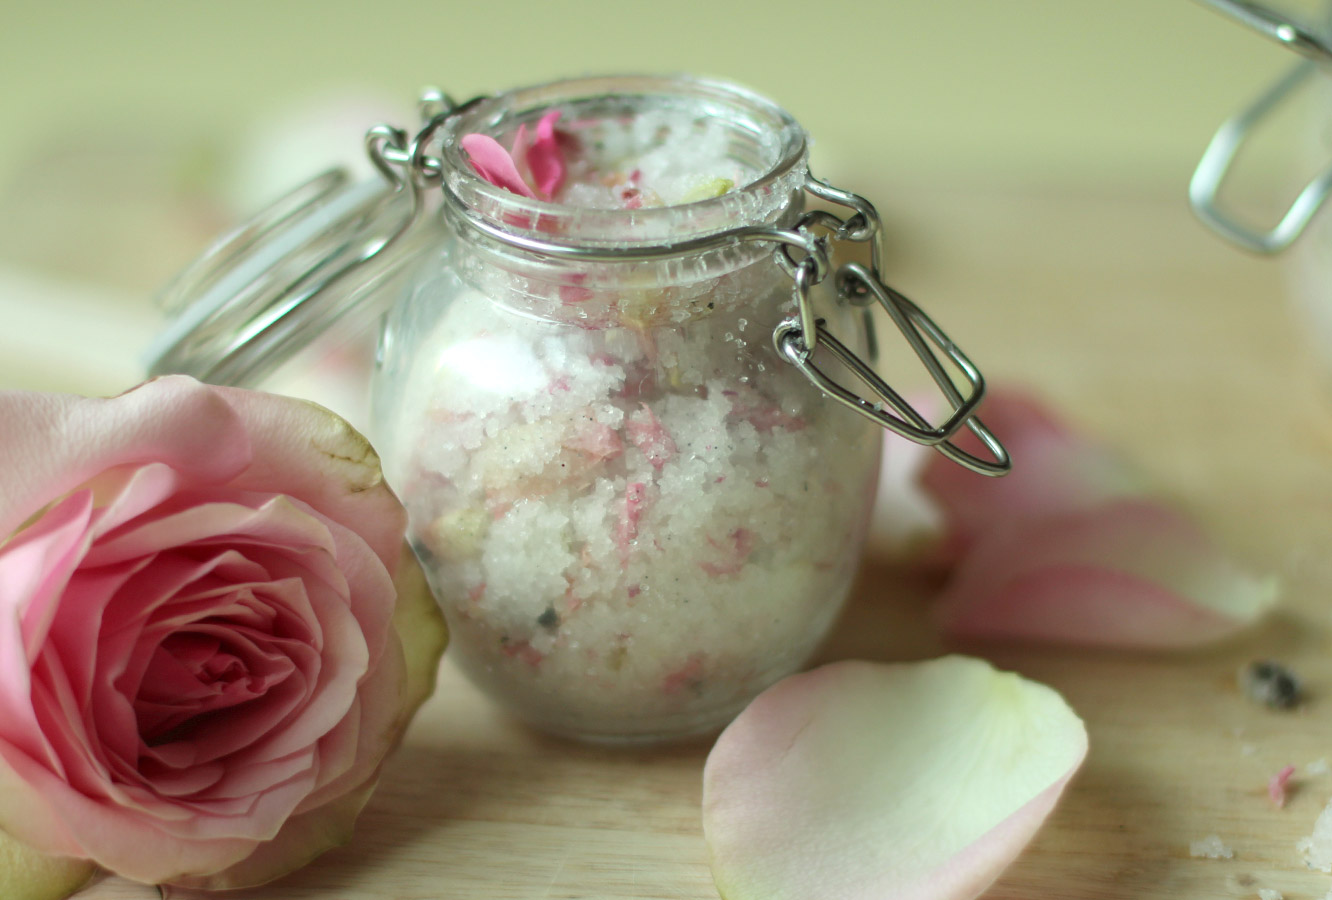
I actually did make this rose and vanilla sugar scrub from the left over flowers from Vicky’s hen party, so it’s not entirely true that we are leaving it behind. My advice is not to make this too far in advance if you’re gifting it as the petals did discolour a little.

homemade-rose-and-vanilla-body-scrub-01

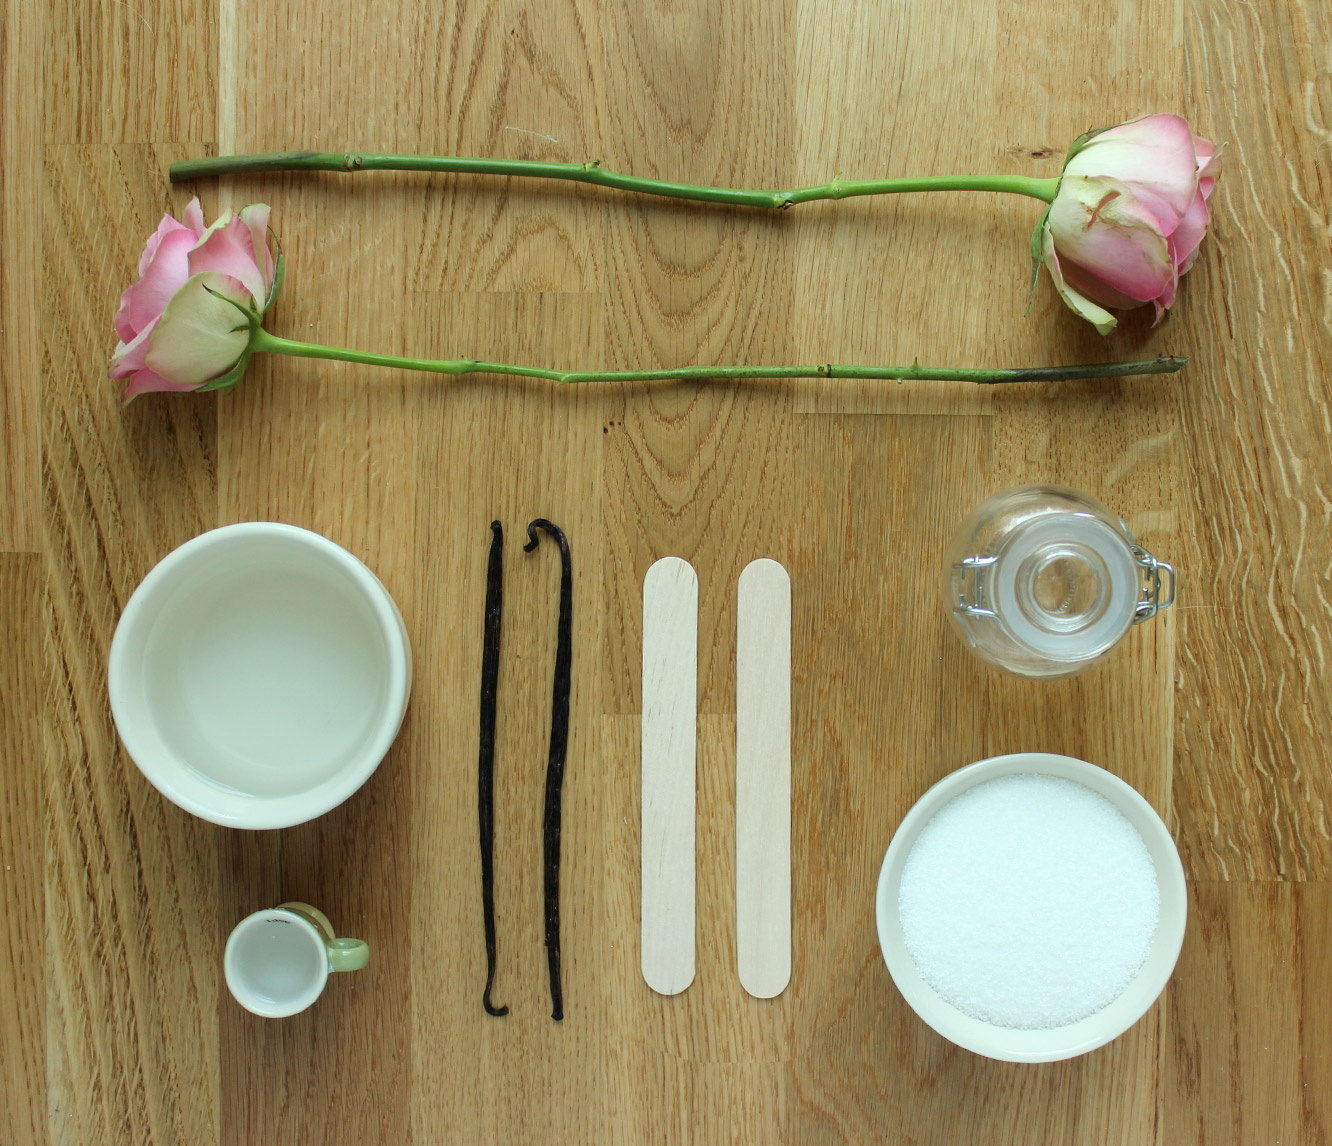
You will need

500g/1lb 2 oz granulated sugar (3 cups)

120ml/4 fl oz baby oil (1/2 cup)

4 roses

1-2 vanilla pods

1tsp rose extract

homemade-rose-and-vanilla-body-scrub-gif

homemade-rose-and-vanilla-body-scrub-02

Step one

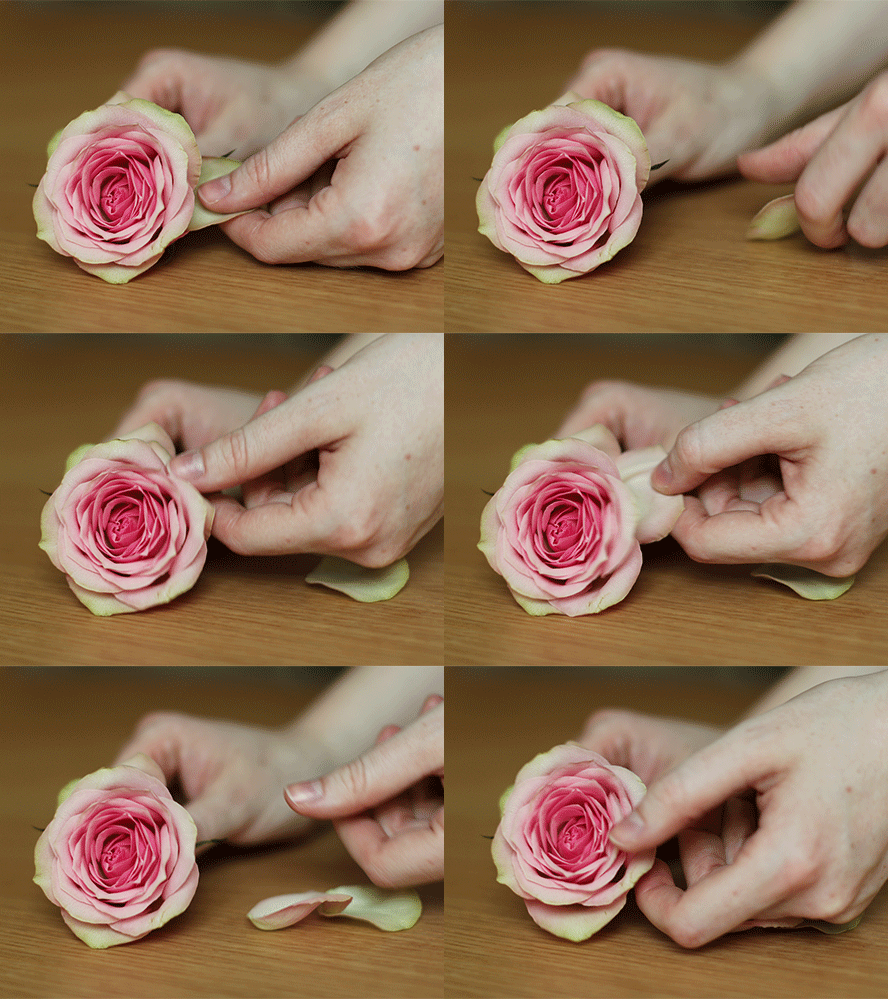
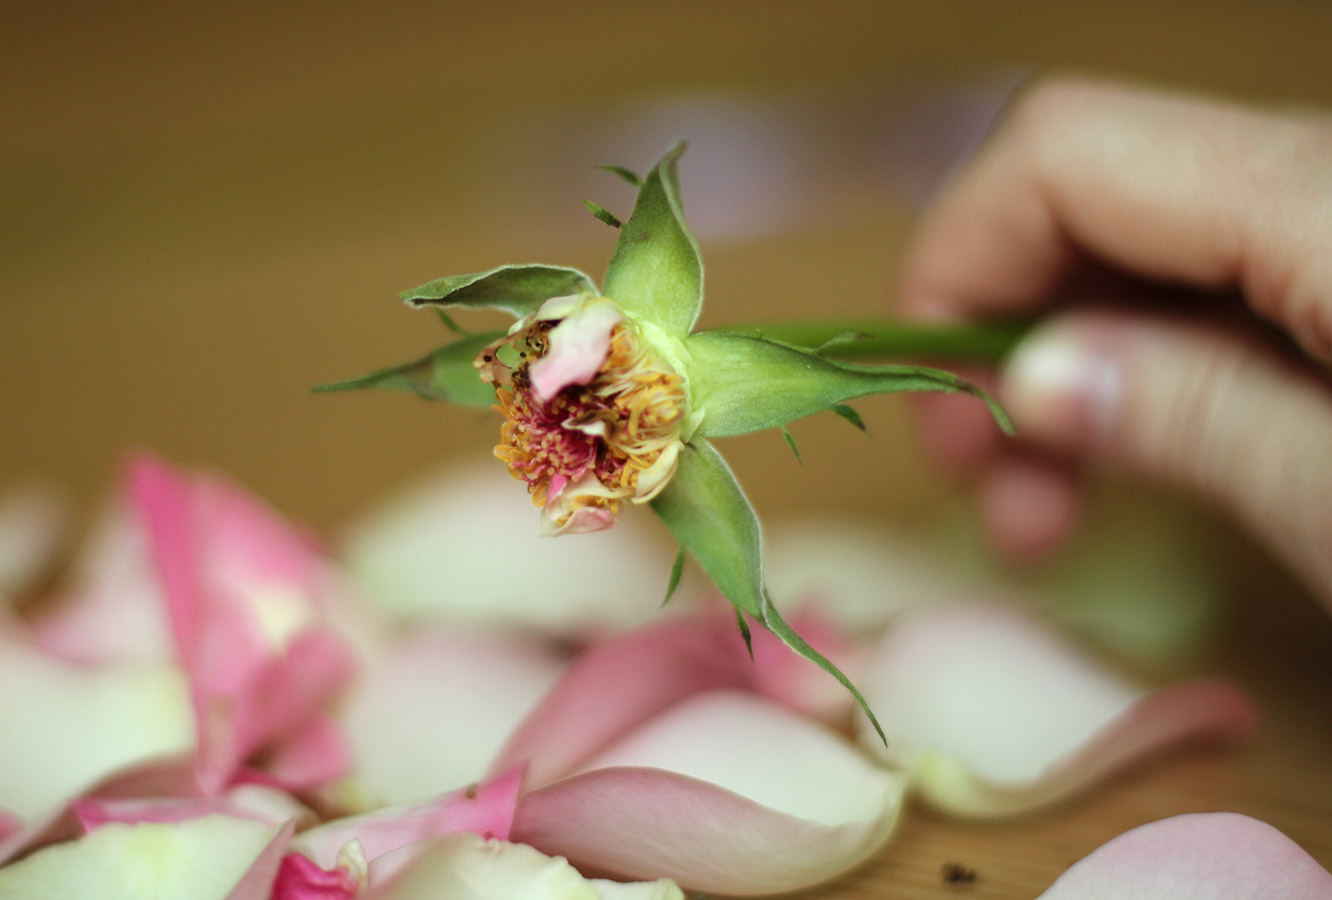
Remove the petals from the roses and spread them out over a surface you won’t need to use for a couple of days, maybe a tray or something so you can move them about with ease.

homemade-rose-and-vanilla-body-scrub-03

Step two

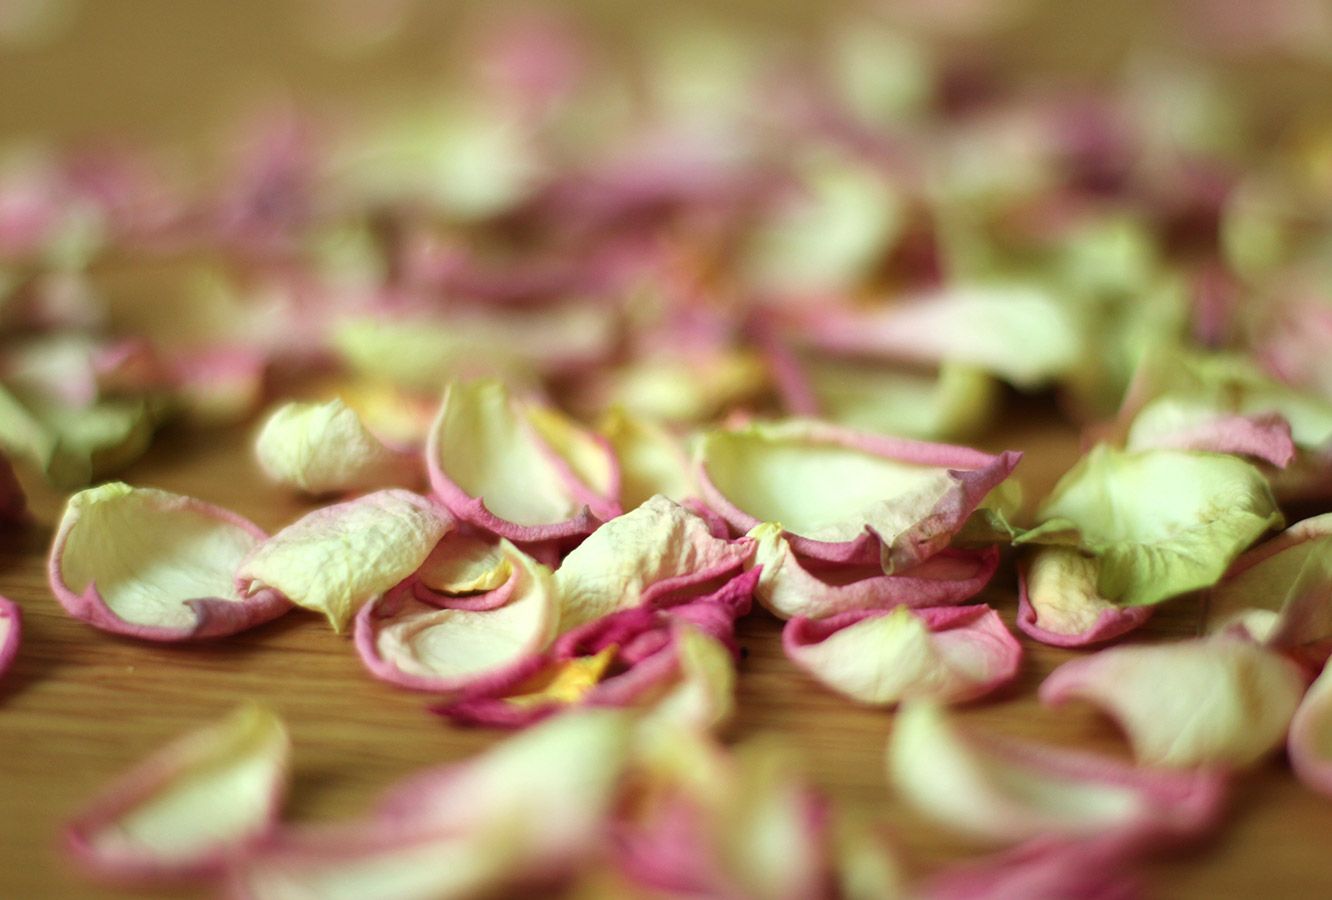
Allow the petals to dry for at least two days until the moisture has gone.

homemade-rose-and-vanilla-body-scrub-04

Step three

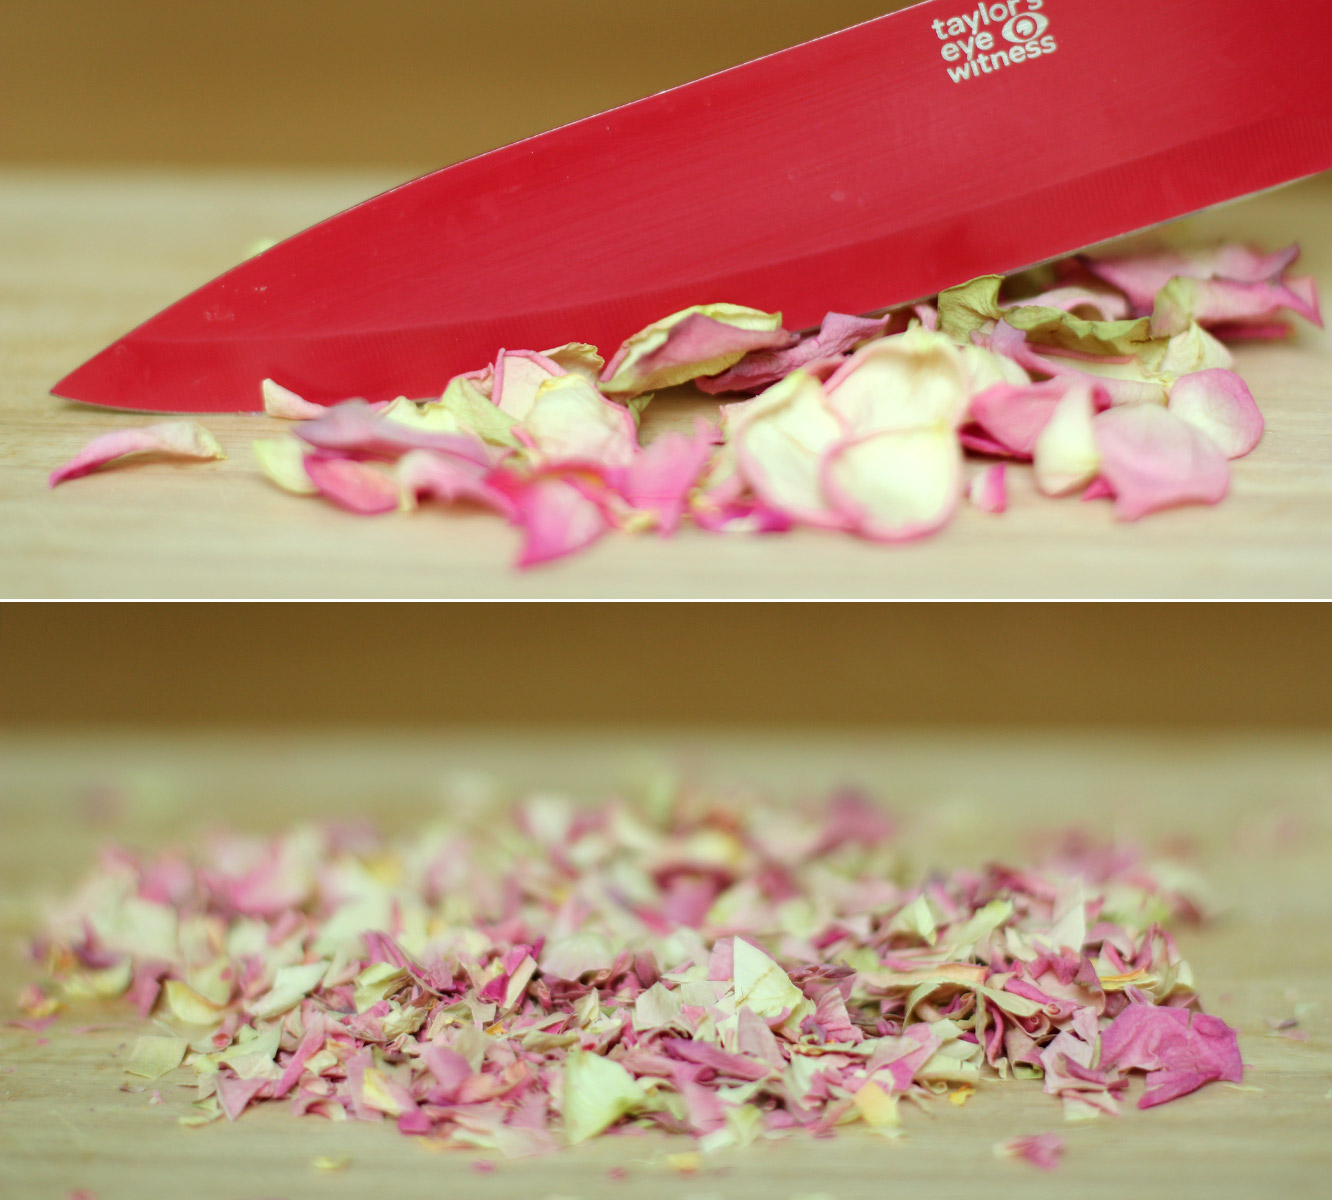
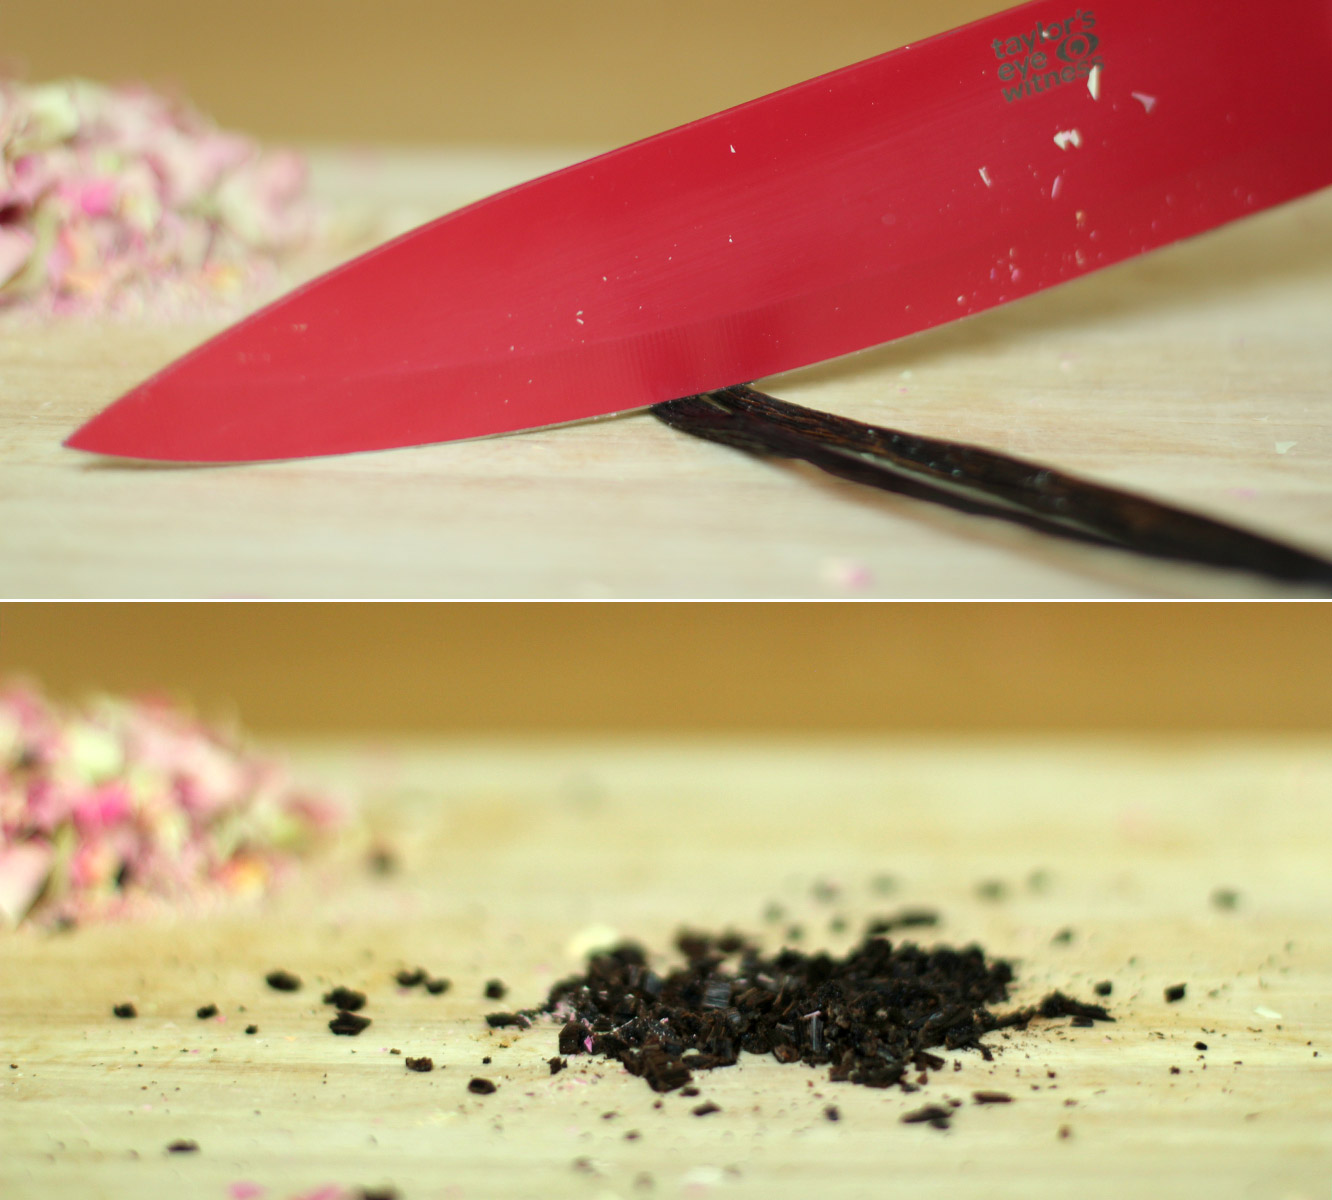
Using a sharp knife, chop the petals into small pieces.

homemade-rose-and-vanilla-body-scrub-05

Step four

Chop the vanilla pods up. Mine had hardened as they were fairly old so I just did it this way to add to the exfoliating feel and make it easier for myself. If yours are still soft you could slice them down the middle and scrape the beans out instead.

homemade-rose-and-vanilla-body-scrub-06

Step five

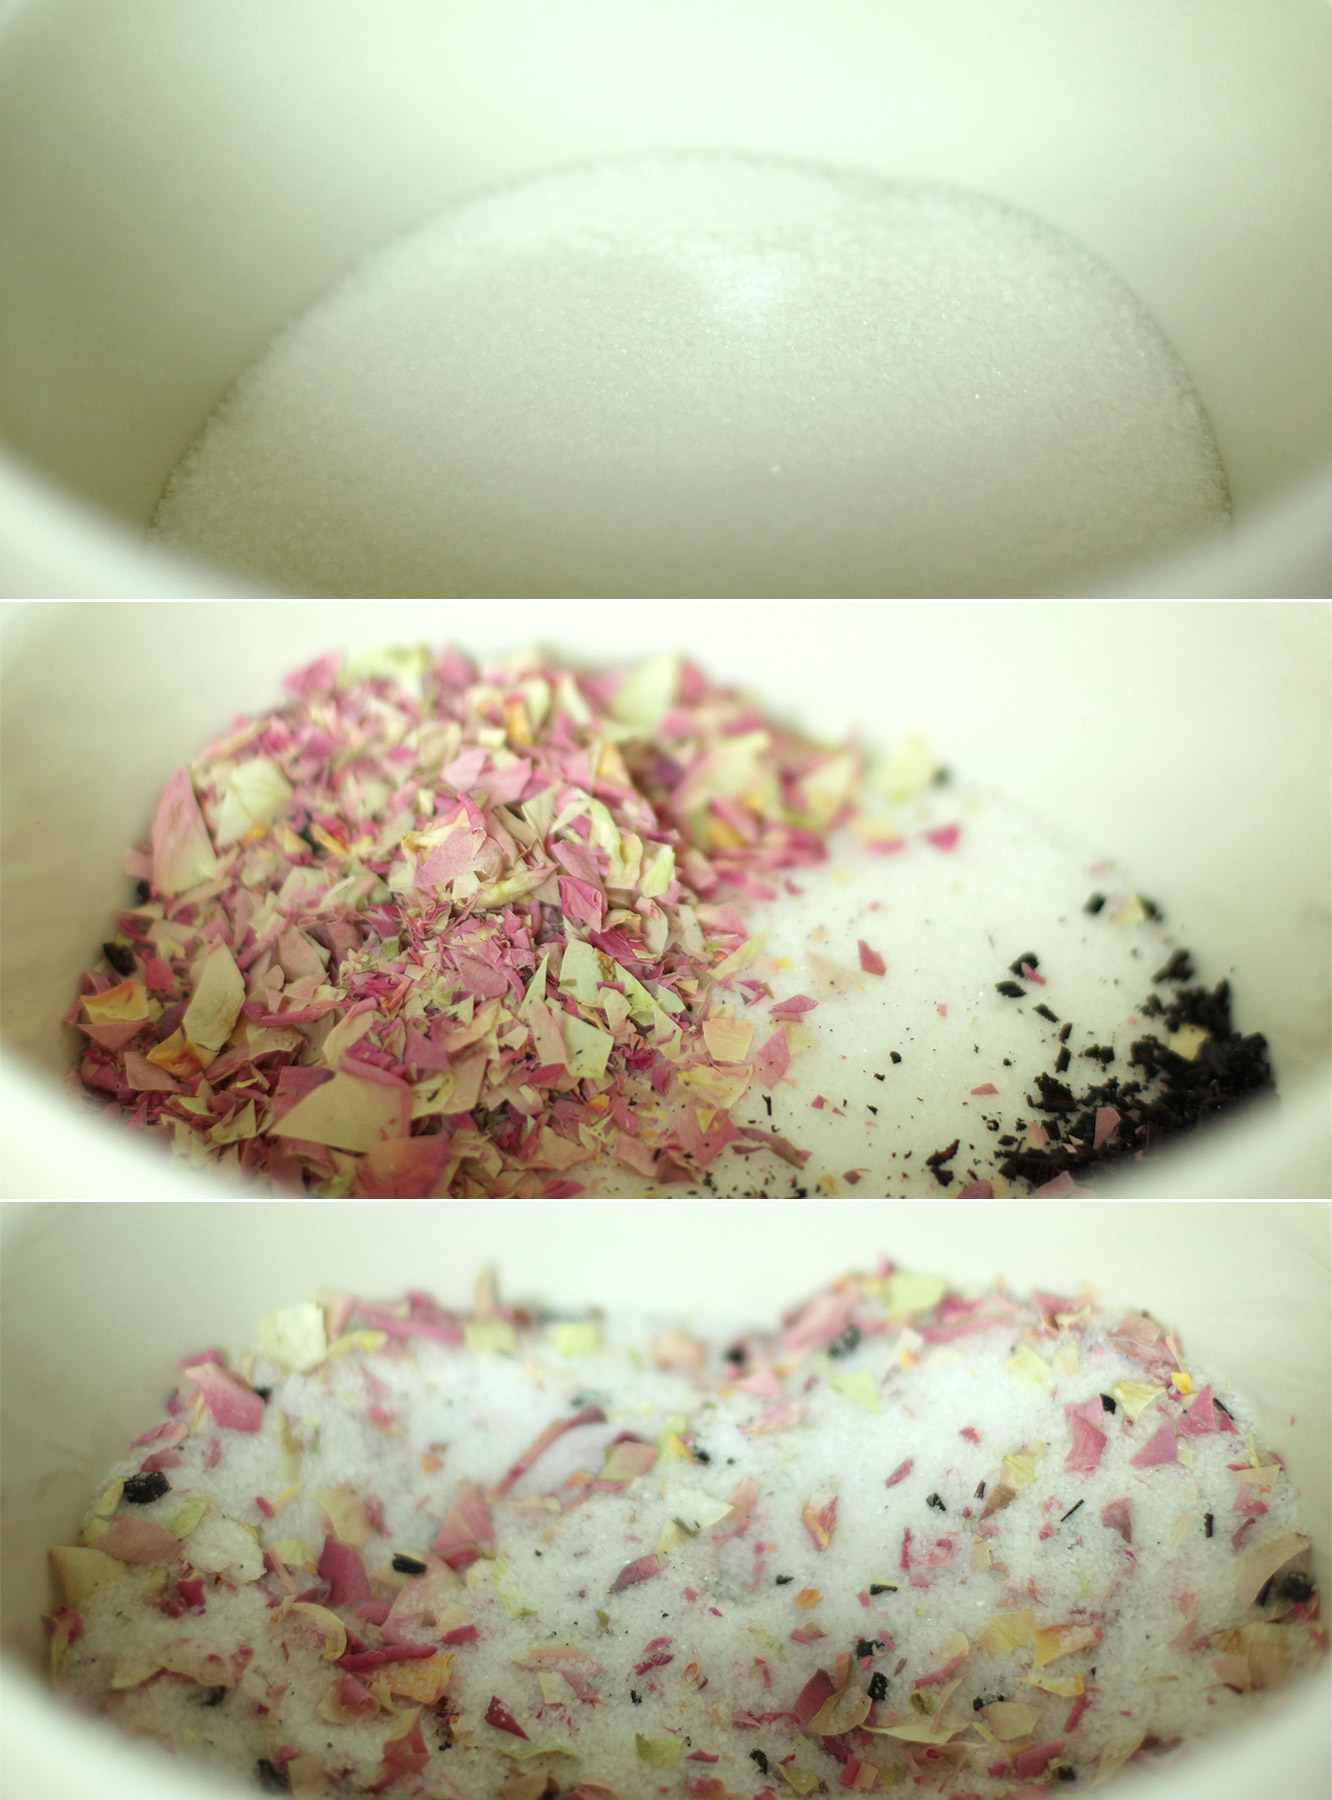
Stir together the sugar, petals and vanilla.

homemade-rose-and-vanilla-body-scrub-07

Step six

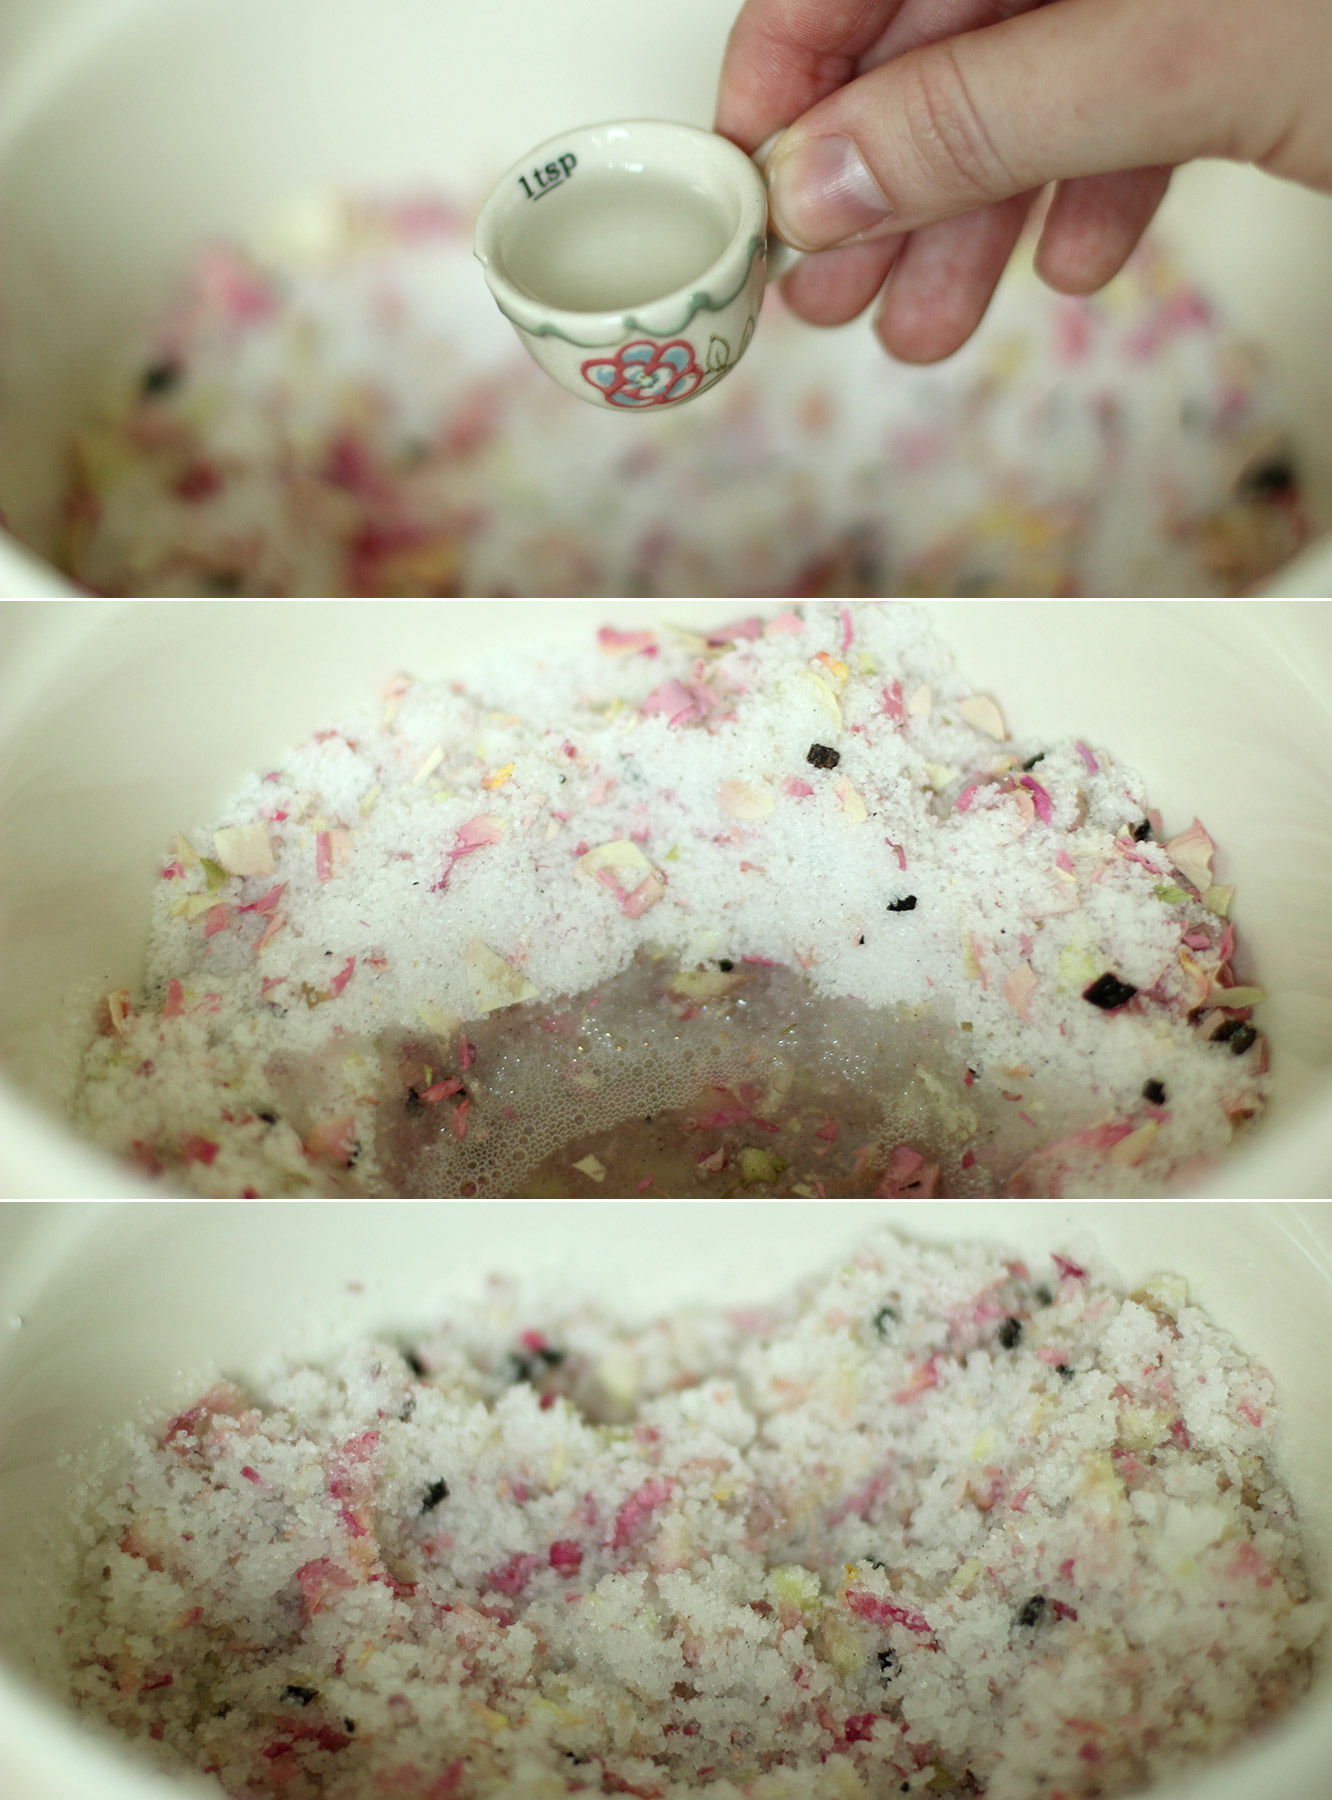
Add the rose extract/essence and the baby oil. Stir together until fully combined.

homemade-rose-and-vanilla-body-scrub-08

Step seven

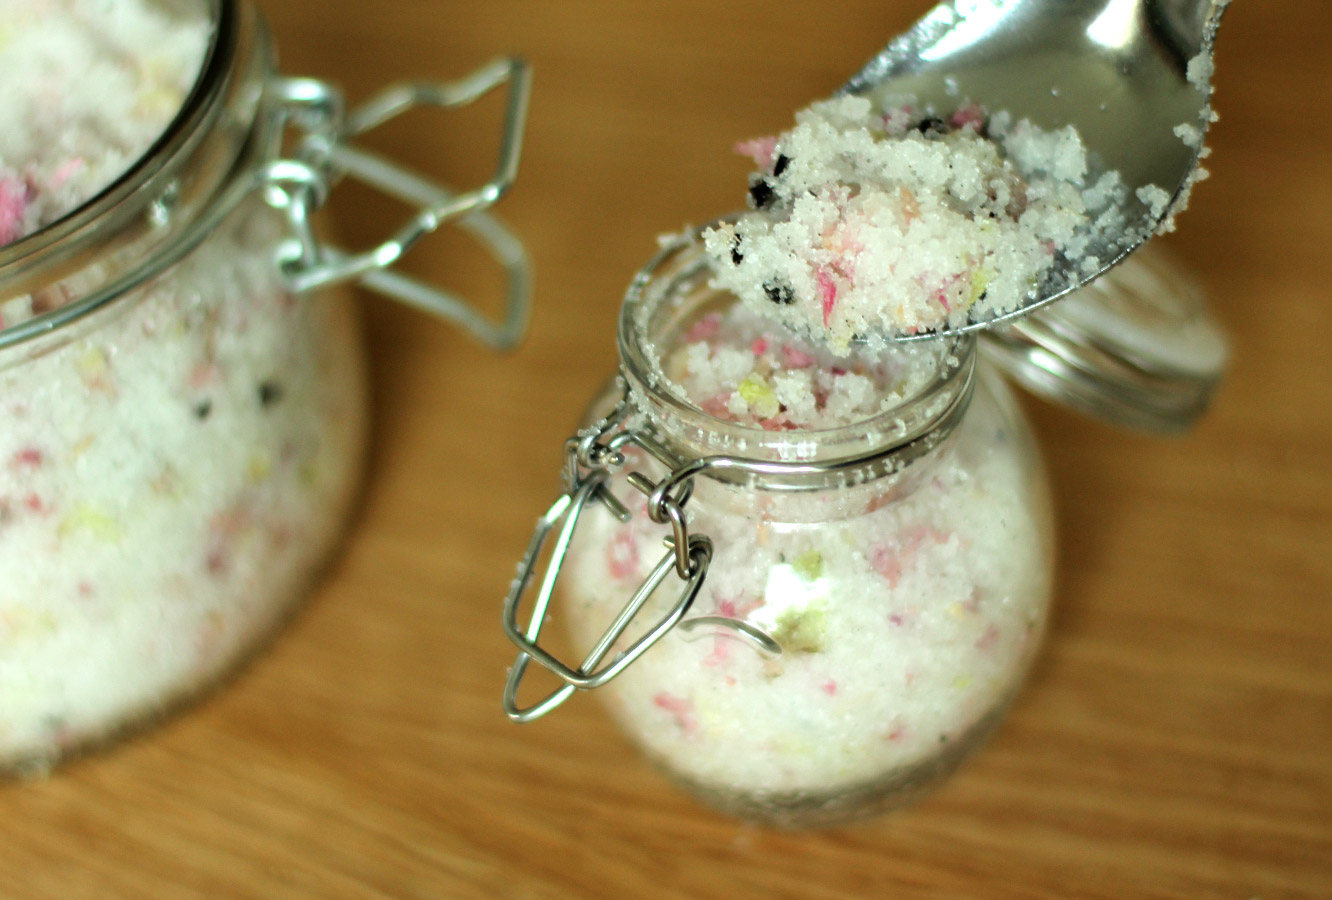
Fill whatever pot you’re using and you’re ready to go!

homemade-rose-and-vanilla-body-scrub-09

homemade-rose-and-vanilla-body-scrub-10

homemade-rose-and-vanilla-body-scrub-11

Ta, Ma.

Apparently when I think Mother’s Day blogging I think fudge. It’s a good thing my mum likes fudge. What’s that? You didn’t realise Mother’s day was so soon? I know, right? Me neither. It’s this Sunday for those of you in GB, the rest of you should check your calendars, this is the sneakiest holiday of the year.

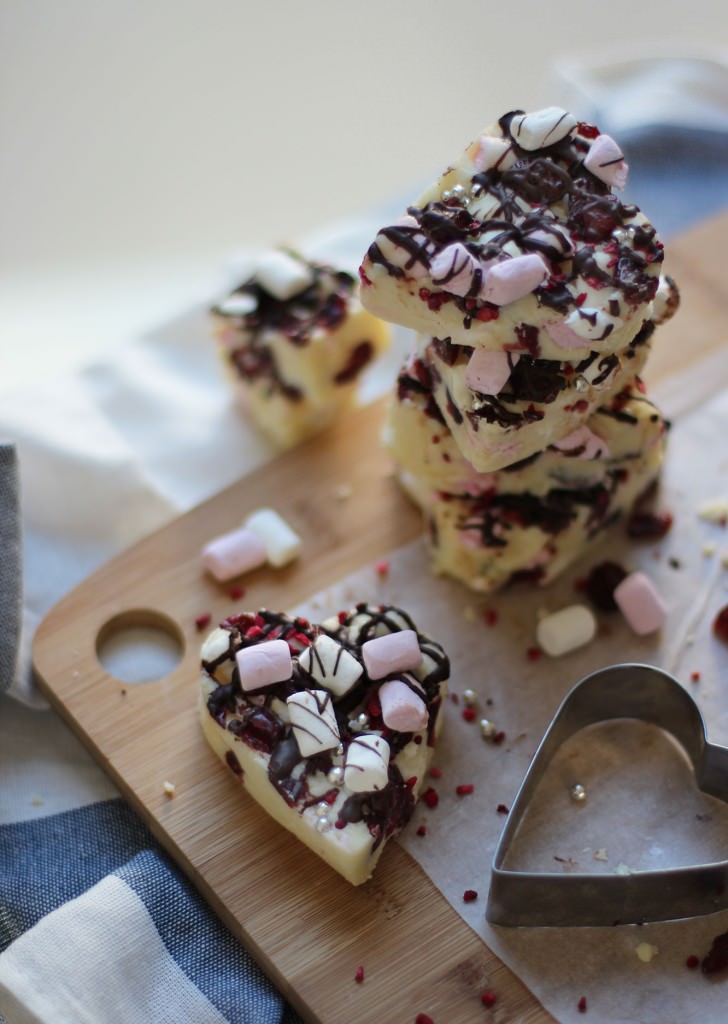
This is a super super easy way to make a treat for your Ma. It’s not like the last fudge recipe I posted, which while being totally delicious I’d wager none of you actually made. Well there’s no boiling sugar or a thermometer required for this one, and barely any cooking at all.

You might need to cut this recipe by half or even more, it makes quite a large batch for just one mummy to eat. It can be frozen.

white-chocolate-fudge-mothers-day-recipe-1

You will need

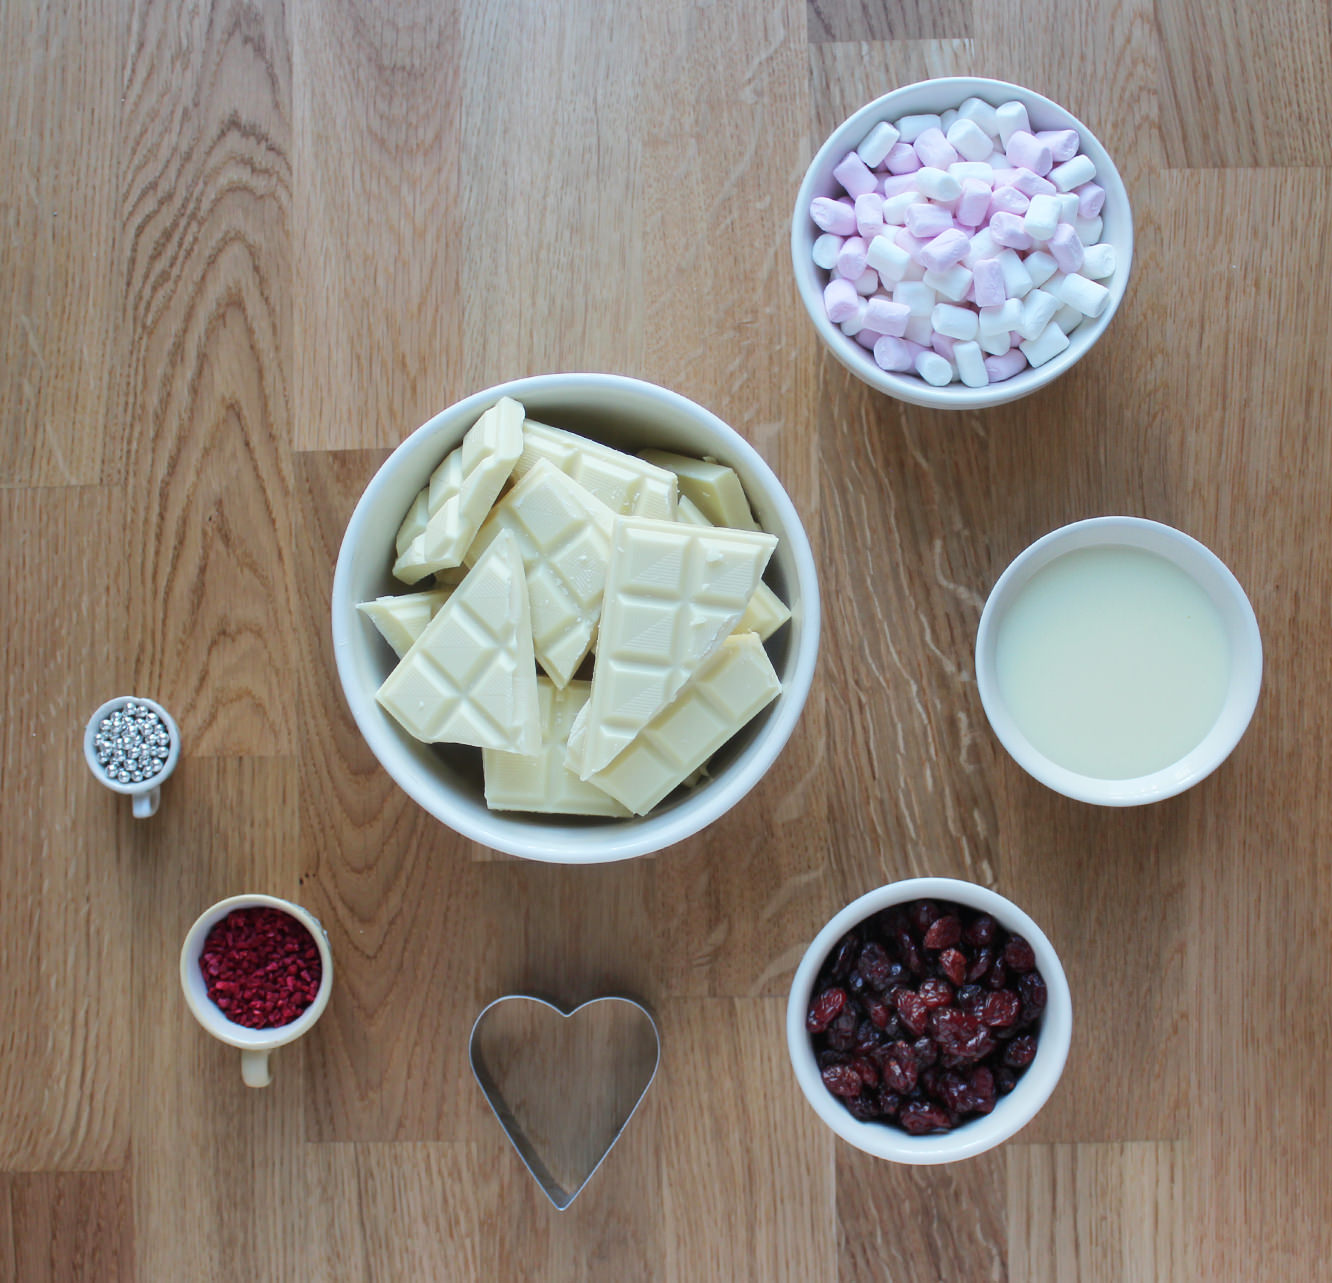
600g/1 lb 3 oz White chocolate (yeah, this is serious stuff)

397g Condensed milk (1 can basically)

125g/4.5 oz Cranberries

85g/3 oz Mini marshmallows

25g/1 oz Dark chocolate

Other decorations (I used silver balls and freeze dried raspberries because that’s what I had, but any manner of nuts and dried fruits would be acceptable, even as a substitute for the marshmallows and cranberries)

white-chocolate-fudge-mothers-day-recipe-2

Step one

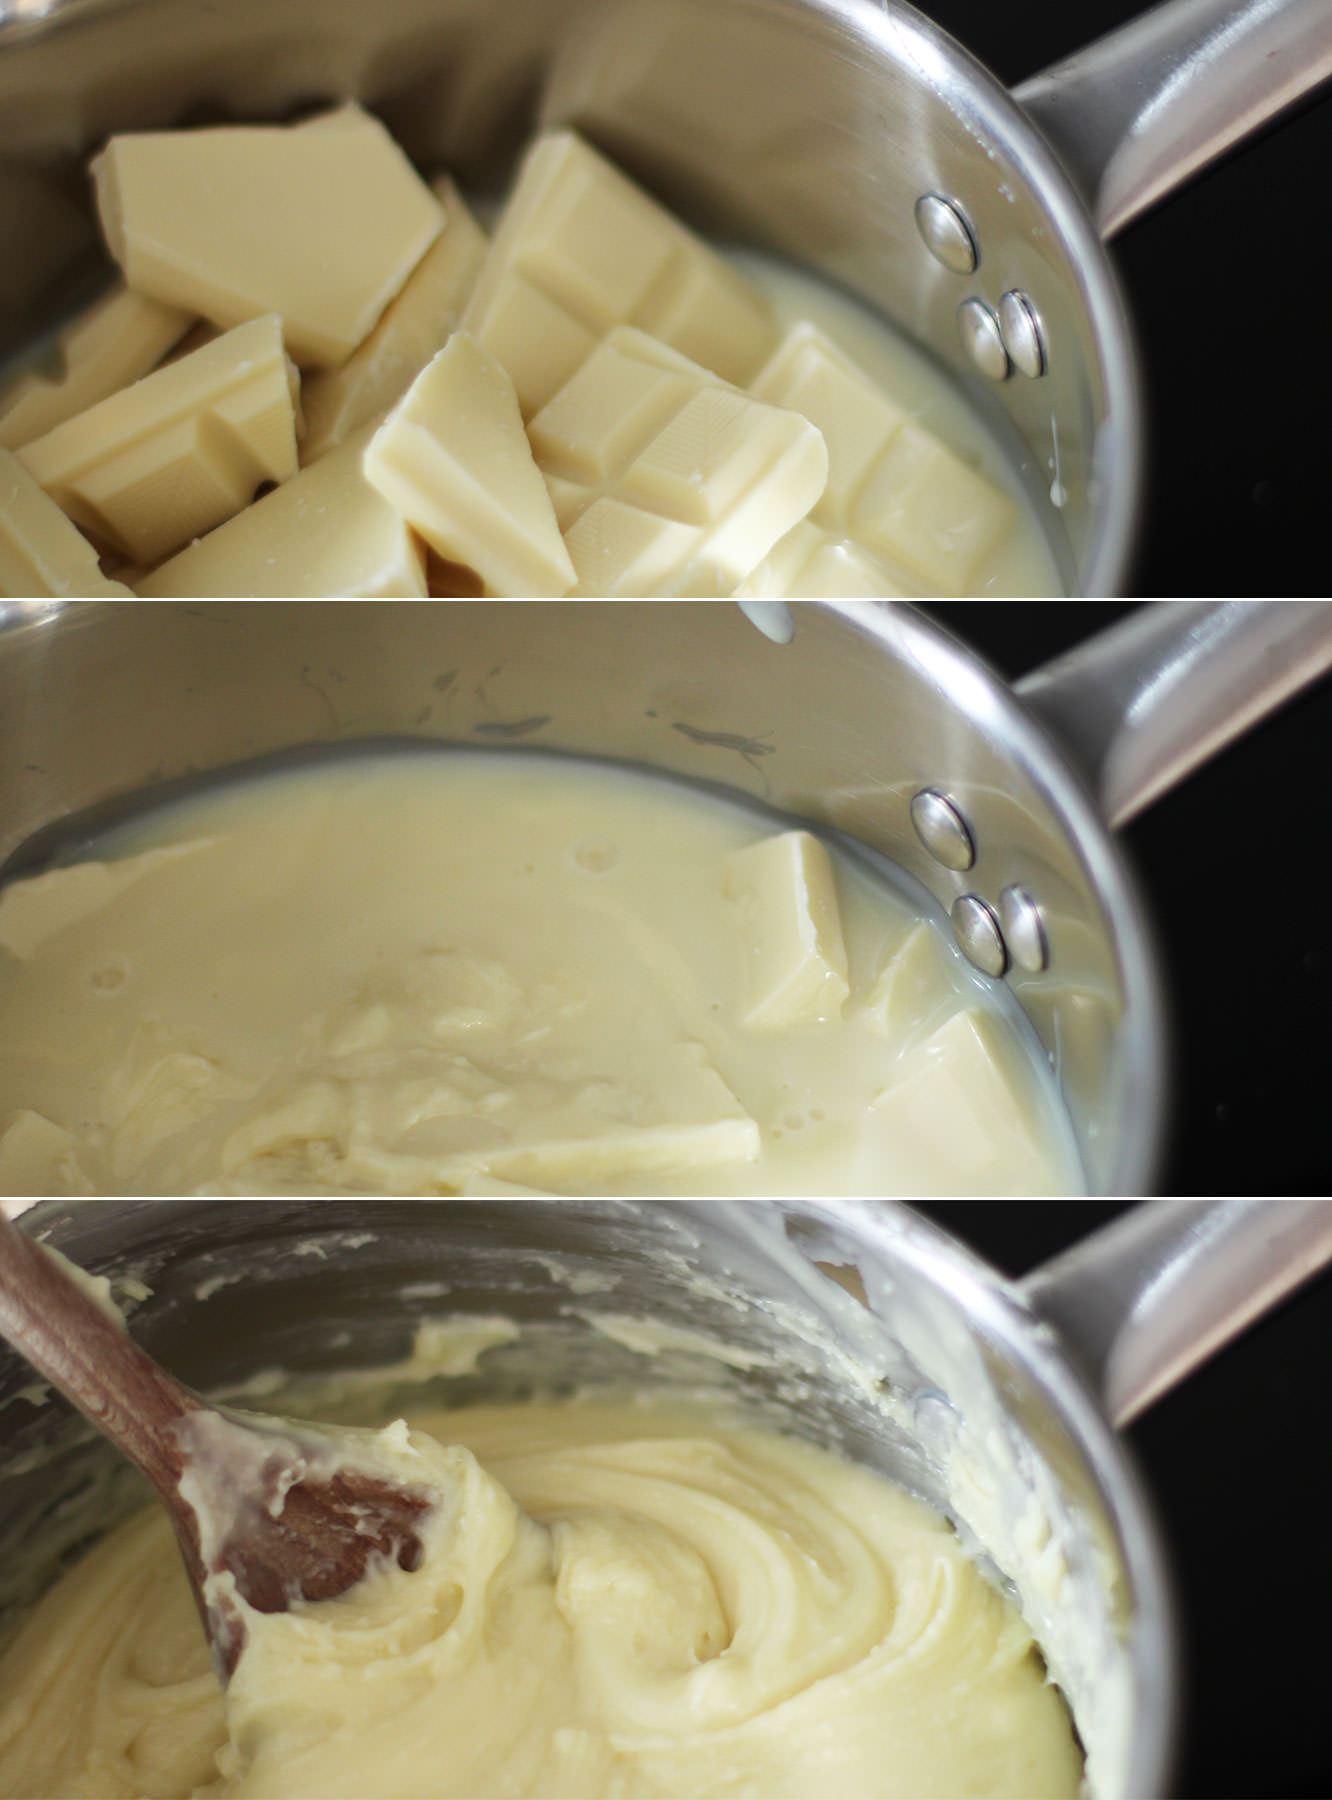
Break the white chocolate into chunks and place in a pan with the tin of condensed milk.

Melt together on a low heat. Once you have a smooth fudge-like mixture, remove from the hob.

white-chocolate-fudge-mothers-day-recipe-7

Step two

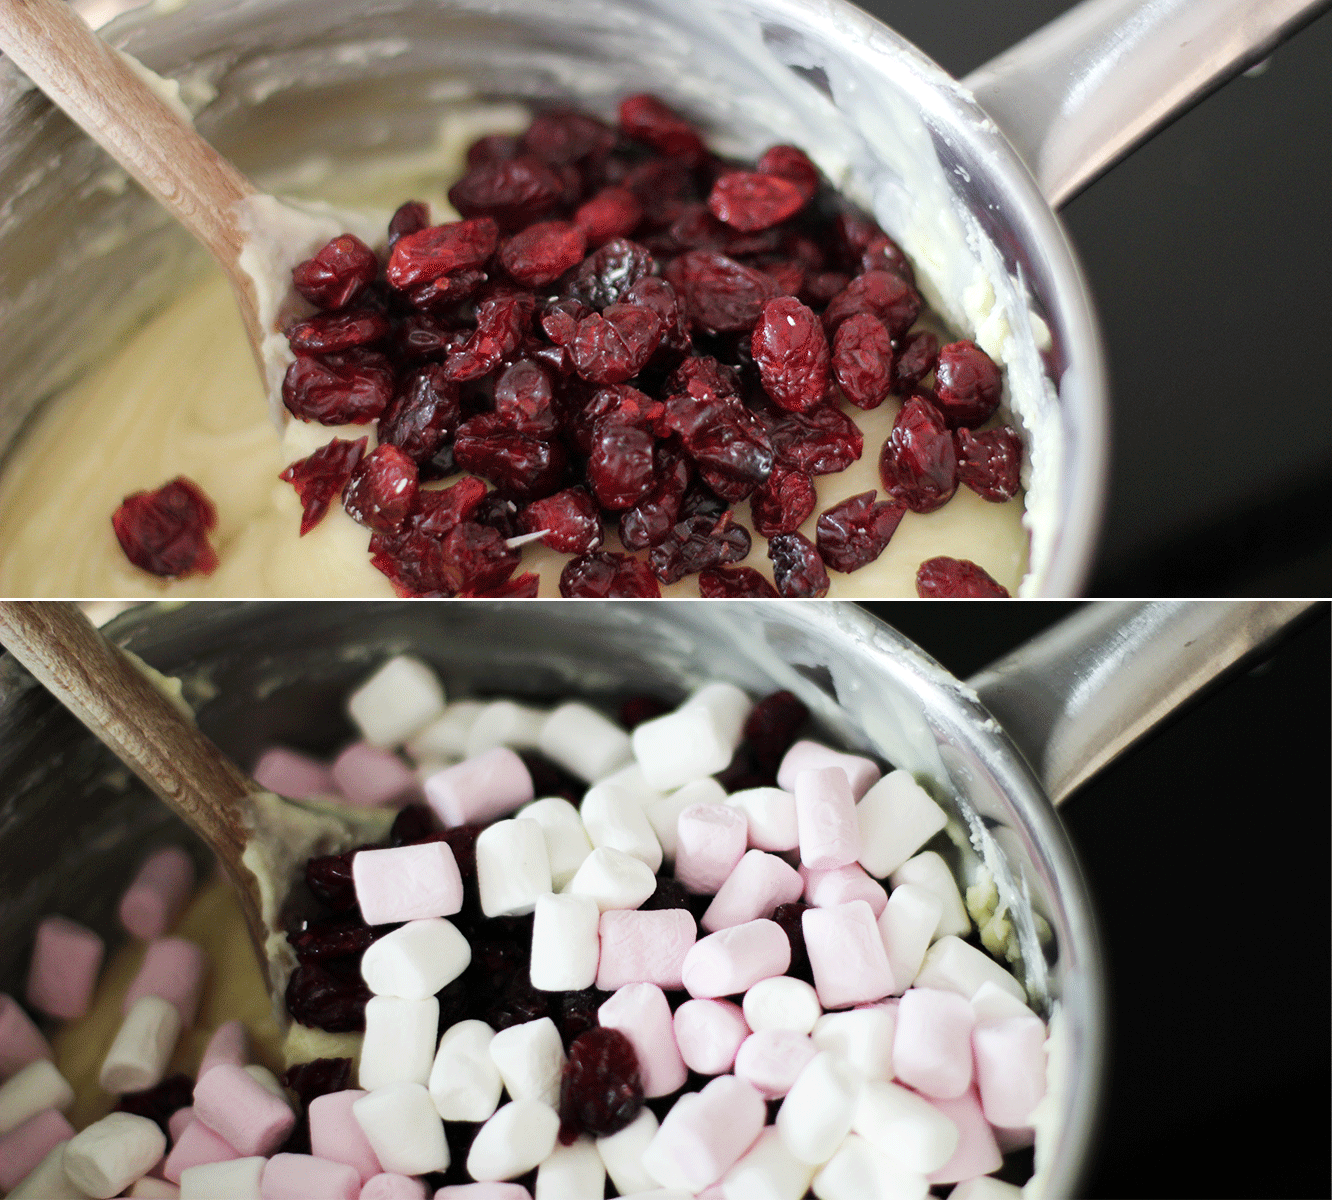
Add two thirds of the cranberries and marshmallows, stir to combine.

white-chocolate-fudge-mothers-day-recipe-3

Step three

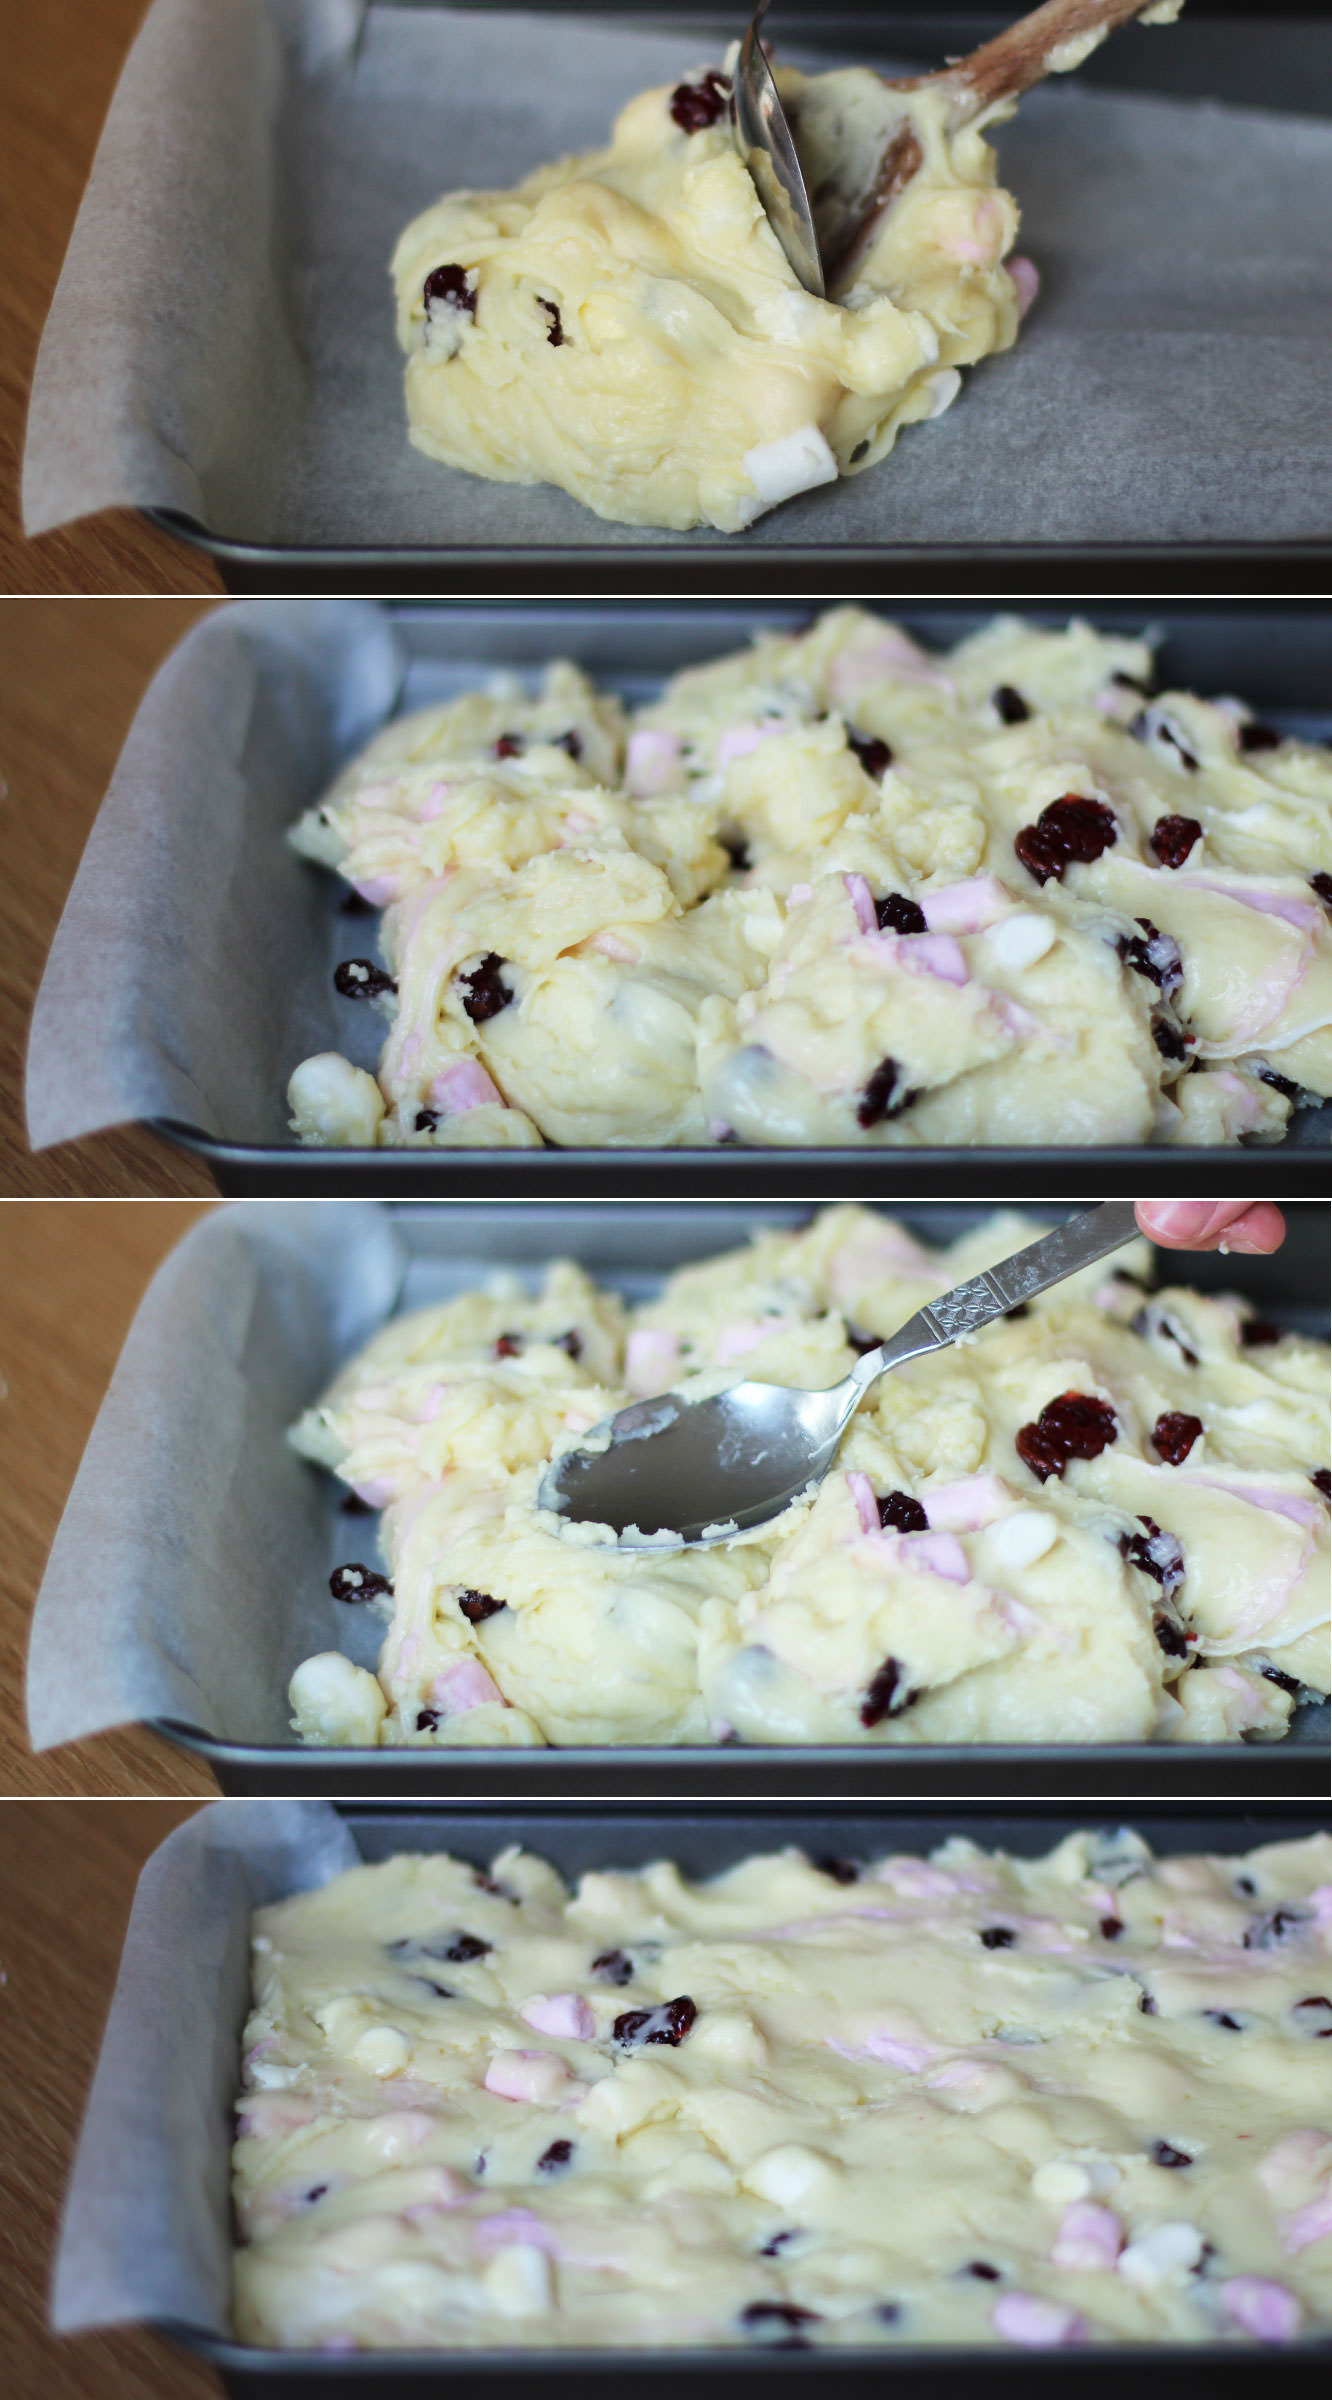
Drop the mixture into a brownie tin lined with greaseproof paper. Push into the corners with the back of a spoon and even the top out a bit.

white-chocolate-fudge-mothers-day-recipe-6

Step four

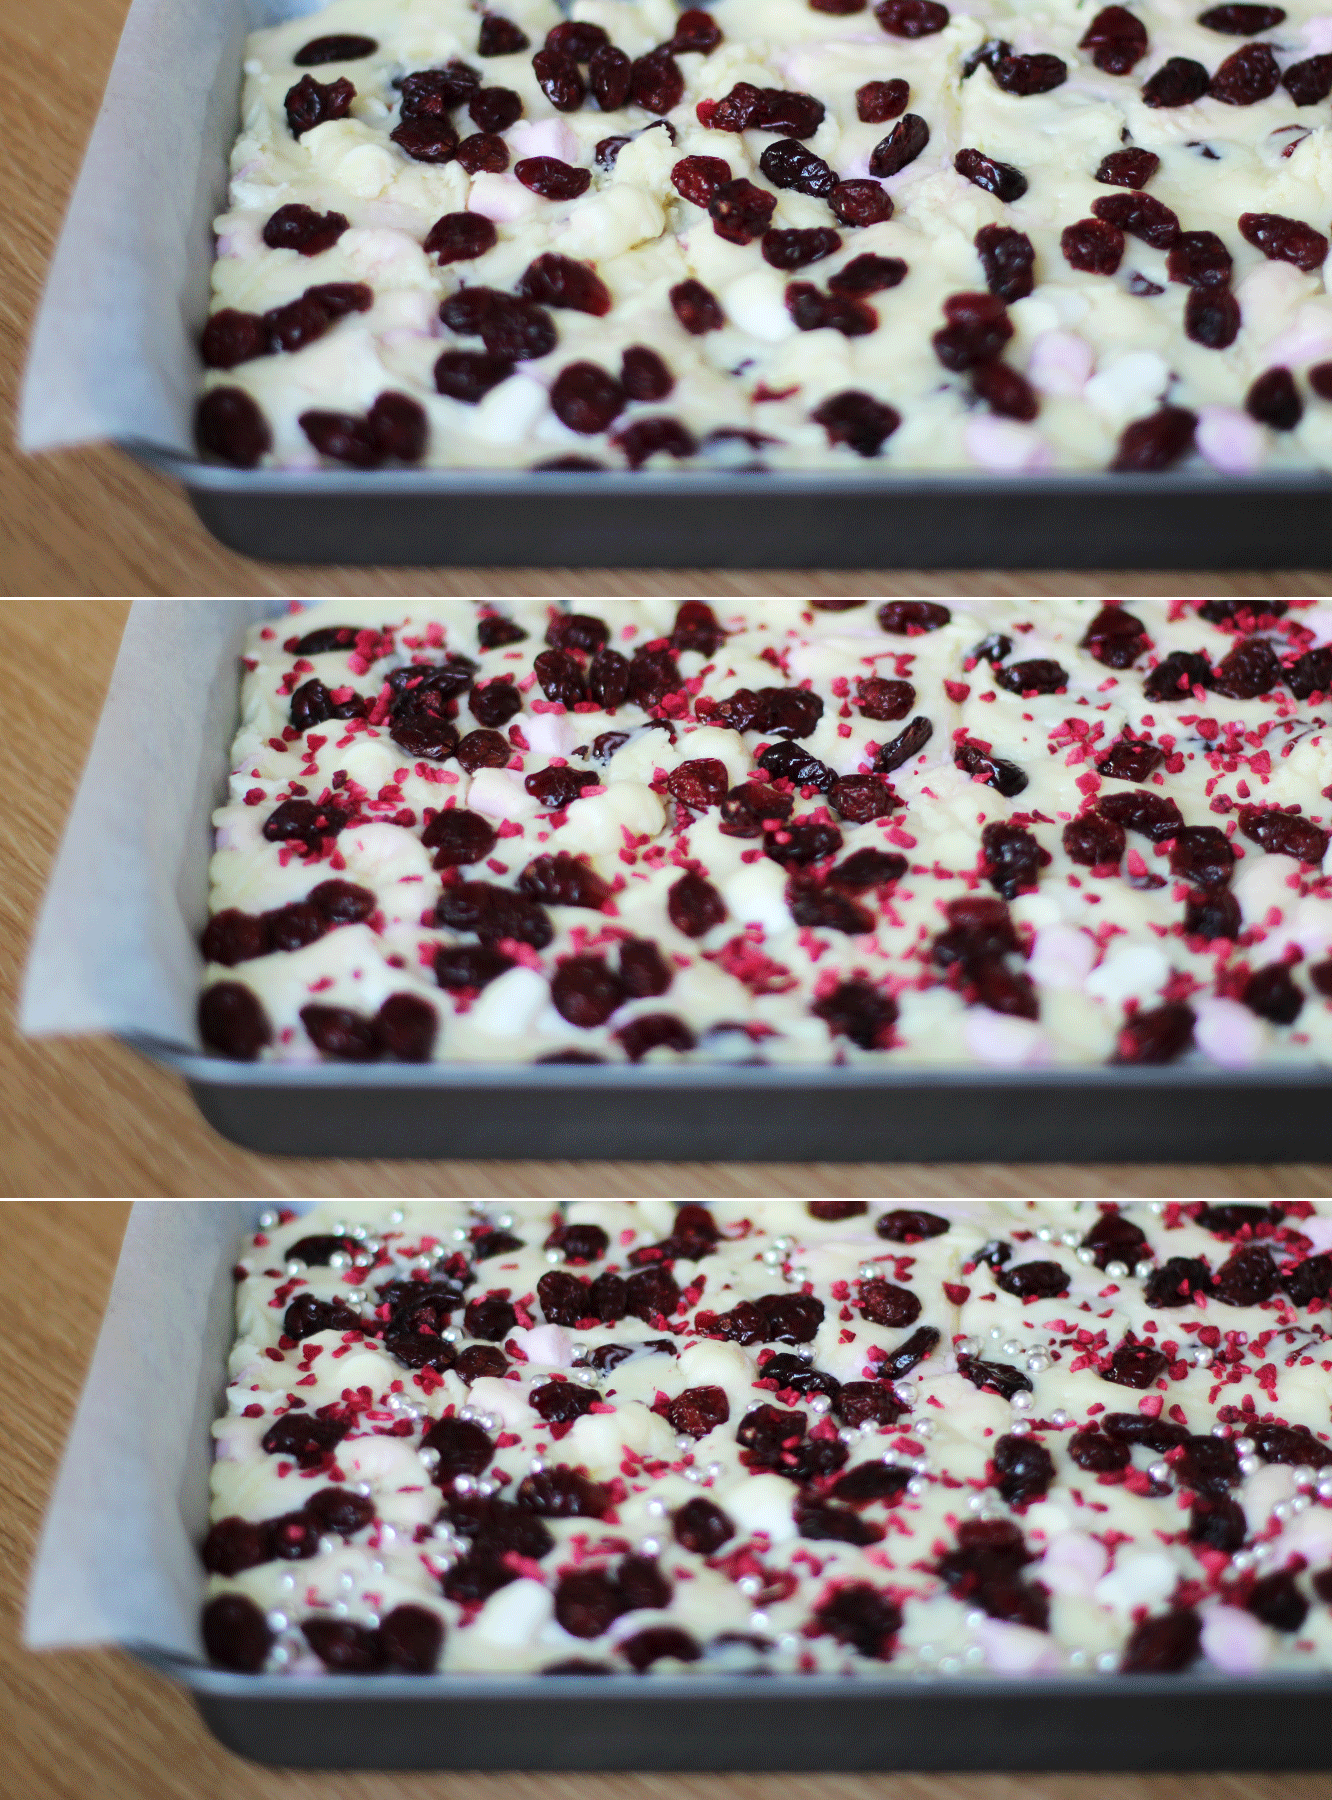
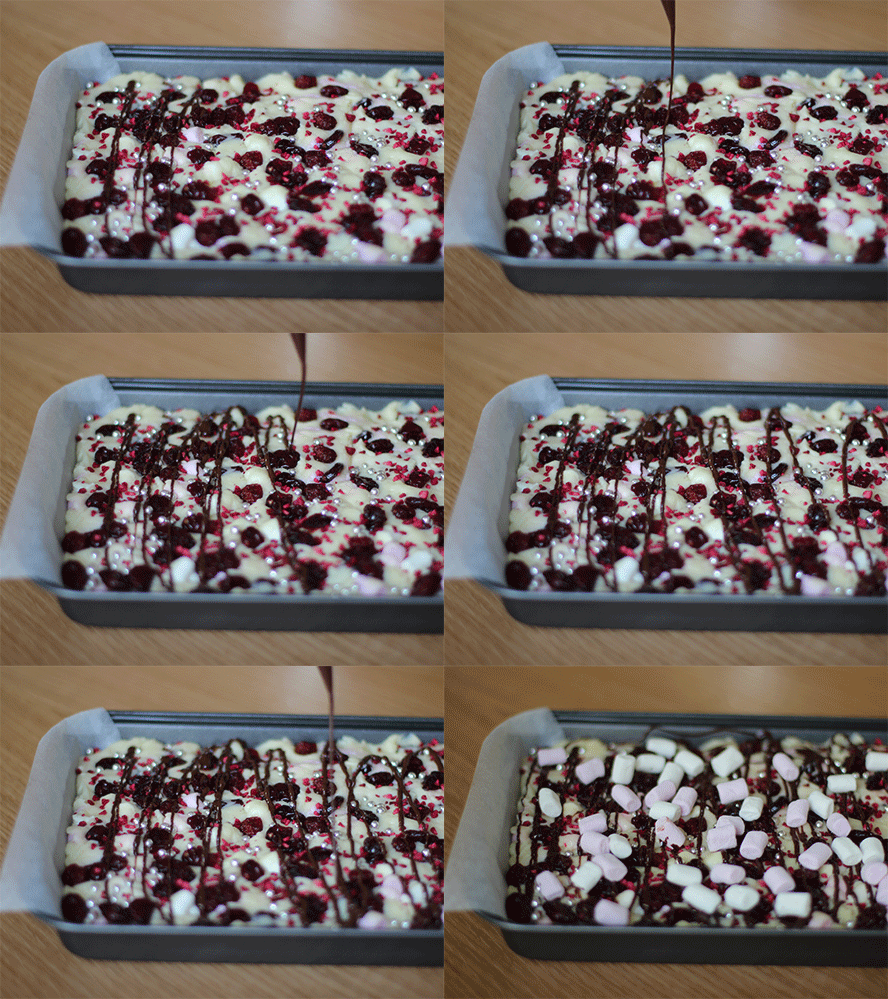
Sprinkle the remaining cranberries, the silver balls and freeze-dried raspberries on top and push down slightly so they stick.

The alternative would be to swap this step with the next one so they stick to the chocolate (this would probably also look nicer because you would actually be able to see them rather than hiding them with a load of dark chocolate…). I make the mistakes so you don’t have to.

white-chocolate-fudge-mothers-day-recipe-gif

Step five

Melt the dark chocolate in the microwave and drizzle over the fudge. Sprinkle the remaining marshmallows on top. I had a bit of dark chocolate left so did another layer on top of the marshmallows.

Place in the fridge to allow the whole thing to set.

white-chocolate-fudge-mothers-day-recipe-4

Step six

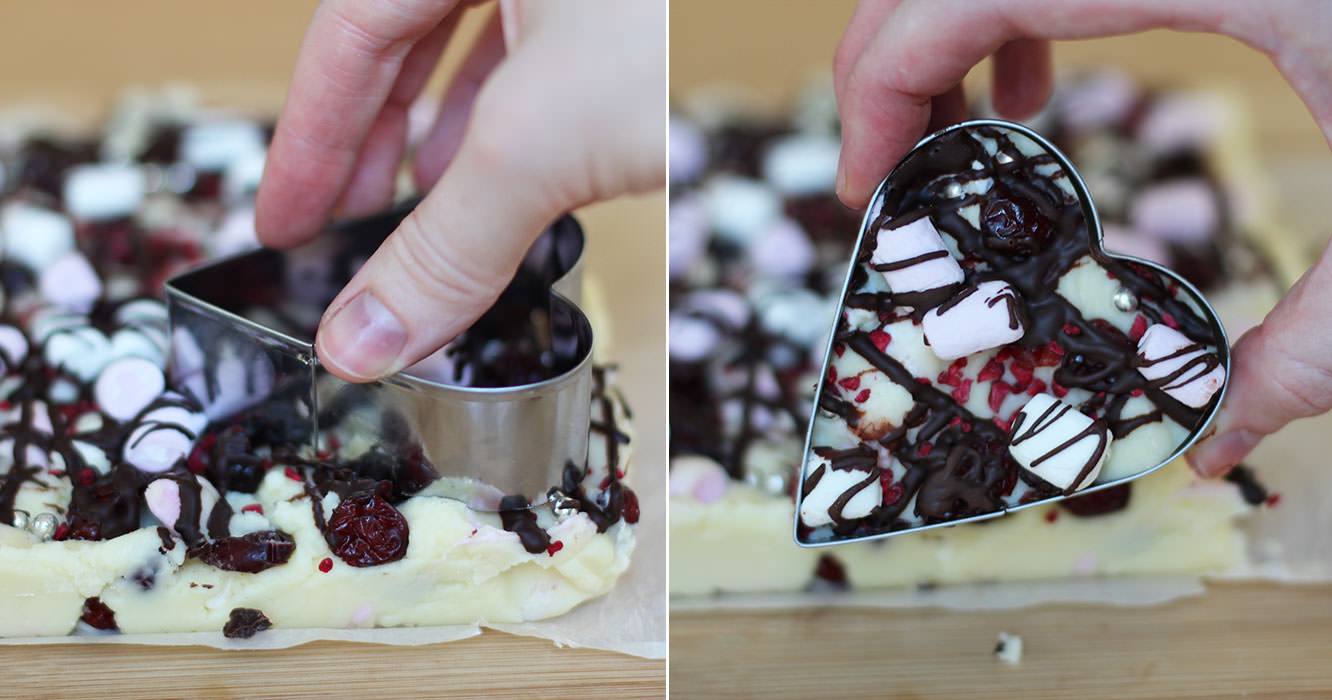
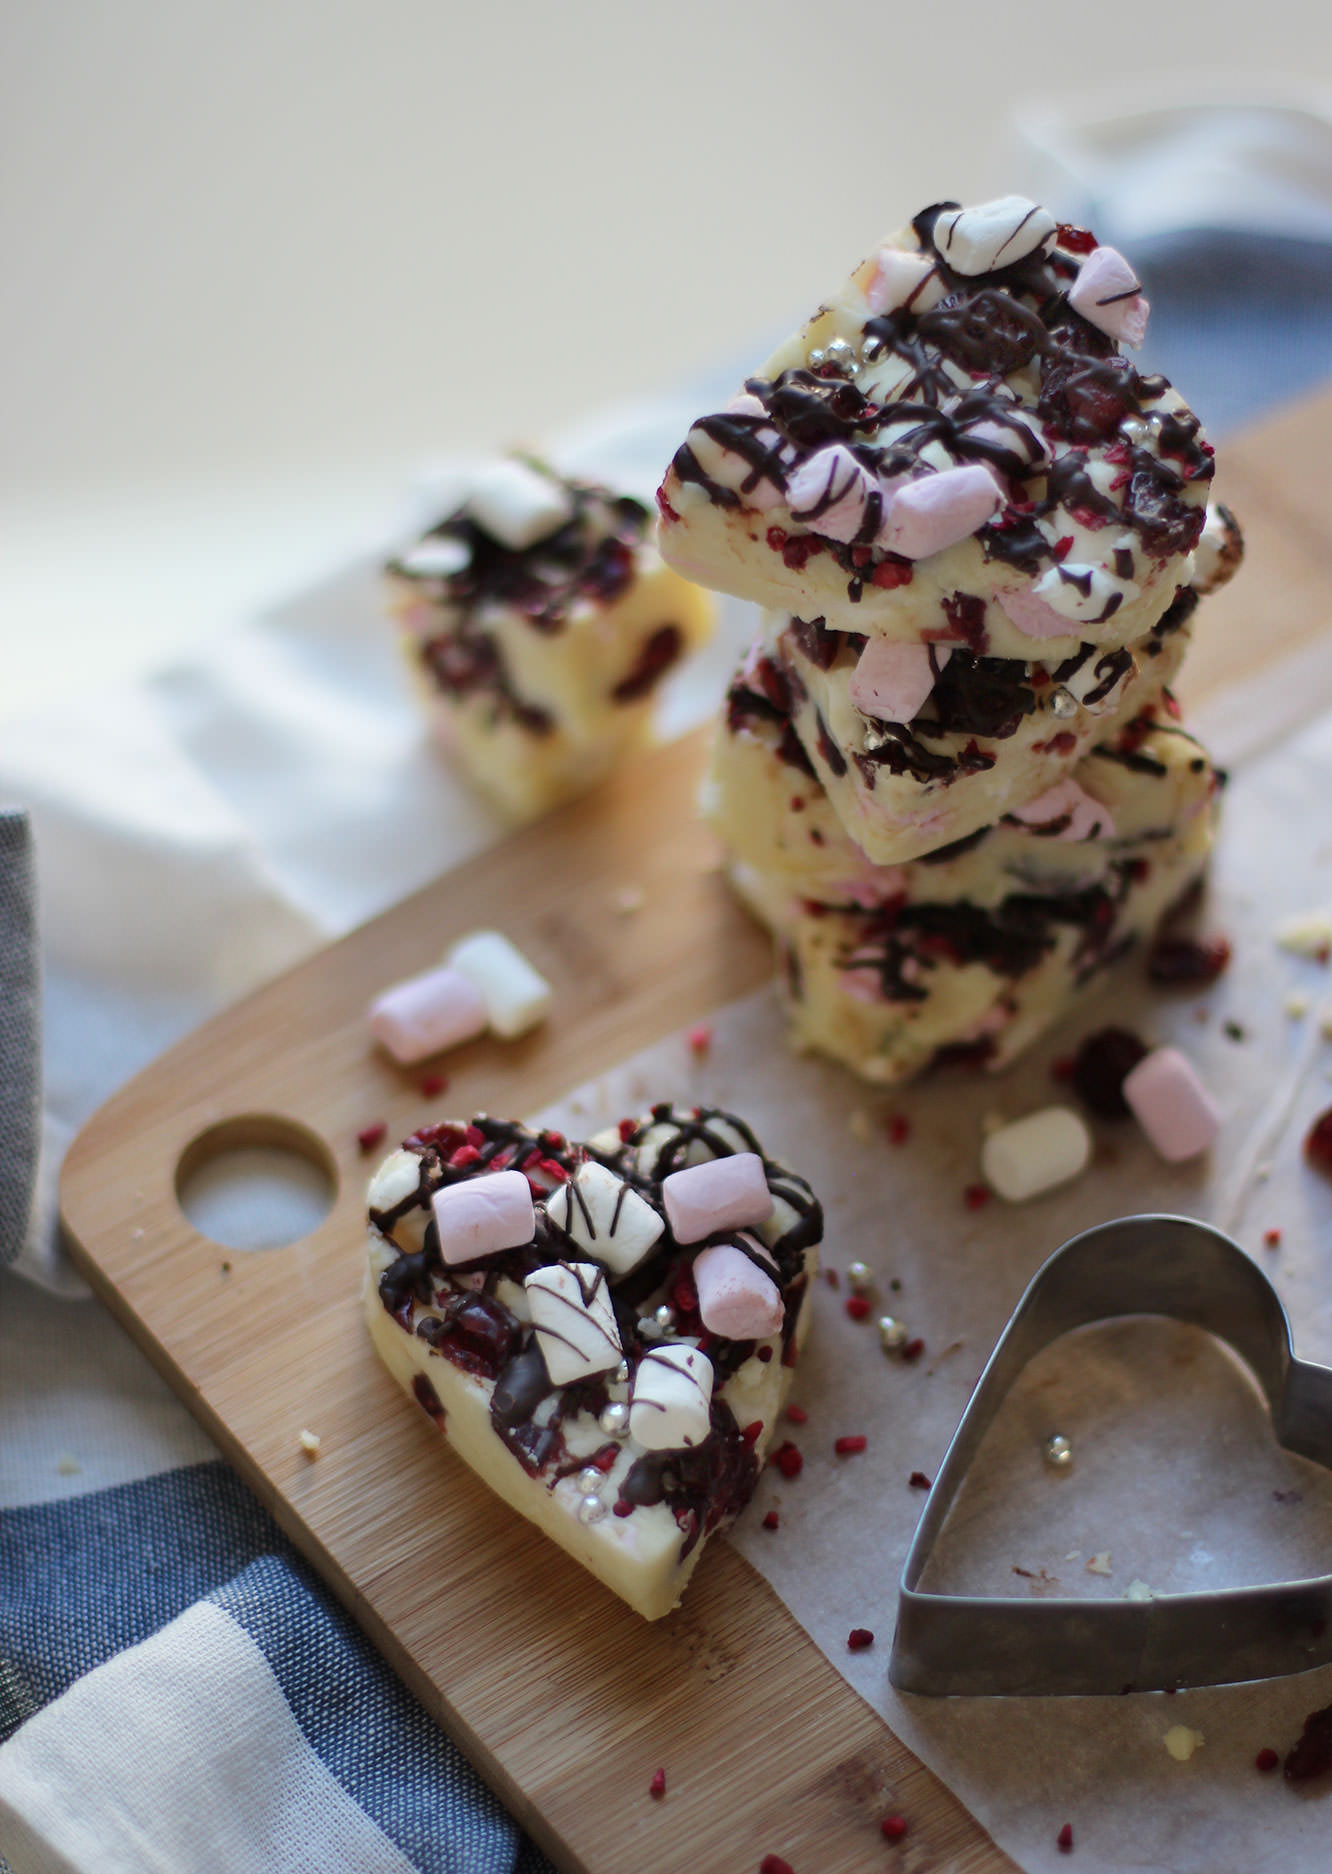
Using a cutter of your choice (this heart-shaped one was from Lakeland), cut the fudge into pieces. If you don’t have a cutter, then bars or chunks would look nice too.

white-chocolate-fudge-mothers-day-recipe-5

The final sprint

Some years (every year) I have grand plans for home made gifts and decorations at Christmas. Rarely does this materialise in the lovely relaxed and whimsical way it looks in my head. Generally I end up covered in the contents of my baking cupboard feeling totally harassed by the number of hampers I’ve decided to make.

If you’re anything like me, or if you’re completely handmade/craft-phobic in the first place, this one is for you. Three super quick festive crafts to brighten up the house and fill up stockings at the last minute. You don’t need an ounce of artistic/baking ability for any of these. So no excuses.

#1: Cute Christmas bunting

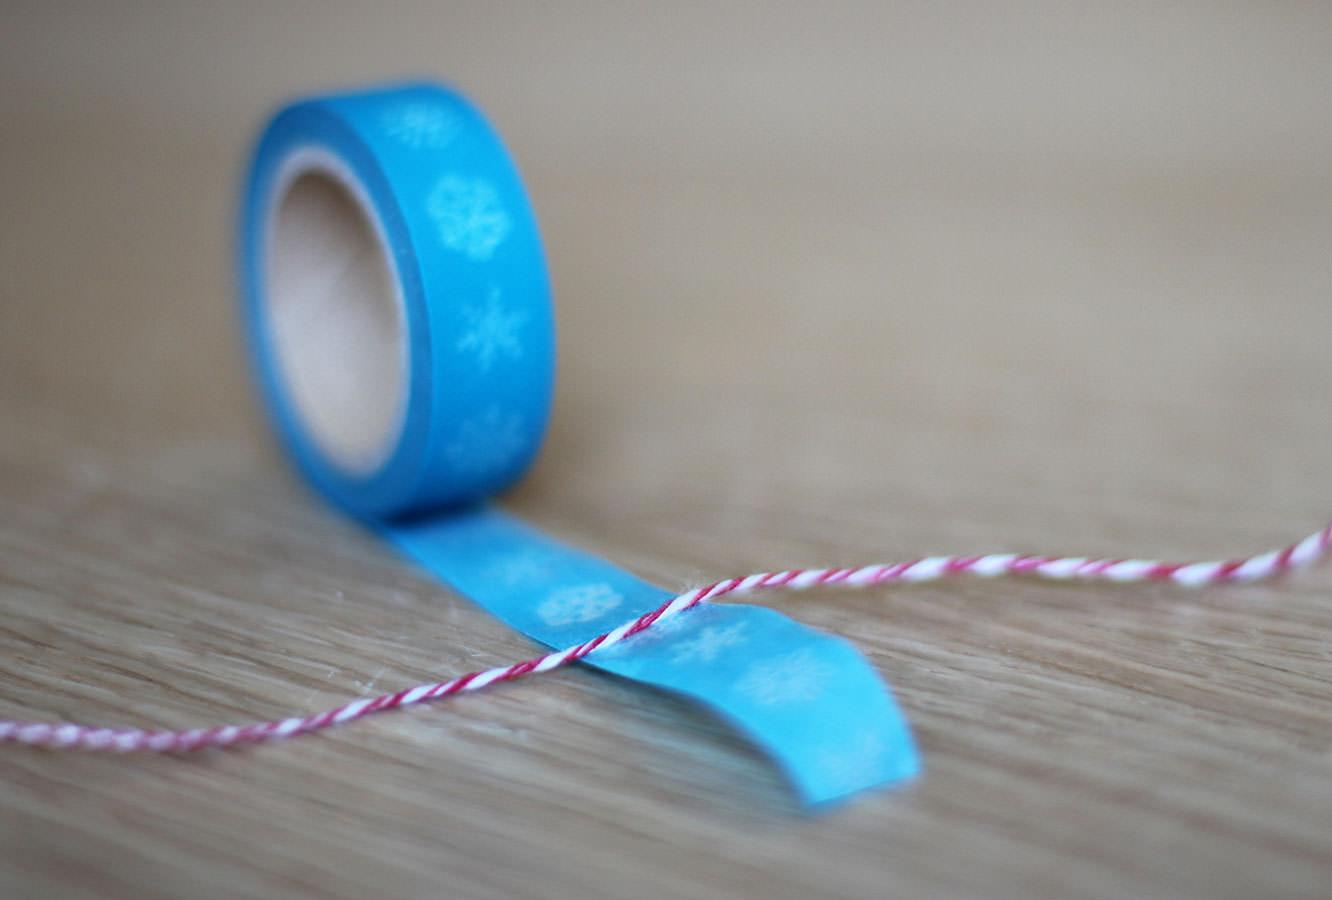
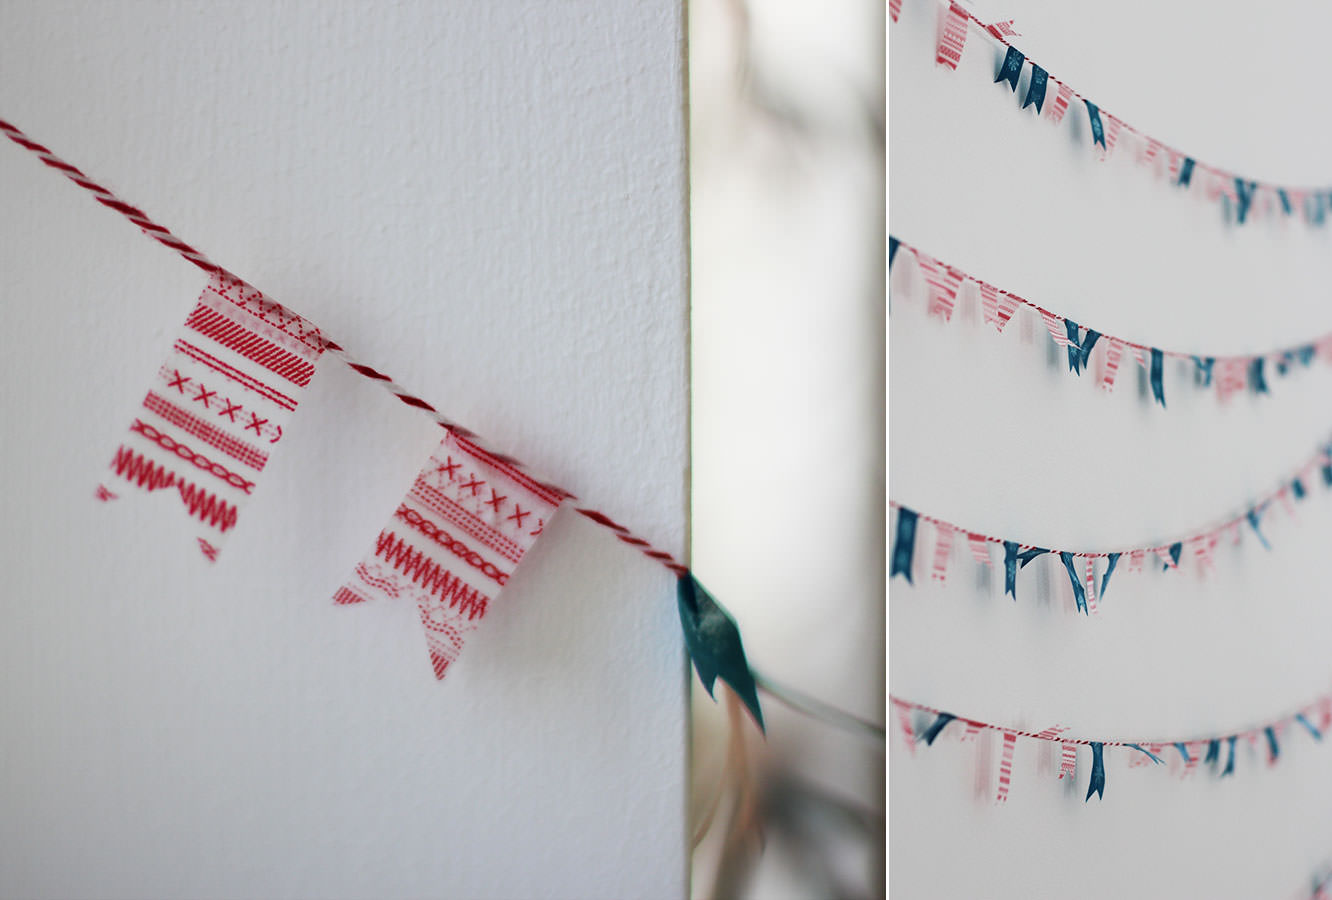
washi-tape-christmas-bunting

You will need

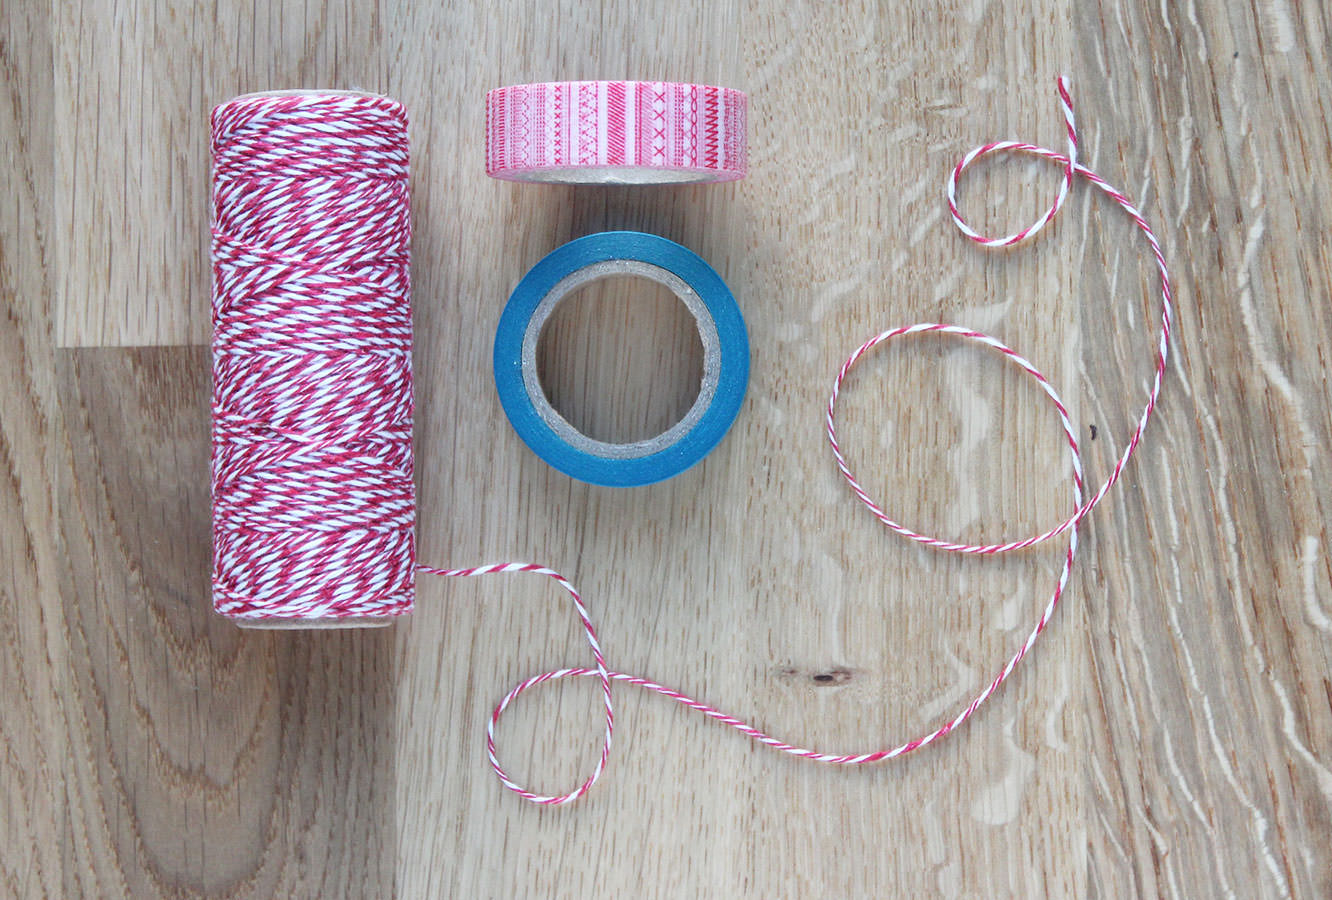
String (I got this two colour spool from Tiger for £1)

Christmassy washi-tape

washi-tape-christmas-bunting-1

Step one

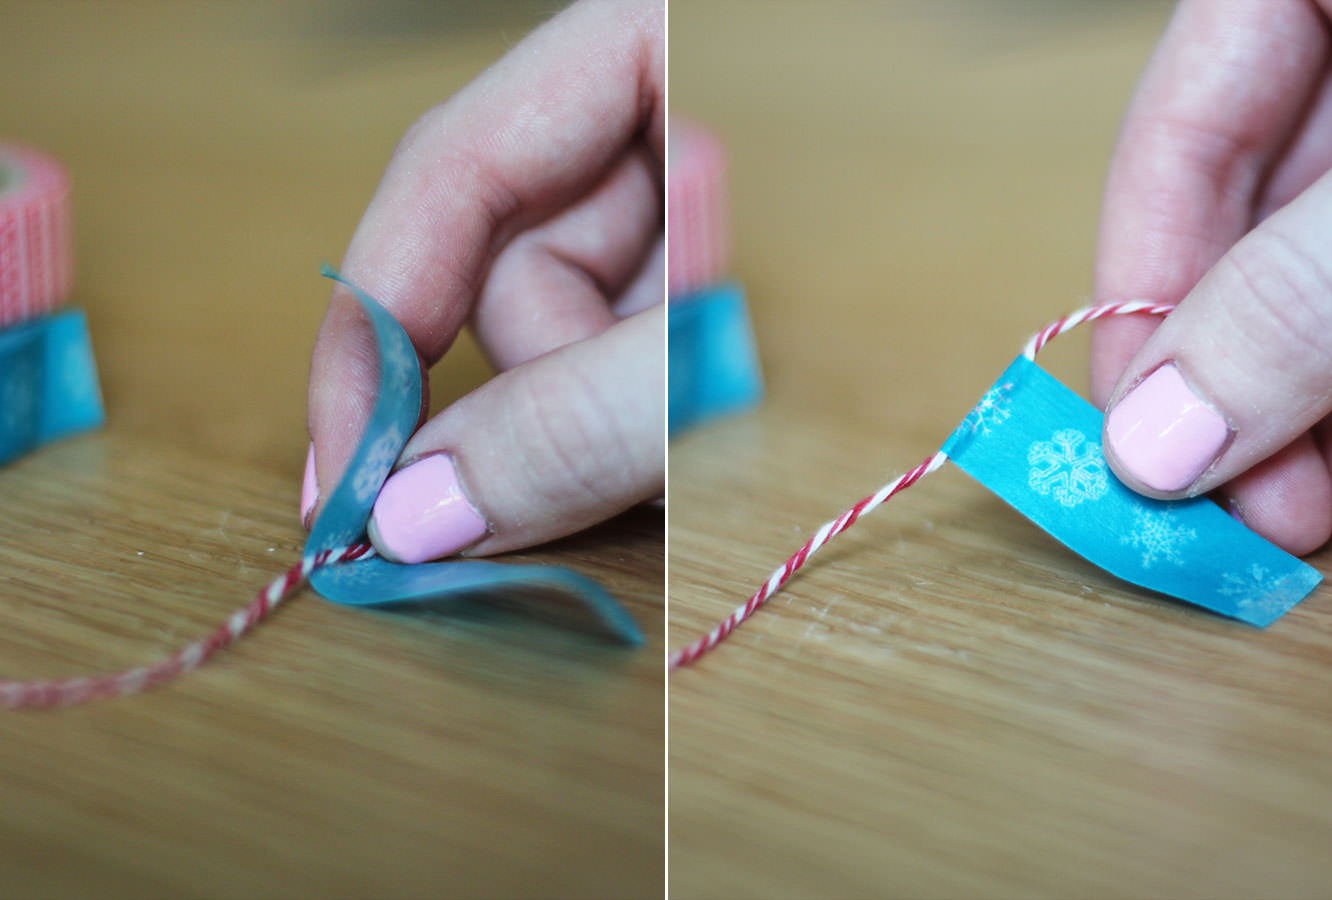
Cut a random length of tape and place the string in the middle. If you really want to punish yourself you can try and make them all the same length, but I really like them random and it’s much easier that way too.

For this step I cut loads and stuck them on the edge of the table so I had them ready and did them in batches so I wasn’t constantly cutting one then sticking it etc etc.

washi-tape-christmas-bunting-2

Step two

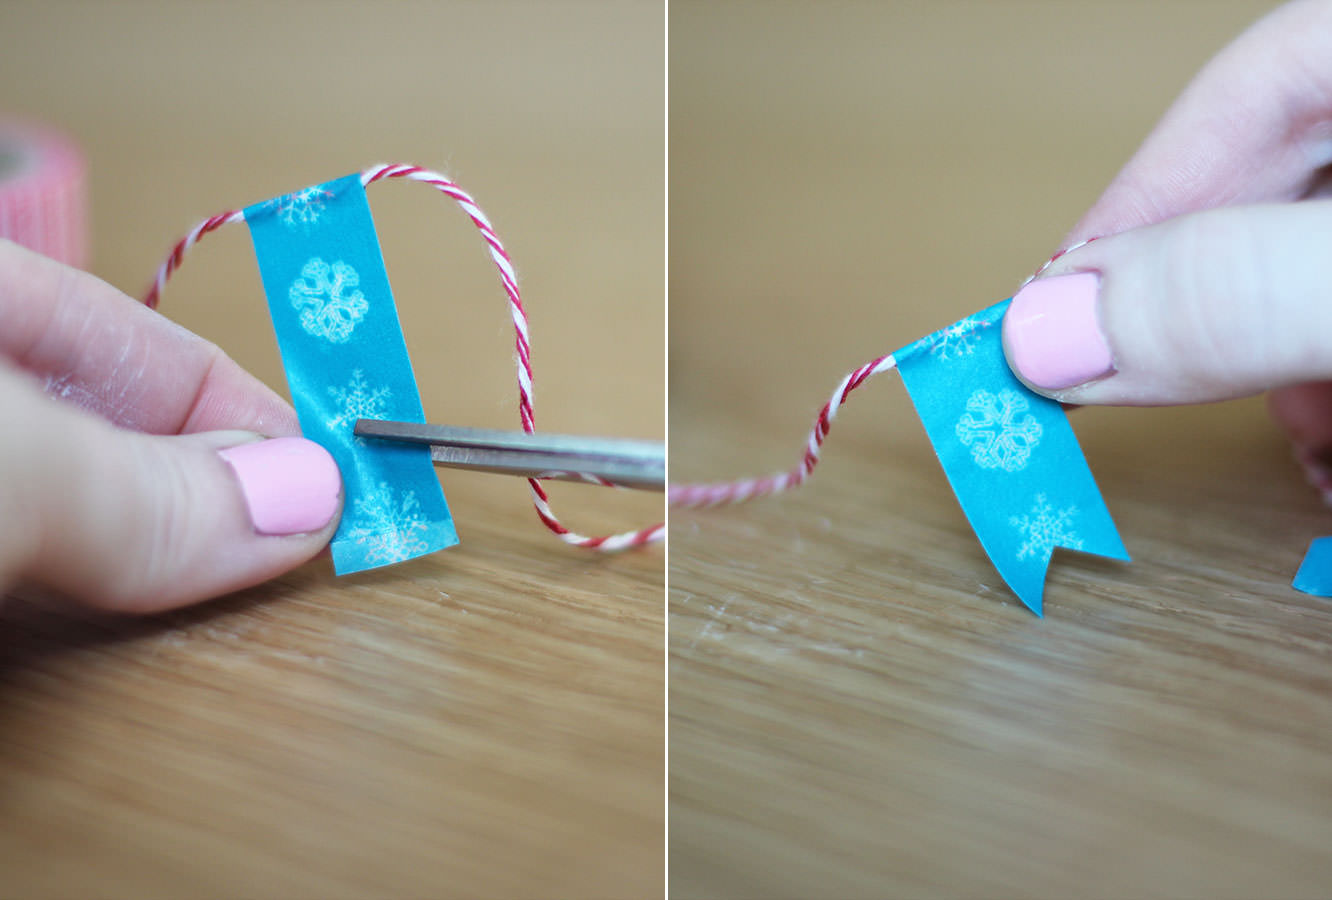
Fold over the wash tape and stick together. Again, I found it easier to do this step in bulk and then snip them in one go (see below).

washi-tape-christmas-bunting-3

Step three

Cut an upside-down ‘v’ shape into the end.

washi-tape-christmas-bunting-4

washi-tape-christmas-bunting-5

Step four

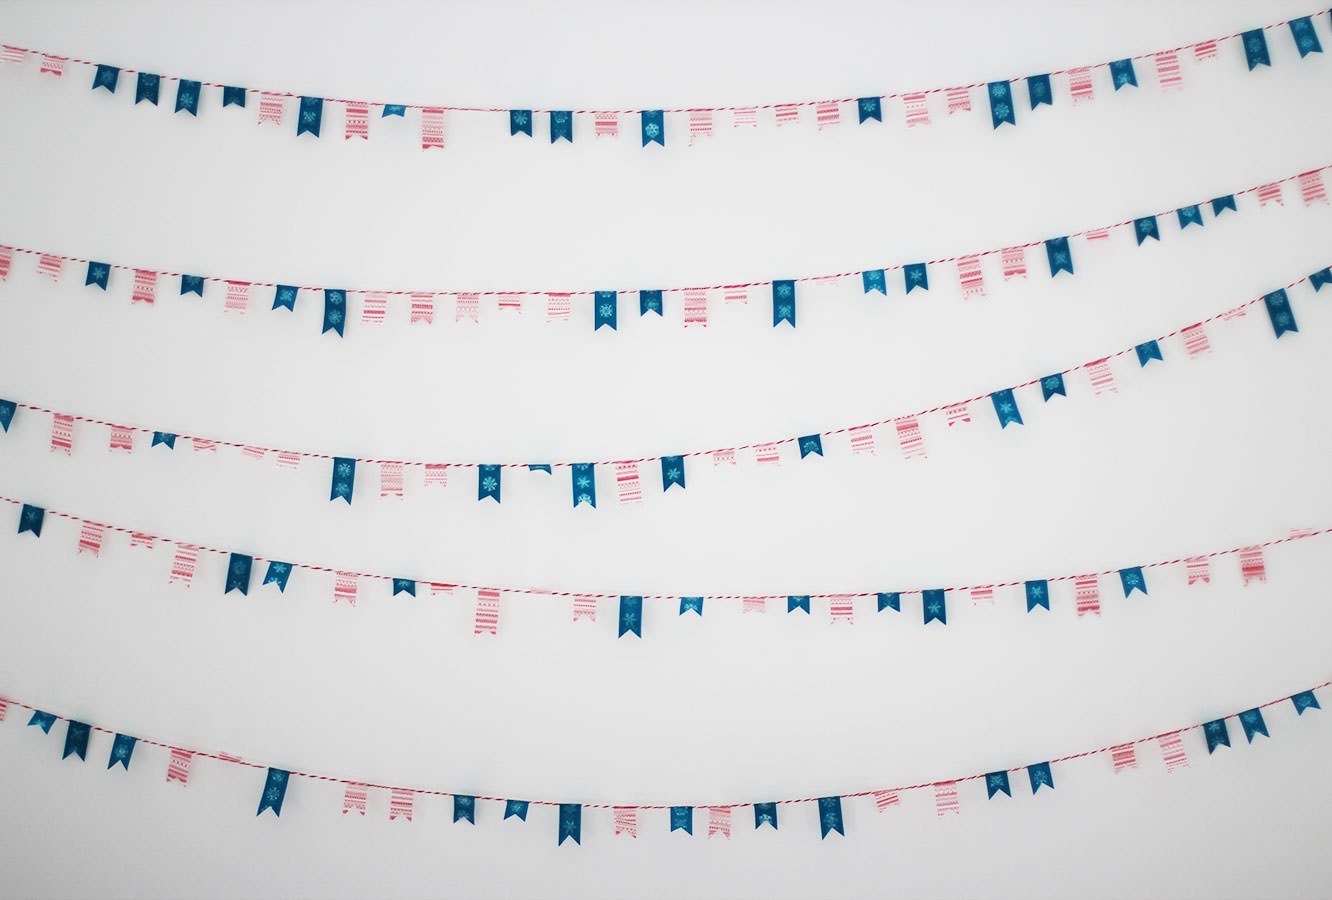
Hang them. 


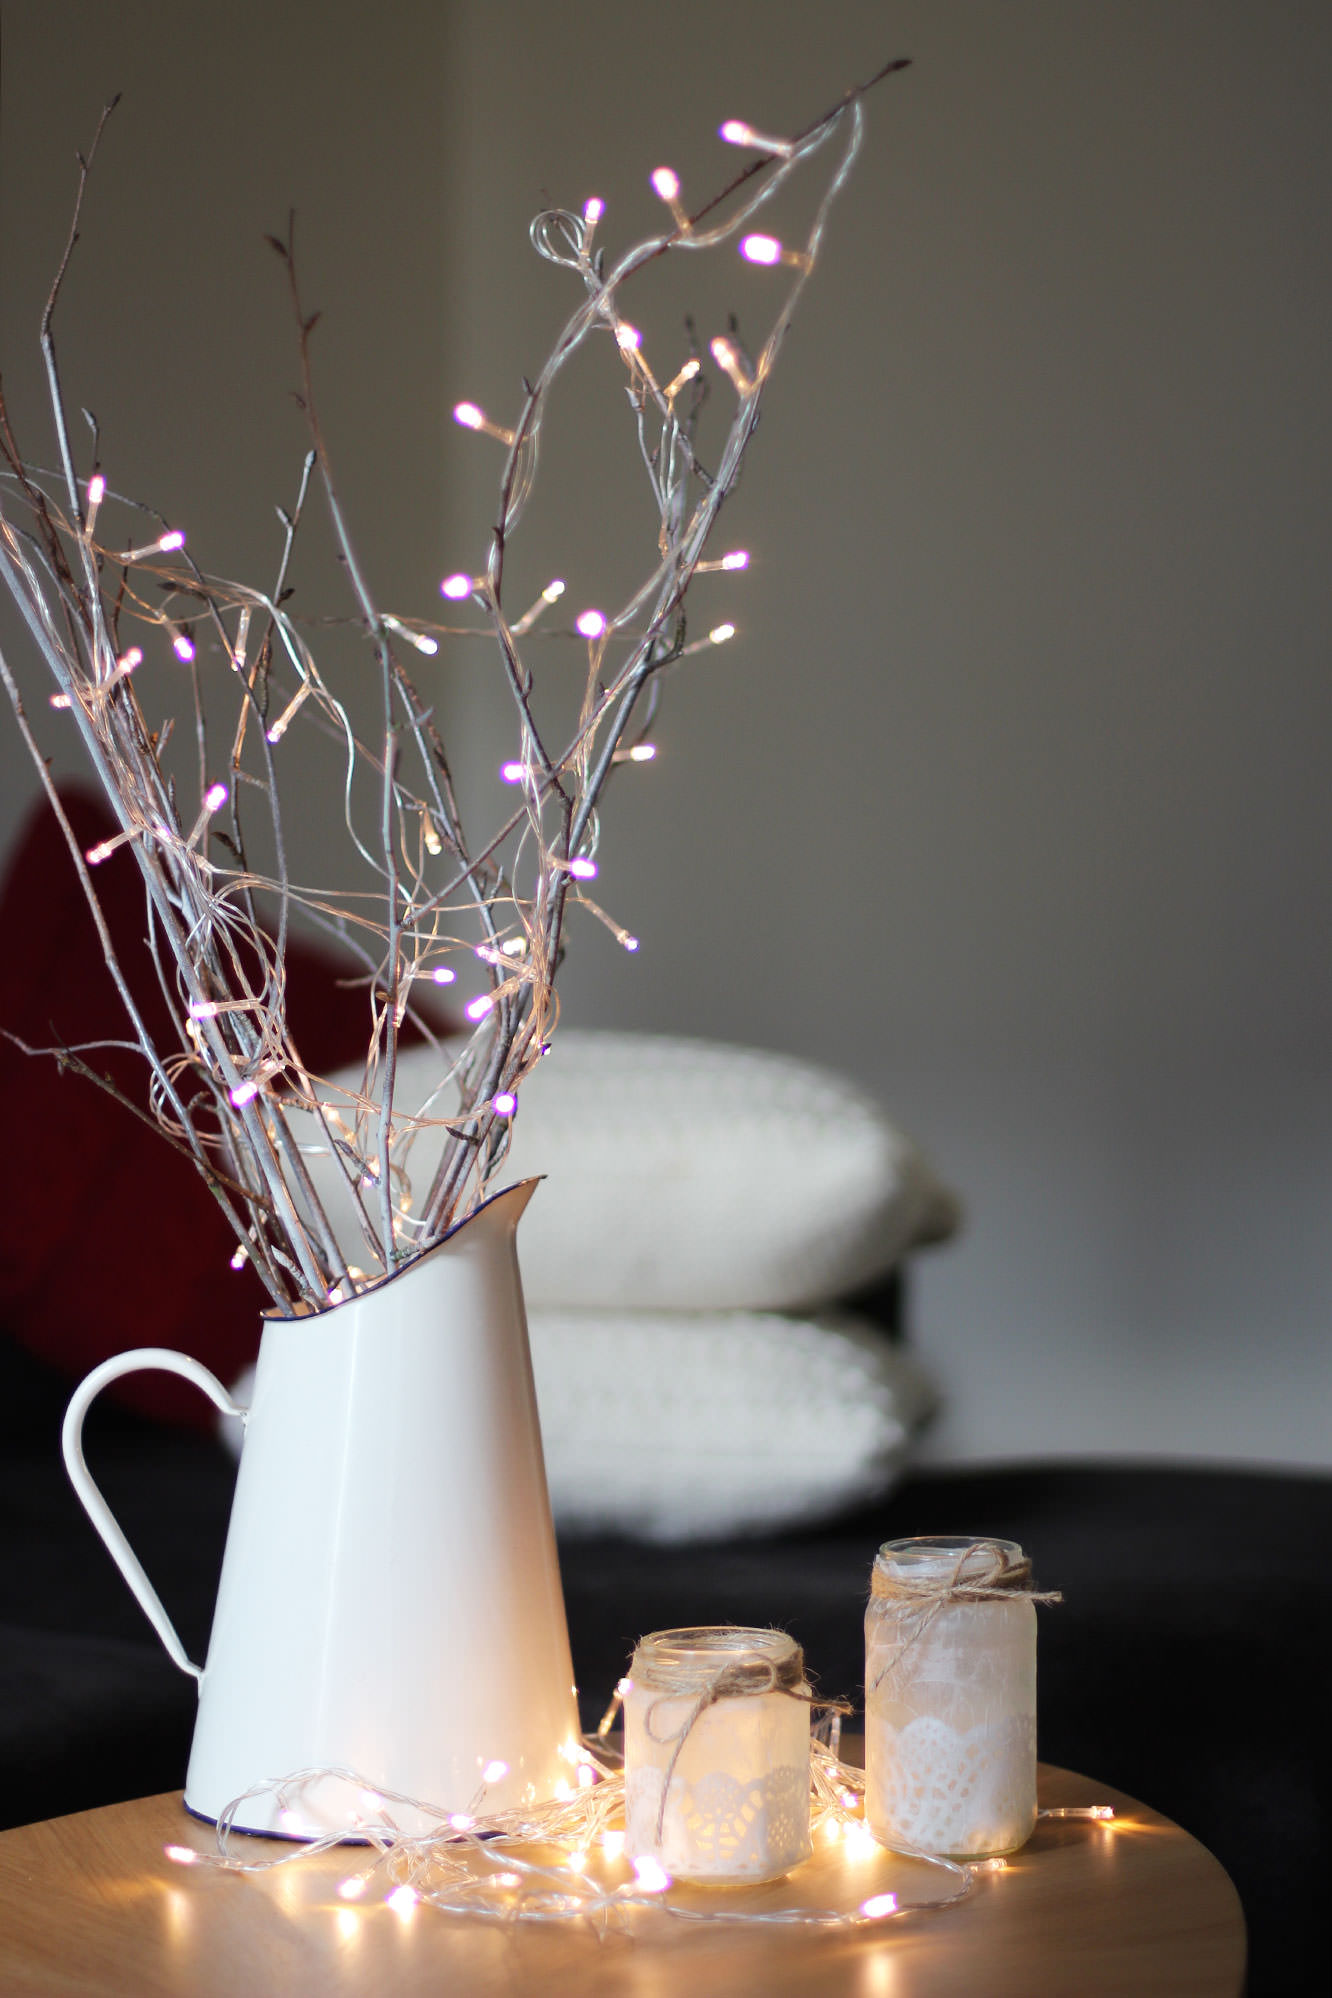
#2: Twig decoration

sprayed-branches-cheap-home-christmas-decoration

You will need

Some twigs foraged from the nearest tree

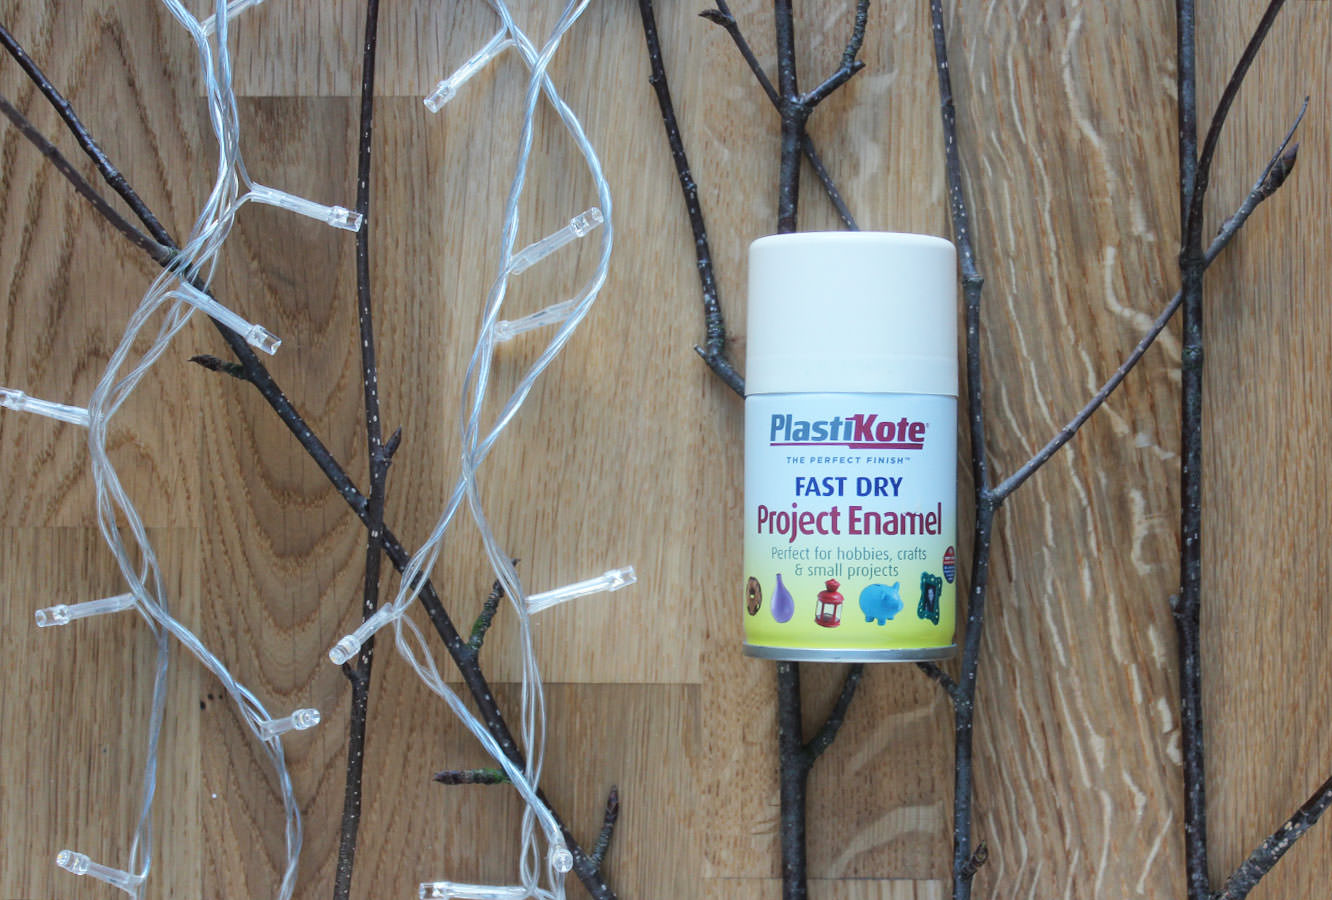
White or cream spray paint

Fairy lights or decorations

Jug/vase/plant pot

sprayed-branches-cheap-home-christmas-decoration-1

Step one

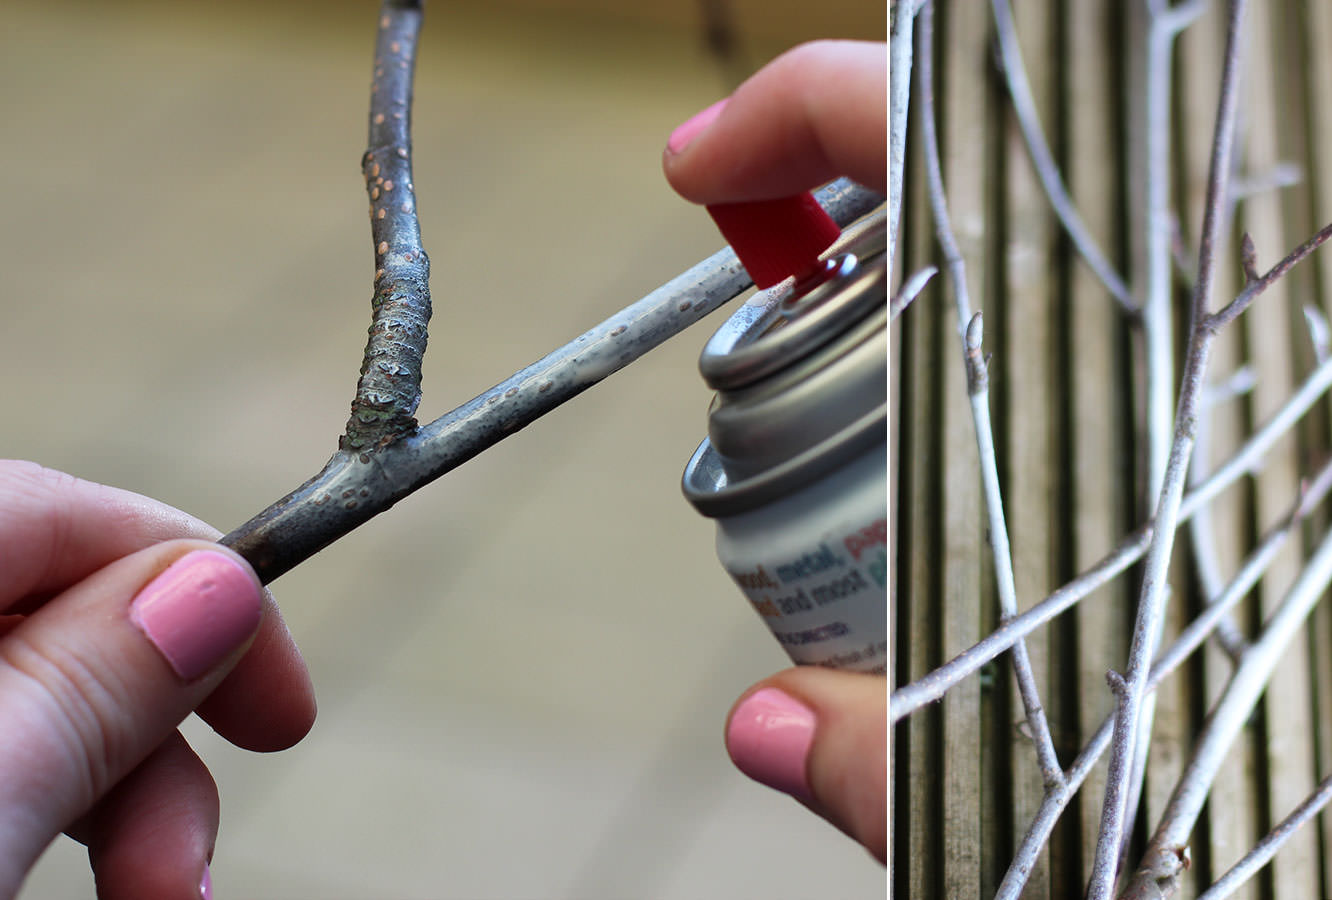
Spray twigs.

Step two

Place in holder.

Step three

Decorate.

sprayed-branches-cheap-home-christmas-decoration-2

Just in case you want the tutorial, here’s how to make the candle holders in the photo.


#3: Hot chocolate stirrers

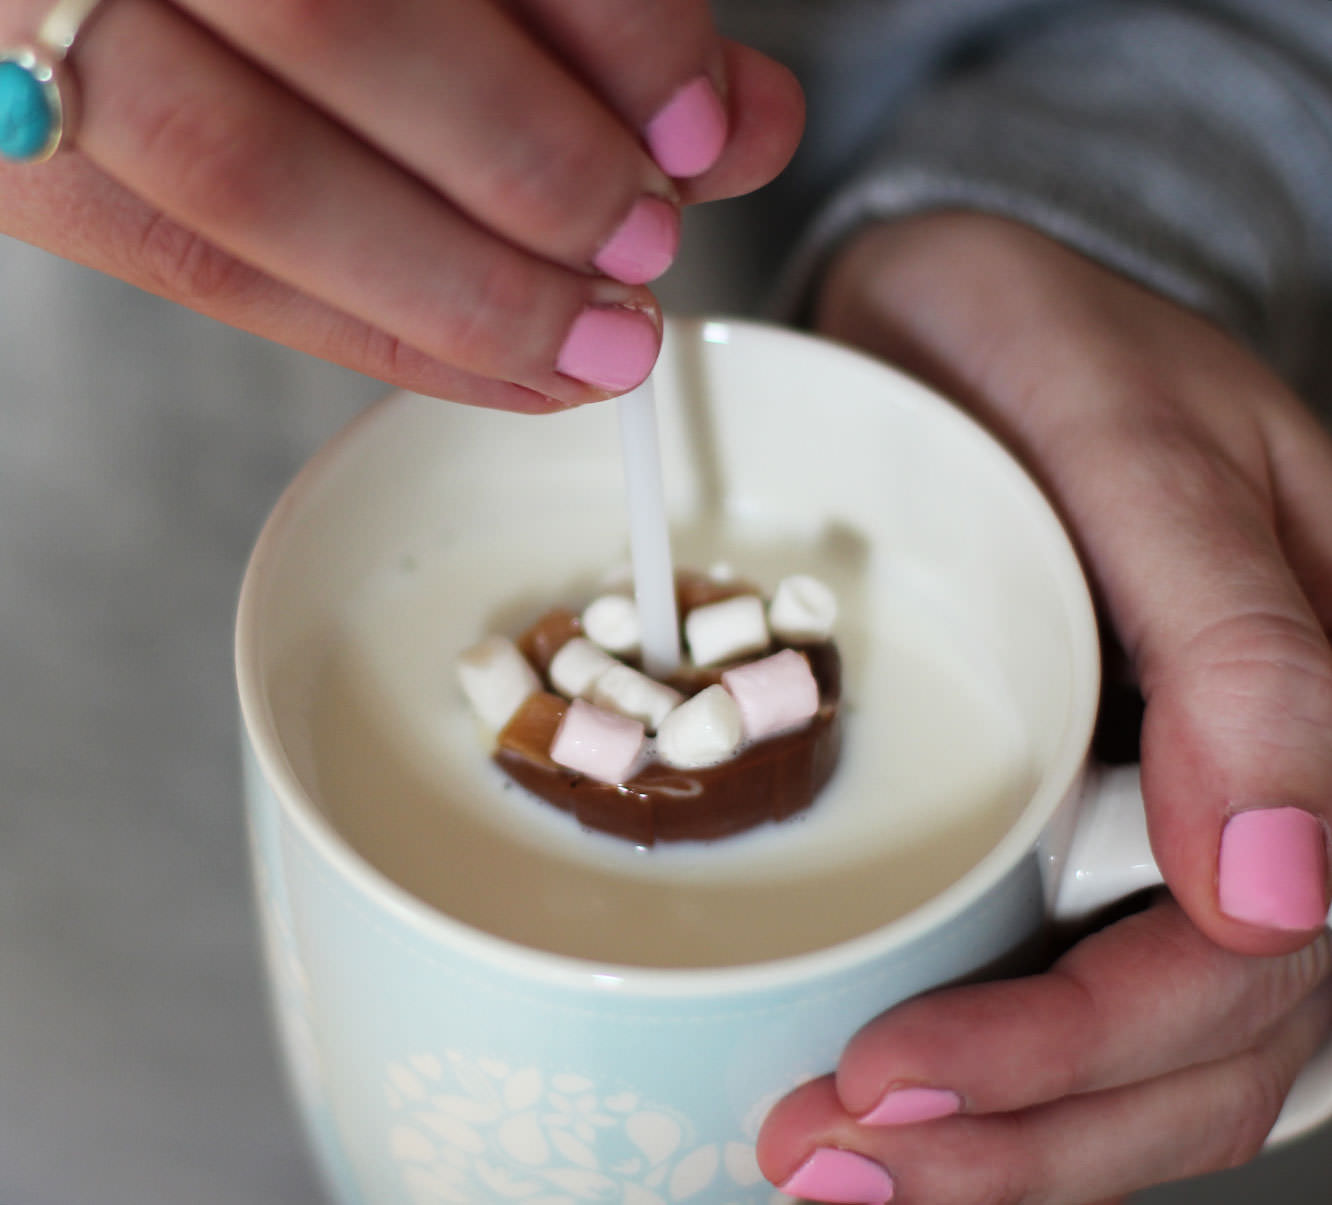
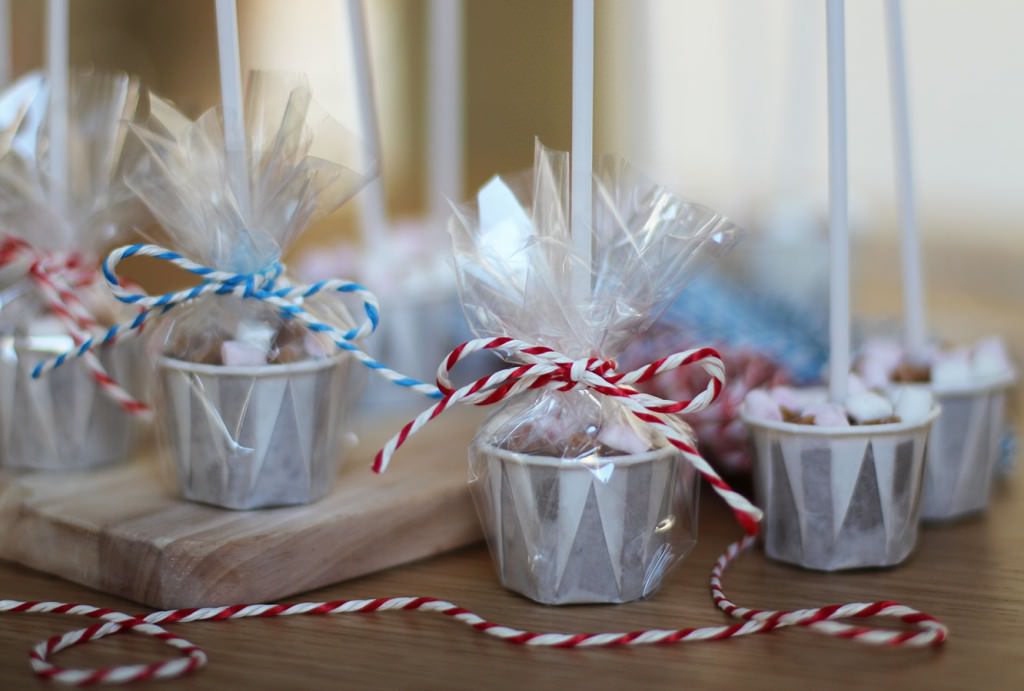
I saw one of these at the shops today, it was £3! These make a great little stocking filler, present topper-upper or gifts for the neighbours. Just swirl into hot milk for a luxury hot chocolate.

homemade-hot-chocolate-stirrer-gift-1

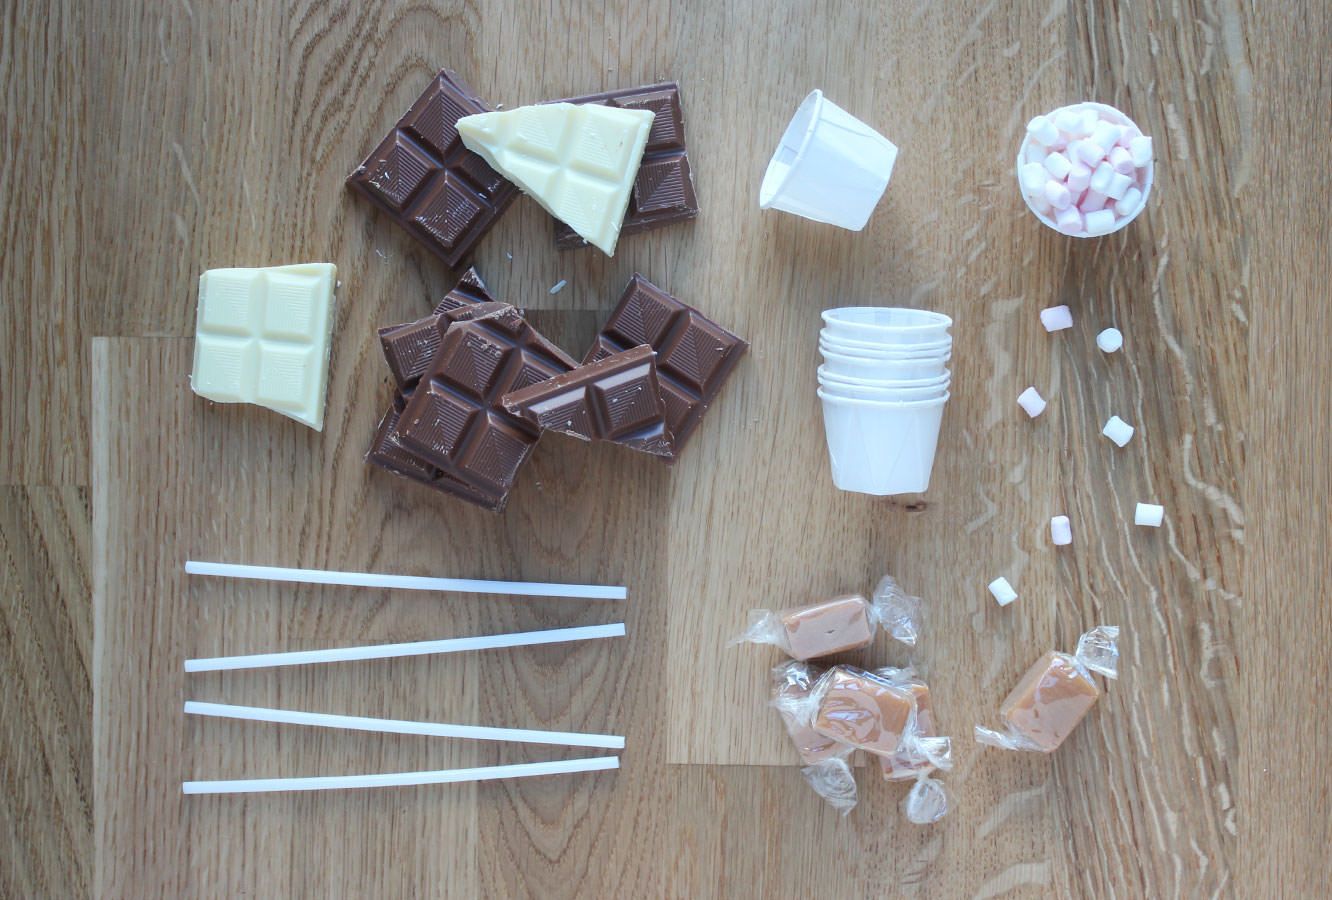
You will need

400g/ 14oz Milk chocolate

50g/ 1.5oz White chocolate

Condiment cups (if the closest McDonalds doesn’t have these you can buy them online, or use mini-muffin cases)

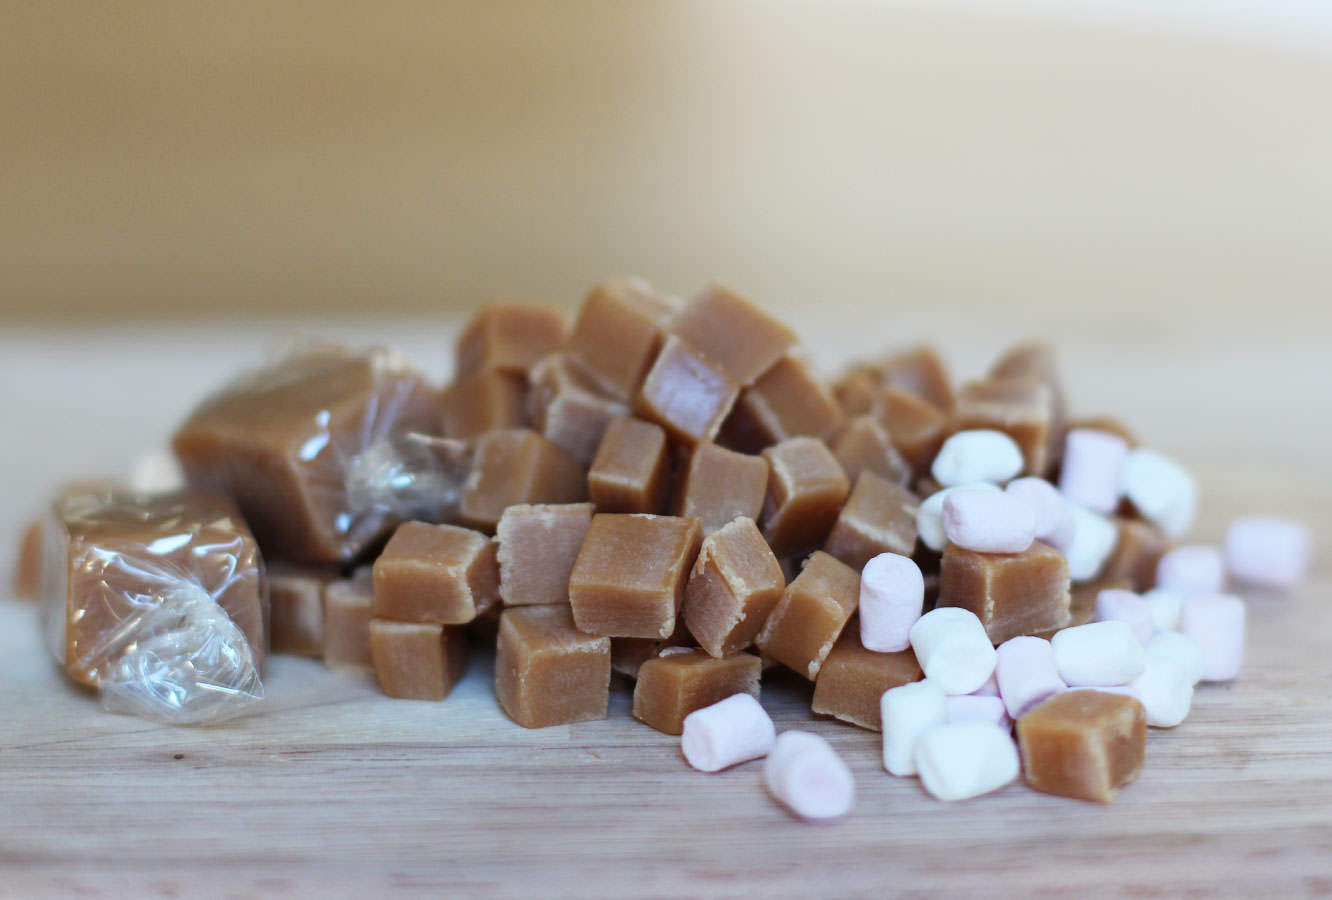
Mini mini marshmallows (these tiny fellows are from Waitrose)

Fudge pieces

Cake pop sticks

Edible glitter (optional)

(Makes 10-12. You need roughly 35g chocolate per cup so adjust the above to suit the number of hot chocolates you want to make).

For wrapping

Cellophane roll (available online or from craft shops)

Chrismassy ribbon or string

homemade-hot-chocolate-stirrer-gift-2

Step one

Chop the fudge into little chunks so that they’re roughly in proportion with the marshmallows.

Step two

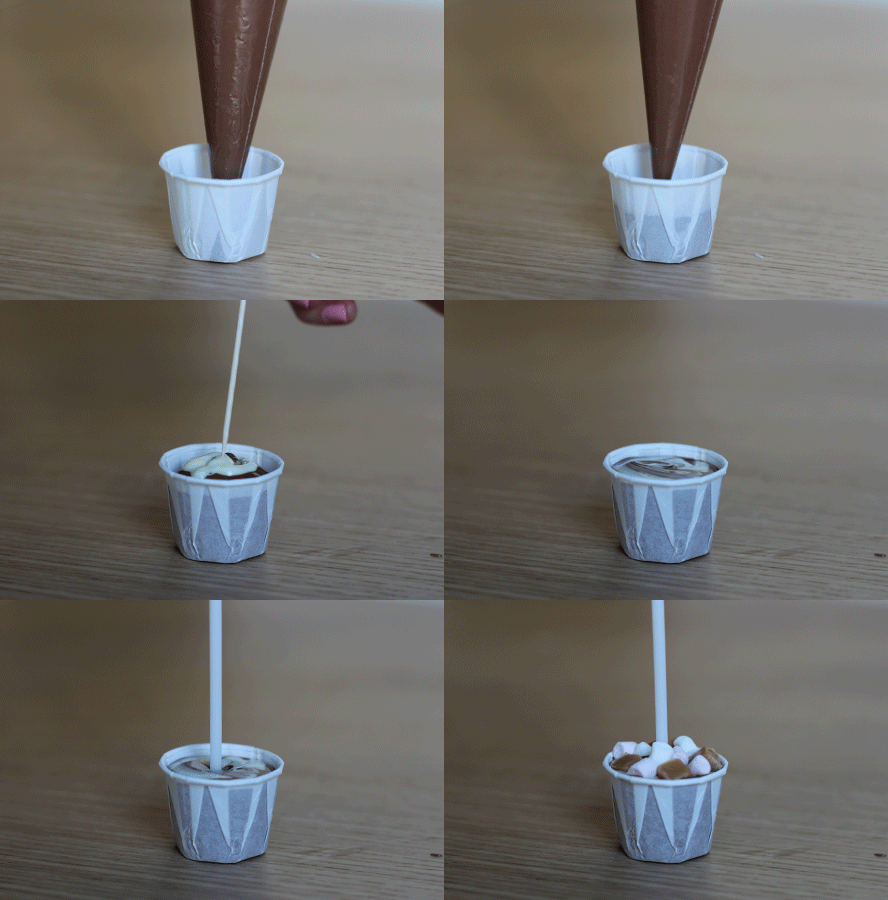
Melt the chocolate slowly in the microwave and put into piping bags. You can temper it if you want, but given that you won’t see much of it, it might not be worthwhile. I go into a bit more detail as to how to temper chocolate here.

homemade-hot-chocolate-stirrer-gift-gif

Step three

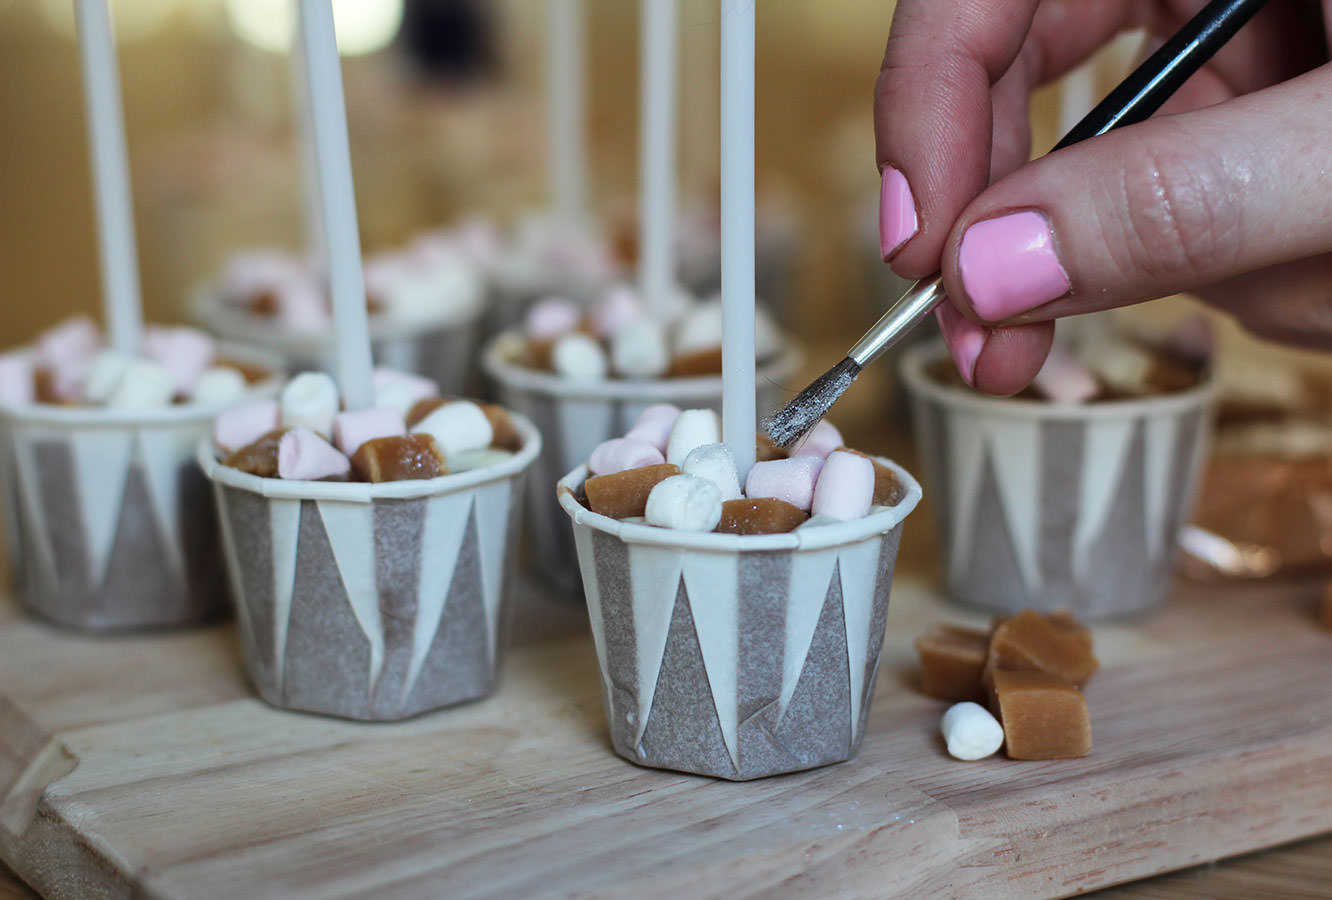
Fill cup to near the brim with milk chocolate. Add a little white and swirl in with a cocktail stick.

Place stick in and surround with fudge and marshmallows.

Leave to set.

homemade-hot-chocolate-stirrer-gift-3

Step four

Dust on a little glitter.

homemade-hot-chocolate-stirrer-gift-5

Step five

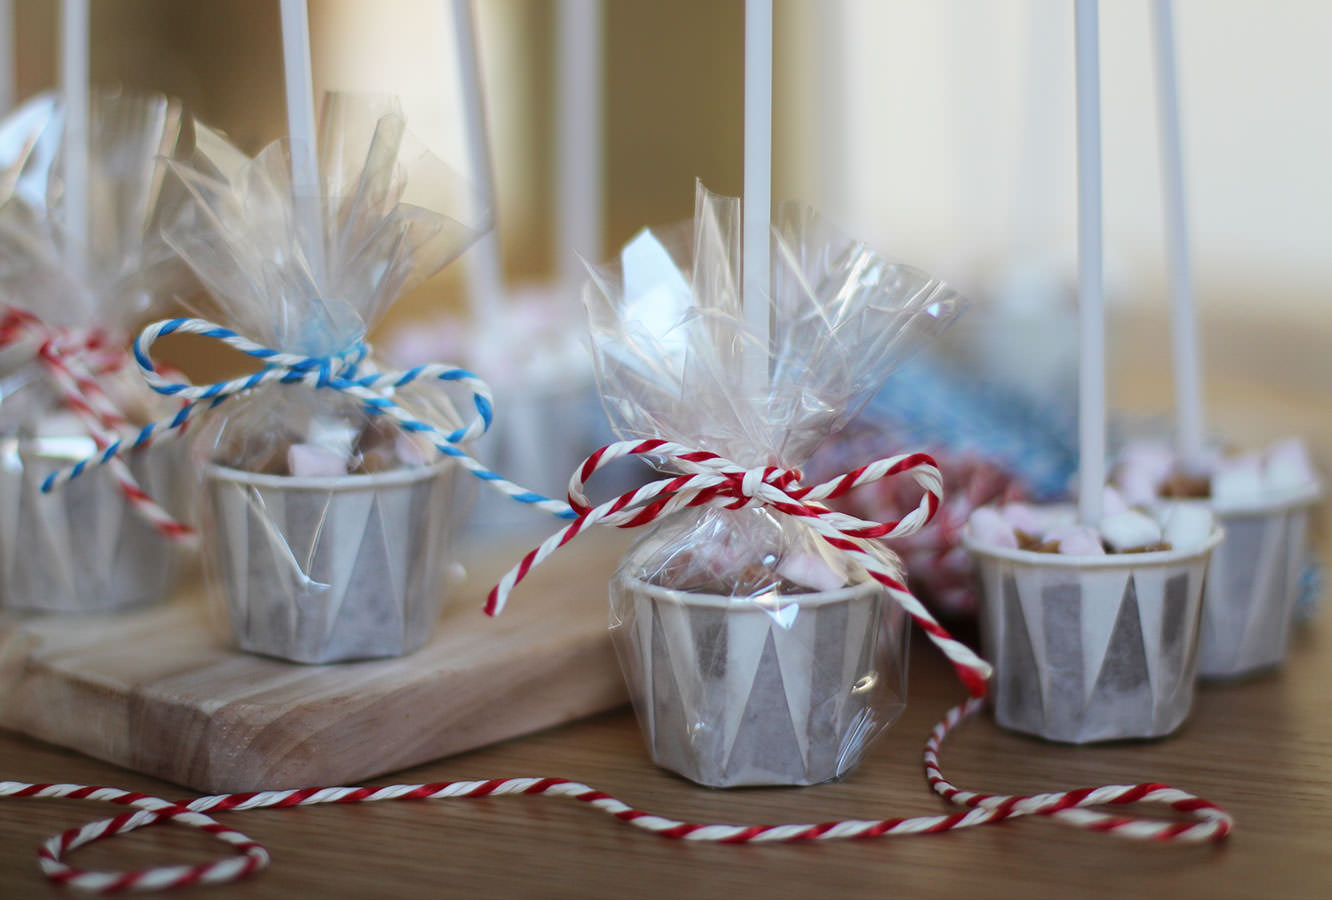
Wrap up. Cut a square of cellophane wrap and place cup in the centre, bring corners up to the middle and secure. I used a loom band to do this, you could use a small elastic band or go straight in with the ribbon/string.

Trim off the corners and ‘foof’.

homemade-hot-chocolate-stirrer-gift-4

Go on. There must be one spare you can treat yourself to?

Little pudding

This week two celebrations collided when my lovely teacher at college had a special birthday and we crept ever closer to the 25th December. Thankfully, teach didn’t mind the seasonally confused gift – Happy Birthday Lana!

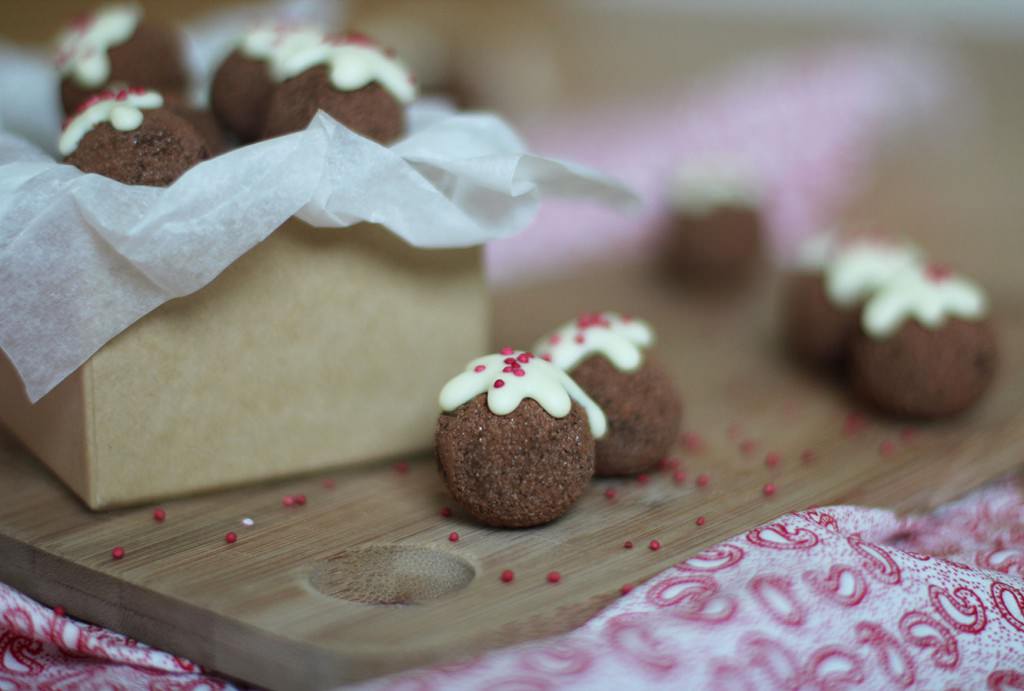
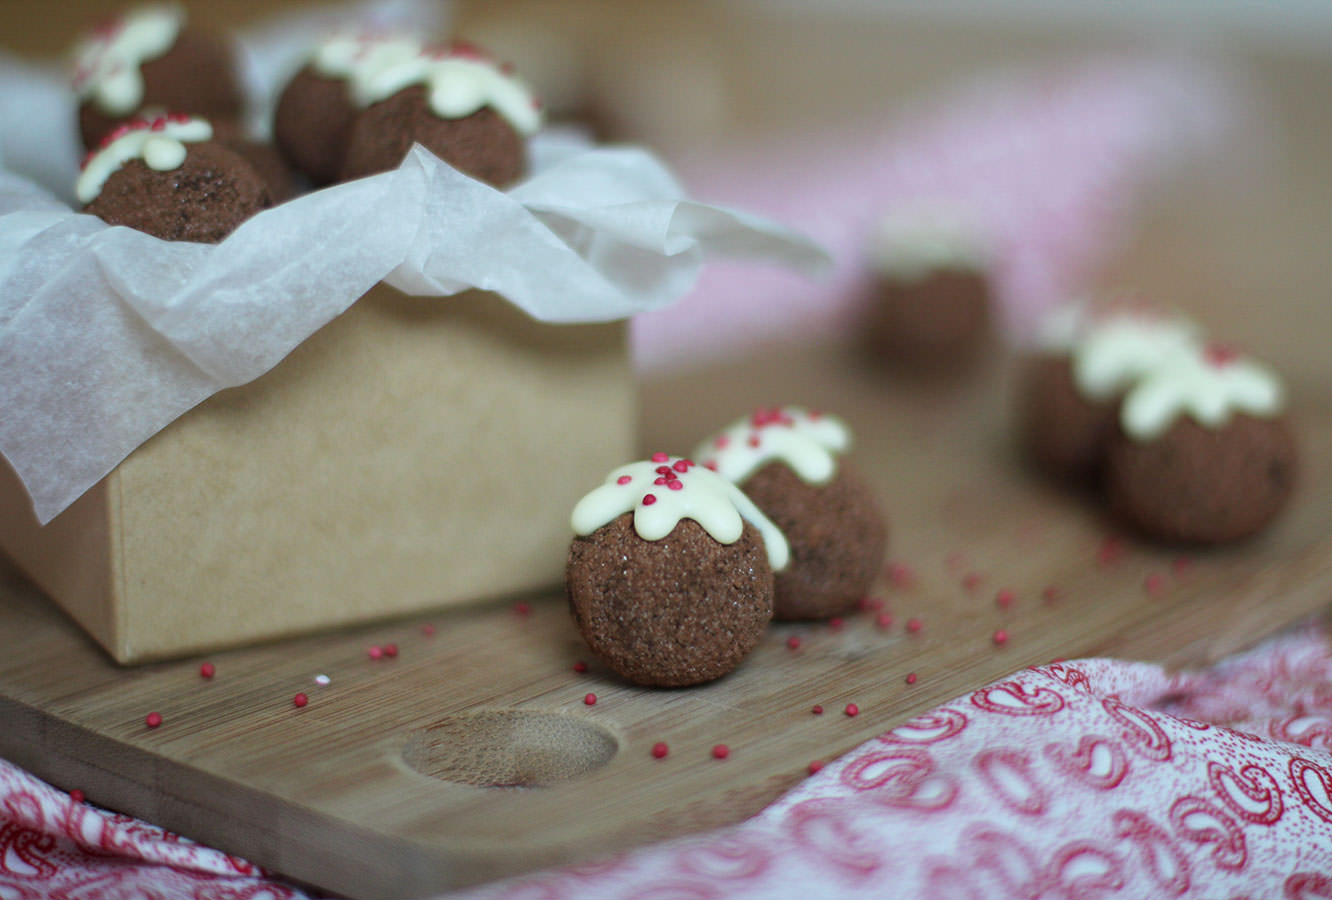
This week it’s Christmas pudding truffles, surprisingly easy to make, and with a large yield they are perfect for last minute gifts on a budget.

christmas-pudding-truffles-recipe

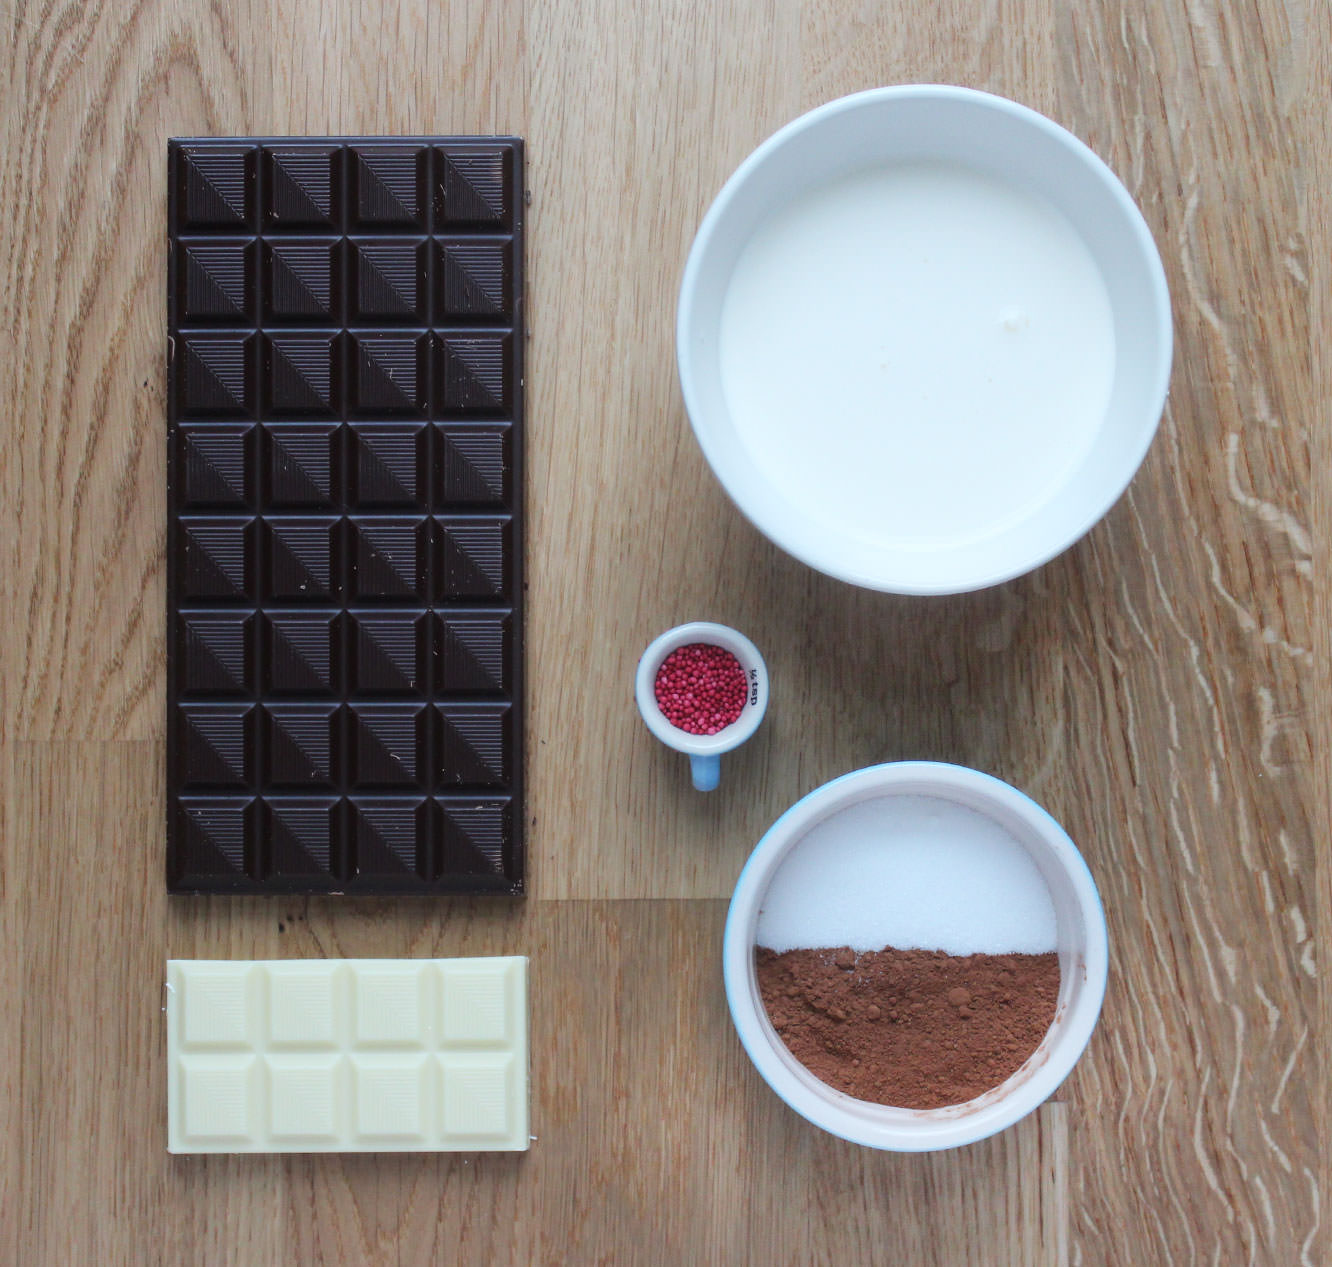
You will need

300g/10.5 oz Dark chocolate

100g/3.5 oz White chocolate

300ml/10.5 fl oz Double cream

30g/1 oz Unsalted butter

Red sprinkles

Cocoa and caster sugar for dusting

(Makes 60-70)

christmas-pudding-truffles-recipe-1

Step one

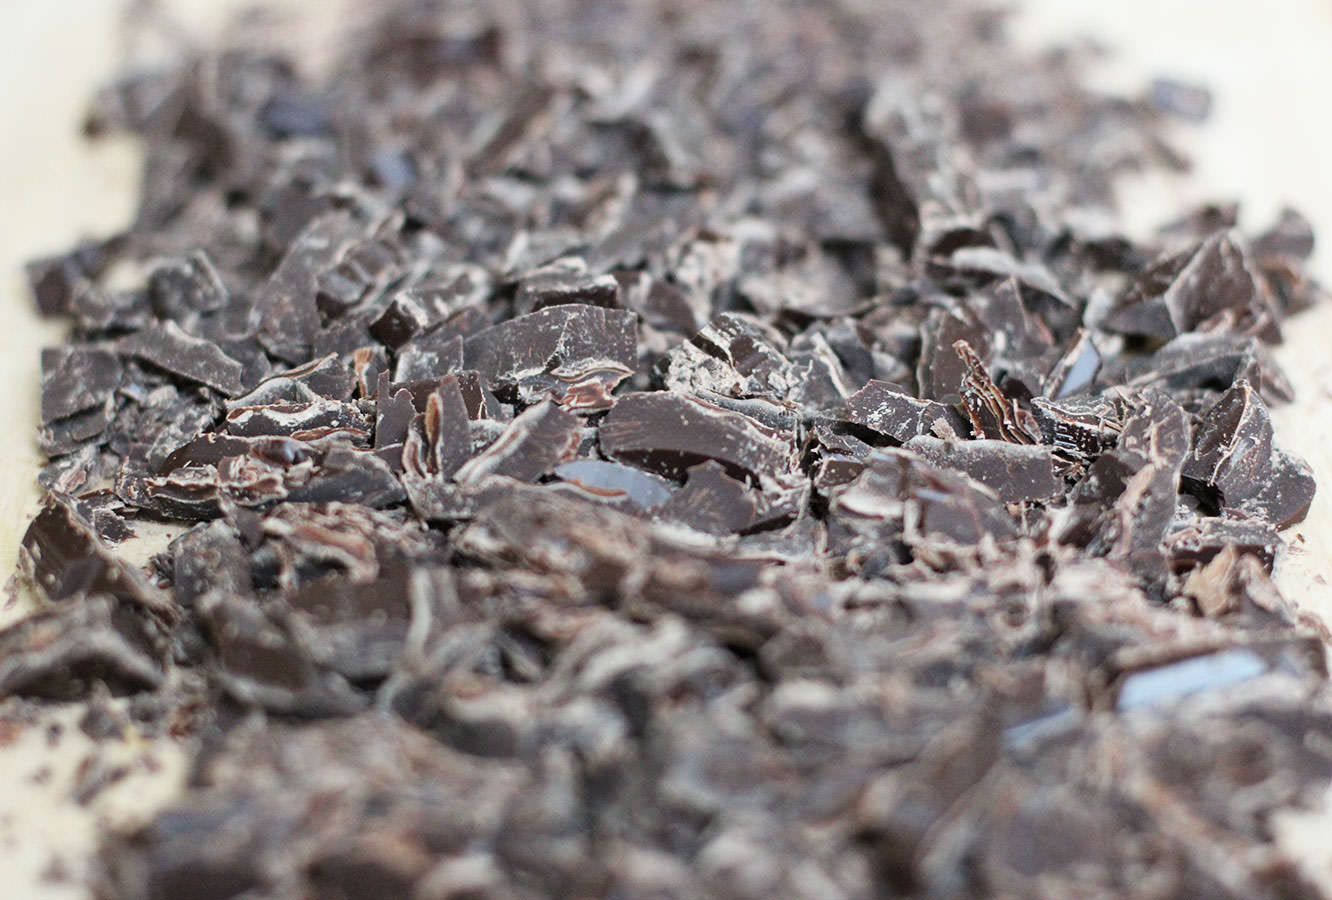
Chop the dark chocolate finely using a bread knife. Resist the urge to eat it all.

christmas-pudding-truffles-recipe-2

Step two

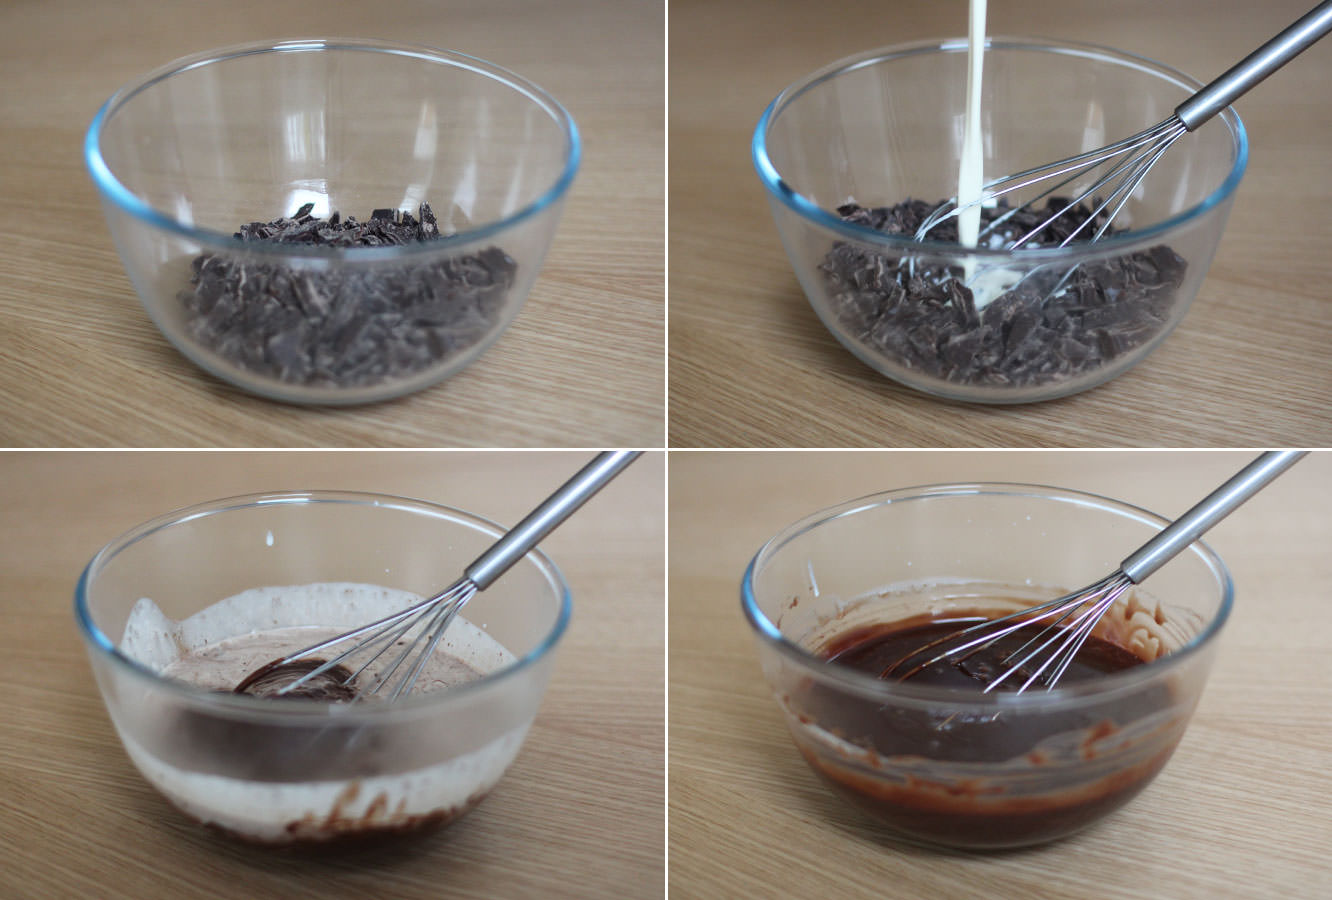
Heat the cream and butter gently in a saucepan. Wait until it starts to bubble and steam dances across the surface. There is no need to let it boil, as Mary Berry always says – chocolate melts in a child’s pocket.

Step three

Take the cream off the heat and whisk into the chocolate until fully melted. Place in the fridge to speed up the setting process.

christmas-pudding-truffles-recipe-3

Step four

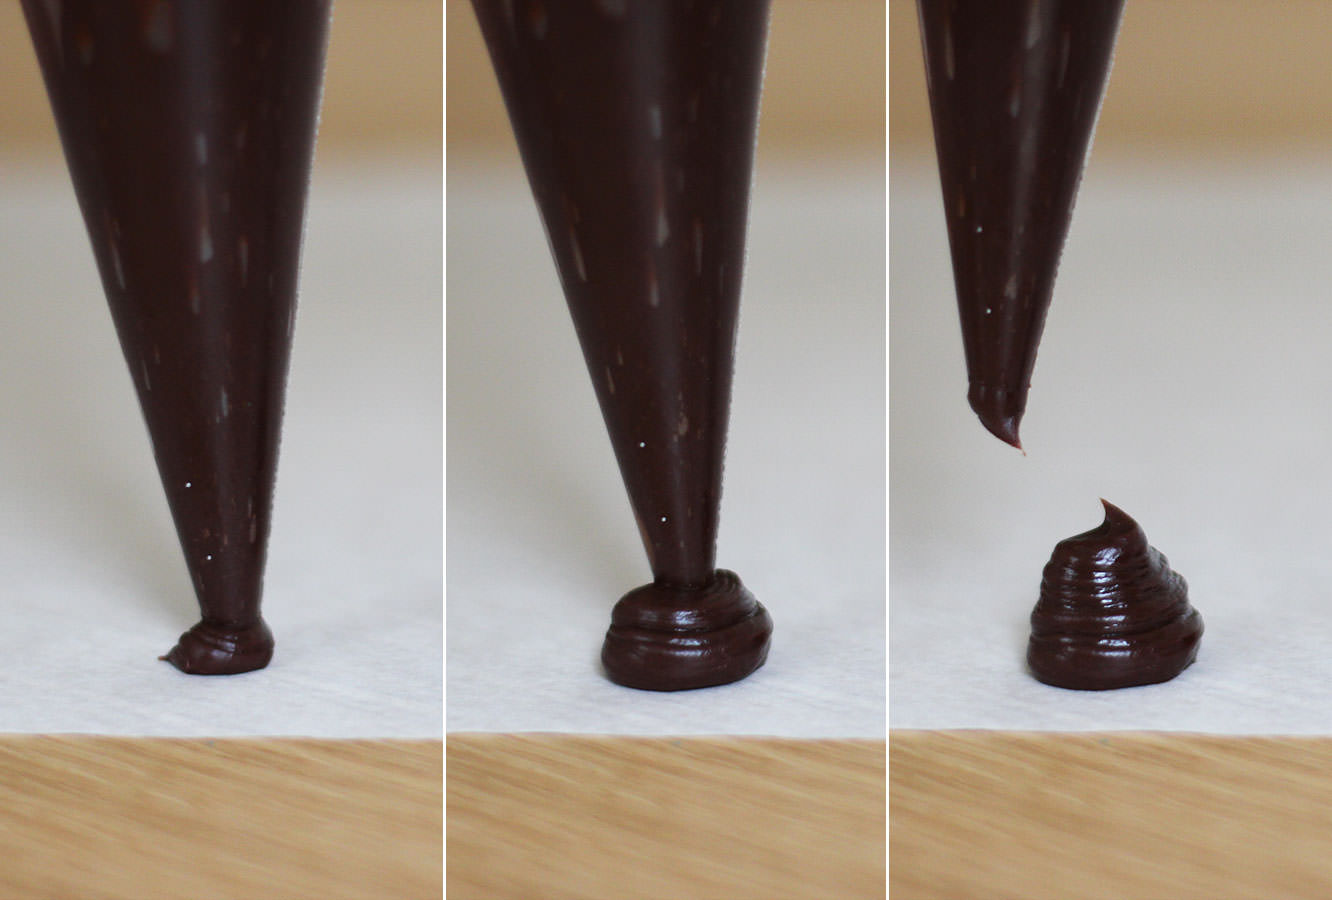
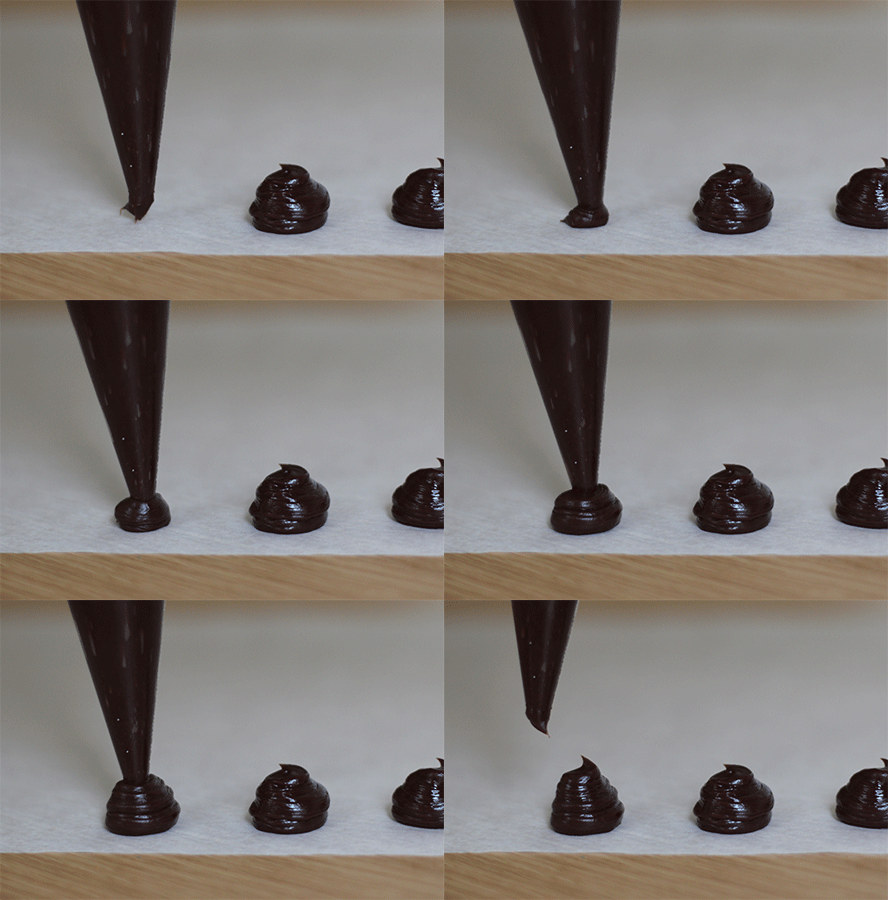
Check regularly on the truffle mix, don’t let it harden fully. Once a spoonful holds its shape when dropped onto the rest of the mixture it’s pipe-able.

Place into a piping bag, and, holding it perpendicular to the greaseproof paper (which you have put down as instructed, um, nowhere in this post) squeeze downwards. Don’t worry if these are a bit misshapen, it’s just to make sure they’re roughly the same size.
christmas-pudding-truffles-recipe-gif

christmas-pudding-truffles-recipe-4

Step five

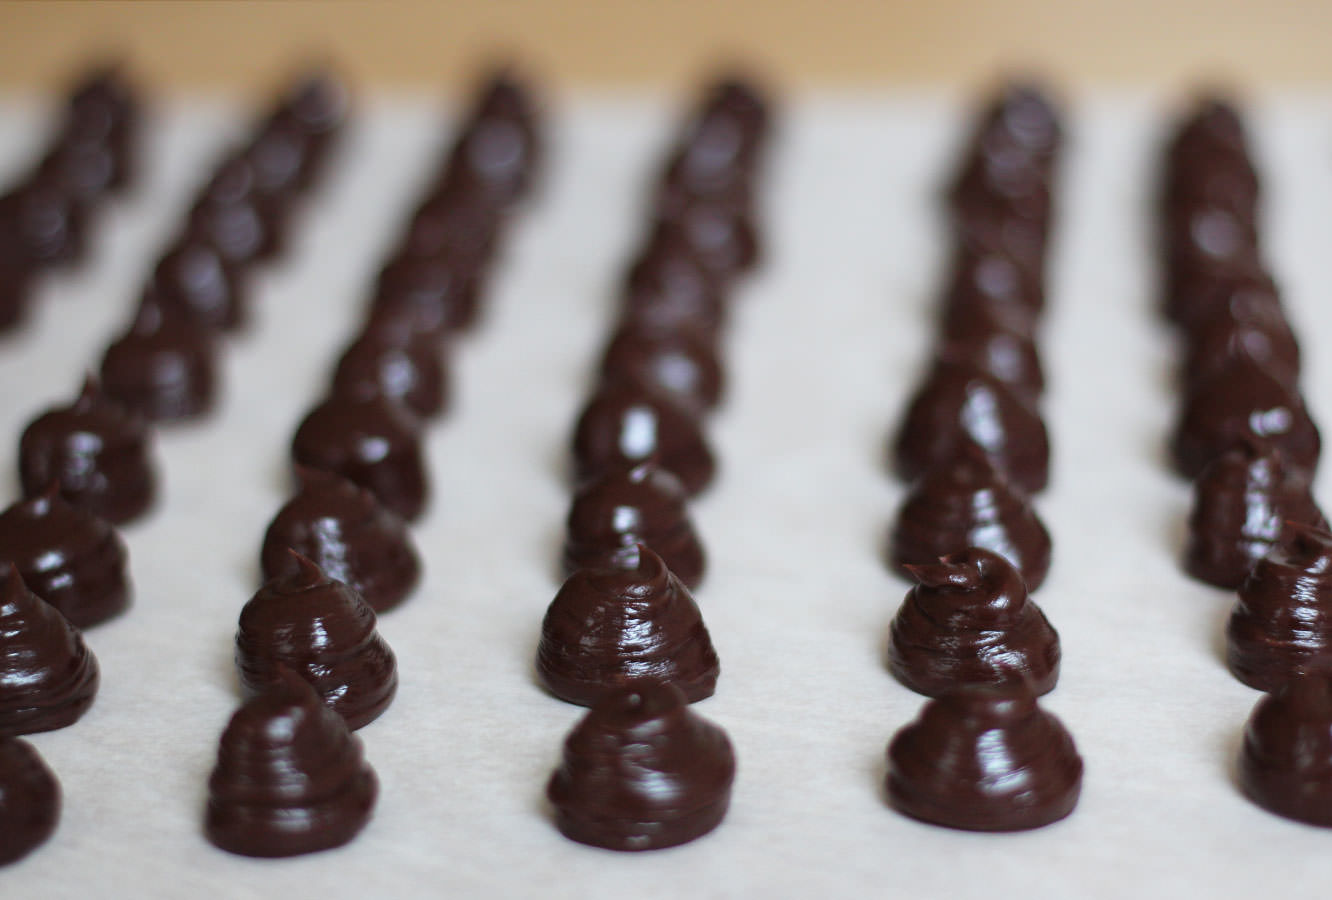
Pipe pipe pipe.

Leave to set a bit longer, preferably with a window open to cool the truffle down quickly. The truffles won’t thank your winter central heating.

christmas-pudding-truffles-recipe-5

Step six

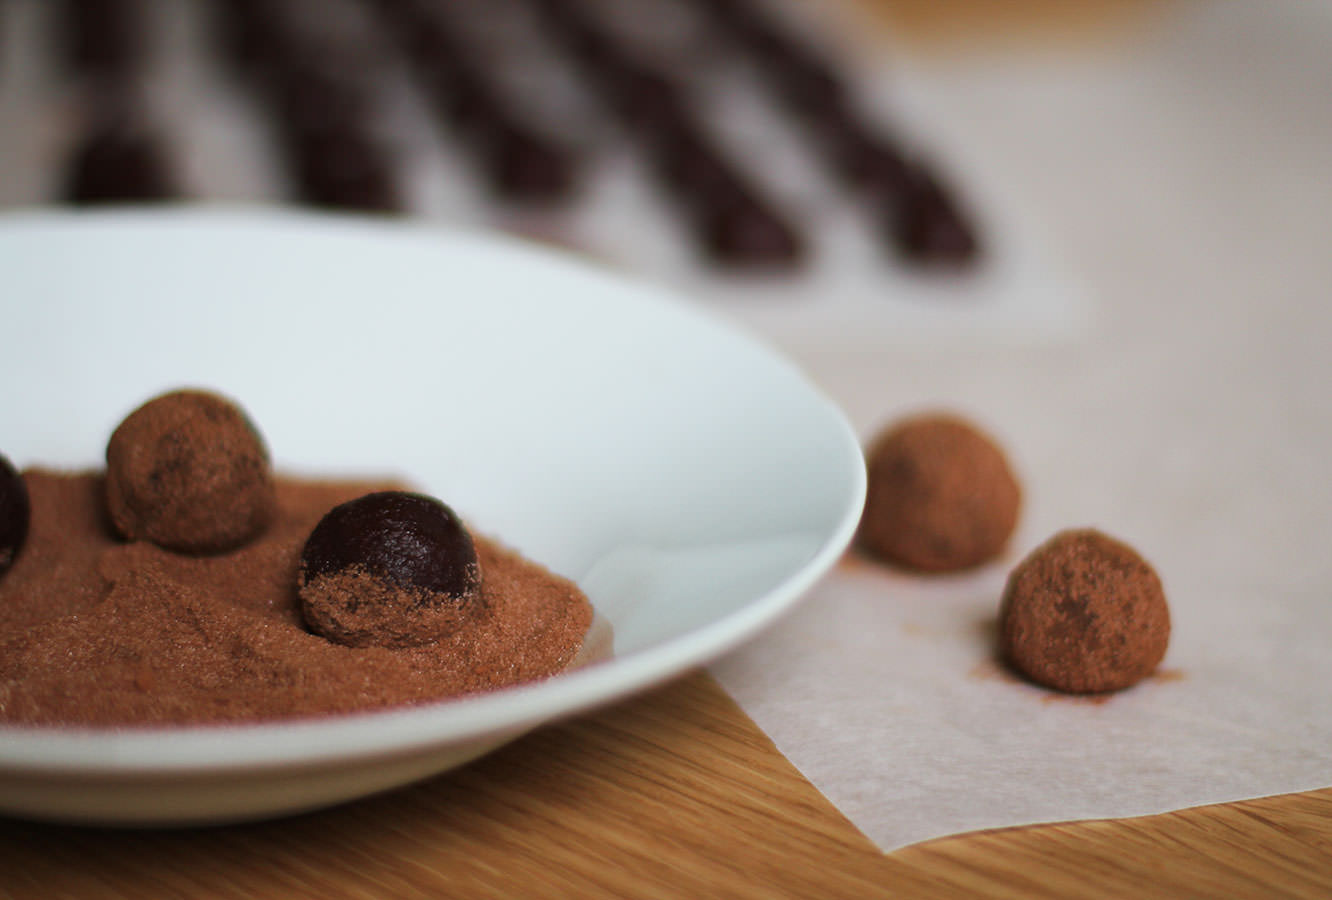
When the truffles are set roll them into balls. You will need fairly cold hands for this, so rinse them in cold water.
Step seven

Dust the truffles in cocoa and caster sugar. I mixed these at random so I’m not sure on quantities, but I used about two thirds caster sugar to a third cocoa powder.

I dusted as I rolled, as hands warm the outside of the truffles so the caster sugar will stick.

christmas-pudding-truffles-recipe-6

Step eight

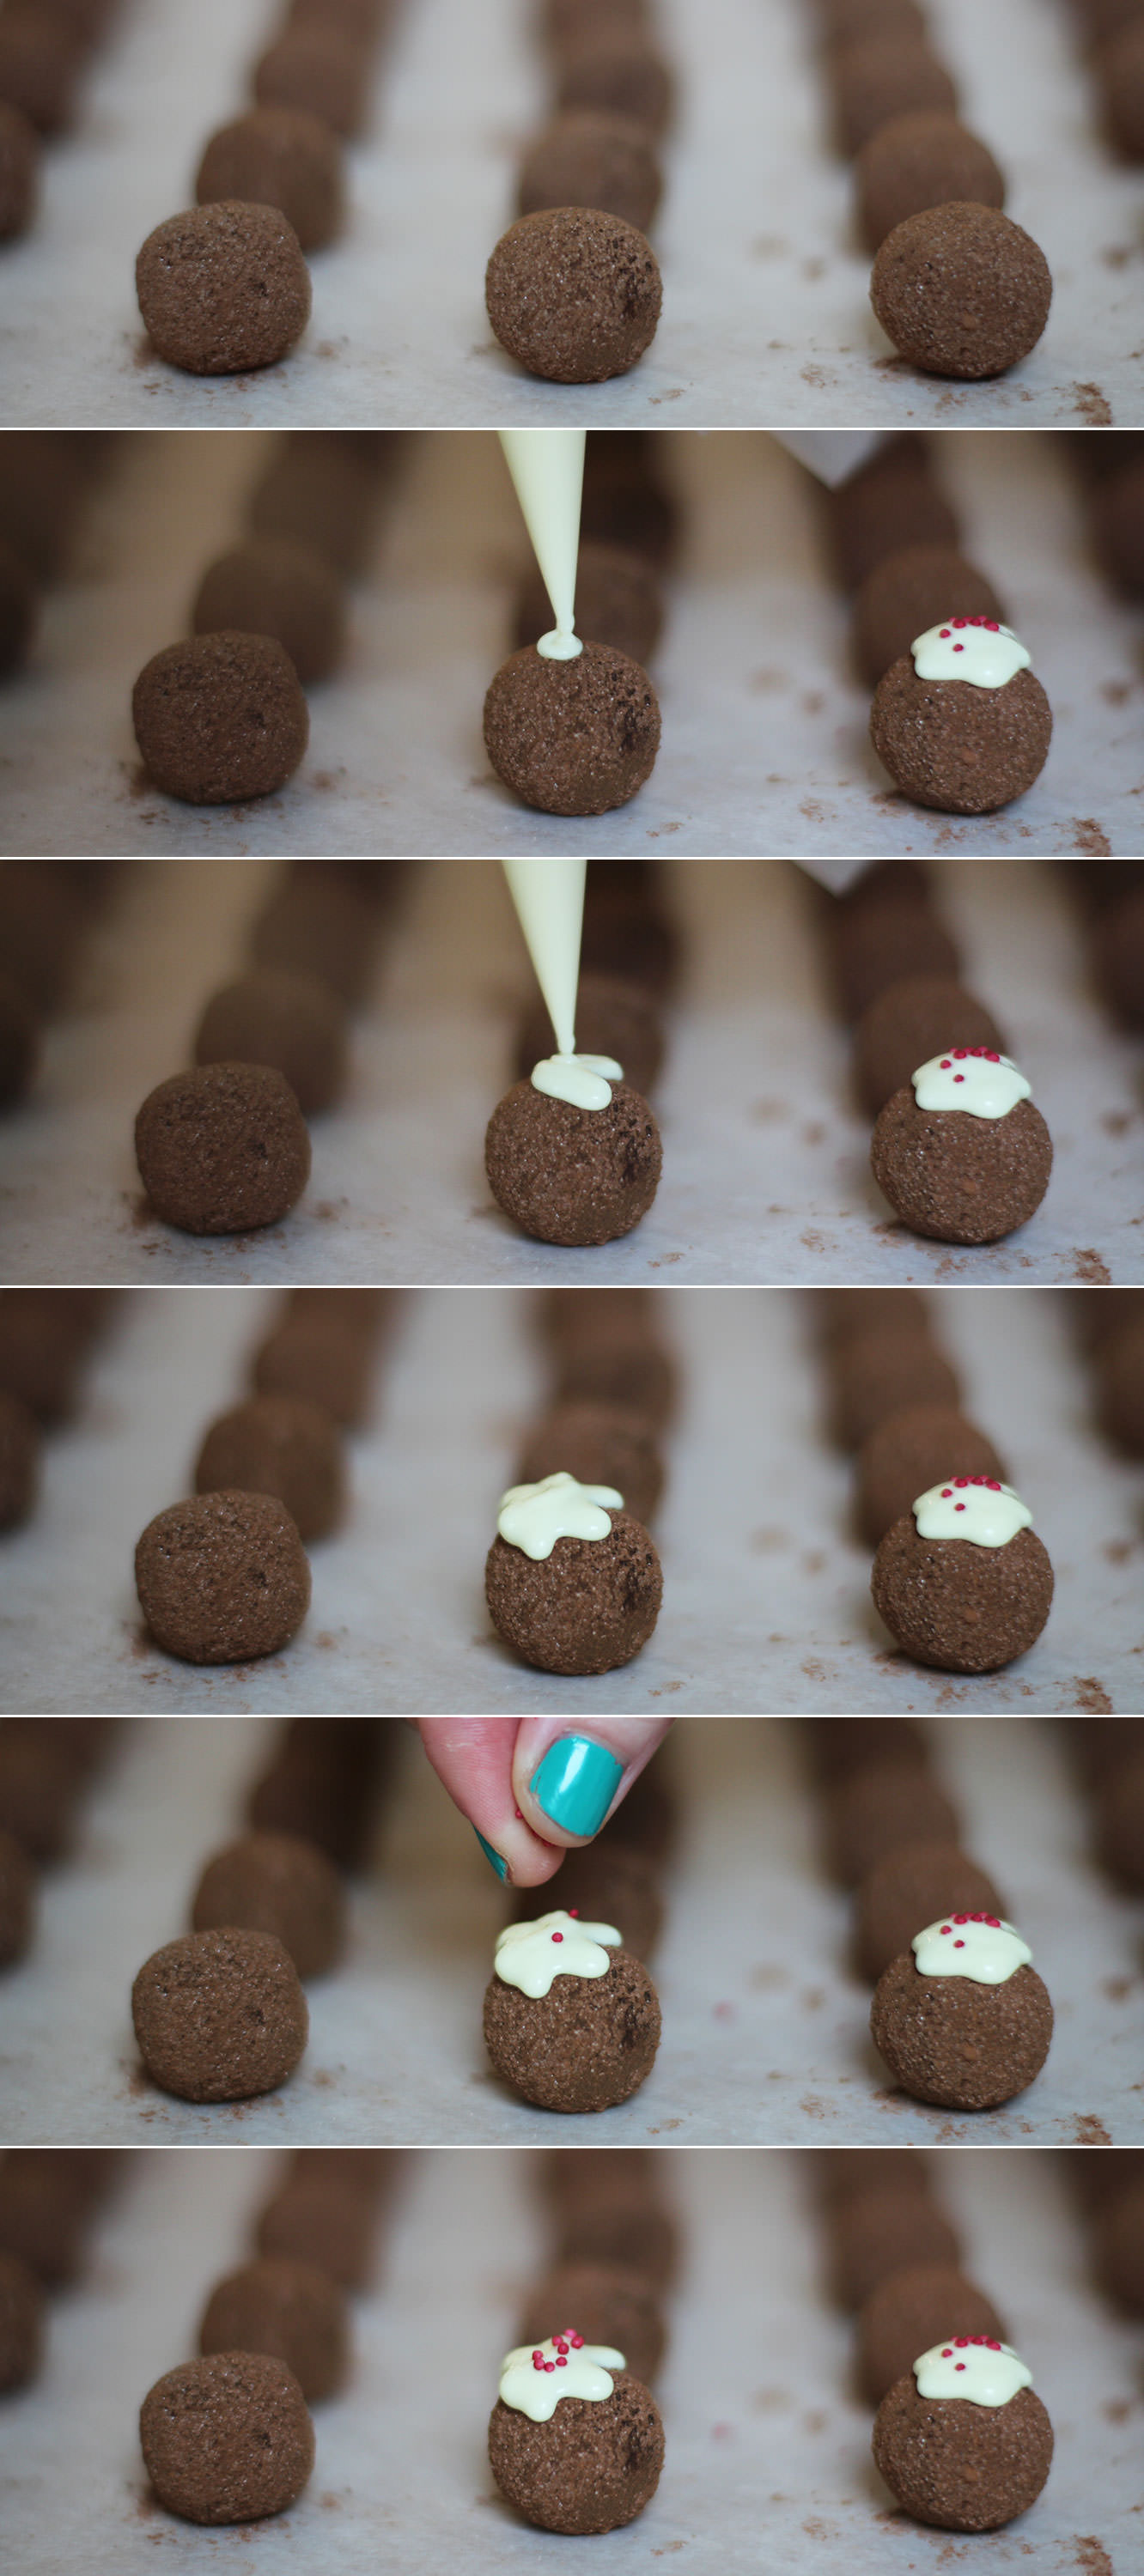
Melt the white chocolate slowly in the microwave, pipe little splodges and drop some red sprinkles on top. I got these from Sainsbury’s, so not too hard to track down.

christmas-pudding-truffles-recipe-8

Leave the white chocolate to set and pack away your truffles into little bags or boxes and spread the Christmas (or Birthday) cheer!

Dear darling….

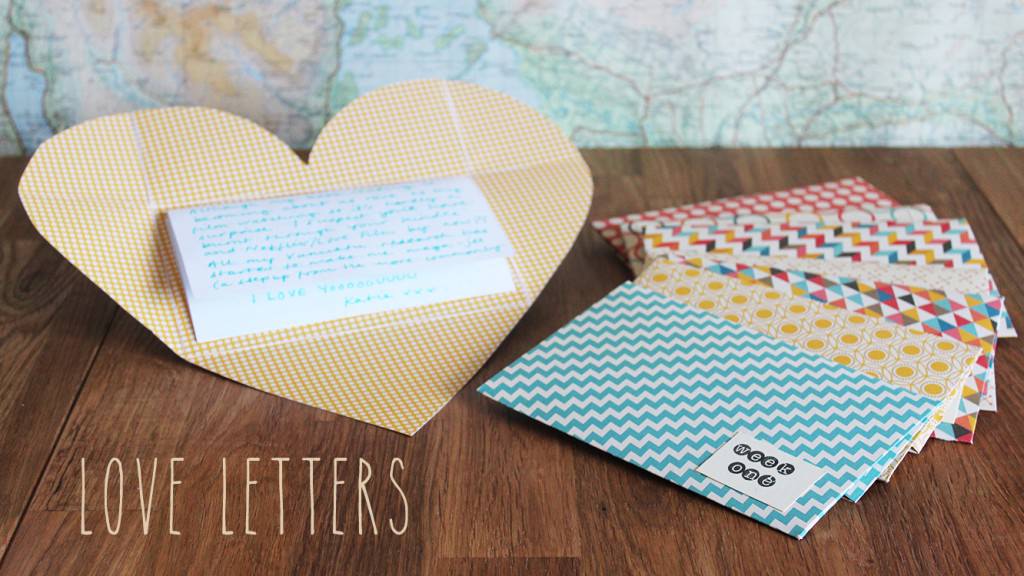
Yo. Another Monday, another blog from me. It’s sort of a cheat really, as it’s a spin off from this present I made for my friend Beth a few months ago. I made one for each week she was away travelling, I hope she’s having as much fun reading them as I had writing them. I MISS her.

I’ve been reflecting a whole lot lately on what wonderful friends I have. Beth is truly one of life’s diamonds (I promise I’m not usually this cheesy).

So if you have a special someone in your life, take a moment to make them a little love letter and let them know how much they are valued.

heart-envelope-homemade-love-letter-1

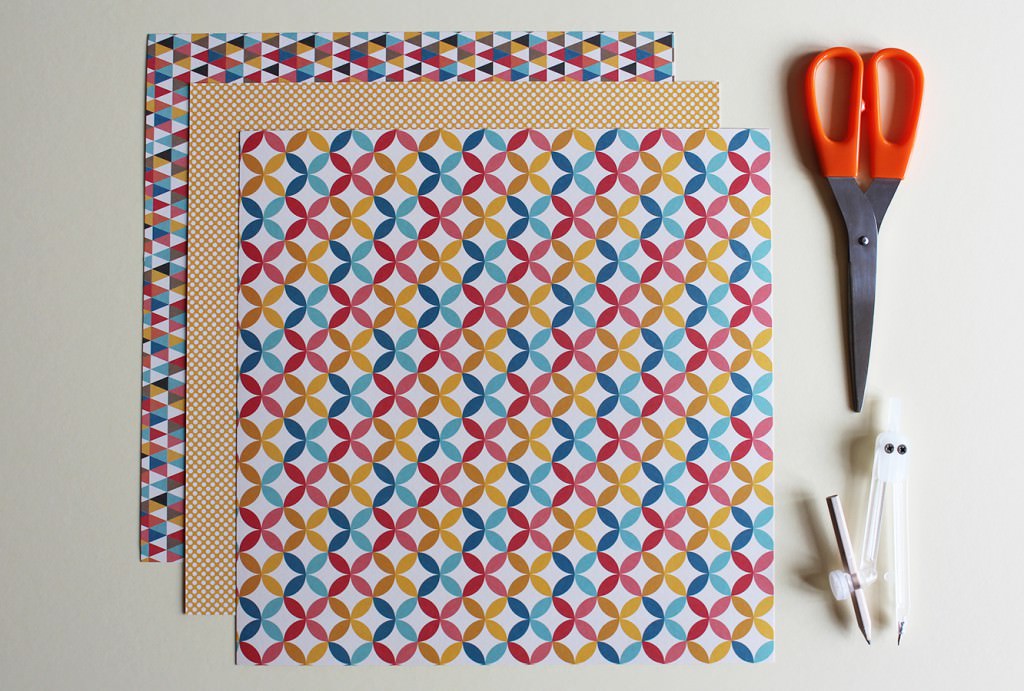
You will need

Large pieces of pretty card/paper (mine are scrapbook sheets 12″x 12″)

Something round/set of compasses

Scissors

The outpourings of your heart

heart-envelope-homemade-love-letter-2

Step one

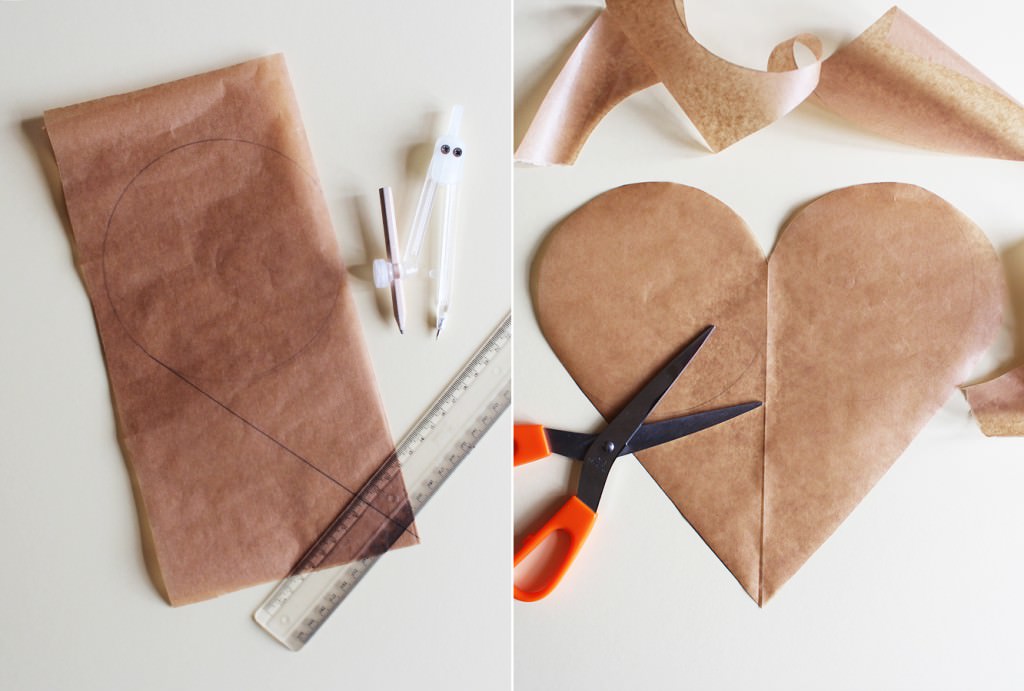
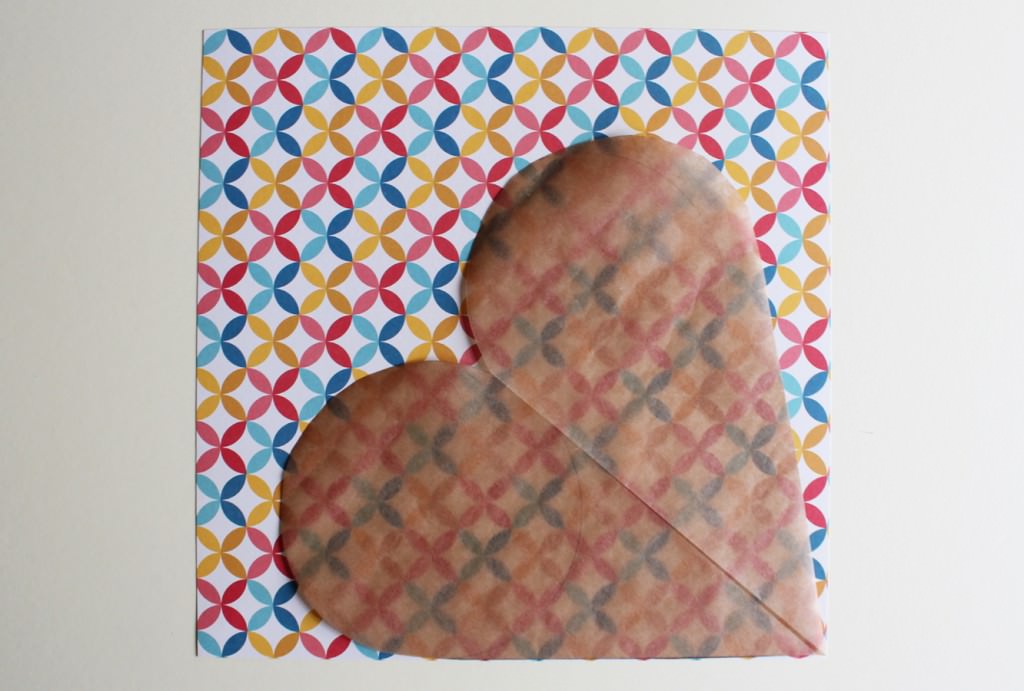
Using a piece of plain paper/newspaper/greaseproof the same size as your proper paper, make a heart template.

I did this by folding the template paper in half and drawing a circle to almost full width. Then use a ruler and draw a line from the edge of the circle towards the fold to make a point.

Cut out and unfold. Voila.

heart-envelope-homemade-love-letter-3

Step two

Draw round the template on your nice paper/card. Don’t be a peasant – use pencil.

heart-envelope-homemade-love-letter-4

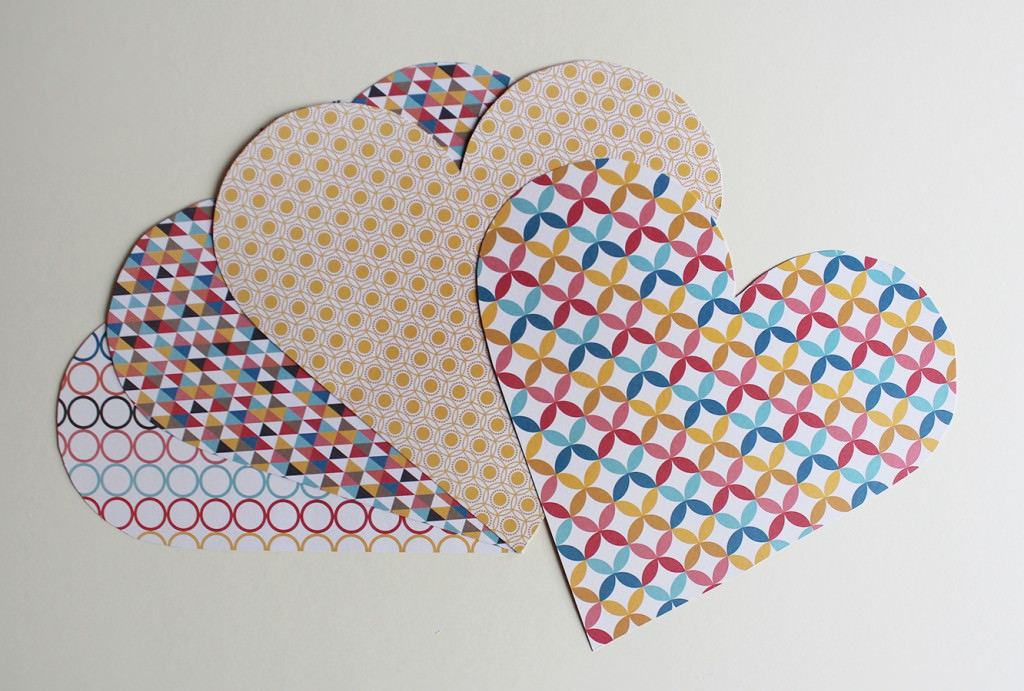
Step three

Cut out as many as you need. I appreciate for you guys this might just be one, not everyone fancies their friends as much as I do.

heart-envelope-homemade-love-letter-5

Step four

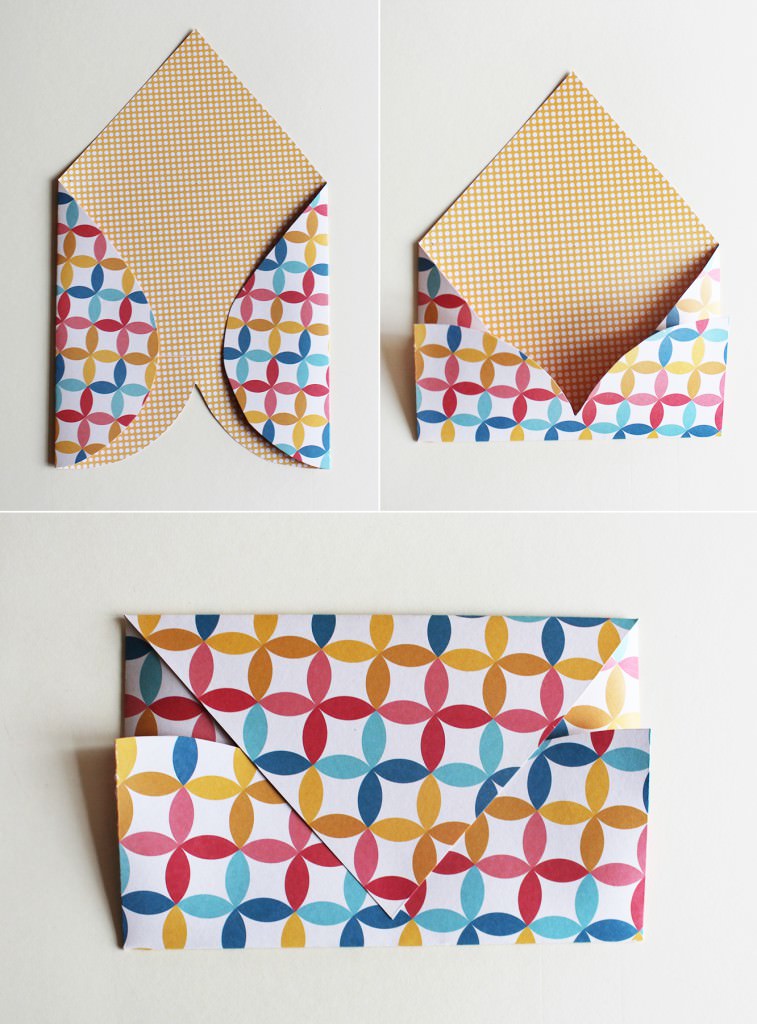
Turn the heart around so the point is facing away from you, and fold the sides in. You might want to use the scissor blades to score the lines first if you are using thicker stock.

Fold the domed bits up to make the bottom of the envelope. Finally, fold the point down to make the flap.

A disclaimer for this step is to practice on the template version first so you have the right dimensions, to make sure your envelope doesn’t have any gaps. You’ll see what I mean.

Step six

Write away.

I folded strips of A4 and stuck one section to the back of the heart so it kind of pulls out. You might prefer to write straight onto the it if your paper doesn’t have such busy patterns.

I stuck a button on each of mine to close them.

heart-envelope-homemade-love-letter-6

Enjoy telling people the people you love that they are great!

I’d tag that

Well hi. Apologies for being MIA, sometimes the blog falls victim to life’s unpredictability, but I’m back, and thanks for sticking with it.

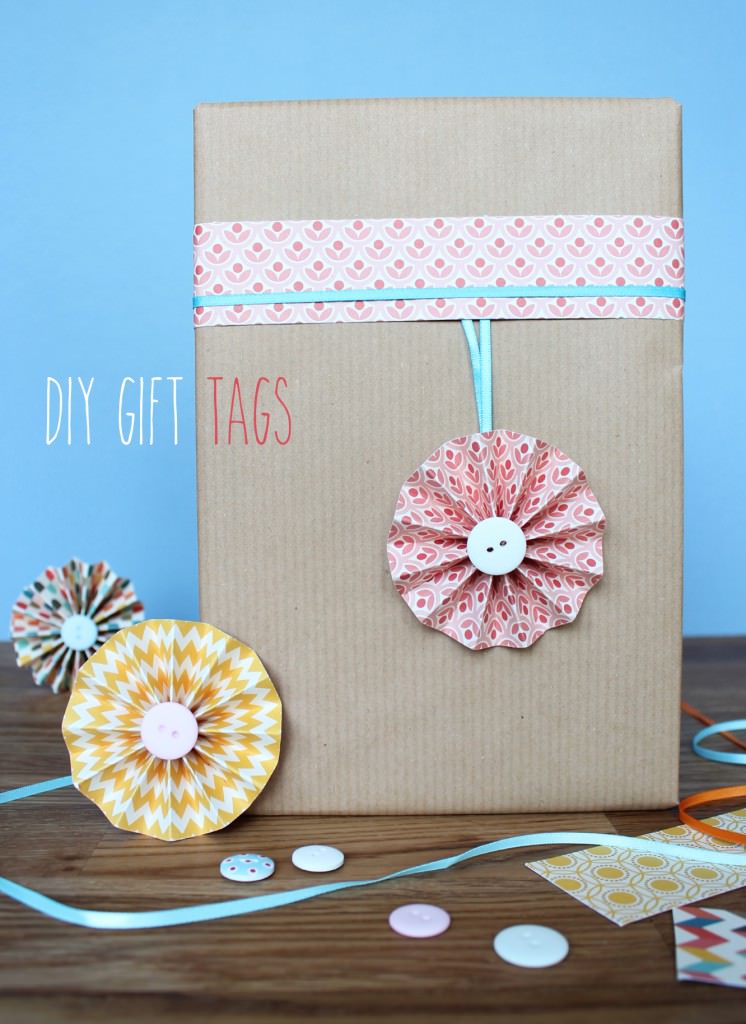
I had a birthday recently, so in honour of my stepping over the early-mid twenties boundary *weeps silently* I have devised an excellent little make to help your gifts stand out from the crowd. You can make a load of these up in one go so that you have a good stock of supplies to whip out at a moment’s notice.

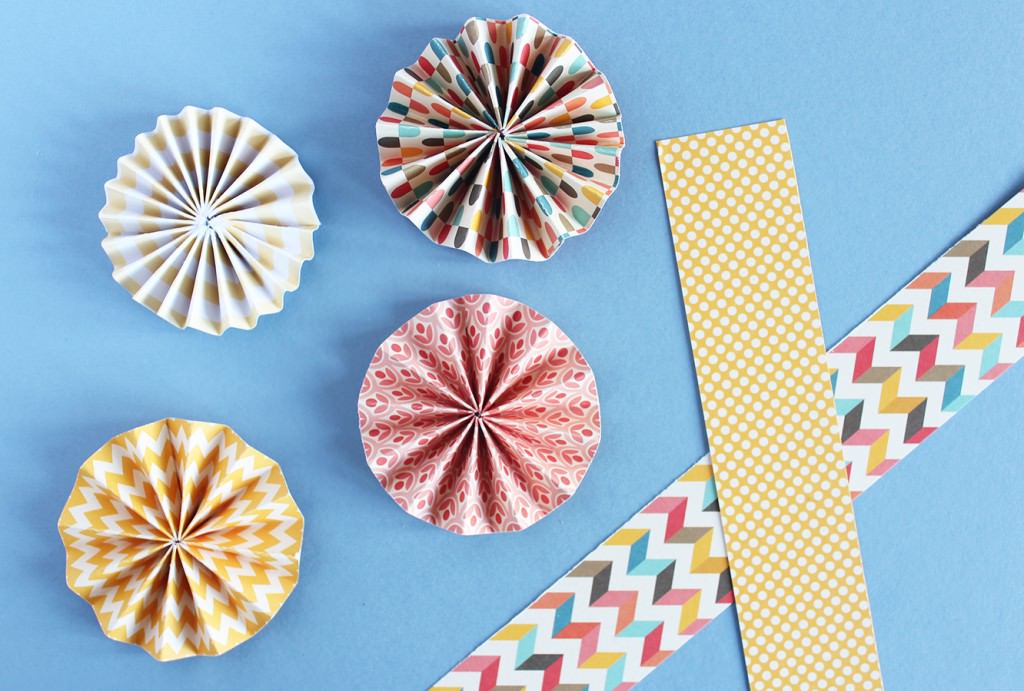
DIY-gift-tag-1

You will need

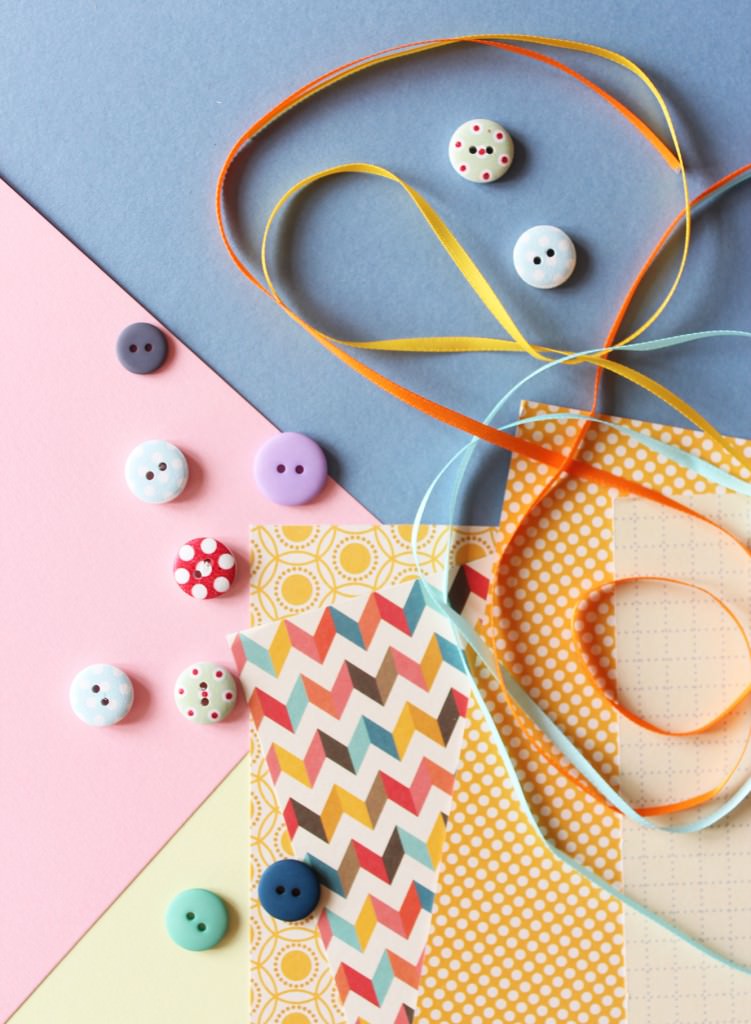
Cheerful patterned paper

Some plain card or paper

Buttons

Ribbon

Strong quick drying glue

DIY-gift-tag-2

Step one

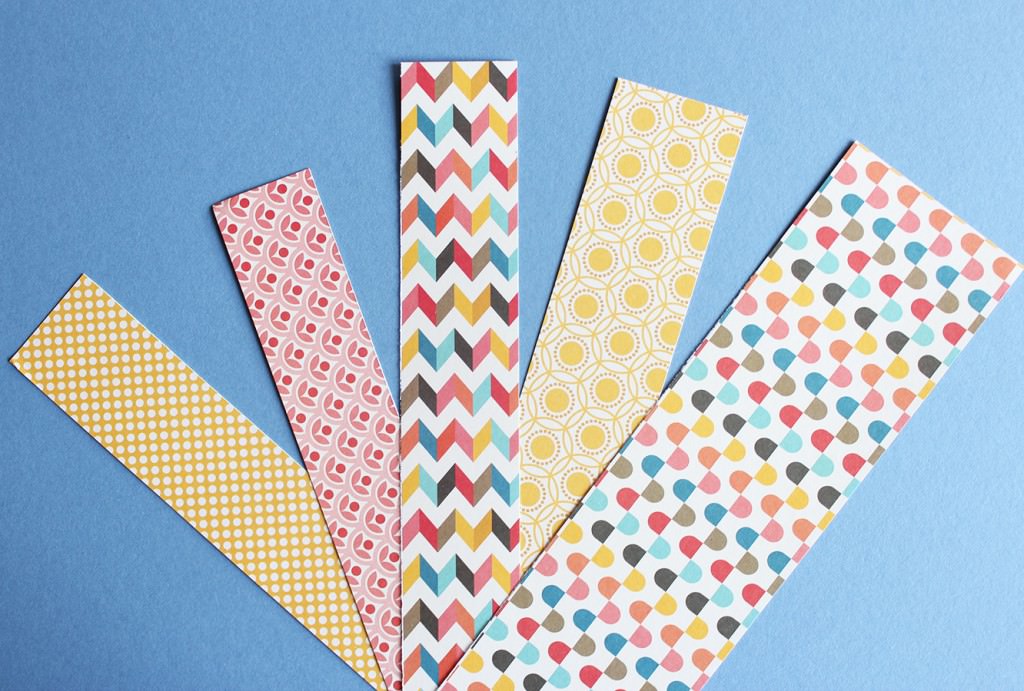
Cut your paper into long strips.

The width is up to you, but bear in mind it will be the radius of your tag. I found the thicker the strip, the longer it needs to be to work (I didn’t deserve my Maths GCSE for not knowing that instinctually) so you may need to tape two strips together if you want big tags.

All will become clear.

DIY-gift-tag-3

Step two

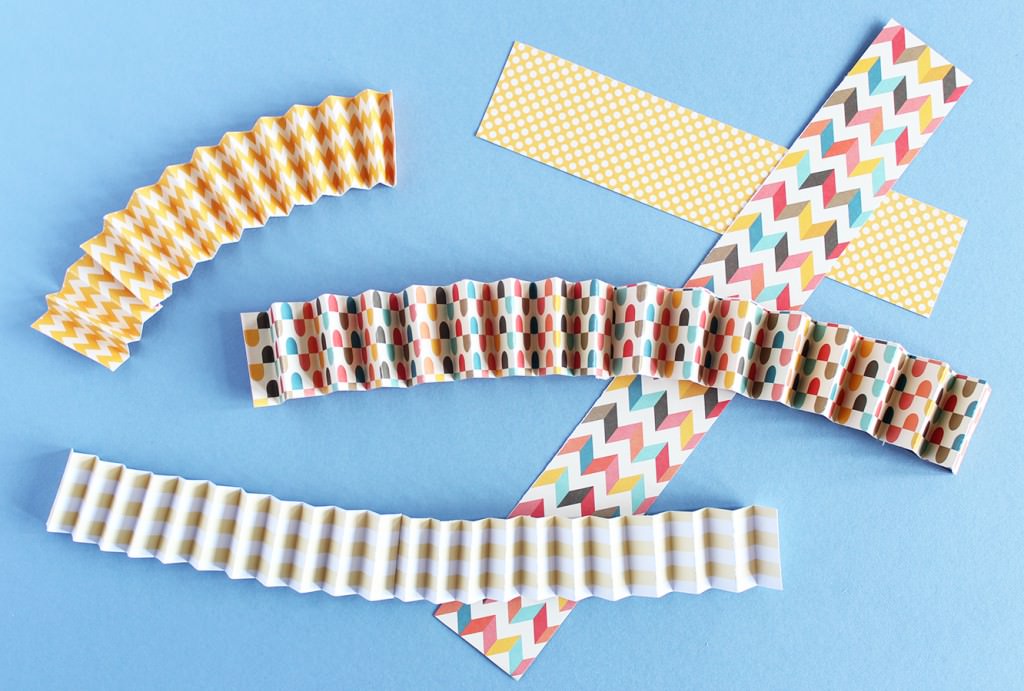
Fold the strips into a concertina (one bit forward, one back, just like in primary school when you made paper fans).

DIY-gift-tag-4

Step three

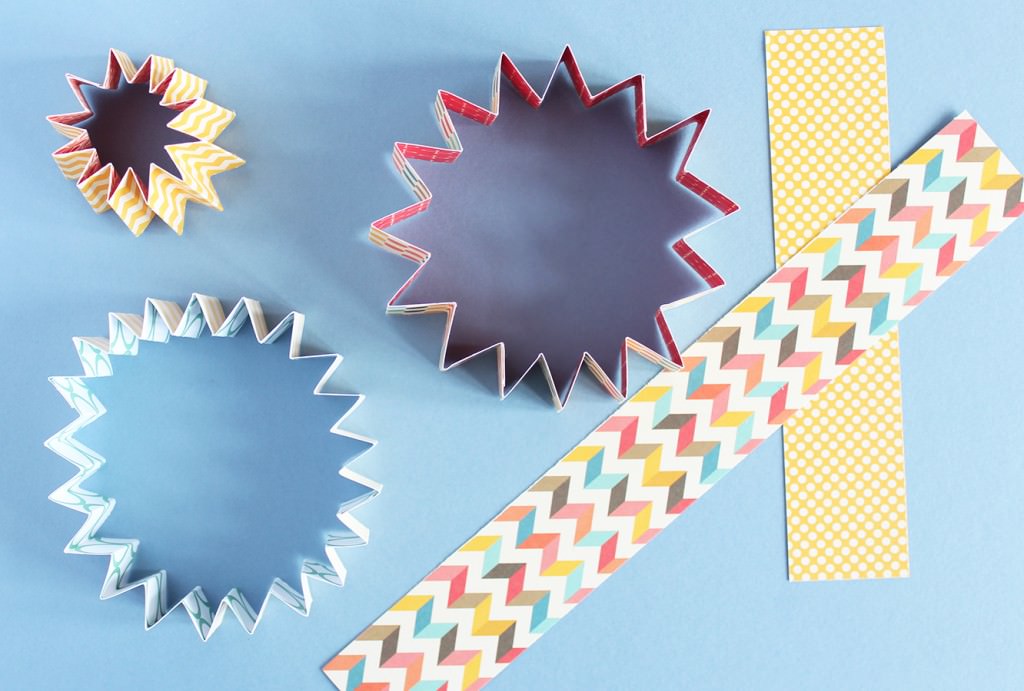
Stick together the two ends of each strip so that you have the star shape type things above.

DIY-gift-tag-5

Step four

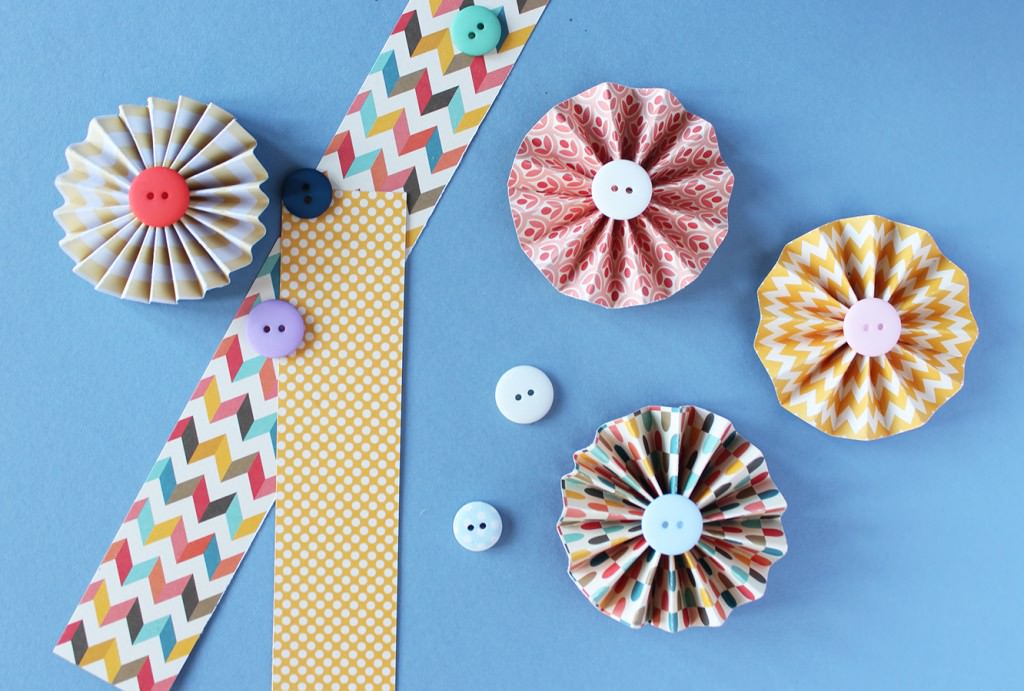
Pick up your stars and push the top edges into the middle to make these circular flowery fan things.

Put a small dab of strong glue on the centre and hold until stuck (I mean super glue really, I have zero patience for anything else, and glue burns to prove it). On that note, be careful it doesn’t drip all the way through the middle while you’re holding it – unless you want a charming new finger accessory.

DIY-gift-tag-6

Step five

Stick a button over the join in the middle.

DIY-gift-tag-7

Step six

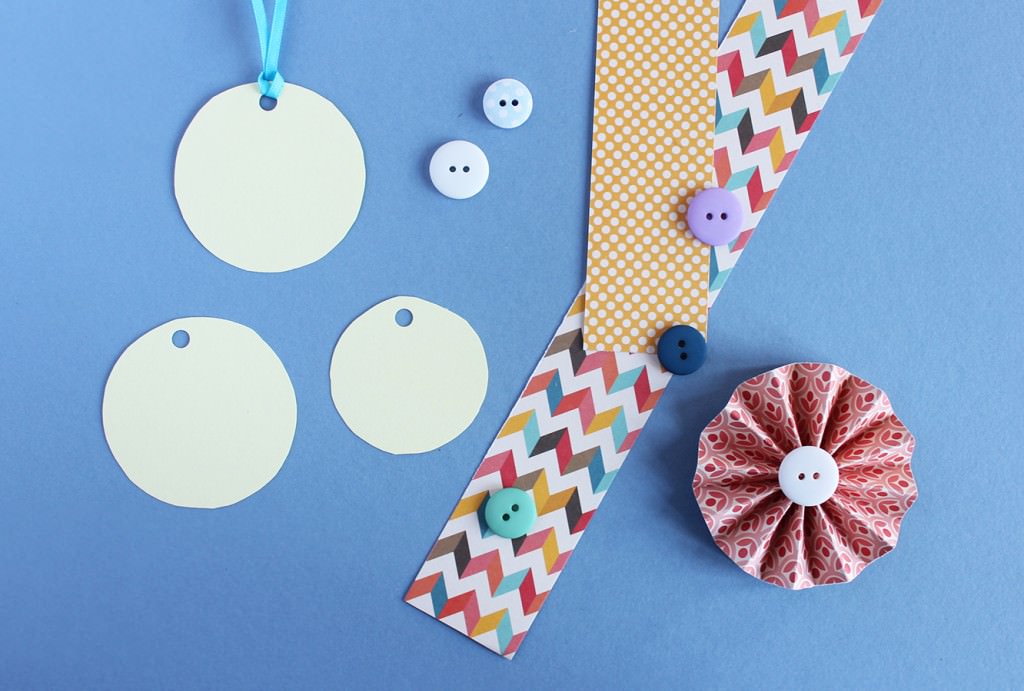
Find something circular that matches the size of your tags (or use a set of compasses). You want the circle to be a bit smaller than the tag itself.

Cut said circles out from plain coloured card and use a hole punch to make, well, a hole.

Loop a short length of ribbon through the hole.

DIY-gift-tag-8

Step seven

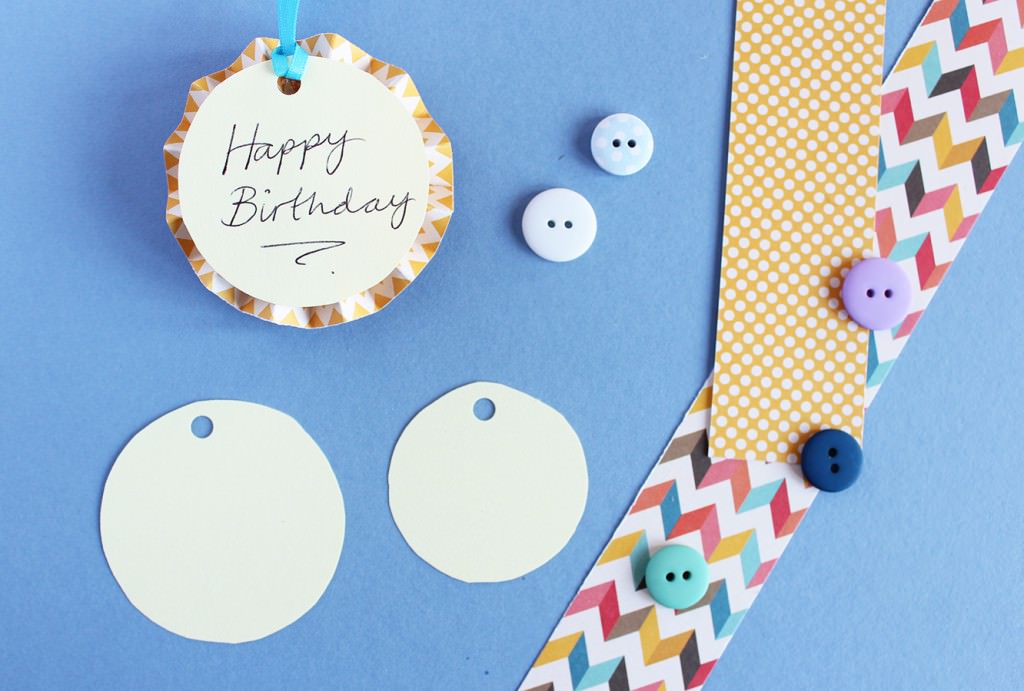
Stick the card disks to the backs of the tags using double sided tape or glue.

Write your meaningful and heartfelt congratulations that the birthday person is still alive on the reverse.

Affix to gift.

DIY-gift-tag-9

Step eight

Smugly produce your beautifully tagged gift at the appropriate moment.

Thanks for stopping by, have a great week!

A little box of joy

In case you hadn’t noticed, Easter is fast approaching. I’m a big fan of Easter, and Spring in general. This year I’m heading to Germany to see some very wonderful people and I can’t wait.

In the meantime though, I’m busy covering everything in mini eggs and thinking up yummy Easter treats for you to get chubby eating. You’re welcome.

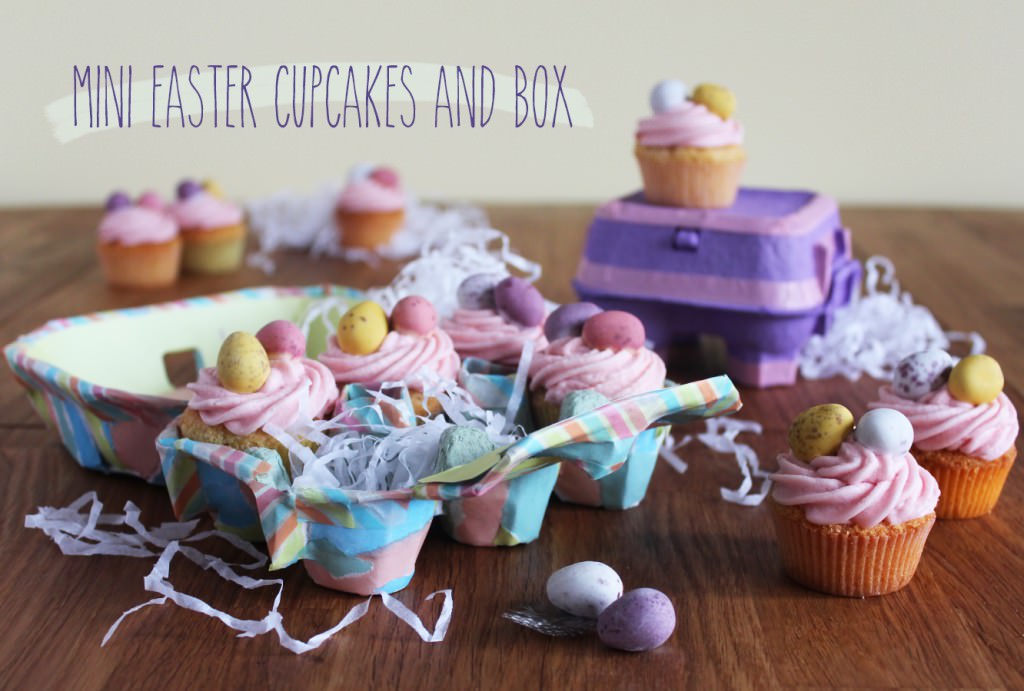
This one is great for kids and would make a lovely little present for the relatives or anyone else you might be seeing over the next few weeks.

Mini-Easter-Cupcakes-Recipe-1


You will need

An egg box

Coloured paper/paints

PVA glue

For the cakes

4.5 oz/125g Self raising flour

4.5 oz/125g Butter/margarine (I use stork for most cakes)

4.5 oz/125g Caster sugar

2 eggs

1tsp Vanilla extract

For the decoration

4.5 oz/125g Unsalted butter (room temperature)

2 tbsp Full fat milk

12 oz/350g Icing sugar

Food colouring

1 tsp Vanilla extract

Mini eggs

Mini cupcake/muffin cases

Makes 24

Mini-Easter-Cupcakes-Recipe-2

Step one

Decorate your egg box. This post is just a suggestion, you can paint it, or cover it in glitter, or stick cotton wool balls all over to make it look like a sheep. Your only limit is your imagination, and the fact it’s an egg box…

Rip paper into strips. The thinner the paper the better with this really, as egg boxes, I discovered, are rather lumpy, so thicker papers don’t mould around them so well.

Mix PVA and water together in a bowl that you don’t mind getting temporarily covered in glue. You want about 3 parts PVA to 1 part water (otherwise the egg box will get soggy).

Paint the glue mix onto the surface of the box and stick paper on top. Cover each strip of paper with more glue mix as you go. This is where it all gets very Art Attack. Neil Buchanan made it look so easy…

Keep going until the whole outside is covered and leave somewhere to dry. Make sure you do the box bit a good few hours in advance of using it, ideally the day before.

Mini-Easter-Cupcakes-Recipe-3

At this stage mine looked like the above, and I still thought it was a bit messy.

Mini-Easter-Cupcakes-Recipe-4

Step two

Line the edges with washi tape. I did this to neaten mine up mainly, you possibly won’t have the same issue.

You might notice the purple box in the background…thought I would include a cheats option. That’s the box from those Cadbury’s Egg n’ Spoon things. They are amazing in case you were wondering, and now you have an excuse to buy a pack.

Cut the central doo-dahs so they are level with the rest of the sides.

Line the lid either using the same technique as before, or with cut paper and double sided tape.

Mini-Easter-Cupcakes-Recipe-5

Step three

Time to start on the cakes. I use an electric whisk to make cakes but a wooden spoon and some elbow grease is just as good.

Cream together the margarine and caster sugar. If you’re using butter bring it to room temperature before doing this. You want it to be fluffy and light like the image on the right. Honestly, Stork is the way forward for this. Cheaper too.

Mini-Easter-Cupcakes-Recipe-6

Step four

Quickly whisk/beat in the eggs and vanilla extract and then add the flour.

Stir until you have a smooth thick batter.

Heat oven to gas mark 4/180 C/350 F

Mini-Easter-Cupcakes-Recipe-7

Step five

Fill cake cases with mixture. You want them to be about two thirds full, a few of mine were too full, so if in doubt look at the above and go for a bit less!

Step six

Bake for  about 30 mins on gas mark 4/180 C/350 F. My oven is a touch special so keep an eye on yours, timings may vary.

Leave to cool completely before icing.

Step seven

Whisk together the unsalted butter, icing sugar, milk, and vanilla extract. Add food colouring of your choice.

Now, I don’t usually use a recipe for this so don’t shy away from adding a bit more icing sugar if your icing is too wet or a splash more milk if too dry.

Mini-Easter-Cupcakes-Recipe-8

Step eight

Ice your cakes and pop two mini eggs on top.

I won’t give too many piping tips as I’m still getting the hang of things myself. The general rule though is to keep the piping bag at quite an upright angle and apply even pressure.

Mini-Easter-Cupcakes-Recipe-9

Step nine

Put them in the egg box and make someone’s day that little bit more joyful.

Mini-Easter-Cupcakes-Recipe-10

Fudge for mama

Hello there, apologies for the short blogging hiatus; life happens sometimes, but I appreciate you sticking with me.

This weekend I went to stay with my friend Beth before she goes on her trip. Being as Mother’s Day is so near (this Sunday for those of you in the UK), B and I thought we would make some fudge for our mummys.

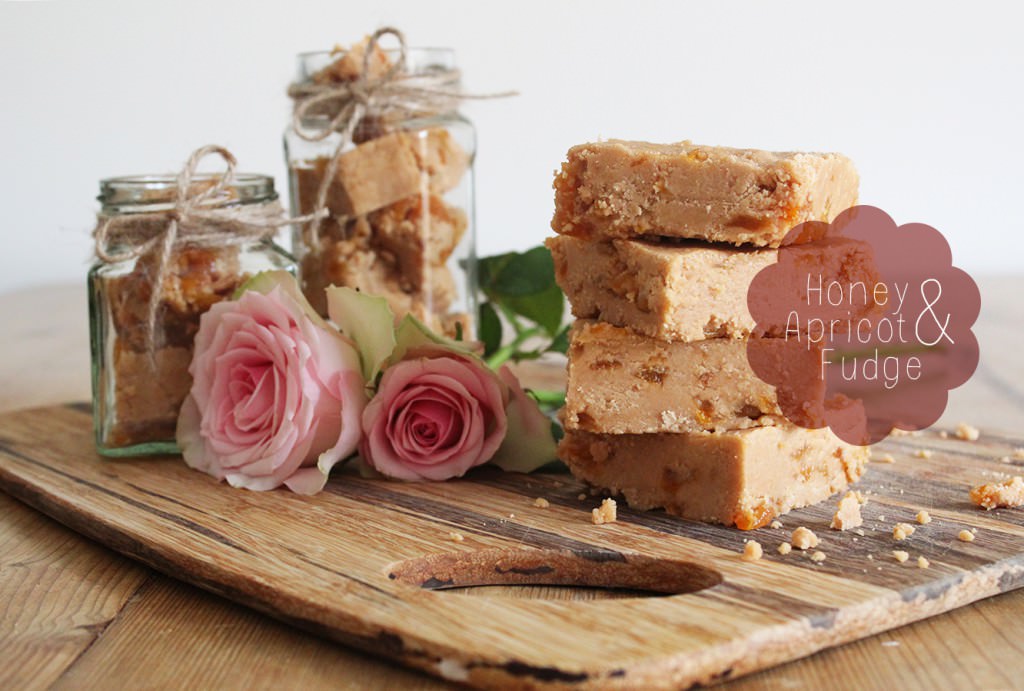
Whether or not you have Mother’s Day coming up, I urge you to have a go with making fudge. It’s a bit of a rascal but there’s lots to feel good about when you get it right, I’ve made quite a lot in my life time and so hopefully some of the below will help you avoid some of the fudging pitfalls.

Just a heads up, the batch below is fairly large, so unless you’re making it with a friend or for your Grandma too, you may want to cut the quantities in half.

how-to-make-honey-fudge-8

how-to-make-honey-fudge-1

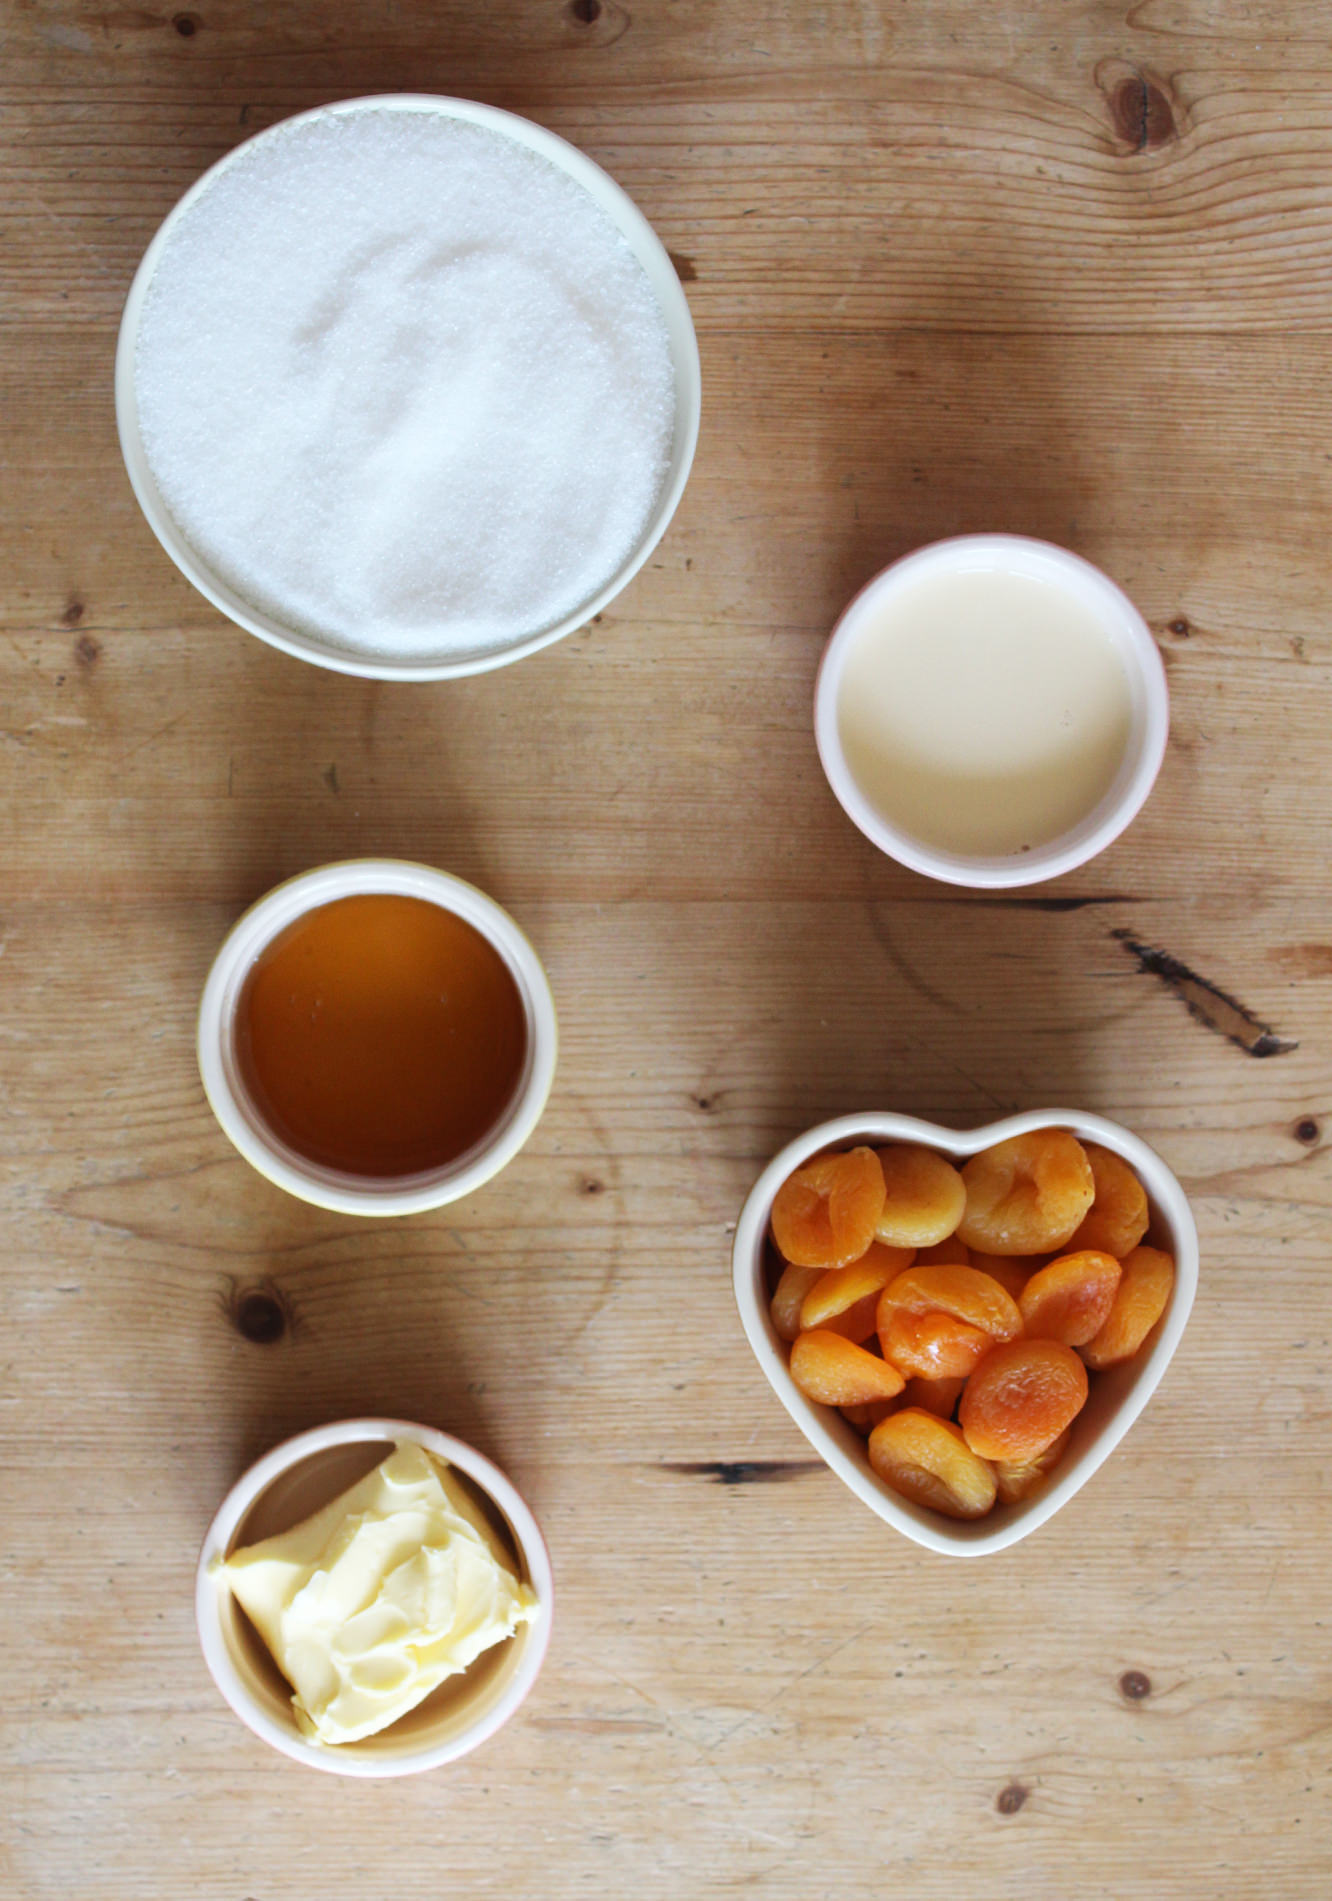
You will need

1kg/2lb Granulated sugar

280g/10 floz Evaporated milk

120g/4 oz Clear honey

120g/4oz Salted butter

250g/9oz Dried apricots

1tsp of Liquid glucose (if you have it – not essential – but great)

Tray bake tin lined with greaseproof paper

Sugar thermometer (essential)

how-to-make-honey-fudge-2

Step one

Combine all the ingredients (minus the apricots) into a large heavy bottomed pan.

At home I use the pressure cooker, and at Beth’s we discovered this casserole dish worked pretty well. The pan should be quite large as the mixture will bubble up, and the sturdier it is the less likely your fudge is to scorch.

how-to-make-honey-fudge-3

how-to-make-honey-fudge-4

Step two

Melt ingredients on a reeeaaallly low heat.

Seriously. As low as your cooker goes. Impatience will not help you here.

This ensures all the sugar is dissolved before it boils, and should help to prevent sugar crystals forming.

You should stir gently to stop the mixture burning on the bottom of the pan. Pop your thermometer in at this point too.

This was the first outing of my rather swish thermospatula, above, so I could stir and measure the temperature at the same time. I know, I need to get out more.

how-to-make-honey-fudge-5

Step two and a half

Keep the fudge on a low heat, stirring gently.

It will begin to boil as above. Resist the urge to put your face in it, as good as it smells, that won’t end well for you.

This is where the thicker your pan the better, as this boiling stage should take around 10-15 minutes ideally. You want your fudge to reach soft ball stage on the thermometer or 115 degrees. Patience is the key here. You should the fudge thicken up and get darker evenly.

Step three (optional)

Once your fudge has reached 115 degrees pour immediately into an empty saucepan. Some fudge people will disagree with me here, as faffing about with fudge can cause crystallisation in the sugar. However, I’ve found that if I leave it in the original pan it carries on cooking and can become brittle. The trick is to do it straight away and don’t scrape the pan out or stir it once transferred.

Now, DO NOT TOUCH. Don’t allow pets, children or interfering family members near the fudge mix for at least half an hour. Preferably you want to wait until the thermometer hits about 50 degrees, but when I did this for a craft fair a few years ago I didn’t have the time to hang around, and found that half an hour was generally enough.

how-to-make-honey-fudge-6

Step four

While you wait, use scissors to chop the apricots into tiny pieces. These are an optional addition and can be substituted depending on your mum’s tastes. You may want to add a different dried fruit, some chopped nuts, or chocolate instead.

how-to-make-honey-fudge-7

Step five

Get a wooden spoon, summons all your arm power, and beat the mixture. If you have a stand mixer, you’re laughing at this stage, because it can take up to 15 mins sometimes…

About 5-7 minutes into your beating add the apricots (warning, if using chocolate chips you want to add them as late as possible so they don’t melt completely).

Keep going until the fudge becomes very thick, you still need it to be soft enough to spoon into the tin, so try not to take it too far. I didn’t have the chance to photograph this, so you will need to take your best guess. Here’s a clue though, your arm will be hurting you by now.

Step six

Spoon into your lined tin and leave to set.

how-to-make-honey-fudge-9

Ta da! You’ve done it!