I might have mentioned just a few times all the weddings I’m going to this summer? Just once or twice maybe? The resultant hen/bachelorette/bridal showers are a wonderful excuse to flex my culinary muscles on some afternoon tea sweet treats. So the next couple of weeks feature just that.
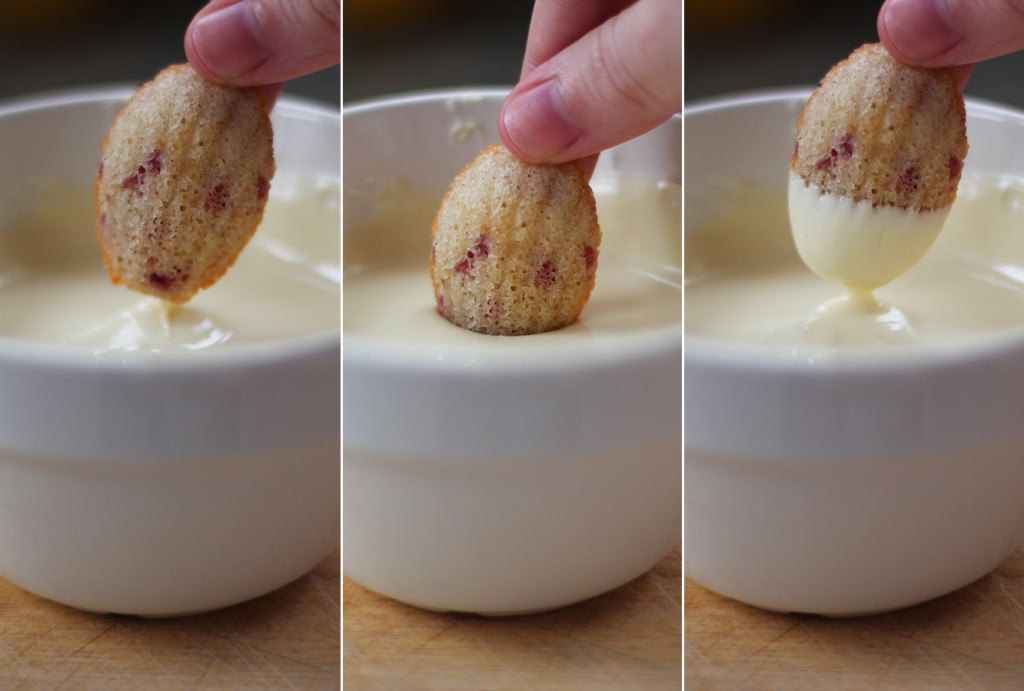
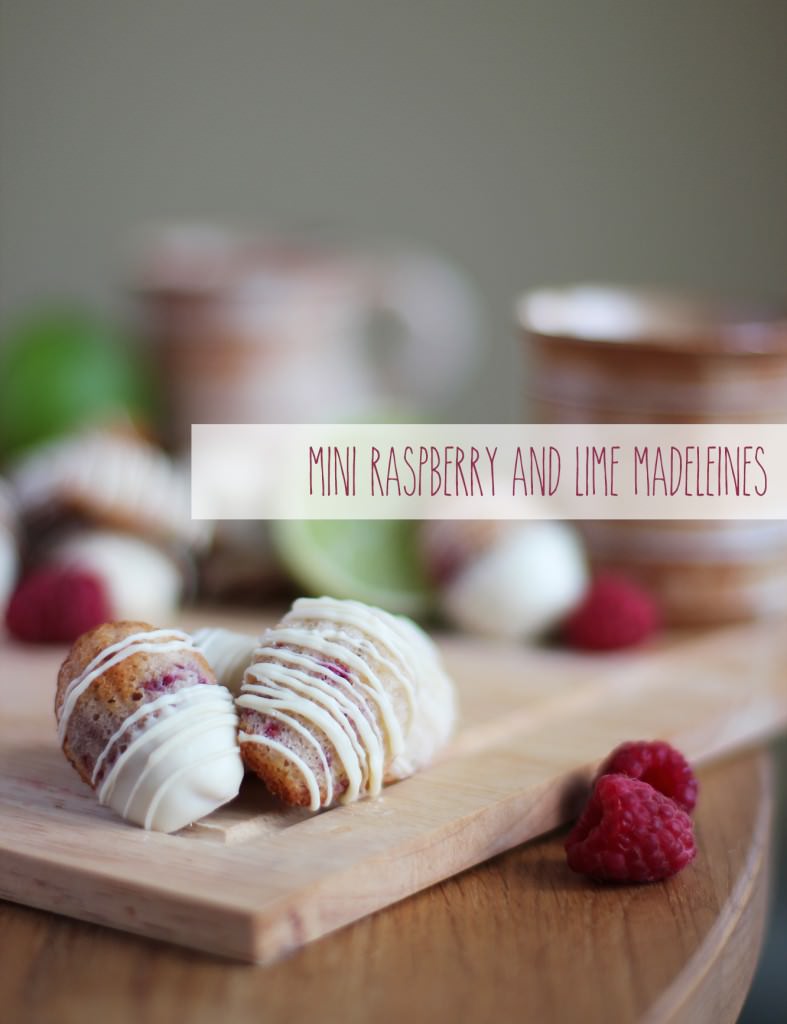
There’s one here already if you’re looking to get started, and this little post contains madeleines, a tiny French delight perfect for scoffing with tea. I decided to add some extra flavours to the classic lemon and vanilla, I’m not convinced the French would be too impressed, but you can thank me later.
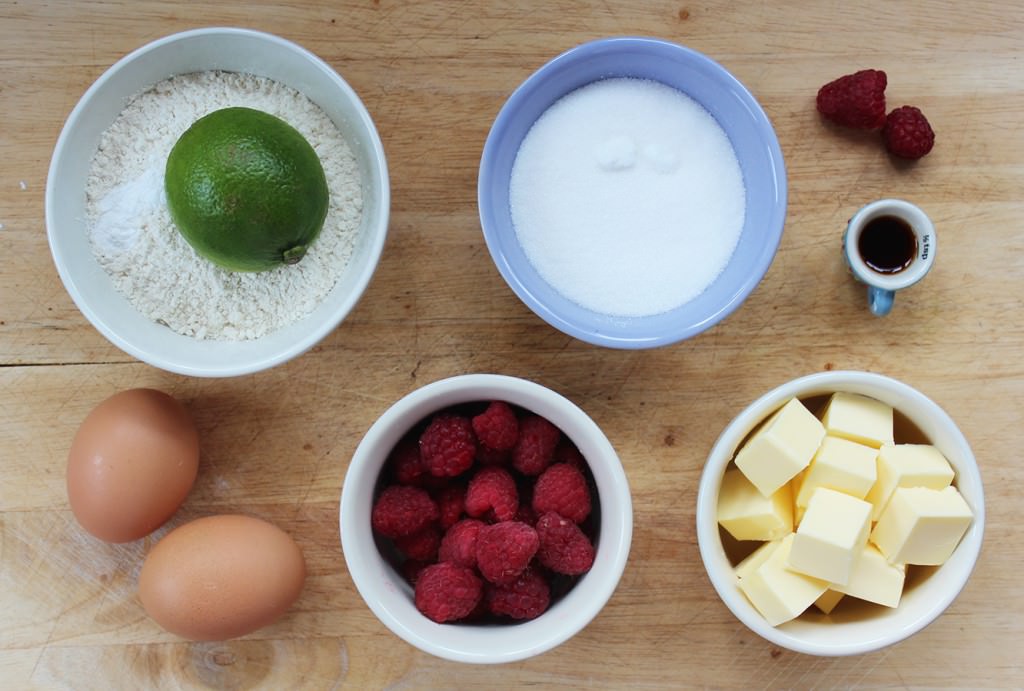
You will need:
75g/2.5 oz Caster sugar
75g/2.5 oz Plain flour
60g/2 oz Butter
2 eggs
1 tsp Vanilla extract
1 tsp Baking powder
60g/2 oz Raspberries
Zest of a lime
200g/7 oz White chocolate
Madeleine mould
Makes 10000000 (I’m sorry I forgot to count, but about 50 mini ones – maybe 25 normal size? Sufficient anyway)
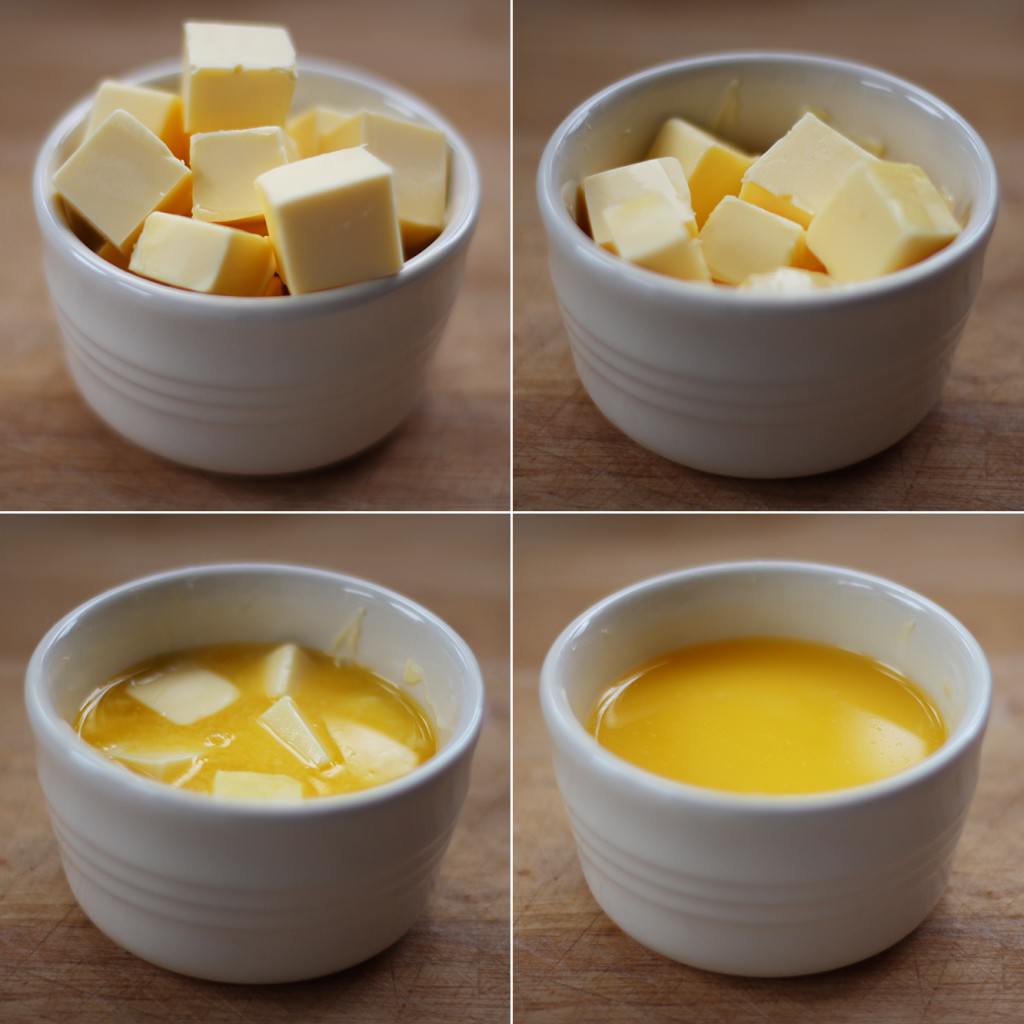
Step one
Melt all of the butter slowly in the microwave. Do this gradually until it’s just melted, none of this burning it until your house smells like popcorn nonsense please.
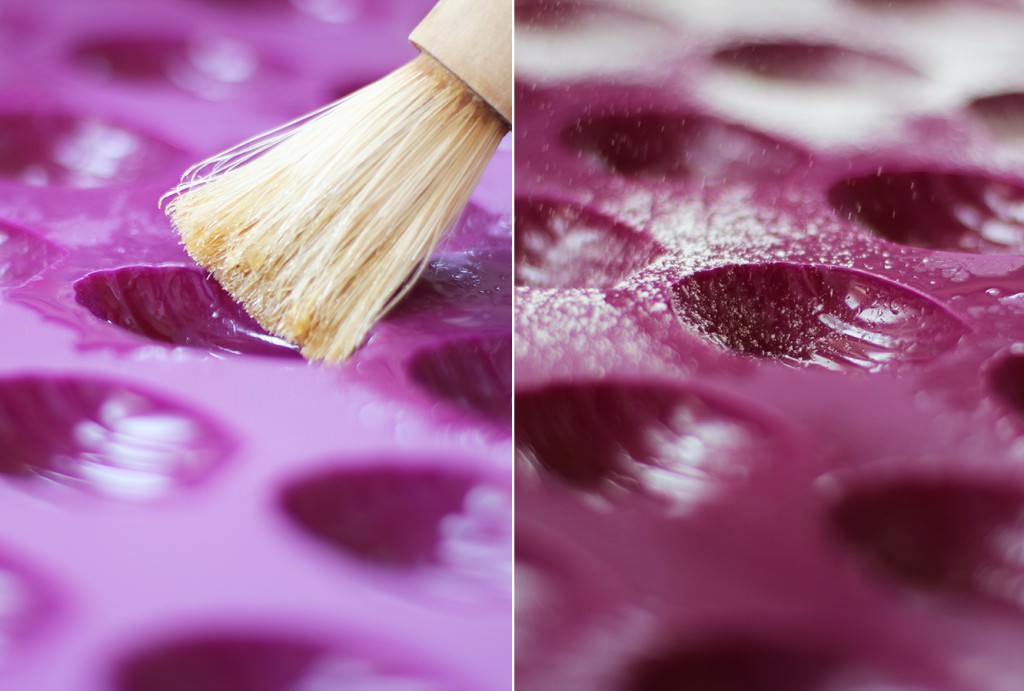
Step two
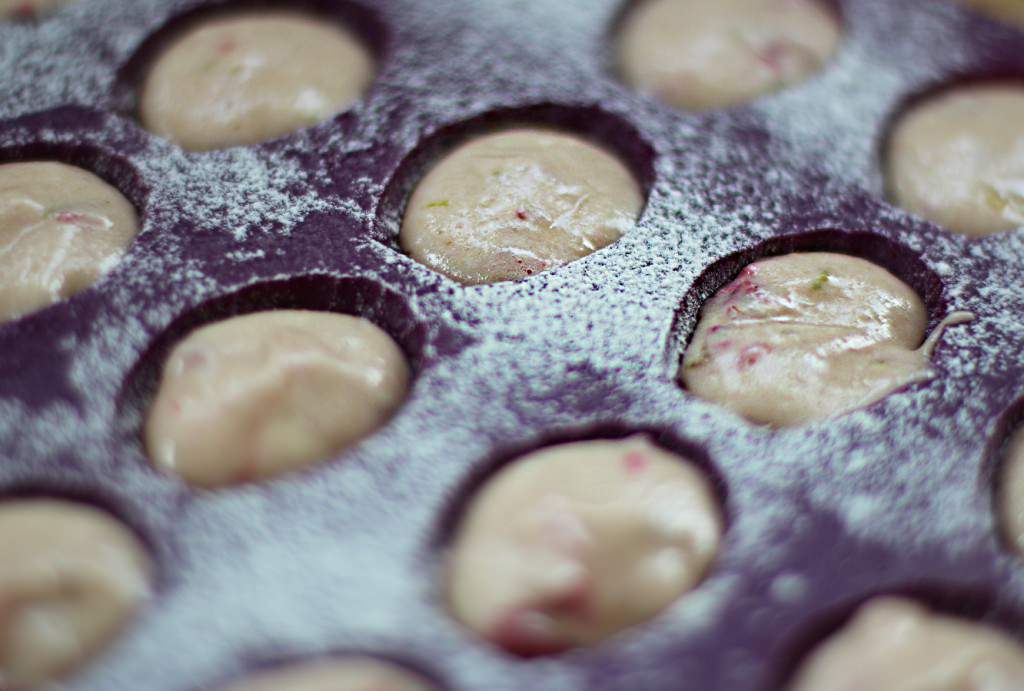
Use a splash of the butter and a pastry brush (or your (clean) fingers) to grease the mould, then dust with flour. To tell the truth if your mould is silicone I’m not entirely convinced this is necessary.
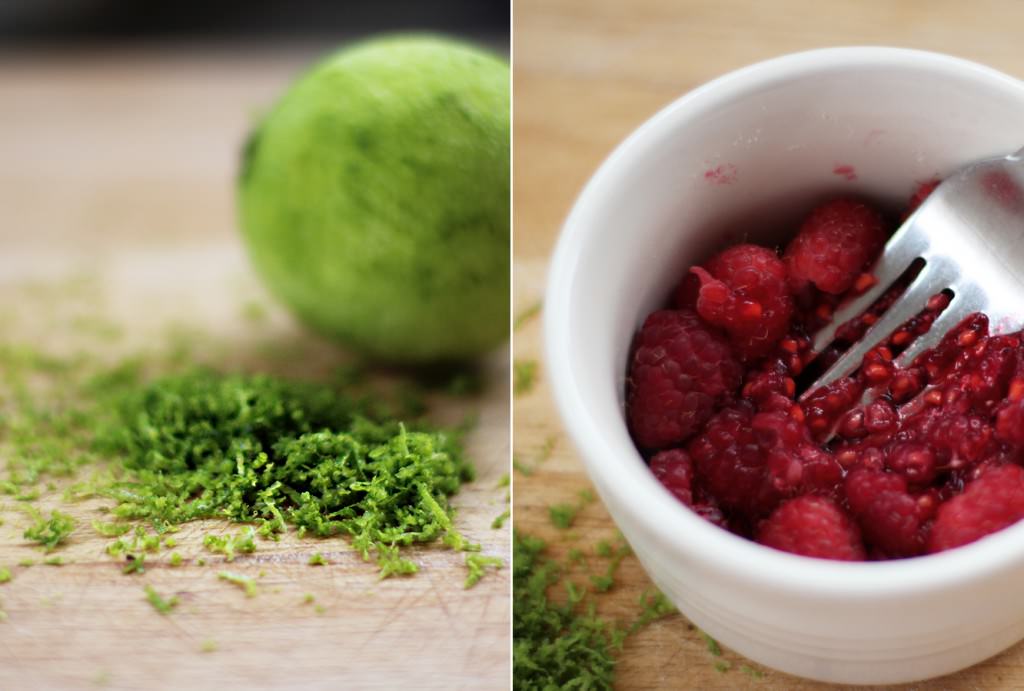
Step three
Grate a lime using the finest side of your grater and crush the raspberries with a fork. I was a little over zealous with the crushing, which made my mixture a bit greyish in the end, so don’t overdo it.
Step four
Finally time to make some cake!
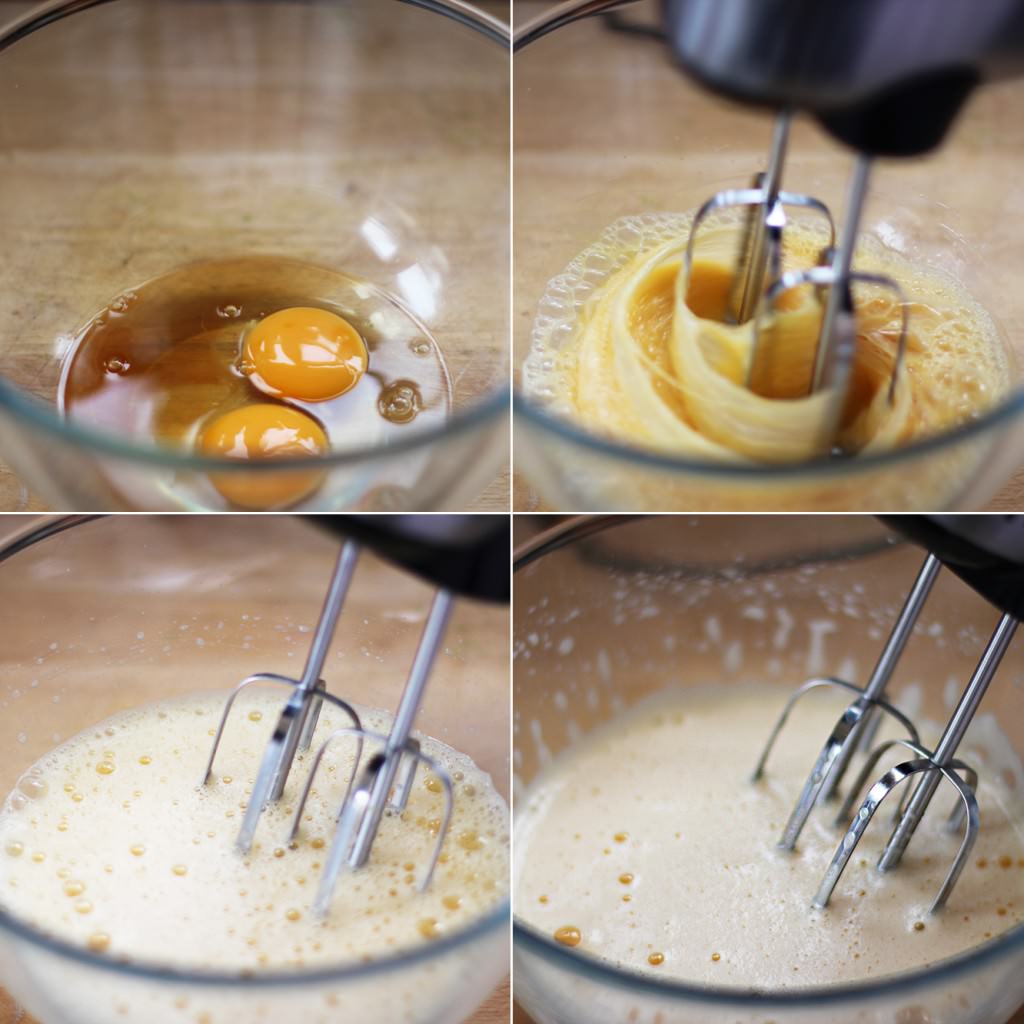
Whisk the eggs until they are light, fluffy and start to thicken. If you don’t know what that means, then whisk them until they look like the bottom right hand picture.
Step five
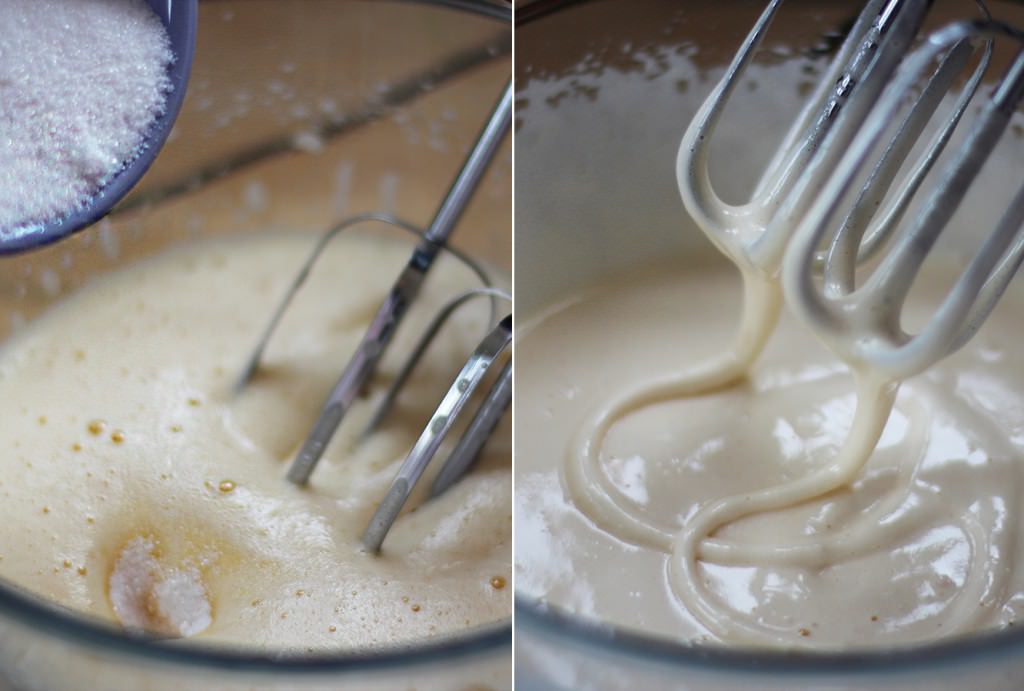
Carry on whisking gradually adding the sugar. The mixture will thicken and will look less bubbly. Keep going until lifting your whisk leaves ribbons of mixture in the bowl.
Step six, seven and eight
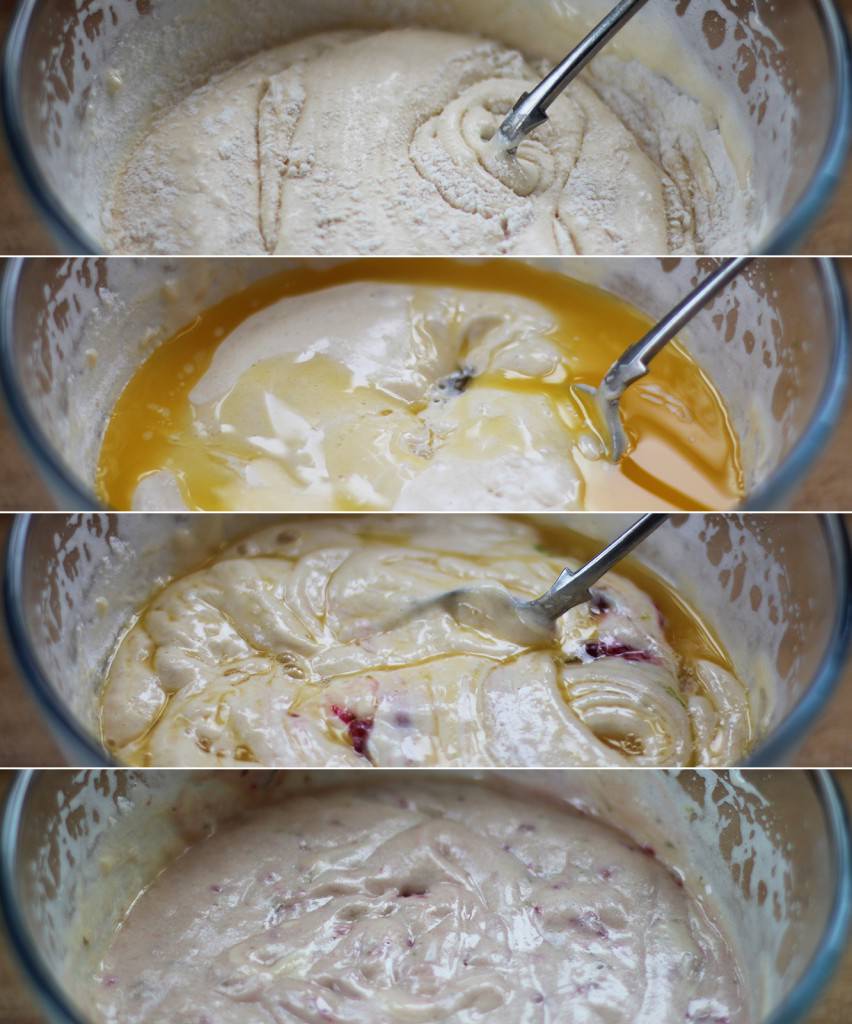
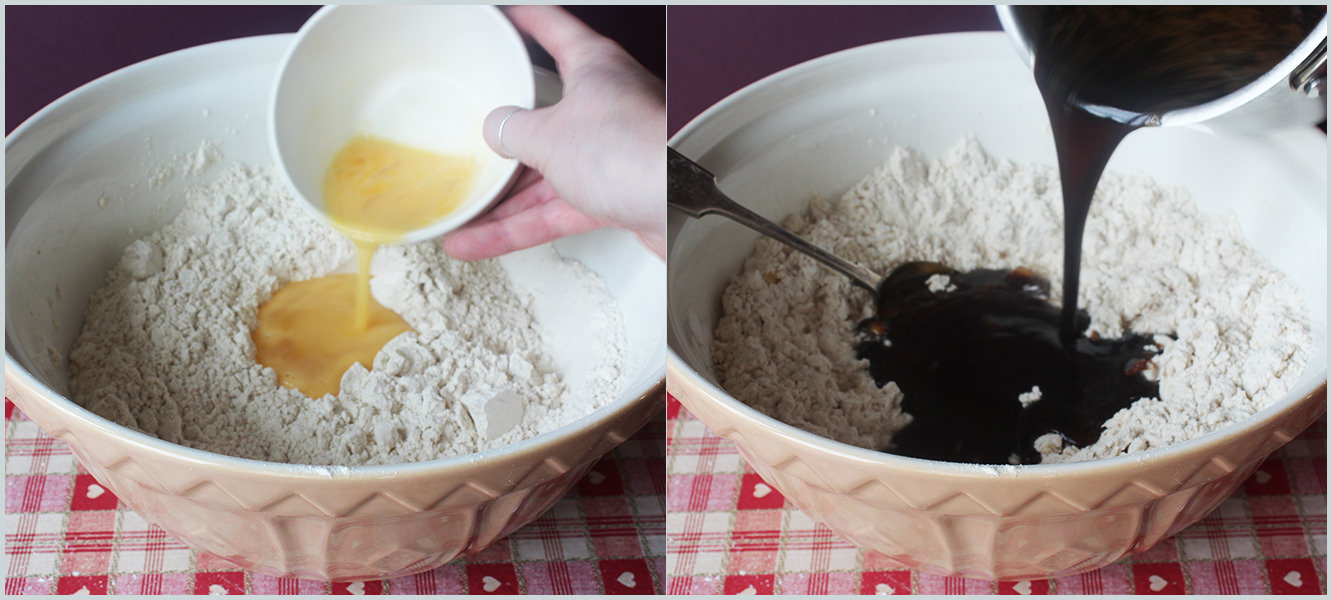
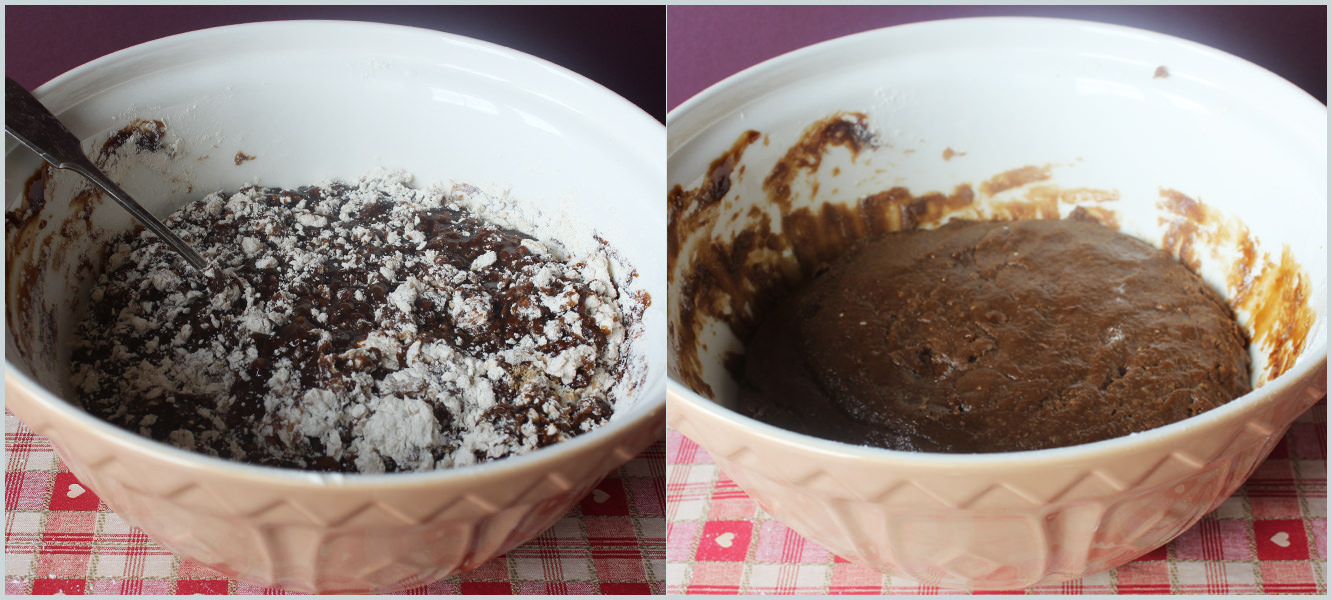
Gently fold in the flour and baking powder with a metal spoon until fully combined.
Add the melted butter. This is weird right? Thanks France…
Whilst folding in the butter add the crushed raspberries, lime zest and vanilla extract. Keep stirring until it’s completely combined. Remember though, softly softly…think about stirring a bowl of baby bunnies.
Step nine
Spoon into mould and cook for 15 minutes on Gas mark 5/190 C/375 F. Leave to cool.
Step ten
Once your madeleines have cooled melt some white chocolate in the microwave and give them a little dunk. I also used a piping bag and the remaining chocolate to drizzle over them when I was done dipping.
Summer for many a gardener means plucking berries from their carefully loved and tended to allotments. Now, in recent years Ma has joined the grow-your-own trend with considerable zeal. To be quite honest this surprised us all immensely, as besides the single hardiest house plant you have ever known (surviving some very aggressive re-potting exercises), everything green that has entered the house since I can remember has wilted before our eyes. It’s a curse. There are no green fingers under this roof.
Fortunately, along with Mother’s rather optimistic plan to convert a section of the garden into a fruit and veg patch, came Ed; one of her colleagues complete with an allotment and a willingness to provide some plants he had given the best possible start in life.
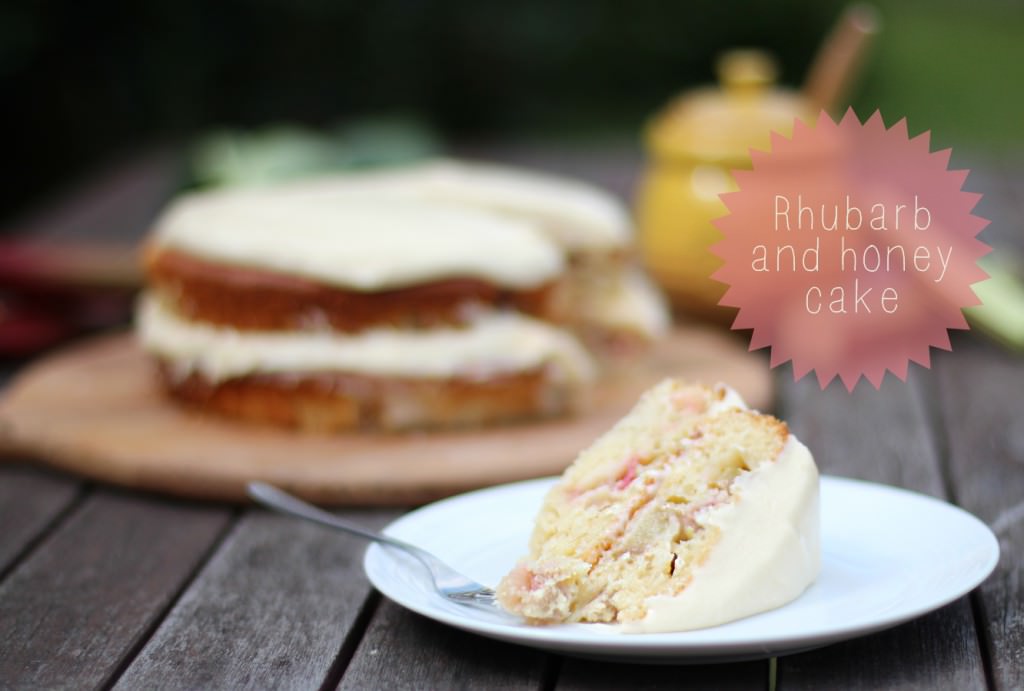
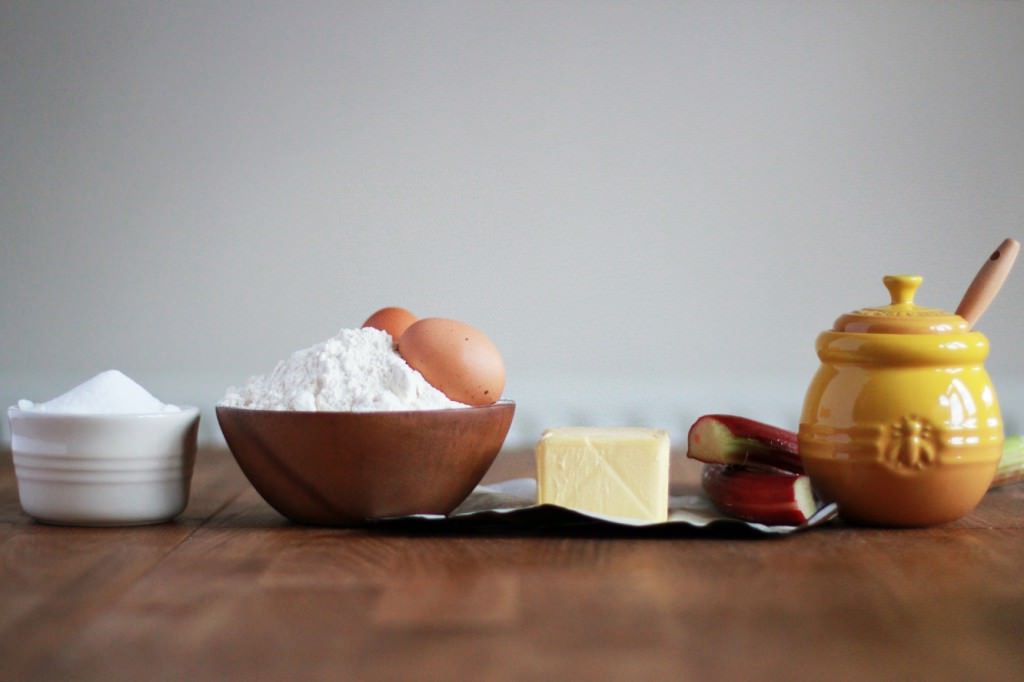
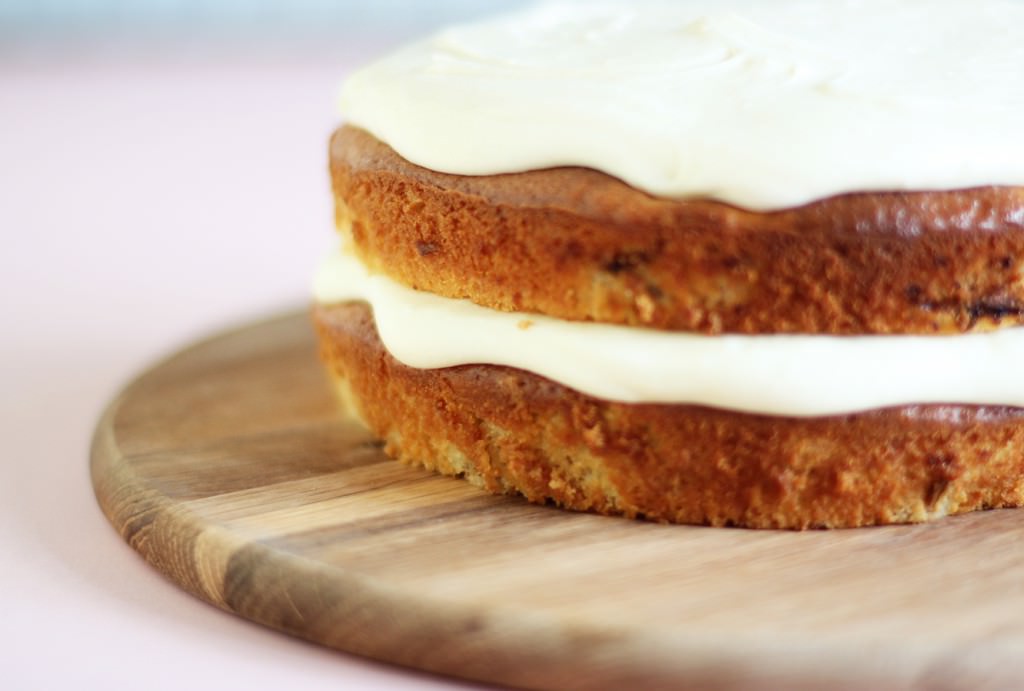
Against all the odds (and I honestly cannot overstate said odds), fruit and vegetables began to grow! This year I decided to combine my love of baking and Mum’s little crop to give you a delicious rhubarb and honey cake recipe.
Don’t turn your nose up until you’ve tried it; I’m a chocolate girl through and through but even I have been back to the kitchen for a second slice of this chap.
First though, I think it’s only fair to offer a little round of applause to the grower for these beauties. Well done Mum, I wish I could say I always believed in you, A*.
You will need
For the cake
250g/9 oz Caster sugar
250g/9oz Self raising flour
200ml Buttermilk
50g/2 oz Butter
2 Large eggs
1tsp Baking powder
350g/12 oz Rhubarb
For the icing
350g/12 oz Icing sugar
150g/5 oz Softened butter
150g/5 oz Honey
50ml Buttermilk
1-2tsp Vanilla Extract
Step one
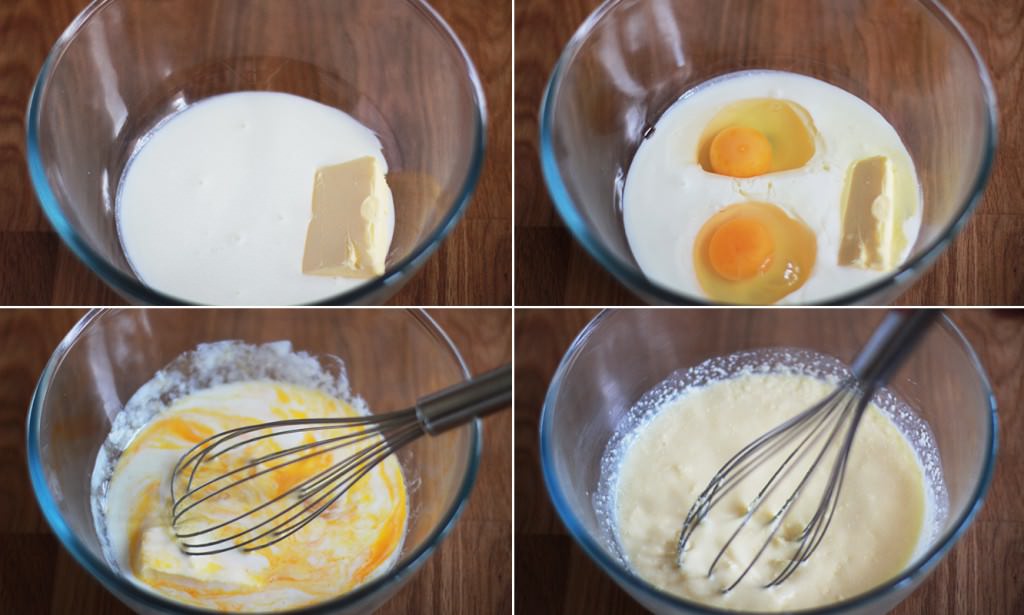
Combine the buttermilk, eggs and butter.
Don’t worry if it’s a bit ‘curdy’ at this stage, if the butter isn’t super soft that will happen, but it’s not an issue, honest!
Step two
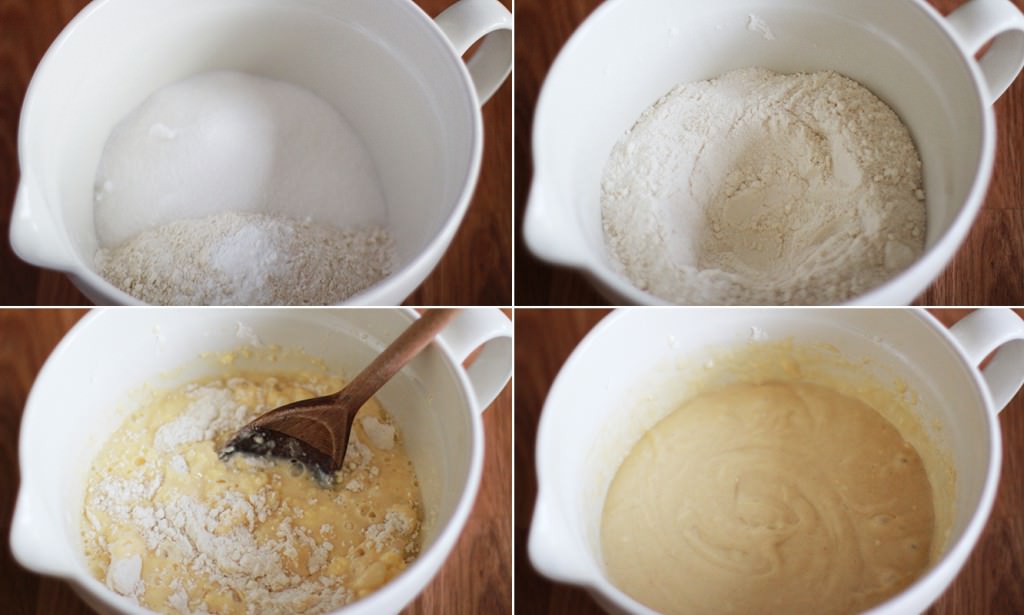
Mix together the sugar, baking powder and flour in a separate bowl. Form a well in the middle.
Step three
Pour the wet ingredients into the dry and stir until smooth. This cake mix is a little more batter-like than your average because of the buttermilk, so if you’re used to something a bit less sloppy, don’t worry.
Step four
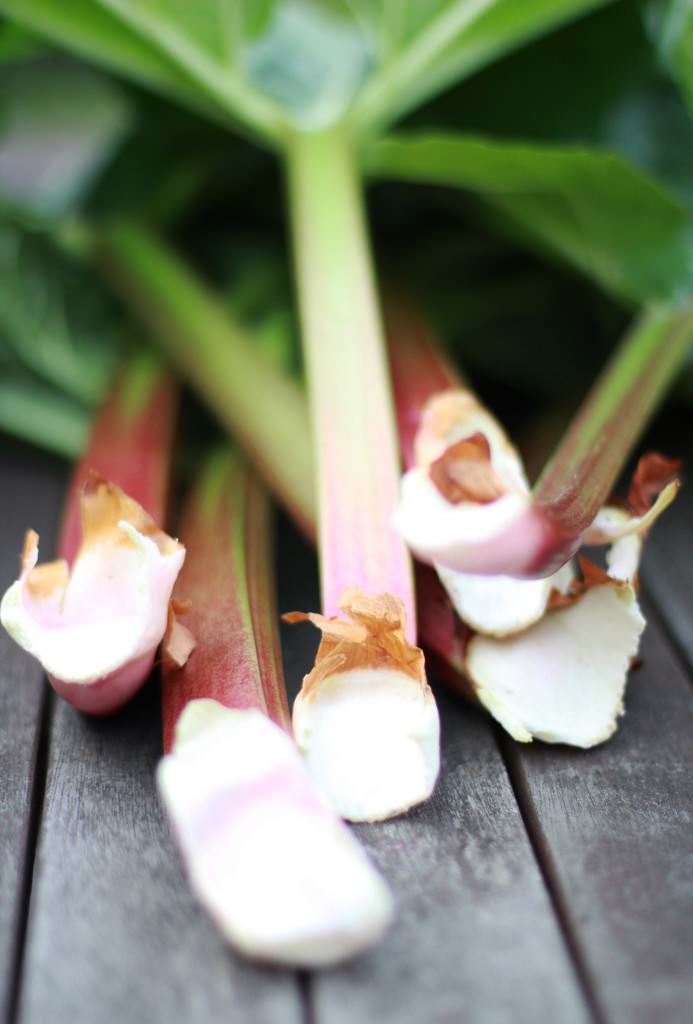
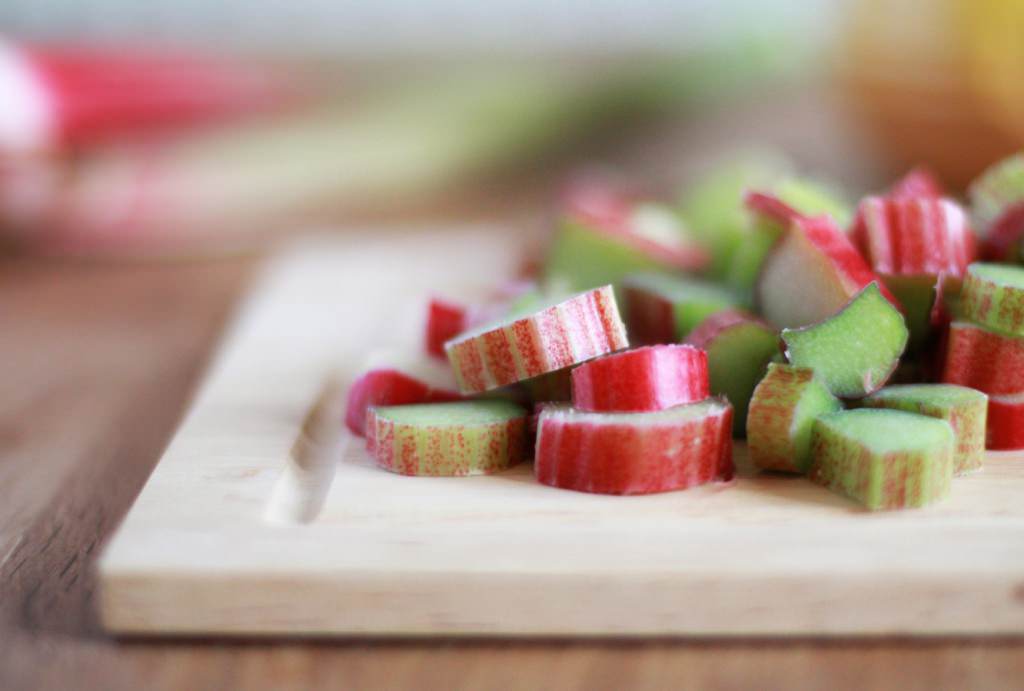
Chop up the rhubarb into slices approx 1cm thick. Get rid of any leaves and the weird husk type bits on the bottom if it’s home grown; I also got rid of a few stringy bits, but you don’t need to peel it.
Whether or not your rhubarb is forced (grown out of season) or main crop like Ma’s you don’t need to boil it or add any extra sugar when baking it into a cake like this. The sweetness of the honey and the rest of the sugar in the sponge off-sets the sharper rhubarb taste really well.
Step five
Grease and line two cake tins. Stir rhubarb into the batter and divide between the tins.
Bake on gas mark 4/ 180 C/ 350 F for 30-40 minutes until golden on top and it springs back when you touch the top.
Step six
Beat together the honey, softened butter, icing sugar, buttermilk and vanilla extract to make the buttercream icing.
It’s worth popping this in the fridge for about 30 mins before using.
Step seven
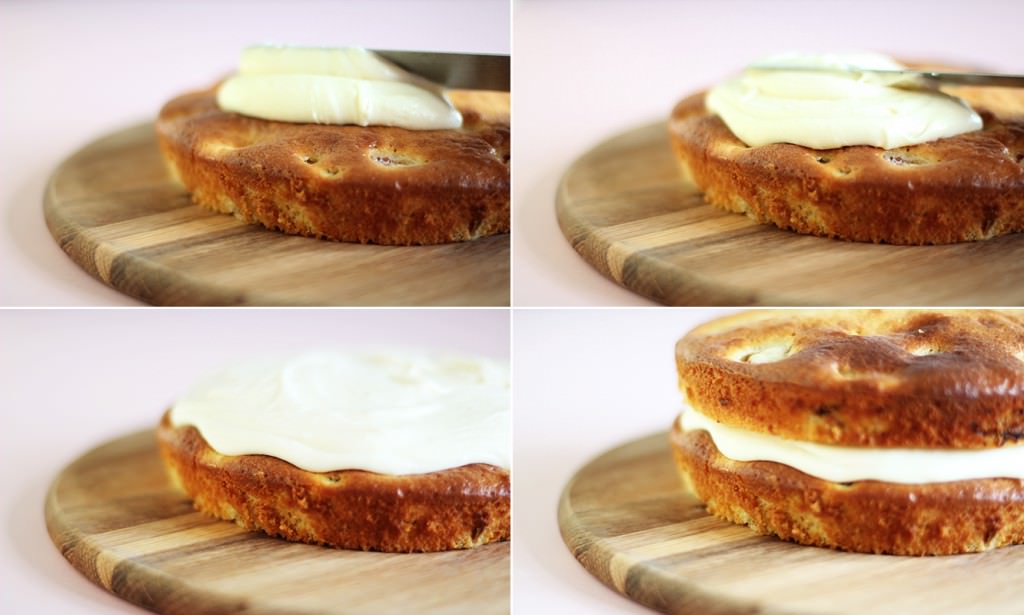
Once the cake has cooled completely, use a palette knife or the back of a spoon to spread half the icing onto the bottom cake. Don’t go right to the edge of the sponge, as the weight of the top cake will push it out a bit further and you don’t want it dribbling down the sides.
Step eight
Cover the top in icing too.
I’ll be honest, I had a little left over, but I kind of made the recipe up as I went along so I’m not sure how to adjust so you have the perfect amount of icing, so you’ll just have to use the rest on some ice-cream or something.
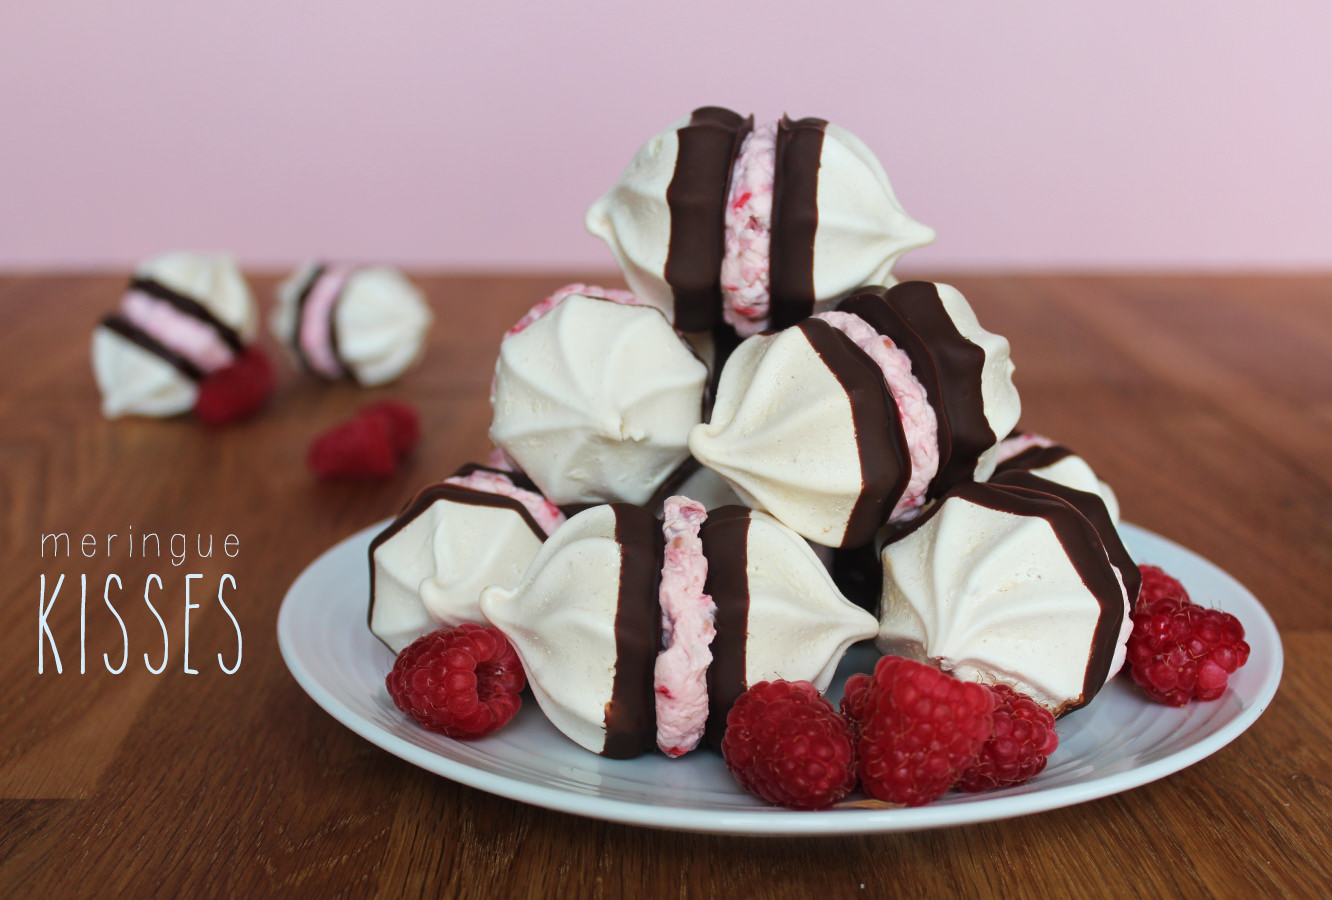
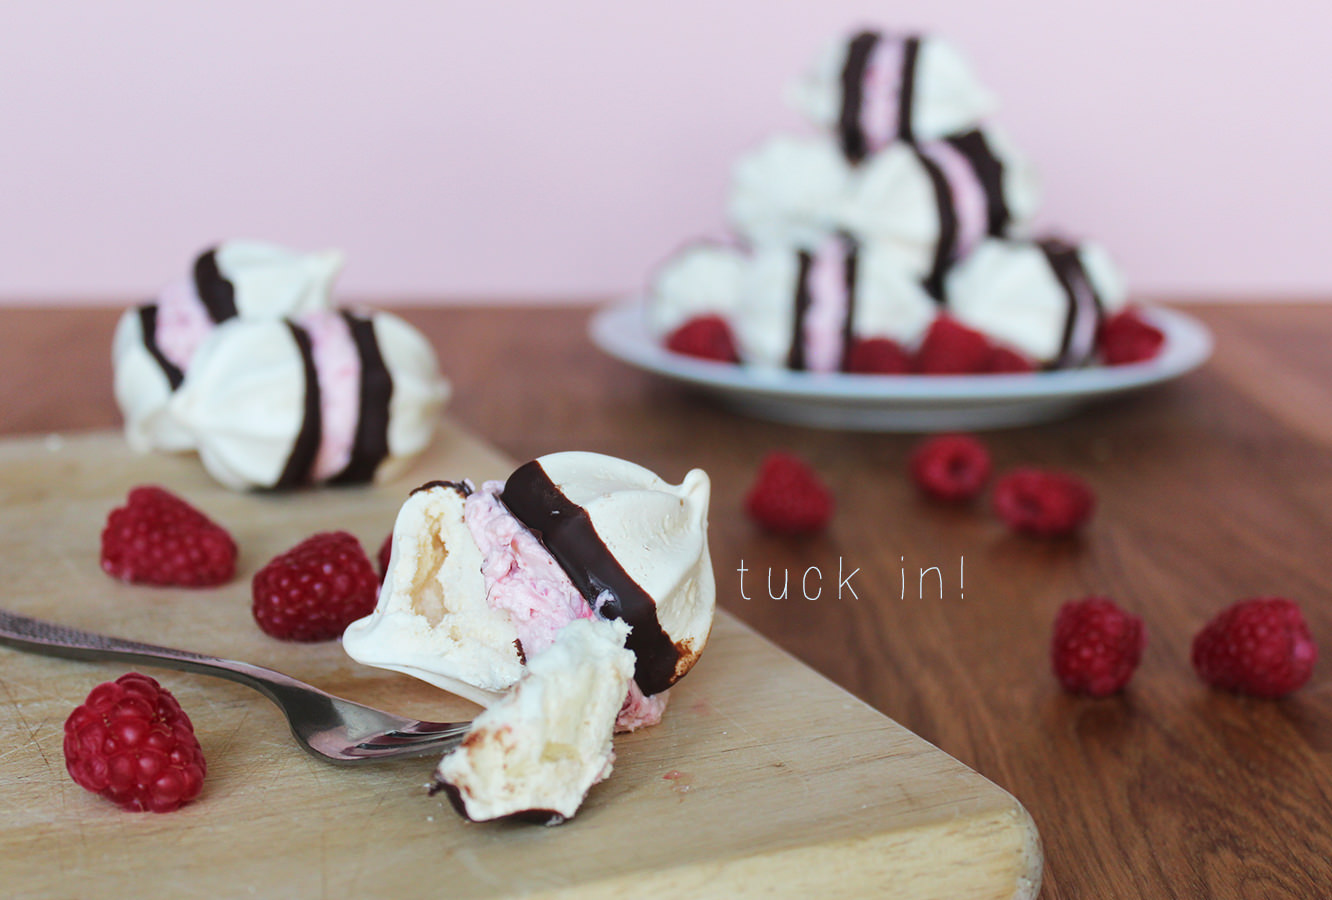
Recently I have been partying down with some of the lovely hens (bachelorettes for those of you across the pond) in my life who are getting married this summer. My friends are definitely going wedding crazy at the moment, and with hen parties springing up every other weekend I thought I would put together a yummy recipe for any keen party planners, or any of you who fancied a new afternoon tea recipe.
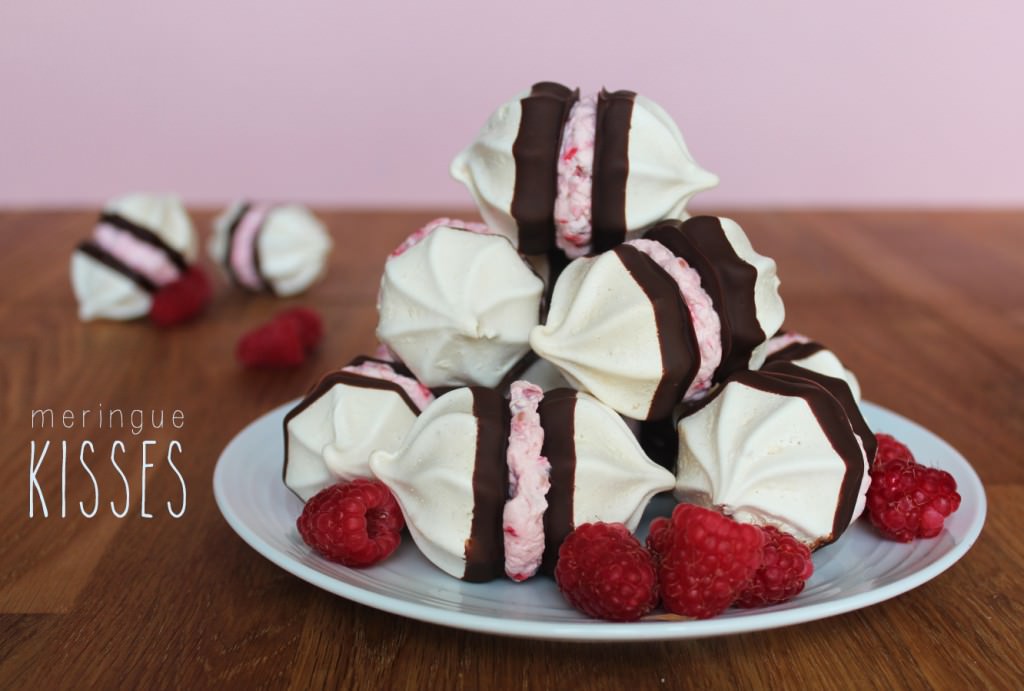
Introducing these lovely little meringue kisses. Although any of the wedding party who are on diets might want to look away now…
You will need
2 egg whites
110g/4 oz caster sugar
100g/3.5 oz dark chocolate
150ml double cream
75g/2.5 oz raspberries
Makes 20
Step one
Separate eggs whites into a glass or metal mixing bowl (plastic tends to hold a bit of grease, gross I know, but this will stop your egg whites fluffing like they should).
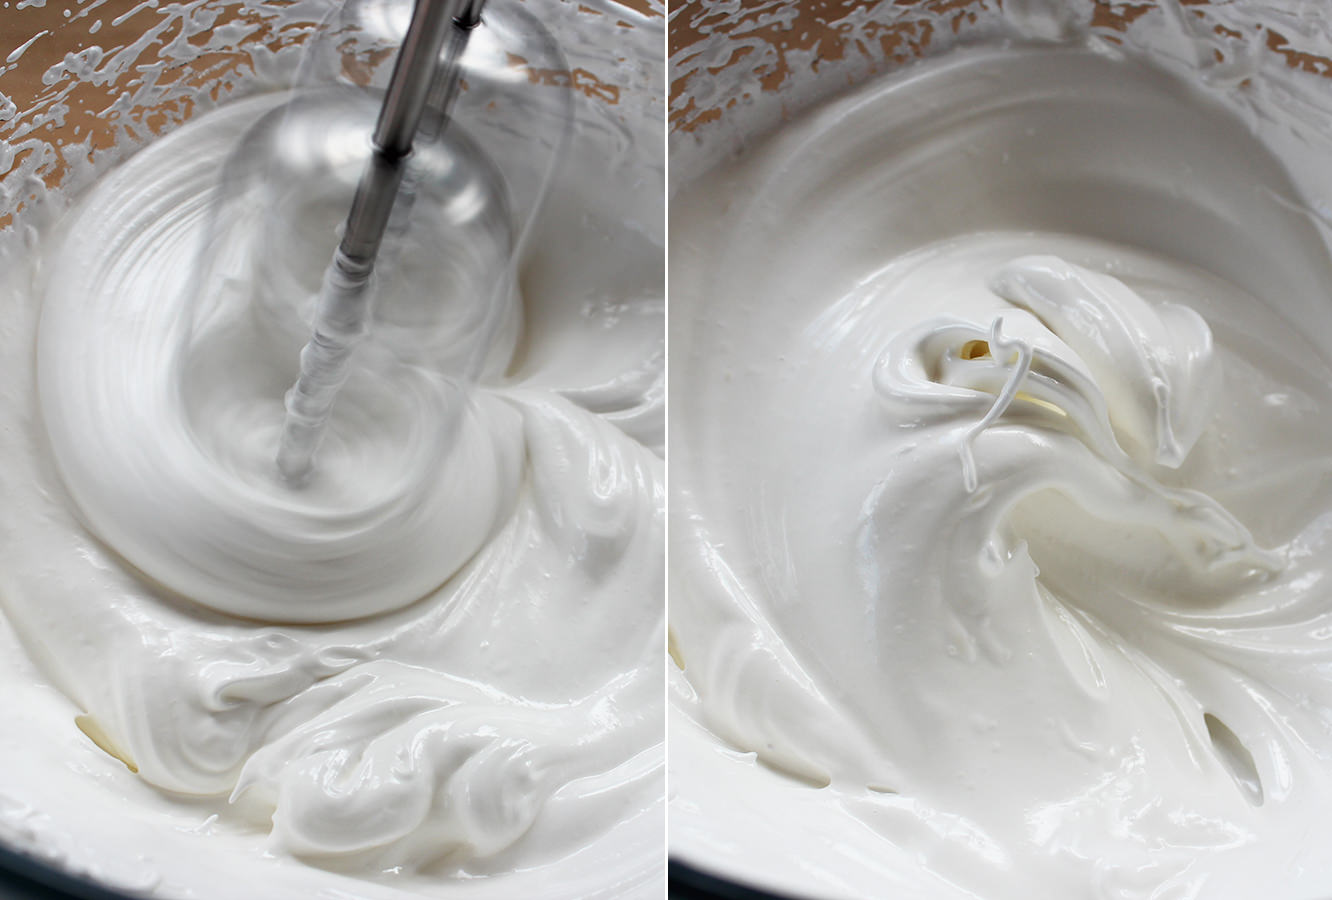
Use an electronic whisk (or a really strong arm) to whip the whites until they double in size and start to stiffen up.
Once they look kind of like the third photo start adding in the sugar as you whisk.
Step one and a half
Keep whisking until you have what’s known in the biz as stiff peaks. If you’re a bit unsure, turn your bowl upside down, if your mix doesn’t fall out then you’re good to go, if it does then I’m sorry.
Step two
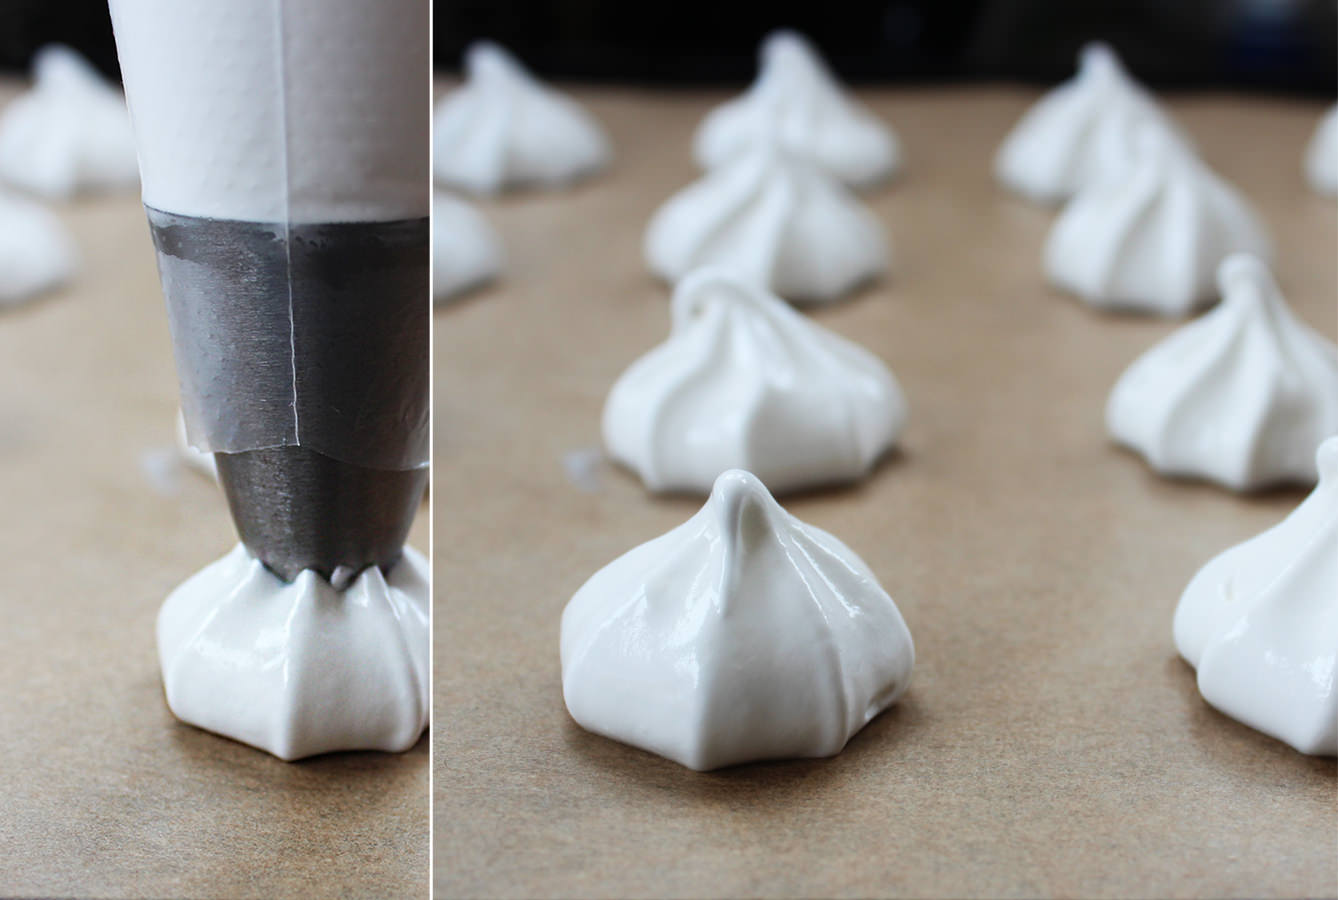
Cover two baking trays in greaseproof paper or baking parchment. Don’t whatever you do grease this, use a dab of meringue in each corner to secure it to the tray.
Fill a piping bag with the meringue mix and pipe lots of little blobs. Hold the piping bag about 2cm away from the tray at a 90 degree angle and squeeze down, once your meringue has reached the desired spread (say 4cm wide?) pull away quickly.
Remember to pipe in pairs, no odd numbers, and leave a little space for these to expand.
Step three
Bake.
Gas Mark 1/2, 130 degrees C or 250 degree F for 40 minutes to an hour. I know, that’s really unhelpful, but I sort of went jogging, and my oven is a law unto itself.
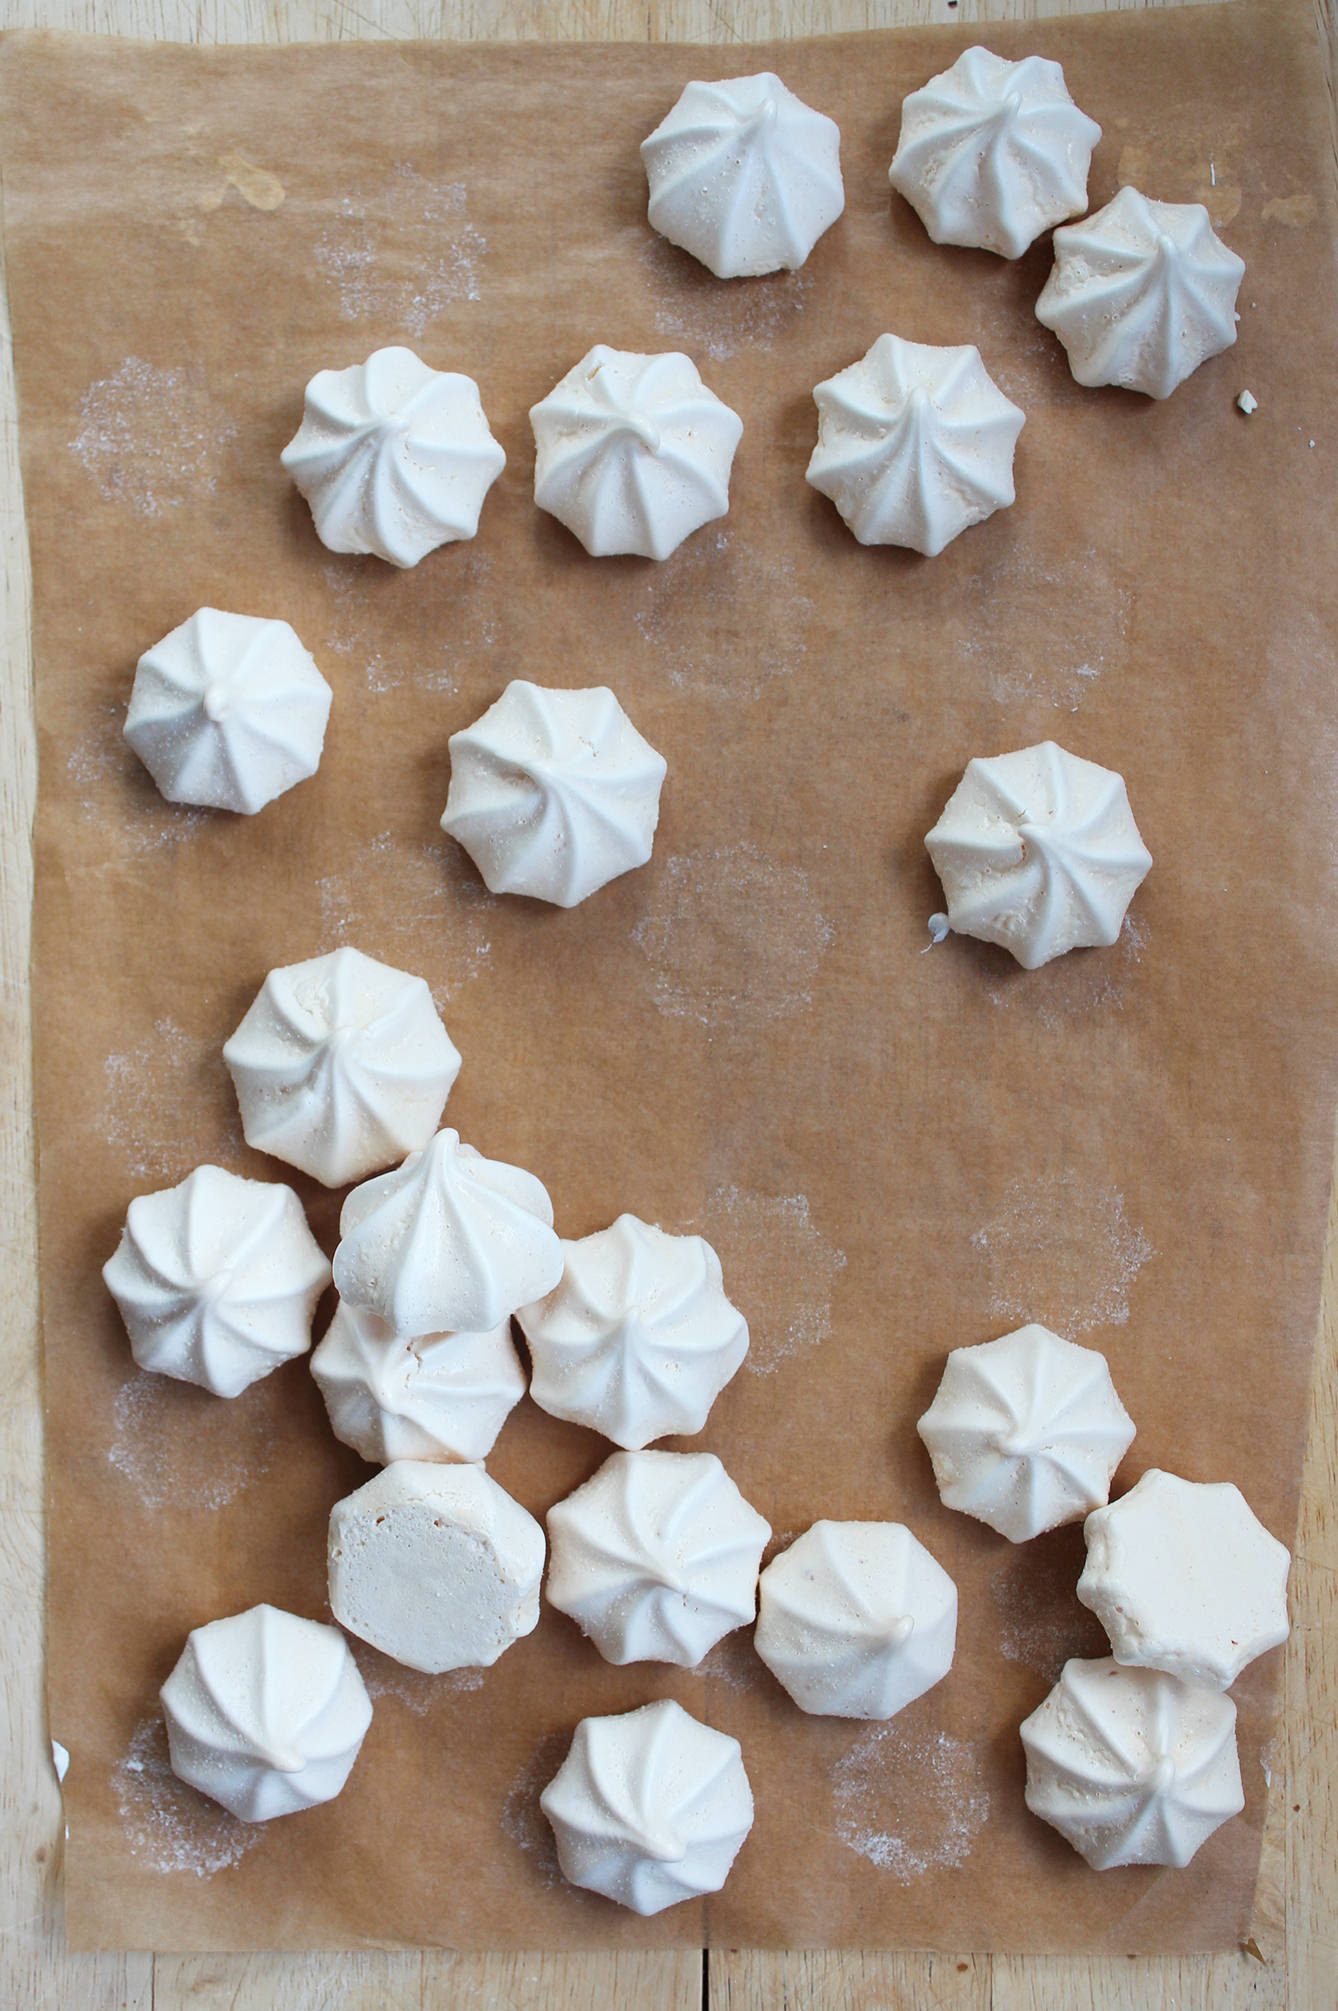
Once you can see they’ve grown and have developed shells, turn the oven off and wait for it to cool before removing them. If you need to take a peek by opening the oven door, try not to throw it wide, or your meringues will crack.
Step four
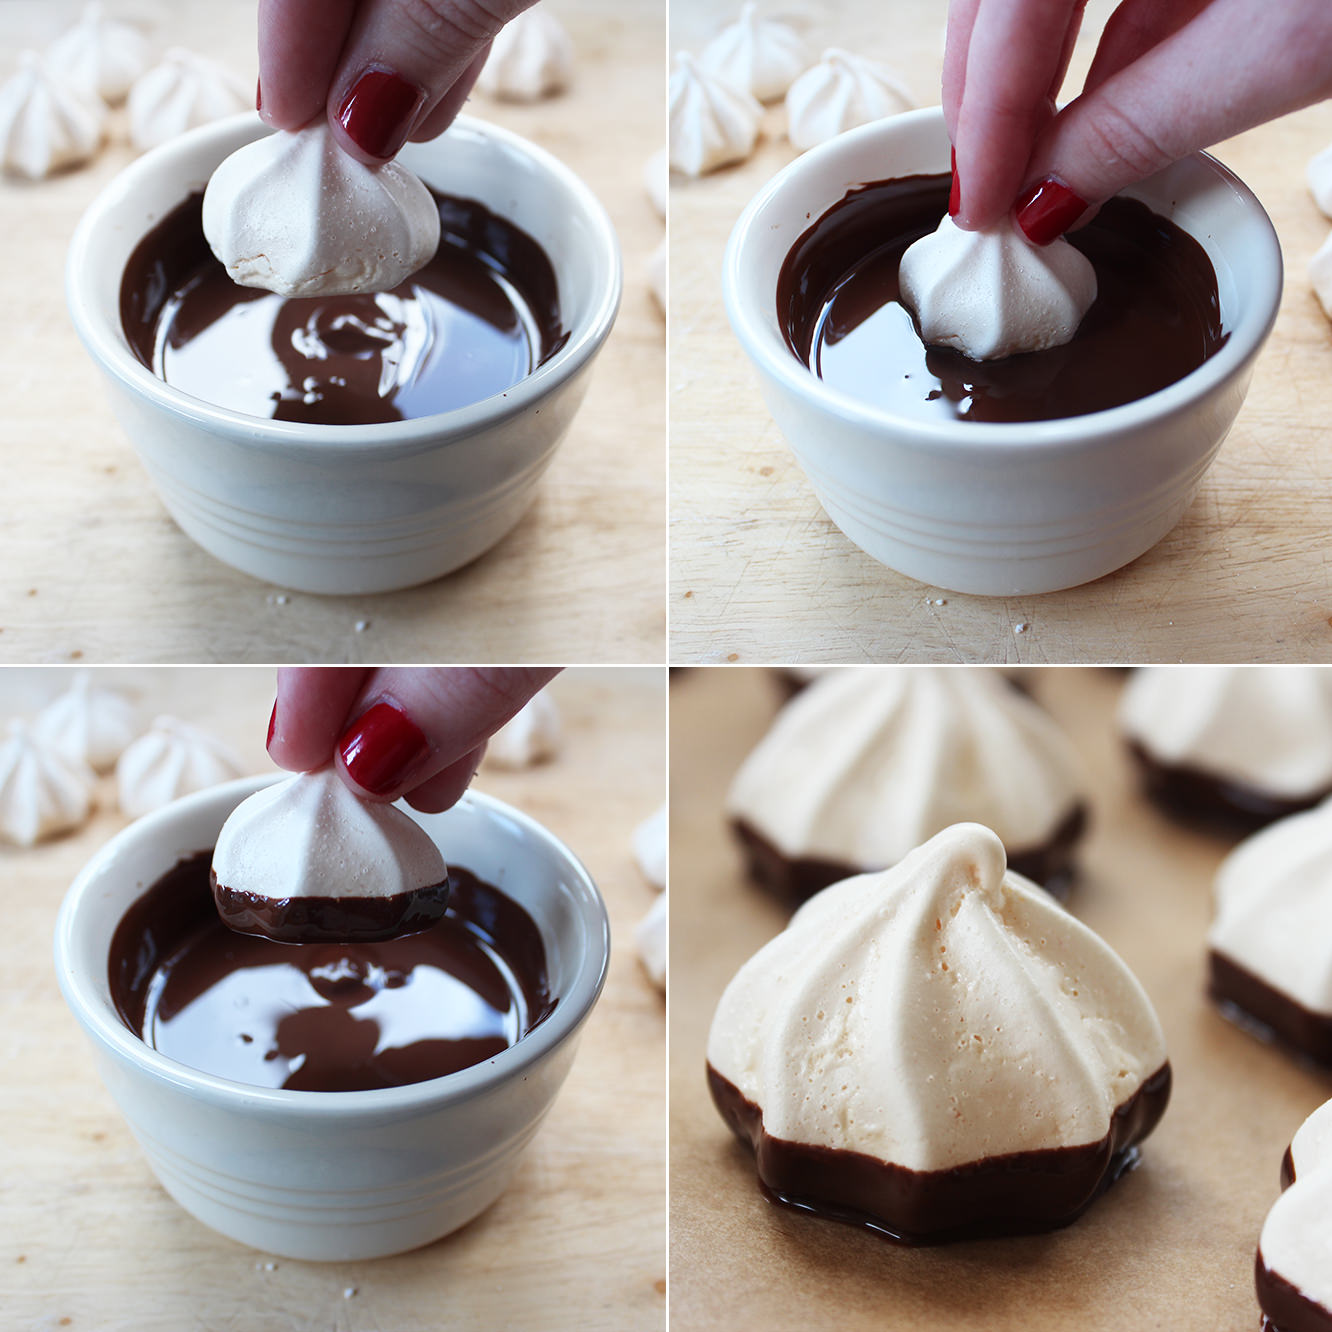
Melt the dark chocolate in a small bowl/ramekin. Do this gradually in the microwave so you don’t burn the chocolate.
Dip each meringue so that the bottom an a little bit of the side is covered. Sit on greaseproof paper and leave to set.
Step five
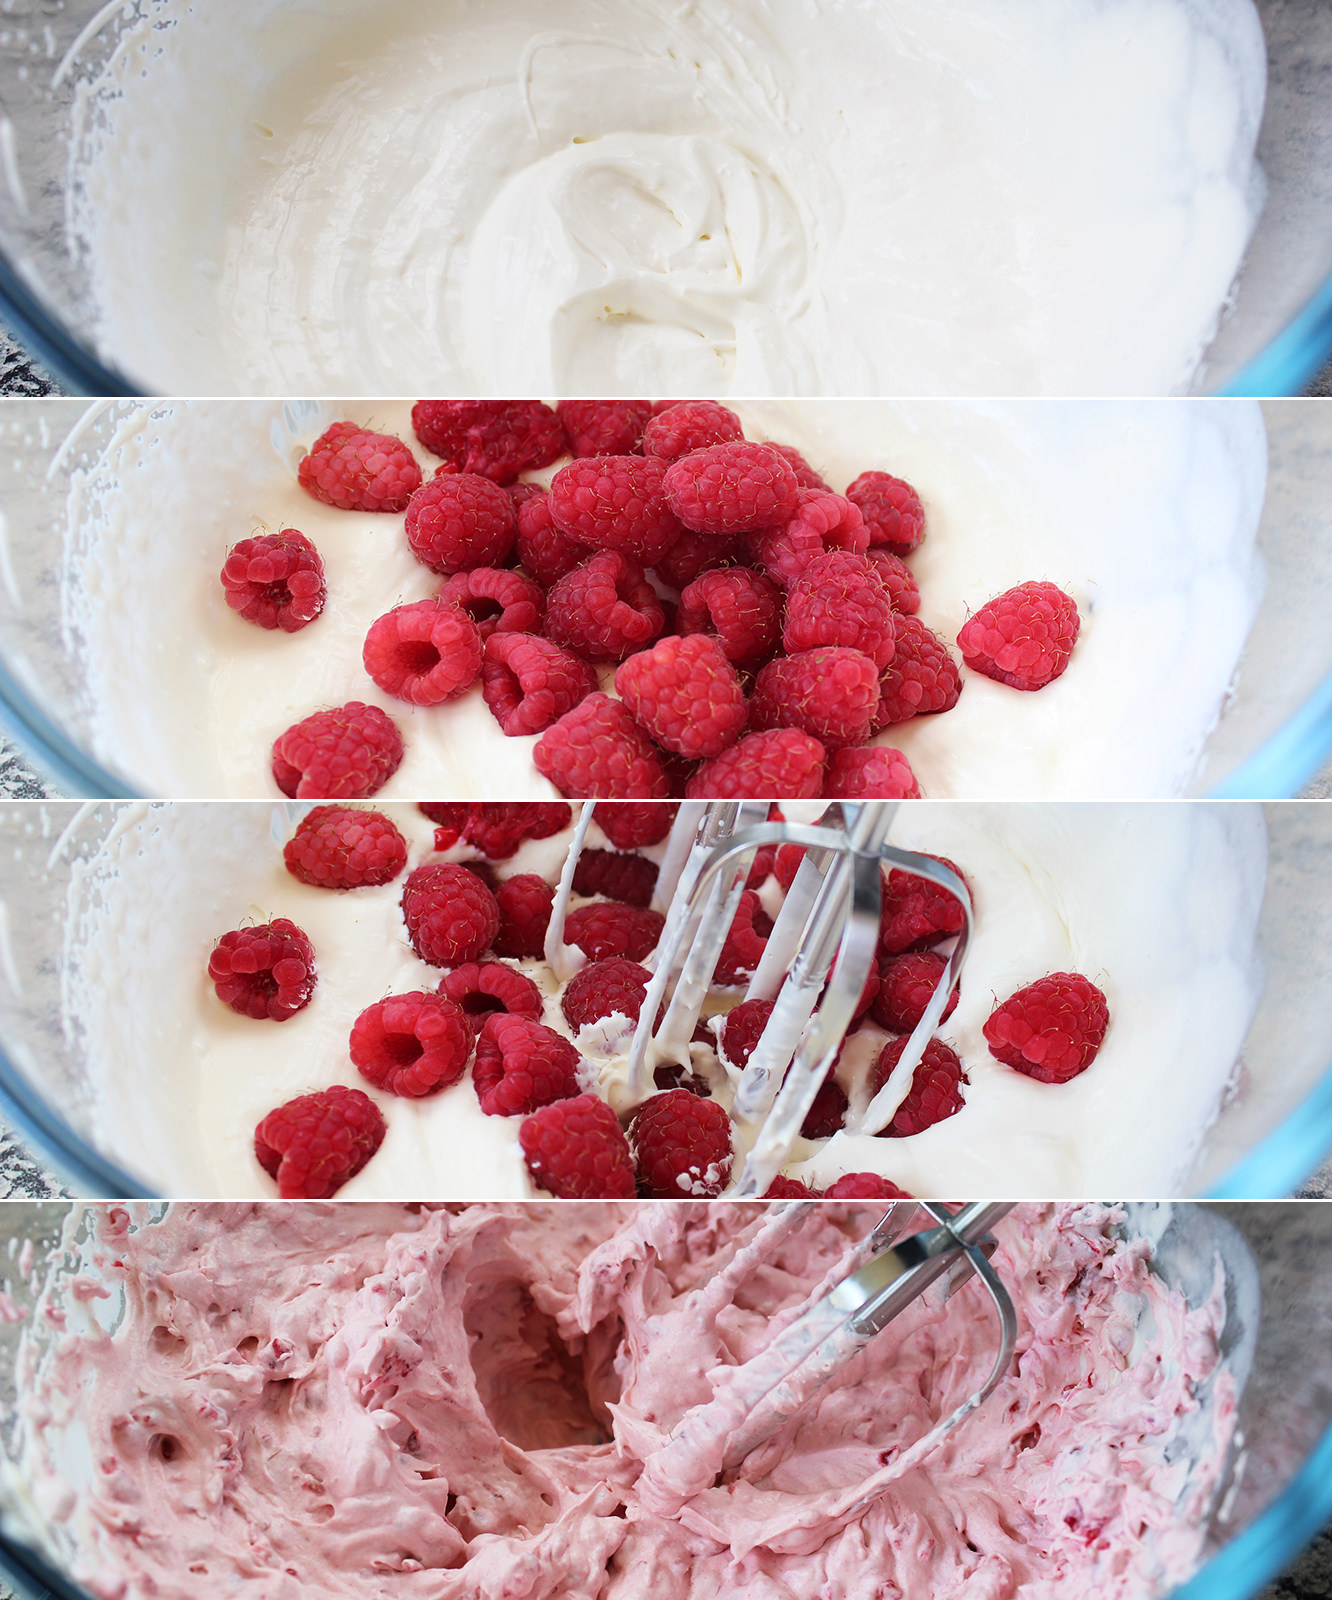
Whisk the double cream until it has doubled in size and is beginning to hod it’s shape.
Add the raspberries and whisk some more. This is pretty satisfying for some reason.
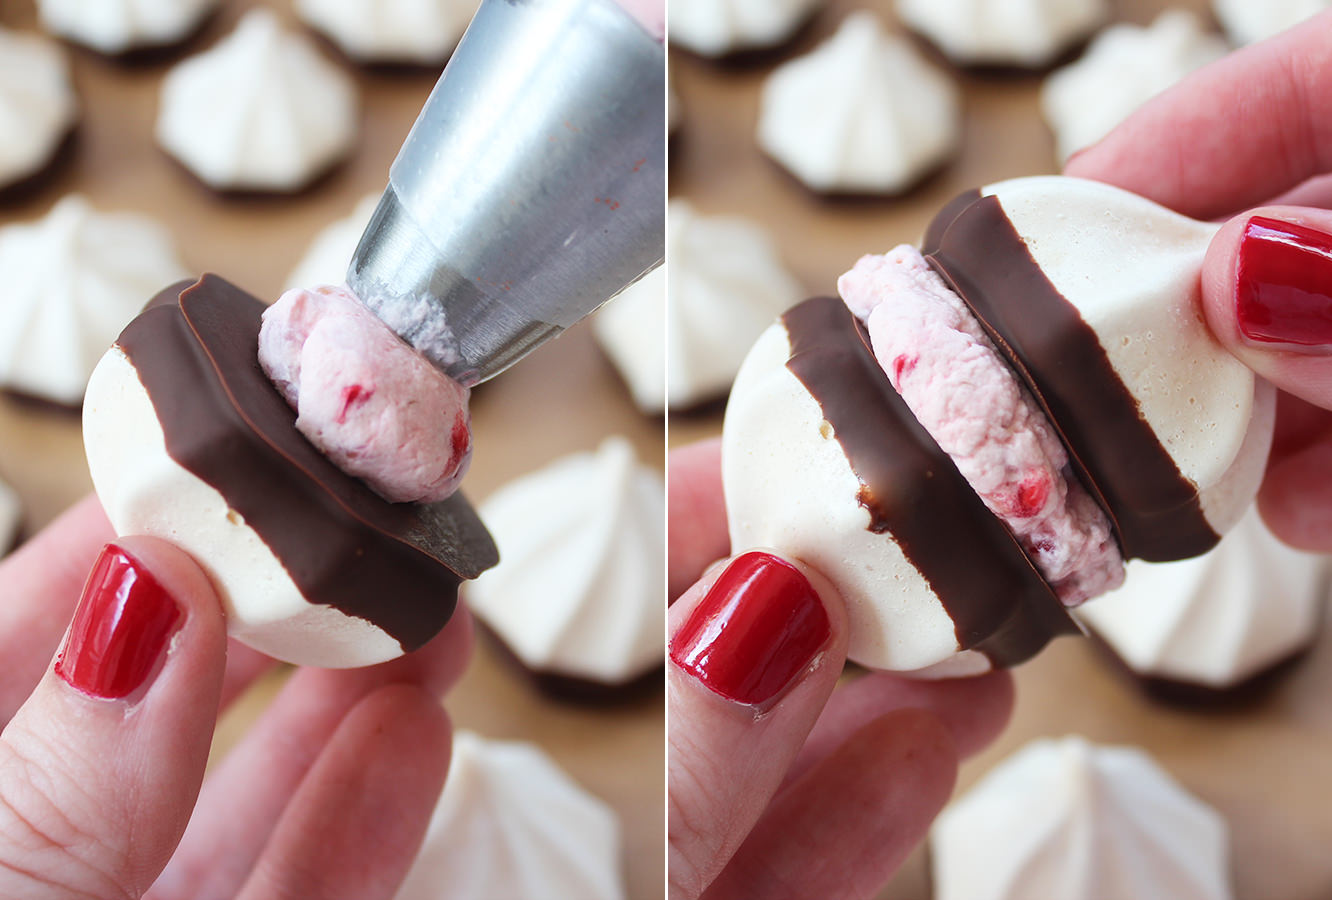
Step six
Pipe the raspberry cream onto a shell and squish another one on top. Repeat until finished.
I have been remiss. Apologies, in all my gallivanting around the country and generally doing life I’ve not updated the blog in a few weeks.
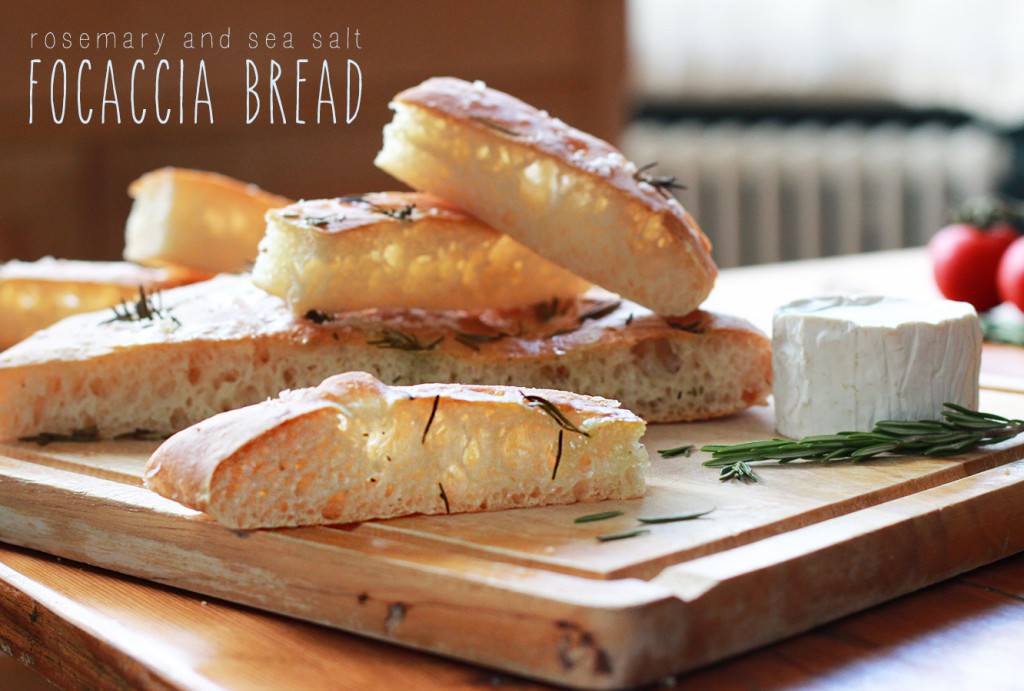
Some of this gallivanting found me in Cambridge with my buddies Rachel and David recently. Last time I saw them they were making focaccia and traversing numerous counties; prepping in one, letting it rise on the car journey and baking in another.
This time round Dave and I kept all stages in one location, and photographed it for your viewing pleasure.
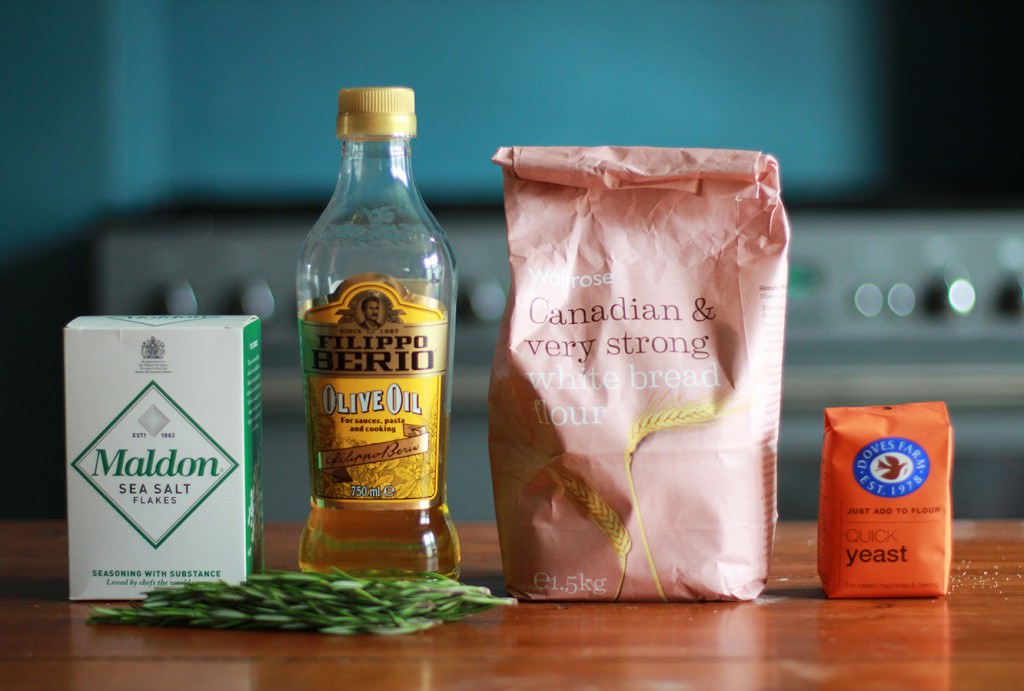
Focaccia is kind of nuts, so don’t be surprised that it looks wrong basically right up until it’s baked, those of you who watch the Great British Bake Off will know that it’s all in the name of getting an uneven crumb structure.
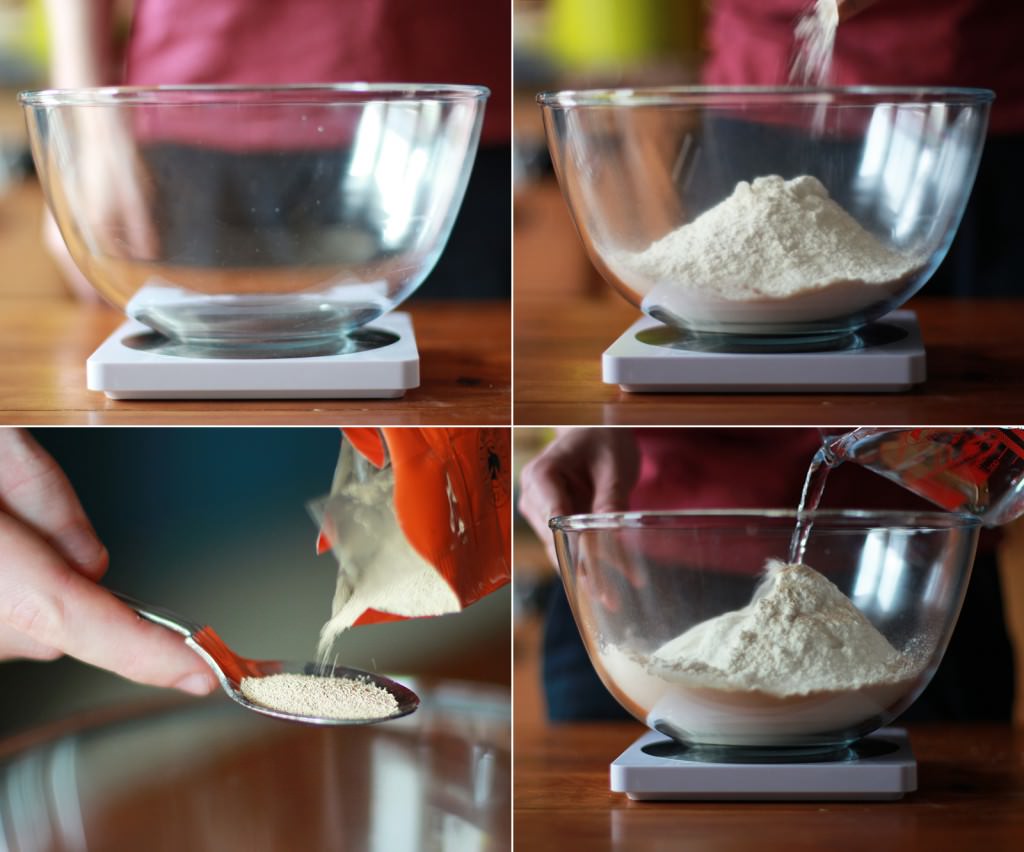
Combine flour and yeast in a bowl with 300mls of the water and two tbsp of olive oil.
Step two
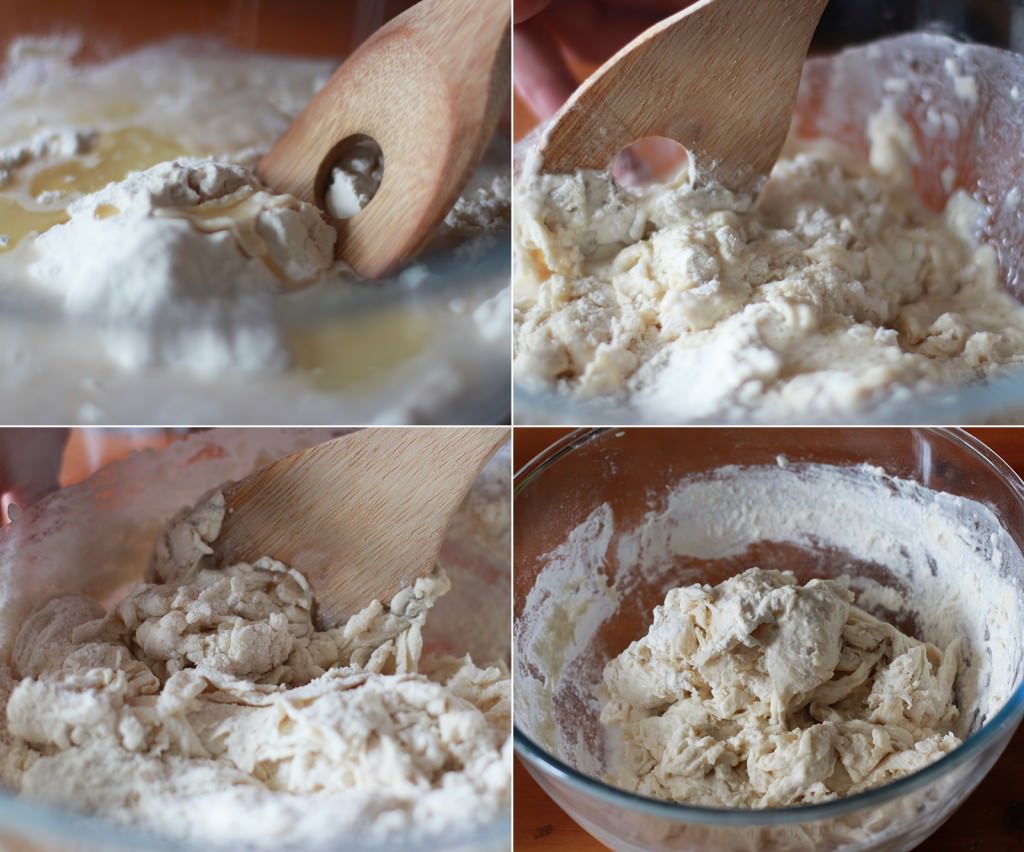
Stir with a wooden spoon to combine. This is the first of many ‘don’t worry’ assurances I will give, because at this stage it really doesn’t look too hot.
Step three
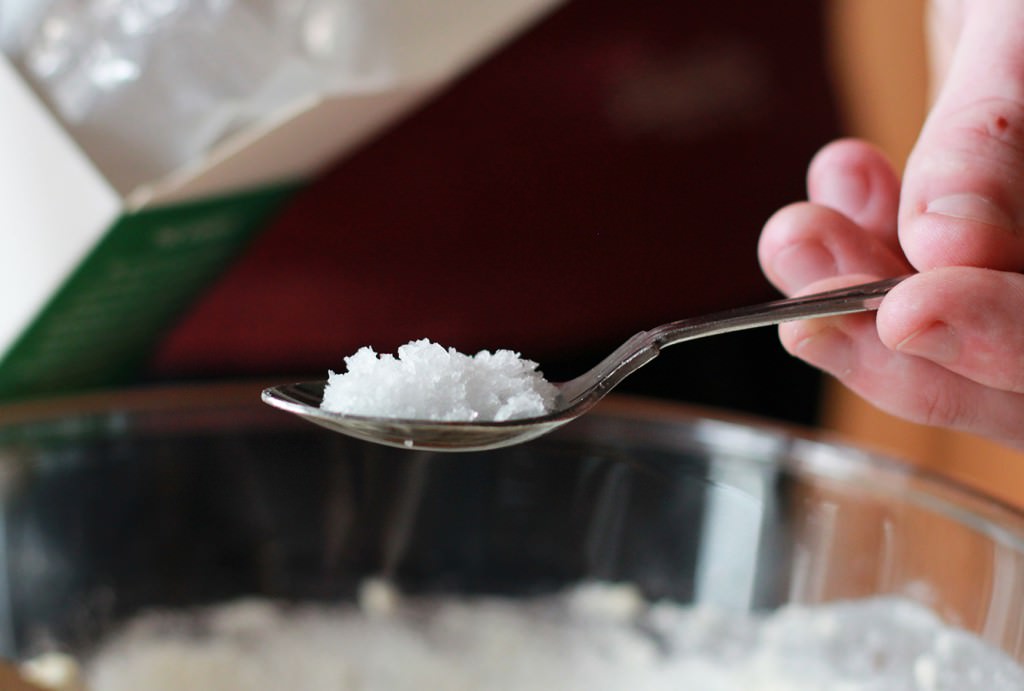
Add the salt.
Top tip from Davey-boy here: don’t add it any earlier like some recipes will tell you, because yeast hates salt and will go on strike if you do. Those weren’t Dave’s exact words, but essentially, it’s better to mix them in separately.
Step four
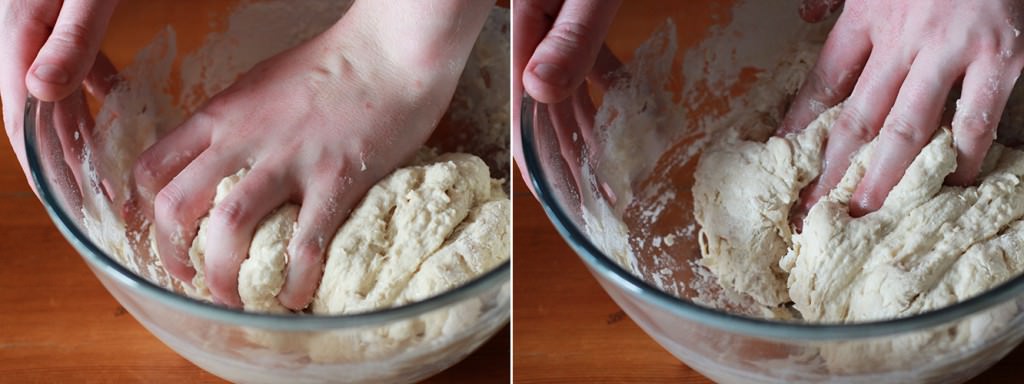
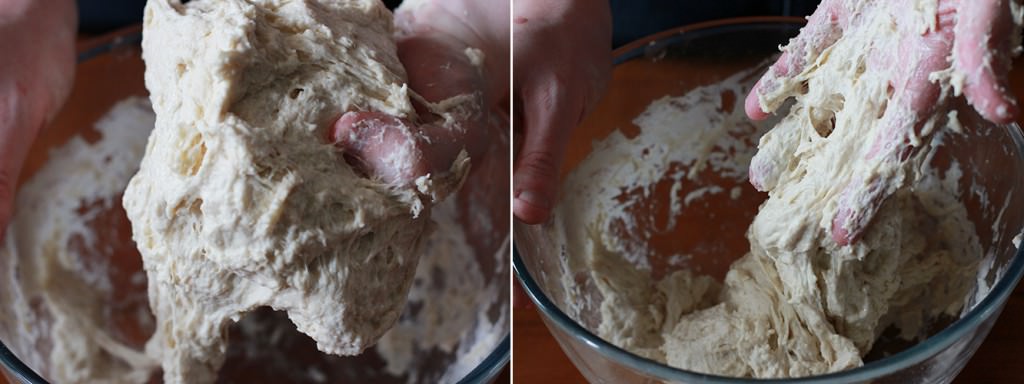
Bring together the dough by kneading in the bowl.
Gradually add the remaining 100mls of water as you do this. Keep pulling and stretching for 5 minutes, it will get disgusting, but don’t be tempted to leave any out. Remember, it’s all about those uneven crumbs.
See?! Ew. But it’s ok. Honest.
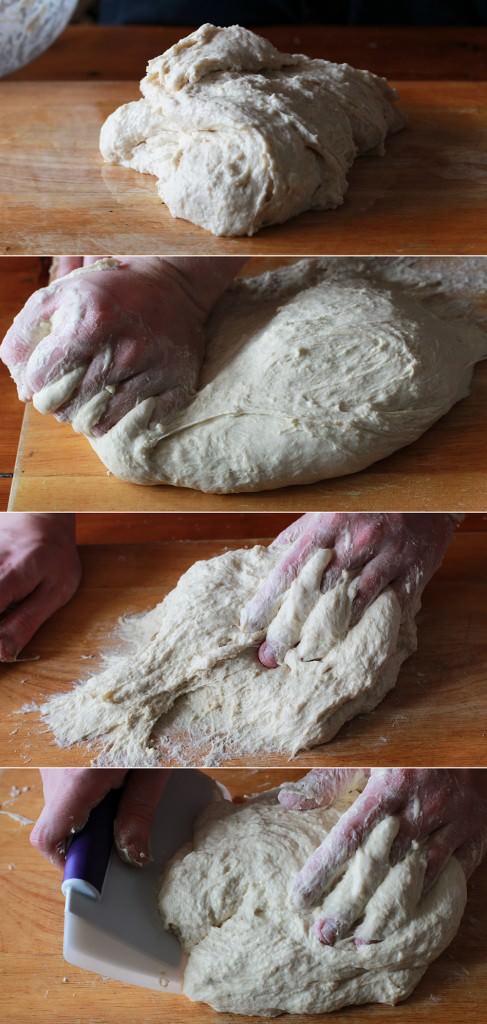
Step five
Cover your work surface in olive oil and slop that mess out onto it.
Carry on kneading for another 5 to 10 minutes until the dough begins to smooth out a bit, a dough scraper really helps here if you have one handy, as the mix is quite stringy and prone to sticking.
Resist the urge to add any flour to your surface; while it would make it a bit easier and would help it to look more like something that you’d want to eat, it won’t do that crumb structure any favours.
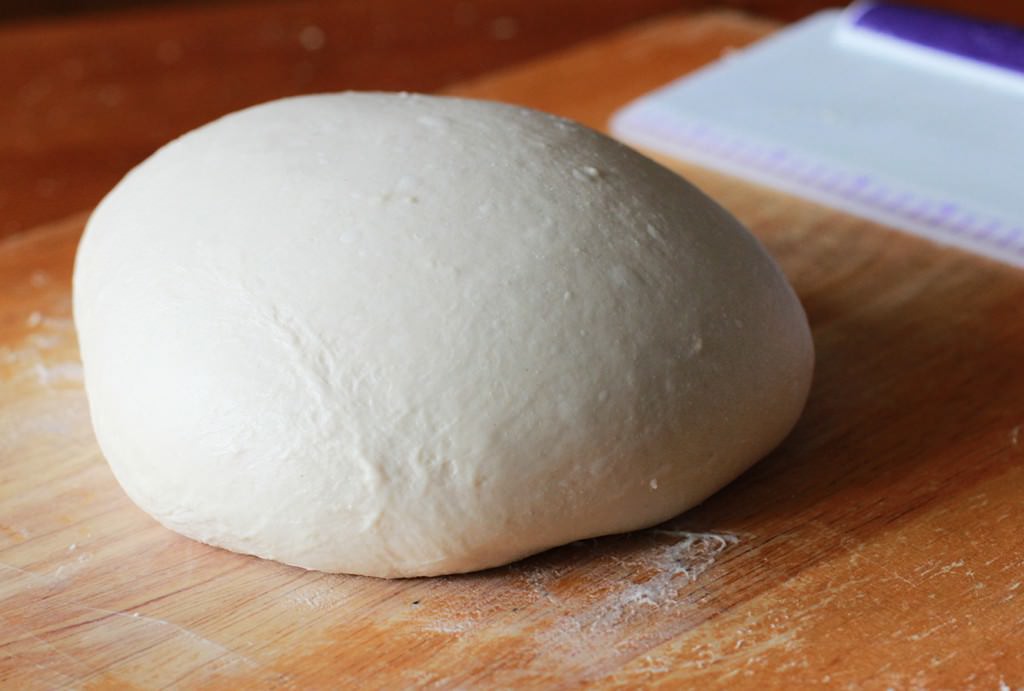
Step six
If yours looks as good as Dave’s take a bow.
Step seven
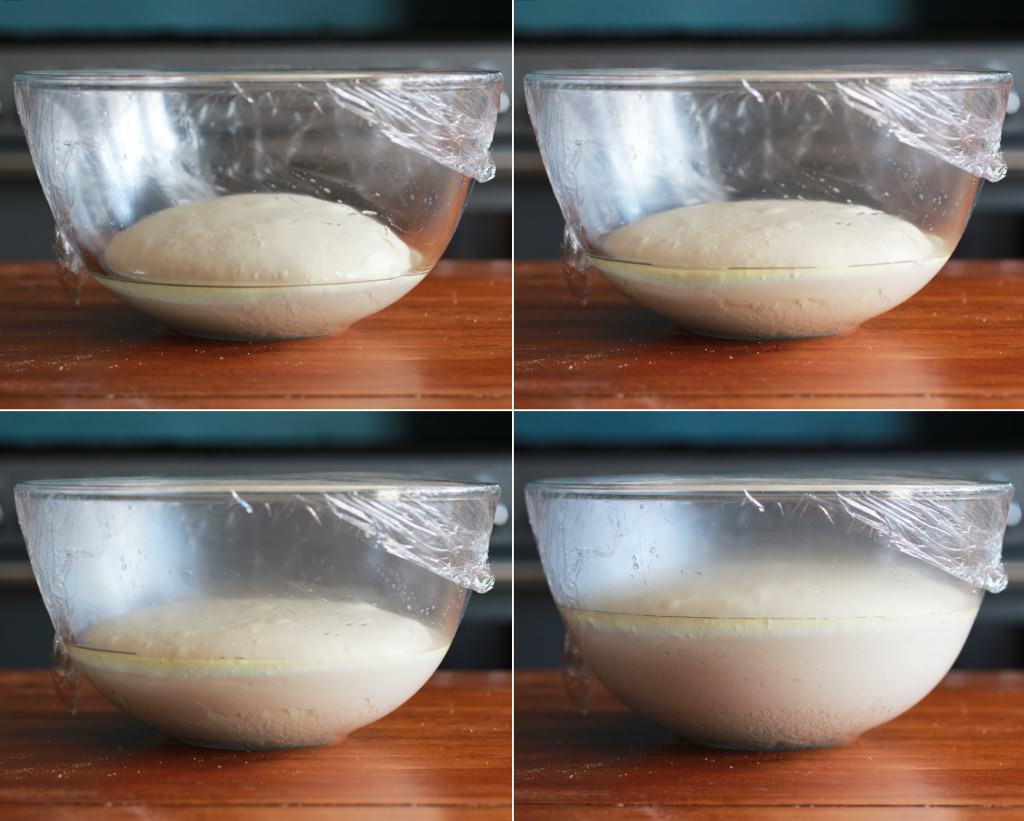
Transfer dough back into the mixing bowl and cover in cling film.
Wait for it to double in size, usually it takes about an hour, but this might vary depending on the temperature of the day/your house.
p.s. It’s still pretty sloppy and weird at this stage, so don’t panic.
Step eight
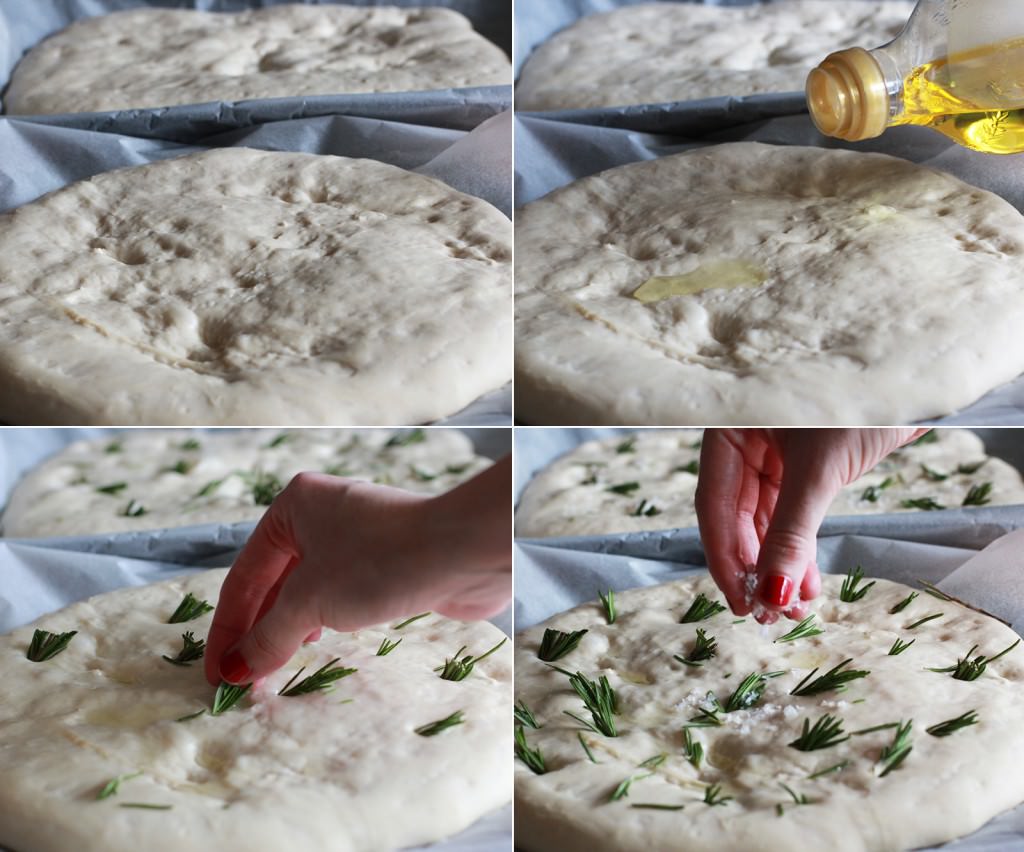
Divide the mix in half and place on two baking trays covered in greaseproof paper/baking parchment.
You will have to adopt a weird stretching-stroking technique to get the dough to fill the space; it’s quite elasticy. The loaves should be about 2-3cm/1″ thick once you’re done. Persevere.
Step eight
Leave to prove for another hour.
Drizzle in olive oil, push in some sprigs of rosemary and sprinkle with sea salt.
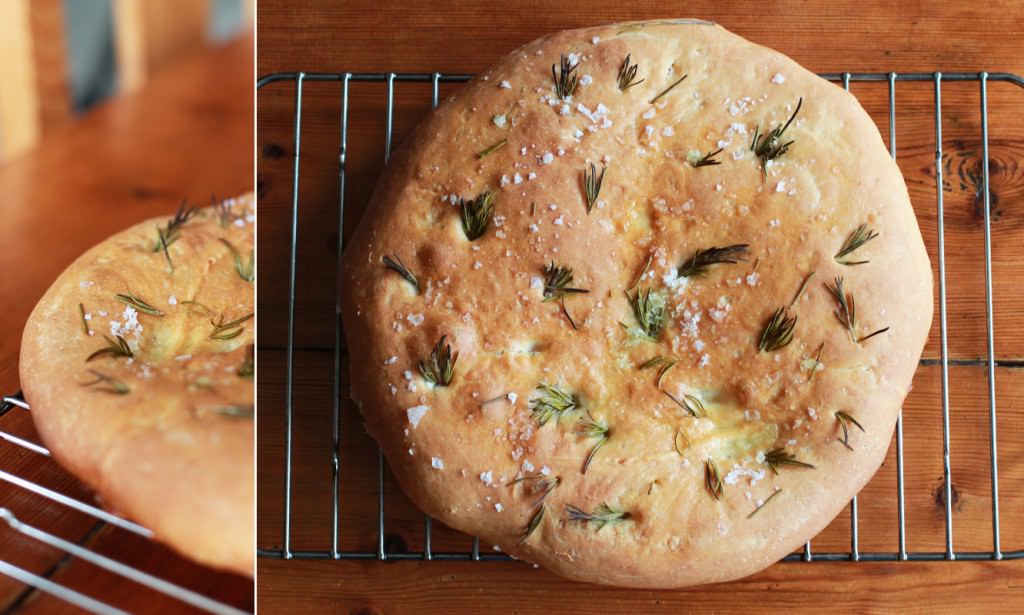
Step nine
Bake in the oven on Gas mark 7/220 C/425 F for about 20-30 minutes until golden on top.
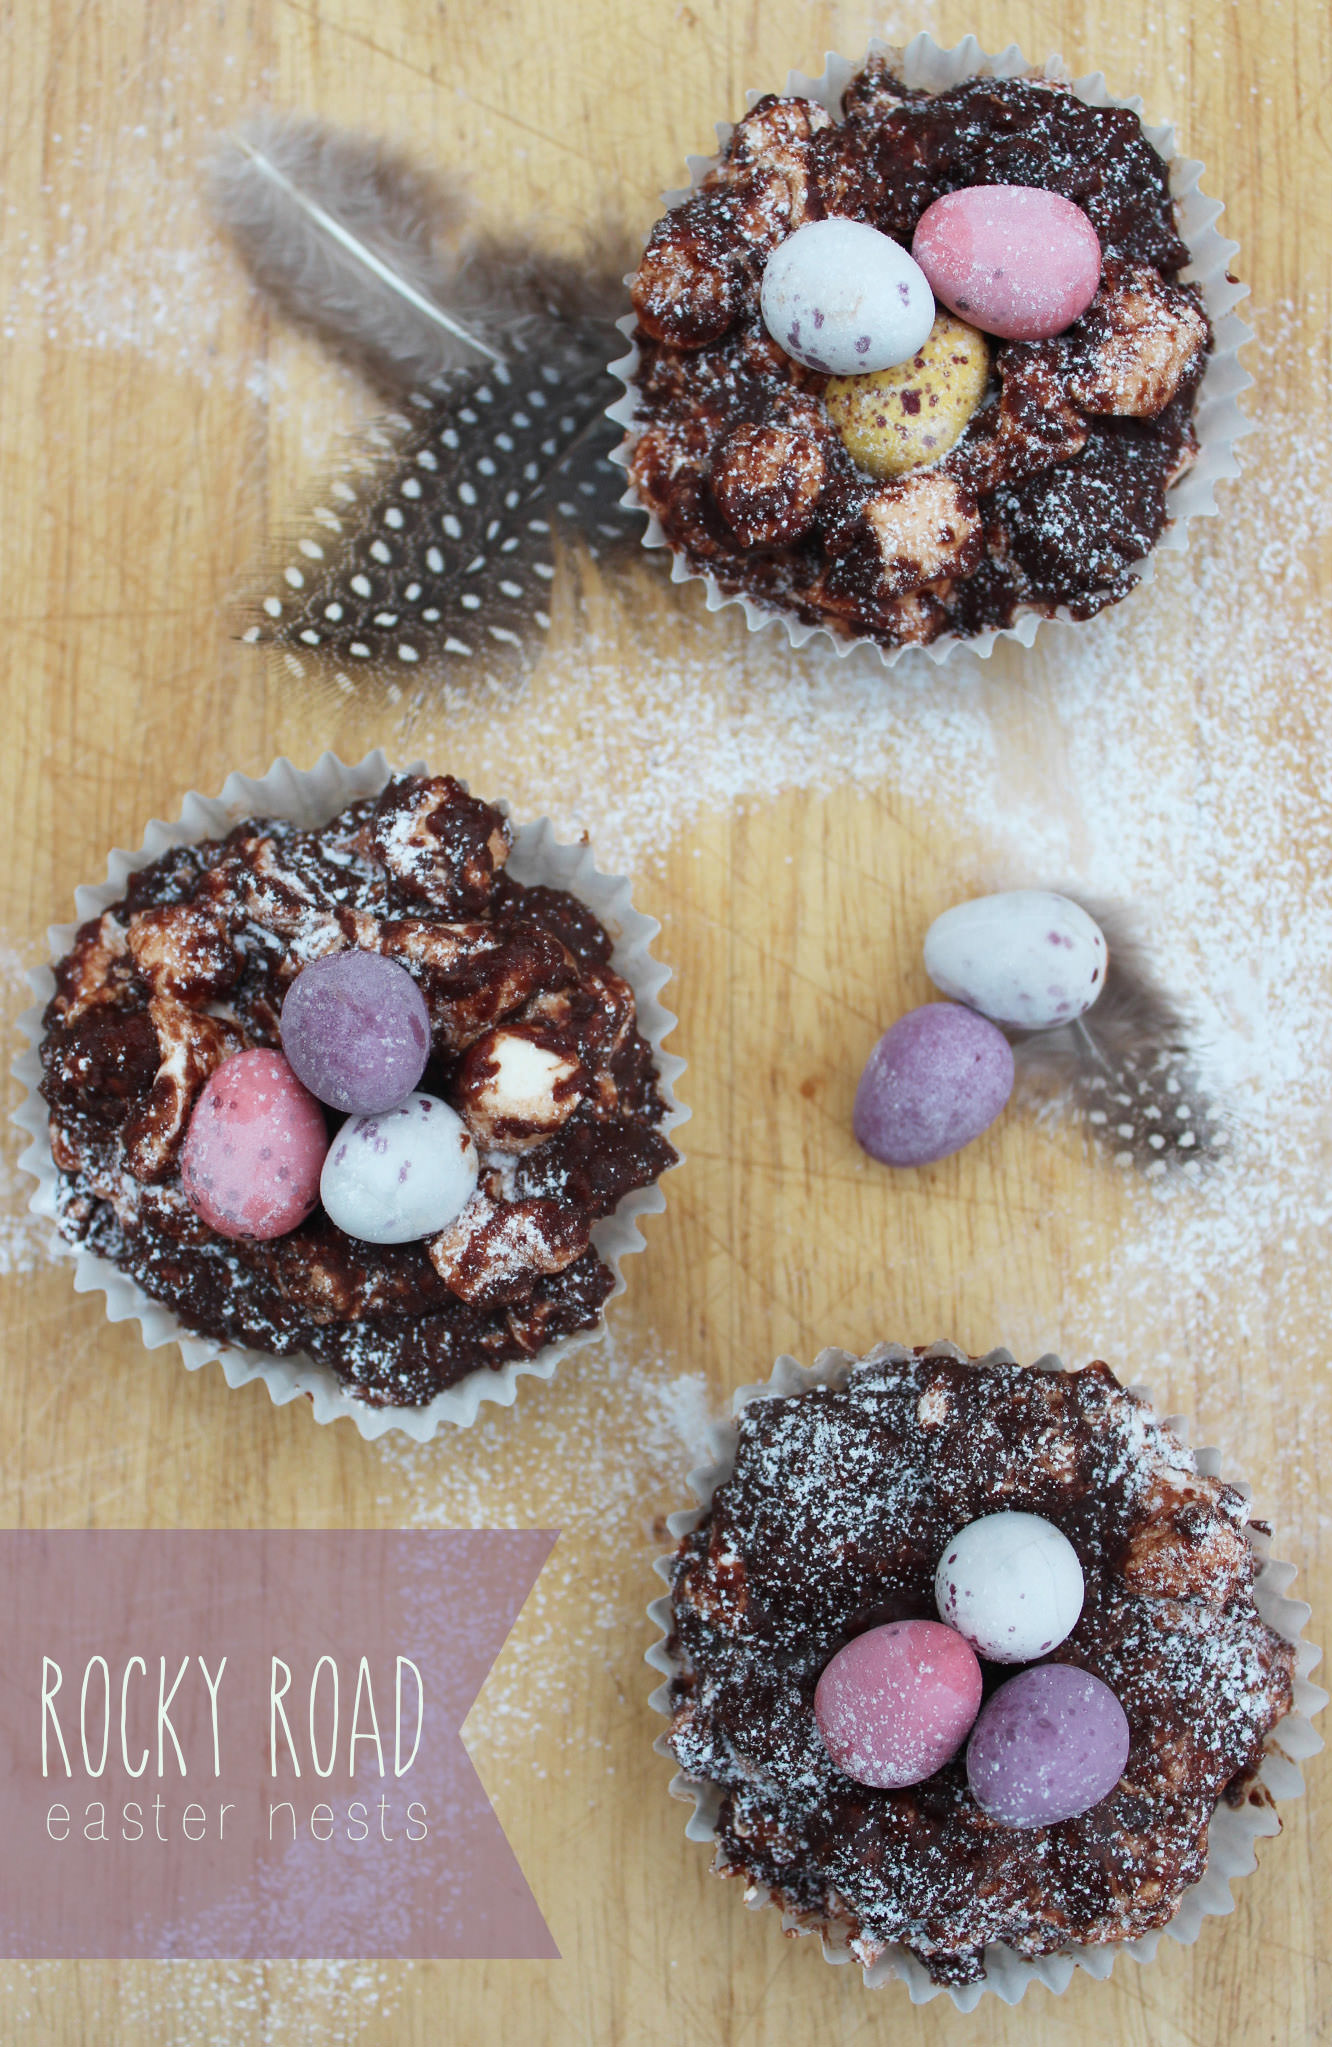
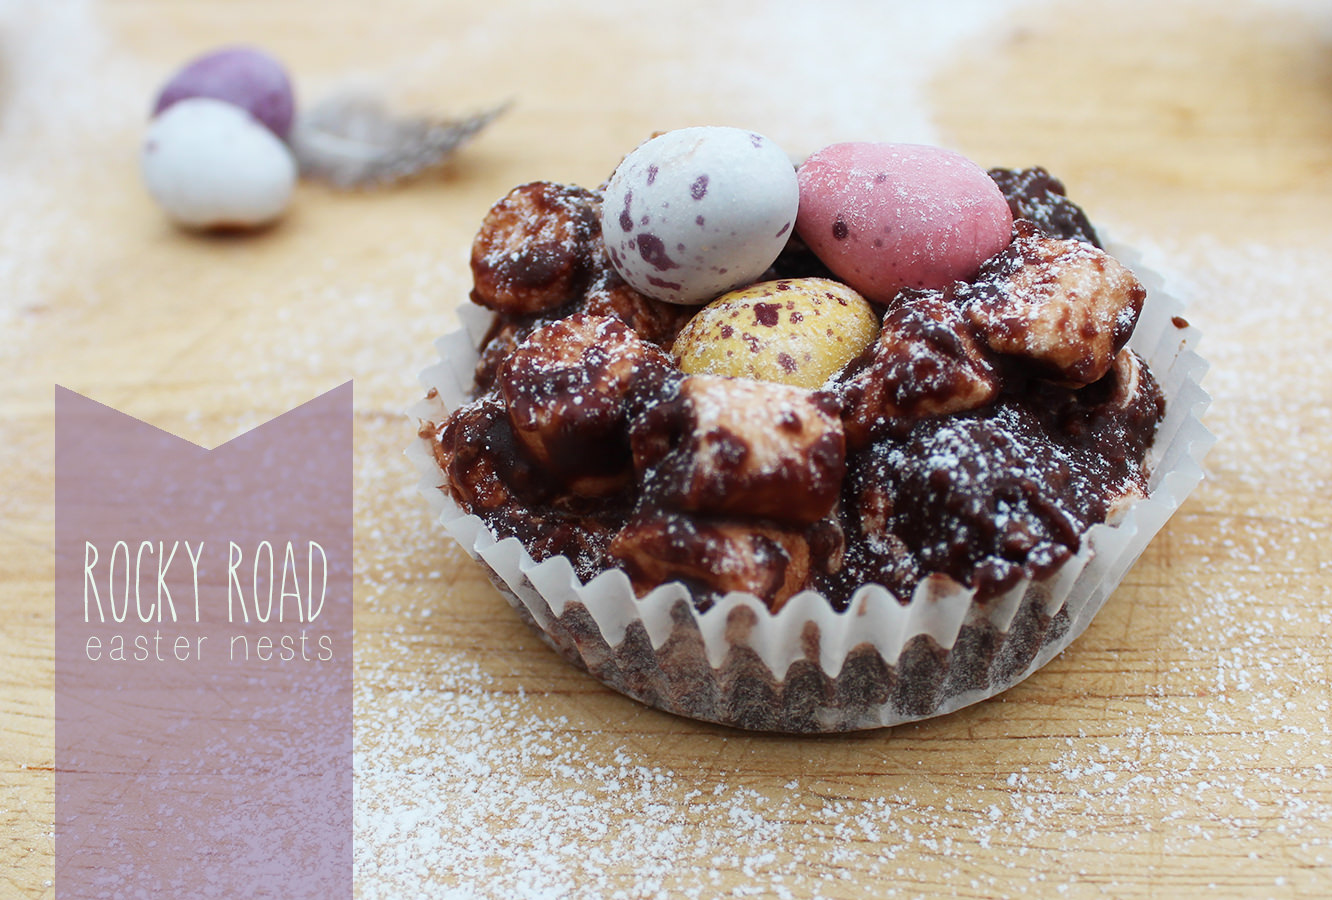
It’s such a lovely time of year, the sun is shining and the shops are full of mini eggs. What’s not to love?
This little idea popped into my head when I was putting out the snacks for an open day (I sort of swing by a university law school and do admissions in my spare time/to get paid). Anyway, after opening the rice crispy bites, and popping one in my mouth (it’s good manners to make sure everything is in order for the guests) I moved on to unpacking the rocky road. BINGO. Rocky road Easter nests were born!
As if that hasn’t sold it well enough to you, these look far more realistic than your regular festive treat, and you will never touch a box of shredded wheat again once you’ve tried them. Just as easy to make with kiddies and more ingredients so more fun to be had.
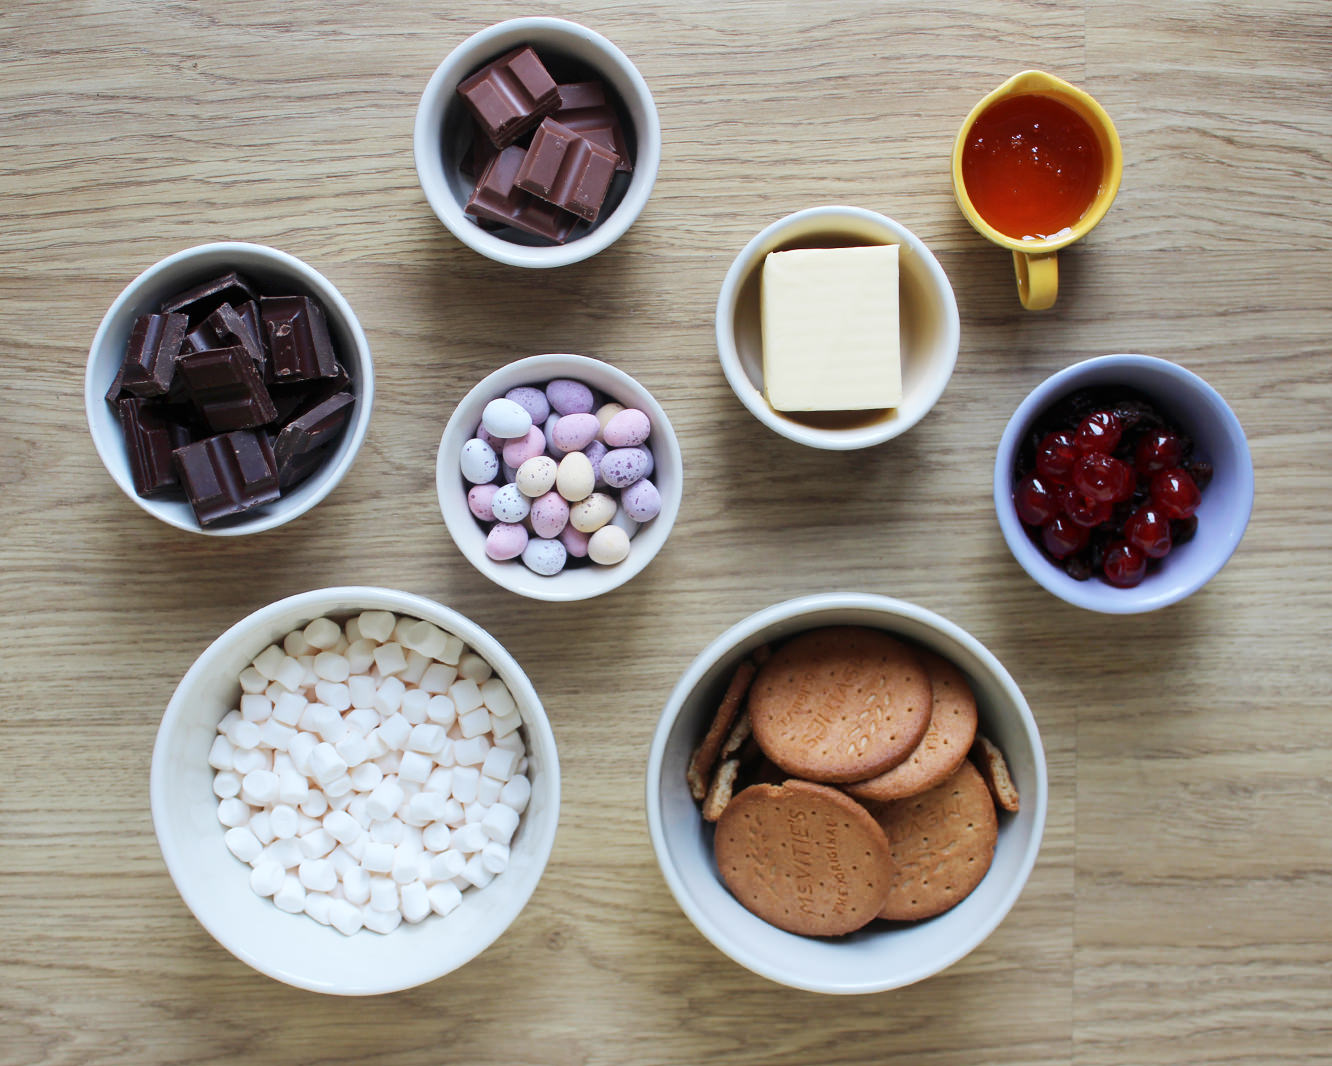
You will need
200g/7 oz Dark chocolate
100g/3.5 oz Milk chocolate
125g/4.5 oz Unsalted butter
3 tbsp Golden syrup
200g/7 0z Digestive biscuits
100g/3.5 oz Mini marshmallows
Generous handful of seedless raisins
15 Glace cherries (cut into quarters)
Bag of mini eggs
Fairy cake cases
Icing sugar to dust
Makes 15
Step one
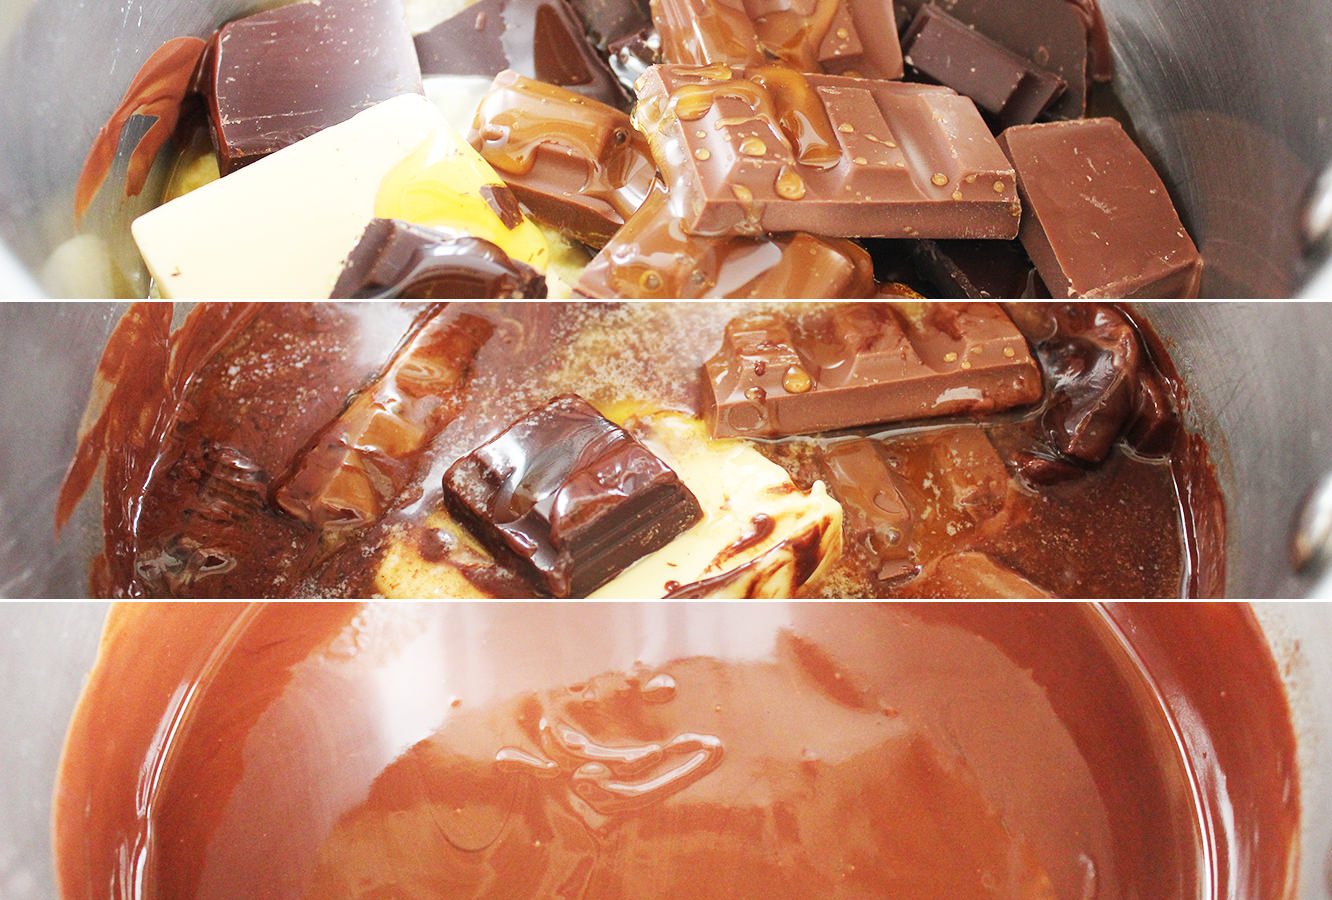
Melt the dark chocolate, milk chocolate, butter and golden syrup in a sauce pan.
Go slowly, burning chocolate is one of life’s saddest occurrences.
Step two
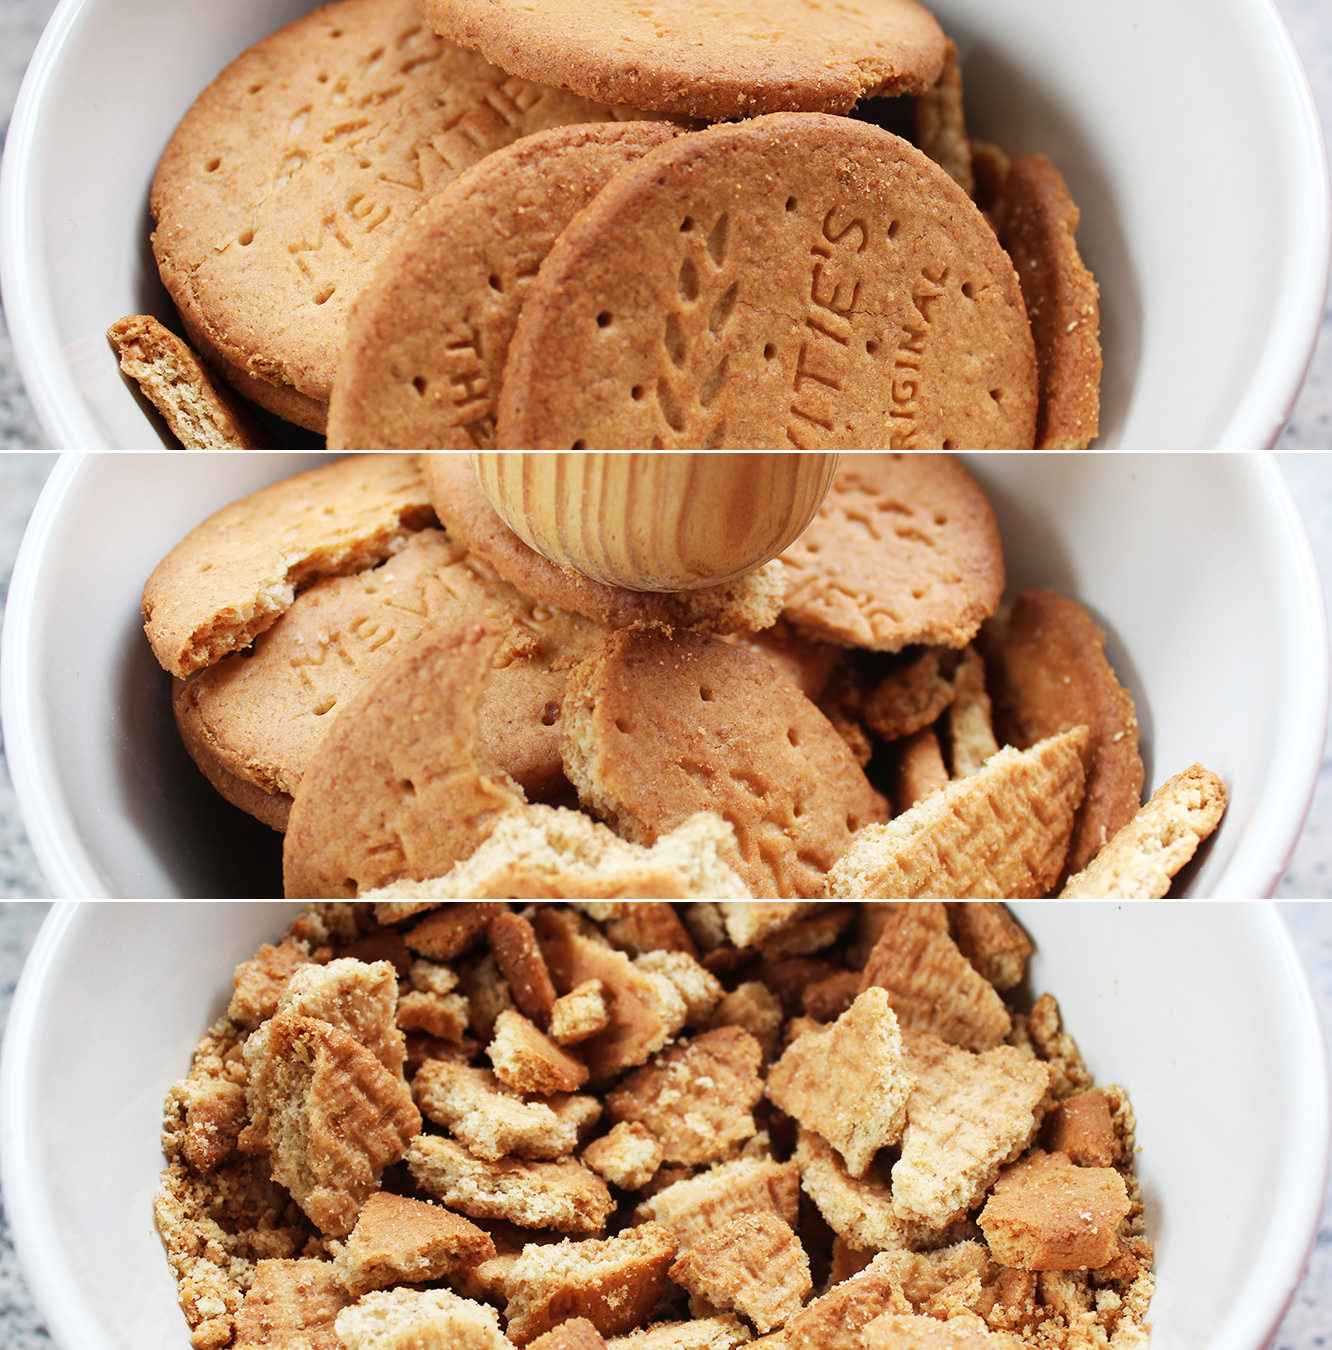
While the chocolate is melting, but without getting too distracted, crush up the digestive biscuits with the end of a rolling pin.
Or your fist if you’re having a particularly bad day.
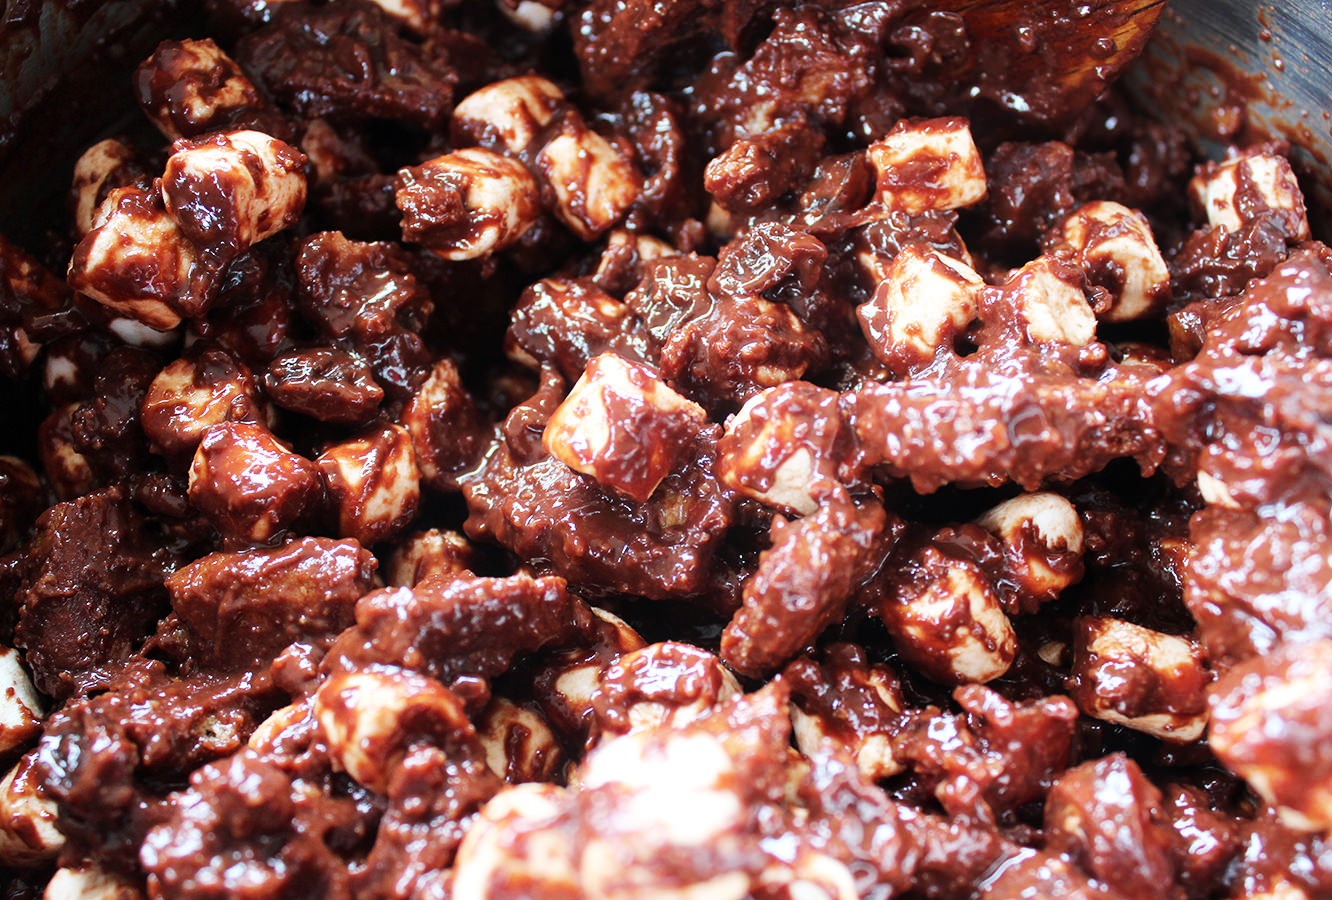
Step three
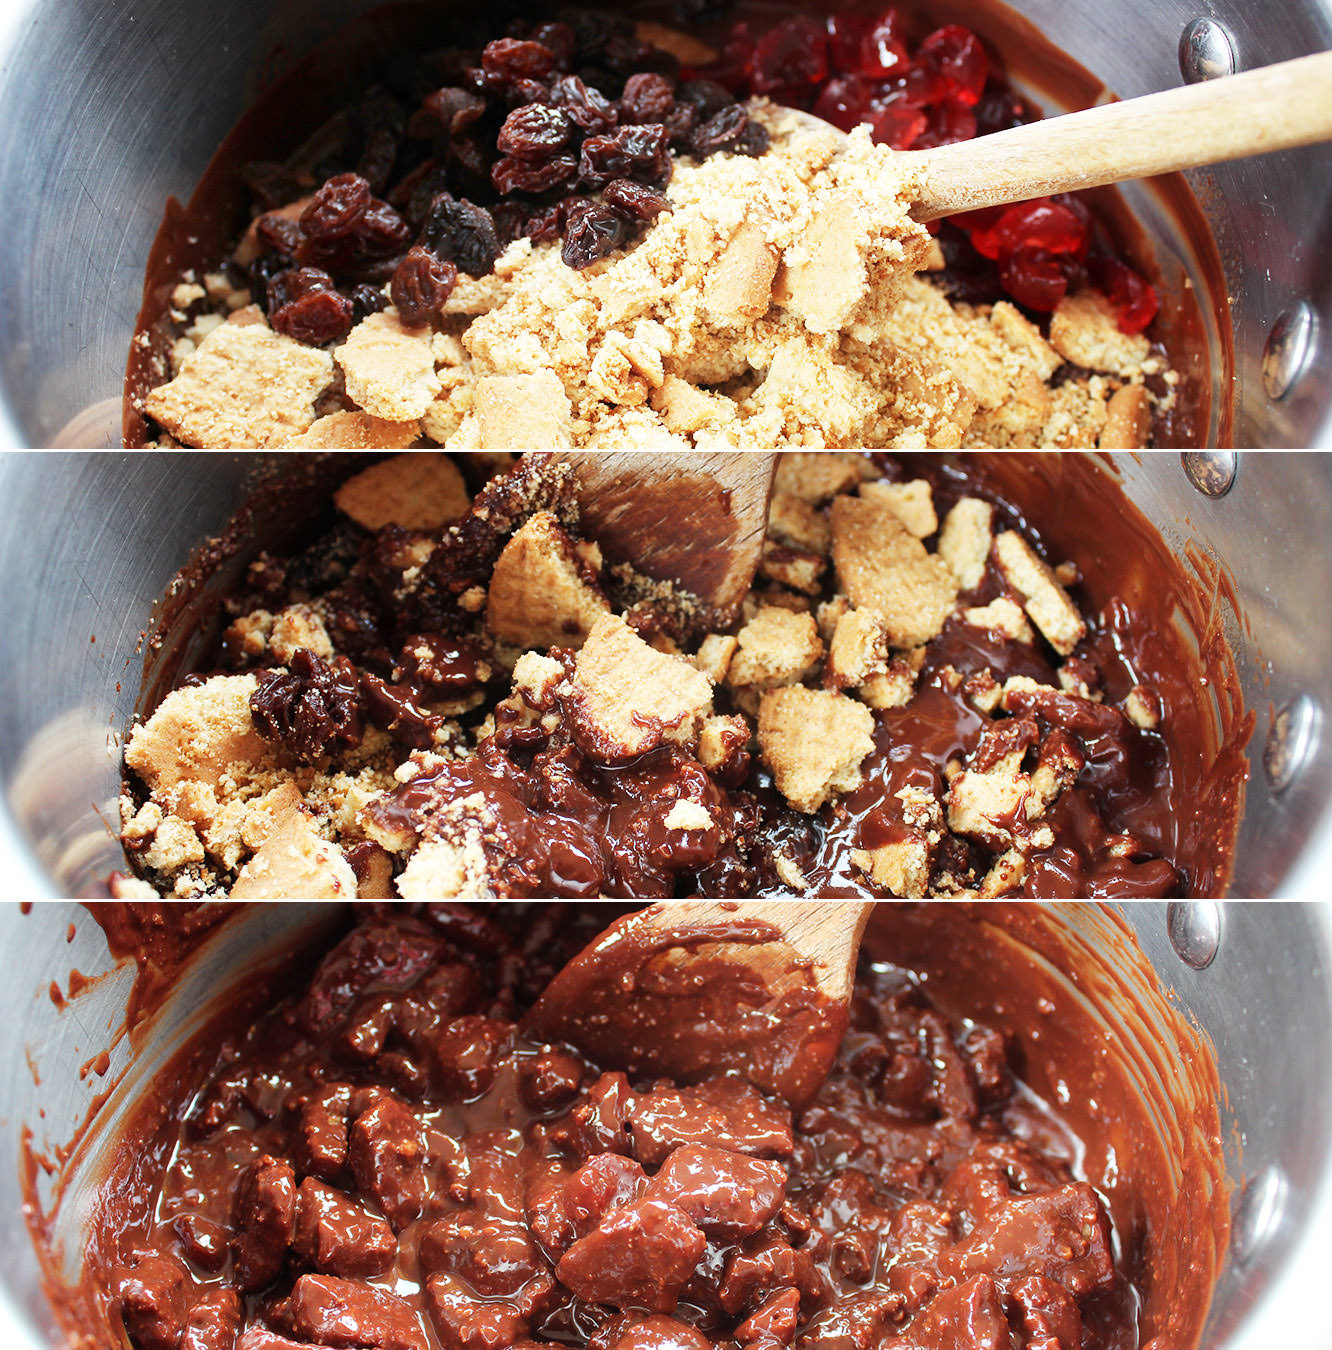
Stir the biscuit, cherries and raisins into the chocolate. Leave the marshmallows alone for the moment.
In case you weren’t gifted with common sense, this should be off the heat by now.
Set to one side.
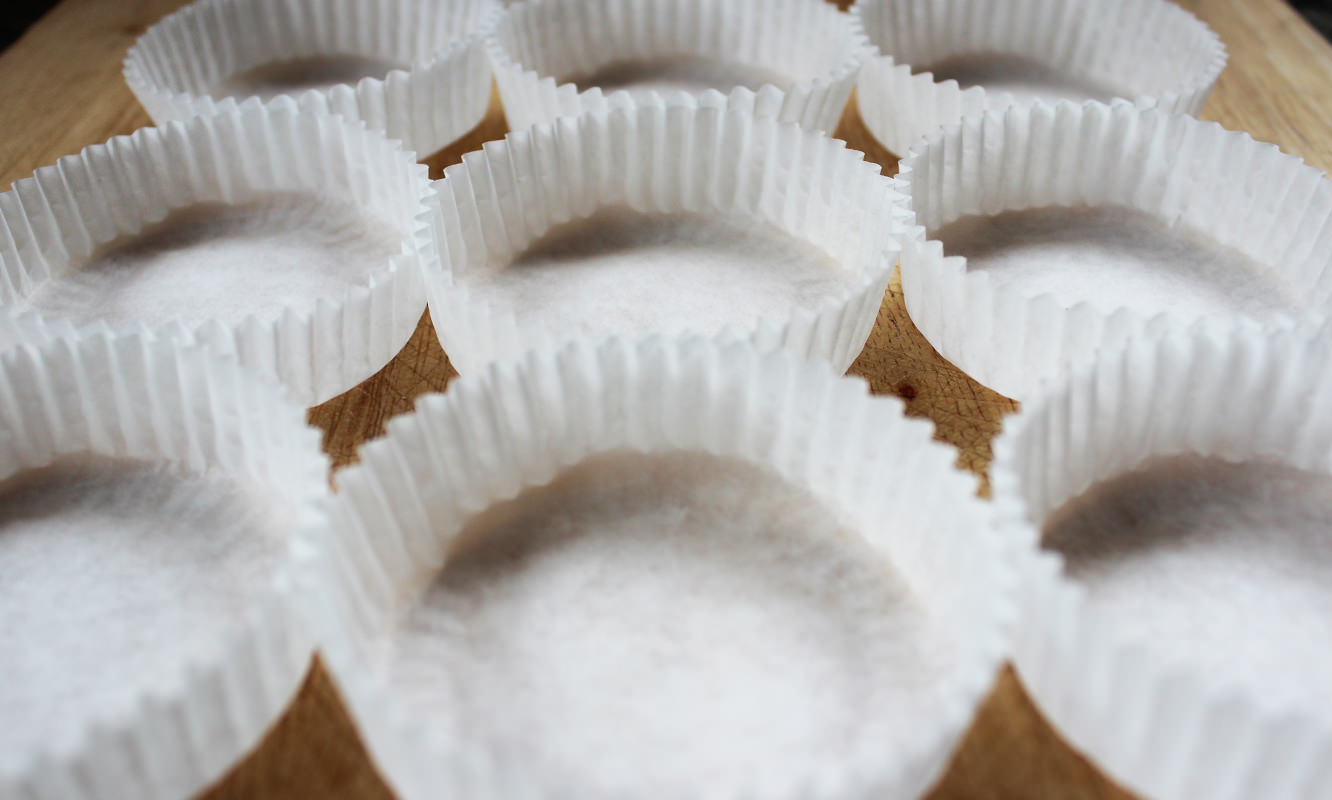
Step four
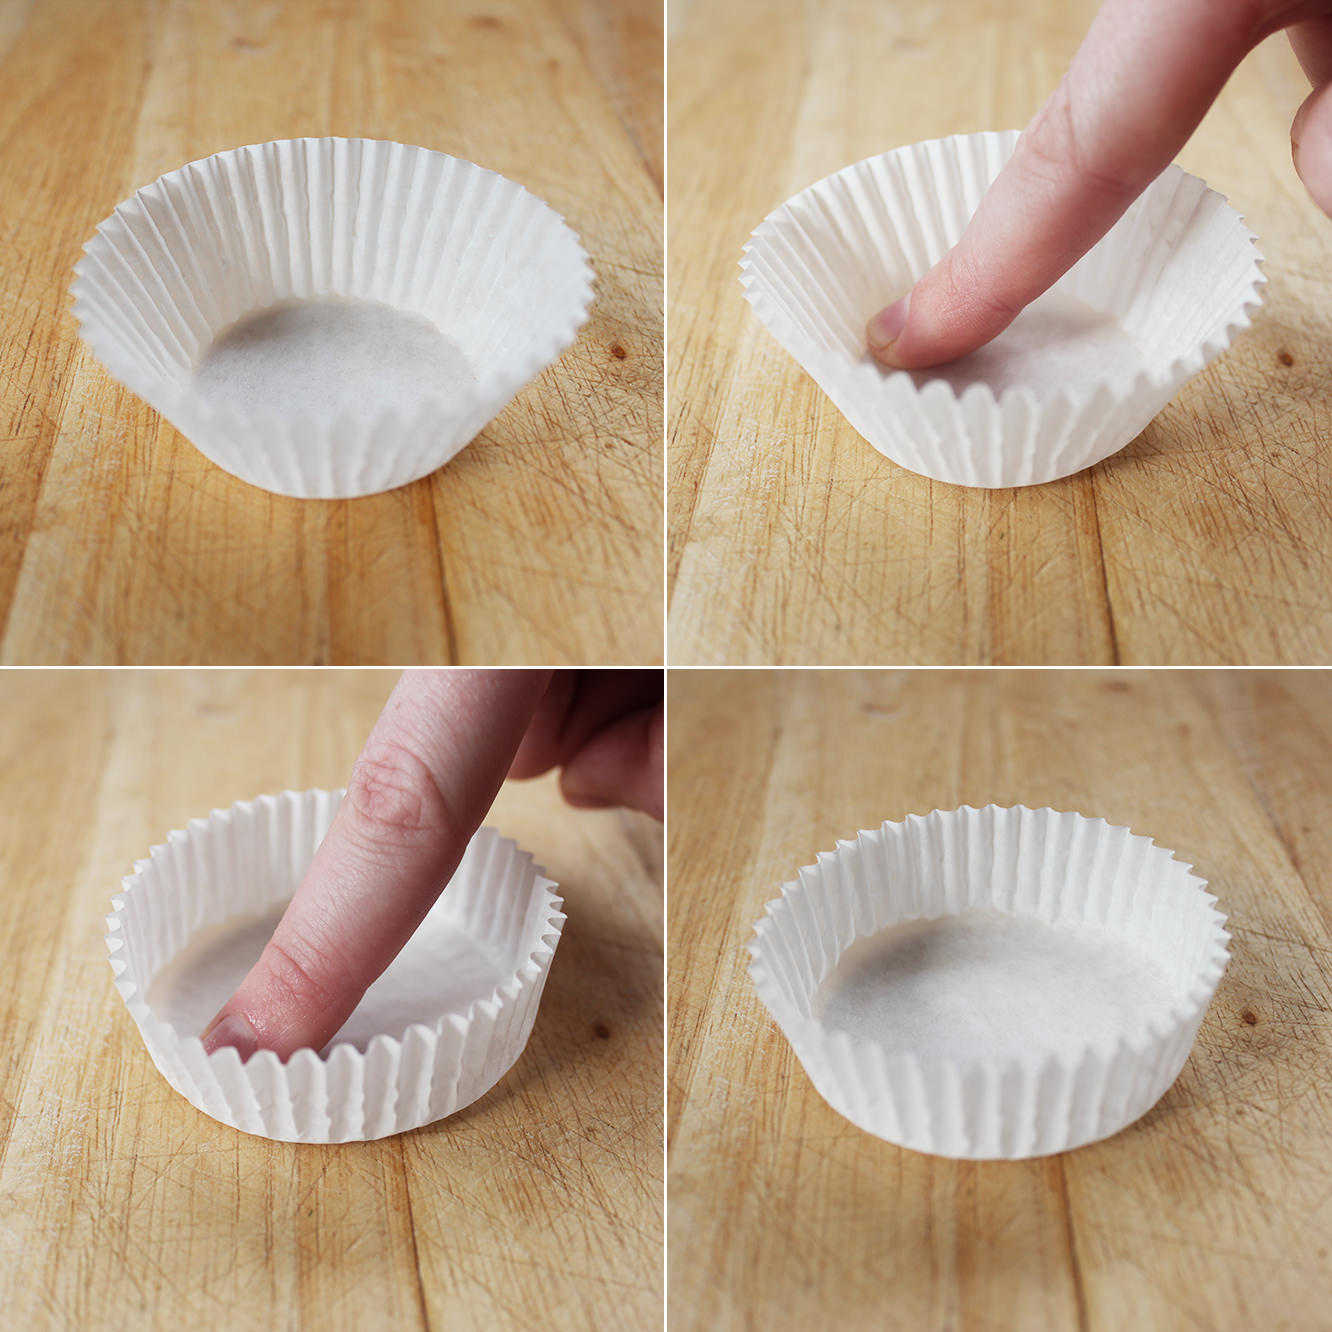
This is the clever bit, or at least I like to think so.
I figured nests aren’t the strange conical shape of cupcake cases, and I didn’t want to end up mail ordering some weird and wonderful baking cases that met my specifications, so I just adapted the regular ones.
I say regular, but I’m not convinced these are actually universal. Before America convinced us that muffin-sized cakes covered in mountains of buttercream (the cupcake we know and love) were the way forward, us Brits had a more modest little bun – the fairy cake. Do other countries have these too? Answers on a post card please.
Anyway, my dear ma has been chastising me about using up the many a fairy cake case we have gathering dust in the cupboard while I burn through the muffin cases to make my cupcakes. They just aren’t cool anymore mum.
Until now.
The fairy cake cases are the perfect size for this, although, of course, whatever size you have should work the same way (you will just have a slightly different number of nests at the end).
Basically you just run your finger around the inside edge of the case in circles until it opens out and has short straight walls as pictured.
Step four
Repeat x 15
Step five
The chocolate mix should now have cooled sufficiently to not melt your marshmallows to mush.
Stir them in…you will still have to work fairly quickly.
Step six
Spoon mixture into cases and stick eggs in the nests. Don’t be tight, give at least three to each one.
Step seven
Put in the fridge to set.
Dust in icing sugar before serving, you can afford to be a bit more liberal than I was. After I’d taken the pictures I dropped the spoon on one and it actually looked a lot better with a heavier dusting.
Step eight
Get chubby.
Have a great week guys!
Oh, and you may have noticed I’ve moved my site – I’m trying to figure out what impact that has on the people who were already following me, I’ll keep you posted!
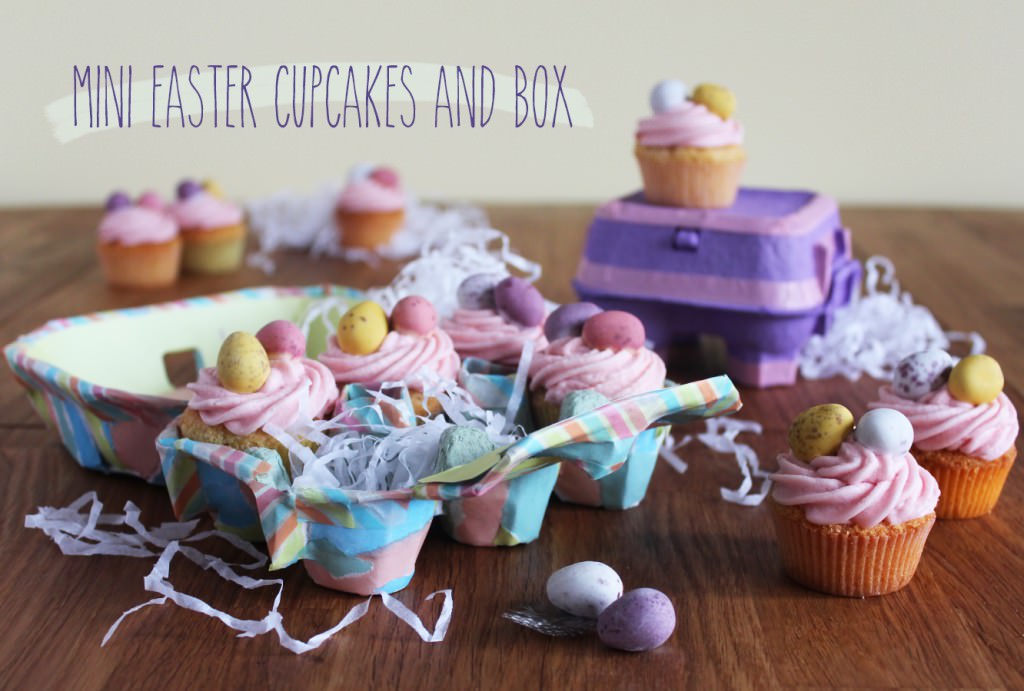
In case you hadn’t noticed, Easter is fast approaching. I’m a big fan of Easter, and Spring in general. This year I’m heading to Germany to see some very wonderful people and I can’t wait.
In the meantime though, I’m busy covering everything in mini eggs and thinking up yummy Easter treats for you to get chubby eating. You’re welcome.
This one is great for kids and would make a lovely little present for the relatives or anyone else you might be seeing over the next few weeks.
You will need
An egg box
Coloured paper/paints
PVA glue
For the cakes
4.5 oz/125g Self raising flour
4.5 oz/125g Butter/margarine (I use stork for most cakes)
4.5 oz/125g Caster sugar
2 eggs
1tsp Vanilla extract
For the decoration
4.5 oz/125g Unsalted butter (room temperature)
2 tbsp Full fat milk
12 oz/350g Icing sugar
Food colouring
1 tsp Vanilla extract
Mini eggs
Mini cupcake/muffin cases
Makes 24
Step one
Decorate your egg box. This post is just a suggestion, you can paint it, or cover it in glitter, or stick cotton wool balls all over to make it look like a sheep. Your only limit is your imagination, and the fact it’s an egg box…
Rip paper into strips. The thinner the paper the better with this really, as egg boxes, I discovered, are rather lumpy, so thicker papers don’t mould around them so well.
Mix PVA and water together in a bowl that you don’t mind getting temporarily covered in glue. You want about 3 parts PVA to 1 part water (otherwise the egg box will get soggy).
Paint the glue mix onto the surface of the box and stick paper on top. Cover each strip of paper with more glue mix as you go. This is where it all gets very Art Attack. Neil Buchanan made it look so easy…
Keep going until the whole outside is covered and leave somewhere to dry. Make sure you do the box bit a good few hours in advance of using it, ideally the day before.
At this stage mine looked like the above, and I still thought it was a bit messy.
Step two
Line the edges with washi tape. I did this to neaten mine up mainly, you possibly won’t have the same issue.
You might notice the purple box in the background…thought I would include a cheats option. That’s the box from those Cadbury’s Egg n’ Spoon things. They are amazing in case you were wondering, and now you have an excuse to buy a pack.
Cut the central doo-dahs so they are level with the rest of the sides.
Line the lid either using the same technique as before, or with cut paper and double sided tape.
Step three
Time to start on the cakes. I use an electric whisk to make cakes but a wooden spoon and some elbow grease is just as good.
Cream together the margarine and caster sugar. If you’re using butter bring it to room temperature before doing this. You want it to be fluffy and light like the image on the right. Honestly, Stork is the way forward for this. Cheaper too.
Step four
Quickly whisk/beat in the eggs and vanilla extract and then add the flour.
Stir until you have a smooth thick batter.
Heat oven to gas mark 4/180 C/350 F
Step five
Fill cake cases with mixture. You want them to be about two thirds full, a few of mine were too full, so if in doubt look at the above and go for a bit less!
Step six
Bake for about 30 mins on gas mark 4/180 C/350 F. My oven is a touch special so keep an eye on yours, timings may vary.
Leave to cool completely before icing.
Step seven
Whisk together the unsalted butter, icing sugar, milk, and vanilla extract. Add food colouring of your choice.
Now, I don’t usually use a recipe for this so don’t shy away from adding a bit more icing sugar if your icing is too wet or a splash more milk if too dry.
Step eight
Ice your cakes and pop two mini eggs on top.
I won’t give too many piping tips as I’m still getting the hang of things myself. The general rule though is to keep the piping bag at quite an upright angle and apply even pressure.
Step nine
Put them in the egg box and make someone’s day that little bit more joyful.
If your country doesn’t stock Mars bars then I am truly sorry…for these are delicious, and you will probably never experience the joy of tasting one. If you live in the UK then get down to your local newsagent, there’s no time to be wasting.
A little disclaimer before I begin: the combination of the fact that a) I was making these for a charity bake sale and b) I couldn’t find a regular 4 pack of Mars bars means that the recipe below is rather substantial. Divide in half or into thirds if you are baking these for home and don’t fancy obesity as a life choice (you won’t be able to stop eating them).
You will need
6 Mars bars
3 tbsp Golden syrup
250g Unsalted butter
9 cups of Rice crispies
(this is basically a whole box – I used the cheap Tesco knock off kind, no need to break the bank)
400g Milk chocolate
An appointment with your GP to test your blood sugar levels.
Makes 24 (at least)
Step one
Chop up the Mars bar.
Oh go on then, there’s at least one piece going spare…
Step two
Put Mars, butter, and golden syrup in a pan on a medium heat to melt.
Those fluffy bits in the middle of the Mars bars take what feels like forever to melt, but they do get there, just keep stirring, and maybe stick a bit of Dragon’s Den on or something.
Step three
Put most of the rice puffs in a big bowl. I always hold a few cups back to add later, as this isn’t an exact Science so you won’t always need them all.
Pour the melted mixture over the puffs. You probably deserve another little taste at this point.
Step four
Stir together until rice crispies are evenly covered. It’s up to you whether to add the rest that you kept to one side or not, I added the whole lot to mine.
Step five
Line a couple of tray bake tins with foil and distribute your mixture accordingly. Again, it’s up to you how deep/shallow you want your crispy cakes to be, so choose your tins with that in mind.
Step six
Squash the mixture down with the back of a spoon until it fills the various crevices (or with your hands when you get tired of doing it the PC way – wash them first though, there are some standards to be upheld).
Make sure the mixture is squashed down firmly or it will all fall apart later. Literally.
Step seven
Melt the milk chocolate and cover the top of the crispy cakes evenly. Again this will sort of depend on what tin you use and what consistency you want as to how much you need, as you want enough to cover it all. If you chose a shallower tin then you’ll need a bit more chocolate and so on.
Step eight
Cut the crispy cakes into slices now before it all sets up, it’s just all a bit easier that way.
I’ve been on my travels up and down the country recently (well, mainly side to side actually). So not a huge amount of crafting has been a-happening.
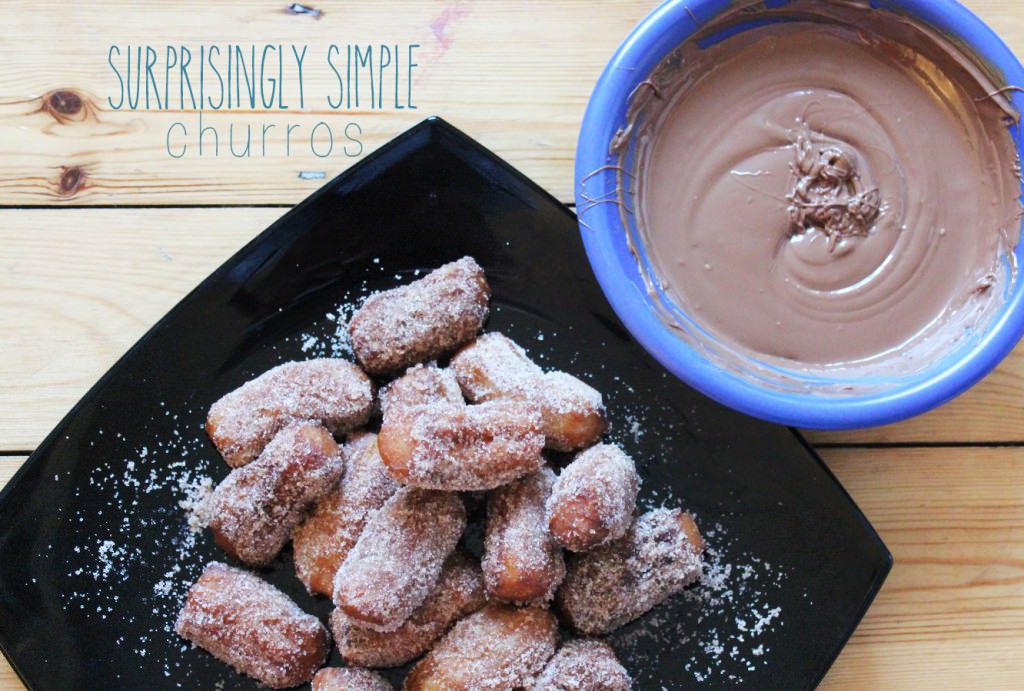
One such weekend was spent with some of my bests in NW London, and at brunch time I took my camera out and started snapping. We decided that churros bites were the order of the day (if you don’t know what churros are, then you’ve not really lived yet, fact).
None of us had made them before and at least one of us was terrified by the prospect of a pan fire (no deep fat fryer for us). It was actually gob-smackingly easy and very fun, so go on, have a go.
You will need
1 cup Water
2 and 1/2 tbsp Caster sugar (plus some for coating)
In a saucepan combine the cup of water, 2 and 1/2 tablespoons of sugar, salt, and 2 tbsp vegetable oil.
Heat over a medium heat until sugar has dissolved and mixture comes to the boil.
Step two
Take water off the heat and pour in a cup of plain flour.
Step two and a half
Stir stir stir.
The mix will a) get too heavy for a whisk very quickly b) get very lumpy very quickly c) look plain wrong.
Persevere though, if you keep mixing you will manage to smooth it out considerably in a matter of minutes. I promise.
Step three
Heat the rest of the oil in a sizeable pan. SLOWLY.
You want it to be on no more than a medium heat the whole time, and this will take a while. You know the oil is at the right temperature when you drop a little mixture in and it bubbles and floats rather than sinking to the bottom.
Step four
Fill a large piping bag with the mix and squeeze to the end.
A star shaped nozzle will give you the most authentic looking churros, but I would advise a fairly small one. Ours was the biggest in the pack, and the chunkiness turned our churros into churros bites fairly early on…we didn’t want to end up with only 4 massive ones…less space for the chocolate that way.
Step five
Pipe into the pan. We had one person piping and another using a pair of scissors to snip the mixture in at a desired length. Manageable with one person though I suspect – if you don’t have a helper.
This is where you need to keep an eye on the heat because if you’re not careful you risk cooking/burning the outside and then having uncooked dough within. We learned by doing on this one!
So keep the pan on a low-medium heat and just cook them by eye. Even the most novice chef can see when one of these is ready.
Step six
Lift the churros out of the pan and drain on a plate covered with a few sheets of kitchen roll.
A slotted spoon would be ideal for this if you have one.
Step seven
Cover another plate in caster sugar and cinnamon (adjust quantities to taste), and roll drained churros around until coated in the mix.
Step eight
Stack em high!
Step nine
While the churros are cooking, draining, and being coated, task somebody with melting the chocolate.
Do this in the microwave and don’t get impatient. A 30 second blast followed by some 10 seconds with stirring in between will do the trick.
Valentine’s Day is the marmite of all the celebrations; people seem to either love it or hate it (I’m actually fairly in the middle on the whole thing, much like my relationship to marmite). The US tends to go mad for Valentine’s*…but let’s be fair, they’re a lot more chipper about everything than the rest of the world anyway. We Brits stay true to form, far more cynical, but with the inherent sense of obligation that both forces us to celebrate something, and then resent the enjoyment we get from it.
Chocolates are a typical Val Day gift, but they tend to lack the personal touch that well, let’s face it, is the fault of the whole shebang. I figure if you’re going to do it, do it right, make your own.
Whatever continent you live on, and whatever occasion you’re celebrating this February, here’s another recipe fresh from my kitchen. Great for gifting or gorging on, I present milk chocolate truffles with a hint of salty maple goodness.
* source: Pinterest…which is a completely accurate representation of American life.
You will need:
500g Milk chocolate
75ml Evaporated milk
50ml Double cream
1 to 1 and a half tbsp Maple syrup
2 tsp Salted butter
Pinch of table salt
Rock salt to decorate
Makes 20-30 truffles
Step one
Chop 250g of the chocolate finely, and place in a bowl. The more you chop the easier the cream will melt it. Use a bread/serrated knife for this…you can thank me later…I just changed your life.
Step two
Put the cream, evaporated milk, maple syrup, a pinch of salt, and the 2 tsp of butter in a small pan.
Don’t put more than a tablespoon and a half of maple syrup in your truffle filling – whilst tasting delicious it won’t set up, ergo it won’t be easy to cover in chocolate (yes, I did find out the hard way, but I’m kind enough to give you recipe 2.0).
Place on a low heat and bring to the boil, stir regularly. Leave that heat on low, I mean it! Patience is the way to go with cream, it’s the hormonal teenager of the baking world (volatile and breaks down easily).
Step three
Once the cream starts to bubble, take off the heat and pour it over the chocolate. Stir quickly with a hand whisk until all the chocolate is melted and it’s thick and glossy.
Step four
Wait.
Step five
Once your truffle mix is holding its shape (pull the whisk out and dribble it around, if it’s not merging back into one clump then it’s good to go) put into a piping bag/good quality sandwich bag. If you’re impatient then stick it in the fridge or freezer to help it along (but don’t forget about it – you don’t want it to be un pipe-able)
Snip off the corner and pipe into evenly sized blobs. Don’t worry if they are a bit misshapen, this is just to ensure evenly sized truffles more than anything. My mix wasn’t quite solid enough when I did it above (this is partly because it was the too-much-maple batch) so wait a while longer than that.
Leave for another 15-20 minutes.
Step six
Roll truffles into balls. You will need cold hands for this, I found washing them in cold water a few times throughout helped. You might need to give them a little squash first so that they roll (you’ll understand when you get there).
Step seven
Melt the remaining chocolate (keep about 50g back for a moment). You want to put it in a fairly small bowl so it’s nice and deep for dunking.
Do this in a microwave, but watch it closely, it turns in seconds. Pop it in for 30 seconds to start it off and then 10 second intervals, stirring in between.
Once it’s fully melted put the remaining 50g in and allow the heat from the rest of the chocolate to melt that too. This will help to temper it making the texture and shine better in the end product.
Step eight
Find something to dip with. You can buy fancy tools for this but I happened to have a metal kebab skewer with a whirly bit on the end. If you don’t, then snap the middle two prongs off a plastic fork.
Step nine
Dip.
I’ve tried to show the stages above, but essentially: 1. Tilt bowl and put truffle on dipper 2. Drop into melted chocolate 3. Lift out using dipper 4. Flip over and drop back in to coat the other side 5. Lift out and allow excess chocolate to drip off.
Don’t tap dipper on the side of the bowl, or your truffle will get stuck onto it. If you are overwhelmed by the urge to tap, then sort of thwack it on the melted chocolate, sounds counter productive but it does work.
Step ten
Dip all the truffles and rest on greaseproof paper in rows, leave to set for 10 minutes or so before decorating.
Step eleven
Put excess melted chocolate into a piping/sandwich bag and snip a small opening in the bottom. Allow the chocolate to start pouring from the bag and move your hand back and forth over the rows of chocolate. This creates the stripey bits on the top. There’s no need to squeeze really, it will pour out of the bag at the right speed.
Don’t worry about the bits that fall down the middle, you can put them on top of your ice cream. Nothing wasted when it comes to chocolate.
Step twelve
Put a little bit of rock salt on the top of each truffle. Don’t overdo this or it will be unpleasant, but a little salt is actually really nice with sweet or caramelly things like maple syrup and chocolate.
Step thirteen
Leave them to set. Have a little taste. Go on. You’ve got a few to spare. They’ll never know. Unless of course you write a blog about it, and then never actually produce any of the chocolates (sorry boyfriend).
Oh, and I made a little baggy…
Step fourteen
Stay tuned to fabrefaction for the making of the bag, and the using up of the left over dipping chocolate.
Three and a bit years ago I stumbled across a marvellous young lady called Anna. She gave me the inspiration to start a new Christmas tradition. I implore you to do the same, there is very little as satisfying as creating a freestanding gingerbread structure – and I won’t lie, it helps that you have a year in between to recover and block out all the royal icing acrobatics it took you to get there.
Apologies in advance for some of the slightly odd measurements below, the recipe is a bit inbred at this stage. Original credit goes to Anna, but I’m not convinced she would still want ownership given my Canadian to English translations and elaboration on the method (I lost the original).
Things you need:
Plain flour: 1lb 10.5 oz/750g/5 cups
Soft light brown sugar: 5oz/140g/1 cup
Unsalted butter: 7oz/200g/1 cup
Eggs: 2
Treacle: 5 tbsp
Golden syrup: 8 tbsp
Salt: 1 tsp
Baking powder: 1 tsp
Ground ginger: 2 tsp
Cinnamon: 2 tsp
Nutmeg: 1 tsp
Other:
Royal icing: probably 2 boxes
A lot of sweets
A base (I used an upturned tray)
Patience: a generous glug
Step one:
Draw out your design on greaseproof paper. I did write down the dimensions of mine but I suspect it ended up in the recycling with a flurry of lists and post-it notes, but it is relatively straightforward maths.
Some tips:
Measure your baking trays and base first. I hope that doesn’t sound too obvious, I’ve had to go back to the drawing board before now, after realising to my disappointment that I don’t own industrial equipment.
When drawing the chimney, draw it directly onto the roof so that it is definitely at the right angle to put on your house later (see photo above left). Don’t forget you need two little rectangles as well, one the same height as the short edge, and one the same as the longer side – they should be the same width.
Draw the front and sides first so you can take the measurements for your roof from those, make sure you add a little for overhang etc.
Mark x2 or x1 and something to identify the pieces on each – they have a tendency to become unrecognisable at some stage.
Step two:
Mix together the flour, baking powder, salt and spices. You will need a large bowl.
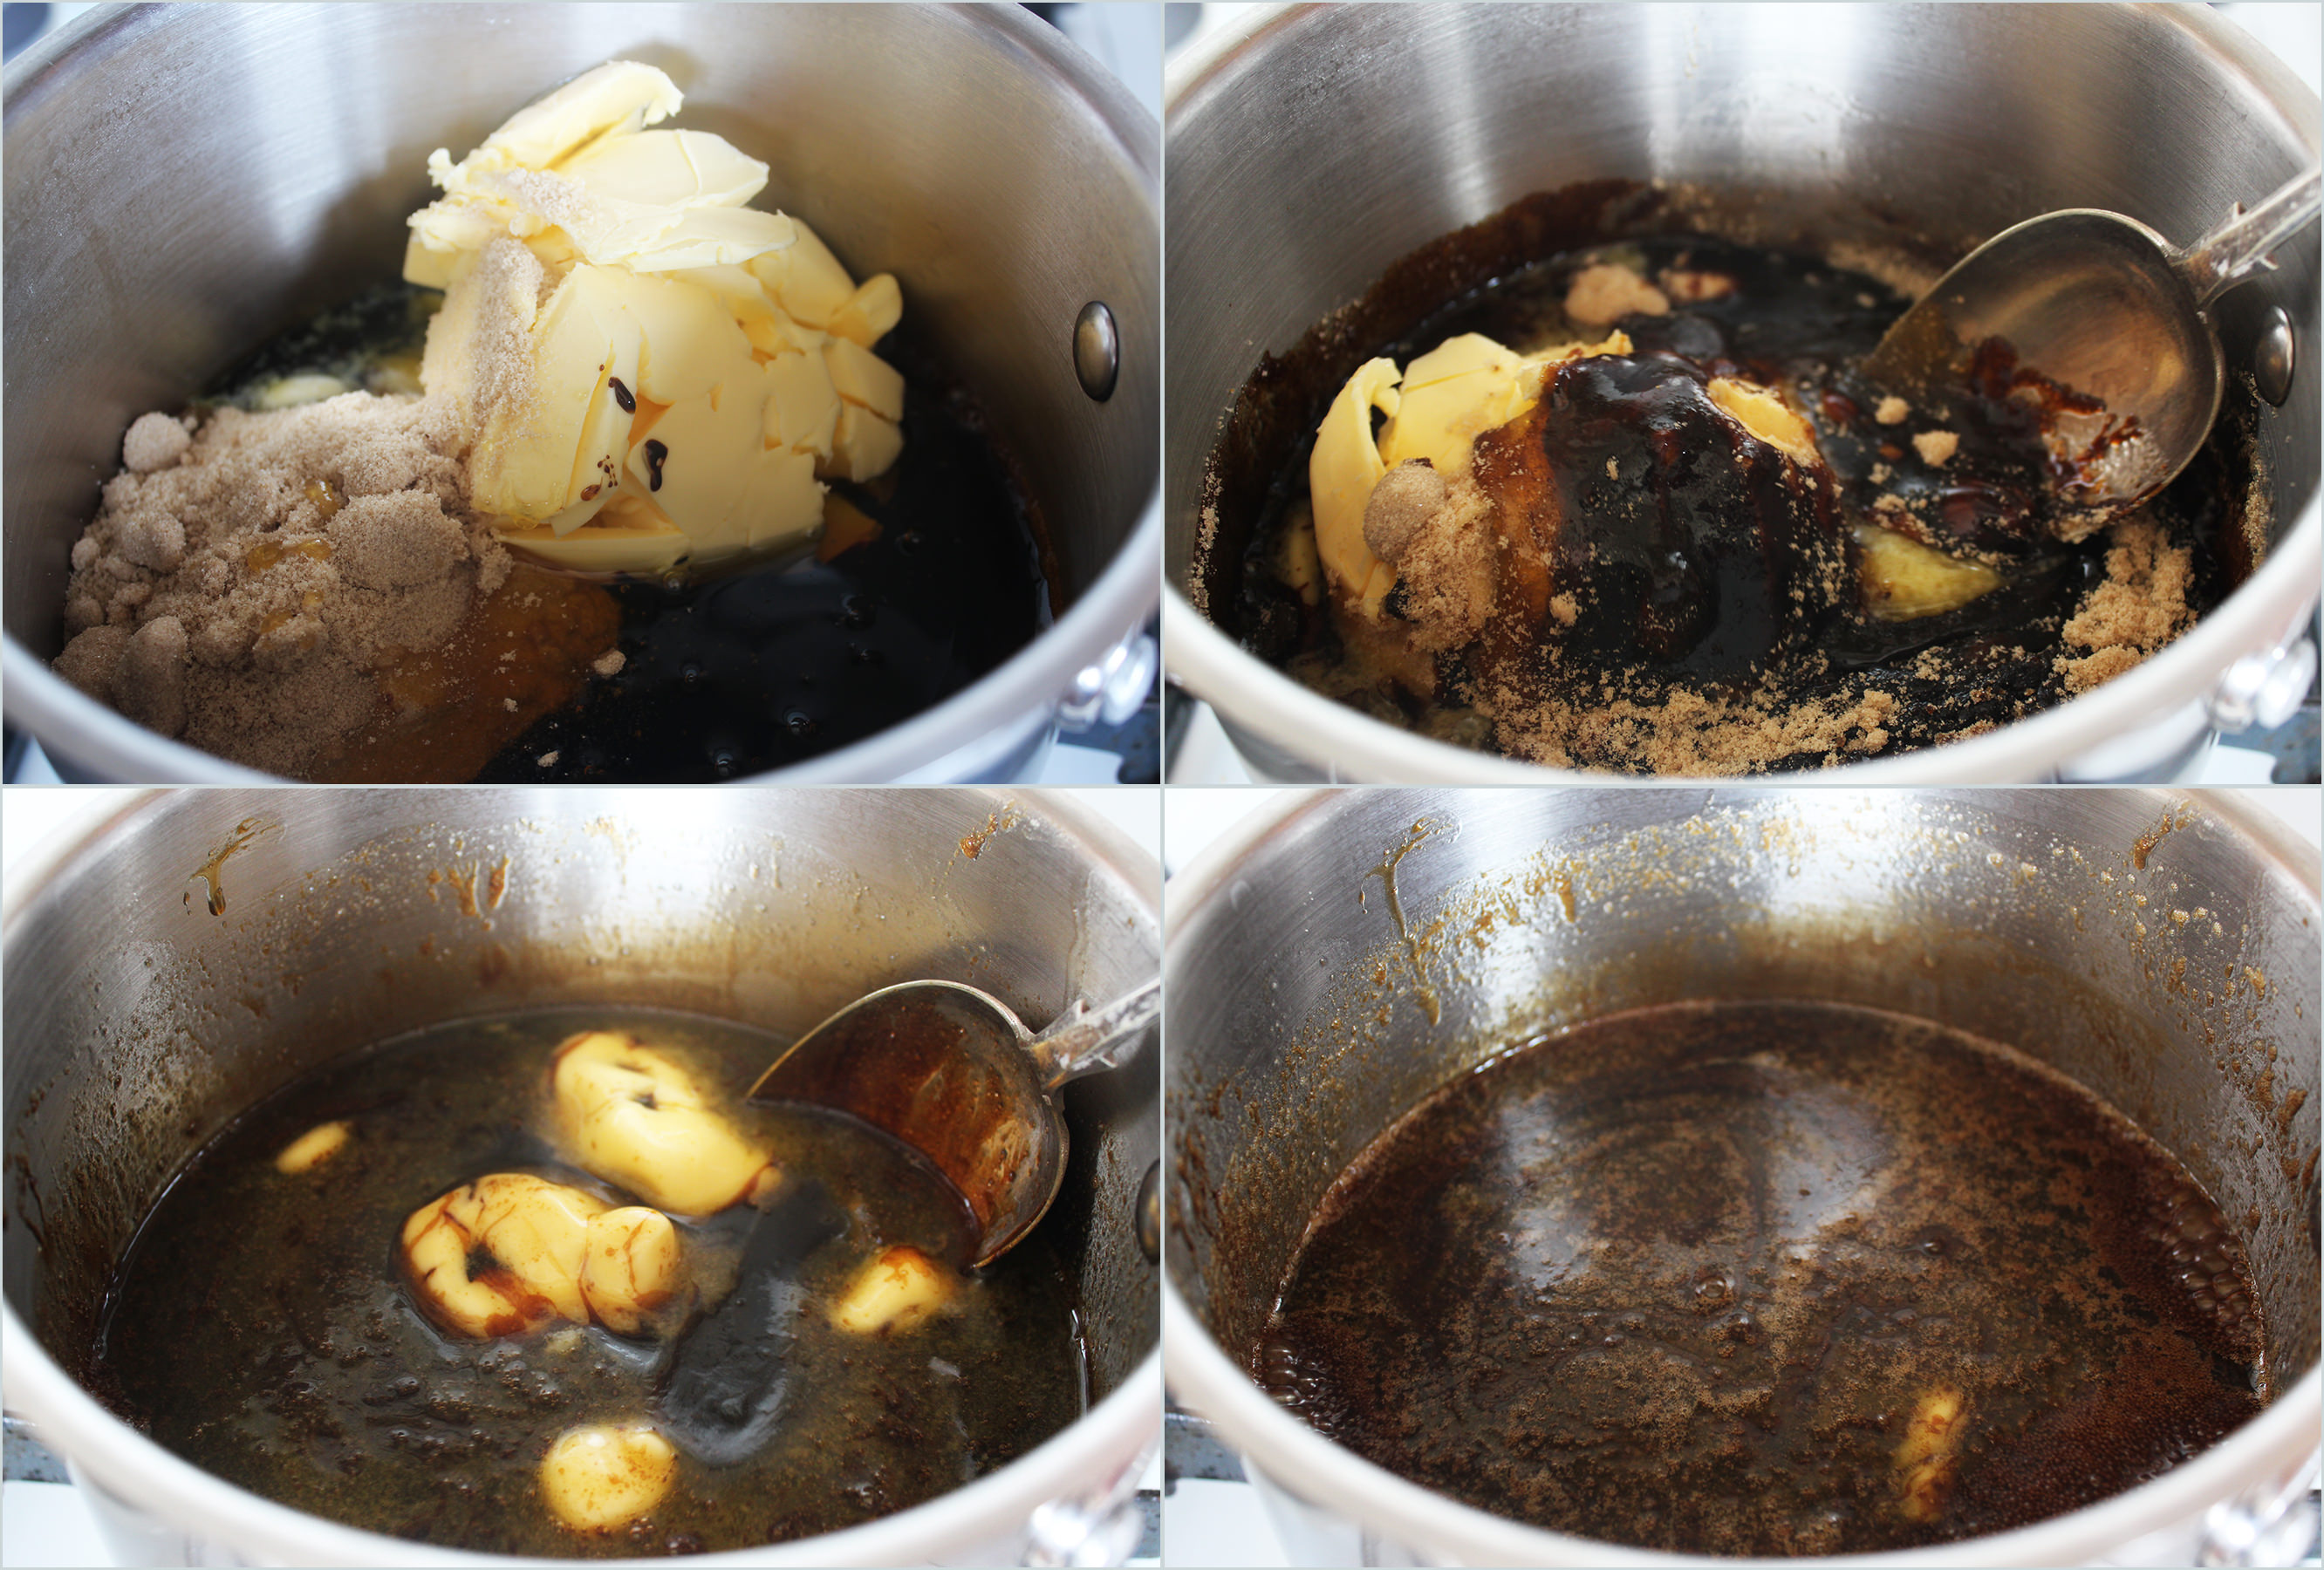
Step three:
Put butter, golden syrup, treacle and sugar into a saucepan and gently heat until sugar has melted.
Step four:
Beat the eggs with a fork in a small bowl and mix into flour mixture. Alternatively you can mix them with the treacle and syrup at an earlier stage and not heat these with the butter.
Pour in butter and treacle mixture.
Step five:
Stir wet ingredients into dry. Place bowl outside or in the fridge until completely cool.
Step six:
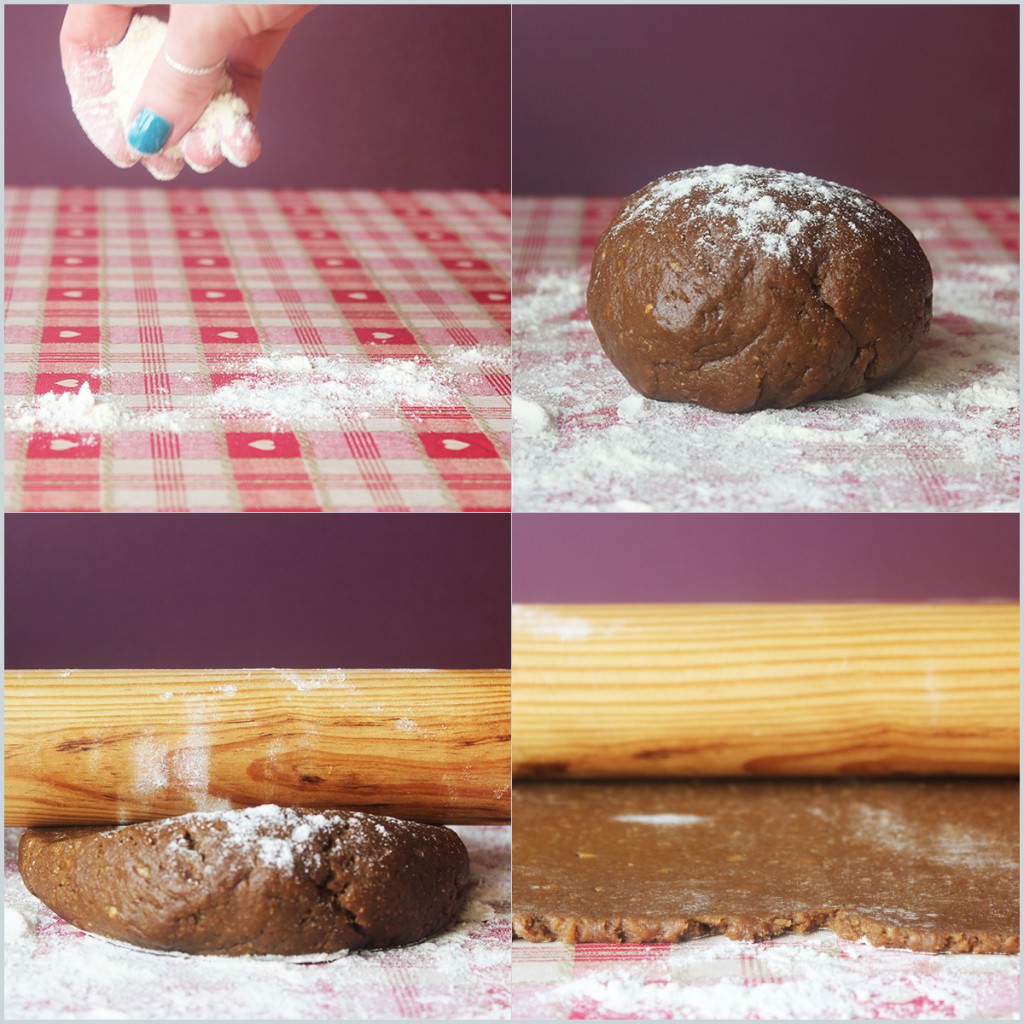
Dust a large work surface thoroughly with plain flour. Take a third to half of the mixture and mould into a ball.
Sprinkle dough and rolling pin with more flour and roll out. Make sure you keep turning the dough to keep it as square as possible. You want it to be about 5mm thick.
Step seven:
Grease baking trays well and then cut out all your shapes.
A tip with the larger pieces is to define the rough shape and then transfer to baking tray, in order to finish cutting once it’s on the tray. This will stop it stretching when you move it, as it’s fairly important to keep the edges as straight as possible. Of course, if your baking trays hate you as much as mine do, then they will warp themselves in the heat of the oven just to mock you.
When cutting out the chimney, flip the template over so that you can have pieces with right sides facing out all around.
Keep rolling and cutting until you have all the pieces you need.
Step eight:
If you want a stained glass window effect then put some boiled sweets in a sandwich bag and pound them to dust with a rolling pin. This takes a bit of welly, so best to do it at a sociable hour to keep the neighbours happy…sorry Audrey…
Fill your window gaps with the crushed sweets.
The bottom-right photo shows you my fatal mistake. For any pieces with windows like these, put greaseproof on the tray first. Otherwise you might have a spot of bother removing it due to its size, fragility, and your patience levels…more on that later.
Step nine:
Bake the pieces in the oven at gas mark 4/180 C/350 F.
Keep an eye on them, as different pieces will bake at different speeds, from 10 mins to 25! It’s always better to go a bit over than under though, as you can cover the darker areas in sweets, but nothing can hide/save a caved in roof because the biscuit was too soft. Having said that, my sister did prop my first roof up with a gingerbread dinosaur when I had that exact problem, so all is never lost.
Step ten:
Stay tuned! I will be posting a guide to assembling and decorating later this week.